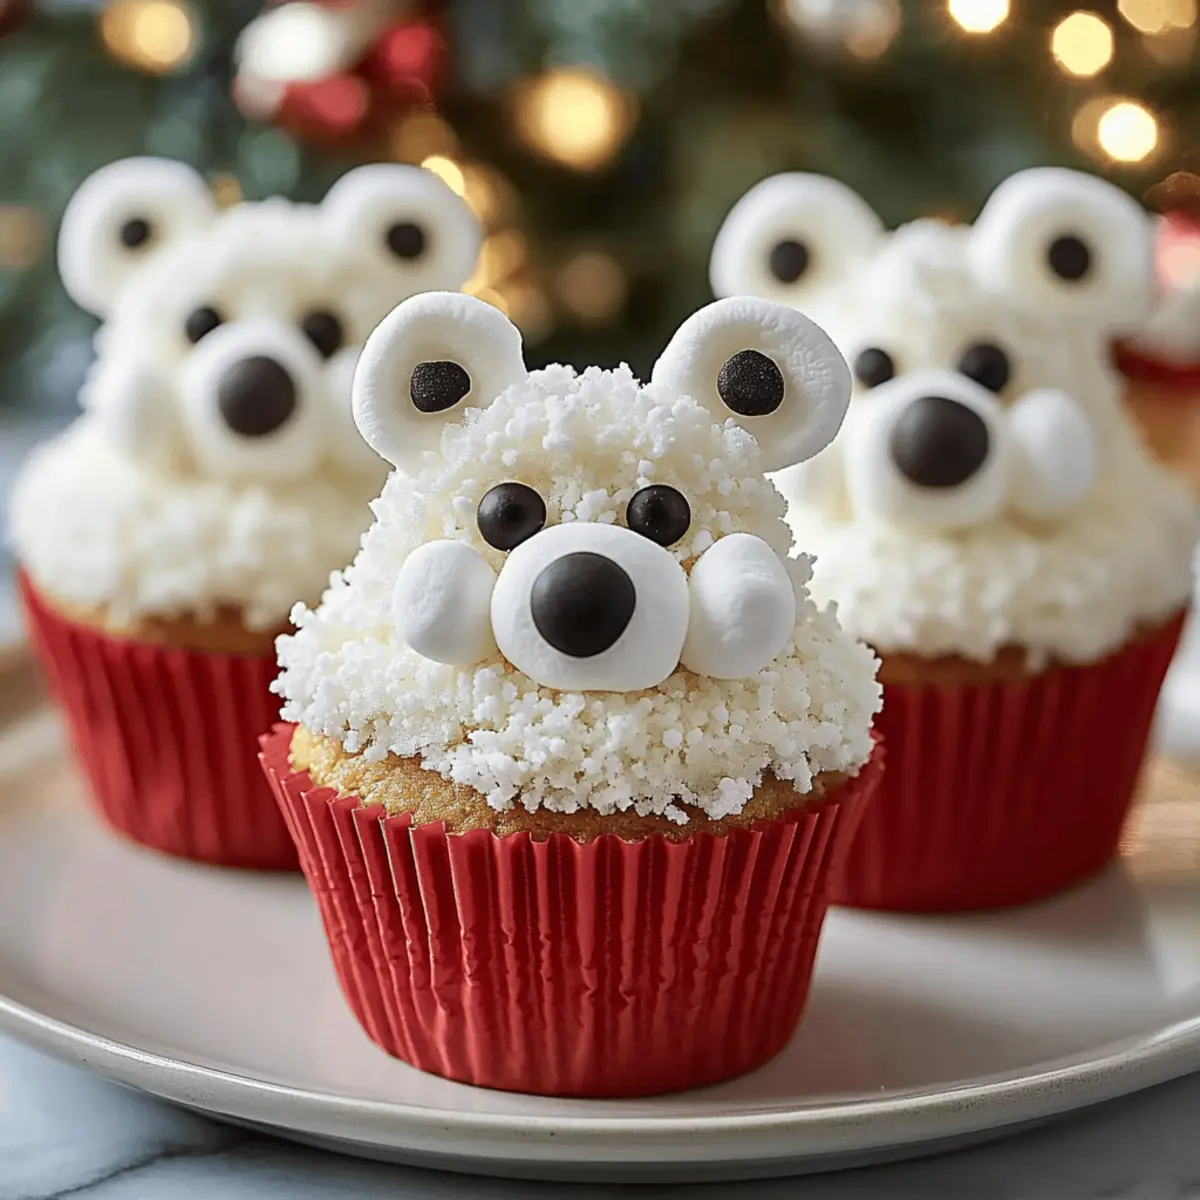
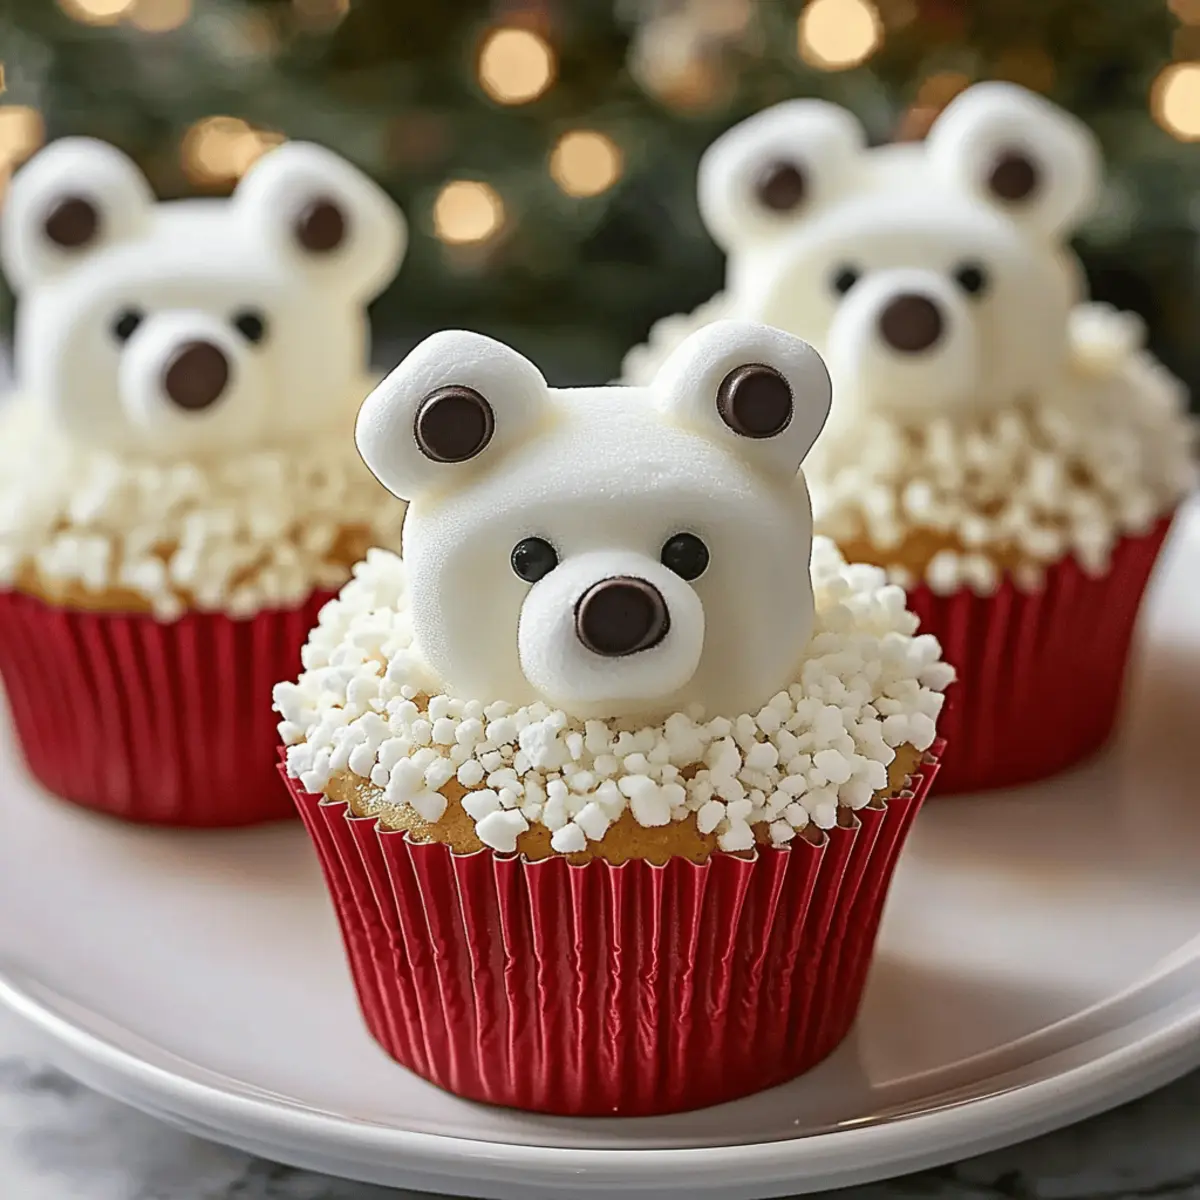
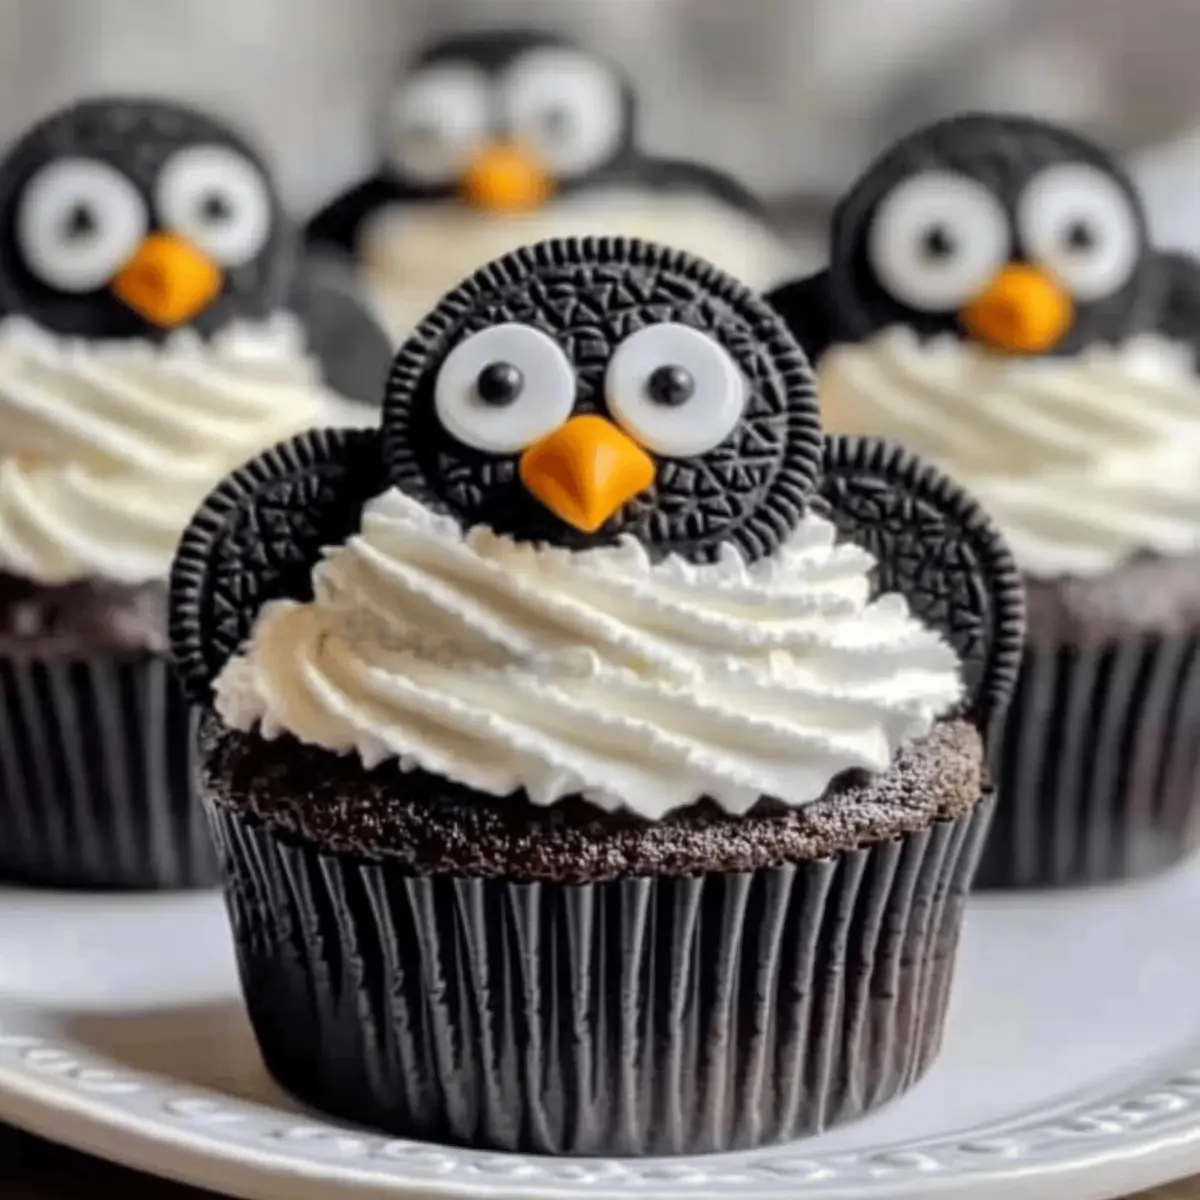
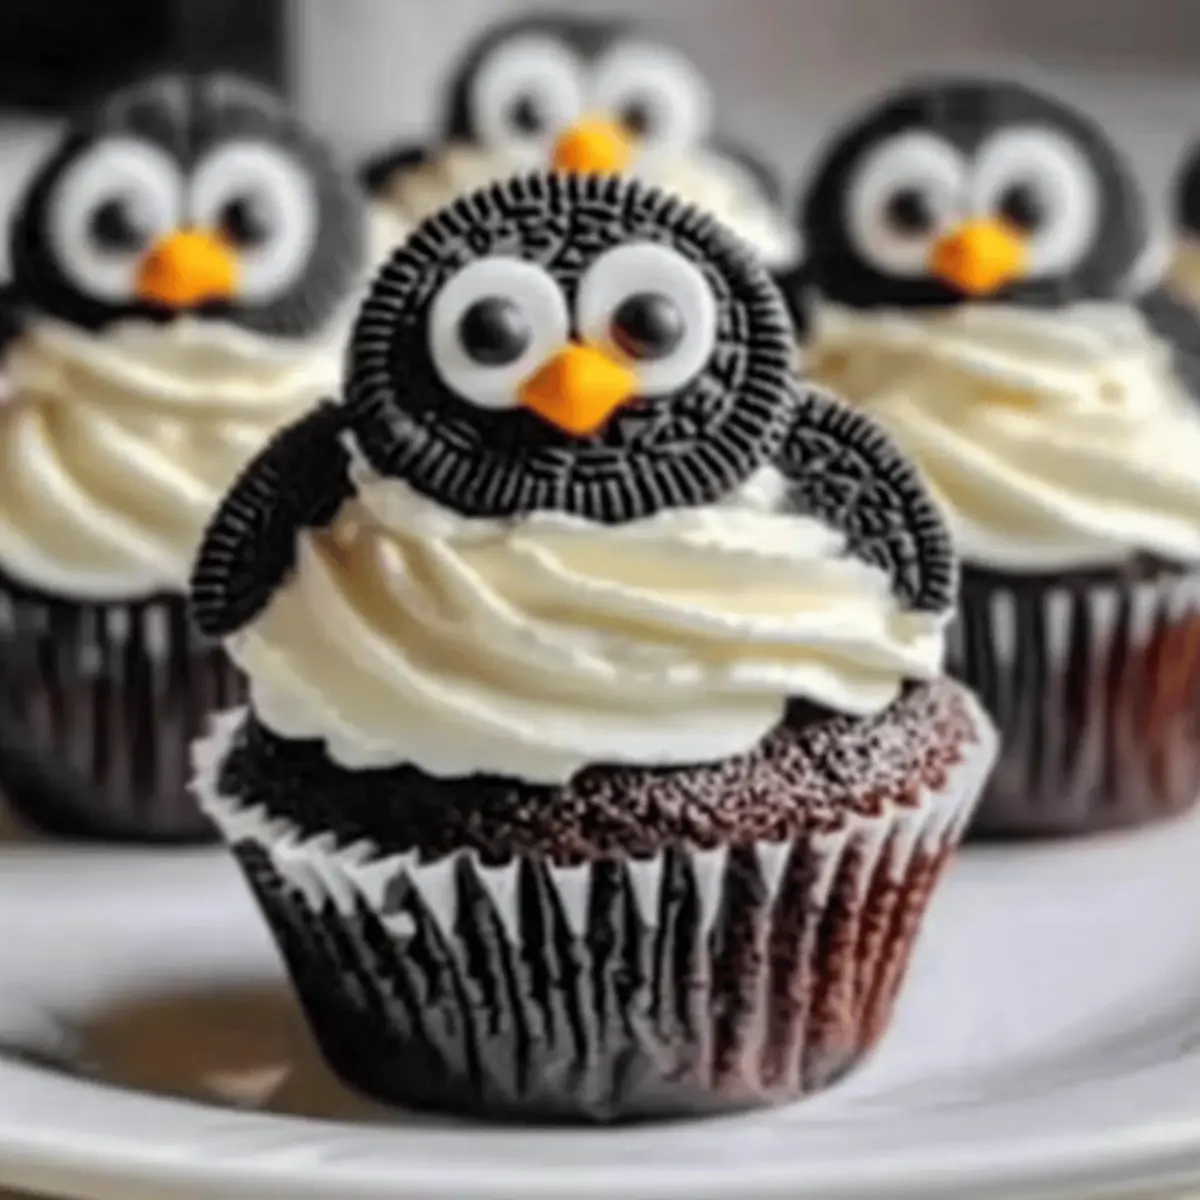
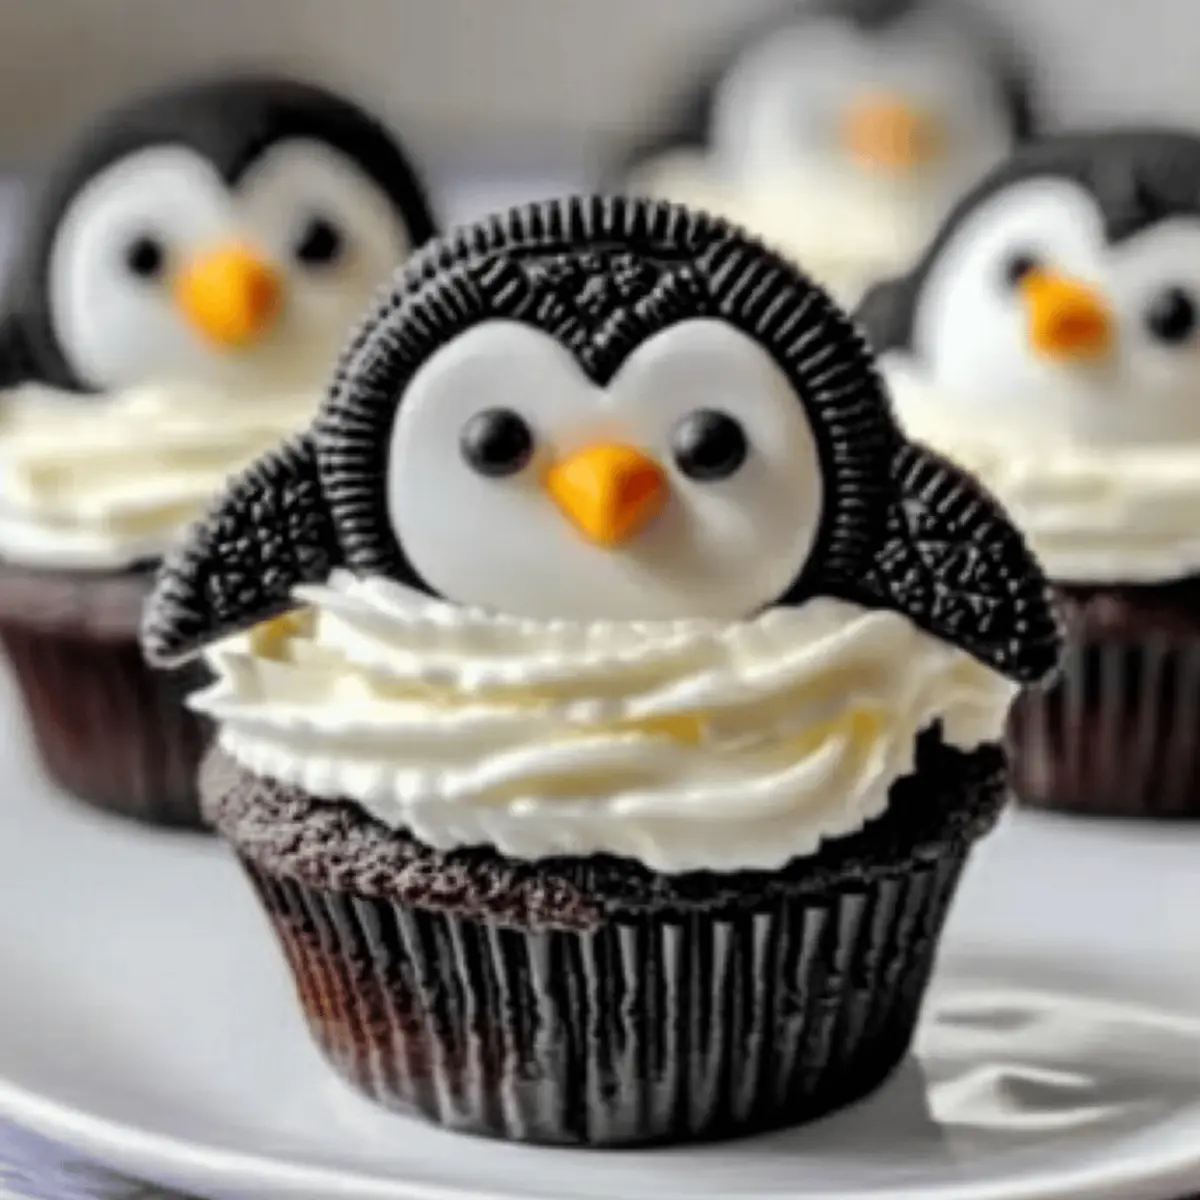
As I walked through the bustling aisles of my local market during the holiday season, a delightful sight caught my eye: a charming display of fluffy marshmallows painted like playful penguins. That spark of inspiration propelled me into the kitchen to recreate these adorable festive treats—Easy Chocolate-Dipped Marshmallow Penguins! These little guys are not just a fun food project to tackle with your kids; they also provide an enjoyable escape from the usual holiday hustle. Quick to assemble and equally impressive, they make delightful homemade gifts or enchanting party snacks that everyone will adore. Who wouldn't want to nibble on such a whimsically chocolatey delight? Ready to bring some cheer to your table? Let’s dive into this sweet adventure together!
Why Are Marshmallow Penguins So Special?
Delightfully adorable: These Marshmallow Penguins are not only cute but also a fun project to enjoy with the kids, making holiday memories together.
Rich chocolate coating: Each fluffy penguin gets a decadent dark chocolate dip that creates a rich contrast to the soft marshmallow inside.
Easy to customize: With simple substitutions, you can easily make these festive treats your own! Try using colored melting chocolates or swap out Smarties for your favorite candy.
Perfect for gifting: These charming little treats make for delightful homemade gifts that are sure to elicit smiles from friends and family.
Quick prep time: In just a few easy steps, you can have these adorable treats ready for your next holiday gathering. Why not pair them with a cup of hot cocoa? Perfect for the season!
Marshmallow Penguins Ingredients
For the Penguins
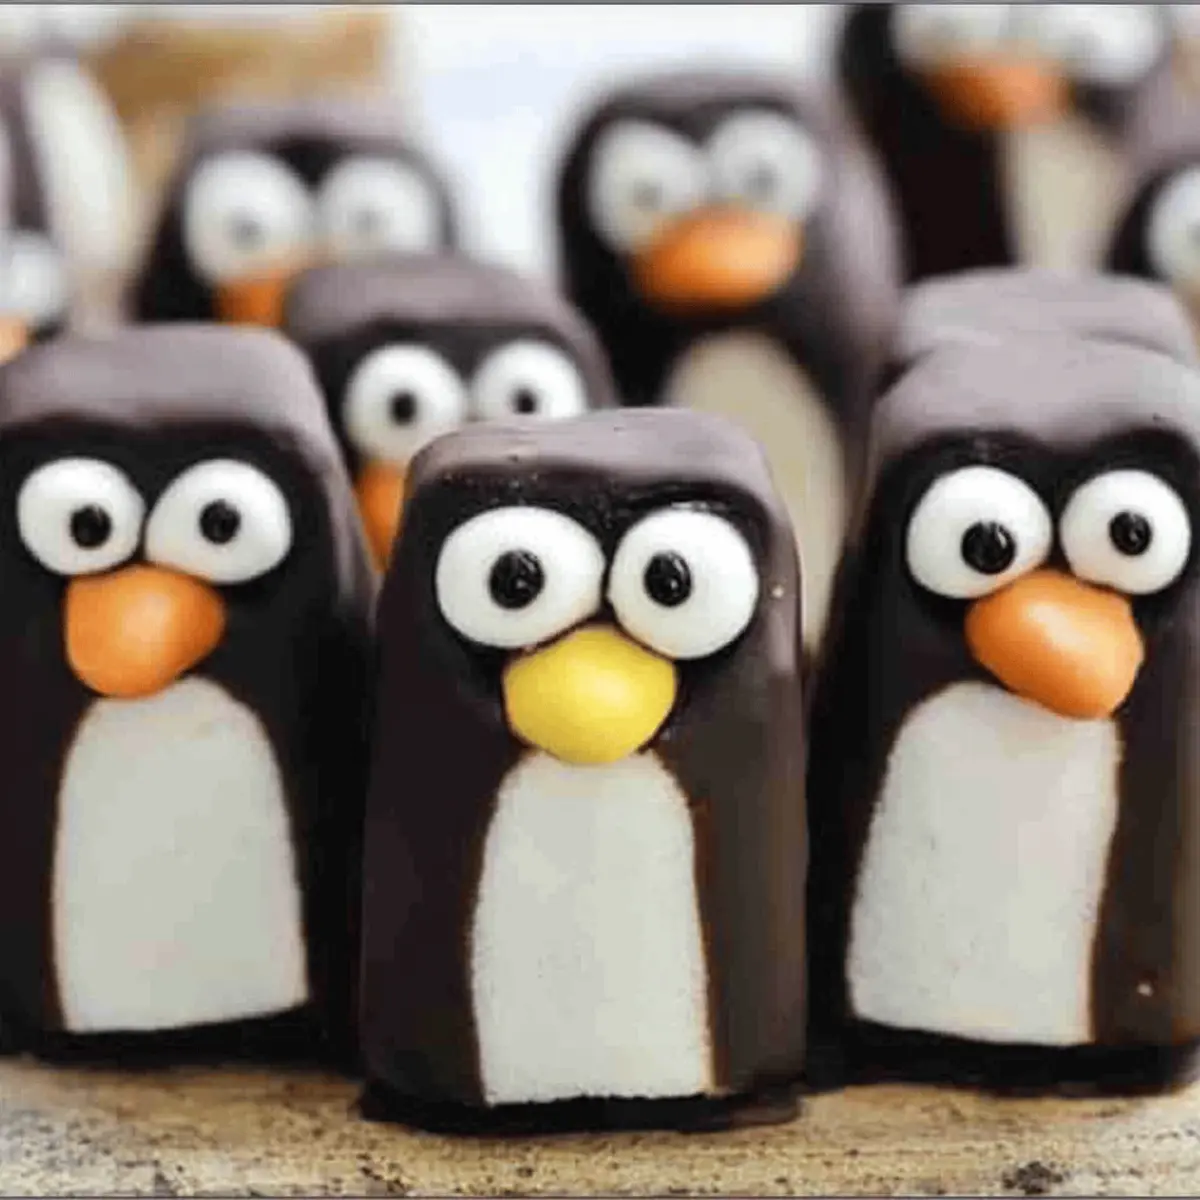
- Marshmallows – These fluffy delights provide the primary structure; taller marshmallows create an even cuter shape for your marshmallow penguins.
- Dark Chocolate – Melts into a rich coating that adds decadence; opt for dairy-free chocolate if you're catering to dietary needs.
- Yellow and Orange Smarties – Serve as adorable beaks; feel free to substitute with Skittles or dried apricots for a different flavorful twist.
- Edible Candy Eyes – These little accents bring your penguins to life; easily found at baking or craft stores.
For Assembly
- Grease-proof Paper – Use this to line your tray for easy cleanup and to keep your penguins upright as they cool.
With just these simple ingredients, you'll be well on your way to creating your own delightful Marshmallow Penguins that everyone will love!
Step‑by‑Step Instructions for Marshmallow Penguins
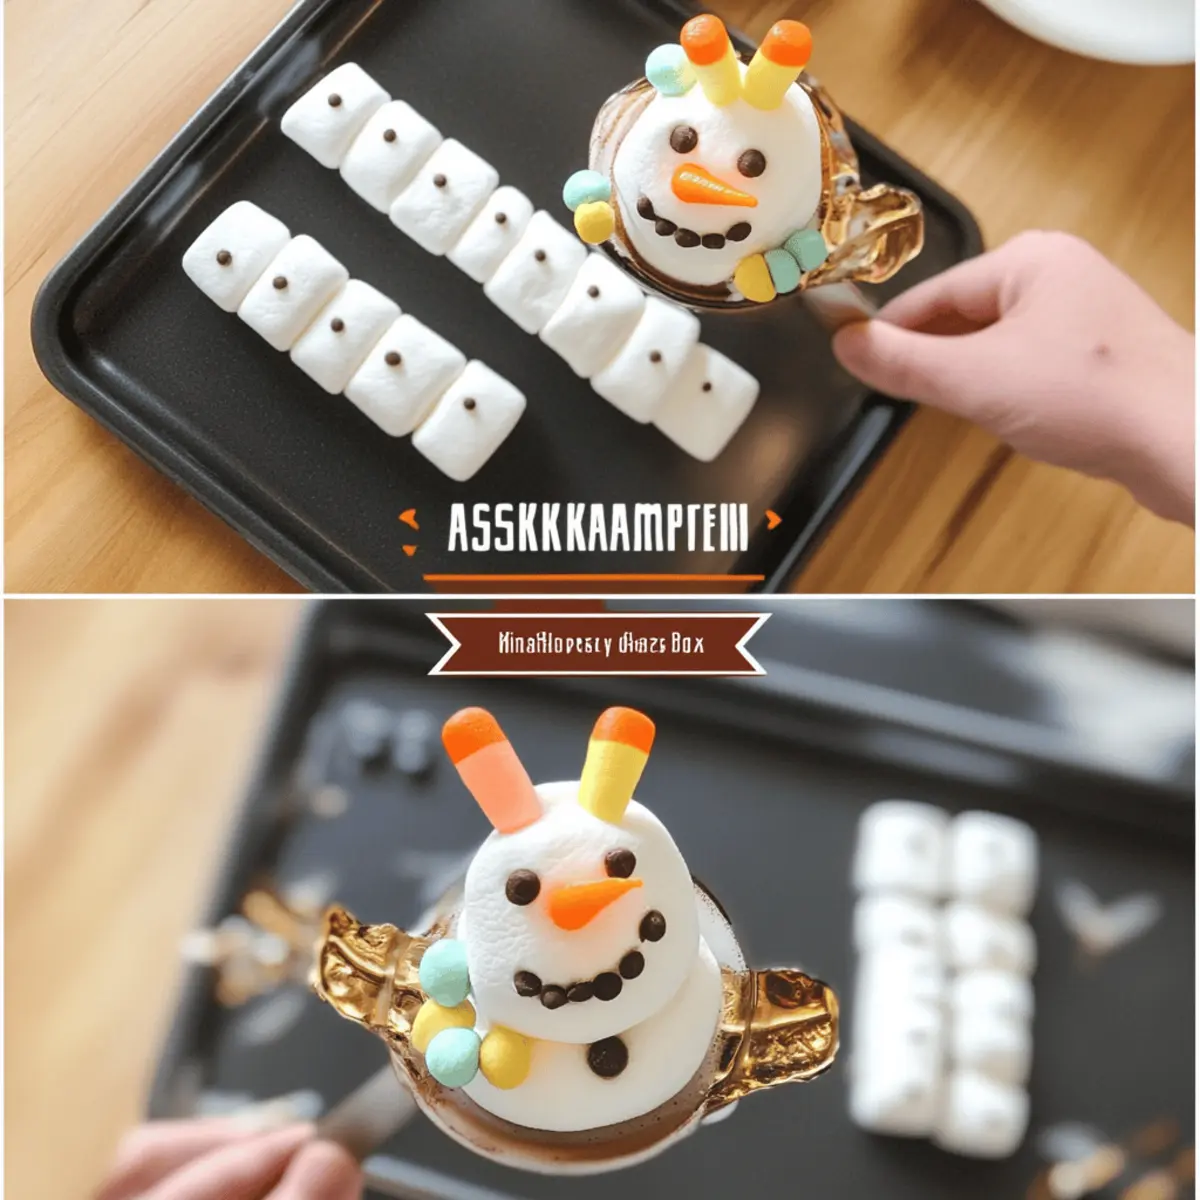
Step 1: Prepare Tray
Begin your marshmallow penguins adventure by lining a baking tray or plate with grease-proof paper. Ensure it fits comfortably in your fridge, as this will be essential for cooling later. This step not only allows for easy cleanup but also provides a stable base for your adorable penguins as their chocolate coats set.
Step 2: Melt Chocolate
Next, break dark chocolate into small pieces and place them in a microwave-safe bowl. Melt the chocolate in 30-second bursts at medium power, stirring between each interval until smooth and glossy. This process usually takes about 1-2 minutes. Be sure to approach this gently, as overheating could cause the chocolate to seize and ruin your dipping process.
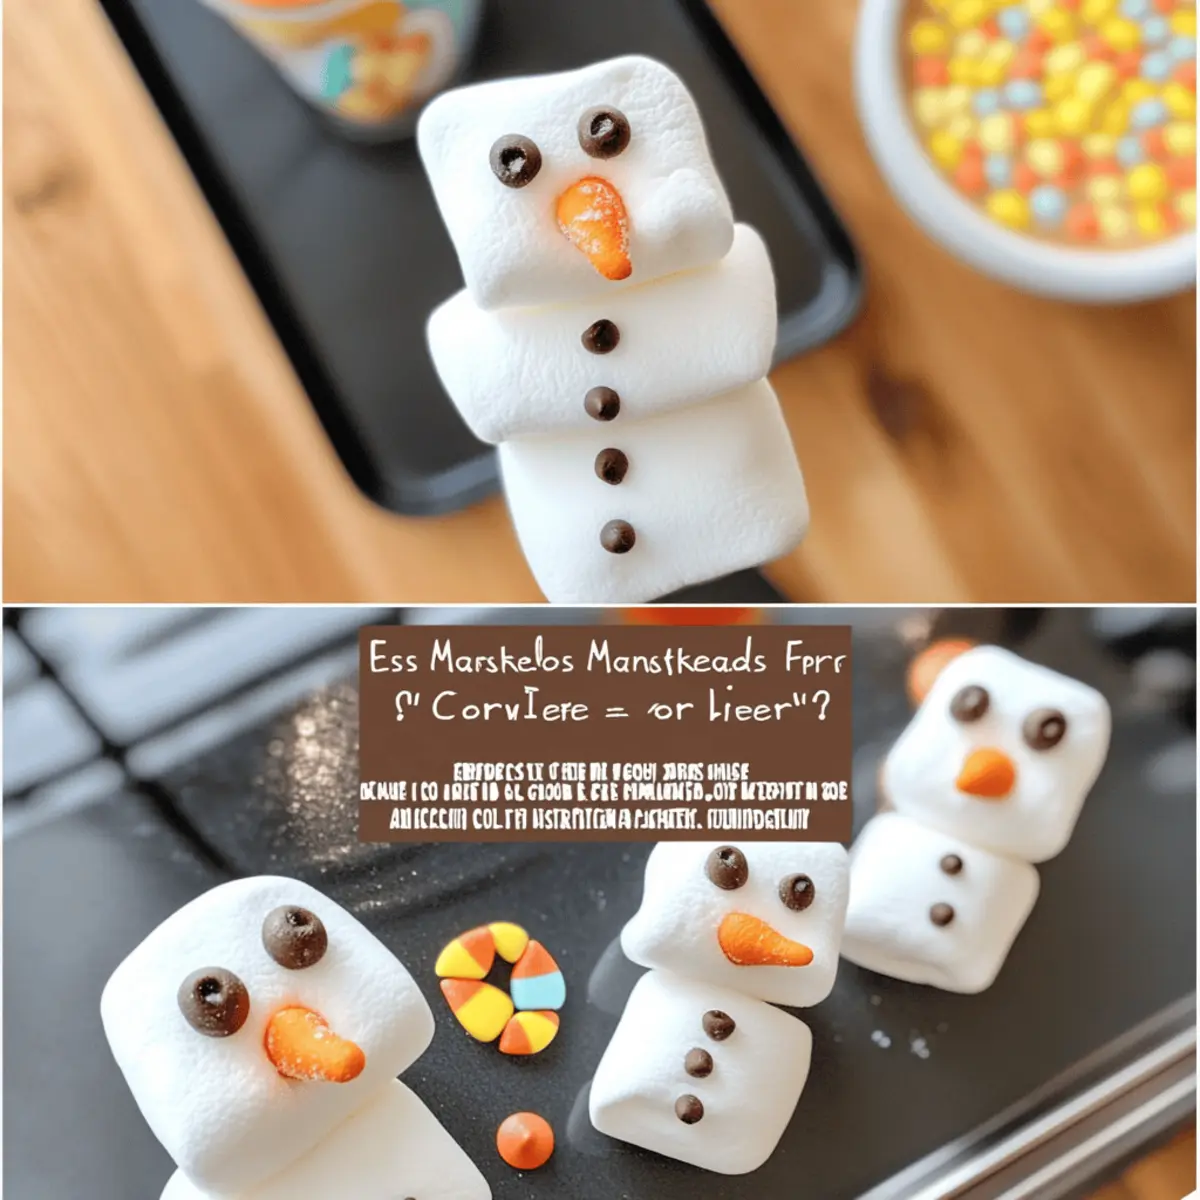
Step 3: Dip Marshmallows
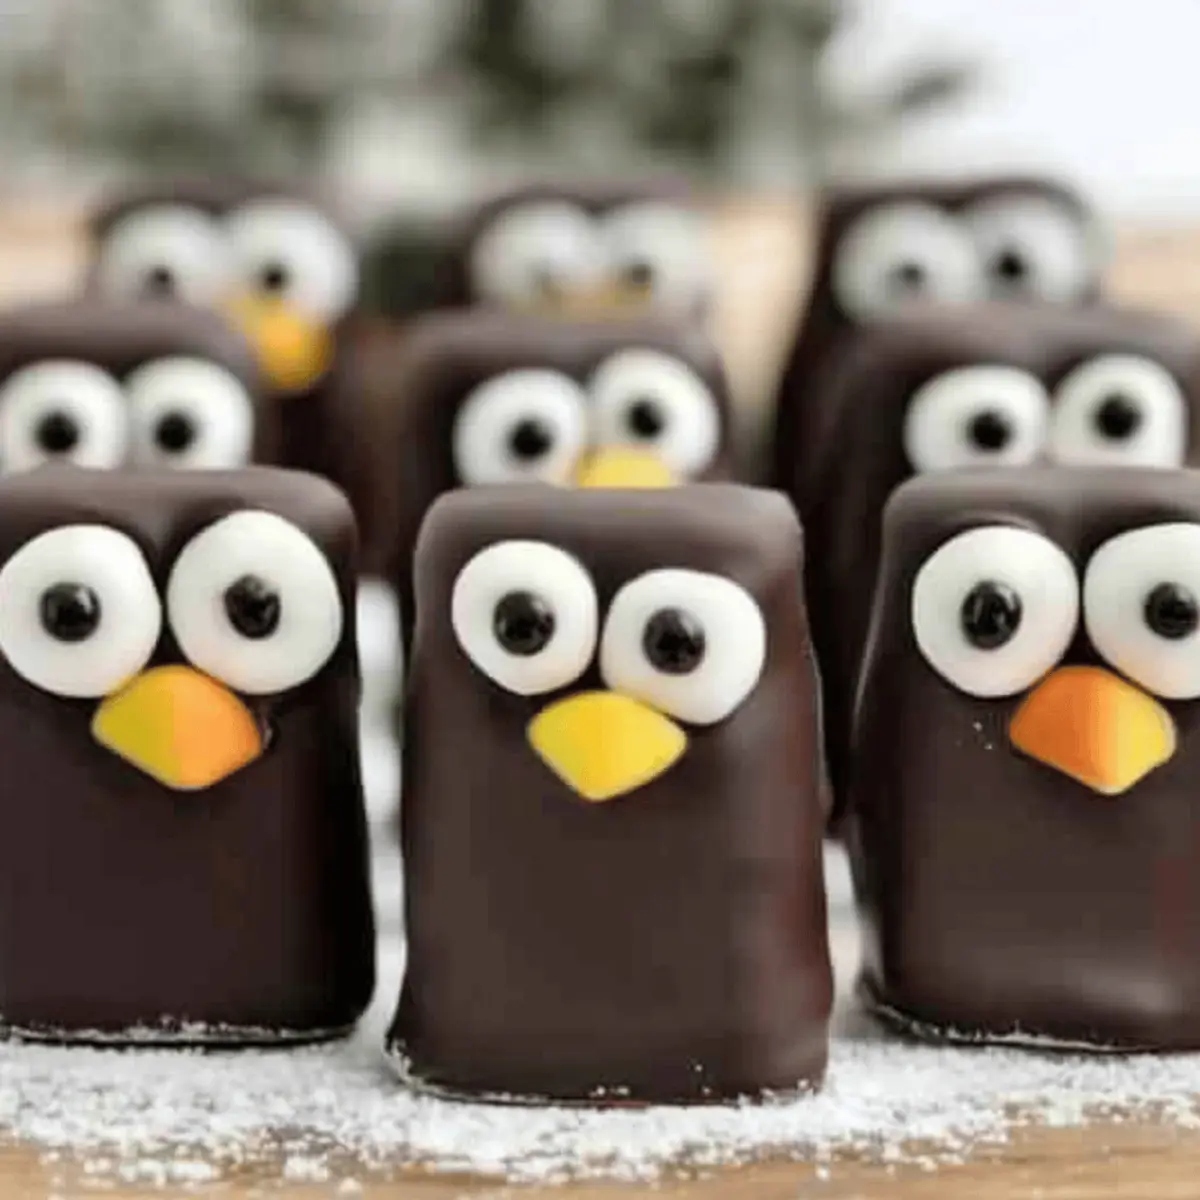
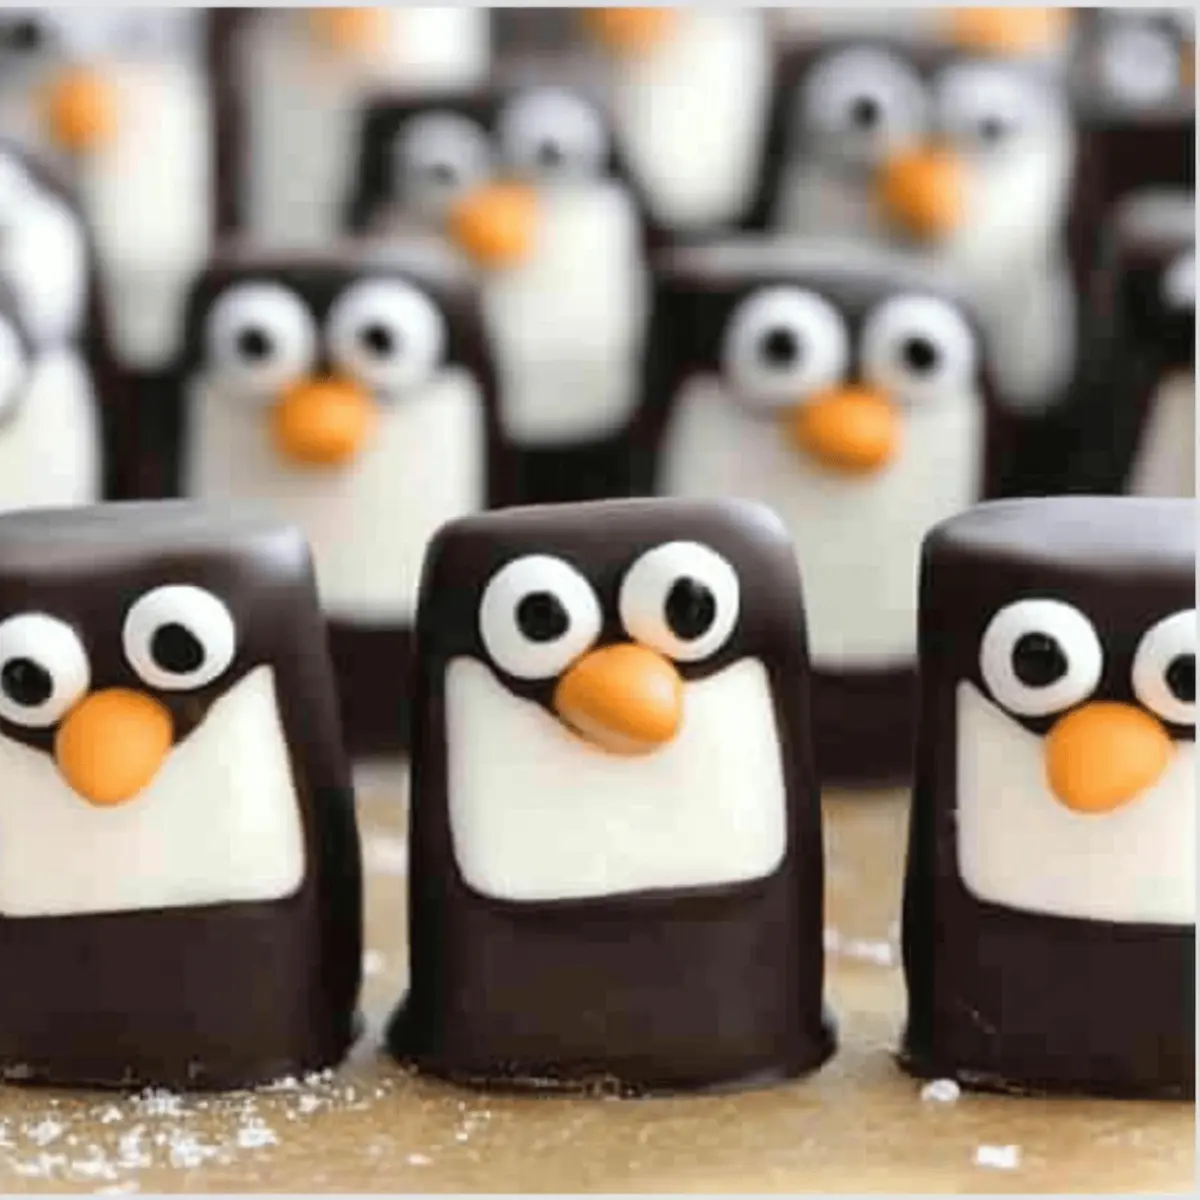
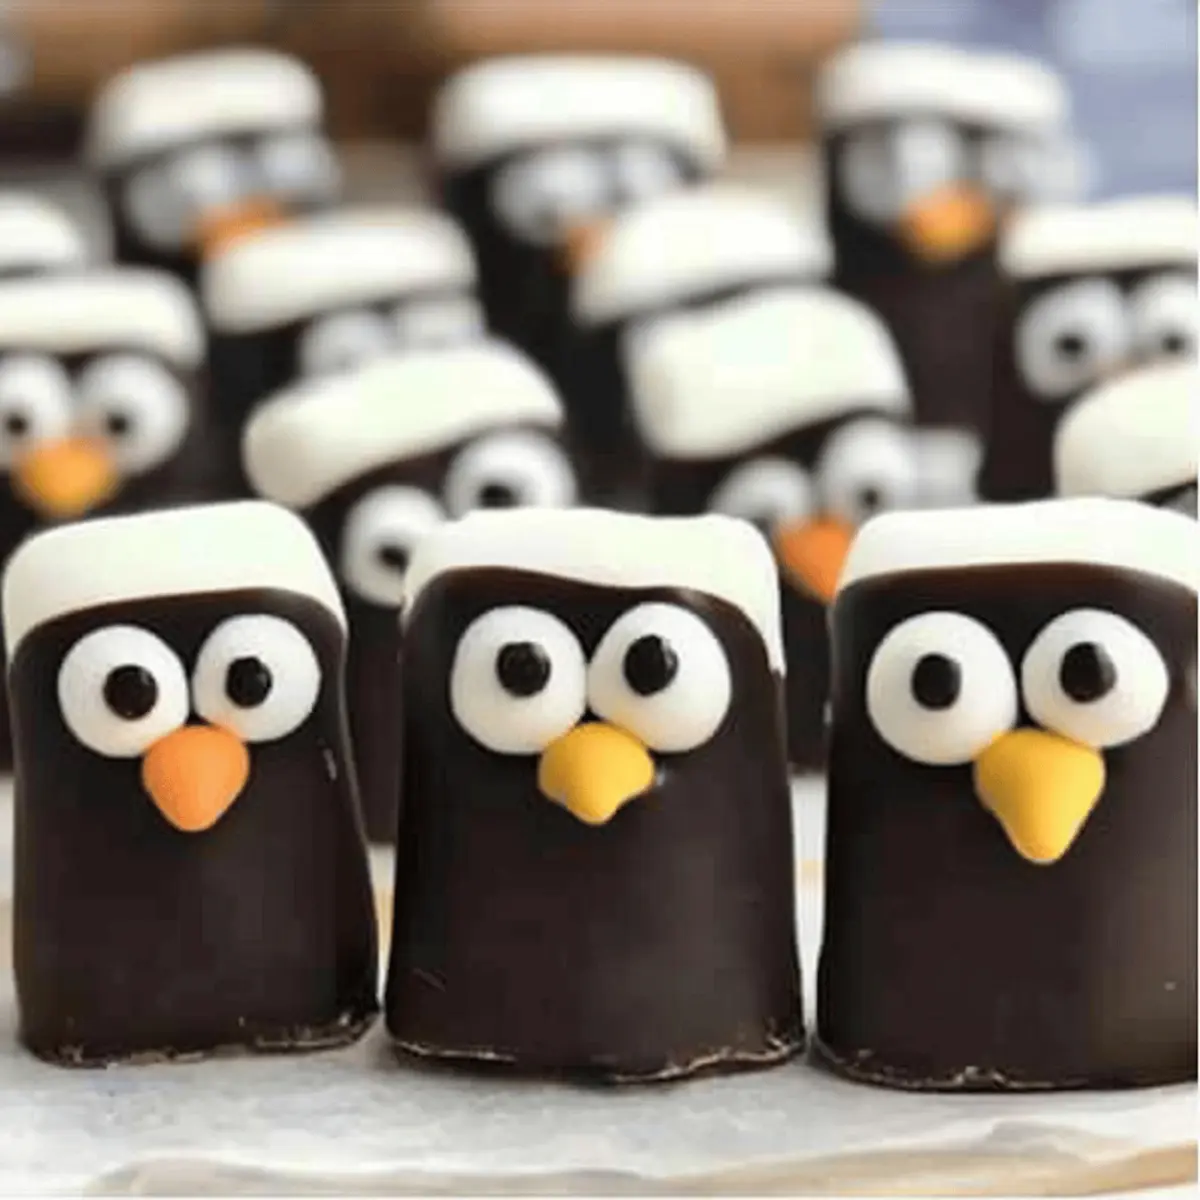
Once your chocolate is perfectly melted, take a tall marshmallow and dip it into the rich chocolate. Coat about three-quarters of the marshmallow, leaving the bottom portion uncoated to create the body. Hold the marshmallow over the bowl briefly, letting any excess chocolate drip off before placing it upright on the prepared tray. Repeat this with each marshmallow for your marshmallow penguins.
Step 4: Set Marshmallows
Stand the dipped marshmallows upright on your lined tray. As you place them, allow the excess chocolate to pool and form little tails—this adds a whimsical charm to your marshmallow penguins. Once all marshmallows are dipped, let them sit for a moment to firm up slightly as you move to the next step.
Step 5: Cool
Now, it's time to chill! Carefully place the tray in the refrigerator for 10-15 minutes, allowing the chocolate coating to harden completely. You'll know the chocolate is set when it appears firm and shiny, which is crucial for a perfect finish to your adorable marshmallow penguins.
Step 6: Decorate
After the chocolate is firmly set, take the tray out of the fridge. If your chocolate has firmed too much, re-melt a small amount. Next, cut the yellow and orange Smarties in half; these will serve as the penguins' beaks. Use a bit of melted chocolate to attach the Smarties to each marshmallow, then add edible candy eyes, placing them just above the beak for a super-cute appearance.
Step 7: Final Chill
Return your decorated marshmallow penguins to the fridge for an additional 5-10 minutes to set the decorations fully. This last chill ensures that every detail stays in place and solidifies the fun look of your festive creations, ready to delight family and friends.
Step 8: Store
Lastly, transfer your completed marshmallow penguins to an airtight container for storage. Keep them at room temperature for up to a week, ensuring they remain fresh and delightful. Now you can proudly showcase these cute treats at holiday gatherings or gift them as sweet surprises!
Marshmallow Penguins Variations & Substitutions
Feel free to explore the fun side of these Marshmallow Penguins by trying out some exciting variations!
- Dairy-Free Chocolate: Use dairy-free dark chocolate to cater to lactose-intolerant friends or vegans. The chocolate's richness will still shine through!
- Colorful Melting Chocolates: Swap the dark chocolate for colored melting chocolates to create vibrant, festive penguins that pop on your holiday table. They’ll be a hit with kids!
- Alternative Candy Beaks: Replace Smarties with yellow/orange gumdrops or even dried mango for a fun flavor twist and chewy texture. It's like giving your penguins a makeover!
- Mini Cookie Eyes: If you can’t find candy eyes, mini chocolate chip cookies or even tiny marshmallows can work perfectly, adding an extra touch of creativity.
- Chocolate Drizzle: After the chocolate coating sets, add a drizzle of white chocolate over the top for a beautiful winter effect and an extra layer of sweetness.
- Spiced Marshmallows: Enhance the marshmallows by using flavored options—think peppermint or cinnamon—to bring a warm, festive charm to your penguins.
- Nut Butter Coating: For a protein twist, dip your marshmallows in melted nut butter instead of chocolate, followed by a sprinkle of crushed nuts for added crunch. This makes for a delightful, nutty treat!
- Frozen Treats: Freeze your penguins after decorating for a cool dessert! They turn into fun, frozen treats, perfect for a warm holiday gathering.
Whichever variation you choose, you’re sure to create something magical! These delightful treats are not just about taste; they're a joyful creation that brings loved ones together. For even more sweet ideas, check out our Dairy-Free Option Recipes or consider Creating Colorful Treats for Kids to keep the fun going!
What to Serve with Easy Chocolate-Dipped Marshmallow Penguins
Create the perfect holiday treat experience with delicious pairings that enhance the joy of your festive marshmallow penguins!
-
Hot Cocoa: A classic warm drink that complements the sweetness of the marshmallows while adding a cozy touch to your celebration.
-
Gingerbread Cookies: Their spicy flavor contrasts beautifully with the sweetness of the penguins, offering a delightful texture combination for your holiday spread.
-
Fruit Platter: Crisp, refreshing fruits like oranges and apples provide a burst of freshness, balancing the rich, chocolate-coated treats perfectly.
-
Christmas Punch: A fruity, festive beverage adds a bubbly flair, making your gathering lively and inviting, ideal for sipping alongside these playful sweets.
-
Cupcakes: Light, fluffy cupcakes drizzled with holiday-themed toppings bring a delightful dose of sweetness and aesthetics to your dessert table.
-
Chocolate Fondue: Serve melted chocolate with dippable fruits, marshmallows, and snacks for a fun interactive experience that pairs perfectly with the penguins!
Each of these delicious suggestions will make your holiday gatherings even sweeter, ensuring that your marshmallow penguins shine as the star of the season!
Make Ahead Options
These delightful Marshmallow Penguins are fantastic for meal prep, letting you soak in the festive fun without the last-minute rush! You can prepare the chocolate-dipped marshmallows up to 24 hours in advance by following your usual dipping process and allowing the chocolate to set. Simply store the dipped marshmallows in an airtight container in the fridge, ensuring they stay fresh and chocolatey. When you're ready to finish, add the Smarties beaks and candy eyes just before serving to maintain their whimsical appeal. This way, you can enjoy more time with loved ones while impressing your guests with these charming treats!
How to Store and Freeze Marshmallow Penguins
Room Temperature: Store your marshmallow penguins in an airtight container at room temperature for up to 7 days to keep them fresh and fluffy.
Refrigerator: If you have leftovers, you can place them in the fridge, but note that this may make the chocolate coating slightly firmer.
Freezer: For longer storage, freeze the marshmallow penguins in a single layer on a baking sheet, then transfer to an airtight container. They can be frozen for up to 3 months.
Reheating: When you're ready to enjoy, simply let them thaw at room temperature for a couple of hours. Enjoy these delightful marshmallow penguins at any festive occasion!
Expert Tips for Marshmallow Penguins
-
Chocolate Temperature: Keep melted chocolate warm but not hot. Overheating can cause it to seize, ruining that perfect dip for your marshmallow penguins.
-
Mess-Free Dipping: Use a cocktail stick to hold the marshmallow while dipping. This method keeps your fingers clean and allows for precise drips.
-
Let Chocolate Set: Be patient during cooling. A proper chill of 10-15 minutes ensures a hard chocolate coating that won’t smudge when decorating your marshmallow penguins.
-
Creative Variations: Experiment with different candies for the beak and eyes. Mini chocolate chips or colored melting chocolates can create fun, personalized marshmallow penguins!
-
Storage Solution: Store your marshmallow penguins in an airtight container to maintain softness and freshness. They'll stay delightful for up to a week—perfect for sharing!
Marshmallow Penguins Recipe FAQs
What is the best way to choose marshmallows for this recipe?
Absolutely! For the best results, I recommend using taller marshmallows, as they create an adorably varied shape for your marshmallow penguins. Look for marshmallows that are soft and fluffy without any dark spots all over—this indicates they are fresh. If taller marshmallows aren't available, regular-sized marshmallows will work just fine!
How do I store leftover marshmallow penguins?
After crafting your delicious marshmallow penguins, keep them in an airtight container at room temperature for up to 7 days. Ensure the container is sealed tightly to prevent them from drying out. If you place them in the fridge, please note that the chocolate might get a bit firmer, which can change the texture slightly.
Can I freeze the marshmallow penguins?
Yes, indeed! To freeze your marshmallow penguins, first arrange them in a single layer on a baking sheet to prevent sticking. Once they’re frozen solid, transfer them to an airtight container. They can be stored in the freezer for up to 3 months! When you’re ready to enjoy them, simply let them thaw at room temperature for a couple of hours.
What should I do if my chocolate seizes during melting?
Very good question! If your chocolate seizes, don’t panic! You can almost always salvage it. Simply add a tablespoon of vegetable oil or coconut oil to the bowl and gently reheat in the microwave in 10-second intervals, stirring in between until smooth again. This should help restore its silky texture for perfect dipping!
Are these marshmallow penguins safe for pets?
While marshmallow penguins are delightful for humans, they aren’t suitable for our furry friends. The chocolate in this recipe is toxic to dogs and cats, so be sure to keep these treats out of their reach. If you want a pet-friendly option, consider making plain marshmallow shapes without any chocolate or extra sweeteners.
Can I use different candies for the beaks and eyes?
The more the merrier! You can easily swap Smarties for other candies like Skittles, M&M’s, or even cut dried apricots. Just keep in mind the total flavor combination you want to achieve. For the eyes, mini chocolate chips or small dots of white frosting also work perfectly—making your marshmallow penguins even more fun and unique!
Marshmallow Penguins: Adorable Christmas Treats You'll Love
Ingredients
Equipment
Method
- Prepare Tray: Line a baking tray with grease-proof paper, then place it in the fridge for cooling later.
- Melt Chocolate: Break dark chocolate into small pieces and melt in a microwave-safe bowl in 30-second bursts until smooth.
- Dip Marshmallows: Dip each marshmallow into the melted chocolate, coating about three-quarters of it.
- Set Marshmallows: Stand the dipped marshmallows on the lined tray, allowing the chocolate to pool for tails.
- Cool: Chill the tray in the refrigerator for 10-15 minutes until the chocolate is set.
- Decorate: Attach halved Smarties for beaks and add candy eyes using melted chocolate.
- Final Chill: Return the decorated penguins to the fridge for another 5-10 minutes to set completely.
- Store: Transfer to an airtight container; store at room temperature for up to a week.