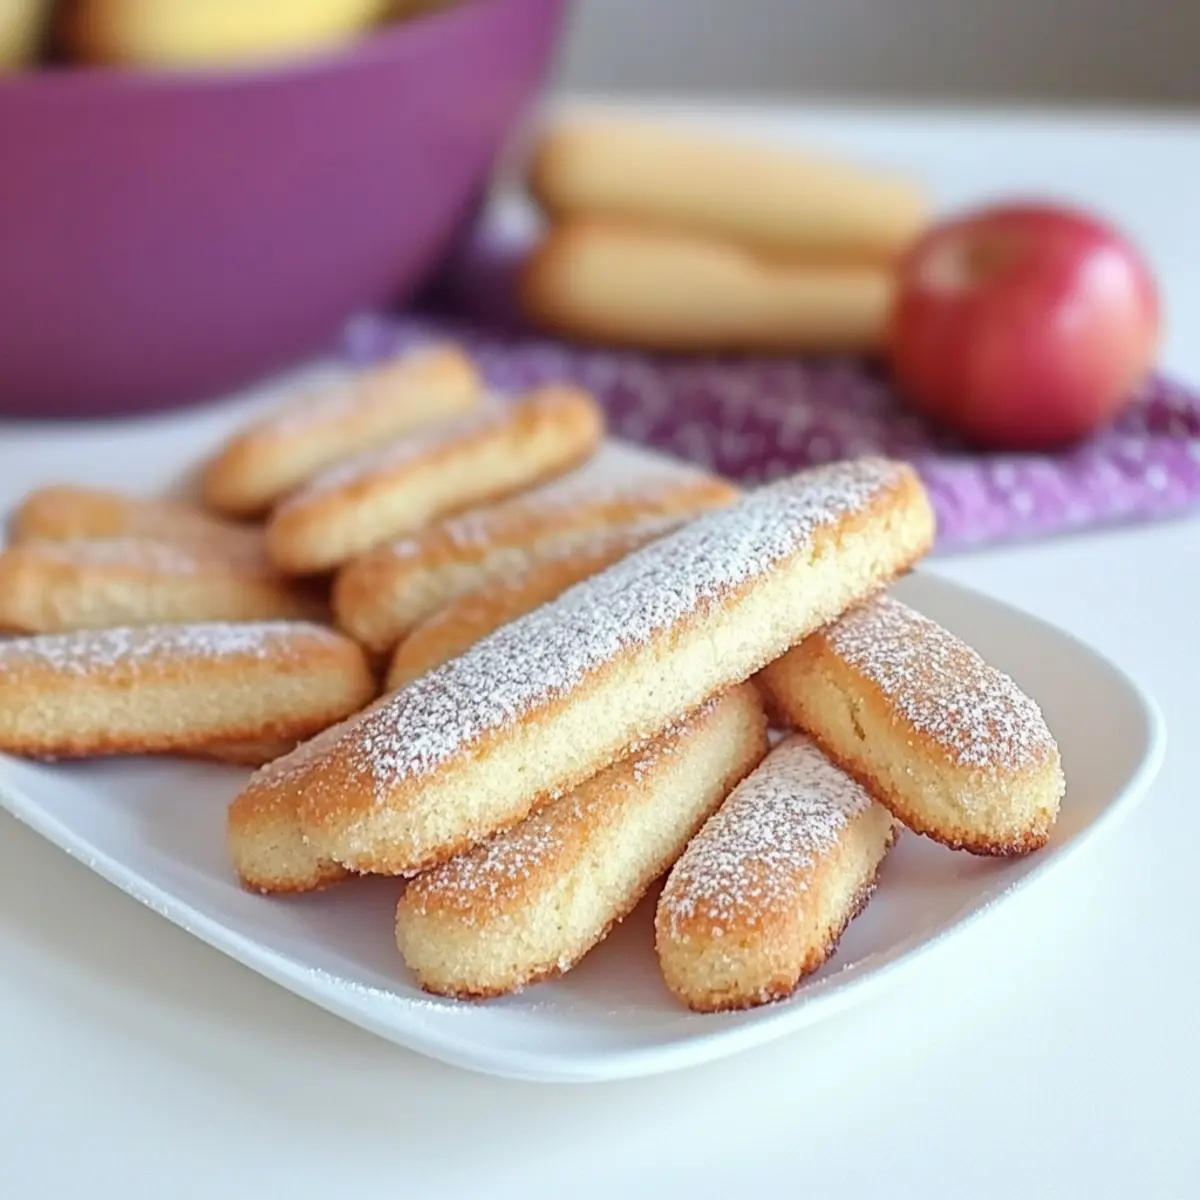
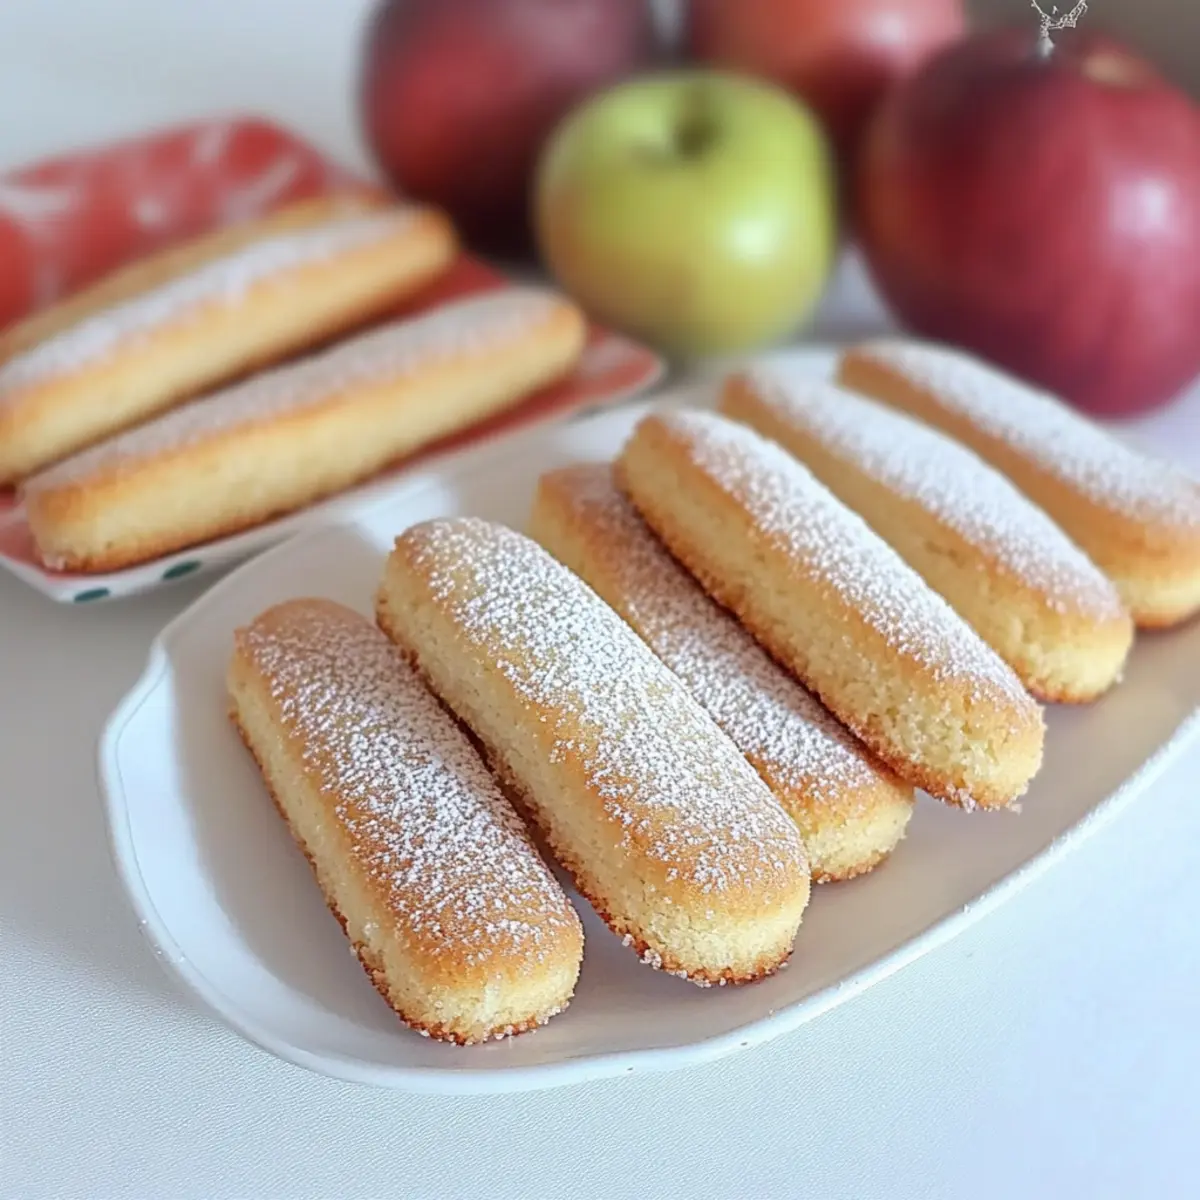
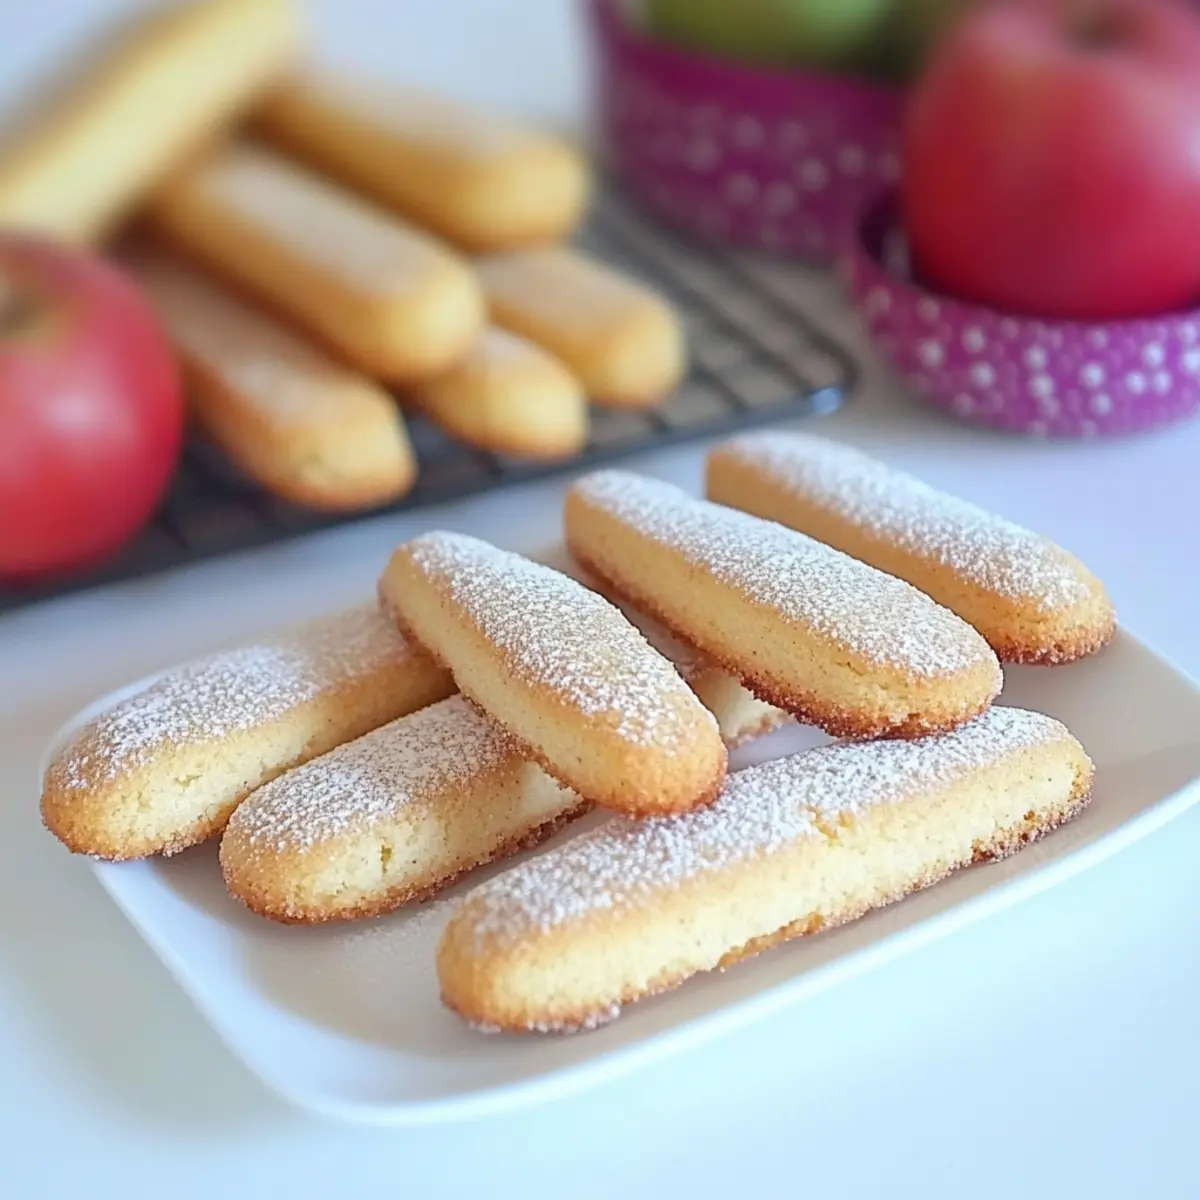
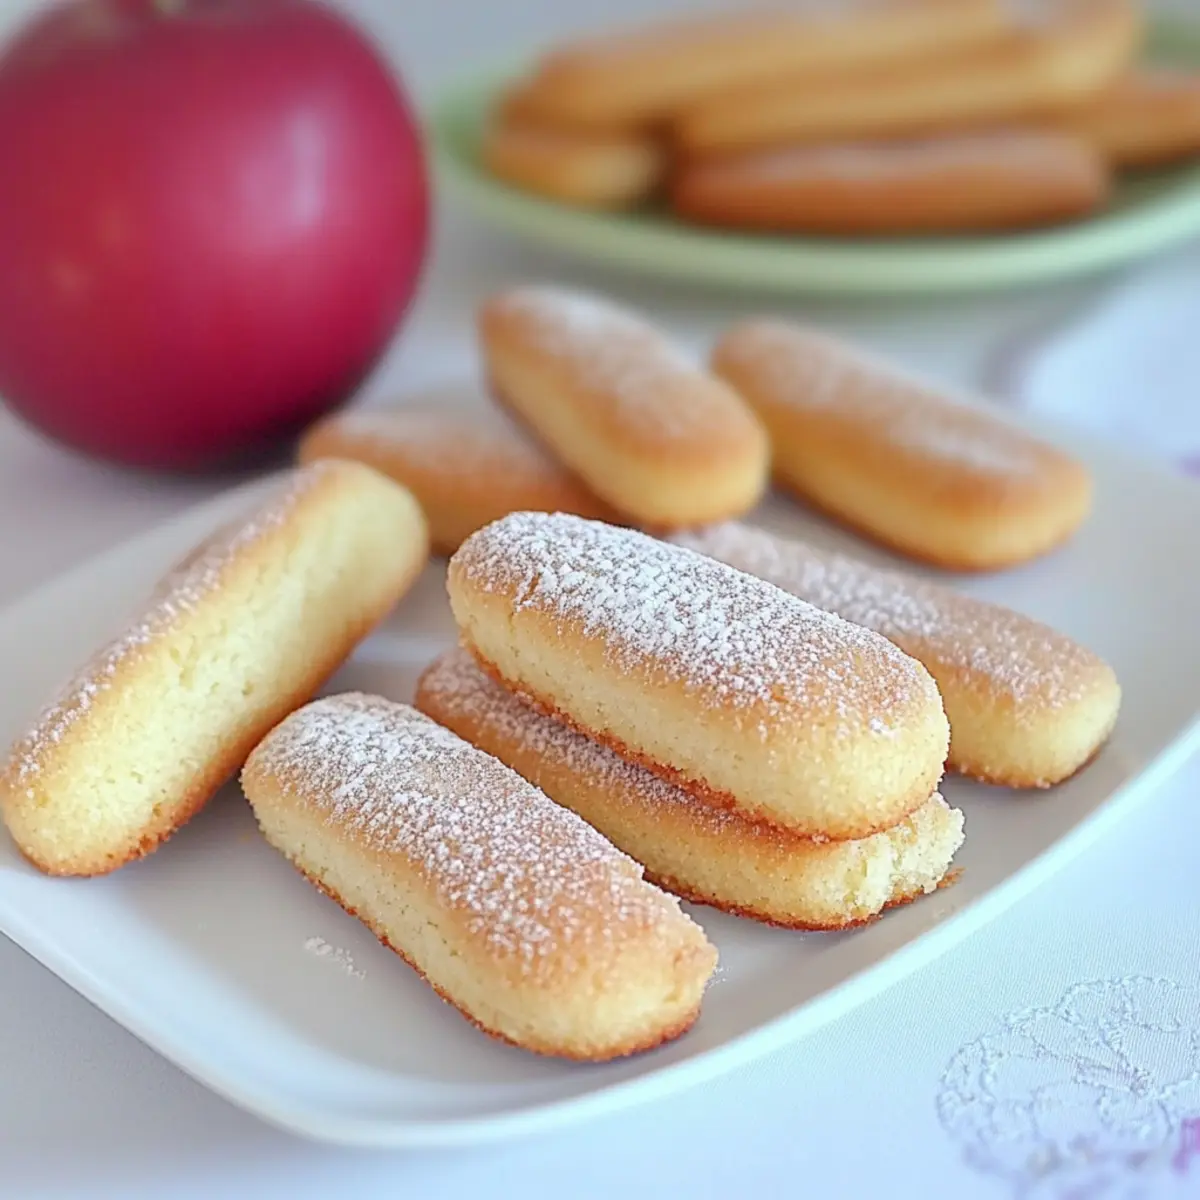
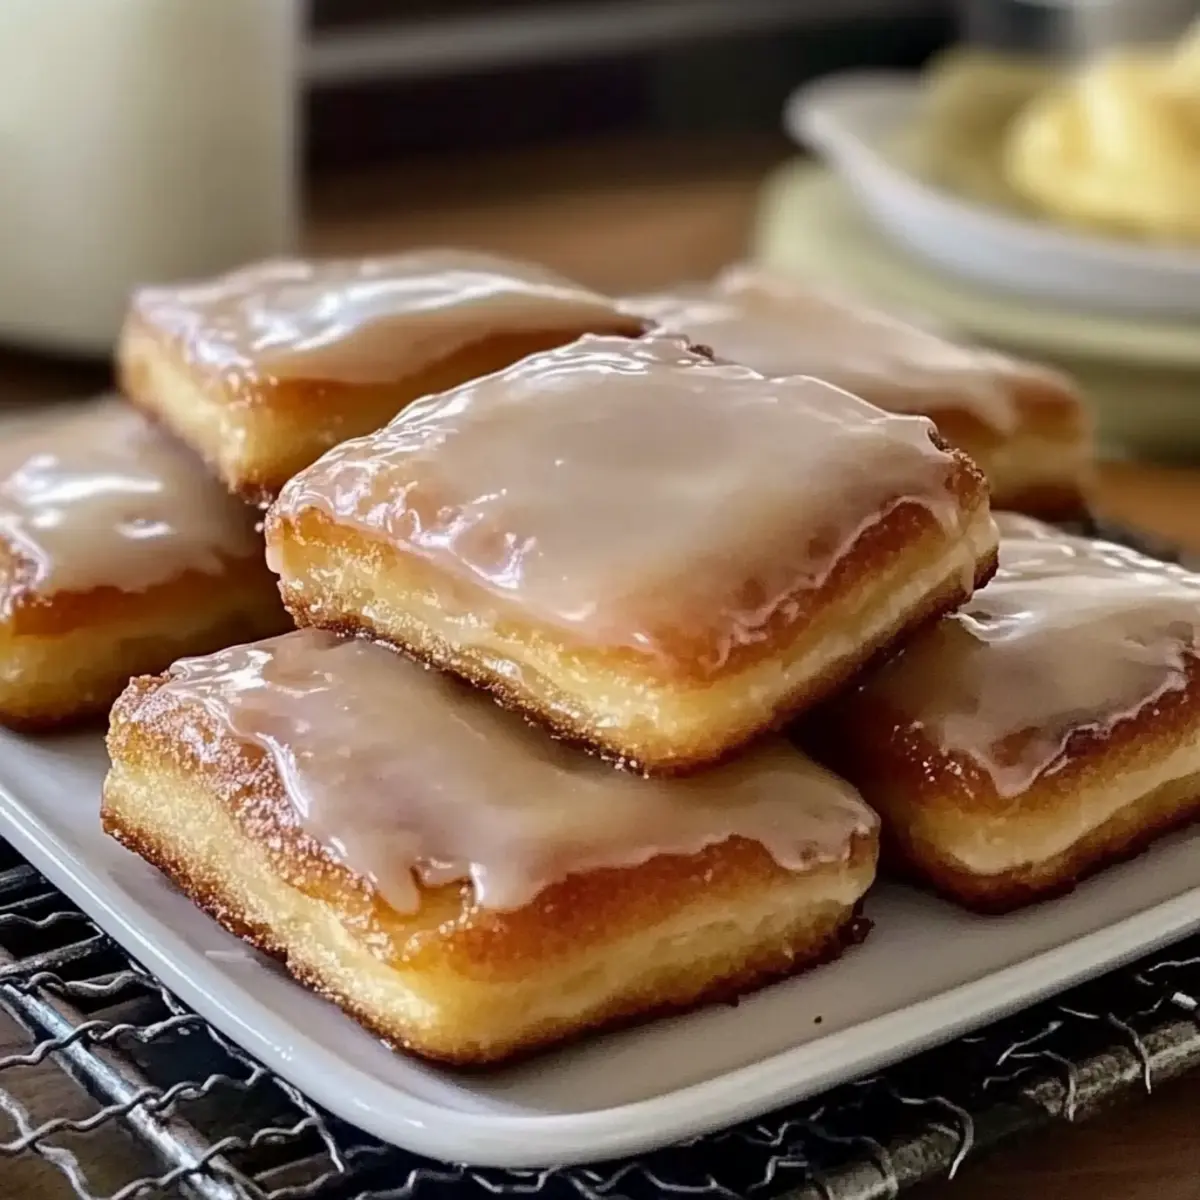
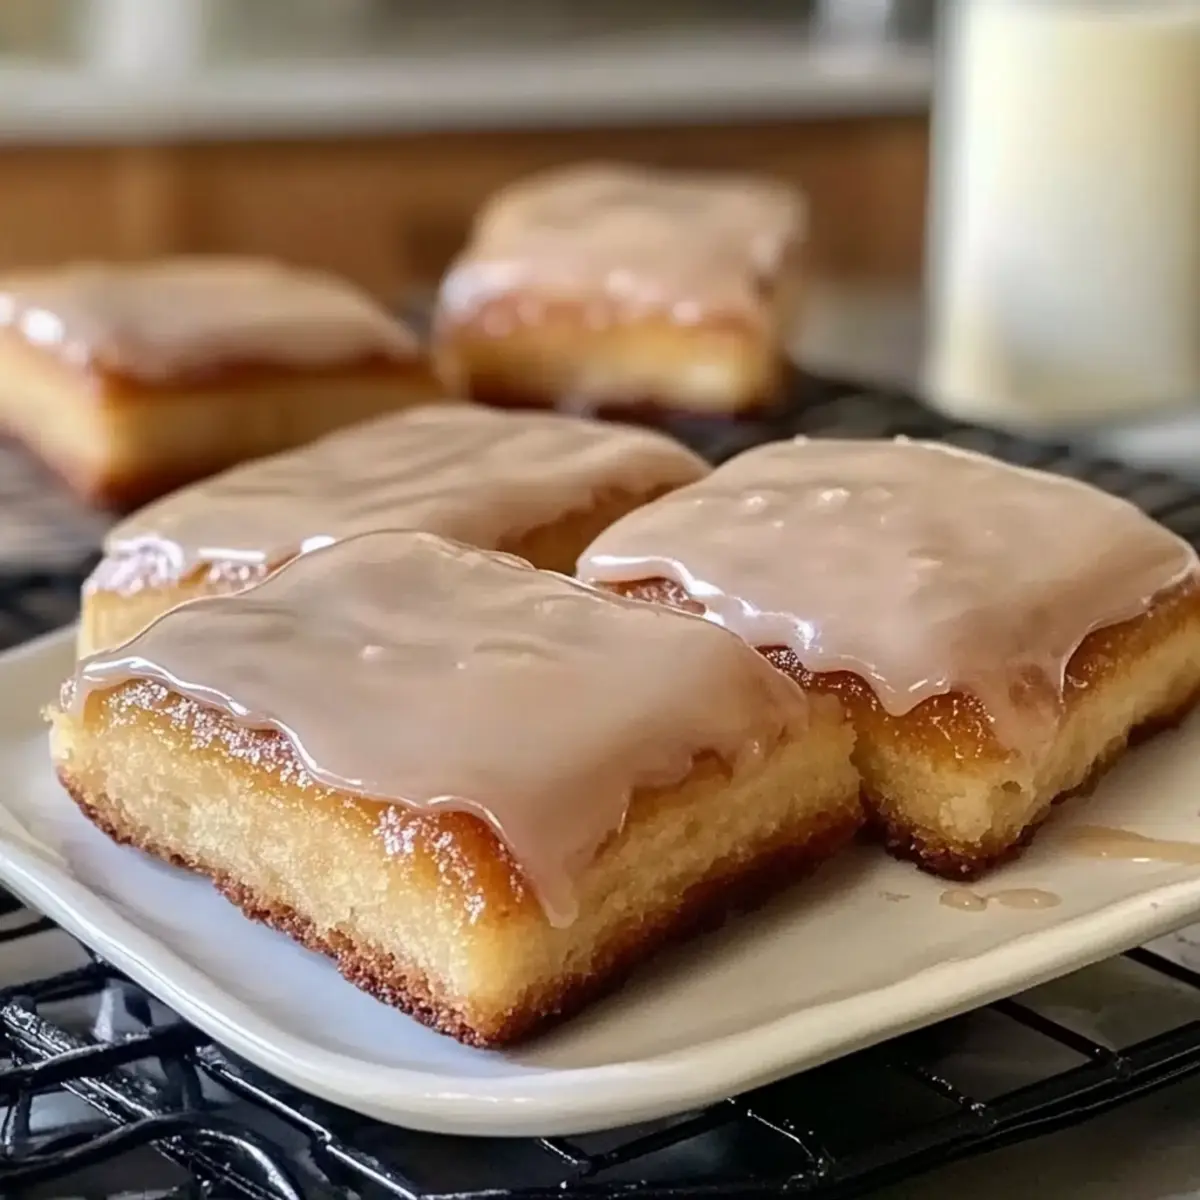
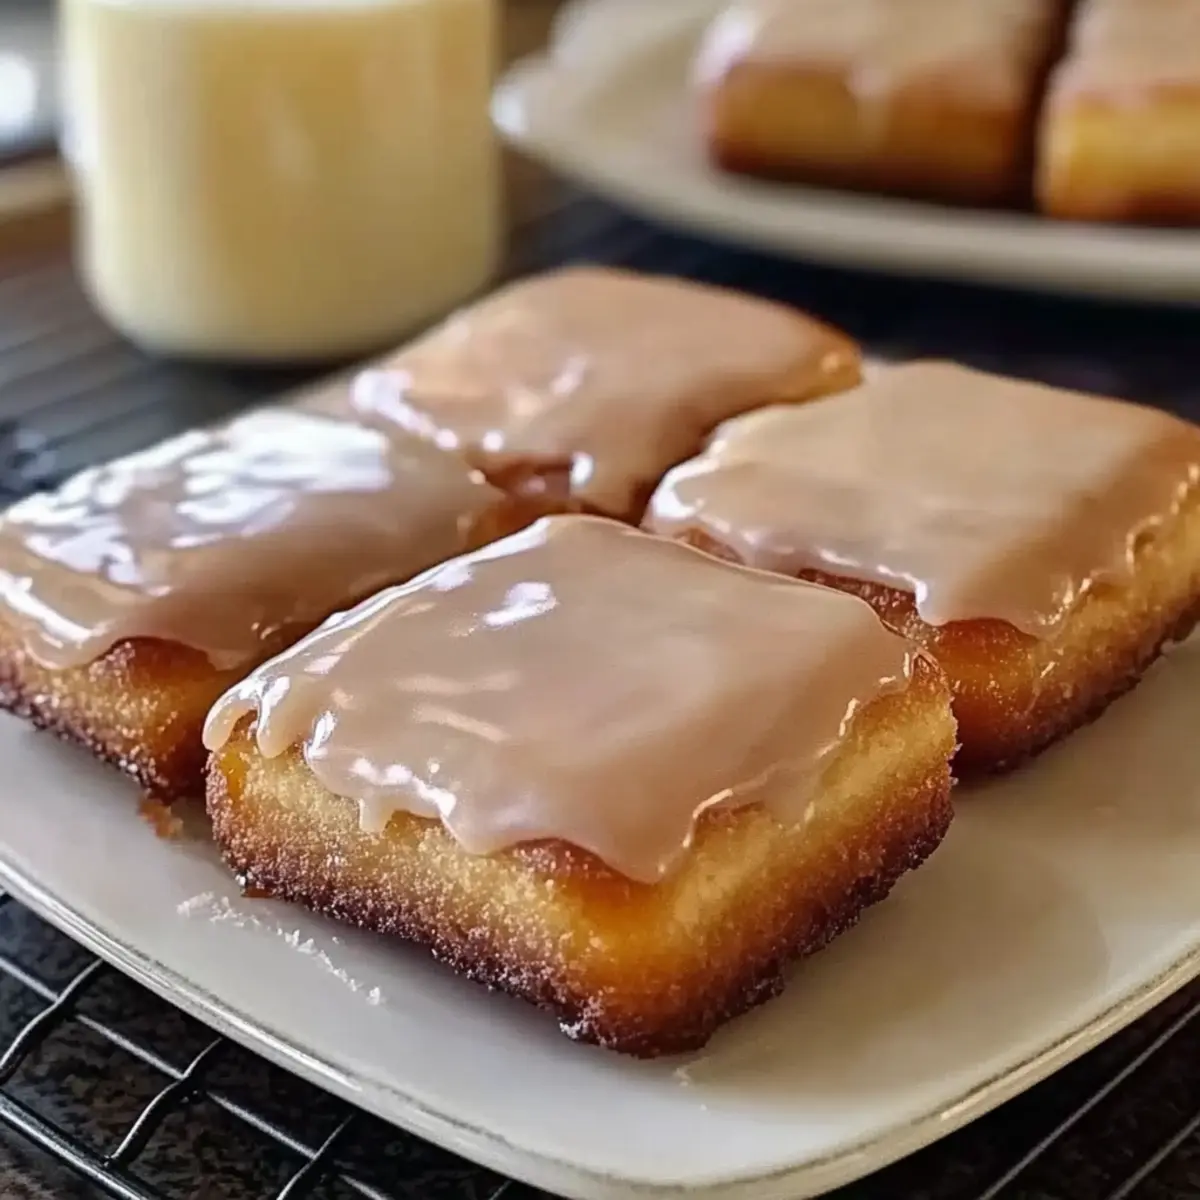
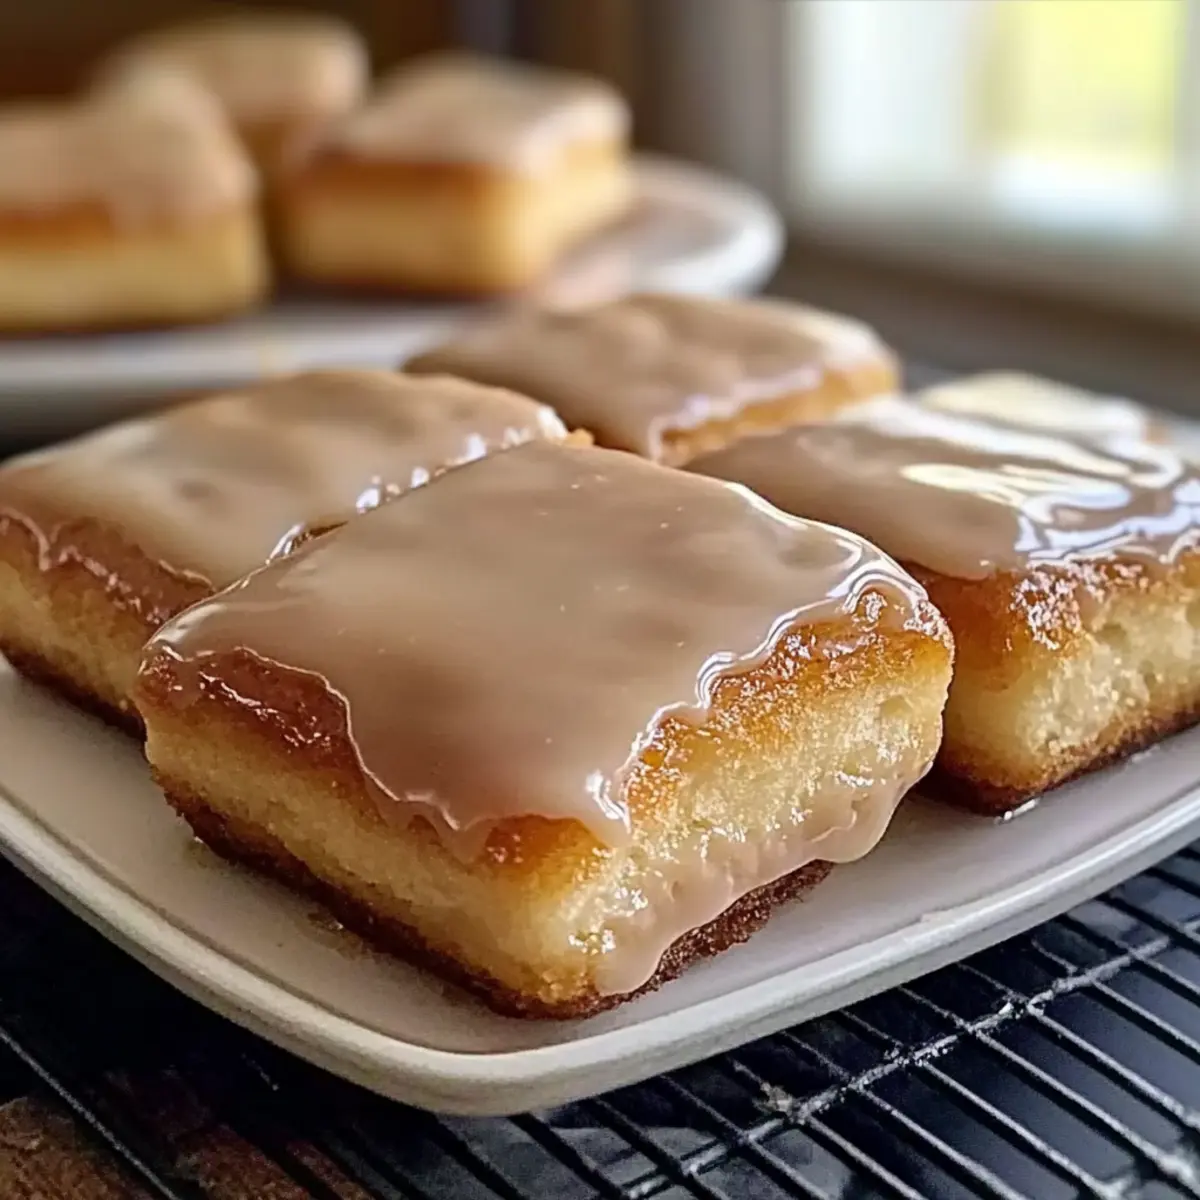
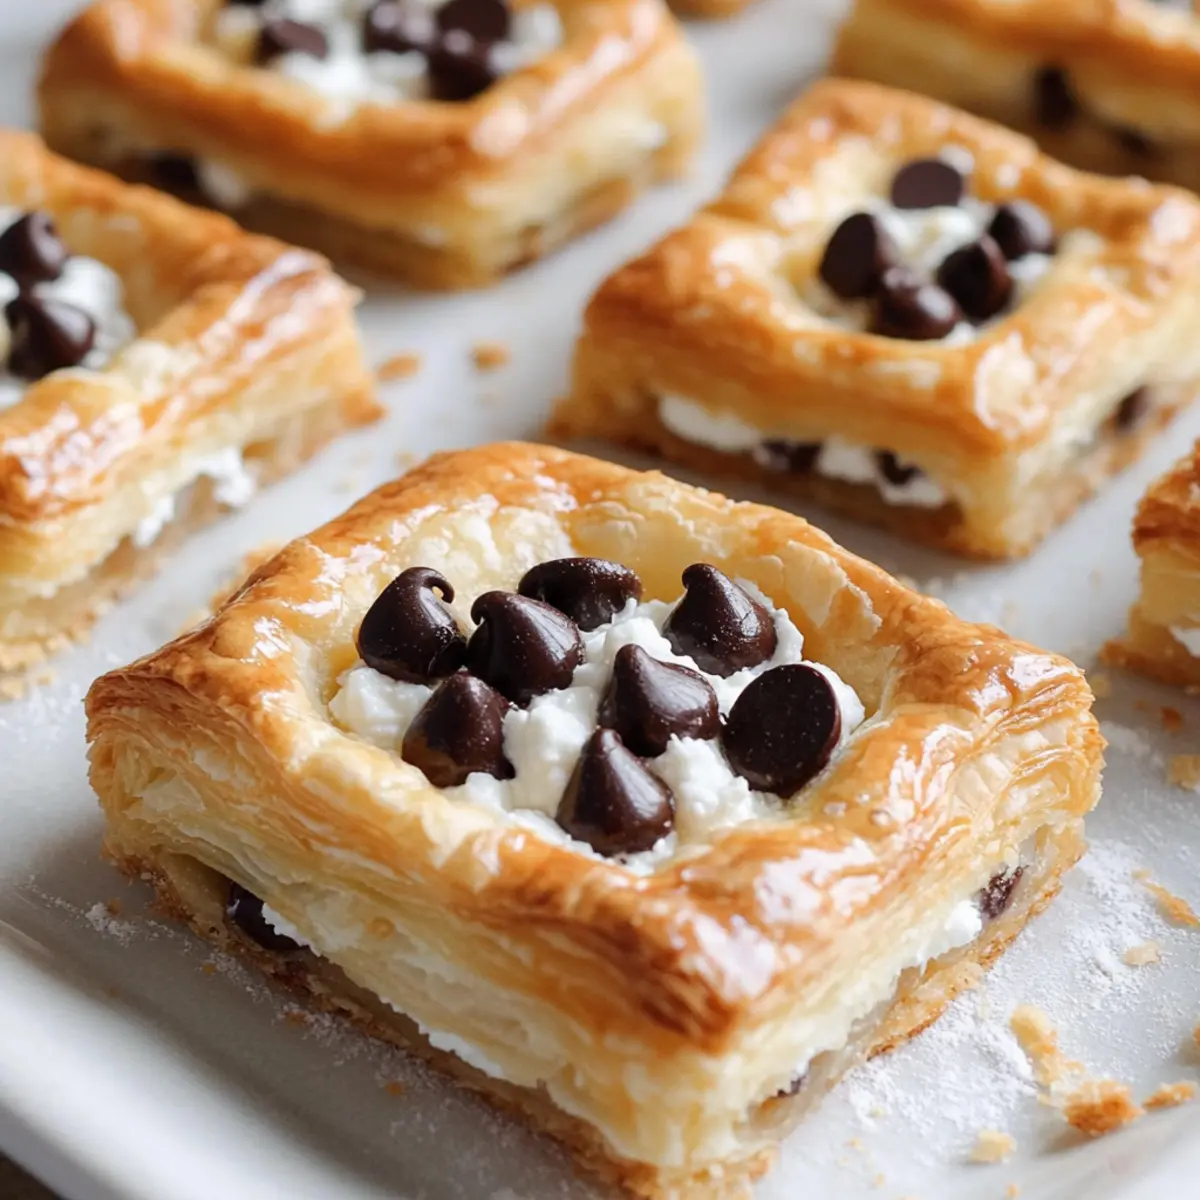
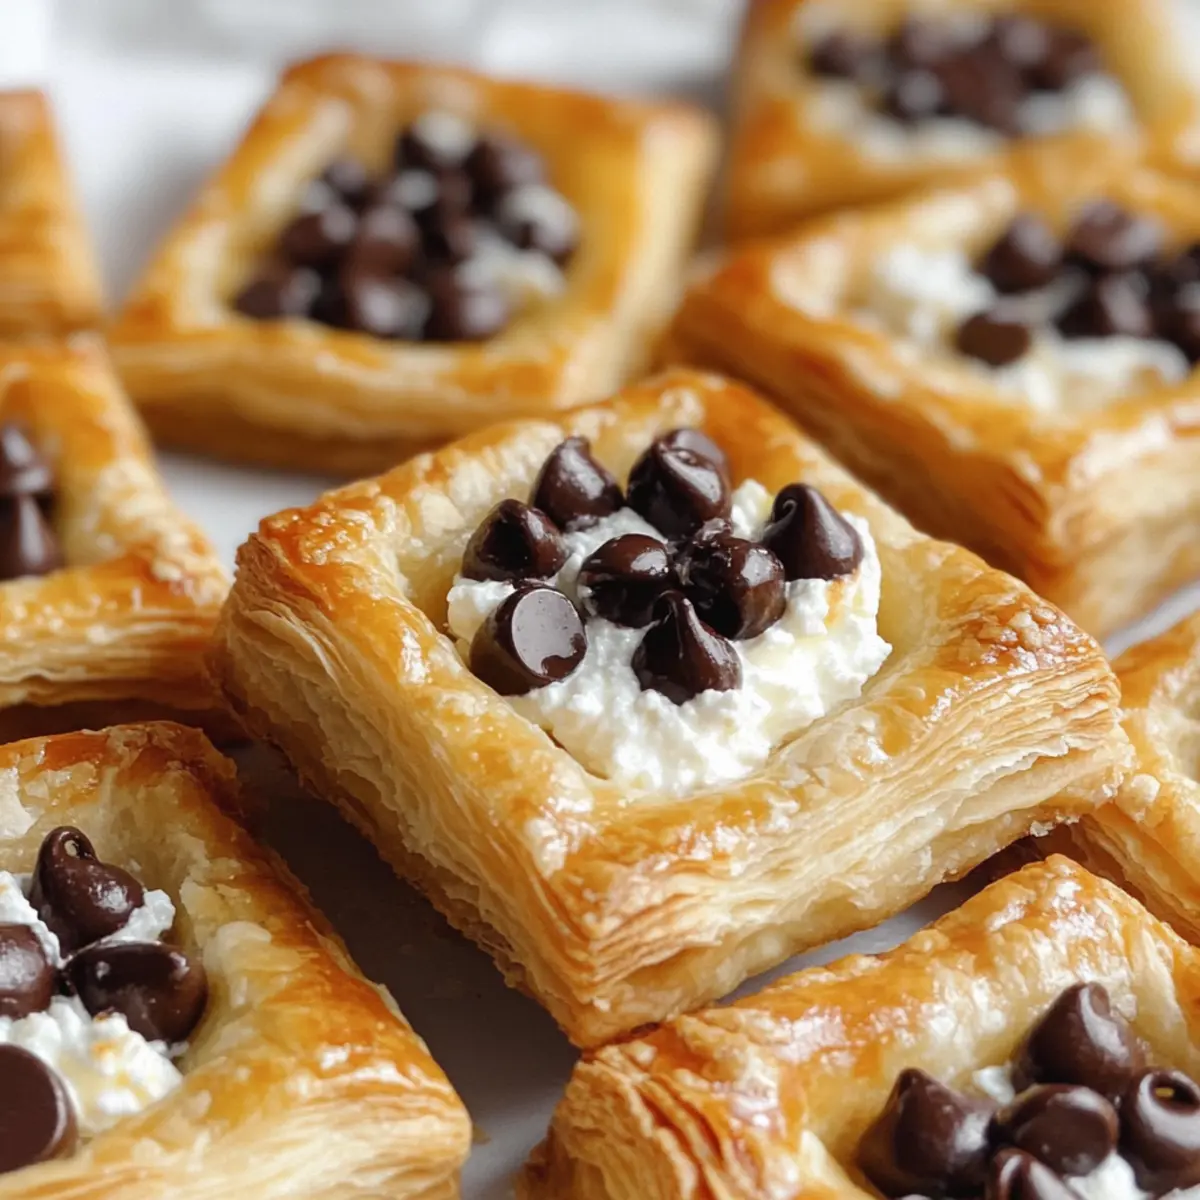
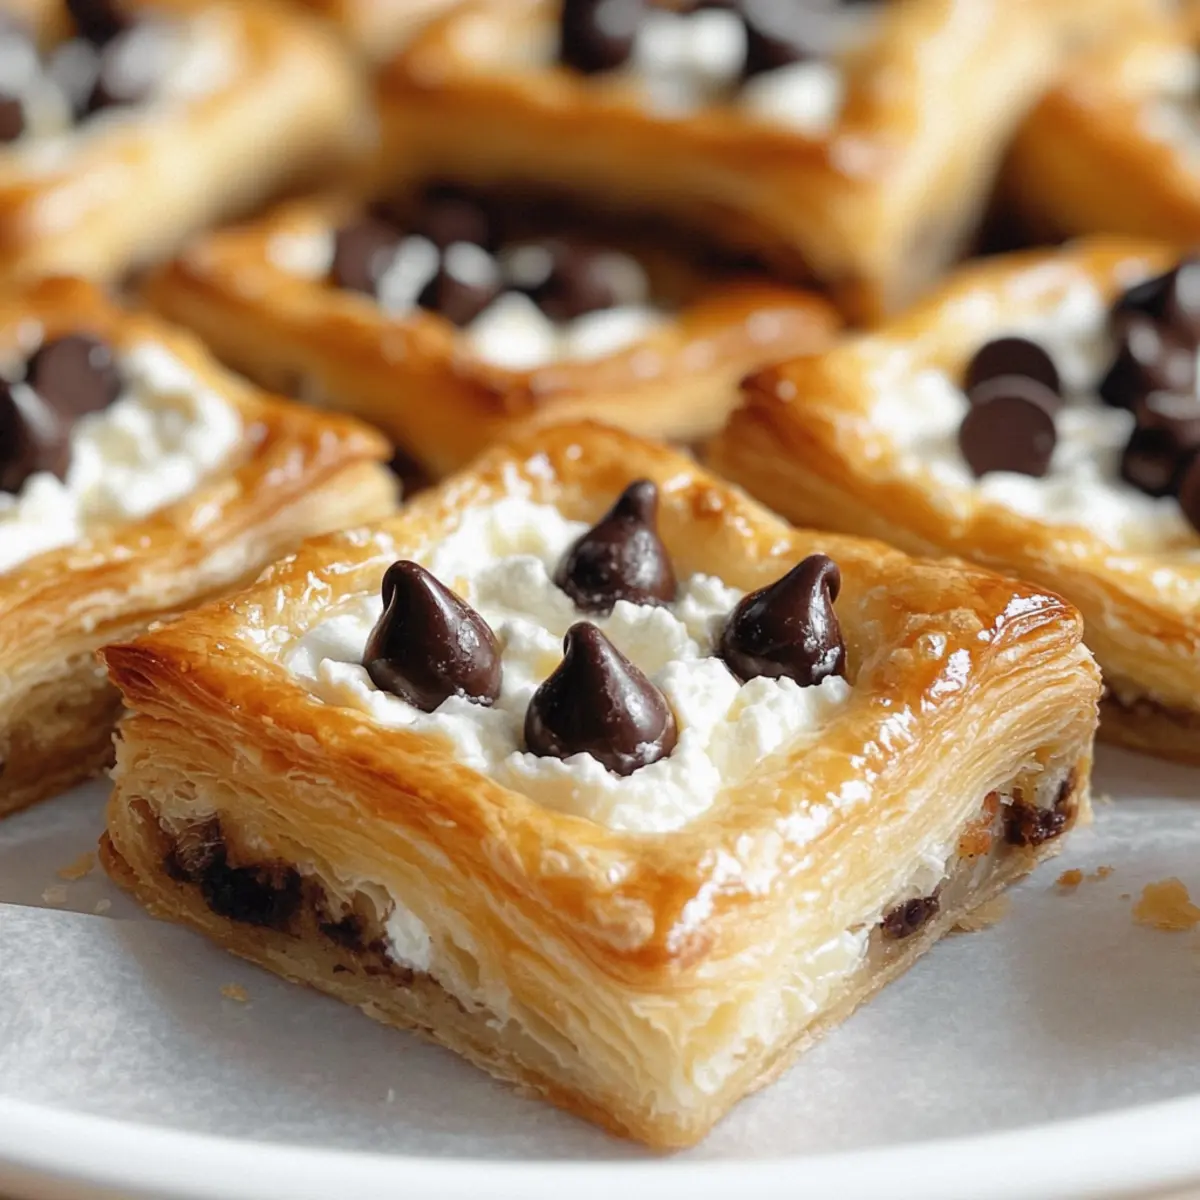
tastytrendingredients

  • Home
  • Recipes
    • Appetizers
    • Breakfast
    • Dessert
    • Dinner
    • Drinks
    • Salads
    • Snacks
    • Soups
  • About me
  • Contact me
menu icon
go to homepage
  • Home
  • Recipes
    • Appetizers
    • Breakfast
    • Dessert
    • Dinner
    • Drinks
    • Salads
    • Snacks
    • Soups
  • About me
  • Contact me
search icon
Homepage link
  • Home
  • Recipes
    • Appetizers
    • Breakfast
    • Dessert
    • Dinner
    • Drinks
    • Salads
    • Snacks
    • Soups
  • About me
  • Contact me
×

Irresistible Mini Peanut Butter Cup Cheesecakes You’ll Love

November 26, 2025 by Grace Snow Leave a Comment

As I pulled the warm, freshly baked mini cheesecakes from the oven, my kitchen filled with the heavenly aroma of chocolate and peanut butter. You know those days when you crave something sweet yet comforting? These Rich Mini Peanut Butter Cup Cheesecakes are here to rescue you. With their chocolate graham cracker crust and creamy peanut butter filling, they are the ultimate dessert indulgence that will thrill any peanut butter lover. Best of all, they’re quick to whip up and perfect for sharing with family or friends. Just imagine a sweet treat that transforms an ordinary evening into a special occasion! Are you ready to embark on a delightful culinary adventure? Let's dive into this irresistible recipe!

Why are these cheesecakes a must-try?

Decadent Flavor: The rich combination of chocolate and creamy peanut butter delivers a taste explosion that’s hard to resist.

Easy to Make: With straightforward steps, even novice bakers can achieve impressive results in no time!

Perfect for Sharing: These mini delights are ideal for parties or family gatherings, ensuring everyone gets their own delicious treat.

Customizable Options: Feel free to switch up the toppings or crust for a unique spin—like adding an Oreo base if you’re feeling adventurous!

Quick Chilling: Only two hours of refrigeration needed transforms these cakes into an impressive dessert, perfect for last-minute cravings.

Once you master this recipe, you might also enjoy exploring other delightful creations like my Crockpot Butter Chicken or sweet treats like Mini Tropical Pavlovas!

Mini Peanut Butter Cup Cheesecake Ingredients

For the Crust
• Chocolate Graham Cracker Crumbs – This gives the base crust a delightful chocolate flavor; substitute with regular graham crackers for a different taste.
• Granulated Sugar – Sweetens both the crust and the filling; it’s best to use exactly what's listed for optimal results.
• Unsalted Butter (melted) – Binds the crust ingredients together and enhances flavor; feel free to use margarine if needed.

For the Cheesecake Filling
• Cream Cheese (room temperature) – The key to a creamy cheesecake filling, make sure it's at room temperature for smooth blending.
• Large Eggs (room temperature) – They contribute structure and a creamy texture, ensuring the perfect consistency.
• Creamy Peanut Butter – This is what gives our mini cheesecakes their signature flavor; natural peanut butter can be used, but it may affect texture.
• Vanilla Extract – Boosts the complexity of flavors; don’t skip this for a rich cheesecake taste.

For the Topping
• Semi-Sweet Chocolate Chips – Used for a decadent topping, these add a rich layer; you can substitute with dark or milk chocolate if you prefer.
• Coconut Oil – Helps achieve that irresistible magic shell consistency; vegetable oil can work as a substitute too.

Step‑by‑Step Instructions for Mini Peanut Butter Cup Cheesecakes

Step 1: Preheat and Prepare
Begin by preheating your oven to 350°F (175°C). Line 18 cups of a standard cupcake or muffin pan with paper liners, ensuring they are secure. This will give your Mini Peanut Butter Cup Cheesecakes a perfect shape and easy removal once baked.

Step 2: Make the Crust
In a medium bowl, combine chocolate graham cracker crumbs, granulated sugar, and melted unsalted butter. Mix until the crumbs are fully coated and resemble wet sand. Firmly press this mixture into the bottom of each lined cup, creating an even layer that serves as the irresistible crust for your cheesecakes.

Step 3: Prepare the Filling
In a large mixing bowl, using an electric mixer, beat the softened cream cheese until it’s smooth and creamy, about 2 minutes. Gradually add the granulated sugar and continue mixing until fully combined. This base is crucial for achieving the rich, creamy texture of the filling in your Mini Peanut Butter Cup Cheesecakes.

Step 4: Combine Ingredients
With the mixer on low, add the large eggs one at a time, mixing just until incorporated after each addition. Then, add the creamy peanut butter and vanilla extract, blending until your mixture is smooth and uniform. Take care not to overmix to keep your filling velvety and minimize air bubbles.

Step 5: Fill the Cups
Carefully distribute the cheesecake batter evenly over your prepared crusts, filling each cup about 2/3 full. Gently tap the pan on the counter to remove any air bubbles that may have formed, ensuring a smooth surface for your Mini Peanut Butter Cup Cheesecakes.

Step 6: Bake to Perfection
Place the muffin pan in the preheated oven and bake for 17-19 minutes. You’ll know they’re done when the edges look set but the centers jiggle slightly. Once baked, turn off the oven and crack the door open to let them cool gradually—a technique to prevent cracking.

Step 7: Cool Down
After about 30 minutes, remove the cheesecakes from the oven and allow them to cool fully at room temperature. Once cooled, transfer the pan to the refrigerator for an additional cooling period, which helps solidify the filling and improve the texture for your Mini Peanut Butter Cup Cheesecakes.

Step 8: Make the Topping
For the decadent topping, combine semi-sweet chocolate chips, creamy peanut butter, and coconut oil in a microwave-safe bowl. Melt this mixture in 30-second increments, stirring in between until smooth and well blended. This luscious topping will add a rich layer of flavor to your cheesecakes.

Step 9: Assemble and Chill
Once the cheesecakes are completely cooled, pour the melted chocolate topping over each one, ensuring an even coat. Return the pan to the refrigerator and chill for at least 2 hours to allow the topping to set before indulging in your Mini Peanut Butter Cup Cheesecakes.

Mini Peanut Butter Cup Cheesecakes Variations

Feel free to get creative and customize these cheesecakes to suit your taste buds! The beauty of this recipe is its versatility—there's a delicious twist waiting just for you.

  • Oreo Crust: Replace the chocolate graham cracker crust with crushed Oreos for an extra chocolatey experience. The dark, rich flavor pairs beautifully with the peanut butter!

  • Nut Butter Swap: Use almond or cashew butter instead of peanut butter for a unique flavor profile. Each nut butter brings its own delightful twist to the recipe.

  • Add a Splash of Spice: Incorporate a pinch of cinnamon or even cayenne pepper into the filling for a surprising warmth. It’s a lovely way to elevate the flavor!

  • Mini Cheesecake Parfaits: Layer the cheesecake filling and topping in small cups instead of baking them. This no-bake version is perfect for summer gatherings.

  • Gluten-Free Option: Use gluten-free graham crackers or almond flour for the crust to make these mini cheesecakes gluten-free without sacrificing flavor.

  • Fruit Topping: Top with fresh berries or banana slices before adding the chocolate layer for a fruity twist that balances the richness of the cheesecake.

  • Chocolate Ganache: For a more decadent topping, switch to chocolate ganache made from heavy cream and chocolate. It transforms your cheesecakes into an ultra-rich experience.

  • Frozen Treats: For a warm day, freeze the cheesecakes instead of refrigerating them for a delicious frozen dessert. Just let them sit at room temperature for a few minutes before serving.

Once you’ve mastered these variations, you might also want to explore other delightful treats like our Crockpot Butter Chicken or satisfy your sweet tooth with Mini Tropical Pavlovas!

Storage Tips for Mini Peanut Butter Cup Cheesecakes

Fridge: Store your mini cheesecakes in an airtight container in the refrigerator for up to 5 days to maintain their fresh flavor and creamy texture.

Freezer: These delightful treats freeze well! Wrap each cheesecake tightly in plastic wrap and store in a freezer-safe container for up to 1 month.

Thawing: To enjoy your frozen mini cheesecakes, simply thaw them on the countertop for about 30 minutes before serving. This ensures they retain their delicious texture and flavor.

Reheating: If desired, you can gently warm a cheesecake in the microwave for about 10-15 seconds to enhance the dreamy peanut butter and chocolate experience—just be careful not to overheat!

Expert Tips for Mini Peanut Butter Cup Cheesecakes

• Room Temperature Ingredients: Ensure cream cheese and eggs are at room temperature to avoid lumps and achieve a smooth filling.

• Mixing Gently: Avoid overmixing the filling to prevent excess air, which can cause your mini cheesecakes to sink.

• Cooling Technique: Let cheesecakes cool gradually in the oven with the door cracked open; this reduces the chances of cracking and gives them the perfect texture.

• Chill for Flavor: For the best taste and texture, let the cheesecakes chill for a full day before serving; flavors deepen beautifully after resting.

• Watch the Baking Time: Bake until the centers jiggle slightly; overbaking can lead to dry cheesecakes. Aim for that perfect jiggle to keep them creamy!

Make Ahead Options

These Mini Peanut Butter Cup Cheesecakes are an excellent choice for meal prep, making your dessert planning a breeze! You can prepare the crust and filling up to 24 hours in advance; simply store the crust in an airtight container and refrigerate the filling separately. When you’re ready to bake, fill the crusts with the chilled cheesecake batter and proceed with the baking instructions. To maintain their creamy texture and flavor, let them cool completely before adding the rich chocolate topping. After pouring the topping over your cheesecakes, refrigerate for a minimum of 2 hours before serving. With a little foresight, you can enjoy these delightful desserts without any last-minute stress!

What to Serve with Mini Peanut Butter Cup Cheesecakes

Elevate your dessert experience with delightful pairings that enhance the rich flavors of these cheesecakes.

  • Fresh Berries: The tartness of strawberries or raspberries cuts through the richness, adding a refreshing contrast.

  • Whipped Cream: Silky and airy, this classic topping brings a light texture that complements the dense cheesecakes beautifully.

  • Chocolate Drizzle: A drizzle of melted chocolate on top creates an indulgent layer, intensifying the dessert’s chocolate flavor.

  • Coffee or Espresso: The robust flavors of coffee provide an aromatic balance, making each bite of cheesecake even more enjoyable.

  • Vanilla Ice Cream: A scoop of creamy vanilla ice cream brings a cool and refreshing element that contrasts wonderfully with the warm flavors.

  • Salted Caramel Sauce: A drizzle of salted caramel adds a sweet and salty depth, enhancing the peanut butter’s luscious texture.

  • Nutty Crumble Topping: Crushed nuts mixed with brown sugar create a flavorful crunch, adding texture and a delightful nutty flavor.

  • Chocolate Affogato: Pouring hot espresso over a scoop of chocolate ice cream creates a divine dessert experience that pairs decadently with the cheesecakes.

  • Chai Tea: The warm spices of chai tea add a cozy touch, beautifully balancing the sweet richness of your mini cheesecakes.

Mini Peanut Butter Cup Cheesecakes Recipe FAQs

What type of peanut butter should I use?
For these mini cheesecakes, creamy peanut butter works best as it gives a smooth texture to the filling. While you can opt for natural peanut butter, which is healthier, keep in mind that it may alter the texture slightly, making it less creamy. Some find that the oils in natural peanut butter can separate, so always stir well before using!

How long can I store mini cheesecakes in the refrigerator?
You can store your mini peanut butter cup cheesecakes in an airtight container in the refrigerator for up to 5 days. Just make sure they are well covered to prevent them from absorbing any unwanted odors or moisture that might affect their delightful flavor.

Can I freeze these cheesecakes?
Absolutely! These mini cheesecakes freeze wonderfully. Just wrap each cheesecake tightly in plastic wrap and keep them in a freezer-safe container for up to 1 month. When you're ready to enjoy them, let them thaw on the countertop for about 30 minutes for the best texture and flavor.

How can I prevent my cheesecakes from cracking?
To minimize cracking, allow the cheesecakes to cool gradually in the oven by turning off the oven and cracking the door open for 2-3 minutes after baking. This helps prevent sudden temperature changes that can cause the surface to crack. Additionally, be gentle when mixing your filling to avoid incorporating too much air, which can cause sinking during baking.

Can I make these cheesecakes gluten-free?
Yes! To make gluten-free mini peanut butter cup cheesecakes, simply substitute the chocolate graham cracker crumbs with gluten-free graham cracker alternatives or crushed gluten-free cookies. This way, you can enjoy these treats without worrying about gluten sensitivities.

Are these cheesecakes suitable for parties?
Indeed! Mini peanut butter cup cheesecakes are perfect for gatherings. Their individual portion sizes make them easy to serve, and their rich flavor appeals to guests of all ages. Plus, you can decorate them with different toppings or sprinkles to make them even more festive!

Mini Peanut Butter Cup Cheesecakes

Irresistible Mini Peanut Butter Cup Cheesecakes You’ll Love

These Mini Peanut Butter Cup Cheesecakes combine rich chocolate and creamy peanut butter for a delightful dessert experience.
Print Recipe Pin Recipe
Prep Time 20 minutes mins
Cook Time 19 minutes mins
Cooling Time 2 hours hrs
Total Time 2 hours hrs 39 minutes mins
Servings: 18 cheesecakes
Course: Dessert
Cuisine: American
Calories: 250
Ingredients Equipment Method Nutrition Notes

Ingredients
  

For the Crust
  • 1 cup Chocolate Graham Cracker Crumbs Substitute with regular graham crackers for a different taste.
  • 2 tablespoons Granulated Sugar Sweetens both the crust and filling.
  • 4 tablespoons Unsalted Butter (melted) Feel free to use margarine if needed.
For the Cheesecake Filling
  • 16 ounces Cream Cheese (room temperature) Key to a creamy filling.
  • 2 large Eggs (room temperature) Contribute structure and texture.
  • 1 cup Creamy Peanut Butter Natural peanut butter can be used.
  • 1 teaspoon Vanilla Extract Boosts flavor complexity.
For the Topping
  • 1 cup Semi-Sweet Chocolate Chips Substitute with dark or milk chocolate if preferred.
  • 1 tablespoon Coconut Oil Can use vegetable oil as substitute.

Equipment

  • Cupcake or Muffin Pan
  • Mixing bowls
  • Electric mixer
  • Microwave-safe bowl

Method
 

Step-by-Step Instructions for Mini Peanut Butter Cup Cheesecakes
  1. Preheat your oven to 350°F (175°C) and line a cupcake pan with paper liners.
  2. In a medium bowl, mix the chocolate graham cracker crumbs, granulated sugar, and melted butter until combined. Press the mixture into the bottom of each lined cup.
  3. Beat the softened cream cheese until smooth, then add granulated sugar and mix until fully combined.
  4. Add eggs one at a time, mixing gently, then add peanut butter and vanilla extract, blending until smooth.
  5. Distribute the cheesecake batter evenly over the crusts, filling each cup about 2/3 full.
  6. Bake for 17-19 minutes, until edges are set but centers jiggle slightly. Cool in the oven with the door cracked open.
  7. Allow them to cool at room temperature, then refrigerate to solidify the filling.
  8. Melt chocolate chips with peanut butter and coconut oil in 30-second increments, mixing until smooth.
  9. Pour the topping over cooled cheesecakes and chill for at least 2 hours before serving.

Nutrition

Serving: 1cheesecakeCalories: 250kcalCarbohydrates: 20gProtein: 5gFat: 18gSaturated Fat: 7gPolyunsaturated Fat: 1.5gMonounsaturated Fat: 10gCholesterol: 45mgSodium: 180mgPotassium: 120mgFiber: 1gSugar: 10gVitamin A: 8IUCalcium: 4mgIron: 6mg

Notes

For best flavor, let cheesecake chill for a full day before serving. Avoid overbaking to keep them creamy.

Tried this recipe?

Let us know how it was!

Creamy Orange Creamsicle Mini Cheesecakes That Refresh Summer

November 26, 2025 by Grace Snow Leave a Comment

As I scooped out the last bits of the creamy filling from my childhood favorite, I realized I had the perfect inspiration for my next dessert adventure: No-Bake Orange Creamsicle Mini Cheesecakes. Combining the nostalgic flavors of a classic creamsicle with a rich cheesecake twist, this delightful summer treat can be whipped up without ever turning on the oven. The simple Oreo crust pairs wonderfully with the airy, orange-infused cheesecake, making these mini delights not just easy to prepare but also perfect for those hot days when you crave something refreshing. Whether you're hosting a summer barbecue or looking for a sweet snack option, these individually portioned treats are sure to impress. Curious to see just how simple it is to recreate a bit of that childhood joy? Let’s dive in!

Why Make Orange Creamsicle Mini Cheesecakes?

Nostalgic Flavor: These mini cheesecakes pack the classic, creamy essence of a frozen creamsicle, perfect for reminding you of carefree summer days.
No-Bake Wonder: Skip the oven! This easy recipe comes together in no time, allowing you to relish deliciousness without the heat of baking.
Creamy Textures: The combination of airy whipped cream and smooth cream cheese creates an irresistibly creamy delight, complemented by a crunchy Oreo base.
Versatile Variations: Feel free to switch up the flavors! Try different fruits or even a chocolate drizzle for an extra indulgent twist, as seen with Mini Tropical Pavlovas.
Perfect Portions: Individually sized, these cheesecakes are not only visually appealing but also make for easy serving at any gathering.
Make Ahead: Prepare ahead of time and store them for effortless hosting, ensuring you're ready to impress your guests without the last-minute rush.

Orange Creamsicle Mini Cheesecake Ingredients

For the Crust
• Oreo Cookies – A fantastic crust base; substituting gluten-free cookies maintains the same crunch for a gluten-free option.

For the Cheesecake Filling
• Cream Cheese (16 oz) – This creamy foundation requires room temperature for easy mixing and a smooth texture.
• Powdered Sugar (½ cup) – Adds just the right sweetness; feel free to use a sugar substitute for a lower-calorie version.
• Vanilla Extract (1 tsp) – Enhances the overall flavor profile of the cheesecake.
• Heavy Whipping Cream (1 cup) – Whipped to deliver that lovely, fluffy texture; can be replaced with coconut cream for a dairy-free treat.
• Orange (1, zest) – Freshens up the flavors; you can swap in 1-2 tbsp of orange juice if necessary.
• Orange Extract (½ tsp) – Intensifies the delightful orange essence of these Orange Creamsicle Mini Cheesecakes.
• Orange Gel Food Coloring (2-3 drops) – Optional but adds a beautiful pop of color to the cheesecakes.

For Garnishing
• Whipped Cream – Use as a delightful topping for added creaminess.
• Orange Slices – Fresh, vibrant garnish to enhance visual appeal and flavor.

Step‑by‑Step Instructions for Orange Creamsicle Mini Cheesecakes

Step 1: Prepare the Muffin Tin
Start by preparing a standard muffin tin with 12 cupcake liners, ensuring each liner is placed securely. Next, place one whole Oreo cookie at the bottom of each liner, creating a solid crust base for your Orange Creamsicle Mini Cheesecakes. This should be done right before mixing the cheesecake filling for efficiency.

Step 2: Mix the Cheesecake Base
In a medium mixing bowl, combine 16 ounces of room-temperature cream cheese with ½ cup of powdered sugar. Using an electric mixer, beat the mixture on medium speed for about 2-3 minutes until it transforms into a smooth and creamy consistency. This is essential to achieve the light texture that your mini cheesecakes will boast.

Step 3: Whip the Cream
In a separate bowl, pour in 1 cup of heavy whipping cream. Using a hand mixer, whip the cream on medium-high speed until soft peaks begin to form, which takes about 2-4 minutes. Once soft peaks are reached, gently add in ½ teaspoon of orange extract. Continue whipping until stiff peaks form, ensuring the cream is not over-whipped for a light finish.

Step 4: Combine Mixtures
Gently fold the smooth cream cheese mixture into the whipped cream using a spatula, being careful not to deflate the whipped cream. Stir the two mixtures just until fully blended, creating a cohesive filling. After this, divide the combined mixture into two bowls for the two distinct layers of your Orange Creamsicle Mini Cheesecakes.

Step 5: Assemble the First Layer
Take one portion of the blended mixture and spoon it evenly over each Oreo crust in the muffin tin. Spread the cheese layer smoothly with an offset spatula, making sure to fill each liner generously. This layer will provide the creamy foundation for your mini cheesecakes, setting the stage for the vibrant orange topping.

Step 6: Flavor the Second Layer
In the second bowl of the cream cheese mixture, incorporate the zest of one orange along with 2-3 drops of orange gel food coloring if desired. Gently mix this until the color is uniform and visually appealing. This playful, citrusy layer will enhance the delicious flavors of your Orange Creamsicle Mini Cheesecakes.

Step 7: Layer and Swirl
Carefully spread the orange-infused mixture over the first layer in each cupcake liner, giving it a beautiful bright hue. Use a toothpick or skewer to gently swirl the two layers together, creating a marbled effect. Aim for a nice blend without completely mixing them, showcasing the two flavors distinctively.

Step 8: Chill Until Set
Place the muffin tin in the refrigerator and allow the cheesecakes to set for at least 3-4 hours, though overnight is recommended for the best texture. This chilling period ensures that the layers firm up perfectly, making your Orange Creamsicle Mini Cheesecakes easy to serve and enjoy.

Step 9: Garnish Before Serving
Once set, carefully remove the mini cheesecakes from the muffin tin by peeling away the liners. Top each one with a dollop of whipped cream and a slice of fresh orange for a charming presentation. The vibrant colors and creamy textures make them an irresistible summer treat ready for sharing!

What to Serve with Orange Creamsicle Mini Cheesecakes?

Transform your dessert into a delightful experience by complementing these mini cheesecakes with tasty sides and beverages that enhance their refreshing flavors.

  • Crispy Fruit Salad: A mix of fresh fruits like berries, melons, and citrus add a burst of flavor and color, balancing the creaminess of the cheesecakes.
  • Chilled Lemonade: This summery beverage not only quenches your thirst but also provides a zesty contrast that brings out the orange notes beautifully.
  • Grilled Pineapple Slices: The smokiness of grilled pineapple offers a warm, caramelized touch that contrasts wonderfully with the chilled, creamy desserts. Serve alongside for a tropical twist!
  • Minty Greek Yogurt Dip: A cool, creamy dip with yogurt and fresh mint enhances the citrusy profile, providing a refreshing palate cleanser. Add crushed nuts for crunch!
  • Decadent Chocolate Sauce: Drizzle a little chocolate sauce over the cheesecakes for a touch of indulgence and a rich taste that pairs beautifully with the orange flavor.
  • Sparkling Water with Citrus: Spritz with a hint of lime or orange, making a fizzy drink that complements the mini cheesecakes's creamy texture while refreshing your palate.
  • Vanilla Ice Cream: The creaminess of vanilla ice cream harmonizes with the cheesecakes, creating a luscious dessert duo, perfect for summer nights.

Helpful Tricks for Orange Creamsicle Mini Cheesecakes

• Soften the Cream Cheese: Always use room temperature cream cheese to ensure a smooth and easily blended filling. Cold cream cheese can lead to lumps.

• Whip Cream Correctly: Stop whipping the heavy cream once stiff peaks form. Over-whipping can make your cheesecake mixture grainy, losing that desired airy texture.

• Chill Thoroughly: Allow the mini cheesecakes to set overnight for the best flavor and texture. This ensures they hold their shape and flavors meld beautifully.

• Use Fresh Ingredients: Freshly zested orange adds a vibrant flavor. Packaged versions fall short in taste, affecting the overall quality of these Orange Creamsicle Mini Cheesecakes.

• Piping for Presentation: Consider using a piping bag for the whipped cream garnish. This will create a beautiful and professional finish that’s perfect for impressing guests at summer gatherings.

How to Store and Freeze Orange Creamsicle Mini Cheesecakes

Fridge: Store your Orange Creamsicle Mini Cheesecakes in an airtight container for up to 5 days to maintain their creamy texture and fresh flavors.

Freezer: For longer storage, freeze the mini cheesecakes for up to 3 months. Place them in an airtight container, separating layers with parchment paper to avoid sticking.

Thawing: When you're ready to enjoy your frozen treats, simply transfer the cheesecakes to the fridge overnight to thaw gently for the best texture.

Serving Tips: Garnish with fresh whipped cream and orange slices just before serving to revive their vibrant appearance and taste.

Make Ahead Options

These Orange Creamsicle Mini Cheesecakes are a fantastic choice for meal prep enthusiasts! You can prepare the cheesecake filling and layer it in the muffin tin up to 24 hours in advance, allowing those delicious flavors to meld beautifully. Simply cover the muffin tin with plastic wrap in the refrigerator to maintain freshness and prevent any unwanted odors from mingling. For the best texture, it's recommended to chill the mini cheesecakes overnight before serving. Just before serving, add the whipped cream topping and orange slices for a vibrant finish. With this prep strategy, you'll have a delightful dessert ready without the last-minute rush!

Orange Creamsicle Mini Cheesecakes Variations

Feel free to let your creativity shine and customize these mini cheesecakes with fun twists and substitutions!

  • Gluten-Free: Use gluten-free sandwich cookies for the crust while preserving that satisfying crunch. These adaptations cater to everyone without sacrificing flavor.

  • Dairy-Free: Swap out heavy cream for coconut cream and the cream cheese for a dairy-free alternative, such as cashew cream, to enjoy a rich, tropical twist. It's a delicious way to accommodate dietary preferences!

  • Flavor Boost: Explore other fruit flavors! Replace orange with lemon, lime, or even berry options for a refreshing change. Each will bring a unique zest that's perfect for summer.

  • Chocolate Drizzle: Elevate the indulgence by adding a luscious chocolate drizzle over the top. Melted dark chocolate complements the orange beautifully, making it a delightful pairing.

  • Mini Size Twist: Want bite-sized goodness? Use a mini muffin tin to create even smaller versions of these cheesecakes. Perfect for parties or when you just want a little sweet nibble!

  • Zesty Layering: Instead of just orange zest, combine it with other citrus, like lime zest, for a vibrant and complex flavor profile. Citrus lovers will simply adore this combo!

  • Frozen Treat: Freeze the prepared cheesecakes for a refreshing dessert on hot days. These popsicle-like treats will become a new favorite way to enjoy your childhood creamsicle memories.

  • Served with Style: Pair your cheesecakes with fresh berries or a dollop of fruit compote for an extra burst of flavor, enhancing both taste and visual appeal as seen with Mini Tropical Pavlovas.

Experimenting with these variations will surely keep your dessert table exciting and full of delightful surprises!

Orange Creamsicle Mini Cheesecakes Recipe FAQs

How do I choose the right oranges for my recipe?
Absolutely! When selecting oranges, opt for ones that feel firm and have a vibrant orange color. Avoid any that show dark spots or have a soft texture. The more fragrant the orange, the juicier and fresher it will likely be, enhancing the flavor of your Orange Creamsicle Mini Cheesecakes!

What’s the best way to store leftover mini cheesecakes?
Very! Store your Orange Creamsicle Mini Cheesecakes in an airtight container in the fridge for up to 5 days. Make sure they're well-covered to prevent any odors from other foods affecting their delightful flavor!

Can I freeze the mini cheesecakes?
Absolutely! You can freeze these mini cheesecakes for up to 3 months. To do this, individually wrap each cheesecake in plastic wrap, then place them in a labeled airtight container. This keeps them from sticking together and preserves their deliciousness. When you're ready to enjoy them, thaw in the fridge overnight.

What should I do if my whipped cream isn't thickening?
No worries! Ensure your heavy whipping cream is cold before starting to whip it. It’s also crucial that your mixing bowl and beaters are chilled as well, as this helps achieve those stiff peaks you’re aiming for. If it still doesn't whip correctly, consider starting with new cream—it could be that the cream was past its prime.

Are there any dietary considerations for this recipe?
Very! For those watching their sugar intake, you can substitute powdered sugar with a sugar alternative. If you're serving these to guests with dietary restrictions, feel free to use gluten-free Oreo cookies for the crust. Remember to check that your heavy cream or substitutes are safe for those with lactose intolerance if necessary.

What’s the best way to garnish my mini cheesecakes?
I often recommend using a piping bag to dollop whipped cream on top for a beautiful finish. You can also add fresh orange slices and a sprinkle of orange zest to enhance the look and tie in that zesty flavor. Displaying them on a decorative plate can take your presentation to the next level!

Orange Creamsicle Mini Cheesecakes

Creamy Orange Creamsicle Mini Cheesecakes That Refresh Summer

Delicious mini cheesecakes inspired by classic creamsicle flavors, perfect for summer.
Print Recipe Pin Recipe
Prep Time 30 minutes mins
Chilling Time 4 hours hrs
Total Time 4 hours hrs 30 minutes mins
Servings: 12 cheesecakes
Course: Dessert
Cuisine: American
Calories: 250
Ingredients Equipment Method Nutrition Notes

Ingredients
  

For the Crust
  • 12 cookies Oreo Cookies Substitute gluten-free cookies if desired.
For the Cheesecake Filling
  • 16 oz Cream Cheese Room temperature for easy mixing.
  • 0.5 cup Powdered Sugar Sugar substitute can be used.
  • 1 tsp Vanilla Extract
  • 1 cup Heavy Whipping Cream Can substitute with coconut cream.
  • 1 Orange Zest needed, or substitute with orange juice.
  • 0.5 tsp Orange Extract
  • 2-3 drops Orange Gel Food Coloring Optional.
For Garnishing
  • Whipped Cream For topping.
  • Orange Slices Fresh garnish.

Equipment

  • Muffin tin
  • Electric mixer
  • hand mixer
  • Spatula
  • toothpick

Method
 

Step-by-Step Instructions
  1. Prepare a standard muffin tin with 12 cupcake liners and place one whole Oreo cookie at the bottom of each liner.
  2. In a mixing bowl, combine cream cheese and powdered sugar and beat until smooth.
  3. Whip the heavy cream until soft peaks form, then gently add orange extract and continue whipping until stiff peaks form.
  4. Fold the cream cheese mixture into the whipped cream carefully.
  5. Spoon one portion of the mixture over each Oreo crust.
  6. In a second bowl, mix in the zest of one orange and gel coloring, then combine with the cream cheese mixture.
  7. Spread the orange-infused mixture over the first layer and swirl gently with a toothpick.
  8. Refrigerate for at least 3-4 hours or overnight for best results.
  9. Garnish with whipped cream and orange slices before serving.

Nutrition

Serving: 1cheesecakeCalories: 250kcalCarbohydrates: 28gProtein: 3gFat: 15gSaturated Fat: 8gCholesterol: 40mgSodium: 150mgPotassium: 100mgSugar: 18gVitamin A: 300IUVitamin C: 5mgCalcium: 50mgIron: 1mg

Notes

Ensure cream cheese is at room temperature for a smooth mixture. Whip the cream until just stiff to maintain airiness. Allow to chill thoroughly for best texture and flavor.

Tried this recipe?

Let us know how it was!

Irresistibly Flaky Cheesecake Crescent Rolls to Savor

November 26, 2025 by Grace Snow Leave a Comment

There's something magical about the scent of fresh-baked pastries wafting through the kitchen. When I first baked these Cheesecake Crescent Rolls, I couldn’t believe how incredibly easy they were to whip up. This quick and easy dessert combines flaky crescent dough with a rich, creamy cheesecake filling that just begs for a sprinkle of cinnamon sugar on top. The best part? You can serve them for brunch or as a sweet treat any time of day, and they’re bound to impress even the pickiest of eaters. Plus, they’re versatile enough to let your creativity shine—soy cream cheese or fruit-flavored options allow for delightful variations. So, are you ready to see how simple it is to treat yourself and your loved ones to this delicious indulgence? Let's dive in!

Why are Cheesecake Crescent Rolls a must-try?

Simplicity: You’ll be amazed at how easy it is to create these indulgent treats, requiring minimal skills and just a handful of ingredients.

Flaky Delight: Each bite offers a delightful contrast, with the buttery, flaky exterior giving way to a rich, creamy filling.

Endless Variations: Feel free to get creative! Substitute flavored cream cheese or add chocolate chips for a twist.

Quick & Tasty: Perfect for unexpected guests or a last-minute dessert, they’re ready in no time and always a crowd pleaser.

Make-Ahead Magic: Assemble them ahead of time, chill, and bake fresh when you’re ready to eat, making your life easier while impressing your guests.

Ready to experience these tasty treats? Discover how easy it is to make delicious desserts that will make you the star of any gathering!

Cheesecake Crescent Rolls Ingredients

For the Dough

• Crescent Rolls – The flaky base that cradles the creamy cheesecake filling; feel free to swap in puff pastry for a different texture.

For the Filling

• Cream Cheese – This provides richness; using full-fat cream cheese enhances the flavor and ensures a smooth filling.
• Sugar – Sweetens the filling beautifully; no direct substitutions are mentioned, but a sugar alternative can be used for a healthier option.

For the Topping

• Butter – Brushed on before baking for a golden and flaky finish; it also enhances the overall flavor.
• Cinnamon – Adds warmth and spice, complementing the sweet cheesecake filling perfectly.

Optional Glaze

• Powdered Sugar – Mix with a little milk or cream for a sweet drizzle after cooling, giving that extra touch of sweetness to your Cheesecake Crescent Rolls.

Step‑by‑Step Instructions for Cheesecake Crescent Rolls

Step 1: Prepare the Cream Cheese Filling
Start by taking your cream cheese out of the refrigerator to soften. In a mixing bowl, combine the softened cream cheese with sugar, mixing until smooth and creamy—about 3 minutes using a hand mixer. This sweet filling will be the star of your Cheesecake Crescent Rolls, so make sure it's well blended and airy.

Step 2: Unroll the Crescent Dough
On a clean work surface, unroll the crescent dough carefully, separating it into triangles as indicated on the package. This flaky base is critical for your rolls. Once laid out, ensure the wider end of each triangle is facing you, ready for that delicious cream cheese filling. Preheat your oven to 375°F (190°C) while you assemble the rolls.

Step 3: Assemble the Rolls
Take a spoonful of the cream cheese mixture and place it on the wider end of each triangle. Using your fingers, spread the filling slightly, but be careful not to overfill. Starting from the wide end, roll up each triangle tightly towards the point until you have a beautifully shaped crescent. Make sure the filling is secured inside to avoid any leaks during baking.

Step 4: Chill the Assembled Rolls (Optional)
If you have time, cover the assembled Cheesecake Crescent Rolls with plastic wrap and refrigerate them for up to 12 hours. This step helps them hold their shape better during baking and enhances the flavor meld. However, if you're short on time, you can skip this step and bake them immediately after assembling.

Step 5: Prepare for Baking
Once ready to bake, take the rolls out of the refrigerator (if chilled). Brush the tops generously with melted butter to get that golden, flaky crust. Next, mix cinnamon with sugar and sprinkle this delightful mixture over the top of each roll, ensuring an even coat that balances the sweetness of the filling with aromatic spice.

Step 6: Bake the Rolls
Place the rolls on a baking sheet lined with parchment paper, ensuring they have space to expand. Bake in the preheated oven for 12-15 minutes, or until the crescent rolls are puffed up and golden brown. Keep an eye on them as they bake; you're looking for a beautifully browned exterior that envelopes the creamy filling inside.

Step 7: Optional Glaze for Extra Sweetness
After taking the Cheesecake Crescent Rolls out of the oven, allow them to cool for a few minutes on the baking sheet. If you want to add an extra touch, whisk together powdered sugar with a bit of milk or cream until smooth. Drizzle this sweet glaze over the rolls for a wonderful finishing touch that adds an irresistible sweetness to each bite.

Expert Tips for Cheesecake Crescent Rolls

  • Storage Advice: Keep your leftover Cheesecake Crescent Rolls in an airtight container; they can last up to 3 days in the refrigerator for a quick snack later.

  • Rolling Technique: Ensure you roll the crescent dough tightly around the cream cheese filling to prevent leaks and maintain that delightful flaky texture.

  • Chill for Success: If you're assembling ahead of time, chilling the rolls helps them keep their shape and ensures a better bake when it's time for dessert.

  • Perfectly Golden: Brush the tops with plenty of melted butter before sprinkling with cinnamon sugar. This ensures a beautifully golden and deliciously flaky crust.

  • Mix It Up: Feel free to experiment with variations like adding chocolate chips or swapping in a flavored cream cheese for a personalized touch!

Cheesecake Crescent Rolls Variations

Feel free to unleash your creativity and make these delectable Cheesecake Crescent Rolls truly your own with these fun twists and substitutions!

  • Dairy-Free: Swap cream cheese for a dairy-free alternative to enjoy this sweet treat without the dairy.

  • Fruit-Filled: Use flavored cream cheese, like strawberry or blueberry, for a fruity burst in every bite. Imagine the delightful surprise of flavor!

  • Chocolate Lover's Dream: Add a handful of chocolate chips to the cream cheese filling for a rich, sweet indulgence. Chocolate and cheesecake together create a match made in heaven!

  • Nutty Twist: Fold in chopped nuts such as pecans or walnuts into the filling for added crunch and flavor. The nutty texture complements the creamy filling perfectly.

  • Savory Spin: Replace the sweet filling with herbed cream cheese for a savory appetizer option, perfect for gatherings or a unique twist on brunch.

  • Cinnamon Roll Style: Use a cinnamon and sugar mixture in place of the plain sugar for a delightful cinnamon roll vibe that takes your rolls to the next level.

  • Glaze It Up: Drizzle with caramel or chocolate sauce after baking for a rich, decadent finish that makes this dish extra special.

  • Spicy Kick: Add a pinch of cayenne pepper or chili powder to the filling for a surprising contrast that enhances the flavor profile. It’s a bold choice that adventurous eaters will love!

Whatever your taste may be, the potential for mouthwatering Cheesecake Crescent Rolls is endless! For more delightful dessert ideas, check out how to make easy desserts that elevate your cooking game.

Make Ahead Options

These Cheesecake Crescent Rolls are perfect for meal prep enthusiasts! You can assemble the rolls and refrigerate them, covered, for up to 12 hours before baking. This step not only saves time during busy mornings or last-minute gatherings but also helps enhance the flavors as they meld together. To maintain the quality, ensure the wraps are tightly sealed to avoid any drying out. When you're ready to enjoy them, simply brush the chilled rolls with melted butter, sprinkle on the cinnamon sugar, and bake as directed, yielding delightful, fresh-baked rolls just as delicious as if made from scratch that day!

What to Serve with Cheesecake Crescent Rolls

There's nothing quite like the pleasure of enjoying sweet, flaky pastries alongside complementary flavors to create a memorable meal experience.

  • Fresh Berries: Garnish your rolls with a medley of strawberries, blueberries, and raspberries for a refreshing contrast that brightens each bite. The tartness of the berries balances the creamy sweetness beautifully!

  • Vanilla Ice Cream: A scoop of creamy vanilla ice cream adds a luxurious touch to warm Cheesecake Crescent Rolls. The melting ice cream pairs delightfully with the warm filling, creating a harmonious dessert experience.

  • Whipped Cream: Light and airy whipped cream enhances the indulgent goodness of your rolls. Drizzling or dolloping this creamy delight over the top can elevate your presentation and provide an extra layer of sweetness.

  • Coffee or Tea: Pair these treats with a rich cup of coffee or fragrant herbal tea. The warmth of the drink perfectly complements the rich flavors of the rolls, making for a cozy dessert moment.

  • Chocolate Drizzle: For an indulgent twist, drizzle melted chocolate over the top of your Cheesecake Crescent Rolls. This adds a decadent layer of flavor and an appealing visual for your dessert spread.

  • Coconut Flakes: Sprinkle toasted coconut flakes on top for a delightful crunch and an exotic flair. The nutty sweetness of coconut adds another texture that complements the creaminess inside the rolls.

  • Grilled Peaches: The caramelized sweetness of grilled peaches pairs beautifully with the richness of the rolls, offering a perfect summer twist that's sure to impress.

With these delightful pairings, you can turn your Cheesecake Crescent Rolls into a full-fledged dessert experience that will leave everyone wanting more!

Storage Tips for Cheesecake Crescent Rolls

Fridge: Store leftover Cheesecake Crescent Rolls in an airtight container for up to 3 days to maintain freshness while preventing them from drying out.

Freezer: Wrap individual rolls in plastic wrap and place them in a freezer-safe bag for up to 2 months. This way, you can enjoy these delicious treats whenever you crave them!

Reheating: To restore the flakiness, reheat them in a preheated oven at 350°F (175°C) for about 10 minutes, ensuring they are heated through and the exterior regains its crispness.

Make-Ahead Option: Assemble the rolls, cover them tightly, and refrigerate for up to 12 hours before baking to simplify brunch or dinner preparations!

Cheesecake Crescent Rolls Recipe FAQs

What type of cream cheese should I use for the filling?
I highly recommend using full-fat cream cheese for the richest flavor and the creamiest texture in your filling. Low-fat or non-fat options may result in a less satisfying creaminess and can affect the overall taste of your Cheesecake Crescent Rolls.

How should I store leftover Cheesecake Crescent Rolls?
Keep your leftover Cheesecake Crescent Rolls in an airtight container in the refrigerator for up to 3 days. To enjoy them warm, simply reheat them in the oven at 350°F (175°C) for about 10 minutes to regain their delightful flakiness.

Can I freeze Cheesecake Crescent Rolls?
Absolutely! Wrap each roll individually in plastic wrap and place them in a freezer-safe bag. They can be stored in the freezer for up to 2 months. When you're ready to enjoy them, simply thaw in the refrigerator overnight and reheat gently in the oven.

What if my cream cheese filling is too thick?
If your cream cheese filling is too thick to spread easily, simply add a tablespoon of milk or cream to the mixture and beat until it reaches a smoother consistency. This adjustment will make it easier to spread onto the crescent dough without tearing it.

Are there any allergy considerations with this recipe?
This recipe contains dairy ingredients, so if you or someone you are serving has a dairy allergy, consider substituting with plant-based cream cheese alternatives. There are various options available that provide a similar creamy texture while accommodating dietary needs.

Can I use a different type of dough instead of crescent rolls?
Yes! While crescent rolls create that classic flaky texture, you can use puff pastry or even pie dough as alternatives. Just be aware that the baking time may vary slightly, so monitor them closely for that perfect golden brown.

Cheesecake Crescent Rolls

Irresistibly Flaky Cheesecake Crescent Rolls to Savor

Delight in these Cheesecake Crescent Rolls, a magical blend of flaky dough and creamy cheesecake filling.
Print Recipe Pin Recipe
Prep Time 15 minutes mins
Cook Time 15 minutes mins
Chilling Time 1 hour hr
Total Time 30 minutes mins
Servings: 12 rolls
Course: Dessert
Calories: 180
Ingredients Equipment Method Nutrition Notes

Ingredients
  

For the Dough
  • 1 tube Crescent Rolls Or puff pastry for a different texture.
For the Filling
  • 8 oz Cream Cheese Use full-fat for best flavor.
  • 1/4 cup Sugar Can substitute with a sugar alternative.
For the Topping
  • 2 tbsp Butter Melted, for brushing.
  • 1 tbsp Cinnamon For sprinkling over the rolls.
Optional Glaze
  • 1 cup Powdered Sugar Mix with milk or cream for drizzling.

Equipment

  • Mixing Bowl
  • Baking Sheet
  • hand mixer
  • plastic wrap

Method
 

Step-by-Step Instructions
  1. Prepare the cream cheese filling by softening cream cheese and mixing with sugar until smooth.
  2. Unroll the crescent dough into triangles with the wide end facing you.
  3. Assemble the rolls by placing cream cheese mixture on the wide end and rolling tightly.
  4. Chill the assembled rolls covered in plastic wrap for up to 12 hours if desired.
  5. Brush the rolls with melted butter and sprinkle with cinnamon sugar before baking.
  6. Bake in a preheated oven at 375°F for 12-15 minutes until golden brown.
  7. Optional: Drizzle with a glaze of powdered sugar mixed with milk or cream after cooling.

Nutrition

Serving: 1rollCalories: 180kcalCarbohydrates: 22gProtein: 3gFat: 9gSaturated Fat: 5gMonounsaturated Fat: 3gCholesterol: 30mgSodium: 150mgPotassium: 50mgFiber: 1gSugar: 5gVitamin A: 300IUCalcium: 50mgIron: 0.5mg

Notes

Store leftover rolls in an airtight container for up to 3 days or freeze them for up to 2 months. Reheat in a preheated oven to restore flakiness.

Tried this recipe?

Let us know how it was!

Gingerbread Brownies Recipe: A Cozy Holiday Treat

November 25, 2025 by Grace Snow Leave a Comment

As I stirred the spices into the brownie batter, a warmth surged through me—like a hug from an old friend. This Gingerbread Brownies Recipe blends the comforting aromas of ginger, cinnamon, and molasses with the dense, chewy goodness of rich brownies. Perfect for the holiday season, this treat not only satisfies your sweet tooth but also makes for an impressive crowd-pleaser. Plus, it’s surprisingly simple to whip up, allowing you to spend less time in the kitchen and more time creating cherished memories with loved ones. Whether you're gluten-free, vegan, or just looking to elevate your dessert game, this recipe has options for everyone. Curious about how these brownies could bring a festive twist to your dessert table? Let’s dive in!

Why Are Gingerbread Brownies Irresistible?

Irresistible, Cozy Flavor: This Gingerbread Brownies Recipe marries the warm spices of classic gingerbread with the rich texture of brownies, creating an unforgettable dessert.

Versatile Options: With easy adaptations like gluten-free or vegan variations, everyone can indulge!

Crowd-Pleasing Delight: Perfect for holiday gatherings or any occasion, they are guaranteed to impress guests.

Quick and Simple: The straightforward process makes baking these a breeze, leaving you stress-free to enjoy the celebration.

Comfort in Every Bite: The fudgy texture combined with the spicy aroma provides that nostalgic comfort we all crave. If you love unique twists, you might also enjoy Pumpkin Brownies Decadent or a flavor-packed Spatchcock Chicken Flavor.

Gingerbread Brownies Recipe Ingredients

For the Brownie Batter
• Unsalted Butter (1 cup / 227 g) – Adds moisture and richness; you can use vegan butter for a dairy-free option.
• Light Brown Sugar (1 ½ cups / 300 g) – Contributes sweetness and a hint of caramel flavor; dark brown sugar works for a deeper taste.
• Eggs (2 large, room temperature) – Helps bind ingredients and adds moisture; substitute with flax eggs for a vegan alternative (1 tbsp ground flaxseed + 3 tbsp water).
• Molasses (2 tablespoons) – Provides the classic gingerbread flavor; honey or maple syrup can be used, but the taste will vary.
• Vanilla Extract (1 teaspoon) – Elevates the overall flavor profile of the brownies.
• All-Purpose Flour (2 ½ cups / 312.5 g) – Creates the structure of the brownies; opt for a gluten-free flour blend for a gluten-free version.
• Ground Ginger (1 tablespoon) – Imparts the signature spice characteristic of gingerbread.
• Cinnamon (2 teaspoons) – Adds warmth and comforting depth.
• Baking Powder (1 teaspoon) – Acts as the leavening agent for a light, fluffy texture.
• Kosher Salt (½ teaspoon) – Balances the sweetness and enhances overall flavor.

For Dusting
• Confectioners’ Sugar – Perfect for a sweet finish on top of the finished brownies.

With this Gingerbread Brownies Recipe, you're just a few ingredients away from creating a festive dessert that will have everyone asking for seconds!

Step‑by‑Step Instructions for Gingerbread Brownies Recipe

Step 1: Preheat the Oven
Begin by preheating your oven to 350°F (177°C). While it warms up, take a 9x9-inch baking dish and line it with parchment paper, allowing some overhang to make it easier to lift the brownies later. This setup will ensure even cooking and help prevent sticking, ensuring your delicious Gingerbread Brownies come out perfectly.

Step 2: Combine Butter and Sugar
In a large mixing bowl, combine 1 cup of melted unsalted butter with 1 ½ cups of light brown sugar. Stir vigorously until you have a smooth mixture with no clumps. The warmth of the melted butter will help dissolve the sugars, creating a glossy base for your Gingerbread Brownies that is rich and inviting.

Step 3: Add Eggs and Molasses
Next, add 2 large room-temperature eggs, 2 tablespoons of molasses, and 1 teaspoon of vanilla extract to the bowl. Mix these ingredients until the batter is smooth and well combined. The eggs will help bind everything together while the molasses infuses that classic gingerbread flavor, making your brownies even more decadent.

Step 4: Whisk Dry Ingredients
In a separate bowl, whisk together 2 ½ cups of all-purpose flour, 1 tablespoon of ground ginger, 2 teaspoons of cinnamon, 1 teaspoon of baking powder, and ½ teaspoon of kosher salt. This step is essential to evenly distribute the spices and leavening agent, ensuring that every bite of your Gingerbread Brownies is packed with flavor and has the right texture.

Step 5: Combine Wet and Dry Mixtures
Gradually fold the dry ingredients into the wet mixture, taking care not to overmix. Stir until just combined and the batter is smooth, with no traces of flour visible. Be careful, as too much mixing can lead to dense brownies; we're aiming for a tender and chewy texture typical of Gingerbread Brownies.

Step 6: Pour and Spread the Batter
Pour the brownie batter into the prepared baking dish, spreading it evenly with a spatula. This ensures that all corners of the dish are filled, which will lead to evenly baked Gingerbread Brownies. The thick batter may require gentle nudging to get into the edges but will level out beautifully as it bakes.

Step 7: Bake the Brownies
Place the baking dish in the preheated oven and bake for 30-35 minutes. Keep an eye on them toward the end; the edges should look set and the center should feel firm but slightly soft when gently pressed. A toothpick inserted into the center should come out with a few moist crumbs; this indicates the perfect doneness for your Gingerbread Brownies.

Step 8: Cool and Dust
Once baked, remove the brownies from the oven and let them cool completely in the pan on a wire rack. Once cooled, dust the top generously with confectioners' sugar before lifting them out using the parchment paper overhang. Slice them into squares and get ready to showcase your delightful Gingerbread Brownies to friends and family.

Make Ahead Options

These Gingerbread Brownies are fantastic for meal prep, saving you time during the busy holiday season! You can prepare the brownie batter up to 24 hours in advance. Simply mix the wet and dry ingredients together, then cover the bowl and refrigerate it to maintain freshness. For the best results, once you're ready to bake, let the batter sit at room temperature for about 30 minutes before pouring it into the prepared pan and baking. After they’ve cooled, these brownies can be stored in an airtight container at room temperature for up to 3 days, ensuring they taste just as delicious when you’re ready to serve them. Dust with confectioners' sugar right before serving for that perfect finishing touch!

What to Serve With Gingerbread Brownies Recipe

The perfect holiday dessert deserves a delightful ensemble to enhance every bite and bring warmth to your table.

  • Vanilla Ice Cream: The creamy, cool texture contrasts beautifully with the warm, spiced brownies, creating a comforting classic combination. A scoop melts slightly over the top, adding richness to each delicious bite.

  • Whipped Cream: Light and airy, a dollop of freshly whipped cream complements the dense, fudgy brownies perfectly. Its subtle sweetness lifts the warm spices, enhancing the overall flavor experience.

  • Peppermint Hot Cocoa: This festive drink brings together the flavors of cocoa with refreshing peppermint, providing a cozy beverage to sip while indulging in your brownies. It's a nostalgic pairing that evokes holiday cheer!

  • Spiced Apple Cider: The cinnamon and nutmeg notes in spiced apple cider harmonize with the ginger and cinnamon of the brownies. Serve it warm for a delightful embrace of autumn flavors.

  • Chocolate Drizzle: Add an extra layer of decadence by drizzling melted chocolate over the brownies. This enhances the dessert’s richness while bringing a beautiful touch to the presentation.

  • Coffee: A nice cup of freshly brewed coffee serves as a perfect companion. The bitter notes balance the sweetness of the gingerbread brownies, making for a sophisticated, well-rounded dessert experience.

  • Dried Fruit Medley: A small bowl of dried cranberries, apricots, and figs introduces a chewy texture and fruity sweetness that perfectly contrasts the rich brownies. This makes for a great palate cleanser between bites.

  • Nutty Snack Mix: Prepare a side of spiced nut mix for an added crunch. The flavors of roasted almonds and walnuts pair beautifully with the cookies, enriching the snacking experience.

  • Maple Syrup Drizzle: For a unique twist, drizzle pure maple syrup over the brownies. This adds a touch of sweetness and depth while bringing out the molasses flavor in the brownies.

Celebrate the cozy flavors of the season and make your meal a memorable gathering with these delightful accompaniments!

Expert Tips for Gingerbread Brownies

  • Check for Doneness: Avoid overbaking your Gingerbread Brownies; they should still be soft in the center. Use a toothpick; it should come out with a few moist crumbs.

  • Mixing Method: When combining the wet and dry ingredients, mix just until incorporated to keep the brownies chewy. Overmixing can lead to dryness!

  • Parchment Paper: Line your baking dish with parchment paper and leave a bit hanging over the edges. This makes it easy to lift the brownies out and cut them into perfect squares.

  • Flavor Boost: For an extra depth of flavor, consider adding a touch of nutmeg or cloves along with the ginger and cinnamon!

  • Variations Ready: Remember, this easy Gingerbread Brownies Recipe can be adapted for gluten-free or vegan diets, so everyone can enjoy!

How to Store and Freeze Gingerbread Brownies

  • Room Temperature: Store your Gingerbread Brownies in an airtight container at room temperature for up to 3-4 days to maintain their soft and chewy texture.

  • Fridge: If you prefer, keep them in the refrigerator for up to a week. Just remember to seal them in an airtight container to prevent drying out.

  • Freezer: For long-term storage, freeze the brownies in an airtight container or heavy-duty freezer bag for 2-3 months. Thaw at room temperature when ready to enjoy.

  • Reheating: To enjoy your brownies warm, gently reheat them in the microwave for 10-15 seconds or in the oven at 350°F (177°C) for about 5-7 minutes.

Gingerbread Brownies Recipe Variations

Feel free to take your Gingerbread Brownies Recipe to new heights with these delightful variations that cater to different diets and preferences!

  • Gluten-Free: Swap all-purpose flour for a high-quality gluten-free blend to make these brownies suitable for everyone at the table. You'll maintain that rich, fudgy texture without sacrificing flavor.

  • Vegan: Replace the eggs with flax eggs (1 tbsp ground flaxseed + 3 tbsp water) and use vegan butter instead of unsalted butter. Even without eggs, the moisture will keep them perfectly chewy!

  • Chocolate Chip Twist: Fold in ½ cup of dark or semi-sweet chocolate chips into the batter for a dreamy chocolate addition. The combination of chocolate with warm spices creates a decadent, irresistible treat.

  • Nutty Crunch: For added texture, mix in ½ cup of chopped pecans or walnuts. The nuts provide a lovely crunch that complements the soft brownies wonderfully!

  • Spice it Up: Introduce other warm spices like cloves or nutmeg to elevate the flavor profile. Just a pinch can transform these brownies into a seasonal delight.

  • Maple Sweetness: Substitute molasses with maple syrup for a lighter flavor while still keeping that festive sweetness. Its unique taste adds a delightful twist to the overall profile!

  • Layered Dessert: Consider turning these brownies into a layered dessert by creating a chocolate or cream cheese frosting to spread on top. Perfect for impressing guests at your next gathering!

  • Coffee Infusion: Add 1-2 tablespoons of instant coffee or espresso powder to the batter for a gentle caffeine kick that enhances the chocolatey notes. Perfect for coffee lovers!

With these delicious variations, you can customize your Gingerbread Brownies to fit your dietary needs or simply bring a new flavor experience to your table. And if you're in a baking mood, check out my Chicken Adobo recipe for a savory counterpart to these sweet treats!

Gingerbread Brownies Recipe FAQs

What type of molasses should I use for the best flavor?
I recommend using unsulfured molasses for the best flavor in your Gingerbread Brownies. It has a rich, sweet taste that perfectly complements the spices. Blackstrap molasses can be used if you're looking for a stronger flavor, but keep in mind it’s less sweet and may alter the overall taste of your brownies.

How should I store my Gingerbread Brownies?
To keep your Gingerbread Brownies fresh, store them in an airtight container at room temperature for up to 3-4 days. If you'd prefer a longer storage option, you can move them to the refrigerator for up to a week, ensuring they remain sealed to prevent any drying.

Can I freeze Gingerbread Brownies?
Absolutely! To freeze your Gingerbread Brownies, first, allow them to cool completely. Then, wrap them tightly in plastic wrap, followed by aluminum foil, or place them in an airtight container or heavy-duty freezer bag. This method will protect them from freezer burn and they can be stored for up to 2-3 months. When you’re ready to eat, simply thaw them at room temperature.

What should I do if my brownies come out too dry?
To enhance moisture in your Gingerbread Brownies next time, make sure not to overbake them. Check for doneness around the 30-minute mark; the center should feel slightly soft and a toothpick inserted should have a few moist crumbs. If your brownies do end up dry, consider serving them with a scoop of ice cream or a drizzle of warm chocolate sauce to bring back some moisture.

Are these brownies safe for gluten-free and vegan diets?
Yes, indeed! This Gingerbread Brownies Recipe can easily be made gluten-free by substituting the all-purpose flour with a gluten-free flour blend. For a vegan version, simply replace the eggs with flax eggs (1 tablespoon ground flaxseed mixed with 3 tablespoons water per egg). These adjustments ensure that dietary restrictions don’t hold anyone back from enjoying these delicious treats.

What are some ingredient substitutes I can use?
You have plenty of options! If you've run out of light brown sugar, dark brown sugar will add a deeper flavor. Alternatively, you can use coconut sugar for a less processed option. For the molasses, honey or maple syrup can work in a pinch, although the flavor profile will change slightly. And for a dairy-free option, vegan butter can replace regular butter seamlessly.

Gingerbread Brownies Recipe

Gingerbread Brownies Recipe: A Cozy Holiday Treat

This Gingerbread Brownies Recipe combines the warmth of gingerbread with rich brownies—perfect for holiday gatherings.
Print Recipe Pin Recipe
Prep Time 15 minutes mins
Cook Time 35 minutes mins
Cooling Time 30 minutes mins
Total Time 1 hour hr 20 minutes mins
Servings: 9 slices
Course: Dessert
Cuisine: American
Calories: 200
Ingredients Equipment Method Nutrition Notes

Ingredients
  

For the Brownie Batter
  • 1 cup Unsalted Butter You can use vegan butter for a dairy-free option.
  • 1.5 cups Light Brown Sugar Dark brown sugar works for a deeper taste.
  • 2 large Eggs Substitute with 1 tbsp ground flaxseed + 3 tbsp water for vegan.
  • 2 tablespoons Molasses Honey or maple syrup can be used, but taste will vary.
  • 1 teaspoon Vanilla Extract
  • 2.5 cups All-Purpose Flour Opt for a gluten-free flour blend for a gluten-free version.
  • 1 tablespoon Ground Ginger
  • 2 teaspoons Cinnamon
  • 1 teaspoon Baking Powder
  • 0.5 teaspoon Kosher Salt
For Dusting
  • Confectioners’ Sugar Perfect for a sweet finish.

Equipment

  • 9x9-inch baking dish
  • Parchment Paper
  • Mixing bowls
  • Whisk
  • Spatula

Method
 

Step-By-Step Instructions
  1. Preheat your oven to 350°F (177°C) and prepare a 9x9-inch baking dish with parchment paper.
  2. In a large mixing bowl, combine melted unsalted butter and light brown sugar. Stir until smooth.
  3. Add eggs, molasses, and vanilla extract to the bowl. Mix until smooth.
  4. In a separate bowl, whisk together flour, ground ginger, cinnamon, baking powder, and kosher salt.
  5. Gradually fold the dry mixture into the wet mixture until just combined.
  6. Pour the batter into the prepared baking dish and spread evenly.
  7. Bake for 30-35 minutes, checking for doneness with a toothpick.
  8. Cool completely in the pan, then dust with confectioners' sugar and slice into squares.

Nutrition

Serving: 1sliceCalories: 200kcalCarbohydrates: 30gProtein: 2gFat: 9gSaturated Fat: 5gPolyunsaturated Fat: 1gMonounsaturated Fat: 3gCholesterol: 40mgSodium: 150mgPotassium: 120mgFiber: 1gSugar: 18gVitamin A: 150IUCalcium: 20mgIron: 1mg

Notes

For best results, do not overmix the batter to ensure chewy brownies. You can add nutmeg or cloves for extra flavor.

Tried this recipe?

Let us know how it was!

Heavenly Sweet Potato Casserole for Cozy Thanksgiving Joy

November 25, 2025 by Grace Snow Leave a Comment

As the leaves turn to shades of amber and gold, the season of comfort food begins to wrap around us like a warm hug. There’s nothing quite like gathering with loved ones over a dish that brings back cherished memories, and this Heavenly Sweet Potato Casserole is at the top of my list. Enveloping tender sweet potatoes in a creamy, cinnamon-kissed filling, it’s effortlessly easy to create, making it the star of Thanksgiving feasts and cozy family dinners alike. Topped with ooey-gooey mini marshmallows that caramelize to golden perfection, this recipe not only makes your kitchen smell divine but also makes for a nutritional powerhouse that's vegetarian-friendly. Are you ready to elevate your holiday table with this irresistible dish?

Why is this casserole a must-try?

Heavenly Sweet Potato Casserole is a celebration of flavor and nostalgia. Ease of Preparation: With minimal steps, it’s perfect for anyone, from novice cooks to seasoned chefs. Flavor Explosion: The delightful blend of cinnamon and nutmeg paired with creamy sweetness will have your taste buds dancing. Crowd-Pleasing: It's a showstopper at gatherings, ensuring your Thanksgiving feels extra special. Vegetarian Delight: Rich in vitamins, it’s a deliciously healthy option for everyone to enjoy. Pair it with the flavors from our Cornbread Breakfast Casserole for a complete meal experience!

Heavenly Sweet Potato Casserole Ingredients

Unlock the secrets to this delightful dish with these essential ingredients!

For the Sweet Potato Filling
• Sweet Potatoes – The core ingredient providing that luscious sweetness; opt for large, smooth-skinned varieties for best results.
• Light Brown Sugar – Brings a warm caramelized flavor; maple syrup can be a delightful alternative, adding an earthy sweetness.
• Butter – Adds richness and smoothness; feel free to swap with vegan butter if you're looking for a dairy-free option.
• Vanilla Extract – Enhances the overall flavor; it’s optional but truly makes a difference in this Heavenly Sweet Potato Casserole.
• Cinnamon – Infuses warm holiday spices; it’s essential for that comforting flavor profile.
• Salt – Vital for balancing the sweetness; never skip it as it enhances all the other flavors.
• Nutmeg – Provides that classic, subtle spice; you can use ground ginger as a substitute, although the taste will vary.

For the Topping
• Mini Marshmallows – Create a gooey, sweet topping that caramelizes beautifully; alternatives like crushed pecans or marshmallow fluff can give a fun twist.

Step‑by‑Step Instructions for Heavenly Sweet Potato Casserole

Step 1: Prep Sweet Potatoes
Begin by peeling and chopping approximately 3 large sweet potatoes into uniform chunks. Place them in a large pot, cover with water, and bring to a rolling boil. Cook the sweet potatoes for about 15-20 minutes or until they are fork-tender and soft. Drain the water and return the sweet potatoes to the pot for mashing.

Step 2: Mash Filling
With the cooked sweet potatoes in the pot, use a potato masher or electric mixer to mash them until smooth. Incorporate ¼ cup of melted butter, ½ cup light brown sugar, a pinch of salt, 1 teaspoon cinnamon, 1 teaspoon vanilla extract, and ¼ teaspoon nutmeg. Mix until fully combined and creamy, ensuring the Heavenly Sweet Potato Casserole filling is rich and flavorful.

Step 3: Prepare Baking Dish
While your sweet potato filling cools slightly, preheat your oven to 350°F (175°C). Grease a 9x13-inch baking dish generously with cooking spray or butter to prevent sticking. This step ensures that the Heavenly Sweet Potato Casserole bakes evenly and comes out beautifully clean from the dish.

Step 4: Layer Sweet Potatoes
Spoon the silky sweet potato mixture into the prepared baking dish, spreading it evenly with a spatula. This creates a smooth, level base for your casserole, making sure every bite is infused with that comforting flavor. You want to fill the baking dish to the brim but still leave some space for the marshmallow topping.

Step 5: Add Marshmallows
Once your sweet potato base is level, sprinkle a generous layer of mini marshmallows evenly over the top. Cover the sweet potato mixture well, allowing the marshmallows to melt and create a gooey topping. This is what makes the Heavenly Sweet Potato Casserole truly special and adds that delightful sweetness.

Step 6: Bake Casserole
Carefully place the baking dish in your preheated oven and bake for about 25-35 minutes. Watch closely as the mini marshmallows toast and turn a beautiful golden brown. The contrast between the fluffy marshmallows and the creamy sweet potatoes will make your kitchen smell heavenly.

Step 7: Monitor Carefully
During the last few minutes of baking, keep a close eye on the casserole to prevent burning the marshmallows. If desired, switch the oven to broil for about 1-2 minutes for extra crispiness on top. You'll know the Heavenly Sweet Potato Casserole is ready when the marshmallows are puffy and perfectly browned.

Expert Tips for Heavenly Sweet Potato Casserole

  • Cook Thoroughly: Ensure sweet potatoes are fork-tender before mashing for a smooth filling. Undercooked potatoes will lead to a chunky texture in your Heavenly Sweet Potato Casserole.

  • Flavor Enhancements: For an extra flavor boost, add a splash of maple syrup or bourbon to the filling. It elevates the sweetness and complexity of your dish.

  • Watch the Topping: Keep an eye on the casserole during the last few minutes of baking to avoid burning the marshmallows. Broil briefly for a perfectly crispy topping.

  • Mix It Up: Feel free to swap mini marshmallows for candied pecans or a layer of crushed graham crackers for an exciting twist. This variation adds depth and a delightful crunch.

  • Make Ahead: Prepare the filling a day in advance and store it in the refrigerator. Just layer the marshmallows and bake before serving to save time on Thanksgiving.

Heavenly Sweet Potato Casserole Variations

Feel free to get creative with this recipe—each twist enhances the dish in delightful ways!

  • Nutty Crunch: Replace mini marshmallows with candied pecans or walnuts for a beautiful, crunchy topping. This adds a delightful earthy contrast to the creamy filling.

  • Graham Cracker Layer: Add a layer of crushed graham crackers on top before the marshmallows for added texture and a hint of sweetness. This creates a fun, layered effect reminiscent of a dessert.

  • Spicy Twist: Experiment with ginger or cardamom instead of nutmeg for an unexpected spicy kick. Each spice brings its unique warmth, transforming the traditional flavor profile.

  • Vegan Delight: Use vegan butter and cashew cream in place of traditional butter and dairy products to create a plant-based masterpiece that everyone can enjoy.

  • Maple Glaze: Drizzle maple syrup on top of the marshmallows before baking for an extra layer of sweetness. It imparts a lovely caramelized flavor while still keeping the classic essence intact.

  • Cheesy Flavor: Incorporate a layer of cream cheese or sharp cheddar mixed into the sweet potato filling. This twist adds a creamy richness and a savory component that’s utterly irresistible.

  • Cinnamon Sugar Dust: Mix a tablespoon of brown sugar with a teaspoon of cinnamon and sprinkle it on top of the marshmallows for a sweet, spiced crust that elevates the dish beautifully.

  • Heat Up: For those who love a little heat, mix in a pinch of cayenne or sprinkle red pepper flakes over the topping. The spicy contrast pairs surprisingly well with sweet potatoes.

With these variations, your Heavenly Sweet Potato Casserole can take on new personas and wow your guests every time. For a comforting side, you might also enjoy it alongside our Smoky Sweet Potatoes. Happy cooking!

How to Store and Freeze Heavenly Sweet Potato Casserole

Fridge: Store leftovers in an airtight container for up to 3 days. Ensure it’s fully cooled before sealing to maintain texture and flavor.

Freezer: For longer storage, freeze the casserole without marshmallows for up to 2 months. Thaw in the fridge overnight before baking with marshmallows on top.

Reheating: Reheat individual portions in the microwave or warm the whole casserole in the oven at 350°F (175°C) for 20-25 minutes until heated through.

Covering: Always cover the dish with aluminum foil during reheating to prevent the marshmallow topping from burning while the insides warm up.

What to Serve with Heavenly Sweet Potato Casserole

As you prepare to delight in this comfy favorite, consider adding some vibrant companions that elevate your dining experience.

  • Savory Roasted Turkey: A classic partner, the moist, flavorful turkey will beautifully balance the sweetness of the casserole, making each bite a celebration.

  • Crispy Green Beans: Their fresh, crunchy texture contrasts wonderfully with the creamy sweetness of the casserole while adding a pop of color to your plate. Sautéed with garlic, they provide an aromatic touch.

  • Herbed Stuffing: A hearty stuffing seasoned with herbs complements the casserole perfectly, enhancing the traditional Thanksgiving flavors. Its fluffy, savory bites will round out your meal.

  • Tangy Cranberry Sauce: The bright acidity of homemade cranberry sauce cuts through the richness of the casserole, bringing a delightful zing. It’s a must-have for balancing flavors on the holiday table.

  • Garlic Mashed Potatoes: Creamy and smooth, these potatoes create a comforting foundation that pairs beautifully with the sweet, fluffy topping of the casserole. A drizzle of gravy can unify the flavors.

  • Apple Cider: To drink, a chilled glass of apple cider provides a refreshing contrast and awakens the palate. Its sweet and tart notes will enhance every mouthful.

  • Pumpkin Pie: For dessert, a slice of classic pumpkin pie ties the meal together, echoing warm spices and autumn flavors, wrapping up the evening on a festive note.

These pairings promise to create a memorable dining experience that celebrates the warmth and comfort of cozy family gatherings.

Make Ahead Options

These Heavenly Sweet Potato Casseroles are perfect for meal prep enthusiasts! You can prepare the sweet potato filling up to 24 hours in advance by mashing the cooked sweet potatoes and mixing in the other ingredients (butter, brown sugar, cinnamon, vanilla, and nutmeg). Store the filling in an airtight container in the refrigerator to maintain its creamy texture. Additionally, you can layer the sweet potato mixture in the baking dish, topping it with marshmallows up to 2 days before baking. When ready to serve, simply preheat your oven and bake for 25-35 minutes, allowing the marshmallows to become beautifully golden. With these make-ahead tips, you’ll save time and still deliver a delicious dish!

Heavenly Sweet Potato Casserole Recipe FAQs

How do I choose the right sweet potatoes?
Absolutely! For the best results, pick large, smooth-skinned sweet potatoes that feel firm without any dark spots or bruises. The sweetness and texture of different sweet potato varieties can vary, so look for those that are labeled as “yam” or “sweet potato” for that classic flavor.

How should I store leftover Heavenly Sweet Potato Casserole?
Very simple! Store your leftovers in an airtight container in the refrigerator for up to 3 days. Make sure it's fully cooled down before sealing to help maintain its delicious texture and flavor.

Can I freeze Heavenly Sweet Potato Casserole?
Certainly! To freeze, prepare the casserole without adding mini marshmallows. Wrap it tightly in plastic wrap and then again in aluminum foil to avoid freezer burn, and it can be stored for up to 2 months. When you're ready to enjoy it, thaw it overnight in the refrigerator and then add the marshmallows before baking.

What should I do if my sweet potatoes are lumpy after mashing?
No worries! If you find that your sweet potatoes are chunky, you can use an electric mixer for a smoother consistency. Just make sure to beat them until creamy. Also, ensuring your sweet potatoes are fork-tender before mashing is key, as undercooked potatoes can lead to lumps in your Heavenly Sweet Potato Casserole.

Is this casserole safe for those with nut allergies?
Absolutely! This recipe as it stands is nut-free; however, if you decide to substitute the marshmallows with alternative nuts like pecans, be cautious. Always check labels to ensure there are no hidden nuts present in ingredients, especially the optional ones you might choose to add.

How do I achieve the perfect golden marshmallow topping?
Great question! Bake your casserole at 350°F (175°C) for 25-35 minutes, watching it closely towards the end of the cooking time. If you want an extra crispy topping, switch to the broil setting for the last couple of minutes, but keep a vigilant eye to prevent burning. Enjoy every gooey bite of your Heavenly Sweet Potato Casserole!

Heavenly Sweet Potato Casserole

Heavenly Sweet Potato Casserole for Cozy Thanksgiving Joy

Heavenly Sweet Potato Casserole is a must-try dish that elevates your holiday table with creamy sweet potatoes and gooey marshmallows.
Print Recipe Pin Recipe
Prep Time 20 minutes mins
Cook Time 35 minutes mins
Total Time 55 minutes mins
Servings: 8 servings
Course: Dessert
Cuisine: American
Calories: 260
Ingredients Equipment Method Nutrition Notes

Ingredients
  

For the Sweet Potato Filling
  • 3 large Sweet Potatoes opt for large, smooth-skinned varieties
  • 1/4 cup Butter can substitute with vegan butter
  • 1/2 cup Light Brown Sugar maple syrup can be a delightful alternative
  • 1 teaspoon Vanilla Extract optional but enhances flavor
  • 1 teaspoon Cinnamon essential for a comforting flavor
  • 1/4 teaspoon Nutmeg can substitute with ground ginger
  • 1 pinch Salt vital for balancing sweetness
For the Topping
  • 2 cups Mini Marshmallows alternatives include crushed pecans or marshmallow fluff

Equipment

  • Large pot
  • potato masher
  • Baking Dish
  • Spatula
  • Oven

Method
 

Step‑by‑Step Instructions
  1. Begin by peeling and chopping approximately 3 large sweet potatoes into uniform chunks. Place them in a large pot, cover with water, and bring to a rolling boil. Cook the sweet potatoes for about 15-20 minutes or until they are fork-tender and soft. Drain the water and return the sweet potatoes to the pot for mashing.
  2. With the cooked sweet potatoes in the pot, use a potato masher or electric mixer to mash them until smooth. Incorporate ¼ cup of melted butter, ½ cup light brown sugar, a pinch of salt, 1 teaspoon cinnamon, 1 teaspoon vanilla extract, and ¼ teaspoon nutmeg. Mix until fully combined and creamy.
  3. While your sweet potato filling cools slightly, preheat your oven to 350°F (175°C). Grease a 9x13-inch baking dish generously with cooking spray or butter to prevent sticking.
  4. Spoon the silky sweet potato mixture into the prepared baking dish, spreading it evenly with a spatula.
  5. Once your sweet potato base is level, sprinkle a generous layer of mini marshmallows evenly over the top.
  6. Carefully place the baking dish in your preheated oven and bake for about 25-35 minutes, watching closely as the mini marshmallows toast and turn a beautiful golden brown.
  7. During the last few minutes of baking, keep a close eye on the casserole to prevent burning the marshmallows. If desired, switch the oven to broil for about 1-2 minutes for extra crispiness on top.

Nutrition

Serving: 1servingCalories: 260kcalCarbohydrates: 45gProtein: 2gFat: 10gSaturated Fat: 6gPolyunsaturated Fat: 1gMonounsaturated Fat: 2gCholesterol: 30mgSodium: 170mgPotassium: 300mgFiber: 3gSugar: 22gVitamin A: 18000IUVitamin C: 20mgCalcium: 35mgIron: 1mg

Notes

You can prepare the filling a day in advance and store it in the refrigerator. Just layer the marshmallows and bake before serving to save time on Thanksgiving.

Tried this recipe?

Let us know how it was!

Indulge in Salted Honey Pie: A Southern Delicacy for All

November 25, 2025 by Grace Snow Leave a Comment

As I savored the last slice of a handmade pie at a charming Southern café, I couldn’t shake the delightful combination of sweet and salty flavors that danced on my palate. Enter the Salted Honey Pie, a dessert that echoes those summer afternoons and brings a slice of Southern comfort into any kitchen. With its silky honey custard nestled in a perfectly flaky crust and topped with a sprinkle of flaky sea salt, this recipe masterfully balances rich creaminess with a hint of savory delight. Not only is it a showstopper at gatherings, but its easy prep makes it a breeze for even beginner bakers. Are you ready to impress your guests and satisfy your sweet tooth with this creamy marvel? Let’s dive into creating this unforgettable treat!

Why is Salted Honey Pie a Must-Try?

Decadent Indulgence: The Salted Honey Pie offers a luxurious dessert experience that is both rich and satisfying. Uniquely Flavorful: Combining silky honey custard with a flaky crust and a sprinkle of sea salt creates a perfect sweet-and-savory balance. Easy to Prepare: With simple ingredients and straightforward instructions, even beginner bakers can master this delightful treat. Crowd-Pleasing Delight: This pie not only impresses with its flavor but also is a stunning centerpiece for gatherings. Serve it alongside a dollop of whipped cream or a scoop of vanilla ice cream for an elevated dessert experience!

Salted Honey Pie Ingredients

For the Pie Crust
• 9-inch Pie Crust – Provides the base structure; can be homemade or store-bought and should be blind baked.

For the Filling
• ½ cup Unsalted Butter – Adds richness; make sure it’s melted and slightly cooled before use.
• ¾ cup Granulated Sugar – Sweetens the custard filling, balancing the savory notes beautifully.
• ¼ cup Fine Cornmeal – Ensures a smooth custard without any grittiness; essential for a perfect texture.
• ¼ teaspoon Salt – Enhances the flavors within the filling; don’t skip this important ingredient.
• 1 tablespoon White Vinegar or Lemon Juice – Adds necessary brightness; lemon juice gives a fresher taste.
• 1 teaspoon Vanilla Extract – Contributes complex flavor notes to the custard, enhancing the overall taste.
• ½ cup Honey – The star ingredient that adds sweetness and unique flavor to the Salted Honey Pie; opt for wildflower or clover for best results.
• 3 Large Eggs – Acts as the custard binder for creaminess; room temperature eggs work best for a smooth filling.
• ½ cup Heavy Cream – Boosts the creaminess and richness of the pie, making each bite decadent.

For the Finishing Touch
• Flaky Sea Salt (such as Maldon) – A sprinkle just before serving enhances the sweet-and-salty contrast beautifully.

Step‑by‑Step Instructions for Salted Honey Pie

Step 1: Prep Crust
Begin by preheating your oven to 375°F (190°C). If using a store-bought pie crust, place it into a 9-inch pie pan, ensuring it fits snugly. Chill the crust for 30 minutes, then line it with aluminum foil and fill with pie weights. Blind bake for 12–15 minutes, then carefully remove the weights and foil, allowing it to bake for an additional 5 minutes until lightly golden. Let it cool slightly.

Step 2: Make Filling
In a large mixing bowl, whisk together the melted butter, granulated sugar, cornmeal, and salt until well combined. Add the white vinegar or lemon juice, vanilla extract, and honey. Whisk this mixture vigorously until everything is fully incorporated, and the texture is smooth and slightly glossy, creating a sweet foundation for your Salted Honey Pie.

Step 3: Incorporate Eggs
Add the room temperature eggs one at a time to the honey mixture, whisking thoroughly after each addition to achieve a creamy consistency. Once all eggs are incorporated, stir in the heavy cream until the filling is completely smooth and homogenous. This step ensures that your custard will be rich and luscious after baking.

Step 4: Fill Crust
Carefully pour the prepared honey custard filling into the pre-baked pie crust, ensuring an even distribution. Position the pie on a baking sheet to catch any potential drips during baking. This will make handling the Salted Honey Pie easier and keeps your oven clean.

Step 5: Bake
Bake the pie in your preheated oven at 350°F (175°C) for 40–50 minutes. Watch for the center to be set yet slightly jiggly when shaken gently, indicating the perfect custard consistency. If the edges of the crust start browning too quickly, cover them lightly with foil to prevent burning while the filling completes baking.

Step 6: Cool
Once baked, remove the Salted Honey Pie from the oven and let it cool completely on a wire rack for at least 2 hours. This cooling process is essential for allowing the custard to properly set, making it easier to slice beautifully when ready to serve.

Step 7: Serve
Just before serving, sprinkle a generous pinch of flaky sea salt over the top of the cooled pie to enhance the sweet-salty flavor balance. Slice with a sharp knife, and consider serving your Salted Honey Pie alongside a dollop of whipped cream or a scoop of vanilla ice cream for an extra touch of indulgence.

How to Store and Freeze Salted Honey Pie

Room Temperature: Allow the pie to cool completely, then cover loosely with a clean kitchen towel for serving within the same day.

Fridge: Wrap slices or the entire pie tightly in plastic wrap or aluminum foil. The Salted Honey Pie can be stored in the refrigerator for up to 4 days.

Freezer: For longer storage, wrap the cooled pie securely in plastic wrap and then in foil. You can freeze it for up to 2 months. Thaw overnight in the fridge before serving.

Reheating: Gently warm slices in the microwave or a low oven. Take care not to overheat, as you want to maintain that creamy custard texture.

Make Ahead Options

These Salted Honey Pie preparations are perfect for busy home cooks seeking to save time without sacrificing flavor! You can pre-bake the pie crust up to 24 hours in advance; just ensure it's completely cooled before covering it tightly to maintain its crispness. The honey custard filling can also be prepared a day ahead—mix everything together, refrigerate it, and then pour it into the crust right before baking. This allows the flavors to meld beautifully. When you're ready to serve, bake the pie until set, cool it for at least 2 hours, sprinkle on flaky sea salt, and enjoy the same delicious taste with reduced stress.

What to Serve with Salted Honey Pie

Pairing this decadent dessert is just as important as the pie itself, enhancing your indulgence experience.

  • Creamy Whipped Cream: A light dollop of fresh whipped cream complements the pie’s richness, adding an airy touch to each smooth slice.

  • Vanilla Ice Cream: A scoop of vanilla ice cream melts against the warm pie, creating a delicious contrast between hot and cold that always pleases the palate.

  • Brewed Sweet Tea: The sweet and refreshing taste of Southern sweet tea harmonizes beautifully with the pie’s sweet-salty flavors, making for a delightful pairing.

  • Fresh Berries: Ripe strawberries, blueberries, or raspberries add a burst of freshness and acidity, cutting through the custard’s richness and balancing the dessert overall.

  • Chocolate Drizzle: A light drizzle of chocolate sauce elevates your Salted Honey Pie even further, adding an extra layer of flavor that chocolate lovers will adore.

  • Café au Lait: A warm cup of café au lait provides a comforting finish, enhancing the pie while also adding a cozy, rich coffee flavor perfect for after dinner.

Expert Tips for Salted Honey Pie

• Room Temperature Ingredients: Make sure to use room temperature eggs and cream; this helps create a smoother, more uniform filling that sets beautifully.

• Blind Baking Essential: Don’t skip the blind baking step! This crucial method maintains a crisp crust, preventing sogginess that can ruin the texture of your Salted Honey Pie.

• Cool Before Slicing: Allow the pie to cool completely before slicing. This ensures clean, beautiful pieces and lets the flavors meld together for the best taste experience.

• High-Quality Honey: Use high-quality honey for the most flavorful results. The sweet and unique honey flavor is central to the success of your Salted Honey Pie!

• Watch Baking Time: Keep an eye on the baking time; every oven is different. If the edges of the pie brown too quickly, cover them with foil to prevent burning while the center finishes baking.

Salted Honey Pie Variations & Substitutions

Feel free to put a personal twist on the Salted Honey Pie and make it uniquely yours with these fun variations!

  • Maple Swirl: Substitute honey with maple syrup for a delightful change in flavor, offering a seasonal twist. Its earthy sweetness adds warmth you’ll adore.

  • Cinnamon Infusion: Add a teaspoon of ground cinnamon to the filling for a warm, aromatic twist. This simple spice elevates the flavor profile beautifully.

  • Nutty Crunch: Sprinkle chopped nuts, like pecans or almonds, on top before baking for a satisfying crunch. They add both texture and a nutty flavor that complements the pie wonderfully.

  • Citrus Zest: Incorporate a tablespoon of lemon or orange zest into the custard for a burst of freshness. This brightens the flavor and balances the sweetness beautifully.

  • Berry Bliss: Top the pie with fresh berries like raspberries or blueberries for a pop of color and a hint of tartness. The contrast with the sweet filling is simply divine!

  • Coconut Cream: For a tropical twist, add shredded coconut to the custard or use coconut cream instead of heavy cream. It brings a wonderfully creamy and exotic flavor.

  • Vegan Option: Replace eggs with a flax or chia seed mixture and use a plant-based cream. This way, everyone can enjoy the deliciousness of your Salted Honey Pie.

  • Spicy Kick: Add a pinch of cayenne or chili powder for an unexpected spicy note. It elevates the sweet and salty flavors to a whole new level!

Each of these variations can delight your guests and allow you to customize this comforting classic! And if you're looking for more ideas, why not pair your pie with a delicious dollop of whipped cream or a scoop of vanilla ice cream? Or, for something a bit different, try serving it with a slice of Tamale Pie Hearty for a unique dessert experience!

Salted Honey Pie Recipe FAQs

What type of honey should I use for the Salted Honey Pie?
Absolutely! I recommend using high-quality honey, preferably wildflower or clover, as the unique flavor of the honey is essential to the pie. Look for honey that is pure and has a rich aroma; this will elevate the overall flavor profile of your dessert and leave your guests impressed with its delightful sweetness.

How should I store Salted Honey Pie once it’s baked?
You can store your Salted Honey Pie in the refrigerator for up to 4 days. Wrap it tightly in plastic wrap or aluminum foil to maintain freshness. If you prefer, you can serve it chilled or bring it to room temperature before serving for that creamy, luscious texture to shine through.

Can I freeze Salted Honey Pie?
Yes, you absolutely can! After the pie has cooled completely, wrap it tightly in plastic wrap and then in aluminum foil to protect it from freezer burn. It will keep well for up to 2 months. When you’re ready to enjoy it, simply thaw the pie in the fridge overnight.

What can I do if my pie cracks while baking?
If you notice cracks forming in your pie while it’s baking, don’t worry too much! This can happen if the oven temperature is too high. To prevent this, consider lowering your oven temperature by 25°F (about 15°C) next time. Additionally, ensure you're using room temperature eggs, as this helps create a smoother custard that’s less likely to crack during baking.

Are there any dietary considerations I should keep in mind with Salted Honey Pie?
Certainly! If you are serving guests with dietary restrictions, remember that this pie contains eggs and dairy products, which could be a concern for those with allergies or lactose intolerance. For a different approach, consider using egg substitutes and dairy-free cream alternatives; however, please note this may alter the pie's texture and flavor somewhat. Always check ingredient labels if you're unsure!

How long does it take for Salted Honey Pie to cool completely before serving?
I recommend letting your Salted Honey Pie cool on a wire rack for at least 2 hours after baking. This cooling time allows the custard to set properly, making slicing easier and ensuring that each piece has that perfect blend of creamy goodness without falling apart!

Salted Honey Pie

Indulge in Salted Honey Pie: A Southern Delicacy for All

Experience the delightful combination of sweet and salty in this Salted Honey Pie, a Southern delicacy that's easy to make and perfect for any gathering.
Print Recipe Pin Recipe
Prep Time 30 minutes mins
Cook Time 50 minutes mins
Cooling Time 2 hours hrs
Total Time 3 hours hrs 20 minutes mins
Servings: 8 slices
Course: Dessert
Cuisine: Southern
Calories: 450
Ingredients Equipment Method Nutrition Notes

Ingredients
  

For the Pie Crust
  • 1 9-inch pie crust homemade or store-bought, blind baked
For the Filling
  • ½ cup unsalted butter melted and slightly cooled
  • ¾ cup granulated sugar
  • ¼ cup fine cornmeal
  • ¼ teaspoon salt
  • 1 tablespoon white vinegar or lemon juice
  • 1 teaspoon vanilla extract
  • ½ cup honey wildflower or clover preferred
  • 3 large eggs room temperature
  • ½ cup heavy cream
For the Finishing Touch
  • flaky sea salt (such as Maldon) for sprinkling just before serving

Equipment

  • 9-inch pie pan
  • Mixing Bowl
  • Whisk
  • Aluminum Foil
  • pie weights
  • Baking Sheet

Method
 

Step-by-Step Instructions for Salted Honey Pie
  1. Preheat oven to 375°F (190°C). Chill the crust for 30 mins, blind bake for 12–15 mins, then bake for an additional 5 mins until golden.
  2. In a mixing bowl, whisk melted butter, sugar, cornmeal, and salt. Then add vinegar or lemon juice, vanilla extract, and honey, whisk until smooth.
  3. Add eggs one at a time, whisking after each. Stir in heavy cream until smooth.
  4. Pour the filling into the pre-baked crust and place on a baking sheet.
  5. Bake at 350°F (175°C) for 40–50 mins until slightly jiggly in center.
  6. Cool completely on a wire rack for at least 2 hours.
  7. Sprinkle sea salt over the top before serving and enjoy!

Nutrition

Serving: 1sliceCalories: 450kcalCarbohydrates: 45gProtein: 5gFat: 28gSaturated Fat: 17gPolyunsaturated Fat: 2gMonounsaturated Fat: 7gCholesterol: 120mgSodium: 150mgPotassium: 150mgFiber: 1gSugar: 30gVitamin A: 900IUCalcium: 50mgIron: 1mg

Notes

Use room temperature ingredients for a smoother filling. Don't skip blind baking to avoid soggy crust. Let it cool before slicing for the best presentation.

Tried this recipe?

Let us know how it was!

The Ultimate Bloomin’ Apples Recipe: Fall's Best Sweet Treat

November 25, 2025 by Grace Snow Leave a Comment

As the leaves begin to turn and the air becomes crisp, there's a certain magic that an autumn kitchen can bring. The Ultimate Bloomin’ Apples Recipe captures this warmth perfectly, transforming simple apples into show-stopping desserts filled with gooey caramel goodness. Not only is this delightful treat an easy way to impress your guests, but it also infuses your home with the comforting aromas of cinnamon, butter, and sweetness. Whether you’re hosting a harvest gathering or simply looking for a cozy night in, these caramel-stuffed bloomin’ apples are not just a dessert; they’re an interactive experience that invites everyone to get involved in the fun. Curious about how to create this stunning centerpiece? Let’s dive in!

Why You'll Love This Recipe

Simplicity at Its Finest: This recipe is incredibly straightforward, requiring minimal ingredients and just a few easy steps, making it perfect for both novice and experienced bakers.

Gooey, Sweet Indulgence: Each bite reveals a tender apple filled with warm, melting caramel, creating a delectable contrast that's simply irresistible.

Perfect for Gatherings: Impress your friends and family at your next fall gathering with this stunning dessert that doubles as a conversation starter.

Customizable Delight: Whether you stick with classic caramel or explore variations like chocolate chips or dried fruits, this recipe invites creativity.

Aromatic Experience: The blend of cinnamon and butter fills your kitchen with inviting autumn scents, creating a warm and cozy atmosphere.

Add a scoop of vanilla ice cream on top for an unforgettable treat that echoes the warmth of flavors found in our Chicken Salad Apples or even our decadent German Chocolate Poke Cake!

The Ultimate Bloomin’ Apples Recipe Ingredients

For the Apples
• Firm Apples – Choose varieties like Honeycrisp, Gala, or Granny Smith for the best flavor and texture.

For the Filling
• Melted Butter – Adds richness and helps the caramel fill the apple beautifully; coconut oil is a great dairy-free substitute.
• Packed Brown Sugar – This sweetener brings depth to the flavor and can be swapped with coconut sugar for a healthier option.
• Granulated Sugar – Balances the sweetness of the dish; feel free to reduce for a less sweet dessert.
• Ground Cinnamon – Enhances the apple's natural flavor; optional spices like nutmeg can also bring warmth.
• Chewy Caramel Squares – The star of the center, ensuring each apple is filled with gooey goodness; use chocolate or butterscotch chips for a tasty twist.

For Serving
• Vanilla Ice Cream – Perfect for a warm apple, providing a creamy contrast; consider dairy-free ice cream if desired.
• Caramel Sauce – Drizzle on top for extra sweetness; feel free to use homemade or your favorite store-bought brand.

Create unforgettable moments this fall with The Ultimate Bloomin’ Apples Recipe and share the warm flavors of the season with your loved ones!

Step‑by‑Step Instructions for The Ultimate Bloomin’ Apples Recipe

Step 1: Preheat Your Oven or Air Fryer
Begin by preheating your oven to 375°F or your air fryer to 350°F. This ensures that when your caramel-stuffed bloomin’ apples are ready, they're greeted by an optimal baking environment. As it heats up, gather your ingredients and prepare your workspace for a cozy cooking session.

Step 2: Mix the Delicious Filling
In a small bowl, combine melted butter, packed brown sugar, granulated sugar, and ground cinnamon. Whisk together until smooth and syrupy, creating a luscious filling for your apples. This mixture will coat the apples beautifully, enhancing their flavor as they bake. Set this aside while you prepare the apples.

Step 3: Prepare the Apples
Take your firm apples and cut off the tops, creating a small cap you can set aside. Use a spoon or apple corer to carefully remove the core without piercing through the bottom. This step is essential for holding the gooey caramel located inside. Ensure each apple is hollowed out and clean for perfect baking.

Step 4: Slice the Apples
With the apples cut-side down, carefully make thin crosswise slices, being mindful not to cut all the way through to the bottom. This technique creates a beautiful blooming effect as the apples bake, allowing the warm filling to seep into the slits, enhancing both presentation and flavor.

Step 5: Fill and Brush the Apples
Place two caramel squares into the center of each apple, allowing them to nestle snugly. Then, generously brush the prepared butter and sugar mixture over each apple, ensuring it's thoroughly coated. This step is vital for achieving that irresistible caramelization during baking, enhancing the sweetness of your ultimate bloomin’ apples.

Step 6: Bake the Apples
For the oven, place the filled apples in a greased baking dish and bake for about 30 minutes, or until they are tender when pierced with a fork. If using the air fryer, arrange the apples in the basket and cook for 20 minutes. Keep an eye on them; the goal is to have crispy edges with a soft, tender inside.

Step 7: Serve and Enjoy
Once your ultimate bloomin’ apples are baked to perfection, take them out and allow them to cool slightly. Serve warm with a scoop of creamy vanilla ice cream and a drizzle of caramel sauce on top. This delightful combination creates an unforgettable fall dessert that's sure to impress everyone at your gathering!

Make Ahead Options

These Caramel-Stuffed Bloomin’ Apples are perfect for meal prep, allowing you to enjoy a cozy dessert with less hassle! You can core and slice the apples up to 3 hours in advance, brushing them with lemon juice to prevent browning. Additionally, you can prepare the buttery sugar filling and store it in the refrigerator for up to 24 hours. When you're ready to serve, simply fill the prepared apples with caramel, brush with the mixture, and bake. This way, you’ll enjoy the same gooey, flavorful experience without the stress of last-minute prep. With these make-ahead tips, your evening can shine just as warmly as your delectable dessert!

What to Serve with Caramel-Stuffed Bloomin’ Apples

The perfect cozy gathering calls for delightful complements that elevate your dessert experience to new heights.

  • Creamy Vanilla Ice Cream: A scoop of this classic treat offers a cool contrast to the warm, gooey apples, enhancing the overall sweetness.

  • Spiced Hot Cider: This fragrant beverage pairs beautifully with the autumn flavors, filling the air with comforting notes of apple and cinnamon.

  • Ginger Snap Cookies: Their spicy crunch offers a tasty texture contrast, making each bite of caramel-stuffed bloomin' apples even more exciting.

  • Candied Pecans: These crunchy, sweet morsels add depth and texture while staying true to the fall theme.

  • Pumpkin Spice Latte: This popular drink accentuates the seasonal vibe, bringing warmth and nostalgia to your dessert table.

  • Whipped Cream: Light and airy, a dollop on top adds a luxurious touch, balancing the rich flavors of the bloomin' apples.

  • Chocolate Drizzle: For chocolate lovers, adding a rich drizzle brings an extra layer of indulgence that intertwines beautifully with the caramel.

  • Maple Syrup: A drizzle can enhance the sweetness and create a delightful maple-apple fusion, perfect for those with a sweet tooth.

  • Salted Caramel Sauce: For an added kick, this sauce creates an irresistible flavor contrast, enveloping each apple in a sweet-savory embrace.

Consider these pairings as culinary companions to your Caramel-Stuffed Bloomin’ Apples, creating an unforgettable autumn experience!

Expert Tips for The Ultimate Bloomin’ Apples Recipe

Choose the Right Apples: Select firm varieties like Honeycrisp or Granny Smith to prevent mushiness during baking; they will hold their shape beautifully.

Slice with Care: Use chopsticks or a similar object as a guide when making crosswise slices on the apples to avoid cutting all the way through the base.

Coat Generously: Don’t skimp on brushing the butter and sugar mixture over the apples; this ensures optimal caramelization and a rich flavor in your bloomin’ apples.

Monitor Cooking Time: Keep an eye on the apples a few minutes before the recommended baking time ends to avoid overcooking; you want them tender but not falling apart.

Customize Your Fillings: Feel free to experiment with different fillings, like chocolate chips or nuts, and use this ultimate bloomin’ apples recipe as a canvas for your favorite flavors.

The Ultimate Bloomin’ Apples Recipe Variations

Feel free to take this delicious recipe and make it your own with these delightful variations!

  • Dairy-Free: Substitute melted butter with coconut oil for a rich, creamy flavor without the dairy.
  • Sweetener Swap: Replace packed brown sugar with coconut sugar for a simpler, less processed option.
  • Nutty Crunch: Add chopped nuts, like walnuts or pecans, to the caramel mixture for an extra satisfying crunch.
  • Flavor Boost: Experiment with optional spices like ginger or nutmeg in the filling for a more aromatic profile.
  • Chocolate Twist: Use chocolate chips instead of caramel squares for a decadent chocolatey center.

Imagine the joy of having that gooey chocolate melting inside, a real game changer!

  • Mixed Dried Fruits: For a fruity surprise, mix in dried cranberries or raisins with the caramel for a sweet-and-tart flavor.
  • Zesty Finish: Add a sprinkle of lemon zest to the butter mixture for a refreshing citrus twist that balances the sweetness.
  • Extra Ice Cream: Consider a serving of cinnamon ice cream on top for a delightful flavor combination reminiscent of our easy German Chocolate Poke Cake!

With these variations, your ultimate bloomin’ apples can be as unique as the gatherings you share them at. Enjoy mixing things up!

How to Store and Freeze The Ultimate Bloomin’ Apples

Room Temperature: Enjoy your bloomin’ apples fresh from the oven for the best taste and texture. If you have leftovers, they can be kept at room temperature for up to 1 day.

Fridge: Store leftover bloomin’ apples in an airtight container in the fridge for up to 3 days. Reheat in the microwave for 20-30 seconds to enjoy warm.

Freezer: For longer storage, freeze the bloomin’ apples individually wrapped in plastic wrap or in airtight freezer bags for up to 2 months. Thaw in the fridge overnight when ready to enjoy.

Reheating: To reheat frozen apples, place them in a preheated oven at 350°F for about 15-20 minutes or until heated through. Serve warm with vanilla ice cream for a delightful treat!

The Ultimate Bloomin’ Apples Recipe FAQs

What type of apples should I use for the best flavor?
Absolutely! I recommend using firm varieties like Honeycrisp, Gala, or Granny Smith. They hold up well during baking and provide a deliciously crisp bite that complements the gooey caramel center perfectly.

How should I store leftover bloomin’ apples?
Very simply! If you have any leftover bloomin’ apples, you can store them in an airtight container in the fridge for up to 3 days. Just reheat them in the microwave for 20-30 seconds when you're ready to enjoy them warm again.

Can I freeze bloomin’ apples?
Yes, you can! Wrap each bloomin’ apple individually in plastic wrap or place them in airtight freezer bags. They can be frozen for up to 2 months. When you’re ready to enjoy, thaw them in the fridge overnight, then reheat in a preheated oven at 350°F for about 15-20 minutes.

What should I do if my apples are mushy after baking?
Oh dear! If your apples turn out mushy, it may be due to over-baking or selecting overly soft apples. To prevent this in the future, always choose firm apples and keep an eye on them as they bake, checking a few minutes before the recommended time. Aim for a tender texture without losing the shape!

Are there any allergy considerations for this recipe?
Definitely! This recipe contains dairy (butter and ice cream) and sugars. For a dairy-free option, you can substitute coconut oil for butter and choose a dairy-free ice cream. If you have nut allergies, ensure that any variations you try (like adding nuts) are safe for those consuming them.

Can I customize the fillings in the bloomin’ apples?
Very much! The bloomin’ apples recipe invites creativity. You can swap the caramel squares for chocolate chips, butterscotch chips, or even mix in some dried fruits or nuts. Experiment with what you love, and make this delicious treat your own!

The Ultimate Bloomin’ Apples Recipe

The Ultimate Bloomin’ Apples Recipe: Fall's Best Sweet Treat

The Ultimate Bloomin’ Apples Recipe transforms simple apples into a delightful dessert filled with gooey caramel goodness, perfect for autumn gatherings.
Print Recipe Pin Recipe
Prep Time 15 minutes mins
Cook Time 30 minutes mins
Total Time 45 minutes mins
Servings: 4 apples
Course: Dessert
Cuisine: American
Calories: 250
Ingredients Equipment Method Nutrition Notes

Ingredients
  

For the Apples
  • 4 pieces Firm Apples Honeycrisp, Gala, or Granny Smith recommended
For the Filling
  • 2 tablespoons Melted Butter Coconut oil is a great dairy-free substitute
  • 1/4 cup Packed Brown Sugar Can swap with coconut sugar for a healthier option
  • 2 tablespoons Granulated Sugar Feel free to reduce for less sweetness
  • 1 teaspoon Ground Cinnamon Optional spices like nutmeg can also bring warmth
  • 8 pieces Chewy Caramel Squares Use chocolate or butterscotch chips for a tasty twist
For Serving
  • 1 scoop Vanilla Ice Cream Consider dairy-free ice cream if desired
  • to taste tablespoons Caramel Sauce Use homemade or store-bought

Equipment

  • Oven
  • Mixing Bowl
  • Knife
  • Spoon
  • Baking Dish

Method
 

Step‑by‑Step Instructions
  1. Preheat your oven to 375°F or your air fryer to 350°F.
  2. In a small bowl, combine melted butter, packed brown sugar, granulated sugar, and ground cinnamon. Whisk together until smooth and syrupy.
  3. Take the apples and cut off the tops. Use a spoon or apple corer to carefully remove the core.
  4. Make thin crosswise slices in the apples, being mindful not to cut all the way through to the bottom.
  5. Place two caramel squares into the center of each apple and brush the prepared butter and sugar mixture over each one.
  6. Place the filled apples in a greased baking dish and bake for about 30 minutes until tender.
  7. Allow to cool slightly, then serve warm with vanilla ice cream and caramel sauce on top.

Nutrition

Serving: 1appleCalories: 250kcalCarbohydrates: 37gProtein: 2gFat: 11gSaturated Fat: 6gCholesterol: 30mgSodium: 150mgPotassium: 150mgFiber: 3gSugar: 20gVitamin A: 500IUVitamin C: 5mgCalcium: 50mgIron: 0.5mg

Notes

Enjoy your bloomin’ apples fresh from the oven for the best taste and texture. Leftovers can be stored in the fridge for up to 3 days and reheated if desired.

Tried this recipe?

Let us know how it was!

Indulge in Easy Samoas Cookie Pie for a Sweet Treat

November 20, 2025 by Grace Snow Leave a Comment

As I opened the pantry door, a wave of nostalgia washed over me—those iconic Girl Scout Samoas had always been a favorite. But what if I told you that you could relive that sweet memory in pie form? Introducing the No-Bake Samoa Cookie Pie! This delightful treat captures all the lush layers of caramel, chocolate, and coconut without the fuss of baking. Perfect for those who crave indulgence but want to skip the oven, it comes together in a matter of minutes, ensuring a quick fix for your sweet tooth. Plus, it’s a showstopper for gatherings that will impress both kids and adults alike. Are you ready to make your kitchen the happiest place on earth with this scrumptious pie?

Why is this pie a must-try?

Simplicity at its finest: This Samoa Cookie Pie is a breeze to whip up with zero baking required—no mixers, no fuss!

Layers of flavor: Imagine gooey caramel, rich chocolate, and chewy coconut harmonizing in every slice.

Versatility at its best: With options to swap toppings or tweaking ingredients, you can customize this pie to suit your palate beautifully!

Crowd pleaser: Whether for parties or family dinners, this pie is sure to impress everyone and have them asking for seconds.

Perfectly indulgent: It delivers that sweet nostalgia of classic Samoas while being a fun twist on dessert tradition, just like my Matcha Cookies Soft or Thumbprint Cookies Melt. Don't miss trying this deliciousness!

Samoas Cookie Pie Ingredients

  • For the Crust
    • Unsalted Butter – Provides richness and moisture to the crust; use regular butter for a non-dairy option.
    • Large Egg – Binds the ingredients of the crust together; for vegan options, consider a flax or chia egg.
    • Light Brown Sugar – Adds sweetness and a hint of molasses flavor; light or dark brown sugar can be used interchangeably.
    • Vanilla Extract – Enhances flavor; a drop of almond extract can give a delightful twist.
    • All-Purpose Flour – The base for the crust, providing structure; substitute with a gluten-free blend for gluten-free options.
    • Salt – Enhances the sweetness of the pie; adjust to taste.

  • For the Layers
    • Semi-Sweet Chocolate Chips – Adds a rich chocolate flavor; use dark chocolate for a bolder taste.
    • Sweetened Shredded Coconut – Provides texture and a tropical flavor; unsweetened coconut is a good lower-sugar alternative.
    • Sweetened Condensed Milk – A key ingredient that adds creaminess and sweetness; can be substituted with coconut milk or almond milk for a lighter version.
    • Salted Caramel Sauce – Delivers the iconic caramel flavor; use homemade or store-bought for convenience, with regular caramel sauce as a substitute if desired.

Crafting this Samoas Cookie Pie is not only straightforward but also a rewarding experience that will surely delight your taste buds!

Step‑by‑Step Instructions for Samoas Cookie Pie

Step 1: Preheat the Oven
Begin by preheating your oven to 350°F (175°C). While the oven warms up, grab a 9-inch pie dish and generously grease it with butter or non-stick spray. This will ensure that your No-Bake Samoa Cookie Pie comes out easily after chilling.

Step 2: Prepare the Crust
In a microwave-safe bowl, melt ½ cup of unsalted butter and let it cool for a minute. Whisk in one large egg, 1 cup of light brown sugar, and 1 teaspoon of vanilla extract until the mixture is smooth. Gradually add 1 ½ cups of all-purpose flour and a pinch of salt, stirring until just combined to form the base of your pie.

Step 3: Bake the Crust
Spread the dough evenly across the greased pie dish. Place it in the preheated oven and bake for 10-12 minutes, or until the edges begin to firm up and the center is slightly set. Keep an eye on the crust to ensure it doesn't overbake—it's perfectly fine if it seems a little underdone.

Step 4: Add Toppings
Once the crust is baked, remove it from the oven and immediately sprinkle 1 cup of semi-sweet chocolate chips evenly over the surface. Follow this with 1 ½ cups of sweetened shredded coconut, and drizzle 1 can of sweetened condensed milk along with ½ cup of salted caramel sauce on top. Return the pie to the oven for an additional 25 minutes, until the filling is bubbly and set.

Step 5: Cool and Drizzle
After baking, let the pie cool at room temperature for at least 30 minutes so the layers can settle. For an extra touch, melt some chocolate chips and drizzle them over the top of your baked Samoa Cookie Pie, creating a beautiful topping. Allow the pie to cool completely for at least 4 hours, or overnight in the fridge for a firmer slice.

Step 6: Serve
Once your Samoa Cookie Pie has chilled and set, it's time to slice! Use a sharp knife to cut through the gooey layers carefully. Serve each slice as is, or pair it with a scoop of vanilla ice cream for an indulgent treat. Enjoy these delicious flavors and textures with your friends and family!

Storage Tips for Samoas Cookie Pie

Room Temperature: Keep the pie at room temperature for up to 5 days, covered to maintain freshness and prevent drying out.

Fridge: Store leftovers in an airtight container in the fridge for up to 5 days to preserve the gooey layers of caramel and chocolate.

Freezer: For longer storage, wrap individual slices tightly in plastic wrap and place them in a freezer-safe bag. Enjoy within 6 months for the best quality.

Reheating: Thaw in the fridge overnight, then serve chilled or at room temperature. Avoid microwave reheating to maintain the texture of the Samoas Cookie Pie.

Expert Tips for Samoas Cookie Pie

  • Mixing Matters: Ensure your butter is slightly cooled before adding the egg to avoid scrambling it; this will help in creating a smooth, blended crust for your Samoas Cookie Pie.

  • Watch Baking Time: Keep an eye on the crust while baking. Underbaking slightly is ideal as it firms up during cooling, preventing a soggy bottom.

  • Setting the Pie: Patience is key—allowing at least 4 hours for your pie to chill helps it set properly, making it easier to slice without falling apart.

  • Topping Variations: Feel free to swap out shredded coconut for chopped nuts or even crushed cookies for a unique texture in your Samoas Cookie Pie.

  • Chill for Perfection: For optimal results, consider refrigerating the pie overnight. This enhances the flavors and provides a firmer, more cohesive dessert.

What to Serve with Samoa Cookie Pie

Indulging in a slice of Samoa Cookie Pie opens up a world of delightful pairings that elevate your dessert experience.

  • Vanilla Ice Cream: A classic pairing, this creamy scoop balances the richness of the pie, delivering a cooling contrast.

  • Whipped Cream: Light and airy, whipped cream adds a fluffy texture that complements the gooey layers of caramel and chocolate beautifully.

  • Fresh Berries: Tart raspberries or strawberries provide a refreshing burst of flavor, cutting through the sweetness for a well-rounded dessert.

  • Coconut Milk Shake: A creamy, tropical drink that echoes the coconut flavor in the pie, giving a delightful sip to accompany each bite.

  • Coffee or Espresso: The rich, bold notes in coffee enhance the chocolate and caramel flavors, making it a perfect sipping companion.

  • Chocolate Drizzle: Enhance the visual appeal and add an extra chocolate touch by drizzling warm chocolate sauce over the pie when serving.

Pair these suggestions for an unforgettable dessert experience that delights every sweet tooth in the room!

Make Ahead Options

These Samoa Cookie Pie are perfect for busy home cooks looking to save time! You can prepare the crust and allow it to cool up to 24 hours in advance by tightly wrapping it in plastic wrap and storing it at room temperature. Additionally, the toppings—chocolate chips, coconut, sweetened condensed milk, and caramel sauce—can be measured out and combined up to 3 days ahead; simply refrigerate them in an airtight container to keep them fresh. When you're ready to serve, layer the toppings over the crust, bake according to the recipe, and let it cool for a minimum of 4 hours or overnight for the best results. This way, your Samoa Cookie Pie will still be just as delicious when it’s time to indulge!

Samoa Cookie Pie Variations & Substitutions

Feel free to tailor your Samoa Cookie Pie to fit your tastes and dietary needs, making it truly your own!

  • Nutty Delight: Substitute shredded coconut with chopped nuts for a crunchy texture that pairs wonderfully with the gooey layers.

  • White Chocolate Twist: Use white chocolate chips instead of semi-sweet for a creamier, sweeter chocolate flavor.

  • Vegan Option: Replace the large egg with a flax egg (1 tablespoon flaxseed meal mixed with 2.5 tablespoons water) and use coconut cream instead of sweetened condensed milk for a delicious vegan-friendly pie.

  • Espresso Infusion: Add 1 to 2 teaspoons of instant coffee granules to the crust mixture; this creates a delightful mocha flavor that complements the chocolate beautifully.

  • Gluten-Free Crust: Swap out the all-purpose flour with a gluten-free blend, ensuring everyone can enjoy this sweet treat.

  • Caramel Variations: Try different caramel sauces—consider homemade bourbon caramel for an adult twist or a butterscotch sauce for a different flavor profile.

  • Chocolate Layer Swap: Instead of chocolate chips, drizzle melted chocolate over the top for a beautifully glossy finish that adds another layer of richness.

  • Baking Optional: While this recipe is no-bake, you can bake the crust as described for that classic pie texture—experiment to find your perfect balance, just like my delicious Spinach Pie Deliciously for a savory touch!

Let your creativity flow as you explore these variations for an unforgettable dessert experience!

Samoas Cookie Pie Recipe FAQs

How do I choose ripe ingredients for my Samoa Cookie Pie?
Absolutely! For the best flavors, choose quality ingredients. When selecting unsalted butter, look for ones that are fresh and creamy without any off-odors. Ensure your eggs are large and fresh; check the expiration date on the carton. If you're using shredded coconut, opt for unsweetened if you're after a less sugary treat, or sweetened for a more decadent flavor.

What is the best way to store my Samoa Cookie Pie?
You can store your Samoa Cookie Pie at room temperature for up to 5 days. Just make sure to cover it with plastic wrap or place it in an airtight container to keep it fresh. If you have leftovers after that, transferring it to the fridge in an airtight container will help retain the gooey texture for another 5 days.

Can I freeze my Samoa Cookie Pie, and how do I do it?
The more the merrier! You can definitely freeze your Samoa Cookie Pie. To do this, allow it to cool completely first. Then, slice it into individual portions and wrap each slice tightly with plastic wrap. Place the wrapped slices in a freezer-safe bag, and enjoy them within 6 months for the best quality. When you’re ready to indulge, simply thaw in the fridge overnight and serve chilled or at room temperature.

What should I do if my Samoa Cookie Pie is too gooey?
Very common! If your pie is too gooey, it’s likely due to inadequate cooling time. Make sure to let it chill for at least 4 hours or preferably overnight for the best texture. If it still seems too soft, you can place it in the fridge for an additional hour prior to serving. Also, ensure that the filling is bubbling and set while baking so that it firms up during cooling.

Are there any dietary considerations for my Samoa Cookie Pie?
Certainly! If you or someone you're serving has allergies, be mindful of ingredients. The pie contains dairy (butter, condensed milk) and possible gluten (flour), so consider gluten-free flour and dairy-free butter or condensed milk for those with intolerances. If preparing for pets, make sure none of the ingredients are harmful to them, especially chocolate, which is toxic to dogs. Happy baking!

Samoas Cookie Pie

Indulge in Easy Samoas Cookie Pie for a Sweet Treat

Relive the nostalgia of Samoas in a no-bake pie that combines caramel, chocolate, and coconut for an indulgent treat.
Print Recipe Pin Recipe
Prep Time 15 minutes mins
Cook Time 40 minutes mins
Cooling Time 4 hours hrs
Total Time 4 hours hrs 55 minutes mins
Servings: 8 slices
Course: Dessert
Cuisine: American
Calories: 360
Ingredients Equipment Method Nutrition Notes

Ingredients
  

For the Crust
  • ½ cup Unsalted Butter Provides richness and moisture to the crust
  • 1 Large Egg Binds the ingredients together
  • 1 cup Light Brown Sugar Adds sweetness
  • 1 teaspoon Vanilla Extract Enhances flavor
  • 1½ cups All-Purpose Flour Provides structure
  • 1 pinch Salt Enhances sweetness
For the Layers
  • 1 cup Semi-Sweet Chocolate Chips Adds rich chocolate flavor
  • 1½ cups Sweetened Shredded Coconut Provides texture and flavor
  • 1 can Sweetened Condensed Milk Adds creaminess and sweetness
  • ½ cup Salted Caramel Sauce Delivers iconic caramel flavor

Equipment

  • 9-inch pie dish
  • Microwave-safe bowl
  • Whisk

Method
 

Preparation Steps
  1. Preheat your oven to 350°F (175°C). Grease a 9-inch pie dish with butter or non-stick spray.
  2. Melt the unsalted butter in a microwave-safe bowl and let it cool. Whisk in the egg, light brown sugar, and vanilla extract until smooth.
  3. Gradually add the all-purpose flour and pinch of salt, stirring until just combined.
  4. Spread the dough evenly in the greased pie dish and bake for 10-12 minutes until edges are firm and center is set.
  5. Remove from oven, sprinkle chocolate chips over the crust, then layer with shredded coconut. Drizzle sweetened condensed milk and salted caramel sauce on top.
  6. Return the pie to the oven for an additional 25 minutes until bubbly and set.
  7. Cool the pie at room temperature for 30 minutes. Drizzle with melted chocolate, then refrigerate for at least 4 hours.
  8. Slice and serve as is or with vanilla ice cream.

Nutrition

Serving: 1sliceCalories: 360kcalCarbohydrates: 45gProtein: 3gFat: 20gSaturated Fat: 12gPolyunsaturated Fat: 1gMonounsaturated Fat: 4gCholesterol: 35mgSodium: 160mgPotassium: 200mgFiber: 2gSugar: 28gVitamin A: 300IUCalcium: 60mgIron: 1mg

Notes

Allow for proper chilling time to ensure the pie sets well and is easier to slice. Consider variations on toppings for a unique experience.

Tried this recipe?

Let us know how it was!

Sweet Dutch Apple Pie with Crunchy Topping to Delight Your Senses

November 20, 2025 by Grace Snow Leave a Comment

As I pulled the steaming Sweet Dutch Apple Pie from the oven, the enticing aroma of cinnamon and nutmeg wafted through my kitchen, wrapping me in a warm embrace. There's something magical about this classic dish, especially when it comes topped with a crunchy crumb layer that makes it a standout at any gathering. What I love most about this comforting family-friendly dessert is not just how simple it is to whip up—perfect for busy weeknights—but also how it transforms seasonal apples into a delightful centerpiece. Each slice reveals sweet, spiced goodness, ready to be paired with a scoop of vanilla ice cream for that extra touch of joy. Ready to dive into this irresistible recipe? Let’s get started!

Why Is Dutch Apple Pie So Irresistible?

Comforting, classic flavors: This Dutch apple pie captures the essence of home with its warm spices and sweet apple filling, making it a nostalgic favorite for all ages.

Effortless preparation: The easy-to-make crumb topping simplifies the baking process, allowing you to enjoy homemade goodness without stress.

Crowd-pleaser: Perfect for gatherings, it’s a dessert that impresses, whether paired with a scoop of vanilla ice cream or served alone.

Seasonal appeal: Use fresh, crisp apples to celebrate fall and make the most of seasonal produce, just like in my Maple Roasted Sweet recipe.

Versatile sweetness: Adjust the sugar levels to match your apple selection, making this pie a flexible treat to suit your taste preferences.

Store-bought option: For those short on time, a store-bought crust makes this recipe even more accessible, so you can whip up this delight any day of the week!

Sweet Dutch Apple Pie Ingredients

• For the ultimate baking experience, here are all you need!

For the Pie Crust

  • Pie Crust – Use your favorite flaky pie crust or a store-bought option for convenience.

For the Apple Filling

  • Apples – Granny Smith or Honeycrisp are best for retaining shape and balancing sweetness; avoid softer varieties.
  • Lemon Juice & Zest – Fresh lemon keeps your apples from browning and adds a lovely brightness.
  • Brown Sugar – This enhances the caramel notes in the filling and deepens the overall flavor.
  • Granulated Sugar – Adjust this based on the sweetness of your apples for a perfect balance.
  • Flour – Helps thicken the filling to keep it from being soupy; cornstarch works well for gluten-free options.
  • Spices (Cinnamon, Nutmeg, Cardamom) – These warm spices create a comforting aroma that defines the dish; feel free to add vanilla extract too.
  • Butter – Adds richness; for flavor, I suggest using Kerrygold.

For the Crumble Topping

  • Flour – Essential for creating that crispy topping; ensure it's combined well for the best texture.
  • Sugar – This complements the crunchiness of the topping and adds sweetness.
  • Brown Sugar – Use it alongside granulated sugar for depth and moisture in your crumble mix.

Now that you're equipped with the ingredients for this delightful Sweet Dutch Apple Pie, you're just moments away from transforming your kitchen into a haven of warm, spiced aromas. Happy baking!

Step‑by‑Step Instructions for Sweet Dutch Apple Pie

Step 1: Prepare Crumble Topping
In a mixing bowl, combine flour, granulated sugar, brown sugar, and a pinch of salt. Gradually pour in the melted butter, mixing until the mixture resembles coarse crumbs. Refrigerate this crumble topping for at least 30 minutes, allowing it to firm up while you prepare the pie filling.

Step 2: Cook Apple Filling
In a large skillet over medium heat, warm the lemon juice and zest until fragrant. Add sliced apples, brown sugar, granulated sugar, and a blend of cinnamon, nutmeg, and cardamom. Cook the mixture for about 5-7 minutes until the apples are tender but still holding their shape. Chill this filling in the refrigerator while you get your crust ready.

Step 3: Prepare Pie Crust
Roll out your pie crust on a lightly floured surface to fit a 9-inch pie dish. Gently place the crust in the dish, pressing it into the edges and trimming any excess. Prick the bottom with a fork to prevent bubbling, then chill the crust in the refrigerator for about 15 minutes, ensuring it retains its shape during baking.

Step 4: Assemble Pie
Preheat your oven to 425°F (220°C). Remove the chilled crust from the refrigerator and evenly layer the cooled apple filling into the pie crust. Sprinkle a thin layer of the reserved crumble topping over the apples before sliding it into the preheated oven to bake for 15 minutes, just until the crust edges begin to turn golden.

Step 5: Lower Temperature & Finish Baking
After the initial baking, reduce the oven temperature to 350°F (175°C). Add the remaining crumble topping to the pie and loosely cover the edges with foil to prevent over-browning. Bake for an additional 35-45 minutes or until the topping is golden brown and the filling is bubbling.

Step 6: Cool
Once baked, remove the Sweet Dutch Apple Pie from the oven and allow it to cool at room temperature for at least 4 hours. This cooling time helps the filling set, making it easier to slice and serve. Enjoy the delightful aroma as it fills your kitchen!

Sweet Dutch Apple Pie Variations

Feel free to make this delightful pie your own by trying out these imaginative twists!

  • Apple Blend: Mix different apple varieties for a unique flavor profile; combine tart and sweet apples for complexity. Granny Smith and Honeycrisp are perfect together!

  • Dried Fruit Addition: Toss in some dried cranberries or raisins into the filling; they’ll add a chewy texture and a hint of tartness that complements the apples beautifully.

  • Nutty Crunch: Add chopped walnuts or pecans to the crumble topping for a delightful crunch and depth of flavor. The nutty richness will elevate the whole pie experience.

  • Spicy Kick: Want a bit of heat? Add a pinch of cayenne pepper or sliced jalapeños to the apple filling; it adds an unexpectedly delicious warmth that intrigues the palate.

  • Citrus Zest Boost: For a zesty twist, include orange or lime zest along with the lemon. This brightens the flavor, enhancing the overall experience of your pie.

  • Gluten-Free Option: Substitute the flour in both the pie crust and crumble topping with your favorite gluten-free blend or almond flour for a fantastic gluten-free version.

  • Caramel Drizzle: Drizzle warm caramel sauce over each slice before serving for an indulgent touch that pairs exquisitely with the sweet and spiced filling.

Each variation breathes new life into this classic dessert while maintaining its soul. Pair it with a scoop of vanilla ice cream, just like in my Chicken Salad Apples recipe, for that melt-in-your-mouth finish! Happy baking and experimenting!

Make Ahead Options

These Sweet Dutch Apple Pies are perfect for meal prep enthusiasts! You can prepare the crumble topping and apple filling up to 24 hours in advance to save time on busy days. Simply mix the ingredients for the crumble and refrigerate, while the cooked apple filling can be chilled in an airtight container. When you're ready to bake, roll out your pie crust, layer the chilled filling into the crust, sprinkle the crumble on top, and bake as directed. Just remember to let the pie cool for at least 4 hours before serving for perfectly set slices. With these make-ahead tips, you can enjoy a delicious homemade dessert with minimal last-minute effort!

How to Store and Freeze Sweet Dutch Apple Pie

Room Temperature: Store your pie at room temperature for up to 2 days. Keep it covered with a clean kitchen towel to maintain freshness.

Fridge: For longer storage, refrigerate your Sweet Dutch Apple Pie for up to 5 days. Cover it loosely with plastic wrap or foil to prevent it from drying out.

Freezer: The pie can be frozen for up to 3 months. Wrap it tightly in plastic wrap and then in foil to ensure it stays fresh.

Reheating: To enjoy your pie again, rewarm slices in the microwave for about 30-45 seconds or in a preheated oven at 350°F (175°C) for 10-15 minutes for that freshly baked flavor.

What to Serve with Sweet Dutch Apple Pie

The perfect meal deserves equally delightful accompaniments to enhance your dining experience.

  • Vanilla Ice Cream: Creamy and smooth, it melts into the warm pie, adding a heavenly contrast to the spiced apple filling.

  • Whipped Cream: Light and fluffy, this classic topping complements the pie’s richness while enhancing its cozy appeal.

  • Caramel Sauce: Drizzling this over each slice takes your pie to new heights with a luscious, sweet finish that tantalizes the taste buds.

  • Coffee: A warm cup of coffee balances the sweetness of the pie, creating a comforting ending to your meal.

  • Mulled Wine: The spiced flavors of mulled wine echo the pie's warmth, making for a cozy pairing perfect for chilly evenings.

  • Nutty Granola: A sprinkle of crunchy granola provides an interesting textural contrast, enhancing the rustic charm of your dessert.

  • Cheddar Cheese: A bold choice, sharp cheddar contrasts wonderfully with the sweetness, adding a savory punch to the experience.

  • Maple Syrup Drizzle: Sweet and earthy, this adds a unique touch that enhances the pie’s flavor while embracing the fall spirit.

  • Pumpkin Spice Latte: Extend the cozy vibes with this seasonal drink; its spices resonate beautifully with the pie, making each bite mesmerizing.

Embrace these pairings, and watch how they elevate your Sweet Dutch Apple Pie experience!

Expert Tips for Sweet Dutch Apple Pie

  • Choose the Right Apples: Use firm apples like Granny Smith or Honeycrisp for a filling that maintains its shape. Avoid softer varieties to prevent a mushy pie.

  • Prevent Soggy Crust: Blind bake the crust for 10-12 minutes at 425°F (220°C) before adding the filling to avoid a soggy bottom.

  • Perfect Crumble Texture: Mix the crumble topping until it resembles coarse crumbs; this gives you that delightful crunch when baked.

  • Cooling is Key: Let the pie cool for at least 4 hours before slicing to help the filling set and enhance the flavors of your Sweet Dutch Apple Pie.

  • Taste Adjustment: Don’t hesitate to adjust sugar levels based on your apple variety’s sweetness, ensuring your pie is just the right amount of sweet.

  • Storage Tips: To keep your pie fresh, store it at room temperature for 2 days, or refrigerate for up to 5 days. It even freezes well for later indulgence!

Sweet Dutch Apple Pie Recipe FAQs

What type of apples should I use for the best flavor and texture?
I recommend using Granny Smith or Honeycrisp apples for your Sweet Dutch Apple Pie. These varieties are firm and hold their shape beautifully during baking, ensuring a delightful texture. Avoid softer apples like Red Delicious, as they can lead to a mushy filling.

How should I store my Dutch apple pie after baking?
To keep your pie fresh, you can store it at room temperature for up to 2 days, covering it with a clean kitchen towel. For longer storage, refrigerate it for up to 5 days. Be sure to loosely cover it with plastic wrap or foil to prevent it from drying out.

Can I freeze my Dutch apple pie, and if so, how?
Absolutely! You can freeze your Sweet Dutch Apple Pie for up to 3 months. Wrap it tightly in plastic wrap followed by aluminum foil to protect it from freezer burn. When you're ready to enjoy it, thaw it in the fridge overnight and reheat as desired.

What should I do if my pie crust is soggy?
If you find your crust has turned soggy, it may be due to not blind baking! I recommend pre-baking the crust for 10-12 minutes at 425°F (220°C) before adding the filling. This helps create a barrier that prevents moisture from soaking through, giving you that perfect flaky crust.

Can I make adjustments for dietary restrictions, such as gluten-free?
Yes, for a gluten-free version of your Sweet Dutch Apple Pie, simply substitute the all-purpose flour in the filling and crumble topping with cornstarch or a gluten-free flour blend. Just ensure you follow the same measurements, and you'll have a delicious pie that everyone can enjoy!

How long should I cool the pie before slicing it?
It’s important to let your Sweet Dutch Apple Pie cool for at least 4 hours before you slice it. This cooling time allows the filling to set properly, making it easier to cut neat, perfect slices. The flavors will meld beautifully during this time, enhancing your dessert experience!

Sweet Dutch Apple Pie

Sweet Dutch Apple Pie with Crunchy Topping to Delight Your Senses

This Sweet Dutch Apple Pie is a comforting and classic dessert, featuring seasonal apples and a crunchy topping.
Print Recipe Pin Recipe
Prep Time 30 minutes mins
Cook Time 1 hour hr
Cooling Time 4 hours hrs
Total Time 5 hours hrs 30 minutes mins
Servings: 8 slices
Course: Dessert
Cuisine: Dutch
Calories: 350
Ingredients Equipment Method Nutrition Notes

Ingredients
  

For the Pie Crust
  • 1 crust Pie Crust Use your favorite flaky pie crust or a store-bought option for convenience.
For the Apple Filling
  • 6 cups Apples Granny Smith or Honeycrisp are best for retaining shape and balancing sweetness; avoid softer varieties.
  • 2 tablespoons Lemon Juice & Zest Fresh lemon keeps your apples from browning and adds a lovely brightness.
  • 1/2 cup Brown Sugar This enhances the caramel notes in the filling and deepens the overall flavor.
  • 1/4 cup Granulated Sugar Adjust this based on the sweetness of your apples for a perfect balance.
  • 1/4 cup Flour Helps thicken the filling to keep it from being soupy; cornstarch works well for gluten-free options.
  • 1 teaspoon Spices (Cinnamon, Nutmeg, Cardamom) These warm spices create a comforting aroma that defines the dish; feel free to add vanilla extract too.
  • 3 tablespoons Butter Adds richness; for flavor, I suggest using Kerrygold.
For the Crumble Topping
  • 1 cup Flour Essential for creating that crispy topping; ensure it's combined well for the best texture.
  • 1/4 cup Sugar This complements the crunchiness of the topping and adds sweetness.
  • 1/4 cup Brown Sugar Use it alongside granulated sugar for depth and moisture in your crumble mix.

Equipment

  • Mixing Bowl
  • Skillet
  • Pie dish
  • Refrigerator

Method
 

Step‑by‑Step Instructions for Sweet Dutch Apple Pie
  1. In a mixing bowl, combine flour, granulated sugar, brown sugar, and a pinch of salt. Gradually pour in the melted butter, mixing until the mixture resembles coarse crumbs. Refrigerate this crumble topping for at least 30 minutes.
  2. In a large skillet over medium heat, warm the lemon juice and zest until fragrant. Add sliced apples, brown sugar, granulated sugar, and a blend of cinnamon, nutmeg, and cardamom. Cook the mixture for about 5-7 minutes until the apples are tender but still holding their shape. Chill this filling in the refrigerator while you get your crust ready.
  3. Roll out your pie crust on a lightly floured surface to fit a 9-inch pie dish. Gently place the crust in the dish, pressing it into the edges and trimming any excess. Prick the bottom with a fork to prevent bubbling, then chill the crust in the refrigerator for about 15 minutes.
  4. Preheat your oven to 425°F (220°C). Remove the chilled crust from the refrigerator and evenly layer the cooled apple filling into the pie crust. Sprinkle a thin layer of the reserved crumble topping over the apples before sliding it into the preheated oven to bake for 15 minutes.
  5. After the initial baking, reduce the oven temperature to 350°F (175°C). Add the remaining crumble topping to the pie and loosely cover the edges with foil to prevent over-browning. Bake for an additional 35-45 minutes or until the topping is golden brown and the filling is bubbling.
  6. Once baked, remove the Sweet Dutch Apple Pie from the oven and allow it to cool at room temperature for at least 4 hours.

Nutrition

Serving: 1sliceCalories: 350kcalCarbohydrates: 50gProtein: 2gFat: 15gSaturated Fat: 8gPolyunsaturated Fat: 1gMonounsaturated Fat: 6gCholesterol: 30mgSodium: 200mgPotassium: 150mgFiber: 2gSugar: 25gVitamin A: 500IUVitamin C: 9mgCalcium: 15mgIron: 1mg

Notes

Let the pie cool for at least 4 hours before slicing to help the filling set and enhance the flavors of your Sweet Dutch Apple Pie.

Tried this recipe?

Let us know how it was!

Delicious Coffee Cake Cookies Inspired by Gilmore Girls

November 20, 2025 by Grace Snow Leave a Comment

The aroma of freshly baked cookies took me back to my favorite moments spent in front of the TV, curled up with a plate of sweets while binge-watching Gilmore Girls. These Delectable Gilmore Girls Coffee Cake Cookies perfectly blend the warm spices and richness we crave when the weather cools down. Not only do they capture the cozy essence of Stars Hollow, but they also make the ideal addition to your Thanksgiving dessert table, showcasing both elegance and comfort. With a quick prep time and the versatility to experiment with toppings, these cookies are sure to impress your family and friends. Curious about how to create these sweet morsels that evoke nostalgia and warmth? Let’s dive into the recipe!

Why are Coffee Cake Cookies irresistible?

Simplicity: You’ll love how easy it is to whip up these cookies, requiring minimal baking skills and only a few key ingredients.

Nostalgic Flavor: The delightful mix of cinnamon and brown sugar brings back memories of cozy evenings spent watching Gilmore Girls.

Versatile Toppings: Feel free to get creative! Whether it’s adding chocolate chips or swapping in pumpkin spice, the customization options are endless, inviting your own touch.

Perfect for Sharing: These cookies are a fantastic addition to any gathering, making them a sure hit for Thanksgiving or casual get-togethers with friends.

Quick Prep Time: With just a few simple steps, you can have warm, homemade cookies ready in under 30 minutes.

Crowd-Pleasing Appeal: Serve them alongside a cup of coffee or ice cream, and watch as everyone goes for seconds! These cookies echo the warmth of home, just like the spirit of Stars Hollow.

Coffee Cake Cookies Ingredients

For the Cookie Dough

  • Butter – Adds richness and moisture; for a dairy-free version, you can use margarine.
  • Vegetable Oil – Keeps the cookies moist and tender; can be swapped with melted coconut oil for a different flavor.
  • Brown Sugar – Brings depth of flavor and moisture; both light and dark brown sugar work, with dark having a richer taste.
  • Egg – Acts as a binder for the dough and adds moisture; replace with a flax egg (1 tbsp ground flaxseed + 3 tbsp water) for a vegan option.
  • Vanilla Extract – Enhances the overall flavor; almond extract can be used for a nutty twist.
  • Cinnamon – Infuses warmth and spice; nutmeg can be used as an alternative for a unique taste.
  • Baking Soda & Baking Powder – Essential leavening agents that help the cookies rise.
  • Salt – Balances sweetness and enhances flavors; essential for a well-rounded taste.
  • All-Purpose Flour – Provides the structure for the cookies; whole wheat flour is a healthy alternative.

For the Streusel Topping

  • Butter – Creates a crumbly texture for the topping; ensure it's softened for easy mixing.
  • Brown Sugar – Provides sweetness and that signature coffee cake flavor; you can use granulated sugar in a pinch.
  • All-Purpose Flour – Helps bind the streusel together; same flour used in the cookie base works perfectly.
  • Cinnamon – Adds extra warmth to the streusel topping; feel free to omit if you prefer a plain crumb topping.

These coffee cake cookies are not just another dessert; they're a heartfelt ode to cozy moments and shared memories. Let’s get baking!

Step‑by‑Step Instructions for Delectable Gilmore Girls Coffee Cake Cookies

Step 1: Preheat the Oven
Start by preheating your oven to 350°F (175°C). This step is crucial as it ensures that your cookies bake evenly and achieve that golden-brown color. While the oven warms up, gather your baking sheets and line them with parchment paper to avoid sticking, making cleanup a breeze.

Step 2: Cream the Wet Ingredients
In a large mixing bowl, cream together the softened butter, vegetable oil, and brown sugar until the mixture is smooth and fluffy, which should take about 2-3 minutes. You’ll know it’s ready when it becomes light in color and slightly aerated, setting a rich foundation for your coffee cake cookies.

Step 3: Incorporate the Egg and Vanilla
Next, beat in the egg and vanilla extract into the creamed mixture until combined. Allowing these ingredients to blend thoroughly enhances the flavor profile of your cookies. This step brings moisture and depth, making your cookies irresistibly soft and rich.

Step 4: Combine Dry Ingredients
In a separate bowl, whisk together the all-purpose flour, baking soda, baking powder, cinnamon, and salt. Gradually add this dry mixture to your wet ingredients, mixing until just combined. This will help achieve the right texture without overmixing, which is essential for soft coffee cake cookies.

Step 5: Make the Streusel Topping
Prepare the streusel by mixing together softened butter, brown sugar, flour, and cinnamon in a medium bowl. Use your fingers or a fork to create a crumbly texture, ensuring everything is well incorporated. This delightful topping adds a beautiful crunch and flavor that complements your cookies perfectly.

Step 6: Shape the Dough
Using a cookie scoop or tablespoon, scoop out rounded balls of dough and place them on the lined baking sheets. Make sure to leave a few inches of space between each one to allow for spreading. Create an indent in the center of each dough ballusing your thumb, ready to hold the delicious streusel.

Step 7: Fill the Indents
Now, fill each thumbprint indent with the streusel topping you prepared earlier. Don’t be shy—generously pile it on! This layer of crumbly goodness will create a deliciously unique texture for each coffee cake cookie, enhancing their overall appeal.

Step 8: Bake the Cookies
Place the baking sheets in the preheated oven and bake for 10-12 minutes. Keep an eye on them; the cookies are ready when the edges turn golden brown but the centers still look slightly soft. This will ensure they remain tender, reminiscent of a cozy coffee cake.

Step 9: Cool and Serve
Once out of the oven, allow the cookies to cool on the baking sheets for about 5 minutes, then transfer them to wire racks to cool completely. This cooling time helps the flavors mesh beautifully, making for a delightful treat. Serve your Delectable Gilmore Girls Coffee Cake Cookies warm with a cup of coffee for the ultimate indulgence!

How to Store and Freeze Coffee Cake Cookies

Room Temperature: Store cookies in an airtight container at room temperature for up to 7 days to maintain their softness and flavor.

Fridge: For extended freshness, keep your cookies in the fridge for up to 10 days; just ensure they're in a sealed container to prevent drying out.

Freezer: Freeze baked cookies for up to 3 months. Layer them with parchment paper in a freezer-safe container, and allow to thaw at room temperature before serving.

Reheating: To enjoy your coffee cake cookies warm, simply reheat in a microwave for about 10-15 seconds, bringing back that fresh-baked taste!

Make Ahead Options

These Delectable Gilmore Girls Coffee Cake Cookies are fantastic for meal prep, allowing you to enjoy homemade goodness without the last-minute rush. You can prepare the cookie dough up to 24 hours in advance; simply wrap it tightly in plastic wrap and refrigerate. Additionally, the streusel topping can be made up to 3 days ahead—store it in an airtight container in the fridge to keep it fresh. When you're ready to serve, just scoop the chilled dough onto baking sheets, fill with the prepped streusel, and bake as directed. This saves you time while ensuring your cookies remain just as delicious and delightful as ever!

Expert Tips for Coffee Cake Cookies

  • Soften Butter Properly: Ensure your butter is softened at room temperature for optimal creaming; this affects texture and flavor.

  • Mix Just Enough: Avoid overmixing the dough once you add flour. This can lead to tough cookies; mix until just combined for perfect softness.

  • Streusel Technique: Ensure your streusel is crumbly but cohesive. If too dry, add a splash of melted butter for an ideal topping consistency.

  • Indentation Matters: When creating thumbprint indents, press gently but deeply to hold the streusel without compromising the cookie structure.

  • Oven Temperature Check: Every oven is different—use an oven thermometer to confirm 350°F (175°C) for even baking and golden edges in your coffee cake cookies.

What to Serve with Delectable Gilmore Girls Coffee Cake Cookies

Imagine the sweet warmth of these coffee cake cookies as part of a delightful spread, perfect for cozy gatherings or quiet moments at home.

  • Rich Coffee: A steaming cup of coffee pairs beautifully, intensifying the cookie's cinnamon notes while enhancing the comforting experience.
  • Creamy Vanilla Ice Cream: The cold, creamy contrast against the warm cookies adds an indulgent touch that everyone will love.
  • Fruity Salad: A fresh fruit salad, bursting with berries and citrus, brings a refreshing brightness that complements the sweetness of the cookies.
  • Spiced Chai Tea: Serve with spiced chai for a cozy pairing that harmonizes with the warm flavors of cinnamon and brown sugar.

Your beloved coffee cake cookies can become the centerpiece of a delightful dessert spread that resonates with nostalgia and warmth; envision gathering loved ones around with laughter, delicious bites, and comforting drinks.

  • Light Whipped Cream: The airy texture of whipped cream adds a luscious touch that elevates these cookies to a new level of indulgence.

For a memorable experience, consider serving your coffee cake cookies alongside these thoughtful pairings that invite a wonderful sense of community and joy.

Coffee Cake Cookies: Variations & Substitutions

Feel free to reinvent these delicious cookies and make them your own, adding delightful twists and substitutions for unique flavors!

  • Nutty Crunch: Add ½ cup of chopped walnuts or pecans to the dough for an added crunch. The rich nutty flavor complements the cinnamon beautifully.

  • Dairy-Free Delight: Substitute the butter with coconut oil and use almond or soy milk in place of the egg for a creamy, non-dairy version. These tweaks keep the cookies tender while making them suitable for various dietary needs.

  • Chocolate Lover: Mix in 1 cup of chocolate chips to the dough for a sweet addition that will satisfy any chocolate craving. Chocolate and coffee are a match made in cookie heaven!

  • Seasonal Spice: Swap cinnamon for pumpkin spice for an autumn-inspired twist. This gives your cookies a warm, cozy flavor reminiscent of fall festivities.

  • Sweet Maple Abundance: Instead of brown sugar, try using maple syrup or maple sugar for a subtle, sweet flavor with a hint of earthiness. Just be sure to reduce the oil slightly to balance moisture.

  • Fruity Boost: Incorporate ½ cup of dried cranberries or raisins into the dough for a chewy texture and a tangy burst. They also make a lovely contrast against the sweetness of the brown sugar.

  • Coconut Infusion: Add 1 cup of shredded coconut for texture and a tropical flair that blends beautifully with the warm spices of the cookies. The result will be a delightful chewy contrast!

  • Heat it Up: For those who love a kick, add a pinch of cayenne pepper or a sprinkle of chili powder to the dough. This unexpected addition will create a unique flavor profile that’s both sweet and spicy.

As you customize, let your creativity shine! These additions can make your coffee cake cookies a sensational staple at your gatherings, much like the beloved episodes of Gilmore Girls. And if you're looking for more cozy recipes, don't miss out on my delectable Peaches Cream Cookies or try the seasonal delight of Eggnog Cookies Soft. Happy baking!

Delectable Gilmore Girls Coffee Cake Cookies Recipe FAQs

How do I know if my ingredients are ripe or fresh?
Absolutely! When selecting ingredients like butter, make sure it’s at room temperature for easy creaming. Look for butter that’s soft and pliable but not melted. For eggs, a fresh one will have a firm yolk that stands up before breaking. Ensure your baking ingredients like flour and sugar are dry and free of clumps—older ingredients can affect the cookies' texture.

What’s the best way to store my coffee cake cookies?
Very! Store your coffee cake cookies in an airtight container at room temperature for up to 7 days. To maintain their freshness, keep them away from direct sunlight and heat sources. If you’re going for a longer shelf life, consider refrigerating them for up to 10 days; just ensure they remain sealed to avoid drying out.

Can I freeze the coffee cake cookies?
The more the merrier! To freeze your cooled coffee cake cookies, layer them with parchment paper in a freezer-safe container, ensuring they don't stick together. They can be kept frozen for up to 3 months. When you're ready to enjoy, simply thaw them at room temperature for about 30 minutes or pop them in the microwave for a few seconds if you want them warm.

What should I do if my cookies turn out too dry?
Oh no! If your cookies end up dry, it could be due to overmixing or too much flour. For future batches, ensure to mix the dough just until combined. If you find your current batch too dry, try glazing them with a simple icing or serve with a scoop of ice cream, adding moisture and bringing back some of that tender texture.

Are these cookies safe for people with allergies?
Definitely! If you or someone you're serving has allergies, be cautious with substitutions. For a dairy-free version, swap butter for margarine or coconut oil. Using a flax egg (1 tbsp ground flaxseed + 3 tbsp water) is a great replacement for eggs. Always check labels for allergen warnings on packaged ingredients, especially if you're incorporating nuts or other potential allergens in your variations.

How can I adjust this recipe for different dietary needs?
For sure! If you want to make these coffee cake cookies healthier, consider using whole wheat flour in place of all-purpose flour and adjusting the sugar content. You could also explore lower-sugar alternatives or even add in ingredients like oats for added fiber. Make sure to monitor your baking time as different flours can affect the cookie's texture and cooking time.

Coffee Cake Cookies

Delicious Coffee Cake Cookies Inspired by Gilmore Girls

These Coffee Cake Cookies are the perfect blend of warmth, nostalgia, and sweet flavors, ideal for any gathering.
Print Recipe Pin Recipe
Prep Time 15 minutes mins
Cook Time 12 minutes mins
Cooling Time 5 minutes mins
Total Time 32 minutes mins
Servings: 12 cookies
Course: Dessert
Cuisine: American
Calories: 150
Ingredients Equipment Method Nutrition Notes

Ingredients
  

For the Cookie Dough
  • 1 cup Butter softened
  • 1/4 cup Vegetable Oil
  • 1 cup Brown Sugar light or dark
  • 1 large Egg or flax egg
  • 1 teaspoon Vanilla Extract
  • 1 teaspoon Cinnamon
  • 1 teaspoon Baking Soda
  • 1 teaspoon Baking Powder
  • 1/2 teaspoon Salt
  • 2 cups All-Purpose Flour
For the Streusel Topping
  • 1/4 cup Butter softened
  • 1/3 cup Brown Sugar
  • 1/2 cup All-Purpose Flour
  • 1 teaspoon Cinnamon

Equipment

  • Mixing Bowl
  • Baking Sheets
  • Parchment Paper
  • Cookie Scoop
  • Whisk

Method
 

Step-by-Step Instructions
  1. Preheat your oven to 350°F (175°C). Prepare baking sheets lined with parchment paper.
  2. Cream together the softened butter, vegetable oil, and brown sugar until smooth and fluffy.
  3. Beat in the egg and vanilla extract until thoroughly combined.
  4. In a separate bowl, whisk together the flour, baking soda, baking powder, cinnamon, and salt.
  5. Gradually mix the dry ingredients into the wet ingredients until just combined.
  6. Prepare the streusel by mixing softened butter, brown sugar, flour, and cinnamon in a medium bowl.
  7. Scoop rounded balls of dough onto lined baking sheets, leaving space between each.
  8. Create an indent in the center of each dough ball and fill with streusel topping.
  9. Bake for 10-12 minutes or until the edges are golden brown and the centers are soft.
  10. Cool on the baking sheets for about 5 minutes before transferring to wire racks to cool completely.

Nutrition

Serving: 1cookieCalories: 150kcalCarbohydrates: 20gProtein: 1gFat: 7gSaturated Fat: 4gPolyunsaturated Fat: 1gMonounsaturated Fat: 2gCholesterol: 20mgSodium: 100mgPotassium: 50mgSugar: 10gVitamin A: 200IUCalcium: 20mgIron: 0.5mg

Notes

Allow cookies to cool before serving for enhanced flavors. Perfect with coffee or as a dessert at gatherings.

Tried this recipe?

Let us know how it was!
  • « Previous Page
  • 1
  • …
  • 32
  • 33
  • 34
  • 35
  • 36
  • …
  • 57
  • Next Page »

Welcome!

Hi, I’m Grace, a Sydney-based home cook with a passion for bold flavors and trending ingredients. Whether you’re a busy beginner or a seasoned foodie, you’ll find dishes here that are fresh, fun, and full of flavor.

More about me

Popular Recipes

  • Chocolate Cake Pops
    Delightful Chocolate Cake Pops for Your Sweet Cravings
  • Cottage Cheese Banana Bread
    Cottage Cheese Banana Bread: Moist, Protein-Packed Delight
  • Flourless Oat Waffles
    Flourless Oat Waffles for a Quick, Healthy Breakfast Boost
  • Cinnamon Waffles
    Fluffy Cinnamon Waffles with Dreamy Whipped Cream Bliss

Footer

↑ back to top

About

  • Privacy Policy
  • Disclaimer
  • Terms & Conditions

Newsletter

  • Sign Up! for emails and updates

Contact

  • About me
  • Contact me

Copyright © 2025 TastyTrendIngredients