tastytrendingredients

  • Home
  • Recipes
    • Appetizers
    • Breakfast
    • Dessert
    • Dinner
    • Drinks
    • Salads
    • Snacks
    • Soups
  • About me
  • Contact me
menu icon
go to homepage
  • Home
  • Recipes
    • Appetizers
    • Breakfast
    • Dessert
    • Dinner
    • Drinks
    • Salads
    • Snacks
    • Soups
  • About me
  • Contact me
search icon
Homepage link
  • Home
  • Recipes
    • Appetizers
    • Breakfast
    • Dessert
    • Dinner
    • Drinks
    • Salads
    • Snacks
    • Soups
  • About me
  • Contact me
×

Pineapple Upside Down Cupcakes that Spark Joy in Every Bite

October 24, 2025 by Grace Snow Leave a Comment

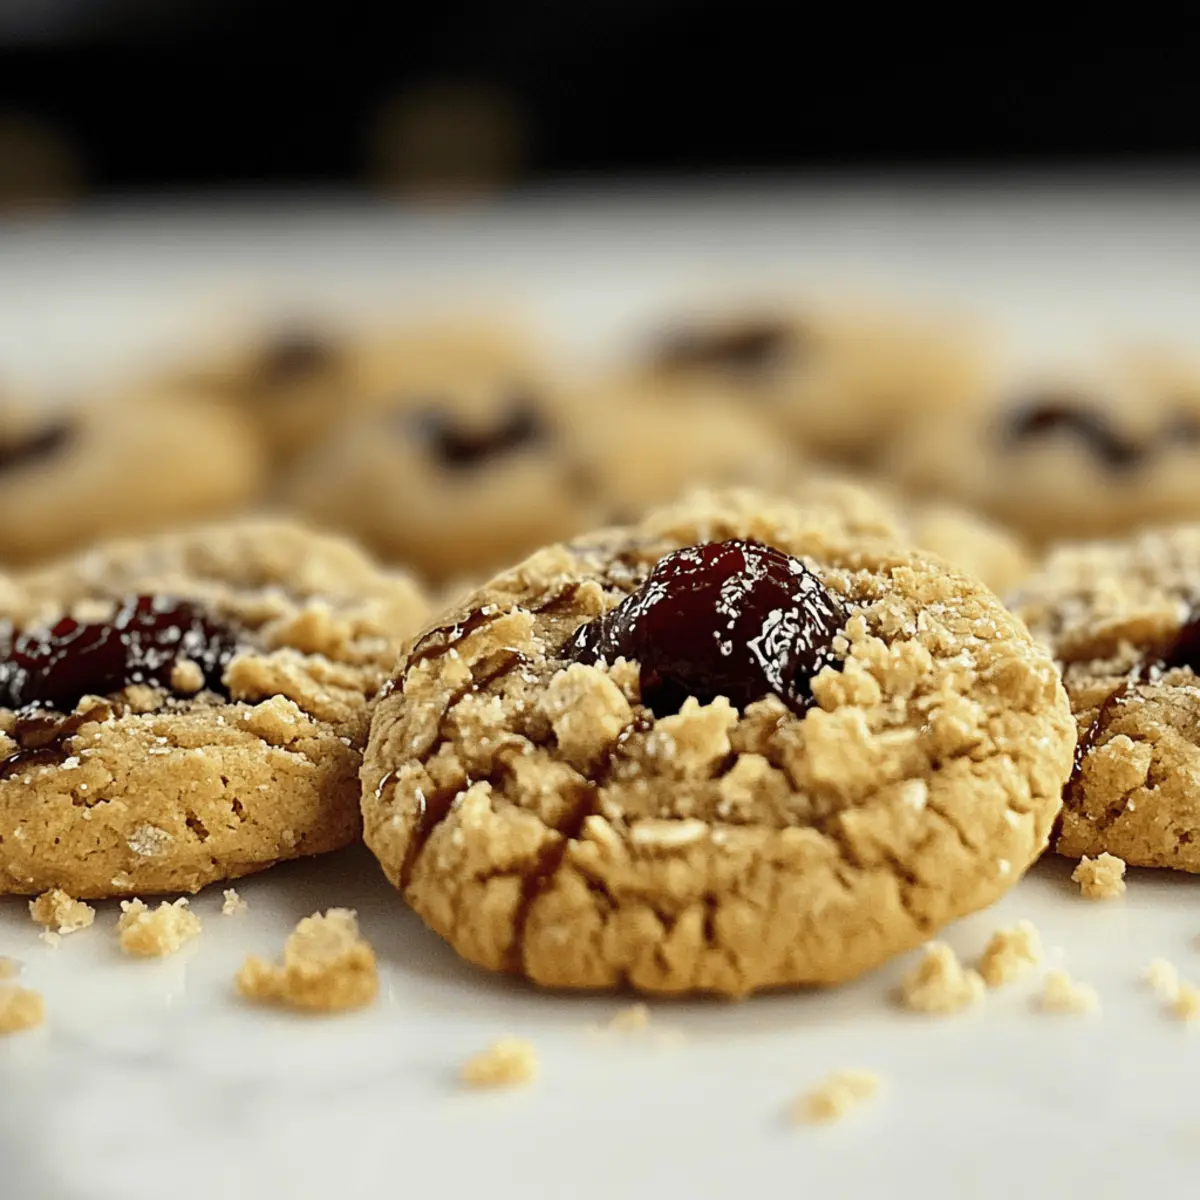
As I was rummaging through old recipe cards, the vibrant memories of family gatherings came rushing back—those glorious moments spent savoring each slice of pineapple upside-down cake. This love for nostalgia inspired me to reinvent a classic into something even more fun: Easy Pineapple Upside Down Cupcakes! These delightful mini treats bring that familiar comfort in a portable form, perfect for any celebration, from backyard barbecues to cozy movie nights. With just a handful of ingredients and minimal prep time, you'll whip up a batch that's light, fluffy, and topped with caramelized pineapple and cherries. They're not only a delicious homage to the original but also a sweet, easy-to-make dessert that everyone will adore. Ready to sprinkle some joy into your kitchen? Let’s dive into this scrumptious recipe together!

Why are Pineapple Upside Down Cupcakes a must-try?

Nostalgic Comfort: Each bite brings back warm memories of family gatherings, offering that familiar sweetness we all love.
Easy to Make: With simple ingredients and minimal prep, anyone can master these delightful treats—even if you’re short on time!
Portable Pleasure: Perfect for picnics or parties, these cupcakes make it easy to enjoy dessert on the go without the mess.
Flavorful Twist: The combination of caramelized pineapple and fluffy vanilla cake creates a deliciously unique dessert experience.
Endless Variations: Don’t hesitate to experiment! Try swapping pineapple for other fruits or adding a splash of rum for the adults. These cupcakes truly shine in any setting!

Pineapple Upside Down Cupcakes Ingredients

For the Batter

  • Butter – Provides richness and moisture. Substitution: Can use margarine for a dairy-free option.
  • Sugar – Adds sweetness and helps create a caramelized crust. Note: Large granulated sugar is typically used for optimal texture.
  • Flour – The structure of the cupcakes. Substitution: For gluten-free, use almond or a gluten-free flour blend.
  • Pineapple Juice – Enhances flavor and adds moisture to the batter. Substitution: Fresh juice can be used for a fresher taste.
  • Eggs – Binds ingredients together and provides lift. Note: For egg-free, consider using flaxseed meal or a commercial egg substitute.
  • Brown Sugar – Adds sweetness and a hint of molasses flavor, enhances caramelization.

For the Topping

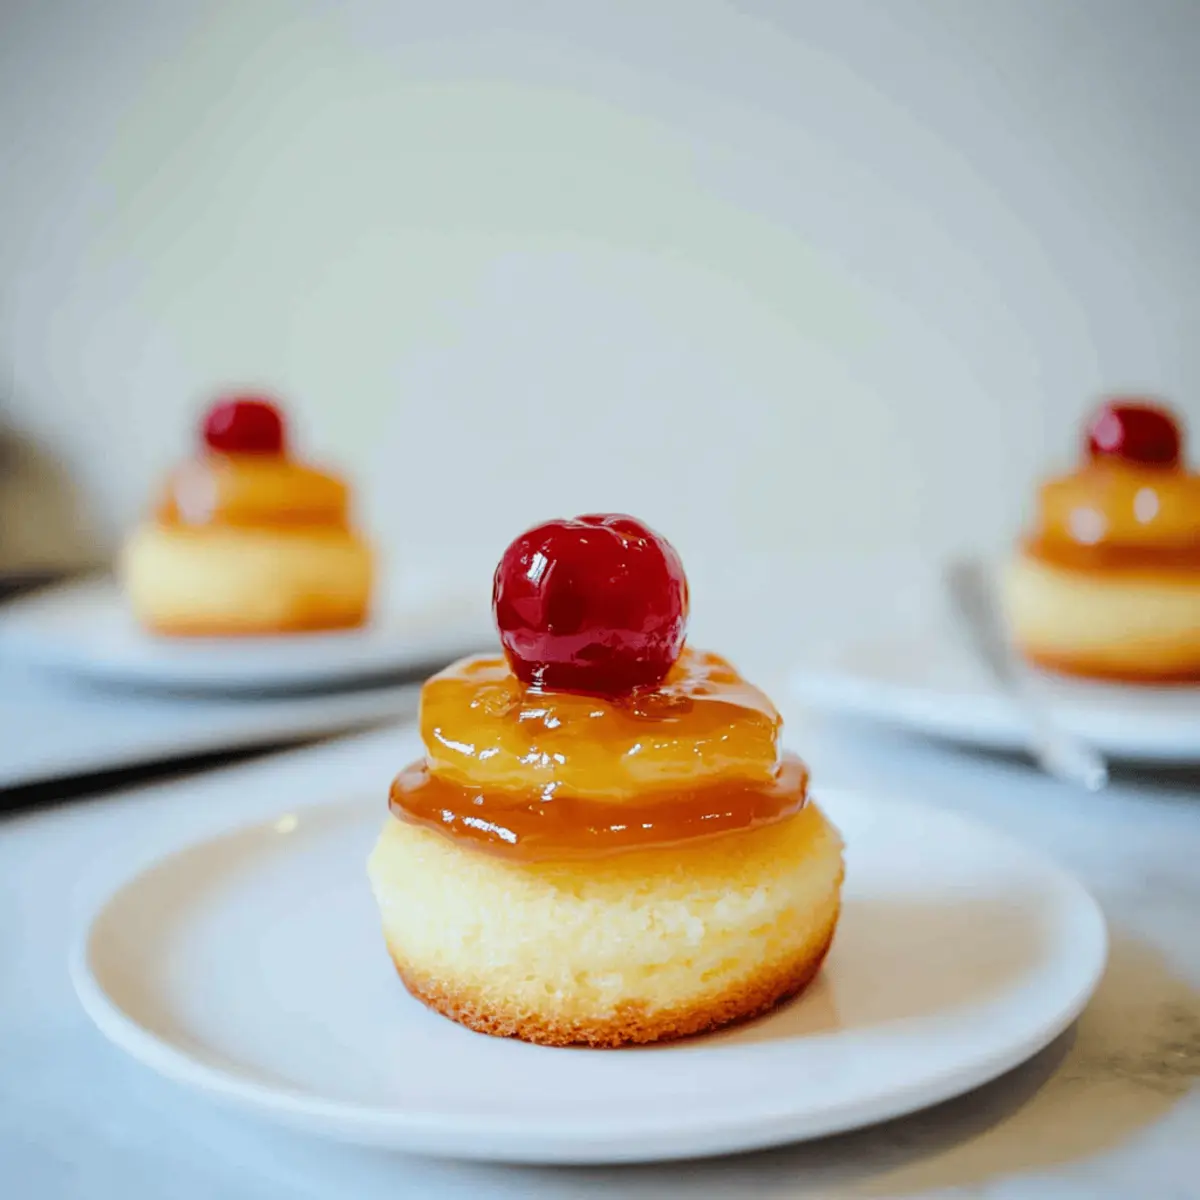
  • Pineapple Rings – The signature topping that caramelizes during baking. Note: If they don’t fit, slice them in half to fit the cupcake pan.
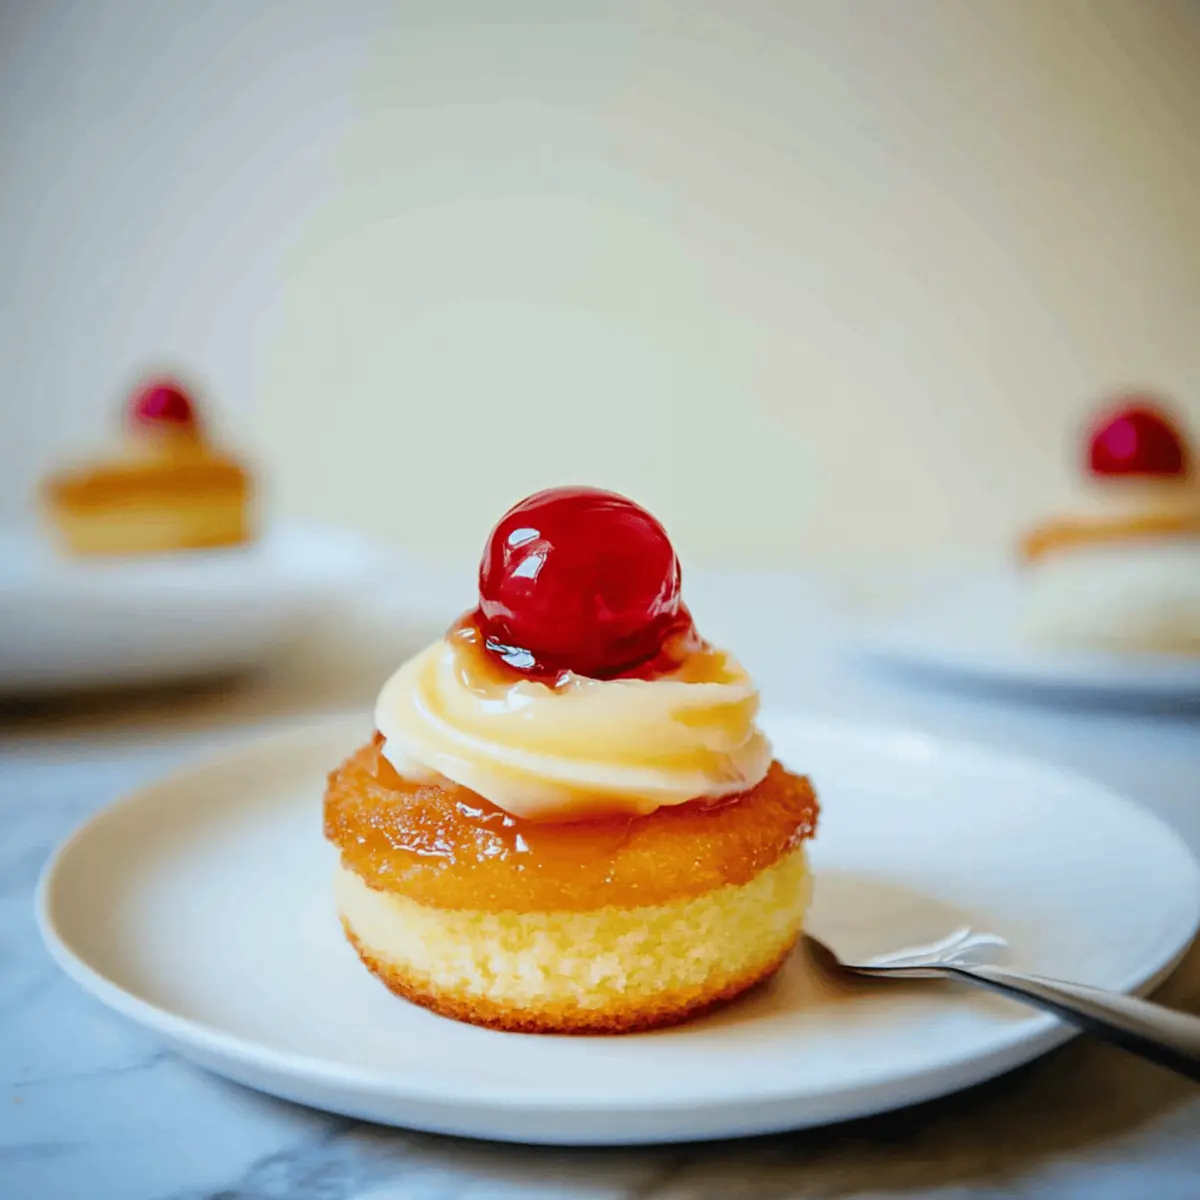
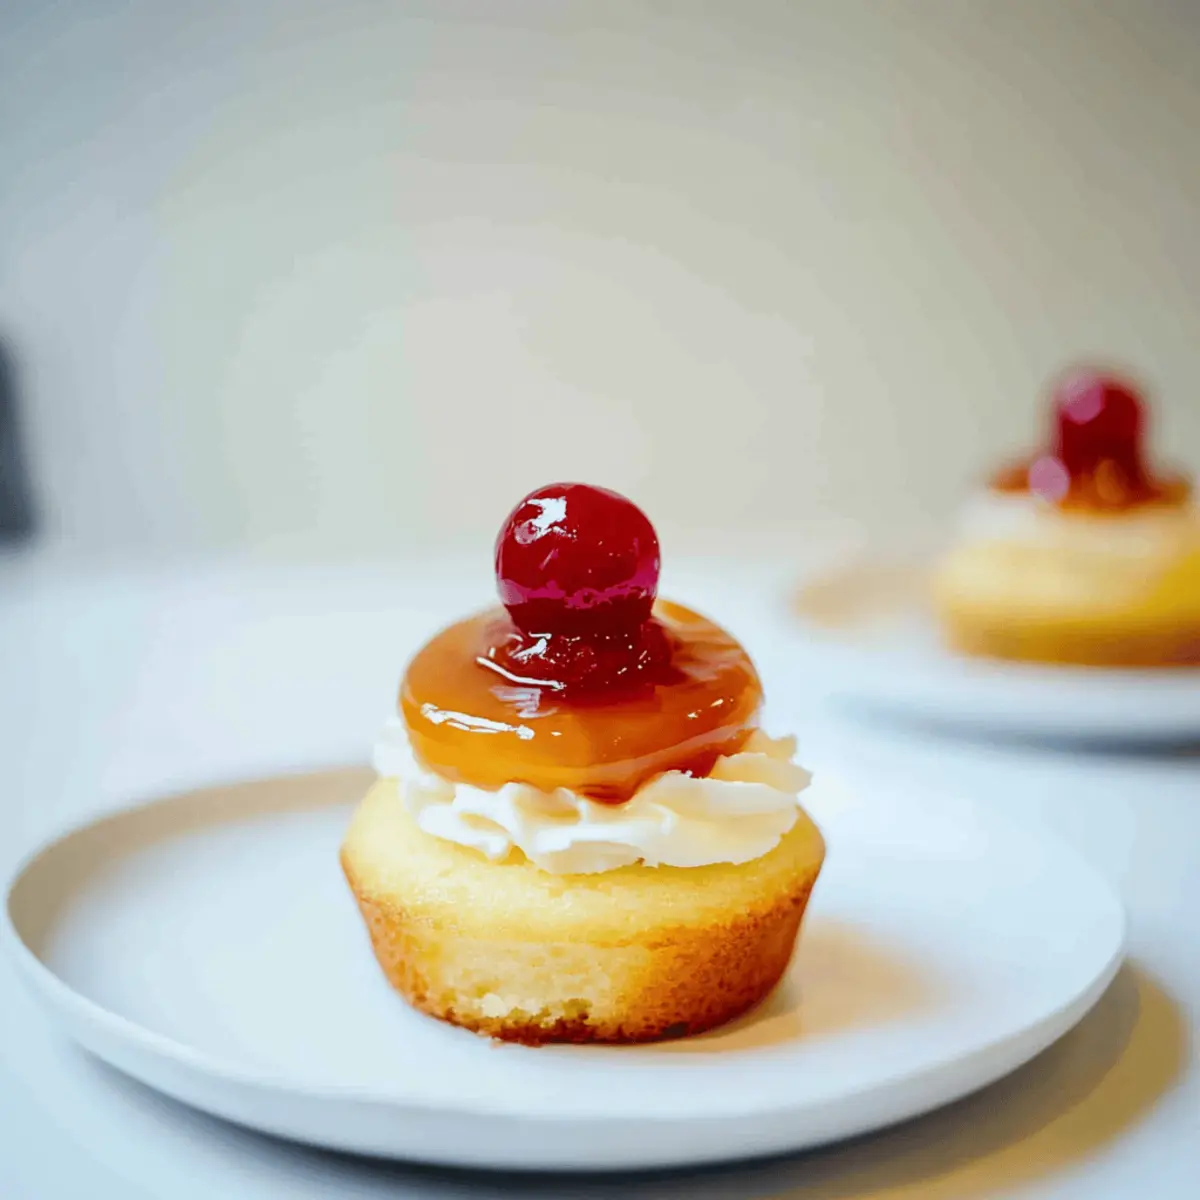
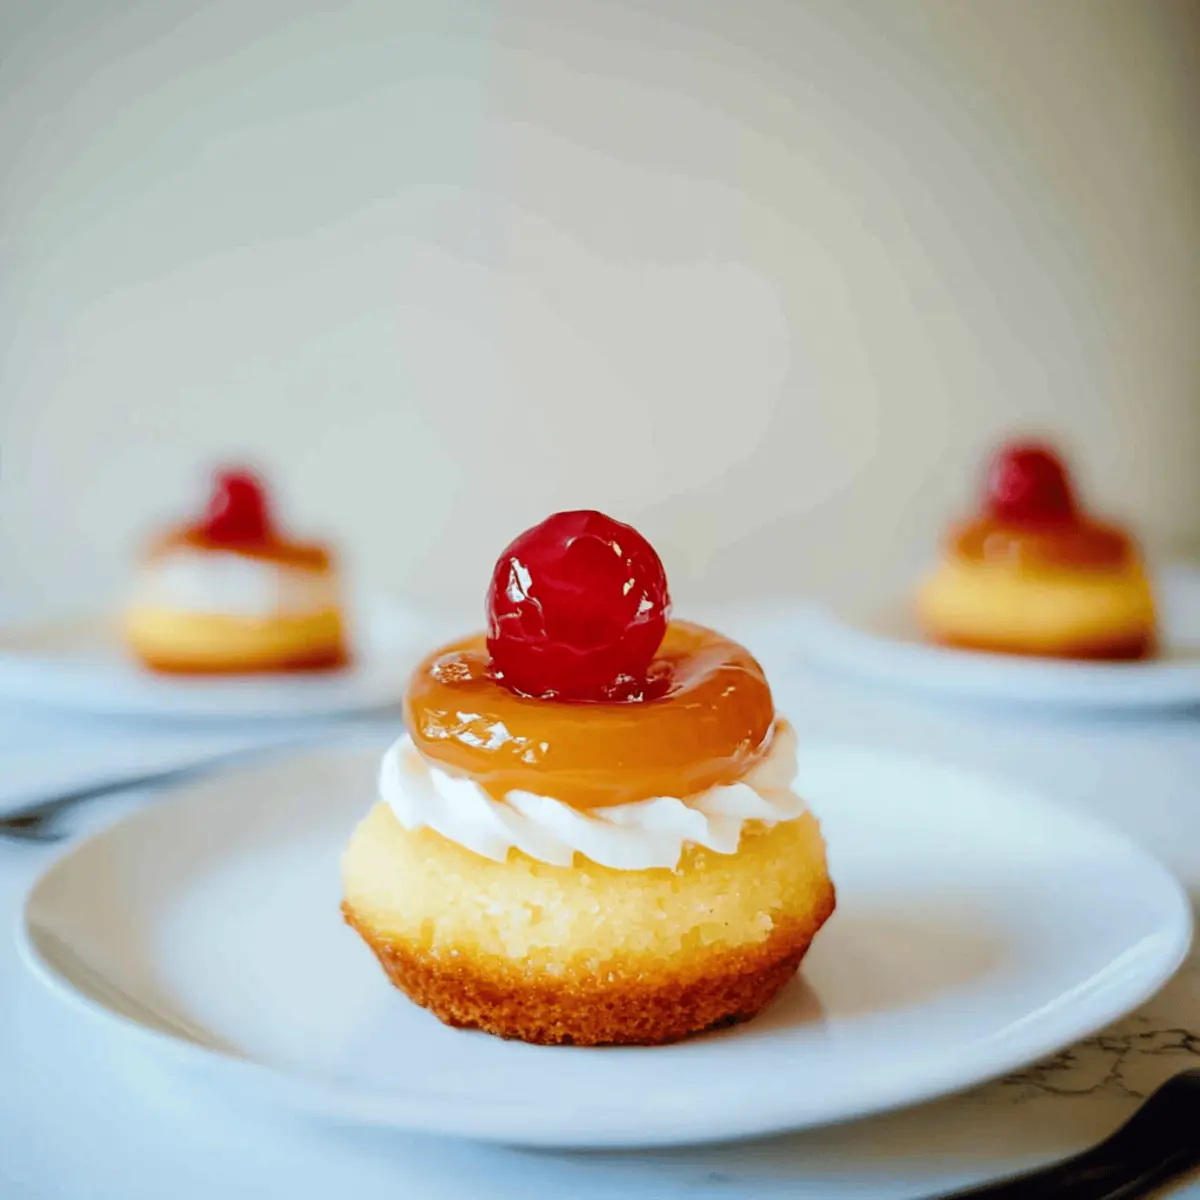
  • Heavy Whipping Cream – Used to whip up into fresh cream for topping. Substitution: Coconut cream can be used for a dairy-free version.
  • Powdered Sugar – Sweetens and stabilizes the whipped cream.
  • Maraschino Cherries – Decorative topping that adds a classic touch. Substitution: Fresh cherries can also be used for a natural option.

Get ready to create magical Pineapple Upside Down Cupcakes that not only celebrate tradition but also add a dash of fun to your dessert table!

Step‑by‑Step Instructions for Pineapple Upside Down Cupcakes

Step 1: Preheat the Oven
Begin by preheating your oven to 350°F (180°C). This temperature is perfect for creating a golden, caramelized top on your Pineapple Upside Down Cupcakes. Make sure your oven rack is positioned in the center for even baking, as you want those delightful mini cakes to rise beautifully.

Step 2: Prepare the Cupcake Pan
In a small saucepan, melt ⅓ cup of butter over low heat. Once melted, stir in brown sugar until combined, then evenly distribute this mixture into each section of a lined cupcake pan. Nestle a pineapple ring – or half rings, if needed – into each section, ensuring they sit flat for even caramelization while baking.

Step 3: Mix the Cake Batter
In a large mixing bowl, whisk together the remaining melted butter and granulated sugar until smooth. Add pineapple juice and eggs to the mix, then continue whisking until fully blended. Gradually incorporate the flour until just combined – be careful not to overmix, as this could affect the lightness of your Pineapple Upside Down Cupcakes.

Step 4: Fill the Cupcake Pan
Now it's time to fill the prepared cupcake sections! Pour the batter into each section, filling them about ¾ full. This allows room for the cupcakes to rise without overflowing. The contrast of the batter against the caramelized pineapple will make for a stunning and tasty treat once they’re baked.

Step 5: Bake to Perfection
Place the cupcake pan in your preheated oven and bake for about 20 minutes. Keep an eye on them, and check for doneness by inserting a toothpick into the center of a cupcake; if it comes out clean, they’re ready to come out of the oven. The tops should be lightly golden and slightly spring back when touched.

Step 6: Cool and Invert
Once baked, remove the cupcakes from the oven and let them cool in the pan for about 5-10 minutes. This is a crucial step to ensure they release easily. To invert, carefully run a knife around the edges and flip them onto a serving platter, revealing the beautiful caramelized pineapple topping.

Step 7: Whip the Cream Topping
While the cupcakes cool completely, prepare the whipped cream. In a mixing bowl, combine heavy whipping cream and powdered sugar. Using a hand mixer or whisk, beat until soft peaks form. The whipped cream will complement the sweetness of your Pineapple Upside Down Cupcakes perfectly, adding a light and airy touch to each bite.

Step 8: Serve and Garnish
Once cooled and inverted, pipe the freshly whipped cream onto each cupcake generously. Top with a maraschino cherry for that classic look. Now your Pineapple Upside Down Cupcakes are ready to be served, making for a delightful treat at any gathering or simply to enjoy at home!

What to Serve with Easy Pineapple Upside Down Cupcakes

As you savor the tropical sweetness of these delightful mini cakes, consider pairing them with delicious sides and treats to enhance your dessert experience.

  • Vanilla Ice Cream: The creamy, rich flavor of vanilla ice cream perfectly complements the fruity sweetness of the cupcakes, creating a delightful contrast.
  • Coconut Whipped Cream: Light and fluffy, this tropical twist on traditional whipped cream adds a luxurious finish that harmonizes with the pineapple.
  • Fresh Berries: A medley of strawberries, blueberries, or raspberries introduces a refreshing acidity that balances the sweetness of the cupcakes.

Pairing a scoop of coconut whipped cream with these cupcakes turns a simple treat into a tropical dessert fantasy. As you indulge in the flavors, you'll feel like you're on a beach getaway.

  • Melon Agua Fresca: This refreshing drink made from fresh melons and lime brings a sweet, fruity flavor that enhances the tropical vibes of your dessert.

A chilled glass of Melon Agua Fresca makes for a delightful contrast to the warmth of the cupcakes, ensuring every bite is a refreshing delight.

  • Pineapple Salsa: This zesty and savory salsa amplifies the pineapple flavor while providing a surprising twist, making it a fantastic side to experiment with.

Enjoying your cupcakes alongside pineapple salsa transforms this dessert into an adventurous pairing that surprises the palate and invites fun feelings.

  • Chocolate Dipping Sauce: A warm, rich chocolate sauce offers an indulgent option for drizzling over each cupcake. The pairing of chocolate and pineapple is a hidden gem worth exploring.

Each bite dipped in chocolate creates a whimsical dessert experience that your friends and family will adore.

  • Chilled Sweet Tea: The refreshing elements of sweet tea provide a perfect balance to the cupcakes, making it an ideal drink for summer gatherings or picnics.

Its cooling effect makes sweet tea a delightful contrast that enhances the tropical flavors of the Pineapple Upside Down Cupcakes and keeps everyone feeling refreshed.

Pineapple Upside Down Cupcakes Variations

Feel free to unleash your creativity and customize these cupcakes to suit your taste buds!

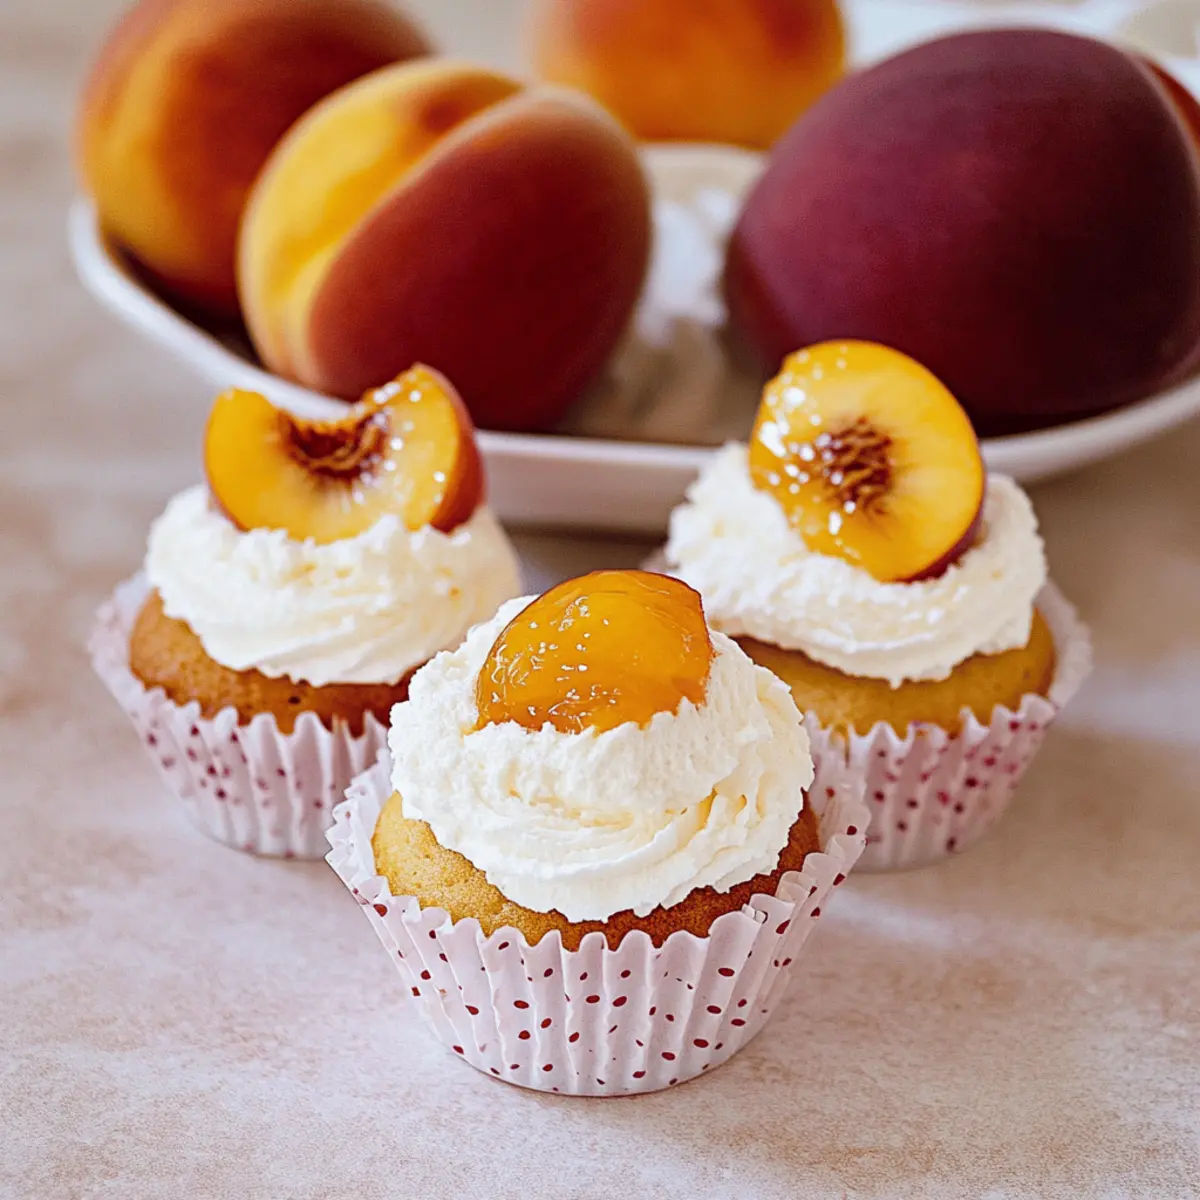
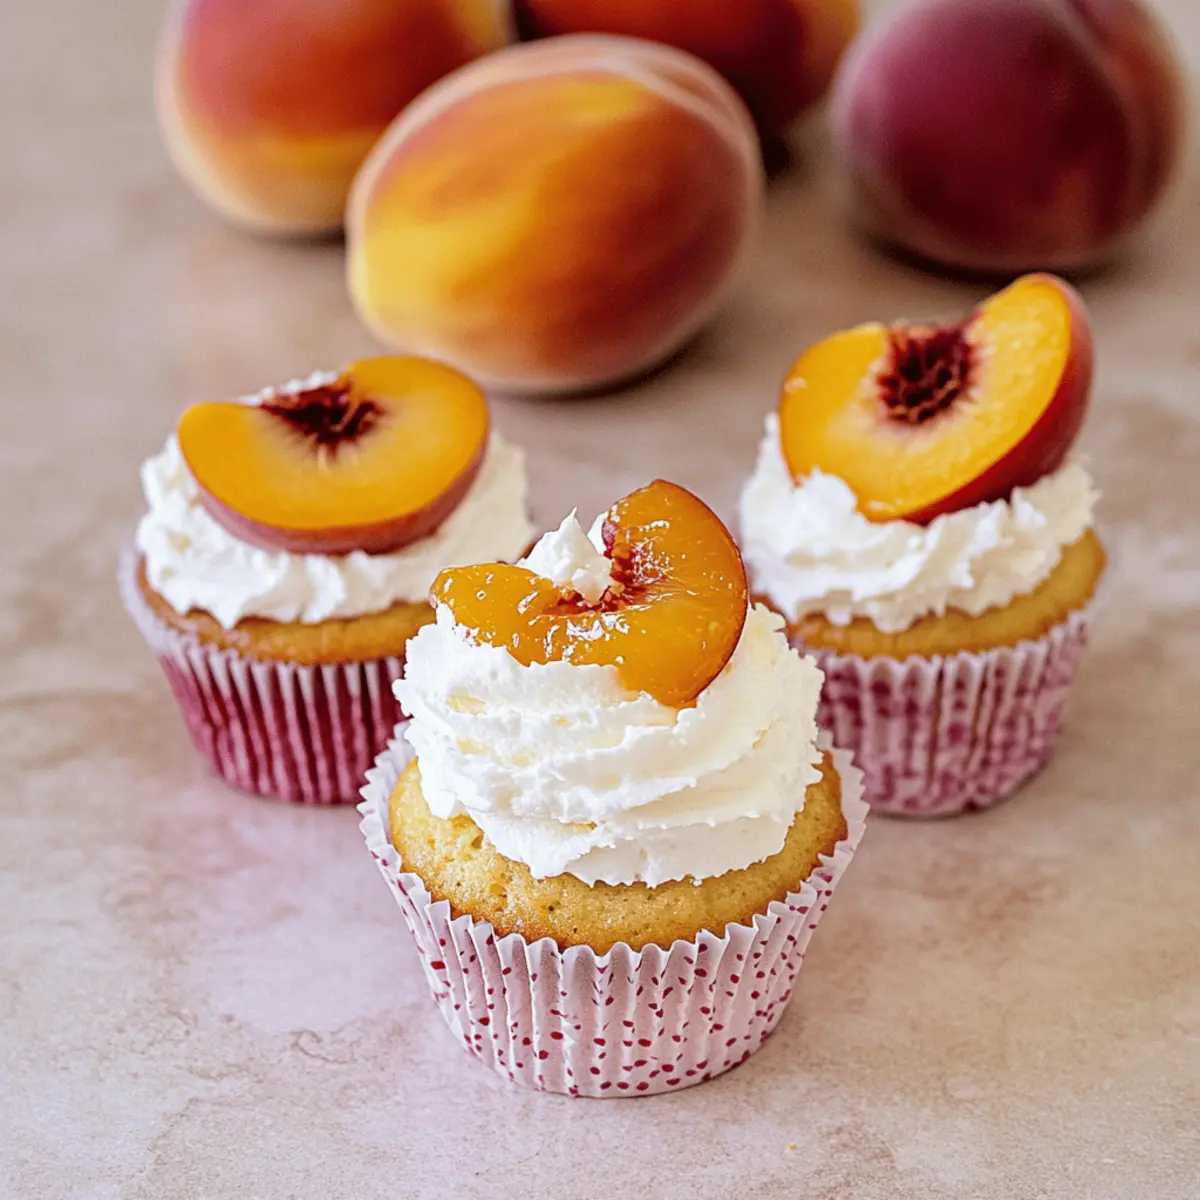
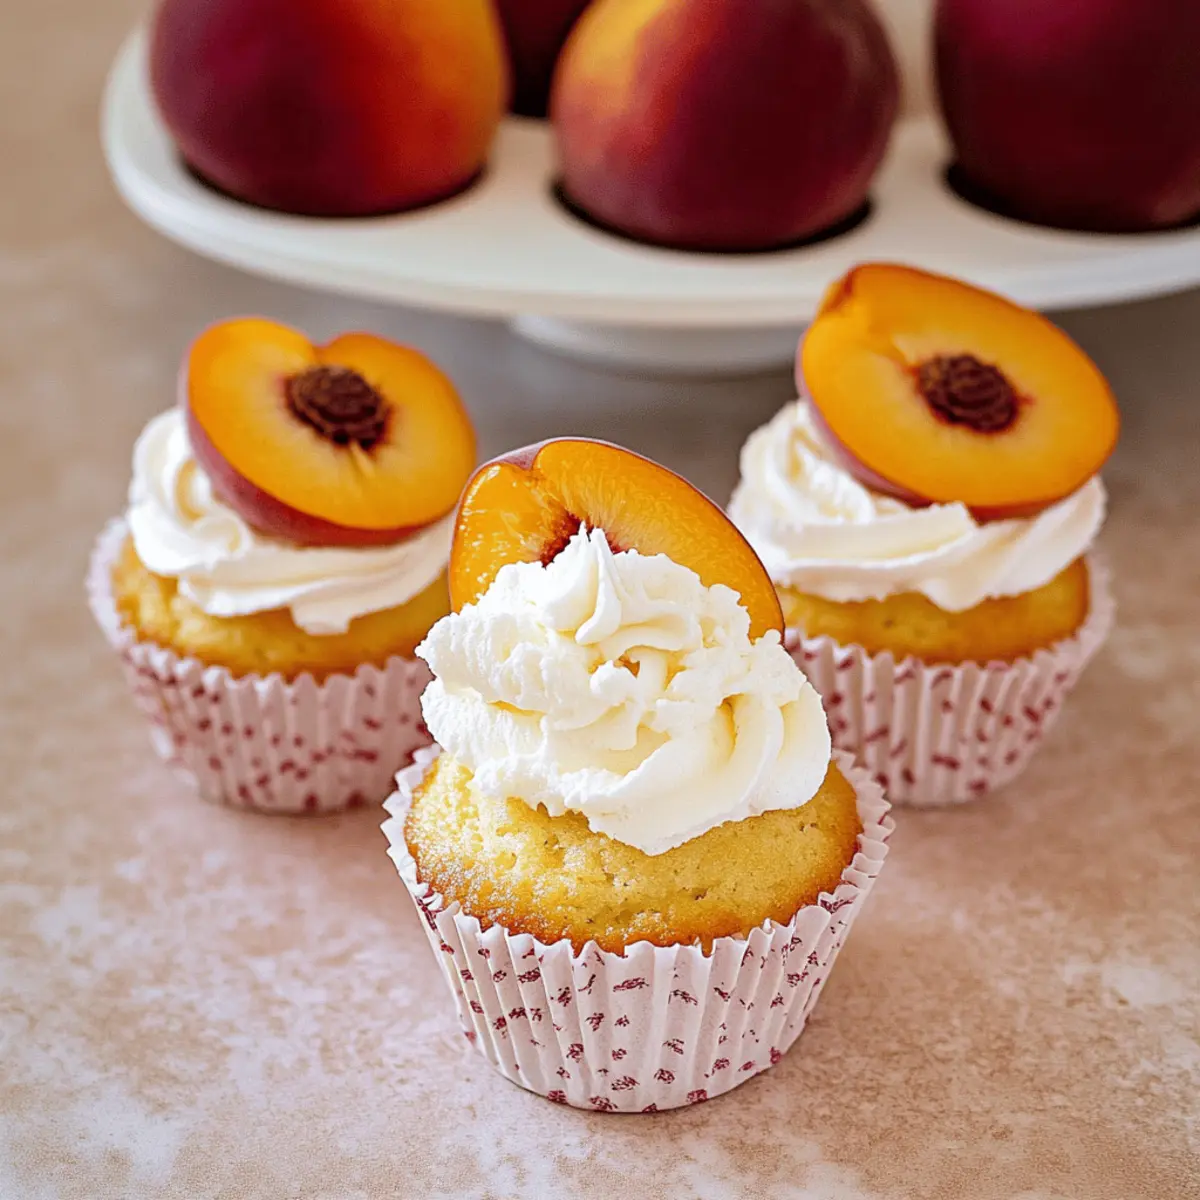
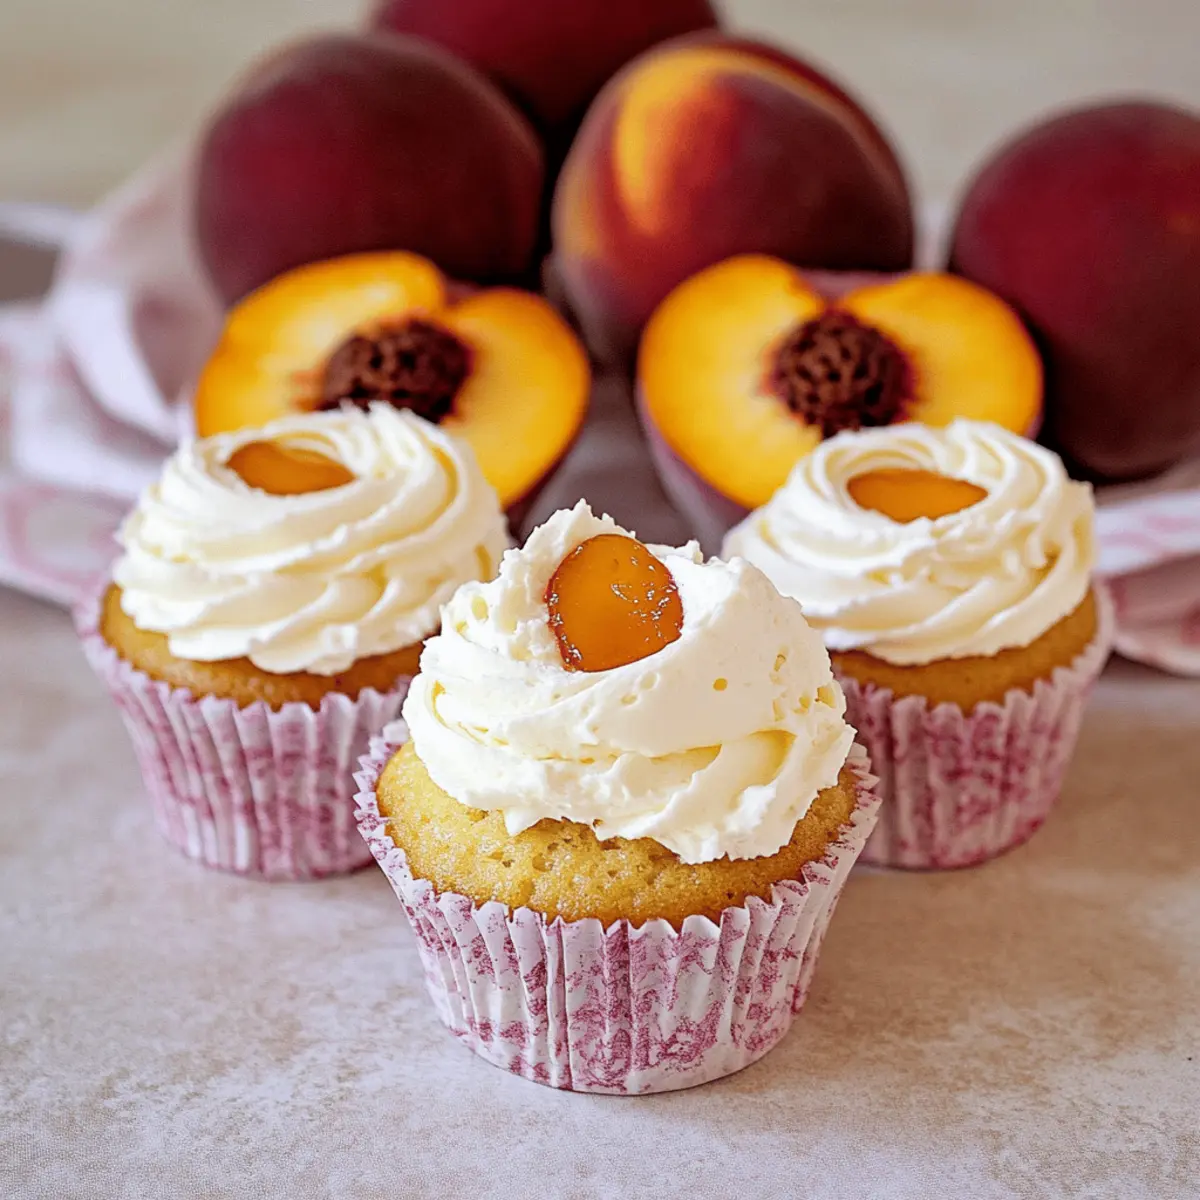
  • Fruit Swap: Substitute pineapple rings with peaches or cherries for a delicious twist. Each fruit brings its own unique sweetness to the cupcakes.
  • Boozy Upgrade: Add a splash of rum to the batter for an adult-friendly version. The rum enhances the flavor while making each bite a little more exciting!
  • Gluten-Free: For gluten-free cupcakes, swap regular flour for almond flour or a gluten-free flour blend. This makes it easy for everyone to enjoy this delightful treat.
  • Vegan Delight: Replace eggs with flaxseed meal or a commercial egg substitute and use coconut cream instead of heavy whipping cream. You'll still achieve that fluffy, satisfying texture!
  • Creamy Infusion: Whip in a bit of vanilla extract or almond extract into the batter for an extra layer of flavor. These enhancements will elevate the cupcake's profile beautifully.
  • Coconut Crunch: Top your cupcakes with toasted coconut flakes along with the caramelized pineapple. This adds a new texture and a delightful, tropical flavor.
  • Extra Caramel: Drizzle some warm caramel sauce over the assembled cupcakes for an indulgent touch. This sweet addition is sure to impress your guests!
  • Nuts for Texture: Fold in chopped walnuts or pecans into the batter for a delightful crunch. The nuttiness pairs well against the sweetness of the cupcakes.

So, whether you're inspired by the season, dietary needs, or simply your cravings, don’t hesitate to make these Pineapple Upside Down Cupcakes your own. For even more ideas, check out my guide on Dessert Substitutions and Creative Cupcake Variations!

Make Ahead Options

These Pineapple Upside Down Cupcakes are a fantastic choice for meal prep, making your dessert planning a breeze! You can prepare the cupcake batter up to 24 hours in advance; simply mix all the wet and dry ingredients, cover the bowl, and refrigerate. Additionally, you can caramelize the pineapple and brown sugar mixture in the cupcake pans a day ahead as well. When you're ready to bake, simply fill the pans and pop them in the oven. This keeps the cupcakes just as delicious and fluffy, with that perfect caramelized topping. Once baked, allow them to cool properly before storing in an airtight container for up to 3 days—this ensures every bite remains fresh and flavorful. Just whip up your cream and garnish just before serving for a delightful treat that saves you time without sacrificing taste!

How to Store and Freeze Pineapple Upside Down Cupcakes

Fridge: Store any leftover Pineapple Upside Down Cupcakes in an airtight container in the fridge for up to 4-5 days to maintain their freshness and avoid drying out.

Freezer: For longer storage, freeze the cupcakes individually wrapped in plastic wrap and then placed in a freezer-safe bag for up to 2 months. This helps preserve their delightful flavor and texture.

Thawing: When ready to enjoy, thaw the frozen cupcakes in the fridge overnight. Reheat in the microwave for a few seconds to restore their warmth and softness, if desired.

Serving Tip: Always add whipped cream fresh when serving after storage for the best taste and presentation.

Expert Tips for Pineapple Upside Down Cupcakes

  • Cool Well: Allow your cupcakes to cool for at least 5-10 minutes before inverting. This helps prevent sticking and ensures a clean release from the pan.
  • Knife Trick: Running a knife around the edges can ease the removal process. It’s a simple step that drastically reduces the chance of broken cupcakes!
  • Perfect Toppings: For a fruity twist, swap the pineapple for other fruits like peaches or cherries. Just ensure they’re firm enough to hold their shape while baking.
  • Keep an Eye on Baking: Every oven is different! Start checking for doneness a few minutes early, as baking times can vary.
  • Whipped Cream Magic: Use chilled tools when whipping the cream for the best results. This helps achieve the light and fluffy texture that perfectly complements your pineapple upside down cupcakes.

Pineapple Upside Down Cupcakes Recipe FAQs

How do I choose ripe pineapple for the topping?
Absolutely! When selecting pineapple rings, look for fruit that is firm, fragrant, and free of dark spots or blemishes. A ripe pineapple will smell sweet at the base and feel slightly soft when gently squeezed. If you're using canned pineapple, choose slices packed in juice rather than syrup for a fresher taste.

What is the best way to store Pineapple Upside Down Cupcakes?
Very! To keep your cupcakes fresh, store them in an airtight container in the refrigerator for up to 4-5 days. First, let them cool completely if they’ve just been baked. If you're stacking them, consider placing parchment paper between layers to prevent sticking.

Can I freeze Pineapple Upside Down Cupcakes?
Yes, you can! To freeze, individually wrap the cooled cupcakes in plastic wrap, then place them in a freezer-safe bag. They can hold up in the freezer for up to 2 months. When you're ready to enjoy them, simply thaw them in the fridge overnight and warm them slightly in the microwave if you'd like.

What if the cupcakes stick to the pan?
No worries! If this happens, it could be due to insufficient cooling. Make sure to let them cool in the pan for 5-10 minutes. To help ease them out, gently run a knife around the edges. If you suspect they’re still stuck, you can place the pan in a shallow dish of warm water for a minute to loosen the edges further.

Are Pineapple Upside Down Cupcakes safe for people with allergies?
Definitely! Be mindful of everyone’s dietary needs. To make these cupcakes more allergy-friendly, use gluten-free flour and substitute eggs with flaxseed meal or a commercial egg replacer. Also, consider using coconut cream instead of dairy whipped cream for a delicious dairy-free topping option.

How should I serve Pineapple Upside Down Cupcakes?
The more the merrier! For a delightful presentation, top each cupcake with freshly whipped cream and a maraschino cherry right before serving. If you're feeling adventurous, pair them with a scoop of vanilla ice cream for a truly indulgent treat that your guests will adore!

Pineapple Upside Down Cupcakes

Pineapple Upside Down Cupcakes that Spark Joy in Every Bite

These Pineapple Upside Down Cupcakes offer a nostalgic taste experience in mini treat form, perfect for any celebration.
Print Recipe Pin Recipe
Prep Time 15 minutes mins
Cook Time 20 minutes mins
Cooling Time 10 minutes mins
Total Time 45 minutes mins
Servings: 12 cupcakes
Course: Dessert
Cuisine: American
Calories: 180
Ingredients Equipment Method Nutrition Notes

Ingredients
  

For the Batter
  • ⅓ cup Butter Can use margarine for a dairy-free option.
  • 1 cup Granulated Sugar Large granulated sugar is typically used for optimal texture.
  • 1 cup Flour For gluten-free, use almond or a gluten-free flour blend.
  • ½ cup Pineapple Juice Fresh juice can be used for a fresher taste.
  • 2 large Eggs For egg-free, consider using flaxseed meal or a commercial egg substitute.
  • ½ cup Brown Sugar Enhances caramelization.
For the Topping
  • 12 slices Pineapple Rings If they don’t fit, slice them in half to fit the cupcake pan.
  • 1 cup Heavy Whipping Cream Coconut cream can be used for a dairy-free version.
  • 2 tablespoons Powdered Sugar
  • 12 pieces Maraschino Cherries Fresh cherries can also be used for a natural option.

Equipment

  • Oven
  • Cupcake pan
  • Mixing Bowl
  • Whisk
  • hand mixer
  • Saucepan

Method
 

Step‑by‑Step Instructions
  1. Preheat your oven to 350°F (180°C).
  2. Melt ⅓ cup of butter over low heat and stir in brown sugar until combined. Distribute evenly in a lined cupcake pan.
  3. Whisk together remaining melted butter and granulated sugar until smooth. Add pineapple juice and eggs, then combine with flour until just mixed.
  4. Fill the cupcake sections about ¾ full with batter.
  5. Bake for about 20 minutes or until a toothpick comes out clean.
  6. Let them cool in the pan for 5-10 minutes, then invert onto a serving platter.
  7. Whip together heavy whipping cream and powdered sugar until soft peaks form.
  8. Pipe whipped cream onto each cupcake and garnish with a maraschino cherry.

Nutrition

Serving: 1cupcakeCalories: 180kcalCarbohydrates: 30gProtein: 2gFat: 6gSaturated Fat: 4gMonounsaturated Fat: 2gCholesterol: 40mgSodium: 150mgPotassium: 70mgSugar: 20gVitamin A: 300IUVitamin C: 5mgCalcium: 20mgIron: 0.5mg

Notes

Allow cupcakes to cool well in the pan for easier removal. Experiment with different fruits for toppings!

Tried this recipe?

Let us know how it was!

Peach Cupcakes That Burst with Flavor and Summer Vibes

October 24, 2025 by Grace Snow Leave a Comment

As the first hints of summer warm the air, I find myself drawn to vibrant, sun-kissed peaches. That’s when I decided to whip up a batch of Peach Cupcakes that perfectly capture the essence of the season. These delightful treats are not only easy to bake but also feature a luscious peach jam filling that surprises with every bite. Topped with a fluffy layer of whipped cream and fresh peach slices, they bring a refreshing twist on traditional summer desserts that will have your friends and family begging for more. Whether you’re hosting a backyard barbecue or simply indulging in an afternoon sweet craving, these cupcakes are the ultimate crowd-pleaser. Ready to transform your summer gatherings into something special? Let’s dive into this deliciousness together!

Why Are These Peach Cupcakes Unique?

Bursting with flavor: Each bite offers the sweet tang of peach jam that beautifully complements the light, moist cupcake base.

Easy to whip up: Perfect for both novice and seasoned bakers, these cupcakes require just simple ingredients and straightforward steps.

Versatile additions: Enjoy them as is, or experiment by swapping the peach jam for mango or topping with cream cheese frosting for a twist!

Crowd-pleaser: Whether at a picnic or a dinner party, they're sure to impress guests and leave them asking for seconds.

Summer vibes: The fresh peach garnish and fluffy whipped cream bring a bright, seasonal touch that captures the essence of summer – perfect for warm days.

Whether you’re also interested in baking classic treats like Peaches Cream Cookies or want to elevate your dessert game, these Peach Cupcakes are an irresistible addition to your summer repertoire.

Peach Cupcake Ingredients

For the Cupcakes
• Unsalted Butter – Provides moisture and richness; substitution with margarine works if needed.
• Brown Sugar – Adds a deeper, caramel-like flavor; can replace with all granulated sugar.
• Granulated Sugar – Sweetens the cupcakes; avoid substitution unless mixing with brown sugar.
• Eggs – Essential for structure and moisture; use room temperature eggs for better mixing.
• Vanilla Extract – Enhances flavor; opt for pure vanilla for best results, but imitation works too.
• Cake Flour – Ensures a light and fluffy texture; can mix with all-purpose flour but results may vary.
• Baking Powder – Leavening agent for rise; ensure it's fresh to maximize effectiveness.
• Kosher Salt – Balances sweetness; table salt can be used in slightly lesser amounts.
• Milk – Adds necessary moisture; non-dairy options can be substituted without issues.

For the Topping
• Heavy Whipping Cream – Provides a rich, creamy flavor; light whipping cream serves as a decent alternative.
• Peach Jam – Acts as a delicious filling, adding to the summer vibe; can substitute with other fruit jams like apricot.
• Peach – Fresh slices for garnish that enhance flavor; any similar stone fruit can be used.

These Peach Cupcake ingredients come together to create a delightful summer dessert, bursting with flavors that evoke the joys of the season!

Step‑by‑Step Instructions for Peach Cupcakes

Step 1: Preheat and Prepare
Begin by preheating your oven to 350°F (175°C). While it heats, line your cupcake pans with paper liners, ensuring they’re set securely in place. This will make it easier to remove your delightful Peach Cupcakes once baked.

Step 2: Cream the Ingredients
In a large mixing bowl, combine the softened unsalted butter, brown sugar, and granulated sugar. Using an electric mixer, blend the mixture until it is light and fluffy, about 2-3 minutes. Next, add in the eggs one at a time, along with the vanilla extract, mixing on medium speed until everything is well incorporated and smooth.

Step 3: Combine Dry Ingredients
In a separate bowl, whisk together the cake flour, baking powder, and kosher salt. Gradually add this dry mixture to the wet ingredients in your mixing bowl, alternating with the milk. Mix until just combined, ensuring you don’t overmix—your Peach Cupcake batter should be smooth and slightly thick.

Step 4: Fill the Liners
Using a spoon or a cookie scoop, fill each lined cupcake cavity about halfway with the batter. This ensures enough space for rising. Bake in the preheated oven for about 20 minutes, or until the tops of the cupcakes are lightly golden and a toothpick inserted in the center comes out clean.

Step 5: Cool the Cupcakes
Once baked, remove the cupcake pans from the oven and allow them to cool in the pans for 5 minutes. Afterward, carefully transfer the cupcakes to a wire cooling rack. Let them cool completely before proceeding to the next step, which is crucial for filling and frosting.

Step 6: Fill with Peach Jam
Once the cupcakes are cool, use a cupcake corer or a small knife to remove the centers from each cupcake. Fill the hollowed centers generously with peach jam, allowing the sweet filling to seep into the airy cupcake, creating a delightful surprise with every bite.

Step 7: Whip the Cream
In a mixing bowl, pour in the heavy whipping cream and begin to whip using an electric mixer on medium speed. Whip until stiff peaks form, which should take about 3-5 minutes. This is the key to achieving that fluffy topping on your Peach Cupcakes—stop when the cream holds its shape but isn't overwhipped.

Step 8: Frost and Garnish
Using a piping bag fitted with your favorite tip, pipe the whipped cream onto each cooled cupcake, generously covering them. Top each cupcake with fresh peach slices for an added touch of color and flavor. Your Peach Cupcakes are now ready to impress!

Make Ahead Options

These Peach Cupcakes are ideal for meal prep, allowing busy home cooks to savor delightful homemade desserts without the last-minute rush! You can prepare the cupcake batter up to 24 hours in advance by mixing it and refrigerating it in an airtight container. When you're ready to bake, simply allow the batter to come to room temperature and fill the cupcake liners before baking. Additionally, the cupcakes can be baked in advance and stored in an airtight container at room temperature for up to 3 days. Just wait to fill them with peach jam and top with whipped cream until you’re ready to serve, ensuring they are just as delicious and fresh as when they were first made.

How to Store and Freeze Peach Cupcakes

Airtight Container: Store leftover cupcakes in an airtight container in the fridge for up to 3 days to maintain freshness and prevent the whipped cream from wilting.

Freezer: If you wish to freeze them, wrap cupcakes individually in plastic wrap, then seal in a freezer-safe bag or container for up to 3 months.

Thawing: To enjoy, simply remove from the freezer and thaw in the fridge overnight. Frost with whipped cream just before serving to keep it fluffy and fresh.

Reheating: If you prefer warm cupcakes, briefly microwave them for 10-15 seconds, but avoid reheating the whipped cream, which is best when fresh.

Peach Cupcakes Variations & Substitutions

Embrace your creativity in the kitchen with these delightful twists on classic peach cupcakes!

  • Tropical Twist: Substitute peach jam for mango jam to bring a refreshing, exotic flavor.

  • Creamy Indulgence: Top the cupcakes with cream cheese frosting for a richer, tangy contrast to the sweetness.

  • Spiced Delight: Add a sprinkle of cinnamon and nutmeg to the batter for a warm, inviting aroma paired with your peachy goodness.

  • Nutty Crunch: Fold in chopped walnuts or pecans into the batter before baking for added texture and a nutty flavor.

  • Gluten-Free: Swap cake flour with gluten-free flour blend to make these cupcakes suitable for those with gluten sensitivities.

  • Vegan Option: Replace eggs with flaxseed meal and use non-dairy milk and whipped coconut cream for a vegan-friendly treat.

  • Fruity Medley: Incorporate diced apricots or plums into the batter alongside peaches for a delicious fruit medley everyone will love.

  • Heat Up the Flavor: Add a hint of jalapeño to the peach jam filling for a surprising spicy kick that contrasts beautifully with the sweetness.

These variations add a personal touch to your peach cupcakes, ensuring there’s a flavor option for everyone! If you’re looking for more fruity sweetness, check out these delectable Peaches Cream Cookies to elevate your dessert offerings. Happy baking!

Expert Tips for Peach Cupcakes

  • Fresh Ingredients: Use fresh, ripe peaches for the best flavor. Overripe or underripe peaches can affect the taste and sweetness of your cupcakes.

  • Avoid Overmixing: When combining dry and wet ingredients, mix just until combined. Overmixing can lead to dense cupcakes, so keep that batter light and fluffy!

  • Room Temperature Ingredients: Bring your eggs and milk to room temperature before mixing. This helps create a uniform batter that yields softer, moist Peach Cupcakes.

  • Proper Cooling: Allow cupcakes to cool completely before filling them with peach jam. If they’re warm, the jam could melt and make a mess instead of providing a delightful surprise!

  • Chill the Whipping Cream: For easier whipping, chill the bowl and beaters before whipping your heavy cream. This helps achieve those beautiful, fluffy peaks for your topping.

  • Experiment with Flavors: Don't hesitate to swap peach jam with other jams or add spices like cinnamon to customize your Peach Cupcakes. The possibilities are endless!

What to Serve with Peach Cupcakes

Delightful and vibrant, these peach cupcakes will brighten any occasion, but pairing them with the right accompaniments elevates the experience even more.

  • Vanilla Ice Cream: This classic pairing adds a creaminess that perfectly balances the fruity sweetness of the cupcakes.
  • Fresh Berries: Strawberries or blueberries bring a burst of flavor and a pop of color that complements the peach goodness.
  • Lemonade: A refreshing glass of tangy lemonade brings contrasting acidity that enhances the sweet richness of the cupcakes.
  • Crushed Graham Crackers: A sprinkle of these adds a fun, crunchy texture that contrasts beautifully with the soft cupcake.
  • Mint Leaves: A few fresh mint leaves provide a refreshing note that enhances the peach flavor and makes each bite feel even more special.
  • Sparkling Water: This effervescent drink cleanses the palate without overpowering the sweet and fruity flavors of the cupcakes.
  • Fruit Salad: A light and colorful medley of seasonal fruits can add freshness to your dessert spread and enhance the summer vibes.
  • Peach Sorbet: Keep the peach theme going with a refreshing scoop of peach sorbet that intensifies those lovely flavors.
  • Lemon Zest Whipped Cream: Mix some lemon zest into your whipped cream for a zesty twist that highlights the peach's bright character.

Peach Cupcakes Recipe FAQs

How do I know if my peaches are ripe enough for the cupcakes?
Absolutely! Look for peaches that are slightly soft to the touch and have a sweet fragrance. Avoid peaches with dark spots or shrivels, as these may be overripe. If they’re hard, leave them at room temperature for a day or two to ripen.

How long can I store leftover peach cupcakes?
You can store leftover peach cupcakes in an airtight container in the fridge for up to 3 days. Just be sure to keep them chilled due to the whipped cream topping, which doesn't hold up well at room temperature!

Can I freeze peach cupcakes?
Yes! To freeze your peach cupcakes, wrap each one individually in plastic wrap. Then, place them in a freezer-safe bag or container. They can be stored this way for up to 3 months. When you’re ready to enjoy, thaw them in the fridge overnight.

Why are my cupcakes dense instead of fluffy?
Very often, dense cupcakes result from overmixing the batter or using cold ingredients. Make sure to mix the wet and dry ingredients just until combined, and use room temperature eggs and milk for a lighter texture.

Can I make these cupcakes gluten-free?
The more the merrier! You can substitute the cake flour with a 1:1 gluten-free baking blend. Just ensure that it’s designed for baking to achieve similar results in texture and flavor.

What can I use instead of heavy whipping cream for the topping?
If you’re looking for alternatives, you can use light whipping cream, but remember it won’t be as rich. You can also make a dairy-free topping using coconut cream or non-dairy whipped topping. Just remember to chill them properly for the best results!

Peach Cupcakes

Peach Cupcakes That Burst with Flavor and Summer Vibes

Peach Cupcakes bursting with flavor, featuring a luscious peach jam filling and topped with whipped cream and fresh peaches.
Print Recipe Pin Recipe
Prep Time 20 minutes mins
Cook Time 20 minutes mins
Cooling Time 5 minutes mins
Total Time 45 minutes mins
Servings: 12 cupcakes
Course: Dessert
Cuisine: American
Calories: 250
Ingredients Equipment Method Nutrition Notes

Ingredients
  

For the Cupcakes
  • 1 cup Unsalted Butter Provides moisture and richness; substitution with margarine works if needed.
  • 1 cup Brown Sugar Adds a deeper, caramel-like flavor; can replace with all granulated sugar.
  • 1 cup Granulated Sugar Sweetens the cupcakes; avoid substitution unless mixing with brown sugar.
  • 2 large Eggs Essential for structure and moisture; use room temperature eggs for better mixing.
  • 1 teaspoon Vanilla Extract Enhances flavor; opt for pure vanilla for best results.
  • 2 cups Cake Flour Ensures a light and fluffy texture; can mix with all-purpose flour.
  • 2 teaspoons Baking Powder Leavening agent for rise; ensure it's fresh to maximize effectiveness.
  • 1/2 teaspoon Kosher Salt Balances sweetness; table salt can be used in slightly lesser amounts.
  • 1 cup Milk Adds necessary moisture; non-dairy options can be substituted.
For the Topping
  • 2 cups Heavy Whipping Cream Provides a rich, creamy flavor; light whipping cream serves as a decent alternative.
  • 1/2 cup Peach Jam Acts as a delicious filling, adding to the summer vibe; can substitute with other fruit jams.
  • 1 medium Peach Fresh slices for garnish that enhance flavor; any similar stone fruit can be used.

Equipment

  • Oven
  • Mixing Bowl
  • Electric mixer
  • Cupcake pans
  • Whisk
  • Cupcake Corer
  • piping bag

Method
 

Cupcake Preparation
  1. Preheat your oven to 350°F (175°C) and line your cupcake pans with paper liners.
  2. In a mixing bowl, cream together the softened butter, brown sugar, and granulated sugar until light and fluffy, about 2-3 minutes. Add eggs one at a time and mix in the vanilla.
  3. In a separate bowl, whisk together cake flour, baking powder, and kosher salt. Gradually add this to the wet ingredients, alternating with milk, mixing until just combined.
  4. Fill each cupcake liner halfway with batter and bake for about 20 minutes until tops are golden and a toothpick comes out clean.
  5. Cool the cupcakes in the pans for 5 minutes, then transfer them to a wire rack to cool completely.
  6. Once cool, use a cupcake corer to remove the centers from each cupcake and fill them with peach jam.
  7. Whip the heavy cream until stiff peaks form and pipe onto each cupcake, then garnish with fresh peach slices.

Nutrition

Serving: 1cupcakeCalories: 250kcalCarbohydrates: 30gProtein: 3gFat: 12gSaturated Fat: 7gPolyunsaturated Fat: 1gMonounsaturated Fat: 3gCholesterol: 50mgSodium: 200mgPotassium: 150mgSugar: 18gVitamin A: 300IUVitamin C: 2mgCalcium: 50mgIron: 1mg

Notes

For best results, use fresh ingredients, avoid overmixing, and chill your whipping cream before use to achieve fluffy peaks.

Tried this recipe?

Let us know how it was!

Easy Peanut Butter and Jelly Cookies – A Nostalgic Sweet Treat

October 24, 2025 by Grace Snow Leave a Comment

“Did you ever wish for a bite of nostalgia?” As I stood in my kitchen, the smell of melting peanut butter and warm cookies whisked me back to my carefree childhood. These Easy Peanut Butter and Jelly Cookies are a delightful blend of soft, chewy peanut butter goodness topped with your choice of sweet jam, reminiscent of those classic sandwiches that brought a smile to our faces. They're quick to prepare, making them a perfect solution for busy days or spontaneous cravings—no chilling required! And these cookies aren’t just delicious; they offer a fun twist on a nostalgic favorite, providing a tasty treat that kids and adults alike will adore. Ready to embark on a sweet journey that combines comfort and fun? Let’s dive in!

Why Will You Love These Cookies?

Nostalgic Flavors: These cookies capture the essence of childhood with a soft, chewy texture and a delightful jam center that invokes memories of classic peanut butter and jelly sandwiches.

Quick and Easy: Perfect for busy cooks, this recipe requires minimal prep time and no chilling, so you can satisfy your sweet tooth in record time.

Versatile Variations: Whether you prefer strawberry, raspberry, or blueberry jam, the options are limitless! You can even swap peanut butter for almond or cashew butter to mix things up.

Kid-Friendly Fun: Kids love these cookies! They can help assemble them, making baking a fun-filled family activity.

Perfect for Sharing: Whether it’s a bake sale, a family gathering, or just a treat for friends, these cookies are sure to impress! Enhance your baking adventures and pair these cookies with a glass of milk or some delicious Eggnog Cookies Soft for an indulgent snack experience!

Easy Peanut Butter and Jelly Cookies Ingredients

• Get ready to create a nostalgic treat that everyone will love!

For the Cookie Dough
• Butter – Adds richness and moisture; ensure it's softened for easier mixing.
• Granulated Sugar – Provides sweetness and texture; can be replaced with brown sugar for a deeper flavor.
• Brown Sugar – Infuses moisture and a hint of caramel; using all granulated sugar is an option if preferred.
• Peanut Butter – The star of the recipe, lending core flavor and structure; you can use either smooth or crunchy varieties.
• Egg – Binds the mixture together; a flax egg serves as a great vegan alternative.
• Vanilla Extract – Heightens the flavors; opt for pure extract for the best results.
• All-Purpose Flour – Offers essential structure; substitute with a gluten-free blend for a gluten-free option.
• Baking Soda – Helps the cookies rise and contributes to a light, fluffy texture.
• Salt – Balances sweetness perfectly; using sea salt can provide a subtle crunch.

For the Jam Filling
• Jam (Strawberry or Other) – Brings fruity sweetness to the cookies; feel free to use your favorite flavor.

For Optional Toppings
• Chopped Nuts – Adds a delightful crunch and enhances the nutty flavor; can be omitted for allergy considerations.

These Easy Peanut Butter and Jelly Cookies are bound to become a family favorite, whether enjoyed fresh from the oven or packed for a snack!

Step‑by‑Step Instructions for Easy Peanut Butter and Jelly Cookies

Step 1: Preheat the Oven
Begin by preheating your oven to 350°F (175°C), ensuring it’s the perfect temperature for baking these delightful Easy Peanut Butter and Jelly Cookies. While the oven heats, line your baking sheets with parchment paper for easy cleanup—this will help keep your cookies from sticking and ensure they develop a beautiful golden edge.

Step 2: Cream the Butter and Sugars
In a mixing bowl, add the softened butter and beat it with an electric mixer until creamy, which should take about 1-2 minutes. Gradually add the granulated and brown sugars, mixing until the mixture is light and fluffy—aim for a pale, almost white color, which usually takes another 2-3 minutes. This step is crucial for achieving that soft, tender cookie texture.

Step 3: Incorporate the Peanut Butter
Next, fold in the peanut butter. Use a spatula or the mixer on low speed to combine until smooth and fully integrated. You want to ensure that the peanut butter is thoroughly mixed in with no streaks remaining, giving your Easy Peanut Butter and Jelly Cookies their signature flavor. This should take about 1 minute.

Step 4: Add Egg and Vanilla
Crack in one egg and pour in the vanilla extract, mixing until well combined. Continue to beat on medium speed for another minute, allowing the egg to bind the ingredients together seamlessly. You'll know it's ready when the mixture looks smooth and glossy, inviting you to bake these delicious cookies.

Step 5: Combine Dry Ingredients
Gradually add the all-purpose flour, baking soda, and salt to the peanut butter mixture, stirring gently with a spatula until just combined. Be careful not to overmix; you want a slightly shaggy dough that retains some airiness. This can take about 30 seconds, and you should see no dry flour remaining.

Step 6: Shape the Cookie Dough
Use your hands to scoop and roll the dough into 1½-inch balls and place them evenly on the prepared baking sheets—aim for about 12 cookies per sheet to give them room to spread. You’ll want your dough balls to be perfectly rounded, as this will help them bake evenly and create gorgeous cookies.

Step 7: Create the Indentations
With a fork, gently press down on each dough ball to flatten it to about ½ inch thick, creating a crisscross pattern. Make sure to press just enough to leave a deep impression in the center, which is essential for holding the jam later. This little step brings a charming look to your Easy Peanut Butter and Jelly Cookies!

Step 8: Add the Jam
Now, spoon approximately 1 teaspoon of your favorite jam into the center of each cookie. Be cautious not to overfill, as the jam may spill over during baking. This fruity center will meld beautifully with the peanut butter, creating that nostalgic experience of a PB&J sandwich.

Step 9: Bake to Perfection
Place the baking sheets in the preheated oven and bake for 13-15 minutes, or until the edges turn lightly golden. Keep an eye on them as they bake; they should feel set yet soft in the middle when you check for doneness. The perfect aroma wafting through your kitchen will guide you!

Step 10: Cool and Transfer
Once baked, remove the cookies from the oven and let them sit on the baking sheets for about 5 minutes. This allows them to firm up a bit more before transferring them to a wire rack to cool completely. This cooling period is vital as it enhances the cookies' chewy texture while preserving that delicious jam center.

Expert Tips for Easy Peanut Butter and Jelly Cookies

  • Softened Butter: Ensure your butter is at room temperature before mixing. Cold butter can lead to unevenly baked cookies.

  • Don’t Overmix: Mix the dough until just combined. Overmixing can create tough cookies, so be gentle when incorporating the dry ingredients.

  • Jam Selection: Choose a jam that complements the peanut butter flavor well. Aim for a smoother jam to avoid spillage during baking.

  • Proper Spacing: Place cookie dough balls well apart on the baking sheet, allowing them to spread without merging into one.

  • Baking Time: Keep a close eye on your cookies towards the end of baking. They should have a light golden edge but remain soft in the center for a chewy texture.

  • Cooling Time: Be patient! Let the cookies cool on the baking sheet for a few minutes before transferring them to a wire rack. This helps maintain the perfect chewy texture.

Make Ahead Options

These Easy Peanut Butter and Jelly Cookies are a fantastic option for meal prep, letting busy cooks save time without sacrificing flavor! You can prepare the cookie dough up to 24 hours in advance—just scoop the dough into balls and store them in an airtight container in the refrigerator. For an even longer option, the uncooked dough can be frozen for up to 3 months. When you're ready to bake, simply let the frozen dough thaw in the fridge for a few hours or overnight, then create the indents and fill with jam before baking as directed. This ensures your cookies remain just as delicious and fresh, perfect for a sweet treat anytime!

Easy Peanut Butter and Jelly Cookies: Variations & Substitutions

Feel free to customize these cookies to suit your taste and dietary needs for a delightful treat that fits just right!

  • Nut-Free: Swap peanut butter for sunflower seed butter for a delicious nut-free alternative.

  • Different Jams: Instead of strawberry jam, try apricot or orange marmalade for a refreshing twist—each brings a unique flair and sweetness!

  • Chocolate Flavors: Add mini chocolate chips to the dough for a decadent chocolate-peanut butter flavor sensation. You can’t go wrong with this delightful duo!

  • Flour Alternatives: Use almond flour or coconut flour for a gluten-free option that still holds its shape and flavor beautifully.

  • Extra Crunch: Fold in crushed pretzels or cereal for added texture and a salty-sweet contrast that’s irresistible.

  • Sweetener Substitute: Replace granulated sugar with coconut sugar for a low-GI alternative offering a slightly caramel-like flavor.

  • Indulgent Toppings: Drizzle with melted chocolate or caramel sauce post-baking for a gourmet touch that elevates the cookie experience.

  • Seasonal Spices: Add a dash of cinnamon or nutmeg to the dough for a warm, spiced flavor that perfectly complements the jam filling and makes these cookies ideal for fall gatherings.

Explore these variations, and don't forget to pair your cookies with a glass of cold milk or perhaps some delicious Thumbprint Cookies Melt for a fun twist!

How to Store and Freeze Easy Peanut Butter and Jelly Cookies

Airtight Container: Store your cookies in an airtight container at room temperature for up to 5 days to maintain their soft, chewy texture.

Fridge: If you prefer a slightly firmer cookie, they can be refrigerated for up to 1 week. Just ensure they're in a sealed container to prevent them from drying out.

Freezer: For longer storage, freeze the cookies in a single layer on a baking sheet, then transfer to a freezer bag for up to 3 months. Thaw at room temperature before serving.

Reheating: To enjoy these delightful Easy Peanut Butter and Jelly Cookies warm again, microwave for 10-15 seconds or pop them in a preheated oven at 300°F (150°C) for a few minutes.

What to Serve with Easy Peanut Butter and Jelly Cookies

Looking to complement the delightful flavors of these soft, chewy cookies? Here are some scrumptious pairings that will enhance your baking experience.

  • Cold Glass of Milk: A classic choice! The creaminess of milk balances the sweetness of the cookies, creating a perfectly nostalgic snack.
  • Sliced Apples with Caramel Dip: The crisp texture of apples with a drizzle of caramel provides a refreshing contrast to the soft cookies. This pairing adds a fruity crunch!
  • Vanilla Ice Cream: Serve these cookies warm with a scoop of vanilla ice cream for an indulgent dessert that brings a whole new level of delight.
  • Hot Cocoa: A steaming mug of hot cocoa, perhaps topped with whipped cream, delivers a cozy feeling, elevating your cookie experience even more.
  • Fruit Salad: A vibrant fruit salad lends a fresh and tangy contrast, lightening up the sweetness of the cookies while providing a colorful plate.
  • Chocolate Milkshake: Blend peanut butter into a milkshake for a rich treat that mirrors the flavors in your cookies. Swirls of peanut butter in vanilla ice cream are heavenly!
  • Carrot Sticks and Hummus: For a savory contrast, pair with crunchy carrot sticks and creamy hummus to add some healthy flair to your snack time.
  • Tea: A cup of chamomile or earl grey tea can bring a soothing element, harmonizing perfectly with the nutty essence of the cookies.
  • Whipped Cream: Top the cookies with a dollop of whipped cream for an extra touch of indulgence, perfect for serving at gatherings or just because.

Easy Peanut Butter and Jelly Cookies Recipe FAQs

How do I know if my peanut butter is the right type for baking?
Absolutely! For this recipe, you can use either smooth or crunchy peanut butter, depending on your preference. Smooth peanut butter will yield a more uniform texture, while crunchy will add delightful little bites of peanut that enhance the flavor. Just make sure it’s not overly oily—if you notice excess oil on the surface, give it a good stir before using!

What’s the best way to store leftover cookies?
Very! To keep your Easy Peanut Butter and Jelly Cookies soft and chewy, store them in an airtight container at room temperature for up to 5 days. If you prefer a firmer texture, refrigerating them in a sealed container can keep them fresh for up to a week.

Can I freeze these cookies? If so, how?
Absolutely! To freeze your Easy Peanut Butter and Jelly Cookies, place them in a single layer on a baking sheet and freeze until solid. Once frozen, transfer them to a freezer-safe bag or an airtight container, separating layers with parchment paper to prevent sticking. They will stay fresh for up to 3 months. When you're ready to enjoy, simply thaw at room temperature or warm them slightly in the microwave.

What should I do if my cookies spread too much while baking?
The more the merrier! If your cookies spread too much, it could be due to a few reasons. First, make sure your butter isn’t too warm. Softened butter should be at room temperature—not melted. Also, check that you’re using the correct ratios of flour; adding a little extra flour can help. Finally, consider chilling the dough for about 30 minutes before baking to help the cookies maintain their shape.

Are these cookies safe for pets or people with nut allergies?
Absolutely! These Easy Peanut Butter and Jelly Cookies are not suitable for dogs or any pets, as peanut butter can be harmful in larger quantities. Additionally, if you’re baking for someone with a nut allergy, you can substitute the peanut butter with sunflower seed butter for a nut-free alternative. Just be sure to check all labels for hidden allergens!

Easy Peanut Butter and Jelly Cookies

Easy Peanut Butter and Jelly Cookies – A Nostalgic Sweet Treat

These Easy Peanut Butter and Jelly Cookies are a delightful blend of soft, chewy peanut butter goodness topped with your choice of sweet jam.
Print Recipe Pin Recipe
Prep Time 15 minutes mins
Cook Time 15 minutes mins
Cooling Time 5 minutes mins
Total Time 35 minutes mins
Servings: 12 cookies
Course: Dessert
Cuisine: American
Calories: 150
Ingredients Equipment Method Nutrition Notes

Ingredients
  

For the Cookie Dough
  • 1 cup Butter Ensure it's softened for easier mixing.
  • 1 cup Granulated Sugar Provides sweetness; can be replaced with brown sugar.
  • 1/2 cup Brown Sugar Infuses moisture; optional to use all granulated sugar.
  • 1 cup Peanut Butter Use either smooth or crunchy varieties.
  • 1 large Egg A flax egg serves as a great vegan alternative.
  • 1 teaspoon Vanilla Extract Opt for pure extract for best results.
  • 2 cups All-Purpose Flour Substitute with gluten-free blend if desired.
  • 1 teaspoon Baking Soda Helps cookies rise.
  • 1/2 teaspoon Salt Balances sweetness.
For the Jam Filling
  • 1 cup Jam (Strawberry or Other) Use your favorite flavor.
For Optional Toppings
  • 1/2 cup Chopped Nuts Can be omitted for allergy considerations.

Equipment

  • Mixing Bowl
  • Electric mixer
  • Baking Sheets
  • Parchment Paper

Method
 

Step-by-Step Instructions for Easy Peanut Butter and Jelly Cookies
  1. Preheat your oven to 350°F (175°C) and line your baking sheets with parchment paper.
  2. In a mixing bowl, cream the softened butter until creamy, about 1-2 minutes. Gradually add granulated and brown sugars until light and fluffy, about 2-3 minutes.
  3. Fold in the peanut butter until smooth and fully integrated.
  4. Crack in the egg and add vanilla extract, mixing until well combined.
  5. Gradually add the flour, baking soda, and salt, stirring gently until just combined.
  6. Scoop and roll the dough into 1½-inch balls and place them on the baking sheets.
  7. Gently press down on each dough ball with a fork to create a crisscross pattern.
  8. Spoon approximately 1 teaspoon of jam into the center of each cookie.
  9. Bake for 13-15 minutes, until the edges are lightly golden.
  10. Let the cookies sit on the baking sheets for about 5 minutes before transferring them to a wire rack to cool completely.

Nutrition

Serving: 1cookieCalories: 150kcalCarbohydrates: 20gProtein: 3gFat: 7gSaturated Fat: 3gPolyunsaturated Fat: 2gMonounsaturated Fat: 1gCholesterol: 10mgSodium: 100mgPotassium: 80mgFiber: 1gSugar: 10gVitamin A: 4IUCalcium: 1mgIron: 3mg

Notes

Store in an airtight container at room temperature for up to 5 days. For firmer cookies, refrigerate for up to 1 week. Freeze in a single layer for up to 3 months.

Tried this recipe?

Let us know how it was!

Irresistible 3-Ingredient Caramel Apple Bites for Fall Fun

October 24, 2025 by Grace Snow Leave a Comment

Walking through the local market, I can practically taste fall in the air! The vibrant hues of oranges and greens, along with the scent of baked goods, remind me of my favorite seasonal indulgence: 3-Ingredient Caramel Apple Bites. This delightful no-bake treat is quick and easy to whip up, making it a perfect choice for gatherings or a cozy night in. With just three ingredients – crisp green apples, creamy caramel, and crunchy pretzels – you’ll create mini bites that kids and adults alike can't resist. They're not only a fun and interactive way to enjoy classic caramel apples, but they also elevate any autumn celebration effortlessly. Are you ready to indulge in a simple, delicious treat that blends nostalgia with a modern twist?

Why You'll Love This Recipe

Simplicity at its Best: With only three ingredients, this recipe is effortless and requires no baking!

Irresistible Flavor: The fusion of tart green apples, rich caramel, and salty pretzels creates a symphony of taste that’s simply mouthwatering.

Perfect for Any Occasion: These bites are ideal for parties, family gatherings, or just a cozy night at home; they’re sure to impress!

Quick Preparation: Ready in minutes, you'll love how quickly you can whip up these delightful treats without fussing in the kitchen.

Versatile Treat: Feel free to customize by adding toppings like chocolate drizzle or crushed nuts for an extra layer of flavor. For more seasonal ideas, you might enjoy our Chicken Salad with Apples as a light, complementary dish.

Now, grab your ingredients and enjoy a delightful fall treat!

3-Ingredient Caramel Apple Bites

• Get ready to create these delightful bites!

For the Bites

  • Green Apples – Use firm Granny Smith for the perfect tartness that balances the sweetness of the caramel.
  • Caramel Candies – Classic Kraft caramel bits melt beautifully to provide that rich, gooey texture essential for your 3-Ingredient Caramel Apple Bites.
  • Mini Pretzels – Opt for sea salt pretzels to add a delightful crunch and balance the sweetness of your treat.

Step‑by‑Step Instructions for 3-Ingredient Caramel Apple Bites

Step 1: Preheat and Prepare
Begin by preheating your oven to 250°F (120°C). While the oven warms up, line a baking sheet with aluminum foil to make for easy cleanup. This will serve as your base for the crispy pretzel layer of your 3-Ingredient Caramel Apple Bites, ensuring they don’t stick and can be easily removed once the caramel is melted.

Step 2: Arrange Pretzels
Next, take your mini pretzels and arrange them evenly on the prepared baking sheet. Place one caramel candy on top of each pretzel, allowing ample space between them for even melting. The combination of the salty pretzels and sweet caramel will create a delightful base for our bites, setting the stage for the harmony of flavors to come.

Step 3: Bake the Caramel
Slide the baking sheet into the preheated oven and bake for about 4 minutes. Keep an eye on them as they warm so you can see the caramel get glossy and soft, but not fully melted. This will ensure that the caramel retains its shape, making it perfect for assembling your 3-Ingredient Caramel Apple Bites once out of the oven.

Step 4: Cut the Apples
While your pretzels and caramel are baking, wash and cut your green apples into bite-sized cubes, leaving the peel on for added texture and nutrition. Aim for uniform pieces so they fit nicely on the pretzel stack. Once the apples are cut, you can squeeze a little lemon juice over the pieces to keep them fresh and prevent browning, ensuring your treats look beautiful and appetizing.

Step 5: Assemble the Bites
Once the caramel is soft and perfectly melted, carefully remove the tray from the oven. Using bamboo skewers, pierce a cube of apple, then gently press it onto the caramel-covered pretzel. The warmth of the caramel will help secure the apple in place. Repeat this process until all pretzels have an apple cube stacked on top, creating a delightful tower of flavor in each 3-Ingredient Caramel Apple Bite.

Step 6: Set and Serve
Now it’s time to let your tasty creations set. Allow the bites to cool at room temperature for at least 45 minutes until the caramel firms up. To speed things up, pop the assembled bites in the fridge for about 20 minutes. Once set, they’ll be ready to serve, perfect for parties or a cozy snack to enjoy as autumn settles in!

3-Ingredient Caramel Apple Bites Variations

Feel free to get creative with your 3-Ingredient Caramel Apple Bites, letting your taste buds guide your choices!

  • Dairy-Free: Swap caramel candies for dairy-free options, like coconut caramel, for a treat that’s just as sweet.
  • Nutty Twist: Add crushed pecans or walnuts on top for a delightful crunch and a boost of flavor. This will enhance the texture and make every bite even more scrumptious!
  • Chocolate Lovers: Drizzle melted dark or white chocolate over the assembled bites for added indulgence. Chocolate pairs beautifully with caramel and apple, offering a rich taste experience.
  • Spicy Kick: Sprinkle a pinch of cayenne pepper or chili powder on your pretzels before adding the caramel for a surprising spicy twist. The contrast will surprise and delight your senses!
  • Flavor Infusion: Use flavored pretzels, such as honey mustard or cheese, to create an unexpected savory note that marries well with the sweet caramel. It makes for a fun and enticing variation!
  • Fall Spice: Dust with pumpkin pie spice or cinnamon for a seasonal flavor boost that perfectly complements the caramel and apple. It's like autumn in a bite, warm and comforting!
  • Fruit Medley: Mix in other fruits like sliced bananas or strawberries with your apple for a varied flavor profile and vibrant color. It's a fruity explosion in each bite!
  • Mini Dessert Skewers: Stack additional layers between the pretzel and apple, such as mini marshmallows or pieces of chocolate, for a decadent dessert on a stick. The more, the merrier!

For more inspiration, try pairing your bites with our delicious Chicken Salad with Apples – it offers a refreshing contrast that your guests will love! Enjoy experimenting!

Expert Tips for 3-Ingredient Caramel Apple Bites

  • Prevent Browning: Squeeze fresh lemon juice on apple cubes to keep them vibrant and avoid browning. It helps maintain the fresh appearance of your tasty bites.
  • Skewer Stability: Use sturdy bamboo skewers that won't break easily. This ensures your 3-Ingredient Caramel Apple Bites stay intact while being served or enjoyed!
  • Perfect Melting: Keep an eye on the caramel in the oven; you want it soft, not fully melted. This allows for optimal sticking when assembling your bites.
  • Cool Time: Be patient as the bites set at room temperature or in the fridge. This helps the caramel firm up properly, making each bite a delicious treat.
  • Customize Flavors: Feel free to experiment with toppings like crushed nuts or chocolate drizzle to elevate your caramel apple bites to new heights of flavor!

How to Store and Freeze 3-Ingredient Caramel Apple Bites

Room Temperature: You can leave your 3-Ingredient Caramel Apple Bites out for up to 3 hours before they start to lose their freshness; they are best enjoyed shortly after preparation.

Fridge: Store leftover bites in an airtight container in the fridge. They will stay fresh for up to 3 days, but keep in mind that the apples may become slightly softer over time.

Freezer: For longer storage, wrap each bite in plastic wrap and place them in a freezer-safe bag. They can be frozen for up to 1 month, though the texture may change slightly upon thawing.

Reheating: If you want to enjoy them warm, briefly microwave individual bites for 5-10 seconds; however, be careful not to overheat, as this may cause the caramel to melt too much.

Make Ahead Options

These 3-Ingredient Caramel Apple Bites are perfect for busy home cooks looking to save time while still delivering a delightful treat! You can prepare the pretzel base topped with melted caramel up to 3 days in advance. Simply arrange the pretzels on a baking sheet with caramel candies, then refrigerate them after baking to maintain freshness. When you’re ready to serve, just cut your apples into bite-sized pieces and assemble the bites on bamboo skewers. The fresh apple cubes can be sliced up to a few hours before serving; just remember to sprinkle them with lemon juice to prevent browning. This way, you’ll have a delicious, stress-free treat ready to impress any crowd!

What to Serve with 3-Ingredient Caramel Apple Bites

Elevate your autumn gatherings with these delightful bites, perfectly paired with delicious accompaniments that awaken your taste buds!

  • Creamy Vanilla Ice Cream: The smooth, cold ice cream complements the warm caramel bites, providing a luxurious contrast in texture. Who can resist a scoop that melts into every scrumptious bite?
  • Crispy Cinnamon Chips: Dusted with cinnamon sugar, these chips provide a delightful crunch and a warm flavor that pairs beautifully with the freshness of the apples.
  • Hot Apple Cider: A steaming cup of spiced apple cider enhances the cozy fall vibes, perfectly balancing the sweetness of your caramel apple treats.
  • Chocolate Dipping Sauce: Rich and silky chocolate sauce adds a decadent layer to the bites, transforming them into an indulgent delight everyone loves.
  • Roasted Nuts: Serve up a mix of roasted almonds or pecans; their nutty flavor and crunch create a pleasing contrast to the sweetness of the caramel bites.
  • Fresh Fruit Platter: Add slices of pears and grapes for a refreshing contrast, highlighting the seasonal theme while offering a lighter palate cleanser between bites.
  • Fall-Themed Charcuterie Board: Create a seasonal board with cheeses, crackers, and sausage, adding variety to your dessert table while complementing the sweet and salty flavors.
  • Pumpkin Spice Latte: For a cozy drink option, the rich and spicy flavors of this popular latte bring warmth to the festivities and pair wonderfully with your treats.

3-Ingredient Caramel Apple Bites Recipe FAQs

What type of apples should I use?
For the best results, I recommend using firm green apples like Granny Smith. They provide the perfect balance of tartness and crunch, which beautifully complements the sweetness of the caramel.

How should I store my Caramel Apple Bites?
Store your leftover 3-Ingredient Caramel Apple Bites in an airtight container in the fridge for up to 3 days. They will remain delicious, though the apples may become slightly softer over time. For optimal taste and texture, enjoy them shortly after preparation!

Can I freeze the Caramel Apple Bites?
Absolutely! To freeze your 3-Ingredient Caramel Apple Bites, wrap each bite in plastic wrap and place them in a freezer-safe bag. They can be stored in the freezer for up to 1 month. Keep in mind that the texture may change slightly once thawed, so it's best to enjoy them fresh whenever possible.

How can I prevent the apples from browning?
A great way to keep your apple cubes looking fresh is to squeeze a bit of lemon juice over them. Alternatively, you can briefly soak them in a saltwater solution. This prevents browning and keeps your bites visually appealing!

What if my caramel doesn’t melt properly?
If your caramel candies aren't melting as expected, ensure your oven is preheated correctly, and try baking for a minute or two longer, keeping a close eye on them. You want the caramel to become glossy and soft but not fully melted. This allowing you to easily stack your apples on the pretzels.

Are there any allergy considerations for this recipe?
Yes! This recipe contains ingredients that may trigger allergies, such as apples and pretzels, which can contain gluten. Always check packaging for allergens, and feel free to substitute the pretzels with gluten-free options or explore other crunchy alternatives if needed.

3-Ingredient Caramel Apple Bites

Irresistible 3-Ingredient Caramel Apple Bites for Fall Fun

Prepare delicious 3-Ingredient Caramel Apple Bites for a fun fall treat that everyone will enjoy.
Print Recipe Pin Recipe
Prep Time 10 minutes mins
Cook Time 4 minutes mins
Cooling Time 45 minutes mins
Total Time 59 minutes mins
Servings: 6 bites
Course: Dessert
Cuisine: American
Calories: 150
Ingredients Equipment Method Nutrition Notes

Ingredients
  

For the Bites
  • 3 medium Green Apples Use firm Granny Smith for optimal tartness.
  • 1 bag Caramel Candies Classic Kraft caramel bits melt beautifully.
  • 1 cup Mini Pretzels Opt for sea salt pretzels to add a delightful crunch.

Equipment

  • Baking Sheet
  • Aluminum Foil
  • Bamboo skewers

Method
 

Step-by-Step Instructions for 3-Ingredient Caramel Apple Bites
  1. Preheat your oven to 250°F (120°C) and line a baking sheet with aluminum foil.
  2. Arrange mini pretzels on the baking sheet and place one caramel candy on top of each pretzel.
  3. Bake for about 4 minutes until the caramel is glossy and soft, but not fully melted.
  4. Wash and cut green apples into bite-sized cubes, leaving the peel on.
  5. Pierce a cube of apple with a bamboo skewer and press it onto the caramel-covered pretzel.
  6. Allow the bites to cool at room temperature for at least 45 minutes or in the fridge for 20 minutes.

Nutrition

Serving: 1biteCalories: 150kcalCarbohydrates: 20gProtein: 1gFat: 7gSaturated Fat: 3gSodium: 105mgPotassium: 120mgFiber: 1gSugar: 12gVitamin A: 2IUVitamin C: 5mgCalcium: 1mgIron: 1mg

Notes

Feel free to customize with toppings like chocolate drizzle or crushed nuts for a unique touch.

Tried this recipe?

Let us know how it was!

Irresistible Dark Chocolate Pear & Walnut Tart for Any Occasion

October 22, 2025 by Grace Snow Leave a Comment

As I stood in my kitchen, the aroma of fragrant vanilla and sweet Bosc pears filled the air, instantly whisking me away to a cozy café in Paris. That’s when I knew I was ready to craft the perfect dessert for my loved ones: a Dark Chocolate Pear & Walnut Tart. This elegant treat is not just a feast for the eyes; it promises an incredible combination of rich dark chocolate, juicy pears, and the delightful crunch of walnuts, making it an impressive yet accessible option for special occasions—especially Valentine’s Day. Best of all, it's gluten-free, ensuring everyone can enjoy a slice of this divine dessert goodness. Curious about how to bring this showstopper to life? Let’s dive into the recipe!

Why is this tart a must-try?

Irresistible flavor profile: The rich dark chocolate pairs beautifully with juicy Bosc pears, creating a dessert that is both sweet and sophisticated.
Easy to make: Don’t be intimidated; this tart is accessible for bakers of all skill levels, ensuring you can impress your guests without the fuss.
Gluten-free option: Perfect for those with dietary restrictions, ensuring everyone can savor its deliciousness.
Beautiful presentation: With its elegant layers and glossy ganache, this tart looks stunning on any table, making it ideal for special occasions like Valentine’s Day.
Versatile dessert: Experiment with different fruits or toppings to make it your own, fostering creativity in the kitchen. Whip it up alongside a cup of Homemade Hot Chocolate for a truly indulgent experience!

Dark Chocolate Pear & Walnut Tart Ingredients

For the Crust

  • Walnut Halves – Adds a nutty flavor to the crust; substitute with pecans for a different nutty twist.
  • All-Purpose Flour – Provides structure to the crust; use gluten-free flour for a gluten-free Dark Chocolate Pear & Walnut Tart.
  • Powdered Sugar – Contributes sweetness and tenderness; granulated sugar can be used, but expect a different texture.
  • Unsalted Butter – Delivers richness; make sure it's cold and cut into small chunks for best results.
  • Kosher Salt – Enhances flavor and balances sweetness; regular table salt works if you’re in a bind.

For the Filling

  • Bosc Pears – Offers a juicy, sweet texture; other firm pear varieties can be used as alternatives.
  • Moscato Wine – Adds a floral note during poaching; swap with white wine or apple juice if needed.
  • Vanilla Bean – Infuses depth of flavor; vanilla extract can replace it, though the taste may not be as robust.
  • Dark Chocolate – A key player in the ganache; coarsely chop for easier melting. Semi-sweet chocolate can provide a different taste profile.
  • Heavy Cream – Creates a silky, smooth ganache; half-and-half can be a lighter substitute, albeit with a less rich result.

For Serving

  • Whipped Cream or Vanilla Ice Cream – Perfect for serving alongside to add a creamy contrast to the tart's richness.

Step‑by‑Step Instructions for Dark Chocolate Pear & Walnut Tart

Step 1: Preheat Your Oven
Begin by preheating your oven to 350ºF (175ºC). This ensures a consistent baking temperature for the crust of your Dark Chocolate Pear & Walnut Tart. While the oven heats, gather your ingredients and prepare your springform pan by greasing it lightly to prevent sticking.

Step 2: Toast and Process Walnuts
Spread the walnut halves on a baking sheet and place them in the oven to toast for about 5 minutes, until fragrant. Once toasted, allow them to cool slightly, then transfer them to a food processor. Process the walnuts into fine crumbs, ensuring you stop before they become a paste for the perfect crust texture.

Step 3: Combine Crust Ingredients
In a mixing bowl, combine the processed walnuts with all-purpose flour, powdered sugar, and kosher salt. Stir these dry ingredients well to ensure even distribution. This mixture will form the base of your tart crust, providing a lovely nutty flavor that complements the dark chocolate beautifully.

Step 4: Incorporate Butter
Add the cold, cubed unsalted butter into the dry mixture. Using a pastry cutter or your fingers, blend the mixture until it resembles a coarse meal, with some pea-sized pieces of butter remaining. This texture is key to creating a flaky crust for your Dark Chocolate Pear & Walnut Tart.

Step 5: Press and Bake Crust
Carefully press the dough mixture into the bottom and up the sides of the prepared springform pan, ensuring an even layer. Bake the crust in your preheated oven for about 15-20 minutes, or until it turns a light golden brown. Keep an eye on it to avoid over-baking. Once done, remove from the oven and let it cool.

Step 6: Poach the Pears
In a saucepan, combine the Moscato wine and the split vanilla bean. Bring this mixture to a boil, then reduce to a simmer. Carefully add your halved Bosc pears to the pot and poach them for 20-25 minutes, or until they become fork-tender. Once poached, let the pears chill in the refrigerator for added firmness.

Step 7: Prepare Ganache
In a small saucepan over low heat, combine the coarsely chopped dark chocolate and heavy cream. Stir gently as the chocolate softens, ensuring it melts evenly into a smooth, glossy ganache. Remove from heat once fully melted, allowing the ganache to cool slightly before pouring.

Step 8: Assemble the Tart
Pour the luscious chocolate ganache into the cooled walnut crust, smoothing the top with a spatula. Slice your poached pear halves and arrange them artfully on the surface of the ganache. This presentation will enhance the overall allure of your Dark Chocolate Pear & Walnut Tart.

Step 9: Chill the Tart
Cover the tart with plastic wrap and refrigerate it for at least 1 hour. Chilling allows the ganache to set properly and meld with the flavors of the pears. Just before serving, let it rest at room temperature for a few minutes to enhance the flavor and texture.

Step 10: Serve and Enjoy
Once chilled, carefully remove the sides of the springform pan. Slice your Dark Chocolate Pear & Walnut Tart into wedges and serve it slightly warm, perhaps with a dollop of whipped cream or a scoop of vanilla ice cream to create a delightful contrast.

How to Store and Freeze Dark Chocolate Pear & Walnut Tart

Fridge: Keep the tart in the refrigerator for up to 3 days, ideally covered with plastic wrap or stored in an airtight container to prevent it from drying out.

Freezer: For longer storage, you can freeze the tart for up to 2 months. Wrap it tightly in plastic wrap and then in aluminum foil to protect from freezer burn.

Thawing: To enjoy the tart after freezing, thaw it in the refrigerator overnight before serving, allowing it to regain its delightful texture.

Serving After Storage: Serve slightly warm for the best texture and taste, and consider a dollop of whipped cream or vanilla ice cream on the side for extra indulgence.

What to Serve with Dark Chocolate Pear & Walnut Tart

Elevate your dessert experience with delightful accompaniments that complement the rich flavors of this exquisite tart.

  • Light Whipped Cream: A dollop of airy whipped cream adds a fluffy texture and balances the tart's richness perfectly.
  • Vanilla Ice Cream: The creamy, cold ice cream contrasts beautifully with the warm tart, creating a harmonious dessert experience.
  • Fresh Berries: Tart raspberries or sweet strawberries add a burst of freshness and a pop of color, making each bite even more enjoyable.
  • Chocolate Sauce Drizzle: For the true chocolate lovers, a drizzle of chocolate sauce enhances the cocoa notes of the tart. You can never have too much chocolate!
  • Espresso or Coffee: A cup of strong espresso or coffee pairs excellently with chocolate desserts, heightening the flavors and creating a delightful after-dinner treat.
  • Sparkling Moscato: Serving the tart with a glass of sparkling Moscato complements the poached pears beautifully, making it feel festive and special, especially for occasions like Valentine’s Day.

Expert Tips for Dark Chocolate Pear & Walnut Tart

  • Chill the Butter: Ensure your butter is very cold before blending; this helps create a flaky texture in the walnut crust.
  • Measure Carefully: Precision matters—measure your flour and sugar correctly to prevent a dry or crumbly crust in the Dark Chocolate Pear & Walnut Tart.
  • Don’t Over-Poach: Keep an eye on your pears while poaching; overcooking them can lead to mushy texture, which is less appealing.
  • Smooth Ganache: Stir the chocolate mixture gently as it melts; avoid high heat to ensure a silky smooth ganache without burning.
  • Presentation Matters: Arrange the pear slices artfully on the ganache for a stunning visual impact—first impressions count!

Dark Chocolate Pear & Walnut Tart Variations

Feel free to explore these delightful twists to make your tart uniquely yours, bursting with flavors and textures!

  • Nutty Options: Substitute walnuts with pecans for a sweeter, richer flavor that occasional bakers will adore. The nuttiness will elevate your crust to new heights!
  • Gluten-Free Delight: Use almond flour in place of all-purpose flour for a gluten-free crust that adds a subtle nutty flavor, perfect for those with dietary restrictions.
  • Sweetness Boost: Drizzle the finished tart with warm caramel sauce for an indulgent touch that enhances the sweet and salty flavor profile.
  • Fruit Swaps: Replace Bosc pears with apples or figs for a different fruit experience. Each option provides a unique sweetness and texture that beautifully complements the chocolate.
  • Flavor Infusion: Infuse the ganache with a touch of espresso powder for a mocha-like richness that intensifies the chocolate flavor and adds depth.
  • Creamy Layer: Incorporate a layer of almond cream beneath the ganache for an added textural twist that brings a delightful creaminess to every bite.
  • Spicy Kick: Stir in a pinch of cayenne pepper into the chocolate ganache for an unexpected heat that beautifully contrasts with the sweet flavors.
  • Herbal Essence: Add a hint of fresh mint or basil to garnish the tart before serving. It elevates the visual appeal while introducing a refreshing herbal note.

Each variation can transform your Dark Chocolate Pear & Walnut Tart into something extraordinary! If you're looking for more dessert inspiration, consider whipping up a delectable German Chocolate Poke Cake as a delightful companion to your tart!

Make Ahead Options

These Dark Chocolate Pear & Walnut Tarts are perfect for meal prep enthusiasts looking to save time during busy weeknights or special occasions! You can prepare the walnut crust up to 24 hours in advance; just bake and let it cool completely before wrapping in plastic wrap to maintain its texture. The poached pears can also be made ahead and stored in the refrigerator for up to 3 days; this ensures they hold their shape while absorbing that delicious Moscato flavor. When you're ready to serve, simply melt the chocolate and cream for the ganache and assemble the tart, allowing it to chill for at least 1 hour. With these make-ahead tips, you’ll have a stunning dessert ready with minimal last-minute effort!

Dark Chocolate Pear & Walnut Tart Recipe FAQs

What type of pears should I use for this tart?
When selecting pears for your Dark Chocolate Pear & Walnut Tart, I recommend using Bosc pears as they have a firm texture and sweet flavor that holds up beautifully when poached. If Bosc pears aren’t available, you can choose other varieties like Anjou or Bartlett, but make sure they are equally firm to avoid mushiness during cooking.

How long will the tart last and how should I store it?
Absolutely! You can store your Dark Chocolate Pear & Walnut Tart in the refrigerator for up to 3 days. Be sure to cover it with plastic wrap or place it in an airtight container to keep it moist and prevent drying out. If you plan to keep it longer, freezing is an option!

Can I freeze the tart? If so, how?
Yes, you can freeze your tart for up to 2 months! Wrap it tightly in plastic wrap first to prevent freezer burn, then wrap it in aluminum foil. When you’re ready to enjoy it, simply transfer it to the refrigerator to thaw overnight. This gentle thawing process will help retain the tart's delightful texture.

What if my ganache is too thick or too thin?
If you find your ganache is too thick, you can add a little more warmed heavy cream to achieve your desired consistency. Stir in small amounts at a time, mixing until smooth. Conversely, if it’s too thin, allow it to cool slightly to thicken up before pouring over the crust. Be patient; the cooling process will help!

Is this tart suitable for people with gluten allergies?
Absolutely! This Dark Chocolate Pear & Walnut Tart can be made gluten-free by using a gluten-free flour blend. Just ensure all your ingredients, especially the chocolate and any added flavorings, are labeled gluten-free to avoid any cross-contamination.

Can I use different nuts in the crust?
Very much so! While walnuts provide a lovely flavor, you can substitute them with pecans or hazelnuts for a different twist. Just ensure they are chopped finely after toasting to maintain the texture of the crust. It’s a fun way to customize your tart!

Dark Chocolate Pear & Walnut Tart

Irresistible Dark Chocolate Pear & Walnut Tart for Any Occasion

This Dark Chocolate Pear & Walnut Tart combines rich flavors and a beautiful presentation, perfect for special occasions.
Print Recipe Pin Recipe
Prep Time 20 minutes mins
Cook Time 45 minutes mins
Chilling Time 1 hour hr
Total Time 2 hours hrs 5 minutes mins
Servings: 8 slices
Course: Dessert
Cuisine: French
Calories: 350
Ingredients Equipment Method Nutrition Notes

Ingredients
  

For the Crust
  • 1 cup Walnut Halves Substitute with pecans for a different nutty twist
  • 1 cup All-Purpose Flour Use gluten-free flour for a gluten-free option
  • 1/4 cup Powdered Sugar Granulated sugar can be used, but expect a different texture
  • 1/2 cup Unsalted Butter Make sure it's cold and cut into small chunks
  • 1/4 teaspoon Kosher Salt Regular table salt can be used if needed
For the Filling
  • 4 medium Bosc Pears Other firm pear varieties can be used as alternatives
  • 1 cup Moscato Wine Swap with white wine or apple juice if needed
  • 1 whole Vanilla Bean Vanilla extract can replace it for less robust flavor
  • 8 ounces Dark Chocolate Coarsely chop for easier melting
  • 1 cup Heavy Cream Half-and-half can be a lighter substitute
For Serving
  • 1 cup Whipped Cream Perfect for serving alongside the tart

Equipment

  • Oven
  • Mixing Bowl
  • Food Processor
  • Springform pan
  • Saucepan

Method
 

Preparation Steps
  1. Preheat your oven to 350ºF (175ºC) and prepare your springform pan.
  2. Toast walnut halves on a baking sheet for about 5 minutes, then process into fine crumbs.
  3. Combine processed walnuts, flour, powdered sugar, and salt in a mixing bowl.
  4. Incorporate cold, cubed butter into dry ingredients until resembling coarse meal.
  5. Press dough into the springform pan and bake for 15-20 minutes until golden brown.
  6. Poach pear halves in a mixture of Moscato wine and split vanilla bean for 20-25 minutes.
  7. Prepare ganache by melting dark chocolate with heavy cream over low heat.
  8. Pour ganache into cooled crust and arrange poached pears on top.
  9. Chill tart in the refrigerator for at least 1 hour before serving.
  10. Serve slightly warm with whipped cream or vanilla ice cream.

Nutrition

Serving: 1sliceCalories: 350kcalCarbohydrates: 40gProtein: 5gFat: 20gSaturated Fat: 10gPolyunsaturated Fat: 3gMonounsaturated Fat: 6gCholesterol: 30mgSodium: 150mgPotassium: 200mgFiber: 3gSugar: 18gVitamin A: 500IUVitamin C: 5mgCalcium: 40mgIron: 2mg

Notes

For best results, chill the butter before blending and measure ingredients accurately to maintain crust consistency.

Tried this recipe?

Let us know how it was!

Irresistibly Sweet Dutch Apple Pie with a Crunchy Topping

October 22, 2025 by Grace Snow Leave a Comment

As I gathered my favorite ingredients for this special dessert, I couldn’t help but feel a sense of nostalgia wash over me. There's something magical about the classic Pennsylvania Dutch Apple Pie that evokes warmth and comfort, making it an ideal centerpiece for any family gathering. This Dutch Apple Pie is a labor of love, showcasing a delectable sweet cream filling tucked under a golden, flaky crust and crowned with a crumbly streusel topping. Not only is it a crowd-pleaser, but it can also be made ahead of time, allowing you to savor the moment spent with loved ones instead of stressing in the kitchen. Are you ready to create a pie that will have everyone asking for seconds? Let's dive in!

Why is Dutch Apple Pie so special?

Nostalgic Comfort: This Dutch Apple Pie brings back cherished memories of family gatherings and fall festivities, making it a beloved classic.

Irresistible Flavor: The combination of tart Granny Smith apples, warm spices, and a creamy filling provides a deliciously sweet and tangy treat.

No-Fuss Preparation: With a make-ahead option, you can prepare this pie before your gathering, freeing up valuable time for making memories.

Versatile Toppings: Serve it warm with vanilla ice cream or a dollop of whipped cream; each bite is a delightful experience!

Traditionally Inspired: Rooted in Pennsylvania Dutch culture, this pie is not just dessert—it's a celebration of heritage, perfect for special occasions or cozy nights in.

Curious about other delightful pie recipes? Check out our Tamale Pie Hearty and Spinach Pie Deliciously for more homemade goodness!

Dutch Apple Pie Ingredients

For the Filling
• Granny Smith Apples – The tartness brings a perfect balance to the sweetness; try mixing with Honeycrisp for added flavor complexity.
• Brown Sugar – Adds richness and depth; you can use either light or dark brown sugar depending on your taste preference.
• Lemon Juice – Brightens up the flavors of the apples; freshly squeezed is recommended for the best outcome.
• Ground Cinnamon – Imparts warmth and sweetness; nutmeg can be used as a substitute for a different spice note.
• Ground Ginger – Offers a subtle kick of warmth; omit if you prefer a milder flavor or use allspice for an alternative twist.
• Kosher Salt – Enhances the flavor balance; Diamond Crystal kosher salt is excellent for precise measurements.
• Heavy Cream – Adds creaminess to the filling, elevating the taste; sour cream can work for a tangy flavor or use evaporated milk for a lighter option.

For the Crust
• Pie Dough – Provides a buttery, flaky textural base; a homemade version gives a traditional touch, while store-bought offers convenience.
• All-Purpose Flour – Forms the base for the delicious streusel topping; consider using whole wheat flour for nuttiness or a gluten-free alternative if needed.

For the Streusel Topping
• Chopped Walnuts (optional) – Introduces a delightful crunch; substitute with pecans for a different flavor, or just leave out nuts for a nut-free version.
• Brown Sugar – Ensures the streusel has a sweet, caramel-like flavor; light or dark brown will work interchangeably.
• Salt – Balances out the sweetness of the streusel; a pinch goes a long way for flavor enhancement.
• Melted Butter – Binds the streusel mixture and adds richness; ensure it’s cooled slightly before mixing in for the best texture.

This Dutch Apple Pie embodies tradition, love, and comfort baked right into each slice! Enjoy creating this festive favorite!

Step‑by‑Step Instructions for Classic Pennsylvania Dutch Apple Pie

Step 1: Prepare the Filling
In a large bowl, mix the brown sugar, lemon juice, ground cinnamon, ground ginger, kosher salt, and ground nutmeg until combined. Peel, core, and slice the Granny Smith apples, then toss them in the sugar mixture to coat. Let the mixture sit at room temperature for 3-4 hours, allowing the apples to release their juices, creating a delicious base for your Dutch Apple Pie.

Step 2: Make the Crust
Roll out the pie dough into a 12-inch circle on a lightly floured surface. Carefully fit the rolled dough into a 9-inch pie plate and trim any excess around the edges, crimping them for a decorative touch. Chill the crust in the refrigerator for at least 1 hour to ensure it holds its shape and bakes perfectly golden.

Step 3: Prepare the Streusel
In a medium bowl, combine all-purpose flour, chopped walnuts (if using), brown sugar, and salt. Pour in the melted butter and mix until the mixture resembles coarse crumbs. Chill the streusel topping in the refrigerator until firm, about 30 minutes, keeping it ready to create a delightful crunch on your Classic Pennsylvania Dutch Apple Pie.

Step 4: Assemble the Pie
After the apple mixture has rested, strain the apples to reduce excess juice if necessary. Layer the apple slices evenly in the prepared crust, creating a beautiful mound. Drizzle the heavy cream over the top of the apples, then sprinkle the chilled streusel mixture generously over everything, ensuring an even coverage for a perfect bake.

Step 5: Bake the Pie
Preheat your oven to 425°F (220°C). Place the assembled pie on the lowest rack and bake for 20 minutes. Then, lower the temperature to 375°F (190°C) and continue baking for an additional 60-75 minutes. The pie is done when the crust is golden brown and the filling is bubbling, showcasing the heart of this Classic Pennsylvania Dutch Apple Pie.

Step 6: Cool the Pie
Once baked to perfection, remove the pie from the oven and let it cool at room temperature for at least 4 hours. This cooling time allows the filling to set beautifully, enhancing the flavors. For the best quality and taste, consider refrigerating and letting it rest overnight before slicing into this irresistible Dutch Apple Pie.

Dutch Apple Pie Variations & Substitutions

Feel free to explore these delicious twists that will inspire your Dutch Apple Pie journey and elevate its flavors!

  • Apple Mix: Combine Granny Smith and Honeycrisp apples for an exciting balance of tart and sweet flavors. You’ll create a more dynamic filling that delights the taste buds.

  • Dried Fruit: Add raisins or dried cranberries to the filling for a pop of sweetness and chewy texture. Adjust the sugar to balance the flavors beautifully.

  • Nut-Free: Omit the walnuts in the streusel topping and substitute with crushed oats. This gives your pie the crunch you love without the nuts, perfect for guests with allergies.

  • Spice Variation: Try using pumpkin spice instead of ground cinnamon for a uniquely seasonal twist that will remind you of cozy fall flavors.

  • Coconut Cream: Swap in coconut cream for heavy cream to add a tropical undertone and richness to the filling—blend this flavor with apples for a delightful surprise.

  • Ginger Crust: Mix ground ginger into your pie dough for an extra flavor layer that pairs perfectly with the sweetness of the apples.

  • Maple Syrup: Replace brown sugar with maple syrup in the filling for a deeper, more caramel-like sweetness that elevates the entire pie.

For more irresistible pie ideas, don't miss our Chicken Salad Apples and celebrate the joys of home-cooked flavors!

How to Store and Freeze Dutch Apple Pie

Room Temperature: Allow the pie to cool completely, then cover with a clean kitchen towel. It can stay at room temperature for up to 2 days.

Fridge: Store leftover Dutch Apple Pie in an airtight container in the refrigerator for up to 4 days to maintain its moist filling and flaky crust.

Freezer: For longer storage, wrap the pie tightly in plastic wrap followed by aluminum foil and freeze for up to 3 months. Thaw in the fridge overnight before reheating.

Reheating: To enjoy the pie warm, place slices in a preheated oven at 350°F (175°C) for about 15-20 minutes, or microwave for 30-45 seconds until heated through.

Make Ahead Options

These Classic Pennsylvania Dutch Apple Pies are perfect for busy home cooks looking to save time while still delivering a delicious dessert! You can prepare the filling (without the cream) and store it in the refrigerator for up to 24 hours; just toss the apples with lemon juice to prevent browning. Additionally, the streusel topping can be made in advance and kept in an airtight container for up to 3 days. When it’s time to bake, simply assemble the pie by layering the chilled apple mixture in the prepared crust, drizzling the heavy cream on top, and finishing with the refrigerated streusel. This way, you'll enjoy a delightful pie with minimal effort, allowing more time to create memories with loved ones!

Expert Tips for Dutch Apple Pie

• Juiciness Control: Allow the apple mixture to sit for several hours to achieve the ideal juiciness. Excess moisture can lead to a soggy crust.

• Baking Position: Bake your pie on the lowest oven rack. This ensures optimal crust crispness without the need for blind baking.

• Streusel Vigilance: Keep an eye on the streusel topping as it bakes. If you see it browning too quickly, loosely cover it with foil to prevent burning.

• Chill the Crust: After fitting your pie dough into the plate, chill it for at least 1 hour. This helps the crust maintain its shape and enhances its flaky texture during baking.

• Apple Varieties: Mixing different tart apple varieties can give your Dutch Apple Pie more depth and complexity in flavor. Experiment with Honeycrisp for added sweetness!

What to Serve with Classic Pennsylvania Dutch Apple Pie

Dive into a delicious array of accompaniments that will elevate your apple pie experience into a heartwarming feast.

  • Vanilla Ice Cream: The creaminess perfectly contrasts the warm pie, adding a refreshing coolness to each slice.

  • Whipped Cream: A light cloud of whipped cream enhances the pie’s warm spices, creating a delightful harmony of flavors.

  • Cheddar Cheese: A classic pairing, its sharpness complements the pie’s sweetness, offering a savory twist that’s unexpectedly delightful.

  • Caramel Sauce: Drizzle warm caramel over the pie to intensify the sweetness and add a luxurious touch that’s truly irresistible.

  • Cold Brew Coffee: The rich, smooth coffee balances the pie's sweetness while providing a bold flavor contrast that’s satisfying and energizing.

  • Chai Tea: The aromatic spices in chai complement the apple pie beautifully, enhancing the cozy, fall-inspired flavors.

For a truly memorable dessert experience, consider serving your Dutch Apple Pie with a scoop of vanilla ice cream or a drizzle of warm caramel sauce. Each addition invites more warmth and happiness to the table, making every moment spent sharing this classic delight even more special!

Dutch Apple Pie Recipe FAQs

What type of apples should I use for Dutch Apple Pie?
The ideal apples for Dutch Apple Pie are Granny Smith due to their tartness, which balances perfectly with the sweetness of the filling. However, you can also try mixing them with Honeycrisp apples for added flavor complexity, making each bite even more delicious!

How long can I store leftover Dutch Apple Pie?
You can store leftover Dutch Apple Pie in an airtight container in the refrigerator for up to 4 days. This keeps the pie's moist filling and flaky crust intact, ensuring it's just as delightful as when freshly baked.

Can I freeze Dutch Apple Pie?
Absolutely! To freeze your pie, first allow it to cool completely. Then, wrap it tightly in plastic wrap followed by aluminum foil to protect it from freezer burn. It can be stored in the freezer for up to 3 months. When you’re ready to enjoy it, thaw it in the fridge overnight before reheating.

How do I prevent my Dutch Apple Pie from becoming soggy?
To prevent sogginess, allow the apple filling to sit for about 3-4 hours to release excess juices before assembling the pie. If there's too much liquid, strain the apples to achieve the right consistency. Additionally, baking the pie on the lowest rack promotes a crisp crust without needing blind baking.

Is it possible to make Dutch Apple Pie nut-free?
Yes! If you want a nut-free version of Dutch Apple Pie, simply omit the walnuts in the streusel topping. You can also substitute them with pumpkin seeds for a similar crunch without the nuts. This way, everyone can enjoy a delicious slice!

Dutch Apple Pie

Irresistibly Sweet Dutch Apple Pie with a Crunchy Topping

This Dutch Apple Pie features a sweet cream filling and a crunchy topping, perfect for any gathering.
Print Recipe Pin Recipe
Prep Time 30 minutes mins
Cook Time 1 hour hr 15 minutes mins
Cooling Time 4 hours hrs
Total Time 5 hours hrs 45 minutes mins
Servings: 8 slices
Course: Dessert
Cuisine: Pennsylvania Dutch
Calories: 350
Ingredients Equipment Method Nutrition Notes

Ingredients
  

For the Filling
  • 6 cups Granny Smith Apples Peeled, cored, and sliced.
  • 3/4 cup Brown Sugar Light or dark, based on preference.
  • 2 tablespoons Lemon Juice Freshly squeezed recommended.
  • 1 teaspoon Ground Cinnamon
  • 1/4 teaspoon Ground Ginger Optional.
  • 1/4 teaspoon Kosher Salt Diamond Crystal recommended.
  • 1/2 cup Heavy Cream Alternatively use sour cream or evaporated milk.
For the Crust
  • 1 batch Pie Dough Homemade or store-bought.
  • 1 cup All-Purpose Flour For rolling out.
For the Streusel Topping
  • 1/2 cup Chopped Walnuts Optional.
  • 1/2 cup Brown Sugar Light or dark.
  • 1/4 teaspoon Salt
  • 1/4 cup Melted Butter Ensure it's cooled slightly.

Equipment

  • 9-inch pie plate
  • medium bowl
  • large bowl

Method
 

Step‑by‑Step Instructions
  1. In a large bowl, mix the brown sugar, lemon juice, ground cinnamon, ground ginger, kosher salt, and ground nutmeg until combined. Peel, core, and slice the Granny Smith apples, then toss them in the sugar mixture to coat. Let the mixture sit at room temperature for 3-4 hours.
  2. Roll out the pie dough into a 12-inch circle on a lightly floured surface. Fit the rolled dough into a 9-inch pie plate and trim any excess around the edges, crimping them for a decorative touch. Chill the crust for at least 1 hour.
  3. In a medium bowl, combine all-purpose flour, chopped walnuts (if using), brown sugar, and salt. Pour in the melted butter and mix until the mixture resembles coarse crumbs. Chill the streusel topping in the refrigerator until firm, about 30 minutes.
  4. After the apple mixture has rested, strain the apples to reduce excess juice if necessary. Layer the apple slices evenly in the prepared crust. Drizzle the heavy cream over the apples, then sprinkle the chilled streusel mixture evenly over the top.
  5. Preheat your oven to 425°F (220°C). Place the assembled pie on the lowest rack and bake for 20 minutes. Lower the temperature to 375°F (190°C) and continue baking for 60-75 minutes until the crust is golden brown and the filling is bubbling.
  6. Remove the pie from the oven and let it cool at room temperature for at least 4 hours for the filling to set.

Nutrition

Serving: 1sliceCalories: 350kcalCarbohydrates: 50gProtein: 3gFat: 15gSaturated Fat: 8gPolyunsaturated Fat: 1gMonounsaturated Fat: 5gCholesterol: 30mgSodium: 200mgPotassium: 150mgFiber: 2gSugar: 25gVitamin A: 300IUVitamin C: 5mgCalcium: 20mgIron: 1mg

Notes

This Dutch Apple Pie can be served with vanilla ice cream or whipped cream for added delight. Enjoy the process of making this traditional recipe!

Tried this recipe?

Let us know how it was!

Decadent Cacao Cream Tart: The No-Bake Chocolate Bliss

October 22, 2025 by Grace Snow Leave a Comment

The moment you taste this Cacao Cream Tart, you'll understand why it's my go-to dessert for any gathering. The delightful blend of a crunchy chocolate cookie crust and a lush, creamy filling is simply irresistible. This no-bake chocolate dessert not only saves you time but also guarantees to impress your guests, making it perfect for busy weeknights or a last-minute potluck invite. Plus, it’s easily adaptable—swap in your favorite nut butter for a fun twist! As we dive into this easy recipe, can you already taste the rich layers of chocolate that await? Let’s bring this lush tart to life!

Why is this Cacao Cream Tart a must-try?

Decadent, no-bake indulgence: This Cacao Cream Tart is a showstopper that requires no baking, making it a breeze to whip up for any occasion.
Adaptable flavors: Swap out the nut butter for your favorite variety to customize your tart experience—peanut or almond butter, anyone?
Crowd-pleaser: With its perfect balance of crunchy crust and creamy filling, this dessert is guaranteed to satisfy both chocolate lovers and those looking for something unique.
Quick preparation: You won't spend hours in the kitchen; this delight comes together quickly and smoothly, leaving you plenty of time to enjoy with friends.
Impressive presentation: Drizzling with chocolate sauce or garnishing with fresh fruit elevates the tart for a stunning dessert that looks as good as it tastes!

Cacao Cream Tart Ingredients

For the Crust
• Ground Chocolate Wafers – Provides the base for the tart crust with a deep chocolate flavor; can substitute with vanilla wafers or graham crackers for a different taste.
• Unsalted Butter – Binds the cookie crumbs and adds richness; melted coconut oil works as a dairy-free option.

For the Filling
• Cream Cheese – Adds a rich, creamy texture; ensure it's at room temperature for easy mixing, or use vegan cream cheese for a dairy-free version.
• Cacao Bliss Spread (or other nut butter) – Delivers the main chocolate flavor; adaptable with peanut, cashew, or almond butter based on your taste preference.
• Whipping Cream – Lightens the filling, creating a fluffy texture; for a non-dairy option, try chilled whipped coconut cream.
• Powdered Sugar – Sweetens without graininess; alternatives like granulated sugar or maple syrup can be used, just adjust the quantities.
• Vanilla Extract – Enhances the overall flavor; fresh vanilla beans can further elevate the taste.

For Decoration
• White Chocolate – Used for a decorative touch and sweet contrast; dark chocolate is a delightful alternative for a richer presentation.

Step‑by‑Step Instructions for Cacao Cream Tart

Step 1: Prepare the Crust
Preheat your oven to 350°F (175°C). In a food processor, grind the chocolate wafers into fine crumbs, then combine them with melted butter until fully coated. Press this mixture firmly into a 9-inch tart pan, creating an even layer. Bake the crust for 10 minutes until set, and let it cool completely before adding the filling.

Step 2: Make the Filling
In a medium mixing bowl, beat the cream cheese and cacao bliss spread until the mixture is smooth and creamy. In a separate large bowl, whip the chilled whipping cream with powdered sugar and vanilla extract until soft peaks form—this will take a few minutes, so be patient. Once ready, gently fold half of the whipped cream into the cream cheese mixture until just combined, and then fold in the remaining whipped cream, preserving that light and airy texture.

Step 3: Assemble the Tart
Carefully pour the luscious filling into the cooled chocolate crust. Using a spatula, smooth the top to achieve an even surface. For a decorative touch, melt white chocolate using a double boiler until smooth, then pipe it onto the tart in swirls to create an eye-catching design.

Step 4: Chill
Place the Cacao Cream Tart in the refrigerator and allow it to chill for at least 2 hours, or until fully set. This step is crucial for the filling to firm up, ensuring each slice holds its shape beautifully. Once chilled, you're ready to serve this stunning dessert!

What to Serve with Cacao Cream Tart

Indulging in a slice of this creamy delight pairs beautifully with a few thoughtful accompaniments that enhance its rich flavors.

  • Fresh Berries: Juicy strawberries or tangy raspberries add a refreshing burst, cutting through the creaminess and enriching each bite. Their natural sweetness also contrasts pleasantly with the dark chocolate.

  • Whipped Cream: A dollop of lightly sweetened whipped cream completes this dessert's sumptuous experience. The airy texture elevates each slice, adding an extra layer of indulgence.

  • Chocolate Drizzle: Drizzling more melted chocolate over the tart enhances its chocolatey goodness, creating visually stunning appeal while intensifying the dessert's flavor profile. Simply melt some chocolate and go to town!

  • Mint Sprigs: Fresh mint leaves lend a bright, herbaceous note that balances the tart's richness. They also make for a beautiful garnish, adding a pop of color.

  • Coffee or Espresso: The slightly bitter notes of coffee or espresso can perfectly complement the sweetness of the tart. A warm cup invites you to truly savor each bite amidst those rich chocolatey flavors.

  • Vanilla Ice Cream: A scoop of velvety vanilla ice cream beside the tart creates a delightful temperature contrast, enhancing the overall dessert experience. A classic pairing you'll never go wrong with!

  • Caramel Sauce: Swirls of caramel add a sweet sophistication and a slight saltiness that beautifully counterpoints the chocolate, providing another layer of flavor to explore.

These pairings not only enhance your dessert experience but create a well-rounded meal that delights your guests. Happy indulging!

How to Store and Freeze Cacao Cream Tart

Fridge: Keep the tart tightly covered in the refrigerator for up to 1 week. This keeps it fresh and delicious, ready to enjoy at a moment's notice.

Freezer: For longer storage, freeze the tart wrapped in plastic wrap and aluminum foil for up to 2 months. Thaw it overnight in the fridge before serving.

Reheating: There's no need to reheat this Cacao Cream Tart; it's best enjoyed chilled! Just slice and serve for a delightful treat.

Leftovers: If you have any leftover filling, store it in an airtight container in the fridge for up to 3 days. Use it as a dip for fresh fruit or spread on toast!

Expert Tips for the Cacao Cream Tart

  • Chill Your Tools: Use a chilled mixing bowl and beaters when whipping cream. This helps achieve maximum volume and a light texture in your filling.

  • Gentle Folding: When incorporating whipped cream into the cream cheese mixture, be gentle to avoid deflating the airy texture. This is key for your delightful Cacao Cream Tart!

  • Taste and Adjust: Always taste your filling before chilling. Adjust sweetness with powdered sugar or flavored extracts to suit your preference and make it even more delicious.

  • Decorative Drizzle: For an elegant touch, melt extra chocolate and drizzle it over the tart just before serving. It creates a beautiful presentation that’s sure to impress!

  • Storage Savvy: Keep any leftovers tightly covered in the fridge for up to a week. This tart is just as great the next day, making it perfect for snacks or spontaneous dessert cravings.

Make Ahead Options

This Cacao Cream Tart is ideal for busy home cooks looking to save time without sacrificing taste! You can prepare the crust up to 3 days in advance and store it tightly wrapped at room temperature, ensuring it stays crisp. The creamy filling can also be made up to 24 hours ahead; just keep it refrigerated to maintain that luscious texture. When you're ready to serve, simply pour the filling into the cooled crust, smooth the top, and add a decorative swirl of melted white chocolate. This advanced prep allows you to enjoy a delightful dessert, stress-free, while impressing your guests with minimal effort!

Cacao Cream Tart Variations & Substitutions

Feel free to explore these fun variations that will inspire you to make this Cacao Cream Tart uniquely yours!

  • Nut Butter Alternatives: Swap Cacao Bliss with any nut butter such as peanut, almond, or cookie butter for a different flavor profile. Each nut brings its own unique character to the tart, inviting unexpected delights in every bite.

  • Crust Substitutions: Use vanilla wafers, graham crackers, or gluten-free cookies to cater to dietary needs. A graham cracker crust adds a delightful sweetness, while a gluten-free option makes this dessert accessible to everyone.

  • Add-Ins: Incorporate crushed nuts or chocolate chips into the filling for added texture and crunch. These small additions can transform the tart into a delightful treasure trove of flavors in every slice.

  • Flavored Extracts: Elevate the flavor by experimenting with flavored extracts, such as almond or hazelnut. Just a splash can introduce a whole new depth and enrich the cocoa essence beautifully.

  • Fruit Variation: Top your tart with fresh fruit like berries or bananas to add a pop of color and freshness. This fruity twist not only looks stunning but enhances the tart's richness with a refreshing note.

  • Switch Up the Whipping Cream: For a lighter and dairy-free version, use chilled coconut cream instead of whipping cream. The coconut adds a tropical flair that beautifully complements the chocolate.

  • Chocolate Decoration: Instead of white chocolate, try dark chocolate or even a drizzle of caramel for a vibrant and rich presentation. These alternatives give the tart a unique visual appeal while enhancing its flavor profile.

Looking for more sweet inspirations? Consider trying out a Vegan Cacao Cream next for a delightful twist. Or how about making an elegant Ice Cream Cake to impress at your next gathering? Each variation brings its own charm, ensuring your dessert experience stays exciting!

Cacao Cream Tart Recipe FAQs

What type of chocolate wafers should I use for the crust?
Absolutely! I recommend using finely ground chocolate wafers for a deep, rich flavor in your tart crust. If you're looking for a different taste, feel free to substitute them with vanilla wafers or graham crackers. Just keep in mind that the flavor profile will change slightly based on your choice!

How should I store my Cacao Cream Tart?
For optimal freshness, store the tart tightly covered in the refrigerator for up to 1 week. This way, you can enjoy its luscious flavors as it keeps well. Just make sure it’s protected from any strong odors in your fridge!

Can I freeze the Cacao Cream Tart?
Yes, you can freeze it! Wrap the tart securely in plastic wrap and then in aluminum foil to prevent freezer burn. It will keep well for up to 2 months. To enjoy, simply thaw it in the refrigerator overnight before serving, and it will taste just as delightful.

How can I avoid a runny filling?
Great question! To avoid a runny filling, ensure that your cream cheese is at room temperature so it mixes smoothly and properly. Whipping the cream to soft peaks before folding it into the mixture also helps incorporate air while maintaining the structure. Gently fold to combine without deflating the whipped cream, which will keep your filling nice and light!

Are there any dietary considerations I should keep in mind?
Very! If you’re making this tart for guests with dietary restrictions, you can easily adapt it. Use a dairy-free cream cheese and whipped coconut cream for a vegan version! Additionally, check the nut butter used, as some guests may have nut allergies. Always communicate with your friends to make sure everyone can indulge safely!

What if I have leftover filling?
If you find yourself with leftover filling, store it in an airtight container in the fridge for up to 3 days. This extra deliciousness can be used as a dip for fresh fruits or even spread on toast—consider it a delightful bonus!

Cacao Cream Tart

Decadent Cacao Cream Tart: The No-Bake Chocolate Bliss

This Cacao Cream Tart is an irresistible no-bake dessert perfect for gatherings.
Print Recipe Pin Recipe
Prep Time 20 minutes mins
Cook Time 10 minutes mins
Chilling Time 2 hours hrs
Total Time 2 hours hrs 30 minutes mins
Servings: 8 slices
Course: Dessert
Cuisine: American
Calories: 320
Ingredients Equipment Method Nutrition Notes

Ingredients
  

For the Crust
  • 1 cup Ground Chocolate Wafers Can substitute with vanilla wafers or graham crackers.
  • 4 tablespoons Unsalted Butter Melted coconut oil works as a dairy-free option.
For the Filling
  • 8 ounces Cream Cheese At room temperature.
  • 1 cup Cacao Bliss Spread Can substitute with other nut butter.
  • 1 cup Whipping Cream Or use chilled whipped coconut cream.
  • 1/2 cup Powdered Sugar Or granulated sugar, adjust quantity.
  • 1 teaspoon Vanilla Extract Fresh vanilla beans can elevate the taste.
For Decoration
  • 1/2 cup White Chocolate Dark chocolate is an alternative.

Equipment

  • Food Processor
  • Mixing bowls
  • tart pan
  • Double Boiler

Method
 

Prepare the Crust
  1. Preheat your oven to 350°F (175°C). Grind the chocolate wafers into fine crumbs, then mix with melted butter. Press into a 9-inch tart pan, bake for 10 minutes, and let cool.
Make the Filling
  1. Beat the cream cheese and cacao bliss spread until smooth. Whip cream with powdered sugar and vanilla until soft peaks form. Fold whipped cream into cream cheese mixture.
Assemble the Tart
  1. Pour filling into the cooled crust and smooth the top. Melt white chocolate and pipe it onto the tart.
Chill
  1. Place tart in the refrigerator for at least 2 hours to set.

Nutrition

Serving: 1sliceCalories: 320kcalCarbohydrates: 35gProtein: 4gFat: 18gSaturated Fat: 10gPolyunsaturated Fat: 1gMonounsaturated Fat: 5gCholesterol: 50mgSodium: 200mgPotassium: 150mgFiber: 2gSugar: 20gVitamin A: 500IUVitamin C: 1mgCalcium: 30mgIron: 0.5mg

Notes

Chill tools for better whipped cream texture. Taste and adjust sweetness as needed. Store leftovers in the fridge for up to a week.

Tried this recipe?

Let us know how it was!

Spooktacular Halloween Milkshake Bar for Kids' Fun

October 22, 2025 by Grace Snow Leave a Comment

As autumn leaves swirl outside and the scent of cinnamon fills the air, it’s time to conjure up some Halloween magic right in your kitchen. What could be more delightful than a Customizable Kid-Friendly Halloween Milkshake Bar? Creating this fun treat is not just easy—it transforms your family’s Halloween celebration into an interactive festivity, where kids can unleash their creativity with delicious mix-ins and toppings. The joy of crafting a personalized milkshake together makes it a fantastic bonding activity, plus, you'll find it’s a crowd-pleaser that guarantees smiles all around. Ready to mix up some spooky sweetness? Let’s dive into this enchanting recipe that’s sure to turn your Halloween into a creamy, dreamy delight!

Why is This Milkshake Bar So Fun?

Interactive Experience: The Halloween Milkshake Bar allows kids to unleash their creativity, customizing their own spooky drinks with endless options.
Easily Customizable: Choose from a variety of ice cream flavors and colorful toppings, making it a treat that caters to every child's taste.
Quick and Simple: With easy steps and common ingredients, you can whip up this festive delight in no time, perfect for busy families.
Makes Wonderful Memories: Working together to create personalized milkshakes turns a simple treat into a delightful bonding experience.
Perfect for Parties: Serve this at a Halloween gathering, and watch as kids get excited over crafting their unique concoctions while keeping the fun flowing!

Halloween Milkshake Bar Ingredients

For the Milkshake Base
• Ice Cream – This is the heart of your Halloween milkshake bar; choose any flavor your kids adore!
• Whole Milk – Adjusts the thickness; for a thicker shake, use less, or add more for a slushier vibe.
• Heavy Whipping Cream – Essential for that luscious homemade whipped cream topping!

For the Whipped Cream
• Vanilla Extract – A splash of this enhances the whipped cream's flavor beautifully.
• Powdered Sugar – Sweetens the whipped cream, making it an irresistible addition to every shake.

For the Toppings
• Colorful Sprinkles – These add a festive and fun touch to your milkshakes, perfect for Halloween!
• Halloween-themed Candy – Use leftover candy for mix-ins, giving every shake a spooky surprise.
• Food Coloring – A few drops can transform your milkshake into a colorful festive treat!

Enjoy concocting an unforgettable Halloween milkshake bar that’s not just delicious but also a creative activity for the little ones!

Step‑by‑Step Instructions for Customizable Kid-Friendly Halloween Milkshake Bar

Step 1: Make Whipped Cream
Begin by pouring 1 cup of heavy whipping cream into your stand mixer bowl. Add 1-2 tablespoons of powdered sugar and a splash of vanilla extract. Mix on high speed for about 1-2 minutes, watching for the whipped cream to reach stiff peaks. Once it forms, stop mixing to avoid over-whipping—this homemade whipped cream will top off your Halloween Milkshake Bar perfectly!

Step 2: Prepare Milkshake Base
In a blender, combine 3-4 generous scoops of your favorite ice cream with ¼ cup of whole milk. Blend on medium speed until smooth and creamy; this should take about 30 seconds. If your milkshake seems too thick to pour, gradually add more milk until you reach the desired consistency. Aim for a thick, luscious texture that’s ideal for sipping!

Step 3: Chill and Assemble
While blending, consider chilling your milkshake glasses ahead of time in the freezer for about 10 minutes. This keeps your Halloween Milkshake Bar treats deliciously cold. Once chilled, pour the prepared milkshake into each glass, filling them about three-quarters full, allowing room for whipped cream and toppings without spilling over.

Step 4: Decorate with Whipped Cream
Using a piping bag or a simple spoon, generously pipe or dollop the homemade whipped cream atop each milkshake. The whipped cream should peak beautifully, creating an inviting look that enhances the festive presentation of your Halloween Milkshake Bar. For added flair, don’t hesitate to experiment with the decoration technique!

Step 5: Add Festive Toppings
Now comes the fun part! Encourage kids to add a variety of colorful toppings to their milkshakes. Sprinkle vibrant Halloween-themed sprinkles, crush some leftover candies, or even drizzle chocolate syrup for an extra indulgence. Let their creativity shine as they transform their milkshake into a spooky delight, making each one truly unique!

Step 6: Serve and Enjoy
Gather around the table for the big reveal! Present the whimsical Halloween Milkshake Bar with the finished milkshakes adorned with toppings and whipped cream. Remind everyone to enjoy their delicious creations immediately for the best experience. The visual feast of colors and textures will surely bring smiles, making this a festive highlight of your Halloween celebrations!

Expert Tips for the Halloween Milkshake Bar

  • Keep It Cold: Store ice cream over ice before serving to maintain the perfect creamy texture in your Halloween milkshake bar.
  • Pre-Scoop Ice Cream: Simplify the process for kids by having ice cream pre-scooped in bowls, allowing for carefree customization.
  • Make Whipped Cream Ahead: Homemade whipped cream tastes best; make it in advance to enhance the richness of your milkshakes.
  • Chill Glasses: Before serving, chill your glasses in the freezer for 10 minutes to keep each milkshake cool and refreshing.
  • Get Creative with Add-Ins: Encourage kids to use leftover Halloween candy and food coloring for unique flavors and spooky visuals!

How to Store and Freeze Halloween Milkshake Bar

Fridge: Keep any leftover whipped cream in an airtight container in the refrigerator for up to 3 days; simply re-whip before serving.

Freezer: Ice cream can be stored in the freezer for up to 2 months. Ensure it’s tightly sealed to prevent freezer burn and maintain its creamy texture.

Prepped Components: You can prepare the milkshake base ingredients ahead of time but avoid blending until you are ready to serve.

Serving Tip: Remember, Halloween Milkshake Bar creations are best enjoyed fresh, so assemble and serve immediately for optimal taste and enjoyment!

What to Serve with Customizable Kid-Friendly Halloween Milkshake Bar

As you gather your family for this delightful Halloween treat, consider some tasty companions to elevate the celebration.

  • Crispy Bat Wings: Perfect for spooky-themed gatherings, these baked chicken wings are seasoned to perfection, creating a crunchy contrast to the creamy milkshake.

  • Silly Sandwiches: Fun, bite-sized sandwiches cut into Halloween shapes make a playful addition. Their savory flavors balance the sweet richness of the milkshake.

  • Wacky Veggie Platter: A rainbow of fresh vegetables served with a tangy dip adds a healthy crunch. This crisp freshness brightens the festive atmosphere, encourage kids to munch while creating milkshakes.

  • Ghoulish Gelatin Cups: Colorful gelatin cups grab kids' attention. Their wiggly texture complements the milkshake, making dessert feel even more playful and fun in each bite.

  • Spooky Popcorn Mix: A blend of popcorn, candy corn, and chocolate pieces creates a chewy, crunchy delight. The sweetness pairs beautifully with the milkshake's creaminess.

  • Hot Chocolate or Pumpkin Spice Lattes: For a warm drink option, consider serving hot chocolate or pumpkin spice lattes in festive mugs. These comforting beverages provide a heartwarming touch on a chilly Halloween evening.

With these fun pairings, your Halloween Milkshake Bar turns into a festive feast that delights both the young and the young at heart!

Halloween Milkshake Bar Variations

Invite your family to unleash their creativity and customize this delightful Halloween treat in so many fun ways!

  • Chocolate Delight:
    Replace whole milk with chocolate milk for a rich, chocolatey flavor that every kid will adore.

  • Fruity Fun:
    Swap the ice cream for fruity flavors like strawberry or mango. The vibrant color and fresh taste will enliven your milkshake bar!

  • Candy Crunch:
    Add chunks of leftover Halloween candy as mix-ins for unexpected sweetness and crunch in every sip. Kids will love the surprise tucked away beneath the whipped cream.

  • Nutty Addition:
    Incorporate crushed nuts or nut butter for a delightful texture twist. A hint of almond extract in the milkshake can also enhance the flavor even further.

  • Spooky Colors:
    Use food coloring to create vibrant, festive shades in your milkshakes. A dash of green or purple adds a Halloween twist that’s visually appealing.

  • Minty Fresh:
    Mix in some mint extract or garnishes like crushed mint candies for a refreshing twist. The coolness will complement the sweetness perfectly!

  • Spiced Pumpkin:
    Add some pumpkin puree and spices like cinnamon or nutmeg for a seasonal touch. This twist will give your milkshake a cozy, autumnal vibe.

Feel free to mix and match these ideas! If you want even more inspiration, consider checking out other fun dessert options like our spooky desserts or perfect side treats like Halloween-themed snacks that pair wonderfully with this milkshake bar! Enjoy making your Halloween celebration truly special!

Make Ahead Options

Preparing your Customizable Kid-Friendly Halloween Milkshake Bar in advance can save precious time on the big day! You can make the homemade whipped cream up to 3 days ahead—just store it in an airtight container in the refrigerator to keep it fresh and fluffy. The milkshake base can also be prepped up to 24 hours prior; simply blend your ice cream and whole milk, then refrigerate it in a sealed container. To serve, just give the shake a quick stir and pour it into chilled glasses before topping with the whipped cream and festive decorations, ensuring your Halloween party whips up in no time, with all the fun intact!

Halloween Milkshake Bar Recipe FAQs

What kind of ice cream should I use?
Absolutely, you can use any ice cream flavor your kids love! I recommend using classic flavors like vanilla, chocolate, or even fun fruity options to cater to every taste at your Halloween Milkshake Bar. For an extra twist, consider seasonal flavors like pumpkin or candy corn!

How should I store leftover whipped cream?
Leftover whipped cream can be stored in an airtight container in the refrigerator for up to 3 days. Before serving it again, simply give it a quick re-whip to restore its texture and fluffiness—trust me, it makes all the difference!

Can I freeze the milkshake base?
While it’s best to enjoy the milkshake fresh, you can freeze the milkshake base. To do this, blend your milkshake ingredients and pour them into an airtight container. Freeze for up to 1 month. When you're ready to enjoy, thaw it in the fridge overnight and blend it again for a creamy texture!

What if my milkshake is too thick?
No worries! If your milkshake turns out too thick, simply add a little more whole milk and give it a good blend until you reach your desired consistency. Aim for a nice, creamy pour that’s tasty for sipping!

Are there any allergy considerations for this recipe?
Yes, it’s essential to consider dietary restrictions when creating your Halloween Milkshake Bar. For dairy allergies, opt for non-dairy ice creams and plant-based whipped toppings. Always check ingredient labels on toppings, as many candies contain allergens like nuts or gluten.

Can I make this milkshake bar ahead of time?
Definitely! You can prep some components ahead of time. Scoop the ice cream and store it in the freezer, and make the whipped cream a day in advance, keeping it in the fridge. When you're ready to serve, just blend the milkshake and let the kids have fun with the toppings at your Halloween Milkshake Bar!

Halloween Milkshake Bar

Spooktacular Halloween Milkshake Bar for Kids' Fun

Create a customizable Halloween Milkshake Bar for kids to enjoy endless fun and creativity with delicious mix-ins and toppings.
Print Recipe Pin Recipe
Prep Time 10 minutes mins
Chilling Time 10 minutes mins
Total Time 20 minutes mins
Servings: 6 milkshakes
Course: Dessert
Calories: 450
Ingredients Equipment Method Nutrition Notes

Ingredients
  

For the Milkshake Base
  • 3-4 scoops Ice Cream Any flavor your kids adore
  • 1/4 cup Whole Milk Adjust for thickness
  • 1 cup Heavy Whipping Cream For whipped cream topping
For the Whipped Cream
  • 1-2 tablespoons Powdered Sugar To sweeten
  • 1 teaspoon Vanilla Extract Enhances flavor
For the Toppings
  • 1 cup Colorful Sprinkles Festive touch
  • 1 cup Halloween-themed Candy For mix-ins
  • drops Food Coloring To customize colors

Equipment

  • Stand Mixer
  • Blender
  • piping bag
  • Milkshake Glasses

Method
 

Step-by-Step Instructions
  1. Make Whipped Cream: Pour heavy whipping cream into stand mixer, add powdered sugar and vanilla extract. Mix on high until stiff peaks form.
  2. Prepare Milkshake Base: In a blender, combine ice cream and whole milk. Blend until smooth, adjusting milk for desired consistency.
  3. Chill and Assemble: Chill milkshake glasses in the freezer for 10 minutes. Pour milkshake into glasses, filling about three-quarters full.
  4. Decorate with Whipped Cream: Pipe or dollop homemade whipped cream on top of each milkshake.
  5. Add Festive Toppings: Encourage kids to add sprinkles, crushed candies, or chocolate syrup to their milkshakes.
  6. Serve and Enjoy: Present the Halloween Milkshake Bar and remind everyone to enjoy their creations immediately.

Nutrition

Serving: 1milkshakeCalories: 450kcalCarbohydrates: 60gProtein: 6gFat: 22gSaturated Fat: 14gCholesterol: 80mgSodium: 150mgPotassium: 350mgFiber: 1gSugar: 45gVitamin A: 15IUCalcium: 20mgIron: 2mg

Notes

For optimal taste, serve immediately after assembling the milkshakes.

Tried this recipe?

Let us know how it was!

Delicious Nutter Butter Turkey Cookies for a Fun Thanksgiving Treat

October 20, 2025 by Grace Snow Leave a Comment

As I stood in my kitchen, colorful candy melts scattered across my countertop, a burst of excitement hit me. It wasn’t just another dessert day; I was on a mission to create the cutest Nutter Butter Turkey Cookies for Thanksgiving! These adorable no-bake treats are not only easy to whip up but also bring a festive flair to any holiday gathering. Imagine the smiles on your loved ones' faces as they discover these whimsical cookies, featuring creamy peanut butter cookies as the base and vibrant candy decorations that make them irresistible to both kids and adults alike. The simple prep allows you to spend more time enjoying the festivities, making these treats a perfect addition to your Thanksgiving dessert table. So, are you ready to channel your inner holiday baker and impress your family with this fun and delightful creation? Let’s get started!

Why Nutter Butter Turkey Cookies Stand Out?

Irresistible Fun: Who can resist these charming little turkeys? They’re perfect for adding a playful spirit to your Thanksgiving celebration!

No-Bake Simplicity: No ovens necessary! Just melt, assemble, and decorate—making them a breeze for both novice and experienced bakers.

Creative Customization: Get creative! Swap candies and cookie types to make each turkey uniquely yours. Try adding a twist with colorful melts or different candies!

Crowd-Pleasing Treat: With their delightful combination of creamy and crunchy textures, these cookies are guaranteed to be a hit with everyone at your gathering—just like my Crockpot Butter Chicken for a main dish that’s equally loved!

Festive Flair: These cookies elevate your dessert table, making them not just a treat but a centerpiece that draws smiles and conversation.

Roll up your sleeves, embrace the holiday spirit, and create these delightful Nutter Butter Turkey Cookies that your family will cherish!

Nutter Butter Turkey Cookies Ingredients

• Get ready to craft these festive delights!

For the Turkey Bodies

  • Nutter Butter Cookies (regular peanut-shaped) – They serve as the main base, offering a delicious peanut flavor and sturdy structure. Substitutions: Try Golden Oreos for a fun twist!
  • Nutter Butter Cookies (large round) – Perfect for forming the turkey's head; essential for that iconic look. Notes: Ensure you use the large round ones for the best results.

For the Decorations

  • Candy Eyes – These charming little treats bring your turkey to life! Notes: A must-have for that adorable touch.
  • Candy Corn – Vibrant feathers that add color and crunch to your creations. Notes: Fresh candy corn sticks well and enhances the fun!

For Assembly

  • Candy Melts (white) – Helps hold everything together and adds a sweet coating. Notes: Melt until smooth for the best adhesion.
  • Reese’s Pieces (orange, cut in half) – Makes for delightful turkey beaks; they add a lovely oaky flavor. Substitutions: Orange M&Ms work nicely too!
  • Red Cookie Icing – Perfect for the turkey's wattle for that extra festive flair. Notes: Alternatively, melted red candy wafers can be used.

Embrace your creativity and let’s bring these adorable Nutter Butter Turkey Cookies to life this Thanksgiving! Your loved ones will be thrilled with this delicious no-bake treat!

Step‑by‑Step Instructions for Nutter Butter Turkey Cookies

Step 1: Prep the Work Area
Begin by lining a large baking sheet with parchment paper to ensure an easy cleanup later on. This will act as your workspace for assembling the Nutter Butter Turkey Cookies. It’s essential to have a clear and organized area, so gather all your ingredients and tools close by to ensure a smooth and efficient assembly process.

Step 2: Melt Candy
In a microwave-safe bowl, add the white candy melts and heat them in the microwave at 30-second intervals. Stir the melts after each interval until they are fully melted and reach a smooth consistency, which usually takes about 1-2 minutes total. Once smooth, let the melted candy cool slightly before using to ensure it can efficiently adhere the cookie components together.

Step 3: Assemble Turkeys
To create the turkey bodies, spread a small dollop of the melted candy onto the bottom half of a large round Nutter Butter cookie. Then, gently press a regular peanut-shaped Nutter Butter cookie onto the lower half of the coated cookie. Hold it in place briefly until it starts to set, ensuring your fabulous Nutter Butter Turkey Cookies have a sturdy construction.

Step 4: Add Feathers
While the melted candy is still warm and tacky, take five pieces of candy corn and swiftly press them into the top of the peanut-shaped cookie to form the turkey's colorful feathers. Position the candy corn in a fan shape, and ensure they are pushed in well enough to stick, adding a bright and festive touch to your adorable treats.

Step 5: Apply Eyes & Beak
Using a skewer, dip it into the remaining melted candy and carefully place two candy eyes on the round Nutter Butter cookie to give your turkey some personality. For the turkey's beak, position a half piece of Reese’s on the cookie, securing it in place with a dab of melted candy. The combination of eyes and beak will bring your Nutter Butter Turkey Cookies to life!

Step 6: Decorate with Icing
To finish off your whimsical turkeys, take the red cookie icing and carefully pipe a wattle or snood on the round cookie right above the beak. This decorative touch adds to the turkey's charm and makes your Nutter Butter Turkey Cookies incredibly festive, creating an appealing visual that will delight everyone at your Thanksgiving gathering.

Step 7: Set
Once all your decoration is complete, allow the assembled Nutter Butter Turkey Cookies to set for about 15-20 minutes at room temperature. For quicker results, you can refrigerate the cookies for 5-10 minutes to help the candy harden. This final step ensures that all components are firmly in place, making your cookies ready to impress your guests!

Expert Tips for Nutter Butter Turkey Cookies

  • Cool Down Candy: Allow melted candy to cool slightly before use to prevent runniness, ensuring better adherence among the layers of your Nutter Butter Turkey Cookies.

  • Preparation is Key: Gather all ingredients and tools before starting the assembly process, making it easier and faster to create your whimsical cookies.

  • Use Fresh Candy Corn: Opt for fresh candy corn to ensure they stick well in the melted candy, creating vibrant and secure feathers for your turkey cookies.

  • Quick Setting Trick: For quicker hardening of your cookies, refrigerate them for 5-10 minutes after assembly to speed up the setting process, allowing you to enjoy your creations sooner.

  • Experiment with Variations: Don’t be afraid to customize your turkey cookies by trying different candies or cookie types, making each batch truly unique and exciting for your Holiday table!

Nutter Butter Turkey Cookies Variations

Get ready to personalize your festive treat with these fun variations that add a delightful twist to your Nutter Butter Turkey Cookies!

  • Dairy-Free: Swap the candy melts for dairy-free chocolate melts to keep the flavor rich and suitable for dairy-sensitive friends.

  • Flavor Boost: Add a drizzle of chocolate icing over the turkey bodies for an extra layer of sweetness. This will create a delightful contrast to the candy decorations!

  • Nut-Free: Replace Nutter Butter cookies with crunchy digestive biscuits or graham crackers to accommodate nut allergies, keeping the fun factor intact.

  • Spicy Kick: Introduce a touch of heat by using spicy cinnamon candies in place of traditional candy corn. This will add a surprising twist to your cookies!

  • Festive Sprinkles: After decorating, generously sprinkle holiday-themed edible glitter or colorful sprinkles over the cookies. The added sparkle makes them even more festive!

Bring these variations to life and make your Nutter Butter Turkey Cookies an unforgettable part of your Thanksgiving tradition! And if you’re looking for more festive treats, don't miss out on my delightful Eggnog Cookies Soft or these charming Thumbprint Cookies Melt that are sure to impress all your holiday guests!

Make Ahead Options

These Nutter Butter Turkey Cookies are a fantastic option for meal prep, allowing you to streamline your Thanksgiving dessert preparations! You can assemble the cookie bodies (Nutter Butter cookies) and store them in an airtight container for up to 3 days at room temperature without any loss of quality. Additionally, you can melt the candy melts and keep them in the refrigerator for up to 24 hours. When you’re ready to serve, simply reheat the candy melts until smooth, assemble the turkeys with candy eyes and feathers, and let them set. This way, you can enjoy the delightful process of decorating without the last-minute rush, ensuring your adorable Nutter Butter Turkey Cookies are just as delicious and festive!

Storage Tips for Nutter Butter Turkey Cookies

  • Room Temperature: Keep your cookies in an airtight container at room temperature for up to 2 weeks. This will maintain their delightful crunch and freshness.

  • Fridge: For an extended shelf life, store your Nutter Butter Turkey Cookies in the refrigerator for up to 1 month. The cool environment helps preserve the decorations.

  • Freezer: Avoid freezing these cookies, as the thawing process can compromise the integrity of the candy decorations, making them less appealing and messier.

  • Reheating: These cookies are best enjoyed cold or at room temperature. If stored in the fridge, simply take them out a few minutes before serving for optimal texture and flavor!

What to Serve with Nutter Butter Turkey Cookies

Elevate your Thanksgiving spread by pairing these whimsical cookies with delightful accompaniments that create a memorable feast experience.

  • Pumpkin Spice Latte: Warm your guests with this seasonal favorite, enhancing the cozy flavors of Thanksgiving with every sip of rich and spicy bliss.

  • Cranberry Sauce: The tartness of this classic side offers a refreshing contrast to the sweet cookies, balancing the overall dessert experience beautifully.

  • Vanilla Ice Cream: Creamy and sweet, a scoop of vanilla ice cream provides a delightful temperature contrast to the cookies’ crunch, making every bite heavenly.

  • Apple Cider: Serve a chilled or warm glass of fresh apple cider. Its crispness complements the cookies while evoking those nostalgic autumn vibes.

  • Chocolate Dip: Melt some chocolate for a dipping option. The rich, velvety flavor of chocolate enriches the sweetness of the cookies, making them even more indulgent!

  • Pecan Pie: A slice of this Thanksgiving staple provides a textural contrast and pairs well with the cookies' festive aesthetics, creating harmony on your dessert table.

Entice your family with these complementary treats, turning your Thanksgiving dessert spread into an unforgettable celebration of flavors and joy!

Nutter Butter Turkey Cookies Recipe FAQs

What type of Nutter Butter cookies should I use?
For the body of the turkey, you'll want regular peanut-shaped Nutter Butter cookies as they provide the perfect flavor and structure. For the head, be sure to use large round Nutter Butter cookies to achieve that lovable turkey look. If you're feeling adventurous, Golden Oreos can also be a fun substitute for a different flavor profile!

How should I store leftover Nutter Butter Turkey Cookies?
To keep your cookies fresh, store them in an airtight container at room temperature for up to 2 weeks. If you want to extend their shelf life, you can refrigerate them for up to 1 month. Just be careful not to freeze these cookies, as the thawing process could ruin the delightful candy decorations.

Can I freeze Nutter Butter Turkey Cookies?
It's best to avoid freezing these adorable cookies. Freezing can cause the candy decorations to lose their shape and texture when thawed. Instead, store them in an airtight container at room temperature or in the refrigerator to maintain their festive look and flavor.

What should I do if my melted candy is too runny?
If you find your melted candy is too runny, it's usually because it hasn't cooled enough. Let it sit for a couple of minutes after melting to allow it to thicken slightly. If it’s still too runny after cooling, you could try adding a bit more candy melt and remelting it carefully. Remember, a thicker consistency will help with better adhesion when assembling your cookies!

Are Nutter Butter Turkey Cookies suitable for those with allergies?
Nutter Butter cookies contain peanut butter and can pose a risk for those with nut allergies. When preparing these fun treats, be sure to inform guests about the ingredients to ensure everyone can safely enjoy them. If you have guests with allergies, consider using nut-free alternatives or consult a list of ingredients to find suitable substitutes.

Nutter Butter Turkey Cookies

Delicious Nutter Butter Turkey Cookies for a Fun Thanksgiving Treat

Create charming Nutter Butter Turkey Cookies for Thanksgiving - a delightful no-bake treat that will impress guests!
Print Recipe Pin Recipe
Prep Time 20 minutes mins
Setting Time 20 minutes mins
Total Time 40 minutes mins
Servings: 12 cookies
Course: Dessert
Cuisine: American
Calories: 120
Ingredients Equipment Method Nutrition Notes

Ingredients
  

For the Turkey Bodies
  • 12 pieces Nutter Butter Cookies (regular peanut-shaped) Substitutions: Try Golden Oreos for a fun twist!
  • 6 pieces Nutter Butter Cookies (large round) Ensure you use the large round ones for the best results.
For the Decorations
  • 1 pack Candy Eyes A must-have for that adorable touch.
  • 1 cup Candy Corn Fresh candy corn sticks well and enhances the fun!
For Assembly
  • 1 cup Candy Melts (white) Melt until smooth for the best adhesion.
  • 12 pieces Reese’s Pieces (orange, cut in half) Substitutions: Orange M&Ms work nicely too!
  • 1 bottle Red Cookie Icing Alternatively, melted red candy wafers can be used.

Equipment

  • Microwave-safe bowl
  • Baking Sheet
  • Parchment Paper
  • skewer

Method
 

Step-by-Step Instructions
  1. Prep the Work Area: Begin by lining a large baking sheet with parchment paper to ensure an easy cleanup later on.
  2. Melt Candy: In a microwave-safe bowl, add the white candy melts and heat them in the microwave at 30-second intervals until fully melted, about 1-2 minutes.
  3. Assemble Turkeys: Spread a small dollop of the melted candy onto the bottom half of a large round Nutter Butter cookie and press a regular peanut-shaped cookie onto it.
  4. Add Feathers: While the melted candy is still warm, press five pieces of candy corn into the top of the peanut-shaped cookie to form the turkey's feathers.
  5. Apply Eyes & Beak: Use a skewer dipped in the melted candy to place two candy eyes on the round cookie, then add a half piece of Reese’s for the beak.
  6. Decorate with Icing: Pipe red icing to create a wattle on the round cookie right above the beak.
  7. Set: Allow the assembled cookies to set for about 15-20 minutes or refrigerate for 5-10 minutes for quicker results.

Nutrition

Serving: 1cookieCalories: 120kcalCarbohydrates: 15gProtein: 2gFat: 6gSaturated Fat: 2gSodium: 60mgPotassium: 30mgFiber: 1gSugar: 8gIron: 2mg

Notes

These cookies can be customized with different candies for a unique twist. Make sure to use fresh candy corn for the best results.

Tried this recipe?

Let us know how it was!

Craft Adorable Pine Cone Turkeys for Your Thanksgiving Decor

October 20, 2025 by Grace Snow Leave a Comment

As I rummaged through the autumn leaves, I stumbled upon an idea that combines nature's charm with our holiday spirit—adorable Pine Cone Turkeys! This delightful DIY craft not only provides a perfect way to engage kids and adults alike but also creates personalized decorations that will brighten any Thanksgiving gathering. With just a few simple materials like pinecones, acrylic paint, and pipe cleaners, you can whip up these whimsical turkeys without breaking the bank. Plus, they double as unique table centerpieces or festive gifts, adding a warm, homey touch to your holiday decor. Are you ready to unleash your creativity and embrace this fun crafting adventure? Let's dive in!

Why Make Pine Cone Turkeys?

Family Fun: This craft is perfect for both kids and adults, making it a fantastic way to bond over creativity during the Thanksgiving season.

Budget-Friendly: Using simple supplies like pinecones, acrylic paint, and pipe cleaners means you can create deliciously charming decor without overspending.

Unique Decor: Each turkey is a one-of-a-kind masterpiece, adding a personal touch to your holiday table or mantle.

Versatile Use: Not only do they serve as adorable centerpieces, but they also make perfect gifts or festive party favors to delight your guests!

Memorable Tradition: Crafting Pine Cone Turkeys can become a cherished family tradition, linking your loved ones to the joy of Thanksgiving decor.

Pine Cone Turkey Ingredients

• Gather your supplies to start crafting these delightful Pine Cone Turkeys!

For the Turkey Body

  • Pinecones – Look for medium-sized ones (about 3x3 inches) for a sturdy base; they provide rustic charm to your decorations.

For the Feathers

  • Matte Acrylic Craft Paint – Choose vibrant colors like orange, yellow, and red to brighten your turkeys' feathers; easily found at craft or dollar stores for budget-friendly fun.

For the Features

  • Craft Paper Scraps – Use colorful scraps to create beaks and wattles; orange, yellow, and red are festive color choices to match the Thanksgiving spirit.
  • Pipe Cleaners – Use these lively colors for legs and facial features; they’re flexible and can easily be shaped into charming turkey legs.
  • Googly Eyes – 15mm (0.6-inch) eyes add an adorable touch to each turkey's personality; they make your creations come alive!

Enjoy crafting these Pine Cone Turkeys and let your creativity shine as you personalize each turkey!

Step‑by‑Step Instructions for Pine Cone Turkeys

Step 1: Paint the Feathers
Begin by selecting your matte acrylic craft paint in vibrant colors like orange, yellow, and red. Using a paintbrush, apply the paint to the tips of each pinecone, making sure to cover them generously while leaving some sections natural for a charming contrast. Allow the painted feathers to dry for about 15-20 minutes before proceeding, ensuring the colors stay bold and lively.

Step 2: Make the Legs
While the feathers dry, take your pipe cleaners and cut them into lengths suited for turkey legs. Bend each piece into a U-shape to form the legs. Once shaped, secure them to the base of the pinecone by applying hot glue, making sure they are firmly attached. Ensure the legs are evenly spaced and provide a sturdy foundation for your Pine Cone Turkeys.

Step 3: Shape the Faces
Next, take a pipe cleaner and curl it into a spiral shape to create the turkey’s head. This will add whimsy and character to your Pine Cone Turkeys. Once shaped, carefully secure the spiral to the top of the pinecone using a small amount of hot glue. This step starts giving your turkey its charming personality, so have fun with the shape!

Step 4: Cut and Attach Features
Now it's time to bring your Pine Cone Turkeys to life! Cut small shapes from your craft paper scraps to form beaks and wattles, sticking with festive colors like orange and red. Use hot glue to attach these features along with googly eyes to the curled pipe cleaner. Position them to give your turkey an endearing expression, ensuring the features are securely glued.

Step 5: Assemble
Finally, attach the completed face to the front of the pinecone using a generous dab of hot glue. Hold it in place for a few moments to allow the glue to set. Once secure, step back and admire your Pine Cone Turkeys, ready to bring warmth and charm to your Thanksgiving decorations. Make sure to let your creations fully dry in a stable location before displaying them.

Pine Cone Turkeys Variations & Substitutions

Feel free to get creative and customize your Pine Cone Turkeys to make them uniquely yours!

  • Metallic Paints: Use metallic paints instead of matte for a glamorous holiday look. These shimmering turkeys will catch everyone's eye on your table.

  • Pastel Colors: Swap bright colors for soft pastels if you're aiming for a cheerful, springtime vibe rather than traditional autumn hues. This gives a fresh and fun twist!

  • Hand-Drawn Eyes: Instead of googly eyes, draw or paint faces for a personal touch. You can let kids create their own unique expressions, making every turkey truly special.

  • Patterned Paper: Integrate patterned scrapbook paper for more colorful beaks and wattles. Think polka dots or florals to add flair and personality to your turkeys.

  • Twisted Pipe Cleaners: Create spiral or braided legs using multiple colors of pipe cleaners for extra pizzazz, adding a whimsical twist to your turkey creations.

  • Felt Features: Try using felt instead of paper for the beaks and wattles. They offer a soft texture that can elevate the aesthetic of your turkey while being easy to cut and glue.

  • Natural Decor: Incorporate small pine needles or acorns as additional decorations around your turkeys, enhancing their connection to nature.

  • Spicy Touch: Add a little heat to your crafting vibe by sharing some spicy recipes or hot beverages to enjoy while creating these adorable decorations. Cozy blankets and a hot cup of pumpkin spice latte will warm up your crafting time!

Make Ahead Options

These adorable Pine Cone Turkeys are perfect for busy home cooks looking to simplify their Thanksgiving preparations! You can paint the pinecones and shape the legs up to 24 hours in advance; just store them in a cool, dry place to maintain their vibrant colors and quality. For the facial features, cut out the beaks and wattles, as well as prepare the googly eyes ahead of time—keeping them in a sealed bag will ensure they stay fresh until you’re ready to finish. When it’s time to gather your family and assemble, simply glue the features onto your painted pinecones, and you’ll have delightful decorations ready in no time, allowing you to enjoy the holiday spirit without stress!

What to Serve with Adorable Pine Cone Turkeys?

Bring your Thanksgiving table to life with delightful pairings that enhance both your meal and this charming decor.

  • Savory Stuffing: A classic walnut and sage stuffing complements the earthy flavor of your Thanksgiving feast while echoing the rustic charm of the pine cone turkeys.

  • Cranberry Sauce: This tangy, sweet sauce adds a refreshing contrast to the savory meats and side dishes, brightening your table and palate alongside your creative decor.

  • Maple Glazed Carrots: Roasted carrots tossed in maple syrup create a luscious sweetness that ties harmoniously with your holiday spread and echoes the autumn colors of your turkeys.

  • Pumpkin Pie: Nothing celebrates Thanksgiving quite like creamy pumpkin pie. Its warm spices create a comforting end to your meal, echoing the festive spirit brought by your crafted turkeys.

  • Herb Roasted Turkey: While you showcase your adorable pine cone versions, savor a succulent herb-roasted turkey, a centerpiece that ties together your crafting journey with a delicious tradition.

  • Spiced Apple Cider: Warm spiced apple cider is a perfect seasonal drink to serve guests, embracing the cozy holiday atmosphere while inviting them to sip and enjoy their surroundings.

  • Garlic Mashed Potatoes: Creamy garlic mashed potatoes provide the ultimate comfort food, enriching your meal while bringing a delightful balance to your Thanksgiving table.

  • Roasted Brussels Sprouts: Crispy Brussels sprouts with a hint of balsamic glaze engage your guests with their texture and flavor, making them an ideal side alongside your festive decor.

Each of these pairings not only blends perfectly with your homemade meal but also complements the whimsical charm of your pine cone turkeys!

Storage Tips for Pine Cone Turkeys

  • Room Temperature: Keep your Pine Cone Turkeys in a dry, stable area, away from direct sunlight to maintain their colorful appearance and structure.

  • Fridge: Not recommended; these decorations do not require refrigeration as they’re not perishable.

  • Display: Arrange turkeys on your mantel or dining table where they can be appreciated. Just ensure they are secure on the surface to prevent tipping.

  • Make-Ahead Tips: You can craft these turkeys in advance. They can be stored in a box or basket, keeping them safe until it's time for Thanksgiving display!

Expert Tips for Pine Cone Turkeys

  • Choose Dry Pinecones: Ensure your pinecones are completely dry to help glue adhere better and make painting easier.

  • Allow Drying Time: After painting, permit 15-20 minutes of drying time between applications to avoid mixing colors and maintain vibrancy.

  • Second Coat Advantage: For a deeper color, don’t hesitate to apply a second coat of paint—this enhances the brightness of your Pine Cone Turkeys.

  • Trim Legs if Necessary: If the pipe cleaner legs seem too long, gently trim them to create a better proportion for your turkey’s appearance.

  • Mix Feature Shapes: Get creative with various shapes and colors for beaks and wattles, adding a unique flair to each of your delightful turkeys.

Pine Cone Turkeys Recipe FAQs

How do I choose the right pinecones for my turkeys?
Choosing the right pinecones is essential for building sturdy Pine Cone Turkeys. Look for medium-sized pinecones, approximately 3x3 inches, that are dry and free from dark spots or mold. This ensures a solid base for decoration and makes painting easier.

How should I store my Pine Cone Turkeys after making them?
Store your Pine Cone Turkeys at room temperature in a dry, stable area, away from direct sunlight. Placing them on a mantel or a dining table where they can be admired is ideal. Just make sure they're secured on the surface to prevent them from tipping over.

Can I freeze my Pine Cone Turkeys for later use?
Freezing is not recommended for Pine Cone Turkeys, as they are decorative items and don’t require refrigeration. Keeping them in a stable environment is best to preserve their appearance and structural integrity.

What should I do if my paint is mixing on the pinecones?
If you notice your colors mixing while painting, it's likely the paint isn't dry yet. To prevent this, allow each layer of paint to dry for 15-20 minutes before applying additional coats. If you're already mixing colors, let it dry fully, then consider painting over with a second coat once it's hardened.

Are these turkeys safe for pets or children?
Yes, Pine Cone Turkeys can be safe around pets and children, but supervision is encouraged. Some materials, like googly eyes and pipe cleaners, could pose a choking hazard if removed. It's always best to keep an eye on little ones and furry friends while they’re around your festive decorations.

Pine Cone Turkeys

Craft Adorable Pine Cone Turkeys for Your Thanksgiving Decor

Create delightful Pine Cone Turkeys that add a charming touch to your Thanksgiving decor, perfect for family bonding.
Print Recipe Pin Recipe
Prep Time 20 minutes mins
Total Time 20 minutes mins
Servings: 1 turkey
Course: Uncategorized
Cuisine: Thanksgiving
Ingredients Equipment Method Nutrition Notes

Ingredients
  

For the Turkey Body
  • 1 medium-sized Pinecone About 3x3 inches for a sturdy base.
For the Feathers
  • 3 colors Matte Acrylic Craft Paint Choose vibrant colors like orange, yellow, and red.
For the Features
  • 1 pack Craft Paper Scraps Use orange, yellow, and red for beaks and wattles.
  • 2 pieces Pipe Cleaners Use for legs and facial features.
  • 2 pcs Googly Eyes 15mm (0.6-inch) for personality.

Equipment

  • Paintbrush
  • Hot glue gun
  • Scissors

Method
 

Step-by-Step Instructions
  1. Begin by selecting your matte acrylic craft paint in vibrant colors. Using a paintbrush, apply the paint to the tips of each pinecone, making sure to cover them generously while leaving some sections natural. Allow to dry for about 15-20 minutes.
  2. While the feathers dry, take your pipe cleaners and cut them to form turkey legs. Bend into a U-shape and secure to the base with hot glue.
  3. Curl a pipe cleaner into a spiral shape for the turkey’s head and secure it to the top of the pinecone with hot glue.
  4. Cut shapes from craft paper scraps for beaks and wattles. Use hot glue to attach these features along with googly eyes to the curled pipe cleaner.
  5. Attach the completed face to the front of the pinecone using hot glue. Hold in place to set. Let dry before displaying your Pine Cone Turkeys.

Nutrition

Serving: 1turkey

Notes

Pine Cone Turkeys are a fun and budget-friendly craft that can become a cherished family tradition during Thanksgiving.

Tried this recipe?

Let us know how it was!
  • « Previous Page
  • 1
  • …
  • 30
  • 31
  • 32
  • 33
  • 34
  • …
  • 49
  • Next Page »

Welcome!

Hi, I’m Grace, a Sydney-based home cook with a passion for bold flavors and trending ingredients. Whether you’re a busy beginner or a seasoned foodie, you’ll find dishes here that are fresh, fun, and full of flavor.

More about me

Popular Recipes

  • Cheesy Chicken Garlic Bread Sandwich
    Cheesy Chicken Garlic Bread Sandwich for Cozy Family Moments
  • Easy Chicken Ranch Wraps
    Easy Chicken Ranch Wraps: Quick, Creamy & Totally Satisfying
  • Chicken Caesar Sandwiches
    Delicious Chicken Caesar Sandwiches for Quick Comfort Food
  • best Cuban sandwich
    The Best Cuban Sandwich You’ll Want Every Weeknight!

Footer

↑ back to top

About

  • Privacy Policy
  • Disclaimer
  • Terms & Conditions

Newsletter

  • Sign Up! for emails and updates

Contact

  • About me
  • Contact me

Copyright © 2025 TastyTrendIngredients