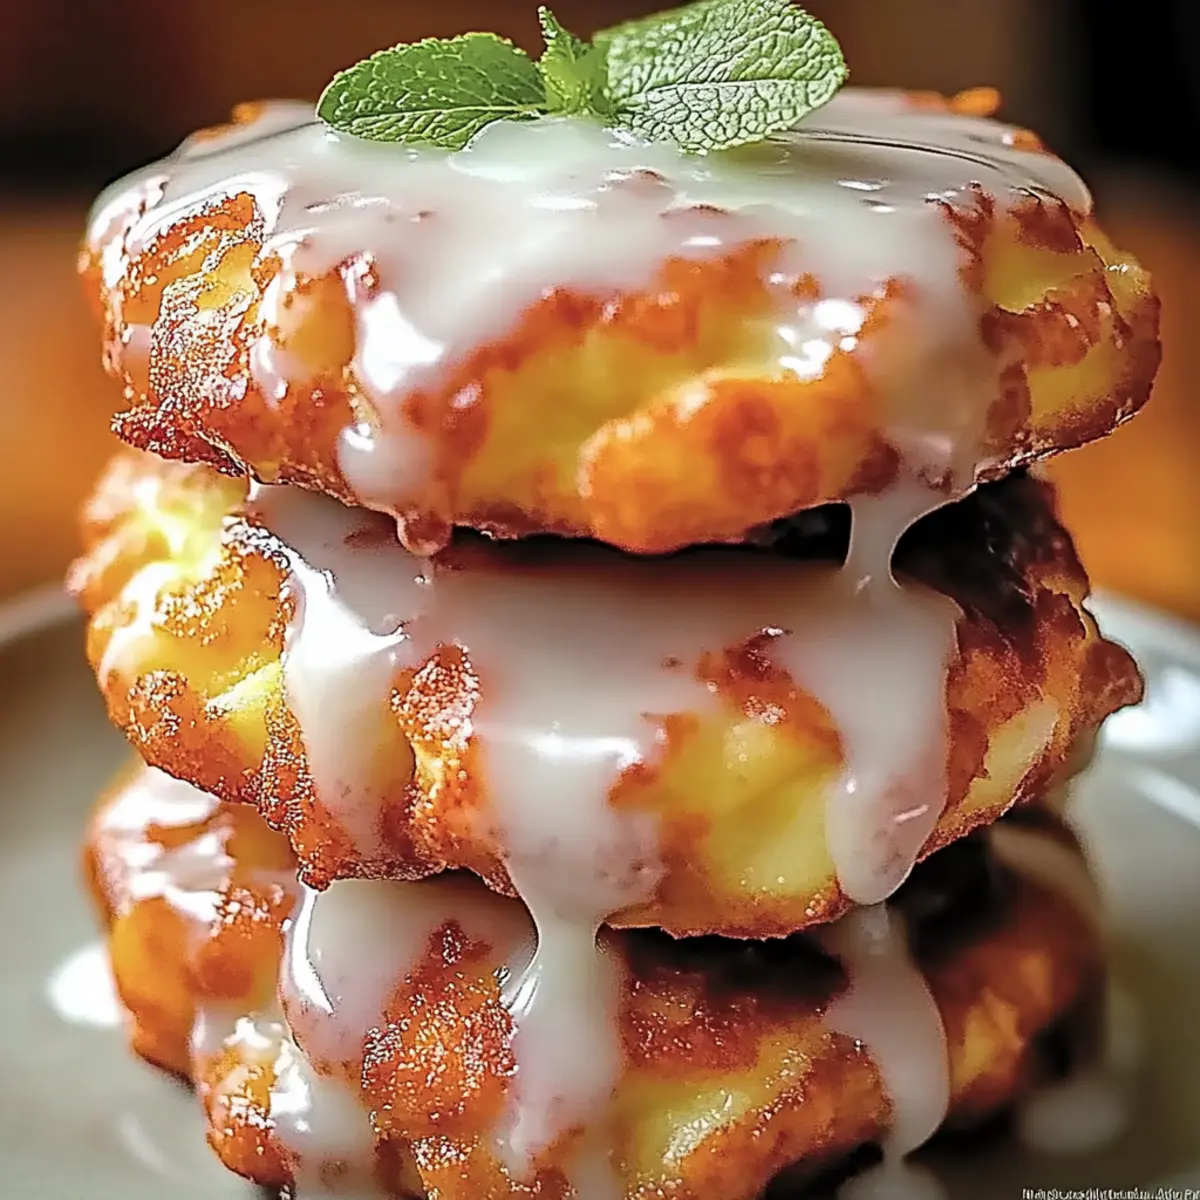
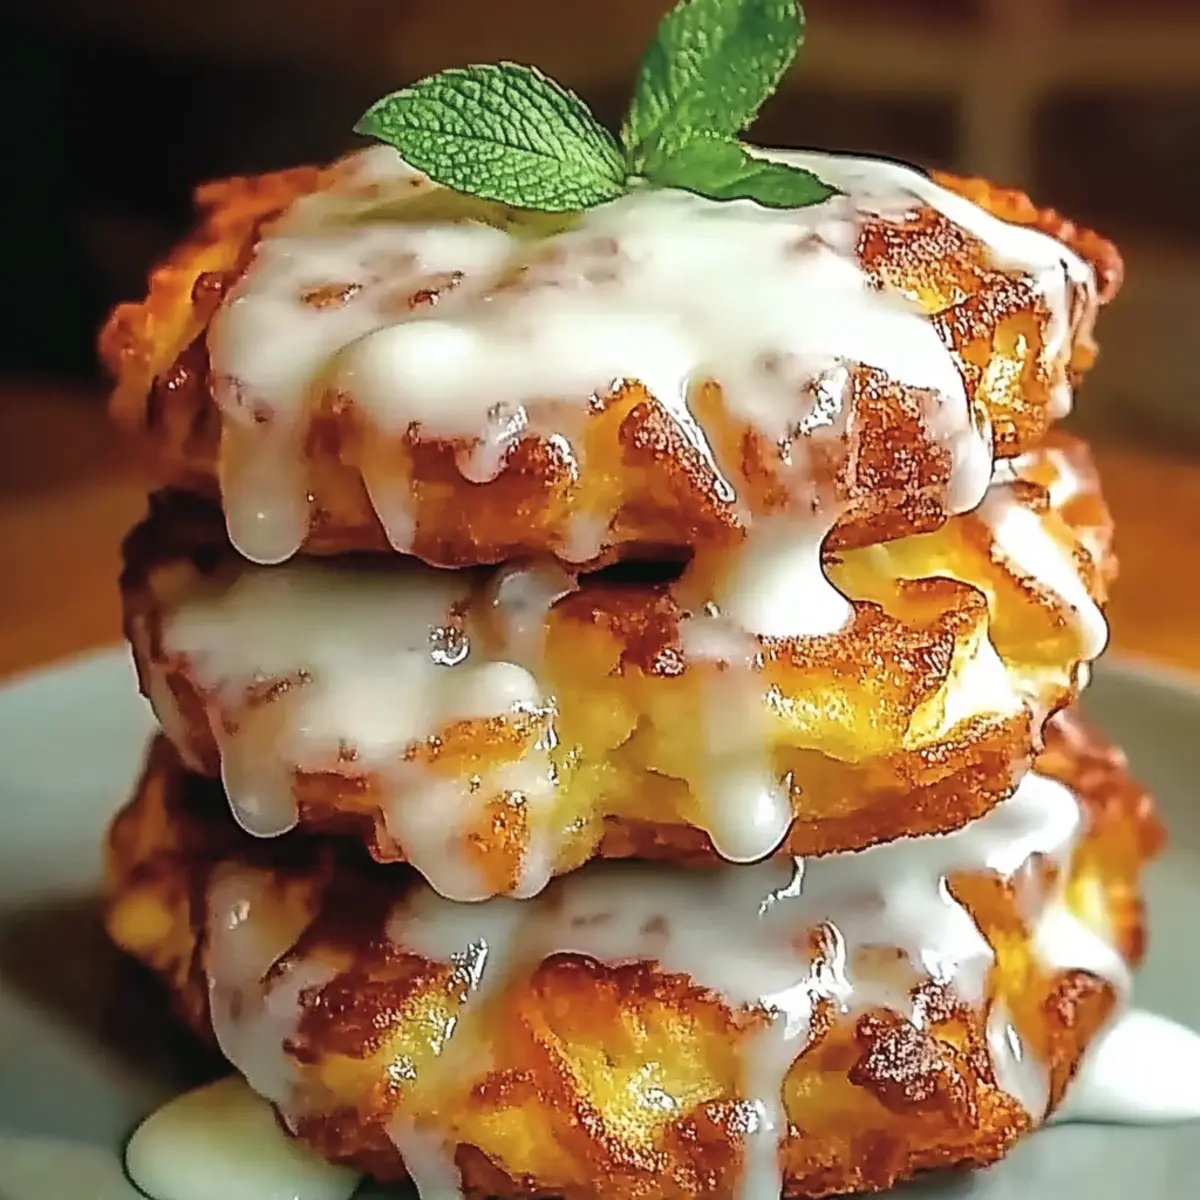
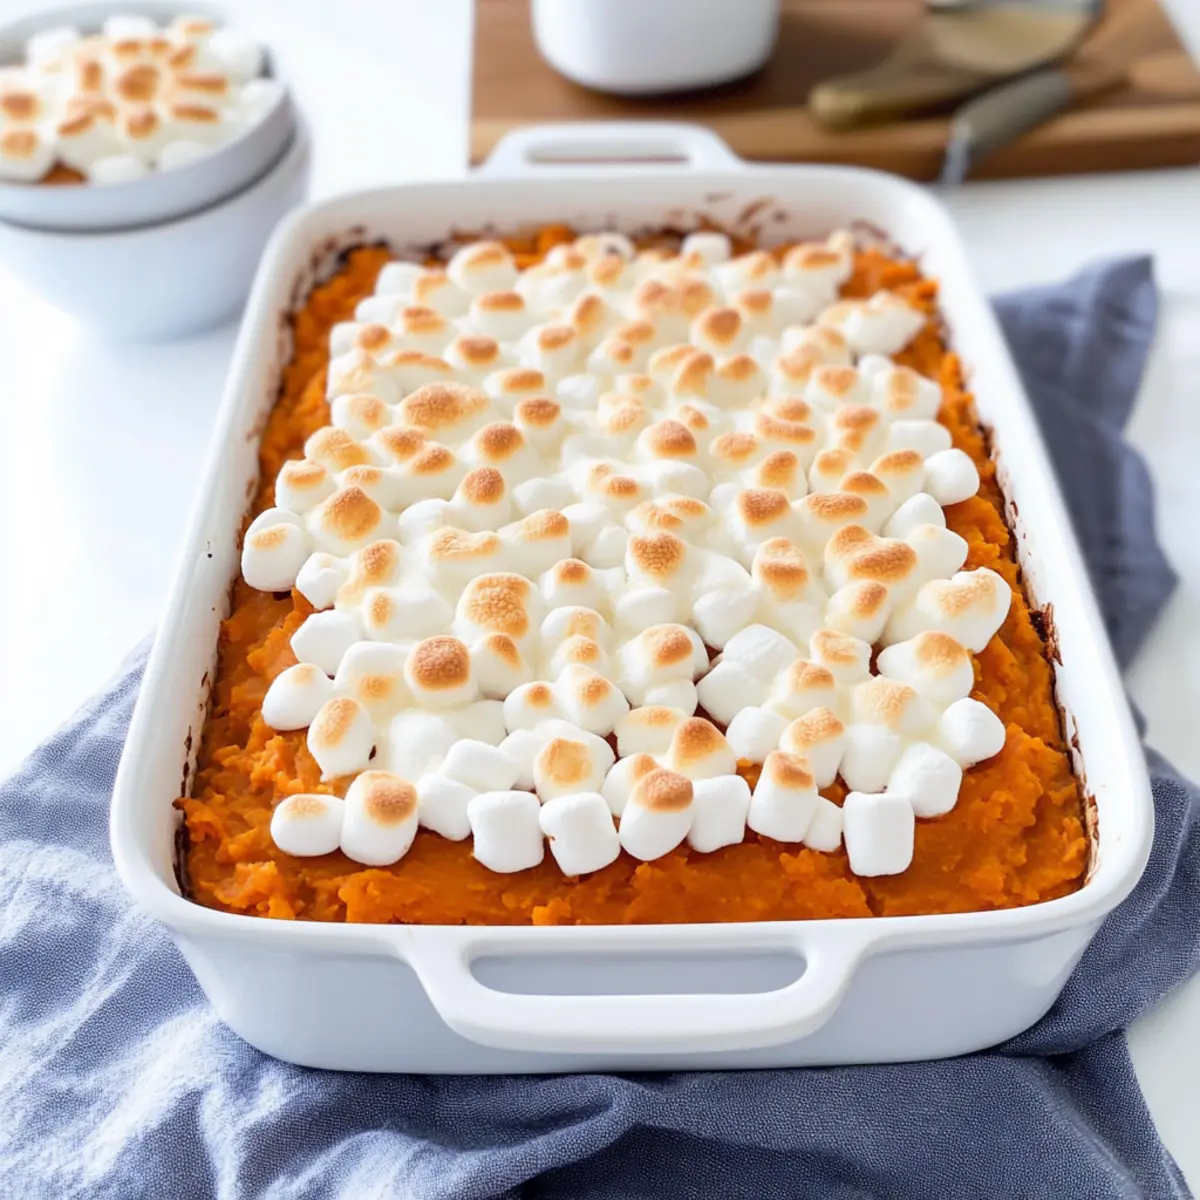
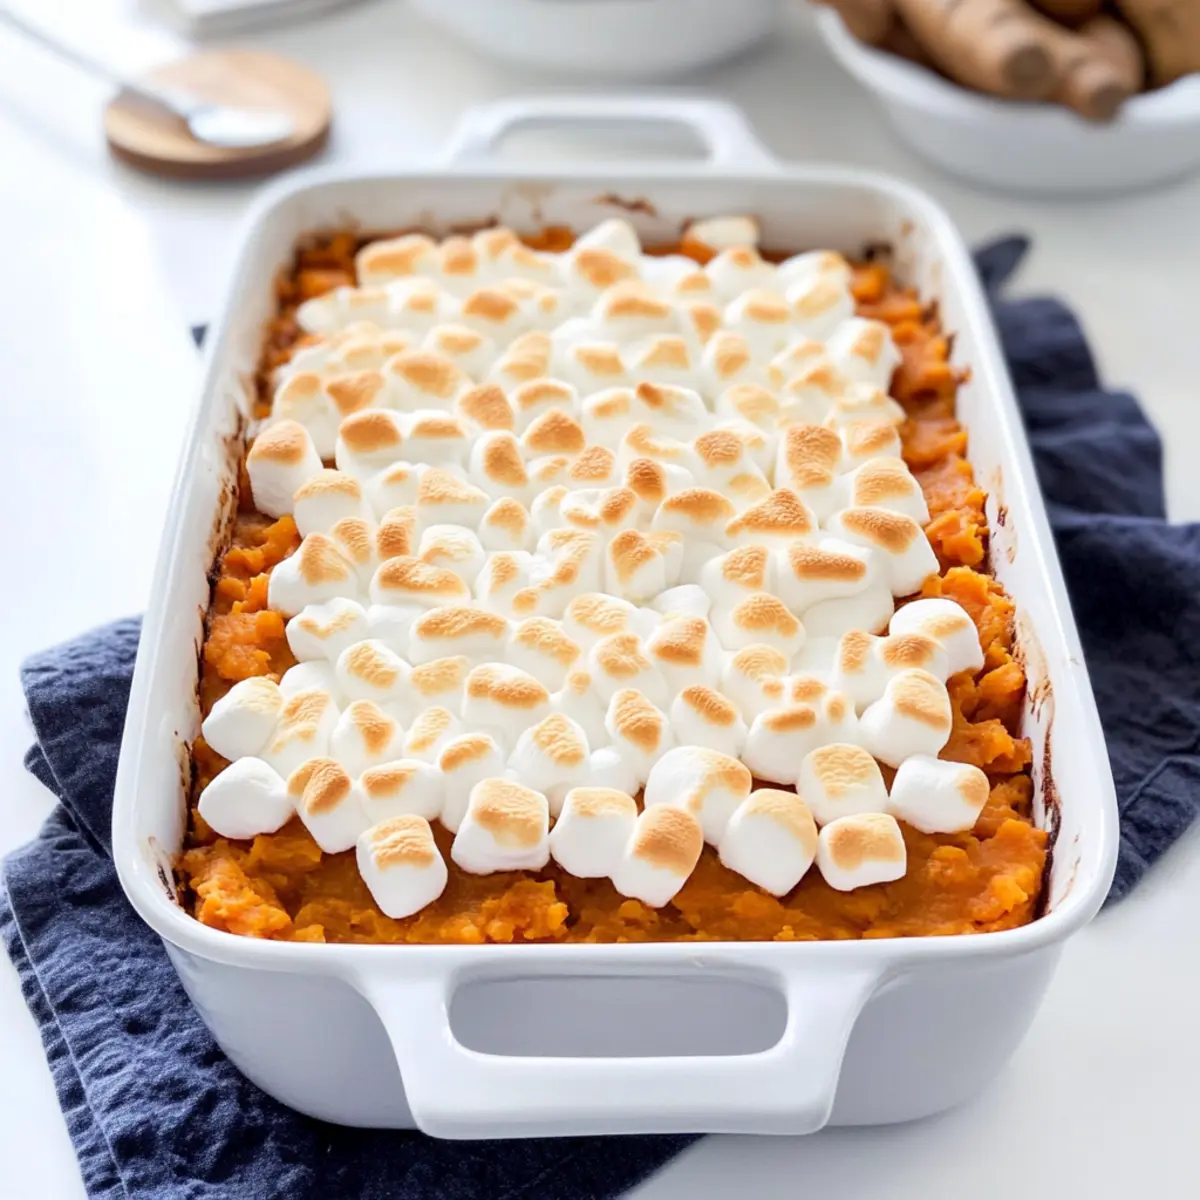
tastytrendingredients

  • Home
  • Recipes
    • Appetizers
    • Breakfast
    • Dessert
    • Dinner
    • Drinks
    • Salads
    • Snacks
    • Soups
  • About me
  • Contact me
menu icon
go to homepage
  • Home
  • Recipes
    • Appetizers
    • Breakfast
    • Dessert
    • Dinner
    • Drinks
    • Salads
    • Snacks
    • Soups
  • About me
  • Contact me
search icon
Homepage link
  • Home
  • Recipes
    • Appetizers
    • Breakfast
    • Dessert
    • Dinner
    • Drinks
    • Salads
    • Snacks
    • Soups
  • About me
  • Contact me
×

Delicious Orange Pumpkin Face Cookies for Spooky Fun

September 27, 2025 by Grace Snow Leave a Comment

As I sifted through my pantry, the vibrant orange of my pumpkin puree caught my eye, sparking a delightful idea. Halloween is just around the corner, and what better way to celebrate than with these Spooky Orange Pumpkin Face Cookies? These fun treats combine the zesty brightness of orange with a soft, melt-in-your-mouth biscuit texture that the whole family will love. Not only are they a hit with the kids, making them the perfect addition to any Halloween gathering, but they're also a fabulous make-ahead treat that lets you enjoy quality time with loved ones without the last-minute rush. Whether you're crafting these delightful cookies for trick-or-treaters or a festive dessert buffet, their playful designs and delicious flavors will surely steal the show. Ready to add some flair to your Halloween festivities? Let’s dive into this easy, crowd-pleasing recipe together!

Why Make Orange Pumpkin Face Cookies?

Irresistible Fun: These spooky cookies bring a playful twist to your Halloween celebrations! With their vibrant orange color and adorable pumpkin faces, they’ll be the highlight of any party.

Zesty Flavor: The tangy note of orange zest brightens each bite, making these cookies more than just a sweet treat.

Easy to Make: With just a few simple ingredients, whipping up a batch is a breeze, ideal for bakers of all skill levels.

Make Ahead Magic: Prepare cookies in advance and store them, ensuring you have time to enjoy the festive activities with family and friends! As you delight in these, why not also try making Pumpkin Brownies Decadent for an extra seasonal treat?

Creative Customization: Feel free to add spices like cinnamon for a warm autumn touch or experiment with different glaze designs for even more Halloween fun!

Orange Pumpkin Face Cookies Ingredients

For the Cookies
• Butter – Adds richness and moisture; use unsalted for better salt control.
• Plain Flour – The main structure for the cookies; substitute with gluten-free flour for a gluten-free version.
• Icing Sugar – Sweetens the cookies and helps achieve a smooth glaze; powdered sugar is a suitable alternative.
• Orange Zest – Imparts a fresh citrus flavor; freshly grated zest maximizes aroma.

For the Filling
• Mascarpone – Provides a creamy richness; can be replaced with cream cheese for a tangy variation.
• Plain Chocolate (55% cocoa) – Enhances the depth of flavor in the filling; dark chocolate can be used for a richer taste.

For the Glaze
• Orange Juice – Used for flavor and consistency in the glaze; freshly squeezed juice is highly recommended.

These ingredients will come together beautifully to create irresistible orange pumpkin face cookies that are perfect for Halloween festivities!

Step‑by‑Step Instructions for Orange Pumpkin Face Cookies

Step 1: Preheat and Prepare
Start by preheating your oven to fan 160°C (conventional 180°C/gas 4). While the oven warms up, gather your mixing bowl and an electric mixer. This step will ensure your Orange Pumpkin Face Cookies have the perfect crispy edge and soft center.

Step 2: Make the Dough
In your mixing bowl, beat 250g of softened unsalted butter until it’s perfectly smooth and creamy. Gradually mix in 250g of plain flour, 100g of icing sugar, and the zest of one large orange until you form a soft dough. Once combined, wrap it in cling film and chill for 1 hour to enhance the flavors and texture.

Step 3: Roll and Cut the Dough
After chilling, roll out your dough to a thickness of about 3mm on a lightly floured surface. Use a 7.5 cm round cookie cutter to cut out 24 circles, placing them evenly on a baking sheet lined with parchment paper. This will set the stage for your charming Halloween-themed Orange Pumpkin Face Cookies.

Step 4: Create Pumpkin Faces
Select 12 of the circles and use small cutters or a knife to carefully carve out whimsical Halloween faces. Don’t forget to mold the leftover dough into little pumpkin stems, attaching them with a knife for added detail. Your festive designs will make the cookies visually enchanting!

Step 5: Bake
Place your cookie sheets in the preheated oven and bake for about 15 minutes. Look for a pale golden hue on the edges as your Orange Pumpkin Face Cookies bake to perfection. Be sure to keep an eye on them—they should be firm but not browned.

Step 6: Cool the Cookies
Once baked, remove the cookies from the oven and let them cool completely on a wire rack. This cooling step is critical for maintaining the delicate balance between crispy and chewy, ensuring your cookies are just right for frosting.

Step 7: Prepare the Filling and Glaze
While the cookies cool, prepare your glaze by mixing icing sugar with freshly squeezed orange juice until smooth. For the filling, blend together 150g of mascarpone, 50g of icing sugar, and 50g of melted plain chocolate until creamy and luscious. This delightful mixture will enhance the flavor of your orange pumpkin face cookies.

Step 8: Assemble the Cookies
Spread the mascarpone filling over each cooled circle and top it with the face biscuit right before serving. This last-minute assembly prevents the cookies from becoming too soft, preserving that deliciously creamy bite. Brush each top with the prepared glaze for a charming finish that adds a glossy sheen.

Expert Tips for Orange Pumpkin Face Cookies

Room Temperature Butter: Ensure your butter is at room temperature for easier mixing, leading to a smoother dough.

Gentle Handling: Handle the cookies gently when glazing; soft biscuits can break easily if pressed too hard.

Assemble Right Away: For the best texture, assemble your Orange Pumpkin Face Cookies just before serving to retain that delightful crunch.

Chill Spare Dough: Keep any leftover dough in the refrigerator while you work; this helps maintain a manageable consistency for cutting.

Watch the Bake Time: Keep a close eye on the cookies as they bake; you're aiming for a pale golden color to avoid over-baking.

Storage Tips for Orange Pumpkin Face Cookies

Airtight Container: Store the baked cookies in an airtight container at room temperature for up to 5 days to maintain freshness and texture.

Refrigerate Filling: If you've assembled the cookies, it's best to enjoy them the same day. However, you can refrigerate the filling separately for up to 3 days, keeping it fresh for later use.

Freezing: Freeze unassembled cookies in a single layer on a baking sheet, then transfer to a freezer bag for up to 2 months. Thaw at room temperature before glazing and assembling to enjoy your Orange Pumpkin Face Cookies.

Reheating Tips: Avoid reheating the assembled cookies; if needed, gently warm individual cookies in the oven for a couple of minutes to restore their crispiness.

What to Serve with Orange Pumpkin Face Cookies

These charming cookies provide a whimsical delight that beautifully complements a festive Halloween feast.

  • Crispy Apple Slices: Their crunchy, fresh texture and fruity sweetness create a delightful contrast to the soft cookies. Perfect for dipping in caramel, apple slices add an autumnal vibe.

  • Pumpkin Spice Hot Chocolate: A warm, cozy drink that harmonizes with the pumpkin theme, offering a rich, creamy texture paired with velvety chocolate richness.

  • Spooky Cheese Platter: Incorporate a variety of cheeses, nuts, and dried fruits, providing playful Halloween shapes and flavors that balance the sweet cookies.

  • Candy Corn Delight: These sweet little treats add a fun touch, their vibrant colors and sweetness echoing the whimsical nature of the cookies.

  • Vanilla Ice Cream: A scoop of creamy vanilla ice cream alongside the cookies creates a dreamy dessert experience, especially as the warm cookies melt beneath it.

  • Festive Fruit Salad: Combine diced apples, oranges, and pomegranate seeds for a fresh and juicy salad that enhances the zingy orange flavor of the cookies.

  • Hot Mulled Cider: The warm spices in this drink resonate beautifully with the orange zest, providing a comforting warmth that pairs perfectly with the cookies during Halloween gatherings.

  • Mini Pumpkin Pies: Serve these alongside the cookies for a delightful dessert variation that keeps the pumpkin theme alive, adding an extra layer of autumnal joy.

Orange Pumpkin Face Cookies Variations

Feel free to get creative with these delicious cookies—there's always room for a personal touch!

  • Citrus Swap: Replace orange zest with lemon or lime for a bright, zesty flavor twist. The tartness will give your cookies a refreshing kick.

  • Spiced Delight: Add a dash of cinnamon or nutmeg to the dough for a warm, autumn-inspired flavor. The cozy spice will evoke memories of fall festivals and family gatherings.

  • Gluten-Free: Substitute plain flour with a gluten-free blend for a cookie that everyone can enjoy. Just ensure your blend has a good binding agent to maintain that soft texture.

  • Alternative Sweeteners: Use honey or maple syrup instead of icing sugar in the glaze for a different depth of sweetness. This adds a unique flavor profile that pairs beautifully with the orange.

  • Cheesecake Filling: Swap mascarpone with a mix of cream cheese and vanilla extract for a cheesecake-like filling. This variation brings a creamy tang that complements the sweetness perfectly.

  • Chocolate Drizzle: Top with a drizzle of melted dark chocolate after glazing for an extra rich flavor. Each bite will be a decadent dance of chocolate and orange.

  • Shape it Up: Get creative with cookie cutters! Use seasonal shapes like bats or ghosts for a playful twist. Your treats can be just as spooky as they are delicious.

  • Fiery Addition: Incorporate a pinch of cayenne pepper into the glaze for a surprising, spicy kick. The heat balances the sweetness, awakening your taste buds in an exciting way.

These variations can make your Orange Pumpkin Face Cookies even more special, perfect for sharing at Halloween parties. If you’re looking for more seasonal treats, consider whipping up some delightful Pumpkin Cinnamon Roll Muffins for a breakfast option that pairs perfectly with your spooky cookies!

Make Ahead Options

These Orange Pumpkin Face Cookies are a fantastic choice for meal prep, making your Halloween festivities hassle-free! You can prepare the cookie dough up to 24 hours in advance; just wrap it tightly in cling film and refrigerate it to maintain its freshness. The baked cookies can also be made ahead and stored in an airtight container for up to 5 days. However, for the best texture, it's recommended to assemble the cookies just before serving. When you’re ready, spread the mascarpone filling and top with the face cookies, brushing on glaze to keep that delightful crunch. Enjoy these spook-tacular treats with minimal last-minute stress, leaving you more time for Halloween fun!

Orange Pumpkin Face Cookies Recipe FAQs

How do I choose ripe oranges for the zest?
Absolutely! When selecting oranges, look for ones that are firm with smooth skin and a vibrant color. Avoid any with dark spots all over, as these may indicate overripeness. A good orange will also feel heavy for its size, suggesting juiciness and flavor, which are perfect for zesting and juicing!

How should I store the cookies after baking?
To keep your Orange Pumpkin Face Cookies fresh, store them in an airtight container at room temperature for up to 5 days. This will help maintain their delightful texture. If you're stacking them, consider using parchment paper between layers to prevent sticking.

Can I freeze the cookies for later?
Absolutely! For freezing, start by placing unassembled cookies in a single layer on a baking sheet, then transfer them to a freezer bag once frozen. They can last for up to 2 months in the freezer. When you’re ready to enjoy them, simply thaw at room temperature, then prepare your glaze and filling to assemble.

What if my dough is too sticky to roll out?
If you encounter sticky dough, it's best to dust your work surface and rolling pin with a little extra flour. If the dough is still too soft, you can refrigerate it for an additional 15-30 minutes to firm it up. This will make it much easier to handle and cut into shapes.

Are these cookies safe for pets or those with specific allergies?
While these Orange Pumpkin Face Cookies are a fun treat for humans, they contain ingredients like chocolate and sugar which are not safe for pets. For dietary considerations, ensure you use gluten-free flour if anyone has gluten allergies, and confirm that there are no other allergens in the chocolate you choose.

How do I prevent the cookies from becoming soft after assembling?
To maintain that perfect texture, I recommend assembling your Orange Pumpkin Face Cookies right before serving. This way, the biscuits won’t absorb moisture from the mascarpone filling, helping to keep a lovely crispy exterior. If you have leftover filling, refrigerate it separately and fill them as needed!

Orange pumpkin face cookies

Delicious Orange Pumpkin Face Cookies for Spooky Fun

These vibrant orange pumpkin face cookies are a fun and delicious treat for Halloween festivities.
Print Recipe Pin Recipe
Prep Time 1 hour hr
Cook Time 15 minutes mins
Chilling Time 1 hour hr
Total Time 2 hours hrs 15 minutes mins
Servings: 24 cookies
Course: Dessert
Cuisine: American
Calories: 120
Ingredients Equipment Method Nutrition Notes

Ingredients
  

For the Cookies
  • 250 g Unsalted Butter softened
  • 250 g Plain Flour substitute with gluten-free flour if needed
  • 100 g Icing Sugar powdered sugar is a suitable alternative
  • 1 large orange Orange Zest freshly grated maximizes aroma
For the Filling
  • 150 g Mascarpone can be replaced with cream cheese
  • 50 g Plain Chocolate (55% cocoa) dark chocolate can be used for a richer taste
For the Glaze
  • 1 cup Orange Juice freshly squeezed recommended

Equipment

  • Mixing Bowl
  • Electric mixer
  • Cookie Cutters
  • Baking Sheet
  • Parchment Paper
  • wire rack

Method
 

Step-by-Step Instructions
  1. Preheat your oven to fan 160°C (conventional 180°C/gas 4) and gather your mixing bowl and electric mixer.
  2. Beat 250g of softened unsalted butter until smooth, then gradually mix in 250g of plain flour, 100g of icing sugar, and the zest of one large orange until a soft dough forms. Wrap in cling film and chill for 1 hour.
  3. Roll out the chilled dough to about 3mm thick and cut out 24 circles using a 7.5 cm round cookie cutter, placing them on a lined baking sheet.
  4. Use small cutters or a knife to carve whimsical faces into 12 of the circles and mold leftover dough into little pumpkin stems.
  5. Bake for about 15 minutes until pale golden on the edges. Cool completely on a wire rack.
  6. Prepare the glaze by mixing icing sugar with freshly squeezed orange juice until smooth. For the filling, blend together 150g of mascarpone, 50g of icing sugar, and 50g of melted plain chocolate until creamy.
  7. Spread the mascarpone filling over each cooled cookie circle and top with the decorated face biscuit. Brush the tops with the prepared glaze.

Nutrition

Serving: 1cookieCalories: 120kcalCarbohydrates: 15gProtein: 1gFat: 7gSaturated Fat: 4gPolyunsaturated Fat: 0.5gMonounsaturated Fat: 2gCholesterol: 30mgSodium: 40mgPotassium: 50mgSugar: 5gVitamin A: 10IUCalcium: 1mgIron: 2mg

Notes

Store baked cookies in an airtight container at room temperature for up to 5 days. Assemble cookies just before serving for best texture.

Tried this recipe?

Let us know how it was!

Scary Halloween Jelly That Will Thrill Your Little Goblins

September 27, 2025 by Grace Snow Leave a Comment

As I flipped through my favorite spooky cookbooks, I stumbled upon a delightful and chilling creation: Scary Halloween Jelly with Eyeballs and Spooky Fingers! This playful dessert is bound to be a hit at any Halloween gathering, captivating the little ones with its eerie presentation while delivering a sweet treat that’s quick and easy to make. Imagine a wobbly red jelly, hiding juicy lychee eyeballs and creepy marzipan fingers — it’s a feast for the eyes and the taste buds! With minimal prep time, this jelly is perfect for busy home chefs looking to impress with a festive flair. You won’t believe how much fun it is to bring this spooky treat to life, so why not dive in and scare up some fun for your next Halloween party? Curious about how to make it? Let’s get started!

Why Is Scary Halloween Jelly a Must-Make?

Eerie Presentation: This dessert is a showstopper, combining vibrant jelly with playful eyeballs and fingers that will thrill kids at any Halloween party.

Quick and Easy: With just a few simple ingredients and minimal prep time, you'll have a spooktacular treat ready in a flash.

Crowd-Pleaser: Perfect for children and adults alike, everyone will be excited to dig into this deliciously creepy concoction.

Customizable Fun: Feel free to switch things up—try different jelly flavors or swap out candies for unique variations that suit your taste.

Festive Atmosphere: Serve this chilling jelly in clear bowls, enhancing the spooky vibe that's sure to be a hit at your gathering!

Dive into this delightful creation and learn how to make it with my clear instructions!

Scary Halloween Jelly Ingredients

For the Jelly Base
• Strawberry or Raspberry Jelly (2 x 135g packs) – Provides a vibrant color and sweet flavor; opt for low-sugar varieties for a lighter treat.
• Lychee in Syrup (425g can) – These fruity ‘eyeballs’ complement the jelly perfectly; fresh lychees can be used for an even fresher taste.

For the Eyeballs
• Seedless Green Grapes (12-14) – Forms the core of the eyeballs, bursting with juicy flavor; small blueberries can be a fun substitute.
• Dark Coloured Jelly Beans (12-14) – Adds a sweet, chewy ‘pupil’ to each eyeball; any candy of similar size works well too.

For the Spooky Fingers
• White Marzipan (80g) – Create creepy fingers with this sweet, chewy treat; almond paste is a good alternative if marzipan isn’t available.
• Blanched Almonds (6-8) – The perfect crunchy ‘nails’ for your spooky fingers; slivered almonds can be used instead for convenience.

For Decoration
• Red Piping Gel or Icing – This gooey gel represents ‘blood', enhancing the horror factor; any red icing can add a festive touch.

Embrace the fun of making this Scary Halloween jelly and delight your little goblins with every wobbly spoonful!

Step‑by‑Step Instructions for Scary Halloween Jelly

Step 1: Prepare the Jelly Base
Begin by cutting the jelly cubes into smaller pieces for easier dissolving. In a mixing bowl, combine the jelly with 400ml of boiling water. Stir continuously for about 2-3 minutes until the jelly is completely dissolved and the mixture appears smooth and clear.

Step 2: Mix in the Liquids
Drain the lychees and reserve the syrup. In a separate container, mix the reserved lychee syrup with cold water to achieve a total of 400ml. Pour this mixture into the dissolved jelly, stirring well to combine until evenly blended and the jelly mixture is beautifully vibrant.

Step 3: Set the First Layer
Pour one-quarter of the jelly mixture into a clear dish or bowl, ensuring an even layer. Place the dish in the refrigerator for about 30-45 minutes, or until the jelly is just set but not fully firm—look for a slight jiggle in the surface that indicates readiness for the next layer.

Step 4: Create the Eyeballs
While the jelly base sets, create the eyeballs. Take the seedless green grapes and carefully insert a dark colored jelly bean into each one, pressing it gently to secure it. Then, push this grape into a lychee, making sure it’s snug and resembles an eerie eyeball ready to float atop the jelly.

Step 5: Shape the Spooky Fingers
Next, take the white marzipan and knead it until soft. Roll it into finger-sized sausages, shaping them with slight curves for realism. Decorate each finger with red piping gel to mimic blood and attach blanched almonds at the end for nails, giving them an authentic spooky touch.

Step 6: Layer the Eyeballs
Once the first jelly layer is set, carefully arrange half of the prepared eyeballs on top, ensuring they’re evenly spread. Slowly pour in another layer of the jelly mixture, covering the eyeballs, and return the dish to the refrigerator. Allow this layer to chill for another 30 minutes until it firms up slightly.

Step 7: Final Assembly
After the second layer is set, place the remaining eyeballs on the jelly’s surface, creating an eerie presentation. Line up your spooky marzipan fingers along the sides of the dish, then pour the last of the jelly mixture over everything, ensuring they are submerged. Chill the completed jelly until fully set, about 2-3 hours.

Step 8: Serve the Scary Halloween Jelly
When ready to serve, remove the dish from the refrigerator. The Scary Halloween jelly should be firm yet wobbly, showcasing the vibrant layers and spooky decorations. For the best effect, serve directly in the bowl, allowing everyone to dig in and enjoy this delightful Halloween treat!

What to Serve with Scary Halloween Jelly

Get ready to elevate your spooky dessert experience with delightful accompaniments that will thrill your little goblins!

  • Witch's Brew Punch: A bubbly, colorful punch adds a festive vibe, perfectly washing down the eerie jelly and keeping the fun flowing. Try mixing soda with some fruity juices and adding gummy eyeballs for an extra kick.

  • Crispy Spider Web Tacos: These crunchy, bite-sized tacos crafted with tortillas shaped into spider webs are a playful savory option. Kids love the crunchy texture alongside the wobbly jelly delight!

  • Halloween-themed Fruit Platter: A colorful arrangement of seasonal fruits like oranges and apples offers a fresh contrast to the sweet jelly. Add some ghostly banana ghosts to enhance the spooky theme.

  • Monster Marshmallow Pops: These easy-to-make pops covered in chocolate and decorated as monsters will surely bring smiles. The sweetness pairs beautifully with the creepy jelly, ensuring a balance of flavors.

  • Graveyard Brownies: Rich, fudgy brownies topped with crushed cookies and gummy worms create a fun dessert alongside the jelly. Their soft texture complements the jelly's wobbly form, making for a jaw-dropping display!

  • Blood Orange Mocktail: A refreshing drink that features the bright flavors of blood oranges adds a touch of sophistication. The vibrant color and sweet-tart flavors will keep everyone refreshed while indulging in the treat.

Serve these enchanting additions to create an unforgettable Halloween party spread that will leave kids and adults raving long after the spooky fun is over!

Expert Tips for Scary Halloween Jelly

• Perfect Layering: Ensure the jelly is fully cooled before layering to prevent the eyeballs from sinking. A slight jiggle indicates it’s ready for the next layer!

• Serve Fresh: For the best taste and presentation, serve the Scary Halloween jelly on the same day it’s made. This keeps the marzipan fingers from dissolving.

• Cutting Aid: Use scissors for cutting jelly cubes; it creates cleaner pieces and makes the process quicker and more efficient.

• Flavor Experimentation: Don’t hesitate to switch up flavors; different jellies like orange or grape can give your spooky treat an exciting new twist!

• Decoration Timing: Consider adding the spooky fingers right before serving to maintain their shape and freshness.

• Chilling Time: Allow ample time for the jelly to set fully. A few extra hours will ensure it achieves the perfect wobble and firmness.

Make Ahead Options

These Scary Halloween Jelly treats are perfect for busy home cooks looking to save time during the Halloween rush! You can prepare the jelly base up to 24 hours ahead of time and store it in the refrigerator. To maintain the quality, cover it tightly with plastic wrap to prevent it from absorbing other odors. The eyeballs can also be assembled a day in advance and kept chilled separately. Just wait to add the spooky fingers until just before serving to ensure they maintain their shape and texture. When ready to impress your guests, layer the released eyeballs, pour the remaining jelly over, and allow it to chill until fully set, providing a spooktacular dessert with minimal effort!

How to Store and Freeze Scary Halloween Jelly

Fridge: Store leftover Scary Halloween jelly in an airtight container in the refrigerator for up to 3 days. This keeps the flavors fresh and the texture intact.

Room Temperature: Avoid leaving the jelly at room temperature for more than 2 hours to prevent spoilage, especially if the weather is warm.

Freezer: It's not recommended to freeze Scary Halloween jelly, as the consistency will change upon thawing, compromising its delightful texture.

Make Ahead: Prepare the jelly a day in advance for convenience. Just keep it covered in the fridge, adding the marzipan fingers just before serving to maintain their shape.

Scary Halloween Jelly Variations & Substitutions

Feel free to get creative with this spooky treat, tailoring it to your taste preferences and dietary needs!

  • Flavor Twist: Experiment with orange or grape jelly for a different spooky vibe. Each flavor can lend a unique touch to the overall experience.

  • Candy Swap: Try using gummy bears instead of jelly beans for a fun, chewy design. The varied textures will add an extra level of delight!

  • Dairy-Free: Substitute marzipan with a dairy-free chocolate fondant for those with dietary restrictions. It’s just as versatile for shaping into creepy fingers!

  • Nut-Free: Replace blanched almonds with pumpkin seeds to keep it crunchy while catering to nut allergies. They’ll still add texture to your spooky fingers!

  • Fruit Substitution: Swap lychees for peeled canned peaches; they work similarly for the “eyeball” effect and provide a sweet, juicy complement.

  • All-Natural Fun: Use all-natural food coloring for a healthier version. Coupled with fresh fruits, this keeps your Halloween treat festive and vibrant!

  • Spicy Kick: Add a dash of chili powder to your syrup mix for a surprising kick that contrasts with the sweetness of the jelly.

  • Themed Toppings: Decorate with candy eyes or sprinkles for extra festivity. They’ll amp up the excitement and make your presentation even more captivating.

Don't hesitate to explore ideas like spooky Halloween cupcakes or whip up a batch of ghostly brownies as additional treats for your gathering! Let your imagination run wild with these variations, and watch the delight unfold!

Scary Halloween Jelly Recipe FAQs

How do I choose the right jelly for my Scary Halloween jelly?
Absolutely! For the best results, I recommend using strawberry or raspberry jelly as these flavors complement the fruity eyeballs beautifully. If you prefer a lighter option, opt for low-sugar varieties to keep the sweetness balanced without overwhelming the palate.

How should I store leftover Scary Halloween jelly?
To keep your Scary Halloween jelly at its best, store any leftovers in an airtight container in the refrigerator for up to 3 days. This ensures the flavors remain fresh and the jelly retains its delightful texture. Just remember to avoid leaving it at room temperature for more than 2 hours to prevent spoilage!

Can I freeze Scary Halloween jelly if I have leftovers?
It's not recommended to freeze Scary Halloween jelly, as the texture will change when thawed, leading to a less appealing consistency. If you're looking to prepare it in advance, you can make it a day ahead and store it in the fridge, adding the marzipan fingers right before serving.

What can I do if my jelly layers don’t set properly?
Don’t worry! If your jelly layers don’t seem to be setting, check that you're allowing enough chilling time between layers, typically at least 30-45 minutes. The jelly should be slightly jiggly but not completely firm when you add the next layer. If you're in a hurry, you might try placing it in the freezer for 10-15 minutes to help speed up the process.

Are there any dietary considerations for pets or allergies?
Yes, it’s wise to be cautious! This Scary Halloween jelly includes several ingredients that may not be suitable for pets, such as jelly and marzipan, which can be harmful. If you're serving it to guests with food allergies, be sure to check for sensitivities to nuts (in marzipan), gelatin, or any other components, and modify accordingly. Always communicate with your guests to ensure everyone can enjoy this spooky treat!

Can I customize the eyeballs or fingers based on what I have at home?
Very! Feel free to switch things up according to your pantry. Instead of jelly beans, try using gummy bears for the eyeballs for a different texture. You can also use modeling chocolate instead of marzipan if that's what you have on hand. The more the merrier with creativity!

Scary Halloween jelly

Scary Halloween Jelly That Will Thrill Your Little Goblins

Scary Halloween jelly with eyeballs and spooky fingers is a delightful treat perfect for any Halloween gathering.
Print Recipe Pin Recipe
Prep Time 15 minutes mins
Chilling Time 3 hours hrs
Total Time 3 hours hrs 15 minutes mins
Servings: 8 servings
Course: Dessert
Cuisine: American
Calories: 120
Ingredients Equipment Method Nutrition Notes

Ingredients
  

For the Jelly Base
  • 270 g Strawberry or Raspberry Jelly 2 x 135g packs
  • 425 g Lychee in Syrup Can use fresh lychees
For the Eyeballs
  • 12-14 Seedless Green Grapes Can substitute with small blueberries
  • 12-14 Dark Coloured Jelly Beans Any similar-sized candy works
For the Spooky Fingers
  • 80 g White Marzipan Almond paste can be used instead
  • 6-8 Blanched Almonds Slivered almonds can be used instead
For Decoration
  • 1 tbsp Red Piping Gel or Icing Represents 'blood'

Equipment

  • Mixing Bowl
  • Refrigerator
  • Clear dish or bowl

Method
 

Step-by-Step Instructions
  1. Begin by cutting the jelly cubes into smaller pieces for easier dissolving. In a mixing bowl, combine the jelly with 400ml of boiling water. Stir continuously for about 2-3 minutes until the jelly is completely dissolved and the mixture appears smooth and clear.
  2. Drain the lychees and reserve the syrup. In a separate container, mix the reserved lychee syrup with cold water to achieve a total of 400ml. Pour this mixture into the dissolved jelly, stirring well to combine until evenly blended and the jelly mixture is beautifully vibrant.
  3. Pour one-quarter of the jelly mixture into a clear dish or bowl, ensuring an even layer. Place the dish in the refrigerator for about 30-45 minutes, or until the jelly is just set but not fully firm.
  4. While the jelly base sets, create the eyeballs. Take the seedless green grapes and carefully insert a dark colored jelly bean into each one. Then, push this grape into a lychee.
  5. Next, take the white marzipan and knead it until soft. Roll it into finger-sized sausages, shaping them with slight curves. Decorate each finger with red piping gel and attach blanched almonds for nails.
  6. Once the first jelly layer is set, carefully arrange half of the prepared eyeballs on top. Slowly pour in another layer of the jelly mixture and return the dish to the refrigerator. Allow this layer to chill for another 30 minutes until it firms up slightly.
  7. After the second layer is set, place the remaining eyeballs on the jelly’s surface, creating an eerie presentation. Line up your spooky marzipan fingers along the sides of the dish, then pour the last of the jelly mixture over everything.
  8. When ready to serve, remove the dish from the refrigerator. The Scary Halloween jelly should be firm yet wobbly, showcasing the vibrant layers and spooky decorations.

Nutrition

Serving: 1servingCalories: 120kcalCarbohydrates: 28gProtein: 1gSodium: 5mgPotassium: 150mgFiber: 1gSugar: 22gVitamin C: 2mgCalcium: 1mgIron: 1mg

Notes

For best taste and presentation, serve the jelly on the same day it's made. Consider adding the spooky fingers right before serving.

Tried this recipe?

Let us know how it was!

Delightful Chocolate Spider Cookies for a Spooky Halloween Treat

September 27, 2025 by Grace Snow Leave a Comment

As the leaves fall and the air turns crisp, I find myself swept up in the enchantment of Halloween. One of my favorite ways to celebrate this spooky season is by whipping up a batch of delightful Chocolate Spider Cookies. Combining rich chocolate with the surprising chewiness of licorice, these cookies not only bring a fun twist to your Halloween festivities, but they’re also a snap to make—perfect for little hands eager to help in the kitchen. Whether you’re hosting a costume party or simply looking to add a touch of whimsy to your afternoon snack, these kid-friendly treats are sure to be a hit. Ready to create some delicious Halloween magic? Let's dive into this fun and easy recipe!

Why are Chocolate Spider Cookies a must-try?

Fun and Festive: The spooky design of these cookies adds a playful spirit to any Halloween gathering, making them a centerpiece for your dessert table.
Quick and Easy: With just a few simple ingredients and steps, you’ll have a batch ready in no time—perfect for those last-minute plans!
Kid-Friendly Fun: Involve your little ones and watch as they delight in decorating their very own spiders, creating cherished family memories along the way.
Versatile Variations: Want to mix it up? You can easily switch liquorice for pretzel sticks or get creative with different icing designs.
Crowd-Pleasing Treat: Rich chocolate and chewy textures create a tempting treat that appeals to both kids and adults alike—perfect for sharing or gifting!

Chocolate Spider Cookies Ingredients

• Get ready to create some spooky goodness!

For the Cookie Base

  • Dark or Milk Chocolate (200g) – Provides a decadent richness; substitute with white chocolate for a sweeter twist.
  • Oreo Cookies (2 packs, 154g each) – The perfect chocolatey foundation; feel free to replace with any chocolate wafer cookies if you prefer.

For the Spider Legs

  • Liquorice Catherine Wheels (113g pack) – Adds a fun, chewy texture for the legs; replace with pretzel sticks for a crunchier option if desired.

For Decoration

  • White and Black Icing Pens – Bring your spiders to life with cute eyes; you can also use colored royal icing for a different look.

Embrace the spirit of Halloween with these delightful Chocolate Spider Cookies!

Step‑by‑Step Instructions for Chocolate Spider Cookies

Step 1: Melt Chocolate
Start by breaking the dark or milk chocolate into small pieces and placing them in a heatproof bowl. Set the bowl over a pot of barely simmering water, ensuring the bowl doesn’t touch the water. Stir gently as the chocolate melts, about 5-7 minutes, until it’s completely smooth and shiny. Remove from heat, but keep warm while you prepare the other components of your Chocolate Spider Cookies.

Step 2: Prepare Legs
While the chocolate is melting, take the liquorice Catherine wheels and unroll them. Using a sharp knife or kitchen scissors, cut the liquorice into 2-3 cm lengths to create the spider legs. This should yield enough pieces for each cookie. Set the cut pieces aside and prepare your Oreo cookies for assembling the spiders.

Step 3: Assemble Spiders
To begin assembling your Chocolate Spider Cookies, take one Oreo and place about a teaspoon of melted chocolate on top. Next, position eight of the liquorice legs around the chocolate, pressing them gently into the cookie so they stay in place. Sandwich another Oreo on top to create the spider body, securing it with additional melted chocolate. Repeat this process until all cookies are assembled.

Step 4: Decorate Eyes
Once you’ve assembled your spiders, it’s time to give them life! Use the white icing pen to draw two large dots on the top Oreo for the eyes of each spider. Follow up with two smaller dots of black icing in the center of the white dots. This will create an adorable and spooky look for your Chocolate Spider Cookies, making them fun for kids to admire.

Step 5: Set
After decorating the spiders, place them on a tray or baking sheet and allow them to set in a cool area for about 15-20 minutes. This will help the chocolate firm up and secure the spider legs and eyes in place. Once set, your delightful Chocolate Spider Cookies are ready to be enjoyed or served at your Halloween celebration!

Storage Tips for Chocolate Spider Cookies

  • Room Temperature: Store your Chocolate Spider Cookies in an airtight container at room temperature for up to 5 days to maintain their delightful texture and flavor.
  • Fridge: If you prefer them chilled, you can refrigerate them for up to a week, but this may change the cookie's original consistency.
  • Freezer: For longer storage, freeze the cookies in a single layer on a baking sheet before transferring them to a freezer bag. They can last for up to 3 months but be sure to thaw them in the fridge before enjoying.
  • Reheating: If you want to savor the gooey chocolate again, warm them in the microwave for a few seconds—just enough to soften without melting!

What to Serve with Spooky Chocolate Spider Cookies?

As your delightful Chocolate Spider Cookies bring festive fun to the table, consider these perfect pairings to enhance your Halloween experience.

  • Cold Glass of Milk: A classic combination, milk perfectly balances the rich chocolate and sweet flavors of your cookies, making every bite better!
  • Warm Hot Chocolate: Cozy up your Halloween treats with a cup of silky hot chocolate, ideal for dipping your spider cookies and adding to the festive atmosphere.
  • Vanilla Ice Cream: The creamy texture of vanilla ice cream contrasts beautifully with the cookies, creating a satisfying dessert that everyone will love.
  • Caramel Dipping Sauce: Drizzle warm caramel sauce over the cookies for a luscious treat that adds a touch of indulgence and a hint of sweet sophistication.
  • Pumpkin Spice Latte: Embrace the season with a spicy, warm beverage. The flavors of pumpkin and spice complement the chocolaty goodness and enhance the Halloween spirit.
  • Gummy Worms: For a fun twist, serve gummy worms alongside—the colorful, chewy candies add a whimsical touch that's perfect for Halloween snacking.
  • Crispy Apple Slices: Slice up some fresh apples for a refreshing crunch. The natural sweetness and slight tartness pair nicely with the rich chocolate in your cookies.
  • Cupcakes with Spider Toppers: Bake up some cute cupcakes adorned with edible spider toppers for a cohesive Halloween-themed dessert experience that kids will adore.
  • Chocolate Milkshake: Blend up a rich chocolate milkshake as a deliciously decadent pairing that elevates the chocolate factor of your spooky cookies to new heights.

Make Ahead Options

These delightful Chocolate Spider Cookies are perfect for meal prep, saving you time during the busy Halloween season! You can prepare the chocolate cookie base and the liquorice legs up to 24 hours in advance by melting the chocolate and cutting the liquorice into spider legs ahead of time. Simply store the chocolate in an airtight container at room temperature to maintain its smoothness, while the legs can be kept in a separate container to avoid sticking. When you’re ready to assemble, take the prepped ingredients and sandwich them together with the Oreos, then decorate with icing pens just before serving. This way, you’ll enjoy fresh, festive treats without the last-minute rush!

Expert Tips for Chocolate Spider Cookies

  • Melt Gently: Ensure you melt chocolate slowly to avoid burning. This keeps it smooth and perfect for assembling your Chocolate Spider Cookies.
  • Cool Environment: Let the decorated cookies set in a cool, dry place—do not freeze! Freezing can make them too hard to enjoy.
  • Leg Placement: Use toothpicks or a small spatula to position the liquorice legs precisely. This will help maintain the structure and look of your spiders.
  • Creative Decorations: Allow kids to get creative with icing designs; different colors can add to the spooky appeal of your cookies.
  • Storage Tips: For best freshness, store your Chocolate Spider Cookies in an airtight container at room temperature, enjoying them within five days.

Variations & Substitutions for Chocolate Spider Cookies

Feeling creative? These easy variations will let you take your Chocolate Spider Cookies to the next level!

  • Flavored Candy Melts: Use candy melts in vibrant colors instead of chocolate for a fun, eye-catching twist that kids will adore.

  • Nutty Crunch: Adding chopped nuts or crispy rice cereal into the chocolate mixture offers delightful pops of crunch, enhancing texture and flavor.

  • Gummy Alternatives: Swap the liquorice legs for colorful gummy worms or gummy spiders to create a different, chewy texture with exciting flavors.

  • Gluten-Free Option: Replace regular Oreos with gluten-free chocolate cookies to make this festive treat accessible for everyone.

  • Dairy-Free Choice: Opt for dairy-free chocolate and icing pens to cater to dietary needs while still delivering on that rich chocolate flavor.

  • Richer Icing Decoration: Try using flavored royal icing instead of standard icing pens for a gourmet touch. Vanilla or almond flavors can elevate the cookies beautifully.

  • Dark Chocolate Dive: Go for a double chocolate treat by using chocolate-flavored Oreos as the base, which intensifies the chocolaty goodness!

Why not make a batch of these delightful Chocolate Spider Cookies and enhance your Halloween celebrations? Pair them with a cozy hot chocolate or serve alongside a plate of Eggnog Cookies Soft for an extra sweet touch!

Chocolate Spider Cookies Recipe FAQs

What type of chocolate is best for Chocolate Spider Cookies?
Absolutely! Dark chocolate offers a rich, intense flavor, while milk chocolate provides a sweeter profile. You can even use white chocolate for a fun twist! The choice really depends on your taste preference and that of your family.

How should I store Chocolate Spider Cookies?
For optimal freshness, store your cookies in an airtight container at room temperature for up to 5 days. If you prefer them chilled, refrigerating them is an option, but know that it might change the original texture a bit.

Can I freeze Chocolate Spider Cookies, and if so, how?
Yes, you can! Firstly, make sure the cookies are fully assembled with decorations. Place them in a single layer on a baking sheet to freeze them solid for about 1 to 2 hours. Once set, carefully transfer them to a freezer-safe bag or container. They can stay fresh for up to 3 months. To enjoy them later, let them thaw in the fridge for a few hours before serving!

What do I do if my chocolate isn't melting smoothly?
Very! If your chocolate starts to seize or isn't melting well, try the following: Ensure you're using low heat to melt the chocolate, as too high heat can cause it to burn. Also, you can add a teaspoon of vegetable oil or shortening to help achieve that silky texture. If using a microwave, melt in 30-second intervals, stirring between to avoid overheating.

Can these cookies be made with allergens in mind?
Certainly! If you need to avoid certain allergens, consider swapping the regular Oreo cookies for gluten-free chocolate wafers or using dairy-free chocolate to accommodate dietary restrictions. Always check ingredient labels to ensure safety for anyone with allergies.

What can I substitute for liquorice in the recipe?
If liquorice isn't your thing, no worries! You can use pretzel sticks for a crunchy spider leg alternative or swap in gummy candies for a pop of color and sweetness. Just make sure the substitute maintains the character of the cookie so that it's still fun and festive for Halloween!

Chocolate spider cookies

Delightful Chocolate Spider Cookies for a Spooky Halloween Treat

Delightful Chocolate Spider Cookies combine rich chocolate with chewy licorice, making them a perfect Halloween treat.
Print Recipe Pin Recipe
Prep Time 15 minutes mins
Cook Time 7 minutes mins
Setting Time 20 minutes mins
Total Time 42 minutes mins
Servings: 12 cookies
Course: Dessert
Cuisine: American
Calories: 150
Ingredients Equipment Method Nutrition Notes

Ingredients
  

Cookie Base
  • 200 g Dark or Milk Chocolate Substitute with white chocolate for a sweeter twist.
  • 2 packs Oreo Cookies Perfect chocolatey foundation.
Spider Legs
  • 113 g Liquorice Catherine Wheels Replace with pretzel sticks for a crunchier option.
Decoration
  • White and Black Icing Pens Use colored royal icing for a different look.

Equipment

  • Heatproof bowl
  • pot
  • Knife
  • kitchen scissors
  • Spatula

Method
 

Step-by-Step Instructions
  1. Start by breaking the dark or milk chocolate into small pieces and placing them in a heatproof bowl. Set the bowl over a pot of barely simmering water, stirring gently until melted, about 5-7 minutes.
  2. While the chocolate is melting, take the liquorice Catherine wheels and unroll them, cutting into 2-3 cm lengths for spider legs.
  3. To assemble, take one Oreo and place about a teaspoon of melted chocolate on top. Position eight liquorice legs around the chocolate, pressing gently. Sandwich another Oreo on top to create the spider body.
  4. Use the white icing pen to draw two large dots on the top Oreo for the eyes of each spider, followed by smaller dots of black icing in the center.
  5. Place the decorated cookies on a tray and allow them to set in a cool area for about 15-20 minutes.

Nutrition

Serving: 1cookieCalories: 150kcalCarbohydrates: 22gProtein: 2gFat: 7gSaturated Fat: 3gPolyunsaturated Fat: 1gMonounsaturated Fat: 2gCholesterol: 5mgSodium: 150mgPotassium: 50mgFiber: 1gSugar: 10gCalcium: 2mgIron: 6mg

Notes

Store in an airtight container at room temperature for up to 5 days. Refrigerate for up to a week, but may change consistency.

Tried this recipe?

Let us know how it was!

Delight in White Peach Mascarpone Tart for Summer Celebrations

September 26, 2025 by Grace Snow Leave a Comment

The aroma of ripe white peaches hits me as I wander through the farmer's market, a fragrant reminder of summer’s fleeting beauty. There's something truly special about preparing a White Peach Mascarpone Tart—it's not just a dessert, but a celebration of warm afternoons and sunshine-filled gatherings. The silky mascarpone pastry cream contrasts elegantly with the softness of poached peaches, all resting on a flaky puff pastry crust. This recipe not only brings joy to your taste buds but is also a delightful make-ahead option, allowing for more time spent with loved ones. Ready to impress? Let’s dive into making this stunning seasonal dessert that’s sure to be the star of your next get-together! What unusual twist will you put on it?

Why is this tart a must-try?

Celebrate the best of summer with this delightful tart! Fresh white peaches and velvety mascarpone combine for a dessert that's as stunning as it is delicious. Versatile enough for any occasion, you can easily swap in your favorite fruits, like nectarines or blueberries, for a seasonal twist. Make-ahead convenience makes it perfect for gatherings—prepare it in advance and wow your guests without stress. Simple yet impressive, this White Peach Mascarpone Tart will elevate your dessert game and become a favorite. If you're seeking more seasonal inspiration, don't miss out on our Tuscan White Bean recipe or a delicious batch of Peaches Cream Cookies!

White Peach Mascarpone Tart Ingredients

• Dive into the delightful layers of this fresh dessert!

For the Pastry Cream

  • Whole Milk – A creamy base for the pastry cream; you can use any dairy milk as a substitute.
  • Vanilla Bean Paste – Infuses rich vanilla flavor; feel free to use extract for convenience.
  • White Sugar – Sweetens the pastry cream and poaching liquid; coconut sugar makes for a healthier alternative.
  • Cornstarch – Thickens the pastry cream; no substitutions are recommended for best results.
  • Salt – Enhances all the sweet flavors beautifully.
  • Egg Yolks – Provide richness and are crucial for thickening the cream.
  • Unsalted Butter – Adds a luscious creaminess to the pastry cream.

For the Diplomat Crème

  • Mascarpone – The star ingredient that delivers creamy goodness; cream cheese can be used as a substitute.
  • Heavy Cream – Whipped to perfection for lightness and flavor.
  • Powdered Sugar – Lightly sweetens the whipped mascarpone.

For the Poached Peaches

  • Peach Poaching Liquid – A mix of sugar, Chardonnay, vanilla extract, honey, lemon juice, and lemon zest for poaching delight.
  • Firm Ripe Peaches – These will bring sweet juiciness to your tart; substitute with quince or green apples if they're out of season.

For the Tart Assembly

  • Puff Pastry – The flaky base of your tart; opt for homemade pastry if you want to elevate it even more.
  • Fresh Peaches & Raspberries – Colorful and fresh toppings that add flair to your dessert.
  • Caramel Sauce – An optional touch for added sweetness that enhances the dessert's appeal.

Explore the beautiful layers of flavor with this White Peach Mascarpone Tart that celebrates the best summer fruits!

Step‑by‑Step Instructions for White Peach Mascarpone Tart

Step 1: Prepare Vanilla Pastry Cream
In a medium saucepan, heat 2 cups of whole milk over medium heat until steaming, then stir in 2 teaspoons of vanilla bean paste. In a separate bowl, whisk together ½ cup of white sugar, ¼ cup of cornstarch, and 4 egg yolks until smooth. Gradually mix in the hot milk, return the mixture to the saucepan, and cook over medium heat for about 5-7 minutes, stirring constantly until thickened. Strain through a sieve into a bowl and let it chill in the refrigerator.

Step 2: Make Poached Peaches
For the poaching liquid, combine 1 cup of sugar, 1 cup of Chardonnay, 1 teaspoon of vanilla extract, ¼ cup of honey, 2 tablespoons of lemon juice, and the zest of 1 lemon in a medium saucepan. Bring to a simmer over medium heat. Carefully add 4 firm ripe peaches, poaching them for about 4 minutes on each side until tender. Remove the peaches and allow them to cool in the liquid. Meanwhile, reduce the poaching liquid down to a syrupy consistency for about 10-15 minutes.

Step 3: Bake Puff Pastry
Preheat your oven to 400°F (200°C). Roll out a sheet of puff pastry on a lightly floured surface to fit your tart pan, gently pressing it into the pan, and trimming any excess. Prick the base with a fork and place a piece of parchment paper over the pastry, filling it with pie weights or dried beans. Bake for 20-25 minutes until golden and crispy. Once baked, remove the parchment and let the crust cool completely before adding the filling.

Step 4: Whip Mascarpone Diplomat Crème
In a large bowl, combine 1 cup of mascarpone, 1 cup of heavy cream, and ¼ cup of powdered sugar. Using an electric mixer, whip the mixture on medium-high speed until soft peaks form, taking about 3-5 minutes. Once the pastry cream is cold, gently fold it into the whipped mascarpone until fully combined, creating a luxurious diplomat crème that’s both light and creamy.

Step 5: Assemble Tart
Spread the whipped mascarpone diplomat crème evenly over the cooled puff pastry crust, creating a smooth layer. Drizzle some of the reduced poaching syrup on top for added flavor and shine. Finally, elegantly arrange sliced poached peaches and fresh raspberries over the cream, creating a vibrant display. Your stunning White Peach Mascarpone Tart is now ready to delight!

Make Ahead Options

These White Peach Mascarpone Tarts are perfect for busy home cooks looking to save time! You can prepare the vanilla pastry cream and poached peaches up to 24 hours in advance, allowing the flavors to meld beautifully. Store the pastry cream in the refrigerator, ensuring it’s completely chilled before folding it into the mascarpone to maintain its luscious texture. Bake the puff pastry crust a few hours ahead of serving and let it cool completely before assembly. When you’re ready to impress your guests, simply whip the mascarpone diplomat crème, fill the tart shell, and top with poached peaches and fresh raspberries. This way, you’ll enjoy a stunning dessert with minimal last-minute effort!

Expert Tips for White Peach Mascarpone Tart

  • Chill Thoroughly: Ensure your pastry cream is completely chilled before folding in the mascarpone; this maintains a lovely texture in your tart.

  • Select Ripe Peaches: Choose firm and ripe peaches for optimal sweetness and juiciness. Underripe peaches may lack flavor in your White Peach Mascarpone Tart.

  • Monitor Puff Pastry: Keep an eye on the puff pastry while baking to prevent over-browning. A perfectly golden crust enhances both presentation and taste.

  • Layer Balance: When assembling, be generous with the diplomat crème, as it complements the tartness of the poached peaches. A balanced layer makes each bite delightful.

  • Syrup Control: Don’t overdo the poaching syrup when drizzling on top; just a light touch adds flavor without making the tart soggy.

What to Serve with White Peach Mascarpone Tart

Imagine a sunny afternoon gathering, where each bite of tart transports you to summer bliss.

  • Creamy Vanilla Ice Cream: Adds a rich and creamy element that beautifully contrasts the tart’s sweetness and offers a delightful chill.
  • Lemon Sorbet: A refreshing palate cleanser that cuts through the creamy mascarpone and enhances the tartness of the peaches.
  • Sparkling Wine: The effervescence and lightness of a sparkling wine complement the dessert's flavors, making it a joyful pairing.
  • Fresh Mint Sprigs: Garnish with fresh mint to add a pop of vibrant color and an aromatic herbal note that elevates the entire dessert experience.
  • Shortbread Cookies: These buttery cookies provide a contrasting texture and add a sweet, crumbly element that pairs well with the creamy mascarpone.
  • Berry Compote: Drizzle a mixed berry compote over the tart for a burst of tart flavor that balances the sweetness of the peaches.
  • Almond Biscotti: Crunchy and slightly nutty, biscotti offers a delightful texture that pairs well with the smooth tart, perfect for dipping.
  • Coffee or Espresso: A warm beverage like coffee enhances the fruity flavors while providing a comforting end to your summer meal.
  • Whipped Cream: Lightly sweetened whipped cream adds an extra layer of creaminess, tying the dessert together beautifully.

Variations & Substitutions for White Peach Mascarpone Tart

Feel free to let your creativity shine by customizing this delightful tart with your favorite seasonal fruits and flavors!

  • Nectarine Swap: Replace white peaches with nectarines for a slightly tart flavor and a beautiful color.

  • Blueberry Burst: Use blueberries instead of raspberries for a sweet twist—perfect for summer picnics!

  • Apricot Addition: Try apricots to add a floral note, enhancing the overall fruity experience of the dessert.

  • Dairy-Free Option: For a dairy-free twist, substitute mascarpone with silken tofu blended with coconut cream for a creamy filling.

  • Flavored Extracts: Experiment with almond or orange extracts in the pastry cream for a unique flavor profile that surprises the palate.

In the mood for a refreshing vibe? You might consider pairing your tart with a light drizzle of honey or a spoon of homemade caramel sauce for added indulgence, just like in our recipe for Peaches Cream Cookies. And if you're feeling adventurous, a scoop of vanilla ice cream on the side could elevate your dessert experience!

  • Spicy Kick: For a fun heat element, add a dash of cayenne or black pepper to the poaching liquid for an unexpected twist!

  • Personal Touch: Personalize the crust by using crushed graham crackers or almond flour if gluten-free is a priority, keeping the flaky texture intact.

How to Store and Freeze White Peach Mascarpone Tart

Fridge: Store the tart in the refrigerator for up to 2 days. Make sure to cover it loosely with plastic wrap to keep it fresh without sticking.

Freezer: You can freeze the unassembled tart for up to 3 months. Wrap the cooled puff pastry tightly in foil and place it in an airtight container. Thaw before adding the filling.

Reheating: If you store the tart after assembling, serve chilled. If desired, you can lightly warm individual slices in the microwave for about 10-15 seconds to enhance the flavors.

Make Ahead: Prepare the pastry cream a day in advance and keep it refrigerated. Assemble the White Peach Mascarpone Tart a few hours before serving for the best texture and freshness.

White Peach Mascarpone Tart Recipe FAQs

What should I look for when selecting ripe peaches?
Absolutely! The ideal peaches for your tart should be firm yet slightly yielding to pressure, indicating ripeness. Look for peaches with a vibrant color and a sweet aroma. Avoid any fruits with dark spots all over or wrinkled skin, as they may be overripe.

How should I store the White Peach Mascarpone Tart?
You can store your tart in the refrigerator for up to 2 days. Just cover it loosely with plastic wrap to keep it fresh while allowing it to breathe. This prevents the cream from sticking while maintaining its lovely texture.

Can I freeze the tart for later use?
Yes! You can freeze the unassembled White Peach Mascarpone Tart for up to 3 months. Wrap the cooled puff pastry tightly in foil and place it in an airtight container. When you’re ready to enjoy, simply thaw it in the refrigerator overnight before adding the filling.

What if my pastry cream doesn’t thicken properly?
Don’t worry! If your pastry cream doesn’t thicken as expected, it may need a little more cooking. Return it to the heat, stirring constantly for a couple of minutes until it reaches the desired consistency. Make sure to keep the heat medium-low to prevent burning.

Is this tart suitable for those with dairy allergies?
Unfortunately, the White Peach Mascarpone Tart contains dairy ingredients, so it’s not suitable for individuals with dairy allergies. However, you can explore alternative ingredients like coconut cream or cashew cream as substitutes to create a dairy-free version, keeping in mind that the taste and texture will differ a bit.

How do I ensure my puff pastry is crispy?
To achieve that delightful flaky texture, ensure that the puff pastry is not overcrowded in the pan and that you prick the base with a fork before baking. Weigh down the pastry with parchment paper and pie weights to prevent it from puffing too much. Keep an eye on it while baking to achieve a beautiful golden crust!

White Peach Mascarpone Tart

Delight in White Peach Mascarpone Tart for Summer Celebrations

This White Peach Mascarpone Tart is a delicious dessert that celebrates summer with fresh peaches and creamy mascarpone.
Print Recipe Pin Recipe
Prep Time 30 minutes mins
Cook Time 45 minutes mins
Chilling Time 1 hour hr
Total Time 2 hours hrs 15 minutes mins
Servings: 8 slices
Course: Dessert
Cuisine: American
Calories: 450
Ingredients Equipment Method Nutrition Notes

Ingredients
  

For the Pastry Cream
  • 2 cups Whole Milk Any dairy milk can substitute.
  • 2 teaspoons Vanilla Bean Paste Extract can be used.
  • ½ cup White Sugar Coconut sugar can be healthier alternative.
  • ¼ cup Cornstarch No substitutions recommended.
  • 1 teaspoon Salt Enhances sweetness.
  • 4 units Egg Yolks Crucial for thickening.
  • 2 tablespoons Unsalted Butter Adds creaminess.
For the Diplomat Crème
  • 1 cup Mascarpone Cream cheese can substitute.
  • 1 cup Heavy Cream Whipped to perfection.
  • ¼ cup Powdered Sugar Lightly sweetens.
For the Poached Peaches
  • 1 cup Sugar For poaching.
  • 1 cup Chardonnay For poaching.
  • 1 teaspoon Vanilla Extract For poaching.
  • ¼ cup Honey For poaching.
  • 2 tablespoons Lemon Juice For poaching.
  • 1 unit Lemon Zest For poaching.
  • 4 units Firm Ripe Peaches Can substitute with quince or green apples.
For the Tart Assembly
  • 1 sheet Puff Pastry Homemade is preferred.
  • 2 units Fresh Peaches For topping.
  • 1 cup Raspberries For topping.
  • to taste Caramel Sauce Optional for added sweetness.

Equipment

  • Medium saucepan
  • tart pan
  • Mixing Bowl
  • Electric mixer

Method
 

Step-by-Step Instructions
  1. Prepare the pastry cream by heating milk and adding vanilla bean paste. Whisk sugar, cornstarch, and egg yolks together. Combine and cook until thickened.
  2. Make poached peaches by simmering sugar, Chardonnay, vanilla, honey, lemon juice, and zest. Poach peaches for 4 minutes each side.
  3. Bake puff pastry at 400°F until golden. Cool completely.
  4. Whip mascarpone, heavy cream, and powdered sugar until soft peaks form. Fold in the cooled pastry cream.
  5. Assemble by spreading diplomat crème over pastry crust, drizzle with poaching syrup, and top with sliced peaches and raspberries.

Nutrition

Serving: 1sliceCalories: 450kcalCarbohydrates: 55gProtein: 6gFat: 22gSaturated Fat: 12gCholesterol: 100mgSodium: 180mgPotassium: 200mgFiber: 3gSugar: 30gVitamin A: 500IUVitamin C: 15mgCalcium: 100mgIron: 1mg

Notes

Chill the pastry cream thoroughly. Select ripe peaches for the best flavor. Monitor puff pastry while baking to prevent over-browning. Be generous with the diplomat crème for best flavor balance. Use poaching syrup sparingly to avoid sogginess.

Tried this recipe?

Let us know how it was!

Decadent Blackberry Cream Cheese Pastry Bliss You’ll Love

September 26, 2025 by Grace Snow Leave a Comment

As I stood in my kitchen, the scent of blackberries simmering on the stove ignited a sweet nostalgia for sunny mornings spent savoring pastries. Today, I’m excited to share my recipe for a Flaky Blackberry Cream Cheese Danish with Homemade Curd, a delightful blend of rich creaminess and fruity brightness that never fails to impress. These beauties are not just a feast for the eyes; they're also surprisingly simple to whip up using store-bought puff pastry, making them perfect for a quick indulgence or a show-stopping dessert at your next gathering. With a creamy filling and a vibrant blackberry curd, they promise to be a new favorite for anyone looking for a deliciously fresh treat. Who’s ready to bring a touch of homemade bliss into their kitchen?

Why This Danish Will WOW You?

Simplicity at Its Finest: The use of store-bought puff pastry makes this recipe incredibly easy for anyone, whether you're an experienced chef or a home cook.

Bursting with Flavor: The creamy cream cheese filling paired with tangy blackberry curd creates a delightful explosion of taste in every bite.

Visually Stunning: With their golden tops and vibrant fruit accents, these Danishes are a showstopper at any gathering, sure to impress family and friends.

Versatile Pleasure: Feel free to swap blackberries with your favorite berries, like raspberries or blueberries, for a unique twist.

Perfect for Any Occasion: Whether it's brunch, an afternoon snack, or a dessert at dinner, these pastries fit seamlessly into any meal.

Get ready to elevate your dessert game! If you love fruit-filled treats, don’t miss out on my Blackberry Crisp Amp or for a cool finish, try some Vegan Cacao Cream.

Blackberry Cream Cheese Danish Ingredients

For the Blackberry Curd
• Blackberries – Fresh or frozen, they provide the core flavor for both the curd and the garnish.
• Sugar – A mixture of granulated and turbinado, it sweetens the curd and adds texture to the pastry's exterior.
• Eggs (whole and yolks) – They add structure and richness to the filling.
• Lemon Juice – Brightens the flavor of the curd, effectively balancing sweetness.
• Butter – Offers creaminess and richness to the curd for a velvety finish.

For the Cream Cheese Filling
• Cream Cheese – The main filling component with a rich and tangy taste; use softened for easy blending.
• Sugar – Adds sweetness to the cream cheese layer, enhancing the overall flavor.
• Egg Yolk – Provides added richness, improving the creaminess of the filling.
• Vanilla Extract – Introduces warm notes that complement the blackberry curd beautifully.

For the Pastry
• Puff Pastry – Forms the flaky outer layer; ensure it's thawed and rolled out for the best texture.
• Egg Wash (beaten egg with water) – Gives the pastries a golden, glossy finish that is visually appealing.
• Turbinado Sugar – A sprinkle on top adds a satisfying crunch to the flaky exterior.

For Garnish
• Fresh Blackberries – Used for garnish; they enhance visual appeal and add a burst of freshness.
• Powdered Sugar – An optional dusting for extra sweetness and a beautiful presentation.

Dive into a delightful baking adventure with these ingredients for an unforgettable Blackberry Cream Cheese Danish!

Step‑by‑Step Instructions for Blackberry Cream Cheese Danish

Step 1: Prepare Blackberry Curd
Begin by placing fresh or frozen blackberries in a blender and pureeing until smooth. Strain the blackberry puree through a fine mesh sieve into a saucepan, discarding the seeds. On medium heat, simmer the strained puree with sugar until it reduces slightly. In a bowl, whisk together eggs, egg yolks, and lemon juice, then stir into the simmering mixture until it thickens, about 5-7 minutes. Remove from heat and whisk in butter, then let the curd cool.

Step 2: Make Cream Cheese Filling
In a mixing bowl, add softened cream cheese, sugar, egg yolk, and vanilla extract. Using an electric mixer, beat the mixture until creamy and well combined, about 2-3 minutes. The cream cheese filling should be smooth and spreadable. Set aside, allowing it to stay at room temperature for easy handling when filling the pastries.

Step 3: Roll Puff Pastry
Preheat your oven to 400°F (200°C). On a lightly floured surface, unroll the thawed puff pastry sheets. Using a round cookie cutter or a glass, cut the pastry into 3 ½-inch circles. Place the circles on a parchment-lined baking sheet. Use a fork to prick the centers of each circle to prevent excessive puffing during baking, ensuring a crisp outer layer for your Blackberry Cream Cheese Danish.

Step 4: Assemble Pastries
Spoon a generous dollop of the cream cheese filling into the center of each puff pastry circle. Carefully brush the edges of the pastry with the egg wash to help create a golden crust. Sprinkle a bit of turbinado sugar on top of the filling for added texture. This step ensures that the pastries puff beautifully and have a delightful crunch once baked.

Step 5: Bake
Place the assembled pastries in the preheated oven and bake for 15-18 minutes. Keep an eye on them as they bake; they should turn golden brown and puff up nicely. Once ready, remove the pastries from the oven and let them cool on a wire rack. Allowing the pastries to cool ensures the cream cheese filling sets properly.

Step 6: Finish with Curd
Once the pastries have cooled completely, use a small spoon to fill each one with the luscious blackberry curd. For an added touch of freshness, top with fresh blackberries and, if desired, a light dusting of powdered sugar. This final presentation not only enhances visual appeal but also adds an extra layer of sweetness to your Blackberry Cream Cheese Danish.

Make Ahead Options

These Flaky Blackberry Cream Cheese Danishes are perfect for meal prep enthusiasts! You can prepare the blackberry curd up to 3 days in advance; simply refrigerate it in an airtight container to maintain freshness. The cream cheese filling can also be made ahead and stored in the fridge for up to 24 hours, ensuring it's ready for quick assembly. When you're ready to serve, just roll out the puff pastry and follow the assembly instructions before baking. This way, you can enjoy delicious, homemade pastries with minimal effort, allowing you to savor those moments you’d otherwise spend in the kitchen!

Blackberry Cream Cheese Variations

Feel free to bring your personal touch to this recipe, transforming every bite into something uniquely yours!

  • Berry Swap: Replace blackberries with raspberries or blueberries for a different fruity flavor that’s equally delightful.
  • No-Cream Cheese: Substitute with mascarpone for a lighter, creamier filling that enhances the overall pastry sweetness.
  • Crescent Dough: Use crescent roll dough instead of puff pastry for a quicker and more buttery twist.
  • Nutty Add-In: Mix chopped almonds or walnuts into the cream cheese filling for a crunchy texture that complements the fresh fruit.
  • Spicy Kick: Add a pinch of cayenne pepper or chili powder to the blackberry curd for an unexpected warming element.
  • Zesty Lemon: Substitute lemon juice with lime juice in the curd for a tropical flair that enhances the berry flavor.
  • Chocolate Drizzle: Drizzle melted chocolate over the cooled pastries for an indulgent finishing touch that elevates presentation and taste.
  • Serving Pairing: Consider serving with fresh whipped cream or a scoop of ice cream, such as Cajeta Ice Cream, for an irresistible combination.

The possibilities are endless, and these variations can create a space for your creativity to shine! If you love variations, check out these recipes for more inspirations: Ice Cream Cake or Peaches Cream Cookies.

Storage Tips for Blackberry Cream Cheese Danish

  • Room Temperature: Enjoy these pastries fresh; they are best served warm right after baking. If you have leftovers, they can sit at room temperature for up to 2 hours.

  • Fridge: Store any uneaten Blackberry Cream Cheese Danishes in an airtight container in the refrigerator for up to 3 days. The pastry may lose some crispness but will still taste delicious!

  • Freezer: For longer storage, freeze the unfilled pastries before baking. Wrap tightly in plastic wrap and then place in an airtight container for up to 2 months. Bake from frozen, adding an extra few minutes to the baking time.

  • Reheating: To reheat, simply pop the pastries in a preheated oven at 350°F (175°C) for about 10 minutes to regain their flaky texture. Enjoy warm for the best results!

Expert Tips for Blackberry Cream Cheese Danish

  • Room Temperature Cream Cheese: Ensure your cream cheese is at room temperature for easy mixing into a smooth filling, avoiding lumps in your Blackberry Cream Cheese Danish.

  • Avoid Overfilling: Be careful not to overfill pastries. This prevents the delicious filling from spilling out during baking and keeps your Danishes perfectly shaped.

  • Strain for Smooth Curd: For a silky texture in your blackberry curd, strain it after cooking to remove any solids, enhancing the overall quality of your dessert.

  • Double Boiler Method: Using a double boiler when preparing the curd can help control the temperature, reducing the risk of cooking the eggs too quickly and creating a scrambled effect.

  • Keep an Eye on Baking Time: Baking times can vary, so watch your pastries closely towards the end. Remove them when they are golden brown for the best texture.

What to Serve with Flaky Blackberry Cream Cheese Danish?

Indulging in these delectable pastries inspires a delightful gathering filled with flavors and textures that complement their rich creaminess.

  • Fresh Fruit Salad: A mix of seasonal fruits adds brightness and balances the buttery pastry's richness, elevating your brunch experience.

  • Coffee or Espresso: The bitterness of a bold brew perfectly complements the sweetness of the danish, making each bite feel like a cozy café moment.

  • Whipped Cream: A dollop of lightly sweetened whipped cream lends a cloud-like softness, enhancing the overall indulgence of this delicious treat.

  • Vanilla Ice Cream: Creamy vanilla ice cream creates a luscious contrast to the flaky layers and tart blackberry curd, making it an irresistible dessert pairing.

  • Herbal Tea: A fragrant herbal tea offers a calming companion, enhancing the berry's fruity notes while providing a refreshing sip between bites.

  • Chocolate Drizzle: For a decadent twist, a drizzle of rich chocolate sauce over the pastries adds a sweet depth and pairs deliciously with the blackberry filling.

  • Salty Charcuterie Board: The savory components of a charcuterie board provide a perfect contrast to the sweet danish, allowing guests to enjoy a well-rounded feast of flavors.

  • Mimosa: A sparkling mimosa brightens any gathering and its citrus notes pair beautifully with the berry flavors, creating a festive atmosphere.

  • Cheese Selection: A creamy brie or tangy goat cheese can enhance the flavors, introducing a savory element that beautifully rounds out the meal.

Invite your family and friends to experience the delightful harmony these pairings create with your Blackberry Cream Cheese Danish!

Blackberry Cream Cheese Danish Recipe FAQs

What type of blackberries should I use?
Absolutely! You can use fresh or frozen blackberries for your curd and garnish. If opting for fresh blackberries, choose ones that are plump, firm, and dark in color. Avoid blackberries with dark spots all over, as they may be overripe or spoil quickly.

How should I store leftover Blackberry Cream Cheese Danishes?
To keep them fresh, store any uneaten Blackberry Cream Cheese Danishes in an airtight container in the refrigerator for up to 3 days. They’re best enjoyed fresh, but even a little chill can still provide delightful flavors!

Can I freeze the Blackberry Cream Cheese Danishes?
Yes, you can definitely freeze them! To do so, wrap unfilled pastries tightly in plastic wrap and then place them in an airtight container. They can be stored in the freezer for up to 2 months. When you’re ready to bake, take them straight from the freezer and add an extra 2-5 minutes to the baking time.

Why did my pastries not puff up properly?
That can be a bit frustrating! Be sure that your puff pastry is completely thawed and rolled out properly before cutting. Also, pricking the centers of the pastry circles helps prevent excessive puffing, allowing for that classic flaky texture. Lastly, keep an eye on your baking time; pastries should be baked at 400°F for 15-18 minutes until golden brown.

Is this recipe suitable for someone with egg allergies?
Great question! Since this recipe contains eggs in both the cream cheese filling and the blackberry curd, it’s not suitable for those with egg allergies. However, you can use egg substitutes such as flaxseed meal mixed with water (1 tablespoon of flaxseed meal + 2.5 tablespoons of water per egg) to mimic the binding properties! Please adjust other ingredients accordingly for balance.

How can I ensure my blackberry curd is smooth?
For a silky-smooth blackberry curd, remember to strain the mixture after cooking to remove any solids or seeds. Begin by pureeing the blackberries, then simmer and whisk until thickened, about 5-7 minutes. After cooking, pour the mixture through a fine mesh sieve into a bowl, discarding any chunks. Whisk in the butter until melted and smooth before letting it cool. This method will transform your curd into a luscious topping!

Blackberry Cream Cheese

Decadent Blackberry Cream Cheese Pastry Bliss You’ll Love

Indulge in this Blackberry Cream Cheese Danish, a simple yet impressive dessert that combines rich cream cheese and vibrant blackberry flavors.
Print Recipe Pin Recipe
Prep Time 30 minutes mins
Cook Time 18 minutes mins
Cooling Time 20 minutes mins
Total Time 1 hour hr 8 minutes mins
Servings: 12 pieces
Course: Dessert
Cuisine: American
Calories: 250
Ingredients Equipment Method Nutrition Notes

Ingredients
  

For the Blackberry Curd
  • 2 cups Blackberries Fresh or frozen
  • 3/4 cups Sugar Mix of granulated and turbinado
  • 2 whole Eggs Whole and yolks
  • 2 tablespoons Lemon Juice Freshly squeezed
  • 2 tablespoons Butter Unsalted
For the Cream Cheese Filling
  • 8 oz Cream Cheese Softened
  • 1/4 cup Sugar
  • 1 large Egg Yolk
  • 1 teaspoon Vanilla Extract
For the Pastry
  • 1 package Puff Pastry Thawed and rolled out
  • 1 large Egg Wash Beaten egg with water
  • 2 tablespoons Turbinado Sugar For sprinkling on top
For Garnish
  • 1/2 cup Fresh Blackberries For garnish
  • 1 tablespoon Powdered Sugar Optional for dusting

Equipment

  • Blender
  • Mixing Bowl
  • Saucepan
  • Electric mixer
  • Cookie cutter
  • Baking Sheet
  • Fine-mesh sieve
  • Parchment Paper

Method
 

Preparation Steps
  1. Prepare Blackberry Curd: Puree blackberries, strain, then simmer with sugar. Whisk and cook until thick, add butter and cool.
  2. Make Cream Cheese Filling: Mix cream cheese, sugar, egg yolk, and vanilla until creamy and smooth. Set aside.
  3. Roll Puff Pastry: Unroll pastry, cut into circles, and prick centers to prevent excessive puffing.
  4. Assemble Pastries: Fill pastry circles with cream cheese mixture, brush edges with egg wash, and sprinkle turbinado sugar on top.
  5. Bake: Bake the pastries in a preheated oven at 400°F for 15-18 minutes until golden brown.
  6. Finish with Curd: Fill cooled pastries with blackberry curd, top with fresh blackberries and optional powdered sugar.

Nutrition

Serving: 1pieceCalories: 250kcalCarbohydrates: 30gProtein: 3gFat: 13gSaturated Fat: 7gPolyunsaturated Fat: 1gMonounsaturated Fat: 5gCholesterol: 50mgSodium: 150mgPotassium: 100mgFiber: 1gSugar: 15gVitamin A: 500IUVitamin C: 5mgCalcium: 50mgIron: 1mg

Notes

Ensure cream cheese is at room temperature for easy mixing. Avoid overfilling pastries to maintain shape during baking.

Tried this recipe?

Let us know how it was!

Irresistible Strawberry Cheesecake Sandwiches for Sweet Cravings

September 26, 2025 by Grace Snow Leave a Comment

Have you ever found yourself daydreaming about a breakfast that feels like a sweet embrace? My Fried Strawberry Cheesecake Sandwiches are that dreamy indulgence, perfectly merging the familiar comfort of a sandwich with the creamy, fruity goodness of strawberry cheesecake. With a crispy exterior and a luscious filling that spills over with fresh strawberries and rich cream cheese, this recipe is not just easy to whip up, but also a guaranteed crowd-pleaser. Whether you're serving it for an inviting breakfast, a delightful snack, or a decadent dessert, your loved ones will cherish every bite. Who can resist a warm, sugar-dusted delight? Get ready to indulge in a fabulous treat that might just become your new favorite! Ready to take your taste buds on an adventure?

Why are Fried Strawberry Cheesecake Sandwiches irresistible?

Decadent Delight: Each bite delivers a fusion of flavors, where the rich cream cheese meets sweet strawberries, harmonizing beautifully.

Crispy Perfection: The golden-brown exterior adds the perfect crunch, contrasting with the soft, creamy interior that simply melts in your mouth.

Quick & Easy: With just a few simple steps, you can create this show-stopping dish in no time—ideal for busy mornings or spontaneous snack cravings.

Crowd-Pleaser: This indulgent treat is sure to wow family and friends, making it an instant favorite for brunch gatherings or dessert celebrations.

Versatile Indulgence: Enjoy them as a breakfast, dessert, or snack—this versatile recipe fits any occasion, serving deliciousness at any hour.

Get ready to treat your loved ones to these delightful Strawberry Cheesecake Sandwiches.

Strawberry Cheesecake Sandwiches Ingredients

For the Sandwiches
• Bread – Use white or brioche bread for the best texture and flavor.
• Cream Cheese – Soften it beforehand for easy mixing to achieve a smooth filling.
• Powdered Sugar – Sweeten the cream cheese mixture; extra can be dusted on top for a finishing touch.
• Strawberries – Fresh strawberries add a burst of flavor—frozen can work if thawed properly.
• Strawberry Jam – To enhance the strawberry flavor; feel free to substitute with other fruit jams for variety.

For the Coating
• Eggs – Use large eggs to ensure a good binding and crisp coating of the sandwich.
• Milk – Mix with eggs for dipping; almond or oat milk can be used as alternatives.
• Butter – Unsalted butter is best for frying; it adds richness while controlling the saltiness.

These Strawberry Cheesecake Sandwiches are sure to impress and satisfy your sweet cravings!

Step‑by‑Step Instructions for Fried Strawberry Cheesecake Sandwiches

Step 1: Prepare the Cream Cheese Filling
In a small mixing bowl, combine softened cream cheese and 2 tablespoons of powdered sugar. Using a hand mixer or whisk, blend until the mixture is smooth and creamy. This luscious filling is the heart of your Fried Strawberry Cheesecake Sandwiches, so ensure it has no lumps for a delightful texture.

Step 2: Assemble the Sandwiches
Take one slice of bread and generously spread a thick layer of the cream cheese mixture over it. Top with freshly sliced strawberries and a spoonful of strawberry jam before closing it with another slice of bread, creating a delightful sandwich. Make sure the filling is evenly distributed for each bite of your indulgent treat.

Step 3: Prepare the Egg Mixture
In a shallow dish, whisk together 2 large eggs with ¼ cup of milk until well combined. This mixture will serve as the dipping bathe for the sandwiches, so ensure the consistency is smooth and completely mixed. You want a nice coating that will create a crispy exterior once fried.

Step 4: Dip the Sandwiches
Carefully dip each assembled sandwich into the egg and milk mixture, ensuring both sides are thoroughly coated. Allow any excess liquid to drip off to prevent soggy sandwiches. This crucial step ensures the Fried Strawberry Cheesecake Sandwiches achieve that golden-brown crust as they cook.

Step 5: Heat the Skillet
Place a skillet over medium heat and add 2 tablespoons of unsalted butter. Allow the butter to melt and bubble, creating a rich base for frying. Once the butter is hot and slightly bubbly, it's time to add the sandwiches for frying.

Step 6: Fry the Sandwiches
Gently place each sandwich in the hot skillet, frying for about 2-3 minutes per side. Keep an eye on them, and flip once they reach a beautiful golden-brown color. The sound of sizzling butter will fill the air, and the sandwiches will transform into crispy delights.

Step 7: Drain Excess Butter
Once both sides are perfectly fried and crispy, carefully remove the sandwiches from the skillet and place them on a paper towel-lined plate. This step helps absorb any excess butter, ensuring your Fried Strawberry Cheesecake Sandwiches are indulgent yet not greasy.

Step 8: Dust and Serve
Before serving, generously dust the warm sandwiches with additional powdered sugar to enhance their sweetness and create a delightful presentation. Serve immediately while they're warm, as that's when the filling is at its best—melt-in-your-mouth creamy and filled with fresh flavors.

Make Ahead Options

These Fried Strawberry Cheesecake Sandwiches are a fantastic choice for meal prep, making your mornings a breeze! You can prepare the cream cheese filling and assemble the sandwiches up to 24 hours in advance; simply store them in an airtight container in the refrigerator to maintain their freshness. To prevent the bread from becoming soggy, avoid dipping the sandwiches in the egg mixture until you’re ready to fry them. When you’re set to enjoy them, just dip those assembled sandwiches into the egg mixture and fry for a few minutes until golden brown. This way, you’ll have delicious, warm, and crispy treats ready in no time!

What to Serve with Fried Strawberry Cheesecake Sandwiches

Pairing these delightful sandwiches with complementary flavors and textures creates a full meal experience you won’t forget.

  • Fresh Fruit Salad: A colorful mix of seasonal fruits adds a refreshing brightness, balancing the richness of the cheesecake filling. The natural sweetness of the fruits harmonizes perfectly.

  • Vanilla Ice Cream: A scoop of creamy vanilla ice cream provides a cool, velvety contrast to the warm sandwiches, enhancing the indulgent experience. Drizzle some chocolate syrup for added delight.

  • Maple Syrup: A drizzle of pure maple syrup adds a touch of warmth and sweetness, elevating each bite to new heights. This classic combination is simply irresistible.

  • Chocolate-Dipped Strawberries: Juicy strawberries wrapped in silky chocolate offer a beautiful presentation and a decadent touch, echoing the flavors found within the sandwiches.

  • Coffee or Espresso: A steaming cup of coffee or espresso pairs beautifully, balancing the sweetness of the sandwich with a rich, slightly bitter element. A perfect brunch companion!

  • Sparkling Water with Lemon: The effervescence of sparkling water with a hint of lemon refreshes the palate, creating a delightful contrast to the creamy richness of the Fried Strawberry Cheesecake Sandwiches.

  • Whipped Cream: Adding a dollop of freshly whipped cream takes indulgence to the next level! It adds airiness and creaminess that complements the warm, gooey filling perfectly.

  • Coconut Milk Smoothie: A light coconut milk smoothie flavored with vanilla or banana offers a tropical twist, adding a creamy consistency that goes hand-in-hand with your sweet sandwiches.

Indulging in these pairings will elevate your mealtime, enhancing the joy of every delightful bite!

Storage Tips for Strawberry Cheesecake Sandwiches

  • Room Temperature: Best enjoyed fresh, but if needed, keep at room temperature for up to 2 hours to maintain that crispy edge.

  • Fridge: Store leftovers in an airtight container for up to 2 days. Place wax paper between layers to prevent sticking and maintain crunchiness.

  • Freezer: For longer storage, freeze the sandwiches individually wrapped in plastic wrap and then inside a freezer bag for up to 1 month. Reheat before serving.

  • Reheating: To revive the crispy texture, reheat in a skillet over medium heat for about 2-3 minutes on each side until warm and crisp again. Enjoy those delightful Strawberry Cheesecake Sandwiches just as you made them!

Strawberry Cheesecake Sandwiches Variations

Feel free to make these delicious sandwiches your own by experimenting with flavors and ingredients!

  • Berry Mix: Swap out strawberries for a mix of blueberries and raspberries for a delightful twist. Each bite will burst with juicy goodness.

  • Nutty Crunch: Add crushed nuts, like almonds or walnuts, to the cream cheese filling. The added texture contrasts beautifully with the creamy filling.

  • Chocolate Drizzle: Drizzle melted chocolate over the finished sandwiches for an extra touch of decadence. Chocolate and strawberry make a classic pairing that's hard to resist!

  • Banana Twist: Replace strawberries with bananas for a fun and fruity option. The creamy texture of bananas adds a lovely sweetness, making every bite a treat.

  • Spiced Up: Incorporate a sprinkle of cinnamon or nutmeg into the cream cheese mixture. These warm spices will elevate the flavor profile and create a cozy vibe.

  • Gluten-Free Option: Use gluten-free bread to accommodate dietary needs without sacrificing deliciousness. You won’t even notice the difference in taste!

  • Vegan Choice: Replace the cream cheese with a vegan alternative and use almond or oat milk for the dipping mixture. These substitutions make it easy to indulge while keeping things plant-based.

With these variations, you can enjoy the tasty goodness of these Fried Strawberry Cheesecake Sandwiches in so many exciting ways! Whether you go for a classic or a new twist, every version is bound to impress. What flavor are you most excited to try?

Expert Tips for Strawberry Cheesecake Sandwiches

  • Monitor Frying: Keep a close eye on the sandwiches while frying. Adjust the heat if necessary to avoid overcooking and to achieve that perfect golden-brown exterior.

  • Use Fresh Strawberries: For the best flavor, opt for fresh strawberries. If you use frozen ones, make sure to thaw and drain them to prevent excess moisture in the filling.

  • Cream Cheese Consistency: Allow the cream cheese to come to room temperature before mixing. This ensures a smooth filling that is easy to spread between the slices of bread.

  • Even Coating: When dipping the sandwiches in the egg and milk mixture, make sure to coat each side thoroughly and let excess liquid drip off to achieve a crispy texture.

  • Serving Warm: Enjoy these Strawberry Cheesecake Sandwiches immediately after frying for the best experience. They are creamier when warm and the flavors are at their peak!

Fried Strawberry Cheesecake Sandwiches Recipe FAQs

How do I select ripe strawberries for this recipe?
Absolutely! Choose strawberries that are vibrant red without dark spots or bruises. Look for those with a sweet fragrance that indicates ripeness. If using frozen strawberries, ensure they are fully thawed and drained to avoid excess moisture in your sandwiches.

How should I store leftover sandwiches?
After enjoying your Fried Strawberry Cheesecake Sandwiches, store any leftovers in an airtight container in the refrigerator for up to 2 days. I recommend placing wax paper between layers to prevent them from sticking together and maintain that delightful crunch.

Can I freeze these sandwiches?
Very! To freeze, wrap each sandwich individually in plastic wrap, then place them in a freezer-safe bag. These can be stored for up to 1 month. When you’re ready to enjoy, reheat them briefly in a skillet over medium heat for about 2-3 minutes on each side to regain their crispness.

What if my sandwiches aren't crispy after frying?
If you find your sandwiches are not achieving that golden-brown crispiness, it’s likely due to excess moisture. Make sure to thoroughly drain any strawberries if you're using frozen ones, and also ensure that the egg mixture is coating the bread evenly. Adjust frying time and heat as needed until you get that perfect crunch!

Are there any dietary considerations I should be aware of?
When making Fried Strawberry Cheesecake Sandwiches, keep in mind any allergies or dietary restrictions. Substitute cream cheese with a dairy-free alternative for those avoiding dairy. Also, consider using gluten-free bread if anyone in your group has gluten sensitivities. Always double-check ingredient labels as necessary!

How long do the flavors last in the fridge?
I often make sandwiches and find that while they can be stored in the fridge for about 2 days, flavors might mellow slightly over time. It’s best to enjoy them fresh but they will still taste great as leftovers!

Strawberry Cheesecake Sandwiches

Irresistible Strawberry Cheesecake Sandwiches for Sweet Cravings

These Fried Strawberry Cheesecake Sandwiches blend creamy cheesecake and fresh strawberries for a delightful dessert treat.
Print Recipe Pin Recipe
Prep Time 15 minutes mins
Cook Time 10 minutes mins
Total Time 25 minutes mins
Servings: 4 sandwiches
Course: Dessert
Cuisine: American
Calories: 350
Ingredients Equipment Method Nutrition Notes

Ingredients
  

For the Sandwiches
  • 4 slices white or brioche bread
  • 8 oz cream cheese softer for easy mixing
  • 2 tbsp powdered sugar plus extra for dusting
  • 1 cup fresh strawberries sliced
  • 2 tbsp strawberry jam or other fruit jams
For the Coating
  • 2 large eggs
  • 1/4 cup milk almond or oat milk can be used
  • 2 tbsp unsalted butter for frying

Equipment

  • Skillet
  • Mixing Bowl
  • Whisk

Method
 

Preparation Steps
  1. In a small mixing bowl, combine softened cream cheese and 2 tablespoons of powdered sugar. Blend until smooth and creamy.
  2. Take one slice of bread, spread a thick layer of the cream cheese, then top with sliced strawberries and strawberry jam. Close with another slice of bread.
  3. In a shallow dish, whisk together 2 large eggs with 1/4 cup of milk until well combined.
  4. Carefully dip each sandwich into the egg and milk mixture, ensuring both sides are coated. Allow excess liquid to drip off.
  5. Heat a skillet over medium heat and melt 2 tablespoons of unsalted butter.
  6. Place sandwiches in the skillet and fry for 2-3 minutes per side until golden brown.
  7. Remove from the skillet and place on a paper towel-lined plate to drain excess butter.
  8. Dust with powdered sugar before serving while warm.

Nutrition

Serving: 1sandwichCalories: 350kcalCarbohydrates: 40gProtein: 8gFat: 18gSaturated Fat: 10gPolyunsaturated Fat: 1gMonounsaturated Fat: 5gCholesterol: 100mgSodium: 300mgPotassium: 150mgFiber: 2gSugar: 12gVitamin A: 500IUVitamin C: 15mgCalcium: 100mgIron: 1mg

Notes

Best enjoyed warm for the best flavor and texture. Monitor frying to prevent overcooking.

Tried this recipe?

Let us know how it was!

Deliciously Easy Orange Ginger Honey Cakes for Any Occasion

September 25, 2025 by Grace Snow Leave a Comment

As I took my first bite of the Orange Ginger Honey Cake, the warm, comforting blend of spices instantly transported me to cozy holiday gatherings. It’s remarkable how simple ingredients like fresh orange zest, spicy ginger, and golden honey can work together to create such a fragrant and inviting treat. Perfect for those moments when you crave a sweet indulgence that doesn’t make you feel guilty, these cakes are not only versatile—accommodating gluten-free and dairy-free needs—but also pack a healthful punch thanks to their immune-boosting properties. Whether enjoyed as an afternoon snack or gifted on joyous occasions, I can’t wait to share this delightful recipe with you. Ready to make your kitchen smell like a bakery? Let's dive in!

Why Are These Cakes a Must-Try?

Irresistible Aroma: Baking these orange ginger honey cakes fills your kitchen with a warm fragrance, enticing everyone to gather around and indulge.

Health Benefits: With ingredients like ginger and honey, these treats are not only delicious but also support your immune system.

Flexible Options: Whether you're gluten-free or need a dairy-free delight, this recipe adapts easily to your dietary needs, just like my Ricotta Protein Pancakes.

Quick to Make: In just 20 minutes of baking, you’ll have a delightful snack ready to enjoy or share.

Gifting Delight: These cakes make perfect gifts. Present them with a lovely glaze for an extra touch, reminiscent of my delicious Honey Garlic Chicken.

Transform your baking repertoire with this cheerful recipe that promises to be a crowd favorite!

Orange Ginger Honey Cakes Ingredients

For the Batter

  • All-Purpose Flour – Provides structure and body for the cakes; substitution: use a gluten-free flour blend for a gluten-free version.
  • Fresh Oranges – Offers natural sweetness and aromatic zest; note: freshly squeezed juice enhances the flavor.
  • Ground Ginger – Adds warmth and spice; substitution: try using fresh ginger for a more intense flavor.
  • Honey – Delivers sweetness and moisture, improving texture; substitution: maple syrup works well for a vegan alternative.
  • Baking Soda – Acts as a leavening agent for a light texture; ensure it's fresh for optimal results.
  • Eggs – Binds ingredients and contributes to a tender crumb; substitution: use a flaxseed egg or unsweetened applesauce for a vegan option.
  • Butter – Brings richness and flavor; substitution: use vegan butter for a dairy-free cake.

Optional Additions

  • Chopped Nuts or Dried Fruits – Add texture and flavor variations; experiment with your favorites!
  • Spices like Cinnamon or Cardamom – Elevate the flavor profile and enhance the cozy aroma.

Step‑by‑Step Instructions for Orange Ginger Honey Cakes

Step 1: Preheat the Oven
Begin by preheating your oven to 350°F (175°C). This crucial step ensures that your orange ginger honey cakes bake evenly and rise perfectly. While the oven warms up, take a moment to grease your baking molds with butter or line them with parchment paper for easy release after baking.

Step 2: Mix the Dry Ingredients
In a large mixing bowl, combine all-purpose flour, ground ginger, and baking soda. Whisk them together until evenly mixed, ensuring there are no clumps remaining. This dry mixture will provide the necessary structure and spicy warmth to your orange ginger honey cakes, setting a flavorful foundation for the batter.

Step 3: Prepare the Wet Ingredients
In a separate bowl, whisk together the melted butter, honey, eggs, and freshly squeezed orange juice until fully combined. This mixture should appear smooth and slightly glossy, signaling that the ingredients are well-emulsified. The combination of honey and orange juice will infuse sweetness and moisture into your cakes, enhancing their delightful flavor.

Step 4: Combine the Mixtures
Gradually pour the dry mixture into the wet ingredients, gently folding them together with a spatula. Mix until just combined; be careful not to overmix, as this could lead to dense cakes. The goal is to maintain a light and airy texture in your orange ginger honey cakes while ensuring all ingredients are well incorporated.

Step 5: Fill the Molds
Once the batter is ready, divide it evenly among your prepared baking molds, filling each about two-thirds full. This ensures that there is enough room for the cakes to rise without spilling over. As you pour, take a moment to enjoy the fragrant aroma of the batter, packed with the warmth of ginger and the zestiness of orange.

Step 6: Bake the Cakes
Place the filled molds in the preheated oven and bake for 15–20 minutes. Keep an eye on them; they are done when a toothpick inserted into the center comes out clean with a few crumbs. The cakes should have a beautifully golden-brown top, indicating they are perfectly baked and ready to be taken out.

Step 7: Cool and Transfer
After baking, allow the orange ginger honey cakes to cool in the molds for about 5 minutes. This will help them set and make transferring easier. Gently invert the molds onto a wire rack, then let the cakes cool completely, filling your kitchen with the delightful aroma of citrus and spice.

Step 8: Optional Glazing
Once cooled, consider adding a glaze or frosting for extra flavor and visual appeal. A simple powdered sugar glaze or a light frosting can elevate your orange ginger honey cakes, making them even more irresistible. Slice and serve them as a delightful treat for any occasion, savoring every bite of this fragrant creation.

How to Store and Freeze Orange Ginger Honey Cakes

Room Temperature: Store your cakes in an airtight container at room temperature for up to 3 days to keep them fresh and moist.

Fridge: If you prefer them chilled, these cakes can stay in the fridge for up to a week; just ensure they are wrapped properly to prevent drying out.

Freezer: For longer preservation, wrap individual cakes in plastic wrap and then in aluminum foil; they can be frozen for up to 3 months.

Reheating: To enjoy them again, thaw in the fridge overnight, then reheat in the oven at 350°F (175°C) for 5-10 minutes for a warm treat.

Tips for the Best Orange Ginger Honey Cakes

  • Room Temperature Ingredients: Let your eggs, butter, and honey come to room temperature to ensure a smooth batter, preventing any lumps.

  • Maximize Zest: Use a fine microplane for zesting your oranges, avoiding the bitter pith and enhancing the citrusy flavor of your orange ginger honey cakes.

  • Don't Overmix: Combine your wet and dry ingredients until just mixed to maintain a light and airy texture in the cakes; overmixing can lead to dense results.

  • Baking Soda Freshness: Always check your baking soda for freshness before use; expired baking soda can lead to insufficient rising, affecting the cake's lightness.

  • Cool Properly: Let the cakes cool in molds briefly before transferring to a wire rack. This prevents them from breaking apart and ensures a tender crumb.

  • Flavor Variations: Feel free to experiment by adding chopped nuts or dried fruits into the batter for additional texture and flavor.

Orange Ginger Honey Cakes: Customization Ideas

Feel free to get creative with these delightful treats and make them your own!

  • Gluten-Free: Use a gluten-free flour blend to enjoy the same tender texture without the gluten.

  • Dairy-Free: Substitute regular butter with vegan butter for a luscious, dairy-free variation.

  • Vegan: Swap out eggs for a flaxseed egg or unsweetened applesauce to create a completely vegan treat that's still moist and flavorful.

  • Fresh Twist: Replace oranges with lemons or limes for a zesty refresh that brightens the flavor profile beautifully.
    The citrusy goodness makes it feel like sunshine on your plate!

  • Sweeten Up: If you love that sweetness, consider adding a touch of maple syrup for a unique flavor—perfect for those cozy mornings.

  • Spice it Up: Incorporate extra spices like cinnamon or cardamom for a warm twist that’s perfect for the cooler months.
    Just imagine the aromatic dance of flavors in each bite!

  • Nutty Crunch: Add chopped nuts or dried fruits like cranberries and walnuts for delightful texture, making each slice a surprise of flavor.

  • Gifting Special: For the perfect gifting idea, glaze the cakes with a honey or citrus glaze, reminiscent of your favorite Honey Garlic Chicken, making them visually appealing and absolutely tempting.

What to Serve with Orange Ginger Honey Cakes

As you savor these delightful cakes, consider pairing them with some delectable accompaniments to enhance your dining experience.

  • Creamy Mascarpone: A dollop of mascarpone adds rich creaminess that beautifully complements the zesty flavors of the cakes.

  • Lemon Thyme Tea: The bright citrus notes in lemon thyme tea echo the orange zest, providing a refreshing contrast that invigorates your senses.

  • Whipped Coconut Cream: For a light, dairy-free option, whipped coconut cream enhances the sweetness while adding a tropical twist to every bite.

  • Honey Drizzle: A simple drizzle of honey brings out the cake’s sweetness while adding a glossy finish that’s visually inviting and deliciously sticky.

  • Spiced Chai Latte: The warm spices in a chai latte harmonize perfectly with ginger, creating a cozy drink that feels like a hug in a mug.

  • Fresh Berries: A side of juicy berries adds a burst of color and freshness, balancing the cake's richness while offering a lovely tartness.

  • Zesty Orange Salad: A mixed citrus salad with mint elevates your dessert offering, reflecting the flavors of the cake while providing a light, refreshing bite.

  • Caramel Drizzle: A warm caramel drizzle enhances the sweetness of the cakes, creating a luxurious dessert experience perfect for special occasions.

Exploring these ideas not only elevates your orange ginger honey cakes but also warms the heart as you share delightful flavors with loved ones.

Make Ahead Options

These orange ginger honey cakes are perfect for meal prep enthusiasts! You can prepare the batter up to 24 hours in advance by mixing the dry and wet ingredients separately and storing them in airtight containers in the refrigerator. This helps preserve freshness while saving you time on busy days. If you’d like, you can also portion the batter into your baking molds and refrigerate them overnight. When you’re ready to bake, preheat your oven and simply pop them in; they’ll come out just as delicious! For longer storage, these cakes can be made ahead and frozen for up to 3 months—just thaw and warm them for a delightful treat anytime.

Orange Ginger Honey Cakes Recipe FAQs

What kind of oranges should I use for the best flavor?
Absolutely! For the most vibrant flavor, use fresh, organic oranges. They provide the best zest and juice. Avoid oranges that have dark spots or are overly soft, as these can indicate overripeness. Freshly squeezed juice makes a significant difference in taste, so I always recommend it!

How should I store leftover Orange Ginger Honey Cakes?
You can store your cakes in an airtight container at room temperature for up to 3 days. If you have leftovers beyond that, consider refrigerating them, where they will last for up to a week. Just make sure they're wrapped well to keep them moist and flavorful.

Can I freeze Orange Ginger Honey Cakes?
Yes, you can! For optimal freezing, wrap each individual cake in plastic wrap, then place them in a sealable plastic bag or wrap them with aluminum foil. They're best enjoyed within 3 months. To eat, simply thaw them in the fridge overnight, then reheat in a 350°F (175°C) oven for 5 to 10 minutes for that fresh-baked taste.

What should I do if my cakes turn out too dense?
If your cakes end up dense, it’s often due to overmixing or incorrect ingredient measurements. For future batches, I recommend carefully mixing the wet and dry ingredients until just combined—no more! Weighing your flour can also prevent this from happening. Additionally, make sure your baking soda is fresh; expired leavening agents won't help your cakes rise.

Are these cakes safe for my pets or people with allergies?
While the ingredients in the Orange Ginger Honey Cakes are generally safe for humans, be cautious around pets. Honey is not recommended for dogs, and the spices may not sit well with them either. For those with allergies, always double-check substitutions based on individual needs; for example, you can easily swap in gluten-free or vegan options to accommodate various dietary restrictions.

Can I make these cakes without eggs?
Absolutely! You can replace each egg with a flaxseed egg. To do this, mix 1 tablespoon of flaxseed meal with 2.5 tablespoons of water, let it sit for 5 minutes until it thickens, and then incorporate it into your batter. Unsweetened applesauce can also be used for an egg alternative. Each option works beautifully while maintaining moisture and texture!

Orange Ginger Honey Cakes

Deliciously Easy Orange Ginger Honey Cakes for Any Occasion

Indulge in these Orange Ginger Honey Cakes, a healthy and fragrant treat perfect for any occasion.
Print Recipe Pin Recipe
Prep Time 10 minutes mins
Cook Time 20 minutes mins
Cooling Time 5 minutes mins
Total Time 35 minutes mins
Servings: 12 cakes
Course: Dessert
Cuisine: American
Calories: 150
Ingredients Equipment Method Nutrition Notes

Ingredients
  

For the Batter
  • 2 cups All-Purpose Flour substitution: use a gluten-free flour blend for a gluten-free version.
  • 1 cup Fresh Oranges note: freshly squeezed juice enhances the flavor.
  • 2 teaspoons Ground Ginger substitution: try using fresh ginger for a more intense flavor.
  • 1/2 cup Honey substitution: maple syrup works well for a vegan alternative.
  • 1 teaspoon Baking Soda ensure it's fresh for optimal results.
  • 2 large Eggs substitution: use a flaxseed egg or unsweetened applesauce for a vegan option.
  • 1/2 cup Butter substitution: use vegan butter for a dairy-free cake.
Optional Additions
  • 1 cup Chopped Nuts or Dried Fruits experiment with your favorites!
  • 1 teaspoon Spices like Cinnamon or Cardamom elevate the flavor profile and enhance the cozy aroma.

Equipment

  • Mixing bowls
  • Whisk
  • Spatula
  • Baking molds
  • Oven

Method
 

Step-by-Step Instructions for Orange Ginger Honey Cakes
  1. Preheat your oven to 350°F (175°C) and prepare your baking molds.
  2. In a large bowl, combine flour, ground ginger, and baking soda; whisk to mix.
  3. In a separate bowl, whisk together melted butter, honey, eggs, and orange juice until smooth.
  4. Gradually fold dry ingredients into wet ingredients until just combined.
  5. Fill the molds about two-thirds full with the batter.
  6. Bake for 15–20 minutes or until a toothpick comes out clean.
  7. Let the cakes cool in molds for about 5 minutes before transferring to a wire rack.
  8. Optional: Add a glaze or frosting for extra flavor before serving.

Nutrition

Serving: 1cakeCalories: 150kcalCarbohydrates: 22gProtein: 2gFat: 6gSaturated Fat: 3gPolyunsaturated Fat: 1gMonounsaturated Fat: 2gCholesterol: 45mgSodium: 150mgPotassium: 100mgFiber: 1gSugar: 8gVitamin A: 5IUVitamin C: 10mgCalcium: 2mgIron: 4mg

Notes

For best results, use room temperature ingredients and avoid overmixing to maintain light texture.

Tried this recipe?

Let us know how it was!

Irresistibly Soft Vegan Pumpkin Sugar Cookies for Fall Fun

September 25, 2025 by Grace Snow Leave a Comment

As the crisp autumn air settles in, I can't help but think of the sweet, comforting treats that this season brings. Enter the delightful Vegan Pumpkin Sugar Cookies—your new go-to recipe for holiday baking! These little wonders are not only gluten-free and dairy-free but promise to be a real crowd-pleaser at any gathering. Imagine the aroma of warm pumpkin spice filling your kitchen, inviting family and friends to join in on the fun. Plus, they come together quickly and make for a wonderful family activity. So, whether you’re gearing up for Halloween festivities or Thanksgiving celebrations, these soft, chewy cookies will surely leave everyone asking for more. Curious about how to whip up this delicious treat? Let’s dive in!

Why are Vegan Pumpkin Sugar Cookies special?

Delightful Texture: These cookies are perfectly soft and chewy, with a delicate crisp edge that melts in your mouth. They're designed to satisfy any sweet tooth without sacrificing flavor!

Autumn Flavors: Each bite is infused with cozy pumpkin spice, making them a seasonal favorite. The warm spices evoke memories of fall, perfect for chilly evenings.

Quick and Easy: With minimal prep time, you'll whip these cookies up in no time! They’re a simple yet rewarding baking project, whether you're a seasoned pro or a novice in the kitchen.

Family-Friendly Fun: Get everyone involved in the baking process! Kids love helping to cut out shapes and decorate with icing, making it a wonderful family activity.

Versatile Treat: Enjoy them as a standalone dessert, or serve on a cookie platter alongside other delights like Matcha Cookies Soft or Pumpkin Brownies Decadent. They’re sure to impress!

Vegan Pumpkin Sugar Cookies Ingredients

For the Cookie Dough

  • All-Purpose Gluten-Free Flour – Provides structure; feel free to substitute with your favorite gluten-free blend.
  • Pumpkin Puree – Adds moisture and a delicious pumpkin flavor; fresh or canned works wonderfully!
  • Granulated Sugar/Coconut Sugar – Sweetens the cookies; coconut sugar is a great lower glycemic option.
  • Arrowroot Powder – Acts as a binding agent; cornstarch works as a perfect substitute if needed.
  • Baking Powder – Helps the cookies rise for that tender texture; make sure it’s fresh!
  • Pumpkin Spice Mix – Infuses warm flavor; can be swapped with a mix of cinnamon, nutmeg, and ginger to taste.
  • Vanilla Extract – Elevates flavor; using pure vanilla extract gives the best results.
  • Aquafaba (or water) – Serves as an egg substitute, creating moisture without any egg derivatives.

For the Icing

  • Powdered Sugar – Sweetens and adds a smooth texture for icing; adjust the quantity to achieve your desired sweetness.

Let the delightful flavors of these Vegan Pumpkin Sugar Cookies fill your home with warmth and joy as you gather around the kitchen!

Step‑by‑Step Instructions for Vegan Pumpkin Sugar Cookies

Step 1: Whisk the Dry Ingredients
In a large mixing bowl, combine 2 cups of all-purpose gluten-free flour, 1 cup of granulated sugar or coconut sugar, 1 teaspoon of baking powder, 2 tablespoons of arrowroot powder, and 2 teaspoons of pumpkin spice mix. Whisk until well-blended, ensuring there are no clumps. The mixture should appear light and airy, setting a perfect base for your Vegan Pumpkin Sugar Cookies.

Step 2: Mix the Wet Ingredients
In another bowl, combine 1 cup of pumpkin puree, 1 teaspoon of vanilla extract, and 3 tablespoons of aquafaba. Whisk together until you achieve a smooth and creamy mixture. This adds moisture and flavor to your dough, and you should see an inviting orange color from the pumpkin.

Step 3: Combine Wet and Dry Mixtures
Gradually pour the wet mixture into the bowl of dry ingredients, stirring with a spatula or wooden spoon until just combined. Be careful not to overmix; the dough should be soft but cohesive. It should feel slightly sticky, embodying the deliciousness of your Vegan Pumpkin Sugar Cookies.

Step 4: Chill the Dough
Cover the dough with plastic wrap or a clean kitchen towel and place it in the refrigerator for at least 30 minutes. Chilling the dough allows the flavors to meld and makes it easier to handle later. Once chilled, the dough will firm up nicely, creating a better texture for cutting shapes.

Step 5: Preheat the Oven
While waiting for the dough to chill, preheat your oven to 350°F (175°C) and prepare a baking sheet by lining it with parchment paper. This ensures your cookies bake evenly and won’t stick, making cleanup a breeze later on.

Step 6: Roll and Cut the Dough
After chilling, take the dough from the refrigerator and let it sit for a few minutes. Lightly flour your work surface with gluten-free flour, then roll the dough out to about 1/4 inch thick. Use cookie cutters to cut out your preferred shapes and transfer them onto the lined baking sheet.

Step 7: Bake the Cookies
Place the baking sheet in the preheated oven and bake the Vegan Pumpkin Sugar Cookies for 7-9 minutes, or until the edges are lightly browned. The cookies will appear soft when removed, so allow them to cool on the baking sheet for a couple of minutes before transferring them to a wire rack to cool completely.

Step 8: Prepare the Icing
In a small bowl, mix 1 cup of powdered sugar with 1-2 tablespoons of water or almond milk until you achieve a smooth, pourable consistency. Adjust the thickness to your liking; you want it to be fluid enough for drizzling. Once your cookies are cool, decorate them with the icing for that festive touch.

Step 9: Enjoy Your Cookies
Once decorated, let the icing set for a few minutes before serving. Share your delightful Vegan Pumpkin Sugar Cookies with family and friends, celebrating the tasty flavors of autumn. The warm spices and soft chewiness will make these cookies a favorite in your home!

How to Store and Freeze Vegan Pumpkin Sugar Cookies

Room Temperature: Keep cookies in an airtight container at room temperature for up to 7 days. This helps retain their delicious chewiness.

Fridge: If you prefer, store your Vegan Pumpkin Sugar Cookies in the fridge for up to 10 days in an airtight container, though they may lose some softness.

Freezer: These cookies freeze beautifully for up to 3 months. Place them in a single layer on a baking sheet until frozen, then transfer to an airtight container or freezer bag.

Reheating: Thaw the cookies at room temperature before serving. If you prefer them warm, pop them in the microwave for 10-15 seconds for a delightful treat.

Vegan Pumpkin Sugar Cookies Variations

Feel free to experiment and make these cookies uniquely yours; there’s plenty of room for creativity!

  • Gluten-Free: Use a 1:1 gluten-free flour blend for a deliciously soft cookie that everyone can enjoy. This option allows those with dietary restrictions to join in on the fun without sacrificing taste!

  • Nut-Free: If you're avoiding nuts, swap almond flour for more gluten-free flour or oat flour. This ensures the cookies remain friendly for allergy concerns and still deliver a delightful texture.

  • Flavor Boost: Add dark chocolate chips or butterscotch chips for a sweet, extra twist! The combination of pumpkin and chocolate brings a decadent harmony that’ll have everyone raving.

  • Spicy Twist: Try adding a sprinkle of ginger or cardamom for an extra layer of warmth that complements the pumpkin flavor beautifully. This little touch elevates the cookies and gives them an aromatic flair that’s irresistible.

  • Icing Variation: For a coconut icing, substitute almond milk with the coconut variety in your icing recipe. This results in a tropical twist that pairs perfectly with the fall spices of the cookies, giving them a delightful all-around flavor.

  • Texture Change: Use chopped pecans or walnuts for a crunchy contrast. Adding nuts provides a satisfying bite while enhancing the overall flavor profile of the cookies.

  • Sugar Swap: For a lower-glycemic treat, swap granulated sugar with coconut sugar. This not only sweetens but also adds a slight caramel note that works wonderfully with pumpkin.

  • Baking Delight: Wrap dough around a candy surprise—think caramel or chocolate-filled centers! This delightful hidden treat within each cookie will sure to impress and create delightful moments during family gatherings.

Explore the wonderful world of flavors and textures to create a batch of Vegan Pumpkin Sugar Cookies that truly reflects your tastes. Whether served at a cozy autumn gathering or as an everyday treat, they’re bound to be a hit!

What to Serve with Easy Vegan Pumpkin Sugar Cookies

These delightful pumpkin sugar cookies can easily become the star of your fall gatherings when paired with equally delicious accompaniments!

  • Cozy Chai Latte: This spiced drink enhances the warm flavors of the cookies, creating a comforting and festive beverage experience.
  • Crisp Apple Slices: Fresh, tart apples offer a refreshing contrast to the sweet, rich cookies, making a lovely balance of flavors.
  • Warm Cinnamon Applesauce: The cinnamon in the applesauce echoes the spices in the cookies, bringing a delightful warmth to each bite.
  • Maple-Glazed Carrots: Roasted carrots drizzled with maple syrup provide a touch of sweetness and a vibrant pop of color to your dessert table.
  • Rich Hot Chocolate: A velvety hot chocolate pairs wonderfully, turning a simple cookie into an indulgent treat for the chilly season.
  • Mixed Green Salad: A light salad with nuts and dried cranberries refreshes the palate, providing a savory counterpoint to the sweet cookies.

Think of your cookie platter adorned with colorful fruits and warm beverages. Each pairing enhances the cozy vibes of fall, making every bite memorable and every gathering special!

Expert Tips for Vegan Pumpkin Sugar Cookies

  • Chill the Dough: Ensure your dough is thoroughly chilled. This helps with cutting shapes and results in better-defined cookies after baking.

  • Monitor Baking Time: Keep a close eye on baking time! Remove the cookies from the oven while they’re still soft to maintain that chewy texture.

  • Shape Variations: Use fun cookie cutters to create festive shapes! From pumpkins to fall leaves, different designs can make the Vegan Pumpkin Sugar Cookies even more appealing.

  • Adjust Sweetness: Taste your icing as you prepare it! Adjust the powdered sugar to find the perfect level of sweetness that complements the spices.

  • Experiment with Flavors: Feel free to add a pinch of cardamom or ginger to your dough! These spices can give an extra kick to your Vegan Pumpkin Sugar Cookies.

Make Ahead Options

These Vegan Pumpkin Sugar Cookies are a fantastic option for busy home cooks looking to save time! You can prepare the cookie dough up to 24 hours in advance by mixing all the ingredients and refrigerating it. Chilling not only helps meld the flavors but also makes it easier to handle when you're ready to bake. For an easy holiday treat, roll and cut the cookies into shapes, then place them on a baking sheet and freeze them. Once frozen, you can transfer them to an airtight container for up to 3 months. When you’re ready to enjoy, simply bake from frozen, adding a couple of extra minutes to the bake time. These make-ahead tips ensure your Vegan Pumpkin Sugar Cookies are just as delicious whenever you choose to serve them!

Vegan Pumpkin Sugar Cookies Recipe FAQs

What should I look for when selecting pumpkin puree?
Absolutely! When choosing pumpkin puree, make sure it’s smooth with a vibrant orange color. Avoid any cans that show signs of damage or have a darkened hue. If you're using fresh pumpkin, opt for smaller sugar pumpkins, and ensure they feel heavy for their size. They should have a solid shell with no soft spots.

How should I store Vegan Pumpkin Sugar Cookies?
To keep your cookies fresh, store them in an airtight container at room temperature for up to 7 days. If you’re looking to extend their shelf life, consider refrigerating them for up to 10 days in a sealed container, although they may become slightly less soft. Just remember, these cookies taste best when fresh!

Can I freeze Vegan Pumpkin Sugar Cookies?
Yes, absolutely! To freeze your cookies, place them in a single layer on a baking sheet and freeze until solid. Then, transfer them to an airtight container or freezer bag for up to 3 months. When you're ready to enjoy, simply thaw them at room temperature for a delicious treat, or warm them in the microwave for about 10-15 seconds!

What should I do if my dough is too sticky?
If you find your dough is overly sticky, no worries! Lightly sprinkle some gluten-free flour on your work surface and your dough, then knead in small amounts until it’s manageable. Chilling the dough can also help; make sure it’s in the fridge for at least 30 minutes to firm up, making it easier to roll and cut.

Can I make these cookies nut-free?
Certainly! To make Vegan Pumpkin Sugar Cookies nut-free, simply ensure that the gluten-free flour blend you use does not contain any nuts. You may also need to double-check your baking powder and any other ingredients for potential allergens. If you need further alternatives, consider using sunflower seed flour in place of more common nut-based flours.

Are these cookies suitable for pets?
While these cookies are delicious for humans, it's essential to avoid sharing them with pets. The sugar and spices can be harmful to animals. Stick to pet-safe treats for your furry friends, so they don’t miss out on the fun when you're baking!

Vegan Pumpkin Sugar Cookies

Irresistibly Soft Vegan Pumpkin Sugar Cookies for Fall Fun

Delight in these Vegan Pumpkin Sugar Cookies—perfectly soft, gluten-free, and a crowd-pleaser for any autumn gathering.
Print Recipe Pin Recipe
Prep Time 30 minutes mins
Cook Time 9 minutes mins
Chilling Time 30 minutes mins
Total Time 1 hour hr 9 minutes mins
Servings: 24 cookies
Course: Dessert
Cuisine: Vegan
Calories: 100
Ingredients Equipment Method Nutrition Notes

Ingredients
  

For the Cookie Dough
  • 2 cups All-Purpose Gluten-Free Flour Feel free to substitute with your favorite gluten-free blend.
  • 1 cup Pumpkin Puree Fresh or canned works wonderfully!
  • 1 cup Granulated Sugar or Coconut Sugar Coconut sugar is a great lower glycemic option.
  • 2 tablespoons Arrowroot Powder Cornstarch works as a perfect substitute if needed.
  • 1 teaspoon Baking Powder Make sure it’s fresh!
  • 2 teaspoons Pumpkin Spice Mix Can be swapped with cinnamon, nutmeg, and ginger.
  • 1 teaspoon Vanilla Extract Using pure vanilla extract gives the best results.
  • 3 tablespoons Aquafaba or Water Serves as an egg substitute.
For the Icing
  • 1 cup Powdered Sugar Adjust the quantity to achieve your desired sweetness.

Equipment

  • Mixing bowls
  • Whisk
  • Spatula
  • Cookie Cutters
  • Baking Sheet
  • Parchment Paper

Method
 

Step-by-Step Instructions
  1. In a large mixing bowl, combine all-purpose gluten-free flour, granulated sugar or coconut sugar, baking powder, arrowroot powder, and pumpkin spice mix. Whisk until well-blended.
  2. In another bowl, combine pumpkin puree, vanilla extract, and aquafaba. Whisk together until smooth and creamy.
  3. Gradually pour the wet mixture into the dry ingredients, stirring until just combined.
  4. Cover the dough with plastic wrap and chill in the refrigerator for at least 30 minutes.
  5. Preheat your oven to 350°F (175°C) and prepare a baking sheet with parchment paper.
  6. Roll the chilled dough to about 1/4 inch thick and cut out shapes with cookie cutters.
  7. Bake the cookies for 7-9 minutes, or until edges are lightly browned. Let cool on the sheet briefly before transferring to a wire rack.
  8. In a small bowl, mix powdered sugar with water or almond milk to achieve a smooth icing consistency. Decorate cooled cookies.
  9. Let the icing set for a few minutes before serving.

Nutrition

Serving: 1cookieCalories: 100kcalCarbohydrates: 13gProtein: 1gFat: 4gSaturated Fat: 1gPolyunsaturated Fat: 2gMonounsaturated Fat: 1gSodium: 80mgPotassium: 50mgFiber: 1gSugar: 6gVitamin A: 5IUVitamin C: 1mgCalcium: 1mgIron: 2mg

Notes

Chill the dough thoroughly for better-defined cookies. Monitor baking time closely and adjust sweetness of icing to your liking.

Tried this recipe?

Let us know how it was!

Chocolate Candle Cookies to Light Up Your Halloween Treats

September 24, 2025 by Grace Snow Leave a Comment

As I flipped through my favorite cookbook, a gleaming image of charming cookies shaped like candles caught my eye. Instantly, my mind was ablaze with ideas for a festive treat that could light up any Halloween gathering—enter my Spooky Candle Cookies. These delicious chocolate shortbread wonders are not just a feast for the eyes but also extremely simple to bake—no special tools required! With their rich taste and whimsical appearance, they are bound to be a hit at your table. Plus, they lend themselves beautifully to creative decorations, making them a fun project for anyone seeking to add a touch of homemade magic to their festivities. Curious about how to whip up these delightful treats? Let's dive into the recipe!

Why Are These Candle Cookies Unique?

Easy Preparation: No special tools needed—just basic kitchen essentials!

Festive Appeal: Designed for Halloween, their charming candle shape brings whimsy to your table.

Decadent Flavor: Rich chocolate shortbread delivers a satisfying treat that chocolate lovers will adore.

Creative Decorations: Unleash your imagination with colorful icing and unique toppings—try nuts or festive sprinkles!

Perfect for Sharing: These cookies are sure to impress at parties and gatherings—your guests will love them!

For a twist, pair them with Eggnog Cookies Soft or Thumbprint Cookies Melt for a delightful dessert spread!

Candle Cookies Ingredients

For the Cookies

  • All-Purpose Flour – Provides structure and body; substitute with gluten-free flour for a gluten-free option.
  • Cocoa Powder – Adds rich chocolate flavor; opt for unsweetened cocoa for the best results.
  • Salt – Enhances flavor; can be omitted or reduced for lower sodium.
  • Unsalted Butter – Creates a tender texture; use cold butter for firmer cookies if needed.
  • Confectioners Sugar – Sweetens the dough; powdered erythritol can be used for a sugar-free version.
  • Vanilla Extract – Adds depth of flavor; consider almond extract for a different twist.
  • Milk – Moistens the dough; use non-dairy milk for a vegan alternative.
  • Sliced Almonds – Used for decoration to simulate candle wicks; can be replaced with chocolate chips or nuts if preferred.

For the Icing

  • Confectioners Sugar – The base for icing; same substitutions apply as in the dough.
  • Water – Adjusts the icing consistency for the perfect drizzle.
  • Vanilla Extract – Flavors the icing; feel free to substitute with other extracts for a unique taste.
  • Red Gel Food Color – Provides a bleeding icing effect, adding a fun festive touch; use different gel colors for various holidays.

Step‑by‑Step Instructions for Candle Cookies

Step 1: Dough Preparation
In a medium bowl, whisk together 2 cups of all-purpose flour, ½ cup of unsweetened cocoa powder, and a pinch of salt until well combined. In a larger mixing bowl, beat together 1 cup of cold unsalted butter, 1 cup of confectioners sugar, and 1 teaspoon of vanilla extract until creamy and smooth. Gradually mix in the dry ingredients and 3 tablespoons of milk until the dough is crumbly and no dry flour remains.

Step 2: Shaping the Cookies
On a clean work surface, roll about 1 tablespoon of dough into a ball, then roll it into thick logs approximately 3 inches long. Place the logs on a wire rack lined with parchment paper to prevent sticking. At one end of each log, gently insert a few sliced almonds to mimic candle wicks, making sure they stay firmly attached for a festive touch.

Step 3: Chill the Dough
Cover the wire rack with plastic wrap and place it in the refrigerator to chill for at least 4 hours. This step is crucial for ensuring the Candle Cookies hold their shape during baking, resulting in beautifully formed, thick candle-like cookies that are ready for the oven.

Step 4: Baking the Cookies
Preheat your oven to 350°F (175°C) and line a baking sheet with parchment paper. Once the oven is ready, bake the chilled logs for about 25 minutes, or until they are firm to the touch and a darker shade of chocolate. Keep an eye on them to prevent over-baking, as you want that perfect shortbread texture.

Step 5: Preparing the Icing
While the cookies cool completely, prepare the icing by mixing 2 cups of confectioners sugar with 2 tablespoons of water and 1 teaspoon of vanilla extract in a small bowl. Stir until smooth, adjusting the water as necessary to achieve a thick drizzle consistency. Add red gel food coloring to create a festive bleeding effect, stirring until evenly colored.

Step 6: Icing the Cookies
Transfer the icing into a piping bag or a small plastic bag with the corner snipped off for easier drizzling. Once the Candle Cookies have completely cooled, drizzle the icing over them, allowing it to run down the sides to simulate dripping wax. Be creative and have fun with this step!

Step 7: Setting the Icing
After icing the cookies, place them on a wire rack to set for a few hours. This will allow the icing to harden properly, ensuring the stunning appearance of your Candle Cookies is preserved. Once set, they will be ready to serve and impress at your Halloween gatherings!

What to Serve with Spooky Candle Cookies

Imagine a celebration filled with laughter and joy, complemented by flavors that dance on your palate and warm your heart.

  • Warm Apple Cider: Its sweet, spiced flavors perfectly complement the rich chocolate of the Candle Cookies, making for a cozy pairing.
  • Pumpkin Pie: A classic fall dessert, its creamy texture and spiced notes enhance the festive spirit of Halloween.
  • Vanilla Ice Cream: The cool creaminess balances the cookies’ rich taste, providing a delightful contrast to every bite.
  • Chocolate Milkshake: Indulgent and nostalgic, this treat adds a delightful twist, creating a silky, sweet treat alongside the cookies.
  • Caramel Sauce: Drizzle over the Candle Cookies to enhance their festive appeal and add a luscious, gooey flavor that whispers autumn.
  • Spiced Pumpkin Bread: Its moist texture and spices evoke warm memories of fall, beautifully contrasting with the chocolatey goodness of the cookies.

Pair these delightful treats with your favorite drinks or enjoy as a decadent dessert display at your next gathering!

Make Ahead Options

These Candle Cookies are a fantastic option for busy home cooks looking to save time! You can prepare the cookie dough up to 24 hours in advance by following the first three steps: whisk together the dry ingredients, beat the butter and sugar, and mix in the dry components with milk until crumbly. Chill the formed logs in the refrigerator as directed, then simply bake them when you're ready for fresh cookies. To maintain quality, ensure that the dough is well-wrapped in plastic to prevent drying out. Once baked, let the cookies cool before icing; they can be decorated up to 3 days in advance to have a lovely festive treat ready for your Halloween festivities!

Storage Tips for Candle Cookies

  • Room Temperature: Store your Candle Cookies in an airtight container for up to 3 days. This helps maintain their delightful texture while ensuring they stay fresh.

  • Fridge: If you prefer, you can refrigerate the cookies to extend their freshness for up to 5 days, but this may alter the texture slightly—just let them come to room temperature before serving.

  • Freezer: For longer storage, freeze the baked cookies without icing in a zip lock bag for up to 2 months. When you're ready to enjoy, simply thaw at room temperature or warm them gently in the oven.

  • Reheating: If desired, reheat cookies at 300°F for about 5-10 minutes to restore their original texture before serving them again. Enjoy those delicious Candle Cookies whenever the craving strikes!

Candle Cookies Variations & Substitutions

Feel free to get creative and suit these Candle Cookies to your taste and occasion with these delightful twists!

  • Gluten-Free: Use a gluten-free flour blend in place of all-purpose flour for a deliciously accessible version.
  • Sugar-Free: Try powdered erythritol instead of confectioners sugar to make these cookies suitable for a sugar-free diet. They’ll still be sweet and delightful!
  • Dairy-Free: Substitute unsalted butter with vegan butter and replace milk with almond or oat milk for a completely dairy-free treat.
  • Flavor Infusion: Swap vanilla extract for almond extract to give your cookies a subtly unique flavor that pairs beautifully with the chocolate.
  • Nutty Variation: Use chopped walnuts or pecans instead of sliced almonds for decoration. This adds a lovely crunch and flavor twist to each bite.
  • Festive Colors: Change up the icing color by using green or orange gel food coloring for a Halloween theme, or even pastel shades for other holidays!
  • Textural Contrast: Add a handful of mini chocolate chips to the cookie dough for added richness and an extra gooey texture with each bite.
  • Hot and Spicy: For a kick, add a sprinkle of cayenne or chili powder to the dough. It’s an adventurous twist that provides a surprising heat to your cookies!

If these cookie variations inspire you, feel free to explore more festive delights like Eggnog Cookies Soft or Matcha Cookies Soft to fill your dessert platter!

Expert Tips for Candle Cookies

  • Dough Consistency Check: Roll a tablespoon of dough to ensure it holds together without cracks; if it crumbles, add a bit more milk for the perfect Candle Cookies.

  • Icing Thickness Matters: Aim for an icing consistency that's thick enough to drizzle slowly from the piping bag but not runny, ensuring a lovely dripping effect.

  • Prevent Cookie Sprawl: Chill the shaped dough for a minimum of 4 hours; this step is essential to maintain the cookies' charming candle shape during baking.

  • Choose Decor Wisely: While sliced almonds simulate wicks beautifully, feel free to experiment with chocolate chips or nuts as decoration for a fun twist on your Candle Cookies.

  • Storing Leftovers: Keep your cookies in an airtight container for up to 3 days, or freeze them without icing in a zip lock bag for a delightful treat later on!

Candle Cookies Recipe FAQs

How do I choose the right cocoa powder for my Candle Cookies?
Absolutely! For the best flavor in your Candle Cookies, opt for unsweetened cocoa powder. This variety offers a robust chocolate taste without added sweetness, enhancing the overall richness of your cookies.

What’s the best way to store my Candle Cookies?
To keep your Candle Cookies fresh, store them in an airtight container at room temperature for up to 3 days. If you want them to last longer, refrigerate them for up to 5 days, but remember to let them return to room temperature before serving for the best texture!

Can I freeze my Candle Cookies?
Very much! For longer storage, freeze the baked cookies without icing in a zip lock bag for up to 2 months. When you're ready to enjoy, simply thaw at room temperature. If you want to warm them slightly, preheat your oven to 300°F and bake for about 5-10 minutes until warm and comforting.

How can I troubleshoot crumbly dough when making Candle Cookies?
If your dough is crumbly, don’t worry! I recommend rolling about one tablespoon of the dough to check its consistency. If it cracks, try adding an extra tablespoon of milk at a time until the dough holds together smoothly without cracks. This will ensure that your Candle Cookies are perfectly shaped and delicious!

Are these Candle Cookies safe for dogs?
While the ingredients in Candle Cookies are generally safe for humans, they’re not suitable for dogs. The cocoa powder can be toxic to dogs in large amounts, so it's best to keep these delightful treats out of reach of your furry friends.

How can I decorate my Candle Cookies for different holidays?
Feel free to get creative! You can swap the red gel food coloring for green or white to celebrate other holidays. Additionally, using different nuts for decoration, such as walnuts or pecans, can give your cookies a unique twist while still maintaining the charming candle vibe!

Candle Cookies

Chocolate Candle Cookies to Light Up Your Halloween Treats

Delightful Chocolate Candle Cookies that are whimsical and easy to make, perfect for Halloween gatherings.
Print Recipe Pin Recipe
Prep Time 30 minutes mins
Cook Time 25 minutes mins
Chilling Time 4 hours hrs
Total Time 4 hours hrs 55 minutes mins
Servings: 24 cookies
Course: Dessert
Cuisine: American
Calories: 150
Ingredients Equipment Method Nutrition Notes

Ingredients
  

For the Cookies
  • 2 cups All-Purpose Flour Substitute with gluten-free flour for a gluten-free option.
  • 0.5 cups Cocoa Powder Opt for unsweetened cocoa for the best results.
  • 1 pinch Salt Can be omitted or reduced for lower sodium.
  • 1 cups Unsalted Butter Use cold butter for firmer cookies if needed.
  • 1 cups Confectioners Sugar Powdered erythritol can be used for a sugar-free version.
  • 1 teaspoon Vanilla Extract Consider almond extract for a different twist.
  • 3 tablespoons Milk Use non-dairy milk for a vegan alternative.
  • 0.5 cups Sliced Almonds Can be replaced with chocolate chips or nuts if preferred.
For the Icing
  • 2 cups Confectioners Sugar Same substitutions apply as in the dough.
  • 2 tablespoons Water Adjusts the icing consistency for the perfect drizzle.
  • 1 teaspoon Vanilla Extract Feel free to substitute with other extracts for a unique taste.
  • 1 drop Red Gel Food Color Use different gel colors for various holidays.

Equipment

  • Mixing bowls
  • Whisk
  • Rolling Pin
  • Baking Sheet
  • piping bag

Method
 

Step-by-Step Instructions
  1. In a medium bowl, whisk together 2 cups of all-purpose flour, ½ cup of unsweetened cocoa powder, and a pinch of salt until well combined.
  2. In a larger mixing bowl, beat together 1 cup of cold unsalted butter, 1 cup of confectioners sugar, and 1 teaspoon of vanilla extract until creamy and smooth.
  3. Gradually mix in the dry ingredients and 3 tablespoons of milk until the dough is crumbly and no dry flour remains.
  4. On a clean work surface, roll about 1 tablespoon of dough into a ball, then roll it into thick logs approximately 3 inches long.
  5. Place the logs on a wire rack lined with parchment paper to prevent sticking. At one end of each log, gently insert a few sliced almonds to mimic candle wicks.
  6. Cover the wire rack with plastic wrap and place it in the refrigerator to chill for at least 4 hours.
  7. Preheat your oven to 350°F (175°C) and line a baking sheet with parchment paper. Bake the chilled logs for about 25 minutes, or until they are firm to the touch.
  8. While the cookies cool completely, prepare the icing by mixing 2 cups of confectioners sugar with 2 tablespoons of water and 1 teaspoon of vanilla extract until smooth.
  9. Transfer the icing into a piping bag or a small plastic bag with the corner snipped off for easier drizzling.
  10. Once the Candle Cookies have completely cooled, drizzle the icing over them, allowing it to run down the sides.
  11. After icing the cookies, place them on a wire rack to set for a few hours.

Nutrition

Serving: 1cookieCalories: 150kcalCarbohydrates: 20gProtein: 1gFat: 7gSaturated Fat: 4gPolyunsaturated Fat: 2gMonounsaturated Fat: 1gCholesterol: 30mgSodium: 80mgPotassium: 100mgFiber: 1gSugar: 8gVitamin A: 200IUCalcium: 10mgIron: 1mg

Notes

Keep your cookies in an airtight container for up to 3 days, or freeze them without icing in a zip lock bag for a delightful treat later on!

Tried this recipe?

Let us know how it was!

Raspberry Zinger Poke Cake: A Refreshing Fruity Treat

September 24, 2025 by Grace Snow Leave a Comment

As I sifted through my collection of dessert recipes, a vibrant memory of summer picnics and family barbecues came rushing back, wrapped in the sweet aroma of a Raspberry Zinger Poke Cake. This delightful treat combines a soft white cake soaked in luscious raspberry gelatin, paired with smooth preserves and a fluffy topping, making it the ultimate easy dessert for any occasion. Not only does this poke cake deliver a delectable fruity flavor, but it also shines as a crowd-pleaser that requires minimal effort. Whether you're looking to impress guests at a festive gathering or indulge in a sweet bite after dinner, this recipe promises to delight both young and old alike. Ready to discover the simple steps to whip up this refreshing cake? Let’s dive in!

Why is Raspberry Zinger Poke Cake a Must-Try?

Irresistible Flavor: Bursting with sweet raspberry goodness, every bite offers a delightful symphony of fruitiness that your taste buds will adore.

Simple Preparation: With just a few ingredients, making this dessert is a breeze, even for novice bakers.

Perfect for Any Occasion: Whether it's a summer barbecue or a holiday gathering, this cake fits seamlessly into any menu and is sure to impress guests.

Versatile Variations: Feel free to experiment! Swap out the raspberry flavor with strawberry or peach for a new twist on this classic poke cake.

Make Ahead Convenience: You can easily prepare it the day before, allowing the flavors to meld beautifully and save you time on the day of your event.

Once you've tasted this amazing treat, you'll want to share it with friends! For more crowd-pleasing ideas, check out my delicious Ice Cream Cake for another fun dessert option!

Raspberry Zinger Poke Cake Ingredients

For the Cake
• White Cake Mix – A quality mix ensures a moist and fluffy base for the Raspberry Zinger Poke Cake.
• Hot Purified Water – Needed to dissolve the raspberry-flavored gelatin thoroughly for the perfect poke.

For the Raspberry Filling
• Raspberry-Flavored Gelatin – Adds that sweet, fruity essence essential for the poke cake effect; be sure it’s well-dissolved.
• Raspberry Preserves – Thick and luscious, these provide concentrated flavor; microwaving them for a few seconds helps with spreading.

For the Topping
• Whipped Topping – This light fluff creates a satisfying creaminess; feel free to substitute with fresh whipped cream.
• Unsweetened Shredded Coconut – Adds a delightful texture; if coconut's not your thing, try chopped nuts or white chocolate shavings.

Get ready to bring the refreshing taste of the Raspberry Zinger Poke Cake to life!

Step‑by‑Step Instructions for Raspberry Zinger Poke Cake

Step 1: Prepare the Cake
Start by preheating your oven to 350°F (175°C). In a large mixing bowl, follow the package instructions on your white cake mix to combine with water, oil, and eggs. Pour the batter into a greased 9x13-inch baking pan, spreading it evenly. Bake in the preheated oven for 25–30 minutes, or until a toothpick inserted in the center comes out clean. Allow the cake to cool for about 30 minutes at room temperature.

Step 2: Make the Holes
Once the cake has cooled, take the end of a wooden spoon and gently poke holes across the surface, about 1 inch apart and halfway deep. This step is crucial for the Raspberry Zinger Poke Cake, as it allows the gelatin to seep into the cake and infuse it with flavor. Make sure the holes are evenly distributed to ensure a delightful burst of raspberry goodness in every slice.

Step 3: Prepare and Pour the Gelatin
In a medium mixing bowl, dissolve the raspberry-flavored gelatin in 2 cups of hot purified water, stirring until fully dissolved. Carefully pour the vibrant gelatin mixture over the poked cake, ensuring that the holes fill completely. Let the cake sit for about 5 minutes to absorb the gelatin, which will give your Raspberry Zinger Poke Cake its signature moistness.

Step 4: Add Raspberry Preserves
For enhanced flavor, microwave the raspberry preserves for about 30 seconds to soften. Once warm, spread the preserves evenly over the gelatin-soaked cake using a spatula. This layer of rich raspberry preserves adds sweetness and depth to your cake. Take your time to ensure an even distribution, making the Raspberry Zinger Poke Cake both beautiful and delicious.

Step 5: Apply Whipped Topping
Next, take your whipped topping and dollop it over the layer of raspberry preserves. Using a spatula, gently spread the whipped topping to create a smooth and fluffy layer that covers the preserves completely. This light and airy topping is what makes the Raspberry Zinger Poke Cake so delightful. Make sure it’s spread evenly for a perfect finish.

Step 6: Sprinkle Coconut
To add texture and a tropical twist, evenly distribute the unsweetened shredded coconut over the whipped topping layer. This step not only enhances the flavor but also gives your Raspberry Zinger Poke Cake a visually appealing finish. You can use your hands or a spoon to sprinkle the coconut so that it covers the whipped cream generously.

Step 7: Chill the Cake
Finally, cover the cake with plastic wrap and refrigerate it for at least 4 hours, or overnight if time permits. Chilling allows the flavors to meld together beautifully, and it firms up the cake for easier slicing. When you're ready to serve, simply remove from the refrigerator, slice, and enjoy the refreshing taste of the Raspberry Zinger Poke Cake with family and friends!

How to Store and Freeze Raspberry Zinger Poke Cake

Fridge: Keep the Raspberry Zinger Poke Cake in an airtight container in the refrigerator for up to 5–7 days. This will maintain its freshness and flavor while preventing dryness.

Freezer: For longer storage, wrap portions tightly in plastic wrap and aluminum foil, then freeze for up to 3 months. Thaw in the fridge overnight before serving.

** serving:** When ready to enjoy, slice and serve chilled. Consider garnishing with fresh raspberries for a pop of color and added flavor.

Leftover Topping: If you have extra whipped topping, store it separately in the fridge, and use it within a few days to maintain its texture.

What to Serve with Raspberry Zinger Poke Cake

Creating a complete meal around this delightful dessert invites your family and friends to indulge in a lively experience filled with fresh, vibrant flavors.

  • Grilled Chicken Skewers: The smoky flavors from the grill enhance the sweetness of the cake, creating a beautiful flavor contrast.

  • Fresh Garden Salad: A crisp salad with mixed greens and balsamic vinaigrette provides a refreshing, tangy balance to the sweet poke cake.

  • Lemonade or Iced Tea: Both drinks offer a zest of citrus that complements the fruity notes of the Raspberry Zinger Poke Cake perfectly, making it a refreshing pairing.

  • Coconut Rice: The subtle sweetness and chewiness of coconut rice harmonize with the cake's coconut topping while providing a tropical theme to your meal.

  • Chocolate Chip Cookies: These classic treats serve as a delightful treat alongside the cake; their rich, buttery flavor pairs well with the delightfully fruity dessert.

  • Berries and Cream: Freshly whipped cream served with a medley of strawberries and blueberries brightens up the dessert table, echoing the raspberry flavor and adding a luxurious touch.

Invite loved ones to experience a complete feast that celebrates the joys of home-cooked flavors!

Raspberry Zinger Poke Cake Variations

Feel free to make this delicious dessert your own with fun and flavorful tweaks!

  • Nutty Flavor: Replace shredded coconut with chopped almonds for a crunchy twist that adds delightful texture.
  • Different Gelatins: Don’t hesitate to try strawberry or peach gelatin instead of raspberry for a fruity variation that’s equally refreshing.
  • Cream Cheese Layer: For a creamy surprise, mix in softened cream cheese with the whipped topping, creating a zesty flavor that balances the sweetness.
  • Chocolate Drizzle: Add a drizzle of chocolate syrup over the top for an indulgent finish that complements the fruity flavors beautifully.
  • Fruit Add-ins: Toss in fresh berries like blueberries or sliced strawberries atop the whipped topping for added taste and color.
  • No-Coconut Option: If coconut isn’t your favorite, simply substitute it with white chocolate shavings for a luscious finish.
  • Spicy Kick: For an adventurous flavor, add a pinch of cayenne pepper or jalapeño flakes to the raspberry preserves for a sweet-heat combo.
  • Layered Perfection: Create a layered dessert by serving individual portions in cups, alternating layers of cake, gelatin, and toppings for a stunning presentation.

Each of these variations introduces its own unique charm, just like this Ice Cream Cake can elevate any gathering! Explore and enjoy creating your perfect Raspberry Zinger Poke Cake!

Expert Tips for Raspberry Zinger Poke Cake

• Perfect Poking Technique: Ensure you poke holes deeply enough to let the gelatin seep into the cake, but not all the way through. This balance is key for a moist Raspberry Zinger Poke Cake.

• Gelatin Dissolving: Always use hot purified water for dissolving gelatin. This ensures it's completely mixed and will set properly, giving you that vibrant raspberry flavor.

• Preserve Warm-Up: Microwaving the raspberry preserves not only softens them for easier spreading but also enhances their flavor, allowing them to meld beautifully with the cake.

• Topping Options: Feel free to substitute whipped topping with homemade whipped cream for an extra touch. Just make sure to whip it to stiff peaks for the best texture in your Raspberry Zinger Poke Cake.

• Chill Time: For the best flavor and texture, chill the cake overnight. This allows the flavors to meld perfectly and makes for easier cutting and serving.

• Double the Recipe Cautiously: If you're making this for a crowd, consider using two pans instead of one to avoid overflow.

Make Ahead Options

These Raspberry Zinger Poke Cakes are perfect for meal prep enthusiasts! You can prepare the cake and poke the holes up to 24 hours in advance, refrigerating it to keep it fresh. Once cooled, simply cover the cake with plastic wrap and store it in the fridge. The raspberry gelatin can be made and poured over the cake just before serving to ensure it's perfectly hydrated. Additionally, you can microwave and spread the raspberry preserves ahead of time and store them separately in the fridge for up to 3 days. When you're ready to enjoy, just layer the preserves and whipped topping, sprinkle with coconut, and it's ready to impress your guests with minimal effort!

Raspberry Zinger Poke Cake Recipe FAQs

What type of white cake mix should I use?
I recommend using a high-quality white cake mix for the best results. Look for one that has a soft and fluffy texture, which will perfectly complement the fruity raspberry flavors in the Raspberry Zinger Poke Cake.

How should I store the Raspberry Zinger Poke Cake?
Store the Raspberry Zinger Poke Cake in an airtight container in the refrigerator for up to 5–7 days. This keeps it fresh and moist, ensuring that every slice is as delightful as the first. Just be sure to cover it well to prevent any dryness!

Can I freeze the leftover cake?
Absolutely! To freeze, slice the Raspberry Zinger Poke Cake into portions and wrap them tightly in plastic wrap and aluminum foil. This will prevent freezer burn and keep the cake fresh for up to 3 months. When you're ready to enjoy, thaw the slices in the refrigerator overnight.

Why is my cake not absorbing the gelatin well?
If the gelatin isn’t soaking in properly, you might not have poked the holes deep enough or evenly enough across the cake. Aim for holes that are halfway deep, about 1 inch apart, using the end of a wooden spoon. This allows the gelatin to seep in evenly, giving you that moist, flavorful texture you’re looking for in the Raspberry Zinger Poke Cake.

Are there any dietary considerations I should be aware of?
If you have guests with dietary restrictions, consider using gluten-free cake mix and whipped topping alternatives to cater to those needs. Additionally, always check the labels for potential allergens if serving to those with food sensitivities.

Can I make this cake in advance?
Yes, this cake is perfect for making ahead of time! In fact, I often prepare it a day in advance to allow the flavors to meld beautifully. Refrigerate it overnight for optimal taste and easy serving the next day.

Raspberry Zinger Poke Cake

Raspberry Zinger Poke Cake: A Refreshing Fruity Treat

This Raspberry Zinger Poke Cake is a delightful blend of fruity flavors and moist texture, perfect for summer gatherings and easy to prepare.
Print Recipe Pin Recipe
Prep Time 20 minutes mins
Cook Time 30 minutes mins
Chilling Time 4 hours hrs
Total Time 4 hours hrs 50 minutes mins
Servings: 12 slices
Course: Dessert
Cuisine: American
Calories: 300
Ingredients Equipment Method Nutrition Notes

Ingredients
  

For the Cake
  • 1 box White Cake Mix A quality mix ensures a moist and fluffy base.
  • 2 cups Hot Purified Water Needed to dissolve the raspberry-flavored gelatin.
For the Raspberry Filling
  • 1 box Raspberry-Flavored Gelatin Adds sweet, fruity essence.
  • 1 cup Raspberry Preserves Thick and luscious; microwave for easier spreading.
For the Topping
  • 1 container Whipped Topping Feel free to substitute with fresh whipped cream.
  • 1 cup Unsweetened Shredded Coconut Optional; can use chopped nuts or white chocolate shavings.

Equipment

  • 9x13-inch baking pan
  • Mixing Bowl
  • Spatula

Method
 

Preparation Steps
  1. Preheat your oven to 350°F (175°C). Combine white cake mix with water, oil, and eggs in a mixing bowl. Pour into a greased 9x13-inch baking pan and bake for 25–30 minutes, or until a toothpick comes out clean. Allow to cool for 30 minutes.
  2. Once cooled, poke holes across the surface of the cake about 1 inch apart and half deep using the end of a wooden spoon.
  3. Dissolve raspberry-flavored gelatin in 2 cups of hot purified water and pour it over the poked cake, letting it absorb for about 5 minutes.
  4. Microwave raspberry preserves for about 30 seconds to soften, then spread evenly over the gelatin-soaked cake.
  5. Dollop whipped topping over the raspberry preserves and spread evenly.
  6. Sprinkle unsweetened shredded coconut over the whipped topping layer.
  7. Cover with plastic wrap and refrigerate for at least 4 hours, or overnight, before serving.

Nutrition

Serving: 1sliceCalories: 300kcalCarbohydrates: 45gProtein: 3gFat: 12gSaturated Fat: 7gPolyunsaturated Fat: 1gMonounsaturated Fat: 3gCholesterol: 20mgSodium: 250mgPotassium: 150mgFiber: 1gSugar: 25gVitamin A: 2IUCalcium: 2mgIron: 4mg

Notes

For the best flavor and texture, chill the cake overnight. Consider garnishing with fresh raspberries for a pop of color and added flavor.

Tried this recipe?

Let us know how it was!
  • « Previous Page
  • 1
  • …
  • 25
  • 26
  • 27
  • 28
  • 29
  • …
  • 36
  • Next Page »

Welcome!

Hi, I’m Grace, a Sydney-based home cook with a passion for bold flavors and trending ingredients. Whether you’re a busy beginner or a seasoned foodie, you’ll find dishes here that are fresh, fun, and full of flavor.

More about me

Popular Recipes

  • Mushroom Crostini
    Deliciously Easy Mushroom Crostini for Your Next Gathering
  • Mini Phyllo Feta Bites
    Mini Phyllo Feta Bites for Effortless Entertaining
  • Onion Boil
    Savory Onion Boil Recipe: A Flavorful Vegan Delight
  • Sweet Potato Fondant with Smoked Almond Cream & Rosemary Oil
    Savory Sweet Potato Fondant with Smoked Almond Cream Delight

Footer

↑ back to top

About

  • Privacy Policy
  • Disclaimer
  • Terms & Conditions

Newsletter

  • Sign Up! for emails and updates

Contact

  • About me
  • Contact me

Copyright © 2025 TastyTrendIngredients