tastytrendingredients

  • Home
  • Recipes
    • Appetizers
    • Breakfast
    • Dessert
    • Dinner
    • Drinks
    • Salads
    • Snacks
    • Soups
  • About me
  • Contact me
menu icon
go to homepage
  • Home
  • Recipes
    • Appetizers
    • Breakfast
    • Dessert
    • Dinner
    • Drinks
    • Salads
    • Snacks
    • Soups
  • About me
  • Contact me
search icon
Homepage link
  • Home
  • Recipes
    • Appetizers
    • Breakfast
    • Dessert
    • Dinner
    • Drinks
    • Salads
    • Snacks
    • Soups
  • About me
  • Contact me
×

Bomboloni alla Crema: Indulge in Creamy Italian Bliss

December 18, 2025 by Grace Snow Leave a Comment

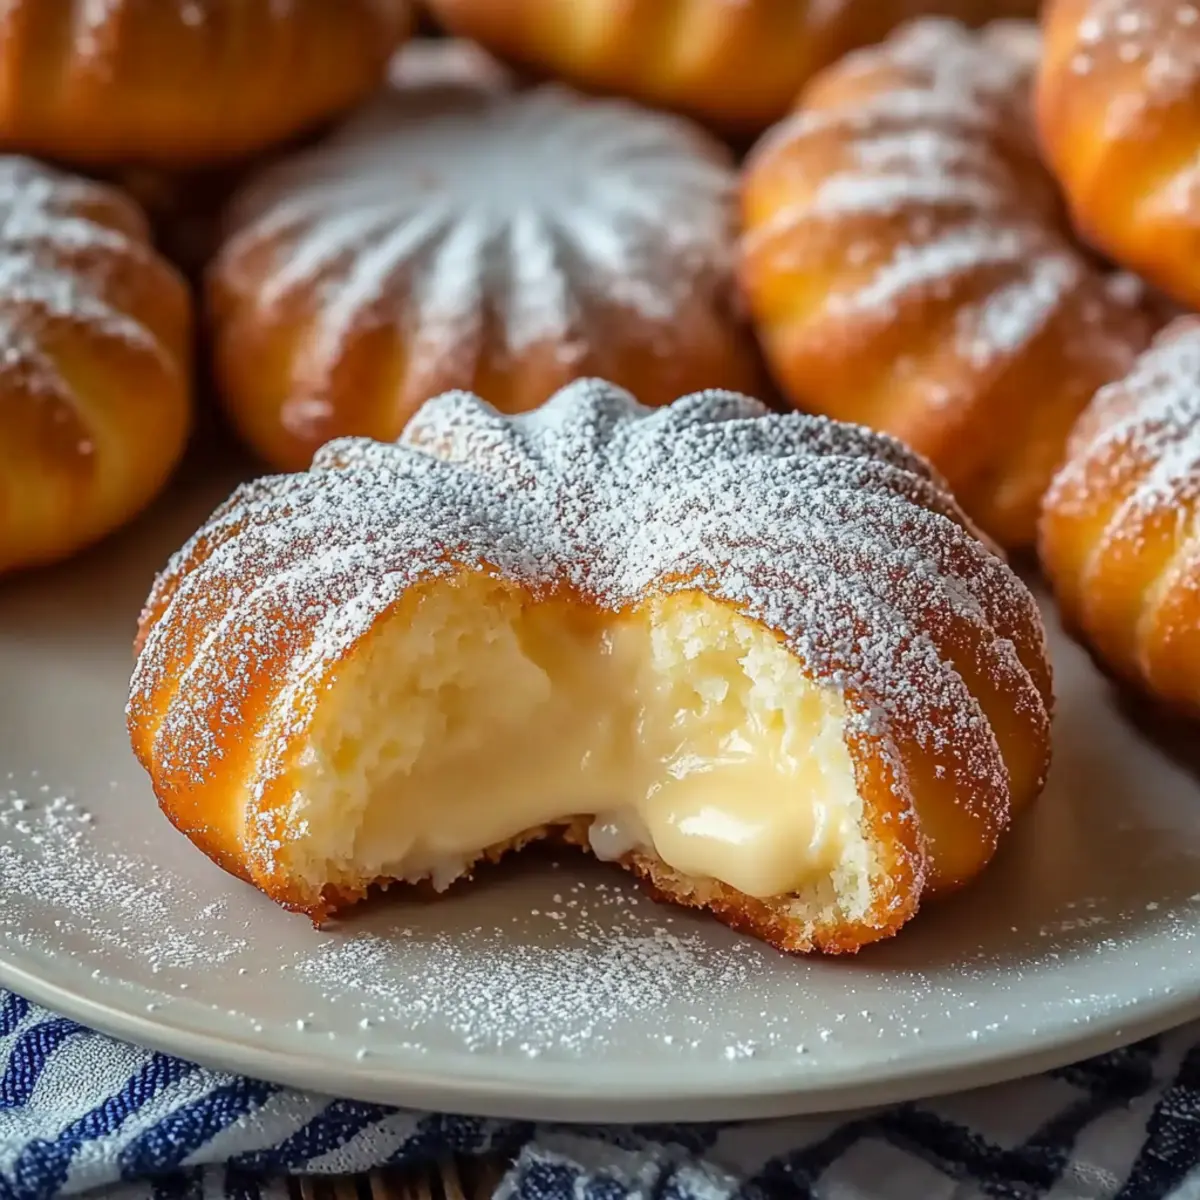
Every time I do a little deep dive into Italian cuisine, I stumble upon a treasure that captivates my taste buds all over again—Bomboloni alla Crema. These heavenly cream-filled doughnuts take the classic treat to an extraordinary level, transforming any occasion into a celebration. With their fluffy interiors and luxurious cream, they embody comfort and joy, making them perfect for sharing with friends or savoring solo as a sweet escape from the ordinary. Plus, the warm aroma wafting through your kitchen is simply irresistible. Not only are these doughnuts a delightful indulgence, but they also offer a fun adventure in the kitchen, complete with the satisfaction of homemade goodness. Are you ready to bring this Italian delight to life? Let’s dive into the recipe!

Why Are Bomboloni alla Crema Irresistible?

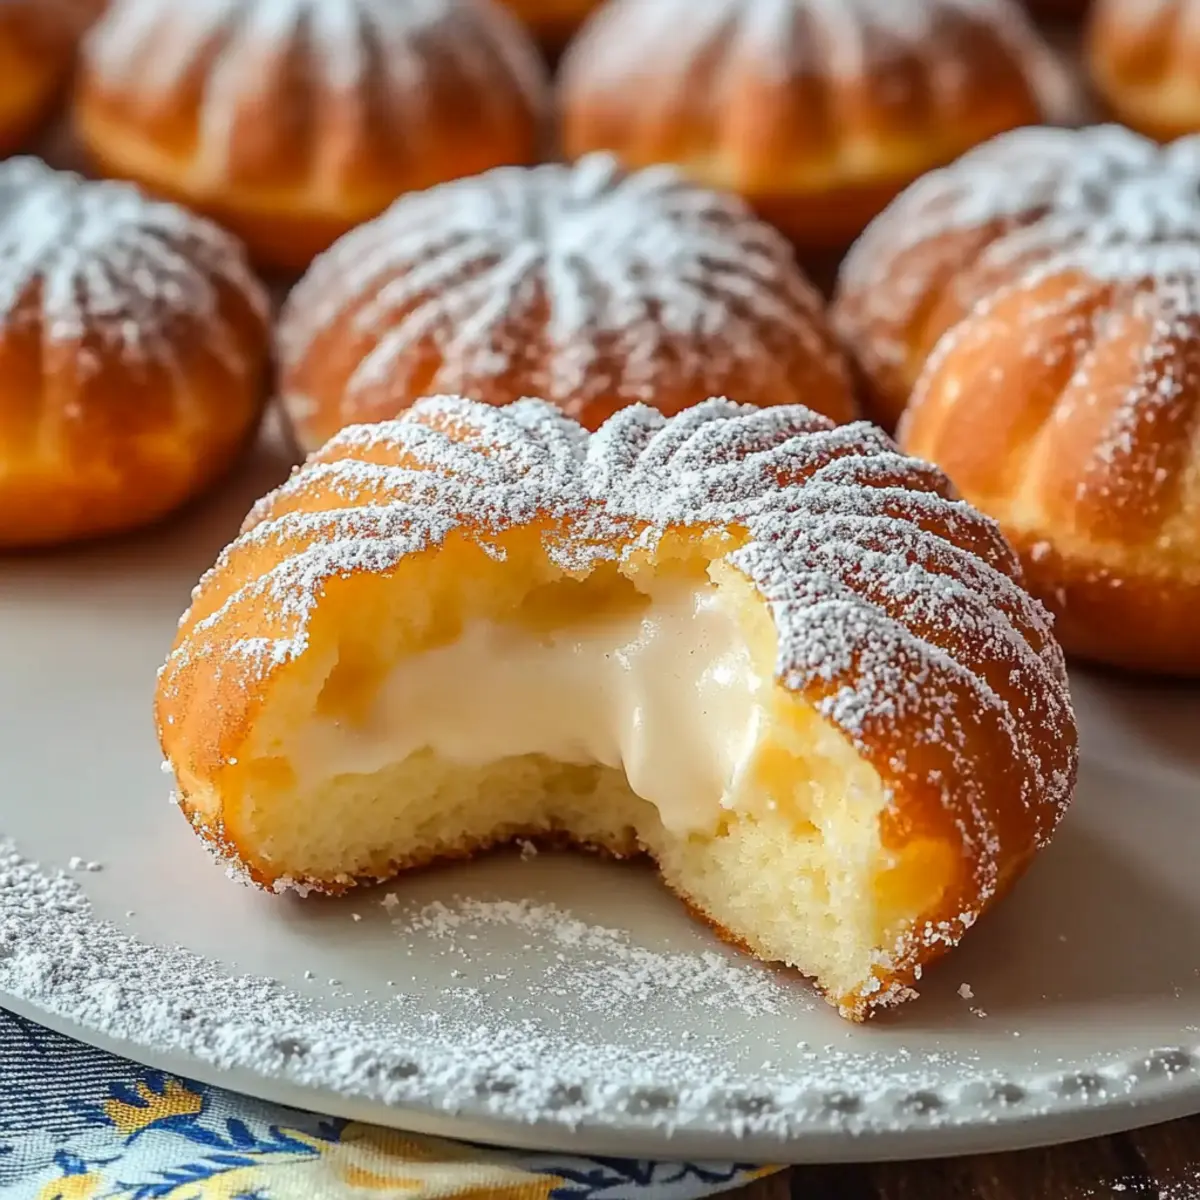
Creamy, Decadent Filling: The luscious pastry cream hugs your palate, turning each bite into a dreamy experience.
Fluffy Texture: The soft, airy dough melts in your mouth, creating a perfect contrast with the creamy center.
Homemade Joy: Crafting these doughnuts yourself brings a fulfilling sense of achievement and indulgence.
Crowd-Pleaser: Whether at a party or a cozy dinner, these treats are bound to impress your guests, making any meal feel festive.
Versatile Variations: Experiment with different flavors or fillings like chocolate ganache or berry jams for a delightful twist on this classic.
Pair your Bomboloni alla Crema with a rich coffee, just like the Italians do, for a delightful treat that brings warmth and joy to every moment!

Bomboloni alla Crema Ingredients

For the Dough

  • All-purpose flour – Provides structure to the dough; can substitute with bread flour for a chewier texture.
  • Sugar – Sweetens the dough and aids in browning; use granulated or coconut sugar for a richer flavor.
  • Yeast – Leavens the dough for a light and fluffy interior; instant yeast allows for a quicker rise.
  • Milk – Adds moisture and richness; almond milk can be used for a dairy-free option.
  • Eggs – Binds the dough and adds richness; consider flax eggs for an egg-free variation.
  • Butter – Enriches the dough for a tender crumb; substitute with vegan butter if desired.
  • Salt – Balances sweetness and enhances flavor; sea salt gives a nice crunch.
  • Vanilla extract – Adds depth and aroma to the cream filling; almond extract offers a delightful twist.

For the Cream Filling

  • Custard or pastry cream – The star filling, providing a silky and smooth texture; can replace with whipped cream for a lighter option.

For Dusting

  • Powdered sugar – For dusting, it adds sweetness and visual appeal; can be omitted or replaced with cocoa powder for a chocolatey twist.

Create these Bomboloni alla Crema and enjoy each delectable bite!

Step‑by‑Step Instructions for Bomboloni alla Crema

Step 1: Combine Dry Ingredients
In a large mixing bowl, whisk together 4 cups of all-purpose flour, ½ cup of sugar, 1 packet (2 ¼ teaspoons) of instant yeast, and ½ teaspoon of sea salt until well blended. Make sure to aerate the flour for a light texture. This dry mixture sets the foundation for your Bomboloni alla Crema, giving it the airy quality we all crave in these Italian doughnuts.

Step 2: Mix Wet Ingredients
In another bowl, gently warm 1 cup of milk until it’s just lukewarm, then whisk in 4 tablespoons of melted butter, 2 large eggs, and 1 teaspoon of vanilla extract. This delightful combination enhances the richness of the dough. Pour the wet mixture into the dry ingredients and stir until a sticky dough starts to form, signaling the next step in your Bomboloni adventure.

Step 3: Knead the Dough
Transfer the slightly sticky dough onto a floured surface and knead for about 8-10 minutes until it becomes smooth and elastic. You'll know it’s ready when it springs back gently when pressed. This step is crucial for developing the gluten, which gives your Bomboloni alla Crema their signature fluffiness.

Step 4: Let the Dough Rise
Place the kneaded dough into a lightly greased bowl, cover it with a damp cloth, and let it rise in a warm environment for about 1 hour, or until it has doubled in size. Look for the dough to become puffy and soft; this is where the magic happens, allowing for those airy, dreamy doughnuts we love.

Step 5: Shape and Rest the Dough
Once the dough has risen, punch it down gently to release air, then roll it out on a floured surface to about ½ inch thick. Use a doughnut cutter or a round cookie cutter to cut out circles. Place the circles on a baking sheet, cover them, and let them rest for about 20 minutes until slightly puffed. This resting is essential for achieving that perfect Bomboloni fluff.

Step 6: Heat the Oil
While the dough rests, heat about 2 inches of oil in a deep, heavy-bottomed pan over medium heat until it reaches 350°F (175°C). Use a thermometer for accuracy. This temperature is key to achieving golden-brown Bomboloni alla Crema without making them greasy; a proper fry will yield that crispy exterior we adore.

Step 7: Fry the Doughnuts
Carefully drop the rested dough rounds into the hot oil, a few at a time, ensuring not to overcrowd the pan. Fry for approximately 2-3 minutes on each side, flipping them halfway through, until they’re golden brown. Keep a close eye on them; they should puff up beautifully, signaling that they’re perfectly cooked.

Step 8: Drain and Cool
Once frying is complete, use a slotted spoon to remove the Bomboloni and place them on a paper towel-lined plate to drain excess oil. Let them cool slightly for about 5 minutes. This is the perfect time to admire your creation—you’ve just made authentic Bomboloni alla Crema!

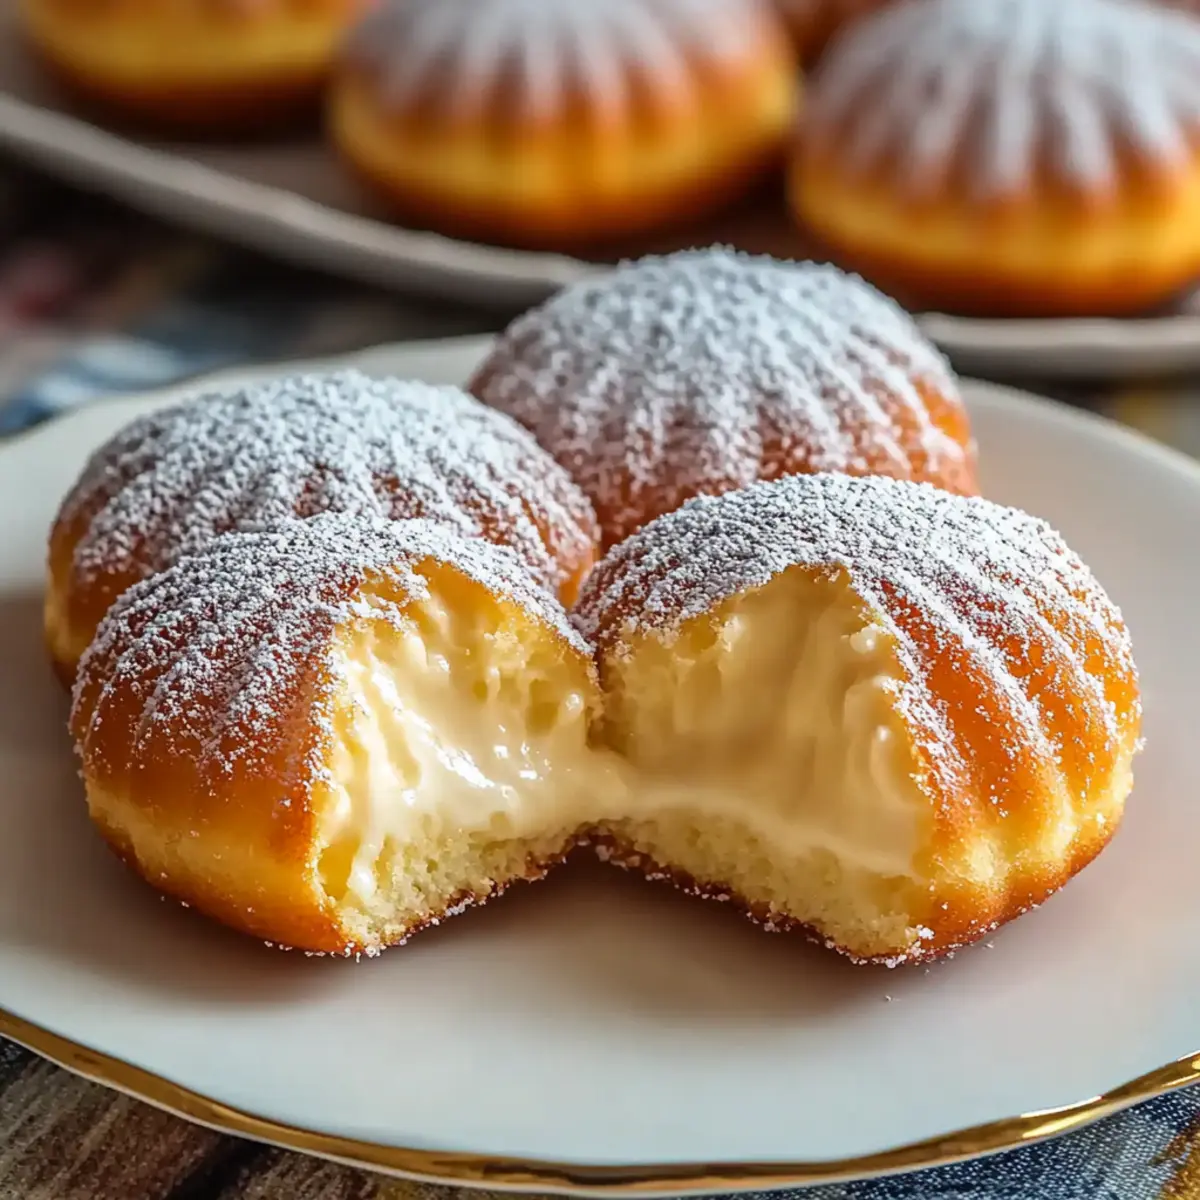
Step 9: Fill with Cream
Using a piping bag fitted with a filling tip, carefully inject each doughnut with your preferred custard or pastry cream until they feel just right. The filling should be generous, adding that luxurious touch that defines Bomboloni alla Crema. Be gentle to ensure the doughnut retains its shape.

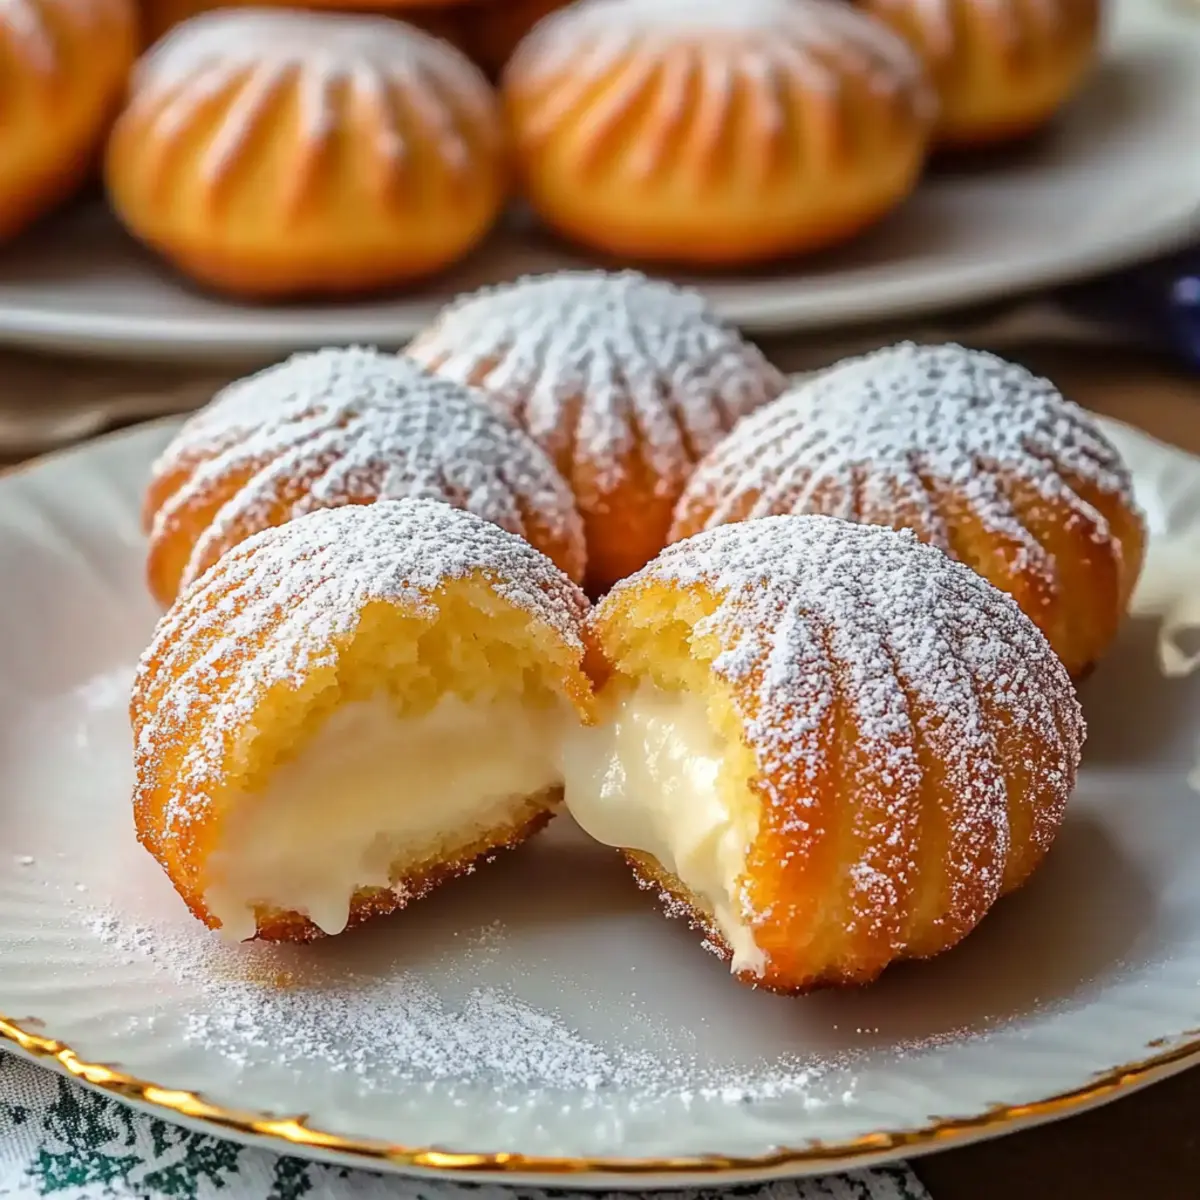
Step 10: Dust with Sugar
Lastly, dust the filled doughnuts with powdered sugar to enhance their sweetness and visual appeal. This final touch will give your delicious Italian treats that classic sugar-kissed look. Serve them warm or at room temperature, and savor the delightful flavor of your homemade Bomboloni alla Crema!

Make Ahead Options

These Bomboloni alla Crema are perfect for meal prep, making them a delightful treat even on the busiest days! You can prepare the dough up to 24 hours in advance; just allow it to rise, punch it down, and refrigerate it covered with plastic wrap. Additionally, the pastry cream can be made ahead and stored in an airtight container in the refrigerator for up to 3 days. When you're ready to enjoy, simply allow the dough to come to room temperature before shaping and frying, then fill with the cream, dust with powdered sugar, and savor the freshly made goodness that feels like a sweet hug from Italy!

Bomboloni alla Crema: Fun Variations to Try

Bring your own touch to these delightful doughnuts with creative twists and substitutions that will surprise and delight your palate!

  • Dairy-Free: Swap regular milk and butter for almond milk and vegan butter to create a deliciously rich dough without dairy.
    Experiment with your choices—coconut milk can also add a sweet aroma, enhancing the warmth of each doughnut.

  • Sugar Swap: Use coconut sugar instead of granulated sugar for a deeper, more caramelized flavor that complements the cream beautifully.
    Not only does it enhance the taste, but it also adds a touch of subtlety to your Bomboloni.

  • Flavor Infusion: Infuse your cream with citrus zest, such as orange or lemon, for a bright pop of flavor that dances on your tongue.
    A hint of liqueur, like limoncello, can elevate your dessert experience, adding sophistication to this classic treat!

  • Alternative Fillings: Get adventurous with different fillings! Replace the custard with chocolate ganache, flavored whipped cream, or fruity berry jam for a tasty twist.
    Each variation opens up a new dimension, making your Bomboloni an ever-changing delight!

  • Seasonal Spices: Sprinkle in seasonal spices like cinnamon or nutmeg into the dough for an extra layer of warmth and comfort.
    They pair beautifully with cream and offer a cozy experience, especially during the cooler months!

  • Chocolate Dip: After frying, dip the Bomboloni in melted chocolate instead of dusting with powdered sugar for a decadent chocolate-covered treat.
    Imagine biting into a warm doughnut, revealing a luscious cream filling and a delightful chocolate exterior—pure bliss!

  • Mini Bomboloni: For a fun party idea, shape the dough into bite-sized pieces and serve as mini Bomboloni for sharing.
    They're perfect for gatherings, allowing everyone to enjoy a little indulgence without the commitment of a full doughnut!

Feel free to explore these variations to personalize your Bomboloni alla Crema journey. Each twist keeps the joy of homemade cooking alive while adding a delightful surprise to your kitchen!

Expert Tips for Bomboloni alla Crema

  • Oil Temperature Matters: Ensure your oil is heated to 350°F (175°C). Too hot, and they'll burn; too cool, and they'll absorb more oil, becoming greasy.

  • Perfect Dough Rise: Let the dough rise until it doubles in size for the light, fluffy texture of Bomboloni alla Crema. Patience is key for perfect results!

  • Fry in Batches: Don't overcrowd the pan while frying. This ensures even cooking and helps maintain that lovely golden color.

  • Fill Generously: When filling your doughnuts, use a piping bag with a small tip to truly indulge in the creamy goodness—you want each bite bursting with flavor!

  • Stay Fresh: Enjoy your Bomboloni alla Crema fresh, but if making ahead, store them in an airtight container at room temperature for up to 2 days for best texture.

What to Serve with Bomboloni alla Crema

Indulging in Bomboloni alla Crema offers a delightful culinary experience, and pairing them with complementary dishes can elevate your meal to new heights.

  • Rich Espresso: A classic Italian companion, the bold flavors of espresso beautifully contrast the sweetness of the doughnuts, enhancing your overall dessert experience.
  • Vanilla Gelato: The creamy, cool texture of vanilla gelato pairs perfectly with the warm, fluffy doughnuts, creating an indulgent contrast that feels luxurious.
  • Fresh Berries: Tossed with a hint of sugar, the tartness of fresh berries adds a refreshing balance to the richness of Bomboloni, lightening each decadent bite.
  • Chocolate Sauce: Drizzling silky chocolate sauce over your doughnuts adds a layer of indulgent sweetness that will satisfy any sweet tooth and elevate the treat.
  • Sweet Wine: A glass of dessert wine, such as Vin Santo, complements the sweetness while offering a delightful touch to your dining experience, wrapping things up with Italian flair.
  • Homemade Whipped Cream: A dollop of lightly sweetened whipped cream can add texture and enhance the vanilla notes of the Bomboloni’s cream filling for a delightful treat.
  • Toasted Nuts: Chopped toasted hazelnuts or almonds sprinkled on top of the doughnuts introduce a nutty crunch, providing contrast to the soft pastry and creamy filling.
  • Citrus Salad: A refreshing citrus salad with oranges and grapefruits can cleanse the palate, allowing the luxurious flavors of the Bomboloni to shine through after each bite.
  • Herbal Tea: Opt for a calming herbal tea like chamomile or peppermint to sip alongside your doughnuts, creating a soothing end to your delightful meal.

How to Store and Freeze Bomboloni alla Crema

Room Temperature: Store the filled doughnuts in an airtight container at room temperature for up to 2 days to maintain freshness and softness.

Freezer: To freeze uncooked dough, wrap tightly in plastic wrap and place in a freezer bag. Use within 2 months for best results. Thaw in the fridge before frying.

Reheating: If you want to reheat leftover filled Bomboloni, place them in a warm oven (around 300°F) for a few minutes until warmed through. Enjoy them fresh for the best experience!

Bomboloni alla Crema Recipe FAQs

What type of flour should I use for Bomboloni alla Crema?
Absolutely, all-purpose flour is perfect for creating a light and fluffy dough. If you're after a chewier texture, I recommend using bread flour instead. It's great to experiment and find your perfect balance!

How should I store Bomboloni alla Crema after making them?
To keep your filled doughnuts fresh, store them in an airtight container at room temperature for up to 2 days. They’ll maintain their softness and deliciousness during this time. Just remember, these treats are best enjoyed fresh!

Can I freeze Bomboloni alla Crema?
Yes, you can! To freeze the uncooked dough, wrap it tightly in plastic wrap and place it in a freezer bag. They can be frozen for up to 2 months. When you’re ready to indulge, simply thaw in the fridge overnight before frying them for that perfect golden-brown finish.

What if my dough doesn’t rise?
Oh no! If your dough isn’t rising, it may be due to the yeast being inactive. Make sure your yeast is fresh and that your warm milk isn't too hot—aim for around 110°F (43°C). If it’s not rising well, try moving it to a warmer spot for a better environment (the oven with just the light on is ideal). Patience is key here, and a little tweaking may yield perfectly fluffy Bomboloni!

Are Bomboloni alla Crema suitable for those with allergies?
If you’re accommodating dietary restrictions, Bomboloni can definitely be modified! For a dairy-free option, swap in almond milk and use vegan butter. Moreover, for an egg-free doughnut, consider flax eggs. Just be conscious of filling choices as some creams might contain allergens. It’s all about customizing for your loved ones!

How long do Bomboloni alla Crema last in the fridge?
Though you’ll likely want to eat them fresh, the filled doughnuts can last in an airtight container in the fridge for about 3 to 4 days. Just pop them in a warm oven for a few minutes to revive their delightfully fluffy texture before enjoying!

Bomboloni alla Crema

Bomboloni alla Crema: Indulge in Creamy Italian Bliss

Experience Bomboloni alla Crema, luscious Italian cream-filled doughnuts that are irresistible and perfect for any celebration.
Print Recipe Pin Recipe
Prep Time 30 minutes mins
Cook Time 15 minutes mins
Resting Time 20 minutes mins
Total Time 1 hour hr 5 minutes mins
Servings: 12 doughnuts
Course: Dessert
Cuisine: Italian
Calories: 250
Ingredients Equipment Method Nutrition Notes

Ingredients
  

Dough Ingredients
  • 4 cups all-purpose flour can substitute with bread flour for a chewier texture
  • 0.5 cups sugar use granulated or coconut sugar for richer flavor
  • 1 packet (2 ¼ teaspoons) instant yeast leavens the dough
  • 1 cups milk a dairy-free option can be almond milk
  • 2 large eggs consider flax eggs for egg-free variation
  • 4 tablespoons butter substitute with vegan butter if desired
  • 0.5 teaspoon sea salt balances sweetness
  • 1 teaspoon vanilla extract almond extract can be used for variation
Cream Filling
  • 1 batch custard or pastry cream the main filling
Dusting
  • 1 cup powdered sugar can be replaced with cocoa powder

Equipment

  • Mixing Bowl
  • Doughnut cutter
  • Deep Frying Pan
  • piping bag
  • Thermometer

Method
 

Preparation Steps
  1. In a large mixing bowl, whisk together flour, sugar, yeast, and salt until blended.
  2. Warm milk and whisk in melted butter, eggs, and vanilla. Pour into dry ingredients and mix.
  3. Knead the dough on a floured surface for about 8-10 minutes until smooth and elastic.
  4. Place the kneaded dough in a greased bowl, cover, and let rise in a warm place for about 1 hour.
  5. After rising, punch down the dough and roll it out to ½ inch thick. Cut out circles.
  6. Heat oil in a deep pan until it reaches 350°F (175°C).
  7. Fry dough rounds in batches for 2-3 minutes on each side until golden brown.
  8. Remove and drain on paper towels. Let them cool slightly.
  9. Inject each doughnut with custard or pastry cream using a piping bag.
  10. Dust with powdered sugar before serving.

Nutrition

Serving: 1doughnutCalories: 250kcalCarbohydrates: 35gProtein: 3gFat: 12gSaturated Fat: 7gPolyunsaturated Fat: 1gMonounsaturated Fat: 2gCholesterol: 40mgSodium: 120mgPotassium: 150mgFiber: 1gSugar: 8gVitamin A: 200IUCalcium: 50mgIron: 1mg

Notes

Serve warm or at room temperature for the best experience. Enjoy fresh for maximum taste.

Tried this recipe?

Let us know how it was!

Blueberry Cream Cheese Babka to Elevate Your Brunch Game

December 18, 2025 by Grace Snow Leave a Comment

The aroma of freshly baked bread wafted through my kitchen, sweeping me back to sunlit mornings filled with laughter and stories over brunch. My latest creation, Blueberry Cream Cheese Babka, is not just a treat—it’s a delightful experience that can transform your breakfast or brunch into a luscious occasion. This yeast bread boasts a rich, buttery dough intertwined with zesty cream cheese and vibrant blueberry preserves, making each bite an irresistible delight. Plus, it’s surprisingly simple to whip up, requiring just a bit of patience for the dough to rise. As a bonus, this babka is versatile enough to allow you to experiment with different fillings, ensuring there’s always a new taste adventure waiting. Ready to add a touch of warmth and sweetness to your table? Let’s dive into this scrumptious recipe!

Why Choose This Blueberry Cream Cheese Babka?

Irresistible Flavor: The combination of fresh blueberries and cream cheese creates a sweet, decadent filling that elevates your taste buds.

Simple to Make: With basic baking skills, you can master this beautiful babka, making it the perfect introduction to homemade yeast bread.

Versatile Filling Options: While this recipe focuses on blueberries, feel free to mix things up with flavors like Nutella or different fruit preserves, just like in my Vegan Cacao Cream recipe.

Perfect for Any Occasion: Whether it’s brunch with friends or a cozy family gathering, this stunning loaf makes for an impressive centerpiece.

Make Ahead Capability: Prepare ahead of time, as this babka can be frozen for up to 2 months! Just thaw it before serving to enjoy its fresh, homemade goodness.

This Blueberry Cream Cheese Babka promises not only to satisfy your sweet cravings but also to create lasting memories around the table!

Blueberry Cream Cheese Babka Ingredients

• Here's everything you need to create this delectable treat!

For the Blueberry Preserves

  • Blueberries – Fresh blueberries provide the vibrant flavor; frozen can be a convenient alternative when fresh isn't an option.
  • Sugar (¾ cup) – Sweetens the preserves; adjust according to your taste preference.
  • Lemon Juice (1 tbsp) – Brightens the flavor of the blueberries, complementing the sweetness beautifully.

For the Cream Cheese Filling

  • Cream Cheese (8 oz) – Ensure it's softened for easier mixing; this adds a creamy, rich filling to the babka.
  • Sugar (⅓ cup) – Adds sweetness to the cream cheese filling; adjust depending on how sweet you like it.

For the Dough

  • All-Purpose Flour (4 cups) – Creates the structure of the dough; consider a 1:1 gluten-free blend if desired.
  • Kosher Salt (1 tsp) – Balances the sweetness and enhances overall flavor.
  • Active Dry Yeast (1 pkg, about 2 ¼ tsp) – Ensures a light and fluffy dough; can be replaced with instant yeast without proofing.
  • Milk (1 cup, warmed to 100-110°F) – Activates the yeast; dairy-free milk works well for a dairy-free version.
  • Eggs (2) – Provide richness and help with the dough's structure.
  • Vanilla Extract (1 tsp) – Enriches the flavor of the dough beautifully.
  • Unsalted Butter (10 tbsp, very soft) – Contributes to a tender, rich dough; make sure it's very soft for easy incorporation.

For the Finishing Touch

  • Sugar Syrup (⅓ cup sugar + ⅓ cup water) – A glaze that adds shine and sweetness; adjust the sugar based on your taste!

With these ingredients in hand, you’re all set to craft a beautiful Blueberry Cream Cheese Babka that’s bound to impress!

Step‑by‑Step Instructions for Blueberry Cream Cheese Babka

Step 1: Prepare Blueberry Preserves
In a saucepan over medium heat, combine fresh blueberries, ¾ cup of sugar, and 1 tablespoon of lemon juice. Bring the mix to a boil, then reduce heat to a simmer. Let it cook for 15 minutes, stirring occasionally until the mixture thickens and resembles a preserve. Once done, remove from the heat and refrigerate to cool.

Step 2: Make Cream Cheese Filling
In a mixing bowl, beat together 8 ounces of softened cream cheese and ⅓ cup of sugar until smooth and creamy, about 2-3 minutes. The mixture should be fluffy with no lumps. Set aside to allow the flavors to meld as you prepare the dough for the Blueberry Cream Cheese Babka.

Step 3: Prepare Dough
In a large bowl, whisk together 4 cups of all-purpose flour, ¼ cup of sugar, and 1 teaspoon of kosher salt. In a separate bowl, warm 1 cup of milk to 100-110°F and sprinkle 2¼ teaspoons of active dry yeast over it. Let it foam for about 5 minutes before combining it with 2 eggs, 1 teaspoon of vanilla extract, and the dry ingredients. Mix until a shaggy dough forms.

Step 4: Incorporate Butter and Knead
Soften 10 tablespoons of unsalted butter until very soft. Gradually add this to the dough, mixing with your hands or a stand mixer until fully integrated and the dough is smooth and elastic. This should take about 10 minutes of kneading. The dough should be sticky but manageable; if too sticky, consider adding a little more flour.

Step 5: First Rise
Transfer the kneaded dough into a greased bowl, turning it to coat. Cover with a kitchen towel or plastic wrap, and let it rise in a warm place for 1 to 1.5 hours. Wait until the dough has doubled in size and feels airy and light to the touch—this is crucial for a soft Blueberry Cream Cheese Babka.

Step 6: Shape Babka
Once risen, punch down the dough to release air. Divide it into two equal halves. Roll out each portion into a rectangle about ¼-inch thick. Spread each with the cream cheese filling, followed by a layer of blueberry preserves. Roll the dough tightly into a log, then twist the logs together to shape the babka, ensuring the filling is nice and snug.

Step 7: Second Rise
Place the twisted babka into greased loaf pans, ensuring they fit snugly. Cover loosely with a towel and let them rise for about an hour until they puff up and are nearly doubled in size. This second rise enhances the texture, leading to a beautifully fluffy Blueberry Cream Cheese Babka.

Step 8: Bake
Preheat your oven to 350°F. Once the babka have risen, bake them in the preheated oven for approximately 40 minutes, or until golden brown and a skewer inserted into the center comes out clean. Keep an eye on them towards the end of baking to avoid over-browning.

Step 9: Finish with Syrup
While the babka cools, prepare a simple sugar syrup by combining ⅓ cup of sugar and ⅓ cup of water in a saucepan; heat until sugar dissolves. Once baked, brush this syrup generously over the cooled babka for a sweet glaze. Allow to cool completely before slicing for the best presentation and flavor.

Blueberry Cream Cheese Babka Variations

Feel free to explore your creativity and customize this delightful babka to make it uniquely yours!

  • Raspberry Swirl: Replace blueberries with fresh or frozen raspberries for a tart twist.
  • Nutella Delight: Spread Nutella in place of cream cheese for a decadent chocolate version. Imagine the rich, nutty flavor mingling with the sweet dough!
  • Cinnamon Sugar: Add a sprinkle of cinnamon and sugar to the filling for a cozy, warm flavor profile that brings nostalgia to every bite.
  • Savory Option: Swap sweet fillings for a savory herbed cheese blend, creating a stunning appetizer that's perfect for parties or gatherings.
  • Apricot Surprise: Use apricot preserves instead of blueberries for a slightly sunny, fruity flavor that pairs well with the cream cheese.
  • Gluten-Free: Substitute regular flour with a 1:1 gluten-free baking blend to make this babka friendly for gluten-sensitive folks.
  • Mixed Berry Medley: Combine blueberries, raspberries, and strawberries for a colorful, flavor-packed filling that’s as beautiful as it is tasty!
  • Almond Cream: Use almond extract in the cream cheese filling for a unique flavor, reminiscent of marzipan, which adds a luxurious twist to the classic babka experience.

Embarking on these variations is just like creating a mouthwatering personal signature dish, much like the brilliance of my Ice Cream Cake. Each option can spark joy at your breakfast or brunch table—ready for your next culinary adventure?

Make Ahead Options

This Blueberry Cream Cheese Babka is perfect for meal prep enthusiasts looking to save time! You can prepare the blueberry preserves up to 3 days in advance and refrigerate them, ensuring they maintain their vibrant flavor. The dough can be made and left to rise overnight in the refrigerator for up to 24 hours; this not only saves time but also enhances the flavors. To keep the quality intact, cover the dough tightly with plastic wrap to prevent drying. When you're ready to bake, simply shape and let it rise for about an hour before baking, and you'll have a beautifully decadent babka to enjoy fresh from the oven!

How to Store and Freeze Blueberry Cream Cheese Babka

Room Temperature: Store the babka tightly wrapped in plastic wrap or in an airtight container for up to 3 days to maintain freshness and softness.

Fridge: For extended freshness, refrigerate the babka for up to 1 week; wrap it well to prevent it from drying out.

Freezer: Freeze the babka for up to 2 months by wrapping it tightly in plastic wrap and placing it in a freezer-safe bag. Thaw in the fridge overnight before serving.

Reheating: To reheat, warm slices in the toaster or oven for a few minutes until heated through, restoring that fresh-baked goodness!

Expert Tips for Blueberry Cream Cheese Babka

Proofing Yeast: Ensure your yeast is fresh and proof it in warm milk (100-110°F) to ensure the dough rises beautifully.

Dough Consistency: If the dough feels too sticky, refrigerate it briefly to stabilize before shaping. This will make handling much easier!

Filling Chill: Consider refrigerating the cream cheese filling before spreading it; this helps to manage any mess during assembly.

Flavor Variations: Don’t hesitate to experiment! Switch out blueberries for raspberries or cherries for an exciting twist on the classic Blueberry Cream Cheese Babka.

Baking Time: Keep a close watch while baking; ovens vary, and you want that perfect golden-brown crust without over-baking!

What to Serve with Blueberry Cream Cheese Babka

There's nothing quite like a warm, sweet slice of bread to accompany your cozy brunch or breakfast gathering.

  • Fresh Fruit Salad: A mix of seasonal fruits brightens the plate and adds a refreshing contrast to the babka’s sweetness.

  • Greek Yogurt with Honey: Creamy yogurt paired with a drizzle of honey provides a tart yet sweet balance, perfect for spooning over babka slices.

  • Fluffy Scrambled Eggs: The rich, savory flavor of eggs complements the sweet, buttery bread beautifully, creating a well-rounded meal.

  • Maple Syrup: Drizzling a hint of maple syrup enhances the sweetness and adds warmth, making each bite of babka even more indulgent.

  • Coffee or Tea: A steaming cup of coffee or herbal tea elevates the experience, grounding the sweetness of the babka with rich, bold flavors.

  • Whipped Cream: Light, airy whipped cream on the side allows for an extra dash of sweetness and makes each slice feel like a treat.

Imagine a lazy Sunday morning, surrounded by loved ones, sharing stories and laughter while enjoying your homemade Blueberry Cream Cheese Babka alongside these delightful pairings.

Blueberry Cream Cheese Babka Recipe FAQs

How do I choose ripe blueberries for the preserves?
Absolutely! Look for blueberries that are firm and plump without any dark spots or wrinkles. Those little beauties should be bright blue and slightly shiny; this indicates freshness. If you find some with a hint of white bloom, don’t worry; it’s a natural protective coating.

What’s the best way to store my Blueberry Cream Cheese Babka?
Very important! Store your babka tightly wrapped in plastic wrap or in an airtight container at room temperature for about 3 days. If you want to enjoy it longer, pop it in the refrigerator where it can stay fresh for up to a week, just make sure it's wrapped well to prevent it from drying out.

Can I freeze the Blueberry Cream Cheese Babka?
Of course! To freeze, wrap the babka tightly in plastic wrap and then place it inside a freezer-safe bag. It can be stored in the freezer for up to 2 months. When you're ready to enjoy, simply thaw it overnight in the refrigerator before serving.

What should I do if my dough doesn't rise?
Oh no! If your dough hasn't risen, it could be due to inactive yeast. Always check that your yeast is fresh and proof it in warm milk (100-110°F). If it doesn't foam after 5 minutes, it might be a good idea to start with a fresh batch. Also, make sure your dough was kept in a warm, draft-free place during rising!

Can I make this babka dairy-free?
Absolutely! To make a dairy-free Blueberry Cream Cheese Babka, you can substitute regular milk with dairy-free milk, and use plant-based cream cheese as well. Just ensure that your butter alternative is suitable for your dietary needs.

How do I know when my babka is done baking?
Look for that perfect combination of golden brown and texture! The babka should take around 40 minutes to bake; you can insert a toothpick into the center, and if it comes out clean, your delicious Blueberry Cream Cheese Babka is ready to be enjoyed. Keep an eye on it near the end of baking to avoid over-browning.

Blueberry Cream Cheese Babka

Blueberry Cream Cheese Babka to Elevate Your Brunch Game

This Blueberry Cream Cheese Babka promises a delicious experience, transforming breakfast or brunch into a delightful occasion.
Print Recipe Pin Recipe
Prep Time 30 minutes mins
Cook Time 40 minutes mins
Rising Time 1 hour hr 30 minutes mins
Total Time 2 hours hrs 40 minutes mins
Servings: 10 slices
Course: Dessert
Cuisine: American
Calories: 300
Ingredients Equipment Method Nutrition Notes

Ingredients
  

For the Blueberry Preserves
  • 2 cups Blueberries Fresh or frozen
  • ¾ cup Sugar Adjust to taste
  • 1 tbsp Lemon Juice
For the Cream Cheese Filling
  • 8 oz Cream Cheese Softened
  • ⅓ cup Sugar Adjust to taste
For the Dough
  • 4 cups All-Purpose Flour Consider gluten-free blend
  • 1 tsp Kosher Salt
  • 1 pkg Active Dry Yeast About 2 ¼ tsp
  • 1 cup Milk Warmed to 100-110°F
  • 2 large Eggs
  • 1 tsp Vanilla Extract
  • 10 tbsp Unsalted Butter Very soft
For the Finishing Touch
  • ⅓ cup Sugar Syrup ⅓ cup sugar + ⅓ cup water

Equipment

  • Saucepan
  • Mixing Bowl
  • Stand Mixer
  • Loaf Pans
  • Whisk

Method
 

Step-by-Step Instructions for Blueberry Cream Cheese Babka
  1. In a saucepan over medium heat, combine fresh blueberries, ¾ cup of sugar, and 1 tablespoon of lemon juice. Bring the mix to a boil, then reduce heat to a simmer. Let it cook for 15 minutes, stirring occasionally until the mixture thickens and resembles a preserve. Remove from heat and refrigerate to cool.
  2. In a mixing bowl, beat together 8 ounces of softened cream cheese and ⅓ cup of sugar until smooth and creamy, about 2-3 minutes. Set aside.
  3. In a large bowl, whisk together 4 cups of all-purpose flour, ¼ cup of sugar, and 1 teaspoon of kosher salt. In a separate bowl, warm 1 cup of milk and sprinkle 2¼ teaspoons of active dry yeast over it. Let it foam for about 5 minutes before combining with 2 eggs, 1 teaspoon of vanilla extract, and the dry ingredients. Mix until a shaggy dough forms.
  4. Gradually add 10 tablespoons of very soft unsalted butter to the dough, mixing until fully integrated and smooth. Knead for about 10 minutes until elastic.
  5. Transfer the kneaded dough into a greased bowl and cover. Let it rise in a warm place for 1 to 1.5 hours until doubled in size.
  6. Once risen, punch down the dough, divide into two halves, roll out each into a rectangle, spread with cream cheese filling, and blueberry preserves. Roll tightly into logs and twist together.
  7. Place twisted babka into greased loaf pans. Cover and let rise for about an hour.
  8. Preheat oven to 350°F. Bake risen babka for approximately 40 minutes, or until golden brown.
  9. Prepare sugar syrup by combining ⅓ cup sugar and ⅓ cup water in a saucepan; heat until sugar dissolves. Brush syrup over cooled babka.

Nutrition

Serving: 1sliceCalories: 300kcalCarbohydrates: 45gProtein: 5gFat: 12gSaturated Fat: 7gMonounsaturated Fat: 4gCholesterol: 50mgSodium: 230mgPotassium: 160mgFiber: 1gSugar: 15gVitamin A: 400IUVitamin C: 2mgCalcium: 30mgIron: 1mg

Notes

Store tightly wrapped for up to 3 days at room temperature, 1 week in the fridge, or freeze for up to 2 months.

Tried this recipe?

Let us know how it was!

Brownie Bite Gnomes: Whimsical No-Bake Treats to Delight

December 16, 2025 by Grace Snow Leave a Comment

As I sifted through my pantry, I stumbled upon a treasure trove of ingredients just waiting to transform into something magical. That's when the idea for Brownie Bite Gnomes came to life. These charming, no-bake dessert treats blend fudgy brownie bites with fluffy cream cheese frosting and playful strawberries for the perfect gnome hats. Ideal for festive gatherings, they bring a smile to faces of all ages with their whimsical appearance and delightful crunch from Reese's Puffs cereal as noses. Plus, the best part? They’re incredibly easy to whip up, making them a hassle-free addition to your holiday celebrations. Are you ready to create a dessert that’s as fun to make as it is to devour? Let’s dive into the delicious world of gnome magic!

Why are Brownie Bite Gnomes so special?

Whimsy in Every Bite: These Brownie Bite Gnomes are not just desserts; they are little pieces of art that add a playful spirit to any gathering.
Easy Assembly: With no baking required, you’ll find this recipe perfect for busy days or spontaneous get-togethers.
Crowd-Pleaser: Their adorable design and rich flavors make them a sure hit with guests of all ages, whether it’s a holiday party or a family game night.
Versatile Treats: Feel free to personalize them! Swap out strawberries for other fruits or try chocolate frosting for a unique twist.
Time-Saving Option: Make the cream cheese frosting in advance and store it in the fridge, making the assembly a breeze and giving you more time to enjoy your company! If you love easy, delightful desserts, check out our Pumpkin Brownies Decadent or refreshing Watermelon Popsicles for more magical treats!

Brownie Bite Gnomes Ingredients

• Gather these delightful components to create your own whimsical treats!

For the Brownie Base

  • Brownie Bites – Store-bought or homemade brownie bites can be used for a rich fudgy foundation.

For the Frosting

  • Cream Cheese Frosting – This sweet addition adds a creamy texture and can be made ahead for convenience.

For the Gnome Hats

  • Fresh Strawberries – Choose firm strawberries for the perfect gnome hat shape, adding freshness and color to each treat.

For the Gnome Noses

  • Reese’s Puffs Cereal – This crunchy treat serves as the gnome's nose, but Cheerios or mini chocolate chips work as tasty substitutes.

Optional Decorative Touches

  • Mini Chocolate Chips – Sprinkle around the serving plate for an extra visual appeal that enhances your holiday spread.
  • Cocoa Powder – Dust lightly over the assembled gnomes for added flavor and an aesthetic finish.

Embrace your creativity and let the magic of these Brownie Bite Gnomes shine during your festive gatherings!

Step‑by‑Step Instructions for Brownie Bite Gnomes

Step 1: Prepare Strawberries
Begin by washing and drying your fresh strawberries thoroughly. Trim the tops to create a gnome hat shape, which means cutting less than a quarter off the top. Make sure the strawberries stand upright by cutting a small slice at the bottom if needed. This will allow your gnome hats to sit securely on the brownie bites later.

Step 2: Pipe Frosting
Using a piping bag fitted with a star tip, fill it with your prepared cream cheese frosting. Apply the frosting generously on each brownie bite, creating a cascading beard effect that mimics the whimsical charm of gnomes. Aim to cover the top two-thirds of the brownie bite completely, leaving room at the base for stability and visual appeal.

Step 3: Assemble Gnomes
Carefully place a trimmed strawberry on top of each frosted brownie bite to form the gnome's hat. Gently push a Reese’s Puffs cereal piece into the frosting below the strawberry, acting as the gnome’s nose. Ensure each piece is secure and visually cohesive to maintain the adorable appearance of your Brownie Bite Gnomes.

Step 4: Chill
After assembling all your gnomes, it's essential to refrigerate them for at least one hour. This chilling period allows the frosting to set and the flavors to meld, ensuring that your Brownie Bite Gnomes hold their shape and look fabulous when served at your gathering.

Step 5: Enhance Presentation
Before serving, consider sprucing up your presentation. Optionally sprinkle mini chocolate chips around the serving plate for a festive touch, or dust the assembled gnomes lightly with cocoa powder for added flavor and visual flair. This final step will elevate your Brownie Bite Gnomes from delightful to dazzling!

Storage Tips for Brownie Bite Gnomes

Fridge: Store any leftover Brownie Bite Gnomes in an airtight container in the refrigerator for up to 2 days to maintain freshness and prevent sogginess.

Make-Ahead: You can make the cream cheese frosting a day in advance and keep it in the fridge. This saves time on assembly day and keeps your treats fluffy.

Avoid Freezing: It’s best not to freeze the decorated gnomes, as the strawberries and frosting won’t retain their texture or appearance once thawed.

Wrap Brownie Bites: If preparing brownie bites in advance, wrap them tightly in plastic wrap or store in an airtight container to keep them moist until you’re ready to assemble.

Make Ahead Options

These Brownie Bite Gnomes are perfect for meal prep, allowing you to enjoy your festivities without the last-minute rush! You can prepare the cream cheese frosting up to 24 hours in advance; simply store it in an airtight container in the refrigerator to keep it fresh and creamy. Additionally, the brownie bites can be made ahead, and if using store-bought ones, they can be kept well for up to 3 days at room temperature. For optimal quality, assemble the gnomes just before serving to prevent the strawberries from losing their firmness. Once ready to serve, simply pipe the frosting, top with strawberries, and finish with Reese's Puffs for those charming noses. Enjoy stress-free celebrations with this easy make-ahead option!

What to Serve with Brownie Bite Gnomes?

Elevate your dessert experience with delightful pairings that complement these whimsical treats!

  • Creamy Vanilla Ice Cream: The smooth, cold ice cream perfectly contrasts the warm, fudgy brownie bite, creating a delightful harmony of flavors and temperatures.

  • Fresh Fruit Salad: A refreshing mix of seasonal fruits adds brightness and a burst of flavor that balances the richness of the gnomes.

  • Whipped Cream: Light and airy, whipped cream brings an extra layer of indulgence, making every bite creamy and exceptional.

  • Chocolate Milk: This sweet, nostalgic drink pairs beautifully with the chocolatey goodness of the Brownie Bite Gnomes, enveloping you in a comforting cocoa embrace.

  • Coffee or Espresso: A warm cup of coffee enhances the dessert's chocolate flavors, making it an ideal companion for a cozy afternoon gathering.

  • Nutty Granola: Adding a sprinkle of crunchy granola delivers a satisfying texture contrast that enhances the overall dessert experience.

  • Spiced Apple Cider: Embrace the festive spirit by serving hot spiced apple cider. Its warming spices and sweetness harmonize beautifully with the gnomes!

  • Chocolate Dipping Sauce: A decadent drizzle of warm chocolate takes these gnomes to new heights, inviting guests to indulge in the chocolate extravaganza.

Expert Tips for Brownie Bite Gnomes

  • Chill for Stability: Always refrigerate the assembled gnomes for at least one hour to maintain their shape and keep the frosting from melting.

  • Fresh Strawberries Matter: Choose firm, ripe strawberries and trim them properly for gnome hats. Overripe strawberries can collapse and ruin the presentation.

  • Frosting Consistency: Make sure your cream cheese frosting is at room temperature for easy piping. Cold frosting can be difficult to spread, affecting your Brownie Bite Gnomes' aesthetic.

  • Avoid Overstuffing: Be careful not to overfill the piping bag with frosting at once. This can lead to pressure buildup and messy results while decorating.

  • Play with Texture: If you want an added crunch, consider mixing some finely chopped nuts into the frosting or using crushed graham crackers on top for a delightful twist!

Brownie Bite Gnomes Variations

Get ready to sprinkle some personal magic into your Brownie Bite Gnomes with these delightful twists that will tickle your taste buds!

  • Fruity Hats: Swap out strawberries for raspberries or blueberries for a pop of color and a burst of tangy flavor. Each bite becomes a new adventure for the palate!

  • Chocolate Lovers: Use chocolate frosting instead of cream cheese to add a rich, velvety layer to your gnomes. The combination of brownie and chocolate frosting is simply irresistible.

  • Nutty Texture: Add a handful of chopped nuts to the frosting for an extra crunch that complements the soft brownie base. It enhances both texture and flavor while keeping things interesting!

  • Minty Freshness: Mix in some peppermint extract into the frosting for a refreshing aftertaste. This is a festive touch that’s delightful for holiday gatherings or cozy winter nights.

  • Spiced Wonder: Add a dash of cinnamon or pumpkin spice to the brownie mix for a warm, inviting flavor that evokes the essence of the season. You won't be able to resist these aromatic treats!

  • Crunchy Alternative: If you're out of Reese’s Puffs, try using mini chocolate chips or even crushed graham crackers for the gnome's nose. They'll create a lovely contrast of textures without losing the fun!

  • Fruit-filled Surprise: Tuck a small piece of banana or a dollop of jam under the strawberry hat for a fruity surprise, making each bite bursting with flavor! It’s a delightful twist that'll amaze your guests.

Feel free to play around, and don’t forget to pair your enchanting gnomes with a scoop of ice cream or a cup of warm coffee for a festive dessert spread that’ll leave everyone smiling. For more delightful ideas, explore our Crock Pot Chicken or check out the refreshing Watermelon Popsicles. Let your creativity shine in the kitchen!

Brownie Bite Gnomes Recipe FAQs

What kind of strawberries should I use for the gnome hats?
Absolutely! Select firm, ripe strawberries to create the perfect gnome hat shape. Look for berries that are vibrant in color and free of dark spots. Trim less than a quarter off the top to create the hat shape while ensuring they stand upright. If needed, you can slice a small bit off the bottom to stabilize them better.

How should I store leftover Brownie Bite Gnomes?
Very simply! Store any leftover Brownie Bite Gnomes in an airtight container in the refrigerator for up to 2 days. Keeping them chilled will help maintain their freshness and avoid sogginess, making sure they’re ready to delight whenever cravings hit!

Can I make the cream cheese frosting in advance?
Yes, you can! I often recommend making the cream cheese frosting a day ahead and storing it in the fridge. To ensure it's ready for piping, let it sit at room temperature for about 15-30 minutes before using. This way, assembly day will be a breeze without sacrificing flavor and texture!

Is it okay to freeze decorated Brownie Bite Gnomes?
It's best to avoid freezing the decorated gnomes. The strawberries and cream cheese frosting may not hold up well once thawed, which can lead to a mushy texture and a less appealing presentation. Instead, assemble and enjoy them fresh for that delightful crunch!

What can I do if my frosting is too stiff to pipe?
If your frosting isn't cooperating, don't fret! Start by letting it warm up slightly at room temperature for about 10-15 minutes. If it’s still too stiff, you can add a splash of milk, about a teaspoon at a time, and mix it in until you reach your desired consistency. This will make piping a lot easier and help achieve that beautiful gnome beard effect!

Are there any dietary considerations for Brownie Bite Gnomes?
Yes, absolutely! The Brownie Bite Gnomes are vegetarian-friendly, but you’ll want to check the specific ingredients in your brownie bites and cream cheese frosting for allergens. If you're accommodating different dietary restrictions, consider using gluten-free brownie bites, and for a nut-free option, ensure the frosting does not contain any nut-based ingredients. Happy gnome-making!

Brownie Bite Gnomes

Brownie Bite Gnomes: Whimsical No-Bake Treats to Delight

Brownie Bite Gnomes are whimsical no-bake treats that blend fudgy brownies, creamy frosting, and playful strawberries.
Print Recipe Pin Recipe
Prep Time 20 minutes mins
Chilling Time 1 hour hr
Total Time 1 hour hr 20 minutes mins
Servings: 12 gnomes
Course: Dessert
Cuisine: American
Calories: 150
Ingredients Equipment Method Nutrition Notes

Ingredients
  

For the Brownie Base
  • 12 pieces Brownie Bites Store-bought or homemade
For the Frosting
  • 1 cup Cream Cheese Frosting Can be made ahead
For the Gnome Hats
  • 12 pieces Fresh Strawberries Choose firm strawberries
For the Gnome Noses
  • 1 cup Reese’s Puffs Cereal Can substitute with Cheerios or mini chocolate chips
Optional Decorative Touches
  • 1/2 cup Mini Chocolate Chips For visual appeal
  • 2 tablespoons Cocoa Powder For dusting

Equipment

  • piping bag
  • Star tip

Method
 

Step-by-Step Instructions
  1. Begin by washing and drying your fresh strawberries thoroughly. Trim the tops to create a gnome hat shape.
  2. Using a piping bag fitted with a star tip, fill it with your prepared cream cheese frosting. Apply the frosting generously on each brownie bite.
  3. Carefully place a trimmed strawberry on top of each frosted brownie bite to form the gnome's hat. Gently push a Reese’s Puffs cereal piece into the frosting below the strawberry.
  4. After assembling all your gnomes, refrigerate them for at least one hour to allow the frosting to set and the flavors to meld.
  5. Before serving, consider sprinkling mini chocolate chips around the serving plate or dusting the assembled gnomes lightly with cocoa powder.

Nutrition

Serving: 1gnomeCalories: 150kcalCarbohydrates: 20gProtein: 2gFat: 8gSaturated Fat: 4gCholesterol: 20mgSodium: 50mgPotassium: 50mgFiber: 1gSugar: 10gVitamin A: 5IUVitamin C: 15mgCalcium: 2mgIron: 4mg

Notes

These treats are perfect for festive gatherings and are easy to customize with various fruits and toppings.

Tried this recipe?

Let us know how it was!

Maple Donut Bars That Make Mornings Irresistibly Sweet

December 16, 2025 by Grace Snow Leave a Comment

The smell of warm maple syrup drifting through the kitchen instantly transports me to lazy weekend mornings, when sweet indulgence feels just right. If you’re craving a delicious yet simple treat, my Soft Baked Maple Donut Bars are just what you need. These delightful bars combine a soft, cake-like base with a sticky maple glaze that’s sure to satisfy your sweet tooth. Perfect for brunch or an afternoon snack, they’re incredibly beginner-friendly and require minimal equipment, making them a hit for both new bakers and kitchen pros alike. Plus, you can easily adapt the recipe to suit your dietary preferences, ensuring everyone can enjoy a taste of homey goodness. Ready to whip up some nostalgic magic in your kitchen? Let’s dive into this recipe for maple perfection!

Why Are Maple Donut Bars Special?

Irresistible sweetness: The fusion of maple syrup and powdered sugar creates a glaze that’s simply heavenly, making these bars a beloved treat.

Beginner-friendly: Whipping up these donuts is a breeze, perfect for those just stepping into baking. You’ll impress loved ones with minimal effort!

Perfect for any occasion: Whether for brunch, a sweet snack, or even dessert, these bars fit the bill elegantly.

Versatile flavors: Feel free to experiment; swap out maple for cinnamon or chocolate for exciting variations! Explore options like Maple Roasted Sweet for another sweet inspiration.

Make-ahead convenience: Bake ahead and store for those busy mornings—you can easily savor these delightful bars fresh, warm, and ready to enjoy!

Maple Donut Bars Ingredients

• Get ready to create sweet magic!

For the Bars

  • 2 cups all-purpose flour – Provides structure and a tender crumb; swap with whole wheat flour for a healthier twist.
  • 1/2 teaspoon baking soda – Essential for helping the bars rise.
  • 1/2 teaspoon baking powder – Works with baking soda for a light, airy texture.
  • 1/4 teaspoon salt – Enhances the overall flavor of your Maple Donut Bars.
  • 1/2 teaspoon ground nutmeg – Adds warm, inviting spices that complement the maple beautifully.
  • 1/2 cup granulated sugar – Sweetens the dough; substitute with coconut sugar for a lower glycemic option.
  • 1/4 cup unsalted butter, softened – Contributes to richness and moisture; can be replaced with vegan butter for dairy-free options.
  • 1 large egg – Acts as a binder; use a flax egg for a vegan alternative.
  • 1/2 cup buttermilk – Provides the necessary acidity for tenderness; substitute with milk mixed with vinegar for a buttermilk alternative.
  • 1 teaspoon vanilla extract – Enhances the overall flavor profile.

For the Maple Glaze

  • 1/2 cup powdered sugar – Crucial for that sweet glaze.
  • 2 tablespoons maple syrup – Gives the bars their signature maple flavor; adjust for a more intense sweetness.
  • 1/2 teaspoon maple extract – Intensifies the maple flavor; omitting it will tone it down significantly.
  • 1–2 tablespoons milk, as needed for glaze consistency – Adjust to reach your desired thickness for that luscious finish.

Step‑by‑Step Instructions for Maple Donut Bars

Step 1: Prepare Oven & Pan
Preheat your oven to 350°F (175°C) while you prepare your baking pan. Line a 9x9 inch baking pan with parchment paper or lightly grease it to ensure easy removal of your Maple Donut Bars once baked. This step is crucial for achieving a beautiful finish on your bars.

Step 2: Mix Dry Ingredients
In a large mixing bowl, whisk together 2 cups of all-purpose flour, 1/2 teaspoon of baking soda, 1/2 teaspoon of baking powder, 1/4 teaspoon of salt, and 1/2 teaspoon of ground nutmeg. Ensure there are no lumps in the flour to promote even rising. Set this bowl aside, ready for the next step in creating your delightful bars.

Step 3: Cream Butter & Sugar
In a separate bowl, use an electric mixer to beat 1/4 cup of softened unsalted butter and 1/2 cup of granulated sugar together until the mixture is light and fluffy—about 3-4 minutes. This whipping process incorporates air, which will make your Maple Donut Bars soft and tender, ensuring a delicious texture.

Step 4: Combine Wet Ingredients
To the creamed butter and sugar, add 1 large egg, 1 teaspoon of vanilla extract, and 1/2 cup of buttermilk. Mix until the wet ingredients are thoroughly combined and smooth. This mixture forms the rich base of your donut bars and infuses them with incredible flavor.

Step 5: Incorporate Dry Ingredients
Gradually add the dry mixture to the wet ingredients in your large bowl, stirring gently until just combined. Be careful not to overmix—the batter should be slightly lumpy for the best texture in your Maple Donut Bars. This is where the flavors meld together beautifully.

Step 6: Bake
Pour the batter into the prepared baking pan, making sure it's evenly spread. Bake in the preheated oven for 18-20 minutes, or until a toothpick inserted in the center comes out clean. The top should be lightly golden, indicating that your Maple Donut Bars are baking to perfection.

Step 7: Cool
After baking, remove the pan from the oven and allow the bars to cool in the pan for about 10 minutes. Once slightly cooled, transfer the bars to a wire rack to cool completely. This step helps maintain their moisture and texture, making the final product even more enjoyable.

Step 8: Prepare Glaze
In a medium bowl, whisk together 1/2 cup of powdered sugar, 2 tablespoons of maple syrup, 1/2 teaspoon of maple extract, and 1-2 tablespoons of milk until smooth and glossy. Adjust the amount of milk for your desired glaze consistency. This glossy topping is what makes your Maple Donut Bars irresistible.

Step 9: Glaze Bars
Once the bars are completely cooled, generously spread or drizzle the prepared glaze over the top. Let it set for a few minutes for a lovely finish. This final touch will add that sweet maple flavor that will make your Maple Donut Bars truly delightful.

Storage Tips for Maple Donut Bars

Room Temperature: Store the Maple Donut Bars in an airtight container at room temperature for up to 2 days to keep them soft and flavorful.

Fridge: If you want to extend their freshness, refrigerate the bars in an airtight container for up to 5 days. Just remember, they may lose that freshly baked warmth!

Freezer: For longer storage, freeze the unglazed Maple Donut Bars for up to 1 month. Make sure to wrap them tightly in plastic wrap, and glaze them after thawing for the best taste.

Reheating: To enjoy warm, simply reheat individual bars in the microwave for about 10-15 seconds. Enjoy them fresh out of the oven feel again!

Maple Donut Bars Variations & Substitutions

Customize your Maple Donut Bars with these fun and flavorful twists! Enjoy exploring different tastes and textures that will make this recipe uniquely yours.

  • Dairy-Free: Substitute unsalted butter with vegan butter and buttermilk with plant-based milk mixed with vinegar for a tasty dairy-free version.

  • Sugar-Free: Replace granulated sugar with erythritol or monk fruit sweetener for a guilt-free treat suitable for those watching their sugar intake.

  • Whole Wheat: Use whole wheat flour instead of all-purpose flour for added fiber and a hearty texture. The nutty flavor enhances these delicious bars wonderfully!

  • Nutty Crunch: Add 1/2 cup of chopped walnuts or pecans to the batter for an added crunch and rich, nutty flavor that perfectly complements the sweetness.

  • Flavor Boost: Swap maple extract for almond or coconut extract to create a delightful twist for a more exotic flavor profile. You might also enjoy trying a cinnamon variation!

  • Fruit Infusion: Mix in 1/2 cup of diced apples or fresh blueberries into the batter for a burst of fruity goodness that brightens up each bite.

  • Spicy Kick: For a heat twist, add a pinch of cayenne pepper or a dash of black pepper to the glaze. This unexpected zing unlocks an exciting depth to the sweetness.

  • Chocolate Lovers: Drizzle melted dark chocolate over the glaze for a decadent topping that’s totally irresistible. This can elevate the sweetness even further and is a must for chocolate enthusiasts!

Let your imagination run wild, and consider pairing these bars with other delightful recipes, such as Maple Roasted Sweet potatoes for an even sweeter meal experience. Enjoy every bite of your uniquely crafted Maple Donut Bars!

What to Serve with Maple Donut Bars?

The warm aroma of freshly baked Maple Donut Bars is just the beginning of a delightful meal experience.

  • Coffee: A bold cup of coffee balances the sweetness of the bars, making for a perfect morning treat. The rich flavors enhance the maple notes beautifully.

  • Fresh Fruit Salad: A refreshing mix of seasonal fruits adds brightness, making for a well-rounded brunch alongside the indulgent bars. Their lightness contrasts deliciously with the bars' texture.

  • Whipped Cream: Light, airy whipped cream offers a dollop of decadence that pairs fantastically with maple flavors. Serve chilled for a delightful, creamy accompaniment.

  • Maple Pecan Ice Cream: A scoop of this creamy delight brings a luscious touch, enhancing the maple flavor and providing a delightful texture contrast with the soft bars.

  • Herbal Tea: A delicate cup of herbal tea introduces gentle flavors that envelop your senses, cooling off your palate after indulging in the sweet bars.

  • Maple Bacon: The saltiness of crispy bacon adds a savory crunch - a fantastic juxtaposition to the sweetness of the bars. The added maple essence can deepen the overall experience.

  • Caramel Drizzle: For an extra touch of sweetness, add a caramel sauce drizzle over each bar. The gooey texture brings richness to the table.

  • Yogurt Parfait: Layered yogurt, granola, and fruits create a fulfilling plate that balances health and indulgence with your sweet donut bars.

  • Sweet Wine: A chilled dessert wine complements the sweet flavors while offering a refreshing sip to accompany the treats.

  • Chocolate Espresso Cookies: A couple of these cookies alongside will satisfy those chocolate cravings, making for a delightful assortment of flavors on your plate.

Expert Tips for Maple Donut Bars

  • Proper Measurements: Always measure your flour carefully to avoid dry bars. Spoon it into the measuring cup and level it off for best results.

  • Oven Accuracy: Check your oven temperature with an oven thermometer to ensure perfect baking. An incorrect temperature can lead to over- or undercooked bars.

  • Avoid Overmixing: When combining dry and wet ingredients, stir until just combined. Overmixing can result in dense, tough Maple Donut Bars.

  • Gulp the Glaze: For the perfect glaze consistency, start with less milk and gradually add until you reach your desired thickness.

  • Flavor Boost: Feel free to experiment with extracts or add-ins like chocolate chips or nuts to customize your Maple Donut Bars to your taste!

Make Ahead Options

These Maple Donut Bars are perfect for meal prep, allowing you to enjoy their deliciousness even on busy mornings! You can prepare the batter up to 24 hours in advance by covering it tightly and refrigerating it to keep it fresh. Alternatively, you can bake the bars and store them, unglazed, at room temperature for up to 2 days or refrigerate for up to 5 days. For maximum freshness, consider freezing the unglazed bars for up to 1 month. When ready to serve, simply glaze them after thawing; they'll taste just as delightful as freshly baked. This make-ahead strategy saves time without sacrificing flavor, ensuring warm, homemade goodness whenever you need it!

Maple Donut Bars Recipe FAQs

How do I know if my ingredients are ripe or fresh?
Absolutely! For the best results in your Maple Donut Bars, be sure to use fresh ingredients. Check your flour for free of lumps or a rancid smell, and use fresh baking powder and baking soda; they should be effective for about 6 months after opening. Also, make sure your buttermilk is still good—look for any off smells or clumps.

What’s the best way to store Maple Donut Bars?
You can store the Maple Donut Bars in an airtight container at room temperature for up to 2 days, ensuring they stay soft and delicious. For maximum freshness, pop them in the refrigerator, where they can last for up to 5 days. Just don’t forget to keep them in an airtight container to avoid drying out!

Can I freeze Maple Donut Bars?
Very much! I often freeze unglazed Maple Donut Bars for up to 1 month. Just wrap them tightly in plastic wrap to protect them from freezer burn. When you’re ready to enjoy, thaw them at room temperature, then glaze them for that freshly made taste.

What should I do if my bars come out too dry?
If your Maple Donut Bars are a bit dry, this could be due to too much flour or overmixing the batter. To adjust for next time, ensure you’re measuring flour properly—spooning it into the measuring cup and leveling it off. Be careful not to overmix after adding dry ingredients; you want just a few lumps for tenderness.

Are there any dietary considerations for Maple Donut Bars?
Of course! These bars are easily customizable. For a dairy-free option, substitute the butter with vegan butter and use almond milk or a non-dairy milk with vinegar instead of buttermilk. If you're considering allergies, make sure to check for gluten in your flour or opt for a gluten-free all-purpose blend.

How long can I keep glazed Maple Donut Bars?
I recommend consuming glazed Maple Donut Bars within 2 days if left at room temperature, as the glaze may become sticky or harden over time. If you find you have leftovers, store them in the fridge, and enjoy them within 5 days for the best flavor and texture. Just remember: the sooner, the sweeter!

Maple Donut Bars

Maple Donut Bars That Make Mornings Irresistibly Sweet

Enjoy these Maple Donut Bars, a sweet treat perfect for brunch or snacks.
Print Recipe Pin Recipe
Prep Time 20 minutes mins
Cook Time 20 minutes mins
Cooling Time 10 minutes mins
Total Time 50 minutes mins
Servings: 12 bars
Course: Dessert
Cuisine: American
Calories: 200
Ingredients Equipment Method Nutrition Notes

Ingredients
  

For the Bars
  • 2 cups all-purpose flour or whole wheat flour for healthier twist
  • 1/2 teaspoon baking soda
  • 1/2 teaspoon baking powder
  • 1/4 teaspoon salt
  • 1/2 teaspoon ground nutmeg
  • 1/2 cup granulated sugar or coconut sugar for lower glycemic
  • 1/4 cup unsalted butter, softened or vegan butter for dairy-free
  • 1 large egg or flax egg for vegan alternative
  • 1/2 cup buttermilk or milk mixed with vinegar
  • 1 teaspoon vanilla extract
For the Maple Glaze
  • 1/2 cup powdered sugar
  • 2 tablespoons maple syrup adjust for sweetness
  • 1/2 teaspoon maple extract omit for less intensity
  • 1–2 tablespoons milk as needed for glaze consistency

Equipment

  • 9x9-inch baking pan
  • large mixing bowl
  • Electric mixer
  • wire rack

Method
 

Step-by-Step Instructions
  1. Preheat your oven to 350°F (175°C). Line or grease a 9x9 inch baking pan.
  2. In a large mixing bowl, whisk together dry ingredients: flour, baking soda, baking powder, salt, and nutmeg.
  3. In a separate bowl, beat softened butter and sugar until light and fluffy, about 3-4 minutes.
  4. Add egg, vanilla extract, and buttermilk to the butter-sugar mixture and mix until smooth.
  5. Gradually incorporate the dry mixture into the wet ingredients, mixing gently until just combined.
  6. Pour the batter into the prepared pan and bake for 18-20 minutes, or until a toothpick comes out clean.
  7. Allow the bars to cool in the pan for 10 minutes, then transfer to a wire rack to cool completely.
  8. Prepare the glaze by whisking together powdered sugar, maple syrup, maple extract, and milk until smooth.
  9. Spread or drizzle the glaze over the cooled bars and let it set before serving.

Nutrition

Serving: 1barCalories: 200kcalCarbohydrates: 30gProtein: 2gFat: 8gSaturated Fat: 5gPolyunsaturated Fat: 0.5gMonounsaturated Fat: 2.5gCholesterol: 32mgSodium: 150mgPotassium: 120mgFiber: 1gSugar: 10gVitamin A: 250IUCalcium: 50mgIron: 1mg

Notes

Ensure proper measurements and oven accuracy for best results. Experiment with flavors to customize your donut bars.

Tried this recipe?

Let us know how it was!

Irresistible Fresh Apple Cake with Cream Cheese Frosting Delight

December 16, 2025 by Grace Snow Leave a Comment

As the leaves start to turn and the air gets that crisp autumn bite, I find myself dreaming of the warm, inviting scents of freshly baked goodies wafting through my kitchen. This Irresistible Fresh Apple Cake with Cream Cheese Frosting is one of my all-time favorites, packed with juicy apples and tantalizing spices that make it a comforting treat for both everyday indulgence and festive gatherings. With its quick prep time and crowd-pleasing nature, this moist cake is perfect for enjoying with loved ones and is bound to make an appearance at any potluck or cozy dessert table. Plus, the tangy cream cheese frosting adds a delightful twist that keeps everyone coming back for more. Are you ready to fill your home with the delightful aroma of fall? Let’s dive into this delicious recipe together!

Why is this apple cake irresistible?

Moist, Flavorful Cake: The blend of fresh apples and warm cinnamon creates a wonderfully moist cake that melts in your mouth.

Creamy Frosting: The rich cream cheese frosting adds the perfect touch, balancing the sweetness while enhancing the cake's deliciousness.

Quick and Easy: This recipe comes together in no time, making it ideal for busy bakers who crave homemade goodness.

Perfect for Gatherings: Whether it’s a fall potluck or a cozy family gathering, this cake is sure to impress and leave everyone asking for the recipe.

Versatile Variations: Feel free to get creative! Add caramel swirls or nuts for a unique twist, or keep it simple for pure apple bliss.

For more delicious dessert options, check out my Chocolate Poke Cake or a refreshing Vegan Cacao Cream.

Irresistible Fresh Apple Cake Ingredients

This delightful cake is packed with everything you need to create the ultimate cozy dessert!

For the Cake

  • All-purpose Flour – Essential for the cake's structure; makes for a hearty base.
  • Baking Soda – A crucial leavening agent; ensures your cake rises perfectly.
  • Salt – Elevates the overall flavor; balances the sweetness of the apples.
  • Ground Cinnamon – Adds warmth and depth, enhancing the apple flavor beautifully.
  • Unsalted Butter – Creates a rich, moist crumb; margarine can be used, but the texture may vary.
  • Granulated Sugar – Provides sweetness and moisture; crucial for that comforting flavor.
  • Large Eggs – Acts as a binding agent; enriches the cake's texture.
  • Vanilla Extract – Boosts flavor; almond extract brings a unique twist if you're feeling adventurous.
  • Grated Apples – Packed with moisture and flavor; make sure to drain them to avoid a soggy cake. Use sweet varieties like Granny Smith or Honeycrisp.
  • Chopped Walnuts (optional) – Adds delightful crunch and nutty flavor; can be replaced with pecans or omitted entirely for a nut-free option.

For the Frosting

  • Cream Cheese – The star ingredient of the frosting; ensure it’s softened for easy mixing.
  • Unsalted Butter – Adds creaminess, enriching the frosting’s texture.
  • Powdered Sugar – Sweetens the frosting; sift to avoid any lumps for a smooth finish.
  • Vanilla Extract (for frosting) – Enhances the frosting’s flavor wonderfully.

With these ingredients in hand, you're all set to create your very own Irresistible Fresh Apple Cake with Cream Cheese Frosting that will have everyone raving for more!

Step‑by‑Step Instructions for Irresistible Fresh Apple Cake with Cream Cheese Frosting

Step 1: Preheat the Oven
Begin by preheating your oven to 350°F (175°C). This ensures a perfectly baked Irresistible Fresh Apple Cake that rises beautifully. While the oven warms up, prepare your 9x13-inch baking pan by greasing it thoroughly to prevent sticking.

Step 2: Combine Dry Ingredients
In a mixing bowl, whisk together the all-purpose flour, baking soda, salt, and ground cinnamon. This step not only blends your dry ingredients but also aerates them, creating a lighter cake. Set this mixture aside as you move on to the wet ingredients.

Step 3: Cream Butter and Sugar
In another large mixing bowl, beat the softened unsalted butter and granulated sugar together until the mixture is pale and fluffy, about 2 minutes. This process incorporates air into the mixture, ensuring a light texture for your cake. Make sure to use a hand mixer or stand mixer for the best results.

Step 4: Add Eggs and Vanilla
Next, introduce the large eggs into the butter-sugar mixture one at a time. Blend well after each addition to ensure a smooth and cohesive batter. Finally, add the vanilla extract, mixing it in until well combined to enhance the flavor of your Irresistible Fresh Apple Cake.

Step 5: Combine Wet and Dry Mixtures
Gradually add the dry ingredients to the bowl with the wet mixture, mixing just until combined. Be careful not to overmix; this could lead to a dense cake. The batter should be smooth with no dry streaks, ready to embrace the fresh flavors of the apples.

Step 6: Incorporate Apples and Nuts
Gently fold in the grated apples, ensuring they are well-drained to avoid excess moisture. If using chopped walnuts, now's the time to add them as well. This step adds wonderful texture and flavor to your cake, making it truly irresistible.

Step 7: Pour Batter into the Pan
Carefully pour the batter into the prepared greased pan, smoothing the top with a spatula. Make sure the batter is evenly distributed to promote even baking. You’re now just moments away from that delightful apple aroma filling your kitchen!

Step 8: Bake the Cake
Place your cake in the preheated oven and bake for 30-35 minutes. Keep an eye on it; the cake is ready when a toothpick inserted into the center comes out with moist crumbs, signaling that it’s perfectly done without being overbaked.

Step 9: Cool the Cake
Once baked, remove the cake from the oven and let it cool in the pan for about 10 minutes. Afterward, carefully transfer the cake to a wire rack to cool completely. This cooling stage is crucial for achieving the best texture and flavor in your frosting later.

Step 10: Prepare the Frosting
In a mixing bowl, beat together the softened cream cheese and unsalted butter until smooth and creamy. Gradually add the sifted powdered sugar and vanilla extract, adjusting the consistency with a splash of milk if necessary. The frosting should be light and spreadable, ready to adorn your cake.

Step 11: Frost the Cake
Once the cake is completely cooled, generously frost the top with your creamy frosting, ensuring every slice will be deliciously indulgent. The rich cream cheese topping perfectly complements the moist apple cake, making it an unforgettable dessert to share and enjoy.

Expert Tips for Irresistible Fresh Apple Cake

• Room Temperature Ingredients: Ensure your butter and cream cheese are at room temperature for smooth mixing, avoiding lumps in your frosting.

• Drain Grated Apples: To prevent a soggy cake, squeeze the grated apples in a clean towel to remove excess moisture before adding them to the batter.

• Don't Overmix: Mix your batter just until combined to maintain a tender, moist cake. Overmixing can lead to a dense texture.

• Check for Doneness: Use a toothpick to test your cake around the 30-minute mark. It should come out with a few moist crumbs, but not wet batter.

• Cool Before Frosting: Allow the cake to cool completely before frosting to prevent the cream cheese frosting from melting and sliding off.

With these expert tips, your Irresistible Fresh Apple Cake with Cream Cheese Frosting will be a guaranteed showstopper!

Make Ahead Options

These Irresistible Fresh Apple Cake with Cream Cheese Frosting are perfect for busy home cooks looking to save time! You can prepare the cake batter up to 24 hours in advance; simply store it in the refrigerator to keep the flavors fresh. Additionally, you can grate your apples and mix them with a splash of lemon juice to prevent browning, storing them separately until you're ready to bake. The cream cheese frosting can also be made up to 3 days ahead and kept in an airtight container in the fridge for optimal flavor and texture. When ready to serve, simply bake the cake and frost it once cooled; you'll enjoy that homemade goodness with minimal effort!

What to Serve with Irresistible Fresh Apple Cake with Cream Cheese Frosting

There's nothing quite like the warm, comforting aroma of freshly baked apple cake to invite friends and family around your table.

  • Vanilla Ice Cream: A scoop of creamy vanilla ice cream creates a delightful contrast with the warm cake and rich frosting.
  • Hot Spiced Cider: The fragrant spices in hot cider enhance the apple flavors, creating a cozy drink perfect for fall gatherings.
  • Coffee: A rich cup of coffee, whether black or with cream, complements the sweetness of the cake, enhancing your tasting experience.
  • Whipped Cream: Light and fluffy whipped cream adds an airy touch that balances the richness of the cream cheese frosting.
  • Chocolate Drizzle: A drizzle of warm chocolate sauce over individual slices adds an indulgent twist, making every bite a chocolate-apple delight.
  • Caramel Sauce: Drizzling warm caramel adds a decadent sweetness that highlights the cake's spiced apples beautifully.
  • Toast with Jam: Serve warm slices with a dollop of spiced apple jam for a more rustic touch, amplifying the apple flavor.
  • Mixed Fruit Salad: A fresh fruit salad with berries and citrus provides a refreshing contrast that beautifully balances the cake's richness.

Irresistible Fresh Apple Cake Variations

Feel free to get creative and tailor this recipe to your taste buds, elevating your apple cake experience!

  • Caramel Swirl: Drizzle caramel sauce into the cake batter before baking for a decadent flavor boost. The sweet, gooey ribbons of caramel blend beautifully with the apple and cinnamon mix.

  • Nutty Twist: Replace chopped walnuts with toasted pecans for a deliciously different nutty flavor. The rich, buttery crunch of pecans will add another layer to this already indulgent dessert.

  • Citrus Zing: Add a hint of orange zest to the frosting for a refreshing twist. This bright flavor will perfectly balance the sweetness of the cream cheese, making each bite unforgettable.

  • Spice it Up: Include a pinch of cardamom in the batter for an intriguing herbal note. Its warm, exotic flavor pairs splendidly with cinnamon and apples, elevating your cake to a new level of deliciousness.

  • Fruit Fusion: Mix in some diced fresh pineapple or pear along with the apples for a fruity extravaganza. Combining fruits adds complexity and moisture, creating a delightful cake bursting with flavor.

  • Gluten-Free: Swap out all-purpose flour for a 1:1 gluten-free flour blend to accommodate gluten sensitivities. Your cake will still remain moist and flavorful while being accessible to more friends and family.

  • Vegan Option: For a vegan-friendly transformation, use flax eggs and coconut oil in place of dairy ingredients. This twist retains the cake's deliciousness while fulfilling dietary preferences.

  • Chocolate Drizzle: Top your frosted cake with a drizzle of melted dark chocolate for an irresistible finish. The richness of the chocolate pairs perfectly with the tangy cream cheese frosting, creating a beautiful marriage of flavors.

These variations will not only add your personal touch but will surprise and delight your guests, ensuring that this Irresistible Fresh Apple Cake remains a favorite! Looking for more delightful desserts? Check out my Chocolate Poke Cake or a lovely Vegan Cacao Cream.

How to Store and Freeze Irresistible Fresh Apple Cake

Fridge: Store the cake in the refrigerator covered tightly with plastic wrap or in an airtight container for up to 3-4 days. This helps maintain its moistness and flavor.

Freezer: For longer storage, wrap the cooled cake tightly in plastic wrap and then in foil before freezing. It can last for up to 3 months in the freezer.

Reheating: To enjoy your Irresistible Fresh Apple Cake, thaw it overnight in the fridge and let it come to room temperature before serving. Optionally, you can warm individual slices in the microwave for a few seconds.

Frosting Storage: If you have leftover cream cheese frosting, store it in the fridge in an airtight container for up to 1 week. Rewhip before using again for the best texture.

Irresistible Fresh Apple Cake with Cream Cheese Frosting Recipe FAQs

What type of apples should I use for the cake?
Absolutely! For the best flavor and moisture, I recommend using sweeter varieties like Granny Smith or Honeycrisp. Be sure to grate and drain the apples to avoid excess moisture, as it can make the cake soggy.

How should I store the cake after baking?
To keep your cake fresh and delicious, store it in the refrigerator covered tightly with plastic wrap or in an airtight container for up to 3-4 days. This will help preserve its moisture and flavor, making it just as delightful as the day you baked it!

Can I freeze the Irresistible Fresh Apple Cake?
Very! To freeze, allow the cake to cool completely, then tightly wrap the cake in plastic wrap followed by aluminum foil. It can be safely frozen for up to 3 months. When you're ready to enjoy it, simply thaw overnight in the fridge and bring it to room temperature before serving!

What should I do if my cake is too dense?
If you find that your cake turns out denser than expected, it may have been overmixed. Always mix the batter just until the ingredients are combined to maintain a light, fluffy texture. Also, check that your baking soda is fresh, as it’s essential for proper leavening!

Can I make this recipe nut-free?
Absolutely! If you’re looking to make a nut-free version of the Irresistible Fresh Apple Cake, simply omit the chopped walnuts. You can still achieve a delightful texture and flavor without them.

How can I adjust the recipe for allergies or dietary restrictions?
If you need to make adjustments for allergies, consider using almond or coconut milk in place of regular milk in the frosting. Also, replace all-purpose flour with a gluten-free blend if gluten-free is required. Just be sure to check all ingredient labels for any hidden allergens.

Irresistible Fresh Apple Cake with Cream Cheese Frosting

Irresistible Fresh Apple Cake with Cream Cheese Frosting Delight

This Irresistible Fresh Apple Cake with Cream Cheese Frosting is a comforting treat perfect for gatherings and everyday indulgence.
Print Recipe Pin Recipe
Prep Time 15 minutes mins
Cook Time 35 minutes mins
Cooling Time 10 minutes mins
Total Time 1 hour hr
Servings: 9 slices
Course: Dessert
Cuisine: American
Calories: 350
Ingredients Equipment Method Nutrition Notes

Ingredients
  

For the Cake
  • 2 cups all-purpose flour Essential for the cake's structure; makes for a hearty base.
  • 1 teaspoon baking soda A crucial leavening agent; ensures your cake rises perfectly.
  • 1/2 teaspoon salt Elevates the overall flavor; balances the sweetness of the apples.
  • 1 teaspoon ground cinnamon Adds warmth and depth, enhancing the apple flavor beautifully.
  • 1/2 cup unsalted butter Creates a rich, moist crumb; margarine can be used, but the texture may vary.
  • 1 cup granulated sugar Provides sweetness and moisture; crucial for that comforting flavor.
  • 2 large eggs Acts as a binding agent; enriches the cake's texture.
  • 2 teaspoons vanilla extract Boosts flavor; almond extract brings a unique twist if you're feeling adventurous.
  • 2 cups grated apples Packed with moisture and flavor; make sure to drain them to avoid a soggy cake.
  • 1/2 cup chopped walnuts (optional) Adds delightful crunch and nutty flavor; can be replaced with pecans or omitted entirely.
For the Frosting
  • 8 oz cream cheese Ensure it’s softened for easy mixing.
  • 1/2 cup unsalted butter Adds creaminess, enriching the frosting’s texture.
  • 2 cups powdered sugar Sweetens the frosting; sift to avoid any lumps for a smooth finish.
  • 1 teaspoon vanilla extract Enhances the frosting’s flavor wonderfully.

Equipment

  • 9x13-inch baking pan
  • Mixing bowls
  • Electric mixer
  • Spatula

Method
 

Step-by-Step Instructions
  1. Preheat your oven to 350°F (175°C) and grease your 9x13-inch baking pan.
  2. In a mixing bowl, whisk together the all-purpose flour, baking soda, salt, and ground cinnamon.
  3. In another mixing bowl, beat the softened unsalted butter and granulated sugar until fluffy, about 2 minutes.
  4. Add the large eggs into the mixture one at a time, mixing well, and then add the vanilla extract.
  5. Gradually add the dry ingredients to the wet mixture, mixing just until combined.
  6. Gently fold in the grated apples and chopped walnuts, if using.
  7. Pour the batter into the prepared pan, smoothing the top.
  8. Bake for 30-35 minutes or until a toothpick comes out with moist crumbs.
  9. Allow to cool in the pan for 10 minutes, then transfer to a wire rack to cool completely.
  10. Beat together the cream cheese and unsalted butter until smooth, then gradually add powdered sugar and vanilla extract.
  11. Once the cake is cooled, frost generously with the cream cheese frosting.

Nutrition

Serving: 1sliceCalories: 350kcalCarbohydrates: 45gProtein: 3gFat: 17gSaturated Fat: 10gPolyunsaturated Fat: 2gMonounsaturated Fat: 5gCholesterol: 60mgSodium: 180mgPotassium: 90mgFiber: 1gSugar: 28gVitamin A: 500IUVitamin C: 2mgCalcium: 50mgIron: 1mg

Notes

For best results, ensure room temperature ingredients and avoid overmixing.

Tried this recipe?

Let us know how it was!

Irresistible Cinnamon Roll Cookies for Cozy Moments

December 16, 2025 by Grace Snow Leave a Comment

As I pulled a batch of Cinnamon Roll Cookies from the oven, I was instantly whisked away to my favorite bakery, the inviting aroma wrapping around me like a warm hug. These delightful treats blend the comforting flavors of cinnamon and vanilla, creating a sweet escape that feels both nostalgic and new. Perfect for brunch gatherings or cozy evenings at home, these irresistible cookies offer a quick and satisfying indulgence that pleases everyone. With just a handful of ingredients, you’ll have soft, chewy cookies oozing with gooey swirls reminiscent of classic cinnamon rolls. What’s your favorite way to enjoy a sweet treat: alone with a cup of coffee, or shared with loved ones?

Why Are These Cookies So Irresistible?

Warm, Comforting Taste: These Cinnamon Roll Cookies combine the cozy flavors of cinnamon and vanilla, creating a nostalgic feel that wraps around you like a warm hug.

Easy to Make: With simple ingredients and straightforward instructions, you can whip up a batch in no time—perfect for busy days or spontaneous baking cravings.

Gooey Goodness: Each cookie is filled with a delicious swirl of cinnamon and sugar, ensuring a delightful experience with every bite.

Versatile Options: Feel free to customize your cookies! Add chocolate chips or nuts for an extra twist, making them a fun treat for everyone.

Crowd-Pleaser: Whether for brunch or a cozy movie night, these cookies are sure to impress family and friends, filling your home with a delightful aroma they won’t forget.

For more sweet ideas, check out this Pumpkin Cinnamon Roll for a unique spin on classic flavors!

Irresistible Cinnamon Roll Cookie Ingredients

• Get ready to bake the best cookies!

For the Cookies

  • All-Purpose Flour – Offers structure; for a gluten-free option, use a suitable blend.
  • Baking Powder – This leavening agent gives the cookies a delightful rise.
  • Ground Cinnamon – Infuses warm, classic flavors reminiscent of cinnamon rolls; try pumpkin spice for a twist.
  • Salt – Balances and enhances the overall sweetness of the cookies.
  • Unsalted Butter – Brings richness and moisture; make sure it’s softened for easy mixing.
  • Granulated Sugar – Sweetens and adds a touch of crispness to the edges.
  • Brown Sugar – Provides depth and moisture; swap for coconut sugar for a healthier alternative.
  • Large Egg – Binds everything together, contributing to a lovely texture.
  • Vanilla Extract – Elevates the flavor profile; opt for pure vanilla for best results.

For the Filling

  • Brown Sugar – Sweetens the filling with added depth.
  • Ground Cinnamon – Coats the filling, enhancing that classic cinnamon flavor.

Step‑by‑Step Instructions for Irresistible Cinnamon Roll Cookies

Step 1: Preheat the Oven
Begin by preheating your oven to 350°F (175°C). This ensures an even bake for your cookies. While the oven heats up, prepare your baking sheets by lining them with parchment paper to prevent sticking, making cleanup easy and ensuring your Irresistible Cinnamon Roll Cookies come out perfectly golden.

Step 2: Mix Dry Ingredients
In a medium-sized bowl, whisk together the all-purpose flour, baking powder, salt, and ground cinnamon. This step combines the dry ingredients thoroughly, allowing for an even distribution of flavor throughout the dough. Set this mixture aside as we move on to the next step.

Step 3: Cream Butter and Sugars
In a large mixing bowl, beat the softened unsalted butter with granulated sugar and brown sugar until the mixture is light and fluffy, about 3 minutes. You’ll know it’s ready when it appears pale and creamy. This step is key to achieving the tender texture in your Irresistible Cinnamon Roll Cookies.

Step 4: Incorporate Eggs and Vanilla
Add the large egg and vanilla extract to the butter mixture. Mix well after each addition to ensure that everything is smoothly combined. This should take about 1-2 minutes. You want the batter to be well-blended and creamy, setting the base for your delightful cookies.

Step 5: Combine Mixtures
Gradually add the dry ingredient mixture to the wet ingredients, mixing on low speed until just combined. Be careful not to over-mix; the dough should be slightly sticky yet cohesive. This careful folding will keep your Irresistible Cinnamon Roll Cookies delightfully soft and chewy.

Step 6: Prepare the Filling
In a small bowl, mix together brown sugar and ground cinnamon to create the filling for your cookies. Set this aside for later use. The sweet aroma of cinnamon will add an extra layer of flavor that echoes the beloved taste of traditional cinnamon rolls in your cookies.

Step 7: Roll the Dough
Scoop half of the cookie dough onto a sheet of parchment paper. Using your hands or a rolling pin, spread it out into a rectangle, about ¼ inch thick. Sprinkle the cinnamon-sugar filling evenly over the dough, making sure to cover every inch. Then, carefully roll the dough tightly like a burrito, forming a log.

Step 8: Slice and Bake
Using a sharp knife, slice the rolled dough into rounds, about 1 inch thick. Place the slices on your prepared baking sheet, leaving space between each cookie. Bake in the preheated oven for 10-12 minutes, or until the edges are golden brown and the cookies are set but still soft in the center, ensuring a deliciously gooey swirl inside.

Irresistible Cinnamon Roll Cookies Variations

Feel free to explore different twists on your Cinnamon Roll Cookies with these fun and flavorful ideas!

  • Nuts: Mix in chopped nuts like pecans or walnuts for added crunch and rich flavors. The nutty texture complements the gooey centers beautifully.

  • Chocolate Chips: Stir in chocolate chips for a sweet surprise! They melt slightly during baking, creating pockets of chocolatey goodness that you won't be able to resist.

  • Fruit Twist: Incorporate dried raisins or chopped fruits such as apples for a fresh taste. Their natural sugars enhance the overall sweetness and add delightful bursts of flavor.

  • Flavored Extracts: Experiment with flavored extracts like almond or maple to give your cookies a unique twist. This simple swap elevates the flavor profile, making them even more special.

  • Pumpkin Spice: If you're craving an autumnal touch, substitute ground cinnamon with pumpkin spice. It’ll fill your kitchen with comforting, seasonal aromas!

For those looking to try even more creative combinations, check out these delicious Pumpkin Cinnamon Roll variations for ideas on how to mix and match flavors.

  • Frosted Delight: Don’t stop at baking! Top your cookies with a simple glaze made from powdered sugar and milk. This gives them a sweeter finish that perfectly complements the cinnamon swirl.

  • Savory Twist: Add a pinch of sea salt to the dough for a delightful sweet-salty balance. This tiny change can elevate the overall flavor, making every bite extraordinary!

With these variations, your Cinnamon Roll Cookies will become a delightful, personalized treat that everyone will adore!

Make Ahead Options

These Irresistible Cinnamon Roll Cookies are perfect for meal prep and can be made ahead to save you time on busy days! You can prepare the dough up to 24 hours in advance by mixing it, rolling it into a log, and wrapping it tightly in plastic wrap before refrigerating. This not only enhances the flavors but also makes for easy slicing right before baking. If you'd like to prep even further, shape and slice the cookies, then freeze the rounds in a single layer for up to 3 months. When you're ready to bake, simply place the frozen slices directly on the baking sheet and add an extra minute to the baking time. You'll have warm, gooey cookies just as delicious as if freshly made!

Expert Tips for Irresistible Cinnamon Roll Cookies

  • Don't Over-Mix: Ensure the dough is mixed just until combined; over-mixing will lead to tough cookies instead of soft, chewy ones.

  • Chill If Sticky: If your dough feels too sticky to handle, refrigerate it for about 30 minutes before rolling to ease the process.

  • Spacing Matters: Place cookies with adequate space on the baking sheet to allow for spreading during baking, promoting an even texture.

  • Golden Edges: Keep a close eye on baking time; remove the cookies once the edges are golden, as they will continue to firm up as they cool.

  • Add a Glaze: For an extra touch of indulgence, drizzle a simple glaze made with powdered sugar and milk over the cooled cookies, enhancing their sweetness.

These tips will ensure your Irresistible Cinnamon Roll Cookies turn out perfectly every time!

Storage Tips for Irresistible Cinnamon Roll Cookies

Room Temperature: Store in an airtight container for up to 5 days. Keep the container away from direct sunlight to maintain their soft texture.

Freezer: Freeze cookies individually wrapped in plastic wrap and then placed in a freezer bag for up to 3 months. This keeps them fresh and ready for treats anytime!

Thawing: To enjoy your frozen Irresistible Cinnamon Roll Cookies, simply thaw at room temperature for about 30 minutes before serving.

Reheating: Warm in the microwave for 10-15 seconds or in a preheated oven at 350°F (175°C) for a few minutes to restore the gooey goodness.

What to Serve with Irresistible Cinnamon Roll Cookies

Indulge in the warmth of a cozy gathering by pairing these delightful cookies with tantalizing sides that elevate your treat.

  • Fresh Fruit Medley: A burst of berries or sliced apples adds a refreshing contrast to the sweet, gooey cookies. Their natural tartness balances the indulgence perfectly, making every bite brighter.

  • Creamy Glaze: Drizzle a simple sugar glaze over the cookies for an extra layer of sweetness that enhances their cinnamon flavor. It's the ultimate indulgence that feels like a warming hug.

  • Rich Coffee: Brew a cup of your favorite coffee to amplify the cozy vibes. The robust flavor complements the cinnamon beautifully, ensuring a delightful pairing for a mid-afternoon pick-me-up.

  • Sparkling Cider: For a non-caffeinated option, serve these cookies with sparkling apple cider. The effervescence adds a delightful texture while the apple notes harmonize with the cinnamon notes, making for a festive treat.

  • Whipped Cream: Serve alongside a dollop of lightly sweetened whipped cream. The airy texture and subtle sweetness create a heavenly contrast to the chewy cookies, perfect for a simple dessert spread.

  • Nutty Ice Cream: A scoop of vanilla ice cream with a sprinkle of crushed nuts can be a fantastic addition. The cool creaminess contrasts, enriching the cookie's warmth for a comforting end to any meal.

  • Chocolate Milk: Pairing these cookies with chocolate milk is a nostalgic throwback that adds a touch of childhood whimsy to the experience. The richness of the chocolate perfectly complements the gooey cinnamon swirls.

These pairings will enhance your Irresistible Cinnamon Roll Cookies, creating an unforgettable experience for those you share them with!

Irresistible Cinnamon Roll Cookies Recipe FAQs

What type of flour should I use for the cookies?
I recommend using all-purpose flour as it provides the best structure for the cookies. If you're looking for a gluten-free version, feel free to substitute with a suitable gluten-free flour blend. Just keep in mind that each blend may react differently, so make sure to follow any specific instructions for the gluten-free flour you choose.

How should I store the cookies for freshness?
Store your Irresistible Cinnamon Roll Cookies in an airtight container at room temperature for up to 5 days. Make sure they are completely cooled before sealing to avoid any excess moisture. For the best experience, keep them in a cool, dry place away from direct sunlight to maintain that delightful softness.

Can I freeze the cookies for later?
Absolutely! To freeze your cookies, wrap each one individually in plastic wrap and then place them in a freezer-safe bag. These can last for up to 3 months in the freezer. When you're ready to enjoy one, simply thaw it at room temperature for about 30 minutes, and they'll be just as delicious as when they were freshly baked!

What do I do if my cookie dough is too sticky?
If your dough feels a bit too sticky to handle, don't fret! Just pop it into the refrigerator for about 30 minutes. This chilling step will make it easier to roll out and help the dough hold its shape when baking, ensuring your Irresistible Cinnamon Roll Cookies turn out perfectly tender and gooey.

Are there any allergens I should be aware of?
Yes, these cookies contain common allergens like gluten (from flour) and dairy (from butter). If you’re baking for someone with allergies, you can consider using dairy alternatives like coconut oil or a dairy-free butter substitute. Keep in mind that the texture and flavor may vary slightly, but it’s worth experimenting to create a safe treat for everyone!

Can I add nuts or chocolate chips to the recipe?
The more the merrier! Feel free to customize your cookies by adding chopped nuts like pecans or walnuts for a delightful crunch. Chocolate chips are also a fantastic addition if you're in the mood for chocolatey goodness. Just mix them into the dough during the final steps before rolling for an extra sweet twist on your Irresistible Cinnamon Roll Cookies!

Irresistible Cinnamon Roll Cookies

Irresistible Cinnamon Roll Cookies for Cozy Moments

Explore these Irresistible Cinnamon Roll Cookies, a blend of cinnamon and vanilla flavors that create a nostalgic experience perfect for cozy moments.
Print Recipe Pin Recipe
Prep Time 15 minutes mins
Cook Time 12 minutes mins
Cooling Time 30 minutes mins
Total Time 57 minutes mins
Servings: 12 cookies
Course: Dessert
Cuisine: American
Calories: 150
Ingredients Equipment Method Nutrition Notes

Ingredients
  

For the Cookies
  • 2 cups All-Purpose Flour For a gluten-free option, use a suitable blend.
  • 2 teaspoons Baking Powder
  • 1 teaspoon Ground Cinnamon Try pumpkin spice for a twist.
  • 1/2 teaspoon Salt
  • 1/2 cup Unsalted Butter Make sure it’s softened for easy mixing.
  • 1/2 cup Granulated Sugar
  • 1/2 cup Brown Sugar Swap for coconut sugar for a healthier alternative.
  • 1 large Egg
  • 1 teaspoon Vanilla Extract Opt for pure vanilla for best results.
For the Filling
  • 1/4 cup Brown Sugar Sweetens the filling with added depth.
  • 1 tablespoon Ground Cinnamon Coats the filling for enhancing flavor.

Equipment

  • Mixing Bowl
  • Whisk
  • Baking Sheet
  • Parchment Paper
  • Sharp Knife
  • Rolling Pin

Method
 

Step-by-Step Instructions
  1. Preheat your oven to 350°F (175°C) and prepare your baking sheets with parchment paper.
  2. In a medium bowl, whisk together flour, baking powder, salt, and ground cinnamon.
  3. Beat softened butter with granulated sugar and brown sugar until light and fluffy, about 3 minutes.
  4. Add the egg and vanilla extract to the butter mixture, mixing until smooth and creamy.
  5. Gradually mix the dry ingredients into the wet ingredients until just combined, forming a slightly sticky dough.
  6. In a small bowl, mix brown sugar and ground cinnamon to create the filling.
  7. Scoop half of the dough on parchment, spread into a rectangle, and sprinkle with the cinnamon-sugar filling before rolling tightly.
  8. Slice the rolled dough into 1-inch rounds and place on a baking sheet, leaving space between each cookie.
  9. Bake for 10-12 minutes or until edges are golden brown; cookies will be soft in the center.

Nutrition

Serving: 1cookieCalories: 150kcalCarbohydrates: 20gProtein: 1gFat: 8gSaturated Fat: 5gPolyunsaturated Fat: 0.5gMonounsaturated Fat: 2.5gCholesterol: 30mgSodium: 100mgPotassium: 50mgFiber: 0.5gSugar: 10gVitamin A: 300IUCalcium: 20mgIron: 0.5mg

Notes

For best results, do not over-mix the dough. Refrigerate if too sticky before rolling. Add glaze for an extra touch of sweetness.

Tried this recipe?

Let us know how it was!

Decadent Cherry Amaretto Tiramisu: A Twist on Tradition

December 16, 2025 by Grace Snow Leave a Comment

As I strolled through the local market, my senses were swept away by the vibrant colors of fresh cherries basking in the sun. It struck me that these juicy gems could elevate a classic dessert and give it a delightful twist. Enter the Cherry Amaretto Tiramisu—this recipe transforms creamy mascarpone and sweet cherries with a hint of amaretto into an exquisite indulgence. Not only is it an unforgettable showstopper for gatherings, but it's also surprisingly easy to whip up, ensuring that you can impress guests without spending hours in the kitchen. Imagine layering ladyfingers with this luscious cherry-infused cream, creating a dreamy dessert that dances on the palate. Are you ready to bring some Italian flair to your next celebration?

Why is Cherry Amaretto Tiramisu Irresistible?

Decadent Layers: This dessert features rich layers of creamy mascarpone and juicy cherries, creating a balance of flavors that will have everyone coming back for seconds.

Unique Twist: The addition of amaretto elevates the classic tiramisu, introducing a delightful nutty sweetness that perfectly complements the tartness of the cherries.

Effortlessly Elegant: Impress your guests with this sophisticated treat that looks as stunning as it tastes, making it a centerpiece worthy of any occasion.

Make-Ahead Magic: Prepare it in advance, allowing the flavors to meld beautifully in the fridge, so you can focus on entertaining rather than last-minute preparations.

Versatile Options: If cherries aren't your thing, consider experimenting with mixed berries for a fresh twist or whip up an indulgent version using Cherry Clafoutis French as inspiration.

Cherry Amaretto Tiramisu Ingredients

For the Cream Mixture

  • Mascarpone Cheese – Creamy base for the dessert; layering it gives richness; cream cheese can be a tangy substitute.
  • Heavy Cream – Adds lightness and stability to the mascarpone mixture; whipping cream can be used if necessary.
  • Amaretto Liqueur – Provides sweetness and a nutty flavor; almond extract can be used for a non-alcoholic version.
  • Cherry Juice – Enhances the cherry flavor and adds moisture; fresh or bottled cherry juice works well.
  • Granulated Sugar – Sweetens the mascarpone mixture; adjust based on cherry sweetness.
  • Cherry Preserves – Provides a concentrated cherry flavor; can use other fruit preserves if desired.
  • Vanilla Extract – Enhances the overall flavor profile; optional, but recommended for depth.

For Assembling

  • Fresh Cherries – Adds texture and sweetness; frozen cherries can be used if thawed and drained properly.
  • Ladyfingers – Provide structure and are soaked in cherry-amaretto mixture; sponge cake can be a substitute if needed.

For Topping

  • Cocoa Powder – For dusting and adding a bittersweet finish; unsweetened cocoa is preferred for balanced flavor.
  • Dark Chocolate – Adds a luxurious garnish; milk chocolate can be used for a sweeter touch.

Step‑by‑Step Instructions for Cherry Amaretto Tiramisu

Step 1: Mix Cream
In a large mixing bowl, combine mascarpone cheese and heavy cream. Using an electric mixer, beat the mixture on medium speed for 2-3 minutes until it's fluffy and holds soft peaks. This creamy base is vital for your Cherry Amaretto Tiramisu, setting the stage for rich layers of flavor.

Step 2: Add Flavors
Next, incorporate the amaretto liqueur, cherry juice, and optional vanilla extract into the mascarpone mixture. Beat for an additional 1-2 minutes until everything is evenly blended and smooth. The fragrant aroma from the amaretto enriches the flavor profile, making your dessert truly inviting.

Step 3: Combine Sweeteners
In a separate bowl, blend granulated sugar with cherry preserves to create a sweet paste. Gradually add this mixture to the mascarpone cream, folding it in gently with a spatula. This step ensures that the sweetness is evenly distributed, enhancing the overall taste of your Cherry Amaretto Tiramisu.

Step 4: Fold in Cherries
Gently fold in the chopped fresh cherries into the mascarpone mixture. Be careful not to overmix; you want those delightful bits of cherry to remain intact while adding a burst of flavor. This step enriches the creamy layers of your dessert, making each bite juicy and indulgent.

Step 5: Prepare Soaking Mixture
In a shallow dish, combine amaretto liqueur and cherry juice, mixing well. This soaking mixture must be readily accessible, as you'll want to act quickly to preserve the structure of the ladyfingers. The combination will add depth and flavor to the layers of your Cherry Amaretto Tiramisu.

Step 6: Dip Ladyfingers
Quickly dip each ladyfinger into the soaking liquid on both sides, ensuring they are moist but not overly soggy. Layer these dipped ladyfingers neatly in the bottom of your chosen baking dish. This will create a solid base, soaking in the cherry and amaretto flavors while maintaining a delightful crunch.

Step 7: Layer Ingredients
Spread half of the mascarpone cream mixture over the ladyfingers, smoothing it evenly. Then, layer another set of dipped ladyfingers on top, followed by the remaining mascarpone cream. This structured layering is key to achieving that classic tiramisu look and enticing flavors in your Cherry Amaretto Tiramisu.

Step 8: Chill
Once assembled, cover the dish tightly with plastic wrap and refrigerate for at least 4 hours, though overnight is ideal. This chilling period allows the layers to meld perfectly, enhancing the flavors of your Cherry Amaretto Tiramisu and resulting in a decadent dessert.

Step 9: Finish and Serve
Before serving, dust the top with unsweetened cocoa powder using a fine mesh strainer for an elegant finish. Then, sprinkle dark chocolate shavings over the top for an extra touch of luxury. Slice, serve chilled, and watch as everyone enjoys the comforting layers of your Cherry Amaretto Tiramisu.

How to Store and Freeze Cherry Amaretto Tiramisu

Fridge: Store your Cherry Amaretto Tiramisu tightly covered in the fridge for up to 3 days for optimal freshness and flavor.

Freezer: If you have leftovers, you can freeze them for up to a month. Ensure the dessert is wrapped tightly to prevent freezer burn, maintaining its creamy texture.

Reheating: To enjoy the tiramisu, simply thaw in the refrigerator overnight before serving. Avoid microwaving, as it can affect the texture.

Individual Servings: Consider portioning individual servings into airtight containers for easy access—perfect for a quick, indulgent treat anytime!

Cherry Amaretto Tiramisu: Endless Possibilities

Feel free to adapt this delightful recipe to fit your taste preferences and dietary needs—let your creativity flow!

  • Dairy-Free: Substitute mascarpone and heavy cream with coconut cream for a rich, creamy base without dairy.
  • Mixed Berry Surprise: Swap fresh cherries with mixed berries for a fruity explosion and a colorful dessert.
  • Nutty Twist: Try using hazelnut liqueur instead of amaretto for a wonderful nutty flavor that pairs beautifully with cherries.
  • Vegan Version: Use vegan ladyfingers and a combination of almond cream or cashew cream for a plant-based take on this dessert.
  • Extra Decadent: Layer in chunks of chocolate or a drizzle of chocolate ganache between the cream and ladyfingers for an indulgent twist.
  • Citrus Zest: Add a hint of orange or lemon zest to the mascarpone mixture for a refreshing zing that brightens the overall flavor.
  • Spicy Kick: Integrate a touch of cinnamon or ginger into the mascarpone mixture for a warm, cozy feel—perfect during the colder months.
  • Fruity Elegance: Consider adding a swirl of Cherry Clafoutis French flavors with a layer of clafoutis batter to elevate the texture and taste.

Explore these variations and make this Cherry Amaretto Tiramisu your own!

Expert Tips for Cherry Amaretto Tiramisu

  • Perfect Soaking: Don’t oversoak the ladyfingers; a quick dip is sufficient to keep them from becoming mushy while still absorbing the cherry-amaretto flavor.

  • Flavor Infusion: For the best taste, prepare the Cherry Amaretto Tiramisu a day ahead. Chilling overnight allows flavors to meld beautifully, enhancing the overall indulgence.

  • Layering Technique: When layering the mascarpone mixture and ladyfingers, spread evenly to create distinct layers, ensuring each bite offers the perfect combination of creamy and fruity.

  • Optional Garnishes: Elevate your presentation by adding fresh cherry halves or mint leaves as garnish for a pop of color and freshness alongside the cocoa powder.

  • Storage Tips: Keep leftovers tightly covered in the fridge for up to three days. This dessert tastes even better after resting, as the flavors continue to develop.

  • Confident Experimentation: Feel free to swap in your favorite liqueur or fruit for a unique twist on this Cherry Amaretto Tiramisu recipe—your creativity is welcome!

What to Serve with Cherry Amaretto Tiramisu

Indulge in a thoughtfully curated meal that complements this luscious cherry dessert, ensuring an unforgettable experience.

  • Rich Espresso: A robust shot of espresso cuts through the creaminess of the tiramisu while enhancing its flavors, creating a perfect, balanced pairing.

  • Chocolate-Dipped Strawberries: The sweetness of fresh strawberries complements the cherry notes and adds a delightful textural contrast, making for an elegant touch to your dessert spread.

  • Creamy Vanilla Gelato: The smoothness of gelato echoes the creamy mascarpone, providing a cool and refreshing contrast that enhances the overall indulgence.

  • Sparkling Wine: A light sparkling wine, like Prosecco, refreshes the palate and adds a celebratory note, making your dessert experience more festive and enjoyable.

  • Almond Biscotti: Crunchy almond biscotti offers a delightful texture and pairs beautifully with the nutty amaretto flavor, making it a lovely accompaniment for dipping.

  • Cherry Compote: A side of cherry compote amplifies the cherry flavor in the tiramisu, adding a burst of bright, sweet-tart notes with each bite, enhancing the overall fruitiness.

  • Mixed Green Salad: A refreshing salad with tart vinaigrette balances the richness of the tiramisu, giving a contrast that clears the palate for dessert.

  • Dark Chocolate Mousse: For the chocolate lovers, rich dark chocolate mousse brings a velvety finish, perfect for a double dessert finale that elevates your dining experience.

Make Ahead Options

These Cherry Amaretto Tiramisu are perfect for busy home cooks wanting to save time! You can prepare the mascarpone mixture and even soak the ladyfingers up to 24 hours in advance. Simply mix the mascarpone, heavy cream, and flavors, then store it in the refrigerator. For the ladyfingers, dip them in the amaretto-cherry mixture and layer them for easier assembly later. Make sure to cover it tightly to maintain freshness and flavor. When it’s time to serve, simply layer the prepped mascarpone over the dipped ladyfingers, chill for a few more hours if possible, and finish with cocoa powder and dark chocolate shavings for that delightful presentation!

Cherry Amaretto Tiramisu Recipe FAQs

How do I select ripe cherries for this dessert?
Absolutely! Look for cherries that are firm and plump with a deep, vibrant color. The ideal cherries should have a glossy surface without any dark spots or wrinkles. If using frozen cherries, ensure they are well-thawed and drained to prevent excess liquid in your tiramisu.

How should I store leftover Cherry Amaretto Tiramisu?
Very! Store your Cherry Amaretto Tiramisu tightly covered in the refrigerator for up to 3 days. This dessert actually improves in flavor as it rests, allowing the creamy and fruity components to meld beautifully!

Can I freeze Cherry Amaretto Tiramisu?
Absolutely! You can freeze leftovers for up to a month. To do this, wrap the dessert tightly in plastic wrap and then in aluminum foil for added protection. When you're ready to enjoy it, thaw it overnight in the refrigerator. Avoid reheating in the microwave, as it might compromise the dessert's creamy texture.

What if my ladyfingers are getting too soggy?
No need to worry! If your ladyfingers are becoming overly soaked, try a quick dip—just a second on each side in the amaretto and cherry juice mixture. This will ensure they maintain structure while absorbing enough flavor. If you have extra ladyfingers, it might also help to layer them directly in the bottom without soaking entirely for that perfect balance!

Can I make Cherry Amaretto Tiramisu without alcohol?
Very easily! For a non-alcoholic version, simply substitute the amaretto liqueur with almond extract for a similar nutty flavor. You may also use a mix of cherry juice and a splash of vanilla extract for an enjoyable twist without the alcohol.

Can pets eat cherry desserts?
Not at all! Cherry desserts can pose risks for pets, especially due to the sugar and potential toxic components in cherries. It’s best to keep this delightful Cherry Amaretto Tiramisu strictly for human enjoyment and find pet-friendly treats for your furry friends!

Cherry Amaretto Tiramisu

Decadent Cherry Amaretto Tiramisu: A Twist on Tradition

Cherry Amaretto Tiramisu offers a delightful twist on a classic dessert, featuring creamy mascarpone, fresh cherries, and the nutty sweetness of amaretto.
Print Recipe Pin Recipe
Prep Time 15 minutes mins
Chilling Time 4 hours hrs
Total Time 4 hours hrs 15 minutes mins
Servings: 8 slices
Course: Dessert
Cuisine: Italian
Calories: 300
Ingredients Equipment Method Nutrition Notes

Ingredients
  

For the Cream Mixture
  • 16 oz Mascarpone Cheese Creamy base for the dessert
  • 1 cup Heavy Cream Adds lightness and stability
  • 1/2 cup Amaretto Liqueur Provides sweetness and a nutty flavor
  • 1/2 cup Cherry Juice Enhances cherry flavor
  • 1/2 cup Granulated Sugar Sweetens the mascarpone mixture
  • 1/2 cup Cherry Preserves Provides concentrated cherry flavor
  • 1 tsp Vanilla Extract Enhances flavor, optional
For Assembling
  • 2 cups Fresh Cherries Adds texture and sweetness
  • 24 pieces Ladyfingers Provide structure, soaked in mixture
For Topping
  • 2 tbsp Cocoa Powder For dusting
  • 1 oz Dark Chocolate For garnish

Equipment

  • Mixing Bowl
  • Electric mixer
  • Spatula
  • Shallow dish
  • Baking Dish
  • fine mesh strainer

Method
 

Mix Cream
  1. In a large mixing bowl, combine mascarpone cheese and heavy cream. Using an electric mixer, beat the mixture on medium speed for 2-3 minutes until it's fluffy and holds soft peaks.
Add Flavors
  1. Incorporate the amaretto liqueur, cherry juice, and optional vanilla extract into the mascarpone mixture. Beat for an additional 1-2 minutes until everything is evenly blended and smooth.
Combine Sweeteners
  1. In a separate bowl, blend granulated sugar with cherry preserves to create a sweet paste. Gradually add this mixture to the mascarpone cream, folding it in gently with a spatula.
Fold in Cherries
  1. Gently fold in the chopped fresh cherries into the mascarpone mixture.
Prepare Soaking Mixture
  1. In a shallow dish, combine amaretto liqueur and cherry juice, mixing well.
Dip Ladyfingers
  1. Quickly dip each ladyfinger into the soaking liquid on both sides, ensuring they are moist but not overly soggy.
Layer Ingredients
  1. Spread half of the mascarpone cream mixture over the ladyfingers, then layer another set of dipped ladyfingers on top, followed by the remaining mascarpone cream.
Chill
  1. Cover the dish tightly with plastic wrap and refrigerate for at least 4 hours.
Finish and Serve
  1. Dust the top with unsweetened cocoa powder and sprinkle dark chocolate shavings over the top.

Nutrition

Serving: 1sliceCalories: 300kcalCarbohydrates: 36gProtein: 4gFat: 16gSaturated Fat: 9gPolyunsaturated Fat: 1gMonounsaturated Fat: 5gCholesterol: 50mgSodium: 120mgPotassium: 150mgFiber: 1gSugar: 22gVitamin A: 500IUVitamin C: 2mgCalcium: 80mgIron: 1mg

Notes

Store leftovers tightly covered in the fridge for up to three days. This dessert tastes better after resting.

Tried this recipe?

Let us know how it was!

Irresistible Butterfinger Balls for Quick No-Bake Bliss

December 16, 2025 by Grace Snow Leave a Comment

The other day, while chatting with friends over coffee, the topic of favorite childhood treats sparked bursts of nostalgia. One name surfaced repeatedly: Butterfinger. I can’t help but smile at the memory of that perfect blend of crunchy candy and creamy peanut butter—such a timeless delight! And that’s exactly what inspired these no-bake Butterfinger Balls! They come together in a snap and make a fabulous indulgence for any gathering, or even just a sweet moment to lighten your day. With minimal effort required, these little bites of joy offer you the satisfaction of being a gourmet chef without the fuss. Plus, they’re a crowd-pleaser that you can customize with your favorite toppings. Curious about how to whip up this delicious treat? Let’s dive into the recipe!

Why Are Butterfinger Balls So Delightful?

Simplicity in preparation: These no-bake Butterfinger Balls take minimal effort, allowing you to enjoy homemade treats without breaking a sweat.

Irresistible flavor combination: The rich peanut butter perfectly melds with crunchy Butterfinger bars, creating a delightful taste that appeals to all ages.

Customizable toppings: Offer your guests an array of garnishes, from festive sprinkles to a sprinkle of coarse sea salt, ensuring they cater to every sweet tooth.

Time-efficient treat: Whip up a batch in under an hour, making them the perfect last-minute dessert for parties or cozy gatherings.

Crowd-pleaser: With their delicious flavor and unique texture, these treats are guaranteed to impress friends and family alike. For more creative dessert ideas, check out our no-bake cookie recipes.

Butterfinger Balls Ingredients

For the Dough

  • Softened Butter – Provides richness and helps bind the ingredients; use conventional butter for best results.
  • Vanilla Extract – Adds a warm, aromatic flavor; no substitutions needed.
  • Peanut Butter – Base flavor and texture; avoid natural varieties as they may be too oily.
  • Powdered Sugar – Sweetener that offers a smooth texture; vital for recipe structure.
  • Graham Cracker Crumbs – Provide texture and help bind; can be substituted with plain cookies or gluten-free options.
  • Crushed Butterfinger Bars – Adds crunch and distinct flavor; perfect for those craving Butterfinger Balls.

For the Coating

  • Chocolate Bark or Chocolate Chips – A glossy coating that adds richness; use chocolate bark for a smoother finish, or melting wafers.

Optional Garnishes

  • Additional Crushed Butterfinger – For an even crunchier bite on the outside.
  • Festive Sprinkles – Add a pop of color and fun for any occasion.
  • Coarse Sea Salt – Enhances sweetness while providing a delicious contrast.

These Butterfinger Balls are not just an easy, no-bake dessert; they’re customizable treats that bring joy to your kitchen!

Step‑by‑Step Instructions for Butterfinger Balls

Step 1: Prepare the Dough
In a mixing bowl, beat 1 cup of softened butter and 1 cup of peanut butter together until the mixture is creamy and well combined, about 2-3 minutes. This base will ensure your Butterfinger Balls have a rich flavor and smooth texture. Scrape down the sides of the bowl to capture any sticking mix.

Step 2: Incorporate Vanilla
Add 1 teaspoon of vanilla extract to the peanut butter and butter mixture. Blend on medium speed until fully incorporated, which should take about 1 minute. The vanilla adds an inviting aroma, enhancing the overall flavor of your Butterfinger Balls.

Step 3: Add Powdered Sugar
Gradually sift in 2 cups of powdered sugar while mixing at low speed to avoid clouds of sugar dust. Continue mixing until combined, about 2-3 minutes. The mixture should become thicker, making it easier to shape the Butterfinger Balls later.

Step 4: Mix in Crunch
Fold in 1 cup of graham cracker crumbs and 1 cup of crushed Butterfinger bars using a spatula. This adds texture and the signature Butterfinger flavor that makes these balls so special. Ensure everything is mixed well, observing the colorful flecks of candy.

Step 5: Shape Balls
Using your hands, roll approximately 1 tablespoon of the dough into balls, placing them on a parchment-lined baking sheet. Make sure the balls are uniform in size for even coating and a consistent treat experience, leaving some space between each ball.

Step 6: Chill
Place the baking sheet in the freezer for 30 minutes or until the balls are firm. This step is crucial as it helps the Butterfinger Balls hold their shape when coated in chocolate, leading to a perfect bite every time.

Step 7: Melt Chocolate
In a microwave-safe bowl, heat 1 to 1½ cups of chocolate bark in 30-second intervals, stirring in between until smooth. This should take around 1-2 minutes total. Be careful not to overheat; your chocolate should be glossy and ready for the ultimate coating.

Step 8: Coat Balls
Once your Butterfinger Balls are firm, dip each one into the melted chocolate, ensuring they are completely covered. Return the coated balls to the parchment-lined baking sheet. The chocolate should evenly coat each ball, giving that rich shell you'll love.

Step 9: Decorate
If desired, sprinkle additional crushed Butterfinger, festive sprinkles, or coarse sea salt on top of each ball before the chocolate sets. Let your creativity shine with the decorations, adding that personal touch to your delightful Butterfinger Balls.

Step 10: Let Set Completely
Allow the chocolate coating to set fully at room temperature or in the refrigerator for about 10-15 minutes. The balls should be firm to the touch, ensuring they are ready for enjoyment or gifting. Once set, these treats are ready to indulge.

How to Store and Freeze Butterfinger Balls

Room Temperature: Store Butterfinger Balls in a cool, dry place for up to 1 week. Keep them in an airtight container to maintain freshness and prevent sticking.

Fridge: For longer shelf life, refrigerate your Butterfinger Balls in an airtight container. They’ll stay delicious for 3-4 weeks, perfect for enjoying at your leisure.

Freezer: To freeze, place the Butterfinger Balls in a single layer on a parchment-lined baking sheet until firm, then transfer them to an airtight container. They can last in the freezer for up to 5-6 months without losing flavor!

Reheating: Enjoy straight from the fridge or freezer. For a softer bite, let them sit at room temperature for 10-15 minutes before indulging in these delightful treats!

Expert Tips for Butterfinger Balls

Perfect Consistency: Use softened butter and peanut butter; avoid natural varieties for a smoother mix. This ensures your Butterfinger Balls won't be overly oily.

Gentle Mixing: When adding powdered sugar, mix on low speed to prevent a sugar cloud. A well-blended mixture aids in easy shaping!

Chocolate Care: Be cautious when melting chocolate; do it in short bursts and stir well to achieve a smooth coating. Avoid overheating to keep the texture luscious.

Uniform Size: Roll dough into equal-sized balls for consistent coating and even bites. This little detail elevates the presentation and experience.

Storage Tips: Store in an airtight container in the refrigerator. Improper storage can alter the texture of your Butterfinger Balls, so keep them fresh!

Butterfinger Balls Variations & Substitutions

Feel free to let your creativity shine as you personalize these treats with tantalizing twists and swaps!

  • Dairy-Free: Use dairy-free margarine and vegan chocolate to create a deliciously plant-based version without compromising flavor.
  • Gluten-Free: Swap out graham cracker crumbs for gluten-free cookie crumbs to ensure everyone can enjoy these delightful bites!
  • Nut-Free: Replace peanut butter with sun butter or another nut-free alternative, making these tasty treats accessible to those with nut allergies.
  • Flavor Boost: Add a pinch of sea salt to your chocolate coating for a mouthwatering sweet-and-salty contrast that elevates each bite.
  • Chocolate Lovers: For an extra chocolate kick, mix mini chocolate chips into the dough for added texture and richness.
  • Coconut Twist: Fold in shredded coconut for a tropical flair that complements the crunchy Butterfinger—this combination is sure to be a hit!
  • Mini Treats: Roll smaller balls for bite-sized delights that are perfect for sharing at parties. These little bites make indulging easier!
  • Spiced Up: Add a dash of cinnamon or even a hint of cayenne pepper in the dough to give your Butterfinger Balls a warm and spicy twist.

Exploring different variations is part of the fun! For more ideas on how to play with flavors, check out our collection of no-bake desserts that can inspire your next culinary adventure.

What to Serve with No-Bake Butterfinger Balls?

These delicious treats are perfect for complementing your gatherings and sweet moments, adding a touch of festive joy to any occasion!

  • Coffee: A warm cup of coffee enhances the sweetness of the Butterfinger Balls, making it an ideal pairing for desserts after dinner. The rich flavors create a delightful balance.

  • Vanilla Ice Cream: Serve these balls alongside a scoop of creamy vanilla ice cream for a decadent dessert experience. The cold, smooth ice cream contrasts beautifully with the rich chocolate coating.

  • Fresh Berries: Juicy strawberries or raspberries add a refreshing tang that cuts through the sweetness, creating a delightful flavor explosion. Their vibrant colors also make for a stunning presentation.

  • Salted Caramel Sauce: Drizzle a bit of salted caramel over the Butterfinger Balls before serving. The combination of salty and sweet will have everyone coming back for more!

  • Milk: A cold glass of milk is a classic pairing that never disappoints. The creamy texture perfectly complements the richness of the Butterfinger Balls and brings a sense of nostalgia.

  • Nutty Trail Mix: Present these desserts alongside nutty trail mix for a crunchy contrast in texture. The mix of flavors offers a satisfying balance to each sweet bite.

  • Sparkling Water: For a lighter alternative, serve with sparkling water. Its crispness refreshes your palate between bites and adds a festive touch to your dessert spread.

  • Chocolate Drizzled Popcorn: For a fun twist, pair with chocolate-drizzled popcorn. The sweet and salty mix enhances the candy-like experience of Butterfinger Balls, making your dessert table even more enticing.

Make Ahead Options

These Butterfinger Balls are perfect for meal prep enthusiasts looking to save time! You can prepare the dough up to 24 hours in advance and refrigerate it in an airtight container to maintain freshness. Simply roll the dough into balls, place them on a parchment-lined baking sheet, and freeze for about 30 minutes until firm. After that, you can store the frozen balls for up to 3 months. When ready to enjoy, simply coat them in melted chocolate, sprinkle with your choice of garnishes, and let the chocolate set. They’ll taste just as delicious as if you made them fresh, giving you gourmet treats with minimal effort!

Butterfinger Balls Recipe FAQs

How do I select ripe and flavorful ingredients?
Absolutely! For the smoothest texture, choose softened butter that’s at room temperature—opt for conventional butter for the best results. When it comes to peanut butter, I recommend brands like Jif or Skippy, as natural varieties may be too oily. Also, the crushed Butterfinger bars should not have dark spots; those may indicate they've passed their prime!

How do I store Butterfinger Balls and for how long?
Very! You can store these delicious Butterfinger Balls in an airtight container at room temperature for about 1 week. However, for optimal freshness, refrigerate them where they’ll stay perfect for 3-4 weeks. I often keep mine in the fridge so they last longer—plus, they’re nice and cool when you’re craving a sweet treat!

Can I freeze Butterfinger Balls and how should I do it?
Definitely! To freeze your Butterfinger Balls, start by placing them in a single layer on a parchment-lined baking sheet until they are firm, which should take around 30 minutes. Once firm, transfer them to an airtight container or a freezer-safe bag, layering parchment paper between the balls to prevent sticking. They’ll keep well for up to 5-6 months—perfect for later indulgence!

What are some common troubleshooting tips?
If the mixture feels too crumbly, you might need to add a touch more peanut butter or softened butter until it binds well. On the flip side, if the Butterfinger Balls are too sticky to roll, chilling the mixture for a bit before shaping can help! If your chocolate isn’t melting smoothly, you might have overheated it—try heating in shorter bursts and stirring thoroughly.

What dietary considerations should I be aware of?
For those with allergies, be cautious about using peanut butter, as it can be a common allergen. You can customize the recipe to be gluten-free by substituting graham cracker crumbs with gluten-free options. Also, if you're considering these as treats for pets, keep in mind that chocolate is toxic to dogs—definitely avoid sharing these treats with furry friends!

Can I customize these Butterfinger Balls with different ingredients?
Absolutely! You could swap out Butterfinger bars with your favorite candy bars such as Snickers or Milky Way for a whole new flavor. I also love to add seasonal sprinkles or colored toppings for festive occasions. The more the merrier! Have fun making these treats your own!

Butterfinger Balls

Irresistible Butterfinger Balls for Quick No-Bake Bliss

These Butterfinger Balls provide a delightful no-bake treat that's quick to prepare and customizable, perfect for any occasion!
Print Recipe Pin Recipe
Prep Time 30 minutes mins
Chilling Time 30 minutes mins
Total Time 1 hour hr
Servings: 24 balls
Course: Dessert
Calories: 100
Ingredients Equipment Method Nutrition Notes

Ingredients
  

For the Dough
  • 1 cup softened butter Provides richness and helps bind the ingredients.
  • 1 cup peanut butter Base flavor; avoid natural varieties.
  • 1 teaspoon vanilla extract Adds flavor and aroma.
  • 2 cups powdered sugar Vital for smooth texture.
  • 1 cup graham cracker crumbs Provides texture; can substitute with cookies.
  • 1 cup crushed Butterfinger bars Adds crunch and distinct flavor.
For the Coating
  • 1 to 1.5 cups chocolate bark or chocolate chips For coating; use bark for smoother finish.
Optional Garnishes
  • additional crushed Butterfinger For garnish.
  • festive sprinkles Add color for occasions.
  • coarse sea salt Enhances sweetness.

Equipment

  • Mixing Bowl
  • Spatula
  • Parchment-lined baking sheet
  • Microwave-safe bowl

Method
 

Step-by-Step Instructions for Butterfinger Balls
  1. In a mixing bowl, beat softened butter and peanut butter together until creamy, about 2-3 minutes.
  2. Add vanilla extract to the mixture and blend on medium speed for about 1 minute.
  3. Gradually sift in powdered sugar while mixing at low speed until well combined.
  4. Fold in graham cracker crumbs and crushed Butterfinger bars using a spatula.
  5. Roll approximately 1 tablespoon of dough into balls and place on a parchment-lined baking sheet.
  6. Place the baking sheet in the freezer for 30 minutes or until firm.
  7. Melt chocolate bark in a microwave-safe bowl in 30-second intervals, stirring until smooth.
  8. Dip each Butterfinger Ball into the melted chocolate, coating completely.
  9. Sprinkle optional garnishes on top of the balls before the chocolate sets.
  10. Allow the chocolate coating to set at room temperature or in the refrigerator for about 10-15 minutes.

Nutrition

Serving: 1ballCalories: 100kcalCarbohydrates: 12gProtein: 2gFat: 5gSaturated Fat: 2gMonounsaturated Fat: 1gCholesterol: 10mgSodium: 50mgPotassium: 30mgFiber: 1gSugar: 8gVitamin A: 200IUCalcium: 10mgIron: 0.5mg

Notes

These Butterfinger Balls are easy to make and perfect for any gathering, providing a delicious treat with customizable options.

Tried this recipe?

Let us know how it was!

Irresistible Chocolate Chip Cheesecake Bars You’ll Crave

December 16, 2025 by Grace Snow Leave a Comment

You might think of cheesecake as a special-occasion dessert, but what if I told you there's a way to make it a go-to treat? Enter my Chocolate Chip Cheesecake Bars, where creamy cheesecake meets a buttery graham cracker crust, all topped with a delicious layer of chocolate chip cookie dough. This recipe is not only easier to whip up than traditional cheesecake, but it's also perfect for make-ahead gatherings—allowing you to wow your guests without the fuss. And trust me, these bars are a crowd-pleaser, combining the best of classic cheesecake and cookie flavors into one irresistible bite. Ready to dive into dessert bliss? Let’s make these bars together!

Why Are These Bars So Irresistible?

Decadent Layers: These Chocolate Chip Cheesecake Bars combine a creamy cheesecake layer with a crumbly graham cracker crust, creating an unforgettable dessert experience.

Effortlessly Versatile: Perfect for any occasion, you can customize them with different crusts or add-ins, like nuts for crunch or seasonal spices for a unique twist.

Make-Ahead Convenience: These bars can be prepared in advance, helping to save you time and stress before gatherings. Simply chill and serve!

Crowd Favorite: With rich flavors and delightful textures, they cater to both cheesecake lovers and cookie enthusiasts, ensuring everyone will enjoy them.

Whether you’re serving them at a weekend BBQ or enjoying a sweet treat with a cup of Homemade Hot Chocolate, these bars are sure to impress your guests!

Chocolate Chip Cheesecake Bars Ingredients

For the Crust

  • Graham Cracker Crumbs – This forms the sturdy base for your bars; swap with crushed Oreos for a unique twist!
  • Melted Butter – Binds everything together; unsalted butter is best to control sweetness.
  • Granulated Sugar – Sweetens the crust; reduce the amount or use a sugar alternative for a lighter option.

For the Cheesecake Filling

  • Cream Cheese – Essential for a creamy base; ensure it’s softened for a smooth mix, and consider lactose-free options if needed.
  • Sour Cream – Adds a tangy richness; Greek yogurt makes a great healthier substitute.
  • Egg – Provides stability; for a vegan option, substitute with a flaxseed meal and water mixture.
  • Lemon Juice – Balances the sweetness and brightens the flavor.
  • Vanilla Extract – Infuses warmth into the filling; almond extract can be used for a different flavor twist.

For the Cookie Dough Topping

  • Butter (softened) – Creates a soft texture in the cookie dough; for a lighter version, consider using applesauce.
  • White Sugar – Sweetens the dough; you can adjust to taste.
  • Brown Sugar – Gives moisture and depth; brown sugar also enhances the overall flavor profile.
  • All-Purpose Flour – Provides structure; gluten-free flour blends can be substituted if needed.
  • Salt – Enhances all flavors; it’s optional based on your preference.
  • Chocolate Chips – The finishing touch for sweetness; feel free to use dark chocolate or nut-free chips for alternatives.

Enjoy crafting these Chocolate Chip Cheesecake Bars, the perfect balance of creamy and crunchy goodness that you and your guests will love!

Step‑by‑Step Instructions for Chocolate Chip Cheesecake Bars

Step 1: Prepare the Crust
Preheat your oven to 350°F (175°C) and line an 8x8-inch baking dish with parchment paper for easy removal. In a mixing bowl, combine the graham cracker crumbs, melted butter, and granulated sugar, mixing until it resembles wet sand. Press the mixture firmly into the bottom of the prepared dish, creating an even layer. Bake in the preheated oven for about 10 minutes, or until the crust is lightly golden and fragrant.

Step 2: Make the Cheesecake Filling
While the crust cools slightly, prepare the cheesecake filling. In a large mixing bowl, beat together the softened cream cheese and granulated sugar until smooth and creamy, about 2-3 minutes. Add in the sour cream, egg, lemon juice, and vanilla extract, continuing to beat until the mixture is completely smooth. Pour the cheesecake filling over the warm crust, spreading it evenly with a spatula.

Step 3: Prepare Cookie Dough Topping
In a separate bowl, cream together the softened butter, white sugar, and brown sugar until light and fluffy, about 2 minutes. Mix in the vanilla extract, then gradually incorporate the all-purpose flour, salt, and chocolate chips, stirring until just combined. The cookie dough should be thick but soft. Take spoonfuls of the dough and gently drop it over the cheesecake layer, spreading it out to cover as much of the surface as possible.

Step 4: Bake the Bars
Return the baking dish to the oven and bake for 30-35 minutes, or until the cookie dough topping is set and lightly golden. You want the center to be slightly jiggly but not wet; it will firm up as it cools. Keep an eye on it towards the end to avoid overbaking, which could dry out the dessert.

Step 5: Cool and Chill
Once baked, remove the dish from the oven and let it cool on a wire rack for about 15 minutes. After it cools, refrigerate the bars for at least 1 hour, or overnight if time allows. This chilling time helps the flavors meld together beautifully and allows for easier cutting.

Step 6: Serve
When ready to serve, lift the bars out of the baking dish using the parchment paper. Slice them into squares with a sharp knife. These Chocolate Chip Cheesecake Bars are best enjoyed chilled, but for easier cutting, allow them to sit at room temperature for about 10 minutes before serving. Enjoy the rich layers of cheesecake and cookie goodness!

Expert Tips for Chocolate Chip Cheesecake Bars

  • Soften Cream Cheese: Ensure your cream cheese is at room temperature before mixing to prevent lumps and create a smooth filling.
  • Use Parchment Paper: Line your baking dish with parchment paper to make removing and cutting the bars a breeze.
  • Chill for Flavor: Let the bars cool and chill in the refrigerator for at least an hour, or overnight if possible, to enhance flavor and texture.
  • Keep an Eye on Baking: Bake until the cookie topping is set and golden, but avoid overbaking to keep the bars moist and creamy.
  • Adjust Pan Size: If you use a different-sized pan, monitor the baking time closely to ensure even cooking of your Chocolate Chip Cheesecake Bars.

What to Serve with Chocolate Chip Cheesecake Bars

Transform your dessert into a delightful feast with these perfect pairings for your sweet treat!

  • Fresh Berries: Juicy strawberries or blueberries add a burst of freshness that contrasts beautifully with the creamy cheesecake.
  • Whipped Cream: A dollop of fluffy whipped cream enhances texture and provides a light airiness to every bite of cheesecake.
  • Chocolate Sauce: Drizzling chocolate sauce over the bars intensifies the chocolate flavor and adds an indulgent touch.
  • Coffee or Espresso: A cup of rich coffee cuts through the sweetness and adds sophistication, making each bite irresistible.
  • Ice Cream: Creamy vanilla or cookie dough ice cream complements the flavors while providing a delightful temperature contrast.
  • Caramel Drizzle: Sweet and buttery caramel sauce adds a gourmet flair, enhancing the sweet charm of the chocolate chip cheesecake bars.
  • Nutty Granola: For a delightful crunch, sprinkle some nutty granola over the bars, adding texture and a hint of nuttiness.
  • Mint Leaves: A touch of fresh mint on the side gives a refreshing lift, balancing indulgence with brightness.

Chocolate Chip Cheesecake Bars Variations

Feel free to let your creativity shine as you make these delectable bars uniquely yours!

  • Oreo Crust: Swap the graham cracker crust for crushed Oreos for a delightful chocolatey twist. This adds a rich flavor that enhances the overall experience.

  • Nutty Surprise: Add chopped pecans or walnuts to the cookie dough for an extra crunch that beautifully contrasts the creamy cheesecake.

  • Pumpkin Spice: Mix pumpkin puree and pumpkin spice into the cheesecake filling for a seasonal treat that captures the essence of fall in each bite.

  • Coconut Delight: Stir shredded coconut into the cheesecake filling or sprinkle it on top of the cookie dough for a tropical flair.

  • Peanut Butter Swirl: Incorporate swirls of peanut butter into the cheesecake layer before baking. This nutty addition will delight any peanut butter lover!

  • Gluten-Free Option: Replace the all-purpose flour in the cookie dough with a gluten-free flour blend for an inclusive treat that everyone can enjoy.

  • Chocolate Chip Variations: Switch up the chocolate chips with white chocolate or butterscotch chips for different flavor profiles that cater to your sweet tooth.

  • Extra Layer of Flavor: Combine a touch of espresso powder or instant coffee into the cheesecake filling to create a delightful coffee-infused dessert.

These variations allow you to tailor the recipe to your tastes and make every bite a new adventure. Whether you enjoy them with friends at a gathering or as a cozy dessert while sipping a warm cup of Homemade Hot Chocolate, these bars are bound to impress! If you’re feeling inspired, check out other dessert bars like the German Chocolate Poke for more delicious options to explore. Enjoy!

Storage Tips for Chocolate Chip Cheesecake Bars

  • Fridge: Store the bars tightly covered in the refrigerator for up to 7 days. This helps maintain their creamy texture and prevents them from drying out.
  • Freezer: For longer storage, freeze the bars in an airtight container for up to 3 months. To thaw, place them in the fridge overnight before serving to retain their deliciousness.
  • Reheating: If you prefer warm bars, gently reheat individual slices in the microwave for about 10-15 seconds. Enjoy the melt-in-your-mouth goodness of these Chocolate Chip Cheesecake Bars!

Make Ahead Options

These Chocolate Chip Cheesecake Bars are a lifesaver for busy home cooks! You can prepare the crust and cheesecake filling up to 24 hours in advance; simply refrigerate them separately to maintain their quality. For the cookie dough topping, mix it and chill it in a covered container for up to 3 days. When you're ready to serve, just layer the cookie dough on top of the cheesecake filling and bake as instructed. This make-ahead strategy allows the flavors to meld beautifully, ensuring your cheesecake bars are just as delicious while saving you precious time on the day of your gathering!

Chocolate Chip Cheesecake Bars Recipe FAQs

How do I choose ripe ingredients for my cheesecake bars?
Absolutely! For the best flavor, select cream cheese that is at room temperature, as it mixes easier and yields a creamy texture. When choosing lemons for juice, look for ones that feel heavy for their size and have a smooth skin; these are usually juicier.

How should I store my leftover Chocolate Chip Cheesecake Bars?
You can store the bars tightly covered in the refrigerator for up to 7 days. This method keeps them fresh and maintains their creamy texture. I often place a layer of plastic wrap directly over the bars before covering with a lid to prevent any drying out.

Can I freeze Chocolate Chip Cheesecake Bars?
Certainly! You can freeze these bars for up to 3 months. To do this, first, let them cool completely, then wrap them tightly in plastic wrap and place them inside an airtight container. When you’re ready to enjoy, thaw them overnight in the refrigerator for best results.

What should I do if my cheesecake layer is lumpy?
No worries! Lumpy cheesecake filling usually happens when the cream cheese isn’t softened enough. Ensure your cream cheese is at room temperature next time, beating it for a full 2-3 minutes to get it creamy and lump-free. If you find lumps despite this, simply mix it longer until smooth.

Are there any dietary considerations I should be aware of?
Very! If you're making these bars for guests with dietary restrictions, you can easily adapt the recipe. For those who are lactose intolerant, consider using lactose-free cream cheese and sour cream. Additionally, substitute the egg with a flaxseed meal (1 tablespoon of flaxseed mixed with 2.5 tablespoons of water is a great alternative). Always double-check labels for chocolate chips if nut allergies are a concern.

Chocolate Chip Cheesecake Bars

Irresistible Chocolate Chip Cheesecake Bars You’ll Crave

These Chocolate Chip Cheesecake Bars combine creamy cheesecake and cookie flavors for a crave-worthy dessert.
Print Recipe Pin Recipe
Prep Time 15 minutes mins
Cook Time 45 minutes mins
Cooling Time 1 hour hr
Total Time 2 hours hrs
Servings: 16 bars
Course: Dessert
Cuisine: American
Calories: 250
Ingredients Equipment Method Nutrition Notes

Ingredients
  

For the Crust
  • 1 cup Graham Cracker Crumbs Substitute with crushed Oreos for a unique twist.
  • 1/2 cup Melted Butter Unsalted butter is best to control sweetness.
  • 1/4 cup Granulated Sugar Reduce the amount or use a sugar alternative for lighter option.
For the Cheesecake Filling
  • 16 oz Cream Cheese Ensure it’s softened for a smooth mix.
  • 1/2 cup Sour Cream Greek yogurt makes a great substitute.
  • 1 large Egg Substitute with flaxseed meal and water for vegan option.
  • 1 tbsp Lemon Juice Balances sweetness.
  • 1 tsp Vanilla Extract Can substitute with almond extract.
For the Cookie Dough Topping
  • 1/2 cup Butter (softened) Consider using applesauce for a lighter version.
  • 1/4 cup White Sugar Adjust to taste.
  • 1/4 cup Brown Sugar Enhances overall flavor profile.
  • 1 cup All-Purpose Flour Gluten-free flour blends can be substituted.
  • 1/2 tsp Salt Optional based on preference.
  • 1 cup Chocolate Chips Use dark chocolate or nut-free chips as alternatives.

Equipment

  • 8x8-inch baking dish
  • Mixing bowls
  • Spatula

Method
 

Directions
  1. Preheat your oven to 350°F (175°C) and line an 8x8-inch baking dish with parchment paper. Combine the graham cracker crumbs, melted butter, and granulated sugar. Press into the bottom of the dish evenly. Bake for about 10 minutes until golden.
  2. In a mixing bowl, beat together softened cream cheese and granulated sugar until smooth. Add sour cream, egg, lemon juice, and vanilla extract, beating until completely smooth. Pour this mixture over the warm crust.
  3. Cream together softened butter, white sugar, and brown sugar until fluffy. Mix in vanilla extract, then gradually incorporate flour, salt, and chocolate chips. Drop spoonfuls over cheescake layer.
  4. Bake for 30-35 minutes until the cookie dough is set and lightly golden, with the center slightly jiggly. Avoid overbaking.
  5. Let the dish cool for about 15 minutes before refrigerating for at least 1 hour or overnight.
  6. Lift the bars using the parchment paper, slice into squares, and serve chilled.

Nutrition

Serving: 1barCalories: 250kcalCarbohydrates: 30gProtein: 4gFat: 14gSaturated Fat: 8gPolyunsaturated Fat: 1gMonounsaturated Fat: 3gCholesterol: 40mgSodium: 180mgPotassium: 120mgFiber: 1gSugar: 18gVitamin A: 500IUVitamin C: 1mgCalcium: 60mgIron: 1mg

Notes

Ensure cream cheese is at room temperature for a smooth filling. Use parchment paper for easy removal and cutting. Chill for at least an hour for enhanced flavor and texture.

Tried this recipe?

Let us know how it was!

Irresistible Tiramisu Brownies That Will Delight Your Tastebuds

December 16, 2025 by Grace Snow Leave a Comment

As I stood in my kitchen, the aroma of fresh-brewed espresso mingled with rich chocolate, wrapping me in a warm embrace. This is the magic moment I cherish most, especially when diving into a batch of my unforgettable tiramisu brownies. Crafted with fudgy brownie layers and topped with creamy mascarpone, these delightful treats marry the classic Italian tiramisu with the comforting texture of a brownie. Not only do these tiramisu brownies bake up quickly, but they also impress everyone they touch—making them a perfect dessert for gatherings. The combination of rich chocolate and coffee flavors will surely make your taste buds dance! Curious about how to create this indulgent treat that feels both elevated and homey? Let's get baking!

Why are Tiramisu Brownies a Must-Try?

Indulgence Awaits: These tiramisu brownies blend rich chocolate and espresso, creating a dessert that’s both decadent and delightful.
Fudgy Delight: With a perfectly moist, fudgy brownie base, every bite feels like a warm hug.
Elevated Flavor: The creamy mascarpone topping paired with coffee-soaked ladyfingers adds a unique twist to traditional brownies.
Quick to Make: This recipe is simple enough for a weekday treat but impressive enough for gatherings.
Crowd-Pleasing Comfort: Perfect for dinner parties, these brownies are sure to garner compliments—your friends won't be able to resist asking for the recipe!
Craving more delicious ideas? Why not try the Pumpkin Brownies Decadent for a seasonal twist!

Tiramisu Brownies Ingredients

For the Brownie Base

• Dark or Semi-Sweet Chocolate (100 g) – Provides a rich chocolate flavor; substitute with milk chocolate for a sweeter taste.
• Natural Cocoa Powder (50 g) – Enhances the chocolaty richness; unsweetened cocoa is best for balanced flavor.
• Unsalted Butter (230 g) – Adds moisture and richness, crucial for fudgy texture; keep at room temperature for even melting.
• Large Eggs (4) – Essential for binding and creating a light texture; ensure room temperature for better mixing.
• Granulated Sugar (150 g) – Sweetens the brownies; can replace half with brown sugar for added moisture.
• Brown Sugar (100 g) – Adds depth of flavor and moisture; you can substitute with additional granulated sugar if necessary.
• All-Purpose Flour (100 g) – Provides structure to the brownies; avoid overmixing to prevent tough texture.

For the Mascarpone Topping

• Mascarpone Cheese (250 g) – Key ingredient for the creamy layer; available at most grocery stores; can be replaced with cream cheese for a tangy twist.
• Whipping Cream (200 g) – Lightens the mascarpone; for a richer texture, use heavy cream.
• Powdered Sugar (50 g) – Sweetens the mascarpone cream for balance; avoid substituting, as it dissolves better than granulated sugar.
• Vanilla Extract (½ teaspoon) – Adds aroma and flavor; vanilla bean paste or imitation vanilla works as alternatives.

For the Espresso Soak

• Espresso Powder (2 teaspoons) – Intensifies the coffee flavor; instant coffee can be used if espresso is unavailable.
• Hot Water (150 g) – Dissolves espresso powder for soaking ladyfingers.
• Coffee Liqueur or Dark Rum (1 tablespoon, optional) – Enhances flavor richness; skip for a non-alcoholic version.
• Ladyfingers (12) – Framework for the tiramisu layer; finger biscuits are a direct substitute but skip if gluten-free is required.

For Dusting

• Cocoa Powder for Dusting (1 tablespoon) – Final touch for presentation and flavor; essential for that classic tiramisu look.

Get ready to experience the magic of tiramisu brownies that blend the best of both worlds!

Step‑by‑Step Instructions for Tiramisu Brownies

Step 1: Prep the Oven and Pan
Begin by preheating your oven to 350°F (175°C). While the oven warms, prepare a 9x9-inch baking pan by lining it with parchment paper, allowing for easy removal of the brownies later. Make sure the edges of the paper overhang slightly for easy lifting out.

Step 2: Combine Chocolate and Cocoa
In a medium-sized mixing bowl, combine the chopped dark or semi-sweet chocolate and natural cocoa powder. This mixture is key for your fudgy brownie base. As the oven continues to heat, set it aside to focus on the next step—a flavorful, luscious treat awaits!

Step 3: Brown the Butter
In a saucepan over medium heat, melt the butter until it begins to foam, stirring continuously. Allow it to cook until it turns golden brown, about 5-7 minutes. Pour the browned butter over the chocolate and cocoa mixture, letting it sit for a few minutes until the chocolate melts, then stir until smooth and combined.

Step 4: Mix Egg Ingredients
In a separate large bowl, whisk together the large eggs, granulated sugar, and brown sugar until smooth and slightly thickened, about 3 minutes. This step combines the sweetness with the richness of the chocolate. Gradually mix in the chocolate mixture, ensuring everything is well combined.

Step 5: Incorporate Flour
Gently fold the all-purpose flour into the chocolate mixture using a spatula. Mix just until combined, ensuring not to overmix, which keeps the brownies fudgy. The batter should look thick and glossy—a true sign of delicious tiramisu brownies ready to bake.

Step 6: Bake the Brownies
Pour the batter into your prepared baking pan, spreading it evenly into the corners. Place it in the preheated oven and bake for 28-30 minutes. You'll know they're done when a toothpick inserted comes out mostly clean, with a few moist crumbs—this is key for that fudgy texture.

Step 7: Cool the Brownies
After baking, remove the brownies from the oven and allow them to cool in the pan for about 15-20 minutes. This cooling time is essential before adding the decadent mascarpone layer, so resist the urge to dive in just yet!

Step 8: Prepare the Mascarpone Cream
In a clean mixing bowl, beat the mascarpone cheese until creamy. Gradually add the whipped cream, powdered sugar, and vanilla extract, mixing until the cream thickens and is light and airy. This will create the heavenly topping for your tiramisu brownies.

Step 9: Soak the Ladyfingers
In a shallow dish, dissolve the espresso powder in hot water, adding the coffee liqueur if desired. Quickly dip each ladyfinger into the coffee mixture—just a few seconds on each side to avoid sogginess, then place them on a plate, ready for layering.

Step 10: Layer with Ladyfingers
Once the brownies have cooled, carefully arrange the soaked ladyfingers over the brownie base in a single layer. This creates a beautiful contrast with the fudgy brownie underneath, enhancing the flavors of your tiramisu brownies.

Step 11: Add the Mascarpone Topping
Spread the prepared mascarpone cream evenly over the layer of ladyfingers, smoothing it out with a spatula. Take your time to ensure every corner is covered for that creamy, indulgent touch that makes tiramisu brownies irresistible.

Step 12: Chill and Serve
Refrigerate the assembled tiramisu brownies for at least 1 hour to allow the layers to set, enhancing the flavors. Before serving, dust the top with cocoa powder for a classic finish. Cut into squares and savor the delightful combination of textures and tastes in each bite!

Tiramisu Brownies Variations & Substitutions

Feeling adventurous? Personalize your tiramisu brownies with these delightful variations!

  • Gluten-Free: Substitute ladyfingers with gluten-free biscuits for an equally delicious texture. This ensures everyone can enjoy the treat without worry!

  • Nutty Twist: Add chopped hazelnuts or walnuts into the brownie batter for a delightful crunch. This unexpected twist will make your brownies a true showstopper.

  • Flavored Mascarpone: Try folding in a splash of almond extract or orange zest into the mascarpone cream for a fragrant layer of flavor. It’s an easy way to elevate your dessert!

  • Add Spice: Sprinkle in a pinch of cinnamon or nutmeg for a warm, inviting flavor that pairs beautifully with chocolate and coffee. This adds a cozy touch everyone will love.

  • Vegan Option: Use aquafaba instead of eggs and coconut cream instead of mascarpone for a plant-based-friendly dessert. You won’t miss the dairy with this luscious substitute!

  • Decadent Layering: Consider crumbling some dark chocolate or chocolate cookies on top of the mascarpone layer for added texture and indulgence. It makes each bite even more enticing!

  • Heat Things Up: Drizzle a bit of chili-infused chocolate over the top to give your brownies a surprising kick. The contrasting flavors of sweet and spice will excite anyone who tries them!

  • Fruity Finish: Top your brownies with fresh raspberries or strawberries for a burst of freshness. The tartness will beautifully balance the rich, fudgy base.

For a seasonal delight, feel free to check out the Pumpkin Brownies Decadent that bring a whole new flavor to your dessert table!

How to Store and Freeze Tiramisu Brownies

Fridge: Store tiramisu brownies in an airtight container in the refrigerator for up to 3 days. Let them come to room temperature for about 30 minutes before serving to restore their fudgy texture.

Freezer: To freeze, wrap individual brownie squares tightly in plastic wrap and place them in a freezer-safe bag. They can last up to 2 months. Thaw overnight in the fridge before enjoying.

Reheating: If you prefer a warm dessert, gently reheat thawed brownies in the microwave for about 10-15 seconds. This will revive their moist, fudgy charm.

Layering: It’s best to keep the layers intact until serving to maintain the lovely contrast between the brownie base and the mascarpone topping.

What to Serve with Tiramisu Brownies

Indulging in rich, fudgy brownies topped with creamy mascarpone and coffee flavors invites a feast of complementary delights to round out your dessert experience.

  • Freshly Brewed Espresso: The bold coffee notes enhance the espresso in the brownies, creating a harmonious pairing that coffee lovers will adore.
  • Vanilla Ice Cream: Creamy and cold, vanilla ice cream balances the richness of the brownies, adding a refreshing touch that mirrors classic tiramisu.
  • Whipped Cream: Light and airy, a dollop of freshly whipped cream provides a contrasting texture and extra sweetness, elevating each indulgent bite.
  • Chocolate Mousse: For a dessert tower, pairing with a light chocolate mousse introduces lusciousness while keeping the overall experience decadent yet airy.
  • Baileys Irish Cream: This whiskey cream liqueur serves as an elegant drizzle, marrying perfectly with the coffee and chocolate flavors for an adult twist on classic flavors.
  • Berries Medley: Raspberries or strawberries offer a burst of tartness, cutting through the richness of the brownies, while adding a beautiful color contrast for presentation.
  • Tiramisu Inspired Milkshake: Blend some mascarpone, coffee, and chocolate ice cream for a delightful shake that mirrors the flavors of your brownies, creating a fun surprise.
  • Chilled Moscato: This sweet, sparkling wine adds a fruity note that complements the rich brownie without overpowering it, making for a delightful finish to your meal.

Expert Tips for Tiramisu Brownies

  • Optimal Cooling Time: Let the brownies cool completely before adding the mascarpone cream; this prevents melting and keeps the layers intact.
  • Perfect Flour Measurement: Use a kitchen scale for accurate flour measurement, as overpacking can lead to dense brownies.
  • Quick Ladyfinger Dip: Soak ladyfingers just long enough to absorb espresso without becoming soggy, ensuring they hold their shape.
  • Rich Flavor Boost: For a deeper coffee flavor, use espresso powder. If unavailable, instant coffee is a fine substitute—just ensure it’s well-dissolved.
  • Smoothing the Topping: When spreading the mascarpone topping, take your time to create an even layer, enhancing the overall aesthetic of your tiramisu brownies.

Make Ahead Options

These tiramisu brownies are perfect for meal prep enthusiasts! You can prepare the brownie base up to 24 hours in advance; just wrap it tightly in plastic wrap to keep it fresh. The mascarpone cream can also be made ahead—store it in an airtight container in the refrigerator for up to 3 days. When ready to assemble, simply soak the ladyfingers right before layering and top with the mascarpone cream. For best results, allow the finished tiramisu brownies to chill for at least 1 hour before serving, ensuring the flavors meld beautifully while keeping the fudgy texture intact. Enjoy a delightful dessert with just a bit of planning!

Tiramisu Brownies Recipe FAQs

How do I choose the best chocolate for my tiramisu brownies?
Absolutely! For the best flavor, opt for dark or semi-sweet chocolate, which provides a rich and intense chocolate taste. If you're looking for something sweeter, milk chocolate can be used as an alternative. Just ensure it’s high-quality for the best results!

How long can I store leftover tiramisu brownies?
You can keep your tiramisu brownies in an airtight container in the refrigerator for up to 3 days. To enjoy them at their best texture, let them sit at room temperature for about 30 minutes before serving.

Can I freeze tiramisu brownies?
Yes, you can absolutely freeze your tiramisu brownies! Wrap individual squares tightly in plastic wrap and place them in a freezer-safe bag. They’ll stay fresh for up to 2 months. To enjoy, simply thaw them overnight in the fridge.

What if my ladyfingers become too soggy during the espresso soak?
Very good question! To prevent sogginess, dip each ladyfinger in the espresso mixture for only a few seconds on each side. This quick dunk allows for flavor absorption without compromising their structure. If you've accidentally soaked them too long, they might break apart, but don’t fret! You can still layer them, and they’ll taste delicious!

Are there any dietary considerations for making tiramisu brownies?
Certainly! For a gluten-free version, substitute ladyfingers with gluten-free biscuits. Additionally, if anyone has dairy allergies, you can use a dairy-free cream cheese alternative for the mascarpone layer. Always check your ingredients to ensure they meet your specific dietary needs!

Can I incorporate other flavors into my tiramisu brownies?
Absolutely! While classic flavors shine in this recipe, feel free to experiment by adding flavored liqueurs like hazelnut or amaretto for a unique twist. Just be sure to skip the coffee liqueur if you'd like a non-alcoholic dessert. The more the merrier when it comes to flavor!

Tiramisu Brownies

Irresistible Tiramisu Brownies That Will Delight Your Tastebuds

These tiramisu brownies combine rich chocolate and coffee flavors, offering a decadent twist on a classic dessert.
Print Recipe Pin Recipe
Prep Time 30 minutes mins
Cook Time 30 minutes mins
Cooling Time 20 minutes mins
Total Time 1 hour hr 20 minutes mins
Servings: 12 squares
Course: Dessert
Cuisine: Italian
Calories: 250
Ingredients Equipment Method Nutrition Notes

Ingredients
  

For the Brownie Base
  • 100 g Dark or Semi-Sweet Chocolate Substitute with milk chocolate for a sweeter taste.
  • 50 g Natural Cocoa Powder Unsweetened cocoa is best.
  • 230 g Unsalted Butter Keep at room temperature for even melting.
  • 4 large Eggs Room temperature for better mixing.
  • 150 g Granulated Sugar Can replace half with brown sugar.
  • 100 g Brown Sugar Can substitute with additional granulated sugar.
  • 100 g All-Purpose Flour Avoid overmixing to prevent tough texture.
For the Mascarpone Topping
  • 250 g Mascarpone Cheese Can be replaced with cream cheese.
  • 200 g Whipping Cream For richer texture, use heavy cream.
  • 50 g Powdered Sugar Dissolves better than granulated sugar.
  • 0.5 teaspoon Vanilla Extract Vanilla bean paste is an alternative.
For the Espresso Soak
  • 2 teaspoons Espresso Powder Instant coffee can be used if unavailable.
  • 150 g Hot Water Dissolves espresso powder.
  • 1 tablespoon Coffee Liqueur or Dark Rum Skip for a non-alcoholic version.
  • 12 pieces Ladyfingers Finger biscuits are a direct substitute.
For Dusting
  • 1 tablespoon Cocoa Powder for Dusting Essential for presentation.

Equipment

  • 9x9-inch baking pan
  • Mixing bowls
  • Spatula
  • Saucepan

Method
 

Step-by-Step Instructions for Tiramisu Brownies
  1. Preheat your oven to 350°F (175°C) and prepare a 9x9-inch baking pan by lining it with parchment paper.
  2. In a bowl, combine the chopped dark or semi-sweet chocolate and cocoa powder.
  3. Melt the butter in a saucepan over medium heat until golden brown, then pour over the chocolate mixture and stir until smooth.
  4. In a large bowl, whisk together eggs, granulated sugar, and brown sugar until smooth, then mix in the chocolate mixture.
  5. Fold in the all-purpose flour until combined, avoiding overmixing.
  6. Pour the batter into the prepared pan and bake for 28-30 minutes.
  7. Allow the brownies to cool in the pan for 15-20 minutes before adding the mascarpone layer.
  8. Beat mascarpone cheese until creamy, then add whipped cream, powdered sugar, and vanilla extract until thickened.
  9. Dissolve espresso powder in hot water and dip each ladyfinger quickly before layering on the brownies.
  10. Spread the mascarpone cream evenly over the ladyfingers.
  11. Refrigerate for at least 1 hour before dusting with cocoa powder and serving.

Nutrition

Serving: 1squareCalories: 250kcalCarbohydrates: 30gProtein: 3gFat: 12gSaturated Fat: 7gPolyunsaturated Fat: 1gMonounsaturated Fat: 3gCholesterol: 50mgSodium: 150mgPotassium: 200mgFiber: 2gSugar: 20gVitamin A: 300IUCalcium: 30mgIron: 2mg

Notes

Store in an airtight container in the refrigerator for up to 3 days or freeze individually for up to 2 months.

Tried this recipe?

Let us know how it was!
  • « Previous Page
  • 1
  • …
  • 20
  • 21
  • 22
  • 23
  • 24
  • …
  • 49
  • Next Page »

Welcome!

Hi, I’m Grace, a Sydney-based home cook with a passion for bold flavors and trending ingredients. Whether you’re a busy beginner or a seasoned foodie, you’ll find dishes here that are fresh, fun, and full of flavor.

More about me

Popular Recipes

  • Cheesy Chicken Garlic Bread Sandwich
    Cheesy Chicken Garlic Bread Sandwich for Cozy Family Moments
  • Easy Chicken Ranch Wraps
    Easy Chicken Ranch Wraps: Quick, Creamy & Totally Satisfying
  • Chicken Caesar Sandwiches
    Delicious Chicken Caesar Sandwiches for Quick Comfort Food
  • best Cuban sandwich
    The Best Cuban Sandwich You’ll Want Every Weeknight!

Footer

↑ back to top

About

  • Privacy Policy
  • Disclaimer
  • Terms & Conditions

Newsletter

  • Sign Up! for emails and updates

Contact

  • About me
  • Contact me

Copyright © 2025 TastyTrendIngredients