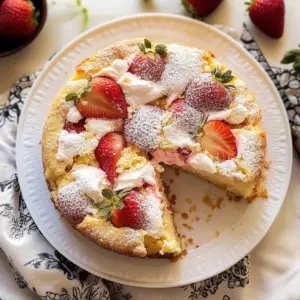
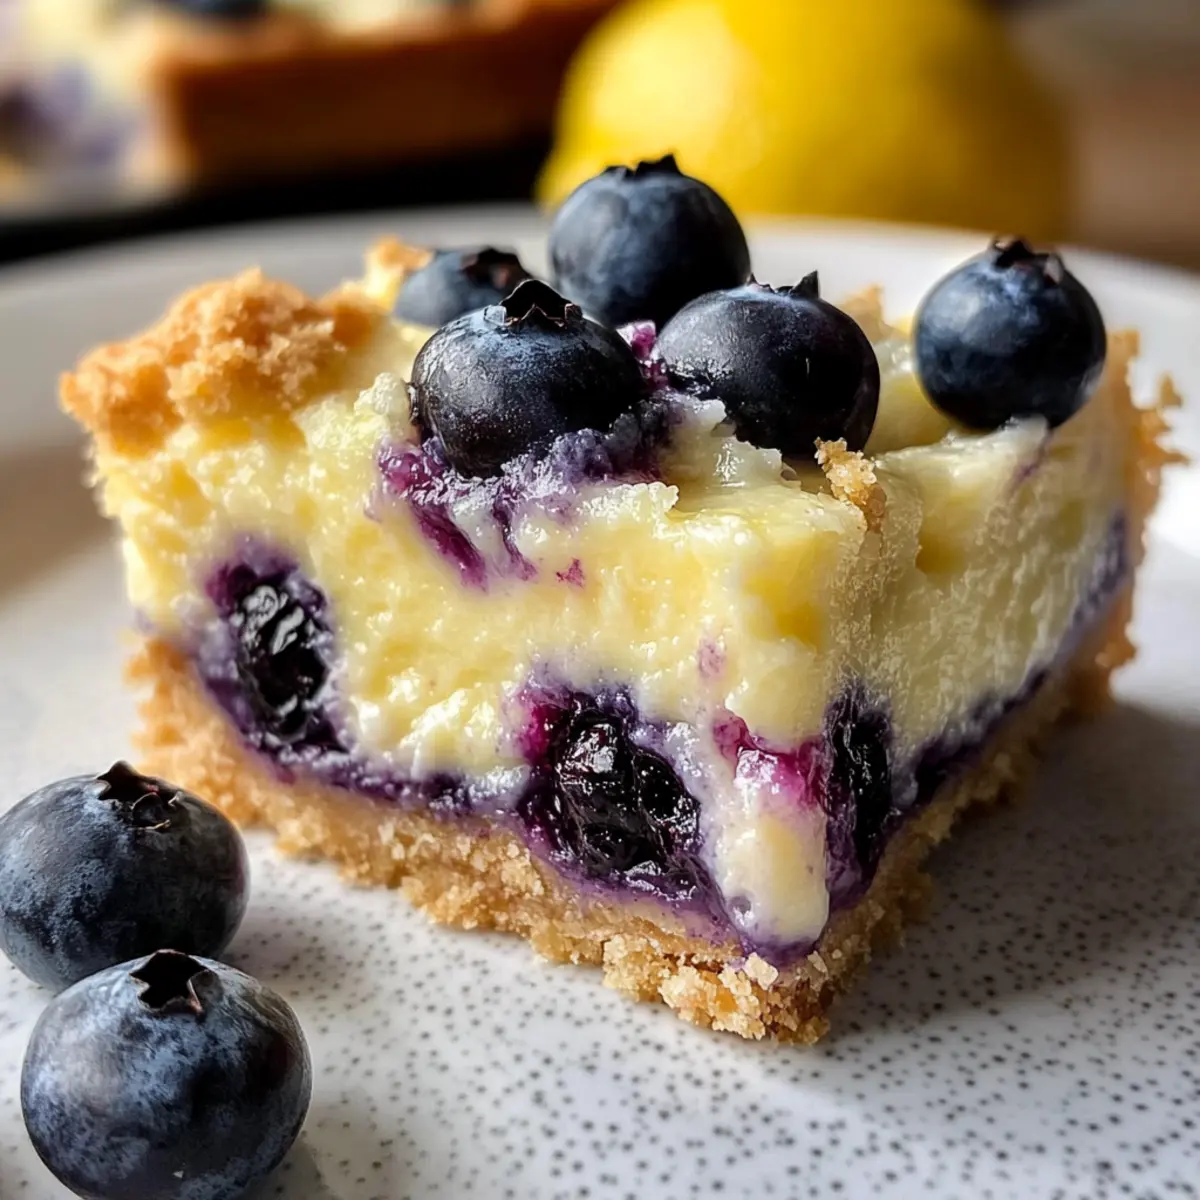
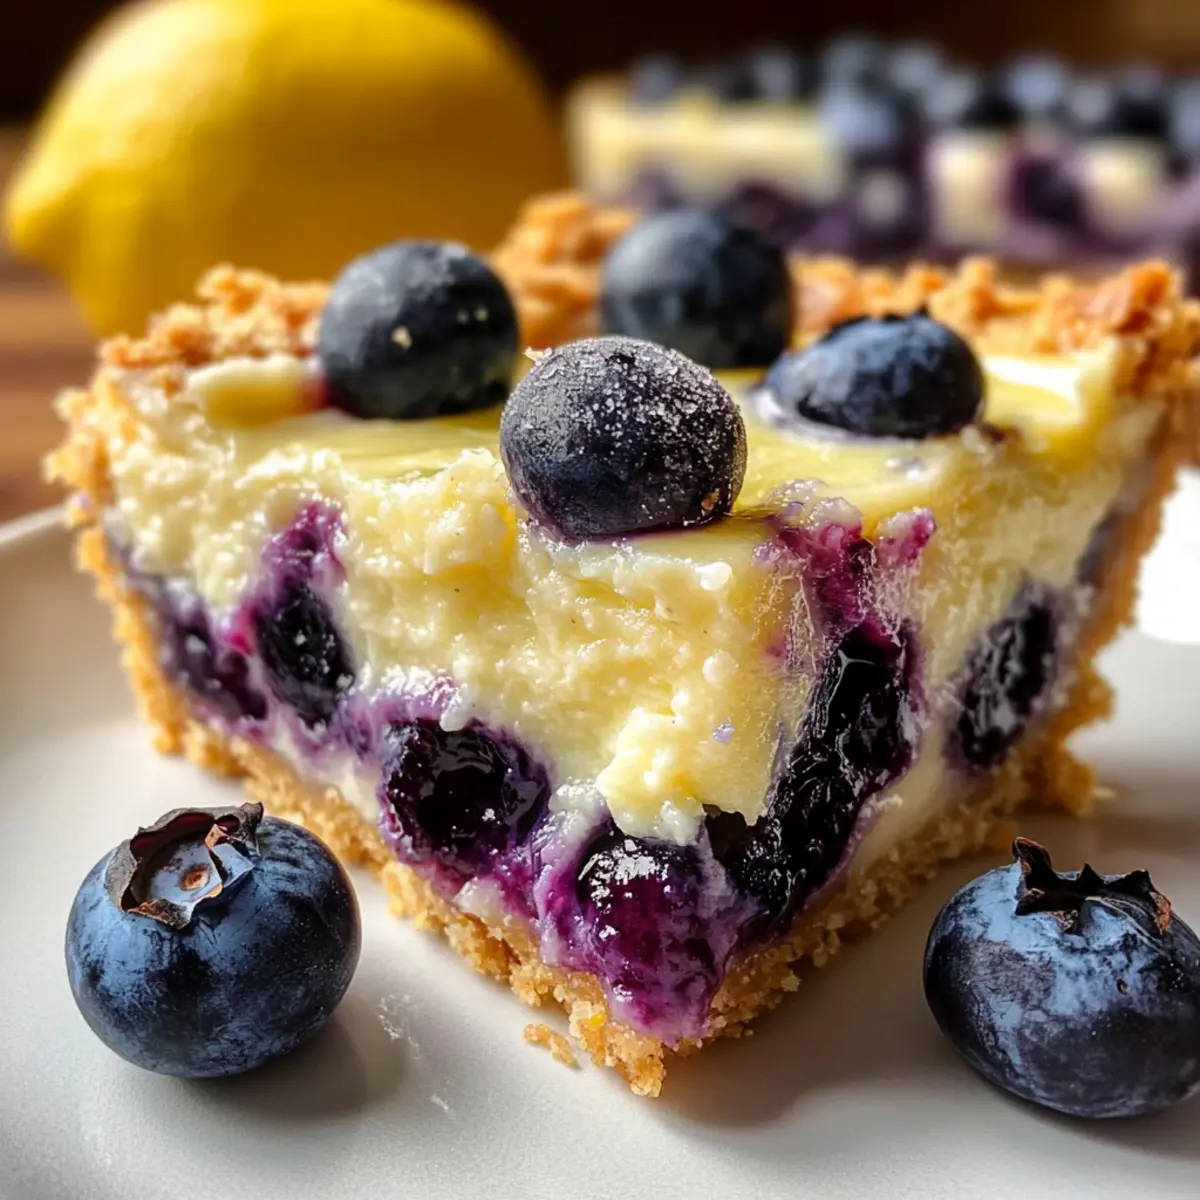
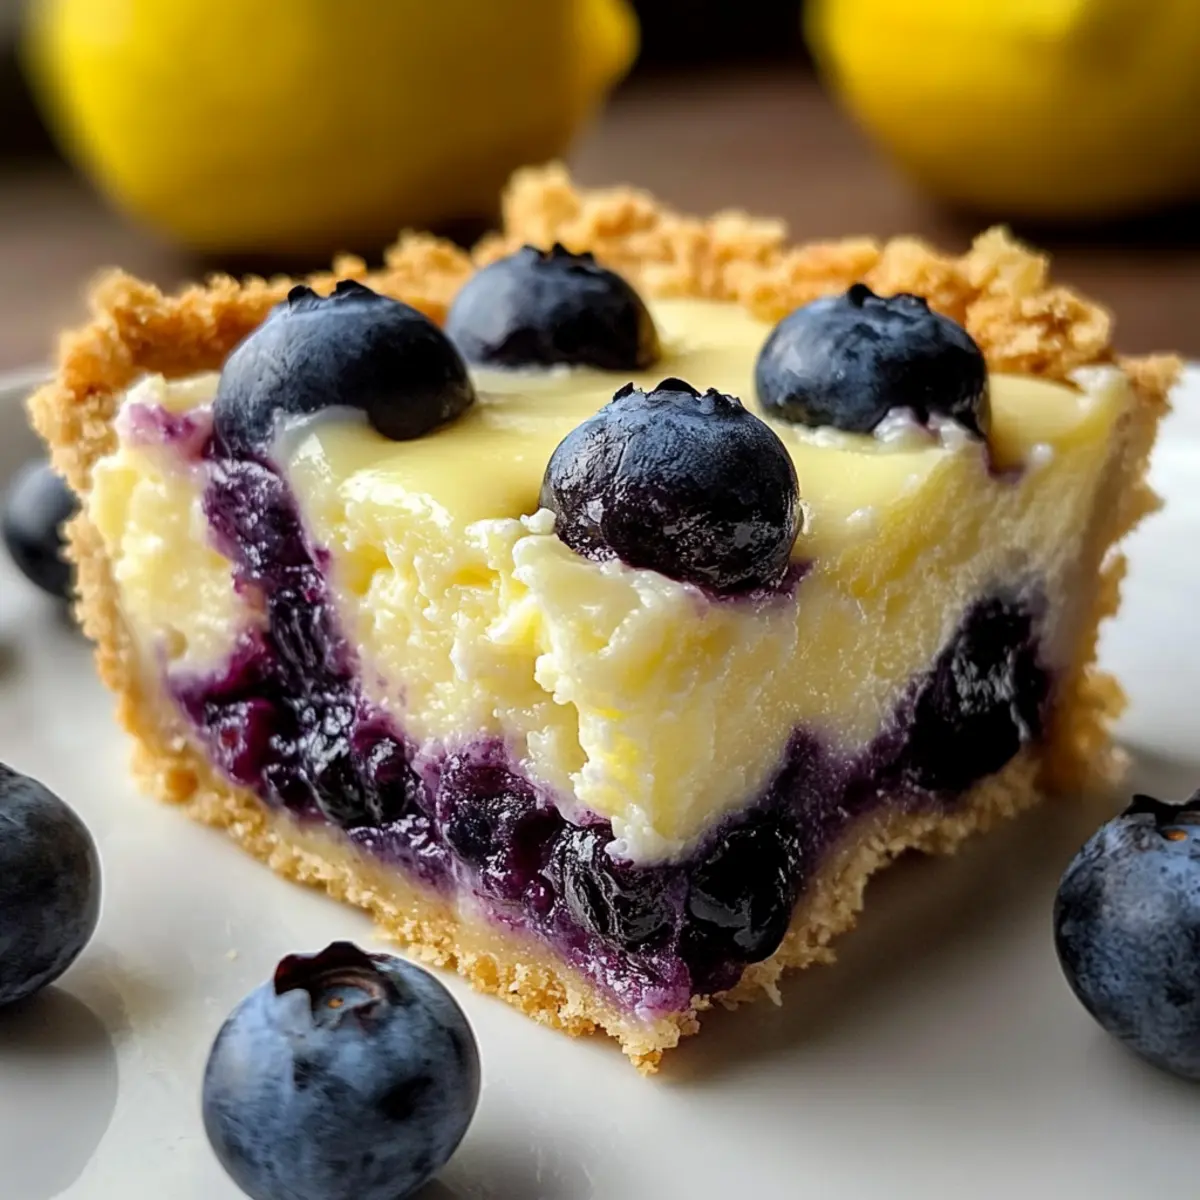
tastytrendingredients

  • Home
  • Recipes
    • Appetizers
    • Breakfast
    • Dessert
    • Dinner
    • Drinks
    • Salads
    • Snacks
    • Soups
  • About me
  • Contact me
menu icon
go to homepage
  • Home
  • Recipes
    • Appetizers
    • Breakfast
    • Dessert
    • Dinner
    • Drinks
    • Salads
    • Snacks
    • Soups
  • About me
  • Contact me
search icon
Homepage link
  • Home
  • Recipes
    • Appetizers
    • Breakfast
    • Dessert
    • Dinner
    • Drinks
    • Salads
    • Snacks
    • Soups
  • About me
  • Contact me
×

Delicious Tuscan Marry Me Butter Beans You’ll Want to Share

October 31, 2025 by Grace Snow Leave a Comment

As I unwrapped the rich scent of freshly baked cookies wafting through my kitchen, the memories of family gatherings and laughter flooded back. This Easy Vegan Chocolate Chip Cookies recipe became my go-to treat, capturing the hearts of everyone with its soft, chewy texture and decadent chocolate goodness. These cookies don’t just satisfy your sweet tooth— they also offer gluten-free and dairy-free options, making them friendly for various dietary needs. Whether you're hosting a gathering or simply indulging yourself, the quick prep time means you can whip them up in no time! Curious how to create these irresistibly delicious cookies that are sure to impress? Let’s dive in!

Want a Delicious Vegan Cookie Experience?

Irresistible Flavor: Each bite reveals rich, chocolatey goodness that will have your taste buds dancing with joy.
Quick & Easy: Just a few simple steps make this recipe perfect for busy bakers, fitting into any schedule.
Customizable Options: Whether you're gluten-free or dairy-free, these cookies cater to various dietary needs without compromising flavor.
Crowd-Pleasing Delight: Perfect for gatherings, they’re sure to impress friends and family alike—everyone will want the recipe!
Memorable Moments: Baking these cookies brings the happiness of shared moments, just like enjoying a plate of Tuscan White Bean Pasta or Crockpot Butter Chicken does! Don’t miss out on pure comfort food.

Vegan Chocolate Chip Cookie Ingredients

For the Batter
• All-Purpose Flour – Provides structure; substitute with almond flour for a gluten-free option.
• Baking Soda – Helps cookies rise; always check for freshness!
• Salt – Enhances flavor; sea salt works wonderfully for a more pronounced taste.
• Coconut Oil – Contributes to chewiness; feel free to swap with vegan butter for a richer flavor.
• Brown Sugar – Adds a delightful sweetness and moisture; consider coconut sugar for a lower glycemic choice.
• Non-dairy Milk – Binds everything together; almond, soy, or oat milk are great options.
• Vegan Chocolate Chips – The delicious star of the show; choose dark chocolate chips to deepen the flavor while ensuring they're dairy-free.

For Serving
• Chopped Nuts – Add walnuts or pecans for crunch; enhance texture and flavor.
• Dried Fruit – Incorporate for a chewy twist; raisins or cranberries bring extra sweetness and surprise!

Indulging in these vegan chocolate chip cookies combines warmth and comfort, much like enjoying a savory plate of Tuscan Marry Me Butter Beans. Live that delicious experience today!

Step‑by‑Step Instructions for Easy Vegan Chocolate Chip Cookies

Step 1: Preheat and Prepare
Begin by preheating your oven to 350°F (175°C) and lining a baking sheet with parchment paper. This will ensure your cookies don’t stick and bake evenly. While the oven heats up, gather all your ingredients so you can easily access them as you move through the recipe.

Step 2: Mix Dry Ingredients
In a large mixing bowl, combine the all-purpose flour, baking soda, and salt. Using a whisk, mix these dry ingredients together until they are well blended and free of lumps. You want to ensure that the baking soda and salt are evenly distributed throughout the flour for perfect cookie texture.

Step 3: Combine Wet Ingredients
In another bowl, whisk together the melted coconut oil and brown sugar until the mixture is fully combined and smooth, achieving a creamy consistency. Then, stir in your chosen non-dairy milk until the mixture is even and luscious. This forms the flavorful base for your Easy Vegan Chocolate Chip Cookies.

Step 4: Form the Dough
Gradually add the dry ingredients from the first bowl into the wet mixture while gently folding them together with a spatula or wooden spoon. Mix until just combined; be careful to avoid overmixing, which might lead to denser cookies. It’s okay if a few streaks of flour remain in the dough, as this will help maintain a soft texture.

Step 5: Add the Chocolate Chips
Once your dough is formed, fold in the vegan chocolate chips until they’re evenly distributed throughout. Take your time to ensure that every cookie will get a delightful burst of chocolate goodness. At this stage, feel free to add any optional ingredients like nuts or dried fruit for extra flavor and texture.

Step 6: Scoop the Dough
Use a cookie scoop or tablespoon to drop rounded balls of dough onto your prepared baking sheet. Space them about 2 inches apart to allow for spreading while baking. Each scoop should be generous enough to ensure that your cookies come out thick and chewy, embodying the essence of these Easy Vegan Chocolate Chip Cookies.

Step 7: Bake to Perfection
Place your baking sheet in the preheated oven and bake for 10 to 12 minutes. Keep an eye on them; you want the edges to be golden while the centers look slightly underbaked. This will give you that perfect soft and chewy texture after they cool.

Step 8: Cool and Enjoy
Once baked, remove the cookies from the oven and let them cool on the baking sheet for about 5 minutes. This resting period allows them to set before transferring them to a wire rack. Give them time to cool completely before indulging in these scrumptious Easy Vegan Chocolate Chip Cookies, allowing their full flavors to develop!

What to Serve with Easy Vegan Chocolate Chip Cookies

These delightful cookies are the perfect sweet treat to share with loved ones, inviting a warm and cozy gathering around your table.

  • Almond Milk: The creamy texture of this non-dairy alternative beautifully balances the richness of the cookies, making for a delightful pairing.
  • Fresh Fruit Salad: A refreshing mix of seasonal fruits like berries and melons adds a burst of color and brightness, complementing the cookies' sweet flavors.
  • Vegan Ice Cream: Serve these cookies warm alongside a scoop of your favorite vegan ice cream; the contrast of temperatures is simply divine!
  • Chocolate Dipped Strawberries: These indulgent delights offer a playful twist on dessert that echoes the chocolatey goodness of the cookies, creating a cohesive sweet experience.
  • Espresso or Coffee: A bold cup of espresso beautifully enhances the chocolate notes in the cookies, perfect for a comforting afternoon treat.
  • Peanut Butter Drizzle: Adding a touch of nutty flavor with a warm peanut butter drizzle takes these cookies to the next level; it’s all about balancing textures and flavors!
  • Vegan Milk Shake: Blend almond, coconut, or even oat milk with a banana for a creamy, dreamy shake; it’s a delightful way to wash down those delicious cookies!
  • Nutty Granola Bars: For a healthier companion, serve homemade granola bars that add a bit of crunch and heartiness to your dessert table.
  • Chai Tea: A hot cup of chai, with its warming spices, creates a comforting ambiance while harmonizing beautifully with the cookies' sweet flavors.
  • Lemon Sorbet: For a refreshing finish, serve a scoop of tangy lemon sorbet to cleanse the palate after indulging in your warm, chocolatey treats.

Make Ahead Options

These Easy Vegan Chocolate Chip Cookies are fantastic for meal prep enthusiasts! You can prepare the cookie dough up to 24 hours in advance by mixing all the ingredients and refrigerating the dough in an airtight container. This not only saves time on busy days but also allows the flavors to meld beautifully. Additionally, if you want to store baked cookies, they can be kept at room temperature in an airtight container for up to a week. To enjoy them fresh, simply reheat for a few seconds in the microwave before serving. This way, you ensure that your cookies stay just as delicious and chewy!

Expert Tips for Easy Vegan Chocolate Chip Cookies

Don’t Overmix: Be cautious not to overmix the dough. This helps achieve the soft and chewy texture you desire in Easy Vegan Chocolate Chip Cookies.

Chill the Dough: Letting the dough sit for about an hour in the fridge before baking enhances the flavors and texture, making your cookies even more delicious.

Use Fresh Ingredients: Always check that your baking soda is fresh. Expired baking soda can lead to flat cookies that don’t rise properly.

Perfect Baking Time: Keep an eye on your cookies while baking; the edges should be golden, but the centers may look slightly underbaked for the best texture.

Store Properly: To maintain their softness, store the cookies in an airtight container at room temperature or freeze them for longer freshness.

Variations & Substitutions for Vegan Chocolate Chip Cookies

Feel free to personalize these cookies with delightful twists that enhance their flavor and cater to your unique tastes!

  • Gluten-Free: Substitute all-purpose flour with almond flour or a 1:1 gluten-free flour blend for a gluten-free cookie.
  • Nut-Free: Use sunflower seed butter instead of coconut oil for a nut-free option while keeping that delicious flavor intact.
  • Sweetness Control: Replace brown sugar with coconut sugar for a lower glycemic version that doesn’t sacrifice taste.
  • Extra Chocolatey: Add cacao nibs along with the chocolate chips for an intense chocolate experience that chocolate lovers will adore.
  • Spice It Up: Mix in a teaspoon of cinnamon or a pinch of nutmeg for a warm, aromatic flavor that adds depth.
  • Dried Fruit Delight: Incorporate raisins or dried cranberries to satisfy those cravings for something sweet and chewy while promoting texture.
  • Chunky Cookies: Toss in chopped dark chocolate or white chocolate for big chunks that deliver delightful bursts with every bite.
  • Flavorful Nuts: Add walnuts or pecans for a satisfying crunch, enhancing both flavor and texture in your cookies.

These variations make it easy to tailor each batch to your preferences, much like customizing a comforting plate of Coconutty Beans Greens or indulging in a serving of Smoky Sweet Potatoes. Embrace your creativity and enjoy the delightful results!

How to Store and Freeze Vegan Chocolate Chip Cookies

Room Temperature: Store cookies in an airtight container at room temperature for up to 1 week to maintain their soft and chewy texture.

Freezer: For longer storage, place cookies in a single layer on a baking sheet to freeze individually, then transfer to a freezer-safe bag for up to 3 months.

Reheating: When ready to enjoy, thaw at room temperature for 30 minutes or warm in the oven at 350°F (175°C) for 5 minutes to restore their delightful texture.

Dough Storage: You can also freeze the cookie dough! Scoop into balls and freeze on a tray, then store in an airtight container for up to 3 months; bake directly from frozen, adding a couple of extra minutes.

Vegan Chocolate Chip Cookies Recipe FAQs

How do I choose ripe ingredients for my vegan chocolate chip cookies?
Absolutely! When selecting ingredients, focus on using fresh, high-quality items. For brown sugar, opt for soft ones without hard clumps. Choose coconut oil that’s not rancid and vegan chocolate chips that are dairy-free to ensure the best flavor in your cookies. Fresh baking soda is key as expired soda can prevent your cookies from rising properly.

What’s the best way to store leftover cookies?
I often recommend storing cookies in an airtight container at room temperature for up to 1 week. This helps maintain their delightful soft and chewy texture. If you want to keep them even longer, freeze the cookies in a single layer before transferring them to a freezer-safe bag, where they can last for up to 3 months. Just make sure to label your container with the date!

Can I freeze the cookie dough to bake later?
Absolutely! Freezing the cookie dough is a great option. After scooping the dough into balls, place them in a single layer on a baking sheet and freeze until solid. Then transfer them to an airtight container or bag for up to 3 months. When you're ready to bake, you can pop the frozen dough directly into the oven, just add an extra 2 minutes to your baking time.

What if my cookies turn out too flat?
Very! If your cookies spread too much, it could be due to several factors. First, make sure your coconut oil is solid rather than melted, as using melted oil can lead to flatter cookies. You may also want to chill the dough for at least 30 minutes before baking to help them hold their shape. Another tip is to ensure your baking soda is fresh and correctly measured, as too much can contribute to excessive spreading.

Are these vegan chocolate chip cookies safe for people with allergies?
Yes! These cookies are dairy-free and can be made gluten-free by substituting all-purpose flour with gluten-free flour like almond or oat flour. However, always check labels to confirm that your ingredients, especially chocolate chips, are dairy-free. If you have nut allergies, skip or substitute the nuts in the recipe. Remember to inform guests about any ingredients that may pose an allergy risk.

Can I use alternative flours in this recipe?
Definitely! For a gluten-free option, almond flour works beautifully. If you want a higher fiber option, spelt flour can be a fantastic substitute as well. Just keep in mind that different flours may require slight adjustments in liquid ingredients, so don't hesitate to experiment until you find your perfect balance!

These Vegan Chocolate Chip Cookies recipe FAQs are here to help you create the most scrumptious treats without any hitches. Enjoy your baking journey!

Tuscan Marry Me Butter Beans

Delicious Tuscan Marry Me Butter Beans You’ll Want to Share

These Tuscan Marry Me Butter Beans are a delightful vegan dish that offers rich flavors and comforting satisfaction, perfect for sharing.
Print Recipe Pin Recipe
Prep Time 15 minutes mins
Cook Time 30 minutes mins
Cooling Time 5 minutes mins
Total Time 50 minutes mins
Servings: 4 servings
Course: Uncategorized
Cuisine: Italian
Calories: 150
Ingredients Equipment Method Nutrition Notes

Ingredients
  

For the Batter
  • 2 cups All-Purpose Flour Substitute with almond flour for a gluten-free option.
  • 1 teaspoon Baking Soda Check for freshness.
  • 1/2 teaspoon Salt Sea salt works wonderfully.
  • 1/2 cup Coconut Oil Swap with vegan butter for richer flavor.
  • 3/4 cup Brown Sugar Consider coconut sugar for a lower glycemic choice.
  • 1 cup Non-dairy Milk Almond, soy, or oat milk are great options.
  • 1 cup Vegan Chocolate Chips Choose dark chocolate chips for a richer flavor.
For Serving
  • 1/2 cup Chopped Nuts Walnuts or pecans for crunch.
  • 1/2 cup Dried Fruit Raisins or cranberries for extra sweetness.

Equipment

  • Oven
  • Mixing Bowl
  • Whisk
  • Spatula
  • Baking Sheet

Method
 

Step-by-Step Instructions
  1. Preheat your oven to 350°F (175°C) and line a baking sheet with parchment paper.
  2. In a large mixing bowl, combine the all-purpose flour, baking soda, and salt.
  3. In another bowl, whisk together melted coconut oil and brown sugar until smooth, then stir in non-dairy milk.
  4. Gradually add dry ingredients to wet mixture, folding gently until just combined.
  5. Fold in the vegan chocolate chips until evenly distributed.
  6. Drop rounded balls of dough onto the prepared baking sheet, spacing them about 2 inches apart.
  7. Bake for 10 to 12 minutes until edges are golden and centers slightly underbaked.
  8. Let cool on the baking sheet for about 5 minutes before transferring to a wire rack.

Nutrition

Serving: 1cookieCalories: 150kcalCarbohydrates: 20gProtein: 2gFat: 7gSaturated Fat: 4gPolyunsaturated Fat: 1gMonounsaturated Fat: 2gSodium: 100mgPotassium: 50mgFiber: 1gSugar: 8gCalcium: 2mgIron: 6mg

Notes

Store cookies in an airtight container at room temperature for up to 1 week. Freeze for longer storage.

Tried this recipe?

Let us know how it was!

Creamy Pumpkin Cheesecake Dip: Perfect for Halloween Fun

October 28, 2025 by Grace Snow Leave a Comment

As the crisp autumn air fills the room, the delightful scent of pumpkin spice begins to weave its magic. One afternoon, while searching for the perfect Halloween treat, I stumbled upon this incredible No-Bake Pumpkin Cheesecake Dip that instantly stole my heart. This creamy, dreamy dessert not only offers a quick and hassle-free way to indulge those fall cravings, but it also serves up a playful presentation with its chocolate cookie "dirt" topping—perfect for impressing friends and family at gatherings. Imagine the joy on their faces as they dig into this fun twist on cheesecake without having to turn on the oven! Are you ready to create a showstopper that's as delightful to make as it is to eat?

Why is this Pumpkin Cheesecake Dip a Must-Try?

Simplicity at its Best: No need to bake or fuss—just mix and enjoy!

Crowd-Pleasing Treat: It's a fun and interactive dessert—perfect for Halloween gatherings.

Rich, Creamy Flavor: The luscious cream cheese and pumpkin blend create a decadent dip everyone will love.

Versatile Pairings: Serve with slices of fresh apples, pretzels, or graham crackers for a delightful treat. You can also enjoy it alongside a warm glass of pumpkin spice latte for that cozy autumn vibe.

Playful Presentation: With its chocolate cookie "dirt" topping, it looks amazing and is sure to be a hit at any party.

So why not take a moment to bask in the deliciousness of this delightful dip? You deserve a break from fast food and a taste of home with every bite!

Pumpkin Cheesecake Dip Ingredients

For the Dip

  • Cream Cheese – Provides a rich, creamy texture; let it soften for easy mixing.
  • Pumpkin Puree – Adds seasonal sweetness; opt for pure pumpkin to control spices.
  • Powdered Sugar – Sweetens the dip; maple syrup can be a great natural substitute.
  • Vanilla Extract – Enhances flavor; using pure vanilla yields the best results.

For the Topping

  • Chocolate Cookies (e.g., Oreos) – Creates the "dirt" look; graham crackers can provide a different texture.
  • Gummy Worms (optional) – Adds a fun, spooky touch for Halloween.

Indulge in this delightful Pumpkin Cheesecake Dip, where each ingredient works in harmony to create a dessert that’s as delicious as it is fun!

Step‑by‑Step Instructions for No-Bake Pumpkin Cheesecake Dip

Step 1: Beat the Cream Cheese
In a large mixing bowl, beat 8 ounces of softened cream cheese with an electric mixer on medium speed for about 2 minutes until it’s smooth and creamy. The texture should be free of lumps, resembling a luscious frosting. Make sure your cream cheese is at room temperature for the best results, as this will create a wonderfully fluffy base for your Pumpkin Cheesecake Dip.

Step 2: Mix in Pumpkin and Sweetness
Add 1 cup of pumpkin puree, 1 cup of powdered sugar, and 1 teaspoon of vanilla extract to the bowl. Continue mixing on low speed for about 2-3 minutes until all ingredients are combined evenly and the dip is velvety smooth. The vibrant orange hue of the pumpkin will meld perfectly with the creaminess, making your dip both delicious and visually appealing.

Step 3: Transfer and Smooth the Mixture
Carefully transfer the creamy pumpkin dip into your favorite serving bowl. Use a spatula to smooth the top for an elegant presentation. This step enhances the creamy texture and helps in showcasing the delightful layers you’ll be adding soon. The rich color will draw everyone’s attention, inviting them to dig in!

Step 4: Prepare the "Dirt" Topping
While your Pumpkin Cheesecake Dip is chilling, crush about 10 chocolate cookies (such as Oreos) into fine crumbs. You can achieve this using a food processor for about 30 seconds or place the cookies in a resealable bag and crush them with a rolling pin. The texture should resemble fine dirt, giving a playful look to your dessert.

Step 5: Add the Crumbled Cookies
Evenly sprinkle the crushed cookie mixture over the top of your prepared Pumpkin Cheesecake Dip, making it look like a delightful layer of dirt. This crumbled topping adds a fun, Halloween-inspired touch that contrasts beautifully with the creamy dip. If desired, gently place a few gummy worms on top for an extra spooky decoration.

Step 6: Chill or Serve Immediately
You can serve the Pumpkin Cheesecake Dip right away, or for a firmer texture, chill it in the refrigerator for about 30 minutes. Be sure to add the crumbled cookie topping just before serving to keep it fresh and crunchy. This simple step makes your dip even more enticing, especially when shared with friends and family during your Halloween gatherings.

Pumpkin Cheesecake Dip Variations

Feel free to get creative with this delightful dip and customize it to your taste!

  • Greek Yogurt: Swap cream cheese for Greek yogurt to lighten the dip while keeping it creamy and tangy. It's a refreshing twist that's equally delicious!

  • Pumpkin Spice Boost: Add a teaspoon of pumpkin pie spice for extra autumn flavor. The warming spices will elevate the comforting essence of this indulgent treat.

  • Gingersnap Crust: Use crushed gingersnap cookies instead of chocolate cookies for a spicy, flavorful alternative. This swap adds a fun zing that truly stands out.

  • Vegan Version: For a vegan-friendly option, substitute dairy-free cream cheese and sweeten with maple syrup. You’ll enjoy a creamy dip that suits everyone's dietary needs.

  • Nutty Crunch: Toss in some finely chopped pecans or walnuts atop your dip for a delightful crunch. It adds a fabulous texture and nutty flavor that complements the creaminess.

  • Chocolate Drizzle: Drizzle melted chocolate over the top for an indulgent finish. This simple addition takes the dessert to another level, making it even more irresistible!

  • Cinnamon Sugar Dusting: Sprinkle a mix of cinnamon and sugar on top for a sweet and aromatic finish. It adds a delightful touch that pairs perfectly with the pumpkin flavor.

For more inspiration, you might also want to check out these delicious options: Pumpkin Brownies Decadent or the indulgent Pumpkin Cinnamon Roll recipes. They're perfect for your autumn gatherings!

Expert Tips for Pumpkin Cheesecake Dip

Room Temperature Cream Cheese: Ensure your cream cheese is softened to room temperature for the smoothest texture and easy mixing in your Pumpkin Cheesecake Dip.

Avoid Overmixing: Once you add powdered sugar, mix just until combined; overmixing can lead to a runny dip.

Customize Sweetness: If your dip is too sweet, balance with a dash of salt or a bit more pumpkin puree for a more complex flavor.

Crush Cookies Carefully: Aim for fine crumbs when preparing the "dirt" topping; larger chunks can disrupt the creamy texture underneath.

Chill for Best Results: Let the dip chill for at least 30 minutes before serving for a firmer texture that’s easier to scoop.

Add Fun Toppings: Don’t hesitate to get creative—try different cookie toppings or add seasonal candies for a personal touch!

How to Store and Freeze Pumpkin Cheesecake Dip

Refrigerator: Store leftovers in an airtight container for up to 3 days. This keeps the Pumpkin Cheesecake Dip fresh and creamy, ready for a quick snack.

Freezer: Although not ideal, you can freeze the dip for up to 1 month. Thaw it overnight in the fridge before serving, and consider re-mixing to restore its creamy texture.

Topping Storage: Keep the crumbled chocolate cookies separate until you’re ready to serve. This helps retain their crunchiness and enhances the dip's presentation.

Make-Ahead Tip: Prepare the dip a day in advance for convenience. Just remember to add the cookie topping right before serving for that fresh, delightful crunch!

Make Ahead Options

This No-Bake Pumpkin Cheesecake Dip is not just a crowd-pleaser, but also a fantastic option for meal prep! You can prepare the dip up to 24 hours in advance, mixing the cream cheese, pumpkin puree, powdered sugar, and vanilla extract together, and refrigerating it in an airtight container. The cookie topping can be crushed and stored separately (to maintain its crunch) for up to 3 days. When you're ready to serve, simply sprinkle the crumbled cookies on top and add any gummy worms for that fun Halloween touch. By prepping ahead, you’ll save valuable time and still impress your guests with a dessert that’s just as delicious as when freshly made!

What to Serve with No-Bake Pumpkin Cheesecake Dip

Create the perfect fall gathering with these delightful pairings that complement the rich flavors of your dip.

  • Fresh Apple Slices: They add a refreshing crunch that cuts through the creaminess, making for a well-rounded treat.
  • Graham Crackers: Their mild sweetness and crispy texture provide a classic contrast to the pumpkin dip's richness.
  • Pretzels: The salty finish offers a delightful balance to the sweet pumpkin cheesecake dip, creating a perfect sweet-salty combo. Try pairing both for a fun grazing platter!
  • Vanilla Wafer Cookies: These cookies add a light, buttery flavor that beautifully enhances the dip's creamy texture, creating an irresistible duo.
  • Spiced Chai: A warm cup of spiced chai enhances the cozy, autumn vibe while pairing beautifully with the pumpkin flavors.
  • Pumpkin Spice Latte: Enjoy this seasonal favorite alongside your dip; its comforting warmth and spice echo the dip’s flavors, making for a delightful treat.
  • Caramel Sauce: Drizzling a bit of caramel over the dip adds an indulgent touch, heightening the sweetness and flavor profile.
  • Chocolate-Covered Pretzels: Offering a sweet twist on traditional pretzels, they bring a crunchy chocolate finish to each bite, enhancing the overall experience.
  • Whipped Cream: A dollop on top of the dip adds a light and airy texture, creating a beautiful contrast with the dense creaminess of the dip.
  • Gummy Worms: Not just for decoration, they add a fun and playful element that truly embraces the Halloween spirit!

Pumpkin Cheesecake Dip Recipe FAQs

How can I tell if my pumpkin puree is fresh?
Absolutely! When selecting pumpkin puree, look for a vibrant orange color with a smooth consistency. If you notice any dark spots, unusual odors, or separation of liquid, it's best to avoid using it. Using pure pumpkin puree will ensure your dip is flavorful and falls in line with our seasonal treat.

How should I store leftovers of the Pumpkin Cheesecake Dip?
You can store leftovers in an airtight container in the refrigerator for up to 3 days. Make sure to keep the dip tightly sealed to maintain its creamy texture. If you have extra crumbled cookie topping, store that separately to keep it crunchy until you’re ready to serve.

Can I freeze Pumpkin Cheesecake Dip?
Very! You can freeze the dip for up to 1 month if you find you have leftovers. To do this, place the dip in a freezer-safe container, leaving a little space at the top for expansion. When you're ready to enjoy it, thaw it in the refrigerator overnight and mix it gently to restore its creamy texture. Just remember, the cookie topping should be added fresh right before serving!

What can I do if my dip turns out too runny?
If your Pumpkin Cheesecake Dip is a bit runny, don't worry! Simply chill it in the refrigerator for about 30 minutes. This will help firm it up. Alternatively, you can gradually add more powdered sugar or a little bit of cream cheese until you achieve your desired consistency. Mixing it gently will maintain that lovely creaminess!

Is this Pumpkin Cheesecake Dip suitable for people with allergies?
Yes! If you're making this dip for guests with dietary restrictions, there are plenty of substitutions. Use dairy-free cream cheese for a vegan option or Greek yogurt for a lighter dip. Make sure to check the labels of any ingredients you use, especially for potential allergens like gluten in the cookies.

What are some fun variations of the Pumpkin Cheesecake Dip?
The more the merrier! You can swap out crushed chocolate cookies with gingersnap cookies for a different flavor profile. Adding pumpkin pie spice to the mixture enhances that autumnal taste, while a sprinkle of sea salt can balance the sweetness beautifully. Don't hesitate to get creative and explore new toppings for added fun!

Pumpkin Cheesecake Dip

Creamy Pumpkin Cheesecake Dip: Perfect for Halloween Fun

This Pumpkin Cheesecake Dip is a creamy, no-bake treat that's perfect for Halloween gatherings and will impress your friends and family.
Print Recipe Pin Recipe
Prep Time 15 minutes mins
Chilling Time 30 minutes mins
Total Time 45 minutes mins
Servings: 8 servings
Course: Dessert
Cuisine: American
Calories: 210
Ingredients Equipment Method Nutrition Notes

Ingredients
  

For the Dip
  • 8 ounces Cream Cheese Softened for easy mixing.
  • 1 cup Pumpkin Puree Opt for pure pumpkin to control spices.
  • 1 cup Powdered Sugar Maple syrup can be a natural substitute.
  • 1 teaspoon Vanilla Extract Using pure vanilla yields the best results.
For the Topping
  • 10 cookies Chocolate Cookies (e.g., Oreos) Creates the 'dirt' look; graham crackers can offer a different texture.
  • Gummy Worms Optional, for a fun, spooky touch.

Equipment

  • Electric mixer
  • Mixing Bowl
  • Spatula
  • Food Processor

Method
 

Step-by-Step Instructions
  1. In a large mixing bowl, beat 8 ounces of softened cream cheese with an electric mixer on medium speed for about 2 minutes until it’s smooth and creamy.
  2. Add 1 cup of pumpkin puree, 1 cup of powdered sugar, and 1 teaspoon of vanilla extract to the bowl. Continue mixing on low speed for about 2-3 minutes until all ingredients are combined evenly.
  3. Carefully transfer the creamy pumpkin dip into your favorite serving bowl and smooth the top with a spatula.
  4. Crush about 10 chocolate cookies into fine crumbs, using a food processor or a rolling pin.
  5. Evenly sprinkle the crushed cookie mixture over the top of the prepared Pumpkin Cheesecake Dip.
  6. Serve immediately or chill in the refrigerator for about 30 minutes for a firmer texture.

Nutrition

Serving: 1servingCalories: 210kcalCarbohydrates: 25gProtein: 2gFat: 10gSaturated Fat: 6gCholesterol: 30mgSodium: 150mgPotassium: 100mgFiber: 1gSugar: 18gVitamin A: 420IUVitamin C: 1mgCalcium: 20mg

Notes

Make the dip a day in advance for convenience, but add the crumbled topping just before serving for freshness.

Tried this recipe?

Let us know how it was!

Creamy Pumpkin Tiramisu You’ll Crave This Fall

October 28, 2025 by Grace Snow Leave a Comment

As the crisp air settles in and leaves start their colorful dance, my thoughts inevitably drift to delightful fall desserts. This season, I can’t get enough of my Easy No-Bake Creamy Pumpkin Tiramisu. With layers of rich mascarpone blended with warm pumpkin spices and dainty ladyfingers soaked in espresso, this dessert beautifully captures the essence of autumn. Not only is it a breeze to whip up—perfect for busy evenings—but it’s also a crowd-pleaser, making it ideal for holiday gatherings or cozy nights at home. You can indulge without ever turning on the oven! Curious about how to create this velvety, spiced wonder yourself? Let’s dive into the delicious details!

Why is Creamy Pumpkin Tiramisu a Must-Try?

Irresistible flavor: This Easy No-Bake Creamy Pumpkin Tiramisu boasts a delightful blend of spiced pumpkin and rich mascarpone that makes every bite memorable.

Quick and simple: With just a few straightforward steps, you can whip up this luscious dessert without any baking—perfect for busy schedules.

Fall favorite: Its seasonal flavors make it a standout choice for festive gatherings. Everyone will be asking for seconds!

Customizable options: Want to cater to different diets? Easily make it vegan or add chocolate for a twist.

Serves a crowd: With generous layers, it’s designed for sharing, ensuring your guests feel welcomed and satisfied.

Have you tried something similar? Pair it with a scoop of vanilla ice cream or consider serving this alongside my Pumpkin Cinnamon Roll for a delightful dessert spread!

Creamy Pumpkin Tiramisu Ingredients

• Gather these ingredients to make this delightful dessert!

For the Cream Layer

  • Mascarpone Cheese (15.87 oz) – The creamy base providing richness; select a high-quality brand for the best texture.
  • Pumpkin Puree (1/2 cup) – Infuses warm, seasonal flavor; ensure it’s pure puree, not pie filling.
  • Granulated Sugar (2/3 cup) – Sweetens the cream; reduce if using sweetened whipped cream.
  • Brown Sugar (1/3 cup) – Adds depth of flavor; can be swapped with coconut sugar for a twist.
  • Pumpkin Pie Spice (2 teaspoons) – Provides warmth and comfort; mix your own with cinnamon, nutmeg, and ginger if needed.
  • Kosher Salt (1/4 teaspoon) – Balances sweetness; fine sea salt works in a pinch.
  • Heavy Cream (2 cups, cold) – Creates a light, fluffy texture; try whipped coconut cream for a dairy-free option.

For the Ladyfinger Layer

  • Ladyfingers (28 pieces) – Builds the structure and offers a light sponge; homemade or sponge cake can also be used as a substitute.
  • Espresso or Strong Coffee (2 cups, cooled) – Soaks the ladyfingers for added flavor; cold brew works well if brewed strong.

For the Garnish

  • Cocoa Powder – Used for dusting the dessert before serving, adds a rich visual contrast.

Now you’re ready to make your Creamy Pumpkin Tiramisu and treat your taste buds to fall’s essence!

Step‑by‑Step Instructions for Easy Creamy Pumpkin Tiramisu

Step 1: Brew Coffee
Start by brewing 2 cups of strong espresso or coffee. Allow it to cool to room temperature, which should take about 15-20 minutes. This cooling step is essential to avoid sogging the ladyfingers. Once cooled, pour the coffee into a shallow dish.

Step 2: Make Cream
In a large mixing bowl, combine 15.87 oz of mascarpone cheese, 2/3 cup of granulated sugar, 1/3 cup of brown sugar, 1/4 teaspoon of kosher salt, and 2 teaspoons of pumpkin pie spice. Beat the mixture until it's smooth and creamy. Gradually blend in 1/2 cup of pumpkin puree, followed by 2 cups of cold heavy cream, whipping for about 3-4 minutes until you achieve a thick, mousse-like texture.

Step 3: Layer 1
Take your cooled coffee and quickly dip the ladyfingers, one at a time, for just 1-2 seconds to soak. Arrange them in a single layer at the bottom of a 13x9 inch dish, creating a sturdy base for your Easy Creamy Pumpkin Tiramisu. The ladyfingers should be soft but still hold their shape for the best texture.

Step 4: Cream Layer 1
Spoon half of the creamy pumpkin mixture over the first layer of coffee-soaked ladyfingers. Use a spatula to spread it evenly, ensuring every corner is covered. This creamy layer adds a delicious, rich contrast to the base, enriching the overall flavor of your tiramisu.

Step 5: Layer 2
Repeat the dipping process with another batch of ladyfingers, soaking them briefly in the cooled coffee. Arrange this new layer of ladyfingers on top of the first cream layer, ensuring they are placed closely together for good structure. The overlap will help to create a delightful balance in your Easy Creamy Pumpkin Tiramisu.

Step 6: Top
Spread the remaining creamy pumpkin mixture over the second layer of ladyfingers. Smooth the top layer with a spatula, making it as even and beautiful as possible. This final layer will be the star of your dessert, providing a luscious finish that welcomes guests in for a taste.

Step 7: Chill
Cover your assembled Creamy Pumpkin Tiramisu with plastic wrap or a lid. Refrigerate it for at least 4 hours, or ideally overnight, to allow the flavors to meld together. Chilling also helps the dessert set up properly, making it easier to slice and serve later.

Step 8: Finish & Serve
Before serving, dust the top of your Easy Creamy Pumpkin Tiramisu with cocoa powder for an elegant finishing touch. Optionally, you can sprinkle a little ground cinnamon on top for added warmth and spice. Slice it into squares, and get ready to impress your friends and family!

How to Store and Freeze Creamy Pumpkin Tiramisu

  • Fridge: Store your Creamy Pumpkin Tiramisu covered in the refrigerator for up to 3 days. This keeps it fresh and preserves the layers' texture.
  • Freezer: For longer storage, you can freeze the tiramisu for up to 2 months. Wrap it tightly in plastic wrap and foil to prevent freezer burn.
  • Thawing: When ready to enjoy, thaw your frozen Creamy Pumpkin Tiramisu in the fridge overnight. Avoid microwaving, as it can alter the creamy texture.
  • Serving After Freezing: Dust with cocoa powder just before serving for a fresh touch, as the garnish may not hold up during freezing.

What to Serve With Easy Creamy Pumpkin Tiramisu

Pairing a sweet and delightful dessert like this Easy Creamy Pumpkin Tiramisu can elevate your meal to a whole new level of comfort and joy.

  • Spiced Apple Cider: The warmth of spiced apple cider enhances the fall flavors, bringing cozy memories to the table.

  • Vanilla Ice Cream: A scoop of creamy vanilla ice cream adds a rich, smooth contrast to the fluffy tiramisu, creating a delightful melt-in-your-mouth experience.

  • Ginger Cookies: Crunchy ginger cookies add a satisfying texture while their spicy sweetness complements the pumpkin flavors beautifully.

  • Pecan Pie: This classic dessert pairs perfectly with the tiramisu, offering a nutty contrast that enhances the autumn vibe of your gathering.

  • Maple Whipped Cream: Adding a dollop of maple-flavored whipped cream brings a sweet, creamy touch that complements the pumpkin and spice tones beautifully.

  • Chocolate Espresso Martinis: For a sophisticated drink pairing, these cocktails elevate the coffee notes in your tiramisu while giving your guests a delightful indulgence.

  • Nutty Fall Salad: A fresh salad with toasted nuts, seasonal greens, and a light vinaigrette provides a crunchy balance to the creamy texture of the tiramisu.

  • Pumpkin Spice Latte: Serve alongside this iconic beverage to enhance the cozy ambiance and keep the pumpkin love alive.

  • Dark Chocolate Covered Almonds: The bitterness of dark chocolate paired with crunchy almonds adds an elegant touch to the dessert while complementing the sweet flavors of the tiramisu with a sophisticated twist.

Each of these pairings offers a unique twist, enhancing your Easy Creamy Pumpkin Tiramisu experience and making your gatherings unforgettable!

Expert Tips for Creamy Pumpkin Tiramisu

  • Quality Ingredients: Use high-quality mascarpone and pure pumpkin puree to enhance the flavor and texture, ensuring your Creamy Pumpkin Tiramisu stands out.
  • Coffee Cooling: Make sure the brewed coffee is fully cooled before dipping the ladyfingers. This prevents them from becoming too soggy, keeping the layers distinct.
  • Quick Dipping: Only dip ladyfingers for 1-2 seconds in coffee to maintain their structural integrity. Soaking too long can result in mushy layers.
  • Chill Time: For the best flavor, refrigerate your tiramisu for at least 4 hours but ideally overnight to allow the flavors to meld perfectly.
  • Layering Magic: Ensure that the layers of cream and ladyfingers are even and well-distributed; this balance creates a delightful texture in every bite.

Make Ahead Options

These Easy Creamy Pumpkin Tiramisu layers are perfect for meal prep enthusiasts! You can prepare the mascarpone cream and soak the ladyfingers up to 24 hours in advance for a quick, stress-free dessert. Just whip together the mascarpone, pumpkin puree, and spices, then layer with the coffee-soaked ladyfingers in your dish. Before serving, allow the tiramisu to chill in the refrigerator for at least 4 hours (or overnight) to ensure rich flavors meld together beautifully. For the best texture, cover it tightly with plastic wrap to prevent drying out. When it’s time to serve, simply dust with cocoa powder and enjoy this luscious fall treat with minimal effort!

Creamy Pumpkin Tiramisu Customizations

Feel free to personalize your Easy Creamy Pumpkin Tiramisu with these delightful variations that will only enhance your fall dessert experience!

  • Dairy-Free: Substitute heavy cream with whipped coconut cream for a creamy, rich alternative that fits any dairy-free diet. Your dessert will still maintain its luxurious texture!

  • Nutty Addition: Include 1/2 cup of toasted pecans or walnuts folded into the cream. This adds a satisfying crunch that contrasts beautifully with the smoothness of the mascarpone.

  • Chocolate Flavor: For a richer twist, fold in mini chocolate chips into the mascarpone mixture. Chocolate meets pumpkin is a dynamic duo that always pleases the palate.

  • Vegan Version: Easily turn this treat into a vegan delight by using coconut whipped cream and a vegan cream cheese alternative. Enjoy the same creamy goodness without any animal products!

  • Spicy Kick: Infuse a bit of heat by adding a pinch of cayenne or chili powder. This unexpected twist brings a delightful warmth to the classic pumpkin flavors.

  • Flavor Swap: Instead of pumpkin puree, try using sweet potato or butternut squash. Each swap brings its unique sweet earthiness, allowing you to switch up the flavor while still staying within the fall spirit.

  • Crunchy Topping: Sprinkle crushed gingersnaps or graham crackers on top before serving for an additional texture layer and a lovely crunch along with the softness.

Looking to extend your pumpkin cravings? You might find joy in my recipe for Pumpkin Brownies Decadent or perhaps treat yourself to some lovely Pumpkin Cinnamon Roll delights!

Creamy Pumpkin Tiramisu Recipe FAQs

How do I select the best pumpkin puree for my Creamy Pumpkin Tiramisu?
Absolutely! When choosing pumpkin puree, opt for 100% pure pumpkin without added sugars or spices. Look for labels that specifically state "pure pumpkin" on the can to ensure you're getting the real deal, as some products labeled "pumpkin" may contain fillers or additives.

How should I store my Creamy Pumpkin Tiramisu?
Store your Creamy Pumpkin Tiramisu covered in the refrigerator for up to 3 days. Make sure it’s tightly wrapped with plastic wrap or kept in an airtight container to maintain its layers' texture and flavor. If you want to keep it longer, consider freezing!

Can I freeze my Creamy Pumpkin Tiramisu?
Very much! You can freeze your Creamy Pumpkin Tiramisu for up to 2 months. Just wrap it tightly in plastic wrap and then in foil to prevent freezer burn. When you’re ready to enjoy, thaw it in the fridge overnight; avoid using the microwave, as it alters the creamy texture.

What if my ladyfingers become too soggy?
No worries! If you find your ladyfingers have become too soggy, it might be due to soaking them for too long in the coffee. Aim for a quick dip, just 1-2 seconds, to maintain their texture. If they’re overly soft, consider using a bit less coffee for the next batch or adjusting your dipping time.

Can I make a vegan version of the Creamy Pumpkin Tiramisu?
Absolutely! To make a vegan version, there are delightful alternatives. Use coconut whipped cream in place of heavy cream and a vegan cream cheese substitute for the mascarpone. Look for plant-based options that provide a similar creamy texture while ensuring a delicious pumpkin flavor!

What should I do with my Creamy Pumpkin Tiramisu leftovers?
After enjoying your delicious dessert, if you have any leftovers, keep them in the refrigerator properly covered for up to 3 days. Remember, the flavors improve with time, so your next serving may taste even better as the layers meld together!

Creamy Pumpkin Tiramisu

Creamy Pumpkin Tiramisu You’ll Crave This Fall

Indulge in this Easy No-Bake Creamy Pumpkin Tiramisu, a delightful dessert filled with warm spices and rich mascarpone, perfect for fall gatherings.
Print Recipe Pin Recipe
Prep Time 30 minutes mins
Chill Time 4 hours hrs
Total Time 4 hours hrs 30 minutes mins
Servings: 10 slices
Course: Dessert
Cuisine: Italian
Calories: 340
Ingredients Equipment Method Nutrition Notes

Ingredients
  

For the Cream Layer
  • 15.87 oz Mascarpone Cheese Select a high-quality brand for the best texture.
  • 1/2 cup Pumpkin Puree Ensure it’s pure puree, not pie filling.
  • 2/3 cup Granulated Sugar Reduce if using sweetened whipped cream.
  • 1/3 cup Brown Sugar Can be swapped with coconut sugar for a twist.
  • 2 teaspoons Pumpkin Pie Spice Mix your own with cinnamon, nutmeg, and ginger if needed.
  • 1/4 teaspoon Kosher Salt Fine sea salt works in a pinch.
  • 2 cups Heavy Cream Try whipped coconut cream for a dairy-free option.
For the Ladyfinger Layer
  • 28 pieces Ladyfingers Homemade or sponge cake can also be used as a substitute.
  • 2 cups Espresso or Strong Coffee Cold brew works well if brewed strong.
For the Garnish
  • Cocoa Powder Used for dusting the dessert before serving.

Equipment

  • Mixing Bowl
  • 13x9 inch dish
  • Shallow dish

Method
 

Step-by-Step Instructions
  1. Brew 2 cups of strong espresso or coffee and allow it to cool to room temperature for about 15-20 minutes.
  2. In a large mixing bowl, combine mascarpone cheese, granulated sugar, brown sugar, kosher salt, and pumpkin pie spice. Beat until smooth and creamy, then blend in pumpkin puree and heavy cream for 3-4 minutes until thick.
  3. Dip ladyfingers in cooled coffee for 1-2 seconds and arrange them in a single layer in a 13x9 inch dish.
  4. Spread half of the creamy pumpkin mixture over the first layer of coffee-soaked ladyfingers evenly.
  5. Repeat the dipping process and place another batch of ladyfingers on top of the first cream layer closely together.
  6. Spread the remaining creamy pumpkin mixture over the second layer of ladyfingers evenly.
  7. Cover with plastic wrap and refrigerate for at least 4 hours or ideally overnight to set.
  8. Before serving, dust with cocoa powder and slice into squares.

Nutrition

Serving: 1sliceCalories: 340kcalCarbohydrates: 40gProtein: 4gFat: 18gSaturated Fat: 10gPolyunsaturated Fat: 0.5gMonounsaturated Fat: 6gCholesterol: 75mgSodium: 90mgPotassium: 150mgFiber: 1gSugar: 20gVitamin A: 15IUVitamin C: 2mgCalcium: 6mgIron: 4mg

Notes

For the best flavor, refrigerate overnight. Use high-quality ingredients for best results.

Tried this recipe?

Let us know how it was!

Gingerbread Cake with Molasses Frosting for Cozy Nights

October 27, 2025 by Grace Snow Leave a Comment

As I pulled that warm gingerbread cake from the oven, the cozy aroma of spices filled my kitchen, wrapping me in a blanket of holiday cheer. This Moist Gingerbread Cake with Molasses Frosting is the ultimate comfort dessert, effortlessly combining traditional flavors with a modern twist. It’s moist and tender, making it perfect for any occasion, especially when friends and family gather around the table. Plus, its irresistible molasses frosting adds a rich, buttery finish that is sure to impress your guests. Whether you're celebrating the season or just need a sweet treat to brighten your day, this recipe is easy to whip up and guaranteed to be a hit! So, are you ready to get baking?

Why Bake Gingerbread Cake Now?

Comforting, Cozy Vibes: There's something special about the aroma of this gingerbread cake filling your home, making it perfect for holiday gatherings or cozy nights in.

Irresistible Flavor: The blend of spices and rich molasses creates a depth of flavor that dances on your palate, ensuring every bite is a delight.

Simple Preparation: No need to be a baking expert! This recipe is straightforward and perfect for both seasoned bakers and beginners alike.

Adaptable Delight: Feel free to switch things up! With options for adding nuts or chocolate chips, you can easily customize this cake to your taste.

Crowd-Pleaser: Whether served as a festive centerpiece or a sweet treat, this cake is bound to impress family and friends alike. Don't forget to check out my Ice Cream Cake for another delicious dessert option!

Gingerbread Cake Ingredients

• Perfect for holiday baking!

For the Cake Base

  • All-Purpose Flour – Forms the structure; consider using gluten-free flour for a gluten-free option.
  • Baking Soda & Baking Powder – These leavening agents ensure a delightful rise; make sure they're fresh for best results.
  • Ground Cinnamon, Ginger, Cloves, Nutmeg – These warm spices create that classic gingerbread flavor; adjust according to your spice preference.
  • Salt – Essential in enhancing the overall flavor; balances the sweetness beautifully.
  • Unsalted Butter – Adds richness and moisture; substitute with coconut oil for a dairy-free version.
  • Dark Brown Sugar – Delivers deep flavor and moisture; light brown sugar works for a milder cake.
  • Granulated Sugar – Sweetens and helps with cake structure; you can replace some with coconut sugar for a healthier option.
  • Eggs – Binds everything together; flax eggs offer a vegan alternative.
  • Unsulfured Molasses – The star ingredient giving that signature gingerbread taste; don't swap without considering its unique properties.
  • Buttermilk – Provides moisture; use almond milk mixed with vinegar as a dairy-free substitute.
  • Hot Water – Ensures a smooth batter while adding moisture for that lovely crumb.

For the Molasses Frosting

  • Unsalted Butter – Adds a creamy texture to the frosting; vegan butter can be used if needed.
  • Powdered Sugar – Sweetens the frosting; sift before adding to avoid lumps for a perfect finish.
  • Unsulfured Molasses – Deepens the flavor profile; try different types of molasses for varied taste experiences.
  • Milk or Heavy Cream – Adjusts the frosting’s consistency; almond milk is a great dairy-free option.
  • Vanilla Extract – Elevates the flavors; it's optional if you prefer a simpler taste.
  • Pinch of Salt – Balances sweetness and enhances flavor—don’t skip this step!

Step‑by‑Step Instructions for Gingerbread Cake Molasses Frosting

Step 1: Preheat and Prepare
Begin by preheating your oven to 350°F (175°C). Grease a 9x13 inch baking pan with a little butter or baking spray, ensuring it's well coated to prevent sticking. This is crucial for your gingerbread cake to come out perfectly.

Step 2: Mix Dry Ingredients
In a large mixing bowl, whisk together the all-purpose flour, baking soda, baking powder, ground cinnamon, ginger, cloves, nutmeg, and salt. This step will help distribute the leavening agents and spices evenly, creating a well-balanced flavor in your gingerbread cake.

Step 3: Cream Butter and Sugars
In another bowl, cream the softened unsalted butter with dark brown and granulated sugars using an electric mixer on medium speed for about 3-5 minutes. You want the mixture to become light and fluffy, indicating that air has been incorporated, which is essential for a soft and moist cake.

Step 4: Add Eggs and Molasses
Add eggs to the creamed mixture one at a time, beating well after each addition. Then, mix in the unsulfured molasses until fully combined. The molasses will add that characteristic rich flavor of gingerbread cake, as well as moisture to the batter.

Step 5: Combine Wet and Dry Ingredients
Alternately add the dry ingredient mixture and the buttermilk into the butter and sugar mixture, starting and ending with the dry. Mix until just combined to ensure your gingerbread cake stays tender and moist; overmixing can lead to a dense texture.

Step 6: Add Hot Water
Stir in the hot water gradually until the batter is smooth and well combined. This step enhances the moisture of your gingerbread cake, ensuring each bite is delectable and fluffy. The batter should be a little thinner, but still hold a good consistency.

Step 7: Bake the Cake
Pour the batter into your prepared baking pan and spread it evenly. Bake in the preheated oven for about 30-35 minutes, or until a skewer inserted into the center comes out clean. The edges should be slightly pulling away from the sides of the pan, indicating it's done.

Step 8: Cool the Cake
Once baked, let the cake cool in the pan for about 10 minutes. Then, carefully transfer it to a wire rack to cool completely. Cooling is essential before frosting; if frosted too soon, the icing could melt and lose its structure.

Step 9: Prepare the Molasses Frosting
While the cake cools, start on the molasses frosting. In a bowl, cream the softened unsalted butter until smooth. Gradually add the sifted powdered sugar, along with the unsulfured molasses and vanilla extract, mixing until creamy. Adjust the consistency with milk if needed for a silky finish.

Step 10: Frost the Cake
Once the gingerbread cake has cooled completely, spread the molasses frosting evenly over the top using a spatula or knife. Feel free to decorate as desired—sprinkle some extra spices or edible decorations to make your cake visually appealing!

Make Ahead Options

These Gingerbread Cake with Molasses Frosting recipes are perfect for meal prep enthusiasts! You can prepare the cake batter and store it in the refrigerator for up to 24 hours. This way, the flavors meld beautifully and cooking can be done right before serving. Additionally, you can frost the cooled cake as needed, ensuring it’s fresh and just as delicious. If you prefer, you can also bake the cake a day in advance and keep it in an airtight container at room temperature for up to 3 days. Just frost it when you're ready to serve, and you'll have a warm, cozy dessert that feels like it just came out of the oven!

How to Store and Freeze Gingerbread Cake

Room Temperature: Keep the gingerbread cake in an airtight container at room temperature for up to 3 days to maintain its moist texture and flavor.

Fridge: If you want to extend its life, store the cake in the refrigerator for up to 5 days. Ensure it's well-wrapped to avoid drying out.

Freezer: For longer storage, freeze individual slices or the whole cake wrapped tightly in plastic wrap and aluminum foil. It can last for up to 3 months.

Reheating: To enjoy your gingerbread cake again, thaw it in the fridge overnight, then reheat gently in the microwave for a few seconds or in the oven at 350°F (175°C) for about 10-15 minutes. Enjoy this delightful gingerbread cake with molasses frosting warm or chilled!

What to Serve with Gingerbread Cake with Molasses Frosting

Sharing a slice of this spiced cake magically transforms cozy evenings into a warm gathering filled with delightful flavors.

  • Vanilla Ice Cream: The creamy texture beautifully balances the cake's spices, offering a refreshing contrast to its warmth.

  • Whipped Cream: A cloud of whipped cream adds a light, airy element that enhances each rich bite of gingerbread.

  • Hot Spiced Apple Cider: The cinnamon and clove notes in the cider complement the gingerbread, creating a festive beverage pairing.

  • Coffee: A rich cup of coffee enhances the cake's flavors, making it the perfect companion for your afternoon treat.

  • Dark Chocolate Drizzle: A drizzle of melted dark chocolate adds a hint of bitterness that pairs wonderfully with the sweetness of the molasses frosting.

  • Pecans or Walnuts: Crunchy nuts provide a delightful texture contrast, and their earthiness can deepen the overall flavor experience.

  • Cream Cheese Frosting Alternative: For a tangy twist, consider a cream cheese frosting, which contrasts beautifully with the gingerbread’s sweetness.

  • Fresh Berries: A scattering of raspberries or blueberries can brighten the plate, adding a pop of freshness that cuts through the richness.

  • Chai Tea: This spiced tea harmonizes beautifully with the cake, creating a cozy moment that feels like a warm hug on a chilly day.

Expert Tips for Gingerbread Cake

  • Room Temperature Ingredients: Ensure all ingredients are at room temperature for better emulsification and a smoother batter.

  • Avoid Overmixing: Mix until just combined to avoid a dense texture. Overmixing can lead to a heavy gingerbread cake rather than a light, moist delight.

  • Cool Before Frosting: Allow the cake to cool completely before applying the molasses frosting to prevent it from melting and losing its shape.

  • Adjust Spice Levels: Feel free to tweak the spice quantities to suit your taste preferences; sometimes a little extra cinnamon can add that perfect touch to your gingerbread cake.

  • Frosting Consistency: Adjust the thickness of the frosting with milk; aim for a spreadable but not runny consistency for the best results.

Gingerbread Cake Molasses Frosting Variations

Feel free to get creative with your gingerbread cake by exploring these delightful variations that will add a personal touch to your baked masterpiece!

  • Nutty Crunch: Add chopped walnuts or pecans into the batter for a satisfying crunch and additional flavor harmony. The nuts will complement the warm spices beautifully!

  • Chocolate Surprise: Incorporate semi-sweet chocolate chips seamlessly into the batter for a comforting twist on the classic gingerbread flavor. Chocolate pairs wonderfully with the molasses—your taste buds will thank you!

  • Cupcake Transformation: Turn your batter into delightful gingerbread cupcakes, adjusting the baking time to around 18-20 minutes for perfectly portioned treats. These make for adorable presentation and easy serving at gatherings.

  • Tangy Frosting Swap: Try a tangy cream cheese frosting instead of molasses frosting for a delicious balance of flavors. Simply whip together cream cheese with powdered sugar and a touch of vanilla for a delightful twist!

  • Citrusy Drizzle: For a fresh take, drizzle a lemon glaze over the frosted cake. The zesty citrus will brighten the rich flavors of the gingerbread, creating a lovely contrast.

  • Spiced Apple Addition: Add diced apples and a sprinkle of cinnamon for a fruity twist. The added moisture from the apples makes this cake even more tender!

For more inspiration on delicious desserts, consider trying my Chocolate Pudding Cake or German Chocolate Poke Cake for a sweet finish to any occasion!

Gingerbread Cake with Molasses Frosting Recipe FAQs

What type of flour should I use for the gingerbread cake?
I recommend using all-purpose flour for the best structure in your gingerbread cake. If you're looking for a gluten-free option, you can substitute it with a gluten-free flour blend. Make sure to check the blend’s recommended measurements as they can vary.

How should I store the leftover gingerbread cake?
To keep your gingerbread cake moist, store it in an airtight container at room temperature for up to 3 days. If you want to extend its freshness, place it in the refrigerator, where it can last for up to 5 days. Just ensure it's well-wrapped to prevent drying out.

Can I freeze gingerbread cake?
Absolutely! To freeze your gingerbread cake, slice it into individual portions or wrap the whole cake tightly in plastic wrap, followed by aluminum foil. This prevents freezer burn! You can freeze it for up to 3 months. When you're ready to enjoy it, thaw it overnight in the fridge before reheating.

What if my gingerbread cake turns out dense?
If your gingerbread cake is dense, it may be due to overmixing the batter. When incorporating the wet and dry ingredients, mix until just combined. Also, ensure your leavening agents (baking soda and baking powder) are fresh—they should not be expired! If the cake appears too dry, it could be due to not enough moisture; next time, consider adding an extra tablespoon of buttermilk or hot water.

Is there a dairy-free option for this recipe?
Yes, you can easily make this gingerbread cake dairy-free! Use coconut oil instead of unsalted butter and substitute buttermilk with almond milk mixed with a tablespoon of vinegar or lemon juice. These alterations still yield a moist and delicious cake with all the rich flavors.

Can I make this cake with pets in mind?
It's best to avoid feeding any gingerbread cake to pets, as ingredients like sugar, molasses, and certain spices may not be safe for them. Always check with your vet if you're unsure about sharing human food with your furry friends!

Gingerbread Cake Molasses Frosting

Gingerbread Cake with Molasses Frosting for Cozy Nights

This Gingerbread Cake with Molasses Frosting is a delightful dessert that combines traditional flavors with a modern twist, perfect for cozy nights.
Print Recipe Pin Recipe
Prep Time 20 minutes mins
Cook Time 35 minutes mins
Cooling Time 10 minutes mins
Total Time 1 hour hr 5 minutes mins
Servings: 12 slices
Course: Dessert
Cuisine: American
Calories: 350
Ingredients Equipment Method Nutrition Notes

Ingredients
  

For the Cake Base
  • 3 cups All-Purpose Flour Consider using gluten-free flour for a gluten-free option.
  • 1 teaspoon Baking Soda Ensure it's fresh for best results.
  • 1 teaspoon Baking Powder Ensure it's fresh for best results.
  • 1 teaspoon Ground Cinnamon Adjust according to your spice preference.
  • 1 teaspoon Ground Ginger Adjust according to your spice preference.
  • 1 teaspoon Ground Cloves Adjust according to your spice preference.
  • 1 teaspoon Ground Nutmeg Adjust according to your spice preference.
  • 1 teaspoon Salt Balances the sweetness beautifully.
  • 1 cup Unsalted Butter Substitute with coconut oil for a dairy-free version.
  • 1 cup Dark Brown Sugar Light brown sugar works for a milder cake.
  • 1/2 cup Granulated Sugar Replace some with coconut sugar for a healthier option.
  • 2 large Eggs Flax eggs offer a vegan alternative.
  • 1 cup Unsulfured Molasses Don't swap without considering its unique properties.
  • 1 cup Buttermilk Use almond milk mixed with vinegar as a dairy-free substitute.
  • 1 cup Hot Water Ensures a smooth batter.
For the Molasses Frosting
  • 1/2 cup Unsalted Butter Vegan butter can be used if needed.
  • 2 cups Powdered Sugar Sift before adding to avoid lumps.
  • 1/2 cup Unsulfured Molasses Try different types of molasses for varied taste experiences.
  • 1 tablespoon Milk or Heavy Cream Almond milk is a great dairy-free option.
  • 1 teaspoon Vanilla Extract Optional if you prefer a simpler taste.
  • 1 pinch Salt Balances sweetness.

Equipment

  • 9x13-inch baking pan
  • Mixing bowls
  • Electric mixer
  • Whisk
  • Spatula
  • wire rack

Method
 

Gingerbread Cake
  1. Preheat your oven to 350°F (175°C) and grease a 9x13 inch baking pan.
  2. In a large mixing bowl, whisk together the all-purpose flour, baking soda, baking powder, ground cinnamon, ginger, cloves, nutmeg, and salt.
  3. Cream the softened unsalted butter with dark brown and granulated sugars using an electric mixer on medium speed for about 3-5 minutes.
  4. Add eggs to the creamed mixture one at a time, beating well after each addition. Then, mix in the unsulfured molasses until fully combined.
  5. Alternately add the dry ingredient mixture and the buttermilk into the butter and sugar mixture, starting and ending with the dry.
  6. Stir in the hot water gradually until the batter is smooth and well combined.
  7. Pour the batter into your prepared baking pan and bake in the preheated oven for about 30-35 minutes.
  8. Let the cake cool in the pan for about 10 minutes, then transfer it to a wire rack to cool completely.
Molasses Frosting
  1. Cream the softened unsalted butter until smooth, then gradually add the sifted powdered sugar, unsulfured molasses, and vanilla extract, mixing until creamy.
  2. Adjust the frosting’s consistency with milk if needed, then frost the cooled gingerbread cake evenly over the top.

Nutrition

Serving: 1sliceCalories: 350kcalCarbohydrates: 55gProtein: 4gFat: 15gSaturated Fat: 9gPolyunsaturated Fat: 1gMonounsaturated Fat: 4gCholesterol: 30mgSodium: 200mgPotassium: 150mgFiber: 2gSugar: 25gVitamin A: 5IUCalcium: 4mgIron: 6mg

Notes

Ensure all ingredients are at room temperature for better emulsification. Adjust the thickness of the frosting with milk when necessary.

Tried this recipe?

Let us know how it was!

Savory Smash Burger Sauce That Elevates Every Bite

October 27, 2025 by Grace Snow Leave a Comment

The aroma hit me the moment I opened the fridge, teasing my senses with a creamy blend waiting to elevate my dinner. This is where the magic of Smash Burger Sauce comes in, a game-changing condiment that transforms even the simplest patty into a gourmet experience. This easy-to-make sauce isn’t just quick to whip up; it’s completely customizable too! Whether you prefer a spicy kick with jalapeños or a refreshing twist with Greek yogurt instead of mayonnaise, the options are endless. Perfect for summer barbecues or cozy weeknight meals, this sauce promises to impress both friends and family alike. Ready to elevate your burger game? Let’s dive into this delicious recipe!

Why is this sauce a must-try?

Irresistible flavor: The harmonious blend of creamy mayonnaise, tangy ketchup, and zesty mustard creates a burst of flavor that takes your burgers to the next level.

Customizable fun: Enjoy creating your own twist by substituting Greek yogurt for mayo or spicing things up with jalapeños and hot sauce.

Quick preparation: This sauce comes together in just minutes, perfect for a last-minute addition to your family dinners or backyard barbecues.

Crowd-pleasing: Whether serving a casual weeknight meal or hosting friends, this sauce pairs beautifully with grilled burgers or even fries, making it a hit all around.

Easy storage: Keep your sauce fresh in the fridge for up to a week, so you can always have this delightful condiment on hand! Looking for more delicious meal ideas? Check out Shrimp Tacos or try a refreshing Tagliatelle Asparagus Peas for a complete dining experience.

Smash Burger Sauce Ingredients

For the Base
• Mayonnaise – A creamy foundation; swap with Greek yogurt for a lighter touch.
• Ketchup – Adds sweetness and tang; adjust the quantity to balance flavor as desired.
• Yellow Mustard – Provides a sharp bite; opt for Dijon if you want a more complex taste.

For the Flavor Boosters
• Worcestershire Sauce – Enhances umami depth; use soy sauce for a gluten-free alternative.
• Garlic Powder – Delivers aromatic goodness; fresh garlic can be used, but reduce the amount.
• Paprika – Adds color and a hint of smokiness; try smoked paprika for an intense flavor boost.

This Smash Burger Sauce makes a delightful addition to your summer barbecues or cozy dinners, and with these ingredients, you’ll see just how easy it is to create your own masterpiece!

Step‑by‑Step Instructions for Smash Burger Sauce

Step 1: Gather Ingredients
Start by gathering all the ingredients for your Smash Burger Sauce. Lay out the mayonnaise, ketchup, yellow mustard, Worcestershire sauce, garlic powder, and paprika in a clean, spacious area. This organization will make the preparation process smooth and efficient. Having everything in reach means no interruptions and a quicker assembly.

Step 2: Mix Base
In a medium-sized mixing bowl, combine the mayonnaise, ketchup, and yellow mustard. Whisk these ingredients together vigorously for about 30 seconds until the mixture is creamy and well-blended. You should see a vibrant color and a thick consistency that signals you’re on the right track to making a delicious Smash Burger Sauce.

Step 3: Incorporate Flavor Boosters
Now it’s time to add the flavor boosters to your base. Stir in the Worcestershire sauce, garlic powder, and paprika into the bowl. Continue mixing for another 30 seconds. The aroma should begin to fill the air, and the sauce should take on a slightly deeper hue, indicating a flavorful enhancement to your Smash Burger Sauce.

Step 4: Chill
Once everything is mixed well, cover the bowl with plastic wrap or a lid. Place the sauce in the refrigerator for at least one hour. This chilling time allows the flavors to meld beautifully, creating a richer taste profile. When ready, your sauce will be reminiscent of gourmet condiments you find at upscale burger joints.

Step 5: Serve
After the chilling period, remove the Smash Burger Sauce from the fridge. Spread it generously on freshly grilled burgers. Don’t hesitate to add your favorite toppings like pickles or jalapeños for an extra kick. The creamy texture of the sauce will perfectly complement the juicy burger, creating a mouthwatering experience.

Step 6: Store Leftovers
If you have any leftover Smash Burger Sauce, transfer it into an airtight container. Seal tightly and store it in the refrigerator for up to one week. This sauce is not only perfect for burgers but can also be a delightful dip for fries or veggies, ensuring you make the most of this delicious condiment!

How to Store and Freeze Smash Burger Sauce

Fridge: Store in an airtight container in the refrigerator for up to 1 week. This keeps your Smash Burger Sauce fresh, flavorful, and ready to elevate your meals.

Freezer: For longer storage, you can freeze your sauce in a freezer-safe container for up to 3 months. Just remember to leave some space for expansion.

Thawing: When ready to use, transfer the frozen sauce to the fridge overnight to thaw. Give it a good stir before serving to restore its creamy consistency.

Reheating: If served cold, there’s no need to reheat! Simply spread it on your burger straight from the fridge for that fresh taste.

Smash Burger Sauce Variations

Feel free to get creative with your sauce! The possibilities are endless, inviting you to explore delightful twists that’ll make this condiment uniquely yours.

  • Greek Yogurt: Substitute mayonnaise with Greek yogurt for a lighter, tangy twist perfect for health-conscious diners.
  • Spicy Kick: Add diced jalapeños or a splash of your favorite hot sauce for an exciting burst of heat that’ll awaken your taste buds.
  • Dijon Mustard: Try using Dijon mustard instead of yellow mustard for a sophisticated flavor profile that elevates the sauce to gourmet status.
  • Herb Infusion: Incorporate fresh herbs like dill or cilantro for a refreshing lift—this adds a garden-fresh aroma that brightens each burger bite.
  • Smoked Paprika: Opt for smoked paprika instead of regular to introduce a deeper, smoky flavor that complements grilled meats beautifully.
  • Pickle Relish: Stir in a spoonful of pickle relish for that extra salty-sour crunch, offering a delightful contrast to the creamy base.
  • Vegan Option: Use vegan mayonnaise and swap Worcestershire for a vegan-friendly soy sauce to create a plant-based version without sacrificing flavor.
  • Garlic Lovers: For those who adore garlic, add roasted garlic cloves into the mix; the sweetness of roasted garlic infuses a delightful depth into your sauce.

Experimenting with these variations can transform a simple sauce into a flavor-packed experience for your burgers. For more delicious meal ideas, check out Shrimp Tacos or try a refreshing Tagliatelle Asparagus Peas. Happy cooking!

Expert Tips for the Best Smash Burger Sauce

• Mix Thoroughly: Ensure all ingredients are well-blended for a consistent flavor throughout the Smash Burger Sauce.

• Taste and Adjust: After mixing, taste your sauce and feel free to tweak the seasonings to match your personal palate.

• Chill Time Matters: Don’t rush the chilling stage; letting the sauce meld for at least an hour maximizes flavor depth.

• Storage Savvy: Store in an airtight container to keep your Smash Burger Sauce fresh, and always check for freshness before use after a few days.

• Explore Variations: Experiment with adding different spices or additional ingredients like dill or cilantro to customize your sauce further!

What to Serve with Irresistible Smash Burger Sauce?

Indulge your senses and create a delightful meal experience with these perfect pairings to complement your homemade sauce.

  • Crispy French Fries: The crispy texture and salted goodness of fries make for an irresistible dip into that creamy Smash Burger Sauce.

  • Grilled Corn on the Cob: Sweet, smoky corn brushed with butter brings a delightful crunch, elevating your meal with vibrant flavors.

  • Coleslaw Salad: A crisp, tangy coleslaw provides an excellent contrast to the richness of the sauce, adding freshness to every bite.

  • Stuffed Bell Peppers: These colorful veggies are versatile and can be filled with meat, grains, or cheese, pairing wonderfully with the tasty sauce.

  • Beer or Cider: Choose a refreshing pale ale or a crisp apple cider. The beverages enhance flavors and keep the meal lively!

  • Garden Salad: A simple salad with mixed greens, tomatoes, and a light vinaigrette brightens the meal, balancing out the rich elements of the burger and sauce.

  • Grilled Vegetables: Smoky grilled zucchini, bell peppers, or mushrooms bring a savory touch to your table, harmonizing deliciously with the Smash Burger Sauce.

  • Sweet Potato Fries: Their natural sweetness adds a unique twist, creating a delightful contrast with the creamy, savory sauce for a fulfilling treat.

Make Ahead Options

These Smash Burger Sauce recipes are perfect for meal prep enthusiasts! You can easily mix the base (mayonnaise, ketchup, and mustard) and flavor boosters (Worcestershire sauce, garlic powder, and paprika) up to 24 hours in advance for an effortless dinner prep. Simply store the mixed sauce in an airtight container in the refrigerator to maintain its creamy texture and rich flavors. To keep the sauce fresh and vibrant, cover it tightly and chill it well before serving. When you’re ready to enjoy, simply remove the sauce from the fridge, give it a good stir, and generously spread it on your burgers for a gourmet experience that saves you time on busy weeknights!

Smash Burger Sauce Recipe FAQs

What type of mayonnaise works best for Smash Burger Sauce?
Absolutely! You can use any mayonnaise you prefer, but I recommend a brand with a smooth texture for the best creaminess. If you’re looking for a lighter option, Greek yogurt is an excellent substitute and adds a nice tang.

How long does Smash Burger Sauce last in the fridge?
Smash Burger Sauce can be stored in an airtight container in the refrigerator for up to one week. To maintain its vibrant flavor, always seal it tightly after each use and check for freshness before serving it again!

Can I freeze Smash Burger Sauce?
Yes, you can freeze Smash Burger Sauce! Pour it into a freezer-safe container, leaving some space for expansion, and it will keep well for up to 3 months. Just remember to label it with the date for easy tracking.

What’s the best way to thaw frozen Smash Burger Sauce?
To thaw your frozen Smash Burger Sauce, simply transfer it to the fridge the night before you plan to use it. Once it’s thawed, give it a good stir to restore its creamy consistency, and you’re ready to elevate your burgers again!

What should I do if my sauce is too thick?
Very! If your Smash Burger Sauce turns out too thick for your liking, simply stir in a tablespoon of water, milk, or more mayonnaise until you reach your desired consistency. Mix it thoroughly, and you’ll have that perfect creamy sauce in no time!

Can I use this sauce for anything besides burgers?
Absolutely! Smash Burger Sauce makes a fantastic dip for fries, veggies, or even a spread on sandwiches. Its versatile nature allows it to enhance many dishes, so feel free to get creative with how you use it!

Smash Burger Sauce

Savory Smash Burger Sauce That Elevates Every Bite

This Smash Burger Sauce is a game-changing condiment that elevates your burgers with its creamy, tangy flavor and customizable options.
Print Recipe Pin Recipe
Prep Time 5 minutes mins
Chilling Time 1 hour hr
Total Time 1 hour hr 5 minutes mins
Servings: 6 servings
Course: Uncategorized
Cuisine: American
Calories: 100
Ingredients Equipment Method Nutrition Notes

Ingredients
  

For the Base
  • 1 cup mayonnaise can substitute with Greek yogurt
  • 1 cup ketchup adjust quantity to taste
  • 2 tablespoons yellow mustard Dijon can be used for a complex taste
For the Flavor Boosters
  • 1 teaspoon Worcestershire sauce soy sauce can be used for gluten-free
  • 1 teaspoon garlic powder can use fresh garlic but reduce amount
  • 1 teaspoon paprika smoked paprika adds more flavor

Equipment

  • Mixing Bowl
  • Whisk
  • Airtight Container

Method
 

Making Smash Burger Sauce
  1. Gather all the ingredients for your Smash Burger Sauce.
  2. In a mixing bowl, combine the mayonnaise, ketchup, and yellow mustard. Whisk until creamy and well-blended.
  3. Stir in the Worcestershire sauce, garlic powder, and paprika. Mix for another 30 seconds.
  4. Cover and refrigerate for at least one hour.
  5. Serve on burgers or as a dip for fries.
  6. Store leftovers in an airtight container in the refrigerator for up to 1 week.

Nutrition

Serving: 1tablespoonCalories: 100kcalCarbohydrates: 2gProtein: 1gFat: 10gSaturated Fat: 1.5gPolyunsaturated Fat: 0.5gMonounsaturated Fat: 8gCholesterol: 5mgSodium: 200mgPotassium: 50mgSugar: 1gVitamin A: 100IUCalcium: 10mgIron: 0.5mg

Notes

Ensure to taste and adjust seasonings as per your preference. The sauce can be customized with different spices and ingredients.

Tried this recipe?

Let us know how it was!

Lemon Raspberry Cupcakes That Burst with Flavor and Fun

October 24, 2025 by Grace Snow Leave a Comment

The moment you pop the oven door, a wave of citrusy sweetness drifts through your kitchen, instantly lifting your spirits. I have to say, there's something utterly rewarding about creating your own desserts, especially when they come together as effortlessly as these Easy Lemon Raspberry Cupcakes. With just a simple cake mix, you can whip up moist and fluffy cupcakes that surprise everyone with their delightful tart and sweet flavor combination. Whether you’re celebrating a special occasion or just indulging your sweet tooth, these little gems are sure to impress. Plus, they’re a quick dessert option that allows you to impress friends and family without spending all day baking. Curiosity piqued? Let’s dive into this delicious recipe!

Why Are These Cupcakes So Irresistible?

Ease of Preparation: Quick and simple, these Lemon Raspberry Cupcakes come together in no time using a convenient cake mix, making them perfect for any busy home cook.

Flavor Explosion: Tart yet sweet, the refreshing lemon pairs beautifully with the raspberry jam center, ensuring every bite bursts with flavor.

Perfect for Any Occasion: Versatile and crowd-pleasing, these cupcakes are lovely for birthdays, brunches, or casual gatherings—everyone will ask for seconds!

Customizable Options: Experiment freely with different jam flavors or add lemon zest to elevate the taste to new heights—your creativity can shine!

Impressive Presentation: Garnished with fresh fruit, these cupcakes look as good as they taste, making them a fantastic centerpiece for your dessert table.

Craving more citrusy goodness? You can try pairing these cupcakes with a warm bowl of Lemon Chicken Soup for a delightful meal!

Lemon Raspberry Cupcake Ingredients

• Capture the vibrant flavors in every bite!

For the Cupcakes

  • Cake Mix – The base for these Lemon Raspberry Cupcakes; a gluten-free cake mix can be used if needed.
  • Water – Keeps the cupcakes moist; substitute with milk for enhanced flavor.
  • Vegetable Oil – Adds tenderness; melted coconut oil or unsweetened applesauce are great alternatives.
  • Eggs – Essential for structure; for a vegan option, use flaxseed meal (1 tbsp flaxseed + 2.5 tbsp water = 1 egg).

For the Filling

  • Raspberry Jam – Provides a lovely surprise center; opt for sugar-free jam to cut down on sweetness.

For the Frosting

  • Butter – Key for richness; dairy-free butter works well for those with dietary restrictions.
  • Vanilla Extract – Brightens the frosting’s flavor; almond extract offers a unique twist.
  • Powdered Sugar – Sweetens the frosting; use granular erythritol for a low-calorie version.
  • Half and Half or Milk – Adjusts consistency; non-dairy milk can be substituted.

With these ingredients at hand, you're well on your way to crafting Lemon Raspberry Cupcakes that will truly delight your taste buds!

Step‑by‑Step Instructions for Lemon Raspberry Cupcakes

Step 1: Preheat and Prepare
Preheat your oven to 350°F (175°C) and prepare a muffin tin by lining it with cupcake liners or greasing it lightly with cooking spray. This ensures that your Lemon Raspberry Cupcakes will release easily after baking. If using liners, choose vibrant colors to add a fun touch to your presentation!

Step 2: Mix the Batter
In a large mixing bowl, combine the cake mix, water, vegetable oil, and eggs. Using an electric mixer on medium speed, blend the ingredients for about 2 minutes until the batter is smooth and well combined. You should see a lovely lemon-yellow mixture forming, indicating it’s ready for the next step!

Step 3: Fill the Muffin Tin
Carefully pour the batter into the prepared muffin tin, filling each cup about two-thirds full to allow room for rising. This ensures your Lemon Raspberry Cupcakes will have a perfect dome shape when baked. Use a measuring cup or a spoon for consistent filling, making the process mess-free and easy.

Step 4: Bake and Cool
Bake the cupcakes in the preheated oven for 18-20 minutes, or until a toothpick inserted into the center comes out clean. Once they are golden and springy to the touch, remove them from the oven and allow them to cool in the tin for about 5 minutes before transferring them to a wire rack to cool completely.

Step 5: Prepare the Jam Filling
Once the cupcakes are completely cooled, use a melon baller or a sharp knife to remove a small section from the center of each cupcake. This creates a lovely little well for your raspberry jam. Ensure to be gentle to maintain the integrity of the cupcake.

Step 6: Add the Raspberry Jam
Fill each well with raspberry jam, making sure to add a generous amount for that burst of flavor in every bite. After filling, replace the cupcake “plug” that you removed earlier, gently pressing it back into place to keep the jam hidden.

Step 7: Make the Frosting
For the frosting, cream the butter in a mixing bowl until light and fluffy, which usually takes about 2-3 minutes. Gradually add the powdered sugar, continuing to mix, and pour in the half and half until achieving a creamy, smooth consistency. The frosting should be easy to spread and hold its shape.

Step 8: Frost and Garnish
Frost the cooled Lemon Raspberry Cupcakes generously, creating a beautiful swirl on top. For added flair, garnish each cupcake with fresh raspberries and a small lemon wedge. This not only enhances the visual appeal but also adds a refreshing touch to every delicious bite.

Lemon Raspberry Cupcakes Variations & Substitutions

Feel free to mix it up and add your own twist to these delightful cupcakes!

  • Gluten-Free: Use a gluten-free cake mix to accommodate those with gluten sensitivities and enjoy the same scrumptious flavors.
  • Milk Instead of Water: Replace the water with milk for a richer and creamier batter that elevates each bite.
  • Coconut Oil: Swap vegetable oil for melted coconut oil for a subtle tropical flavor and added moisture.
  • Vegan Option: Use flaxseed meal mixed with water as an egg substitute for a plant-based version that doesn’t compromise taste.
  • Sweet Filling: Trade raspberry jam for strawberry or blueberry preserves to create a different fruity surprise in the center. Imagine the contrasting flavors dancing on your palate!
  • Lemon Zest: Add freshly grated lemon zest to the batter for an extra zesty kick that enhances the lemon flavor beautifully.
  • Cream Cheese Frosting: Replace the butter with cream cheese for your frosting for a tangier and creamier texture that pairs perfectly with the sweetness.
  • Flavor Twist: Consider using almond extract instead of vanilla in the frosting to introduce a unique aromatic profile that complements the flavors delightfully.

And if you’re looking for a delightful partner to these cupcakes, why not try them alongside a comforting bowl of Lemon Chicken Soup to balance out the sweetness? Enjoy your baking adventure!

Expert Tips for Lemon Raspberry Cupcakes

  • Cool Completely: Ensure cupcakes are completely cooled before injecting jam and frosting to prevent melting and maintaining the structure.

  • Enhance Flavor: Add zest from a fresh lemon to the cupcake batter or frosting for an extra pop of lemony goodness, enhancing your Lemon Raspberry Cupcakes.

  • Avoid Overflow: When filling the muffin tins, only fill each cup two-thirds full. This prevents overflow during baking and results in beautifully dome-shaped cupcakes.

  • Perfect Consistency: If your frosting seems too thick, gradually add more half and half or milk until it reaches the desired creamy consistency, ensuring an easy spread on your cupcakes.

  • Presentation Matters: For a stunning look, decorate your cupcakes with additional fresh raspberries and lemon wedges right before serving. This makes them visually appealing and enticing!

Storage Tips for Lemon Raspberry Cupcakes

Room Temperature: Store your cupcakes in an airtight container at room temperature for up to 3 days to maintain their moist texture and flavor.

Fridge: For longer freshness, keep them in the fridge for up to a week. Ensure they’re well covered to prevent drying out.

Freezer: Freeze Lemon Raspberry Cupcakes for up to 3 months. Place them in a single layer in a freezer-safe container, separated by parchment paper.

Reheating: To enjoy them warm, let cupcakes thaw in the fridge overnight, then microwave briefly for 10-15 seconds before serving.

Make Ahead Options

These Lemon Raspberry Cupcakes are perfect for meal prep enthusiasts! You can prepare the cupcake batter and fill the muffin tins up to 24 hours in advance; just cover them tightly with plastic wrap and refrigerate to keep them fresh. Alternatively, bake the cupcakes and let them cool completely, then store them in an airtight container for up to 3 days at room temperature or a week in the fridge. To maintain quality, frost them just before serving—this way, the frosting remains creamy and delightful, and the cupcakes stay moist. When ready to enjoy, simply inject the raspberry jam and frost the cupcakes, providing a fresh dessert experience with minimal effort!

What to Serve with Easy Lemon Raspberry Cupcakes

Elevate your dessert experience by exploring delightful pairings that enhance the magic of these cupcakes.

  • Lemonade Splash: A refreshing glass of lemonade complements the zesty flavor of the cupcakes, enhancing their bright, citrusy notes. The combination is perfect for warm afternoons or festive gatherings.

  • Berry Medley Salad: Combining fresh strawberries, blueberries, and raspberries creates a colorful, sweet salad that echoes the flavors within the cupcakes. Serve it alongside for a fresh, light contrast.

  • Vanilla Ice Cream: The creamy richness of vanilla ice cream is a classic pairing, balancing the tartness of the raspberry jam beautifully. Each bite of cupcake topped with a scoop of ice cream creates a dreamy dessert experience.

  • Herbal Tea: Opt for a fragrant herbal tea such as chamomile or mint to offer a soothing contrast. The gentle flavors of the tea will harmonize perfectly with the sweet and tart notes of the cupcakes.

  • Coconut Whipped Cream: A dollop of light and airy coconut whipped cream adds a tropical twist. Its creamy texture pairs delightfully with the lemony frosting and jam, creating a tropical finish.

  • Sparkling Water with Berries: Infuse your sparkling water with a handful of fresh berries for a fizzy, flavorful drink. It keeps things light and refreshing, enhancing the cupcakes’ delightful sweetness.

  • Cream Cheese Frosting: If you're feeling adventurous, try these cupcakes again with a rich cream cheese frosting. The tangy flavor of cream cheese adds depth, taking the cupcakes to the next level.

Indulging in any of these options will not only enhance your dessert but also bring joy to your whole meal!

Lemon Raspberry Cupcakes Recipe FAQs

How do I know if my lemons are ripe and ready to use?
Absolutely! When selecting lemons, look for ones that are bright yellow with a smooth, firm texture. Avoid any that have dark spots all over or feel soft. A ripe lemon should feel heavy for its size, indicating juiciness and freshness.

What’s the best way to store Lemon Raspberry Cupcakes?
It's very easy! Store your cupcakes in an airtight container at room temperature for up to 3 days, maintaining their moist texture. If you want them to last longer, keep them in the fridge for up to a week, but make sure they're covered to prevent drying out.

Can I freeze these cupcakes for later?
Absolutely! You can freeze Lemon Raspberry Cupcakes for up to 3 months. Start by placing them in a single layer in a freezer-safe container, separated by sheets of parchment paper to prevent sticking. When you're ready to enjoy them, thaw them in the fridge overnight and microwave for 10-15 seconds to warm them.

What should I do if my cupcakes overflow during baking?
If your cupcakes overflow, don't worry; it happens to the best of us! Next time, simply fill the cups about two-thirds full instead of completely. This gives them space to rise without spilling over. If some did overflow, allow them to cool before gently cutting away any excess, ensuring they stay beautifully shaped.

Are there any allergies I should consider with this recipe?
Very importantly! If you're serving these Lemon Raspberry Cupcakes to guests, be aware of common allergens. This recipe includes eggs and dairy; for a vegan option, use flaxseed meal instead of eggs and dairy-free butter. Also, if you're making them gluten-free, simply swap in a gluten-free cake mix and double-check all other ingredients before baking.

Lemon Raspberry Cupcakes

Lemon Raspberry Cupcakes That Burst with Flavor and Fun

These Lemon Raspberry Cupcakes are a delightful dessert that combines tart lemon flavor with sweet raspberry, perfect for any occasion.
Print Recipe Pin Recipe
Prep Time 20 minutes mins
Cook Time 20 minutes mins
Total Time 40 minutes mins
Servings: 12 cupcakes
Course: Dessert
Cuisine: American
Calories: 200
Ingredients Equipment Method Nutrition Notes

Ingredients
  

Cupcake Ingredients
  • 1 box cake mix gluten-free option available
  • 1 cup water can substitute with milk
  • 1/2 cup vegetable oil melted coconut oil or unsweetened applesauce can be used
  • 3 large eggs 1 tbsp flaxseed + 2.5 tbsp water can substitute for each egg
Filling Ingredients
  • 1 jar raspberry jam sugar-free option available
Frosting Ingredients
  • 1/2 cup butter dairy-free butter works for dietary restrictions
  • 1 tsp vanilla extract almond extract can be used for a twist
  • 3 cups powdered sugar granular erythritol can be used for a low-calorie version
  • 2 tbsp half and half non-dairy milk can be substituted to adjust consistency

Equipment

  • Muffin tin
  • Electric mixer
  • measuring cups
  • Mixing Bowl
  • Knife

Method
 

Baking Instructions
  1. Preheat your oven to 350°F (175°C) and prepare a muffin tin by lining it with cupcake liners or greasing it lightly.
  2. In a large mixing bowl, combine the cake mix, water, vegetable oil, and eggs, and mix on medium speed for about 2 minutes until smooth.
  3. Pour the batter into the prepared muffin tin, filling each cup about two-thirds full.
  4. Bake in the preheated oven for 18-20 minutes or until a toothpick comes out clean.
  5. Once cooled, remove the center of each cupcake to create a well for the raspberry jam.
  6. Fill each well with raspberry jam and replace the top of the cupcake.
  7. For frosting, cream the butter until fluffy, add powdered sugar gradually, and mix in half and half for desired consistency.
  8. Frost the cooled cupcakes and garnish with fresh raspberries and lemon wedges.

Nutrition

Serving: 1cupcakeCalories: 200kcalCarbohydrates: 30gProtein: 2gFat: 8gSaturated Fat: 4gPolyunsaturated Fat: 1gMonounsaturated Fat: 3gCholesterol: 30mgSodium: 200mgPotassium: 80mgFiber: 1gSugar: 15gVitamin A: 200IUVitamin C: 1mgCalcium: 20mgIron: 0.5mg

Notes

Store in an airtight container at room temperature for up to 3 days, refrigerated for up to a week, or freeze for up to 3 months. Reheat briefly before serving if desired.

Tried this recipe?

Let us know how it was!

Zesty Lemon Lime Cupcakes for a Refreshing Summer Treat

October 24, 2025 by Grace Snow Leave a Comment

As I watched summer's warmth blanket my backyard, I couldn't help but crave the light and zesty refreshment of summer desserts. Enter these delightful Lemon Lime Cupcakes! Made with lemon-lime soda, these cupcakes rise effortlessly, giving you a soft, moist texture without the hassle of heavy mixing. Perfect for picnics or backyard gatherings, these treats are not only a crowd-pleaser but also incredibly quick to whip up using a simple cake mix. Topped with a tangy cream cheese frosting, they're just the vibrant burst of citrus you've been dreaming of on hot days. Ready to add a zesty twist to your baking routine? Let’s dive into this refreshing recipe together!

Why are Lemon Lime Cupcakes special?

Refreshing and light, these cupcakes capture the essence of summer in every bite. Ease of preparation makes them perfect for both novice bakers and seasoned chefs alike. Moist from the soda and topped with a creamy frosting, they are the ideal dessert for picnics or casual gatherings. Plus, the citrus zing brightens any event! For another delicious summer treat, be sure to try my Lemon Chicken Soup or take a look at these easy Lemon Ricotta Protein Pancakes.

Lemon Lime Cupcake Ingredients

Note: Gather these ingredients to create your delicious lemon lime cupcakes!

For the Batter

  • White Cake Mix – This provides structure and base flavor; feel free to swap with another flavor of box cake mix if you desire.
  • Vegetable Oil – Adds a rich moisture; try melted coconut oil for a unique twist.
  • Egg Whites – Contributes to the lightness of the cupcakes; whole eggs will work, but the texture may be denser.
  • Lemon Lime Soda – Acts as a leavening agent and boosts flavor; any clear citrus soda can be used for these lemon lime cupcakes.
  • Lime Gelatin Mix – Elevates the citrus flavor and moisture; you can omit this if it's not on hand, but the cupcakes will be less zesty.

For the Frosting

  • Salted Butter – Provides a creamy richness to the frosting; unsalted butter is fine, just add a pinch of salt.
  • Cream Cheese – Gives the frosting its signature tangy creaminess; vegan cream cheese is a fantastic dairy-free alternative.
  • Powdered Sugar – Sweetens and stabilizes the frosting; coconut sugar can be a less processed option.
  • Vanilla Extract – Adds a depth of flavor; this ingredient is optional but enhances the frosting's taste.
  • Half and Half – Achieves a smooth consistency in your frosting; substitute with milk or a non-dairy option if needed.
  • Green Food Coloring – Use for a fun, vibrant appearance; it's optional, so feel free to skip if you prefer a more natural look.
  • Green Sprinkles – These give your cupcakes a festive touch; swap with any color sprinkles based on your preference.

Now that you’ve got everything ready, let’s whip up a batch of zesty lemon lime cupcakes that will delight everyone!

Step‑by‑Step Instructions for Lemon Lime Cupcakes

Step 1: Preheat the Oven
Begin by preheating your oven to 350°F (175°C). While it heats, prepare a standard muffin tin by lining it with cupcake liners, giving you a cheerful base for your lemon lime cupcakes. This ensures easy removal later and a neat presentation for your delightful treats.

Step 2: Mix the Batter
In a large mixing bowl, combine one box of white cake mix, 1/3 cup of vegetable oil, 3 egg whites, and 12 ounces of lemon-lime soda. Stir these ingredients together gently until just incorporated, being careful not to overmix. For enhanced citrus flavor, fold in a packet of lime gelatin, making sure it blends seamlessly into the batter.

Step 3: Fill the Cups
With your batter ready, pour it into the prepared cupcake liners, filling each about two-thirds full. This allows ample room for the lemon lime cupcakes to rise beautifully while baking. As you fill the liners, take a moment to admire the vibrant color of the batter; it's a quick reminder of the zesty flavor awaiting you!

Step 4: Bake to Perfection
Place the muffin tin in your preheated oven and bake for 18 to 20 minutes. Keep an eye on them; they're done when the tops are light golden and a toothpick inserted into the center comes out clean. This is the moment to experience the delightful aroma of lemon lime filling your kitchen!

Step 5: Cool Down
Once baked, remove the cupcakes from the oven and let them cool in the muffin tin for about 5 minutes. After this, transfer them to a wire rack to cool completely. This step is crucial for ensuring that your lemon lime cupcakes remain moist, providing the perfect base for creamy frosting.

Step 6: Prepare the Frosting
While the cupcakes cool, it’s time to whip up the frosting. In a large bowl, beat together 8 ounces of cream cheese and 1/2 cup of salted butter until fluffy. Gradually add in 3 to 4 cups of powdered sugar and 2 tablespoons of half and half, mixing until smooth. Add a dash of vanilla extract for depth and a little lime gelatin if you wish for extra zest.

Step 7: Frost the Cupcakes
Once the cupcakes are cooled completely, use a piping bag to frost each one generously with your creamy mixture. Feel free to get creative with your technique; a swirl or rosette can add an artistic flair! To finish, sprinkle on green sprinkles for an eye-catching touch that complements the look of your vibrant lemon lime cupcakes.

Expert Tips for Lemon Lime Cupcakes

  • Mix Gently: To achieve the light texture in your lemon lime cupcakes, mix the batter only until just combined. Overmixing can lead to dense cupcakes.
  • Rest Before Frosting: Ensure your cupcakes are completely cool before frosting to prevent the cream cheese frosting from melting.
  • Add Citrus Zest: For an extra burst of flavor, consider adding fresh lime or lemon zest to the batter or frosting. It elevates the citrus notes beautifully.
  • Soda Variations: Feel free to experiment with different citrus sodas! Limeade or lemon soda can lend a unique twist to your lemon lime cupcakes.
  • Frosting Consistency: If your frosting is too thick, add a splash of milk or half and half to achieve a smooth, spreadable consistency. Adjust to your preference!

Lemon Lime Cupcakes Variations & Substitutions

Feel free to get creative and make these lemon lime cupcakes your own with these delightful twists!

  • Dairy-Free: Substitute cream cheese with vegan cream cheese and use coconut milk in the frosting for a deliciously creamy, dairy-free option.
  • Flavor Twist: Experiment with different flavored sodas like orange or grapefruit to add an unexpected zing to your cupcakes.
  • Homemade Cake: Swap the store-bought cake mix for a homemade vanilla cake recipe to create a richer base for these lemon lime cupcakes.
  • Natural Sweetener: Use coconut sugar instead of powdered sugar in the frosting for a less processed sweetness that’s still fabulously creamy.
  • Zesty Frosting: Add lime zest to your frosting for an extra burst of citrus flavor that complements the cupcake beautifully.
  • Texture Variety: Top your cupcakes with crushed graham crackers for a delightful crunch contrasted with the creamy frosting—like a summer pie!
  • Sprinkled Heat: For a spicy kick, mix a pinch of cayenne or chili powder into the frosting to balance the sweetness with heat.
  • Fruit Addition: Fold chopped fresh berries or citrus segments into the batter for added freshness and bursts of flavor in each bite.

These variations are perfect for customizing your cupcakes to fit your taste! If you’re in the mood for more zest, check out my Chipotle Lime Chicken or try the vibrant flavors of Fiesta Lime Chicken with Avocado.

Storage Tips for Lemon Lime Cupcakes

Fridge: Store your lemon lime cupcakes in an airtight container for up to 5 days to maintain their freshness and moisture.

Freezer: You can freeze the cupcakes for up to 2 months. Wrap each cupcake individually in plastic wrap and place them in a freezer-safe bag for easy serving later.

Reheating: Thaw frozen cupcakes in the fridge overnight, then enjoy them at room temperature or pop them in the microwave for 10-15 seconds for a warm treat.

Frosting Storage: If you have leftover frosting, store it in the fridge in an airtight container for up to a week and re-whip before using again on your lemon lime cupcakes.

Make Ahead Options

These Lemon Lime Cupcakes are a fantastic option for meal prep, saving you time on busy days! You can prepare the cupcake batter and refrigerate it for up to 24 hours before baking. Just mix all your ingredients together, cover the bowl, and store it in the fridge. Additionally, feel free to make the cream cheese frosting in advance and keep it in an airtight container in the fridge for up to 3 days. When you're ready to bake, pour the chilled batter into the prepared muffin tin and bake as directed. Once the cupcakes are cool, simply frost them, and you’ll have delicious, fresh lemon lime cupcakes with minimal effort!

What to Serve with Lemon Lime Cupcakes

These delightful treats are the highlight of any summer gathering, inviting smiles and sweet memories with every bite.

  • Fresh Fruit Salad: A mix of berries, melons, and citrus brings bright flavors that pair wonderfully with the tangy cupcakes, enhancing the overall freshness of your dessert spread.

  • Iced Tea Lemonade: This refreshing drink offers the perfect balance of sweetness and tartness, complementing the citrus notes of the cupcake and keeping everyone cool.

  • Coconut Macaroons: These chewy, tropical treats add a contrasting texture and sweetness, creating a delightful dessert duo that feels both indulgent and light.

  • Lemon Sorbet: Light and refreshing, this frozen dessert mirrors the cupcake's bright flavor profile, providing a palate-cleansing counterpoint that is oh-so-satisfying.

  • Creamy Coleslaw: This crunchy, tangy side adds a savory element to your meal, balancing the sweetness of the cupcakes while celebrating summer's vibrant colors.

  • Sparkling Water with Lime: An invigorating, bubbly drink that enhances the lemonade vibes, sparkling water refreshes the palate and keeps the gathering lively.

  • Key Lime Pie: A classic companion that echoes the citrus theme; its creamy tartness creates a delightful contrast to the light texture of the cupcakes, ensuring your dessert table shines bright.

  • Mini Cheesecakes: These luscious bites add a rich and creamy texture while keeping to the citrus theme—they’re another showstopper that will leave taste buds dancing!

Lemon Lime Cupcakes Recipe FAQs

What type of soda is best for Lemon Lime Cupcakes?
Absolutely! The ideal choice for these cupcakes is lemon-lime soda, as it provides the perfect balance of flavor and carbonation. However, you can also use any clear citrus-flavored soda like 7UP or Sprite. If you're feeling adventurous, experimenting with other sodas like orange can create the same delightful texture with a unique twist!

How should I store Lemon Lime Cupcakes?
To keep your lemon lime cupcakes fresh, store them in an airtight container in the fridge for up to 5 days. This will help maintain their moisture and light texture. If you prefer to make them ahead of time, freeze the cupcakes individually wrapped in plastic wrap for up to 2 months. When you're ready to enjoy them, just thaw overnight in the fridge!

Can I freeze the cupcakes?
Very! Freezing your lemon lime cupcakes is a wonderful way to save leftovers. Here’s how: After they’ve cooled completely, wrap each cupcake in plastic wrap securely and place them in a freezer-safe bag or container. This helps prevent freezer burn. When ready to indulge, remove a cupcake and leave it in the fridge to thaw overnight.

My cupcakes turned out dense. What did I do wrong?
Common culprit alert! Dense cupcakes can result from overmixing the batter, which develops the gluten in the flour. To avoid this, mix the ingredients until just combined—no more! Also, double-check your oven temperature; an oven that is too hot can hinder proper rising. Ensuring that your egg whites are fresh and correctly measured will also make a difference in achieving that light texture.

Are Lemon Lime Cupcakes safe for my pets?
It's best to keep these cupcakes away from your furry friends. The ingredients, particularly the sugar and cream cheese frosting, can be harmful to pets, especially dogs. If you're looking for pet-friendly treats, there are plenty of recipes designed specifically for them. Always consult with your vet before sharing any human food with your pets to ensure their safety!

Can I make these cupcakes gluten-free?
Absolutely! To make gluten-free lemon lime cupcakes, simply swap the regular white cake mix with a gluten-free cake mix. Many brands have delicious options that will yield equally moist and fluffy cupcakes. Just be sure to check the label to ensure all other ingredients you use are gluten-free as well!

Lemon Lime Cupcakes

Zesty Lemon Lime Cupcakes for a Refreshing Summer Treat

Delightful Lemon Lime Cupcakes are a light and refreshing treat perfect for summer gatherings.
Print Recipe Pin Recipe
Prep Time 15 minutes mins
Cook Time 20 minutes mins
Cooling Time 5 minutes mins
Total Time 40 minutes mins
Servings: 12 cupcakes
Course: Dessert
Cuisine: American
Calories: 190
Ingredients Equipment Method Nutrition Notes

Ingredients
  

For the Batter
  • 1 box White Cake Mix Feel free to swap with another flavor of box cake mix.
  • 1/3 cup Vegetable Oil Try melted coconut oil for a unique twist.
  • 3 large Egg Whites Whole eggs can be used but may make the texture denser.
  • 12 ounces Lemon Lime Soda Any clear citrus soda can be used.
  • 1 packet Lime Gelatin Mix Can be omitted if not available.
For the Frosting
  • 1/2 cup Salted Butter Unsalted butter is fine, just add a pinch of salt.
  • 8 ounces Cream Cheese Vegan cream cheese is a dairy-free alternative.
  • 3-4 cups Powdered Sugar Coconut sugar can be a less processed option.
  • 1 teaspoon Vanilla Extract Optional but enhances flavor.
  • 2 tablespoons Half and Half Substitute with milk or a non-dairy option if needed.
  • Green Food Coloring Optional for appearance.
  • Green Sprinkles Swap with any color sprinkles if preferred.

Equipment

  • Muffin tin
  • Mixing Bowl
  • Whisk
  • piping bag

Method
 

Step-by-Step Instructions
  1. Preheat your oven to 350°F (175°C) and line a muffin tin with cupcake liners.
  2. In a large mixing bowl, combine white cake mix, vegetable oil, egg whites, and lemon-lime soda. Mix gently until just incorporated.
  3. Fold in the lime gelatin until fully combined.
  4. Pour the batter into the cupcake liners, filling each about two-thirds full.
  5. Bake for 18 to 20 minutes until the tops are golden and a toothpick inserted comes out clean.
  6. Let the cupcakes cool in the muffin tin for 5 minutes before transferring them to a wire rack.
  7. In a large bowl, beat together cream cheese and salted butter until fluffy. Gradually add powdered sugar and half and half until smooth.
  8. Frost the cooled cupcakes with the cream cheese mixture and add green sprinkles.

Nutrition

Serving: 1cupcakeCalories: 190kcalCarbohydrates: 24gProtein: 2gFat: 9gSaturated Fat: 5gPolyunsaturated Fat: 0.5gMonounsaturated Fat: 2gCholesterol: 30mgSodium: 160mgPotassium: 60mgSugar: 15gVitamin A: 200IUVitamin C: 2mgCalcium: 20mgIron: 0.5mg

Notes

Mix gently to avoid dense cupcakes and ensure the cupcakes are completely cool before frosting.

Tried this recipe?

Let us know how it was!

Pineapple Upside Down Cupcakes that Spark Joy in Every Bite

October 24, 2025 by Grace Snow Leave a Comment

As I was rummaging through old recipe cards, the vibrant memories of family gatherings came rushing back—those glorious moments spent savoring each slice of pineapple upside-down cake. This love for nostalgia inspired me to reinvent a classic into something even more fun: Easy Pineapple Upside Down Cupcakes! These delightful mini treats bring that familiar comfort in a portable form, perfect for any celebration, from backyard barbecues to cozy movie nights. With just a handful of ingredients and minimal prep time, you'll whip up a batch that's light, fluffy, and topped with caramelized pineapple and cherries. They're not only a delicious homage to the original but also a sweet, easy-to-make dessert that everyone will adore. Ready to sprinkle some joy into your kitchen? Let’s dive into this scrumptious recipe together!

Why are Pineapple Upside Down Cupcakes a must-try?

Nostalgic Comfort: Each bite brings back warm memories of family gatherings, offering that familiar sweetness we all love.
Easy to Make: With simple ingredients and minimal prep, anyone can master these delightful treats—even if you’re short on time!
Portable Pleasure: Perfect for picnics or parties, these cupcakes make it easy to enjoy dessert on the go without the mess.
Flavorful Twist: The combination of caramelized pineapple and fluffy vanilla cake creates a deliciously unique dessert experience.
Endless Variations: Don’t hesitate to experiment! Try swapping pineapple for other fruits or adding a splash of rum for the adults. These cupcakes truly shine in any setting!

Pineapple Upside Down Cupcakes Ingredients

For the Batter

  • Butter – Provides richness and moisture. Substitution: Can use margarine for a dairy-free option.
  • Sugar – Adds sweetness and helps create a caramelized crust. Note: Large granulated sugar is typically used for optimal texture.
  • Flour – The structure of the cupcakes. Substitution: For gluten-free, use almond or a gluten-free flour blend.
  • Pineapple Juice – Enhances flavor and adds moisture to the batter. Substitution: Fresh juice can be used for a fresher taste.
  • Eggs – Binds ingredients together and provides lift. Note: For egg-free, consider using flaxseed meal or a commercial egg substitute.
  • Brown Sugar – Adds sweetness and a hint of molasses flavor, enhances caramelization.

For the Topping

  • Pineapple Rings – The signature topping that caramelizes during baking. Note: If they don’t fit, slice them in half to fit the cupcake pan.
  • Heavy Whipping Cream – Used to whip up into fresh cream for topping. Substitution: Coconut cream can be used for a dairy-free version.
  • Powdered Sugar – Sweetens and stabilizes the whipped cream.
  • Maraschino Cherries – Decorative topping that adds a classic touch. Substitution: Fresh cherries can also be used for a natural option.

Get ready to create magical Pineapple Upside Down Cupcakes that not only celebrate tradition but also add a dash of fun to your dessert table!

Step‑by‑Step Instructions for Pineapple Upside Down Cupcakes

Step 1: Preheat the Oven
Begin by preheating your oven to 350°F (180°C). This temperature is perfect for creating a golden, caramelized top on your Pineapple Upside Down Cupcakes. Make sure your oven rack is positioned in the center for even baking, as you want those delightful mini cakes to rise beautifully.

Step 2: Prepare the Cupcake Pan
In a small saucepan, melt ⅓ cup of butter over low heat. Once melted, stir in brown sugar until combined, then evenly distribute this mixture into each section of a lined cupcake pan. Nestle a pineapple ring – or half rings, if needed – into each section, ensuring they sit flat for even caramelization while baking.

Step 3: Mix the Cake Batter
In a large mixing bowl, whisk together the remaining melted butter and granulated sugar until smooth. Add pineapple juice and eggs to the mix, then continue whisking until fully blended. Gradually incorporate the flour until just combined – be careful not to overmix, as this could affect the lightness of your Pineapple Upside Down Cupcakes.

Step 4: Fill the Cupcake Pan
Now it's time to fill the prepared cupcake sections! Pour the batter into each section, filling them about ¾ full. This allows room for the cupcakes to rise without overflowing. The contrast of the batter against the caramelized pineapple will make for a stunning and tasty treat once they’re baked.

Step 5: Bake to Perfection
Place the cupcake pan in your preheated oven and bake for about 20 minutes. Keep an eye on them, and check for doneness by inserting a toothpick into the center of a cupcake; if it comes out clean, they’re ready to come out of the oven. The tops should be lightly golden and slightly spring back when touched.

Step 6: Cool and Invert
Once baked, remove the cupcakes from the oven and let them cool in the pan for about 5-10 minutes. This is a crucial step to ensure they release easily. To invert, carefully run a knife around the edges and flip them onto a serving platter, revealing the beautiful caramelized pineapple topping.

Step 7: Whip the Cream Topping
While the cupcakes cool completely, prepare the whipped cream. In a mixing bowl, combine heavy whipping cream and powdered sugar. Using a hand mixer or whisk, beat until soft peaks form. The whipped cream will complement the sweetness of your Pineapple Upside Down Cupcakes perfectly, adding a light and airy touch to each bite.

Step 8: Serve and Garnish
Once cooled and inverted, pipe the freshly whipped cream onto each cupcake generously. Top with a maraschino cherry for that classic look. Now your Pineapple Upside Down Cupcakes are ready to be served, making for a delightful treat at any gathering or simply to enjoy at home!

What to Serve with Easy Pineapple Upside Down Cupcakes

As you savor the tropical sweetness of these delightful mini cakes, consider pairing them with delicious sides and treats to enhance your dessert experience.

  • Vanilla Ice Cream: The creamy, rich flavor of vanilla ice cream perfectly complements the fruity sweetness of the cupcakes, creating a delightful contrast.
  • Coconut Whipped Cream: Light and fluffy, this tropical twist on traditional whipped cream adds a luxurious finish that harmonizes with the pineapple.
  • Fresh Berries: A medley of strawberries, blueberries, or raspberries introduces a refreshing acidity that balances the sweetness of the cupcakes.

Pairing a scoop of coconut whipped cream with these cupcakes turns a simple treat into a tropical dessert fantasy. As you indulge in the flavors, you'll feel like you're on a beach getaway.

  • Melon Agua Fresca: This refreshing drink made from fresh melons and lime brings a sweet, fruity flavor that enhances the tropical vibes of your dessert.

A chilled glass of Melon Agua Fresca makes for a delightful contrast to the warmth of the cupcakes, ensuring every bite is a refreshing delight.

  • Pineapple Salsa: This zesty and savory salsa amplifies the pineapple flavor while providing a surprising twist, making it a fantastic side to experiment with.

Enjoying your cupcakes alongside pineapple salsa transforms this dessert into an adventurous pairing that surprises the palate and invites fun feelings.

  • Chocolate Dipping Sauce: A warm, rich chocolate sauce offers an indulgent option for drizzling over each cupcake. The pairing of chocolate and pineapple is a hidden gem worth exploring.

Each bite dipped in chocolate creates a whimsical dessert experience that your friends and family will adore.

  • Chilled Sweet Tea: The refreshing elements of sweet tea provide a perfect balance to the cupcakes, making it an ideal drink for summer gatherings or picnics.

Its cooling effect makes sweet tea a delightful contrast that enhances the tropical flavors of the Pineapple Upside Down Cupcakes and keeps everyone feeling refreshed.

Pineapple Upside Down Cupcakes Variations

Feel free to unleash your creativity and customize these cupcakes to suit your taste buds!

  • Fruit Swap: Substitute pineapple rings with peaches or cherries for a delicious twist. Each fruit brings its own unique sweetness to the cupcakes.
  • Boozy Upgrade: Add a splash of rum to the batter for an adult-friendly version. The rum enhances the flavor while making each bite a little more exciting!
  • Gluten-Free: For gluten-free cupcakes, swap regular flour for almond flour or a gluten-free flour blend. This makes it easy for everyone to enjoy this delightful treat.
  • Vegan Delight: Replace eggs with flaxseed meal or a commercial egg substitute and use coconut cream instead of heavy whipping cream. You'll still achieve that fluffy, satisfying texture!
  • Creamy Infusion: Whip in a bit of vanilla extract or almond extract into the batter for an extra layer of flavor. These enhancements will elevate the cupcake's profile beautifully.
  • Coconut Crunch: Top your cupcakes with toasted coconut flakes along with the caramelized pineapple. This adds a new texture and a delightful, tropical flavor.
  • Extra Caramel: Drizzle some warm caramel sauce over the assembled cupcakes for an indulgent touch. This sweet addition is sure to impress your guests!
  • Nuts for Texture: Fold in chopped walnuts or pecans into the batter for a delightful crunch. The nuttiness pairs well against the sweetness of the cupcakes.

So, whether you're inspired by the season, dietary needs, or simply your cravings, don’t hesitate to make these Pineapple Upside Down Cupcakes your own. For even more ideas, check out my guide on Dessert Substitutions and Creative Cupcake Variations!

Make Ahead Options

These Pineapple Upside Down Cupcakes are a fantastic choice for meal prep, making your dessert planning a breeze! You can prepare the cupcake batter up to 24 hours in advance; simply mix all the wet and dry ingredients, cover the bowl, and refrigerate. Additionally, you can caramelize the pineapple and brown sugar mixture in the cupcake pans a day ahead as well. When you're ready to bake, simply fill the pans and pop them in the oven. This keeps the cupcakes just as delicious and fluffy, with that perfect caramelized topping. Once baked, allow them to cool properly before storing in an airtight container for up to 3 days—this ensures every bite remains fresh and flavorful. Just whip up your cream and garnish just before serving for a delightful treat that saves you time without sacrificing taste!

How to Store and Freeze Pineapple Upside Down Cupcakes

Fridge: Store any leftover Pineapple Upside Down Cupcakes in an airtight container in the fridge for up to 4-5 days to maintain their freshness and avoid drying out.

Freezer: For longer storage, freeze the cupcakes individually wrapped in plastic wrap and then placed in a freezer-safe bag for up to 2 months. This helps preserve their delightful flavor and texture.

Thawing: When ready to enjoy, thaw the frozen cupcakes in the fridge overnight. Reheat in the microwave for a few seconds to restore their warmth and softness, if desired.

Serving Tip: Always add whipped cream fresh when serving after storage for the best taste and presentation.

Expert Tips for Pineapple Upside Down Cupcakes

  • Cool Well: Allow your cupcakes to cool for at least 5-10 minutes before inverting. This helps prevent sticking and ensures a clean release from the pan.
  • Knife Trick: Running a knife around the edges can ease the removal process. It’s a simple step that drastically reduces the chance of broken cupcakes!
  • Perfect Toppings: For a fruity twist, swap the pineapple for other fruits like peaches or cherries. Just ensure they’re firm enough to hold their shape while baking.
  • Keep an Eye on Baking: Every oven is different! Start checking for doneness a few minutes early, as baking times can vary.
  • Whipped Cream Magic: Use chilled tools when whipping the cream for the best results. This helps achieve the light and fluffy texture that perfectly complements your pineapple upside down cupcakes.

Pineapple Upside Down Cupcakes Recipe FAQs

How do I choose ripe pineapple for the topping?
Absolutely! When selecting pineapple rings, look for fruit that is firm, fragrant, and free of dark spots or blemishes. A ripe pineapple will smell sweet at the base and feel slightly soft when gently squeezed. If you're using canned pineapple, choose slices packed in juice rather than syrup for a fresher taste.

What is the best way to store Pineapple Upside Down Cupcakes?
Very! To keep your cupcakes fresh, store them in an airtight container in the refrigerator for up to 4-5 days. First, let them cool completely if they’ve just been baked. If you're stacking them, consider placing parchment paper between layers to prevent sticking.

Can I freeze Pineapple Upside Down Cupcakes?
Yes, you can! To freeze, individually wrap the cooled cupcakes in plastic wrap, then place them in a freezer-safe bag. They can hold up in the freezer for up to 2 months. When you're ready to enjoy them, simply thaw them in the fridge overnight and warm them slightly in the microwave if you'd like.

What if the cupcakes stick to the pan?
No worries! If this happens, it could be due to insufficient cooling. Make sure to let them cool in the pan for 5-10 minutes. To help ease them out, gently run a knife around the edges. If you suspect they’re still stuck, you can place the pan in a shallow dish of warm water for a minute to loosen the edges further.

Are Pineapple Upside Down Cupcakes safe for people with allergies?
Definitely! Be mindful of everyone’s dietary needs. To make these cupcakes more allergy-friendly, use gluten-free flour and substitute eggs with flaxseed meal or a commercial egg replacer. Also, consider using coconut cream instead of dairy whipped cream for a delicious dairy-free topping option.

How should I serve Pineapple Upside Down Cupcakes?
The more the merrier! For a delightful presentation, top each cupcake with freshly whipped cream and a maraschino cherry right before serving. If you're feeling adventurous, pair them with a scoop of vanilla ice cream for a truly indulgent treat that your guests will adore!

Pineapple Upside Down Cupcakes

Pineapple Upside Down Cupcakes that Spark Joy in Every Bite

These Pineapple Upside Down Cupcakes offer a nostalgic taste experience in mini treat form, perfect for any celebration.
Print Recipe Pin Recipe
Prep Time 15 minutes mins
Cook Time 20 minutes mins
Cooling Time 10 minutes mins
Total Time 45 minutes mins
Servings: 12 cupcakes
Course: Dessert
Cuisine: American
Calories: 180
Ingredients Equipment Method Nutrition Notes

Ingredients
  

For the Batter
  • ⅓ cup Butter Can use margarine for a dairy-free option.
  • 1 cup Granulated Sugar Large granulated sugar is typically used for optimal texture.
  • 1 cup Flour For gluten-free, use almond or a gluten-free flour blend.
  • ½ cup Pineapple Juice Fresh juice can be used for a fresher taste.
  • 2 large Eggs For egg-free, consider using flaxseed meal or a commercial egg substitute.
  • ½ cup Brown Sugar Enhances caramelization.
For the Topping
  • 12 slices Pineapple Rings If they don’t fit, slice them in half to fit the cupcake pan.
  • 1 cup Heavy Whipping Cream Coconut cream can be used for a dairy-free version.
  • 2 tablespoons Powdered Sugar
  • 12 pieces Maraschino Cherries Fresh cherries can also be used for a natural option.

Equipment

  • Oven
  • Cupcake pan
  • Mixing Bowl
  • Whisk
  • hand mixer
  • Saucepan

Method
 

Step‑by‑Step Instructions
  1. Preheat your oven to 350°F (180°C).
  2. Melt ⅓ cup of butter over low heat and stir in brown sugar until combined. Distribute evenly in a lined cupcake pan.
  3. Whisk together remaining melted butter and granulated sugar until smooth. Add pineapple juice and eggs, then combine with flour until just mixed.
  4. Fill the cupcake sections about ¾ full with batter.
  5. Bake for about 20 minutes or until a toothpick comes out clean.
  6. Let them cool in the pan for 5-10 minutes, then invert onto a serving platter.
  7. Whip together heavy whipping cream and powdered sugar until soft peaks form.
  8. Pipe whipped cream onto each cupcake and garnish with a maraschino cherry.

Nutrition

Serving: 1cupcakeCalories: 180kcalCarbohydrates: 30gProtein: 2gFat: 6gSaturated Fat: 4gMonounsaturated Fat: 2gCholesterol: 40mgSodium: 150mgPotassium: 70mgSugar: 20gVitamin A: 300IUVitamin C: 5mgCalcium: 20mgIron: 0.5mg

Notes

Allow cupcakes to cool well in the pan for easier removal. Experiment with different fruits for toppings!

Tried this recipe?

Let us know how it was!

Peach Cupcakes That Burst with Flavor and Summer Vibes

October 24, 2025 by Grace Snow Leave a Comment

As the first hints of summer warm the air, I find myself drawn to vibrant, sun-kissed peaches. That’s when I decided to whip up a batch of Peach Cupcakes that perfectly capture the essence of the season. These delightful treats are not only easy to bake but also feature a luscious peach jam filling that surprises with every bite. Topped with a fluffy layer of whipped cream and fresh peach slices, they bring a refreshing twist on traditional summer desserts that will have your friends and family begging for more. Whether you’re hosting a backyard barbecue or simply indulging in an afternoon sweet craving, these cupcakes are the ultimate crowd-pleaser. Ready to transform your summer gatherings into something special? Let’s dive into this deliciousness together!

Why Are These Peach Cupcakes Unique?

Bursting with flavor: Each bite offers the sweet tang of peach jam that beautifully complements the light, moist cupcake base.

Easy to whip up: Perfect for both novice and seasoned bakers, these cupcakes require just simple ingredients and straightforward steps.

Versatile additions: Enjoy them as is, or experiment by swapping the peach jam for mango or topping with cream cheese frosting for a twist!

Crowd-pleaser: Whether at a picnic or a dinner party, they're sure to impress guests and leave them asking for seconds.

Summer vibes: The fresh peach garnish and fluffy whipped cream bring a bright, seasonal touch that captures the essence of summer – perfect for warm days.

Whether you’re also interested in baking classic treats like Peaches Cream Cookies or want to elevate your dessert game, these Peach Cupcakes are an irresistible addition to your summer repertoire.

Peach Cupcake Ingredients

For the Cupcakes
• Unsalted Butter – Provides moisture and richness; substitution with margarine works if needed.
• Brown Sugar – Adds a deeper, caramel-like flavor; can replace with all granulated sugar.
• Granulated Sugar – Sweetens the cupcakes; avoid substitution unless mixing with brown sugar.
• Eggs – Essential for structure and moisture; use room temperature eggs for better mixing.
• Vanilla Extract – Enhances flavor; opt for pure vanilla for best results, but imitation works too.
• Cake Flour – Ensures a light and fluffy texture; can mix with all-purpose flour but results may vary.
• Baking Powder – Leavening agent for rise; ensure it's fresh to maximize effectiveness.
• Kosher Salt – Balances sweetness; table salt can be used in slightly lesser amounts.
• Milk – Adds necessary moisture; non-dairy options can be substituted without issues.

For the Topping
• Heavy Whipping Cream – Provides a rich, creamy flavor; light whipping cream serves as a decent alternative.
• Peach Jam – Acts as a delicious filling, adding to the summer vibe; can substitute with other fruit jams like apricot.
• Peach – Fresh slices for garnish that enhance flavor; any similar stone fruit can be used.

These Peach Cupcake ingredients come together to create a delightful summer dessert, bursting with flavors that evoke the joys of the season!

Step‑by‑Step Instructions for Peach Cupcakes

Step 1: Preheat and Prepare
Begin by preheating your oven to 350°F (175°C). While it heats, line your cupcake pans with paper liners, ensuring they’re set securely in place. This will make it easier to remove your delightful Peach Cupcakes once baked.

Step 2: Cream the Ingredients
In a large mixing bowl, combine the softened unsalted butter, brown sugar, and granulated sugar. Using an electric mixer, blend the mixture until it is light and fluffy, about 2-3 minutes. Next, add in the eggs one at a time, along with the vanilla extract, mixing on medium speed until everything is well incorporated and smooth.

Step 3: Combine Dry Ingredients
In a separate bowl, whisk together the cake flour, baking powder, and kosher salt. Gradually add this dry mixture to the wet ingredients in your mixing bowl, alternating with the milk. Mix until just combined, ensuring you don’t overmix—your Peach Cupcake batter should be smooth and slightly thick.

Step 4: Fill the Liners
Using a spoon or a cookie scoop, fill each lined cupcake cavity about halfway with the batter. This ensures enough space for rising. Bake in the preheated oven for about 20 minutes, or until the tops of the cupcakes are lightly golden and a toothpick inserted in the center comes out clean.

Step 5: Cool the Cupcakes
Once baked, remove the cupcake pans from the oven and allow them to cool in the pans for 5 minutes. Afterward, carefully transfer the cupcakes to a wire cooling rack. Let them cool completely before proceeding to the next step, which is crucial for filling and frosting.

Step 6: Fill with Peach Jam
Once the cupcakes are cool, use a cupcake corer or a small knife to remove the centers from each cupcake. Fill the hollowed centers generously with peach jam, allowing the sweet filling to seep into the airy cupcake, creating a delightful surprise with every bite.

Step 7: Whip the Cream
In a mixing bowl, pour in the heavy whipping cream and begin to whip using an electric mixer on medium speed. Whip until stiff peaks form, which should take about 3-5 minutes. This is the key to achieving that fluffy topping on your Peach Cupcakes—stop when the cream holds its shape but isn't overwhipped.

Step 8: Frost and Garnish
Using a piping bag fitted with your favorite tip, pipe the whipped cream onto each cooled cupcake, generously covering them. Top each cupcake with fresh peach slices for an added touch of color and flavor. Your Peach Cupcakes are now ready to impress!

Make Ahead Options

These Peach Cupcakes are ideal for meal prep, allowing busy home cooks to savor delightful homemade desserts without the last-minute rush! You can prepare the cupcake batter up to 24 hours in advance by mixing it and refrigerating it in an airtight container. When you're ready to bake, simply allow the batter to come to room temperature and fill the cupcake liners before baking. Additionally, the cupcakes can be baked in advance and stored in an airtight container at room temperature for up to 3 days. Just wait to fill them with peach jam and top with whipped cream until you’re ready to serve, ensuring they are just as delicious and fresh as when they were first made.

How to Store and Freeze Peach Cupcakes

Airtight Container: Store leftover cupcakes in an airtight container in the fridge for up to 3 days to maintain freshness and prevent the whipped cream from wilting.

Freezer: If you wish to freeze them, wrap cupcakes individually in plastic wrap, then seal in a freezer-safe bag or container for up to 3 months.

Thawing: To enjoy, simply remove from the freezer and thaw in the fridge overnight. Frost with whipped cream just before serving to keep it fluffy and fresh.

Reheating: If you prefer warm cupcakes, briefly microwave them for 10-15 seconds, but avoid reheating the whipped cream, which is best when fresh.

Peach Cupcakes Variations & Substitutions

Embrace your creativity in the kitchen with these delightful twists on classic peach cupcakes!

  • Tropical Twist: Substitute peach jam for mango jam to bring a refreshing, exotic flavor.

  • Creamy Indulgence: Top the cupcakes with cream cheese frosting for a richer, tangy contrast to the sweetness.

  • Spiced Delight: Add a sprinkle of cinnamon and nutmeg to the batter for a warm, inviting aroma paired with your peachy goodness.

  • Nutty Crunch: Fold in chopped walnuts or pecans into the batter before baking for added texture and a nutty flavor.

  • Gluten-Free: Swap cake flour with gluten-free flour blend to make these cupcakes suitable for those with gluten sensitivities.

  • Vegan Option: Replace eggs with flaxseed meal and use non-dairy milk and whipped coconut cream for a vegan-friendly treat.

  • Fruity Medley: Incorporate diced apricots or plums into the batter alongside peaches for a delicious fruit medley everyone will love.

  • Heat Up the Flavor: Add a hint of jalapeño to the peach jam filling for a surprising spicy kick that contrasts beautifully with the sweetness.

These variations add a personal touch to your peach cupcakes, ensuring there’s a flavor option for everyone! If you’re looking for more fruity sweetness, check out these delectable Peaches Cream Cookies to elevate your dessert offerings. Happy baking!

Expert Tips for Peach Cupcakes

  • Fresh Ingredients: Use fresh, ripe peaches for the best flavor. Overripe or underripe peaches can affect the taste and sweetness of your cupcakes.

  • Avoid Overmixing: When combining dry and wet ingredients, mix just until combined. Overmixing can lead to dense cupcakes, so keep that batter light and fluffy!

  • Room Temperature Ingredients: Bring your eggs and milk to room temperature before mixing. This helps create a uniform batter that yields softer, moist Peach Cupcakes.

  • Proper Cooling: Allow cupcakes to cool completely before filling them with peach jam. If they’re warm, the jam could melt and make a mess instead of providing a delightful surprise!

  • Chill the Whipping Cream: For easier whipping, chill the bowl and beaters before whipping your heavy cream. This helps achieve those beautiful, fluffy peaks for your topping.

  • Experiment with Flavors: Don't hesitate to swap peach jam with other jams or add spices like cinnamon to customize your Peach Cupcakes. The possibilities are endless!

What to Serve with Peach Cupcakes

Delightful and vibrant, these peach cupcakes will brighten any occasion, but pairing them with the right accompaniments elevates the experience even more.

  • Vanilla Ice Cream: This classic pairing adds a creaminess that perfectly balances the fruity sweetness of the cupcakes.
  • Fresh Berries: Strawberries or blueberries bring a burst of flavor and a pop of color that complements the peach goodness.
  • Lemonade: A refreshing glass of tangy lemonade brings contrasting acidity that enhances the sweet richness of the cupcakes.
  • Crushed Graham Crackers: A sprinkle of these adds a fun, crunchy texture that contrasts beautifully with the soft cupcake.
  • Mint Leaves: A few fresh mint leaves provide a refreshing note that enhances the peach flavor and makes each bite feel even more special.
  • Sparkling Water: This effervescent drink cleanses the palate without overpowering the sweet and fruity flavors of the cupcakes.
  • Fruit Salad: A light and colorful medley of seasonal fruits can add freshness to your dessert spread and enhance the summer vibes.
  • Peach Sorbet: Keep the peach theme going with a refreshing scoop of peach sorbet that intensifies those lovely flavors.
  • Lemon Zest Whipped Cream: Mix some lemon zest into your whipped cream for a zesty twist that highlights the peach's bright character.

Peach Cupcakes Recipe FAQs

How do I know if my peaches are ripe enough for the cupcakes?
Absolutely! Look for peaches that are slightly soft to the touch and have a sweet fragrance. Avoid peaches with dark spots or shrivels, as these may be overripe. If they’re hard, leave them at room temperature for a day or two to ripen.

How long can I store leftover peach cupcakes?
You can store leftover peach cupcakes in an airtight container in the fridge for up to 3 days. Just be sure to keep them chilled due to the whipped cream topping, which doesn't hold up well at room temperature!

Can I freeze peach cupcakes?
Yes! To freeze your peach cupcakes, wrap each one individually in plastic wrap. Then, place them in a freezer-safe bag or container. They can be stored this way for up to 3 months. When you’re ready to enjoy, thaw them in the fridge overnight.

Why are my cupcakes dense instead of fluffy?
Very often, dense cupcakes result from overmixing the batter or using cold ingredients. Make sure to mix the wet and dry ingredients just until combined, and use room temperature eggs and milk for a lighter texture.

Can I make these cupcakes gluten-free?
The more the merrier! You can substitute the cake flour with a 1:1 gluten-free baking blend. Just ensure that it’s designed for baking to achieve similar results in texture and flavor.

What can I use instead of heavy whipping cream for the topping?
If you’re looking for alternatives, you can use light whipping cream, but remember it won’t be as rich. You can also make a dairy-free topping using coconut cream or non-dairy whipped topping. Just remember to chill them properly for the best results!

Peach Cupcakes

Peach Cupcakes That Burst with Flavor and Summer Vibes

Peach Cupcakes bursting with flavor, featuring a luscious peach jam filling and topped with whipped cream and fresh peaches.
Print Recipe Pin Recipe
Prep Time 20 minutes mins
Cook Time 20 minutes mins
Cooling Time 5 minutes mins
Total Time 45 minutes mins
Servings: 12 cupcakes
Course: Dessert
Cuisine: American
Calories: 250
Ingredients Equipment Method Nutrition Notes

Ingredients
  

For the Cupcakes
  • 1 cup Unsalted Butter Provides moisture and richness; substitution with margarine works if needed.
  • 1 cup Brown Sugar Adds a deeper, caramel-like flavor; can replace with all granulated sugar.
  • 1 cup Granulated Sugar Sweetens the cupcakes; avoid substitution unless mixing with brown sugar.
  • 2 large Eggs Essential for structure and moisture; use room temperature eggs for better mixing.
  • 1 teaspoon Vanilla Extract Enhances flavor; opt for pure vanilla for best results.
  • 2 cups Cake Flour Ensures a light and fluffy texture; can mix with all-purpose flour.
  • 2 teaspoons Baking Powder Leavening agent for rise; ensure it's fresh to maximize effectiveness.
  • 1/2 teaspoon Kosher Salt Balances sweetness; table salt can be used in slightly lesser amounts.
  • 1 cup Milk Adds necessary moisture; non-dairy options can be substituted.
For the Topping
  • 2 cups Heavy Whipping Cream Provides a rich, creamy flavor; light whipping cream serves as a decent alternative.
  • 1/2 cup Peach Jam Acts as a delicious filling, adding to the summer vibe; can substitute with other fruit jams.
  • 1 medium Peach Fresh slices for garnish that enhance flavor; any similar stone fruit can be used.

Equipment

  • Oven
  • Mixing Bowl
  • Electric mixer
  • Cupcake pans
  • Whisk
  • Cupcake Corer
  • piping bag

Method
 

Cupcake Preparation
  1. Preheat your oven to 350°F (175°C) and line your cupcake pans with paper liners.
  2. In a mixing bowl, cream together the softened butter, brown sugar, and granulated sugar until light and fluffy, about 2-3 minutes. Add eggs one at a time and mix in the vanilla.
  3. In a separate bowl, whisk together cake flour, baking powder, and kosher salt. Gradually add this to the wet ingredients, alternating with milk, mixing until just combined.
  4. Fill each cupcake liner halfway with batter and bake for about 20 minutes until tops are golden and a toothpick comes out clean.
  5. Cool the cupcakes in the pans for 5 minutes, then transfer them to a wire rack to cool completely.
  6. Once cool, use a cupcake corer to remove the centers from each cupcake and fill them with peach jam.
  7. Whip the heavy cream until stiff peaks form and pipe onto each cupcake, then garnish with fresh peach slices.

Nutrition

Serving: 1cupcakeCalories: 250kcalCarbohydrates: 30gProtein: 3gFat: 12gSaturated Fat: 7gPolyunsaturated Fat: 1gMonounsaturated Fat: 3gCholesterol: 50mgSodium: 200mgPotassium: 150mgSugar: 18gVitamin A: 300IUVitamin C: 2mgCalcium: 50mgIron: 1mg

Notes

For best results, use fresh ingredients, avoid overmixing, and chill your whipping cream before use to achieve fluffy peaks.

Tried this recipe?

Let us know how it was!

Easy Peanut Butter and Jelly Cookies – A Nostalgic Sweet Treat

October 24, 2025 by Grace Snow Leave a Comment

“Did you ever wish for a bite of nostalgia?” As I stood in my kitchen, the smell of melting peanut butter and warm cookies whisked me back to my carefree childhood. These Easy Peanut Butter and Jelly Cookies are a delightful blend of soft, chewy peanut butter goodness topped with your choice of sweet jam, reminiscent of those classic sandwiches that brought a smile to our faces. They're quick to prepare, making them a perfect solution for busy days or spontaneous cravings—no chilling required! And these cookies aren’t just delicious; they offer a fun twist on a nostalgic favorite, providing a tasty treat that kids and adults alike will adore. Ready to embark on a sweet journey that combines comfort and fun? Let’s dive in!

Why Will You Love These Cookies?

Nostalgic Flavors: These cookies capture the essence of childhood with a soft, chewy texture and a delightful jam center that invokes memories of classic peanut butter and jelly sandwiches.

Quick and Easy: Perfect for busy cooks, this recipe requires minimal prep time and no chilling, so you can satisfy your sweet tooth in record time.

Versatile Variations: Whether you prefer strawberry, raspberry, or blueberry jam, the options are limitless! You can even swap peanut butter for almond or cashew butter to mix things up.

Kid-Friendly Fun: Kids love these cookies! They can help assemble them, making baking a fun-filled family activity.

Perfect for Sharing: Whether it’s a bake sale, a family gathering, or just a treat for friends, these cookies are sure to impress! Enhance your baking adventures and pair these cookies with a glass of milk or some delicious Eggnog Cookies Soft for an indulgent snack experience!

Easy Peanut Butter and Jelly Cookies Ingredients

• Get ready to create a nostalgic treat that everyone will love!

For the Cookie Dough
• Butter – Adds richness and moisture; ensure it's softened for easier mixing.
• Granulated Sugar – Provides sweetness and texture; can be replaced with brown sugar for a deeper flavor.
• Brown Sugar – Infuses moisture and a hint of caramel; using all granulated sugar is an option if preferred.
• Peanut Butter – The star of the recipe, lending core flavor and structure; you can use either smooth or crunchy varieties.
• Egg – Binds the mixture together; a flax egg serves as a great vegan alternative.
• Vanilla Extract – Heightens the flavors; opt for pure extract for the best results.
• All-Purpose Flour – Offers essential structure; substitute with a gluten-free blend for a gluten-free option.
• Baking Soda – Helps the cookies rise and contributes to a light, fluffy texture.
• Salt – Balances sweetness perfectly; using sea salt can provide a subtle crunch.

For the Jam Filling
• Jam (Strawberry or Other) – Brings fruity sweetness to the cookies; feel free to use your favorite flavor.

For Optional Toppings
• Chopped Nuts – Adds a delightful crunch and enhances the nutty flavor; can be omitted for allergy considerations.

These Easy Peanut Butter and Jelly Cookies are bound to become a family favorite, whether enjoyed fresh from the oven or packed for a snack!

Step‑by‑Step Instructions for Easy Peanut Butter and Jelly Cookies

Step 1: Preheat the Oven
Begin by preheating your oven to 350°F (175°C), ensuring it’s the perfect temperature for baking these delightful Easy Peanut Butter and Jelly Cookies. While the oven heats, line your baking sheets with parchment paper for easy cleanup—this will help keep your cookies from sticking and ensure they develop a beautiful golden edge.

Step 2: Cream the Butter and Sugars
In a mixing bowl, add the softened butter and beat it with an electric mixer until creamy, which should take about 1-2 minutes. Gradually add the granulated and brown sugars, mixing until the mixture is light and fluffy—aim for a pale, almost white color, which usually takes another 2-3 minutes. This step is crucial for achieving that soft, tender cookie texture.

Step 3: Incorporate the Peanut Butter
Next, fold in the peanut butter. Use a spatula or the mixer on low speed to combine until smooth and fully integrated. You want to ensure that the peanut butter is thoroughly mixed in with no streaks remaining, giving your Easy Peanut Butter and Jelly Cookies their signature flavor. This should take about 1 minute.

Step 4: Add Egg and Vanilla
Crack in one egg and pour in the vanilla extract, mixing until well combined. Continue to beat on medium speed for another minute, allowing the egg to bind the ingredients together seamlessly. You'll know it's ready when the mixture looks smooth and glossy, inviting you to bake these delicious cookies.

Step 5: Combine Dry Ingredients
Gradually add the all-purpose flour, baking soda, and salt to the peanut butter mixture, stirring gently with a spatula until just combined. Be careful not to overmix; you want a slightly shaggy dough that retains some airiness. This can take about 30 seconds, and you should see no dry flour remaining.

Step 6: Shape the Cookie Dough
Use your hands to scoop and roll the dough into 1½-inch balls and place them evenly on the prepared baking sheets—aim for about 12 cookies per sheet to give them room to spread. You’ll want your dough balls to be perfectly rounded, as this will help them bake evenly and create gorgeous cookies.

Step 7: Create the Indentations
With a fork, gently press down on each dough ball to flatten it to about ½ inch thick, creating a crisscross pattern. Make sure to press just enough to leave a deep impression in the center, which is essential for holding the jam later. This little step brings a charming look to your Easy Peanut Butter and Jelly Cookies!

Step 8: Add the Jam
Now, spoon approximately 1 teaspoon of your favorite jam into the center of each cookie. Be cautious not to overfill, as the jam may spill over during baking. This fruity center will meld beautifully with the peanut butter, creating that nostalgic experience of a PB&J sandwich.

Step 9: Bake to Perfection
Place the baking sheets in the preheated oven and bake for 13-15 minutes, or until the edges turn lightly golden. Keep an eye on them as they bake; they should feel set yet soft in the middle when you check for doneness. The perfect aroma wafting through your kitchen will guide you!

Step 10: Cool and Transfer
Once baked, remove the cookies from the oven and let them sit on the baking sheets for about 5 minutes. This allows them to firm up a bit more before transferring them to a wire rack to cool completely. This cooling period is vital as it enhances the cookies' chewy texture while preserving that delicious jam center.

Expert Tips for Easy Peanut Butter and Jelly Cookies

  • Softened Butter: Ensure your butter is at room temperature before mixing. Cold butter can lead to unevenly baked cookies.

  • Don’t Overmix: Mix the dough until just combined. Overmixing can create tough cookies, so be gentle when incorporating the dry ingredients.

  • Jam Selection: Choose a jam that complements the peanut butter flavor well. Aim for a smoother jam to avoid spillage during baking.

  • Proper Spacing: Place cookie dough balls well apart on the baking sheet, allowing them to spread without merging into one.

  • Baking Time: Keep a close eye on your cookies towards the end of baking. They should have a light golden edge but remain soft in the center for a chewy texture.

  • Cooling Time: Be patient! Let the cookies cool on the baking sheet for a few minutes before transferring them to a wire rack. This helps maintain the perfect chewy texture.

Make Ahead Options

These Easy Peanut Butter and Jelly Cookies are a fantastic option for meal prep, letting busy cooks save time without sacrificing flavor! You can prepare the cookie dough up to 24 hours in advance—just scoop the dough into balls and store them in an airtight container in the refrigerator. For an even longer option, the uncooked dough can be frozen for up to 3 months. When you're ready to bake, simply let the frozen dough thaw in the fridge for a few hours or overnight, then create the indents and fill with jam before baking as directed. This ensures your cookies remain just as delicious and fresh, perfect for a sweet treat anytime!

Easy Peanut Butter and Jelly Cookies: Variations & Substitutions

Feel free to customize these cookies to suit your taste and dietary needs for a delightful treat that fits just right!

  • Nut-Free: Swap peanut butter for sunflower seed butter for a delicious nut-free alternative.

  • Different Jams: Instead of strawberry jam, try apricot or orange marmalade for a refreshing twist—each brings a unique flair and sweetness!

  • Chocolate Flavors: Add mini chocolate chips to the dough for a decadent chocolate-peanut butter flavor sensation. You can’t go wrong with this delightful duo!

  • Flour Alternatives: Use almond flour or coconut flour for a gluten-free option that still holds its shape and flavor beautifully.

  • Extra Crunch: Fold in crushed pretzels or cereal for added texture and a salty-sweet contrast that’s irresistible.

  • Sweetener Substitute: Replace granulated sugar with coconut sugar for a low-GI alternative offering a slightly caramel-like flavor.

  • Indulgent Toppings: Drizzle with melted chocolate or caramel sauce post-baking for a gourmet touch that elevates the cookie experience.

  • Seasonal Spices: Add a dash of cinnamon or nutmeg to the dough for a warm, spiced flavor that perfectly complements the jam filling and makes these cookies ideal for fall gatherings.

Explore these variations, and don't forget to pair your cookies with a glass of cold milk or perhaps some delicious Thumbprint Cookies Melt for a fun twist!

How to Store and Freeze Easy Peanut Butter and Jelly Cookies

Airtight Container: Store your cookies in an airtight container at room temperature for up to 5 days to maintain their soft, chewy texture.

Fridge: If you prefer a slightly firmer cookie, they can be refrigerated for up to 1 week. Just ensure they're in a sealed container to prevent them from drying out.

Freezer: For longer storage, freeze the cookies in a single layer on a baking sheet, then transfer to a freezer bag for up to 3 months. Thaw at room temperature before serving.

Reheating: To enjoy these delightful Easy Peanut Butter and Jelly Cookies warm again, microwave for 10-15 seconds or pop them in a preheated oven at 300°F (150°C) for a few minutes.

What to Serve with Easy Peanut Butter and Jelly Cookies

Looking to complement the delightful flavors of these soft, chewy cookies? Here are some scrumptious pairings that will enhance your baking experience.

  • Cold Glass of Milk: A classic choice! The creaminess of milk balances the sweetness of the cookies, creating a perfectly nostalgic snack.
  • Sliced Apples with Caramel Dip: The crisp texture of apples with a drizzle of caramel provides a refreshing contrast to the soft cookies. This pairing adds a fruity crunch!
  • Vanilla Ice Cream: Serve these cookies warm with a scoop of vanilla ice cream for an indulgent dessert that brings a whole new level of delight.
  • Hot Cocoa: A steaming mug of hot cocoa, perhaps topped with whipped cream, delivers a cozy feeling, elevating your cookie experience even more.
  • Fruit Salad: A vibrant fruit salad lends a fresh and tangy contrast, lightening up the sweetness of the cookies while providing a colorful plate.
  • Chocolate Milkshake: Blend peanut butter into a milkshake for a rich treat that mirrors the flavors in your cookies. Swirls of peanut butter in vanilla ice cream are heavenly!
  • Carrot Sticks and Hummus: For a savory contrast, pair with crunchy carrot sticks and creamy hummus to add some healthy flair to your snack time.
  • Tea: A cup of chamomile or earl grey tea can bring a soothing element, harmonizing perfectly with the nutty essence of the cookies.
  • Whipped Cream: Top the cookies with a dollop of whipped cream for an extra touch of indulgence, perfect for serving at gatherings or just because.

Easy Peanut Butter and Jelly Cookies Recipe FAQs

How do I know if my peanut butter is the right type for baking?
Absolutely! For this recipe, you can use either smooth or crunchy peanut butter, depending on your preference. Smooth peanut butter will yield a more uniform texture, while crunchy will add delightful little bites of peanut that enhance the flavor. Just make sure it’s not overly oily—if you notice excess oil on the surface, give it a good stir before using!

What’s the best way to store leftover cookies?
Very! To keep your Easy Peanut Butter and Jelly Cookies soft and chewy, store them in an airtight container at room temperature for up to 5 days. If you prefer a firmer texture, refrigerating them in a sealed container can keep them fresh for up to a week.

Can I freeze these cookies? If so, how?
Absolutely! To freeze your Easy Peanut Butter and Jelly Cookies, place them in a single layer on a baking sheet and freeze until solid. Once frozen, transfer them to a freezer-safe bag or an airtight container, separating layers with parchment paper to prevent sticking. They will stay fresh for up to 3 months. When you're ready to enjoy, simply thaw at room temperature or warm them slightly in the microwave.

What should I do if my cookies spread too much while baking?
The more the merrier! If your cookies spread too much, it could be due to a few reasons. First, make sure your butter isn’t too warm. Softened butter should be at room temperature—not melted. Also, check that you’re using the correct ratios of flour; adding a little extra flour can help. Finally, consider chilling the dough for about 30 minutes before baking to help the cookies maintain their shape.

Are these cookies safe for pets or people with nut allergies?
Absolutely! These Easy Peanut Butter and Jelly Cookies are not suitable for dogs or any pets, as peanut butter can be harmful in larger quantities. Additionally, if you’re baking for someone with a nut allergy, you can substitute the peanut butter with sunflower seed butter for a nut-free alternative. Just be sure to check all labels for hidden allergens!

Easy Peanut Butter and Jelly Cookies

Easy Peanut Butter and Jelly Cookies – A Nostalgic Sweet Treat

These Easy Peanut Butter and Jelly Cookies are a delightful blend of soft, chewy peanut butter goodness topped with your choice of sweet jam.
Print Recipe Pin Recipe
Prep Time 15 minutes mins
Cook Time 15 minutes mins
Cooling Time 5 minutes mins
Total Time 35 minutes mins
Servings: 12 cookies
Course: Dessert
Cuisine: American
Calories: 150
Ingredients Equipment Method Nutrition Notes

Ingredients
  

For the Cookie Dough
  • 1 cup Butter Ensure it's softened for easier mixing.
  • 1 cup Granulated Sugar Provides sweetness; can be replaced with brown sugar.
  • 1/2 cup Brown Sugar Infuses moisture; optional to use all granulated sugar.
  • 1 cup Peanut Butter Use either smooth or crunchy varieties.
  • 1 large Egg A flax egg serves as a great vegan alternative.
  • 1 teaspoon Vanilla Extract Opt for pure extract for best results.
  • 2 cups All-Purpose Flour Substitute with gluten-free blend if desired.
  • 1 teaspoon Baking Soda Helps cookies rise.
  • 1/2 teaspoon Salt Balances sweetness.
For the Jam Filling
  • 1 cup Jam (Strawberry or Other) Use your favorite flavor.
For Optional Toppings
  • 1/2 cup Chopped Nuts Can be omitted for allergy considerations.

Equipment

  • Mixing Bowl
  • Electric mixer
  • Baking Sheets
  • Parchment Paper

Method
 

Step-by-Step Instructions for Easy Peanut Butter and Jelly Cookies
  1. Preheat your oven to 350°F (175°C) and line your baking sheets with parchment paper.
  2. In a mixing bowl, cream the softened butter until creamy, about 1-2 minutes. Gradually add granulated and brown sugars until light and fluffy, about 2-3 minutes.
  3. Fold in the peanut butter until smooth and fully integrated.
  4. Crack in the egg and add vanilla extract, mixing until well combined.
  5. Gradually add the flour, baking soda, and salt, stirring gently until just combined.
  6. Scoop and roll the dough into 1½-inch balls and place them on the baking sheets.
  7. Gently press down on each dough ball with a fork to create a crisscross pattern.
  8. Spoon approximately 1 teaspoon of jam into the center of each cookie.
  9. Bake for 13-15 minutes, until the edges are lightly golden.
  10. Let the cookies sit on the baking sheets for about 5 minutes before transferring them to a wire rack to cool completely.

Nutrition

Serving: 1cookieCalories: 150kcalCarbohydrates: 20gProtein: 3gFat: 7gSaturated Fat: 3gPolyunsaturated Fat: 2gMonounsaturated Fat: 1gCholesterol: 10mgSodium: 100mgPotassium: 80mgFiber: 1gSugar: 10gVitamin A: 4IUCalcium: 1mgIron: 3mg

Notes

Store in an airtight container at room temperature for up to 5 days. For firmer cookies, refrigerate for up to 1 week. Freeze in a single layer for up to 3 months.

Tried this recipe?

Let us know how it was!
  • 1
  • 2
  • 3
  • …
  • 19
  • Next Page »

Welcome!

Hi, I’m Grace, a Sydney-based home cook with a passion for bold flavors and trending ingredients. Whether you’re a busy beginner or a seasoned foodie, you’ll find dishes here that are fresh, fun, and full of flavor.

More about me

Popular Recipes

  • Autumn Harvest Grain Salad with Cranberries
    Autumn Harvest Grain Salad with Cranberries for Cozy Nights
  • Ground Beef Hot Honey Bowl
    Ground Beef Hot Honey Bowl for a Flavor-Packed Dinner Enjoyment
  • Autumn Harvest Grain Salad with Cranberries
    Autumn Harvest Grain Salad with Cranberries for Cozy Nights
  • Ground Beef Hot Honey Bowl
    Ground Beef Hot Honey Bowl for a Flavor-Packed Dinner Enjoyment

Footer

↑ back to top

About

  • Privacy Policy
  • Disclaimer
  • Terms & Conditions

Newsletter

  • Sign Up! for emails and updates

Contact

  • About me
  • Contact me

Copyright © 2025 TastyTrendIngredients