As the aroma of freshly baked Maple Bacon Cinnamon Rolls wafts through your kitchen, you might find yourself transported to a cozy café on a leisurely Sunday morning. This delightful recipe perfectly balances the sweetness of cinnamon and maple with the savory crunch of bacon, creating a breakfast treat that both comforts and indulges. Ideal for brunch gatherings or a special morning at home, these rolls are surprisingly simple to make, taking under two hours from start to finish, making them accessible for bakers of all levels. Plus, you can get creative by swapping in vegetarian options if you wish! Ready to bring some warmth to your kitchen and impress your loved ones? Let’s dive in and make those sweet and savory dreams come true!
Why are Maple Bacon Cinnamon Rolls irresistible?
Irresistible aromas engulf your kitchen as these rolls bake to perfection, making them the ultimate brunch showstopper. Sweet and savory blend harmoniously, with maple and bacon creating a taste sensation that’s hard to resist. Versatile enough to cater to dietary preferences, substitute vegetarian bacon for a guilt-free twist! Plus, this recipe is surprisingly simple, perfect for both novice and experienced bakers alike. Whether you’re serving them at a gathering or enjoying them on a cozy morning, these rolls are sure to impress—just like our delightful Pumpkin Cinnamon Roll recipe!
Maple Bacon Cinnamon Roll Ingredients
For the Dough
• Warm Milk – Provides moisture and activates yeast. Note: Use whole or 2% milk for the best flavor.
• Instant Yeast – Leavening agent that causes the dough to rise. No substitution necessary; use active dry yeast if preferred but will require adjustments.
• Granulated Sugar – Sweetens the dough and feeds the yeast. Can replace with brown sugar for a different flavor profile.
• Softened Butter – Adds richness and flavor to the dough. Substitute with margarine for a dairy-free option.
• Eggs – Contributes to structure and moisture in the dough. For a vegan version, use flax eggs (1 tablespoon ground flaxseed + 2.5 tablespoons water per egg).
• All-Purpose Flour – Main structure of the rolls. Can substitute half with whole wheat flour for a healthier option.
• Salt – Enhances flavor and regulates yeast activity. No substitutions necessary.
For the Filling
• Brown Sugar – Sweetens the filling and adds depth. Light or dark brown sugar can be used depending on preference.
• Ground Cinnamon – Key spice in the filling, providing warmth and sweetness. Increasing it enhances flavor complexity.
For the Glaze
• Powdered Sugar – For making the glaze, sweetens and creates a smooth texture. No substitutions required.
• Maple Syrup – Adds distinctive flavor to the glaze. Substitute with agave syrup for a similar texture and sweetness.
For the Topping
• Crispy Bacon – Provides savory crunch on top. Vegetarian alternatives include crispy tempeh or sautéed mushrooms.
Step‑by‑Step Instructions for Maple Bacon Cinnamon Rolls
Step 1: Activate the Yeast
In a large mixing bowl, combine 1 cup of warm milk, 2 ¼ teaspoons of instant yeast, and 2 tablespoons of granulated sugar. Stir gently and let the mixture sit for about 5 minutes, until it becomes frothy. This allows the yeast to activate, ensuring your Maple Bacon Cinnamon Rolls will rise beautifully.
Step 2: Mix the Dough
Add 4 tablespoons of softened butter, 2 large eggs, and 1 teaspoon of salt to the yeast mixture. Gradually incorporate 4 cups of all-purpose flour, mixing until a soft dough begins to form. Use a spatula or wooden spoon for this step, making sure all ingredients are thoroughly combined before moving on.
Step 3: Knead the Dough
Dust a clean surface with flour and transfer the dough onto it. Knead the dough for 8-10 minutes, until it becomes smooth and elastic. Use the heel of your hand to push the dough away from you, then fold it back over itself. When you’re done, the dough should spring back when lightly pressed.
Step 4: First Rise
Place the kneaded dough in a greased bowl, covering it with a clean kitchen towel. Let it rise in a warm spot, like a turned-off oven, for about 1 hour or until doubled in size. This is key for fluffy Maple Bacon Cinnamon Rolls, as the yeast works its magic during this time.
Step 5: Prepare the Filling
After the dough has risen, punch it down to deflate gently and roll it out on a floured surface into a large rectangle (about 15x20 inches). Spread the surface with 4 tablespoons of softened butter. Then, sprinkle a generous mixture of ½ cup brown sugar and 2 tablespoons of ground cinnamon evenly over the top.
Step 6: Roll and Cut the Dough
Starting from one long side, carefully roll the dough tightly into a log shape. Once rolled up, use a sharp knife or dental floss to cut the log into 12 equal pieces. Place the cut rolls in a greased baking dish, ensuring they have room to expand further.
Step 7: Second Rise
Cover the dish with a towel and let the rolls rise for another 30-40 minutes in a warm place. During this time, preheat your oven to 350°F (175°C). When the rolls have puffed up nicely and touch each other, they're ready to bake.
Step 8: Bake the Rolls
Once preheated, place the rolls in the oven and bake them for 25-30 minutes until they turn golden brown. Keep an eye on them; a nice light brown color is a sign that your Maple Bacon Cinnamon Rolls are done and will taste delightful!
Step 9: Glaze Preparation
While the rolls are baking, prepare the glaze by whisking together 1 cup of powdered sugar, ¼ cup of maple syrup, and 2-3 tablespoons of milk in a small bowl. Aim for a smooth consistency that will drizzle beautifully over the warm rolls once they come out of the oven.
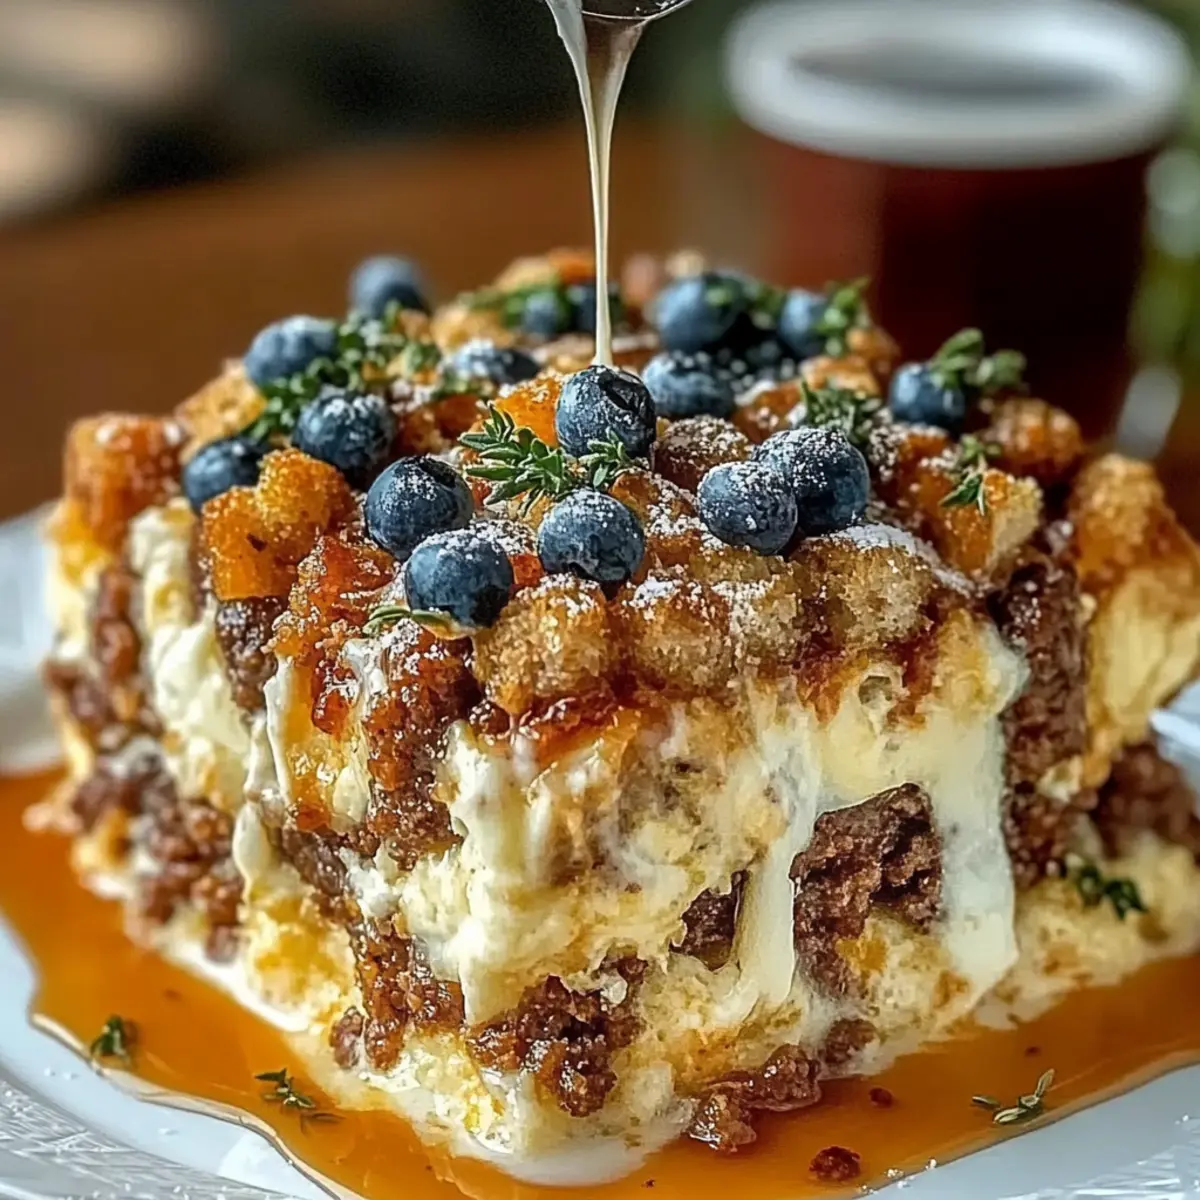
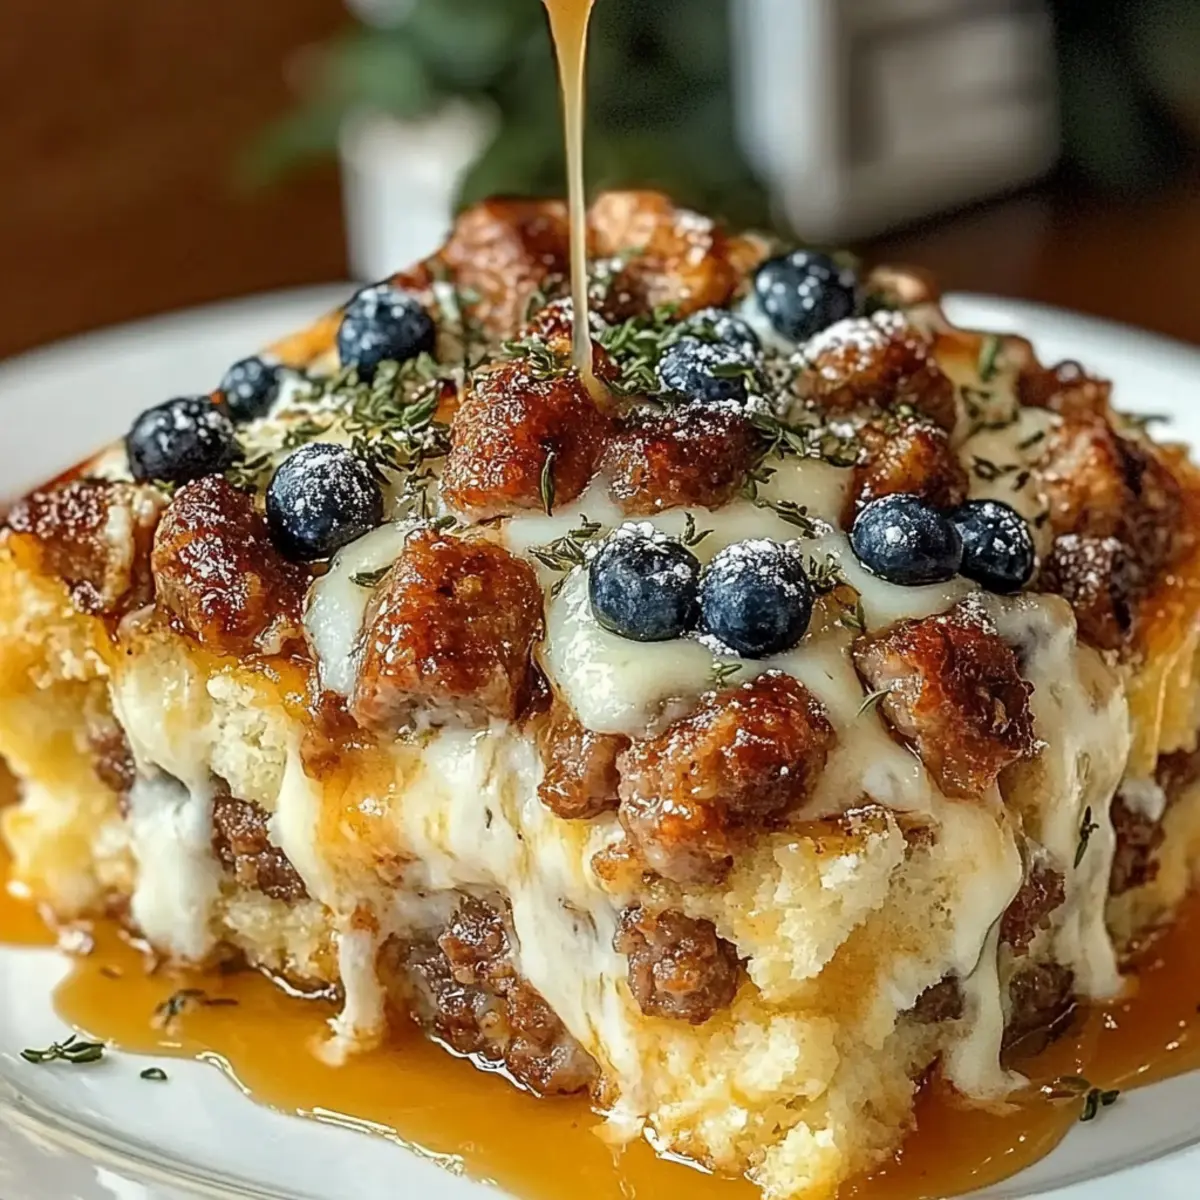
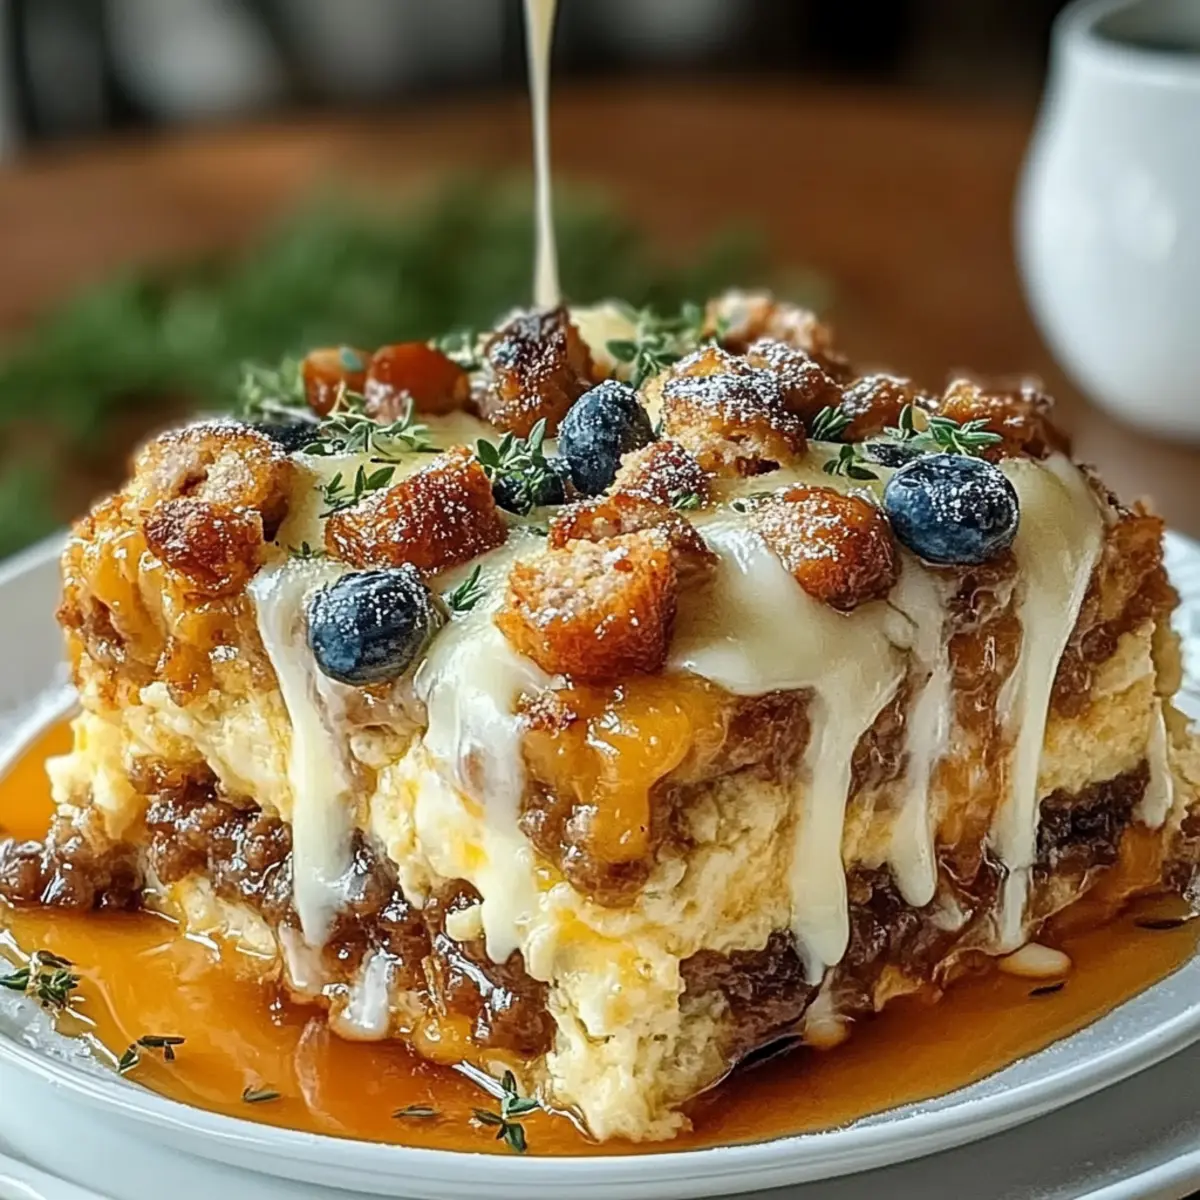
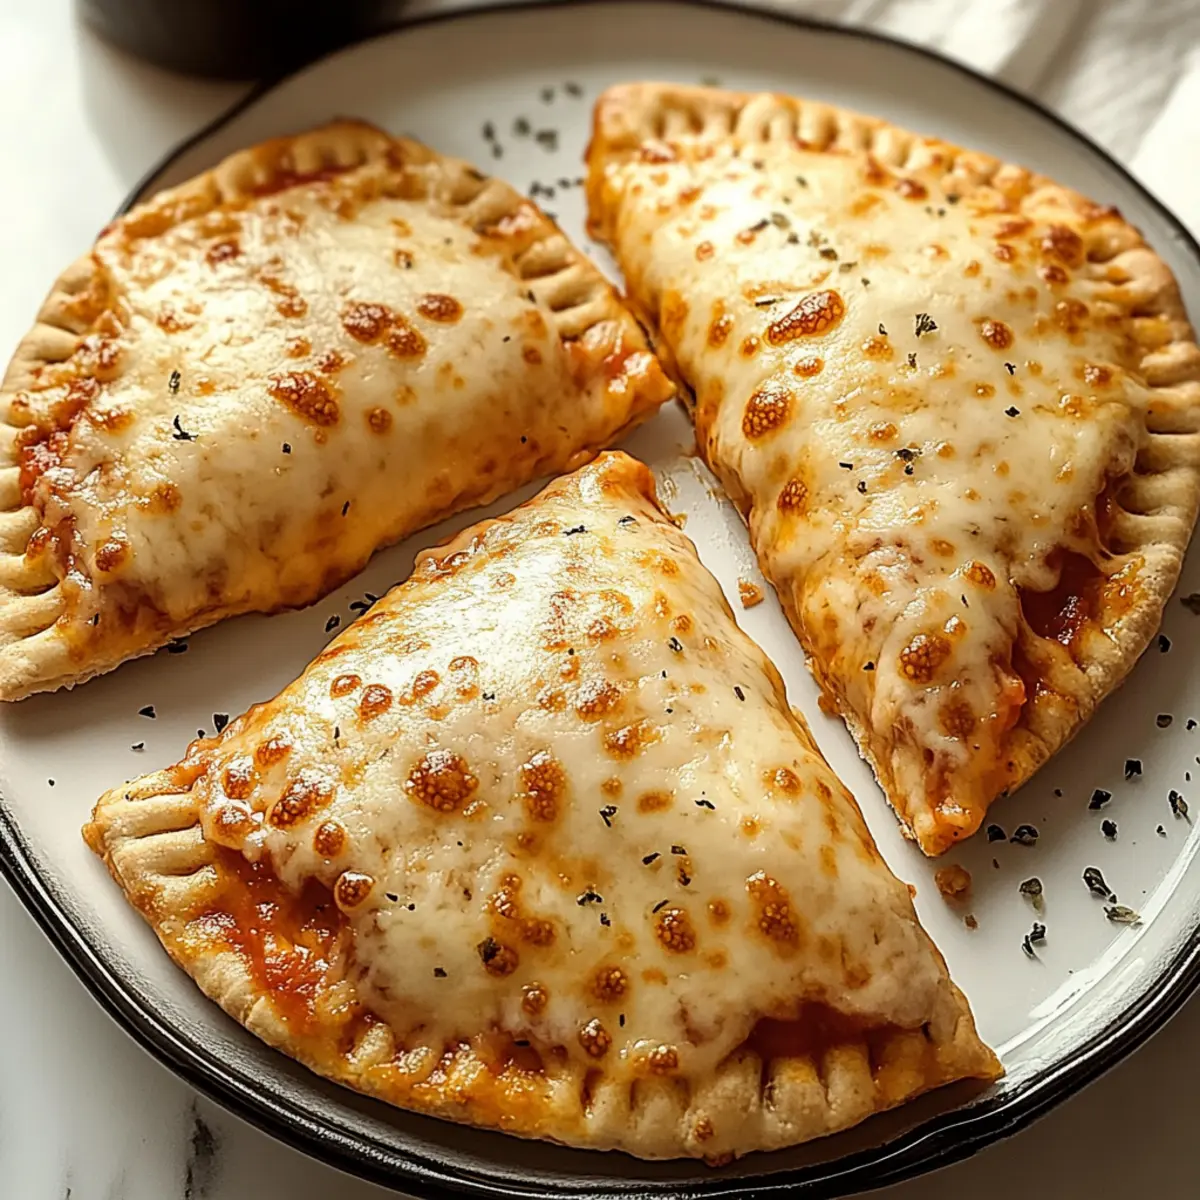
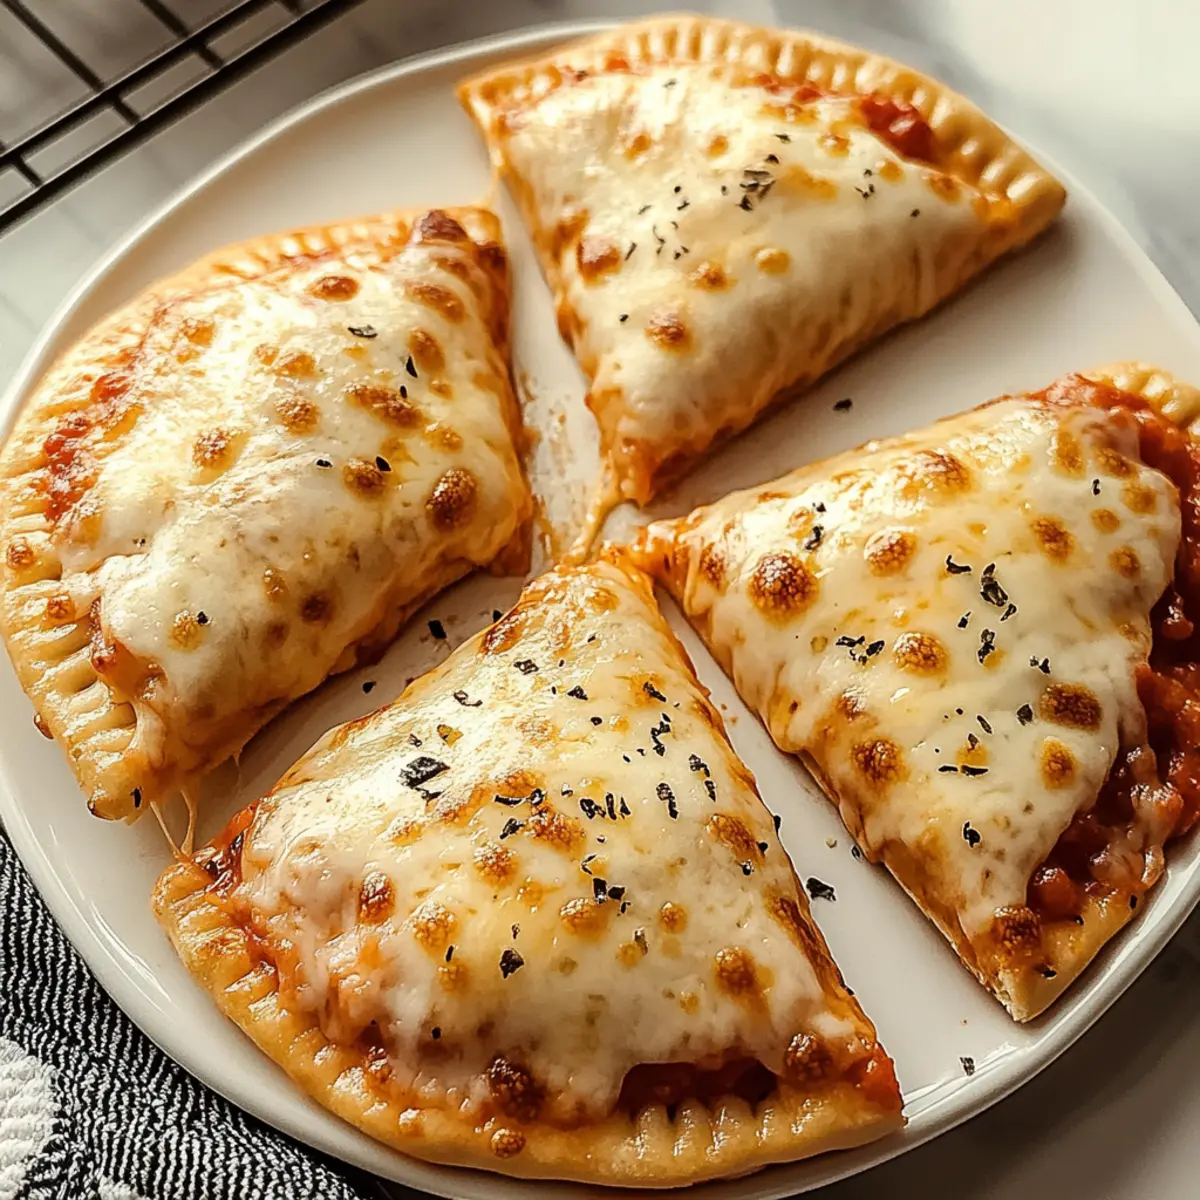
Step 10: Finish with Toppings
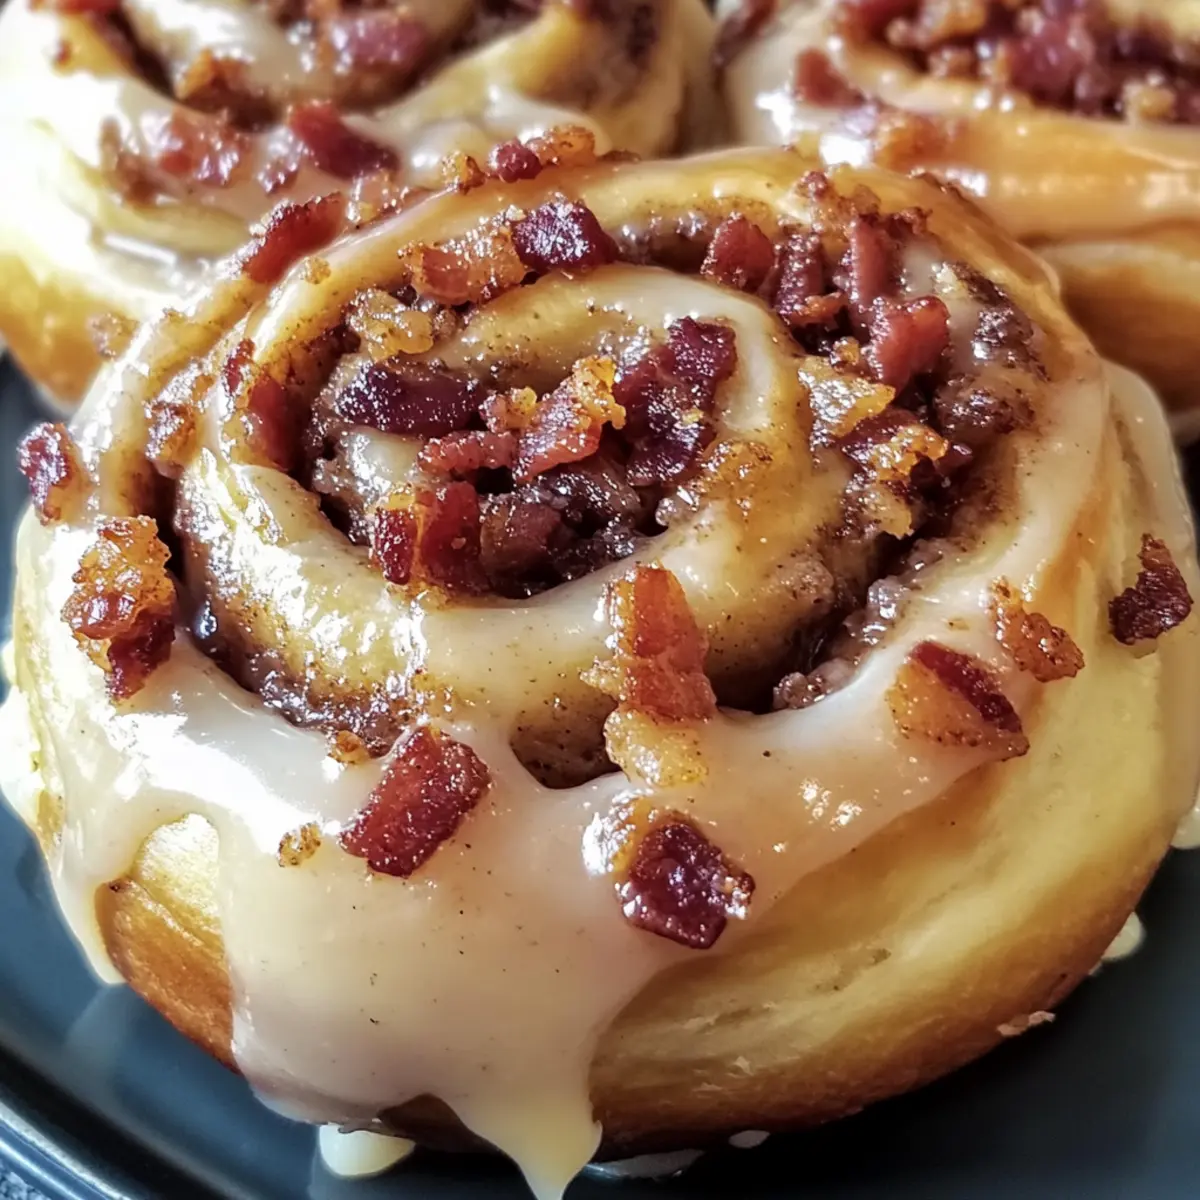
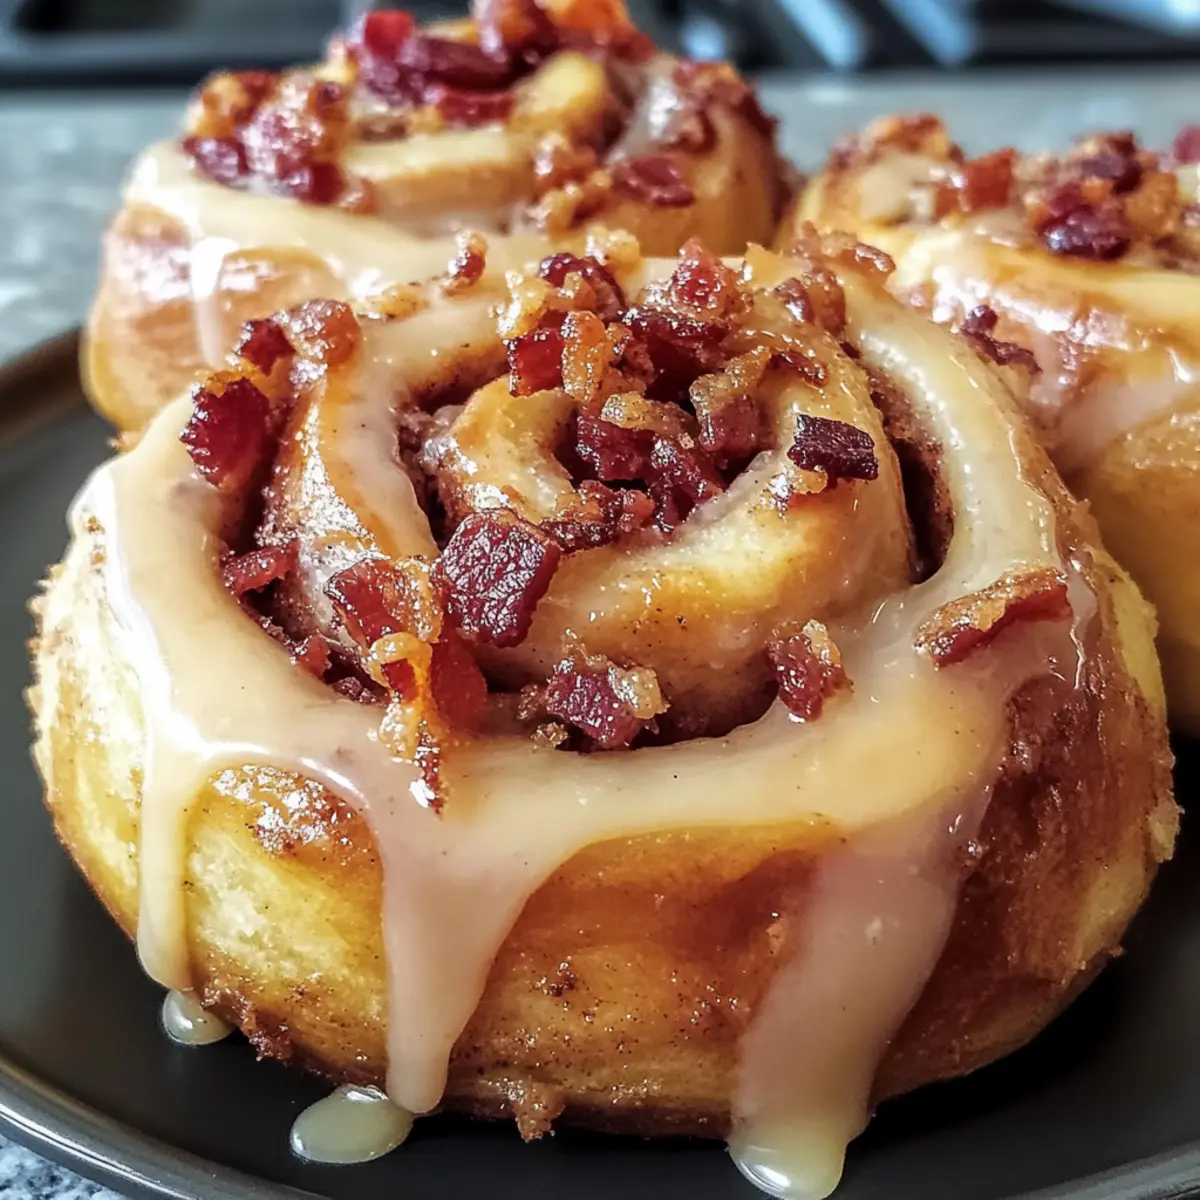
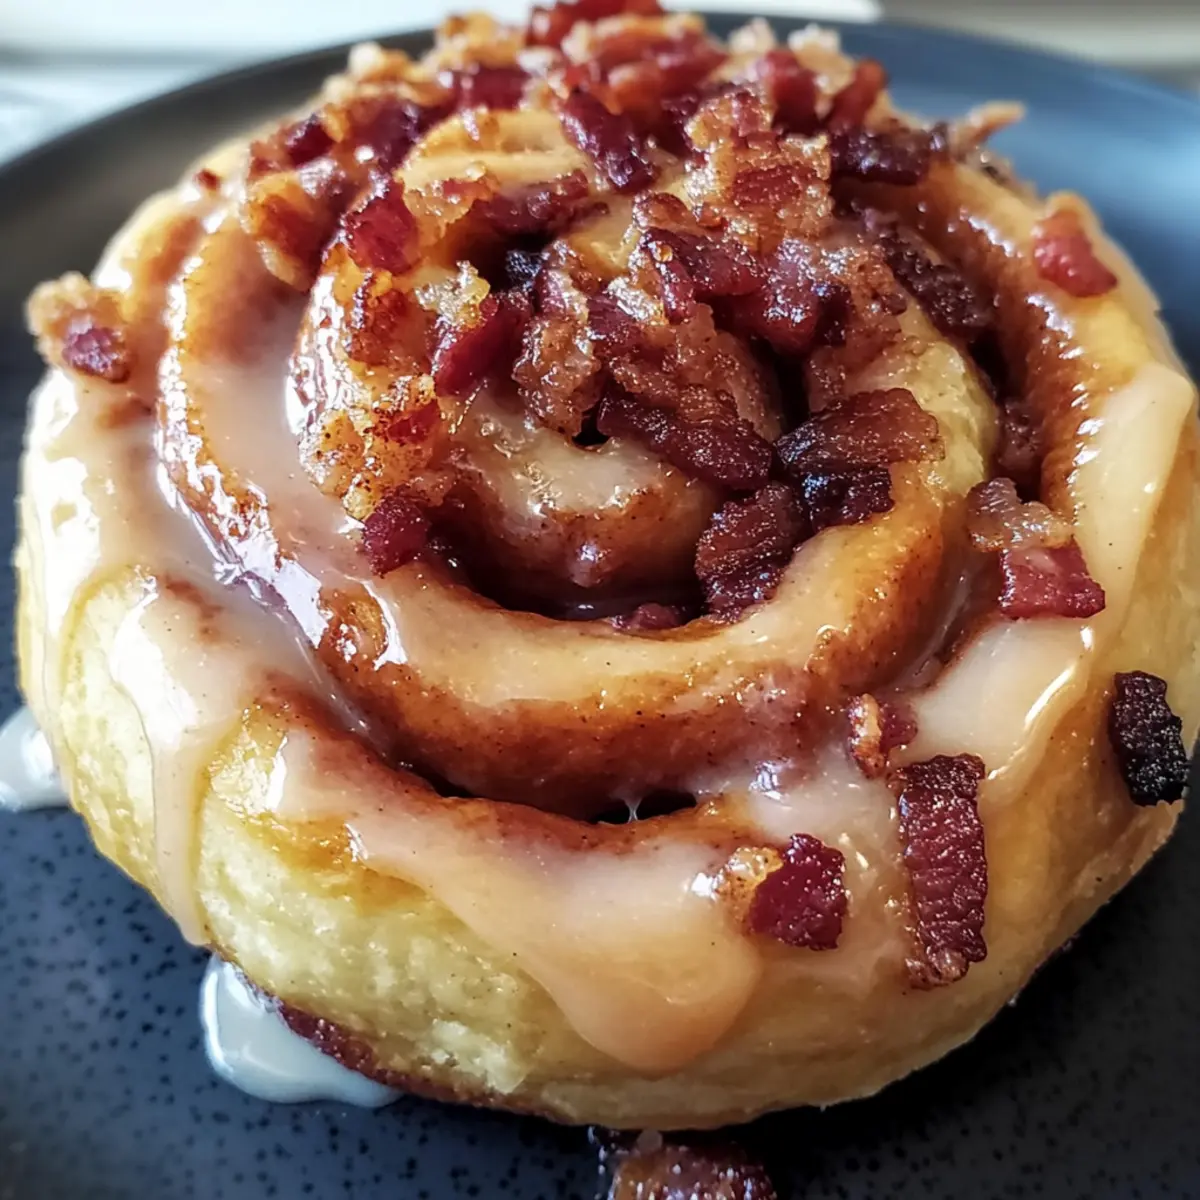
After baking, allow the rolls to cool for about 10 minutes before drizzling the maple glaze over the top. Finish off with crispy bacon crumbles for an irresistible sweet and savory touch that defines your Maple Bacon Cinnamon Rolls!

What to Serve with Maple Bacon Cinnamon Rolls?
Indulge your senses as you create a delightful brunch experience that perfectly complements the warm, sweet, and savory flavors of these rolls.
-
Fresh Fruit Salad: A medley of seasonal fruits adds a refreshing contrast—think juicy berries and crisp apples that balance the richness of the cinnamon rolls.
-
Fluffy Scrambled Eggs: Light and airy scrambled eggs provide a protein-packed option that will fill your guests while enhancing the brunch vibe.
-
Crispy Hash Browns: Golden brown and crispy on the outside, soft inside, hash browns offer a satisfying crunch against the gooey maple glaze of your rolls.
-
Creamy Greek Yogurt Parfait: Layered with honey and granola, this parfait brings a creamy texture and lovely sweetness to your brunch table, making every bite memorable.
-
Steamed Asparagus with Lemon: For a touch of brightness, this lightly sautéed vegetable will provide a fresh, earthy flavor to round out the meal beautifully.
-
Freshly Brewed Coffee: A robust cup of coffee enhances the sweetness of the rolls while ensuring your guests feel energized and ready to enjoy their brunch feast.
Invite your friends and family to gather around your table, and let the delightful flavors of these accompaniments elevate your Maple Bacon Cinnamon Rolls to a brunch experience they won’t forget!
Expert Tips for Maple Bacon Cinnamon Rolls
-
Warm Environment: Ensure you let the dough rise in a warm place. A turned-off oven with the light on creates an ideal setting for the yeast in your Maple Bacon Cinnamon Rolls to work effectively.
-
Don’t Over-Knead: Kneading too long can lead to tough rolls. Aim for 8-10 minutes until the dough is smooth and elastic for the perfect texture.
-
Glaze Consistency: Adjust the milk in your glaze to achieve your desired thickness. A slightly thicker glaze sticks better to the rolls, adding a delightful finish.
-
Storage Savvy: Store any leftovers in an airtight container. If you plan to make ahead, refrigerate unbaked rolls overnight and then bake fresh in the morning for maximum freshness.
-
Vegetarian Substitutes: If you're looking for a meatless option, consider using tempeh or sautéed mushrooms instead of bacon, allowing everyone to enjoy these delicious Maple Bacon Cinnamon Rolls!
Make Ahead Options
These Maple Bacon Cinnamon Rolls are perfect for busy home cooks looking to save time without sacrificing flavor! You can prepare the dough and filling up to 24 hours in advance—just roll, cut, and place the rolls in a greased baking dish, then cover and refrigerate. When you're ready to bake, let them rise at room temperature for about 30-40 minutes before popping them in the oven. For the best results, ensure they’re stored tightly covered to prevent drying out. Trust me, whether you bake them fresh in the morning or the night before, you'll enjoy the same delightful blend of sweetness and savory goodness!
How to Store and Freeze Maple Bacon Cinnamon Rolls
Room Temperature: Store leftover rolls in an airtight container for up to 3 days to maintain freshness and prevent them from drying out.
Fridge: For longer storage, place the rolls in the fridge in an airtight container for up to 5 days. Reheat in the oven or microwave before serving for best taste.
Freezer: Freeze unglazed rolls in a single layer on a baking sheet, then transfer to a freezer bag for up to 3 months. You can bake them straight from frozen; simply add extra baking time.
Reheating: Reheat in a 350°F (175°C) oven for about 10-15 minutes or microwave for 20-30 seconds until warmed through, perfect for enjoying your Maple Bacon Cinnamon Rolls again!
Maple Bacon Cinnamon Roll Variations
Feel free to get creative and make these delights your own—there's a world of possibilities waiting for your kitchen!
- Vegetarian Option: Swap crispy bacon for crispy tempeh or sautéed mushrooms to create a delicious meatless treat.
- Nutty Flavor: Add chopped pecans or walnuts to the filling for an extra crunch and a burst of nutty flavor.
- Dried Fruit Delight: Incorporate raisins or dried cranberries into the filling for a chewy, fruity surprise in every bite.
- Spices Twist: Experiment with spices such as nutmeg or cardamom to elevate the aromatic profile of your rolls. Such subtle changes make each batch feel like a new recipe!
- Chocolate Lovers: Toss in mini chocolate chips with the sugar and cinnamon for a decadent touch that blends beautifully with maple.
- Whole Wheat Substitute: Replace half of the all-purpose flour with whole wheat flour for added nutrition and a heartier texture.
- Glaze Variations: Try adding a splash of vanilla extract or a pinch of sea salt to the glaze for a unique flavor twist!
- Maple Syrup Swap: Use agave syrup instead of maple syrup for a lighter, but still delicious glaze option.
These sweet rolls can also be paired seamlessly with countless sides, like our scrumptious Pumpkin Cinnamon Roll recipe for brunch gatherings! Happy baking!
Maple Bacon Cinnamon Rolls Recipe FAQs
What type of milk should I use for the dough?
I recommend using whole or 2% milk for the best flavor. Warm milk activates the yeast, helping your rolls rise and become soft. If you're looking for a dairy-free option, almond or oat milk can work, but keep in mind that it may slightly change the flavor and texture.
How long can I store Maple Bacon Cinnamon Rolls?
Leftover rolls can be stored in an airtight container at room temperature for up to 3 days. If you want to keep them longer, refrigerate them for up to 5 days, and reheat in the oven for optimal results. Just pop them back in at 350°F (175°C) for about 10-15 minutes to warm them up nicely.
Can I freeze unbaked rolls?
Absolutely! To freeze unglazed rolls, place them in a single layer on a baking sheet until frozen solid, then transfer them to a freezer bag. They can be kept for up to 3 months. When you’re ready to bake, take them out the night before and let them thaw in the fridge. They can go straight from the freezer to the oven; just remember to add extra baking time if needed.
What should I do if my dough doesn't rise?
If your dough hasn't risen after the first hour, it may be due to inactive yeast. Make sure your yeast is fresh and properly activated; it should foam up in warm milk with sugar. If the dough is over-kneaded, it might also struggle to rise. In the future, keep an eye on your kneading time and make sure you give the dough a warm place to rise, like a turned-off oven with a light on.
Are there any dietary considerations with this recipe?
Yes! You can make Maple Bacon Cinnamon Rolls vegetarian by using crispy tempeh or sautéed mushrooms instead of bacon. Additionally, for a vegan version, replace eggs with flax eggs (1 tablespoon ground flaxseed + 2.5 tablespoons water per egg) and use dairy-free butter and milk. It's always best to check for any allergies before serving to your guests!
Maple Bacon Cinnamon Rolls: Your New Brunch Obsession
Ingredients
Equipment
Method
- Activate the Yeast: In a large mixing bowl, combine warm milk, yeast, and sugar. Stir and let sit for 5 minutes until frothy.
- Mix the Dough: Add softened butter, eggs, and salt to the yeast mixture. Incorporate flour until a soft dough forms.
- Knead the Dough: Dust a surface with flour, transfer dough, and knead for 8-10 minutes until smooth and elastic.
- First Rise: Place dough in a greased bowl, cover with a towel, and let rise in a warm place for about 1 hour.
- Prepare the Filling: Roll out dough into a large rectangle, spread with butter, and sprinkle brown sugar and cinnamon.
- Roll and Cut the Dough: Roll tightly into a log and cut into 12 pieces, placing them in a greased baking dish.
- Second Rise: Cover and let the rolls rise for 30-40 minutes in a warm place while preheating the oven to 350°F (175°C).
- Bake the Rolls: Bake in the preheated oven for 25-30 minutes until golden brown.
- Glaze Preparation: Whisk together powdered sugar, maple syrup, and milk until smooth.
- Finish with Toppings: Cool the rolls for 10 minutes, drizzle with glaze, and top with crispy bacon.