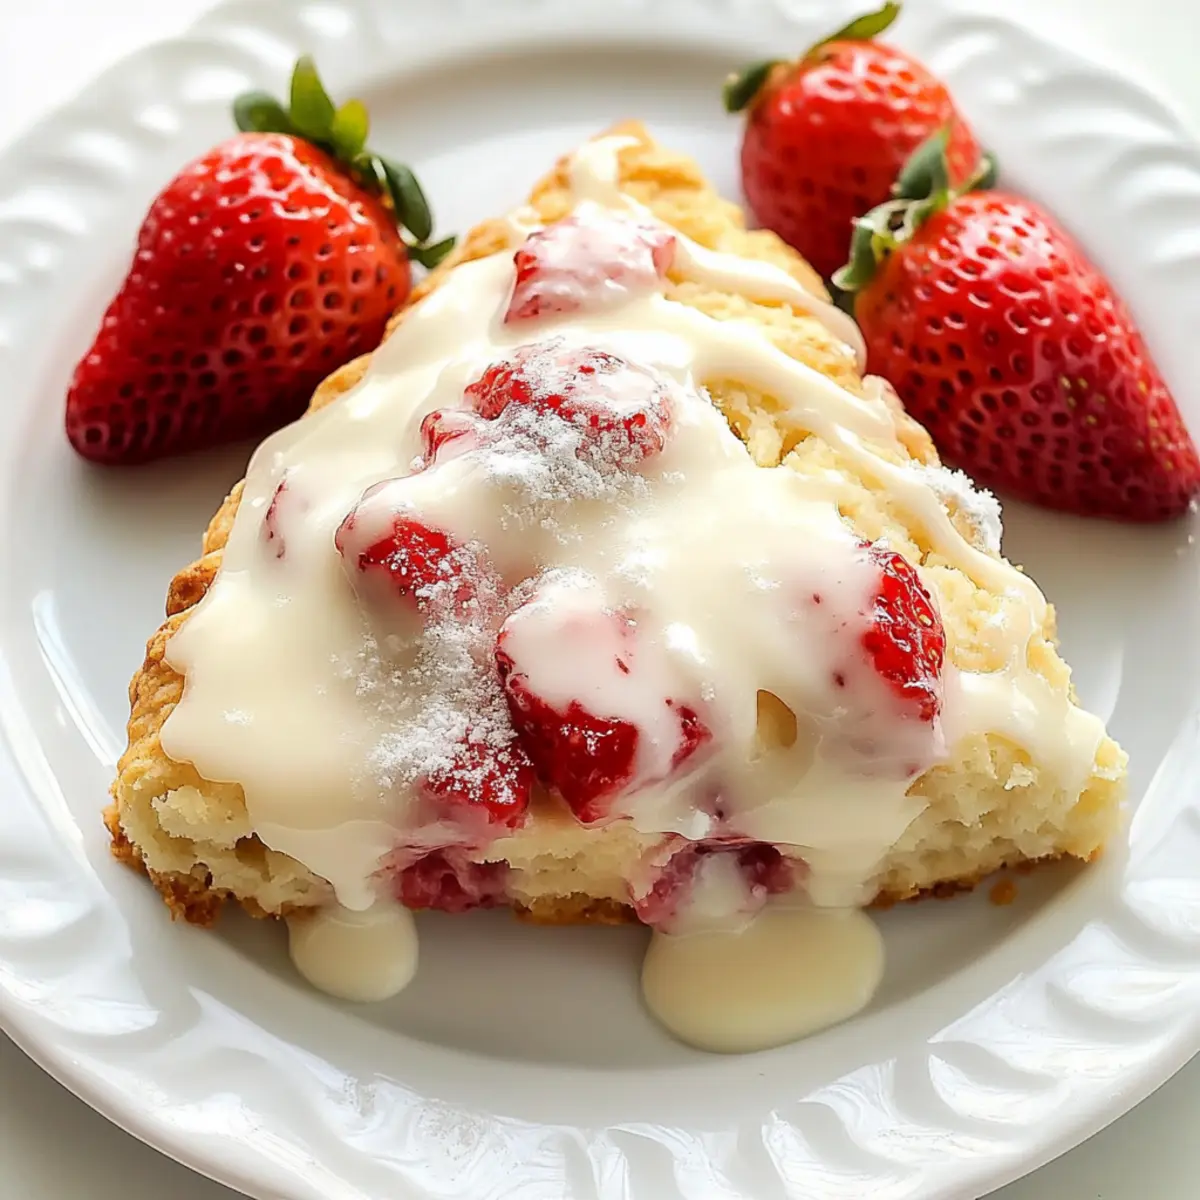
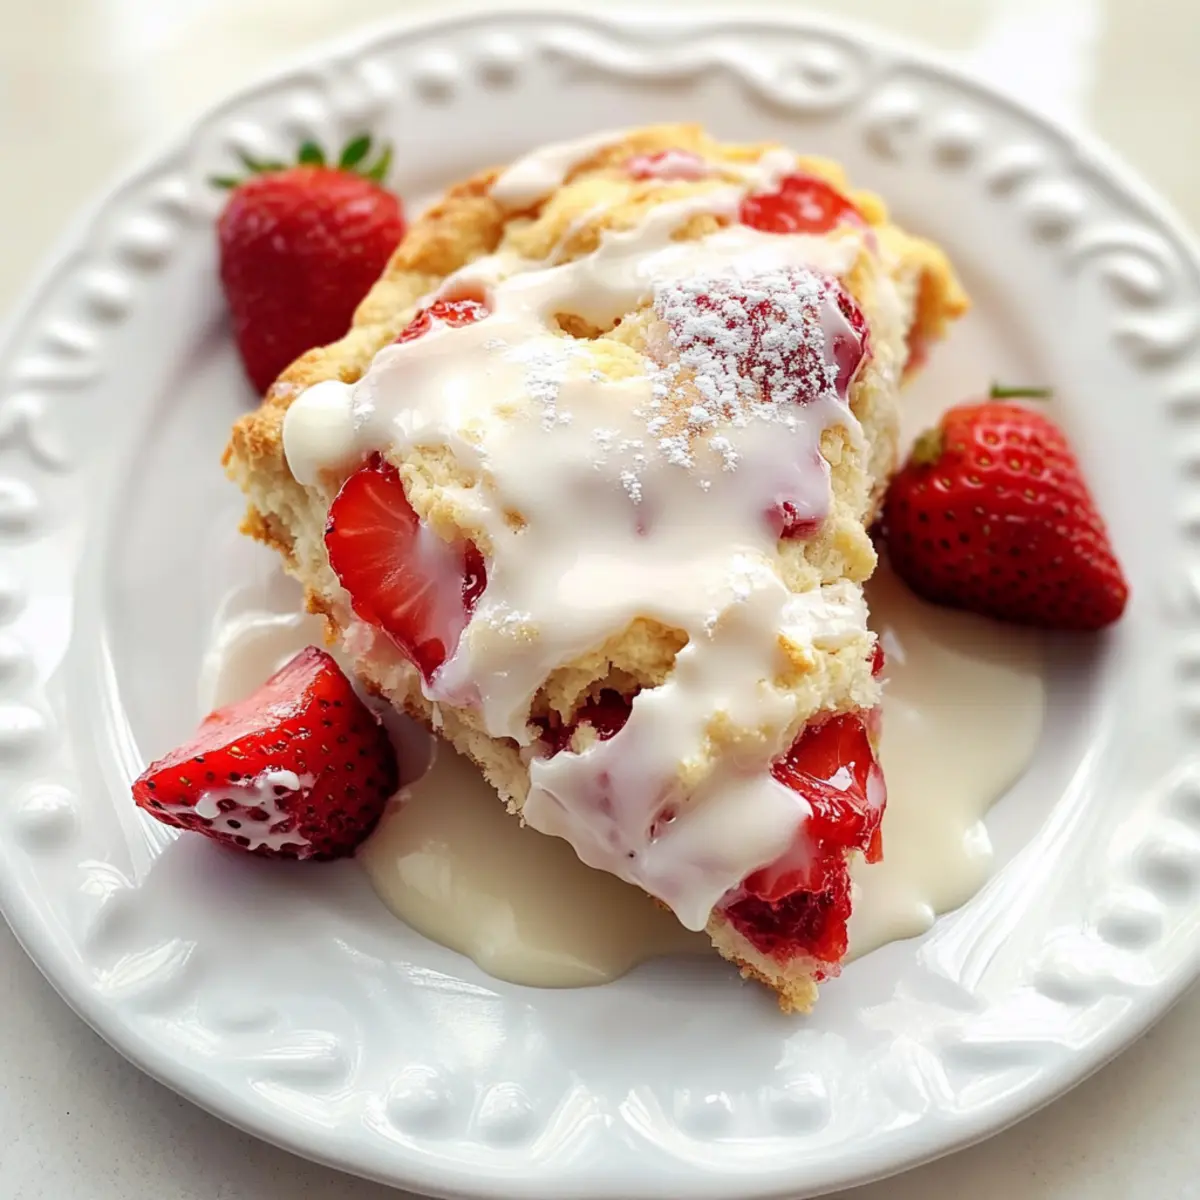
tastytrendingredients

  • Home
  • Recipes
    • Appetizers
    • Breakfast
    • Dessert
    • Dinner
    • Drinks
    • Salads
    • Snacks
    • Soups
  • About me
  • Contact me
menu icon
go to homepage
  • Home
  • Recipes
    • Appetizers
    • Breakfast
    • Dessert
    • Dinner
    • Drinks
    • Salads
    • Snacks
    • Soups
  • About me
  • Contact me
search icon
Homepage link
  • Home
  • Recipes
    • Appetizers
    • Breakfast
    • Dessert
    • Dinner
    • Drinks
    • Salads
    • Snacks
    • Soups
  • About me
  • Contact me
×

Quick and Easy Mango Slaw: A Refreshing Tropical Crunch

January 29, 2026 by Grace Snow Leave a Comment

In just 15 minutes, you can elevate any meal with a splash of tropical flair! My Quick and Easy Mango Slaw is a delightful mix of juicy mangoes, crisp cabbage, and vibrant carrots, all tossed in a zesty lime dressing. It’s the kind of side dish that turns weeknight dinners or summer barbecues into something special. The best part? Not only is this slaw incredibly simple to whip up, but it also adds a refreshing and healthy crunch that’s hard to resist. Plus, it’s versatile enough to complement everything from grilled meats to tacos. So, are you ready to bring a burst of sunshine to your table?

Why is Mango Slaw a must-try?

Vibrant Flavors: This Mango Slaw brings together sweet mangoes and crunchy vegetables, delivering a delightful burst of taste.

Quick Prep: With just 15 minutes from start to finish, it's perfect for busy weeknights or last-minute gatherings, allowing you to focus on what really matters.

Health Boost: Packed with vitamins and dietary fiber, it's a refreshing side that can easily elevate any meal.

Versatile Pairing: Serve it alongside grilled meats, tacos, or even fold it into a wrap for a satisfying lunch, making it an ideal companion for just about any dish.

Customizable: Feel free to add nuts for crunch or avocados for creaminess, ensuring every serving can be unique.

Quick And Easy Mango Slaw Ingredients

For the Slaw
• Ripe Mangoes – Enjoy the sweetness and juicy texture; can substitute with pineapple if needed.
• Green Cabbage – Provides that all-important crunch; Napa cabbage can lighten it up perfectly.
• Large Carrot – Adds lovely color and natural sweetness; shredded zucchini is a great alternative.
• Red Bell Pepper – Offers a sweet bite and vibrant color; feel free to use any sweet pepper available.
• Red Onion – Contributes a sharp, pungent flavor; substitute with green onions for a milder option.
• Fresh Cilantro – Brings a refreshing herbal note; parsley is a good substitute if you prefer less flavor.

For the Dressing
• Lime Juice – Provides acidity and a bright zing; in a pinch, lemon juice works just as well.
• Honey or Maple Syrup – Adds balance with sweetness; choose maple syrup for a vegan version.
• Sesame Oil – Infuses the slaw with a nutty richness; any neutral oil can work, but olive oil adds more flavor.
• Salt and Pepper – Essential for seasoning; adjust according to taste to enhance your Quick And Easy Mango Slaw.

Step‑by‑Step Instructions for Quick And Easy Mango Slaw:

Step 1: Prepare the Vegetables
In a large mixing bowl, combine 2 cups of diced ripe mangoes, 2 cups of shredded green cabbage, 1 grated large carrot, 1 sliced red bell pepper, 1 sliced red onion, and 1/2 cup of chopped fresh cilantro. Use a sharp knife and a cutting board for safety and precision. Ensure the veggies are vibrant and fresh for a colorful Quick And Easy Mango Slaw.

Step 2: Make the Dressing
In a small bowl, whisk together 1/4 cup of fresh lime juice, 2 tablespoons of honey (or maple syrup), and 2 tablespoons of sesame oil. Add a pinch of salt and pepper to taste, mixing well until the dressing is smooth and blended. The vibrant colors of the dressing will complement the slaw beautifully, adding an enticing zing.

Step 3: Combine the Slaw and Dressing
Pour the dressing over your mango and vegetable mixture. Using salad tongs or two large spoons, gently toss everything together, ensuring each piece is evenly coated in the zesty dressing. This step should take about 1 to 2 minutes, and you’ll want to see the colors pop as they come together in this Quick And Easy Mango Slaw.

Step 4: Allow Flavors to Meld
Let the slaw sit at room temperature for 5 to 10 minutes, allowing the flavors to meld beautifully. During this time, you’ll notice the cabbage starts to soften slightly while still retaining its crunch. This resting period enhances the overall taste and makes the slaw even more delightful when served.

Step 5: Serve and Enjoy
Serve the mango slaw chilled or at room temperature, perfect for picnics or gatherings. You can garnish with extra cilantro and lime wedges for a fresh presentation. This Quick And Easy Mango Slaw makes a vibrant side dish to accompany grilled meats, tacos, or even as a light lunch on its own.

Expert Tips for Quick And Easy Mango Slaw

  • Fresh Ingredients: Always use ripe mangoes and fresh vegetables for the best flavor and texture. Avoid using limp produce to maintain the slaw's vibrant crunch.

  • Adjust the Dressing: Taste and adjust the lime juice and sweetness to your liking. Too much acidity? Add a bit more honey or maple syrup to balance it out in your Quick And Easy Mango Slaw.

  • Chill for Flavor: Allow the slaw to sit for at least 10 minutes before serving. This resting time helps the flavors meld, enhancing the overall taste experience.

  • Prep Ahead: If you're short on time, prepare the veggies and dressing in advance, but don’t combine them until just before serving to keep everything crisp.

  • Add a Kick: For those who enjoy a bit of heat, sprinkle some chili flakes or add diced jalapeños. This twist can elevate your Quick And Easy Mango Slaw to a whole new level!

Make Ahead Options

These Quick and Easy Mango Slaw options are a lifesaver for busy cooks! You can chop and mix all the vegetables (mangoes, cabbage, carrots, bell peppers, onions, and cilantro) up to 24 hours in advance. Store them in an airtight container in the refrigerator to maintain their freshness and crunch. As for the dressing, prepare it a day before—just whisk together the lime juice, honey or maple syrup, sesame oil, salt, and pepper, then refrigerate. When you’re ready to serve, simply toss the slaw with the dressing, allowing it to meld for about 5-10 minutes at room temperature. This way, you’ll enjoy vibrant flavors and a delightful crunch without any last-minute stress!

Quick And Easy Mango Slaw Variations

Feel free to make this delightful slaw your own with these fun and easy twists!

  • Avocado Addition: Creamy avocado slices can be folded in just before serving for an irresistible richness.

  • Crunchy Sesame Seeds: Toss in a sprinkle of toasted sesame seeds to add nutty flavor and extra texture. It’s a simple upgrade that gives depth to every bite.

  • Spicy Kick: Add diced jalapeños or a sprinkle of chili flakes for a touch of heat, giving your slaw an exciting flavor boost.

  • Nutty Twist: Chopped peanuts or cashews sprinkled on top will give extra crunch and a hint of earthy flavor. This combo not only enhances texture but adds a satisfying bite.

  • Tropical Fusion: Throw in some diced pineapple to amplify the tropical vibes and sweetness, creating a more refreshing blend with every mouthful.

  • Wrap it Up: Use this slaw as a filling in wrap sandwiches with grilled chicken or shredded tofu. Drizzle yogurt or a creamy dressing for a heartier meal.

  • Lime Chicken Rice: Serve alongside a delightful Lime Chicken Rice for a beautifully balanced meal.

  • Chickpea Spinach Curry: Enjoy this mango slaw paired with a comforting dish of Chickpea Spinach Curry to add a refreshing contrast to the warm flavors.

Feel inspired to let your creativity shine and whip up your personalized version of Quick And Easy Mango Slaw!

What to Serve with Quick and Easy Mango Slaw

Elevate your next meal with delightful sides that complement the vibrant flavors of this refreshing slaw.

  • Grilled Chicken: The smokiness of charred chicken juxtaposes the sweet and tangy slaw, creating a comforting and satisfying balance.
  • Fish Tacos: Pairing slaw with crispy or grilled fish tacos adds an exciting crunch and refreshing contrast to the rich flavors.
  • Quinoa Salad: A protein-packed, nutty quinoa salad rounds out your meal, adding a hearty, wholesome component to the light slaw.
  • Pork Tenderloin: The savory and juicy nature of pork tenderloin complements the sweetness of the mangoes, providing a balance of flavors and textures.
  • Asian Noodle Bowl: A heavenly combination of noodle dishes brings together the freshness of the slaw and the warmth of cooked noodles, enhancing your dining experience.
  • Chilled White Wine: A crisp, chilled white wine brings a refreshing vibe and echoes the citrus notes of lime in your slaw, perfect for summer nights.
  • Coconut Rice: This gentle sweetness and creaminess showcase summer flavors alongside the crunchy mango slaw, harmonizing tropical elements beautifully.
  • Chocolate Mousse: For dessert, a light and airy chocolate mousse makes for an indulgent finish, contrasting the crispness of your slaw with its velvety richness.

How to Store and Freeze Quick And Easy Mango Slaw

Room Temperature: Enjoy your slaw fresh! If left out, consume within 2 hours to maintain its vibrant taste and crunch.

Fridge: Store any leftovers in an airtight container for up to 2 days. The flavors may deepen, but the slaw will lose some crunch, so enjoy it soon!

Freezer: While not recommended for freezing due to texture changes from the water content in the mango and veggies, you can freeze the dressing separately for up to 1 month.

Reheating: For best results, serve the Quick And Easy Mango Slaw cold. If you want to warm it, do so gently in a pan, but freshness is key!

Quick And Easy Mango Slaw Recipe FAQs

What is the best way to select ripe mangoes for my slaw?
Absolutely! Look for mangoes that yield slightly to gentle pressure, indicating ripeness. A ripe mango will have a vibrant color and sweet aroma at the stem. Avoid those with dark spots or wrinkles, as they may be overripe.

How should I store leftovers of the Quick And Easy Mango Slaw?
To keep your slaw fresh, transfer any leftovers into an airtight container and store it in the refrigerator. It should stay good for up to 2 days. Just a heads up, the slaw’s crunch may soften the longer it sits, but the flavors will continue to meld and become even tastier!

Can I freeze the Quick And Easy Mango Slaw?
While freezing isn’t ideal due to potential texture issues once thawed, you can freeze the dressing separately for up to 1 month. Just whisk it back together when you’re ready to use it! For the slaw mix, it’s best enjoyed fresh.

What if my dressing is too acidic or sweet?
If you find the dressing too tangy, simply whisk in a bit more honey or maple syrup to balance it out. Conversely, if it’s too sweet, a squeeze of lime juice can perk up the flavors. Adjusting these elements to your taste is key for the perfect Quick And Easy Mango Slaw!

Is there a way to make this recipe pet-friendly?
Yes! If you're looking to share a little slaw with your furry friend, skip the dressing and offer plain diced mango and shredded cabbage without added sauces or seasonings. Always consult your vet before introducing new foods into your pet’s diet to ensure it’s safe for them.

Can I use different vegetables in this slaw?
Very! This recipe is flexible. Feel free to substitute with veggies like shredded zucchini or thinly sliced bell peppers. You can also add chopped nuts for a delightful crunch or make it heartier with some diced avocado! The more the merrier when it comes to customization!

Quick And Easy Mango Slaw:

Quick and Easy Mango Slaw: A Refreshing Tropical Crunch

Quick And Easy Mango Slaw is a vibrant, healthy side dish combining sweet mangoes, crunchy vegetables, and zesty lime dressing.
Print Recipe Pin Recipe
Prep Time 15 minutes mins
Resting Time 10 minutes mins
Total Time 25 minutes mins
Servings: 4 servings
Course: Salads
Cuisine: Tropical
Calories: 150
Ingredients Equipment Method Nutrition Notes

Ingredients
  

For the Slaw
  • 2 cups diced ripe mangoes Substitute with pineapple if needed.
  • 2 cups shredded green cabbage Napa cabbage can be used.
  • 1 large grated carrot Shredded zucchini is a great alternative.
  • 1 large sliced red bell pepper Any sweet pepper can be used.
  • 1 large sliced red onion Substitute with green onions for a milder flavor.
  • 1/2 cup chopped fresh cilantro Parsley is a good substitute if preferred.
For the Dressing
  • 1/4 cup fresh lime juice Lemon juice can be used in a pinch.
  • 2 tablespoons honey or maple syrup Choose maple syrup for a vegan version.
  • 2 tablespoons sesame oil Any neutral oil can work.
  • salt and pepper Adjust according to taste.

Equipment

  • large mixing bowl
  • small bowl
  • Whisk
  • salad tongs
  • Cutting Board
  • Sharp Knife

Method
 

Step-by-Step Instructions
  1. In a large mixing bowl, combine 2 cups of diced ripe mangoes, 2 cups of shredded green cabbage, 1 grated large carrot, 1 sliced red bell pepper, 1 sliced red onion, and 1/2 cup of chopped fresh cilantro.
  2. In a small bowl, whisk together 1/4 cup of fresh lime juice, 2 tablespoons of honey (or maple syrup), and 2 tablespoons of sesame oil. Add a pinch of salt and pepper to taste.
  3. Pour the dressing over the mango and vegetable mixture. Using salad tongs, gently toss everything together.
  4. Let the slaw sit at room temperature for 5 to 10 minutes.
  5. Serve the mango slaw chilled or at room temperature, garnished with extra cilantro and lime wedges.

Nutrition

Serving: 1servingCalories: 150kcalCarbohydrates: 30gProtein: 2gFat: 5gSaturated Fat: 0.5gPolyunsaturated Fat: 0.2gMonounsaturated Fat: 4gSodium: 50mgPotassium: 300mgFiber: 4gSugar: 10gVitamin A: 3000IUVitamin C: 60mgCalcium: 45mgIron: 0.5mg

Notes

Always use fresh ingredients for the best flavor. Adjust the dressing to your liking and allow the slaw to sit to enhance flavors.

Tried this recipe?

Let us know how it was!

Crunchy Asian Cabbage Slaw That Will Wow Your Taste Buds

January 29, 2026 by Grace Snow Leave a Comment

The vibrant crunch of fresh vegetables in my Crunchy Asian Cabbage Slaw is like a delightful symphony of textures and flavors dancing on my tongue. This salad isn’t just a feast for the eyes; it’s an easy, healthy choice perfect for those who crave a break from fast food. With its addictive sesame dressing, this dish offers a sweet, tangy, and slightly nutty flavor that elevates any meal. The best part? It’s not only vegetarian and vegan-friendly but also gluten-free with simple substitutions. Whether you’re hosting a barbecue, bringing a dish to a potluck, or just looking for a refreshing side to your dinner, this slaw is the answer. Are you ready to toss together this colorful bowl of goodness? Let’s get started!

Why is this slaw a must-try?

Vibrant Colors: This Crunchy Asian Cabbage Slaw adds a pop of color to any meal, making it visually appealing for gatherings or family dinners.
Fresh & Flavorful: Each bite is a refreshing burst of crisp vegetables, perfectly complemented by an addictive homemade sesame dressing.
Quick to Prepare: In just about 15 minutes, you can whip up this tasty side, saving you from the hassle of fast food!
Versatile Dish: Pair it with grilled chicken, use it as a taco topping, or enjoy it on its own – it fits into countless meals.

For more easy salad inspiration, check out my delicious Sweet Potato Casserole or try the deliciously crunchy Fried Shrimp Cabbage for a wholesome dinner!

Crunchy Asian Cabbage Slaw Ingredients

This Crunchy Asian Cabbage Slaw comes together with fresh ingredients that enhance both flavor and nutrition.

For the Slaw
• Green Cabbage – Provides a crisp texture; substitute with napa cabbage for a different flavor.
• Red Cabbage – Adds vibrant color and mild flavor; use more green cabbage if unavailable.
• Carrots – Introduces natural sweetness for contrast; replace with shredded zucchini for a lower-carb option.
• Broccoli – Adds crunch and nutritional value; substitute with bell peppers for a sweeter touch.
• Green Onions – Offer a mild onion flavor; use red onions for a bolder taste.
• Crispy Chow Mein Noodles – Contribute delightful crunch; fried wonton strips or toasted nuts are great alternatives.

For the Dressing
• Sesame Seeds – Add a nutty finish; can be omitted if preferred.
• Rice Vinegar – Provides essential tanginess; substitute with apple cider vinegar for a different profile.
• Soy Sauce (or Tamari) – Adds umami depth; use coconut aminos for a soy-free version.
• Honey (or Maple Syrup) – Sweetens the dressing; adjust as necessary or use agave syrup for a vegan alternative.
• Toasted Sesame Oil – Infuses a rich, nutty flavor; regular sesame oil can also be used.
• Neutral Oil – Balances the dressing, such as canola or vegetable oil.
• Ginger (grated) – Provides warmth and a hint of spice; fresh is best, but powdered works too.
• Garlic (minced) – Adds depth; shallots are a suitable substitute.
• Lime Juice – Brightens flavors; use lemon juice if limes are not on hand.
• Sriracha (optional) – Adds heat to the dressing; omit for a milder taste.

Now you're all set to create this beautiful bowl of Crunchy Asian Cabbage Slaw that will amaze your taste buds!

Step‑by‑Step Instructions for Crunchy Asian Cabbage Slaw

Step 1: Prepare the Vegetables
Start by shredding the green and red cabbage, and grate the carrots. Finely chop the broccoli into small, bite-sized pieces, and slice the green onions. For a colorful and crunchy Crunchy Asian Cabbage Slaw, aim for uniform sizes to ensure even mixing. This should take about 10 minutes, and don’t forget to have a large mixing bowl ready for the next steps.

Step 2: Make the Dressing
In a medium bowl or jar, whisk together all the dressing ingredients: sesame seeds, rice vinegar, soy sauce, honey, toasted sesame oil, neutral oil, grated ginger, minced garlic, and lime juice. For an extra kick, add sriracha if desired. This step should take around 5 minutes, and it's important to mix until you achieve a smooth, well-combined dressing that glistens invitingly.

Step 3: Combine the Slaw and Dressing
In your large mixing bowl, add the shredded vegetables and drizzle the dressing over them. Toss gently using tongs or your hands, ensuring every piece is well-coated with that addictive sesame dressing. This crucial step helps blend all the flavors together while maintaining the brightness and crunch of your Crunchy Asian Cabbage Slaw. This should take about 3-5 minutes.

Step 4: Add the Crunchy Toppings
Right before serving, sprinkle crispy chow mein noodles or fried wonton strips on top of the slaw, and add a generous sprinkle of sesame seeds for that perfect finish. This last step adds delightful texture and visual appeal, making your slaw irresistible. Aim to serve immediately to preserve that satisfying crunch.

Step 5: Serve and Enjoy
Gather your friends or family around as you transfer the slaw to a beautiful serving bowl. For optimal crunch, it’s best to serve immediately. If you need to prepare ahead, store the dressed slaw in the fridge for up to 3 days, making sure to add your crispy toppings just before serving. Enjoy this vibrant Crunchy Asian Cabbage Slaw!

What to Serve with Crunchy Asian Cabbage Slaw

Enjoy the vibrant crunch of this salad alongside an array of delicious accompaniments that enhance your dining experience.

  • Grilled Chicken Skewers: Juicy and smoky, these skewers add a satisfying protein element that pairs beautifully with the refreshing slaw.
  • Rice Noodles: Light and chewy, these noodles serve as a delightful base, bringing an additional texture that complements the crunchy vegetables.
  • Sesame Ginger Tofu: Marinated and sautéed tofu echoes the salad’s flavors, offering a plant-based protein option that’s both hearty and delicious.
  • Miso Soup: This warm and comforting broth adds a soothing element, balancing out the bright and crisp flavors of the slaw.
  • Fresh Spring Rolls: Stuffed with veggies and paired with a savory dipping sauce, these rolls are a crunchy, fresh counterpart that feels light and refreshing.
  • Chilled Sake: This smooth and slightly sweet drink beautifully matches the sesame dressing's nuttiness, elevating the meal experience.
  • Coconut Rice: Creamy and subtly sweet, coconut rice offers a perfect contrast to the tartness of the slaw, creating a harmonious balance on the plate.
  • Lychee Sorbet: As a light dessert, this refreshing treat rounds off your meal with a sweet, tropical finish that echoes the slaw’s zing and zest.

Make Ahead Options

These Crunchy Asian Cabbage Slaw preparations are perfect for busy weeknights! You can chop and combine all the vegetables—green cabbage, red cabbage, carrots, broccoli, and green onions—up to 24 hours in advance, storing them in an airtight container in the refrigerator to maintain freshness. The addictive sesame dressing can also be whipped up and refrigerated for up to 3 days; just remember to give it a good shake before mixing. When ready to serve, simply combine the prepped vegetables with the dressing, then top with crispy chow mein noodles or fried wonton strips for that satisfying crunch. Serving this vibrant slaw will be a breeze while keeping it just as delicious!

Storage Tips for Crunchy Asian Cabbage Slaw

Fridge: Store the dressed slaw in an airtight container in the refrigerator for up to 3 days to maintain its freshness and flavor.

Crispy Toppings: Keep the crispy chow mein noodles or wonton strips in a separate container to ensure they remain crunchy and do not get soggy.

Make-Ahead: For optimal texture, prepare the slaw and dressing separately. Combine them just before serving to enjoy the vibrant crunch of your Crunchy Asian Cabbage Slaw!

Refrigeration Reminder: If you're making this slaw in advance, remember to add the toppings just prior to serving for the best experience.

Expert Tips for Crunchy Asian Cabbage Slaw

  • Keep It Crisp: Make sure to add the crispy toppings right before serving to maintain their delightful crunch in your Crunchy Asian Cabbage Slaw.

  • Customize Your Dressing: Adjust the sesame dressing thickness by adding a little water if too thick, ensuring it coats the slaw perfectly without overpowering the vegetables.

  • Prep Ahead Wisely: If you're making this slaw in advance, store the dressing and vegetables separately to retain freshness and crunch for up to 3 days.

  • Mix and Match: Feel free to experiment with additional proteins, like grilled chicken or tofu, for a heartier salad that still keeps the fresh essence of your slaw.

  • Balance Flavors: Taste the dressing and adjust the sweetness or acidity as needed. A little extra lime juice or honey can enhance the overall flavor profile beautifully.

Crunchy Asian Cabbage Slaw Variations

Feel free to let your creativity shine as you customize this delightful slaw to your own taste!

  • Dairy-Free: Use olive oil instead of sesame oil for a lighter flavor without any dairy.
    Embrace the lightness while still enjoying that crunch!

  • Nut-Free: Skip the sesame seeds and use sunflower seeds for a similar texture without the nuts.
    This keeps it allergy-friendly and just as tasty!

  • Extra Crunch: Add roasted chickpeas to bring in a hearty crunch and a protein boost.
    These will add a delightful texture and make the dish even more satisfying!

  • Spicy Kick: Mix in fresh sliced jalapeños or a dash more sriracha for a fiery punch.
    This variation perfectly complements the slaw's freshness while tantalizing your taste buds.

  • Citrus Zing: Substitute some lime juice with orange juice for a sweet, tangy twist.
    This adds a refreshing brightness that pairs wonderfully with the other flavors.

  • Creamy Addition: Stir in a tablespoon of Greek yogurt or vegan yogurt for a richer dressing experience.
    This twist will give your slaw a creamy texture without losing that vibrant flavor!

  • Herbed Up: Throw in some fresh cilantro or mint for an herby freshness that elevates the dish.
    This simple addition can transform your slaw into a more vibrant, aromatic experience.

For readers looking for more flavor boosts, give our deliciously crunchy Parmesan Artichoke Hearts a try to complement your slaw perfectly!

Crunchy Asian Cabbage Slaw Recipe FAQs

How do I select the best cabbage for the slaw?
Absolutely! When choosing green and red cabbage, look for heads that feel heavy for their size and have tightly packed leaves without dark spots or wilting. Fresh cabbage will feel crisp and firm to the touch. If you're looking for a slightly sweeter flavor, napa cabbage is a wonderful alternative for your Crunchy Asian Cabbage Slaw.

What’s the best way to store the slaw?
To preserve the freshness of your Crunchy Asian Cabbage Slaw, store it in an airtight container in the refrigerator for up to 3 days. Be sure to keep the crispy toppings separate, as storing them together can lead to sogginess. They'll maintain their delightful crunch longer this way!

Can I freeze my Crunchy Asian Cabbage Slaw?
I wouldn't recommend freezing the dressed slaw as the vegetables may lose their crisp texture. However, if you want to prep ahead, you can freeze the shredded cabbage and mixed veggies in a freezer-safe bag for up to 3 months. Just remember to thaw them in the fridge and enjoy fresh toppings for added crunch when you serve!

What if my dressing is too thick?
Very! If your sesame dressing turns out thicker than desired, simply whisk in a small amount of water, one tablespoon at a time, until you achieve your preferred consistency. This will ensure the dressing glides smoothly over your slaw, enhancing those vibrant flavors without overpowering the vegetables.

Are there any dietary considerations for this recipe?
You bet! This Crunchy Asian Cabbage Slaw is suitable for vegetarian and vegan diets. If you're avoiding gluten, make sure to substitute regular soy sauce with tamari or coconut aminos. Also, for those with food allergies, be cautious with toppings like sesame seeds and crispy noodles. Using toasted nuts instead can add a delightful crunch without the allergy concerns!

Crunchy Asian Cabbage Slaw

Crunchy Asian Cabbage Slaw That Will Wow Your Taste Buds

This Crunchy Asian Cabbage Slaw is a healthy, vibrant, and easy side salad, perfect for any meal.
Print Recipe Pin Recipe
Prep Time 15 minutes mins
Total Time 15 minutes mins
Servings: 4 servings
Course: Salads
Cuisine: Asian
Calories: 150
Ingredients Equipment Method Nutrition Notes

Ingredients
  

For the Slaw
  • 4 cups Green Cabbage Provides a crisp texture; substitute with napa cabbage for a different flavor.
  • 2 cups Red Cabbage Adds vibrant color and mild flavor; use more green cabbage if unavailable.
  • 2 medium Carrots Introduces natural sweetness for contrast; replace with shredded zucchini for a lower-carb option.
  • 1 cup Broccoli Adds crunch and nutritional value; substitute with bell peppers for a sweeter touch.
  • 4 tablespoons Green Onions Offer a mild onion flavor; use red onions for a bolder taste.
  • 1 cup Crispy Chow Mein Noodles Contribute delightful crunch; fried wonton strips or toasted nuts are great alternatives.
For the Dressing
  • 2 tablespoons Sesame Seeds Add a nutty finish; can be omitted if preferred.
  • 1/4 cup Rice Vinegar Provides essential tanginess; substitute with apple cider vinegar for a different profile.
  • 3 tablespoons Soy Sauce (or Tamari) Adds umami depth; use coconut aminos for a soy-free version.
  • 1 tablespoon Honey (or Maple Syrup) Sweetens the dressing; adjust as necessary or use agave syrup for a vegan alternative.
  • 2 tablespoons Toasted Sesame Oil Infuses a rich, nutty flavor; regular sesame oil can also be used.
  • 1/4 cup Neutral Oil Balances the dressing, such as canola or vegetable oil.
  • 1 tablespoon Ginger (grated) Provides warmth and a hint of spice; fresh is best, but powdered works too.
  • 1 clove Garlic (minced) Adds depth; shallots are a suitable substitute.
  • 2 tablespoons Lime Juice Brightens flavors; use lemon juice if limes are not on hand.
  • 1 teaspoon Sriracha (optional) Adds heat to the dressing; omit for a milder taste.

Equipment

  • Mixing Bowl
  • Whisk

Method
 

Instructions
  1. Step 1: Prepare the Vegetables. Start by shredding the green and red cabbage, and grate the carrots. Finely chop the broccoli into small, bite-sized pieces, and slice the green onions. This should take about 10 minutes.
  2. Step 2: Make the Dressing. In a medium bowl or jar, whisk together all the dressing ingredients until you achieve a smooth, well-combined dressing that glistens invitingly. This step should take around 5 minutes.
  3. Step 3: Combine the Slaw and Dressing. In your large mixing bowl, add the shredded vegetables and drizzle the dressing over them. Toss gently ensuring every piece is well-coated. This should take about 3-5 minutes.
  4. Step 4: Add the Crunchy Toppings. Right before serving, sprinkle crispy chow mein noodles or fried wonton strips on top of the slaw, and add a generous sprinkle of sesame seeds.
  5. Step 5: Serve and Enjoy. Serve immediately for optimal crunch, or store the dressed slaw in the fridge for up to 3 days, adding toppings just before serving.

Nutrition

Serving: 1servingCalories: 150kcalCarbohydrates: 10gProtein: 3gFat: 10gSaturated Fat: 1gPolyunsaturated Fat: 2gMonounsaturated Fat: 7gSodium: 180mgPotassium: 200mgFiber: 3gSugar: 2gVitamin A: 500IUVitamin C: 30mgCalcium: 50mgIron: 1mg

Notes

Expert tips include keeping the crispy toppings right before serving and storing dressing and veggies separately if made in advance.

Tried this recipe?

Let us know how it was!

Crispy Baked Parmesan Zucchini Sticks You'll Crave

January 29, 2026 by Grace Snow Leave a Comment

The other day, while hosting a casual gathering, I overheard a friend rave about how much they loved zucchini, yet had no clue it could be this addictive. Enter my Crispy Oven-Roasted Zucchini Sticks with Parmesan, a delightful way to transform a simple vegetable into a crowd-pleasing snack. These oven-roasted gems are not only healthy but also incredibly easy to prepare, making them the perfect answer for those tired of fast food. With the savory kick of Parmesan combined with fragrant herbs, you’ll find yourself reaching for seconds, or even thirds! How will you enjoy yours—dipped in marinara or simply on their own?

Why are these Zucchini Sticks a Must-try?

Irresistible Flavor: The combination of savory Parmesan and fragrant herbs elevates ordinary zucchini into a delectable snack. Healthy Choice: Packed with nutrients, these baked zucchini sticks satisfy your cravings without the guilt. Quick Preparation: With just a few simple steps, you can create a crispy treat in no time! Versatile Delight: Enjoy them as a side dish, a snack, or even as a fun appetizer for your next gathering. Plus, if you love veggie-centric recipes, don't miss out on these Cheesy Zucchini Bake or the tasty Parmesan Artichoke Hearts for more delicious options.

Baked Parmesan Zucchini Ingredients

For the Zucchini Sticks
• Zucchini – Fresh, firm zucchini brings the perfect crunch and nutrition; avoid soft ones for the best texture.
• Olive oil – Essential for roasting, ensuring crispiness; avocado oil can be used as a smokier alternative.

For the Parmesan Mixture
• Parmesan cheese – Freshly grated cheese adds rich flavor and creaminess; stay away from pre-grated for maximum taste.
• Dried thyme – This herb adds a lovely flavor; substitute with Italian seasoning if desired.
• Dried oregano – Another great herb for depth; dried rosemary can work as a bolder substitution.
• Dried basil – A mild, sweet flavor enhancer; feel free to switch with fresh basil if you have it on hand.
• Garlic powder – Gives a savory kick; you can use fresh garlic to taste for an extra burst of flavor.
• Kosher salt – Use for seasoning; adjust according to your personal preference.
• Freshly ground black pepper – Adds a touch of warmth; season to taste as well.

For Garnish
• Chopped fresh parsley – Adds freshness and vibrant color; it’s optional but highly recommended for that extra flair.

These delightful ingredients come together to create baked Parmesan zucchini sticks that are sure to impress everyone at your table!

Step‑by‑Step Instructions for Crispy Baked Parmesan Zucchini Sticks

Step 1: Preheat the Oven
Begin by preheating your oven to 350°F (175°C). This temperature ensures that your zucchini sticks cook through while achieving that perfect crispy texture. While the oven heats up, gather your baking sheet and a cooling rack—you'll use these in the following steps to help your zucchini achieve maximum crispiness.

Step 2: Prepare the Baking Sheet
Coat a cooling rack with nonstick spray and place it atop a baking sheet. This setup allows hot air to circulate around the zucchini sticks, promoting even cooking and browning. It’s key to achieving those crunchy edges for your baked Parmesan zucchini sticks that everyone will love!

Step 3: Mix the Parmesan Coating
In a small bowl, combine the freshly grated Parmesan cheese with the dried thyme, oregano, basil, garlic powder, kosher salt, and freshly ground black pepper. Stir these ingredients together until well mixed, creating a savory blend. This Parmesan mixture adds wonderful flavor to your baked zucchini sticks, making them irresistible.

Step 4: Cut the Zucchini
Take fresh, firm zucchinis and cut them into quarters lengthwise. Aim for uniform sizes to ensure even cooking. As you slice, admire the vibrant green color; this will be the base of your crispy baked Parmesan zucchini sticks! Arrange the cut zucchini on the prepared baking sheet without overlapping.

Step 5: Add Olive Oil and Seasoning
Drizzle the cut zucchini with olive oil, ensuring each piece is lightly coated to help the cheese adhere. After that, generously sprinkle the Parmesan mixture over the top, pressing slightly to ensure it sticks. This combination of oil and seasoning will make your zucchini sticks not only flavorful but also deliciously crispy when baked.

Step 6: Bake to Perfection
Place the zucchini sticks in the preheated oven and bake for about 15 minutes. At this point, you want the zucchini to become tender but still firm. Keep an eye on them; you'll know they're ready when they begin to turn golden and deliciously fragrant.

Step 7: Broil for Extra Crisp
After baking, switch your oven to broil and let them cook for an additional 2-3 minutes. This last step creates a golden brown crust and adds an extra crunch to your crispy baked Parmesan zucchini sticks. Be sure to watch carefully, as broilers can cook quickly!

Step 8: Serve and Enjoy
Once broiling is complete, carefully take your crispy baked Parmesan zucchini sticks out of the oven. Let them cool for a moment, then transfer them to a serving platter. For a fresh touch, garnish with chopped fresh parsley if desired. Serve immediately and watch them disappear as everyone enjoys this healthy treat!

Expert Tips for Baked Parmesan Zucchini

• Drying Zucchini: Ensure the zucchini is thoroughly dried after cutting. Extra moisture can lead to sogginess instead of crispiness when baking.

• Single Layer Cooking: Arrange zucchini sticks in a single layer without overlapping on the baking sheet. This helps achieve an even bake and crispy texture for your baked Parmesan zucchini.

• Broil Wisely: Keep a close eye while broiling; it can quickly turn from golden brown to burnt. Just a couple of extra minutes makes a big difference for those irresistible crispy edges!

• Fresh Cheese Matters: Use freshly grated Parmesan cheese for the best flavor. Pre-grated cheese often contains anti-caking agents that can hinder crispiness.

• Easy Variations: Feel free to experiment with spices! Adding crushed red pepper flakes can elevate the flavor profile and give your baked Parmesan zucchini a delightful kick.

How to Store and Freeze Baked Parmesan Zucchini

Fridge: Store leftover baked Parmesan zucchini sticks in an airtight container for up to 2 days. This keeps them fresh but may reduce their crispiness.

Freezer: For longer storage, place cooled zucchini sticks in a single layer on a baking sheet and freeze until solid. Transfer to a freezer-safe bag and store for up to 3 months.

Reheating: To restore crispiness, reheat the zucchini sticks in a preheated oven at 350°F (175°C) for about 10 minutes. Avoid microwave reheating, as it can make them soggy.

Room Temperature: If serving leftover zucchini sticks at a gathering, avoid leaving them out for more than 2 hours to ensure safety and freshness.

Baked Parmesan Zucchini Variations

Feel free to sprinkle your creativity into these delicious zucchini sticks and make them your own!

  • Dairy-Free: Use nutritional yeast in place of Parmesan for a cheese-like flavor that keeps it creamy without the dairy. It adds an umami punch too!

  • Spicy Kick: Add crushed red pepper flakes to the Parmesan mixture for a spicy twist. This will elevate your zucchini sticks with a delightful heat that both surprises and delights.

  • Different Veggies: Swap zucchini with eggplant, bell peppers, or even sweet potatoes for a totally new texture and flavor experience. Each vegetable brings its own unique charm to this dish!

  • Herb-Blended: Experiment with other herbs like fresh rosemary or dill instead of the classic thyme and oregano. This can bring bright and vibrant notes that complement the Parmesan beautifully.

  • Cheese Variety: Feel free to switch out Parmesan for mozzarella or feta, both offering tasty alternatives that change the flavor profile dramatically. Mozzarella gives a gooey contrast, while feta introduces a tangy bite.

  • Crunchy Coating: For added texture, mix in breadcrumbs or panko with the Parmesan to create a wonderfully crunchy crust. The extra crunch really brings that deep-fried feel without the guilt.

  • Garlic Lovers: Enhance the savory goodness by adding freshly crushed garlic to the olive oil before drizzling it over the zucchini. A little garlic goes a long way in enriching the flavor!

  • Herbed Oil Drizzle: Swap regular olive oil for infused oils like garlic or chili oil to elevate the taste. The richness of the infused oils will add depth while keeping things exciting.

If you’re looking for more inspiration with zucchini, I recommend trying out these delightful Cheesy Zucchini Bake or crispy and satisfying Parmesan Artichoke Hearts. Happy cooking!

Make Ahead Options

These Crispy Baked Parmesan Zucchini Sticks are ideal for busy home cooks looking to save time without sacrificing flavor! You can slice and coat the zucchini up to 24 hours in advance. Simply prepare them as per the recipe, then cover tightly and refrigerate. When you're ready to enjoy, pop them in the oven straight from the fridge—there’s no need to bring them to room temperature. This method helps maintain their quality and ensures they bake up just as crispy and delicious. For an even quicker option, you might consider baking them ahead and reheating them in the oven for just a few minutes before serving. Enjoy restaurant-quality results with minimal effort!

What to Serve with Crispy Baked Parmesan Zucchini Sticks?

Enhance your culinary experience by pairing these crispy, flavorful bites with a variety of delicious accompaniments.

  • Creamy Ranch Dip: A classic choice that adds a rich, tangy flavor, perfectly complementing the savory zucchini.

  • Savory Marinara Sauce: The acidity and herbs in marinara create a delightful contrast, making each bite even more delicious. Dip them for a satisfying snack or appetizer!

  • Grilled Chicken or Fish: Juicy grilled meats enhance the healthy nature of zucchini, transforming your meal into a comforting feast that everyone can enjoy.

  • Quinoa Salad: This hearty salad adds a fresh, nutritious element to your plate, balancing the crispy texture of the zucchini sticks with a wholesome grain.

  • Chilled Rosé Wine: A light, fruity wine pairs beautifully, making your meal feel special and perfect for gatherings on warm evenings.

  • Fresh Tomato and Mozzarella Salad: The brightness of ripe tomatoes and creamy mozzarella elevates the flavors of your dish, bringing lightness to the meal overall.

  • Herb-Garlic Bread: Enjoy warm, buttery garlic bread on the side, adding a delicious crunch with a fresh herb flavor that complements your zucchini perfectly.

  • Chocolate Mousse for Dessert: End on a sweet note with a rich mousse that offsets the savory zucchini sticks, leaving you with a balanced and satisfying meal experience.

Baked Parmesan Zucchini Recipe FAQs

How do I choose ripe zucchini?
Absolutely! When selecting zucchini, opt for fresh, firm ones that feel heavy for their size. Look for smooth skin without dark spots or blemishes. A well-ripe zucchini will be about 6-8 inches long for ideal texture when roasted.

How do I store leftover baked Parmesan zucchini?
After enjoying your delicious zucchini sticks, place any leftovers in an airtight container and store them in the refrigerator for up to 2 days. While this method keeps them relatively fresh, be aware that they may lose some of their crispiness. To enjoy them again, reheat in the oven to bring back some crunch!

Can I freeze baked Parmesan zucchini?
Yes, you can! To freeze, first ensure your zucchini sticks have cooled completely. Lay them out in a single layer on a baking sheet and freeze until solid, about 1-2 hours. Then, transfer them to a freezer-safe bag, labeling it with the date. They can stay in the freezer for up to 3 months. When you're ready to eat them, bake from frozen at 350°F (175°C) for about 15-20 minutes to heat through and regain some crunch.

What if my zucchini sticks turn out soggy?
Very! To avoid sogginess, ensure the zucchini is completely dried after cutting. Excess moisture will hinder crispiness during baking. Also, arrange the sticks in a single layer without overlapping on the baking sheet—the hot air circulation is essential for that perfectly baked texture!

Are there any dietary considerations for baked Parmesan zucchini?
If you're serving these zucchini sticks to friends or family with dietary restrictions, it's good to know that they are vegetarian-friendly! However, please check for cheese allergies as Parmesan can cause issues for some. For a dairy-free alternative, consider using nutritional yeast or a vegan cheese substitute that melts well.

Baked Parmesan Zucchini

Crispy Baked Parmesan Zucchini Sticks You'll Crave

Enjoy these addictive baked Parmesan zucchini sticks for a healthy snack that's easy to prepare and irresistible.
Print Recipe Pin Recipe
Prep Time 10 minutes mins
Cook Time 15 minutes mins
Broiling Time 3 minutes mins
Total Time 28 minutes mins
Servings: 4 sticks
Course: Snacks
Cuisine: American
Calories: 90
Ingredients Equipment Method Nutrition Notes

Ingredients
  

For the Zucchini Sticks
  • 2 medium Zucchini Fresh and firm
  • 1 tablespoon Olive oil For roasting
For the Parmesan Mixture
  • 1 cup Parmesan cheese Freshly grated
  • 1 teaspoon Dried thyme Substitute with Italian seasoning if desired
  • 1 teaspoon Dried oregano Substitute with dried rosemary if desired
  • 1 teaspoon Dried basil Substitute with fresh basil if available
  • 1 teaspoon Garlic powder Or fresh garlic to taste
  • 1 teaspoon Kosher salt Adjust to taste
  • 1/2 teaspoon Freshly ground black pepper Adjust to taste
For Garnish
  • 2 tablespoons Chopped fresh parsley Optional but recommended

Equipment

  • Oven
  • Baking Sheet
  • cooling rack
  • Mixing Bowl

Method
 

Step-by-Step Instructions
  1. Preheat your oven to 350°F (175°C).
  2. Coat a cooling rack with nonstick spray and place it atop a baking sheet.
  3. In a small bowl, combine Parmesan cheese, dried thyme, oregano, basil, garlic powder, kosher salt, and pepper.
  4. Cut the fresh zucchinis into quarters lengthwise and arrange them on the prepared baking sheet without overlapping.
  5. Drizzle olive oil over the zucchini and sprinkle the Parmesan mixture on top, pressing slightly to adhere.
  6. Bake for about 15 minutes until tender and slightly golden.
  7. Switch to broil and cook for an additional 2-3 minutes for extra crispiness.
  8. Remove from oven, garnish with parsley if desired, and serve immediately.

Nutrition

Serving: 1stickCalories: 90kcalCarbohydrates: 7gProtein: 5gFat: 5gSaturated Fat: 2gMonounsaturated Fat: 3gCholesterol: 10mgSodium: 200mgPotassium: 220mgFiber: 2gSugar: 2gVitamin A: 250IUVitamin C: 5mgCalcium: 200mgIron: 1mg

Notes

Ensure zucchini is thoroughly dried after cutting for maximum crispiness. Store leftovers in an airtight container for up to 2 days, or freeze for longer storage.

Tried this recipe?

Let us know how it was!

Crock Pot Street Tacos: Easy, Flavorful Beef Chuck Success

January 28, 2026 by Grace Snow Leave a Comment

As I savored the last bite of these delightful tacos, I couldn’t help but marvel at how a simple ingredient like beef chuck roast unlocks a world of flavor in my Crock Pot Street Tacos. This easy recipe transforms busy weeknights into relaxed gatherings, combining rich, tender beef with the light, warmth of corn tortillas. The beauty of Crock Pot Street Tacos lies not just in their authentic taste, but in their beginner-friendly preparation, making them a go-to choice for anyone tired of fast food and craving homemade comfort. Imagine filling your home with the comforting aroma of spices as you effortlessly whip up this crowd-pleasing dish. Ready to explore the magic of slow cooking? Let’s dive in!

Why Are These Tacos a Must-Try?

Flavor Explosion: With tender beef chuck roast slow-cooked to perfection, each bite is packed with vibrant spices that elevate your taco experience.

Effortless Preparation: Simply season and sear, then let the crock pot do all the work—perfect for busy nights or relaxed weekends.

Versatile Toppings: Customize your tacos with fresh cilantro, zesty salsa, or crumbled queso fresco for added flair.

Crowd-Approved: These tacos are a guaranteed hit at gatherings—serve them alongside sides like Crock Pot Chicken or a refreshing Mexican slaw for a full fiesta.

Beginner-Friendly: No expert skills required! Just follow the simple steps and impress your friends and family.

Get ready to enjoy a deliciously easy dinner that will make you forget all about fast food!

Crock Pot Street Tacos Ingredients

• For the Beef

  • Beef Chuck Roast – Rich and well-marbled, making it ideal for slow cooking; can substitute with brisket or shoulder roast for different flavors.

• For Searing

  • Olive Oil – Essential for locking in flavors; any neutral oil works as a great alternative.
  • Salt – Enhances the meat and spices; kosher or sea salt provides the best results.
  • Black Pepper – Adds depth and mild heat; freshly cracked gives a stronger flavor.

• For the Spice Blend

  • Ground Cumin – Provides an earthy, warm backbone that is essential for authentic flavor.
  • Chili Powder – Adds subtle smokiness and heat; adjustable based on your spice preference.
  • Smoked Paprika – Deepens the flavor profile with a hint of smokiness; a must-have for this dish.
  • Garlic Powder – Concentrates garlic flavor seamlessly among the spices; no fresh cloves needed.
  • Onion Powder – Adds sweet and savory notes; useful if fresh onions aren’t available.
  • Cayenne Pepper – For an extra kick; adjust according to desired spice levels.

• For Cooking Liquid

  • Beef Broth – Provides moisture and additional flavor; vegetable broth can lighten the flavor if you prefer.
  • Lime Juice – Brightens the dish with acidity; freshly squeezed is always best for maximum flavor.

• For Assembly

  • Corn Tortillas – Traditional and gluten-free for wrapping the beef; flour tortillas can be used as a substitute if desired.
  • Fresh Cilantro – Adds a burst of freshness before serving to round out the flavors.

• Optional Toppings

  • Diced Onions – For a crunch and added flavor.
  • Chopped Cilantro – Extra freshness to complement the beef.
  • Sliced Radishes – A crisp texture addition that balances the richness.
  • Salsa – Choose your favorite for added zest.
  • Crumbled Queso Fresco – Adds creamy texture and flavor contrast.

Dive into this flavorful world of Crock Pot Street Tacos and prepare for a delightful cooking experience!

Step‑by‑Step Instructions for Crock Pot Street Tacos

Step 1: Season the Beef
Generously season the beef chuck roast on all sides with kosher salt and freshly cracked black pepper. Allow the meat to sit for about 15 minutes at room temperature so the seasoning penetrates. This step enhances the flavor of your Crock Pot Street Tacos, giving the beef a savory depth when slow-cooked.

Step 2: Sear the Beef
In a large skillet, heat 2 tablespoons of olive oil over medium-high heat until shimmering. Carefully place the seasoned roast in the skillet, searing it for about 3 minutes on each side until it develops a rich, brown crust. This process locks in the juices and adds a beautiful color to your Crock Pot Street Tacos.

Step 3: Transfer to the Crock Pot
Once the roast is nicely seared, transfer it to the crock pot. This step ensures that all the flavors from the sear are captured in the slow cooker. Avoid cutting into the meat; it should remain whole to retain moisture and tenderness during the cooking process.

Step 4: Add the Spice Blend
In a small bowl, combine ground cumin, chili powder, smoked paprika, garlic powder, onion powder, and cayenne pepper. Sprinkle the spice mixture evenly over the beef roast in the crock pot, ensuring every part is covered. The spices will infuse the meat with authentic flavor as it cooks for your Crock Pot Street Tacos.

Step 5: Pour in the Cooking Liquid
Gently pour 1 cup of beef broth and 2 tablespoons of freshly squeezed lime juice over the roast, partially submerging the meat. This combination not only keeps the meat hydrated but also adds a zesty kick, enhancing the overall taste of your tacos.

Step 6: Slow Cook the Roast
Cover the crock pot and set it to cook on low for 8–10 hours or high for 4–5 hours. The beef is ready when it is fork-tender and easily shreds apart. The aromas will fill your kitchen, signaling that your Crock Pot Street Tacos are nearly complete.

Step 7: Shred the Beef
After the cooking time is complete, carefully remove the roast from the crock pot and place it on a cutting board. Using two forks, shred the beef into bite-sized pieces. For ultimate flavor, return the shredded beef to the pot and let it soak in the juices for an additional 15-20 minutes before serving.

Step 8: Warm the Tortillas
While the beef is soaking up the juices, warm the corn tortillas according to package instructions—typically on a skillet over medium heat for about 30 seconds on each side. You want them soft and pliable for easy assembly of your delicious Crock Pot Street Tacos.

Step 9: Assemble the Tacos
To assemble the tacos, take a warm tortilla and fill it generously with the shredded, flavorful beef from the crock pot. Top with your choice of optional toppings like diced onions, chopped cilantro, sliced radishes, salsa, or crumbled queso fresco for a burst of freshness and added flavor.

Step 10: Serve Immediately
Serve your Crock Pot Street Tacos immediately with lime wedges on the side for an extra zing. Gather your loved ones around the table, savor the warm flavors, and enjoy the delightful textures that make this meal a comforting family favorite!

Crock Pot Street Tacos Variations

Customize your dining experience and let your creativity shine as you explore these delicious twists on the traditional recipe!

  • Beef Variant: Substitute beef chuck with brisket or flank steak for a different flavor profile. Each cut brings its unique tenderness and taste to the table!

  • Chicken Option: Use chicken thighs for a lighter version. Simply adjust the cooking time to ensure a juicy result—everyone will love this twist!

  • Vegetarian Delight: Replace meat with sautéed mushrooms and black beans. The earthy flavors of mushrooms add rich depth, while beans offer a hearty bite.

  • Smoky Kick: Add chipotle peppers in adobo sauce for a smoky, spicy burst. This depth will elevate your Crock Pot Street Tacos with an exciting new layer of flavor!

  • Add More Heat: Adjust cayenne pepper levels to suit your spice preference. Don’t hesitate to add more for fiery tacos that will delight those who love a kick!

  • Flavor Boost: Incorporate fresh herbs like oregano or thyme into the spice blend. Just a sprinkle adds freshness, creating a flavorful balance for your tacos.

  • Topping Variations: Experiment with toppings like spicy pickled onions or grilled corn. These additions provide refreshing crunch and vibrant bursts of flavor!

  • Different Tortilla: Swap corn tortillas for flour tortillas if you prefer a softer texture. They’re equally delicious and can add a different appeal to your tacos.

For more delightful recipes, consider trying out Shrimp Tacos Zesty or some comforting Crockpot Butter Chicken. Enjoy crafting your perfect taco experience!

Make Ahead Options

These Crock Pot Street Tacos are a lifesaver for meal prep enthusiasts! You can season and marinate the beef chuck roast up to 24 hours in advance, letting the spices penetrate for even richer flavor. Simply wrap the seasoned meat in plastic wrap and refrigerate until ready to cook. Additionally, you can prepare the spice blend and store it in an airtight container, ready to sprinkle on the beef when it goes into the crock pot. When it's time to cook, just sear the roast, place it in the slow cooker with the broth and lime juice, and let it work its magic. This prep method saves you time and ensures your tacos are just as delicious as if made fresh!

How to Store and Freeze Crock Pot Street Tacos

Fridge: Store leftover shredded beef in an airtight container for up to 3 days to maintain freshness and flavor.

Freezer: If you want to keep your Crock Pot Street Tacos longer, freeze the shredded beef in airtight containers or freezer bags for up to 3 months. Make sure to squeeze out any excess air.

Reheating: When ready to enjoy the leftovers, thaw in the fridge overnight, then gently reheat the beef on the stove over low heat, adding a splash of beef broth to keep it moist.

Tortilla Tips: Wrap any remaining corn tortillas tightly in plastic wrap or foil and store in the fridge for up to a week, or freeze for longer storage.

What to Serve with Crock Pot Street Tacos

Transform your taco night into a feast with delightful sides that'll elevate each bite of tender beef!

  • Mexican Slaw: A crisp mix of cabbage, carrots, and lime juice adds a refreshing crunch that balances the rich flavors of the tacos.

  • Guacamole: Creamy avocado dip with lime and cilantro provides a luscious contrast to the spicy beef, enhancing each mouthful.

  • Elote (Mexican Street Corn): This grilled corn on the cob topped with creamy mayo, chili powder, and cheese harmonizes beautifully with the tacos’ flavors.

  • Pico de Gallo: Fresh diced tomatoes, onions, and cilantro create a zesty salsa that adds brightness and freshness to your meal.

  • Refried Beans: Creamy, seasoned beans offer a hearty side that pairs well with the tender meat, rounding out your dining experience.

  • Chips and Salsa: Crispy tortilla chips served with zesty salsa provide a fun, crunchy element perfect for dipping between taco bites.

  • Margaritas: A classic lime margarita brings a refreshing zing to your meal, making every bite even more enjoyable.

  • Churros: Finish your meal with these warm, crispy pastries coated in cinnamon sugar for a sweet treat that everyone will love.

Expert Tips for Crock Pot Street Tacos

• Sear for Flavor: Make sure to sear the beef chuck roast until it's deeply browned. This step locks in flavors and elevates your tacos.

• Timing is Key: Use a meat thermometer to check for doneness; aim for an internal temperature of 195°F for perfectly shreddable beef.

• Balance Spices: Adjust the spice levels in your blend to suit your preference; start with less cayenne and add more for heat.

• Rest the Meat: Let the shredded beef sit in the cooking juices for 15-20 minutes before serving. This ensures maximum flavor for your Crock Pot Street Tacos.

• Tortilla Technique: Warm your corn tortillas properly to avoid tearing. A quick toast on a skillet enhances their flavor and makes them pliable.

Crock Pot Street Tacos Recipe FAQs

What type of beef should I use for Crock Pot Street Tacos?
Absolutely! I recommend using beef chuck roast for its rich marbling and tenderness when cooked low and slow. It shreds beautifully, making it perfect for tacos. If you're looking for alternatives, brisket or shoulder roast can also provide delicious results.

How do I store leftover Crock Pot Street Tacos?
To keep your leftovers fresh, store the shredded beef in an airtight container in the refrigerator for up to 3 days. This way, you can enjoy your delicious tacos later in the week without compromising flavor!

Can I freeze the shredded beef?
Yes, you can! For long-term storage, place the shredded beef in airtight containers or freezer bags, making sure to remove as much air as possible. You can freeze it for up to 3 months. When you're ready to enjoy it again, simply thaw it in the fridge overnight and reheat it gently on the stove, adding a splash of beef broth for moisture.

What if my beef isn't shredding easily?
If your beef isn't shredding easily, it may need more time in the slow cooker. If it hasn't reached an internal temperature of about 195°F, it could be undercooked. To fix this, return the meat to the crock pot and continue cooking on low for another 30-60 minutes. The key is patience; the longer it cooks, the tender it becomes!

Can I make this recipe vegetarian-friendly?
Very! If you want a vegetarian version of Crock Pot Street Tacos, I often substitute the beef with sautéed mushrooms and black beans. Sauté mushrooms with spices like cumin and chili powder until tender, then follow the same slow-cooking process with vegetable broth for a hearty filling.

How do I know if my ingredients are fresh?
For the best-tasting tacos, always choose fresh ingredients. Look for beef that’s bright red with no dark spots; for spices, check their expiry dates and ensure they have a potent aroma. Fresh cilantro should be bright green, while lime should feel firm yet slightly yielding when squeezed. Freshness elevates your Crock Pot Street Tacos to a whole new level!

Crock Pot Street Tacos

Crock Pot Street Tacos: Easy, Flavorful Beef Chuck Success

Crock Pot Street Tacos offer a flavorful way to enjoy beef chuck roast in a simple, beginner-friendly recipe.
Print Recipe Pin Recipe
Prep Time 30 minutes mins
Cook Time 10 hours hrs
Resting Time 20 minutes mins
Total Time 10 hours hrs 50 minutes mins
Servings: 6 tacos
Course: Dinner
Cuisine: Mexican
Calories: 300
Ingredients Equipment Method Nutrition Notes

Ingredients
  

For the Beef
  • 2 pounds Beef Chuck Roast can substitute with brisket or shoulder roast
For Searing
  • 2 tablespoons Olive Oil or any neutral oil
  • 1 teaspoon Salt kosher or sea salt preferred
  • 1 teaspoon Black Pepper freshly cracked for better flavor
For the Spice Blend
  • 1 teaspoon Ground Cumin essential for authentic flavor
  • 1 tablespoon Chili Powder adjustable for spice preference
  • 1 teaspoon Smoked Paprika adds depth and smokiness
  • 1 teaspoon Garlic Powder no fresh cloves needed
  • 1 teaspoon Onion Powder useful for flavor if fresh onion is unavailable
  • 1/2 teaspoon Cayenne Pepper for adjusting spice levels
For Cooking Liquid
  • 1 cup Beef Broth or vegetable broth for lighter flavor
  • 2 tablespoons Lime Juice freshly squeezed is best
For Assembly
  • 12 pieces Corn Tortillas or flour tortillas as a substitute
  • 1 bunch Fresh Cilantro for garnish before serving
Optional Toppings
  • 1 cup Diced Onions for added flavor
  • 1/2 cup Chopped Cilantro extra freshness
  • 1 cup Sliced Radishes for crisp texture
  • 1 cup Salsa choose your favorite variety
  • 1 cup Crumbled Queso Fresco adds creamy texture

Equipment

  • Crock-pot
  • Skillet
  • Cutting Board
  • Forks

Method
 

Step-by-Step Instructions for Crock Pot Street Tacos
  1. Generously season the beef chuck roast on all sides with kosher salt and freshly cracked black pepper. Allow to sit for 15 minutes.
  2. In a skillet, heat olive oil over medium-high heat and sear the beef for 3 minutes on each side.
  3. Transfer the seared roast to the crock pot, keeping it whole to retain moisture.
  4. Combine cumin, chili powder, smoked paprika, garlic powder, onion powder, and cayenne pepper and sprinkle over the roast.
  5. Pour beef broth and lime juice over the roast, partially submerging it.
  6. Cover and cook on low for 8–10 hours or high for 4–5 hours until fork-tender.
  7. Once cooked, shred the beef with two forks and let it soak in the juices for 15-20 minutes.
  8. Warm corn tortillas on a skillet over medium heat for about 30 seconds on each side.
  9. Assemble the tacos with tortillas, shredded beef, and optional toppings.
  10. Serve immediately with lime wedges on the side.

Nutrition

Serving: 1tacoCalories: 300kcalCarbohydrates: 30gProtein: 20gFat: 15gSaturated Fat: 5gCholesterol: 80mgSodium: 600mgPotassium: 400mgFiber: 3gSugar: 1gVitamin A: 200IUVitamin C: 10mgCalcium: 50mgIron: 2mg

Notes

Sear for optimal flavor and let the shredded beef rest in juices for maximum flavor.

Tried this recipe?

Let us know how it was!

Savory Crockpot Jambalaya for Effortless Comfort Food Bliss

January 28, 2026 by Grace Snow Leave a Comment

A whiff of Creole spices and simmering goodness wafts through the kitchen, transporting me straight to the vibrant streets of New Orleans. This Easy Slow Cooker Crockpot Jambalaya is not just a meal; it’s an experience filled with layers of flavor and comfort. With its rich blend of proteins like chicken and andouille sausage, this dish is designed for those who cherish cooking from scratch but appreciate a hassle-free approach. The best part? It’s incredibly easy to customize—swap in your favorite veggies or adjust the spices to fit your family’s taste. Plus, you can prep it in no time, making it a perfect weeknight dinner that everyone will love. So, are you ready to discover how to create a bowl of happiness that captures the heart of Cajun cooking?

Why is Jambalaya a Family Favorite?

Irresistible Flavor: Each bite of this Crockpot Jambalaya bursts with authentic Creole spices, creating a dish that’s both comforting and satisfying.

Easy Customization: You can swap proteins or add your favorite veggies, making it a versatile meal that caters to everyone’s preferences.

Minimal Prep: Spend less time in the kitchen and more time enjoying the moments with your family. With just a few minutes of prep, the slow cooker does the heavy lifting for you.

Crowd-Pleaser: Perfect for gatherings, this dish catches the attention of every guest at the table, sparking smiles and good conversations.

Nutritious Goodness: Packed with protein and colorful veggies, it’s a wholesome option that fits into any balanced diet—just like our delightful Crockpot Butter Chicken.

Dive into a dish that truly brings everyone together!

Crockpot Jambalaya Ingredients

For the Proteins
• Chicken Breast – A lean protein that can be substituted with turkey for a different flavor profile.
• Andouille Sausage – Adds a smoky essence; you can use smoked sausage or kielbasa if you prefer.
• Shrimp – Tossed in for a delightful seafood twist—ensure it's thawed before adding.

For the Vegetables
• Celery – Brings a satisfying crunch; can be omitted if you're in a pinch.
• Bell Peppers (red and yellow) – Offers sweetness and color; any bell pepper variety works!
• Onion – Essential for building flavor; white or yellow onions are best, but shallots are a good alternative.
• Garlic (minced) – Enhances aroma; fresh is ideal, but garlic powder can fill in.

For the Sauce
• Crushed Tomatoes – Forms the base, adding rich acidity; feel free to substitute with diced tomatoes if needed.
• Chicken Broth – Necessary for moisture; vegetable broth is a great alternative for a vegetarian version.

For Seasonings
• Creole Seasoning – The star for authentic flavor; adjust to taste or whip up your own blend.
• Oregano & Thyme – Contributes herbal notes; you can swap in Italian seasoning if you prefer.
• Cayenne Pepper – Adds heat; adjust according to your spice tolerance or omit it for a milder dish.
• Salt & Pepper – Fundamental for seasoning; use to taste and elevate the dish’s overall flavor.

Dive into making a delicious Crockpot Jambalaya that’s simple yet bursting with flavor!

Step‑by‑Step Instructions for Crockpot Jambalaya

Step 1: Prep Ingredients
Begin by cubing the chicken breast into bite-sized pieces and slicing the andouille sausage. Next, chop the celery, red and yellow bell peppers, and onion, then mince the garlic. Place all these prepared ingredients into your crockpot, creating a vibrant base that promises delightful flavors in your Crockpot Jambalaya.

Step 2: Season
Sprinkle the Creole seasoning, oregano, thyme, cayenne pepper, salt, and pepper over your chopped ingredients in the crockpot. Use a wooden spoon to mix everything thoroughly, ensuring the meats and vegetables are well coated with spices. This crucial step will infuse the jambalaya with a rich, authentic flavor.

Step 3: Add Liquids
Pour the crushed tomatoes and chicken broth over the seasoned mixture in the crockpot. Carefully stir to combine all ingredients, ensuring that the tomatoes and broth envelop the chicken and vegetables. This liquid component is essential, adding moisture and creating a delicious sauce for your Crockpot Jambalaya.

Step 4: Cook
Secure the lid on your crockpot and set it to low heat. Allow the jambalaya to cook for 6 hours, or if you're in a hurry, set it to high for 4–6 hours. The slow cooking process will blend the flavors beautifully, resulting in tender meat and hearty vegetables.

Step 5: Add Shrimp
About 30 minutes before serving, add the thawed shrimp to the crockpot. Stir gently to ensure the shrimp are submerged in the cooking liquid. Cover the crockpot again, allowing the shrimp to heat through until they turn pink and opaque, perfectly completing your Crockpot Jambalaya.

Step 6: Serve
While the jambalaya finishes cooking, prepare rice according to package instructions. Once cooked, serve the delicious Cajun-inspired Crockpot Jambalaya over or mixed with the rice, garnishing with fresh parsley for a pop of color. This hearty dish is now ready to bring warmth to your family table!

Expert Tips for Crockpot Jambalaya

  • Spice It Up: Adjust the Creole seasoning to your heat preference. Start with less and gradually add more to avoid overwhelming flavors.

  • Thickening Magic: For a thicker jambalaya, cook with the lid slightly ajar during the last hour to let excess liquid evaporate.

  • Cooking Rice Right: If using brown rice, add it to the crockpot at the start, since it requires a longer cooking time than white rice.

  • Seafood Sensitivity: If adding seafood like shrimp, do so towards the end of cooking to prevent overcooking, which results in chewy shrimp.

  • Avoid Soupy Results: Ensure you’re measuring broth accurately; too much broth can lead to a soupy consistency instead of a thick, rich jambalaya.

  • Creative Customization: Feel free to add seasonal vegetables like zucchini or corn to your Crockpot Jambalaya for extra flavor and nutrition.

What to Serve with Easy Slow Cooker Crockpot Jambalaya

Prepare to elevate your Cajun culinary experience with mouthwatering sides that harmonize perfectly with the robust flavors of your jambalaya!

  • Creamy Garlic Mashed Potatoes: The smooth, buttery texture provides a comforting contrast to the hearty jambalaya, making each bite a delightful experience.
  • Garlic Bread: Crispy and warm, this bread is perfect for soaking up the flavorful sauce, enhancing the meal's overall enjoyment.
  • Coleslaw: A refreshing crunch balances the spiciness of the jambalaya, adding a cool, creamy element to your plate.
  • Cornbread: Slightly sweet and fluffy, cornbread adds a southern twist that complements the dish’s rich flavors beautifully.
  • Sauteed Greens: Nutrient-packed greens, like spinach or kale, add a vibrant color and freshness to the meal, enhancing its healthy aspect.
  • Simple Green Salad: Tossed with a light vinaigrette, a fresh salad brings brightness and cuts through the richness of the jambalaya.
  • Sweet Tea: The sweetness of this classic drink pairs wonderfully with the heat of the dish, creating a well-rounded dining experience.
  • Pecan Pie: For dessert, this traditional southern favorite offers a sweet, nutty finish that lingers pleasantly after the savory jambalaya.

How to Store and Freeze Crockpot Jambalaya

Room Temperature: Leftover jambalaya can stay out for up to 2 hours after cooking—be sure to refrigerate it promptly to ensure freshness.

Fridge: Store in an airtight container for up to 4 days, keeping leftovers tasty and ready for quick meals throughout the week.

Freezer: For longer storage, freeze your jambalaya in a freezer-safe container for up to 3 months. Thaw overnight in the fridge before reheating.

Reheating: Reheat on the stove or in the microwave, adding a splash of broth as needed to restore moisture and avoid dryness in your delightful Crockpot Jambalaya.

Make Ahead Options

Busy weeknights don’t have to mean sacrificing flavor with this Crockpot Jambalaya! You can prep the ingredients, such as cubing the chicken and slicing the sausage, up to 24 hours in advance. Simply store the prepared vegetables and meats in an airtight container in the refrigerator to maintain freshness. When you’re ready to cook, add everything to the crockpot along with the liquids and seasonings, then let it simmer as directed. For best results, avoid adding the shrimp until about 30 minutes before serving to ensure it remains tender and juicy. With these make-ahead steps, you’ll enjoy a cozy, homemade meal with minimal effort!

Crockpot Jambalaya Variations

Feel free to let your creativity shine as you customize this comforting dish with exciting twists and substitutions!

  • Dairy-Free: Omit any dairy products such as cream or cheese if included. This jambalaya is naturally creamy from the other ingredients.

  • Gluten-Free: Use gluten-free sausage and broth to make this dish suitable for gluten-sensitive diets, ensuring everyone can enjoy it.

  • Vegetarian: Replace the chicken and sausage with hearty vegetables like mushrooms and zucchini for a tasty plant-based option.

  • Spice Level: Increase the heat by adding diced jalapeños or a dash of hot sauce. Feel free to play with flavor balance until it’s just right for your palate.

  • Rice Variety: Experiment with brown rice or cauliflower rice for a lower-carb alternative. Keep in mind that cooking times may vary, so adjust accordingly.

  • Extra Veggies: Get creative with colorful bell peppers, corn, or even spinach for added nutrition and vibrant presentation that echoes the spirit of a Cajun feast.

  • Seafood Boost: Add crab or crawfish for an authentic taste of Louisiana, ensuring to adjust cooking times to keep seafood tender.

Don’t forget, this dish is all about the joy of cooking for your loved ones—like our delectable Crockpot Butter Chicken, the options are endless and sure to delight!

Crockpot Jambalaya Recipe FAQs

What type of chicken is best for Crockpot Jambalaya?
Using boneless, skinless chicken breast is ideal for Crockpot Jambalaya as it cooks evenly and stays tender. You can also substitute it with turkey or omit the protein altogether for a vegetarian version—just make sure to balance it with plenty of veggies.

How do I store leftover Crockpot Jambalaya?
Absolutely! To keep your leftovers fresh, store them in an airtight container in the refrigerator. They’ll stay good for up to 4 days. Just let them cool before sealing the container to avoid condensation which can lead to sogginess.

Can I freeze Crockpot Jambalaya?
Yes, you can freeze it! Allow the jambalaya to cool completely and then transfer it to a freezer-safe container. It can be kept for up to 3 months. When you’re ready to enjoy it, just thaw it overnight in the fridge and reheat on the stove or microwave for a quicker meal.

Why is my Crockpot Jambalaya too soupy?
If your jambalaya turns out too soupy, it might be due to too much broth added. For a thicker consistency, you can cook the jambalaya uncovered in the final stages or add a bit more rice. Thickening it will help achieve that hearty stew-like texture that everyone loves!

Can pets eat leftover Crockpot Jambalaya?
It’s not advisable to share jambalaya with pets. While chicken and many veggies are safe, ingredients like onion and garlic can be harmful to dogs and cats. It's best to keep their diet strictly to pet-safe food to prevent any health risks.

What kind of vegetables can I add to customize my jambalaya?
The more the merrier! You can add seasonal favorites like okra, corn, or even diced zucchini for added texture and flavor. Feel free to get creative—making it your own will bring in new tastes while still keeping it delicious!

Crockpot Jambalaya

Savory Crockpot Jambalaya for Effortless Comfort Food Bliss

This Crockpot Jambalaya is a comforting and flavorful meal packed with Creole spices, proteins, and veggies.
Print Recipe Pin Recipe
Prep Time 15 minutes mins
Cook Time 6 hours hrs
Total Time 6 hours hrs 15 minutes mins
Servings: 6 servings
Course: Dinner
Cuisine: Cajun, Creole
Calories: 350
Ingredients Equipment Method Nutrition Notes

Ingredients
  

For the Proteins
  • 1 pound Chicken Breast cubed
  • 1 pound Andouille Sausage sliced
  • 1 pound Shrimp thawed
For the Vegetables
  • 2 stalks Celery chopped
  • 2 medium Bell Peppers (red and yellow) chopped
  • 1 medium Onion chopped
  • 4 cloves Garlic minced
For the Sauce
  • 28 ounces Crushed Tomatoes
  • 2 cups Chicken Broth
For Seasonings
  • 2 tablespoons Creole Seasoning adjust to taste
  • 1 teaspoon Oregano
  • 1 teaspoon Thyme
  • 1/2 teaspoon Cayenne Pepper adjust to taste
  • 1 teaspoon Salt to taste
  • 1/2 teaspoon Pepper to taste

Equipment

  • Crockpot

Method
 

Step-by-Step Instructions for Crockpot Jambalaya
  1. Begin by cubing the chicken breast into bite-sized pieces and slicing the andouille sausage. Next, chop the celery, red and yellow bell peppers, and onion, then mince the garlic. Place all these prepared ingredients into your crockpot, creating a vibrant base that promises delightful flavors in your Crockpot Jambalaya.
  2. Sprinkle the Creole seasoning, oregano, thyme, cayenne pepper, salt, and pepper over your chopped ingredients in the crockpot. Use a wooden spoon to mix everything thoroughly, ensuring the meats and vegetables are well coated with spices. This crucial step will infuse the jambalaya with a rich, authentic flavor.
  3. Pour the crushed tomatoes and chicken broth over the seasoned mixture in the crockpot. Carefully stir to combine all ingredients, ensuring that the tomatoes and broth envelop the chicken and vegetables. This liquid component is essential, adding moisture and creating a delicious sauce for your Crockpot Jambalaya.
  4. Secure the lid on your crockpot and set it to low heat. Allow the jambalaya to cook for 6 hours, or if you're in a hurry, set it to high for 4–6 hours. The slow cooking process will blend the flavors beautifully, resulting in tender meat and hearty vegetables.
  5. About 30 minutes before serving, add the thawed shrimp to the crockpot. Stir gently to ensure the shrimp are submerged in the cooking liquid. Cover the crockpot again, allowing the shrimp to heat through until they turn pink and opaque, perfectly completing your Crockpot Jambalaya.
  6. While the jambalaya finishes cooking, prepare rice according to package instructions. Once cooked, serve the delicious Cajun-inspired Crockpot Jambalaya over or mixed with the rice, garnishing with fresh parsley for a pop of color. This hearty dish is now ready to bring warmth to your family table!

Nutrition

Serving: 1servingCalories: 350kcalCarbohydrates: 32gProtein: 25gFat: 15gSaturated Fat: 4gPolyunsaturated Fat: 1gMonounsaturated Fat: 2gCholesterol: 90mgSodium: 800mgPotassium: 800mgFiber: 3gSugar: 5gVitamin A: 500IUVitamin C: 50mgCalcium: 50mgIron: 3mg

Notes

Adjust the seasoning according to your spice tolerance and use seasonal vegetables for added nutrition.

Tried this recipe?

Let us know how it was!

Crockpot Garlic Butter Beef Bites with Potatoes for Cozy Nights

January 28, 2026 by Grace Snow Leave a Comment

As I walked into the kitchen, the rich aroma of garlic and herbs wrapped around me like a cozy blanket, instantly making me feel at home. These Crockpot Garlic Butter Beef Bites with Potatoes are my go-to comfort food for those busy weeknights when I crave something hearty yet hassle-free. With just a handful of ingredients and minimal fuss, this beginner-friendly recipe delivers savory bites of beef that melt in your mouth, along with perfectly tender potatoes that soak up every bit of that luscious garlic butter. It's not just a meal; it's a warm hug on a plate, designed to bring joy to your home and delight to your loved ones. Are you ready to transform your dinner routine into a cozy celebration?

Why You'll Love These Beef Bites

Simplicity at its Finest: With just a few ingredients, this recipe is as easy as combining and cooking, making it perfect for beginners or busy cooks.

Mouthwatering Aromatics: The combination of garlic and herbs creates an inviting aroma that fills your home, uplifting spirits even on the busiest weeknights.

Versatile Comfort: Pair these bites with a side of crusty bread or serve alongside a fresh salad for a balanced meal. Don’t forget to check out my recipe for Cheesy Garlic Bread to soak up that delicious sauce!

Time-Saving Delight: Simply set your crockpot to work, allowing you to go about your day while this dish cooks to perfection, freeing up your evening.

Family Favorite: The savory flavor and tender texture ensure that everyone at the table will be asking for seconds, making it a surefire hit for gatherings or weeknight dinners.

Crockpot Garlic Butter Beef Bites Ingredients

For the Beef and Potatoes
• Beef Stew Meat – Provides hearty, meaty bites that become fork-tender with slow cooking; substitute with chuck roast or brisket for similar results.
• Baby Potatoes – Halved to match beef cubes in size; they soak up the garlic butter sauce, creating a creamy texture, or try any favorite potato variety instead.

For the Flavorful Sauce
• Unsalted Butter – Creates a rich, glossy base for the sauce, melting with garlic to form a velvety coating.
• Garlic (Minced) – Adds aromatic flavor; sauté until fragrant but not browned to avoid bitterness.
• Olive Oil – Aids in seasoning adherence and prevents sticking when searing beef.
• Salt – Enhances all other flavors, ensuring well-seasoned beef.
• Black Pepper – Adds mild heat to balance the butter and beef richness.

For the Herbs and Spices
• Dried Thyme – Provides herbaceous notes that perfectly complement beef flavors.
• Dried Rosemary – Adds a savory warmth that enhances the garlic and butter relationship.
• Paprika – Contributes color and mild smokiness for depth.

For Cooking Liquid
• Beef Broth – Keeps beef and potatoes moist; chicken or vegetable broth can be a valid substitute.

For Garnish
• Fresh Parsley (optional) – Adds a pop of color and fresh flavor when garnished, brightening up the dish.

These Crockpot Garlic Butter Beef Bites with Potatoes are not just a meal; they represent a delicious opportunity to bring cozy comfort into your home. Enjoy!

Step‑by‑Step Instructions for Crockpot Garlic Butter Beef Bites with Potatoes

Step 1: Prepare the Beef
Begin by placing your beef stew meat in a large mixing bowl. Drizzle with olive oil and sprinkle generously with salt, black pepper, dried thyme, dried rosemary, and paprika. Use your hands or a spoon to thoroughly toss the beef, ensuring each piece is well-coated with these seasonings. This step adds a flavor-packed foundation for your Crockpot Garlic Butter Beef Bites with Potatoes.

Step 2: Sear the Beef
In a large skillet, heat a drizzle of olive oil over medium-high heat. Once hot, add the seasoned beef cubes in batches, ensuring not to overcrowd the pan. Sear for about 3-4 minutes per side, or until the meat develops a rich, brown crust. This optional step enhances the depth of flavor, so take your time. Once browned, transfer the beef to the crockpot.

Step 3: Sauté the Garlic
In the same skillet, reduce the heat to low and add unsalted butter, allowing it to melt gently. Once melted, add the minced garlic and sauté for 1-2 minutes, stirring until fragrant but not browned, which can turn bitter. The golden, buttery garlic creates a flavorful sauce base for our dish. Pour this garlic butter mixture directly over the beef in the crockpot.

Step 4: Add the Potatoes
Next, prepare your baby potatoes by halving them to match the size of the beef cubes. Scatter these around the beef in the crockpot, ensuring even distribution throughout. The potatoes will absorb the rich flavors from the garlic butter and beef broth, giving you tender bites that complement the savory meat in your Crockpot Garlic Butter Beef Bites with Potatoes.

Step 5: Incorporate the Broth
Pour the beef broth over the contents in the crockpot, allowing it to pool at the bottom. This liquid is crucial as it keeps your beef and potatoes moist while they cook. The broth envelops everything in warmth, ensuring deliciously tender ingredients. Make sure not to stir too vigorously, keeping the potatoes intact.

Step 6: Stir Gently
With the broth added, gently stir the ingredients in your crockpot. Be careful not to crush the potatoes as you combine everything. This step ensures that all flavors meld together while preserving the integrity of the potatoes. You’re building a cozy layer of flavors for your Crockpot Garlic Butter Beef Bites with Potatoes.

Step 7: Set the Cooking Time
Now it’s time to cover the crockpot with a lid. Set the cooking on low for 6-8 hours or high for 3-4 hours, depending on your schedule. The goal is to achieve fork-tender beef and creamy potatoes. Check for doneness towards the end of the cooking time; you want everything to be beautifully tender and flavorful.

Step 8: Garnish and Serve
Once cooking is complete, taste and adjust the seasoning if needed. For a burst of freshness, consider garnishing with freshly chopped parsley before serving. Scoop generous portions of your Crockpot Garlic Butter Beef Bites with Potatoes into bowls, enjoying the warmth and comforting flavors that are just waiting to embrace you and your loved ones.

How to Store and Freeze Crockpot Garlic Butter Beef Bites

Fridge: Keep leftovers in an airtight container for up to 3 days; ensure it's completely cooled before sealing for best results.

Freezer: For longer storage, divide portions into freezer-safe containers and freeze for up to 2-3 months. Thaw overnight in the fridge before reheating.

Reheating: Reheat on the stove or in the microwave, adding a splash of beef broth to maintain moisture and enhance flavors in your Crockpot Garlic Butter Beef Bites.

Temperature Check: Always ensure reheated food reaches 165°F for safe consumption and the best taste experience.

Expert Tips for Crockpot Garlic Butter Beef Bites

• Searing Matters: Enhance the flavor by searing the beef before adding it to the crockpot; this step deepens the savory notes.

• Don’t Overcrowd: When browning the beef, avoid overcrowding the pan; it prevents proper browning and can lead to steaming instead.

• Watch the Cooking Time: Different crockpot models can vary in heat; monitor the cooking time to ensure fork-tender beef and perfectly soft potatoes.

• Customize with Veggies: Add carrots or onions for a nutritional boost and extra flavor reminiscent of a hearty stew.

• Adjust the Broth: If you’re out of beef broth, don’t worry! Chicken or vegetable broth works just as well in this comforting dish.

What to Serve with Crockpot Garlic Butter Beef Bites with Potatoes

Elevate your cozy dinner with delightful pairings that balance flavors and textures.

  • Crusty Bread: A must-have to scoop up the rich garlic butter sauce, adding a satisfying crunch to each bite.
  • Fresh Green Salad: A vibrant salad with vinaigrette complements the hearty beef, offering a refreshing contrast and lightness.
  • Creamy Mashed Potatoes: For a double dose of comfort, buttery mashed potatoes soak up the flavors and add a silky texture.
  • Roasted Vegetables: Caramelized carrots and Brussels sprouts provide a sweet and earthy balance against the savory beef bites.
  • Garlic Butter Rice: Fluffy rice cooked in garlic butter pairs beautifully, enhancing the comforting essence of the dish.
  • Red Wine: A glass of velvety red wine deepens the flavors and creates a perfect pairing for cozy evenings.
  • Homemade Coleslaw: A crunchy, tangy coleslaw balances the richness of the beef, offering a crisp bite at every turn.
  • Chocolate Cake: End on a sweet note with a slice of rich chocolate cake, making your meal feel like a celebration.

Make Ahead Options

These Crockpot Garlic Butter Beef Bites with Potatoes are perfect for meal prep aficionados! To save time during busy weeknights, you can season the beef and refrigerate it in an airtight container for up to 24 hours. Additionally, you can chop the baby potatoes and toss them with a little olive oil to prevent browning, storing them alongside the beef. When you're ready to cook, simply transfer the seasoned beef and prepped potatoes into the crockpot, pour in the garlic butter mixture, and add beef broth. Set it to cook on low for 6-8 hours or high for 3-4 hours, allowing the flavors to meld beautifully while you attend to your day. You'll enjoy heartwarming results with minimal effort!

Crockpot Garlic Butter Beef Bites with Potatoes Variations

Feel free to make this cozy dish your own with these delightful twists and swaps!

  • Vegetable Boost: Add carrots and onions to enhance nutrition and flavor. These veggies will meld beautifully with the rich sauce, creating a heartier meal that feels like a warm embrace.

  • Broth Swap: Use chicken or vegetable broth instead of beef broth for a lighter twist. The result is still flavorful and comforting, making it perfect for those who prefer a non-red meat option.

  • Herb Mix: Swap out dried thyme and rosemary for your favorite fresh herbs, such as parsley or oregano. Fresh herbs infuse a vibrant flavor that makes each bite feel like springtime.

  • Spice it Up: For a spicy kick, add a pinch of red pepper flakes or diced jalapeños. This simple addition turns up the heat and awakens your taste buds, bringing excitement to every spoonful.

  • Different Potatoes: Try sweet potatoes or Yukon golds instead of baby potatoes. Their unique flavors and textures bring a new dimension to the dish, adding a hint of sweetness that pairs beautifully with garlic butter.

  • Creamy Touch: Stir in a dollop of cream cheese or sour cream at the end for a creamy finish. It creates a rich, velvety sauce that clings to the beef and potatoes, turning comfort food into a gourmet experience.

  • Honey Glaze: Drizzle a little honey before serving for a touch of sweetness that contrasts delightfully with savory flavors. Just a teaspoon can elevate the dish to new heights, making it an enticing surprise.

  • Classic Pairing: Serve your beef bites with a side of Cheesy Garlic Bread to soak up that scrumptious sauce. It creates a classic, comforting meal that will leave everyone asking for more!

Feel free to mix and match these ideas to make this dish uniquely yours. Cooking is all about love, creativity, and sharing with those you care about!

Crockpot Garlic Butter Beef Bites with Potatoes Recipe FAQs

What type of beef is best for this recipe?
For the best results, use beef stew meat, which becomes tender during slow cooking. You can also substitute with cuts like chuck roast or brisket if you prefer. These choices ensure a hearty texture that complements the potatoes beautifully.

How should I store leftovers?
Refrigerate your leftovers in an airtight container for up to 3 days. Ensure the dish is completely cooled before sealing it to maintain freshness and prevent spoilage.

Can I freeze Crockpot Garlic Butter Beef Bites?
Absolutely! To freeze, divide the leftovers into freezer-safe containers or bags. This dish will stay fresh for up to 2-3 months. When you're ready to enjoy, just thaw in the fridge overnight and reheat gently.

What if I don’t have beef broth?
No problem at all! If you're out of beef broth, you can substitute with chicken broth or vegetable broth. Water with added seasonings can also work in a pinch, although the flavor may be less rich.

How can I prevent the beef from becoming tough?
To avoid tough beef, make sure to monitor the cooking time depending on your crockpot model, as some cook faster than others. Searing the beef before adding it to the crockpot also helps enhance tenderness and flavor, so it's worth considering if you have the time!

Is this dish suitable for anyone with dietary restrictions?
While this recipe is a comforting delight, always check for any specific allergies. It contains beef and dairy, so if you or your loved ones have allergies to those, consider alternative ingredients like dairy-free butter or a plant-based protein for a delicious twist.

Crockpot Garlic Butter Beef Bites with Potatoes

Crockpot Garlic Butter Beef Bites with Potatoes for Cozy Nights

These Crockpot Garlic Butter Beef Bites with Potatoes are a comforting, hassle-free meal perfect for busy weeknights.
Print Recipe Pin Recipe
Prep Time 15 minutes mins
Cook Time 8 hours hrs
Total Time 8 hours hrs 15 minutes mins
Servings: 6 servings
Course: Dinner
Cuisine: Comfort Food
Calories: 350
Ingredients Equipment Method Nutrition Notes

Ingredients
  

For the Beef and Potatoes
  • 2 pounds Beef Stew Meat Substitute with chuck roast or brisket for similar results.
  • 1 pound Baby Potatoes Halved to match beef cubes in size.
For the Flavorful Sauce
  • 1/2 cup Unsalted Butter
  • 4 cloves Garlic (Minced) Sauté until fragrant but not browned.
  • 2 tablespoons Olive Oil
  • 1 teaspoon Salt
  • 1/2 teaspoon Black Pepper
For the Herbs and Spices
  • 1 teaspoon Dried Thyme
  • 1 teaspoon Dried Rosemary
  • 1 teaspoon Paprika
For Cooking Liquid
  • 2 cups Beef Broth Chicken or vegetable broth can be substituted.
For Garnish
  • 1/4 cup Fresh Parsley (optional) Adds color and fresh flavor.

Equipment

  • Crockpot
  • Skillet
  • Mixing Bowl

Method
 

Step‑by‑Step Instructions
  1. Prepare the Beef by tossing it with olive oil, salt, black pepper, thyme, rosemary, and paprika.
  2. Sear the Beef in a skillet until browned, about 3-4 minutes per side.
  3. Sauté the Garlic in the same skillet with butter until fragrant.
  4. Add halved Potatoes around the Beef in the crockpot.
  5. Pour Beef Broth over the contents in the crockpot.
  6. Gently stir the ingredients to combine without crushing the Potatoes.
  7. Set the Cooking Time on low for 6-8 hours or high for 3-4 hours.
  8. Garnish with Parsley before serving.

Nutrition

Serving: 1bowlCalories: 350kcalCarbohydrates: 30gProtein: 25gFat: 15gSaturated Fat: 7gPolyunsaturated Fat: 2gMonounsaturated Fat: 6gCholesterol: 70mgSodium: 800mgPotassium: 800mgFiber: 4gSugar: 2gVitamin A: 500IUVitamin C: 30mgCalcium: 40mgIron: 3mg

Notes

For best results, allow to cool before storing leftovers in an airtight container. Can be frozen for longer storage.

Tried this recipe?

Let us know how it was!

Heavenly Crockpot French Dip Sandwiches for Ultimate Comfort

January 28, 2026 by Grace Snow Leave a Comment

As I walked into my kitchen, the inviting aroma of slow-cooked beef mingled with the scent of caramelized onions, making my mouth water in anticipation. Today, I’m sharing my go-to recipe for Crockpot French Dip Sandwiches, the ultimate comfort food that’s as easy to prepare as it is delicious. This dish not only highlights the rich flavors of tender beef and creamy melted cheese tucked in crusty rolls, but it also does all the heavy lifting while you carry on with your day. Perfect for family dinners or meal prepping, this slow-cooker marvel requires minimal effort yet delivers big on taste and satisfaction. Are you ready to indulge in a warm, hearty meal that will whisk you away to sandwich paradise? Let’s dive into the recipe!

Why Are These Sandwiches So Irresistible?

Simplicity at its finest: This Crockpot French Dip Sandwiches recipe requires minimal prep—just combine ingredients and let your slow cooker work its magic!

Heavenly Flavors: The combination of tender beef, caramelized onions, and melty cheese wrapped in crusty rolls creates a symphony of taste.

Time-Saving: Perfect for busy weekdays, it effortlessly delivers a comforting meal without constant supervision.

Crowd Pleaser: Whether for family dinners or gatherings, these sandwiches are sure to impress and satisfy everyone’s cravings.

Versatile: Mix and match cheeses or pair with sides like roasted potatoes or a fresh salad for a complete meal. If you're looking for more comfort food ideas, don't miss out on these delicious Crockpot Butter Chicken or try a sweet touch with Cherry Clafoutis French for dessert!

Indulge in a quick, comforting bite that makes you feel right at home.

Crockpot French Dip Sandwiches Ingredients

• For a delightful experience, gather these key ingredients!

For the Beef

  • Olive Oil – Adds richness and enhances the flavor during searing, though optional.
  • Beef Chuck Roast – The star of the show; slow-cooks into tender shreds that envelop flavors beautifully.
  • Kosher Salt and Freshly Ground Black Pepper – Essential seasoning to elevate the taste profile of your dish.
  • Dry Onion Soup Mix – Infuses a savory depth to the beef; can be replaced with homemade seasoning for a personal touch.

For the Broth

  • Water – Helps create the delicious broth in which the beef simmers to perfection.
  • Beef Broth – Forms the rich base for your au jus; use Better-than-Bouillon for an even bolder flavor.

For the Sandwiches

  • Crusty Rolls (Ciabatta or Hoagie) – Provides a satisfying crunch and absorbs the flavorful juices beautifully.
  • Swiss or Provolone Cheese – Melts beautifully over the beef, providing creaminess and flavor contrast; feel free to switch with your favorite cheese.

Enjoy every bite of these Crockpot French Dip Sandwiches, and let the comforting flavors take you on a culinary journey!

Step‑by‑Step Instructions for Crockpot French Dip Sandwiches

Step 1: Sear the Beef (optional)
In a skillet, heat a splash of olive oil over medium-high heat. Season the beef chuck roast generously with kosher salt and freshly ground black pepper, then sear it for about 1-2 minutes on each side, or until it's beautifully browned. This optional step enhances the flavor of your Crockpot French Dip Sandwiches and sets a rich base for the broth to come.

Step 2: Combine Ingredients
Transfer your seared beef into the slow cooker. Sprinkle on the dry onion soup mix, then pour in the water and beef broth. Make sure the beef is nicely nestled in the liquid to ensure even cooking. It’s the perfect blend of flavor that will create a decadent au jus for dipping your sandwiches.

Step 3: Cook
Set your slow cooker to HIGH for 4-6 hours or LOW for 8-10 hours. Cover it tightly and let the magic happen! You’ll know it’s ready when the beef is fork-tender and shreds effortlessly. The delightful aroma will fill your kitchen, teasing you with the promise of satisfying Crockpot French Dip Sandwiches.

Step 4: Shred the Beef
Once the cooking time is up, carefully remove the beef from the slow cooker and place it in a mixing bowl. Using two forks, shred the beef into bite-sized pieces, allowing it to soak in some of the flavorful broth. This shredded beef will become the star of your sandwiches, ensuring every bite is juicy and filled with flavor.

Step 5: Assemble Sandwiches
Slice the crusty rolls in half and load them generously with the shredded beef. Top each sandwich with a slice of Swiss or provolone cheese, allowing its creamy goodness to melt over the warm beef. This moment of assembly is where the comfort of your Crockpot French Dip Sandwiches truly begins to shine!

Step 6: Broil
Preheat your broiler to medium-high. Place the assembled sandwiches on a baking sheet and slide them under the broiler for about 2-3 minutes, or until the cheese is perfectly melted and the rolls are toasted to golden perfection. Keep a close eye on them to avoid burning; you want glorious, crispy tops.

Step 7: Serve
Ladle the flavorful broth from the slow cooker into small bowls for dipping. Serve your delicious Crockpot French Dip Sandwiches hot alongside the au jus—perfect for dipping. Each bite of tender beef, melty cheese, and crusty roll will have everyone coming back for more comfort food goodness!

Make Ahead Options

These Crockpot French Dip Sandwiches are perfect for busy home cooks looking to save time during hectic weekdays! You can prepare the beef up to 24 hours in advance, cooking it in your slow cooker as usual, and then refrigerate the shredded beef separately. The broth can also be stored in an airtight container for up to 3 days. To maintain quality, be sure to let the beef cool completely before refrigerating to prevent sogginess. When you're ready to serve, simply reheat the beef and broth. Assemble your sandwiches with fresh rolls and cheese, then broil for a few minutes until golden, ensuring each bite is just as delicious as when first made!

What to Serve with Crockpot French Dip Sandwiches

Nothing completes a meal quite like the perfect side dishes, and these sandwiches deserve an equally delicious accompaniment.

  • Crispy Sweet Potato Fries: Crispy, sweet, and slightly salty, they offer a delightful crunch alongside the tender beef, creating a delightful contrast in textures.

  • Classic Coleslaw: The freshness and crunch of coleslaw provide a refreshing balance to the rich, savory flavors of the sandwiches, enhancing each bite.

  • Garlic Butter Roasted Potatoes: Tender, buttery potatoes infused with garlic add a luxurious touch and pair beautifully with the hearty sandwiches.

  • Garden Salad with Vinaigrette: A light garden salad offers a burst of freshness and acidity, cutting through the richness of the beef and cheese.

  • Pickle Chips: Add a tangy crunch with side pickle chips, their sharp flavor complementing the rich flavors of the French dip.

  • Creamy Potato Salad: A classic favorite, its creaminess works in harmony with the robust flavors of the shredded beef, making it a crowd-pleaser.

  • Dipping Sauces: Consider adding a side of horseradish or spicy mustard for an extra kick that pairs well with the tender beef.

  • Cold Beer or Red Wine: Pair these sandwiches with a crisp lager or a robust red wine for a complete dining experience that brings out the best in flavors.

Expert Tips for Crockpot French Dip Sandwiches

  • Perfect Searing: Searing the beef adds depth to the flavor, but feel free to skip it if you're short on time—it won’t ruin your Crockpot French Dip Sandwiches!

  • Broth Balance: Adjust salt levels in the broth; the dry onion soup mix can be salty. Taste before serving to ensure balanced flavors.

  • Chunky or Shredded: For a heartier bite, cube the beef instead of shredding. This offers more texture in each delicious sandwich!

  • Watch the Broiler: When broiling, stay nearby! The high heat can quickly go from golden perfection to burnt if left unattended.

  • Storage Tips: Keep leftover beef and au jus stored separately to maintain freshness, refrigerating for up to 4 days or freezing for up to 3 months.

Indulge in the mouthwatering warmth of your homemade Crockpot French Dip Sandwiches!

Crockpot French Dip Sandwiches Variations

Feel free to unleash your creativity and make this comforting recipe your own!

  • Brisket: Substitute chuck roast with brisket for a richer, smokier flavor. The difference is remarkable and might become your new favorite!
  • Skip Searing: Save time by omitting the searing step; the beef will still be incredibly tender and tasty. Sometimes, simplicity is key to a hassle-free dinner.
  • Frozen Roast: Using a frozen roast? No problem! Just extend your cooking time by about 2 hours for the same delicious result.
  • Cheese Variety: Experiment with different cheeses like cheddar, gouda, or pepper jack for a flavorful twist. You might find a combination that surprises and delights your taste buds!
  • Add Veggies: Toss in sautéed mushrooms or bell peppers during cooking for added texture and flavor, transforming your sandwiches into a veggie-loaded delight!
  • Spice It Up: If you crave heat, add sliced jalapeños or a handful of red pepper flakes to the slow cooker. The result will infuse your French dip with delicious warmth.
  • Homemade Seasoning: Create a signature flavor by swapping dry onion soup mix for your own blend of onions, garlic powder, and herbs. Your kitchen will smell divine!
  • Different Breads: Switch up the rolls by using baguettes, kaiser rolls, or soft bread for unique textures and flavors. Have fun discovering your favorite combination!

For more comforting recipes, check out this delectable Crockpot Butter Chicken or the delightful Cherry Clafoutis French for a sweet finish!

Storage Tips for Crockpot French Dip Sandwiches

  • Fridge: Store leftover beef and au jus in airtight containers for up to 4 days. This keeps your delicious sandwiches ready for quick meals!

  • Freezer: For longer storage, freeze the shredded beef and au jus in separate airtight containers or freezer bags for up to 3 months. This ensures you can enjoy those comforting flavors anytime.

  • Reheating: Thaw frozen beef and au jus overnight in the fridge. When ready, reheat on the stove over low heat until warmed through, or microwave in short intervals, stirring occasionally.

  • Avoid sogginess: To keep your sandwiches from getting soggy, only assemble the sandwiches just before serving—keep components separate until ready to enjoy your Crockpot French Dip Sandwiches!

Crockpot French Dip Sandwiches Recipe FAQs

How do I choose the right beef for the recipe?
Absolutely! For the best flavor and tenderness, I recommend using a beef chuck roast. Look for one that has good marbling; this will ensure your meat is juicy and flavorful once it’s cooked. If you prefer a different texture, you can also substitute it with brisket. Make sure the meat has a nice red color without any dark spots or excessive fat.

What’s the best way to store leftovers?
Very! To keep your leftover beef and au jus fresh, store them separately in airtight containers. You can keep them in the refrigerator for up to 4 days. For longer storage, consider freezing the shredded beef and au jus in separate airtight freezer bags for up to 3 months. This way, you can easily reheat them for a quick meal later on!

Can I freeze the assembled sandwiches?
I often make my life easier by freezing the individual components instead of assembled sandwiches. If you do freeze them, be sure to keep the buns separate and assemble them just before serving. This prevents sogginess! Simply thaw the beef overnight in the fridge, reheat, and then assemble your sandwiches with the buns when you're ready to enjoy.

What should I do if my beef isn’t shredding easily?
Don’t worry, it happens! If your beef isn’t shredding easily, it may need more cooking time. Try covering it back up and cooking it for an additional hour on low heat. If it’s still tough, you can slice it into chunks for a different texture, or return it to the slow cooker with a bit more broth to make sure it gets tender.

Is this recipe suitable for special dietary needs?
The more the merrier! For those with dietary restrictions, feel free to swap out the beef for a plant-based alternative like jackfruit or a meat-free protein. Additionally, if you’re catering to allergies, make sure to check all packaged ingredients, especially the dry onion soup mix, which may contain gluten or other allergens. You can always make a simple homemade blend of dried onions and spices to suit your needs.

How can I avoid soggy rolls when serving?
Great question! To keep your rolls from becoming soggy, only assemble the sandwiches right before serving. Serve the shredded beef and au jus separately so everyone can build their sandwiches fresh. If you prefer, you can also toast the rolls lightly before adding the filling; this creates a barrier that helps maintain their crunchiness.

Crockpot French Dip Sandwiches

Heavenly Crockpot French Dip Sandwiches for Ultimate Comfort

Discover the mouthwatering Crockpot French Dip Sandwiches that promise ultimate comfort and flavor, perfect for family dinners.
Print Recipe Pin Recipe
Prep Time 15 minutes mins
Cook Time 8 hours hrs
Total Time 8 hours hrs 15 minutes mins
Servings: 4 sandwiches
Course: Dinner
Cuisine: American
Calories: 450
Ingredients Equipment Method Nutrition Notes

Ingredients
  

For the Beef
  • 1 tablespoon Olive Oil optional
  • 3 pounds Beef Chuck Roast
  • 1 teaspoon Kosher Salt
  • 1 teaspoon Freshly Ground Black Pepper
  • 1 packet Dry Onion Soup Mix can be replaced with homemade seasoning
For the Broth
  • 1 cup Water
  • 4 cups Beef Broth use Better-than-Bouillon for bolder flavor
For the Sandwiches
  • 4 rolls Crusty Rolls (Ciabatta or Hoagie)
  • 8 slices Swiss or Provolone Cheese or your favorite cheese

Equipment

  • Slow Cooker
  • Skillet
  • Mixing Bowl
  • Baking Sheet

Method
 

Step-by-Step Instructions
  1. In a skillet, heat a splash of olive oil over medium-high heat. Sear the beef chuck roast for 1-2 minutes on each side until browned.
  2. Transfer the seared beef into the slow cooker. Sprinkle on the dry onion soup mix, and pour in the water and beef broth.
  3. Set your slow cooker to HIGH for 4-6 hours or LOW for 8-10 hours. Cover and cook until the beef is fork-tender.
  4. Remove the beef and shred it into bite-sized pieces using two forks, soaking it in the flavorful broth.
  5. Slice the crusty rolls in half and fill them with the shredded beef and a slice of cheese.
  6. Preheat your broiler to medium-high. Place the sandwiches on a baking sheet and broil for 2-3 minutes until the cheese is melted.
  7. Serve the sandwiches hot with the broth for dipping.

Nutrition

Serving: 1sandwichCalories: 450kcalCarbohydrates: 40gProtein: 35gFat: 20gSaturated Fat: 8gPolyunsaturated Fat: 1gMonounsaturated Fat: 9gCholesterol: 100mgSodium: 900mgPotassium: 600mgFiber: 2gSugar: 1gVitamin A: 2IUCalcium: 15mgIron: 15mg

Notes

Perfect for family dinners and meal prepping, and adaptable to personal taste.

Tried this recipe?

Let us know how it was!

Tender Sweet Baby Rays Crockpot Chicken for Busy Nights

January 28, 2026 by Grace Snow Leave a Comment

As the slow cooker hums gently in the background, the rich aroma of Sweet Baby Rays Crockpot Chicken fills my kitchen, creating an inviting atmosphere that beckons everyone to the table. This easy, family-friendly recipe is a game-changer for busy weeknights when you crave delicious comfort food without spending hours in the kitchen. With just a few simple ingredients, like juicy chicken breasts and the tangy goodness of Sweet Baby Rays BBQ sauce, this dish transforms a hectic day into a culinary triumph. Plus, the slow-cooked magic ensures that your chicken turns out tender and flavorful, making it perfect for shredding and piling onto sandwiches or serving over rice. Trust me, once you try this delightful BBQ chicken, you’ll wonder how you ever lived without it. So, are you ready to dive into a world of sweet, smoky goodness?

Why is Slow-Cooked Chicken So Irresistible?

Simplicity at Its Best: With minimal prep time, this recipe is perfect for those busy evenings when you crave homemade goodness without the fuss.

Flavor Explosion: The tangy Sweet Baby Rays BBQ sauce melds beautifully with tender chicken, ensuring every bite bursts with flavor.

Family-Friendly Fun: It's a crowd-pleaser, appealing to both kids and adults alike. Serve it on sandwiches or over rice, and everyone will be asking for seconds!

Versatile Variations: Explore different BBQ sauce flavors or add veggies for a personalized twist. The adaptability keeps meals exciting, whether you’re making Chipotle Lime Chicken or adding seasonal veggies.

Time-Saving Delight: Cooked in a slow cooker, this dish allows you to set it and forget it—perfect for multitasking in the kitchen.

Heartwarming Comfort: Rich in flavor and history, this dish embodies the essence of BBQ culture, making it a go-to for gatherings or family dinners.

Sweet Baby Rays Crockpot Chicken Ingredients

For the Chicken

  • Chicken Breasts – Tender and juicy, boneless and skinless is easiest, but bone-in adds flavor.

For the Sauce

  • Sweet Baby Rays BBQ Sauce – The star of the dish, bringing a delightful sweet and tangy flavor; don’t hesitate to try different variations like honey or hickory.
  • Brown Sugar – Enhances the sweetness; adjust to your taste for a less sugary dish.
  • Apple Cider Vinegar – Adds a necessary acidity to balance the sweetness; if unavailable, white vinegar is a decent substitute.
  • Olive Oil – Keeps the chicken moist and enriches the sauce; feel free to swap with vegetable oil if preferred.
  • Garlic Powder – Brings aromatic supremacy; fresh garlic can be used for a more robust flavor.
  • Salt and Pepper – Vital for proper seasoning; add to your liking for the perfect taste.

Optional Add-Ins

  • Diced Onions and Bell Peppers – For added flavor and crunch; these veggies elevate the dish’s texture.
  • Spices – Smoked paprika or cayenne pepper can be added for those who like a spicy kick!

With these simple yet flavorful ingredients, you’re all set for a cozy, satisfying dinner. Enjoy the journey of creating your Sweet Baby Rays Crockpot Chicken!

Step‑by‑Step Instructions for Sweet Baby Rays Crockpot Chicken

Step 1: Season the Chicken
Begin by seasoning the boneless, skinless chicken breasts with garlic powder, salt, and pepper. Ensure each piece is evenly coated for maximum flavor. This initial step sets the stage for the delicious Sweet Baby Rays Crockpot Chicken. Once seasoned, set the chicken aside while you prepare the sauce.

Step 2: Whisk Together the Sauce
In a medium bowl, combine Sweet Baby Rays BBQ sauce, brown sugar, apple cider vinegar, and olive oil. Whisk these ingredients together until they form a cohesive mixture. This step is crucial as the sauce not only enhances the chicken's flavor but also helps maintain its moisture during cooking.

Step 3: Combine in the Crockpot
Place the seasoned chicken breasts into the crockpot, arranging them in a single layer for even cooking. Pour the BBQ sauce mixture over the chicken, ensuring every piece is well coated. The rich sauce will infuse the chicken with a sweet and tangy flavor as it cooks slowly.

Step 4: Set the Cooking Time
Cover the crockpot and set it to cook on low for 4 to 6 hours or on high for 2 to 3 hours. The chicken is done when it is tender and easily shredded with a fork. Make sure to check for doneness toward the end of the cooking time, as slow cooker models can vary.

Step 5: Shred the Chicken
Once the cooking time is up, carefully remove the chicken from the crockpot and place it on a cutting board. Using two forks, shred the chicken into bite-sized pieces. This step allows the sweet BBQ sauce to blend seamlessly with the chicken, creating a perfect bite of your Sweet Baby Rays Crockpot Chicken.

Step 6: Mix with Sauce
Return the shredded chicken to the crockpot and stir it into the remaining sauce. This ensures every piece is deliciously coated, enhancing the overall flavor of the dish. Allow it to sit for a few minutes on the warm setting to soak up the sauce flavors before serving.

Step 7: Serve and Enjoy
Your Sweet Baby Rays Crockpot Chicken is now ready to serve! Enjoy it hot over rice, piled high in a sandwich, or alongside your favorite side dishes. This comforting meal is perfect for busy weeknights and will surely be a hit with the whole family!

Make Ahead Options

These Sweet Baby Rays Crockpot Chicken meal prep options are perfect for busy home cooks seeking to save time! You can season the chicken and prepare the BBQ sauce mixture up to 24 hours in advance. Simply store the seasoned chicken in an airtight container or resealable bag in the refrigerator, and whisk together the sauce ingredients to keep in a separate container. When you're ready to cook, just combine them in the crockpot and set to low for 4-6 hours or high for 2-3 hours. This method not only simplifies your evening but also ensures that the flavors meld beautifully, allowing you to enjoy a delicious meal with minimal effort. Enjoy hassle-free family dinners with your flavorful Sweet Baby Rays Crockpot Chicken!

Expert Tips for Sweet Baby Rays Crockpot Chicken

Perfectly Seasoned: Ensure your chicken is seasoned evenly with garlic powder, salt, and pepper to enhance flavor throughout the dish.

Check the Sauce Consistency: If your Sweet Baby Rays BBQ sauce is too thin, simmer it on the stovetop for a few minutes to thicken it before serving.

Avoid Overcooking: Cooking times can vary depending on the crockpot model. Always check for doneness by shredding the chicken at the end of cooking.

Flavor Boost: For an extra depth of flavor, consider marinating the chicken in the sauce overnight before cooking. It’s optional but can be a delightful enhancement!

Make-Ahead Friendly: Double the recipe and freeze leftovers in portions for easy meals later; simply reheat and enjoy your Sweet Baby Rays Crockpot Chicken anytime.

Customize to Taste: Experiment with additional ingredients, like diced onions or bell peppers, for more texture and flavor variations that everyone will love!

What to Serve with Sweet Baby Rays Crockpot Chicken

As the sweet, smoky aroma fills the air, it’s time to think about the perfect accompaniments that will elevate your meal experience.

  • Creamy Coleslaw: The crisp, cool textures provide a refreshing contrast against the tender, BBQ-laden chicken, adding a delightful crunch.

  • Fluffy Rice: A perfect base to soak up the rich BBQ sauce, fluffy rice elevates your meal while bringing a comforting element. Pair it with cilantro for an added burst of flavor!

  • Buttery Cornbread: This warm, slightly sweet bread complements the savory taste of the chicken beautifully, creating a homestyle feel that warms the heart. Enjoy slices with a pat of butter melting over the top.

  • Sweet Potato Fries: The natural sweetness of the fries harmonizes with the BBQ chicken’s flavor, providing a fun and satisfying crunch. Their golden color adds a vibrant touch to your plate, and they pair well with a zesty dip.

  • Pickled Jalapeños: For those who seek a little heat, pickled jalapeños introduce a spicy kick, balancing the sweetness of the dish. Their tangy flavor can awaken your taste buds in every bite!

  • Cold Beer or Iced Tea: To wash it all down, a cold brew or refreshing iced tea complements the meal perfectly, offering a soothing contrast to the richness of the crockpot chicken.

  • Peach Cobbler: End your meal on a sweet note with this classic dessert. The warm, gooey peaches and flaky crust provide a delightful finish that feels like a warm hug!

Storage Tips for Sweet Baby Rays Crockpot Chicken

Fridge: Keep leftovers in an airtight container for up to 3-4 days. This helps maintain the flavor and moisture of your Sweet Baby Rays Crockpot Chicken.

Freezer: For longer storage, freeze portions in airtight containers or freezer bags for up to 2-3 months. Make sure to label them for easy identification later!

Reheating: Thaw frozen chicken in the fridge overnight before reheating. Reheat in the microwave or stovetop until heated through; add a splash of water if needed to maintain moisture.

Make-Ahead Meals: This dish is great for meal prep; cook in advance and store for easy weeknight dinners without the hassle of cooking from scratch each night.

Sweet Baby Rays Crockpot Chicken Variations

Feel free to make this comforting dish your own with these exciting variations!

  • Spicy Twist: Add a teaspoon of cayenne pepper or hot sauce to the BBQ sauce mix for a zesty kick. Perfect for heat lovers!

  • Sweet Citrus: Replace apple cider vinegar with freshly squeezed orange juice for a fruity tang that complements the BBQ beautifully.

  • Diced Veggies: Toss in chopped onions and bell peppers before cooking to add both flavor and texture. They’ll soften and infuse the dish with their sweetness.

  • Herb Infusion: For an aromatic twist, add fresh herbs like thyme or rosemary to the sauce. Their earthy notes will elevate the overall flavor profile!

  • Smoky Flavor: Incorporate smoked paprika into the seasoning mix to give your chicken a delightful smoky vibe without the grill. Ideal for fans of BBQ culture!

  • Creamy BBQ: Stir in a dollop of cream cheese to the shredded chicken before serving, creating a rich and creamy texture. It’s a decadent touch!

  • Healthy Swap: Use skinless chicken thighs instead of breasts for a juicier result; they hold up beautifully under slow cooking and have a richer flavor.

Feeling adventurous? Try combining different variations! For instance, you could create a zesty, creamy concoction by using orange juice and cream cheese together, similar to how you might enjoy Maple Roasted Sweet Potatoes with Pecans as a side. Whatever direction you choose, your Sweet Baby Rays Crockpot Chicken will surely be a hit!

Sweet Baby Rays Crockpot Chicken Recipe FAQs

What type of chicken is best for this recipe?
Absolutely! For the best results, boneless, skinless chicken breasts are recommended as they cook evenly and stay moist. If you prefer more flavor, bone-in chicken breasts or thighs can be used; just keep in mind to adjust the cooking time slightly longer.

How should I store leftovers of Sweet Baby Rays Crockpot Chicken?
Store any leftovers in an airtight container in the refrigerator for up to 3-4 days. This will help preserve the juiciness and flavor of the chicken. If you're not planning to eat it within that timeframe, freezing is a great option.

Can I freeze Sweet Baby Rays Crockpot Chicken?
Absolutely! To freeze, allow the chicken to cool completely, then transfer it into freezer-safe containers or bags, ensuring you remove as much air as possible. It can be frozen for up to 2-3 months. When you're ready to enjoy it again, thaw it overnight in the fridge and reheat until warmed through.

What should I do if the sauce is too thin after cooking?
If you find the sauce too thin, no worries! Simply pour it into a saucepan and simmer on medium heat for about 5-10 minutes until it thickens to your desired consistency. Stir occasionally to prevent it from burning. This step really brings out the flavor!

Is this recipe safe for people with allergies?
It's important to consider the ingredients! This recipe contains common allergens like garlic and potentially hidden ingredients in the BBQ sauce (like soy or gluten). For those with garlic or other specific allergies, feel free to skip the garlic powder and look for allergy-friendly BBQ sauce options or make your own!

Can I add vegetables to the crockpot?
Very! You can certainly add diced onions, bell peppers, or even carrots for added flavor and texture. Just chop them into bite-sized pieces and add them to the crockpot alongside the chicken and the sauce. They will cook down nicely and mix well with the flavors. This is a great way to sneak in some extra nutrients while keeping the dish hearty!

Sweet Baby Rays Crockpot Chicken

Tender Sweet Baby Rays Crockpot Chicken for Busy Nights

Sweet Baby Rays Crockpot Chicken is an easy, flavorful dish perfect for busy nights, combining juicy chicken breasts and tangy BBQ sauce.
Print Recipe Pin Recipe
Prep Time 15 minutes mins
Cook Time 4 hours hrs
Total Time 4 hours hrs 15 minutes mins
Servings: 4 servings
Course: Dinner
Cuisine: American
Calories: 300
Ingredients Equipment Method Nutrition Notes

Ingredients
  

For the Chicken
  • 2 pounds Boneless, Skinless Chicken Breasts Tender and juicy
For the Sauce
  • 1 cup Sweet Baby Rays BBQ Sauce The star of the dish
  • 1/4 cup Brown Sugar Adjust to taste
  • 2 tablespoons Apple Cider Vinegar Can substitute with white vinegar
  • 2 tablespoons Olive Oil Helps maintain moisture
  • 1 teaspoon Garlic Powder Can use fresh garlic
  • to taste Salt For seasoning
  • to taste Pepper For seasoning
Optional Add-Ins
  • 1 cup Diced Onions For added flavor and crunch
  • 1 cup Diced Bell Peppers For added flavor and crunch
  • to taste Smoked Paprika Optional spice
  • to taste Cayenne Pepper Optional spice

Equipment

  • Slow Cooker

Method
 

Step-by-Step Instructions
  1. Season the chicken breasts with garlic powder, salt, and pepper, ensuring they are evenly coated.
  2. In a bowl, whisk together the Sweet Baby Rays BBQ sauce, brown sugar, apple cider vinegar, and olive oil.
  3. Place the seasoned chicken in the crockpot and pour the sauce mixture over it, coating every piece.
  4. Cover and set the crockpot to cook on low for 4-6 hours or on high for 2-3 hours.
  5. Once done, shred the chicken using two forks.
  6. Return the shredded chicken to the crockpot, mixing it with the remaining sauce.
  7. Serve hot over rice or in sandwiches.

Nutrition

Serving: 1servingCalories: 300kcalCarbohydrates: 25gProtein: 30gFat: 10gSaturated Fat: 2gPolyunsaturated Fat: 1gMonounsaturated Fat: 6gCholesterol: 80mgSodium: 600mgPotassium: 400mgFiber: 1gSugar: 10gVitamin A: 2IUVitamin C: 5mgCalcium: 2mgIron: 8mg

Notes

For extra flavor, consider marinating the chicken overnight in the sauce. Leftovers can be stored in the fridge for 3-4 days or frozen for up to 2-3 months.

Tried this recipe?

Let us know how it was!

Tender Crockpot Orange Chicken for Effortless Family Dinners

January 28, 2026 by Grace Snow Leave a Comment

As I stirred the bubbling pot on my stove, the sweet and tangy aroma of orange wafted through my kitchen, instantly transporting me to a cozy evening filled with warmth and comfort. This moment inspired my favorite recipe: Crockpot Orange Chicken. With just five minutes of prep, this dish is not only a crowd-pleaser but also a lifesaver for busy weeknights, offering a delightful break from fast food routines. Imagine tender chicken simmering in a glossy sauce made from pantry staples, all while you can unwind or tend to other things. The best part? Minimal cleanup is required, leaving you more time to enjoy dinner with loved ones. Curious about how to whip up this deliciously effortless meal? Let’s dive into the recipe!

Why is Crockpot Orange Chicken a must-try?

Easy Preparation: With just five minutes of prep time, you can set it and forget it, making it perfect for busy evenings.

Family-Friendly: This dish is a hit with both kids and adults, transforming a typical dinner into a delightful feast that everyone will enjoy.

Rich Flavors: The sweet and tangy orange sauce is a delightful change from takeout, made with simple pantry staples that deliver big taste.

Minimal Cleanup: Utilizing a crockpot means fewer dishes to wash, giving you more precious time to spend with family or relax after a long day.

Versatile Options: Feeling adventurous? You can easily swap chicken for tofu or serve it over cauliflower rice, catering to various dietary needs.

And if you're looking for more comforting chicken recipes, you might enjoy my Crock Pot Chicken or Honey Garlic Chicken.

Crockpot Orange Chicken Ingredients

• This irresistible dish is made with simple staples!

For the Chicken
• Boneless Skinless Chicken – The heart of the dish; chicken breasts are budget-friendly, while tenders add tenderness.
• Cornstarch – Essential for creating a light, crispy coating; don't skip it for the perfect texture.

For the Sauce
• Olive Oil – Used for browning the chicken, enhancing flavor while preventing it from sticking.
• Orange Marmalade – Provides that sweet, vibrant flavor for the sauce; you can substitute with homemade orange sauce if desired.
• Reduced-Sodium Soy Sauce – Adds depth and umami without overwhelming saltiness; opt for regular soy sauce if needed, but adjust other salt as necessary.
• White Vinegar – Balances sweetness with a touch of acidity, brightening the dish.
• Sesame Oil – Infuses a nutty aroma; switch to vegetable oil if sesame isn't available.
• Ground Ginger – A pinch brings warmth and spiciness; it's a flavor bomb!
• Garlic – Fresh is best for a robust taste that enriches the dish.
• Crushed Red Pepper Flakes – An optional kick of heat; tailor it to your spice preference.
• Sesame Seeds – For garnish, adding crunch and a lovely finish to the dish.

Feel free to experiment with this easy Crockpot Orange Chicken recipe, and watch as it brings both joy and comfort to your dinner table!

Step‑by‑Step Instructions for Crockpot Orange Chicken

Step 1: Prepare the Chicken
Begin by cutting the boneless skinless chicken into bite-sized pieces and placing them in a shallow dish. Evenly coat the chicken pieces with cornstarch, ensuring each piece is well covered. This coating is essential for creating a light, crispy texture. The chicken will be lightly browned later, which adds flavor and visual appeal to your Crockpot Orange Chicken.

Step 2: Brown the Chicken
Heat a splash of olive oil in a skillet over medium-high heat. Carefully add the cornstarch-coated chicken pieces, cooking them for about 4-5 minutes until they develop a golden crust on the outside. Avoid cooking them all the way through, as they'll finish cooking in the crockpot. Once browned, use tongs to transfer the chicken to your slow cooker.

Step 3: Mix the Sauce
In a separate bowl, whisk together the orange marmalade, reduced-sodium soy sauce, white vinegar, sesame oil, ground ginger, minced garlic, and crushed red pepper flakes until the mixture is smooth and well combined. This sauce is what gives the Crockpot Orange Chicken its sweet and tangy flavor profile, so make sure to mix it thoroughly to incorporate all the flavors.

Step 4: Combine Chicken and Sauce
Carefully pour the sauce over the browned chicken in the slow cooker. Using a spatula, gently stir to ensure that all the chicken pieces are well coated with the delicious sauce. This step is crucial as it allows the chicken to soak up the flavorful orange sauce while it cooks, resulting in tender and juicy pieces of meat.

Step 5: Slow Cook the Chicken
Cover the slow cooker with its lid and set it to cook on LOW for 2-3 hours. During this time, the chicken will become incredibly tender and infused with the delightful flavors of the orange sauce. Remember to stir the mixture halfway through the cooking time to prevent the chicken from sticking to the bottom, ensuring everything cooks evenly and stays delicious.

Step 6: Garnish and Serve
Once the cooking time is complete, remove the lid and give the Crockpot Orange Chicken a gentle stir. At this stage, check for seasoning and adjust if necessary. To enhance presentation and flavor, sprinkle with additional sesame seeds and chopped scallions before serving. This step adds a lovely finishing touch, transforming your meal into a vibrant feast for the eyes as well as the palate.

Crockpot Orange Chicken Variations

Feel free to get creative with your Crockpot Orange Chicken and let your taste preferences shine through!

  • Vegetarian: Swap chicken for tofu for a hearty vegetarian option. Press the tofu to remove excess moisture for the best texture.

  • Fruit Preserves: Use apricot or peach marmalade in place of orange for a different flavor twist. Each fruit brings its own unique sweetness and charm to the dish.

  • Gluten-Free: Choose gluten-free soy sauce or tamari to accommodate gluten-sensitive diets while retaining delicious flavor. Simply substitute it in equal measure for the regular soy sauce.

  • Spicy Kick: Add more crushed red pepper flakes to spice things up, or even toss in some sliced jalapeños for a fresh heat element. Adjust to your spice tolerance for a personalized touch!

  • Citrus Twist: Experiment with a blend of orange and lime juice for the sauce. This citrus duo gives a zesty brightness that elevates the dish.

  • Serve Smart: Try serving the chicken over quinoa or brown rice instead of white rice for a healthier spin packed with more nutrients. This will enhance the dish while keeping it wholesome.

  • Crunchy Toppings: Top with slivered almonds or chopped walnuts for added crunch and an interesting texture contrast. They’ll also bring a delightful nutty flavor.

As you explore these variations, you might also enjoy other comforting recipes like my Crock Pot Chicken and Chicken Adobo Again. Celebrate creativity and tastes that make your dinners truly memorable!

Expert Tips for Perfect Crockpot Orange Chicken

  • Perfect Coating: Always ensure the chicken is evenly coated with cornstarch to achieve a light, crispy texture. This avoids toughness after browning.

  • Avoid Overcooking: Stick to LOW heat during cooking. Cooking on high for too long can dry out the chicken, making it less tender and juicy.

  • Thickening Sauce: If the sauce ends up too thin, simply mix a tablespoon of cornstarch with water and add it during the last 30 minutes of cooking for a glossy finish.

  • Adjusting Flavors: Taste the sauce before serving; you can add additional soy sauce or vinegar to balance sweetness according to your preference.

  • Storage Matters: Once you've enjoyed your delicious Crockpot Orange Chicken, refrigerate leftovers in an airtight container. They taste even better the following day!

How to Store and Freeze Crockpot Orange Chicken

Fridge: Store leftover Crockpot Orange Chicken in an airtight container for up to 4 days. Reheating will intensify the flavors, making it taste even better over time.

Freezer: Freeze the chicken in portioned airtight containers for up to 3 months. Ensure the sauce covers the chicken completely to prevent freezer burn.

Reheating: To enjoy leftovers, gently warm in the microwave or stovetop, adding a splash of broth or water if needed to maintain moisture.

Thawing: When ready to use frozen Crockpot Orange Chicken, thaw overnight in the fridge before reheating for the best texture and flavor.

Make Ahead Options

These Crockpot Orange Chicken preparations are ideal for busy weeknights! You can cut the chicken and coat it with cornstarch up to 24 hours ahead of time—just be sure to refrigerate it in an airtight container to maintain its texture. Additionally, prepare the sauce by mixing together the orange marmalade, soy sauce, vinegar, sesame oil, ginger, garlic, and red pepper flakes, and store it in the fridge for up to 3 days. When you’re ready to enjoy this delicious meal, simply brown the chicken, transfer it to the slow cooker, pour the prepared sauce over, and cook as instructed. This way, you’ll have a comforting dinner ready with minimal effort!

What to Serve with Irresistible Crockpot Orange Chicken

Elevate your dinner experience with tempting sides that perfectly complement this sweet and tangy dish.

  • Fluffy Steamed Rice: This classic pairing soaks up the delicious sauce, providing a neutral base that balances the vibrant flavors of the chicken.
  • Garlic Green Beans: Sautéed in a hint of soy sauce and garlic, these green beans add crunch and a burst of freshness to your meal.
  • Sesame Broccoli: Tender steamed broccoli tossed with sesame seeds takes a nutritious turn, adding both color and texture to the plate.
  • Cucumber Salad: A light, crisp salad drizzled with rice vinegar can cut through the sweetness of the dish while refreshing your palate.

Consider making a combination of these delicious sides—together, they create a harmonious meal that will leave everyone wanting more.

  • Chilled Sake: Serve this traditional Japanese rice wine chilled for a delightful pairing that'll enhance the Asian-inspired flavors.
  • Chocolate Fortune Cookies: For a fun dessert, pair your meal with these light, crunchy cookies to end your dinner on a sweet note.

Crockpot Orange Chicken Recipe FAQs

What type of chicken should I use for Crockpot Orange Chicken?
I recommend using boneless skinless chicken breasts for a budget-friendly option, or tenders for an even more tender texture. Both work deliciously!

How should I store leftover Crockpot Orange Chicken?
Store any leftovers in an airtight container in the fridge for up to 4 days. The flavors actually deepen and get richer over time, making it even tastier for your next meal!

Can I freeze Crockpot Orange Chicken?
Absolutely! You can freeze the chicken in portioned airtight containers for up to 3 months. To prevent freezer burn, make sure the sauce completely covers the chicken. When you're ready to enjoy it, simply thaw overnight in the fridge.

What should I do if my sauce is too thin after cooking?
If the sauce turns out thinner than you'd like, don’t worry! Mix one tablespoon of cornstarch with an equal amount of water, then stir it into the sauce during the last 30 minutes of cooking to thicken it up to the desired consistency.

Is there a vegetarian option for this recipe?
Very much so! You can substitute the chicken with tofu. Just press the tofu to remove excess moisture and cut it into appropriate sizes to make it absorb the delicious orange sauce.

What should I watch for when cooking the chicken to ensure it's tender?
To keep the chicken tender, avoid cooking on high heat for extended periods. Always stick to low for the best results, and if you stir halfway through cooking, it helps prevent any sticking!

Crockpot Orange Chicken

Tender Crockpot Orange Chicken for Effortless Family Dinners

Crockpot Orange Chicken is a sweet and tangy dish that's perfect for busy weeknights, requiring only five minutes of prep.
Print Recipe Pin Recipe
Prep Time 5 minutes mins
Cook Time 3 hours hrs
Total Time 3 hours hrs 5 minutes mins
Servings: 4 servings
Course: Dinner
Cuisine: Asian
Calories: 300
Ingredients Equipment Method Nutrition Notes

Ingredients
  

For the Chicken
  • 2 pounds Boneless Skinless Chicken Can use breasts or tenders
  • 1/4 cup Cornstarch For coating the chicken
For the Sauce
  • 2 tablespoons Olive Oil For browning the chicken
  • 1 cup Orange Marmalade Substitute with homemade orange sauce if desired
  • 1/4 cup Reduced-Sodium Soy Sauce Adjust salt levels if using regular soy sauce
  • 2 tablespoons White Vinegar Balances sweetness
  • 1 tablespoon Sesame Oil Can substitute with vegetable oil
  • 1 teaspoon Ground Ginger For warmth and spiciness
  • 4 cloves Garlic Minced
  • 1/2 teaspoon Crushed Red Pepper Flakes Optional for heat
  • 2 tablespoons Sesame Seeds For garnish

Equipment

  • Crockpot
  • Skillet
  • Mixing Bowl

Method
 

Step-by-Step Instructions
  1. Cut the boneless skinless chicken into bite-sized pieces and coat with cornstarch.
  2. Heat olive oil in a skillet and brown the chicken for 4-5 minutes.
  3. Mix orange marmalade, soy sauce, white vinegar, sesame oil, ground ginger, minced garlic, and crushed red pepper flakes in a bowl.
  4. Pour the sauce over the browned chicken in the slow cooker and stir to coat.
  5. Cover and cook on LOW for 2-3 hours, stirring halfway through.
  6. Garnish with sesame seeds and serve once cooked.

Nutrition

Serving: 1servingCalories: 300kcalCarbohydrates: 24gProtein: 25gFat: 10gSaturated Fat: 2gPolyunsaturated Fat: 1gMonounsaturated Fat: 6gCholesterol: 70mgSodium: 600mgPotassium: 400mgFiber: 1gSugar: 10gVitamin A: 500IUVitamin C: 30mgCalcium: 30mgIron: 2mg

Notes

Ensure the chicken is evenly coated with cornstarch for a crispy texture. Avoid overcooking and check seasoning before serving.

Tried this recipe?

Let us know how it was!

Loaded Hash Browns with Scrambled Eggs: Your Cozy Breakfast Fix

January 28, 2026 by Grace Snow Leave a Comment

As I stood in the kitchen, the sizzle of potatoes sizzling in butter brought an instant smile to my face. There’s something so comforting about breakfast, especially when it’s a hearty dish like Loaded Hash Browns with Scrambled Eggs. This recipe transforms simple russet potatoes into crispy golden perfection, topped with fluffy scrambled eggs and a generous sprinkle of cheese. Not only is it quick and easy to whip up, but it’s also fully customizable—perfect for using up whatever veggies or toppings you have on hand. Whether you’re aiming to impress at Sunday brunch or just want a satisfying start to your day, this dish hits the spot. What will you choose to load onto your hash browns?

Why are Loaded Hash Browns the Best?

Versatile: The possibilities are endless! Customize your hash browns with a variety of toppings like fresh herbs or different cheeses—there’s no wrong way to enjoy them.
Quick Prep: In just a few simple steps, you can whip up this comforting breakfast dish that will leave everyone asking for seconds.
Hearty & Filling: Perfect for energizing your mornings, this meal combines crispy hash browns with fluffy, creamy scrambled eggs that keep you satisfied throughout the day.
Crowd-Pleaser: Serve this at your next brunch gathering, and watch your friends and family rave about it.
Easy Cleanup: Using a non-stick skillet means less fuss when it comes to cleaning up, making breakfast stress-free! Whether you pair it with some crispy bacon or a side of fresh fruit salad, these Loaded Hash Browns with Scrambled Eggs are sure to make your mornings brighter.

Loaded Hash Browns with Scrambled Eggs Ingredients

For the Hash Browns

  • 2 large russet potatoes – Provide the base of the dish with a crispy texture; substitute with sweet potatoes for a healthier twist.
  • 2 tablespoons butter – Used for frying to achieve a golden crust; substitute with olive oil or a plant-based butter for dairy-free versions.
  • Salt and pepper to taste – Essential for flavor enhancement; adjust quantities based on preference.

For the Scrambled Eggs

  • 4 eggs – Create fluffy, creamy scrambled eggs; use egg whites for a lower-fat option.
  • 1/2 cup shredded cheddar cheese – Adds richness and flavor; substitute with mozzarella or pepper jack for a different taste.

For the Veggies

  • 1/4 cup diced bell peppers – Provides color and a fresh crunch; can be replaced with zucchini or spinach for more greens.
  • 1/4 cup diced onions – Adds savory depth; green onions or scallions make a milder alternative.

Optional Toppings

  • Salsa, avocado, sour cream – Add personal flair and additional flavor; experiment with different toppings like hot sauce or fresh herbs.

Feel the comfort of a warm breakfast with these Loaded Hash Browns with Scrambled Eggs; they’re just waiting for your personal touch!

Step‑by‑Step Instructions for Loaded Hash Browns with Scrambled Eggs

Step 1: Prepare the Hash Browns
Begin by peeling the russet potatoes and grating them using a box grater or food processor. Transfer the grated potatoes to a clean kitchen towel and squeeze out excess moisture; this step is crucial for achieving crispy hash browns. Set the prepared potatoes aside while you preheat your skillet to medium heat.

Step 2: Cook the Hash Browns
In a large non-stick skillet, melt 1 tablespoon of butter over medium heat. Once melted, add the grated potatoes evenly to the skillet, spreading them out to form a flat layer. Cook for about 5-7 minutes without stirring, until the underside is golden brown and crispy. Using a spatula, flip the hash browns and cook for an additional 5-7 minutes.

Step 3: Scramble the Eggs
While the hash browns are cooking, crack the eggs into a mixing bowl and whisk them with a pinch of salt and pepper until well combined. When the hash browns are crispy on both sides, create a space in the center of the skillet and pour the egg mixture over the top. Gently scramble the eggs with a spatula, cooking until they are softly set and slightly creamy.

Step 4: Add Cheese and Vegetables
Once the eggs are nearly cooked to your liking, sprinkle the shredded cheddar cheese, diced bell peppers, and onions evenly over the hash browns and scrambled eggs. Make sure to cover everything generously for maximum flavor.

Step 5: Melt the Cheese
To melt the cheese perfectly, cover the skillet with a lid and let it cook for an additional 1-2 minutes, or until the cheese is gooey and bubbly. This step will elevate your Loaded Hash Browns with Scrambled Eggs, bringing everything together beautifully.

Step 6: Serve and Garnish
Remove the skillet from heat, and carefully uncover it to reveal your delicious creation. Feel free to top your dish with optional salsa, avocado, or sour cream for added flavor. Serve hot, and let the delightful aromas of your Loaded Hash Browns with Scrambled Eggs fill the kitchen!

How to Store and Freeze Loaded Hash Browns with Scrambled Eggs

Fridge: Keep cooked hash browns in an airtight container in the fridge for up to 2 days. Reheat in a skillet over medium heat for the best texture.

Freezer: For long-term storage, freeze leftover hash browns without the eggs for up to 3 months. To reheat, bake in the oven or sauté in a skillet until heated through and crisp.

Make-Ahead Tips: Prep the hash browns in advance and store them in the fridge overnight before cooking, making it a quick breakfast option.

Reheating: Leftovers can be reheated in the microwave, but for extra crispiness, give them a quick sauté in a non-stick skillet. Enjoy your Loaded Hash Browns with Scrambled Eggs fresh whenever you can!

Make Ahead Options

These Loaded Hash Browns with Scrambled Eggs are perfect for meal prep enthusiasts! You can prepare the hash browns up to 24 hours in advance by grating and squeezing out the moisture from the potatoes, then refrigerating them in an airtight container. The eggs can be whisked and stored separately, making them easy to combine later. When you’re ready to serve, simply cook the hash browns in a skillet until crispy, add the eggs, top with cheese and veggies, and melt under a lid. This method ensures you enjoy a satisfying breakfast with just a few final steps, saving precious time on busy mornings while maintaining delicious flavor and texture.

Expert Tips for Loaded Hash Browns with Scrambled Eggs

  • Maximize Crispiness: Squeeze out all moisture from the grated potatoes before cooking. This simple step is essential for that perfect crispy texture in your loaded hash browns.

  • Low Heat for Eggs: Cook the scrambled eggs on low heat and stir gently to achieve a soft, creamy consistency. Avoid high heat, as it can overcook them quickly.

  • Non-Stick Advantage: Using a non-stick skillet makes a world of difference. It helps to prevent sticking and ensures easy cleanup—saving you time and hassle.

  • Customize Your Toppings: Don’t hesitate to get creative with toppings for your loaded hash browns with scrambled eggs. Experiment with different veggies, cheeses, and sauces according to your preferences!

  • Scale Up Easily: If you’re cooking for a crowd, feel free to double the recipe. Leftovers also reheat well, making this a fantastic meal prep option.

What to Serve with Loaded Hash Browns with Scrambled Eggs

Start your breakfast experience with vibrant pairs that elevate your dish from satisfying to spectacular.

  • Crispy Bacon: The savory crunch of crispy bacon perfectly complements the fluffiness of the scrambled eggs, creating a delicious contrast in each bite.
  • Fresh Fruit Salad: A refreshing medley of fruits provides a bright and fruity balance to the hearty hash browns, making your meal feel lighter and more complete.
  • Golden Toast: Slices of warm, buttery toast offer a satisfying crunch, ideal for mopping up any leftover egg or cheese. It's classic comfort food!
  • Sautéed Spinach: This light, leafy green offers a nutritious touch and earthy flavor, adding depth to the hash brown dish without overwhelming it.
  • Herbed Yogurt Dip: A dollop of tangy yogurt blended with fresh herbs brings a creamy and zesty kick, harmonizing beautifully with the flavors of the hash browns.
  • Mimosa: The bubbly freshness of a mimosa made with orange juice adds a festive touch to your brunch table, making every bite even more celebratory.
  • Avocado Toast: Creamy avocado on toasted bread adds richness while balancing the flavors of the eggs, offering a modern twist to your plate.
  • Hot Sauce: A few dashes of your favorite hot sauce can lift the dish's flavor profile, adding a delightful heat that pairs well with the other ingredients.
  • Coffee: A warm cup of freshly brewed coffee just enhances the comforting vibes of your hearty breakfast, invigorating your morning experience.

Loaded Hash Browns with Scrambled Eggs Variations

Feel free to get creative and make these Loaded Hash Browns with Scrambled Eggs your own with these delightful twists!

  • Vegetarian Boost: Add sautéed spinach, diced mushrooms, or cherry tomatoes for an abundance of colors and nutrition. A medley of fresh veggies can brighten up your dish!

  • Different Cheeses: Swap the cheddar for feta for a tangy zing or try smoked gouda for a wonderful smoky richness. Each cheese will add its unique flair to your breakfast masterpiece.

  • Spice It Up: Sprinkle paprika, red pepper flakes, or toss in jalapeños for a spicy kick. The heat will awaken your taste buds and transform your morning routine.

  • Sweet Potato Swap: For a sweeter flavor profile, substitute russet potatoes with sweet potatoes. They bring a lovely natural sweetness that complements the savory ingredients beautifully.

  • Herb Infusion: Enhance the flavors with fresh herbs like chives, parsley, or cilantro mixed right into the eggs before cooking. Fresh herbs elevate your dish and add a delightful aroma.

  • Smoky Flavor: Incorporate cooked bacon or ham for a savory, smoky experience. Crispy bits of meat add a hearty touch that pairs well with the eggs.

  • Breakfast Burrito: Roll it all up in a tortilla, add some salsa, and you’ve got a delicious breakfast burrito! This makes for a hand-held indulgence that’s perfect on-the-go.

  • Frozen Hash Browns: If you're in a rush, using frozen hash browns can save time. Just remember, fresh grated potatoes will yield the ultimate crispiness that everyone loves!

If you're looking to recreate a cozy breakfast experience at home, don’t forget to check out recipes for Turkish Eggs or even some delicious Pan Fried Shrimp to accompany your dish!

Loaded Hash Browns with Scrambled Eggs Recipe FAQs

What type of potatoes should I use for hash browns?
Absolutely! I recommend using large russet potatoes for their starchy content, which helps achieve that perfect crispiness. You can also substitute with sweet potatoes for a healthier twist if you prefer a sweeter flavor.

How long can I store cooked hash browns in the fridge?
Cooked hash browns can be stored in an airtight container in the refrigerator for up to 2 days. When you're ready to enjoy them again, reheat them in a skillet over medium heat to retain their delicious crispiness.

Can I freeze the Loaded Hash Browns with Scrambled Eggs?
Yes, you can freeze the hash browns separately from the eggs! To freeze, let the cooked hash browns cool completely, then spread them in a single layer on a baking sheet. Freeze for about 1 to 2 hours until solid, then transfer to a freezer bag for up to 3 months. When ready to eat, reheat them in the oven or sauté in a skillet.

How can I ensure my hash browns are crispy?
To achieve optimal crispiness, drain as much moisture as possible from the grated potatoes using a clean kitchen towel before cooking. This step is key! Spread them evenly in a preheated non-stick skillet and let them cook undisturbed for 5-7 minutes before flipping. The result will be beautifully crispy hash browns!

What are some dietary considerations for this recipe?
If you have dietary restrictions, you can easily customize this recipe. Opt for egg whites instead of whole eggs for a lower-fat version. Use dairy-free butter or oil instead of regular butter if you're avoiding dairy. Plus, you can swap out the cheese for a lactose-free alternative or omit it altogether for a lighter dish. Always remember to check for any allergies related to the ingredients you choose!

Loaded Hash Browns with Scrambled Eggs

Loaded Hash Browns with Scrambled Eggs: Your Cozy Breakfast Fix

Experience Loaded Hash Browns with Scrambled Eggs, a hearty, customizable breakfast perfect for any morning.
Print Recipe Pin Recipe
Prep Time 10 minutes mins
Cook Time 20 minutes mins
Total Time 30 minutes mins
Servings: 2 servings
Course: Breakfast
Cuisine: American
Calories: 450
Ingredients Equipment Method Nutrition Notes

Ingredients
  

For the Hash Browns
  • 2 large russet potatoes Substitute with sweet potatoes for a healthier twist.
  • 2 tablespoons butter Substitute with olive oil or plant-based butter for dairy-free versions.
  • Salt To taste.
  • Pepper To taste.
For the Scrambled Eggs
  • 4 eggs Use egg whites for a lower-fat option.
  • 1/2 cup shredded cheddar cheese Substitute with mozzarella or pepper jack for a different taste.
For the Veggies
  • 1/4 cup diced bell peppers Can be replaced with zucchini or spinach for more greens.
  • 1/4 cup diced onions Green onions or scallions make a milder alternative.
Optional Toppings
  • Salsa
  • Avocado
  • Sour cream

Equipment

  • non-stick skillet

Method
 

Step‑by‑Step Instructions
  1. Prepare the Hash Browns: Begin by peeling the russet potatoes and grating them using a box grater or food processor. Transfer the grated potatoes to a clean kitchen towel and squeeze out excess moisture; set aside while you preheat your skillet to medium heat.
  2. Cook the Hash Browns: In a large non-stick skillet, melt 1 tablespoon of butter over medium heat. Once melted, add the grated potatoes evenly to the skillet, spreading them out to form a flat layer. Cook for about 5-7 minutes without stirring, until the underside is golden brown and crispy. Flip and cook for an additional 5-7 minutes.
  3. Scramble the Eggs: Crack the eggs into a mixing bowl and whisk them with a pinch of salt and pepper. When the hash browns are crispy on both sides, create a space in the center of the skillet and pour the egg mixture over the top. Gently scramble the eggs with a spatula until softly set and slightly creamy.
  4. Add Cheese and Vegetables: Once the eggs are nearly cooked, sprinkle the shredded cheddar cheese, diced bell peppers, and onions over the hash browns and scrambled eggs.
  5. Melt the Cheese: Cover the skillet with a lid and let it cook for an additional 1-2 minutes, or until the cheese is gooey and bubbly.
  6. Serve and Garnish: Remove the skillet from heat, uncover, and top your dish with optional salsa, avocado, or sour cream. Serve hot.

Nutrition

Serving: 1servingCalories: 450kcalCarbohydrates: 40gProtein: 20gFat: 25gSaturated Fat: 15gCholesterol: 400mgSodium: 600mgPotassium: 800mgFiber: 3gSugar: 1gVitamin A: 15IUVitamin C: 40mgCalcium: 15mgIron: 10mg

Notes

Maximize crispiness by squeezing out all moisture from the grated potatoes. Use low heat for scrambled eggs to achieve a soft, creamy consistency.

Tried this recipe?

Let us know how it was!
  • « Previous Page
  • 1
  • …
  • 72
  • 73
  • 74
  • 75
  • 76
  • …
  • 217
  • Next Page »

Welcome!

Hi, I’m Grace, a Sydney-based home cook with a passion for bold flavors and trending ingredients. Whether you’re a busy beginner or a seasoned foodie, you’ll find dishes here that are fresh, fun, and full of flavor.

More about me

Popular Recipes

  • Crispy Chicken Tacos
    Crispy Chicken Tacos for the Perfect Taco Tuesday Night
  • Slow Cooked Scottish Beef Stew
    Slow Cooked Scottish Beef Stew That Warms Your Soul
  • Cottage Cheese Banana Bread
    Cottage Cheese Banana Bread: Moist, Healthy Perfection Awaits
  • Layered Taco Bake
    Layered Taco Bake: A Cozy Weeknight Family Favorite

Footer

↑ back to top

About

  • Privacy Policy
  • Disclaimer
  • Terms & Conditions

Newsletter

  • Sign Up! for emails and updates

Contact

  • About me
  • Contact me

Copyright © 2025 TastyTrendIngredients