tastytrendingredients

  • Home
  • Recipes
    • Appetizers
    • Breakfast
    • Dessert
    • Dinner
    • Drinks
    • Salads
    • Snacks
    • Soups
  • About me
  • Contact me
menu icon
go to homepage
  • Home
  • Recipes
    • Appetizers
    • Breakfast
    • Dessert
    • Dinner
    • Drinks
    • Salads
    • Snacks
    • Soups
  • About me
  • Contact me
search icon
Homepage link
  • Home
  • Recipes
    • Appetizers
    • Breakfast
    • Dessert
    • Dinner
    • Drinks
    • Salads
    • Snacks
    • Soups
  • About me
  • Contact me
×

Gochujang Pasta: Creamy, Spicy Delight Ready in 15 Minutes

December 22, 2025 by Grace Snow Leave a Comment

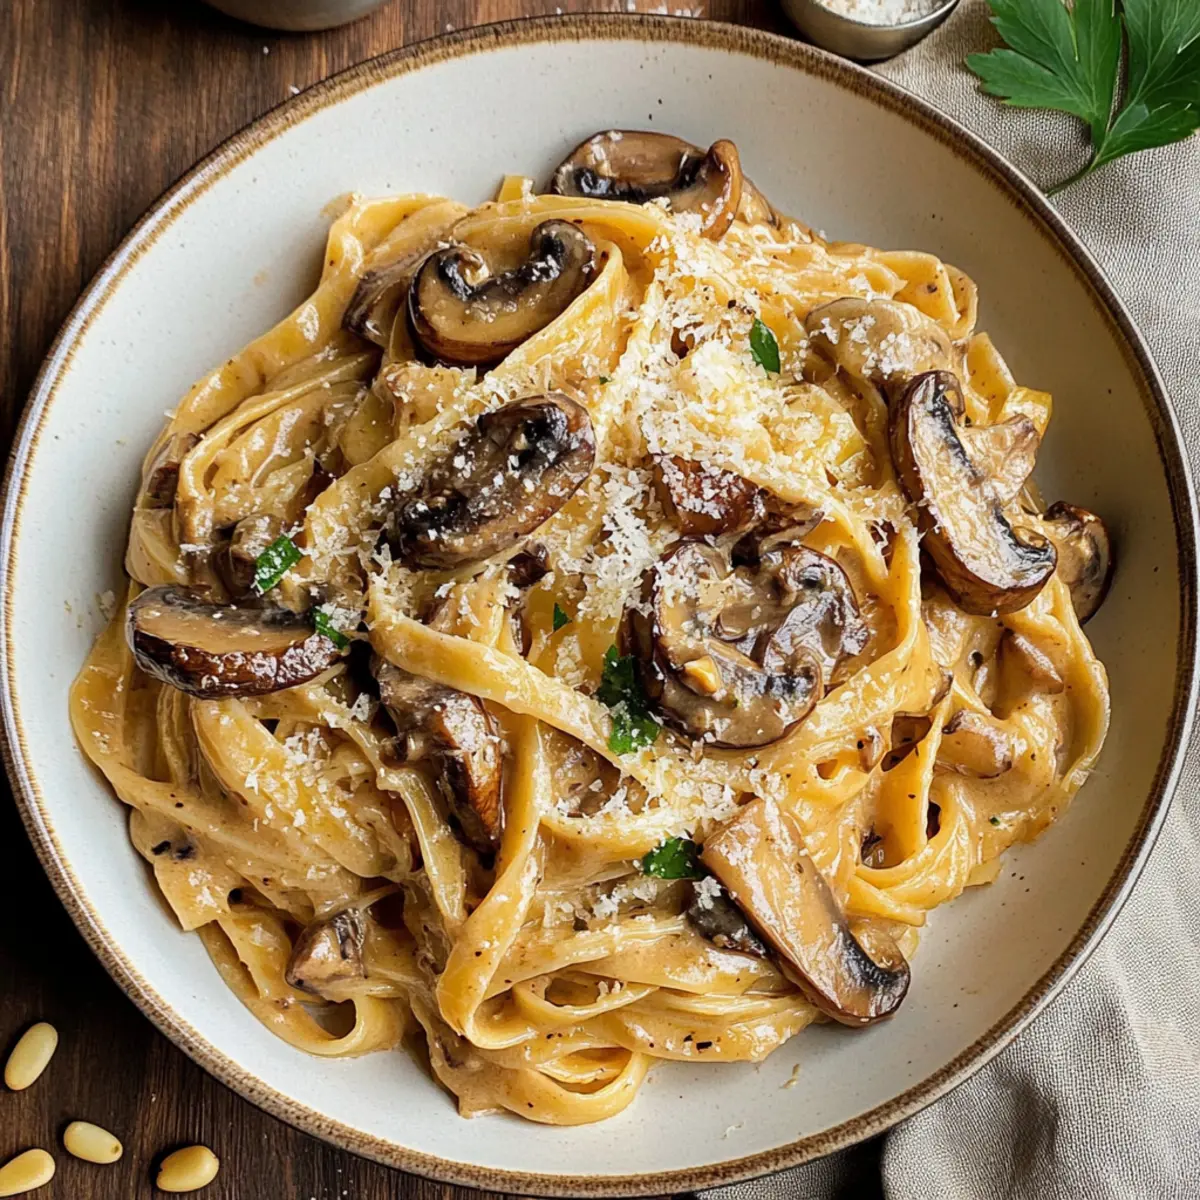
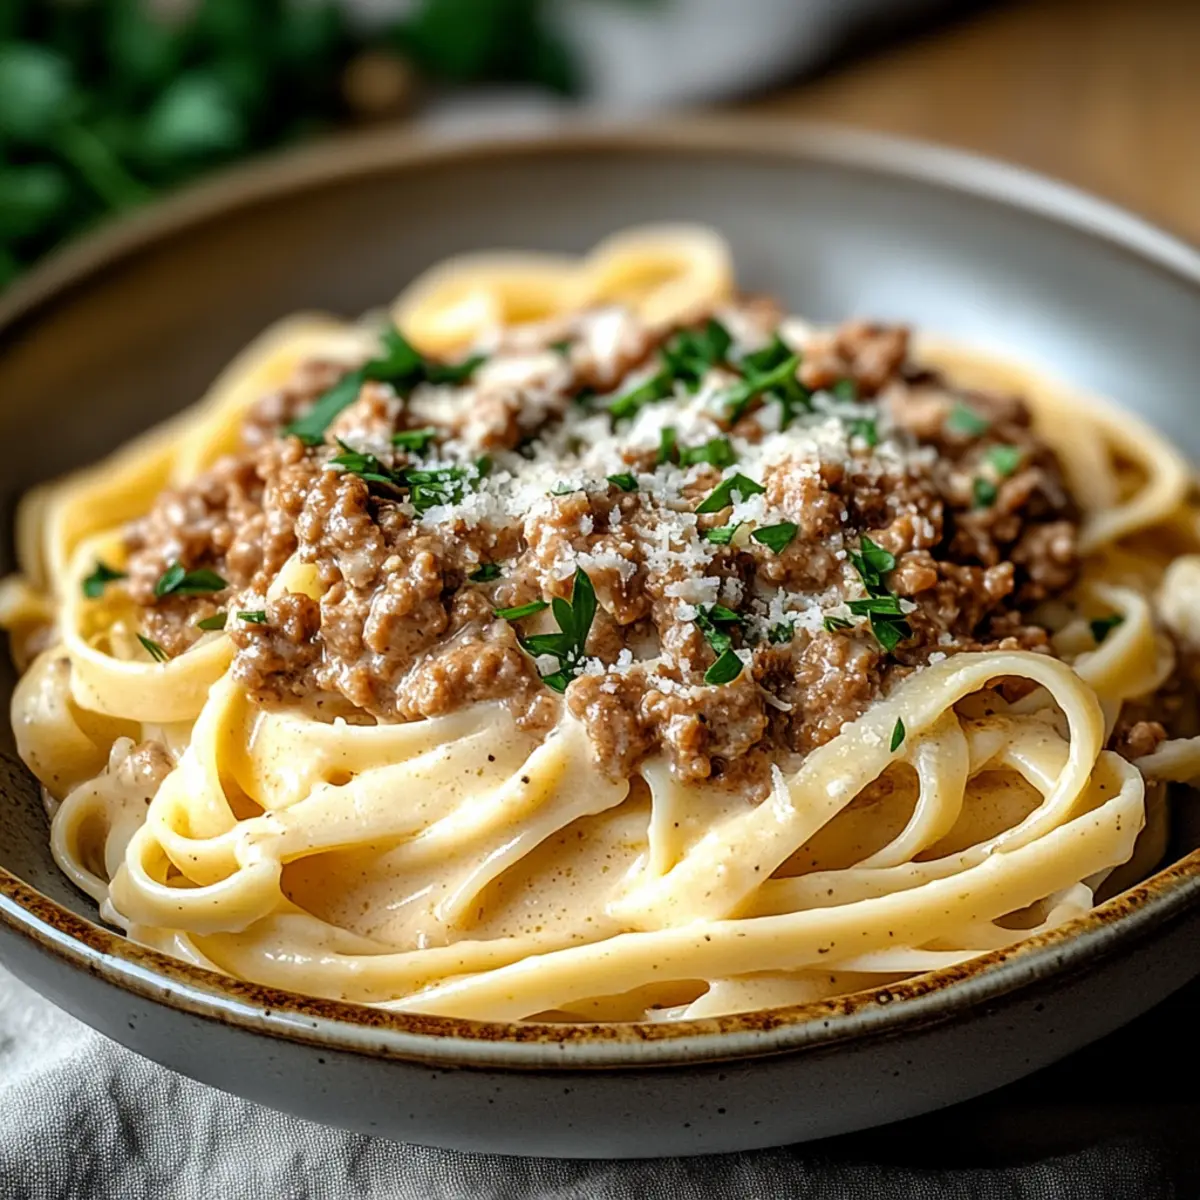
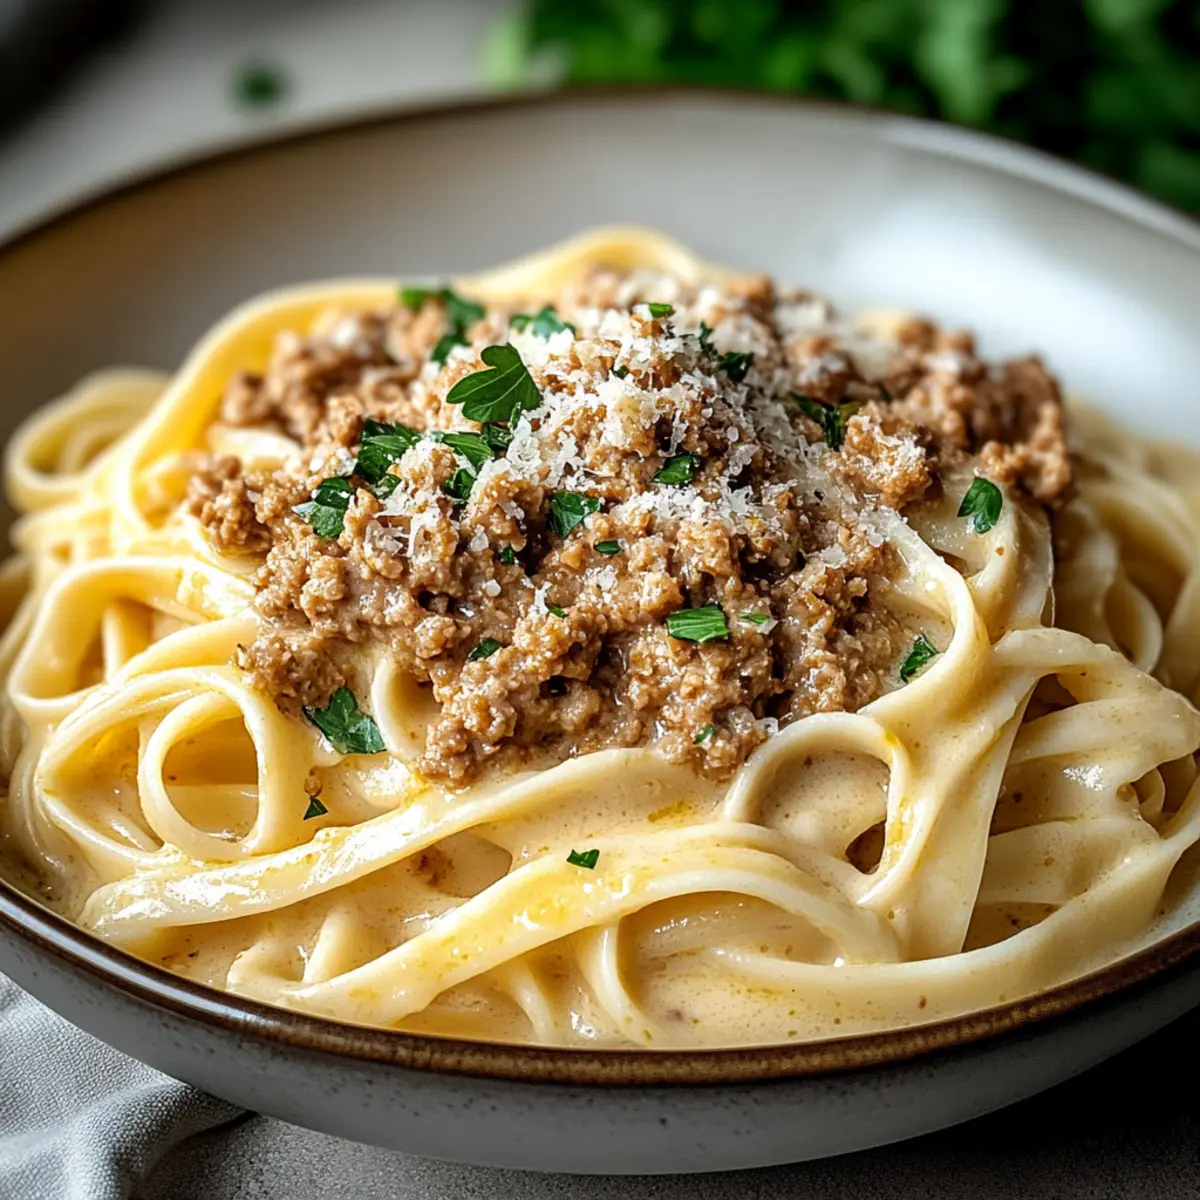
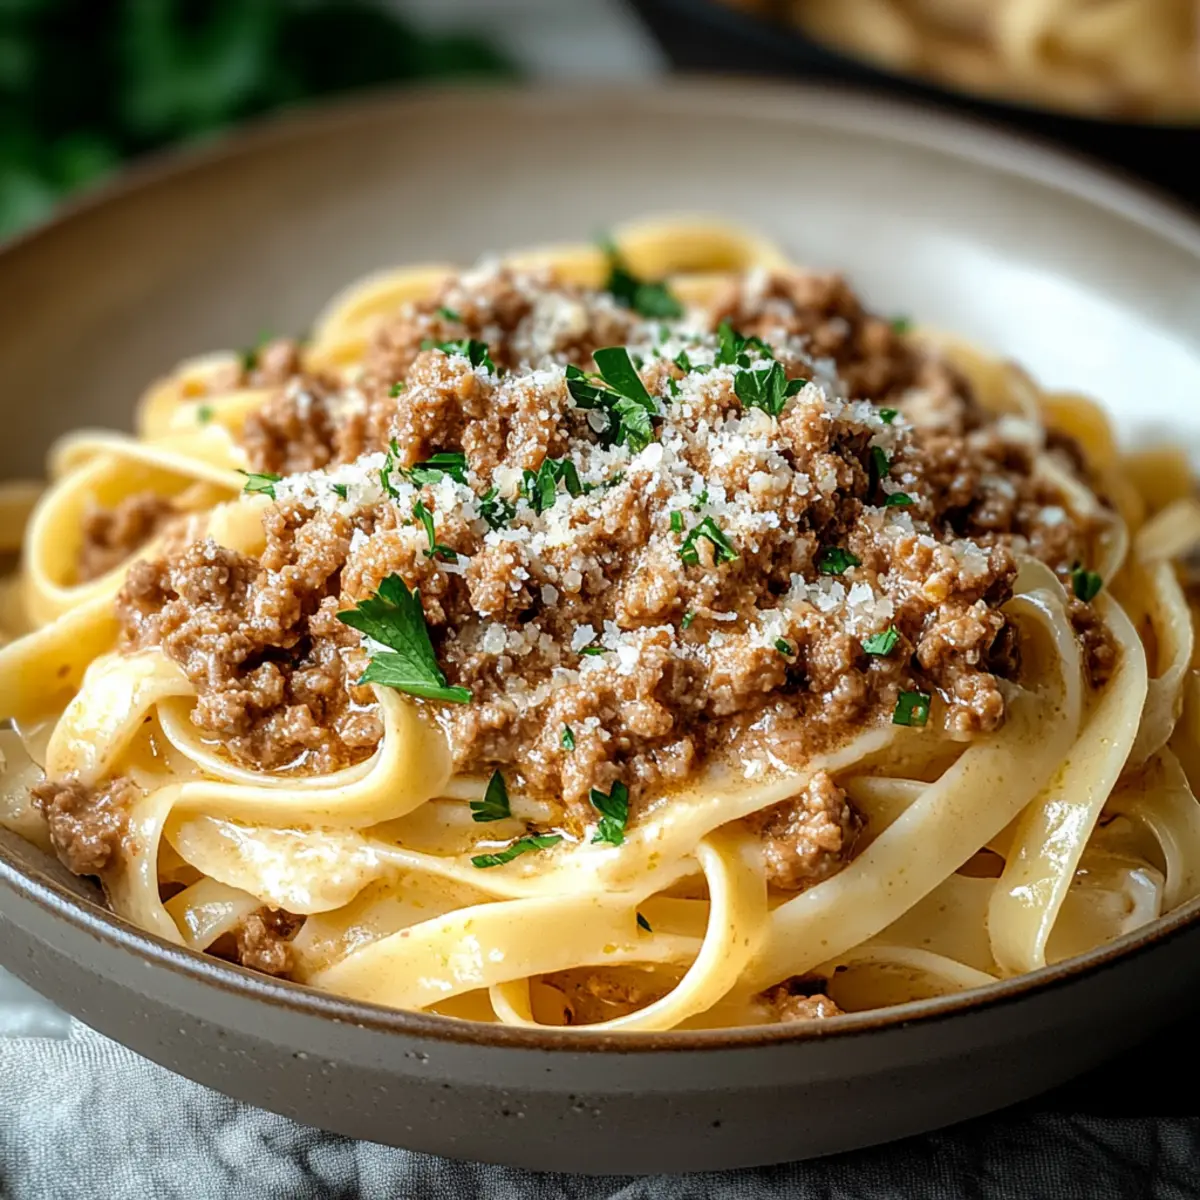
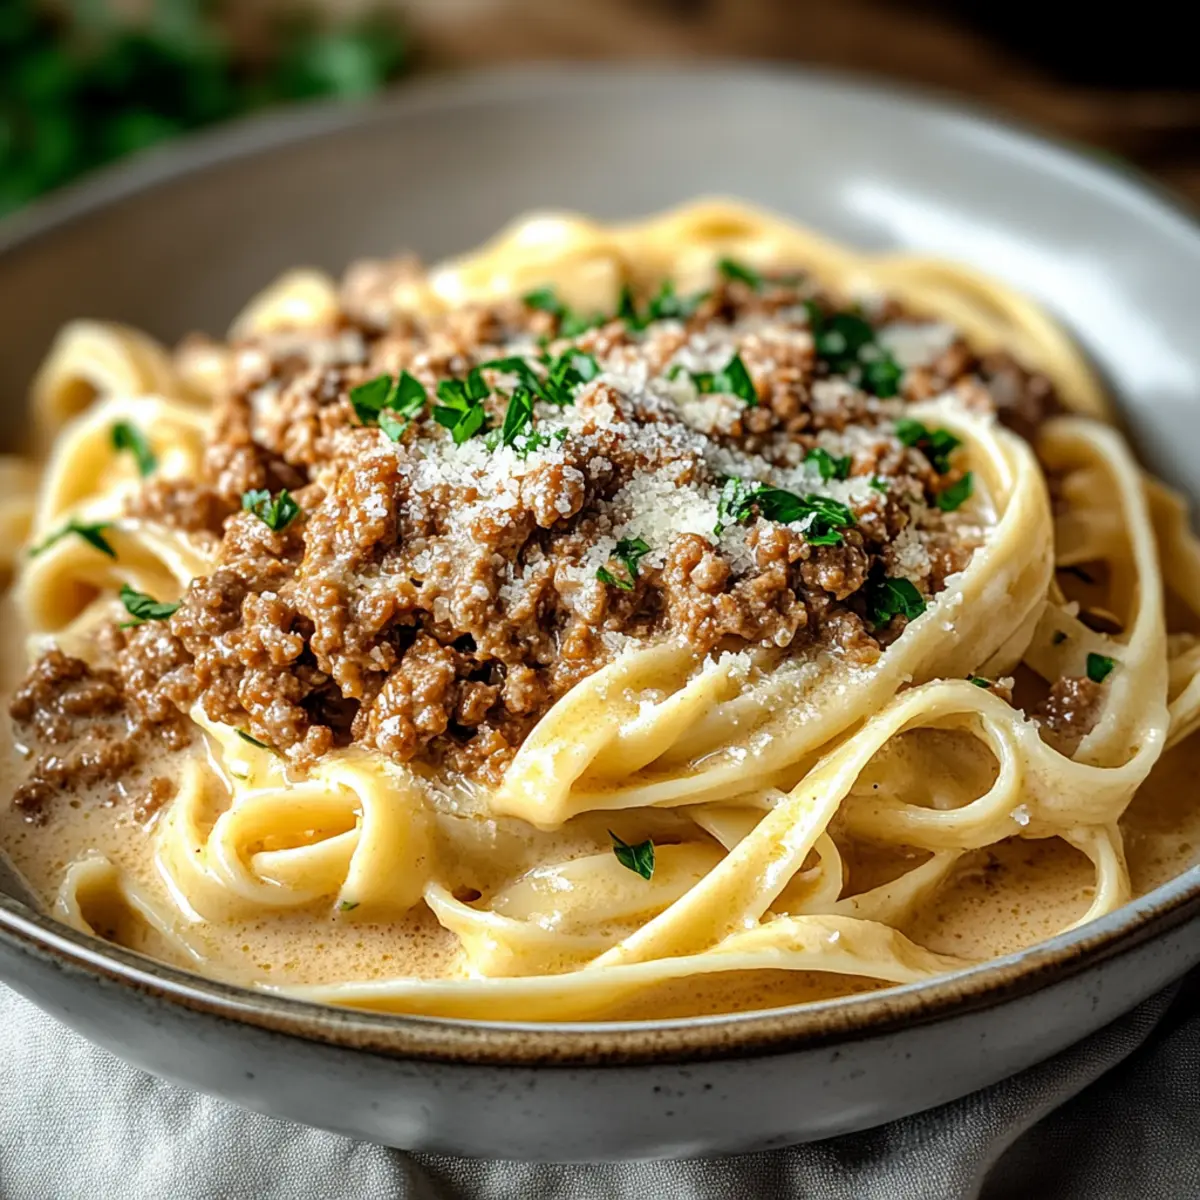
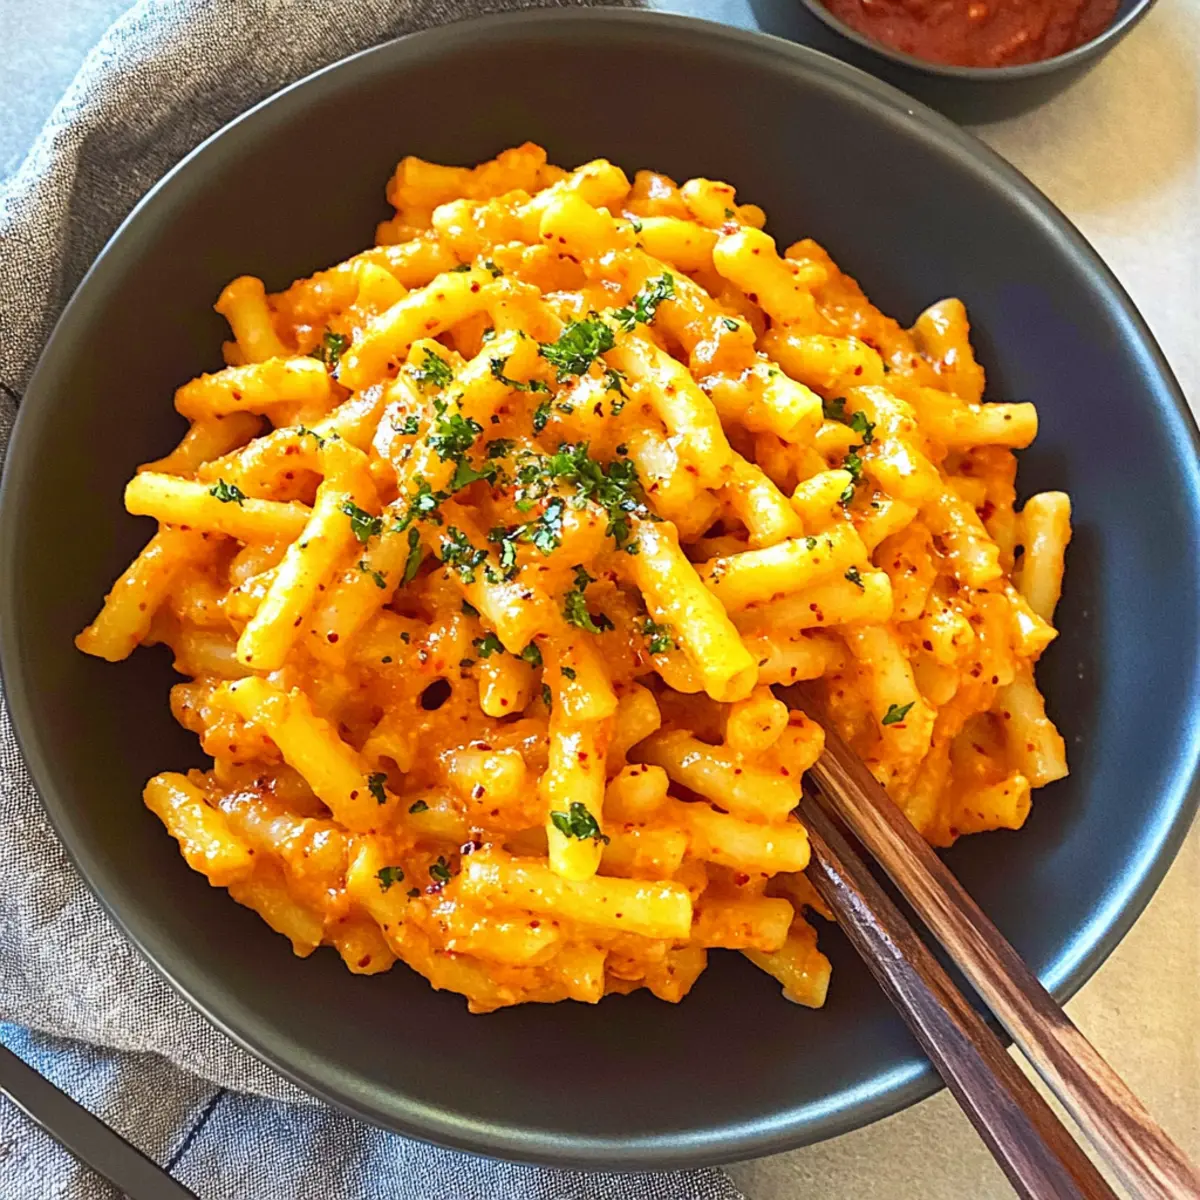
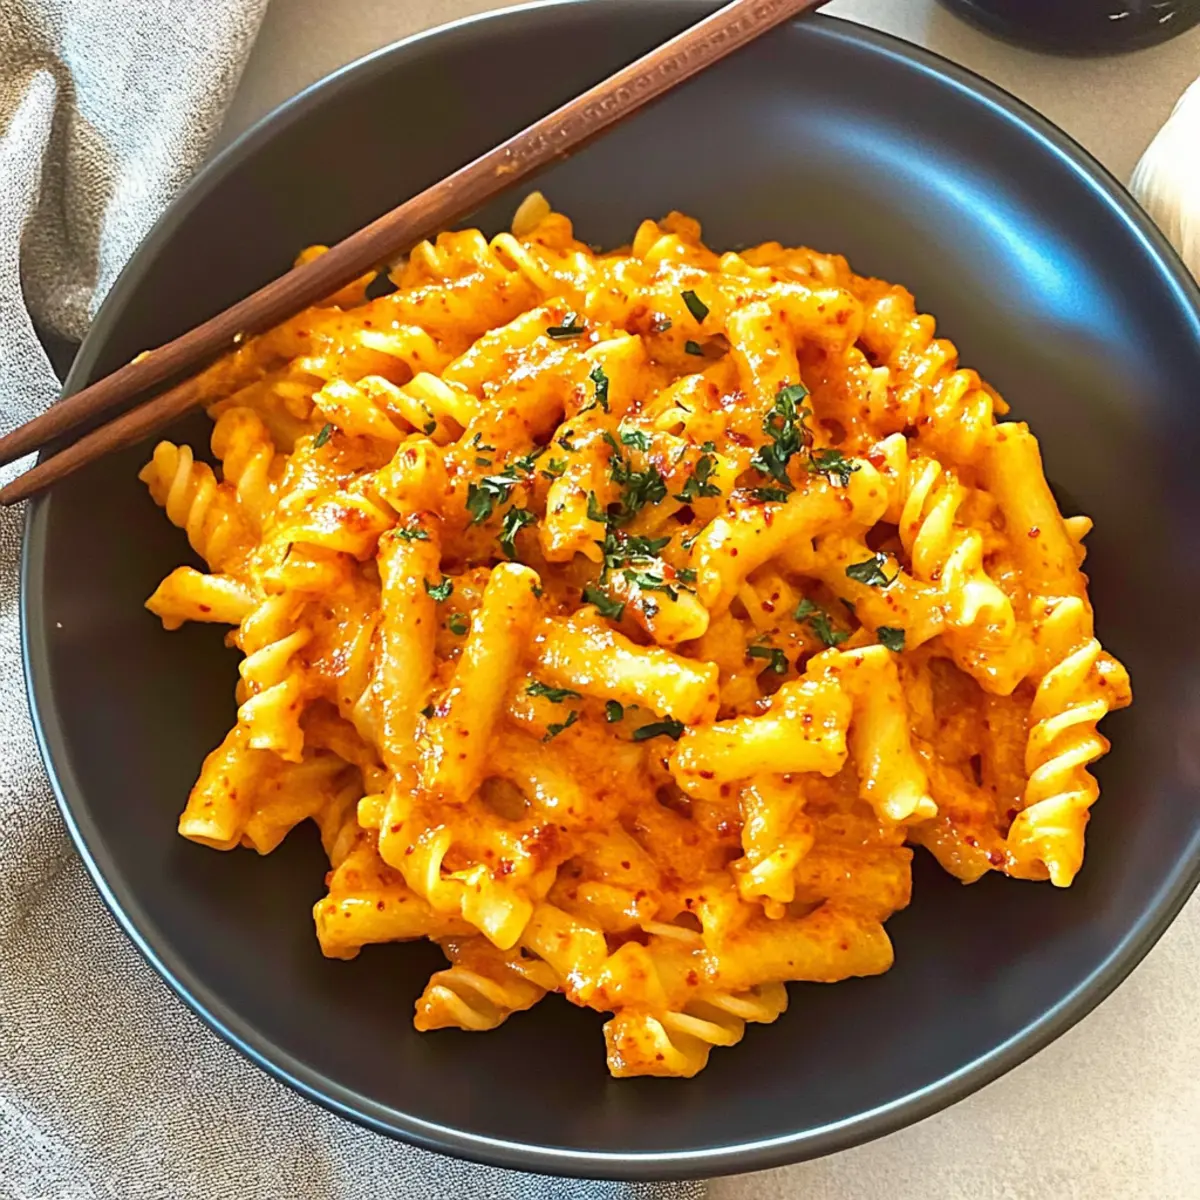
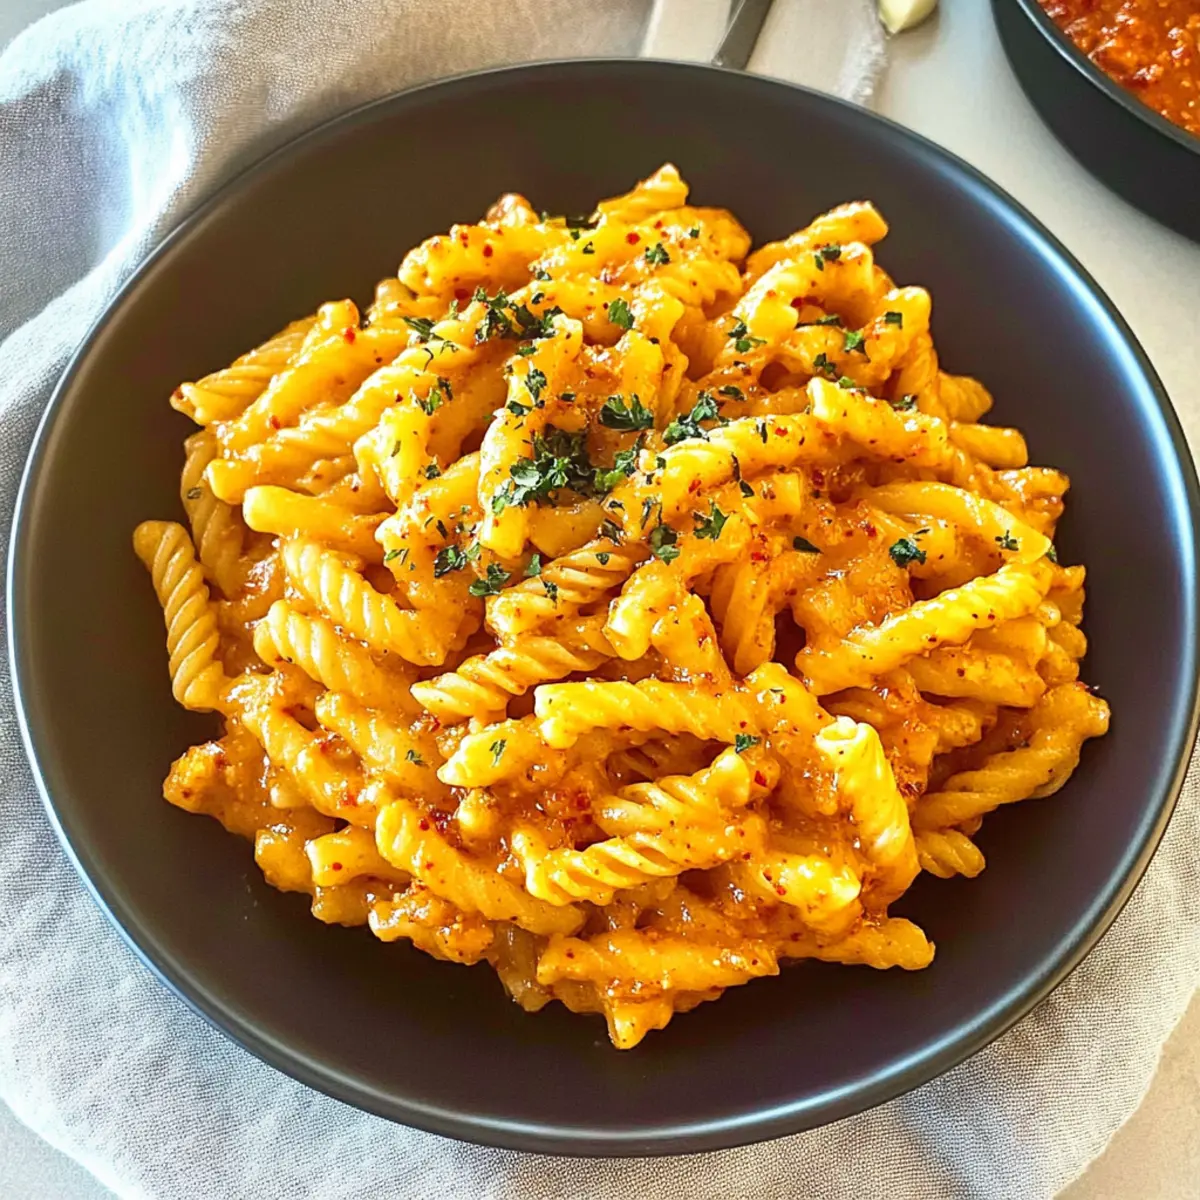
During a recent weekend stroll through my favorite local market, I stumbled upon a vibrant jar of gochujang that beckoned me to explore its bold flavors. Today, I'm thrilled to share my Spicy Gochujang Pasta recipe, a delicious fusion of Korean heat and Italian comfort that you can whip up in just 15 minutes! This dish not only satisfies your craving for something quick and delicious but also introduces an exciting twist to traditional pasta nights. Perfect for weeknight dinners or a spontaneous date night, this creamy creation is destined to become a family favorite. Curious how this spicy yet comforting meal can transform your culinary repertoire? Let’s dive in!

Why Love This Gochujang Pasta?

Quick and Easy: This dish comes together in just 15 minutes, perfect for busy weeknights or last-minute gatherings.

Flavor Fusion: The bold, spicy notes of Gochujang marry beautifully with creamy pasta for a deliciously unique taste you won't forget.

Diet-Friendly: Easily modify it to be gluten-free or vegan! Simply choose the right ingredients and enjoy without compromise.

Versatile Pairings: Serve it alongside grilled chicken, shrimp, or your favorite roasted veggies to elevate the meal! Looking for more pasta options? Don't miss out on Seafood Pasta Savory or Cauliflower Pasta Ready.

Crowd-Pleaser: Your family and friends will be raving about this creamy delight, making it a surefire hit at any dinner table!

Gochujang Pasta Ingredients

For the Pasta
• Fusilli Corti Bucati Pasta – A great base that holds sauce well; substitute with any pasta shape you prefer.

For the Sauce
• Gochujang – Adds a spicy and savory depth; ensure you check brands for gluten-free or vegan options.
• Garlic – Enhances flavor with aromatic notes; always use freshly minced or pressed garlic for the best taste.
• Salted Butter – Provides a rich creaminess to the sauce; use unsalted butter for better control over the dish's saltiness.
• Olive Oil – Essential for sautéing garlic and blending flavors; choose a high-quality extra-virgin olive oil for added richness.
• Shredded Parmesan or Cheddar Cheese – Adds creaminess and flavor; opt for a dairy-free cheese for vegan options.
• Heavy Cream – Gives the sauce its luscious texture; substitute with plant-based milk for a lighter vegan version.
• Freshly Ground Black Pepper – Optional for an accent of spice; feel free to omit if you prefer a milder flavor.

For Garnish
• Chopped Parsley – A fresh and colorful finish to the dish; it brightens the flavors beautifully on the plate.

Step‑by‑Step Instructions for Gochujang Pasta

Step 1: Boil the Pasta
Begin by bringing a large pot of salted water to a rolling boil over high heat. Once boiling, add the fusilli corti bucati pasta and cook according to package instructions, usually about 7-12 minutes, or until al dente. Stir occasionally to prevent sticking. When ready, strain the pasta in a colander and set it aside, reserving a bit of pasta water for later.

Step 2: Prepare the Sauce Base
In a large sauté pan, heat a tablespoon of olive oil over medium heat. Once shimmering, add two tablespoons of salted butter, letting it melt fully until it becomes fragrant and bubbly. This luxurious combination will form the base for your creamy Gochujang Pasta sauce. Be sure to keep an eye on the heat to prevent burning.

Step 3: Sauté the Garlic
Add 2-3 cloves of minced garlic to the melted butter and oil mixture, stirring constantly for 30 to 60 seconds until fragrant but not browned. The garlic should release its aroma without reaching a dark color, which can lead to bitterness. This step infuses your sauce with a rich, garlicky essence that beautifully complements the Gochujang.

Step 4: Create the Sauce
Stir in 2 tablespoons of Gochujang, blending it into the garlic and butter for about 30 seconds. Then, add 1 cup of heavy cream and ½ cup of shredded Parmesan cheese, mixing well until fully combined and slightly thickened—around 1-2 minutes. The sauce will take on a smooth, creamy texture, filled with the unique spicy notes of the Gochujang, making your pasta utterly irresistible.

Step 5: Combine Pasta and Sauce
Add the cooked fusilli pasta directly to the sauce in the sauté pan. Gently toss the pasta with the sauce for about a minute, ensuring every noodle is coated with the creamy mixture. If the sauce seems too thick, incorporate a splash of the reserved pasta water to achieve your desired consistency. This is the moment your Gochujang Pasta comes together!

Step 6: Plate and Garnish
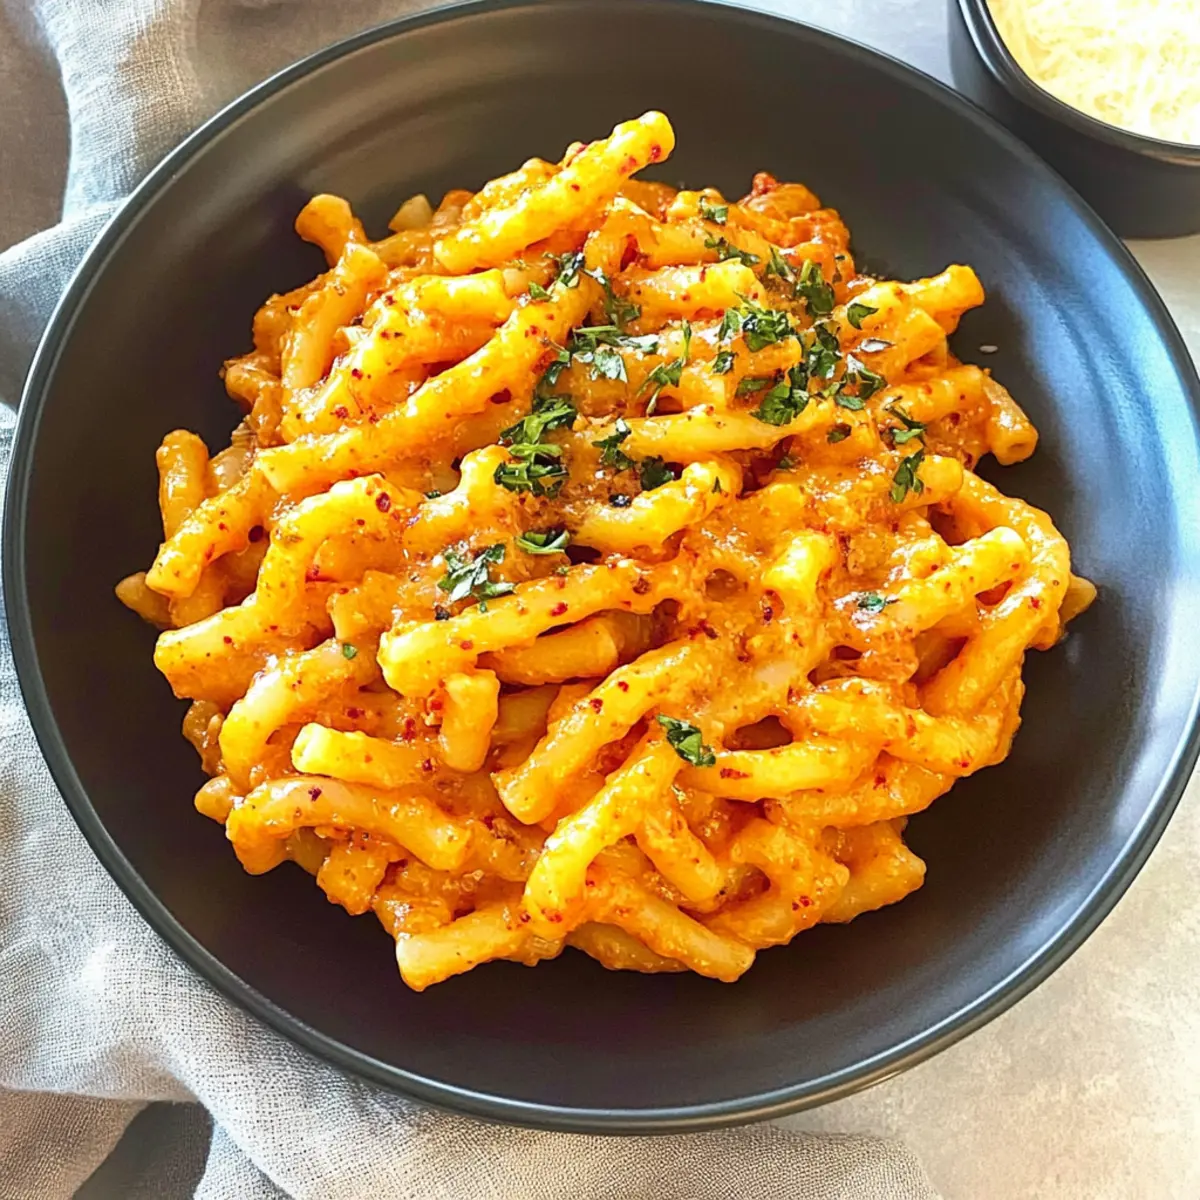
Transfer the creamy Gochujang Pasta to individual plates to serve. For an elegant touch, chop some fresh parsley and sprinkle it over the top as a garnish. This vibrant addition not only adds color but also enhances the dish's flavors. Your Gochujang Pasta is now officially ready to delight your family and friends!

What to Serve with Spicy Gochujang Pasta?

Elevate your meal with delightful pairings that enhance the creamy, spicy flavors of this culinary gem.

  • Garlic Bread: The crusty exterior and soft interior of garlic bread provide a marvelous contrast, perfect for soaking up the luscious sauce.

  • Korean-Style Kimchi: Bring a tangy crunch to the table with kimchi; its fermented flavors balance the richness of the pasta beautifully.

  • Crispy Asian Slaw: A crunchy mix of cabbage, carrots, and sesame seeds adds freshness and texture, making every bite exciting.

  • Grilled Chicken: Tender, juicy grilled chicken adds protein and a smoky flavor, transforming your Gochujang Pasta into a heartier meal.

  • Roasted Vegetables: Caramelized bell peppers, zucchini, or broccoli add a touch of sweetness and earthy tones, creating a colorful, wholesome plate.

  • Chilled Sauvignon Blanc: The crisp acidity of Sauvignon Blanc brightens the dish and complements the heat of the Gochujang, making for a refreshing sip.

  • Mango Sticky Rice: End on a sweet note with creamy coconut rice and ripe mango; the tropical flavors offer a delicious contrast to the spicy pasta.

  • Fresh Parsley Salad: A light salad with parsley, lemon, olive oil, and cherry tomatoes adds a refreshing herbaceous note that brightens the entire meal.

  • Sriracha Wings: If you're feeling adventurous, spicy sriracha chicken wings can amplify the heat and satisfy those who crave extra kick.

  • Chocolate Lava Cake: To sweeten the experience, a rich chocolate lava cake provides the perfect sweet finale to a spicy culinary adventure.

Expert Tips for Gochujang Pasta

Perfect Timing: Keep an eye on the pasta cooking time. Overcooked noodles can turn mushy, while perfectly cooked fusilli guarantees a delightful bite!

Gochujang Levels: Start with less Gochujang if you're unsure about heat; you can always add more. It’s best to taste as you go for a comfortable spice level.

Creaminess Control: If the sauce is too thick, add a bit of reserved pasta water to loosen it up. This keeps your Gochujang Pasta creamy and luscious.

Experiment with Veggies: Toss in some sautéed vegetables like bell peppers or zucchini for added nutrition and freshness. They pair wonderfully with this dish!

Leftover Storage: Cool leftovers completely before placing them in an airtight container. This keeps your Gochujang Pasta fresh and tasty for up to five days!

Garlic Care: Cook the garlic until just golden to avoid bitterness. A fragrant garlic aroma is the key to a delicious sauce!

Storage Tips for Gochujang Pasta

  • Room Temperature: It's best to avoid leaving Gochujang Pasta at room temperature for more than 2 hours to prevent spoilage.

  • Fridge: Store any leftovers in an airtight container and refrigerate for up to 5 days. Ensure the pasta is fully cooled before sealing to maintain freshness.

  • Freezer: You can freeze Gochujang Pasta for up to 3 months. For best results, portion it into single servings and use freezer-safe containers.

  • Reheating: When ready to enjoy, reheat gently on the stovetop over low heat, adding a splash of cream or reserved pasta water to keep it creamy and delicious.

Make Ahead Options

These Gochujang Pasta variations are perfect for busy cooks looking to save time during the week! You can prepare the sauce (butter, garlic, Gochujang, cream, and cheese) up to 24 hours in advance; simply store it in an airtight container in the refrigerator. Additionally, you can cook the pasta and refrigerate it for up to 3 days; just make sure it's fully cooled before storing to prevent clumping. When you're ready to enjoy your meal, gently heat the sauce on the stovetop and stir in the reheated pasta until thoroughly heated. This way, your Gochujang Pasta will be just as delicious with minimal effort, making weeknight dinners a breeze!

Gochujang Pasta Variations & Substitutions

Get creative with this delightful dish and add your own personal twist for even more flavor!

  • Vegan Twist: Substitute heavy cream with coconut cream and use a dairy-free cheese to make this dish entirely plant-based.
  • Vegetable Boost: Stir in sautéed spinach or roasted cherry tomatoes for a burst of color and nutrition, elevating the creamy sauce beautifully.
  • Pasta Alternatives: Try using gluten-free or whole grain pasta varieties for a healthier or gluten-free option that doesn’t compromise on taste.
  • Spicy Kick: Add a splash of chili oil or some red pepper flakes for those who crave an extra dose of heat in their Gochujang Pasta.
  • Protein-Packed: Incorporate grilled chicken, shrimp, or chickpeas for added protein, transforming this dish into a heartier meal for any occasion.
  • Savory Garnish: Sprinkle with toasted sesame seeds or crushed peanuts for an enjoyable crunch that complements the smooth texture of the pasta.
  • Herbaceous Freshness: Enhance the flavor with fresh herbs like basil or cilantro, which bring a refreshing contrast to the rich sauce.
  • Chili-Infused: For those who love a serious bite, mix in a tablespoon of Sriracha for a thrilling kick that will elevate the entire dish.

For more delightful pasta ideas, don't forget to explore Skillet Pasta Sun and Tuscan White Bean Pasta—your culinary journey awaits!

Gochujang Pasta Recipe FAQs

How do I select ripe ingredients for the Gochujang Pasta?
Absolutely! When choosing garlic, look for firm bulbs without any dark spots or sprouting. Ensure that the Gochujang is fresh by checking the expiration date; quality brands are usually bright red with a rich aroma. For the best flavor, pick pasta that’s marked gluten-free if necessary.

How should I store leftovers of Gochujang Pasta?
Very! Once cooled, store your Gochujang Pasta in an airtight container in the refrigerator. It's best to eat it within 5 days for maximum flavor and safety. Be sure to cool it completely before sealing to avoid moisture buildup that can lead to spoilage.

Can I freeze Gochujang Pasta?
Of course! You can freeze your Gochujang Pasta for up to 3 months. To do this, portion it into single servings and place them in freezer-safe containers. When reheating, let it thaw in the fridge overnight, and warm it on the stove with a splash of cream or reserved pasta water to restore creaminess.

What if my Gochujang Pasta is too spicy?
Don't worry! If you find it too spicy, try adding more heavy cream or cheese to balance the heat. Alternatively, serve it alongside a cooling side, like a simple cucumber salad or yogurt dip, to mellow out the spice.

Is Gochujang safe for my dietary restrictions?
Definitely! Gochujang is inherently gluten-free, but always check the labels to ensure there are no hidden gluten sources. For a vegan version, opt for plant-based milk and dairy-free cheese. Just keep in mind that some brands of Gochujang may contain anchovy paste, so check the ingredient list carefully if you’re avoiding seafood.

Gochujang Pasta

Gochujang Pasta: Creamy, Spicy Delight Ready in 15 Minutes

This Gochujang Pasta offers a creamy, spicy delight perfect for a quick dinner.
Print Recipe Pin Recipe
Prep Time 5 minutes mins
Cook Time 10 minutes mins
Total Time 15 minutes mins
Servings: 4 servings
Course: Dinner
Cuisine: Korean-Italian
Calories: 600
Ingredients Equipment Method Nutrition Notes

Ingredients
  

For the Pasta
  • 8 ounces Fusilli Corti Bucati Pasta Substitute with any pasta shape you prefer.
For the Sauce
  • 2 tablespoons Gochujang Ensure you check brands for gluten-free or vegan options.
  • 2-3 cloves Garlic Always use freshly minced or pressed garlic for best taste.
  • 2 tablespoons Salted Butter Use unsalted butter for better control over saltiness.
  • 1 tablespoon Olive Oil Choose a high-quality extra-virgin olive oil.
  • ½ cup Shredded Parmesan or Cheddar Cheese Opt for dairy-free cheese for vegan options.
  • 1 cup Heavy Cream Substitute with plant-based milk for a lighter vegan version.
  • to taste Freshly Ground Black Pepper Optional for an accent of spice.
For Garnish
  • 2 tablespoons Chopped Parsley A fresh and colorful finish.

Equipment

  • Large pot
  • sauté pan
  • Colander

Method
 

Step-by-Step Instructions for Gochujang Pasta
  1. Boil a large pot of salted water, add fusilli pasta, cook until al dente, strain, and reserve a bit of pasta water.
  2. In a sauté pan, heat olive oil and melt salted butter until fragrant and bubbly.
  3. Sauté minced garlic in the butter and oil mixture for 30 to 60 seconds.
  4. Stir in Gochujang, then add heavy cream and shredded cheese, mixing until smooth.
  5. Add cooked pasta to the sauce, toss gently, using reserved pasta water if needed.
  6. Serve on plates and garnish with chopped parsley.

Nutrition

Serving: 1servingCalories: 600kcalCarbohydrates: 70gProtein: 15gFat: 30gSaturated Fat: 15gCholesterol: 70mgSodium: 800mgPotassium: 300mgFiber: 3gSugar: 2gVitamin A: 500IUVitamin C: 1mgCalcium: 200mgIron: 2mg

Notes

Experiment with vegetables for added nutrition. Store leftovers in an airtight container.

Tried this recipe?

Let us know how it was!

Caramelized Leek and Mushroom Gruyere Pasta Your New Comfort Dish

December 22, 2025 by Grace Snow Leave a Comment

As the aroma of sautéing leeks filled my kitchen, I couldn’t help but feel a rush of nostalgia for cozy family dinners spent around the table. This Caramelized Leek and Mushroom Gruyere Pasta encapsulates everything I love about comfort food—it's warm, satisfying, and packed with charming flavors. The sweet caramelization of the leeks pairs beautifully with earthy mushrooms and rich gruyere cheese, transforming simple ingredients into an unforgettable vegetarian delight. Best of all, this recipe is a breeze to whip up on busy weeknights, making it a go-to choice for anyone looking to escape the fast-food trap. So, why not elevate your dinner routine with this dish that feels like a gourmet meal but requires minimal effort? Are you ready to bring a touch of elegance to your next pasta night?

Why Choose Caramelized Leek and Mushroom Pasta?

Comforting Warmth: Each bite of this pasta embraces you with its creamy texture and rich flavors, making it the perfect dish for cozy nights.
Effortless Elegance: With minimal preparation, you can impress your guests without the stress, bringing a touch of gourmet dining to your table.
Vegetarian Delight: Packed with wholesome ingredients, this dish caters to vegetarians and showcases how satisfying meatless meals can be.
Versatile Pairings: Serve it alongside a crisp salad or some crunchy garlic bread for a balanced meal, or try it with a side of Grilled Mushrooms for a delightful twist.
Quick and Easy: In under 30 minutes, you can create a restaurant-quality dinner that will leave everyone asking for seconds! Don’t forget to check out more delicious vegetarian options like Seafood Pasta Savory for your next meal.

Caramelized Leek and Mushroom Gruyere Pasta Ingredients

For the Pasta

  • Fettuccine – The base of the dish; any pasta shape can be deliciously used.
  • Reserved pasta water – Essential for thinning and adjusting the sauce to the perfect consistency.

For the Sauce

  • Olive oil – Adds richness and helps with sautéing; substitute with avocado oil for an alternative flavor.
  • Butter – Provides creaminess; use plant-based butter for a dairy-free option.
  • Heavy cream – The key to a velvety sauce; coconut cream is a great dairy-free substitute.
  • Granulated sugar – Aids in caramelization; omit if you'd prefer less sweetness.
  • Sherry wine – Introduces acidity; a dry white wine can be a suitable alternative.
  • Balsamic vinegar – Adds a tangy flavor; red wine vinegar can work in its place.

For the Vegetables

  • Leeks – Sweet and aromatic; can be swapped with onions if necessary.
  • Oyster mushrooms – Offers earthy textures; cremini or button mushrooms can be used as substitutes.
  • Garlic – Fresh garlic is ideal for flavor; powdered garlic can work if you're in a pinch.
  • Sage leaves – Provide a delightful herby note; thyme can be used instead for a different flavor profile.

For Flavor Boosts

  • Gruyere cheese – Adds nutty flavor and excellent melting properties; Swiss cheese is a fine swap.
  • Black pepper – Adds a hint of spice; adjust to your taste preference.
  • Toasted pine nuts – Provides a lovely crunch; can be substituted with toasted walnuts or omitted for nut allergies.
  • Lemon zest – Brightens the flavors; lime zest is an excellent alternative for a citrusy twist.
  • Salt – Essential for enhancing all the flavors; adjust according to your taste.

Step‑by‑Step Instructions for Caramelized Leek and Mushroom Gruyere Pasta

Step 1: Caramelize the Leeks
In a large sauté pan, heat 2 tablespoons of olive oil and 2 tablespoons of butter over medium heat. Add the sliced leeks, 1 teaspoon of salt, and 1 teaspoon of sugar, cooking for about 20 minutes. Stir occasionally until they turn golden brown and fragrant, adding a splash of water if needed to prevent sticking.

Step 2: Add Sherry
Pour ¼ cup of sherry wine into the pan with the caramelized leeks. Cook for an additional 2-3 minutes until the wine has reduced and the leeks are coated in a glossy sauce. This will deepen the flavor of your Caramelized Leek and Mushroom Gruyere Pasta, ensuring that every bite is rich and tasty.

Step 3: Brown the Mushrooms
Remove the leeks from the pan and set aside. In the same pan, melt another tablespoon of butter over medium-high heat. Add the oyster mushrooms in a single layer, cooking them for about 4 minutes on each side until they are golden brown and caramelized. Season with salt and black pepper to enhance their earthy flavors.

Step 4: Sauté with Aromatics
Once the mushrooms are browned, add 2 minced garlic cloves and a handful of fresh sage leaves to the pan. Sauté for about 1 minute, stirring constantly until the garlic becomes fragrant. Return the caramelized leeks to the mushroom mixture, stirring to combine the delicious flavors together.

Step 5: Prepare the Sauce
Lower the heat and pour in 1 cup of heavy cream, along with 1 tablespoon of balsamic vinegar and the zest of half a lemon. Simmer the mixture for 2-3 minutes until it thickens slightly, stirring occasionally. Taste and adjust seasoning as needed for your Caramelized Leek and Mushroom Gruyere Pasta.

Step 6: Cook the Pasta
While the sauce simmers, bring a large pot of salted water to a boil. Cook 12 ounces of fettuccine according to package instructions until al dente. Reserve 1 cup of the pasta water before draining the noodles, ensuring you have enough liquid to adjust your sauce consistency later.

Step 7: Combine
Add the drained fettuccine directly into the sauce, along with the reserved pasta water. Toss everything gently to ensure the pasta is well-coated. Gradually stir in 1 cup of grated gruyere cheese and a pinch of black pepper, allowing the cheese to melt and create a delightful, creamy texture in your Caramelized Leek and Mushroom Gruyere Pasta.

Step 8: Serve
Plate the pasta generously and sprinkle with toasted pine nuts for added crunch. Serve your Caramelized Leek and Mushroom Gruyere Pasta immediately, perhaps with a side of garlic bread or a refreshing salad to elevate the meal experience.

Caramelized Leek and Mushroom Gruyere Pasta Variations

Feel free to explore these variations and substitutions to make this dish your own—the comforting possibilities are endless!

  • Mushroom Mix: Replace oyster mushrooms with a blend of cremini and shiitake for a deeper, richer flavor.

  • Pasta Shapes: Switch fettuccine for penne, rotini, or even zoodles for a unique twist on your favorite dish.

  • Adding Greens: Toss in a handful of fresh spinach or peas just before serving for a pop of vibrant color and nutrition. They will wilt beautifully and add a lovely freshness.

  • Protein Boost: For a heartier meal, mix in cooked chickpeas or white beans. They will absorb the sauce's flavors, making every bite delightful.

  • Nut-Free Options: Skip the toasted pine nuts and substitute with crunchy pumpkin seeds for an equally delicious (and nut-free!) topping.

  • Spicy Kick: Add a pinch of red pepper flakes or a dash of hot sauce if you enjoy a bit of heat to balance the creaminess of the sauce.

  • Flavor Infusion: Instead of basic balsamic vinegar, experiment with flavored versions like fig or raspberry for a sweet and tangy note.

  • Cheesy Choices: Swap gruyere for smoked gouda or a dairy-free cheese to customize the creamy, rich flavor to your liking.

Looking for more delicious ideas? Pair this along with a side of Cauliflower Pasta Ready or make it a feast with a savory Seafood Pasta option! Enjoy experimenting!

What to Serve with Caramelized Leek and Mushroom Gruyere Pasta

Elevate your pasta experience with delightful sides that add freshness, crunch, or a touch of sweetness to every bite.

  • Garlic Bread: Crispy on the outside, warm on the inside; the perfect accompaniment to soak up the creamy sauce.

  • Mixed Greens Salad: A bright, crisp salad dressed with lemon vinaigrette complements the rich pasta, balancing flavors beautifully. Sprinkle some sliced almonds for added crunch!

  • Roasted Broccoli: Lightly seasoned and caramelized, roasted broccoli adds a deliciously nutty flavor and a vibrant green contrast to the dish.

  • Bruschetta: Topped with fresh tomatoes and basil, the refreshing bite of bruschetta enhances the savory goodness of the pasta.

  • Sautéed Spinach: Simple sautéed spinach with garlic brings a tender, earthy element that harmonizes with the rich flavors.

  • Chardonnay: A chilled glass of Chardonnay's crisp acidity pairs excellently with the creamy cheese, refreshing your palate with every sip.

  • Dessert Option: Finish off with a light lemon sorbet for a refreshing palate cleanser; its citrus notes echo the lemon zest in your pasta.

  • Toasted Pine Nuts: Serve some toasted pine nuts on the side as an extra crunchy garnish that complements the pasta’s textures perfectly.

These sides will transform your Caramelized Leek and Mushroom Gruyere Pasta into a delightful and satisfying meal that your family will love!

Expert Tips for Caramelized Leek and Mushroom Gruyere Pasta

  • Perfectly Caramelized Leeks: Cook them slowly over medium heat to allow their natural sweetness to develop. Patience is key for the best flavor in your Caramelized Leek and Mushroom Gruyere Pasta.

  • Avoid Steaming Mushrooms: Don’t overcrowd the pan when browning mushrooms; work in batches if necessary. This prevents them from steaming and ensures a lovely golden crust.

  • Adjusting Sauce Consistency: If your sauce becomes too thick after mixing in the pasta, gradually add more reserved pasta water to reach the desired creaminess without compromising flavor.

  • Meal Prep Made Easy: Consider prepping the sauce ahead of time. It reheats beautifully and can save you time during a busy weeknight dinner, making this a fantastic make-ahead option.

  • Flavor Enhancements: For an extra flavor boost, try adding freshly cooked peas or spinach in the final moments of cooking, adding both color and nutrition to your Caramelized Leek and Mushroom Gruyere Pasta.

Make Ahead Options

These Caramelized Leek and Mushroom Gruyere Pasta are perfect for meal prep! You can prepare the sauce up to 3 days in advance; just refrigerate it in an airtight container to maintain its creamy texture and flavors. The caramelized leeks and mushrooms can also be made ahead and stored together to save time. When you’re ready to serve, simply reheat the sauce on low heat while cooking the fettuccine according to package instructions. Toss the drained pasta with the warm sauce, add in the gruyere cheese, and enjoy a delicious family meal that feels gourmet yet requires minimal effort!

How to Store and Freeze Caramelized Leek and Mushroom Gruyere Pasta

Fridge: Store leftovers in an airtight container for up to 3 days. Make sure the pasta has cooled before sealing to prevent moisture build-up.

Freezer: For longer storage, freeze in a freezer-safe container for up to 3 months. To avoid freezer burn, press plastic wrap directly onto the pasta's surface before sealing.

Reheating: Thaw overnight in the fridge, then reheat gently in a saucepan over low heat. Add a splash of reserved pasta water to restore creaminess to your Caramelized Leek and Mushroom Gruyere Pasta.

Meal Prep: Consider making the sauce in advance and storing it separately. When ready to serve, simply cook fresh pasta and combine for a quick, delicious meal.

Caramelized Leek and Mushroom Gruyere Pasta Recipe FAQs

What kind of leeks should I choose for this recipe?
Look for leeks that are firm and free of blemishes. The greens should be vibrant without dark spots. Smaller leeks tend to be sweeter, making them perfect for caramelizing, so choose accordingly!

How should I store leftovers of the Caramelized Leek and Mushroom Gruyere Pasta?
Refrigerate your leftovers in an airtight container for up to 3 days. Make sure the pasta is completely cooled before sealing to avoid moisture buildup. When you’re ready to enjoy it again, reheat gently on the stove, adding a splash of reserved pasta water to revive the creaminess.

Can I freeze the Caramelized Leek and Mushroom Gruyere Pasta?
Absolutely! To freeze, transfer the cooled pasta to a freezer-safe container, pressing plastic wrap directly onto the surface to avoid freezer burn. It can be stored for up to 3 months. When you’re ready to eat, thaw overnight in the fridge and gently reheat in a saucepan, adding a bit of reserved pasta water to restore the sauce’s original texture.

What should I do if my sauce is too thick after adding the pasta?
If your sauce thickens too much, don’t worry! Simply add a little reserved pasta water, one tablespoon at a time, while tossing the pasta until you reach your desired sauce consistency. This method helps keep the flavors intact while adjusting the texture of your Caramelized Leek and Mushroom Gruyere Pasta.

Are there any dietary considerations with this recipe?
Yes! This dish is vegetarian, but if you have nut allergies, you can skip the toasted pine nuts or substitute them with sunflower seeds. Additionally, for a dairy-free version, consider using plant-based butter and coconut cream instead of heavy cream. Be sure to adjust cheese options for any lactose sensitivities.

Can I prepare the sauce ahead of time?
Definitely! Making the sauce in advance is a great time-saver. Just allow it to cool completely before storing it in an airtight container in the fridge for up to 3 days. When you’re ready to serve, cook fresh pasta and combine the sauce with it for a quick and delicious meal!

Caramelized Leek and Mushroom Gruyere Pasta

Caramelized Leek and Mushroom Gruyere Pasta Your New Comfort Dish

This Caramelized Leek and Mushroom Gruyere Pasta is warm, satisfying, and a delightful vegetarian option.
Print Recipe Pin Recipe
Prep Time 10 minutes mins
Cook Time 20 minutes mins
Total Time 30 minutes mins
Servings: 4 servings
Course: Dinner
Cuisine: Vegetarian
Calories: 500
Ingredients Equipment Method Nutrition Notes

Ingredients
  

For the Pasta
  • 12 oz Fettuccine Any pasta shape can be used.
  • 1 cup Reserved pasta water Essential for sauce consistency.
For the Sauce
  • 2 tbsp Olive oil Substitute with avocado oil if desired.
  • 2 tbsp Butter Use plant-based butter for dairy-free.
  • 1 cup Heavy cream Coconut cream as a dairy-free option.
  • 1 tsp Granulated sugar Omit if less sweetness is preferred.
  • 1/4 cup Sherry wine A dry white wine can be a substitute.
  • 1 tbsp Balsamic vinegar Red wine vinegar can be used.
For the Vegetables
  • 2 Leeks Can be swapped with onions.
  • 8 oz Oyster mushrooms Cremini or button mushrooms can be used.
  • 2 cloves Garlic Fresh garlic is ideal.
  • 4 leaves Sage leaves Thyme can be used instead.
For Flavor Boosts
  • 1 cup Gruyere cheese Swiss cheese is a fine swap.
  • 1 tsp Black pepper Adjust to taste preference.
  • 1/4 cup Toasted pine nuts Can be omitted for nut allergies.
  • 1 tsp Lemon zest Lime zest is an excellent alternative.
  • 1 tsp Salt Adjust according to your taste.

Equipment

  • large sauté pan
  • Pot for boiling pasta

Method
 

Caramelized Leek and Mushroom Gruyere Pasta Instructions
  1. In a large sauté pan, heat 2 tablespoons of olive oil and 2 tablespoons of butter over medium heat. Add the sliced leeks, 1 teaspoon of salt, and 1 teaspoon of sugar, cooking for about 20 minutes until golden brown.
  2. Pour ¼ cup of sherry wine into the pan with the caramelized leeks and cook for an additional 2-3 minutes until reduced.
  3. Remove the leeks and melt another tablespoon of butter in the same pan. Add the oyster mushrooms in a single layer, cooking for about 4 minutes on each side.
  4. Once the mushrooms are browned, add 2 minced garlic cloves and a handful of sage leaves. Sauté for about 1 minute until fragrant.
  5. Lower the heat and pour in 1 cup of heavy cream, 1 tablespoon of balsamic vinegar, and the zest of half a lemon. Simmer for 2-3 minutes until thickened.
  6. While the sauce simmers, bring salted water to a boil. Cook 12 ounces of fettuccine until al dente, reserving 1 cup of pasta water before draining.
  7. Add drained fettuccine into the sauce along with reserved pasta water. Stir in 1 cup of grated gruyere cheese until melted.
  8. Plate the pasta and sprinkle with toasted pine nuts, serve immediately.

Nutrition

Serving: 1servingCalories: 500kcalCarbohydrates: 60gProtein: 15gFat: 25gSaturated Fat: 12gPolyunsaturated Fat: 2gMonounsaturated Fat: 10gCholesterol: 50mgSodium: 600mgPotassium: 700mgFiber: 4gSugar: 4gVitamin A: 500IUVitamin C: 5mgCalcium: 300mgIron: 2mg

Notes

For best results, caramelize leeks slowly and avoid overcrowding mushrooms when cooking. Adjust sauce consistency with reserved pasta water if needed.

Tried this recipe?

Let us know how it was!

Creamy White Bolognese Sauce for Cozy Pasta Nights

December 22, 2025 by Grace Snow Leave a Comment

As the aroma of sautéing onions and garlic swirled through my kitchen, I felt transported to a cozy Italian trattoria, where comforting dishes come alive. This Creamy White Bolognese Sauce is my go-to recipe for transforming ordinary evenings into special occasions. Rich and velvety, it offers a delicious twist on traditional pasta sauces that’s not just quick to whip up but also impressively versatile—perfect for lasagna or even baked potatoes! Whether you're cooking for a casual family dinner or a date night, this sauce packs a punch while staying light and indulgent. Want to know the secret to elevating your pasta game? Let’s dive into this delightful recipe together!

Why is White Bolognese Sauce a Must-Try?

Creamy Delight: This White Bolognese Sauce boasts a rich and velvety texture that elevates any dish, making it perfect for cozy dinners.

Versatility Galore: Ideal for pasta, lasagna, or even baked potatoes, this sauce complements a variety of meals, ensuring you won’t get bored.

Quick & Easy: With simple ingredients and straightforward steps, you can create a gourmet meal without spending hours in the kitchen.

Rich Flavor Dynamics: The combination of ground meat, aromatic veggies, and a splash of white wine results in a flavor explosion that will impress your family and friends.

Perfect for Meal Prep: Make a batch ahead of time and store it in the fridge or freezer, just like you would with Tuscan White Bean sauce, for quick weeknight dinners.

Try this recipe, and you might just discover that it's your new favorite sauce!

White Bolognese Sauce Ingredients

For the Meat Base
• Ground Meat – Use a mix of beef, pork, or veal for optimal flavor and texture.
• Olive Oil – Extra virgin is best for sautéing; it adds a rich, fruity flavor to the sauce.

For the Aromatics
• Onion – Finely chopped yellow onion adds natural sweetness and depth to the sauce.
• Carrot – Grated or finely diced for natural sweetness; parsnip can be a delicious alternative.
• Celery – Fresh celery enhances the flavor base and contributes freshness to the sauce.
• Garlic – Fresh cloves are a must for the savory depth and aroma.

For the Sauce
• White Wine – A dry variety adds acidity and depth; substitute with chicken broth for a non-alcoholic version.
• Milk or Heavy Cream – Heavy cream yields a richer texture; milk offers a lighter alternative.
• Nutmeg – A pinch adds warmth and complexity; freshly grated elevates the flavor.
• Salt and Pepper – Essential for balancing the flavors; adjust to your taste.

For the Finishing Touch
• Parmesan Cheese – Freshly grated for an extra layer of richness; Pecorino Romano is a tasty substitute if preferred.

This White Bolognese Sauce is sure to become a cherished part of your culinary repertoire!

Step‑by‑Step Instructions for White Bolognese Sauce

Step 1: Sauté the Vegetables
Heat 2 tablespoons of olive oil in a large skillet over medium heat. Add 1 finely chopped onion, 1 grated carrot, and 1 finely diced celery stalk. Sauté for 5-7 minutes until the vegetables are softened and fragrant, stirring occasionally. This aromatic base will enhance the depth of flavor in your White Bolognese Sauce.

Step 2: Brown the Meat
Increase the heat to medium-high and add 1 pound of ground meat (a mix of beef, pork, or veal works best). Cook, breaking the meat apart with a wooden spoon, until it is browned and no longer pink, about 5-7 minutes. Searing the meat will develop a rich base, essential for your creamy sauce.

Step 3: Deglaze with Wine
Pour in 1 cup of dry white wine, scraping up any browned bits from the bottom of the skillet. Allow the mixture to cook for 3-5 minutes, or until the wine has reduced by about half. This step adds acidity and depth to your White Bolognese Sauce, creating a well-rounded flavor.

Step 4: Add Dairy
Stir in 1 cup of milk or heavy cream, depending on your preference for richness. Bring the mixture to a gentle simmer while stirring frequently. Add a pinch of freshly grated nutmeg, followed by salt and pepper to taste. This will develop the creamy texture and enhance the overall warmth of the sauce.

Step 5: Simmer
Reduce the heat to low and let the sauce simmer uncovered for 30-45 minutes. Stir occasionally to prevent sticking. During this time, the sauce will thicken and its flavors will deepen, transforming into a luscious White Bolognese Sauce that beautifully coats your pasta.

Step 6: Finish with Cheese
Once the sauce has thickened to your liking, stir in ½ cup of freshly grated Parmesan cheese until it’s fully melted and incorporated. The cheese adds a wonderful richness and ties all the flavors together, making your sauce indulgently satisfying.

Step 7: Serve
Serve the White Bolognese Sauce hot over your favorite pasta, such as pappardelle or fettuccine. For an extra touch, consider garnishing with additional grated cheese or freshly cracked black pepper. This creamy delight is ready to elevate your dinner into a cozy and memorable occasion.

What to Serve with Creamy White Bolognese Sauce?

As you prepare this creamy goodness, consider some delightful companions that will complete your cozy dinner experience.

  • Pappardelle Pasta: Its wide ribbons hold the luscious sauce perfectly, creating a satisfying dish that's sure to please.

  • Garlic Bread: The buttery crispness adds a comforting crunch that beautifully contrasts the creamy sauce, making every bite delectable.

  • Caesar Salad: Fresh greens and a tangy dressing provide a refreshing balance, cleansing the palate between bites of rich sauce.

  • Roasted Vegetables: Caramelized veggies like zucchini and bell peppers offer a burst of color and flavor that enhances your meal's overall experience.

  • White Wine: A chilled glass of dry white wine mirrors the wine used in the sauce, enhancing the flavor profile and making your dinner extra special.

  • Tiramisu: End your meal on a sweet note with this classic dessert; its creamy layers echo your main dish's luxuriousness while providing a delightful contrast.

Expert Tips for White Bolognese Sauce

Simmer for Flavor: A longer simmer deepens the sauce's complexity; let it cook slowly for at least 30 minutes.

Meat Matters: Using a combination of ground meats like beef and pork enhances flavor, avoiding leaner options that may dry out.

Cheese Quality: For the best taste in your White Bolognese Sauce, always opt for freshly grated Parmesan over pre-packaged types.

Adjust for Creaminess: If preferred, replace heavy cream with milk for a lighter version, but remember it may impact the sauce's richness.

Don't Rush Deglazing: Take your time scraping the pan after adding wine—those browned bits add irresistible depth to your sauce!

How to Store and Freeze White Bolognese Sauce

Fridge: Store the White Bolognese Sauce in an airtight container for up to 3 days. Make sure it cools completely before sealing to prevent condensation.

Freezer: For longer storage, freeze the sauce in a freezer-safe container or bag for up to 3 months. Label the container with the date for easy tracking.

Reheating: Thaw frozen sauce in the refrigerator overnight, then reheat gently on the stovetop over low heat, stirring occasionally. Add a splash of milk or cream to restore creaminess if needed.

Serving: After reheating, serve hot over pasta, ensuring a comforting and delicious meal that brings warmth back to your table!

White Bolognese Sauce Variations

Feel free to mix things up with these delightful twists that will enhance your homemade White Bolognese Sauce and cater to your palate!

  • Vegetarian Option: Swap out the ground meat for a mix of sautéed mushrooms and lentils. This creates a hearty texture while still packing a savory punch.

  • Dairy-Free Delight: Use coconut milk or a non-dairy cream in place of traditional milk or heavy cream. You'll achieve a creamy texture with a subtle sweetness that's simply divine!

  • Gluten-Free: Serve your White Bolognese Sauce over gluten-free pasta options or use zucchini noodles for a light and refreshing twist. It's a perfect way to enjoy this sauce without the gluten!

  • Extra Veggies: Toss in some chopped spinach, zucchini, or diced bell peppers while simmering to amp up the nutritional value and add delightful color to the sauce.

  • Cheesy Twist: For an indulgent flare, mix in a bit of ricotta cheese along with the Parmesan. This will create an extra creamy and cheesy layer that is absolutely irresistible.

  • Heat It Up: If you're a fan of spice, add a pinch of red pepper flakes or some finely chopped jalapeños when you add the garlic. This will give your sauce a loving kick that livens up any dish.

  • White Wine Substitute: For a non-alcoholic version, replace white wine with cooked chicken broth and a splash of lemon juice to retain flavor without the alcohol.

  • Savor the Herbs: Sprinkle in fresh herbs like thyme or sage right before serving. This adds a layer of freshness that beautifully complements the rich sauce, creating a well-rounded dish.

Experimenting with these variations can take your White Bolognese Sauce to new heights! And don’t forget, if you ever need more inspiration, you might enjoy whipping up some Shrimp Tacos or treat yourself to a sweet ending with Matcha Cookies Soft. Happy cooking!

Make Ahead Options

Preparing your Creamy White Bolognese Sauce ahead of time is a game-changer for busy weeknights! You can sauté the vegetables and brown the meat up to 24 hours in advance; simply store them in an airtight container in the refrigerator. When you’re ready to finish the sauce, just deglaze the pan with wine, add the prepared meat and veggies, and stir in your dairy and seasonings. This way, the sauce stays fresh and flavorful, making your intimate dinners feel like special occasions without the last-minute rush. Plus, if you make a larger batch, it freezes well for up to 3 months—just reheat and serve for a quick, satisfying meal!

White Bolognese Sauce Recipe FAQs

How do I select the right ground meat for my White Bolognese Sauce?
Absolutely! For optimal flavor and texture, I recommend using a mix of beef, pork, and veal. This combination provides the sauce with richness and complexity. If you're looking for a lighter option, ground turkey or chicken can also work, but be sure to adjust your cooking time to prevent dryness.

What is the best way to store leftover White Bolognese Sauce?
Very! After cooking, let the sauce cool completely before transferring it to an airtight container. It will keep well in the fridge for up to 3 days. To ensure the best flavor, make sure the lid is sealed tightly to prevent air exposure.

Can I freeze White Bolognese Sauce, and if so, how?
Absolutely! To freeze your delicious White Bolognese Sauce, pour it into a freezer-safe container or resealable bag. Make sure to leave some space for expansion. Label it with the date, and it will last for up to 3 months. When you're ready to enjoy it again, simply thaw in the refrigerator overnight and reheat gently on the stovetop.

What should I do if my sauce seems too thin?
If your sauce is looking a bit runny, don’t fret! Simply let it simmer uncovered on low heat for an additional 10-15 minutes, stirring occasionally. This will allow some of the excess liquid to evaporate and will help thicken your sauce beautifully. Alternatively, you can make a cornstarch slurry by mixing one tablespoon of cornstarch with two tablespoons of cold water; add it to the simmering sauce while stirring until thickened.

Are there any dietary considerations for this recipe?
Certainly! This White Bolognese Sauce can easily be adapted for various dietary needs. For a gluten-free option, use certified gluten-free pasta or serve it with vegetables like zucchini noodles. If you're avoiding dairy, you can replace the milk or cream with a non-dairy alternative such as coconut milk or a plant-based cream. Also, feel free to substitute ground meat with a plant-based option for a vegetarian or vegan version.

How can I enhance the flavor of my White Bolognese Sauce?
To really elevate your sauce, consider using freshly grated nutmeg instead of pre-ground, as it adds a wonderful warmth. Also, don’t rush the deglazing step after adding the wine; scraping up those browned bits enhances the sauce's flavor dramatically! For added vegetable goodness, you can sauté mushrooms or spinach along with the aromatics.

White Bolognese Sauce

Creamy White Bolognese Sauce for Cozy Pasta Nights

Discover the rich and velvety delight of White Bolognese Sauce, perfect for elevating your pasta dishes.
Print Recipe Pin Recipe
Prep Time 15 minutes mins
Cook Time 45 minutes mins
Total Time 1 hour hr
Servings: 4 servings
Course: Dinner
Cuisine: Italian
Calories: 300
Ingredients Equipment Method Nutrition Notes

Ingredients
  

For the Meat Base
  • 1 pound Ground Meat (beef, pork, or veal)
  • 2 tablespoons Olive Oil (extra virgin)
For the Aromatics
  • 1 Onion (finely chopped)
  • 1 Carrot (grated or finely diced)
  • 1 Celery (finely diced)
  • 3 cloves Garlic (fresh)
For the Sauce
  • 1 cup White Wine (dry) Substitute with chicken broth for non-alcoholic version
  • 1 cup Milk or Heavy Cream
  • 1/4 teaspoon Nutmeg (freshly grated)
  • to taste Salt
  • to taste Pepper
For the Finishing Touch
  • 1/2 cup Parmesan Cheese (freshly grated) Pecorino Romano can be a substitute

Equipment

  • Large skillet
  • Wooden spoon

Method
 

Step-by-Step Instructions
  1. Step 1: Heat 2 tablespoons of olive oil in a large skillet over medium heat. Add 1 finely chopped onion, 1 grated carrot, and 1 finely diced celery stalk. Sauté for 5-7 minutes until the vegetables are softened and fragrant.
  2. Step 2: Increase the heat to medium-high and add 1 pound of ground meat. Cook, breaking the meat apart with a wooden spoon, until browned and no longer pink, about 5-7 minutes.
  3. Step 3: Pour in 1 cup of dry white wine, scraping up any browned bits. Allow to cook for 3-5 minutes, until reduced by half.
  4. Step 4: Stir in 1 cup of milk or heavy cream. Simmer while stirring frequently. Add a pinch of freshly grated nutmeg, followed by salt and pepper to taste.
  5. Step 5: Reduce heat to low and let simmer uncovered for 30-45 minutes, stirring occasionally.
  6. Step 6: Once thickened, stir in 1/2 cup of freshly grated Parmesan cheese until melted.
  7. Step 7: Serve hot over your favorite pasta, garnishing with extra grated cheese or black pepper.

Nutrition

Serving: 1cupCalories: 300kcalCarbohydrates: 8gProtein: 12gFat: 24gSaturated Fat: 12gPolyunsaturated Fat: 1gMonounsaturated Fat: 10gCholesterol: 75mgSodium: 300mgPotassium: 450mgFiber: 1gSugar: 2gVitamin A: 750IUVitamin C: 5mgCalcium: 200mgIron: 2mg

Notes

Simmering for longer enhances the sauce's complexity. Always use freshly grated Parmesan for the best flavor.

Tried this recipe?

Let us know how it was!

Gnome Mini Cheesecakes: Adorable Treats for Your Party

December 21, 2025 by Grace Snow Leave a Comment

Picture a cozy holiday gathering, laughter filling the air as colorful decorations twinkle in the soft light. That’s the spirit I channel when making Gnome Mini Cheesecakes! These delightful, bite-sized treats not only brighten any festive table but also offer a smooth, creamy texture that charms everyone, from kids to adults. With quick prep and the ability to customize them as gluten-free or even no-bake, they make for an impressive yet accessible dessert. Imagine the joy on your loved ones’ faces as they bite into these adorable little gnomes topped with fresh strawberries and light whipped cream. Ready to whip up some holiday magic in your kitchen? Let’s dive into the fun!

Why Are These Cheesecakes So Special?

Whimsy in Every Bite: These Gnome Mini Cheesecakes are not just desserts; they are little pieces of joy that capture the festive spirit.
Endless Customization: With options for gluten-free and no-bake variations, you can cater to different dietary needs without compromising on taste.
Kid-Friendly Fun: Crafting these charming gnomes is an exciting activity for kids and adults alike, making them perfect for gatherings.
Time-Saving Delight: Ready in under 30 minutes plus chilling time, these cheesecakes are a quick solution to your holiday dessert needs.
Crowd-Pleasing Treat: Their adorable appearance and creamy flavors ensure they will be the star of any dessert table, just like these delightful Mini Tropical Pavlovas.

Gnome Mini Cheesecakes Ingredients

For the Crust
• Graham Cracker Crumbs – This is the base structure for the crust; feel free to use vanilla wafers or gluten-free graham crackers for a tasty alternative.
• Granulated Sugar – Adds just the right sweetness to the crust and cheesecake filling; no substitutions recommended.
• Butter (melted) – Binds the crust together and imparts richness; coconut oil can be used for a dairy-free option.

For the Cheesecake Filling
• Cream Cheese – This ingredient offers a creamy texture and rich flavor; Neufchâtel makes for a lighter version if desired.
• Granulated Sugar (for filling) – Sweetens the cheesecake filling; no substitutions suggested.
• Vanilla Extract – Enhances the overall flavor profile beautifully; stick with the classic version for the best results.
• Eggs – Provide structure and help set the filling; no substitutes recommended unless opting for a no-bake version.
• Sour Cream or Greek Yogurt – Adds tanginess and creaminess, balancing the sweetness; cream cheese can create a denser filling if preferred.

For the Toppings
• Whipped Cream – Adds lightness and a delightful finish; a piping bag can give you a professional-looking result.
• Fresh Strawberries – Perfect for hats on your gnomes; use extra berries for decoration as well.
• Candies – Use them for noses to enhance the whimsical look; let your creativity shine by mixing up the colors!

Create these magical Gnome Mini Cheesecakes and watch the smiles light up your holiday gatherings!

Step‑by‑Step Instructions for Gnome Mini Cheesecakes

Step 1: Preheat and Prepare
Begin your delicious journey by preheating your oven to 325°F (160°C). While the oven warms, line a muffin tin with cupcake liners, making it easy to lift out each adorable Gnome Mini Cheesecake later. This preparation sets the stage for a delightful assembly of flavors that will dazzle your family and friends.

Step 2: Make the Crust
In a medium bowl, combine graham cracker crumbs, granulated sugar, and melted butter until everything is well mixed. The mixture should resemble wet sand, easily moldable yet crumbly. Press this blend firmly into the bottom of each muffin cup, creating a lovely base that will hold your delightful cheesecakes together.

Step 3: Bake the Crust
Slide the muffin tin into your preheated oven and bake the crust for 5 minutes. Keep an eye on them as they should become slightly golden and firm. Once done, remove the tin from the oven and allow it to cool slightly, setting the stage for the creamy cheesecake filling to follow.

Step 4: Prepare the Cheesecake Filling
In a large mixing bowl, beat the cream cheese with an electric mixer on medium speed until smooth and creamy. Gradually mix in the granulated sugar and vanilla extract until fully incorporated, creating a luscious base. The mixture should be fluffy and free of any lumps, ready to hold all the sweet flavors of your Gnome Mini Cheesecakes.

Step 5: Add Eggs and Creaminess
Add the eggs one at a time to the cream cheese mixture, mixing on low speed after each addition until just blended. This is a crucial step, so be gentle to prevent cracks in your cheesecakes. Next, fold in the sour cream or Greek yogurt until combined, enhancing the creamy texture that makes these mini treats irresistible.

Step 6: Fill the Muffin Cups
Carefully spoon the cheesecake batter into each muffin cup, filling them about ¾ full. This allows them to rise slightly during baking. Once all the cups are filled, gently smooth the tops for an even finish. These Gnome Mini Cheesecakes are starting to take shape, waiting for the warmth of the oven.

Step 7: Bake the Cheesecakes
Place the filled muffin tin back into the oven and bake for 18-20 minutes. You’ll know they’re ready when the edges look set but the centers still have a slight jiggle. This contrast will yield the creamy texture we adore in cheesecakes, so resist the urge to overbake!

Step 8: Cool and Chill
Once baked, turn off the oven and leave the cheesecakes inside for 10 minutes, allowing them to cool gradually and prevent cracking. Afterward, move them to a wire rack to cool completely. For that delightful chill, refrigerate your Gnome Mini Cheesecakes for at least 2 hours, ensuring they are perfectly set before their grand appearance.

Step 9: Decorate with Whimsy
After the chilling time, it’s time for the fun! Use whipped cream to create fluffy hats atop each mini cheesecake. Top with fresh strawberries for a cheerful gnome effect, and place colorful candies for noses, bringing each one to life. This playful decorating step adds a special touch to your festive gathering.

Expert Tips for Gnome Mini Cheesecakes

  • Crust Consistency: Ensure that your graham cracker crumb mixture resembles wet sand. If too dry, the crust may crumble and not hold its shape.

  • Gentle Mixing: When adding eggs, mix on low speed and just until combined to prevent cracks in your cheesecakes, ensuring a smooth finish.

  • Chilling Time: For the best flavor and texture, refrigerate the Gnome Mini Cheesecakes for at least 2 hours before serving; they will set better and be easier to decorate.

  • Decorating Fun: Use a piping bag for the whipped cream for a professional touch; creativity in decoration makes these mini cheesecakes even more delightful!

  • Flavor Variations: Don’t hesitate to experiment with different toppings or fillings to personalize your Gnome Mini Cheesecakes and surprise your guests!

What to Serve with Gnome Mini Cheesecakes?

Picture a delightful holiday spread, where each bite of these whimsical treats pairs perfectly with a variety of sides to create an unforgettable feast.

  • Festive Fruit Salad: Fresh fruits like berries and oranges add brightness and a refreshing contrast to the creamy cheesecakes, perfect for breaking up the richness.

  • Creamy Vanilla Ice Cream: A scoop of smooth, velvety vanilla ice cream complements the mini cheesecakes' rich flavors and adds a delightful temperature contrast.

  • Chocolate Drizzle: A simple chocolate sauce poured over your Gnome Mini Cheesecakes offers a luxurious touch, enhancing the sweetness that everyone loves.

  • Hot Cocoa or Mulled Wine: A warm drink like hot cocoa or spiced mulled wine rounds out the festive ambiance, inviting guests to linger and indulge in the cozy flavors of the season.

  • Nutty Biscotti: Crunchy, nutty biscotti complements the smooth texture of the cheesecakes, creating a delightful textural contrast that enhances each bite.

  • Whipped Cream Topping: Extra whipped cream served on the side allows guests to customize the amount of lightness they desire atop their delightful cheesecakes.

Craft a full culinary experience by pairing these delightful sides with your adorable Gnome Mini Cheesecakes, and watch the smiles bloom around your table!

How to Store and Freeze Gnome Mini Cheesecakes

Fridge: Keep your Gnome Mini Cheesecakes in an airtight container, and they will stay fresh for up to 4 days.

Freezer: For longer storage, freeze unadorned cheesecakes for up to 2 months. Thaw overnight in the fridge before decorating.

Reheating: These treats are best served cold. If desired, let them sit at room temperature for 15-20 minutes before serving for a softer texture.

Make Ahead: Prepare the cheesecakes up to 1-2 days in advance; simply decorate before serving to keep them looking fresh and delightful!

Gnome Mini Cheesecakes Variations & Substitutions

Feel free to let your creativity shine and customize these delightful mini cheesecakes to suit your taste and dietary needs!

  • Gluten-Free: Use gluten-free graham crackers instead of regular for a completely gluten-free dessert. Your friends with dietary restrictions will appreciate this thoughtful touch!

  • No-Bake Option: Swap the classic cheesecake filling for a no-bake version by using cream cheese, whipped cream, and gelatin. This twist lets you skip the oven while still achieving a creamy finish.

  • Flavorful Fruit Swirl: Fold in a fruit puree like raspberry or mango into the filling before baking. This adds a burst of color and a fruity kick!

  • Chocolate Lover's Delight: Mix in cocoa powder for a rich chocolate cheesecake filling. Top with chocolate shavings or mini chocolate chips for an extra treat.

  • Nutty Variations: Blend crushed nuts like almonds or pecans into the crust for added texture and a nutty flavor. It’ll give your cheesecakes a delightful crunch.

  • Spiced Delight: Add a pinch of cinnamon or nutmeg to the cheesecake batter for a warm, cozy vibe. This is perfect for holiday gatherings when everyone loves a bit of spice!

  • Zesty Lemon Cheesecake: Incorporate fresh lemon zest into the filling for a refreshing twist, making a perfect spring flavor. The bright citrus adds vibrancy and freshness to each bite.

For more delightful dessert inspirations, don’t miss out on these lovely Mini Tropical Pavlovas that will surely add a colorful splash to your festive table!

Make Ahead Options

These Gnome Mini Cheesecakes are perfect for busy cooks looking to save time during the holiday rush! You can prepare the cheesecake batter up to 24 hours in advance; simply store it in an airtight container in the refrigerator to maintain that creamy texture. The crust can also be made and baked 1-2 days ahead; just keep it covered at room temperature. When you're ready to serve, fill the muffin cups with the chilled batter and bake as directed. After cooling, let them chill in the fridge for at least 2 hours before decorating. This way, you’ll have charming desserts that are just as delicious as if they were made fresh the day of serving!

Gnome Mini Cheesecakes Recipe FAQs

What should I look for when selecting ingredients?
For the best results, choose fresh cream cheese that is smooth and has no lumps. When picking strawberries for decoration, look for vibrant red berries that are firm and free of dark spots or blemishes. For graham crackers, choose a brand that doesn't have added sugars or preservatives for a cleaner taste in your crust.

How should I store leftover Gnome Mini Cheesecakes?
Store your cheesecakes in an airtight container in the refrigerator, where they will stay fresh for up to 4 days. Place a piece of parchment paper between layers if stacking them to prevent sticking. This way, you can enjoy them at your leisure throughout the week!

Can I freeze Gnome Mini Cheesecakes?
Absolutely! To freeze your cheesecakes, place the unadorned cheesecakes in a single layer on a baking sheet and freeze until solid. Then, transfer them to an airtight container or freezer-safe bag. They can be kept for up to 2 months. When you’re ready to serve, thaw them overnight in the refrigerator before adding your toppings.

What if my cheesecakes crack during baking?
If your cheesecakes crack, don’t fret! This happens when they’re overmixed or baked too long. To avoid this, mix the eggs on low speed and just until combined. If a crack does form, consider covering it with whipped cream or fresh strawberries for a charming look—nobody will notice!

Can I make Gnome Mini Cheesecakes gluten-free?
Yes! Simply swap the graham cracker crumbs for gluten-free alternatives. There are many options available, and they all provide delicious results without the gluten. This way, everyone can enjoy the whimsical delight of these mini cheesecakes at your festive gatherings!

Are there any dietary considerations for pets or allergies?
Please note that this recipe contains common allergens, such as dairy and eggs, which can be harmful to pets. Always keep desserts out of reach of your furry friends. If serving to guests with allergies, be sure to double-check ingredient labels and consider alternative ingredients that suit their dietary needs.

Gnome Mini Cheesecakes

Gnome Mini Cheesecakes: Adorable Treats for Your Party

Delight in Gnome Mini Cheesecakes, charming little desserts that bring festive joy to your gatherings.
Print Recipe Pin Recipe
Prep Time 15 minutes mins
Cook Time 20 minutes mins
Chilling Time 2 hours hrs
Total Time 2 hours hrs 35 minutes mins
Servings: 12 cheesecakes
Course: Dessert
Cuisine: American
Calories: 200
Ingredients Equipment Method Nutrition Notes

Ingredients
  

Crust
  • 1 cup Graham Cracker Crumbs or gluten-free graham crackers or vanilla wafers
  • 2 tablespoons Granulated Sugar
  • 1/4 cup Butter (melted) coconut oil for dairy-free option
Filling
  • 16 ounces Cream Cheese Neufchâtel for lighter version
  • 1/2 cup Granulated Sugar for filling
  • 1 teaspoon Vanilla Extract classic version recommended
  • 2 large Eggs no substitutes unless no-bake version
  • 1/2 cup Sour Cream or Greek Yogurt for creaminess and tang
Toppings
  • 1 cup Whipped Cream for decoration
  • 1 cup Fresh Strawberries for hats
  • 1/2 cup Candies for noses

Equipment

  • Muffin tin
  • Electric mixer
  • Cupcake liners
  • Mixing bowls

Method
 

Preparation
  1. Preheat oven to 325°F (160°C) and line a muffin tin with cupcake liners.
  2. In a bowl, mix graham cracker crumbs, sugar, and melted butter.
  3. Press mixture into muffin cups to form the crust.
  4. Bake for 5 minutes until golden, then cool slightly.
  5. Beat cream cheese until smooth, then mix in sugar and vanilla.
  6. Add eggs one at a time, mixing on low speed after each addition. Fold in sour cream or yogurt.
  7. Spoon cheesecake batter into muffin cups, filling ¾ full.
  8. Bake for 18-20 minutes until edges are set and centers jiggle slightly.
  9. Cool in the oven for 10 minutes, then transfer to a rack and refrigerate for at least 2 hours.
  10. Decorate with whipped cream, fresh strawberries, and candies.

Nutrition

Serving: 1cheesecakeCalories: 200kcalCarbohydrates: 24gProtein: 3gFat: 10gSaturated Fat: 6gCholesterol: 40mgSodium: 150mgPotassium: 100mgFiber: 1gSugar: 12gVitamin A: 300IUVitamin C: 5mgCalcium: 40mgIron: 0.5mg

Notes

For best results, refrigerate cheesecakes for at least 2 hours before serving. Use creativity for decoration!

Tried this recipe?

Let us know how it was!

Joyful Grinch Mini Cheesecakes for a Festive Holiday Treat

December 21, 2025 by Grace Snow Leave a Comment

In the bustling kitchen of the holiday season, the laughter of children often blends with the aromas of baking delights. That’s precisely how I stumbled upon these Grinch Mini Cheesecakes—a whimsical nod to our favorite green mischief-maker. They’re not just adorable with their vibrant, neon green hue; they bring joy to every festive gathering. Perfectly nestled on a crunchy Oreo crust, these vegetarian Christmas desserts are quick to prepare and guaranteed to be a crowd-pleaser. Whether you’re hosting a holiday party or simply want to add a little cheer to your evening, these delightful mini cheesecakes will leave everyone smiling. So, are you ready to bring a sprinkle of holiday magic to your table? Let’s get started!

Why are these Grinch Mini Cheesecakes special?

Unforgettable visual appeal: The vibrant neon green color of these cheesecakes instantly brings festive cheer to any table.

Quick and easy: With simple ingredients and straightforward steps, even beginner bakers can create these delightful treats.

Rich, creamy texture: The creamy filling, paired with a crunchy Oreo crust, offers a delectable bite that everyone will love.

Versatile options: You can easily customize these mini cheesecakes—try topping them with crushed candy canes for an extra festive touch.

Crowd-pleasing delight: They’re perfect for holiday gatherings, entertaining guests of all ages, especially children! If you’re looking for more holiday treats, check out my Mini Tropical Pavlovas for another fun dessert option.

Grinch Mini Cheesecake Ingredients

• Delight in the festive flavors!

For the Crust

  • Oreo Crumbs – Provides a sweet, crunchy crust; you can swap with Graham cracker crumbs for a fun twist.
  • Butter, Melted – Binds the Oreo crumbs together; for a vegan option, try using coconut oil instead.

For the Filling

  • Cream Cheese, Softened (2 × 8 oz) – Gives the cheesecake its rich, creamy texture; ensure it's at room temperature for easy mixing.
  • Sugar (1/2 cup) – Sweetens the filling; a sugar alternative can be used for a lower-calorie option.
  • Eggs (2) – Adds structure and richness; for a vegan alternative, substitute with flax eggs (1 tablespoon flaxseed meal + 2.5 tablespoons water per egg).
  • Vanilla (1 tsp) – Enhances the flavor; opt for pure vanilla extract for the best taste.
  • Neon Green Food Coloring – Gives the festive Grinch-like color; this is optional but adds a pop of vibrancy.

These delicious Grinch Mini Cheesecakes are perfect for your holiday spread and embody the true spirit of festive treats!

Step‑by‑Step Instructions for Grinch Mini Cheesecakes

Step 1: Preheat and Prepare
Start by preheating your oven to 350°F (175°C) and lining a cupcake pan with festive cupcake liners. This setup ensures that your Grinch Mini Cheesecakes bake evenly and look delightful for any holiday gathering. While you prepare the crust and filling, it’s important to have the oven ready to create that perfect, creamy texture.

Step 2: Make the Crust
In a food processor, pulse about 10-11 Oreos until they form fine crumbs. Melt some butter and add it to the Oreo crumbs, mixing them together until they resemble wet sand. This combination creates a deliciously crunchy crust that adds depth to your Grinch Mini Cheesecakes. Once mixed, move on to the next step.

Step 3: Fill the Cupcake Liners
Evenly distribute the crumb mixture into the lined cupcake cups, using your fingers or the back of a spoon to press it down firmly. Aim for a compact layer that will hold up perfectly against the creamy filling. The contrast between the crunchy crust and smooth filling will make these festive treats irresistible.

Step 4: Prepare the Cheesecake Filling
In a medium bowl, add the softened cream cheese and sugar, mixing them together with an electric mixer until the mixture is smooth and free of lumps. This step is crucial for achieving the creamy texture that makes Grinch Mini Cheesecakes so delightful. Incorporate the eggs one at a time along with the vanilla extract, ensuring everything is blended well.

Step 5: Add a Pop of Color
Now, it’s time to bring your Grinch Mini Cheesecakes to life! Slowly mix in a few drops of neon green food coloring until you achieve your desired vibrant hue. This step not only makes them visually appealing but also captures the whimsical spirit of the holidays. Once combined, you're ready to fill the cupcake liners.

Step 6: Fill Each Cup
Spoon approximately 1/4 cup of the cheesecake batter into each cupcake liner, filling them to about three-quarters full. Ensure a smooth and even top using a small spatula or the back of a spoon. This step is crucial as it ensures that each mini cheesecake bakes evenly and develops that delightful creamy center.

Step 7: Bake to Perfection
Place the filled cupcake pan in the preheated oven and bake for 15-17 minutes. You'll know they’re done when the centers are slightly jiggly, which is key for that creamy texture in your Grinch Mini Cheesecakes. Be sure to keep an eye on them to prevent overbaking—this can dry out the delicious filling.

Step 8: Cool and Chill
Once baked, remove the pan from the oven and allow the cheesecakes to cool completely in the pan. This step helps them set perfectly without creating condensation on the liners. After they’ve cooled to room temperature, transfer them to the refrigerator and let them chill for at least 2 hours, or until firm.

Step 9: Serve and Enjoy
When ready to serve, consider topping your Grinch Mini Cheesecakes with whipped cream and festive sprinkles for that extra holiday charm. Present these delightful treats chilled, and watch as they bring smiles to everyone at your festive gathering. Their vibrant color and creamy texture truly embody the spirit of the season!

Expert Tips for Grinch Mini Cheesecakes

  • Room Temperature Cream Cheese: Ensure your cream cheese is at room temperature before mixing. This helps avoid lumps in your creamy filling and ensures smooth blending.

  • Don’t Overbake: Keep an eye on the baking time. The centers should remain slightly jiggly for that perfect, creamy texture in your Grinch Mini Cheesecakes.

  • Cool Gradually: Allow the mini cheesecakes to cool to room temperature in the pan before refrigerating. This prevents condensation from forming on the liners, keeping your treats looking pristine.

  • Creative Toppings: Experiment with festive toppings like crushed candy canes or holiday sprinkles. Not only does this enhance the visual appeal, but it also adds delightful textures and flavors.

  • Storage Tips: Store your Grinch Mini Cheesecakes in an airtight container in the refrigerator for up to 5 days or freeze un-topped for up to 2 months. Just remember to thaw before serving!

Grinch Mini Cheesecakes Variations & Substitutions

Feel free to tailor these delightful treats with a few personal twists that will bring extra joy to your gatherings.

  • Festive Toppings: Add crushed candy canes or holiday-themed sprinkles for a colorful, crunchy finish. These toppings not only enhance the visual appeal but provide a delightful contrast to the creamy filling.
  • Vegan Cream Cheese: Substitute standard cream cheese with your favorite vegan cream cheese to make these mini cheesecakes dairy-free. This way, everyone can indulge in the fun, festive flavors without a second thought!
  • Sugar Swap: Use coconut sugar or a sugar alternative to sweeten the filling, perfect for those looking for lower-calorie options. It will give your cheesecakes a unique flavor while still keeping that delightful sweetness intact.
  • Graham Cracker Crust: Switch the Oreo crumbs for Graham cracker crumbs for a slightly different flavor profile. It adds a touch of nostalgia and works wonderfully with the cheesecakes’ creamy filling.
  • Flavored Extracts: Experiment with flavored extracts like almond or peppermint instead of vanilla to give your cheesecakes a unique twist. The subtle flavor variations can elevate these treats to a whole new level!
  • Mini Cheesecake Bites: Pour the filling into mini muffin tins for bite-sized cheesecake delights. They’re not only adorable but also perfect for serving at holiday parties where guests love a variety of treats.
  • Different Colors: Have fun mixing up the food coloring! Use red or blue for different festive occasions, like red for Valentine's Day or blue for winter celebrations. This adds a playful touch that always delights kids and adults alike!
  • Add a Little Heat: For those who enjoy a hint of spice, try adding a pinch of cinnamon or nutmeg to the cheesecake filling. This will give your Grinch Mini Cheesecakes a warm and inviting flavor that’s perfect for the season.

Let your creativity flow and make these Grinch Mini Cheesecakes your own! And if you’re looking for more sweet treats, check out my Mini Tropical Pavlovas or try some other festive desserts for delightfully delicious inspiration!

What to Serve with Grinch Mini Cheesecakes?

Delight your guests with a full holiday meal featuring treats that complement the whimsical charm of these vibrant desserts.

  • Hot Cocoa Bar: A warm, rich cocoa station with toppings like marshmallows and whipped cream keeps the festive vibe alive.

  • Chewy Gingerbread Cookies: Their spicy sweetness harmonizes beautifully with the creamy cheesecakes, enhancing the holiday spirit.

  • Peppermint Bark: The cool, minty flavor of this classic treat provides a satisfying crunch and pairs perfectly with the smoothness of the cheesecakes.

    Imagine a cozy evening with the scent of ginger and chocolate wafting through the air while everyone savors the delightful cheesecakes.

  • Fruit Salad: A refreshing mix of seasonal fruits brightens the table and adds a burst of natural sweetness, balancing the rich flavors of the mini cheesecakes.

  • Vanilla Ice Cream: Serve a scoop alongside the cheesecakes for a delightful contrast in temperature and texture.

  • Mulled Wine: A spiced red wine brings warmth and sophistication, making it a perfect drink choice for holiday gatherings.

Let these pairings enhance your festive celebration as you share delicious moments and create lasting memories.

Make Ahead Options

These Grinch Mini Cheesecakes are perfect for meal prep, saving you precious time during the busy holiday season! You can prepare the crust and the cheesecake filling up to 24 hours in advance. Simply make the crust and press it into the cupcake liners, then mix your cheesecake filling and store it separately in the fridge. This helps maintain the crust's crunchiness. When you're ready to bake, just spoon the filling into the prepped crusts and pop them in the oven. They'll turn out just as delicious, ensuring your festive treat is a hit without the last-minute rush!

Storage Tips for Grinch Mini Cheesecakes

Fridge: Store in an airtight container in the refrigerator for up to 5 days. This keeps your Grinch Mini Cheesecakes fresh and creamy for any festive occasion.

Freezer: For longer storage, freeze un-topped mini cheesecakes for up to 2 months. Wrap tightly in plastic wrap to prevent freezer burn and preserve flavor.

Thawing: When ready to enjoy, thaw the frozen cheesecakes in the fridge overnight. This ensures a smooth texture upon serving.

Reheating: These mini cheesecakes are best served chilled. Avoid reheating, as it may alter the delightful creamy texture. Enjoy them straight from the fridge!

Grinch Mini Cheesecakes Recipe FAQs

How do I select ripe or fresh ingredients for this recipe?
Absolutely! For the best results, ensure your cream cheese is fresh and at room temperature. Look for cream cheese that's smooth and free of any lumps or dark spots. Also, check your eggs by cracking them open—fresh eggs should have a firm white and a bright yolk. If using food coloring, opt for gel-based colors for the most vibrant results.

What is the best way to store leftover Grinch Mini Cheesecakes?
You should store these mini cheesecakes in an airtight container in the fridge for up to 5 days. They’ll maintain their creamy texture beautifully. To ensure they stay fresh, avoid stacking them and use parchment paper between layers if necessary.

Can I freeze Grinch Mini Cheesecakes, and how do I do it?
Yes, you can absolutely freeze them! For the best results, freeze them un-topped in a single layer. Wrap each cheesecake tightly in plastic wrap and place them in a freezer-safe container. They can be stored for up to 2 months. When you’re ready to enjoy, simply remove them from the freezer and thaw in the fridge overnight before serving.

What should I do if my cheesecake batter has lumps?
Very important! If you notice lumps in your cheesecake batter, it usually means your cream cheese wasn't softened enough. To fix this, let the cream cheese sit at room temperature for about 30 minutes before mixing. If you're already mixing and notice lumps, try using a hand mixer or blender to fully incorporate the ingredients for a smooth consistency.

Are there any dietary considerations I should be aware of?
Yes, definitely! These Grinch Mini Cheesecakes are vegetarian-friendly, but if you have dietary restrictions, you can make them dairy-free by using a vegan cream cheese alternative. For those with egg allergies, substituting the eggs with flax eggs works wonderfully—combine 1 tablespoon of flaxseed meal with 2.5 tablespoons of water for each egg. Just remember to let it sit until it thickens!

Can I add different flavors or colors to this recipe?
The more, the merrier! Feel free to get creative! You can substitute the neon green food coloring with red for a fun Valentine’s theme or use blue for a winter wonderland look. Additionally, consider adding some peppermint extract or vanilla bean to the filling for a delightful flavor twist!

Grinch Mini Cheesecakes

Joyful Grinch Mini Cheesecakes for a Festive Holiday Treat

Grinch Mini Cheesecakes are vibrant, adorable desserts perfect for holiday gatherings, combining a creamy filling on a crunchy Oreo crust.
Print Recipe Pin Recipe
Prep Time 20 minutes mins
Cook Time 17 minutes mins
Chilling Time 2 hours hrs
Total Time 2 hours hrs 39 minutes mins
Servings: 12 mini cheesecakes
Course: Dessert
Cuisine: American
Calories: 210
Ingredients Equipment Method Nutrition Notes

Ingredients
  

For the Crust
  • 24 cookies Oreo Crumbs You can swap with Graham cracker crumbs for a fun twist.
  • 1/2 cup Butter, Melted For a vegan option, try using coconut oil instead.
For the Filling
  • 16 oz Cream Cheese, Softened Ensure it's at room temperature for easy mixing.
  • 1/2 cup Sugar A sugar alternative can be used for a lower-calorie option.
  • 2 large Eggs For a vegan alternative, substitute with flax eggs (1 tablespoon flaxseed meal + 2.5 tablespoons water per egg).
  • 1 tsp Vanilla Opt for pure vanilla extract for the best taste.
  • few drops Neon Green Food Coloring This is optional but adds a pop of vibrancy.

Equipment

  • Food Processor
  • Cupcake pan
  • Electric mixer
  • Mixing bowls

Method
 

Step-by-Step Instructions
  1. Preheat your oven to 350°F (175°C) and line a cupcake pan with festive cupcake liners.
  2. In a food processor, pulse about 10-11 Oreos until they form fine crumbs. Melt some butter and add it to the Oreo crumbs, mixing until they resemble wet sand.
  3. Evenly distribute the crumb mixture into the lined cupcake cups, pressing down firmly.
  4. In a medium bowl, mix the softened cream cheese and sugar using an electric mixer until smooth. Incorporate the eggs one at a time along with the vanilla extract.
  5. Mix in a few drops of neon green food coloring until you achieve the desired vibrant hue.
  6. Spoon approximately 1/4 cup of the cheesecake batter into each cupcake liner, filling them to about three-quarters full.
  7. Bake for 15-17 minutes until the centers are slightly jiggly.
  8. Allow the cheesecakes to cool completely in the pan, then refrigerate for at least 2 hours or until firm.
  9. Serve topped with whipped cream and festive sprinkles if desired.

Nutrition

Serving: 1mini cheesecakeCalories: 210kcalCarbohydrates: 24gProtein: 3gFat: 12gSaturated Fat: 7gCholesterol: 50mgSodium: 150mgPotassium: 80mgSugar: 10gVitamin A: 500IUCalcium: 40mgIron: 0.5mg

Notes

Ensure your cream cheese is at room temperature before mixing to avoid lumps. Store in an airtight container for up to 5 days in the fridge or freeze un-topped for up to 2 months.

Tried this recipe?

Let us know how it was!

Decadent Christmas Red Velvet Cheesecake for Holiday Joy

December 21, 2025 by Grace Snow Leave a Comment

As the holiday season approaches, I find myself eagerly anticipating the joy of festive gatherings and the deliciousness they bring. This isn't just any dessert; it’s a show-stopping Christmas Red Velvet Cheesecake that perfectly marries the classic richness of red velvet cake with the silky smoothness of cheesecake. Not only does it make a striking centerpiece for your holiday table, but it also promises a delightful taste experience that will leave your guests raving. Plus, it’s surprisingly easy to whip up, making it a perfect project even for the busiest hosts. So, are you ready to add a touch of magic to your holiday dessert spread? Let’s dive into making this unforgettable treat together!

Why is this cheesecake a holiday must-have?

Decadence at Its Finest: This Christmas Red Velvet Cheesecake elevates your dessert table with its stunning appearance and luxurious flavor, making it a show-stopping delight.

Easy to Make: You don't need to be a professional baker; this recipe is designed for all skill levels, ensuring everyone can enjoy a festive masterpiece.

Festive Touch: The vibrant red and white layers add a magical flair to any holiday gathering, brightening up your celebrations.

Crowd-Pleaser: The combination of rich red velvet and creamy cheesecake is sure to impress guests of all ages, leaving them wanting seconds.

Make-Ahead Friendly: Prepare it a day in advance, allowing for extra time to enjoy your family and festivities. Don’t forget to check out our tips on how to perfectly chill your cakes for the best results!

Christmas Red Velvet Cheesecake Ingredients

For the Cake Layers

  • All-purpose flour – Structure for the cake layers; use gluten-free flour for a gluten-free option.
  • Unsweetened cocoa powder – Adds a touch of chocolate flavor; choose high-quality cocoa for best results.
  • Baking powder & Baking soda – Essential leavening agents that ensure the cake rises beautifully.
  • Salt – Enhances flavor and balances the sweetness perfectly.
  • Granulated sugar – Provides sweetness and moisture for the cake.
  • Vegetable oil – Keeps the cake delightfully moist; canola oil works as a substitute.
  • Buttermilk – Adds a tangy flavor and moisture; substitute with milk and vinegar in equal parts.
  • Large eggs – These give the cake structure; remember to use room temperature eggs for smoother mixing.
  • Red food coloring – Essential for that signature red hue; opt for gel food coloring for vibrant results without altering texture.
  • Vanilla extract – Enhances the flavor in both the cake and the cheesecake layers.
  • White vinegar – Reacts with baking soda to keep the cake moist while enhancing its rise.

For the Cheesecake Filling

  • Cream cheese – The star of the cheesecake filling, offering rich creaminess and tang.
  • Sour cream – Contributes extra richness and moisture to the filling.
  • Powdered sugar – Sweetens the cheesecake filling and helps thicken it; sifting before use prevents lumps.
  • Unsalted butter – Adds creaminess to the frosting and enhances flavor; make sure it’s softened before use.

This Christmas Red Velvet Cheesecake will surely brighten your holiday celebrations, combining delectable flavors and stunning visuals!

Step‑by‑Step Instructions for Christmas Red Velvet Cheesecake

Step 1: Prepare Cake Layers
Begin by preheating your oven to 350°F (175°C) and greasing two 9-inch round cake pans with non-stick spray. In a medium bowl, whisk together the all-purpose flour, cocoa powder, baking powder, baking soda, and salt until well combined. In a separate larger bowl, mix the granulated sugar, vegetable oil, buttermilk, large eggs, red food coloring, vanilla extract, and white vinegar until smooth and homogeneous. Gradually combine the wet and dry ingredients, mixing until just combined, then divide the batter evenly into the prepared pans. Bake for 25-30 minutes, or until a toothpick inserted into the center comes out clean.

Step 2: Make Cheesecake Filling
While the cake layers cool, prepare your cheesecake filling. In a large mixing bowl, beat the cream cheese until creamy and smooth, then add the granulated sugar and sour cream, mixing until fully combined. Incorporate the eggs one at a time, adding the vanilla extract, and ensure the mixture is smooth again. Once your cheesecake batter is ready, pour it over the top of the cooled red velvet cake layers in the pans, spreading evenly. Bake in the oven at 325°F (163°C) for 30-35 minutes, or until the edges are set and the center is slightly jiggly.

Step 3: Prepare Frosting
After your cheesecake layers have cooled completely, it’s time to make the frosting. In a medium bowl, beat the softened unsalted butter and cream cheese together until creamy and fluffy. Gradually add in the sifted powdered sugar, mixing on low until incorporated, then increase the speed and add vanilla extract. Continue beating for 2-3 minutes, or until the frosting is light and airy. Set aside while you assemble the cake.

Step 4: Assemble the Cake
Once both the cake layers and cheesecake filling are fully cooled, it's time to assemble your festive delight. Place one cake layer on a serving plate or cake stand, carefully top it with half of the cheesecake filling, smoothing it out evenly. Repeat with the second layer, adding the remaining cheesecake filling on top. Finally, spread the cream cheese frosting over the top and sides of the assembled Christmas Red Velvet Cheesecake for a beautiful finish.

Step 5: Chill and Serve
To ensure the flavors meld beautifully and the frosting sets, chill the assembled cheesecake in the refrigerator for at least 4 hours, but overnight is best for a thicker texture. Once chilled, slice beautifully into pieces and serve to your eager guests, delighting in the rich layers and festive presentation that is sure to impress during your holiday gatherings.

Expert Tips for Christmas Red Velvet Cheesecake

  • Room Temperature Ingredients: Always use room temperature ingredients, like eggs and cream cheese, for smoother mixing and a fluffier texture in your cheesecake filling.

  • Avoid Overmixing: Beat the cheesecake filling slowly to prevent incorporating too much air, which can lead to cracks in your final product.

  • Proper Cooling: Ensure your cake layers are completely cool before adding the cheesecake filling. This prevents melting and ensures clean layers in your Christmas Red Velvet Cheesecake.

  • Chill Time is Key: Let the assembled cheesecake chill at least 4 hours, preferably overnight, to allow flavors to meld and the texture to set perfectly.

  • Sifting Powdered Sugar: Always sift your powdered sugar before adding it to the frosting. This prevents lumps and guarantees a silky, smooth frosting finish.

Make Ahead Options

Preparing this Christmas Red Velvet Cheesecake ahead of time is a fantastic way to save you stress during the busy holiday season! You can make the cake layers and cheesecake filling up to 24 hours in advance; simply bake and cool the layers, then wrap them tightly in plastic wrap and refrigerate. The cheesecake filling can be prepared the same day and stored in the fridge. When you're ready to assemble, take the layers and frosting out and let them come to room temperature before layering. This helps maintain moisture and flavor, ensuring your dessert is just as delicious as if it were made fresh! Finish by frosting the cheesecake and chilling for at least 4 hours, or overnight for the best results before serving.

What to Serve with Christmas Red Velvet Cheesecake

As you plan your holiday feast, consider delightful accompaniments to elevate your dessert experience even further.

  • Spiced Chai Tea: A warm cup of spiced chai adds a comforting, aromatic touch that perfectly contrasts the rich cheesecake.

  • Hot Cocoa: Indulge your sweet tooth with luxurious hot cocoa topped with whipped cream, enhancing that cozy holiday feeling.

  • Fresh Berries: Garnish with raspberries or strawberries for a burst of freshness that cuts through the richness of the cheesecake.

  • Peppermint Bark: A festive treat that combines crunch and minty sweetness, adding a delightful textural contrast and holiday spirit.

  • Vanilla Ice Cream: A scoop of creamy vanilla ice cream complements the velvety texture of the cheesecake beautifully, creating a decadent duo.

  • Festive Fruit Salad: A light, fruity salad featuring citrus and pomegranate provides a refreshing balance to the rich flavors of the cheesecake.

  • Sparkling Wine: A chilled glass of sparkling wine adds a celebratory touch, its effervescence marrying wonderfully with the cheesecake's richness.

  • Chocolate Ganache: Drizzle warm chocolate ganache over each slice for an extra layer of indulgence and a rich, luscious finish.

  • Gingerbread Cookies: Add childhood nostalgia with chewy gingerbread cookies; their spices will harmonize with the holiday flavors in your cheesecake.

Christmas Red Velvet Cheesecake Variations

Customize your Christmas Red Velvet Cheesecake to make it truly one-of-a-kind, embracing flavors that warm the heart and soul!

  • Chocolate Twist: Stir in some chocolate chips into the cheesecake layer for an additional burst of flavor that the chocolate lovers will adore.

  • Natural Coloring: Replace the red food coloring with natural beet juice for a healthier option and a beautiful earth-toned hue. Your dessert still retains that festive allure!

  • Peppermint Crunch: Top it with crushed peppermint candies or candy canes for a refreshing, minty finish that adds a delightful crunch and perfect holiday spirit.

  • Berry Burst: Add fresh raspberries or strawberries on top for a pop of color and a tart flavor that pairs beautifully with the sweetness of the cheesecake.

  • Nutty Surprise: Incorporate finely chopped nuts, such as pecans or walnuts, into your cheesecake filling for an added crunch and rustic flavor.

  • Spiced Infusion: Add a sprinkle of cinnamon or nutmeg to the batter for a warm, cozy flavor that screams holiday cheer and enhances the festive vibe.

  • Lemon Zest Freshness: Brighten up the cream cheese frosting by mixing in some fresh lemon zest. The citrus notes will give a tangy balance to the richness of the cheesecake.

  • Personalize the Frosting: Instead of the standard cream cheese frosting, try a chocolate ganache or a whipped cream topping for a unique twist that can satisfy different taste preferences.

Every variation offers a new way to share love through cooking. Don't forget to look at our tips on how to make the perfect chocolate ganache for additional inspiration!

How to Store and Freeze Christmas Red Velvet Cheesecake

Fridge: Store any leftover Christmas Red Velvet Cheesecake in an airtight container in the fridge for up to 5 days, ensuring it remains fresh and delicious.

Freezer: If you want to keep it longer, freeze slices wrapped in plastic wrap and aluminum foil for up to 2 months; allow to thaw in the refrigerator before serving.

Reheating: This cheesecake is best enjoyed chilled, so serve it straight from the fridge. No need for reheating; simply slice and savor all that luscious flavor!

Christmas Red Velvet Cheesecake Recipe FAQs

What’s the best way to select ripe ingredients?
Absolutely! For the best results, ensure your eggs are at room temperature before mixing, as this helps them blend more evenly into the batter. Choose fresh, high-quality buttermilk for a richer flavor, and opt for a pure, gel food coloring for that vibrant red hue—this won't alter the texture and provides a more intense color.

How should I store leftover cheesecake?
Very! Store any remaining portions of your Christmas Red Velvet Cheesecake in an airtight container in the refrigerator for up to 5 days. If you're using a cake dome or wrap, it helps keep the cheesecake moist and fresh, ready for you to enjoy at any time during the holiday week!

Can I freeze my cheesecake, and if so, how?
Of course! To freeze your cheesecake, slice it into individual portions first for easy access later. Wrap each slice tightly in plastic wrap, then place it in an airtight container or freezer bag. It will stay delicious in the freezer for up to 2 months. When you’re ready to indulge, remove it from the freezer and let it thaw in the refrigerator for a few hours or overnight.

What if my cheesecake cracks while baking?
No worries! If your cheesecake layer cracks, you can easily cover it with frosting for a smooth finish. Remember to mix your cheesecake batter on low speed to avoid incorporating too much air, which can lead to cracks during the baking process. Additionally, placing a shallow pan of water in the oven while baking can help create a steamy environment, preventing cracks.

Is this cheesecake safe for pets or those with allergies?
Great question! This Christmas Red Velvet Cheesecake contains ingredients like cream cheese and sugar that aren't suitable for pets, especially dogs and cats, as they can lead to digestive issues. For those with allergies, be mindful of the gluten in regular flour; consider using gluten-free flour instead, and be sure to check for any specific allergies in your guests before serving.

Christmas Red Velvet Cheesecake

Decadent Christmas Red Velvet Cheesecake for Holiday Joy

This Christmas Red Velvet Cheesecake combines richness and elegance, making it a holiday must-have!
Print Recipe Pin Recipe
Prep Time 30 minutes mins
Cook Time 1 hour hr 5 minutes mins
Chill Time 4 hours hrs
Total Time 5 hours hrs 35 minutes mins
Servings: 12 slices
Course: Dessert
Cuisine: American
Calories: 350
Ingredients Equipment Method Nutrition Notes

Ingredients
  

Cake Layers
  • 2 cups all-purpose flour can use gluten-free flour
  • 1 tablespoon unsweetened cocoa powder choose high-quality cocoa
  • 1 teaspoon baking powder
  • 1 teaspoon baking soda
  • 1 teaspoon salt
  • 1.5 cups granulated sugar
  • 0.5 cups vegetable oil canola oil works as a substitute
  • 1 cup buttermilk substitute with milk and vinegar
  • 2 large eggs use room temperature
  • 2 tablespoons red food coloring opt for gel food coloring
  • 1 teaspoon vanilla extract
  • 1 teaspoon white vinegar
Cheesecake Filling
  • 16 ounces cream cheese softened
  • 0.5 cups sour cream
  • 1 cup powdered sugar sifted
  • 0.25 cups unsalted butter softened

Equipment

  • Oven
  • Mixing bowls
  • Whisk
  • Cake Pans
  • Electric mixer

Method
 

Preparation
  1. Preheat the oven to 350°F (175°C) and grease two 9-inch round cake pans.
  2. Whisk flour, cocoa powder, baking powder, baking soda, and salt in a bowl.
  3. In another bowl, mix sugar, oil, buttermilk, eggs, food coloring, vanilla, and vinegar until smooth.
  4. Combine wet and dry ingredients, divide batter into pans, and bake for 25-30 minutes.
  5. For the cheesecake, beat cream cheese, add sugar and sour cream, mix in eggs and vanilla.
  6. Pour cheesecake mixture over cooled cake layers and bake at 325°F (163°C) for 30-35 minutes.
  7. For the frosting, beat butter and cream cheese until fluffy, then add sifted powdered sugar and vanilla.
  8. Assemble by layering cake and cheesecake, topping with frosting.
  9. Chill assembled cheesecake for at least 4 hours before serving.

Nutrition

Serving: 1sliceCalories: 350kcalCarbohydrates: 45gProtein: 5gFat: 18gSaturated Fat: 10gPolyunsaturated Fat: 1gMonounsaturated Fat: 5gCholesterol: 80mgSodium: 350mgPotassium: 200mgFiber: 1gSugar: 30gVitamin A: 500IUCalcium: 80mgIron: 1mg

Notes

Ensure all ingredients are at room temperature for best results. Chill overnight for optimal flavor melding.

Tried this recipe?

Let us know how it was!

Strawberry Cheesecake Cookies that Melt in Your Mouth

December 21, 2025 by Grace Snow Leave a Comment

As I was preparing for a get-together with friends, a thought struck me – wouldn’t it be delightful to offer them something that blends the nostalgia of cheesecake with the comforting appeal of cookies? Enter my Strawberry Cheesecake Cookies, a delightful fusion that’s both easy to make and utterly impressive. These cookies boast a soft, tender base that envelops a creamy cheesecake filling with luscious swirls of homemade strawberry jam, making them the perfect treat to brighten anyone's day. They're not just crowd-pleasers; with minimal prep time, they seamlessly fit into your busy schedule, allowing you to indulge your passion for baking without the fuss. Curious about how to make these delightful treats? Let’s dive in!

Why are Strawberry Cheesecake Cookies so irresistible?

Creamy, Dreamy Filling: The luscious cheesecake filling melts in your mouth, offering a delightful surprise with every bite.
Homemade Jam Goodness: Each cookie is swirled with homemade strawberry jam, enhancing the cookie experience with fresh, fruity bursts.
Quick and Easy: This recipe is simple enough for bakers of any level, perfect for those busy days when you crave homemade goodness.
Versatile Pairings: Enjoy them with a cup of Earl Grey tea or proudly display them on your dessert table!
Impress Your Guests: These cookies are a showstopper at gatherings, sure to wow everyone without requiring hours in the kitchen.
Whether you're a fan of Eggnog Cookies Soft or you want to try something unique, these Strawberry Cheesecake Cookies will certainly satisfy your sweet tooth!

Strawberry Cheesecake Cookies Ingredients

For the Cheesecake Filling

  • Cream Cheese – Provides a rich, creamy filling; substitute with mascarpone for a milder flavor.
  • Sugar – Sweetens the cheesecake filling; adjust to taste for desired sweetness.
  • Vanilla Extract – Enhances flavor depth; almond extract can be used for a different twist.

For the Cookies

  • Butter – Adds richness and tenderness; margarine or vegan butter can be substituted.
  • Sugar – Sweetens the cookie dough; feel free to modify for your sweetness preference.
  • Egg – Acts as a binding agent; a flax egg is a great vegan alternative.
  • Flour – Provides structure; gluten-free flour is an excellent substitute for those with sensitivities.
  • Baking Powder/Baking Soda – Creates the perfect rise; ensure freshness for best results.
  • Salt – Enhances overall flavor; essential for balancing sweetness, but use sparingly.

For the Strawberry Jam

  • Strawberries – Fresh berries are crucial for homemade jam and flavor pockets in cookies; any other fresh jam fruit can work as a substitute.
  • Sugar (for jam) – Sweetens the homemade jam; adjust based on the natural sweetness of the strawberries.

For Garnish

  • Powdered Sugar – Adds a sweet finish to the cookies; use it to sprinkle on top based on personal preference.

Step‑by‑Step Instructions for Strawberry Cheesecake Cookies

Step 1: Prepare Cheesecake Filling
In a mixing bowl, combine 8 oz of cold cream cheese with 1/3 cup of sugar and 1 tsp of vanilla extract. Beat until the mixture is completely smooth, about 2-3 minutes. Transfer the filling to a shallow dish, spreading it evenly, and freeze for approximately 1 hour until firm. This step ensures your cheesecake filling maintains its shape when nestled in the Strawberry Cheesecake Cookies.

Step 2: Make Strawberry Jam
In a saucepan over medium heat, cook 2 cups of diced strawberries with 1/2 cup of sugar. Gently mash the strawberries halfway through cooking to release their juices. Stir continuously, allowing the mixture to thicken for about 45 minutes. The jam is ready when it coats the back of a spoon and glistens. Let it cool completely before incorporating it into the cookies.

Step 3: Mix Dry Ingredients
In a separate bowl, whisk together 2 cups of all-purpose flour, 1 tsp of baking powder, 1/2 tsp of baking soda, and 1/4 tsp of salt. Ensure that all dry ingredients are well-combined for even distribution, which is crucial for the Strawberry Cheesecake Cookies' texture. Set the bowl aside as you move on to preparing the wet mixture.

Step 4: Cream Butter and Sugar
Using an electric mixer, beat 1 cup of softened butter with 1 cup of sugar on medium speed until it becomes light and fluffy, taking about 3-5 minutes. Then, add in 1 large egg and 1 tsp of vanilla extract, mixing until the batter turns pale and fluffy. This creamy base will provide a rich flavor that perfectly complements the cheesecake filling.

Step 5: Combine Mixtures
Gradually incorporate the dry ingredients into the wet mixture, mixing on low speed just until combined. Be cautious not to overmix, as this can lead to tough cookies. You'll want to achieve a soft, slightly sticky dough that's easy to work with. It should be a lovely pale yellow, hinting at the rich flavor of the Strawberry Cheesecake Cookies.

Step 6: Layer Dough with Jam
Gently fold in half of the prepared strawberry jam into the cookie dough, ensuring that you create pockets of flavor without over-mixing. You’ll want to see vibrant swirls of jam throughout the dough for those delightful bursts of strawberry in each cookie. Set the remaining jam aside for later use as a topping.

Step 7: Assemble Cookies
Preheat your oven to 350°F (175°C) and line a baking sheet with parchment paper. Scoop out a portion of cookie dough (about 2 tablespoons), flatten it slightly, and place a frozen cheesecake disc in the center. Encapsulate the disc with the dough, rolling it into a ball, then rolling the top in sugar for added sweetness and texture. Repeat with the remaining dough.

Step 8: Bake
Arrange the assembled cookies on the prepared baking sheet, spacing them about 2 inches apart. Bake them in the preheated oven for 11-12 minutes until the edges are lightly golden and the centers are set. If needed, gently adjust their shape with a cookie cutter as they cool. The Strawberry Cheesecake Cookies will be soft and irresistible!

Strawberry Cheesecake Cookies Variations

Embrace your inner creativity with these delightful tweaks to your Strawberry Cheesecake Cookies!

  • Ricotta Filling: Substitute cream cheese with ricotta for a lighter, fluffier filling. You'll be surprised at how evenly this alternative complements the jam!

  • Lemon Zest: Add a teaspoon of fresh lemon zest to the filling for a bright, zesty pop. This twist creates a refreshing contrast with the strawberries that’s simply enchanting!

  • Gluten-Free Flour: Swap all-purpose flour for gluten-free flour to cater to dietary needs without sacrificing texture. You won’t believe how delicious they can be, regardless of dietary restrictions.

  • Chopped Nuts: Incorporate finely chopped pecans or walnuts into the dough for added crunch. This will bring a new dimension to your cookies, making each bite even more exciting.

  • Dark Chocolate: Add dark chocolate chips into the cookie dough for a rich flavor contrast. The combination of chocolate and strawberry is a match made in heaven!

  • Spicy Kick: Mix in a pinch of cayenne pepper or chili powder to the dough for a subtle heat. This surprising layer will elevate the sweetness and create an adventurous taste sensation!

  • Peach Jam Swirls: Substitute the strawberry jam with homemade peach jam for a delightful flavor twist. Peach and cream combine to create a unique blend that’s simply dreamy.

  • Coconut Flakes: Fold in unsweetened shredded coconut to the dough for a tropical vibe. The hint of coconut transports you to sunny days, making these cookies a mini-vacation in every bite.

No matter how you choose to make them, these Strawberry Cheesecake Cookies promise to satisfy all your cravings! And if you’re looking for more flavor-packed treats, you might enjoy experimenting with Matcha Cookies Soft or Mexican Wedding Cookies for your next baking adventure.

Helpful Tricks for Strawberry Cheesecake Cookies

  • Chill the Filling: Freezing the cheesecake filling is essential; it prevents it from melting into the cookies during baking, ensuring a delightful surprise.
  • Avoid Overmixing: Keep the dough tender by mixing just until combined. Overmixing can lead to tough cookies instead of the soft Strawberry Cheesecake Cookies you desire.
  • Fresh Produce Matters: Use only the ripest strawberries for your homemade jam. Fresh berries yield the best flavor, enhancing the overall cookie experience.
  • Roll in Sugar: Rolling the cookie dough in sugar before baking adds an irresistible sweetness and a delightful crunch that complements the soft interior.
  • Proper Cooling: Allow cookies to cool on the baking sheet for a few minutes before transferring them to a wire rack. This step helps them hold their shape and lets the flavors develop.

Make Ahead Options

These Strawberry Cheesecake Cookies are perfect for meal prep and save you precious time on busy days! You can make the cheesecake filling and strawberry jam up to 3 days in advance. Simply prepare the filling and jam according to the instructions, then store them separately in airtight containers in the refrigerator. The cookie dough can also be assembled and refrigerated up to 24 hours before baking; just wrap it tightly in plastic wrap to prevent drying. When you're ready to enjoy these delightful cookies, simply bake them as directed, and they'll come out just as delicious, with that perfect creamy center and fruity jam swirl!

Storage Tips for Strawberry Cheesecake Cookies

Room Temperature: Store cookies in an airtight container at room temperature for up to 3 days to keep them fresh.

Fridge: If you prefer a chilled treat, these cookies can be kept in the fridge for up to 5 days. Just ensure they are well-wrapped to avoid drying out.

Freezer: For longer preservation, freeze the cookies in a single layer on a baking sheet until solid, then transfer to an airtight container. They will stay fresh for up to 3 months.

Reheating: When ready to enjoy, allow frozen cookies to thaw at room temperature, then warm them in a 350°F (175°C) oven for about 5-7 minutes for that fresh-baked taste.

What to Serve with Strawberry Cheesecake Cookies

Pair your delectable treats with these delightful accompaniments that enhance the flavor and elevate your dessert experience.

  • Earl Grey Tea: The fragrant notes of bergamot in this tea perfectly complement the creamy cheesecake filling, creating a beautifully balanced pairing. Sip slowly and enjoy the harmony of flavors.

  • Fresh Strawberries: This classic pairing highlights the cookie's strawberry jam, offering a refreshing burst of sweetness that complements every bite. Serve them alongside as a refreshing palate cleanser.

  • Mint Garnishes: A sprig of fresh mint not only adds a pop of color but also delivers a cool, refreshing contrast to the rich flavors of the cookies. It’s a visual and taste delight.

  • Vanilla Ice Cream: Serve your cookies warm with a scoop of vanilla ice cream on top. The creamy coldness perfectly balances the soft, chewy texture of the cookies.

  • Homemade Whipped Cream: Light and airy, whipped cream adds a luscious touch to each cookie, enhancing the dessert experience without overshadowing the flavors. A sprinkle of powdered sugar over the top seals the deal.

  • Chocolate Drizzle: A simple drizzle of melted chocolate over the cookies adds a touch of decadence that pairs wonderfully with the sweetness of strawberry jam. It’s an indulgent twist!

Strawberry Cheesecake Cookies Recipe FAQs

How do I select ripe strawberries for my homemade jam?
Absolutely! When choosing strawberries, look for ones that are bright red and firm, with no dark spots or soft areas. A fragrant aroma is also a good indicator of ripeness. If they are too soft or have significant bruising, they may not yield the best flavor for your jam.

What is the best way to store Strawberry Cheesecake Cookies?
For up to 3 days, store the cookies in an airtight container at room temperature to maintain their freshness. If you want to keep them longer, place a slice of bread in the container; it helps maintain moisture. Alternatively, for up to 5 days, they can be kept in the fridge if wrapped properly to prevent drying out.

Can I freeze these Strawberry Cheesecake Cookies, and how should I do it?
Absolutely! To freeze, first, arrange the assembled cookies in a single layer on a baking sheet. Freeze until they're solid, which takes about an hour. Then, transfer them to an airtight container, layering them with parchment paper, and they will stay fresh for up to 3 months. When you’re ready to enjoy, thaw at room temperature and warm them in the oven for that fresh-baked feel.

What should I do if my cookies spread too much while baking?
If your Strawberry Cheesecake Cookies spread too much, it could be due to butter that was too warm or not enough flour. To troubleshoot, ensure that your butter is softened but not melted. Also, double-check that you are measuring your flour correctly (spooning it into the measuring cup and leveling off) to ensure you have enough structure in the dough.

Are there any dietary considerations I should be aware of when making these cookies?
Very! If you wish to cater to allergies or dietary restrictions, consider using a dairy-free cream cheese and a flax egg as a substitute for the regular egg. For gluten sensitivity, you can use a gluten-free flour blend. Always double-check with your guests regarding any food sensitivities before serving these delightful treats!

Strawberry Cheesecake Cookies

Strawberry Cheesecake Cookies that Melt in Your Mouth

Strawberry Cheesecake Cookies are a delightful fusion of cheesecake and cookies, perfect for any occasion.
Print Recipe Pin Recipe
Prep Time 1 hour hr
Cook Time 12 minutes mins
Freezing Time 1 hour hr
Total Time 2 hours hrs 12 minutes mins
Servings: 24 cookies
Course: Dessert
Cuisine: American
Calories: 200
Ingredients Equipment Method Nutrition Notes

Ingredients
  

For the Cheesecake Filling
  • 8 oz Cream Cheese Provides a rich, creamy filling; substitute with mascarpone for a milder flavor.
  • 1/3 cup Sugar Sweetens the cheesecake filling; adjust to taste for desired sweetness.
  • 1 tsp Vanilla Extract Enhances flavor depth; almond extract can be used for a different twist.
For the Cookies
  • 1 cup Butter Adds richness and tenderness; margarine or vegan butter can be substituted.
  • 1 cup Sugar Sweetens the cookie dough; feel free to modify for your sweetness preference.
  • 1 large Egg Acts as a binding agent; a flax egg is a great vegan alternative.
  • 2 cups Flour Provides structure; gluten-free flour is an excellent substitute for those with sensitivities.
  • 1 tsp Baking Powder Creates the perfect rise; ensure freshness for best results.
  • 1/2 tsp Baking Soda Creates the perfect rise; ensure freshness for best results.
  • 1/4 tsp Salt Enhances overall flavor; essential for balancing sweetness, but use sparingly.
For the Strawberry Jam
  • 2 cups Strawberries Fresh berries are crucial for homemade jam and flavor pockets in cookies.
  • 1/2 cup Sugar Sweetens the homemade jam; adjust based on the natural sweetness of the strawberries.
For Garnish
  • to taste Powdered Sugar Adds a sweet finish to the cookies; use it to sprinkle on top based on personal preference.

Equipment

  • Mixing Bowl
  • Electric mixer
  • Saucepan
  • Baking Sheet
  • Parchment Paper

Method
 

Preparation Steps
  1. In a mixing bowl, combine 8 oz of cold cream cheese with 1/3 cup of sugar and 1 tsp of vanilla extract. Beat until smooth, about 2-3 minutes. Transfer to a shallow dish and freeze for 1 hour.
  2. In a saucepan over medium heat, cook 2 cups of diced strawberries with 1/2 cup of sugar. Mash halfway through. Cook until thickened, about 45 minutes.
  3. In a separate bowl, whisk together 2 cups of flour, 1 tsp of baking powder, 1/2 tsp of baking soda, and 1/4 tsp of salt.
  4. Beat 1 cup of softened butter with 1 cup of sugar until light and fluffy, about 3-5 minutes. Add 1 large egg and 1 tsp of vanilla extract, mixing until pale and fluffy.
  5. Gradually incorporate the dry ingredients into the wet mixture, mixing on low speed just until combined.
  6. Gently fold in half of the prepared strawberry jam into the cookie dough.
  7. Preheat your oven to 350°F (175°C) and line a baking sheet with parchment paper. Scoop out a portion of cookie dough, flatten it, and place a cheesecake disc in the center. Encapsulate with the dough and roll in sugar.
  8. Arrange the cookies on the baking sheet and bake for 11-12 minutes until edges are golden and centers are set.

Nutrition

Serving: 1cookieCalories: 200kcalCarbohydrates: 30gProtein: 2gFat: 9gSaturated Fat: 5gPolyunsaturated Fat: 1gMonounsaturated Fat: 3gCholesterol: 35mgSodium: 90mgPotassium: 100mgFiber: 1gSugar: 15gVitamin A: 250IUVitamin C: 4mgCalcium: 40mgIron: 0.5mg

Notes

Chilling the filling is essential to prevent it from melting into the cookies during baking. Use fresh strawberries for the best flavor.

Tried this recipe?

Let us know how it was!

Irresistible Strawberry Shortcake Cheesecake for Sweet Lovers

December 21, 2025 by Grace Snow Leave a Comment

Walking through the vibrant aisles of a local farmers' market, I spotted the first fresh strawberries of the season, glistening in the sunlight. That sensory zap inspired me to whip up a dessert that marries nostalgia with indulgence: Strawberry Shortcake Cheesecake. This easy recipe takes the classic flavors of strawberry shortcake and elevates them to creamy heights, making it the perfect crowd-pleaser for any gathering or a delightful treat when you simply need a sweet escape. Not only does it come together quickly, but it also looks stunning when served, ensuring you leave a lasting impression on your guests. So, ready to make a show-stopping dessert that’s as irresistible as it is beautiful? Let’s dive in!

Why will you love this cheesecake?

Irresistible Flavor: This Strawberry Shortcake Cheesecake combines the refreshing taste of strawberries with the rich, creamy goodness of cheesecake, creating a dessert that will have everyone asking for seconds.

Effortless Preparation: With a straightforward recipe, you'll spend less time in the kitchen and more time enjoying the delicious results.

Visual Appeal: The vibrant pink of the strawberry topping and the luscious whipped cream make each slice a feast for the eyes, perfect for impressing guests at your next gathering.

Customizable Delight: Feel free to experiment with different fruit flavors or swap out ingredients for dietary preferences, making it a versatile treat for every occasion.

Crowd-Pleaser: Whether it's a family dinner or a potluck, this cheesecake is sure to be a hit, leaving everyone in awe of your baking skills!

Strawberry Shortcake Cheesecake Ingredients

For the Crust
• Graham Cracker Crumbs – Provides a buttery base; you can substitute crushed Golden Oreos for a sweeter twist.
• Granulated Sugar – Sweetens the crust and filling; consider using coconut sugar for a healthier alternative.
• Melted Butter – Binds the crust ingredients together; can be replaced with margarine for a dairy-free option.

For the Cheesecake Filling
• Cream Cheese – Creates the rich, creamy filling; Greek yogurt works as a lighter substitute but will alter the texture slightly.
• Sour Cream – Adds creaminess and a tangy flavor; plain Greek yogurt can be used for a similar effect.
• Vanilla Extract – Enhances the cheesecake's flavor; substitute with almond extract for a different taste profile.
• Eggs – Binds the filling together; for a vegan option, use flax eggs (1 tablespoon ground flaxseed + 2.5 tablespoons water per egg).

For the Strawberry Topping
• Strawberry Jell-O – Creates the vibrant strawberry topping and provides sweetness; can be replaced with natural fruit puree for a cleaner ingredient list.
• Fresh Strawberries – Offers fresh flavor and decoration; feel free to substitute with any berry based on preference or season.

For the Whipped Cream
• Heavy Whipping Cream – Essential for whipping into stiff peaks for topping; coconut cream can be used as a non-dairy alternative.
• Powdered Sugar – Sweetens the whipped cream; can be omitted or replaced with an alternative sweetener for less sweetness.

For the Crumble Topping
• Golden Oreos (or Vanilla Cookies) – Used for adding a shortcake crumble on top; any similar cookie may also be substituted.

Step‑by‑Step Instructions for Strawberry Shortcake Cheesecake

Step 1: Prepare the Oven & Crust
Preheat your oven to 325°F (160°C) while you prepare the crust for the Strawberry Shortcake Cheesecake. In a mixing bowl, combine the graham cracker crumbs, granulated sugar, and melted butter. Stir until well-mixed, then press this mixture evenly into the bottom of a 9-inch springform pan. Bake for 10 minutes until set and golden, then remove it from the oven to cool.

Step 2: Make the Filling
In a large mixing bowl, beat the cream cheese and granulated sugar together until smooth and creamy. Gradually mix in the sour cream and vanilla extract, ensuring everything is well-combined. Add the eggs one at a time, mixing thoroughly after each addition to create a light, airy filling.

Step 3: Bake the Cheesecake
Pour the luscious filling carefully over the cooled crust in your springform pan. Place the pan in the preheated oven and bake for 45-50 minutes, or until the center is slightly wobbly but set. Once done, turn off the oven, crack the door, and let the cheesecake cool at room temperature for about an hour before transferring it to the fridge to chill for at least 4 hours or overnight.

Step 4: Prepare Strawberry Layer
To create the colorful strawberry topping, start by dissolving the Strawberry Jell-O in boiling water. Once mixed, stir in cold water and set it aside to cool until it becomes slightly thickened. Fold in your whipped topping and chopped fresh strawberries gently for a fresh burst of flavor, then pour this mixture over the chilled cheesecake, spreading it evenly.

Step 5: Finish with Whipped Cream
For the final touch, whip the heavy cream with powdered sugar and vanilla extract until stiff peaks form, creating a fluffy topping. Spread this whipped cream generously over the chilled strawberry layer, ensuring an even coverage that makes the Strawberry Shortcake Cheesecake look decadent and inviting.

Step 6: Add Crumble
In a small bowl, combine crushed Golden Oreos with melted butter and dry Jell-O powder for a delightful crumble topping. Sprinkle this mixture evenly over the whipped cream layer, adding a crispy texture that enhances both flavor and presentation.

Step 7: Chill and Serve
After adding the crumble, return the finished Strawberry Shortcake Cheesecake to the refrigerator for another hour to let everything set beautifully. When you’re ready to serve, slice it up carefully and enjoy the incredible layers of flavor and texture!

Expert Tips for Strawberry Shortcake Cheesecake

  • Perfect Cooling: Allow the cheesecake to cool completely before refrigerating to prevent excess moisture, enhancing the flavor of your Strawberry Shortcake Cheesecake.

  • Prevent Cracks: Bake the cheesecake in a water bath by placing it in a larger pan filled with hot water. This method helps to maintain even heat, resulting in a smooth surface.

  • Whipped Cream Technique: Whip the heavy cream to stiff peaks for the best texture. This lightens the dessert and adds a delightful layer of sweetness atop your cheesecake.

  • Fresh Fruit: Always use fresh strawberries for the topping. Frozen strawberries can release excess moisture, which might affect the texture and presentation of your Strawberry Shortcake Cheesecake.

  • Customize Flavor: Feel free to experiment with different flavored Jell-O or fruit purees for the topping, allowing you to create variations of your beloved Strawberry Shortcake Cheesecake.

Strawberry Shortcake Cheesecake Variations

Feel free to let your creativity shine by customizing this delightful recipe based on your taste preferences!

  • Dairy-Free Delight: Replace the cream cheese with a vegan cream cheese alternative for a dairy-free option that’s equally creamy.

  • Nutty Flavor: Add crushed almonds or pecans to the graham cracker crust for an extra crunch and a burst of nutty goodness.

  • Lemon Zest: Incorporate lemon zest into the cheesecake filling for a refreshing citrusy twist that pairs beautifully with strawberries.

  • Chocolate Drizzle: After assembling, enhance the dessert by drizzling melted dark chocolate over the top for a decadent touch.

  • Add Heat: Toss in a pinch of cayenne pepper or chili powder into the strawberry topping for a surprising hint of heat that complements the sweetness.

  • Different Berries: Swap out fresh strawberries for raspberries, blueberries, or blackberries, creating a colorful medley of flavors and textures.

  • Plant-Based: Use silken tofu blended until smooth instead of cream cheese for a light and plant-based cheesecake option that’s still oh-so-satisfying.

  • Similar Cookies: Feel free to mix things up by using crushed chocolate wafers or vanilla wafers in place of Golden Oreos to vary the flavor profile.

Let these variations inspire you to craft a Strawberry Shortcake Cheesecake that's uniquely yours, perfect for sharing with family and friends! And if you’re in the mood for another delightful dessert, you might also enjoy exploring a delicious classic cheesecake or a refreshing fruit tart.

What to Serve with Strawberry Shortcake Cheesecake

Indulging in this delightful dessert opens the door to pairing a variety of sides that will enhance your experience.

  • Fresh Berries: A bowl of mixed berries brings brightness and contrasts the creamy cheesecake beautifully. The tartness of raspberries or blueberries can be especially refreshing.

  • Vanilla Ice Cream: The classic creamy flavor of vanilla ice cream complements the strawberry notes, creating a mouthwatering combination that feels indulgent and nostalgic.

  • Lemon Sorbet: This light and zesty treat offers a refreshing contrast to the rich cheesecake, cleansing the palate while enhancing the fruity flavor profile.

  • Minted Fruit Salad: Tossed with a hint of mint, a fruit salad featuring seasonal fruits can add a vibrant, fresh element to the table. The sweetness blends perfectly with the cheesecake.

  • Sparkling Lemonade: A glass of chilled sparkling lemonade offers a crisp, tangy sip that's invigorating and balances the sweet layers of the cheesecake beautifully.

  • Chocolate-Covered Strawberries: These elegant treats not only serve as a visual delight but also provide a sweet chocolatey pop that pairs fabulously with your strawberry shortcake cheesecake.

  • Coffee or Espresso: A robust cup of coffee or shot of espresso can enhance the sweetness of the dessert while providing a warm, comforting contrast to the chilled cheesecake.

  • Whipped Cream: Extra whipped cream on the side adds a delightful presentation factor, and it can be enjoyed with each perfect slice.

Each of these pairings amplifies the essence of your Strawberry Shortcake Cheesecake, making for a complete and pleasing dessert experience.

Make Ahead Options

These delightful Strawberry Shortcake Cheesecake are perfect for busy home cooks looking to save time! You can prepare the cheesecake filling and crust up to 3 days in advance, simply refrigerate them separately in airtight containers to maintain their freshness. Additionally, the strawberry topping can be made the day before and kept in the fridge, which allows the flavors to meld beautifully. When you’re ready to serve, simply assemble the cheesecake by layering the filling onto the prepared crust and topping it with the chilled strawberry mixture. Finish it off with freshly whipped cream and the crumble topping for a dessert that’s just as delicious as when you first made it!

Storage Tips for Strawberry Shortcake Cheesecake

Fridge: Store your Strawberry Shortcake Cheesecake in an airtight container for up to 3-5 days. This keeps the flavors fresh while preventing it from drying out.

Freezer: To preserve it longer, wrap individual slices tightly in plastic wrap followed by aluminum foil. Freeze for up to 2 months, ensuring it stays protected from freezer burn.

Reheating: Thaw frozen slices in the refrigerator overnight before serving. If you'd like to enjoy it slightly warm, let it sit at room temperature for 15-20 minutes before indulging.

Strawberry Shortcake Cheesecake Recipe FAQs

What kind of strawberries should I use for the best flavor?
Absolutely! For the most delicious Strawberry Shortcake Cheesecake, use fresh, ripe strawberries. Look for berries that are bright red, plump, and firm, without dark spots. If you can, choose organic strawberries as they have better flavor and sweetness. Avoid overripened strawberries which may be mushy and lack that vibrant taste.

How should I store leftover cheesecake?
Very simple! Store any leftover Strawberry Shortcake Cheesecake in an airtight container in the refrigerator. It will stay fresh for up to 3-5 days. Just make sure to keep it tightly sealed to prevent it from drying out or absorbing other odors from the fridge.

Can I freeze Strawberry Shortcake Cheesecake? If so, how?
Yes, you can! To freeze your Strawberry Shortcake Cheesecake, first, allow the cheesecake to cool completely. Then, slice it into portions and wrap each slice tightly in plastic wrap followed by aluminum foil to prevent freezer burn. It's best to freeze it for up to 2 months. When you're ready to enjoy, simply thaw it overnight in the refrigerator, and it will be just as delightful!

What can I do if my cheesecake cracks during baking?
Don’t worry, it happens to the best of us! If your Strawberry Shortcake Cheesecake cracks, the texture and flavor will still be delicious. To prevent cracking in the future, consider baking your cheesecake in a water bath. To do this, wrap the outside of your springform pan with foil to avoid leaking, and place it in a larger pan filled with water before baking. This helps maintain a consistent temperature and moisture level, leading to a smoother finish.

Is this cheesecake suitable for vegetarians?
Absolutely! The Strawberry Shortcake Cheesecake recipe is vegetarian-friendly, as it doesn’t contain any meat products. However, if you have specific dietary restrictions, pay attention to ingredients like gelatin in the Jell-O. You can easily substitute with a vegetarian gelatin alternative or natural fruit puree to suit your needs. Enjoy the delicious flavors without worry!

Can I make this cheesecake ahead of time for a gathering?
Yes, you can! In fact, making the Strawberry Shortcake Cheesecake a day ahead is often recommended, as this allows the flavors to meld beautifully. Just make sure to chill it properly in the refrigerator after baking and applying the toppings. This way, when your guests arrive, you'll have a stunning dessert ready to impress!

Strawberry Shortcake Cheesecake

Irresistible Strawberry Shortcake Cheesecake for Sweet Lovers

This Strawberry Shortcake Cheesecake combines creamy cheesecake with fresh strawberries, creating an irresistible dessert perfect for any occasion.
Print Recipe Pin Recipe
Prep Time 30 minutes mins
Cook Time 1 hour hr
Cooling Time 4 hours hrs
Total Time 5 hours hrs 30 minutes mins
Servings: 8 slices
Course: Dessert
Cuisine: American
Calories: 300
Ingredients Equipment Method Nutrition Notes

Ingredients
  

For the Crust
  • 1.5 cups Graham Cracker Crumbs or crushed Golden Oreos for a sweeter twist
  • 0.5 cups Granulated Sugar or coconut sugar for a healthier alternative
  • 0.5 cups Melted Butter or margarine for a dairy-free option
For the Cheesecake Filling
  • 16 oz Cream Cheese or Greek yogurt for a lighter substitute
  • 0.5 cups Sour Cream or plain Greek yogurt
  • 1 tablespoon Vanilla Extract or almond extract for a different flavor
  • 3 large Eggs or flax eggs for a vegan option
For the Strawberry Topping
  • 1 box Strawberry Jell-O or natural fruit puree for a cleaner ingredient list
  • 2 cups Fresh Strawberries or any berry based on preference or season
For the Whipped Cream
  • 1 cups Heavy Whipping Cream or coconut cream for a non-dairy alternative
  • 0.25 cups Powdered Sugar can be omitted or replaced with an alternative sweetener
For the Crumble Topping
  • 1 cups Golden Oreos or vanilla cookies for shortcake crumble

Equipment

  • Springform pan
  • Mixing bowls
  • Electric mixer
  • measuring cups
  • Measuring Spoons

Method
 

Preparation Steps
  1. Preheat your oven to 325°F (160°C) and prepare the crust by mixing graham cracker crumbs, sugar, and melted butter. Press into a 9-inch springform pan and bake for 10 minutes until set.
  2. In a large bowl, beat cream cheese and granulated sugar until smooth. Mix in sour cream and vanilla extract, then add eggs one at a time, mixing well after each addition.
  3. Pour the filling carefully over the cooled crust and bake for 45-50 minutes, until the center is set. Let cool in the oven for 1 hour, then chill in the fridge for at least 4 hours or overnight.
  4. Dissolve Strawberry Jell-O in boiling water, then stir in cold water. When slightly thickened, fold in whipped cream and chopped strawberries, then pour over the cheesecake.
  5. Whip heavy cream with powdered sugar until stiff peaks form. Spread over the chilled strawberry layer for an inviting topping.
  6. Mix crushed Golden Oreos with melted butter and dry Jell-O powder, then sprinkle over whipped cream layer for crumble topping.
  7. Chill cheesecake for another hour before serving. Slice and enjoy the incredible layers of flavor and texture!

Nutrition

Serving: 1sliceCalories: 300kcalCarbohydrates: 40gProtein: 5gFat: 15gSaturated Fat: 9gPolyunsaturated Fat: 1gMonounsaturated Fat: 4gCholesterol: 70mgSodium: 180mgPotassium: 150mgFiber: 1gSugar: 25gVitamin A: 500IUVitamin C: 10mgCalcium: 60mgIron: 1mg

Notes

Perfect cooling and preventing cracks are essential for the best outcome. Use fresh strawberries and feel free to customize with different flavors.

Tried this recipe?

Let us know how it was!

Indulge in No-Bake Cherry Bourbon Balls for Festive Bliss

December 21, 2025 by Grace Snow Leave a Comment

There’s something magical about the aroma of holiday treats wafting through the house, isn’t there? As I whipped up these Easy No-Bake Cherry Bourbon Balls, I couldn’t help but feel that festive spirit come alive. This delightful recipe showcases a creamy filling bursting with the tang of dried cherries and a gentle warmth from bourbon, all enveloped in a velvety chocolate coating. What’s more? They’re not just indulgent; they're incredibly easy to make, perfect for those of us who crave homemade goodness without the fuss. Whether you’re looking to impress at your next holiday gathering or in need of a thoughtful gift, these no-bake delights are bound to charm everyone. Ready to bring a taste of celebration to your kitchen?

Why are No-Bake Cherry Bourbon Balls special?

Intriguing Flavor Harmony: These delightful treats combine the sweetness of cream cheese and powdered sugar with tart dried cherries, creating a flavor explosion in each bite.

Effortless Preparation: You won’t need to turn on the oven! This no-bake recipe takes minimal time, making it perfect for busy holiday schedules.

Gifting Greatness: Whether you’re surprising a friend or showcasing your culinary talents at a gathering, these truffles make gift-giving feel thoughtful and festive.

Versatility in Ingredients: Feel free to swap out pecans for walnuts or add crushed cookies to the filling for a twist. Looking for more inspiration? Check out Chocolate Cherry Smoothie for another cherry-infused treat!

Perfectly Indulgent: With each ball containing just enough bourbon to warm the spirit, they’re a delicious way to indulge without overwhelming sweetness. Enjoy them with coffee or as a palate cleanser after a meal!

Storage-Friendly Goodness: They keep well in the refrigerator, making them a superb option for holiday hosts or anyone craving a delightful treat throughout the season. Don’t forget to check out the elegant Cherry Clafoutis French for more cherry-inspired desserts!

No-Bake Cherry Bourbon Balls Ingredients

For the Filling
• Cream Cheese – Provides a creamy base; ensure it's softened for easy mixing.
• Unsalted Butter – Adds richness; use softened butter for the best results.
• Powdered Sugar – Sweetens the mixture; no substitutions recommended for this recipe.
• Dried Cherries – Offers bursts of tartness; can be substituted with dried cranberries if desired.
• Pecans – Adds crunch and nuttiness; walnuts can serve as an alternative.
• Bourbon – Infuses a warm, festive flavor; for a non-alcoholic option, substitute with 1 tbsp milk and ½ tsp almond extract.
• Vanilla Extract – Enhances overall flavor; opt for pure vanilla for the best taste.

For the Coating
• Semi-Sweet or Dark Chocolate – Forms the rich outer coating; milk chocolate can be used for a sweeter variant.
• Coconut Oil (optional) – Adds smoothness to the chocolate coating; can be omitted if not available.

For Garnish
• Whole or Dried Cherries – Enhances presentation and adds a decorative touch; perfect for that festive flair!

Step‑by‑Step Instructions for No-Bake Cherry Bourbon Balls

Step 1: Beat the Creamy Base
In a large mixing bowl, use an electric mixer to beat together the softened cream cheese and unsalted butter on medium speed until the mixture is smooth and creamy, about 2-3 minutes. Ensure there are no lumps, and the mixture should be pale and fluffy, setting the perfect foundation for the delicious filling of your No-Bake Cherry Bourbon Balls.

Step 2: Incorporate Sweetness and Flavor
Gradually add the powdered sugar to the cream cheese and butter mixture while continuing to mix on low speed. Once all the sugar is incorporated, increase the speed to medium and mix until the filling is thick, creamy, and evenly sweetened, about 2 more minutes. This step enhances the luscious texture that will beautifully complement the cherries.

Step 3: Mix in the Goodies
Stir in the chopped dried cherries, finely chopped pecans, bourbon, and vanilla extract using a spatula or wooden spoon. Make sure all ingredients are well combined, creating a beautifully textured mixture. This flavor infusion will be the star of your No-Bake Cherry Bourbon Balls, enhancing your treat with delicious layers of taste.

Step 4: Chill the Mixture
Cover the bowl with plastic wrap and place it in the refrigerator for about 1 hour, allowing the filling to firm up. If you're in a hurry, you can also place it in the freezer for 20-30 minutes. This chilling step is crucial, as it makes the mixture easier to handle when rolling it into balls.

Step 5: Shape the Balls
Once the mixture is firm, use a tablespoon to scoop portions and roll them between your hands to form small balls, about 1 inch in diameter. As you work, keep the mixture refrigerated to prevent it from becoming too soft. Placing the rolled balls back in the fridge for another 20 minutes will ensure they hold their shape for coating.

Step 6: Melt the Chocolate
In a microwave-safe bowl or using a double boiler, melt the semi-sweet or dark chocolate along with the optional coconut oil. Heat in 30-second intervals in the microwave, stirring between each interval until smooth and glossy. Be cautious not to overheat the chocolate; it should have a silky consistency for coating your No-Bake Cherry Bourbon Balls perfectly.

Step 7: Dip and Coat
Carefully dip each chilled ball into the melted chocolate, making sure it is entirely coated. Use a fork or toothpick to lift them out, allowing any excess chocolate to drip off. Place the coated balls on a parchment-lined baking sheet to prevent sticking, and create a beautiful chocolate shell that will delight your guests.

Step 8: Add a Decorative Touch
Before the chocolate coating sets, garnish each ball with a whole or dried cherry on top for a festive touch. This will not only add to the visual appeal of your No-Bake Cherry Bourbon Balls but also provide an additional burst of flavor that enhances the overall experience.

Step 9: Let it Set
Allow the chocolate to harden at room temperature for about 15-20 minutes, or you can speed up the process by placing them in the refrigerator. Once set, your No-Bake Cherry Bourbon Balls will be ready to serve, offering a luscious treat that perfectly captures the spirit of your celebrations.

Make Ahead Options

These Easy No-Bake Cherry Bourbon Balls are perfect for meal prep enthusiasts looking to simplify their holiday baking! You can prepare the filling and roll the balls up to 24 hours in advance, allowing the flavors to meld beautifully. Just keep them chilled in an airtight container in the refrigerator. When you’re ready to impress your guests, simply melt the chocolate and coat the chilled balls, adding a garnish of cherries just before serving. This approach not only saves time but also ensures that your treats remain just as delicious and vibrant, making them an easy yet indulgent option for busy weeknights or festive gatherings!

Expert Tips for No-Bake Cherry Bourbon Balls

  • Soften Ingredients: Ensure your cream cheese and butter are fully softened to avoid lumps and achieve a smooth filling that blends seamlessly.

  • Chill to Shape: Keep the mixture chilled while rolling the balls. Warmer mixtures can become sticky, making them difficult to handle.

  • Watch the Chocolate: If your melted chocolate appears dull, it may have overheated. Adding a bit of coconut oil can restore its glossy finish.

  • Storage Solution: Store the finished No-Bake Cherry Bourbon Balls in an airtight container in the refrigerator for up to two weeks to maintain freshness.

  • Don’t Skimp on Flavor: Adjust the bourbon quantity for a stronger kick; just remember to chill longer before coating if you increase it!

How to Store and Freeze No-Bake Cherry Bourbon Balls

Fridge: Keep your delicious No-Bake Cherry Bourbon Balls in an airtight container in the refrigerator for up to 2 weeks, ensuring they remain fresh and creamy.

Freezer: For longer storage, freeze the truffles in a single layer on a baking sheet before transferring them to an airtight container. They can last up to 2 months in the freezer; simply thaw in the fridge before serving.

Reheating: There’s no need to heat these treats, but if they've been frozen, let them sit at room temperature for about 20-30 minutes for the best texture before enjoying.

Gifting Tip: If you plan to gift them, consider adding a festive touch with decorative packaging, ensuring their gorgeous look matches the delightful taste!

What to Serve with Easy No-Bake Cherry Bourbon Balls

Indulging in these delightful treats is just the beginning—consider how to craft a full meal experience around them!

  • Rich Coffee: A warm cup of freshly brewed coffee enhances the flavors of the bourbon balls, making for an ideal pairing.

  • Spiced Hot Chocolate: For a cozy twist, pairing with spiced hot chocolate adds a comforting element that complements the chocolate coating beautifully.

  • Festive Cheeseboard: A selection of cheeses, nuts, and dried fruits on a cheeseboard creates a perfect contrast, catering to various palates at your holiday gathering.

  • Crisp Fruit Salad: Fresh, crisp apples and pears offer a refreshing crunch that cuts through the richness, balancing the sweetness of the cherry bourbon balls.

  • Savory Meat Charcuterie: Include cured meats like prosciutto for a savory touch; the saltiness plays off the sweet, tangy filling delightfully.

  • Sparkling Wine or Champagne: A glass of bubbly elevates the festive atmosphere while the acidity complements the indulgent sweetness of the treats.

  • Vanilla Ice Cream: Serving with a scoop of vanilla ice cream brings a creamy texture that contrasts nicely with the chocolaty exterior.

Each of these pairings not only enhances the flavors but creates a memorable and festive dining experience!

No-Bake Cherry Bourbon Balls Variations

Feel free to explore these delightful twists on the classic recipe to satisfy every palate!

  • Nutty Alternative: Use almonds instead of pecans for a different flavor and crunch. Their mild taste pairs beautifully with the cherries, elevating the dish.

  • Cookie Crunch: Add crushed cookies to the filling for an exciting texture twist. Whether you choose Oreos or graham crackers, this variation creates a fun crunch that complements the creaminess.

  • Fruity Twist: Swap out the dried cherries for dried cranberries for a tangy change. This substitution adds a delightful tartness that still sings harmoniously with the bourbon.

  • Bourbon Boost: Increase the bourbon to 3 tablespoons for a bolder flavor kick. Just remember to chill the mixture longer beforehand to keep it from getting too soft!

  • Coconut Delight: Mix in toasted coconut flakes for an exotic flair. Not only does it provide a tropical taste, but it also adds a wonderful texture that brings summer vibes to your winter celebrations.

  • Sweetened Coating: Use milk chocolate instead of semi-sweet or dark for a sweeter, creamier coating. This whimsical twist is sure to appeal to those with a sweeter tooth!

  • Spicy Heat: Incorporate a pinch of cayenne pepper or chili powder into the filling for a touch of heat. It provides an unexpected and exciting kick that balances the sweetness beautifully.

  • Vegan Option: Swap cream cheese with vegan cream cheese and use maple syrup instead of powdered sugar. This version allows everyone to enjoy the festive treat without animal products.

With all these delightful options, you can make your No-Bake Cherry Bourbon Balls truly your own! They make for a festive treat on their own or can inspire other treats; give the charming Chocolate Cherry Smoothie a try for a cherry-infused drink! And if you're curious about other cherry delicacies, the splendid Cherry Clafoutis French is a must-see!

No-Bake Cherry Bourbon Balls Recipe FAQs

How do I choose ripe dried cherries for the filling?
When selecting dried cherries, look for those that are plump and vibrant in color. Ideally, they should have a firm texture without any dark spots or an overly hard exterior. Avoid any that appear shriveled or overly sticky, as they may have lost their freshness.

What’s the best way to store No-Bake Cherry Bourbon Balls?
To keep your No-Bake Cherry Bourbon Balls fresh, store them in an airtight container in the refrigerator. They will stay delectable for up to 2 weeks. If you notice them becoming too soft, it's best to separate layers with parchment paper to prevent sticking.

Can I freeze these treats for later?
Absolutely! To freeze your No-Bake Cherry Bourbon Balls, first, arrange them in a single layer on a baking sheet and freeze until solid. Once firm, transfer them to an airtight container or resealable freezer bag. They can be kept for up to 2 months. To enjoy, thaw them in the refrigerator overnight for the best texture.

What should I do if my chocolate coating is dull?
If your chocolate coating turns out dull, it likely overheated. To salvage it, simply add a small amount of coconut oil (about a teaspoon) and stir until smooth. This adjustment can restore the glossy finish and enhance the overall appearance of your No-Bake Cherry Bourbon Balls.

Are there any dietary considerations I should be aware of?
Yes, if you're serving these to guests with dietary restrictions, note that the No-Bake Cherry Bourbon Balls contain cream cheese, pecans, and bourbon. For a non-alcoholic option, substitute the bourbon with 1 tablespoon of milk and ½ teaspoon of almond extract. Always check for allergens related to nuts and dairy!

Can I substitute the nuts in the recipe?
Definitely! If you're not a fan of pecans or have nut allergies, feel free to replace them with walnuts or even omit the nuts altogether for a nut-free version. Alternatively, you can mix in crushed cookies for added texture and flavor variation!

No-Bake Cherry Bourbon Balls

Indulge in No-Bake Cherry Bourbon Balls for Festive Bliss

Enjoy the delightful flavors of No-Bake Cherry Bourbon Balls with a creamy filling and rich chocolate coating.
Print Recipe Pin Recipe
Prep Time 30 minutes mins
Chilling Time 1 hour hr
Total Time 1 hour hr 30 minutes mins
Servings: 24 balls
Course: Dessert
Cuisine: American
Calories: 130
Ingredients Equipment Method Nutrition Notes

Ingredients
  

For the Filling
  • 8 oz Cream Cheese softened
  • 4 tbsp Unsalted Butter softened
  • 2 cups Powdered Sugar no substitutions
  • 1 cup Dried Cherries can be substituted with dried cranberries
  • 1 cup Pecans can substitute with walnuts
  • 1/4 cup Bourbon for non-alcoholic option, substitute with 1 tbsp milk and ½ tsp almond extract
  • 1 tsp Vanilla Extract opt for pure vanilla
For the Coating
  • 8 oz Semi-Sweet or Dark Chocolate milk chocolate can be used for a sweeter variant
  • 1 tbsp Coconut Oil optional
For Garnish
  • 12 pieces Whole or Dried Cherries for decorative touch

Equipment

  • Electric mixer
  • Mixing Bowl
  • Spatula
  • Baking Sheet
  • Parchment Paper
  • Microwave

Method
 

Step-by-Step Instructions
  1. In a large mixing bowl, use an electric mixer to beat together the softened cream cheese and unsalted butter on medium speed until smooth and creamy, about 2-3 minutes.
  2. Gradually add the powdered sugar to the mixture while mixing on low speed, then increase to medium speed and mix until thick and creamy, about 2 more minutes.
  3. Stir in the chopped dried cherries, finely chopped pecans, bourbon, and vanilla extract using a spatula until well combined.
  4. Cover the bowl with plastic wrap and place it in the refrigerator for about 1 hour.
  5. Oncefirm, scoop portions and roll them into small balls, about 1 inch in diameter.
  6. Melt the semi-sweet or dark chocolate along with the coconut oil in a microwave-safe bowl.
  7. Dip each chilled ball into the melted chocolate, ensuring they are entirely coated.
  8. Garnish each ball with a whole or dried cherry before the chocolate coating sets.
  9. Allow the chocolate to harden at room temperature for about 15-20 minutes before serving.

Nutrition

Serving: 1ballCalories: 130kcalCarbohydrates: 15gProtein: 1gFat: 7gSaturated Fat: 4gPolyunsaturated Fat: 0.5gMonounsaturated Fat: 2.5gCholesterol: 15mgSodium: 40mgPotassium: 50mgSugar: 12gVitamin A: 2IUVitamin C: 2mgCalcium: 2mgIron: 2mg

Notes

Store finished No-Bake Cherry Bourbon Balls in an airtight container in the refrigerator for up to two weeks or freeze for longer storage.

Tried this recipe?

Let us know how it was!

Little Debbie Christmas Tree Cake Truffles: A Festive Treat!

December 21, 2025 by Grace Snow Leave a Comment

The smell of melting white chocolate wafts through my kitchen, instantly whisking me back to the thrill of unwrapping my favorite Little Debbie Christmas Tree Cakes as a child. Those snowy treats are not just a nostalgic snack; they’ve inspired a whimsical holiday dessert that’s as fun to make as it is to eat. Enter my Easy No-Bake Little Debbie Christmas Tree Cake Truffles! These festive bites combine the deliciousness of creamy cake and chocolate, making them perfect for cookie exchanges, holiday gatherings, or simply indulging your sweet tooth. Plus, they're a breeze to whip up—anyone can join the fun! With a quick prep time and minimal ingredients, these delightful truffles are destined to be your go-to holiday treat. Curious about the secret to their delightful charm? Let's embark on this easy and festive journey together!

Why Are These Truffles So Special?

Nostalgic Flavor: These Little Debbie Christmas Tree Cake truffles bring back cherished memories of childhood treats, combining the indulgence of cake with a creamy chocolate coating.
No-Bake Delight: Enjoy the ease of a no-bake recipe that anyone can master, making it a great project for families and kids during the holidays.
Festive Appeal: Coated in snowy white chocolate and adorned with vibrant colors, these truffles are perfect for any festive occasion! Just imagine them at your holiday gatherings or as gifts.
Endless Variations: Want to customize? Swap in chocolate cake or get creative with toppings; there are countless ways to make these truffles uniquely yours. For more festive ideas, try adding crushed candy canes for a minty twist or checking out my Chocolate Pudding Cake for another delightful dessert.
Crowd Favorite: With their fun flavors and adorable presentation, these truffles are sure to be a hit at any holiday celebration!

Little Debbie Christmas Tree Cake Truffles Ingredients

• The key to creating these delightful Little Debbie Christmas Tree Cake Truffles lies in their fun yet simple ingredient list:

For the Truffles

  • Little Debbie Christmas Tree Cakes – These provide the sweet, nostalgic base for your truffles; use the vanilla variety for the best results.
  • White Chocolate Chips (or Candy Melts) – This coating adds a deliciously creamy texture; just watch not to overheat while melting!

For Decoration

  • Red Candy Melts – Perfect for drizzling over the truffles, making them festive; feel free to swap colors for a twist.
  • Green Sanding Sugar – Adds a beautiful sparkle and festive flair; it's optional but adds a nice touch during the holidays!

These scrumptious Little Debbie Christmas Tree Cake Truffles are not only quick to make but truly celebrate the season's joy!

Step‑by‑Step Instructions for Little Debbie Christmas Tree Cake Truffles

Step 1: Prepare Cake Mixture
Unwrap all five Little Debbie Christmas Tree Cakes and place them in a mixing bowl. Using a hand mixer, beat the cakes on medium speed until a dough-like consistency forms, about 1-2 minutes. If desired, add festive sprinkles for a pop of color and mix until evenly incorporated.

Step 2: Form Truffle Balls
Scoop out approximately one tablespoon portions of the cake mixture and roll them into smooth 1-inch balls using your hands. Place these truffle balls onto a parchment-lined baking sheet to ensure they don’t stick, yielding about 15-20 truffles. Once formed, set them aside as you prepare for chilling.

Step 3: Chill
Refrigerate the formed truffle balls on the baking sheet for at least 30 minutes. This chilling period helps firm up the mixture, making it easier to dip into chocolate later. Keep an eye on them; they should feel firm to the touch before proceeding to the next step.

Step 4: Melt Chocolate
In a microwave-safe bowl, measure out your white chocolate chips or candy melts. Microwave on medium power in 30-second intervals, stirring between each, until the chocolate is completely melted and smooth—about 90 seconds total. Be careful not to overheat to maintain that glossy finish for the truffles.

Step 5: Dip Truffles
Using a fork, dip each chilled truffle ball into the melted white chocolate, allowing any excess chocolate to drip back into the bowl. Carefully place the coated truffles back onto the parchment-lined sheet, ensuring they are well spaced apart. This glossy coating will give your Little Debbie Christmas Tree Cake Truffles an elegant look.

Step 6: Decorate
In a separate bowl, melt the red candy melts in the same way as before. Once smooth, transfer the melted candy into a piping bag or a small zip-top bag with a corner snipped off. Drizzle the melted candy over the chocolate-covered truffles and immediately sprinkle them with green sanding sugar for a delightful festive touch.

Step 7: Set & Serve
Chill the decorated Little Debbie Christmas Tree Cake Truffles in the refrigerator for 10-15 minutes until the chocolate coating is firm to the touch. Once set, serve these delightful truffles either chilled or at room temperature. They’re perfect for sharing during holiday gatherings or giving as sweet gifts!

Make Ahead Options

These Easy No-Bake Little Debbie Christmas Tree Cake Truffles are perfect for those busy holiday weeks when meal prep saves the day! You can prepare the cake mixture and form the truffles up to 24 hours in advance—simply refrigerate them on a parchment-lined baking sheet to maintain their shape. For optimal quality, chill them well before dipping to prevent any melting during the process. When you're ready to finish preparing the truffles, just melt the white chocolate and dip the chilled balls, then drizzle with candy melts and the sanding sugar. This way, you’ll have adorable festive treats ready for any occasion, with minimal last-minute effort!

What to Serve with Easy No-Bake Little Debbie Christmas Tree Cake Truffles

Indulging in these delightful truffles opens the door to a world of festive flavors and textures, making your holiday gatherings even more special!

  • Creamy Hot Chocolate: A rich, velvety cup of hot chocolate complements the sweetness of the truffles, creating a cozy treat.

  • Peppermint Bark: This crunchy, minty delight balances the soft truffles while adding a refreshing twist that everyone will love.

  • Gingerbread Cookies: The spiced warmth of gingerbread offers delightful contrast to the sweet and creamy truffles, perfect for a holiday cookie platter.

  • Christmas Punch: A fruity, fizzy punch is a festive drink that refreshes your palate between bites of these sweet truffles.

  • Spritz Cookies: Light and buttery, these classic cookies provide a comforting taste and texture, harmonizing beautifully with the indulgence of the truffles.

  • Fruit and Nut Platter: A mix of fresh berries and seasonal nuts brings a refreshing brightness that enhances the richness of the truffles.

  • Eggnog: This classic holiday drink’s creamy sweetness and nutmeg flavor pairing beautifully with your delightful truffles make for a seasonal match.

  • Chocolate Dipped Strawberries: These bite-sized treats add a touch of elegance to your dessert table and bring a delicious freshness to the mix.

  • Mini Cheesecakes: Creamy and decadent, a small cheesecake can offer a delightful contrast in flavor and texture, ensuring variety for your guests.

Expert Tips for Little Debbie Christmas Tree Cake Truffles

  • Chill Thoroughly: Make sure to refrigerate the truffle balls for at least 30 minutes to ensure they harden properly, preventing them from breaking during dipping.
  • Use Quality Chocolate: Choose high-quality white chocolate or candy melts for your coating. It makes a noticeable difference in flavor and texture.
  • Avoid Chocolate Seizing: If your melted chocolate seizes up, add a teaspoon of vegetable oil to restore its smooth consistency.
  • Kids’ Fun Factor: Involve little hands in the fun! Let kids unwrap the cakes and roll the truffles—it's a great way to make family memories during the holidays.
  • Decorating Delight: Get creative with toppings; consider crushed candy canes or colorful sprinkles to give your Little Debbie Christmas Tree Cake Truffles an extra festive flair!

Little Debbie Christmas Tree Cake Truffles Variations

Feel free to make these delightful truffles your own with tempting twists and substitutions!

  • Chocolate Swap: Use chocolate versions of Little Debbie cakes for a deeper cocoa flavor while still keeping the nostalgic vibe intact.
  • Colorful Melts: Experiment with different colors of candy melts; bright green or festive red can create stunning visual appeal and holiday cheer.
  • Fun Textures: Replace green sanding sugar with crushed candy canes for a minty crunch or mini chocolate chips for an extra layer of sweetness.
  • Crunch Factor: Mix crushed pretzels into the cake mixture; the salty crunch beautifully contrasts with the sweet, creamy filling.
  • Shape Shift: Instead of rolling into balls, mold your truffles into star or tree shapes—perfect for adding a playful touch to your festive presentations!
  • Nutty Surprise: Incorporate finely chopped nuts like almonds or pecans into the dough for added flavor and heartiness; just be sure to adjust for allergies.
  • Spicy Kick: Add a pinch of cinnamon or nutmeg to the cake mixture for a warm, cozy flavor that’s perfect for the season.
  • Layered Treats: For a twist on presentation, create layered truffles by alternating cake and chocolate layers in mini cups for a fun dessert that looks just as good as it tastes!

Whether you're hosting a holiday gathering or kicking back at home, these variations will ensure your Little Debbie Christmas Tree Cake Truffles stay exciting and fresh. For more festive ideas, consider adding crushed candy canes to your truffles or trying out my delicious Chocolate Poke Cake for another crowd-pleaser!

How to Store and Freeze Little Debbie Christmas Tree Cake Truffles

Room Temperature: Keep truffles in an airtight container for up to 1-2 days. Enjoy them fresh to savor their delightful flavors.

Fridge: Stored in the refrigerator, they can last up to 2 weeks. Allow them to come to room temperature for about 15 minutes before serving for the best flavor.

Freezer: For longer storage, freeze truffles in an airtight container for up to 2 months. Thaw overnight in the fridge before enjoying your Little Debbie Christmas Tree Cake Truffles again.

Reheating: These truffles are best served chilled or at room temperature, so no reheating is necessary. Enjoy their sweet, creamy goodness as is!

Little Debbie Christmas Tree Cake Truffles Recipe FAQs

What kind of Little Debbie cakes should I use?
Absolutely! For the best results, use the vanilla variety of Little Debbie Christmas Tree Cakes. They provide the nostalgic flavor that pairs perfectly with the creamy white chocolate coating.

How long can I store these truffles?
You can keep your Little Debbie Christmas Tree Cake Truffles in an airtight container at room temperature for about 1-2 days. If you prefer to extend their shelf life, store them in the refrigerator for up to 2 weeks. Ensure you let them sit out for about 15 minutes before serving to enhance their flavors.

Can I freeze the truffles?
Very much! To freeze your Little Debbie Christmas Tree Cake Truffles, place them in an airtight container and store them in the freezer for up to 2 months. When you're ready to enjoy them, simply thaw them in the refrigerator overnight. This gentle thaw helps maintain their delightful texture.

What should I do if the chocolate seizes during melting?
If your melted chocolate seizes and becomes hard or clumpy, don’t worry! Just add a teaspoon of vegetable oil while stirring the chocolate, and it should help restore a smooth consistency. Remember to melt your chocolate slowly and in small increments to prevent this from happening in the first place.

Can I make these truffles allergen-friendly?
Definitely! To customize for allergies, try using dairy-free chocolate alternatives and make sure to check for gluten-free Little Debbie cakes if that's a concern. Always read the labels for potential allergens, especially if you're making them for a large group or as gifts.

What can I use for decoration if I don’t have sanding sugar?
The more the merrier! If you don't have green sanding sugar, consider using crushed candy canes for a festive crunch or colorful sprinkles for added pizzazz. You could even drizzle them with melted dark chocolate for an extra layer of flavor.

Little Debbie Christmas Tree Cake Truffles

Little Debbie Christmas Tree Cake Truffles: A Festive Treat!

Delight in these Little Debbie Christmas Tree Cake Truffles, a nostalgic no-bake treat perfect for holiday gatherings.
Print Recipe Pin Recipe
Prep Time 30 minutes mins
Chilling Time 30 minutes mins
Total Time 1 hour hr 30 minutes mins
Servings: 15 truffles
Course: Dessert
Cuisine: American
Calories: 100
Ingredients Equipment Method Nutrition Notes

Ingredients
  

For the Truffles
  • 5 Little Debbie Christmas Tree Cakes Use vanilla variety for best results.
  • 1 cup White Chocolate Chips Or Candy Melts.
For Decoration
  • 1 cup Red Candy Melts For drizzling.
  • 1 cup Green Sanding Sugar Optional for decoration.

Equipment

  • Mixing Bowl
  • hand mixer
  • Parchment Paper
  • Microwave-safe bowl
  • Fork
  • piping bag

Method
 

Step-by-Step Instructions
  1. Unwrap all five Little Debbie Christmas Tree Cakes and place them in a mixing bowl. Using a hand mixer, beat the cakes on medium speed until a dough-like consistency forms, about 1-2 minutes.
  2. Scoop out approximately one tablespoon portions of the cake mixture and roll them into smooth 1-inch balls using your hands. Place these truffle balls onto a parchment-lined baking sheet.
  3. Refrigerate the formed truffle balls on the baking sheet for at least 30 minutes.
  4. In a microwave-safe bowl, measure out your white chocolate chips or candy melts. Microwave on medium power in 30-second intervals, stirring between each, until melted and smooth.
  5. Using a fork, dip each chilled truffle ball into the melted white chocolate, allowing any excess to drip back into the bowl. Place the coated truffles back onto the parchment-lined sheet.
  6. Melt the red candy melts in a separate bowl. Once smooth, transfer to a piping bag and drizzle over the chocolate-covered truffles, then sprinkle with green sanding sugar.
  7. Chill the decorated truffles in the refrigerator for 10-15 minutes until the chocolate coating is firm. Serve chilled or at room temperature.

Nutrition

Serving: 1truffleCalories: 100kcalCarbohydrates: 15gProtein: 1gFat: 5gSaturated Fat: 3gPolyunsaturated Fat: 0.5gMonounsaturated Fat: 1gCholesterol: 5mgSodium: 50mgPotassium: 30mgSugar: 10gCalcium: 1mgIron: 1mg

Notes

These truffles can be customized with different cake flavors and toppings for variety throughout the holiday season.

Tried this recipe?

Let us know how it was!
  • « Previous Page
  • 1
  • …
  • 70
  • 71
  • 72
  • 73
  • 74
  • …
  • 180
  • Next Page »

Welcome!

Hi, I’m Grace, a Sydney-based home cook with a passion for bold flavors and trending ingredients. Whether you’re a busy beginner or a seasoned foodie, you’ll find dishes here that are fresh, fun, and full of flavor.

More about me

Popular Recipes

  • Butter Pecan Cookies
    Irresistibly Soft Butter Pecan Cookies for Cozy Moments
  • Decadent Turtle Bars
    Decadent Turtle Bars: Indulge in Sweet Gooey Perfection
  • Salted Caramel Butter Bars
    Decadent Salted Caramel Butter Bars You Can't Resist
  • Easy Italian Pasta Salad
    Easy Italian Pasta Salad: A Summer Delight to Share

Footer

↑ back to top

About

  • Privacy Policy
  • Disclaimer
  • Terms & Conditions

Newsletter

  • Sign Up! for emails and updates

Contact

  • About me
  • Contact me

Copyright © 2025 TastyTrendIngredients