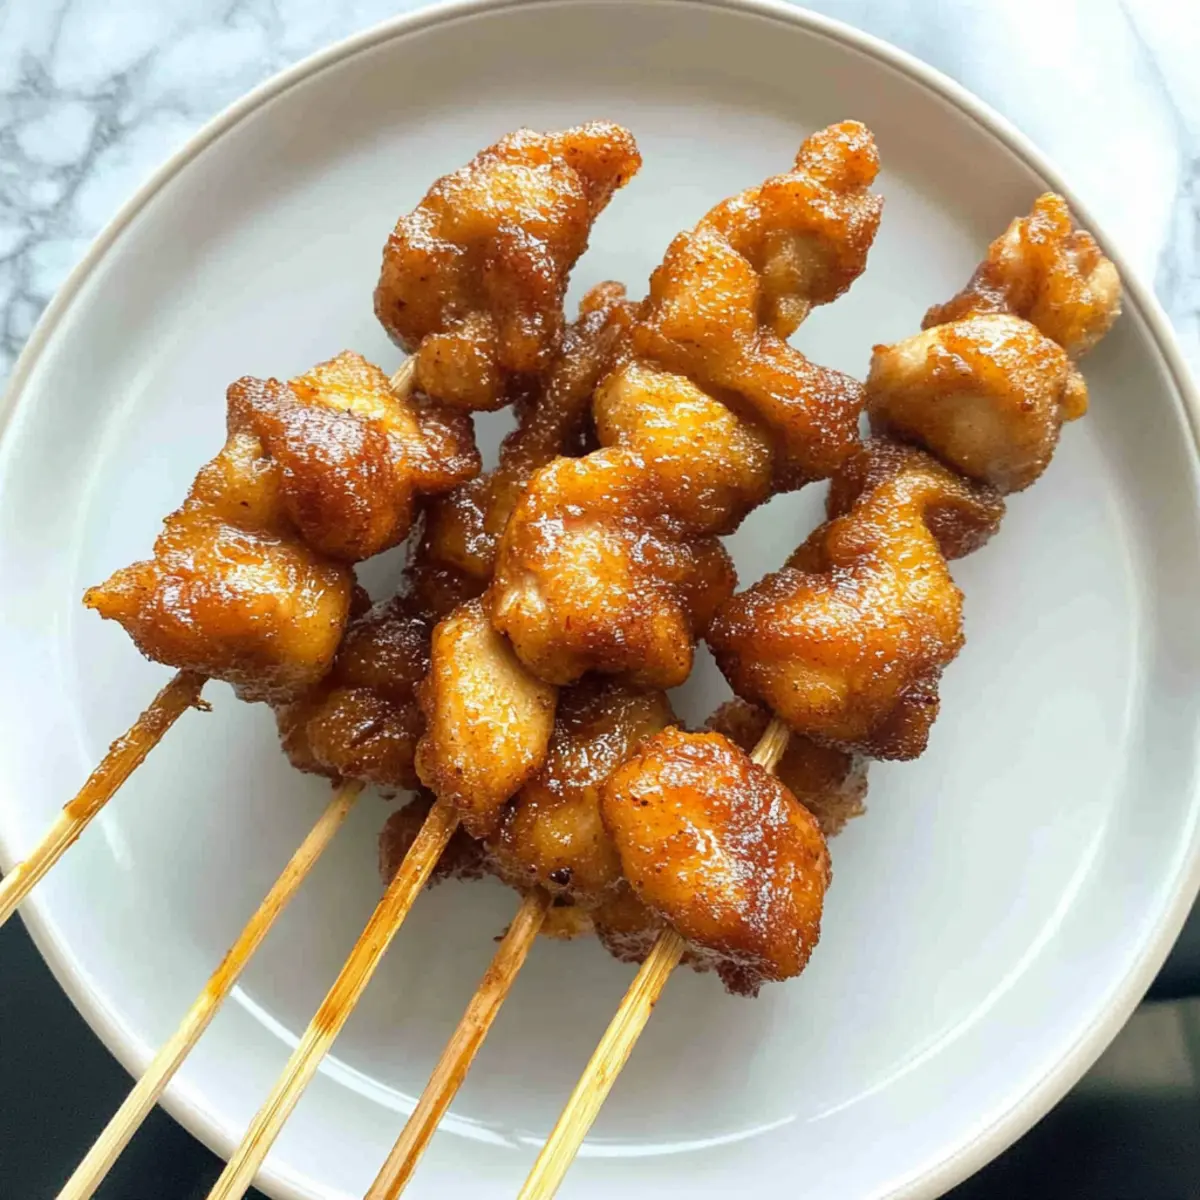
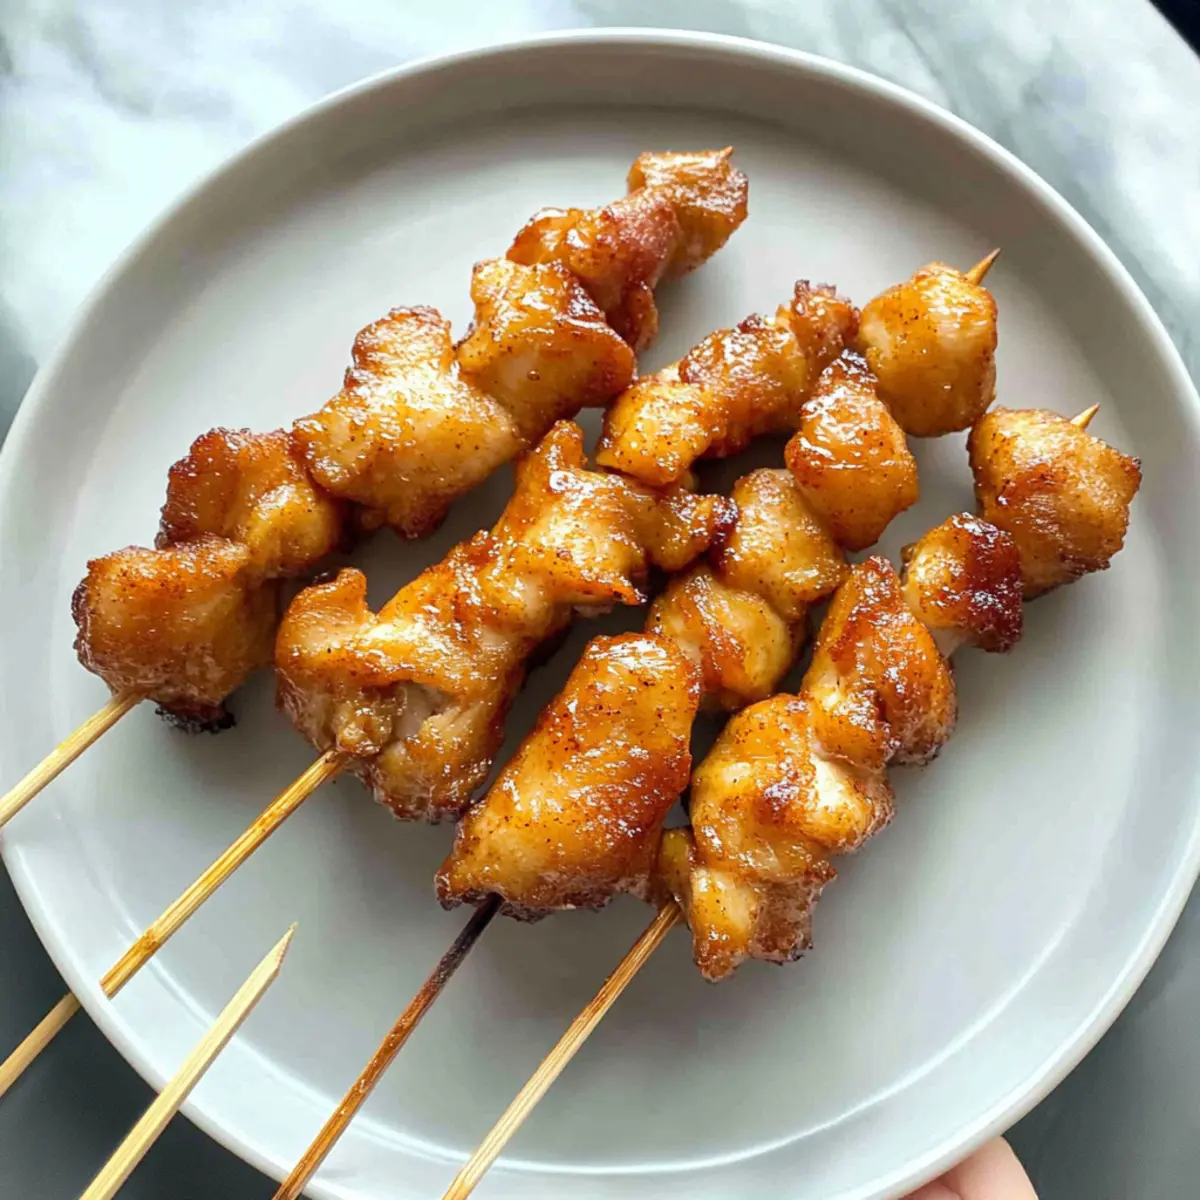
As I flipped through my favorite cookbook, a craving hit me like a wave—a vision of crispy Chinese Chicken On A Stick, golden and tantalizing. Inspired by the vibrant buffets where these skewers are a staple, I couldn't help but recreate the joy in my own kitchen. This recipe showcases juicy boneless chicken thighs nestled in a light, crunchy layer, enhanced by the aromatic notes of five-spice. Not only is it quick to whip up, but it’s also an irresistible crowd-pleaser perfect for any gathering. Imagine satisfying your fast-food cravings with a homemade version that's completely from scratch! Are you ready to savor the deliciousness that awaits?
Why You'll Crave This Chicken?
Incredible Flavor: Each bite bursts with the aromatic warmth of five-spice, elevating traditional flavors to a whole new level.
Quick and Easy: With simple prep and cooking times, this dish can go from your kitchen to the table in under an hour.
Customizable: Want a twist? Try swapping five-spice for teriyaki or char siu for an exciting flavor adventure! You could also use Honey Garlic Chicken for an even sweeter touch.
Perfect for Any Occasion: Whether it’s a game day party or a cozy family dinner, these skewers will impress guests and satisfy cravings.
Healthier Alternative: Ditch the takeout and create this cozy dish at home, giving you control over the ingredients and flavors.
Get ready to enjoy crispy, juicy Chicken On A Stick, a delight for both your taste buds and your cooking skills!
Chinese Chicken On A Stick Ingredients
For the Marinade
• Boneless Chicken Thighs – Keeps the dish juicy and full of flavor; you can substitute with chicken breast for a leaner option.
• Oyster Sauce – Provides a rich umami depth; if you don't have it, soy sauce mixed with a touch of fish sauce works well.
• Soy Sauce – Adds essential saltiness and savory notes; use tamari for a gluten-free alternative.
• Hoisin Sauce – A sweet and tangy enhancer that gives complexity; mix soy sauce with sugar for a quick substitute.
• Water – Balances the flavors and consistency of the marinade.
• Chinese Five-Spice Powder – The star of your marinade, infusing warmth and depth; feel free to make your own blend using star anise, fennel seeds, cinnamon, nutmeg, and clove.
• Garlic Powder – Constantly enhances the savoriness; fresh garlic can be used as well, but adjust according to your taste.
• Baking Soda – A little goes a long way in tenderizing the chicken; remember to limit it to just ¼ teaspoon to avoid a soapy taste.
• Sugar – Balances and enriches the whole flavor profile; honey or coconut sugar can be delightful alternatives.
For the Coating
• Cornstarch – Essential for creating that iconic crispy coating when fried; arrowroot powder is a great gluten-free substitute.
Step‑by‑Step Instructions for Crispy Five-Spice Chinese Chicken On A Stick
Step 1: Prepare the Marinade
In a medium bowl, combine the boneless chicken thighs with oyster sauce, soy sauce, hoisin sauce, water, Chinese five-spice powder, garlic powder, baking soda, and sugar. Massage the chicken for about 30 seconds until each piece is thoroughly coated and the marinade is well blended. This step is crucial for infusing flavor into your chicken for the Chinese Chicken On A Stick.
Step 2: Marinate the Chicken
Cover the bowl with plastic wrap and refrigerate the marinated chicken for a minimum of 1 hour, although letting it sit for 4 hours or even up to 48 hours will deepen the flavors and tenderize the meat further. The longer you marinate, the more aromatic and juicy your chicken will become, which is key for achieving that sought-after taste.
Step 3: Coat the Chicken
After the marinating time, remove the chicken from the fridge and add cornstarch to the mixture. Ensure that every piece of chicken is evenly coated in cornstarch, which will allow for that desirable crisp when frying. This coating step is essential for achieving the perfect texture in your crispy Chinese Chicken On A Stick.
Step 4: Skewer the Chicken
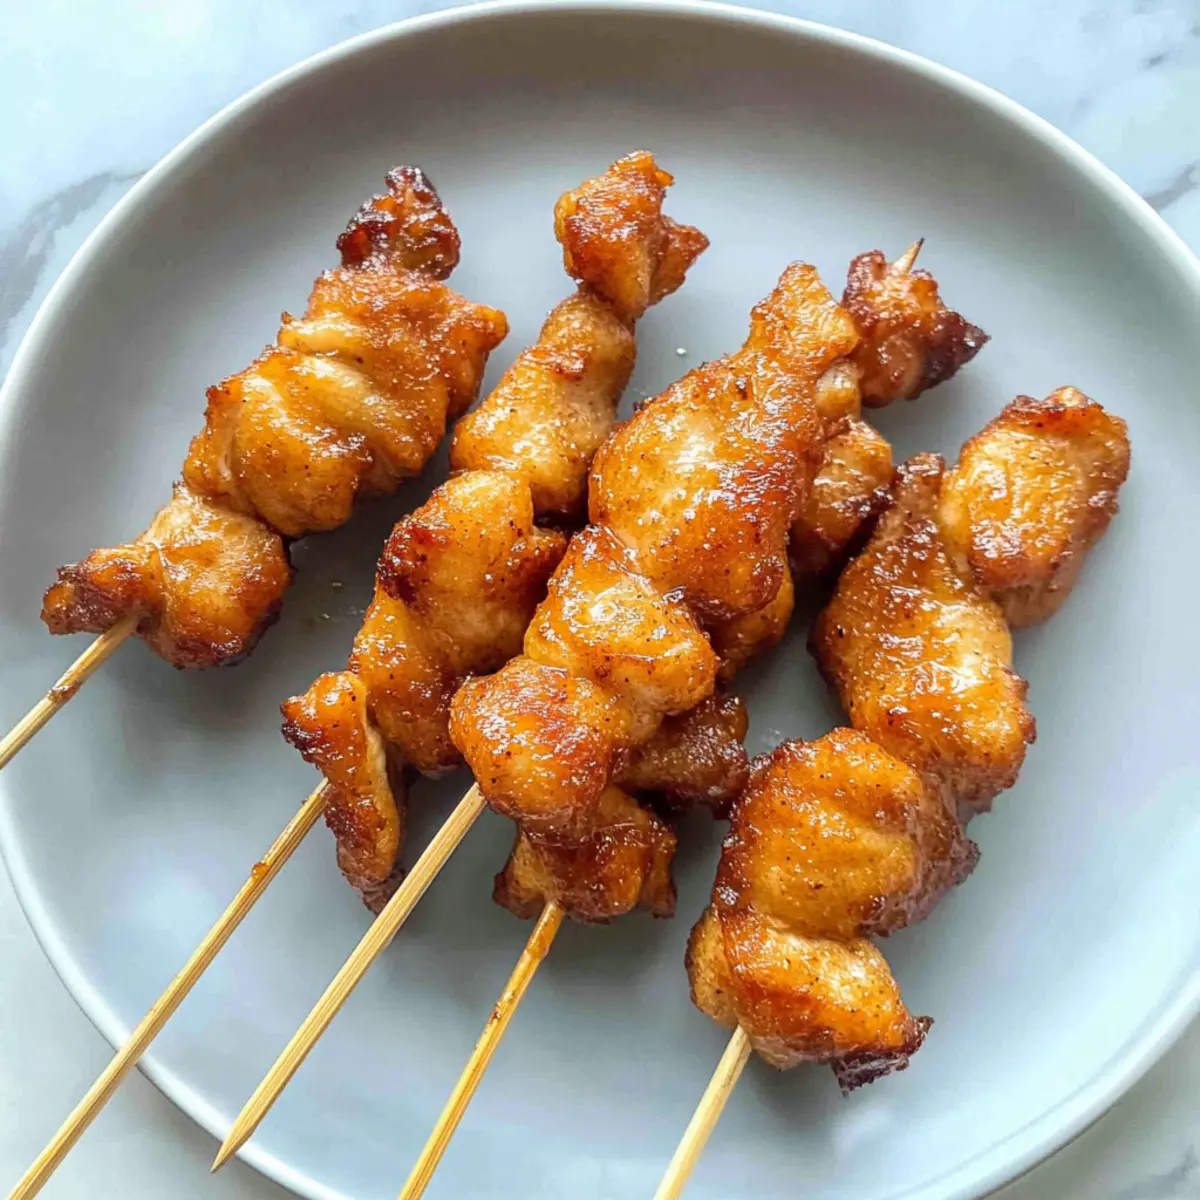
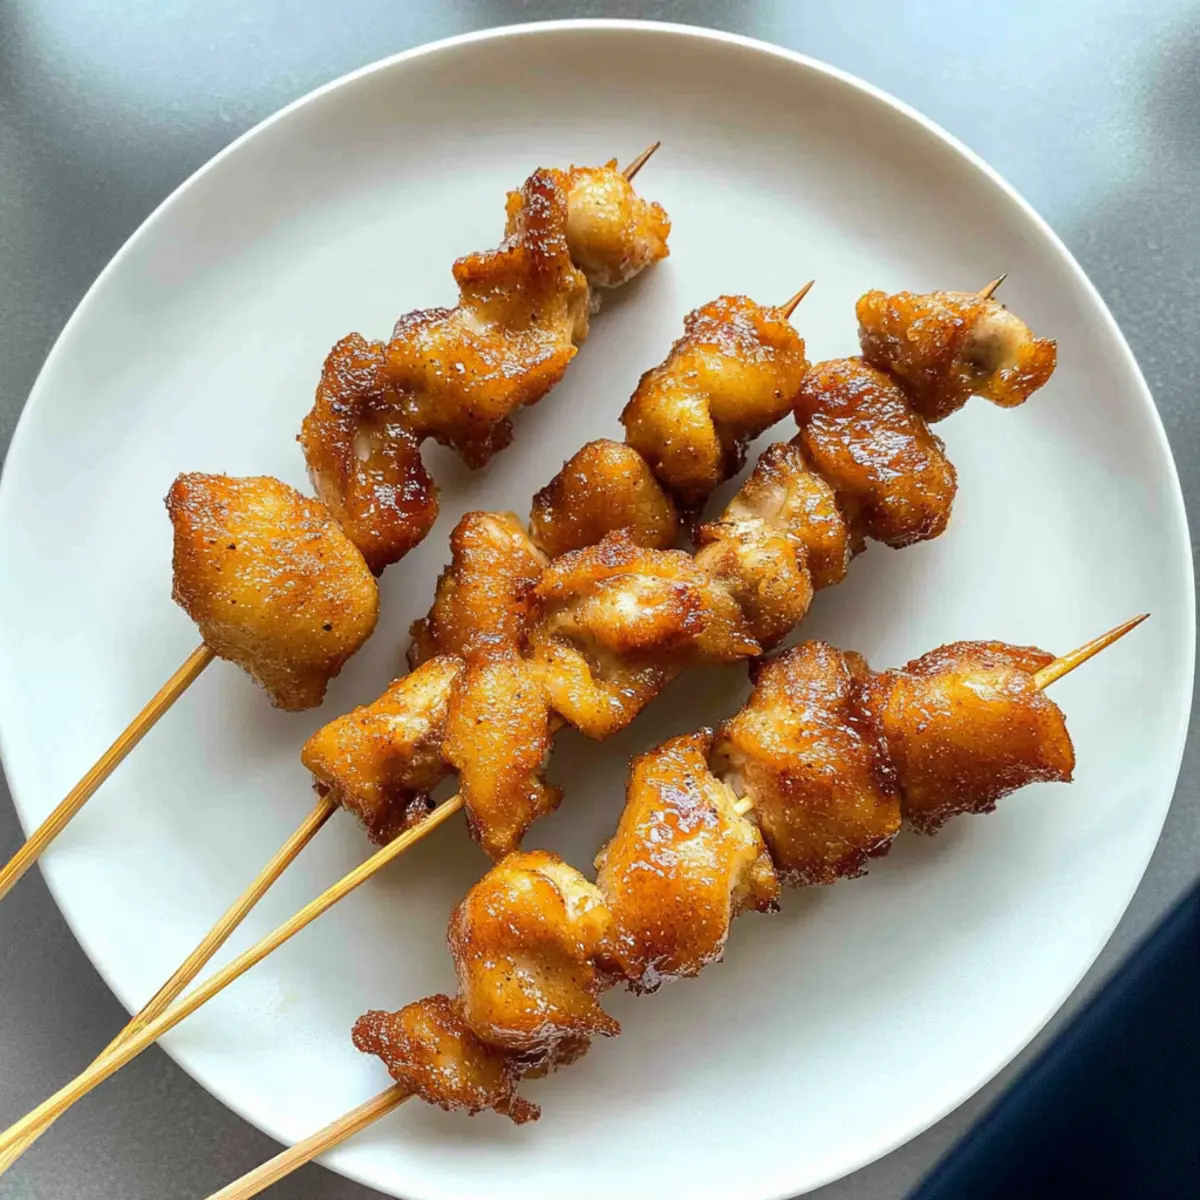
Take bamboo skewers and carefully thread the coated chicken pieces onto them, ensuring they are evenly spaced. If necessary, trim the edges of the skewers to fit your frying pot or air fryer. This method not only makes for easier cooking but also creates a delightful presentation for serving your chicken on a stick.
Step 5: Heat the Oil
In a deep frying pot, heat oil to 350°F (175°C). Use a thermometer for accuracy, as this temperature is ideal for frying the chicken to a golden perfection. Make sure to have a wire rack nearby to drain excess oil after frying, which will keep your crispy Chinese Chicken On A Stick light and crunchy.
Step 6: Fry the Skewers
Carefully lower 3-4 skewers into the hot oil, ensuring not to overcrowd the pan. Fry them for about 2-3 minutes or until they achieve a beautiful golden brown color. The chicken should be properly cooked through and the coating should be delightfully crispy, which is what makes this dish so irresistible.
Step 7: Drain and Serve
Once cooked, remove the skewers from the oil and let them drain on a wire rack for a minute. This allows excess oil to drip away, keeping your Chinese Chicken On A Stick crispy. Serve hot, maybe with dipping sauces or alongside rice, and get ready for compliments from your family and friends!
Expert Tips for Chinese Chicken On A Stick
- Marinate Wisely: The longer you marinate, the more flavorful and tender the chicken will become. Aim for at least 4 hours for the best results.
- Check for Doneness: Use a meat thermometer to ensure your chicken reaches an internal temperature of 165°F to avoid any risk of undercooking.
- Oil Temperature: Maintain the oil temperature at 350°F for perfectly crispy chicken. If the oil is too hot, the coating may burn before the chicken is cooked.
- Avoid Overcrowding: Fry in small batches to ensure the chicken cooks evenly and maintains a crispy exterior. This is key for achieving your desired texture in Chinese Chicken On A Stick.
- Serve Fresh: For optimal taste, serve your skewers immediately after frying. Reheat gently if necessary to preserve crunchiness.
Make Ahead Options
These Crispy Chinese Chicken On A Stick are perfect for meal prep, allowing you to enjoy restaurant-quality flavors with minimal day-of effort! You can marinate the chicken thighs up to 48 hours in advance to intensify the flavor; just cover them tightly with plastic wrap in the refrigerator. For a speedy finishing touch, skewer and coat the chicken with cornstarch, then when you’re ready to serve, simply fry them up for 2-3 minutes until golden brown. This method ensures that every bite remains just as delicious and crispy as if they were made fresh, making weeknight dinners or last-minute entertaining a breeze!
What to Serve with Crispy Five-Spice Chinese Chicken On A Stick?
Get ready to elevate your meal experience with vibrant sides that harmonize beautifully with your crispy treat!
-
Fragrant Jasmine Rice: Perfectly fluffy with a subtle aroma, jasmine rice soaks up the flavors, making every bite irresistible.
-
Quick Asian Slaw: A crunchy, refreshing salad with a zesty dressing brings balance to the richness of the chicken, adding a delightful contrast.
-
Savory Fried Rice: Packed with peas, carrots, and a hint of soy, this hearty dish perfectly complements the flavor profile of the chicken while enhancing the buffet vibe.
-
Spicy Szechuan Noodles: With a kick and a touch of sweetness, these noodles provide a wonderful depth of flavor that plays nicely off the five-spice seasoning.
-
Garlic Broccoli Stir-Fry: Tender-crisp broccoli with garlic adds a nutritious element and a pop of color to your plate, creating an enticing visual feast.
-
Chilled Cucumber Salad: Cool, crunchy cucumber dressed in rice vinegar offers a lovely, refreshing contrast against the crispy chicken, enhancing every bite.
-
Mango Sticky Rice: As a sweet finish, this dessert wraps up the meal beautifully; the creamy coconut complements the savory spice of the chicken perfectly.
-
Iced Green Tea: Refreshing and slightly earthy, a chilled glass of green tea cleanses the palate while complementing the meal's dynamic flavors.
Chinese Chicken On A Stick Variations
Feel free to get creative with this recipe and personalize it to match your taste buds!
- Teriyaki Twist: Swap five-spice powder for teriyaki sauce in the marinade for a sweet and savory profile. This change brings an entirely new flavor that complements the chicken beautifully.
- Char Siu Style: Substitute the marinade with char siu sauce for a delightful BBQ-esque flavor. This variation promises a sticky glaze that’s both sweet and aromatic, reminiscent of traditional Chinese BBQ.
- Vegetable Skewers: Add bell peppers, zucchini, or cherry tomatoes to the skewers for a nutritious and colorful twist. It's a great way to boost the health factor and add some crunch alongside the tender chicken.
- Spicy Heat: Amp up the marinade with some red pepper flakes or sriracha for an extra kick. The heat can really complement the sweetness from the hoisin, elevating your Chicken On A Stick to a new level.
- Curry Infusion: Mix in some curry powder or paste with the marinade for a unique fusion twist. This will offer a remarkable depth of flavor that will surprise your palate.
- Honey Garlic Variation: For an extra layer of sweetness, incorporate honey into the marinade alongside minced garlic. You could even try this with Honey Garlic Chicken for a sweeter alternative.
- Lemon Zest Brightness: Add a splash of lemon juice and some grated zest to the marinade for a zesty, fresh flavor that lightens up the dish. It offers a refreshing contrast to the richness of the chicken.
- Gluten-Free Option: Ensure all sauces used are gluten-free, replacing soy sauce with tamari and hoisin with compliant alternatives for everyone to enjoy without worry.
Each variation is a chance to explore bold flavors, so feel free to mix and match these ideas to discover your favorite combination! Enjoy your cooking adventure!
How to Store and Freeze Chinese Chicken On A Stick
Fridge: Store leftover cooked Chinese Chicken On A Stick in an airtight container for up to 3 days. This keeps the chicken moist while preventing it from absorbing excess odors.
Freezer: For longer storage, freeze the cooked skewers in a freezer-safe bag for up to 2 months. Ensure they're separated with parchment paper to prevent sticking together.
Reheating: To reheat, place the thawed chicken in an oven at 375°F (190°C) for about 10-15 minutes, or air fry at 350°F (175°C) for 5-7 minutes until crispy and heated through.
Making Ahead: Marinate the chicken up to 48 hours in advance; it will deepen the flavors wonderfully, making your meal prep a breeze!
Crispy Five-Spice Chinese Chicken On A Stick Recipe FAQs
How do I choose the best chicken thighs for this recipe?
Absolutely! Look for boneless chicken thighs that are firm and slightly moist with a rich color. Avoid any that have dark spots or an unpleasant smell. Freshness is key for achieving the best flavor in your Chinese Chicken On A Stick.
How should I store leftover Chinese Chicken On A Stick?
You can store leftover cooked skewers in an airtight container in the fridge for up to 3 days. Make sure they are completely cooled first to maintain texture. This way, you'll have delicious leftovers ready for a quick snack or meal!
Can I freeze my Chinese Chicken On A Stick?
Yes, you can! To freeze, place cooked skewers in a freezer-safe bag, ensuring they are separated by parchment paper to prevent sticking. They can be kept for up to 2 months. When you're ready to enjoy them again, simply thaw and reheat for a quick meal.
What if my chicken isn’t getting crispy when I fry it?
If your chicken isn’t crisping up, it might be due to the oil temperature. Ensure your oil is heated to 350°F (175°C) before frying. Also, avoid overcrowding the pan, as this can lower the oil temperature and result in soggy chicken. Fry in small batches for the crispiest results!
Are there any dietary considerations I should keep in mind?
Definitely! If you have guests with dietary restrictions, you can easily adapt this recipe. For gluten-free diets, use tamari instead of soy sauce and cornstarch instead of flour. Always check that your sauces are also gluten-free, and feel free to adjust ingredients based on allergies or preferences.
Can I prepare the marinade ahead of time?
Very! You can marinate the chicken up to 48 hours in advance. Just cover it well and store it in the refrigerator. The longer it marinates, the more flavors develop, making your Chinese Chicken On A Stick even more delicious when you're ready to cook!
Crispy Chinese Chicken On A Stick: Your New Favorite Snack
Ingredients
Equipment
Method
- In a medium bowl, combine boneless chicken thighs with oyster sauce, soy sauce, hoisin sauce, water, five-spice powder, garlic powder, baking soda, and sugar. Massage for about 30 seconds until coated.
- Cover and refrigerate the marinated chicken for at least 1 hour, up to 48 hours for deeper flavors.
- Remove chicken from the fridge and add cornstarch, ensuring each piece is evenly coated.
- Thread coated chicken pieces onto bamboo skewers, ensuring they are evenly spaced.
- Heat oil in a deep frying pot to 350°F (175°C).
- Carefully lower skewers into hot oil, frying for 2-3 minutes until golden brown.
- Drain skewers on a wire rack for a minute before serving hot.