As the aroma of sizzling chicken fills my kitchen, I can't help but feel a wave of nostalgia wash over me, transporting me back to family dinners gathered around the table. Today, I’m excited to share my go-to weeknight recipe: Instant Pot Chicken Thighs and Rice. This one-pot wonder is not only a lifesaver for busy evenings, but it also packs a punch of flavor that pleases even the pickiest eaters. With tender chicken thighs falling off the bone and fluffy, buttery rice infused with the perfect blend of herbs, it’s a dinner that feels as comforting as a warm hug. Plus, it's a gluten-free option that minimizes cleanup—what's not to love? Curious how you can whip up this family-friendly dish in no time? Let’s dive into the recipe!
Why Choose Instant Pot Chicken Thighs?
Flavorful Combination: The delicious fusion of spices and tender chicken creates a mouth-watering dish that both kids and adults will adore.
Minimal Effort: With just one pot, prep is a breeze—no need to juggle multiple pans.
Quick Cooking Time: Ready in under 30 minutes, this meal is perfect for those hectic weeknights.
Versatile Options: Don’t hesitate to swap chicken thighs for the equally delicious chicken legs or even add in some veggies like peas for added nutrition.
Crowd-Pleaser: Serve it up with a side of your favorite salad or some Crock Pot Chicken—your family will keep coming back for seconds!
Instant Pot Chicken Thighs and Rice Ingredients
For the Chicken
• Skinless Bone-in Chicken Thighs – Main protein source; can be substituted with chicken legs for variety.
• Salt – Essential for enhancing the natural flavors of the chicken.
• Black Pepper – Adds subtle heat and depth to the seasoning.
• Paprika – For color and mild spice; use smoked paprika for added depth.
For the Rice
• Uncooked Basmati Rice – Provides the meal's carbohydrate base; no soaking needed.
• Chicken Stock – Adds depth of flavor; vegetable or beef stock make great alternatives.
• Herb de Provence – Infuses the rice with aromatic flavor; can be substituted with Italian seasoning if desired.
For the Aromatics
• Onion – Enhances sweetness and texture; yellow or white onion works perfectly.
• Ginger Paste – A fresh flavor boost; fresh ginger can also be minced as a substitute.
• Garlic Paste – Enhances overall flavor; fresh garlic, minced, is a good alternative.
For Cooking
• Butter – Adds richness to the dish; optional for those preferring a non-dairy alternative.
• Vegetable Oil – Necessary for sautéing the aromatics; olive oil is a suitable substitute.
For Garnish
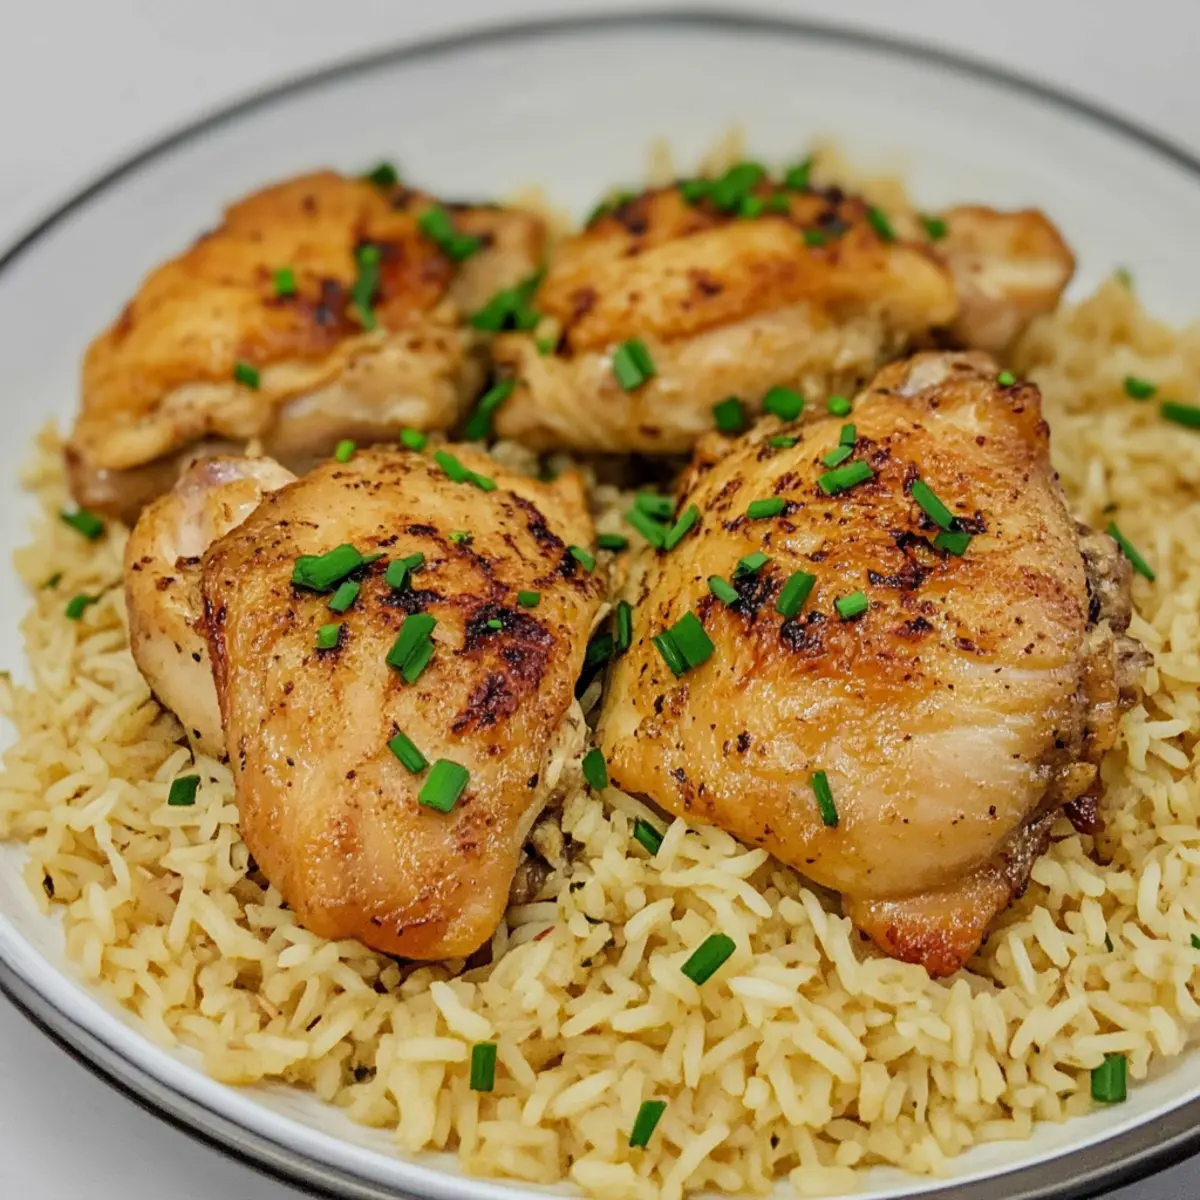
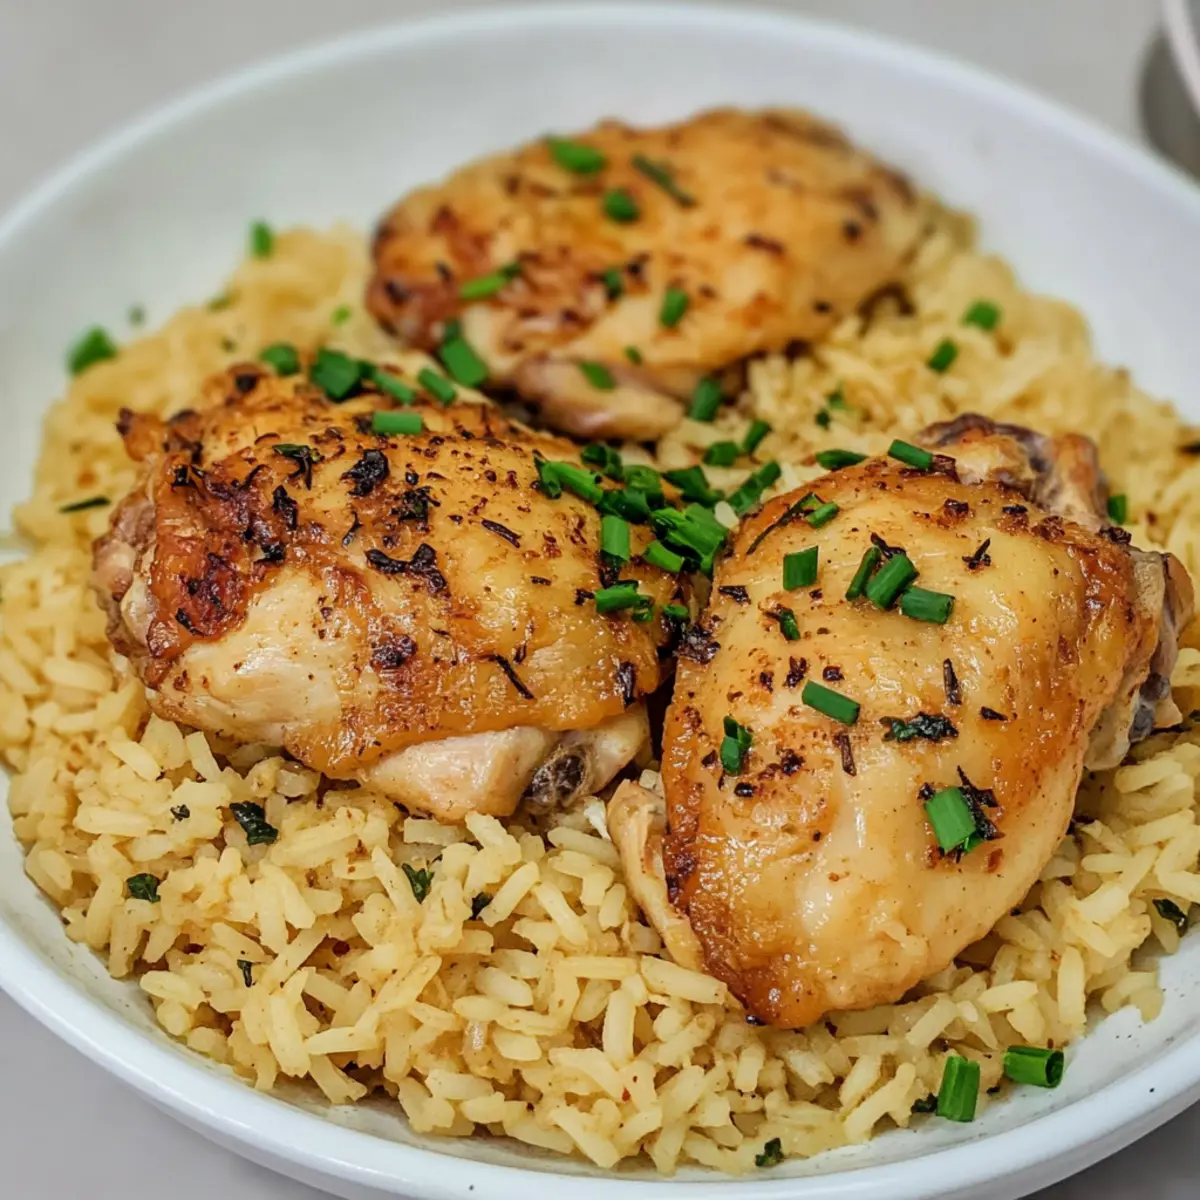
• Chopped Chives – Adds a fresh, vibrant touch; can use chopped green onions as a substitute.
Enjoy crafting this Instant Pot Chicken Thighs and Rice dish that is bound to become a staple in your household!
Step‑by‑Step Instructions for Instant Pot Chicken Thighs and Rice
Step 1: Prepare Chicken
Begin by seasoning the skinless bone-in chicken thighs with salt, black pepper, and smoked paprika. Make sure to coat each thigh thoroughly for even flavor. Once seasoned, set the chicken thighs aside and let them rest while you prep the aromatics and other ingredients.
Step 2: Sauté Aromatics
Turn on the Instant Pot and select the sauté setting to preheat. Add a tablespoon of butter along with a tablespoon of vegetable oil, allowing them to melt and combine. Once the mixture is hot, toss in the chopped onion and sauté for about 3 to 4 minutes until soft and translucent, filling your kitchen with a comforting aroma.
Step 3: Brown Chicken
Add ginger and garlic paste to the onions in the pot, stirring for about 30 seconds until fragrant. Next, gently place the seasoned chicken thighs into the pot, browning them for approximately 3 minutes on each side until they develop a lovely golden color. This step seals in their juiciness and flavor, enhancing the dish.
Step 4: Deglaze Pot
Carefully remove the browned chicken thighs and set them aside on a plate. Pour 2 cups of chicken stock into the pot, using a wooden spoon to scrape the bottom thoroughly. This prevents any burn notices during cooking, ensuring a smooth process. Make sure to clear any bits stuck to the bottom.
Step 5: Add Rice
Stir in 2 cups of unwashed basmati rice, followed by another cup of chicken stock. Sprinkle in the Herb de Provence, ensuring it’s evenly distributed. Avoid stirring the rice at this point; just let the rice sit undisturbed on top of the stock to create a perfectly fluffy base for the chicken.
Step 6: Cook Chicken
Place the browned chicken thighs on top of the rice, skin side facing up. Secure the Instant Pot lid, ensuring it’s locked in place, and select high-pressure cooking for 6 minutes. When cooking is complete, allow the pot to naturally release pressure for 10 minutes for optimal tenderness, which will further develop the flavors.
Step 7: Release Pressure
After the natural release, carefully turn the steam release valve to quick release any remaining pressure. Listen for the hissing sound as the steam escapes. Once fully released, open the lid and set it aside. The aroma of Instant Pot Chicken Thighs and Rice should now fill your kitchen, teasing your appetite.
Step 8: Finish and Serve
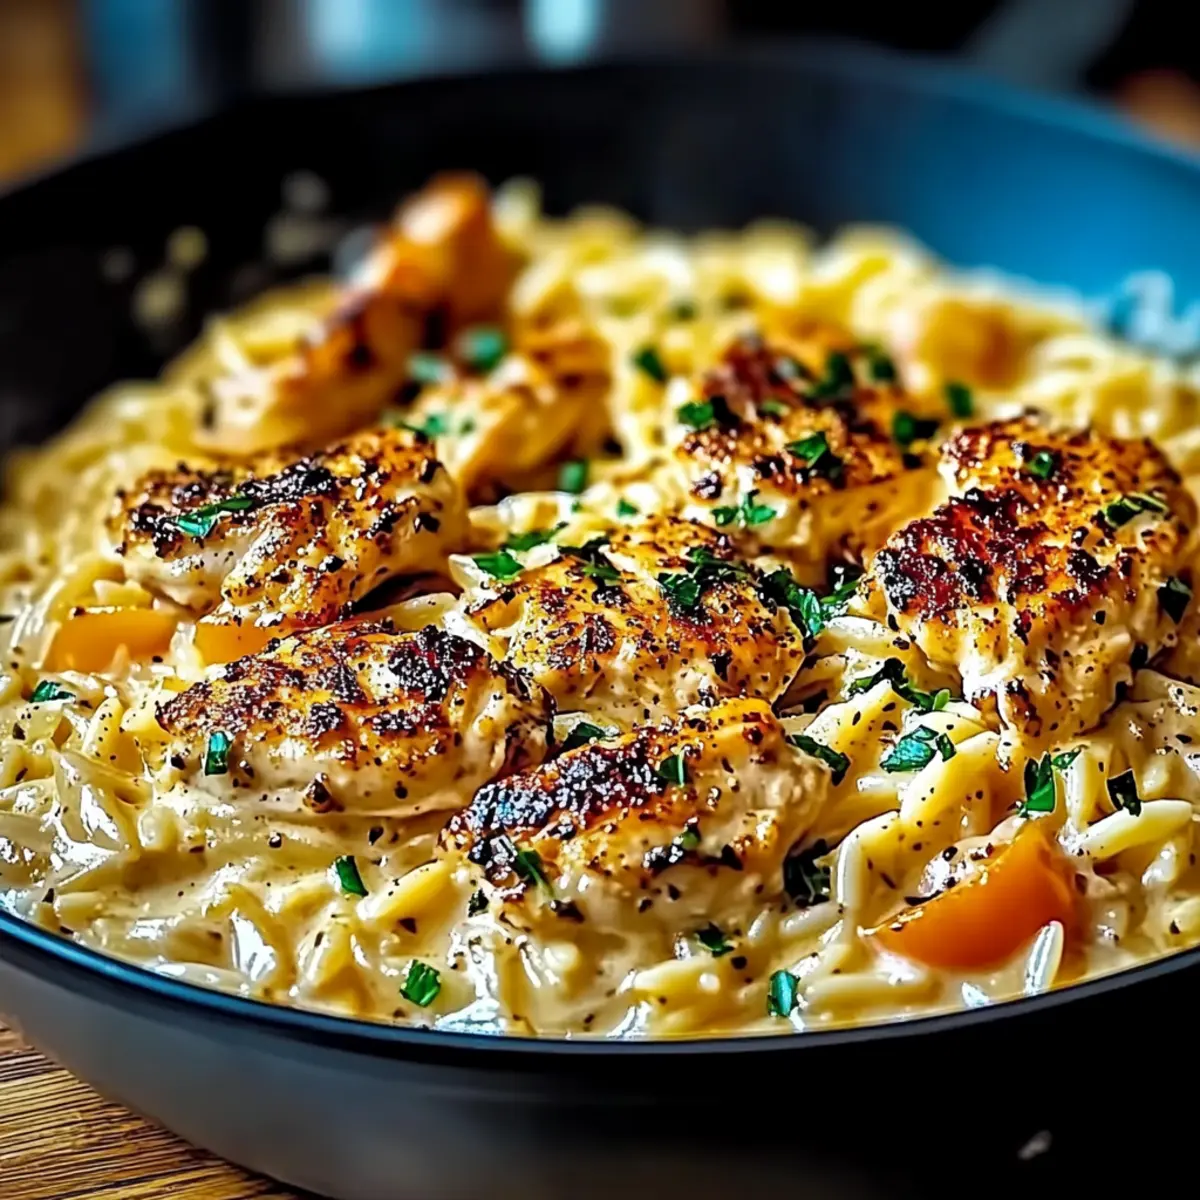
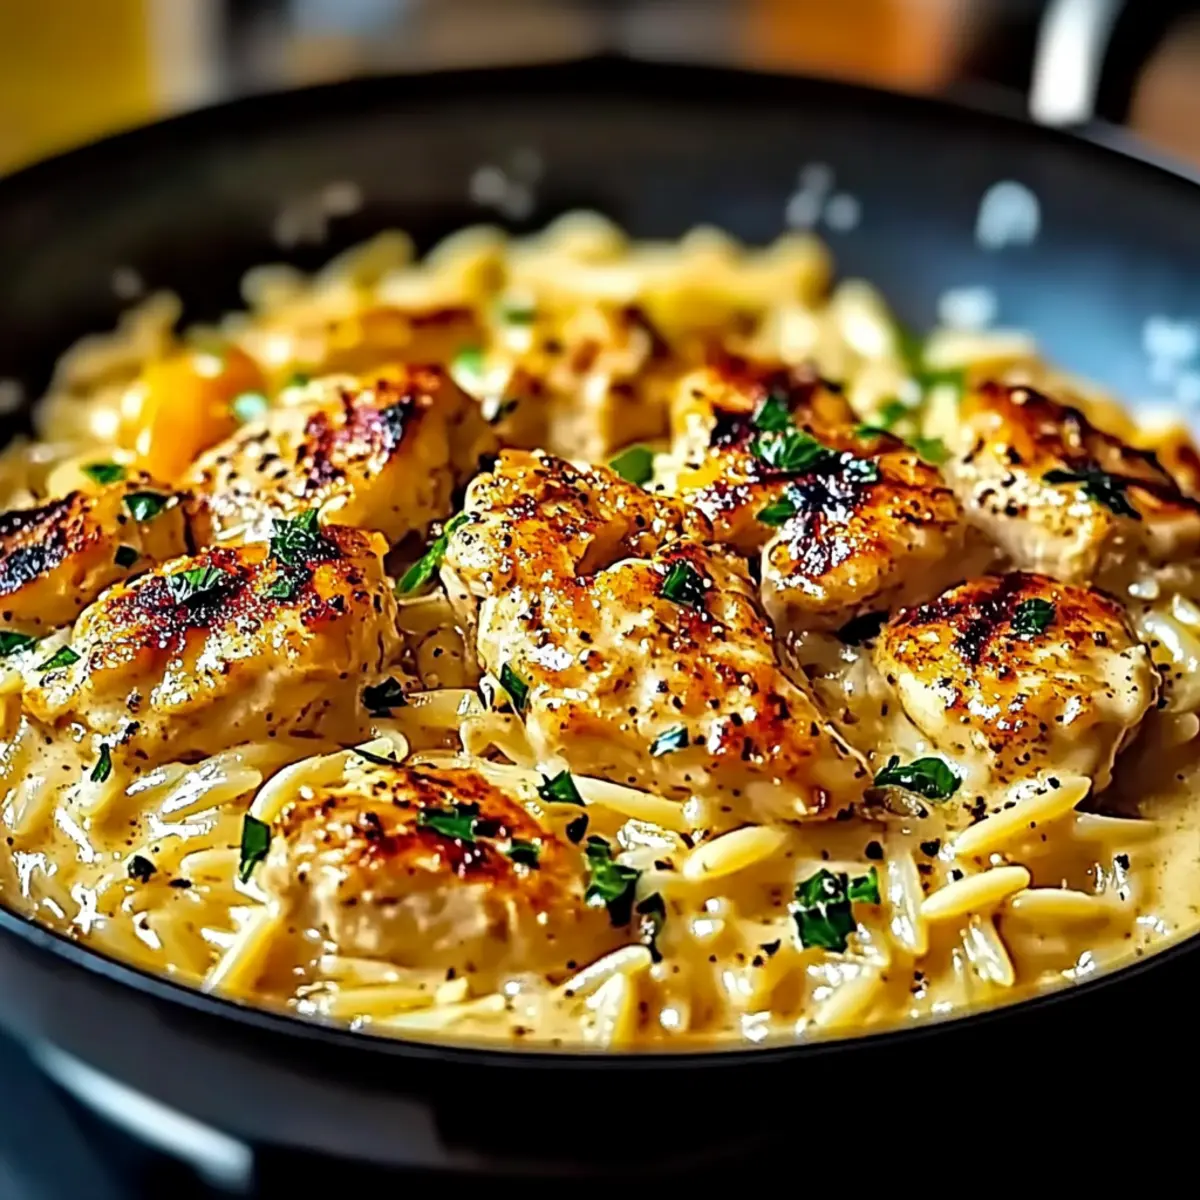
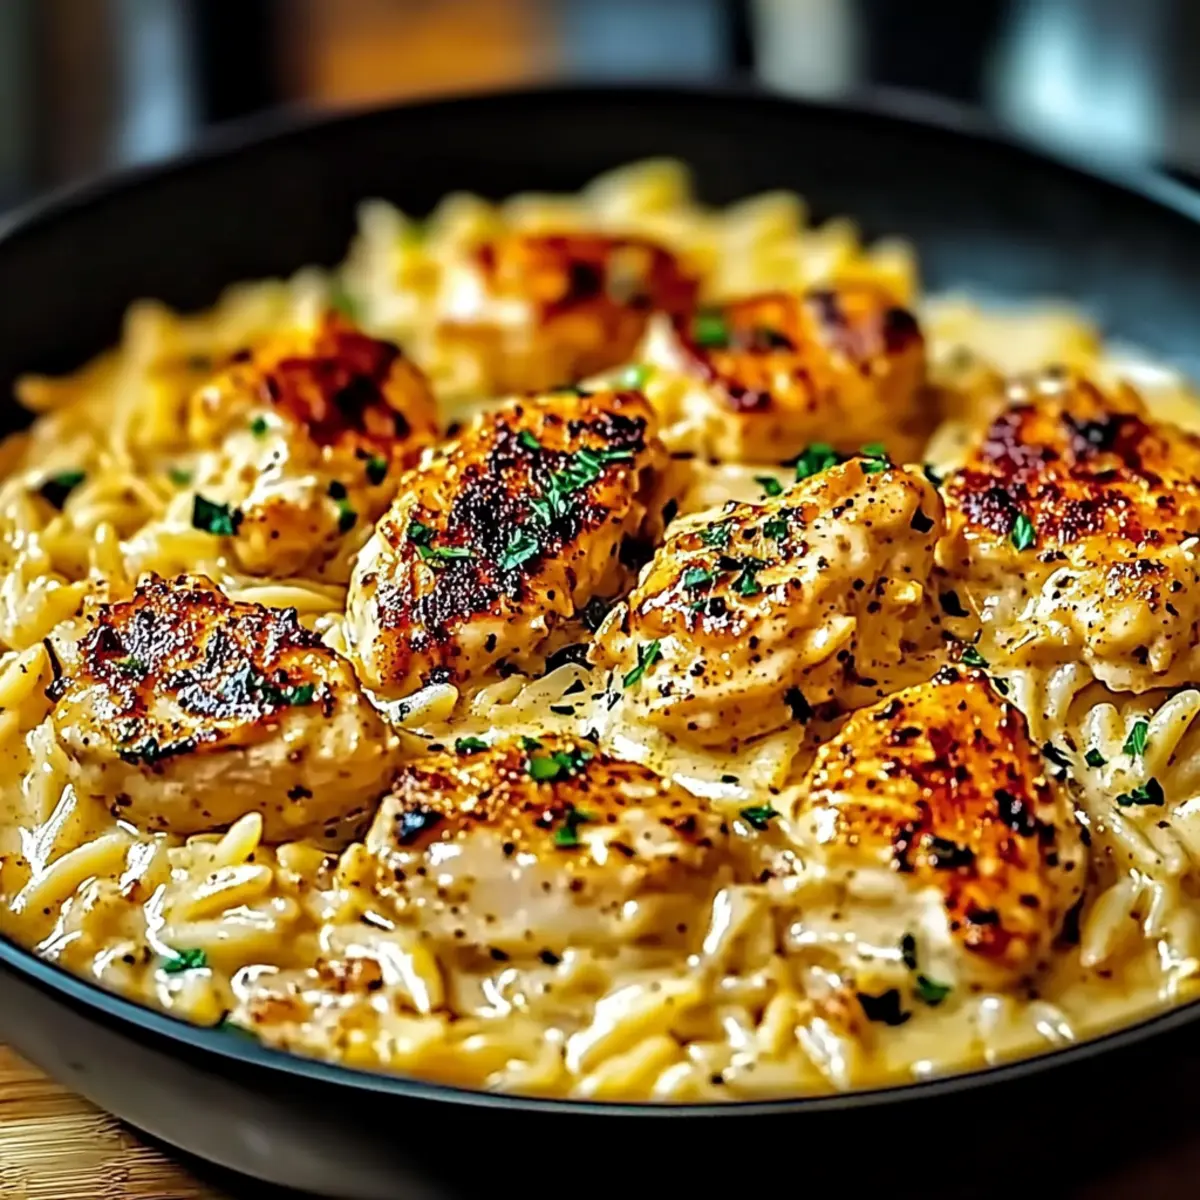
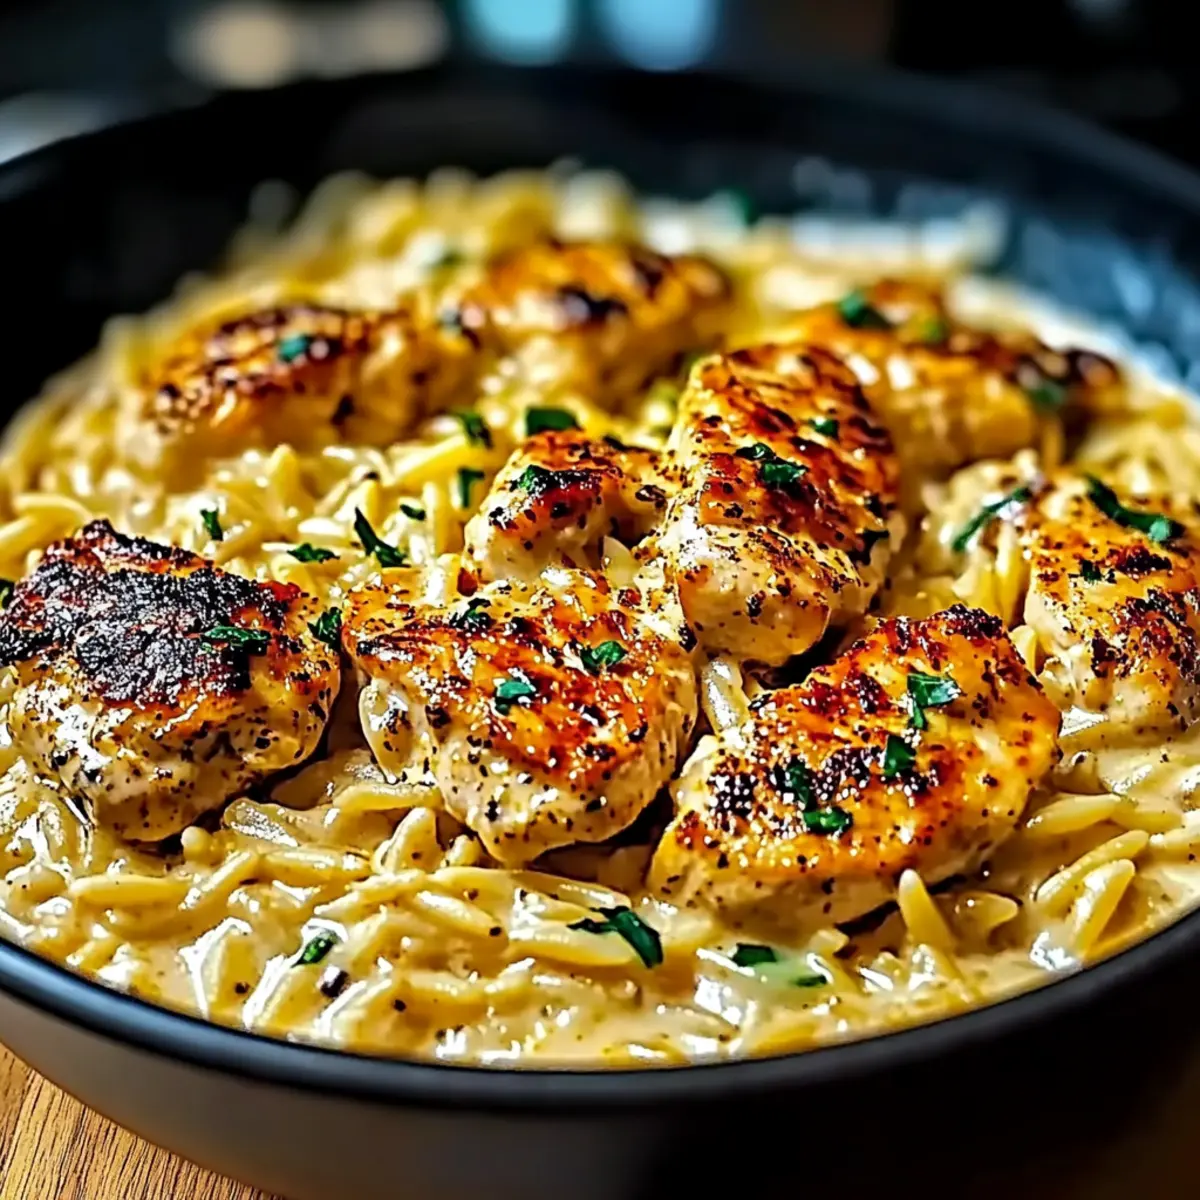
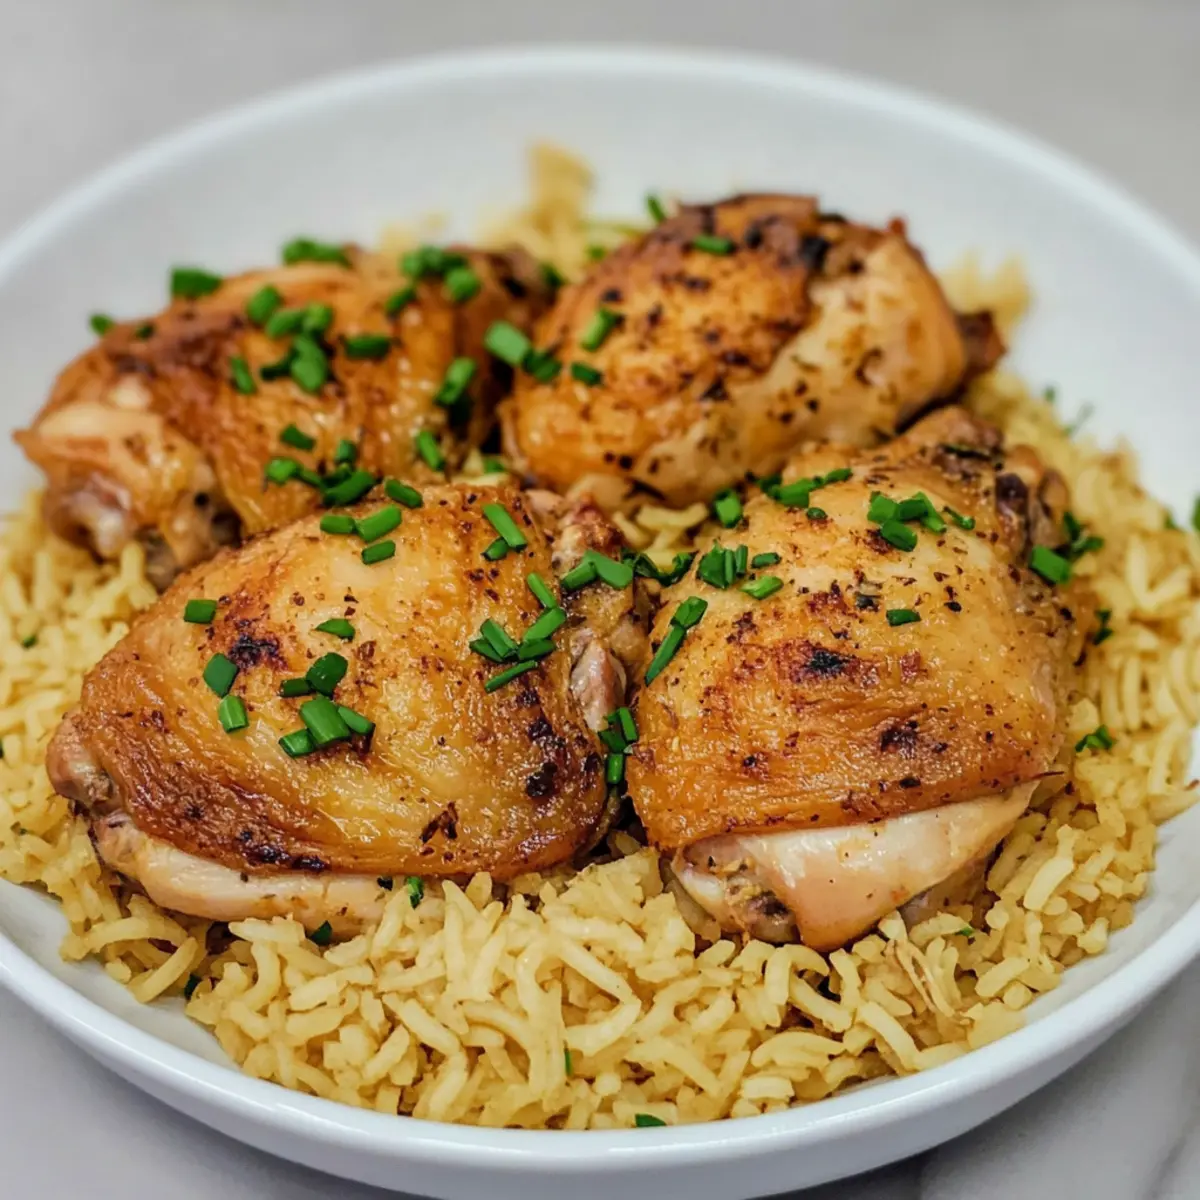
Gently fluff the rice with a fork, mixing in any accumulated juices. Stir in chopped chives for added freshness. Allow the dish to rest for a couple of minutes before serving. This Instant Pot Chicken Thighs and Rice meal is now ready to be plated, perfect for enjoying with your family around the dinner table.
What to Serve with Instant Pot Chicken Thighs and Rice
Imagine a wholesome family meal that brings everyone together, filled with delightful textures and flavors.
-
Creamy Coleslaw: This crunchy side offers a refreshing contrast, balancing the warmth of the chicken and rice with its tangy, creamy dressing.
-
Garlicky Green Beans: Sautéed with garlic and a hint of lemon, they add a vibrant green color and a mild warmth that complements the dish beautifully.
-
Honey-Glazed Carrots: Their sweetness enhances the savory profile of the chicken, creating a delicious harmony of flavors on your plate.
-
Cucumber Salad: Light and crisp, this salad brings a refreshing crunch that cuts through the richness of the meal, keeping your taste buds happy.
-
Herbed Corn on the Cob: Grilled or boiled, corn brushed with herbs is a summertime celebration that adds sweetness and a wanderlust spirit to your dinner.
-
Chilled White Wine: Pour a glass of chilled Sauvignon Blanc—its crispness and acidity find a lovely partner in hearty chicken and rice.
-
Chocolate Mousse: For dessert, this rich, silky treat is a sweet kiss to finish your meal, effortlessly melting away any lingering savory flavors.
-
Lemon Sorbet: As a light refresher, this tangy sorbet cleanses your palate and offers a sweet farewell to your dining experience.
Make Ahead Options
These Instant Pot Chicken Thighs and Rice are a fantastic choice for meal prep enthusiasts! You can season the chicken thighs and refrigerate them for up to 24 hours to allow the flavors to meld beautifully. The rice can also be rinsed and stored in an airtight container for up to 3 days. When you’re ready to cook, simply sauté your aromatics, add the stock and rice, then layer the marinated chicken thighs on top. This way, you’ll have a comforting, homemade meal ready with minimal effort—just as delicious as if you had made it fresh, and perfect for busy weeknights!
Expert Tips for Instant Pot Chicken Thighs and Rice
-
Season Generously: Ensure each chicken thigh is well-seasoned with salt, black pepper, and paprika for maximum flavor—don’t skimp here!
-
Avoid Burn Notices: Always deglaze the pot thoroughly after sautéing—scraping up any browned bits will prevent the dreaded BURN notice.
-
Natural Release Magic: Letting the Instant Pot naturally release pressure for 10 minutes enhances tenderness, so resist the urge to rush this step.
-
Fluff, Don’t Stir: When it’s time to fluff the rice, use a fork instead of a spoon to avoid breaking the grains and keep them tender.
-
Customize Flavors: Experiment with herbs and spices you love; adding a pinch of cayenne can introduce delightful heat to your Instant Pot Chicken Thighs and Rice.
How to Store and Freeze Instant Pot Chicken Thighs and Rice
-
Fridge: Store leftover Instant Pot Chicken Thighs and Rice in an airtight container for up to 3 days. Let it cool to room temperature before sealing to maintain freshness.
-
Freezer: For longer storage, freeze portions in freezer-safe bags or containers for up to 2 months. Ensure to remove as much air as possible.
-
Reheating: Thaw overnight in the fridge before reheating. Warm in the microwave or on the stovetop until heated through, adding a splash of chicken stock if needed to revive moisture.
-
Tip: Always cool completely before storing, and remember to check for any signs of spoilage before enjoying your reheated meal!
Instant Pot Chicken Thighs and Rice Variations
Feel free to personalize this dish and make it your own, bringing your unique tastes to the table!
-
Alternative Protein: Swap bone-in chicken thighs for chicken legs or quarters to explore different flavors. Each protein offers a delightful twist.
-
Brown Rice: Choose brown rice instead of basmati for a hearty, nutritious option—but make sure to adjust the liquid and cooking time for perfect results.
-
Extra Veggies: Toss in peas or carrots during the last few minutes of cooking for a vibrant, veggie-packed meal. Kids will love the added color and crunch!
-
Herb Swaps: Experiment with Italian seasoning in place of Herb de Provence for a different aromatic vibe. It’s a simple change that adds a lovely Mediterranean flair.
-
Creamy Touch: Stir in some light cream cheese after cooking for a rich and creamy consistency. This adds a luxurious finish that you and your family will adore.
-
Spicy Kick: For added heat, mix in a pinch of cayenne pepper or use spicy paprika when seasoning the chicken. It will transform the dish into a flavor bomb!
-
Coconut Rice: Switch to coconut milk instead of chicken stock for a tropical, creamy base. This will give your dish an exciting twist that's simply irresistible.
-
Bright Citrus: Add a splash of fresh lemon or lime juice before serving to brighten up the dish. A simple squeeze can elevate the flavors beautifully!
These variations can help you craft your own version of this comforting dish, whether you're looking to use up leftovers or adapt to your family’s taste preferences. You might also enjoy it alongside a refreshing side like Cucumber Salad or pair with Garlic Chicken Thighs for a delightful feast!

Instant Pot Chicken Thighs and Rice Recipe FAQs
How do I choose the right chicken thighs for this recipe?
Absolutely! When selecting chicken thighs, look for skinless, bone-in options for the best flavor and texture. They should feel firm and have a vibrant pink color. Avoid thighs with dark spots or an off-smell, which indicates spoilage. If bone-in isn’t available, chicken legs also work beautifully, providing a similar juicy result.
How long can I store leftovers of Instant Pot Chicken Thighs and Rice?
Leftovers can be stored in an airtight container in the refrigerator for up to 3 days. It's best to let the dish cool completely before sealing to keep it fresh. To rehear, simply warm in the microwave or on the stovetop; add a splash of chicken stock if you want to refresh the flavors and moisture!
Can I freeze Instant Pot Chicken Thighs and Rice?
Yes, indeed! To freeze, place portions of the chicken and rice in freezer-safe bags or containers, making sure to push out as much air as possible. For optimal taste and quality, it's best consumed within 2 months. When ready to enjoy, thaw overnight in the fridge and reheat thoroughly before serving.
What if my Instant Pot shows a burn notice during cooking?
Very! If a burn notice appears, don’t panic. Simply turn off the Instant Pot and allow it to naturally release pressure for about 10 minutes. This should help to prevent further burning, and you can finish cooking by carefully adding a little more liquid if necessary. Be sure to scrape the bottom thoroughly while deglazing next time to avoid this issue altogether.
Are there any dietary considerations I should be aware of?
If you're cooking for guests with dietary restrictions, this Instant Pot Chicken Thighs and Rice recipe is gluten-free and can be easily customized. For those with lactose intolerance, you can skip the butter or substitute it with a non-dairy alternative like olive oil. Always check for allergies with your pantry staples or any additional ingredients, especially when cooking for pets as some common ingredients can be harmful to them.
What are some good variations I can try with this recipe?
The more the merrier! If you’d like to switch things up, you can substitute bone-in chicken thighs with chicken legs or quarters, which cook similarly. Consider using brown rice instead of basmati—just adjust the liquid and cooking time slightly to accommodate for the different texture. Adding vegetables like peas or carrots can not only enhance the nutrition but also add a delightful pop of color to your dish.
Instant Pot Chicken Thighs and Rice for Effortless Family Dinners
Ingredients
Equipment
Method
- Season the chicken thighs with salt, black pepper, and smoked paprika. Set aside.
- Select the sauté setting on the Instant Pot, add butter and vegetable oil, and heat.
- Add chopped onion to the pot and sauté for 3 to 4 minutes until soft.
- Stir in ginger and garlic paste, then brown chicken thighs in the pot for 3 minutes per side.
- Remove chicken and deglaze the pot with chicken stock, scraping any stuck bits.
- Stir in Basmati rice and additional chicken stock, then add Herb de Provence without stirring.
- Place the browned chicken on top of the rice, secure the lid, and cook on high pressure for 6 minutes.
- Allow a natural pressure release for 10 minutes, then quick release any remaining pressure.
- Fluff the rice with a fork, mix in juices, and stir in chopped chives before serving.