tastytrendingredients

  • Home
  • Recipes
    • Appetizers
    • Breakfast
    • Dessert
    • Dinner
    • Drinks
    • Salads
    • Snacks
    • Soups
  • About me
  • Contact me
menu icon
go to homepage
  • Home
  • Recipes
    • Appetizers
    • Breakfast
    • Dessert
    • Dinner
    • Drinks
    • Salads
    • Snacks
    • Soups
  • About me
  • Contact me
search icon
Homepage link
  • Home
  • Recipes
    • Appetizers
    • Breakfast
    • Dessert
    • Dinner
    • Drinks
    • Salads
    • Snacks
    • Soups
  • About me
  • Contact me
×

Mushroom Skulls Spooky Pasta for a Fun Halloween Feast

October 7, 2025 by Grace Snow Leave a Comment

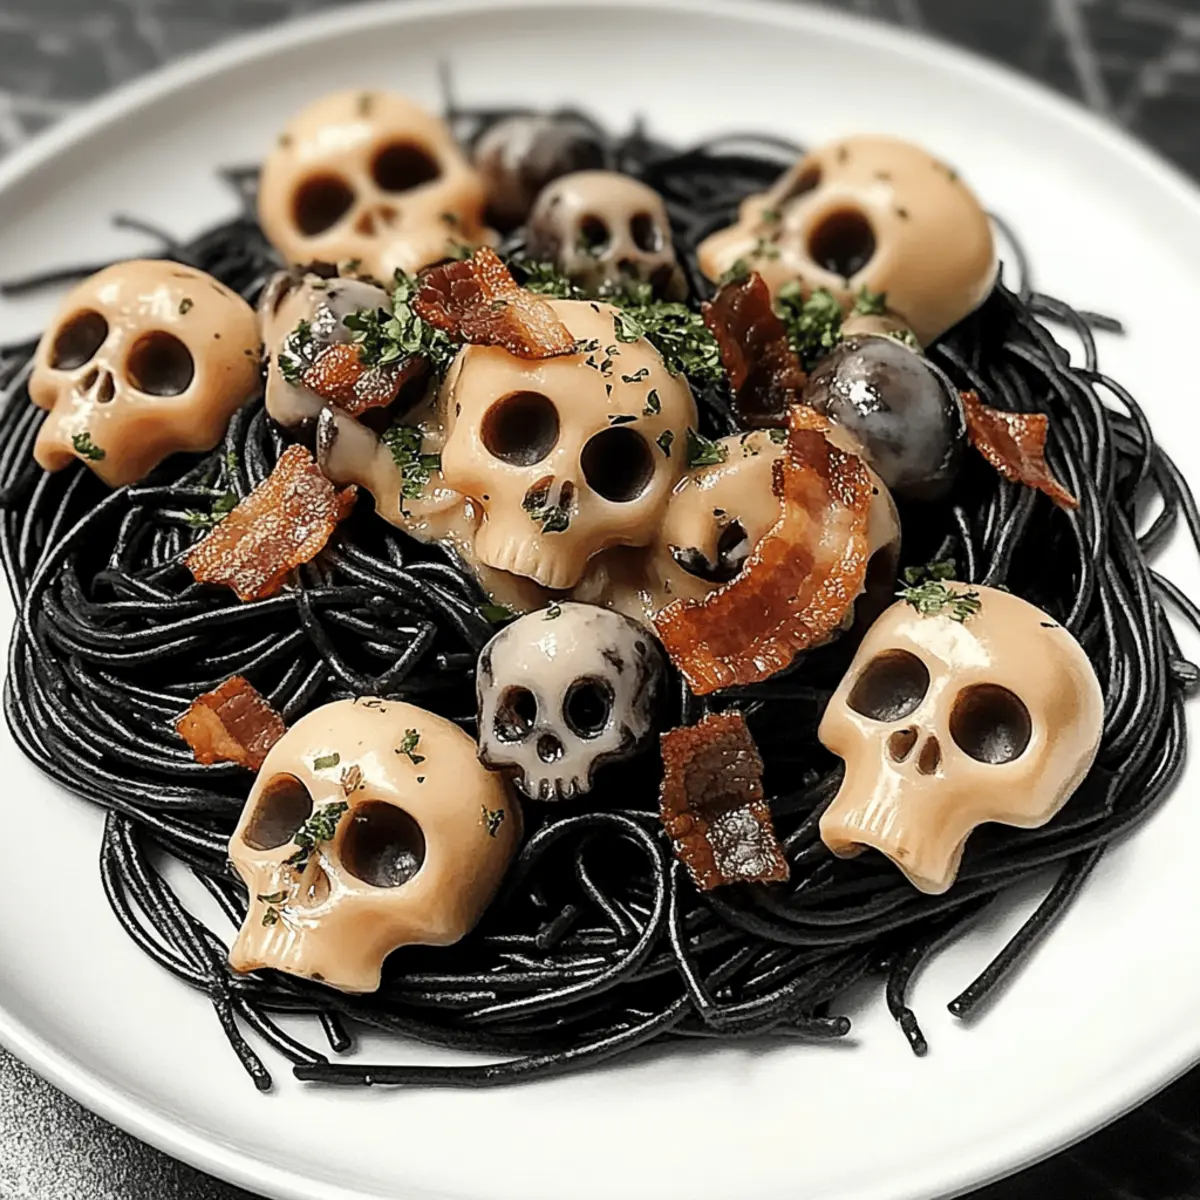
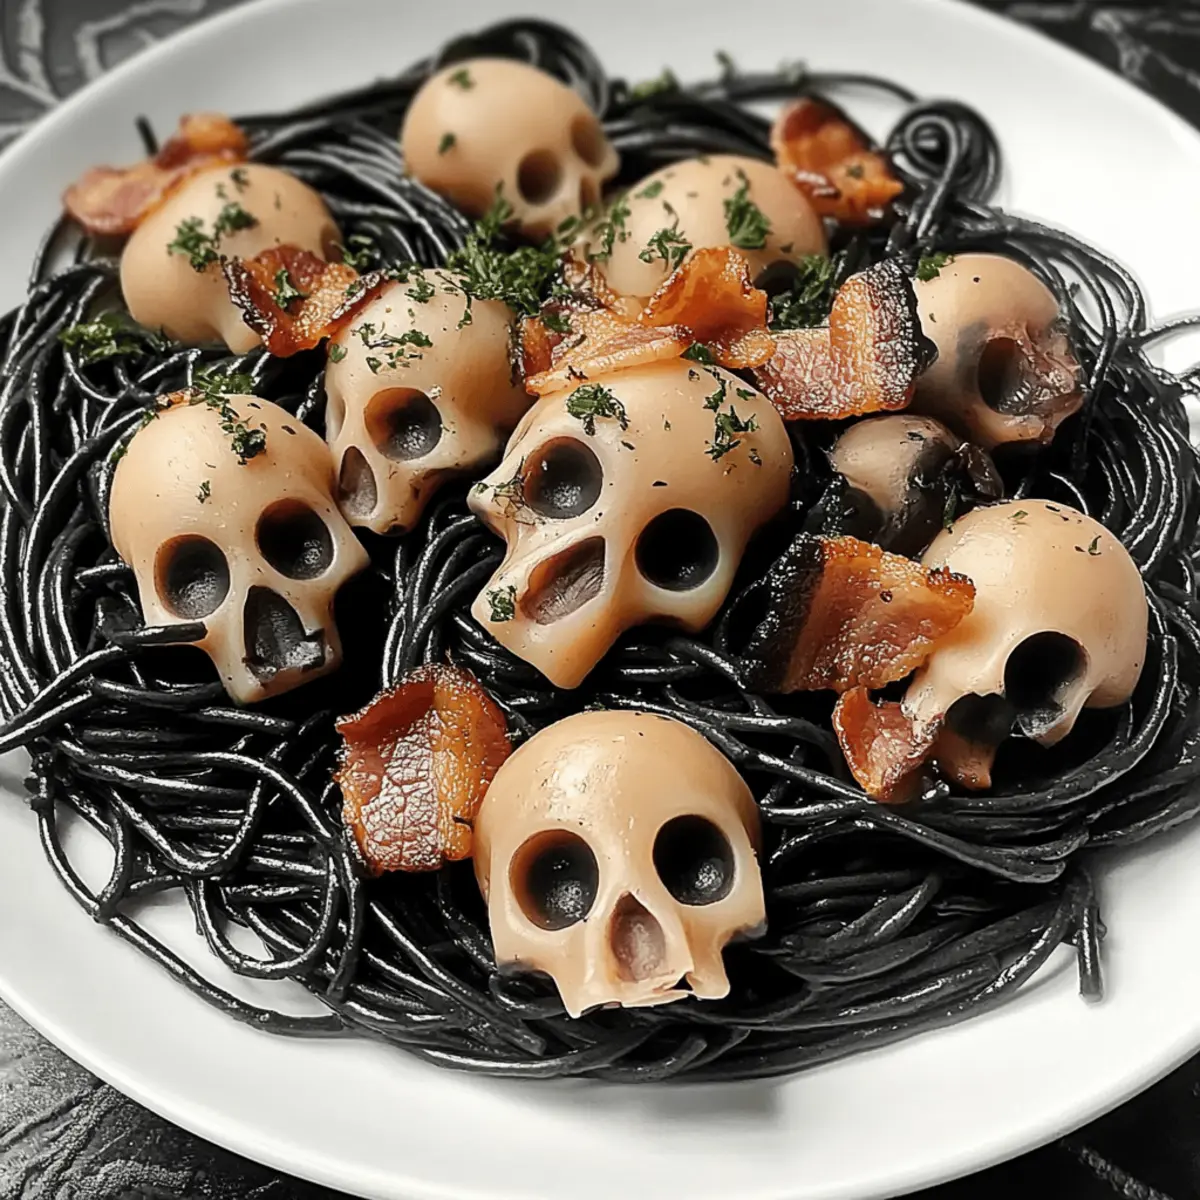
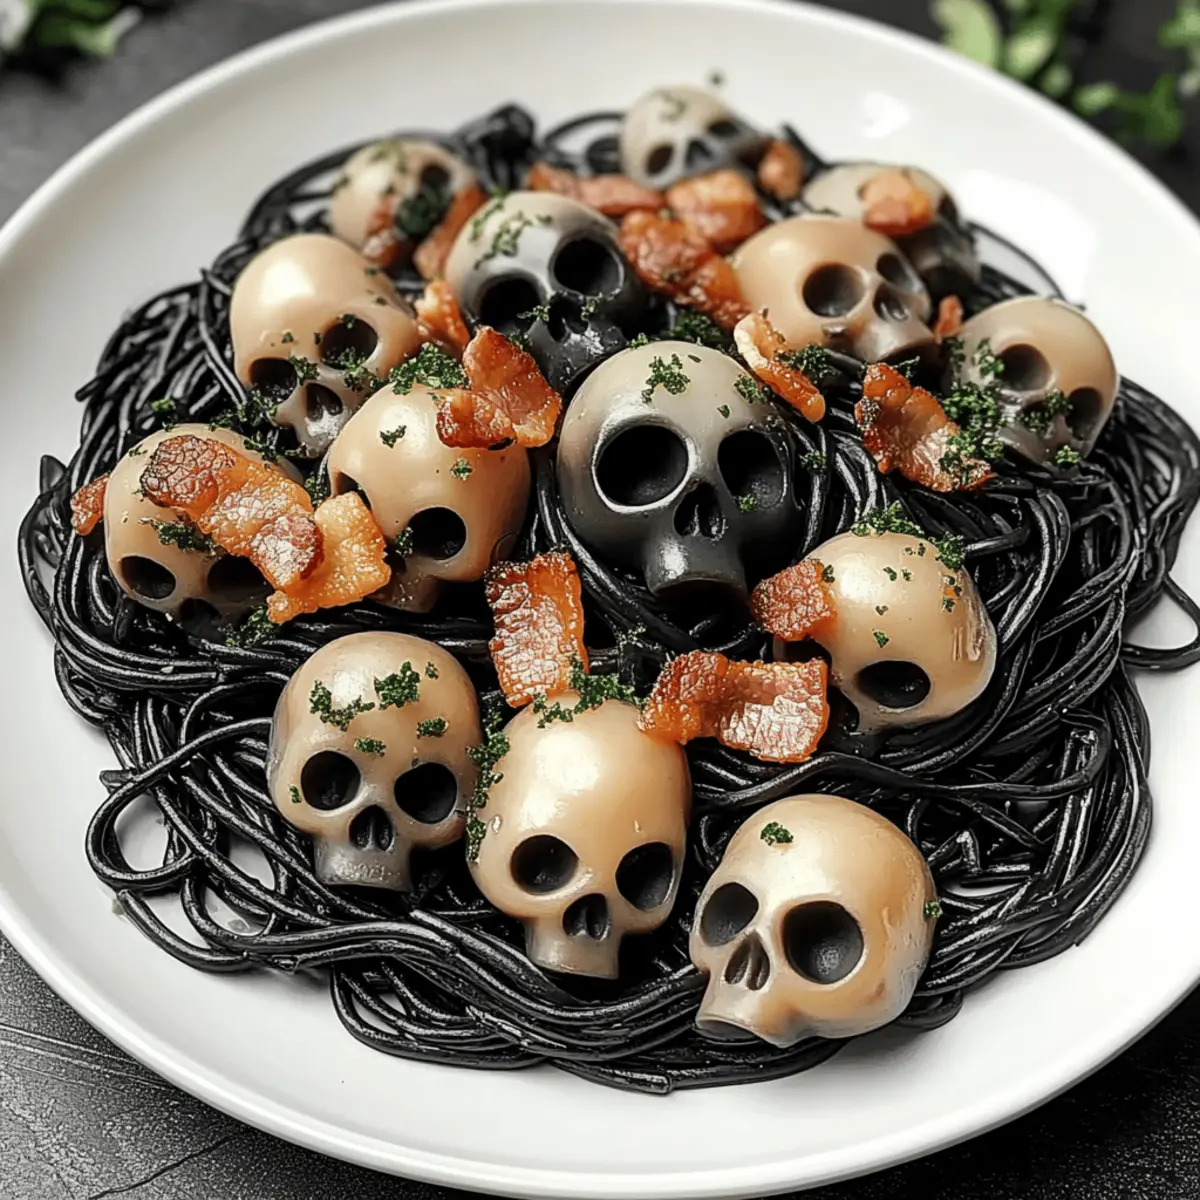
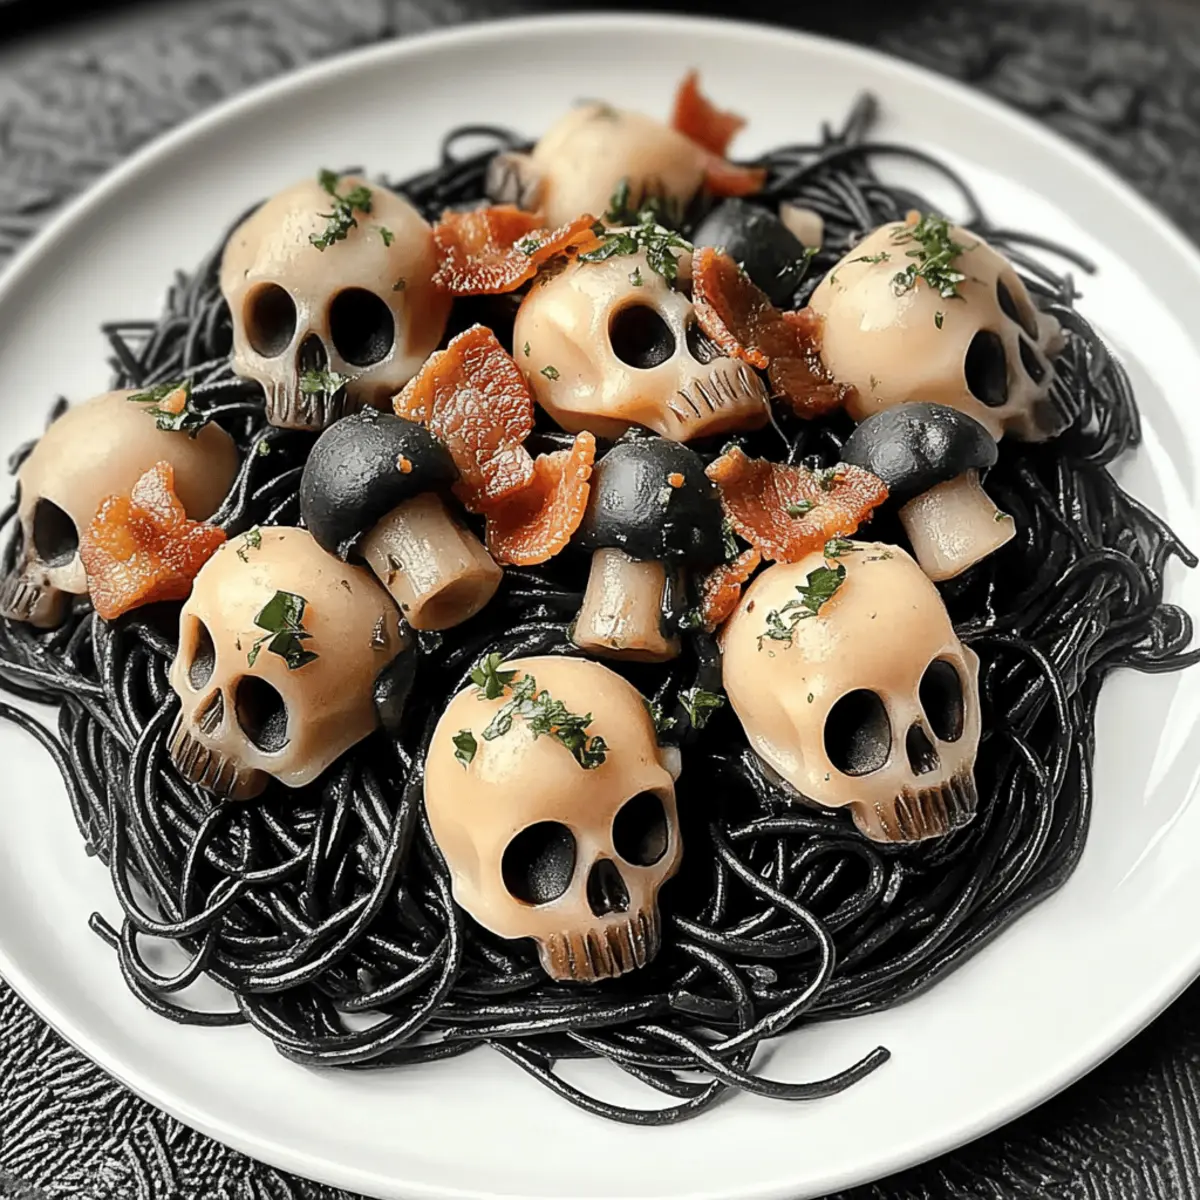
As I rummaged through my pantry, a surprising burst of inspiration struck: Halloween was just around the corner! To celebrate this spooky season, I instantly thought of the Mushroom Skulls Spooky Pasta—an enchanting dish that’s as much fun to make as it is to eat. Made with striking squid ink spaghetti and topped with playful, carved mushroom skulls, this family-friendly recipe is perfect for fostering creativity and enjoying quality time together. Plus, its creamy, savory sauce comes together in no time, making it an ideal choice for busy weeknights when you need something both festive and quick. Just wait until you see the faces of your loved ones as they dive into this whimsical dinner. Ready to get started? Let’s make some kitchen magic!

Why is Mushroom Skulls Pasta a Must-Try?

Fun and Festive: This quirky Halloween dish adds a playful twist to your dinner table, making it a hit for family gatherings.

Quick and Easy: With simple steps and ingredients, you can whip up this eye-catching pasta in under 30 minutes, perfect for busy nights.

Creamy Delight: The rich, savory sauce coats the squid ink spaghetti beautifully, creating a satisfying flavor explosion that everyone will love.

Endless Variations: Customize it to fit dietary needs—swap out the squid ink spaghetti for whole wheat or gluten-free options, or make it vegan with coconut cream.

Crowd Winner: Everyone, from kids to adults, will be enchanted by those adorable mushroom skulls, turning mealtime into a fun adventure!

As a side note, consider serving this alongside some roasted veggies or a fresh salad for a complete meal perfect for the season.

Mushroom Skulls Spooky Pasta Ingredients

Get ready to create something truly magical for Halloween!

For the Pasta

  • Squid Ink Spaghetti – Adds a striking dark hue and a unique flavor; feel free to substitute with your favorite pasta.
  • Butter – Enhances richness and helps brown the mushrooms to perfection.
  • Olive Oil – Prevents butter from burning and adds a delightful flavor.

For the Sauce

  • Brown Onion – Serves as a fragrant base for the sauce; shallots or leeks can be great alternatives.
  • Bacon – Introduces depth and savory goodness; consider turkey bacon or shredded chicken for a healthier option.
  • Garlic – Boosts the overall flavor of the creamy sauce.
  • Dry White Wine – Contributes acidity and depth to the sauce; use vegetable broth for a non-alcoholic alternative.
  • Thickened Cream – Creates a velvety sauce; coconut cream works well for a dairy-free version.
  • Parmesan Cheese – Adds umami; it can be omitted for a vegan dish.
  • Fresh Thyme – Complements the dish with a fragrant herbal note.

For the Spooky Mushrooms

  • Button Mushrooms – Perfect for carving into spooky skull shapes; try cremini or portobello for a deeper flavor.

Now that you've gathered everything, you're one step closer to delighting your family with this Mushroom Skulls Spooky Pasta that’s not just delicious but bursting with Halloween fun!

Step‑by‑Step Instructions for Mushroom Skulls Spooky Pasta

Step 1: Prepare Mushroom Skulls
Begin by preheating your oven to 400°F (200°C). While it heats, take your button mushrooms and carve spooky faces into them using a small knife; feel free to halve them for easier cooking. Arrange the carved mushroom skulls cut side up on a baking sheet, ready to transform into adorable edible decorations for your Mushroom Skulls Spooky Pasta.

Step 2: Boil Water
Fill a large pot with salted water and bring it to a rapid boil over high heat. This will be the cooking water for your squid ink spaghetti. Once boiling, keep an eye on it, as the pasta will be added shortly—make sure you have your ingredients ready for the next steps!

Step 3: Sauté Mushrooms
In a large frying pan over medium heat, melt 2 tablespoons of butter and 1 tablespoon of olive oil together. Add your carved mushroom skulls, cut side down, and sauté for about 4–5 minutes until they are golden brown and fragrant. Remove them from the pan and set them aside, allowing the flavor to deepen while you move on to creating the sauce.

Step 4: Make Sauce
Using the same pan, add a finely chopped brown onion, 4 strips of chopped bacon, and 2 minced garlic cloves. Cook these ingredients together for about 7–8 minutes, stirring until the onions are translucent and the bacon is crispy. Pour in ½ cup of dry white wine, scraping the bottom of the pan, and let it simmer for about 5 minutes until reduced by half.

Step 5: Add Cream
Stir in 1 cup of thickened cream and ½ cup of grated Parmesan cheese into the pan. Continue to cook on low heat for about 2–3 minutes, stirring frequently, until the cheese has melted and the sauce has thickened. This creamy sauce will coat your spaghetti beautifully, making the Mushroom Skulls Spooky Pasta irresistible.

Step 6: Cook Pasta
Once the water is boiling, add your squid ink spaghetti and cook according to the package instructions, usually around 8–10 minutes for al dente. Stir occasionally to ensure the pasta doesn't stick together. Keep an eye on it, as you want the pasta to be tender but firm to the bite.

Step 7: Combine
After draining the pasta (reserve about ½ cup of pasta water), add it directly to the creamy sauce in the frying pan. Gently fold in the sautéed mushroom skulls, mixing everything together to ensure the pasta is evenly coated. If needed, add a splash of reserved pasta water to reach your desired sauce consistency.

Step 8: Serve
Plate your Mushroom Skulls Spooky Pasta with care. Garnish with fresh thyme and extra Parmesan on top for an added touch of flavor and visual appeal. Serve immediately while hot to delight your family with this festive Halloween dish that’s sure to be a hit around the dinner table!

Expert Tips for Mushroom Skulls Spooky Pasta

  • Mushroom Skull Prep: Carve mushrooms carefully to avoid breakage. Use a small knife for detailed faces and ensure even cuts for consistent cooking.

  • Sauce Thickening: Allow the sauce to simmer adequately before adding cream. If it’s too thin, create a cornstarch slurry by mixing 1 tablespoon of cornstarch with 2 tablespoons of cold water.

  • Pasta Alert: Watch the squid ink spaghetti closely while cooking. Overcooking can lead to mushy pasta. Aim for al dente for the best texture.

  • Flavor Boost: You can enhance the flavor by sautéing the garlic slightly longer until fragrant before adding other ingredients for the sauce.

  • Mushroom Variations: Switch up the types of mushrooms based on personal preference or seasonal availability to give your Mushroom Skulls Spooky Pasta a unique twist each time!

Mushroom Skulls Spooky Pasta Variations

Get ready to create your own unique twist on this festive dish with these fun and tasty variations!

  • Whole Wheat: Swap squid ink spaghetti for whole wheat pasta to add fiber and a nuttier flavor. It’s a wholesome choice that still delivers on taste!

  • Gluten-Free: Use gluten-free pasta instead to accommodate dietary needs without compromising on the enjoyment of this delightful Halloween meal.

  • Vegan: Replace the bacon with smoky tempeh and use coconut cream plus plant-based cheese for a delicious vegan version that everyone will appreciate.

  • Spicy Kick: Add a pinch of red pepper flakes to the sauce for a little heat that contrasts beautifully with the creamy texture, making it a thrilling dish!

  • Different Mushrooms: Experiment with cremini, shiitake, or portobello mushrooms for unexpected flavors and an exciting medley of textures—each brings something special to the plate!

  • Extra Veggies: Toss in some sautéed spinach or broccoli florets for a colorful boost of nutrition. It not only makes the dish pop but also adds great texture.

  • Herb Variations: Instead of thyme, try fresh basil or parsley for a bright, herbal note that complements the richness of the sauce perfectly.

  • Seafood Twist: Incorporate shrimp or scallops for a luxurious seafood variation that adds depth and elegance to your Mushroom Skulls Spooky Pasta adventure.

Consider pairing your pasta with some Garlic Bread or a light Caesar Salad to round out your festive Halloween feast!

What to Serve with Mushroom Skulls Spooky Pasta

The perfect Halloween-themed dinner deserves equally delightful accompaniments to round out your family meal.

  • Garlic Bread: A classic side that complements the creamy sauce beautifully, perfect for soaking up every drop.
  • Roasted Vegetables: Seasonal veggies like Brussels sprouts and carrots bring a healthy crunch and vibrant color to the table.
  • Caesar Salad: Crisp romaine tossed with creamy dressing and croutons offers a refreshing contrast to the richness of the pasta.
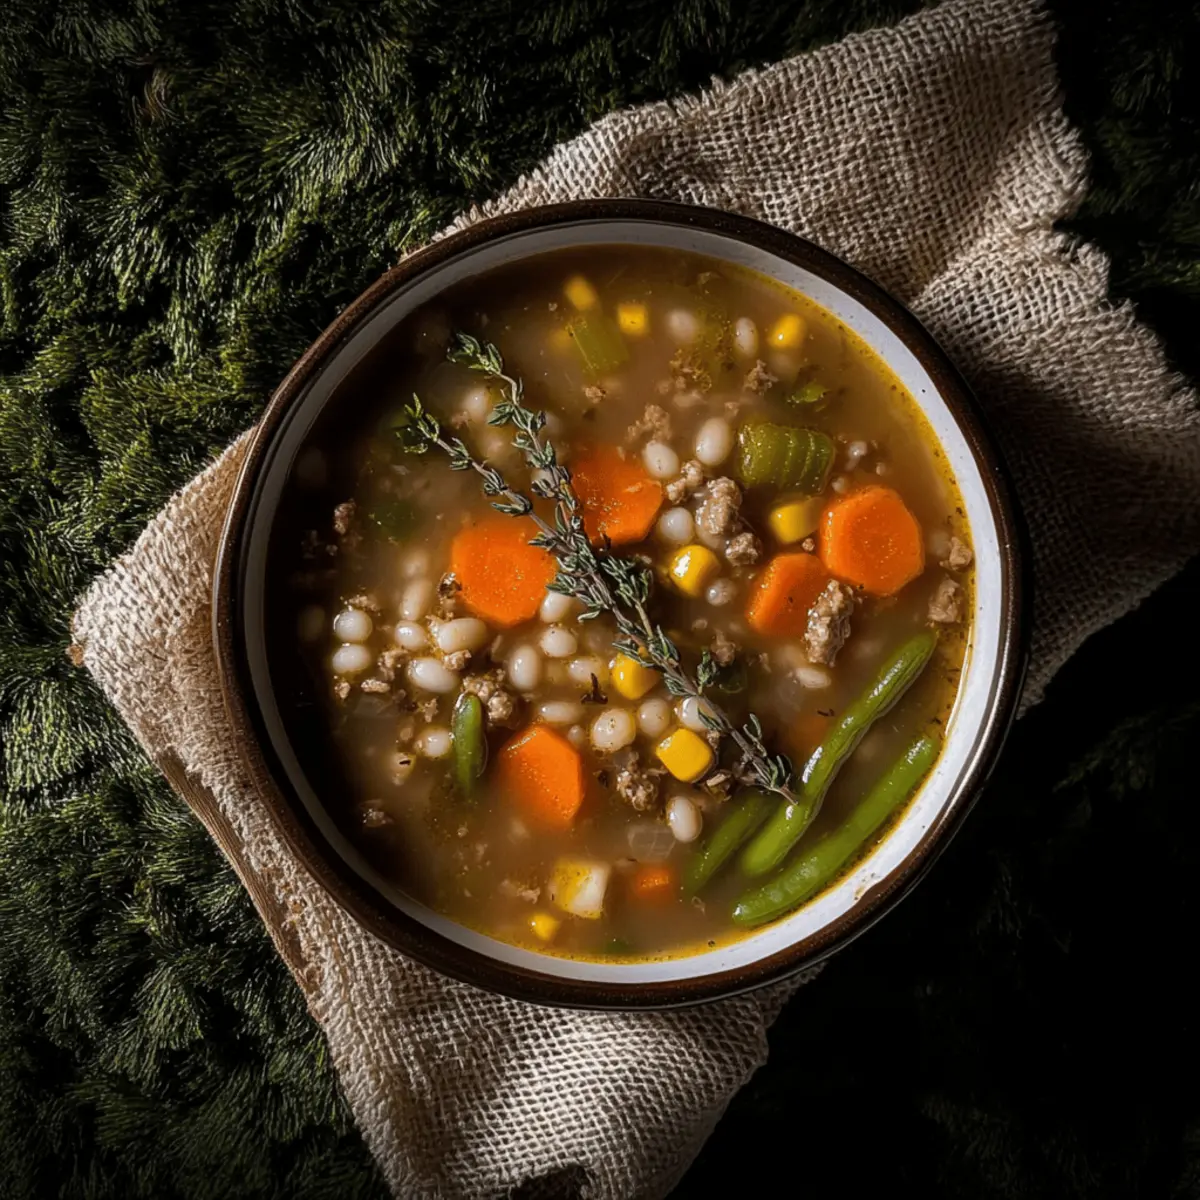
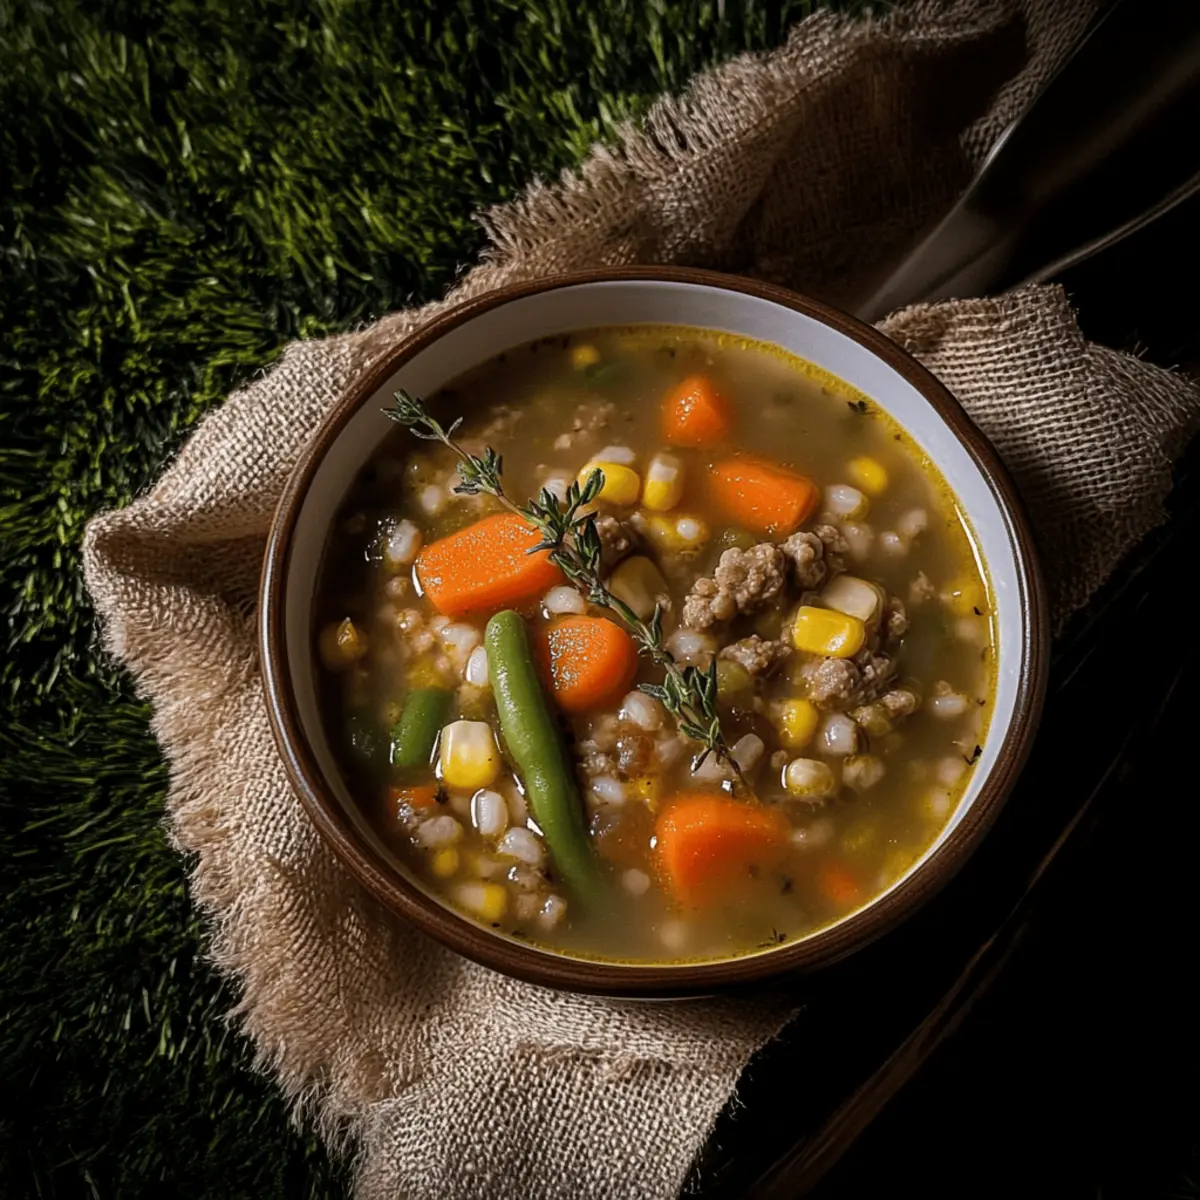
  • Pumpkin Soup: Silky and slightly sweet, this seasonal favorite adds a cozy touch to your spooky feast.
  • Apple Cider: A warm and spiced beverage that enhances the autumnal flavors and brings a festive spirit to your table.
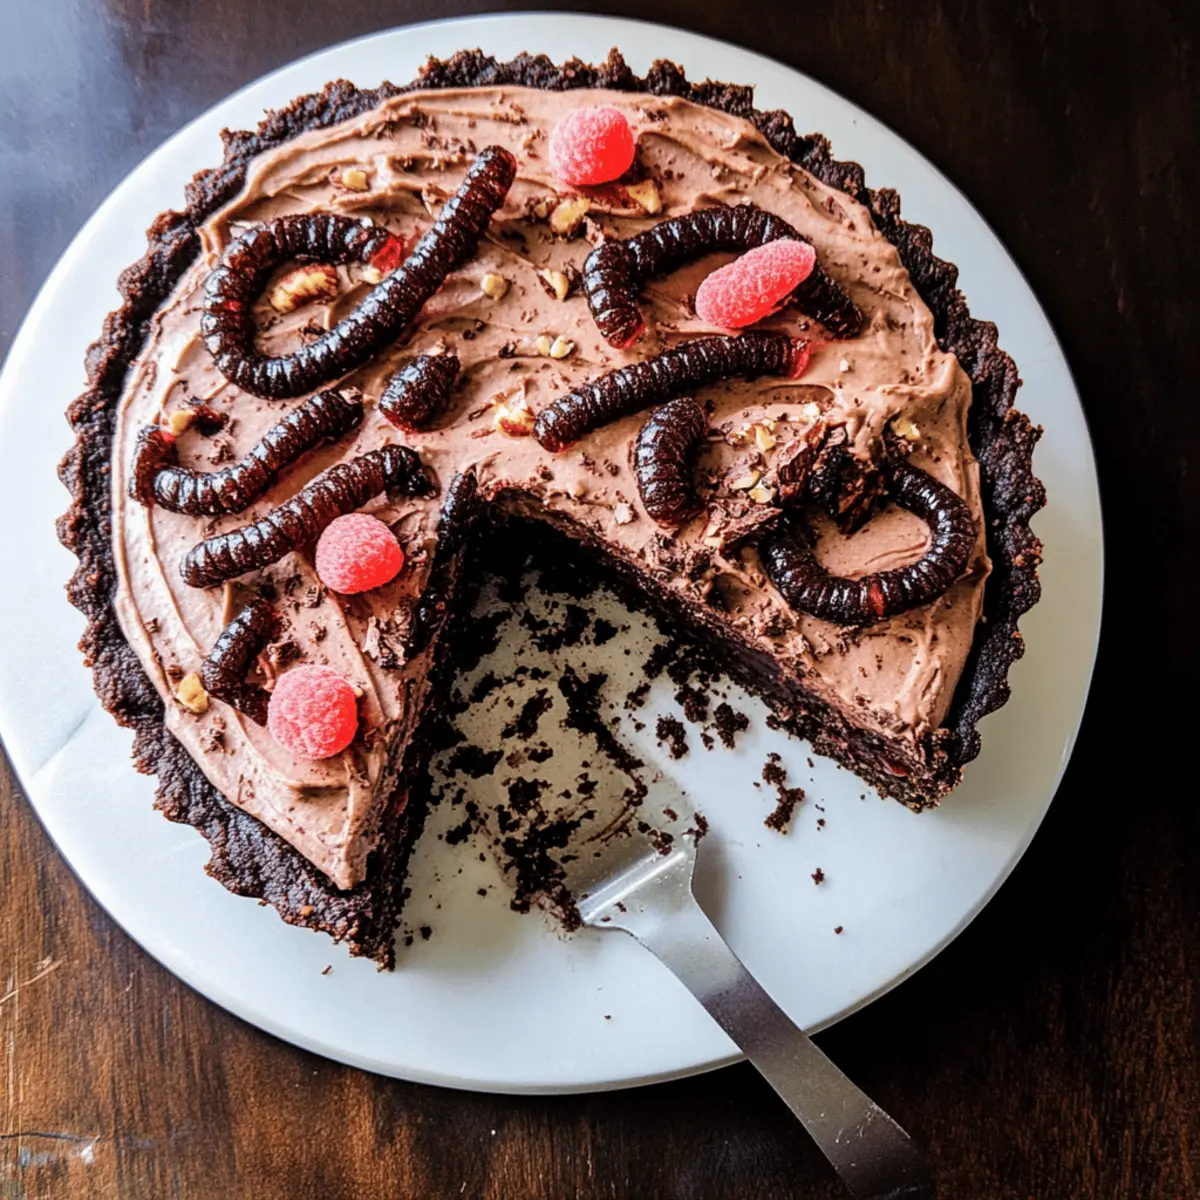
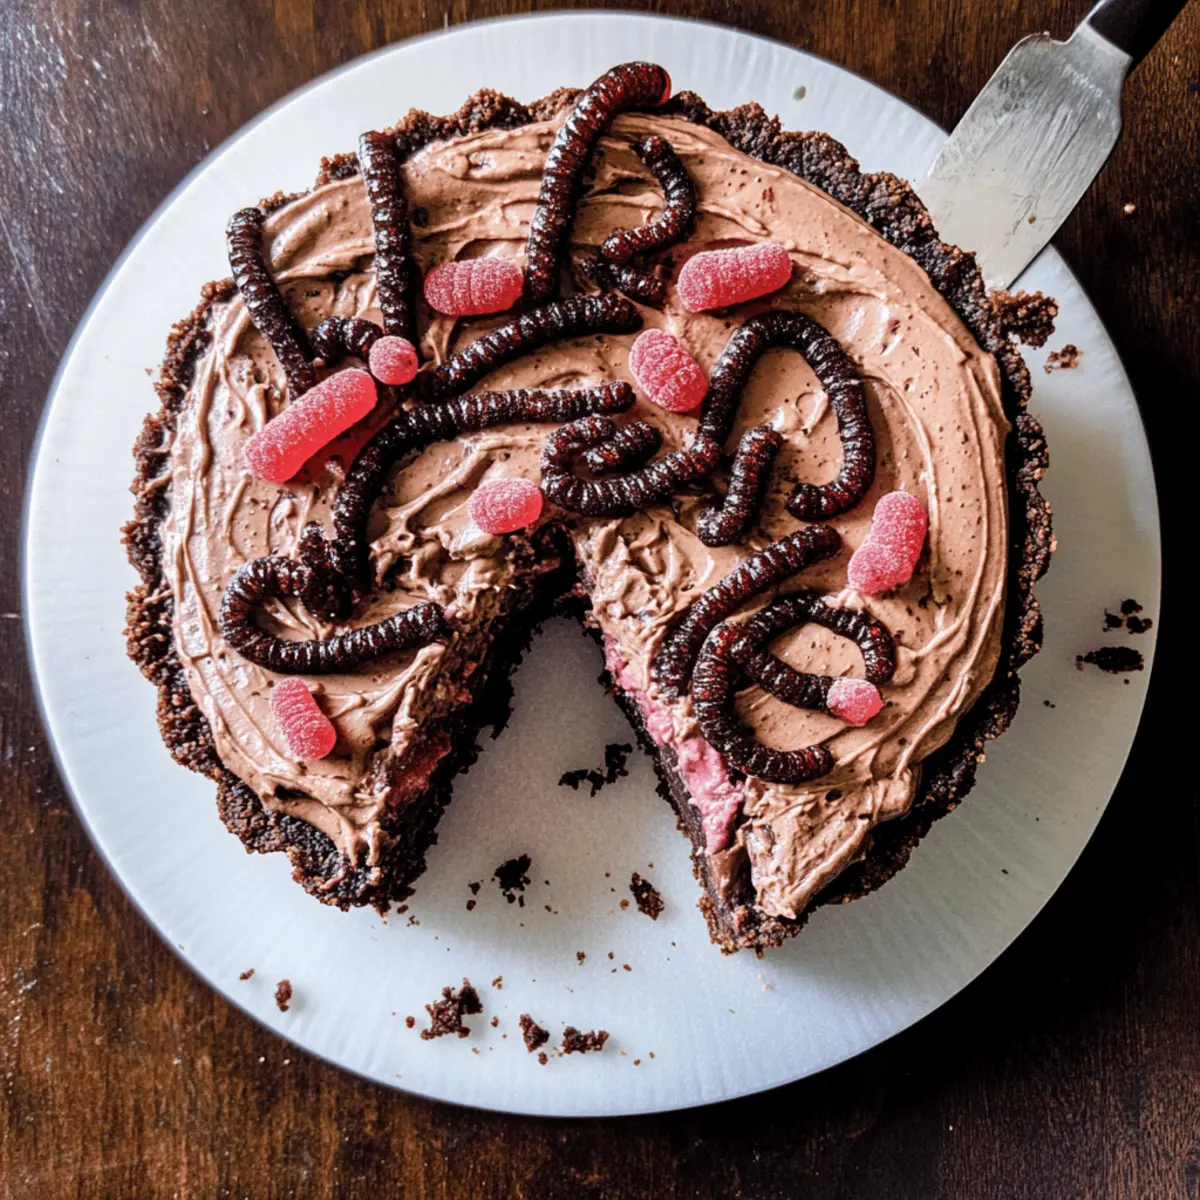
  • Chocolate Mousse: For dessert, a light and airy mousse delicately rounds out your spooky dinner adventure with a sweet finish.

Make Ahead Options

These Mushroom Skulls Spooky Pasta are perfect for busy home cooks looking to save time! You can prepare the carved mushroom skulls and creamy sauce up to 3 days in advance, storing them in airtight containers in the refrigerator. To maintain quality, keep the mushroom skulls and sauce separate until you're ready to serve. When you’re ready to enjoy this festive dish, simply reheat the sauce on the stove over low heat and sauté the mushroom skulls for about 3-5 minutes until warm. Meanwhile, cook the squid ink spaghetti fresh, combine everything, and dinner is served with minimal effort—just as delicious and delightfully spooky!

How to Store and Freeze Mushroom Skulls Spooky Pasta

Room Temperature: It's best to avoid leaving any leftovers out. Store them promptly after serving to maintain freshness.

Fridge: Store the Mushroom Skulls Spooky Pasta in an airtight container for up to 3 days. Reheat gently on the stovetop or microwave for best results.

Freezer: You can freeze the pasta for up to 2 months. For optimal quality, separate the creamy sauce from the pasta before freezing. Thaw overnight in the fridge before reheating.

Reheating: When reheating, add a splash of milk or reserved pasta water to revive the creamy texture of the sauce. Enjoy your spooky pasta!

Mushroom Skulls Spooky Pasta Recipe FAQs

How do I choose ripe mushrooms for this recipe?
Absolutely! When selecting mushrooms, look for firm button mushrooms with a smooth surface. Avoid mushrooms that have dark spots or wrinkles, which can indicate they are past their prime. Fresh mushrooms should have a light, earthy aroma, while those with a strong, unpleasant smell should be avoided.

What’s the best way to store leftover Mushroom Skulls Spooky Pasta?
To keep your leftovers fresh, store them in an airtight container in the refrigerator for up to 3 days. When reheating, gently warm it on the stovetop or in the microwave, adding a splash of water or milk to restore the sauce's creamy texture.

Can I freeze Mushroom Skulls Spooky Pasta?
You can indeed! I recommend separating the creamy sauce from the pasta to maintain its texture when stored. Place each in airtight containers and freeze for up to 2 months. When you're ready to enjoy, thaw the pasta and sauce overnight in the fridge, then reheat gently on the stovetop.

What if my sauce doesn’t thicken?
If your sauce is still thin after simmering, don’t worry—it happens! Create a cornstarch slurry by mixing 1 tablespoon of cornstarch with 2 tablespoons of cold water. Stir this mixture into the sauce, and let it simmer for a few minutes until it thickens up nicely.

Are there any dietary considerations for my family or pets?
Very! For those with dietary restrictions, consider swapping out the bacon for turkey bacon or shredded chicken for a healthier option. Additionally, you can use coconut cream and plant-based cheese for a vegan version of the Mushroom Skulls Spooky Pasta. As for pets, avoid feeding them anything containing garlic or onions, which can be harmful to them.

Mushroom Skulls Spooky Pasta

Mushroom Skulls Spooky Pasta for a Fun Halloween Feast

Mushroom Skulls Spooky Pasta is a delicious Halloween-themed dish featuring squid ink spaghetti and playful mushroom skulls.
Print Recipe Pin Recipe
Prep Time 10 minutes mins
Cook Time 20 minutes mins
Total Time 30 minutes mins
Servings: 4 plates
Course: Dinner
Cuisine: Halloween, Italian
Calories: 600
Ingredients Equipment Method Nutrition Notes

Ingredients
  

For the Pasta
  • 12 ounces Squid Ink Spaghetti or your favorite pasta
  • 2 tablespoons Butter for richness
  • 1 tablespoon Olive Oil to prevent burning
For the Sauce
  • 1 medium Brown Onion can substitute with shallots or leeks
  • 4 strips Bacon can use turkey bacon or chicken
  • 2 cloves Garlic minced
  • 0.5 cup Dry White Wine or vegetable broth
  • 1 cup Thickened Cream or coconut cream for dairy-free
  • 0.5 cup Parmesan Cheese omit for vegan
  • 1 teaspoon Fresh Thyme for flavor
For the Spooky Mushrooms
  • 8 ounces Button Mushrooms or cremini/portobello

Equipment

  • Oven
  • pot
  • frying pan
  • Baking Sheet
  • Knife

Method
 

Preparation
  1. Preheat your oven to 400°F (200°C) and carve spooky faces into the button mushrooms.
  2. Fill a large pot with salted water and bring it to a rapid boil.
Cooking
  1. In a large frying pan, melt the butter and olive oil over medium heat and sauté the carved mushroom skulls for 4-5 minutes.
  2. In the same pan, add the chopped onion, bacon, and garlic; cook until onions are translucent and bacon is crispy.
  3. Pour in the dry white wine and simmer for 5 minutes until reduced by half.
  4. Stir in the cream and Parmesan, and cook on low until the cheese melts and the sauce thickens.
  5. Cook the squid ink spaghetti in boiling water for 8-10 minutes until al dente.
  6. Combine the drained pasta with the sauce and sautéed mushroom skulls, adding reserved pasta water as needed.
  7. Plate your Mushroom Skulls Spooky Pasta and garnish with fresh thyme and extra Parmesan. Serve immediately.

Nutrition

Serving: 1plateCalories: 600kcalCarbohydrates: 80gProtein: 15gFat: 25gSaturated Fat: 10gPolyunsaturated Fat: 5gMonounsaturated Fat: 5gCholesterol: 50mgSodium: 800mgPotassium: 600mgFiber: 4gSugar: 5gVitamin A: 500IUVitamin C: 2mgCalcium: 200mgIron: 3mg

Notes

Consider serving alongside roasted veggies or a fresh salad for a complete meal.

Tried this recipe?

Let us know how it was!

Crispy Sleepy Hollow Cruller Recipe for Sweet Nostalgia

October 7, 2025 by Grace Snow Leave a Comment

As the golden light of autumn dances through my kitchen window, I can’t help but feel a wave of nostalgia wash over me. It's the perfect moment to bring a piece of history alive with these delightful Sleepy Hollow Crullers. Drawing inspiration from the enchanting tales of Washington Irving, these traditional corkscrew pastries marry a delicate crunch with a light, airy interior—making them an irresistible addition to your baking repertoire. What I love most is how quick and simple the preparation is, allowing you to indulge in homemade goodness without the fuss. Plus, their whimsical shape makes them a charming treat for gatherings or cozy afternoons at home. Curious about how to twist these delightful crullers into existence? Let’s dive in!

Why are Sleepy Hollow Crullers so special?

Nostalgic flavors transport you back in time, evoking memories of cozy autumn afternoons and classic tales. Easy to make, this recipe requires just a few simple steps, perfect for both novice and seasoned bakers alike. Versatile additions like cinnamon or a chocolate glaze allow for personalization. Crowd-pleaser appeal makes them an ideal treat for gatherings, sparking conversation and delight. Most importantly, these crispy pastries are a delightful way to indulge in homemade sweetness without the hassle of complicated techniques. Ready to create these crullers? You won’t regret it!

Sleepy Hollow Cruller Ingredients

Embrace the taste of tradition with these delightful crullers!

For the Dough

  • Butter – Adds richness and flavor; replace with margarine for a dairy-free version.
  • Large Egg – Serves as a binder for moisture; ensure it’s at room temperature for the best consistency.
  • Flour – The main structure ingredient; use all-purpose flour or a gluten-free blend for an alternative.
  • Cream (optional) – Enhances moisture and richness; omit if you prefer a stiffer dough.

For Frying

  • Vegetable Oil – Choose an oil with a high smoke point for frying; the perfect base for creating those crispy Sleepy Hollow Crullers.

For Dusting

  • Icing Sugar – Sprinkled on top for a sweet finish; adjust to your personal sweetness preference.

Step‑by‑Step Instructions for Sleepy Hollow Cruller

Step 1: Prepare the Dough
In a mixing bowl, cream together ½ cup of softened butter until it’s light and fluffy, about 2-3 minutes. Next, incorporate one room temperature large egg and mix until fully combined. Gradually sift in 2 cups of all-purpose flour until just incorporated, adding 2 tablespoons of cream if the dough appears too stiff. You should have a soft, pliable dough that forms a ball without being sticky.

Step 2: Shape the Crullers
On a lightly floured surface, roll out the dough to about 1/6 inch thick. Using a sharp knife or pizza cutter, cut the dough into strips approximately 3/4 inch wide. Take each strip and twist it around the handle of a wooden spoon or your fingers to form a corkscrew shape, ensuring that the ends are secured well to hold their form during frying.

Step 3: Fry the Crullers
Heat up about 2 inches of vegetable oil in a deep pan or heavy-bottomed pot to 350°F (175°C). Carefully slide a few cruller twists into the hot oil, making sure not to overcrowd the pan. Fry for 2-3 minutes on each side until they turn golden brown and are crispy; they should sizzle upon contact with the oil. Use a slotted spoon to turn them as needed for even cooking.

Step 4: Drain and Dust
Once golden brown, remove the crullers from the oil and place them on a plate lined with paper towels to drain excess oil. Allow them to cool slightly for about 2 minutes. For an extra touch of sweetness, dust the warm Sleepy Hollow Crullers with icing sugar, adjusting the amount to your taste preference. Serve immediately for the best texture!

Sleepy Hollow Cruller Variations & Substitutions

Feel free to explore these delightful twists and make this classic recipe your own!

  • Spiced Dough: Add cinnamon or nutmeg to the dough for fragrant warmth. A sprinkle can really elevate each bite!
  • Gluten-Free: Substitute with a gluten-free flour blend for a celiac-friendly treat. Just ensure it's a good quality mix for the best results.
  • Dairy-Free: Use margarine instead of butter to keep these treats dairy-free. Everyone will enjoy them without missing out!
  • Chocolate Dip: Melt dark or milk chocolate for a decadent dipping option. This extra layer adds a luscious richness that’s hard to resist.
  • Citrus Zest: Incorporate orange or lemon zest into the dough. It brightens the flavor profile and adds a refreshing twist.
  • Maple Glaze: Create a sweet maple glaze to drizzle over the cooled crullers. This adds a delightful sweetness that pairs perfectly with morning coffee.
  • Savory Twist: Experiment by adding herbs like rosemary or thyme to the dough. This creates an intriguing savory option that’s perfect for brunch gatherings.
  • Coconut Flakes: Dip the edges in toasted coconut flakes and then dust with icing sugar for a tropical flair. This unexpected addition will surprise your taste buds!

Embrace your creativity in the kitchen, and personalize your Sleepy Hollow Crullers! If you want to explore more flavor combinations or learn about other scrumptious pastries, check out our article on Delicious Deep-Fried Treats or discover how to make Homemade Doughnuts. Your taste journey awaits!

What to Serve with Classic Corkscrew Crullers?

Indulge in a delightful array of pairings that will elevate your cruller experience into a full-blown treat for the senses.

  • Rich Hot Chocolate: A warm, velvety drink that perfectly complements the crispy texture of crullers; its sweetness enhances the flavor beautifully.

  • Fresh Berries: Light and tart, blueberries or strawberries offer a refreshing contrast to the rich crullers, adding a burst of color and nutrients.

  • Vanilla Ice Cream: Creamy and cool, a scoop of vanilla ice cream can transform your crullers into an elegant dessert experience that everyone loves.

  • Cinnamon Sugar Dusting: For a sweet twist, toss your crullers in a mix of sugar and ground cinnamon, enhancing their nostalgic flavor.

  • Chai Latte: The aromatic spices of a chai latte perfectly match the crullers’ richness, creating a lovely balance perfect for cozy moments.

  • Fruit Compote: A warm, spiced fruit compote drizzled over crullers adds both moisture and a sweet-tart kick to every bite.

  • Almond Milk: This slightly sweet, nutty drink serves as a lighter alternative to coffee or tea, harmonizing beautifully with the delicate pastries.

  • Espresso Shots: A bold espresso shot brings out the crullers' subtle sweetness while providing a delightful caffeine boost for your day.

  • Chocolate Dipping Sauce: Decadent and indulgent, a warm chocolate dip invites everyone to indulge further in their cruller experience, making each bite even more enjoyable.

Storage Tips for Sleepy Hollow Crullers

  • Room Temperature: Keep crullers in an airtight container at room temperature for up to 2 days to maintain their crispy texture.

  • Fridge: If you need to store them longer, place crullers in the refrigerator for up to 3 days. Let them come to room temperature before serving.

  • Freezer: For extended storage, freeze crullers in a single layer on a baking sheet, then transfer to an airtight container. They can be stored for up to 2 months.

  • Reheating: To refresh frozen Sleepy Hollow Crullers, bake them at 350°F (175°C) for 5-7 minutes for a crispy finish.

Make Ahead Options

These Sleepy Hollow Crullers are perfect for busy home cooks looking to save time during hectic weeknights! You can prepare the dough up to 24 hours in advance; simply wrap it tightly in plastic wrap and refrigerate. Additionally, feel free to shape the crullers and place them on a parchment-lined baking sheet, covering them with a kitchen towel for up to 3 hours before frying. This way, you can have them ready to go without the last-minute rush. When you’re ready to fry, just ensure the oil is hot enough (350°F or 175°C) and fry until golden brown, resulting in deliciously crispy pastries that are just as delightful as when made fresh!

Expert Tips for Sleepy Hollow Crullers

  • Dough Consistency: Aim for a soft, pliable dough that doesn't stick. If too sticky, add a bit more flour; if too stiff, mix in a touch more cream.

  • Oil Temperature: Use a kitchen thermometer to ensure the oil is at 350°F (175°C) for perfect frying. If it's too cool, the crullers will absorb excess oil and become greasy.

  • Frying in Batches: Avoid overcrowding the pan; this can lower the oil temperature. Fry in small batches for even cooking and crispiness of your Sleepy Hollow Crullers.

  • Shaping Tools: Use a wooden spoon handle or your fingers for twisting; make sure to secure the ends well so they hold their shape during frying.

  • Flavor Variations: Experiment with adding spices like cinnamon or nutmeg to the dough for a delightful twist that personalizes your Sleepy Hollow Cruller experience.

Sleepy Hollow Cruller Recipe FAQs

How can I ensure my dough is the right consistency?
Absolutely! You want a soft and pliable dough that doesn’t stick. If it’s too sticky, gradually add more flour until the desired consistency is reached. If it feels too stiff, mix in a touch more cream until you get that perfect balance for easy handling!

What’s the best way to store my Sleepy Hollow Crullers?
For optimal freshness, place crullers in an airtight container at room temperature for up to 2 days. If you wish to store them longer, transfer to the refrigerator for up to 3 days, but make sure to let them return to room temperature before enjoying.

Can I freeze my crullers for later use?
Certainly! To freeze your Sleepy Hollow Crullers, arrange them in a single layer on a baking sheet to avoid sticking, then transfer them to an airtight container. They can last up to 2 months in the freezer. When ready to enjoy, bake them at 350°F (175°C) for 5-7 minutes to restore their delightful crispness.

What oil is best for frying crullers?
I recommend using vegetable oil or any oil with a high smoke point for frying these delicious pastries. This helps attain that perfect golden-brown color without burning. Be sure to heat it to 350°F (175°C) to ensure they cook evenly and stay crispy.

Can I add ingredients to give my crullers a unique flavor?
Very! Spice things up by adding cinnamon or nutmeg to the dough for a delightful twist. You can also set up a chocolate dipping glaze for a rich and indulgent treat that will make these crullers even more irresistible—perfect for impressing your friends and family!

Sleepy Hollow Cruller

Crispy Sleepy Hollow Cruller Recipe for Sweet Nostalgia

Indulge in crispy, nostalgic Sleepy Hollow Crullers that marry flavor and charm for a perfect autumn treat.
Print Recipe Pin Recipe
Prep Time 15 minutes mins
Cook Time 10 minutes mins
Cooling Time 2 minutes mins
Total Time 27 minutes mins
Servings: 10 crullers
Course: Dessert
Cuisine: American
Calories: 180
Ingredients Equipment Method Nutrition Notes

Ingredients
  

For the Dough
  • 0.5 cup Butter Adds richness and flavor; replace with margarine for a dairy-free version.
  • 1 large Egg Ensure it’s at room temperature for best consistency.
  • 2 cups All-Purpose Flour Use gluten-free blend for an alternative.
  • 2 tablespoons Cream (optional) Enhances moisture; omit for a stiffer dough.
For Frying
  • 2 inches Vegetable Oil Choose oil with high smoke point.
For Dusting
  • Icing Sugar Adjust to your sweetness preference.

Equipment

  • Mixing Bowl
  • Sharp Knife
  • Pizza Cutter
  • Deep pan
  • slotted spoon
  • kitchen thermometer

Method
 

Step-by-Step Instructions for Sleepy Hollow Cruller
  1. In a mixing bowl, cream together the softened butter until light and fluffy, about 2-3 minutes. Incorporate the room temperature egg and mix until combined. Gradually sift in the flour until just incorporated, adding cream if needed for consistency.
  2. On a floured surface, roll out the dough to 1/6 inch thick, cut into strips 3/4 inch wide, and twist each strip around the handle of a spoon to form a corkscrew shape.
  3. Heat vegetable oil in a pan to 350°F (175°C). Slide cruller twists into the hot oil, frying for 2-3 minutes on each side until golden brown.
  4. Remove from oil, drain on paper towels, and cool slightly. Dust with icing sugar and serve immediately.

Nutrition

Serving: 1crullerCalories: 180kcalCarbohydrates: 24gProtein: 2gFat: 9gSaturated Fat: 5gPolyunsaturated Fat: 1gMonounsaturated Fat: 3gCholesterol: 30mgSodium: 100mgPotassium: 50mgFiber: 1gSugar: 5gVitamin A: 300IUCalcium: 10mgIron: 0.5mg

Notes

Best served warm for optimal texture. Can add spices like cinnamon for flavor variations.

Tried this recipe?

Let us know how it was!

Crispy Haunted Hash Browns: A Fun Halloween Breakfast Treat

October 7, 2025 by Grace Snow Leave a Comment

As the leaves crunch beneath our feet and the air grows crisp, the excitement for Halloween kicks into high gear. Enter Haunted Hash Browns, the perfect spooky treat to enliven your breakfast table this October! These charming ghost-shaped hash browns aren’t just a festive delight but also a comfort food classic, packed with simple, vegetarian ingredients that whip up in a flash. Whether you’re entertaining little ghouls or hosting a grown-up soiree, these crispy wonders will have everyone smiling in no time. Plus, they’re an excellent way to transform a regular meal into a whimsical celebration. So, are you ready to conjure some delicious fun in your kitchen?

What makes Haunted Hash Browns special?

Irresistibly Fun: These Haunted Hash Browns turn a simple breakfast into a spooky celebration with their adorable ghost shapes.

Crispy Perfection: Achieving a delightful crunch is easy with our tips! Starchy potatoes create the ultimate crispy exterior.

Quick & Easy: With just a handful of ingredients and simple steps, you’ll have a festive meal ready in no time.

Customization Galore: Whether you want to spice them up with hot sauce or swap in sweet potatoes, the variations are endless!

Crowd-Pleasing Appeal: Perfect for kids and adults alike, they’re a guaranteed hit at any Halloween gathering.

Make Ahead Option: Prep your ghostly delights hours in advance or even freeze them, making entertaining effortless! Enjoy your gatherings with a dash of creativity, and check out our tips on storing and reheating hash browns for that perfect crisp every time.

Haunted Hash Browns Ingredients

For the Hash Browns
• Potatoes – Choose starchy varieties like Russets for ultimate crispiness.
• Onion – Adds depth of flavor; garlic can substitute for a twist.
• Egg – Essential for binding the mixture and keeping the ghost shape intact.
• Flour – Aids in crispiness; gluten-free flour works as a substitute.
• Salt & Pepper – Enhances flavor; adjust to your taste preference.

For Decoration
• Black Olives – Perfect for creating ghost eyes; any small vegetable works for this fun detail.

These Haunted Hash Browns not only provide a delicious, vegetarian breakfast but also deliver a spooky surprise that’s perfect for your Halloween celebrations!

Step‑by‑Step Instructions for Haunted Hash Browns

Step 1: Prep Potatoes
Begin by grating 2 to 3 medium-sized Russet potatoes using a box grater or food processor. Once grated, place the potato shreds in a clean kitchen towel and squeeze out as much moisture as possible, ensuring your potatoes are dry. This step is crucial for achieving the crispy texture in your Haunted Hash Browns, so take your time!

Step 2: Mix Ingredients
In a large mixing bowl, combine the grated potatoes with 1 finely chopped onion, 1 beaten egg, 1/4 cup of flour, and a generous sprinkle of salt and pepper. Use a fork or your hands to mix everything together until the mixture can hold its shape when formed. This will create the base for your ghostly hash browns, ensuring they stay together while frying.

Step 3: Shape Ghosts
Scoop a handful of the mixture and shape it into a ghost figure, aiming for an oval form with a wider bottom and a rounded top. Each ghost should ideally be about 3 inches long. This playful shaping makes your Haunted Hash Browns come alive! Place the shaped ghosts on a platter as you work, ready for frying.

Step 4: Heat Oil
In a large skillet, pour in about 1/4 inch of vegetable oil and heat it over medium-high heat. Allow the oil to reach shimmering status, which typically takes about 4-5 minutes. To test if the oil is hot enough, drop a small piece of the potato mixture in; if it bubbles immediately, you're ready to fry up your ghostly delights!

Step 5: Fry Hash Browns
Carefully place the shaped ghost hash browns into the hot oil, frying them for about 3-4 minutes on each side. Flip them gently using a wide spatula when they turn a golden brown and crispy color. This stage is where the magic happens, so keep an eye to prevent burning, ensuring they’re beautifully crisp and delicious.

Step 6: Add Decoration
Once their ghostly form is crisp and golden, use a slotted spoon to remove the hash browns from the oil and drain them on paper towels. While still warm, gently press small pieces of black olives into each hash brown for the eyes of your Haunted Hash Browns, adding an adorable touch to your spooky breakfast treat!

Expert Tips for Haunted Hash Browns

Dry Potatoes: Ensure your grated potatoes are very dry, as excess moisture will prevent them from becoming crispy.

Monitor Temperature: Keep an eye on your oil temperature; medium-high heat is ideal to avoid soggy or burnt hash browns.

Use a Wide Spatula: When flipping your Haunted Hash Browns, use a wide spatula to maintain their ghostly shape and avoid breakage.

Don’t Overcrowd the Pan: Fry in batches if necessary; overcrowding can lead to uneven cooking and sogginess in your delicious Halloween treat.

Customize Wisely: Feel free to get creative with flavors! Add garlic powder or cheese but ensure they still hold together for the ultimate crunchy finish.

How to Store and Freeze Haunted Hash Browns

Fridge: Store any leftover cooked Haunted Hash Browns in an airtight container for up to 3 days. Reheat in a skillet over medium heat for best results.

Freezer: Freeze shaped, uncooked hash browns on a baking sheet until solid, then transfer to a freezer bag. They can be stored for up to a month.

Reheating: For frozen hash browns, fry from frozen without thawing for about 4-5 minutes on each side until golden and crispy. Enjoy your spooky treat again!

Make-Ahead Tip: You can prepare your Haunted Hash Browns in advance and store them, making meal prep a breeze during the Halloween festivities!

Make Ahead Options

These Haunted Hash Browns are perfect for meal prep enthusiasts! You can shape the ghostly figures up to 24 hours in advance; simply store them in an airtight container in the refrigerator to keep them fresh. To further extend their shelf life, freeze the uncooked hash browns for up to a month. This way, you'll have a fun breakfast ready whenever the Halloween spirit strikes! When you're ready to serve, just heat your oil, fry the hash browns for about 3-4 minutes on each side, and finish by adding the black olive eyes. With this strategy, you’ll enjoy a delicious breakfast with minimal effort, ensuring your Haunted Hash Browns are just as crispy and delightful as if they were freshly made!

What to Serve with Haunted Hash Browns

Delightful morning feasts await as you pair these crispy, fun treats with exciting sides and drinks!

  • Scrambled Eggs: Add a splash of orange food coloring for a Halloween twist, bringing a savory balance to your hash browns. The fluffiness of the eggs complements the crispy texture perfectly.

  • Salsa: A fresh and zesty salsa can provide a lively contrast to the crispy hash browns. The brightness of the tomatoes and spices elevates the entire meal.

  • Crispy Bacon: For meat-lovers, crispy bacon adds a salty crunch that pairs wonderfully with the soft interior of the haunted treats. The smoky flavor will elevate every bite into a celebration.

  • Pumpkin Spice Latte: This festive drink brings warm, aromatic spices to your table, enhancing the cozy, autumnal vibe of your breakfast spread. Its sweetness will make your Halloween morning feel extra special.

  • Fried Green Tomatoes: These offer a delightful crunch and tangy flavor that complements the ghost-shaped potatoes beautifully. Their slightly tart profile adds a refreshing twist.

  • Fruit Salad: A colorful medley of seasonal fruits introduces bright flavors and a touch of sweetness to balance the savory hash browns. It’s a refreshing addition that everyone will enjoy.

  • Ketchup & Hot Sauce: These classic condiments give a spicy and tangy kick, allowing you to customize each bite. Pairing them with the ghosts adds another layer of fun!

  • Sweet Potato Fries: These crispy delights create an interesting contrast in flavor and color while maintaining the festive theme. The natural sweetness pairs well with the savory hash browns, making for a leisurely brunch experience.

Haunted Hash Browns Variations

Feel free to get creative with these Haunted Hash Browns, as there are endless delightful twists to explore!

  • Dairy-Free: Substitute the egg with a flaxseed mixture (1 tablespoon flaxseed meal + 2.5 tablespoons water) for a vegan option.

  • Cheesy Delight: Stir in 1/2 cup shredded cheese (like cheddar) into the mixture for a gooey, flavorful twist. Cheese lovers will rejoice!

  • Spicy Kick: Add a teaspoon of hot sauce to the mixture before frying for an unexpected heat that exhilarates your taste buds. It transforms the dish into a fiery favorite!

  • Festive Sweet Potatoes: Use sweet potatoes instead of regular potatoes for a delicious sweetness and vibrant color, making your ghosts even more colorful!

  • Herb-Infused: Toss in some chopped fresh herbs like parsley or chives to the mixture for a fragrant touch and added flavor. The refreshing notes brighten up each bite.

  • Shape Shifter: Instead of ghosts, create seasonal shapes like pumpkins or leaves using cookie cutters. It adds a whimsical flair that's perfect for Halloween gatherings.

  • Nutty Crunch: Incorporate a handful of crushed nuts like walnuts or pecans into the mixture for an exciting texture and nutty flavor profile. It introduces a delightful surprise with each bite!

  • Loaded Hash Browns: Top your fried hash browns with sour cream, diced green onions, and a sprinkle of cheese for an indulgent, loaded experience that elevates breakfast into a rich feast.

These variations not only enhance flavor but also keep meal times exciting! For tips on how to store and reheat your delightful hash browns, check out our article on storing and reheating hash browns to maintain that perfect crispiness!

Haunted Hash Browns Recipe FAQs

What kind of potatoes should I use for Haunted Hash Browns?
Absolutely! For the best results, I recommend using starchy potatoes like Russets. They have a higher starch content, which helps achieve that delightful crispiness we all love. Avoid waxy potatoes like reds or yellows, as they may not crisp up as well.

How should I store leftover Haunted Hash Browns?
Once cooked, store any leftovers in an airtight container in the fridge for up to 3 days. To reheat, simply warm them in a skillet over medium heat, which will help restore their crispy edges.

Can I freeze shaped hash browns before cooking?
Very much so! To freeze, place your shaped, uncooked Haunted Hash Browns on a baking sheet lined with parchment paper. Freeze them until solid, which usually takes about 1-2 hours. After that, transfer them into a freezer-safe bag or container. They’ll keep well for up to a month. When you're ready to cook, fry them directly from frozen for a deliciously crispy treat!

What if my hash browns are mushy?
If you find your hash browns are mushy, it's likely due to excess moisture in the potatoes. Make sure you thoroughly squeeze out the water after grating them. Another tip is to consider salting the grated potatoes for about 15 minutes to help draw out excess moisture before squeezing. If they still don’t hold shape, adding a bit more flour can help bind the mixture and keep them together during frying.

Are Haunted Hash Browns suitable for vegetarians?
Yes, indeed! These Haunted Hash Browns are completely vegetarian-friendly. Plus, if you have dietary restrictions or want to make them gluten-free, simply use a gluten-free flour substitute, and they’ll still turn out deliciously.

What other decorations can I use besides black olives?
The more the merrier! While black olives are perfect for ghost eyes, you could also use small bits of bell peppers, cherry tomatoes, or even checkered pimentos. Get creative and let your imagination run wild, making those spooky faces even more unique!

Haunted Hash Browns

Crispy Haunted Hash Browns: A Fun Halloween Breakfast Treat

Enjoy Crispy Haunted Hash Browns this Halloween, a delightful vegetarian breakfast that adds a spooky touch to your meal.
Print Recipe Pin Recipe
Prep Time 15 minutes mins
Cook Time 15 minutes mins
Total Time 30 minutes mins
Servings: 4 servings
Course: Breakfast
Cuisine: American
Calories: 150
Ingredients Equipment Method Nutrition Notes

Ingredients
  

For the Hash Browns
  • 2-3 medium Russet potatoes starchy variety for crispiness
  • 1 onion finely chopped
  • 1 egg beaten
  • 1/4 cup flour can substitute with gluten-free flour
  • to taste salt
  • to taste pepper
For Decoration
  • as needed black olives for ghost eyes

Equipment

  • Box grater
  • Food Processor
  • Mixing Bowl
  • Skillet
  • slotted spoon
  • Spatula
  • Kitchen Towel

Method
 

Step‑by‑Step Instructions
  1. Begin by grating 2 to 3 medium-sized Russet potatoes using a box grater or food processor. Once grated, place the potato shreds in a clean kitchen towel and squeeze out as much moisture as possible.
  2. In a large mixing bowl, combine the grated potatoes with 1 finely chopped onion, 1 beaten egg, 1/4 cup of flour, and a generous sprinkle of salt and pepper. Mix everything together until the mixture can hold its shape.
  3. Scoop a handful of the mixture and shape it into a ghost figure, aiming for an oval form with a wider bottom and a rounded top.
  4. In a large skillet, pour in about 1/4 inch of vegetable oil and heat it over medium-high heat until shimmering.
  5. Carefully place the shaped ghost hash browns into the hot oil, frying them for about 3-4 minutes on each side until golden brown and crispy.
  6. Once their ghostly form is crisp and golden, remove the hash browns from the oil and drain on paper towels. Gently press small pieces of black olives into each hash brown for the eyes.

Nutrition

Serving: 1servingCalories: 150kcalCarbohydrates: 25gProtein: 3gFat: 5gSaturated Fat: 1gPolyunsaturated Fat: 1gMonounsaturated Fat: 2gCholesterol: 30mgSodium: 200mgPotassium: 400mgFiber: 2gSugar: 1gVitamin A: 2IUVitamin C: 20mgCalcium: 2mgIron: 6mg

Notes

These Haunted Hash Browns can be made ahead of time and stored in the fridge or freezer for convenient meal prep during Halloween!

Tried this recipe?

Let us know how it was!

Chocolatey Cauldron Cakes: A Magical Dessert Experience

October 7, 2025 by Grace Snow Leave a Comment

As I stood in my kitchen, the smell of melting chocolate wafted through the air, instantly transporting me to the enchanting world of wizards and magic. Those moments sparked the inspiration for my Cauldron Cakes, delightfully chocolatey cupcakes that serve up a charming twist on a classic treat. This recipe not only brings your baking skills to life with a quick prep time but also makes for an irresistible centerpiece at celebrations, capturing the hearts of friends and family alike. With a soft, gooey center and a fluffy buttercream crown, these cupcakes mimic a whimsical cauldron, sure to enchant any dessert lover. Are you ready to conjure up some sweetness and sprinkle your own magic into the mix?

Why Are Cauldron Cakes So Irresistible?

Magic in Every Bite: These Cauldron Cakes deliver an enchanting flavor experience with rich, chocolatey goodness that’s simply unforgettable.
Quick and Easy: With just a few simple steps, you can whip up these delightful treats without any fuss, perfect for busy bakers!
Show-Stopping Appeal: Impress your guests at parties and celebrations—everyone will be charmed by these whimsical creations!
Customizable Fun: Feel free to mix it up with different frosting flavors or decorative touches like edible glitter. If you love themed desserts, don’t miss out on making Crab Cakes Forget for a complete festive spread!
Perfect Pairing: Enjoy them warm, with a cup of coffee or tea, creating a cozy dessert moment that’s hard to beat.

Cauldron Cakes Ingredients

For the Cupcakes
• Chocolate Cupcake Mix – The foundation of your Cauldron Cakes, offering sweetness and structure. Substitution: You can use a homemade chocolate cupcake recipe for an extra personal touch.
• Chocolate Chips (Semi-Sweet, 2 bags) – Adds delightful texture and richness to the cupcakes. Prep Note: Use high-quality chocolate for the best flavor and melting results.

For the Buttercream Frosting
• Butter (1 cup, room temperature) – Essential for creating a fluffy buttercream texture. Prep Note: Make sure the butter is at room temperature for easier mixing.
• Powdered Sugar (2 cups) – Sweetens and thickens your buttercream. Note: Sift to avoid any unwanted lumps.
• Vanilla Extract (2 tsp) – Enhances the flavor of your buttercream beautifully. Substitution: Almond extract works well for a unique flavor twist.

For Topping & Decoration
• Store-Bought Dark Chocolate Frosting (1 can) – Perfect for topping off your Cauldron Cakes. Feel free to use homemade frosting for a richer taste if you're feeling adventurous.
• Remaining Chocolate (from melting chips) – Used for dipping and creating handles. Make sure to allow it to cool slightly to prevent burning while dipping cupcakes.

Get ready to whip up these delightful Cauldron Cakes and bring a sprinkle of magic to your dessert table!

Step‑by‑Step Instructions for Cauldron Cakes

Step 1: Prepare the Cupcake Mixture
Begin by preheating your oven to 350°F (175°C). In a mixing bowl, prepare the chocolate cupcake mix according to the package instructions. Grease your cupcake pans generously, skipping liners to allow for easy removal later. Pour the batter into each cavity, filling them about two-thirds full. Bake for approximately 18–20 minutes, or until a toothpick inserted in the center comes out clean.

Step 2: Cool and Carve
Once your cupcakes are baked, remove them from the oven and allow them to cool in the pans for about 10 minutes. Gently invert the cupcakes onto a wire rack to cool completely. Once cooled, use a sharp knife to carve out a small hole in the bottom of each cupcake. This will create space for the delightful filling and give your Cauldron Cakes their signature look.

Step 3: Make the Buttercream Frosting
While the cupcakes cool down, melt 1 cup of chocolate chips in a microwave-safe bowl, stirring every 30 seconds until smooth. In a separate bowl, beat the room temperature butter until fluffy. Gradually add in the sifted powdered sugar, mixing until well combined. Incorporate the melted chocolate and 2 teaspoons of vanilla extract, mixing until your buttercream is light, fluffy, and smooth, ready for decorating your Cauldron Cakes.

Step 4: Dip Cupcake Bases
Melt any remaining chocolate chips for dipping in a bowl, ensuring they’re still warm and smooth. Carefully dip the bottom of each carved cupcake into the melted chocolate, letting the excess drip off. Place the dipped cupcakes on a piece of wax paper to harden. This chocolate shell not only adds flavor but visually completes your Cauldron Cakes’ magical appearance.

Step 5: Pipe the Buttercream Frosting
Take the fluffy buttercream frosting and transfer it into a quart-sized ziplock bag. Snip off one corner of the bag to create a piping tip. Pipe a generous amount of frosting around the top of each cupcake, creating a whimsical swirl that resembles a cauldron’s lid. Ensure you leave the center cavity visible for added drama and magic.

Step 6: Create the Chocolate Handles
Using the remaining melted chocolate, pour it onto a piece of wax paper and shape it into small, handle-like curves. Allow them to cool and harden in the refrigerator for about 10–15 minutes. Once set, gently peel the handles from the wax paper and attach one to each Cauldron Cake by gently pressing it into the frosting. Now your Cauldron Cakes are not only delicious but have charming handles that truly bring them to life!

Make Ahead Options

These Cauldron Cakes are perfect for meal prep, allowing you to savor delightful treats during your busy week! You can bake the cupcakes up to 24 hours in advance; simply cool them completely, and then store them in an airtight container at room temperature. The buttercream can also be made ahead and refrigerated for up to 3 days—just be sure to let it come to room temperature and re-whip it before using. When you’re ready to serve, dip the bases and frost the cupcakes, finishing them with your chocolate handles. This way, your magical Cauldron Cakes remain just as delicious while saving you precious time!

What to Serve with Cauldron Cakes?

Indulge in a magical dessert experience that pairs beautifully with a variety of delightful dishes and drinks.

  • Creamy Vanilla Ice Cream: The coolness of vanilla ice cream balances the rich chocolate flavors, making each bite a dreamy experience.

  • Fresh Berries: Juicy strawberries or raspberries provide a tart contrast to the sweetness of the cupcakes, adding a refreshing touch to your dessert plate.

  • Whipped Cream: Light and airy whipped cream complements the dense chocolateiness of Cauldron Cakes, creating a lovely texture combination.

  • Espresso or Cappuccino: The bold flavors of coffee enhance the chocolate's richness, creating a cozy atmosphere perfect for sharing with friends.

  • Chocolate Milkshake: Treat yourself to a fun pairing with a chocolate milkshake that deepens the dessert experience—ideal for any chocolate lover!

  • Flavored Tea: A warm cup of chamomile or peppermint tea can cleanse the palate, balancing the dessert's sweetness wonderfully.

  • Chocolate-Covered Pretzels: The salty crunch of pretzels contrasts beautifully with the sweet cupcakes, providing an irresistible sweet-salty combination.

  • Fruit Salad with Honey Drizzle: A light fruit salad brings brightness to the table, and honey enhances the natural sweetness without overpowering the main dessert.

Cauldron Cakes: Customize Your Magic

Let your creativity shine as you explore delightful twists on your Cauldron Cakes—there are so many ways to bring unique flavors and textures to life!

  • Frosting Variety: Swap the dark chocolate frosting for luscious white chocolate or creamy peanut butter frosting for a tasty twist.
  • Lighter Base: Use a vanilla cupcake mix instead of chocolate for a delightful contrast in flavor that still provides whimsy.
  • Elegant Touch: Sprinkle edible glitter or colorful confetti on top for a festive look that adds a touch of charm to every cupcake.
  • Nutty Crunch: Toss in chopped walnuts or pecans to the batter for added texture and a delightful crunch that complements the softness of the cupcake.
  • Extra Gooey: Add a spoonful of caramel sauce inside each cupcake before sealing them back up to create an irresistibly gooey center.
  • Spicy Kick: Incorporate a pinch of cayenne pepper or chili powder into your chocolate batter for a surprising, delightful heat that chocolates like peanut butter thrive on.
  • Themed Delights: Use food coloring in your frosting to match festive occasions—green for Halloween or red and green for Christmas! It’s fun and inviting.

As you enjoy making these enchanting Cauldron Cakes, remember, creativity knows no bounds. Consider serving them alongside Ricotta Protein Pancakes as an energizing brunch option or at a gathering to impress your guests with both treats!

How to Store and Freeze Cauldron Cakes

Airtight Container: Store your Cauldron Cakes in an airtight container at room temperature for up to 3 days to preserve their moisture and flavor.

Refrigeration: For longer freshness, refrigerate the cupcakes for up to a week. Just ensure they are well-covered to prevent drying out.

Freezing: You can freeze the un-frosted cupcakes for up to 3 months. Wrap each in plastic wrap, then place in a freezer-safe bag. Thaw before frosting.

Reheating: When ready to enjoy, gently warm the cupcakes in the microwave for about 10-15 seconds for a freshly-baked taste, then top with your frosting!

Expert Tips for Cauldron Cakes

  • Room Temperature Butter: Ensure your butter is at room temperature to achieve a fluffy, smooth buttercream without lumps. This step is crucial for perfect frosting!

  • Quality Ingredients: Use high-quality chocolate chips for an indulgent flavor. This will enhance the overall taste of your Cauldron Cakes, making them truly memorable.

  • Cooling Time: Allow your cupcakes to cool completely before frosting. This helps the buttercream set nicely and prevents it from melting off on warm cupcakes.

  • Piping Simplicity: Instead of using a traditional piping bag, a quart-sized ziplock bag works wonders for easy piping. Just snip a small corner, and you’re good to go!

  • Chocolate Dipping: Ensure the melted chocolate isn't too hot when dipping the cupcakes. A cooler temperature helps it set properly without burning or melting the cupcake base.

Cauldron Cakes Recipe FAQs

What type of chocolate chips should I use for the best flavor?
Absolutely! I recommend using high-quality semi-sweet chocolate chips for the richest and most enjoyable flavor. Cheaper brands can lack the depth of taste and may not melt as smoothly, affecting both the frosting and cupcake textures.

How should I store my Cauldron Cakes for freshness?
Store your Cauldron Cakes in an airtight container at room temperature for up to 3 days. If you'd like to keep them longer, refrigerate them for up to a week. Just make sure they’re well-covered to retain that delightful moisture!

Can I freeze the Cauldron Cakes?
Yes, you can freeze your un-frosted Cauldron Cakes! I often wrap each cupcake individually in plastic wrap, and then place them into a freezer-safe bag. They can last in the freezer for up to 3 months. When you're ready to enjoy them, simply thaw at room temperature before frosting.

What if my buttercream frosting is too runny?
No worries! If your buttercream frosting turns out too runny, it might be due to the butter being too warm or too much liquid being added. To troubleshoot, add more sifted powdered sugar a tablespoon at a time until the frosting thickens. Make sure the butter is at room temperature—cool, but soft!

Are there any dietary considerations I should be aware of?
Great question! These Cauldron Cakes contain butter and are high in sugar, so they’re not suitable for those with dairy allergies or lactose intolerance. If you're concerned about allergies, feel free to substitute the butter with a dairy-free option and use allergy-friendly chocolate chips or frosting. Always double-check labels to ensure they meet your dietary needs.

What variations can I try with my Cauldron Cakes?
The more the merrier! You can have fun by substituting the dark chocolate frosting for white chocolate or peanut butter frosting for a delicious twist. Additionally, try using a vanilla cupcake mix for a lighter base or sprinkle festive edible glitter on top for some extra magic!

Cauldron Cakes

Chocolatey Cauldron Cakes: A Magical Dessert Experience

Indulge in irresistibly chocolatey Cauldron Cakes, a delightful twist on cupcakes that enchant with their gooey center and fluffy buttercream.
Print Recipe Pin Recipe
Prep Time 30 minutes mins
Cook Time 20 minutes mins
Cooling Time 10 minutes mins
Total Time 1 hour hr
Servings: 12 cupcakes
Course: Dessert
Cuisine: Magical
Calories: 250
Ingredients Equipment Method Nutrition Notes

Ingredients
  

For the Cupcakes
  • 1 box Chocolate Cupcake Mix Substitution: You can use a homemade chocolate cupcake recipe for an extra personal touch.
  • 2 bags Chocolate Chips (Semi-Sweet) Use high-quality chocolate for the best flavor and melting results.
For the Buttercream Frosting
  • 1 cup Butter Make sure the butter is at room temperature for easier mixing.
  • 2 cups Powdered Sugar Sift to avoid any unwanted lumps.
  • 2 tsp Vanilla Extract Substitution: Almond extract works well for a unique flavor twist.
For Topping & Decoration
  • 1 can Store-Bought Dark Chocolate Frosting Feel free to use homemade frosting for a richer taste.
  • Remaining Chocolate (from melting chips) Make sure to allow it to cool slightly to prevent burning while dipping cupcakes.

Equipment

  • Mixing Bowl
  • Cupcake pans
  • Microwave-safe bowl
  • Whisk
  • Piping Bag or Ziplock Bag
  • Knife
  • wire rack
  • wax paper

Method
 

Step-by-Step Instructions
  1. Preheat your oven to 350°F (175°C). Prepare the chocolate cupcake mix according to package instructions. Grease cupcake pans and fill cavities two-thirds full. Bake for approximately 18–20 minutes.
  2. Remove the cupcakes from the oven after baking, cool in pans for about 10 minutes, then invert onto a wire rack to cool completely. Carve a small hole in the bottom of each cupcake.
  3. Melt 1 cup of chocolate chips in a microwave-safe bowl. Beat room temperature butter until fluffy, gradually add sifted powdered sugar, then incorporate melted chocolate and vanilla extract.
  4. Melt any remaining chocolate chips for dipping. Dip the bottom of each carved cupcake into the melted chocolate, letting excess drip off. Place on wax paper to harden.
  5. Transfer buttercream frosting into a ziplock bag, snip off one corner and pipe a generous amount around the top of each cupcake, leaving the center cavity visible.
  6. Shape remaining melted chocolate into small curves on wax paper for handles. Cool in the refrigerator for 10–15 minutes, then attach one handle to each Cauldron Cake.

Nutrition

Serving: 1cupcakeCalories: 250kcalCarbohydrates: 34gProtein: 3gFat: 12gSaturated Fat: 7gPolyunsaturated Fat: 1gMonounsaturated Fat: 3gCholesterol: 30mgSodium: 200mgPotassium: 100mgFiber: 1gSugar: 20gVitamin A: 350IUCalcium: 30mgIron: 1mg

Notes

Ensure butter is at room temperature for the best buttercream consistency. Use high-quality ingredients for optimal flavor. Allow cupcakes to cool completely before frosting to maintain structure.

Tried this recipe?

Let us know how it was!

Graveyard Pudding Cookie Cups: A Fun Halloween Delight

October 7, 2025 by Grace Snow Leave a Comment

The Halloween air is thick with anticipation, and I can feel the excitement bubbling as little goblins and witches prepare for the festivities. This Spooky Graveyard Pudding Cookie Cups recipe is just the treat to awaken your inner child! These delightful layers of creamy chocolate pudding and crushed Oreo “dirt” are topped with adorable candy pumpkins and cookie tombstones—perfect for igniting laughter around the table. Not only is this dessert a breeze to whip up with no baking required, but it's also a fantastic way to get the kids involved in the kitchen. Trust me, the giggles that emerge while decorating these spooky cups will create memorable moments. Have you ever made a dessert that looks so fun yet is so simple? You're going to be amazed at how quickly they disappear!

Why Are These Cookie Cups So Fun?

Easy Assembly: These Spooky Graveyard Pudding Cookie Cups require no baking, making them incredibly simple for anyone to whip up. Kid-Friendly: They’re a hit with kids, providing a wonderful opportunity for family bonding in the kitchen as you assemble and decorate together. Visually Entertaining: With layers of creamy pudding and crunchy Oreo “dirt,” they wow guests with their impressive looks. Versatile Toppings: Feel free to get creative! Swap in different cookies or toppings like gummy worms for a unique twist. For more fun, serve them alongside treats like Witch Hat Cookies to complete your Halloween spread!

Graveyard Pudding Cookie Cups Ingredients

For the Pudding Base
• Chocolate Instant Pudding Mix – Provides creamy texture and rich chocolate flavor; homemade chocolate pudding can be used as a tasty alternative.
• Milk – Hydrates pudding mix to achieve a thick consistency; no substitutions required.
• Cool Whip – Adds lightness and fluffiness to the pudding; whipped cream can also serve this purpose.

For the "Dirt" Layer
• Oreo Cookies – Crushed to create a dirt-like layer for texture and flavor; gluten-free cookies can be used for dietary needs.

For Decoration
• Milano Double Chocolate Cookies – Used as tombstones; chocolate wafers could be a fun alternative.
• Black Frosting/Edible Marker – Perfect for writing "RIP" on tombstones; white chocolate can be a contrasting option.
• Candy Pumpkins – Adds a festive touch and color; consider substituting with candy corn or Halloween-themed gummies.
• Googly Eyes (edible) – For a playful look; these can be omitted for a cleaner presentation.
• Gummy Worms – Optional spooky decoration to enhance the theme.

Step‑by‑Step Instructions for Graveyard Pudding Cookie Cups

Step 1: Prepare the Tombstones
Start by writing “RIP” on each Milano Double Chocolate cookie using black frosting or an edible marker. This adds a spooky touch to your Graveyard Pudding Cookie Cups! Once finished, set the tombstones aside on a plate, allowing the frosting to set while you move on to the pudding layers.

Step 2: Mix the Pudding
In a mixing bowl, combine the chocolate instant pudding mix with 2 cups of cold milk. Whisk vigorously for 2–3 minutes until the mixture thickens, achieving a smooth and creamy consistency. Next, gently fold in 1 cup of Cool Whip until well blended. This will create the delicious, fluffy pudding base for your dessert.

Step 3: Crush the Oreos
Take about 15 Oreo cookies and place them in a resealable plastic bag. Use a rolling pin to crush them into fine crumbs, resembling dirt. This will form the layered “dirt” for your Graveyard Pudding Cookie Cups. Set aside the crushed Oreos in a bowl, making sure they’re ready for assembly.

Step 4: Layer the Ingredients
Grab clear cups to showcase the delightful layers of your Graveyard Pudding Cookie Cups. Begin by spooning about a quarter of the crushed Oreo crumbs into the bottom of each cup. Then, gently press some edible googly eyes against the sides of the cups for a fun effect, before adding a generous layer of the pudding mix on top.

Step 5: Repeat the Layers
Continue layering by adding more Oreo crumbs, followed by more pudding mixture. Aim for at least two to three layers to create a visually striking dessert. Remember to keep the crushed Oreos for the final topping! This process will add texture and enhance the fun of your spooky graveyard cups.

Step 6: Add Final Touches
Top each cup with a generous layer of the remaining crushed Oreo crumbs to resemble dirt. Carefully insert a Milano cookie tombstone into the center of each cup, then place a candy pumpkin on top for added festivity. If desired, embellish with gummy worms or additional decorations to enhance your spooky presentation.

Step 7: Chill Before Serving
Once assembled, cover the cups with plastic wrap and refrigerate for at least 30 minutes. This allows the flavors of the Graveyard Pudding Cookie Cups to meld beautifully while the pudding firms up slightly. The chilling not only enhances the textures but also makes for a refreshing treat on a Halloween night!

Step 8: Serve and Enjoy
When ready to serve, remove the cups from the refrigerator and uncover. Present these playful Graveyard Pudding Cookie Cups at your Halloween gathering, and watch as they become the star of the dessert table. Delight in the laughter as everyone enjoys this fun and easy-to-make treat!

Make Ahead Options

These Spooky Graveyard Pudding Cookie Cups are perfect for meal prep enthusiasts looking to save time during Halloween festivities! You can prepare the pudding mixture and crush the Oreos up to 24 hours in advance, storing them separately in the refrigerator. This helps maintain the creamy texture of the pudding and prevents the Oreos from becoming soggy. When you're ready to serve, simply layer the prepped pudding and Oreos in clear cups, add your cookie tombstones and candy pumpkins, and refrigerate for another 30 minutes to allow flavors to meld. With this make-ahead approach, you'll have a fun, festive dessert ready to wow guests with minimal last-minute effort!

What to Serve with Graveyard Pudding Cookie Cups?

These spooky delights bring a playful essence to any Halloween gathering, making it easy to create a whimsical and delicious feast.

  • Witch Hat Cookies: These adorable cookies, shaped like hats, enhance the festive theme and provide a chocolaty crunch to accompany the pudding cups.

  • Halloween Fruit Skewers: Fresh fruit skewers featuring orange and green fruits add a refreshing twist and a pop of color to balance the richness of the dessert.

  • Pumpkin Spice Hot Chocolate: A warm, creamy drink that captures the essence of fall, complementing the creamy layers of the pudding cups perfectly.

  • Ghostly Marshmallow Pops: Dipped marshmallows adorned with ghostly designs provide a sweet and chewy contrast to the crunchy Oreo layers in the dessert.

  • Spooky Cheese Platter: A mix of sharp and creamy cheeses served with spooky-themed crackers gives a variety of flavors that perfectly offset the sweetness of your dessert.

  • Eerie Eyeball Punch: This colorful punch, made with fruit juices and floating “eyeballs” (gumballs or frozen fruit), creates an exciting drink option for all ages, adding a touch of fun to your Halloween spread.

For an unforgettable Halloween celebration, consider serving these alongside your Graveyard Pudding Cookie Cups for a delightful mix of flavors and fun!

Expert Tips for Graveyard Pudding Cookie Cups

  • Chill Properly: Allow your cups to refrigerate for at least 30 minutes to ensure the pudding firms up and flavors meld seamlessly.

  • Layer Wisely: When assembling, aim for at least two distinct layers of pudding and Oreo crumbs. This adds to the visual appeal and texture of your Graveyard Pudding Cookie Cups.

  • Decorative Details: Get creative! Use edible markers to add funny phrases or spooky designs on additional cookies for a personal touch.

  • Freshness Matters: Assemble your cookie cups shortly before serving. This keeps the Oreo “dirt” crunchy and helps maintain the dessert's delightful texture.

  • Involve the Kids: Let your children help with the decorating! It’s a fantastic way to create memories and inspire their creativity while making these magical Halloween treats.

Graveyard Pudding Cookie Cups Variations

Feel free to get creative with these delightful Graveyard Pudding Cookie Cups and customize them to your taste!

  • Gluten-Free: Substitute Oreos with gluten-free cookies to enjoy this spooky treat without worry. Everyone deserves a ghoulish dessert, no matter their dietary needs!

  • Dairy-Free: Use almond milk and coconut whipped cream instead of regular milk and Cool Whip for a dairy-free delight. The flavors will still shine through beautifully!

  • Vegan-Friendly: Swap chocolate pudding mix for a vegan option, and use plant-based cool whip for a dessert that everyone can enjoy together. It's a fantastic way to celebrate inclusivity!

  • Flavor Twist: Try using butterscotch or vanilla pudding for a different flavor profile that still resonates with the Halloween spirit. These variations bring unique and delightful surprises to every bite.

  • Add Crunch: Incorporate crushed nuts or candy corn between the layers for added texture and sweetness. The crunch will contrast nicely with the creamy pudding!

  • Mini Versions: Use mini cups to create bite-sized servings, perfect for little hands at parties. These can be fun for kids and adults alike—no one can resist these cute spooky treats!

  • Customized Toppings: Sprinkle edible glitter or add candy bones for a creative flair. It adds a magical touch that makes each cup uniquely yours!

  • Layered Surprises: Consider layering in some whipped cream or even a fruit layer between the cookies and pudding. The fruity burst can enhance the overall experience!

And while you're at it, if you're looking for more fun treats to accompany your spooky dessert, check out my delicious Witch Hat Cookies or perhaps some delightful Peaches Cream Cookies. Happy crafting!

Storage Tips for Graveyard Pudding Cookie Cups

  • Fridge: Store assembled cups covered in the refrigerator for up to 24 hours. This will keep the pudding chilled and delicious until you're ready to serve.

  • Freezer: For longer storage, assemble the cups minus the toppings and freeze for up to 1 month. Thaw in the fridge overnight and add decorations before serving.

  • Toppings: Assemble cookie tombstones and candy decorations just before serving to maintain their integrity and visual appeal on your Graveyard Pudding Cookie Cups.

  • Reheating: No reheating needed! Simply enjoy chilled as a refreshing Halloween treat.

Graveyard Pudding Cookie Cups Recipe FAQs

How do I pick the right chocolate pudding mix?
Absolutely! For the best results, choose a high-quality chocolate instant pudding mix that is rich in flavor. Look for brands that list cocoa as one of the first ingredients and don’t be afraid to try a homemade version for an extra decadent treat!

How should I store the cookie cups after making them?
You can easily store your assembled Graveyard Pudding Cookie Cups by covering them with plastic wrap or placing them in an airtight container. They can be kept in the refrigerator for up to 24 hours, ensuring they remain fresh and creamy until you're ready to serve!

Can I freeze these pudding cups for later?
Yes, you can! To freeze, assemble the cups without the toppings (like cookies and candy) and place them in an airtight container in the freezer for up to 1 month. When you're ready to enjoy them, simply thaw them in the fridge overnight and add your fun decorations before serving.

What if my pudding doesn’t thicken properly?
If your pudding mixture doesn’t thicken, check that you’ve whisked it vigorously for the full 2-3 minutes as suggested. If it's still not thickening, try adding a tad more pudding mix or allowing it to sit for a few additional minutes. This can help to achieve that lovely creamy texture you're looking for!

Are there any allergy considerations with the ingredients?
Very! Always check the packaging of your ingredients for potential allergens. If you're dealing with nut allergies, opt for nut-free cookies and ensure the pudding mix doesn’t contain any traces of nuts. For gluten-free options, be sure to use gluten-free Oreo cookies and any other necessary substitutions.

What are some fun variations I can try with these cookie cups?
The more the merrier! Get creative by swapping out Oreo cookies for other flavors, adding unique toppings like gummy worms, or even incorporating a layer of whipped cream on top for added fluffiness. You could also experiment with different cookie shapes for tombstones—mini graham crackers or chocolate wafers could work wonderfully!

Graveyard Pudding Cookie Cups

Graveyard Pudding Cookie Cups: A Fun Halloween Delight

Graveyard Pudding Cookie Cups are an easy and festive Halloween dessert featuring layers of creamy pudding, Oreo dirt, and delightful toppings.
Print Recipe Pin Recipe
Prep Time 30 minutes mins
Chilling Time 30 minutes mins
Total Time 1 hour hr
Servings: 8 cups
Course: Dessert
Cuisine: Halloween
Calories: 250
Ingredients Equipment Method Nutrition Notes

Ingredients
  

For the Pudding Base
  • 1 box Chocolate Instant Pudding Mix Homemade chocolate pudding can be used as a tasty alternative.
  • 2 cups Milk Hydrates pudding mix for thick consistency.
  • 1 cup Cool Whip Whipped cream can serve this purpose.
For the 'Dirt' Layer
  • 15 cookies Oreo Cookies Use gluten-free cookies for dietary needs.
For Decoration
  • 8 cookies Milano Double Chocolate Cookies Chocolate wafers could be a fun alternative.
  • 1 tube Black Frosting/Edible Marker White chocolate can be a contrasting option.
  • 1 cup Candy Pumpkins Consider substituting with candy corn.
  • 1 cup Googly Eyes (edible) Can be omitted for a cleaner presentation.
  • 1 cup Gummy Worms Optional spooky decoration.

Equipment

  • Mixing Bowl
  • Whisk
  • Resealable plastic bag
  • Rolling Pin
  • clear cups

Method
 

Preparation Steps
  1. Start by writing “RIP” on each Milano Double Chocolate cookie using black frosting or an edible marker. Set the tombstones aside while you prepare the pudding layers.
  2. In a mixing bowl, combine the chocolate instant pudding mix with 2 cups of cold milk. Whisk vigorously for 2-3 minutes until the mixture thickens.
  3. Gently fold in 1 cup of Cool Whip until well blended to create the fluffy pudding base.
  4. Crush about 15 Oreo cookies in a resealable plastic bag with a rolling pin into fine crumbs for the layered 'dirt'.
  5. In clear cups, layer about a quarter of the crushed Oreo crumbs, then add a layer of the pudding mix, pressing in some edible googly eyes on the sides of the cups.
  6. Continue layering with more Oreo crumbs, followed by more pudding mixture, aiming for 2-3 layers, keeping crushed Oreos for the final topping.
  7. Top each cup with remaining crushed Oreo crumbs, insert a Milano cookie tombstone, and place a candy pumpkin on top. Add gummy worms if desired.
  8. Cover with plastic wrap and refrigerate for at least 30 minutes before serving.
  9. Serve the cups chilled at your Halloween gathering, and enjoy!

Nutrition

Serving: 1cupCalories: 250kcalCarbohydrates: 35gProtein: 3gFat: 9gSaturated Fat: 5gCholesterol: 15mgSodium: 150mgPotassium: 200mgFiber: 1gSugar: 20gVitamin A: 2IUCalcium: 4mgIron: 2mg

Notes

Involve kids for decorating and ensure to chill the cups for best texture.

Tried this recipe?

Let us know how it was!

Cemetery Soup: A Cozy Halloween Bowl of Comfort

October 7, 2025 by Grace Snow Leave a Comment

As the leaves turn and a crisp breeze sweeps through the air, my thoughts drift to cozy evenings spent stirring up something special in the kitchen. This Halloween, I'm excited to share my Spooky Cemetery Soup! Inspired by the classic tales from Scary Stories to Tell in the Dark, this hearty dish brings a delightful touch to your fall gatherings. Packed with fresh vegetables and aromatic herbs, it's not only a warm comfort food but also quick to prepare—ready in just over an hour! Whether you’re hosting a party or simply embracing the season, this uniquely themed recipe offers a fun way to celebrate Halloween while satisfying your taste buds. So, are you ready to conjure up some culinary magic? Let's dive into this frightfully delicious adventure!

What Makes Cemetery Soup So Special?

Unique Theme: Inspired by Scary Stories to Tell in the Dark, this soup adds a whimsical touch to your Halloween festivities.

Comforting Flavors: A savory blend of vegetables and herbs creates a warm, inviting bowl that’s perfect for chilling autumn nights.

Quick Prep: With just over an hour from start to finish, you can whip this up and enjoy it without hassle.

Customizable: Add your favorite veggies or go meatless by swapping beef for lentils or chickpeas, allowing everyone to savor it.

Crowd-Pleasing: This hearty dish not only fills bellies but also sparks conversations, making it ideal for gatherings. Embrace the cozy vibes and serve it with crusty bread for a delightful dipping experience!

Cemetery Soup Ingredients

• This hearty blend captures the essence of comfort food while celebrating the spirit of Halloween!

For the Base

  • Water – Use chicken or vegetable broth for enhanced flavor.
  • Onions – Yellow or white onions work best for a rich aromatic base.

For the Vegetables

  • Carrots – Adds sweetness and crunch; substitute with parsnips for a different twist.
  • Green Beans – Provides texture and vibrant color; fresh or frozen can be used.
  • Corn – Brings sweetness; you can use canned or frozen corn based on preference.
  • Potatoes – Use Yukon gold or red potatoes for creaminess and body.

For Texture

  • Barley – Adds heartiness to the soup; substitute with rice or quinoa for a gluten-free option.

For Protein

  • Beef – Introduces depth of flavor; can be omitted for a vegetarian Cemetery Soup.

Seasonings

  • Salt & Pepper – Essential for enhancing taste; adjust according to your liking.
  • Thyme – Fresh or dried, this herb adds aromatic flavor.
  • Bay Leaves – Enriches the depth of the soup; don't forget to remove them before serving.

Step‑by‑Step Instructions for Cemetery Soup

Step 1: Prepare the Base
In a large pot, pour in approximately 8 cups of water or chicken broth, then bring it to a rolling boil over medium-high heat. As the liquid heats, gather your vegetables and chop the onions, carrots, and potatoes into bite-sized pieces, ready to enhance the base of your Cemetery Soup.

Step 2: Add the Vegetables
Once boiling, carefully add the chopped carrots, green beans, corn, barley, onions, and potatoes into the bubbling pot. Stir well to ensure all the ingredients are mixed, and allow it to return to a boil—this should take about 5 minutes—before reducing the heat to a simmer.

Step 3: Season the Soup
With the vegetables in place, season your Cemetery Soup with salt, pepper, thyme, and the bay leaves. Stir the mixture gently to combine the flavors thoroughly. Let it simmer on low heat for approximately 55 minutes, allowing the vegetables and barley to become tender and release their delightful aromas.

Step 4: Incorporate the Protein
After the veggies are tender, stir in the beef if using, ensuring it gets submerged in the warm broth. Increase the heat slightly to bring the soup back to a gentle simmer. Cook for an additional 15-20 minutes, monitoring until the beef is cooked through and the flavors meld beautifully.

Step 5: Final Adjustments
Once the Cemetery Soup is bubbling and thickened, taste it and adjust seasoning as needed, adding extra salt or pepper if desired. Remember to remove the bay leaves before serving. The soup should look hearty and inviting, with vibrant colors from the fresh veggies.

Step 6: Serve and Enjoy
Ladle the Cemetery Soup into warm bowls, accompanied by crusty bread for dipping. This comforting dish is perfect for sharing with family or friends during your Halloween festivities, ready to warm hearts and spark delightful conversations!

What to Serve with Cemetery Soup

Warm, comforting, and bursting with seasonal flavors, this delightful dish pairs beautifully with a variety of sides that enhance your Halloween dining experience.

  • Crusty Bread: Perfect for dipping, a nice loaf offers a chewy texture that contrasts with the smooth soup.

  • Autumn Salad: A fresh salad with mixed greens, apples, and candied nuts provides a crisp, refreshing balance to the hearty soup.

  • Garlic Breadsticks: Soft and buttery, these breadsticks are ideal for sopping up every last drop of your Cemetery Soup.

Combine your soup with this delightful salad to create a meal that sings of the season!

  • Spiced Cider: A warm spiced apple cider brings a cozy fall atmosphere, complementing the savory flavors of the soup.

  • Pumpkin Pie: For a sweet finish, serve slices of pumpkin pie, a classic fall dessert that adds a touch of sweetness to your meal.

  • Roasted Vegetables: Roasted Brussels sprouts or root vegetables add depth and sophistication, making your meal a true seasonal celebration.

Cemetery Soup: Creative Variations Await

Embrace your culinary creativity as you explore delightful twists on this Halloween-inspired dish!

  • Vegetarian Delight: Replace beef with chickpeas or lentils for a hearty, plant-based version that still packs a punch.

  • Hearty Grains: Swap out barley for quinoa or wild rice to elevate the texture while making this soup gluten-free.

  • Spicy Kick: Add a pinch of cayenne pepper or diced jalapeños to give your soup an exciting heat that warms your soul.

  • Flavor Boost: Stir in a tablespoon of Worcestershire sauce or soy sauce for a deep umami flavor that complements the vegetables beautifully.

  • Extra Veggies: Don't hesitate to toss in other vegetables like bell peppers, zucchini, or celery to enhance nutritional value and texture.

For even more cozy soup options, try making this Lemon Chicken Soup or savor the flavors of a Zuppa Toscana Soup. They both make wonderful additions to any fall gathering.

  • Herb Infusion: Experiment with fresh herbs like parsley, dill, or rosemary for a fragrant twist that elevates your soup to gourmet status.

  • Creamy Touch: For a luxuriously creamy version, add a splash of cream or a dollop of sour cream right before serving.

Each variation invites you to craft the perfect Cemetery Soup that tantalizes your taste buds while enhancing the Halloween spirit!

How to Store and Freeze Cemetery Soup

Fridge: Store leftover Cemetery Soup in an airtight container; it will keep well for up to 3 days in the refrigerator.

Freezer: Freeze Cemetery Soup in individual portions in freezer-safe containers for up to 3 months. Thaw overnight in the fridge before reheating.

Reheating: To enjoy your frozen Cemetery Soup, reheat it on the stove over low heat or in the microwave, stirring occasionally until heated through.

Airtight Care: Ensure the containers are airtight to prevent freezer burn and maintain the rich flavors of the soup when stored.

Make Ahead Options

These Cemetery Soup preparations are perfect for busy home cooks seeking a time-saving solution for Halloween festivities! You can chop all your vegetables (carrots, green beans, potatoes, and onions) up to 24 hours in advance and store them in an airtight container in the refrigerator to keep them fresh and vibrant. You can also cook the soup completely and refrigerate it for up to 3 days, just remember to let it cool before sealing it. When ready to serve, simply reheat the soup on the stove, adjusting the seasoning as needed and allowing it to simmer gently until heated through. This way, you’ll have a delightful, heartwarming bowl ready with minimal effort, ensuring your Halloween is both fun and flavorful!

Expert Tips for Cemetery Soup

  • Broth Upgrade: Use chicken or vegetable broth instead of water for a richer, more flavorful Cemetery Soup that enhances the overall taste.

  • Veggie Prep: Cut vegetables into even-sized pieces to ensure they cook uniformly. This prevents some from being overcooked while others remain crunchy.

  • Seasoning Balance: Start with less salt and pepper; you can always add more later. Adjust the seasoning during the final step for best results.

  • Vegetable Substitutes: Experiment with seasonal vegetables like squash or zucchini for added variety and freshness in your Cemetery Soup.

  • Simmer Time: Don’t rush the simmering process. Allowing more time to cook melds the flavors beautifully while making the vegetables tender but not mushy.

Cemetery Soup Recipe FAQs

How do I select ripe ingredients for Cemetery Soup?
Absolutely! When choosing carrots, look for firm ones without dark spots. For potatoes, pick those that are smooth and free of blemishes. Fresh herbs should be vibrant and fragrant. Meanwhile, for green beans, choose those that snap easily; if they bend, they may be past their prime.

What are the best storage methods for leftover Cemetery Soup?
Very important! Store your leftover Cemetery Soup in an airtight container in the refrigerator for up to 3 days. If you're not planning to enjoy it within that time, consider freezing. Make sure to let it cool completely before sealing for storage.

Can I freeze Cemetery Soup, and how?
Absolutely! To freeze your Cemetery Soup, let it cool completely. Then, ladle it into freezer-safe containers or heavy-duty freezer bags, leaving about an inch of space at the top for expansion. Seal tightly and label with the date; it will keep well for up to 3 months. When you're ready to enjoy it again, thaw in the fridge overnight and reheat on the stove or in the microwave.

What should I do if my soup is too salty?
If you find your Cemetery Soup has become too salty, don't worry! You can add a diced potato while it simmers to absorb some of the extra salt. Alternatively, add more water or broth to dilute it. Let it simmer for a bit longer to meld the flavors back together.

Are there any dietary considerations I should keep in mind for Cemetery Soup?
Of course! If you're cooking for others, it's a good idea to check for allergies. For instance, if someone is allergic to gluten, you can easily substitute the barley with quinoa or rice. Additionally, if you're preparing this for vegetarians, simply omit the beef and up the vegetable content for a satisfying dish.

Can I make Cemetery Soup vegetarian?
Certainly! Simply omit the beef and use vegetable broth instead of water. You can enhance the flavor profile by incorporating lentils or chickpeas for protein, making it a hearty, meat-free option. Feel free to add more seasonal vegetables to elevate the taste!

Cemetery Soup

Cemetery Soup: A Cozy Halloween Bowl of Comfort

This Cemetery Soup is a warm and comforting dish, perfect for Halloween gatherings packed with fresh vegetables and aromatic herbs.
Print Recipe Pin Recipe
Prep Time 15 minutes mins
Cook Time 55 minutes mins
Total Time 1 hour hr 10 minutes mins
Servings: 6 cups
Course: Soups
Cuisine: American
Calories: 220
Ingredients Equipment Method Nutrition Notes

Ingredients
  

For the Base
  • 8 cups Water or chicken broth Use chicken or vegetable broth for enhanced flavor
  • 2 medium Onions Yellow or white onions work best
For the Vegetables
  • 2 medium Carrots Adds sweetness and crunch; substitute with parsnips if desired
  • 1 cup Green beans Fresh or frozen can be used
  • 1 cup Corn Canned or frozen corn based on preference
  • 2 medium Potatoes Yukon gold or red potatoes for creaminess
For Texture
  • 1 cup Barley Substitute with rice or quinoa for gluten-free option
For Protein
  • 1 pound Beef Can be omitted for a vegetarian version
Seasonings
  • 1 teaspoon Salt Essential for enhancing taste
  • 1 teaspoon Pepper Adjust according to your liking
  • 1 teaspoon Thyme Fresh or dried adds aromatic flavor
  • 2 leaves Bay leaves Remove before serving

Equipment

  • Large pot

Method
 

Step-by-Step Instructions
  1. In a large pot, pour in approximately 8 cups of water or chicken broth, then bring it to a rolling boil over medium-high heat.
  2. Once boiling, carefully add the chopped carrots, green beans, corn, barley, onions, and potatoes. Stir well and let it return to a boil before reducing the heat to a simmer.
  3. Season your Cemetery Soup with salt, pepper, thyme, and the bay leaves. Let it simmer on low heat for approximately 55 minutes.
  4. After the veggies are tender, stir in the beef if using, and cook for an additional 15-20 minutes.
  5. Taste and adjust seasoning as needed, removing the bay leaves before serving.
  6. Ladle the Cemetery Soup into warm bowls, accompanied by crusty bread for dipping.

Nutrition

Serving: 1cupCalories: 220kcalCarbohydrates: 30gProtein: 15gFat: 5gSaturated Fat: 2gPolyunsaturated Fat: 1gMonounsaturated Fat: 2gCholesterol: 30mgSodium: 500mgPotassium: 600mgFiber: 6gSugar: 4gVitamin A: 300IUVitamin C: 25mgCalcium: 10mgIron: 15mg

Notes

Store leftover soup in an airtight container for up to 3 days in the refrigerator, or freeze in individual portions for up to 3 months.

Tried this recipe?

Let us know how it was!

Worms in Dirt Mousse Cake: A Spooktacular Halloween Treat

October 7, 2025 by Grace Snow Leave a Comment

As I rummaged through my kitchen the other day, a delightful thought popped into my head: why not bring a touch of whimsy to Halloween with a "Worms in Dirt" Mousse Cake? This charming dessert features layers of luscious dark chocolate mousse and a crunchy cookie base, crowned with vibrant raspberry gummy worms that contrast beautifully with the rich flavors. Not only is this Halloween dessert quick to whip up, but it's also sure to become a crowd favorite, making it perfect for gatherings where nostalgia and fun take center stage. Imagine indulging in a treat that evokes childhood memories while impressing your loved ones with its spookily gorgeous appearance! Curious to find out how to create this delectable dessert that will leave everyone smiling? Let's dig in!

Why You'll Love This Mousse Cake

Simplicity at Its Best: This “Worms in Dirt” Mousse Cake is a breeze to make, requiring no advanced baking skills or complicated techniques.

Decadent Flavor: The luscious dark chocolate mousse paired with aromatic cinnamon cookie crumbles creates a rich, unforgettable dessert that will have everyone asking for seconds.

Playful Presentation: Topped with vibrant raspberry gummy worms, this dessert not only tastes divine but also adds a fun twist to your Halloween festivities.

Nostalgic Appeal: Transport yourself back to childhood with every bite, as this cake evokes fond memories of playful treats and festive gatherings.

Quick Prep Time: With most of the work done in advance, you can delight your guests without spending all day in the kitchen, making it a fantastic option for busy hosts.

Crowd-Pleasing Treat: Ideal for parties and gatherings, this mousse cake perfectly balances fun and indulgence, ensuring it's a showstopper at any Halloween celebration.

Worms in Dirt Mousse Cake Ingredients

For the Gummy Worms

  • Raspberry Jello – adds a sweet and tangy flavor for a spooktacular touch to your cake.
  • Unflavored Gelatin – helps create a firm structure for the gummy worms; necessary for that chewy texture.
  • Heavy Cream – enriches the gummy mixture, making it creamy and indulgent.
  • Food Coloring – to enhance the delightful appearance of your gummy worms; a little goes a long way!

For the Cookie Base

  • Chocolate Pecan Cookies – provide a crunchy and flavorful base; the combination of chocolate and cinnamon enhances the overall taste.
  • Butter – adds richness and moisture to the cookie dough; be sure it’s softened for easy mixing.
  • Sugar – sweetens the cookies and balances the chocolate; feel free to adjust based on your sweetness preference.

For the Dark Chocolate Mousse

  • Dark Chocolate – the star of this dessert; it gives a rich and velvety filling. Substitute with semi-sweet chocolate for a sweeter mousse if preferred.
  • Egg Yolks – help create a luxurious texture; be sure to use fresh eggs for the best results.
  • Espresso – intensifies the chocolate flavor; you can omit it or replace it with strong brewed coffee if you desire.
  • Whipped Cream – gently folded in for a light and airy mousse; can use regular whipped cream if chocolate flavor is not to your liking.

For the Topping

  • Chocolate Whipped Cream – adds a light yet indulgent finish to the cake; consider drizzling chocolate sauce for an extra touch of delight.
  • Cookie Crumbs – sprinkle on top for an aesthetic "dirt" effect that complements the gummy worms; make extra to enhance the presentation!

With this perfect concoction of ingredients, your “Worms in Dirt” Mousse Cake is sure to be a Halloween hit, bringing smiles and nostalgia to everyone at your gathering!

Step‑by‑Step Instructions for “Worms in Dirt” Mousse Cake

Step 1: Prepare Gummy Worms
Begin your spooky creation by mixing raspberry jello and unflavored gelatin with 2 cups of boiling water until fully dissolved. Allow the mixture to cool to room temperature, then blend in 1 cup of heavy cream and a few drops of food coloring for a vibrant hue. Pour this gelatin mixture into clean straws and place them upright in a cup. Chill in the refrigerator for at least 9 hours to set, creating delightful gummy worms for your mousse cake.

Step 2: Make Chocolate Pecan Cookies
Preheat your oven to 350°F (175°C). In a mixing bowl, cream together 1 cup of softened butter and 1 cup of sugar until fluffy, about 3 minutes. Gradually add in 2 cups of flour, 1 cup of finely chopped pecans, and a pinch of cinnamon to form a dough. Chill the dough for 30 minutes, then slice it into rounds and bake on a parchment-lined baking sheet for 8-10 minutes until firm and aromatic, allowing them to cool completely afterward.

Step 3: Prepare Dark Chocolate Mousse
For the luscious dark chocolate mousse, start by melting 8 ounces of dark chocolate over a double boiler, ensuring the heat is low to prevent burning. In a separate bowl, whisk 4 egg yolks, 1 tablespoon of espresso, and ¼ cup of sugar over simmering water until it lightens in color, about 6-8 minutes. Remove from heat, mix in the melted chocolate, and then gently fold in 2 cups of whipped cream and the beaten egg whites until well combined and airy.

Step 4: Assemble the Tart
Line the bottom of a springform pan with plastic wrap for easy removal. Crush the cooled chocolate pecan cookies into fine crumbs and spread them evenly across the bottom, pressing down firmly to create a solid base. Layer the rich dark chocolate mousse over the cookie crust, smoothing the top with a spatula. Finish this layer with a generous spread of chocolate whipped cream, then sprinkle any remaining cookie crumbles for that delightful "dirt" effect.

Step 5: Finish and Chill
Cover the assembled "Worms in Dirt" Mousse Cake with plastic wrap and chill in the refrigerator for at least 4 hours, although overnight chilling is recommended for enhanced flavor and texture. Before serving, remove the gummy worms from the straws, slice the tart into pieces, and artistically arrange the gummy worms on top for a fun and festive presentation.

How to Store and Freeze Worms in Dirt Mousse Cake

Fridge: Store your mousse cake in an airtight container in the refrigerator for up to 3 days. This keeps it fresh and maintains its delightful flavor.

Freezer: For longer storage, you can freeze individual slices wrapped tightly in plastic wrap and then placed in a freezer-safe container for up to 1 month.

Reheating: Thaw frozen slices in the refrigerator overnight. Avoid reheating as it may alter the texture of the mousse.

Assembly Note: If freezing, add gummy worms and whipped cream just before serving for the best presentation and taste.

Worms in Dirt Mousse Cake Variations

Feel free to get creative with your “Worms in Dirt” Mousse Cake for a fun twist on this classic Halloween treat!

  • Fruit-Flavored Gummies: Switch up the gummy worms for strawberry or blue raspberry versions to surprise your taste buds. The vibrant colors will make your dessert even more festive.

  • Gluten-Free Option: Replace chocolate pecan cookies with gluten-free cookies or use a mixture of crushed nuts to create a crunchy base that everyone can enjoy.

  • Nut-Free Base: For a nut-free twist, substitute the chocolate pecan cookies with Oreo cookies or another cookie of your choice; they'll still bring that delightful crunch!

  • Vegan Mousse: Use dairy-free chocolate and whipped coconut cream for a vegan mousse that's just as delicious and rich. You can still enjoy the same creamy texture!

  • Extra Crunch: Add crushed chocolate wafer cookies on top of the mousse layer for an added crunch factor that contrasts nicely with the creamy mousse.

  • Add a Spice Kick: Incorporate a pinch of cayenne pepper into the cookie mixture for a surprising heat that will complement the sweetness of the mousse and gummy worms.

  • Layered Presentation: Create individual dessert cups instead of a cake; layer the mousse, cookie crumbles, and gummy worms for a fun and personal serving option.

  • Chocolate Drizzle: Give your mousse cake an extra touch of elegance and flavor with a drizzle of melted dark chocolate over the top before adding the gummy worms for a beautiful finish.

These variations and substitutions will ensure that your “Worms in Dirt” Mousse Cake remains a delightful and versatile dessert year after year. For more fun and festive recipes, consider making an Ice Cream Cake or a Chocolate Pudding Cake!

Expert Tips for Your Worms in Dirt Mousse Cake

  • Chill Time Matters: Allow your mousse cake to chill overnight for the best texture and flavor; this helps all layers meld beautifully.

  • Avoid Chocolate Seizing: When melting dark chocolate, use low heat and stir frequently to keep it silky smooth; overheating can lead to a grainy texture.

  • Gummy Worms Preparation: Ensure the gelatin mixture cools to room temperature before adding cream to avoid separation and achieve that perfect chewy consistency.

  • Cookie Base Firmness: Press the cookie crumbs down firmly to create a solid base; this prevents the mousse from seeping through and enhances overall texture.

  • Whipped Cream Boost: For an ultra-light mousse, ensure your whipped cream is at stiff peaks before folding it in, creating an airy, delightful texture.

  • Fun Variations: Switch up the gummy worms with different flavors to personalize your “Worms in Dirt” Mousse Cake for your party!

Make Ahead Options

These “Worms in Dirt” Mousse Cake components are perfect for busy home cooks looking to make ahead and save time! You can prepare the gummy worms up to 24 hours in advance; just ensure they chill for at least 9 hours to set. The chocolate pecan cookie base can also be made and stored in an airtight container for up to 3 days, keeping them fresh and crunchy. As for the dark chocolate mousse, you can mix it a day ahead and refrigerate; fold the whipped cream in just before assembly to maintain its airy texture. When it’s time to serve, simply assemble the tart and chill for at least 4 hours before adding the gummy worms on top for a delightful presentation!

What to Serve with Worms in Dirt Mousse Cake

This playful and indulgent dessert invites a variety of delightful companions to create a memorable Halloween feast.

  • Spooky Sugar Cookies: Soft and chewy, these cookies can be decorated with icing in fun Halloween shapes, adding a whimsical touch to your dessert spread.

  • Creepy Crawly Cupcakes: Chocolate cupcakes topped with ghostly meringue or chocolate frosting make a fantastic mini dessert that complements the rich flavors of the mousse cake.

  • Chilled Pumpkin Soup: A savory and slightly spiced soup offers a rich contrast to the sweetness of your mousse, creating balance in this festive meal.

  • Caramelized Apple Slices: Warm, tender apples with a drizzle of caramel add a delightful fruity note and comforting warmth, perfect alongside the cold mousse.

  • Mini Cheese Platter: A selection of creamy cheeses and crunchy crackers can provide a savory interlude, elevating your dessert experience and refreshing the palate.

  • Gingerbread Hot Chocolate: This cozy drink, spiced with ginger and cinnamon, pairs beautifully with chocolate and can evoke the warmth of holiday gatherings.

  • Mummy-Style Hot Dogs: Fun and easy to make, these wrapped hot dogs add a savory snack option for your guests and enhance the festive theme.

  • Graveyard Dirt Cups: Chocolate pudding layered with crushed cookies and topped with gummy worms make for an adorable and thematic treat, echoing the spirit of your “Worms in Dirt” Mousse Cake.

Worms in Dirt Mousse Cake Recipe FAQs

What type of chocolate should I use for the mousse?
For the best flavor and texture in your “Worms in Dirt” Mousse Cake, I recommend using high-quality dark chocolate, as it provides a rich and velvety filling. If you prefer a sweeter mousse, you can substitute it with semi-sweet chocolate instead. Always ensure your chocolate is finely chopped to facilitate even melting.

How should I store any leftover mousse cake?
You can store your mousse cake in an airtight container in the refrigerator for up to 3 days. This method ensures it remains fresh while preserving its delightful flavor. Just make sure to cover it well to avoid any absorption of refrigerator odors.

Can I freeze the mousse cake?
Absolutely! To freeze your “Worms in Dirt” Mousse Cake, slice it into individual portions and wrap each piece tightly in plastic wrap before placing them in a freezer-safe container. This way, it can be stored for up to 1 month. When you're ready to enjoy it, simply thaw in the refrigerator overnight. Avoid reheating for the best texture.

What should I do if my mousse is too stiff or grainy?
If your mousse appears too stiff or grainy, it may be due to over-beating the whipped cream or chocolate seizing from overheating. To fix this, gently reheat the chocolate in a double boiler until smooth, then allow it to cool slightly before folding it into the whipped cream. Make sure that your cream is whipped just to stiff peaks, maintaining its airy fluffiness for the perfect mousse texture.

Are there any dietary considerations for the gummy worms?
If you're catering to dietary restrictions, you may want to opt for allergy-free gummy worms, as some conventional options may contain gluten or artificial colors. There are several brands that offer vegan or gluten-free alternatives, which could work perfectly for your “Worms in Dirt” Mousse Cake while still delivering the same fun flavor and design.

“Worms in Dirt” Mousse Cake

Worms in Dirt Mousse Cake: A Spooktacular Halloween Treat

This Worms in Dirt Mousse Cake is a whimsical Halloween treat featuring layers of chocolate mousse and gummy worms.
Print Recipe Pin Recipe
Prep Time 30 minutes mins
Cook Time 10 minutes mins
Chill Time 9 hours hrs
Total Time 9 hours hrs 40 minutes mins
Servings: 12 slices
Course: Dessert
Cuisine: American
Calories: 450
Ingredients Equipment Method Nutrition Notes

Ingredients
  

For the Gummy Worms
  • 1 pack Raspberry Jello adds a sweet and tangy flavor for a spooktacular touch
  • 2 tablespoons Unflavored Gelatin helps create a firm structure for the gummy worms
  • 1 cup Heavy Cream enriches the gummy mixture
  • few drops Food Coloring to enhance the delightful appearance
For the Cookie Base
  • 2 cups Chocolate Pecan Cookies provide a crunchy and flavorful base
  • 1 cup Butter softened for easy mixing
  • 1 cup Sugar sweetens the cookies
For the Dark Chocolate Mousse
  • 8 ounces Dark Chocolate the star of this dessert
  • 4 large Egg Yolks help create a luxurious texture
  • 1 tablespoon Espresso intensifies the chocolate flavor
  • 2 cups Whipped Cream gently folded in for a light mousse
For the Topping
  • 1 cup Chocolate Whipped Cream adds a light yet indulgent finish
  • 1 cup Cookie Crumbs sprinkle on top for an aesthetic 'dirt' effect

Equipment

  • Mixing Bowl
  • Whisk
  • Double Boiler
  • Springform pan
  • Oven
  • Refrigerator

Method
 

Step-by-Step Instructions
  1. Prepare Gummy Worms by mixing raspberry jello and unflavored gelatin with boiling water until dissolved, then add heavy cream and food coloring, pour into straws and chill for 9 hours.
  2. Make Chocolate Pecan Cookies by creaming butter and sugar, adding flour, pecans, and cinnamon, chill dough, then bake at 350°F for 8-10 minutes.
  3. Prepare Dark Chocolate Mousse by melting dark chocolate, whisking egg yolks, espresso, and sugar, then combine with melted chocolate and fold in whipped cream.
  4. Assemble the Tart by layering cookie crumbs as the base, dark chocolate mousse on top, and finishing with chocolate whipped cream and cookie crumbles.
  5. Finish and Chill the mousse cake by covering with plastic wrap and chill for at least 4 hours before adding gummy worms and serving.

Nutrition

Serving: 1sliceCalories: 450kcalCarbohydrates: 55gProtein: 5gFat: 25gSaturated Fat: 15gPolyunsaturated Fat: 2gMonounsaturated Fat: 8gCholesterol: 80mgSodium: 150mgPotassium: 200mgFiber: 2gSugar: 30gVitamin A: 500IUVitamin C: 5mgCalcium: 50mgIron: 2mg

Notes

Chill the mousse cake overnight for the best texture; sprinkle cookie crumbs firmly to prevent mousse seeping through.

Tried this recipe?

Let us know how it was!

Chocolatey Cauldron Cakes: A Magical Dessert Experience

October 7, 2025 by Grace Snow Leave a Comment

The aroma of freshly baked chocolate cupcakes wafting through the air is enough to whisk you away to a whimsical world of sweetness. Inspired by the enchanting universe of Harry Potter, these delightful Cauldron Cakes are a true celebration of indulgence. Imagine sinking your teeth into a moist chocolate cupcake, bursting with a gooey center and topped with fluffy buttercream—what a treat! Not only are these Cauldron Cakes a crowd-pleaser for any festive gathering, but they’re also surprisingly quick to whip up, making them perfect for both special occasions and cozy afternoons. Plus, the charming chocolate handles will leave your guests in awe! Ready to stir up some magic in your kitchen? Let's dive into this delightful recipe together!

Why Are These Cauldron Cakes So Special?

Decadent Chocolate Delight: Indulge in the rich, chocolatey flavor that brings joy with every bite. Perfectly moist cupcakes with a gooey center, you'll be reaching for seconds!

Quick and Easy: Whip these up in no time using a simple cupcake mix—great for both experienced bakers and beginners!

Visually Stunning: Impress your friends with charming chocolate handles that mimic cauldrons, perfect for celebrations or themed parties.

Versatile Options: Switch up the frosting or add unique toppings to personalize each cupcake to your taste!

Crowd-Pleasing Treat: Serve these delightful Cauldron Cakes at gatherings, and watch them disappear faster than a spell! For more delightful options, don't forget to check out these Ricotta Protein Pancakes for a deliciously different dessert!

Cauldron Cakes Ingredients

For the Cake
• Chocolate Cupcake Mix – This forms the delightful base of our Cauldron Cakes, providing that rich chocolate flavor. Substitution: You can use a homemade chocolate cupcake recipe for a personal touch.
• Chocolate Chips (Semi-Sweet, 2 bags) – Adding texture and bursts of rich chocolate flavor. Prep Note: Opt for high-quality chocolate chips to elevate the taste.

For the Buttercream Frosting
• Butter (1 cup, room temperature) – Ensures a light and fluffy buttercream that spreads beautifully. Prep Note: Make sure the butter is softened for easier mixing.
• Powdered Sugar (2 cups) – Sweetens and thickens the frosting to create the perfect spread. Note: Sift the sugar first to avoid lumps in your frosting.
• Vanilla Extract (2 tsp) – Amplifies the overall flavor of your buttercream. Substitution: Almond extract can provide a lovely twist if preferred.

For Topping
• Store-Bought Dark Chocolate Frosting (1 can) – Perfect for topping the cupcakes quickly. Homemade frosting will enhance the richness if you're feeling adventurous.

Get ready to bake these magical Cauldron Cakes, a deliciously chocolatey treat that will charm your taste buds and dazzle your guests!

Step‑by‑Step Instructions for Cauldron Cakes

Step 1: Prepare the Cupcake Mixture
Preheat your oven to 350°F (175°C). In a large mixing bowl, prepare the chocolate cupcake mix according to the package instructions. Grease your cupcake pans generously, omitting liners for that enchanting touch. Once combined, pour the batter evenly into each cup, filling them about two-thirds full, and bake for 18-20 minutes until a toothpick comes out clean.

Step 2: Cool and Carve the Cupcakes
After baking, remove the cupcake pans from the oven and let them cool in the pans for about 10 minutes. Gently transfer the cupcakes to a wire rack to cool completely—this will take another 20-30 minutes. Once cool, invert each cupcake and carve out a small hole in the bottom using a sharp knife for filling later.

Step 3: Make the Buttercream Frosting
In a microwave-safe bowl, melt 1 cup of chocolate chips until smooth, stirring every 30 seconds. In a separate bowl, beat the room temperature butter with an electric mixer until light and fluffy, about 3-5 minutes. Gradually add the sifted powdered sugar, mixing until fully combined, and then add the melted chocolate and 2 teaspoons of vanilla extract, blending until creamy.

Step 4: Create the Chocolate Coating
In the same microwave-safe bowl, melt the remaining chocolate chips until smooth, ensuring it’s cool enough to touch without burning. Take each cupcake base and dip it into the melted chocolate, allowing any excess to drip off. Then, place them on a sheet of wax paper and let the chocolate harden, which usually takes about 15-20 minutes.

Step 5: Pipe the Buttercream Frosting
Once the chocolate coating has set, prepare to pipe the buttercream. Fill a quart-sized ziplock bag with your fluffy buttercream and snip a small corner off. Pipe the frosting generously around the tops of each cupcake, creating a whimsical look that resembles cauldron edges, ensuring all that deliciousness stays in for a bite of joy.

Step 6: Shape Chocolate Handles
To create the enchanting chocolate handles for your Cauldron Cakes, melt the remaining chocolate again. Using a spoon or a piping bag, shape the chocolate into handle forms on a piece of wax paper. Freeze the handles for about 10 minutes until solid, and then carefully attach them to the sides of each cupcake, completing their magical appearance.

Cauldron Cakes Variations & Substitutions

Feel free to explore these delightful twists on your Cauldron Cakes, igniting your creativity and taste buds!

  • Gluten-Free: Use a gluten-free chocolate cupcake mix to make these treats accessible for everyone.
  • Nutty Crunch: Add chopped nuts like pecans or walnuts into the batter for an enjoyable crunch.
  • Flavor Variation: Incorporate orange or peppermint extract into the batter for a refreshing spin.
  • Fruit-Filled Delight: Stuff your cupcakes with raspberry or cherry preserves before frosting for a fruity surprise.
  • Vegan Option: Substitute the butter with vegan butter and use dairy-free chocolate chips for a plant-based version.
  • Caramel Center: Inject warm caramel sauce into the gooey center for an indulgent chocolate-caramel experience.
  • Spicy Twist: Add a pinch of cayenne pepper to the batter for a delightful, unexpected heat.
  • Customized Toppings: Explore festive decorations like colored sprinkles or edible glitter to amplify the magical feel.

If you’re looking for more inspiration, check out these delectable Crab Cakes Forget or try making some delicious Ricotta Protein Pancakes for a wholesome treat!

Make Ahead Options

These Cauldron Cakes are perfect for meal prep enthusiasts! You can bake the chocolate cupcakes up to 24 hours in advance; simply let them cool completely and store them in an airtight container at room temperature. The buttercream frosting can also be made ahead of time and stored in the fridge for up to 3 days—just bring it back to room temperature before piping for a smooth finish. To maintain the quality, make sure to cover any exposed cupcake tops with plastic wrap to prevent them from drying out. When you're ready to serve, dip the bases in melted chocolate, pipe on the buttercream, and attach the chocolate handles for that enchanting touch. Enjoy a seamless dessert experience on busy weeknights!

How to Store and Freeze Cauldron Cakes

Airtight Container: Store Cauldron Cakes in an airtight container at room temperature for up to 3 days to maintain their delightful freshness.

Refrigeration: If you need to keep them longer, move to the fridge, where they will last up to a week. Ensure they're well-covered to prevent drying out.

Freezing: For longer storage, freeze the un-frosted cupcakes in a single layer on a baking sheet, then transfer to a freezer bag for up to 3 months. Frost them after thawing for the best texture.

Reheating: If you prefer warm Cauldron Cakes, reheat in the microwave for about 10-15 seconds, just until warmed through, but be careful not to overheat.

Expert Tips for Cauldron Cakes

  • Quality Ingredients: Choose high-quality chocolate chips and cupcake mix for the best flavor in your Cauldron Cakes. Your ingredients can make all the difference!

  • Proper Cooling: Allow cupcakes to cool completely before carving; this prevents them from falling apart and ensures a perfect filling.

  • Butter Temperature: Ensure your butter is at room temperature to achieve a light and fluffy buttercream—cold butter will result in a dense frosting.

  • Gentle Chocolate Dipping: Let the melted chocolate cool slightly before dipping the cupcakes; too hot can cause the cupcakes to become soggy.

  • Frosting Piping: Use a ziplock bag to pipe frosting; this makes it easier to create whimsical designs without needing special tools.

  • Creative Toppers: Feel free to customize the decorations on your Cauldron Cakes to reflect your personal style or occasion; edible glitter adds an extra magical touch!

What to Serve with Magical Cauldron Cakes?

Experience a delightful pairing that transforms your Cauldron Cakes into a complete celebration of flavors and textures.

  • Rich Hot Chocolate: Perfectly complements the chocolatey goodness of the cupcakes with a warming, velvety embrace that feels like a big hug. Imagine savoring a sip while indulging in your treats—pure bliss!

  • Vanilla Ice Cream: A scoop of creamy vanilla ice cream brings a refreshing contrast to the rich chocolate, creating a smooth, luscious mouthfeel that balances all the flavors beautifully.

  • Chocolate-Dipped Strawberries: These add a touch of freshness, offering a sweet, tangy crunch that brightens the chocolates and creates a harmonious dessert experience.

  • Fruit Salad: A vibrant medley of seasonal fruits offers a refreshing contrast to the decadent cupcakes, cleansing the palate and providing a burst of sweetness.

  • Coffee or Espresso: The bold aroma of freshly brewed coffee enhances the chocolate flavor, creating a perfect pairing for an afternoon treat or a delightful after-dinner dessert.

  • Petite Cheesecakes: When you want to impress, try serving mini cheesecakes alongside. Their creamy texture complements the lightness of the buttercream, creating a delightful contrast of flavors.

  • Chocolate Mint Cookies: For those who love a bit of nostalgia, pairing these with your Cauldron Cakes amplifies the chocolate experience while introducing a cool minty twist.

  • Sparkling Water with Lime: Refresh your palate with a bubbly drink that cuts through the sweetness, ensuring you return for more without feeling overwhelmed.

These combinations will surely elevate your magical baking experience!

Cauldron Cakes Recipe FAQs

How can I choose the best chocolate cupcake mix?
Absolutely! When selecting a chocolate cupcake mix, look for one with high-quality ingredients. I recommend checking the list for real cocoa powder and avoid any mix with artificial flavors or ingredients. If you're feeling adventurous, making your own homemade chocolate cupcake recipe allows you to control the flavor and quality!

How should I store my Cauldron Cakes?
The best way to store your Cauldron Cakes is in an airtight container at room temperature for up to 3 days. If you want them to last longer, you can refrigerate them, where they can stay fresh for a week. Just make sure they're well-covered to prevent them from drying out!

Can I freeze Cauldron Cakes, and how?
Certainly! To freeze your Cauldron Cakes, first, place the un-frosted cupcakes in a single layer on a baking sheet and freeze them until solid, which should take about 2-3 hours. Then, transfer them to a freezer bag, removing as much air as possible. They can be stored this way for up to 3 months. When you're ready to enjoy them, thaw at room temperature and frost afterward for the best fresh taste!

What if my cupcakes sink in the middle?
Very! If your cupcakes sink in the middle, it could be due to several reasons: overmixing the batter, not baking them long enough, or opening the oven door too soon during baking. To troubleshoot, make sure to mix until just combined and follow the baking time. Use a toothpick to check for doneness; if it comes out clean, they’re ready!

Are these Cauldron Cakes suitable for those with allergies?
Definitely! However, be mindful of any allergies to gluten, dairy, or chocolate. You can use gluten-free cupcake mix or alternative frosting options to cater to different dietary needs. If you're baking for anyone with allergies, always double-check ingredient labels and consider making adjustments to ensure everyone's safe to indulge in this chocolate-free magic!

Cauldron Cakes

Irresistibly Chocolatey Cauldron Cakes for Magical Moments

These delightful Cauldron Cakes are a rich and chocolatey treat that brings magic to every occasion.
Print Recipe Pin Recipe
Prep Time 30 minutes mins
Cook Time 20 minutes mins
Cooling Time 30 minutes mins
Total Time 1 hour hr 20 minutes mins
Servings: 12 cakes
Course: Dessert
Cuisine: American
Calories: 300
Ingredients Equipment Method Nutrition Notes

Ingredients
  

For the Cake
  • 1 box Chocolate Cupcake Mix Substitution: You can use a homemade chocolate cupcake recipe for a personal touch.
  • 2 bags Chocolate Chips (Semi-Sweet) Opt for high-quality chocolate chips to elevate the taste.
For the Buttercream Frosting
  • 1 cup Butter Make sure the butter is softened for easier mixing.
  • 2 cups Powdered Sugar Sift the sugar first to avoid lumps in your frosting.
  • 2 tsp Vanilla Extract Substitution: Almond extract can provide a lovely twist if preferred.
For Topping
  • 1 can Store-Bought Dark Chocolate Frosting Homemade frosting will enhance the richness if you're feeling adventurous.

Equipment

  • Oven
  • Cupcake pans
  • Mixing bowls
  • Electric mixer
  • Ziplock bag
  • Microwave-safe bowl
  • wax paper
  • Sharp Knife

Method
 

Step-by-Step Instructions for Cauldron Cakes
  1. Preheat your oven to 350°F (175°C). In a large mixing bowl, prepare the chocolate cupcake mix according to the package instructions. Grease your cupcake pans generously, omitting liners. Pour the batter evenly into each cup, filling them about two-thirds full, and bake for 18-20 minutes until a toothpick comes out clean.
  2. After baking, remove the cupcake pans from the oven and let them cool in the pans for about 10 minutes. Gently transfer the cupcakes to a wire rack to cool completely—this will take another 20-30 minutes. Once cool, invert each cupcake and carve out a small hole in the bottom using a sharp knife for filling later.
  3. In a microwave-safe bowl, melt 1 cup of chocolate chips until smooth, stirring every 30 seconds. In a separate bowl, beat the room temperature butter with an electric mixer until light and fluffy, about 3-5 minutes. Gradually add the sifted powdered sugar, mixing until fully combined, then add the melted chocolate and 2 teaspoons of vanilla extract, blending until creamy.
  4. Melt the remaining chocolate chips until smooth, ensuring it’s cool enough to touch without burning. Dip each cupcake base into the melted chocolate, allowing any excess to drip off. Place them on a sheet of wax paper and let the chocolate harden, which usually takes about 15-20 minutes.
  5. Once the chocolate coating has set, fill a quart-sized ziplock bag with your fluffy buttercream and snip a small corner off. Pipe the frosting generously around the tops of each cupcake, resembling cauldron edges.
  6. Melt the remaining chocolate again and shape it into handle forms on wax paper. Freeze the handles for about 10 minutes until solid, and then carefully attach them to the sides of each cupcake.

Nutrition

Serving: 1cakeCalories: 300kcalCarbohydrates: 45gProtein: 3gFat: 14gSaturated Fat: 8gPolyunsaturated Fat: 2gMonounsaturated Fat: 4gCholesterol: 40mgSodium: 200mgPotassium: 150mgFiber: 2gSugar: 30gVitamin A: 500IUCalcium: 20mgIron: 1mg

Notes

Choose high-quality chocolate chips and cupcake mix for the best flavor. Allow cupcakes to cool completely before carving; this prevents them from falling apart. Ensure your butter is at room temperature for a light and fluffy buttercream. Let the melted chocolate cool slightly before dipping the cupcakes.

Tried this recipe?

Let us know how it was!

Worms in Dirt Mousse Cake: A Spooktacular Halloween Treat

October 7, 2025 by Grace Snow Leave a Comment

As I rummaged through my kitchen the other day, a delightful thought popped into my head: why not bring a touch of whimsy to Halloween with a "Worms in Dirt" Mousse Cake? This charming dessert features layers of luscious dark chocolate mousse and a crunchy cookie base, crowned with vibrant raspberry gummy worms that contrast beautifully with the rich flavors. Not only is this Halloween dessert quick to whip up, but it's also sure to become a crowd favorite, making it perfect for gatherings where nostalgia and fun take center stage. Imagine indulging in a treat that evokes childhood memories while impressing your loved ones with its spookily gorgeous appearance! Curious to find out how to create this delectable dessert that will leave everyone smiling? Let's dig in!

Why You'll Love This Mousse Cake

Simplicity at Its Best: This “Worms in Dirt” Mousse Cake is a breeze to make, requiring no advanced baking skills or complicated techniques.

Decadent Flavor: The luscious dark chocolate mousse paired with aromatic cinnamon cookie crumbles creates a rich, unforgettable dessert that will have everyone asking for seconds.

Playful Presentation: Topped with vibrant raspberry gummy worms, this dessert not only tastes divine but also adds a fun twist to your Halloween festivities.

Nostalgic Appeal: Transport yourself back to childhood with every bite, as this cake evokes fond memories of playful treats and festive gatherings.

Quick Prep Time: With most of the work done in advance, you can delight your guests without spending all day in the kitchen, making it a fantastic option for busy hosts.

Crowd-Pleasing Treat: Ideal for parties and gatherings, this mousse cake perfectly balances fun and indulgence, ensuring it's a showstopper at any Halloween celebration.

Worms in Dirt Mousse Cake Ingredients

For the Gummy Worms

  • Raspberry Jello – adds a sweet and tangy flavor for a spooktacular touch to your cake.
  • Unflavored Gelatin – helps create a firm structure for the gummy worms; necessary for that chewy texture.
  • Heavy Cream – enriches the gummy mixture, making it creamy and indulgent.
  • Food Coloring – to enhance the delightful appearance of your gummy worms; a little goes a long way!

For the Cookie Base

  • Chocolate Pecan Cookies – provide a crunchy and flavorful base; the combination of chocolate and cinnamon enhances the overall taste.
  • Butter – adds richness and moisture to the cookie dough; be sure it’s softened for easy mixing.
  • Sugar – sweetens the cookies and balances the chocolate; feel free to adjust based on your sweetness preference.

For the Dark Chocolate Mousse

  • Dark Chocolate – the star of this dessert; it gives a rich and velvety filling. Substitute with semi-sweet chocolate for a sweeter mousse if preferred.
  • Egg Yolks – help create a luxurious texture; be sure to use fresh eggs for the best results.
  • Espresso – intensifies the chocolate flavor; you can omit it or replace it with strong brewed coffee if you desire.
  • Whipped Cream – gently folded in for a light and airy mousse; can use regular whipped cream if chocolate flavor is not to your liking.

For the Topping

  • Chocolate Whipped Cream – adds a light yet indulgent finish to the cake; consider drizzling chocolate sauce for an extra touch of delight.
  • Cookie Crumbs – sprinkle on top for an aesthetic "dirt" effect that complements the gummy worms; make extra to enhance the presentation!

With this perfect concoction of ingredients, your “Worms in Dirt” Mousse Cake is sure to be a Halloween hit, bringing smiles and nostalgia to everyone at your gathering!

Step‑by‑Step Instructions for “Worms in Dirt” Mousse Cake

Step 1: Prepare the Gummy Worms
Start by boiling one cup of water and dissolving raspberry jello and unflavored gelatin until fully dissolved. Allow the mixture to cool slightly before mixing in heavy cream and a few drops of food coloring for a fun twist. Pour the combined mixture into straws, ensuring they are upright, and chill in the refrigerator for at least 9 hours until set firmly.

Step 2: Make Chocolate Pecan Cookies
Preheat your oven to 350°F (175°C). In a large mixing bowl, cream together softened butter and sugar until light and fluffy. Mix in the remaining cookie ingredients to form a smooth dough. Chill the dough for about 30 minutes before slicing it into rounds. Bake the cookies on a parchment-lined baking sheet for 8-10 minutes, until they are aromatic and slightly firm.

Step 3: Prepare Dark Chocolate Mousse
While your cookies cool, whip heavy cream in a mixing bowl until stiff peaks form. In a separate bowl, whisk egg yolks with sugar and espresso over simmering water until the mixture lightens in color and doubles in volume. Stir in melted dark chocolate, ensuring it’s smooth. Gently fold in the whipped egg whites and whipped cream until fully incorporated for a light, airy mousse.

Step 4: Assemble the Tart
Line a springform pan with plastic wrap to make removal easier. Crush the cooled chocolate pecan cookies into fine crumbs, then press them into the bottom of the pan as a crust. Spread the dark chocolate mousse evenly over the cookie base, making sure to smooth the top with a spatula. Top the mousse with a light layer of chocolate whipped cream, adding a decorative touch.

Step 5: Finish and Chill
Sprinkle any remaining cookie crumbs over the whipped cream layer to create that "dirt" look. Cover the tart with plastic wrap and place it in the refrigerator to chill for at least 4 hours, although overnight is ideal. This chilling time allows the flavors to meld beautifully, enhancing your "Worms in Dirt" Mousse Cake’s richness and creaminess before serving.

What to Serve with Halloween Mousse Tart with Raspberry Gummy Worms

Creating a magical atmosphere around your Halloween Mousse Tart can add to the fun and flavor of your gathering.

  • Crispy Apple Slices: These lightly sweet, crunchy slices provide a light contrast to the rich tart, offering a refreshing bite that complements the chocolate beautifully.

  • Pumpkin Spice Latte: A warm, cozy drink that encapsulates the essence of fall, this beverage's spicy notes pair well with chocolate while enhancing the Halloween vibe.

  • Sugary Snickerdoodles: Chewy and cinnamon-dusted, these cookies add a delightful crunch and warmth, creating a playful contrast with the velvety mousse.

  • Caramel Popcorn: The sweet, buttery crunch of caramel popcorn brings a fun texture to your dessert table, making it a festive and indulgent option next to your tart.

  • Spooky Fruit Skeletons: Use banana slices, grapes, and toothpicks to create whimsical skeletons. They introduce freshness and a touch of creativity that will delight kids and adults alike.

  • Chocolate Milkshake: Thick and creamy, this shake echoes the tart’s dark chocolate notes, and kids will love it, making your dessert spread utterly irresistible.

  • Ghostly Meringues: Light and airy, these whimsical treats add a festive flair to the table and their sweetness nicely balances the tart’s richness.

  • Warm Spiced Cider: A cozy beverage filled with warming spices offers a lovely contrast to the dessert. It wraps around the flavors of Halloween perfectly, making your meal feel complete.

  • Vanilla Ice Cream: A scoop of creamy vanilla not only complements the tart's chocolate flavor but also adds a delightful cold element that makes each bite more enjoyable.

  • Chocolate-Dipped Strawberries: These offer a fresh, sweet bite with surprising texture, tying in the chocolate theme while providing a vibrant pop of color to your dessert display.

Expert Tips for Worms in Dirt Mousse Cake

  • Chill Properly: Make sure to chill your gummy worms mixture adequately to achieve the perfect texture; under-chilling can lead to a runny consistency.

  • Gradual Chocolate Melting: Melt dark chocolate slowly over low heat and stir constantly to avoid seizing—this will ensure your mousse is silky smooth.

  • Cookie Crunch: For the best cookie base, let the chocolate pecan cookies cool completely before crushing them; warm cookies can clump and affect texture.

  • Whip with Care: When whipping cream, watch for stiff peaks; over-whipping can lead to a grainy texture in your chocolate whipped cream topping.

  • Longer Chill Time: For an extra decadent experience, allow the “Worms in Dirt” Mousse Cake to chill overnight—this lets the flavors deepen and meld together perfectly.

Make Ahead Options

These "Worms in Dirt" Mousse Cake components are perfect for meal prep, allowing you to enjoy your dessert with minimal effort on the big day! You can prepare the raspberry gummy worms up to 24 hours in advance by making the gelatin mixture and chilling it in straws overnight. Additionally, the chocolate pecan cookies can be baked ahead of time and stored in an airtight container for up to 3 days. When you’re ready to assemble, simply crush the cookies for the tart base and follow the steps to prepare the mousse. Chilling the assembled tart overnight is ideal for the best flavor and texture, ensuring your dessert remains just as delightful as freshly made!

Storage Tips for Worms in Dirt Mousse Cake

  • Fridge: Keep your delicious "Worms in Dirt" Mousse Cake stored in the refrigerator, wrapped tightly, for up to 3 days to maintain its creamy texture and flavors.

  • Freezer: For longer storage, you can freeze individual slices of the mousse cake wrapped in plastic wrap and aluminum foil for up to 2 months. Thaw in the fridge before serving.

  • Reheating: If desired, serve your mousse cake cold; there’s no need to reheat, as the chilled texture is part of its charm!

  • Extra Cookies: Store any leftover cookie crumbs in an airtight container at room temperature for up to a week, perfect for adding a crunchy touch to other desserts!

Worms in Dirt Mousse Cake Variations

Feel free to get creative and make this delightful Halloween dessert your own with these exciting twists!

  • Gummy Worm Swap: Use green apple gummy worms for a tart twist, adding a hint of fruity flavor to your mousse.

  • Nut-Free Option: For a nut-free base, substitute chocolate pecan cookies with crushed chocolate digestive biscuits, ensuring all your guests can enjoy!

  • Vegan Delight: Replace dairy products with coconut cream for a luscious vegan mousse; just ensure to use dairy-free cookies too.

  • Spiced Up: Add a pinch of cayenne or chili powder to the whipped cream for a surprising kick that perfectly complements the chocolate richness.

  • Fruit Infusion: Fold in pureed fruits like strawberries or raspberries into the mousse for natural sweetness and a pop of color.

  • Mint Chocolate: Mix in crushed mint candies or a drop of peppermint extract to the mousse to create a fresh minty delight that perfectly pairs with dark chocolate.

  • Oreo Base: Swap out chocolate pecan cookies for crushed Oreos for an even richer cookie crust with familiar flavors that everyone loves.

You can also serve this playful mousse with a drizzle of chocolate sauce, or pair it with a cheeky fruit salad to create a balanced and fun dessert experience. If you're feeling adventurous, try it next to a holiday favorite like this decadent Chocolate Poke Cake for even more spooky sweetness!

Worms in Dirt Mousse Cake Recipe FAQs

How do I choose the right raspberries for the gummy worms?
Absolutely! For the best gummy worms, look for fresh raspberries that are firm and vibrant in color, without any dark spots or mushiness. They should smell fragrant and sweet, indicating they are ripe and ready to use. If you can't find raspberries, using store-bought gummy worms is a great shortcut without losing the fun!

What’s the best way to store leftover mousse cake?
To keep your "Worms in Dirt" Mousse Cake fresh, tightly wrap it in plastic wrap and store it in the refrigerator for up to 3 days. This will help maintain its creamy texture and delicious flavors. I often make this dessert the day before a gathering so it has time to chill and set, making it an easy, fuss-free dessert on the day of the event.

Can I freeze the mousse cake for later?
Yes! If you want to enjoy your "Worms in Dirt" Mousse Cake later, wrap individual slices tightly in plastic wrap and then in aluminum foil. It can be stored in the freezer for up to 2 months. When you’re ready to indulge, just transfer it to the refrigerator to thaw for a few hours or overnight. This keeps the mousse beautifully creamy upon serving.

What if my mousse doesn’t set properly?
If your mousse appears too runny, it might not have chilled long enough, or the chocolate was too warm when mixed in. Make sure to give it plenty of time in the fridge—ideally overnight for best results. If it’s a texture issue related to whipped cream, ensure you've hit those stiff peaks without over-whipping, which can make it grainy. Next time, chill all components well before assembly for the best texture!

Are there any dietary allergies I should consider for this dessert?
The "Worms in Dirt" Mousse Cake contains dairy, eggs, and gluten, which are common allergens. If you’re catering to guests with allergies, you can create gluten-free options using gluten-free cookies for the crust, and check if dairy alternatives are suitable for your mousse, such as coconut or almond cream. Always be sure to label the dessert, so everyone is well-informed!

“Worms in Dirt” Mousse Cake

Worms in Dirt Mousse Cake: A Spooktacular Halloween Treat

Delight in this Worms in Dirt Mousse Cake, a fun and festive Halloween dessert featuring rich mousse and gummy worms.
Print Recipe Pin Recipe
Prep Time 30 minutes mins
Cook Time 20 minutes mins
Chilling Time 4 hours hrs
Total Time 4 hours hrs 50 minutes mins
Servings: 8 slices
Course: Dessert
Cuisine: American
Calories: 350
Ingredients Equipment Method Nutrition Notes

Ingredients
  

For the Gummy Worms
  • 1 cup Water
  • 1 package Raspberry Jello
  • 1 tablespoon Unflavored Gelatin
  • 1 cup Heavy Whipping Cream
  • a few drops Food Coloring
For the Tart Base
  • 1 cup Chocolate Pecan Cookies or regular pecans
For the Dark Chocolate Mousse
  • 8 ounces Dark Chocolate or semi-sweet chocolate
  • 1 cup Heavy Whipping Cream
  • 3 large Egg Yolks
  • 1/2 cup Sugar
  • 1 tablespoon Espresso
For the Topping
  • 1 cup Chocolate Whipped Cream or standard whipped cream
For Garnish
  • Additional Cookie Crumbs for replication of 'dirt' look

Equipment

  • Oven
  • Mixing Bowl
  • Springform pan
  • Parchment Paper
  • Whisk
  • plastic wrap
  • straws
  • Refrigerator

Method
 

Preparation Steps
  1. Prepare the Gummy Worms by boiling water and dissolving raspberry jello and gelatin, then mix in cream and food coloring, pour into straws and chill for 9 hours.
  2. Make Chocolate Pecan Cookies by creaming together butter and sugar, mixing in ingredients to form dough, chilling, slicing, and baking for 8-10 minutes.
  3. Prepare Dark Chocolate Mousse by whipping cream, whisking egg yolks with sugar and espresso, stirring in melted chocolate, then folding in whipped cream and egg whites.
  4. Assemble the Tart by lining a pan, crushing cookies for the crust, spreading mousse, and topping with chocolate whipped cream.
  5. Finish and Chill by sprinkling cookie crumbs on top, covering with plastic wrap, and chilling for at least 4 hours.

Nutrition

Serving: 1sliceCalories: 350kcalCarbohydrates: 35gProtein: 4gFat: 24gSaturated Fat: 14gPolyunsaturated Fat: 0.5gMonounsaturated Fat: 1.5gCholesterol: 150mgSodium: 100mgPotassium: 250mgFiber: 2gSugar: 20gVitamin A: 500IUCalcium: 40mgIron: 2mg

Notes

Chill the gummy worms properly for texture; melt dark chocolate slowly to avoid seizing; cool cookies completely before crushing. For best results, chill overnight to deepen flavors.

Tried this recipe?

Let us know how it was!

Delight in Homemade Harry Potter Chocolate Frogs Today!

October 7, 2025 by Grace Snow Leave a Comment

“Did you hear about the new magical treat that’s been enchanting kitchens everywhere?” Whisking up a touch of whimsy, these DIY Harry Potter Chocolate Frogs are the perfect way to delight family and friends at your next gathering. Ready in just a few simple steps, this recipe is an easy indulgence that will make you feel like a chocolatier, no special skills required! Imagine the joy on your loved ones' faces as they unwrap these glossy, frog-shaped confections filled with creamy or crunchy surprises. With versatile filling options ranging from rich peanut butter to sweet white chocolate, these treats not only cater to every chocolate lover's craving but also add a playful twist to birthday parties or Halloween festivities. So, are you ready to jump into your next culinary adventure and conjure up some magic in the kitchen?

Why Make Harry Potter Chocolate Frogs?

Easy to Create: This recipe is simple and straightforward, requiring no advanced baking skills.

Versatile Fillings: Customize your frogs with a variety of fillings, like smooth peanut butter or delightful white chocolate, making them perfect for everyone.

Show-Stopping Presentation: Their whimsical frog shape adds a fun element to your dessert table.

Family-Friendly Fun: Kids and adults alike will be excited to make and enjoy these magical treats together!

Make-Ahead Magic: Prepare them a day in advance, allowing you to enjoy the festivities stress-free.

Indulge your creativity with these unique Harry Potter Chocolate Frogs for any occasion!

Harry Potter Chocolate Frogs Ingredients

For the Chocolate

  • Chocolate – Choose dark, milk, or white chocolate based on your personal preference for a delectable experience.

For the Mold

  • Frog-shaped chocolate mold – This is essential to create the fun and whimsical shape of the frogs; you can find these online or at specialty kitchen stores.

For the Filling

  • Optional filling – Consider white chocolate, creamy peanut butter, or crunchy bits like almond or rice crisps for delightful texture and flavor combinations.

Feel the magic with these delicious Harry Potter Chocolate Frogs – each bite is a fun adventure!

Step‑by‑Step Instructions for Harry Potter Chocolate Frogs

Step 1: Melt the Chocolate
Begin by breaking your chosen chocolate into small, uniform pieces and placing them in a microwave-safe bowl. Heat the chocolate in the microwave in 30-second bursts at medium power, stirring after each interval until fully melted and smooth. This process generally takes about 1 to 2 minutes. Use high-quality chocolate for the best results, as it contributes to the glossy finish of your Harry Potter Chocolate Frogs.

Step 2: Prepare the Molds
Once your chocolate is melted, grab your frog-shaped chocolate molds and use a spoon to generously coat the insides with the melted chocolate. Make sure to leave enough room for your filling by filling them about halfway. Maintain an even layer, ensuring every detail of the mold is filled for a beautiful final appearance. Place the filled molds in the refrigerator for about 15 minutes to allow the chocolate to set slightly before adding the filling.

Step 3: Add Your Filling
After the initial chocolate layer has set, it's time to add your chosen filling into each frog-shaped mold. Using a teaspoon, carefully spoon in your fillings, whether it’s creamy peanut butter, crunchy rice crisps, or silky white chocolate. Avoid mixing the filling with the chocolate to keep distinct layers. Aim for a generous amount but leave space for a chocolate cover on top.

Step 4: Cover the Filling
Now that your filling is in place, return to your melted chocolate and pour the remaining chocolate over the filling in each mold. Ensure that the filling is completely covered, smoothing over the tops to create a nice finish. This layer will seal in the filling and form the outer shell of the Harry Potter Chocolate Frogs. For best results, tap the molds gently on the counter to eliminate air bubbles and ensure an even distribution.

Step 5: Set the Chocolate
Place the filled molds back into the refrigerator or, if you prefer, the freezer for around 30 to 60 minutes. The chocolate will harden during this time, creating a lovely, glossy shell around your delicious fillings. To check for doneness, gently press the surface of the chocolate; it should feel firm and solid. Patience is key for perfectly set Harry Potter Chocolate Frogs!

Step 6: Unmold the Frogs
Once completely set, carefully remove the molds from the refrigerator or freezer. Gently flex and squeeze the silicone molds to release your chocolate frogs. If they resist, you can use a toothpick to help coax any stubborn parts. Take a moment to admire your whimsical creations—these delightful Harry Potter Chocolate Frogs are now ready to enjoy or be shared at your next gathering!

Expert Tips for Harry Potter Chocolate Frogs

  • Smooth Chocolate: Ensure your chocolate is completely smooth before filling molds; any lumps could affect the final result and prevent easy removal.

  • Avoid Overheating: Melt chocolate in short bursts, stirring often—overheating can cause it to seize and lose its glossy appeal, making your Harry Potter Chocolate Frogs less appealing.

  • Sturdy Filling: Choose fillings that won’t ooze out; too runny options can make a mess and spoil the frog shape. Aim for creaminess or light crunch instead.

  • Cool Setting: Let the filled molds set completely in the fridge or freezer for the best texture; patience here ensures a perfect snap in each chocolate frog!

  • Cleaning Molds: After use, ensure molds are thoroughly cleaned and dry before storing; this avoids residue buildup that can affect future creations.

  • Personal Touch: Don’t hesitate to get creative with fillings or toppings; try mixing nuts or sprinkles for a whimsical twist on your Harry Potter Chocolate Frogs!

Harry Potter Chocolate Frogs Variations

Feel free to sprinkle your own magic on these delicious chocolate frogs with these fun twists!

  • Dark Chocolate: Swap milk chocolate for rich dark chocolate for a bolder flavor that’s perfect for grown-up palates.
  • Peanut Butter: Substitute creamy peanut butter for an indulgent filling that brings delightful richness to every bite.
  • White Chocolate: Replace dark or milk chocolate with smooth white chocolate for a sweeter, more decadent treat that's visually striking.
  • Crunchy Add-Ins: Toss in rice crisps or crushed almonds as a filling for an unexpected and delightful texture contrast. Crunch is key!
  • Flavored Ganache: Jazz up the fillings with flavored ganaches like espresso or raspberry for a sophisticated, gourmet twist.
  • Fruit Purees: Experiment with sweet fruit purees as filling; think strawberry or passion fruit for a bright, fruity surprise inside.
  • Spicy Heat: Add a dash of cayenne or chili powder to your chocolate for a surprising kick that dazzles the taste buds.
  • Swirl Varieties: Create a marbled effect by swirling different chocolates before setting, adding an artistic flair to your froggy friends.

Looking for more chocolate inspiration? Don’t miss out on these heavenly recipes: Homemade Hot Chocolate and German Chocolate Poke will keep your chocolaty adventures going!

Storage Tips for Harry Potter Chocolate Frogs

Room Temperature: Store your Harry Potter Chocolate Frogs in an airtight container at room temperature, where they will stay fresh for up to 5 days without losing their delightful crunch.

Fridge: If it's warm or humid, keep them in the refrigerator for up to a week to maintain their texture. Just make sure to let them come to room temperature before serving for the best flavor.

Freezer: For longer storage, you can freeze the chocolate frogs for up to 3 months. Wrap each one in plastic wrap and place them in a freezer bag to prevent freezer burn.

Reheating: If they harden too much after freezing, simply let them sit at room temperature for about 20 minutes before enjoying.

Make Ahead Options

These DIY Harry Potter Chocolate Frogs are perfect for meal prep enthusiasts! You can easily prepare the chocolate molds filled with your chosen fillings up to 24 hours in advance. Simply melt the chocolate, coat the molds, and leave space in each for fillings like peanut butter or rice crisps. After adding the fillings, cover them with chocolate and refrigerate. To maintain the quality, keep the unwrapped molds refrigerated until you're ready to set them. When it's time to serve, just let them sit for a few minutes at room temperature for easier unmolding, and you'll have delightful treats that are just as delicious as if made fresh!

What to Serve with DIY Harry Potter Chocolate Frogs

Dive into a whimsical feast that complements your magical treats with delightful pairings that will enchant everyone!

  • Festive Fruit Platter: A vibrant selection of seasonal fruits adds freshness to your dessert table, balancing the rich chocolate with zesty flavors.

  • Whipped Cream Clouds: Serve alongside a bowl of lightly sweetened whipped cream for dipping, enhancing the chocolate experience with creamy indulgence.

  • Savory Cheese Board: A mix of creamy brie and sharp cheddar creates a fun flavor contrast, making each sweet bite even more enjoyable. The variety will spark conversations and elevate your gathering.

  • Chocolate Milkshake: A rich chocolate milkshake is the ultimate charming drink to pair, making every bite of your Harry Potter Chocolate Frogs taste like a dream come true!

  • Mini Cupcakes: Light and fluffy mini cupcakes in flavors like vanilla or chocolate provide a delightful two-bite treat that pairs beautifully with the richness of your frogs.

  • Magical Butterbeer: Complement the enchanting theme with a glass of homemade butterbeer, offering a delightful cream soda-like taste that everyone will love!

  • Caramel Dipping Sauce: A warm caramel sauce provides a sweet addition that pairs perfectly with a teaspoon of frog-shaped sweetness, amplifying the fun.

  • Chocolate-Dipped Pretzels: These sweet and salty bites offer a fun crunch, contrasting beautifully with your smooth chocolate frogs while keeping things playful.

  • Ice Cream Sundae Bar: Set up a sundae bar where guests can top their bowls with chocolate frogs, allowing for interactive and delightful dessert creativity!

Harry Potter Chocolate Frogs Recipe FAQs

How do I choose the right chocolate for my Harry Potter Chocolate Frogs?
Absolutely! The type of chocolate you select can greatly affect the flavor of your frogs. I recommend using high-quality chocolate, whether it’s dark, milk, or white, based on your personal preference. Each type brings its unique sweetness and richness, so feel free to experiment!

What’s the best way to store Harry Potter Chocolate Frogs?
Great question! Store your chocolate frogs in an airtight container at room temperature for up to 5 days to maintain that delightful crunch. If you find yourself in a warm or humid environment, stick them in the refrigerator, and they’ll stay fresh for up to a week. Just remember to let them come to room temperature before you dig in—this will enhance the flavor!

Can I freeze the Harry Potter Chocolate Frogs? How?
Yes, you can! These tasty treats freeze incredibly well. Simply wrap each frog individually in plastic wrap, then place them in a freezer bag. They’ll stay good in the freezer for up to 3 months. When you’re ready to enjoy, allow them to thaw at room temperature for about 20 minutes, and they’ll be just as delightful as when you first made them!

What if my chocolate seizes during melting?
No worries; this happens to the best of us! If your chocolate seizes and becomes clumpy, it usually means it was overheated. To remedy it, try adding a small amount of vegetable oil or solid shortening (1 teaspoon at a time) to the chocolate while stirring continuously. If it still doesn't work, you might need to start over with a new batch of chocolate, melting it in short bursts while stirring frequently to maintain that silky smoothness.

Are there any dietary considerations I should keep in mind?
Very much! If you’re catering to specific dietary needs, consider the fillings you use. For a nut-free option, stick with fillings like white chocolate or rice crisps. Always check your chocolate’s labels to ensure there are no allergens present, especially for those with nut allergies. Happy cooking!

Can I make these Harry Potter Chocolate Frogs in advance?
Absolutely! These magical treats can be made a day or two ahead of your event. Just be sure to allow extra time for the chocolate layers to set properly. Storing them in an airtight container ensures they stay fresh until you’re ready to share the fun!

Harry Potter Chocolate Frogs

Delight in Homemade Harry Potter Chocolate Frogs Today!

Indulge in delightful Harry Potter Chocolate Frogs, a magical treat that enchants families and friends.
Print Recipe Pin Recipe
Prep Time 15 minutes mins
Cook Time 1 hour hr
Setting Time 30 minutes mins
Total Time 1 hour hr 45 minutes mins
Servings: 12 frogs
Course: Dessert
Cuisine: International
Calories: 150
Ingredients Equipment Method Nutrition Notes

Ingredients
  

For the Chocolate
  • 12 oz Chocolate Choose dark, milk, or white chocolate based on preference
For the Mold
  • 1 Frog-shaped chocolate mold Essential for creating the whimsical shape
For the Filling
  • 1 cup Optional filling Consider white chocolate, creamy peanut butter, or crunchy bits

Equipment

  • Microwave-safe bowl
  • Frog-shaped chocolate mold
  • Spoon
  • Teaspoon

Method
 

Step-by-Step Instructions
  1. Begin by breaking your chosen chocolate into small, uniform pieces and placing them in a microwave-safe bowl. Heat in the microwave in 30-second bursts, stirring after each interval until fully melted.
  2. Grab your frog-shaped chocolate molds and use a spoon to coat the insides with melted chocolate, filling them about halfway. Refrigerate for about 15 minutes.
  3. After the initial chocolate layer has set, add your chosen filling carefully without mixing it with the chocolate.
  4. Pour the remaining chocolate over the filling, ensuring it’s completely covered and smooth. Tap the molds gently to eliminate air bubbles.
  5. Place the filled molds back into the refrigerator or freezer for 30 to 60 minutes until the chocolate hardens completely.
  6. Carefully remove the molds and enjoy your whimsical Harry Potter Chocolate Frogs.

Nutrition

Serving: 1frogCalories: 150kcalCarbohydrates: 20gProtein: 2gFat: 8gSaturated Fat: 5gMonounsaturated Fat: 2gCholesterol: 5mgSodium: 30mgPotassium: 100mgFiber: 1gSugar: 15gCalcium: 2mgIron: 4mg

Notes

Let the filled molds set completely for the best texture and enjoy a delightful treat that can be stored or shared.

Tried this recipe?

Let us know how it was!
  • « Previous Page
  • 1
  • …
  • 127
  • 128
  • 129
  • 130
  • 131
  • …
  • 179
  • Next Page »

Welcome!

Hi, I’m Grace, a Sydney-based home cook with a passion for bold flavors and trending ingredients. Whether you’re a busy beginner or a seasoned foodie, you’ll find dishes here that are fresh, fun, and full of flavor.

More about me

Popular Recipes

  • Cheesy Chicken Garlic Bread Sandwich
    Cheesy Chicken Garlic Bread Sandwich for Cozy Family Moments
  • Easy Chicken Ranch Wraps
    Easy Chicken Ranch Wraps: Quick, Creamy & Totally Satisfying
  • Chicken Caesar Sandwiches
    Delicious Chicken Caesar Sandwiches for Quick Comfort Food
  • best Cuban sandwich
    The Best Cuban Sandwich You’ll Want Every Weeknight!

Footer

↑ back to top

About

  • Privacy Policy
  • Disclaimer
  • Terms & Conditions

Newsletter

  • Sign Up! for emails and updates

Contact

  • About me
  • Contact me

Copyright © 2025 TastyTrendIngredients