tastytrendingredients

  • Home
  • Recipes
    • Appetizers
    • Breakfast
    • Dessert
    • Dinner
    • Drinks
    • Salads
    • Snacks
    • Soups
  • About me
  • Contact me
menu icon
go to homepage
  • Home
  • Recipes
    • Appetizers
    • Breakfast
    • Dessert
    • Dinner
    • Drinks
    • Salads
    • Snacks
    • Soups
  • About me
  • Contact me
search icon
Homepage link
  • Home
  • Recipes
    • Appetizers
    • Breakfast
    • Dessert
    • Dinner
    • Drinks
    • Salads
    • Snacks
    • Soups
  • About me
  • Contact me
×

Creamy Ground Beef Stroganoff That'll Bring You Comfort

October 29, 2025 by Grace Snow Leave a Comment

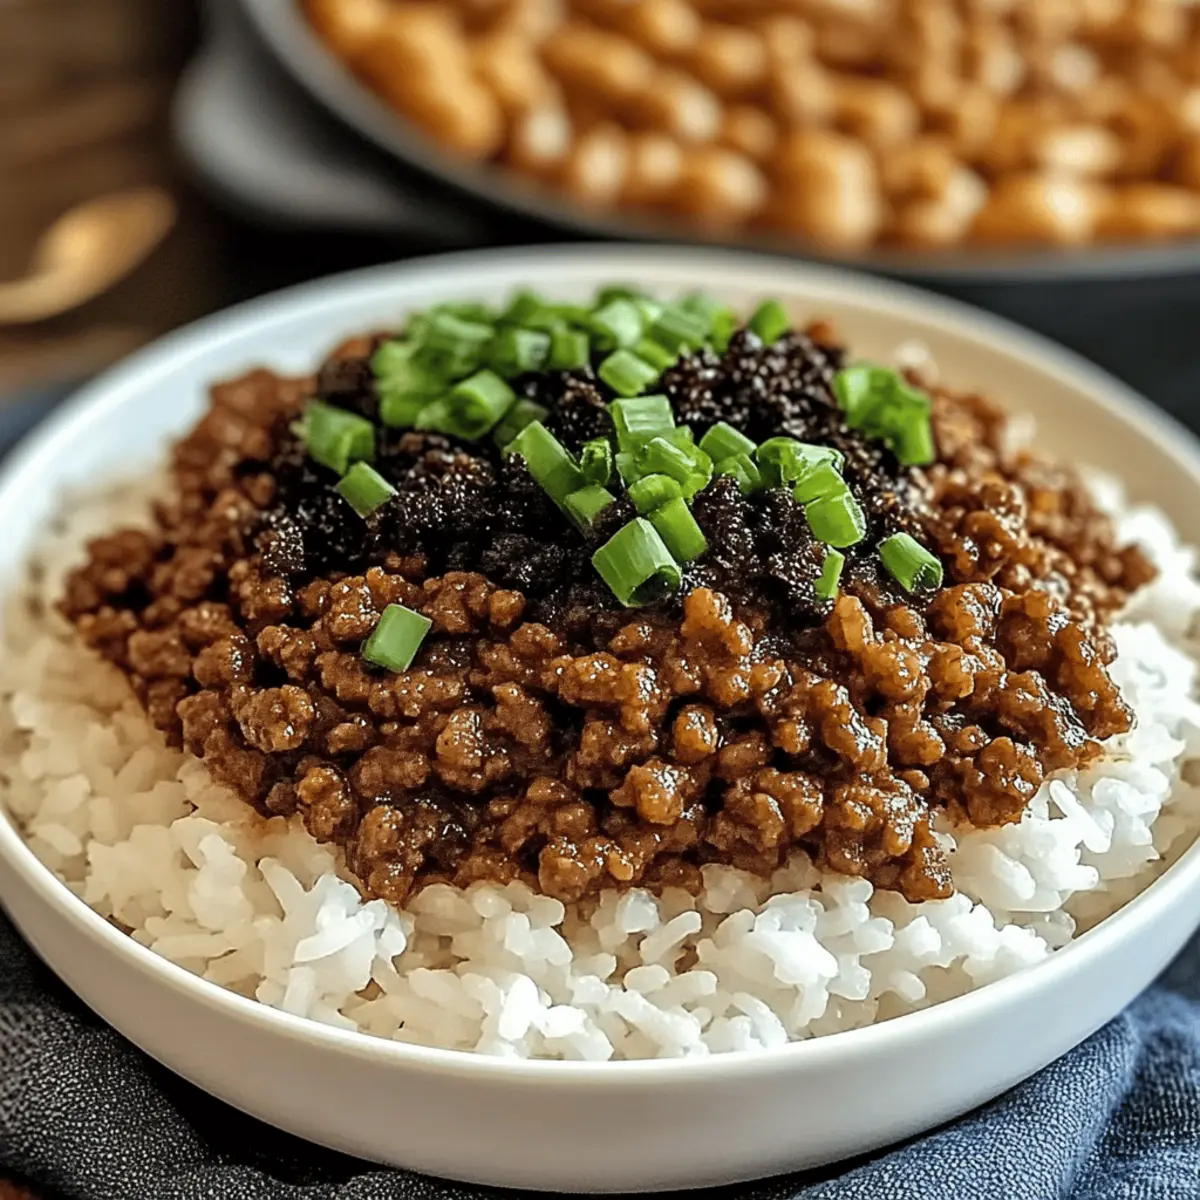
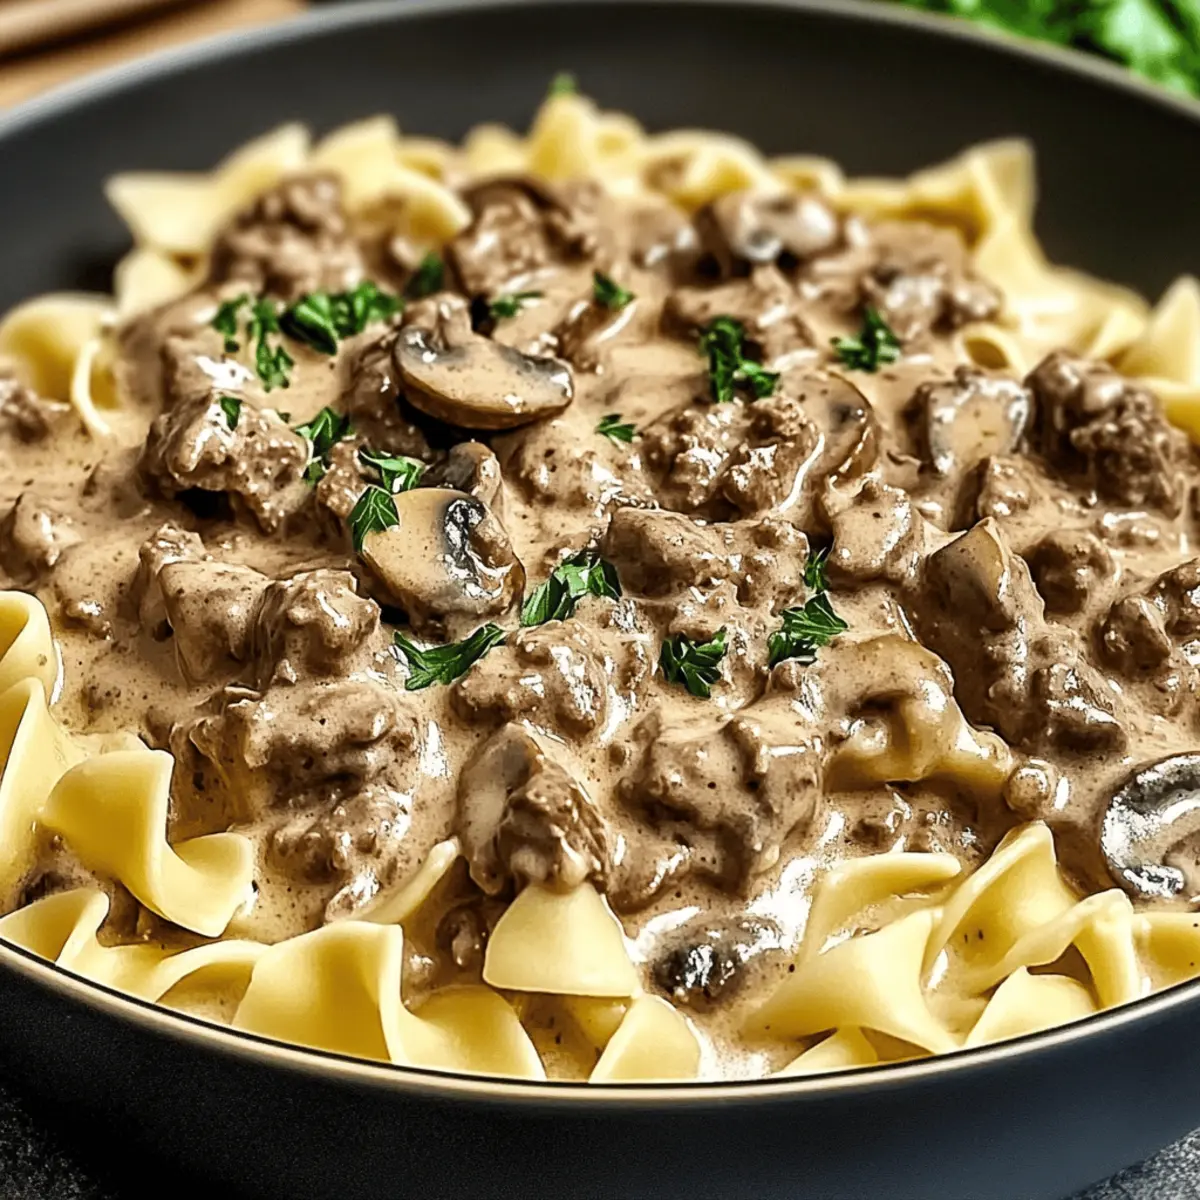
The rich, savory aroma of sautéed onions and beef can transport me back to cozy family dinners, where laughter mingled with the delicious scent of a homemade meal. That's exactly the magic of this Creamy Ground Beef Stroganoff with Egg Noodles. It's not just dinner; it's comfort food at its finest, ready in under 30 minutes. This dish is perfect for hectic weeknights yet impressive enough for a family gathering, offering a hearty meal that accommodates appetites of all kinds. If you're looking for warmth wrapped in a creamy sauce, this adaptable recipe can also cater to dietary preferences—whether by swapping in ground turkey or mushrooms for a vegetarian option. Will you be trying this delightful classic for dinner tonight?

What Makes This Stroganoff So Special?

Comforting Experience: The rich and creamy sauce envelops each tender piece of beef, creating a dish that is truly heartwarming.

Quick Preparation: Ready in under 30 minutes, this recipe is perfect for those busy weeknights when you crave something delicious without the fuss!

Adaptable for Everyone: You can easily swap ground beef for ground turkey or mushrooms, making it a versatile choice for various dietary needs.

Perfectly Paired: Serve with garlic bread to soak up the sauce, or add steamed broccoli for a nutritious touch.

Family-Friendly Delight: This creamy stroganoff is sure to please everyone at the table, even the pickiest of eaters!

Creamy Ground Beef Stroganoff Ingredients

• Let’s dive into the delicious components of this comforting dish!

For the Stroganoff

  • Ground Beef – The heart and soul of this dish, offering a robust, savory flavor; feel free to substitute with ground turkey for a lighter twist.
  • Onion – Adds a touch of sweetness and depth; diced yellow onion works best to enhance the overall taste.
  • Mushrooms – Earthy and rich, they elevate the flavor profile; opt for cremini or button mushrooms, sautéing them for added goodness.
  • Sour Cream – This creates that signature creamy, tangy sauce; swap for Greek yogurt if you’re aiming for a healthier alternative.
  • Beef Broth – Provides moisture and flavor, forming the base of the sauce; vegetable broth is a great substitute for a vegetarian option.
  • Egg Noodles – The perfect vessel for the luscious sauce; consider gluten-free pasta if you have dietary sensitivities.
  • Fresh Parsley – An optional garnish that brightens the dish and adds a pop of color.

Embrace the joy of cooking with this Creamy Ground Beef Stroganoff, guaranteed to become a family favorite!

Step‑by‑Step Instructions for Creamy Ground Beef Stroganoff

Step 1: Brown the Beef
In a large skillet, heat a tablespoon of oil over medium heat. Add 1 pound of ground beef, breaking it apart with a spatula. Cook for 5–7 minutes, stirring occasionally until the beef is browned and no longer pink, with a lovely sizzle and rich aroma filling your kitchen. Once browned, drain any excess fat, being careful not to lose the flavorful bits stuck to the pan.

Step 2: Sauté Onion and Mushrooms
Reduce the heat to medium-low and add a diced yellow onion to the skillet. Sauté for about 2–3 minutes until the onion becomes translucent and aromatic. Next, add 8 ounces of sliced mushrooms, continuing to cook for another 4–5 minutes until they are tender and have released their moisture. This combination creates a beautiful flavor base for your Creamy Ground Beef Stroganoff.

Step 3: Prepare the Sauce
Lower the heat further to prevent curdling while gently stirring in 1 cup of sour cream and 1 cup of beef broth. Allow the mixture to simmer for 3–4 minutes, stirring occasionally until everything is well combined and heated through. The sauce should be smooth and luscious, enveloping the beef and vegetables with a creamy richness, perfect for spooning over noodles.

Step 4: Combine with Noodles
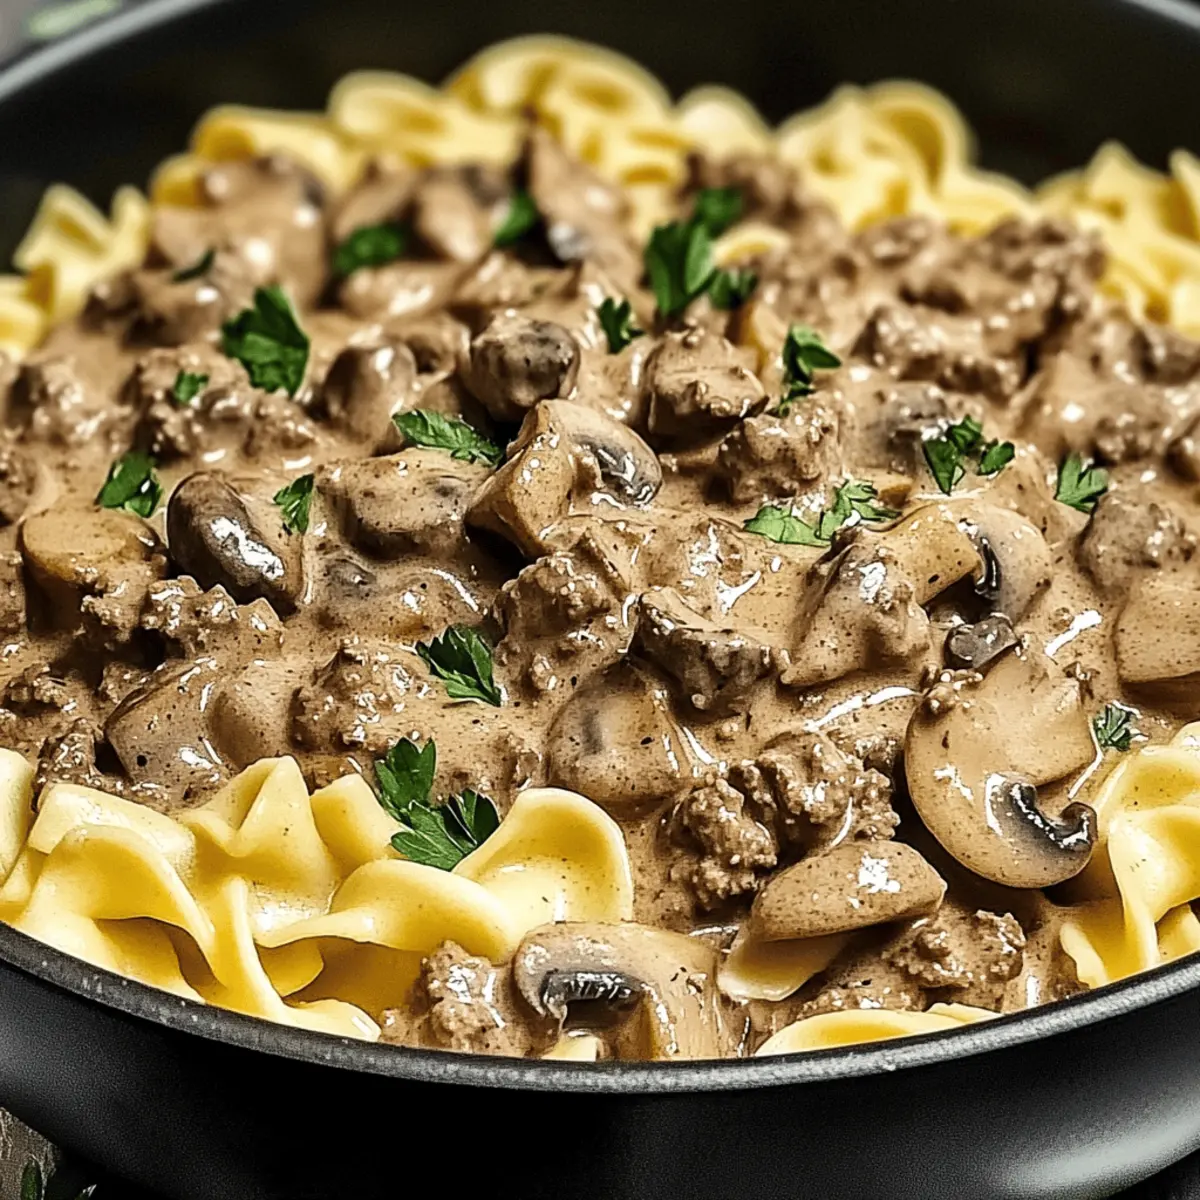
While the sauce simmers, bring a pot of salted water to boil and cook 8 ounces of egg noodles according to package instructions. Drain the noodles once al dente, then add them directly to the skillet with the creamy stroganoff sauce. Gently toss everything together, ensuring the noodles are well coated and infused with the delicious flavors of your dish.

Step 5: Serve It Up
Once everything is combined and heated through, it’s time to serve your Creamy Ground Beef Stroganoff! Plate the luscious noodles topped with the rich beef and mushroom sauce. Optionally, garnish with fresh parsley for a touch of color and added freshness. This dish is now ready to bring comfort and joy to your dinner table!

Creamy Ground Beef Stroganoff Variations

Feel free to explore these twists to make this comforting dish uniquely yours and cater to various preferences!

  • Ground Turkey: Substitute ground beef with ground turkey for a leaner meal without sacrificing flavor.
  • Vegetarian Delight: Use mushrooms in place of beef to create a hearty vegetarian version, perfect for satisfying meatless cravings.
  • Gluten-Free Option: Swap traditional egg noodles with gluten-free pasta to keep it enjoyable for those with gluten sensitivities.
  • Extra Creamy: For a richer texture, add an additional dollop of sour cream or a splash of heavy cream into the sauce.
  • Herbed Twist: Elevate the flavor by adding fresh herbs like thyme or parsley during the cooking process for an aromatic boost.
  • Spicy Kick: Stir in a teaspoon of red pepper flakes or a dash of hot sauce to add a bit of heat and excitement to your dish.
  • Cheesy Version: Sprinkle in some shredded cheese, such as Parmesan or cheddar, into the sauce for a delightful cheesy twist.
  • Serve with Style: Pair this stroganoff with garlic bread or a light mixed greens salad to round out your meal and enhance dining experience.

If you ever want to explore more comforting recipes, why not check out my Ground Beef Enchiladas or Avocado Egg Salad? Each dish brings a unique flavor journey to your table!

Expert Tips for Creamy Ground Beef Stroganoff

  • Cook in Batches: Cooking the beef in batches prevents overcrowding in the skillet, ensuring even browning and a savory flavor in your Creamy Ground Beef Stroganoff.

  • Stir Gently: When adding sour cream, stir gently over low heat to avoid curdling, maintaining that silky texture in your sauce.

  • Enhance Flavor: For an aromatic twist, sauté minced garlic with the onions or add fresh thyme; these small touches can elevate your dish impressively.

  • Adjust Consistency: If the sauce becomes too thick, add warm beef broth a little at a time until achieving your desired creamy consistency.

  • Mind the Noodles: Avoid overcooking the egg noodles; they should be al dente, as they'll continue to absorb the sauce after mixing with the stroganoff.

What to Serve with Creamy Ground Beef Stroganoff

Indulge in the full experience of your comforting meal by adding these delightful pairings that elevate every bite.

  • Garlic Bread: Perfect for soaking up that rich sauce, garlic bread brings a crunchy texture that contrasts beautifully with creamy stroganoff. Just imagine the flavor explosion!

  • Steamed Broccoli: This vibrant green side adds freshness and nutrition, complementing the rich and savory elements of the stroganoff. An easy way to incorporate veggies!

  • Mixed Greens Salad: A light and refreshing salad featuring crisp greens is the ideal accompaniment to balance the creamy indulgence of your dish. Drizzle with your favorite vinaigrette for an added zing.

  • Roasted Carrots: Their natural sweetness, combined with a slight caramelization, pairs wonderfully with the savory flavors of the stroganoff, creating a delightful mix of tastes.

  • Mashed Potatoes: Creamy, buttery mashed potatoes offer an extra level of comfort and can be the perfect canvas for the rich sauce to embrace. What’s not to love?

  • Red Wine: A glass of robust red wine, such as a Cabernet Sauvignon, enhances the meal’s richness and provides a sophisticated touch, making your dinner feel luxurious.

  • Apple Crisp: End your meal on a sweet note with a warm apple crisp, adding a touch of seasonal fruitiness that contrasts nicely with the savory stroganoff.

Embrace these pairings to truly enjoy the warmth and comfort of your Creamy Ground Beef Stroganoff, turning dinner into a cherished family experience.

How to Store and Freeze Creamy Ground Beef Stroganoff

  • Fridge: Store leftovers in an airtight container for up to 3 days, ensuring they maintain optimal freshness and flavor.

  • Freezer: For longer storage, place the stroganoff in a freezer-safe container or bag for up to 3 months. Thaw in the fridge overnight before reheating.

  • Reheating: Reheat gently on the stovetop over low heat, adding a splash of beef broth for creaminess. Stir frequently to prevent sticking and ensure even warming.

  • Separated Storage: If you prefer to freeze, consider storing the sauce and cooked noodles separately. This helps retain the best texture upon reheating.

Make Ahead Options

Preparing your Creamy Ground Beef Stroganoff in advance is a fantastic way to save time on busy weeknights! You can cook the ground beef, onions, and mushrooms up to 24 hours ahead. Once sautéed, let the mixture cool, then refrigerate it in an airtight container. The sauce can also be prepared and stored, simply adding sour cream and beef broth just before reheating to maintain its creamy texture. When you're ready to enjoy your stroganoff, cook the egg noodles according to package instructions, combine everything in a skillet, and heat through for a comfort food classic that’s just as delicious as if it were made fresh!

Creamy Ground Beef Stroganoff Recipe FAQs

How do I choose the right ground beef?
Absolutely! When selecting ground beef for your Creamy Ground Beef Stroganoff, look for lean ground beef with a fat content of around 80/20 or 85/15. This gives you a perfect balance of flavor without being overly greasy. Also, ensure the beef is bright red with minimal dark spots or discoloration; any dark spots could indicate it’s past its prime.

What’s the best way to store leftovers?
Very simply, store your leftover Creamy Ground Beef Stroganoff in an airtight container in the fridge for up to 3 days. Just make sure it has completely cooled down before sealing it. This helps retain the flavors and texture. When ready to eat, simply reheat over low heat on the stovetop, stirring occasionally.

Can I freeze this dish?
Absolutely! You can freeze Creamy Ground Beef Stroganoff for up to 3 months. For best results, store the stroganoff in a freezer-safe container, ensuring it’s tightly sealed to prevent freezer burn. When you're ready to enjoy it again, thaw in the fridge overnight, then reheat gently on the stovetop. Adding a splash of broth will help restore the creamy consistency.

What should I do if my sauce curdles?
Oh no, curdled sauce can be a bit disheartening! If you find your sour cream sauce has curdled, don’t panic. Start by lowering the heat to prevent further cooking. You can try adding a tablespoon of warm beef broth to the curdled sauce while stirring gently. If the texture is still off, blend the sauce in a blender for a smoother finish. To avoid this issue in the first place, always stir in the sour cream over low heat.

Is this recipe suitable for gluten-free diets?
Yes, you can easily adapt this Creamy Ground Beef Stroganoff for gluten-sensitive diets! Simply replace regular egg noodles with gluten-free pasta alternatives, which are widely available. Always check the labels to ensure they meet your specific dietary needs. Enjoy the comfort without compromise!

What alternatives can I use for the beef?
If you’re looking for alternatives, using ground turkey or a combination of hearty mushrooms (like cremini) is a delicious way to cater to different dietary needs. For a vegetarian option, sauté the mushrooms first to create a deep, rich flavor profile. You’ll have a satisfying dish without sacrificing taste!

Creamy Ground Beef Stroganoff

Creamy Ground Beef Stroganoff That'll Bring You Comfort

Creamy Ground Beef Stroganoff is the ultimate comforting dish, ready in under 30 minutes.
Print Recipe Pin Recipe
Prep Time 10 minutes mins
Cook Time 20 minutes mins
Total Time 30 minutes mins
Servings: 4 servings
Course: Dinner
Cuisine: American
Calories: 450
Ingredients Equipment Method Nutrition Notes

Ingredients
  

For the Stroganoff
  • 1 pound ground beef or ground turkey
  • 1 medium yellow onion diced
  • 8 ounces mushrooms sliced, cremini or button
  • 1 cup sour cream or Greek yogurt
  • 1 cup beef broth or vegetable broth for vegetarian option
  • 8 ounces egg noodles or gluten-free pasta
  • to taste fresh parsley optional for garnish

Equipment

  • Large skillet
  • pot
  • Spatula

Method
 

Step-by-Step Instructions for Creamy Ground Beef Stroganoff
  1. In a large skillet, heat a tablespoon of oil over medium heat. Add 1 pound of ground beef, breaking it apart with a spatula. Cook for 5–7 minutes until browned. Drain excess fat.
  2. Reduce heat to medium-low and add a diced yellow onion. Sauté for about 2–3 minutes until translucent. Add 8 ounces of sliced mushrooms, cooking for 4–5 minutes more.
  3. Lower the heat and stir in 1 cup of sour cream and 1 cup of beef broth. Allow to simmer for 3–4 minutes, stirring occasionally until smooth.
  4. Cook 8 ounces of egg noodles in salted water. Drain once al dente and add to the skillet with stroganoff sauce, tossing gently to combine.
  5. Plate the noodles topped with the beef and mushroom sauce. Garnish with fresh parsley, if desired.

Nutrition

Serving: 1servingCalories: 450kcalCarbohydrates: 45gProtein: 30gFat: 20gSaturated Fat: 10gPolyunsaturated Fat: 1gMonounsaturated Fat: 8gCholesterol: 90mgSodium: 600mgPotassium: 650mgFiber: 2gSugar: 3gVitamin A: 500IUVitamin C: 5mgCalcium: 50mgIron: 3mg

Notes

For storage, keep leftovers in an airtight container for up to 3 days. Thaw frozen stroganoff in the fridge overnight.

Tried this recipe?

Let us know how it was!

Creamy Pumpkin Cheesecake Dip: Perfect for Halloween Fun

October 28, 2025 by Grace Snow Leave a Comment

As the crisp autumn air fills the room, the delightful scent of pumpkin spice begins to weave its magic. One afternoon, while searching for the perfect Halloween treat, I stumbled upon this incredible No-Bake Pumpkin Cheesecake Dip that instantly stole my heart. This creamy, dreamy dessert not only offers a quick and hassle-free way to indulge those fall cravings, but it also serves up a playful presentation with its chocolate cookie "dirt" topping—perfect for impressing friends and family at gatherings. Imagine the joy on their faces as they dig into this fun twist on cheesecake without having to turn on the oven! Are you ready to create a showstopper that's as delightful to make as it is to eat?

Why is this Pumpkin Cheesecake Dip a Must-Try?

Simplicity at its Best: No need to bake or fuss—just mix and enjoy!

Crowd-Pleasing Treat: It's a fun and interactive dessert—perfect for Halloween gatherings.

Rich, Creamy Flavor: The luscious cream cheese and pumpkin blend create a decadent dip everyone will love.

Versatile Pairings: Serve with slices of fresh apples, pretzels, or graham crackers for a delightful treat. You can also enjoy it alongside a warm glass of pumpkin spice latte for that cozy autumn vibe.

Playful Presentation: With its chocolate cookie "dirt" topping, it looks amazing and is sure to be a hit at any party.

So why not take a moment to bask in the deliciousness of this delightful dip? You deserve a break from fast food and a taste of home with every bite!

Pumpkin Cheesecake Dip Ingredients

For the Dip

  • Cream Cheese – Provides a rich, creamy texture; let it soften for easy mixing.
  • Pumpkin Puree – Adds seasonal sweetness; opt for pure pumpkin to control spices.
  • Powdered Sugar – Sweetens the dip; maple syrup can be a great natural substitute.
  • Vanilla Extract – Enhances flavor; using pure vanilla yields the best results.

For the Topping

  • Chocolate Cookies (e.g., Oreos) – Creates the "dirt" look; graham crackers can provide a different texture.
  • Gummy Worms (optional) – Adds a fun, spooky touch for Halloween.

Indulge in this delightful Pumpkin Cheesecake Dip, where each ingredient works in harmony to create a dessert that’s as delicious as it is fun!

Step‑by‑Step Instructions for No-Bake Pumpkin Cheesecake Dip

Step 1: Beat the Cream Cheese
In a large mixing bowl, beat 8 ounces of softened cream cheese with an electric mixer on medium speed for about 2 minutes until it’s smooth and creamy. The texture should be free of lumps, resembling a luscious frosting. Make sure your cream cheese is at room temperature for the best results, as this will create a wonderfully fluffy base for your Pumpkin Cheesecake Dip.

Step 2: Mix in Pumpkin and Sweetness
Add 1 cup of pumpkin puree, 1 cup of powdered sugar, and 1 teaspoon of vanilla extract to the bowl. Continue mixing on low speed for about 2-3 minutes until all ingredients are combined evenly and the dip is velvety smooth. The vibrant orange hue of the pumpkin will meld perfectly with the creaminess, making your dip both delicious and visually appealing.

Step 3: Transfer and Smooth the Mixture
Carefully transfer the creamy pumpkin dip into your favorite serving bowl. Use a spatula to smooth the top for an elegant presentation. This step enhances the creamy texture and helps in showcasing the delightful layers you’ll be adding soon. The rich color will draw everyone’s attention, inviting them to dig in!

Step 4: Prepare the "Dirt" Topping
While your Pumpkin Cheesecake Dip is chilling, crush about 10 chocolate cookies (such as Oreos) into fine crumbs. You can achieve this using a food processor for about 30 seconds or place the cookies in a resealable bag and crush them with a rolling pin. The texture should resemble fine dirt, giving a playful look to your dessert.

Step 5: Add the Crumbled Cookies
Evenly sprinkle the crushed cookie mixture over the top of your prepared Pumpkin Cheesecake Dip, making it look like a delightful layer of dirt. This crumbled topping adds a fun, Halloween-inspired touch that contrasts beautifully with the creamy dip. If desired, gently place a few gummy worms on top for an extra spooky decoration.

Step 6: Chill or Serve Immediately
You can serve the Pumpkin Cheesecake Dip right away, or for a firmer texture, chill it in the refrigerator for about 30 minutes. Be sure to add the crumbled cookie topping just before serving to keep it fresh and crunchy. This simple step makes your dip even more enticing, especially when shared with friends and family during your Halloween gatherings.

Pumpkin Cheesecake Dip Variations

Feel free to get creative with this delightful dip and customize it to your taste!

  • Greek Yogurt: Swap cream cheese for Greek yogurt to lighten the dip while keeping it creamy and tangy. It's a refreshing twist that's equally delicious!

  • Pumpkin Spice Boost: Add a teaspoon of pumpkin pie spice for extra autumn flavor. The warming spices will elevate the comforting essence of this indulgent treat.

  • Gingersnap Crust: Use crushed gingersnap cookies instead of chocolate cookies for a spicy, flavorful alternative. This swap adds a fun zing that truly stands out.

  • Vegan Version: For a vegan-friendly option, substitute dairy-free cream cheese and sweeten with maple syrup. You’ll enjoy a creamy dip that suits everyone's dietary needs.

  • Nutty Crunch: Toss in some finely chopped pecans or walnuts atop your dip for a delightful crunch. It adds a fabulous texture and nutty flavor that complements the creaminess.

  • Chocolate Drizzle: Drizzle melted chocolate over the top for an indulgent finish. This simple addition takes the dessert to another level, making it even more irresistible!

  • Cinnamon Sugar Dusting: Sprinkle a mix of cinnamon and sugar on top for a sweet and aromatic finish. It adds a delightful touch that pairs perfectly with the pumpkin flavor.

For more inspiration, you might also want to check out these delicious options: Pumpkin Brownies Decadent or the indulgent Pumpkin Cinnamon Roll recipes. They're perfect for your autumn gatherings!

Expert Tips for Pumpkin Cheesecake Dip

Room Temperature Cream Cheese: Ensure your cream cheese is softened to room temperature for the smoothest texture and easy mixing in your Pumpkin Cheesecake Dip.

Avoid Overmixing: Once you add powdered sugar, mix just until combined; overmixing can lead to a runny dip.

Customize Sweetness: If your dip is too sweet, balance with a dash of salt or a bit more pumpkin puree for a more complex flavor.

Crush Cookies Carefully: Aim for fine crumbs when preparing the "dirt" topping; larger chunks can disrupt the creamy texture underneath.

Chill for Best Results: Let the dip chill for at least 30 minutes before serving for a firmer texture that’s easier to scoop.

Add Fun Toppings: Don’t hesitate to get creative—try different cookie toppings or add seasonal candies for a personal touch!

How to Store and Freeze Pumpkin Cheesecake Dip

Refrigerator: Store leftovers in an airtight container for up to 3 days. This keeps the Pumpkin Cheesecake Dip fresh and creamy, ready for a quick snack.

Freezer: Although not ideal, you can freeze the dip for up to 1 month. Thaw it overnight in the fridge before serving, and consider re-mixing to restore its creamy texture.

Topping Storage: Keep the crumbled chocolate cookies separate until you’re ready to serve. This helps retain their crunchiness and enhances the dip's presentation.

Make-Ahead Tip: Prepare the dip a day in advance for convenience. Just remember to add the cookie topping right before serving for that fresh, delightful crunch!

Make Ahead Options

This No-Bake Pumpkin Cheesecake Dip is not just a crowd-pleaser, but also a fantastic option for meal prep! You can prepare the dip up to 24 hours in advance, mixing the cream cheese, pumpkin puree, powdered sugar, and vanilla extract together, and refrigerating it in an airtight container. The cookie topping can be crushed and stored separately (to maintain its crunch) for up to 3 days. When you're ready to serve, simply sprinkle the crumbled cookies on top and add any gummy worms for that fun Halloween touch. By prepping ahead, you’ll save valuable time and still impress your guests with a dessert that’s just as delicious as when freshly made!

What to Serve with No-Bake Pumpkin Cheesecake Dip

Create the perfect fall gathering with these delightful pairings that complement the rich flavors of your dip.

  • Fresh Apple Slices: They add a refreshing crunch that cuts through the creaminess, making for a well-rounded treat.
  • Graham Crackers: Their mild sweetness and crispy texture provide a classic contrast to the pumpkin dip's richness.
  • Pretzels: The salty finish offers a delightful balance to the sweet pumpkin cheesecake dip, creating a perfect sweet-salty combo. Try pairing both for a fun grazing platter!
  • Vanilla Wafer Cookies: These cookies add a light, buttery flavor that beautifully enhances the dip's creamy texture, creating an irresistible duo.
  • Spiced Chai: A warm cup of spiced chai enhances the cozy, autumn vibe while pairing beautifully with the pumpkin flavors.
  • Pumpkin Spice Latte: Enjoy this seasonal favorite alongside your dip; its comforting warmth and spice echo the dip’s flavors, making for a delightful treat.
  • Caramel Sauce: Drizzling a bit of caramel over the dip adds an indulgent touch, heightening the sweetness and flavor profile.
  • Chocolate-Covered Pretzels: Offering a sweet twist on traditional pretzels, they bring a crunchy chocolate finish to each bite, enhancing the overall experience.
  • Whipped Cream: A dollop on top of the dip adds a light and airy texture, creating a beautiful contrast with the dense creaminess of the dip.
  • Gummy Worms: Not just for decoration, they add a fun and playful element that truly embraces the Halloween spirit!

Pumpkin Cheesecake Dip Recipe FAQs

How can I tell if my pumpkin puree is fresh?
Absolutely! When selecting pumpkin puree, look for a vibrant orange color with a smooth consistency. If you notice any dark spots, unusual odors, or separation of liquid, it's best to avoid using it. Using pure pumpkin puree will ensure your dip is flavorful and falls in line with our seasonal treat.

How should I store leftovers of the Pumpkin Cheesecake Dip?
You can store leftovers in an airtight container in the refrigerator for up to 3 days. Make sure to keep the dip tightly sealed to maintain its creamy texture. If you have extra crumbled cookie topping, store that separately to keep it crunchy until you’re ready to serve.

Can I freeze Pumpkin Cheesecake Dip?
Very! You can freeze the dip for up to 1 month if you find you have leftovers. To do this, place the dip in a freezer-safe container, leaving a little space at the top for expansion. When you're ready to enjoy it, thaw it in the refrigerator overnight and mix it gently to restore its creamy texture. Just remember, the cookie topping should be added fresh right before serving!

What can I do if my dip turns out too runny?
If your Pumpkin Cheesecake Dip is a bit runny, don't worry! Simply chill it in the refrigerator for about 30 minutes. This will help firm it up. Alternatively, you can gradually add more powdered sugar or a little bit of cream cheese until you achieve your desired consistency. Mixing it gently will maintain that lovely creaminess!

Is this Pumpkin Cheesecake Dip suitable for people with allergies?
Yes! If you're making this dip for guests with dietary restrictions, there are plenty of substitutions. Use dairy-free cream cheese for a vegan option or Greek yogurt for a lighter dip. Make sure to check the labels of any ingredients you use, especially for potential allergens like gluten in the cookies.

What are some fun variations of the Pumpkin Cheesecake Dip?
The more the merrier! You can swap out crushed chocolate cookies with gingersnap cookies for a different flavor profile. Adding pumpkin pie spice to the mixture enhances that autumnal taste, while a sprinkle of sea salt can balance the sweetness beautifully. Don't hesitate to get creative and explore new toppings for added fun!

Pumpkin Cheesecake Dip

Creamy Pumpkin Cheesecake Dip: Perfect for Halloween Fun

This Pumpkin Cheesecake Dip is a creamy, no-bake treat that's perfect for Halloween gatherings and will impress your friends and family.
Print Recipe Pin Recipe
Prep Time 15 minutes mins
Chilling Time 30 minutes mins
Total Time 45 minutes mins
Servings: 8 servings
Course: Dessert
Cuisine: American
Calories: 210
Ingredients Equipment Method Nutrition Notes

Ingredients
  

For the Dip
  • 8 ounces Cream Cheese Softened for easy mixing.
  • 1 cup Pumpkin Puree Opt for pure pumpkin to control spices.
  • 1 cup Powdered Sugar Maple syrup can be a natural substitute.
  • 1 teaspoon Vanilla Extract Using pure vanilla yields the best results.
For the Topping
  • 10 cookies Chocolate Cookies (e.g., Oreos) Creates the 'dirt' look; graham crackers can offer a different texture.
  • Gummy Worms Optional, for a fun, spooky touch.

Equipment

  • Electric mixer
  • Mixing Bowl
  • Spatula
  • Food Processor

Method
 

Step-by-Step Instructions
  1. In a large mixing bowl, beat 8 ounces of softened cream cheese with an electric mixer on medium speed for about 2 minutes until it’s smooth and creamy.
  2. Add 1 cup of pumpkin puree, 1 cup of powdered sugar, and 1 teaspoon of vanilla extract to the bowl. Continue mixing on low speed for about 2-3 minutes until all ingredients are combined evenly.
  3. Carefully transfer the creamy pumpkin dip into your favorite serving bowl and smooth the top with a spatula.
  4. Crush about 10 chocolate cookies into fine crumbs, using a food processor or a rolling pin.
  5. Evenly sprinkle the crushed cookie mixture over the top of the prepared Pumpkin Cheesecake Dip.
  6. Serve immediately or chill in the refrigerator for about 30 minutes for a firmer texture.

Nutrition

Serving: 1servingCalories: 210kcalCarbohydrates: 25gProtein: 2gFat: 10gSaturated Fat: 6gCholesterol: 30mgSodium: 150mgPotassium: 100mgFiber: 1gSugar: 18gVitamin A: 420IUVitamin C: 1mgCalcium: 20mg

Notes

Make the dip a day in advance for convenience, but add the crumbled topping just before serving for freshness.

Tried this recipe?

Let us know how it was!

Irresistible Irish Rarebit: Your New Favorite Comfort Food

October 28, 2025 by Grace Snow Leave a Comment

As I stood in my kitchen, the aroma of melting cheese started to swirl around me, evoking memories of cozy afternoons spent indulging in comforting meals. Today, I’m excited to share my take on Irish Rarebit, an irresistible twist on the classic cheese-on-toast dish. This delightful recipe combines rich Irish cheddar with zesty mustard and crunchy gherkins, creating a quick meal that’s perfect for light lunches or as a warming appetizer. Not only is it a crowd-pleaser that embraces the art of simplicity, but it’s also incredibly versatile; you can easily customize it to suit your taste. Whether you’re treating yourself on a cozy night in or celebrating St. Patrick’s Day with friends, this plate of creamy goodness is bound to bring smiles. Ready to elevate your cheese game? Let’s dive into making this scrumptious Irish Rarebit together!

Why Is Irish Rarebit So Irresistible?

Comforting: This dish offers a warm, cheesy embrace, perfect for those chilly evenings when you crave a taste of home.
Quick to Make: With minimal prep and cook time, this recipe can be ready in a flash, making it ideal for busy weeknights or spontaneous gatherings.
Customizable: Feel free to experiment with toppings and variations; add crispy bacon or switch cheeses for a unique flavor twist.
Crowd-Pleasing: Serve it at your next get-together or special occasion, and watch as your guests relish every last bite! Enhance it with a side salad for a balanced meal or keep it simple as a delightful snack. Trust me, this is a dish you won’t soon forget!

Irish Rarebit Ingredients

For the Cheese Sauce
• Irish Cheddar – Gives a sharp and rich flavor; consider using mature cheddar for a similar taste.
• Mustard – Adds a nice heat and acidity; you can try Dijon or wholegrain mustard based on what you like.
• Gherkins – Provides crunch and tang; dill pickles can be a great substitute or you can omit them for milder flavor.

For the Base
• Bread – Serves as the foundation; opt for whole-grain for added fiber and nutrients.
• Butter (optional) – Enhances the richness of the dish; switch to olive oil for a healthier alternative if desired.

Feel free to customize these ingredients to create a unique version of Irish Rarebit that suits your palate!

Step‑by‑Step Instructions for Irish Rarebit

Step 1: Prepare the Cheese Sauce
Start by melting 2 tablespoons of butter in a medium saucepan over low heat. Once melted, whisk in 1 tablespoon of your chosen mustard until well combined. Gradually add 1 cup of grated Irish cheddar, stirring continuously for about 3-4 minutes until the cheese completely melts into a creamy sauce. Remove from heat once you have a smooth mixture, which should be gooey and luscious.

Step 2: Add Gherkins
Next, chop about 2-3 gherkins into small pieces and stir them into the cheese sauce. This will introduce a delightful crunch and tanginess to the Irish Rarebit. Give the mixture a good stir to ensure the gherkins are evenly distributed, enhancing the flavor profile. Set the sauce aside while you prepare the bread.

Step 3: Toast the Bread
While the cheese sauce cools slightly, preheat your oven's broiler. Take 2-4 slices of whole-grain bread and lightly toast them in a toaster or under the broiler for 2-3 minutes. The goal is to achieve a golden brown hue on both sides of the bread, providing a sturdy base for the creamy cheese sauce that will follow.

Step 4: Assemble the Toast
Once the bread is toasted, place the slices on a baking sheet lined with parchment paper. Carefully spoon the cheesy mixture over each slice, making sure to thoroughly cover them for that delicious cheesy experience. Don’t be shy with the sauce—it’s the star of the show and should look indulgent and appetizing.

Step 5: Broil
Slide the baking sheet under the broiler and cook for 1-2 minutes. Keep a close eye on the bread, as the cheese should bubble up and develop a golden crust. Remove the Irish Rarebit from the oven when the cheese is beautifully golden and bubbly, perfect for enjoying soon after!

Step 6: Serve
Allow the Irish Rarebit to cool for just a minute before serving. Optionally, garnish with freshly chopped herbs such as parsley or chives for an extra touch of flavor and color. You can pair it with a simple green salad or extra pickles on the side to balance the richness, and enjoy!

What to Serve with Irish Rarebit

Elevate your dining experience with delightful side dishes that complement the irresistible warmth of this cheesy comfort food.

  • Simple Green Salad: A fresh, crisp salad with light vinaigrette provides a refreshing contrast to the richness of the rarebit.
  • Crispy Fried Potatoes: Golden, fluffy fries add a satisfying crunch, making an indulgent pairing that enhances the cozy feel of your meal.
  • Pickled Vegetables: Bright, tangy pickles or a medley of pickled veggies cut through the creaminess, giving a delightful pop of flavor.
  • Roasted Brussels Sprouts: Seasoned and caramelized, these veggies add a savory note, balancing the richness of the cheese beautifully.
  • Tomato Soup: A classic pairing, this warming soup provides both comfort and a dose of acidity that complements the savory toast.
  • Guinness Stout: For a perfect drink pairing, enjoy the deep flavors of Guinness, enhancing the experience with hints of malt and cream.

These side options not only create a full meal, but they also invite your family and friends to gather around the table, sharing laughter and warmth over mouthwatering bites!

Expert Tips for Irish Rarebit

• Perfect Timing: Watch the broiling closely—it's easy to overcook! The cheese should be bubbly but not burnt for the best Irish Rarebit experience.

• Cheese Matters: Use finely grated Irish cheddar for a smoother melting sauce. This prevents clumping and ensures each bite is creamy.

• Sauce Variability: Don't hesitate to tweak the cheese sauce! Adding a splash of Guinness gives extra depth of flavor—perfect for a festive twist.

• Bread Choice: Choose sturdier bread, like whole-grain, to hold the weight of the rich cheese. Avoid soft white bread, which can get soggy.

• Batch Prep: Make the cheese sauce in advance, refrigerate, and reheat for quick assembly. This way, a delicious Irish Rarebit is always just moments away!

• Texture Balance: Add crunch by serving with a salad or fried onions as a topping, enhancing the creamy goodness with satisfying textures.

Make Ahead Options

These Irish Rarebit sandwiches are perfect for meal prep enthusiasts! You can prepare the cheese sauce up to 3 days in advance; simply follow the instructions to melt the butter, whisk in the mustard, and add the grated Irish cheddar, then allow it to cool before storing it in an airtight container in the refrigerator. As you prepare to serve, toast your bread as directed, reheat the cheese sauce on low until warm, then assemble and broil for just a couple of minutes. This way, you'll enjoy the same rich, creamy goodness without the last-minute rush, making your mealtime as delightful as it is effortless!

Storage Tips for Irish Rarebit

Fridge: Store any leftover Irish Rarebit in an airtight container for up to 3 days. Reheat in the oven to restore that inviting cheesiness.

Freezer: You can freeze the cheese sauce separately for up to 2 months. Thaw in the fridge overnight and reheat gently before serving over fresh toast.

Toast Storage: Avoid storing assembled rarebit with the toast, as the bread will become soggy. Instead, keep it separate until ready to enjoy!

Reheating: For best results, reheat under the broiler for about 1-2 minutes until bubbly and golden, just like the first time!

Irish Rarebit Variations & Substitutions

Feel free to get creative with your Irish Rarebit and make it your own with these delicious options!

  • Cheese Swap: Use Gruyère or smoked cheese for a deeper flavor that adds an exciting twist to the classic dish.

  • Bacon Lover: Crumble crispy cooked bacon into the cheese sauce for a savory, smoky flavor that will delight meat lovers.

  • Vegetarian Delight: Replace gherkins with caramelized onions for a naturally sweet counterpart that complements the richness of the cheese.

  • Heat It Up: Add a pinch of red pepper flakes or jalapeños for a spicy kick, perfect for those who enjoy a bit of heat in their comfort food.

  • Herbaceous Boost: Incorporate fresh herbs like thyme or rosemary into the cheese sauce for a fresh aroma and taste that elevates this simple dish.

  • Creamier Texture: Mix in a splash of heavy cream or sour cream to the cheese sauce before broiling for an extra luscious finish.

  • Whole Grain Upgrade: Opt for multigrain or sourdough bread instead of whole-grain to enhance flavors and add a chewy texture that balances the creaminess.

  • Try Guinness: Add a dash of Guinness to the cheese sauce for an authentic Irish flavor that gives a delightful depth to your Rarebit experience.

Discovering variations is part of the joy of cooking! If you want more ideas, check out these tasty alternatives or side dishes to create the perfect meal to remember. Enjoy your cooking adventure!

Irish Rarebit Recipe FAQs

What type of bread is best for Irish Rarebit?
I recommend using whole-grain bread for its sturdiness and added fiber, which perfectly supports the rich cheese topping. Avoid soft white bread, as it tends to become soggy under the creamy sauce.

How should I store leftover Irish Rarebit?
Store any leftover Irish Rarebit in an airtight container in the fridge for up to 3 days. If you want to preserve that delightfully cheesy texture, reheat it in the oven. Just be patient and allow the cheese to warm up slowly; it’ll be worth the wait!

Can I freeze the cheese sauce for later use?
Absolutely! You can freeze the cheese sauce separately for up to 2 months. Simply place it in an airtight container, and when you’re ready to enjoy it, thaw it in the fridge overnight. When reheating, do so gently on the stovetop until it's warmed through and creamy again.

What if my cheese sauce is too thick?
If you find your cheese sauce is thicker than desired, don’t worry! Just add a splash of milk or cream while reheating to thin it out. Stir continuously until you achieve that luscious and smooth texture again.

Can I modify the ingredients for dietary restrictions?
Very! This recipe is quite flexible. For a vegetarian option, it's perfect as is, but if you're dairy-free, you can experiment with plant-based cheese alternatives. Just ensure you adjust the cooking times and methods as needed for the best results.

What kind of cheese can I use instead of Irish cheddar?
If you’re looking to switch it up, try using Gruyère for a nutty flavor or smoked cheese for a twist of richness. Each variety will bring a unique depth to your Irish Rarebit while keeping it comforting and delicious. Enjoy experimenting!

Irish Rarebit

Irresistible Irish Rarebit: Your New Favorite Comfort Food

Discover this quick and comforting Irish Rarebit recipe that combines rich cheese and tangy gherkins for an irresistible snack.
Print Recipe Pin Recipe
Prep Time 10 minutes mins
Cook Time 10 minutes mins
Cooling Time 5 minutes mins
Total Time 25 minutes mins
Servings: 4 slices
Course: Snacks
Cuisine: Irish
Calories: 250
Ingredients Equipment Method Nutrition Notes

Ingredients
  

For the Cheese Sauce
  • 1 cup Irish Cheddar grated
  • 1 tablespoon Mustard Dijon or wholegrain
  • 2-3 pieces Gherkins chopped
  • 2 tablespoons Butter optional
For the Base
  • 2-4 slices Whole-grain Bread for better fiber content

Equipment

  • Medium saucepan
  • toaster or broiler
  • Baking Sheet

Method
 

Step‑by‑Step Instructions for Irish Rarebit
  1. Melt butter in a saucepan, whisk in mustard, and add cheese, stirring until melted.
  2. Chop gherkins, stir into the cheese sauce.
  3. Toast the bread until golden brown.
  4. Spoon cheese mixture over toasted bread on a baking sheet.
  5. Broil until cheese bubbles and turns golden.
  6. Serve warm, optionally garnished with herbs.

Nutrition

Serving: 1sliceCalories: 250kcalCarbohydrates: 30gProtein: 10gFat: 12gSaturated Fat: 6gPolyunsaturated Fat: 1gMonounsaturated Fat: 4gCholesterol: 30mgSodium: 500mgPotassium: 250mgFiber: 3gSugar: 2gVitamin A: 250IUVitamin C: 1mgCalcium: 250mgIron: 1mg

Notes

Customize your rarebit with additional toppings like crispy bacon. Serve with a salad for a balanced meal.

Tried this recipe?

Let us know how it was!

Savory Korean Ground Beef Bowl That's Ready in 30 Minutes

October 28, 2025 by Grace Snow Leave a Comment

It’s that moment in the evening when the kitchen starts to fill with the delicious fragrance of something hearty simmering on the stove, and I can’t help but smile. Today, I’m excited to share my Quick & Flavorful Korean Ground Beef Bowl, a dish that transforms a busy weeknight into a culinary delight. In just 30 minutes, you’ll have a satisfying meal packed with tender ground beef, savory sauce, and fresh vegetables that your whole family will adore. This recipe not only caters to your cravings but also offers the freedom to customize it with your favorite veggies or even spice it up to your liking. Ready to bring a touch of Korean comfort food to your home table? Let’s see how this delightful dish comes together!

Why is this Korean Bowl a Must-Try?

Quick Preparation: This meal comes together in just 30 minutes, so you can whip it up even on the busiest nights.

Endless Customization: With the option to include your favorite vegetables like bell peppers or snap peas, every bowl can be unique to your family’s tastes.

Delicious Fusion of Flavors: The blend of savory ground beef with sweet brown sugar and umami-rich soy sauce creates a taste that’s simply irresistible.

Family-Friendly Appeal: Not only is this dish satisfying, but it’s also a fun way to introduce kids to different flavors while keeping it familiar.

Healthy Options: Swap in ground turkey or cauliflower rice for a lighter take, making it adaptable for various dietary preferences, much like my popular Fish Taco Bowls.

Delve into this recipe and treat yourself to a bowl that's big on flavor yet quick on time!

Korean Ground Beef Bowl Ingredients

• Ready to create your own delicious Korean Ground Beef Bowl? Here's what you'll need:

For the Beef Mixture

  • Ground Beef – A hearty protein base; choose lean ground beef or substitute with ground turkey for a lighter option.
  • Soy Sauce – Provides essential umami flavor; opt for low-sodium to keep it healthier.
  • Brown Sugar – Balances the savory notes with sweetness; honey works as a great alternative if desired.
  • Garlic – Infuses aromatic flavor; freshly minced garlic is recommended for maximum taste.
  • Ginger – Adds warmth and a touch of spice; fresh ginger is best, but ground ginger can work in a pinch.
  • Sesame Oil – Gives a nutty richness to the dish; olive oil can be a suitable substitute if needed.

For the Vegetables

  • Green Onions – Brightens up the dish with freshness; chop just before adding for the best flavor.
  • Vegetables (e.g., bell peppers, broccoli) – Customize your bowl with any of your favorite veggies; pre-chop for speed and convenience.

For Serving

  • Rice – The perfect base for your bowl; options include white, brown, or cauliflower rice to fit dietary needs.
  • Sesame Seeds – A crunchy garnish for added texture; sprinkle on top before serving for a delightful finish.

Prepare these ingredients, and you’ll be halfway to a comforting Korean Ground Beef Bowl that your family will love!

Step‑by‑Step Instructions for Korean Ground Beef Bowl

Step 1: Prepare the Ingredients
Begin by gathering all your ingredients for the Korean Ground Beef Bowl. Chop your preferred vegetables, like bell peppers or broccoli, and mince the garlic and ginger finely. This prep will streamline your cooking process and ensure that everything is ready for the skillet. You’ll want to have everything within easy reach to make this dish even quicker to prepare.

Step 2: Cook the Ground Beef
In a large skillet, heat 1 tablespoon of sesame oil over medium-high heat. Once the oil is shimmering, add the ground beef, breaking it apart with a spatula. Cook for 5-7 minutes, stirring occasionally, until the beef is nicely browned and cooked through. The meat should be fully opaque with no pink remaining, providing a hearty base for your flavorful bowl.

Step 3: Sauté Aromatics
Reduce the heat to medium and stir in the minced garlic and ginger to the browned beef. Sauté these aromatics for about 1-2 minutes, allowing them to become fragrant and infuse their flavor into the meat. You'll know they're ready when your kitchen fills with a delicious aroma, setting the stage for the next flavorful steps.

Step 4: Add Sauces
Pour in ¼ cup of soy sauce and sprinkle 1 tablespoon of brown sugar over the beef mixture. Mix well to ensure the beef is evenly coated in the sauce. Allow these ingredients to simmer for 2-3 minutes, stirring occasionally. This will help the flavors meld together while the sauce thickens slightly, creating a savory glaze.

Step 5: Incorporate the Vegetables
Next, fold in the chopped vegetables of your choice, cooking them alongside the beef for an additional 3-5 minutes. The goal is to achieve tender yet crisp vegetables. Keep stirring until the colors brighten, and they soften slightly but retain their fresh crunch—this adds both nutrition and visual appeal to your Korean Ground Beef Bowl.

Step 6: Cook the Rice
While the beef and vegetables are cooking, prepare your rice according to the package instructions. Use white, brown, or cauliflower rice as your base. This will take roughly 10-15 minutes, depending on your choice. Once cooked, fluff the rice with a fork and set aside, ensuring that it’s ready to soak up all the delicious flavors of the beef mixture.

Step 7: Assemble the Bowls
To serve, spoon a generous portion of the fluffy rice into bowls, topping it with the savory Korean ground beef mixture and its vegetables. For a visually appealing finish, garnish each bowl with a sprinkle of sesame seeds and a handful of chopped green onions. This final touch not only enhances the flavor but also elevates the dish for a delightful presentation.

What to Serve with Quick & Flavorful Korean Ground Beef Bowl

Every bite of this vibrant dish deserves the perfect companion to elevate your meal experience!

  • Steamed Broccoli: Its bright green color and tender crunch provide a nutritious balance to the savory beef bowl. A touch of lemon juice adds brightness to every bite.

  • Kimchi: This traditional fermented side adds tangy heat and probiotics, enhancing the meal's flavors while introducing a classic Korean element. Pair it with the beef bowl for an authentic experience.

  • Cucumber Salad: Refreshing and crunchy, a light cucumber salad drizzled with sesame dressing complements the richness of the beef, breaking up heavier flavors with bright acidity.

  • Sesame Rice Balls: These fluffy, seasoned rice balls are perfect for scooping up beef and veggies. Their delightful texture adds a playful element to each serving, making every bite fun.

  • Pickled Carrots: Sweet and tangy pickled carrots offer crunchy contrast and vibrancy. They balance the savory notes of the Korean Ground Beef Bowl while adding a splash of color to your plate.

  • Miso Soup: A warm, umami-rich miso soup serves as a cozy beverage choice alongside your meal. The gentle flavors and warmth soothe the spirit, making for a comforting experience.

  • Chilled Soba Noodles: Light yet satisfying, chilled soba noodles tossed with a touch of soy sauce and sesame oil offer a refreshing contrast. They play beautifully with the hearty ground beef providing a textural lift to your meal.

  • Fruit Salad: A light, sweet fruit salad offers a refreshing finish to this hearty dish. Select seasonal fruits to surprise your taste buds and cleanse your palate after the flavorful bowl.

  • Chardonnay: A crisp glass of Chardonnay harmonizes beautifully with the savory elements of the beef dish, enhancing the overall dining experience with its refreshing notes.

Expert Tips for the Best Korean Ground Beef Bowl

  • Prep Ahead: Chop veggies and mince garlic in advance to save precious minutes during cooking. This makes preparing your Korean Ground Beef Bowl even quicker and more enjoyable!

  • Lean Options: Opt for lean ground beef, or switch to ground turkey or chicken for a healthier alternative. This keeps the dish nutritious without sacrificing flavor.

  • Customize Veggies: Feel free to mix and match your favorite vegetables based on availability or seasonality. Broccoli, carrots, and snap peas add color and nutrition to your Korean Ground Beef Bowl.

  • Taste Test: As you add soy sauce and brown sugar, taste the mixture to adjust sweetness and saltiness according to your preference—this encourages a personal touch to the dish!

  • Rice Choices: Experiment with different types of rice, such as brown or cauliflower rice, to cater to diverse dietary needs, keeping your family meal flavorful and adaptable.

Make Ahead Options

These Korean Ground Beef Bowls are perfect for meal prep enthusiasts! You can prepare the ground beef mixture up to 3 days in advance, storing it in an airtight container in the refrigerator to maintain freshness. Chop your favorite vegetables and refrigerate them separately, as this helps keep them crisp until ready to cook. For best results, reheat the beef mixture gently in a skillet before serving. Just add the prepped vegetables during reheating, and you’ll still achieve that vibrant, crunchy texture. This method saves precious time on busy nights while ensuring that your family enjoys delicious, homemade meals that are just as flavorful as when freshly made!

Storage Tips for Korean Ground Beef Bowl

  • Fridge: Store leftovers in an airtight container for up to 3 days. Reheat gently in the microwave or on the stove until warmed through to enjoy that delicious flavor again.

  • Freezer: The beef mixture can be frozen for up to 3 months. Thaw overnight in the fridge before reheating for a quick meal on a hectic day.

  • Serving Suggestions: When reheating, consider adding a splash of soy sauce or a dash of fresh ginger to freshen up the flavors in your Korean Ground Beef Bowl.

  • Vegetable Prep: If adding fresh veggies from the fridge, toss them in right before serving to keep them crisp and vibrant, enhancing your meal's presentation and taste!

Variations & Substitutions for Korean Ground Beef Bowl

Customize your Korean Ground Beef Bowl to suit your taste buds and pantry staples!

  • Lean Meat: Swap out ground beef for ground turkey or chicken for a lighter option with fewer calories. This change keeps the dish hearty while catering to health-conscious eaters.

  • Vegetable Medley: Use whatever veggies you have on hand—think snap peas, zucchini, or shredded carrots! The beauty of this recipe lies in its flexibility; you can experiment with in-season produce to brighten your meal.

  • Rice Alternatives: If you're avoiding grains, serve the beef mixture in lettuce wraps or over cauliflower rice for a low-carb delight. Cauliflower rice provides the same texture while sneaking in extra veggies.

  • Spice It Up: For those who love a little heat, add red pepper flakes or sriracha to your sauce. A pinch of spice enhances the overall flavor and gives it a vibrant kick.

  • Sweetness Adjustments: If you prefer less sweetness, reduce or completely omit the brown sugar. You might try a dash of liquid stevia or a splash of pineapple juice for a subtle sweetness without the sugar spike.

  • Sesame Oil Swap: In case you’re out of sesame oil, olive oil will do the trick. While it might alter the flavor slightly, it still delivers a deliciously rich experience.

  • Soy Sauce Options: Make it gluten-free by using tamari sauce or coconut aminos. Both alternatives provide the necessary umami without the gluten, making this bowl accessible to those with dietary restrictions.

  • Flavor Enhancements: Incorporate fresh herbs like cilantro or basil as a topping, adding a refreshing twist and depth of flavor. It's a simple tweak that elevates the dish beautifully.

Feel free to explore, create, and make this recipe uniquely yours! And if you’re looking for more quick recipes, check out the flavors of my Ground Beef Enchiladas or energize your mornings with an Acai Bowl Nutritious.

Korean Ground Beef Bowl Recipe FAQs

What type of ground beef should I use for this recipe?
I recommend using lean ground beef for a hearty base, but you can also swap it for ground turkey or chicken if you prefer a lighter option. Look for ground beef that’s around 85% lean to ensure it remains flavorful without excessive grease.

How should I store leftovers from the Korean Ground Beef Bowl?
Store any leftovers in an airtight container and keep them in the refrigerator for up to 3 days. When you’re ready to reheat, gently warm it in the microwave or on the stovetop to retain that delicious flavor. A splash of soy sauce can help revive the taste!

Can I freeze the Korean Ground Beef Bowl mixture?
Absolutely! The beef mixture can be frozen for up to 3 months. To freeze, let it cool completely, then transfer it to a freezer-safe bag or container. Ensure you remove excess air to prevent freezer burn. When it’s time to enjoy, simply thaw it overnight in the refrigerator before reheating.

What vegetables can I use in my beef bowl?
Feel free to customize your bowl with various vegetables! Popular choices include bell peppers, broccoli, snap peas, or even shredded carrots. Just make sure to chop them into similar sizes for even cooking. Pre-chopping them can save time on busy evenings!

Are there any dietary considerations for this recipe?
Yes, for gluten-free options, choose a gluten-free soy sauce. Additionally, if you’re preparing this meal for children or anyone with allergies, always check for any allergic reactions to specific ingredients, especially with soy and sesame. This makes it suitable and safe for the entire family!

Korean Ground Beef Bowl

Savory Korean Ground Beef Bowl That's Ready in 30 Minutes

Enjoy a delicious Korean Ground Beef Bowl that's quick to prepare and customizable with fresh vegetables.
Print Recipe Pin Recipe
Prep Time 10 minutes mins
Cook Time 20 minutes mins
Total Time 30 minutes mins
Servings: 4 bowls
Course: Dinner
Cuisine: Korean
Calories: 450
Ingredients Equipment Method Nutrition Notes

Ingredients
  

For the Beef Mixture
  • 1 pound ground beef or ground turkey for a lighter option
  • 1/4 cup soy sauce low-sodium recommended
  • 1 tablespoon brown sugar or honey as an alternative
  • 3 cloves garlic freshly minced
  • 1 tablespoon fresh ginger or ground ginger in a pinch
  • 1 tablespoon sesame oil olive oil can be a substitute
For the Vegetables
  • 2 stalks green onions chopped just before adding
  • 2 cups mixed vegetables bell peppers, broccoli, or your choice
For Serving
  • 2 cups rice white, brown, or cauliflower rice
  • 2 tablespoons sesame seeds for garnish

Equipment

  • Large skillet

Method
 

Step‑by‑Step Instructions
  1. Gather all ingredients. Chop vegetables and mince garlic and ginger.
  2. Heat sesame oil in a large skillet over medium-high heat. Add ground beef, cooking for 5-7 minutes until browned.
  3. Reduce heat to medium. Add garlic and ginger, sauté for 1-2 minutes.
  4. Pour in soy sauce and sprinkle brown sugar over beef. Stir and simmer for 2-3 minutes.
  5. Add chopped vegetables and cook for an additional 3-5 minutes.
  6. Prepare rice according to package instructions.
  7. Assemble bowls with rice topped with beef mixture and garnish with sesame seeds and green onions.

Nutrition

Serving: 1bowlCalories: 450kcalCarbohydrates: 40gProtein: 30gFat: 20gSaturated Fat: 5gPolyunsaturated Fat: 2gMonounsaturated Fat: 10gCholesterol: 80mgSodium: 800mgPotassium: 600mgFiber: 3gSugar: 5gVitamin A: 500IUVitamin C: 30mgCalcium: 30mgIron: 3mg

Notes

Customize with your favorite vegetables and adjust seasoning to taste.

Tried this recipe?

Let us know how it was!

Creamy Pumpkin Tiramisu You’ll Crave This Fall

October 28, 2025 by Grace Snow Leave a Comment

As the crisp air settles in and leaves start their colorful dance, my thoughts inevitably drift to delightful fall desserts. This season, I can’t get enough of my Easy No-Bake Creamy Pumpkin Tiramisu. With layers of rich mascarpone blended with warm pumpkin spices and dainty ladyfingers soaked in espresso, this dessert beautifully captures the essence of autumn. Not only is it a breeze to whip up—perfect for busy evenings—but it’s also a crowd-pleaser, making it ideal for holiday gatherings or cozy nights at home. You can indulge without ever turning on the oven! Curious about how to create this velvety, spiced wonder yourself? Let’s dive into the delicious details!

Why is Creamy Pumpkin Tiramisu a Must-Try?

Irresistible flavor: This Easy No-Bake Creamy Pumpkin Tiramisu boasts a delightful blend of spiced pumpkin and rich mascarpone that makes every bite memorable.

Quick and simple: With just a few straightforward steps, you can whip up this luscious dessert without any baking—perfect for busy schedules.

Fall favorite: Its seasonal flavors make it a standout choice for festive gatherings. Everyone will be asking for seconds!

Customizable options: Want to cater to different diets? Easily make it vegan or add chocolate for a twist.

Serves a crowd: With generous layers, it’s designed for sharing, ensuring your guests feel welcomed and satisfied.

Have you tried something similar? Pair it with a scoop of vanilla ice cream or consider serving this alongside my Pumpkin Cinnamon Roll for a delightful dessert spread!

Creamy Pumpkin Tiramisu Ingredients

• Gather these ingredients to make this delightful dessert!

For the Cream Layer

  • Mascarpone Cheese (15.87 oz) – The creamy base providing richness; select a high-quality brand for the best texture.
  • Pumpkin Puree (1/2 cup) – Infuses warm, seasonal flavor; ensure it’s pure puree, not pie filling.
  • Granulated Sugar (2/3 cup) – Sweetens the cream; reduce if using sweetened whipped cream.
  • Brown Sugar (1/3 cup) – Adds depth of flavor; can be swapped with coconut sugar for a twist.
  • Pumpkin Pie Spice (2 teaspoons) – Provides warmth and comfort; mix your own with cinnamon, nutmeg, and ginger if needed.
  • Kosher Salt (1/4 teaspoon) – Balances sweetness; fine sea salt works in a pinch.
  • Heavy Cream (2 cups, cold) – Creates a light, fluffy texture; try whipped coconut cream for a dairy-free option.

For the Ladyfinger Layer

  • Ladyfingers (28 pieces) – Builds the structure and offers a light sponge; homemade or sponge cake can also be used as a substitute.
  • Espresso or Strong Coffee (2 cups, cooled) – Soaks the ladyfingers for added flavor; cold brew works well if brewed strong.

For the Garnish

  • Cocoa Powder – Used for dusting the dessert before serving, adds a rich visual contrast.

Now you’re ready to make your Creamy Pumpkin Tiramisu and treat your taste buds to fall’s essence!

Step‑by‑Step Instructions for Easy Creamy Pumpkin Tiramisu

Step 1: Brew Coffee
Start by brewing 2 cups of strong espresso or coffee. Allow it to cool to room temperature, which should take about 15-20 minutes. This cooling step is essential to avoid sogging the ladyfingers. Once cooled, pour the coffee into a shallow dish.

Step 2: Make Cream
In a large mixing bowl, combine 15.87 oz of mascarpone cheese, 2/3 cup of granulated sugar, 1/3 cup of brown sugar, 1/4 teaspoon of kosher salt, and 2 teaspoons of pumpkin pie spice. Beat the mixture until it's smooth and creamy. Gradually blend in 1/2 cup of pumpkin puree, followed by 2 cups of cold heavy cream, whipping for about 3-4 minutes until you achieve a thick, mousse-like texture.

Step 3: Layer 1
Take your cooled coffee and quickly dip the ladyfingers, one at a time, for just 1-2 seconds to soak. Arrange them in a single layer at the bottom of a 13x9 inch dish, creating a sturdy base for your Easy Creamy Pumpkin Tiramisu. The ladyfingers should be soft but still hold their shape for the best texture.

Step 4: Cream Layer 1
Spoon half of the creamy pumpkin mixture over the first layer of coffee-soaked ladyfingers. Use a spatula to spread it evenly, ensuring every corner is covered. This creamy layer adds a delicious, rich contrast to the base, enriching the overall flavor of your tiramisu.

Step 5: Layer 2
Repeat the dipping process with another batch of ladyfingers, soaking them briefly in the cooled coffee. Arrange this new layer of ladyfingers on top of the first cream layer, ensuring they are placed closely together for good structure. The overlap will help to create a delightful balance in your Easy Creamy Pumpkin Tiramisu.

Step 6: Top
Spread the remaining creamy pumpkin mixture over the second layer of ladyfingers. Smooth the top layer with a spatula, making it as even and beautiful as possible. This final layer will be the star of your dessert, providing a luscious finish that welcomes guests in for a taste.

Step 7: Chill
Cover your assembled Creamy Pumpkin Tiramisu with plastic wrap or a lid. Refrigerate it for at least 4 hours, or ideally overnight, to allow the flavors to meld together. Chilling also helps the dessert set up properly, making it easier to slice and serve later.

Step 8: Finish & Serve
Before serving, dust the top of your Easy Creamy Pumpkin Tiramisu with cocoa powder for an elegant finishing touch. Optionally, you can sprinkle a little ground cinnamon on top for added warmth and spice. Slice it into squares, and get ready to impress your friends and family!

How to Store and Freeze Creamy Pumpkin Tiramisu

  • Fridge: Store your Creamy Pumpkin Tiramisu covered in the refrigerator for up to 3 days. This keeps it fresh and preserves the layers' texture.
  • Freezer: For longer storage, you can freeze the tiramisu for up to 2 months. Wrap it tightly in plastic wrap and foil to prevent freezer burn.
  • Thawing: When ready to enjoy, thaw your frozen Creamy Pumpkin Tiramisu in the fridge overnight. Avoid microwaving, as it can alter the creamy texture.
  • Serving After Freezing: Dust with cocoa powder just before serving for a fresh touch, as the garnish may not hold up during freezing.

What to Serve With Easy Creamy Pumpkin Tiramisu

Pairing a sweet and delightful dessert like this Easy Creamy Pumpkin Tiramisu can elevate your meal to a whole new level of comfort and joy.

  • Spiced Apple Cider: The warmth of spiced apple cider enhances the fall flavors, bringing cozy memories to the table.

  • Vanilla Ice Cream: A scoop of creamy vanilla ice cream adds a rich, smooth contrast to the fluffy tiramisu, creating a delightful melt-in-your-mouth experience.

  • Ginger Cookies: Crunchy ginger cookies add a satisfying texture while their spicy sweetness complements the pumpkin flavors beautifully.

  • Pecan Pie: This classic dessert pairs perfectly with the tiramisu, offering a nutty contrast that enhances the autumn vibe of your gathering.

  • Maple Whipped Cream: Adding a dollop of maple-flavored whipped cream brings a sweet, creamy touch that complements the pumpkin and spice tones beautifully.

  • Chocolate Espresso Martinis: For a sophisticated drink pairing, these cocktails elevate the coffee notes in your tiramisu while giving your guests a delightful indulgence.

  • Nutty Fall Salad: A fresh salad with toasted nuts, seasonal greens, and a light vinaigrette provides a crunchy balance to the creamy texture of the tiramisu.

  • Pumpkin Spice Latte: Serve alongside this iconic beverage to enhance the cozy ambiance and keep the pumpkin love alive.

  • Dark Chocolate Covered Almonds: The bitterness of dark chocolate paired with crunchy almonds adds an elegant touch to the dessert while complementing the sweet flavors of the tiramisu with a sophisticated twist.

Each of these pairings offers a unique twist, enhancing your Easy Creamy Pumpkin Tiramisu experience and making your gatherings unforgettable!

Expert Tips for Creamy Pumpkin Tiramisu

  • Quality Ingredients: Use high-quality mascarpone and pure pumpkin puree to enhance the flavor and texture, ensuring your Creamy Pumpkin Tiramisu stands out.
  • Coffee Cooling: Make sure the brewed coffee is fully cooled before dipping the ladyfingers. This prevents them from becoming too soggy, keeping the layers distinct.
  • Quick Dipping: Only dip ladyfingers for 1-2 seconds in coffee to maintain their structural integrity. Soaking too long can result in mushy layers.
  • Chill Time: For the best flavor, refrigerate your tiramisu for at least 4 hours but ideally overnight to allow the flavors to meld perfectly.
  • Layering Magic: Ensure that the layers of cream and ladyfingers are even and well-distributed; this balance creates a delightful texture in every bite.

Make Ahead Options

These Easy Creamy Pumpkin Tiramisu layers are perfect for meal prep enthusiasts! You can prepare the mascarpone cream and soak the ladyfingers up to 24 hours in advance for a quick, stress-free dessert. Just whip together the mascarpone, pumpkin puree, and spices, then layer with the coffee-soaked ladyfingers in your dish. Before serving, allow the tiramisu to chill in the refrigerator for at least 4 hours (or overnight) to ensure rich flavors meld together beautifully. For the best texture, cover it tightly with plastic wrap to prevent drying out. When it’s time to serve, simply dust with cocoa powder and enjoy this luscious fall treat with minimal effort!

Creamy Pumpkin Tiramisu Customizations

Feel free to personalize your Easy Creamy Pumpkin Tiramisu with these delightful variations that will only enhance your fall dessert experience!

  • Dairy-Free: Substitute heavy cream with whipped coconut cream for a creamy, rich alternative that fits any dairy-free diet. Your dessert will still maintain its luxurious texture!

  • Nutty Addition: Include 1/2 cup of toasted pecans or walnuts folded into the cream. This adds a satisfying crunch that contrasts beautifully with the smoothness of the mascarpone.

  • Chocolate Flavor: For a richer twist, fold in mini chocolate chips into the mascarpone mixture. Chocolate meets pumpkin is a dynamic duo that always pleases the palate.

  • Vegan Version: Easily turn this treat into a vegan delight by using coconut whipped cream and a vegan cream cheese alternative. Enjoy the same creamy goodness without any animal products!

  • Spicy Kick: Infuse a bit of heat by adding a pinch of cayenne or chili powder. This unexpected twist brings a delightful warmth to the classic pumpkin flavors.

  • Flavor Swap: Instead of pumpkin puree, try using sweet potato or butternut squash. Each swap brings its unique sweet earthiness, allowing you to switch up the flavor while still staying within the fall spirit.

  • Crunchy Topping: Sprinkle crushed gingersnaps or graham crackers on top before serving for an additional texture layer and a lovely crunch along with the softness.

Looking to extend your pumpkin cravings? You might find joy in my recipe for Pumpkin Brownies Decadent or perhaps treat yourself to some lovely Pumpkin Cinnamon Roll delights!

Creamy Pumpkin Tiramisu Recipe FAQs

How do I select the best pumpkin puree for my Creamy Pumpkin Tiramisu?
Absolutely! When choosing pumpkin puree, opt for 100% pure pumpkin without added sugars or spices. Look for labels that specifically state "pure pumpkin" on the can to ensure you're getting the real deal, as some products labeled "pumpkin" may contain fillers or additives.

How should I store my Creamy Pumpkin Tiramisu?
Store your Creamy Pumpkin Tiramisu covered in the refrigerator for up to 3 days. Make sure it’s tightly wrapped with plastic wrap or kept in an airtight container to maintain its layers' texture and flavor. If you want to keep it longer, consider freezing!

Can I freeze my Creamy Pumpkin Tiramisu?
Very much! You can freeze your Creamy Pumpkin Tiramisu for up to 2 months. Just wrap it tightly in plastic wrap and then in foil to prevent freezer burn. When you’re ready to enjoy, thaw it in the fridge overnight; avoid using the microwave, as it alters the creamy texture.

What if my ladyfingers become too soggy?
No worries! If you find your ladyfingers have become too soggy, it might be due to soaking them for too long in the coffee. Aim for a quick dip, just 1-2 seconds, to maintain their texture. If they’re overly soft, consider using a bit less coffee for the next batch or adjusting your dipping time.

Can I make a vegan version of the Creamy Pumpkin Tiramisu?
Absolutely! To make a vegan version, there are delightful alternatives. Use coconut whipped cream in place of heavy cream and a vegan cream cheese substitute for the mascarpone. Look for plant-based options that provide a similar creamy texture while ensuring a delicious pumpkin flavor!

What should I do with my Creamy Pumpkin Tiramisu leftovers?
After enjoying your delicious dessert, if you have any leftovers, keep them in the refrigerator properly covered for up to 3 days. Remember, the flavors improve with time, so your next serving may taste even better as the layers meld together!

Creamy Pumpkin Tiramisu

Creamy Pumpkin Tiramisu You’ll Crave This Fall

Indulge in this Easy No-Bake Creamy Pumpkin Tiramisu, a delightful dessert filled with warm spices and rich mascarpone, perfect for fall gatherings.
Print Recipe Pin Recipe
Prep Time 30 minutes mins
Chill Time 4 hours hrs
Total Time 4 hours hrs 30 minutes mins
Servings: 10 slices
Course: Dessert
Cuisine: Italian
Calories: 340
Ingredients Equipment Method Nutrition Notes

Ingredients
  

For the Cream Layer
  • 15.87 oz Mascarpone Cheese Select a high-quality brand for the best texture.
  • 1/2 cup Pumpkin Puree Ensure it’s pure puree, not pie filling.
  • 2/3 cup Granulated Sugar Reduce if using sweetened whipped cream.
  • 1/3 cup Brown Sugar Can be swapped with coconut sugar for a twist.
  • 2 teaspoons Pumpkin Pie Spice Mix your own with cinnamon, nutmeg, and ginger if needed.
  • 1/4 teaspoon Kosher Salt Fine sea salt works in a pinch.
  • 2 cups Heavy Cream Try whipped coconut cream for a dairy-free option.
For the Ladyfinger Layer
  • 28 pieces Ladyfingers Homemade or sponge cake can also be used as a substitute.
  • 2 cups Espresso or Strong Coffee Cold brew works well if brewed strong.
For the Garnish
  • Cocoa Powder Used for dusting the dessert before serving.

Equipment

  • Mixing Bowl
  • 13x9 inch dish
  • Shallow dish

Method
 

Step-by-Step Instructions
  1. Brew 2 cups of strong espresso or coffee and allow it to cool to room temperature for about 15-20 minutes.
  2. In a large mixing bowl, combine mascarpone cheese, granulated sugar, brown sugar, kosher salt, and pumpkin pie spice. Beat until smooth and creamy, then blend in pumpkin puree and heavy cream for 3-4 minutes until thick.
  3. Dip ladyfingers in cooled coffee for 1-2 seconds and arrange them in a single layer in a 13x9 inch dish.
  4. Spread half of the creamy pumpkin mixture over the first layer of coffee-soaked ladyfingers evenly.
  5. Repeat the dipping process and place another batch of ladyfingers on top of the first cream layer closely together.
  6. Spread the remaining creamy pumpkin mixture over the second layer of ladyfingers evenly.
  7. Cover with plastic wrap and refrigerate for at least 4 hours or ideally overnight to set.
  8. Before serving, dust with cocoa powder and slice into squares.

Nutrition

Serving: 1sliceCalories: 340kcalCarbohydrates: 40gProtein: 4gFat: 18gSaturated Fat: 10gPolyunsaturated Fat: 0.5gMonounsaturated Fat: 6gCholesterol: 75mgSodium: 90mgPotassium: 150mgFiber: 1gSugar: 20gVitamin A: 15IUVitamin C: 2mgCalcium: 6mgIron: 4mg

Notes

For the best flavor, refrigerate overnight. Use high-quality ingredients for best results.

Tried this recipe?

Let us know how it was!

Delicious Cranberry Glazed Chicken Thighs for Cozy Nights

October 28, 2025 by Grace Snow Leave a Comment

As I stood by the stove, the tantalizing aroma of cranberries mingling with spices wafted through my kitchen, instantly transporting me to cozy autumn evenings. This Easy Cranberry Glazed Chicken Thighs with Wild Rice Pilaf is not just a dish; it’s a warm hug on a plate, effortlessly bringing comfort to busy weeknights. In just 30 minutes, you can serve up a one-pan meal that’s not only gluten-free but also bursting with festive flavors that brighten chilly days. Picture tender chicken thighs bathed in a tangy-sweet glaze, perfectly complemented by the nutty richness of wild rice—it’s the kind of home-cooked goodness that makes you feel right at home. Let’s dive into this delightful recipe that promises to not only satisfy your taste buds but also save you time in the kitchen. Are you ready to impress your family with this flavorful autumn-inspired gem?

Why Are Cranberry Glazed Chicken Thighs a Must-Try?

Simplicity at Its Finest: This recipe comes together in just 30 minutes, making it perfect for busy weeknights.

Flavor Explosion: The tangy-sweet glaze infused with fresh cranberries and spices elevates your chicken to a whole new level.

One-Pan Wonder: Enjoy the ease of a truly one-pan meal, which means less cleanup and more dining delight—a win-win!

Versatile Comfort: Pair it with wild rice pilaf or mashed potatoes for a hearty meal that guests will rave about.

Crowd-pleaser: Watch everyone at the table light up with joy—nothing says comfort like juicy chicken dressed in a vibrant, sticky glaze.

This dish promises not only satisfaction but also a delightful dining experience that rivals your favorite takeout. For more chicken inspiration, check out our Honey Garlic Chicken Thighs or Spatchcock Chicken Flavor for flavorful weeknight ideas!

Cranberry Glazed Chicken Thighs Ingredients

• Here’s everything you’ll need for this delightful recipe!

For the Chicken

  • Boneless Skinless Chicken Thighs – Juicy meat for tenderness and even cooking. Bone-in thighs can enhance flavor; adjust cooking time accordingly.
  • Kosher Salt – Essential for seasoning both the chicken and glaze. No notable substitutions.
  • Fresh Ground Black Pepper – Adds depth to the chicken's flavor. No notable substitutions.
  • Extra-Virgin Olive Oil – Used for searing. No notable substitutions.

For the Glaze

  • Minced Shallot – Provides a savory base for the glaze. Can be replaced with onion if necessary.
  • Fresh Cranberries – Creates the tangy, sweet glaze. Frozen cranberries can be used if fresh are unavailable.
  • Water – Helps soften the cranberries during cooking. No notable substitutions.
  • Apple Cider Vinegar – Brings acidity to balance the glaze's sweetness. Rice vinegar can be a milder alternative.
  • Honey – Sweetens the glaze. Maple syrup or brown sugar can substitute for a different flavor profile.
  • Ground Ginger – Adds warmth and spice complexity. Fresh ginger can be used for a more robust flavor.
  • Allspice – Infuses subtle warmth. Can be omitted or replaced with cinnamon or nutmeg.

Garnish

  • Fresh Thyme – Enhances visual appeal and adds a fresh herbal note. No notable substitutions.

Gather these ingredients and get ready to whip up your delicious Cranberry Glazed Chicken Thighs that’ll warm your soul and impress your loved ones!

Step‑by‑Step Instructions for Cranberry Glazed Chicken Thighs

Step 1: Prep Chicken
Begin by patting your boneless skinless chicken thighs dry with paper towels. Season both sides generously with kosher salt and fresh ground black pepper, letting them rest on the countertop for about 10 minutes to allow the flavors to absorb and the meat to come to room temperature.

Step 2: Prepare Glaze
In a large skillet, heat 1 tablespoon of extra-virgin olive oil over medium heat. Once hot, add the minced shallots and sauté for about 2 minutes until they become fragrant and translucent. This will create a savory base for your cranberry glaze, enhancing the overall flavor of the dish.

Step 3: Cook Cranberries
Next, stir in the fresh cranberries, ½ cup of water, apple cider vinegar, and honey into the skillet. Allow the mixture to come to a gentle simmer and cook for 5–8 minutes, or until the cranberries burst and the glaze thickens to a syrupy consistency. The vibrant color and aroma will fill your kitchen, promising deliciousness ahead.

Step 4: Mash Cranberries
After cooking, lightly mash the cranberry mixture with a fork or potato masher to break down some of the fruit and create a cohesive glaze. Stir in ground ginger, allspice, and a pinch of salt, then let it simmer for an additional minute. Once combined, transfer the glaze to a bowl and set aside.

Step 5: Sear Chicken
Using the same skillet, add another tablespoon of extra-virgin olive oil and increase the heat to medium-high. Once the oil shimmers, add the chicken thighs skin-side down. Sear them for about 5–7 minutes or until they develop a beautiful golden-brown crust. Flip the thighs over and cook for an additional 4–6 minutes, ensuring the internal temperature reaches 165°F.

Step 6: Finish
After the chicken is cooked, reduce the heat to low and spoon the tangy cranberry glaze generously over each thigh. Allow the chicken to rest in the skillet for about 5 minutes, letting the glaze soak in. Before serving, garnish with fresh thyme for a pop of color and herbal freshness, elevating your cozy cranberry glazed chicken thighs to the next level!

Cranberry Glazed Chicken Thighs Variations

Feel free to explore these exciting twists to elevate your dish even further and suit your taste!

  • Cherry Glaze: Swap cranberries for cherries for a sweeter, fruitier glaze that pairs beautifully with chicken. The burst of cherry flavor will surprise your palate!

  • Milder Glaze: Reduce the apple cider vinegar to soften the tartness. You can add extra honey for balancing out the sweetness—perfect for the kiddos!

  • Turkey Upgrade: Incorporate leftover roasted turkey or chicken breasts for a delightful leaner version. This is a fantastic way to enjoy holiday leftovers!

  • Spicy Kick: Add crushed red pepper flakes to the glaze for a subtle heat that complements the sweet tang of cranberries. It’s all about that flavor balance!

  • Herby Twist: Mix in fresh rosemary or sage to the glaze for an aromatic experience. These herbs can bring an earthy note, making it cozy and vibrant.

  • Citrus Burst: Add a splash of fresh orange juice or zested orange peel to brighten your glaze's flavor profile. The citrus will awaken the dish beautifully!

  • Maple Sweetness: Substitute honey with maple syrup for a different depth of sweetness. The rich flavor of maple enhances the glaze and pairs so well with savory chicken.

  • Nutty Addition: Stir in some toasted pecans or walnuts right before serving for a delightful crunch, adding both texture and a nutty richness to the dish.

And if you’re seeking more delightful chicken recipes, check out Honey Garlic Chicken Thighs for another flavorful option that's sure to please!

Make Ahead Options

These Easy Cranberry Glazed Chicken Thighs are perfect for meal prep enthusiasts! You can prepare the glaze up to 24 hours in advance, allowing the flavors to meld beautifully. Simply simmer the cranberries, shallots, and spices, then let it cool before refrigerating in an airtight container. The chicken can also be seasoned and stored for up to 3 days in the fridge, ensuring it's ready to cook at a moment's notice. When you're ready to serve, simply sear the chicken and warm the glaze in a saucepan before drizzling it over the cooked thighs. This way, you’ll save time and still enjoy a comforting, restaurant-quality meal!

Storage Tips for Cranberry Glazed Chicken Thighs

Fridge: Store leftovers in an airtight container for up to 3 days. Make sure the chicken is cooled completely before sealing to maintain moisture.

Freezer: For longer storage, freeze the cranberry glazed chicken thighs and glaze separately for up to 2 months. Wrap each item tightly in plastic wrap and place in freezer bags for best results.

Reheating: Thaw overnight in the fridge and reheat gently on the stove over low heat. Add a splash of water if the glaze has thickened too much during freezing. Enjoy your juicy Cranberry Glazed Chicken Thighs as if they were just made!

What to Serve with Easy Cranberry Glazed Chicken Thighs

Elevate your dining experience with mouthwatering sides that beautifully complement this delightful one-pan dish.

  • Fluffy Wild Rice Pilaf: The nutty texture of wild rice adds a wholesome touch, soaking up every bit of that vibrant cranberry glaze.
  • Creamy Mashed Potatoes: The smooth and buttery richness balances the tangy glaze, creating a comforting and satisfying combination.
  • Roasted Root Vegetables: Caramelized carrots and parsnips bring earthy sweetness, enhancing the dish’s flavor palette with tender, roasted goodness.
  • Garlic Green Beans: Crisp-tender green beans drizzled with garlic-infused olive oil add a fresh crunch and a pop of color to your plate.

Pairing your chicken with a simple green salad is another excellent option. The lightness and freshness of mixed greens dressed in a lemon vinaigrette will contrast beautifully with the richness of the dish.

  • Apple Crisp: For a sweet ending, serve a warm apple crisp. Its cinnamon-spiced, caramelized apples will echo the cozy autumn vibes of your cranberry dish.
  • Cider Mimosas: Bright and refreshing, these drinks can be a delightful accompaniment, balancing savory and sweet notes with every sip.

Expert Tips for Cranberry Glazed Chicken Thighs

  • Prep Ahead: Prepare the glaze a day in advance for deeper flavors. Store it in the fridge and simply warm it up before using.

  • Searing Skills: Allow the chicken to sear undisturbed for the first few minutes. This prevents sticking and ensures a perfect golden crust.

  • Check for Doneness: Always use a meat thermometer to check that your chicken thighs reach an internal temperature of 165°F for safe eating.

  • Flavor Boost: Feel free to add a pinch of crushed red pepper flakes to the glaze for an unexpected hint of heat that complements the sweetness beautifully.

  • Watch the Glaze: Keep an eye on the glaze while it simmers. If it thickens too much, add a splash of water to maintain the right consistency for drizzling over your chicken.

Cranberry Glazed Chicken Thighs Recipe FAQs

How should I select fresh cranberries?
When choosing fresh cranberries, look for bright, glossy berries free of dark spots or blemishes. Firm cranberries that bounce when dropped are a good indication of freshness. If you find some that are too soft or shriveled, it's better to avoid them as they might be past their prime.

How should I store leftovers?
Absolutely! Store any leftovers in an airtight container and refrigerate them for up to 3 days. Make sure the chicken has cooled completely before sealing to retain moisture and flavor, ensuring a delicious meal when you're ready to enjoy it again.

Can I freeze cranberry glazed chicken thighs?
Yes, you can! For longer storage, freeze the chicken and glaze separately for up to 2 months. Wrap each portion tightly in plastic wrap, then place them in freezer bags labeled with the date. When ready to eat, thaw the items overnight in the fridge, and gently reheat on the stove over low heat. If the glaze thickens too much, add a splash of water to revive it.

What if my glaze turns out too thick?
If your glaze is too thick, do not fret! Just add a tablespoon of water at a time while gently stirring it over low heat until you reach your desired consistency. This adjustment can help you achieve that perfect, drizzly glaze without losing flavor.

Can I adapt this recipe for dietary restrictions?
Certainly! This recipe is naturally gluten-free, but if you're allergic to certain ingredients, consider alternatives such as using maple syrup instead of honey or skipping the ginger if you're sensitive to spices. For those cooking for pets, ensure no sauce or glaze makes it into your furry friends' meals, as some ingredients may not be suitable for them.

Can I use frozen cranberries instead?
Yes! If fresh cranberries aren't available, frozen cranberries work just as well. Simply toss them into the skillet without thawing—they'll cook down beautifully and create that delightful glaze you’re after. This substitution makes the recipe even more convenient for any time of the year!

Cranberry Glazed Chicken Thighs

Delicious Cranberry Glazed Chicken Thighs for Cozy Nights

Indulge in Cranberry Glazed Chicken Thighs, a warm, comforting dish perfect for busy evenings.
Print Recipe Pin Recipe
Prep Time 10 minutes mins
Cook Time 20 minutes mins
Resting Time 5 minutes mins
Total Time 30 minutes mins
Servings: 4 servings
Course: Dinner
Cuisine: American
Calories: 350
Ingredients Equipment Method Nutrition Notes

Ingredients
  

For the Chicken
  • 1 pound Boneless Skinless Chicken Thighs Bone-in thighs can enhance flavor; adjust cooking time accordingly.
  • 1 teaspoon Kosher Salt Essential for seasoning both the chicken and glaze.
  • 1 teaspoon Fresh Ground Black Pepper Adds depth to the chicken's flavor.
  • 1 tablespoon Extra-Virgin Olive Oil Used for searing.
For the Glaze
  • 1 tablespoon Minced Shallot Can be replaced with onion if necessary.
  • 1 cup Fresh Cranberries Frozen cranberries can be used if fresh are unavailable.
  • 0.5 cup Water Helps soften the cranberries during cooking.
  • 2 tablespoons Apple Cider Vinegar Brings acidity to balance the glaze's sweetness.
  • 2 tablespoons Honey Sweetens the glaze.
  • 1 teaspoon Ground Ginger Adds warmth and spice complexity.
  • 0.25 teaspoon Allspice Can be omitted or replaced with cinnamon or nutmeg.
Garnish
  • 2 sprigs Fresh Thyme Enhances visual appeal and adds a fresh herbal note.

Equipment

  • Skillet

Method
 

Step-by-Step Instructions
  1. Begin by patting your boneless skinless chicken thighs dry with paper towels. Season both sides generously with kosher salt and fresh ground black pepper, letting them rest on the countertop for about 10 minutes to allow the flavors to absorb and the meat to come to room temperature.
  2. In a large skillet, heat 1 tablespoon of extra-virgin olive oil over medium heat. Once hot, add the minced shallots and sauté for about 2 minutes until they become fragrant and translucent.
  3. Stir in the fresh cranberries, ½ cup of water, apple cider vinegar, and honey into the skillet. Allow the mixture to come to a gentle simmer and cook for 5–8 minutes, or until the cranberries burst and the glaze thickens to a syrupy consistency.
  4. Lightly mash the cranberry mixture with a fork or potato masher to break down some of the fruit and create a cohesive glaze. Stir in ground ginger, allspice, and a pinch of salt, then let it simmer for an additional minute.
  5. Using the same skillet, add another tablespoon of extra-virgin olive oil and increase the heat to medium-high. Once the oil shimmers, add the chicken thighs skin-side down. Sear them for about 5–7 minutes or until they develop a beautiful golden-brown crust.
  6. Flip the thighs over and cook for an additional 4–6 minutes, ensuring the internal temperature reaches 165°F.
  7. Reduce the heat to low and spoon the tangy cranberry glaze generously over each thigh. Allow the chicken to rest in the skillet for about 5 minutes, letting the glaze soak in. Garnish with fresh thyme before serving.

Nutrition

Serving: 1servingCalories: 350kcalCarbohydrates: 30gProtein: 34gFat: 10gSaturated Fat: 1.5gPolyunsaturated Fat: 0.5gMonounsaturated Fat: 6gCholesterol: 150mgSodium: 560mgPotassium: 450mgFiber: 3gSugar: 10gVitamin A: 300IUVitamin C: 15mgCalcium: 20mgIron: 2mg

Notes

This dish can be paired with wild rice pilaf or mashed potatoes for a hearty meal that guests will rave about.

Tried this recipe?

Let us know how it was!

Keto Hamburger Broccoli Skillet – A Quick & Creamy Delight

October 28, 2025 by Grace Snow Leave a Comment

Chopping vegetables and hearing the sizzling sound of ground beef in the skillet is a symphony I adore. The Keto Hamburger Broccoli Skillet captures this joy, marrying the hearty richness of ground beef with vibrant broccoli and melty cheddar cheese, all in one easy dish. In just 30 minutes, you can whip up this quick meal that’s perfect for those hectic weeknights, delighting your taste buds while keeping your carb count in check. Not only is this recipe a time-saver, but it also packs a nutritious punch that leaves you feeling satisfied and guilt-free. Are you ready to indulge in a low-carb dish that truly delights? Let's dive in!

Why is this skillet a must-try?

Quick and Easy: This Keto Hamburger Broccoli Skillet comes together in just 30 minutes—ideal for busy evenings!

One-Pan Wonder: Say goodbye to dish duty; everything cooks in one pan, keeping cleanup a breeze.

Flavor-Packed: With ground beef, fresh broccoli, and gooey cheddar, this dish offers rich flavors that will satisfy even the pickiest eaters.

Nutritious and Low-Carb: Enjoy a hearty meal that fits perfectly into your keto lifestyle without sacrificing taste or satisfaction.

Versatile Options: Feel free to mix it up with different proteins or veggies; it's all about what you love! If you’re looking for more delicious one-pan ideas, check out Skillet Pasta Sun for another quick recipe!

Keto Hamburger Broccoli Skillet Ingredients

For the Skillet

  • Ground Beef – Provides protein and richness; substitute with ground turkey or chicken for a leaner option.
  • Broccoli Florets – Adds nutrition and a vibrant green color; fresh or frozen can be used, but ensure preservation of crunch.
  • Diced Onion – Enhances flavor and sweetness; shallots can also be substituted for a milder taste.
  • Minced Garlic – Offers aromatic flavors; garlic powder may be used as a substitute.
  • Olive Oil – Used for sautéing, adds healthy fats; vegetable oil can be an alternative.
  • Salt – Enhances overall flavor; adjust to taste.
  • Black Pepper – Adds spice; freshly cracked is recommended for better flavor.
  • Garlic Powder & Onion Powder – Provide depth of flavor; use fresh garlic for a stronger taste if desired.

For the Creamy Sauce

  • Heavy Cream – Makes the sauce rich and creamy; coconut cream can be used for a dairy-free option.
  • Shredded Cheddar Cheese – Creates a creamy texture and savory flavor; Monterey Jack can be used for a different taste.
  • Worcestershire Sauce (optional) – Adds an umami flavor, perfect for enhancing the dish.
  • Red Pepper Flakes (optional) – Provides a spicy kick, great for those who enjoy a little heat.

This Keto Hamburger Broccoli Skillet is a delightful way to enjoy a wholesome meal without the fuss, perfectly blending flavors and nutrition in one quick dish.

Step‑by‑Step Instructions for Keto Hamburger Broccoli Skillet

Step 1: Sauté the Ground Beef
In a large skillet, heat 2 tablespoons of olive oil over medium heat until shimmering. Add 1 pound of ground beef, breaking it apart with a spatula as it cooks. Stir frequently for about 6-8 minutes, or until the meat is browned and no longer pink. Once cooked, ensure it's well distributed in the skillet before moving to the next step.

Step 2: Add Aromatics
Push the cooked ground beef to one side of the skillet. Add 1 diced onion and 2 minced garlic cloves to the open space. Sauté these aromatic ingredients for about 3 minutes until the onion becomes translucent and fragrant. This blend will amplify the flavors in your Keto Hamburger Broccoli Skillet, creating a savory base for the dish.

Step 3: Introduce the Broccoli
Next, toss in 2 cups of broccoli florets, stirring them into the skillet for about 1 minute. Season generously with salt, black pepper, garlic powder, and onion powder to taste. The bright green broccoli will add a vibrant crunch, so ensure it gets coated in the seasonings for maximum flavor.

Step 4: Cook the Broccoli
Cover the skillet with a lid and reduce the heat to medium-low. Let the broccoli steam and cook for 5-7 minutes, stirring halfway through, until it becomes tender yet still crisp. This method will preserve its beautiful bright color and nutritional benefits while soaking up the flavors around it.

Step 5: Create the Creamy Base
Stir in ½ cup of heavy cream, scraping the bottom of the skillet to incorporate any flavorful bits leftover from the ground beef and vegetables. Mix thoroughly to create a creamy sauce that binds all the ingredients together, enhancing the richness of your Keto Hamburger Broccoli Skillet.

Step 6: Melt the Cheese
Sprinkle 1 cup of shredded cheddar cheese over the skillet mixture. Cover with a lid again and allow it to melt for about 2-3 minutes. The cheese will transform into a gooey topping that brings everything together wonderfully, adding that comforting element we all love.

Step 7: Final Seasoning Touches
For an extra flavor boost, drizzle a little Worcestershire sauce and sprinkle some red pepper flakes over the top, if desired. These optional ingredients add depth and a hint of heat to your Keto Hamburger Broccoli Skillet. Stir gently to combine just before serving.

What to Serve with Keto Hamburger Broccoli Skillet

Brighten your meal experience with delightful side dishes that perfectly complement this hearty one-pan wonder.

  • Cauliflower Rice: A fluffy and low-carb alternative to enhance the wholesome flavor of the skillet, providing additional texture and nutrients. Serve it drizzled with a touch of olive oil for extra richness.

  • Simple Green Salad: Crisp lettuce topped with refreshing cucumbers and a tangy vinaigrette balances the richness of the skillet, offering a light contrast that's both vibrant and nutritious.

  • Garlic Breadsticks: Treat yourself with warm, buttery breadsticks that add a satisfying crunch and soak up the creamy sauce. They’re perfect for dipping, making every bite even more enjoyable.

  • Roasted Asparagus: Tender asparagus spears, roasted with a drizzle of olive oil and a sprinkle of salt, add a pop of color and freshness to your plate. Their crisp texture beautifully complements the dish.

  • Sparkling Water with Lemon: Refreshing and bubbly, this zesty drink cleanses the palate and enhances the meal without adding any carbs. Add a slice of lemon for a hint of brightness.

  • Baked Sweet Potato Wedges: Sweet potatoes bring a natural sweetness that contrasts nicely with the savory skillet, while their fiber content keeps you feeling full. Dip them in the skillet’s creamy sauce for a delicious twist.

  • Creamy Coleslaw: A light and crunchy slaw made with cabbage, carrots, and a creamy dressing offers a refreshing side that cuts through the richness of the Keto Hamburger Broccoli Skillet.

  • Dark Chocolate Dessert: For a little indulgence, treat yourself with a small serving of dark chocolate. Its richness and slight bitterness complement the dish beautifully, satisfying your sweet cravings without going overboard.

Make Ahead Options

These Keto Hamburger Broccoli Skillets are perfect for meal prep enthusiasts! You can chop the broccoli, onion, and garlic and store them in the refrigerator up to 3 days in advance, keeping them fresh in an airtight container. Additionally, you can brown the ground beef and season it, then refrigerate this mixture for up to 24 hours. When you're ready to enjoy your meal, simply sauté the onions and garlic, add in the prepped beef and broccoli, and proceed with the creamy sauce preparation. This way, you’ll have a delicious, homemade dish with minimal effort, ensuring every bite is just as satisfying as when freshly made!

Expert Tips for Keto Hamburger Broccoli Skillet

  • Watch the Cooking Time: Keep an eye on the broccoli to maintain its vibrant color and crunch; aim for tender yet crisp florets.

  • Use Fresh Ingredients: For the best flavor in your Keto Hamburger Broccoli Skillet, opt for fresh garlic and high-quality cheese instead of pre-packaged options.

  • Taste as You Go: Don't hesitate to adjust seasonings while cooking. Gradually add salt and spices to suit your personal preference—it's easier to add than to remove!

  • Experiment with Variations: Tweak the recipe by substituting ground beef with turkey, or add other colorful vegetables. It's all about creating your perfect low-carb meal!

  • Reheating Tips: When reheating leftovers, add a splash of cream or a bit of water to keep the dish moist and avoid drying it out.

Keto Hamburger Broccoli Skillet Variations

Feel free to get creative with this delicious recipe and make it your own; the possibilities are endless!

  • Ground Turkey: Swap ground beef for ground turkey for a leaner protein option that still delivers delicious flavor.

  • Extra Veggies: Add bell peppers or zucchini to the mix for a colorful, nutrient-packed addition that enhances both flavor and texture.

  • Cheese Change: Switch out cheddar for mozzarella or pepper jack for a milder or spicier flavor profile; it brings a new dimension to every bite.

  • Coconut Cream: For a dairy-free twist, swap heavy cream for coconut cream, creating a subtle sweetness that pairs beautifully with the savory elements.

  • Cauliflower Rice Base: Serve your skillet over cauliflower rice or zucchini noodles, making the dish feel more filling while keeping it low-carb.

  • Herb Boost: Mix in some fresh herbs like basil or parsley right before serving for a fresh pop of flavor and a beautiful presentation.

  • Spice It Up: For those who crave heat, add chopped jalapeños or a dash of your favorite hot sauce to give the skillet a fiery kick.

  • Savory Mushrooms: Incorporate sautéed mushrooms for an earthy flavor that complements the beef and broccoli beautifully.

For more tempting one-pan recipes, be sure to check out the flavorful Skillet Pasta Sun to keep your mealtime exciting!

How to Store and Freeze Keto Hamburger Broccoli Skillet

Fridge: Store leftovers in an airtight container for up to 3 days. Make sure to seal it well to retain flavors and freshness.

Freezer: Portion out the skillet into freezer-safe containers or bags for easy meal prep. It can be frozen for up to 2 months. Thaw overnight in the fridge before reheating.

Reheating: For best results, reheat the Keto Hamburger Broccoli Skillet in a skillet over medium heat, adding a splash of heavy cream or water to keep it creamy and moist.

Room Temperature: Consume any leftovers within 2 hours to avoid spoilage. Always refrigerate after this timeframe to maintain safety.

Keto Hamburger Broccoli Skillet Recipe FAQs

What type of broccoli should I use for this recipe?
You can use either fresh or frozen broccoli florets for the Keto Hamburger Broccoli Skillet. Fresh broccoli gives a nice crunch and vibrant color, while frozen can save time. If using frozen, ensure it’s thawed and drained to prevent excess moisture in your dish.

How should I store leftovers of the Keto Hamburger Broccoli Skillet?
Store leftovers in an airtight container in the refrigerator for up to 3 days. Make sure to seal it well to retain freshness and flavors. If you find yourself with extra portions, freezing it can extend its life significantly!

Can I freeze the Keto Hamburger Broccoli Skillet?
Absolutely! To freeze, portion the dish into freezer-safe containers or bags, labeling them with the date. It can be frozen for up to 2 months. When you're ready to enjoy it again, simply thaw overnight in the fridge and reheat on the stovetop. Adding a splash of heavy cream while reheating keeps it creamy and delicious.

What if my broccoli seems too mushy after cooking?
No worries! To avoid overcooking, keep a close eye on the broccoli when covered. Aim for a tender yet crisp texture by cooking for about 5-7 minutes. If you notice it getting mushy, next time try reducing the cooking time or checking it halfway to stir and monitor its crunch factor.

Are there any dietary considerations for this dish?
The Keto Hamburger Broccoli Skillet is low-carb and perfect for those following a ketogenic diet. If you have allergies, be cautious with any dairy; you can substitute heavy cream with coconut cream for a dairy-free option. Always ensure that spices and additional ingredients like Worcestershire sauce are suitable for your dietary needs.

Can I add different vegetables to the skillet?
Yes, the more the merrier! You can easily add bell peppers, zucchini, or even spinach to the mix. Just chop them up to a similar size as the broccoli and adjust the cooking time slightly based on how quickly they cook. This flexibility makes the Keto Hamburger Broccoli Skillet an easy way to incorporate more veggies into your meals!

Keto Hamburger Broccoli Skillet

Keto Hamburger Broccoli Skillet – A Quick & Creamy Delight

Keto Hamburger Broccoli Skillet is a quick and creamy low-carb dish that blends ground beef, broccoli, and cheddar cheese in just 30 minutes.
Print Recipe Pin Recipe
Prep Time 10 minutes mins
Cook Time 20 minutes mins
Total Time 30 minutes mins
Servings: 4 servings
Course: Dinner
Cuisine: American
Calories: 450
Ingredients Equipment Method Nutrition Notes

Ingredients
  

For the Skillet
  • 1 pound Ground Beef Provides protein and richness; substitute with ground turkey or chicken for a leaner option.
  • 2 cups Broccoli Florets Adds nutrition and a vibrant green color; fresh or frozen can be used.
  • 1 medium Diced Onion Enhances flavor and sweetness; shallots can also be substituted.
  • 2 cloves Minced Garlic Offers aromatic flavors; garlic powder may be used as a substitute.
  • 2 tablespoons Olive Oil Used for sautéing, adds healthy fats; vegetable oil can be an alternative.
  • to taste Salt Enhances overall flavor; adjust to taste.
  • to taste Black Pepper Adds spice; freshly cracked is recommended for better flavor.
  • 1 teaspoon Garlic Powder Provides depth of flavor; use fresh garlic for a stronger taste if desired.
  • 1 teaspoon Onion Powder Provides depth of flavor; use fresh onion for a stronger taste if desired.
For the Creamy Sauce
  • ½ cup Heavy Cream Makes the sauce rich and creamy; coconut cream can be used for a dairy-free option.
  • 1 cup Shredded Cheddar Cheese Creates a creamy texture and savory flavor; Monterey Jack can be used for a different taste.
  • to taste Worcestershire Sauce Adds an umami flavor, perfect for enhancing the dish.
  • to taste Red Pepper Flakes Provides a spicy kick, great for those who enjoy a little heat.

Equipment

  • Skillet

Method
 

Cooking Instructions
  1. In a large skillet, heat 2 tablespoons of olive oil over medium heat until shimmering. Add 1 pound of ground beef, breaking it apart with a spatula as it cooks. Stir frequently for about 6-8 minutes, or until the meat is browned and no longer pink.
  2. Push the cooked ground beef to one side of the skillet. Add 1 diced onion and 2 minced garlic cloves to the open space. Sauté these aromatic ingredients for about 3 minutes until the onion becomes translucent and fragrant.
  3. Next, toss in 2 cups of broccoli florets, stirring them into the skillet for about 1 minute. Season generously with salt, black pepper, garlic powder, and onion powder to taste.
  4. Cover the skillet with a lid and reduce the heat to medium-low. Let the broccoli steam and cook for 5-7 minutes, stirring halfway through, until it becomes tender yet still crisp.
  5. Stir in ½ cup of heavy cream, scraping the bottom of the skillet to incorporate any flavorful bits leftover. Mix thoroughly to create a creamy sauce.
  6. Sprinkle 1 cup of shredded cheddar cheese over the mixture. Cover with a lid and allow it to melt for about 2-3 minutes.
  7. For an extra flavor boost, drizzle a little Worcestershire sauce and sprinkle some red pepper flakes over the top, if desired. Stir gently to combine just before serving.

Nutrition

Serving: 1servingCalories: 450kcalCarbohydrates: 8gProtein: 35gFat: 35gSaturated Fat: 15gPolyunsaturated Fat: 1gMonounsaturated Fat: 8gCholesterol: 90mgSodium: 600mgPotassium: 640mgFiber: 4gSugar: 2gVitamin A: 500IUVitamin C: 70mgCalcium: 250mgIron: 3mg

Notes

Store leftovers in an airtight container for up to 3 days. For freezing, portion out into freezer-safe containers for up to 2 months. Reheat in a skillet with a splash of cream or water to keep it moist.

Tried this recipe?

Let us know how it was!

Crockpot Sweet Corn & Pepper Jack White Chicken Chili Bliss

October 28, 2025 by Grace Snow Leave a Comment

As I stood at the crossroads of a busy week, a comforting thought emerged: the simmering magic of my slow cooker. That's when I realized it was the perfect time for my Crockpot Sweet Corn & Pepper Jack White Chicken Chili, a dish that brings warmth and joy with little effort. This creamy delight melds the sweetness of corn with the zesty kick of pepper jack cheese and tender chicken, turning a chaotic day into a cozy, satisfying experience. With just a few minutes of prep, you can set it and forget it, leaving you free to focus on life while it transforms itself into a hearty meal. Plus, this dish is gluten-free if you choose the right broth, making it a wholesome option for everyone. So, are you ready to fill your home with luscious aromas and tantalizing flavors? Let’s dive into this creamy creation!

Why is this chili a must-try?

Comforting, creamy goodness: This Crockpot Sweet Corn & Pepper Jack White Chicken Chili wraps you in a warm embrace, perfect for busy days when you crave a satisfying meal.

Effortlessly prepared: Just toss in your ingredients, set your slow cooker, and let it do the work—no fuss, no stress!

Flavor-packed: The balance of sweet corn and spicy pepper jack cheese creates a delightful taste that keeps everyone coming back for more.

Versatile: Want to switch it up? Easily adapt this recipe for vegetarians or use raw chicken for those days when prep time is minimal.

Healthy and hearty: Packed with protein and fiber, it's not just a treat; it’s a nourishing meal that adds wholesome nutrition to your table.

Perfect pairings: Serve it alongside cornbread, or consider complementing it with a fresh salad for a delightful dining experience.

Crockpot Sweet Corn & Pepper Jack White Chicken Chili Ingredients

• To create this comforting dish, gather your flavorful ingredients!

For the Base

  • Yellow onion – Adds depth of flavor; substitute with shallots for a milder taste.
  • Garlic cloves – Provide aromatic warmth; use garlic powder if fresh is unavailable (1/4 teaspoon per clove).
  • Ground cumin – Offers an earthy flavor; can be substituted with coriander for a different spice profile.
  • Dried oregano – Contributes a herbaceous note; substitute with Italian seasoning for a more complex flavor.
  • Chili powder – Adds heat; adjust to taste; smoked chili powder could enhance smokiness.
  • Salt – Enhances overall flavor; use low-sodium options to control salt intake.
  • Black pepper – Adds pungency; use white pepper for a milder touch.

For the Chili

  • Diced green chiles – Provide a mild kick; canned jalapeños can be used for added spiciness.
  • Shredded cooked chicken – Serves as the protein base; rotisserie chicken is a great time-saver.
  • White beans – Adds creaminess and fiber; substitute with chickpeas or more beans for a vegetarian option.
  • Frozen sweet corn – Adds sweetness and texture; fresh corn can be used for an even sweeter flavor.
  • Low-sodium chicken broth – Keeps the dish flavorful without excess sodium; vegetable broth can be used for a vegetarian version.

For Creaminess

  • Cream cheese – Provides creaminess and richness; use Neufchâtel for a lower-fat alternative.
  • Shredded pepper jack cheese – Adds flavor and a bit of heat; can be replaced with Monterey Jack for a milder flavor.
  • Sour cream – Offers tang and creaminess; Greek yogurt can serve as a healthy alternative.
  • Lime juice – Adds acidity and brightness; lemon juice is a suitable substitute.

For Garnish

  • Fresh cilantro – Used as a garnish for freshness; omit if not preferred.

Equipped with these ingredients, you'll be on your way to crafting a comforting bowl of Crockpot Sweet Corn & Pepper Jack White Chicken Chili that the whole family will love!

Step‑by‑Step Instructions for Crockpot Sweet Corn & Pepper Jack White Chicken Chili

Step 1: Combine the Base Ingredients
In your crockpot, start by adding the diced yellow onion and minced garlic cloves. Sprinkle in the ground cumin, dried oregano, chili powder, salt, and black pepper. Give the mixture a good stir to integrate all the spices and set the stage for your flavorful Crockpot Sweet Corn & Pepper Jack White Chicken Chili.

Step 2: Add the Main Ingredients
Next, incorporate the diced green chiles, shredded cooked chicken, white beans, and frozen sweet corn into the mix. Pour in the low-sodium chicken broth, ensuring every ingredient is well-coated. This combination of savory and sweet sets the foundation for a hearty chili that will meld beautifully as it cooks.

Step 3: Set to Cook
Cover your crockpot with the lid and set it to cook on low for 4 to 6 hours. Avoid stirring during this time, allowing the flavors to meld undisturbed. As the chili simmers, your home will be filled with an enticing aroma that builds anticipation for the creamy delight to come.

Step 4: Incorporate Creaminess
After the cooking time, carefully lift the lid of your crockpot, and stir in the softened cream cheese. Allow it to melt for about 5 minutes, stirring gently until it creates a smooth, creamy consistency in your chili. This step transforms your Crockpot Sweet Corn & Pepper Jack White Chicken Chili into a comforting dish with luscious texture.

Step 5: Finish with Cheesy Goodness
Once cream cheese is fully blended, mix in the shredded pepper jack cheese, sour cream, and lime juice. Stir thoroughly to ensure everything is combined well. This adds an extra layer of richness and zest, making your chili feel indulgent while maintaining its comforting essence.

Step 6: Serve and Garnish
Spoon the hot chili into bowls and garnish with fresh cilantro, extra cheese, or a dollop of sour cream, if desired. Each serving of your Crockpot Sweet Corn & Pepper Jack White Chicken Chili is a warm hug in a bowl, ready to warm your heart and satisfy your hunger.

Crockpot Sweet Corn & Pepper Jack White Chicken Chili Variations

Feel free to get creative with this delicious chili—these simple swaps and twists will elevate your dish into something uniquely yours!

  • Vegetarian: Swap the chicken for additional white beans or chickpeas to create a hearty, meatless option. You’ll maintain the satisfying creaminess while embracing plant-based goodness.

  • Extra Veggies: Toss in diced bell peppers, zucchini, or even corn salsa for a delightful explosion of color and nutrients. Each added veggie contributes a fresh flavor that complements the chili's rich base perfectly.

  • Smoky Depth: Replace some of the chili powder with smoked paprika for an extra layer of smokiness. It can transform the chili's flavor profile, making it deeply satisfying.

  • Creamy Texture Boost: For an extra creamy bowl, consider stirring in a touch of coconut milk or cream after cooking. This adds a luxurious, silky finish to your Crockpot Sweet Corn & Pepper Jack White Chicken Chili.

  • Heat it Up: Craving some spice? Add diced jalapeños or a pinch of cayenne pepper to crank up the heat level. Adjust to your family's taste—every bite is sure to please!

  • Cheese Variety: Experiment with different cheese blends—like sharp cheddar or a hint of blue cheese for something bold. Each cheese adds its own personality to the overall taste!

  • Flavorful Broth: Try using homemade broth or a bold vegetable broth instead of store-bought to enhance the flavor. It’s a simple step that can make a significant impact on this comforting dish.

  • Toppings Galore: Step up your garnishing game with toppings like avocado slices, crispy tortilla strips, or even a drizzle of hot sauce for a fun, vibrant chili experience.

By incorporating these variations, you'll create a memorable and delightful chili experience worth sharing. Pair it with some Roasted Corn Fried or enjoy it alongside Crockpot Butter Chicken for an inviting family meal everyone will love!

What to Serve with Crockpot Sweet Corn & Pepper Jack White Chicken Chili

Looking to create a delightful meal alongside your chili? Let these scrumptious pairings elevate your dining experience!

  • Cornbread: Soft and buttery, cornbread adds a sweet contrast that complements the chili’s creamy texture beautifully.
  • Tortilla Chips: Crunchy and perfect for dipping, they offer a satisfying texture that pairs well with the hearty chili. Enjoy with a side of fresh salsa for a vibrant kick!
  • Simple Green Salad: A crisp salad with mixed greens, cucumbers, and a light vinaigrette brings freshness to balance the chili's richness.
  • Guacamole: Creamy and zesty, guacamole provides a delightful richness that pairs wonderfully with the tortilla chips or directly with the chili.
  • Sour Cream and Lime Wedges: Classic garnishes that add a tangy touch and enhance the flavors in your chili, ensuring every bite is luscious and refreshing.
  • Pickled Jalapeños: For spice enthusiasts, these tangy additions provide a punch of flavor that complements the creaminess with some heat.
  • Homemade Coleslaw: Crunchy and cool, coleslaw can offer a refreshing contrast and enhance the overall dining experience with its creamy dressing.
  • Refreshing Lemonade: A glass of chilled lemonade pairs perfectly, cutting through the richness with its bright, sweet-tart flavor.
  • Chocolate Chip Cookies: For dessert, finish on a sweet note with warm, gooey chocolate chip cookies that contrast wonderfully with the savory chili.
  • Spiced Apple Cider: A warm beverage that's perfect for fall, spiced apple cider brings cozy, comforting flavors that echo the warmth of the chili.

Make Ahead Options

These Crockpot Sweet Corn & Pepper Jack White Chicken Chili preparations are perfect for busy home cooks looking to save time! You can chop the vegetables (onion and garlic) and combine the spices up to 24 hours in advance. Just store them in an airtight container in the refrigerator to keep them fresh. Additionally, you can shred the chicken and have the white beans and corn ready to go. When you're ready to cook, simply add all the prepped ingredients to your slow cooker, pour in the broth, and let it simmer. This way, you'll enjoy a cozy, delicious meal with minimal effort, making weeknight dinners a breeze!

Expert Tips for Your Crockpot Chili

  • Cook Low and Slow: For the best flavors, always cook on low. High can lead to uneven cooking and dried-out chicken.

  • Use Rotisserie Chicken: Save time by using rotisserie chicken instead of raw; it adds flavor and moisture without extra effort.

  • Be Careful with Dairy: If planning to freeze leftovers, do so before adding cream cheese and sour cream. Stir these in when reheating for the best texture.

  • Adjust the Spice Level: If you're sensitive to spice, start with less chili powder and add more as desired—it's easier to increase heat than to take it away!

  • Vegetarian Options: Want a meatless meal? Swap in extra beans or lentils as a protein source; the Crockpot Sweet Corn & Pepper Jack White Chicken Chili will still be delicious!

How to Store and Freeze Crockpot Sweet Corn & Pepper Jack White Chicken Chili

Fridge: Store leftovers in an airtight container for up to 3 days. Make sure the chili is cooled to room temperature before sealing to maintain freshness.

Freezer: Place cooled chili in freezer-safe containers or bags, leaving some space for expansion. It will keep well for up to 3 months.

Reheating: Thaw in the refrigerator overnight before reheating. Warm on the stovetop or in the microwave, adding a splash of broth to restore creaminess.

Dairy Addition: If you plan to freeze your Crockpot Sweet Corn & Pepper Jack White Chicken Chili, do so before adding cream cheese and sour cream. Stir in the dairy when reheating for the best texture.

Crockpot Sweet Corn & Pepper Jack White Chicken Chili Recipe FAQs

What type of corn should I use?
For the best sweetness and texture, I recommend using frozen sweet corn. However, if you're lucky enough to have fresh corn, that can elevate the flavor even more! Just make sure to cut the kernels off the cob for the perfect bite-sized pieces.

How should I store leftovers?
Absolutely! Store any leftovers in an airtight container in the refrigerator for up to 3 days. Make sure it’s cooled to room temperature before sealing it to keep it fresh and delicious.

Can I freeze this chili?
Yes, you can! To freeze your Crockpot Sweet Corn & Pepper Jack White Chicken Chili, allow it to cool completely, then place it in freezer-safe containers or bags. It will stay fresh for up to 3 months. Just remember, it's best to freeze before adding any dairy ingredients like cream cheese or sour cream. When you’re ready to enjoy, thaw in the refrigerator overnight and stir in the dairy when reheating.

What should I do if my chili is too thick?
If your chili turns out thicker than you like, don't fret! Simply stir in a bit of low-sodium chicken broth or water until you reach your desired consistency. Adding a little more broth at a time is the best way to gradually adjust the texture without watering down the flavor.

Are there any dietary considerations for this recipe?
Definitely! This Crockpot Sweet Corn & Pepper Jack White Chicken Chili can easily be made gluten-free by using the right broth. It’s also simple to make it vegetarian; just swap the shredded chicken for extra beans or a plant-based protein of your choice. Always check for allergies, especially with dairy ingredients, to ensure everyone can enjoy this creamy goodness.

Can I use raw chicken?
Yes, you can! If you prefer to use raw chicken, place the uncooked chicken in the crockpot, cover, and cook on low for 6 to 7 hours. After cooking, shred the chicken and return it to the chili before adding cream cheese for that creamy finish.

Crockpot Sweet Corn & Pepper Jack White Chicken Chili

Crockpot Sweet Corn & Pepper Jack White Chicken Chili Bliss

Crockpot Sweet Corn & Pepper Jack White Chicken Chili is a comforting, creamy dish that brings warmth and joy, filled with flavors of sweet corn and pepper jack cheese.
Print Recipe Pin Recipe
Prep Time 15 minutes mins
Cook Time 5 hours hrs
Total Time 5 hours hrs 15 minutes mins
Servings: 6 servings
Course: Soups
Cuisine: American
Calories: 350
Ingredients Equipment Method Nutrition Notes

Ingredients
  

For the Base
  • 1 medium yellow onion Adds depth of flavor
  • 3 cloves garlic Minced, provide aromatic warmth
  • 1 teaspoon ground cumin Offers an earthy flavor
  • 1 teaspoon dried oregano Contributes a herbaceous note
  • 2 tablespoons chili powder Adds heat, adjust to taste
  • 1 teaspoon salt Enhances overall flavor
  • 1 teaspoon black pepper Adds pungency
For the Chili
  • 1 can diced green chiles Provides a mild kick
  • 3 cups shredded cooked chicken Serves as the protein base
  • 1 can white beans Adds creaminess and fiber
  • 2 cups frozen sweet corn Adds sweetness and texture
  • 4 cups low-sodium chicken broth Keeps the dish flavorful
For Creaminess
  • 8 ounces cream cheese Provides creaminess and richness
  • 1 cup shredded pepper jack cheese Adds flavor and a bit of heat
  • 1 cup sour cream Offers tang and creaminess
  • 2 tablespoons lime juice Adds acidity and brightness
For Garnish
  • 1 cup fresh cilantro Used as a garnish for freshness

Equipment

  • Crockpot

Method
 

Base Ingredients
  1. In your crockpot, start by adding the diced yellow onion and minced garlic cloves. Sprinkle in the ground cumin, dried oregano, chili powder, salt, and black pepper. Stir to integrate all the spices.
Main Ingredients
  1. Incorporate the diced green chiles, shredded cooked chicken, white beans, and frozen sweet corn into the mix. Pour in the low-sodium chicken broth.
Cooking
  1. Cover your crockpot and set it to cook on low for 4 to 6 hours. Avoid stirring during this time.
Incorporate Creaminess
  1. After cooking, stir in the softened cream cheese and allow it to melt for about 5 minutes.
Finish with Cheesy Goodness
  1. Mix in the shredded pepper jack cheese, sour cream, and lime juice. Stir thoroughly.
Serve and Garnish
  1. Spoon the hot chili into bowls and garnish with fresh cilantro, extra cheese, or a dollop of sour cream, if desired.

Nutrition

Serving: 1cupCalories: 350kcalCarbohydrates: 30gProtein: 28gFat: 15gSaturated Fat: 8gCholesterol: 65mgSodium: 800mgPotassium: 650mgFiber: 6gSugar: 5gVitamin A: 600IUVitamin C: 10mgCalcium: 200mgIron: 2mg

Notes

Serve alongside cornbread or a fresh salad for a delightful dining experience.

Tried this recipe?

Let us know how it was!

One-Pot Taco Spaghetti: Quick, Cheesy Bliss in 30 Minutes

October 28, 2025 by Grace Snow Leave a Comment

The aroma of spices and cheese wafting through the kitchen transports me to a cozy Mexican cantina, mingling with the unmistakable comfort of a family dinner at home. This One-Pot Taco Spaghetti is my go-to solution for busy weeknights, blending the zest of taco night with the satisfying ease of pasta. In under 30 minutes, you can whip up this quick dinner that’s not only a crowd-pleaser but also a hearty meal the whole family will love. You’ll find versatile options for both vegetarian and gluten-free eaters, ensuring everyone can enjoy a taste of this fusion delight. So, are you ready to bring a little taco flair to your dinner table?

Why is One-Pot Taco Spaghetti a Must-Try?

Simplicity: This recipe brings joy to busy weeknights with just one pot and minimal cleanup.

Flavor Explosion: The melding of taco spices and savory cheese delivers a bold, delicious taste that will make your taste buds dance.

Family-Friendly: Perfectly suited for everyone at the table, you can easily adjust it for dietary preferences—like opting for vegetarian options with black beans or keeping it gluten-free with the right pasta.

Quick Preparation: Prep and cook in under 30 minutes, making it an ideal option for those hectic evenings when you're craving something hearty yet fast.

Versatile: From simple ingredients to creative add-ins—like extra veggies or various types of cheese—this dish is as flexible as it is satisfying!

One-Pot Taco Spaghetti Ingredients

• Discover the essential components of this quick dinner!

For the Pasta

  • Spaghetti – The base of the dish; feel free to swap in linguine, fettuccine, or gluten-free pasta for variety.

For the Protein

  • Ground Beef or Turkey – Provides hearty protein; substitute with black beans or lentils for a vegetarian option.

For the Flavor

  • Taco Seasoning – Infuses the dish with bold, zesty flavor; use your favorite store-bought blend or make a homemade mix.

For the Creaminess

  • Cheddar Cheese – Added richness and creaminess; substitute with Monterey Jack or a dairy-free cheese for different flavors.

For the Sauce

  • Diced Tomatoes – Adds moisture and depth; fresh tomatoes or tomato sauce can also work beautifully.

For Cooking

  • Water – Essential for cooking the spaghetti; ensure you have about 4 cups to cover the pasta completely.

Now that you have everything you need, let’s get cooking and savor the delightful flavors of this One-Pot Taco Spaghetti!

Step‑by‑Step Instructions for One-Pot Taco Spaghetti

Step 1: Brown the Meat
In a large skillet over medium heat, add your ground beef or turkey. Cook for about 5 to 7 minutes, breaking it apart with a wooden spoon, until it’s browned all over and no longer pink. Make sure to drain any excess fat, ensuring a leaner meal as you kick off this One-Pot Taco Spaghetti.

Step 2: Add Flavor
Stir in your taco seasoning and diced tomatoes, allowing them to mix thoroughly with the cooked meat. Cook for an additional 2 minutes, stirring occasionally, until the tomatoes soften and the spices become aromatic. This step melds the flavors beautifully, setting the stage for the rich taste that will define your dish.

Step 3: Incorporate Pasta
Now it’s time to elevate our One-Pot Taco Spaghetti! Add the uncooked spaghetti into the skillet, ensuring it’s evenly distributed. Pour in enough water to cover the pasta, approximately 4 cups, and increase the heat to bring the mixture to a rapid boil. Once boiling, reduce the heat to low, cover the skillet, and simmer for about 10 to 12 minutes, or until the pasta is tender and has absorbed most of the liquid.

Step 4: Add Cheese for Creaminess
Remove your skillet from the heat and immediately stir in the shredded cheddar cheese. Keep stirring until the cheese completely melts and creates a creamy, luscious sauce that coats the spaghetti beautifully. This step is essential for achieving that comforting, cheesy essence that makes your One-Pot Taco Spaghetti so irresistible.

Step 5: Serve and Garnish
Once the cheese is melted and the dish is well-combined, it’s time to serve! Spoon generous portions into bowls and enjoy warm. Consider garnishing with optional toppings like a dollop of sour cream, diced avocado, or fresh cilantro to add an extra layer of flavor and a fresh pop of color to your delicious meal.

How to Store and Freeze One-Pot Taco Spaghetti

  • Fridge: Keep leftovers in an airtight container for up to 3 days. Make sure to cool the spaghetti completely before refrigerating to maintain freshness.

  • Freezer: Portion the One-Pot Taco Spaghetti into freezer-safe containers and store for up to 2 months. Be sure to label them with the date for easy tracking.

  • Thawing: When you're ready to enjoy your frozen spaghetti, transfer it to the fridge a day prior to allow it to thaw gradually.

  • Reheating: Warm the One-Pot Taco Spaghetti in a skillet over medium heat, adding a splash of water or broth to restore moisture, ensuring it remains creamy and delicious as you reheat.

One-Pot Taco Spaghetti Variations

Feel free to get creative with this dish—there's a world of flavor just waiting to be explored!

  • Gluten-Free: Swap regular spaghetti for gluten-free pasta to accommodate dietary needs without sacrificing taste. Your family won’t even notice the difference!

  • Vegetarian Delight: Substitute ground meat with canned black beans or lentils for a hearty vegetarian version. This adds protein and a rich texture while keeping it satisfying.

  • Cheese Experiment: Try pepper jack cheese for an extra kick or experiment with a blend of cheeses for a more complex flavor profile. Mixing and matching keeps every bite exciting!

  • Veggie Boost: Toss in diced bell peppers, zucchini, or spinach before adding the pasta to sneak in some extra nutrition and color. It’s an easy way to enjoy meal diversity.

  • Spicy Kick: For those who love heat, incorporate diced jalapeños or a splash of hot sauce when browning the meat. Just a little can elevate the flavor to a whole new level.

  • Taco Twist: Treat your One-Pot Taco Spaghetti like tacos by adding in corn, avocado, or even crushed tortilla chips on top right before serving—because who doesn’t love a little crunch?

  • Creamy Upgrade: Stir in a dollop of cream cheese or sour cream after adding the cheddar for a tangy and creamy finish that will have everyone asking for seconds.

  • Flavor Infusion: Instead of water, use vegetable or chicken broth to cook your pasta for an added layer of flavor. This simple swap can make a huge difference!

For more meal inspiration, check out my recipes for Taco Spaghetti Cheesy or Fish Taco Bowls to keep the taco theme alive. Enjoy your culinary adventures!

Make Ahead Options

These One-Pot Taco Spaghetti are perfect for meal prep enthusiasts! You can prepare the ground meat mixed with taco seasoning and diced tomatoes up to 24 hours in advance. Just refrigerate the mixture in an airtight container to keep the flavors intact. When you're ready to serve, simply reheat the meat mixture in a large skillet, add the uncooked spaghetti along with the necessary water, and follow the usual cooking instructions. This means you can enjoy a delicious, comforting meal with minimal effort, making your busy weeknights feel a little less rushed. Just remember to stir in the cheese once the pasta is cooked to maintain that creamy goodness!

What to Serve with One-Pot Taco Spaghetti

The perfect meal deserves delightful companions that enhance its vibrant flavors and textures.

  • Creamy Avocado Salad: This fresh salad adds a cool, creamy contrast to the zesty spaghetti, making each bite a refreshing experience. Toss ripe avocados with lime juice, diced tomatoes, and red onion for a quick, tangy side.

  • Crunchy Corn Chips: These provide a satisfying crunch that complements the creamy pasta. Use them for dipping or crush them on top of your dish for an added texture.

  • Spicy Roasted Vegetables: With a blend of bell peppers, zucchini, and spices, these roasted veggies introduce a smoky, fiery element that pairs beautifully with the taco seasoning.

  • Tangy Coleslaw: A side of coleslaw lends a crisp, tangy bite that balances the rich flavors of the One-Pot Taco Spaghetti. Opt for a simple vinaigrette to keep it light and vibrant.

  • Chunky Salsa: The freshness of homemade or store-bought salsa bursts with flavor, bringing an extra layer of brightness to your meal. Serve alongside for a delightful, tangy accompaniment.

  • Zesty Limeade: Refresh your palate with a cool glass of zesty limeade. The citrusy sweetness will elevate the meal and provide a lovely contrast to the savory dish.

With these thoughtful pairings, you’re sure to create a full meal that delights every family member!

Expert Tips for One-Pot Taco Spaghetti

  • Water Coverage: Ensure your spaghetti is well-submerged in water; this prevents uneven cooking and sticking, achieving perfect one-pot perfection.

  • Pasta Timing: Monitor cooking time closely, especially if using a different pasta shape to avoid overcooking. Al dente is best for a better texture.

  • Flavor Boost: For enhanced flavor, sauté onions and garlic with the meat before adding taco seasoning; this creates a deeper flavor profile in your One-Pot Taco Spaghetti.

  • Don’t Skip Garnishes: Fresh toppings like cilantro or avocado add brightness and contrast to the creamy dish, elevating the overall dining experience.

  • Meal Prep Friendly: Consider preparing the protein and seasoning mix ahead of time, up to 24 hours in advance, for a quick assembly when meal time arrives.

One-Pot Taco Spaghetti Recipe FAQs

How do I choose ripe tomatoes for my One-Pot Taco Spaghetti?
Absolutely! Look for tomatoes that are firm yet slightly soft to the touch, with a rich, deep color. Avoid those with dark spots or blemishes, as these can indicate overripeness. For a burst of fresh flavor, you can also opt for vine-ripened tomatoes if they're available!

How should I store leftovers from my One-Pot Taco Spaghetti?
Very simple! Store your leftovers in an airtight container in the fridge for up to 3 days. Make sure to cool the spaghetti completely before packing it away—this keeps it fresh and prevents excess moisture from building up in the container.

Can I freeze One-Pot Taco Spaghetti? How?
Yes! To freeze your One-Pot Taco Spaghetti, portion it into freezer-safe containers and store them for up to 2 months. Here's how: Allow the spaghetti to cool completely, then fill the containers, leaving a little space at the top for expansion. Label them with the date, then place them in your freezer. When you're ready to serve, thaw it in the fridge overnight before reheating.

What can I do if my pasta is overcooked or mushy?
If your pasta ends up overcooked or mushy, don’t worry too much! You can try adding a sprinkle of extra cheese, which can help bind it together and enhance its flavor. A touch of fresh herbs, citrus juice, or a vitamin-rich sauce can also revitalize the dish. In the future, keep an eye on the timing for the pasta to ensure it stays al dente, enhancing that delightful texture!

Are there any dietary considerations for pets or allergies in this recipe?
Very important! This dish contains common allergens like cheese and pasta, which could be problematic for lactose-intolerant individuals or those with gluten sensitivities. For pets, it's best to avoid feeding them any human food that contains spices and cheese, as it could upset their stomach. Opt for veggie-based or gluten-free alternatives if you are accommodating such allergies—this way, everyone can enjoy a delicious meal safely!

One-Pot Taco Spaghetti

One-Pot Taco Spaghetti: Quick, Cheesy Bliss in 30 Minutes

This One-Pot Taco Spaghetti blend the zest of taco night with pasta for a quick and satisfying dinner.
Print Recipe Pin Recipe
Prep Time 10 minutes mins
Cook Time 20 minutes mins
Total Time 30 minutes mins
Servings: 4 servings
Course: Dinner
Cuisine: Mexican
Calories: 500
Ingredients Equipment Method Nutrition Notes

Ingredients
  

For the Pasta
  • 8 oz Spaghetti Can swap with linguine, fettuccine, or gluten-free pasta.
For the Protein
  • 1 lb Ground Beef or Turkey Substitute with black beans or lentils for a vegetarian option.
For the Flavor
  • 1 packet Taco Seasoning Store-bought or homemade mix.
For the Creaminess
  • 1 cup Cheddar Cheese Can substitute with Monterey Jack or dairy-free cheese.
For the Sauce
  • 14.5 oz can Diced Tomatoes Fresh tomatoes or tomato sauce can also work.
For Cooking
  • 4 cups Water Ensure to cover the pasta completely.

Equipment

  • Large skillet

Method
 

Cooking Instructions
  1. Brown the meat in a large skillet over medium heat for 5 to 7 minutes until browned, draining any excess fat.
  2. Stir in taco seasoning and diced tomatoes; cook for an additional 2 minutes.
  3. Add uncooked spaghetti and enough water to cover the pasta; bring to a boil, then reduce heat and simmer for 10 to 12 minutes.
  4. Stir in shredded cheddar cheese until melted and creamy.
  5. Serve warm and garnish with optional toppings like sour cream, diced avocado, or cilantro.

Nutrition

Serving: 1servingCalories: 500kcalCarbohydrates: 45gProtein: 30gFat: 20gSaturated Fat: 10gPolyunsaturated Fat: 2gMonounsaturated Fat: 7gCholesterol: 80mgSodium: 800mgPotassium: 600mgFiber: 5gSugar: 3gVitamin A: 400IUVitamin C: 15mgCalcium: 200mgIron: 3mg

Notes

Ensure spaghetti is submerged in water during cooking for even texture. You can prepare the protein and seasoning mix up to 24 hours in advance for quick assembly.

Tried this recipe?

Let us know how it was!

Authentic Irish Potato Farls: Crispy Cakes You’ll Love

October 28, 2025 by Grace Snow Leave a Comment

As I flipped through my grandmother's cherished cookbook, a warm wave of nostalgia washed over me, and I stumbled upon a cherished staple: Authentic Irish Potato Farls. These delightful potato cakes, with their crispy edges and soft interiors, are the epitome of Irish comfort food. Ready in just 20-30 minutes, they are not just easy to make but also budget-friendly, perfect for those of us craving a cozy meal without extensive preparations. Whether enjoyed as a hearty breakfast alongside eggs or as a comforting snack topped with butter, these potato farls are sure to steal hearts at the dining table. Curious to uncover the secret to their fluffy texture and irresistible taste? Let’s dive into the easy steps to create this comforting dish!

Why will you adore these potato farls?

Simplicity at Its Best: With just a handful of ingredients, making these farls is a breeze, requiring minimal cooking skills.
Comfort Food Classic: These potato cakes embody classic Irish comfort, perfect for warming up any meal.
Quick Preparation: Ready in just 20-30 minutes, they’re ideal for busy weeknights or lazy weekends.
Versatile Delight: Enjoy them beside eggs for breakfast or topped with your favorite spread for a quick snack.
Crowd-Pleasing Flavor: The crispy exterior combined with the fluffy interior offers a satisfying experience that everyone will love.
If you’re looking for more hearty options, try serving them next to a delightful Sweet Potato Casserole or alongside some German Potato Salad.

Authentic Irish Potato Farls Ingredients

For the Dough
• Potatoes – Russet potatoes are ideal for their texture and flavor.
• All-Purpose Flour – Provides crucial structure; replace with gluten-free flour for a gluten-free version.
• Baking Powder – Ensures a light and fluffy texture.
• Salt – Enhances the flavor profiles; adjust according to your taste.

For Frying
• Butter – Creates a delicious crispy crust; use olive oil for a lighter alternative.

These ingredients come together to create the beloved Authentic Irish Potato Farls, offering a fuss-free cooking experience enriched with comforting taste!

Step‑by‑Step Instructions for Authentic Irish Potato Farls

Step 1: Prepare Potatoes
Begin by peeling and cutting 1 to 2 large russet potatoes into halves or quarters. Place them in a large pot, cover with salted water, and bring to a boil over medium-high heat. Cook for about 15 minutes, or until the potatoes are fork-tender. Drain the potatoes and let them cool slightly before mashing.

Step 2: Make Dough
In a large bowl, mash the cooled potatoes until they are smooth and free of lumps. Gradually add in 1 cup of all-purpose flour, 1 teaspoon of baking powder, and ½ teaspoon of salt. Mix everything together gently until a soft dough forms, ensuring not to overwork it. The dough should be pliable but not sticky, ideal for shaping into farls.

Step 3: Shape Farls
Divide the potato dough into two equal portions. On a lightly floured surface, flatten each portion into a disc about ½ inch thick, using your hands or a rolling pin. Next, cut each disc into quarters, creating four pie-shaped farl pieces. These shapes will cook evenly, ensuring a perfect texture for your authentic Irish potato farls.

Step 4: Cook Farls
Heat a skillet over medium heat and melt 2 tablespoons of butter until it sizzles gently. Place the farls in the skillet, ensuring they are spaced out to cook evenly. Fry for about 5 minutes on one side, or until they turn golden brown and crispy, then flip them over and cook for an additional 5 minutes.

Step 5: Serve
Once cooked to a lovely golden brown on both sides, remove the farls from the skillet and let them rest on a plate lined with paper towels to absorb any excess butter. Serve warm, allowing everyone to enjoy these delightful Authentic Irish Potato Farls with a pat of butter or your favorite toppings for a comforting treat.

What to Serve with Authentic Irish Potato Farls

Warm, crispy potato cakes create the perfect foundation for a comforting meal bursting with flavor and variety.

  • Creamy Buttered Peas: These sweet and tender peas bring a pop of color and a fresh sweetness that perfectly complements the rich flavor of the farls.

  • Smoky Baked Beans: Their hearty, savory flavor pairs beautifully with the fluffy texture of the potato cakes, creating a satisfying blend of comfort.

  • Traditional Irish Breakfast: Serve alongside eggs, sausage, and black pudding for a deliciously authentic start to your day, transforming the farls into a hearty centerpiece.

  • Savory Mushroom Gravy: Drizzling this rich, earthy sauce over the farls elevates them to a gourmet delight, adding depth and warmth to every bite.

  • Homemade Tomato Relish: The tangy sweetness of this relish provides a delightful contrast, enhancing both flavor and texture in each mouthful.

  • Herbed Yogurt Dip: A refreshing tangy dip infused with herbs will bring brightness and balance, making for a delightful twist that keeps you coming back for more.

  • Roasted Root Vegetables: Their sweetness and slight crunch add a wonderful complement to the soft, warm farls, ushering in all the cozy autumn vibes.

  • Irish Ale: A cold glass of this traditional beverage brings a delightful fizz and elevates the meal with delightful depth and flavors reminiscent of the Emerald Isle.

Authentic Irish Potato Farls Variations

Feel free to personalize your potato farls to perfectly fit your taste and dietary needs!

  • Gluten-Free: Swap all-purpose flour with gluten-free flour blends for a deliciously gluten-free version.
    You won’t lose any of the fluffy texture or rustic charm; it’s a win-win!

  • Herbed Delight: Add finely chopped fresh herbs, such as chives or parsley, into the dough for an aromatic twist.
    This enhances flavors and adds a pop of color, making each bite irresistible.

  • Spicy Kick: Incorporate finely chopped jalapeños or red pepper flakes into the dough for a zesty exciting flavor boost.
    Perfect for those who love a hint of heat in their comfort food!

  • Savory Cheese: Mix in grated cheese like cheddar or parmesan directly into the dough for extra flavor.
    The gooey melty cheese transforms these farls into a rich, comforting experience that’s hard to resist.

  • Sweet Treat: Elevate your potato farls by sprinkling a little brown sugar and cinnamon into the dough for a sweet finish.
    They can be served as a dessert or with your favorite preserves for a perfect brunch treat.

  • Pan-Seared: Try cooking your farls in a mix of butter and olive oil for a healthier option without sacrificing the rich flavor.
    This method yields crispy edges with a hint of herbaceousness, adding depth to the taste.

  • Topping Ideas: Serve with classic toppings—like a dollop of crème fraîche and smoked salmon for an elegant brunch.
    This combination offers contrasting textures and flavors that will impress your guests.

Why not explore these variations alongside a cozy dish like Smoky Sweet Potatoes for a comforting meal? Alternatively, pair with some Roasted Sweet Potatoes for added warmth and coziness!

How to Store and Freeze Authentic Irish Potato Farls

Fridge: Store leftover farls in an airtight container in the refrigerator for up to 3-4 days to maintain their freshness and taste.

Freezer: For longer storage, freeze cooled potato farls in a single layer on a baking sheet. Once frozen, transfer them to a freezer-safe bag and enjoy for up to a month.

Reheating: To reheat, place the farls in a skillet over medium heat for about 4-5 minutes per side until warmed through and crispy, rather than using a microwave.

Serving Suggestions: Enjoy reheated farls topped with butter, or use them as a delightful side with meals, making your comforting dish last longer!

Make Ahead Options

These Authentic Irish Potato Farls are a fantastic option for meal prep! You can prepare the potato dough up to 24 hours in advance by following the first two steps of cooking and mashing the potatoes, then mixing in the flour, baking powder, and salt. Once the dough is formed, wrap it tightly in plastic wrap and refrigerate. For optimal quality, avoid cutting the farls until you're ready to cook them. When you’re ready to serve, simply shape the dough into farls and cook them in a skillet as instructed. They'll be just as delicious, bringing the warmth of homemade comfort food to your table with minimal effort!

Expert Tips for Authentic Irish Potato Farls

  • Perfect Mash: Ensure your potatoes are well-mashed to maintain a smooth texture in the dough. Lumps can inhibit the fluffy consistency of your farls.
  • Don’t Overcrowd: Cook the farls in batches if your skillet isn’t large enough. Overcrowding leads to steaming instead of crisping, ruining that lovely texture.
  • Adjust the Heat: Use medium heat to keep the butter from burning while cooking the farls. A high heat can create a crispy exterior but leave the inside undercooked.
  • Storage Wisdom: For leftovers, store in an airtight container in the fridge for up to 3-4 days. Reheat slowly in a skillet to preserve crispy edges.
  • Experiment with Flavors: While traditional farls are amazing, feel free to add herbs or spices to the dough for a personalized twist on this classic comfort food.

Authentic Irish Potato Farls Recipe FAQs

What type of potatoes are best for Irish Potato Farls?
Absolutely! Russet potatoes are preferred for their starchy texture, which creates a fluffy interior. Look for firm potatoes without dark spots or blemishes. For a different flavor, some people like to mix in Yukon Gold potatoes for a creamier taste.

How long can I store leftover Potato Farls?
Very! Leftover farls should be stored in an airtight container in the refrigerator for up to 3-4 days. When reheating, you can gently warm them in a skillet over medium heat to restore their crispiness.

Can I freeze Irish Potato Farls?
Yes, indeed! To freeze, allow the cooked farls to cool completely, then lay them out in a single layer on a baking sheet. Freeze them for about 1-2 hours until firm, then transfer them to a freezer-safe bag. They’ll keep well for up to 3 months. When you're ready to enjoy them again, simply reheat in a skillet for ideal texture.

What can I do if my dough is too sticky?
If you find the dough is sticky, don't worry! Simply sprinkle a little extra flour onto the surface where you're working and gently knead in more flour, a tablespoon at a time. Be careful not to add too much, as you want to maintain that fluffy texture. Aim for a soft but workable dough.

Are Potato Farls suitable for a gluten-free diet?
Absolutely! You can easily substitute the all-purpose flour with a gluten-free flour blend. Make sure to keep an eye on the texture while mixing; gluten-free flours can vary in absorbency, so you might need to adjust the amount slightly to achieve the right consistency.

Can I add flavors to the Potato Farls?
Yes, that's the beauty of this recipe! Feel free to get creative by adding finely chopped herbs like chives or parsley to the dough. This not only enhances the flavor but also adds a lovely color to your finished Potato Farls. Enjoy experimenting!

Authentic Irish Potato Farls

Authentic Irish Potato Farls: Crispy Cakes You’ll Love

Authentic Irish Potato Farls are crispy potato cakes that are easy to make and perfect for any meal.
Print Recipe Pin Recipe
Prep Time 20 minutes mins
Cook Time 10 minutes mins
Total Time 30 minutes mins
Servings: 4 farls
Course: Breakfast
Cuisine: Irish
Calories: 150
Ingredients Equipment Method Nutrition Notes

Ingredients
  

For the Dough
  • 2 large Russet potatoes peeled and cut
  • 1 cup All-purpose flour or gluten-free flour
  • 1 teaspoon Baking powder
  • ½ teaspoon Salt adjust to taste
For Frying
  • 2 tablespoons Butter or olive oil for lighter option

Equipment

  • Large pot
  • Skillet
  • Mixing Bowl

Method
 

Step‑by‑Step Instructions for Authentic Irish Potato Farls
  1. Peel and cut 1 to 2 large russet potatoes into halves or quarters. Place them in a large pot, cover with salted water, and bring to a boil over medium-high heat. Cook for about 15 minutes, or until fork-tender. Drain and let cool slightly before mashing.
  2. In a large bowl, mash the cooled potatoes until smooth. Gradually add in 1 cup of all-purpose flour, 1 teaspoon of baking powder, and ½ teaspoon of salt. Mix until a soft dough forms.
  3. Divide the potato dough into two portions. On a floured surface, flatten each into a ½ inch thick disc, then cut each disc into quarters.
  4. Heat a skillet over medium heat and melt 2 tablespoons of butter. Fry the farls for about 5 minutes on one side, then flip and cook for another 5 minutes until golden brown.
  5. Remove the farls from the skillet and let them rest on paper towels to absorb excess butter. Serve warm with butter or toppings of choice.

Nutrition

Serving: 1farlCalories: 150kcalCarbohydrates: 25gProtein: 3gFat: 5gSaturated Fat: 3gMonounsaturated Fat: 1gCholesterol: 15mgSodium: 200mgPotassium: 400mgFiber: 3gSugar: 1gVitamin A: 5IUVitamin C: 15mgCalcium: 2mgIron: 6mg

Notes

For best results, ensure potatoes are well-mashed and avoid overcrowding the skillet when cooking.

Tried this recipe?

Let us know how it was!
  • « Previous Page
  • 1
  • …
  • 113
  • 114
  • 115
  • 116
  • 117
  • …
  • 180
  • Next Page »

Welcome!

Hi, I’m Grace, a Sydney-based home cook with a passion for bold flavors and trending ingredients. Whether you’re a busy beginner or a seasoned foodie, you’ll find dishes here that are fresh, fun, and full of flavor.

More about me

Popular Recipes

  • Butter Pecan Cookies
    Irresistibly Soft Butter Pecan Cookies for Cozy Moments
  • Decadent Turtle Bars
    Decadent Turtle Bars: Indulge in Sweet Gooey Perfection
  • Salted Caramel Butter Bars
    Decadent Salted Caramel Butter Bars You Can't Resist
  • Easy Italian Pasta Salad
    Easy Italian Pasta Salad: A Summer Delight to Share

Footer

↑ back to top

About

  • Privacy Policy
  • Disclaimer
  • Terms & Conditions

Newsletter

  • Sign Up! for emails and updates

Contact

  • About me
  • Contact me

Copyright © 2025 TastyTrendIngredients