tastytrendingredients

  • Home
  • Recipes
    • Appetizers
    • Breakfast
    • Dessert
    • Dinner
    • Drinks
    • Salads
    • Snacks
    • Soups
  • About me
  • Contact me
menu icon
go to homepage
  • Home
  • Recipes
    • Appetizers
    • Breakfast
    • Dessert
    • Dinner
    • Drinks
    • Salads
    • Snacks
    • Soups
  • About me
  • Contact me
search icon
Homepage link
  • Home
  • Recipes
    • Appetizers
    • Breakfast
    • Dessert
    • Dinner
    • Drinks
    • Salads
    • Snacks
    • Soups
  • About me
  • Contact me
×

Cowboy Butter Chicken Bites: Flavor-Packed Party Pleaser

November 23, 2025 by Grace Snow Leave a Comment

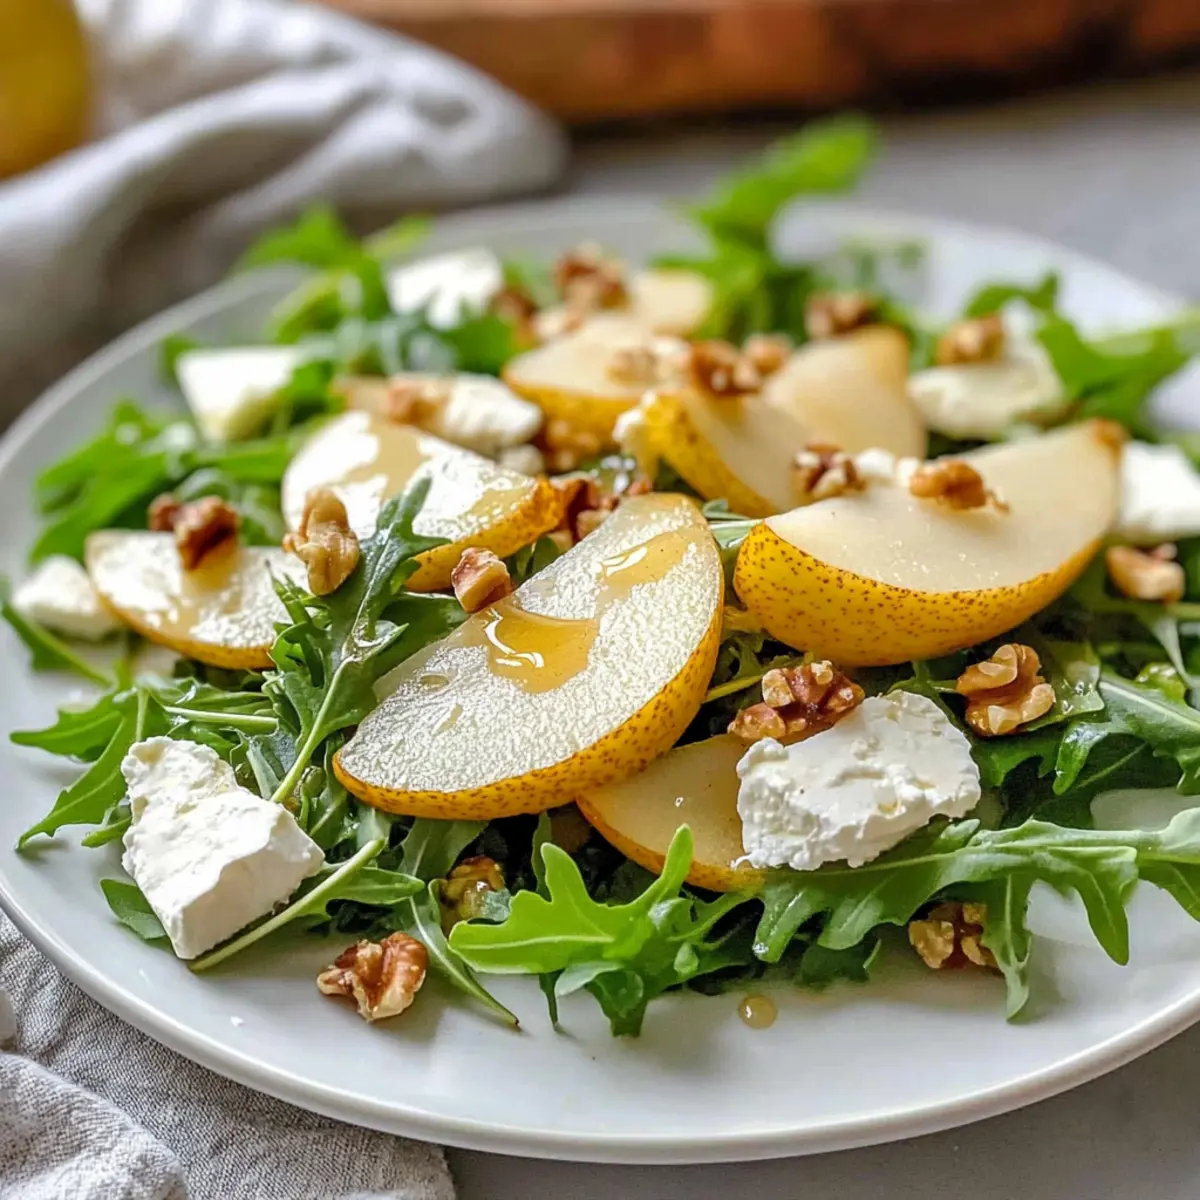
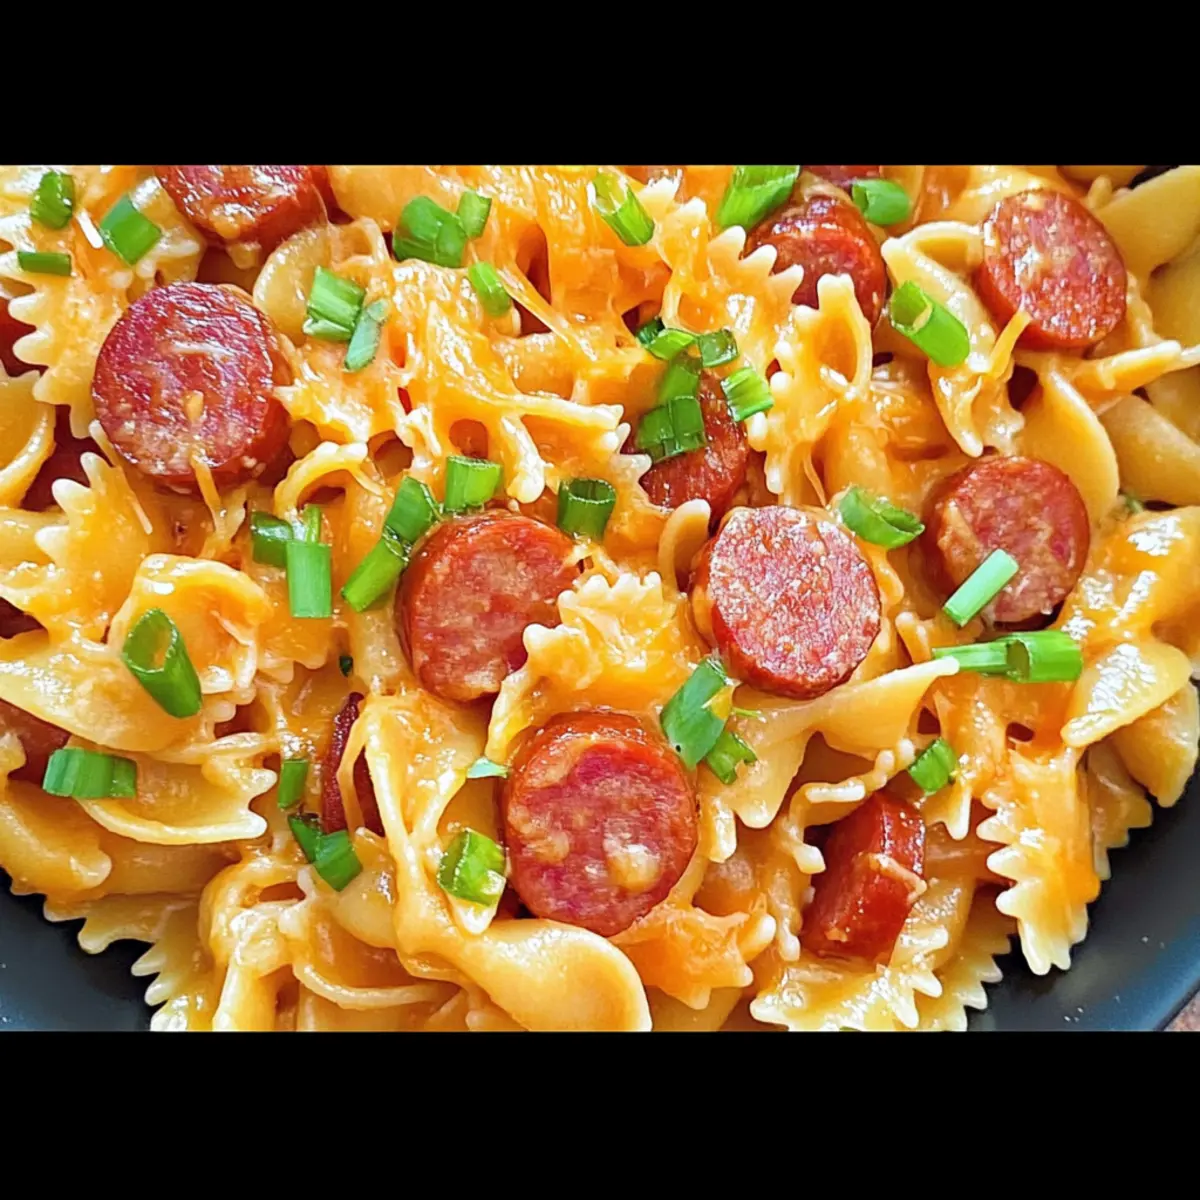
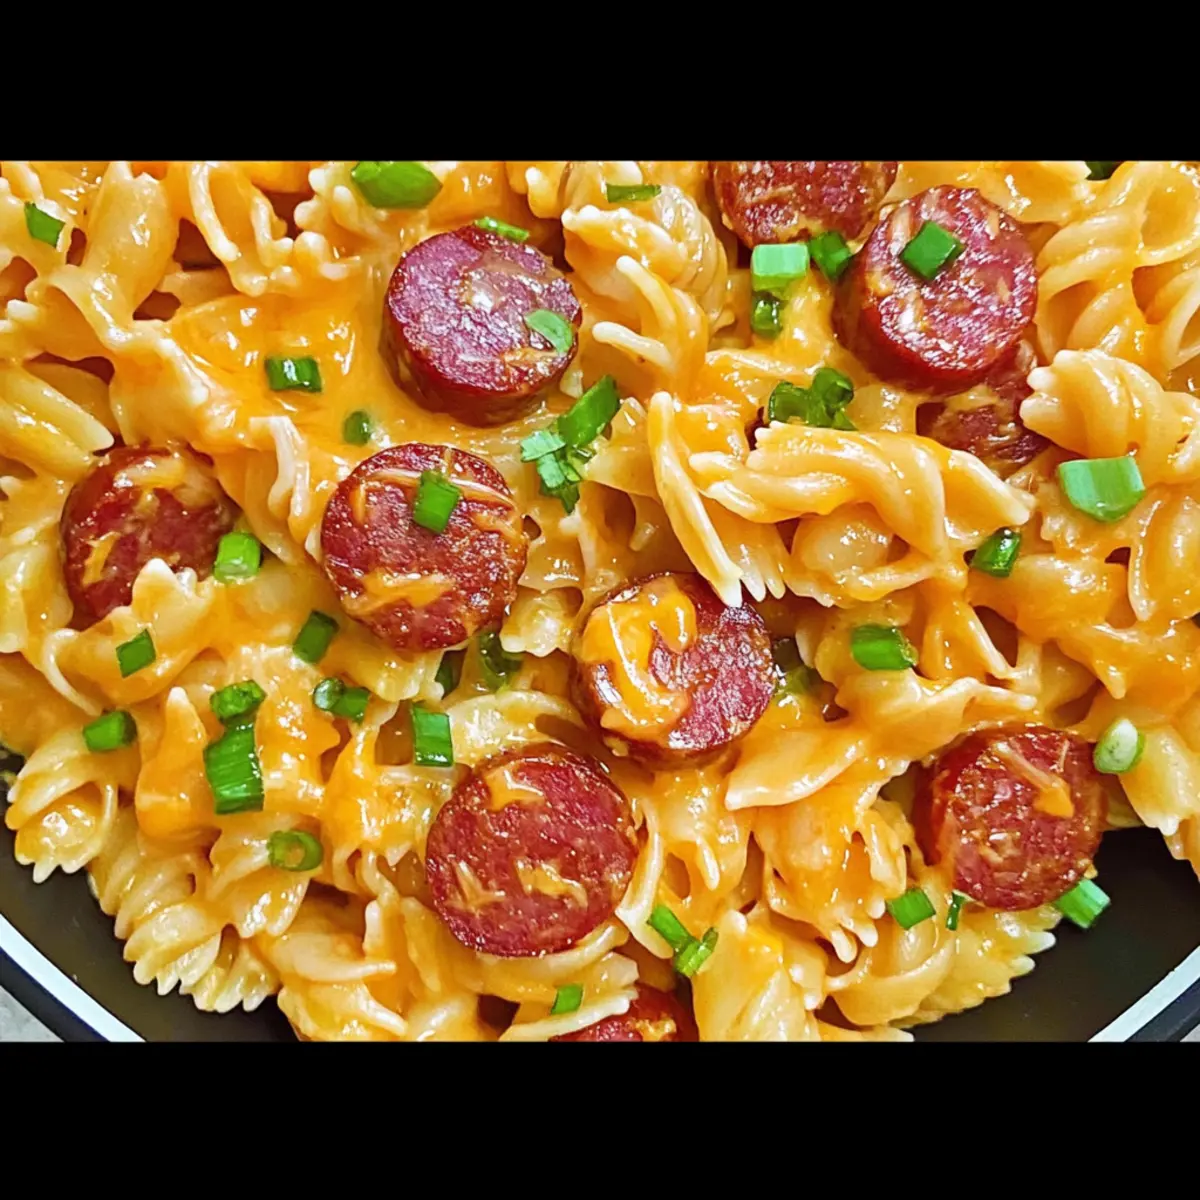
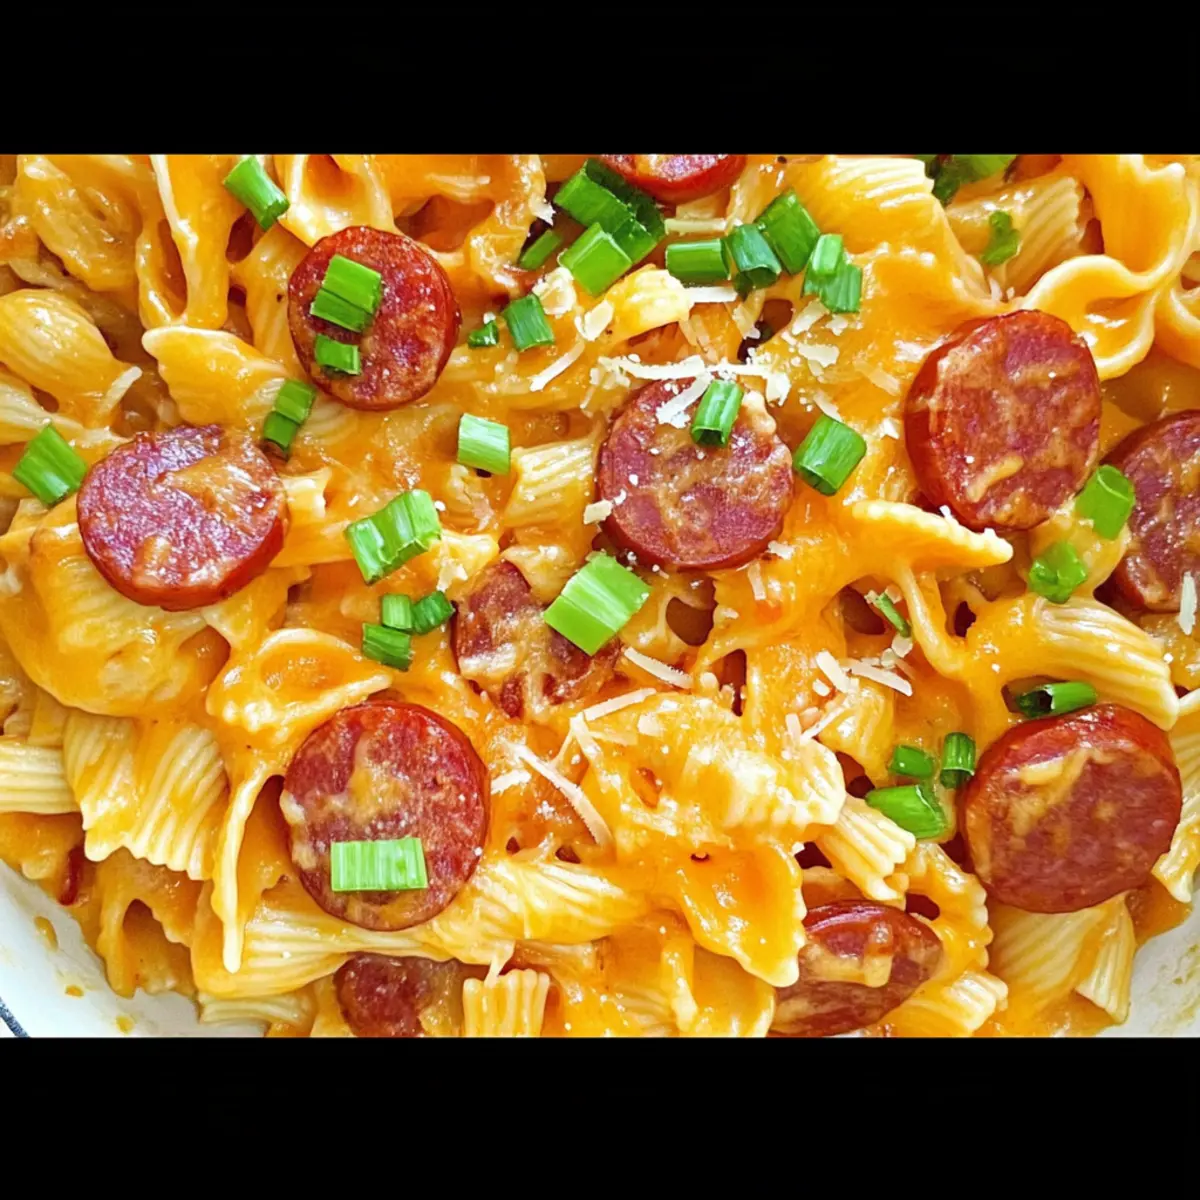
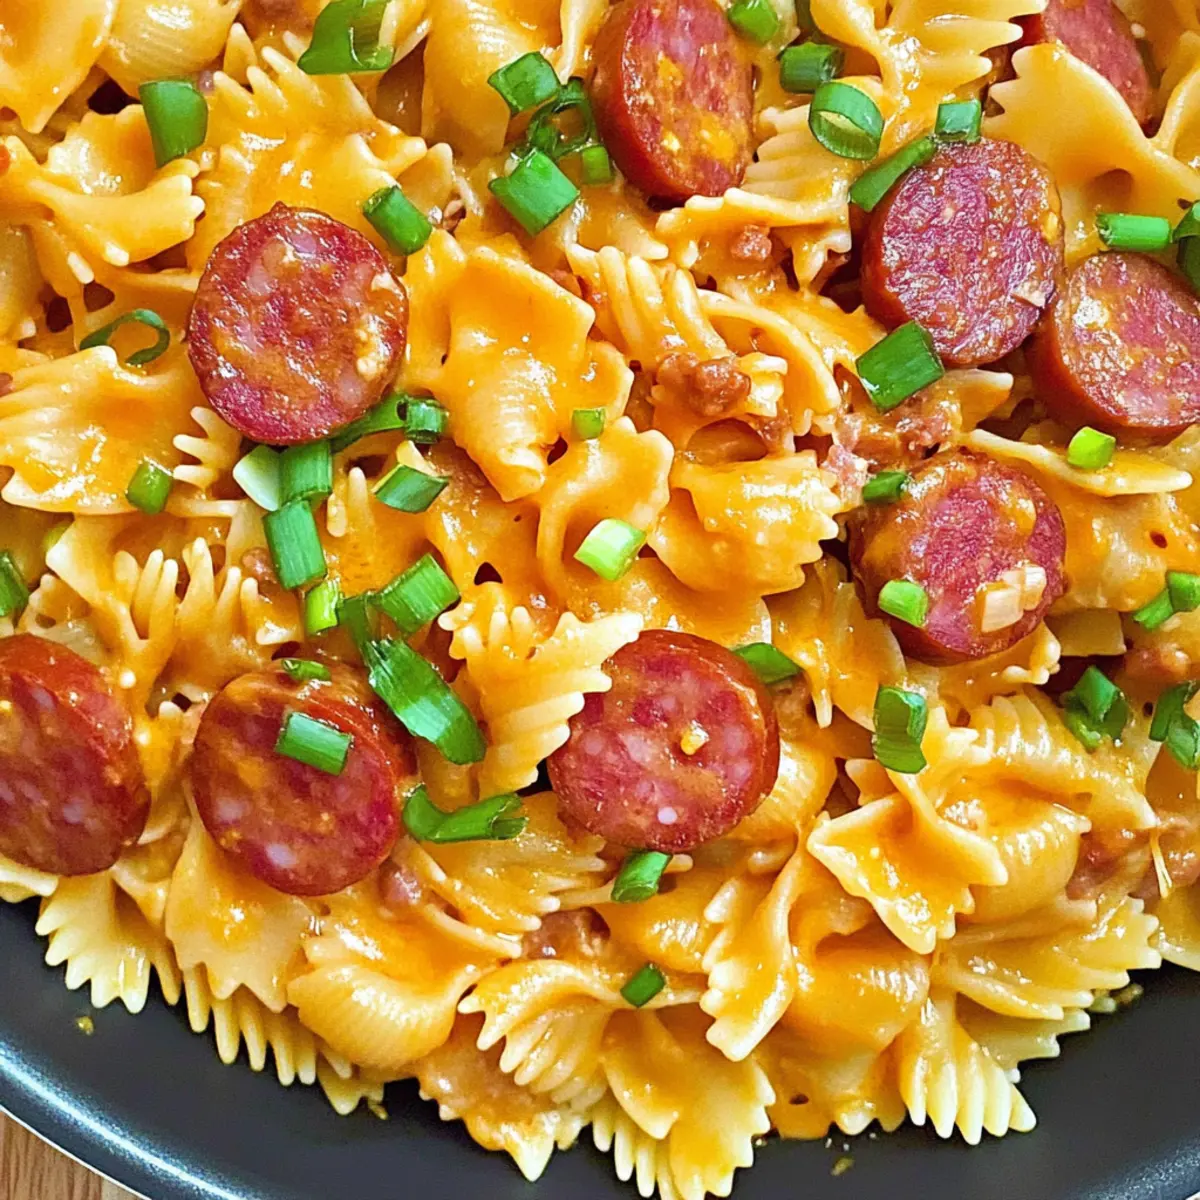
The sizzle of butter hitting a hot skillet can be downright irresistible, can’t it? That’s how I feel each time I whip up these Cowboy Butter Chicken Bites; they’re simply delicious morsels that bring a taste of the wild West into my kitchen. This recipe offers a quick route to a savory sensation, making it perfect for busy weeknights or spontaneous gatherings with friends. Juicy chicken bites are enveloped in a rich, zesty cowboy butter sauce infused with garlic and fresh herbs, offering remarkable versatility that can easily cater to various dietary preferences. Whether served as a fun appetizer or a satisfying main dish, these bites promise to impress. Are you ready to dive into this flavorful feast?

Why are Cowboy Butter Chicken Bites a hit?

Simplicity at its finest: This recipe features easy-to-follow steps that even novice cooks can master in no time.

Rich, savory flavor: The harmonious blend of garlic, herbs, and creamy butter creates a taste explosion that will leave everyone wanting seconds.

Versatile dinner choice: Adapt it for different diets—swap in plant-based butter for a dairy-free delight, or change the protein to your preference.

Quick preparation time: With just 30 minutes from start to finish, these bites make weeknight dinners feel gourmet without the hassle.

Crowd-pleasing appeal: Perfect for parties or casual get-togethers, these bites are sure to impress guests when served alongside refreshing sides or tasty dips.

Looking for more delicious chicken options? Try my famous Crockpot Butter Chicken or explore my easy recipe for Honey Garlic Chicken.

Cowboy Butter Chicken Bites Ingredients

For the Chicken
• Boneless Skinless Chicken Breasts or Thighs (1.5 lbs) – This primary protein can be cut into bite-sized pieces for easy cooking and eating.
• Salt (1 tsp) – Essential for seasoning the chicken to enhance its flavor.
• Black Pepper (1/2 tsp) – Adds warmth; adjust according to your taste preferences.
• Smoked Paprika (1 tsp) – Provides a smokey depth to the bites; regular paprika can be used as a substitute.
• Garlic Powder (1/2 tsp) – Infuses additional garlic flavor; feel free to use fresh garlic for a bolder taste.

For the Cowboy Butter Sauce
• Olive Oil (1 tbsp) – Used for searing chicken; other cooking oils like avocado or canola work well too.
• Unsalted Butter (4 tbsp) – The base for the flavorful cowboy butter; substitute with plant-based butter for a dairy-free version.
• Garlic (4 cloves, minced) – Fresh garlic adds aromatic depth; adjust the quantity based on your preference.
• Lemon Juice (1 tbsp) – Brightens the sauce’s flavors; fresh lemon juice is recommended for the best taste.
• Dijon Mustard (1 tsp) – Adds tanginess and complexity; omit if you prefer a simpler flavor.
• Red Pepper Flakes (1/2 tsp) – Provides heat; adjust the amount based on your spice preference (perfect for those Cowboy Butter Chicken Bites!).
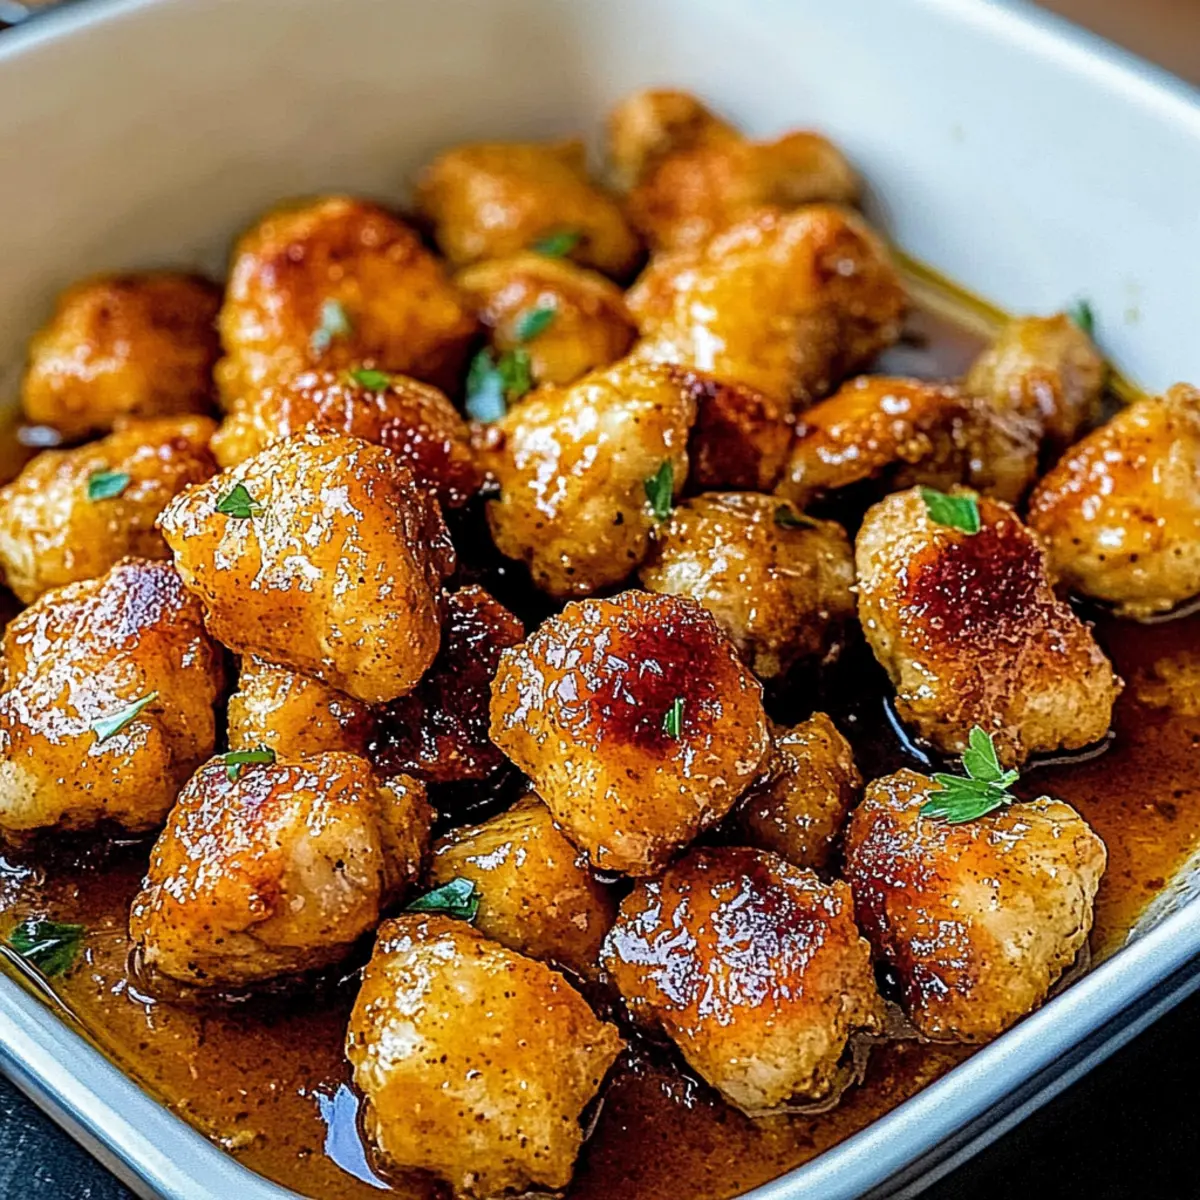
• Fresh Parsley (2 tbsp, chopped) – Adds freshness and color to your dish; can be substituted with other herbs like cilantro or thyme.

These ingredients set the foundation for your Cowboy Butter Chicken Bites, ensuring each bite is packed with flavor and warmth!

Step‑by‑Step Instructions for Cowboy Butter Chicken Bites

Step 1: Prepare the Chicken
Begin by cutting the boneless skinless chicken breasts or thighs into bite-sized pieces, ensuring they are all approximately uniform for even cooking. Pat the chicken dry with paper towels to promote a nice sear, then season generously with salt, black pepper, smoked paprika, and garlic powder for a flavor-packed base.

Step 2: Sear the Chicken
Heat a large skillet over medium-high heat and add 1 tablespoon of olive oil, swirling to coat the pan. Once the oil is shimmering, add the seasoned chicken in a single layer, ensuring not to overcrowd the pan. Sear for about 2-3 minutes until the chicken reaches a golden brown color, then flip and cook for an additional 3-4 minutes until fully cooked through, reaching an internal temperature of 165°F.

Step 3: Make the Cowboy Butter Sauce
While the chicken is cooking, melt 4 tablespoons of unsalted butter in a small saucepan or the same skillet over medium heat. Add the minced garlic and sauté for about 1 minute, until fragrant but not browned. Stir in the lemon juice, Dijon mustard, and red pepper flakes, letting the sauce simmer gently for another minute to meld the flavors together beautifully.

Step 4: Combine Chicken and Sauce
Once the chicken is thoroughly cooked, return it to the skillet with the cowboy butter sauce. Toss the chicken bites gently to ensure they are all coated in that rich, zesty sauce. Heat everything together for an additional 1-2 minutes, allowing the flavors to intertwine and the chicken to absorb that delightful buttery goodness.

Step 5: Serve and Garnish
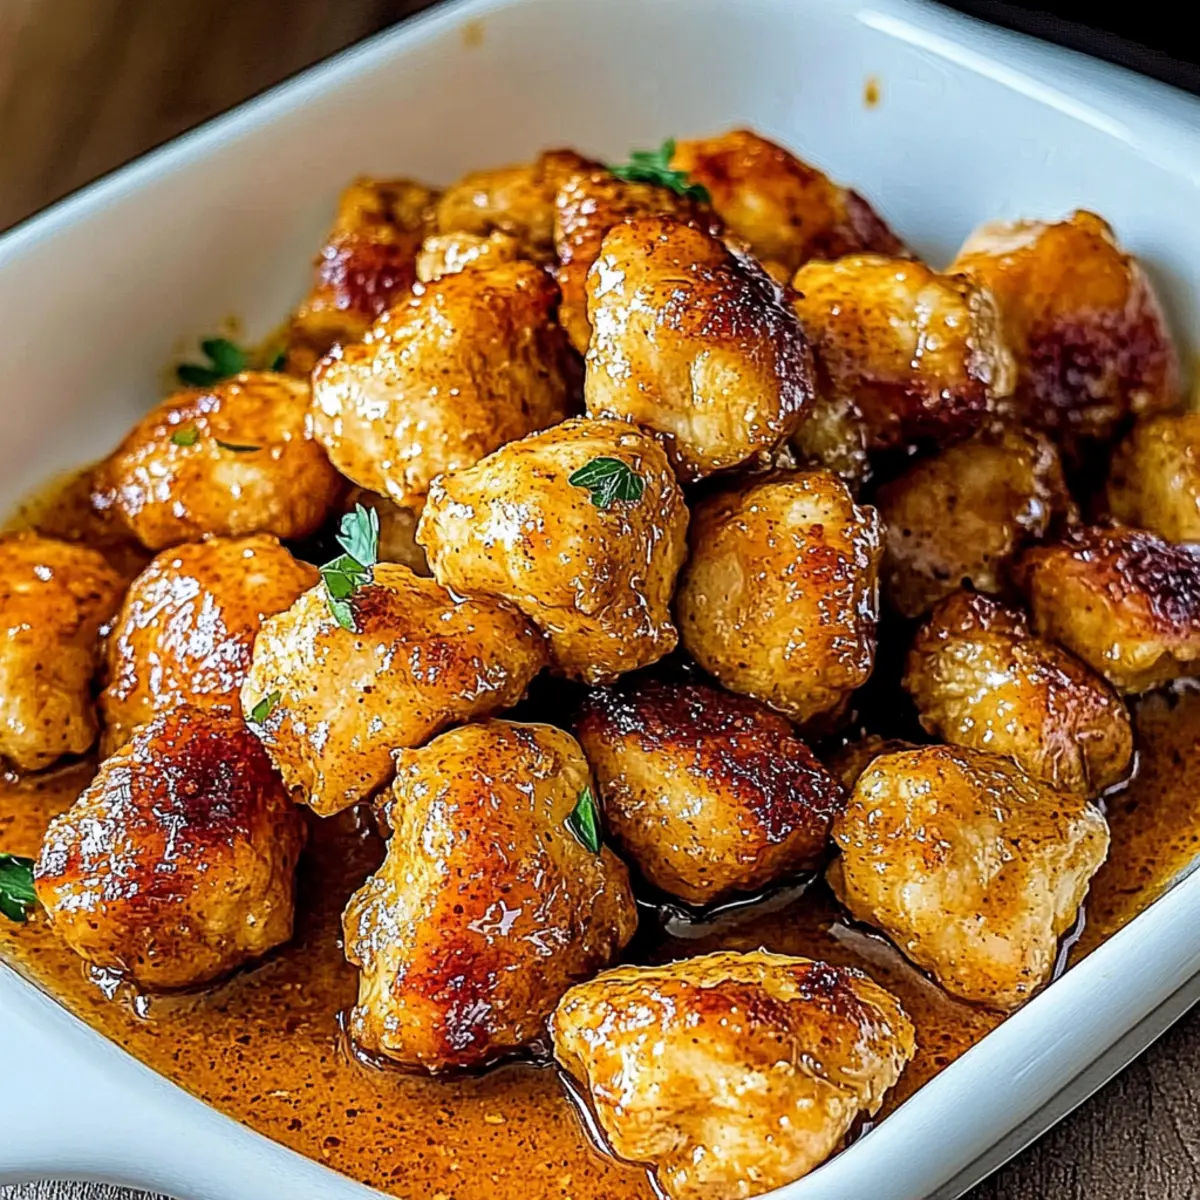
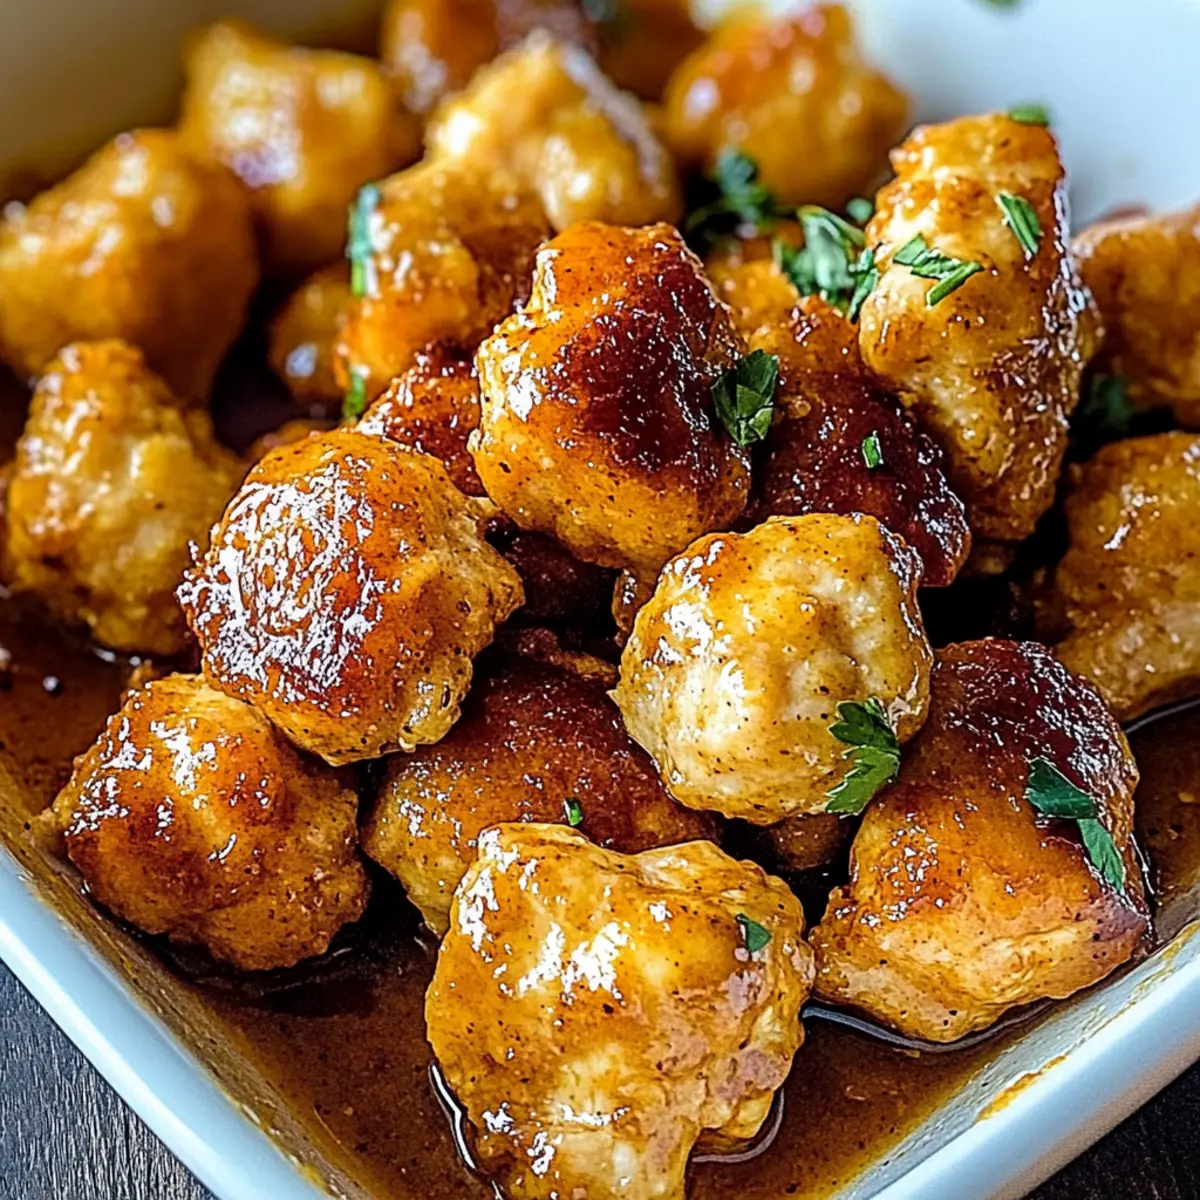
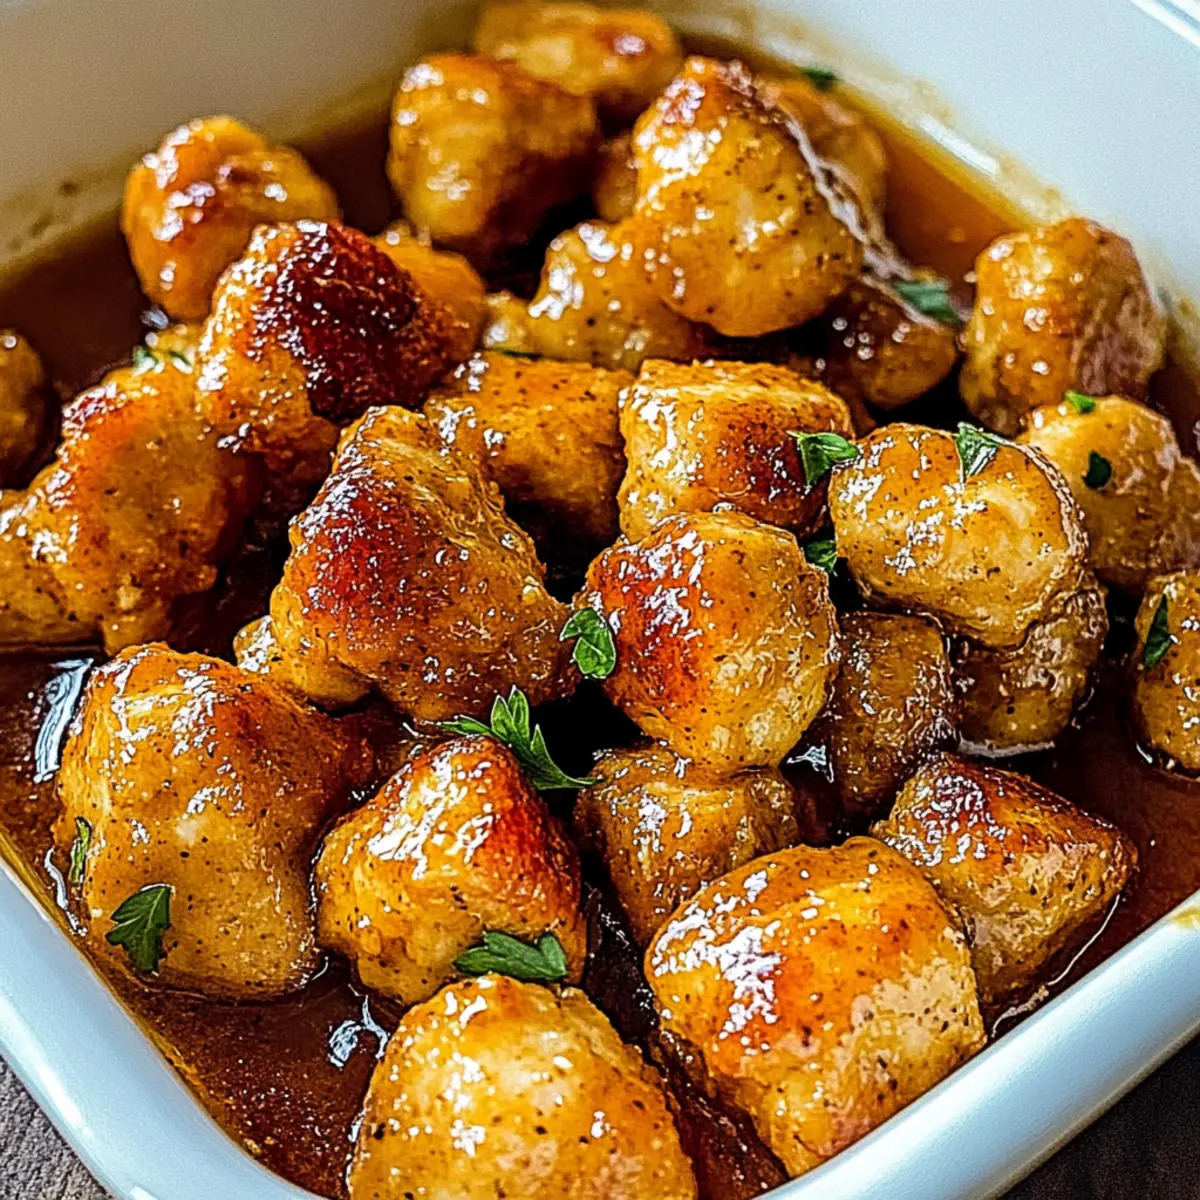
Transfer the Cowboy Butter Chicken Bites to a serving dish, inviting everyone to feast on these savory morsels. Drizzle any remaining sauce over the chicken for an extra touch of flavor, and sprinkle with chopped fresh parsley for a pop of color. Serve these bites hot, perfect for a gathering or a delightful dinner at home.

Expert Tips for Cowboy Butter Chicken Bites

  • Dry Before Seasoning: Ensure chicken pieces are patted dry prior to seasoning. This helps achieve that irresistible golden-brown crust when searing!

  • Don't Overcrowd the Pan: Searing too many pieces at once can lead to steaming rather than browning. Cook in batches for perfect, crispy Cowboy Butter Chicken Bites.

  • Adjust Spice Levels: Tailor the amount of red pepper flakes to your heat preference. Start with less, and add more if you crave a spicier kick!

  • Use Fresh Ingredients: Fresh garlic and herbs elevate the flavors significantly; don’t shy away from choosing fresh over dried for the best taste.

  • Check Chicken Temp: Always ensure your chicken hits an internal temperature of 165°F to guarantee it's safely cooked and tender—no one wants dry bites!

Make Ahead Options

These Cowboy Butter Chicken Bites are perfect for meal prep enthusiasts! You can season and cut the chicken into bite-sized pieces up to 24 hours in advance, storing it in an airtight container in the refrigerator to maintain its flavor and freshness. Additionally, the cowboy butter sauce can be prepared ahead and stored separately for up to 3 days; simply refrigerate it in a sealed jar. When you're ready to serve, just reheat the chicken thoroughly in a skillet, toss it with the warmed sauce for another minute, and voilà! You’ll enjoy restaurant-quality results with minimal effort, saving precious time on busy weeknights.

Cowboy Butter Chicken Bites Variations

Feel free to make these delectable bites your own with a few easy tweaks that will entice your taste buds!

  • Plant-Based Swap: Use tofu or tempeh instead of chicken for a fantastic vegan alternate, marinating it to soak up those delicious flavors.
  • Herb Infusion: Substitute with fresh basil or cilantro for a fragrant twist that packs a fresh punch, enhancing the overall experience of each bite.
  • Spicy Kick: Feel adventurous? Add more red pepper flakes or minced jalapeños for an extra fiery flavor that can elevate the cowboy theme!
  • Cheesy Delight: Sprinkle grated Parmesan or feta cheese atop the finished dish for a creamy, savory layer that will make your guests swoon.
  • Crispy Coating: For a crunchier option, dip the chicken pieces in breadcrumbs before searing; this adds a delightful texture and a satisfying crunch.
  • Zesty Citrus: Add finely grated lime zest along with the lemon juice for a vibrant zing that brightens the flavors wonderfully.
  • Vegan Butter: Use a high-quality plant-based butter to achieve the same rich flavor while keeping it entirely dairy-free—perfect for vegan friends!

For more captivating chicken recipes, consider trying Chipotle Lime Chicken or my easy-to-make Crock Pot Chicken; your culinary adventures await!

How to Store and Freeze Cowboy Butter Chicken Bites

Fridge: Store leftovers in an airtight container in the refrigerator for up to 3 days; this keeps the Cowboy Butter Chicken Bites fresh and tasty.

Freezer: If you need to freeze them, place cooked chicken bites in a single layer on a baking sheet before transferring to a freezer bag once frozen; can last up to 3 months.

Reheating: To reheat, gently warm in a skillet over medium heat, adding a splash of water or broth to maintain moisture and prevent drying out.

Serving Suggestions: These bites are best enjoyed hot, so aim to reheat only what you'll eat at one time to savor their delightful flavor!

What to Serve with Cowboy Butter Chicken Bites

The sizzle of buttery goodness invites you to create a mouthwatering meal that’s both comforting and impressive.

  • Creamy Mashed Potatoes: The smooth, buttery texture pairs beautifully with the zesty chicken bites, absorbing the savory sauce. A classic that never disappoints!

  • Garlic Bread: Crunchy, herb-infused garlic bread brings a delightful crunch to the table, perfect for mopping up any leftover cowboy butter sauce.

  • Crunchy Coleslaw: This fresh side adds a refreshing crunch and tanginess that balances out the rich and buttery chicken, enhancing your dining experience.

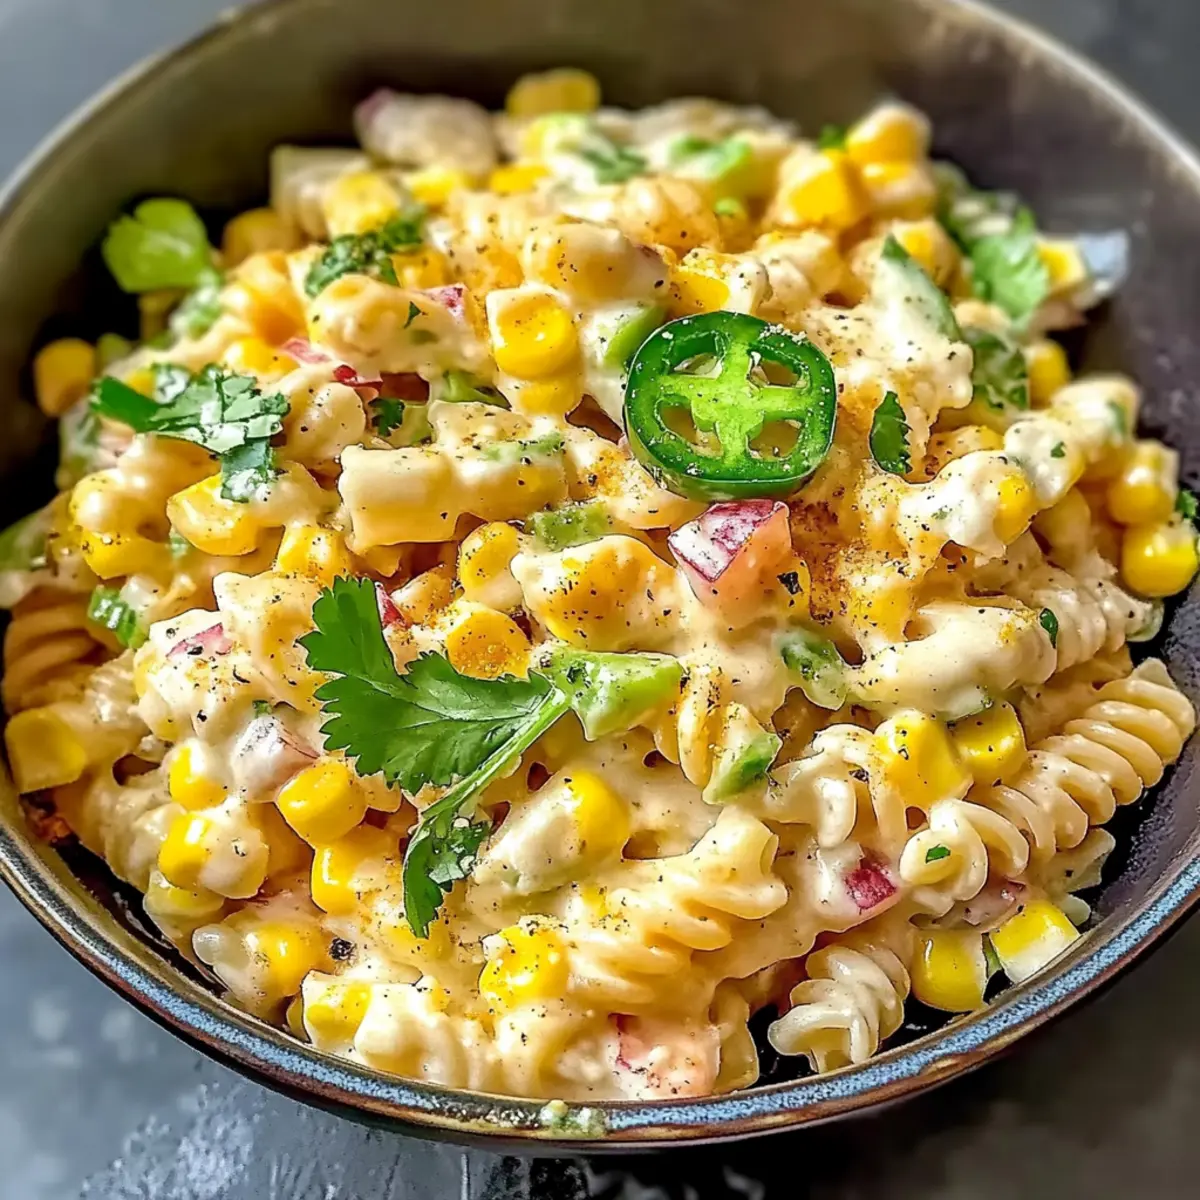
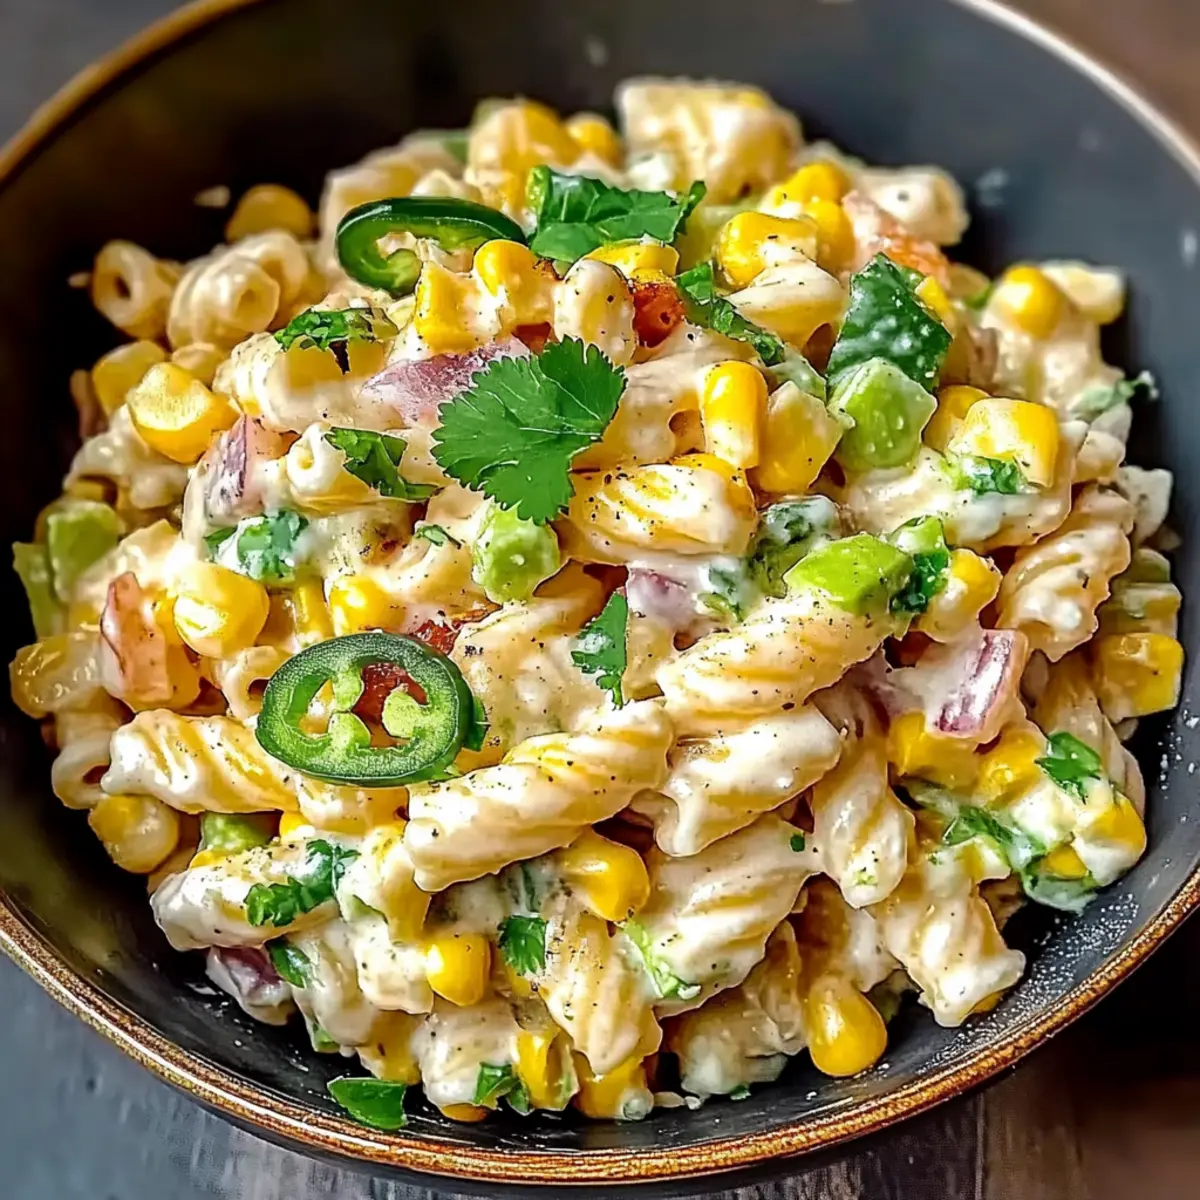
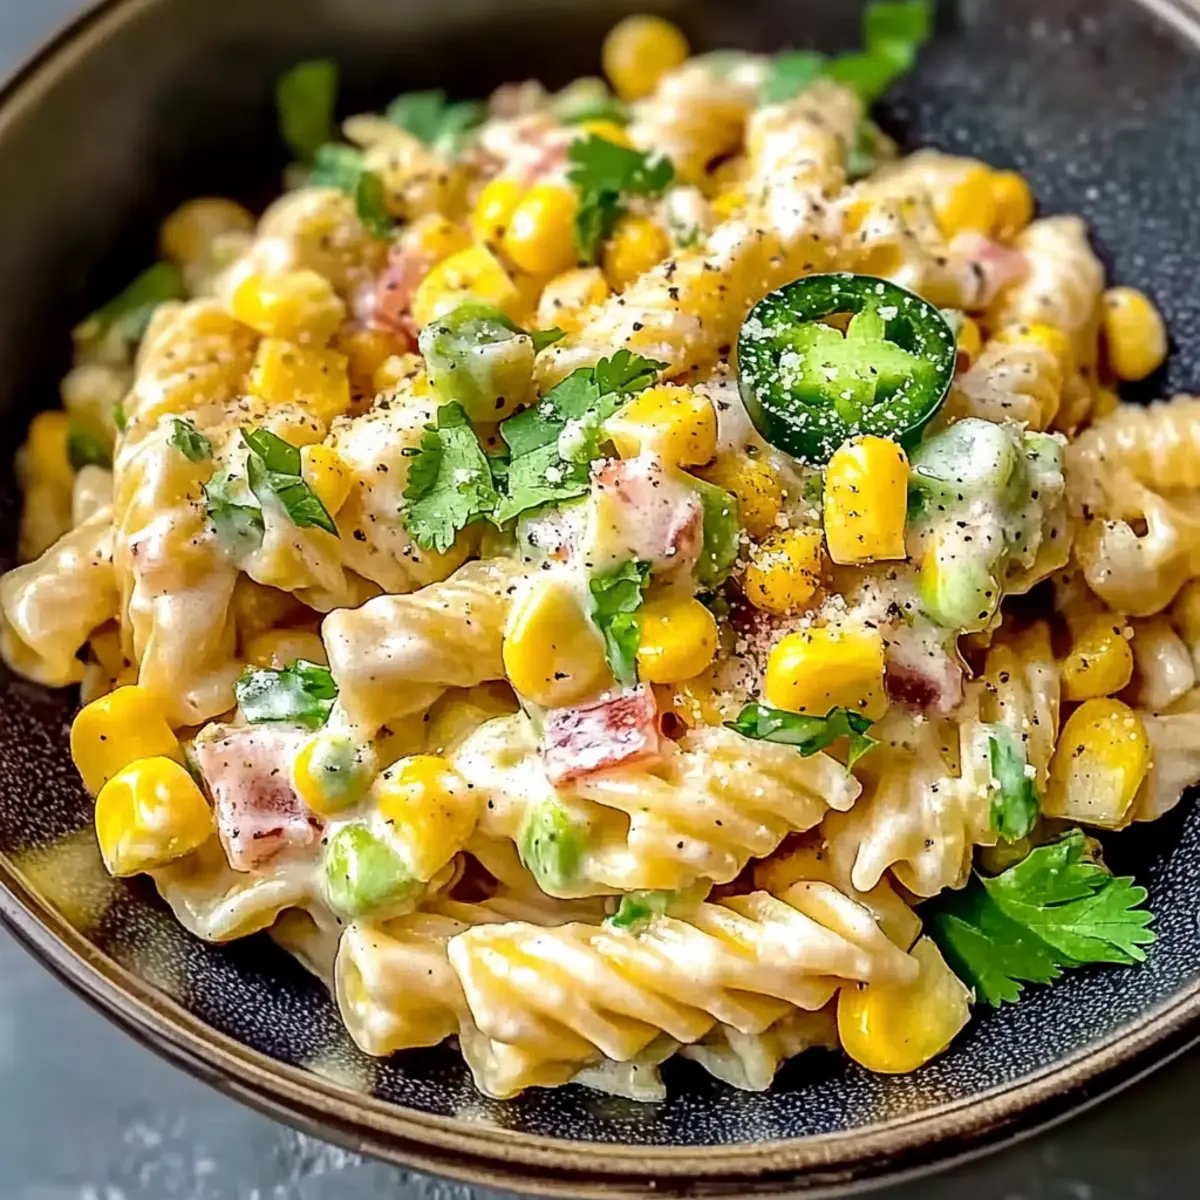
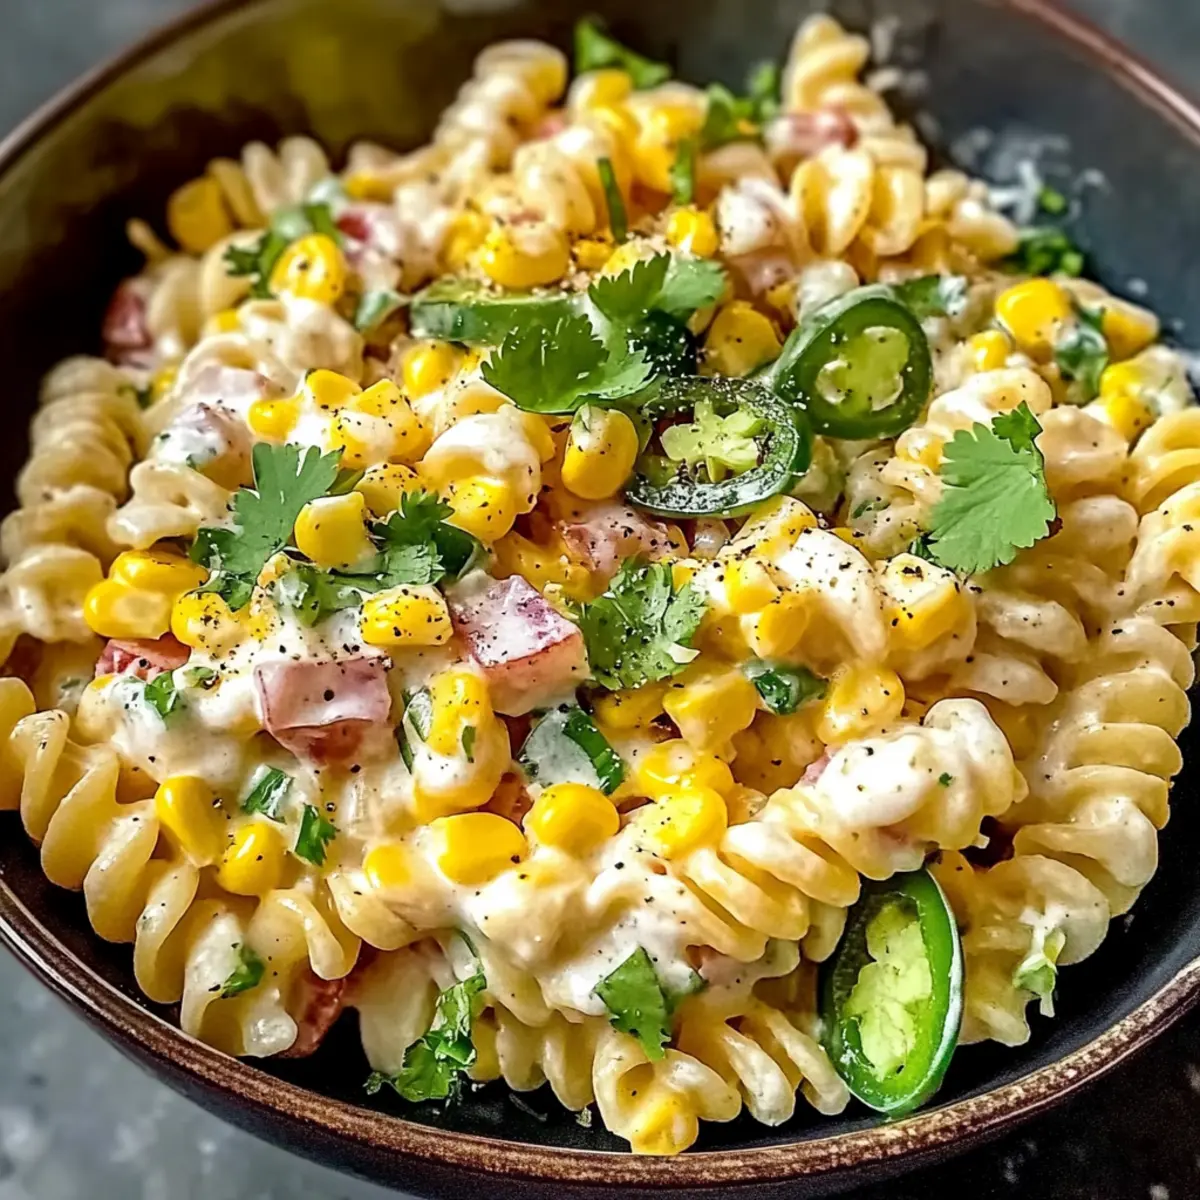
  • Grilled Corn on the Cob: Charred and sweet, grilled corn pairs well with the cowboy flavors and adds a fun, summery element to your meal.

  • Herb Salad: A vibrant salad with mixed greens, cucumbers, and a zesty lemon vinaigrette brighten up the plate and complement the savory bites beautifully.

  • Spicy Pickles: These zesty, tangy bites provide a punchy contrast to the buttery chicken, adding an exciting crunch and flavor pop with each bite.

  • Sangria: A refreshing glass of sangria, with its fruity and sweet notes, complements the spicy and rich flavors of the chicken, making for a perfect pairing.

  • Chocolate Mousse: End your meal on a rich, sweet note with a silky chocolate mousse that contrasts the savory bites, leaving your taste buds singing.

Creating a full meal around these Cowboy Butter Chicken Bites can turn any gathering into a delightful feast!

Cowboy Butter Chicken Bites Recipe FAQs

What kind of chicken is best for this recipe?
Absolutely! For the best texture and flavor, boneless skinless chicken breasts or thighs work wonderfully. They provide juiciness and are easy to cut into bite-sized pieces. When selecting chicken, look for meat that is firm and has a pinkish color without any dark spots, which may indicate spoilage.

How should I store leftovers of these Cowboy Butter Chicken Bites?
To store leftovers, place them in an airtight container and refrigerate for up to 3 days. Make sure to let them cool down first to maintain their quality! When you’re ready to enjoy them again, gently reheat in a skillet over medium heat to help retain that crispy exterior.

Can I freeze Cowboy Butter Chicken Bites?
Yes, you can! To freeze, allow the cooked chicken bites to cool completely. Then, lay them out in a single layer on a baking sheet and freeze until firm. Once frozen, transfer the bites to a freezer-safe bag or container. They’ll stay fresh for up to 3 months. When ready to eat, thaw them in the fridge overnight, then reheat gently.

What if my chicken isn’t browning during searing?
If your chicken isn’t browning like you expect, it’s likely overcrowding in the pan is the culprit. Searing requires space for the chicken to develop that golden crust. Make sure to cook in batches, giving each piece enough room to form that delicious outer layer!

Can I make this dish vegetarian or vegan?
Very! You can swap the chicken for tofu or chickpeas for a plant-based version. Additionally, using plant-based butter will keep it dairy-free. Season the meat substitute well to infuse those lovely flavors we love in Cowboy Butter Chicken Bites while keeping everyone happy at the table!

Is this recipe safe for people with common allergies?
Always consider dietary restrictions, especially with guests. This recipe contains chicken, dairy (butter), and can include gluten if served with certain sides. If using substitutions, like plant-based butter, ensure everyone is aware of any potential allergens that may still be present, like garlic or mustard.

Cowboy Butter Chicken Bites

Cowboy Butter Chicken Bites: Flavor-Packed Party Pleaser

Cowboy Butter Chicken Bites are savory morsels with a taste of the wild West, perfect for parties and gatherings.
Print Recipe Pin Recipe
Prep Time 10 minutes mins
Cook Time 20 minutes mins
Total Time 30 minutes mins
Servings: 4 bites
Course: Appetizers
Cuisine: American
Calories: 370
Ingredients Equipment Method Nutrition Notes

Ingredients
  

For the Chicken
  • 1.5 lbs Boneless Skinless Chicken Breasts or Thighs Cut into bite-sized pieces.
  • 1 tsp Salt For seasoning.
  • 0.5 tsp Black Pepper Adjust to taste.
  • 1 tsp Smoked Paprika Provides smokiness.
  • 0.5 tsp Garlic Powder Can substitute with fresh garlic.
For the Cowboy Butter Sauce
  • 1 tbsp Olive Oil For searing chicken.
  • 4 tbsp Unsalted Butter Can substitute with plant-based butter.
  • 4 cloves Garlic Minced.
  • 1 tbsp Lemon Juice Fresh lemon juice recommended.
  • 1 tsp Dijon Mustard Optional for tanginess.
  • 0.5 tsp Red Pepper Flakes Adjust for spice level.
  • 2 tbsp Fresh Parsley Chopped, for garnish.

Equipment

  • Skillet
  • Saucepan
  • Cutting Board
  • Knife
  • Measuring Spoons

Method
 

Cooking Steps
  1. Cut the chicken into bite-sized pieces and season with salt, black pepper, smoked paprika, and garlic powder.
  2. Heat oil in a skillet over medium-high heat, then sear chicken for 2-3 minutes until golden brown.
  3. Melt butter in a saucepan, add minced garlic, lemon juice, Dijon mustard, and red pepper flakes; simmer for 1 minute.
  4. Combine the cooked chicken with the butter sauce in the skillet; heat for an additional 1-2 minutes.
  5. Serve on a plate with extra sauce drizzle and garnished with parsley.

Nutrition

Serving: 4bitesCalories: 370kcalCarbohydrates: 2gProtein: 30gFat: 27gSaturated Fat: 10gPolyunsaturated Fat: 2gMonounsaturated Fat: 11gCholesterol: 100mgSodium: 800mgPotassium: 450mgVitamin A: 500IUVitamin C: 5mgCalcium: 15mgIron: 1mg

Notes

Pat chicken dry before seasoning. Cook in batches to avoid overcrowding the pan. Adjust spice levels to preference. Use fresh ingredients for a vibrant flavor.

Tried this recipe?

Let us know how it was!

Creamy Rotel Pasta with Ground Beef for Cozy Nights

November 21, 2025 by Grace Snow Leave a Comment

As I was stirring a pot of creamy goodness the other day, I felt a wave of nostalgia wash over me—reminding me of family dinners filled with laughter and comfort. Today, I’m excited to share my go-to recipe for Creamy Rotel Pasta with Ground Beef, a hearty one-pot wonder that’s not only beginner-friendly but also perfect for those with busy evenings. With just 15 minutes of prep and a total cooking time of 30 minutes, this dish brings a delightful blend of rich ground beef, zesty Rotel tomatoes, and luscious cheddar cheese to your table. It’s a crowd-pleaser that makes weeknight meals utterly enjoyable. Curious about how to bring warmth and joy to your family dinner with this delicious pasta? Let’s dive in!

Why is Creamy Rotel Pasta a Must-Try?

Comforting Combination: This dish brings together ground beef, creamy cheese, and zesty tomatoes for a flavor explosion that’ll make everyone at the table smile.

One-Pot Ease: With just one skillet required, you’ll have minimal cleanup on busy nights, making it perfect for those who want an effortless cooking experience.

Quick Cooking: In just 30 minutes, you can serve a fully plated meal, meaning less time in the kitchen and more time to relax and enjoy with loved ones.

Versatile Substitutions: Not a fan of beef? No problem! You can easily swap in ground turkey or even lentils for a hearty vegetarian version, ensuring this recipe suits everyone's taste.

Family Favorite: This Creamy Rotel Pasta is bound to become a staple in your household for its crowd-pleasing flavors, similar to my Skillet Pasta Sun or Seafood Pasta Savory.

Creamy Rotel Pasta Ingredients

For the Pasta Dish
• Ground Beef – Adds protein and richness; feel free to substitute with ground turkey or plant-based beef for a lighter option.
• Onion (1 medium, diced) – Provides sweetness and depth; shallots can be used for a more delicate flavor.
• Garlic (2 cloves, minced) – Enhances overall flavor with its aromatic qualities; fresh garlic is best for maximum impact.
• Rotel Tomatoes (1 can, 10 oz with green chilies) – Introduces acidity and a touch of heat; swap for diced tomatoes with jalapeños if you like it spicier.
• Cream of Mushroom Soup (1 can, 10.5 oz) – Serves as a creamy base; consider making a homemade mushroom cream sauce for freshness.
• Heavy Cream (1 cup) – Provides richness and creaminess; use half-and-half for a lighter take.
• Cheddar Cheese (2 cups, shredded) – Creates that gooey, cheesy texture; Pepper Jack cheese adds a spicy twist if desired.
• Pasta (12 oz, penne or rotini) – The heart of the dish; other shapes like fusilli or farfalle can be used based on preference.
• Olive Oil (1 tbsp) – Essential for sautéing onion and garlic; any cooking oil will work in a pinch.
• Salt and Pepper – For seasoning to enhance the dish’s flavors.
• Green Onions (2, chopped, optional) – Adds a fresh garnish and touches of color to your plate.

Embark on a culinary adventure with this Creamy Rotel Pasta with Ground Beef that will not only satisfy your hearty cravings but also fill your home with comforting aromas!

Step‑by‑Step Instructions for Creamy Rotel Pasta with Ground Beef

Step 1: Cook the Pasta
Begin by boiling a large pot of salted water over high heat. Once the water reaches a rolling boil, add 12 ounces of your choice of pasta, such as penne or rotini. Cook for 8 to 10 minutes, or until al dente, stirring occasionally. Once cooked, drain the pasta in a colander and set it aside while you prepare the sauce.

Step 2: Sauté Onion and Garlic
In a large skillet, pour 1 tablespoon of olive oil and heat over medium heat. Add 1 medium diced onion and 2 minced garlic cloves, sautéing for about 3 minutes until the onion becomes translucent and fragrant. Stir frequently to ensure the garlic doesn’t burn, as you want a sweet flavor base for your Creamy Rotel Pasta.

Step 3: Brown the Ground Beef
Next, add your ground beef to the skillet, breaking it apart with a wooden spoon. Cook for 5 to 7 minutes until browned and no longer pink. Make sure to stir occasionally while the meat cooks, and once done, drain any excess fat from the skillet to keep your dish from becoming greasy.

Step 4: Add Rotel Tomatoes and Soup
Stir in one 10-ounce can of Rotel tomatoes and one 10.5-ounce can of cream of mushroom soup into the skillet with the beef. Mix thoroughly, allowing the warm flavors to meld together for about 2 minutes. This combination will be the base of the creamy sauce for your Creamy Rotel Pasta.

Step 5: Incorporate Heavy Cream
Pour in 1 cup of heavy cream to the skillet, stirring well to combine all ingredients. Let the mixture simmer on low heat for around 5 minutes, allowing it to thicken. The sauce should become velvety and rich, setting the stage for a luscious pasta experience.

Step 6: Add Cheddar Cheese
While your sauce is simmering, gradually add 2 cups of shredded cheddar cheese, stirring continuously until melted and creamy. This step is crucial for achieving that deliciously gooey texture that brings the Creamy Rotel Pasta together. Ensure everything is well-mixed and smooth.

Step 7: Season the Dish
Taste your sauce and season with salt and pepper to your liking. This simple seasoning helps enhance the flavors of the dish. Once seasoned, turn off the heat and prepare to combine the pasta with the sauce for a rich and satisfying meal.

Step 8: Combine Pasta and Sauce
Gently fold the cooked pasta into the creamy sauce in the skillet, ensuring every piece is well-coated. Use tongs or a spatula to combine thoroughly for about 1-2 minutes. The goal is to have a beautiful blend of flavors throughout the pasta, making this Creamy Rotel Pasta with Ground Beef truly irresistible.

Step 9: Serve and Garnish
Finally, serve your Creamy Rotel Pasta hot, garnished with chopped green onions if desired. This vibrant touch not only adds color but also a fresh crunch to your hearty meal. Enjoy a comforting bowl that brings smiles at the dinner table!

Storage Tips for Creamy Rotel Pasta

Fridge: Store any leftover Creamy Rotel Pasta in an airtight container for up to 3 days. This ensures freshness and prevents moisture loss.

Freezer: If you want to keep it longer, freeze the pasta in a covered container for up to 3 months. To reheat, allow it to thaw overnight in the fridge.

Reheating: Gently reheat the pasta on the stovetop over low heat or in the microwave. Adding a splash of milk will help revive the creaminess of the sauce.

Avoid Storing: Do not store in metal containers, as the acidity in the Rotel tomatoes may react with the metal and alter the taste.

What to Serve with Creamy Rotel Pasta with Ground Beef

Looking to elevate your comforting bowl of creamy pasta and create a full meal experience?

  • Garlic Bread: Its crispy, buttery goodness makes it the perfect vessel for scooping up extra sauce, bringing joy to every bite.
  • Fresh Green Salad: A vibrant mix of greens, tomatoes, and cucumbers offers a refreshing contrast to the richness of the pasta, making each forkful satisfying.
  • Roasted Vegetables: Sweet, caramelized veggies like zucchini or bell peppers add depth and color to your meal, balancing the flavors beautifully.
  • Coleslaw: Crisp, tangy coleslaw serves as a refreshing side that cuts through the creaminess with a delightful crunch.
  • Cheesy Garlic Breadsticks: Soft and gooey with a hint of garlic, these breadsticks soak up the creamy sauce, making them a family favorite.
  • Homemade Apple Crisp: End your cozy meal on a sweet note; the warm, cinnamon-spiced apples provide a comforting dessert that pairs well with your creamy pasta.
  • Sweet Iced Tea: A pitcher of refreshing iced tea complements the meal, offering a sweet, thirst-quenching balance to the savory dish.
  • Beer or Wine: A crisp white wine or a light beer can enhance the flavors of the dish and create a delightful dining experience for adults.
  • Fruit Salad: A light, fruity option adds a burst of color and a refreshing sweetness that rounds out your hearty meal splendidly.

Creamy Rotel Pasta with Ground Beef Variations

Feel free to mix and match to create your ideal version of this creamy delight!

  • Dairy-Free: Replace heavy cream and cheese with coconut cream and nutritional yeast for a rich, dairy-free alternative.
  • Spicy Twist: Add sliced jalapeños or a dash of hot sauce to the sauce for an extra kick that complements the Rotel tomatoes.
  • Flavor Boost: Stir in Italian seasoning or taco seasoning for a zesty, herby flavor profile that elevates the dish.
  • Veggie-Loaded: Toss in vegetables like spinach, bell peppers, or zucchini for added nutrients and a colorful presentation.
  • Pasta Variations: Experiment with different pasta shapes like farfalle or even zoodles to switch up the texture and presentation. Each shape captures the creamy sauce differently.
  • Savory Mushrooms: Incorporate sliced mushrooms along with the onions for extra umami flavor that beautifully complements the beef and creamy base.
  • Protein Packed: For extra protein, mix in beans like black or pinto beans to make the dish even heartier and add a delightful texture.
  • One-Pot Wonder: Want even less cleanup? Use a pressure cooker or Instant Pot for this recipe to cook everything in one pot seamlessly. You can check out my Ground Beef Enchiladas as another great one-pot option.

Feel free to let your culinary creativity flow, and enjoy crafting the perfect bowl of Creamy Rotel Pasta with Ground Beef!

Make Ahead Options

These Creamy Rotel Pasta with Ground Beef meals are perfect for busy home cooks looking to save time! You can prep the sauce (steps 2 through 6) up to 24 hours in advance. Just allow it to cool, then store it in an airtight container in the refrigerator to maintain its creamy texture. The pasta can also be cooked ahead of time and stored separately; keep it in an airtight container for up to 3 days. When you’re ready to serve, simply reheat both the sauce and pasta on the stovetop, gently mixing them together for perfectly creamy results that are just as delicious!

Expert Tips for Creamy Rotel Pasta

  • Perfect Pasta: Cook pasta until al dente to prevent it from becoming mushy when mixed with the creamy sauce.

  • Choose Wisely: Don’t skip draining excess fat from the ground beef; it helps keep your Creamy Rotel Pasta from becoming greasy.

  • Cheese Magic: Constantly stir the cheddar cheese into the sauce until fully melted to avoid clumping and achieve that smooth, creamy texture.

  • Seasoning Balance: Taste and adjust the salt and pepper at the end to enhance flavors. This ensures your dish has the right pop without overpowering it.

  • Customize with Spice: If you prefer a little heat, consider adding cayenne pepper or red pepper flakes while cooking for a tasty kick!

Creamy Rotel Pasta with Ground Beef Recipe FAQs

How do I choose ripe ingredients for this recipe?
Absolutely! For the best flavor in your Creamy Rotel Pasta, opt for fresh vegetables. Look for onions that are firm without any dark spots, and garlic that is dry to the touch. For Rotel tomatoes, a quality can with no dents or leaks is ideal—this ensures the ingredients are fresh and flavorful.

What are the best methods for storing leftovers?
Very easily! Store any leftover Creamy Rotel Pasta in an airtight container in the fridge for up to 3 days. Make sure it’s cooled down before sealing to maintain freshness. If you want to savor it longer, consider freezing it in a freezer-safe container for up to 3 months. Just remember to label it with the date!

Can I freeze Creamy Rotel Pasta? How?
Definitely! To freeze your Creamy Rotel Pasta, allow it to cool completely first. Then, scoop portions into airtight, freezer-safe containers, leaving space at the top for expansion. You can also use freezer bags, ensuring to press out as much air as possible. For reheating, let it thaw overnight in the fridge and when ready, warm it gently on the stovetop while adding a splash of milk to bring back the creaminess.

What should I do if the sauce is too greasy?
If you find your sauce oily, no worries! Drain the excess fat from the ground beef before adding the tomatoes and cream. This step is crucial for a richer, comforting dish. If your sauce still seems oily, you can also add a bit of cornstarch mixed with water—just simmer it a few minutes longer until it thickens.

Are there any dietary considerations for this recipe?
Absolutely! If you or someone you’re serving has allergies, make sure to check labels on the cream of mushroom soup and Rotel tomatoes, as they can sometimes contain allergens. For a vegetarian option, substitute the ground beef with lentils or plant-based meat substitutes and ensure that the cream and soup are vegetarian-friendly. Always best to be cautious!

Creamy Rotel Pasta with Ground Beef

Creamy Rotel Pasta with Ground Beef for Cozy Nights

A comforting and easy creamy Rotel pasta with ground beef, perfect for busy evenings.
Print Recipe Pin Recipe
Prep Time 15 minutes mins
Cook Time 30 minutes mins
Total Time 30 minutes mins
Servings: 4 servings
Course: Dinner
Cuisine: American
Calories: 600
Ingredients Equipment Method Nutrition Notes

Ingredients
  

For the Pasta Dish
  • 1 lb Ground Beef Can substitute with ground turkey or plant-based beef.
  • 1 medium Onion Diced; can use shallots for a more delicate flavor.
  • 2 cloves Garlic Minced; fresh garlic is best.
  • 1 can (10 oz) Rotel Tomatoes With green chilies; can swap for diced tomatoes with jalapeños.
  • 1 can (10.5 oz) Cream of Mushroom Soup Consider making a homemade mushroom cream sauce.
  • 1 cup Heavy Cream Use half-and-half for a lighter option.
  • 2 cups Cheddar Cheese Shredded; Pepper Jack cheese can be added for spice.
  • 12 oz Pasta Penne or rotini; other shapes like fusilli or farfalle work as well.
  • 1 tbsp Olive Oil Essential for sautéing.
  • to taste Salt
  • to taste Pepper
  • 2 Green Onions Chopped, optional for garnish.

Equipment

  • Large pot
  • Large skillet
  • Colander

Method
 

Cooking Steps
  1. Boil a large pot of salted water over high heat. Add pasta and cook for 8-10 minutes until al dente. Drain and set aside.
  2. In a large skillet, heat olive oil over medium heat. Sauté onion and garlic for about 3 minutes until onion becomes translucent.
  3. Add ground beef to the skillet, breaking it apart. Cook for 5-7 minutes until browned. Drain excess fat.
  4. Stir in Rotel tomatoes and cream of mushroom soup. Mix thoroughly and allow to warm for about 2 minutes.
  5. Pour in heavy cream and stir well. Simmer on low heat for around 5 minutes until thickened.
  6. Gradually add cheddar cheese, stirring continuously until melted and creamy.
  7. Season the dish with salt and pepper to your liking.
  8. Fold the cooked pasta into the creamy sauce, ensuring each piece is well-coated.
  9. Serve hot, garnished with chopped green onions if desired.

Nutrition

Serving: 1bowlCalories: 600kcalCarbohydrates: 45gProtein: 30gFat: 35gSaturated Fat: 18gPolyunsaturated Fat: 2gMonounsaturated Fat: 12gTrans Fat: 1gCholesterol: 100mgSodium: 800mgPotassium: 600mgFiber: 3gSugar: 4gVitamin A: 600IUVitamin C: 5mgCalcium: 300mgIron: 3mg

Notes

Store leftovers in an airtight container for up to 3 days, or freeze for up to 3 months. Reheat gently, adding a splash of milk if needed.

Tried this recipe?

Let us know how it was!

Delightful Mexican Street Corn Pasta Salad for Summer Fun

November 21, 2025 by Grace Snow Leave a Comment

As the sun shines brighter and the days grow longer, my cravings shift toward brisk outdoor meals that capture the essence of summer. Enter the Creamy Mexican Street Corn Pasta Salad—a delightful blend of smoky charred corn, zesty lime, and creamy dressing that perfectly embodies the season. This dreamy pasta salad is not only quick to prepare, making it a stress-free option for cookouts, but it’s also a crowd-pleaser that leaves everyone feeling satisfied without that heavy post-meal slump. With just a few simple ingredients, you can whip up this vibrant dish that transforms your usual picnic spread. Who's ready to dive into a bowl of summery goodness?

Why is this pasta salad a must-try?

Quick & Easy: This Creamy Mexican Street Corn Pasta Salad is not only a flavor explosion but also a breeze to prepare. Perfect for busy weekdays or spontaneous cookouts!
Vibrant Flavors: The combination of smoky charred corn, zesty lime, and creamy dressing creates a harmonious blend that dances on your palate.
Crowd-Pleasing Appeal: Ideal for gatherings, this dish is sure to impress guests, making it a staple at summer barbecues.
Versatile Additions: Feel free to add your favorite mix-ins like diced avocado or bacon bits for a personalized twist.
Make-Ahead Magic: Prepare it a day in advance, allowing flavors to meld beautifully. It’s ready when you are!

This dish is a must for your summer menu, just as delicious served next to grilled meats or even on its own.

Mexican Street Corn Pasta Salad Ingredients

For the Pasta Base
• Elbow Macaroni or Penne – This serves as the foundation of your salad; gluten-free pasta can be swapped if needed.

For the Charred Corn
• Sweet Corn Kernels – Adds sweetness and crunch; for the best flavor, use fresh corn when available.
• Butter – Helps achieve that smoky flavor when charring the corn; olive oil can be a lighter alternative.

For the Flavor Boosters
• Jalapeño Pepper – Brings a delightful heat; omit for a milder salad that everyone can enjoy.
• Chopped Cilantro Leaves – Infuses freshness; parsley can work in its place if preferred.
• Chili Powder & Smoked Paprika – Elevate the smoky essence, or adjust to taste; cayenne pepper is a good substitute if you like it spicier.

For the Creamy Dressing
• Mayonnaise – Forms the base of your rich dressing; Greek yogurt offers a lighter option.
• Lime Juice – Brightens the dish; fresh is key for a zesty kick.
• Crumbled Cotija Cheese – Provides a creamy, salty pop; feta cheese can also work well as a substitute.

For Seasoning
• Salt and Black Pepper – Essential for enhancing the overall flavor; adjust to taste.

This Mexican Street Corn Pasta Salad is not just a meal; it's a summer celebration on a plate! Enjoy it at your next gathering or picnic for a dish that truly shines.

Step‑by‑Step Instructions for Mexican Street Corn Pasta Salad

Step 1: Cook the Pasta
Bring a large pot of salted water to a vigorous boil over high heat. Add elbow macaroni or penne and cook according to package instructions until al dente, usually around 8-10 minutes. Drain the pasta in a colander and rinse under cold water to stop the cooking process and cool it down, ensuring your Mexican Street Corn Pasta Salad won’t turn mushy.

Step 2: Char the Corn
In a skillet, melt about 2 tablespoons of butter over medium heat. Once melted, add the sweet corn kernels to the skillet, spreading them out evenly. Cook for about 8-10 minutes, stirring occasionally, until the corn is charred and golden brown. This charring adds a smoky flavor that enhances the overall taste of your pasta salad.

Step 3: Spice It Up
Once the corn has achieved that beautiful char, remove the skillet from heat. Quickly stir in chili powder and smoked paprika, ensuring the spices blend well with the corn. Allow the mixture to cool slightly so that it won’t affect the temperature of the pasta when you combine everything for your Mexican Street Corn Pasta Salad.

Step 4: Combine the Ingredients
In a large mixing bowl, combine the cooled pasta, charred corn mixture, mayonnaise, lime juice, crumbled cotija cheese, chopped cilantro, and diced jalapeño, if using. Gently toss all the ingredients together, ensuring each piece of pasta is coated with the creamy dressing and all flavors meld together beautifully.

Step 5: Season and Chill
Taste your mixture and season with salt and black pepper according to your preference. Once seasoned, cover the bowl with plastic wrap or a lid and refrigerate the Mexican Street Corn Pasta Salad for at least 30 minutes. This chilling time allows the flavors to develop and marry for a delightful taste experience.

Expert Tips for Mexican Street Corn Pasta Salad

  • Perfect Pasta: Always cook your pasta al dente; it will soften further while chilling in the fridge. This ensures your salad maintains a perfect texture.
  • Charred to Perfection: Achieve a golden-brown char on your corn for an intense smoky flavor. Don’t rush this step; good charring elevates your salad!
  • Cool Before Mixing: Let the corn cool slightly before adding it to the pasta to prevent the mayonnaise from separating. A little patience goes a long way!
  • Season Generously: Remember to taste and adjust the salt and pepper after mixing. Focusing on seasoning ensures an explosion of flavors in your Mexican Street Corn Pasta Salad.
  • Chill for Flavor: Refrigerate the salad for at least 30 minutes before serving. This allows the flavors to meld beautifully and provides a refreshing, cool dish.

Make Ahead Options

These Creamy Mexican Street Corn Pasta Salad ingredients are perfect for meal prep enthusiasts! You can char the corn and cook the pasta up to 24 hours in advance, allowing for speedy assembly when it's time to serve. Simply cook the pasta according to package instructions, rinse, and cool it well; this prevents any mushiness. The charred corn can also be prepped and stored in an airtight container. When ready to enjoy, combine the prepped ingredients—pasta, corn, mayonnaise, lime juice, cotija cheese, cilantro, and any seasonings. Mix gently, chill for at least 30 minutes, and you'll have a vibrant salad that's just as delicious as if made fresh!

Storage Tips for Mexican Street Corn Pasta Salad

Fridge: Store your Mexican Street Corn Pasta Salad in an airtight container for up to 4 days. The flavors will deepen and improve over time, making it even tastier!

Make-Ahead: This salad is perfect for prepping a day in advance. Just mix and chill; it'll be ready for your summer gatherings without last-minute fuss.

Reheating: This dish is best served chilled, so no reheating is necessary. If it feels dry after storing, you can refresh it with a splash of lime juice before serving.

Freezer: Avoid freezing, as the creamy dressing and fresh ingredients may separate or become mushy upon thawing. Stick to refrigeration for the best experience!

Mexican Street Corn Pasta Salad Variations

Feel free to get creative with this dish to match your taste preferences and dietary needs!

  • Avocado Addition: Add diced avocado for a creamy twist that enhances the salad's richness and flavor.

  • Bacon Boost: Include crispy bacon bits for a salty crunch that'll take your pasta salad to a whole new level.

  • Bean Swap: Substitute sweet corn with black beans for a protein-packed option that adds a delicious earthiness to the mix.

  • Spicy Kick: Toss in sliced jalapeños for an added fiery flavor; adjust the quantity according to your heat tolerance!

  • Herb Variations: Replace cilantro with fresh parsley or even dill for a different herbaceous note that brightens the dish.

  • Cheese Choices: If you can’t find cotija, feta cheese works beautifully too, bringing that creamy, tangy finish.

  • Yogurt Lightening: For a healthier dressing, swap out the mayonnaise for Greek yogurt, maintaining creaminess while cutting calories.

  • Seasonal Veggies: Consider adding colorful chopped bell peppers or diced cherry tomatoes for an extra crunch and fresh burst of flavor.

Remember, this Skillet Pasta Sun recipe can give you more ideas for delicious variations if you're looking to keep things fresh and exciting!

What to Serve with Perfect Mexican Street Corn Pasta Salad

As you prepare to enjoy a bowl of creamy, smoky goodness, think about enhancing your meal with equally delightful companions that will elevate your dining experience.

  • Grilled Chicken Skewers: Juicy and flavorful, these skewers complement the creamy pasta salad perfectly while adding a charred note that echoes the smoky corn.
  • Tortilla Chips & Guacamole: Crunchy tortilla chips paired with buttery guacamole provide the perfect textural contrast, making for a fun and satisfying side dish.
  • Fresh Avocado Salad: A light avocado salad with diced tomatoes and lime offers a fresh burst of flavor that beautifully balances the richness of the pasta. Enjoy it as a palate cleanser between bites.
  • Watermelon Feta Salad: The sweet, juicy watermelon combined with salty feta cheese creates an irresistible summer duo, providing a refreshing counterpoint to the pasta’s creamy texture.
  • Grilled Shrimp Tacos: Spicy grilled shrimp tacos add a burst of zing to your meal, and their lightness pairs wonderfully with the rich pasta salad.
  • Strawberry Lemonade: This refreshing drink, blending sweet strawberries with tart lemons, will quench your thirst brilliantly while enhancing the whole meal with a summery sensation.

With these scrumptious pairings, your Perfect Mexican Street Corn Pasta Salad comes alive, transforming your meal into a lively celebration!

Mexican Street Corn Pasta Salad Recipe FAQs

How do I choose the best corn for this recipe?
Absolutely! For the best flavor in your Mexican Street Corn Pasta Salad, fresh sweet corn kernels are ideal, especially in the summer when they are at their sweetest. Look for corn with bright green husks and plump, moist kernels. If fresh isn’t available, frozen corn can be a great alternative—just thaw it first. Canned corn works in a pinch but may lack the crunchy texture you desire.

What’s the best way to store leftover pasta salad?
After preparing your Mexican Street Corn Pasta Salad, store any leftovers in an airtight container in the refrigerator for up to 4 days. The flavors continue to meld and often taste even better after a day in the fridge. Just ensure the salad remains chilled and covered to maintain its quality.

Can I freeze this pasta salad?
It’s not recommended to freeze the Mexican Street Corn Pasta Salad due to the creamy dressing and fresh ingredients, which can separate or become mushy when thawed. However, if you have leftover pasta without the dressing, consider freezing it separately and mixing it with freshly made dressing when you’re ready to enjoy it.

What should I do if my pasta is overcooked?
If you accidentally overcook the pasta, don’t fret! The key to saving it is to rinse it under cold water immediately after cooking to stop the cooking process. To provide some structure, you can add more ingredients like corn or additional cheese to balance things out. Just remember, shorter pasta shapes like macaroni or penne work best for this salad as they hold their shape and texture better.

Is this recipe suitable for a gluten-free diet?
Very! To make your Mexican Street Corn Pasta Salad gluten-free, simply swap the elbow macaroni or penne with a gluten-free pasta variety. There are many options available now that hold up well and deliver great taste, making your dish inclusive for everyone to enjoy, even with dietary restrictions.

Are there any common allergies to consider?
Certainly! When preparing your Mexican Street Corn Pasta Salad, be mindful of potential allergies. The ingredients include common allergens like dairy (from the cotija cheese and mayonnaise) and gluten (from the pasta). If you’re serving guests, it’s wise to ask about allergies ahead of time. For dairy-free alternatives, consider using lactose-free cheese or a plant-based mayonnaise!

Mexican Street Corn Pasta Salad

Delightful Mexican Street Corn Pasta Salad for Summer Fun

This Mexican Street Corn Pasta Salad is a quick, flavorful dish perfect for summer gatherings, combining smoky corn, zesty lime, and creamy dressing.
Print Recipe Pin Recipe
Prep Time 15 minutes mins
Cook Time 10 minutes mins
Chilling Time 30 minutes mins
Total Time 55 minutes mins
Servings: 6 servings
Course: Salads
Cuisine: Mexican
Calories: 350
Ingredients Equipment Method Nutrition Notes

Ingredients
  

For the Pasta Base
  • 2 cups Elbow Macaroni or Penne Gluten-free pasta can be swapped if needed.
For the Charred Corn
  • 2 cups Sweet Corn Kernels Fresh corn is best when available.
  • 2 tablespoons Butter Olive oil can be a lighter alternative.
For the Flavor Boosters
  • 1 medium Jalapeño Pepper Omit for a milder salad.
  • 1 cup Chopped Cilantro Leaves Parsley can be used as a substitute.
  • 1 teaspoon Chili Powder Adjust to taste.
  • 1 teaspoon Smoked Paprika Cayenne pepper is a substitute for spiciness.
For the Creamy Dressing
  • 1 cup Mayonnaise Greek yogurt offers a lighter option.
  • 1 tablespoon Lime Juice Fresh is key for a zesty kick.
  • 1 cup Crumbled Cotija Cheese Feta cheese can be a substitute.
For Seasoning
  • 1 teaspoon Salt Adjust to taste.
  • 1/2 teaspoon Black Pepper Adjust to taste.

Equipment

  • Large pot
  • Skillet
  • Colander
  • Mixing Bowl

Method
 

Step-by-Step Instructions
  1. Bring a large pot of salted water to a vigorous boil over high heat. Add elbow macaroni or penne and cook according to package instructions until al dente, usually around 8-10 minutes. Drain in a colander and rinse under cold water.
  2. In a skillet, melt about 2 tablespoons of butter over medium heat. Add sweet corn kernels, cooking for about 8-10 minutes, until charred and golden brown.
  3. Once the corn is charred, stir in chili powder and smoked paprika, blending well with the corn and allowing to cool before combining with pasta.
  4. In a mixing bowl, combine the cooled pasta, charred corn mixture, mayonnaise, lime juice, crumbled cotija cheese, chopped cilantro, and diced jalapeño. Toss gently.
  5. Season with salt and black pepper to taste. Cover and refrigerate for at least 30 minutes before serving.

Nutrition

Serving: 1cupCalories: 350kcalCarbohydrates: 40gProtein: 8gFat: 18gSaturated Fat: 3gPolyunsaturated Fat: 2gMonounsaturated Fat: 10gCholesterol: 10mgSodium: 500mgPotassium: 300mgFiber: 3gSugar: 2gVitamin A: 500IUVitamin C: 10mgCalcium: 100mgIron: 1mg

Notes

This salad can be made a day in advance and is best served chilled. If it feels dry after storage, refresh with a splash of lime juice.

Tried this recipe?

Let us know how it was!

Delightful Mexican Street Corn Pasta Salad for Summer Fun

November 21, 2025 by Grace Snow Leave a Comment

As the sun shines brighter and the days grow longer, my cravings shift toward brisk outdoor meals that capture the essence of summer. Enter the Creamy Mexican Street Corn Pasta Salad—a delightful blend of smoky charred corn, zesty lime, and creamy dressing that perfectly embodies the season. This dreamy pasta salad is not only quick to prepare, making it a stress-free option for cookouts, but it’s also a crowd-pleaser that leaves everyone feeling satisfied without that heavy post-meal slump. With just a few simple ingredients, you can whip up this vibrant dish that transforms your usual picnic spread. Who's ready to dive into a bowl of summery goodness?

Why is this pasta salad a must-try?

Quick & Easy: This Creamy Mexican Street Corn Pasta Salad is not only a flavor explosion but also a breeze to prepare. Perfect for busy weekdays or spontaneous cookouts!
Vibrant Flavors: The combination of smoky charred corn, zesty lime, and creamy dressing creates a harmonious blend that dances on your palate.
Crowd-Pleasing Appeal: Ideal for gatherings, this dish is sure to impress guests, making it a staple at summer barbecues.
Versatile Additions: Feel free to add your favorite mix-ins like diced avocado or bacon bits for a personalized twist.
Make-Ahead Magic: Prepare it a day in advance, allowing flavors to meld beautifully. It’s ready when you are!

This dish is a must for your summer menu, just as delicious served next to grilled meats or even on its own.

Mexican Street Corn Pasta Salad Ingredients

For the Pasta Base
• Elbow Macaroni or Penne – This serves as the foundation of your salad; gluten-free pasta can be swapped if needed.

For the Charred Corn
• Sweet Corn Kernels – Adds sweetness and crunch; for the best flavor, use fresh corn when available.
• Butter – Helps achieve that smoky flavor when charring the corn; olive oil can be a lighter alternative.

For the Flavor Boosters
• Jalapeño Pepper – Brings a delightful heat; omit for a milder salad that everyone can enjoy.
• Chopped Cilantro Leaves – Infuses freshness; parsley can work in its place if preferred.
• Chili Powder & Smoked Paprika – Elevate the smoky essence, or adjust to taste; cayenne pepper is a good substitute if you like it spicier.

For the Creamy Dressing
• Mayonnaise – Forms the base of your rich dressing; Greek yogurt offers a lighter option.
• Lime Juice – Brightens the dish; fresh is key for a zesty kick.
• Crumbled Cotija Cheese – Provides a creamy, salty pop; feta cheese can also work well as a substitute.

For Seasoning
• Salt and Black Pepper – Essential for enhancing the overall flavor; adjust to taste.

This Mexican Street Corn Pasta Salad is not just a meal; it's a summer celebration on a plate! Enjoy it at your next gathering or picnic for a dish that truly shines.

Step‑by‑Step Instructions for Mexican Street Corn Pasta Salad

Step 1: Cook the Pasta
Bring a large pot of salted water to a vigorous boil over high heat. Add elbow macaroni or penne and cook according to package instructions until al dente, usually around 8-10 minutes. Drain the pasta in a colander and rinse under cold water to stop the cooking process and cool it down, ensuring your Mexican Street Corn Pasta Salad won’t turn mushy.

Step 2: Char the Corn
In a skillet, melt about 2 tablespoons of butter over medium heat. Once melted, add the sweet corn kernels to the skillet, spreading them out evenly. Cook for about 8-10 minutes, stirring occasionally, until the corn is charred and golden brown. This charring adds a smoky flavor that enhances the overall taste of your pasta salad.

Step 3: Spice It Up
Once the corn has achieved that beautiful char, remove the skillet from heat. Quickly stir in chili powder and smoked paprika, ensuring the spices blend well with the corn. Allow the mixture to cool slightly so that it won’t affect the temperature of the pasta when you combine everything for your Mexican Street Corn Pasta Salad.

Step 4: Combine the Ingredients
In a large mixing bowl, combine the cooled pasta, charred corn mixture, mayonnaise, lime juice, crumbled cotija cheese, chopped cilantro, and diced jalapeño, if using. Gently toss all the ingredients together, ensuring each piece of pasta is coated with the creamy dressing and all flavors meld together beautifully.

Step 5: Season and Chill
Taste your mixture and season with salt and black pepper according to your preference. Once seasoned, cover the bowl with plastic wrap or a lid and refrigerate the Mexican Street Corn Pasta Salad for at least 30 minutes. This chilling time allows the flavors to develop and marry for a delightful taste experience.

Storage Tips for Mexican Street Corn Pasta Salad

Fridge: Store your Mexican Street Corn Pasta Salad in an airtight container for up to 4 days. The flavors will deepen and improve over time, making it even tastier!

Make-Ahead: This salad is perfect for prepping a day in advance. Just mix and chill; it'll be ready for your summer gatherings without last-minute fuss.

Reheating: This dish is best served chilled, so no reheating is necessary. If it feels dry after storing, you can refresh it with a splash of lime juice before serving.

Freezer: Avoid freezing, as the creamy dressing and fresh ingredients may separate or become mushy upon thawing. Stick to refrigeration for the best experience!

Mexican Street Corn Pasta Salad Variations

Feel free to get creative with this dish to match your taste preferences and dietary needs!

  • Avocado Addition: Add diced avocado for a creamy twist that enhances the salad's richness and flavor.

  • Bacon Boost: Include crispy bacon bits for a salty crunch that'll take your pasta salad to a whole new level.

  • Bean Swap: Substitute sweet corn with black beans for a protein-packed option that adds a delicious earthiness to the mix.

  • Spicy Kick: Toss in sliced jalapeños for an added fiery flavor; adjust the quantity according to your heat tolerance!

  • Herb Variations: Replace cilantro with fresh parsley or even dill for a different herbaceous note that brightens the dish.

  • Cheese Choices: If you can’t find cotija, feta cheese works beautifully too, bringing that creamy, tangy finish.

  • Yogurt Lightening: For a healthier dressing, swap out the mayonnaise for Greek yogurt, maintaining creaminess while cutting calories.

  • Seasonal Veggies: Consider adding colorful chopped bell peppers or diced cherry tomatoes for an extra crunch and fresh burst of flavor.

Remember, this Skillet Pasta Sun recipe can give you more ideas for delicious variations if you're looking to keep things fresh and exciting!

Expert Tips for Mexican Street Corn Pasta Salad

  • Perfect Pasta: Always cook your pasta al dente; it will soften further while chilling in the fridge. This ensures your salad maintains a perfect texture.
  • Charred to Perfection: Achieve a golden-brown char on your corn for an intense smoky flavor. Don’t rush this step; good charring elevates your salad!
  • Cool Before Mixing: Let the corn cool slightly before adding it to the pasta to prevent the mayonnaise from separating. A little patience goes a long way!
  • Season Generously: Remember to taste and adjust the salt and pepper after mixing. Focusing on seasoning ensures an explosion of flavors in your Mexican Street Corn Pasta Salad.
  • Chill for Flavor: Refrigerate the salad for at least 30 minutes before serving. This allows the flavors to meld beautifully and provides a refreshing, cool dish.

What to Serve with Perfect Mexican Street Corn Pasta Salad

As you prepare to enjoy a bowl of creamy, smoky goodness, think about enhancing your meal with equally delightful companions that will elevate your dining experience.

  • Grilled Chicken Skewers: Juicy and flavorful, these skewers complement the creamy pasta salad perfectly while adding a charred note that echoes the smoky corn.
  • Tortilla Chips & Guacamole: Crunchy tortilla chips paired with buttery guacamole provide the perfect textural contrast, making for a fun and satisfying side dish.
  • Fresh Avocado Salad: A light avocado salad with diced tomatoes and lime offers a fresh burst of flavor that beautifully balances the richness of the pasta. Enjoy it as a palate cleanser between bites.
  • Watermelon Feta Salad: The sweet, juicy watermelon combined with salty feta cheese creates an irresistible summer duo, providing a refreshing counterpoint to the pasta’s creamy texture.
  • Grilled Shrimp Tacos: Spicy grilled shrimp tacos add a burst of zing to your meal, and their lightness pairs wonderfully with the rich pasta salad.
  • Strawberry Lemonade: This refreshing drink, blending sweet strawberries with tart lemons, will quench your thirst brilliantly while enhancing the whole meal with a summery sensation.

With these scrumptious pairings, your Perfect Mexican Street Corn Pasta Salad comes alive, transforming your meal into a lively celebration!

Make Ahead Options

These Creamy Mexican Street Corn Pasta Salad ingredients are perfect for meal prep enthusiasts! You can char the corn and cook the pasta up to 24 hours in advance, allowing for speedy assembly when it's time to serve. Simply cook the pasta according to package instructions, rinse, and cool it well; this prevents any mushiness. The charred corn can also be prepped and stored in an airtight container. When ready to enjoy, combine the prepped ingredients—pasta, corn, mayonnaise, lime juice, cotija cheese, cilantro, and any seasonings. Mix gently, chill for at least 30 minutes, and you'll have a vibrant salad that's just as delicious as if made fresh!

Mexican Street Corn Pasta Salad Recipe FAQs

How do I choose the best corn for this recipe?
Absolutely! For the best flavor in your Mexican Street Corn Pasta Salad, fresh sweet corn kernels are ideal, especially in the summer when they are at their sweetest. Look for corn with bright green husks and plump, moist kernels. If fresh isn’t available, frozen corn can be a great alternative—just thaw it first. Canned corn works in a pinch but may lack the crunchy texture you desire.

What’s the best way to store leftover pasta salad?
After preparing your Mexican Street Corn Pasta Salad, store any leftovers in an airtight container in the refrigerator for up to 4 days. The flavors continue to meld and often taste even better after a day in the fridge. Just ensure the salad remains chilled and covered to maintain its quality.

Can I freeze this pasta salad?
It’s not recommended to freeze the Mexican Street Corn Pasta Salad due to the creamy dressing and fresh ingredients, which can separate or become mushy when thawed. However, if you have leftover pasta without the dressing, consider freezing it separately and mixing it with freshly made dressing when you’re ready to enjoy it.

What should I do if my pasta is overcooked?
If you accidentally overcook the pasta, don’t fret! The key to saving it is to rinse it under cold water immediately after cooking to stop the cooking process. To provide some structure, you can add more ingredients like corn or additional cheese to balance things out. Just remember, shorter pasta shapes like macaroni or penne work best for this salad as they hold their shape and texture better.

Is this recipe suitable for a gluten-free diet?
Very! To make your Mexican Street Corn Pasta Salad gluten-free, simply swap the elbow macaroni or penne with a gluten-free pasta variety. There are many options available now that hold up well and deliver great taste, making your dish inclusive for everyone to enjoy, even with dietary restrictions.

Are there any common allergies to consider?
Certainly! When preparing your Mexican Street Corn Pasta Salad, be mindful of potential allergies. The ingredients include common allergens like dairy (from the cotija cheese and mayonnaise) and gluten (from the pasta). If you’re serving guests, it’s wise to ask about allergies ahead of time. For dairy-free alternatives, consider using lactose-free cheese or a plant-based mayonnaise!

Mexican Street Corn Pasta Salad

Delightful Mexican Street Corn Pasta Salad for Summer Fun

This Mexican Street Corn Pasta Salad is a refreshing and flavorful dish, perfect for summer gatherings and cookouts.
Print Recipe Pin Recipe
Prep Time 20 minutes mins
Cook Time 10 minutes mins
Chilling Time 30 minutes mins
Total Time 1 hour hr
Servings: 6 servings
Course: Salads
Cuisine: Mexican
Calories: 350
Ingredients Equipment Method Nutrition Notes

Ingredients
  

For the Pasta Base
  • 8 ounces Elbow Macaroni or Penne Gluten-free pasta can be used if needed.
For the Charred Corn
  • 2 cups Sweet Corn Kernels Use fresh corn when available.
  • 2 tablespoons Butter Olive oil can be a lighter alternative.
For the Flavor Boosters
  • 1 medium Jalapeño Pepper Omit for a milder salad.
  • 1/4 cup Chopped Cilantro Leaves Parsley can be used instead.
  • 1 teaspoon Chili Powder Adjust to taste.
  • 1 teaspoon Smoked Paprika Cayenne can be used for a spicier flavor.
For the Creamy Dressing
  • 1/2 cup Mayonnaise Greek yogurt can be a lighter option.
  • 2 tablespoons Lime Juice Fresh is key for a zesty kick.
  • 1/2 cup Crumbled Cotija Cheese Feta cheese can also be used.
For Seasoning
  • 1 teaspoon Salt Adjust to taste.
  • 1/2 teaspoon Black Pepper Adjust to taste.

Equipment

  • Large pot
  • Skillet
  • Colander
  • Mixing Bowl

Method
 

Step‑by‑Step Instructions
  1. Bring a large pot of salted water to a vigorous boil over high heat. Add elbow macaroni or penne and cook according to package instructions until al dente, usually around 8-10 minutes. Drain the pasta in a colander and rinse under cold water to stop the cooking process and cool it down.
  2. In a skillet, melt about 2 tablespoons of butter over medium heat. Once melted, add the sweet corn kernels and cook for about 8-10 minutes, until the corn is charred and golden brown.
  3. Once the corn is charred, remove the skillet from heat. Quickly stir in chili powder and smoked paprika, ensuring the spices blend well with the corn.
  4. In a large mixing bowl, combine the cooled pasta, charred corn mixture, mayonnaise, lime juice, crumbled cotija cheese, chopped cilantro, and diced jalapeño, if using. Gently toss all ingredients together.
  5. Taste your mixture and season with salt and black pepper. Cover the bowl and refrigerate for at least 30 minutes.

Nutrition

Serving: 1cupCalories: 350kcalCarbohydrates: 45gProtein: 10gFat: 15gSaturated Fat: 3gPolyunsaturated Fat: 1.5gMonounsaturated Fat: 10gCholesterol: 20mgSodium: 400mgPotassium: 350mgFiber: 5gSugar: 3gVitamin A: 500IUVitamin C: 10mgCalcium: 150mgIron: 1.5mg

Notes

This salad is perfect for prepping a day in advance. The flavors deepen and improve over time. Refrigerate for at least 30 minutes before serving to allow flavors to meld beautifully.

Tried this recipe?

Let us know how it was!

Parmesan Bow Tie Italian Pasta: A Fresh Summer Delight

November 21, 2025 by Grace Snow Leave a Comment

As I took the first bite of this Easy Parmesan Bow Tie Pasta Salad, a burst of summer flavors danced across my palate. This dish has quickly become my go-to for those hot days when gatherings are in full swing. With a medley of colorful fresh veggies and a zesty homemade Italian dressing, it’s the perfect vegetarian side that brings the whole meal together. What's even better? It's quick to whip up, making it an effortless yet impressive addition to any potluck or picnic. Plus, being mayonnaise-free means it’s safe to sit out on a warm day without worry. Curious how this bowl of sunshine can elevate your next gathering? Keep reading to discover the recipe that will certainly steal the show!

Why is this pasta salad a must-try?

Vibrant, this Easy Parmesan Bow Tie Pasta Salad bursts with flavor and color, making it a visual and delicious delight for any gathering. Quick to prepare, it’s an effortless dish that transforms any lunch or potluck into a festive meal. Versatile, you can customize it with different pasta and veggies, ensuring it suits everyone’s taste. Light and refreshing, it’s the perfect summer side that won’t weigh you down. Discover more about elevating your gatherings with Parmesan Artichoke Hearts or serving alongside Seafood Pasta Savory. You’ll love how effortlessly this dish blends with your favorite foods!

Parmesan Bow Tie Italian Pasta Ingredients

This vibrant dish will brighten your summer gatherings!

For the Pasta
• Bowtie Pasta (Farfalle) – The main ingredient providing structure; versatile enough to swap with medium-sized pasta shapes.

For the Vegetables
• Cherry Tomatoes – Adds sweetness and juiciness; can substitute with grape or diced tomatoes if needed.
• English Cucumber – Contributes crunch and freshness; Persian cucumber can work as a great substitute or omit if unavailable.
• Red Bell Pepper – Offers sweetness and color; yellow or orange bell peppers can be used for similar taste.
• Red Onion – Provides sharpness and crunch; try using green onions for a milder flavor.

For the Dressing
• Extra Virgin Olive Oil – Acts as the dressing base for richness; regular olive oil is a fine alternative.
• Red Wine Vinegar – Provides acidity for balance; white wine vinegar or apple cider vinegar are suitable substitutes.
• Italian Seasoning – Adds depth to the flavor profile; combine dried oregano and basil if needed.
• Garlic Powder – Offers savory undertones; fresh minced garlic can be used but reduce the amount.
• Salt & Black Pepper – Essential for enhancing overall flavor; adjust according to your preference.
• Honey – Balances acidity and bitterness, but can be left out for a sugar-free option.

For the Extras
• Grated Parmesan Cheese – Provides savory flavor and creaminess; swap for crumbled feta if you prefer.
• Fresh Parsley – Enhances overall flavor with herbal freshness; use fresh basil instead or omit if desired.
• Black Olives – Adds briny flavor and texture; substitute with green olives for a different twist.
• Spanish Olives – Brings a mellow sweetness and tang; you can use all black olives if preferred.

This Easy Parmesan Bow Tie Italian Pasta Salad is not just a meal; it’s a recipe that invites creativity and warmth to your table. Enjoy the flavors of summer!

Step‑by‑Step Instructions for Easy Parmesan Bow Tie Italian Pasta Salad

Step 1: Cook Pasta
Bring a large pot of salted water to a rolling boil over high heat. Carefully add 8 oz of bowtie pasta and cook for about 10 minutes, stirring occasionally, until al dente. Once cooked, drain the pasta in a colander, then rinse under cold water to halt the cooking process and cool it down, ensuring the perfect texture for your Easy Parmesan Bow Tie Italian Pasta Salad.

Step 2: Make Dressing
In a spacious mixing bowl, combine 1/3 cup of extra virgin olive oil, 2 tablespoons of red wine vinegar, and your Italian seasoning mix. Whisk in 1 teaspoon each of garlic powder, salt, and black pepper, along with a teaspoon of honey if desired. This zesty dressing will coat your pasta beautifully, bringing vibrant flavor to the dish, so ensure all ingredients are well blended before moving on.

Step 3: Prep Vegetables
While your pasta cools, take this time to prepare your veggies! Dice 1 cup of cherry tomatoes, half a cucumber, and 1 red bell pepper into bite-sized pieces. Also, finely chop 1/4 of a red onion and slice a mix of black and Spanish olives. Having these colorful additions ready will enhance the look and taste of your Easy Parmesan Bow Tie Italian Pasta Salad, ensuring each bite is packed with freshness.

Step 4: Combine Ingredients
Add the cooled bowtie pasta to the bowl with the dressing, followed by your chopped veggies and 1/4 cup of fresh parsley. Gently toss everything together until the vegetables are evenly distributed and coated in the dressing. This step is crucial as it allows the flavors to mingle, setting the stage for a delightful pasta salad that’s perfect for summer gatherings.

Step 5: Chill
Once everything is well mixed, cover the bowl with plastic wrap or transfer the mixture to an airtight container. Refrigerate the Easy Parmesan Bow Tie Italian Pasta Salad for at least 30 minutes. This chilling time allows the flavors to meld together, creating a refreshing dish that is best served cold, just in time for your next potluck or picnic!

How to Store and Freeze Parmesan Bow Tie Italian Pasta Salad

Fridge: Store the Easy Parmesan Bow Tie Italian Pasta Salad in an airtight container for up to 3 days. Keep it well-sealed to maintain its freshness and flavor.

Freezer: This pasta salad is best enjoyed fresh, but if you have leftovers, you can freeze it for up to a month. Thaw overnight in the fridge before serving.

Reheating: If you prefer to serve it warm, gently reheat the pasta in a skillet over low heat. Add a splash of olive oil for moisture and toss in some fresh veggies to refresh its crunch.

Make-Ahead Tip: For gatherings, prepare the salad a day in advance. Just make sure to add the fresh veggies right before serving for that vibrant crunch!

Make Ahead Options

These Easy Parmesan Bow Tie Italian Pasta Salad is a fantastic choice for busy weeknights and meal prep! You can prepare the pasta, chop the veggies, and whisk the dressing up to 24 hours in advance. Just cook your bowtie pasta, rinse it under cold water, and store it in an airtight container. Chop your cherry tomatoes, cucumber, red bell pepper, and onion, and keep them refrigerated until you're ready to assemble. When you're ready to serve, simply combine the prepped ingredients with the dressing, toss, and enjoy! This method ensures your pasta salad is just as delicious while saving you precious time when preparing for gatherings.

Parmesan Bow Tie Italian Pasta Options

You can easily customize this dish to suit your taste and dietary needs, inviting fresh adventures into your kitchen!

  • Gluten-Free: Swap bowtie pasta with gluten-free penne or rotini for a delightful alternative that everyone can enjoy.
  • Protein Boost: Add grilled chicken, chickpeas, or white beans to increase the protein content, making it a satisfying meal on its own.
  • Veggie Variety: Incorporate diced artichoke hearts or sautéed zucchini for added nutrition and varied texture, enhancing that summer garden feel.
  • Herb Infusion: Instead of parsley, try fresh basil or dill for an aromatic twist that pairs beautifully with the Italian dressing.
  • Cheesy Delight: Crumbled feta or goat cheese can replace Parmesan for a tangy twist, creating a richer flavor profile.
  • Nutty Crunch: Toss in some toasted pine nuts or walnuts to introduce a delightful crunch and an earthy contrast to the freshness.
  • Spice it Up: If you love a kick, sprinkle in some red pepper flakes or sliced jalapeños to bring an exciting heat level to your pasta salad.
  • Smooth Dressing: For a creamier texture, whisk in a couple of tablespoons of plain yogurt or sour cream into the dressing for a delightful twist.

Don't forget to explore other delicious pasta ideas, such as Seafood Pasta Savory or enjoy the flavors of White Bean Pasta for even more possibilities! Let your culinary imagination soar!

What to Serve With Easy Parmesan Bow Tie Italian Pasta Salad

This delightful pasta salad is the perfect centerpiece for a refreshing meal, and pairing it with complementary sides can elevate your dining experience.

  • Grilled Chicken Skewers: The smoky char from grilled chicken adds depth, perfectly balancing the fresh flavors of the pasta salad. Serve them drizzled with lemon for a zesty touch that brightens both dishes.

  • Garlic Bread: Crispy on the outside and soft inside, garlic bread is a classic side that complements the lightness of the salad, making each bite a comforting experience.

  • Caprese Salad: A simple caprese salad with fresh mozzarella, tomatoes, and basil brings out the Italian roots of your pasta dish, creating a beautiful contrast of textures and flavors.

  • Crispy Vegetable Chips: These add a satisfying crunch alongside the salad’s fresh ingredients. Their savory flavors harmonize beautifully, inviting everyone to munch happily as they savor their meal.

  • Lemonade or Iced Tea: Refreshing beverages like homemade lemonade or sweet iced tea create a delightful pairing with the pasta salad, enhancing those sunny summer vibes.

  • Fruit Salad: A light, colorful fruit salad acts as a sweet counterpoint to your savory meal, providing a cooling, hydrating element that completes the warm weather dining.

Let’s celebrate summer gatherings by bringing together these delicious pairings!

Expert Tips for Easy Parmesan Bow Tie Pasta Salad

  • Al Dente Pasta: Make sure to cook the bowtie pasta just until al dente. Overcooking will result in mushy pasta that won't hold up in the salad.

  • Chill Time: Allow the salad to chill for at least 30 minutes before serving. This lets the flavors combine beautifully in the Easy Parmesan Bow Tie Pasta Salad.

  • Dress It Up: Adjust the dressing's acidity by tasting it after mixing. Feel free to add a splash of vinegar or a pinch of salt to enhance the taste.

  • Fresh Herbs: Use fresh parsley or basil to elevate the flavor and add a pop of color. If using dried herbs, remember that they are more concentrated, so adjust accordingly.

  • Keep It Vibrant: Add the vegetables right before serving if you’re making the pasta salad in advance. This preserves their crunch and fresh flavor, ensuring every bite is delightful.

Easy Parmesan Bow Tie Italian Pasta Salad Recipe FAQs

What type of pasta is best for this salad?
Absolutely! Bowtie pasta (farfalle) is perfect due to its structure and ability to hold dressing well. You can easily substitute it with medium-sized pasta like penne or rotini. Just avoid small or large shapes, as they may not have the same delightful bite.

How should I store leftovers?
I recommend storing the Easy Parmesan Bow Tie Italian Pasta Salad in an airtight container. It will stay fresh in the fridge for up to 3 days. Just remember to give it a quick toss with a splash of olive oil before serving to refresh the flavors!

Can I freeze this pasta salad?
Yes, you can! While it's best enjoyed fresh, the salad can be frozen for up to 1 month. To freeze, place the pasta salad in an airtight container or freezer bag, ensuring all air is removed. Thaw it overnight in the fridge before serving. For best results, you may want to reheat it gently in a skillet with a splash of olive oil to revive its texture.

What if I have allergies to some ingredients?
Totally understandable! This pasta salad is quite versatile; if you have allergies, feel free to omit or substitute ingredients. For instance, you can replace the grated Parmesan cheese with crumbled feta or nutritional yeast for a dairy-free option. Ensure you check for any cross-contamination with olives or dressings if you're sensitive to specific allergens.

How ripe should my vegetables be for this recipe?
It's all about that fresh taste! Look for cherry tomatoes that are bright and firm, avoiding any that have dark spots or are overly soft. Opt for an English cucumber that is smooth and crisp, and choose bell peppers that are glossy and vibrant. Good-quality, ripe ingredients make a world of difference in your Easy Parmesan Bow Tie Italian Pasta Salad!

Parmesan Bow Tie Italian Pasta

Parmesan Bow Tie Italian Pasta

Delight your summer gatherings with this Easy Parmesan Bow Tie Italian Pasta salad, featuring vibrant veggies and a zesty dressing.
Print Recipe Pin Recipe
Prep Time 15 minutes mins
Cook Time 10 minutes mins
Chilling Time 30 minutes mins
Total Time 55 minutes mins
Servings: 6 servings
Course: Dinner
Cuisine: Italian
Calories: 210
Ingredients Equipment Method Nutrition Notes

Ingredients
  

For the Pasta
  • 8 oz Bowtie Pasta (Farfalle) Can swap with medium-sized pasta shapes.
For the Vegetables
  • 1 cup Cherry Tomatoes Can substitute with grape or diced tomatoes.
  • 1/2 unit English Cucumber Persian cucumber can be a substitute or omit.
  • 1 unit Red Bell Pepper Yellow or orange can be used.
  • 1/4 unit Red Onion Use green onions for a milder flavor.
For the Dressing
  • 1/3 cup Extra Virgin Olive Oil Regular olive oil is a fine alternative.
  • 2 tbsp Red Wine Vinegar White wine vinegar or apple cider can substitute.
  • 1 tsp Italian Seasoning Combine dried oregano and basil if needed.
  • 1 tsp Garlic Powder Fresh minced garlic can be used; reduce the amount.
  • 1 tsp Salt Adjust according to your preference.
  • 1 tsp Black Pepper Adjust according to your preference.
  • 1 tsp Honey Can be omitted for a sugar-free option.
For the Extras
  • 1/4 cup Grated Parmesan Cheese Swap for crumbled feta if preferred.
  • 1/4 cup Fresh Parsley Or use fresh basil instead or omit if desired.
  • 1/3 cup Black Olives Substitute with green olives for a different twist.
  • 1/3 cup Spanish Olives Can use all black olives if preferred.

Equipment

  • Large pot
  • Mixing Bowl
  • Colander

Method
 

Instructions
  1. Bring a large pot of salted water to a boil. Add 8 oz of bowtie pasta and cook for about 10 minutes, stirring occasionally, until al dente. Drain and rinse under cold water.
  2. In a mixing bowl, combine 1/3 cup olive oil, 2 tbsp red wine vinegar, 1 tsp Italian seasoning, 1 tsp garlic powder, salt, and black pepper. Whisk until blended.
  3. Dice 1 cup cherry tomatoes, 1/2 cucumber, and 1 red bell pepper. Finely chop 1/4 red onion and slice black and Spanish olives.
  4. Add the cooled pasta and veggies to the bowl with dressing. Toss gently to combine and distribute evenly.
  5. Cover and refrigerate the salad for at least 30 minutes to let flavors meld before serving.

Nutrition

Serving: 1servingCalories: 210kcalCarbohydrates: 27gProtein: 5gFat: 10gSaturated Fat: 1.5gPolyunsaturated Fat: 0.5gMonounsaturated Fat: 7gCholesterol: 5mgSodium: 300mgPotassium: 200mgFiber: 2gSugar: 3gVitamin A: 500IUVitamin C: 25mgCalcium: 100mgIron: 1mg

Notes

Use fresh herbs for enhanced flavor. Add vegetables right before serving to maintain freshness.

Tried this recipe?

Let us know how it was!

Pear and Arugula Salad with Honey Vinaigrette Perfection

November 21, 2025 by Grace Snow Leave a Comment

As I strolled through the local farmers’ market, the vibrant colors of fall produce caught my eye, with juicy Bartlett pears glistening under the sun. That day inspired me to create a delightful Pear and Arugula Salad with Honey Vinaigrette, blending this seasonal fruit with peppery arugula and creamy goat cheese for a fresh, nutritious meal. Not only is this salad incredibly quick to prepare—taking just ten minutes—but it’s also gluten-free and vegetarian, perfect for those days when you want something light yet satisfying. The combination of textures and the zesty dressing make it a guaranteed crowd-pleaser, whether you’re serving it as a main dish or alongside roasted meats. Ready to elevate your salad game? Let's dive into this wholesome recipe that’s bound to impress!

Why is this salad a must-try?

Freshness, the star of this recipe is the vibrant combination of crisp arugula and juicy pears, perfect for a nutritious boost. Versatility is key; you can easily swap nuts or cheeses to suit your taste. Quick prep means you can whip this salad up in just 10 minutes without any cooking. Delicious flavor shines through with the tangy honey vinaigrette, adding a sweet twist. Crowd-pleaser status is guaranteed, whether served as a light lunch or a companion to main dishes like Bratwurst Peppers Onions or Chicken Salad Apples. Make it once and enjoy it repeatedly!

Pear and Arugula Salad Ingredients

• Get ready to make this tasty salad!

For the Salad

  • Arugula – This peppery green is the perfect base, providing a fresh, leafy texture.
  • Bartlett Pears – These sweet, chopped fruits add a delightful crunch, though you can use other ripe pears if you prefer.
  • Goat Cheese – Adds creamy tanginess that enhances the overall flavor; feta is a great alternative for a different taste.
  • Walnuts – Offering a crunchy texture and nutty richness, walnuts can be swapped out for pecans, almonds, or cashews for variety.
  • Fresh Thyme – This aromatic herb provides an earthy note; feel free to substitute with dried thyme if fresh isn't available.

For the Honey Vinaigrette

  • Olive Oil – Forms the base of the vinaigrette, bringing depth and richness; avocado oil can also be used for a twist.
  • Apple Cider Vinegar – Balances the flavors with its acidity; white wine vinegar is a suitable alternative.
  • Lemon Juice – Brightens the salad's flavors; lime juice makes a good substitute when desired.
  • Honey – Adds natural sweetness that connects all the flavors; for a vegan option, maple syrup works perfectly.
  • Shallots – Imparts a mild onion flavor in the vinaigrette; regular onions can easily be used in a pinch.
  • Garlic – Provides savory depth, while roasted garlic can add a sweeter touch.
  • Salt and Black Pepper – Essential for enhancing flavor; adjust to personal taste.

Get ready to create a dish that embodies the essence of healthy eating with this Pear and Arugula Salad!

Step‑by‑Step Instructions for Pear and Arugula Salad with Honey Vinaigrette

Step 1: Make the Vinaigrette
In a small jar or bowl, combine 1/4 cup of olive oil with 2 tablespoons of apple cider vinegar, 1 tablespoon of lemon juice, and 1 tablespoon of honey. Add 1 finely chopped shallot, 1 minced garlic clove, a pinch of salt, and a dash of black pepper. Whisk or shake until the mixture is well emulsified and smooth, creating a vibrant honey vinaigrette that will elevate your Pear and Arugula Salad.

Step 2: Prepare the Salad
In a large mixing bowl, add about 4 cups of fresh arugula, 2 chopped Bartlett pears, 1/2 cup of crumbled goat cheese, 1/2 cup of chopped walnuts, and 1 tablespoon of fresh thyme leaves. Gently toss the ingredients together using salad tongs, ensuring everything is evenly combined. The mixture should look colorful and inviting, showcasing the key components of your delicious salad.

Step 3: Toss and Adjust
Drizzle the prepared honey vinaigrette over the salad mixture, starting with about half of it, and toss gently to coat all the ingredients evenly. After mixing, take a moment to taste the salad. Adjust the seasoning by adding extra salt and black pepper to suit your preferences, ensuring the flavors of the Pear and Arugula Salad with Honey Vinaigrette shine through.

Step 4: Serve
Chill the salad for a few minutes if you prefer a refreshing touch, then plate your salad in individual bowls or on a large serving platter. For the best presentation, garnish with additional goat cheese crumbles and thyme sprigs. Serve immediately to enjoy the fresh flavors and textures at their peak, making this Pear and Arugula Salad a delightful centerpiece for your meal.

Make Ahead Options

This Pear and Arugula Salad with Honey Vinaigrette is a fantastic meal prep solution, allowing you to enjoy fresh flavors while saving time on busy weeknights. You can prepare the honey vinaigrette up to one week in advance; simply store it in an airtight container in the refrigerator and shake well before using. For the salad, cut and toss the pear slices with a little lemon juice (to prevent browning) and store them in an airtight container for up to 24 hours. Assemble your salad just before serving to keep the arugula crisp and the goat cheese creamy. Trust me, making this salad ahead is the perfect way to relish restaurant-quality results with minimal effort!

Expert Tips for Pear and Arugula Salad

  • Prevent Browning: Toss pear slices in lemon juice right after chopping to stop them from turning brown, keeping your salad looking fresh.
  • Prep Ahead: You can prepare the honey vinaigrette up to a week in advance; just give it a shake before adding it to your Pear and Arugula Salad.
  • Ingredient Freshness: Always use fresh arugula and pears for the best flavor and texture—this elevates the overall quality of your salad.
  • Adjust to Taste: Don’t hesitate to taste and adjust seasoning after mixing. Each ingredient's flavor can vary, so personalizing it is key!
  • Textural Variation: For a more satisfying and hearty dish, consider adding grilled chicken or roasted chickpeas, along with your favorite nuts for some crunch.

What to Serve with Pear and Arugula Salad with Honey Vinaigrette

This delightful salad can easily be turned into a complete meal with the right pairings, enhancing its fresh flavors and textures.

  • Grilled Chicken: Tender and juicy, it adds a satisfying protein element, making the salad more filling.

  • Roasted Vegetables: Earthy and savory, a side of roasted seasonal veggies complements the peppery arugula beautifully.

  • Crusty Bread: A slice of warm, crusty bread provides a hearty texture, perfect for mopping up the honey vinaigrette.

  • Quinoa: Lightly seasoned quinoa introduces a nutty flavor and additional fiber, rounding out the nutritional profile of your meal.

  • Crispy Prosciutto: This salty, crispy addition bursts with flavor, enhancing the balance of sweetness from the pears.

  • Sparkling Water with Lemon: A refreshing drink that enhances the salad's bright flavors, especially perfect for warm days.

  • Cheesecake Bites: For dessert, these creamy bites serve as a sweet contrast, leaving your guests satisfied but not overwhelmed.

Pairing these options alongside your Pear and Arugula Salad makes for a colorful and well-rounded dining experience that everyone will love!

Variations & Substitutions for Pear and Arugula Salad

There are so many delightful ways to make this Pear and Arugula Salad even more your own, adding your personal touch to every bite!

  • Nut Swap: Replace walnuts with pecans, almonds, or cashews for a different crunch. Each nut brings a unique flavor, enhancing your salad wonderfully.
  • Protein Boost: Toss in grilled chicken or seasoned chickpeas for extra protein. These additions turn your salad into a heartier meal, perfect for lunch or dinner.
  • Cheese Choices: For a subtle twist, swap goat cheese with feta or blue cheese. These alternatives introduce new flavors and creamy textures that complement the pears.
  • Avocado Addition: Incorporate sliced avocado for that extra creaminess and healthy fats. This addition lends a smooth texture and additional nutrition to your salad.
  • Vinaigrette Variations: Try swapping honey for maple syrup to create a vegan-friendly dressing that's equally delicious. You'll love how this change provides a new flavor depth!
  • Herb Twists: Fresh basil or mint can replace thyme for an entirely different aromatic experience. Both herbs add a refreshing twist that brightens each bite.
  • Spicy Kick: For those who like a bit of heat, toss in some sliced jalapeños or red pepper flakes. That spicy addition can elevate the flavor profile and create a unique taste sensation.
  • Greens Exploration: Experiment with a base of mixed greens instead of arugula for a milder flavor. This swap makes it an excellent option for those who might find arugula too peppery, allowing everyone to enjoy a fresh salad experience.

These variations are not only fun to try out, but they also take this salad to another level! Plus, if you're ever looking for delicious side options, consider pairing it with the vibrant Skillet Pasta Feta or that addictive Jello Salad Cottage for a unique meal that everyone will love! Enjoy creating your perfect version of this delightful Pear and Arugula Salad!

Storage Tips for Pear and Arugula Salad

  • Room Temperature: It’s best to serve your Pear and Arugula Salad fresh right after preparation for optimal flavor and texture.
  • Fridge: If you have leftovers, store them in an airtight container in the fridge for up to 1 day. Expect some sogginess as arugula wilts over time.
  • Vinaigrette Storage: Prepare the honey vinaigrette up to 1 week in advance. Keep it in a sealed jar in the fridge, and remember to shake it well before use.
  • Freezer: Freezing is not recommended for the finished salad, but you can freeze the vinaigrette for up to 3 months. Thaw in the fridge before serving with your salad again.

Pear and Arugula Salad with Honey Vinaigrette Recipe FAQs

How do I select ripe pears for this salad?
Absolutely! When choosing pears, look for Bartlett pears that are slightly soft to the touch, indicating ripeness. They should have a subtle fragrance and a smooth skin without dark spots. If you can only find firm pears, leave them at room temperature for a few days until they yield slightly when pressed.

How can I store leftovers of the Pear and Arugula Salad?
Store any leftover salad in an airtight container in the fridge and consume within 1 day for the best quality. Keep in mind that the arugula may wilt and get soggy over time. To extend storage life and retain freshness, it's wise to separate the components—store the vinaigrette in a sealed jar and mix it just before serving.

Can I freeze the vinaigrette?
Yes, you can freeze the honey vinaigrette! Pour it into an ice cube tray or a freezer-safe container. It can be stored in the freezer for up to 3 months. When you're ready to use it, simply thaw in the fridge overnight or at room temperature for a few hours. Shake well before adding it to your salad.

What should I do if the salad dressing separates?
Very good question! If your vinaigrette separates, it's perfectly normal. Just give the jar a good shake or whisk it again to re-emulsify before drizzling over your salad. To prevent this, store your vinaigrette in a jar instead of a bowl, as the lid helps ensure everything blends nicely when shaken.

Are there any dietary considerations I should be aware of?
Yes! This Pear and Arugula Salad is gluten-free and vegetarian-friendly. However, if you're serving it to guests with allergies, let them know about the nuts in the salad. You can easily substitute the walnuts with seeds like sunflower or pumpkin seeds for a nut-free version. Just make sure to ask about any other allergies beforehand.

How can I enhance the nutritional benefits of this dish?
If you're looking for added protein or heartiness, consider adding grilled chicken, roasted chickpeas, or even quinoa. These additions can not only make the salad more filling but also boost its nutritional profile by incorporating more vitamins, minerals, and healthy fats. The more the merrier, after all!

Pear and Arugula Salad with Honey Vinaigrette

Pear and Arugula Salad with Honey Vinaigrette Perfection

A delightful Pear and Arugula Salad featuring honey vinaigrette, perfect for a nutritious boost.
Print Recipe Pin Recipe
Prep Time 10 minutes mins
Total Time 10 minutes mins
Servings: 4 servings
Course: Salads
Cuisine: American
Calories: 320
Ingredients Equipment Method Nutrition Notes

Ingredients
  

For the Salad
  • 4 cups fresh arugula
  • 2 medium Bartlett pears chopped
  • 1/2 cup goat cheese crumbled
  • 1/2 cup walnuts chopped
  • 1 tablespoon fresh thyme leaves
For the Honey Vinaigrette
  • 1/4 cup olive oil or avocado oil
  • 2 tablespoons apple cider vinegar or white wine vinegar
  • 1 tablespoon lemon juice or lime juice
  • 1 tablespoon honey or maple syrup for vegan
  • 1 medium shallot finely chopped
  • 1 clove garlic minced
  • to taste salt
  • to taste black pepper

Equipment

  • Mixing Bowl
  • jar or bowl for vinaigrette
  • salad tongs

Method
 

Step-by-Step Instructions
  1. Make the Vinaigrette: In a small jar or bowl, combine olive oil, apple cider vinegar, lemon juice, honey, shallot, garlic, salt, and black pepper. Whisk or shake until well emulsified.
  2. Prepare the Salad: In a large mixing bowl, add arugula, pears, goat cheese, walnuts, and thyme. Gently toss to combine.
  3. Toss and Adjust: Drizzle honey vinaigrette over the salad and toss to coat. Taste and adjust seasoning as needed.
  4. Serve: Chill if preferred, then plate the salad. Garnish with additional goat cheese and thyme. Serve immediately.

Nutrition

Serving: 1servingCalories: 320kcalCarbohydrates: 28gProtein: 7gFat: 22gSaturated Fat: 4gPolyunsaturated Fat: 5gMonounsaturated Fat: 12gCholesterol: 10mgSodium: 100mgPotassium: 350mgFiber: 3gSugar: 10gVitamin A: 500IUVitamin C: 15mgCalcium: 150mgIron: 1.5mg

Notes

Serve fresh for optimal flavor. You can prepare the vinaigrette in advance to save time.

Tried this recipe?

Let us know how it was!

One Pot Kielbasa Pasta: Cozy Comfort in 30 Minutes

November 21, 2025 by Grace Snow Leave a Comment

As steam wafted from my stovetop, I couldn’t help but smile at the comforting aromas enveloping my kitchen. This Quick One Pot Kielbasa Pasta has become a staple in our home, effortlessly blending the savory, smoky flavors of kielbasa with creamy pasta in just 30 minutes. Perfect for those hectic weeknights, it’s both a budget-friendly option and a family favorite that pleases even the pickiest eaters! With minimal cleanup and the ability to customize with your favorite veggies or cheese, this dish checks all the boxes for convenience without compromising on taste. So, what do you say—are you ready to whip up a delicious dinner that feels like a warm hug in a bowl?

What makes this pasta dish a must-try?

Simplicity: With just one pot needed, cleanup is a breeze—perfect for busy weeknights.
Quick Cooking: In only 30 minutes, you can serve up a satisfying meal that delights the whole family.
Flavor Fusion: The blend of smoky kielbasa and creamy sauce creates a rich taste that keeps everyone coming back for more.
Budget-Friendly: This recipe is not only easy to make but also gentle on your wallet!
Versatility: Feel free to swap in your favorite vegetables or proteins, like chicken sausage or shrimp, for a personal twist.
Crowd-Pleasing: It's a comforting dish that caters to diverse palates, making it a guaranteed hit at any table. For more quick meal ideas, check out my Crock Pot Chicken or Seafood Pasta recipes!

One Pot Kielbasa Pasta Ingredients

• Get ready to create a hearty meal!

For the Pasta Base

  • Olive Oil – Adds richness and helps sauté ingredients; substitute with butter for a different flavor.
  • Smoked Kielbasa (or Turkey/Chicken Sausage) – Main protein providing smoky flavor; any cooked sausage of choice can be used for variations.
  • Diced Onion – Provides sweetness and flavor depth; can substitute with shallots or omit for a simpler profile.
  • Garlic – Enhances overall flavor; fresh garlic is preferred, but garlic powder works in a pinch.
  • Low-Sodium Chicken Broth – Forms the base of the sauce; vegetable broth can be used for a vegetarian option.
  • Diced Tomatoes (canned) – Adds acidity and moisture; fresh tomatoes can replace canned for a lighter option.
  • Dry Pasta (small pasta) – The heart of the dish; use small pasta like penne or rotini for the best texture.
  • Milk or Heavy Cream – Adds creaminess; substitute with half-and-half or plant-based milk for lighter options.
  • Salt and Pepper – Essential seasonings that enhance all the flavors; adjust according to taste.

For the Topping

  • Shredded Cheddar Cheese – Provides a creamy, cheesy topping; Parmesan or Monterey Jack can be used for varied taste.
  • Sliced Scallions – Adds freshness as a garnish; can be replaced with chives if not available.

Step‑by‑Step Instructions for One Pot Kielbasa Pasta

Step 1: Heat the Oil
In a large 4-5 quart sauté pan, heat 2 tablespoons of olive oil over medium-high heat. Allow the oil to shimmer but not smoke, indicating it's hot enough. This will create a rich base for your One Pot Kielbasa Pasta, providing the right environment to sauté your ingredients.

Step 2: Sauté the Kielbasa and Onions
Add the sliced kielbasa and diced onion to the pan. Cook for about 5–7 minutes, stirring occasionally, until the onions become translucent and the kielbasa is lightly browned. This step infuses the dish with smoky flavor and deepens the overall taste as the onions soften.

Step 3: Add the Garlic
Stir in minced garlic and cook for an additional 30 seconds, just until fragrant. Watch closely, as garlic can burn quickly! This aromatic addition elevates the flavor profile of your One Pot Kielbasa Pasta, making it even more appealing.

Step 4: Combine the Base Ingredients
Pour in 4 cups of low-sodium chicken broth, one can of diced tomatoes, and 1 cup of milk or heavy cream. Then, add 12 ounces of dry small pasta like penne or rotini, along with salt and pepper to taste. Give the mixture a good stir to combine and bring it to a simmer; this should take about 3–4 minutes.

Step 5: Cook the Pasta
Reduce the heat to medium and let the mixture simmer uncovered for about 15 minutes. Stir occasionally to prevent the pasta from sticking to the bottom. You'll know it's ready when the pasta is tender and has absorbed most of the liquid, creating a creamy sauce.

Step 6: Melt the Cheese
Once the pasta is cooked, remove the pan from heat and stir in half of the shredded cheddar cheese until melted and creamy. Then, sprinkle the remaining cheese on top, cover the pan, and let it sit for about 2–3 minutes. This allows the cheese to melt into a gooey, comforting topping for your One Pot Kielbasa Pasta.

Step 7: Garnish and Serve
Before serving, garnish your dish with sliced scallions for a fresh burst of flavor. These bright green slices will add a delightful contrast to the creamy pasta. Serve immediately, enjoying every comforting mouthful of this family-friendly meal!

Expert Tips for One Pot Kielbasa Pasta

  • Don’t Rush the Sauté: Saute the kielbasa and onions until the onions are translucent. This step develops essential flavors for your One Pot Kielbasa Pasta.
  • Watch the Liquid: If the dish looks too soupy at the end, simmer it a bit longer without the lid to reduce excess liquid.
  • Pasta Choices Matter: Use small pasta shapes like penne or rotini for the best texture. They help soak up the creamy sauce beautifully.
  • Customize Wisely: Feel free to add vegetables like spinach or bell peppers, but ensure they are cut to similar size for even cooking.
  • Adjust Creaminess: For a lighter dish, switch to half-and-half or a plant-based milk instead of heavy cream, keeping it delicious and budget-friendly.

Make Ahead Options

These One Pot Kielbasa Pasta is perfect for meal prep enthusiasts! You can prep the kielbasa, onions, and garlic up to 24 hours in advance by chopping them and storing in an airtight container in the refrigerator. The dry pasta can also be measured out ahead of time. When you're ready to enjoy this dish, simply heat the olive oil, sauté the prepped ingredients, and follow with the broth, tomatoes, and milk. This allows for a quick assembly during busy weeknights, significantly reducing cooking time. To maintain quality, don’t combine all ingredients until you're ready to cook; this ensures your pasta stays perfectly al dente!

What to Serve with Quick One Pot Kielbasa Pasta

A delightful dining experience is just around the corner, waiting to be enhanced with the right sides!

  • Crusty Garlic Bread: A perfect companion, this bread is perfect for soaking up every bit of delicious sauce while adding a flavorful crunch.

  • Fresh Garden Salad: Crisp greens with a tangy vinaigrette bring a refreshing contrast to the creamy pasta, balancing the meal beautifully.

  • Roasted Vegetables: Seasoned bell peppers, zucchini, and carrots not only add color but also provide a sweet, earthy flavor that complements the kielbasa.

  • Steamed Broccoli: Lightly steamed, this green veggie offers healthy nutrients and a vibrant pop of color, making your plate even more appetizing.

  • Creamy Coleslaw: The tangy crunch of coleslaw adds a pleasant texture contrast while cutting through the richness of the pasta.

  • Herbed Rice: Soft, fluffy rice cooked with fresh herbs provides a lovely base that absorbs the sauce's flavors, creating a hearty meal.

  • Sparkling Lemonade: This refreshing drink quenches your thirst while its citrusy zing brightens the meal, making every bite feel vibrant.

  • Chocolate Chip Cookies: For a sweet finish, these classic cookies provide a warm, comforting end to your family dinner that everyone loves.

One Pot Kielbasa Pasta Variations

Feel free to tweak this beloved recipe and let your personal touch shine through with these delightful variations!

  • Protein Swap: Substitute kielbasa with chicken sausage or shrimp for a tasty twist. Try combining different proteins for a fun, hearty mix!

  • Veggie Boost: Add nutrient-rich vegetables like spinach, bell peppers, or broccoli. They not only add color but also enhance the meal's nutritional profile without losing any flavor.

  • Cheesy Upgrade: Experiment with cheeses such as Parmesan or pepper jack for extra depth and a delightful kick. The more cheese, the better in my book!

  • Creamy Alternatives: For a lighter take, swap heavy cream with half-and-half or your favorite plant-based milk. You’ll still achieve that creamy consistency with a lighter touch!

  • Heat It Up: Add a pinch of red pepper flakes or diced jalapeños for a spicy kick that will keep your taste buds dancing. Just a small amount can make a big difference!

  • Herb Infusion: Toss in fresh herbs like parsley or basil just before serving to brighten up the dish. A sprinkle of freshness elevates the comfort factor immensely.

  • Pasta Variations: Use whole wheat or gluten-free pasta instead of regular dry pasta for dietary accommodations. There are great options available that don’t compromise on taste!

  • Sausage Blend: If you're feeling adventurous, mix different types of sausage like chorizo or andouille for a flavor explosion. Each type adds its unique zest to the dish!

These variations have the power to turn a simple dish into something completely unique! Once you're ready to take that plunge into culinary exploration, be sure to check out my comforting Crock Pot Chicken or delightful Seafood Pasta for more inspiring ideas. Enjoy experimenting!

Storage Tips for One Pot Kielbasa Pasta

Fridge: Store leftovers in an airtight container for up to 3 days. This helps maintain freshness and flavor in your One Pot Kielbasa Pasta.

Freezer: If you want to keep it longer, freeze the pasta for up to 2 months. Make sure to let it cool completely before placing it in a freezer-safe container.

Reheating: When you're ready to enjoy it again, reheat on the stovetop with a splash of broth or water to restore its creaminess. Stir gently until warmed through.

Room Temperature: Avoid leaving the pasta at room temperature for more than 2 hours to ensure food safety.

One Pot Kielbasa Pasta Recipe FAQs

What should I look for when selecting kielbasa?
Absolutely! When selecting kielbasa, look for a firm texture and a nice sheen on the surface; avoid any packages that have dark spots or feel slimy. Freshly made sausages often provide the best flavor, so check the packaging dates to ensure freshness.

How long can I store leftovers of One Pot Kielbasa Pasta?
Store your One Pot Kielbasa Pasta in an airtight container in the fridge for up to 3 days. I recommend reheating it gently on the stovetop with a splash of chicken broth or water to keep it creamy and delicious.

Can I freeze One Pot Kielbasa Pasta?
Yes! You can freeze this dish for up to 2 months. First, let it cool completely, then transfer it to a freezer-safe container. When ready to eat, thaw overnight in the refrigerator and reheat on the stovetop, adding a little broth to revive its creamy texture.

What if my pasta isn’t cooking evenly?
If you find that your pasta isn't cooking evenly, be sure to stir it occasionally while it simmers. This helps prevent it from sticking together and ensures even cooking. If it seems too dry, sprinkle in a little extra broth or water, and let it simmer a bit longer.

Is this recipe suitable for people with dietary restrictions?
Very! You can easily adapt the One Pot Kielbasa Pasta recipe for dietary needs. Substitute smoked kielbasa with turkey or chicken sausage for a leaner option, and use low-sodium broth to control sodium intake. For a vegetarian version, try using plant-based sausage and vegetable broth, and incorporate plenty of veggies for added flavor.

What if I want to add vegetables to my One Pot Kielbasa Pasta?
Absolutely! Adding veggies like spinach, bell peppers, or broccoli is a wonderful way to enhance both flavor and nutrition. Just chop them into bite-sized pieces and stir them in after you've added the broth and pasta. They will cook to tender perfection in the same time it takes for the pasta to finish cooking; perfect for a one-pot meal!

One Pot Kielbasa Pasta

One Pot Kielbasa Pasta: Cozy Comfort in 30 Minutes

One Pot Kielbasa Pasta is a quick and delicious recipe that combines smoky flavors and creamy pasta in just 30 minutes.
Print Recipe Pin Recipe
Prep Time 10 minutes mins
Cook Time 30 minutes mins
Total Time 40 minutes mins
Servings: 4 servings
Course: Dinner
Cuisine: American
Calories: 450
Ingredients Equipment Method Nutrition Notes

Ingredients
  

For the Pasta Base
  • 2 tablespoons Olive Oil Substitute with butter for a different flavor.
  • 14 ounces Smoked Kielbasa (or Turkey/Chicken Sausage) Any cooked sausage can be used.
  • 1 cup Diced Onion Can substitute with shallots or omit.
  • 3 cloves Garlic Fresh garlic is preferred.
  • 4 cups Low-Sodium Chicken Broth Vegetable broth can be used for vegetarian option.
  • 1 can Diced Tomatoes Fresh tomatoes can be used.
  • 12 ounces Dry Pasta (small pasta) Use small pasta like penne or rotini.
  • 1 cup Milk or Heavy Cream Substitute with half-and-half or plant-based milk.
  • to taste Salt
  • to taste Pepper
For the Topping
  • 1 cup Shredded Cheddar Cheese Parmesan or Monterey Jack can be used.
  • 1 bunch Sliced Scallions Can replace with chives.

Equipment

  • 4-5 quart sauté pan

Method
 

Preparation Steps
  1. In a large 4-5 quart sauté pan, heat 2 tablespoons of olive oil over medium-high heat until shimmering.
  2. Add the sliced kielbasa and diced onion to the pan. Cook for about 5–7 minutes, stirring occasionally, until the onions are translucent and the kielbasa is lightly browned.
  3. Stir in minced garlic and cook for an additional 30 seconds until fragrant.
  4. Pour in 4 cups of low-sodium chicken broth, one can of diced tomatoes, and 1 cup of milk or heavy cream. Add 12 ounces of dry small pasta along with salt and pepper to taste. Stir to combine and bring to a simmer for about 3–4 minutes.
  5. Reduce the heat to medium and let the mixture simmer uncovered for about 15 minutes, stirring occasionally.
  6. Once cooked, remove from heat and stir in half of the shredded cheddar cheese until melted. Sprinkle the remaining cheese on top, cover, and let sit for 2–3 minutes.
  7. Garnish with sliced scallions before serving and enjoy your comforting pasta dish!

Nutrition

Serving: 1servingCalories: 450kcalCarbohydrates: 60gProtein: 20gFat: 15gSaturated Fat: 7gPolyunsaturated Fat: 1gMonounsaturated Fat: 7gCholesterol: 30mgSodium: 800mgPotassium: 600mgFiber: 3gSugar: 4gVitamin A: 500IUVitamin C: 5mgCalcium: 200mgIron: 2mg

Notes

Feel free to customize with your favorite vegetables or proteins like chicken sausage or shrimp.

Tried this recipe?

Let us know how it was!

Deliciously Cheesy Baked Ziti for Cozy Family Nights

November 21, 2025 by Grace Snow Leave a Comment

There's something magical about the aroma of pasta baking in the oven, pulling everyone into the kitchen with its comforting embrace. My Life-Changing Baked Ziti, featuring a delightful combination of four cheeses, is a dish that transforms any ordinary evening into a memorable gathering. It’s wonderfully customizable, allowing you to experiment with different cheeses or add your favorite proteins, making it the perfect comfort food. What I love most is how quickly this dish comes together—less than an hour from prep to plate—making it ideal for busy weeknights and special occasions. As that golden-brown crust forms, you can almost hear the cheers from your family as they anticipate a hearty meal. So, are you ready to dive into this cheesy delight and discover why it’s a favorite around my dinner table?

Why is Baked Ziti a Family Favorite?

Quick and Easy: You'll love that this baked ziti can be on the table in under an hour, making it perfect for hectic weeknights.

Customizable Goodness: From adding your favorite proteins to experimenting with different cheese blends, the possibilities are endless!

Crowd-Pleaser: The creamy, cheesy layers appeal to everyone, ensuring even the pickiest eaters will come back for seconds.

Memorable Comfort: Picture everyone gathered around the table, savoring each bite of warm, gooey deliciousness; it’s a dish that creates lasting memories.

Ready to elevate your dinner game? Consider pairing this baked ziti with a fresh green salad or some delightfully crispy garlic bread for a meal that will impress! If you’re looking for more inspiration, check out my delicious Matcha Baked Doughnuts for a sweet finish!

Baked Ziti Ingredients

• Gather these delicious elements for the ultimate baked ziti experience.

For the Pasta

  • Ziti or Penne – Choose your favorite pasta shape, but cook until al dente to maintain that perfect texture.

For the Sauce

  • Marinara Sauce – A great quality sauce enhances flavor; consider making it from scratch for a personal touch.

For the Cheesy Mixture

  • Mozzarella Cheese – Fresh mozzarella is ideal for that gooey, stretchy goodness everyone loves.
  • Provolone Cheese – This addition brings a delightful depth of flavor to your baked ziti.
  • Ricotta Cheese – For a rich and creamy layer; if you prefer something lighter, cottage cheese works well too.
  • Parmesan Cheese – Grated for an even melt and a nutty, flavorful topping on your dish.

Optional Binder

  • Egg – Helps bind the cheese mixture together; it's optional but recommended for a firmer texture.

The key to a truly memorable baked ziti is the harmonious blend of these ingredients! Get ready for a family favorite that will have everyone looking for seconds.

Step‑by‑Step Instructions for Baked Ziti

Step 1: Preheat the Oven
Begin by preheating your oven to 350°F (175°C). This allows the heat to circulate evenly, ensuring your baked ziti cooks perfectly. As the oven warms up, prepare your baking dish by lightly greasing it with cooking spray or a drizzle of olive oil, helping to prevent sticking and promote an evenly cooked crust.

Step 2: Cook the Pasta
Boil a large pot of salted water and add your ziti or penne, cooking until al dente, about 6 minutes. Be careful not to overcook the pasta, as it will continue to soften while baking. Once done, drain the pasta and set it aside to cool slightly. This is the foundation of your comforting baked ziti!

Step 3: Prepare the Cheese Mixture
In a large mixing bowl, combine ricotta cheese, half of the mozzarella, provolone, and grated parmesan. Optionally, add the egg to the mixture for a firmer texture. Stir everything until well-blended, creating a rich and creamy layer that will elevate your baked ziti to delicious new heights.

Step 4: Assemble the First Layer
Take half of the cooked pasta and mix it with a generous portion of marinara sauce, ensuring every piece is coated. Spread this mixture evenly in your greased baking dish. This layer of pasta and sauce will create a flavorful base for your cheese mixture, enhancing the overall taste of the baked ziti.

Step 5: Add the Cheese Layer
Spread half of the creamy cheese mixture over your pasta layer in the baking dish. This will form the heart of your baked ziti, combining all the delicious flavors. Repeat the process by layering the remaining pasta and the leftover marinara sauce on top, creating a satisfying depth of flavor throughout the dish.

Step 6: Top with Cheese
Finish your assembly by spreading the remaining cheese mixture over the top, ensuring a luscious, cheesy finish. Sprinkle the remaining mozzarella and parmesan evenly across the surface, providing that gooey, melt-in-your-mouth texture and a golden-brown crust that will make everyone eager for a serving of your baked ziti.

Step 7: Bake the Ziti
Cover the baking dish with foil and place it in the preheated oven. Bake for 30 minutes to allow the flavors to meld and the cheeses to melt together. Removing the foil afterward is essential for achieving a deliciously bubbly and golden top, so set a timer for an additional 10-15 minutes.

Step 8: Broil for Extra Crispiness
If desired, set your oven to broil and place your baked ziti under the broiler for 1-2 minutes. This step is optional but highly recommended for that irresistible crispy finish on top. Keep a close eye on it to prevent burning, ensuring the cheese is golden and inviting.

Step 9: Let It Rest
Once baked to perfection, remove your baked ziti from the oven and let it rest for about 10-15 minutes. This resting period is crucial as it allows the layers to set, making it easier to cut and serve. The aroma will fill your kitchen, signalling that a delicious meal is nearly ready to be enjoyed!

Expert Tips for Baked Ziti

Perfect Pasta Texture: Ensure the pasta is al dente: Cooking the ziti for just about 6 minutes prevents mushiness after baking, maintaining that delightful bite.

Quality Ingredients: Choose fresh cheeses: Using high-quality mozzarella and ricotta significantly enhances the flavor and creaminess of your baked ziti.

Layer Wisely: Distribute evenly: When layering the pasta and cheese mixture, ensure even distribution to enjoy a harmonious flavor in every bite.

Add More Flavor: Don't skip the sauce: Consider mixing in browned meat like Italian sausage or ground beef into your marinara for a hearty twist on your baked ziti.

Let It Set: Rest before serving: Allowing the baked ziti to rest for 10-15 minutes after baking helps it hold its shape when sliced, making it easier to serve.

How to Store and Freeze Baked Ziti

Fridge: Store baked ziti in an airtight container for up to 3 days. Make sure to let it cool completely before covering to avoid condensation.

Freezer: To freeze, wrap unbaked assembled ziti tightly in plastic wrap and aluminum foil. It will last up to 3 months. When ready to bake, extend the cooking time.

Reheating: For leftovers, reheat in the oven at 350°F (175°C) for 20-30 minutes until heated through. Add a splash of marinara sauce if it seems dry to keep it deliciously gooey.

Make-Ahead: Consider prepping your baked ziti a day in advance and store it in the fridge. This allows flavors to meld beautifully before baking.

Baked Ziti Variations & Substitutions

Feel free to get creative and personalize your baked ziti experience with these delightful twists!

  • Dairy-Free: Substitute all cheeses with plant-based alternatives for a creamy, dairy-free version that's still delicious.

  • Meat-Lover's Delight: Add browned Italian sausage or ground beef to your marinara sauce for an extra layer of flavor and heartiness. The combination of savory meat with the cheesy goodness will surely satisfy.

  • Cheese Swap: Experiment with different cheese blends, such as gouda or cheddar, for a unique twist on the traditional flavor. Each type brings its own richness, elevating the dish to new heights.

  • Veggie-Packed: Toss in sautéed zucchini, spinach, or bell peppers to amp up the nutrition and add some color to your baked ziti. It’s a sneaky way to incorporate more veggies into your meal, without sacrificing flavor.

  • Spicy Kick: Add red pepper flakes or sliced jalapeños to the marinara sauce for those who love a bit of heat. This spicy addition will make your baked ziti a true flavor adventure.

  • Gluten-Free: Swap traditional pasta with gluten-free ziti or penne to make this comfort dish accessible for those with gluten sensitivities. Enjoy the same creamy goodness without the worry!

  • Herb Infusion: Sprinkle fresh basil or oregano over the top before baking to enhance the aromatic experience. Fresh herbs add a delightful burst of flavor that beautifully complements the cheese.

  • Sauce Exploration: Try using Alfredo sauce or a homemade roasted garlic sauce in place of marinara for a rich and creamy alternative. The change in sauce will take your baked ziti to a whole new flavor profile.

If you're feeling inspired, pair this delicious baked ziti with a fresh green salad and some crispy garlic bread for a comforting family dinner! And if you're in the mood for something sweet afterward, my delightful Matcha Baked Doughnuts would be the perfect ending to your meal.

Make Ahead Options

Baked Ziti is a perfect make-ahead dish for busy cooks looking to streamline their meal planning! You can assemble the entire baked ziti up to 24 hours in advance; simply cover and refrigerate it until you're ready to bake. For even longer storage, consider preparing the dish without baking and wrapping it tightly to freeze for up to 3 months—when ready to serve, just bake from frozen, adding about 15-20 minutes to the cooking time. To maintain its quality, ensure the pasta is cooked al dente and keep the cheese mixture evenly distributed. When it's time to enjoy this comforting meal, simply pop it in the oven, and you’ll have ooey-gooey, restaurant-quality baked ziti with minimal effort!

What to Serve with Life-Changing Baked Ziti

A warm, cheesy dish deserves the perfect companions to create a delightful meal experience.

  • Garlic Bread: Soft, buttery garlic bread offers a crunchy counterpart to the creamy baked ziti, soaking up every delicious bite.
  • Caesar Salad: Crisp romaine lettuce tossed with Caesar dressing adds a refreshing crunch, balancing the richness of the ziti.
  • Roasted Vegetables: Seasonal roasted veggies bring a touch of earthiness and vibrant colors to your plate, enhancing both flavor and nutrition.
  • Steamed Broccoli: Bright green broccoli adds freshness, and it pairs beautifully with the savory, cheesy pasta, making it a wholesome addition.
  • Italian Sausage: For those who crave extra protein, grilled or roasted Italian sausage elevates the dish while complementing its flavors deliciously.
  • Wine Pairing: A glass of Chianti or a light-bodied red wine enhances the rich flavors, creating a lovely dining experience with each sip.
  • Tiramisu: For dessert, creamy tiramisu adds a sweet, coffee-infused end to your meal, leaving everyone satisfied and happy.

Combine these delightful sides with your baked ziti for a family meal that feels warming and special.

Baked Ziti Recipe FAQs

How do I choose the right pasta for baked ziti?
Absolutely! For baked ziti, you want to stick with ziti or penne pasta. Both shapes hold up well during baking, and their tubular structure allows the sauce to cling beautifully, ensuring every bite is flavorful. Make sure to cook the pasta until al dente—about 6 minutes is ideal—so it doesn’t turn mushy while baking.

What’s the best way to store leftover baked ziti?
Very simply, store your baked ziti in an airtight container in the fridge for up to 3 days. Let it cool completely before sealing to prevent condensation from making it soggy. If you find yourself with more leftovers than you can handle, you can freeze it for up to 3 months—just ensure it's tightly wrapped to avoid freezer burn.

Can I freeze baked ziti before baking it?
Definitely! To freeze unbaked ziti, assemble the dish but don’t bake it. Cover it tightly with plastic wrap and then aluminum foil. When you’re ready to cook it, remove the plastic wrap and put it directly in the preheated oven. Just be prepared to increase the baking time by 10 to 15 minutes since it’ll be starting from frozen.

What if my baked ziti is too dry after reheating?
No worries at all! If your baked ziti seems a bit dry after reheating, simply add a splash of marinara sauce before popping it back in the oven. This will help restore that gooey, cheesy texture we all love. Reheat it at 350°F (175°C) for about 20-30 minutes until it's heated through and bubbling.

Are there any dietary considerations I should keep in mind?
Indeed! If you have guests with dietary restrictions, consider alternatives like gluten-free pasta for a gluten-sensitive option. When it comes to dairy, you can substitute ricotta with cottage cheese, making it lighter. Always double-check ingredient labels for allergens, especially with different types of cheese and sauces. Your loved ones will appreciate the consideration!

Baked Ziti

Deliciously Cheesy Baked Ziti for Cozy Family Nights

Baked Ziti is a comforting, cheesy dish perfect for family gatherings.
Print Recipe Pin Recipe
Prep Time 15 minutes mins
Cook Time 40 minutes mins
Resting Time 15 minutes mins
Total Time 1 hour hr 10 minutes mins
Servings: 6 servings
Course: Dinner
Cuisine: Italian
Calories: 400
Ingredients Equipment Method Nutrition Notes

Ingredients
  

For the Pasta
  • 12 oz Ziti or Penne Cooked until al dente.
For the Sauce
  • 24 oz Marinara Sauce Consider making it from scratch.
For the Cheesy Mixture
  • 15 oz Ricotta Cheese For a rich and creamy layer.
  • 16 oz Mozzarella Cheese Fresh, for gooeyness.
  • 8 oz Provolone Cheese Brings depth of flavor.
  • 8 oz Parmesan Cheese Grated for the topping.
Optional Binder
  • 1 large Egg Helps bind the cheese.

Equipment

  • Oven
  • Large pot
  • Mixing Bowl
  • Baking Dish

Method
 

Preparation Steps
  1. Preheat the oven to 350°F (175°C) and grease the baking dish.
  2. Cook ziti or penne in salted water until al dente for about 6 minutes.
  3. In a mixing bowl, combine ricotta, half mozzarella, provolone, and parmesan. Optionally add an egg.
  4. Mix half of the cooked pasta with marinara sauce and layer in the baking dish.
  5. Spread half of the cheese mixture over the pasta layer.
  6. Layer remaining pasta and marinara, then top with the remaining cheese mixture.
  7. Cover with foil and bake for 30 minutes; remove foil and bake for an additional 10-15 minutes.
  8. Optionally broil for 1-2 minutes for extra crispiness.
  9. Let rest for 10-15 minutes before serving.

Nutrition

Serving: 1plateCalories: 400kcalCarbohydrates: 45gProtein: 20gFat: 18gSaturated Fat: 10gPolyunsaturated Fat: 1gMonounsaturated Fat: 5gCholesterol: 80mgSodium: 800mgPotassium: 450mgFiber: 3gSugar: 6gVitamin A: 400IUVitamin C: 3mgCalcium: 300mgIron: 2mg

Notes

This dish is customizable; feel free to add proteins like Italian sausage for extra flavor.

Tried this recipe?

Let us know how it was!

TikTok Spaghetti: The Cheesy Comfort Meal You'll Love

November 21, 2025 by Grace Snow Leave a Comment

As I was scrolling through TikTok, I stumbled upon a delightful dish that stopped me in my tracks—TikTok Spaghetti! This heartwarming casserole combines layers of meaty richness with gooey cheese, creating an easy-to-make comfort food that’s perfect for family dinners or potlucks. You won't believe how simple and satisfying it is to whip up this meaty and cheesy TikTok Spaghetti Casserole, especially when you’re craving something delicious without spending hours in the kitchen. Plus, it's an instant crowd-pleaser that everyone will rave about. Who knew a viral recipe could taste this good? Curious how to make this creamy, cheesy wonder? Let's dive into the recipe!

Why is TikTok Spaghetti a Must-Try?

Comforting Layers: The harmonious combination of meaty goodness and gooey cheese layers will make your heart sigh with happiness.
Time-Saving Delight: Quick to prepare and bake, this dish is perfect for busy weeknights or impromptu gatherings.
Family-Friendly Appeal: With familiar flavors and fun textures, even picky eaters will ask for seconds!
Versatile Variations: Feel free to swap in turkey, veggies, or different cheeses to suit your taste, making it adaptable for everyone.
Crowd-Pleasing Winner: This recipe has gone viral for a reason—it's that good! Check out my Taco Spaghetti Cheesy for another twist on classic comfort food.

TikTok Spaghetti Ingredients

For the Base

  • Olive Oil – Provides healthy fats and aids in sautéing; can be substituted with canola or vegetable oil.
  • Onion, Chopped – Adds sweetness and depth to the sauce; use shallots for a milder flavor if desired.
  • Green Bell Pepper – Contributes crunch and sweetness; replace with red bell pepper for a sweeter twist.
  • Garlic, Minced – Enhances flavor with aromatic notes; garlic powder (1 teaspoon) works if fresh garlic isn't on hand.
  • Ground Beef (80/20) – Main protein source, adds richness; swap for ground turkey or plant-based ground for a lighter option.
  • Salt – Enhances all flavors; kosher or sea salt is recommended for the best taste.
  • Black Pepper – Provides mild heat; freshly cracked pepper ensures the best flavor.
  • Italian Seasoning – Infuses traditional Italian flavors; a mix of oregano, basil, and thyme can be used as a substitute.
  • Spaghetti Sauce (1 ½ jars/36 ounces) – Forms the base of the red sauce; homemade sauce brings a fresher flavor.
  • Salt (for pasta) – Essential for seasoning the water when boiling pasta.
  • Spaghetti (16 ounces) – The main carbohydrate; substitute with any pasta type, including gluten-free.

For the Alfredo Sauce

  • Butter (1/2 cup) – The base of the Alfredo sauce that adds richness; margarine can be used for a dairy-free option.
  • Garlic, Minced (4 cloves) – Adds flavor to the Alfredo sauce; garlic powder is an alternative if needed.
  • All-Purpose Flour – Thickens the Alfredo; use cornstarch (1 tablespoon) for a gluten-free version.
  • Heavy Cream (2 cups) – Creates a rich, creamy sauce; half-and-half can reduce calories if preferred.
  • Parmesan Cheese (1 ½ cups) – Imparts a nutty flavor; nutritional yeast can be a vegan substitute.

For the Topping

  • Mozzarella Cheese (2 cups) – Gives a gooey topping; cheddar cheese is a great alternative for a different flavor profile.

You’re all set to create this tasty TikTok spaghetti casserole! Let’s get cooking!

Step-by-Step Instructions for TikTok Spaghetti

Step 1: Preheat and Prepare
Start by preheating your oven to 350°F (177°C). While it heats up, grab a 9x13-inch baking dish and coat it with nonstick spray to ensure easy serving later. Setting up your dish in advance will save time when it's ready for assembly, so you can enjoy the delicious TikTok Spaghetti without any delays.

Step 2: Sauté Aromatics
In a large skillet, heat 2 tablespoons of olive oil over medium heat. Once the oil shimmers, add 1 chopped onion and 1 diced green bell pepper. Sauté these for about 5–7 minutes until softened and translucent. The aroma of sautéed veggies will fill your kitchen, setting the stage for the flavorful layers of your TikTok Spaghetti.

Step 3: Cook the Garlic
After the veggies have softened, add 4 minced garlic cloves to the skillet. Sauté for another 1-2 minutes, stirring frequently, until the garlic becomes fragrant but not browned. This step intensifies the flavor of your sauce, creating a lovely base for the meaty filling in your TikTok Spaghetti casserole.

Step 4: Brown the Beef
Add 1 pound of ground beef to the skillet, breaking it apart with a spoon. Cook for about 7–10 minutes until the meat is browned and no longer pink. Remember to drain any excess grease to keep your dish from being too oily, allowing the rich flavors of the meat to shine in your TikTok Spaghetti.

Step 5: Add Seasoning and Sauce
Stir in 1 teaspoon of salt, ½ teaspoon of black pepper, and 1 tablespoon of Italian seasoning. Pour in 1 ½ jars (36 ounces) of spaghetti sauce and mix well. Let the sauce simmer for about 5 minutes to meld the flavors, making your house smell incredible as the meaty mixture becomes ready for the next stage of your TikTok Spaghetti.

Step 6: Cook the Spaghetti
While the sauce simmers, bring a large pot of salted water to a boil. Add 16 ounces of spaghetti and cook according to package directions, usually around 8–10 minutes, until al dente. Once done, drain the pasta and set it aside. This step is crucial to ensure that the spaghetti holds its shape in the delicious layers of your TikTok Spaghetti casserole.

Step 7: Make the Alfredo Sauce
In a separate pan, melt ½ cup of butter over medium heat, then add another 4 minced garlic cloves and sauté for about 1 minute. Next, whisk in ½ cup of all-purpose flour and cook for 1 minute until bubbly, forming a roux. This will create a rich base for your creamy Alfredo sauce, complementing the savory layers of the TikTok Spaghetti.

Step 8: Stir in Cream and Cheese
Slowly add 2 cups of heavy cream to the roux, stirring continuously until the mixture is smooth. Then, gradually add 1 ½ cups of grated Parmesan cheese, whisking until melted and creamy. The result will be a luscious Alfredo sauce that envelops your spaghetti, making your TikTok Spaghetti a comforting delight.

Step 9: Combine Pasta and Sauce
Toss the drained spaghetti into the Alfredo sauce, ensuring each strand is evenly coated. This combination is what truly makes your TikTok Spaghetti extra creamy and flavorful. Spread the coated spaghetti evenly into the greased baking dish, ready for the layered goodness to come.

Step 10: Layer the Red Sauce
Carefully spoon the meat and red sauce mixture over the spaghetti, creating an even layer. Do not mix the layers together; you want to maintain that creamy goodness on the bottom of your TikTok Spaghetti. This will ensure each bite is a delightful combination of flavors and textures.

Step 11: Top with Cheese
Sprinkle 2 cups of shredded mozzarella cheese generously over the top of the casserole. This melty layer will provide a beautiful finish, creating that irresistible golden crust when baked. Make sure the cheese covers the red sauce completely for a beautifully gooey layer in the final updated TikTok Spaghetti.

Step 12: Bake to Perfection
Place the baking dish in the preheated oven and bake, uncovered, for about 30 minutes. The casserole should be bubbling and the cheese melted, giving it that inviting look. The aroma wafting through your home will surely make everyone eager for the first bite of your comforting TikTok Spaghetti.

Step 13: Cool and Serve
After baking, remove the casserole from the oven and let it cool for about 10 minutes before serving. This resting time helps the layers set, making it easier to serve. You can garnish with chopped parsley and a sprinkle of extra Italian seasoning for a fresh touch. Enjoy the cozy goodness of your TikTok Spaghetti with family and friends!

Make Ahead Options

These Meaty and Cheesy TikTok Spaghetti Casseroles are perfect for busy home cooks who love meal prepping! You can assemble the entire casserole up to 24 hours in advance, keeping it covered in the refrigerator to maintain freshness and prevent drying out. If you're planning to enjoy leftovers, they can be stored in an airtight container for up to 3 days. When you're ready to bake, simply preheat the oven to 350°F (177°C) and add an extra 10-15 minutes to the baking time, ensuring the casserole is hot and bubbly. This effortless prep ahead strategy saves you time during busy weeknights while still delivering delicious, comforting flavors.

What to Serve with TikTok Spaghetti

Looking to elevate your dining experience with dishes that harmonize perfectly with this creamy casserole?

  • Garlic Bread: The warm, buttery goodness of garlic bread is perfect for soaking up every last drop of sauce, making each bite more satisfying.
  • Simple Garden Salad: Vibrant veggies tossed in a light vinaigrette offer a refreshing crunch, balancing the hearty richness of the spaghetti.
  • Creamy Coleslaw: The sweet and tangy elements of a creamy coleslaw add a delightful contrast, cleansing your palate between bites.
  • Roasted Vegetables: Tender roasted seasonal veggies provide a lovely earthy flavor that complements the savory components of TikTok Spaghetti.
  • Cheesy Cauliflower Bake: This low-carb side mirrors the cheese in your casserole while adding another layer of creamy goodness to your meal.
  • Red Wine: A glass of Merlot or Chianti brings out the bold flavors of the meat sauce, making for a perfect pairing with your hearty meal.
  • Chocolate Chip Cookies: End your meal on a sweet note with warm cookies that evoke nostalgia—a familiar comfort alongside this comforting dish.
  • Crispy Fried Zucchini: For a fun twist, these crunchy bites add a unique texture, enhancing the flavor profile of your already delightful dinner.

Storage Tips for TikTok Spaghetti

Fridge: Store leftovers in an airtight container in the refrigerator for up to 3 days. When you're ready to eat, simply reheat in the oven or microwave until warmed through.

Freezer: You can freeze this TikTok Spaghetti casserole for up to 3 months. Wrap it tightly in plastic wrap and aluminum foil to prevent freezer burn. Thaw in the fridge before baking.

Reheating: For the best texture, reheat from frozen in a 350°F (177°C) oven for about 45 minutes, or reheat in the microwave in 1-2 minute intervals until hot.

Assembling Ahead: This dish can be assembled a day ahead and stored in the fridge before baking, making it perfect for busy weeknights!

TikTok Spaghetti Variations & Substitutions

Feel free to make this TikTok spaghetti your own by trying out these delightful variations that add flavor and adjust to different dietary needs!

  • Spicy Kick: Substitute ground beef with Italian sausage for a zesty flavor boost that adds a little heat. You’ll enjoy a savory depth that makes every bite exciting.

  • Low-Carb Delight: Swap spaghetti for zucchini noodles to create a refreshing, low-carb version of this hearty dish. Not only is it healthier, it still delivers that comforting essence everyone loves.

  • Veggie-Packed: Incorporate chopped mushrooms or spinach into the red sauce for a nutritious twist. This not only elevates the flavor but also adds vibrant colors to your casserole!

  • Creamy Vegan Option: Replace heavy cream with coconut cream and use nutritional yeast instead of Parmesan for a rich, plant-based take on the classic. You'd be surprised at how satisfying a vegan version can taste!

  • Cheese Lovers’ Twist: Try adding a mix of mozzarella and cheddar cheeses for a gooey, melted topping that gets extra cheesy goodness. Each slice will ooze with delightful flavors!

  • Garlic Lovers: North out the garlic in the Alfredo sauce with roasted garlic to deepen the flavor profile. It adds a sweet and savory touch that will impress garlic fans.

  • Herb-Infused Flavor: Sprinkle in fresh basil or oregano between layers for a bright herby flavor that will elevate your TikTok spaghetti to a new culinary level. You might also enjoy pairing it with my delicious Taco Spaghetti Cheesy for another herb-rich comfort food experience!

  • Extra Creamy: Increase the heavy cream in your Alfredo sauce to 2½ cups for an even richer, creamier texture. Your family will be begging for seconds with this luxurious twist!

These variations are not just practical—they're an invitation to explore new tastes while enjoying the comforting warmth of TikTok spaghetti! Enjoy customizing your casserole to suit your cravings and dietary needs.

Expert Tips for TikTok Spaghetti

  • Grease Drainage: Always drain excess grease from the ground beef to ensure a non-greasy, rich final dish that truly shines.
  • Cheesy Topping: Bake uncovered for the last 10 minutes to achieve a golden, bubbly cheese layer that completes your TikTok Spaghetti.
  • Layering Technique: Avoid mixing the layers of sauce and Alfredo; this keeps the creamy goodness intact and enhances the flavor in every bite.
  • Herbs for Flavor: Enhance the dish with fresh or dried herbs, such as basil or oregano, for additional flavor depth in your TikTok Spaghetti.
  • Vegetable Add-In: Boost nutrition by adding veggies like spinach or mushrooms to the meat sauce for delicious flavor and added texture.

TikTok Spaghetti Recipe FAQs

What kind of ground beef should I use for TikTok Spaghetti?
I recommend using ground beef with an 80/20 ratio for optimal flavor and moisture. If you're looking for a lighter option, ground turkey or a plant-based ground meat can also work beautifully!

How do I store leftover TikTok Spaghetti?
Leftovers can be stored in an airtight container in the refrigerator for up to 3 days. Just make sure to let it cool to room temperature before sealing it up. When you're ready to enjoy, you can easily reheat it in the oven or microwave.

Can I freeze TikTok Spaghetti?
Absolutely! You can freeze the casserole for up to 3 months. To do this, wrap it tightly in plastic wrap and then in aluminum foil to protect it from freezer burn. To serve, thaw it in the fridge overnight and bake it straight from there.

What's the best way to reheat TikTok Spaghetti?
For the best texture, I suggest reheating from frozen in a preheated oven at 350°F (177°C). Cover it with foil to prevent drying out, and bake for about 45 minutes. If it's just leftover, you can reheat in the microwave in 1-2 minute intervals until thoroughly warmed.

Are there any dietary considerations for TikTok Spaghetti?
Yes! You can easily adapt this recipe to accommodate various dietary needs. For a gluten-free version, swap regular spaghetti with gluten-free pasta. If dairy is a concern, use dairy-free cheese and margarine instead of butter. Always double-check any pre-packaged ingredients for allergens!

What should I do if my TikTok Spaghetti turns out watery?
If your casserole has excess liquid, it might be due to the meat sauce not thickening enough or overcooked spaghetti. For next time, ensure you cook the sauce until it's reduced or add a bit of cornstarch to thicken it up. If you encounter a watery casserole, let it rest for a bit after baking—this will help absorb excess moisture.

TikTok Spaghetti

TikTok Spaghetti: The Cheesy Comfort Meal You'll Love

Try TikTok Spaghetti for a quick and delicious dinner with cheesy layers of meat and sauce.
Print Recipe Pin Recipe
Prep Time 20 minutes mins
Cook Time 40 minutes mins
Cooling Time 10 minutes mins
Total Time 1 hour hr 10 minutes mins
Servings: 6 servings
Course: Dinner
Cuisine: American
Calories: 600
Ingredients Equipment Method Nutrition Notes

Ingredients
  

For the Base
  • 2 tablespoons Olive Oil can be substituted with canola or vegetable oil
  • 1 Onion, Chopped use shallots for milder flavor
  • 1 Green Bell Pepper replace with red bell pepper for a sweeter twist
  • 4 cloves Garlic, Minced garlic powder (1 teaspoon) works if fresh garlic isn't on hand
  • 1 pound Ground Beef (80/20) swap for ground turkey or plant-based ground
  • 1 teaspoon Salt kosher or sea salt recommended
  • ½ teaspoon Black Pepper freshly cracked pepper ensures the best flavor
  • 1 tablespoon Italian Seasoning mix of oregano, basil, and thyme as a substitute
  • 1 ½ jars Spaghetti Sauce (36 ounces) homemade sauce brings a fresher flavor
  • 1 tablespoon Salt (for pasta) essential for boiling pasta
  • 16 ounces Spaghetti substitute with any pasta type, including gluten-free
For the Alfredo Sauce
  • ½ cup Butter margarine can be used for dairy-free option
  • 4 cloves Garlic, Minced garlic powder is an alternative if needed
  • ½ cup All-Purpose Flour use cornstarch (1 tablespoon) for gluten-free version
  • 2 cups Heavy Cream half-and-half can reduce calories if preferred
  • 1 ½ cups Parmesan Cheese nutritional yeast can be a vegan substitute
For the Topping
  • 2 cups Mozzarella Cheese cheddar cheese is a great alternative

Equipment

  • 9x13-inch baking dish
  • Large skillet
  • pot
  • separate pan for Alfredo sauce

Method
 

Step-by-Step Instructions for TikTok Spaghetti
  1. Preheat your oven to 350°F (177°C) and coat a 9x13-inch baking dish with nonstick spray.
  2. Heat 2 tablespoons of olive oil in a large skillet over medium heat. Add 1 chopped onion and 1 diced green bell pepper. Sauté for 5-7 minutes until softened.
  3. Add 4 minced garlic cloves to the skillet and sauté for another 1-2 minutes until fragrant.
  4. Add 1 pound of ground beef, breaking it apart, and cook for 7-10 minutes until browned. Drain excess grease.
  5. Stir in 1 teaspoon of salt, ½ teaspoon of black pepper, and 1 tablespoon of Italian seasoning. Add 1 ½ jars (36 ounces) of spaghetti sauce and let simmer for 5 minutes.
  6. Bring a large pot of salted water to a boil. Cook 16 ounces of spaghetti according to package directions (8-10 minutes). Drain and set aside.
  7. In a separate pan, melt ½ cup of butter. Add 4 minced garlic cloves and sauté for about 1 minute. Whisk in ½ cup of all-purpose flour, cooking until bubbly.
  8. Slowly add 2 cups of heavy cream, stirring until smooth. Gradually whisk in 1 ½ cups of Parmesan cheese until melted and creamy.
  9. Toss the drained spaghetti into the Alfredo sauce, ensuring each strand is coated. Spread into the greased baking dish.
  10. Spoon the meat and red sauce mixture over the spaghetti without mixing the layers.
  11. Sprinkle 2 cups of shredded mozzarella cheese over the top of the casserole.
  12. Bake uncovered for about 30 minutes until bubbling and cheese is melted.
  13. Let cool for about 10 minutes before serving. Optionally garnish with parsley and extra Italian seasoning.

Nutrition

Serving: 1servingCalories: 600kcalCarbohydrates: 40gProtein: 30gFat: 35gSaturated Fat: 20gPolyunsaturated Fat: 2gMonounsaturated Fat: 10gTrans Fat: 1gCholesterol: 90mgSodium: 800mgPotassium: 600mgFiber: 3gSugar: 4gVitamin A: 800IUVitamin C: 10mgCalcium: 300mgIron: 3.5mg

Notes

This casserole can be assembled a day in advance and refrigerated before baking, making it perfect for busy weeknights.

Tried this recipe?

Let us know how it was!

Creamy Parmesan Italian Sausage Ditalini for Cozy Comfort Nights

November 21, 2025 by Grace Snow Leave a Comment

As the cool breeze of autumn sweeps in, I find myself craving hearty meals that wrap me in warmth and nostalgia. One of my all-time favorites for those cozy nights is Creamy Parmesan Italian Sausage Ditalini Soup. This delightful dish is not only easy to prepare but also customizable to suit your needs, making it a perfect choice for busy weeknights or family gatherings. The rich, creamy broth mingled with savory Italian sausage and tender ditalini pasta creates a comforting embrace that’s hard to resist. Plus, you can easily adapt the ingredients to be low-carb or vegetarian, ensuring everyone at the table can enjoy it. Ready to fill your kitchen with delicious aromas and warm your heart? Let’s dive into this soul-soothing soup!

Why Is This Soup a Must-Try?

Comforting Warmth: There’s nothing like a creamy bowl of soup to chase away the chill on a cozy evening.

Endless Customization: This recipe allows for endless variations, so you can easily adjust it to suit your pantry or dietary preferences.

Rich, Savory Flavor: The savory Italian sausage combined with rich Parmesan creates an irresistible taste that’ll have everyone asking for seconds!

Quick and Easy: Forget complicated recipes; this one is simple to whip up, making it a great option for busy weeknights.

Perfect for Any Occasion: Whether you're hosting friends or just need a comforting meal, this soup is a guaranteed crowd-pleaser. Try serving it with some crusty bread or even alongside a fresh salad like Avocado Egg Salad for a complete experience!

Creamy Parmesan Italian Sausage Ditalini Ingredients

For the Soup Base

  • Italian Sausage – Provides savory depth and protein; substitute with ground turkey or chicken sausage for a leaner option.
  • Onion – Adds sweetness and aroma; use shallots for a milder flavor.
  • Garlic – Enhances flavor with pungency; fresh garlic is preferred and can be substituted with garlic powder in a pinch.
  • Chicken Broth – Forms the soup’s base; vegetable or beef broth can be used as alternatives.
  • Diced Tomatoes – Adds acidity and texture; fresh tomatoes can replace canned, just cook them down before adding.

For the Creamy Finish

  • Heavy Cream – Creates a creamy texture; substitute with half-and-half or whole milk for a lighter option.
  • Parmesan Cheese – Intensifies the umami flavor; use nutritional yeast for a dairy-free option.

For the Add-Ins

  • Fresh Spinach – Provides color and nutrients; kale or Swiss chard can be substituted.
  • Ditalini Pasta – Offers a small, fun shape for soup; alternatives include elbow macaroni or small shells.

For Seasoning

  • Italian Seasoning – Balances and enhances overall flavor; mix dried herbs like basil, oregano, and thyme if unavailable.
  • Salt & Pepper – Essential for seasoning; adjust to personal taste.
  • Olive Oil – Used for sautéing ingredients; can be replaced with butter for a richer flavor.

Dive into this Creamy Parmesan Italian Sausage Ditalini Soup and embrace the magic of homemade comfort food!

Step‑by‑Step Instructions for Creamy Parmesan Italian Sausage Ditalini

Step 1: Heat the Olive Oil
In a large pot, warm 1 tablespoon of olive oil over medium heat until shimmering. This ensures the oil is hot enough for sautéing, which will help develop the flavors of your Creamy Parmesan Italian Sausage Ditalini Soup. Make sure to choose a pot with enough capacity to hold all the ingredients comfortably.

Step 2: Brown the Sausage
Add the Italian sausage to the pot, breaking it apart with a wooden spoon. Cook for about 5 to 7 minutes, stirring occasionally, until the sausage is browned and cooked through. Look for a deep golden color, as this will enhance the overall flavor of the soup.

Step 3: Sauté the Aromatics
Once the sausage is browned, add the chopped onion and minced garlic to the pot. Sauté for 2 to 3 minutes until the onion is softened and translucent. The aromatic smell will fill your kitchen, signaling that it’s time to move on to the next step of your Creamy Parmesan Italian Sausage Ditalini Soup.

Step 4: Incorporate the Broth and Tomatoes
Pour in the chicken broth along with the diced tomatoes and their juices. Stir in the Italian seasoning, bringing the mixture to a gentle simmer over medium heat. This should take about 3 to 5 minutes. The simmering will prepare the broth base for the delightful flavors that will follow.

Step 5: Cook the Pasta
Add the ditalini pasta to the pot, stirring to combine everything well. Cook according to the package instructions, which will typically take 8 to 10 minutes. Keep an eye on the pasta, making sure it stays al dente as it will absorb some liquid from the soup.

Step 6: Stir in the Cream and Spinach
Once the pasta is cooked, reduce the heat to medium-low. Mix in the heavy cream, Parmesan cheese, and fresh spinach. Cook for another 2 to 3 minutes until the spinach is wilted and the soup is warmed through. The creamy texture begins to blend beautifully with the hearty ingredients of your Creamy Parmesan Italian Sausage Ditalini Soup.

Step 7: Season and Serve
Finally, taste the soup and season with salt and pepper to your preference. Once adjusted, serve the soup hot, garnished with additional Parmesan cheese if desired, welcoming everyone to enjoy this delightful and heartwarming dish.

Creamy Parmesan Italian Sausage Ditalini Variations

Feel free to put your own spin on this deliciously comforting soup—it’s all about making it your own!

  • Spicy Kick: Add hot Italian sausage or a sprinkle of crushed red pepper flakes for an exciting heat boost. Your taste buds will thank you!

  • Low-Carb Delight: Swap out ditalini pasta for cauliflower rice or spiralized zucchini noodles for a fresh, guilt-free version. This twist will keep the soup hearty without the carbs!

  • Vegetarian Option: Omit the sausage and load up on colorful vegetables like bell peppers and carrots, or add plant-based protein to keep it filling and nutritious. You'll savor every bite!

  • Creamy Herb Essence: Infuse the soup with fresh herbs like basil or thyme instead of just Italian seasoning. This creates a fragrant bowl that feels like a warm hug.

  • Cheesy Variations: For an even cheesier experience, stir in shredded mozzarella or fontina cheese before serving. The gooey goodness will elevate this dish to a new level!

  • Nutty Flavor: Replace Parmesan with a sprinkle of nutritional yeast for a vegan and nutty flavor boost that doesn’t skimp on taste. It's a great way to cater to your dairy-free friends!

  • All About the Greens: Add more nutritional value by incorporating a variety of greens. Try kale or Swiss chard for a delightful texture and health boost that pairs beautifully with the creamy broth!

  • Italian Twist: Consider tossing in some sun-dried tomatoes or olives for a Mediterranean vibe. These ingredients can add extra layers of savory flavor that truly complement the soup.

Now that you're ready to unleash your creativity, why not enjoy your flavorful adventure alongside a hearty side like Parmesan Artichoke Hearts or conclude with a refreshing bowl of Asparagus Soup Healthy? Your table time just got a whole lot more exciting!

What to Serve with Creamy Parmesan Italian Sausage Ditalini Soup

Embrace the comfort of a hearty meal by pairing your delicious soup with complementary sides that elevate the dining experience.

  • Crusty Bread: Perfect for dipping, the crispy exterior and soft interior contrast beautifully with the creamy soup.
  • Mixed Green Salad: A vibrant salad with fresh greens, cucumbers, and a light vinaigrette adds a refreshing crunch, balancing the richness of the soup.
  • Garlic Parmesan Breadsticks: These cheesy, buttery delights are a must-have! Their savory flavor makes each bite feel indulgent alongside the soup.
  • Roasted Vegetables: Seasonal roasted veggies bring a caramelized sweetness that complements the savory flavors of the soup while adding a nutritious burst.
  • Cheesy Garlic Knots: Soft, warm knots topped with garlic and melted cheese serve as the perfect finger food to enjoy with your Creamy Parmesan Italian Sausage Ditalini.
  • Italian-Style Antipasto Platter: A selection of cured meats, cheeses, olives, and marinated vegetables creates a delightful starter, enticing your guests with each savory bite.
  • Dessert Wine: Pair your meal with a glass of sweet dessert wine like Moscato or Vin Santo for a rich finish; the sweetness beautifully offsets the soup's hearty flavors.
  • Chocolate Chip Cookies: For a classic dessert, warm, gooey cookies deliver a comforting sweetness that rounds out a delightful home-cooked meal.

Expert Tips for Creamy Parmesan Italian Sausage Ditalini

  • Pasta Perfection: Avoid overcooking the ditalini pasta; it should be al dente to maintain texture. This ensures it doesn’t turn mushy once it soaks up the soup’s liquid.

  • Creamy Control: Adjust the amount of heavy cream based on your preferred creaminess. Start with a bit less and gradually add more to get your ideal richness in the Creamy Parmesan Italian Sausage Ditalini.

  • Flavor Blend: Allow the soup to simmer for a few extra minutes after adding cream. This helps the flavors meld beautifully, enhancing the overall taste profile.

  • Storage Savvy: When storing leftovers, keep the pasta separate if you plan to freeze. This prevents it from becoming too soft when reheating your delicious soup.

  • Season to Taste: Always taste before serving! The flavors can develop during cooking, so a final adjustment of salt and pepper can elevate the dish to perfection.

  • Endless Adaptations: Don’t hesitate to customize your Creamy Parmesan Italian Sausage Ditalini by adding in other vegetables or adjusting the sausage for different levels of heat and flavor preferences.

Storage Tips for Creamy Parmesan Italian Sausage Ditalini

Fridge: Leftovers can be stored in an airtight container for up to 3-4 days. Make sure to cool the soup to room temperature before sealing it away.

Freezer: If you want to freeze the Creamy Parmesan Italian Sausage Ditalini, omit the pasta before freezing. It can be stored for up to 3 months, ensuring the best texture upon reheating.

Reheating: When you're ready to enjoy your soup again, reheat on the stove over medium heat. Add fresh ditalini pasta or your choice of pasta while simmering to restore its delicious consistency.

Airtight Storage: Always use airtight containers to maintain freshness and avoid freezer burn, which can diminish the flavors you love in this comforting soup.

Make Ahead Options

These Creamy Parmesan Italian Sausage Ditalini Soup ingredients are perfect for meal prep! You can brown the Italian sausage and sauté the onion and garlic up to 24 hours in advance, then refrigerate them. Additionally, you can chop the spinach and prepare the broth and diced tomatoes, storing them in separate containers for up to 3 days. When you're ready to serve, simply reheat the meat mixture in a pot, add the broth and tomatoes, then stir in the ditalini pasta and spinach. This ensures your soup retains its comforting, creamy texture, making your busy weeknight dinners a breeze without sacrificing flavor!

Creamy Parmesan Italian Sausage Ditalini Recipe FAQs

How do I choose the right Italian sausage for the soup?
Absolutely! Look for Italian sausage that is fresh and well-seasoned, typically found in the meat section. You can opt for sweet or spicy varieties based on your taste preference. If you prefer a leaner option, ground turkey or chicken sausage works wonderfully as a substitute. Just ensure the sausage is pork-free if you’re looking for a healthier alternative!

What is the best way to store leftover Creamy Parmesan Italian Sausage Ditalini soup?
Leftovers can be stored in an airtight container in the refrigerator for 3-4 days. It’s best to let the soup cool to room temperature before sealing it. For long-term storage, you can freeze the soup without the ditalini pasta. In an airtight container, it will last for up to 3 months. Just remember to label it with the date for easy identification!

Can I freeze Creamy Parmesan Italian Sausage Ditalini soup?
Certainly! To freeze, allow the soup to cool completely. Then, omit the ditalini pasta and portion out the soup into airtight containers or freezer bags. Lay the bags flat for better storage efficiency in your freezer. When you’re ready to enjoy it, simply reheat on the stove, adding fresh ditalini pasta as it simmers until tender, which usually takes about 8-10 minutes.

What should I do if my soup is too thick after cooking?
Very common! If your soup turns out too thick, simply add a splash of chicken broth or water to reach your desired consistency. This is definitely a forgiving recipe, so you can adjust it based on your preference! If you find it needs more flavor after adding liquid, consider seasoning it again with salt, pepper, or additional Italian seasoning to enhance the taste.

Can I make this soup vegetarian-friendly?
Absolutely! For a vegetarian version of Creamy Parmesan Italian Sausage Ditalini, simply omit the sausage and replace it with a variety of vegetables like mushrooms, zucchini, or bell peppers. You could also add plant-based protein options, such as lentils or chickpeas, to make it heartier. The creamy base can remain the same, ensuring that everyone at your table enjoys a comforting bowl of goodness!

How long can I keep the soup in the freezer without it losing flavor?
You can keep your Creamy Parmesan Italian Sausage Ditalini soup in the freezer for up to 3 months without significant loss of flavor. Just ensure it’s stored in airtight containers to prevent freezer burn, which can affect the taste and texture. If sealed correctly, your delicious soup will taste just as delightful when it’s reheated!

Creamy Parmesan Italian Sausage Ditalini

Creamy Parmesan Italian Sausage Ditalini for Cozy Comfort Nights

This Creamy Parmesan Italian Sausage Ditalini soup is a comforting dish perfect for chilly nights, easy to customize and full of savory flavors.
Print Recipe Pin Recipe
Prep Time 15 minutes mins
Cook Time 30 minutes mins
Total Time 45 minutes mins
Servings: 6 people
Course: Soups
Cuisine: Italian
Calories: 380
Ingredients Equipment Method Nutrition Notes

Ingredients
  

For the Soup Base
  • 1 lb Italian Sausage Substitute with ground turkey or chicken sausage for a leaner option.
  • 1 medium Onion Use shallots for a milder flavor.
  • 3 cloves Garlic Fresh garlic is preferred, can use garlic powder in a pinch.
  • 4 cups Chicken Broth Vegetable or beef broth can be used as alternatives.
  • 1 can Diced Tomatoes Fresh tomatoes can replace canned, just cook them down before adding.
For the Creamy Finish
  • 1 cup Heavy Cream Substitute with half-and-half or whole milk for a lighter option.
  • 1 cup Parmesan Cheese Use nutritional yeast for a dairy-free option.
For the Add-Ins
  • 4 cups Fresh Spinach Kale or Swiss chard can be substituted.
  • 1 cup Ditalini Pasta Alternatives include elbow macaroni or small shells.
For Seasoning
  • 2 tsp Italian Seasoning Mix dried herbs like basil, oregano, and thyme if unavailable.
  • to taste Salt & Pepper Essential for seasoning; adjust to personal taste.
  • 1 tbsp Olive Oil Can be replaced with butter for a richer flavor.

Equipment

  • Large pot

Method
 

Step-by-Step Instructions
  1. In a large pot, warm 1 tablespoon of olive oil over medium heat until shimmering.
  2. Add the Italian sausage to the pot, breaking it apart with a wooden spoon. Cook for about 5 to 7 minutes until browned.
  3. Once the sausage is browned, add chopped onion and minced garlic. Sauté for 2 to 3 minutes until onion is softened.
  4. Pour in the chicken broth and diced tomatoes with their juices. Stir in the Italian seasoning and simmer for 3 to 5 minutes.
  5. Add the ditalini pasta to the pot, stirring to combine. Cook according to package instructions, about 8 to 10 minutes.
  6. Once the pasta is cooked, reduce heat to medium-low. Mix in heavy cream, Parmesan cheese, and fresh spinach. Cook for another 2 to 3 minutes.
  7. Taste the soup and season with salt and pepper. Serve hot, garnished with additional Parmesan cheese if desired.

Nutrition

Serving: 1bowlCalories: 380kcalCarbohydrates: 32gProtein: 18gFat: 22gSaturated Fat: 10gPolyunsaturated Fat: 2gMonounsaturated Fat: 8gCholesterol: 60mgSodium: 900mgPotassium: 600mgFiber: 3gSugar: 4gVitamin A: 1000IUVitamin C: 10mgCalcium: 250mgIron: 2mg

Notes

Ensure to store leftovers separately from pasta to maintain texture. Adjust cream and seasoning to personal preference.

Tried this recipe?

Let us know how it was!
  • « Previous Page
  • 1
  • …
  • 99
  • 100
  • 101
  • 102
  • 103
  • …
  • 180
  • Next Page »

Welcome!

Hi, I’m Grace, a Sydney-based home cook with a passion for bold flavors and trending ingredients. Whether you’re a busy beginner or a seasoned foodie, you’ll find dishes here that are fresh, fun, and full of flavor.

More about me

Popular Recipes

  • Butter Pecan Cookies
    Irresistibly Soft Butter Pecan Cookies for Cozy Moments
  • Decadent Turtle Bars
    Decadent Turtle Bars: Indulge in Sweet Gooey Perfection
  • Salted Caramel Butter Bars
    Decadent Salted Caramel Butter Bars You Can't Resist
  • Easy Italian Pasta Salad
    Easy Italian Pasta Salad: A Summer Delight to Share

Footer

↑ back to top

About

  • Privacy Policy
  • Disclaimer
  • Terms & Conditions

Newsletter

  • Sign Up! for emails and updates

Contact

  • About me
  • Contact me

Copyright © 2025 TastyTrendIngredients