The sizzle of ground meat hitting a hot skillet instantly evokes a sense of home and cozy nostalgia. Let me introduce you to High-Protein Cheeseburger Bowls, where all the beloved flavors of a classic cheeseburger come together without the bun! This recipe not only satisfies those comfort-food cravings but is also a low-carb and meal prep-friendly option for the health-conscious among us. With the versatility to swap in your favorite proteins and bases, these bowls can be tailored to suit any taste and lifestyle—perfect for busy weeknights or a post-workout refuel. Curious about how to transform a classic cheeseburger into a bowl bursting with nutrition? Keep reading to discover all the delicious possibilities!
Why You’ll Love These Cheeseburger Bowls
Satisfying Comfort Food: These High-Protein Cheeseburger Bowls deliver all the classic flavors you adore without the guilt of a traditional bun.
Customization Galore: Whether you prefer ground beef, turkey, or a plant-based twist, this recipe invites you to personalize every bite.
Perfect for Meal Prep: Easily whip these up for a week's worth of lunches or dinners—store them in airtight containers for freshness!
Packed with Nutrients: With over 30 grams of protein per serving, these bowls meet your nutritional needs while keeping carbs in check.
Quick and Easy: Ready in just 30 minutes, this recipe is a lifesaver for busy weeknights when you crave comfort food without the hassle.
Great for Everyone: Whether you’re a health enthusiast or just looking for a fun, flavorful dinner, these bowls are sure to impress! Don't forget to check out my Mans Burrito Bowls or Fish Taco Bowls for more tasty options!
High-Protein Cheeseburger Bowl Ingredients
• Get ready to create a filling meal!
For the Meat
- Lean Ground Beef or Turkey (1 lb) – This choice is your main protein; opt for 90% lean for the best flavor without excess fat. Substitution: Ground chicken or plant-based alternatives work perfectly, too!
For Flavor
- Seasonings (Salt, Pepper, Garlic Powder, Onion Powder) – Essential for enhancing the meat’s deliciousness; feel free to tweak the spices to match your palate.
- Mustard (1 tbsp), Ketchup (1 tbsp) – These classic condiments add that unmistakable cheeseburger experience. Tip: Consider using sugar-free versions to keep carbs low.
For the Base
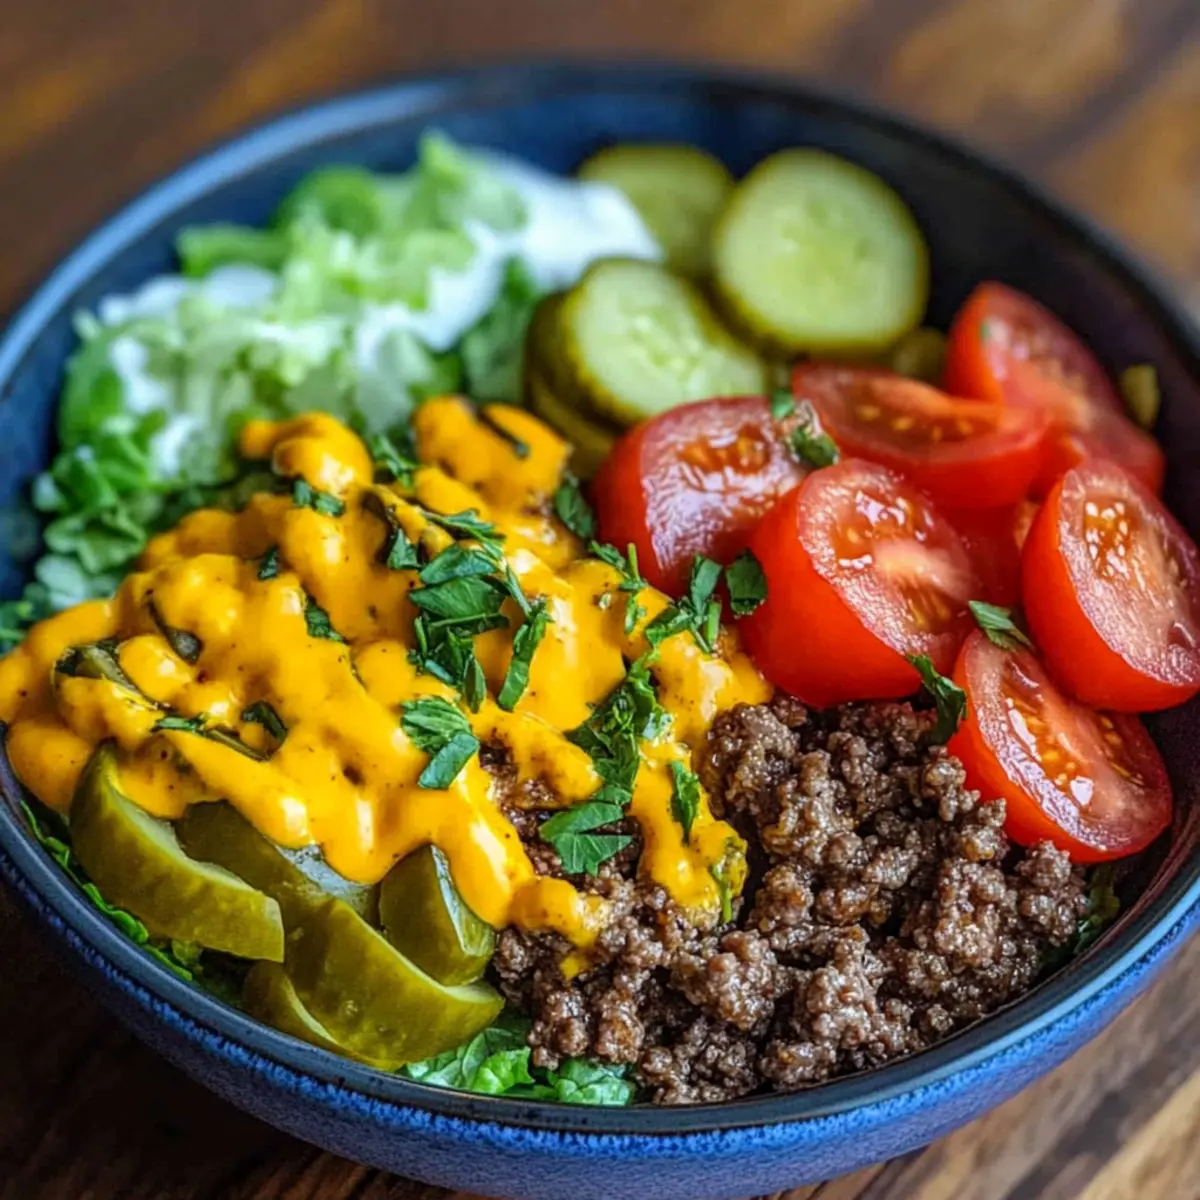
- Chopped Lettuce (4 cups) – Provides a crisp texture that complements the flavors; try incorporating fresh spinach for an exciting twist.
- Grains (2 cups cooked quinoa, brown rice, or cauliflower rice) – Offer a hearty base filled with nutrients; perfect for a more filling bowl.
For Freshness
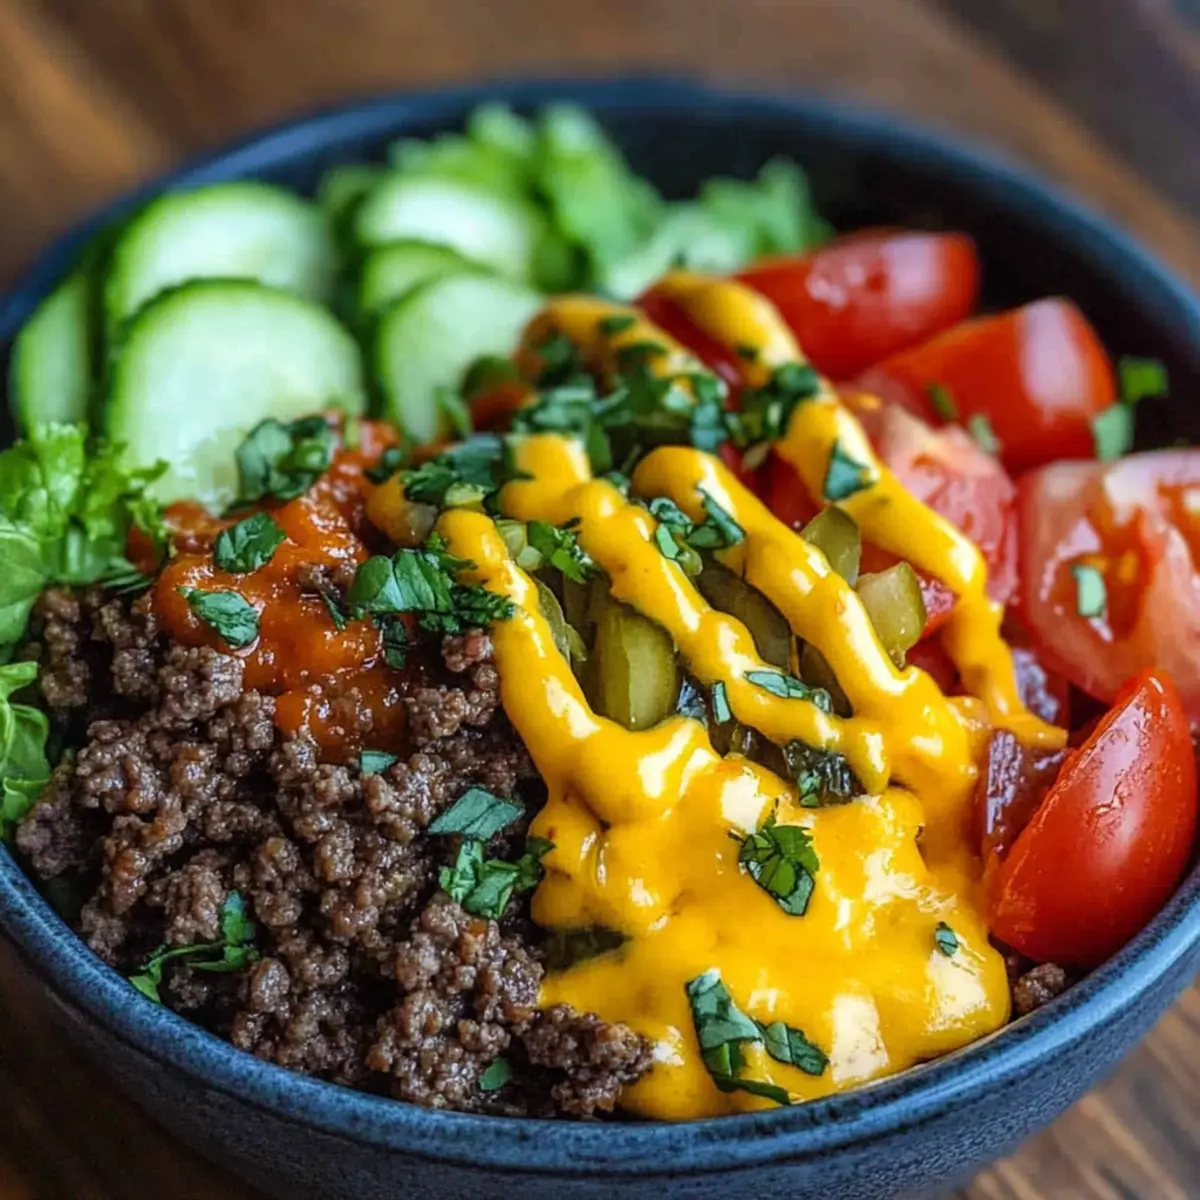
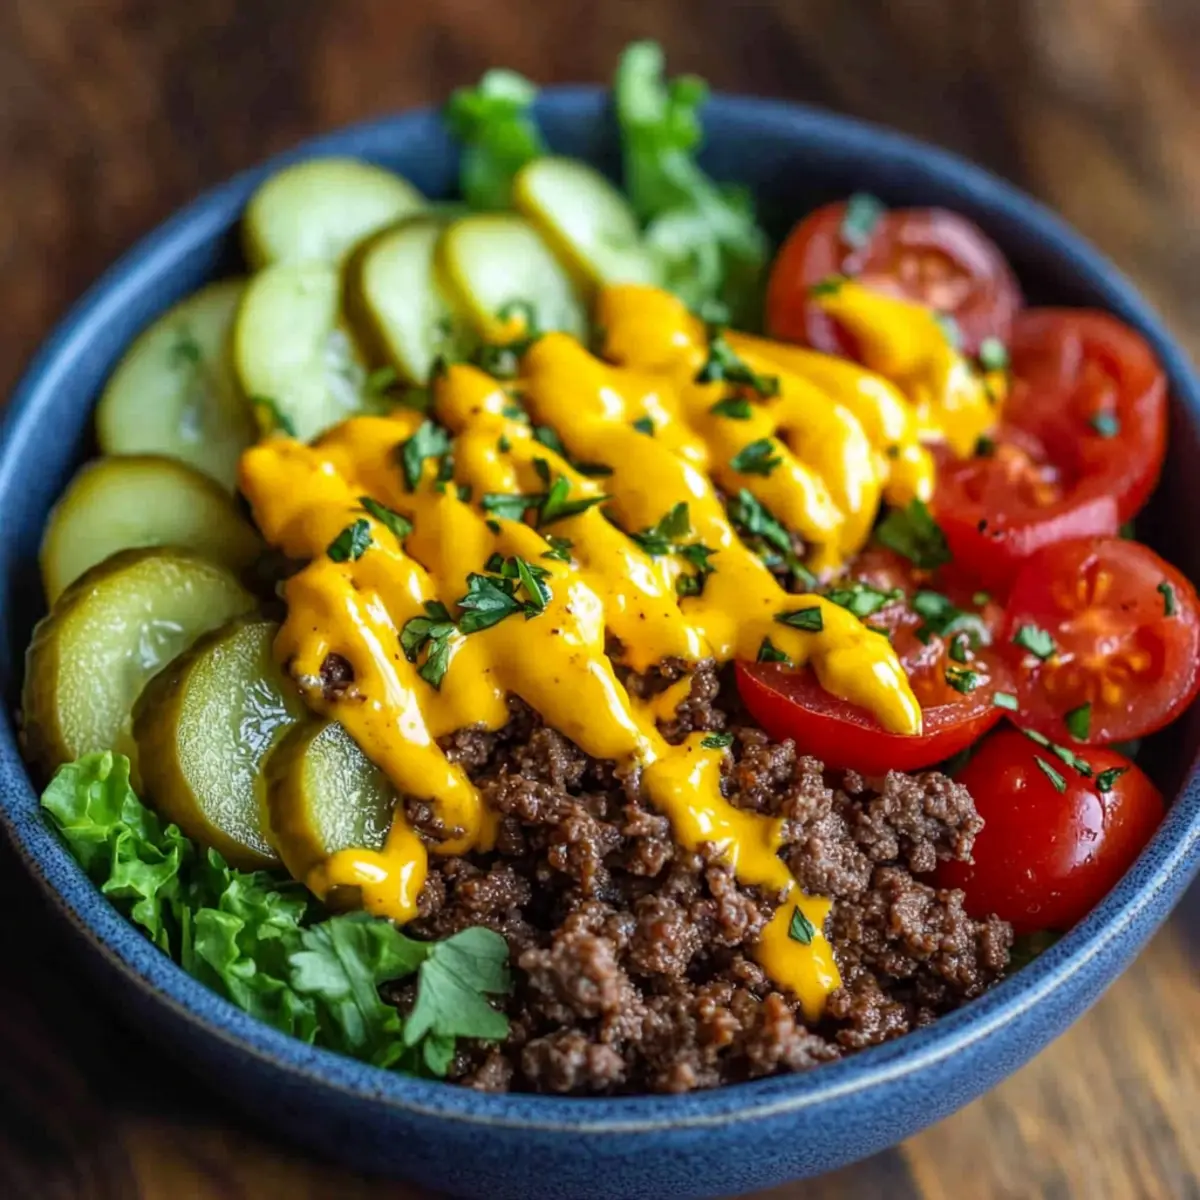
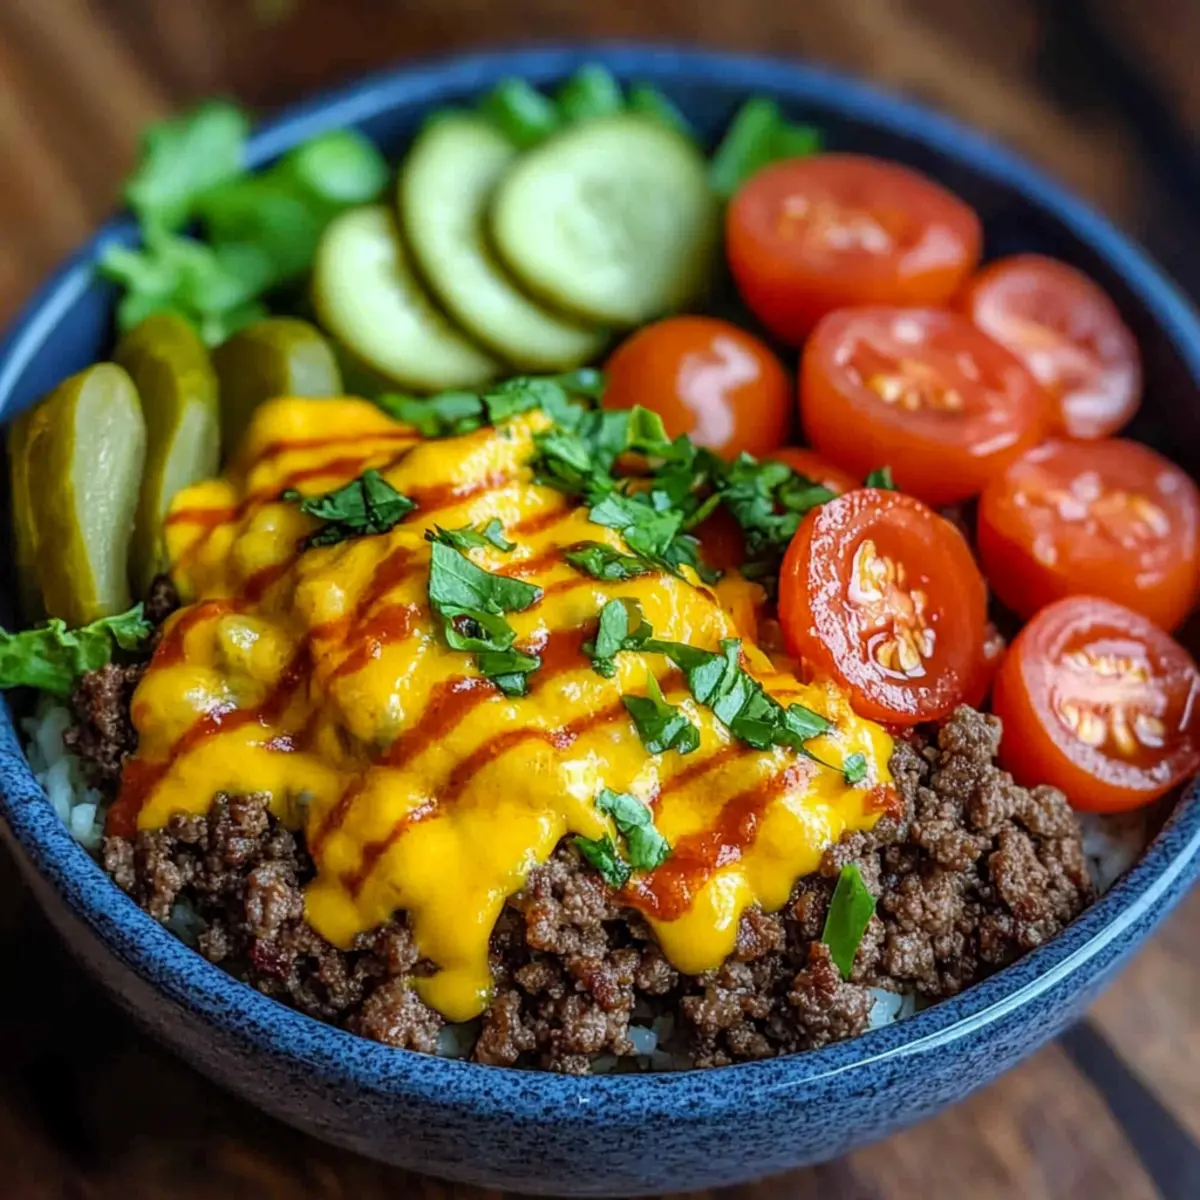
- Cherry Tomatoes (1 cup, halved) – These add a burst of sweetness and color to your meal; diced bell peppers are also a fantastic, crunchy alternative.
- Dill Pickles (½ cup, sliced) – A tangy and crunchy component that elevates your bowl; olives could add a nice flair if you’re adventurous.
- Red Onion (½, thinly sliced) – Adds sharpness for a flavorful kick; swap in green onions if you prefer something milder.
For Creaminess
- Shredded Cheddar or American Cheese (1 cup) – This is key for that creamy, comforting bite; choose dairy-free cheese for a vegan-friendly option.
- Greek Yogurt (½ cup) – A creamy base for your sauce that gives pleasant richness; feel free to use sour cream or non-dairy yogurt instead.
For Optional Toppings
- Optional Toppings (Avocado, Bacon, Jalapeños, Fried Eggs) – These finishers can add extra flavor and excitement; skip the bacon for a plant-based twist or pile on more veggies for added health benefits.
Get ready to enjoy these High-Protein Cheeseburger Bowls, a customizable delight that’s sure to satisfy your cravings!
Step‑by‑Step Instructions for High-Protein Cheeseburger Bowls
Step 1: Cook the Meat
In a large skillet over medium heat, add 1 pound of lean ground beef or turkey. Break the meat apart with a spatula, seasoning it with salt, pepper, garlic powder, and onion powder. Cook for 8–10 minutes, stirring frequently until the meat is fully browned and no longer pink. Drain excess fat from the skillet, ensuring the meat remains juicy for your High-Protein Cheeseburger Bowls.
Step 2: Prepare the Base
While the meat is cooking, prepare your base. If using grains, follow the package instructions to cook 2 cups of quinoa, brown rice, or cauliflower rice until tender. Alternatively, wash and chop 4 cups of crisp lettuce or spinach for a low-carb option. Lay the base in individual bowls to start building your Cheeseburger Bowls.
Step 3: Prep the Toppings
Next, slice your fresh toppings to enhance the flavors of your High-Protein Cheeseburger Bowls. Halve 1 cup of cherry tomatoes, slice ½ cup of dill pickles, and thinly slice ½ of a red onion. Arrange these vibrant ingredients alongside your base, ready to add color, crunch, and a burst of freshness to your meal.
Step 4: Make the Sauce
In a small bowl, combine ½ cup of Greek yogurt with 1 tablespoon of mustard, 1 tablespoon of ketchup, and your preferred seasonings. Whisk until smooth, adjusting flavors as needed. This creamy sauce will marry all the components together beautifully, adding essential cheeseburger flavors to your high-protein bowls.
Step 5: Assemble the Bowls
Now it’s time to bring everything together! Start layering your High-Protein Cheeseburger Bowls by placing your cooked meat on top of the base. Next, sprinkle your prepped toppings—tomatoes, pickles, and red onions—over the meat. Finish with a generous handful of shredded cheese for that comforting creaminess.
Step 6: Optional Finishing Touches
For an extra boost of protein and flavor, consider adding optional toppings to your Cheeseburger Bowls. A fried egg on top will add richness, while crispy bacon or fresh avocado slices can enhance both taste and texture. Customize each bowl to your liking for a satisfying meal that suits your cravings!
Make Ahead Options
These High-Protein Cheeseburger Bowls are a fantastic meal prep option for busy cooks! You can prepare the meat and store it in the refrigerator for up to 3 days—just cook your seasoned ground beef or turkey, then cool it completely before transferring it to an airtight container. Additionally, you can chop the lettuce, slice tomatoes, pickles, and onions, and keep them in separate containers for up to 24 hours to maintain their freshness. When ready to serve, simply reheat the meat, assemble the bowls with your base and toppings, and drizzle with sauce for a quick, nutritious meal that’s just as delicious as freshly made!
High-Protein Cheeseburger Bowls Variations
Feel free to explore these delightful twists and substitutions that will elevate your High-Protein Cheeseburger Bowls!
-
Plant-Based:
Replace ground meat with jackfruit or lentils for a delicious vegetarian option. It's a hearty choice bursting with flavor and perfect for veggie lovers. -
Low-Carb Base:
Use spiralized zucchini or shredded cabbage instead of lettuce or grains. This keeps the meal light while still providing a satisfying crunch! -
Cheese Swap:
Try crumbled feta or mozzarella instead of cheddar for a different flavor profile that adds an exciting twist to your bowls. -
Add a Spice Kick:
Mix in some diced jalapeños or sprinkle crushed red pepper flakes for added heat. You’ll get a fiery surprise in each bite! -
Southwest Style:
Incorporate black beans and corn for a south-of-the-border flair. This adds fiber and richness, making every bowl more filling. -
Breakfast-Inspired:
Top your bowls with a fried egg and swap ground meat for breakfast sausage. It's a comforting mix for those brunch cravings any time of day! -
Cooking Method:
Grill your protein instead of pan-frying. This creates mouthwatering char marks and an irresistible smoky flavor that enhances your bowls. -
Sauce Varieties:
Drizzle with a homemade guacamole or chipotle yogurt sauce to layer on creamy textures and vibrant tastes. These additions make every bite a fiesta!
With all these options, your High-Protein Cheeseburger Bowls can transform to suit every craving! Don't forget to try out my flavorful Mans Burrito Bowls or tempt your taste buds with the scrumptious Fish Taco Bowls for more satisfying meals!
Expert Tips for High-Protein Cheeseburger Bowls
-
Choose Quality Meat: Opt for 90% lean ground beef or turkey to ensure juicy, flavorful meat while keeping your High-Protein Cheeseburger Bowls healthy and satisfying.
-
Customize Wisely: Feel free to swap proteins and bases! Consider lean ground turkey or jackfruit alongside fresh veggies for a unique twist while maintaining delicious flavor.
-
Don’t Overcook: Stir the meat frequently to prevent drying out. Cook it just until fully browned and tender for the best texture in your bowls.
-
Keep Veggies Crisp: Assemble your bowls just before serving to keep textures fresh and appealing. If meal prepping, store ingredients separately to maintain crunch.
-
Add Your Favorite Bites: Jazz up your High-Protein Cheeseburger Bowls with optional toppings like avocado or jalapeños for an irresistible flavor boost!
How to Store and Freeze High-Protein Cheeseburger Bowls
Fridge: Store assembled High-Protein Cheeseburger Bowls in airtight containers for up to 4 days. For best taste, keep sauce separate until you're ready to enjoy.
Freezer: If you wish to freeze components, the cooked meat can be frozen in a sealed container for up to 3 months. Ensure it's cooled completely before freezing.
Reheating: When ready to eat, thaw in the fridge overnight and reheat the meat in a skillet until warmed through. Assemble the bowls fresh with toppings and sauce for optimal flavor.
Meal Prep Storage: Keep all ingredients in separate containers in the fridge to maintain freshness and crunch for quick lunches or dinners.
What to Serve with High-Protein Cheeseburger Bowls
There's nothing quite like a cozy meal that invites family around the table while tantalizing your taste buds.
-
Creamy Mashed Cauliflower: A low-carb alternative to traditional mashed potatoes, this side offers a smooth and buttery addition to balance the cheeseburger flavors.
-
Simple Arugula Salad: Fresh, peppery arugula tossed with lemon vinaigrette adds a refreshing crunch, enhancing the richness of your bowls.
-
Zesty Honey Mustard Brussels Sprouts: Roasted to perfection and drizzled with honey mustard sauce, these Brussels sprouts pack a punch that complements the savory notes beautifully.
-
Garlic Herb Roasted Vegetables: A medley of seasonal veggies roasted until caramelized, these vibrant bits provide an array of textures and flavors, boosting your meal’s nutritional profile.
-
Cauliflower Rice: A lighter alternative to traditional rice, cauliflower rice soaks up the sauce and pairs excellently with the hearty elements of the burger bowls.
-
Fruit-Infused Iced Tea: A refreshing drink with a hint of fruit will cleanse your palate and keep the meal light, making it the perfect beverage alongside this satisfying dish.
-
Chocolate Avocado Mousse: For a healthy dessert, this creamy, rich mousse made from ripe avocados provides a delightful sweetness that rounds out the meal without the guilt.
-
Pickled Vegetable Medley: A tangy, crunchy component that can serve as a palate cleanser, enhancing the overall enjoyment of the cheeseburger experience.
-
Crispy Sweet Potato Fries: A delicious, sweet addition that contrasts beautifully with the savory burgers, offering a satisfying crunch in every bite.
-
Sparkling Water with Lime: A bubbly and refreshing drink option adds a zest that pairs wonderfully with this flavorful meal, keeping it light and enjoyable.
High-Protein Cheeseburger Bowls Recipe FAQs
What type of ground meat should I use for cheeseburger bowls?
Absolutely! I recommend using 90% lean ground beef or turkey for the best balance of flavor and health. If you're looking for a lighter option, ground chicken or even plant-based alternatives like lentils or jackfruit can work wonderfully, allowing you to customize your meal based on your dietary preferences.
How should I store my cheeseburger bowls?
Very! Store your assembled High-Protein Cheeseburger Bowls in airtight containers in the fridge for up to 4 days. To maintain that crunchy texture, it's best to keep the sauce separate until you’re ready to enjoy your delicious meal!
Can I freeze cheeseburger bowls?
Yes, you can! For freezing, I recommend freezing the cooked meat in a sealed container for up to 3 months. Make sure it's cooled completely before you freeze it. When you’re ready to enjoy, just thaw it in the fridge overnight, warm it in a skillet, and then assemble your bowls with fresh toppings and sauce.
How can I prevent the meat from being dry?
The key is to avoid overcooking! After browning the meat, keep stirring it regularly and cook it just until it’s no longer pink—this usually takes 8–10 minutes. If you drain any excess fat before serving, this will help keep your meat juicy and flavorful.
Are there any allergen considerations for this recipe?
Absolutely! If someone has dairy allergies, feel free to substitute shredded cheese with dairy-free cheese and Greek yogurt with plant-based yogurt. Always check the labels of your seasonings and sauces to ensure they are allergy-friendly. If you're serving this to pets, avoid ingredients like garlic and onion, which can be harmful to them.
What can I use instead of lettuce for my base?
Great question! If you prefer a different base, you can use cooked grains like quinoa, brown rice, or cauliflower rice for added nutrients and complexity. Alternatively, spiralized veggies or even finely shredded cabbage can make a delightful base while still keeping the carb count low.
Savory High-Protein Cheeseburger Bowls You’ll Crave Every Time
Ingredients
Equipment
Method
- In a large skillet over medium heat, add 1 pound of lean ground beef or turkey. Break the meat apart with a spatula, seasoning it with salt, pepper, garlic powder, and onion powder. Cook for 8–10 minutes, stirring frequently until the meat is fully browned and no longer pink.
- While the meat is cooking, prepare your base. If using grains, follow the package instructions to cook 2 cups of quinoa, brown rice, or cauliflower rice until tender. Alternatively, wash and chop 4 cups of crisp lettuce or spinach for a low-carb option.
- Slice your fresh toppings to enhance the flavors. Halve 1 cup of cherry tomatoes, slice ½ cup of dill pickles, and thinly slice ½ of a red onion.
- In a small bowl, combine ½ cup of Greek yogurt with 1 tablespoon of mustard, 1 tablespoon of ketchup, and your preferred seasonings. Whisk until smooth, adjusting flavors as needed.
- Start layering your High-Protein Cheeseburger Bowls by placing your cooked meat on top of the base. Next, sprinkle your prepped toppings over the meat. Finish with a generous handful of shredded cheese.
- Consider adding optional toppings like a fried egg, crispy bacon, or fresh avocado slices.