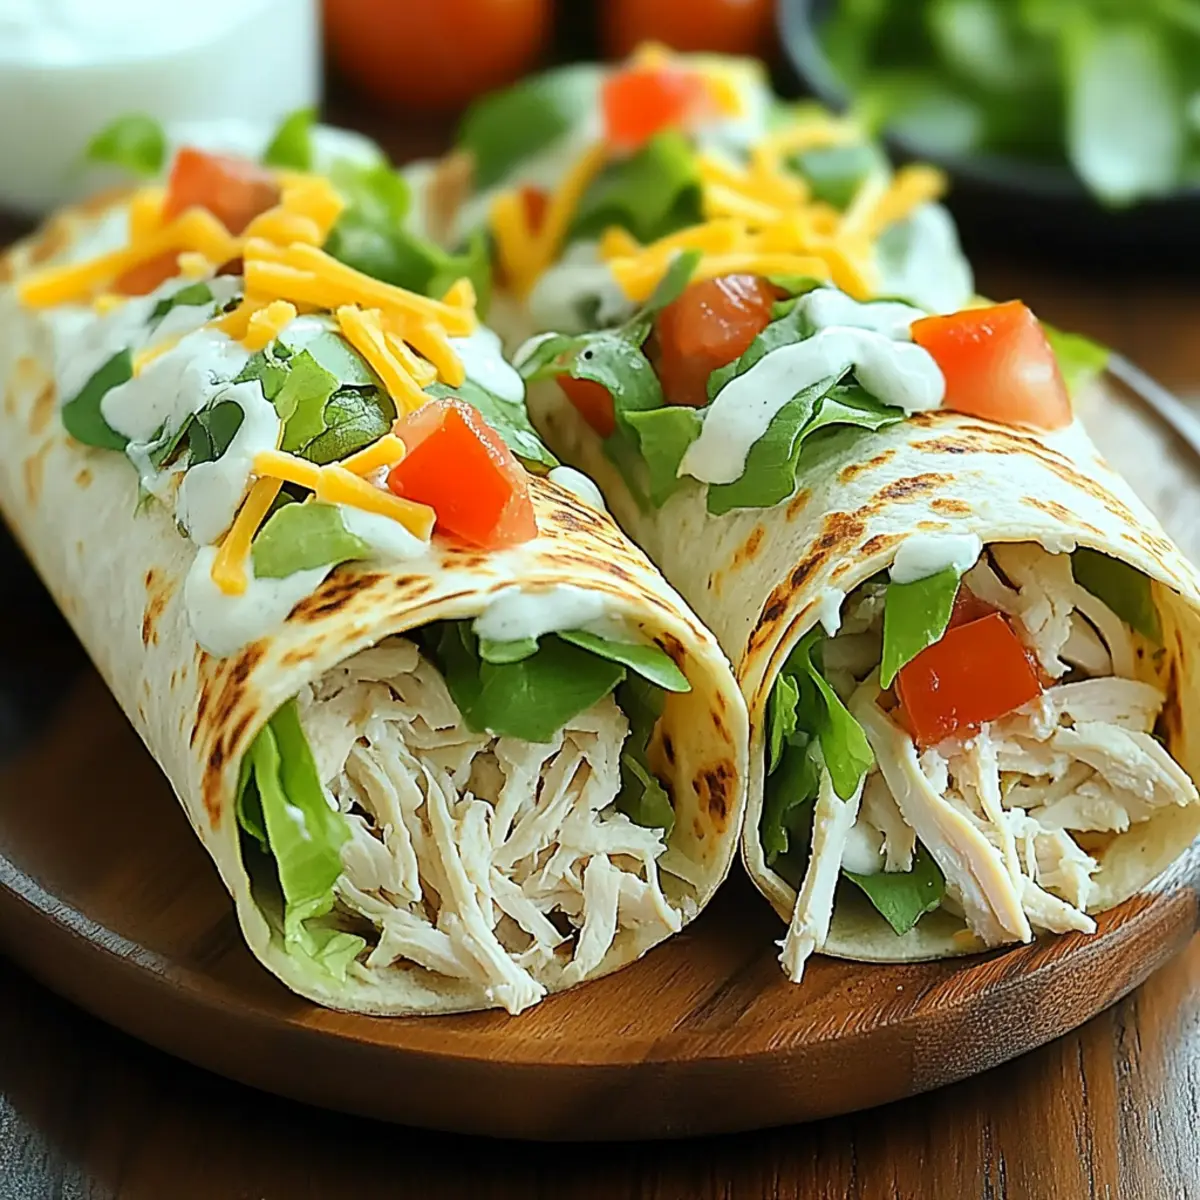
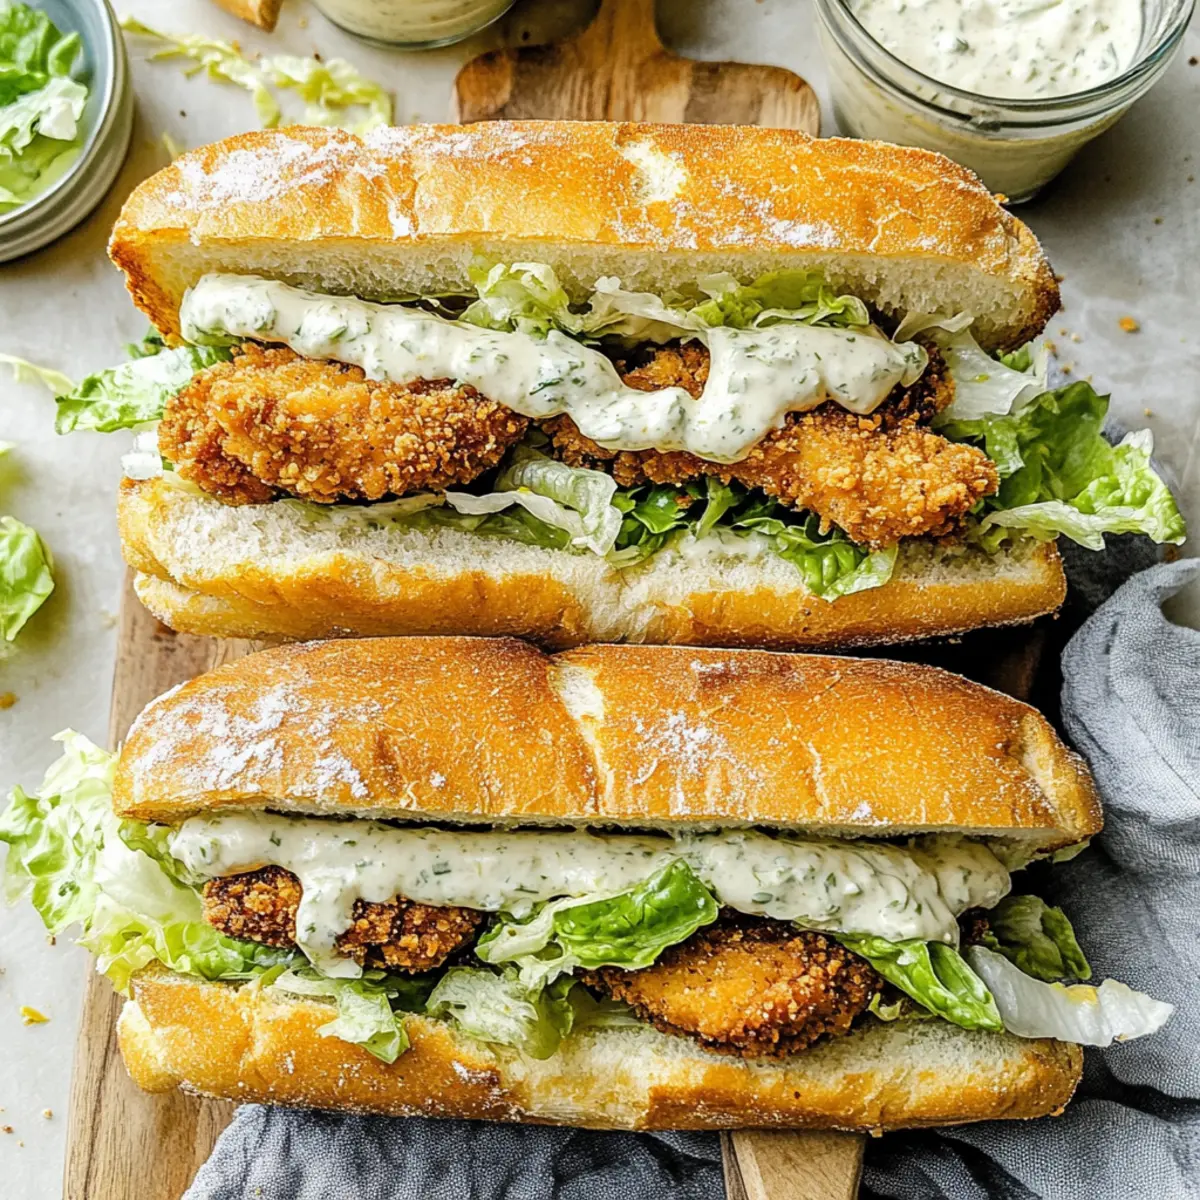
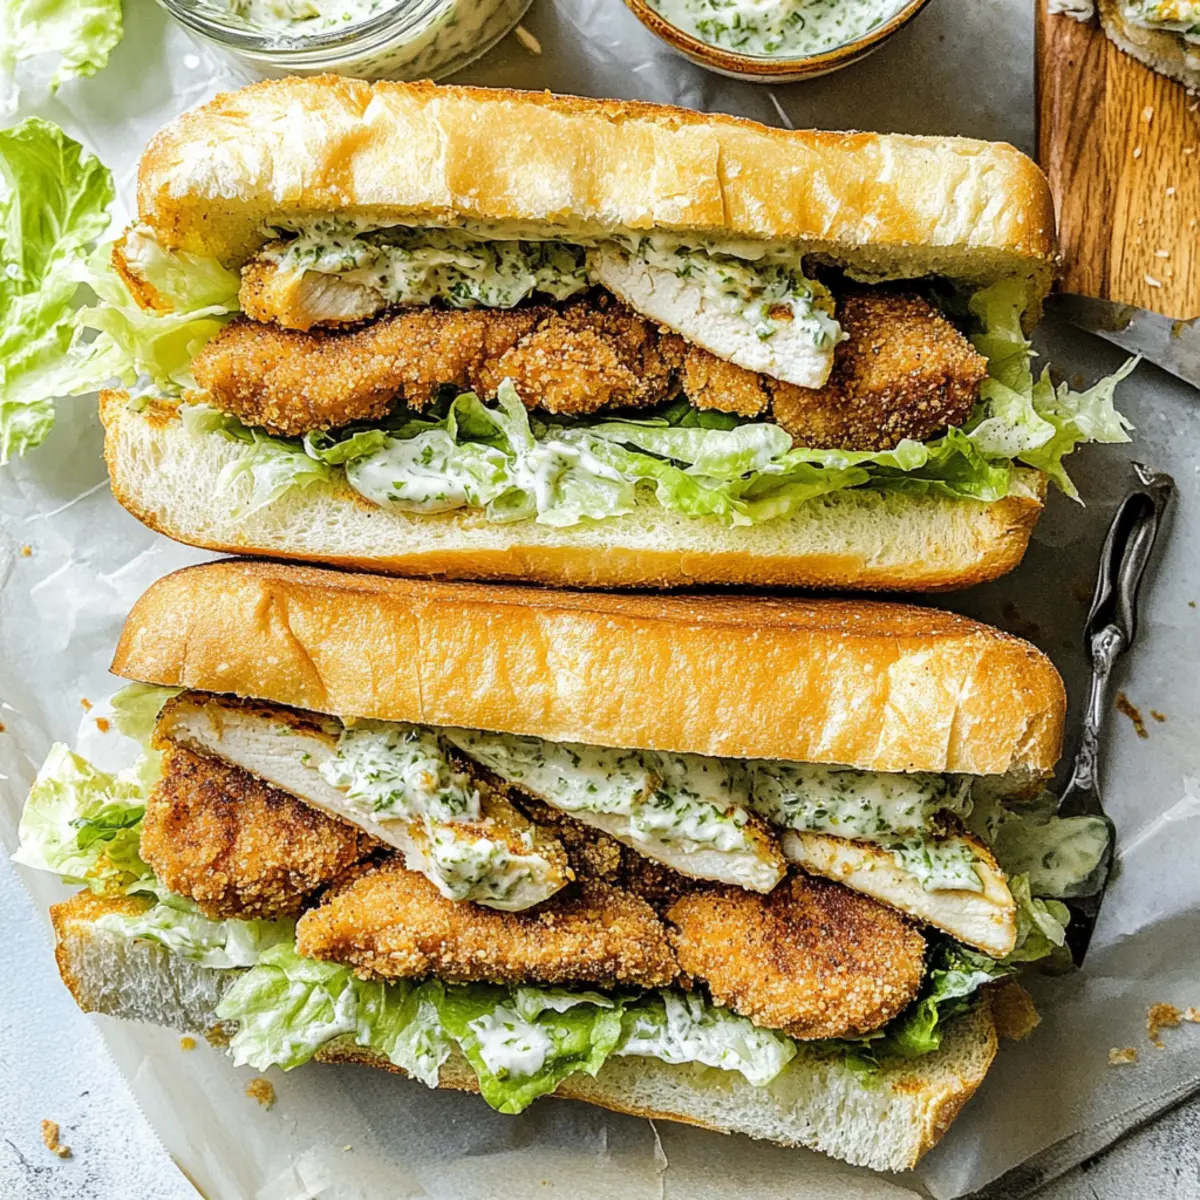
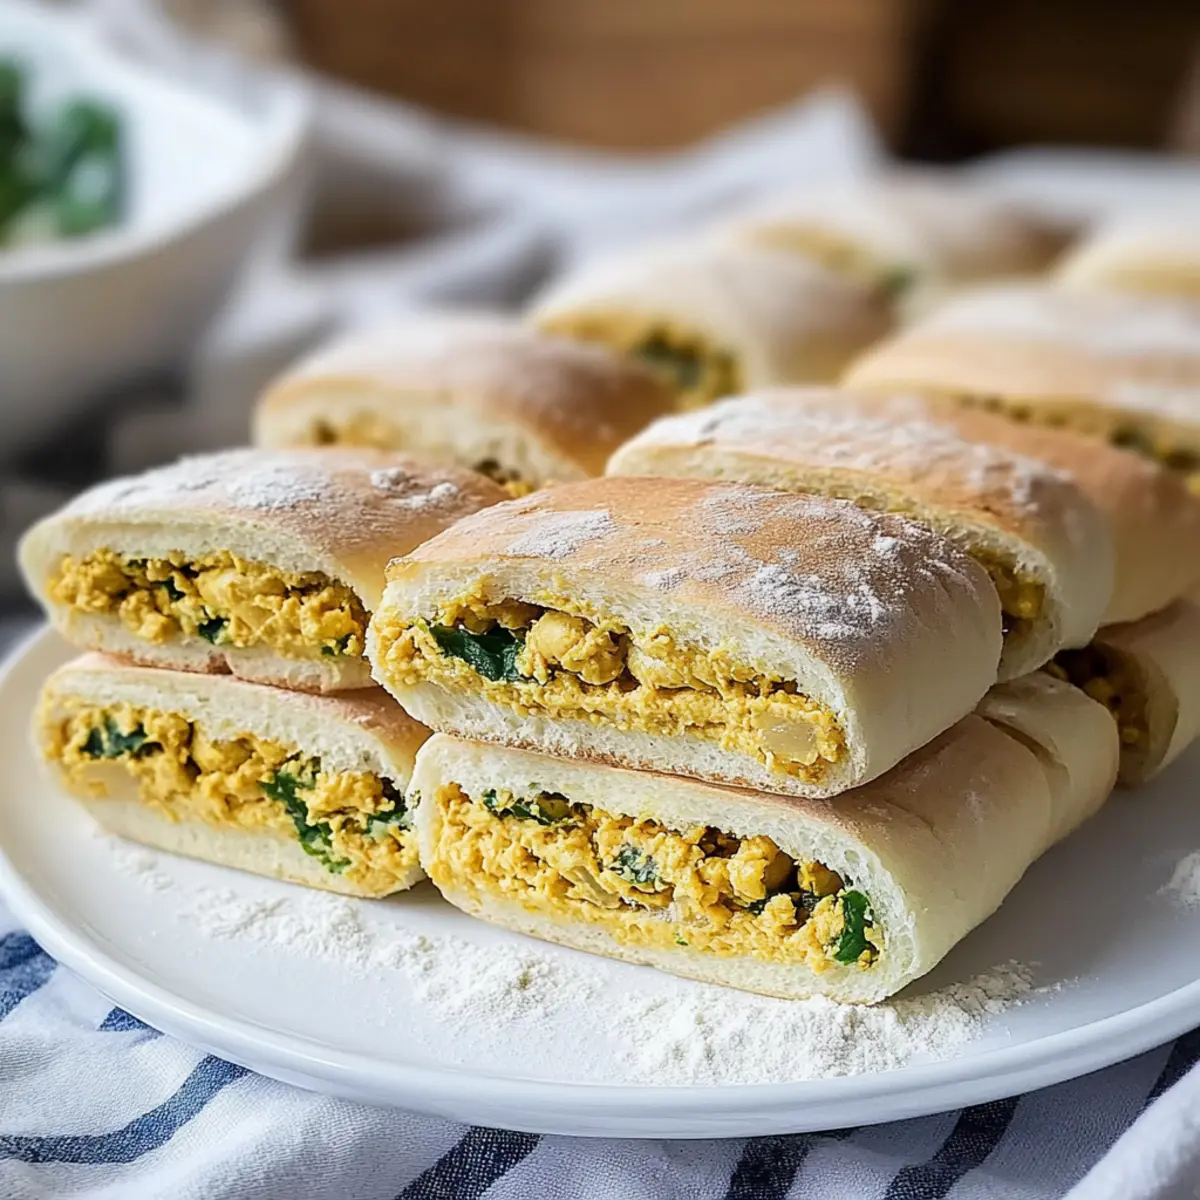
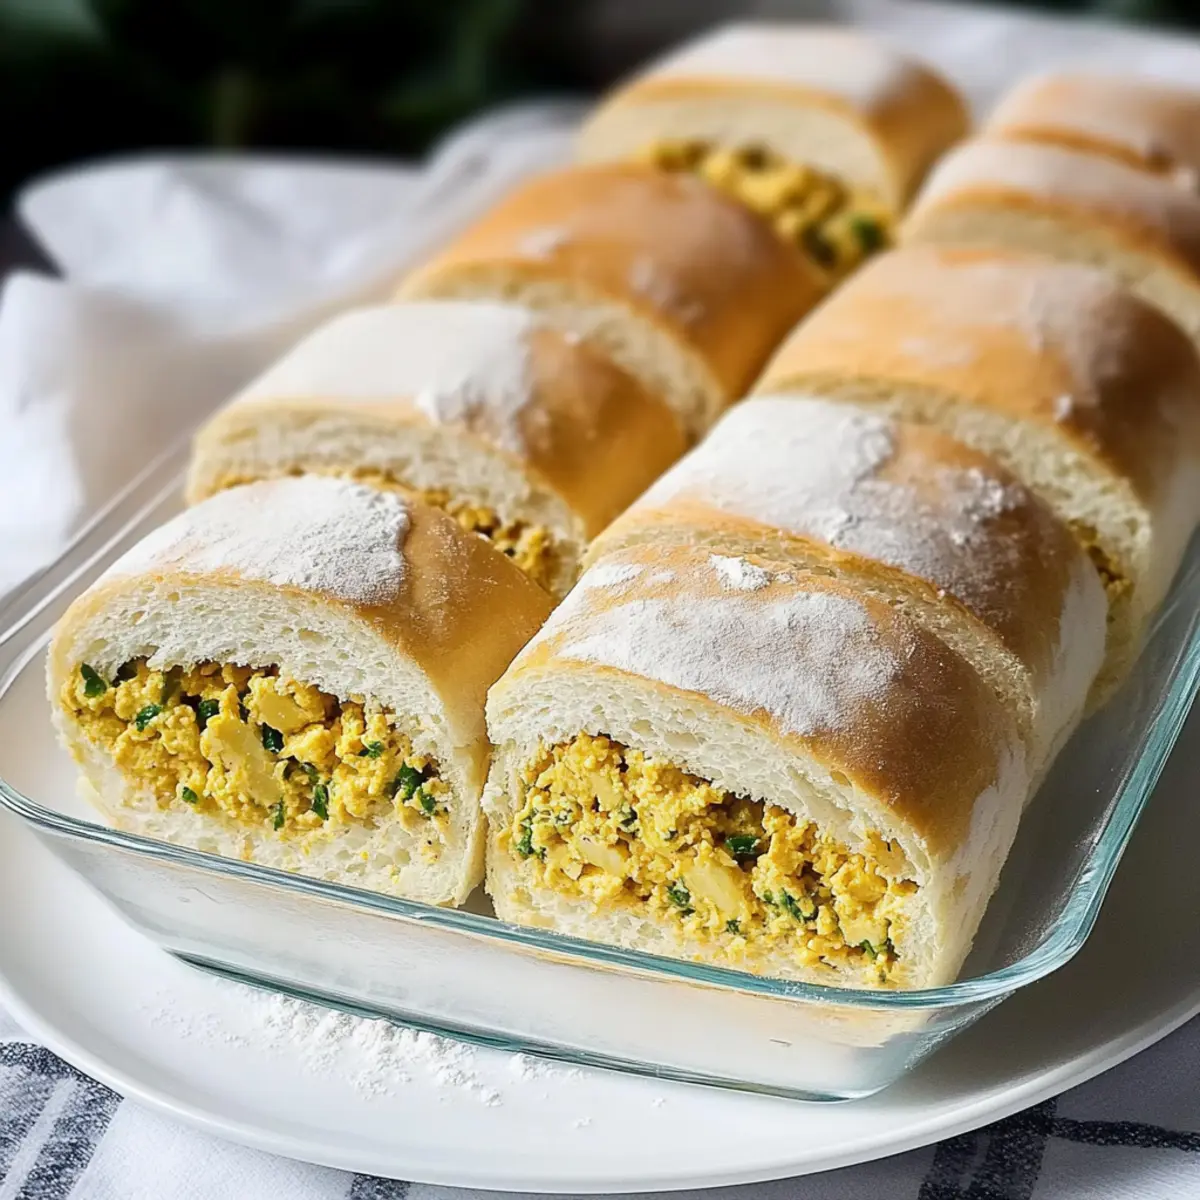
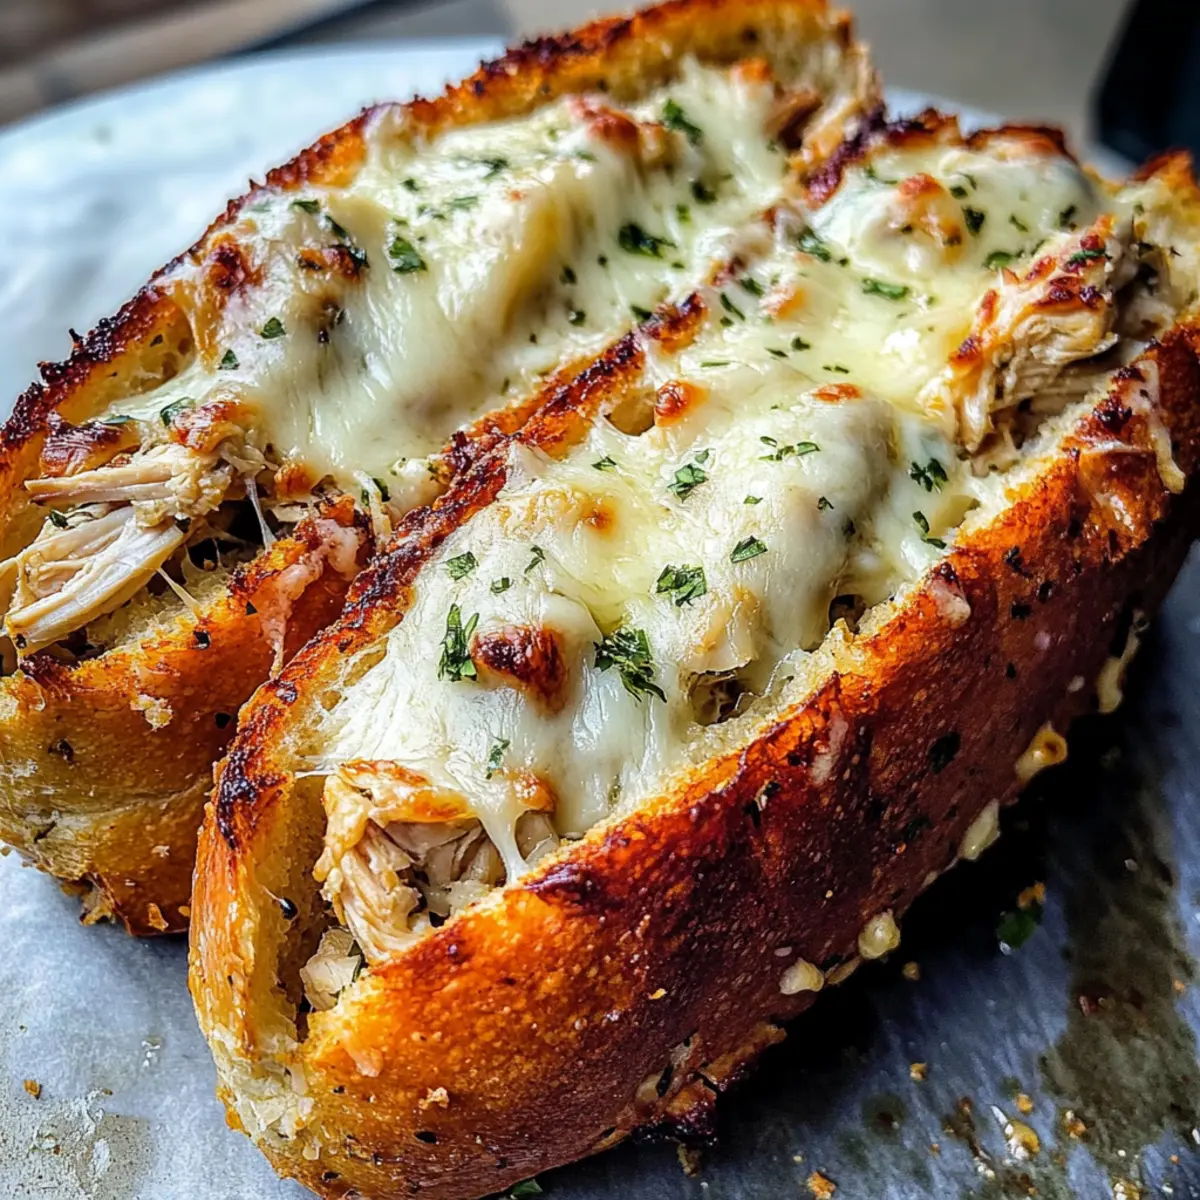
tastytrendingredients

  • Home
  • Recipes
    • Appetizers
    • Breakfast
    • Dessert
    • Dinner
    • Drinks
    • Salads
    • Snacks
    • Soups
  • About me
  • Contact me
menu icon
go to homepage
  • Home
  • Recipes
    • Appetizers
    • Breakfast
    • Dessert
    • Dinner
    • Drinks
    • Salads
    • Snacks
    • Soups
  • About me
  • Contact me
search icon
Homepage link
  • Home
  • Recipes
    • Appetizers
    • Breakfast
    • Dessert
    • Dinner
    • Drinks
    • Salads
    • Snacks
    • Soups
  • About me
  • Contact me
×

Deliciously Easy Mushroom Crostini for Your Next Gathering

January 15, 2026 by Grace Snow Leave a Comment

The rich aroma of buttery caramelization wafts through my kitchen, instantly transforming the ordinary into an extraordinary culinary delight. My Mushroom Crostini, featuring jammy caramelized onions and earthy mushrooms, is an appetizer that never fails to impress at gatherings. This recipe offers the dual benefit of being quick to prep and a perfect vegetarian option, making it a go-to choice for any occasion. Imagine the warmth of toasted baguette topped with a silky, sweet mixture that invites smiles and sparks conversations—who can resist? Just wait until you see how easily you can prepare this dish ahead of time, leaving you free to mingle and enjoy your guests. Ready to elevate your next gathering with this simple yet sophisticated twist on Italian flavors?

Why is Mushroom Crostini a Must-Try?

Simplicity: This recipe is incredibly easy to make, perfect for home cooks and chefs alike.

Irresistible Flavors: The sweet caramelized onions paired with earthy shiitake mushrooms create a truly gourmet flavor profile.

Crowd-Pleaser: Ideal as an appetizer for any gathering, this dish invites compliments and sparks delightful conversations.

Versatile: Feel free to customize with different mushroom varieties or add a creamy topping like goat cheese for extra richness. And if you're looking to explore more delicious options, check out our Grilled Mushrooms Savory for another tasty twist!

Make-Ahead Ability: Prep the mushroom and onion mixture in advance; just reheat and assemble right before serving. This time-saving tip keeps you stress-free and engaged with your guests!

Mushroom Crostini Ingredients

For the Mushroom Mixture
• Vermont Creamery Cultured Unsalted Butter – Provides a rich, creamy base; swap it for any high-quality unsalted butter for versatility.
• Medium Yellow Onion – Introduces sweetness and a flavorful foundation; thinly slice for even cooking. Shallots can stand in for a milder flavor.
• Shiitake Mushrooms – Offer an earthy flavor and chewy texture; ensure they are cleaned and sliced for cooking. Cremini mushrooms can be a great alternative.
• Brown Mushrooms – Enhance volume and earthiness; cleaned and sliced for consistency. Regular white mushrooms also work well as substitutes.
• Garlic (1 clove) – Adds depth to the flavor; press or mince to release its aromatic qualities. Be cautious not to burn it, as that introduces bitterness.
• Marsala Wine (¼ cup) – Infuses richness and sweetness; consider chicken stock or grape juice if you want a non-alcoholic option.
• Fresh Thyme Leaves (2 teaspoons) – Bring a delightful herbal note; fresh is preferred for potency, but dried thyme can work—just use less.
• Kosher Salt (½ teaspoon) – Essential for enhancing flavors; adjust this to taste, especially with other salty components.
• Freshly Ground Black Pepper (¼ teaspoon) – Provides a hint of spice; feel free to adjust according to your preference.

For the Baguette
• Baguette (1 loaf) – This forms the crispy base; slice into pieces for crostini. Choosing a day-old baguette can ease slicing and enhance texture.

Enjoy the journey of crafting these delightful Mushroom Crostini — a simple yet stunning appetizer that nibbles at the heart of Italian cuisine!

Step‑by‑Step Instructions for Mushroom Crostini

Step 1: Sauté the Aromatics
In a large skillet, melt 4 tablespoons of Vermont Creamery Cultured Unsalted Butter over medium heat. Once it's bubbly and fragrant, add thinly sliced medium yellow onions and both shiitake and brown mushrooms. Cook this mixture for about 5 minutes, stirring occasionally, until the mushrooms are tender and the onions are golden-brown, filling your kitchen with a heavenly aroma.

Step 2: Incorporate Wine and Thyme
Remove the skillet from heat and pour in ¼ cup of Marsala wine along with 2 teaspoons of fresh thyme leaves. Stir well to combine, and then return the skillet to low heat. Allow the mixture to simmer for another 5-7 minutes until the juices thicken and the mixture becomes jammy, creating a delicious topping for your Mushroom Crostini.

Step 3: Prepare the Baguette
While the mushroom mixture simmers, preheat your oven to 400°F (200°C). Slice the baguette into pieces about ½ inch thick and lay them flat on a baking sheet. Brush each slice generously with the remaining melted butter, then place in the oven to toast for 8-10 minutes until they are lightly browned and crispy, inviting perfect crunch.

Step 4: Assemble Your Crostini
Once the baguette slices are toasted, remove them from the oven and let them cool for a moment. Spoon a generous mound of the savory mushroom and onion mixture onto each toasted slice. For a final touch, garnish with additional fresh thyme leaves to enhance the visual appeal and flavor of your delightful Mushroom Crostini.

Step 5: Serve and Enjoy
Present your assembled Mushroom Crostini on a beautiful serving platter for an inviting touch. This easy yet sophisticated appetizer is perfect for gatherings, offering a delightful bite of rich buttery flavor combined with the sweet earthiness of the mushrooms.

Mushroom Crostini Variations & Substitutions

Feel free to get creative with this Mushroom Crostini recipe; the possibilities are endless and delicious!

  • Non-Dairy: Use plant-based butter to make this recipe dairy-free while still achieving that creamy richness. Your guests won’t even notice the difference!

  • Different Mushrooms: Experiment with ports, oyster, or even truffle mushrooms for a unique twist. Each variety brings a special flavor profile for new culinary adventures.

  • Spicy Kick: Add a pinch of red pepper flakes or some finely chopped jalapeños to the mushroom mixture for a delightful heat that will tantalize your taste buds!

  • Hearty Greens: Fold in sautéed spinach or kale for added nutrients and vibrant color. This not only boosts the flavor but also makes the dish more satisfying.

  • Gluten-Free: Substitute the baguette with gluten-free bread or crackers to ensure everyone at your gathering can enjoy a taste of this delightful appetizer.

  • Herb Swap: While fresh thyme is divine, try rosemary or basil for a different aromatic experience. Each herb will bring its own unique charm to the dish.

  • Cheesy Delight: Top your crostini with freshly grated Parmesan or mozzarella before toasting. This extra layer of cheesy goodness melts delectably into the warm mushroom mixture.

  • Gourmet Finish: Drizzle balsamic glaze over the finished crostini for a touch of sweetness and a sophisticated finish. It adds a beautiful presentation and piquant flavor that elevates the dish.

And if you want to explore more flavor-packed options, don’t forget to check out our Grilled Mushrooms Savory for another delightful culinary creation!

Expert Tips for Mushroom Crostini

  • Make-Ahead Magic: Prepare the mushroom and onion mixture in advance and refrigerate for up to 3-4 days. Just reheat before serving for an effortless appetizer.

  • Perfect Mushroom Cuts: Cut mushrooms thick enough to maintain their shape while cooking; they will shrink as they caramelize, ensuring a hearty bite on your crostini.

  • Butter Control: Use cultured unsalted butter for better seasoning control. This enhances the rich flavor of your Mushroom Crostini without overwhelming it with salt.

  • Wine Substitutions: If you'd like a non-alcoholic version, chicken stock or grape juice can replace Marsala wine, offering a slightly different yet delicious taste.

  • Customize Your Toppings: For added creaminess and flavor, consider topping the assembled crostini with goat cheese or crème fraîche, elevating the dish even further.

How to Store and Freeze Mushroom Crostini

Fridge: Keep the caramelized mushroom and onion mixture in an airtight container for up to 3-4 days. Reheat gently before serving to restore flavors.

Freezer: For longer storage, freeze the mushroom mixture in a sealed bag for up to 2 months. Thaw overnight in the fridge and reheat before topping your crostini.

Assembled Crostini: To maintain the crunchiness of the baguette, consume the final assembled Mushroom Crostini fresh. If leftovers remain, eat them within a day for the best texture.

Reheating: To reheat, place assembled crostini on a baking sheet and pop them in a warm oven (about 350°F) for 5-7 minutes, ensuring they crisp back up nicely.

What to Serve with Savory Mushroom Crostini?

The Mushroom Crostini is a delightful appetizer that pairs beautifully with various flavors and textures, creating a memorable meal experience.

  • Fresh Arugula Salad: A vibrant mix of peppery arugula, cherry tomatoes, and a tangy vinaigrette adds a refreshing contrast to the rich crostini. This salad brightens up your plate and palate.

  • Garlic Roasted Asparagus: Tender asparagus tossed in minced garlic and olive oil, then roasted to perfection, offers a delightful crunch alongside the silky mushroom topping. The earthy asparagus complements the flavors beautifully.

  • Creamy Polenta: A smooth bed of creamy, buttery polenta serves as a hearty base that balances the textures of the crostini, lending a comforting element to your meal. Plus, it’s easy to make ahead!

  • Wine Pairing: Lightly chilled Sauvignon Blanc is a perfect match, enhancing the dish's earthy flavors while adding a refreshing citrus note that awakens the senses. A sip of this wine perfectly complements every bite.

  • Savory Cheese Platter: Include a selection of soft cheeses like goat cheese or Brie along with some assorted olives. The rich, creamy cheeses enhance the flavors of the crostini, making them an irresistible pairing.

  • Mini Stuffed Peppers: Colorful mini bell peppers filled with cheese and herbs bring a burst of flavor and color to your table, creating an eye-catching spread that your guests will adore. Their sweetness perfectly contrasts the savory crostini.

Each of these pairings will elevate your Mushroom Crostini experience, making your gathering a celebration of flavors!

Make Ahead Options

These Mushroom Crostini are perfect for meal prep aficionados looking to save time and enjoy delicious homemade food! You can prepare the mushroom and onion mixture up to 3 days in advance. Simply sauté the onions and mushrooms as instructed, then let the mixture cool before transferring it to an airtight container for refrigeration. To maintain quality, avoid adding the toasted baguette slices until just before serving, as this will keep them crispy. When you’re ready to impress your guests, reheat the mixture gently on the stove and assemble your crostini with the toasted baguette slices just before serving. This allows you to enjoy restaurant-quality results with minimal effort!

Mushroom Crostini Recipe FAQs

What type of mushrooms should I use for the best flavor?
Absolutely! Shiitake mushrooms bring an earthy richness that truly elevates the Mushroom Crostini. However, if you can't find them, cremini mushrooms are a great alternative that will still provide wonderful flavor and texture.

How long can I store the mushroom and onion mixture in the fridge?
You can keep the caramelized mushroom and onion mixture in an airtight container for up to 3–4 days. Just make sure to reheat it gently before topping your crostini to bring back its delicious flavors.

Can I freeze the mushroom and onion mixture?
Yes, you can! To freeze, place the mixture in a zip-top bag, removing as much air as possible, and store it in the freezer for up to 2 months. When you’re ready to use it, just thaw it overnight in the fridge and reheat it on the stove before serving.

What’s the best way to reheat leftover assembled crostini?
For the crispiest outcome, place any leftover assembled Mushroom Crostini on a baking sheet and reheat them in a preheated oven at 350°F (175°C) for 5–7 minutes. This will help restore that delightful crunch while warming the mushroom topping.

Are there any dietary considerations I should keep in mind?
Definitely! If you’re serving this dish to guests, be sure to check for any mushroom allergies or dietary restrictions. For a gluten-free option, you can serve the mushroom mixture on gluten-free crackers instead of baguette slices, ensuring everyone can enjoy this savory treat!

Can I prepare the crostini toppings ahead of time?
Yes! Preparing the mushroom and onion mixture ahead of time is a fantastic idea. Just make it up to 3–4 days in advance, store it in the fridge, and reheat it before serving. This way, you can spend more time enjoying your gathering with friends!

Mushroom Crostini

Deliciously Easy Mushroom Crostini for Your Next Gathering

Mushroom Crostini is a quick and impressive vegetarian appetizer perfect for gatherings.
Print Recipe Pin Recipe
Prep Time 15 minutes mins
Cook Time 20 minutes mins
Total Time 35 minutes mins
Servings: 12 crostini
Course: Appetizers
Cuisine: Italian
Calories: 120
Ingredients Equipment Method Nutrition Notes

Ingredients
  

For the Mushroom Mixture
  • 4 tablespoons Vermont Creamery Cultured Unsalted Butter Provides a rich, creamy base.
  • 1 medium Yellow Onion Thinly sliced.
  • 8 ounces Shiitake Mushrooms Cleaned and sliced.
  • 8 ounces Brown Mushrooms Cleaned and sliced.
  • 1 clove Garlic Pressed or minced.
  • 0.25 cup Marsala Wine Can substitute with chicken stock.
  • 2 teaspoons Fresh Thyme Leaves Fresh preferred.
  • 0.5 teaspoon Kosher Salt Adjust to taste.
  • 0.25 teaspoon Freshly Ground Black Pepper Adjust to taste.
For the Baguette
  • 1 loaf Baguette Slice into pieces for crostini.

Equipment

  • Skillet
  • Baking Sheet
  • Oven

Method
 

Step-by-Step Instructions for Mushroom Crostini
  1. Sauté the Aromatics: Melt butter in a skillet over medium heat, add onions and mushrooms, cook until tender.
  2. Incorporate Wine and Thyme: Add Marsala wine and thyme, simmer until the mixture is jammy.
  3. Prepare the Baguette: Preheat oven to 400°F, slice baguette, brush with melted butter, and toast until crispy.
  4. Assemble Your Crostini: Spoon mushroom mixture onto toasted baguette slices, garnish with thyme.
  5. Serve and Enjoy: Present on a platter and enjoy your Mushroom Crostini.

Nutrition

Serving: 1crostiniCalories: 120kcalCarbohydrates: 15gProtein: 3gFat: 6gSaturated Fat: 3gPolyunsaturated Fat: 0.5gMonounsaturated Fat: 2gCholesterol: 15mgSodium: 200mgPotassium: 150mgFiber: 1gSugar: 1gVitamin A: 200IUVitamin C: 2mgCalcium: 30mgIron: 0.5mg

Notes

Make ahead by preparing the mushroom mixture in advance and refrigerating. Reheat before serving for best results.

Tried this recipe?

Let us know how it was!

Mini Phyllo Feta Bites for Effortless Entertaining

January 15, 2026 by Grace Snow Leave a Comment

The aroma of warm, flaky pastries wafting through the kitchen can transport anyone back to joyous family gatherings. That's just what you’ll experience with these Mini Phyllo Feta Bites. In less than 30 minutes, you’ll create these irresistible snacks that are sure to impress your friends and family. Not only are they a quick appetizer, but they also strike the perfect balance between buttery pastry and creamy feta—making them a crowd-pleaser for any occasion. Whether you’re gearing up for a casual game night or an elegant bridal shower, you’ll be delighted by their versatility and simplicity. And since they’re freezer-friendly, you can prepare them ahead of time, saving you precious moments for mingling with guests. Curious about how to whip up these delicious bites? Let’s dive into the recipe!

Why are Mini Phyllo Feta Bites a must-try?

Quick and Easy: These bites come together in under 30 minutes, making them a perfect solution for last-minute entertaining.

Versatile Flavors: Swap the feta with goat cheese or add spinach for a unique twist that caters to all taste preferences.

Crowd-Pleasing Appeal: Their flaky texture and creamy filling are bound to impress guests at any gathering, from casual get-togethers to elegant events.

Freezable Convenience: Prep them ahead of time and freeze unbaked; just pop them in the oven when you’re ready for effortless snacking.

Elevate Your Spread: Serve with a refreshing dip or alongside light cocktails to enhance your appetizer table, making them a fabulous addition to dishes like Skillet Pasta Feta.

With so much to love, these Mini Phyllo Feta Bites are sure to become a staple in your entertaining repertoire!

Mini Phyllo Feta Bites Ingredients

For the Filling
• Feta Cheese – the star of this dish, adding tanginess and creaminess.
• Cream Cheese – enriches the filling; can be omitted for a lighter option.
• Fresh Parsley – brightens up the flavor; swap it out for dill for a delightful twist.
• Garlic – infuses the bites with aromatic goodness; use garlic powder if fresh isn't on hand.

For the Pastry
• Phyllo Dough – essential for flaky layers; remember to keep it covered to prevent drying.
• Butter – provides richness and helps create that golden-brown crispy texture; olive oil is a great dairy-free swap.

Optional Enhancements
• Spinach – add it for a healthy spin on your Mini Phyllo Feta Bites.
• Sun-Dried Tomatoes – enhance the Mediterranean flair for a robust flavor.
• Olives – for a briny touch that complements the creamy filling beautifully.

Dive into your culinary adventure and enjoy these mouth-watering Mini Phyllo Feta Bites!

Step‑by‑Step Instructions for Mini Phyllo Feta Bites

Step 1: Preheat and Prepare the Pan
Preheat your oven to 375°F (190°C) while you prepare. Lightly grease a mini muffin tin with butter or baking spray to prevent sticking. This step ensures that your Mini Phyllo Feta Bites come out perfectly crispy and golden without any hassle during serving.

Step 2: Mix the Filling
In a mixing bowl, combine crumbled feta cheese, cream cheese, minced garlic, and chopped parsley. Use a fork to blend the ingredients together until smooth and creamy. This mixture should have a lovely balance of flavors, which will be the delicious filling for your phyllo bites.

Step 3: Prepare the Phyllo Dough
Layer three sheets of thawed phyllo dough, brushing each sheet generously with melted butter to create those delightful flaky layers. Cut the stacked dough into 3-inch squares, ensuring they’re easy to handle. Keep the extra dough covered with a damp towel to prevent drying out while you work.

Step 4: Shape the Bites
Press the phyllo squares into the prepared mini muffin tin, forming small cups that can hold the filling. Gently push the edges down to create a nice shape. Spoon about 1 teaspoon of the feta filling into each phyllo cup, ensuring not to overfill; you want them to cook evenly and remain crispy.

Step 5: Bake the Bites
Place the mini muffin tin in your preheated oven and bake for 15-18 minutes. Keep an eye on them as they bake; they should turn golden brown and crispy. The rich aroma of the Mini Phyllo Feta Bites wafting through your kitchen will make your mouth water in anticipation.

Step 6: Cool and Serve
Once baked to perfection, remove the bites from the oven and allow them to cool slightly for about 5 minutes. They can be enjoyed warm or at room temperature, making them perfect for gatherings. Serve alongside your favorite dips and watch them disappear!

Storage Tips for Mini Phyllo Feta Bites

Room Temperature: Enjoy your Mini Phyllo Feta Bites fresh for up to 2 hours at room temperature if served immediately after baking.

Fridge: Store leftover bites in an airtight container in the refrigerator for up to 3 days. Allow them to come to room temperature before serving.

Freezer: For longer storage, freeze unbaked Mini Phyllo Feta Bites by placing them in a single layer on a baking sheet. Once frozen, transfer them to a freezer-safe bag or container. They can be baked straight from frozen without thawing.

Reheating: To reheat, use the oven at 350°F (175°C) until crispy, about 10-15 minutes. This will ensure they retain their flaky texture without becoming soggy.

Mini Phyllo Feta Bites Variations

Feel free to get creative and make these Mini Phyllo Feta Bites your own with these delightful twists!

  • Spinach Addition: Fold in fresh spinach for a delicious spanakopita-inspired filling that adds a nutritious twist.

  • Mediterranean Medley: Mix in sun-dried tomatoes and olives for a pop of Mediterranean flavor that will transport your taste buds.

  • Dairy-Free Delight: Substitute traditional feta and cream cheese with almond-based cheese for a creamy, vegan option that everyone can enjoy.

  • Herb Swap: Replace fresh parsley with dill or even fresh basil for a new flavor dimension that enhances the taste.

  • Nutty Crunch: Top your bites with crushed nuts or drizzle with honey for an irresistible sweet-savory contrast that elevates each bite.

  • Spice It Up: Add chili flakes or a dash of smoked paprika to the filling for a kick of heat that adds excitement to the flavor profile.

  • Sweet & Savory: Incorporate a spoonful of caramelized onions for a rich flavor, perfectly complementing the creamy feta.

  • Layered Flavors: Mix in roasted red peppers or artichokes for an extra layer of flavor that brings a touch of sophistication.

Enhancing your Mini Phyllo Feta Bites is easy and makes every gathering that much more special. And if you're on the hunt for more delicious appetizers, don't miss out on these Mini Tropical Pavlovas or consider pairing them with a lovingly crafted Skillet Pasta Feta dish. Enjoy the flavor journey!

What to Serve with Mini Phyllo Feta Bites

These delectable bites deserve a delightful accompaniment to create a well-rounded meal that will tantalize your taste buds.

  • Crispy Garden Salad: A fresh salad tossed with mixed greens, cherry tomatoes, and a light vinaigrette brings a burst of color and crunch, balancing the richness of the bites beautifully.

  • Tzatziki Sauce: Serve with this creamy cucumber dip for a refreshing contrast. The coolness perfectly complements the flaky warmth, enhancing each bite with Mediterranean flair.

  • Roasted Vegetables: A medley of seasonal vegetables roasted to perfection adds depth and earthiness, making it a comforting pairing that brightens the overall dish.

  • Hummus Platter: Pair with a variety of hummus flavors, such as roasted red pepper or classic garlic. This combination provides a warm, inviting experience and encourages sharing.

  • Sparkling White Wine: A chilled glass of sparkling wine or prosecco complements the salty feta well, adding a festive touch that elevates any gathering effortlessly.

  • Lemon Mint Tea: For a non-alcoholic option, serve a refreshing tea infused with lemon and mint. It cleanses the palate and adds a fragrant note that enhances the overall flavor experience.

  • Mediterranean Cheese Board: Create a cheese board featuring olives, nuts, and assorted cheeses, which not only pairs perfectly with the bites but also adds an elegant touch to your table setting.

  • Fruit Tart: A light, sweet dessert like a fruit tart offers a colorful and cheerful end to the meal, balancing savory flavors with a refreshing sweetness for an unforgettable finish.

Make Ahead Options

These Mini Phyllo Feta Bites are a dream for meal prep enthusiasts! You can prepare the filling up to 3 days in advance by mixing the crumbled feta, cream cheese, garlic, and parsley, then refrigerating it in an airtight container. Additionally, you can assemble the bites and keep them unbaked in the fridge for up to 24 hours. To maintain their quality, cover the assembled bites with plastic wrap to prevent the phyllo from drying out. When you're ready to entertain, simply bake them straight from the fridge for 15-18 minutes until golden brown and crispy! This way, you’ll have delicious bites ready with minimal last-minute effort.

Expert Tips for Mini Phyllo Feta Bites

  • Keep Phyllo Moist: Cover unused phyllo sheets with a damp towel to prevent drying out while you work on your Mini Phyllo Feta Bites.

  • Chill the Filling: Refrigerate the feta filling for about 15 minutes before filling the cups, making it easier to scoop and preventing overflow.

  • Crispy Reheating: For leftover bites, reheat in the oven or air fryer instead of the microwave to maintain their crispy texture.

  • Don’t Overfill: Use about 1 teaspoon of filling for each cup to ensure even cooking and prevent soggy bottoms in your Mini Phyllo Feta Bites.

  • Experiment with Herbs: Feel free to swap parsley for dill or add spices like chili flakes to elevate the flavor profile.

Mini Phyllo Feta Bites Recipe FAQs

How do I choose the best phyllo dough?
Look for phyllo dough that is thawed and has no tears or rips. If you notice any dry spots or cracks, it may be past its prime. A good quality brand will ensure that your Mini Phyllo Feta Bites turn out flaky and delicious. Always keep the sheets covered with a damp towel while working to prevent them from drying out.

How should I store leftover Mini Phyllo Feta Bites?
Store your leftover Mini Phyllo Feta Bites in an airtight container in the refrigerator for up to 3 days. Allow them to come to room temperature before serving. For optimal freshness, I recommend eating them within the first couple of days.

Can I freeze Mini Phyllo Feta Bites? How?
Absolutely! You can freeze unbaked Mini Phyllo Feta Bites. Place the filled and shaped cups in a single layer on a baking sheet and freeze until solid. Once frozen, transfer them to a freezer-safe bag or container. They are best used within 3 months. When ready to bake, just pop them in the oven directly from the freezer—no thawing needed!

What if my phyllo dough tears?
Don’t worry! If your phyllo dough tears, you can simply layer another sheet over it, brushing with melted butter for extra flakiness. They’ll still turn out delicious, and no one will notice those little imperfections once baked!

Are Mini Phyllo Feta Bites suitable for vegetarians?
Yes, these bites are vegetarian-friendly! With their creamy feta filling and buttery pastry, they make a great choice for meat-free occasions. If you’re catering to specific dietary restrictions or allergies, consider substituting ingredients as needed—for instance, using goat cheese instead of feta for a different flavor profile.

How can I enhance the flavor of the filling?
For added depth, try mixing in chopped sun-dried tomatoes, olives, or even wilted spinach into your feta filling. You can also incorporate spices like chili flakes or lemon zest for a refreshing twist. The more flavors, the merrier!

Mini Phyllo Feta Bites

Mini Phyllo Feta Bites for Effortless Entertaining

Mini Phyllo Feta Bites are quick, crowd-pleasing appetizers that combine buttery pastry with creamy feta, perfect for any gathering.
Print Recipe Pin Recipe
Prep Time 15 minutes mins
Cook Time 18 minutes mins
Cooling Time 5 minutes mins
Total Time 38 minutes mins
Servings: 12 bites
Course: Appetizers
Cuisine: Mediterranean
Calories: 100
Ingredients Equipment Method Nutrition Notes

Ingredients
  

For the Filling
  • 1 cup Feta Cheese crumbled
  • 4 oz Cream Cheese softened
  • 2 tbsp Fresh Parsley chopped
  • 2 cloves Garlic minced
For the Pastry
  • 1 package Phyllo Dough thawed
  • 1/2 cup Butter melted
Optional Enhancements
  • 1 cup Spinach chopped
  • 1/2 cup Sun-Dried Tomatoes chopped
  • 1/2 cup Olives sliced

Equipment

  • mini muffin tin
  • Mixing Bowl
  • Baking Sheet

Method
 

Step-by-Step Instructions
  1. Preheat your oven to 375°F (190°C) and lightly grease a mini muffin tin.
  2. In a mixing bowl, combine crumbled feta cheese, cream cheese, minced garlic, and chopped parsley. Mix until smooth.
  3. Layer three sheets of phyllo dough, brushing each with melted butter. Cut into 3-inch squares.
  4. Press the phyllo squares into the mini muffin tin and spoon in 1 teaspoon of the feta filling.
  5. Bake for 15-18 minutes until golden brown and crispy.
  6. Allow to cool for 5 minutes before serving. Enjoy warm or at room temperature.

Nutrition

Serving: 1biteCalories: 100kcalCarbohydrates: 6gProtein: 3gFat: 8gSaturated Fat: 5gPolyunsaturated Fat: 1gMonounsaturated Fat: 2gCholesterol: 20mgSodium: 200mgPotassium: 50mgSugar: 1gVitamin A: 200IUVitamin C: 2mgCalcium: 50mgIron: 1mg

Notes

These bites are freezer-friendly and can be prepared ahead of time. Just bake from frozen when ready to serve.

Tried this recipe?

Let us know how it was!

Savory Onion Boil Recipe: A Flavorful Vegan Delight

January 15, 2026 by Grace Snow Leave a Comment

On a recent afternoon, as I scrolled through my TikTok feed, my eyes landed on a captivating quick video of a lone onion transforming into a culinary masterpiece. The crowd was raving about the Onion Boil, and I couldn’t wait to try it myself! This easy vegan dish brilliantly converts a simple ingredient into a flavor-packed delight, seasoned with just the right blend of spices and olive oil. Not only does this Onion Boil deliver a punch of taste, but it's also gluten-free, nut-free, and ready in a snap, making it ideal for weeknight dinners or impressing last-minute guests. The tender layers nearly melt in your mouth and can beautifully accompany anything from rice to roasted veggies. Are you curious about how to make this viral sensation at home? Let’s dive into the recipe!

Why Try This Onion Boil?

Simplicity at Its Best: With just a handful of ingredients, this recipe is perfect for anyone, whether you're an experienced chef or just starting out in the kitchen.

Mouthwatering Flavor: The blend of cajun seasoning and rich butter creates a taste explosion that elevates the humble onion to gourmet status.

Vegan & Healthy: Enjoy guilt-free indulgence with a dish that is not only vegan but also low in calories and packed with nutrients.

Versatile Pairing: This flavorful onion can be served over rice, alongside roasted veggies, or even as a stand-alone dish that steals the show, much like this Bratwurst Peppers Onions.

Crowd-Pleasing: Perfect for gatherings or cozy family dinners, the Onion Boil is sure to impress your guests, making it an instant favorite at your table!

Onion Boil Ingredients

• Get ready to savor this simple yet delicious dish!

For the Onion

  • Onion – The star of the show; use yellow or sweet onions for the best flavor.

For the Seasoning

  • Butter – Adds richness and aids in caramelization; opt for vegan butter to keep it plant-based.
  • Olive Oil – Keeps the onion moist while enhancing its natural flavor; melted coconut oil can be a great alternative.
  • Salt – Essential to amplify all the flavors; adjust based on your palate preferences.
  • Cajun Seasoning – Provides a zesty kick; feel free to swap with Italian herbs or garlic powder for a gentler taste.

Now that you have the ingredients ready, it's time to create your own viral Onion Boil masterpiece!

Step‑by‑Step Instructions for Onion Boil

Step 1: Preheat the Oven
Begin by preheating your oven to 375°F (190°C). This step ensures the perfect cooking environment for your onion boil. As the oven warms up, you can gather your ingredients and equipment, including a baking dish or a cast iron skillet. This preparation will set the stage for a deliciously tender onion that’s ready in about an hour.

Step 2: Prepare the Onion
Select a beautiful yellow or sweet onion and slice off the top center to create a shallow well. This well will allow the savory goodness to seep into the onion as it cooks, enhancing the flavor of your onion boil. You can keep the outer skin intact to maintain its structure throughout the baking process.

Step 3: Season the Onion
Place the prepared onion on a piece of aluminum foil. Add a generous dollop of butter into the well you created, followed by a splash of olive oil mixed with cajun seasoning. Sprinkle salt over the onion to taste. Look for the oil to glisten as it seeps into the onion, ensuring every bite will be packed with flavor!

Step 4: Wrap and Seal
Carefully wrap the aluminum foil around the seasoned onion, making sure it's tightly sealed to lock in moisture and flavor. Place the wrapped onion in your baking dish or cast iron skillet. This creates a perfect steam pocket, ensuring your onion will bake evenly and emerge fork-tender.

Step 5: Roast
Transfer the dish to the center rack of your preheated oven and bake for 1 hour. Keep an eye on it; the onion will become fork-tender and slightly jiggly when it's ready. You can also smell the intoxicating aroma of the cajun seasoning as it wafts through your kitchen, signaling that the onion boil is nearing completion.

Step 6: Caramelize (Optional)
For an extra layer of flavor, switch your oven to broil after the hour is up. Carefully unwrap the onion and place it under the broiler for an additional 5-10 minutes. Watch it closely until the outer layers develop a golden brown color. This step adds a delightful caramelization to the onion, enhancing its sweet richness.

Step 7: Serve
Once caramelized, remove the onion from the oven and unwrap it carefully, letting any juices flow over the onion. Serve it warm, drizzling the savory juices directly over the top. The layers of your onion boil are now ready to be enjoyed, perfect over a bed of rice or alongside roasted vegetables for a satisfying meal.

Expert Tips for Onion Boil

  • Choose the Right Onion: Opt for yellow or sweet onions to achieve the best flavor in your onion boil, enhancing its sweetness and tenderness.

  • Don’t Skip the Foil: Wrapping the onion tightly in aluminum foil helps seal in moisture and flavor, making it essential for a delicious outcome.

  • Check for Tenderness: Use a fork to test if the onion is fully cooked. It should be easy to pull apart; if it’s still firm, return it to the oven.

  • Careful with Broiling: If caramelizing, keep a close watch under the broiler to prevent burning. The onion should be golden brown without charring.

  • Flavor Variations: Feel free to experiment with different seasonings or herbs to create unique tasting profiles for your onion boil according to your preference.

How to Store and Freeze Onion Boil

Fridge: Store leftover onion boil in an airtight container for up to 3 days. Be sure to reheat it gently in the oven or microwave to maintain its flavor and texture.

Freezer: For longer storage, wrap the cooled onion tightly in plastic wrap and then in aluminum foil, freezing for up to 2 months. Thaw in the fridge before reheating.

Reheating: To reheat, place the thawed onion in a baking dish and cover it with foil. Bake at 350°F (175°C) for about 20-30 minutes until heated through.

Serving Tip: The onion boil can be enjoyed warm over rice or with roasted veggies any time you crave its savory goodness!

What to Serve with Onion Boil?

Imagine a cozy dinner table adorned with flavors that sing in harmony, perfectly complementing your savory centerpiece.

  • Creamy Mashed Potatoes: Their velvety texture acts as a comforting base, harmonizing beautifully with the tender layers of the onion.

  • Crispy Chickpeas: Add a delightful crunch alongside your onion boil. Their nutty flavor and protein will keep everyone satisfied and asking for more.

  • Garlic Roasted Vegetables: Perfectly caramelized veggies provide a sweet contrast. Think roasted carrots, zucchini, or bell peppers that elevate your meal to new heights.

  • Fresh Garden Salad: A crisp, refreshing salad dressed lightly will balance the richness of the onion. Add seasonal greens, cherry tomatoes, and a tangy vinaigrette to brighten the plate.

  • Quinoa Pilaf: This nutty, fluffy side is a protein booster that adds depth and pairs wonderfully with the flavors of your onion. Add some herbs for an aromatic touch!

  • Vegan Mushroom Gravy: Elevate your onion boil by adding a rich, savory gravy drizzled on top. Its earthy mushroom flavors will make each bite even more mouthwatering.

  • Light White Wine: A chilled Sauvignon Blanc offers a crisp finish, enhancing the savory notes of your onion while refreshing your palate.

  • Chocolate Avocado Mousse: For dessert, this rich yet healthy treat rounds out your meal. Its creaminess and subtle sweetness are the perfect ending after your savory feast.

Make Ahead Options

These delicious Onion Boils are perfect for meal prep enthusiasts! You can prepare the onion by scooping out the top and seasoning it up to 24 hours in advance. Simply wrap the prepped onion tightly in aluminum foil and store it in the refrigerator to maintain its moisture and flavor. When it's time to cook, just pop it in a preheated oven at 375°F (190°C) for about 1 hour. If you're looking to save even more time, you can also roast the onion ahead of time and refrigerate it for up to 3 days; simply reheat it before serving. This way, you ensure a flavor-packed side dish with minimal effort on busy weeknights!

Onion Boil Variations & Substitutions

Feel free to get creative with your onion boil and adapt it to suit your tastes or dietary needs!

  • Dairy-Free: Use vegan butter instead of regular butter to maintain creaminess without animal products. This swap ensures everyone can enjoy this dish.

  • Oil Alternatives: Substitute olive oil with melted coconut oil for a tropical twist or avocado oil for a rich flavor. Each oil brings a unique texture that complements the onion beautifully.

  • Spice It Up: Instead of cajun seasoning, try taco seasoning or smoked paprika for a different kind of heat. Experimenting with these flavors will give your onion a new personality!

  • Stuffed Onions: After roasting, use the tender onion layers to create stuffed onions filled with quinoa, black beans, and spices for a delightful combination of textures.

  • Herb-Infused: Toss in fresh herbs, like thyme or rosemary, along with your seasoning for an aromatic boost. The fragrant herbs will add layers of flavor you won’t want to miss.

  • Sweet Twist: Drizzle some balsamic glaze or honey (if not vegan) over your onion before roasting for a sweet and tangy contrast to the savory flavors. It’s a surprisingly delicious addition!

  • Serving Options: For a heartier meal, place slices of your onion boil atop a bed of rice, or pair it with crispy chickpeas and roasted veggies, similar to a comforting plate of Bratwurst Peppers Onions for a satisfying dinner.

  • Add Heat: Include a dash of cayenne pepper or red pepper flakes to kick things up a notch. Adjust according to your heat tolerance and taste preferences.

Let these variations inspire you to customize your onion boil and make it uniquely yours!

Onion Boil Recipe FAQs

What type of onion should I use for the Onion Boil?
Absolutely! For the best results, I recommend using yellow or sweet onions. These varieties have a natural sweetness that develops beautifully when roasted. Avoid using red onions, as they can be too pungent for this dish.

How should I store leftovers of Onion Boil?
Store your leftover onion boil in an airtight container in the refrigerator for up to 3 days. When you're ready to enjoy it again, gently reheat it in the oven at 350°F (175°C) or in the microwave, ensuring it remains moist and flavorful.

Can I freeze the cooked Onion Boil?
Yes! To freeze, allow the onion to cool completely, then wrap it tightly in plastic wrap followed by aluminum foil. This double-wrapping helps prevent freezer burn and preserves flavor. The onion can be frozen for up to 2 months. Just thaw it in the fridge before reheating!

What if my onion isn't tender after roasting?
No worries! If your onion isn't fork-tender after the initial roast, simply cover it back up and return it to the oven for an additional 10-15 minutes. Test again for doneness; it should easily separate into its layers when fully cooked.

Are there any allergy considerations for the Onion Boil?
Great question! This onion boil recipe is vegan, gluten-free, and nut-free, making it suitable for many dietary needs. However, if you have a specific allergy to ingredients like olive oil or butter (including vegan options), consider substituting with avocado oil or ghee. Always check your seasonings to ensure they're free from allergens too!

Onion Boil

Savory Onion Boil Recipe: A Flavorful Vegan Delight

Discover the savory onion boil, a flavor-packed vegan dish that elevates simple ingredients into a culinary delight.
Print Recipe Pin Recipe
Prep Time 15 minutes mins
Cook Time 1 hour hr
Caramelizing Time 10 minutes mins
Total Time 1 hour hr 25 minutes mins
Servings: 4 servings
Course: Snacks
Cuisine: Vegan
Calories: 150
Ingredients Equipment Method Nutrition Notes

Ingredients
  

For the Onion
  • 1 medium Yellow or Sweet Onion The star of the show; use yellow or sweet onions for the best flavor.
For the Seasoning
  • 2 tbsp Vegan Butter Adds richness and aids in caramelization.
  • 2 tbsp Olive Oil Keeps the onion moist; melted coconut oil can be an alternative.
  • 1 tsp Salt Essential to amplify all the flavors; adjust based on your palate preferences.
  • 1 tbsp Cajun Seasoning Provides a zesty kick.

Equipment

  • Oven
  • Baking Dish
  • Aluminum Foil
  • cast iron skillet

Method
 

Step-by-Step Instructions for Onion Boil
  1. Preheat your oven to 375°F (190°C).
  2. Slice off the top center of the onion to create a shallow well.
  3. Add a dollop of vegan butter into the well, followed by olive oil and cajun seasoning. Sprinkle salt over the onion.
  4. Wrap the seasoned onion tightly in aluminum foil.
  5. Bake in the oven for 1 hour until fork-tender.
  6. For extra flavor, broil the onion for 5-10 minutes until golden brown.
  7. Serve warm, drizzling juices over the onion, perfect over rice or with roasted vegetables.

Nutrition

Serving: 1servingCalories: 150kcalCarbohydrates: 15gProtein: 1gFat: 10gSaturated Fat: 3gPolyunsaturated Fat: 1gMonounsaturated Fat: 6gSodium: 320mgPotassium: 300mgFiber: 2gSugar: 3gVitamin C: 7mgCalcium: 1mgIron: 4mg

Notes

This recipe is easy, healthy, and packed with flavor, making it a great option for weeknight dinners or gatherings.

Tried this recipe?

Let us know how it was!

Savory Sweet Potato Fondant with Smoked Almond Cream Delight

January 15, 2026 by Grace Snow Leave a Comment

As the sun begins to set, I often find myself daydreaming about cozy meals that spark warmth and joy—like a classic Sweet Potato Fondant with Smoked Almond Cream & Rosemary Oil. This dish takes simple ingredients and elevates them into a mouthwatering masterpiece that’s perfect for any dining occasion. Imagine golden-seared sweet potatoes, each piece tender and caramelized, paired with a velvety smoked almond cream that brings a nutty richness and a drizzle of fragrant rosemary oil that adds sophistication to every bite. Not only is this an impressive vegetarian option for your next gathering, but it’s also quick to prepare, allowing you to focus on what truly matters—sharing delightful moments with those you love. Are you ready to transform your dinner routine into something extraordinary?

Why is This Fondant Recipe a Must-Try?

Elevated Comfort Food: This Sweet Potato Fondant offers a gourmet twist on a classic favorite, making it an ideal choice for both casual nights and special celebrations.
Rich, Nutty Creaminess: The smoked almond cream adds an irresistible depth of flavor, which perfectly balances the sweetness of the caramelized potatoes.
Easy to Make: With straightforward steps, this recipe guarantees impressive results, even for novice cooks looking to master modern American cuisine.
Versatile Serving Options: Whether as a stunning main course or an elegant side dish, it pairs beautifully with roasted chicken or a fresh green salad, ensuring festivity at every table.
Crowd-Pleasing Appeal: With vibrant colors and bold flavors, it’s a dish that will impress your family and friends, making you the star of your dinner gatherings. For another delightful potato dish, check out my Smoky Sweet Potatoes!

Sweet Potato Fondant Ingredients

For the Sweet Potatoes
• Sweet Potatoes – Choose firm ones for the best texture; cut into thick squares for even cooking.
• Olive Oil – Great for enhancing flavors; vegetable oil works as a substitute if needed.
• Butter – Adds richness; use vegan margarine for a vegan version.

For the Flavoring
• Garlic – Provides a delightful aromatic flavor; adjust the amount to suit your taste.
• Fresh Thyme – Infuses earthy notes; dried thyme can be used as a substitute in a pinch.
• Rosemary – Infuses the oil with a fragrant flavor; feel free to experiment with other herbs for variety.

For the Smoked Almond Cream
• Smoked Almonds – Creates a savory cream that balances the sweet potatoes; regular almonds with smoked paprika can substitute.
• Lemon Juice – Brightens the almond cream; fresh juice ensures the best flavor.
• Vegetable or Chicken Stock – Adds moisture and flavor; opt for low-sodium for better control.

For Finishing Touches
• Micro Herbs – Adds a pop of color and freshness to the presentation; choose your favorite variety.
• Crushed Almonds – Provides a nice textural contrast; feel free to toast them for added flavor.

Dive into preparing this delightful Sweet Potato Fondant with Smoked Almond Cream & Rosemary Oil, and elevate your dining experience!

Step‑by‑Step Instructions for Sweet Potato Fondant with Smoked Almond Cream & Rosemary Oil

Step 1: Prepare Rosemary Oil
In a small saucepan, gently warm 1/4 cup of olive oil over low heat. Add a sprig of fresh rosemary and let it infuse for 5–7 minutes, stirring occasionally until fragrant. Remove the saucepan from the heat and allow the oil to steep while you prepare the sweet potatoes. This rosemary oil will elevate the flavors of your Sweet Potato Fondant beautifully.

Step 2: Sear Sweet Potatoes
Cut your sweet potatoes into thick squares, about 1-inch in size, ensuring they will cook evenly. In a large, heavy skillet, melt 2 tablespoons of butter along with 2 tablespoons of olive oil over medium heat. Once the butter is foamy, add the sweet potatoes cut side down and sear them without moving for about 5 minutes, or until they’re deeply golden and caramelized.

Step 3: Braise the Sweet Potatoes
Carefully flip the sweet potatoes to brown the other side. Add 2 cloves of minced garlic and a few sprigs of fresh thyme to the skillet. Season with salt and pepper, then pour enough vegetable or chicken stock to come halfway up the sides of the sweet potatoes. Cover the skillet, reduce the heat to low, and let them cook for 20–25 minutes, basting occasionally, until tender yet intact.

Step 4: Make Smoked Almond Cream
While the sweet potatoes are braising, prepare the smoked almond cream. In a blender, combine 1 cup of smoked almonds, 1/2 cup of water (or stock), the juice of half a lemon, and 2 tablespoons of olive oil. Blend until smooth, adjusting with more water or stock if necessary to reach a creamy consistency, similar to thick yogurt. The cream will complement the sweetness of your Sweet Potato Fondant.

Step 5: Serve and Garnish
To serve, spread a generous layer of the smoked almond cream on a plate as a base. Carefully place the seared sweet potato fondants on top, allowing them to showcase their lovely golden crust. Drizzle with your infused rosemary oil, and for a delightful finish, sprinkle some crushed smoked almonds and a few micro herbs over the top. Enjoy this elegant dish warm!

Expert Tips for Sweet Potato Fondant

  • Even Cuts: Ensure your sweet potatoes are cut into uniform squares; this promotes even cooking and prevents some from becoming mushy while others remain hard.

  • Skillet Choice: Use a heavy skillet to maintain even heat distribution when searing the sweet potatoes for that perfect golden crust.

  • Consistent Cream: Blend the smoked almond cream to a smooth, yogurt-like consistency. Adding liquid incrementally helps achieve the right texture—too much can make it runny.

  • Basting Technique: Baste the sweet potatoes occasionally while braising; this ensures flavor penetration and helps keep them moist without falling apart.

  • Storage Savvy: If you have leftovers, store them in an airtight container for up to 3 days. When reheating, do so gently in a skillet to maintain texture—avoid the microwave.

  • Presentation Perfection: Garnish with a mix of crushed smoked almonds and fresh micro herbs for that visually appealing touch to elevate your Sweet Potato Fondant experience!

Sweet Potato Fondant with Flavor Variations

Feel free to dive into your culinary creativity with these delightful variations that invite a symphony of flavors and textures!

  • Nut-Free: Swap smoked almonds for sunflower seeds blended with olive oil and a touch of smoked paprika for a nut-free alternative.
  • Spicy Kick: Add a pinch of cayenne pepper or red pepper flakes to the smoked almond cream for a subtle heat boost that tantalizes the palate.
  • Herbaceous Twist: Experiment with fresh herbs like basil or cilantro instead of rosemary for a refreshing twist that brightens every bite.
  • Creamy Vegan Option: Substitute butter with a rich vegan butter and ensure the vegetable stock is plant-based for a completely vegan dish.
  • Additional Flavoring: Try adding a tablespoon of maple syrup to the smoked almond cream for a delightful sweetness that pairs beautifully with savory.
  • Textural Contrast: Include some toasted panko breadcrumbs on top for a crispy layer that enhances the overall experience!
  • Sweet Potato Varieties: Mix in some purple sweet potatoes with the orange ones for a colorful presentation and a unique flavor profile.
  • Roasty Goodness: Add a hint of ground cumin or coriander to the searing oil for an aromatic depth that accentuates the dish beautifully.

For another hearty side, you might also enjoy my recipe for Roasted Sweet Potatoes. Don't hesitate to let your imagination run wild with these options!

Make Ahead Options

These Sweet Potato Fondant with Smoked Almond Cream & Rosemary Oil are fantastic for meal prep, allowing you to enjoy a gourmet meal without the last-minute rush! You can prepare the smoked almond cream up to 3 days in advance; simply store it in an airtight container in the refrigerator, ensuring it remains creamy by stirring it before serving. Additionally, the sweet potato fondants can be seared and braised up to 24 hours prior. To keep their texture, refrigerate them in a covered dish and reheat gently in a skillet with a splash of stock. When ready to serve, just drizzle with rosemary oil and garnish, resulting in a stunning dish with minimal effort!

Storage Tips for Sweet Potato Fondant with Smoked Almond Cream

Fridge: Store leftover Sweet Potato Fondant in an airtight container for up to 3 days. Ensure they’re cooled completely before sealing to maintain texture.

Freezer: While it's best enjoyed fresh, you can freeze the fondant for up to 1 month. Place in a freezer-safe container, separating layers with parchment paper to prevent sticking.

Reheating: Gently reheat in a skillet over medium heat, adding a splash of stock or water to prevent drying out. Avoid the microwave to maintain the fondant's luxurious texture.

Smoked Almond Cream: Store the cream in the fridge for up to 4 days. Give it a good stir before serving, as it may thicken when chilled.

What to Serve with Sweet Potato Fondant with Smoked Almond Cream & Rosemary Oil

Imagine serving a delightful meal that not only fills the stomach but warms the heart—these pairings will elevate your dining experience even further.

  • Creamy Garlic Mashed Potatoes: The silky texture and buttery flavor beautifully contrast the caramelized sweet potatoes while enhancing the overall comfort of the meal.
  • Fresh Arugula Salad: Peppery greens with a zesty vinaigrette offer a refreshing balance to the rich almond cream, adding lively texture and taste.
  • Roasted Brussels Sprouts: Crisp and caramelized, these mini cabbages bring a nutty flavor that harmonizes perfectly with the sweetness of the fondant.
  • Herbed Quinoa: Fluffy quinoa flavored with herbs is an excellent source of protein, making it a nutritious companion to this elegant dish. Enjoy the nutty undertones as it complements the sweet potatoes.
  • Grilled Lemon-Herb Chicken: This succulent protein adds a savory depth that pairs wonderfully with the fondant, creating a rounded meal experience for meat lovers.
  • Chardonnay: A glass of chilled Chardonnay showcases fruity notes and a touch of oak, both of which complement the richness of the smoked almond cream beautifully.
  • Chocolate Mousse: For dessert, a rich chocolate mousse provides a decadent finish, balancing the flavors of the meal with its luxurious texture.
  • Roasted Beets: Sweet, earthy roasted beets add vibrancy and a different texture to your plate, pairing well with both sweet potatoes and the almond cream.
  • Balsamic Glazed Green Beans: These lightly sautéed green beans bring a tangy brightness, cutting through the richness and adding a hint of elegance to your spread.
  • Sparkling Water with Lemon: A refreshing sparkle keeps everything light and is the perfect palate cleanser to accompany this stylish meal.

Sweet Potato Fondant with Smoked Almond Cream & Rosemary Oil Recipe FAQs

How do I choose the best sweet potatoes for this recipe?
Absolutely! When selecting sweet potatoes, look for firm ones with smooth skin—avoid any that have dark spots or blemishes. At their best, they should feel somewhat heavy for their size; this indicates freshness. Cutting them into thick squares, about 1-inch in size, guarantees even cooking and caramelization.

How should I store leftovers, and how long will they last?
Sweet Potato Fondant can be stored in an airtight container in the fridge for up to 3 days. Make sure to let them cool completely before sealing to help maintain their texture. When you're ready to enjoy them again, gently reheat in a skillet over medium heat, adding a splash of stock or water to keep them moist.

Can I freeze the sweet potato fondant? If so, how?
Yes, you can! Freeze the Sweet Potato Fondant for up to 1 month. To do this, place them in a freezer-safe container, interlaying parchment paper between layers to prevent sticking. When you're ready to serve, thaw them overnight in the fridge and then reheat gently in a skillet with a splash of liquid to restore their original texture.

What should I do if the almond cream is too thick?
If you find your smoked almond cream is too thick, don’t worry! Just add a tablespoon of water or stock at a time while blending until you reach a smooth, creamy consistency—ideally thick enough to spread but not runny. It should resemble thick yogurt to complement the fondant beautifully.

Are there any dietary considerations for this dish?
This Sweet Potato Fondant is vegetarian-friendly and can easily be made vegan by substituting butter with vegan margarine. If you're cooking for someone with nut allergies, try using sunflower seeds instead of smoked almonds—blend them the same way and adjust seasoning as needed. Always keep an eye on the ingredients for hidden allergens.

How long can I keep the smoked almond cream in the fridge?
The smoked almond cream can stay fresh in the fridge for up to 4 days. It's best to give it a good stir before using, as it might thicken when chilled. For optimal flavor, use fresh lemon juice during preparation for that zesty kick!

Sweet Potato Fondant with Smoked Almond Cream & Rosemary Oil

Savory Sweet Potato Fondant with Smoked Almond Cream Delight

A gourmet twist on Sweet Potato Fondant with Smoked Almond Cream & Rosemary Oil, perfect for any occasion.
Print Recipe Pin Recipe
Prep Time 15 minutes mins
Cook Time 30 minutes mins
Total Time 45 minutes mins
Servings: 4 servings
Course: Dinner
Cuisine: American
Calories: 250
Ingredients Equipment Method Nutrition Notes

Ingredients
  

For the Sweet Potatoes
  • 4 medium Sweet Potatoes Cut into thick squares for even cooking.
  • 2 tablespoons Olive Oil Vegetable oil works as a substitute if needed.
  • 2 tablespoons Butter Use vegan margarine for a vegan version.
For the Flavoring
  • 2 cloves Garlic Minced for aromatic flavor.
  • 4 sprigs Fresh Thyme Dried thyme can be used as a substitute.
  • 1 sprig Rosemary Infuses the oil with fragrant flavor.
For the Smoked Almond Cream
  • 1 cup Smoked Almonds Regular almonds with smoked paprika can substitute.
  • 1/2 cup Lemon Juice Fresh juice ensures the best flavor.
  • 2 cups Vegetable or Chicken Stock Low-sodium is preferable.
For Finishing Touches
  • 1 cup Micro Herbs Choose your favorite variety.
  • 1/4 cup Crushed Almonds Toast them for added flavor if desired.

Equipment

  • small saucepan
  • large heavy skillet
  • Blender

Method
 

Step-by-Step Instructions
  1. Prepare Rosemary Oil: Warm 1/4 cup of olive oil over low heat with a sprig of fresh rosemary for 5–7 minutes. Remove from heat and steep.
  2. Sear Sweet Potatoes: Cut sweet potatoes and sear in a skillet with butter and olive oil for about 5 minutes until golden.
  3. Braise the Sweet Potatoes: Flip the sweet potatoes, add garlic and thyme, season, and pour in stock. Cover and cook for 20–25 minutes.
  4. Make Smoked Almond Cream: Blend smoked almonds, water or stock, lemon juice, and olive oil until smooth.
  5. Serve and Garnish: Spread almond cream on a plate, top with sweet potatoes, drizzle with rosemary oil, and sprinkle with crushed almonds and micro herbs.

Nutrition

Serving: 1servingCalories: 250kcalCarbohydrates: 35gProtein: 6gFat: 10gSaturated Fat: 2gPolyunsaturated Fat: 1gMonounsaturated Fat: 6gCholesterol: 5mgSodium: 200mgPotassium: 500mgFiber: 6gSugar: 8gVitamin A: 12000IUVitamin C: 30mgCalcium: 60mgIron: 1mg

Notes

Ensure even cuts for sweet potatoes to promote even cooking and prevent mushiness. Gently reheat leftovers in a skillet.

Tried this recipe?

Let us know how it was!

Cranberry Brie and Thyme Puff Pastry Twists for Festive Feasts

January 15, 2026 by Grace Snow Leave a Comment

As the scent of buttery puff pastry fills the kitchen, I can’t help but feel a wave of excitement for the gatherings ahead. Nothing says festive cheer quite like these Cranberry Brie and Thyme Puff Pastry Twists. Perfect for holiday parties and cozy dinners alike, this easy party snack is both stunning and simple to prepare. The delightful combination of creamy brie, tart cranberry, and herbaceous thyme creates an appetizer that will impress your guests without requiring hours in the kitchen. Plus, they can be made ahead of time, leaving you free to relax and enjoy the festivities. Are you ready to elevate your holiday spread with a touch of elegance? Let’s dive into this scrumptious recipe!

Why are these twists a must-try?

Effortless Elegance: These Cranberry Brie and Thyme Puff Pastry Twists are the perfect way to impress guests without breaking a sweat.

Flavor Harmony: Combining tart cranberry with creamy brie and fresh thyme creates a flavor explosion that will have everyone coming back for seconds.

Flexible Preparation: With the option to prepare them a day in advance, you can enjoy more time mingling at your holiday gatherings.

Crowd-Pleasing Appeal: These twists are a guaranteed hit at any festive event, much like other favorites such as Roasted Corn Tacos or a comforting Chickpea Spinach Curry.

Unique Presentation: Their whimsical shape makes them visually stunning, adding a touch of sophistication to your appetizer table.

Easy Cleanup: With minimal mess involved, you can whip these up and enjoy your celebration without the fuss!

Cranberry Brie and Thyme Puff Pastry Twists Ingredients

For the Twists

  • Puff Pastry – Provides a flaky, buttery base; for a homemade touch, consider making your own!
  • Brie Cheese – Adds creaminess and indulgent texture; if you want a slightly stronger flavor, go for Camembert.
  • Cranberry Sauce – Offers a sweet-tart flavor that complements the brie; for a healthier option, use unsweetened cranberry sauce.
  • Fresh Thyme Leaves – Imparts a fragrant herbal note; feel free to swap it out for rosemary or sage if you desire a twist.
  • Egg (for wash) – Gives the pastry a beautiful golden shine; a dairy-free alternative is mixing plant milk with cornstarch.

For Garnish (Optional)

  • Honey – Adds a touch of elegance and sweetness; maple syrup works well too for a different flavor.
  • Crushed Nuts – For added crunch and texture; walnuts or pecans would be delightful!

These Cranberry Brie and Thyme Puff Pastry Twists will elevate your holiday gatherings, offering an irresistible combination of flavors and textures that guests won’t forget!

Step‑by‑Step Instructions for Cranberry Brie and Thyme Puff Pastry Twists

Step 1: Preheat and Prepare Baking Sheet
Begin by preheating your oven to 400°F (200°C). While the oven heats, line a baking sheet with parchment paper to ensure your Cranberry Brie and Thyme Puff Pastry Twists don’t stick. This preparation not only saves you clean-up time but also allows for even baking, ensuring a beautifully golden finish.

Step 2: Roll Out the Puff Pastry
On a lightly floured surface, carefully roll out your puff pastry. Aim to smooth out any folds and achieve an even thickness of about 1/4 inch. This step is crucial for achieving the perfect flaky texture in your Cranberry Brie and Thyme Puff Pastry Twists. Once rolled, you’re ready for the next delicious layer!

Step 3: Spread Cranberry Sauce
Spread a generous layer of cranberry sauce evenly over the puff pastry, ensuring you leave about a 1-inch border around the edges. The vibrant color of the cranberry will peek through the pastry as it bakes, adding to the visual appeal. This sweet-tart layer is what makes your twists extra special and flavorful.

Step 4: Add Brie and Thyme
Next, layer slices of creamy brie cheese over the cranberry sauce, ensuring they are well-spaced for maximum cheesy goodness. Sprinkle fresh thyme leaves on top, allowing their aromatic flavor to infuse the twists as they bake. This combination of ingredients is what transforms simple puff pastry into a festive culinary delight.

Step 5: Cut and Twist the Pastry
Using a sharp knife or pizza cutter, cut the pastry into 8 equal strips. Fold each strip in half lengthwise, encasing the filling, then twist each piece gently before pinching the ends to seal. This playful shape not only looks inviting but also allows for even cooking, creating those delightful flaky layers in your Cranberry Brie and Thyme Puff Pastry Twists.

Step 6: Brush with Egg Wash
Place the twisted pastries onto the prepared baking sheet, making sure to leave space between them for expansion. Beat an egg in a small bowl and brush the tops of each twist generously. This egg wash will help achieve a delectable golden-brown crust while adding a shiny finish to your festive treats.

Step 7: Bake Until Golden
Bake your twists in the preheated oven for 18–22 minutes, or until they puff up beautifully and turn golden brown. Keep an eye on them toward the end of baking, as the smell of buttery pastry will be irresistible, signaling they are almost ready. You want them crispy on the outside and gooey on the inside!

Step 8: Drizzle and Serve
Once baked, remove the twists from the oven and allow them to cool for a few minutes. If desired, drizzle with honey for an added touch of sweetness. Serve warm to fully enjoy the rich blend of flavors in your Cranberry Brie and Thyme Puff Pastry Twists, and watch them disappear from the platter!

Expert Tips for Cranberry Brie and Thyme Puff Pastry Twists

  • Chill the Pastry: Refrigerating the twists for about 15 minutes before baking enhances their flakiness, making those Cranberry Brie and Thyme Puff Pastry Twists even more delicious.

  • Watch the Filling: Avoid the common mistake of overfilling your twists. Too much filling can ooze out during baking, creating a mess and potentially burning.

  • Make Ahead: Prepare the twists a day in advance and keep them in the fridge. Bake them just before your guests arrive for the freshest taste and beautiful presentation.

  • Customize Flavors: Don’t hesitate to experiment with ingredients! Adding a sprinkle of crushed nuts or swapping fresh thyme for rosemary can elevate the flavor profile of your twists.

  • Use Parchment Paper: Always line your baking sheet with parchment paper. This little tip not only prevents sticking but also makes cleanup a breeze!

Cranberry Brie and Thyme Puff Pastry Twists Variations

Feel free to personalize your twists and make them your own with these delightful twists and swaps!

  • Cheese Swap: Use goat cheese or aged cheddar instead of brie for a distinctive flavor experience. This will impart a tangy bite that beautifully complements the cranberry.

  • Nutty Crunch: Add chopped walnuts or pecans for a delightful crunch. This textural contrast enhances each bite, turning ordinary twists into extraordinary bites.

  • Herb Alternatives: Replace thyme with rosemary or sage for a different aromatic twist. These herbs can bring new dimensions of flavor, perfect for the holiday season.

  • Sweetener Options: Instead of honey, drizzle with maple syrup for a more robust sweetness. This subtle change can add a unique twist to your dish.

  • Spice It Up: Add a pinch of red pepper flakes to the cranberry sauce for a touch of heat. A little kick can elevate the overall flavor profile and surprise your taste buds.

  • Fruit Fusion: Include dried cranberries or chopped figs along with the cranberry sauce for extra sweetness and texture. The fruity addition pairs beautifully with brie and adds depth.

  • Vegan Friendly: For a plant-based version, swap brie for vegan cheese and use a flax egg in lieu of the egg wash. Your twists will still be beautiful and delicious!

To add more depth to your gatherings, consider pairing these twists with my delicious Roasted Bratwurst with Peppers and Onions for a heartwarming main course or serve alongside comforting Beans Greens Stew as a wholesome complement.

Make Ahead Options

These Cranberry Brie and Thyme Puff Pastry Twists are a fantastic choice for meal prep, saving you time on busy holiday days! You can prepare the twists up to 24 hours in advance by assembling them and refrigerating the unbaked twists on a parchment-lined baking sheet. This allows the flavors to meld while keeping the pastry fresh. When you're ready to impress your guests, simply preheat the oven and bake from the refrigerator without the need for additional thawing. For best results, avoid overcrowding the baking sheet, enabling the twists to puff perfectly. With this prep method, you'll have an elegant appetizer ready to serve in no time!

Storage Tips for Cranberry Brie and Thyme Puff Pastry Twists

Fridge: Store baked twists in an airtight container for up to 3 days. This keeps them fresh and prevents them from drying out while preserving the delightful flavors.

Freezer: For longer storage, freeze the unbaked twists wrapped in plastic wrap for up to 2 months. When ready to bake, no need to thaw—just add a few extra minutes to the baking time!

Reheating: To restore crispiness, reheat baked twists in a 350°F (175°C) oven for 5-7 minutes, allowing you to enjoy the scrumptious taste of your Cranberry Brie and Thyme Puff Pastry Twists once again.

Make Ahead: Prepare twists a day in advance and keep them unbaked in the fridge, ready to pop into the oven just before serving.

What to Serve with Cranberry Brie and Thyme Puff Pastry Twists

These delightful twists are the perfect centerpiece for a festive gathering, inviting warmth and flavor to your table.

  • Creamy Mashed Potatoes: Their buttery richness complements the flaky pastry, creating a cozy contrast perfect for holiday celebrations.

  • Mixed Green Salad: A fresh salad with a zesty lemon vinaigrette balances the rich flavors of the twists, adding brightness to your meal.

  • Honey Glazed Carrots: Sweet and tender, these veggies are a delightful side that echoes the honey’s sweetness in the twists.

  • Sparkling Wine: Effervescent bubbles elevate the experience, making each bite feel special and celebratory, ideal for festive toasts.

  • Pomegranate Glazed Brussels Sprouts: These slightly bitter sprouts offer a pop of flavor and color, providing balance to the creamy brie-filled twists.

  • Herbal Tea: A warm cup of herbal tea is a soothing counterpart, perfect for those chilly evenings, enhancing the comforting vibe of your holiday feast.

  • Chocolate Dipped Strawberries: For a sweet finish, these juicy treats add a romantic touch that contrasts beautifully with the savory twists.

  • Warm Apple Crisp: A cozy dessert option, the cinnamon-infused apples will bring a delightful warmth that resonates with the festive spirit.

  • Spiced Cider: The aromatic spices in the cider pair wonderfully with the thyme and brie, making for an inviting, comforting drink.

Cranberry Brie and Thyme Puff Pastry Twists Recipe FAQs

What type of puff pastry should I use?
I recommend using store-bought puff pastry for convenience, but homemade puff pastry can elevate the flavor and texture if you're up for the challenge! Just ensure it's well-chilled before you roll it out.

How should I store leftover twists?
Baked twists should be stored in an airtight container in the fridge, where they will stay delicious for up to 3 days. If you want to keep them longer, consider freezing the unbaked twists for up to 2 months. You can then bake them fresh whenever you crave a tasty snack!

Can these twists be frozen, and how should I do it?
Absolutely! To freeze your Cranberry Brie and Thyme Puff Pastry Twists, wrap each twist in plastic wrap or aluminum foil once shaped and unbaked. Place them in a freezer-safe container or bag to prevent freezer burn. When you’re ready to bake, you don’t need to thaw them, just add a few extra minutes to the baking time.

What if my twists open up while baking?
No worries! If your twists start to open up, it usually means they were either overfilled or not sealed tightly. Next time, just make sure to seal the ends well and avoid using too much filling. If they do split, they’ll still taste wonderful, but I know how you want them to look perfect!

Can I replace brie with another cheese?
Certainly! If you're in the mood for something different, consider using Camembert for a similar creamy texture, or aged cheddar for a sharper flavor. Goat cheese works wonderfully too, adding a tangy twist to your famous Cranberry Brie and Thyme Puff Pastry Twists.

Are there any dietary considerations with the ingredients?
Yes! If you or your guests have dietary restrictions, opt for dairy-free cheese alternatives, and use a plant-based milk mixture instead of egg for the wash. Always check labels for potential allergens, especially with pre-made ingredients like puff pastry and cranberry sauce.

Cranberry Brie and Thyme Puff Pastry Twists

Cranberry Brie and Thyme Puff Pastry Twists for Festive Feasts

These Cranberry Brie and Thyme Puff Pastry Twists are a festive appetizer that combines creamy brie, tart cranberry sauce, and fresh thyme in a flaky puff pastry.
Print Recipe Pin Recipe
Prep Time 30 minutes mins
Cook Time 22 minutes mins
Chilling Time 15 minutes mins
Total Time 1 hour hr 7 minutes mins
Servings: 8 twists
Course: Appetizers
Cuisine: American
Calories: 230
Ingredients Equipment Method Nutrition Notes

Ingredients
  

For the Twists
  • 1 sheet Puff Pastry Homemade option available
  • 8 oz Brie Cheese Can substitute with Camembert for a stronger flavor
  • 1 cup Cranberry Sauce Use unsweetened for a healthier option
  • 2 tbsp Fresh Thyme Leaves Substitute with rosemary or sage if desired
  • 1 large Egg For wash; use plant milk and cornstarch for dairy-free option
For Garnish (Optional)
  • 2 tbsp Honey Maple syrup is a good alternative
  • 1/4 cup Crushed Nuts Walnuts or pecans recommended

Equipment

  • Oven
  • Baking Sheet
  • Parchment Paper
  • Rolling Pin
  • sharp knife or pizza cutter
  • small bowl

Method
 

Step-by-Step Instructions
  1. Preheat your oven to 400°F (200°C) and line a baking sheet with parchment paper.
  2. Roll out the puff pastry on a lightly floured surface to about 1/4 inch thickness.
  3. Spread a generous layer of cranberry sauce over the puff pastry, leaving a 1-inch border.
  4. Layer slices of brie cheese over the cranberry sauce and sprinkle fresh thyme leaves on top.
  5. Cut the pastry into 8 equal strips, fold each in half, twist, and pinch the ends to seal.
  6. Brush the tops of each twist with egg wash and place on the prepared baking sheet.
  7. Bake for 18–22 minutes until golden brown and puffed up.
  8. Remove from the oven, allow to cool slightly, and drizzle with honey if desired before serving.

Nutrition

Serving: 1twistCalories: 230kcalCarbohydrates: 22gProtein: 4gFat: 15gSaturated Fat: 8gPolyunsaturated Fat: 1gMonounsaturated Fat: 6gCholesterol: 40mgSodium: 230mgPotassium: 150mgFiber: 1gSugar: 2gVitamin A: 300IUVitamin C: 1mgCalcium: 100mgIron: 1mg

Notes

Chilling the pastry enhances flakiness. Prepare a day ahead for convenience, and avoid overfilling to prevent oozing during baking.

Tried this recipe?

Let us know how it was!

Crispy Pan Fried Salmon Croquettes You’ll Love in Every Bite

January 15, 2026 by Grace Snow Leave a Comment

As I stood by the stove, the familiar sizzle of oil in a hot pan brought me straight back to my grandmother's kitchen, where the scent of culinary magic was always in the air. That nostalgic feeling inspired me to create these crispy pan fried salmon croquettes, a delightful blend of tender salmon and creamy mashed potatoes, kissed with shallots and spices. Perfectly golden on the outside and satisfyingly soft within, these croquettes are not only a breeze to whip up—ready in just 40 minutes—but they're also freezer-friendly, ensuring a quick homemade meal whenever you crave something special. Whether served as a crowd-pleasing appetizer or a hearty snack, these beauties are bound to resonate with any cooking enthusiast. Are you ready to indulge in a comforting bite of these crispy wonders?

Why Are These Salmon Croquettes Irresistible?

Flavorful: The crispy exterior gives way to a tender, flavorful center, combining salmon and creamy potatoes seasoned with shallots and spices perfectly.
Quick Prep Time: Made in just 40 minutes, they’re a fantastic option for busy evenings or last-minute gatherings.
Versatile Options: Want to change it up? Try variations with different fish or add veggies for a unique twist!
Freezer-Friendly: Prepare a batch ahead of time and freeze, ensuring homemade goodness whenever you need it.
Crowd-Pleasing: Whether as an appetizer or centerpiece, everyone will love these delightful bites. Serve them alongside a zesty remoulade and they’ll be a hit!

Crispy Pan Fried Salmon Croquettes Ingredients

For the Croquettes

  • Salmon Fillet – Provides rich flavor and protein; use fresh for best taste, or opt for canned for an easy shortcut.
  • Neutral Oil – Essential for frying, creating that desirable crispy texture; can be substituted with canola, avocado, or grapeseed oil.
  • Kosher Salt – Enhances overall flavors; feel free to adjust quantity based on your taste preferences.
  • Black Pepper – Adds a hint of mild heat; freshly ground pepper delivers the best flavor.
  • Unsalted Butter – Brings richness when sautéing shallots; stick to unsalted to control salt levels.
  • Shallot – Imparts a subtly sweet onion flavor; you can swap it with finely chopped onion if needed.
  • Garlic – Deepens the flavor profile; reduce the amount for a milder taste if preferred.
  • Leftover Mashed Potatoes – Binds and adds creaminess to the croquettes; you can also use freshly made mashed potatoes.
  • Seasoned Breadcrumbs – Provides that satisfying crunch; plain breadcrumbs mixed with herbs work as a good substitute.
  • Old Bay Seasoning – A unique blend that perfectly enhances the seafood flavor; can be replaced with standard seafood seasoning or omitted altogether for a milder taste.
  • Dijon Mustard – Adds a tangy kick; feel free to omit if you desire a more neutral flavor.
  • Parsley – For garnish, it adds a fresh touch that brightens the dish.

For Serving

  • Remoulade Sauce – A creamy dip that perfectly complements the croquettes; choose store-bought or homemade for a gourmet twist.

With these delicious ingredients lined up, you’re on your way to making crispy pan fried salmon croquettes that are sure to impress. Happy cooking!

Step‑by‑Step Instructions for Crispy Pan Fried Salmon Croquettes

Step 1: Make Remoulade Sauce
Start by preparing the remoulade sauce if you haven't done so already. Combine mayo, minced pickles, capers, Dijon mustard, lemon juice, and a touch of paprika in a bowl. Whisk until smooth and creamy. Chill in the refrigerator while you prepare the rest; this enhances the flavors and allows your sauce to be ready when serving your crispy pan fried salmon croquettes.

Step 2: Cook Salmon
Preheat your oven to 375°F (190°C). Place your seasoned salmon fillet on a lined baking sheet and bake for about 15-20 minutes, or until it flakes easily with a fork. Remove it from the oven and let it cool for a few minutes. Once cooled, flake the salmon into a mixing bowl, making sure to remove any skin and bones for the perfect croquette foundation.

Step 3: Sauté Shallots and Garlic
In a small pan, melt 1 tablespoon of unsalted butter over medium heat. Add finely chopped shallots and cook for about 3-4 minutes until they turn translucent. Stir in minced garlic and cook for an additional minute. The aroma will fill your kitchen—this mixture adds a wonderful depth of flavor to your crispy pan fried salmon croquettes.

Step 4: Combine Mixture
In the bowl with the flaked salmon, add in your leftover mashed potatoes, seasoned breadcrumbs, sautéed shallots, garlic, Old Bay seasoning, and Dijon mustard. Mix everything thoroughly until combined; ensure the ingredients are evenly distributed. Your mixture should be moldable without being too wet, setting the stage for delicious and cohesive salmon croquettes.

Step 5: Form Croquettes
Lightly dust your hands with flour to prevent sticking, then shape the mixture into oval patties, about 3 tablespoons each. Don’t worry if they seem a little imperfect—this is part of their charm! Place the formed croquettes on a plate; you'll have a delightful batch of crispy pan fried salmon croquettes ready to hit the pan.

Step 6: Pan Fry
Heat a generous amount of neutral oil in a large skillet over medium-high heat until shimmering, about 2-3 minutes. Carefully add the croquettes in batches, ensuring not to overcrowd the pan. Fry for 3-4 minutes on each side until they achieve a golden-brown color. This ensures maximum crispiness while the insides stay tender and flavorful.

Step 7: Serve
Once the salmon croquettes are cooked, transfer them to a plate lined with paper towels to absorb excess oil. Sprinkle lightly with salt for added flavor. Serve warm, garnished with chopped parsley, alongside your chilled remoulade sauce for dipping. Enjoy the delightful crunch of your crispy pan fried salmon croquettes; they're sure to impress!

Storage Tips for Crispy Pan Fried Salmon Croquettes

Room Temperature: Leftover crispy pan fried salmon croquettes can be kept at room temperature for up to 2 hours; however, it's best to refrigerate them promptly after serving to maintain freshness.

Fridge: Store the cooked croquettes in an airtight container in the refrigerator for up to 3 days. Reheat them gently in a skillet for a few minutes to regain their crispiness.

Freezer: Uncooked croquettes can be frozen for up to 3 months. Place them in a single layer on a baking sheet until firm, then transfer to a freezer bag. Thaw overnight in the refrigerator before frying.

Reheating: For best results, reheat cooked croquettes in a skillet over medium heat with a splash of oil, ensuring they become delightfully crispy on the outside again.

Crispy Pan Fried Salmon Croquettes Variations

Feel free to explore different twists on these delightful salmon croquettes to cater to your taste buds!

  • Seafood Swap: Substitute salmon with trout, canned tuna, or a firm white fish for a new flavor experience. Each alternative brings its unique profile while maintaining that wonderful crispy texture.

  • Veggie Boost: Add finely chopped bell peppers, zucchini, or spinach for vibrant colors and flavors. Mixing in veggies not only enhances nutrition but also adds a delightful crunch!

  • Sweet Potato Twist: Use mashed sweet potatoes instead of regular potatoes for a subtly sweet flavor and a beautiful orange hue. This change creates a comforting croquette that satisfying and unique.

  • Spicy Kick: Mix in some diced jalapeños or a dash of hot sauce for those who crave a little heat. It’s an excellent way to awaken your palate and make these croquettes even more exciting!

  • Seasoning Alternatives: Replace Old Bay seasoning with Cajun or lemon pepper seasoning for an added depth of flavor. These spices can give your croquettes a lovely zing that feels like a mini-vacation.

  • Cheesy Delight: Incorporate shredded cheese, like sharp cheddar or feta, into the mixture for an added creaminess. Melting cheese adds an unforgettable gooey texture that’s sure to make you smile!

  • Baked Variation: For a healthier approach, try baking the croquettes instead of frying. Brush them with a little olive oil and bake at 375°F for about 20-25 minutes, flipping halfway through for an equally crispy exterior.

  • Herb Infusion: Add fresh herbs like dill, chives, or cilantro to the mixture for a burst of freshness. These aromatic herbs can uplift the entire dish and make every bite feel special.

And for those looking to expand their seafood endeavors, try your hand at other flavorful dishes like Corn Furikake Fried Rice or indulge in tasty Fish Taco Bowls. The options are endless!

What to Serve with Crispy Pan Fried Salmon Croquettes

The perfect side dishes can elevate your salmon croquettes into a complete meal, delighting your senses and those at your table.

  • Crispy Coleslaw: Provides a crunchy contrast, with a refreshing tang that complements the rich flavor of the croquettes. The coolness of the slaw balances the warmth of the fried dish beautifully.

  • Lemon Quinoa Salad: Light and zesty, this salad mixes fluffy quinoa with fresh veggies and a lemon vinaigrette. Its brightness pairs well with the savory croquettes and helps to enhance their flavor.

  • Roasted Asparagus: Tender spears roasted to perfection offer a delightful crunch and earthy flavor, making for a light side that doesn't overshadow the main event. Drizzle with balsamic reduction for an extra burst of flavor.

  • Creamy Mashed Potatoes: If you have extra mash on hand, serve it alongside. The creaminess beautifully mirrors the croquettes while soaking in the flavors of the remoulade sauce.

  • Garlic Bread: A crusty loaf slathered in garlic butter creates an irresistible side. The aromatic garlicky notes and crunchy crust make it a hit at any table!

  • Sparkling Lemonade: A refreshing drink choice, its effervescence and acidity contrast superbly with the crispy croquettes, cleansing your palate with each sip.

These pairings will not only satisfy your appetite but will enhance the overall dining experience, ensuring every bite of your crispy pan fried salmon croquettes is cherished.

Make Ahead Options

These Crispy Pan Fried Salmon Croquettes are perfect for meal prep enthusiasts! You can prepare the croquette mixture up to 24 hours in advance by combining the flaked salmon, mashed potatoes, sautéed shallots, and seasoning, then refrigerate in an airtight container. This allows the flavors to meld beautifully. When you're ready to enjoy, simply shape the mixture into patties and pan-fry. Alternatively, uncooked croquettes can be frozen for up to 3 months; just thaw overnight in the refrigerator before cooking. This way, you’ll have a quick, homemade meal that’s just as delicious as when freshly made, saving you time on busy weeknights!

Expert Tips for Crispy Pan Fried Salmon Croquettes

  • Perfectly Cooked Salmon: Ensure your salmon is cooked to an internal temperature of 130°F for optimal flakiness. Undercooked salmon can lead to a mushy texture in your croquettes.

  • Avoid Overcrowding: Fry the croquettes in small batches to maintain oil temperature. This keeps your salmon croquettes crisp instead of soggy.

  • Optimal Oil Temperature: Wait for the oil to shimmer before frying. If the oil isn’t hot enough, the croquettes will absorb too much oil and lose their desired crispiness.

  • Flake It Right: Allow the salmon to cool before flaking. This makes it easier to remove skin and bones, helping you achieve the best texture in your crispy pan fried salmon croquettes.

  • Customize to Taste: Feel free to adjust spices and seasoning according to your preference. Want a kick? Add a pinch of cayenne for a spicy surprise!

Crispy Pan Fried Salmon Croquettes Recipe FAQs

What type of salmon should I use for the croquettes?
You can use fresh salmon fillet for the best flavor, but canned salmon is a wonderful shortcut! If opting for canned, make sure to choose high-quality, wild-caught salmon if possible to enjoy rich flavor.

How long can I store cooked salmon croquettes in the fridge?
Cooked salmon croquettes keep well in the refrigerator for up to 3 days. Just place them in an airtight container. When ready to eat, reheat them gently in the skillet for a few minutes to bring back their delightful crispiness!

Can I freeze uncooked salmon croquettes?
Absolutely! Uncooked crispy pan fried salmon croquettes can be frozen for up to 3 months. Line them on a baking sheet in a single layer to freeze until firm, then transfer to a freezer bag. When you’re ready to cook, simply thaw them in the refrigerator overnight before frying.

What should I do if my croquettes fall apart while frying?
If your croquettes are falling apart, it might be due to the mixture being too wet. Make sure your mashed potatoes are well-drained, and consider adding a bit more breadcrumbs to help bind them. If there's still an issue, refrigerate the formed croquettes for 20-30 minutes before frying to help them hold their shape.

Are there any dietary considerations for these croquettes?
Yes! If preparing for someone with specific allergies, ensure there are no cross-contaminants with allergens such as gluten or dairy (found in breadcrumbs and butter). You can make these croquettes gluten-free by using gluten-free breadcrumbs and for a dairy-free option, substitute the butter with vegan butter or olive oil.

What’s the best way to serve crispy pan fried salmon croquettes?
These croquettes shine when served alongside a zesty remoulade sauce for dipping, but they’re also delightful with a fresh side salad or atop a soft bun for salmon burgers. Garnishing with parsley adds a refreshing touch that beautifully complements the dish!

Crispy Pan Fried Salmon Croquettes

Crispy Pan Fried Salmon Croquettes You’ll Love in Every Bite

These crispy pan fried salmon croquettes blend tender salmon and creamy potatoes, perfect for any occasion.
Print Recipe Pin Recipe
Prep Time 20 minutes mins
Cook Time 20 minutes mins
Total Time 40 minutes mins
Servings: 4 croquettes
Course: Appetizers
Cuisine: American
Calories: 250
Ingredients Equipment Method Nutrition Notes

Ingredients
  

For the Croquettes
  • 1 lb Salmon Fillet Use fresh for best taste, or opt for canned for an easy shortcut.
  • 1/2 cup Neutral Oil Can be substituted with canola, avocado, or grapeseed oil.
  • 1 tsp Kosher Salt Adjust based on taste preferences.
  • 1/2 tsp Black Pepper Freshly ground delivers the best flavor.
  • 1 tbsp Unsalted Butter Stick to unsalted to control salt levels.
  • 1 medium Shallot Can be swapped with finely chopped onion if needed.
  • 2 cloves Garlic Reduce amount for a milder taste if preferred.
  • 2 cups Leftover Mashed Potatoes Can also use freshly made mashed potatoes.
  • 1 cup Seasoned Breadcrumbs Plain breadcrumbs mixed with herbs work well.
  • 1 tbsp Old Bay Seasoning Can be replaced with standard seafood seasoning.
  • 1 tbsp Dijon Mustard Feel free to omit for a more neutral flavor.
  • 2 tbsp Parsley For garnish.
For Serving
  • 1 cup Remoulade Sauce Choose store-bought or homemade.

Equipment

  • Baking Sheet
  • Skillet
  • Mixing Bowl
  • Whisk

Method
 

Step-by-Step Instructions
  1. Make Remoulade Sauce: Combine mayo, minced pickles, capers, Dijon mustard, lemon juice, and a touch of paprika in a bowl. Whisk until smooth and creamy. Chill in the refrigerator.
  2. Cook Salmon: Preheat your oven to 375°F (190°C). Bake seasoned salmon fillet for 15-20 minutes until it flakes easily. Cool and flake into a bowl.
  3. Sauté Shallots and Garlic: Melt butter over medium heat, cook shallots until translucent, add garlic for an additional minute.
  4. Combine Mixture: In the bowl with flaked salmon, add mashed potatoes, breadcrumbs, sautéed shallots, garlic, Old Bay seasoning, and Dijon mustard. Mix until combined.
  5. Form Croquettes: Shape the mixture into oval patties, about 3 tablespoons each, and place on a plate.
  6. Pan Fry: Heat neutral oil in a skillet, fry croquettes for 3-4 minutes on each side until golden brown.
  7. Serve: Transfer croquettes to a plate lined with paper towels, sprinkle with salt, serve warm with remoulade.

Nutrition

Serving: 1croquetteCalories: 250kcalCarbohydrates: 25gProtein: 15gFat: 10gSaturated Fat: 3gPolyunsaturated Fat: 4gMonounsaturated Fat: 2gCholesterol: 55mgSodium: 500mgPotassium: 300mgFiber: 2gSugar: 1gVitamin A: 500IUVitamin C: 2mgCalcium: 20mgIron: 1mg

Notes

These croquettes can be stored and reheated for maintaining their crispiness. Freeze uncooked batches for up to 3 months.

Tried this recipe?

Let us know how it was!

Lemon Capellini Salad: A Bright and Zesty Summer Delight

January 15, 2026 by Grace Snow Leave a Comment

As I was enjoying a lazy summer afternoon, the vibrant colors of fresh tomatoes and fragrant herbs beckoned me to the kitchen. That's when I decided it was time to whip up a refreshing Lemon Capellini Salad. This Italian-inspired dish is a delightful blend of delicate noodles tossed in a zesty lemon dressing, complemented perfectly by juicy tomatoes and the briny goodness of capers. Not only is this salad quick to prepare—ideal for light lunches or as a dazzling side at your next barbecue—but it also offers a refreshing burst of seasonal flavors that can elevate any meal. Whether you’re feeding a crowd or just treating yourself, this Lemon Capellini Salad promises to be a hit. So, are you ready to brighten your plate with this amazing dish?

Why is Lemon Capellini Salad a must-try?

Light and Fresh: The Lemon Capellini Salad is loaded with seasonal ingredients, making it a great way to enjoy fresh produce. Quick to Prepare: With minimal cooking involved, this recipe is perfect for busy days when you want something tasty yet simple. Versatile Choice: It can be served on its own, as a side, or even enhanced with proteins like grilled chicken or shrimp for a wholesome meal. Zesty Flavor: The bright lemon dressing adds a refreshing zing that awakens the palate, making every bite memorable. If you love vibrant flavors, you’ll also enjoy other dishes like Chicken Salad Apples and Buffalo Tofu with Caesar Salad. Each serving of this salad captures the essence of summer—the perfect balance of tangy, briny, and herbal goodness!

Lemon Capellini Salad Ingredients

• Fresh, zesty, and vibrant flavors await!

For the Salad

  • Capellini Pasta – A delicate base; long, thin noodles provide a lovely texture. Substitution: Thin spaghetti or angel hair pasta works too.
  • Lemons – Brightens the dish with zesty acidity; both juice and zest are essential. Tip: Always use fresh lemons for optimal flavor.
  • Extra Virgin Olive Oil – Richness complements the lemon beautifully. Note: While you can use other light oils, extra virgin provides the best taste.
  • Garlic Salt – Enhances the overall flavor profile. Alternative: Fresh minced garlic gives a bolder taste if preferred.
  • Black Pepper – Adds subtle heat and depth of flavor. Tip: Freshly cracked black pepper is recommended for maximum impact.
  • Diced Tomatoes – Juicy, fresh components that brighten the dish. Tip: Be sure to use ripe, in-season tomatoes for the best taste.
  • Capers – Deliver a briny, tangy punch; they pair perfectly with the lemon. Substitution: If capers aren’t your thing, try chopped olives or pickles for a different twist.
  • Curly Leaf Parsley – Provides a fresh, herbaceous note and enhances visual appeal. Note: Flat-leaf parsley or basil can add an interesting flavor alternative.

Step‑by‑Step Instructions for Lemon Capellini Salad

Step 1: Boil the Pasta
Begin by bringing a large pot of salted water to a rolling boil over high heat. Once boiling, add the capellini pasta and cook for about 5 minutes, or until al dente. The pasta should be tender yet firm to the bite. After cooking, carefully drain the pasta in a colander and rinse it quickly under cold water to halt the cooking process and cool it down.

Step 2: Prepare the Dressing
In a spacious mixing bowl, combine the freshly squeezed juice of your lemons, extra virgin olive oil, garlic salt, and freshly cracked black pepper. Using a whisk, blend the ingredients together until well emulsified; you should have a light, golden dressing. The vibrant citrus aroma will fill your kitchen, hinting at the bright flavors to come in your Lemon Capellini Salad.

Step 3: Combine Ingredients
Add the cooled capellini pasta to the bowl with the dressing, ensuring all of the pasta strands are well-coated. Next, fold in the diced tomatoes and capers, creating a colorful medley of ingredients. Toss gently but thoroughly to prevent breaking the delicate pasta while achieving an even distribution of flavors.

Step 4: Add Fresh Herbs and Zest
Sprinkle in the chopped curly leaf parsley and add the bright lemon zest, giving your salad an extra pop of color and freshness. Toss everything together once again, making sure each ingredient is beautifully combined. The colors should be vibrant, reflecting the freshness of your Lemon Capellini Salad.

Step 5: Chill and Serve
For optimal flavor, allow the salad to sit for about 15-30 minutes at room temperature, or cover and chill it in the refrigerator if preparing ahead. This resting time allows the pasta to absorb the dressing’s zesty flavors. Serve your Lemon Capellini Salad cold or at room temperature, delighting in every refreshing bite!

Expert Tips for Lemon Capellini Salad

  • Choose Fresh Ingredients: Always opt for the freshest tomatoes and lemons possible; they truly elevate the flavor of your Lemon Capellini Salad.

  • Be Gentle with the Pasta: Capellini is delicate; handle it carefully to prevent breaking it into smaller pieces, preserving the salad's visual appeal.

  • Chill for Best Taste: Letting your salad chill for about 30 minutes enhances the flavors, allowing the pasta to soak up the lemon dressing beautifully.

  • Adjust to Your Taste: Feel free to modify the quantity of lemon juice or capers based on your preference; a little experimentation can make your Lemon Capellini Salad even more personalized.

  • Mix and Match Herbs: Don’t hesitate to play with different herbs like basil or dill for a unique twist to the traditional flavor profile.

Make Ahead Options

These Lemon Capellini Salad components are perfect for busy home cooks looking to streamline their meal prep! You can prepare the capellini pasta and dressing up to 24 hours in advance. Simply cook the pasta and rinse it with cold water to stop the cooking process before storing it in an airtight container in the refrigerator. The dressing can also be whisked together ahead of time; just be sure to give it a good shake before using, as the ingredients may settle. When you're ready to serve, combine the chilled pasta with the dressing, diced tomatoes, capers, and fresh herbs. This way, you'll enjoy a refreshing, homemade salad with minimal effort, letting those bright flavors shine just as deliciously as when freshly made!

How to Store and Freeze Lemon Capellini Salad

Fridge: Store your Lemon Capellini Salad in an airtight container in the refrigerator for up to 5 days. Make sure to toss it gently before serving if the dressing has settled.

Freezer: Although freezing is not recommended due to the delicate texture of the capellini pasta, you can freeze individual components like the dressing or cooked pasta separately for up to 3 months.

Room Temperature: If serving at a gathering, keep the salad out for no more than 2 hours to ensure freshness and food safety.

Reheating: This salad is best served cold or at room temperature. If you need to reheat any leftover components, do so gently on low heat to avoid overcooking the pasta.

Lemon Capellini Salad Variations & Substitutions

Feel free to experiment and make this delightful Lemon Capellini Salad your own with these fun variations!

  • Herb Twist: Add fresh basil or dill instead of parsley for a different flavor profile. Each herb brings a unique aroma and taste that can brighten your salad!
  • Protein Boost: Toss in grilled chicken or shrimp to transform your salad into a hearty main dish. This adds both protein and a satisfying chew!
  • Creamy Avocado: Incorporate diced avocado for a creamy texture that complements the bright lemon dressing. This addition also enhances the salad's richness!
  • Olive Options: Substitute capers with chopped olives for a similar briny flavor. Black olives provide a milder taste, while green olives will enhance the tanginess.
  • Pasta Alternatives: Swap the capellini pasta for thin spaghetti or even zucchini noodles if you're looking for a low-carb option. Each type of noodle offers a distinct texture that can change the dish’s dynamics.
  • Dressing Change: Use a balsamic vinaigrette for a different flavor twist. The sweetness of balsamic can work beautifully alongside the lemon!
  • Spice It Up: Add a pinch of red pepper flakes for a subtle heat that enhances the zesty flavors. A little kick can elevate the entire dish!
  • Nutty Flavor: Sprinkle toasted pine nuts or slivered almonds on top for an added crunch and nutty flavor that pairs wonderfully with the salad’s freshness.

By playing around with these variations, you can create a dish that not only stays true to its roots but also allows your culinary creativity to shine. For more flavor-packed ideas, consider pairing this salad with a delicious German Potato Salad or a simple yet satisfying Avocado Egg Salad. Happy cooking!

What to Serve with Lemon Capellini Salad?

Imagine a sunny afternoon, where every bite of food reflects the vibrant flavors of summer, perfectly complementing your Lemon Capellini Salad.

  • Grilled Chicken: Juicy and smoky, grilled chicken adds a delightful protein that pairs harmoniously with the zesty pasta salad.
  • Garlic Bread: The buttery crunch of garlic bread brings a comforting texture that balances well with the light, refreshing salad.
  • Caprese Skewers: Skewers of fresh mozzarella, ripe tomatoes, and basil provide a splash of Italian flair, enhancing the overall meal experience.
  • Roasted Vegetables: A medley of caramelized, seasoned vegetables adds depth and a hearty component alongside the refreshing salad.
  • Sparkling Lemonade: This crisp, citrusy drink mirrors the flavors of the salad, ensuring each sip and bite dance together in a delightful symphony.
  • Fresh Fruit Salad: A mix of seasonal fruits adds a sweet contrast to the tangy elements of the Lemon Capellini Salad, creating a delightful balance.
  • Pesto Pasta Salad: More noodles! A cold pesto pasta offers an herby flavor twist that resonates with the fresh ingredients in your salad while enhancing its Italian essence.
  • Tiramisu: A classic Italian dessert, this creamy coffee treat rounds off the meal decadently, delivering a lovely end to a bright, zesty dining experience.

Lemon Capellini Salad Recipe FAQs

How do I choose the right tomatoes for my Lemon Capellini Salad?
Absolutely! For the best flavor, opt for ripe, in-season tomatoes. Look for tomatoes that have a vibrant color and feel slightly soft when gently squeezed. Avoid any that have dark spots or wrinkles, as these indicate ripeness issues.

How should I store leftover Lemon Capellini Salad?
To keep your Lemon Capellini Salad fresh, store it in an airtight container in the refrigerator for up to 5 days. If you notice the dressing has settled at the bottom, just give it a gentle toss before serving to reincorporate the flavors.

Can I freeze Lemon Capellini Salad?
Very! While I don't recommend freezing the entire salad due to the delicate capellini texture, you can freeze the dressing or any leftover cooked capellini pasta separately. Just store each component in airtight containers; the dressing can be kept for up to 3 months, and the pasta for about the same time.

What if my capellini pasta gets too soft during cooking?
If your capellini turns out too soft, it might be because it was cooked too long. Always keep an eye on it and taste a strand a minute before the package’s cooking time ends. If it’s already soft, you can try rinsing it under cold water to stop the cooking process immediately, but note that the texture may still be affected.

Is this Lemon Capellini Salad suitable for people with dietary restrictions?
Certainly! This dish is vegetarian and can easily be made gluten-free by substituting the capellini pasta with gluten-free pasta alternatives. Just ensure to check that all ingredients, such as capers and olive oil, are gluten-free as well. Additionally, for individuals with citrus allergies, feel free to infuse the salad with a different dressing that complements the other ingredients.

Can I use dried herbs instead of fresh ones in this recipe?
While fresh herbs truly shine in this Lemon Capellini Salad, you can use dried herbs if that’s what you have on hand. A general rule is to use about 1/3 of the amount of dried herbs compared to fresh, as dried herbs are more concentrated. Just keep in mind that fresh herbs provide a burst of flavor that dried herbs may not replicate as well.

Lemon Capellini Salad

Lemon Capellini Salad: A Bright and Zesty Summer Delight

Enjoy this Lemon Capellini Salad bursting with fresh, vibrant flavors. Perfect for summer gatherings or light lunches.
Print Recipe Pin Recipe
Prep Time 10 minutes mins
Cook Time 5 minutes mins
Chilling Time 30 minutes mins
Total Time 45 minutes mins
Servings: 4 servings
Course: Salads
Cuisine: Italian
Calories: 200
Ingredients Equipment Method Nutrition Notes

Ingredients
  

For the Salad
  • 8 oz Capellini Pasta Thin spaghetti or angel hair pasta works too.
  • 2 pcs Lemons Use fresh lemons for optimal flavor.
  • 1/4 cup Extra Virgin Olive Oil While other oils can be used, extra virgin provides the best taste.
  • 1 tsp Garlic Salt Fresh minced garlic can be used for a bolder flavor.
  • 1/2 tsp Black Pepper Freshly cracked black pepper is recommended.
  • 2 cups Diced Tomatoes Use ripe, in-season tomatoes for the best taste.
  • 2 tbsp Capers Chopped olives or pickles can substitute if preferred.
  • 1/4 cup Curly Leaf Parsley Flat-leaf parsley or basil can be good alternatives.

Equipment

  • Large pot
  • Colander
  • Mixing Bowl
  • Whisk

Method
 

Preparation Steps
  1. Begin by bringing a large pot of salted water to a rolling boil. Add the capellini pasta and cook for about 5 minutes until al dente. Drain and rinse under cold water.
  2. In a mixing bowl, combine lemon juice, olive oil, garlic salt, and black pepper. Whisk until well emulsified.
  3. Add the cooled pasta to the dressing and ensure it is well-coated. Fold in the diced tomatoes and capers.
  4. Sprinkle in parsley and add lemon zest; toss again to combine.
  5. Allow the salad to chill for about 30 minutes before serving.

Nutrition

Serving: 1servingCalories: 200kcalCarbohydrates: 30gProtein: 5gFat: 8gSaturated Fat: 1gPolyunsaturated Fat: 2gMonounsaturated Fat: 5gSodium: 200mgPotassium: 300mgFiber: 2gSugar: 2gVitamin A: 500IUVitamin C: 40mgCalcium: 20mgIron: 1mg

Notes

Choose the freshest ingredients and handle the capellini gently. Chill the salad for best flavor.

Tried this recipe?

Let us know how it was!

Crispy Caesar Salad Croquettes With a Savory Chicken Twist

January 15, 2026 by Grace Snow Leave a Comment

As I reached into the pantry, I stumbled upon the unexpected combination of leftover chicken thighs and a few classic Caesar salad staples. That sparked an idea: why not combine these flavors into something totally unique and absolutely fun? That’s how my Caesar Salad Croquettes were born! These golden bites not only bring a mouthwatering crunch to your appetizer game but also simplify meal prep with their easy-to-follow method. Imagine impressing your guests with a dish that encapsulates the richness of Parmesan and the savory depth of anchovies—it's comfort food in a gourmet disguise. With these croquettes, you’ll walk the line between nostalgia and innovation, making them the perfect starter for any gathering. Curious how to reimagine this salad staple? Let’s dive into the recipe!

Why are these croquettes a must-try?

Easy to Make: The preparation is straightforward—even novice cooks can impress with this dish.

Crispy Exterior: Each croquette boasts a crunchy shell that envelops a tender, flavorful center, making every bite a delightful experience.

Savory Flair: Infused with rich Parmesan and umami-packed anchovies, they elevate the classic salad to a whole new level.

Versatile Dish: Perfect as a starter at dinner parties or a fun snack at casual gatherings, these croquettes suit any occasion.

Make Ahead: Assemble ahead of time and fry just before serving for a fresh, hot treat. Looking for something lighter? Try serving them alongside a refreshing Tofu Caesar Salad for a balanced meal!

Caesar Salad Croquettes Ingredients

For the Croquettes
• Chicken Thigh – Provides richness and moisture; use boneless skinless chicken for best results.
• Chicken Stock – Adds depth of flavor and moisture during cooking; homemade stock is recommended for the best taste.
• Unsalted Butter – Used to create a roux for the béchamel; can be substituted with olive oil for a dairy-free option.
• Plain Flour – Acts as a thickening agent for the béchamel; be sure to sift for a lump-free consistency.
• Parmesan Cheese – Infuses salty, nutty flavor into the filling; can be substituted with aged Gruyère for a different taste profile.
• Anchovies – Enhances umami flavor in the filling and dressing; feel free to skip if avoiding fish.
• Garlic Clove – Adds aromatic flavor to the filling; garlic powder works in a pinch.
• Parsley – Gives freshness and a pop of color; substitute with chives for a milder taste.
• Egg (soft boiled) – Acts as a binder in Caesar dressing; silken tofu makes a great egg-free alternative.

For the Dressing
• White Wine Vinegar & Dijon Mustard – Provide acidity and tang; apple cider vinegar can serve as a substitute.
• Olive Oil – Essential for emulsifying the dressing; avocado oil is a delicious alternative for a different flavor.
• Worcestershire Sauce – Gives depth to the Caesar dressing; can be omitted for a vegetarian version.

For Serving
• Romaine Lettuce – Used for garnish and as part of the purée; feel free to use any leafy green.
• Spinach – Adds color and nutritional value to the purée; optional but highly recommended.
• Cress – A perfect garnish for presentation; can replace with microgreens for an eye-catching touch.

With these ingredients and a sprinkle of love, you're closer to creating delicious Caesar salad croquettes that will wow everyone at the table!

Step‑by‑Step Instructions for Caesar salad croquettes

Step 1: Poach the Chicken
Begin by poaching the boneless skinless chicken thighs in a pot of gently simmering seasoned chicken stock for about 12 to 14 minutes. The chicken should be cooked through and tender but not overdone; it'll be juicy and flavorful. Once poached, remove the chicken and allow it to cool before chopping it into small pieces.

Step 2: Make the Roux
In a medium saucepan, melt unsalted butter over medium heat until bubbly, then add sifted plain flour to create a roux. Stir continuously for about 2-3 minutes until it turns a light golden color. Gradually whisk in the reserved chicken stock from poaching, stirring until the mixture thickens. Incorporate the chopped chicken, grated Parmesan cheese, chopped anchovies, minced garlic, and parsley, mixing until well combined.

Step 3: Chill the Mixture
Transfer the mixture onto a tray lined with parchment paper and spread it out evenly. Refrigerate it for at least 1 hour, or until the mixture is firm enough to mold. This cooling step is crucial for forming your Caesar salad croquettes, as it helps them hold their shape during frying.

Step 4: Prepare the Dressing
While the mixture is chilling, blend a soft-boiled egg, white wine vinegar, Dijon mustard, and anchovies in a bowl. Slowly drizzle in olive oil while whisking until the dressing emulsion forms and thickens. Taste the dressing and adjust the seasoning with salt, Worcestershire sauce, and extra Parmesan cheese if needed.

Step 5: Set Up the Breading Station
Prepare your breading station with three shallow dishes: one with flour, one with a beaten egg, and the third with breadcrumbs. Take the chilled croquette mixture out of the refrigerator, and form small balls or patties. Coat each in flour, dip in the egg wash, and finally roll in breadcrumbs to achieve the classic crispy exterior.

Step 6: Prepare the Spinach Purée
In a saucepan, blanch a handful of romaine lettuce and spinach in boiling water for about 2 minutes until bright green. Drain and immediately plunge them into ice water to stop the cooking process. Once cooled, blend the greens with a touch of olive oil until smooth and vibrant. Set aside to chill before plating.

Step 7: Fry the Croquettes
Heat vegetable oil in a deep pot or fryer to 180°C (356°F). Carefully fry the coated Caesar salad croquettes in batches for about 2 to 3 minutes, or until they're golden brown and crispy on all sides. Use a slotted spoon to transfer them to a plate lined with paper towels to absorb excess oil.

Step 8: Plate and Serve
On individual plates, swirl the chilled spinach purée to create a beautiful base. Place the freshly fried Caesar salad croquettes on top, drizzling them with the prepared dressing. Garnish each plate with additional romaine, shavings of Parmesan, and a sprinkle of cress for a stunning presentation.

Make Ahead Options

These Caesar salad croquettes are perfect for busy home cooks looking to simplify meal prep! You can prepare the croquette mixture and refrigerate it up to 24 hours in advance, allowing the flavors to meld beautifully. After chilling, form the croquettes and store them in an airtight container until you're ready to cook. To maintain their crunchy texture, fry the croquettes just before serving—heat oil to 180°C (356°F) and fry for 2-3 minutes until golden brown. This way, your Caesar salad croquettes will be just as delicious and fresh, bringing gourmet flair to your table with minimal effort on the day of serving!

Expert Tips for Caesar Salad Croquettes

  • Cook Chicken Right: Ensure the chicken thighs are perfectly poached—fully cooked yet tender—so they stay juicy and flavorful in the croquettes.

  • Prep Time Matters: Be patient! Chilling the mixture for at least an hour helps the croquettes hold their shape while frying, ensuring the best texture.

  • Oil Temperature Check: Fry in oil preheated to 180°C (356°F). Cold oil can lead to soggy croquettes, while overheating can burn them.

  • Breading Technique: For an even crunch, gently press the croquettes into the breadcrumbs, ensuring they're well-coated without clumps.

  • Dressing Balance: Taste your Caesar dressing as you go. Adjust the salt or Worcestershire sauce to ensure the flavors shine, complementing the croquettes perfectly.

  • Serving Style: Serve your Caesar salad croquettes on a vibrant spinach purée and top with fresh garnishes for a stunning presentation that’s as delightful as the flavors!

Storage Tips for Caesar Salad Croquettes

  • Fridge: Store leftover croquettes in an airtight container for up to 3 days. To retain their crunch, reheat them in the oven at 180°C (356°F) for about 10 minutes.

  • Freezer: For longer storage, freeze uncooked croquettes in a single layer on a baking sheet, then transfer to a freezer bag for up to 2 months. Fry from frozen, adding an extra minute to the cooking time.

  • Reheating: When ready to serve, reheat the cooked croquettes in a preheated oven for 10-15 minutes or until heated through and crispy. Avoid microwaving to maintain texture.

  • Make-Ahead: Assemble your Caesar salad croquettes a day in advance. Just fry them right before serving for a delightful, fresh appetizer!

Caesar Salad Croquettes Variations

Embrace the spirit of culinary creativity by personalizing these delicious croquettes with some simple swaps and additions!

  • Vegetarian Delight: Substitute chicken with mushrooms or tofu for a hearty, plant-based twist. It’s a delicious way to pack in flavor and nutrition!

  • Cheesy Options: Swap out Parmesan for tangy feta or creamy goat cheese. Each option brings its own robust flavor, enhancing your croquettes in a delightful way.

  • Spicy Kick: Mixed in some cayenne pepper or hot sauce for a fiery version. Just imagine those spicy, crunchy bites paired with cool creamy dressing!

  • Herb Infusion: Change up the parsley for fresh dill or basil. The aromatic difference will elevate the dish and tantalize the taste buds even further.

  • Nutty Crunch: Add crushed nuts like walnuts or almonds into the filling for added texture and earthiness. It’s a fun surprise in every croquette!

  • Lighter Touch: For a healthier option, air fry the croquettes instead of deep-frying. You won’t miss the grease but will enjoy all the crispy bliss.

  • Sweet Surprise: Sprinkle some finely chopped sundried tomatoes or roasted red peppers into the mixture for a sweet, tangy flavor that cuts through the richness of the cheese.

For even more variety, adventurous eaters might pair these croquettes with a vibrant German Potato Salad or a refreshing Avocado Egg Salad for a delightful meal experience!

What to Serve with Caesar Salad Croquettes

Elevate your meal experience with these delightful croquettes by pairing them with fresh and complementary sides that excite the palate.

  • Creamy Mashed Potatoes: The velvety texture of mashed potatoes adds comfort, balancing the crunch of the croquettes.
  • Garlic Butter Asparagus: Crisp-tender asparagus with a garlic butter glaze offers a fresh, vibrant contrast to the savory flavors.
  • Zesty Coleslaw: A crunchy, tangy coleslaw brings a delightful crunch and acidity, ensuring a well-rounded plate.
  • Cauliflower Rice Salad: Light and fluffy cauliflower rice mixed with herbs provides a nutritious, low-carb option that complements the rich croquettes.
  • Roasted Vegetable Medley: A colorful array of roasted vegetables enhances the meal's visual appeal while adding natural sweetness to balance the flavors.
  • Chilled Tomato Gazpacho: This refreshing soup can cleanse the palate between bites, providing a zesty kick that complements the savory croquettes.
  • Lemon-Infused Quinoa: Nutty quinoa flavored with lemon and herbs adds a delightful texture and a subtle brightness to your dish.
  • Sparkling Lemonade: A refreshing drink that cuts through the richness of the croquettes, perfectly quenching your thirst.
  • Crème Brûlée: Finish with a delicious dessert that offers a creamy texture and sweet surprise, contrasting beautifully with the savory starter.

Caesar Salad Croquettes Recipe FAQs

How should I select ripe ingredients for the croquettes?
Absolutely! When selecting chicken, opt for boneless, skinless chicken thighs—they provide moisture and tenderness. Look for fresh, vibrant greens and check for dark spots on any leafy ingredients. For the cheese, ensure it’s freshly grated to get the best flavor.

What’s the best way to store leftover croquettes?
You can store leftover croquettes in an airtight container in the fridge for up to 3 days. To keep them crispy, reheat in the oven at 180°C (356°F) for about 10 minutes before serving.

Can I freeze the croquettes? How do I do that?
Certainly! To freeze uncooked croquettes, place them on a baking sheet in a single layer and freeze until firm, then transfer to a freezer bag for up to 2 months. When ready to fry, cook them from frozen, adding an extra minute to the cooking time for a perfectly crispy finish.

What if my croquette mixture is too wet to form?
Very often, that can happen! If the mixture is too wet, try adding a little more sifted flour to help bind it together. Alternatively, chilling the mixture for a longer time can also help firm it up, making it easier to shape into croquettes.

Are there any dietary considerations I should keep in mind?
Definitely! If gluten is a concern, you can make your Caesar salad croquettes gluten-free by substituting plain flour with a 1:1 gluten-free blend and using gluten-free breadcrumbs. For a vegetarian option, simply omit the anchovies and swap the chicken for a hearty vegetable alternative like mushrooms or chickpeas.

Can pets eat any part of these croquettes?
While the ingredients in the croquettes are generally safe for dogs, you should avoid sharing fried treats with pets due to high-fat content. Always consult a vet before introducing new foods!

Caesar salad croquettes

Crispy Caesar Salad Croquettes With a Savory Chicken Twist

Delicious Caesar salad croquettes combining chicken and classic flavors for a unique appetizer.
Print Recipe Pin Recipe
Prep Time 1 hour hr
Cook Time 15 minutes mins
Chilling Time 1 hour hr
Total Time 2 hours hrs 15 minutes mins
Servings: 4 croquettes
Course: Appetizers
Cuisine: American
Calories: 150
Ingredients Equipment Method Nutrition Notes

Ingredients
  

For the Croquettes
  • 2 pieces Boneless Skinless Chicken Thighs Provides richness and moisture
  • 2 cups Chicken Stock Homemade stock is recommended
  • 4 tablespoons Unsalted Butter Can be substituted with olive oil for a dairy-free option
  • 1/2 cup Plain Flour Be sure to sift for a lump-free consistency
  • 1/2 cup Parmesan Cheese Can be substituted with aged Gruyère
  • 3 pieces Anchovies Feel free to skip if avoiding fish
  • 1 clove Garlic Garlic powder works in a pinch
  • 2 tablespoons Parsley Substitute with chives for a milder taste
  • 1 piece Egg (soft boiled) Silken tofu makes a great egg-free alternative
For the Dressing
  • 2 tablespoons White Wine Vinegar Can substitute with apple cider vinegar
  • 1 tablespoon Dijon Mustard
  • 1/2 cup Olive Oil Avocado oil is a delicious alternative
  • 1 teaspoon Worcestershire Sauce Can be omitted for a vegetarian version
For Serving
  • 2 cups Romaine Lettuce Used for garnish and as part of the purée
  • 1 cup Spinach Optional but highly recommended
  • 1/4 cup Cress Can replace with microgreens

Equipment

  • Saucepan
  • Blender
  • Fryer
  • Baking Sheet
  • Parchment Paper

Method
 

Step-by-Step Instructions
  1. Poach the boneless skinless chicken thighs in seasoned chicken stock for about 12 to 14 minutes until cooked through.
  2. Melt unsalted butter in a saucepan, add sifted flour to create a roux, and whisk in chicken stock until thickened.
  3. Chill the mixture for at least 1 hour or until firm enough to mold.
  4. Blend soft-boiled egg, white wine vinegar, Dijon mustard, and anchovies, then drizzle in olive oil while whisking to emulsion.
  5. Set up a breading station with flour, beaten egg, and breadcrumbs. Form croquette balls and coat them accordingly.
  6. Blanch romaine and spinach in boiling water, then blend with olive oil until smooth for the purée.
  7. Fry the coated croquettes in hot oil until golden brown and crispy on all sides.
  8. Serve on a swirl of spinach purée, drizzled with dressing, and garnished with romaine, Parmesan, and cress.

Nutrition

Serving: 1croquetteCalories: 150kcalCarbohydrates: 10gProtein: 8gFat: 10gSaturated Fat: 4gPolyunsaturated Fat: 1gMonounsaturated Fat: 4gCholesterol: 30mgSodium: 400mgPotassium: 200mgFiber: 1gSugar: 1gVitamin A: 500IUVitamin C: 5mgCalcium: 150mgIron: 1mg

Notes

These croquettes are best served freshly made but can also be stored for up to 3 days in the fridge or frozen for 2 months.

Tried this recipe?

Let us know how it was!

Mini Caprese Bites Perfect for Effortless Entertaining

January 15, 2026 by Grace Snow Leave a Comment

Stepping into a sunlit Italian kitchen, the aroma of fresh basil and ripe tomatoes wafts through the air, reminding me of summer evenings spent with family and friends. It’s memories like these that inspired my Mini Caprese Bites, a delightful twist on the classic Caprese salad. With just a few fresh ingredients and no cooking required, these vegetarian appetizers come together in a mere 10 minutes—perfect for any gathering! Not only are they light and refreshing, but they also bring a touch of elegance that will impress your guests. Whether you're hosting a casual brunch or an elegant dinner party, these bite-sized wonders are sure to be a hit. Will you be the one to share these delicious morsels?

Why are Mini Caprese Bites a Must-Try?

Effortless Creation: With just a handful of fresh ingredients, these delectable bites require no cooking, making them perfect for even the busiest hosts.
Flavor Explosion: The vibrant combination of juicy tomatoes, creamy mozzarella, and fragrant basil creates a delightful burst of flavor in every mouthful.
Versatile Delight: Whether served at a picnic or a formal soirée, these Mini Caprese Bites effortlessly elevate any occasion. You can even explore variations with Mini Tropical Pavlovas for dessert!
Crowd Favorite: Their bite-sized nature means they’re easy to enjoy, making them a guaranteed hit at gatherings.
Healthy Choice: Packed with vitamins and healthy fats, they not only taste great but also nourish your guests.

Mini Caprese Bites Ingredients

For the Bites

  • Cherry Tomatoes – They provide juiciness and sweetness; if desired, roasted tomatoes can be used for a deeper flavor.
  • Fresh Basil Leaves – These add aromatic freshness; other fragrant herbs like oregano can be substituted for variety.
  • Mozzarella Balls (Bocconcini) – They deliver a creamy texture and mild taste; feel free to experiment with burrata or ricotta, keeping in mind texture stability.

For the Drizzle

  • Extra Virgin Olive Oil – This ingredient enhances flavor and richness, making your Mini Caprese Bites truly delightful.
  • Balsamic Glaze – Adds a sweet tangy finish; balsamic vinegar can be used for a lighter touch instead.
  • Salt and Pepper – They balance the flavors beautifully; adjust the quantity according to your taste.

Step‑by‑Step Instructions for Mini Caprese Bites

Step 1: Prep Ingredients
Start by washing your cherry tomatoes thoroughly under cool running water. Select mozzarella balls that are about the same size as the tomatoes, or slice larger ones into bite-sized pieces. Gently pat everything dry with a clean kitchen towel to ensure the Mini Caprese Bites hold well without excess moisture.

Step 2: Assemble Bites
Grab a toothpick or skewer to start constructing your Mini Caprese Bites. First, thread a cherry tomato onto the stick, then add a fresh basil leaf followed by a mozzarella ball. Repeat this process until you've utilized all your ingredients, creating a delightful stack of colors and textures that showcases the delicious flavors.

Step 3: Presentation
Carefully arrange your assembled Mini Caprese Bites on a beautiful serving platter, allowing space between each one. Drizzle a generous amount of extra virgin olive oil over them, followed by a beautiful swirl of balsamic glaze to add that sweet tangy finish. Make sure to sprinkle a pinch of salt and freshly cracked pepper for a seasoning boost.

Step 4: Chill (Optional)
For a refreshing experience, place the platter of Mini Caprese Bites in the refrigerator for 10–15 minutes. This chilling time helps the flavors meld beautifully, making each bite even more delicious. You can serve them cold or let them sit at room temperature for about 30 minutes before serving if you prefer a softer temperature.

What to Serve with Mini Caprese Bites

Indulging in these vibrant appetizers can inspire a delightful full meal that elevates your gathering.

  • Crunchy Breadsticks: Their crisp texture offers a satisfying contrast to the creamy mozzarella and juicy tomatoes, perfect for nibbling.
  • Refreshing Green Salad: A light salad with mixed greens and a citrus vinaigrette complements the flavors and adds a vibrant touch to your table.
  • Herbed Pasta Salad: The richness of a pasta salad tossed in a lemon-herb dressing pairs beautifully, enhancing the Italian theme of your meal.
  • Marinated Olives: Their briny flavor adds a savory touch that balances the sweetness of the Caprese bites, enticing your taste buds.
  • Sparkling White Wine: An effervescent wine elevates the dining experience, elevating the freshness of the tomatoes and basil for a perfect sip.
  • Lemon Sorbet: This light and refreshing dessert cleanses the palate, making it a sweet finish after the savory flavors of the Mini Caprese Bites.

Create a memorable meal by mixing and matching these suggestions, making each bite a delicious celebration of fresh flavors.

Expert Tips for Mini Caprese Bites

• Fresh Ingredients Matter: Always use the freshest tomatoes and basil for the best flavor. Subpar ingredients can dampen the delightful taste of your Mini Caprese Bites.

• Assembly Time: Aim to assemble the bites no more than two hours before serving. This helps maintain their bright colors and fresh taste.

• Alternative Herbs: If you want to shake it up, try adding other herbs like mint or parsley alongside basil. They can provide an interesting spin on the classic flavors.

• Mind the Salt: Be cautious with salt; too much can overpower the fresh ingredients. Start with a light sprinkle and adjust to taste for your Mini Caprese Bites.

• Serve Deconstructed for Kids: If you have little ones, consider allowing them to build their own bites. This makes it fun and avoids toothpick hazards!

Storage Tips for Mini Caprese Bites

Fridge: Store assembled Mini Caprese Bites in an airtight container in the refrigerator for up to 24 hours to maintain freshness and flavor.

Preparing Ahead: If you plan to make them in advance, keep the ingredients separate and assemble just before serving for the best result.

Avoid Freezing: It’s best not to freeze Mini Caprese Bites, as the fresh ingredients, particularly the mozzarella and basil, will lose their desired texture and flavor when thawed.

Serving Suggestions: Before serving, drizzle a little extra olive oil and balsamic glaze to refresh the flavors, enhancing the visual appeal too.

Make Ahead Options

These Mini Caprese Bites are perfect for busy home cooks wanting to save time while impressing guests! You can prepare the components—wash and slice the cherry tomatoes and mozzarella, and separate the basil leaves—up to 24 hours in advance. Just be sure to store them separately in airtight containers to maintain their freshness and prevent the basil from wilting. When you’re ready to serve, simply assemble the bites on skewers and drizzle with olive oil and balsamic glaze. By prepping ahead, you’ll enjoy effortless entertaining and flavorful results, allowing you more time to relax and mingle with your guests!

Mini Caprese Bites Variations & Substitutions

Feel free to play with these Mini Caprese Bites, letting your creativity flow and tantalizing your taste buds!

  • Vegan Option: Swap mozzarella for vegan cheese or marinated tofu for a delicious plant-based twist.
  • Spicy Kick: Add chili flakes or sliced jalapeños to elevate the heat and excitement of flavor. Spice blends like Italian herbs can also make a delightful addition!
  • Dairy-Free: Use cashew cheese or a nut-based spread in place of mozzarella for a creamy, dairy-free alternative.
  • Herb Variety: Try substituting fresh basil with arugula or mint, offering a different yet inviting flavor profile. Don’t forget to explore variations with herbs found in dishes like Mini Tropical Pavlovas.
  • Grilled Twist: For a smoky flavor, grill the cherry tomatoes briefly before assembling; this adds depth to each bite.
  • Fruit Fusion: Consider adding a slice of ripe avocado or a piece of fresh peach to bring a sweet and creamy twist.
  • Crunchy Texture: Incorporate toasted pine nuts or crunchy baguette crisps as an exciting topping, enhancing both taste and texture.
  • Caprese Salad Skewers: Instead of traditional assembly, layer ingredients on longer skewers for a fun, shareable presentation!

Feel free to combine some of these ideas to create a mouthwatering experience that perfectly fits your event or personal taste!

Mini Caprese Bites Recipe FAQs

What size cherry tomatoes should I choose?
When selecting cherry tomatoes, opt for ones that are firm with vibrant color. They should feel heavy for their size and have smooth skin without any dark spots or bruises. Generally, bite-sized tomatoes that are around 1 to 2 inches in diameter work best for Mini Caprese Bites.

How should I store leftover Mini Caprese Bites?
Store any leftover Mini Caprese Bites in an airtight container in the refrigerator for up to 24 hours to keep them fresh. This ensures that you can enjoy these tasty morsels without quality loss. Make sure to consume them within this timeframe for the best taste experience!

Can I freeze assembled Mini Caprese Bites?
I wouldn’t recommend freezing assembled Mini Caprese Bites. The fresh mozzarella and basil will lose their texture and flavor when thawed, resulting in a less-than-ideal bite. Instead, prepare the ingredients separately and assemble them fresh just before serving to maintain their delightful quality.

What should I do if the tomatoes are too ripe?
If your tomatoes are overly ripe, they may become mushy, which can affect the integrity of your bites. Look for firm tomatoes that do not yield easily to gentle pressure. If they are slightly past their prime, you may consider roasting them to achieve a deeper flavor profile, but for this recipe, fresh tomatoes are ideal.

Can these be made vegan-friendly?
Absolutely! For a vegan version of Mini Caprese Bites, simply replace the mozzarella with vegan cheese or marinated tofu. This way, you can still enjoy all the freshness of the original recipe while catering to plant-based diets. Just make sure to choose a brand that complements the flavors of the basil and tomatoes.

What’s the best way to improve flavor without added salt?
To enhance the flavors of your Mini Caprese Bites without using salt, try adding a squeeze of fresh lemon juice or a sprinkle of lemon zest on top before serving. The acidity will brighten the flavors and elevate the freshness without overpowering the dish!

Mini Caprese Bites

Mini Caprese Bites Perfect for Effortless Entertaining

Mini Caprese Bites are effortless vegetarian appetizers that combine fresh ingredients for a delightful taste experience.
Print Recipe Pin Recipe
Prep Time 10 minutes mins
Chill Time 15 minutes mins
Total Time 25 minutes mins
Servings: 8 bites
Course: Appetizers
Cuisine: Italian
Calories: 80
Ingredients Equipment Method Nutrition Notes

Ingredients
  

For the Bites
  • 12 pieces Cherry Tomatoes Roasted tomatoes can be used for a deeper flavor.
  • 12 leaves Fresh Basil Leaves Other fragrant herbs like oregano can be substituted.
  • 8 ounces Mozzarella Balls (Bocconcini) Burrata or ricotta can be used if desired.
For the Drizzle
  • 3 tablespoons Extra Virgin Olive Oil
  • 2 tablespoons Balsamic Glaze Balsamic vinegar can be used for a lighter touch.
  • to taste Salt
  • to taste Pepper

Equipment

  • toothpicks or skewers

Method
 

Step-by-Step Instructions for Mini Caprese Bites
  1. Start by washing your cherry tomatoes thoroughly under cool running water. Select mozzarella balls that are about the same size as the tomatoes, or slice larger ones into bite-sized pieces. Gently pat everything dry with a clean kitchen towel to ensure the Mini Caprese Bites hold well without excess moisture.
  2. Grab a toothpick or skewer to start constructing your Mini Caprese Bites. First, thread a cherry tomato onto the stick, then add a fresh basil leaf followed by a mozzarella ball. Repeat this process until you've utilized all your ingredients, creating a delightful stack of colors and textures.
  3. Carefully arrange your assembled Mini Caprese Bites on a serving platter. Drizzle a generous amount of extra virgin olive oil over them, followed by a swirl of balsamic glaze. Sprinkle a pinch of salt and freshly cracked pepper for seasoning.
  4. For a refreshing experience, place the platter of Mini Caprese Bites in the refrigerator for 10–15 minutes before serving. Serve them cold or allow them to sit at room temperature for about 30 minutes.

Nutrition

Serving: 1biteCalories: 80kcalCarbohydrates: 3gProtein: 4gFat: 7gSaturated Fat: 2gPolyunsaturated Fat: 0.5gMonounsaturated Fat: 5gCholesterol: 10mgSodium: 50mgPotassium: 150mgFiber: 1gSugar: 1gVitamin A: 500IUVitamin C: 10mgCalcium: 200mgIron: 0.5mg

Notes

Always use the freshest tomatoes and basil for the best flavor; consider letting kids build their own bites.

Tried this recipe?

Let us know how it was!

Sweet and Spicy Pepper Jelly Cheeseball Your New Favorite Appetizer

January 15, 2026 by Grace Snow Leave a Comment

As I was prepping for a cozy gathering last weekend, a delightful nibble made its debut on my table: a Sweet and Spicy Pepper Jelly Cheeseball. This no-bake wonder fuses smooth cream cheese with sharp cheddar and just the right amount of pepper jelly heat—perfect for those who crave a mix of sweet and savory in each bite. Not only is this appetizer a breeze to whip up, but it also brings an impressive touch to any party spread. Overflowing with colorful pecans, it's a true crowd-pleaser that's sure to spark conversation and appetites alike. Stored easily in the fridge, you can make it ahead of time, leaving you free to enjoy the festivities. Curious how this crowd favorite comes together? Let’s dive into the recipe!

Why Is This Cheeseball a Must-Try?

Irresistible Flavor: The combination of creamy cheeses and sweet-spicy pepper jelly creates a unique taste sensation that your guests will rave about.
Effortless Preparation: With no baking required, this cheeseball comes together in minutes, making it perfect for impromptu gatherings.
Stunning Presentation: Rolled in crunchy pecans, it’s not just delicious—it’s visually appealing, adding a pop of color to your appetizer spread.
Versatile Pairing Options: Serve it with crackers, fresh veggies, or even toasted baguette slices for a delightful crunch.
Make-Ahead Convenience: Prepare in advance and let the flavors meld overnight; it’s a time-saver you’ll appreciate when entertaining!

Add a touch of excitement to your next gathering with this Sweet and Spicy Pepper Jelly Cheeseball, and discover why it’s destined to become your go-to appetizer!

Sweet and Spicy Pepper Jelly Cheeseball Ingredients

For the Cheeseball Base
• Cream Cheese – This creamy base provides richness; choose full-fat for the best flavor.
• Sharp Cheddar Cheese – Delivers a robust, tangy bite; swap with mild cheddar for a softer taste.
• Garlic Powder – Enhances the cheeseball's flavor; fresh garlic can offer a stronger kick.
• Smoked Paprika – Adds a delicious depth; feel free to skip if you prefer a lighter flavor.
• Cayenne Pepper – Introduces optional spice; adjust the amount to suit your heat preference.

For the Sweet and Spicy Touch
• Sweet and Spicy Pepper Jelly – This key ingredient adds a perfect balance of sweetness and heat; regular pepper jelly can be a nice alternative if preferred.

For the Crunchy Coating
• Chopped Pecans – Creates a delightful crunch; walnuts can replace them, or omit for a nut-free option.

For Finishing Touches
• Green Onions – Use as an optional garnish to brighten up the dish and add freshness.

Step‑by‑Step Instructions for Sweet and Spicy Pepper Jelly Cheeseball

Step 1: Mix Base
In a large mixing bowl, combine 8 ounces of softened cream cheese and 1 cup of shredded sharp cheddar cheese. Use a hand mixer on medium speed for about 2 minutes until the mixture is smooth and creamy. This is the flavorful base for your Sweet and Spicy Pepper Jelly Cheeseball, so ensure no lumps remain.

Step 2: Add Seasonings
Sprinkle in 1 teaspoon of garlic powder, 1 teaspoon of smoked paprika, and optional cayenne pepper to taste. Use a spatula to gently fold these ingredients into the cheese mixture for about 1 minute until they are evenly distributed, enhancing the cheeseball’s flavor profile with warmth and depth.

Step 3: Incorporate Jelly
Carefully fold in 1/2 cup of sweet and spicy pepper jelly into the mixture, ensuring it’s evenly blended. Be gentle during this process—excessive mixing can alter the texture you desire. You should see delightful swirls of jelly throughout the cheeseball mixture, bringing both color and flavor.

Step 4: Shape and Chill
Once incorporated, use your hands to form the mixture into a ball shape. Wrap it tightly in plastic wrap and refrigerate for at least 1 hour. Chilling allows the flavors to meld and helps the cheeseball maintain its shape when served, giving you a firm, lovely appetizer.

Step 5: Coat with Pecans
After chilling, unwrap the cheeseball and place 1 cup of chopped pecans on a flat surface or plate. Roll the cheeseball in the pecans until it’s thoroughly coated. This crunchy exterior enhances the overall texture, making your Sweet and Spicy Pepper Jelly Cheeseball truly irresistible.

Step 6: Serve
Carefully transfer the cheeseball to a serving platter. If desired, sprinkle chopped green onions over the top for a fresh touch. This delightful cheeseball pairs perfectly with an assortment of crackers, breadsticks, or fresh veggies, making it the star of any gathering.

Storage Tips for Sweet and Spicy Pepper Jelly Cheeseball

Fridge: Store leftovers in an airtight container for up to one week. The flavors will continue to meld, enhancing the taste.

Freezer: For longer storage, freeze the cheeseball for up to 3 months. Wrap it tightly in plastic wrap and aluminum foil to prevent freezer burn.

Thawing: To enjoy your frozen Sweet and Spicy Pepper Jelly Cheeseball, thaw it overnight in the fridge. This will help retain its creamy texture.

Reheating: The cheeseball is best served chilled. Allow it to sit at room temperature for about 30 minutes before serving for optimal flavor and texture.

What to Serve with Sweet and Spicy Pepper Jelly Cheeseball

Elevate your appetizer spread with delightful pairings that enhance the flavors of this creamy and crunchy crowd-pleaser.

  • Assorted Crackers: Perfect for scooping, their crisp texture complements the creamy cheeseball while adding a welcome crunch.
  • Fresh Vegetable Sticks: Crisp cucumbers, vibrant bell peppers, and crunchy carrots add a refreshing contrast and a healthful touch to your spread.
  • Toasted Baguette Slices: Their warm, crunchy surface provides an excellent base for a generous dollop of cheeseball, creating a gourmet bite.
  • Fruit Platter: Juicy slices of apple or pear harmonize beautifully with the sweet-spicy flavor of the cheeseball for a delightful balance.
  • Wine Pairing: A chilled Chardonnay or a fruity Riesling complements the cheeseball’s richness and enhances its delightful flavors.
  • Spiced Nuts: Create a flavor explosion with a bowl of sweet and salty spiced nuts, echoing the pecans on the cheeseball and adding crunch.
  • Pickles or Olives: The briny tang of pickles or olives contrast with the cheeseball's sweetness, balancing the palate and offering a savory bite.
  • Dark Chocolate: For adventurous tastes, serving small pieces of dark chocolate offers a surprising yet exciting combination with the cheeseball’s flavors.
  • Mini Meat Skewers: Skewers of seasoned grilled chicken or sausage pairs well, introducing a savory element that rounds out your appetizer table beautifully.

Sweet and Spicy Pepper Jelly Cheeseball Variations

Feel free to play around with this recipe to cater to your taste buds or dietary needs!

  • Cheese Swap: Use feta or blue cheese for a bold, tangy twist. This adds a sophisticated note that pairs beautifully with the jelly's sweetness.
  • Herby Delight: Mix in fresh herbs like dill or chives to brighten the flavor. The fresh elements will create a garden-inspired taste that’s refreshing and vibrant.
  • Nut-Free Option: Replace pecans with sunflower seeds or completely omit nuts if allergies are a concern. You’ll still achieve a tasty cheeseball with a delightful crunch!
  • Spicy Upgrade: Add diced jalapeños or a splash of hot sauce for an extra kick of heat. This little twist will turn up the volume on the cheeseball and thrill spice lovers.
  • Fruit Addition: Incorporate finely chopped dried fruits like cranberries or apricots for a subtle sweetness and added chewiness. This mix of flavors can be a delightful surprise!
  • Smoky Flavor: Swap out smoked paprika with chipotle powder for a smoky, spicy depth. This change brings a new dimension that stands out on its own.
  • Sweetness Variation: Use regular pepper jelly or a fruit preserve to dial back the heat. A sweeter version will delight those who prefer a milder flavor profile.
  • New Coating: Roll the cheeseball in crushed tortilla chips or crispy onions instead of pecans for a fun twist. This unexpected coating can enhance both flavor and texture!

Whether you’re in the mood for something spicy, sweet, or savory, these variations are perfect for creating your own signature Sweet and Spicy Pepper Jelly Cheeseball. If you like more unique inspirations, consider experimenting with recipes like Smoky Sweet Potatoes or even the delectable Spicy Miso Tuna.

Make Ahead Options

These Sweet and Spicy Pepper Jelly Cheeseballs are perfect for meal prep, saving you time during busy gatherings! You can prepare the cheeseball up to 24 hours in advance; simply mix all the ingredients as outlined and shape it into a ball. Wrap it tightly in plastic wrap and refrigerate. This allows the flavors to meld beautifully while keeping the cheeseball firm and delicious. For a crunchy exterior, coat the cheeseball in chopped pecans just before serving to ensure they remain crispy. When it’s time to serve, transfer it to a platter, garnish with green onions if desired, and enjoy the effortlessly vibrant appetizer that’s just as good as fresh!

Tips for the Best Sweet and Spicy Pepper Jelly Cheeseball

  • Room Temperature Dairy: Ensure your cream cheese is at room temperature for a smoother texture and easy blending with the other ingredients.
  • Chill Time Matters: Don’t skip the chilling step! Refrigerating for at least an hour helps the cheeseball retain its shape when serving.
  • Handy Tips for Shaping: Lightly wet your hands with water when forming the cheeseball to minimize stickiness—this makes the process easier!
  • Jelly Integration: Gently fold in the pepper jelly. Overmixing can lead to a less appealing texture and flavor.
  • Nut Alternatives: If nut allergies are a concern, feel free to omit the pecans or use seeds like sunflower seeds to maintain the crunch.

Sweet and Spicy Pepper Jelly Cheeseball Recipe FAQs

How do I choose ripe ingredients for my cheeseball?
For your Sweet and Spicy Pepper Jelly Cheeseball, opt for cream cheese that is creamy without any lumps, preferably at room temperature for easy blending. Shredded sharp cheddar should have a vibrant color and no signs of moisture or clumping. When selecting pepper jelly, look for bright hues without any dark spots or separation—this ensures it’s fresh and flavorful!

What are the best storage methods for leftovers?
After indulging in your cheeseball, transfer any leftovers to an airtight container. Stored properly in the refrigerator, it will stay tasty for up to one week. The flavors will continue to blend and enhance over time, making it just as delightful for your next snack or party!

Can I freeze the Sweet and Spicy Pepper Jelly Cheeseball?
Absolutely! If you want to prepare ahead, wrap the cheeseball tightly in plastic wrap followed by aluminum foil to prevent freezer burn. You can freeze it for up to 3 months. When you're ready to serve, thaw it overnight in the fridge. Take it out about 30 minutes before serving to reach that perfect creamy consistency again.

What should I do if my cheeseball is too sticky to handle?
If you find your cheeseball mixture is too sticky, here’s a handy fix: light wetting of your hands can be a game-changer when shaping the ball. Just sprinkle a little water on your palms before handling—it helps to manage the stickiness and allows you to form it more easily without getting too gooey!

Are there any dietary considerations I should keep in mind?
Yes! Ensure that any guests with nut allergies are considered when rolling your cheeseball in chopped pecans. You can either omit them or substitute with pumpkin seeds or sunflower seeds for a similar crunchy texture. Additionally, always check the labels of your ingredients to ensure they are free from allergens that might be a concern for your friends and family.

Sweet and Spicy Pepper Jelly Cheeseball

Sweet and Spicy Pepper Jelly Cheeseball Your New Favorite Appetizer

This Sweet and Spicy Pepper Jelly Cheeseball is a no-bake, crowd-pleasing appetizer fusion of creamy cheeses and pepper jelly.
Print Recipe Pin Recipe
Prep Time 15 minutes mins
Chill Time 1 hour hr
Total Time 1 hour hr 15 minutes mins
Servings: 8 servings
Course: Appetizers
Cuisine: American
Calories: 250
Ingredients Equipment Method Nutrition Notes

Ingredients
  

For the Cheeseball Base
  • 8 ounces Cream Cheese Use full-fat for the best flavor.
  • 1 cup Sharp Cheddar Cheese Mild cheddar can be used as an alternative.
  • 1 teaspoon Garlic Powder Fresh garlic can offer a stronger kick.
  • 1 teaspoon Smoked Paprika Feel free to skip if a lighter flavor is desired.
  • to taste Cayenne Pepper Optional spice.
For the Sweet and Spicy Touch
  • 1/2 cup Sweet and Spicy Pepper Jelly Regular pepper jelly can be an alternative.
For the Crunchy Coating
  • 1 cup Chopped Pecans Walnuts can replace them or omit for a nut-free option.
For Finishing Touches
  • to taste Green Onions Use as an optional garnish.

Equipment

  • Mixing Bowl
  • hand mixer
  • plastic wrap
  • Spatula

Method
 

Step-by-Step Instructions
  1. In a large mixing bowl, combine softened cream cheese and shredded sharp cheddar cheese. Use a hand mixer on medium speed for about 2 minutes until smooth and creamy.
  2. Sprinkle in garlic powder, smoked paprika, and optional cayenne pepper to taste. Fold these ingredients into the cheese mixture for about 1 minute until evenly distributed.
  3. Gently fold in sweet and spicy pepper jelly, ensuring it’s evenly blended.
  4. Shape the mixture into a ball. Wrap it tightly in plastic wrap and refrigerate for at least 1 hour.
  5. Roll the cheeseball in chopped pecans until thoroughly coated.
  6. Transfer the cheeseball to a serving platter and sprinkle chopped green onions on top, if desired.

Nutrition

Serving: 1servingCalories: 250kcalCarbohydrates: 7gProtein: 5gFat: 22gSaturated Fat: 10gPolyunsaturated Fat: 2gMonounsaturated Fat: 8gCholesterol: 40mgSodium: 300mgPotassium: 100mgFiber: 1gSugar: 3gVitamin A: 500IUCalcium: 150mgIron: 1mg

Notes

For optimal texture, ensure cream cheese is at room temperature and do not skip the chilling step.

Tried this recipe?

Let us know how it was!
  • 1
  • 2
  • 3
  • …
  • 133
  • Next Page »

Welcome!

Hi, I’m Grace, a Sydney-based home cook with a passion for bold flavors and trending ingredients. Whether you’re a busy beginner or a seasoned foodie, you’ll find dishes here that are fresh, fun, and full of flavor.

More about me

Popular Recipes

  • Mushroom Crostini
    Deliciously Easy Mushroom Crostini for Your Next Gathering
  • Mini Phyllo Feta Bites
    Mini Phyllo Feta Bites for Effortless Entertaining
  • Onion Boil
    Savory Onion Boil Recipe: A Flavorful Vegan Delight
  • Sweet Potato Fondant with Smoked Almond Cream & Rosemary Oil
    Savory Sweet Potato Fondant with Smoked Almond Cream Delight

Footer

↑ back to top

About

  • Privacy Policy
  • Disclaimer
  • Terms & Conditions

Newsletter

  • Sign Up! for emails and updates

Contact

  • About me
  • Contact me

Copyright © 2025 TastyTrendIngredients