tastytrendingredients

  • Home
  • Recipes
    • Appetizers
    • Breakfast
    • Dessert
    • Dinner
    • Drinks
    • Salads
    • Snacks
    • Soups
  • About me
  • Contact me
menu icon
go to homepage
  • Home
  • Recipes
    • Appetizers
    • Breakfast
    • Dessert
    • Dinner
    • Drinks
    • Salads
    • Snacks
    • Soups
  • About me
  • Contact me
search icon
Homepage link
  • Home
  • Recipes
    • Appetizers
    • Breakfast
    • Dessert
    • Dinner
    • Drinks
    • Salads
    • Snacks
    • Soups
  • About me
  • Contact me
×

Chill Out with Cold Witches Brew Coffee: A Pumpkin Spice Delight

October 3, 2025 by Grace Snow Leave a Comment

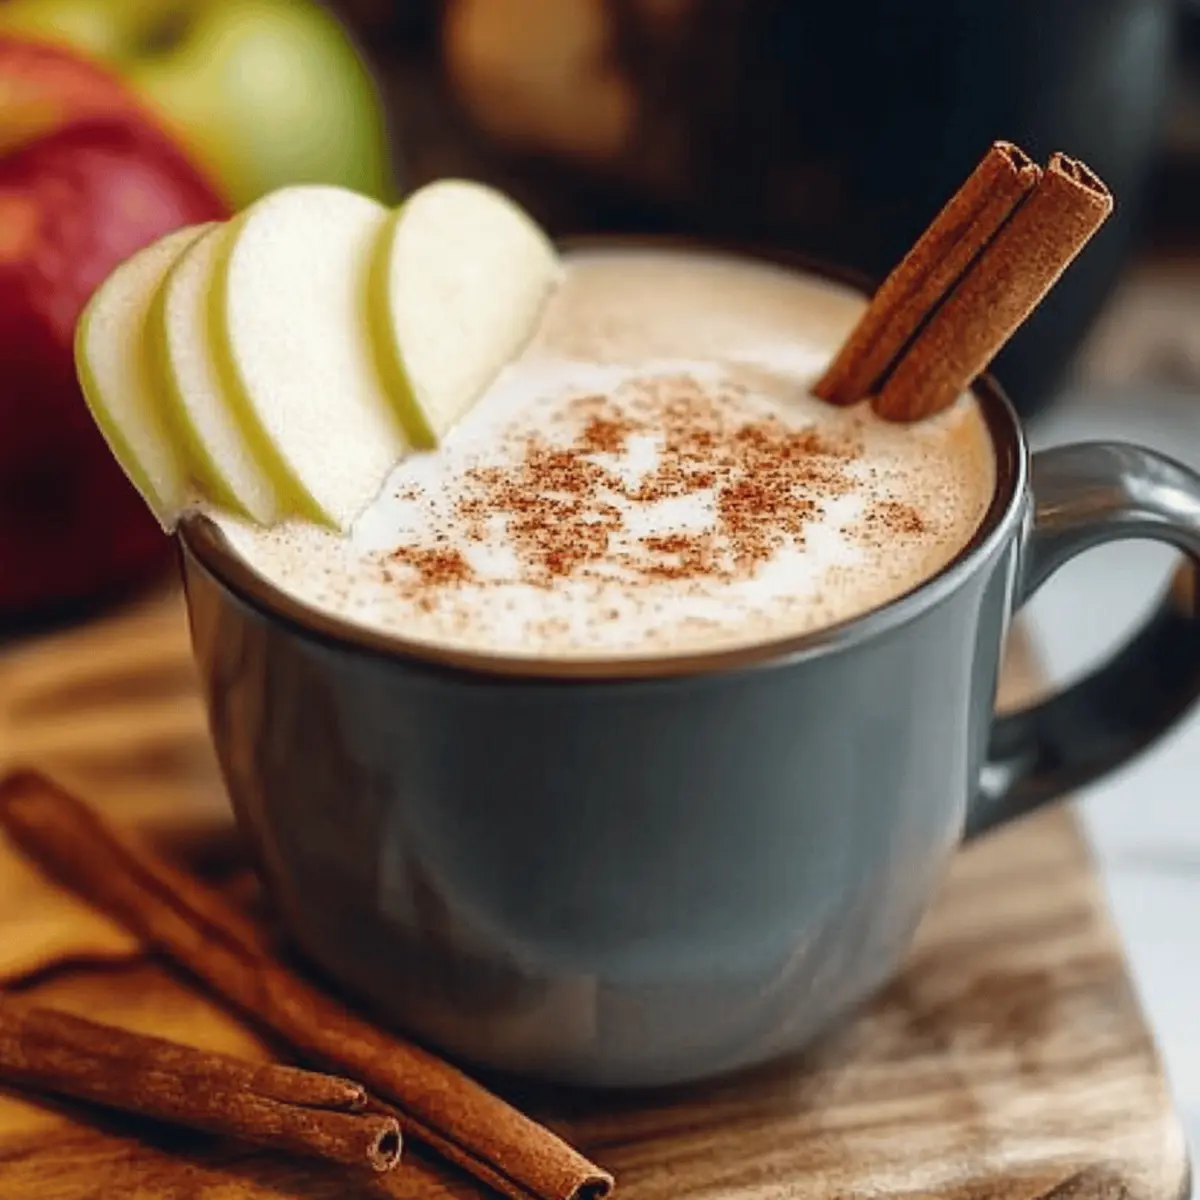
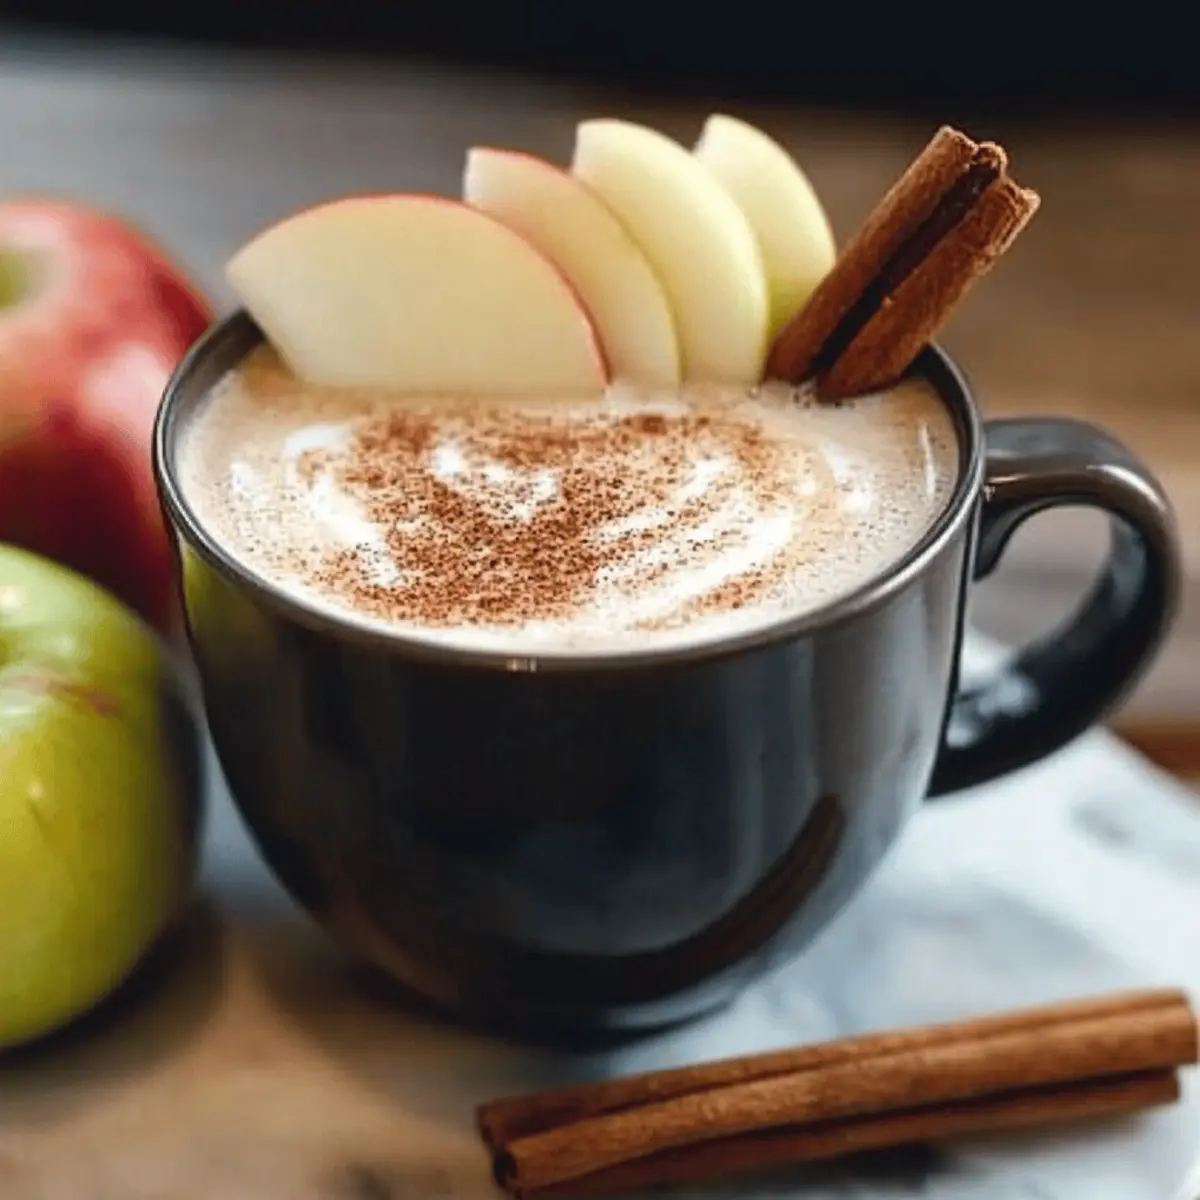
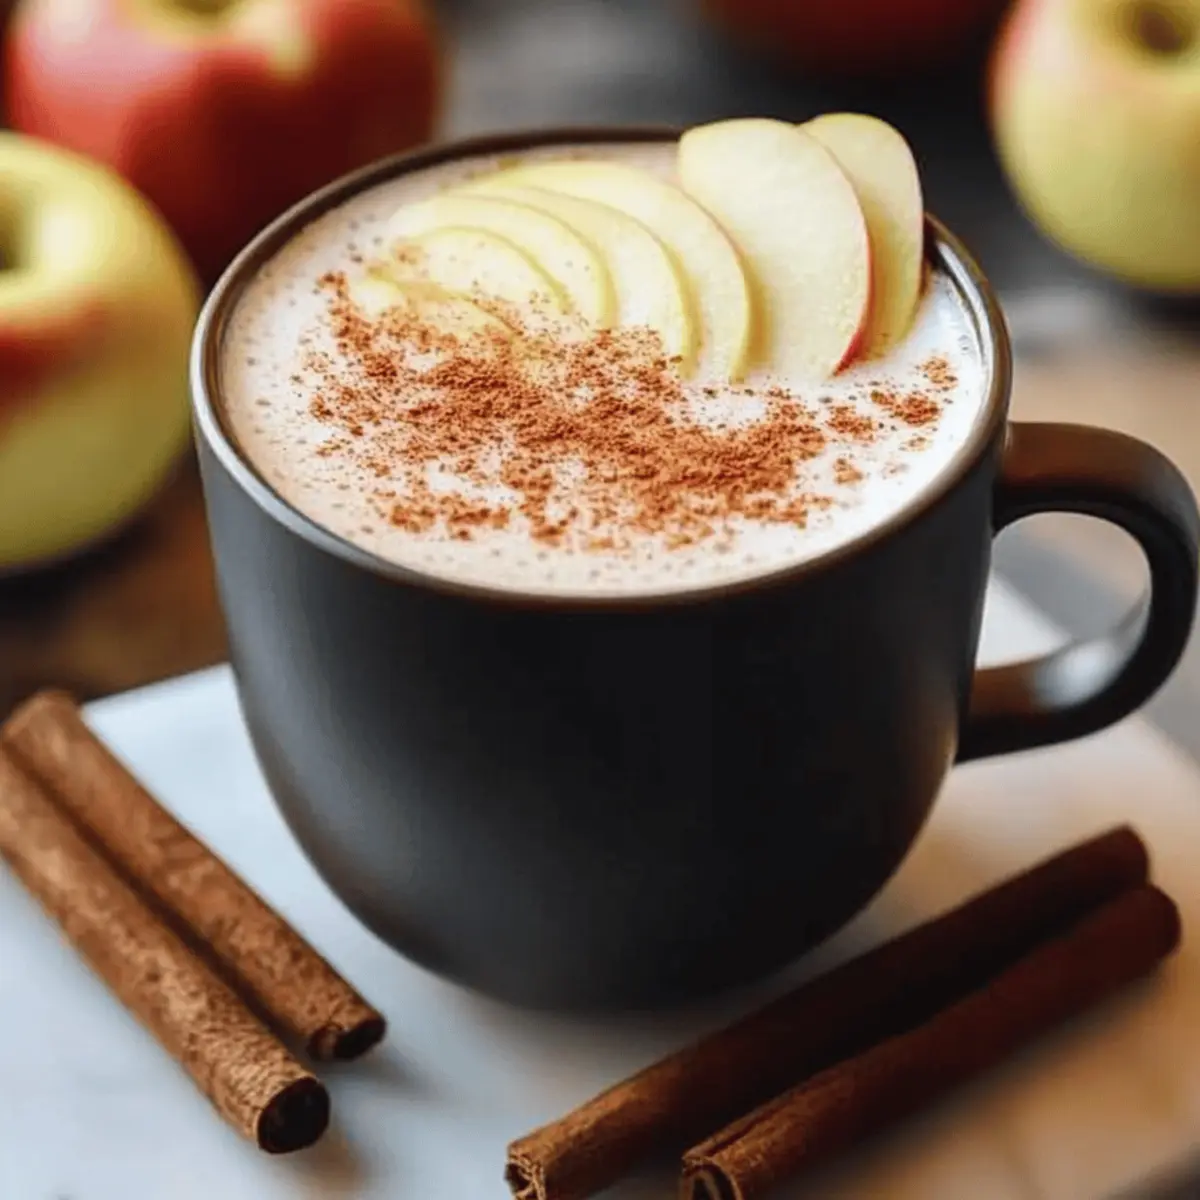
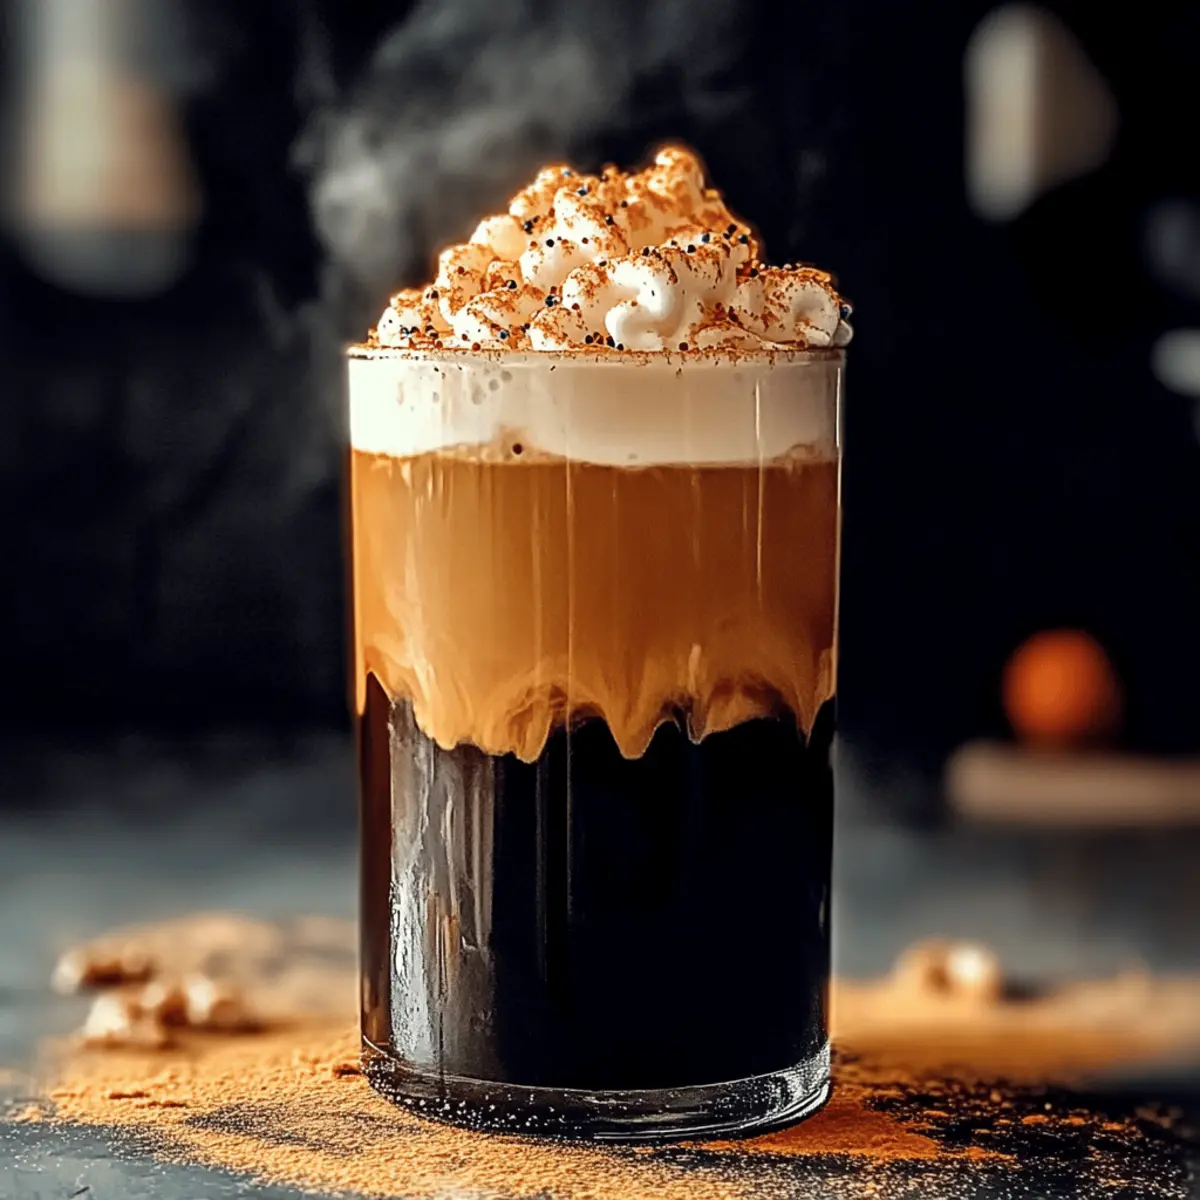
As the leaves begin to change and pumpkin patches bloom, I find myself craving the cozy embrace of autumn flavors. That's where my Cold Witches Brew Coffee comes in—a delightful blend of cold brew and pumpkin spice that’s both refreshing and comforting. This recipe is a true crowd-pleaser, bringing a festive twist and quick prep to your Halloween gatherings or laid-back afternoons. And the best part? It's fully customizable, offering dairy-free and sugar-free alternatives, so everyone can enjoy this seasonal treat. Are you ready to stir up some magic in your kitchen? Let’s dive into the enchanting world of this delicious brew!

Why is Cold Witches Brew Coffee special?

Autumn Bliss: This recipe captures the warm, inviting flavors of fall, making your taste buds dance with joy.
Customizable Delight: Whether you prefer dairy-free or sugar-free, there’s an option for everyone!
Quick and Easy: In just a few simple steps, you can whip up this refreshing drink with minimal effort.
Crowd-Pleasing Flavor: Delight friends and family at any gathering with this festive twist on a classic favorite.
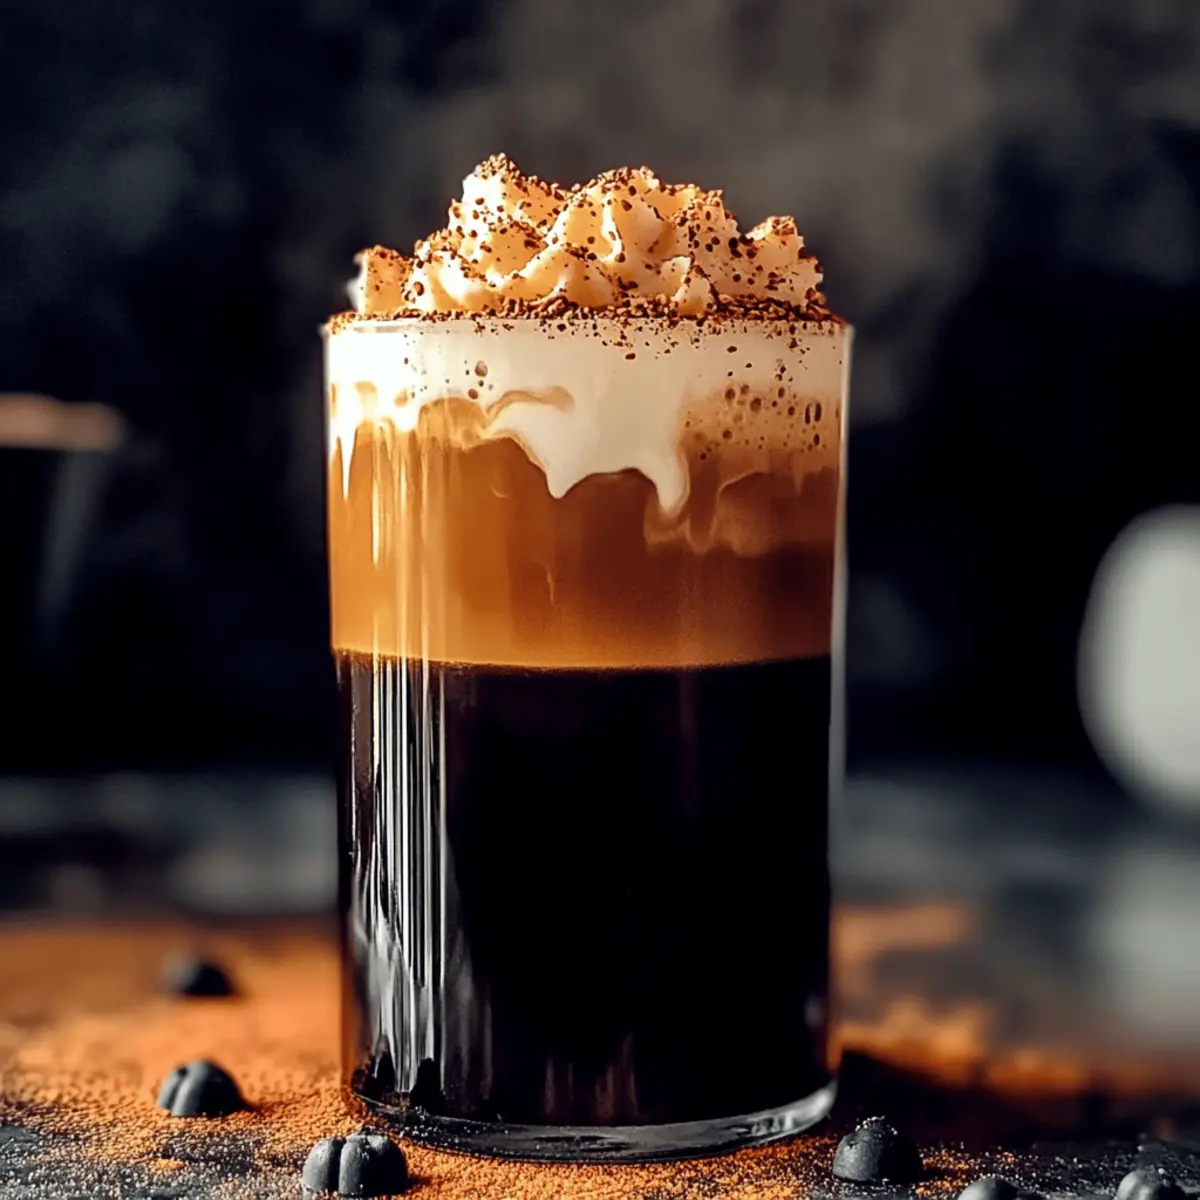
Textural Heaven: The creamy, frothy pumpkin-spice foam adds a luscious layer that feels both indulgent and refreshing.
Don't forget to try pairing it with some delicious spiced pumpkin muffins or check out my delightful Vegan Sushi for a full seasonal menu!

Cold Witches Brew Coffee Ingredients

For the Brew

• Cold Brew Coffee – The bold flavor base of your magical drink; you can choose between a concentrated or ready-to-drink option.
• Water – Helps achieve the perfect cold brew strength if you're diluting concentrate; aim for equal parts.

For the Sweetness

• Maple Syrup – Adds a delightful sweetness to balance the flavors; feel free to swap with honey or agave for different notes.
• Vanilla Paste/Extract – A touch of depth to enhance your coffee; both forms work interchangeably to lend a warm, inviting flavor.

For the Creamy Foam

• Heavy Whipping Cream – This creates a rich and fluffy foam layer; substitute with coconut cream for a delicious dairy-free alternative.
• Milk – Balances the consistency of your foam; opt for plant-based milk to keep it dairy-free.

For the Flavoring

• Pumpkin Pie Spice – The essence of fall captured in a jar, adding that iconic warmth; adjust the amount to suit your spice preference!
• Orange Gel Food Coloring – Optional for a festive look; consider natural options if you prefer a healthier alternative.

For the Finishing Touch

• Halloween Sprinkles – A fun and festive decoration to top off your creation; choose ones that fit your spook-tacular theme.

Dive into this festive recipe and experience the joy of my Cold Witches Brew Coffee—a perfect blend of flavors, textures, and seasonal charm!

Step‑by‑Step Instructions for Cold Witches Brew Coffee

Step 1: Prepare Cold Brew
Start by making your cold brew coffee, which serves as the foundation of your Cold Witches Brew Coffee. If using coffee grounds, steep them in cold water for 24 hours. Alternatively, dilute cold brew concentrate with equal parts water for a quick option. Once prepared, strain the mixture if needed, and keep it chilled until it's time to assemble your drink.

Step 2: Make Cold Foam
In a mixing bowl, whisk together heavy whipping cream, milk, maple syrup, vanilla paste, pumpkin pie spice, and optional orange gel food coloring. Use a hand mixer or whisk for about 2-3 minutes until the mixture thickens and becomes well combined. Chill this mixture in the refrigerator for about 15 minutes while you set up the rest of your ingredients.

Step 3: Assemble the Drink
Take a tall glass and pour in your prepared cold brew coffee. For added flavor, incorporate more maple syrup and a splash of vanilla extract according to your preference. If you enjoy your drink icy, fill the glass with ice cubes before proceeding to the next step—visualize those layers of rich flavor just waiting to be created.

Step 4: Whip Cold Foam
Retrieve the chilled foam mixture and froth it using an electric frother or blender for about 1-2 minutes until it becomes light and airy. Watch for the foam to double in volume and achieve a fluffy consistency. Remember, this cold foam will be the star layer of your Cold Witches Brew Coffee, so keep it light and inviting.

Step 5: Combine
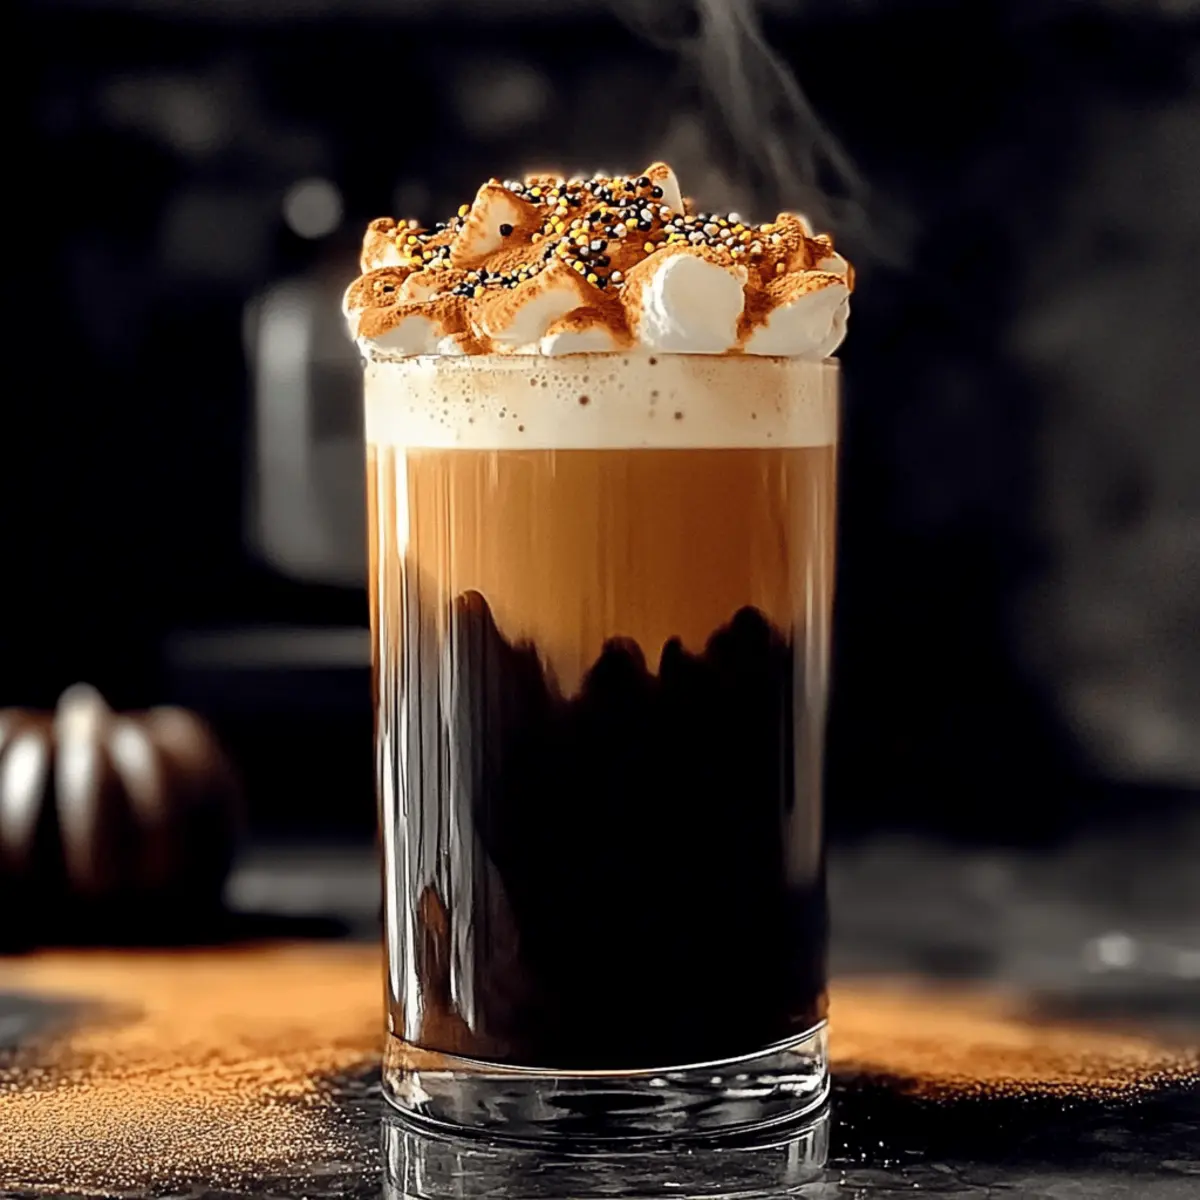
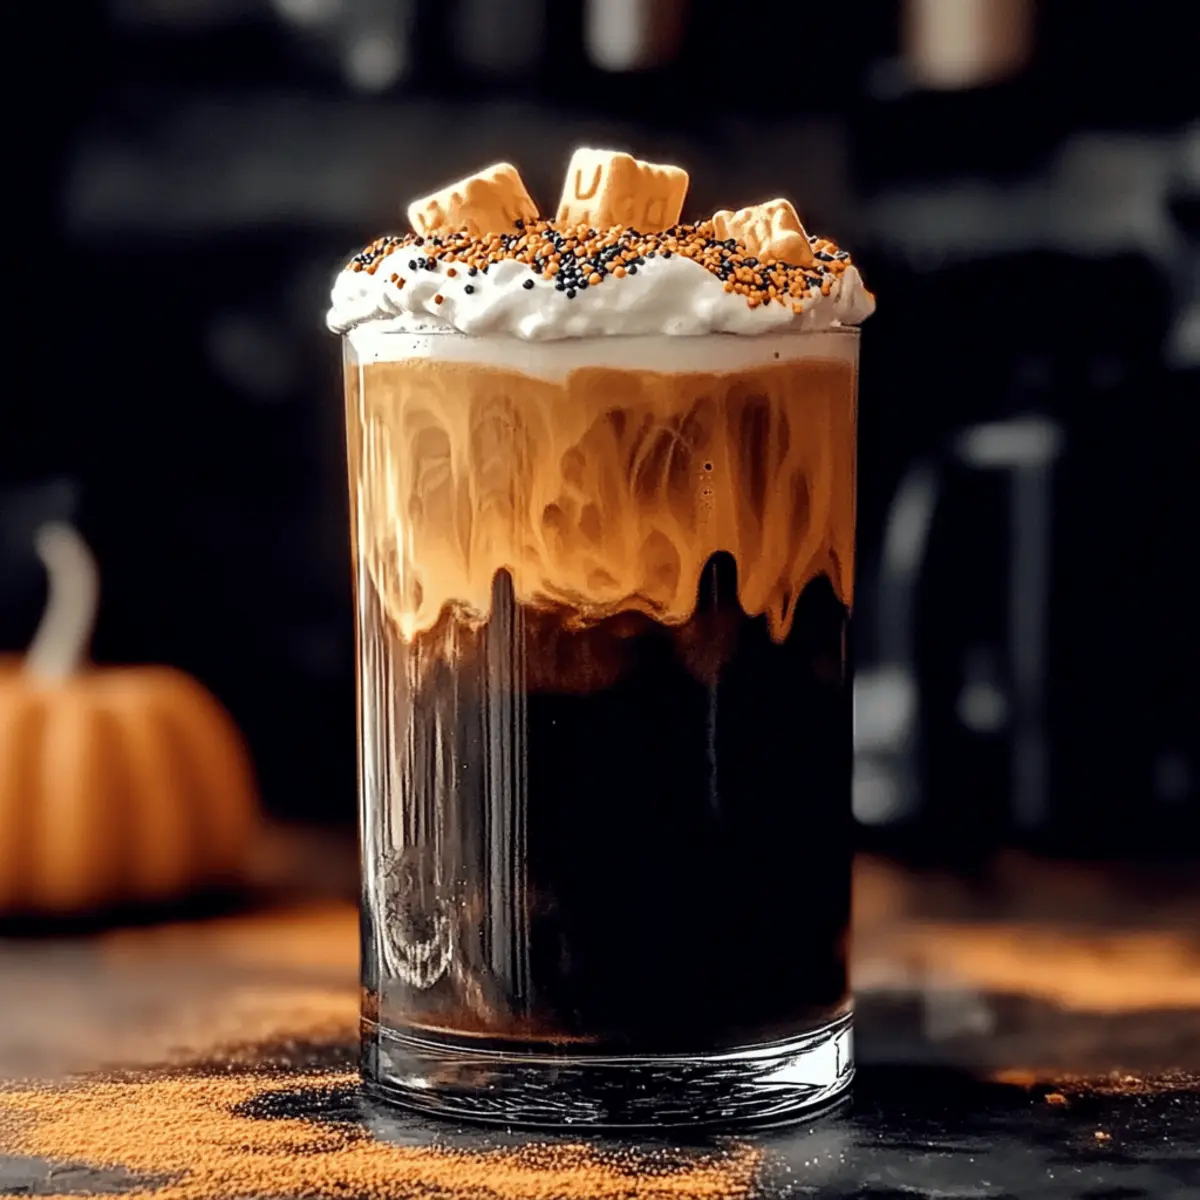
Finally, pour the fluffy whipped pumpkin spice foam over the cold brew coffee in your glass—see how it swirls and transforms the beverage into a festive delight! To finish, sprinkle Halloween-themed sprinkles on top for an extra touch of fun. This final layering creates a visual feast and enhances the drink's festive spirit, making it perfect for any autumn gathering.

How to Store and Freeze Cold Witches Brew Coffee

Fridge: Store leftover Cold Witches Brew Coffee in an airtight container for up to 3 days; give it a gentle stir before serving to mix the flavors.

Cold Foam: Prepare the pumpkin spice foam in advance and keep it refrigerated in a sealed container for up to 2 days; re-whip before using for the best texture.

Freezer: For longer storage, freeze the cold brew coffee in an ice cube tray; use the cubes in future drinks within 1–2 months for a refreshing twist.

Reheating: If you prefer your brew warm, carefully heat the cold brew coffee in a microwave or stovetop, but avoid bringing it to a boil to maintain flavor integrity.

Expert Tips for Cold Witches Brew Coffee

  • Chill Ingredients: Ensure your heavy cream and milk are well-chilled before whipping; this will help achieve a stable and fluffy foam for your Cold Witches Brew Coffee.

  • Don’t Over-Froth: Whip the cold foam until light and airy but avoid overdoing it to maintain that luscious texture; stop once it looks fluffy and holds peaks.

  • Adjust Sweetness: Tailor the sweetness of your Cold Witches Brew Coffee by modifying the amount of maple syrup or substituting with your preferred sugar alternative.

  • Spice It Up: Feel free to increase the pumpkin pie spice for a stronger fall flavor; this will elevate the autumn essence of your delightful brew.

  • Serving Size: For larger gatherings, double the recipe for more servings, but remember to adjust the foam mixture accordingly to maintain the creamy top.

Make Ahead Options

These Cold Witches Brew Coffee drinks are a blessing for busy home cooks, allowing you to enjoy festive flavors without the last-minute rush! You can prepare the cold brew coffee up to 24 hours in advance; simply steep your coffee grounds in cold water or dilute concentrate as directed. The pumpkin spice cold foam can also be made ahead and stored in the refrigerator for up to 2 days—just remember to re-whip it lightly before serving to maintain that fluffy texture. When it’s time to serve, pour the cold brew into glasses, top with the whipped foam, and add your Halloween sprinkles for a delightful presentation. Enjoy the convenience of meal prep while serving a delicious, seasonal treat!

What to Serve with Cold Witches Brew Coffee

As you prepare this delightful autumn-inspired drink, think about the perfect accompaniments that will elevate your festive gatherings to new heights.

  • Spiced Pumpkin Muffins: Moist and flavorful, these muffins bring a delightful warmth that pairs beautifully with the pumpkin spice flavors in your brew.

  • Cinnamon Sugar Donuts: Soft and sweet, these donuts offer a comforting texture, making them a perfect treat for dunking into your magical coffee.

  • Warm Apple Crisp: The gooey apple filling and crunchy topping create a heavenly dessert that complements the richness of Cold Witches Brew Coffee.

  • Caramel Drizzle Cheesecake: Indulge in a creamy, decadent cheesecake that balances the spices from the brew, adding a touch of elegance to your gathering.

  • Roasted Pumpkin Soup: A savory option to contrast the sweet flavors, this soup enhances the festive vibe of fall with its warm, comforting nature.

  • Chai-Spiced Cookies: These lightly spiced treats offer a crispy texture and rich flavor that pairs wonderfully, inviting a delightful crunch alongside your drink.

  • Mulled Wine: A warm, spiced drink that will resonate with the autumn flavors, perfect for adding a cozy, adult twist to your festivities.

  • Cranberry Walnut Salad: The tangy cranberries and crunchy walnuts lend a vibrant freshness that balances the rich coffee, refreshing the palate beautifully.

Cold Witches Brew Coffee Variations

Feel free to get creative with your Cold Witches Brew Coffee and make it your own with these fun ideas!

  • Dairy-Free: Replace heavy cream with coconut cream and use a plant-based milk for a smooth, dairy-free experience. This twist retains the creamy texture while keeping the festive spirit alive.

  • Pumpkin Spice Boost: Add an extra dash of pumpkin pie spice for a more pronounced fall flavor that will make your heart sing with the essence of autumn!

  • Sugar-Free: Swap maple syrup for sugar-free syrup or stevia to reduce sugar while still enjoying your spooktacular brew.

  • Flavorful Infusion: Experiment with flavored syrups, like caramel or peppermint, to add a unique twist to your Cold Witches Brew. Imagine the delightful surprise that these flavors can conjure!

  • Adult Version: Introduce a splash of cream liqueur for an adult kick that makes your drink merry, perfect for Halloween or cozy gatherings.

  • Iced Version: Make it a refreshing iced treat by serving the brew over ice—especially delightful for those warm autumn afternoons!

  • Nutty Flavor: Add a splash of almond or hazelnut milk for a nutty twist that complements the pumpkin spice beautifully.

Enhance your seasonal delights even further by pairing this drink with spiced pumpkin muffins or check out my delightful Vegan Sushi for an unforgettable meal!

Cold Witches Brew Coffee Recipe FAQs

What type of cold brew coffee should I use?
Absolutely! For the best flavor, I recommend using a concentrated cold brew coffee. This delivers a bold taste that pairs wonderfully with the pumpkin spice. If you're in a pinch, ready-to-drink options found at your local store also work!

How should I store the Cold Witches Brew Coffee?
Simply refrigerate any leftover cold brew coffee in an airtight container for up to 3 days. When you're ready to serve it again, give it a gentle stir to reintroduce the flavors, and it should be just as delicious as when you made it!

Can I freeze Cold Witches Brew Coffee?
Yes! Freezing is a great way to store your cold brew. Pour the leftover coffee into an ice cube tray and freeze for 1–2 months. These ice cubes can be added directly to future drinks for an instant chill and a boost of flavor!

How do I ensure my cold foam turns out perfectly?
To achieve that light and airy cold foam, chill your heavy cream and milk for at least 15 minutes before whipping. Froth it on low speed and stop once it forms soft peaks. If needed, re-whip lightly before serving to restore the fluffiness.

Are there any common allergens in the recipe?
The Cold Witches Brew Coffee does contain dairy in the form of heavy whipping cream and milk. To accommodate dietary restrictions, you can easily substitute with coconut cream and plant-based milk for a delicious dairy-free alternative.

Cold Witches Brew Coffee

Chill Out with Cold Witches Brew Coffee: A Pumpkin Spice Delight

Enjoy the enchanting blend of Cold Witches Brew Coffee, a delightful pumpkin spice treat perfect for autumn gatherings.
Print Recipe Pin Recipe
Prep Time 5 minutes mins
Chill Time 15 minutes mins
Total Time 20 minutes mins
Servings: 4 cups
Course: Drinks
Cuisine: American
Calories: 250
Ingredients Equipment Method Nutrition Notes

Ingredients
  

For the Brew
  • 4 cups Cold Brew Coffee Use concentrated or ready-to-drink option.
  • 4 cups Water If diluting concentrate.
For the Sweetness
  • 1 cup Maple Syrup May substitute with honey or agave.
  • 1 teaspoon Vanilla Paste/Extract Both forms work interchangeably.
For the Creamy Foam
  • 1 cup Heavy Whipping Cream Or substitute with coconut cream.
  • 1/2 cup Milk Opt for plant-based milk if dairy-free.
For the Flavoring
  • 1 teaspoon Pumpkin Pie Spice Adjust to taste.
  • a few drops Orange Gel Food Coloring Optional for a festive touch.
For the Finishing Touch
  • to taste Halloween Sprinkles Choose themed ones.

Equipment

  • Mixing Bowl
  • Whisk
  • hand mixer
  • Tall Glass
  • Electric Frother

Method
 

Preparation Steps
  1. Step 1: Prepare Cold Brew - Steep coffee grounds in cold water for 24 hours or dilute cold brew concentrate with equal parts water. Strain and keep chilled.
  2. Step 2: Make Cold Foam - Whisk heavy cream, milk, maple syrup, vanilla, pumpkin pie spice, and gel food coloring until thick. Chill for 15 minutes.
  3. Step 3: Assemble the Drink - Pour cold brew coffee into a glass. Add more maple syrup and vanilla if desired. Add ice if you prefer it cold.
  4. Step 4: Whip Cold Foam - Froth the chilled foam mixture until light and airy, about 1-2 minutes.
  5. Step 5: Combine - Pour the whipped foam over the cold brew coffee. Top with Halloween sprinkles for a festive touch.

Nutrition

Serving: 1cupCalories: 250kcalCarbohydrates: 35gProtein: 2gFat: 12gSaturated Fat: 7gCholesterol: 40mgSodium: 50mgPotassium: 200mgSugar: 25gVitamin A: 500IUCalcium: 150mg

Notes

Chill ingredients for the best foam. Adjust sweetness per preference. For larger gatherings, double the recipe and adjust foam accordingly.

Tried this recipe?

Let us know how it was!

Spooky Eyeball Snot-Tail Mocktail for Halloween Fun

September 30, 2025 by Grace Snow Leave a Comment

"It's not slime, it's a drink!" I overheard my nephew exclaim as I set out to create something truly playful for our upcoming Halloween gathering. This Eyeball Snot-Tail Mocktail is not just a drink; it's a spooky experience that will capture the imagination of kids (and a few adults too!). Packed with fruity flavors and a memorable jellied texture, this kid-friendly mocktail is a fabulous alternative to sugary sodas at your festive celebrations. With just a few simple ingredients, including vibrant lime jelly and edible eyeballs, it’s easy to whip up and serves as a delightful conversation starter at any party. Plus, it's gluten-free, making it safe for everyone to enjoy! Curious to see how this ghoulish drink comes together? Let’s mix up some Halloween magic!

Why is the Eyeball Snot-Tail Mocktail a hit?

Whimsical and unique, this Eyeball Snot-Tail Mocktail takes Halloween festivities to another level! Kid-friendly and approved, it appeals to young ones looking for fun drinks. Easy to prepare, you can create spooky magic in under an hour, perfect for last-minute parties. Versatile, swap ingredients for fun variations, and ensure everyone gets a taste of the creepy goodness. Eye-catching presentation garners gasps and giggles, making this mocktail the star of your Halloween gathering! For additional spooky ideas, check out our themed treats that complement this delightful drink!

Eyeball Snot-Tail Mocktail Ingredients

For the Jelly Base
• Lime Jelly – This gives our spooky drink its essential jellied texture; just follow the package instructions for best results.

For the Juice Mixture
• Apple & Pear Juice (700ml) – A sweet, fruity blend that balances the flavors beautifully; opt for a mix to enhance the taste.
• Lemonade (300ml) – Adds a fizzy brightness; feel free to swap this with lemon-lime soda for an extra citrus kick!

For the Eyeballs
• Lychees (425g can) – These form the base for your eyeballs; don’t forget to drain them well.
• Cocktail Cherries (10-15) – Acting as the 'pupil' for our creepy eyeballs; maraschino cherries work wonderfully too!
• Raisins (10-15) – These create the 'iris'; any dried fruit can do in a pinch.

For Serving
• Cocktail Sticks (10-15) – Essential for assembling those eye-catching eyeballs and easy serving.

Get ready to whip up some delightful spooky fun with these Eyeball Snot-Tail Mocktail ingredients!

Step‑by‑Step Instructions for Eyeball Snot-Tail Mocktail

Step 1: Prepare the Lime Jelly
Follow the package instructions to prepare the lime jelly, heating water as needed. Once fully mixed, pour the jelly mixture into a bowl or mold and place it in the refrigerator to set for approximately 4 hours. Check its firmness by gently shaking the container; it should wobble softly when ready.

Step 2: Mix the Juice Base
In a large jug, combine 700ml of apple & pear juice with 300ml of lemonade. Stir gently to blend the flavors without creating too much foam. Cover with plastic wrap and chill this fruity mixture in the fridge until it's cold, ensuring a refreshing element when served with the Eyeball Snot-Tail Mocktail.

Step 3: Create the Eyeballs
To make the eyeballs, drain the lychees thoroughly, ensuring no liquid remains. Use a cocktail stick to puncture a small hole in each cherry, then insert one into each lychee to simulate the eyeball effect. Push a raisin into the cherry to create an iris, and set these creepy concoctions on cocktail sticks for easy serving later.

Step 4: Break the Set Jelly
Once the jelly is set and firm, use a whisk to break it into small chunks. This action will create the delightful jellied texture that resembles slime. Spoon the jelly chunks into individual cocktail glasses, filling them generously for an enticing visual treat in your Eyeball Snot-Tail Mocktail.

Step 5: Assemble the Mocktails
Top each glass filled with jelly pieces with the chilled apple-pear juice mixture, pouring it gently to create layers. Add one eyeball assembly from the cocktail stick into each glass right before serving. This final touch will add to the spooky effect and bring your Eyeball Snot-Tail Mocktail to life for all to enjoy!

Make Ahead Options

These Eyeball Snot-Tail Mocktails are perfect for busy Halloween party planners! You can prepare the lime jelly up to 24 hours in advance and store it in the refrigerator, ensuring it stays fresh and sets perfectly. Additionally, the juice mixture of apple & pear juice and lemonade can chill in the fridge for up to 3 days without losing its fizz. When it's time to serve, simply break the set jelly into chunks and layer it in your glasses, followed by the prepared juice mix. Assemble the eyeballs with lychees, cherries, and raisins shortly before serving to maintain their creepy appearance, ensuring every mocktail looks just as delightful as it tastes!

Expert Tips for Eyeball Snot-Tail Mocktail

  • Jelly Setting: Ensure the jelly is completely set before breaking it up; a whisk works perfectly for achieving those whimsical chunks.
  • Chill Well: Keep your juice mixture and jelly in the refrigerator until serving for a refreshing treat that kids will love.
  • Kid-Friendly Fun: Involve the kids in rolling the 'eyeballs' using the ingredients; it’s a perfect family activity for Halloween.
  • Customize Your Eyeballs: Use different dried fruits for the iris; get creative with flavors and sizes to make each mocktail unique.
  • Presentation Counts: For an extra spooky touch, consider adding a few drops of food coloring to the jelly or juice mix for a more vibrant look.

Eyeball Snot-Tail Mocktail Variations

Feel free to get creative and customize your Eyeball Snot-Tail Mocktail with these fun ideas!

  • Grape Juice: Swap the apple & pear juice for grape juice to add a bold, fruity profile. This change will introduce a deeper color and flavor that kids will love.

  • Different Jelly Flavors: Experiment with jelly flavors like green apple or raspberry for a unique twist. Each flavor will bring its own character, so mix and match to find your favorite!

  • Simpler Version: For younger kids, consider skipping the eyeballs entirely and serving the jelly in cute cups. This simpler presentation still offers the fun texture without the spooky visuals.

  • Sparkling Water Swap: Replace the lemonade with sparkling water for a lighter, fizzier finish. It will make for a refreshing drink option that’s still fun!

  • Add Some Spice: If your kids love a little heat, mix in a splash of ginger ale with the juice. The gentle spice is playful, adding an unexpected kick.

  • Alternative Garnishes: Use fruit gummies or marshmallows as eyeball substitutes to make the mocktail more appealing to picky eaters. They're soft and sweet and add a playful element!

  • Color Boosting: Level up the visuals by adding a few drops of food coloring to the jelly or juice mixture. A little extra color can go a long way in making it even more captivating!

Feel free to dive into these options, and for more fun ideas, don't miss our themed snacks that pair perfectly with this spooky drink!

How to Store and Freeze Eyeball Snot-Tail Mocktail

Fridge: Keep the jelly and juice mixture separately in airtight containers for up to 3 days. This way, you can quickly assemble the mocktails fresh when ready to serve.

Freezer: While it's best to enjoy the Eyeball Snot-Tail Mocktail fresh, you can freeze leftover jelly without the added juice mixture. Freeze in a mold for up to 2 months for a fun future treat.

Reheating: If you've prepared separate components, allow the jelly to thaw in the fridge overnight before using. The juice mixture can be served chilled straight from the fridge.

Make-Ahead Tips: The jelly can be made a day in advance, letting it set overnight. Store it in the refrigerator, ensuring it stays firm and ready for your Halloween gathering!

What to Serve with Eyeball Snot-Tail Mocktail

Embrace the spooky spirit of Halloween by creating a festive table that delights both young and old with playful pairings!

  • Witch’s Finger Cookies: These creepy snacks mimicking fingers will visually entertain while adding a buttery crunch that contrasts nicely with the jiggly mocktail.
  • Mummified Hot Dogs: Wrapped in crescent dough, these deliciously spooky treats deliver a savory balance, making them a hit among kids and adults alike.
  • Monster Meatballs: Saucy and savory, these meatballs are a delicious main dish that will keep your guests satisfied while enjoying the mocktail. Their playful presentation complements the Halloween theme beautifully.
  • Frankenstein Guacamole: A vibrant green dip packed with creamy avocado goodness, served with black olive “eyes” makes for a healthy and fun treat that pairs well with the sweet mocktail.
  • Spooky Cheese Board: Selector of spooky elements like ghost-shaped cheese, and seasonal fruits, this versatile platter invites guests to nibble while sipping on their drinks.
  • Pumpkin Spice Popcorn: Sweet, crunchy, and slightly salty, this deliciously fun treat evokes the flavors of fall without being too heavy, adding a festive touch to your spread.
  • Creepy Crawly Gummies: These gelatinous treats bring a playful twist with their slimy appearance, perfectly matching the thick jelly texture of the Eyeball Snot-Tail Mocktail.
  • Chilling Green Salad: Fresh greens topped with pumpkin seeds and cranberries offer a refreshing balance to the sweet flavors, showcasing vivid colors that brighten your Halloween table.
  • Ghostly Lemonade: For a drink pairing, whip up a simple lemonade decorated with ghost-shaped ice cubes to make it a fizzy, themed addition that complements the mocktail perfectly.
  • Chocolate Mousse Graveyard Cups: Toasted crumbs mimic soil while chocolate mousse creates a rich dessert experience, delighting your guests with a sweet ending after the spooky fun.

Eyeball Snot-Tail Mocktail Recipe FAQs

What type of lime jelly should I use for the Eyeball Snot-Tail Mocktail?
Absolutely! Any store-bought lime jelly will work perfectly. Just follow the instructions on the package to prepare it. You can also consider making your own jelly for more natural flavors, using fresh lime juice and gelatin if you're feeling adventurous!

How long can I store the Eyeball Snot-Tail Mocktail ingredients?
Store the prepared lime jelly and juice mixture separately in airtight containers in the refrigerator for up to 3 days. This allows you to whip up fresh and vibrant mocktails right before your gathering without losing any of the delightful flavors.

Can I freeze the leftover jelly from the Eyeball Snot-Tail Mocktail?
Yes! Freezing the leftover jelly is a great idea. Pour it into ice cube trays or a jelly mold and freeze for up to 2 months. When you're ready to use it, simply thaw the jelly in the fridge overnight for a fun treat on a hot day, or to incorporate into another spooky beverage.

What if my jelly didn't set properly?
If your jelly hasn’t set, don’t worry! Sometimes this happens if the gelatin wasn't mixed well or the ingredients weren't at the right temperature. Just heat the mixture gently on the stove until it dissolves, then add more gelatin according to the package instructions. Allow it to cool before placing it in the refrigerator again to set.

Is the Eyeball Snot-Tail Mocktail suitable for all ages?
Very much so! This mocktail is designed to be kid-friendly, free from alcohol, and gluten-free. However, be cautious if any guests have allergies to the specific fruits used, like lychees or cherries. Always have alternative jewelry options on hand, like coconut balls or gummy candies, and your Halloween fun will certainly be inclusive!

Can pets have any part of this mocktail?
Although the individual ingredients like apple juice and certain fruits may be safe for pets, it's best to avoid giving them any part of the Eyeball Snot-Tail Mocktail. Ingredients like cocktail cherries often contain added sugars or preservatives that aren’t suitable for dogs or cats. Keep the spooky fun for your humans only!

Eyeball snot-tail

Spooky Eyeball Snot-Tail Mocktail for Halloween Fun

This Eyeball Snot-Tail mocktail is a whimsical drink filled with fruity flavors and a jellied texture, perfect for Halloween celebrations.
Print Recipe Pin Recipe
Prep Time 15 minutes mins
Cook Time 4 hours hrs
Total Time 4 hours hrs 15 minutes mins
Servings: 8 glasses
Course: Drinks
Cuisine: Halloween
Calories: 150
Ingredients Equipment Method Nutrition Notes

Ingredients
  

For the Jelly Base
  • 1 package Lime Jelly Follow the package instructions for best results.
For the Juice Mixture
  • 700 ml Apple & Pear Juice A sweet, fruity blend.
  • 300 ml Lemonade Fizzy brightness; can swap with lemon-lime soda.
For the Eyeballs
  • 425 g Lychees Drained well from the can.
  • 10-15 pieces Cocktail Cherries Maraschino cherries work wonderfully.
  • 10-15 pieces Raisins Any dried fruit can be used.
For Serving
  • 10-15 pieces Cocktail Sticks For assembling and serving eyeballs.

Equipment

  • large jug
  • Whisk
  • cocktail sticks
  • mold or bowl

Method
 

Step‑by‑Step Instructions
  1. Prepare the Lime Jelly: Follow package instructions and refrigerate until set.
  2. Mix the Juice Base: Combine apple & pear juice with lemonade in a jug and chill.
  3. Create the Eyeballs: Drain lychees, insert cherries as pupils, and add raisins for irises.
  4. Break the Set Jelly: Whisk the jelly into chunks and spoon into glasses.
  5. Assemble the Mocktails: Layer jelly with juice mixture and add eyeball assembly to each glass.

Nutrition

Serving: 1glassCalories: 150kcalCarbohydrates: 35gSodium: 5mgPotassium: 150mgFiber: 1gSugar: 30gVitamin C: 5mgCalcium: 2mg

Notes

Jelly can be made a day in advance; store properly for freshness. Customize eyeballs with various dried fruits.

Tried this recipe?

Let us know how it was!

Chilling Cherry Sour Cocktail to Delight Your Halloween Party

September 27, 2025 by Grace Snow Leave a Comment

"I swear I just saw a ghost in the backyard!" My friend exclaimed, laughing nervously as we set the scene for our Halloween gathering. There's something undeniably magical about Halloween — it’s that one night every year when the ordinary transforms into the extraordinary. And what better way to elevate your spooky festivities than with a vibrant Cherry Sour cocktail? This spirited concoction is not only quick to whip up in just five minutes, but it's also a crowd-pleaser, combining the enticing sweetness of cherry vodka with zesty lime and deep red juice. Whether you're preparing for a haunted soirée or simply craving a fun twist on your cocktail repertoire, this gluten-free delight is sure to impress. Ready to add a splash of frightful fun to your drink menu? Let’s dive into this chillingly delicious Cherry Sour cocktail recipe!

Why is Cherry Sour Cocktail a Must-Try?

Quick and Easy: This cocktail comes together in just 5 minutes, making it the perfect choice for last-minute gatherings.

Vibrant and Festive: The striking red color and spooky vibes are perfect for Halloween parties, ensuring your drink stands out on any table.

Crowd-Pleasing Flavor: The balance of sweet cherry vodka, tart lime, and fruity juice creates a flavor that appeals to both sweet and sour lovers.

Versatile Options: Whether you prefer a fizzy twist with club soda or a delightful mocktail version, there’s a Cherry Sour for everyone. For a fun dessert drink to serve alongside, check out my Chocolate Cherry Smoothie.

Gluten-Free Goodness: This cocktail caters to gluten-sensitive friends too — it’s a delicious way to keep everyone included in your festivities! Remember to serve it alongside themed snacks for an unforgettable experience.

Cherry Sour Cocktail Ingredients

• Perfect for a spooky night!

For the Cocktail
• Ice – Use crushed ice for quicker chilling and a smooth texture.
• Cherry Vodka or Kirsch (50ml) – This sweet base spirit brings the cherry flavor to life; swap for raspberry vodka for a fun twist.
• Cherry or Pomegranate Juice (50ml) – Adds fruity goodness and a vibrant color; mixing both juices amplifies the tartness beautifully.
• Lime Juice (50ml) – Freshly squeezed for the best acidity that balances the sweetness; don’t skimp on this!
• Honey (1 tbsp) – Coats the glass rims for a decorative touch; agave syrup works as a vegan alternative.
• Red Food Coloring Gel – Provides an alluring aesthetic; optional for those who prefer a natural look.

Step‑by‑Step Instructions for Cherry Sour

Step 1: Prepare the Shaker
Begin by filling a cocktail shaker halfway with crushed ice. This will chill your Cherry Sour cocktail quickly and keep it refreshing. Next, pour in 50ml of cherry vodka or kirsch, followed by 50ml of cherry or pomegranate juice and 50ml of freshly squeezed lime juice. Close the shaker tightly and ensure all ingredients are ready to mix.

Step 2: Mix It Up
Vigorously shake the cocktail shaker for about 5–10 seconds until the mixture is well combined and chilled. You want to hear the ice clattering against the shaker, which indicates that it's doing its job. When done, ensure the shaker feels cold to the touch; this means your Cherry Sour is perfectly chilled for serving.

Step 3: Prepare the Glass Rims
On a small plate, combine 1 tablespoon of honey with a drop of red food coloring gel. Mix the two until it reaches a vibrant red hue, which adds a spooky touch to your cocktail presentation. This sweet and colorful mixture will beautifully coat the rim of your glass, making each sip even more delightful.

Step 4: Rim the Glasses
Take two martini glasses and dip their rims into the honey mixture. Swirl them gently until they are evenly coated, allowing any excess to drip off. This honey rim not only enhances the appearance of your Cherry Sour cocktail but also adds a touch of sweetness with each sip. Set the glasses aside to let the rims set.

Step 5: Serve the Cocktail
Shake the shaker again briefly to make sure everything is well mixed, then remove the lid. Carefully pour the chilled Cherry Sour cocktail into the prepared glasses, filling them until they reach the rim. Aim for a smooth pour to maintain the lovely honey rim, creating a stunning presentation for your guests to admire.

Step 6: Garnish and Enjoy
If desired, garnish your Cherry Sour cocktail with a slice of lime or a cherry on top for an extra touch of festivity. This final flourish brings an enticing look to your drink, perfect for setting a chilling Halloween atmosphere. Serve immediately to enjoy the refreshing blend of flavors in every sip!

Make Ahead Options

These Cherry Sour cocktails are perfect for meal prep enthusiasts looking to save time on busy nights! You can mix the cherry vodka, cherry or pomegranate juice, and lime juice together up to 24 hours in advance, storing the mixture in an airtight container in the refrigerator to maintain freshness. However, be sure to prepare the honey rim just before serving to avoid it drying out. When you're ready to delight your guests, simply shake the chilled mixture again for a refreshing finish, rim your glasses with honey, and pour in the pre-prepped cocktail. Enjoy a delicious drink without the last-minute rush!

Expert Tips for Cherry Sour Cocktail

  • Cherry Flavor Boost: Consider blending equal parts of cherry juice and pomegranate juice for an even more intense cherry flavor. This combo enhances the tartness beautifully.

  • Honey Mixture Consistency: Ensure your honey and food coloring mixture is thick enough to cling to the glass rims. Using too little honey is a common mistake.

  • Chill Your Glassware: For an extra refreshing experience, chill your martini glasses in the freezer before serving. This simple step makes a world of difference.

  • Juice Prepping: Feel free to prepare your juice mixture (excluding alcohol) in advance and store it in the fridge for up to 24 hours. Fresh cocktails are fantastic, but pre-prepped mixtures save time!

  • Adjust for Sweetness: If you find the cocktail too sweet for your taste, adding a splash more lime juice can balance the flavors and make the Cherry Sour even more enjoyable.

What to Serve with Spooky Cherry Sour Cocktail

Crafting the perfect Halloween experience isn't just about eerie decorations; pairing your chilling Cherry Sour cocktail with the right accompaniments can take your gathering to the next level.

  • Ghoulish Guacamole: This creamy dip pairs beautifully with crunchy tortilla chips, providing a refreshing contrast to the tart cocktail flavors.
  • Spooky Cheese Board: A variety of cheeses, nuts, and seasonal fruits will appeal to diverse palates, creating a colorful spread that complements the vibrant hues of the drink.
  • Witch’s Wands (Pretzel Sticks): These salty snacks add a fun and crunchy element that balances the sweet and sour taste of the cocktail.
  • Creepy Caprese Skewers: Fresh mozzarella balls, cherry tomatoes, and basil drizzled with balsamic make for a fresh bite while echoing the cocktail's cherry notes.
  • Vampire’s Bite (Cherry Pies): Bite-sized cherry hand pies add a delightful pastry to your spread while enhancing the cherry theme of your drink.
  • Phantom Popcorn: Lightly salted popcorn with a sprinkle of paprika for a smoky kick provides an appetizing crunch that pairs nicely with your cocktail.

Creating a hauntingly delicious pairing enhances the experience, ensuring every sip of your Spooky Cherry Sour cocktail is just as hauntingly delightful as the last!

How to Store and Freeze Cherry Sour Cocktail

  • Fridge: Store any leftover juice mixtures (without vodka) in an airtight container in the refrigerator for up to 24 hours. This allows you to prep in advance while keeping the flavors fresh.
  • Freezer: If you want to freeze the cocktail, pour the mixture (without ice and vodka) into ice cube trays. These can be frozen for up to 2 months for quick future use in blended drinks.
  • Reheating: While cocktails are best served fresh, if you made a juice blend ahead, simply let it thaw in the fridge overnight before shaking with vodka and ice when ready to serve.
  • Avoiding Waste: To prevent leftover cocktails, consider making individual servings, ensuring each Cherry Sour is enjoyed at its peak freshness!

Cherry Sour Variations & Substitutions

Get ready to customize your Cherry Sour cocktail experience with these delightful variations!

  • Vanilla Vodka: Swap cherry vodka for vanilla vodka to create a creamier, dessert-like twist. It brings a smooth flavor that pairs beautifully with the tart juices.

  • Fizzy Addition: Add a splash of club soda or tonic water for a refreshing fizz. This bubbly twist lightens the drink and adds a fun texture, perfect for party vibes.

  • Mocktail Version: For a non-alcoholic delight, substitute vodka with soda or sparkling water. Adjust the juice ratio to maintain that delicious balance of sweet and tart.

  • Berry Medley: Experiment with a mix of berry vodkas, like raspberries or blueberries, for a colorful medley of flavors. Each sip can bring a new berry note that excites the palate.

  • Citrus Twist: Incorporate a splash of orange or grapefruit juice to brighten the drink. This fruity addition amplifies the festive vibes and supports the Halloween theme.

  • Spiced Cherry: For a warm kick, add a dash of cinnamon or nutmeg to your mixture. This spicy addition can give the drink a comforting autumn twist, ideal for chilly evenings.

  • Chill with Herbs: Muddle fresh mint leaves in the shaker for an herbal note. The mint adds an aromatic freshness, elevating the cocktail experience.

  • Sugar Rim: Instead of honey, use a sugar rim for a sweeter touch. You can even blend it with dyed sugar using red food coloring for added festive flair.

Why not pair your Cherry Sour with my spooky dessert, such as Cherry Clafoutis French, to create a thrilling treat for your guests? Each variation invites a new experience, making your Halloween gathering even more memorable!

Cherry Sour Cocktail Recipe FAQs

What type of cherries should I use for this cocktail?
Absolutely! For the best flavor in your Cherry Sour cocktail, opt for fresh, ripe cherries if you're using them as a garnish. Look for firm and plump cherries without dark spots or bruising. If using cherry juice, ensure it’s 100% juice for the best taste.

How should I store leftover Cherry Sour cocktail ingredients?
For optimal freshness, store leftover juice mixtures (excluding spirits) in an airtight container in the refrigerator. This can last up to 24 hours, allowing you to prepare in advance while keeping all the flavors intact. Remember, it's best to mix with vodka just before serving!

Can I freeze the Cherry Sour cocktail?
Yes! To freeze, simply pour the mixed juice (without ice and vodka) into ice cube trays. These can be frozen for up to 2 months. When you're ready to enjoy, just let the cubes thaw in the fridge overnight, then shake them with vodka and ice, blending the flavors superbly.

What if my honey mixture isn't sticking to the glass rims?
If you find the honey mixture isn’t adhering well, don’t worry! This is a common issue. Ensure you’re using enough honey for a solid coating; aim for a thicker consistency. If needed, you can add a tiny bit of water to the honey to create a more workable paste. Alternatively, you can try using agave syrup for a vegan-friendly option.

Is the Cherry Sour cocktail suitable for gluten-free diets?
Very! This Cherry Sour cocktail is gluten-free, making it a delightful choice for those with gluten sensitivities. Just ensure you're using gluten-free ingredients, particularly if you’re substituting any juices or mixers, to keep everyone included in the fun!

Can I make this drink non-alcoholic (mocktail version)?
Absolutely! To create a mocktail version of the Cherry Sour cocktail, just swap out the vodka for soda or sparkling water. Adjust the juice ratios to your taste — it’s all about finding that perfect balance of sweet and tart without the spirits!

Cherry sour

Chilling Cherry Sour Cocktail to Delight Your Halloween Party

Enjoy a vibrant Cherry Sour cocktail, perfect for Halloween parties with its enticing blend of cherry vodka, lime, and juice.
Print Recipe Pin Recipe
Prep Time 5 minutes mins
Total Time 5 minutes mins
Servings: 2 glasses
Course: Drinks
Cuisine: Cocktail
Calories: 150
Ingredients Equipment Method Nutrition Notes

Ingredients
  

For the Cocktail
  • 50 ml Cherry vodka or Kirsch Swap for raspberry vodka for a fun twist.
  • 50 ml Cherry or Pomegranate Juice Mixing both amplifies tartness.
  • 50 ml Lime Juice Freshly squeezed for best flavor.
  • 1 tbsp Honey Agave syrup works as a vegan alternative.
  • Ice Use crushed ice for quicker chilling.
  • Red Food Coloring Gel Optional for aesthetic.

Equipment

  • cocktail shaker
  • Martini glasses
  • Small plate

Method
 

Step-by-Step Instructions for Cherry Sour
  1. Fill a cocktail shaker halfway with crushed ice. Pour in cherry vodka, cherry or pomegranate juice, and lime juice. Close the shaker tightly.
  2. Shake vigorously for 5–10 seconds until well combined and chilled.
  3. Combine honey and red food coloring gel on a small plate until it reaches a vibrant red hue.
  4. Dip the rims of two martini glasses into the honey mixture and set aside.
  5. Shake the shaker again briefly, then pour the cocktail into the prepared glasses.
  6. Garnish with a slice of lime or cherry if desired and serve immediately.

Nutrition

Serving: 1cocktailCalories: 150kcalCarbohydrates: 20gSodium: 5mgPotassium: 150mgSugar: 15gVitamin C: 15mg

Notes

Chill martini glasses in the freezer for an extra refreshing experience. Prepare juice mixture in advance for easier serving.

Tried this recipe?

Let us know how it was!

Pumpkin Patch Punch: Sip Fall’s Cozy Flavor All Season Long

September 24, 2025 by Grace Snow Leave a Comment

As the leaves turn crisp and the air takes on a hint of chill, there's nothing quite like cozying up with a festive drink in hand. Enter the Pumpkin Patch Punch, an easy party drink that captures the essence of autumn in every sip. Blending pumpkin spice liqueur with creamy apple cider and a splash of bourbon, this Halloween cocktail is sure to enchant your guests, whether young or young-at-heart. Not only is it a breeze to whip up for gatherings, but it also warms the soul with its comforting flavors, making every chilly evening feel just a bit more special. Ready to dive into the flavors of fall? Let's mix up a batch of this delightful punch together!

Why Is Pumpkin Patch Punch a Must-Try?

Deliciously Festive: This cocktail brings the essence of autumn right to your glass with its cozy pumpkin spice flavor.

Easy Preparation: In just a few simple steps, you can have a stunning punch ready for your guests—no advanced skills required!

Perfect for Gatherings: Whether it’s a Halloween party or a cozy fall night, this punch is a crowd pleaser that appeals to all ages.

Versatile Flavors: Customize your punch by swapping apple cider for pear cider or using spiced rum instead of bourbon. The possibilities are endless!

Inviting Aromas: The warmth of cinnamon and pumpkin wafting through your space will make everyone feel at home, just like a good autumn day.

Why not pair it with some delicious treats like Pumpkin Brownies Decadent or enjoy a sweet Pumpkin Cinnamon Roll for a delightful dessert spread? Splendid flavors await!

Pumpkin Patch Punch Ingredients

• Get ready to create the perfect festive drink with these cozy components!

For the Punch

  • Pumpkin spice liqueur – Provides a creamy, spiced flavor that embodies autumn; no direct substitution, but a different spiced liqueur can add a fun twist.
  • Apple cider – Adds a crisp, sweet base for the punch; fresh apple cider is recommended for the best flavor, or substitute with similar juice if unavailable.
  • Bourbon – Offers depth and warmth to the punch; feel free to replace it with rum or whiskey for a different taste profile.
  • Maple syrup (optional) – Enhances sweetness and complements the pumpkin flavors; omit if preferring less sweetness or substitute with agave syrup for a lighter option.

For Garnish

  • Cinnamon sticks – A beautiful garnish that adds aroma and festive flair; fresh herbs like mint can be used as a lively alternative.
  • Apple slices or pumpkin candies – Decorative elements that enhance visual appeal and add a fun Halloween theme; any seasonal fruit can work for variety.
  • Ice cubes – Essential for serving and chilling the punch; ensure you have plenty on hand for a refreshing drink.

Each of these ingredients contributes to the delightful warmth and festivity of this Pumpkin Patch Punch, making it a perfect addition to your autumn gatherings!

Step‑by‑Step Instructions for Pumpkin Patch Punch

Step 1: Mix Your Ingredients
In a large punch bowl, pour in the pumpkin spice liqueur, crisp apple cider, and robust bourbon. If you’re adding maple syrup for extra sweetness, drizzle it in now. Use a wooden spoon to stir the mixture gently for about 1–2 minutes, until everything is well combined and the flavors meld beautifully into a warm, inviting blend.

Step 2: Serve Over Ice
Take a few glasses and fill each with ice cubes, leaving enough space for the punch. Carefully ladle the Pumpkin Patch Punch over the ice, filling each glass about three-quarters full. Ensure that the punch cascades over the ice, creating a chilling effect as the vibrant liquids blend and swirl together beautifully.

Step 3: Garnish Creatively
Now it's time to make your punch visually delightful! Add a cinnamon stick to each glass for aromatic allure and a seasonal touch. For an extra festive flair, float a few apple slices or Halloween-themed candies on top. This will not only enhance the look of your Pumpkin Patch Punch but also add a delightful aroma with each sip.

Step 4: Keep It Cold
As your guests arrive, keep the fun flowing! Serve the punch immediately for the best experience. If you wish to maintain the chill throughout your gathering, place the punch bowl on a larger bowl filled with ice or add more ice to the glasses as needed. This ensures your Pumpkin Patch Punch stays refreshing and delicious for everyone to enjoy!

What to Serve with Pumpkin Patch Punch

As you sip on the warmth of fall, why not elevate your gathering with some delightful accompaniments that perfectly complement this cozy cocktail?

  • Savory Stuffed Mushrooms: These bite-sized delights are rich and flavorful, making them a perfect pairing with the spiced notes of the punch. Their earthiness balances out the sweeter elements in the cocktail.

  • Crispy Apple Chips: Light and crunchy, these chips bring a fresh touch that echoes the apple cider in your punch. They are a delightful snack that adds a healthy twist to your autumn festivities.

  • Cheese Board: A selection of soft and aged cheeses with fruits can enhance the experience. The creaminess of cheese complements the punch, creating a harmonious balance of flavors.

  • Pumpkin Bread Pudding: Embrace those autumn vibes with a warm and comforting dessert that pairs beautifully with your drink. Rich and indulgent, it will create a truly memorable ending to your meal.

  • Warm Pretzels with Mustard Dip: Their soft, chewy texture and slight saltiness contrast nicely with the sweet punch, offering a fun and interactive snack for guests to enjoy.

  • Spiced Pear Tart: A seasonal dessert that echoes the autumn flavors of your punch, this tart provides a perfect sweet and slightly tart finish to the evening, leaving everyone satisfied.

  • Mulled Wine: For an additional drink option, consider offering a warm mulled wine that resonates with the spiced notes of Pumpkin Patch Punch. This cozy drink invites conversations and merriment.

  • Pumpkin Spice Sugar Cookies: Delightfully sweet and softly spiced, these cookies can enhance everyone’s festive mood while mirroring the flavors of your punch. Perfect for holiday cheer!

Make Ahead Options

These Pumpkin Patch Punch preparations are perfect for busy home cooks wanting to save time! You can mix the punch base of pumpkin spice liqueur, apple cider, and bourbon up to 24 hours in advance and refrigerate it in an airtight container to keep it fresh. Just remember to stir it well before serving. When you're ready to enjoy your festive drink, fill glasses with ice and ladle the chilled punch over. Garnish each glass with a cinnamon stick and a slice of apple or some Halloween candies just before serving to ensure that they look inviting. This not only saves you time but also allows you to impress your guests with a ready-to-serve punch that’s just as delicious as if you made it fresh!

Pumpkin Patch Punch Variations

Feel free to make this festive cocktail your own with a few exciting twists!

  • Pear Cider: Substitute apple cider with pear cider for a unique, fruity flavor that brightens the punch. This adds a lovely twist while maintaining that cozy autumn essence.

  • Spiced Rum: Swap bourbon for spiced rum to create a sweeter, tropical note, perfect for an island-inspired autumn celebration. The warmth of spices adds depth to each sip.

  • Non-Alcoholic: For a festive mocktail, replace spirits with extra apple cider or sparkling cider for a bubbly, refreshing experience that everyone can enjoy.

  • Honey or Agave: Instead of maple syrup, use honey or agave syrup to sweeten the punch naturally. Both options provide lovely flavor variations that pair beautifully with the pumpkin.

  • Pineapple Juice: Mix in a splash of pineapple juice for a zingy twist that introduces an unexpected-but-delightful element to your punch.

  • Ginger Beer: For a spicy kick, combine with ginger beer instead of sparkling cider. This adds fizz and a bold, zingy note that beautifully complements the pumpkin spice.

  • Herb Garnishes: Instead of traditional cinnamon sticks, try fresh rosemary or thyme for an herbal twist. Their aromatic notes enhance the festive vibe and add a touch of elegance.

  • Seasonal Fruits: Experiment with garnishes like pomegranate seeds or seasonal citrus slices. They not only add vibrant color but also offer bursts of flavor with each sip.

No matter how you choose to customize your Pumpkin Patch Punch, each variation brings its unique charm. And speaking of flavor, don't forget to pair your punch with some delightful treats like Pumpkin Brownies Decadent for a truly enchanting autumn spread!

How to Store and Freeze Pumpkin Patch Punch

  • Room Temperature: Pumpkin Patch Punch is best served immediately. If left at room temperature, it should be consumed within 2 hours to ensure freshness and safety.

  • Fridge: Leftover punch can be stored in an airtight container in the refrigerator for up to 2 days. Always give it a good stir before serving again for the best flavor.

  • Freezer: While it's not recommended to freeze the entire punch due to the presence of ice and carbonation, you can freeze individual components (like apple cider) separately for up to 3 months. Just thaw and mix again when ready to serve!

  • Reheating: If the punch has been cooled, you can gently heat it on the stove over low heat, being careful not to boil, to serve warm again.

Expert Tips for Pumpkin Patch Punch

  • Mix Thoroughly: Ensure you stir the mixture well to evenly distribute the pumpkin spice flavor and sweetness throughout the punch.

  • Sweetness Control: Adjust the amount of maple syrup based on your taste preferences; a little can go a long way in enhancing the Pumpkin Patch Punch.

  • Chill Before Serving: For the best taste, prepare the punch ahead and store it in the refrigerator; add ice just before serving to avoid diluting the flavors.

  • Versatile Garnishes: Feel free to get creative with your garnishes. Use fresh herbs or different fruits to match your party's theme or personal preferences.

  • Test Before Guests Arrive: Always taste your punch before serving to ensure it's just right; small adjustments can make a big difference in the overall experience.

Pumpkin Patch Punch Recipe FAQs

What should I look for in pumpkin spice liqueur?
When selecting pumpkin spice liqueur, look for a rich and creamy texture with warm cinnamon and nutmeg aromas. I often prefer brands that include real pumpkin flavors, as they enhance the autumn vibe. Ensure the bottle is well-sealed and check the expiration date for optimal taste.

How long can I store leftover Pumpkin Patch Punch in the fridge?
Leftover Pumpkin Patch Punch can be stored in an airtight container in the refrigerator for up to 2 days. Make sure to give it a gentle stir before serving again, as some of the ingredients may settle while it rests. I recommend serving it over ice to keep it refreshing!

Can I freeze Pumpkin Patch Punch?
While freezing the entire punch isn't ideal due to potential dilution from melting ice, you can freeze individual components such as the apple cider. To freeze, pour the cider into ice cube trays or freezer-safe containers and store for up to 3 months. To enjoy, simply thaw and mix with the remaining ingredients before serving!

What if my Pumpkin Patch Punch is too sweet?
If you find your punch too sweet, there are a few simple adjustments you can make. Start by diluting it with a little more apple cider or even some soda water to balance out the sweetness. You can also add a splash of lemon juice for a tangy contrast, which can brighten the flavors beautifully!

Is Pumpkin Patch Punch suitable for dietary restrictions?
Absolutely! For a non-alcoholic version, simply replace the bourbon and pumpkin spice liqueur with extra apple cider or sparkling cider. This way, everyone can enjoy a festive drink. If you have any allergies, double-check all ingredient labels, especially for the liqueur and any garnishes you choose to use.

Pumpkin Patch Punch

Pumpkin Patch Punch: Sip Fall’s Cozy Flavor All Season Long

Pumpkin Patch Punch is a festive drink combining pumpkin spice liqueur, apple cider, and bourbon, perfect for fall gatherings.
Print Recipe Pin Recipe
Prep Time 10 minutes mins
Total Time 10 minutes mins
Servings: 8 cups
Course: Drinks
Cuisine: American
Calories: 180
Ingredients Equipment Method Nutrition Notes

Ingredients
  

For the Punch
  • 1 cup Pumpkin spice liqueur Provides a creamy, spiced flavor that embodies autumn.
  • 4 cups Apple cider Fresh apple cider is recommended for the best flavor.
  • 1 cup Bourbon Offers depth and warmth to the punch.
  • 1/4 cup Maple syrup (optional) Enhances sweetness and complements the pumpkin flavors.
For Garnish
  • 3 sticks Cinnamon sticks A beautiful garnish that adds aroma and festive flair.
  • 1 cup Apple slices or pumpkin candies Enhances visual appeal and adds a fun Halloween theme.
  • as needed Ice cubes Essential for serving and chilling the punch.

Equipment

  • Large punch bowl
  • Wooden spoon
  • Glasses

Method
 

Step-by-Step Instructions
  1. In a large punch bowl, pour in the pumpkin spice liqueur, crisp apple cider, and robust bourbon. If adding maple syrup for extra sweetness, drizzle it in now. Use a wooden spoon to stir gently for about 1–2 minutes, until well combined.
  2. Take a few glasses and fill each with ice cubes, leaving space for the punch. Ladle the Pumpkin Patch Punch over the ice, filling each glass about three-quarters full.
  3. Add a cinnamon stick to each glass for aromatic allure. Float apple slices or Halloween-themed candies on top for extra festive flair.
  4. Serve the punch immediately for the best experience. To keep it cold, place the punch bowl in a larger bowl filled with ice or add more ice to glasses as needed.

Nutrition

Serving: 1cupCalories: 180kcalCarbohydrates: 25gSodium: 5mgPotassium: 100mgSugar: 20gCalcium: 10mg

Notes

Adjust the sweetness by modifying the amount of maple syrup according to taste. Store any leftovers in the fridge for up to 2 days.

Tried this recipe?

Let us know how it was!

Hauntingly Delicious Poison Apple Martini for Halloween Fun

September 24, 2025 by Grace Snow Leave a Comment

As I stirred the vibrant mix in my shaker, a potent cocktail was beginning to take shape—Halloween was just around the corner, and it was time to conjure up something truly enchanting. Enter the Poison Apple Martini, a cocktail that's not only visually striking but also packed with the cozy flavors of apple cider and tart pomegranate juice. This spooky drink is a crowd-pleaser, perfect for adding a dash of suspense to your Halloween celebrations. With a touch of activated charcoal for that haunting dark hue and a sweet rim of black sugar, every sip feels like a special treat. Plus, it’s incredibly easy to whip up, ensuring you can spend more time enjoying the festivities and less time behind the bar. Are you ready to embrace the magic of the season and impress your guests?

Why is the Poison Apple Martini Unforgettable?

Spectacular presentation: With its deep, dark hue and rim of black sugar, this cocktail is sure to be a focal point at any Halloween gathering. Delightful flavor balance: The combination of sweet apple cider and tart pomegranate juice creates a deliciously unique blend. Quick to prepare: You'll have time for trick-or-treating too, as this drink can be made in minutes! Crowd-pleasing treat: Its enchanting look and smooth taste appeal to both kids and adults (just skip the dry ice for the little ones!). As part of your Halloween menu, consider pairing it with fun bites like spider-shaped cheese balls for a complete spooky experience!

Poison Apple Martini Ingredients

Here’s everything you need to conjure up your very own Poison Apple Martini for a spooktacular celebration!

For Rimming the Glass

  • Black Lava Salt or Coarse Black Sugar – Use this for an eerie, sweet-salty contrast that enhances the visual appeal of your cocktail.

For the Cocktail

  • Apple Cider – This sweet ingredient gives the drink a fall-inspired base, making each sip feel cozy.
  • Pomegranate Juice – Adds a vibrant color and tartness that perfectly balances the sweetness of the apple cider.
  • Lemon Juice – A dash of freshness, bringing brightness to the drink's flavor profile.
  • Vodka (or Apple Vodka) – The main alcohol, providing a smooth backdrop for the other flavors.
  • Activated Charcoal (or Black Food Dye) – Optional but recommended for that hauntingly dark hue; it’s truly what makes this Poison Apple Martini stand out.
  • Dry Ice – Optional for an added spooky effect of smoky fog—just be careful when handling!

Now you're all set to whip up this delightful Halloween cocktail that'll have your guests bewitched!

Step‑by‑Step Instructions for Poison Apple Martini

Step 1: Prepare the Glass
Begin by rimming your martini glass with black lava salt or coarse black sugar. To do this, take a lemon wedge and run it along the rim of the glass to moisten it. Then, dip the rim into the black salt or sugar mixture, ensuring an even coating that adds a spooky touch to your Poison Apple Martini.

Step 2: Mix Ingredients
Grab a cocktail shaker and fill it halfway with ice to ensure a chilled drink. Pour in the apple cider, pomegranate juice, and fresh lemon juice, followed by the vodka. If you’re feeling adventurous, add a pinch of activated charcoal to create that signature dark hue. Seal the shaker and get ready to shake.

Step 3: Shake It Up
Vigorously shake the cocktail shaker for about 15-20 seconds until well chilled. You'll know it’s ready when the shaker feels frosty to the touch, and you can hear the ice clinking inside. This step is crucial to blending the flavors perfectly and achieving the smooth texture desired in your Poison Apple Martini.

Step 4: Strain the Mixture
Carefully open the shaker and position a strainer over the prepared martini glass. Pour the mixed ingredients into the glass, ensuring the rim stays clean. The deep, dark color of the drink will create an enticing visual as you serve this delightful Poison Apple Martini.

Step 5: Serve with a Spooky Twist
For an added eerie effect, drop a small piece of dry ice into the martini just before serving. Watch as the cocktail emits a spooky fog, captivating your guests. Be sure to remind everyone to wait until the dry ice has completely dissolved before sipping your potion for a safe and haunting experience!

Make Ahead Options

The Poison Apple Martini is a fantastic choice for those who want to save time during Halloween festivities! You can prepare the mixture of apple cider, pomegranate juice, lemon juice, and vodka up to 24 hours in advance and refrigerate it in an airtight container. To maintain the drink's quality, mix in the activated charcoal just before serving to retain its striking color. Additionally, you can rim your glasses with black lava salt or coarse black sugar a few hours ahead of time—just cover them until you're ready to use them. When it's time to impress your guests, simply shake the prepped mixture with ice, strain it into the prepared glasses, and finish with a spooky drop of dry ice. This strategy ensures you can enjoy the festivities without being stuck behind the bar!

Poison Apple Martini Variations

Get ready to unleash your creativity with these delightful twists on the classic Poison Apple Martini that’ll enchant your guests.

  • Pear Cider: Substitute apple cider with pear cider for a fruitier flavor profile that still captures the essence of fall.

  • Flavorful Vodkas: Experiment with flavored vodkas like caramel or cinnamon to introduce new dimensions and surprises.

  • Herbal Touch: Add a sprig of rosemary or thyme for an aromatic twist; simply shake it with the other ingredients for a unique herbal note.

  • Sparkling Version: Top the finished martini with a splash of sparkling water or prosecco for a bubbly, refreshing feel.

  • Lower Sugar: Use unsweetened pomegranate juice and reduce the sugar on the rim for a lighter, less sweet cocktail.

  • Garnish Options: Float sliced apples or blood oranges on top for a visually stunning and tasty garnish.

  • Chilled Variation: For an even cooler sip, freeze your martini glass prior to serving it for an icy surprise your guests will love.

  • Mocktail Version: Omit the vodka and double the apple cider and pomegranate juice for a family-friendly version that everyone can enjoy. Pair it with spooky treats like spider-shaped cheese balls for a festive experience.

With these variations, your Poison Apple Martini can be tailored to suit any taste and occasion while maintaining its eerie allure!

What to Serve with Poison Apple Martini

As you sip on the enchanting flavors of your Poison Apple Martini, elevate your gathering with delicious pairings that will enchant your guests even further.

  • Spider-Shaped Cheese Balls: These savory bites are as fun as they are delicious, perfect for adding a playful spirit to your spooky soirée. They pair wonderfully with the sweet-tart notes of the martini.

  • Ghost-Shaped Meringues: Light and airy, these whimsical treats offer a delightful contrast to the robust cocktail, adding a charm that's visually captivating.

  • Pumpkin Deviled Eggs: With a hint of spice and a creamy texture, these beauties complement the fall flavors in your martini, making every bite a burst of autumn magic.

  • Caramel Apple Slices: Drizzled with chocolate and paired with your drink, these sweet and crunchy apple treats echo the cocktail's apple flavors, creating a harmonious snacking experience.

  • Savory Meat and Cheese Platter: A mix of textures and flavors, this offering allows guests to nibble while enjoying the Poison Apple Martini’s richness, ensuring a well-rounded feast.

  • Apple Crisp Bars: These dessert bars need no introduction—warm, gooey apple flavors combined with cinnamon enhance the essence of your cocktail, making for an unforgettable ending to your spooky celebration.

  • Mulled Wine: A hot cup of spiced red wine warms the soul; its fragrant spices pair beautifully with the flavors of the martini, ideal for chilly Halloween nights.

  • Chilled Cucumber Soup: Refreshing and smooth, this contrasts nicely with the robust martini, offering a cooling effect and a touch of sophistication to your spread.

Storage Tips for Poison Apple Martini

  • Room Temperature: Best enjoyed fresh, but if necessary, you can leave the Poison Apple Martini at room temperature for up to 1 hour; make sure to drink it before it warms too much.
  • Fridge: If preparing in advance, refrigerate the mixed juices (apple cider, pomegranate juice, lemon juice) separately for up to 3 days, but avoid mixing with vodka until ready to serve.
  • Freezer: It’s not recommended to freeze the Poison Apple Martini as freezing could alter the texture and flavors; instead, prepare your ingredients fresh for the best experience.
  • Reheating: There's no need to reheat this cocktail; simply shake and serve, ensuring a delightful and chilling presentation that captures the essence of Halloween!

Expert Tips for the Best Poison Apple Martini

  • Perfectly Rimmed Glass: Ensure you moisten the glass rim evenly with lemon juice for a better stick of black sugar, enhancing both flavor and looks.
  • Chill the Shaker: Use a well-insulated shaker to keep the cocktail cool while mixing. This helps the ingredients combine beautifully for your Poison Apple Martini.
  • Controlled Dry Ice Use: When adding dry ice, handle it with gloves and keep it away from children. Always wait until it's fully dissolved before drinking.
  • Substitution Smart: If you want a sweeter cocktail, opt for apple vodka instead of regular vodka, as it’ll complement the apple cider nicely.
  • Visual Appeal: For an added touch, consider using a clear cocktail shaker to showcase the vibrant colors of your mixture before pouring.

Poison Apple Martini Recipe FAQs

How do I choose the right apples for my Apple Cider?
Absolutely! When selecting apples for your cider, opt for ones that are slightly firm and free from dark spots or bruises. Varieties like Honeycrisp or Gala bring a beautiful sweetness, while Granny Smith adds a tart note. You’ll want to balance sweet and tart to create the perfect flavor profile in your Poison Apple Martini.

How should I store leftover ingredients for my cocktail?
Very! If you have leftover apple cider or pomegranate juice, store them in an airtight container in the refrigerator for up to 3 days. Keep the vodka separate until you're ready to mix again. Just make sure to shake well before serving, as some separation may occur.

Can I freeze the ingredients for my Poison Apple Martini?
Of course! While it’s best to serve this cocktail fresh, you can freeze apple cider or pomegranate juice in ice cube trays for up to 3 months. Just remember to let the cubes thaw in the refrigerator before mixing, to ensure the freshest taste. Avoid freezing the entire cocktail as it could alter its texture.

Why did my Poison Apple Martini taste too tart?
That can happen sometimes! If your cocktail turns out too tart, it may be due to the acidity of the lemon juice or pomegranate juice you used. To balance the flavors, add a splash more apple cider or a teaspoon of simple syrup (1 part sugar, 1 part water boiled until dissolved) to sweeten it up to your liking.

Is this cocktail safe for those with dietary restrictions?
Definitely! The Poison Apple Martini is gluten-free as long as you use gluten-free vodka. For vegan options, all ingredients are plant-based. However, ensure your rimming sugar is free from any animal byproducts if that's a concern. Just double-check for any allergies, especially with the activated charcoal, which some may prefer to avoid.

Can I make this cocktail non-alcoholic?
Absolutely! To create a non-alcoholic version of the Poison Apple Martini, simply replace the vodka with additional apple cider or sparkling water for a bubbly twist. Mix as directed, and you’ll have a delightful, kid-friendly drink that still packs a festive punch for your Halloween festivities!

Poison Apple Martini

Hauntingly Delicious Poison Apple Martini for Halloween Fun

This Poison Apple Martini is a visually striking and delicious cocktail perfect for Halloween celebrations.
Print Recipe Pin Recipe
Prep Time 5 minutes mins
Total Time 5 minutes mins
Servings: 1 cocktail
Course: Drinks
Cuisine: American
Calories: 200
Ingredients Equipment Method Nutrition Notes

Ingredients
  

For Rimming the Glass
  • Black Lava Salt or Coarse Black Sugar For rimming the glass
For the Cocktail
  • 2 oz Apple Cider Sweet ingredient for a cozy flavor
  • 1 oz Pomegranate Juice Adds color and tartness
  • 0.5 oz Lemon Juice Adds freshness
  • 2 oz Vodka Main alcohol; can substitute with apple vodka
  • 0.5 tsp Activated Charcoal Optional for dark hue
  • 1 piece Dry Ice Optional for spooky effect

Equipment

  • cocktail shaker
  • strainer
  • Martini Glass

Method
 

Step-by-Step Instructions
  1. Prepare the glass by rimming it with black lava salt or coarse black sugar.
  2. Fill a cocktail shaker halfway with ice and add the apple cider, pomegranate juice, and lemon juice.
  3. Add vodka and activated charcoal if desired, then shake vigorously for about 15-20 seconds.
  4. Strain the mixture into the prepared martini glass.
  5. If using, drop a small piece of dry ice into the martini before serving.

Nutrition

Serving: 1cocktailCalories: 200kcalCarbohydrates: 20gSodium: 5mgPotassium: 100mgFiber: 1gSugar: 15gVitamin C: 10mgCalcium: 2mgIron: 1mg

Notes

Use caution with dry ice, ensuring it's fully dissolved before drinking. This cocktail is best served fresh.

Tried this recipe?

Let us know how it was!

Cozy Apple Chai Latte: Your Perfect Sip for Fall Bliss

September 21, 2025 by Grace Snow Leave a Comment

As the first crisp leaves begin to fall, a cozy aroma starts to fill my kitchen—it's the unmistakable scent of my favorite autumn drink: a delightful Apple Chai Latte. This recipe marries the sweet, fruity notes of fresh apple cider with the warmth of traditional chai spices, creating a comforting beverage that’s perfect for cool evenings and holiday gatherings. Not only is this Apple Chai Latte quick to prepare, making it ideal for busy nights, but it also offers a delightful twist on the classic latte, proving to be a crowd-pleaser for friends and family alike. So, why not put the fast food down and treat yourself to the seasonal hug in a mug you deserve? Are you ready to stir up some cozy magic in your kitchen?

Why Is This Apple Chai Latte Special?

Delightful Flavors: The perfect blend of sweet apple cider and aromatic chai spices creates a taste that embodies the essence of fall.

Quick to Make: With just a few easy steps, you can whip up this cozy drink in no time, making it a go-to for those busy evenings!

Customizable: Feel free to swap the milk for your favorite plant-based version or add a touch of sweetness with honey or maple syrup. For those who love variety, check out our Chicken Salad Apples for a flavor-packed culinary adventure.

Holiday Appeal: This drink is not only comforting but also eye-catching, perfect for serving at festive gatherings.

Seasonal Hug in a Mug: Each sip warms your soul, making it a delightful way to embrace the cozy vibes of autumn and winter.

Indulge in this Apple Chai Latte and make your seasonal gatherings even more special!

Apple Chai Latte Ingredients

• Let's gather everything you need for your cozy delight!

For the Base

  • Apple Cider – Choose high-quality, unfiltered cider for depth of flavor.
  • Water – Use to dilute the apple cider and achieve a well-balanced drink.
  • Chai Tea Bags (or Loose Chai Tea) – Infuses the latte with warm spices; chai bags are convenient, while loose tea offers a bolder infusion.

For the Creaminess

  • Milk (Dairy or Plant-Based) – Adds creaminess; almond, oat, or coconut milk are wonderful lighter options.

For Sweetness

  • Honey or Maple Syrup (optional) – Add sparingly for sweetness; honey brings a floral note, while maple syrup adds rich caramel depth.

For Garnish

  • Ground Cinnamon (optional) – Enhances warmth and spice, perfect for that cozy feeling.
  • Cinnamon Stick or Apple Slice (optional) – These decorative garnishes not only elevate the visual appeal but also enhance the aroma.

With this combination of ingredients, you'll create a delightful Apple Chai Latte that’s a hug in a mug for those cool autumn days!

Step‑by‑Step Instructions for Apple Chai Latte

Step 1: Combine Ingredients
In a medium-sized pot, combine 1 cup of high-quality, unfiltered apple cider with 1/2 cup of water. Place the pot over medium heat and bring the mixture to a gentle simmer, stirring occasionally. You'll know it's ready when you see small bubbles forming on the surface, releasing the comforting aroma of apple as it heats.

Step 2: Steep the Chai
Once the apple cider mixture is simmering, add 2 chai tea bags or 2 teaspoons of loose chai tea directly into the pot. Let the chai steep for 3 to 5 minutes, allowing the spices to meld beautifully with the apple flavors. Keep an eye on the color, as it should darken slightly, indicating that the flavors are infusing perfectly.

Step 3: Remove the Tea
After steeping, carefully remove the tea bags or strain out the loose tea from the pot. Discard them, and take a moment to enjoy the rich, fragrant aroma of your blended apple chai, a warm promise of the cozy Apple Chai Latte to come.

Step 4: Add the Creaminess
Pour 1 cup of your preferred milk—whether dairy or plant-based—into the pot with the apple chai mixture. Stir gently as you heat the mixture over low heat, avoiding boiling to ensure the milk doesn’t curdle. You’ll know it’s perfectly warmed when you can see steam rising but no bubbles.

Step 5: Sweeten to Taste
Once the milk is warm, consider sweetening your Apple Chai Latte! Add 1 to 2 teaspoons of honey or maple syrup, depending on your preference. Stir until the sweetener dissolves completely, creating a beautifully rich flavor profile that complements the apple and chai spices.

Step 6: Serve and Garnish
Pour the delightful mixture into your favorite mugs, ready for enjoyment. For a finishing touch, sprinkle a dash of ground cinnamon on top or garnish with a cinnamon stick or a fresh apple slice. This not only adds aesthetic charm but also enhances the cozy aroma as you sip your warm Apple Chai Latte.

What to Serve with Cozy Apple Chai Latte

As the temperatures drop, the comforting aroma of spices and sweet apple fills your home, creating the perfect backdrop for a cozy gathering.

  • Ginger Snaps: These crispy cookies provide a delightful crunch and a spicy contrast that enhances the warmth of your latte—truly a match made in heaven.

  • Pumpkin Muffins: Soft, flavorful muffins bring a seasonal touch while balancing the spiced notes from the Apple Chai Latte. These treats are perfect for sharing!

  • Cheese Board: A selection of sharp cheddar and creamy brie paired with fresh apple slices offers a savory-sweet combination, making your cozy sipping experience even more delightful.

  • Cinnamon Rolls: Warm, gooey rolls drizzled in icing are the ultimate sweet companion. Each fluffy bite pairs beautifully with the warm spices in your drink, especially on chilly mornings.

  • Caramel Popcorn: The buttery, sweet, and slightly salty popcorn adds fun and whimsy to your drink experience. Enjoy snacking while savoring your cozy latte.

  • Apple Crisp: A warm apple crisp topped with vanilla ice cream is a comforting dessert that complements your drink’s apple flavors. It’s a dessert worth indulging in!

  • Maple-Glazed Doughnuts: Soft, sweet doughnuts with a hint of maple echo the cozy flavors of your latte. They make for a delightful breakfast or afternoon treat!

  • Spiced Hot Cider: For those who want to enhance the apple flavor even more, serve a small glass of warm spiced cider alongside. It’s a warming complement for sipping while enjoying your latte.

Expert Tips for the Best Apple Chai Latte

  • Choose Quality Cider: Opt for high-quality, unfiltered apple cider to ensure a rich, authentic flavor that elevates your Apple Chai Latte.

  • Sweetness Balance: Remember, apple cider is naturally sweet. Adjust the honey or maple syrup based on your taste buds and how sweet your cider is.

  • Steeping Time Matters: Don’t oversteep the chai tea! Aim for 3-5 minutes to keep the flavors balanced without bitterness, enhancing your latte's cozy taste.

  • Gentle Heating: Heat the milk slowly to avoid curdling. Your Apple Chai Latte should be warm and creamy, not overheated.

  • Garnish Creativity: Get creative with garnishes! A sprinkle of nutmeg or a star anise can add an unexpected twist to your Apple Chai Latte experience.

  • Make Ahead: Prepare the apple cider and chai mixture ahead of time. Just reheat and add milk when you're ready to enjoy a quick, cozy sip!

Apple Chai Latte Variations

Embrace your creativity in the kitchen with these delightful variations for your Apple Chai Latte!

  • Dairy-Free: Substitute regular milk with almond or oat milk for a light, nut-free option that still delivers creaminess. The nutty flavors intertwine perfectly with apple and chai spices.

  • Spiced Apple Cider: Use spiced apple cider instead of regular for an extra kick. Imagine the warmth of cinnamon and cloves enhancing each sip—it's autumn in a cup!

  • Richness Boost: For a richer flavor, replace part of the apple cider with cream. This decadent twist creates a luxuriously smooth beverage that feels extra indulgent.

  • Sweetener Swaps: Explore different sweeteners by trying agave nectar or coconut sugar instead of honey or maple syrup. Each one adds a unique flavor profile to your drink.

  • Flavorful Mix-Ins: Add a splash of vanilla extract to elevate the taste even further. Just a hint will brighten the flavors and bring harmony to the spices.

  • Garnish Enhancement: Experiment with garnishes like a sprinkle of nutmeg or a star anise. Not only do these enhance visual appeal, but they also add new aromatic layers to your latte.

  • Chai Variety: Swap regular chai for rooibos chai or matcha for a caffeine-free or vibrant alternative. Each variation introduces a unique essence, allowing for a delightful twist.

  • Exploring Heat: Love a little spice? Add a pinch of cayenne pepper or a slice of fresh ginger while steeping the chai. It'll give you a pleasant warmth that complements the apple perfectly.

Ready to try one of these tantalizing twists on your Apple Chai Latte? And for even more delicious ideas, check out our recipe for Chicken Salad Apples that's sure to captivate your taste buds!

Make Ahead Options

These cozy Apple Chai Lattes are perfect for busy home cooks looking to save time during the chillier months! You can prep the apple cider and chai mixture up to 24 hours in advance by combining 1 cup of apple cider and 1/2 cup of water in a pot and steeping the chai tea. After removing the tea, let the mixture cool, then refrigerate it in an airtight container. When you're ready to enjoy, simply reheat the mixture over low heat, stir in 1 cup of your desired milk, and sweeten it to taste. This way, you maintain the rich, comforting flavors, ensuring your Apple Chai Latte is just as delightful as if made fresh!

How to Store and Freeze Apple Chai Latte

Fridge: Store any leftover Apple Chai Latte in an airtight container in the fridge for up to 3 days. Just give it a good stir before reheating.

Freezer: Freeze portions of the Apple Chai Latte in freezer-safe containers for up to 2 months. Thaw in the fridge overnight and reheat gently before serving.

Reheating: Reheat on the stovetop over low heat to maintain creaminess, or use a microwave in short intervals, stirring in between until warmed through.

Make-Ahead Tips: You can prepare the apple cider and chai mixture ahead of time and store it in the fridge. Add milk when you're ready to serve for the freshest taste.

Apple Chai Latte Recipe FAQs

What type of apple cider should I use for the best flavor?
Absolutely! For the best Apple Chai Latte, choose high-quality, unfiltered apple cider. It provides a deep, natural sweetness and rich flavor that elevates your drink. Look for cider that has a fresh aroma and is free from added sugars for the most authentic taste.

How long can I store leftover Apple Chai Latte?
You can store any leftover Apple Chai Latte in an airtight container in the fridge for up to 3 days. Just make sure to give it a good stir before reheating, as the ingredients may separate slightly when chilled.

Can I freeze Apple Chai Latte?
Very! You can freeze portions of the Apple Chai Latte in freezer-safe containers for up to 2 months. To do this, let it cool completely before transferring to containers. When you’re ready to enjoy it, simply thaw in the fridge overnight and reheat gently on the stovetop or microwave until warmed through.

What should I do if my Apple Chai Latte turns out too sweet?
If your Apple Chai Latte is too sweet for your taste, consider adding more milk to balance out the flavors. This not only helps reduce sweetness but also maintains the creamy texture. Alternatively, a pinch of salt can enhance other flavors and offset the sweetness.

Is this Apple Chai Latte safe for children?
Absolutely! This Apple Chai Latte is safe for children. Just make sure to adjust the spice levels according to their taste preferences if you're using a more robust chai blend. The natural apple flavor and creamy texture make it a delightful treat for kids as well.

Can I customize the sweetness of the latte?
Yes, you can absolutely customize the sweetness! Both honey and maple syrup are great options, but start with just a teaspoon, as apple cider itself is naturally sweet. Taste and add more if necessary to achieve your desired flavor. Enjoy experimenting!

Apple Chai Latte

Cozy Apple Chai Latte: Your Perfect Sip for Fall Bliss

Enjoy a delightful Apple Chai Latte that marries sweet apple cider with traditional chai spices, perfect for fall relaxation.
Print Recipe Pin Recipe
Prep Time 10 minutes mins
Cook Time 10 minutes mins
Total Time 20 minutes mins
Servings: 2 cups
Course: Drinks
Cuisine: American
Calories: 150
Ingredients Equipment Method Nutrition Notes

Ingredients
  

For the Base
  • 1 cup Apple Cider Choose high-quality, unfiltered cider for depth of flavor.
  • 1/2 cup Water Use to dilute the apple cider and achieve a well-balanced drink.
  • 2 bags Chai Tea Bags Infuses the latte with warm spices.
For the Creaminess
  • 1 cup Milk (Dairy or Plant-Based) Add creaminess; almond, oat, or coconut milk are wonderful lighter options.
For Sweetness
  • 1-2 teaspoons Honey or Maple Syrup Add sparingly for sweetness; honey brings a floral note, while maple syrup adds rich caramel depth.
For Garnish
  • to taste Ground Cinnamon Enhances warmth and spice.
  • to taste Cinnamon Stick or Apple Slice For decorative garnishes.

Equipment

  • medium-sized pot

Method
 

Step-by-Step Instructions
  1. In a medium-sized pot, combine 1 cup of high-quality, unfiltered apple cider with 1/2 cup of water. Place the pot over medium heat and bring the mixture to a gentle simmer.
  2. Once the apple cider mixture is simmering, add 2 chai tea bags or 2 teaspoons of loose chai tea directly into the pot. Let the chai steep for 3 to 5 minutes.
  3. After steeping, carefully remove the tea bags or strain out the loose tea from the pot.
  4. Pour 1 cup of your preferred milk into the pot with the apple chai mixture. Stir gently as you heat the mixture over low heat.
  5. Once the milk is warm, consider sweetening your Apple Chai Latte. Add 1 to 2 teaspoons of honey or maple syrup.
  6. Pour the mixture into your favorite mugs and garnish with a sprinkle of ground cinnamon or a cinnamon stick.

Nutrition

Serving: 1cupCalories: 150kcalCarbohydrates: 35gProtein: 2gFat: 3gSaturated Fat: 1gCholesterol: 10mgSodium: 50mgPotassium: 200mgFiber: 1gSugar: 30gVitamin A: 200IUVitamin C: 2mgCalcium: 100mgIron: 1mg

Notes

Store any leftover Apple Chai Latte in an airtight container in the fridge for up to 3 days. Can be frozen for up to 2 months.

Tried this recipe?

Let us know how it was!

Spooky Halloween Mimosas with Fun Lychee Eyeballs

September 19, 2025 by Grace Snow Leave a Comment

As I strolled through the vibrant autumn market, a witches' cauldron of ideas began bubbling in my mind. Halloween season calls for creativity, and what better way to celebrate than with a festive Halloween Mimosa? This fun cocktail pairs the crisp effervescence of champagne with the tangy richness of pomegranate juice, making it a perfect choice for lively parties or cozy brunch gatherings. Not only do these mimosas look delightfully spooky with their lychee and blueberry eyeballs, but they also cater to all palates—offering an easy non-alcoholic twist for your guests. Ready to enjoy a sip of Halloween magic and impress your friends? Let’s mix up some spooky delights!

Why Are Halloween Mimosas So Special?

Festive Twist: This Halloween Mimosa brings a playful spin to the classic brunch drink, making it a festive highlight for gatherings.
Visually Stunning: The lychee eyeballs not only add intrigue but also spark conversation, captivating both kids and adults alike.
Simple Preparation: With just a few steps, you can easily whip up these delightful cocktails—perfect for those rushed party prep moments!
Versatile Flavor Options: Feel free to mix and match juices to create your preferred flavor profile, making it enjoyable for every taste bud.
Non-Alcoholic Adaptation: Hosting friends or family who prefer not to drink? Simply swap the champagne for sparkling soda for a delicious non-alcoholic treat!
Serve these fun beverages at your next spooky celebration and watch them fly off the table! Enjoy a delightful twist on a classic with this captivating drink.

Halloween Mimosa Ingredients

• Ready to create your own spooky drink? Here’s what you’ll need!

For the Eyeballs

  • Lychees in Light Syrup – A unique texture and sweetness, perfect for creating "eyeballs." Substitute fresh lychees if unavailable.
  • Blueberries – Bursting with color and flavor, these complete the eyeball look; fresh or frozen work well!

For the Cocktail

  • Pomegranate Juice – The fruity, tangy base for your Halloween Mimosa; cranberry juice is a great substitute if needed.
  • Brut Champagne – Provides the bubbly fizz; can be swapped with sparkling wine or prosecco, or use club soda for a non-alcoholic option.

These ingredients will help you conjure up the perfect festive concoction for your Halloween gatherings!

Step‑by‑Step Instructions for Halloween Mimosas

Step 1: Prepare the Eyeballs
Begin by draining the lychees from the light syrup. Carefully pierce a blueberry into the center of each lychee, creating your spooky eyeballs. Use a cocktail skewer to hold the blueberry in place. As you assemble them, place the finished lychee eyeballs on a serving plate, making sure they are intact and ready for the cocktails.

Step 2: Chill the Glasses
To ensure your Halloween Mimosas are refreshingly cool, chill your champagne glasses in the freezer for about 10 minutes. If you prefer, you can also fill them with ice water while you prepare other ingredients. This step enhances the effervescence of the champagne, making your drinks even more delightful.

Step 3: Pour the Champagne
Once your glasses are chilled, remove them from the freezer or ice water. Gently pour the brut champagne into each glass, filling them about two-thirds full. Look for that pleasant fizz as the bubbles rise, creating a lively atmosphere for your Halloween celebration.

Step 4: Add the Pomegranate Juice
Carefully top each glass of champagne with pomegranate juice, pouring it slowly to maintain the bubbles. Pour until the glass is nearly full, creating a beautiful ombre effect with the dark red juice meeting the golden bubbly champagne. The colors will evoke the spirit of Halloween.

Step 5: Garnish with Eyeballs
Finally, take your cocktail skewers with the lychee eyeballs and place one in each glass. Arrange them so they elegantly float above the liquid, giving your Halloween Mimosas a festive and spooky appearance. The playful presentation will surely delight your guests as they admire their unique, eerie drinks.

Tips for the Best Halloween Mimosa

  • Chill Everything: Ensure your champagne and glasses are well-chilled prior to serving. This helps maintain the effervescence of your Halloween Mimosa.
  • Gentle Assembly: When creating lychee eyeballs, be gentle to avoid breaking the delicate fruit. Patience pays off for an impressive presentation!
  • Flavor Adjustments: Don't hesitate to experiment with different juices! Tasting along the way allows you to customize the sweetness and flavor of your mimosas.
  • Non-Alcoholic Option: If serving guests who prefer not to drink, swap champagne for club soda or a flavored sparkling drink to create a delightful non-alcoholic version.
  • Serve Fresh: Mimosas are best enjoyed fresh to maintain their carbonation, so prepare them just before serving for ultimate enjoyment!

Halloween Mimosa Variations & Substitutions

Feel free to get creative and customize your Halloween Mimosa with these fun twists!

  • Non-Alcoholic: Replace champagne with club soda or a flavored sparkling drink for a bubbly, festive option everyone can enjoy.
    Serving these chilled will keep the fizz lively, ensuring a refreshing experience for all your guests.

  • Juice Swap: If pomegranate juice is not available, cranberry juice makes a delicious alternative, providing similar fruity notes.
    Mixing juices can add an element of surprise in flavor, making your mimosas a talking point around the table!

  • Flavored Champagne: Consider using flavored sparkling wine, like peach or raspberry, to add an exciting twist to the classic taste.
    This is a fun way to enhance the overall flavor profile, transforming your mimosa into a unique seasonal cocktail.

  • Herbal Twist: Infuse your pomegranate juice with fresh mint or basil for a refreshing layer of complexity in each sip.
    A little herb can elevate your drink and add a fresh pop that complements the sweetness wonderfully!

  • Spice it Up: Add a sprinkle of cinnamon or nutmeg to the pomegranate juice for a warm, spiced twist that's perfect for fall.
    These warming spices give your mimosas a cozy touch, inviting warmth to each bubbly sip.

  • Garnish Options: Instead of lychee, use gummy eyeballs or spooky-shaped fruit cutouts for a fun and playful garnish.
    This quick switch can lighten the mood while adding a sweet treat your guests will enjoy after the drink is gone!

  • Colorful Layers: Layer different juices, like orange or pineapple, for a vibrant rainbow effect that adds visual appeal.
    This playful presentation not only looks festive but also gives varied flavors with each sip, delighting both kids and adults alike!

Whether you choose to dive into tropical flavors or spritz up some spookiness, these variations for your Halloween Mimosa ensure everyone's taste buds will be catered to at your celebration!

Make Ahead Options

These Halloween Mimosas are perfect for preparing ahead of time, allowing you to enjoy more time with your guests during the festivities! You can prepare the lychee eyeballs by piercing the blueberries into the lychees and refrigerating them up to 24 hours in advance, ensuring they stay fresh and intact. To serve, simply chill your champagne glasses, pour in the champagne, and top with pomegranate juice just before serving to maintain that lovely fizz. This thoughtful preparation saves you valuable time during busy party moments, allowing your Halloween Mimosas to be just as delicious and festive when served!

What to Serve with Spooky Halloween Mimosas

Elevate your Halloween gathering with delightful pairings that enhance the festive spirit and tantalize the taste buds.

  • Savory Cheese Platter: A variety of cheeses paired with crackers adds a savory contrast to the sweet mimosas, making a perfect handheld bite.
  • Pumpkin Spice Muffins: These warm, spiced treats echo seasonal flavors and offer a cozy feeling, complementing the refreshing cocktails beautifully.
  • Frightful Finger Foods: Mini savory pastries or stuffed mushrooms provide a fun and tasty twist that guests will love while enjoying their mimosas.
  • Halloween Fruit Skewers: Add a splash of color with skewers of seasonal fruits like grapes, oranges, and strawberries for a fresh, vibrant touch.
    Perfect for balancing their sweetness, these fruity bites not only add variety but also refresh the palate.
  • Witch’s Brew Soup: A warm, creamy pumpkin soup serves as a comforting counterpart, embracing the spirit of the season while providing an inviting warmth.
  • Chilling Midnight Brew: For a unique drink option, serve a spooky non-alcoholic punch alongside your Halloween Mimosas, inviting all guests to join in the fun.

Mix and match these options to create an enchanting Halloween feast that guests will remember long after the last toast!

How to Store and Freeze Halloween Mimosas

Fridge: Store any leftover mimosas in the fridge for up to 1 day, covering them tightly with plastic wrap to preserve carbonation.

Lychee Eyeballs: If you prepare lychee eyeballs in advance, keep them refrigerated in an airtight container for up to 3 days before serving.

Make-Ahead Tip: You can mix the juices ahead of time and store them in the fridge, but always add champagne just before serving to enjoy the fizz of your Halloween Mimosa.

Freezer: For no-fuss entertaining, freeze prepared lychee eyeballs in a single layer, then transfer to a bag for up to 1 month.

Halloween Mimosas Recipe FAQs

What are the best lychees to use for the eyeballs?
I recommend using canned lychees in light syrup for their sweet, soft texture, perfect for forming spooky eyeballs. If you can find fresh lychees, they can also work wonderfully—just peel and pit them before inserting the blueberries!

How long can I store leftover mimosas?
Leftover Halloween Mimosas should be stored in the fridge and consumed within 1 day. Make sure to cover them with plastic wrap to help retain some of the bubbles.

Can I make the lychee eyeballs in advance?
Absolutely! You can prepare the lychee eyeballs up to 3 days in advance. Just keep them in an airtight container in the refrigerator to maintain their freshness until it's time to serve.

What’s the proper way to freeze lychee eyeballs?
To freeze lychee eyeballs, first arrange them in a single layer on a baking sheet. Flash freeze them for about 2 hours until solid. Then, transfer the frozen eyeballs to a sealed freezer bag. They can be stored in the freezer for up to 1 month. Simply thaw them in the fridge or at room temperature before using.

Is there a non-alcoholic option for the Halloween Mimosa?
Yes! You can easily create a non-alcoholic Halloween Mimosa by substituting the brut champagne with club soda or a sparkling flavored beverage. This way, everyone can enjoy the festive fun, regardless of their drink preferences.

Can I customize the juice flavors in my mimosas?
Definitely! Feel free to experiment with different juices like cranberry or orange to create a flavor you love. I often mix and match to achieve the perfect blend, ensuring every sip is delightful!

Halloween Mimosa

Spooky Halloween Mimosas with Fun Lychee Eyeballs

These festive Halloween Mimosas feature a delightful combination of champagne and pomegranate juice, topped with lychee eyeballs for a spooky presentation.
Print Recipe Pin Recipe
Prep Time 15 minutes mins
Total Time 15 minutes mins
Servings: 4 mimosas
Course: Drinks
Calories: 150
Ingredients Equipment Method Nutrition Notes

Ingredients
  

For the Eyeballs
  • 1 can Lychees in Light Syrup Substitute fresh lychees if unavailable.
  • ½ cup Blueberries Fresh or frozen both work well.
For the Cocktail
  • 2 cups Pomegranate Juice Cranberry juice is a great substitute if needed.
  • 1 bottle Brut Champagne Can be swapped with sparkling wine or prosecco, or use club soda for a non-alcoholic option.

Equipment

  • champagne glasses
  • cocktail skewers
  • freezer

Method
 

Step‑by‑Step Instructions
  1. Begin by draining the lychees from the light syrup. Carefully pierce a blueberry into the center of each lychee, creating your spooky eyeballs. Use a cocktail skewer to hold the blueberry in place. As you assemble them, place the finished lychee eyeballs on a serving plate.
  2. To ensure your Halloween Mimosas are refreshingly cool, chill your champagne glasses in the freezer for about 10 minutes. If you prefer, you can also fill them with ice water while you prepare other ingredients.
  3. Once your glasses are chilled, remove them from the freezer or ice water. Gently pour the brut champagne into each glass, filling them about two-thirds full.
  4. Carefully top each glass of champagne with pomegranate juice, pouring it slowly to maintain the bubbles. Pour until the glass is nearly full, creating a beautiful ombre effect.
  5. Finally, take your cocktail skewers with the lychee eyeballs and place one in each glass. Arrange them so they elegantly float above the liquid.

Nutrition

Serving: 1mimosaCalories: 150kcalCarbohydrates: 20gSodium: 5mgPotassium: 120mgFiber: 1gSugar: 16gVitamin C: 10mg

Notes

Mimosas are best enjoyed fresh to maintain their carbonation, so prepare them just before serving for ultimate enjoyment.

Tried this recipe?

Let us know how it was!

Black Magic Margarita: Your Spooky Sip for Halloween Fun

September 19, 2025 by Grace Snow Leave a Comment

As the leaves turn a fiery orange and spooky decorations start making their appearance, it’s time to embrace the Halloween spirit with a drink that truly captivates the imagination. Enter the Black Magic Margarita—a cocktail so enchanting, it’s as if it’s conjured from a witch's brew. This quick-to-prepare elixir features captivating flavors of tropical passion fruit, making it a flexible option for any gathering. Whether you’re hosting a themed party or enjoying a cozy movie night, this customizable Halloween cocktail promises to be the highlight of your soirée. Curious to see how you can mix your own magical concoction?

Why is Black Magic Margarita a Must-Try?

Showstopper at Parties: This cocktail is not just a drink; it's a conversation starter. Its striking dark color and shimmering effect wow your guests, making it the perfect centerpiece for your Halloween party.

Quick and Customizable: Whipping up this magical concoction takes only a few minutes! Plus, with options for ingredient swaps like using raspberry liqueur or different flavored salts, you can easily personalize it to suit anyone's taste.

Irresistible Flavor: The combination of passion fruit liqueur and fresh lime creates a delightful balance that is both lively and refreshing. You'll find it hard to resist pouring another!

Versatile Enjoyment: Perfect for any spooky occasion—be it Halloween festivities, themed parties, or cozy movie nights—this margarita adapts to your needs seamlessly.

Fun for All: Whether you're a cocktail aficionado or a casual sipper, this Black Magic Margarita beckons everyone to join the fun. Pair it with your favorite snacks, like Sweet Potatoes Black or Blackberry Crisp Amp, for an unforgettable flavor experience!

Black Magic Margarita Ingredients

For the Margarita
• Passion Fruit Liqueur – This adds fruity sweetness and tropical notes; feel free to substitute with raspberry, cherry, or lemon liqueur!
• Tequila – The backbone of this cocktail, it provides strength and characteristic flavor; no substitutions recommended for this key ingredient.
• Cointreau – Adds a zesty orange flavor and complexity; can be replaced by Triple Sec or any orange liqueur.
• Fresh Lime Juice – Provides that refreshing acidity; if fresh is unavailable, bottled lime juice or sour mix works just fine.
• Simple Syrup – Sweetens the cocktail perfectly; swap it out for agave nectar if you prefer a different sweetness profile.
• Activated Charcoal – Adds that spooky black color; can be replaced with black gel food coloring if desired.

For the Garnish
• Black Lava Salt – Rims the glass for a striking salty kick and visual appeal; black sugar sprinkles can be used as a substitute.
• Edible Silver Glitter or Shimmer – Optional but enhances the visual allure—perfect for adding that magical touch!
• Cup of Ice – To chill the cocktail and achieve the desired dilution.

Unleash your creativity with this Black Magic Margarita, and watch as your Halloween celebrations soar to new heights!

Step‑by‑Step Instructions for Black Magic Margarita

Step 1: Prepare the Glass
Start your Black Magic Margarita by preparing the glass. Run a lime slice along the rim of your chosen glass, making sure to coat it evenly. Then, gently dip the rim into black lava salt for a striking visual effect and a salty kick. Set the glass aside to let the rim dry while you gather the remaining ingredients.

Step 2: Combine Ingredients
Take a cocktail shaker and fill it with a cup of ice. Pour in the passion fruit liqueur, tequila, Cointreau, fresh lime juice, simple syrup, and a pinch of activated charcoal for that signature spooky color. If you're using edible shimmer for an extra magical touch, add it now. Ensure all ingredients are combined in a harmonious blend before moving on.

Step 3: Shake It Up
Secure the lid on your cocktail shaker and shake vigorously for about 15 seconds. This process is essential to chill the Black Magic Margarita and properly incorporate the flavors. You should feel the shaker cool down in your hands. After shaking, it should have a frosty appearance, indicating that it's perfectly mixed.

Step 4: Strain into the Glass
Now, take your prepared glass filled with fresh ice and position a strainer over the top of the shaker. Carefully pour the chilled margarita into the glass, ensuring the rim stays intact. The vibrant dark color should cascade into the glass, showcasing the cocktail's allure and inviting your guests to take a sip.

Step 5: Add the Finishing Touch
To elevate the presentation of your Black Magic Margarita, garnish with a whimsical skull cocktail stirrer or a sprinkle of edible silver glitter atop the drink. This not only enhances the visual appeal but also adds a touch of festive charm—perfect for any Halloween gathering. Serve immediately to enjoy the freshness!

Black Magic Margarita Variations & Substitutions

Feel free to play around with the Black Magic Margarita; unleash your creativity and craft a drink that fits your taste perfectly!

  • Fruity Twist: Swap the passion fruit liqueur for raspberry or cherry liqueur for a different fruity flavor.

  • Zesty Alternative: Use fresh lemon juice instead of lime for a tart and refreshing change that brightens the drink.

  • Sweetener Switch: Replace simple syrup with agave nectar for a richer sweetness and a touch of natural flavor.

  • Rimmed Delight: Try rimming your glass with flavored salts like jalapeño or chili powder for a spicy kick.

  • Add a Pop: Incorporate a splash of club soda for a fizzy lift that adds extra excitement to each sip.

  • Chilly Option: For a frozen Black Magic Margarita, blend the ingredients with ice instead of shaking them for a slushy delight.

  • Lower Sugar: Use a sugar-free sweetener like stevia or monk fruit for a lighter, calorie-conscious option without sacrificing taste.

  • Colorful Variation: Mix it up with food coloring instead of activated charcoal or black gel food coloring for a festive twist that’s still visually enticing.

As you serve these delightful variations, consider pairing your Black Magic Margarita with tempting snacks like Roasted Bratwurst Peppers for a spooky movie night! Embrace this Halloween season with creativity—your guests will thank you!

What to Serve with Black Magic Margarita

To create a truly memorable Halloween gathering, think about pairing your drink with delightful and themed accompaniments.

  • Spooky Cheese Platter: A selection of cheeses with dark grapes and black licorice adds both visual appeal and tantalizing flavors that enhance the margarita's fruity notes. A mix of creamy and sharp cheeses will cater to different taste preferences.

  • Charcoal-Infused Tortilla Chips: These trendy chips lend a perfect crunch and a touch of the theme, making them great for dipping into spooky salsas or guacamole. The added crunch will contrast nicely with the smooth texture of your margarita.

  • Pumpkin Spice Popcorn: Light and flavorful, this sweet treat complements the tropical elements of your drink, while the crunchiness adds a delightful pairing experience. It's an easy snack to whip up and sure to please all your guests!

  • Black Bean Tacos: Stuffed with flavorful fillings like roasted corn and creamy avocado, these tacos bring a savory delight that balances the cocktail's sweetness. Tacos are always a crowd-pleaser, making them perfect for an informal festive gathering.

  • Witch's Brew Fruit Punch: Mix up a refreshing non-alcoholic option with dark berries and a splash of lime to mimic the magical tones of the Black Magic Margarita. This berry twist will cater to non-drinkers and adds to the overall theme.

  • Chocolate Mousse Cups: Rich and luscious, these dark desserts are the perfect sweet treat to finish off your Halloween feast. The decadent chocolate flavor enhances the cocktail while providing a satisfyingly sumptuous end to your meal!

Expert Tips for Black Magic Margarita

  • Perfect Chilling: Shake vigorously: Ensuring your cocktail is well-chilled enhances the overall flavor. A good shake incorporates air, resulting in a lighter texture.

  • Portion Control: Be mindful of activated charcoal: A little goes a long way! Start with less and adjust according to your desired spooky effect to avoid overwhelming your margarita.

  • Taste Adjustments: Customize your sweetness: If you're using alternative liqueurs, taste the mix before serving. You might need to tweak the simple syrup or agave nectar for balance.

  • Visual Appeal: Enhance your garnish: Opt for unique rim styles like flavored sugars or fun embellishments. This touches your Black Magic Margarita with a personal flair that guests will love!

  • Make-Ahead: Prep ingredients in advance: Prepare your lime juice, simple syrup, and liqueurs ahead of time. It'll save you precious time when guests arrive, ensuring a stress-free serving experience.

Make Ahead Options

These Black Magic Margaritas are perfect for busy home cooks looking to simplify their Halloween festivities! You can prep the cocktail base—combining the passion fruit liqueur, tequila, Cointreau, fresh lime juice, simple syrup, and activated charcoal—up to 24 hours in advance and refrigerate it in an airtight container. This way, all the flavors meld beautifully, making your cocktail just as delicious when served. When it’s time to entertain, simply shake the mixture with ice, strain into your prepared glass with the black lava salt rim, and add your optional garnishes. Enjoy stress-free serving, knowing your spooktacular drinks are ready to impress!

How to Store and Freeze Black Magic Margarita

Fridge: Store any leftover Black Magic Margarita in an airtight container in the fridge for up to 3 days. Be sure to keep the ingredients separate for the best taste.

Freezer: If you'd like to prepare a batch in advance, freeze the margarita in an airtight container for up to 1 month. Allow it to thaw in the fridge before serving, giving it a good shake to restore texture.

Garnish Best Practices: Prepare garnishes separately and store in the fridge. Rimming salt, especially black lava salt, should be kept dry and airtight for freshness when serving.

Serving Freshness: For optimum flavor and presentation, always serve your Black Magic Margarita fresh. Mix ingredients on the day of your gathering for a delightful experience.

Black Magic Margarita Recipe FAQs

What type of passion fruit liqueur should I use?
I recommend using a quality passion fruit liqueur to capture that tropical sweetness. If you can't find passion fruit, alternatives like raspberry, cherry, or sour apple schnapps work beautifully. Just be mindful that different flavors may alter the overall taste!

How should I store leftover Black Magic Margarita?
Store any leftover Black Magic Margarita in an airtight container in the fridge, where it will stay fresh for up to 3 days. If you’ve prepared your ingredients separately, keep them stored that way to maintain flavor integrity and freshness until you’re ready to enjoy!

Can I freeze Black Magic Margarita?
Absolutely! If you want to make a batch ahead of time, pour the margarita into an airtight container and freeze it for up to 1 month. To serve, thaw it in the fridge and shake well before enjoying to restore its original texture!

What if I don’t have black lava salt for rimming?
No worries at all! If black lava salt isn't available, you can substitute it with black sugar sprinkles, which will provide a similar visual impact and sweetness. Alternatively, any flavored salt or a mix of regular salt and activated charcoal will also work nicely.

Is activated charcoal safe for everyone?
While activated charcoal gives that enchanting black color, it's important to note that it can interfere with the absorption of certain medications. If you're concerned, I suggest consulting with a healthcare professional, especially if you're planning to serve this cocktail to guests with health considerations.

Can I make this cocktail non-alcoholic?
Absolutely! To craft a non-alcoholic version of the Black Magic Margarita, substitute the spirits with sparkling water or lemon-lime soda, while using passion fruit juice for sweetness and tang. Adjust the flavors to suit your taste, and it’ll still be a spooky delight for everyone!

Black Magic Margarita

Black Magic Margarita: Your Spooky Sip for Halloween Fun

Enjoy the enchanting Black Magic Margarita, a must-try Halloween cocktail with tropical passion fruit and a striking appearance.
Print Recipe Pin Recipe
Prep Time 5 minutes mins
Total Time 5 minutes mins
Servings: 1 cocktail
Course: Drinks
Cuisine: Mexican
Calories: 200
Ingredients Equipment Method Nutrition Notes

Ingredients
  

For the Margarita
  • 1 ounce Passion Fruit Liqueur Or substitute with raspberry, cherry, or lemon liqueur.
  • 2 ounces Tequila No substitutions recommended.
  • 1 ounce Cointreau Can be replaced with Triple Sec or any orange liqueur.
  • 1 ounce Fresh Lime Juice Bottled lime juice or sour mix can also be used.
  • 0.5 ounce Simple Syrup Agave nectar can be used as a substitute.
  • 1 pinch Activated Charcoal Can be replaced with black gel food coloring.
For the Garnish
  • 1 tablespoon Black Lava Salt Black sugar sprinkles can be used as a substitute.
  • 1 teaspoon Edible Silver Glitter or Shimmer Optional.
  • 1 cup Ice For chilling the cocktail.

Equipment

  • cocktail shaker
  • strainer
  • glass

Method
 

Step-by-Step Instructions
  1. Run a lime slice along the rim of your chosen glass and dip it into black lava salt. Set aside to let the rim dry.
  2. Fill a cocktail shaker with ice. Add passion fruit liqueur, tequila, Cointreau, lime juice, simple syrup, and activated charcoal. Mix well.
  3. Shake vigorously for about 15 seconds until well chilled.
  4. Strain the margarita into the prepared glass filled with fresh ice.
  5. Garnish with edible silver glitter and serve immediately.

Nutrition

Serving: 1cocktailCalories: 200kcalCarbohydrates: 25gSodium: 5mgPotassium: 60mgSugar: 20gVitamin C: 15mgCalcium: 3mg

Notes

Mix ingredients fresh for best flavor and visual appeal. Customize sweetness to taste.

Tried this recipe?

Let us know how it was!

Orc Draught: Ignite Your Evenings with this Epic Cocktail

September 18, 2025 by Grace Snow Leave a Comment

As I sifted through my collection of classic cocktails, I stumbled upon a recipe that instantly transported me to Middle Earth—Orc Draught. This exhilarating drink isn't just for fans of J.R.R. Tolkien; it’s a celebration of flavors that beautifully harmonize sweet blackberries and spicy cinnamon whiskey. In just 5 minutes, you can whip up this invigorating cocktail, perfect for cozy evenings or fantasy-themed gatherings. The Orc Draught offers a delightful twist on traditional cocktails with its tipsy warmth and vibrant hues, making it an instant crowd-pleaser. Whether you're a seasoned mixologist or a casual home bartender, you’ll love how effortlessly it elevates any occasion. So, are you ready to embark on this flavor-filled journey?

Why Is Orc Draught So Special?

Unique Experience: The Orc Draught invites you to experience a thrilling flavor adventure inspired by fantasy.
Quick to Make: With just 5 minutes of prep, it's ideal for busy evenings or spontaneous gatherings.
Bursting with Flavor: The blend of sweet blackberries and spicy cinnamon whiskey creates a harmonious, bold taste sensation.
Versatile Options: Customize it with different berries or flavored whiskeys to suit your palate or themed event! Would you like to explore variation ideas?
Crowd-Pleasing Appeal: Perfect for entertaining, this cocktail will thrill fans and newbies alike, making any occasion unforgettable.
Prepare Ahead: Mix the components in advance for a hassle-free serving, allowing you to enjoy the festivities!

Orc Draught Ingredients

• Explore the perfect blend of flavors ready to enchant your palate.

For the Cocktail

  • Blackberries – Fresh and sweet, they bring a vibrant berry flavor; raspberries can be a delightful substitute.
  • Cinnamon Whiskey – Offers a warming sweetness and spice that reflects the fiery essence of Orc Draught; Fireball Whiskey works beautifully here.
  • Blackberry Liqueur – Enhances the depth of berry flavors; feel free to swap with other fruit liqueurs if desired.
  • Fernet-Branca – This herbal liqueur provides a necessary bitterness to balance the sweetness; Amaro is a great alternative.
  • Lemon Juice – Freshly squeezed adds acidity, brightening the overall flavor; always opt for fresh for the best taste.

For Garnish

  • Extra Blackberries – Use these for a stunning presentation; other fruits or herbs can also make great garnishes to suit your taste.

By following these expertly curated Orc Draught ingredients, you're on your way to crafting a cocktail that is as adventurous as the tales of Middle Earth themselves!

Step‑by‑Step Instructions for Orc Draught

Step 1: Prepare the Blackberries
Begin by adding 4 fresh blackberries into a cocktail shaker. With a muddler, gently crush them until they are broken down and juicy, releasing their vibrant color and sweet aroma. This essential first step infuses the foundation of the Orc Draught with rich berry flavor.

Step 2: Combine the Spirits
Next, pour in 1 oz of cinnamon whiskey, 1 oz of blackberry liqueur, ½ oz of Fernet-Branca, and ½ oz of freshly squeezed lemon juice into the shaker with the muddled blackberries. This harmonious combination of ingredients brings forth a balance of sweetness, tartness, and herbal bitterness, essential for the perfect Orc Draught.

Step 3: Add Ice and Shake
Now, fill the shaker with ice, ensuring it’s packed well to chill the mixture effectively. Secure the lid tightly and shake vigorously for about 10 to 15 seconds. You want to feel the shaker get cold and see condensation forming, indicating that your Orc Draught is blending beautifully and getting chilled.

Step 4: Strain into Glassware
Carefully remove the lid from your shaker and strain the cocktail mixture through a fine sieve into a small coupe or Nick and Nora glass. This step is key to achieving a smooth drink, free of pulp, allowing the vibrant colors of the Orc Draught to shine through.

Step 5: Garnish and Serve
Finally, take a few extra blackberries and place them as a garnish on top of your cocktail for a beautiful presentation. Serve the Orc Draught immediately, enjoying its delightful aroma and inviting hues. This warm, invigorating concoction is sure to impress at any gathering!

Tips for the Best Orc Draught

  • Muddle Effectively: Make sure to crush the blackberries well to release their juices, as a good muddle sets the foundation for the flavor of the Orc Draught.

  • Chill Properly: Don’t skip on the shaking! Adequate shaking merges the flavors beautifully while chilling the cocktail, balancing the strength of the alcohol.

  • Adjust Sweetness: For a sweeter drink, consider increasing the blackberry liqueur or the number of muddled blackberries—find your perfect balance in this Orc Draught!

  • Strain Carefully: Use a fine sieve while straining; this ensures a smooth cocktail free from pulp, allowing the vibrant color and flavors to shine.

  • Garnish Creatively: While blackberries are recommended for garnish, feel free to get creative! Try fresh mint or even a slice of lemon for a different aesthetic or flavor twist.

What to Serve with Orc Draught

Enhance your Orc Draught experience with delightful pairings that balance its bold flavors and invigorating notes.

  • Savory Cheese Platter: A selection of aged cheeses, like gouda or cheddar, complements the cocktail's sweetness perfectly, creating a delightful contrast.
  • Spiced Nuts: Roasted nuts with a hint of spice amplify the warmth of cinnamon whiskey, offering crunch and flavor that enhances the drink.
  • Charcuterie Board: Mix cured meats with fruits and honey to build layers of flavor that pair seamlessly with the cocktail’s berry notes.
  • Grilled Skewers: Marinated chicken or vegetable skewers add a hearty element, creating a satisfying bite alongside the vibrant Orc Draught.
  • Chocolate Fondue: Indulge your sweet tooth with rich, dark chocolate that pairs beautifully with the tart blackberries in the cocktail.
  • Berry Tart: A fresh berry tart brings out the fruity essence of the drink, creating a delightful harmony that will please any palate.
  • Sparkling Wine: For an effervescent touch, sip on sparkling wine as a refreshing counterpoint to the rich flavors of the Orc Draught.
  • Cinnamon Sugar Cookies: Sweet, buttery cookies with a hint of cinnamon echo the cocktail’s warmth, creating a comforting dessert pairing.
  • Spiced Apple Cider: This warm drink mirrors the spicy notes of the Orc Draught, making it an excellent complementary beverage for fall gatherings.

How to Store and Freeze Orc Draught

Fridge: Store any unused prepared Orc Draught in the fridge for up to 24 hours in an airtight container to maintain freshness.

Components Storage: Keep individual ingredients like blackberry liqueur and cinnamon whiskey in a cool, dark place. Fresh blackberries should be consumed within 2 days for optimal flavor.

Make-Ahead Tips: You can mix the muddled blackberries with the spirits (avoiding ice) and refrigerate for a few hours before serving, ensuring a delicious cocktail that quickly thrills your guests.

Freezer: While not recommended for the mixed cocktail, you can freeze extra blackberries for later use in future Orc Draughts, extending their life for several months.

Make Ahead Options

These Orc Draught cocktails are perfect for busy home cooks looking to save time without sacrificing flavor! You can muddle the blackberries and combine them with the spirits (cinnamon whiskey, blackberry liqueur, Fernet-Branca, and lemon juice) up to 24 hours in advance. Simply refrigerate the mixture until you’re ready to serve. This not only retains the vibrant flavor but also enhances the infusion of the spirits. When it’s time to enjoy your cocktails, just add ice, shake, strain into glasses, and garnish with extra blackberries. This way, you can relish the festivities with ease, serving up delicious, stress-free Orc Draughts that are just as delightful as when freshly made!

Orc Draught Variations & Substitutions

Feel free to unleash your creativity and customize this cocktail to surprise your taste buds!

  • Berry Switch: Substitute blackberries with raspberries for a tangier twist or try strawberries for a sweeter version. Each berry brings its unique essence to the drink.

  • Spicy Kick: Add a dash of hot sauce or a slice of jalapeño for a spicy kick that contrasts beautifully with the sweetness of the drink. It elevates the flavor profile, making it exciting for the adventurous palate.

  • Non-Alcoholic: Create a delightful mocktail by replacing alcohol with flavored sparkling water and using syrup or fruit extracts. This way, everyone can join in on the fun without the booze!

  • Herbal Infusion: Incorporate fresh herbs like mint or basil into the muddling process to add a refreshing layer of complexity. The addition of herbs can brighten up the drink, merging perfectly with the berry flavor.

  • Flavored Whiskeys: Swap cinnamon whiskey for apple or vanilla whiskey for a unique take that still maintains a comforting, warm essence. Varying the whiskey can totally transform the whole cocktail experience.

  • Citrus Burst: Add a splash of orange or lime juice alongside the lemon for an extra citrusy brightness. It not only enhances the drink's vibrant look but also adds an exciting zing!

  • Garnish Galore: Beyond blackberries, feel free to use colorful citrus slices or edible flowers for a whimsical touch to your garnish. It’s all about creativity and presentation.

  • Chilly Version: Blend the ingredients with ice for a frozen version of Orc Draught that’s perfect for hot days or lively parties. This icy twist offers a refreshing and playful take on the classic drink.

Dive deeper into possible flavors, and don't hesitate to explore! And if you want to know more about serving suggestions or prep tips, I've got your back. Enjoy experimenting!

Orc Draught Recipe FAQs

What kind of blackberries should I use?
Absolutely, using fresh blackberries will yield the best flavor! Look for berries that are firm and plump with a deep color, avoiding any with dark spots all over. If blackberries are unavailable, raspberries can be a delightful substitute—just keep in mind they’re a bit tarter.

How long can I store the Orc Draught after preparing it?
The Orc Draught is best enjoyed fresh, but if you have leftovers, store them in the fridge for up to 24 hours in an airtight container. This will help maintain the flavor, although the vibrancy of the fizz may diminish over time.

Can I freeze the Orc Draught?
It’s not recommended to freeze the mixed cocktail itself, as the texture and flavors won’t hold up well. However, if you have extra blackberries, feel free to freeze them! Just wash, dry, and spread them out on a baking sheet to freeze individually before transferring them to a freezer bag. They can last for up to 3 months!

What if I want to make the Orc Draught non-alcoholic?
Very! To create a non-alcoholic version, use flavored sparkling water in place of the spirits. Combine muddled blackberries with sweet syrups that mimic the flavor profile of whiskey. Add a splash of lemon juice for acidity, and you’ll have a refreshing mocktail that everyone can enjoy!

Are there any dietary considerations with the Orc Draught?
This cocktail is primarily composed of alcohol and blackberries, which should be fine for most diets. However, if you have allergies to berry fruits or particular liqueurs, be sure to check the labels. If you’re serving guests, consider offering a non-alcoholic alternative for designated drivers or those preferring not to drink.

Orc Draught

Orc Draught: Ignite Your Evenings with this Epic Cocktail

Orc Draught: A thrilling cocktail blending sweet blackberries and spicy whiskey for an unforgettable experience.
Print Recipe Pin Recipe
Prep Time 5 minutes mins
Total Time 5 minutes mins
Servings: 1 cocktail
Course: Drinks
Cuisine: Fantasy
Calories: 180
Ingredients Equipment Method Nutrition Notes

Ingredients
  

For the Cocktail
  • 4 fresh blackberries sweet and vibrant
  • 1 oz cinnamon whiskey Fireball Whiskey recommended
  • 1 oz blackberry liqueur can substitute with other fruit liqueurs
  • 0.5 oz Fernet-Branca can use Amaro as alternative
  • 0.5 oz freshly squeezed lemon juice always use fresh for best flavor
For Garnish
  • 3 extra blackberries for beautiful presentation

Equipment

  • cocktail shaker
  • fine sieve
  • measuring jigger

Method
 

Step-by-Step Instructions for Orc Draught
  1. Begin by adding 4 fresh blackberries into a cocktail shaker. Gently crush them until they are broken down and juicy, releasing their vibrant color and sweet aroma.
  2. Next, pour in 1 oz of cinnamon whiskey, 1 oz of blackberry liqueur, ½ oz of Fernet-Branca, and ½ oz of freshly squeezed lemon juice into the shaker with the muddled blackberries.
  3. Fill the shaker with ice, ensuring it’s packed well. Secure the lid tightly and shake vigorously for about 10 to 15 seconds.
  4. Carefully remove the lid and strain the cocktail mixture through a fine sieve into a small coupe or Nick and Nora glass.
  5. Take a few extra blackberries and place them as a garnish on top of your cocktail. Serve immediately.

Nutrition

Serving: 1cocktailCalories: 180kcalCarbohydrates: 22gSodium: 5mgPotassium: 150mgFiber: 1gSugar: 18gVitamin A: 50IUVitamin C: 10mgCalcium: 5mgIron: 0.2mg

Notes

Muddle effectively, chill properly, and adjust sweetness to your taste for the best Orc Draught experience.

Tried this recipe?

Let us know how it was!

Creamy Chestnut Hot Chocolate with Boozy Whipped Cream Bliss

September 16, 2025 by Grace Snow Leave a Comment

I stumbled upon a cozy little coffee shop tucked away in the snowy streets of an Alpine village, where the scent of roasting chestnuts beckoned from the corner. It was there that I first tasted the magic of Chestnut Hot Chocolate, a rich indulgence that wraps you in warmth just like a favorite blanket on a chilly evening. Combining roasted chestnuts with dark chocolate and topped with a cloud of boozy whipped cream, this delightful drink is not only an irresistible winter treat but also quick to whip up—perfect for those evenings filled with laughter and relaxation. Whether you’re entertaining friends or simply treating yourself, this decadent drink promises to elevate your winter gatherings and rekindle your love for homemade comforts. Curious about how to bring this enchanting blend into your own kitchen? Let's dive in!

Why is this chestnut hot chocolate so special?

Indulgent Warmth: Each sip of this chestnut hot chocolate wraps you in a cozy embrace, balancing roasted nuttiness and rich dark chocolate.

Boozy Delight: The addition of boozy whipped cream elevates it to a gourmet experience, making it feel like a celebration in a cup.

Quick and Easy: With simple ingredients and straightforward steps, you'll have this delightful drink ready in no time, perfect for impromptu get-togethers.

Versatility: Feel free to experiment with flavored liqueurs or even swap in hazelnuts for a unique twist.

Perfect for Sharing: Ideal for winter gatherings, this drink invites friends and family to bond over a warm, comforting treat.

Chestnut Hot Chocolate Ingredients

• The secret to this cozy drink lies in its rich and flavorful ingredients.

For the Drink

  • Milk – The base for this chestnut hot chocolate; substitute with almond milk for a dairy-free option.
  • Roasted, Peeled Chestnuts – They add a nutty flavor and creamy texture; using pre-packaged saves you time.
  • Heavy Cream – This contributes to the drink’s richness and is also used in the whipped cream topping; no substitutions are recommended for the topping.
  • Dark Chocolate (70%) – Offers deep chocolate flavor; opt for high-quality chocolate for the best results.
  • Cocoa Powder – Enhances the chocolate depth; Dutch-processed cocoa yields a smoother taste.
  • Sugar – Balances the bitterness of chocolate; adjust to your personal taste.
  • Vanilla Extract – Adds a lovely aromatic flavor; pure vanilla works best for a deeper taste.

For the Boozy Whipped Cream

  • Icing Sugar – Used for sweetening whipped cream as it dissolves better than granulated sugar.
  • Dark Rum – Infuses the whipped cream with a warm, rich flavor; rum extract can be a great substitute for an alcohol-free option.

Indulge in the delightful warmth of this chestnut hot chocolate and whisk up some cozy winter vibes!

Step‑by‑Step Instructions for Creamy Chestnut Hot Chocolate with Boozy Whipped Cream Bliss

Step 1: Simmer the Chestnut Milk
In a medium saucepan, bring 1 ½ cups of milk to a gentle simmer over medium heat, then add the roasted, peeled chestnuts. Stir occasionally and let it simmer for about 5 minutes, allowing the chestnuts to soften and infuse their flavor into the milk. Once heated through, carefully transfer this mixture to a high-speed blender and blend until smooth.

Step 2: Prepare the Chocolate Base
Return the empty saucepan to the stove and pour in the remaining 1 ½ cups of milk and ½ cup of heavy cream. Heat over medium-low until it begins to simmer gently. Stir in the finely chopped dark chocolate, mixing continuously for about 3–5 minutes until completely melted. Then, add the cocoa powder, sugar, and vanilla extract, whisking until the mixture is velvety and well combined.

Step 3: Combine Mixtures
Pour the blended chestnut milk into the chocolate mixture in the saucepan. Use a whisk to combine both mixtures until fully integrated, creating a rich and creamy chestnut hot chocolate. Continue to heat gently over medium-low for an additional 2–3 minutes, stirring occasionally to prevent sticking, until hot but not boiling.

Step 4: Make the Boozy Whipped Cream
In a separate mixing bowl, use an electric mixer to beat 1 cup of heavy cream on medium speed. After 2-3 minutes, or once soft peaks start to form, gradually add in the icing sugar, vanilla extract, and dark rum. Continue to beat on medium-high until stiff peaks form, creating a delightful boozy whipped cream that will crown your hot chocolate.

Step 5: Serve with Style
Pour the creamy chestnut hot chocolate into warm mugs, filling them about three-quarters full. Generously top each mug with a dollop of the boozy whipped cream, allowing it to cascade down the sides. For an extra touch, grate some dark chocolate on top as a garnish, then serve immediately to warm hearts and spirits on a chilly evening.

Make Ahead Options

These creamy chestnut hot chocolates are perfect for meal prep enthusiasts looking to save time! You can prepare the chestnut milk base up to 24 hours in advance; simply blend and refrigerate it in an airtight container. The chocolate mixture can also be made ahead and stored in the fridge for up to 3 days. When you're ready to serve, gently reheat both mixtures on the stove, whisking until smooth. For the boozy whipped cream, it's best to whip it fresh right before serving to maintain its fluffiness, but you can pre-measure ingredients and chill them, making the final step quick and easy. Just follow these tips, and your indulgent chestnut hot chocolate will be just as delightful and inviting!

What to Serve with Chestnut Hot Chocolate with Boozy Whipped Cream

Warm up your winter evenings with delightful pairings that enhance the cozy experience of your hot chocolate.

  • Gingerbread Cookies: These sweet and spiced cookies create a festive contrast, perfect for dunking into your decadent drink.
  • Marshmallow Float: A few pillowy marshmallows on top of your hot chocolate create a nostalgic twist, bringing back childhood memories.
  • Spiced Nuts: Roasted nuts seasoned with warm spices add a crunchy textural contrast, balancing the creamy smoothness of the hot chocolate. Enjoy their tantalizing aroma as you sip.
  • Chocolate Croissants: Flaky, buttery pastries filled with rich chocolate perfectly complement the velvety sweetness of the chestnut hot chocolate. They're a luxurious treat that can elevate any cozy gathering.
  • Fruit Tart: A refreshing fruit tart with a buttery crust can brighten your drink's richness, adding a layer of tartness that harmonizes beautifully with the chocolatey flavors.
  • Mulled Wine: This warm, spiced wine adds a festive touch to any winter evening, pairing beautifully with the cozy flavors of your indulgent hot chocolate.
  • Pecan Pie: The buttery, nutty filling of pecan pie creates a rich sweetness that pairs wonderfully with the deep flavors of your chestnut hot chocolate.
  • Peppermint Bark: The cool mint on top of dark chocolate brings a refreshing contrast, making each sip of hot chocolate feel extra festive and indulgent.
  • Creamy Cheesecake: A slice of rich cheesecake adds a luxurious feel; its tanginess perfectly balances the sweetness of your drink, making it a delightful ending to any winter gathering.

Expert Tips for Chestnut Hot Chocolate

  • Blend Safely: When blending hot liquids, keep the lid tightly secured to prevent splatter, ensuring a mess-free experience.

  • High-Speed Convenience: Use a high-speed blender for a silky smooth texture. If using an immersion blender, finely chop chestnuts first for better incorporation.

  • Taste Before Serving: Always taste and adjust the sugar before serving; the sweetness of the whipped cream can affect the overall flavor of the chestnut hot chocolate.

  • Whipped Cream Whisking: Beat the heavy cream until stiff peaks form. This will ensure your boozy whipped cream holds its shape and doesn’t deflate.

  • Experiment with Toppings: Try adding a sprinkle of cinnamon or a twist of orange zest on top of the whipped cream for a unique flavor boost!

How to Store and Freeze Chestnut Hot Chocolate

Fridge: Store leftover chestnut hot chocolate in an airtight container for up to 3 days. Reheat gently on the stove or in the microwave before serving.

Freezer: If you want to freeze the hot chocolate, pour it into freezer-safe containers and store for up to 3 months. Thaw overnight in the fridge and reheat before enjoying.

Boozy Whipped Cream: This whipped cream is best freshly made, but if you have leftovers, store it in the fridge for up to 2 days. Give it a quick whisk before serving, as it may lose some volume.

Make-Ahead Tip: Prepare the chestnut hot chocolate base in advance, refrigerate, and then just reheat before topping with freshly whipped cream for an effortless serving experience!

Variations & Substitutions for Chestnut Hot Chocolate

Feel free to get creative with this cozy drink! Here are some delightful ideas to customize your chestnut hot chocolate experience.

  • Nutty Twist: Substitute roasted chestnuts with hazelnuts to create a unique flavor. Hazelnuts offer a sweeter, richer taste that pairs beautifully with chocolate.

  • Dairy-Free Delight: Swap the milk for almond or oat milk for a vegan option. These alternatives maintain creaminess while adding a subtle nutty flavor.

  • Flavored Liqueurs: Use flavored liqueurs like hazelnut or vanilla vodka in the whipped cream. This adds an exciting twist that enhances the buttery richness of the drink.

  • Spicy Kick: Introduce a pinch of cinnamon or nutmeg into the chocolate mixture for warmth. This adds depth and coziness, perfect for those chilly nights.

  • Extra Boozy: Try bourbon or Irish cream instead of dark rum for a different flavor profile. Each brings its own richness, making every sip uniquely indulgent.

  • Gourmet Upgrade: Use gourmet chocolate chips or shavings for a luxurious chocolate experience. Choosing high-quality chocolate can elevate your drink from ordinary to extraordinary.

  • Crunchy Topping: Add crushed nuts or chocolate shavings on top of the boozy whipped cream. This contributes an appealing texture and additional flavor.

For even cozier inspirations, check out the warmth found in Homemade Hot Chocolate or explore the indulgent layers of German Chocolate Poke Cake.

Embrace your creativity and make this cozy drink your own!

Chestnut Hot Chocolate with Boozy Whipped Cream Recipe FAQs

What should I look for when selecting chestnuts?
For the best flavor and texture, choose fresh, firm chestnuts that are shiny and free from dark spots or blemishes. The chestnuts should feel heavy for their size, indicating moisture is present. If you’re using pre-packaged roasted chestnuts, check for any signs of spoilage or off smells before purchasing.

How do I store leftover chestnut hot chocolate?
Store any remaining chestnut hot chocolate in an airtight container in the refrigerator for up to 3 days. When ready to enjoy again, gently reheat it on the stove over low heat or in the microwave, stirring occasionally to prevent scorching.

Can I freeze chestnut hot chocolate?
Absolutely! To freeze, pour the cooled chestnut hot chocolate into freezer-safe containers, leaving some space at the top for expansion. It will keep well for up to 3 months. When you’re ready to enjoy it, let it thaw overnight in the fridge, then reheat gently and give it a good stir before serving.

What if my hot chocolate is too bitter?
If the hot chocolate tastes too bitter, simply stir in additional sugar, a tablespoon at a time, until it reaches your preferred level of sweetness. Remember to taste as you go, especially since the boozy whipped cream will add a sweet note too. Another tip is to use a lighter cocoa powder or milk chocolate next time for a milder flavor.

Can I make this recipe dairy-free or vegan?
Yes! You can make this chestnut hot chocolate dairy-free by substituting regular milk with almond milk or any plant-based milk of your choice. For the boozy whipped cream, try using coconut cream or a store-bought dairy-free whipped topping. Just ensure the dark rum or substitute used is vegan-friendly.

Chestnut Hot Chocolate

Creamy Chestnut Hot Chocolate with Boozy Whipped Cream Bliss

Indulge in this Chestnut Hot Chocolate, a cozy drink combining roasted chestnuts, rich dark chocolate, and a delightful boozy whipped cream.
Print Recipe Pin Recipe
Prep Time 15 minutes mins
Cook Time 15 minutes mins
Total Time 30 minutes mins
Servings: 4 mugs
Course: Drinks
Cuisine: Alpine
Calories: 350
Ingredients Equipment Method Nutrition Notes

Ingredients
  

For the Drink
  • 3 cups Milk Substitute with almond milk for dairy-free option.
  • 1 cup Roasted, Peeled Chestnuts Pre-packaged saves time.
  • ½ cup Heavy Cream No substitutions for topping.
  • ½ cup Dark Chocolate (70%) Opt for high-quality chocolate.
  • 2 tablespoons Cocoa Powder Dutch-processed for smoother taste.
  • 2 tablespoons Sugar Adjust to personal taste.
  • 1 teaspoon Vanilla Extract Pure vanilla works best.
For the Boozy Whipped Cream
  • 1 cup Icing Sugar Better than granulated sugar for dissolving.
  • ¼ cup Dark Rum Rum extract can be a non-alcoholic substitute.

Equipment

  • Medium saucepan
  • High-speed blender
  • Mixing Bowl
  • Electric mixer

Method
 

Step-by-Step Instructions
  1. In a medium saucepan, bring 1 ½ cups of milk to a gentle simmer over medium heat, then add the roasted, peeled chestnuts. Stir occasionally and let it simmer for about 5 minutes. Transfer mixture to a high-speed blender and blend until smooth.
  2. Return the saucepan to the stove, pour in the remaining 1 ½ cups of milk and ½ cup of heavy cream. Heat over medium-low until it simmers. Stir in the chopped dark chocolate until melted, then add cocoa powder, sugar, and vanilla extract; whisk until velvety.
  3. Pour the blended chestnut milk into the chocolate mixture in the saucepan. Whisk together until fully combined, and heat gently for an additional 2–3 minutes.
  4. In a separate mixing bowl, beat 1 cup of heavy cream on medium speed until soft peaks form. Gradually add icing sugar, vanilla extract, and dark rum; continue beating until stiff peaks form.
  5. Pour the hot chocolate into warm mugs, top generously with the boozy whipped cream, and grate some dark chocolate on top for garnish. Serve immediately.

Nutrition

Serving: 1mugCalories: 350kcalCarbohydrates: 40gProtein: 5gFat: 20gSaturated Fat: 12gPolyunsaturated Fat: 1gMonounsaturated Fat: 5gCholesterol: 80mgSodium: 120mgPotassium: 300mgFiber: 2gSugar: 25gVitamin A: 600IUVitamin C: 1mgCalcium: 200mgIron: 1.5mg

Notes

Blend hot liquids safely to prevent splatter. Always taste and adjust sugar before serving.

Tried this recipe?

Let us know how it was!
  • « Previous Page
  • 1
  • 2
  • 3
  • Next Page »

Welcome!

Hi, I’m Grace, a Sydney-based home cook with a passion for bold flavors and trending ingredients. Whether you’re a busy beginner or a seasoned foodie, you’ll find dishes here that are fresh, fun, and full of flavor.

More about me

Popular Recipes

  • Autumn Harvest Grain Salad with Cranberries
    Autumn Harvest Grain Salad with Cranberries for Cozy Nights
  • Ground Beef Hot Honey Bowl
    Ground Beef Hot Honey Bowl for a Flavor-Packed Dinner Enjoyment
  • Autumn Harvest Grain Salad with Cranberries
    Autumn Harvest Grain Salad with Cranberries for Cozy Nights
  • Ground Beef Hot Honey Bowl
    Ground Beef Hot Honey Bowl for a Flavor-Packed Dinner Enjoyment

Footer

↑ back to top

About

  • Privacy Policy
  • Disclaimer
  • Terms & Conditions

Newsletter

  • Sign Up! for emails and updates

Contact

  • About me
  • Contact me

Copyright © 2025 TastyTrendIngredients