tastytrendingredients

  • Home
  • Recipes
    • Appetizers
    • Breakfast
    • Dessert
    • Dinner
    • Drinks
    • Salads
    • Snacks
    • Soups
  • About me
  • Contact me
menu icon
go to homepage
  • Home
  • Recipes
    • Appetizers
    • Breakfast
    • Dessert
    • Dinner
    • Drinks
    • Salads
    • Snacks
    • Soups
  • About me
  • Contact me
search icon
Homepage link
  • Home
  • Recipes
    • Appetizers
    • Breakfast
    • Dessert
    • Dinner
    • Drinks
    • Salads
    • Snacks
    • Soups
  • About me
  • Contact me
×

Vampire’s Fig & Thyme Punch: A Fall Cocktail to Savor

October 27, 2025 by Grace Snow Leave a Comment

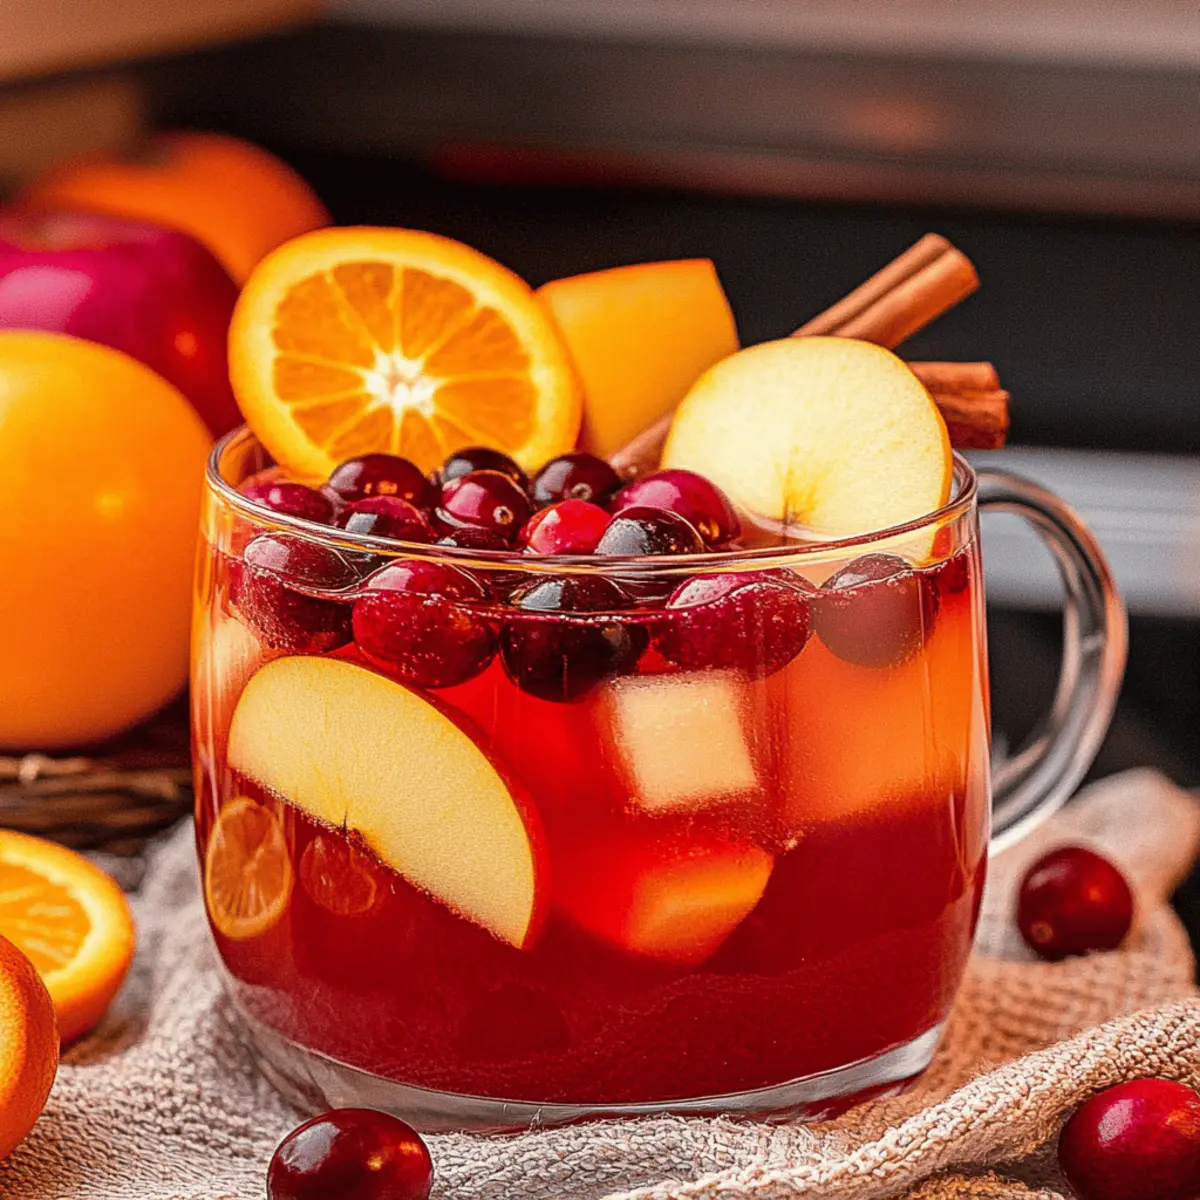
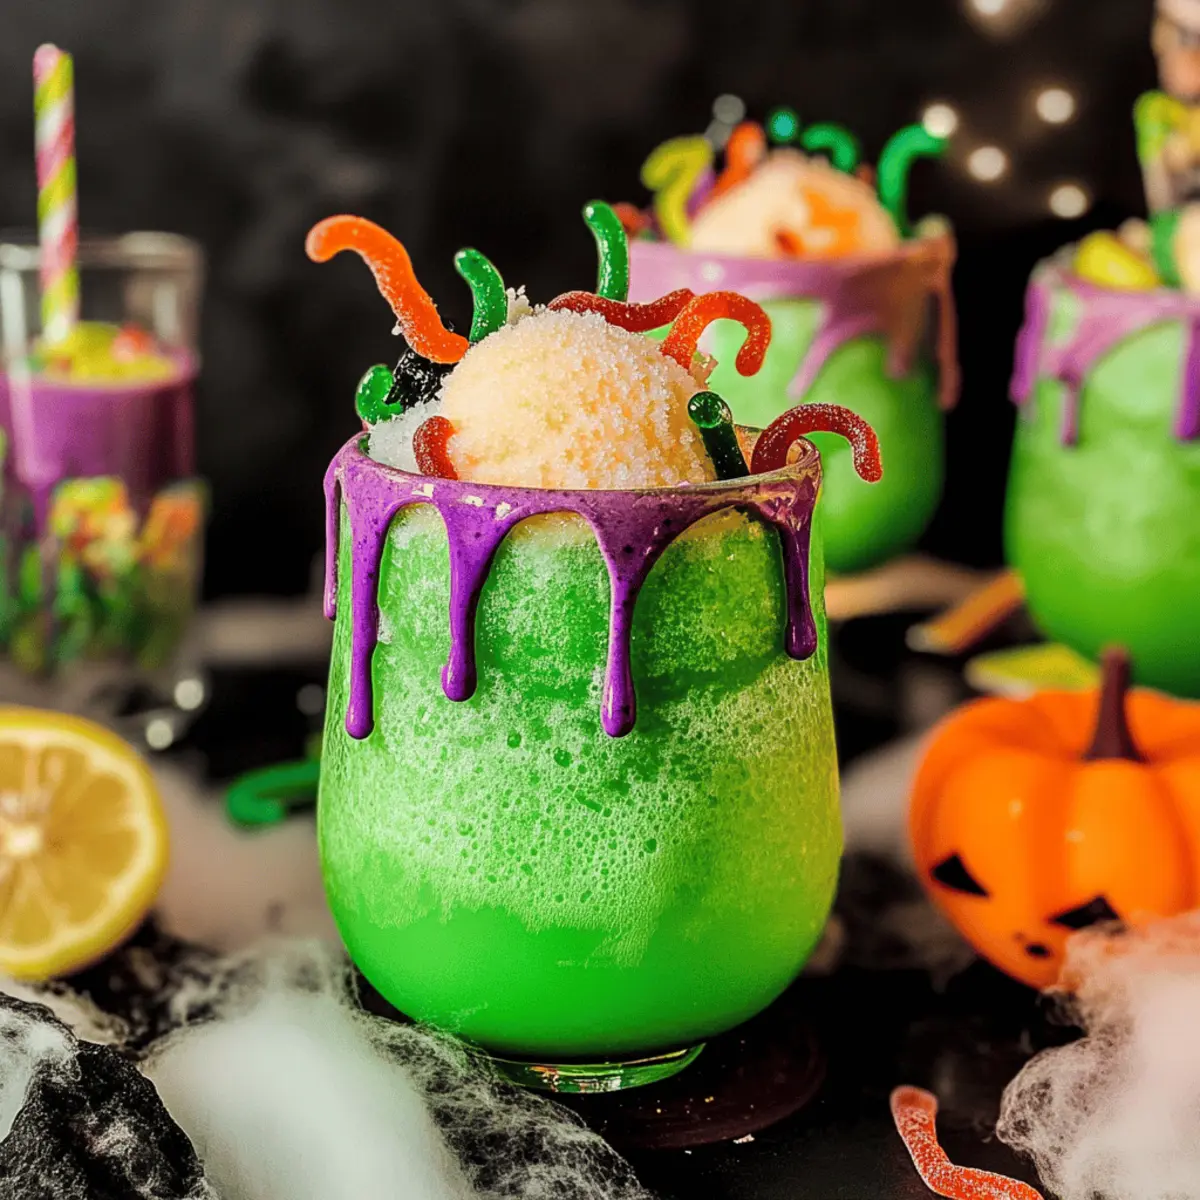
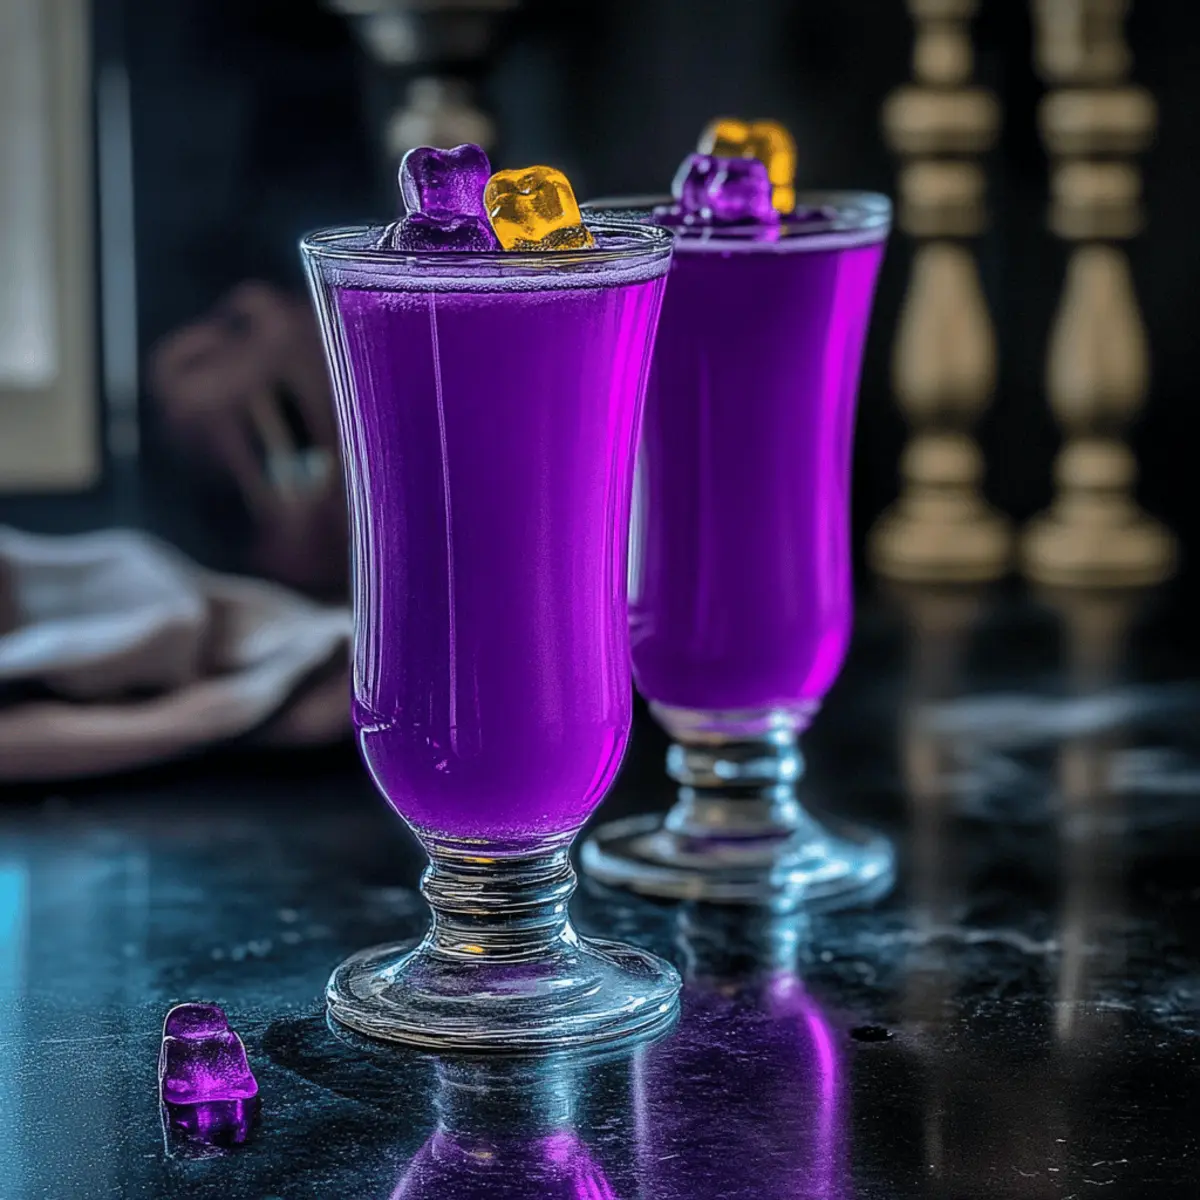
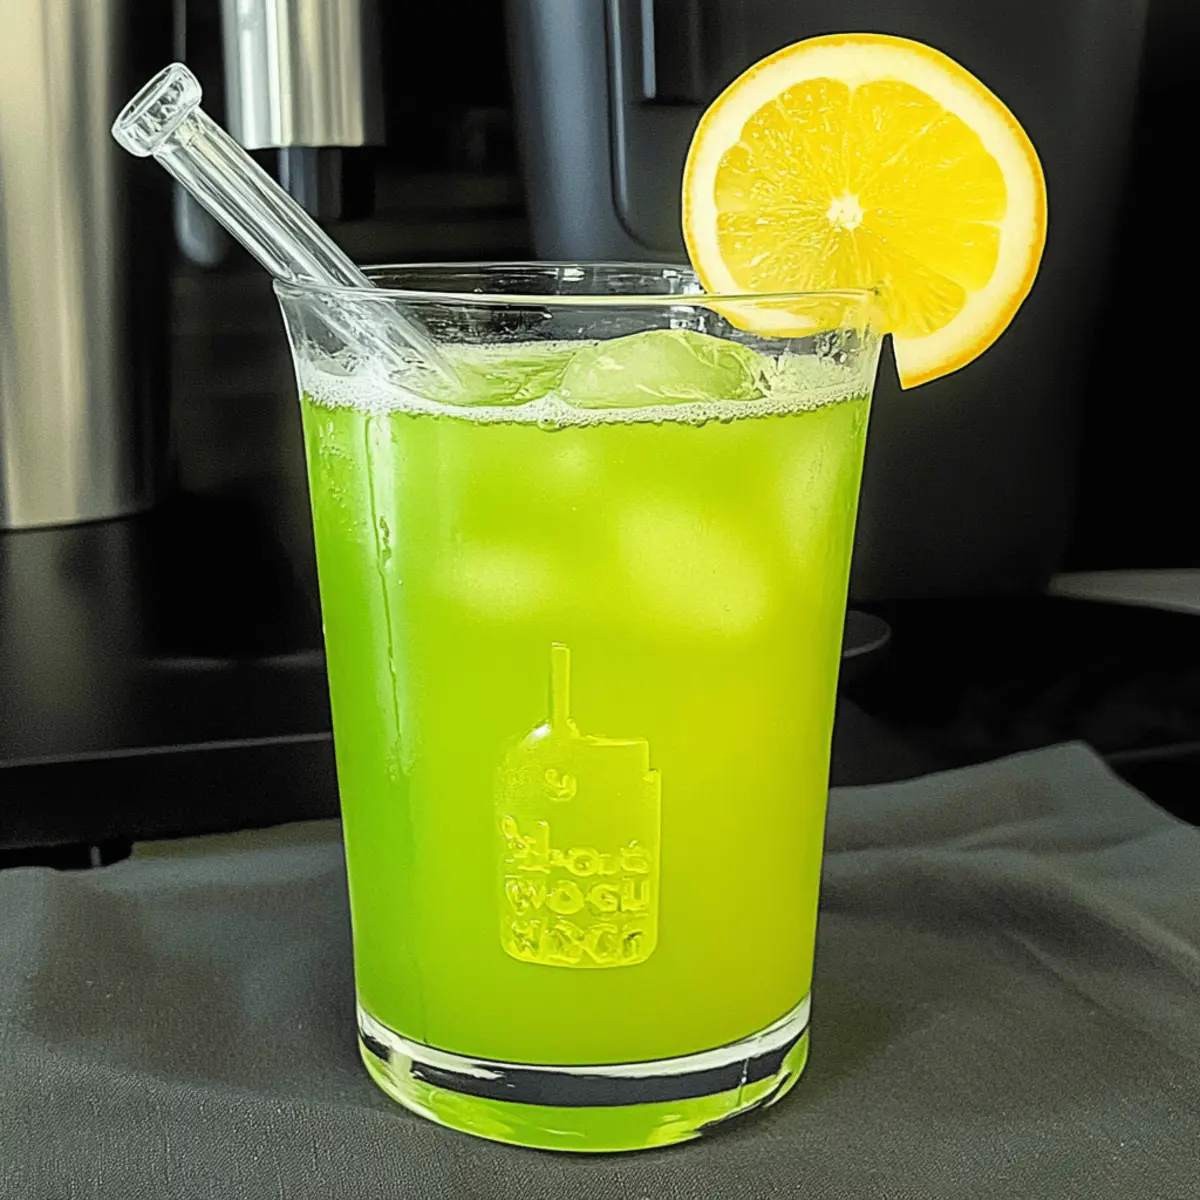
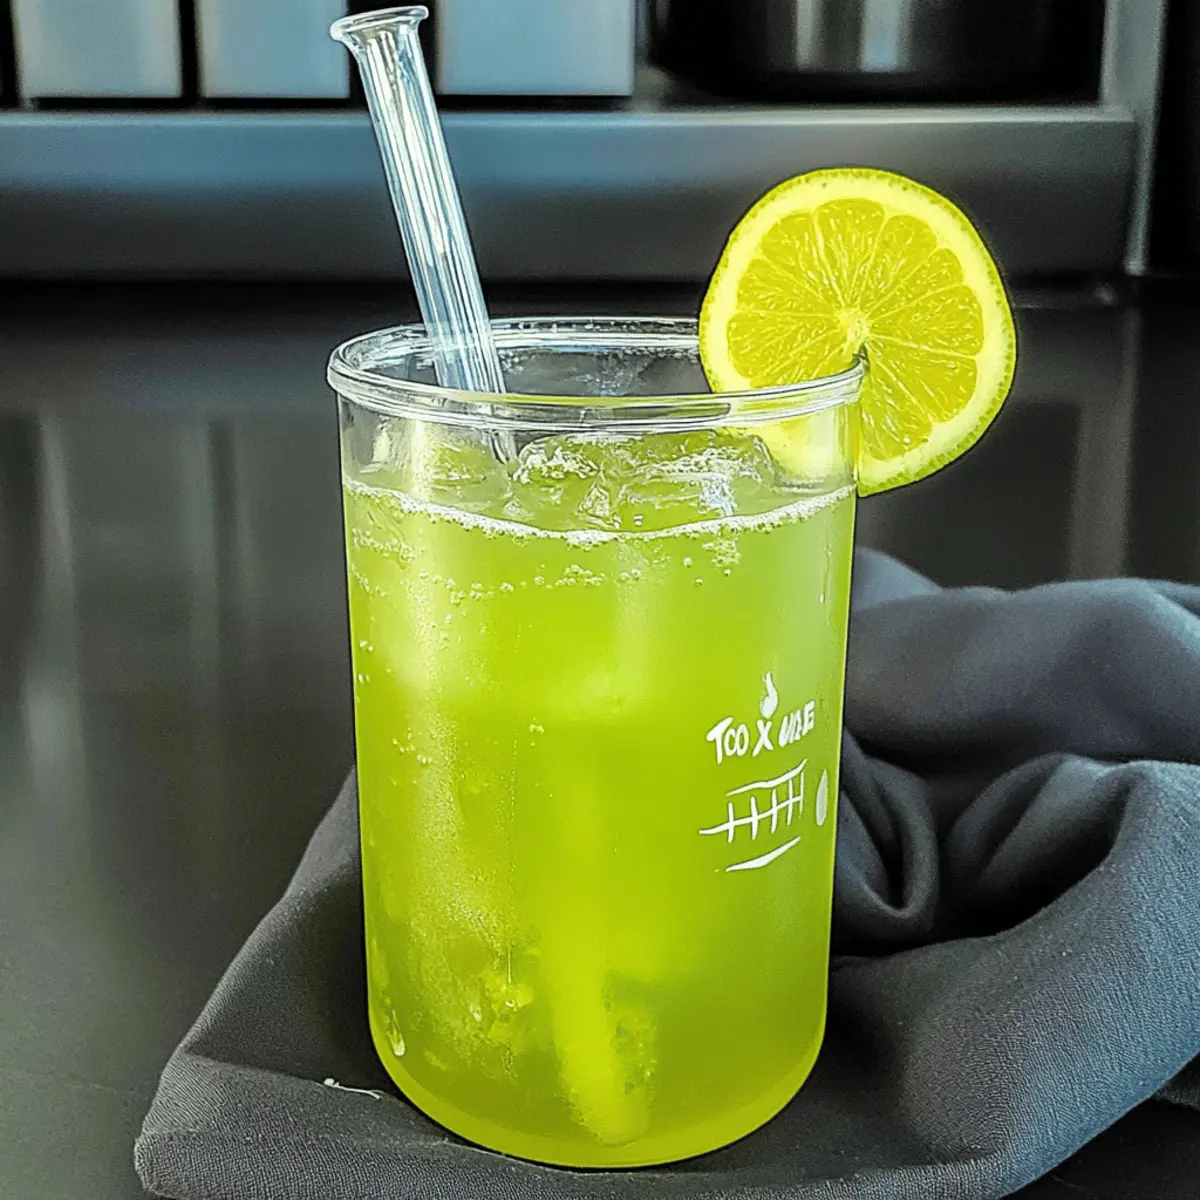
As the first leaves turn and the air grows crisp, I can’t help but crave the warm embrace of autumn flavors. Enter the Vampire’s Fig & Thyme Punch, a cocktail that perfectly captures the essence of the season. This bewitching drink beautifully blends the sweet depth of fig jam with the herbal notes of fresh thyme syrup, creating a refreshing autumn beverage that’s as delightful for Halloween gatherings as it is for cozy nights at home. The best part? It’s quick to whip up, making your entertaining effortless while impressing your guests. Plus, with the option to swap gin for vodka or choose flavored sparkling water, this punch is wonderfully versatile. Are you ready to toast to fall with this enchanting creation?

Why is this punch a fall favorite?

Versatile, this Vampire’s Fig & Thyme Punch can easily adapt to your taste by exchanging gin for vodka or using flavored sparkling water. Effortlessly elegant, it’s the ideal addition to Halloween festivities or cozy evenings with friends. Quick to prepare, this punch takes minimal time to mix, ensuring you can enjoy more moments with loved ones. Refreshing complexity comes from the unique blend of fig jam and thyme syrup, producing a taste that lingers elegantly on the palate. For more inspired drink ideas, check out our delightful Autumn Cocktail Recipes!

Vampire’s Fig & Thyme Punch Ingredients

• Ready to whip up this enchanting autumn cocktail? Here’s what you’ll need!

For the Punch Base

  • Fig Jam – Adds sweetness and flavor; choose a smooth variety for easy blending.
  • Gin – Provides botanical notes; opt for high-quality gin to elevate your drink's taste—but vodka works beautifully too!
  • Fresh Lemon Juice – Offers brightness; be sure to strain out any seeds before using.
  • Thyme Syrup – This herbaceous sweetness is made by simmering sugar, water, and thyme; prepare it ahead of time for convenience.

For Serving

  • Sparkling Water – Introduces effervescence; add just before serving to keep the punch fizzy.
  • Ice – Essential for chilling the drink; fill your glasses with plenty of ice for a refreshing experience.

Garnish

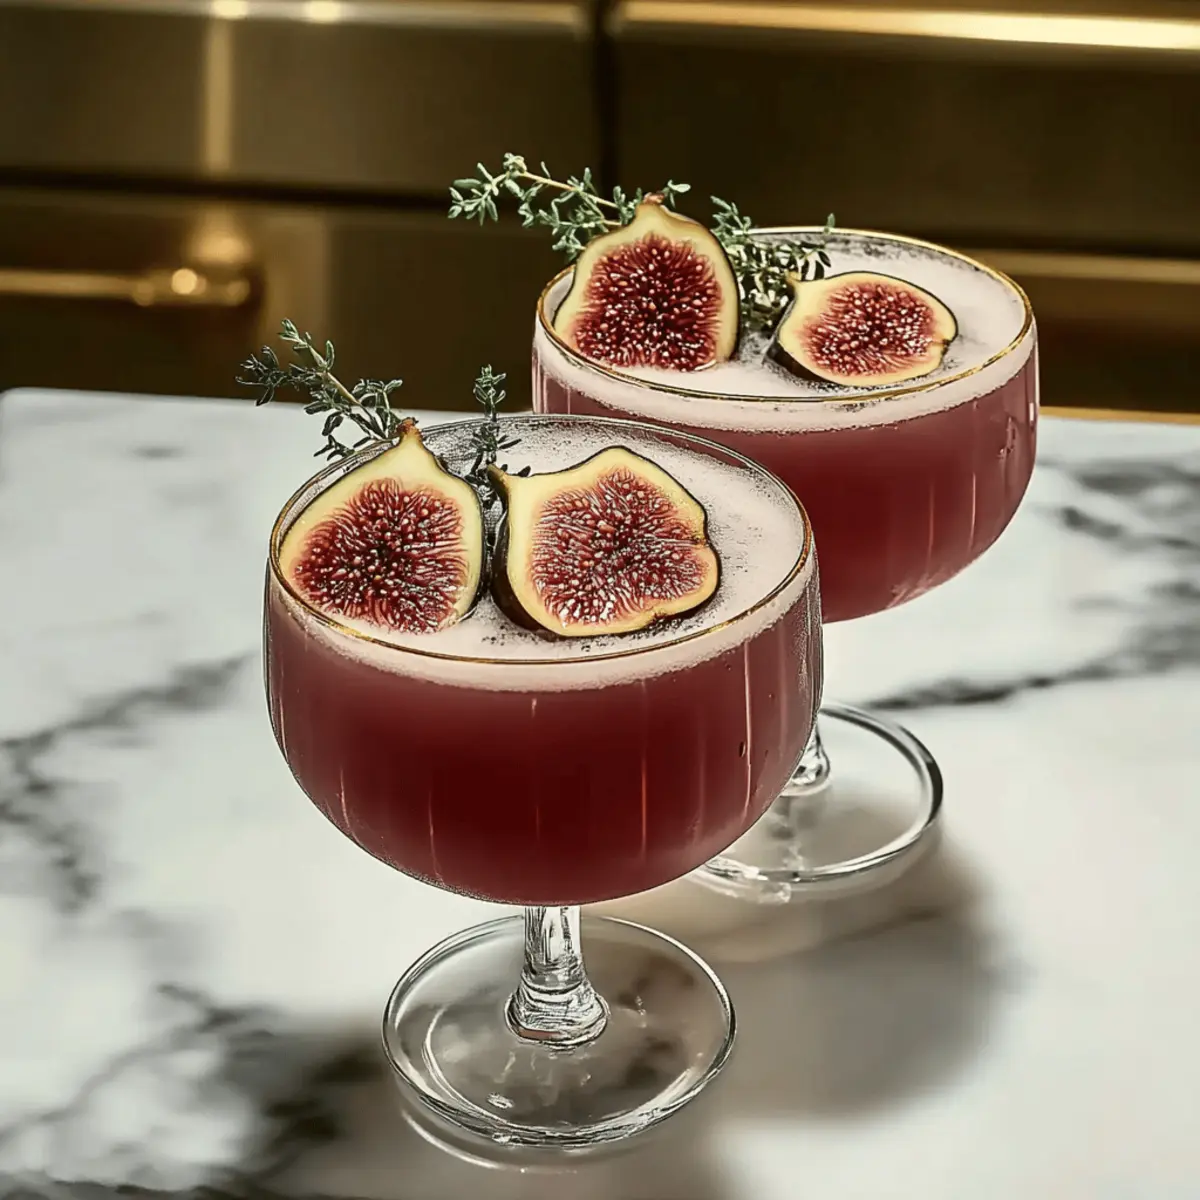
  • Fresh Thyme Sprigs – Use these to add aromatic elegance to each glass.
  • Fig Slices – A lovely finishing touch that enhances the cocktail's visual appeal.

Now that you have all your ingredients sorted, let's get ready to enjoy a delightful sip of Vampire’s Fig & Thyme Punch!

Step‑by‑Step Instructions for Vampire’s Fig & Thyme Punch

Step 1: Prepare Thyme Syrup
In a small saucepan, combine 1/2 cup sugar, 1/2 cup water, and 4 fresh thyme sprigs. Place the saucepan over medium heat and stir until the sugar completely dissolves, which should take about 3-5 minutes. Once the mixture starts to simmer, remove it from the heat and let it cool completely. Strain the syrup through a fine mesh sieve to remove the thyme, and set aside.

Step 2: Juice the Lemon
While the thyme syrup cools, squeeze one fresh lemon to obtain about 1 ounce of juice. Be sure to strain out any seeds to keep your punch smooth. This bright lemon juice will balance the sweetness of the fig jam in your Vampire’s Fig & Thyme Punch, so it's essential for a refreshing flavor profile.

Step 3: Mix the Ingredients
Grab a cocktail shaker and add 2 tablespoons of fig jam, 2 ounces of gin (or vodka for a twist), 1 ounce of your freshly squeezed lemon juice, and 1 ounce of the prepared thyme syrup. Fill the shaker with ice and secure the lid. Shake vigorously for about 15 seconds until well chilled, and the mixture is slightly frothy.

Step 4: Strain & Serve
Take your favorite glasses and fill them with ice to keep the punch cold. Using a fine mesh strainer, pour the cocktail mixture from the shaker into each glass, ensuring a smooth texture. Then, top each glass with approximately 3 ounces of sparkling water to add a delightful effervescence to your Vampire’s Fig & Thyme Punch.

Step 5: Garnish
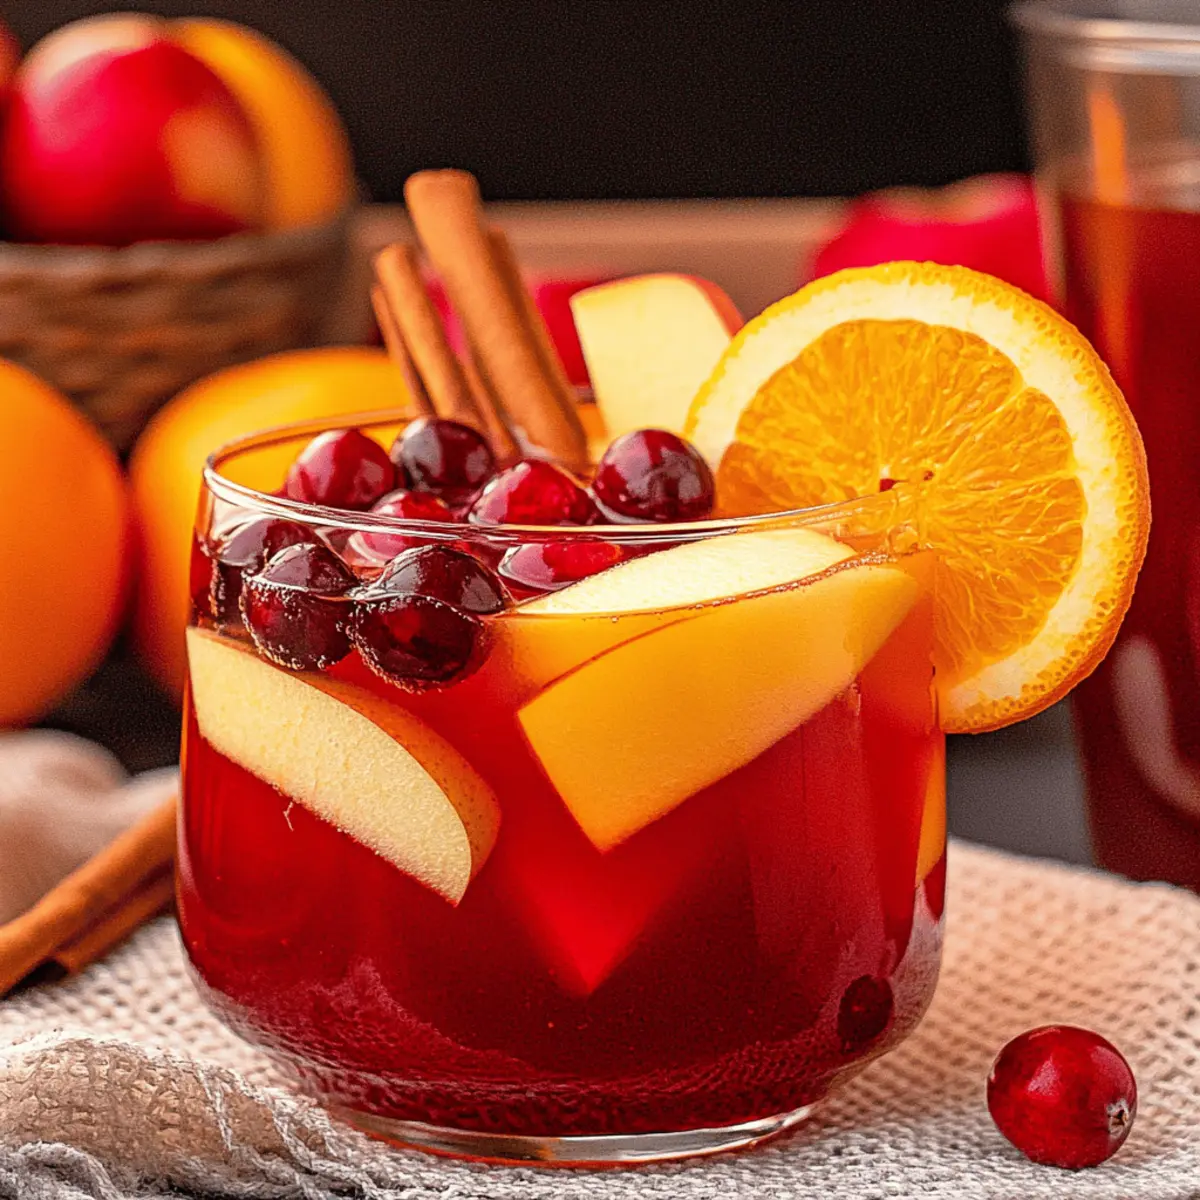
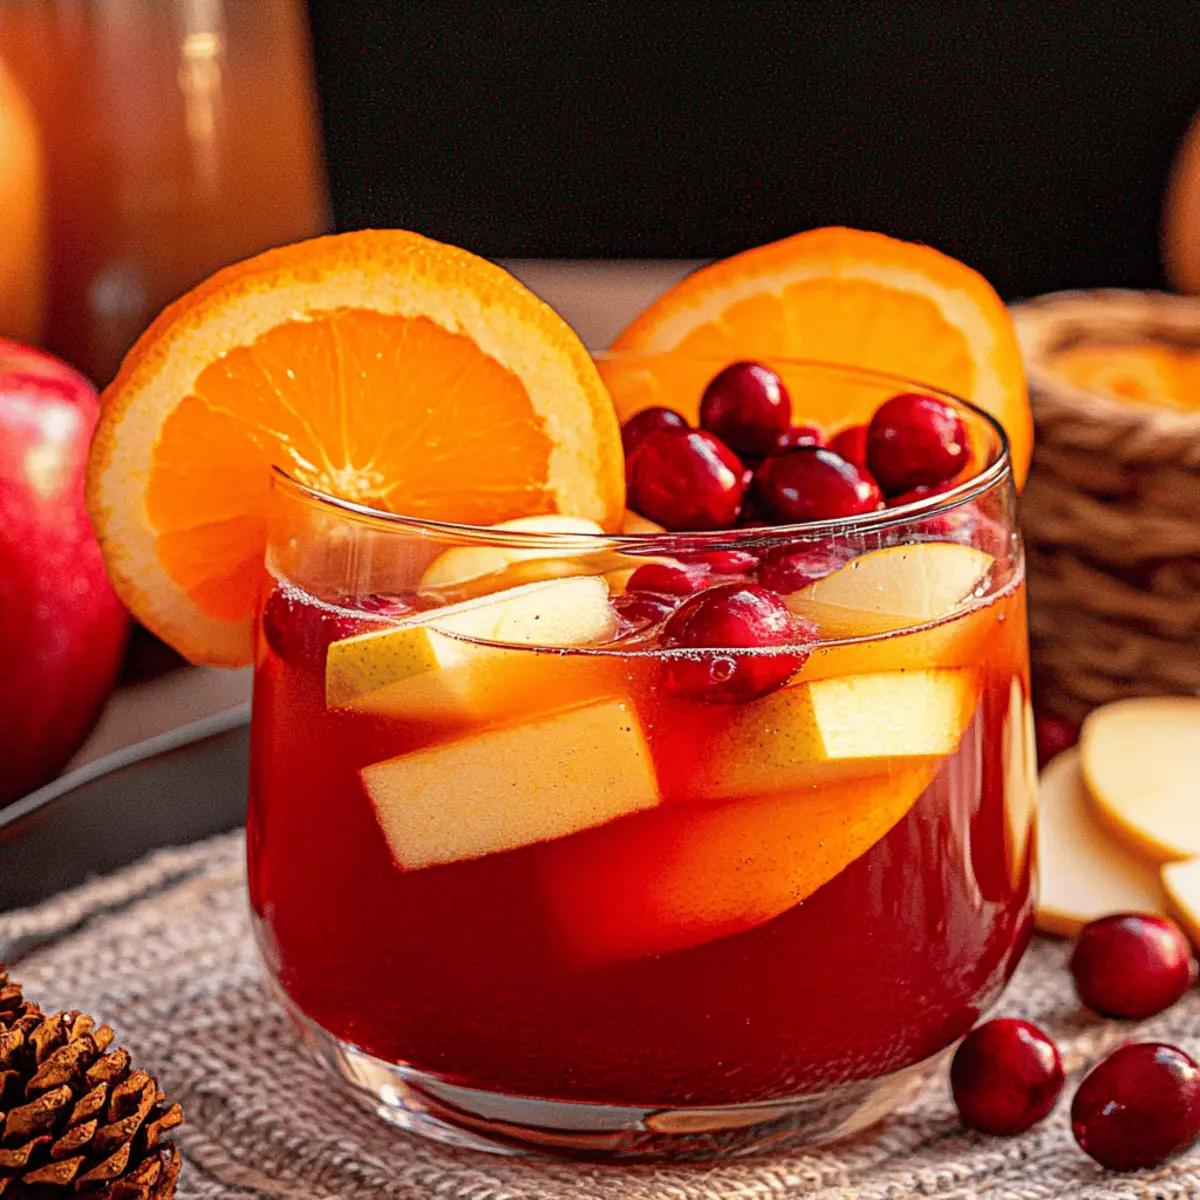
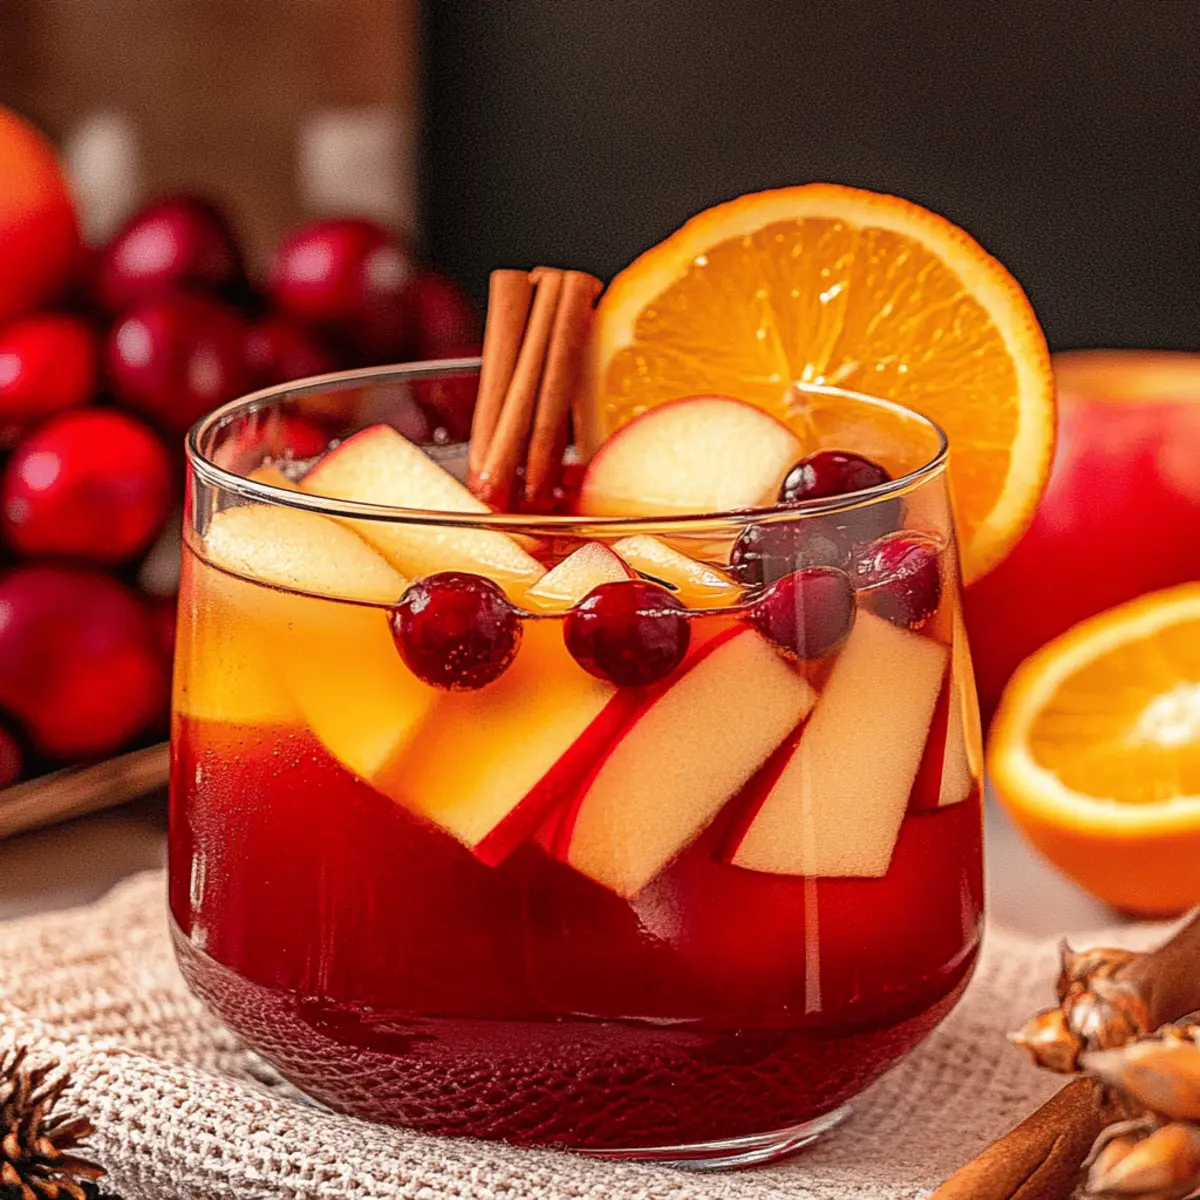
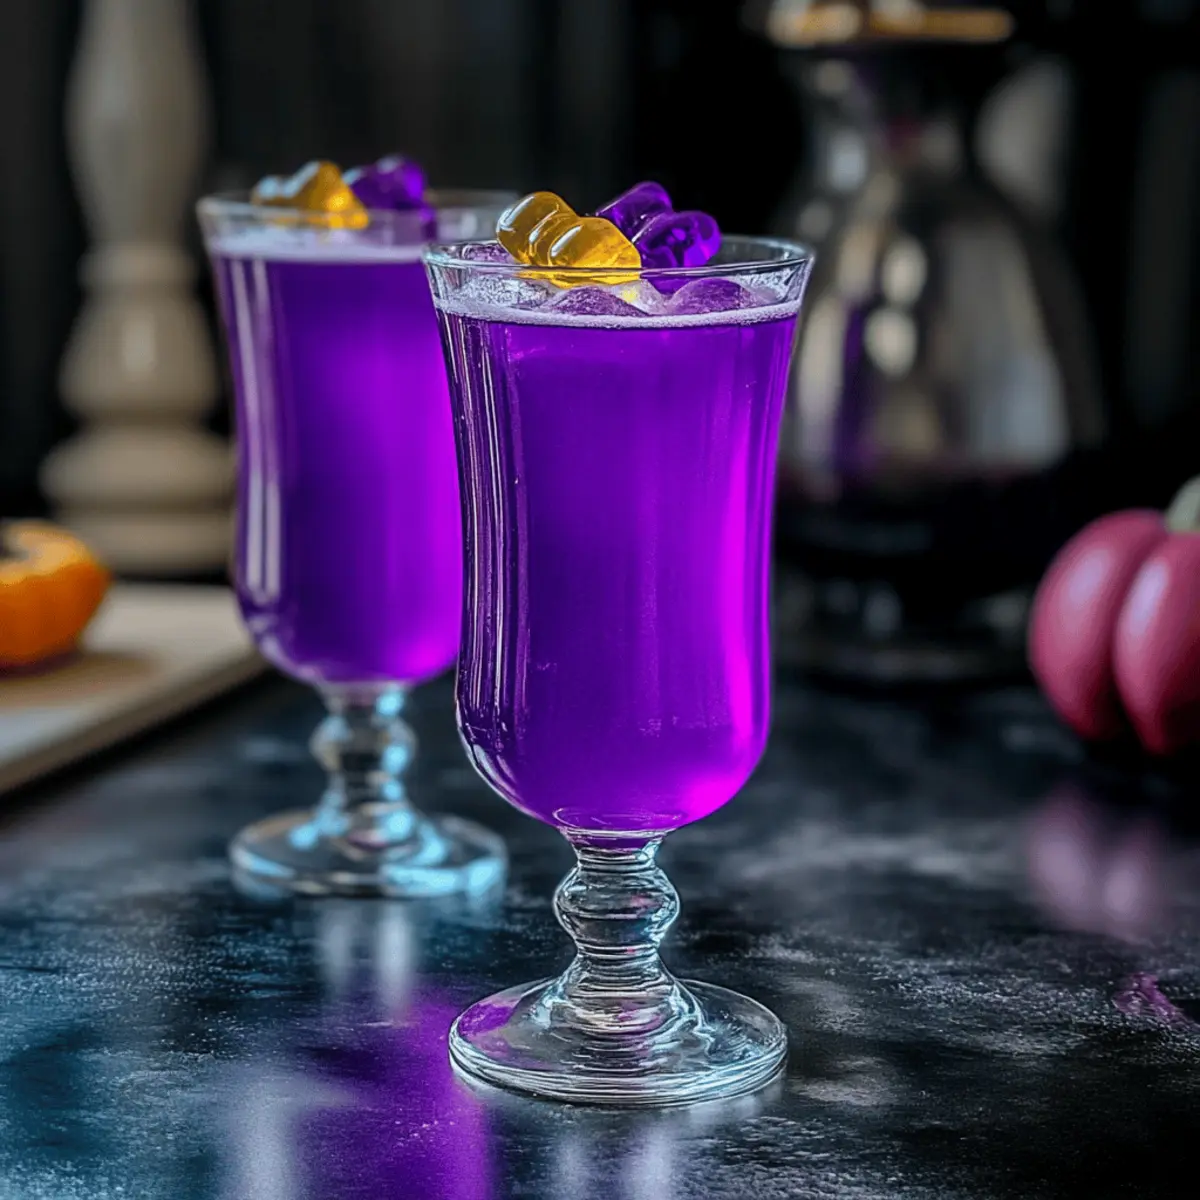
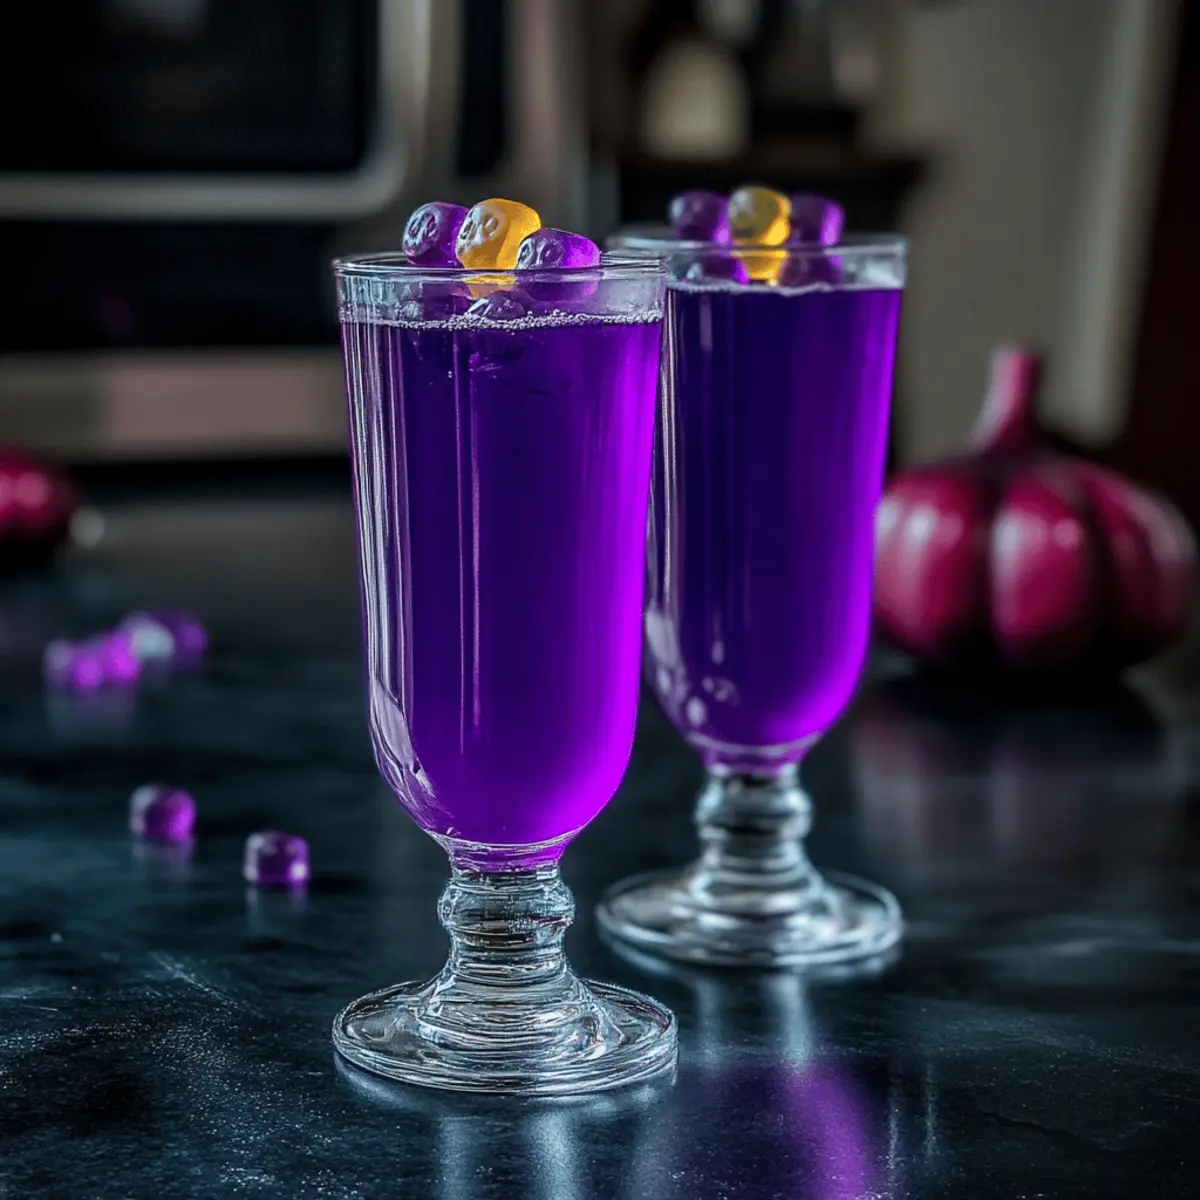
For an elegant touch, garnish each glass with a fresh sprig of thyme and a slice of fig. This not only enhances the presentation but also infuses additional fragrance as you take each refreshing sip. Now, your delightful Vampire’s Fig & Thyme Punch is ready to be enjoyed!

Expert Tips for Vampire’s Fig & Thyme Punch

  • Smooth Jam: Use only smooth fig jam for the best blending; chunky jams can create an unappealing texture in your punch.
  • Quality Spirits: Invest in a high-quality gin that suits your palate. The flavor of the spirit significantly impacts the overall taste of the Vampire’s Fig & Thyme Punch.
  • Fresh Thyme: Ensure your thyme is fresh for maximum flavor; wilted thyme will lead to a less vibrant punch.
  • Timing Matters: Add sparkling water just before serving to maintain its fizz—adding it too early can result in a flat punch.
  • Prep Ahead: Make thyme syrup in advance and store in the fridge for up to a week for a quicker prep time when entertaining.

How to Store and Freeze Vampire’s Fig & Thyme Punch

  • Refrigeration: Store the punch mix (without sparkling water) in an airtight container in the fridge for up to 2 days. This ensures the flavors meld beautifully while keeping it fresh.
  • Serving Tips: When ready to enjoy, stir well and add sparkling water just before serving for that fizzy delight.
  • Garnish Storage: Keep fresh thyme and fig slices in a sealed bag in the fridge for up to 3 days, maintaining their freshness and vibrancy for your next gathering.
  • Freezing: To prepare for future parties, you can freeze the thyme syrup in ice cube trays for easy use—just thaw and mix with the punch when needed!

Make Ahead Options

These Vampire’s Fig & Thyme Punch components are perfect for busy home cooks looking to streamline their entertaining! You can prepare the thyme syrup up to one week ahead; simply refrigerate it in an airtight container until you’re ready to use it. Additionally, the fig jam can be mixed with the gin (or vodka) and lemon juice up to 24 hours before serving—store this mixture in the fridge to keep it fresh. When it’s time to serve, pour the prepped mixture over ice, top with sparkling water, and garnish your glasses with thyme and fig slices for that finishing touch. With these make-ahead tips, your punch will be just as delicious and perfectly refreshing!

What to Serve with Vampire’s Fig & Thyme Punch

Pair your delightful punch with dishes that complement its sweet-herbaceous charm, creating a well-rounded autumn feast.

  • Savory Cheese Board: A curated selection of cheeses will bring out the punch's fig notes while providing a delightful textural addition. Think creamy brie, tangy goat cheese, and crunchy crackers.

  • Roasted Butternut Squash Soup: This creamy, spiced soup offers warmth and richness, perfectly offsetting the refreshing qualities of the cocktail. The sweetness of the squash ties together beautifully with the fig.

  • Herb-Infused Flatbreads: Chewy flatbreads topped with fresh herbs, like thyme and rosemary, echo the punch's herbal notes. Pair them with a tangy dipping sauce for an unforgettable appetizer.

  • Pomegranate Glazed Brussels Sprouts: The sweet-tart pomegranate glaze paired with nutty Brussels sprouts complements the punch's sweetness while adding a festive touch to your table.

  • Grilled Chicken Skewers: Seasoned with lemon and herbs, these skewers offer a savory counterpart to the punch, enhancing its lemony brightness. The smoky flavor is a delightful match.

  • Spiced Caramel Pear Tart: Dive into dessert with this tart, where sweet pear and warming spices resonate with the succulent flavors of fig jam. It's a seasonal treat that pairs wonderfully with your cocktail.

  • Crisp Green Salad: A fresh salad made with mixed greens, apples, and toasted nuts provides a light, refreshing contrast to the Vampire’s Fig & Thyme Punch, balancing the rich flavors in each sip.

  • Elderflower Spritzers: Keep the theme going with these light, floral drinks. Their crispness and bubbly texture echo the punch's effervescence without overpowering it.

  • Chocolate Ganache Tart: Rich and decadent, this dessert plays off the sweetness of the punch while allowing the herbal elements to shine through, offering a lovely end to your meal.

Variations & Substitutions for Vampire’s Fig & Thyme Punch

Feel free to explore these creative ideas and make this punch truly your own!

  • Vodka Swap: Substitute gin with vodka for a smoother taste that allows the fig and thyme to shine.
  • Flavored Sparkling Water: Use lemon or elderflower sparkling water for a burst of additional flavor and intrigue.
  • Herb Alternatives: Try fresh basil or mint instead of thyme for a unique twist that brightens each sip.
  • Fruit Infusions: Add fresh fig slices or other seasonal fruits like apples or pears to enhance the punch with delightful textures.
  • Sweetening Adjustments: Control the sweetness by modifying the amount of fig jam or adding a touch of honey for an added depth of flavor.
  • Mocktail Version: For a non-alcoholic option, replace gin or vodka with ginger ale or tonic water for a refreshing bubbly treat.
  • Spicy Touch: Introduce a hint of heat by muddling jalapeño slices in the shaker for a fun kick that intrigues the palate.
  • Herbaceous Infusion: Infuse the thyme syrup with rosemary for a more complex flavor profile that harmonizes beautifully with the figs.

With these variations, your Vampire's Fig & Thyme Punch can adapt to any gathering or craving! For more delightful autumn-inspired beverages, check out our selection of Seasonal Cocktails or explore how to make a refreshing Thyme Lemonade!

Vampire’s Fig & Thyme Punch Recipe FAQs

What type of fig jam should I use?
Absolutely! For the best results, opt for a smooth fig jam. This ensures easy blending and a pleasant texture in your Vampire’s Fig & Thyme Punch. Chunky jams can disrupt the drink's consistency, making it less enjoyable.

How should I store the punch and how long does it last?
Store the punch mix (without sparkling water) in an airtight container in the fridge for up to 2 days. This way, the flavors develop and remain fresh. Just give it a good stir before serving and add the sparkling water right before you enjoy it!

Can I freeze the thyme syrup?
Yes, you can! To freeze the thyme syrup, pour it into ice cube trays and let it freeze completely. Once frozen, transfer the cubes to a sealed bag or container, and it will last for up to 3 months. When you’re ready to use it, simply thaw the desired amount and mix it into your punch.

What can I do if my punch turns out too sweet?
No worries! If your Vampire’s Fig & Thyme Punch is sweeter than you’d like, simply add a splash more fresh lemon juice to balance the sweetness. You could also reduce the amount of fig jam next time to suit your taste better.

Is this punch safe for pets or anyone with allergies?
For pet safety, it’s best to keep this punch away from dogs and cats, as ingredients like lemon juice can upset their stomachs. Additionally, if someone has a fig allergy, they should avoid this drink. Always ensure that your guests know the ingredients, especially if they have allergies.

Can I use a different herb instead of thyme?
Certainly! Feel free to experiment with other fresh herbs like basil or mint in place of thyme. Each herb will provide a unique flavor profile, allowing you to customize your Vampire’s Fig & Thyme Punch to your liking!

Vampire’s Fig & Thyme Punch

Vampire’s Fig & Thyme Punch: A Fall Cocktail to Savor

Experience the enchanting Vampire’s Fig & Thyme Punch, a refreshing fall cocktail blending fig jam with thyme syrup.
Print Recipe Pin Recipe
Prep Time 10 minutes mins
Cook Time 5 minutes mins
Total Time 15 minutes mins
Servings: 4 glasses
Course: Drinks
Cuisine: Autumn Cocktails
Calories: 150
Ingredients Equipment Method Nutrition Notes

Ingredients
  

Punch Base
  • 2 tablespoons Fig Jam Choose a smooth variety for easy blending.
  • 2 ounces Gin Opt for high-quality gin; vodka works too.
  • 1 ounce Fresh Lemon Juice Strain out any seeds before using.
  • 1 ounce Thyme Syrup Made by simmering sugar, water, and thyme.
For Serving
  • 3 ounces Sparkling Water Add just before serving to keep the punch fizzy.
  • Ice Fill glasses with plenty of ice.
Garnish
  • Fresh Thyme Sprigs Adds aromatic elegance.
  • Fig Slices Enhances the cocktail's visual appeal.

Equipment

  • cocktail shaker
  • Fine-mesh sieve
  • small saucepan

Method
 

Step‑by‑Step Instructions
  1. Prepare Thyme Syrup: In a small saucepan, combine 1/2 cup sugar, 1/2 cup water, and 4 fresh thyme sprigs over medium heat. Stir until the sugar dissolves (3-5 minutes), then let it cool and strain.
  2. Juice the Lemon: Squeeze one fresh lemon for about 1 ounce of juice, strain out any seeds.
  3. Mix the Ingredients: In a shaker, add 2 tablespoons fig jam, 2 ounces gin, 1 ounce lemon juice, and 1 ounce thyme syrup. Fill with ice, shake for 15 seconds.
  4. Strain & Serve: Fill glasses with ice and strain the mixture into each glass. Top with 3 ounces sparkling water.
  5. Garnish: Add a sprig of thyme and a slice of fig to each glass before serving.

Nutrition

Serving: 1glassCalories: 150kcalCarbohydrates: 20gSodium: 10mgPotassium: 50mgSugar: 18gVitamin C: 5mg

Notes

Smooth fig jam is key for blending; use high-quality spirits for best results. Make thyme syrup ahead of time and store it in the fridge.

Tried this recipe?

Let us know how it was!

Delightful Thanksgiving Punch: Festive Fun for Everyone!

October 24, 2025 by Grace Snow Leave a Comment

As the leaves turn and the air grows crisp, I find myself craving the festive flavors of fall. This is the perfect time to whip up a batch of Thanksgiving Punch, a delightful blend that captures the essence of the season. With its fruity and refreshing notes, this drink promises to be the highlight of your holiday gatherings—especially with both an alcoholic and non-alcoholic option to please everyone at the table. Not only is it simple to prepare, but it also adds a festive touch that elevates any Thanksgiving feast. Imagine your guests sipping on this vibrant punch, garnished with slices of fresh fruit, as they revel in the warmth of togetherness. Curious to discover how to create this centerpiece drink that will leave everyone clamoring for more? Let’s get started!

Why is Thanksgiving Punch a Must-Have?

Festive Flair: This Thanksgiving Punch brings the celebration to life with its vibrant colors and heavenly aroma, making your gathering feel special.

Easy to Customize: With both alcoholic and non-alcoholic versions available, it’s perfect for guests of all ages. You can easily adjust the flavors by swapping ingredients or adding seasonal spices.

Kid-Friendly Option: Children will love the non-alcoholic variation, ensuring no one feels left out during the festivities!

Crowd-Pleaser: Its fruity and slightly spicy flavor profile appeals to a wide range of tastes, making it a drink everyone can enjoy.

Make-Ahead Magic: You can prepare the punch mixture a day in advance, giving you more time to focus on the rest of your Thanksgiving feast.

Thanksgiving Punch Ingredients

For the Punch Base

  • Apple Cider – Provides a sweet and tart base; substitute with pear cider for a different flavor twist.
  • Cranberry Juice – Adds a slight tanginess; use 100% cranberry juice for the best color and flavor—avoid cocktail blends.
  • Orange Juice – Offers a citrusy sweetness; freshly squeezed is preferable for optimal taste, though bottled can be used in a pinch.

For the Alcoholic Variation

  • Fireball Whiskey – Infuses a cinnamon kick; if unavailable, a different whiskey can be used, but the flavor will vary.
  • Apricot Brandy – Enhances fruitiness; can be replaced with other fruit-flavored brandies like peach or apple.

For the Non-Alcoholic Variation

  • Lemon-Lime Soda – Adds carbonation and sweetness; club soda can substitute for a less sweet version—adjust sweetness by using ginger ale instead.

For Serving

  • Ice – Chills the punch and keeps it refreshing.
  • Garnishes – Apple slices, orange slices, cranberries, and cinnamon sticks add visual appeal and enhance flavor while inviting curiosity about this festive drink.

Step‑by‑Step Instructions for Thanksgiving Punch

Step 1: Mix the Fruit Juices
In a large punch bowl, pour together 4 cups of apple cider, 2 cups of cranberry juice, and 1 cup of freshly squeezed orange juice. Stir the mixture gently with a ladle until well combined, creating a beautiful base for your Thanksgiving Punch. The vibrant colors of the juices should blend harmoniously, evoking the warm hues of fall.

Step 2: Add the Alcohol
Pour in 1 cup of Fireball whiskey and ½ cup of apricot brandy to the juice mixture. Stir again to ensure the alcohol is evenly distributed throughout the punch, adding a touch of sweetness and warmth. The spices from the whiskey will create a delightful scent that fills the air, instantly elevating the festive vibe.

Step 3: Chill the Mixture
Cover the punch bowl with plastic wrap or a lid and place it in the refrigerator to chill for at least 4 hours. This resting period allows the flavors of the Thanksgiving Punch to meld beautifully. You’ll know it’s ready when the mixture is cold and the aromas have deepened, inviting you to take a taste.

Step 4: Add the Fizz
Just before serving, carefully add 2 cups of lemon-lime soda to the chilled punch mixture. This will give your Thanksgiving Punch a refreshing burst of effervescence, perfect for that festive sparkle. Stir gently to combine, ensuring the carbonation remains intact, and enjoy the delightful fizziness that enhances the entire drink.

Step 5: Prepare for Serving
Fill a serving glass with ice and ladle the punch over it to ensure each guest receives a refreshing, chilled drink. The punch should have a vibrant color and inviting sparkle, making it an appealing centerpiece for your table.

Step 6: Garnish with Festive Touches
Before serving, garnish the Thanksgiving Punch with slices of fresh apples and oranges, along with a handful of cranberries and a few cinnamon sticks. These beautiful garnishes not only elevate the drink’s presentation but also enhance its inviting flavors, enticing everyone to indulge in your delicious concoction.

Thanksgiving Punch: Endless Possibilities

Feel free to put your personal spin on this delicious Thanksgiving Punch, making it uniquely yours!

  • Alcohol-Free Delight: Omit the whiskey and brandy. Add a splash more ginger ale to keep that fizzy fun alive!

  • Sparkling Alternative: Swap lemon-lime soda with sparkling apple cider for an extra touch of festive sweetness. Imagine serving a drink that sparkles as brightly as your holiday spirit!

  • Juice Variations: Replace cranberry juice with pomegranate juice for a gorgeous color and subtle tartness. It’ll make your punch even more beautiful and exciting!

  • Herb Infusion: Add a few sprigs of fresh rosemary or mint for an aromatic twist. These herbs will brighten up the flavors and create an unexpected, refreshing layer to the punch.

  • Autumn Spices: Stir in a pinch of ground cinnamon or nutmeg for warming spices that embrace the season fully. This simple addition will invoke memories of cozying up by the fire!

  • Tropical Twist: Incorporate pineapple juice for a tropical flair that complements the fall fruits beautifully. It's a fun way to surprise your guests with a taste of sunshine amid the autumn chill!

  • Heightened Heat: If you like a spicier punch, add a splash of ginger beer or a small dose of hot sauce for an unexpected kick. Your guests will be intrigued, and it’s sure to spark conversations!

  • Keep it Smooth: For a creamier texture, consider adding a splash of coconut milk or cream. This will also give your punch an alluring, tropical vibe that would be a hit at any holiday gathering!

Playing with these variations will bring out new flavors that can harmonize perfectly with your unique Thanksgiving feast. If you're looking for more inspiration, check out this delightful non-alcoholic option or learn how to elevate your holiday gatherings with our festive drinks collection!

Expert Tips for Thanksgiving Punch

  • Chill Time: Refrigerate the punch mixture without soda for at least 4 hours. This step allows the flavors of your Thanksgiving Punch to meld together beautifully.
  • Mix It Up: Consider offering the alcohol on the side. This way, guests can customize their drinks, especially those wanting the non-alcoholic option.
  • Avoid Dilution: Serve the punch over ice instead of letting it sit with ice for too long. This helps maintain the punch's vibrant flavor without becoming watered down.
  • Garnish Smartly: Use fresh fruit slices and cinnamon sticks for garnishes; they not only enhance visual appeal but also elevate the overall drinking experience.
  • Flavor Variations: Don’t hesitate to experiment with seasonal spices like nutmeg or cloves for a unique twist on your Thanksgiving Punch that reflects your personal taste.

Make Ahead Options

These Thanksgiving Punch variations are perfect for busy home cooks who want to enjoy more time with their guests! You can prepare the punch base, excluding the lemon-lime soda and ice, up to 24 hours in advance to let the flavors meld beautifully in the refrigerator. Simply mix together the apple cider, cranberry juice, orange juice, Fireball whiskey, and apricot brandy, then cover and refrigerate. To maintain the punch's vibrant taste, avoid adding the soda until just before serving. When it’s time to celebrate, simply stir in the soda, add ice, and garnish with fresh fruit for a stunning presentation that will impress everyone at your Thanksgiving gathering!

How to Store and Freeze Thanksgiving Punch

Fridge: Keep the punch mixture (without soda and ice) in an airtight container in the refrigerator for up to 3 days. This ensures the flavors remain fresh and vibrant.

Freezer: If you want to prepare ahead, freeze the punch mixture (again, without soda) in ice cube trays or freezer-safe containers for up to 1 month. Thaw and add soda just before serving.

Avoid Dilution: When serving, always add ice to individual glasses instead of the entire punch bowl. This keeps the Thanksgiving Punch from becoming watered down during the festivities.

Refrigerate Leftovers: If you have leftover punch with soda, consume it within 2 hours for the best taste and effervescence; carbonation will decrease over time.

What to Serve with Thanksgiving Punch

As you prepare to delight your guests with this festive concoction, consider these delectable pairings to create a memorable meal experience.

  • Savory Stuffing: This stuffing's rich flavors complement the punch's fruity notes, bridging savory and sweet beautifully. A warm side dish invites the comfort of the season and pairs perfectly with your beverage.

  • Roasted Turkey: The classic centerpiece of any Thanksgiving meal, turkey’s savory flavor harmonizes with the punch’s sweet acidity, balancing the palate with every sip.

  • Cranberry Sauce: Enhance the fruitiness of the punch with homemade cranberry sauce that mirrors its flavor profile, creating a delightful synergy on the plate.

  • Sweet Potato Casserole: This dish's natural sweetness and earthy spices elevate the warm notes of the Thanksgiving Punch, creating a wonderfully cohesive dining experience.

  • Pumpkin Pie: A holiday favorite, the spice-forward profile of pumpkin pie complements the cinnamon kick in the punch, making for a harmonious finish as you celebrate together.

  • Cheese Platter: Offering a mix of sharp and creamy cheeses will provide a delightful contrast and keep your guests snacking happily while enjoying their drinks.

  • Apple Crisp: This warm dessert infused with cinnamon and apples resonates beautifully with the punch’s flavors, offering a cozy and satisfying end to the meal.

  • Mulled Wine: For a delightful drink pairing, serve mulled wine alongside your punch to enhance the festive spirit, with its warm spices echoing the fall theme.

  • Fresh Fruit Salad: A light and refreshing side that echoes the fruity elements of the punch, offering a burst of freshness and color that brightens the table.

Thanksgiving Punch Recipe FAQs

What type of apple cider should I use for the punch?
I recommend using fresh, unfiltered apple cider for a richer flavor. If you can't find it, a quality store-bought apple cider will work too—just avoid clear apple juice, as it won’t provide the same depth of taste!

How should I store leftovers of the Thanksgiving Punch?
Store the punch mixture (without soda) in an airtight container in the fridge for up to 3 days. If you’ve added soda, try to consume it within 2 hours to ensure the fizz stays fresh!

Can I freeze Thanksgiving Punch?
Absolutely! To freeze, pour the punch mixture (without soda) into ice cube trays or a freezer-safe container. It can last up to a month in the freezer. When you’re ready to serve, thaw it out and mix in the soda just before serving for that refreshing effervescence!

What if my punch tastes too sweet or too strong?
No worries at all! If it's too sweet, adjust the flavor by adding more cranberry juice or even a splash of lemon juice to balance it out. If it's too strong, simply dilute it with a bit more club soda or lemon-lime soda.

Is there a non-alcoholic option available?
Yes! For a non-alcoholic Thanksgiving Punch, simply omit the whiskey and brandy. You can replace those spirits with an additional splash of ginger ale or club soda to maintain the festive fizz and flavor!

Thanksgiving Punch

Delightful Thanksgiving Punch: Festive Fun for Everyone!

Thanksgiving Punch is a festive and fruity drink perfect for holiday gatherings.
Print Recipe Pin Recipe
Prep Time 15 minutes mins
Chill Time 4 hours hrs
Total Time 4 hours hrs 15 minutes mins
Servings: 10 drinks
Course: Drinks
Cuisine: American
Calories: 150
Ingredients Equipment Method Nutrition Notes

Ingredients
  

For the Punch Base
  • 4 cups apple cider substitutable with pear cider
  • 2 cups cranberry juice use 100% juice, avoid cocktail blends
  • 1 cup orange juice freshly squeezed preferred
For the Alcoholic Variation
  • 1 cup Fireball whiskey substitutable with other whiskey
  • 1/2 cup apricot brandy substitutable with other fruit-flavored brandies
For the Non-Alcoholic Variation
  • 2 cups lemon-lime soda can substitute with club soda
For Serving
  • as needed cups ice to chill the punch
  • as desired garnishes apple slices, orange slices, cranberries, cinnamon sticks

Equipment

  • Large punch bowl
  • Ladle

Method
 

Step-by-Step Instructions for Thanksgiving Punch
  1. In a large punch bowl, pour together 4 cups of apple cider, 2 cups of cranberry juice, and 1 cup of freshly squeezed orange juice. Stir gently until well combined.
  2. Pour in 1 cup of Fireball whiskey and 1/2 cup of apricot brandy to the juice mixture. Stir to ensure the alcohol is evenly distributed.
  3. Cover the punch bowl and place it in the refrigerator to chill for at least 4 hours.
  4. Just before serving, carefully add 2 cups of lemon-lime soda to the chilled punch mixture. Stir gently to combine.
  5. Fill a serving glass with ice and ladle the punch over it.
  6. Garnish the punch with slices of fresh apples and oranges, along with cranberries and cinnamon sticks.

Nutrition

Serving: 8ozCalories: 150kcalCarbohydrates: 35gSodium: 10mgPotassium: 200mgSugar: 30gVitamin C: 10mgCalcium: 1mgIron: 1mg

Notes

Prepare the punch mixture ahead of time to allow flavors to meld. Adjust sweetness with additional soda if needed.

Tried this recipe?

Let us know how it was!

Easy Cinnamon Dolce Latte: Your Cozy Café Moment at Home

October 22, 2025 by Grace Snow Leave a Comment

As the first whiffs of cinnamon swirl through the air, I can't help but smile at the thought of a cozy morning with my favorite cup. This Easy Cinnamon Dolce Latte is my at-home version of that warm, indulgent drink you typically crave from Starbucks. With just a handful of ingredients, you can whip up this delightful latte, which combines the comforting notes of sweet cinnamon and robust coffee for a truly heartwarming experience. Plus, it's ridiculously easy to make, allowing you to relish in café vibes without breaking the bank. Whether you enjoy it as a weekend treat or a cheerful pick-me-up during busy mornings, this drink brings a sense of warmth and joy that’s hard to replicate. Ready to discover the secret to crafting your own delicious cup? Let's dive in!

Why make your own Cinnamon Dolce Latte?

Convenience at Home: Why spend extra bucks at Starbucks when you can easily whip this up in your own kitchen?

Rich, Aromatic Flavors: The blend of cinnamon and coffee creates a cozy drink that comforts the soul—perfect for chilly mornings.

Endless Customization: Whether it’s a sprinkle of nutmeg or a dairy-free milk alternative, this recipe invites you to get creative with every cup.

Quick and Easy: With just a few simple steps, you can have your latte ready in under 15 minutes!

Perfect for Any Occasion: Pair it with pastries for breakfast or savor it alone as a soothing afternoon treat.

Taste for yourself how this Easy Cinnamon Dolce Latte can elevate your mornings!

Easy Cinnamon Dolce Latte Ingredients

For the Cinnamon Syrup
• Water – Essential for creating the cinnamon syrup base.
• Cinnamon Sticks – Fresh sticks infuse a delightful flavor; ground cinnamon can be used in a pinch, but texture may differ.
• Brown Sugar – Adds sweetness and depth; light brown sugar will give a milder taste, while dark brown sugar deepens the flavor.

For the Latte
• Strong Coffee – Use espresso or brewed coffee for a robust flavor; adjust strength to your liking.
• Milk (frothy) – Provides a creamy texture; feel free to substitute with whole, skim, or non-dairy alternatives for personalized richness.

Taste the comforting blend of this Easy Cinnamon Dolce Latte—an inviting way to start your day!

Step‑by‑Step Instructions for Easy Cinnamon Dolce Latte

Step 1: Prepare the Cinnamon Syrup
In a small saucepan, combine 1 cup of water with 2 broken cinnamon sticks. Bring this mixture to a gentle boil over medium heat, watching for small bubbles. Once boiling, reduce the heat to low and let it simmer for about 5 minutes, allowing the fragrant aroma to fill your kitchen.

Step 2: Steep the Cinnamon
After simmering, remove the saucepan from heat and cover it with a lid. Let the cinnamon sticks steep in the hot water for 10 minutes. This step is crucial—the longer they steep, the more intense the cinnamon flavor will be in your Easy Cinnamon Dolce Latte. Keep an eye on the time and enjoy the warm, inviting scent as it infuses.

Step 3: Make the Syrup
Once the cinnamon has steeped, carefully remove the cinnamon sticks from the saucepan. Stir in 1/2 cup of brown sugar into the infused water, mixing until it fully dissolves. The syrup will have a warm, rich color, and a sweet aroma that complements the cinnamon beautifully. Set the syrup aside to cool for a few minutes.

Step 4: Cool and Store the Syrup
Allow the cinnamon syrup to cool completely before transferring it to a sealed jar. You can store this syrup in the refrigerator for up to 2 weeks, making it easy to whip up your Easy Cinnamon Dolce Latte whenever the craving strikes. Just be sure to give it a quick shake before using as some separation might occur.

Step 5: Brew the Coffee
While the cinnamon syrup cools, brew your favorite cup of strong coffee or espresso. Aim for about 1/2 cup for each serving of the Easy Cinnamon Dolce Latte you plan to make. The robust flavor of the coffee will balance the sweetness of the syrup and create a comforting drink.

Step 6: Froth the Milk
In a separate saucepan, heat 1 cup of your chosen milk over medium heat, ensuring it doesn’t boil. Use a frother, whisk, or even a mason jar to froth the milk once heated. The goal is to achieve a creamy, velvety texture, which will perfectly blend with the strong coffee and sweet cinnamon syrup.

Step 7: Assemble the Latte
In a large mug, combine 3 tablespoons of the cinnamon syrup with your brewed coffee. Stir well to ensure the syrup disperses throughout the drink. Slowly pour the frothed milk over the coffee mixture, allowing the creamy texture to mix together elegantly. Top with a sprinkle of ground cinnamon for an extra touch of flavor.

Step 8: Enjoy Your Creation
Your Easy Cinnamon Dolce Latte is now ready to be savored! Take a moment to appreciate the comforting scents and the cozy atmosphere you’ve created. Whether you enjoy it with breakfast or as a midday treat, this homemade version of a café classic is sure to warm your heart.

What to Serve with Easy Cinnamon Dolce Latte?

The perfect pairing elevates your cozy café moment, turning a delightful drink into an unforgettable experience.

  • Fluffy Pancakes: Soft and warm, pancakes are the ideal match, soaking up the sweet flavors of your latte.

  • Chocolate Croissants: The flaky layers and rich chocolate contrast beautifully with the spiced notes of the latte, creating a decadent breakfast.

  • Overnight Oats: Creamy, wholesome oats are a nourishing companion, enhancing the latte's sweetness while keeping you satisfied.

  • Fruit Salad: Fresh, juicy fruits like apples and berries brighten the palate, balancing the warm espresso flavors with vibrant freshness.

  • Savory Quiche: A slice of quiche adds a comforting savory flair; the richness complements and enhances the coffee's depth.

  • Cinnamon Rolls: Nothing says cozy morning like cinnamon rolls! Their gooey sweetness mirrors the latte’s flavor, creating a cinnamon celebration.

  • Spiced Muffins: Soft muffins spiced with nutmeg or clove offer a wonderful texture, echoing the aromatic warmth of the drink.

  • Nutty Granola Bars: Chewy and crunchy, these bars provide a satisfying bite alongside your latte, perfect for an on-the-go breakfast.

  • Pumpkin Spice Cookie: A warm cookie with hints of pumpkin and spices intertwines perfectly with your latte, especially during the fall season.

  • Maple Syrup Drizzle: Consider drizzling a bit of maple syrup over your breakfast choice for a sweet, earthy boost that pairs impeccably with the cinnamon flavors.

Easy Cinnamon Dolce Latte Variations

Embrace your creativity and personalize your Easy Cinnamon Dolce Latte to make every cup a new adventure for your taste buds!

  • Dairy-Free: Swap regular milk for almond, coconut, or oat milk for a delightful, creamy alternative that everyone can enjoy.

  • Sugar-Free: For a lower-calorie twist, use a sugar substitute like erythritol or monk fruit sweetener while preparing your syrup.

  • Spiced Up: Add a pinch of nutmeg or a dash of vanilla extract to your syrup for an extra layer of warmth and flavor.

  • Iced Delight: Make your latte a refreshing iced version by chilling your coffee and serving it over ice with frothed milk on top.

  • Chocolate Lover's Twist: Stir in a spoonful of cocoa powder into your coffee for a rich chocolatey flavor that perfectly complements the cinnamon.

  • Nutty Variations: Incorporate a splash of hazelnut or almond syrup into your latte for a nutty upgrade that adds a gourmet touch.

  • Seasonal Spice: During the holidays, toss in a sprinkle of pumpkin spice alongside your cinnamon for a festive fall flavor.

  • Texture Boost: Experiment by adding whipped cream on top for an indulgent finish or sprinkle some crushed nuts for added crunch.

These variations ensure that your Easy Cinnamon Dolce Latte remains a beloved favorite, no matter how you choose to make it. And if you love the idea of combining coffee and spices, check out our delicious Pumpkin Cinnamon Roll for the perfect pairing!

Make Ahead Options

These Easy Cinnamon Dolce Lattes are perfect for busy mornings! You can prepare the cinnamon syrup up to 2 weeks in advance, ensuring a delightful and quick start to your day. Just follow the syrup instructions, allowing it to cool completely before storing in an airtight jar in the refrigerator. This way, you’ll have the sweet, spiced base ready to go whenever you crave a cozy latte. When you’re ready to serve, simply mix 3 tablespoons of the syrup with ½ cup of freshly brewed coffee, froth your milk, and pour it over. Enjoy café-quality results with minimal effort—your future self will thank you!

How to Store and Freeze Easy Cinnamon Dolce Latte

Fridge: Store your cinnamon syrup in a sealed jar in the refrigerator for up to 2 weeks. This will allow you to enjoy your Easy Cinnamon Dolce Latte whenever the craving strikes!

Freezer: If you want to keep the syrup longer, pour it into ice cube trays and freeze for easy portions. Use within 2–3 months for the best flavor.

Reheating: When ready to use the syrup, simply thaw the desired number of cubes and heat gently in the microwave or on the stovetop before adding to your latte.

Coffee Storage: Brewed coffee can be kept in the fridge for up to 3 days in an airtight container. Just remember to heat it up before mixing with the syrup and frothed milk.

Expert Tips for Easy Cinnamon Dolce Latte

  • Perfect Your Syrup: Letting the cinnamon sticks steep longer enhances the flavor, but avoid boiling to prevent bitterness.

  • Froth Your Milk: Frothing the milk properly is key! A frother or a mason jar can create that creamy texture you love without an espresso machine.

  • Customize Sweetness: Start with less sugar in the syrup, and add more to taste. This ensures your Easy Cinnamon Dolce Latte fits your sweetness preference perfectly.

  • Experiment with Milk: Don't hesitate to try different milk varieties—almond, oat, or coconut can give your latte a delicious twist!

  • Make it Iced: For a refreshing change, chill the coffee and pour it over ice, then top with frothed milk and syrup for an iced treat.

Easy Cinnamon Dolce Latte Recipe FAQs

How do I choose the right cinnamon for my latte?
Absolutely! For the best flavor, I recommend using fresh cinnamon sticks. They not only impart a richer aroma but also enhance the overall taste of your Easy Cinnamon Dolce Latte. Ground cinnamon can be used in a pinch, but do remember that it may alter the texture since it tends to clump more when mixed.

How long can I store the cinnamon syrup?
You can store your cinnamon syrup in a sealed jar in the refrigerator for up to 2 weeks. Make sure it's completely cooled before sealing it to maintain its freshness. I often make a batch ahead of time so it’s ready to go whenever I’m craving a cozy latte!

Can I freeze the cinnamon syrup?
Absolutely! To freeze, pour your cinnamon syrup into ice cube trays and freeze them. Once frozen, transfer the cubes to a resealable bag. They'll last for about 2 to 3 months. When you're ready to use, simply thaw a few cubes and heat them gently in the microwave or on the stovetop—perfect for a quick Easy Cinnamon Dolce Latte!

What should I do if my latte is too sweet?
No worries! If you find your Easy Cinnamon Dolce Latte too sweet for your taste, you can easily adjust it. Start by using less brown sugar in the syrup, then gradually add more sugar into your latte to personalize it. If you've already made it, you can balance sweetness by adding a bit more brewed coffee or a splash of milk to mellow the taste.

Can I make this recipe dairy-free?
Very much so! This Easy Cinnamon Dolce Latte is highly customizable. Simply use any non-dairy milk you love—almond, oat, or coconut milk work wonderfully! These alternatives can add a unique twist to your favorite latte, all while keeping it light and delicious!

Is this latte safe for pets?
It’s important to note that while the latte is a delightful treat for us, it’s not suitable for pets. Ingredients like caffeine from coffee and sugar can adversely affect their health. Always keep your coffee creations out of reach of your furry friends to ensure their safety.

Easy Cinnamon Dolce Latte

Easy Cinnamon Dolce Latte: Your Cozy Café Moment at Home

Enjoy the comforting flavors of an Easy Cinnamon Dolce Latte made at home with simple ingredients.
Print Recipe Pin Recipe
Prep Time 5 minutes mins
Cook Time 10 minutes mins
Cooling Time 5 minutes mins
Total Time 20 minutes mins
Servings: 2 cups
Course: Drinks
Cuisine: American
Calories: 180
Ingredients Equipment Method Nutrition Notes

Ingredients
  

For the Cinnamon Syrup
  • 1 cup Water Essential for creating the cinnamon syrup base.
  • 2 pieces Cinnamon Sticks Fresh sticks infuse a delightful flavor.
  • 1/2 cup Brown Sugar Adds sweetness and depth.
For the Latte
  • 1/2 cup Strong Coffee Use espresso or brewed coffee.
  • 1 cup Milk Frothy, use whole or non-dairy alternatives.

Equipment

  • small saucepan
  • mason jar
  • frother or whisk

Method
 

Step-by-Step Instructions for Easy Cinnamon Dolce Latte
  1. Combine 1 cup of water with 2 broken cinnamon sticks in a small saucepan. Bring to a gentle boil.
  2. Remove from heat and cover with a lid. Let steep for 10 minutes.
  3. Remove cinnamon sticks and stir in 1/2 cup of brown sugar until dissolved.
  4. Allow the cinnamon syrup to cool completely before transferring to a jar.
  5. Brew 1/2 cup of strong coffee or espresso.
  6. Heat 1 cup of milk over medium heat and froth until creamy.
  7. In a large mug, combine 3 tablespoons of cinnamon syrup with brewed coffee, then top with frothed milk.
  8. Enjoy your Easy Cinnamon Dolce Latte.

Nutrition

Serving: 1cupCalories: 180kcalCarbohydrates: 30gProtein: 5gFat: 4gSaturated Fat: 2gMonounsaturated Fat: 1gCholesterol: 10mgSodium: 70mgPotassium: 200mgFiber: 1gSugar: 24gVitamin A: 250IUCalcium: 150mgIron: 0.5mg

Notes

Customize the sweetness of the syrup and the type of milk used for a personal touch.

Tried this recipe?

Let us know how it was!

Goosebumps Halloween Punch: A Spooky Treat for All Ages

October 22, 2025 by Grace Snow Leave a Comment

As I rummaged through my pantry in search of festive treats, I stumbled upon a vibrant green bottle that sparked a delightful memory. It reminded me of my childhood love for Halloween and all the spooky fun that came with it. Enter the Goosebumps Halloween Punch, an easy-to-make 4-ingredient wonder that brings that magic right back. Perfectly fizzy and refreshingly sweet, this punch is a crowd-pleaser for both kids and adults, making it the ultimate addition to your Halloween festivities. Within just 10 minutes, you’ll whip up a drink that's not only eye-catching but also a conversation starter at any gathering. Want to know how simple it is to mix your way into a spooky adventure? Let’s dive into this hauntingly good recipe!

Why is Goosebumps Halloween Punch a Must-Try?

Simplicity: With just 4 ingredients, you can create a festive drink in minutes! Perfect for busy schedules or last-minute gatherings.

Fun Factor: The vibrant green color and gummy worms add a playful touch that delights both kids and adults alike.

Customizable: Whether you keep it non-alcoholic or mix in your favorite spirits, this recipe can cater to any crowd.

Kid-Friendly: Say goodbye to boring drinks; this punch embodies festive fun, making it a perfect addition to Halloween parties or family movie nights.

Conversation Starter: Its unique appearance is sure to spark conversations, creating a memorable experience for all your guests! For more fun variations, check out our suggestions on cocktail and punch ideas.

Goosebumps Halloween Punch Ingredients

For the Punch

  • Lemon Lime Soda – Provides the bubbly base and refreshing fizz that makes the Goosebumps Halloween Punch irresistible.
  • Green Food Coloring – Gives the drink its spooky appearance; adjust to achieve your preferred ghoulish hue.
  • Rainbow Sherbet – Adds a creamy sweetness and festive twist; for a different texture, consider using sorbet instead.
  • Gummy Worms – A fun garnish that enhances the Halloween theme; swap for other gummy candies if desired.

Optional Additions

  • Pineapple Juice – Mix in for a fruity twist that brightens up the flavor profile.
  • Vodka or White Rum – Add 1-2 cups for an adult-friendly version that keeps the Halloween spirit alive.

Step‑by‑Step Instructions for Goosebumps Halloween Punch

Step 1: Combine the Base
In a large punch bowl, pour in 3 liters of chilled Lemon Lime Soda, ensuring it's bubbly and refreshing. Add 12 drops of Green Food Coloring to create that spooky ghoulish hue, and use a ladle or a long spoon to stir gently until the color is evenly blended. This vibrant green base will set a festive mood for your Goosebumps Halloween Punch.

Step 2: Add the Sherbet
Scoop out the entire quart of Rainbow Sherbet and add it to the punch bowl, placing it in large dollops. Allow the sherbet to begin melting, which will create a delightful blend of creamy texture and fizz. As it swirls and softens, this adds a festive, frothy layer to your Goosebumps Halloween Punch, enhancing both flavor and visual appeal.

Step 3: Incorporate the Worms
Carefully mix in 18 of the 30 Gummy Worms directly into the punch, letting them float and add a fun, thematic element to the drink. This will give the punch a magical, whimsical touch that kids and adults will love. Reserve the remaining gummy worms for later garnish, ensuring they maintain their chewy texture.

Step 4: Serve and Garnish
Using a ladle, pour the spooky Goosebumps Halloween Punch into cups, making sure each serving gets a generous share of the fizzy liquid and creamy sherbet. To finish, decorate each cup with the reserved gummy worms draping over the edges, creating a playful presentation that's perfect for your Halloween celebration.

What to Serve with Goosebumps Halloween Punch

Creating a magical Halloween experience isn't complete without delicious pairings that complement this spooky drink.

  • Monster Cookies: These vibrant treats are colorful and chewy, adding a delightful sweetness that balances the fizzy punch. They make for a fun and spooky dessert.

  • Halloween Dirt Cups: Layered chocolate pudding, crushed cookies, and gummy candies echo the fun elements of the punch, creating a playful dessert that all ages will adore.

  • Spooky Cheese Platter: A mix of sharp cheeses, crackers, and eerie fruit shapes harmonizes cheesy and savory flavors with the sweetness of the punch, offering a twist to the menu.

  • Pumpkin Spice Muffins: Delight in the warm, fragrant spices from pumpkin muffins that pair beautifully with chilled drinks, bringing a cozy fall vibe to your gathering.

  • Witch’s Brew Popcorn: Seasoned with edible glitter and Halloween-themed sprinkles, this crunchy treat is a whimsical snack that adds texture and fun to your festive spread.

  • Apple Cider: A spiced apple cider, served warm or chilled, enhances the fall flavors and keeps the spooky spirit alive while providing a comforting contrast to the vibrant punch.

Each of these pairings brings its own texture and flavors, elevating your Goosebumps Halloween Punch into a full, enchanting feast that's sure to be memorable!

Storage Tips for Goosebumps Halloween Punch

  • Room Temperature: For best flavor and fizz, serve the Goosebumps Halloween Punch immediately after preparation. Avoid storing at room temperature to maintain freshness.

  • Fridge: If you need to store leftovers, refrigerate in an airtight container for up to 1 day. Be aware that the effervescence will diminish, impacting the punch's texture.

  • Freezer: Freezing is not recommended as it can alter the creamy texture of the sherbet and affect the punch's overall taste.

  • Reheating: Reheating is not necessary for a punch. Serve chilled or allow it to come to room temperature, but remember to stir gently to mix any settled ingredients.

Goosebumps Halloween Punch Variations

Feel free to let your creativity shine by customizing this punch with these fun and festive suggestions!

  • Fruity Twist: Add pineapple juice or lemonade concentrate for an invigorating citrus twist that brightens the overall flavor. It's a fruity surprise that takes the punch to a whole new level!

  • Soda Swap: Use other fruit-flavored sodas like orange or grape soda to change the base and create a unique taste. Imagine the delightful combinations you can explore!

  • Adult Additions: For an adult version, consider adding Midori or pineapple rum to elevate the tropical essence of the drink. Just mix slowly and taste to find your desired balance.

  • Colorful Gummy Worms: Get creative with different gummy candies. Eye-shaped gummies or gummy spiders can enhance the spooky effect and surprise all your guests!

  • Sugar Rim Variation: For a touch of elegance, create a sugar rim using colored sugar or sprinkles that match your party theme. Just dip the rims in your favorite spooky color for added fun!

  • Sherbet Substitution: Swap out the rainbow sherbet for green or orange sorbet for a unique texture. This simple change adds a subtle twist while keeping taste and creaminess intact.

  • Extra Fizz: Enhance the fizz by incorporating club soda or ginger ale instead of plain lemon-lime soda. This adds both sweetness and a delightful zing with every sip.

  • Flavor Enhancements: Consider adding a splash of freshly squeezed lime or lemon juice for a bright and zesty kick. It balances the sweetness and keeps it refreshing!

Need more ideas to ignite your Halloween spirit? Check out our fun suggestions on punch variations and spooky treats to accompany your Goosebumps Halloween Punch recipe!

Expert Tips for Goosebumps Halloween Punch

  • Fresh is Best: Serve the Goosebumps Halloween Punch immediately after making to maintain its fizzy goodness. The carbonation diminishes quickly after mixing.

  • Sugar Rim Option: For a spooky touch, create a sugar rim by mixing powdered sugar with a drop of green food coloring and a bit of water. Dip the rim of your cups for an extra festive flair!

  • Mix It Up: Want an adult version? Mix 1-2 cups of vodka or white rum into the punch bowl. Start small and taste, adjusting the flavor to suit your preference.

  • Gummy Worm Variations: Feel free to swap out gummy worms for other fun candy shapes, like eyeballs or spiders, to enhance the punch’s Halloween theme.

  • Smooth Serving: To ensure easy pouring, use a ladle with a long handle. It helps avoid spills while serving this fun, bubbly Goosebumps Halloween Punch to your guests.

Make Ahead Options

These Goosebumps Halloween Punch preparations are perfect for busy home cooks looking to streamline their festive gatherings! You can mix the Lemon Lime Soda and Green Food Coloring together up to 24 hours in advance, storing the mixture in the refrigerator to maintain its bubbly texture. Prepare the Rainbow Sherbet and keep it in the freezer until you're ready to serve. On the day of your event, simply add the sherbet to the soda mixture and stir gently to activate that whimsical froth. Finally, incorporate the gummy worms for that fun touch just before serving. This way, you’ll enjoy delicious, kid-friendly punch with minimal last-minute effort!

Goosebumps Halloween Punch Recipe FAQs

What kind of Lemon Lime Soda should I use for the punch?
Absolutely! For the Goosebumps Halloween Punch, I recommend using a chilled, classic Lemon Lime Soda like 7UP or Sprite. The carbonation is key for that fizzy effect, so make sure it’s fresh and well-chilled before mixing, as warmer soda won’t have the same bubbly pop!

How long can I store leftover Goosebumps Halloween Punch?
If you have any leftovers (which is rare with this crowd-pleaser!), store them in an airtight container in the fridge for up to 1 day. Just remember, the longer it sits, the less fizzy it becomes, impacting the delightful texture and fun experience of the punch.

Can I freeze Goosebumps Halloween Punch?
Freezing the punch is not recommended, as it can affect the creamy texture of the Rainbow Sherbet. If you want to prepare in advance, consider making the base (soda and food coloring) and adding Sherbet just before serving. The punch is best enjoyed fresh, ensuring that bubbly goodness lasts!

What can I do if my punch looks too dark?
If your Goosebumps Halloween Punch turns out darker than you'd like, add a splash more Lemon Lime Soda to lighten it up. Start by adding incremental amounts, stirring gently until the hue matches your spooky aesthetic. Remember, it’s all about having fun with it, so get creative!

Is this punch suitable for children and those with allergies?
Very! This punch is kid-friendly; however, always double-check the ingredients of the Lemon Lime Soda and any gummy candies you choose, as they might contain allergens like gelatin, gluten, or artificial colors. I often suggest using allergy-friendly candies to ensure everyone can enjoy the fun!

Goosebumps Halloween Punch

Goosebumps Halloween Punch: A Spooky Treat for All Ages

Goosebumps Halloween Punch is a fizzy, sweet, and spooky drink perfect for all ages, making it a must-have for Halloween parties.
Print Recipe Pin Recipe
Prep Time 10 minutes mins
Total Time 10 minutes mins
Servings: 10 cups
Course: Drinks
Calories: 150
Ingredients Equipment Method Nutrition Notes

Ingredients
  

For the Punch
  • 3 liters Lemon Lime Soda Chilled for a bubbly refreshment.
  • 12 drops Green Food Coloring Adjust to achieve preferred ghoulish hue.
  • 1 quart Rainbow Sherbet Or consider using sorbet for a different texture.
  • 30 pieces Gummy Worms Use as garnish or mix in.
Optional Additions
  • 1-2 cups Vodka or White Rum For an adult-friendly version.
  • 1 cup Pineapple Juice Mix for a fruity twist.

Equipment

  • Large punch bowl
  • Ladle

Method
 

Step-by-Step Instructions for Goosebumps Halloween Punch
  1. In a large punch bowl, pour in 3 liters of chilled Lemon Lime Soda and add 12 drops of Green Food Coloring, stirring gently to blend the color.
  2. Scoop out the entire quart of Rainbow Sherbet and add it to the punch bowl, allowing it to melt and swirl.
  3. Mix in 18 of the 30 Gummy Worms, letting them float in the drink for a whimsical touch.
  4. Ladle the punch into cups, garnishing with reserved gummy worms draped over the edges.

Nutrition

Serving: 1cupCalories: 150kcalCarbohydrates: 36gSodium: 50mgPotassium: 20mgSugar: 34gVitamin C: 10mg

Notes

Serve immediately to maintain fizz; can be garnished with a sugar rim for added flair.

Tried this recipe?

Let us know how it was!

Aztec Kahlúa Hot Cocoa: Your Cozy Indulgence This Winter

October 22, 2025 by Grace Snow Leave a Comment

As the chill of winter wraps around us, there’s nothing quite like a steaming cup of Aztec Kahlúa Hot Cocoa to warm the heart and soul. This delightful blend of semi-sweet chocolate and a hint of cayenne pepper transforms your ordinary hot cocoa into a cozy indulgence, making it the perfect companion for chilly evenings. What’s more, it’s not just a treat for adults; you can easily whip up a non-alcoholic version for the kids, ensuring everyone can join in on the fun. Whether you're curling up by the fire or gathering with friends during the holiday season, this luscious drink promises quick prep and a crowd-pleasing moment of joy. So, are you ready to discover how this rich, velvety cocoa can elevate your winter traditions? Let's dive in!

Why is Aztec Kahlúa Hot Cocoa a must-try?

Indulgent Delight: This rich cocoa is a perfect blend of semi-sweet chocolate and warming spices that elevate your winter nights.
Customizable Goodness: Easily enjoy a non-alcoholic version, making it a fun option for all ages!
Quick and Easy: Ready in just a few minutes, it's ideal for spontaneous gatherings or leisurely evenings.
Comfort in a Cup: The velvety texture wraps around you, providing warmth and comfort similar to a cozy blanket.
Perfect Pairing: Enjoy it alongside your favorite holiday baked goods or a classic Homemade Hot Chocolate for an unforgettable treat.
Crowd Favorite: Serve it at your next get-together, and watch it disappear in no time!

Aztec Kahlúa Hot Cocoa Ingredients

For the Cocoa Base
• Milk – A creamy base providing richness; substitute with almond milk for a dairy-free version.
• Heavy Cream – Adds luxurious creaminess; use half-and-half as a lighter substitute.
• Semi-Sweet Chocolate – The main cocoa source delivering chocolate flavor; dark chocolate can be used for a deeper taste.
• Instant Espresso Powder – Enhances chocolate flavor; omit if unavailable.
• Ground Cinnamon – Adds warmth and spice; nutmeg can be a substitute for a different flavor profile.
• Cayenne Pepper – Provides subtle heat; adjust quantity to taste or omit for a milder drink.
• Kosher Salt – Enhances flavors; regular salt can be used, but kosher salt is preferred.

For the Boozy Touch
• Mocha Kahlúa (or regular Kahlúa) – Adds sweetness and a rich coffee flavor; replace with chocolate syrup for a non-alcoholic version of Aztec Kahlúa Hot Cocoa.

Step‑by‑Step Instructions for Aztec Kahlúa Hot Cocoa

Step 1: Combine Ingredients
In a large saucepan, combine 2 cups of milk, 1 cup of heavy cream, 4 ounces of semi-sweet chocolate (chopped), 1 tablespoon of instant espresso powder, 1 teaspoon of ground cinnamon, and a pinch of cayenne pepper along with 1/4 teaspoon of kosher salt. Stir the mixture gently to ensure everything is well distributed before heading to the heat.

Step 2: Heat the Mixture
Place the saucepan over medium-low heat, stirring continuously. Allow the mixture to warm for about 5-7 minutes, or until the chocolate is completely melted and the mixture is steaming but not boiling. Keep an eye on it to prevent scorching. You’ll know it’s ready when it achieves a silky texture.

Step 3: Incorporate Kahlúa
Once the cocoa is warm and smooth, stir in 2 ounces of Mocha Kahlúa (or regular Kahlúa), mixing thoroughly until fully incorporated. This adds a delightful depth of flavor to your Aztec Kahlúa Hot Cocoa. Continue heating briefly for another 1-2 minutes to meld the flavors without boiling.

Step 4: Serve the Drink
Remove the saucepan from heat and carefully ladle the rich cocoa into mugs. For an extra special touch, consider topping your Aztec Kahlúa Hot Cocoa with fluffy marshmallows or a dollop of whipped cream. This little garnish will elevate your cozy beverage while adding a delightful visual appeal.

Step 5: Enjoy and Customize
Take a moment to savor the warmth as you enjoy your Aztec Kahlúa Hot Cocoa. Feel free to adjust the spice level by adding more cayenne if desired or use chocolate syrup for a non-alcoholic version for younger guests. This drink is perfect for gatherings or a tranquil evening to yourself.

Storage Tips for Aztec Kahlúa Hot Cocoa

Fridge: Refrigerate any leftover Aztec Kahlúa Hot Cocoa in an airtight container for up to 2 days. Make sure it's cooled before sealing to prevent condensation.

Freezer: While not ideal for hot cocoa, you can freeze the mixture in ice cube trays for up to 1 month. Use the cubes in smoothies or as cold cocoa bites!

Reheating: Reheat gently on the stovetop over low heat or in the microwave, stirring occasionally until warmed through. Avoid boiling to maintain the creamy texture.

Serving After Storage: Allow the cocoa to cool slightly after reheating before serving to ensure it’s comfortable to sip. Your cozy treat is ready to enjoy again!

Expert Tips for Aztec Kahlúa Hot Cocoa

• Continuous Stirring: Prevent scorching by stirring constantly while heating. This helps create a smooth texture without burnt chocolate.

• Spice Adjustment: Start with a small amount of cayenne pepper, then gradually add more to suit your taste. This keeps the drink enjoyable for everyone!

• Cool Before Serving: Allow the cocoa to cool slightly after cooking to prevent burns. It should be warm but comfortable to sip.

• Creative Toppings: Elevate your Aztec Kahlúa Hot Cocoa with varied toppings, such as whipped cream, marshmallows, or even a sprinkle of cinnamon for extra flair.

• Storage Solutions: If you have leftover cocoa, refrigerate it for up to two days. Reheat gently on the stove or in the microwave before serving.

Make Ahead Options

These Aztec Kahlúa Hot Cocoa cups are perfect for meal prep enthusiasts seeking to save time on busy weeknights! You can prepare the cocoa base (milk, heavy cream, chocolate, espresso powder, cinnamon, cayenne, and salt) up to 24 hours in advance; simply refrigerate it once it has cooled. When you're ready to serve, reheat the mixture gently over low heat, stirring until warmed through, and then mix in the Kahlúa until fully incorporated. This way, you maintain that rich, chocolatey flavor without sacrificing quality. By prepping ahead, you’ll have a cozy winter treat ready to enjoy with minimal effort!

Aztec Kahlúa Hot Cocoa Variations

Embrace your creativity with these delightful twists on the classic Aztec Kahlúa Hot Cocoa that will make your heart sing.

  • Dairy-Free: Substitute milk with almond milk or oat milk for a smooth, creamy cocoa suitable for dairy-free diets.

  • Lower Calorie: Use low-fat milk and reduce the heavy cream to enjoy a lighter version without sacrificing flavor.

  • Dark Chocolate: Swap semi-sweet chocolate for dark chocolate to create a richer, more intense cocoa experience that chocolate lovers will adore.

  • Flavored Liqueurs: Try replacing Kahlúa with hazelnut or vanilla coffee liqueur for a unique twist on the original flavor profile.

  • Extra Spice: For an invigorating kick, add a pinch of chili powder along with cayenne pepper, intensifying the heat and adding depth.

  • Nutty Additions: Mix in a tablespoon of almond butter or hazelnut spread while heating for a wonderfully nutty flavor and enhanced creaminess.

  • Marshmallow Swirl: Top your cocoa with toasted marshmallows or a dollop of marshmallow fluff for an indulgent treat that everyone will love!

  • Cocoa Delight Combo: Serve your Aztec Kahlúa Hot Cocoa alongside a slice of decadent chocolate cake or even a batch of festive Homemade Hot Chocolate cookies to create a truly deluxe dessert experience.

What to Serve with Aztec Kahlúa Hot Cocoa

Warm up your evenings with delightful pairings that complement the rich, spicy flavors of this indulgent cocoa.

  • Spiced Apple Cider: The blend of sweet and spicy notes pairs perfectly with the cocoa, enhancing the cozy atmosphere of winter gatherings.
  • Gingerbread Cookies: These festive treats' molasses and spices harmonize beautifully with the heat from the cayenne, making each sip and bite a joy.
  • Chocolate Chip Muffins: Soft and tender muffins provide a delightful textural contrast, creating a balance with the smooth richness of the hot cocoa.
  • Roasted Marshmallows: Imagine toasting marshmallows by the fire, then dipping them in hot cocoa—pure comfort to warm up chilly nights.
  • Mince Pies: Their fruity sweetness cuts through the richness of the cocoa, allowing a reflective pause during indulgent sips. Truly a festive treat!
  • Pecan Pie: This classic dessert's nutty sweetness complements the mocha richness from the Kahlúa, making for a satisfying, decadent finish to your evening.
  • Classic Irish Cream: For a more spirited pairing, serve a little shot of Irish cream on the side—its creaminess will perfectly mingle with your cocoa.
  • Chili Con Carne: A warm bowl of this hearty dish just before sipping your cocoa can set a wonderful contrast, balancing the warmth with spice.

Aztec Kahlúa Hot Cocoa Recipe FAQs

What type of milk is best for Aztec Kahlúa Hot Cocoa?
Absolutely! A creamy milk like whole milk or 2% is best to achieve that rich, velvety texture. For a dairy-free option, almond milk works wonderfully, though it may slightly alter the flavor.

How should I store leftover Aztec Kahlúa Hot Cocoa?
After enjoying your delicious cocoa, store any leftovers in an airtight container in the fridge. They’ll stay fresh for up to 2 days. Be sure to let it cool before sealing to avoid condensation!

Can I freeze Aztec Kahlúa Hot Cocoa?
Yes, you can! While it's best fresh, you can freeze the cocoa in ice cube trays for fun cocoa bites. Just remember, it will keep for about a month. To use, simply pop the cubes into a blender for a smoothie or let them melt into your favorite drinks.

What should I do if my cocoa is too thick or too thin?
Very! If your cocoa is too thick, simply stir in a bit more milk until you reach your desired consistency. For a thinner cocoa, gradually add more milk over low heat, stirring until well combined. Remember, it’s all about personal preference!

Can children enjoy a version of Aztec Kahlúa Hot Cocoa?
Absolutely! Just omit the Kahlúa and replace it with your favorite chocolate syrup for a delightful, non-alcoholic treat that’s perfect for kids. They’ll love the rich chocolate flavor without the spirits, ensuring everyone can cozy up with a cup.

What spices can I add if I want more flavor?
Yes, indeed! Feel free to experiment with spices like nutmeg or even a touch of vanilla extract for added depth. For those who love a kick, consider a dash of chili powder along with the cayenne. Adjust according to your taste preferences—exploring flavors is half the fun!

Aztec Kahlúa Hot Cocoa

Aztec Kahlúa Hot Cocoa: Your Cozy Indulgence This Winter

Enjoy a warm cup of Aztec Kahlúa Hot Cocoa, a delightful blend of chocolate and spices, perfect for chilly winter nights.
Print Recipe Pin Recipe
Prep Time 5 minutes mins
Cook Time 7 minutes mins
Total Time 12 minutes mins
Servings: 4 cups
Course: Drinks
Cuisine: Mexican
Calories: 370
Ingredients Equipment Method Nutrition Notes

Ingredients
  

For the Cocoa Base
  • 2 cups Milk substitute with almond milk for a dairy-free version
  • 1 cup Heavy Cream use half-and-half for a lighter substitute
  • 4 ounces Semi-Sweet Chocolate chopped; dark chocolate can be used
  • 1 tablespoon Instant Espresso Powder omit if unavailable
  • 1 teaspoon Ground Cinnamon nutmeg can be a substitute
  • a pinch Cayenne Pepper adjust to taste or omit
  • 1/4 teaspoon Kosher Salt preferably kosher salt
For the Boozy Touch
  • 2 ounces Mocha Kahlúa or regular Kahlúa; replace with chocolate syrup for non-alcoholic version

Equipment

  • Large saucepan

Method
 

Combine Ingredients
  1. In a large saucepan, combine 2 cups of milk, 1 cup of heavy cream, 4 ounces of semi-sweet chocolate (chopped), 1 tablespoon of instant espresso powder, 1 teaspoon of ground cinnamon, and a pinch of cayenne pepper along with 1/4 teaspoon of kosher salt. Stir gently to ensure well distribution before heading to heat.
Heat the Mixture
  1. Place the saucepan over medium-low heat, stirring continuously. Warm for about 5-7 minutes, or until chocolate is melted and mixture is steaming but not boiling.
Incorporate Kahlúa
  1. Once the cocoa is warm and smooth, stir in 2 ounces of Mocha Kahlúa (or regular Kahlúa). Mix thoroughly until fully incorporated.
Serve the Drink
  1. Remove from heat and ladle the cocoa into mugs. Consider topping with marshmallows or whipped cream.
Enjoy and Customize
  1. Savor the warmth and adjust spice levels as desired. Perfect for gatherings or relaxing evenings.

Nutrition

Serving: 1cupCalories: 370kcalCarbohydrates: 30gProtein: 6gFat: 25gSaturated Fat: 15gMonounsaturated Fat: 10gCholesterol: 70mgSodium: 210mgPotassium: 350mgFiber: 2gSugar: 25gVitamin A: 600IUCalcium: 290mgIron: 2mg

Notes

Stir continuously to prevent scorching. Allow cocoa to cool slightly before serving. Can refrigerate leftovers for up to 2 days.

Tried this recipe?

Let us know how it was!

Hocus Pocus Punch: A Magical 3-Ingredient Delight

October 22, 2025 by Grace Snow Leave a Comment

As the leaves turn crisp and the scent of autumn fills the air, Halloween whispers its enchanting secrets, beckoning us to gather and celebrate. Enter the Hocus Pocus Punch, a 3-ingredient delight that captures the essence of the season. With the vibrant blend of mango peach juice and sparkling peach water, this drink transforms ordinary gatherings into festive occasions. In just two minutes, you can whip up a whimsical potion topped with a scoop of colorful rainbow sherbet—perfect for kids and adults alike. Whether you’re hosting a spooky movie night or a fun family gathering, this punch will surely be a hit! Curious how to make it? Let’s dive into this easy and delightful recipe!

Why Is Hocus Pocus Punch a Must-Try?

Simplicity makes this punch a win! With just three ingredients, you can effortlessly create a festive drink that dazzles without the fuss. Kid-Friendly and delightful for all ages, this non-alcoholic treat is perfect for family gatherings or Halloween parties. Versatile enough to customize, swap in your favorite juices or sparkling waters for a personal twist. Plus, time-saving—whip it up in just two minutes! Whether enjoyed during spooky movie nights or holiday celebrations, this punch is the ultimate crowd-pleaser that promises to bring smiles and joy. For more festive ideas, explore our tips on themed snacks!

Hocus Pocus Punch Ingredients

• Get ready to mix up some magic with these simple ingredients!

For the Punch

  • Mango Peach Juice – This sweet nectar is essential for that tropical flavor; V8 brand delivers just the right punch!
  • Peach Sparkling Water – Adds a delightful fizz that elevates the flavors while maintaining a fruity essence.
  • Rainbow Sherbet – This fun treat creates a creamy texture and beautiful colors; you can replace it with vanilla ice cream if you prefer!

With these three ingredients, your Hocus Pocus Punch will be a hit at any festive gathering!

Step‑by‑Step Instructions for Hocus Pocus Punch

Step 1: Prepare Your Glasses
Start by filling each glass with ice cubes to keep your Hocus Pocus Punch refreshingly chilled. Aim to fill the glasses about halfway to allow for the punch and additional ingredients. Clear, tall glasses work best for an eye-catching presentation! Set the prepared glasses aside on a stable surface to easily access them during the mixing process.

Step 2: Pour in the Juice
Carefully pour the mango peach juice over the ice-filled glasses, allowing the vibrant tropical color to sparkle. Use about 1 cup of juice per glass, and watch as it cascades beautifully over the ice, creating a delightful visual effect. The juice should fill the glasses about three-quarters full, setting a sweet stage for the next ingredient in your Hocus Pocus Punch.

Step 3: Add the Sparkling Water
Next, gently add the peach sparkling water to each glass, filling them the rest of the way while creating a delightful fizz. Aim for about 1/2 cup of sparkling water per glass, and watch as the bubbles dance to the surface. Stir the mixture gently with a long spoon to combine, ensuring the fruity flavors meld beautifully without losing all the fizz.

Step 4: Top with Sherbet
Now comes the fun part! Scoop a generous portion of rainbow sherbet and place it atop each glass of Hocus Pocus Punch. Aim for about 2-3 tablespoons of sherbet per serving, letting it sit proudly like a colorful crown. As the sherbet begins to melt, it will create a whimsical swirled effect in your punch, enhancing both its appearance and creamy texture.

Step 5: Serve and Enjoy
Finally, it’s time to serve your enchanting Hocus Pocus Punch right away! The vibrant colors and aromas will beckon your guests to dive in. For the best experience, make sure each glass retains its chilly thrill as you gather everyone for a festive toast. This quick and delightful drink will surely be a hit for Halloween gatherings and family celebrations!

How to Store and Freeze Hocus Pocus Punch

Fridge: Keep any leftover Hocus Pocus Punch covered in an airtight container in the fridge for up to 3 days.

Freezer: If you want to freeze, pour the punch into ice cube trays to create fun, punch-flavored ice cubes. These can last for up to 3 months!

Reheating: For best taste, enjoy it chilled; do not reheat as the fizz will flatten.

Sherbet Storage: Store leftover rainbow sherbet in the freezer, tightly sealed, and serve it fresh with your next batch for an irresistible punch!

Expert Tips for Hocus Pocus Punch

  • Juice Choice: Ensure you use quality mango peach juice like V8 for the best flavor; it’s sweeter and rich in fruity goodness.
  • Fizz Factor: Don’t skimp on the peach sparkling water, as it adds a refreshing fizz; pour slowly to preserve the bubbles and excitement!
  • Sherbet Scoop: Use a generous scoop of rainbow sherbet for that colorful pop; add it just before serving to keep its texture intact.
  • Make Ahead: Prepare your juice and sparkling water in advance but wait to add the sherbet until guests arrive, maintaining its delightful creaminess.
  • Spiked Option: For adult gatherings, consider adding a splash of vodka, rum, or tequila for a lively twist in your Hocus Pocus Punch!

Hocus Pocus Punch: Creative Variations

Feel free to let your imagination run wild and customize your Hocus Pocus Punch with these magical twists!

  • Dairy-Free: Swap rainbow sherbet with coconut or almond milk-based ice cream for a creamy, lactose-free alternative.
    This version keeps the vibrant flavor while accommodating those with dairy sensitivities. The light coconut flavor adds a tropical twist!

  • Spiked: Elevate your punch by adding a splash of vodka, rum, or tequila for adult gatherings.
    Just stir in 1-2 ounces per glass after pouring the juice and sparkling water for an enchanting cocktail experience!

  • Citrus Burst: Substitute mango peach juice with a bright blend of orange pineapple juice for a zesty kick.
    This swap brings a playful tang that perfectly complements the fizz of peach sparkling water.

  • Bubbles Galore: Experiment with various flavored sparkling waters, like lime or raspberry, for a new dimension of fizz.
    Each flavor infuses its essence while keeping the punch delightfully refreshing and fizzy.

  • Frozen Treats: Replace the ice with frozen fruit chunks, such as diced peaches or berries, to keep the punch chilly without watering it down.
    This not only looks stunning but adds flavor as the fruit slowly melts into the drink.

  • Herbal Infusion: Add fresh mint or basil leaves to the punch for an aromatic boost.
    Toss in a few leaves after mixing and before serving for a fragrant twist that surprises the palate.

  • Light & Crisp: Use a low-calorie or sparkling water soda version to reduce calories while maintaining the festive fizz.
    This keeps your punch lighter without sacrificing the bubbly joy, making it perfect for more health-conscious gatherings.

Feel inspired to explore the enchanting variations of your Hocus Pocus Punch? It’s all about making magic in your kitchen! For even more festive ideas, check out our serving suggestions and themed snacks to complete your Halloween experience!

What to Serve with Hocus Pocus Punch

As you conjure up this festive punch, consider some delightful pairings that’ll enchant both taste buds and spirits.

  • Witch Hat Cupcakes: These adorable treats complement the punch's sweetness with their chocolate richness, creating a playful yet indulgent pairing for your celebrations.

  • Spooky Cheese Platter: A mix of creamy brie, tangy cheddar, and seasonal fruits lends a savory contrast that balances the fruity punch beautifully.

  • Monster Eyes Cookies: Yummy sugar cookies topped with candy eyes add whimsy while their sweetness rounds out the punch's fruity essence.

  • Ghostly Popcorn Balls: Light and airy, these marshmallow-coated popcorn treats offer a crunchy contrast, making them perfect for a casual snack alongside the punch.

  • Crispy Veggie Dippers: Fresh vegetable sticks served with a tangy dip bring a refreshing crunch, enhancing the flavors of the fruity punch and keeping the balance.

  • Halloween-Themed Cheese Balls: Shaped like pumpkins or spiders, these savory bites provide a fun and savory addition to your punch, sure to delight guests of all ages.

  • Sparkling Ciders: A non-alcoholic sparkling cider pairs well with the drink, offering a different yet festive fizz to complement your Halloween festivities.

The vibrant Hocus Pocus Punch is sure to shine brighter when served alongside these fun and festive options!

Make Ahead Options

Planning ahead for your Hocus Pocus Punch can save you valuable time during your Halloween festivities! You can prepare the mango peach juice and peach sparkling water mixture up to 24 hours in advance—just mix them together in a large pitcher and refrigerate. Keep the rainbow sherbet separate until you're ready to serve; this ensures it retains its delightful texture and prevents it from melting into the punch too soon. When you're ready to wow your guests, pour the prepped juice and water mixture over ice, then add a generous scoop of sherbet for that magical finish. By prepping ahead, you'll enjoy the party without the rush!

Hocus Pocus Punch Recipe FAQs

What type of mango peach juice should I use?
Absolutely! I recommend using V8 brand mango peach juice for its rich sweetness and fruity flavor. Opting for a quality juice ensures the best taste, making your Hocus Pocus Punch truly magical!

How long can I store leftover Hocus Pocus Punch?
Very! You can keep any leftover punch in an airtight container in the fridge for up to 3 days. Just give it a gentle stir before serving as the ingredients may separate over time.

Can I freeze Hocus Pocus Punch?
Absolutely! To freeze, pour the punch into ice cube trays, creating fun, punch-flavored ice cubes that can last for up to 3 months. You can use these cubes in future punches for an added flavor boost!

What should I do if my sherbet melts too quickly?
No worries! If you find your sherbet melting faster than expected, consider adding it just before serving or using chilled glasses. This way, it maintains its texture longer, contributing to that delightful swirl in your punch!

Is Hocus Pocus Punch safe for kids?
Very! This recipe is non-alcoholic and perfect for kids and families. If there are allergy concerns, feel free to substitute juices or sherbet to ensure everyone can enjoy this festive treat!

How can I make a spiked version of Hocus Pocus Punch?
To create a spiked version, simply add a splash (about 1-2 ounces) of your favorite spirit, like vodka, rum, or tequila, to each glass. Stir gently and adjust according to your taste preference for a lively adult twist!

Hocus Pocus Punch

Hocus Pocus Punch: A Magical 3-Ingredient Delight

Hocus Pocus Punch is a delightful 3-ingredient drink perfect for Halloween gatherings, combining mango peach juice, peach sparkling water, and rainbow sherbet.
Print Recipe Pin Recipe
Prep Time 2 minutes mins
Total Time 2 minutes mins
Servings: 4 glasses
Course: Drinks
Cuisine: American
Calories: 140
Ingredients Equipment Method Nutrition Notes

Ingredients
  

For the Punch
  • 1 cup Mango Peach Juice V8 brand recommended
  • 1/2 cup Peach Sparkling Water Adds fizz
  • 2-3 tablespoons Rainbow Sherbet Can substitute with vanilla ice cream

Equipment

  • Glasses
  • Spoon

Method
 

Step-by-Step Instructions
  1. Fill each glass with ice cubes to keep the punch chilled, about halfway.
  2. Pour in the mango peach juice until the glasses are three-quarters full.
  3. Add the peach sparkling water to fill the glasses, stir gently to combine.
  4. Scoop rainbow sherbet on top of each glass for a colorful finish.
  5. Serve immediately and enjoy your enchanting punch!

Nutrition

Serving: 1glassCalories: 140kcalCarbohydrates: 35gSodium: 15mgPotassium: 150mgSugar: 30gVitamin C: 10mg

Notes

Use quality ingredients for the best flavor. Serve chilled and enjoy immediately for optimal fizz.

Tried this recipe?

Let us know how it was!

Delicious Purple People Eater Halloween Punch for Everyone

October 22, 2025 by Grace Snow Leave a Comment

As I wandered through the bustling streets of October, the unmistakable hint of spooky excitement crackled in the air. This is the time of year when ghosts and goblins roam, but it's also a chance to create something magical in your kitchen. Enter the Non-Alcoholic Purple People Eater Halloween Punch—a drink that promises to enchant kids and adults alike at your Halloween gathering. With its vibrant hue and fizzy lift, this refreshing concoction is a breeze to whip up, making it a perfect choice for busy party planners. Not only does it capture the spirit of Halloween, but it also ensures everyone can indulge, regardless of age. Are you ready to add a splash of color and fun to your festivities? Let’s gather our ingredients and bring this whimsical drink to life!

Why is this punch a Halloween hit?

Vibrant hues and fizzy fun make this punch a standout at any gathering. Perfectly kid-friendly, it offers a non-alcoholic option that everyone's palate will enjoy. Easy to prepare, this recipe saves you time with minimal fuss—ideal for busy hosts! Plus, impress your guests with unique serving options like spooky floats or a dramatic "Witches Brew" presentation. Don't forget to check out our easy Halloween treats to complement your festive spread!

Purple People Eater Halloween Punch Ingredients

For the Punch Base

  • Grenadine – Adds sweetness and a bright red color, enhancing the visual appeal. Substitute: pure cranberry juice for a similar tartness.
  • Blue Gatorade – Provides a blue color base and fruity flavor. Substitute: blue Hawaiian punch for a similar taste.
  • Sprite – Adds carbonation for fizz and sweetness. Substitute: 7-Up or other lemon-lime sodas.
  • Lemon juice – Introduces tartness to balance sweetness. Freshly squeezed is preferred.
  • Violet food coloring – Enhances the purple color profile. Use gel food coloring for vibrant results.

For Optional Garnishes

  • Gummy worms – Adds a fun, playful touch to your Halloween punch.
  • Candy eyeballs – Creepy, crawly additions that delight kids and adults alike.

With these ingredients in hand, you’re all set to concoct the delightful Purple People Eater Halloween Punch that’ll be the star of your spooky festivities!

Step‑by‑Step Instructions for Purple People Eater Halloween Punch

Step 1: Combine Base Ingredients
Begin by taking a large pitcher and pour in 1 cup of grenadine, 2 cups of Blue Gatorade, and 1 cup of freshly squeezed lemon juice. Next, slowly add in 2 cups of Sprite to bring in that fizzy element. Stir the mixture gently with a wooden spoon until all ingredients are well combined and you achieve a vibrant purple base, perfect for your Purple People Eater Halloween Punch.

Step 2: Adjust the Color
Once your punch base is ready, it's time to enhance the color. Add a few drops of violet food coloring to the punch, stirring gently after each addition. Continue adding until you reach your desired shade of purple, making sure the hue is bright and eye-catching. This step not only beautifies the punch but also sets the stage for a visually stunning Halloween presentation.

Step 3: Chill the Punch
To best enjoy your Purple People Eater Halloween Punch, chill it in the refrigerator for at least 30 minutes. This cooling period allows the flavors to meld beautifully while ensuring a refreshing experience for your guests. If you’re short on time, you can skip this step, but make sure to serve it over ice to keep it cool.

Step 4: Serve the Punch
When ready to serve, pour the punch into clear cups or goblets to show off its vibrant purple color. If desired, you can add fun garnishes like gummy worms or candy eyeballs to each glass, creating an inviting and festive look. These decorative elements will surely delight the kids and make your Halloween gathering a memorable one.

Step 5: Maintain Fizz
To maintain the fizz of your punch, add the remaining Sprite just before serving. This ensures your Purple People Eater Halloween Punch stays bubbly and refreshing. Gently stir in the Sprite to avoid losing too much carbonation, allowing guests to enjoy the delightful fizz and fun flavors captured in this festive drink.

How to Store and Freeze Purple People Eater Halloween Punch

Refrigerate: Store any leftover punch in an airtight container in the fridge for up to 3 days. Wait to add the Sprite until you're ready to serve to maintain fizz.

Freezer: If you have a large batch, you can freeze the punch base (without soda) for up to 1 month. Thaw it in the fridge before serving, and then mix in the Sprite.

Garnishes: Keep gummy worms and candy eyeballs in a separate container at room temperature until ready to serve. This ensures they remain fresh and delightful for your guests.

Make-Ahead: Prepare the punch base up to 24 hours in advance. Just remember to refrigerate it and add carbonation just before serving to keep your Purple People Eater Halloween Punch sparkling and fun!

Purple People Eater Halloween Punch Variations

Feel free to get creative and make this punch your own with these delightful variations!

  • Spooky Floats: Add scoops of vanilla ice cream or lime sherbet for a creamy, dreamy twist that kids will adore.
  • Witches Brew: Serve the punch in a black cauldron, adding dry ice for a bubbling, mystical effect that will amaze your guests. Just be careful—never let dry ice come into contact with the punch.
  • Citrus Burst: Swap out some of the lemon juice for fresh lime juice to give your punch a zesty, refreshing kick that brightens up the flavors.
  • Berry Blast: Mix in fresh berries like blueberries or raspberries for added color and a delightful fruity twist that makes the punch even more visually appealing.
  • Mango Magic: Replace Blue Gatorade with mango juice for a tropical flair that adds a sweet surprise to your Halloween gathering.
  • Heat It Up: If you want to spice things up, consider adding a few dashes of cayenne pepper to the mix for a surprising little kick.
  • Minty Fresh: Toss in a handful of fresh mint leaves for a refreshing aroma and a wonderful flavor that complements the sweetness of the punch.
  • Frozen Versions: Create ice cubes with juices from the punch base and use them in place of regular ice to keep it cool without dilution. As they melt, they add more flavor!

Feel free to mix and match these ideas to create a custom experience. You can also incorporate these variations as part of your fun Halloween treats. Enjoy serving this festive punch and watch everyone be thrilled by your creativity!

Make Ahead Options

These Purple People Eater Halloween Punch preparations are perfect for busy home cooks looking to save time! You can make the punch base—comprised of grenadine, Blue Gatorade, lemon juice, and violet food coloring—up to 24 hours in advance and simply refrigerate it until it’s time to serve. To maintain its refreshing quality, add the Sprite just before serving to keep that delightful fizz intact. When your guests are ready, pour the punch into cups and add any fun garnishes like gummy worms for that spooky touch. This simple prep not only makes for a smoother serving experience but ensures everyone enjoys a vibrant and tasty drink at your Halloween gathering!

Expert Tips for Purple People Eater Halloween Punch

• Chill Wisely: Ensure your punch chills for at least 30 minutes; this melds flavors and makes each sip refreshing for your guests.

• Color Control: Adjust the violet food coloring gradually. A little goes a long way, so add drops until your punch is vibrantly purple for spellbinding appeal.

• Fizz Factor: Avoid adding Sprite too early; maintain carbonation by mixing in soda just before serving. This keeps your Purple People Eater Halloween Punch lively!

• Playful Garnishes: Enhance the Halloween spirit by using gummy worms and candy eyeballs as garnishes. They not only look spooky but also add fun surprises for kids.

• Ice Ring Tip: For a chilling effect without dilution, freeze a portion of the punch in a ring mold and place it in the bowl. It’s both decorative and practical!

What to Serve with Purple People Eater Halloween Punch

The Halloween festivities are all about fun, flavor, and a spooky flair that tickles the senses while bringing everyone together.

  • Spooky Snack Board: A mix of cheese, crackers, and themed Halloween treats adds a savory counterpoint to the refreshing punch, making it a balanced and festive display.

  • Witch's Broomsticks: Simple pretzel sticks with cheese and chives resemble witch's brooms, offering a crunchy, cheesy complement to sip alongside the tart and fizzy punch.

  • Pumpkin Spice Popcorn: Sweet and savory popcorn drizzled with pumpkin spice caramel provides delightful contrast and a cozy flavor that elevates the punch experience.

  • Bat-Shaped Sandwiches: Use cookie cutters to create bat-shaped sandwiches filled with your favorite spreads. They're fun to eat, visually appealing, and pair remarkably well with the punch.

  • Candy Corn Fruit Kabobs: Colorful fruit skewers with pineapple, orange melon, and banana resemble fun candy corn shapes and bring a refreshing bite that balances sweetness with zesty punch.

  • Creepy Crawly Gummies: Serve gummy worms in the punch bowl or alongside. They add a playful element that kids love, echoing the whimsical, fantastical essence of the drink.

  • Haunted Halloween Cookies: Decorate sugar cookies with spooky designs. Their sweetness pairs beautifully with the fizzy flavor of Purple People Eater Halloween Punch, creating a delightful treat.

  • Festive Fruit Juice Slushies: For a layered texture, serve fruit juice slushies made with berries and citrus. They provide a tangy contrast to the punch while being visually spectacular!

  • Monster Munch Trail Mix: Mix pretzels, candy eyes, and dried fruits for a crunchy, sweet snack that enhance the festivity and complements the fruity flavors in your punch.

Purple People Eater Halloween Punch Recipe FAQs

How do I choose ripe ingredients for my punch?
Absolutely! For the freshest flavors, use quality ingredients. Look for grenadine that is deep red and not overly sweet. When selecting Blue Gatorade, check for vibrant blue, as faded colors indicate it may be losing its flavor. Freshly squeezed lemon juice is best—pick lemons that feel heavy for their size and are slightly soft when gently pressed.

How long can I store leftovers of the punch?
You can store any leftover Purple People Eater Halloween Punch in an airtight container in the fridge for up to 3 days. Make sure to keep the Sprite separate until you're ready to serve, as adding it too early will cause the carbonation to fizzle out!

Can I freeze the punch? If so, how?
Yes, you can freeze the punch base for a fun storage option! Pour the mixture (without Sprite) into an airtight container and freeze it for up to 1 month. When you're ready to enjoy, thaw it in the fridge overnight, and then mix in the Sprite just before serving to maintain that fizzy freshness.

What should I do if the punch is too sweet?
Very! If you find your punch to be overly sweet, you can balance it out by adding more freshly squeezed lemon juice. Start with a tablespoon at a time until you reach your desired flavor. If you want to adjust it further, consider a dash of soda water for added tang and fizz without the sweetness.

Are there any allergy considerations for this punch?
Great question! The Purple People Eater Halloween Punch is generally kid-friendly and free from common allergens like nuts or gluten. However, always check the labels of your ingredients, especially for drinks like Gatorade where flavors can differ by brand. If serving to those with dietary concerns, opt for naturally derived food coloring and ensure the garnishes, like gummy worms, are allergen-free.

Purple People Eater Halloween Punch

Delicious Purple People Eater Halloween Punch for Everyone

This non-alcoholic Purple People Eater Halloween Punch is perfect for all ages, ensuring everyone can indulge in the festive fun.
Print Recipe Pin Recipe
Prep Time 10 minutes mins
Chilling Time 30 minutes mins
Total Time 40 minutes mins
Servings: 8 cups
Course: Drinks
Cuisine: Halloween
Calories: 120
Ingredients Equipment Method Nutrition Notes

Ingredients
  

Punch Base
  • 1 cup Grenadine Adds sweetness and a bright red color, enhancing the visual appeal.
  • 2 cups Blue Gatorade Provides a blue color base and fruity flavor.
  • 1 cup Lemon juice Introduces tartness to balance sweetness. Freshly squeezed is preferred.
  • 2 cups Sprite Adds carbonation for fizz and sweetness.
  • a few drops Violet food coloring Enhances the purple color profile.
Optional Garnishes
  • to taste Gummy worms Adds a fun, playful touch to your Halloween punch.
  • to taste Candy eyeballs Creepy, crawly additions that delight kids and adults alike.

Equipment

  • Large pitcher
  • Wooden spoon
  • clear cups or goblets

Method
 

Preparation Steps
  1. Combine base ingredients in a large pitcher: 1 cup of grenadine, 2 cups of Blue Gatorade, 1 cup of freshly squeezed lemon juice, and 2 cups of Sprite. Stir gently with a wooden spoon until well combined.
  2. Add a few drops of violet food coloring to the punch, stirring gently after each addition until the desired shade of purple is achieved.
  3. Chill the punch in the refrigerator for at least 30 minutes to meld flavors. For quick serving, use ice.
  4. Serve in clear cups or goblets, adding gummy worms or candy eyeballs as garnishes for a festive look.
  5. To maintain fizz, add the remaining Sprite just before serving and stir gently to avoid losing carbonation.

Nutrition

Serving: 1cupCalories: 120kcalCarbohydrates: 30gSodium: 10mgPotassium: 50mgSugar: 29gVitamin C: 15mgCalcium: 2mg

Notes

Store any leftover punch in an airtight container in the fridge for up to 3 days without Sprite. For longer storage, freeze the punch base without soda for up to 1 month, then mix in the Sprite before serving.

Tried this recipe?

Let us know how it was!

Toxic Waste Cocktail: A Spooky Sip for Halloween Fun

October 17, 2025 by Grace Snow Leave a Comment

As the moon hangs high and the air grows crisp, Halloween approaches like a vibrant green potion bubbling over with delight. The Toxic Waste Cocktail perfectly embodies all the fun and spookiness of this festive season. With its eye-catching hue and refreshing blend of bold citrus flavors—thanks to a spirited mix of vodka, sour apple schnapps, and a splash of club soda—this cocktail makes for a show-stopping centerpiece at any haunted gathering. Plus, it’s a breeze to whip up in just five minutes, ensuring you can mingle with your guests rather than spend hours behind the bar. Are you ready to concoct a drink that'll be the talk of the night? Let's dive into this bewitching recipe together!

Why is the Toxic Waste Cocktail a Must-Try?

Vibrant, Eye-Catching Color: The striking green hue makes this cocktail a showstopper at any Halloween gathering.

Quick and Easy: With just five minutes of prep time, this drink is perfect for those unexpected party moments!

Bold, Refreshing Flavor: The combination of vodka, sour apple schnapps, and club soda creates a delightful citrusy experience that’s simply irresistible.

Versatile Ingredients: Feel free to switch up the citrus juices or add that splash of cranberry for a festive twist!

Crowd Pleaser: This cocktail is sure to impress your guests and become a Halloween favorite. Unleash your inner mixologist and elevate your spooky soirée with the Toxic Waste Cocktail!

Toxic Waste Cocktail Ingredients

Get ready to mix up some Halloween magic!

For the Base

  • Vodka – A neutral spirit that forms the heart of the Toxic Waste Cocktail; feel free to swap it for white rum if you prefer a different flavor profile.
  • Sour Apple Schnapps – Provides a delightful sweetness and tangy flavor, infusing the drink with a crisp apple essence; no direct substitutes here, but other fruity schnapps can work in a pinch.
  • Orange Juice – Adds an essential burst of freshness and acidity; always opt for fresh-squeezed for the best taste.
  • Blue Curacao – It brings a captivating color and a hint of orange flavor; you can substitute with another blue liqueur, but the vibrant hue might change.
  • Citrus Bitters – This ingredient enhances the drink's complexity, elevating its overall profile; it's highly recommended for that extra depth.

For the Fizz

  • Club Soda – Lightens the drink and adds delightful bubbles; add just before serving for optimal freshness.

Unleash the spirit of Halloween with this mesmerizing Toxic Waste Cocktail recipe. Your guests will love the spooky flavor and striking appearance!

Step‑by‑Step Instructions for Toxic Waste Cocktail

Step 1: Prepare Your Glass
Begin by filling a tall glass with ice cubes, filling it about halfway. This will chill your Toxic Waste Cocktail, ensuring it's refreshingly cool when served. The ice should clink pleasantly as you add it, creating a vibrant backdrop for the vivid colors of the drink to come.

Step 2: Measure and Pour the Spirits
In a measuring jigger, pour 1.5 ounces of vodka, 1 ounce of sour apple schnapps, and 1 ounce of orange juice. Carefully layer each liquid into the glass over the ice, allowing the bold green and orange colors to merge beautifully. The vodka acts as the cocktail's neutral base, while the schnapps and juice add zest.

Step 3: Add the Blue Curacao
Next, introduce 0.5 ounces of blue curacao into the glass. Gently pour it along the side of the glass to create a visually striking layer. This will infuse your Toxic Waste Cocktail with an enticing deep green shade, reminiscent of bubbling potions, enhancing both its look and taste.

Step 4: Incorporate Citrus Bitters
Add 2 dashes of citrus bitters to the mixture. This step is crucial for adding depth to your cocktail's flavor profile. As you add the bitters, you might notice the aromas elevating the drink’s complexity, transforming your creation from delicious to extraordinary.

Step 5: Stir to Combine
Using a long straw or a cocktail stirrer, gently stir the mixture for about 10-15 seconds. This will blend the ingredients harmoniously while keeping the vibrant colors visible. Look for the vivid green hue to become more uniform, indicating that your Toxic Waste Cocktail is ready for the next step.

Step 6: Add Fizz with Club Soda
Just before serving, top off the glass with a splash of club soda. This adds a delightful fizz to your Toxic Waste Cocktail, enhancing its refreshment factor. Watch as tiny bubbles rise through the layers, creating a visually stunning effect that’s sure to impress your guests.

Step 7: Garnish and Serve
To finish, garnish your cocktail with a slice of green apple or a citrus wheel perched on the rim of the glass. This final touch adds an inviting aroma and a pop of color, making your Toxic Waste Cocktail not just delicious but also a feast for the eyes. Serve immediately to enjoy the best fizziness!

Expert Tips for the Toxic Waste Cocktail

  • Fresh Ingredients Matter: Use fresh-squeezed orange juice instead of bottled for a vibrant, zesty flavor that elevates the drink's profile.

  • Layered Look: Pour the blue curacao slowly along the glass's edge to maintain the stunning layers, making your Toxic Waste Cocktail visually appealing.

  • Citrus Bitters Essential: Don’t skip the citrus bitters; they add complexity that transforms your cocktail from ordinary to extraordinary.

  • Chill It Right: Make sure to fill your glass with plenty of ice to keep the cocktail refreshingly cold and enjoyable.

  • Make Ahead: For gatherings, prepare the non-carbonated mix ahead of time, letting guests add club soda just before serving to keep it fizzy.

What to Serve with Toxic Waste Cocktail

Elevate your Halloween festivities with delightful pairings that will complement this spooky cocktail.

  • Crispy Chicken Wings: The savory crunch of wings adds a satisfying contrast to the sweet and tangy cocktail. Opt for a spicy buffalo sauce to balance the flavors beautifully.

  • Pumpkin Soup: A warm and creamy pumpkin soup balances the boldness of the Toxic Waste Cocktail, creating a cozy, autumnal vibe. Serve with a drizzle of cream and a sprinkle of nutmeg for an elegant touch.

  • Caramel Popcorn: The sweet crunch of caramel popcorn pairs perfectly with the cocktail's vibrant flavors, making for a playful and festive snack. Guests will love nibbling on this treat as they sip their drinks!

  • Cheese Platter: Include a variety of cheeses, such as brie and sharp cheddar, alongside some crackers. This adds a rich texture that complements the refreshing notes of the cocktail.

  • Spooky Fruit Skewers: Fresh fruit skewers featuring grapes, melon, and orange slices bring a refreshing, juicy element to the table. The sweetness harmonizes elegantly with the Toxic Waste Cocktail's fruity notes.

  • Dark Chocolate Truffles: Indulge your guests with rich dark chocolate truffles. The smooth cocoa flavors beautifully contrast with the cocktail's sweetness, making it a decadent finale.

With these pairings, your Halloween gathering will be not just festive, but truly unforgettable!

Make Ahead Options

The Toxic Waste Cocktail is perfect for busy home cooks looking to save time during the Halloween festivities! You can prepare the cocktail mixture (vodka, sour apple schnapps, orange juice, blue curacao, and bitters) up to 24 hours in advance, just refrigerate it in an airtight container to maintain freshness. When it's time to serve, simply fill your glasses with ice and pour the pre-mixed cocktail over the ice before topping with club soda for that desired fizz. This method allows you to enjoy your gathering without the stress of last-minute mixing, while the flavors remain just as delicious and refreshing!

Toxic Waste Cocktail Variations & Substitutions

Feel free to get creative with the Toxic Waste Cocktail and make it your own delightfully spooky concoction!

  • Dairy-Free: Swap the club soda with a flavored sparkling water for a refreshing twist that keeps the drink crisp and bubbly.
  • Fruit-Infused: Add a splash of passion fruit juice to enhance the tropical flavor profile! The hint of sweetness will pair perfectly with the tangy components.
  • Berry Burst: Try using raspberry or blueberry schnapps for a vibrant alternative that will give your drink a berrylicious twist. It's a fun way to surprise your guests!
  • Less Sweet: If you prefer a less sweet cocktail, reduce the amount of sour apple schnapps and increase the orange juice for a more balanced taste.
  • Warm Spice: For a cozy feel, infuse the drink with a dash of cinnamon or nutmeg. This playful addition will give an unexpected yet delightful warm note.
  • Add a Jolt: Increase the fun by adding a splash of energy drink just before serving – it gives a color boost and a lively twist that fits perfectly for a party atmosphere!
  • Heat it Up: For an adventurous kick, mix in some jalapeño-infused vodka to give your Toxic Waste Cocktail a fiery surprise that will tingle your senses!

Remember, experimenting is half the fun! With these easy substitutions, you can whip up a memorable cocktail every time while keeping the spirit of the season alive. Speaking of exciting drinks, don’t forget to check out our Crispy Tortilla Chips and Spicy Guacamole for the perfect Halloween snack pairing that complements this drink!

How to Store and Freeze Toxic Waste Cocktail

Fridge: Keep any prepared mixture of the Toxic Waste Cocktail (minus club soda) in an airtight container in the fridge for up to 3 days. When ready to serve, just add the soda for that bubbly finish.

Room Temperature: It's best to serve this cocktail fresh, but if you happen to have leftovers, it can sit at room temperature for up to 2 hours before it loses its effervescence.

Freezer: Avoid freezing the Toxic Waste Cocktail as the ingredients will not maintain their texture or flavor once thawed. Instead, prep the individual components in advance for fresh mixing later.

Reheating: Not applicable for cocktails, but if you prepare the mix ahead of time, ensure it's stored properly to maintain its vibrant flavor and color when you serve it!

Toxic Waste Cocktail Recipe FAQs

What should I look for when selecting the best vodka?
Absolutely! When choosing vodka for your Toxic Waste Cocktail, opt for a high-quality brand that is both smooth and neutral in flavor. Look for vodka that is distilled multiple times for purity, which helps in preventing any off-flavors from affecting your delicious blend. If you're open to experimenting, consider selecting a flavored vodka that complements the apple notes in this cocktail.

How long can I store the Toxic Waste Cocktail mix without the soda?
You can store the prepared mixture (vodka, sour apple schnapps, orange juice, blue curacao, and bitters) in an airtight container in the fridge for up to 3 days. Just remember to add the club soda right before serving to keep the fizz intact and ensure a refreshing experience for you and your guests!

Can I freeze any part of the Toxic Waste Cocktail?
It's not recommended to freeze the Toxic Waste Cocktail once mixed, as freezing can alter the flavor and texture of the ingredients. Instead, consider preparing the individual components ahead of time. Freeze freshly squeezed orange juice in ice cube trays, and keep the schnapps and vodka in the liquor cabinet, allowing for a quick and easy mix when you're ready to serve.

What can I do if my cocktail isn't bubbly enough?
If your Toxic Waste Cocktail lacks fizz, the most likely culprit is insufficient club soda. Ensure you add it just before serving for the best carbonation. If it’s been sitting for a while after mixing, stir gently to bring some air back into the drink, or feel free to top it off with a bit more club soda to refresh those bubbles!

Are there any dietary considerations for guests with allergies?
While the Toxic Waste Cocktail is a fun and festive drink, it's crucial to consider any allergies your guests may have. The primary ingredients include vodka (which is gluten-free), sour apple schnapps, and citrus juices. However, be cautious with bitters, as some recipes may contain various flavorings and additives. Always check labels and speak with your guests beforehand to ensure they can safely enjoy this spooky sip!

Toxic Waste Cocktail

Toxic Waste Cocktail: A Spooky Sip for Halloween Fun

The Toxic Waste Cocktail is a vibrant and refreshing drink perfect for Halloween gatherings.
Print Recipe Pin Recipe
Prep Time 5 minutes mins
Total Time 5 minutes mins
Servings: 1 cocktail
Course: Drinks
Cuisine: Halloween
Calories: 200
Ingredients Equipment Method Nutrition Notes

Ingredients
  

Base
  • 1.5 ounces Vodka Neutral spirit; can substitute with white rum.
  • 1 ounce Sour Apple Schnapps Provides sweetness and tang.
  • 1 ounce Orange Juice Use fresh-squeezed.
  • 0.5 ounces Blue Curacao For color and a hint of orange flavor.
  • 2 dashes Citrus Bitters Enhances complexity.
Fizz
  • 1 splash Club Soda Add just before serving for freshness.

Equipment

  • Tall Glass
  • measuring jigger
  • Long Straw or Cocktail Stirrer

Method
 

Preparation
  1. Step 1: Prepare Your Glass - Fill a tall glass with ice cubes halfway.
  2. Step 2: Measure and Pour the Spirits - Pour vodka, sour apple schnapps, and orange juice into the glass over the ice.
  3. Step 3: Add the Blue Curacao - Pour blue curacao gently along the side of the glass.
  4. Step 4: Incorporate Citrus Bitters - Add 2 dashes of citrus bitters.
  5. Step 5: Stir to Combine - Stir gently for 10-15 seconds.
  6. Step 6: Add Fizz with Club Soda - Top with a splash of club soda just before serving.
  7. Step 7: Garnish and Serve - Garnish with a slice of green apple or a citrus wheel and serve immediately.

Nutrition

Serving: 1cocktailCalories: 200kcalCarbohydrates: 15gSodium: 10mgPotassium: 100mgSugar: 12gVitamin C: 15mg

Notes

Use fresh ingredients for the best flavor and maintain the layered look by pouring slowly.

Tried this recipe?

Let us know how it was!

Delightful Pink Witch Punch: A Refreshing Festive Treat

October 4, 2025 by Grace Snow Leave a Comment

As I poured the bright pink liquid into the jug, I couldn’t help but feel the joyful spirit of the season fill the room. Enter the Enchanting Pink Witch Punch—a vibrant, kid-friendly drink that's perfect for any gathering, from whimsical Halloween parties to cheerful baby showers. This refreshing concoction marries bubbly ginger ale, zesty pink lemonade, and a hint of tart cranberry juice for a delightful sip that’s fun to customize. With its effortless preparation and the ability to wow guests of all ages, this punch promises to bring smiles and spark conversations. So, what fun twists will you add to your own magical punch bowl?

Why is Pink Witch Punch a Must-Try?

Kid-friendly and refreshing: This delightful punch is perfect for all ages, making it an instant hit at any gathering.
Vibrant visuals: Its eye-catching pink hue not only looks stunning but invites everyone to pour a glass.
Effortless preparation: With simple ingredients and quick steps, you can whip it up in no time, allowing you to focus on enjoying the party!
Customizable options: Feel free to mix in your favorite fruits or flavor enhancements, like orange juice or ginger beer, to create a unique twist that suits your taste.
Great for gatherings: Whether it's a Halloween bash or a baby shower, this punch is designed to bring joy and laughter, sparking conversations among friends and family.
Make-ahead friendly: Prepare your punch base in advance and store it; this way, you’ll be ready to impress with minimal last-minute effort.

Pink Witch Punch Ingredients

For the Punch

  • Ginger Ale – Provides fizz and refreshment; substitute with diet ginger ale for a lower-calorie option.
  • Pink Lemonade – This main flavor offers sweetness and color; regular lemonade mixed with cranberry or raspberry juice can also achieve the pink hue.
  • Cranberry Juice – Adds tartness and depth; opt for unsweetened to reduce sugar content.

For Creamy Decoration

  • Whipped Topping – Adds creaminess and serves as a cheerful decoration for the punch.

For Festive Touch

  • Edible Pink Glitter – Use sparingly for a magical sparkle; it's an optional yet fun addition.
  • Pink Sanding Sugar – Ideal for rimming glasses, enhancing both sweetness and visual appeal; adhere with lemon juice.

For Chilling

  • Ice – Keeps the drink chilled; why not use ice cubes made from pink lemonade or cranberry juice for added flavor?

For Garnishing

  • Sliced Fruit (e.g., strawberries, oranges, lemons) – Optional but great for decoration and flavor enhancement; they're perfect for a fresh touch in your Pink Witch Punch!

Step‑by‑Step Instructions for Pink Witch Punch

Step 1: Chill Ingredients
Begin by placing your pink lemonade, ginger ale, and cranberry juice in the refrigerator for 1-2 hours. This ensures that all the components of your Pink Witch Punch are delightfully cold when it's time to serve, enhancing the refreshing experience. Visualize the vibrant colors getting even more enticing as they chill!

Step 2: Rim the Glasses (Optional)
While the ingredients chill, prepare your glasses for serving. Dampen the rims with a bit of lemon juice, then dip them into pink sanding sugar, creating a sweet and sparkly border. This fun step adds visual appeal to your Pink Witch Punch and sets the festive mood for your gathering.

Step 3: Mix the Base
In a large punch bowl, combine the chilled pink lemonade and cranberry juice. Using a large spoon, stir the mixture gently for about 30 seconds until well blended. The beautiful pink hue will emerge, signaling that your punch base is ready for the next step. Keep the bowl nearby for serving later!

Step 4: Add Ginger Ale
Now it's time to add the bubbly ginger ale! Slowly pour it into the punch bowl while gently stirring for 15-20 seconds. This helps maintain the carbonation and prevent any overflow of bubbles. The fizzy texture of your Pink Witch Punch will make it even more refreshing and lively!

Step 5: Garnish
Enhance the look and taste of your Pink Witch Punch by adding optional whipped topping, sprinkling a bit of edible glitter for sparkle, and layering in sliced fruits like strawberries, oranges, or lemons. These additions not only beautify your punch but also infuse delightful flavors into every glass.

Step 6: Serve
Carefully ladle the mixed Pink Witch Punch into your prepared glasses, filling them about three-quarters full. Make sure to serve immediately to keep the fizz alive. Watch as your guests smile with delight, eager to indulge in the enchanting and refreshing drink you’ve created.

Make Ahead Options

These Enchanting Pink Witch Punch preparations are perfect for busy home cooks looking to save time without sacrificing flavor! You can prepare the punch base (pink lemonade and cranberry juice) up to 3 days in advance. Simply mix these two ingredients and store them in an airtight container in the refrigerator to maintain their refreshing taste. To keep it fizzy, wait to add the ginger ale until just before serving. You can also freeze pink lemonade and cranberry juice in ice cube trays for up to 2 months for quick flavor-enhanced ice cubes. This way, you’ll have a stunning and magical drink ready to impress your guests without any last-minute effort!

What to Serve with Enchanting Pink Witch Punch

Sip on the magic of this vibrant, fizzy punch while indulging in delightful pairings that enhance your festive gatherings.

  • Cheesy Thumbprint Appetizers: These savory bites provide a satisfying contrast to the sweet notes in your Pink Witch Punch. Their creamy texture is sure to be a crowd-pleaser.

  • Fruity Skewers: Bright pieces of fresh fruit on skewers not only echo the lively colors of the punch but also add a refreshing, juicy element to your spread. They are easy to grab and enjoy!

  • Halloween Cupcake Pops: Sweet, festive treats that mirror the enchanting spirit of the punch. Their whimsical appearance will capture the hearts of both kids and adults alike, making your event memorable!

  • Savory Mini Quiches: These cute bite-sized quiches offer a delicious savory option, balancing out the sweetness of the Pink Witch Punch and providing hearty sustenance for all those fun festivities!

  • Sparkling Water with Fruit: For those who may prefer a lighter beverage, offering sparkling water infused with seasonal fruits can complement the punch beautifully, adding a refreshing twist.

  • Chocolate-Dipped Pretzels: A delightful mix of salty and sweet, these treats are the perfect crunchy accompaniment to your drink, enhancing the flavor experience while adding fun texture.

  • Ghostly Marshmallow Treats: Soft and chewy, these mini marshmallow snacks evoke playful Halloween vibes, making them ideal companions to your enchanting punch. They're simple to make and fun to eat!

  • Cranberry and Orange Salad: A crisp, tangy salad echoes the flavors in the punch, adding a fresh, zesty note to balance your menu while keeping the festive theme alive.

  • Non-Alcoholic Sparkling Cider: Offer a sophisticated yet kid-friendly drink choice that pairs seamlessly with the Pink Witch Punch, ensuring everyone feels included in the toasts and celebrations!

Pink Witch Punch Variations & Substitutions

Feel free to sprinkle some creativity into your punch and make it truly your own!

  • Dairy-Free: Substitute whipped topping with coconut whipped cream to keep it light and vegan-friendly. Your guests won't even miss the dairy!
  • Flavor Booster: Add a splash of orange juice for an extra citrus kick or use blended berry puree in place of some pink lemonade for a rich fruitiness. The versatility in flavors can lead to delightful surprises.
  • Spicy Twist: For a more adult-friendly version, replace ginger ale with ginger beer for a spicier touch, or try adding club soda or lemon-lime soda for a lighter fizz. This twist can ignite some exciting conversations at your gathering!
  • Frozen Fruit Ice Cubes: Freeze chunks of fruit like strawberries or oranges into ice cubes to keep your punch chilled and add vibrant pops of color and flavor. Not only will they look beautiful, but they’ll keep your drink flavorful too.
  • Herbal Infusion: Infuse your punch with fresh mint or basil for a refreshing twist. This unexpected addition can awaken the senses and make your drink even more enchanting.
  • Less Sweet: Opt for unsweetened cranberry juice and diet ginger ale to cut down on sugar, making it a great choice for those watching their intake without sacrificing flavor.
  • Garnish Creativity: Experiment with different fruits as garnishes, such as kiwis or pomegranates, to introduce new textures and tastes to your Pink Witch Punch. A colorful arrangement can turn your drink into a stunning centerpiece!
  • Customized Sweetener: If you're looking for alternative sweetness, consider using stevia or agave syrup to accommodate various dietary preferences, ensuring everyone at the table can enjoy this festive drink!

Hosting a party soon? Pair your enchanted punch with snacks like Cheesy Thumbprint Appetizers or Fruity Skewers for even more fun! Enjoy mixing and matching to create your perfect Pink Witch Punch!

Expert Tips for Pink Witch Punch

• Chill Ingredients Well: Ensure all your liquids are thoroughly chilled before mixing; this enhances the refreshing taste of your Pink Witch Punch.

• Add Ginger Ale Last: To maintain the fizz, add ginger ale just before serving. Mixing it in too early can lead to a flat punch.

• Control Sweetness: Use unsweetened cranberry juice and diet ginger ale to reduce sugar content and make your punch less sweet.

• Be Creative with Garnishes: Feel free to incorporate various fruits or edible glitter, but don't let them overpower the refreshing taste of your Pink Witch Punch.

• Serve Immediately: For the best bubbly experience, serve the punch right after preparation to keep its delightful effervescent quality.

• Make-ahead Magic: Prepare your punch base and store it in the fridge for up to 3 days for easy serving; just add ginger ale before drinking!

Storage Tips for Pink Witch Punch

  • Fridge: Store any leftover Pink Witch Punch in an airtight container in the refrigerator for up to 3 days. Give it a gentle stir before serving to reinvigorate the flavors.
  • Freezer: For longer-term storage, freeze the pink lemonade and cranberry juice in ice cube trays for up to 2 months. Use these cubes to chill future servings of your punch without diluting it.
  • Reheating: While this drink is best served cold, if you want a warm version, gently heat the ingredients and enjoy as a cozy beverage! Just note, it will lose its fizzy charm.

Pink Witch Punch Recipe FAQs

How do I choose the right ingredients for my Pink Witch Punch?
Absolutely! For an enchanting Pink Witch Punch, ensure your ginger ale is fresh and fizzy for that perfect sparkle. When selecting pink lemonade, look for brands without artificial flavors or colors; you can also make your own by mixing regular lemonade with a splash of cranberry or raspberry juice. For cranberry juice, opt for unsweetened varieties if you're mindful of sugar content.

What is the best way to store leftover Pink Witch Punch?
After your gathering, you can store any leftover Pink Witch Punch in an airtight container in the refrigerator for up to 3 days. Just remember to give it a gentle stir before serving again to revive its refreshing flavor. If you've kept the ginger ale separate, add it back just before serving for that delightful fizz!

Can I freeze ingredients for later use in the Pink Witch Punch?
Absolutely! For longer-term storage, freeze your pink lemonade and cranberry juice in ice cube trays for up to 2 months. When you’re ready to whip up another batch of Pink Witch Punch, simply drop a couple of these flavored ice cubes into your pitcher to cool your drink without watering it down.

What should I do if my punch isn’t bubbly enough?
If your Pink Witch Punch lacks the desired fizziness, check how you added your ginger ale; remember to pour it in slowly and mix gently right before serving to maintain carbonation. If it's already combined, try adding more chilled ginger ale to your batch and serve immediately to reinstate that fizzy goodness!

Can I make this festive drink suitable for my kids and guests with allergies?
Very much so! The Pink Witch Punch is naturally kid-friendly, but always double-check the labels on your ingredients for any allergens, especially if serving guests with dietary restrictions. If you're catering for those with a sensitivity to gluten or certain dyes, choose gluten-free ginger ale and natural food colorings to keep everyone safe while they enjoy this refreshing treat!

Pink Witch Punch

Delightful Pink Witch Punch: A Refreshing Festive Treat

Experience the joy of Pink Witch Punch, a vibrant and customizable drink perfect for festive gatherings.
Print Recipe Pin Recipe
Prep Time 15 minutes mins
Chilling Time 2 hours hrs
Total Time 2 hours hrs 15 minutes mins
Servings: 8 cups
Course: Drinks
Cuisine: American
Calories: 90
Ingredients Equipment Method Nutrition Notes

Ingredients
  

For the Punch
  • 2 liters Ginger Ale Can substitute with diet ginger ale for lower calories.
  • 6 cups Pink Lemonade Can use regular lemonade mixed with cranberry or raspberry juice.
  • 2 cups Cranberry Juice Opt for unsweetened to reduce sugar content.
For Creamy Decoration
  • 1 cup Whipped Topping Adds creaminess and cheer.
For Festive Touch
  • 1 tablespoon Edible Pink Glitter Use sparingly for sparkle.
  • 1 cup Pink Sanding Sugar Use for rimming glasses with lemon juice.
For Chilling
  • 4 cups Ice Use ice cubes made from pink lemonade or cranberry juice.
For Garnishing
  • 1 cup Sliced Fruit Can include strawberries, oranges, or lemons.

Equipment

  • Large punch bowl
  • Serving Glasses
  • ice cube trays

Method
 

Preparation Steps
  1. Chill Ingredients: Place pink lemonade, ginger ale, and cranberry juice in the refrigerator for 1-2 hours.
  2. Rim the Glasses: Dampen the rims with lemon juice and dip into pink sanding sugar.
  3. Mix the Base: In a large punch bowl, combine pink lemonade and cranberry juice. Stir gently for about 30 seconds until well blended.
  4. Add Ginger Ale: Slowly pour the ginger ale into the punch bowl while gently stirring for 15-20 seconds.
  5. Garnish: Add whipped topping, edible glitter, and sliced fruits to enhance flavor and appeal.
  6. Serve: Ladle the Pink Witch Punch into prepared glasses, filling them about three-quarters full.

Nutrition

Serving: 1cupCalories: 90kcalCarbohydrates: 22gSodium: 15mgPotassium: 50mgSugar: 20gVitamin C: 25mg

Notes

Chill all ingredients well and serve immediately for the best bubbly experience. You can prepare the punch base ahead of time and store it in the fridge for up to 3 days; just add ginger ale before serving.

Tried this recipe?

Let us know how it was!

Delicious Old-Fashioned Pumpkin Soda for Fall Festivities

October 3, 2025 by Grace Snow Leave a Comment

As the crisp fall air descends, my mind often drifts to delightful autumnal flavors, and nothing captures that spirit quite like my Old-Fashioned Pumpkin Soda. This refreshing drink perfectly marries the sweetness of real pumpkin with fizzy soda, making it an instant hit for sharing with friends and family. Whether you're hosting a Halloween party or simply indulging in some cozy self-care, this non-alcoholic beverage is both a nostalgia-packed treat and a healthier alternative to fast food options. Plus, it’s a breeze to whip up, with variations for individual servings or a pitcher, allowing you to customize it for any gathering. Ready to bring a little fall magic into your kitchen? Let’s dive into the recipe and discover how simple and fun satisfying your pumpkin cravings can be!

Why is Pumpkin Soda So Irresistible?

Nostalgic Flavors: This Old-Fashioned Pumpkin Soda evokes warm memories of autumn celebrations, making every sip a comforting delight.
Easy to Make: With just a few simple ingredients, creating this festive drink requires minimal effort and expertise, perfect for novice chefs and busy parents alike.
Versatile Treat: Whether you prefer individual servings or a pitcher for a crowd, this recipe perfectly fits your gathering needs without sacrificing flavor.
Kid-Approved: The bubbly nature and fun toppings, like whipped cream and sprinkles, ensure it’s a hit with kids, providing a fun alternative to sugary sodas.
Customizable: Adjust sweetness or explore variations like Pumpkin Cream Soda, enhancing the recipe to suit your taste or dietary preferences.

Old-Fashioned Pumpkin Soda Ingredients

• Dive into the delicious world of Old-Fashioned Pumpkin Soda with this simple list of ingredients!

For the Syrup

  • Water – Solvent for making the syrup; filtered water works best for a clean taste.
  • Sugar – Provides sweetness; substitute with brown sugar or a non-sugar alternative for a healthier option.
  • Pumpkin Puree – Adds genuine pumpkin flavor and vibrant color; ensure it’s pure pumpkin, not pie filling for optimal results.
  • Pumpkin Pie Spice – Enhances the flavor with warm spices; can be swapped with a mix of cinnamon and nutmeg if you're out.

For the Soda

  • Cold Soda Water – This is what gives your drink its fizz; make sure it's cold for the best experience.

For Toppings

  • Whipped Cream – Adds a creamy texture and lovely decoration; use dairy-free whipped cream to keep it vegan-friendly.
  • Halloween Sprinkles – Totally optional but highly recommended! Customize sprinkles based on your party theme for added fun.

Step‑by‑Step Instructions for Old-fashioned pumpkin soda

Step 1: Prepare Pumpkin Spice Syrup
In a small saucepan, combine equal parts sugar and filtered water over medium heat. Stir gently until the sugar dissolves, avoiding boiling which can alter flavors. Once dissolved, add pumpkin puree and pumpkin pie spice, mixing well. Allow this delicious mixture to cool for about 20 minutes, ensuring a rich flavor develops as it thickens. Strain it through a fine mesh sieve lined with cheesecloth to remove any sediment for a smooth syrup.

Step 2: Assemble Individual Servings
For a personalized touch, grab your favorite glass and pour in 1 ounce of the freshly made pumpkin syrup. Top it off with 6 ounces of cold soda water, creating a fizzy effect. The blending of the syrup and soda should become a bubbly delight. Add a generous dollop of whipped cream on top, letting it cascade down the sides, and finish with colorful Halloween sprinkles for that festive appearance.

Step 3: Create a Pitcher for Sharing
If you're hosting a gathering, pour the cooled pumpkin syrup into a large pitcher. Carefully mix it with enough cold soda water to serve the desired number of guests. Stir gently to combine, taking care not to lose the fizz. Serve immediately in cups filled with ice, adding whipped cream and sprinkles as optional garnishes on each for a visually appealing presentation.

Step 4: Adjust Sweetness as Desired
To tailor your Old-fashioned pumpkin soda to personal tastes, feel free to adjust the syrup-to-soda ratio. If you prefer a sweeter drink, simply add an extra splash of syrup into your glass, stirring to mix thoroughly. This flexibility ensures that everyone can enjoy this festive beverage according to their own sweetness preferences.

Old-Fashioned Pumpkin Soda Variations

Feel free to let your creativity shine as you customize this delightful pumpkin soda to your taste!

  • Pumpkin Cream Soda: Add 1 ounce of heavy cream along with the syrup for a richer, creamier touch. The combination of bubbles and cream will make each sip a luxurious experience!

  • Pumpkin Spice Latte Soda: Incorporate a splash of strongly brewed coffee or espresso for a flavorful kick. This variation blends the warm notes of fall with an energizing twist!

  • Dairy-Free Delight: Substitute whipped cream with a coconut-based option for a tasty vegan version. The slight coconut flavor will complement the pumpkin beautifully.

  • Spicy Pumpkin Soda: Stir in a dash of cayenne pepper or crushed red pepper flakes to add a gentle heat. This unexpected twist elevates the flavor to new, exciting heights!

  • Cinnamon Sugar Rim: Before pouring your soda, coat your glass rim with cinnamon sugar for added sweetness. It’s a simple enhancement that elevates the presentation.

  • Pumpkin Float: Top your soda with a scoop of vanilla or pumpkin ice cream for an indulgent dessert-style treat. The melting ice cream mixes wonderfully with the soda!

  • Nutty Touch: Drizzle a little almond or hazelnut syrup to add a nutty twist to your drink. This inspired addition will bring a cozy warmth to your pumpkin soda.

  • Mix with Other Flavors: Combine your pumpkin syrup with other fruity sodas like ginger ale or apple soda for a unique blend. The fusion of flavors keeps things fun and interesting at any gathering!

For more pumpkin-themed ideas, consider trying out these delectable Pumpkin Brownies Decadent or some beautifully layered Pumpkin Cinnamon Rolls to complete your fall festivities!

Storage Tips for Old-Fashioned Pumpkin Soda

Fridge: Store any leftover pumpkin syrup in an airtight container for up to 1 week in the refrigerator. Keeping it sealed ensures maximum freshness and flavor.

Freezer: Optional but effective! You can freeze the syrup in ice cube trays for up to 3 months. This method allows for quick and easy use in future sodas.

Reheating: If you want to enjoy the syrup warm, gently reheat it in a small saucepan over low heat before mixing it with your cold soda water.

Soda Mixing: Always combine the syrup with cold soda water for the best effervescence. Remember, once the soda is mixed, it’s best enjoyed immediately for that perfect fizzy experience!

Make Ahead Options

These Old-Fashioned Pumpkin Soda preparations are perfect for busy home cooks looking to save time during the festive season! You can make the pumpkin spice syrup up to 3 days in advance; store it in an airtight container in the refrigerator to maintain its rich flavor. When ready to serve, simply mix 1 ounce of the chilled syrup with 6 ounces of cold soda water in each glass. Top with whipped cream and sprinkles just before serving for that delightful presentation. This way, you'll have a refreshing, homemade drink ready to impress your guests with minimal effort!

Expert Tips for Old-Fashioned Pumpkin Soda

  • Syrup Consistency: Ensure your syrup simmers gently; boiling can change its flavor and texture, resulting in a less delightful Old-Fashioned Pumpkin Soda.
  • Choose Quality Ingredients: Opt for pure pumpkin puree and high-quality soda water to elevate the drink's flavors and ensure the best experience.
  • Sweetness Adjustment: If you're unsure about sweetness, start with less syrup; you can always add more, ensuring a perfect fit for your taste buds.
  • Experiment with Toppings: Get creative with toppings beyond whipped cream; consider crushed graham crackers or chocolate shavings for a delightful twist on the classic presentation.
  • Chill Soda Water: For a fizzy treat, ensure your soda water is ice-cold before mixing; lukewarm soda water can dilute the refreshing experience of this fun drink.

What to Serve with Old-Fashioned Pumpkin Soda

The warm hues of fall inspire delightful pairings that complement this fizzy apple treat, enhancing your seasonal gatherings with every sip.

  • Savory Pumpkin Soup: A rich, creamy pumpkin soup pairs beautifully, echoing the flavors of your soda while offering warmth and comfort.
  • Spiced Apple Cider: This brings a cozy aroma to the table, creating a harmonious blend of fall flavors that guests will adore.
  • Cinnamon Sugar Donuts: Their sweetness and warmth contrast with the soda's effervescence, providing a scrumptious bite for a delightful snack.
  • Cheese Platter with Crackers: A selection of sharp cheeses and crunchy crackers offers a savory balance to the fizzy drink's sweetness, elevating your gathering.

For a sweet treat, consider serving spiced cookies alongside for the ultimate autumn indulgence. Their crispy edges and soft centers will leave your friends happily reminiscing about childhood fall adventures.

  • Pumpkin Muffins: Muffins create a delightful texture contrast; their moistness enhances your pumpkin experience and make for perfect on-the-go treats!
  • Caramel Popcorn: Sweet, crunchy, and just a bit salty, this festive snack offers delightful textures, making it a fun pairing with your bubbly drink!
  • Ginger Ale Float: For a twist, introduce a ginger ale float topped with whipped cream; the spicy kick will create an exciting flavor profile alongside your similar bubbly soda!

Old-Fashioned Pumpkin Soda Recipe FAQs

What is the best way to select pumpkin puree?
Absolutely! When choosing pumpkin puree, make sure it’s 100% pure pumpkin, without any added spices or sweeteners. Check the label to avoid canned pumpkin pie filling, which often contains extra sugars and flavors that can alter your soda’s taste. A good quality puree will have a rich, deep orange color and a thick consistency.

How should I store any leftover pumpkin syrup?
You can store your pumpkin syrup in an airtight container in the refrigerator for up to 1 week. Just make sure that the container is sealed tightly to maintain the syrup's freshness and flavor. If you plan on keeping it longer, I often recommend freezing it in ice cube trays. This way, you can pop out a cube whenever you’re in the mood for a refreshing Old-Fashioned Pumpkin Soda—even months down the line!

Can I freeze the pumpkin syrup, and how?
Yes, you can freeze your pumpkin syrup! To do this, pour the cooled syrup into ice cube trays and freeze until solid. Once frozen, transfer the cubes to a resealable freezer bag and store them for up to 3 months. When you're ready to use them, simply add the cubes directly to your soda water and let them melt for a delightful pumpkin treat!

What should I do if my syrup becomes too thick?
If you find your syrup is a bit too thick, don't worry! Just add a little warm water to the syrup and stir well until it reaches your desired consistency. Aim for a pourable texture that flows easily from a measuring cup. Remember, thin syrup is easier to mix with the soda, ensuring a bubbly effervescence in your pumpkin drink.

Is this recipe safe for individuals with dietary restrictions?
This Old-Fashioned Pumpkin Soda is quite versatile! It’s naturally vegetarian and can be made vegan by choosing a dairy-free whipped cream. If allergies are a concern, be sure to check ingredient labels for potential allergens in the whipped cream or sprinkles you choose. For sweetness, consider using alternatives like agave nectar or maple syrup if you have dietary restrictions with sugar.

Old-fashioned pumpkin soda

Delicious Old-Fashioned Pumpkin Soda for Fall Festivities

Enjoy this Old-fashioned pumpkin soda, a nostalgic and fizzy drink perfect for fall gatherings.
Print Recipe Pin Recipe
Prep Time 20 minutes mins
Cooling Time 20 minutes mins
Total Time 40 minutes mins
Servings: 4 cups
Course: Drinks
Cuisine: American
Calories: 120
Ingredients Equipment Method Nutrition Notes

Ingredients
  

For the Syrup
  • 1 cup Water filtered for the best taste
  • 1 cup Sugar can substitute with brown sugar or a non-sugar alternative
  • 1 cup Pumpkin Puree ensure it's pure pumpkin, not pie filling
  • 1 tablespoon Pumpkin Pie Spice can swap with a mix of cinnamon and nutmeg
For the Soda
  • 6 ounces Cold Soda Water ensure it's cold for the best experience
For Toppings
  • 1 dollop Whipped Cream use dairy-free whipped cream for a vegan option
  • to taste none Halloween Sprinkles customize based on your party theme

Equipment

  • Saucepan
  • Fine-mesh sieve
  • glass
  • pitcher

Method
 

Prepare Pumpkin Spice Syrup
  1. In a small saucepan, combine equal parts sugar and filtered water over medium heat. Stir gently until the sugar dissolves, avoiding boiling. Add pumpkin puree and pumpkin pie spice, mixing well. Allow the mixture to cool for about 20 minutes.
Assemble Individual Servings
  1. Pour 1 ounce of the freshly made pumpkin syrup into a glass. Top it with 6 ounces of cold soda water. Add a generous dollop of whipped cream and finish with colorful Halloween sprinkles.
Create a Pitcher for Sharing
  1. Pour the cooled pumpkin syrup into a large pitcher and mix it with enough cold soda water for the desired number of guests. Serve immediately with ice and optional garnishes.
Adjust Sweetness as Desired
  1. If preferred, adjust the syrup-to-soda ratio for desired sweetness by adding more syrup.

Nutrition

Serving: 1cupCalories: 120kcalCarbohydrates: 31gSodium: 5mgPotassium: 150mgFiber: 1gSugar: 26gVitamin A: 50IUVitamin C: 1mgCalcium: 1mgIron: 1mg

Notes

Store any leftover pumpkin syrup in an airtight container for up to 1 week. Optional to freeze syrup in ice cube trays for up to 3 months.

Tried this recipe?

Let us know how it was!
  • 1
  • 2
  • 3
  • Next Page »

Welcome!

Hi, I’m Grace, a Sydney-based home cook with a passion for bold flavors and trending ingredients. Whether you’re a busy beginner or a seasoned foodie, you’ll find dishes here that are fresh, fun, and full of flavor.

More about me

Popular Recipes

  • Autumn Harvest Grain Salad with Cranberries
    Autumn Harvest Grain Salad with Cranberries for Cozy Nights
  • Ground Beef Hot Honey Bowl
    Ground Beef Hot Honey Bowl for a Flavor-Packed Dinner Enjoyment
  • Autumn Harvest Grain Salad with Cranberries
    Autumn Harvest Grain Salad with Cranberries for Cozy Nights
  • Ground Beef Hot Honey Bowl
    Ground Beef Hot Honey Bowl for a Flavor-Packed Dinner Enjoyment

Footer

↑ back to top

About

  • Privacy Policy
  • Disclaimer
  • Terms & Conditions

Newsletter

  • Sign Up! for emails and updates

Contact

  • About me
  • Contact me

Copyright © 2025 TastyTrendIngredients