tastytrendingredients

  • Home
  • Recipes
    • Appetizers
    • Breakfast
    • Dessert
    • Dinner
    • Drinks
    • Salads
    • Snacks
    • Soups
  • About me
  • Contact
menu icon
go to homepage
  • Home
  • Recipes
    • Appetizers
    • Breakfast
    • Dessert
    • Dinner
    • Drinks
    • Salads
    • Snacks
    • Soups
  • About me
  • Contact
search icon
Homepage link
  • Home
  • Recipes
    • Appetizers
    • Breakfast
    • Dessert
    • Dinner
    • Drinks
    • Salads
    • Snacks
    • Soups
  • About me
  • Contact
×

Hearty Simple Bolognese: Your Family's New Favorite Dinner

November 21, 2025 by Grace Snow Leave a Comment

As I was stirring the sauce on the stove, the aroma of sautéing garlic and onions filled my kitchen—drawing family members in like moths to a flame. This Classic Simple Bolognese Sauce is truly a staple for a reason, embodying the heart of Italian comfort food while being incredibly easy to whip up. With just a handful of pantry staples and some fresh herbs, you can create a meal that’s not only budget-friendly but also perfect for busy weeknights. Whether you’re a seasoned chef or just starting, this recipe promises to delight your loved ones and banish fast food cravings for good. Ready to fill your home with warmth and deliciousness? Let’s dive into elevating your dinner game today!
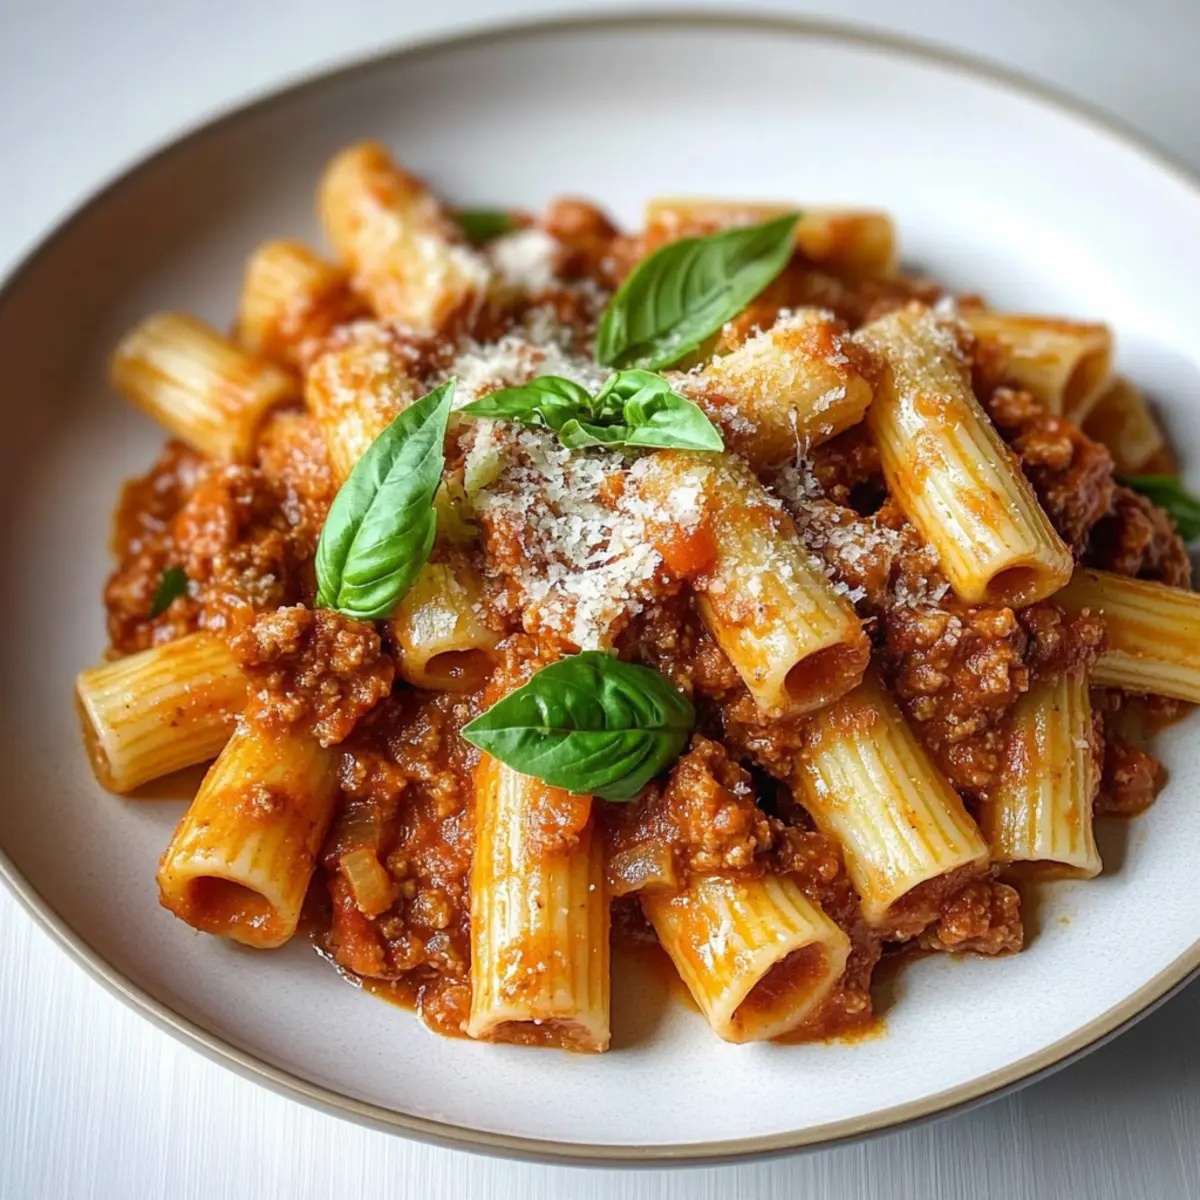
Why is Bolognese sauce so beloved?

Comforting flavors of Simple Bolognese bring everyone to the table, creating moments to cherish with loved ones. Beginner-friendly, this recipe is straightforward, perfect for those new to cooking. Quick prep means you can whip up a satisfying meal in no time, ideal for busy evenings. Versatile ingredients allow customization, whether you want to add mushrooms for a vegetarian option or extra veggies for nutrition. Serve it with garlic bread and a salad for a complete feast that will keep your family asking for seconds!

Simple Bolognese Ingredients

For the Base

  • Olive Oil – Essential for sautéing; adds flavor and richness while providing a healthy fat source.
  • Onion (1 medium, coarsely chopped) – Provides a savory base; substitute with shallots for a sweeter flavor.
  • Garlic (2 cloves, coarsely chopped) – Enhances the aroma and taste; always go for fresh garlic for the best flavor.
  • Celery (1 stalk, coarsely chopped) – Adds depth and texture to the dish; can be omitted if you prefer a simpler sauce.
  • Carrot (1, coarsely chopped) – Contributes natural sweetness and balance; swap for bell pepper for a different twist.

For the Sauce

  • Ground Chuck Beef (1 lb) – The main protein that enriches the sauce; ground turkey works wonderfully for a leaner meal.
  • Crushed Cherry Tomatoes (2, 14-ounce cans) – Forms the sauce base, boosting acidity and sweetness; fresh tomatoes are a great option when in season.
  • Flat-leaf Italian Parsley (1/4 cup, chopped) – Adds a burst of freshness; replace with cilantro if that’s your preference.
  • Fresh Basil Leaves (8, chopped) – Imparts aromatic notes; dried basil can substitute in smaller amounts if needed.
  • Salt and Pepper – Essential for overall seasoning; always adjust to your taste—sea salt is a lovely choice for enhanced flavor.

For the Finishing Touch

  • Pecorino Romano Cheese (1/4 cup, freshly grated) – Adds creaminess and a salty kick to the dish; you can also use Parmesan if that’s what you have on hand.
  • Pasta (1 lb, such as mezzi rigatoni or pappardelle) – The perfect vehicle for the sauce; feel free to opt for gluten-free pasta to meet dietary needs.

Step‑by‑Step Instructions for Simple Bolognese

Step 1: Heat the Oil
In a large skillet, pour in 1/4 cup of olive oil and warm it over medium heat until it shimmers—this usually takes about 2 minutes. You want the oil hot enough to sauté but not smoking. This step lays the flavorful foundation for your Simple Bolognese sauce.

Step 2: Sauté the Aromatics
Add the coarsely chopped onion and garlic to the skillet, sautéing them for about 8 minutes. Stir occasionally until the onion becomes soft and translucent. This fragrant mixture will fill your kitchen with warmth and start building the layers of flavor for your Bolognese.

Step 3: Add the Vegetables
Next, stir in the chopped celery and carrot, cooking for an additional 5 minutes. Continue to sauté until the vegetables begin to soften, allowing their natural sweetness to blend with the aromatic base. The colors will brighten, signaling it's time to add the next ingredient.

Step 4: Cook the Beef
Increase the heat to high and add 1 pound of ground chuck beef to the skillet, breaking it up with a wooden spoon. Cook for about 10 minutes until the meat is browned and no longer pink. You’ll hear a satisfying sizzle, and the beef should start sticking slightly to the pan, adding depth to your Simple Bolognese sauce.

Step 5: Add Tomatoes and Herbs
Lower the heat back to medium-low and mix in the crushed cherry tomatoes, chopped parsley, and basil. Let the mixture simmer for approximately 30 minutes, stirring occasionally as the sauce thickens. Season with salt and pepper to taste, ensuring a well-rounded flavor emerges as it cooks down.

Step 6: Boil the Pasta
While your Simple Bolognese sauce simmers, bring a large pot of salted water to a rolling boil. Add 1 pound of pasta and cook until just 2 minutes shy of the package instructions—this usually takes about 8-9 minutes. You want the pasta to be al dente, remaining firm for the final toss with the sauce.

Step 7: Combine Pasta and Sauce
Using tongs, carefully transfer the cooked pasta directly to the Bolognese sauce, allowing a little bit of pasta water to join the mixture. Toss everything together for a minute until the pasta is well-coated with the thick, hearty sauce. The final dish should look inviting, glistening with flavor and ready to serve!

What to Serve with Simple Bolognese?

A well-crafted Bolognese sauce deserves the perfect companions to create a delightful meal experience that tantalizes the senses.

  • Garlic Bread: The buttery, garlicky flavors pair beautifully with the rich sauce, adding a delightful crunch that enhances every bite. It's the perfect way to scoop up extra sauce, bringing warmth to your dinner table.

  • Caesar Salad: Crisp romaine lettuce combined with a zesty Caesar dressing complements the hearty Bolognese by adding freshness and a satisfying crunch. Toss some homemade croutons in for an extra layer of flavor and texture.

  • Roasted Vegetables: A colorful medley of roasted zucchini, bell peppers, and asparagus offers a burst of vibrant flavors that balance the sauce's richness. This dish also packs in nutrients, keeping your meal hearty yet healthy.

  • Parmesan Risotto: Creamy and cheesy, risotto brings a luxurious, silky texture that melds wonderfully with the bold Bolognese sauce, enhancing the overall dining experience. You’ll relish every spoonful, savoring each bite.

  • Red Wine: A glass of Chianti or Merlot enhances the dining experience, its tannins cutting through the meatiness of the sauce. The deep notes of the wine perfectly echo the flavors of the Bolognese.

  • Lemon Sorbet: As a refreshing palate cleanser, lemon sorbet clears the richness of the Bolognese, leaving a zesty note that invigorates the taste buds. It's a delightful way to end your meal on a light note.

  • Cheesy Polenta: Creamy, cheesy polenta serves as a wonderful alternative to pasta, providing a comforting base to soak up the savory Bolognese sauce. The smooth texture makes each bite a comforting delight.

Make Ahead Options

These Simple Bolognese preparations are a dream come true for busy weeknights! You can cook the sauce up to 3 days in advance; simply let it cool completely before transferring it to an airtight container. For optimal flavor, refrigerate the sauce and reheat it on the stove before serving. Additionally, you can prepare the chopped vegetables (onion, celery, and carrot) up to 24 hours ahead. Store them in an airtight container in the fridge to lock in freshness. When it’s time to eat, just reheat your Bolognese and cook the pasta freshly in boiling water, ensuring a warm, comforting meal that feels just as delightful any night!

Storage Tips for Simple Bolognese

Fridge: Store your Simple Bolognese sauce in an airtight container; it will keep well for up to 5 days, ready for quick weekday meals.

Freezer: For longer storage, freeze the sauce in a freezer-safe container or freezer bags. It can last up to 3 months; just remember to label and date.

Thawing: To enjoy frozen Bolognese, thaw it overnight in the fridge or use the defrost setting on your microwave for a faster option.

Reheating: Reheat on the stovetop over medium heat, adding a splash of water if the sauce seems too thick. Stir often until heated through for a perfectly warm meal.

Expert Tips for Simple Bolognese

  • Simmer Longer: Let your sauce simmer for at least 30 minutes to deepen the flavors; add a splash of red wine for an extra kick.
  • Break It Up: Ensure to break the meat into small pieces while cooking for a uniform texture in your Simple Bolognese.
  • Adjust Acidity: If the sauce is too acidic, add a pinch of sugar to balance the flavors and enhance the overall taste.
  • Use Fresh Herbs: Fresh parsley and basil can elevate your sauce. Add half toward the beginning and the other half just before serving.
  • Pair Wisely: Serve with garlic bread and a green salad for a complete meal; the contrast of textures will delight your family.

Simple Bolognese Variations & Substitutions

Feel free to get creative with this Simple Bolognese sauce and add your personal touch to make it truly yours!

  • Vegetarian: Replace ground beef with 1 cup of cooked lentils or finely chopped mushrooms for a hearty veggie alternative.

  • Spicy Kick: Stir in a teaspoon of crushed red pepper flakes while sautéing for a pleasantly spicy note that warms the soul.

  • Herbaceous Twist: Experiment with different fresh herbs like thyme or oregano for a unique flavor profile that suits your taste.

  • Creamy Addition: For a luxurious twist, mix in a splash of heavy cream right before serving to create a luscious sauce that coats the pasta beautifully.

  • Zucchini Boost: Add diced zucchini or bell peppers along with your other veggies for extra nutrition and a pop of color.

  • Wine Infusion: A splash of red wine added during the cooking process can deepen the flavors—just let it simmer off for a maximum flavor experience!

  • Cheese Variation: Swap Pecorino Romano cheese for a rich Gruyère for a nutty flavor that elevates this classic dish.

  • Gluten-Free: Use gluten-free pasta varieties or zoodles (zucchini noodles) for a lighter, healthier option perfect for those with dietary restrictions.

No matter which variation you choose, your family will love the warm, inviting flavors of your lovingly crafted Simple Bolognese. And if you’re interested in discovering more delightful recipes to enhance your family meals, check out my guide on quick and easy weeknight dinners or dive into some satisfying vegetarian options that will inspire your kitchen creativity!
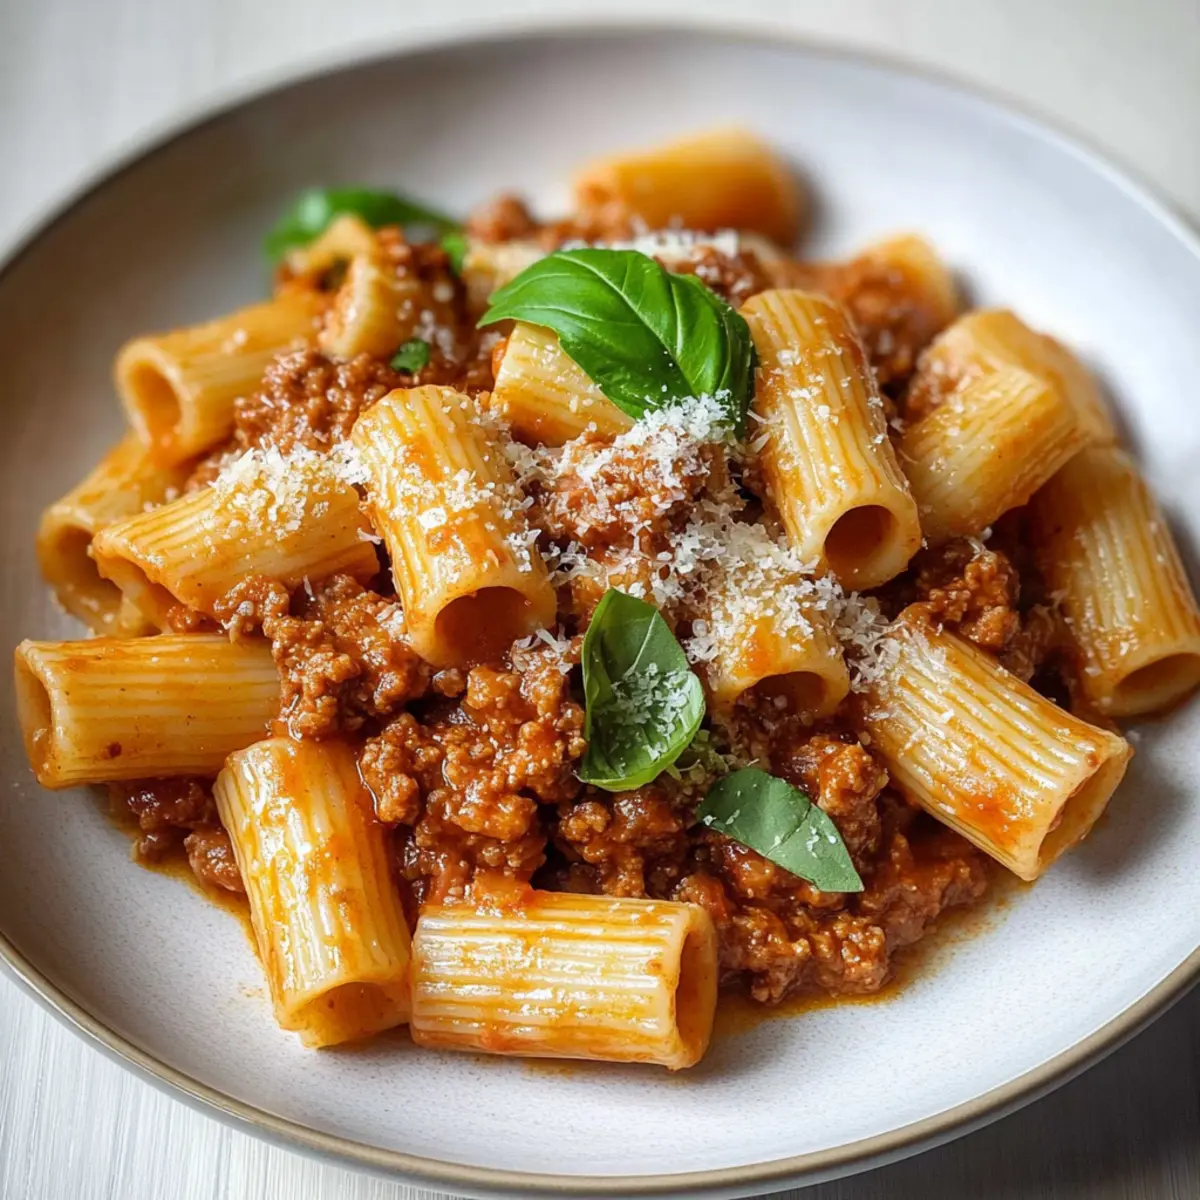
Simple Bolognese Recipe FAQs

What ingredients should I use for the best flavor?
For the best flavor in your Simple Bolognese, always opt for fresh ingredients. Use high-quality olive oil for sautéing, and go for fresh garlic rather than powdered. When choosing your ground meat, ground chuck beef gives a rich and hearty flavor but feel free to substitute with ground turkey for a leaner option. Fresh herbs like basil and parsley should be used toward the end for maximum freshness.

How can I store homemade Bolognese sauce?
Store your Simple Bolognese sauce in an airtight container in the fridge for up to 5 days. It’s a great way to have a quick meal ready when you need it! If you’re looking to keep it longer, freeze it in a freezer-safe container or zip-top bags. Ensure to label the bags with the date to keep track, as the sauce will be good for up to 3 months in the freezer.

Can I freeze Simple Bolognese sauce?
Absolutely! Freezing your homemade Simple Bolognese sauce is a fantastic way to save time for future meals. To do this, cool the sauce completely and then transfer it to freezer-safe containers or heavy-duty freezer bags. Remove as much air as possible before sealing. When you're ready to enjoy it, thaw it overnight in the refrigerator or use the defrost setting on your microwave. Heat it on the stovetop until warmed through, stirring occasionally.

What if my Bolognese sauce is too thick or too thin?
If your Simple Bolognese turns out too thick, simply add a splash of pasta water or broth to reach your desired consistency while reheating. Stir often to incorporate it evenly. Conversely, if it’s too thin, allow it to simmer uncovered on the stovetop for a little longer to reduce the liquid. Keep an eye on it to prevent burning, stirring occasionally for an even texture.

Are there any dietary concerns with this recipe?
Yes, consider dietary preferences when preparing your Simple Bolognese! This recipe can be easily adapted: for vegetarian options, replace ground beef with lentils or mushrooms. Additionally, be mindful of dairy allergies—Pecorino Romano can be omitted or substituted with a dairy-free cheese alternative. Always double-check ingredient labels for allergens, especially with sauces like crushed tomatoes or pasta.
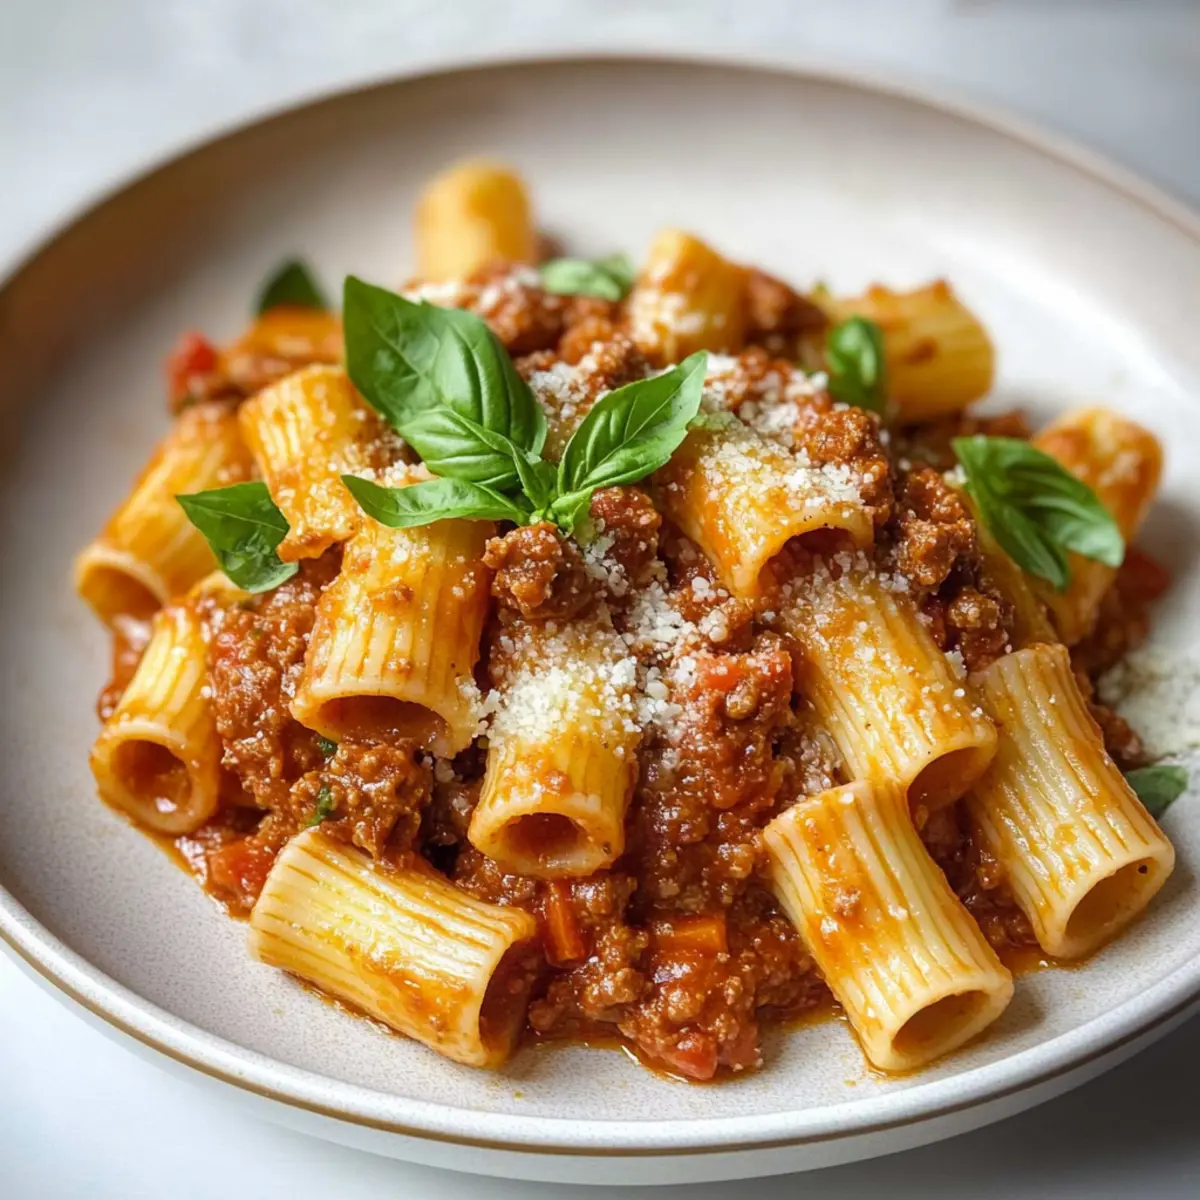
Simple Bolognese

Hearty Simple Bolognese: Your Family's New Favorite Dinner

This Simple Bolognese recipe is a perfect blend of comforting flavors and easy preparation, making it a go-to for families.
Print Recipe Pin Recipe
Prep Time 15 minutes mins
Cook Time 1 hour hr
Total Time 1 hour hr 15 minutes mins
Servings: 6 servings
Course: Dinner
Cuisine: Italian
Calories: 500
Ingredients Equipment Method Nutrition Notes

Ingredients
  

Base
  • 1/4 cup Olive Oil Essential for sautéing; adds flavor and richness.
  • 1 medium Onion Coarsely chopped; substitute with shallots for a sweeter flavor.
  • 2 cloves Garlic Coarsely chopped; always use fresh for the best flavor.
  • 1 stalk Celery Coarsely chopped; can be omitted.
  • 1 Carrot Coarsely chopped; contributes natural sweetness.
Sauce
  • 1 lb Ground Chuck Beef Main protein; ground turkey is a leaner option.
  • 2 14-ounce cans Crushed Cherry Tomatoes Forms the sauce base.
  • 1/4 cup Flat-leaf Italian Parsley Chopped; adds freshness.
  • 8 Fresh Basil Leaves Chopped; imparts aromatic notes.
  • Salt Adjust to taste.
  • Pepper Adjust to taste.
Finishing Touch
  • 1/4 cup Pecorino Romano Cheese Freshly grated; adds creaminess.
  • 1 lb Pasta Such as mezzi rigatoni or pappardelle.

Equipment

  • Large skillet
  • pot

Method
 

Step-by-Step Instructions
  1. Heat the Olive Oil: In a large skillet, pour in 1/4 cup of olive oil and warm it over medium heat until it shimmers, about 2 minutes.
  2. Sauté the Aromatics: Add the chopped onion and garlic to the skillet, sautéing for about 8 minutes until softened.
  3. Add the Vegetables: Stir in the chopped celery and carrot, cooking for an additional 5 minutes.
  4. Cook the Beef: Increase the heat to high and add 1 pound of ground chuck beef, breaking it up. Cook for about 10 minutes until browned.
  5. Add Tomatoes and Herbs: Lower the heat to medium-low, mix in the crushed cherry tomatoes, parsley, and basil. Simmer for 30 minutes.
  6. Boil the Pasta: Bring a large pot of salted water to a boil, add 1 pound of pasta, and cook until al dente, about 8-9 minutes.
  7. Combine Pasta and Sauce: Transfer the cooked pasta to the Bolognese sauce, tossing together for a minute.


Nutrition

Serving: 1servingCalories: 500kcalCarbohydrates: 60gProtein: 30gFat: 20gSaturated Fat: 7gPolyunsaturated Fat: 1gMonounsaturated Fat: 10gCholesterol: 80mgSodium: 600mgPotassium: 800mgFiber: 4gSugar: 6gVitamin A: 500IUVitamin C: 10mgCalcium: 100mgIron: 3mg

Notes

For longer simmering, consider adding a splash of red wine for extra flavor.

Tried this recipe?

Let us know how it was!

Creamy Cowboy Butter Chicken Pasta for Cozy Nights

November 21, 2025 by Grace Snow Leave a Comment

Amid the hustle and bustle of daily life, finding time to whip up a satisfying dinner can feel like a mini crisis. That’s where my 30-Minute Cowboy Butter Chicken Pasta comes to the rescue! This creamy, comforting dish brings together tender chicken, aromatic garlic, and a hint of Italian herbs, all wrapped in a luscious sauce — a true delight for pasta lovers. Whether you're looking for a quick weeknight meal or something hearty to impress your loved ones, this recipe checks all the boxes. Plus, it’s versatile enough to cater to various dietary needs, allowing for easy vegan or gluten-free swaps. Can you think of a better way to elevate your family dinner? Let’s dive into the delightful world of Cowboy Butter Chicken Pasta!

Why is Cowboy Butter Chicken Pasta a Must-Try?

Quick Preparation: This dish can be ready in just 30 minutes, making it perfect for those busy weeknights when you crave something homemade without the lengthy cooking time.

Creamy Goodness: The rich, buttery sauce envelops every bite of tender pasta and chicken, creating a comforting meal reminiscent of your favorite Italian dishes.

Versatile Options: Easily adapt this recipe for vegan or gluten-free diets by swapping in plant-based ingredients like veggie pasta or dairy-free butter. It's a crowd-pleaser that everyone can enjoy!

Packed with Flavor: With aromatic garlic and a hint of Italian herbs, this dish delivers a savory punch that tantalizes the taste buds. It's not just a meal; it's a flavor experience.

Perfect Pairings: Serve alongside homemade garlic bread or a fresh salad for a complete, satisfying dinner that truly impresses!

Cowboy Butter Chicken Pasta Ingredients

• Get ready to create a delightful meal!

For the Pasta

  • Pasta – Forms the base of this delicious dish; gluten-free pasta can be substituted to cater to dietary needs.

For the Chicken

  • Chicken breast – Provides hearty protein; consider using plant-based chicken for a vegan-friendly option.

For the Sauce

  • Butter – Infuses richness and flavor; opt for non-dairy butter if you're making it vegan.
  • Garlic – Adds aromatic depth; make sure to mince it for even distribution of flavor.
  • Onion – Introduces sweetness; yellow or white onions work wonderfully.
  • Heavy cream – Creates a creamy sauce; coconut milk works as a great dairy-free alternative.
  • Chicken broth – Enhances the savory elements of the sauce; switch to vegetable broth for a vegetarian offering.
  • Parmesan cheese – Offers a cheesy finishing touch; nutritional yeast can be used for a vegan option.
  • Italian seasoning – Blends various Italian herbs; feel free to use individual herbs if you prefer.
  • Red pepper flakes – Provides a kick of heat; adjust the amount to suit your taste.
  • Salt and pepper – Essential for perfecting the dish’s flavor profile.
  • Fresh parsley – Adds a fresh garnish; it brightens up the presentation and taste!

Step‑by‑Step Instructions for Cowboy Butter Chicken Pasta

Step 1: Cook the Pasta
Bring a large pot of salted water to a rolling boil over high heat. Add your choice of pasta and cook for about 8-10 minutes, stirring occasionally until al dente. Once done, reserve 1 cup of the pasta water for later, then drain the pasta and set it aside in a colander while you prepare the sauce.

Step 2: Sauté the Chicken
In a large skillet, melt 2 tablespoons of butter over medium heat. Add the diced chicken breast, seasoning it generously with salt and pepper. Cook the chicken for about 6-8 minutes, stirring occasionally until it's golden brown and cooked through. Once finished, remove the chicken from the skillet and set it aside on a plate.

Step 3: Sauté Aromatics
In the same skillet, add the remaining 2 tablespoons of butter, allowing it to melt completely. Introduce the minced garlic and diced onion, sautéing the mixture for about 3-4 minutes until the onions become translucent and fragrant. This creates a flavorful base for your Cowboy Butter Chicken Pasta.

Step 4: Prepare the Creamy Sauce
Pour in the heavy cream and chicken broth into the skillet, stirring to combine the ingredients smoothly. Sprinkle in the Italian seasoning and red pepper flakes, bringing the mixture to a gentle simmer. Let the sauce cook for about 5 minutes, stirring occasionally until it slightly thickens and becomes luscious.

Step 5: Combine Chicken and Pasta
Return the cooked chicken and drained pasta to the skillet with the creamy sauce. Gently toss everything together for about 2 minutes, ensuring that the pasta and chicken are well coated in the sauce. If necessary, adjust the seasoning with extra salt and pepper according to your taste.

Step 6: Serve and Garnish
Once everything is well combined and heated through, serve the Cowboy Butter Chicken Pasta warm. Top each serving with a generous sprinkle of grated Parmesan cheese and a garnish of fresh parsley. This makes for a delightful and comforting presentation ready to impress your family or guests!

What to Serve with Cowboy Butter Chicken Pasta

A delightful meal awaits when you pair your comforting pasta dish with the perfect sides and beverages.

  • Garlic Bread: The warm, buttery crunch of garlic bread is the perfect vehicle for savoring every drop of the creamy sauce.
  • Fresh Garden Salad: A crisp salad with vibrant greens and a tangy vinaigrette balances the richness of the pasta and adds refreshing crunch.
  • Steamed Broccoli: Tender, bright green broccoli provides a nutritious contrast, enhancing your dish with a burst of color and flavor without overpowering it.
  • Roasted Vegetables: A medley of seasonal roasted vegetables brings warmth and earthiness, creating a harmonious background for your Cowboy Butter Chicken Pasta.
  • White Wine: A chilled glass of crisp Sauvignon Blanc perfectly highlights the buttery sauce without overwhelming the dish, making it a delightful pairing.
  • Lemon Sorbet: For dessert, a light and refreshing lemon sorbet cleanses the palate after a satisfying meal, leaving your taste buds tingling with delight.

Cowboy Butter Chicken Pasta Variations

Feel free to bring your personal touch to this lovely dish! Explore these delightful twists to enhance flavor and cater to different dietary needs.

  • Dairy-Free: Use coconut milk or cashew cream instead of heavy cream to make it vegan-friendly yet still rich and creamy.
  • Gluten-Free: Substitute regular pasta with gluten-free pasta for those with gluten sensitivities; it will still taste amazing!
  • Vegetable Boost: Toss in spinach, broccoli, or bell peppers for added nutrition and color, making each bite even more delightful.
  • Spicy Version: Increase red pepper flakes or add diced jalapeños for an extra kick; ideal if you love a bit of heat in your meals.
  • Lightened Up: Replace heavy cream with low-fat yogurt for a lighter option without losing creaminess—perfect for those watching their calories.
  • Cheesy Alternative: Instead of Parmesan, try goat cheese or feta crumbles for a tangy twist that complements the pasta beautifully.
  • Herb Variations: Sprinkle fresh basil or oregano on top instead of parsley for a fragrant herb boost—each herb brings its own personality.
  • Protein Swap: Use shredded rotisserie chicken for a quick shortcut or opt for tofu for a delicious plant-based alternative, maintaining the hearty nature of the dish.

For those who enjoy experimenting, check out this Crockpot Butter Chicken and Skillet Pasta with Sun-Dried Tomatoes, Walnuts, and Feta for more ways to tantalize your taste buds!

Expert Tips for Cowboy Butter Chicken Pasta

  • Perfectly Cooked Chicken: Ensure the chicken reaches an internal temperature of 165°F. Use a meat thermometer to avoid undercooking.

  • Creamy Sauce Consistency: If your sauce is too thick, gradually add reserved pasta water until you achieve the desired creaminess for your Cowboy Butter Chicken Pasta.

  • Fresh Ingredients Matter: Use fresh garlic and quality butter for richer flavor. Dried ingredients may dull the taste of your sauce.

  • Customize with Veggies: For added nutrition, consider tossing in vegetables like spinach or bell peppers during the sautéing step.

  • Adjust Heat Levels: Feel free to modify the amount of red pepper flakes based on your spice preference. More flakes equal more heat!

  • Plan for Leftovers: Store any leftovers in an airtight container, and reheat gently on the stove with a splash of chicken broth to revive your creamy sauce.

Storage Tips for Cowboy Butter Chicken Pasta

  • Fridge: Store leftovers in an airtight container for up to 3 days. This helps maintain the creamy texture and flavor of your Cowboy Butter Chicken Pasta.

  • Freezer: For longer storage, freeze portions in airtight containers for up to 2 months. Allow the pasta to cool completely before freezing to preserve quality.

  • Reheating: When you're ready to enjoy, reheat on the stove over low heat, adding a splash of chicken broth to restore creaminess. Stir gently to evenly heat.

  • Room Temperature: Avoid leaving the Cowboy Butter Chicken Pasta at room temperature for more than 2 hours to ensure food safety. Always refrigerate promptly after serving.

Make Ahead Options

These Cowboy Butter Chicken Pasta is a fantastic choice for meal prep enthusiasts! You can cook the pasta and chicken separately up to 3 days in advance, storing each in airtight containers in the refrigerator. The creamy sauce can also be prepared in advance; simply refrigerate it in a sealed jar for up to 2 days. To maintain quality, add a splash of reserved pasta water when reheating the sauce, ensuring it remains creamy. When you're ready to enjoy this comforting dish, simply heat the sauce in a skillet, add the cooked chicken and pasta, and toss everything together until warmed through. You'll have a delicious and satisfying meal with minimal effort!

Cowboy Butter Chicken Pasta Recipe FAQs

How do I choose ripe chicken for my Cowboy Butter Chicken Pasta?
When selecting chicken breast for a recipe like this, look for pieces that are pink in color with no dark spots. Fresh chicken should feel firm to the touch and have a fresh, mild smell. If you notice any unusual odor or if the meat appears slimy, it’s best to avoid it.

What’s the best way to store leftover Cowboy Butter Chicken Pasta?
After enjoying your Cowboy Butter Chicken Pasta, transfer any leftovers to an airtight container. It will remain fresh in the refrigerator for up to 3 days. Be sure to let it cool to room temperature before sealing it to prevent condensation, which can make the pasta soggy.

Can I freeze Cowboy Butter Chicken Pasta?
Absolutely! To freeze, allow the pasta to cool completely. Then, portion it into airtight freezer-safe containers. You can keep it in the freezer for up to 2 months. When you’re ready to enjoy it, simply thaw in the fridge overnight, then gently reheat on the stove with a splash of broth for a creamy texture.

What do I do if the sauce for my Cowboy Butter Chicken Pasta is too thick?
If your sauce becomes too thick while cooking, don't worry! Just add the reserved pasta water gradually until you reach your desired consistency. Start with a few tablespoons and mix well; the starch in the pasta water will help maintain that creamy texture while loosening up the sauce.

Are there any dietary considerations for Cowboy Butter Chicken Pasta?
Definitely! If you need to accommodate dietary restrictions, this recipe can be easily made vegan by using plant-based chicken, non-dairy butter, coconut milk, and nutritional yeast instead of Parmesan. Always check for allergies, particularly with the chicken broth and cheese options.

How long can I leave Cowboy Butter Chicken Pasta at room temperature?
It's important not to leave Cowboy Butter Chicken Pasta out at room temperature for more than 2 hours. To ensure food safety, refrigerate any leftovers promptly after serving. This helps prevent bacterial growth and keeps your meal safe for later enjoyment.

Cowboy Butter Chicken Pasta

Creamy Cowboy Butter Chicken Pasta for Cozy Nights

Enjoy the delightful Cowboy Butter Chicken Pasta, a creamy and comforting dish perfect for busy weeknights or impressing loved ones.
Print Recipe Pin Recipe
Prep Time 10 minutes mins
Cook Time 20 minutes mins
Total Time 30 minutes mins
Servings: 4 servings
Course: Dinner
Cuisine: Italian
Calories: 450
Ingredients Equipment Method Nutrition Notes

Ingredients
  

For the Pasta
  • 8 ounces pasta gluten-free pasta can be substituted
For the Chicken
  • 1 pound chicken breast plant-based chicken can be used for a vegan option
For the Sauce
  • 4 tablespoons butter use non-dairy butter for a vegan option
  • 3 cloves garlic minced
  • 1 medium onion yellow or white
  • 1 cup heavy cream coconut milk works as a great dairy-free alternative
  • 1 cup chicken broth vegetable broth for vegetarian offering
  • 1/2 cup Parmesan cheese nutritional yeast can be used for a vegan option
  • 2 teaspoons Italian seasoning
  • 1/4 teaspoon red pepper flakes adjust to taste
  • 1 teaspoon salt
  • 1/2 teaspoon pepper
  • 2 tablespoons fresh parsley for garnish

Equipment

  • Large pot
  • Large skillet
  • Colander

Method
 

Step-by-Step Instructions
  1. Bring a large pot of salted water to a rolling boil over high heat. Add your choice of pasta and cook for about 8-10 minutes, stirring occasionally until al dente. Once done, reserve 1 cup of the pasta water for later, then drain the pasta and set it aside in a colander while you prepare the sauce.
  2. In a large skillet, melt 2 tablespoons of butter over medium heat. Add the diced chicken breast, seasoning it generously with salt and pepper. Cook the chicken for about 6-8 minutes, stirring occasionally until it's golden brown and cooked through. Once finished, remove the chicken from the skillet and set it aside on a plate.
  3. In the same skillet, add the remaining 2 tablespoons of butter, allowing it to melt completely. Introduce the minced garlic and diced onion, sautéing the mixture for about 3-4 minutes until the onions become translucent and fragrant.
  4. Pour in the heavy cream and chicken broth into the skillet, stirring to combine the ingredients smoothly. Sprinkle in the Italian seasoning and red pepper flakes, bringing the mixture to a gentle simmer. Let the sauce cook for about 5 minutes, stirring occasionally until it slightly thickens.
  5. Return the cooked chicken and drained pasta to the skillet with the creamy sauce. Gently toss everything together for about 2 minutes, ensuring that the pasta and chicken are well coated in the sauce.
  6. Once everything is well combined and heated through, serve the Cowboy Butter Chicken Pasta warm, topped with a generous sprinkle of grated Parmesan cheese and a garnish of fresh parsley.

Nutrition

Serving: 1servingCalories: 450kcalCarbohydrates: 55gProtein: 30gFat: 15gSaturated Fat: 8gPolyunsaturated Fat: 2gMonounsaturated Fat: 3gCholesterol: 70mgSodium: 800mgPotassium: 600mgFiber: 3gSugar: 2gVitamin A: 500IUVitamin C: 2mgCalcium: 200mgIron: 2mg

Notes

Store leftovers in an airtight container for up to 3 days. Reheat gently on the stove, adding a splash of chicken broth to revive the creamy sauce.

Tried this recipe?

Let us know how it was!

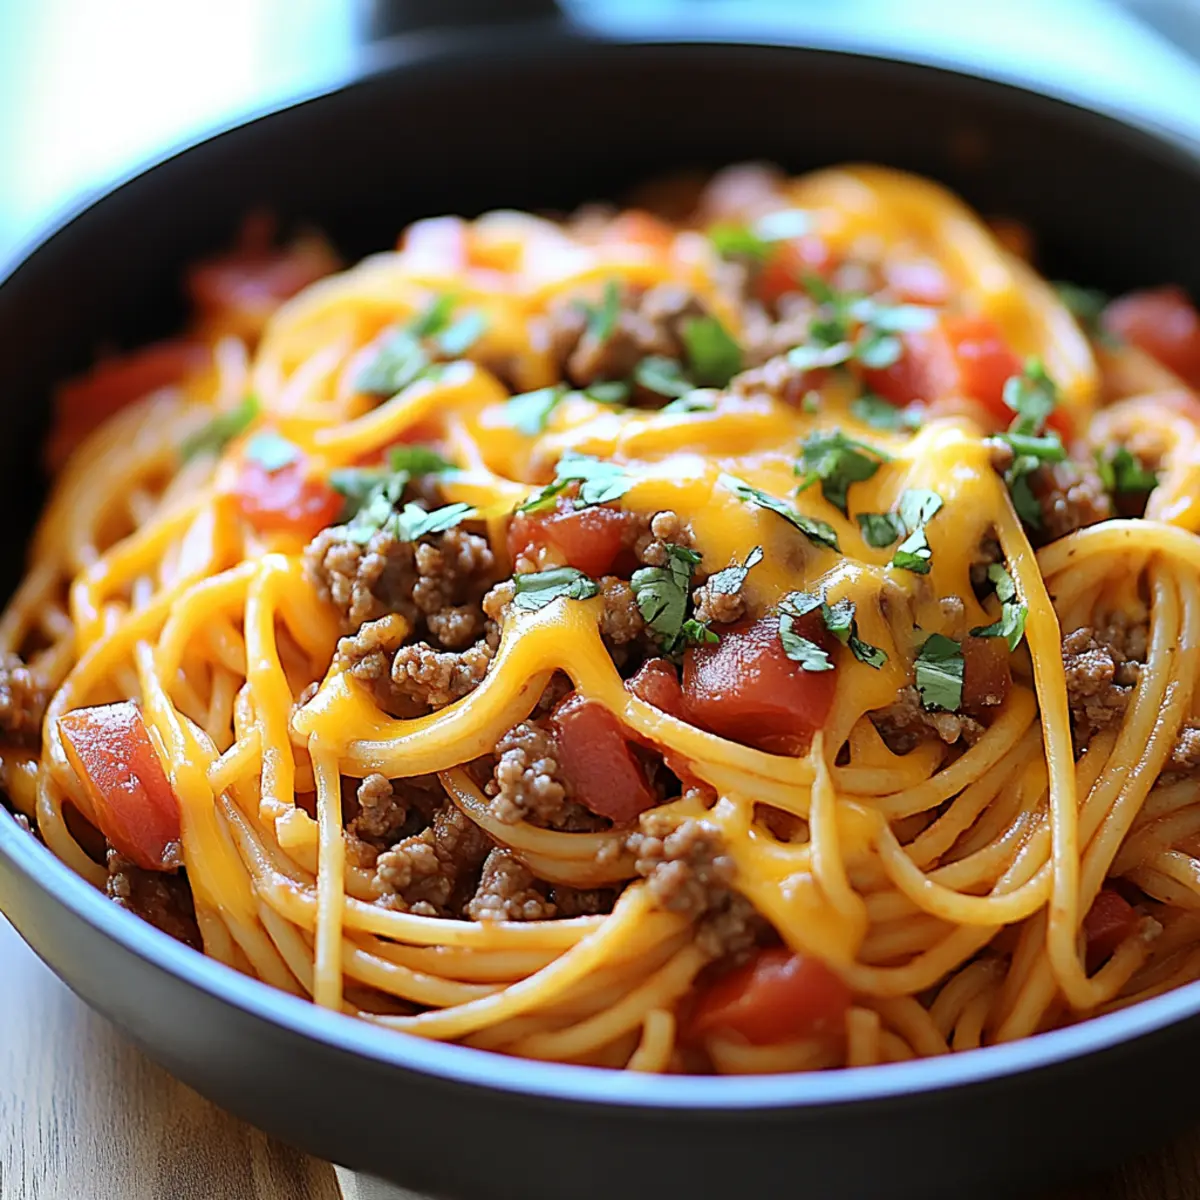
One-Pot Taco Spaghetti: Easy Comfort Food for Busy Nights

November 21, 2025 by Grace Snow Leave a Comment

As I stirred the bubbling pot on the stove, the tantalizing aroma of spices enveloped my kitchen—it felt like a warm hug on a busy weeknight. This One-Pot Taco Spaghetti seamlessly blends the robust flavors of tacos with the comforting embrace of spaghetti, creating a dish that is not only quick to prepare but also a dream when it comes to cleanup. With just one pot needed, you’ll save time doing dishes, making it a go-to meal for those nights when you crave something delicious yet easy. Join me in whipping up this savory, satisfying dinner that’s bound to be a hit with family and friends alike. Are you ready to dive into this flavor-packed fusion?

Why is One-Pot Taco Spaghetti a Must-Try?

Simplicity at its Core: This dish is incredibly easy to whip up! With just one pot needed, cleanup becomes a breeze, allowing you to focus more on enjoying your meal.

Versatile Flavor Fusion: The combination of savory taco spices and cheesy spaghetti creates a flavor explosion that will impress even the pickiest of eaters. You can easily swap out proteins with options like turkey or make it vegetarian with black beans for added texture.

Quick and Satisfying: Ready in under 30 minutes, this recipe is a fantastic solution for busy weeknights. No need to order takeout; a hearty and delicious dinner awaits you at home!

Crowd-Pleasing Delight: Everyone loves tacos and pasta, so this dish brings together two favorites that family and friends will rave about. Try serving it with a side of tortilla chips for an extra crunch, and you’ll have a complete meal that’s sure to please!

Explore more exciting options like Taco Bell Crunchwrap or Fish Taco Bowls to keep your weeknight dinners varied and fun!

One-Pot Taco Spaghetti Ingredients

For the Main Dish

  • Ground Beef – The main protein source; feel free to substitute turkey or plant-based alternatives for a lighter dinner.
  • Garlic – Adds aromatic flavor; fresh garlic is recommended, but garlic powder works in a pinch.
  • Onion – Boosts the overall flavor; yellow or white onions are perfect, while green onions offer a milder alternative.
  • Taco Seasoning – Provides the dish's signature flavor; consider using homemade seasoning for a healthier option.
  • Diced Tomatoes – Adds moisture and fresh tomato flavor; fire-roasted varieties will bring a smoky twist to the dish.
  • Water – Essential for cooking the spaghetti; substitute with chicken or vegetable broth for an enhanced flavor.
  • Spaghetti – The heart of the meal; gluten-free pasta can be used for a gluten-free version.
  • Cheddar Cheese – Provides creaminess and richness; Monterey Jack or dairy-free cheese are great substitutes.
  • Fresh Parsley – For garnish and a touch of freshness; cilantro can be used for a different flavor profile.

Step‑by‑Step Instructions for One-Pot Taco Spaghetti

Step 1: Sauté Aromatics
In a large skillet, heat a drizzle of olive oil over medium heat. Once shimmering, add minced garlic and chopped onion, cooking for 2-3 minutes until the onions are translucent and fragrant. This aromatic base not only flavors your One-Pot Taco Spaghetti but sets the stage for the delicious spices to come.

Step 2: Brown the Beef
Add the ground beef to the skillet, breaking it apart with a spatula. Cook for about 5-7 minutes, stirring occasionally, until fully browned and no longer pink. Make sure to drain any excess fat, as this will keep the dish lighter and let the taco flavors shine through in your final One-Pot Taco Spaghetti.

Step 3: Combine Ingredients
Stir in the taco seasoning, diced tomatoes, and about a cup of water, mixing everything well. Allow the flavors to marry and bubble together for about a minute. This step enriches the dish with the signature taco spices and creates a savory sauce that coats the spaghetti perfectly.

Step 4: Add the Spaghetti
Break the spaghetti in half and gently add it to the skillet, ensuring it's submerged in the liquid. Turn the heat up to high and bring the mixture to a rolling boil. The bubbling sound is a cue that your One-Pot Taco Spaghetti is on its way to becoming a mouthwatering meal!

Step 5: Simmer
Once boiling, reduce the heat to low, cover the skillet with a lid, and let it simmer for 12-15 minutes. Stir occasionally, keeping an eye on the pasta to ensure it cooks evenly and absorbs all those delicious flavors, forming a rich, thick sauce.

Step 6: Liquid Reduction
After simmering, remove the lid and continue cooking for an additional 2-3 minutes. This step allows excess liquid to evaporate, achieving that creamy consistency in your One-Pot Taco Spaghetti that everyone loves. Stir gently to prevent sticking if needed.

Step 7: Add Cheese
Turn off the heat and sprinkle a generous layer of shredded cheddar cheese over the top. Cover the skillet again for about 2 minutes, letting the residual heat melt the cheese perfectly into the dish. This cheesy finish makes every bite of your One-Pot Taco Spaghetti indulgent and comforting.

Step 8: Garnish and Serve
Finally, uncover the skillet and garnish the dish with freshly chopped parsley for a burst of color and flavor. Serve immediately, sharing this delightful One-Pot Taco Spaghetti with family and friends for a meal that’s bound to impress!

Make Ahead Options

These One-Pot Taco Spaghetti are perfect for meal prep enthusiasts looking to save time on busy weeknights! You can brown the ground beef and sauté the garlic and onion up to 24 hours in advance, storing them in an airtight container in the refrigerator to maintain freshness. The diced tomatoes and taco seasoning can also be mixed together and kept aside. When ready to complete the dish, simply reheat the meat mixture in a skillet, add the remaining ingredients (water and spaghetti), and follow the same simmering steps for a family-friendly meal that tastes just as delicious as if made fresh! With these prep-ahead components, you’ll whip up dinner in no time!

Expert Tips for One-Pot Taco Spaghetti

Stir Consistently: Stirring occasionally while cooking helps to prevent the spaghetti from sticking together, ensuring a pleasant texture in your One-Pot Taco Spaghetti.

Submerge Fully: Make sure the spaghetti is fully submerged in the liquid to guarantee even cooking and prevent any hard pasta parts.

Customize Spice: Feel free to adjust the amount of taco seasoning depending on how spicy you want your dish. Don’t be shy to experiment!

Use Broth for Flavor: Instead of water, using chicken or vegetable broth enhances the flavor of the pasta, giving your One-Pot Taco Spaghetti an extra depth.

Watch Liquid Levels: Keep an eye on the sauce during the simmering process; if it gets too thick, add a splash of water to maintain the desired consistency.

Serve Hot: Enjoy your One-Pot Taco Spaghetti fresh off the stove for the best taste and texture; it’s the kind of meal that tastes even better when shared warm!

What to Serve with One-Pot Taco Spaghetti?

A delightful meal deserves delightful companions to create a memorable dining experience. Let’s explore some tasty pairings that enhance the flavors of your One-Pot Taco Spaghetti.

  • Crunchy Tortilla Chips:
    These chips add a satisfying crunch that contrasts perfectly with the creamy texture of the spaghetti, turning each bite into a fiesta.

  • Fresh Garden Salad:
    A simple salad with romaine lettuce, cherry tomatoes, and a light vinaigrette brings freshness and a vibrant color to your meal. The crispness complements the hearty pasta beautifully.

  • Spicy Guacamole:
    Creamy guacamole provides a rich, tangy flavor that enhances the taco notes in the spaghetti. Its smooth texture makes for an irresistible dip and a perfect match.

  • Mexican Street Corn (Elote):
    Grilled corn with lime, cheese, and spices adds a sweet and savory twist to the meal, echoing the taco flavors while introducing a different texture.

  • Creamy Cilantro Lime Rice:
    A side of cilantro lime rice brings a refreshing zest to your plate, giving a wonderful contrast to the bold tastes of the spaghetti without overpowering them.

  • Margaritas or Sparkling Water with Lime:
    Refreshing drinks like a zesty margarita or bubbly sparkling water with lime balance the meal's richness and add a festive touch.

Elevate your dining experience with these complementary sides, making your One-Pot Taco Spaghetti dinner an occasion to remember!

One-Pot Taco Spaghetti Variations

Feel free to make this One-Pot Taco Spaghetti your own and let your creativity shine in the kitchen!

  • Turkey Swap: Substitute ground beef with ground turkey for a leaner meal that still delivers on flavor. This twist keeps it hearty without sacrificing taste.

  • Veggie Power: Add black beans or corn to amp up the nutrition and texture. You'll enjoy a delightful pop of flavor and added fiber in every bite!

  • Cheese Variations: Use pepper jack cheese for a zesty kick, or opt for dairy-free cheese to cater to dietary preferences. Each cheese brings its own unique character to the dish.

  • Broth Boost: Replace water with chicken or vegetable broth to enhance the overall flavor profile. This swap adds richness, making every spoonful even more comforting.

  • Pasta Alternatives: Try using gluten-free pasta for a gluten-free option, or even zoodles for a low-carb twist! The dish stays delicious while accommodating various diets.

  • Spicy Kick: Add jalapeños or crushed red pepper for a heat upgrade. For those who love a fiery taste, this variation will awaken the senses!

  • Saucy Additions: Stir in some salsa or green enchilada sauce for a flavor-packed surprise. This change will create lovely depth in your One-Pot Taco Spaghetti.

  • Serving Suggestions: Elevate your meal by serving it with a side of tortilla chips or a fresh garden salad. This enhances both the crunch and nutritional aspects of your dinner.

For more delightful taco twists, don’t miss trying out these options: Taco Spaghetti Cheesy and Shrimp Tacos Zesty. Enjoy the journey of flavors!

How to Store and Freeze One-Pot Taco Spaghetti

Fridge: Store leftovers in an airtight container for up to 3 days. Ensure it's completely cool before sealing to prevent condensation.

Freezer: For longer storage, freeze your One-Pot Taco Spaghetti in a freezer-safe container for up to 3 months. Portion it into individual servings for easy reheating later.

Reheating: When ready to enjoy, reheat on the stovetop over low heat with a splash of water to avoid drying out. Stir occasionally until heated through, then serve!

Reserving Toppings: If possible, store fresh garnishes like parsley separately to keep their freshness intact until serving.

One-Pot Taco Spaghetti Recipe FAQs

What type of meat is best for One-Pot Taco Spaghetti?
I typically use ground beef for this dish, as it offers great flavor and texture. However, you can absolutely substitute it with ground turkey or even plant-based alternatives for a lighter or vegetarian version. Both options work wonderfully!

How can I store leftover One-Pot Taco Spaghetti?
Leftovers should be placed in an airtight container and stored in the refrigerator for up to 3 days. Make sure the spaghetti has cooled completely before sealing to maintain its texture. Reheat it gently on the stovetop with a splash of water to keep it from drying out.

Can I freeze One-Pot Taco Spaghetti?
Definitely! To freeze, portion the spaghetti into freezer-safe containers and store it for up to 3 months. When you're ready to enjoy it, thaw it in the fridge overnight and reheat on low heat on the stovetop, adding a bit of water to keep it moist.

What if my spaghetti is sticking together during cooking?
If you find that the spaghetti is sticking, stir it more frequently while it's simmering. This will help separate the strands and prevent clumping. Also, ensure the spaghetti is fully submerged in the liquid for even cooking; if necessary, add a little more water or broth.

Are there any dietary considerations I should keep in mind?
Absolutely! This dish can be tailored for various dietary needs. For gluten-free diets, feel free to substitute regular spaghetti with gluten-free pasta. Additionally, if you have dairy allergies, consider using a dairy-free cheese alternative for a similar creamy finish.

How do I know if my taco seasoning is still good?
Check your taco seasoning by smelling and tasting a small amount. If it has lost its aromatic scent or tastes bland, it's time to replace it. For the best flavor, I recommend making your own seasoning using spices like chili powder, cumin, and garlic powder; it's fresher and healthier!

One-Pot Taco Spaghetti

One-Pot Taco Spaghetti: Easy Comfort Food for Busy Nights

One-Pot Taco Spaghetti is a quick and delicious dish that combines savory taco flavors with comforting spaghetti, perfect for busy nights.
Print Recipe Pin Recipe
Prep Time 10 minutes mins
Cook Time 20 minutes mins
Total Time 30 minutes mins
Servings: 4 servings
Course: Dinner
Cuisine: Italian, Mexican
Calories: 450
Ingredients Equipment Method Nutrition Notes

Ingredients
  

For the Main Dish
  • 1 lb Ground Beef or turkey for a lighter option
  • 3 cloves Garlic minced
  • 1 medium Onion chopped
  • 2 tbsp Taco Seasoning or to taste
  • 14.5 oz Diced Tomatoes fire-roasted recommended
  • 2 cups Water or broth for flavor
  • 8 oz Spaghetti broken in half
  • 1 cup Cheddar Cheese shredded
  • 2 tbsp Fresh Parsley chopped, for garnish

Equipment

  • Large skillet

Method
 

Step-by-Step Instructions
  1. Sauté garlic and onion in olive oil for 2-3 minutes until onions are translucent.
  2. Add ground beef to the skillet; cook for about 5-7 minutes until browned, draining excess fat.
  3. Stir in taco seasoning, diced tomatoes, and water; simmer for a minute.

  4. Add spaghetti to the skillet, bring to a boil.
  5. Reduce heat, cover, and simmer for 12-15 minutes.
  6. Remove lid and cook for another 2-3 minutes to reduce liquid.
  7. Sprinkle cheddar cheese on top, cover for 2 minutes to melt.
  8. Garnish with parsley and serve.

Nutrition

Serving: 1servingCalories: 450kcalCarbohydrates: 50gProtein: 25gFat: 15gSaturated Fat: 7gPolyunsaturated Fat: 1gMonounsaturated Fat: 5gCholesterol: 70mgSodium: 800mgPotassium: 600mgFiber: 5gSugar: 4gVitamin A: 500IUVitamin C: 10mgCalcium: 250mgIron: 3mg

Notes

For a vegetarian option, substitute ground beef with black beans. Serve with tortilla chips for a crunch.

Tried this recipe?

Let us know how it was!

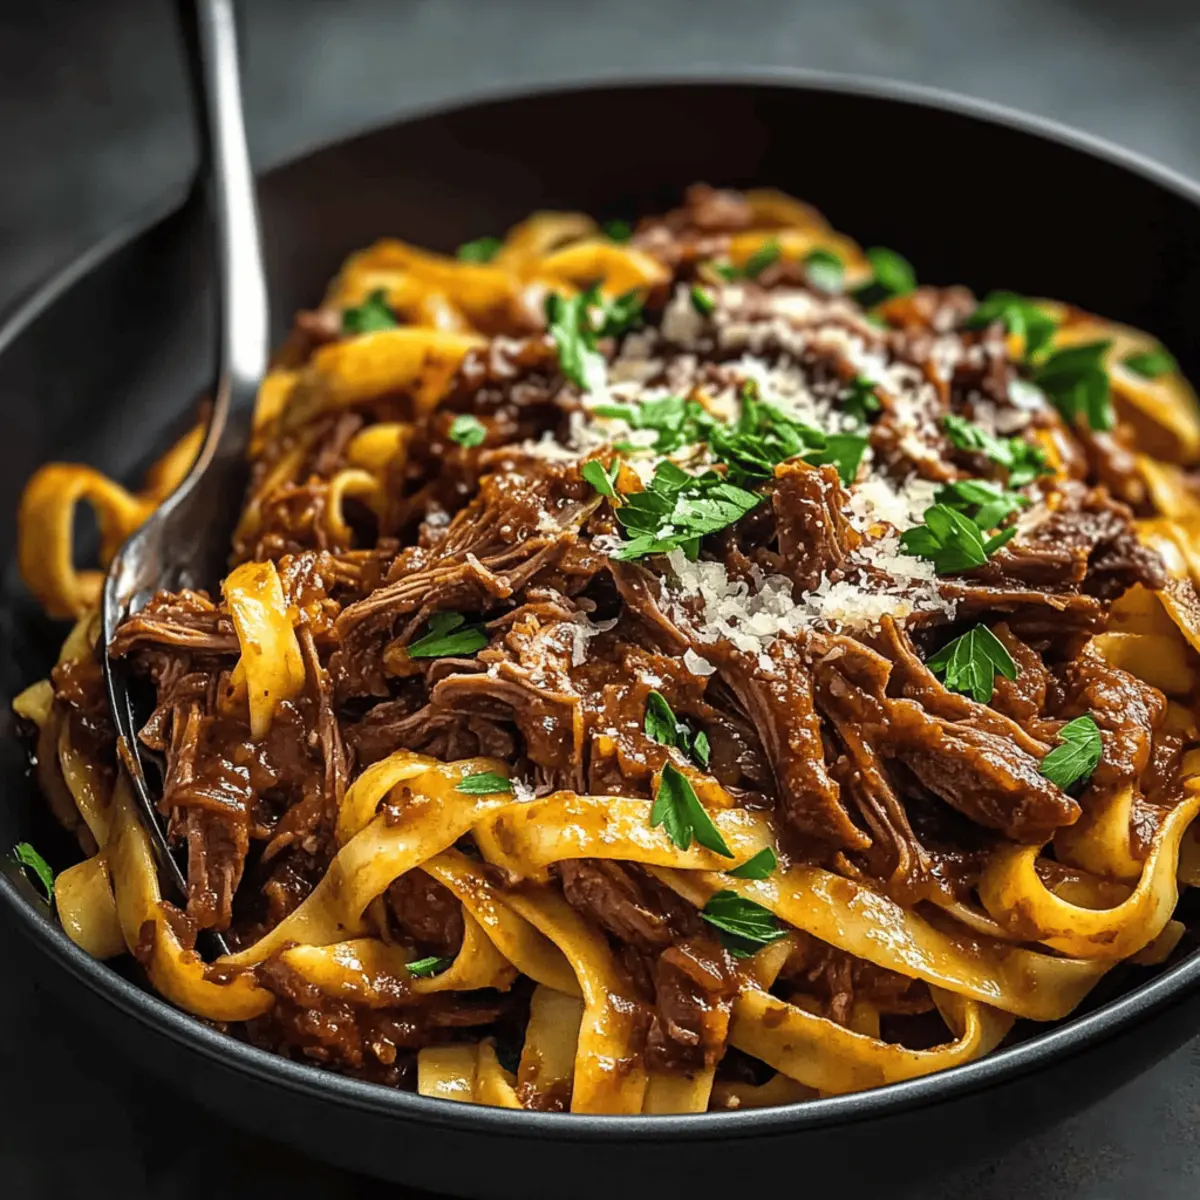
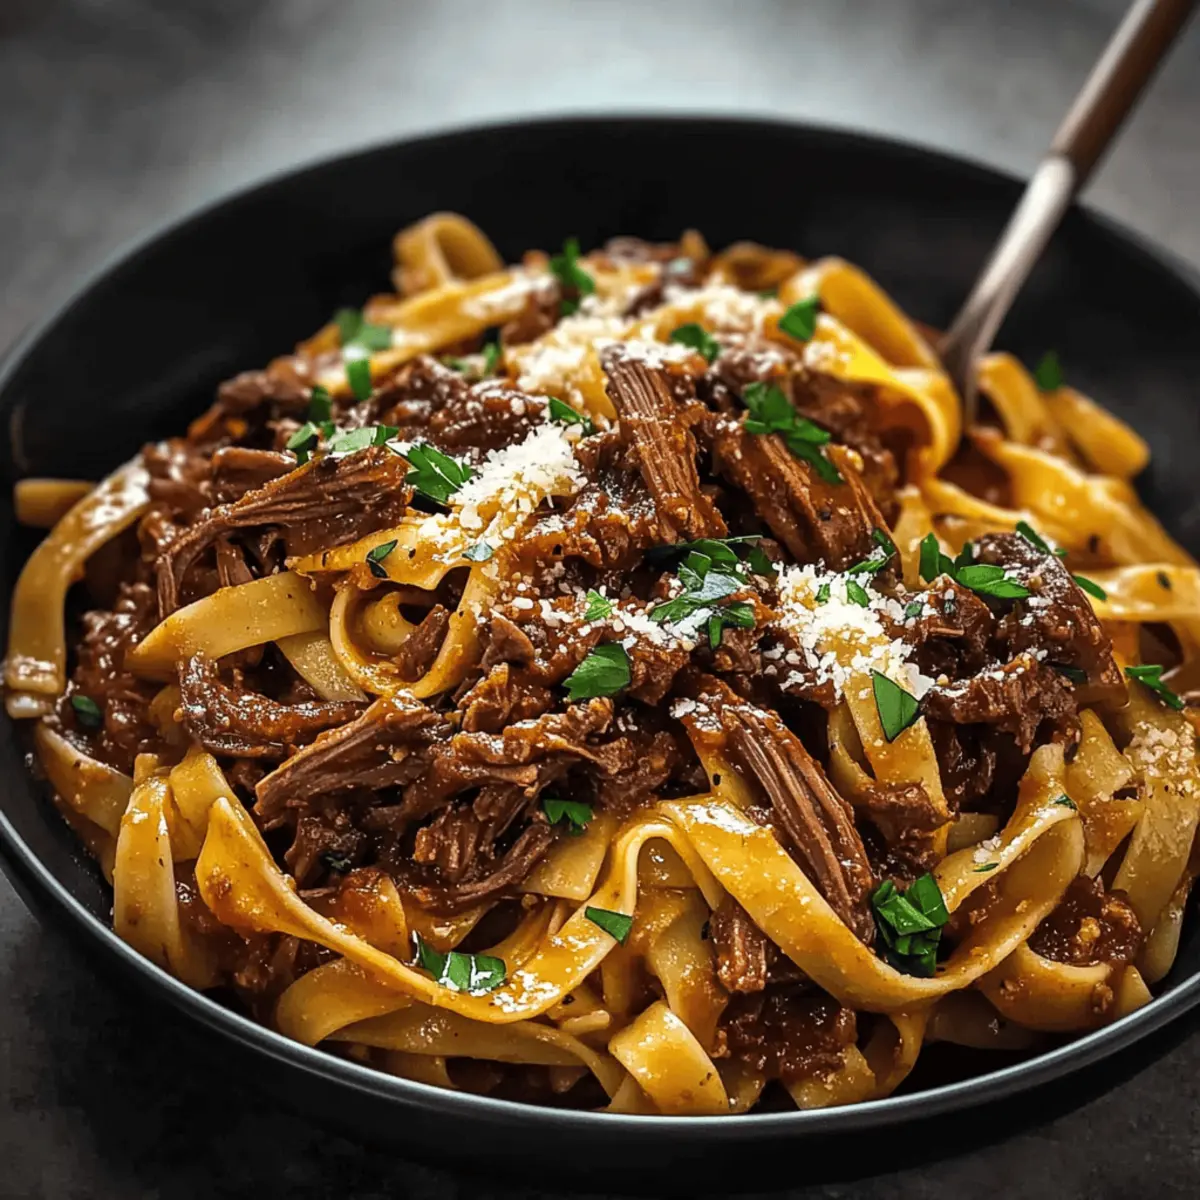
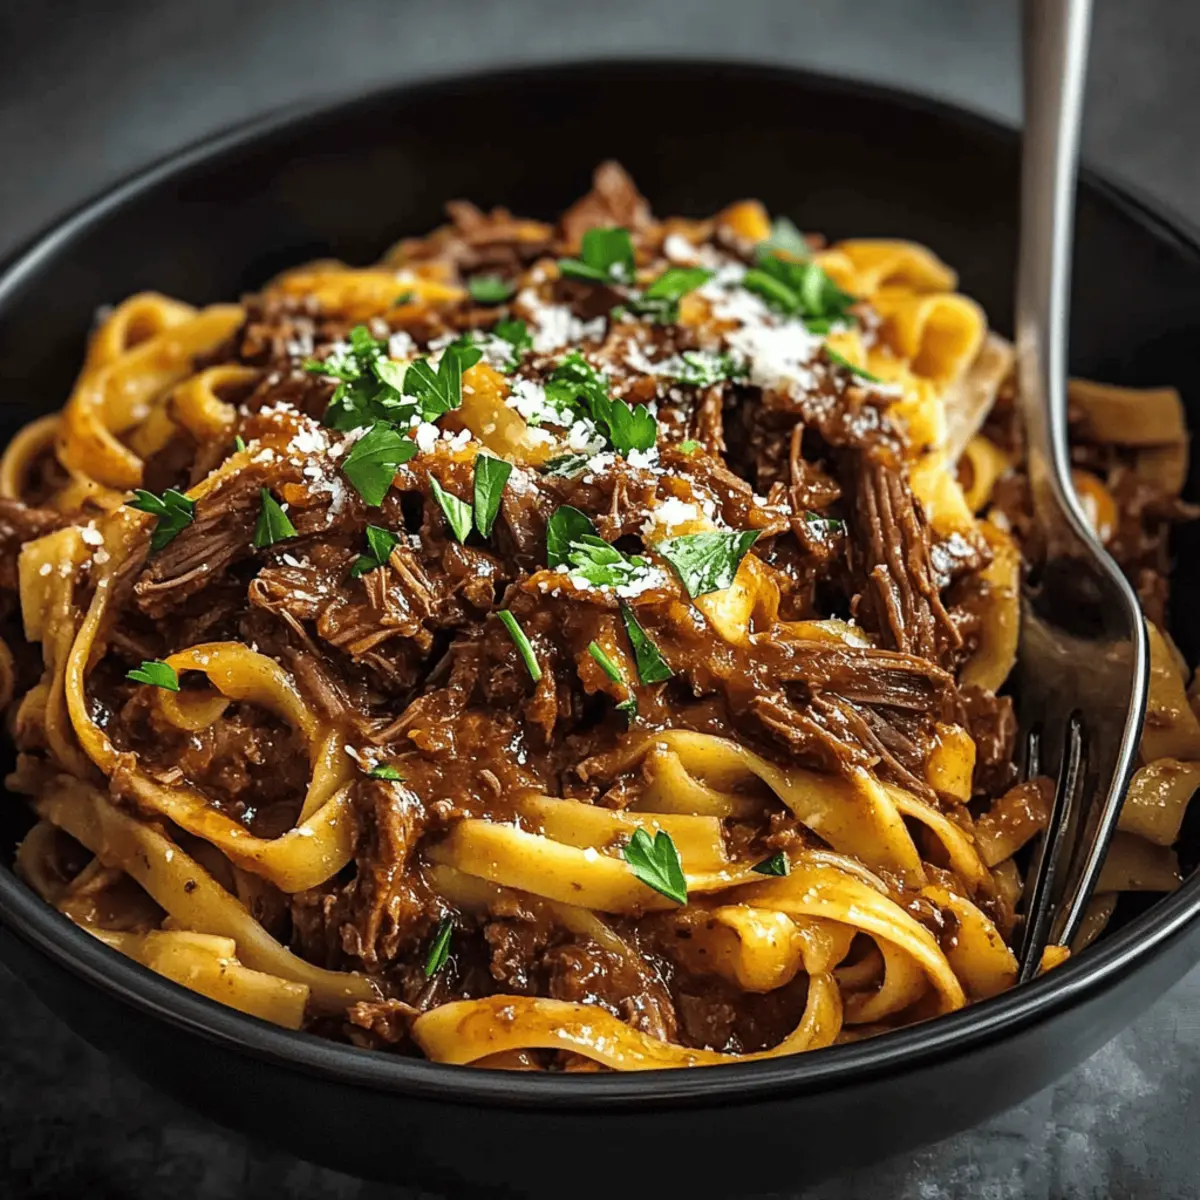
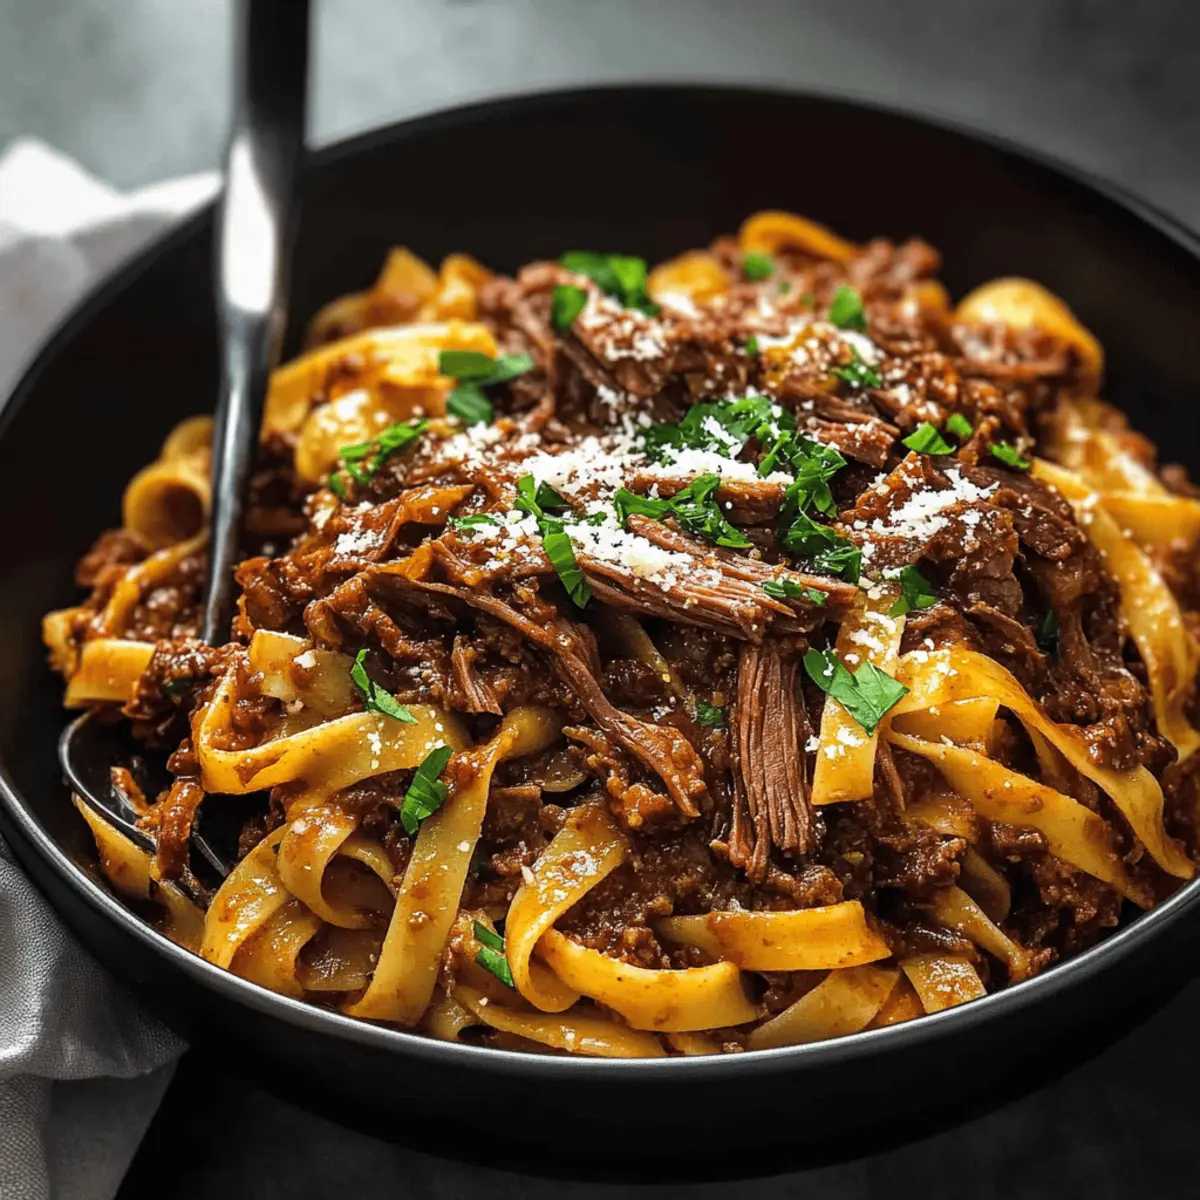
Savory Short Rib Ragu: Ultimate Comfort for Cozy Nights

November 15, 2025 by Grace Snow Leave a Comment

As the savory aroma of red wine and herbs wafts through your kitchen, you may find yourself reminiscing about cozy evenings spent around the dinner table with loved ones. My Slow-Cooked Short Rib Ragu is here to rekindle that warmth. This comforting dish is not only a hearty pasta delight but also perfect for beginner cooks seeking to impress. The best part? While it simmers for about three hours, most of that time is yours to unwind or take care of other things. Imagine tender, melt-in-your-mouth beef enveloped in a rich, luscious sauce, making every bite a satisfying experience. Are you ready to dive into a world of flavor where homemade beats fast food every time?

Why is Short Rib Ragu a Must-Try?

Hearty Comfort: This Short Rib Ragu offers a warm embrace with every forkful, perfect for chilly nights.
Melt-in-Your-Mouth Goodness: The slow cooking transforms the beef into tender, mouthwatering shreds that you'll crave again and again.
Easy Preparation: Ideal for beginner cooks, most of the time is hands-off, allowing you to relax or prepare sides like Spicy Potatoes (Batata Harra) with ease.
Flavorful Depth: The combination of red wine, herbs, and vegetables creates a rich, complex sauce that elevates your meal.
Versatile Use: Pair it with tagliatelle, creamy polenta, or even layer it in a lasagna for varying tastes. This is comfort food reimagined!
Ready to impress your family? This ragu is surely a showstopper, making any weeknight feel special!

Short Rib Ragu Ingredients

• Nourishing flavors await you!

For the Ragu

  • Beef Short Ribs – the star of the dish, offering rich, melt-in-your-mouth flavor; consider using de-boned for easier handling.
  • Light Olive Oil – perfect for searing; feel free to substitute with vegetable or avocado oil if needed.
  • Kosher Salt – generously season the meat and vegetables to enhance their natural flavors.
  • White Onion – provides a sweet depth to the sauce; choose a fresh one for the best results.
  • Celery – adds earthy notes and balances the dish; finely chop for even cooking.
  • Carrot – introduces natural sweetness and vibrant color to the mix; a fresh option will yield the best results.
  • Garlic – finely minced for that aromatic punch; can be adjusted based on your preference.
  • Tomato Paste – intensifies the flavor of the sauce; sautéing it helps to deepen its richness.
  • Red Wine – deglazes the pot and brings acidity that balances the dish; always choose a wine you’d enjoy drinking.
  • Broth (beef or chicken) – contributes liquid and flavor for a luscious sauce base; homemade is always a great choice!
  • Crushed Tomatoes – forms the main body of the sauce, ensuring a cohesive texture; look for quality canned options.
  • Herb Bundle – rosemary, thyme, and parsley leaves lend aromatic complexity to the ragu; feel free to adjust based on what's fresh.
  • Bay Leaves – infuses the sauce with fragrant depth; remember to remove them before serving.
  • Sherry or Red Wine Vinegar – brightens and balances the flavors beautifully; a small splash goes a long way!
  • Pasta (Tagliatelle or Pappardelle) – sturdy pasta shapes are ideal for holding the flavors of the ragu; orecchiette also works wonderfully.
  • Chopped Parsley & Grated Parmigiano Reggiano – fresh garnishes that add a burst of flavor and elegance to your dish.

Get ready to indulge in this comforting Short Rib Ragu that brings the essence of home-cooked meals right to your table!

Step‑by‑Step Instructions for Short Rib Ragu

Step 1: Season Ribs
Begin by generously seasoning the beef short ribs with kosher salt, ensuring they are evenly coated on all sides. This step is crucial for flavor, so take your time to really cover the meat well. Allow the ribs to sit for about 10 minutes, which will help the salt penetrate and enhance the overall taste of your Short Rib Ragu.

Step 2: Sear Ribs
In a large braiser or Dutch oven, heat two tablespoons of light olive oil over medium-high heat until shimmering. Carefully place the seasoned short ribs into the pot, searing them for about 4-5 minutes on each side until they form a deep, golden-brown crust. This caramelization adds a rich flavor to your ragu. Once done, transfer the seared ribs to a plate and set aside.

Step 3: Cook Vegetables
Lower the heat to medium, and in the same pot, add a finely chopped white onion, one diced celery stalk, and a diced carrot. Sauté for 3-4 minutes, stirring frequently, until the vegetables are softened and fragrant. The gentle sizzling combined with their sweet aroma will signal that they are ready for the next step in your Short Rib Ragu.

Step 4: Add Tomato Paste
Now stir in a generous tablespoon of tomato paste, mixing it thoroughly with the vegetables. Sauté the mixture for an additional 2-3 minutes, allowing the paste to cook down and deepen in color while infusing the vegetables with its rich flavor. This caramelized tomato paste is key to achieving a robust taste in your ragu.

Step 5: Deglaze
Next, pour in one cup of red wine, using a wooden spoon to scrape up any flavorful brown bits stuck to the bottom of the pot. This deglazing process, which should take about 2 minutes, is essential for building depth in your Short Rib Ragu. As the wine reduces, the aroma will fill your kitchen, creating a mouthwatering anticipation.

Step 6: Combine Ingredients
Return the seared short ribs to the pot carefully. Add two cups of broth (beef or chicken), one can of crushed tomatoes, an herb bundle containing rosemary, thyme, and parsley stems, along with two bay leaves. Stir everything together until well combined, ensuring that all the ingredients are nestled into the liquid for an even cook.

Step 7: Slow Cook
Cover the pot slightly ajar and reduce the heat to low. Allow your Short Rib Ragu to simmer for 2 to 2.5 hours, stirring occasionally. Watch for the sauce to thicken and the ribs to become fork-tender, creating an inviting, hearty smell in your home. If the sauce appears to dry out, add a splash of broth to maintain moisture.

Step 8: Shred & Serve
Once the ribs are perfectly tender, remove the pot from heat and discard the herb bundle and bay leaves. Using tongs or a fork, shred the beef directly in the pot, mixing it back into the sauce. Adjust the flavors with a splash of sherry or red wine vinegar, then serve your luscious Short Rib Ragu over cooked tagliatelle or pappardelle pasta, garnished with chopped parsley and grated Parmigiano Reggiano for a delightful finish.

Make Ahead Options

Prepare your Short Rib Ragu ahead of time to save precious moments during busy weeknights! You can easily make the ragu up to 24 hours in advance; simply allow it to cool completely before transferring it to an airtight container and refrigerate. For even better flavor, consider letting it rest overnight, as this will enhance the rich, savory taste. When you’re ready to serve, gently reheat the ragu on the stove over low heat, stirring occasionally, and serve it over freshly cooked pasta. This method not only saves time but also ensures that your Short Rib Ragu remains just as delicious and comforting on serving day!

Short Rib Ragu Variations

Explore these delightful twists to create your own unique version of short rib ragu!

  • Stewing Beef: Substitute short ribs with stewing beef for an economical alternative that still delivers rich flavor. It’s a great way to enjoy this hearty dish without breaking the bank.

  • Pasta Swap: Choose alternative pasta shapes like orecchiette or cavatelli for a fun twist on the traditional tagliatelle or pappardelle. Each shape showcases the ragu in a different way, creating a new culinary experience.

  • Vegetable Medley: Add chopped mushrooms, bell peppers, or zucchini to the vegetable mix for extra texture and flavor. These additions complement the ragu beautifully, enhancing its heartiness.

  • Heat It Up: For a spicy kick, include crushed red pepper flakes or diced jalapeños. A little heat balances the richness of the sauce, making every bite a flavorful adventure.

  • Herb Infusion: Experiment by switching the herb bundle to include fresh basil or oregano. This gives the ragu a fresh finish and elevates the aromatic quality, especially during warmer months.

  • Red Wine Variety: Try using different types of red wine, such as a deep Chianti or Merlot, to see how it changes the ragu's flavor profile. Each wine offers a unique depth, enriching the overall dish.

  • Stuffed Delights: Use the ragu as a delicious filling for homemade ravioli or as a layer in lasagna for a comforting take on these classic Italian dishes. This opens up a world of possibilities to savor every bite.

  • Savory Cheeses: Top with crumbled blue cheese or feta for a tangy kick that contrasts beautifully with the rich ragu. This unique flourish brings out a new dimension in flavor you won’t want to miss.

As you venture into your kitchen, remember to check out Asparagus Soup Healthy or delight in a plate of Tagliatelle Asparagus Peas for side dish ideas that complement your ragu splendidly!

Expert Tips for Short Rib Ragu

  • Use a Dutch Oven: This pot ensures even heat distribution, preventing burning and allowing for a perfect slow cook of your Short Rib Ragu.

  • Properly Sear Ribs: Take your time during searing to achieve a rich, caramelized crust. Skipping this step may result in less flavor in your sauce.

  • Avoid Overcrowding Vegetables: Sauté vegetables without crowding the pot to promote even cooking. This balances their sweetness and ensures optimal flavor development.

  • Adjust Consistency: If the ragu becomes too thick while cooking, simply add a splash of broth to maintain a luscious, rich texture.

  • Make Ahead for Flavor: Prepare your Short Rib Ragu a day in advance. It tastes even better the next day, allowing flavors to fully develop.

  • Experiment with Meats: While beef short ribs are exceptional, consider using stewing beef or other meats for a delightful twist on this comforting dish.

What to Serve with Short Rib Ragu

As the rich aroma of your slow-cooked creation fills the space, you'll want to complement this comforting dish with delightful pairings that envelope your senses.

  • Creamy Polenta: This smooth base absorbs the ragu’s delicious sauce, creating a luxurious, hearty dish everyone will love.
  • Garlic Bread: A crunchy side that welcomes the sauce and balances the rich flavors with its buttery bite. Perfect for soaking up every morsel!
  • Roasted Vegetables: Opt for seasonal veggies like carrots or Brussels sprouts; their sweetness contrasts beautifully with the savory ragu.
  • Herb Salad: A fresh herb salad mixed with olive oil and lemon brightens the meal, cleansing the palate between bites of the hearty ragu.
  • Parmesan Risotto: The creamy, cheesy texture of risotto pairs seamlessly, making for an indulgent dining experience worth sharing.
  • Red Wine: A glass of the same robust red wine used for cooking beautifully enhances the flavors, creating a harmonious dining atmosphere.
  • Chocolate Mousse: End on a sweet note—this light, airy dessert makes a perfect finish after the savory experience of the ragu.
  • Homemade Pasta: For a hearty touch, serve on fresh fettuccine, as the ragu clings to the strands, ensuring each bite is utterly satisfying!
  • Fresh Focaccia: Offered warm with olive oil for dipping, this bread adds a delightful crunch and pairs perfectly with the meal’s textures.
  • Crusty Multigrain Bread: A nutritious option to bring to the table, allowing everyone to enjoy the robust sauce in a wholesome way.

How to Store and Freeze Short Rib Ragu

Fridge: Store any leftover Short Rib Ragu in an airtight container for up to 4 days. This helps retain its deep flavor and luscious texture for your next meal.

Freezer: If you want to enjoy the ragu later, freeze it in an airtight container for up to 3 months. Be sure to cool it completely before placing it in the freezer.

Reheating: When ready to enjoy, thaw overnight in the fridge and reheat gently on the stovetop over low heat until warmed through, adding a splash of broth if needed to restore moisture.

Separation Tip: For optimal taste and texture, store the ragu separately from any pasta if you plan to have leftovers. This prevents the pasta from becoming soggy.

Short Rib Ragu Recipe FAQs

What kind of short ribs should I use for this ragu?
I recommend using beef short ribs, as they provide a rich, melt-in-your-mouth flavor that is perfect for ragu. If you want to lighten the load on your wallet, you can also opt for stewing beef, which will still yield a delicious result but at a more affordable price.

How do I know when my short ribs are properly seared?
Properly seared short ribs should have a deep, golden-brown crust that adds flavor to your ragu. Aim for about 4-5 minutes on each side over medium-high heat until they form a nice crust. Don’t rush this step, as it enhances the overall richness of the dish!

What's the best way to store leftover short rib ragu?
To store leftovers, simply place them in an airtight container in the fridge, where they will last for up to 4 days. For longer storage, freeze your ragu in an airtight container for up to 3 months. Just remember, it’s best to cool it completely before freezing to maintain texture.

Can I freeze short rib ragu, and how should I do it?
Absolutely! Allow your short rib ragu to cool completely, then transfer it to an airtight container or freezer-safe bag. It will maintain its quality for up to 3 months. When you’re ready to enjoy it again, thaw it overnight in the fridge and reheat it gently on the stovetop over low heat. A splash of broth may help restore moisture as it reheats.

Are there any dietary considerations I should keep in mind?
If you have allergies, be sure to check the labels on your broth and any canned products, as they can sometimes contain hidden allergens. If you have pets, avoid sharing any food that contains onions or garlic, as they are harmful to dogs and cats. If you're cooking for someone with a gluten sensitivity, simply serve the ragu over gluten-free pasta or polenta for an inclusive meal!

Short Rib Ragu

Savory Short Rib Ragu: Ultimate Comfort for Cozy Nights

Enjoy the rich flavors of Short Rib Ragu, a comforting dish ideal for cozy nights with loved ones.
Print Recipe Pin Recipe
Prep Time 20 minutes mins
Cook Time 2 hours hrs 30 minutes mins
Total Time 2 hours hrs 50 minutes mins
Servings: 4 servings
Course: Dinner
Cuisine: Italian
Calories: 600
Ingredients Equipment Method Nutrition Notes

Ingredients
  

For the Ragu
  • 2 pounds Beef Short Ribs consider using de-boned for easier handling
  • 2 tablespoons Light Olive Oil or substitute with vegetable or avocado oil
  • 1 tablespoon Kosher Salt for seasoning
  • 1 medium White Onion finely chopped for the sauce
  • 1 stalk Celery finely chopped
  • 1 medium Carrot diced, fresh
  • 4 cloves Garlic minced
  • 1 tablespoon Tomato Paste sauté to deepen richness
  • 1 cup Red Wine a wine you’d enjoy drinking
  • 2 cups Broth beef or chicken
  • 28 ounces Crushed Tomatoes use quality canned options
  • 1 bunch Herb Bundle includes rosemary, thyme, and parsley
  • 2 leaves Bay Leaves remove before serving
  • 1 tablespoon Sherry or Red Wine Vinegar adjust to taste
  • 12 ounces Pasta Tagliatelle or Pappardelle
  • 1/4 cup Chopped Parsley for garnish
  • 1/2 cup Grated Parmigiano Reggiano for serving

Equipment

  • Dutch oven

Method
 

Step-by-Step Instructions
  1. Season the beef short ribs with kosher salt, ensuring they are coated on all sides. Let them sit for 10 minutes.
  2. In a Dutch oven, heat two tablespoons of olive oil. Sear the short ribs for 4-5 minutes on each side until golden brown. Transfer to a plate.
  3. Add chopped onion, celery, and carrot to the pot. Sauté for 3-4 minutes until softened and fragrant.
  4. Stir in the tomato paste and sauté for an additional 2-3 minutes until it deepens in color.
  5. Deglaze the pot with the red wine, scraping up brown bits for 2 minutes.
  6. Return the ribs to the pot, add broth, crushed tomatoes, the herb bundle, and bay leaves. Stir well.
  7. Cover the pot slightly ajar, reduce heat to low, and simmer for 2 to 2.5 hours until the ribs are fork-tender.
  8. After cooking, discard the herb bundle and bay leaves. Shred the beef in the pot and adjust flavors with vinegar. Serve over pasta garnished with parsley and cheese.

Nutrition

Serving: 1plateCalories: 600kcalCarbohydrates: 45gProtein: 30gFat: 30gSaturated Fat: 10gPolyunsaturated Fat: 4gMonounsaturated Fat: 12gCholesterol: 100mgSodium: 900mgPotassium: 800mgFiber: 5gSugar: 6gVitamin A: 20IUVitamin C: 6mgCalcium: 100mgIron: 5mg

Notes

Ideal to prepare a day in advance for enhanced flavor. Store leftovers properly to maintain texture.

Tried this recipe?

Let us know how it was!

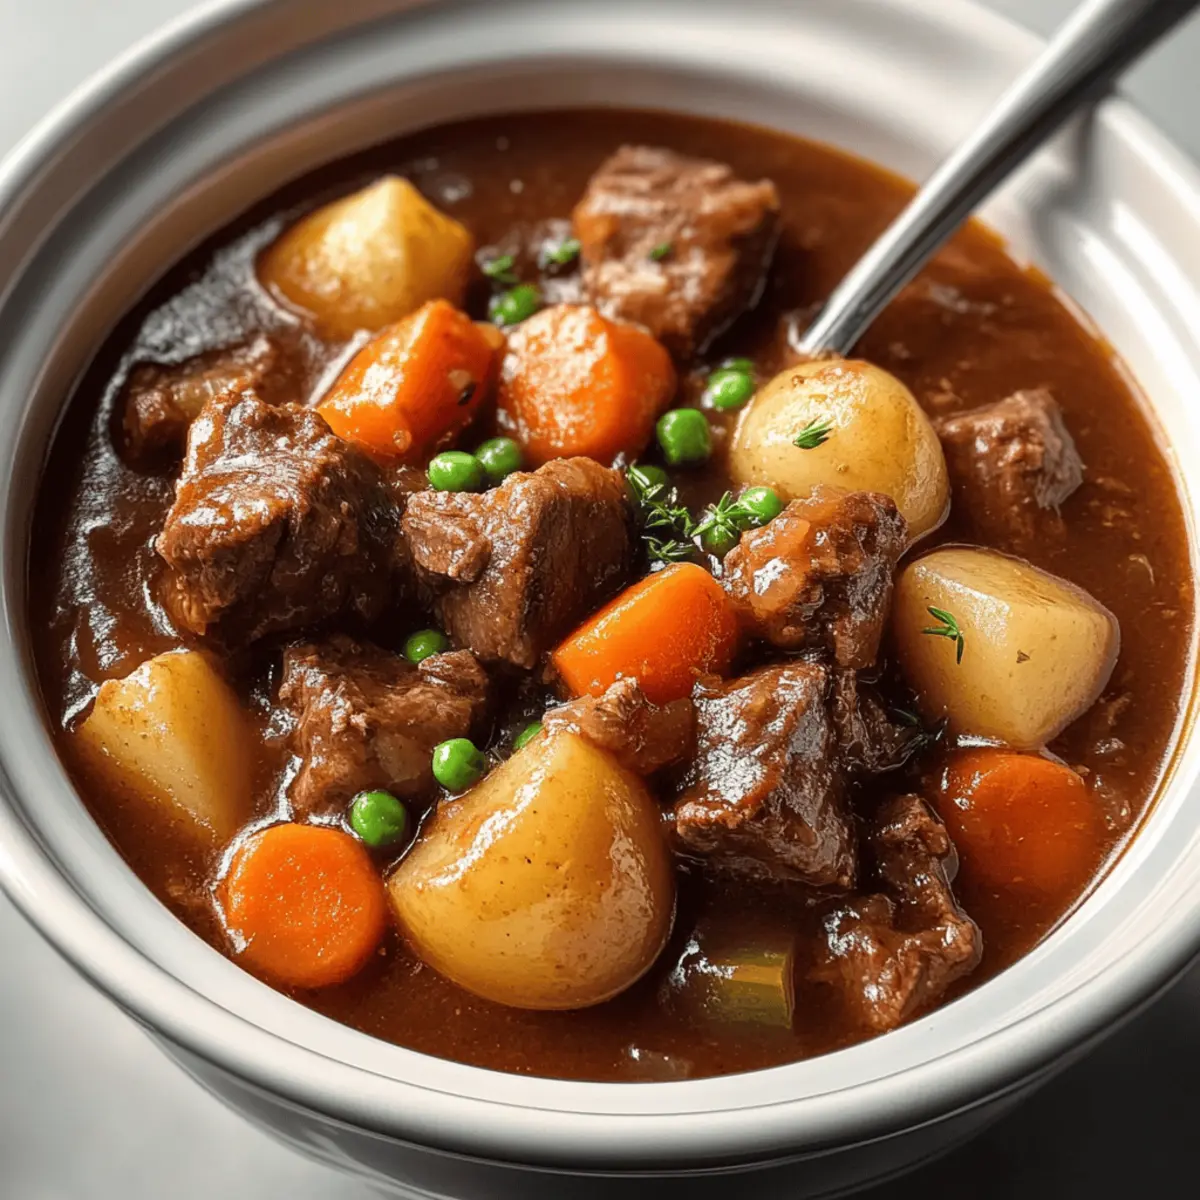
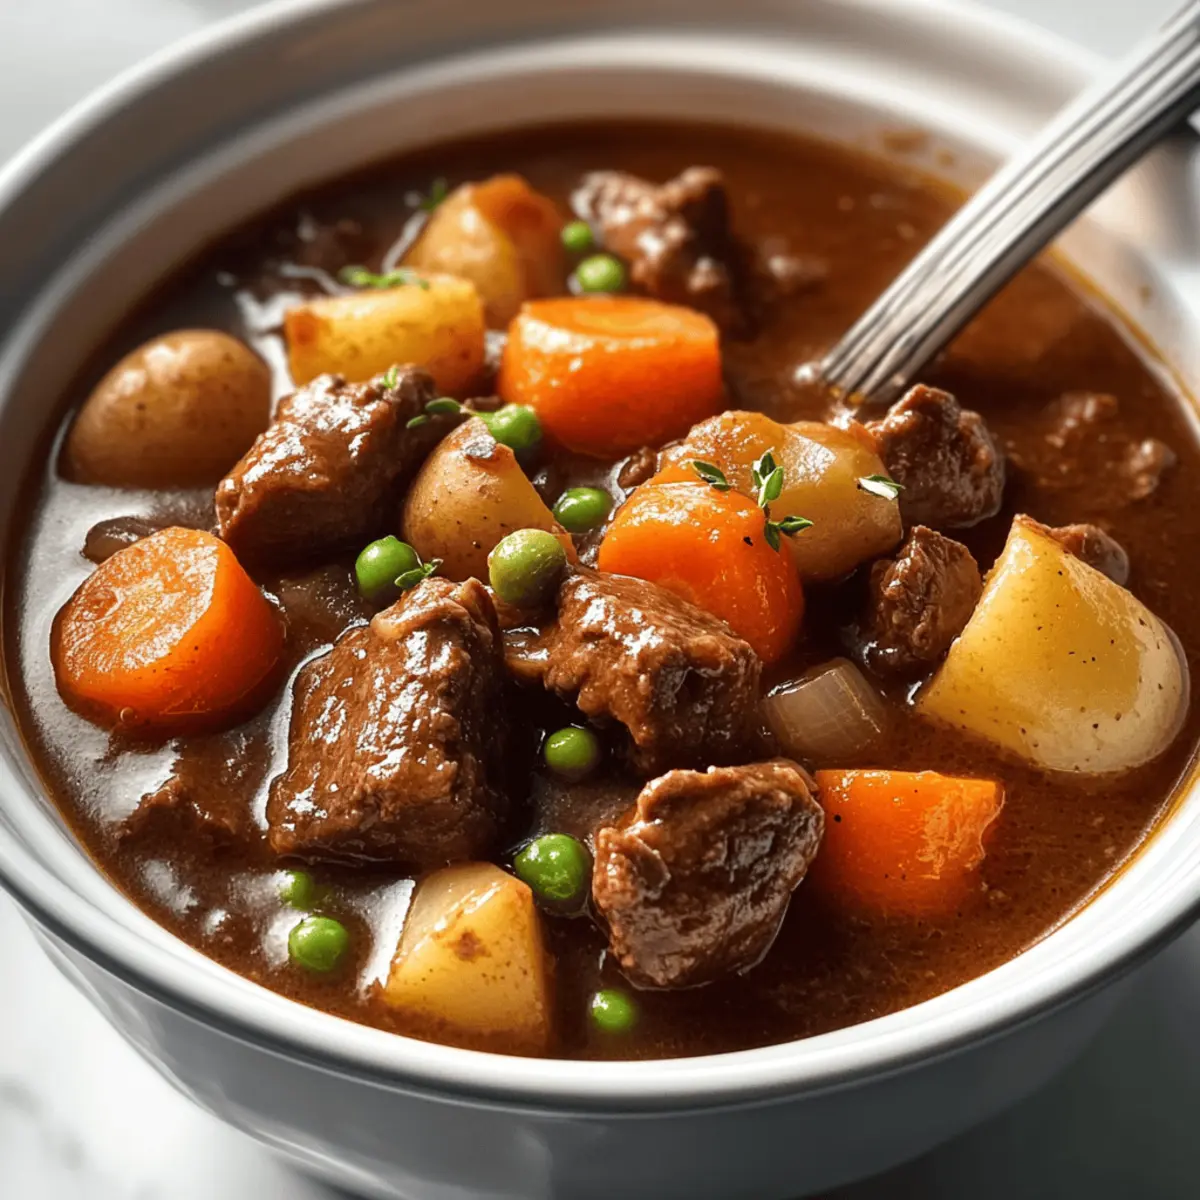
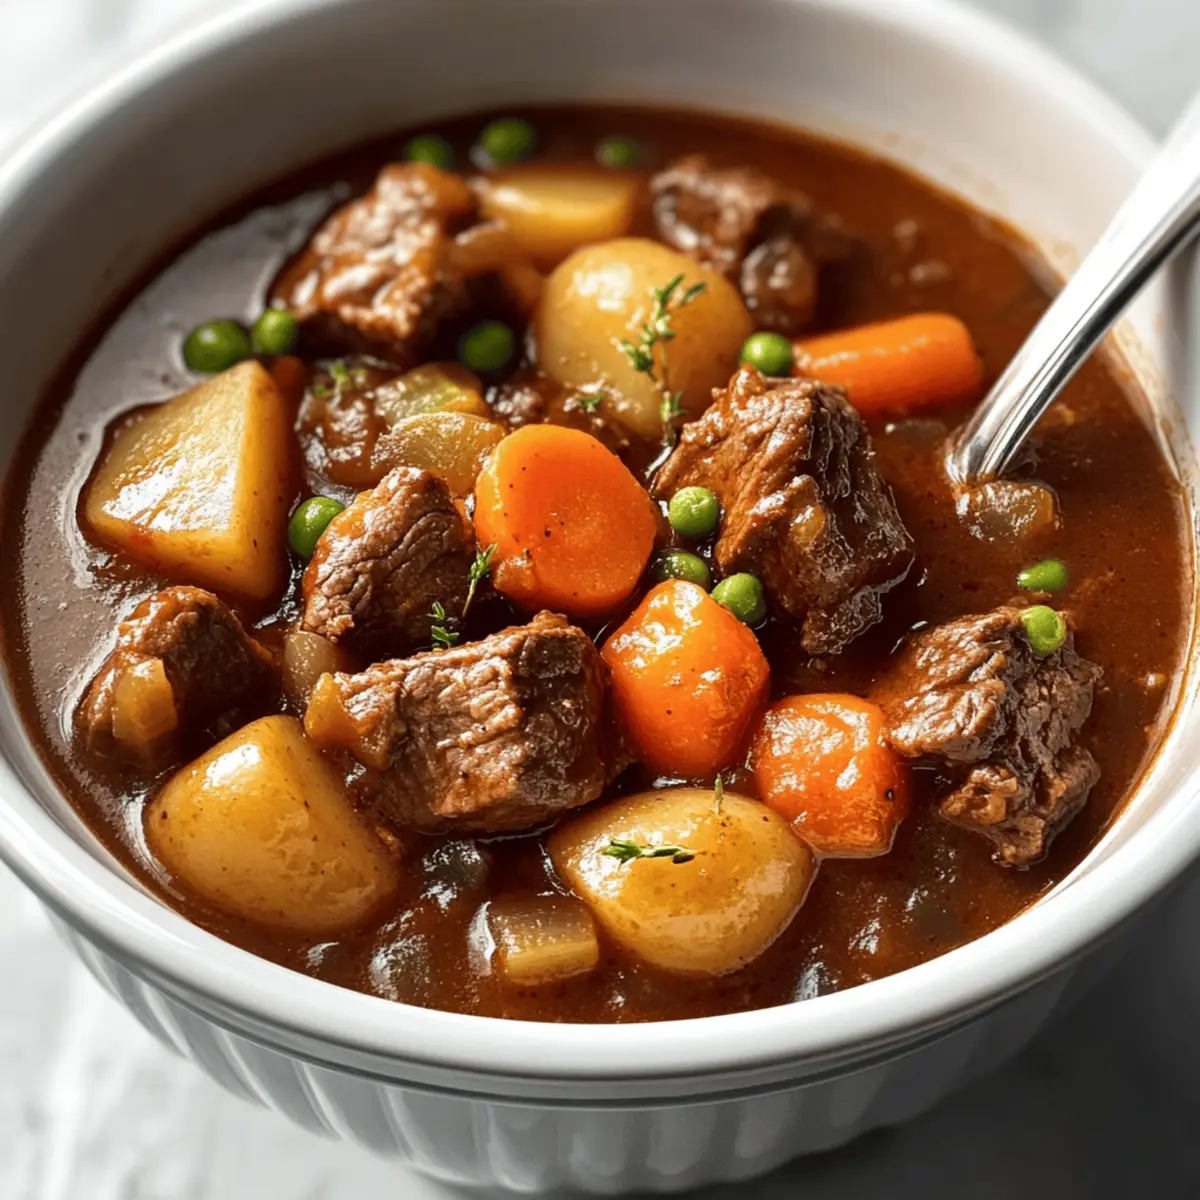
Wholesome Crockpot Beef Stew for Cozy Nights In

November 15, 2025 by Grace Snow Leave a Comment

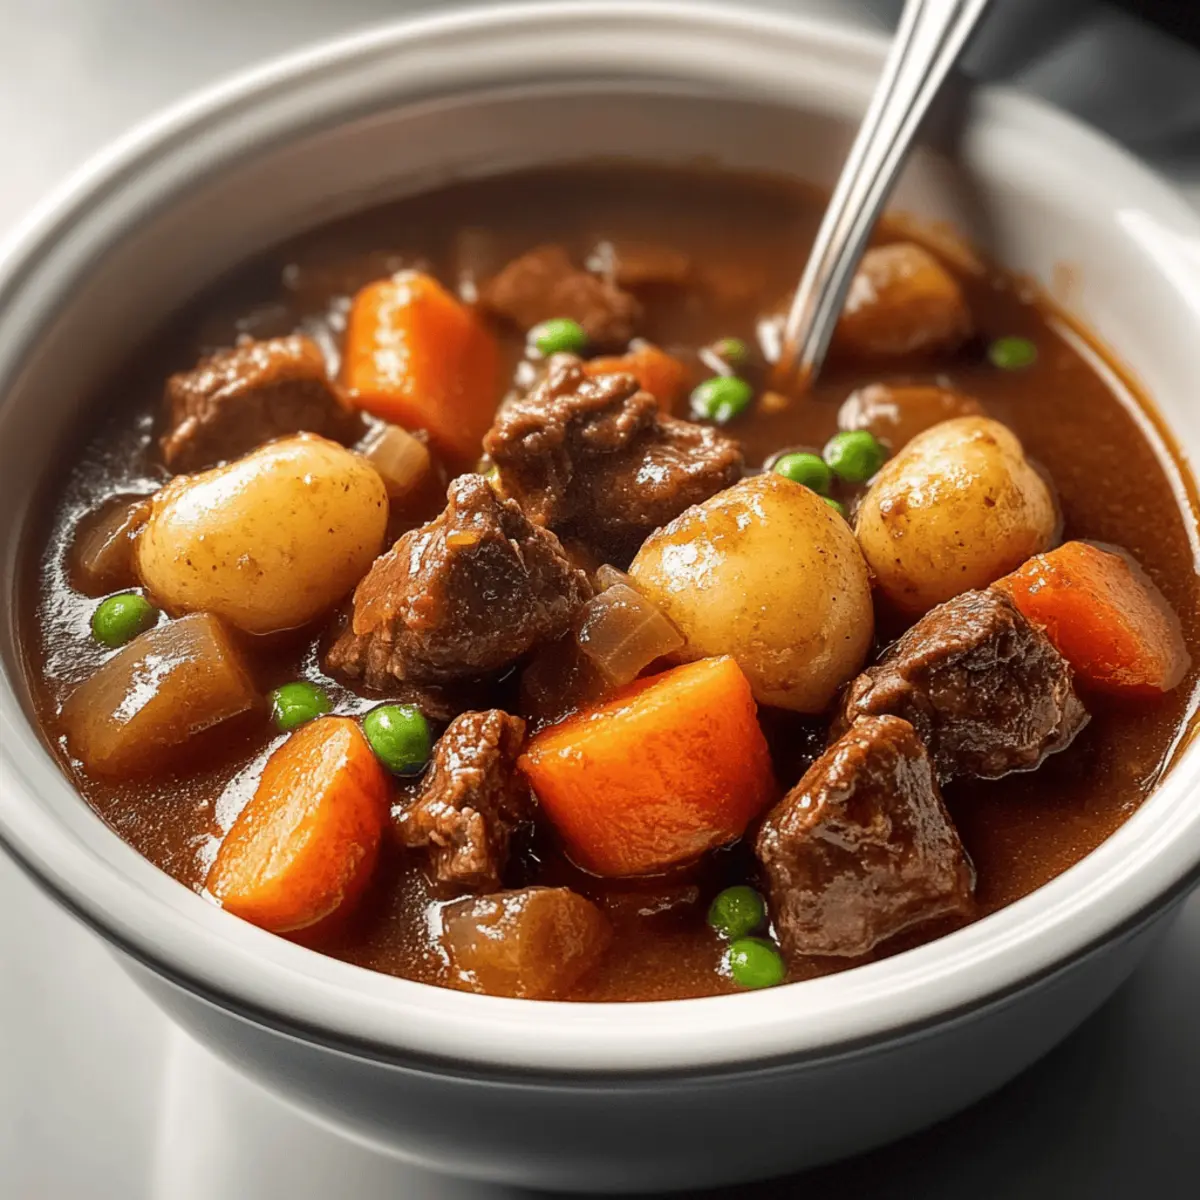
As I plopped down after a long day, the comforting aroma dancing from the kitchen not only drew me in but also promised warmth and satisfaction. This is what happens when you whip up a Wholesome Crockpot Beef Stew—lovingly crafted to embrace your senses with its tender chunks of beef simmered in a rich, savory broth. The glorious mix of vegetables adds just the right touch, turning this into a meal even the pickiest eaters can’t resist. It’s perfect for busy weeknights—prep it in the morning and return home to a hearty feast that feels like a hug in a bowl. Plus, it’s make-ahead and freezer-friendly, making dinner planning a breeze! Are you ready to dive into the cozy world of slow-cooked goodness?

Why Is This Beef Stew So Special?

Unmatched Convenience: This Wholesome Crockpot Beef Stew allows you to prep in minutes, leaving it to slowly cook while you go about your day.

Rich, Deep Flavors: The blend of red wine and fresh herbs creates a savoriness that fills your kitchen with irresistible scents.

Versatile Variations: Whether you stick with beef or opt for portobello mushrooms, this stew happily adapts to your dietary needs.

Family-Friendly Fare: Even picky eaters will enjoy this comforting dish, making it a wonderful choice for family dinners.

Make-Ahead Magic: Leftovers can be easily stored for up to three days or frozen for later, ensuring you always have a hearty meal ready to go. Check out recipes like Crockpot Butter Chicken or Ground Beef Enchiladas for more crowd-pleasers!

Wholesome Crockpot Beef Stew Ingredients

For the Beef Stew
• Stew Meat – The main protein; chuck roast is ideal for tenderness. Substitute bottom round or portobello mushrooms for a vegetarian version.
• Olive Oil – Perfect for browning meat and adding a touch of flavor.
• Butter – Enhances richness when sautéing onions and other aromatics.
• Onion – Provides sweetness and elevates the stew's depth.
• Garlic – Infuses delicious aromatic flavor throughout the dish.
• Red Wine – Contributes to the broth’s complexity; swap with beef stock or grape juice for alcohol-free.
• Beef Stock – Essential for creating a rich stew base; choose high-quality for the best flavor.
• Carrots – Add natural sweetness and essential nutrients.
• Potatoes – Offer heartiness and help thicken the stew as they cook.
• Frozen Peas – Added at the end for a pop of color and a hint of sweetness.
• Flour – Thickens the stew beautifully; cornstarch is a gluten-free option.
• Fresh Herbs (e.g., rosemary, thyme) – Infuse fresh notes and aroma into the dish.
• Seasonings (salt, black pepper, garlic salt, celery salt) – Key enhancers for overall flavor.

This Wholesome Crockpot Beef Stew is as much about the ingredients as it is about the time you put into making it—each one plays a vital role in creating a cozy and delicious meal!

Step‑by‑Step Instructions for Wholesome Crockpot Beef Stew

Step 1: Prepare the Beef
Start by cutting the chuck roast into 1½-inch cubes, carefully trimming away any excess fat. Season the beef generously with black pepper, garlic salt, and celery salt, ensuring every piece is coated. This step enhances the flavor profile of your Wholesome Crockpot Beef Stew right from the start.

Step 2: Browning the Meat
Toss the seasoned beef cubes with flour in a bowl, making sure they're evenly coated. In a large skillet, heat olive oil over medium-high heat. Add the beef in batches and sauté for about 3–4 minutes, or until each piece is browned on all sides. This not only locks in flavor but also gives the stew a rich base.

Step 3: Sauté the Aromatics
In the same skillet, melt butter over medium heat and add diced onion, cooking until softened and translucent, about 5 minutes. Stir in minced garlic and sauté for an additional minute until fragrant. Deglaze the skillet with a splash of red wine, scraping up the browned bits, then transfer this mixture to the slow cooker for your stew.

Step 4: Combine Remaining Ingredients
Add the browned beef, sautéed onion, and garlic to the slow cooker. Then, pour in the beef stock, followed by chopped carrots, diced potatoes, and fresh herbs like rosemary and thyme. Stir everything together thoroughly, ensuring the ingredients are well-mixed for a balanced flavor in your Wholesome Crockpot Beef Stew.

Step 5: Cook the Stew
Cover your slow cooker with the lid and select the low setting. Allow the stew to cook for 7½ to 8 hours, or on high for 3½ to 4 hours. The stew is ready when the beef is tender and easily shreds with a fork, and the vegetables are cooked through and soft.

Step 6: Finishing Touches
In the last 15 minutes of cooking, stir in the frozen peas to add vibrant color and sweetness. If you want to thicken the stew further, mix cornstarch with cold water to create a slurry, and add it while stirring. This step will give your Wholesome Crockpot Beef Stew a satisfying, hearty texture.

Step 7: Final Seasoning and Serve
Once the cooking time is up, taste the stew for seasoning and adjust with salt, pepper, or additional herbs as desired. Serve this comforting dish hot, ideally with crusty bread or a fresh salad on the side, making it a delightful meal for your family or guests.

Storage Tips for Wholesome Crockpot Beef Stew

  • Fridge: Store leftover Wholesome Crockpot Beef Stew in an airtight container for up to 3 days. Reheat gently on the stovetop or in the microwave, adding a splash of stock or water if needed.
  • Freezer: Freeze the stew in portioned airtight containers for up to 3 months. Label with the date and use within the recommended timeframe for best quality.
  • Reheating: To reheat, thaw overnight in the fridge if frozen, then warm on the stovetop over low heat, stirring occasionally. Add a little broth to ensure it stays moist.
  • Serving: Consider adding a fresh herb garnish when serving again for an extra boost of flavor, making each reheated portion feel like a warm, comforting meal.

Helpful Tricks for Wholesome Crockpot Beef Stew

  • Choose Quality Meat: Always select well-marbled beef for tenderness. Lean cuts can result in tougher pieces, ruining your Wholesome Crockpot Beef Stew.

  • Don’t Skip Browning: Browning the beef in olive oil builds depth. Skipping this step can result in a flat flavor profile.

  • Correct Cooking Time: Cook on low for 7½ to 8 hours or high for 3½ to 4 hours. Pull the meat apart easily to test if it’s done; overcooking will dry it out.

  • Adjust to Taste: Don’t hesitate to tweak seasonings before serving. A pinch of salt or a splash of vinegar at the end can elevate your stew dramatically.

  • Freeze for Later: Make a double batch and freeze leftovers in portions up to 3 months. Just remember to add a little liquid when reheating to keep it moist!

What to Serve with Hearty Crockpot Beef Stew

As you gather around the table, the warm aroma of slow-cooked beef will invite your family to enjoy a full-bodied meal filled with love and comfort.

  • Crusty Bread: Perfect for dipping, a warm slice will soak up the luscious broth and add a delightful crunch.

  • Simple Green Salad: A light salad with a tangy vinaigrette balances the richness of the stew, providing a refreshing contrast to the hearty flavors.

  • Garlic Mashed Potatoes: Ultra-creamy potatoes are a classic pairing that complement the stew’s textures while delivering an extra dose of comfort.

  • Roasted Root Vegetables: Carrots, parsnips, and sweet potatoes enhance the wholesome taste and add a delightful sweetness to your meal.

  • Buttered Corn on the Cob: This simple side brings a pop of sweetness and a fun, summery feel, countering the hearty beef stew perfectly.

  • Rich Red Wine: A glass of red wine, like a Cabernet Sauvignon, enhances the deep flavors of your stew while making the dining experience even more special.

  • Chocolate Lava Cake: For dessert, a warm chocolate lava cake offers a decadent finish, creating a cozy end to your flavorful meal.

  • Apple Crisp: This warm, spiced dessert echoes the comfort of the stew and adds a delightful fruity touch that everyone will love.

Make Ahead Options

These Wholesome Crockpot Beef Stew components are perfect for meal prep, saving you time during those busy weeknights! You can chop the vegetables (carrots, potatoes, onions, and garlic) and marinate the beef in seasoning up to 24 hours in advance, storing them in separate airtight containers in the fridge. For best results, keep the beef and vegetables separate until you're ready to cook, preventing excess moisture. When you're set to enjoy your hearty stew, simply combine everything in the slow cooker and follow the usual cooking instructions. This way, you'll have a delicious, comforting meal waiting for you with minimal effort!

Wholesome Crockpot Beef Stew Variations

Feel free to play around with this recipe, adding your personal touch to create the perfect dish for cozy nights.

  • Vegetarian: Substitute the beef with portobello mushrooms, sautéed to bring out their rich flavor. This twist offers a hearty alternative without sacrificing satisfaction.

  • Gluten-Free: Use cornstarch instead of flour to thicken the stew, making it friendly for gluten sensitivities while maintaining that thick, luscious texture.

  • Root Vegetable Boost: Swap in parsnips or sweet potatoes for a twist on traditional carrots and potatoes. Their unique flavors and textures will elevate your stew to new heights.

  • Spicy Kick: Add diced jalapeños or a dash of cayenne pepper for a little heat. This will awaken the flavor and bring an exciting zing to your hearty stew.

  • Herb Variations: Experiment with different herbs such as sage or oregano based on what you have on hand. This can completely alter the flavor profile of the stew, making it a culinary adventure.

  • Savory Stock Swap: Use a mixture of beef stock and a splash of balsamic vinegar instead of red wine for depth. This combo adds a special richness that will make your stew stand out.

  • Green Goodness: Toss in chopped green beans or spinach in the last 10 minutes of cooking for added nutrients and a pop of color. It's an excellent way to sneak in some extra veggies!

  • Slow-Cooker Alternatives: Don't forget that this stew can also be made on the stove or in an Instant Pot, just adjust cooking times accordingly. Each method brings a different flavor and texture, giving you options for easy cooking.

If you're looking for more cozy meal inspiration, check out Lamb Stew Hearty or Coconutty Beans and Greens Stew for another level of comfort food!

Wholesome Crockpot Beef Stew Recipe FAQs

What type of beef is best for stew?
For the best results in your Wholesome Crockpot Beef Stew, I recommend using chuck roast. This cut is well-marbled, which means it has a good amount of fat that keeps the meat tender during long, slow cooking. If you’re looking for alternatives, bottom round is a decent substitute, or for a vegetarian option, try portobello mushrooms.

How do I store leftover beef stew?
Absolutely! Store your leftover Wholesome Crockpot Beef Stew in an airtight container in the fridge for up to 3 days. When reheating, add a splash of broth or water to keep it moist. If you find you have more than you can eat, consider freezing it for later.

Can I freeze this stew?
Very! You can freeze portions of your Wholesome Crockpot Beef Stew in airtight containers for up to 3 months. Just label them with the date. To reheat, take it out the night before and let it thaw in the fridge, then warm it gently on the stovetop, stirring occasionally. A little added broth will help it stay juicy!

What should I do if my stew is too thin?
If your Wholesome Crockpot Beef Stew is too thin after cooking, don't worry! You can mix a tablespoon of cornstarch with cold water to create a slurry. Stir this mixture into the stew during the last 15 minutes of cooking while it's still bubbling. This will help thicken the broth, giving you that hearty texture you’re looking for!

Is this stew suitable for gluten-free diets?
Yes, indeed! To make your Wholesome Crockpot Beef Stew gluten-free, simply substitute the flour used for browning the meat with cornstarch. This adjustment ensures that everyone can enjoy this comforting meal without worrying about gluten sensitivities. Just remember to use gluten-free beef stock as well.

How do I pick ripe vegetables for the stew?
Selecting the right vegetables is crucial! Choose carrots that are firm with a smooth surface, avoiding those with dark spots or soft spots. For potatoes, look for ones that are free of blemishes and sprouts. Aim for fresh herbs with vibrant color and a fragrant aroma to enhance the flavors in your Wholesome Crockpot Beef Stew. Always remember, fresh ingredients make the dish sing!

Wholesome Crockpot Beef Stew

Wholesome Crockpot Beef Stew for Cozy Nights In

A deliciously hearty Wholesome Crockpot Beef Stew, perfect for cozy nights, featuring tender beef and a rich, savory broth.
Print Recipe Pin Recipe
Prep Time 20 minutes mins
Cook Time 7 hours hrs 30 minutes mins
Total Time 7 hours hrs 50 minutes mins
Servings: 4 bowls
Course: Dinner
Cuisine: American
Calories: 350
Ingredients Equipment Method Nutrition Notes

Ingredients
  

For the Beef Stew
  • 2 pounds Stew meat (chuck roast) Can substitute bottom round or portobello mushrooms for vegetarian version.
  • 2 tablespoons Olive oil For browning meat.
  • 2 tablespoons Butter Enhances richness.
  • 1 medium Onion Diced.
  • 4 cloves Garlic Minced.
  • 1 cup Red wine Can substitute with beef stock or grape juice.
  • 4 cups Beef stock Use high-quality stock.
  • 3 medium Carrots Chopped.
  • 2 medium Potatoes Diced.
  • 1 cup Frozen peas Added at the end.
  • 1/3 cup Flour Use cornstarch for gluten-free.
  • 2 sprigs Fresh herbs (e.g., rosemary, thyme)
  • to taste Seasonings (salt, black pepper, garlic salt, celery salt)

Equipment

  • Slow Cooker
  • Skillet
  • Cutting Board
  • Chef’s Knife
  • measuring cups
  • Measuring Spoons

Method
 

Step-by-Step Instructions
  1. Start by cutting the chuck roast into 1½-inch cubes, trimming excess fat. Season generously with black pepper, garlic salt, and celery salt.
  2. Toss seasoned beef cubes with flour. In a skillet, heat olive oil and brown beef in batches for about 3-4 minutes.
  3. Melt butter in the skillet, add diced onion, and cook until softened. Stir in garlic and sauté for a minute. Deglaze with red wine, then transfer to slow cooker.
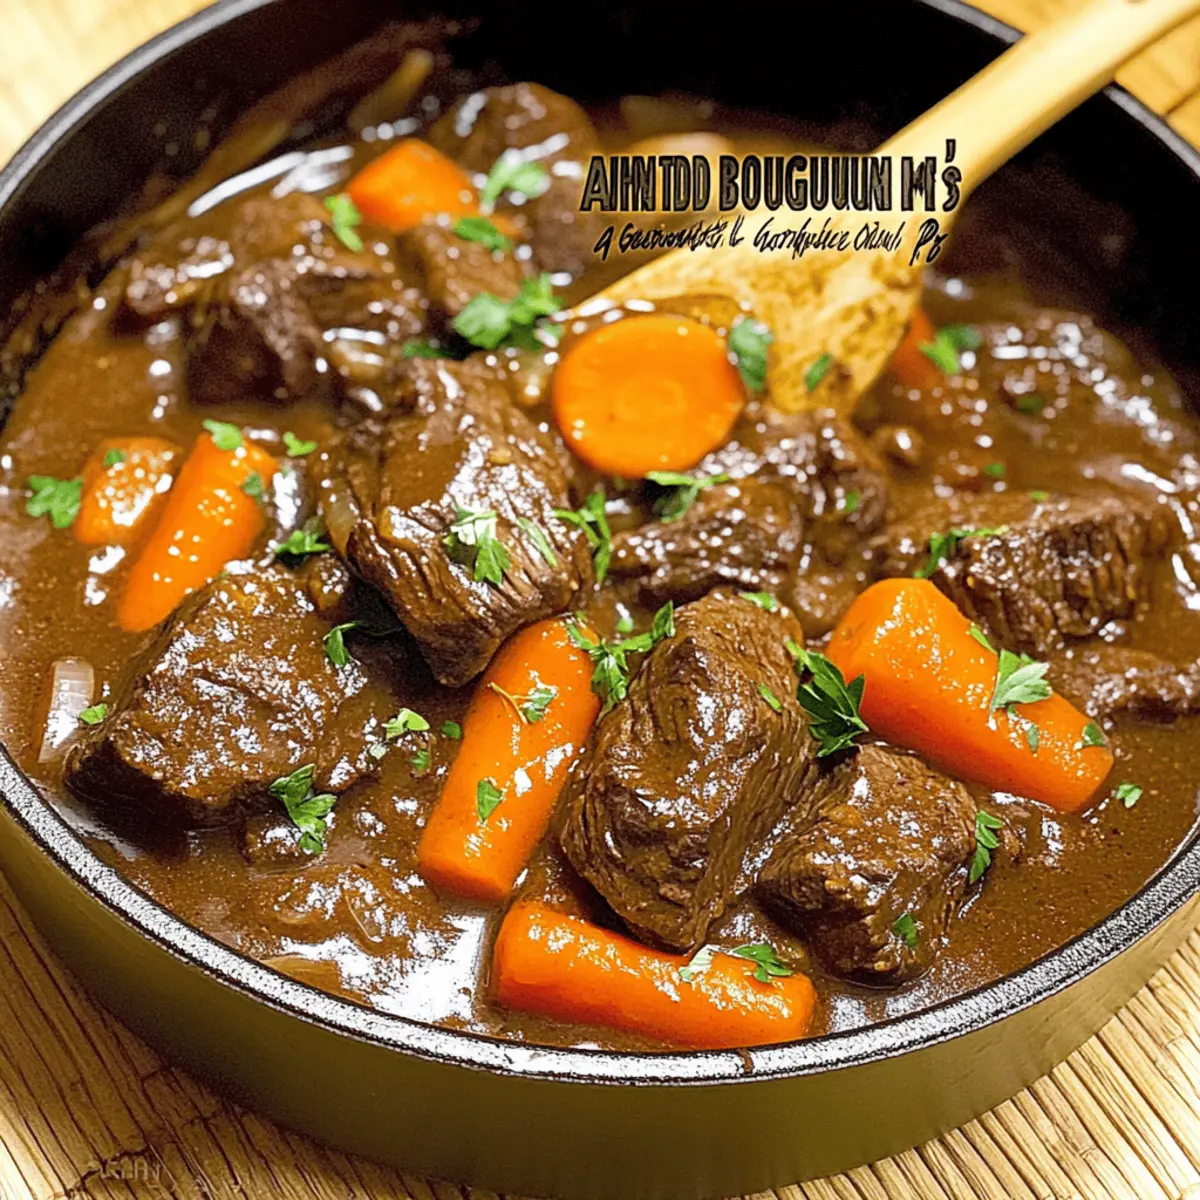
  4. Add browned beef, sautéed onion, garlic, beef stock, chopped carrots, diced potatoes, and fresh herbs to the slow cooker. Stir well.
  5. Cover and cook on low for 7½ to 8 hours or high for 3½ to 4 hours until beef is tender.
  6. In the last 15 minutes, stir in frozen peas. For thickening, mix cornstarch with cold water and add while stirring.
  7. Taste and adjust seasoning before serving hot with crusty bread or salad.

Nutrition

Serving: 1bowlCalories: 350kcalCarbohydrates: 45gProtein: 25gFat: 10gSaturated Fat: 4gPolyunsaturated Fat: 1gMonounsaturated Fat: 4gCholesterol: 80mgSodium: 600mgPotassium: 800mgFiber: 5gSugar: 5gVitamin A: 500IUVitamin C: 15mgCalcium: 50mgIron: 3mg

Notes

Store leftovers in an airtight container for up to 3 days. Can be frozen for up to 3 months. Reheat gently on the stovetop, adding a splash of liquid if needed.

Tried this recipe?

Let us know how it was!

Crispy Chilli Beef: Easy Takeout Flavor at Home

November 15, 2025 by Grace Snow Leave a Comment

“Did you hear that crunch?” is what you’ll hear echoing through your kitchen as you take that first bite of my Crispy Chilli Beef. This dish captures the joy of restaurant-style Chinese cuisine, delivering the satisfying bite of tender beef coated in a sweet and spicy sauce, all from the comfort of your home. This quick and easy recipe isn’t just a crowd-pleaser; it’s a delightful escape from takeout that leaves your kitchen smelling irresistible. Not only does it come together fast, but you can also whip up a gluten-free option using corn or potato starch for the coating. Are you ready to impress your family with a dinner that’s both stylish and comforting? Let’s dive into this culinary adventure!

Why is Crispy Chilli Beef a Must-Try?

Crunchy Texture: The moment you bite into this dish, the crispy coating gives way to tender beef, creating an irresistible combination of textures.

Quick and Easy: With just a handful of ingredients and simple steps, this recipe is perfect for busy weeknights yet impressive enough for special occasions.

Flavor Explosion: The harmonious blend of sweet and spicy takes your taste buds on a flavor journey, making it feel like authentic takeout.

Versatile Dish: Pair it with fluffy rice, stir-fried noodles, or enjoy it alone as a savory snack—there's no wrong way to savor this delight!

Gluten-Free Option: Easily adjust this recipe for gluten-sensitive diners by using corn or potato starch for a deliciously crispy finish.

Once you’ve tried this scrumptious Crispy Chilli Beef, you might also want to explore options like Ground Beef Enchiladas for a Mexican twist or serve up some Crispy Parmesan Artichoke Hearts as a perfect starter!

Crispy Chilli Beef Ingredients

For the Beef
• Rump/Sirloin Steak – Tender cuts create a rich flavor; flank steak works as a satisfying substitute.
• Egg – Helps bind the coating for that perfect crisp; consider a flax egg for a plant-based option.

For the Coating
• Corn/Potato Starch – Forms a glorious, crispy layer on the beef; alternative flours may alter texture.

For the Vegetables
• Sweet Onion – Brings sweetness and depth to the dish; red onion can replace it if desired.
• Bell Pepper – Adds vibrant color and crunch; any variety suits this dish.
• Spring Onions – Fresh garnish that introduces a zing; green onions can be used instead.
• Chilies (Birdseye/Hot) – Adds necessary heat; adjust quantity based on your spice preference.

For the Marinade
• Light Soy Sauce – Infuses umami into the beef; tamari is perfect for a gluten-free substitute.
• Ginger Garlic Paste – Elevates the dish with aromatic flavor; fresh minced ginger and garlic can be substituted.
• Sesame Oil – Adds a nutty richness, but it can be omitted if you don't have it on hand.

For the Sauce
• Sugar – Balances the sweet and spicy notes; honey or a sugar substitute works well too.
• White Pepper – Provides a mild heat; black pepper is an acceptable alternative.
• Stir Fry Sauce Ingredients (Sweet Chilli Sauce, Ketchup, Soy Sauce, Vinegar, Sugar, Salt) – These create the signature sauce; feel free to tinker with ratios for sweetness and spice.

Let this delightful blend of ingredients inspire you to create the best Crispy Chilli Beef right in your kitchen!

Step‑by‑Step Instructions for Crispy Chilli Beef

Step 1: Prepare the Beef
Begin by trimming any fat from the rump or sirloin steak, then slice it against the grain into thin strips, about 1/4 inch thick. This ensures tenderness in your Crispy Chilli Beef. Aim for uniformity for even cooking. Set the beef aside while you prepare the marinade, which will infuse the meat with rich flavors.

Step 2: Marinate the Beef
In a mixing bowl, combine light soy sauce, ginger garlic paste, and a splash of sesame oil to create the marinade. Add the thin beef strips and toss well to ensure each piece is coated. Cover the bowl and let the beef marinate for about 15 minutes. This process enhances the flavor and prepares the meat for that perfect crispy texture.

Step 3: Mix the Sauce
While the beef marinates, prepare the sauce by combining sweet chili sauce, ketchup, additional soy sauce, vinegar, sugar, and a sprinkle of salt in a separate bowl. Whisk the ingredients together until well blended—this will be the delightful glaze that gives your Crispy Chilli Beef its signature sweet and spicy flavor. Set this sauce aside for later use.

Step 4: Add the Egg
Once the beef has marinated, crack an egg directly into the bowl with the beef. Mix well to ensure the egg binds to the meat, promoting a crispy coating. This step is essential for giving your Crispy Chilli Beef its crunchy texture during frying. Make sure every strip is evenly coated with the egg.

Step 5: Coat the Beef
Transfer the marinated beef strips to a shallow dish filled with corn or potato starch. Toss the meat in the starch until each piece is thoroughly coated, ensuring no clumps. This coating will create that irresistible crunch once fried. After coating, gently shake off any excess starch and arrange the strips on a plate, ensuring they do not stick together.

Step 6: Heat the Oil
In a deep skillet or wok, pour enough oil to immerse the beef strips, about 2-3 inches deep. Heat the oil to 350°F (175°C) over medium-high heat. A frying thermometer is handy for accuracy. To test if the oil is ready, drop a small piece of coated beef in; it should sizzle upon contact. This step is crucial for achieving a golden, crispy finish.

Step 7: Fry the Beef
Carefully add the beef strips to the hot oil in small batches, frying for about 1-2 minutes until they are golden brown and crispy. Use a slotted spoon to stir occasionally to ensure even cooking. Once done, transfer the fried beef to a plate lined with paper towels to drain excess oil, keeping them warm while you finish cooking the remaining strips.

Step 8: Stir-Fry the Vegetables
In the same skillet or wok, remove excess oil, leaving about a tablespoon. Preheat it over medium-high heat, then add the sliced sweet onions and bell peppers. Stir-fry them for 2-3 minutes until they become slightly tender yet retain some crunch, adding vibrant color to your Crispy Chilli Beef. This step brings freshness to the dish.

Step 9: Combine Everything
Add the crispy beef back into the wok along with the prepared sauce, spring onions, and chopped chilies. Quickly toss everything together for about 1-2 minutes over high heat, ensuring every piece is evenly coated in the sauce and heated through. This final step melds the flavors and keeps the beef crispy while enhancing the overall taste.

Step 10: Serve and Enjoy
Transfer your steaming hot Crispy Chilli Beef to a serving plate, garnishing with extra spring onions if desired. Serve immediately alongside fluffy steamed rice or stir-fried noodles for a delightful meal. The visual appeal of the glossy sauce coating the crispy beef will surely impress your family and guests.

Expert Tips for Crispy Chilli Beef

  • Perfect Oil Temperature: Ensure your oil is at 350°F (175°C) before adding the beef. Too cool, and it won’t crisp; too hot, and it'll burn.

  • Even Coating: Make sure the beef strips are evenly coated with corn or potato starch. This prevents clumping and allows for that delightful crispy finish in your Crispy Chilli Beef.

  • Fry in Batches: Avoid overcrowding the pan when frying. This helps maintain the oil temperature and ensures each piece gets evenly crispy without steaming.

  • Double Frying: For an extra crispy texture, let the fried beef rest for a minute after the first fry, then return it to the hot oil for a brief second fry.

  • Veggie Variations: Feel free to toss in additional vegetables like broccoli or snap peas for added color and nutrition, making your Crispy Chilli Beef a more complete meal.

Make Ahead Options

These Crispy Chilli Beef strips are perfect for meal prep enthusiasts! You can marinate and coat the beef up to 24 hours in advance, ensuring the flavors deeply infuse while keeping that crispy texture. Simply store the coated beef strips in an airtight container in the refrigerator to maintain their quality. On cooking day, all you need to do is heat the oil and fry the beef for 1-2 minutes until golden crisp. For even more convenience, consider prepping the sauce ahead of time; it keeps well for up to 3 days in the fridge. Just mix it in when you're ready to stir-fry, and you'll achieve restaurant-quality results with minimal effort, making busy weeknights a breeze!

Storage Tips for Crispy Chilli Beef

Fridge: Store leftover Crispy Chilli Beef in an airtight container for up to 3 days. You'll want to keep that delicious crunch, so reheat in a pan for best results.

Freezer: For longer storage, freeze the fried beef strips for up to 2 months. Seal them in a freezer bag, and when ready, thaw and quickly reheat in a hot pan to restore crispiness.

Reheating: When reheating, avoid the microwave as it can make the beef soggy. Instead, heat in a skillet over medium heat for 4-5 minutes, allowing it to regain its delightful crunch.

Make-Ahead Tips: You can prepare and freeze the beef strips before frying. Just remember to coat them well; later, simply fry them and toss with sauce for a quick meal!

What to Serve with Crispy Chilli Beef

Nothing elevates the delightful experience of homemade Crispy Chilli Beef like the perfect side dishes to complement its bold flavors.

  • Fluffy Steamed Rice:
    A classic pairing that absorbs the savory sauce, balancing out the sweetness and spice of the beef beautifully.

  • Stir-Fried Noodles:
    Tender noodles tossed with fresh vegetables create a satisfying contrast in texture, enhancing the meal's overall appeal.

  • Crispy Spring Rolls:
    A crunchy starter or side, these are perfect for dipping, adding another layer of flavor that ties in well with Asian cuisine.

  • Garlic Bok Choy:
    Lightly sautéed, this vibrant green adds a fresh, crisp element, providing a light contrast to the richness of the beef.

  • Sesame Cucumber Salad:
    Refreshing and crunchy, this salad tempers the spice of the Crispy Chilli Beef while offering a revitalizing bite.

  • Chilled Asian Beer:
    An ice-cold brew complements the dish, enhancing the overall experience with its light carbonation refreshing the palate.

With these delightful pairings, your Crispy Chilli Beef will transform into a masterful meal that everyone will rave about!

Crispy Chilli Beef Variations & Substitutions

Let your creative cooking spirit shine as you customize your Crispy Chilli Beef to suit your taste and dietary needs.

  • Vegetable Boost: Add broccoli or snap peas for extra nutrition and color. They add a delightful crunch that complements the beef beautifully.

  • Protein Swap: Substitute the beef with chicken or firm tofu for a lighter option. Both alternatives will soak up the marinade flavors perfectly.

  • Gluten-Free Option: Use tamari instead of light soy sauce and maintain the crunch with corn or potato starch; your dish will still deliver the same satisfaction!

  • Heat Adjustments: Vary the number of chilies according to your spice tolerance. For a milder version, try sweet bell peppers or a sprinkle of chili flakes instead.

  • Hoisin Twist: Swap out the sweet chili sauce for hoisin or teriyaki sauce to introduce a unique, savory sweetness that elevates the flavor profile.

  • Extra Crunch: For that unbeatable crispy texture, toss in a handful of crushed peanuts or sesame seeds just before serving; they add a beautiful crunch and a nutty flavor.

  • Zingy Freshness: Add some lime juice or zest before serving to enhance the dish with a fresh, zesty finish that balances out the sweetness.

Feel free to explore these variations to suit your family's preferences and create an unforgettable meal. Once you've mastered this Crispy Chilli Beef, you might want to try making Fish Taco Bowls or Crispy Parmesan Artichoke Hearts for more delicious options!

Crispy Chilli Beef Recipe FAQs

What type of beef should I use for Crispy Chilli Beef?
For the best results, I recommend using rump or sirloin steak, as they are tender and flavorful. If you're looking for a different texture, flank steak is a fantastic substitute. Just make sure to slice the beef against the grain to ensure it's tender!

How should I store leftover Crispy Chilli Beef?
To keep your delicious Crispy Chilli Beef fresh, store leftover portions in an airtight container in the refrigerator for up to 3 days. When you're ready to enjoy it again, I suggest reheating it in a skillet rather than the microwave to maintain that delightful crunch.

Can I freeze Crispy Chilli Beef?
Absolutely! To freeze, place the fried beef strips in a freezer-safe bag or container, ensuring they're sealed tightly. You can freeze them for up to 2 months. When you're ready to enjoy, simply thaw in the fridge overnight and reheat in a hot pan for about 4-5 minutes to regain their crispy texture.

What can I do if my beef isn't crispy enough?
If you find your beef isn't as crispy as you'd like, don't worry! Make sure your oil temperature is around 350°F (175°C) before frying. Fry in small batches to avoid overcrowding the pan, which can lead to steaming rather than frying. For extra crunch, consider double frying the beef—just allow it to rest briefly after the first fry, then return it to the hot oil for a second fry.

Is Crispy Chilli Beef gluten-free?
Yes, you can easily make this dish gluten-free! Simply substitute the light soy sauce with tamari, and use corn or potato starch for the coating instead of regular flour. This way, you can enjoy all the wonderful flavors without any gluten concerns!

How do I adjust the spiciness of Crispy Chilli Beef?
If you prefer a milder dish, reduce the number of chilies or opt for milder varieties instead of Birdseye chilies. Conversely, if you're looking for more heat, feel free to add extra chilies. Just remember that it’s easier to add spice than to take it away, so add gradually and taste as you go!

Crispy Chilli Beef

Crispy Chilli Beef: Easy Takeout Flavor at Home

Enjoy the crunch of my Crispy Chilli Beef, a delightful escape from takeout with sweet and spicy sauce.
Print Recipe Pin Recipe
Prep Time 15 minutes mins
Cook Time 15 minutes mins
Total Time 30 minutes mins
Servings: 4 servings
Course: Dinner
Cuisine: Chinese
Calories: 550
Ingredients Equipment Method Nutrition Notes

Ingredients
  

For the Beef
  • 1 pound Rump/Sirloin Steak Tender cuts for rich flavor
  • 1 large Egg Consider a flax egg for plant-based option
For the Coating
  • 1 cup Corn/Potato Starch Forms a crispy layer
For the Vegetables
  • 1 medium Sweet Onion Red onion can replace if desired
  • 1 large Bell Pepper Any variety suits this dish
  • 2 stalks Spring Onions Fresh garnish
  • 2 pieces Chilies (Birdseye/Hot) Adjust for spice preference
For the Marinade
  • 3 tablespoons Light Soy Sauce Tamari for gluten-free substitute
  • 1 tablespoon Ginger Garlic Paste Fresh minced ginger and garlic can substitute
  • 1 tablespoon Sesame Oil Optional, can be omitted
For the Sauce
  • 2 tablespoons Sugar Honey or a sugar substitute works
  • 1 teaspoon White Pepper Black pepper is an acceptable alternative
  • 1 cup Stir Fry Sauce Mix of sweet chilli sauce, ketchup, soy sauce, vinegar, sugar, salt

Equipment

  • Skillet
  • Mixing Bowl
  • frying thermometer

Method
 

Cooking Instructions
  1. Trim any fat from the ribeye or sirloin and slice into thin strips, about 1/4 inch thick.
  2. In a bowl, mix light soy sauce, ginger garlic paste, and sesame oil. Add beef strips, toss to coat, and marinate for 15 minutes.
  3. Prepare the sauce by mixing sweet chili sauce, ketchup, soy sauce, vinegar, sugar, and salt.
  4. Add egg to the marinated beef, mix to ensure even coating.
  5. Coat beef strips in corn or potato starch until thoroughly coated.
  6. Heat oil in a skillet to 350°F. Test with a small piece of beef to ensure it's ready.
  7. Fry beef strips in small batches for 1-2 minutes until golden and crispy. Drain on paper towels.
  8. Stir-fry sliced sweet onions and bell peppers for 2-3 minutes.
  9. Add crispy beef, prepared sauce, spring onions, and chilies. Toss for 1-2 minutes.
  10. Serve immediately, garnished with extra spring onions if desired.

Nutrition

Serving: 1plateCalories: 550kcalCarbohydrates: 40gProtein: 30gFat: 30gSaturated Fat: 10gPolyunsaturated Fat: 5gMonounsaturated Fat: 10gCholesterol: 150mgSodium: 800mgPotassium: 600mgFiber: 3gSugar: 12gVitamin A: 10IUVitamin C: 15mgCalcium: 6mgIron: 15mg

Notes

For extra crispiness, double fry the beef after initial frying. Store leftovers in an airtight container for up to 3 days.

Tried this recipe?

Let us know how it was!

Gordon Ramsay Ground Turkey Pasta: A Cozy Weeknight Delight

November 15, 2025 by Grace Snow Leave a Comment

As I stood by the stove, I felt like a culinary magician, ready to transform humble ingredients into something extraordinary. Let me introduce you to Gordon Ramsay's Creamy Ground Turkey Pasta, a quick and easy dinner that elevates your weeknight routine in a matter of minutes. Not only is this dish packed with lean protein and rich flavors, it's also incredibly customizable—meaning it can easily adapt to whatever your pantry holds. Imagine a creamy sauce enveloping perfectly cooked pasta, making it a satisfying feast that even picky eaters will love. Double win! Are you curious to see how this delightful meal comes together? Let's dive in!

Why is This Pasta Recipe a Game Changer?

Quick and Easy: This dish comes together in under 30 minutes, perfect for busy weeknights when you crave something comforting yet nutritious.

Healthy Twist: Made with lean ground turkey, it's a guilt-free choice that keeps you feeling your best.

Customizable: Switch up the ingredients! Use your favorite pasta shape or add seasonal vegetables for extra nutrition—like in this Seafood Pasta variation.

Crowd-Pleaser: With its creamy flavors and cheesy goodness, it appeals to kids and adults alike, making it the ideal family meal.

One-Pan Wonder: Reducing cleanup time, it’s a simple, satisfying dish that doesn't require fussing around with multiple pots—just like my go-to Ground Beef Enchiladas.

Get ready to love this deliciously simple recipe!

Gordon Ramsay Ground Turkey Pasta Ingredients

Here’s what you’ll need to create this creamy delight.

For the Pasta
• Penne Pasta – Provides structure for the dish; substitute with any preferred pasta shape.

For the Sauce
• Olive Oil – Essential for sautéing aromatics; canola or vegetable oil can be used instead.
• Yellow Onion – Adds sweetness and depth; red onion can offer a sharper taste if desired.
• Ground Turkey – A lean protein source; can substitute with ground chicken or beef for variety.
• Salt – Enhances flavor; adjust to dietary needs.
• Black Pepper – Freshly cracked is recommended for maximum flavor.
• Italian Seasoning – Adds herby notes; can be substituted with dried oregano, basil, or thyme.
• Garlic – Vital for flavor; garlic powder may work in a pinch.
• All-Purpose Flour – Used for thickening the sauce; gluten-free flour is an alternative.
• Chicken Broth – Adds richness to the sauce; swap for vegetable broth for a vegetarian option.
• Tomato Sauce – Provides tangy acidity; canned diced tomatoes can give a chunkier texture.
• Half-and-Half – For creaminess; can be replaced with heavy cream or non-dairy milk.

For the Cheese
• Mozzarella Cheese – Melts beautifully; may substitute with provolone or dairy-free cheese.
• Cheddar Cheese – Adds sharp flavor; any melty cheese can be used.

For Garnish
• Fresh Parsley – Adds a pop of color and freshness.
• Red Chili Flakes – Optional for a bit of heat; can be omitted or replaced with fresh chili.

Now you’re ready to make Gordon Ramsay’s Ground Turkey Pasta!

Step‑by‑Step Instructions for Gordon Ramsay Ground Turkey Pasta

Step 1: Cook Pasta
Begin by bringing a large pot of salted water to a vigorous boil over high heat. Once boiling, add the penne pasta and cook for about 8-10 minutes until it's just shy of al dente. Reserve 1 cup of the pasta water, then carefully drain the pasta in a colander and set it aside while you prepare the sauce.

Step 2: Sauté Aromatics
In a spacious skillet, heat 2 tablespoons of olive oil over medium heat until shimmering. Add the diced yellow onion and sauté for around 5 minutes until it turns soft and translucent, stirring occasionally. This step helps to build a flavorful base for your Gordon Ramsay Ground Turkey Pasta.

Step 3: Brown Turkey
Once the onions are ready, increase the heat slightly and add the ground turkey to the skillet. Use a wooden spoon to break it apart and cook for 6-8 minutes until it's beautifully browned. Season the turkey with salt, pepper, and Italian seasoning, then stir in the minced garlic, cooking for an additional minute to release its delicious aroma.

Step 4: Build Sauce
Sprinkle all-purpose flour evenly over the turkey mixture, stirring it in for about 1 minute to eliminate raw flour taste. Gradually pour in the chicken broth and tomato sauce, stirring continuously until the mixture begins to thicken, which should take about 3-5 minutes. The sauce will become silky, perfect for coating your pasta.

Step 5: Combine Ingredients
Gently fold the cooked penne pasta into the turkey sauce, ensuring every piece is well-coated. Pour in the half-and-half for an extra creamy texture, and season the mixture as needed with additional salt and pepper. If the sauce is too thick, adjust the consistency by adding some reserved pasta water until you reach your preferred creaminess.

Step 6: Add Cheese
Reduce the skillet heat to low and sprinkle half of the mozzarella and cheddar cheese into the pasta mixture. Stir well until the cheese melts and incorporates fully into the sauce, creating a creamy, cheesy blend. Top with the remaining cheese and cover the skillet for a minute to melt everything perfectly.

Step 7: Serve
Remove the skillet from heat and garnish your Gordon Ramsay Ground Turkey Pasta with freshly chopped parsley and a sprinkle of red chili flakes for an optional kick. Serve immediately while hot, and watch as your family and friends enjoy this cozy weeknight delight, feeling utterly satisfied.

Gordon Ramsay Ground Turkey Pasta Variations

Feel free to personalize this dish to your taste and make it uniquely yours. Your kitchen is your canvas!

  • Gluten-Free: Substitute regular pasta with gluten-free alternatives for a lighter option.
  • Vegetable Boost: Toss in spinach, bell peppers, or broccoli for added nutrients and vibrant color. This makes the dish more filling and healthful.
  • Extra Creamy: For an indulgent twist, replace half-and-half with heavy cream or a rich non-dairy milk. This will amp up the creamy texture everyone loves!
  • Cheese Lovers: Incorporate ricotta or cream cheese for a rich layer of flavor and creaminess. Use this variation on a cozy night in!
  • Spicy Kick: Add red chili flakes, jalapeños, or a dash of hot sauce for a zingy twist. It’s a great way to spice things up!
  • Baked Pasta: Layer any leftovers with breadcrumbs and additional cheese, broil until bubbly and golden for a delightful crispy topping. Think of it like turning a simple meal into a gourmet dish!
  • Italian Twist: Introduce a splash of white wine during sauce preparation for depth and flavor. Pairing it with a glass of wine while cooking makes for the perfect evening!
  • Swap Meats: Use ground chicken or beef for a different but equally delicious flavor profile. Each option brings its own flair to the dish!

Explore these delicious variations to see what resonates with you and your family. And while you’re at it, check out my Skillet Pasta Sun recipe for even more inspiration!

What to Serve with Gordon Ramsay's Creamy Ground Turkey Pasta

To create a delightful dining experience, complement your creamy pasta with dishes that enhance its comforting flavors.

  • Garlic Bread: The warm, aromatic crunch of garlic bread is the perfect sidekick to this creamy dish, perfect for scraping up every last bit of sauce.

  • Fresh Green Salad: Crisp romaine or mixed greens provide a refreshing contrast to the rich pasta, while a light vinaigrette balances the meal beautifully.

  • Roasted Vegetables: Seasonal veggies like zucchini, bell peppers, and asparagus, roasted to perfection, add texture and a sweet earthiness that complements the pasta.

  • Steamed Broccoli: This vibrant green side not only offers a satisfying crunch but also brings a pop of color and nutrients to your plate.

  • Caesar Salad: The creamy dressing pairs perfectly with the flavors of the pasta, making this classic side fit right in with your cozy dinner.

  • A Light White Wine: A glass of chilled Chardonnay or Pinot Grigio elevates the meal, enhancing the flavors of the ground turkey and creamy sauce with every sip.

How to Store and Freeze Gordon Ramsay Ground Turkey Pasta

Fridge: Store leftovers in an airtight container in the refrigerator for up to 3 days. Allow to cool before sealing to maintain texture.

Freezer: For longer storage, freeze portions of the pasta in airtight containers for up to 3 months. Label with the date to keep track.

Reheating: When ready to enjoy, thaw overnight in the fridge if frozen. Reheat slowly on the stove over low heat, adding a splash of water or broth to restore creaminess.

Avoid Clumping: Stir well during reheating to prevent the cheese from clumping, ensuring a smooth and delightful Gordon Ramsay Ground Turkey Pasta experience.

Make Ahead Options

Gordon Ramsay's Creamy Ground Turkey Pasta is perfect for make ahead meal prep, allowing you to enjoy a comforting dinner with minimal effort during busy weeknights. You can prepare the turkey sauce (steps 2 through 4) up to 3 days in advance; simply refrigerate it in an airtight container. The cooked pasta can also be made up to 24 hours ahead and stored separately, as combining them too early can lead to sogginess. When you're ready to serve, gently reheat the sauce on the stovetop, adding a splash of broth to maintain its creamy texture, then toss in the cooked pasta and cheese just before serving. This way, you'll have a warm, delicious meal that tastes just as freshly made!

Expert Tips for Gordon Ramsay Ground Turkey Pasta

• Flavor Boost: Season generously: Don't be shy with salt and spices; they elevate the overall flavor and enhance the turkey's rich taste.

• Perfect Pasta: Cook al dente: Aim for pasta that's just shy of fully cooked to avoid any mushiness when combined with the sauce later.

• Smooth Sauce: Mix well: Ensure flour is fully incorporated into the turkey mixture to prevent clumps in your creamy sauce.

• Cheesy Goodness: Low heat: When adding cheese, keep the heat low to achieve a creamy melt without separating or curdling.

• Ingredient Substitution: Get creative: This Gordon Ramsay Ground Turkey Pasta is flexible—feel free to swap ingredients for whatever you have on hand!

Gordon Ramsay Ground Turkey Pasta Recipe FAQs

How do I choose the right pasta for this recipe?
It's absolutely your choice! I recommend using penne pasta as it holds onto the creamy sauce well, but feel free to experiment with any pasta shape you like. Just ensure it’s cooked al dente to prevent mushiness once mixed with the sauce.

How should I store leftovers of Gordon Ramsay Ground Turkey Pasta?
Store any leftovers in an airtight container in the fridge for up to 3 days. Be sure to let it cool to room temperature before sealing it to maintain the best texture when reheating.

Can I freeze Gordon Ramsay Ground Turkey Pasta?
Yes! You can freeze this dish for up to 3 months. Just portion it into airtight containers, and label them with the date. To reheat, thaw overnight in the fridge, then warm it gently on the stovetop, adding a splash of water or broth to keep it creamy.

What if the sauce turns out too thick?
No worries! If your sauce ends up thicker than desired, gently stir in a little of the reserved pasta water, one tablespoon at a time, until you reach your preferred consistency. This will help keep the sauce creamy without losing that rich flavor.

Can I make this recipe gluten-free?
Absolutely! To make this Gordon Ramsay Ground Turkey Pasta gluten-free, simply substitute regular pasta with a gluten-free alternative. You can also use gluten-free flour to thicken the sauce without compromising its deliciousness.

What about dietary concerns?
If you're concerned about allergies, be sure to check labels on your ingredients, especially on sauces and cheese. For dairy-free options, swap the mozzarella and cheddar for dairy-free cheese alternatives and use non-dairy milk or broth in place of half-and-half. Enjoy the adaptability of this dish!

Gordon Ramsay Ground Turkey Pasta

Gordon Ramsay Ground Turkey Pasta: A Cozy Weeknight Delight

Experience the comfort of Gordon Ramsay's Ground Turkey Pasta, a creamy, customizable dish packed with lean protein perfect for weeknights.
Print Recipe Pin Recipe
Prep Time 10 minutes mins
Cook Time 20 minutes mins
Total Time 30 minutes mins
Servings: 4 servings
Course: Dinner
Cuisine: American
Calories: 650
Ingredients Equipment Method Nutrition Notes

Ingredients
  

For the Pasta
  • 8 ounces Penne Pasta Substitute with any preferred pasta shape.
For the Sauce
  • 2 tablespoons Olive Oil Can substitute with canola or vegetable oil.
  • 1 medium Yellow Onion Red onion can be used for a sharper taste.
  • 1 pound Ground Turkey Can substitute with ground chicken or beef.
  • 1 teaspoon Salt Adjust to dietary needs.
  • 1 teaspoon Black Pepper Freshly cracked is recommended.
  • 1 teaspoon Italian Seasoning Can substitute with dried oregano, basil, or thyme.
  • 3 cloves Garlic Minced; garlic powder may work in a pinch.
  • 2 tablespoons All-Purpose Flour Gluten-free flour is an alternative.
  • 1 cup Chicken Broth Swap for vegetable broth for a vegetarian option.
  • 1 cup Tomato Sauce Canned diced tomatoes can be used for a chunkier texture.
  • 1 cup Half-and-Half Can be replaced with heavy cream or non-dairy milk.
For the Cheese
  • 1 cup Mozzarella Cheese May substitute with provolone or dairy-free cheese.
  • 1 cup Cheddar Cheese Any melty cheese can be used.
For Garnish
  • 2 tablespoons Fresh Parsley Chopped, for garnish.
  • 1/2 teaspoon Red Chili Flakes Optional for heat; can be omitted.

Equipment

  • Large pot
  • Skillet
  • Colander

Method
 

Cooking Steps
  1. Begin by bringing a large pot of salted water to a vigorous boil over high heat. Once boiling, add the penne pasta and cook for about 8-10 minutes until it's just shy of al dente. Reserve 1 cup of the pasta water, then carefully drain the pasta in a colander and set it aside while you prepare the sauce.
  2. In a spacious skillet, heat 2 tablespoons of olive oil over medium heat until shimmering. Add the diced yellow onion and sauté for around 5 minutes until it turns soft and translucent, stirring occasionally.
  3. Once the onions are ready, increase the heat slightly and add the ground turkey to the skillet. Use a wooden spoon to break it apart and cook for 6-8 minutes until it's beautifully browned. Season the turkey with salt, pepper, and Italian seasoning, then stir in the minced garlic, cooking for an additional minute.
  4. Sprinkle all-purpose flour evenly over the turkey mixture, stirring it in for about 1 minute. Gradually pour in the chicken broth and tomato sauce, stirring continuously until the mixture begins to thicken, which should take about 3-5 minutes.
  5. Gently fold the cooked penne pasta into the turkey sauce, ensuring every piece is well-coated. Pour in the half-and-half for an extra creamy texture, and season as needed with additional salt and pepper.
  6. Reduce the skillet heat to low and sprinkle half of the mozzarella and cheddar cheese into the pasta mixture. Stir well until the cheese melts and incorporates into the sauce, then top with the remaining cheese and cover the skillet for a minute.
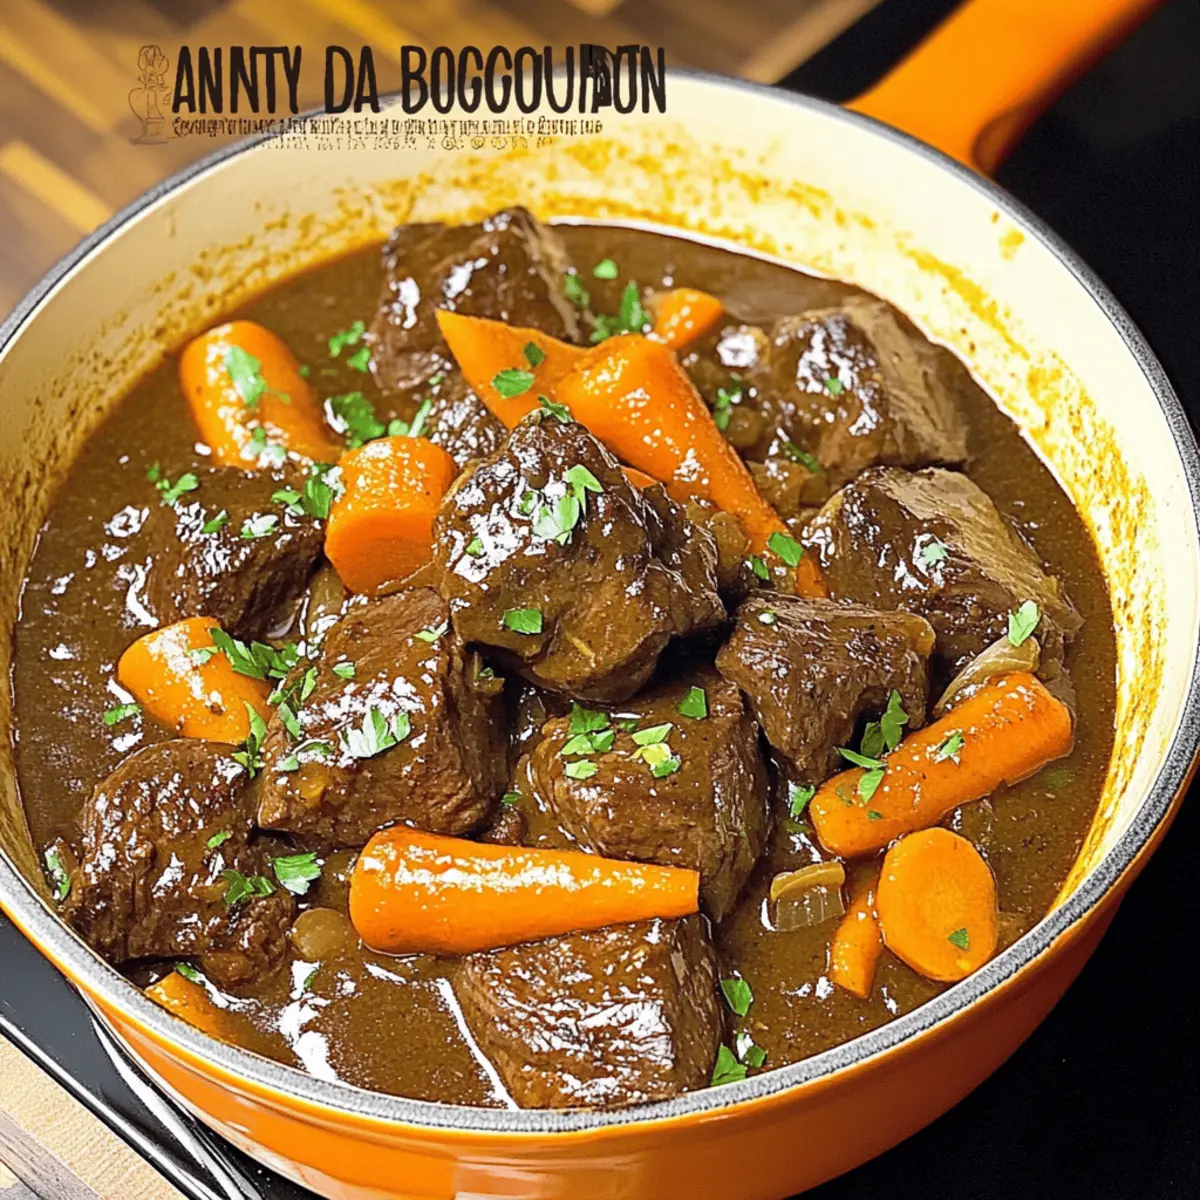
  7. Remove the skillet from heat and garnish your Gordon Ramsay Ground Turkey Pasta with freshly chopped parsley and a sprinkle of red chili flakes for an optional kick. Serve immediately while hot.

Nutrition

Serving: 1servingCalories: 650kcalCarbohydrates: 50gProtein: 40gFat: 30gSaturated Fat: 15gPolyunsaturated Fat: 5gMonounsaturated Fat: 5gCholesterol: 100mgSodium: 800mgPotassium: 600mgFiber: 3gSugar: 5gVitamin A: 10IUVitamin C: 4mgCalcium: 30mgIron: 15mg

Notes

Store leftovers in an airtight container in the refrigerator for up to 3 days or freeze portions for up to 3 months. Reheat slowly on the stove to restore creaminess.

Tried this recipe?

Let us know how it was!

Savor Anthony Bourdain’s Beef Bourguignon: A French Classic

November 15, 2025 by Grace Snow Leave a Comment

Stepping into the world of French cuisine can feel like a transformative journey, and there’s no better destination than Anthony Bourdain's Beef Bourguignon. This rich beef stew invites you to savor the depth of tender beef simmered in a luxurious red wine sauce, kissed with herbs and adorned with caramelized onions. It’s not just comfort food; it’s a gourmet experience that turns an ordinary dinner into a remarkable feast. Plus, the beauty of this recipe lies in its simplicity and ability to please even the fussiest eaters. It takes a bit of time but the reward is a heavenly aroma wafting through your kitchen that’s sure to draw everyone in. Are you ready to take your taste buds on an adventure?

Why is Beef Bourguignon so special?

Unforgettable Flavor: This recipe is a celebration of rich, savory tastes, featuring tender beef that melts in your mouth, harmonized with the sweetness of caramelized onions and the depth of red wine.

Gourmet Comfort: Elevate your dining experience at home with this classic French dish that combines the warmth of comfort food with gourmet flair.

Crowd-Pleaser: Perfect for gatherings, this Beef Bourguignon is sure to impress your guests, making it a staple for any dinner party or family meal.

Make-Ahead Magic: The flavors deepen when made in advance, allowing you to prepare it the day before and enjoy more time with your guests. Reheat gently and serve it over creamy mashed potatoes or alongside crusty bread for a complete meal.

Easy Yet Elegant: Despite its gourmet appearance, the steps are manageable, making it accessible for both beginners and seasoned cooks alike. For more delectable home-cooked ideas, check out my post on Ground Beef Enchiladas for a twist on classic flavors.

Anthony Bourdain's Beef Bourguignon Ingredients

For the Stew

  • Boneless beef shoulder or chuck – This primary protein provides the richness and substance essential for a satisfying stew.
  • Kosher salt – Enhances the flavor and tenderness of the beef, giving it that melt-in-your-mouth quality.
  • Freshly ground black pepper – Adds seasoning and a touch of heat; fresh is always best for a bolder flavor.
  • Olive oil – Perfect for searing the beef and sautéing the onions, infusing the dish with its distinct taste.
  • Medium onions – Forms the base of the sauce, adding necessary sweetness and depth to the dish.
  • All-purpose flour – Helps to thicken the sauce for that rich, comforting texture.
  • Red burgundy wine (e.g., Pinot Noir) – Infuses the stew with complexity—opt for a good quality dry red for the best results.
  • Medium carrots – Adds a hint of sweetness and texture, balancing the dish beautifully.
  • Garlic – Introduces aromatic flavors that elevate the overall taste of the stew.
  • Bouquet garni (thyme, bay, parsley) – Infuses the stew with herby notes, lending freshness and depth.
  • Water – Adjusts the cooking liquid, but consider using low-sodium beef broth for added flavor.
  • Demi-glace (optional) – Intensifies the flavor and enriches the sauce, making it extra luxurious.
  • Chopped fresh flat-leaf parsley – For garnish, it adds a pop of color and freshness to the dish.

Planning to embark on this culinary adventure? Each bite of Anthony Bourdain's Beef Bourguignon promises to be a delightful revelation!

Step‑by‑Step Instructions for Anthony Bourdain’s Beef Bourguignon

Step 1: Prepare the Beef
Begin by patting the boneless beef shoulder or chuck dry with paper towels, ensuring an excellent sear. Generously season the beef chunks with kosher salt and freshly ground black pepper, creating a flavorful crust that will enhance the richness of Anthony Bourdain's Beef Bourguignon.

Step 2: Sear the Beef
In a heavy Dutch oven, heat half of the olive oil over high heat until shimmering. In batches, sear the seasoned beef for about 3-4 minutes on each side, allowing a deep brown crust to develop. Once browned on all sides, transfer the beef to a plate and reduce the heat to medium-high.

Step 3: Sauté the Onions
Add the remaining olive oil to the Dutch oven, letting it heat for a moment. Stir in the medium onions and cook for approximately 10 minutes until they soften and turn golden brown. This step is crucial, as the caramelized onions will contribute to the depth of flavor in your Beef Bourguignon.

Step 4: Thicken the Sauce
Sprinkle in the all-purpose flour while stirring continuously, allowing it to cook for 4-5 minutes. This process creates a roux that will thicken your stew and enhance its texture. You are looking for a slightly darkened color and a nutty aroma before moving on.

Step 5: Deglaze with Wine
Pour in the red burgundy wine, using a wooden spoon to scrape the flavorful bits stuck to the bottom of the pot. Bring the mixture to a rolling boil, which will concentrate flavors and add complexity. This step is essential for crafting the luxurious sauce that defines Anthony Bourdain's Beef Bourguignon.

Step 6: Combine Ingredients
Return the seared beef along with any juices back into the pot. Add in the medium carrots, minced garlic, bouquet garni, and enough water to cover the ingredients—consider using low-sodium beef broth for added richness. Bring the pot to a boil, then immediately reduce the heat to a gentle simmer.

Step 7: Simmer to Perfection
Allow the stew to simmer uncovered for 2 to 2.5 hours, stirring every 15-20 minutes. Keep an eye on the liquid level, adding water as necessary to maintain a sauce-like consistency. The beef should become fork-tender and fully absorb the aromatic flavors of the stew.

Step 8: Final Touches
Once the simmering time is complete, remove the bouquet garni from the pot. Taste the stew and adjust the seasoning with additional salt and pepper as needed. To finish, garnish your Beef Bourguignon with freshly chopped flat-leaf parsley, adding a vibrant touch before serving.

Anthony Bourdain's Beef Bourguignon Variations

Feel free to explore these delicious twists on the classic beef stew, each adding a unique touch to your culinary adventure.

  • Mushroom Medley: Add sautéed mushrooms with the onions for a richer, umami flavor. This will enhance the overall depth and balance of the dish.

  • Root Veggie Delight: Swap the carrots for parsnips or add potatoes for heartier fare. You can play with the flavors and textures, giving a comforting twist to your stew.

  • Brandy Boost: Incorporate a splash of brandy along with the red wine for an extra layer of complexity. A luxurious enhancement that’ll make everyone ask for seconds!

  • Herb Infusion: Experiment with fresh herbs like rosemary or oregano in place of the bouquet garni. This will give your stew a distinctive aroma and taste.

  • Sweet Potato Swirl: Substitute regular potatoes with sweet potatoes to add a hint of sweetness that pairs beautifully with the savory meat.

  • Heat it Up: Toss in some chili flakes or a diced jalapeño for a spicy kick, adding an exhilarating twist to the traditional flavor profile.

  • Dairy-Free Dream: For a dairy-free option, simply skip the demi-glace; it’s optional and won’t sacrifice the essential taste. This allows more people to enjoy this heartwarming dish.

  • Wine’s Wonders: If you want a non-alcoholic twist, use grape juice simmered with some vinegar instead of wine. It keeps the sweetness and depth without the alcohol.

No matter how you choose to customize, these variations are sure to make Anthony Bourdain’s Beef Bourguignon your own delicious masterpiece. Looking for a different flavor profile for your weeknight dinner? Check out my Ground Beef Enchiladas, a perfect alternative when you're craving something quick yet satisfying!

Make Ahead Options

Preparing Anthony Bourdain's Beef Bourguignon in advance is a fantastic way to simplify your meal planning and save time during busy weeknights. You can prepare the entire stew up to 24 hours ahead by cooking it completely, allowing it to cool, and then transferring it to an airtight container. Once refrigerated, the flavors will deepen, making it just as delicious when reheated. When you're ready to serve, gently reheat the stew on the stovetop over low heat, stirring occasionally to maintain a consistent texture. If the sauce thickens too much, feel free to add a splash of water or broth. These make-ahead options ensure a gourmet meal awaits you with minimal effort!

How to Store and Freeze Anthony Bourdain's Beef Bourguignon

Fridge: Store leftover Beef Bourguignon in an airtight container for up to 3 days. Allow it to cool down before refrigerating to preserve its rich flavors.

Freezer: For longer storage, transfer cooled Beef Bourguignon to freezer-safe containers. It can be kept for up to 3 months. Make sure to leave some space for expansion.

Reheating: Thaw overnight in the fridge before reheating gently on the stove or in the microwave with a splash of broth to restore consistency. Never rush the reheating process to maintain the stew's luxurious texture.

Make-Ahead Tip: Preparing this delightful dish in advance can enhance its flavors; enjoy the ease of having a gourmet meal ready to go!

Expert Tips for Anthony Bourdain's Beef Bourguignon

  • Sear in Batches: Always sizzle the beef in batches; overcrowding will lead to steaming instead of that delicious browning, which is essential for flavor.

  • Monitor the Liquid: Check the stew regularly to ensure it doesn’t stick to the pot; add water if it starts to thicken too much to maintain that luscious sauce consistency.

  • Season Generously: Don’t be shy about seasoning; adding salt and pepper at various stages enhances the depth of flavors in your Anthony Bourdain's Beef Bourguignon.

  • Use Quality Wine: Opt for a good quality dry red wine, like Pinot Noir, as it significantly impacts the flavor profile of the stew—your taste buds will thank you!

  • Fresh Herbs Matter: Whenever possible, utilize fresh herbs in the bouquet garni for a more robust flavor in the stew, elevating your culinary creation.

  • Let it Rest: For the best results, consider making it a day ahead; the flavors deepen overnight, making it even more satisfying when served.

What to Serve with Anthony Bourdain's Beef Bourguignon?

Creating a memorable meal is all about harmonious pairings, and this French classic opens the door to endless delicious possibilities.

  • Creamy Mashed Potatoes: This velvety dish soaks up the rich sauce beautifully, giving you a comforting bite in every forkful.
  • Crusty French Bread: Perfect for sopping up the delicious stew, its crispy outside complements the tender beef, creating a delightful textural contrast.
  • Buttered Noodles: Tossed in a light butter sauce, these noodles provide a soft, subtle base that enhances the stew's robust flavors.
  • Garlic Roasted Green Beans: Crisp and vibrant, these green beans add a burst of freshness to the meal, balancing the richness of the stew.
  • Caesar Salad: With its tangy dressing and crunchy croutons, this salad offers a refreshing side, creating a beautiful contrast to the warm beef.
  • Red Wine (Pinot Noir): Pairing a glass of the same wine used to cook enhances the flavor experience and elevates your dining atmosphere.
  • Chocolate Mousse: For dessert, this lightweight, rich treat completes the meal, providing a decadent finish to your French feast.
  • Herb and Cheese Quiche: As a savory alternative, this quiche complements the stew's depth while also serving as a delightful brunch option.
  • Apple Tart: A warm, spiced apple tart brings a cozy sweetness, rounding out the meal with an inviting dessert option.
  • Sparkling Water with Lemon: To cleanse the palate, this refreshing drink offers a crisp finish that pairs nicely with the hearty stew.

Anthony Bourdain's Beef Bourguignon Recipe FAQs

What is the best way to select beef for this recipe?
Absolutely! For the best flavor and tenderness in your Beef Bourguignon, I recommend using boneless beef shoulder or chuck. Look for meat with good marbling, which indicates flavor and juiciness. Avoid cuts that are overly lean, as they won’t develop that delicious richness during cooking.

How should I store leftover Beef Bourguignon?
You can keep your leftover Beef Bourguignon in an airtight container in the refrigerator for up to 3 days. Make sure it has cooled down completely before placing it in the fridge. For reheating, simply gently warm it on the stove or in the microwave. Remember to add a splash of broth or water if it seems too thick when reheating.

Can I freeze Beef Bourguignon? If so, how?
Yes, you can freeze Beef Bourguignon! To do this, let it cool completely before transferring it to freezer-safe containers. Be sure to leave some space at the top, as the stew will expand when frozen. It can be kept in the freezer for up to 3 months. When ready to enjoy, thaw it overnight in the fridge and reheat gently to preserve its rich texture.

What if my stew turns out too thick?
If your Beef Bourguignon is too thick after cooking, don’t worry! Just add a little more water or low-sodium beef broth, stirring it in while heating on low. If it's too thin, continue cooking uncovered for a bit longer to allow some liquid to evaporate, thickening the sauce naturally.

Are there any dietary considerations I should keep in mind?
When making Beef Bourguignon, keep in mind that it contains beef, wine, and gluten (from flour). If you need a gluten-free option, simply substitute the all-purpose flour with a gluten-free flour blend. As always, check for any personal allergies or dietary restrictions when serving to guests or family members.

Can I use different types of wine in this recipe?
Very much! While a good quality red burgundy wine like Pinot Noir is ideal for this Beef Bourguignon, you can substitute with any other dry red wine that you enjoy drinking. Just remember that the better the wine, the better the flavor of your stew. If you have any leftover wine, it makes for an excellent pairing!

Anthony Bourdain’s Beef Bourguignon

Savor Anthony Bourdain’s Beef Bourguignon: A French Classic

Experience the rich flavors of Anthony Bourdain’s Beef Bourguignon, a classic French dish that's perfect for any dinner.
Print Recipe Pin Recipe
Prep Time 30 minutes mins
Cook Time 2 hours hrs 30 minutes mins
Total Time 3 hours hrs
Servings: 6 servings
Course: Dinner
Cuisine: French
Calories: 350
Ingredients Equipment Method Nutrition Notes

Ingredients
  

For the Stew
  • 2 pounds boneless beef shoulder or chuck primary protein
  • 2 teaspoons kosher salt for seasoning
  • 1 teaspoon freshly ground black pepper for seasoning
  • 2 tablespoons olive oil for searing
  • 2 medium onions chopped
  • 2 tablespoons all-purpose flour for thickening
  • 1 bottle red burgundy wine (e.g., Pinot Noir) for flavor
  • 2 medium carrots chopped
  • 4 cloves garlic minced
  • 1 bunch bouquet garni (thyme, bay, parsley) for flavor
  • 3 cups water or low-sodium beef broth
  • 1 cup demi-glace optional for richness
  • 2 tablespoons chopped fresh flat-leaf parsley for garnish

Equipment

  • Dutch oven

Method
 

Step-by-Step Instructions
  1. Pat the beef dry with paper towels and season generously with kosher salt and black pepper.
  2. Heat half the olive oil in a Dutch oven over high heat, sear the beef in batches until browned on all sides.
  3. Add remaining olive oil, sauté onions until soft and golden brown, about 10 minutes.
  4. Stir in flour, cook for 4-5 minutes to create a roux.
  5. Deglaze with red wine, scraping any browned bits from the bottom, and bring to a boil.
  6. Return beef to pot with carrots, garlic, bouquet garni, and enough water to cover.
  7. Bring to a boil, then reduce heat to a gentle simmer and cover partially.
  8. Simmer uncovered for 2 to 2.5 hours, stirring occasionally, until beef is fork-tender.
  9. Remove bouquet garni, adjust seasoning with salt and pepper, garnish with parsley before serving.

Nutrition

Serving: 1servingCalories: 350kcalCarbohydrates: 15gProtein: 25gFat: 20gSaturated Fat: 8gPolyunsaturated Fat: 2gMonounsaturated Fat: 10gCholesterol: 70mgSodium: 800mgPotassium: 600mgFiber: 2gSugar: 3gVitamin A: 150IUVitamin C: 10mgCalcium: 40mgIron: 4mg

Notes

Serve with creamy mashed potatoes or crusty bread for a perfect meal.

Tried this recipe?

Let us know how it was!

Crock Pot Shipwreck Stew: Hearty Comfort in Every Bite

November 15, 2025 by Grace Snow Leave a Comment

On those chilly evenings when the wind howls outside, there's nothing more comforting than a warm bowl of stew. That’s where my Crock Pot Shipwreck Stew truly shines! This hearty, slow-cooked delight is packed with tender potatoes, vibrant carrots, and savory ground beef simmering in a rich tomato broth. Not only is it a crowd-pleaser, but it’s also incredibly budget-friendly—perfect for bringing family and friends together without breaking the bank. Plus, with minimal hands-on prep, you can set it and forget it while you tackle your evening plans or simply unwind. Ready to elevate your comfort food game? Join me in discovering how to make this cozy dish, and I promise you'll be coming back to it time and again! What unique twist will you add to your Shipwreck Stew?

What's so special about Shipwreck Stew?

Comforting Warmth: This Crock Pot Shipwreck Stew is like a hug in a bowl, perfect for chilly nights.

Budget-Friendly: With simple ingredients, it won’t break the bank while filling your family’s bellies.

Easy Prep: Just toss everything in the slow cooker and let it do the work for you.

Crowd-Pleaser: It’s perfect for game days or family gatherings, ensuring everyone leaves happy and satisfied.

Versatile Ingredients: Customize it with whatever veggies or beans you have on hand, like a heartwarming Beans Greens Stew.

Make-Ahead Friendly: Prep it ahead of time; it tastes even better the next day, just like my delicious Crock Pot Chicken!

Crock Pot Shipwreck Stew Ingredients

• Dive into making your own Crock Pot Shipwreck Stew with these essential ingredients!

For the Base

  • Ground Beef – A hearty protein that can be swapped for ground turkey, chicken, or plant-based crumbles for a lighter option.
  • Russet Potatoes – Break down slightly to thicken the stew; Yukon gold or red potatoes work well if you don’t have russets.
  • Carrots & Celery – These fresh aromatics add sweetness and texture to the stew; consider using a pinch of celery seed if celery is out of reach.
  • Yellow Onion & Garlic – Essential for depth of flavor; feel free to substitute with sweet onion or shallots as needed.

For the Broth

  • Diced Tomatoes + Tomato Sauce – The flavorful backbone of the stew; crushed tomatoes can also be used as an alternative.
  • Kidney Beans – Packed with protein and fiber; opt for pinto or black beans if you prefer, making sure to rinse canned beans.
  • Beef Broth – Adds richness; vegetable or chicken broth can be used if you want a different flavor profile.

For the Flavor

  • Worcestershire Sauce & Spices (Paprika, Bay Leaf, Thyme) – These enhance umami and flavor depth; soy sauce can substitute Worcestershire if necessary.

With these ingredients, you’re on your way to a delicious, comforting homestyle meal that’s bound to warm your heart and feed your soul!

Step‑by‑Step Instructions for Crock Pot Shipwreck Stew

Step 1: Brown the Ground Beef
In a large skillet, heat a drizzle of olive oil over medium heat. Add the ground beef and cook for about 4–5 minutes, breaking it apart with a wooden spoon. You want it nicely browned, with no pink remaining. This step adds rich flavor to your Crock Pot Shipwreck Stew.

Step 2: Sauté the Aromatics
Once the beef is browned, stir in the diced yellow onion and continue cooking for 3 minutes until the onions become translucent. Add minced garlic and sauté for an additional 30 seconds until fragrant. This fragrant mixture builds the foundation of flavor for your hearty stew.

Step 3: Combine Ingredients in the Slow Cooker
Transfer the beef and onion mixture to your slow cooker. Then, add in the diced russet potatoes, sweet carrots, and chopped celery. Sprinkle in the kidney beans, diced tomatoes, tomato sauce, beef broth, and Worcestershire sauce. Gently stir to combine everything, ensuring the ingredients are well-distributed in your Crock Pot Shipwreck Stew.

Step 4: Season the Stew
Next, add the spices: paprika, thyme, bay leaf, salt, and pepper, enhancing the savory depth of your stew. Stir one more time to blend the flavors. It’s important to tune the seasoning to your taste, as this will really elevate the comfort food experience.

Step 5: Set the Slow Cooker
Cover the slow cooker with its lid and set it to cook on LOW for 7–8 hours or on HIGH for 3–4 hours. Choose the low setting for a deeper flavor development. During this time, the vegetables will become fork-tender, and the broth will thicken to a comforting consistency.

Step 6: Final Touches and Serve
After cooking, carefully remove the bay leaf. Taste your Crock Pot Shipwreck Stew and adjust any seasoning if necessary. Serve hot, garnished with freshly chopped parsley, a dollop of sour cream, or sprinkle of shredded cheddar cheese for an extra layer of comfort in every bowl.

What to Serve with Crock Pot Shipwreck Stew?

Warm up your evening with perfect pairings that enhance the hearty goodness of your favorite stew.

  • Creamy Mashed Potatoes: The buttery creaminess complements the rich broth, making each bite a dreamy experience.
  • Crusty Bread: A fresh-baked loaf or breadsticks adds texture, perfect for soaking up the flavorful stew.
  • Garden Salad: A refreshing mix of greens and light vinaigrette balances the richness of the stew, adding a crisp, fresh element.
  • Cornbread Muffins: Sweet and crumbly, cornbread muffins bring a touch of sweetness that juxtaposes the savory stew beautifully.
  • Steamed Broccoli: The bright green color and mild crunch of steamed broccoli offer a nutritious contrast that rounds out the meal.
  • Pickle Chips: For a tangy kick, serve pickles on the side. Their acidity cuts through the stew's richness while adding flavor complexity.
  • Iced Tea or Lemonade: These refreshing drinks offer a sweet, tart balance, making each sip delightful against the hearty flavors of the meal.
  • Chocolate Chip Cookies: Complete your comforting feast with warm, gooey cookies. Their sweetness is the perfect finish after a savory stew meal.
  • Crispy Roasted Brussels Sprouts: The crispy texture and slightly nutty flavor provide a delightful contrast to the soft vegetables in your stew.
  • Classic Apple Pie: A slice of warm apple pie serves as a sweet conclusion, with its spicy notes connecting beautifully with the hearty stew.

Expert Tips for the Best Crock Pot Shipwreck Stew

  • Prep Ahead: Prepare and chop your ingredients up to 24 hours in advance. This makes assembling your Crock Pot Shipwreck Stew a breeze!
  • Avoid Peeking: Resist the urge to lift the lid during cooking. This helps maintain the cooking temperature and prevents extended cooking times.
  • Flavor Boost: To enhance richness, consider adding a splash of red wine along with the broth, elevating the flavors of your stew.
  • Taste & Adjust: Always taste before serving! Adjust salt and pepper or add a dash of hot sauce for a spicy kick.
  • Bean Choices: If using canned beans, rinse them first to reduce sodium content; this small step can greatly improve the health of your stew.

Crock Pot Shipwreck Stew Variations

Feel free to play with your ingredients and make this cozy stew truly your own!

  • Dairy-Free: Omit sour cream and cheese toppings for a lightened option, or use dairy-free alternatives like cashew cream.

  • Gluten-Free: Ensure all ingredients, especially Worcestershire sauce and broth, are marked gluten-free for a safe, delicious meal.

  • Spicy Kick: Add diced jalapeños or a dash of cayenne pepper to ignite your taste buds. Adjust to your preferred spice level!

For flavor-loving fans, the heat can transform your dish from cozy to exciting in no time.

  • Vegetarian: Swap ground beef for lentils or mushroom crumbles, combining with vegetable broth for a robust flavor without meat.

  • Bean Bliss: Experiment with different beans, such as black beans or chickpeas, for varied flavors and textures. Each type brings a unique twist to the stew.

  • Herbaceous Take: Incorporate fresh herbs like parsley, basil, or rosemary toward the end of cooking to brighten up the flavors of the stew.

If you’re inspired by these variations, you might also want to explore a comforting Crockpot Butter Chicken or my hearty Lamb Stew Hearty for more delicious options!

  • International Flair: Try adding a touch of curry powder or Italian seasoning for an unexpected, global twist that complements the tomato base beautifully.

Make Ahead Options

Planning ahead makes enjoying a hearty bowl of Crock Pot Shipwreck Stew even easier! You can brown the ground beef and sauté the onions and garlic up to 24 hours in advance, storing these components in an airtight container in the refrigerator. Additionally, chop your potatoes, carrots, and celery, and store them separately to maintain their freshness. When you're ready to cook, simply combine these prepped ingredients in your slow cooker with the remaining items and set it to low heat. This not only saves you time on busy weeknights but also enhances the flavors as they meld together throughout the cooking process. You'll have a comforting, delicious meal waiting for you with minimal effort!

Storage Tips for Crock Pot Shipwreck Stew

Fridge: Store cooled Crock Pot Shipwreck Stew in airtight containers for up to 4 days, ensuring to cool it completely before refrigerating to maintain freshness.

Freezer: For longer storage, freeze the stew in individual portions in freezer-safe containers for up to 3 months. Make sure to leave some space at the top for expansion.

Reheating: Thaw overnight in the fridge before reheating. Reheat gently on the stovetop or in the microwave, adding a splash of broth if needed to restore consistency.

Make-Ahead: This stew actually tastes even better the next day, so feel free to prepare it ahead of time for a delicious, hassle-free meal!

Crock Pot Shipwreck Stew Recipe FAQs

How do I choose the right ground beef for the stew?
Absolutely! When selecting ground beef, look for a higher fat content (around 80/20) for a juicy flavor. Avoid ground beef that's overly lean as it can lead to a dry stew. If you're opting for a healthier choice, consider ground turkey or chicken, which can be just as tasty in this dish!

How should I store leftovers of Crock Pot Shipwreck Stew?
You can refrigerate your cooled Crock Pot Shipwreck Stew in airtight containers for up to 4 days. Make sure to allow it to cool down before storing to keep it fresh. I often portion it out for easy reheating during the week!

Can I freeze this stew for later?
Yes, you can! Simply pour your cooled stew into freezer-safe containers, leaving a little space at the top for expansion, and freeze it for up to 3 months. To reheat, let it thaw overnight in the fridge, then warm gently on the stovetop or microwave, adding broth for the desired consistency.

What if the stew is too thick or too salty?
If your stew turns out too thick, simply add a splash of broth or water while reheating. For a salty flavor, you can balance it by adding a splash of vinegar or a small amount of sugar. Make sure to taste and adjust until you achieve the perfect balance!

Is this recipe suitable for gluten-free diets?
Very! Just ensure you use certified gluten-free Worcestershire sauce and broth. This Crock Pot Shipwreck Stew is naturally gluten-free when you follow these substitutions, allowing everyone to enjoy a warm, comforting meal together.

Can I substitute the vegetables in the stew?
Definitely! The beauty of this stew lies in its versatility. Feel free to mix in whatever vegetables you have on hand—peppers, green beans, or zucchini work beautifully. Just keep the balance of flavors in mind to maintain the comforting essence of the dish.

Crock Pot Shipwreck Stew

Crock Pot Shipwreck Stew: Hearty Comfort in Every Bite

Enjoy the comforting warmth of Crock Pot Shipwreck Stew, a budget-friendly, hearty dish perfect for chilly evenings.
Print Recipe Pin Recipe
Prep Time 15 minutes mins
Cook Time 8 hours hrs
Total Time 8 hours hrs 15 minutes mins
Servings: 6 servings
Course: Dinner
Cuisine: American
Calories: 350
Ingredients Equipment Method Nutrition Notes

Ingredients
  

For the Base
  • 1 lb Ground Beef can be substituted for ground turkey, chicken, or plant-based crumbles.
  • 2 large Russet Potatoes can replace with Yukon gold or red potatoes if needed.
  • 2 medium Carrots
  • 2 stalks Celery consider celery seed as a substitute.
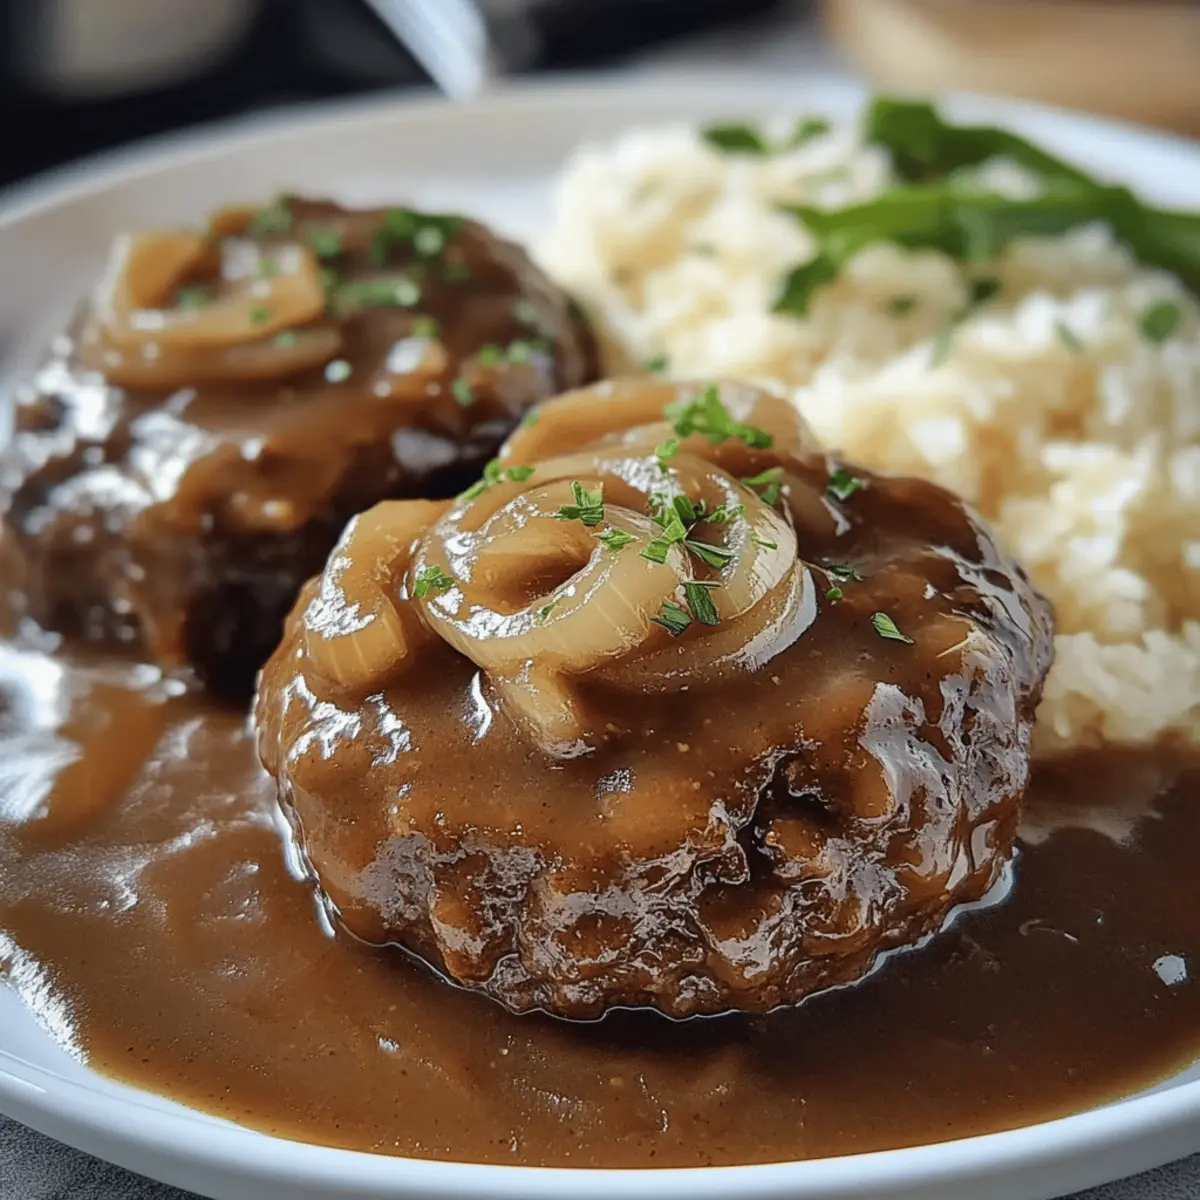
  • 1 medium Yellow Onion can substitute with sweet onion or shallots.
  • 3 cloves Garlic minced.
For the Broth
  • 14.5 oz Diced Tomatoes or crushed tomatoes.
  • 8 oz Tomato Sauce
  • 2 cups Beef Broth or vegetable/chicken broth for variation.
  • 15 oz Kidney Beans drained and rinsed.
For the Flavor
  • 2 tbsp Worcestershire Sauce can substitute with soy sauce.
  • 1 tbsp Paprika
  • 1 leaf Bay Leaf
  • 1 tsp Thyme
  • to taste Salt
  • to taste Pepper

Equipment

  • Slow Cooker

Method
 

Cooking Steps
  1. In a large skillet, heat a drizzle of olive oil over medium heat. Add the ground beef and cook for about 4–5 minutes, breaking it apart with a wooden spoon until nicely browned with no pink remaining.
  2. Stir in the diced yellow onion and continue cooking for 3 minutes until the onions become translucent. Add minced garlic and sauté for an additional 30 seconds until fragrant.
  3. Transfer the beef and onion mixture to your slow cooker. Add in the diced russet potatoes, carrots, and chopped celery. Sprinkle in the kidney beans, diced tomatoes, tomato sauce, beef broth, and Worcestershire sauce. Gently stir to combine.
  4. Add the spices: paprika, thyme, bay leaf, salt, and pepper. Stir one more time to blend the flavors.
  5. Cover the slow cooker with its lid and set it to cook on LOW for 7–8 hours or on HIGH for 3–4 hours.
  6. After cooking, carefully remove the bay leaf. Taste and adjust seasoning if necessary. Serve hot, garnished with parsley, sour cream, or cheddar cheese.

Nutrition

Serving: 1bowlCalories: 350kcalCarbohydrates: 40gProtein: 25gFat: 12gSaturated Fat: 5gPolyunsaturated Fat: 1gMonounsaturated Fat: 4gCholesterol: 80mgSodium: 800mgPotassium: 800mgFiber: 10gSugar: 6gVitamin A: 900IUVitamin C: 15mgCalcium: 40mgIron: 3mg

Notes

This stew can actually taste better the next day, making it great for make-ahead meals. Avoid peeking while cooking to maintain heat.

Tried this recipe?

Let us know how it was!

Salisbury Steak Recipe: Comfort Food in Just 35 Minutes

November 15, 2025 by Grace Snow Leave a Comment

As the aroma of sizzling beef fills the kitchen, I can't help but smile at the thought of a meal that embodies pure comfort. This Easy Homemade Salisbury Steak Recipe is not just quick to whip up—taking only 35 minutes—but it’s also a wonderful way to bring your family together around the dinner table. Enveloped in a rich onion gravy, these flavorful beef patties create a nostalgic dining experience that reminds me of cozy nights spent sharing stories over hearty plates. Plus, with options for lighter meat substitutions like ground turkey or even gluten-free breadcrumbs, it’s a dish that everyone can enjoy without sacrificing taste. Ready to discover how to make this classic dish? Let’s dive in!

Why is this Salisbury Steak Recipe irresistible?

Ease of Preparation: This Easy Homemade Salisbury Steak comes together in just 35 minutes, perfect for those busy weeknights when you crave something hearty.

Rich, Savory Gravy: The onion gravy is rich and flavorful, enhancing the juicy patties, making each bite a satisfying experience.

Crowd-Pleaser: It’s a dish that everyone loves, from kids to adults, ensuring everyone sits down together for a delightful meal.

Versatile Ingredients: Feel free to substitute meats with ground turkey or explore gluten-free options—this recipe adapts to your preferences!

Comfort Food Classic: This dish packs in nostalgia, making you feel like a chef at home, reminiscent of cozy family gatherings. For more comfort food recipes, check out my Grilled Balsamic Steak Salad or try the flavors of Spatchcock Chicken.

Salisbury Steak Recipe Ingredients

For the Patties

  • Ground Beef – This serves as the base, providing rich flavor and a juicy texture. For a lighter option, use ground turkey or chicken, adjusting cooking time accordingly.
  • Breadcrumbs – These add structure to the patties. Substitute with panko for extra crunch, or gluten-free alternatives for a similar texture.
  • Onions – Essential for sweetness and flavor depth. Yellow onions are mild; shallots or green onions can be great alternatives.
  • Worcestershire Sauce – This enhances the umami profile. Soy sauce or a vinegar-sugar blend works well as substitutes.
  • Egg – Helps bind the ingredients together. No direct substitutions recommended for best results.
  • Milk – Contributes moisture to the patties. Feel free to use non-dairy alternatives if needed.
  • Garlic Powder – Adds a warming, aromatic touch. You can swap it with fresh minced garlic for a sharper flavor.

For the Gravy

  • Cornstarch – Used to thicken the rich gravy. Arrowroot powder is a nice gluten-free alternative.
  • Vegetable Oil – Necessary for frying the patties to a golden perfection. Olive oil or butter can offer a different and delicious flavor profile.

This Salisbury Steak Recipe promises to be a delightful addition to your family dinner, filled with warmth and flavor!

Step‑by‑Step Instructions for Salisbury Steak Recipe

Step 1: Mix the Patties
In a large mixing bowl, combine 1 pound of ground beef, ½ cup of breadcrumbs, ¼ cup of finely chopped onion, 1 beaten egg, and ¼ cup of milk. Add 2 tablespoons of Worcestershire sauce, 1 teaspoon of garlic powder, and a pinch of salt and pepper. Mix gently with your hands until just combined, ensuring not to overwork the mixture for tender patties.

Step 2: Shape the Patties
Divide the meat mixture into four equal portions and shape each one into oval patties about ½ inch thick. Aim for uniform thickness to ensure even cooking. Place the patties on a plate or a cutting board while you prepare to cook them. This Salisbury Steak Recipe begins to take shape as you create perfectly formed patties.

Step 3: Cook the Patties
Heat a large skillet over medium heat and add 2 tablespoons of vegetable oil. Once the oil is shimmering, carefully add the shaped patties. Cook for 4-5 minutes on each side until they are golden brown and cooked through, with an internal temperature of 160°F. Once finished, remove the patties from the skillet and set them aside on a plate to rest.

Step 4: Prepare the Gravy
In the same skillet, without cleaning it, sauté 1 large sliced onion over medium heat for 2-3 minutes until they are softened and slightly caramelized. Stir frequently to avoid burning, as this will add a rich flavor to the gravy. Once the onions are fragrant and tender, proceed to the next step.

Step 5: Thicken the Gravy
Add 1 cup of beef broth and 1 tablespoon of soy sauce to the skillet, scraping the bottom with a wooden spoon to incorporate any browned bits. Bring the mixture to a gentle simmer for about 5 minutes, allowing the flavors to meld. Meanwhile, in a small bowl, whisk together 1 tablespoon of cornstarch with 2 tablespoons of water until smooth.

Step 6: Combine and Serve
Stir the cornstarch mixture into the simmering gravy and cook for an additional 2-3 minutes until the gravy thickens to your desired consistency. Bring back the cooked Salisbury steak patties to the skillet, spoon the gravy over them, cover, and heat for another 5 minutes. Serve hot alongside creamy mashed potatoes or your favorite vegetables for the ultimate comfort meal.

Make Ahead Options

These Salisbury Steak patties are the perfect make-ahead option for busy home cooks! You can prepare the patties—mixing together the ground beef, breadcrumbs, onions, and seasonings—up to 24 hours in advance. Simply shape them and store them in an airtight container in the fridge. When you're ready to enjoy your meal, cook them directly from the fridge for the best results; they’ll be just as delicious! Additionally, the gravy can be made ahead of time and stored in the refrigerator for up to 3 days. Reheat gently on the stove before serving, and don’t forget to spoon it over the reheated patties for an effortless and satisfying dinner!

How to Store and Freeze Salisbury Steak

Fridge: Store leftover Salisbury steaks and gravy in an airtight container for up to 3 days. Be sure to let them cool before sealing to avoid trapping moisture, which can make the patties soggy.

Freezer: For longer storage, freeze the steaks and gravy in a freezer-safe container or heavy-duty zip-top bag for up to 3 months. Ensure everything is well-wrapped to prevent freezer burn.

Reheating: When ready to enjoy, thaw the frozen Salisbury steak overnight in the fridge. Reheat gently in a skillet over low heat or in the microwave until warmed through, sprinkling a little water on top to keep them moist.

Portion Control: Consider freezing individual portions so you can thaw just what you need for a quick, comforting meal that reminds you of home!

Salisbury Steak Recipe Variations & Substitutions

Feel free to get creative with this dish—there are so many ways to make it your own!

  • Healthier Swap: Use Ground Turkey instead of beef for a leaner option. It retains flavor while being a bit lighter on the palate.

  • Crunchy Texture: Swap regular breadcrumbs with Panko Breadcrumbs for a delightful crunch that brings a new texture to your patties.

  • Flavor Exploration: Experiment with Shallots or Green Onions in place of yellow onions for a unique flavor twist that enhances the dish beautifully.

  • Umami Boost: Add a splash of Soy Sauce to your gravy for an extra layer of richness. It complements the savory notes without overpowering.

  • Gluten-Free Option: For a gluten-free meal, use Crushed Rice Crackers instead of bread crumbs and thicken your gravy with Arrowroot Powder.

  • Herb Infusion: Mix in fresh Chopped Parsley or Thyme to the patties for a burst of freshness that brightens the overall flavor profile.

  • Spicy Kick: Add a dash of Cayenne Pepper or some chopped Jalapeño to the patties if you’re in the mood for a little heat!

  • Creamy Twist: For a rich alternative, consider stirring in a dollop of Cream Cheese into the gravy for a creamy texture that complements the savory patties.

Want to explore even more flavors? Pair your Salisbury steak with the hearty and delicious Cocoa Crusted Steak or elevate your meal with a refreshing Spatchcock Chicken. Happy cooking!

Expert Tips for Salisbury Steak Recipe

  • Uniform Thickness: Ensure your patties are evenly shaped to guarantee consistent cooking and avoid dry edges. This makes a difference in achieving that juicy texture!

  • Resting Time: Let the patties rest after frying to allow the juices to redistribute, ensuring a tender bite that bursts with flavor.

  • Cooking Temperature: If using lighter meats like ground turkey or chicken, be mindful to check that the internal temperature reaches 165°F for safety.

  • Smooth Gravy: To prevent lumps in your onion gravy, whisk the cornstarch mixture thoroughly before adding it and constantly stir as you combine it.

  • Flavor Variations: Don't hesitate to experiment with different onion types or spices in your Salisbury Steak Recipe to find the combination that your family loves best!

What to Serve with Easy Homemade Salisbury Steak

Elevate your dinner table with delightful sides and treats, creating a full experience around the warmth of home-cooked meals.

  • Creamy Mashed Potatoes: The silky texture adds comfort and soaks up the rich onion gravy beautifully, making every bite indulgent. Imagine creamy potatoes paired with savory beef—pure bliss!

  • Roasted Vegetables: Seasonal roasted carrots, Brussels sprouts, or broccoli bring a colorful, crisp contrast that balances the meal. Their slight caramelization enhances the meal's overall flavor profile.

  • Buttery Corn on the Cob: Classic and sweet, this side adds a juicy pop that complements the savory richness of the Salisbury steak without competing for attention.

  • Garden Salad: A fresh mix of greens with a light vinaigrette offers a refreshing bite to cleanse the palate and lighten the meal. Toss in cherry tomatoes and cucumber for an extra crunch.

  • Crusty Bread: A side of warm, crusty bread or dinner rolls allows for the delightful sopping of gravy left on your plate. Just picture the flavors mingling with the bread—absolutely heartwarming!

  • Red Wine: A glass of full-bodied red wine can heighten the experience, enhancing the flavors of the steak while providing a soothing backdrop to your dinner conversation.

  • Chocolate Cake: Finish the meal on a sweet note with a slice of rich chocolate cake. Its decadence perfectly contrasts the savory elements of your main dish, ensuring a joyous ending to the feast.

Easy Homemade Salisbury Steak Recipe FAQs

What should I look for when selecting ground beef for the Salisbury Steak?
Absolutely! When choosing ground beef, look for meat that has a bright red color and does not have dark spots or an off smell. I recommend an 80/20 blend for a good balance of flavor and moisture. If you're opting for a lighter option, you can certainly use ground turkey or chicken; just be sure to adjust your cooking time accordingly.

How should I store leftover Salisbury Steak and gravy?
Very easy! Store your leftover Salisbury steaks and gravy in an airtight container in the fridge for up to 3 days. Let them cool completely before sealing to avoid sogginess. For ultimate flavor preservation, consider freezing leftovers if you won't finish them within that timeframe!

Can I freeze my Salisbury Steak? If so, how?
Definitely! To freeze your Salisbury Steak, let the patties and gravy cool completely. Then, transfer them to a freezer-safe container or heavy-duty zip-top bag, making sure to remove as much air as possible. You can freeze them for up to 3 months. When ready to enjoy, simply thaw in the fridge overnight and reheat gently!

What can I do to prevent lumps in my gravy?
To avoid any lumpy gravy, it's key to whisk the cornstarch with water until smooth before adding it to the broth mixture. When incorporating it, stir continuously to ensure it's fully integrated. This simple method will help create that silky texture we all love.

Are there any dietary considerations I should take into account with this recipe?
If you have dietary restrictions, there are plenty of alternatives! Use gluten-free breadcrumbs for a suitable replacement. If someone has a dairy allergy, non-dairy milk can be used. Just be sure to communicate and adjust according to everyone's needs, as this Salisbury Steak Recipe can be easily customized for a variety of diets.

How long does cooked Salisbury Steak last in the refrigerator?
Cooked Salisbury Steak can be stored in the refrigerator for up to 3 days. When storing, ensure it's in an airtight container to maintain its moisture and flavor. If you're ever in doubt, trust your nose—if it smells off, it's best to discard. Enjoy your cozy meals!

Salisbury Steak Recipe

Salisbury Steak Recipe: Comfort Food in Just 35 Minutes

This Salisbury Steak Recipe brings comfort food to your table in just 35 minutes, perfect for family dinners.
Print Recipe Pin Recipe
Prep Time 15 minutes mins
Cook Time 20 minutes mins
Total Time 35 minutes mins
Servings: 4 patties
Course: Dinner
Cuisine: American
Calories: 350
Ingredients Equipment Method Nutrition Notes

Ingredients
  

For the Patties
  • 1 pound ground beef Use ground turkey for a lighter option.
  • 0.5 cup breadcrumbs Substitute with panko or gluten-free alternatives.
  • 0.25 cup onion Finely chopped; yellow onions recommended.
  • 2 tablespoons Worcestershire sauce Soy sauce can be used as a substitute.
  • 1 large egg
  • 0.25 cup milk Non-dairy alternatives are acceptable.
  • 1 teaspoon garlic powder Fresh minced garlic can be used instead.
For the Gravy
  • 1 tablespoon cornstarch Arrowroot powder is a gluten-free alternative.
  • 2 tablespoons vegetable oil Olive oil or butter can be used.

Equipment

  • large mixing bowl
  • Large skillet
  • Wooden spoon

Method
 

Step‑By‑Step Instructions
  1. In a large mixing bowl, combine ground beef, breadcrumbs, chopped onion, beaten egg, and milk. Add Worcestershire sauce, garlic powder, and a pinch of salt and pepper. Mix gently with your hands until just combined.
  2. Divide the mixture into four equal portions and shape into oval patties about ½ inch thick.
  3. Heat a large skillet over medium heat and add vegetable oil. Add the shaped patties and cook for 4-5 minutes on each side until golden brown and cooked through.
  4. In the same skillet, sauté sliced onion over medium heat for 2-3 minutes until softened.
  5. Add beef broth and soy sauce to the skillet, scraping the bottom to incorporate browned bits. Simmer for about 5 minutes.
  6. Whisk together cornstarch with water until smooth. Stir into the simmering gravy and cook for an additional 2-3 minutes until thickened.
  7. Return the cooked patties to the skillet, spoon the gravy over them, cover, and heat for 5 minutes before serving.

Nutrition

Serving: 1pattyCalories: 350kcalCarbohydrates: 20gProtein: 25gFat: 18gSaturated Fat: 6gPolyunsaturated Fat: 1gMonounsaturated Fat: 10gCholesterol: 80mgSodium: 700mgPotassium: 400mgFiber: 1gSugar: 2gVitamin A: 4IUVitamin C: 2mgCalcium: 50mgIron: 3mg

Notes

Ensure patties are evenly shaped for consistent cooking and allow to rest after frying for optimal juiciness. Experiment with different onion types for added flavor.

Tried this recipe?

Let us know how it was!
  • « Previous Page
  • 1
  • …
  • 79
  • 80
  • 81
  • 82
  • 83
  • …
  • 102
  • Next Page »

Welcome!

Hi, I’m Grace, a Sydney-based home cook with a passion for bold flavors and trending ingredients. Whether you’re a busy beginner or a seasoned foodie, you’ll find dishes here that are fresh, fun, and full of flavor.

More about me

Popular Recipes

  • Honey Sriracha Salmon Bowls
    Delicious Honey Sriracha Salmon Bowls for Quick Dinners
  • Air Fryer Apple Pie Taquitos
    Crispy Air Fryer Apple Pie Taquitos for a Sweet Treat
  • Crispy Parmesan Crusted Cod
    Crispy Parmesan Crusted Cod: A Healthy Flavor Explosion
  • Air Fryer French Toast Bites
    Delicious Air Fryer French Toast Bites for Busy Mornings

Footer

↑ back to top

About

  • Privacy Policy
  • Disclaimer
  • Terms & Conditions

Newsletter

  • Sign Up! for emails and updates

Contact

  • About me
  • Contact me

Copyright © 2025 TastyTrendIngredients