As I stood in my kitchen, the scent of melting cheese mingled with the sweet-spicy aroma of hot honey wafting through the air, I couldn’t help but smile. This Sweet-Spicy Hot Honey Flatbread Pizza has become my go-to solution for quick weeknight dinners, elevating the familiar pizza experience into something truly memorable. Not only is it a breeze to whip up, but it also allows for endless customization based on whatever toppings are calling your name. With its crispy crust and glossy honey drizzle, this dish perfectly balances indulgence and convenience, making it a delightful option to satisfy your pizza cravings without the wait. Are you ready to create a pizza that tantalizes your taste buds? Let's dive into this delicious recipe!
Why is Hot Honey Flatbread Pizza a Must-Try?
Simplicity: This recipe requires minimal effort, perfect for busy weeknights.
Flavor Explosion: The unique blend of sweet hot honey and spicy jalapeños creates a taste sensation that will surprise and delight your palate.
Adaptable: Feel free to mix and match toppings based on what you have on hand, much like a quick yet sophisticated version of this Honey Garlic Chicken or even some fresh veggies inspired by seasonal flavors.
Crispy Texture: The flatbread crust turns perfectly crispy, offering a satisfying crunch that contrasts beautifully with the gooey cheese.
Crowd-Pleaser: Serve this at any gathering, and watch everyone come back for seconds! It’s sure to be a hit, just like your favorite homemade hot chocolate on a cozy evening.
Hot Honey Flatbread Pizza Ingredients
For the Pizza Base
• Store-bought Flatbread – A convenient base for your pizza; feel free to use homemade flatbread if you prefer a personal touch.
• Pizza Sauce – Provides a delicious layer of moisture and flavor; be careful not to overload it.
For the Toppings
• Mozzarella Cheese – Offers a creamy, melty texture; swap for provolone if you’re feeling adventurous.
• Pepperoni – Adds robust flavor; you can easily replace it with vegetables for a tasty vegetarian twist.
• Jalapeños – Brings the heat; use milder peppers if you want a less spicy bite.
• Olives – Infuses a savory note; these can be omitted if they’re not your thing.
For the Sweet-Spicy Drizzle
• Honey – Delivers sweetness and blends beautifully with hot sauce; I love using clover, orange blossom, or wildflower honey.
• Hot Sauce – Amplifies the spiciness of the honey; adjust according to your heat preference.
• Chili Flakes – Add extra spice to taste; a little goes a long way!
This Hot Honey Flatbread Pizza is not just about the ingredients—it's about creating a meal that feels special while being simple enough for any weeknight!
Step‑by‑Step Instructions for Hot Honey Flatbread Pizza
Step 1: Preheat the Oven
Begin by preheating your oven to 450°F (230°C). Place an oven tray inside to heat up simultaneously, which will help achieve that perfectly crispy base for your Hot Honey Flatbread Pizza. Allow the oven to fully preheat, which usually takes about 10-15 minutes, ensuring your tray is sizzling hot.
Step 2: Prepare the Hot Honey Drizzle
In a small bowl, combine honey, hot sauce, and chili flakes, adjusting to your taste preferences. Mix them until you achieve a smooth consistency, then warm the mixture briefly in the microwave or a saucepan for about 30 seconds. Let it cool off slightly as this will enhance its flavors, creating a delightful sweet-spicy drizzle.
Step 3: Assemble the Pizza
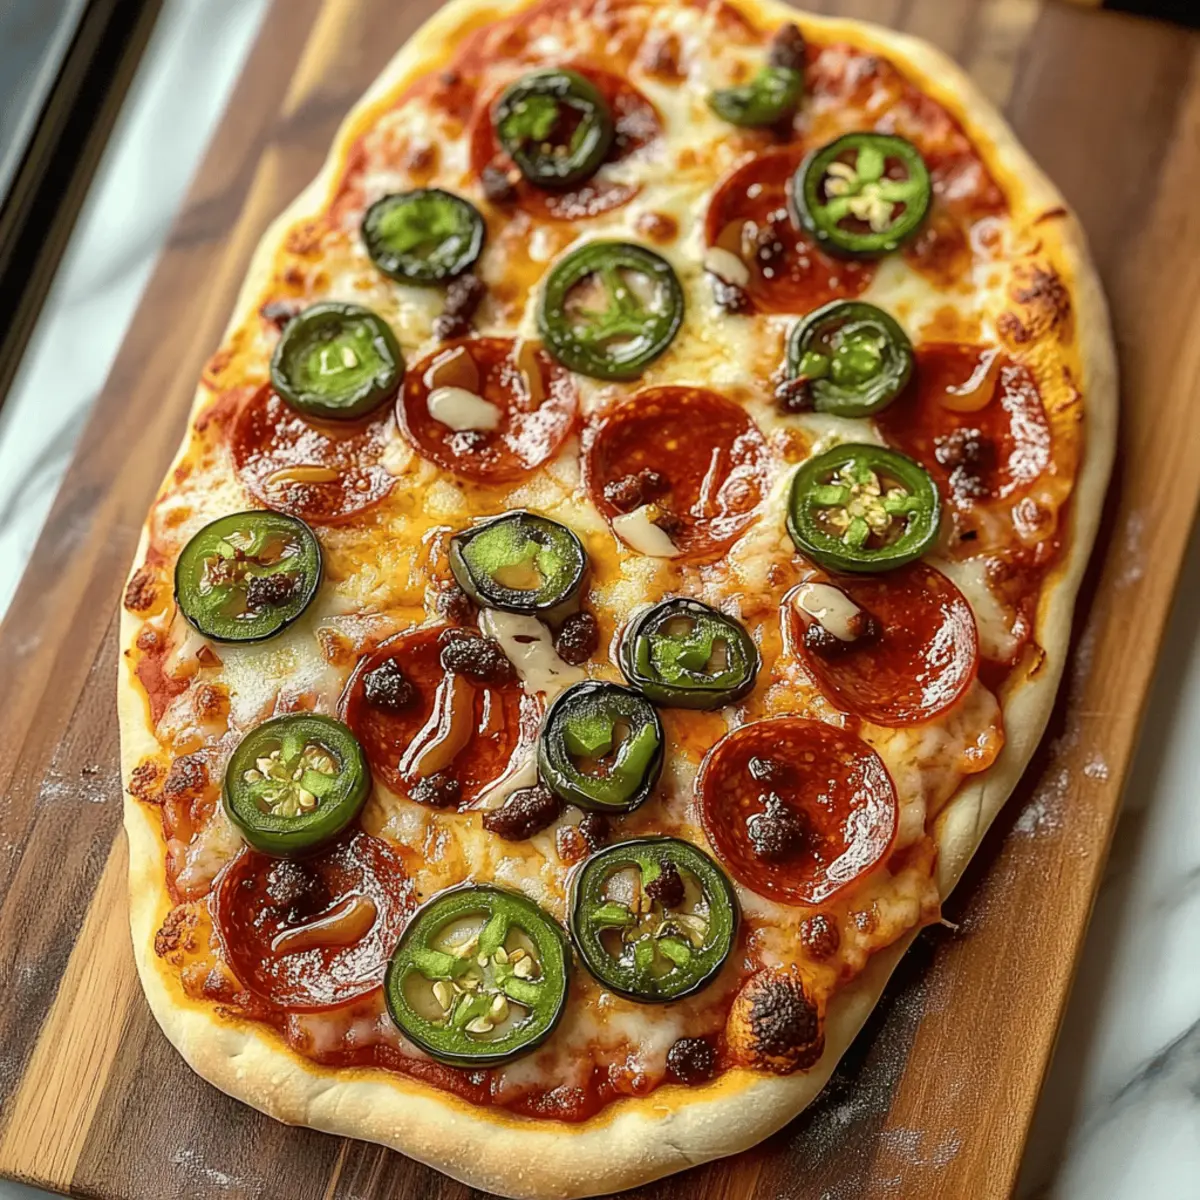
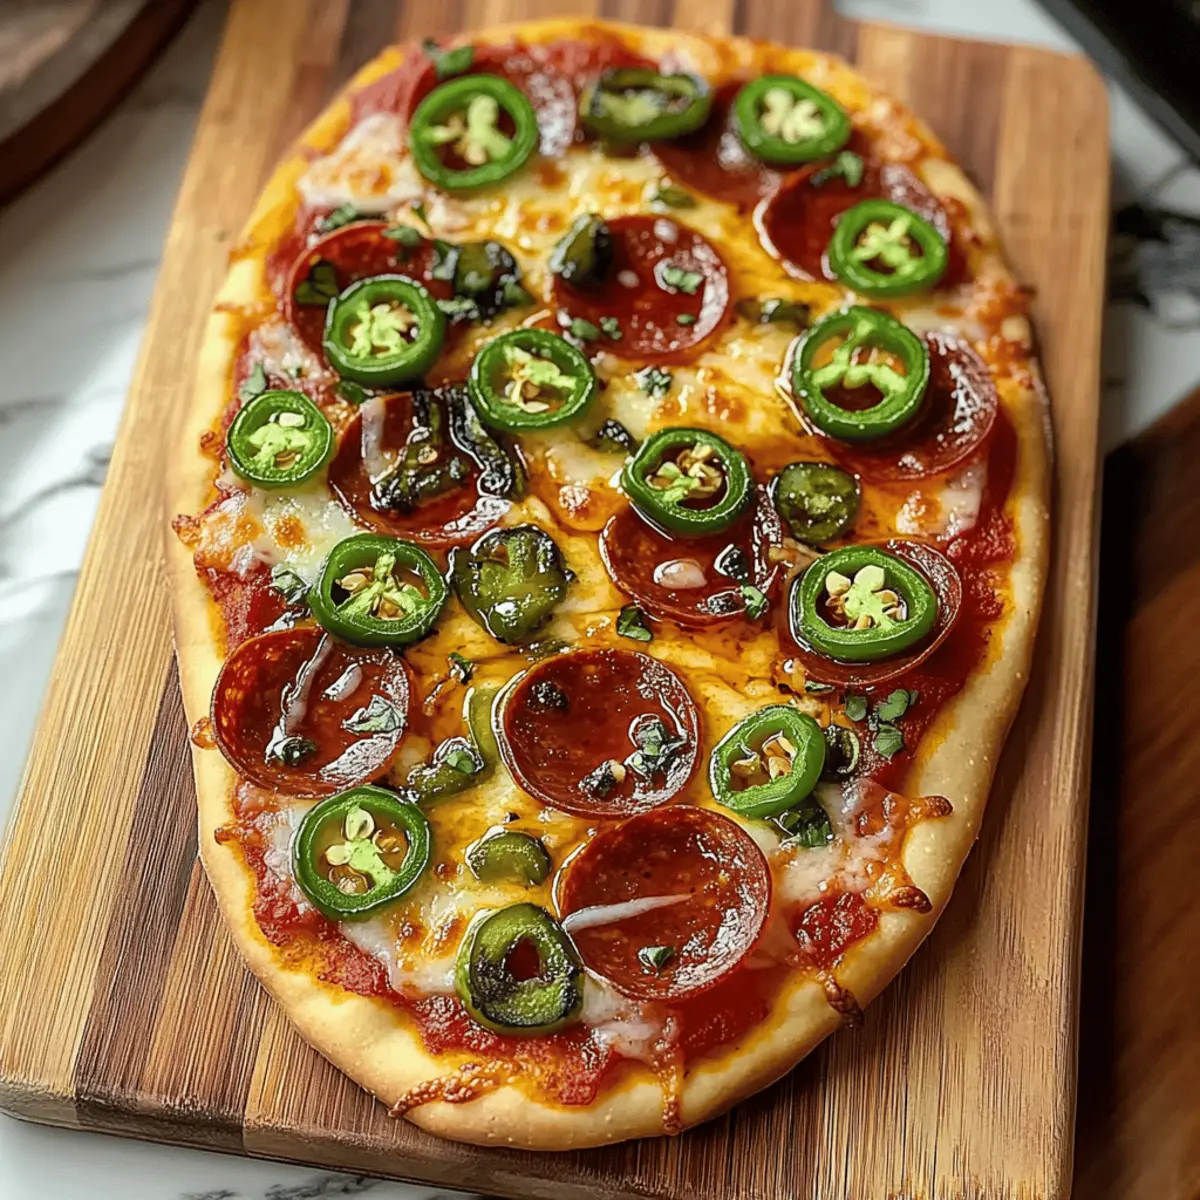
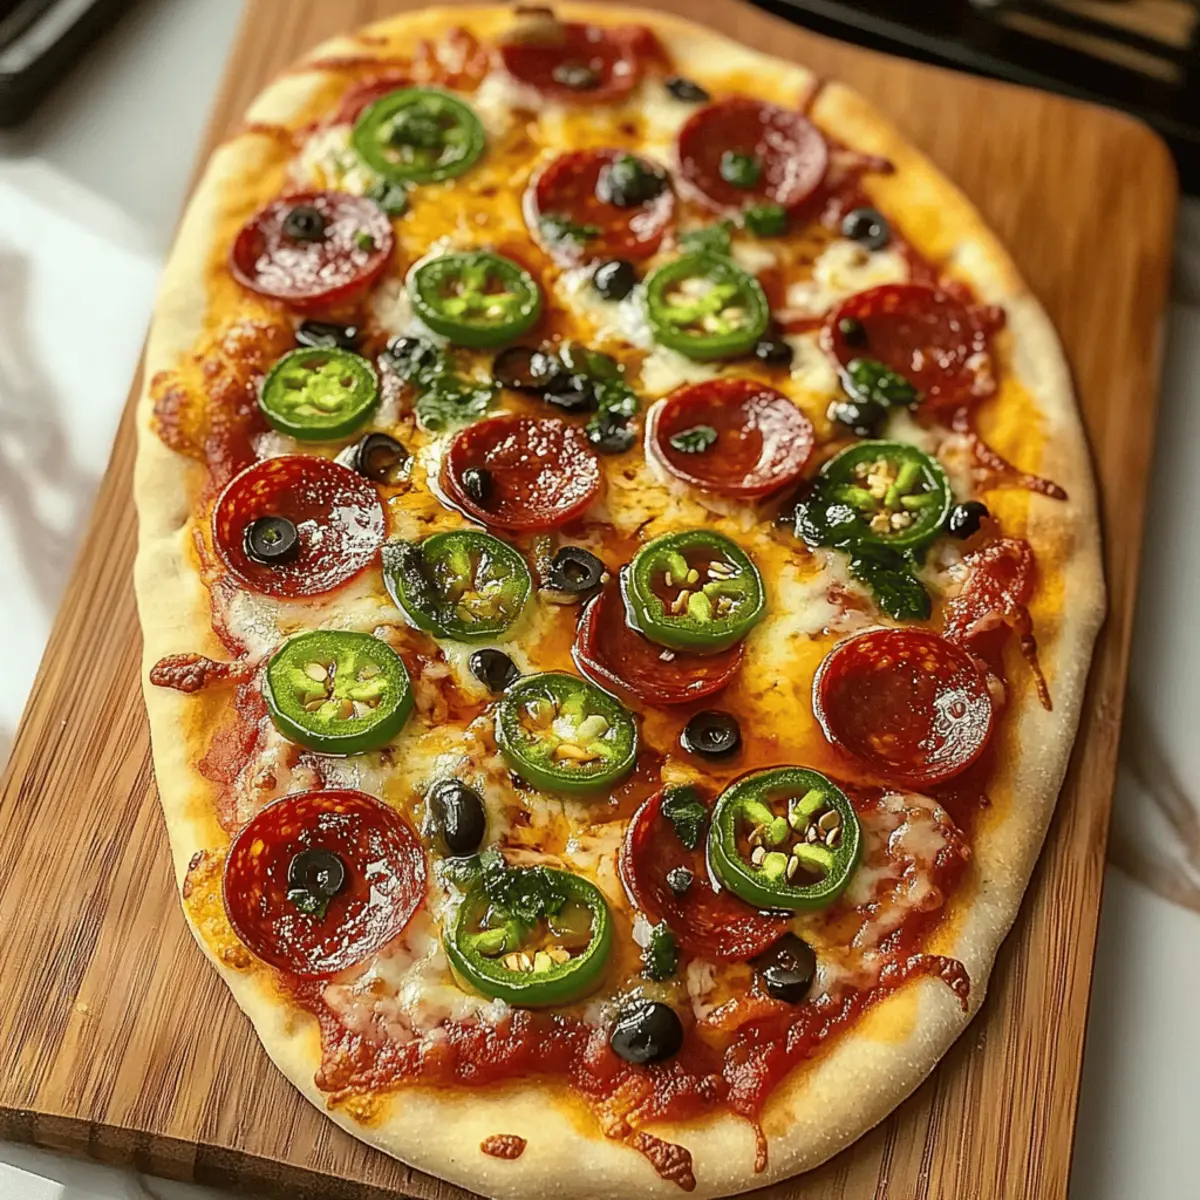
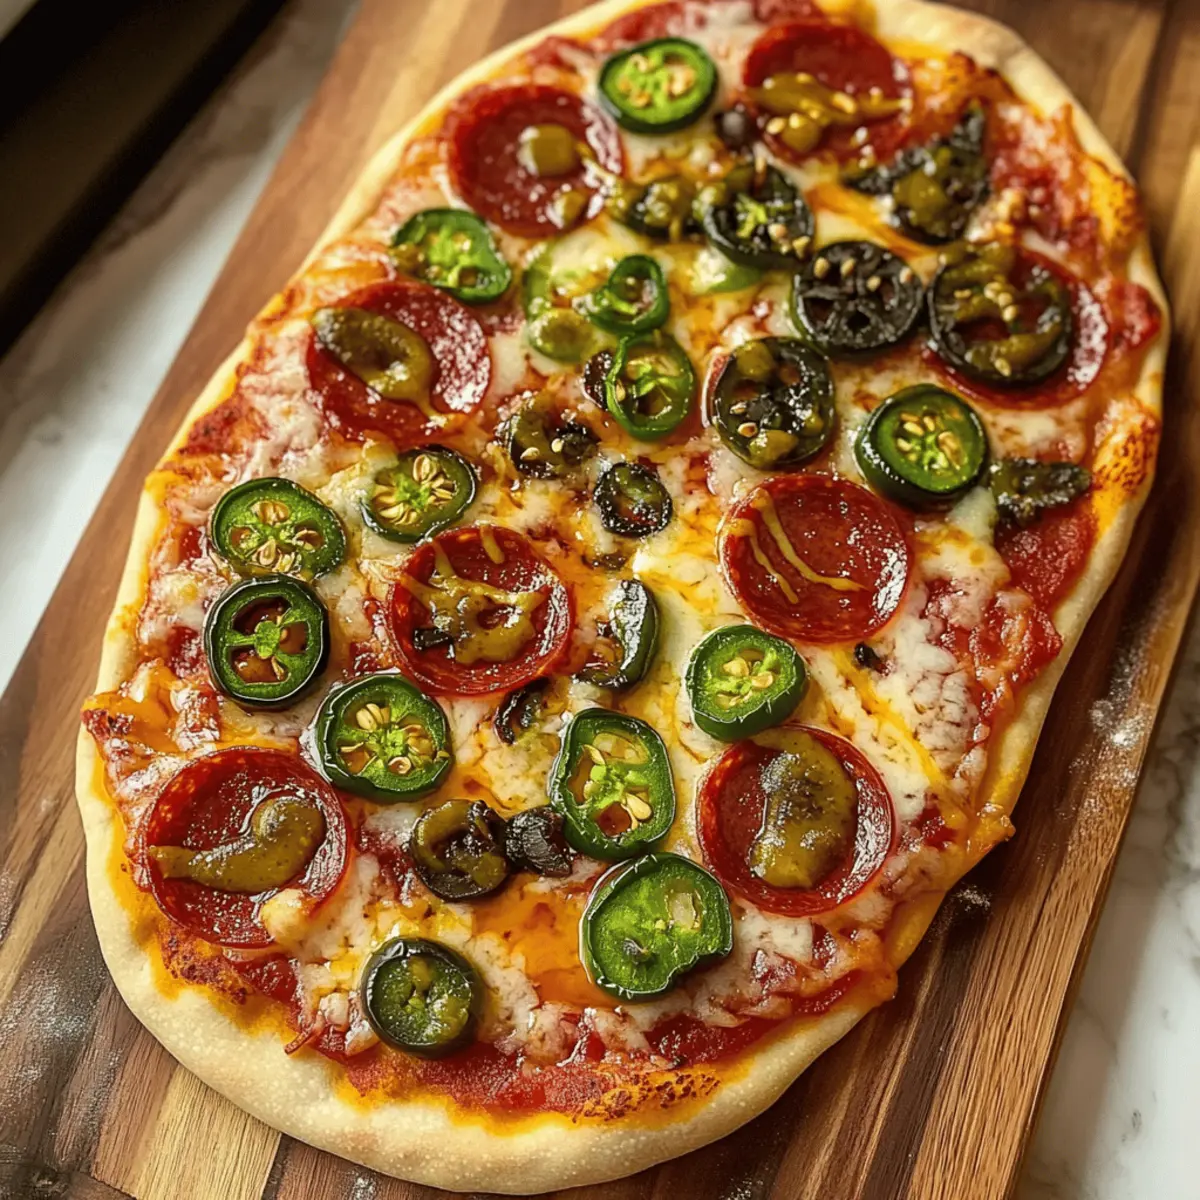
Take the store-bought flatbread and spread a thin layer of pizza sauce over the surface, ensuring an even coat for flavor and moisture. Next, sprinkle a generous layer of mozzarella cheese on top. This helps in maintaining a gooey texture that complements the crispy flatbread perfectly.
Step 4: Add Your Toppings
Evenly distribute the pepperoni, jalapeños, and olives over the cheese layer. If using pepperoni, consider adding a little more cheese on top to ensure they stay flat and crisp up nicely. Feel free to mix and match other toppings based on your preferences, creating your unique version of the Hot Honey Flatbread Pizza.
Step 5: Bake the Pizza
Carefully place the assembled pizza onto the hot oven tray and bake for 8-10 minutes. Keep an eye on it; the edges should turn golden brown and charred while the cheese bubbles and melts to perfection. This short baking time ensures a delightful crispness without overcooking.
Step 6: Drizzle with Hot Honey
Once baked, take your beautiful Hot Honey Flatbread Pizza out of the oven and let it sit for a minute. Then, drizzle the prepared hot honey mixture generously over the pizza, allowing it to seep into the toppings and create that divine sweet-spicy contrast.
Step 7: Slice and Serve
Slice your delicious hot honey flatbread pizza into generous portions and serve hot, perhaps with a side salad for a balanced meal. The crispy crust paired with gooey cheese and a kick of hot honey will leave everyone craving more!
Expert Tips for Hot Honey Flatbread Pizza
-
Pre-Bake for Crispiness: Pre-bake the flatbread for 2-3 minutes to prevent a soggy crust, ensuring a delightful crunch.
-
Drizzle After Baking: Always drizzle the hot honey after baking to avoid burning the sweet glaze and maintain its flavors.
-
Mind Your Toppings: Avoid overloading with toppings. Too many ingredients can lead to uneven cooking and a soggy pizza.
-
Optimal Baking Position: Place the pizza on the lowest rack in the oven for the crispiest base; this ensures ideal heat circulation.
-
Rest Before Slicing: Let the pizza rest for 1-2 minutes after baking before slicing to allow the cheese to set slightly.
Make Ahead Options
These Hot Honey Flatbread Pizzas are a fantastic option for meal prep enthusiasts! You can prepare the flatbread and toppings up to 24 hours in advance by assembling everything on the flatbread, then wrapping it tightly in plastic wrap and refrigerating. To maintain that irresistible crispy texture, it's crucial to keep the sauce and toppings dry until you're ready to bake. Just before serving, unwrap the pizza, pop it into a preheated oven at 450°F (230°C) for about 8-10 minutes, and finish by drizzling the hot honey after baking. This way, you'll savor the same mouthwatering flavors with minimal effort during your busy weeknights!
Hot Honey Flatbread Pizza Variations
Feel free to expand your culinary creativity and personalize this delightful pizza to fit your taste and dietary needs!
-
Dairy-Free: Substitute mozzarella with vegan cheese or a nut-based alternative for a creamy texture without dairy.
-
Spicy Veggie Boost: Add seasonal veggies like bell peppers or zucchini for a flavorful twist and extra nutrition. Roasted veggies lend a sweetness that balances the heat beautifully!
-
Grain Swap: Try using whole-wheat or gluten-free flatbread to accommodate dietary preferences while keeping it wholesome. A nutty flavor will contrast nicely with the sweet honey.
-
Flavored Honey: Experiment with infused honey, like rosemary or chili-infused honey, for an exciting flavor dimension that elevates the sweetness and spice even further.
-
Inspired by Italian Classics: Top your pizza with a sprinkle of balsamic glaze post-bake for a sophisticated finish, akin to pizzas served in authentic Italian pizzerias.
-
Meat Lovers’ Twist: For a heartier option, add Italian sausage or prosciutto for a savory infusion, ensuring a delightful contrast between the sweet honey drizzle and meaty toppings.
-
Smoky Flavor: Incorporate smoked paprika or chipotle powder into your hot honey mix for a deeper, smokier kick that will have your taste buds dancing with joy.
-
Personal Touch: Customize your flatbread with toppings inspired by your favorite dishes, like adding elements from spicy honey BBQ chicken to conjure up those flavors in pizza form.
How to Store and Freeze Hot Honey Flatbread Pizza
Fridge: Store any cooled leftovers in an airtight container for up to 3 days. This keeps your Hot Honey Flatbread Pizza fresh and flavorful.
Freezer: For longer storage, wrap slices individually in plastic wrap and then in aluminum foil; they can be frozen for up to 2 months without losing quality.
Reheating: For a crispy crust, reheat slices in an oven at 350°F (175°C) for 8-10 minutes. If you’re in a rush, use the microwave, but be mindful that the crust will be softer.
Thawing: When ready to enjoy your frozen pizza, move it to the fridge overnight to thaw before reheating for the best texture.
What to Serve with Hot Honey Flatbread Pizza?
Imagine the delightful aroma filling your kitchen as you piece together a complete meal that’s both comforting and satisfying.
-
Crisp Caesar Salad: The crunchy romaine and tangy dressing provide a refreshing counterpoint to the sweet-spicy pizza, balancing the meal beautifully. This classic salad brings a bright and crunchy texture that complements the warm, soft pizza.
-
Garlic Knots: These golden, buttery knots pair perfectly with the pizza—offering a savory bite that’s just as addictive. Dip them in marinara or enjoy them solo for that extra touch of flavor.
-
Spicy Chicken Tenders: Crunchy on the outside and tender inside, these add spice and protein, making the meal heartier. They’re perfect for dipping in ranch or hot sauce, echoing the sweet heat of the pizza.
-
Roasted Vegetables: Toss seasonal veggies like bell peppers and zucchini in olive oil and herbs, then roast until caramelized. Their rich flavors and slight sweetness beautifully complement the hot honey drizzle.
-
Cucumber Tomato Salad: Fresh, cool cucumbers and juicy tomatoes create a refreshing contrast to the heat of the pizza. Drizzled with a bit of olive oil and vinegar, it's an easy, vibrant side.
-
Chilled White Wine: A light, crisp wine, like Sauvignon Blanc, can enhance the flavors of the hot honey and rich cheeses. The refreshing sip will counterbalance the pizza's spicy sweetness for a lovely dining experience.
-
Chocolate Chip Cookies: End the meal on a sweet note with warm, gooey cookies. The classic flavors of chocolate and butter make for a comforting pairing after the delicious heat of the pizza.
Hot Honey Flatbread Pizza Recipe FAQs
How do I choose the right flatbread?
Absolutely! When selecting your flatbread, look for one that is thick enough to hold up against the toppings without making the pizza soggy. I often recommend whole wheat or garlic-flavored flatbreads for added taste. If you can, pick one with a golden-brown color and a slightly crispy texture—they usually yield the best results!
What is the best way to store leftover Hot Honey Flatbread Pizza?
You can store your leftover Hot Honey Flatbread Pizza in an airtight container in the fridge for up to 3 days. Make sure it has cooled completely before sealing to maintain freshness. For longer storage, wrap the slices individually in plastic wrap, then in aluminum foil, and place them in the freezer, where they will stay good for up to 2 months.
How do I freeze Hot Honey Flatbread Pizza?
Freezing pizza is easy! First, let the pizza cool to room temperature. Then, slice it into desired portions. Wrap each slice tightly in plastic wrap and then in aluminum foil, indicating the date on the packaging. When you're ready to enjoy it, simply thaw in the fridge overnight before reheating in the oven at 350°F (175°C) for 8-10 minutes for that crispy crust.
What toppings should I avoid to prevent sogginess?
Very! It’s important to be mindful of toppings that contain a lot of moisture, like fresh tomatoes or frozen vegetables. If you want to use them, consider pre-cooking or patting them dry first. Opting for dryer options like pepperoni, cooked chicken, or roasted vegetables can also help maintain that satisfying crunch.
Can I adapt this recipe for dietary restrictions?
Absolutely! This Hot Honey Flatbread Pizza is highly adaptable. For a gluten-free option, you can use gluten-free flatbreads or tortillas. If you're looking for a vegetarian version, simply replace the pepperoni with seasonal vegetables like bell peppers or mushrooms. You can also use vegan cheese if you're avoiding dairy; there are many delicious alternatives available now!
Is it safe for pets?
No, I wouldn't recommend sharing this pizza with your pets. Ingredients like cheese and jalapeños can upset their stomachs. If you'd like to treat them, consider making a simple, pet-friendly flatbread topped with plain chicken or veggies instead. It's always best to keep human food and pet food separate for their health!
Irresistible Hot Honey Flatbread Pizza for Weeknight Bliss
Ingredients
Equipment
Method
- Preheat your oven to 450°F (230°C) and heat an oven tray simultaneously.
- In a small bowl, mix honey, hot sauce, and chili flakes for the drizzle.
- Spread a thin layer of pizza sauce over the flatbread.
- Sprinkle mozzarella cheese evenly on top of the pizza sauce.
- Add pepperoni, jalapeños, and olives as your toppings.
- Bake for 8-10 minutes until the edges are golden and cheese is bubbly.
- Drizzle the hot honey mixture over the pizza after baking.
- Slice into portions and serve hot.