tastytrendingredients

  • Home
  • Recipes
    • Appetizers
    • Breakfast
    • Dessert
    • Dinner
    • Drinks
    • Salads
    • Snacks
    • Soups
  • About me
  • Contact
menu icon
go to homepage
  • Home
  • Recipes
    • Appetizers
    • Breakfast
    • Dessert
    • Dinner
    • Drinks
    • Salads
    • Snacks
    • Soups
  • About me
  • Contact
search icon
Homepage link
  • Home
  • Recipes
    • Appetizers
    • Breakfast
    • Dessert
    • Dinner
    • Drinks
    • Salads
    • Snacks
    • Soups
  • About me
  • Contact
×

Savory Chicken Étouffée: Your New Favorite Comfort Dish

May 2, 2026 by Grace Snow Leave a Comment

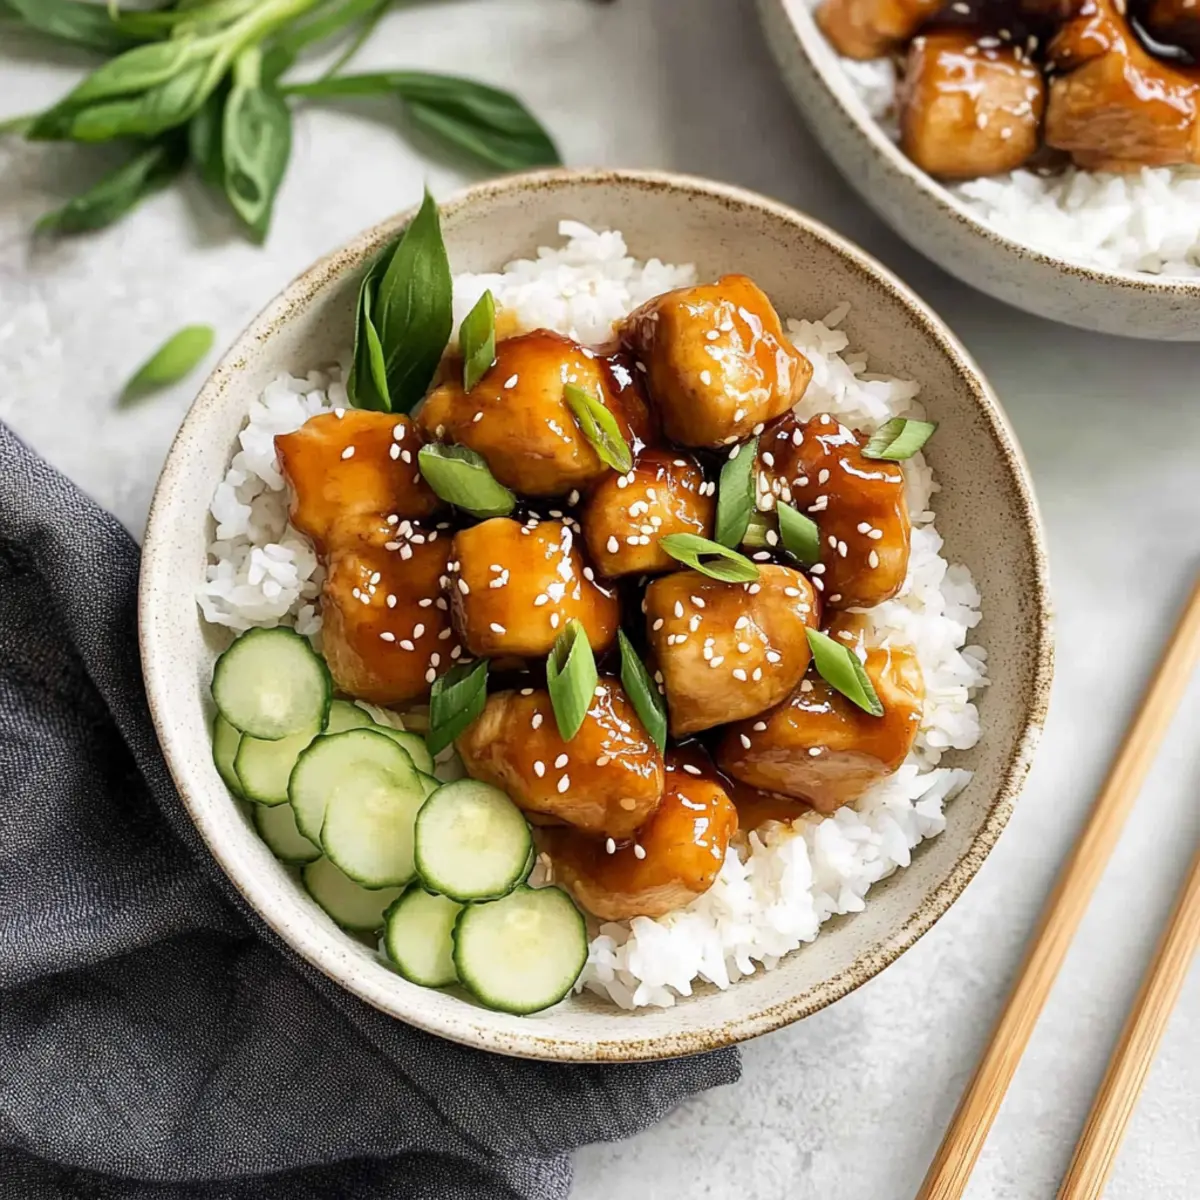
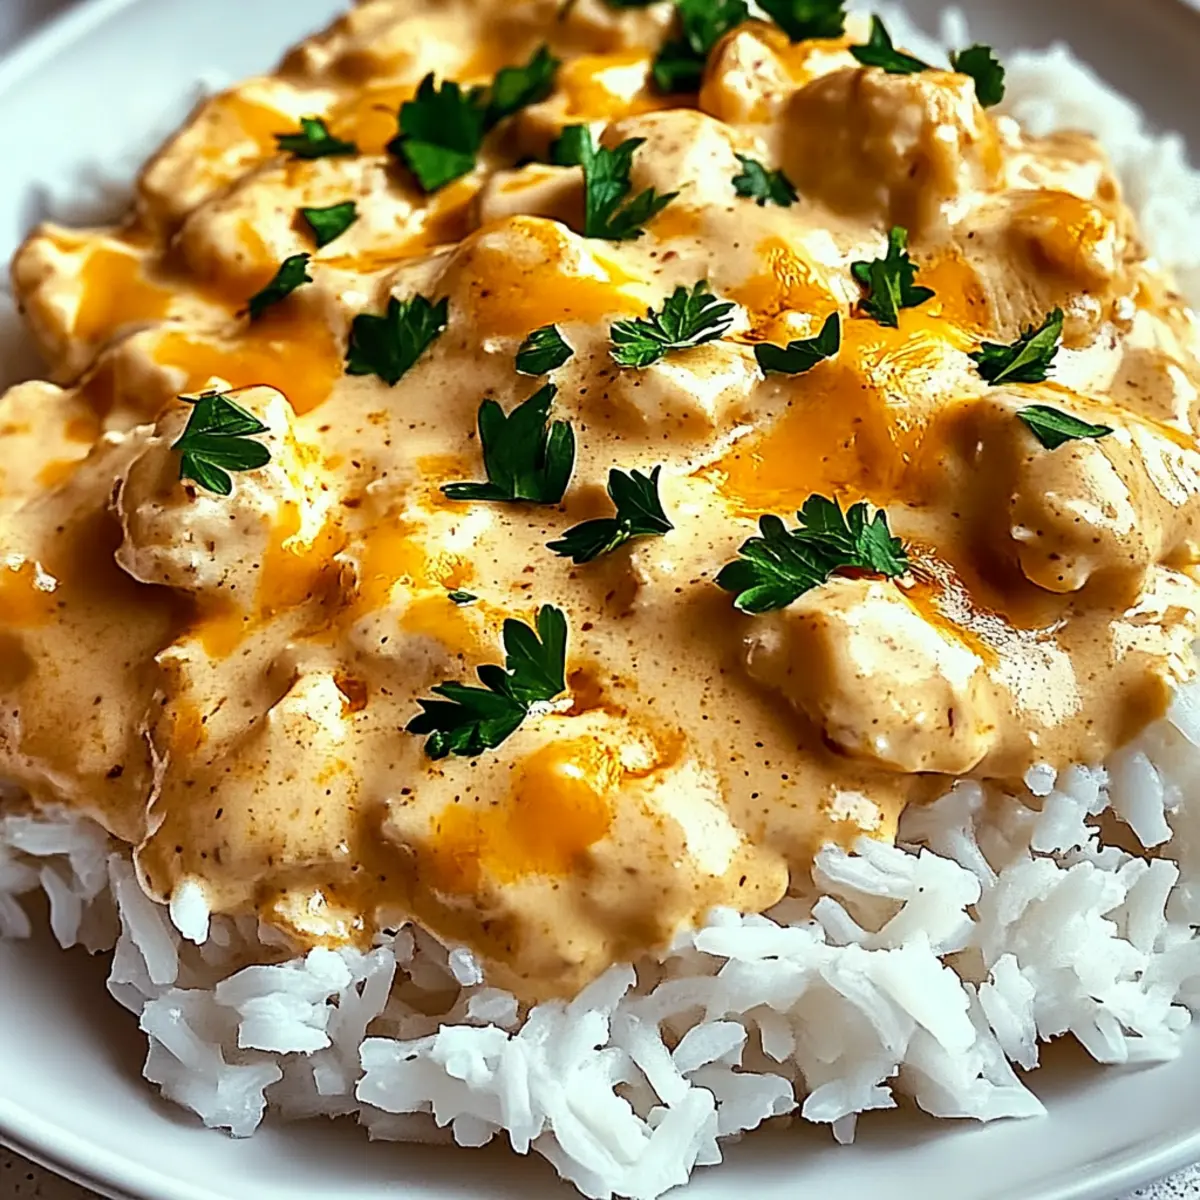
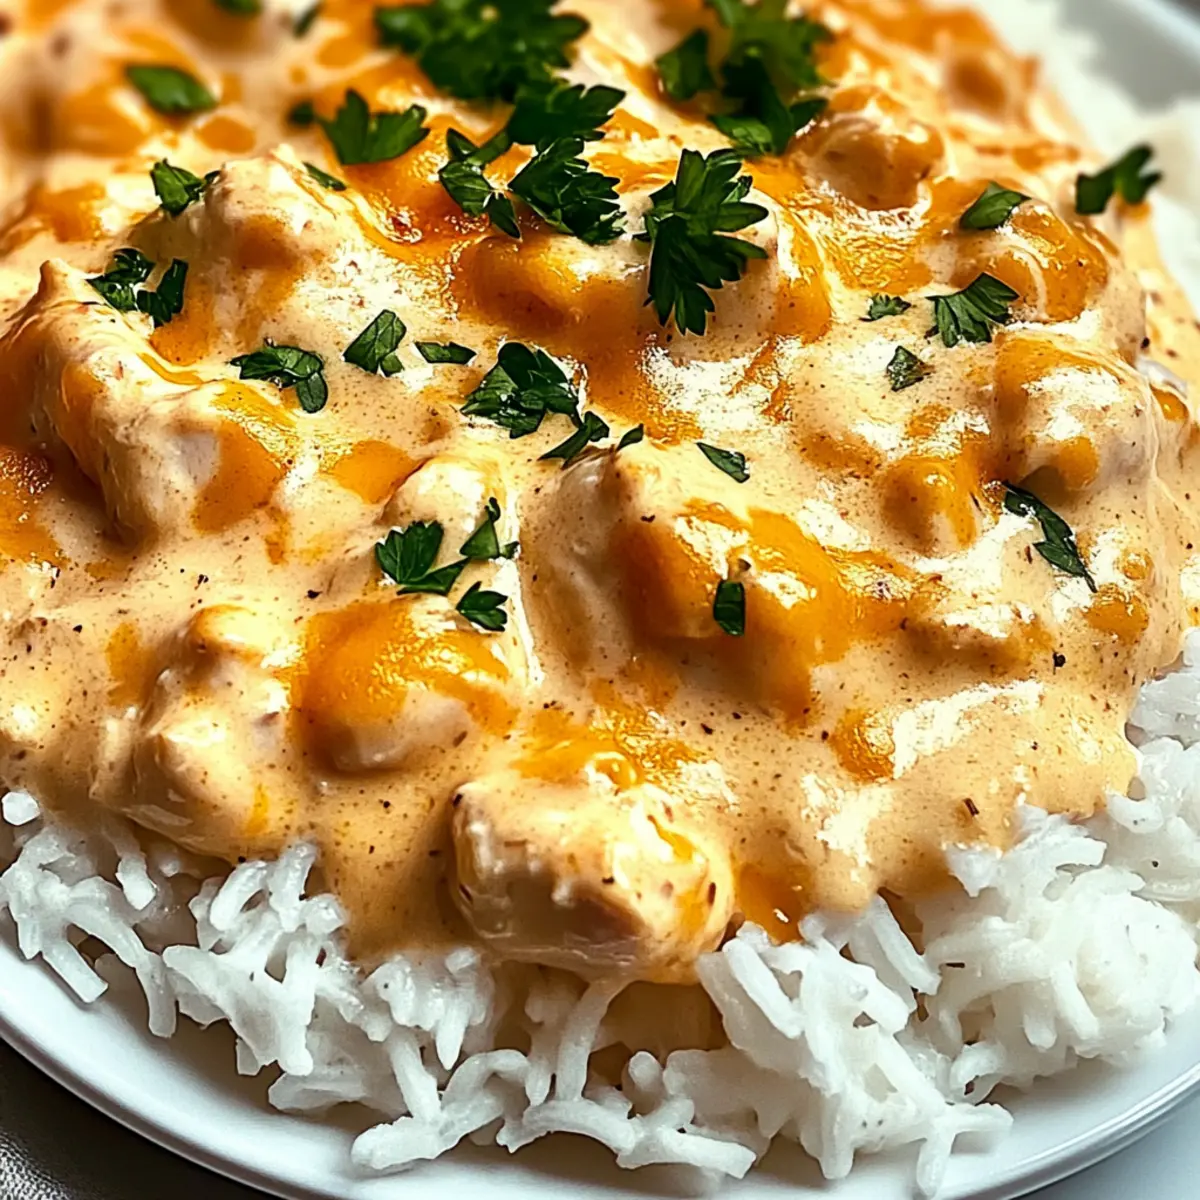
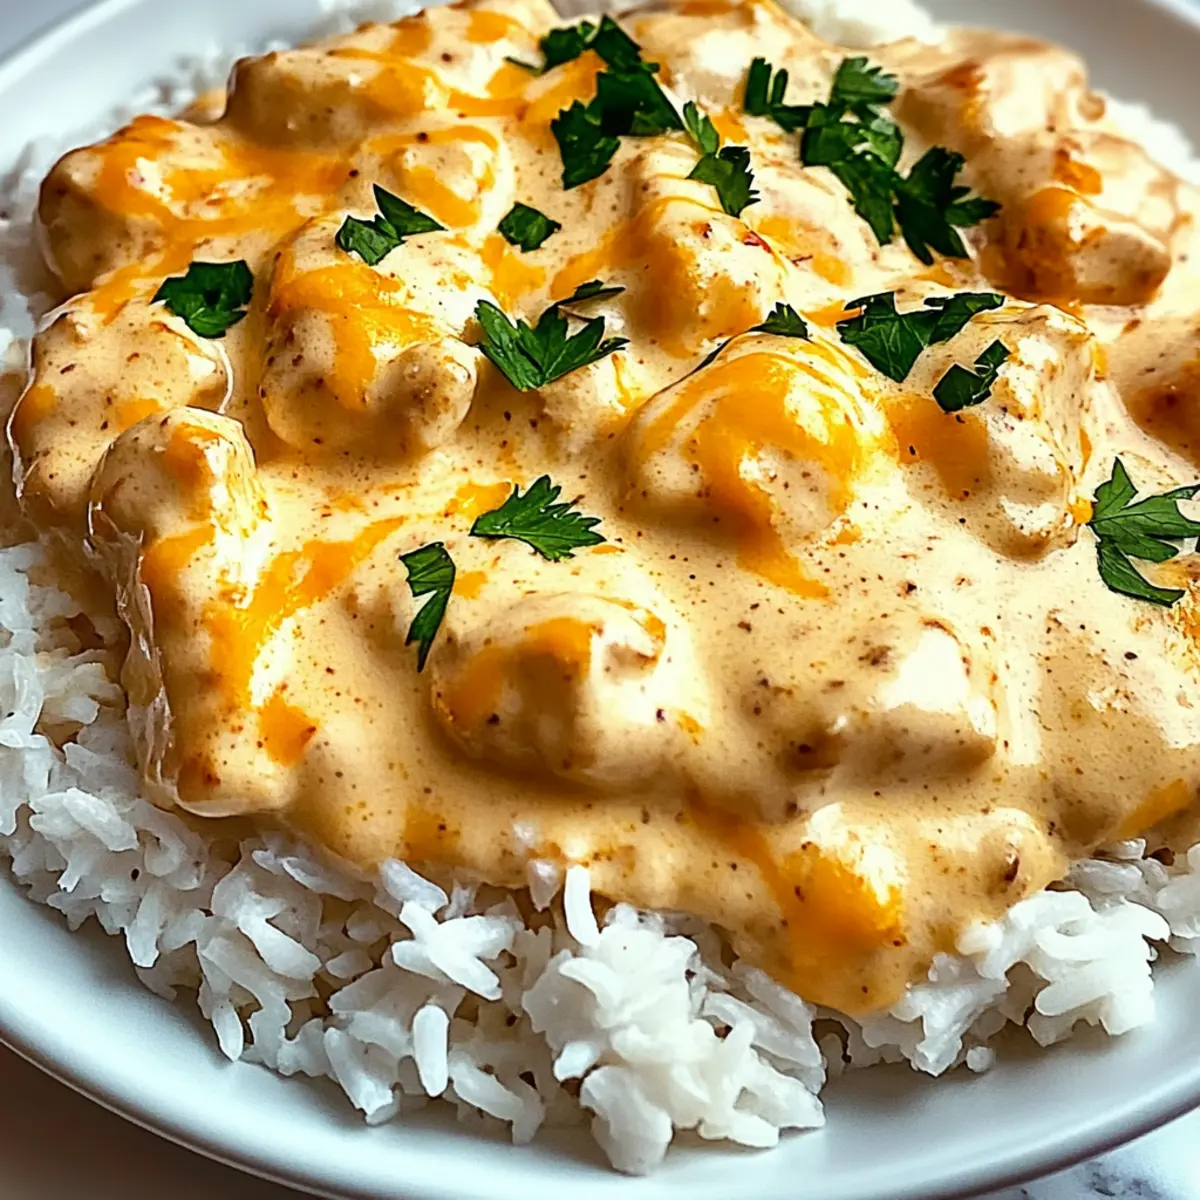
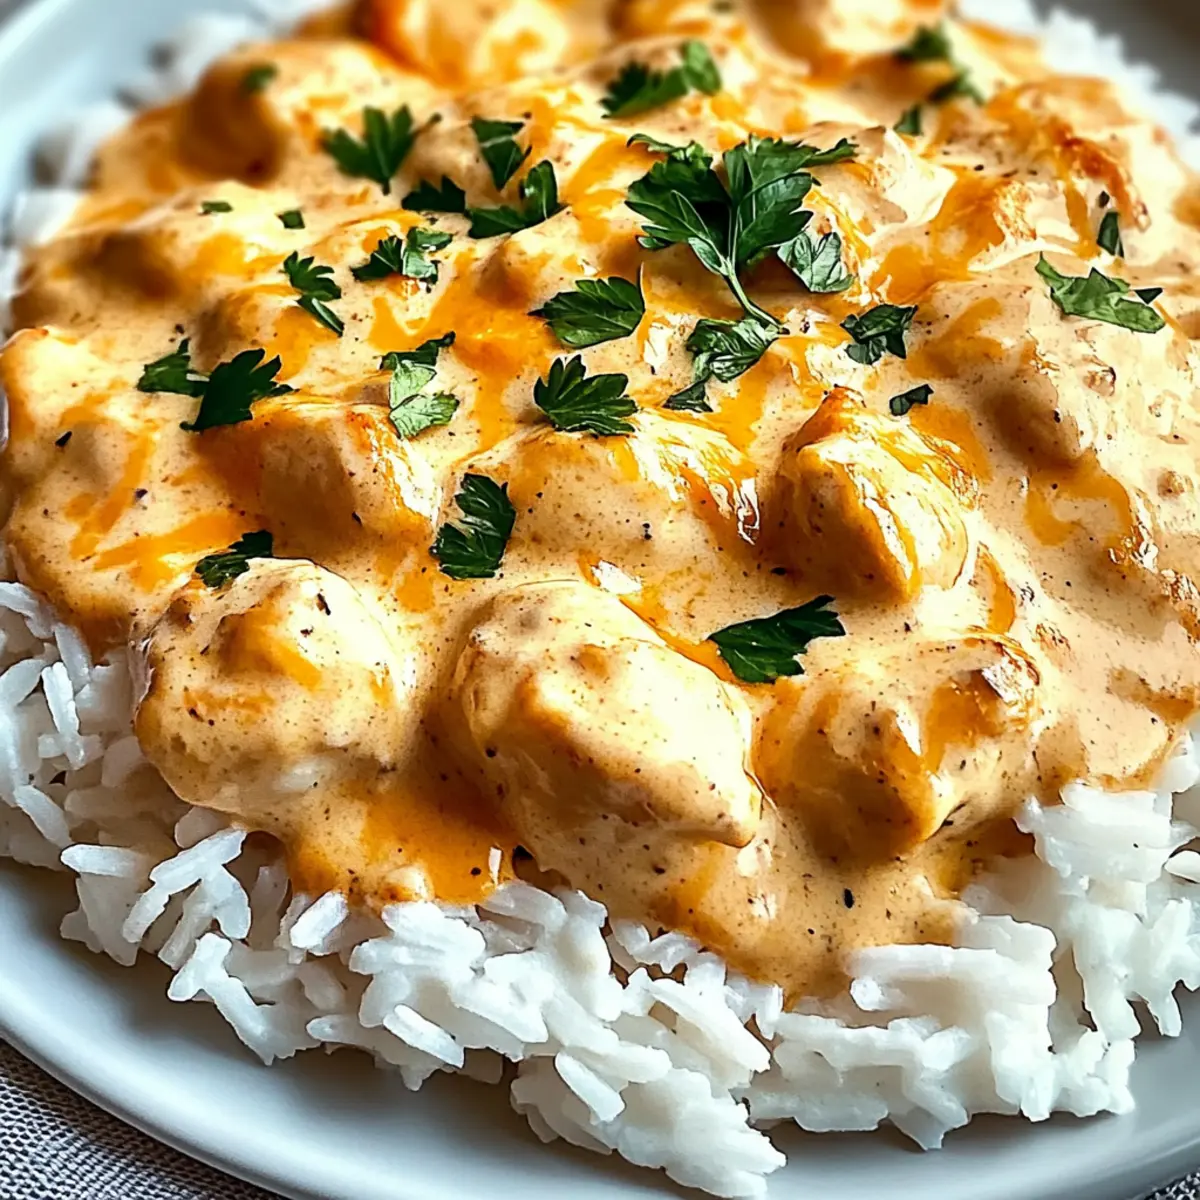
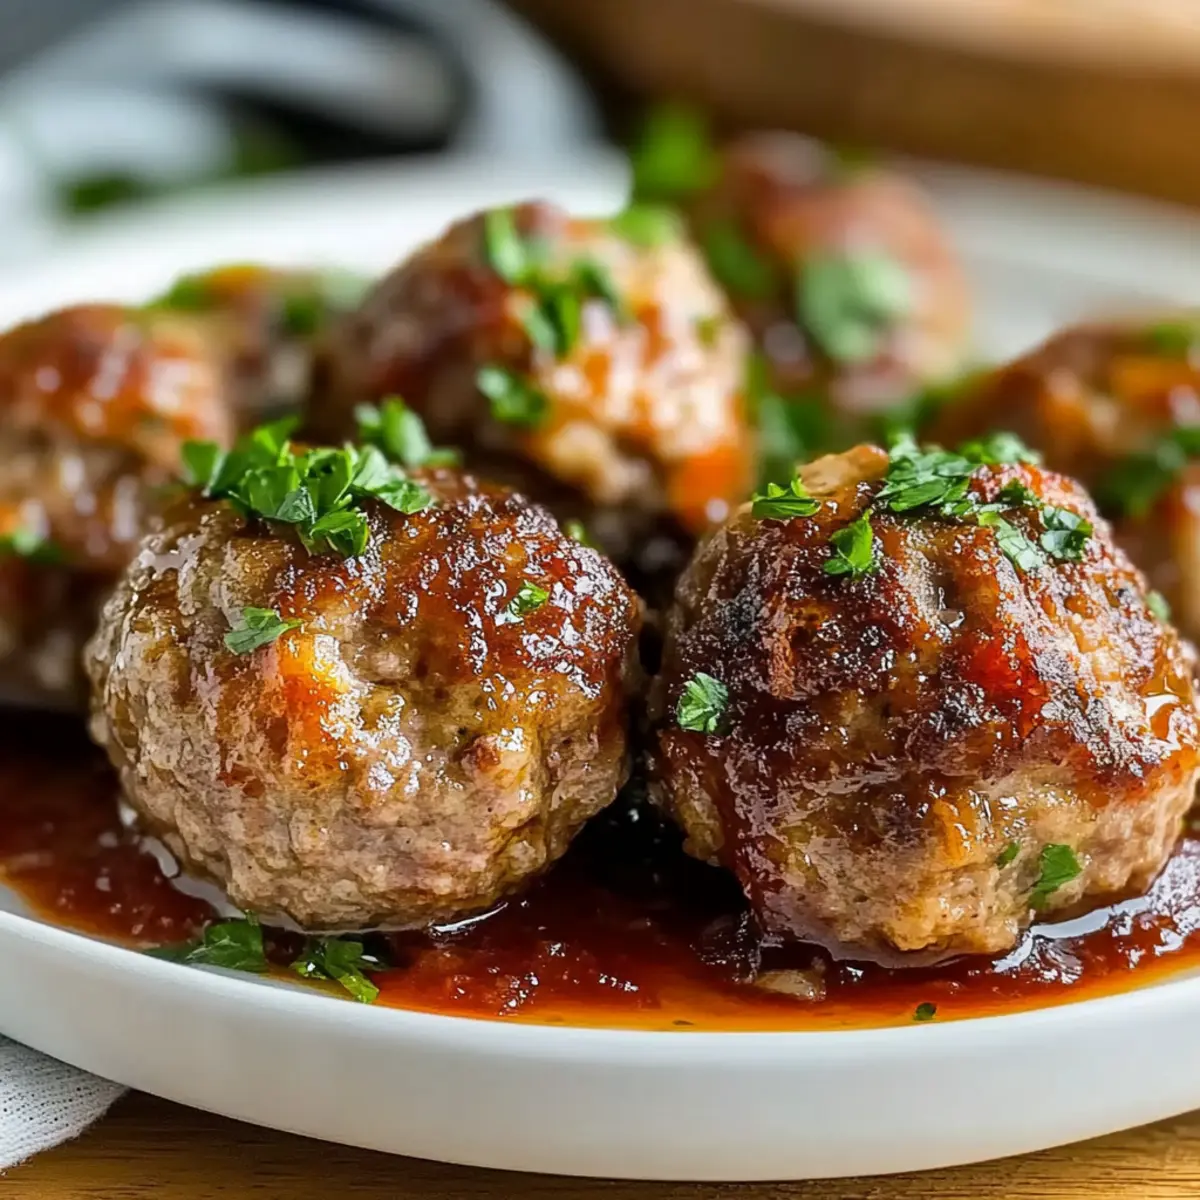
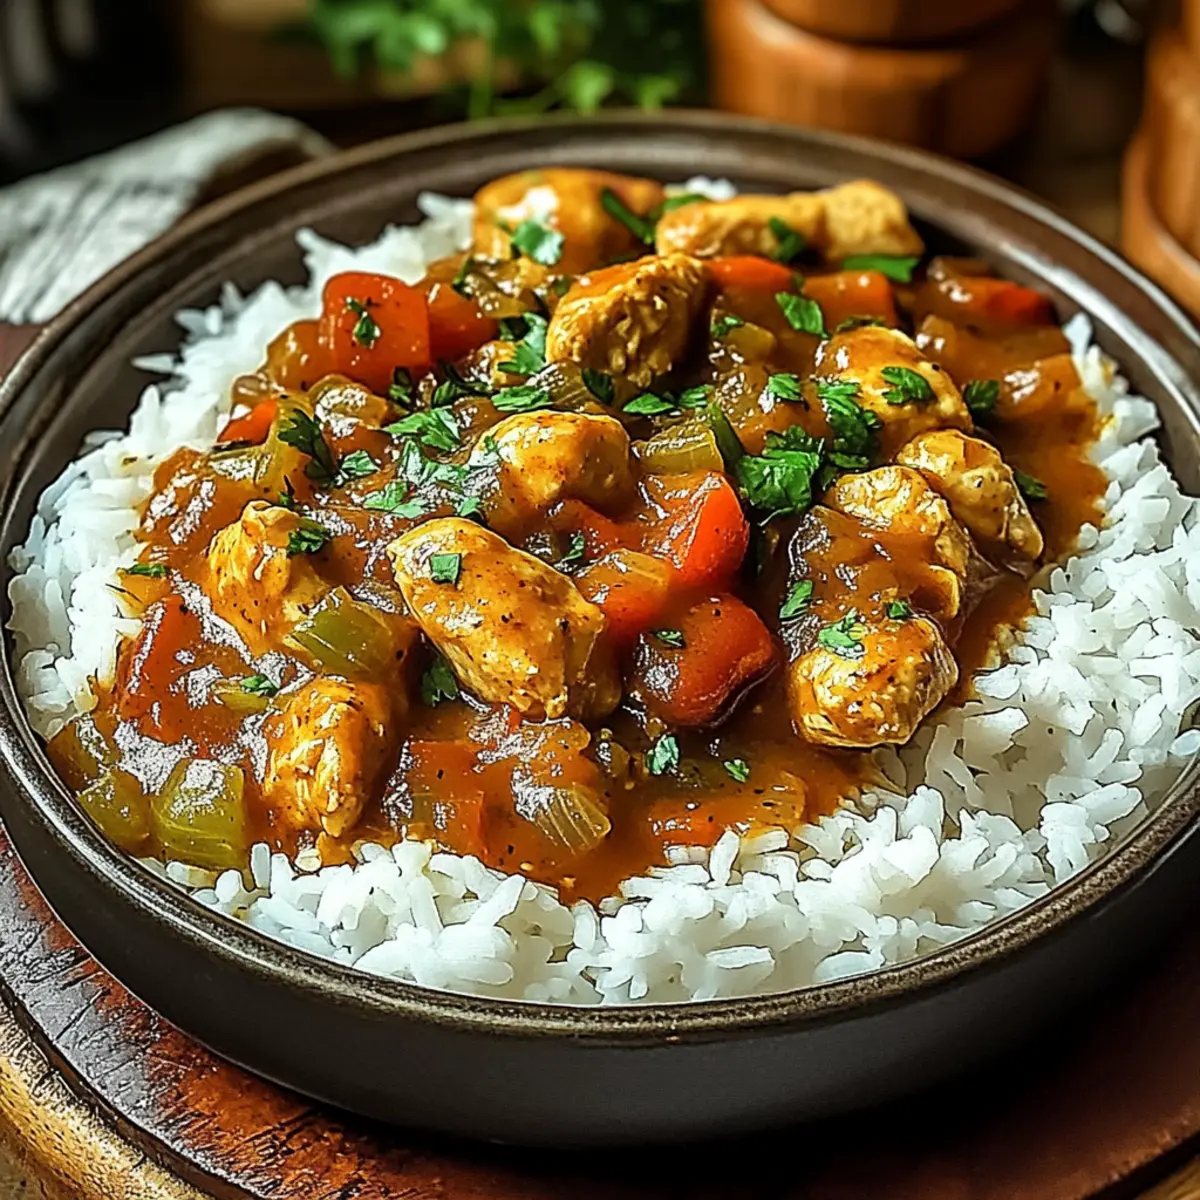
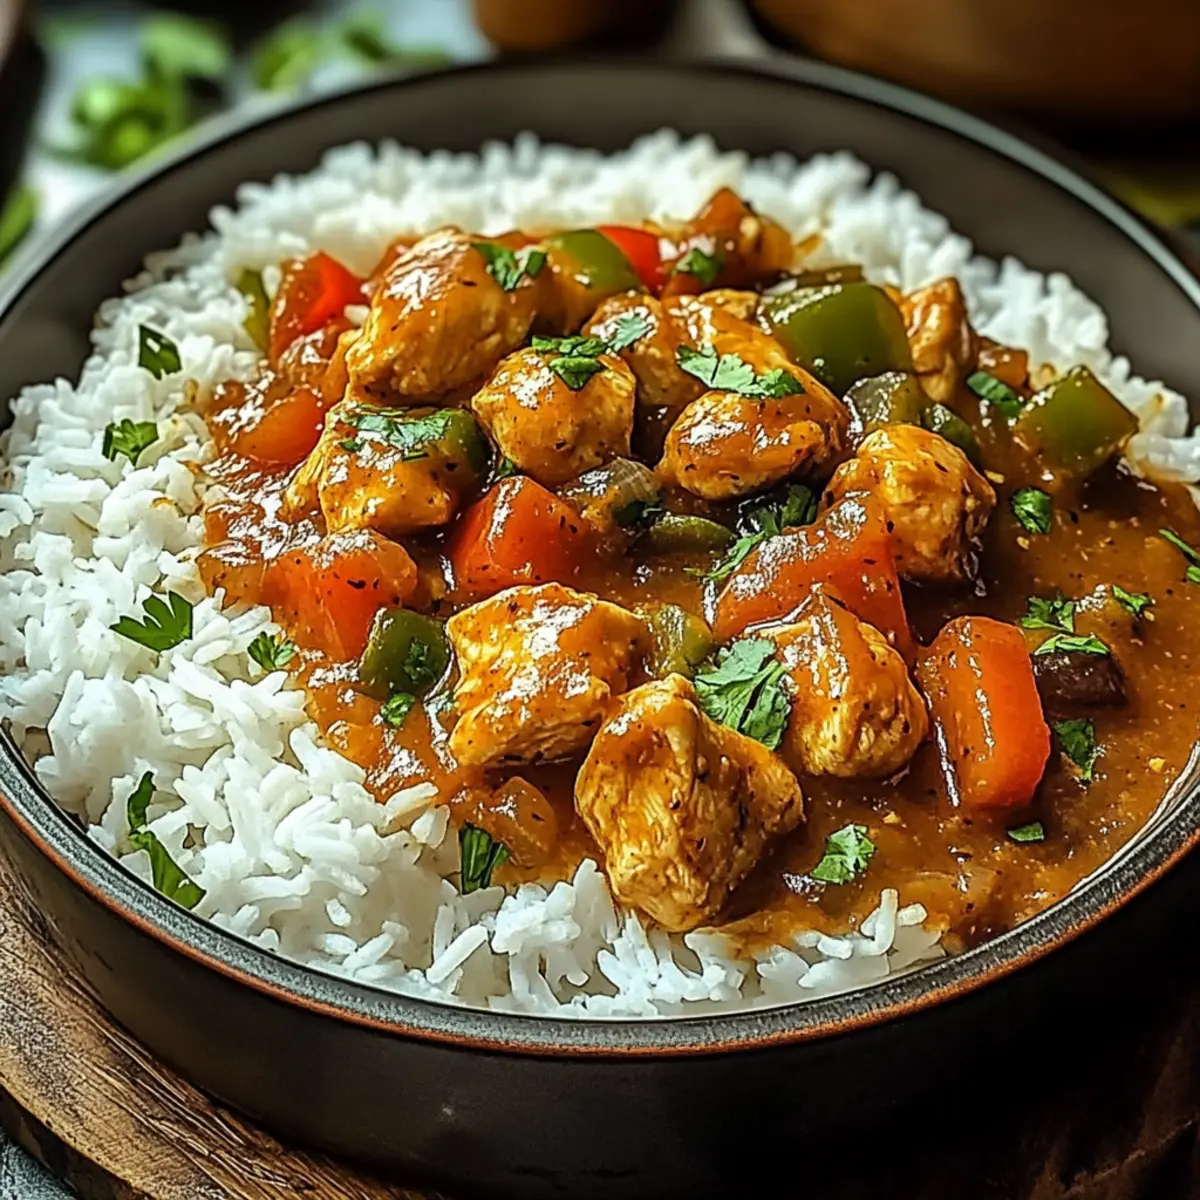
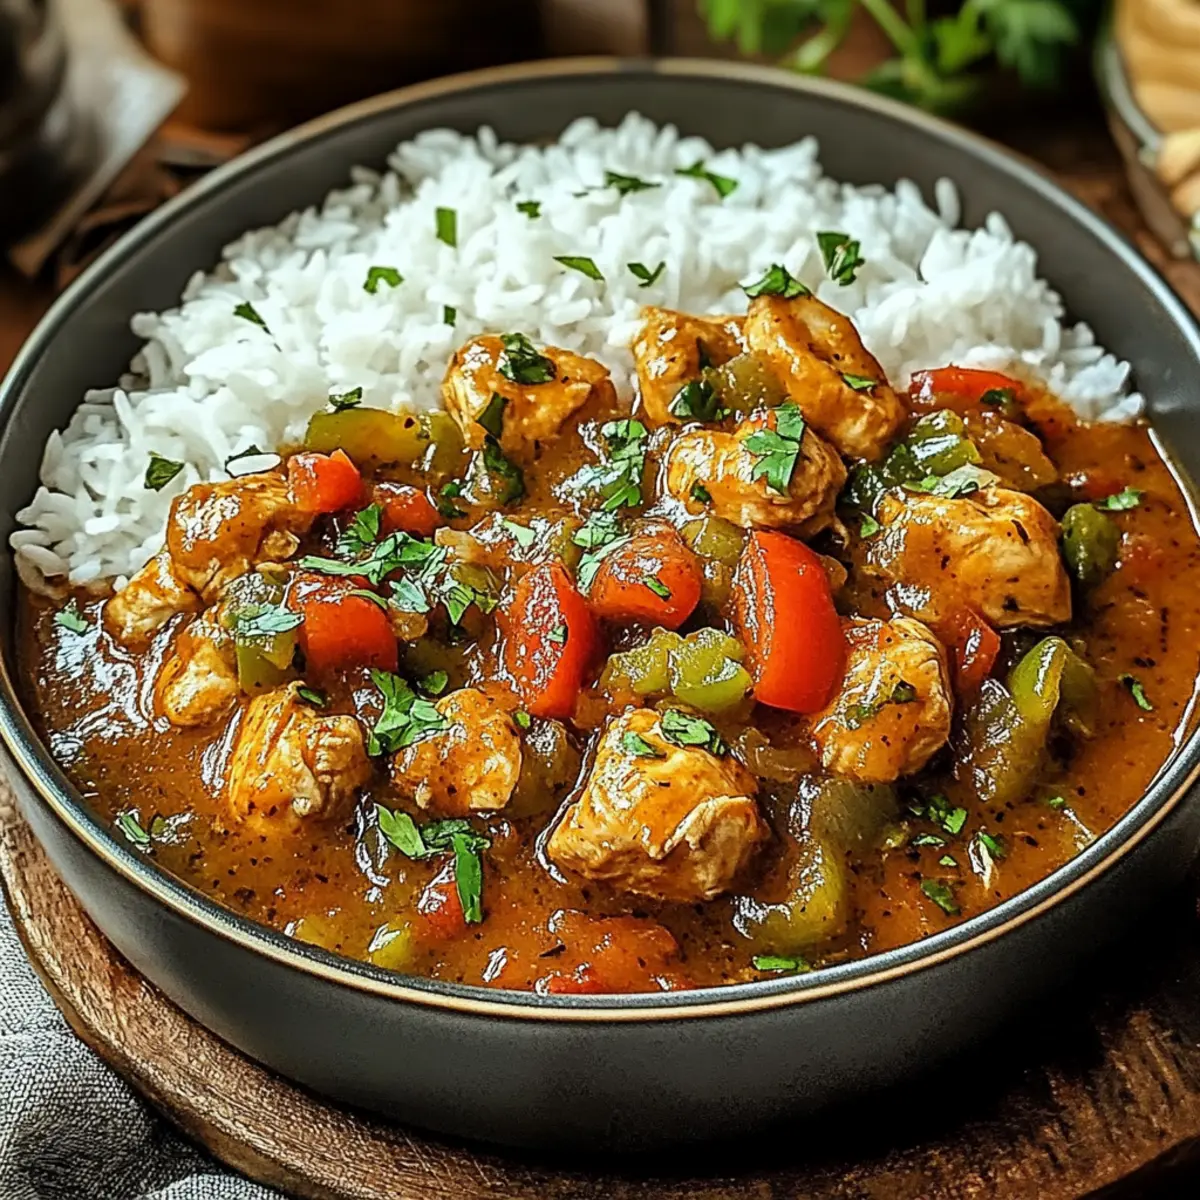
As I stirred the pot, the rich aroma of sautéing vegetables and herbs transported me straight to the vibrant streets of Louisiana. This comforting dish, known as Savory Chicken Étouffée, is a culinary hug meant to warm your soul. Imagine tender chicken thighs smothered in a velvety sauce, blending the flavors of the famous Cajun holy trinity with just the right amount of spice. Whipping up this quick recipe means you can impress guests or create a cozy family dinner, all without spending hours in the kitchen. The best part? It's a dish ripe for personalization—switch in shrimp or crawfish for a delightful twist. Are you ready to spice up your dinner rotation?

Why is Chicken Étouffée so beloved?

Comforting, this dish is the ultimate warm hug on a plate, enveloping you in a rich sauce that feels like home. Quick to prepare, you can whip it up in under an hour, making it a perfect weeknight meal. Versatile, feel free to embrace your culinary creativity by swapping chicken for shrimp or crawfish. Flavorful and aromatic, the Cajun holy trinity of onions, bell peppers, and celery creates a tantalizing perfume that fills your kitchen. Crowd-pleasing, it’s guaranteed to impress your guests at any gathering! You can easily pair this dish with fluffy white rice or crusty French bread for a complete feast.

Savory Chicken Étouffée Ingredients

Here’s everything you need to create this delectable dish!

For the Chicken

  • Boneless Chicken Thighs – Provides a juicier texture than chicken breasts; consider bone-in thighs for rich flavor.
  • Cajun Seasoning – Adds the foundational spice and flavor; adjust to taste as store-bought versions vary.

For the Roux

  • Unsalted Butter – A foundational ingredient that adds rich flavor to the roux.
  • All-Purpose Flour – Essential for thickening; forms the base of the roux.

For the Vegetables

  • Large Onion – Finely chopped for an aromatic base.
  • Green Bell Pepper – Adds sweetness and embodies the classic Cajun flavor.
  • Red Bell Pepper – Brightens the dish with additional sweetness and color.
  • Celery – An important part of the Cajun holy trinity, providing crunch and flavor.
  • Garlic – Minced to infuse the dish with a rich aroma.

For the Sauce

  • Chicken Broth – The cooking liquid that elevates the flavor; warm it beforehand for a better texture.
  • Browning Sauce – Optional for enhancing color and depth, especially for a Creole version.

For Serving

  • Cooked White Rice – Essential for soaking up the delicious Savory Chicken Étouffée sauce.
  • Green Onions – Used both in cooking and as a garnish for additional flavor.
  • Parsley Leaves – Freshly chopped for garnish; other herbs can also be used.

Now that you have all the ingredients in hand, you’re one step closer to experiencing the comforting embrace of this classic dish!

Step‑by‑Step Instructions for Savory Chicken Étouffée

Step 1: Prep Ingredients
Begin by finely chopping the onion, green and red bell peppers, and celery to create the classic Cajun holy trinity. Mince the garlic and chop the parsley leaves for garnish. Lay out your ingredients and have them ready to streamline the cooking process, ensuring you can transition smoothly to each step of this delicious Savory Chicken Étouffée.

Step 2: Sear Chicken
Heat a tablespoon of avocado oil in a large skillet over medium-high heat. Season the boneless chicken thighs with Cajun seasoning and place them in the hot skillet. Sear the chicken for 3–5 minutes per side, or until they develop a golden brown crust. Once perfectly browned, remove the chicken from the skillet and set aside, allowing the flavors to focus on the roux.

Step 3: Make Roux
Lower the heat to medium and add the unsalted butter to the skillet, letting it melt completely. Gradually whisk in all-purpose flour, stirring constantly for 10–15 minutes. Continue until the mixture darkens to a medium brown shade resembling peanut butter, ensuring you keep an eye on it to prevent burning. This roux is the backbone of your Savory Chicken Étouffée, lending it rich flavor.

Step 4: Sauté Vegetables
Add the finely chopped onion, green bell pepper, red bell pepper, and celery to the roux in the skillet. Sauté the vegetables for about 10 minutes until they soften and become aromatic. Stir in the minced garlic and cook for an additional minute, allowing the rich flavors to meld. This mixture creates a delightful base that complements the chicken.

Step 5: Simmer Sauce
Gradually whisk in warmed chicken broth until the sauce is smooth and thick, ensuring there are no lumps. Return the seared chicken thighs to the skillet, nestling them into the sauce. Allow the mixture to come to a gentle simmer, then reduce the heat to low and let it simmer for 30 minutes, so all the flavors of the Savory Chicken Étouffée meld beautifully.

Step 6: Final Touches
After simmering, remove the chicken from the skillet and cut it into bite-sized pieces. Return the chopped chicken to the sauce, stirring to combine and incorporating chopped parsley. Taste and adjust seasoning with additional Cajun spices if desired, ensuring a delightful balance of flavors in your Chicken Étouffée.

Step 7: Serve
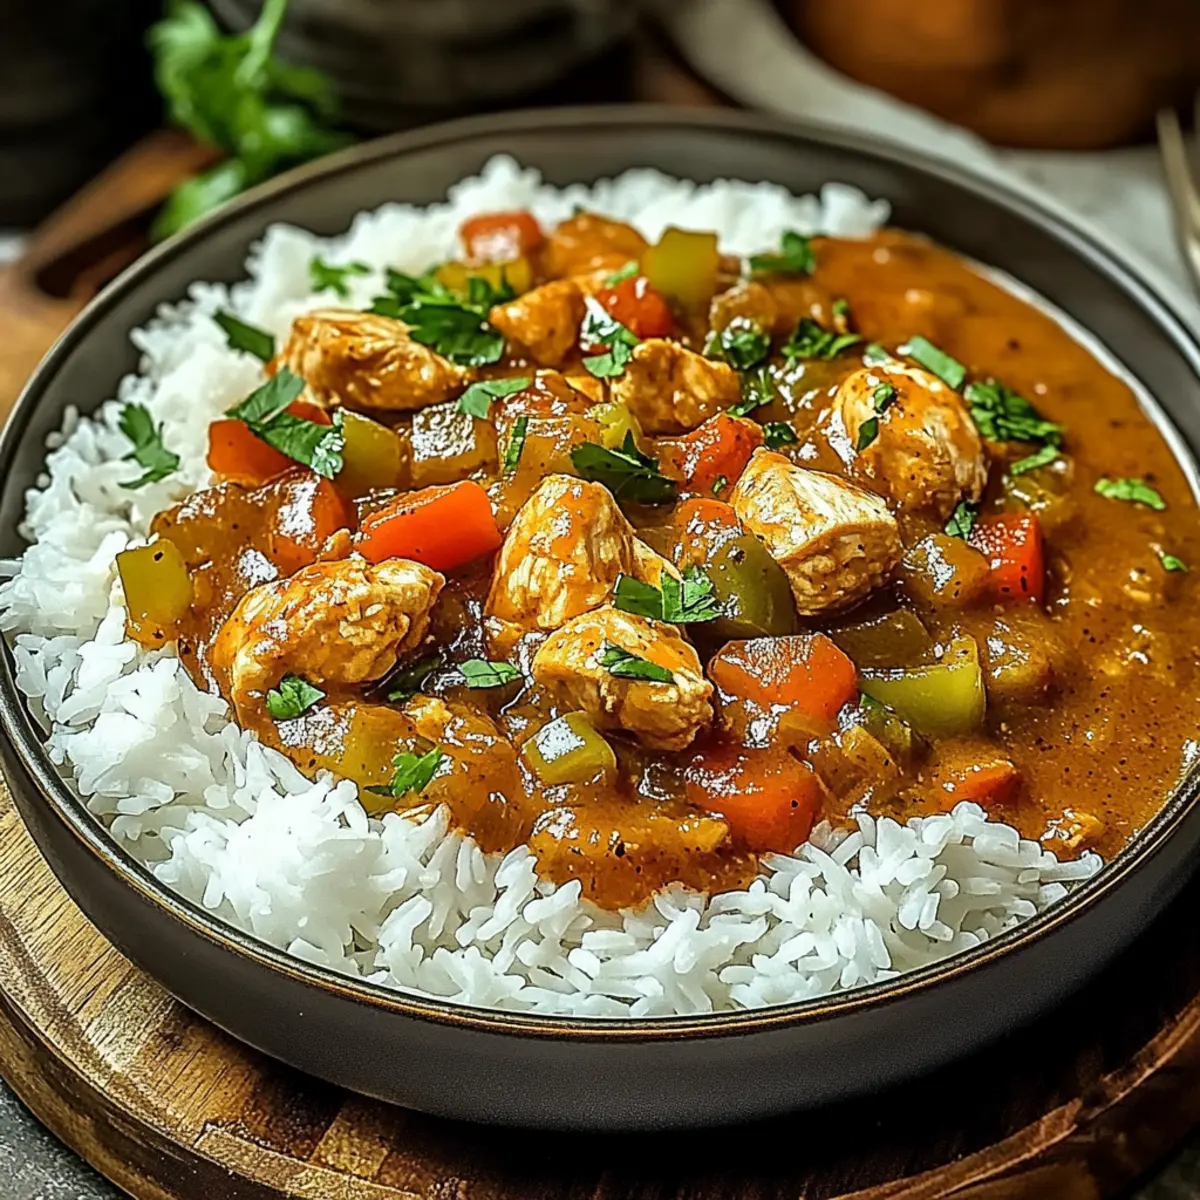
To serve, spoon generous portions of the Savory Chicken Étouffée over fluffy cooked white rice, allowing the sauce to soak beautifully into the rice. Garnish with sliced green onions for an added pop of color and freshness. This dish promises a comforting and satisfying experience, perfect for any family dinner or gathering.

Storage Tips for Savory Chicken Étouffée

  • Fridge: Store leftovers in an airtight container for up to 5 days. Gently reheat on the stovetop or in the microwave, stirring occasionally to maintain creaminess.
  • Freezer: Freeze Savory Chicken Étouffée in airtight freezer bags for up to 6 months. Thaw in the refrigerator overnight before reheating for best results.
  • Reheating: When reheating, add a splash of chicken broth if the sauce has thickened too much. Stir until heated through and enjoy the comforting flavors once again.
  • Make-Ahead: Pre-chop your vegetables and season the chicken thighs a day ahead. Store in separate containers to make the cooking process even smoother!

Savory Chicken Étouffée Variations

Feel free to get creative with your cooking—these variations will add a delightful twist to your dish!

  • Seafood Delight: Substitute shrimp or crawfish for chicken, cooking until just tender for a taste of the Gulf. The ocean's flavors will intertwine beautifully with your creamy sauce!
  • Spicy Kick: Add cayenne pepper or hot sauce to the roux for an extra punch of heat. Adjust to your family's spice tolerance to ensure everyone enjoys!
  • Vegetable Medley: Toss in diced zucchini or mushrooms for added texture and flavor. These veggies not only enhance the dish but also provide a pop of color!
  • Dairy-Free: Use coconut milk instead of chicken broth for a creamy, dairy-free alternative that also adds a touch of sweetness. This twist creates an exotic layer to the traditional recipe!
  • Herb Infusion: Incorporate fresh thyme or bay leaves while simmering the sauce to deepen the flavor. These herbs bring out the comforting notes of your Chicken Étouffée!
  • Southern Comfort: Add andouille sausage or chorizo for a hearty, smoky flavor boost. The meatiness pairs perfectly with the Cajun spices, elevating the dish and making it even more satisfying!
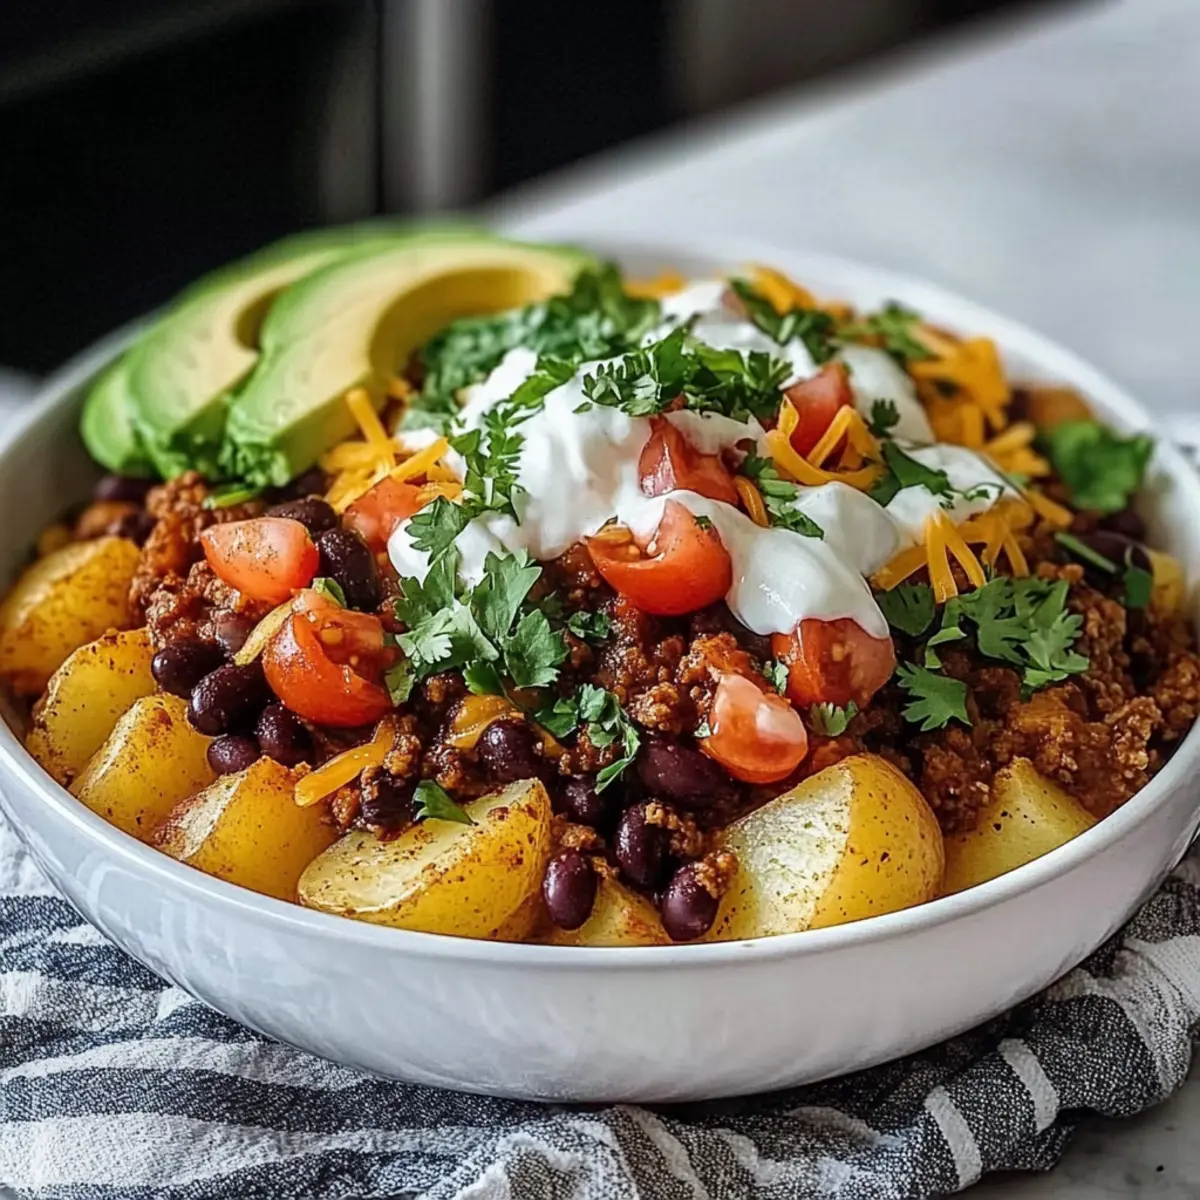
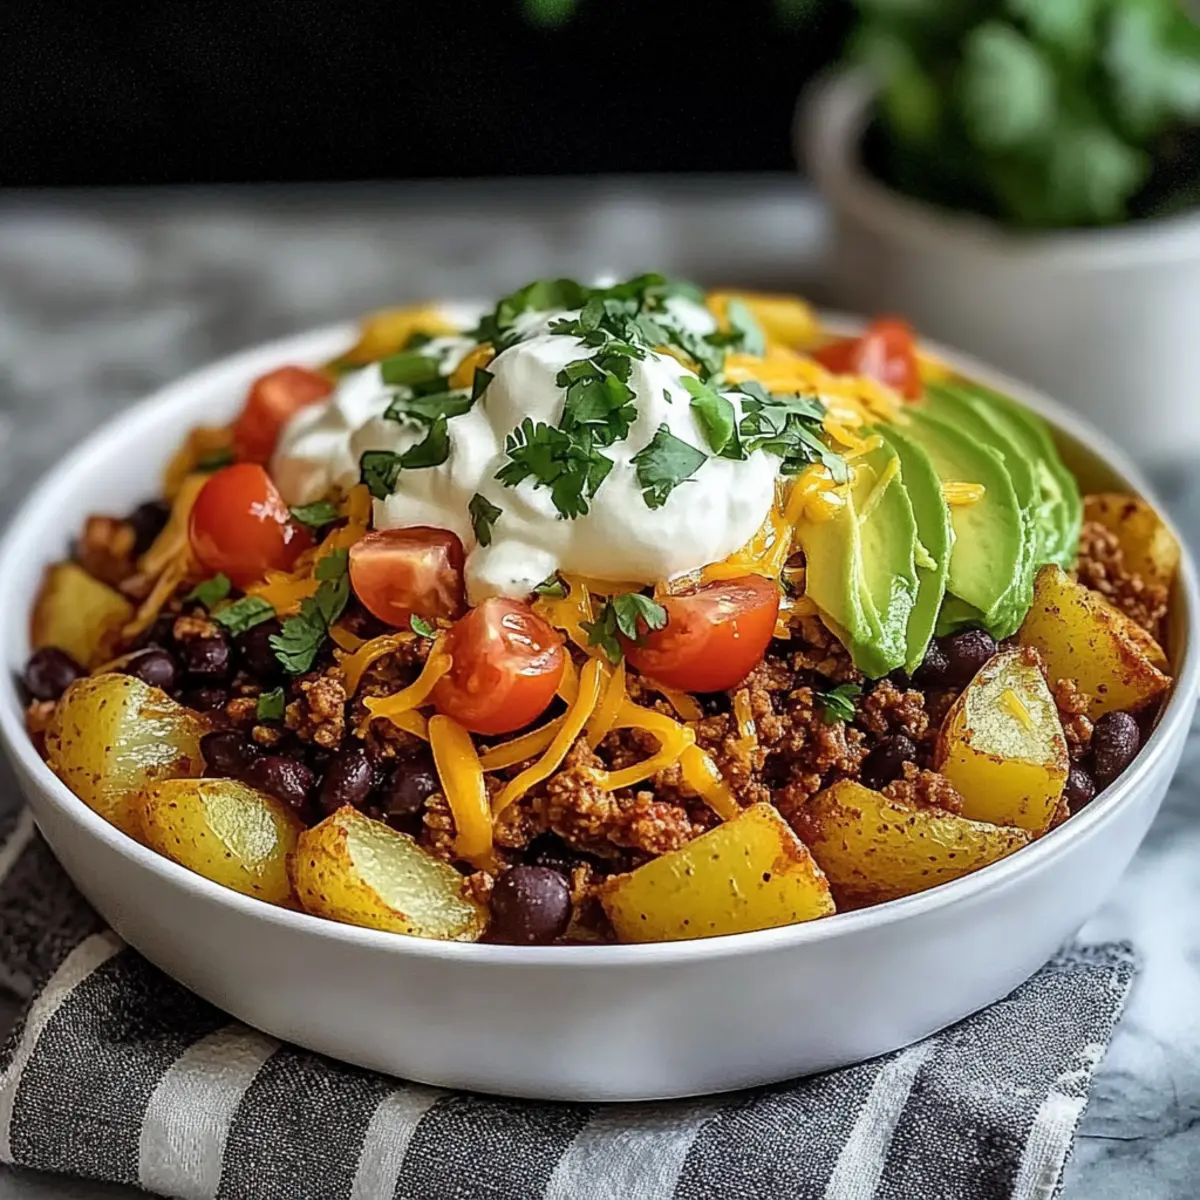
  • Make It Veggie: Replace chicken with a medley of beans like black or kidney beans for a satisfying vegetarian dish. You'll still get the hearty feel without sacrificing flavor!
  • Rich Add-Ons: Stir in a dollop of cream cheese or sour cream at the end for extra creaminess; this will create a dreamy texture that clings to your chicken and rice delightfully.

No matter which variation you choose, each twist promises to create a memorable meal that warms the heart! For more delicious chicken inspiration, check out my recipes for Honey Garlic Chicken or Crock Pot Chicken. Enjoy your culinary adventure!

Expert Tips for Savory Chicken Étouffée

  • Perfect Roux: Stir constantly to avoid burning; if it darkens too much, restart in a new pan. The roux is essential for a rich flavor.
  • Warm Broth: Use warm chicken broth to achieve a smooth sauce texture; cold broth can lead to lumps in your Savory Chicken Étouffée.
  • Longer Simmer: Consider allowing the dish to simmer longer for deeper flavor and to help the sauce thicken even more.
  • Taste Adjustments: Always taste and adjust the seasoning; you might want to amp up the Cajun spice for additional heat or depth.
  • Cooking Ahead: Prep your ingredients ahead of time to streamline the cooking process, making it easier and quicker to pull together on busy nights.

What to Serve with Savory Chicken Étouffée

Picture this: a cozy dinner table filled with delightful dishes that complement the comforting embrace of your Savory Chicken Étouffée. The right accompaniments can elevate your meal, creating a symphony of flavors and textures.

  • Fluffy White Rice: Essential for soaking up the rich sauce, the rice provides a neutral base that enhances the dish's heartiness.

  • Crusty French Bread: Perfect for sopping up every last drop of the velvety sauce, this bread adds a delightful crunch to your meal.

  • Fresh Green Salad: A light salad, tossed with a zesty vinaigrette, brings a refreshing contrast to the richness of the étouffée, creating a well-rounded dining experience.

  • Roasted Asparagus: This crunchy vegetable adds a pop of color and a hint of earthiness that beautifully balances the dish's flavors.

  • Cajun Coleslaw: A tangy slaw with a kick pairs excellently, providing a cool, crunchy texture that contrasts the warmth of the chicken.

  • Chocolate Bread Pudding: For dessert, indulge in a warm, fudgy bread pudding. Its sweetness is a comforting finish after the savory main course, promising a delightful end to the meal.

Make Ahead Options

These Savory Chicken Étouffée make-ahead options are perfect for busy weeknights! You can pre-chop all the vegetables (onions, bell peppers, celery, and garlic) and store them in an airtight container in the refrigerator for up to 3 days. Additionally, you can season the boneless chicken thighs in advance and keep them refrigerated for up to 24 hours, ensuring maximum flavor while saving time. When you're ready to serve, simply prepare the roux, sauté the vegetables, whisk in the warmed chicken broth, and return the chicken to simmer as directed. This way, you’ll enjoy a comforting, homemade meal that’s just as delicious without the hassle!

Savory Chicken Étouffée Recipe FAQs

What type of chicken should I use for Chicken Étouffée?
Using boneless chicken thighs is ideal for this dish, as they provide a juicier texture than chicken breasts. However, you can also opt for bone-in thighs for added richness; just be sure to debone them before serving for ease of eating.

How should I store leftover Chicken Étouffée?
Refrigerate leftovers in an airtight container for up to 5 days. When you're ready to enjoy the dish again, gently reheat it on the stovetop over low heat, stirring occasionally to ensure it warms evenly and maintains its creamy texture.

Can I freeze Savory Chicken Étouffée?
Absolutely! You can freeze Chicken Étouffée in airtight freezer bags for up to 6 months. To freeze, portion the dish into bags, removing as much air as possible. Thaw it in the refrigerator overnight before reheating, and if the sauce appears too thick, add a splash of chicken broth while warming.

What if my roux burns while cooking?
If your roux darkens too much and begins to burn, do not panic! Simply transfer it to a new pan and start over. It's crucial to stir constantly while cooking the roux, so you achieve that beautiful medium-brown color without the burnt flavor.

How do I adjust the spice level in Chicken Étouffée?
You can easily modify the spice level by adding cayenne pepper or hot sauce for more heat. If you prefer a milder dish, simply reduce the amount of Cajun seasoning you use. Taste as you go to ensure it matches your personal preference!

Is Chicken Étouffée safe for pets?
This dish is not recommended for pets, primarily due to the seasoning and the presence of onions, which can be harmful to dogs and cats. Always keep pet safety in mind when preparing meals that contain ingredients not suitable for their diet.

Savory Chicken Étouffée

Savory Chicken Étouffée: Your New Favorite Comfort Dish

Savory Chicken Étouffée is a comforting dish that warms the soul with its rich flavors and versatile ingredients.
Print Recipe Pin Recipe
Prep Time 15 minutes mins
Cook Time 45 minutes mins
Total Time 1 hour hr
Servings: 4 servings
Course: Dinner
Cuisine: Cajun, Southern
Calories: 450
Ingredients Equipment Method Nutrition Notes

Ingredients
  

For the Chicken
  • 1 lb Boneless Chicken Thighs Consider bone-in thighs for rich flavor.
  • 2 tbsp Cajun Seasoning Adjust to taste.
For the Roux
  • 4 tbsp Unsalted Butter
  • 1/2 cup All-Purpose Flour
For the Vegetables
  • 1 large Onion Finely chopped.
  • 1 medium Green Bell Pepper Finely chopped.
  • 1 medium Red Bell Pepper Finely chopped.
  • 2 stalks Celery Finely chopped.
  • 3 cloves Garlic Minced.
For the Sauce
  • 4 cups Chicken Broth Warm it beforehand for better texture.
  • 2 tbsp Browning Sauce Optional.
For Serving
  • 4 cups Cooked White Rice
  • 2 tbsp Green Onions For garnish.
  • 2 tbsp Parsley Leaves Freshly chopped for garnish.

Equipment

  • Large skillet

Method
 

Step-by-Step Instructions
  1. Begin by finely chopping the onion, green and red bell peppers, and celery to create the classic Cajun holy trinity. Mince the garlic and chop the parsley leaves for garnish.
  2. Heat a tablespoon of avocado oil in a large skillet over medium-high heat. Season the boneless chicken thighs with Cajun seasoning and sear for 3–5 minutes per side until golden brown. Set aside.
  3. Lower the heat to medium and add the unsalted butter to the skillet, letting it melt completely. Gradually whisk in all-purpose flour, stirring constantly for 10–15 minutes until the mixture darkens to peanut butter shade.
  4. Add the chopped vegetables to the roux and sauté for about 10 minutes until softened. Stir in minced garlic and cook for an additional minute.
  5. Gradually whisk in warmed chicken broth, returning seared chicken thighs to the skillet. Allow to simmer for 30 minutes on low heat.
  6. Remove chicken, cut into pieces, and return to the sauce with chopped parsley. Taste and adjust seasoning.
  7. Serve over cooked rice, garnished with green onions.

Nutrition

Serving: 1bowlCalories: 450kcalCarbohydrates: 40gProtein: 30gFat: 20gSaturated Fat: 10gPolyunsaturated Fat: 3gMonounsaturated Fat: 7gCholesterol: 80mgSodium: 900mgPotassium: 600mgFiber: 3gSugar: 5gVitamin A: 500IUVitamin C: 35mgCalcium: 50mgIron: 3mg

Notes

This dish is perfect for family dinners or gatherings, showcasing its comforting nature.

Tried this recipe?

Let us know how it was!

Savory Spanish Chicken Rice: Your Easy One-Pot Delight

May 2, 2026 by Grace Snow Leave a Comment

As I stand by the stove, a sizzling sound draws me in—a familiar yet exciting melody of cooking reminiscent of my travels through Spain. Today, I'm diving into the warm embrace of One-Pan Spanish Chicken and Rice, a dish that promises a delightful balance of crispy chicken thighs and golden rice infused with rich, smoky flavors. This recipe not only shines as a crowd-pleaser but also simplifies your cooking experience with its one-pot wonder appeal, perfect for those weeknights when time is fleeting but flavor is a must. With just a handful of wholesome ingredients and minimal cleanup, you’ll whip up a comforting meal that feels like a warm hug. Curious to see how this easy dish transforms into an unforgettable feast? Let’s get cooking!

Why is this Spanish Chicken Rice special?

Simplicity at Its Best: This one-pot dish takes minimal effort while delivering maximum flavor, making it an ideal choice for busy weeknights.

Rich, Flavorful Ingredients: With a delightful blend of smoky paprika, garlic, and fresh veggies, each bite is a taste of Spain that dances on your palate.

Crowd-Pleasing Comfort: Whether you're hosting friends or making dinner for the family, this savory Spanish Chicken Rice will leave everyone asking for seconds.

Versatile and Adaptable: Easily adjust ingredients to suit your preferences—try adding olives, peas, or even a spicy kick with jalapeños!

Time-Saving Marvel: Forget about multiple pots and pans; this simple recipe ensures easy cleanup, allowing you to savor your delicious creation without added stress.

Dive into the mouthwatering world of this dish, and if you’re looking for more tempting options, check out my easy Crock Pot Chicken recipe for another effortless meal!

Spanish Chicken Rice Ingredients

• Get ready for a flavorful experience!

For the Chicken

  • Chicken Thighs – Ensure they are skin-on for a juicy texture and crispy skin.
  • Olive Oil – Used for searing the chicken to achieve a perfect golden crust; can substitute with vegetable oil.

For the Rice

  • Long-Grain Rice – This acts as the dish's foundation, soaking up all the delicious flavors; can be swapped with other types of rice but adjust the liquid accordingly.
  • Chicken Stock – Adds moisture and depth; consider using homemade or low-sodium options for a healthier touch.
  • Turmeric Powder – Provides an earthy flavor and vibrant color; feel free to replace it with curry powder for a unique twist.
  • Smoked Paprika – Infuses a smoky depth to the dish; regular paprika can work in a pinch, but you’ll miss out on that rich flavor.

For the Vegetables

  • Red Bell Pepper – Adds a sweet crunch and beautiful color; substitute with other bell peppers or jalapeños for some heat.
  • Yellow Bell Pepper – Similar role as the red pepper; mixing colors can create a visually appealing dish.
  • Onion – Essential for building flavor; sautéing brings out its natural sweetness.
  • Garlic – A key player in enhancing the overall flavor; fresh minced garlic is highly recommended for the best taste.

For Garnish

  • Fresh Cilantro – Provides a bright, fresh finish; omit if you're not a fan.
  • Limes – Essential for squeezing a bit of brightness over your dish; it beautifully balances the richness.

Embrace the deliciousness of this Spanish Chicken Rice, and let it wow your taste buds!

Step‑by‑Step Instructions for Spanish Chicken Rice

Step 1: Prep Chicken
Start by patting the chicken thighs dry with paper towels to ensure a crispy texture. Season both sides generously with salt, pepper, turmeric powder, and half of the smoked paprika, making sure to coat thoroughly. This step enhances flavor and prepares the chicken for a beautiful sear in your pan.

Step 2: Sear Chicken
In a large, deep skillet or a Dutch oven, heat 2 tablespoons of olive oil over medium-high heat. Once hot, place the seasoned chicken thighs skin-side down in the pan and cook for about 7-8 minutes until the skin is deeply golden and crispy. Flip the chicken and briefly sear the other side for 2 minutes before removing them from the pan.

Step 3: Sauté Veggies
In the same pan, add the diced onion and both red and yellow bell peppers. Sauté for about 4-5 minutes, stirring occasionally until the vegetables are soft and the onions become translucent. Next, add the minced garlic along with the remaining smoked paprika and a pinch of salt, allowing everything to cook for another minute to release those delightful aromas.

Step 4: Toast Rice
Stir in 1 ½ cups of long-grain rice, making sure to coat each grain with the flavorful vegetable mixture. Toast the rice for about 2 minutes, stirring constantly to prevent sticking and ensure each grain absorbs the rich flavors in the pan. This step enhances the overall taste of your Spanish Chicken Rice.

Step 5: Cook Rice
Pour in 3 cups of chicken stock and give everything a good stir, ensuring the rice is evenly distributed. Nestle the seared chicken thighs back into the pan, skin-side up, and bring the mixture to a gentle boil. Once boiling, reduce the heat to low, cover with a tight-fitting lid, and let it simmer for 20 minutes or until the rice is tender and has absorbed all the liquid.

Step 6: Rest and Serve
Once cooked, remove the pan from the heat and let it sit, covered, for an additional 5 minutes. This resting period allows the flavors to meld beautifully. Fluff the rice with a fork, then garnish your Spanish Chicken Rice with freshly chopped cilantro. Serve with lime wedges on the side for a touch of brightness, enhancing this already delightful dish.

What to Serve with One-Pan Spanish Chicken and Rice

Transform your dinner into a delightful feast with these perfect pairings that complement every vibrant bite.

  • Crisp Green Salad: A refreshing mix of greens tossed in a light vinaigrette adds a crunchy contrast to the comforting rice dish. It's the perfect palate cleanser between bites!

  • Crusty Bread: Serve some warm, crusty bread for dipping and soaking up the delicious pan sauce—there's nothing quite like it!

  • Roasted Vegetables: Roasted seasonal veggies bring earthy notes and extra nutrition, balancing the richness of your Spanish Chicken Rice beautifully.

  • Chilled Spanish Red Wine: A glass of Tempranillo or Garnacha enhances the dish's smoky flavors, ideal for a cozy dinner with loved ones.

  • Spanish Olives: A small bowl of marinated olives offers a briny, tangy bite that contrasts wonderfully with the savory chicken and rice.

  • Lime Sorbet: For dessert, a light and refreshing lime sorbet serves as a sweet, zesty finale to your meal; a lovely nod to the dish’s lime wedges!

  • Citrus-Infused Iced Tea: Opt for a citrus-infused iced tea to cool down and cleanse your palate in between bites, enhancing the flavor profile of your meal.

  • Grilled Corn on the Cob: Sweet and smoky, grilled corn pairs delightfully with Spanish flavors, making each bite feel like a summer celebration!

Explore these pairings, and elevate your dining experience with this savory Spanish Chicken Rice at the heart of your table!

Make Ahead Options

These flavorful Spanish Chicken and Rice are perfect for meal prep enthusiasts craving convenience! You can season and prep the chicken thighs, as well as chop the onion and bell peppers, up to 24 hours in advance. Simply store the seasoned chicken in an airtight container in the refrigerator to keep it fresh. When you're ready to cook, sauté the vegetables, toast the rice, and proceed with the recipe as usual. This prep method will save you time during the week while ensuring your dish is just as delicious. As the flavors meld overnight, you'll find this one-pan wonder's taste remains vibrant and satisfying when served fresh!

Spanish Chicken Rice: Customization Ideas

Feel free to get creative with this recipe, tailoring it to suit your taste and pantry!

  • Boneless Chicken: Switch out thighs for boneless skinless chicken breasts, adjusting the cooking time to prevent drying.
    Try marinating the breasts ahead of time for an extra kick—this keeps them tender and flavorful.

  • Veggie Boost: Add sweet peas or sliced olives for extra texture and flavor.
    A colorful mix not only beautifies your dish but also adds delightful bursts of flavor!

  • Spicy Twist: Spice things up with diced jalapeños or a pinch of cayenne pepper.
    The heat creates an exciting contrast to the rich flavors, perfect for those who enjoy a little adventure on their plate.

  • Herb Infusion: Incorporate fresh herbs like thyme or oregano for an aromatic lift.
    These herbs enhance the overall flavor profile, inviting a fragrant experience that complements the dish beautifully.

  • Zesty Lime Chicken Rice: Replace regular lime with key limes for a unique tang.
    This twist offers a refreshing brightness that pairs perfectly with the dish's richness.

  • Nutty Flavor: Sprinkle slivered almonds or pine nuts before serving for added crunch.
    The nutty textures enhance the overall dish, making every bite a delightful surprise!

  • Curry-Centric: Use curry powder instead of turmeric for a whole new flavor experience.
    This swap brings a warmth to the dish that’s wonderfully comforting, reminiscent of home-cooked family meals.

If you’re exploring more flavor-packed options, my Honey BBQ Chicken Rice and Crock Pot Chicken recipes each bring their unique flair to the table—perfect for satisfying your palate!

Expert Tips for Spanish Chicken Rice

  • Crispy Skin Magic: Ensure chicken thighs are thoroughly patted dry before seasoning to achieve that coveted crispy texture. Avoid moving them too much while they sear.

  • Perfect Rice Ratio: Stick to the rice-to-liquid ratio of 1:2 for long-grain rice. Resist the urge to lift the lid during cooking to retain steam for perfectly cooked grains.

  • Flavor Boost: For a fuller flavor experience, sauté the onion and garlic until they are golden brown before adding other ingredients. This will deepen the overall taste of your Spanish Chicken Rice.

  • Make It Ahead: Prep your chicken and vegetables the night before and store them in the fridge. You’ll save time on a busy weekday evening while still impressing your dinner guests!

  • Storing Leftovers: If you have any leftovers, they can be stored in the fridge for up to 3 days or freeze for up to 3 months. Thaw overnight in the refrigerator before reheating.

Storage Tips for Spanish Chicken Rice

  • Fridge: Store leftovers in an airtight container for up to 3 days. Make sure the rice has cooled completely before sealing to prevent moisture buildup.

  • Freezer: Spanish Chicken Rice can be frozen for up to 3 months. Divide into portions and use freezer-safe bags or containers to keep it fresh.

  • Thawing: When ready to enjoy, thaw overnight in the refrigerator. This allows for even reheating without compromising the flavors.

  • Reheating: Gently reheat on the stovetop or in the microwave, adding a splash of chicken stock or water if needed to restore moisture and enhance flavor.

Spanish Chicken Rice Recipe FAQs

What kind of chicken should I use for this recipe?
Absolutely! I recommend using skin-on chicken thighs for this Spanish Chicken Rice. They provide juicy meat and crispy skin, enhancing both texture and flavor. However, if you prefer boneless skinless chicken breasts, you can substitute them, but adjust the cooking time since they cook faster.

How can I ensure my rice turns out perfectly?
Very! It's essential to maintain a proper rice-to-liquid ratio, which is typically 1:2 for long-grain rice. Avoid lifting the lid during cooking to preserve steam, ensuring your rice is fluffy. If you find your rice isn't tender after the suggested cooking time, give it a few extra minutes with the lid on to finish cooking without adding more liquid.

How should I store leftovers?
Absolutely! Store any leftovers in an airtight container in the fridge for up to 3 days. Allow the rice and chicken to cool completely before sealing to avoid moisture buildup. For longer storage, you can freeze the dish in freezer-safe bags or containers for up to 3 months.

Can I freeze Spanish Chicken Rice? How?
Very! To freeze, let your Spanish Chicken Rice cool completely, then divide it into portions. Transfer the portions into freezer-safe bags or containers, removing as much air as possible to prevent freezer burn. Label with the date, and it should stay good for up to 3 months. When ready to enjoy, thaw overnight in the refrigerator and reheat gently.

Are there any dietary concerns I should be aware of?
Absolutely! This recipe can be gluten-free if you ensure the chicken stock you use is gluten-free as well. If there are any allergies to note, such as to peppers or garlic, feel free to adapt the ingredients according to your needs. Always consult with diners regarding potential allergens to keep everyone safe.

Spanish Chicken Rice

Savory Spanish Chicken Rice: Your Easy One-Pot Delight

This Spanish Chicken Rice recipe is a delightful one-pot dish packed with flavor, making it perfect for busy weeknights.
Print Recipe Pin Recipe
Prep Time 15 minutes mins
Cook Time 30 minutes mins
Resting Time 5 minutes mins
Total Time 50 minutes mins
Servings: 4 servings
Course: Dinner
Cuisine: Spanish
Calories: 450
Ingredients Equipment Method Nutrition Notes

Ingredients
  

For the Chicken
  • 4 pieces Chicken Thighs Skin-on for juiciness and crispy skin
  • 2 tablespoons Olive Oil Can substitute with vegetable oil
For the Rice
  • 1.5 cups Long-Grain Rice Can be swapped with other types of rice
  • 3 cups Chicken Stock Use homemade or low-sodium for healthier option
  • 1 teaspoon Turmeric Powder Can replace with curry powder
  • 1 teaspoon Smoked Paprika Regular paprika can work in a pinch
For the Vegetables
  • 1 piece Red Bell Pepper Can substitute with other bell peppers
  • 1 piece Yellow Bell Pepper Mixing colors creates a visually appealing dish
  • 1 piece Onion Sautéing brings out sweetness
  • 3 cloves Garlic Fresh minced for best taste
For Garnish
  • 1/4 cup Fresh Cilantro Omit if not a fan
  • 2 pieces Limes For squeezing over the dish

Equipment

  • Large skillet
  • Dutch oven
  • measuring cups
  • Measuring Spoons
  • Cutting Board
  • Knife

Method
 

Step-by-Step Instructions
  1. Prep Chicken: Pat the chicken thighs dry and season with salt, pepper, turmeric powder, and half of the smoked paprika.
  2. Sear Chicken: Heat olive oil in a skillet. Cook chicken skin-side down for 7-8 minutes until golden and flip to sear the other side for 2 minutes.
  3. Sauté Veggies: Sauté onion and both bell peppers for 4-5 minutes until soft. Add minced garlic, remaining smoked paprika, and pinch of salt.
  4. Toast Rice: Stir in long-grain rice and toast for 2 minutes while stirring constantly.
  5. Cook Rice: Add chicken stock and stir, nestle chicken back in, bring to a boil, reduce heat, cover, and simmer for 20 minutes.
  6. Rest and Serve: Let sit covered for 5 minutes, fluff rice, garnish with cilantro, and serve with lime wedges.

Nutrition

Serving: 1servingCalories: 450kcalCarbohydrates: 48gProtein: 24gFat: 18gSaturated Fat: 3gPolyunsaturated Fat: 1gMonounsaturated Fat: 5gCholesterol: 80mgSodium: 600mgPotassium: 850mgFiber: 3gSugar: 4gVitamin A: 800IUVitamin C: 100mgCalcium: 50mgIron: 2mg

Notes

Ensure chicken is patted dry for crispy skin. Stick to the rice-to-liquid ratio of 1:2 for perfect cooking. Store leftovers in the fridge for up to 3 days or freeze for up to 3 months.

Tried this recipe?

Let us know how it was!

Creamy Paprika Chicken Drumsticks with Steamed Rice Delight

May 2, 2026 by Grace Snow Leave a Comment

The aroma of roasted chicken fills the air, luring everyone into the kitchen with its warmth and promise of comfort. Today, I’m excited to share my Creamy Paprika Chicken Drumsticks with Steamed Rice—a dish that effortlessly merges hearty European flavors with home-cooked goodness. This recipe shines during busy weeknights or cozy family gatherings, requiring only simple ingredients and straightforward techniques. The juicy drumsticks, enveloped in a rich, smoky paprika cream sauce, transform a mundane meal into a culinary experience worth savoring. Plus, it’s a true crowd-pleaser for both kids and adults, ensuring everyone leaves the table satisfied. Ready to discover how to create this delicious comfort food right at home? Let’s dive in!

What makes this dish so irresistible?

Comforting, the interplay of creamy sauce and tender chicken is pure bliss. Uncomplicated preparation means even novice cooks can shine in the kitchen. Versatile options allow you to swap in whatever proteins or grains you have on hand, making it adaptable. Perfect for gatherings, this dish impresses guests while keeping your stress level low. And don’t forget, the leftovers reheat beautifully—ideal for meal prep alongside a refreshing salad or your favorite side, such as Lime Chicken Rice. You’ll wonder why you haven’t made it sooner!

Creamy Paprika Chicken Drumsticks Ingredients

Prepare to bring the rich flavors of European cuisine right to your dinner table with this delightful recipe.

For the Chicken

  • Chicken Drumsticks – The main protein that gives this dish its juicy, tender character.
  • Crushed Red Pepper Flakes – Adds just a hint of spice; feel free to adjust according to your heat preference.

For the Sauce

  • Smoked Paprika – This essential ingredient infuses deep, smoky flavor into your creamy sauce; regular paprika can substitute if needed, though it won’t have the same depth.
  • Garlic – Fresh garlic delivers an aromatic punch, but garlic powder is a fine backup in a hurry.
  • Dijon Mustard – Adds a tangy element that enhances the sauce's overall flavor. Whole grain mustard can provide a nice texture twist.
  • Heavy Cream – Creates that luscious, rich sauce we all adore; you can swap in half-and-half for a lighter touch.
  • Flour (or gluten-free flour/cornstarch) – Necessary for thickening the sauce; gluten-free flour is a great alternative!
  • Chicken Broth – This adds not just moisture but also elevates the overall flavor of the dish. If you're going vegetarian, vegetable broth works perfectly.

For Serving

  • Steamed White Rice – The ideal bed for your chicken and sauce, soaking up all that deliciousness; jasmine or basmati rice could be lovely alternatives if you're feeling adventurous.

Every bite of these Creamy Paprika Chicken Drumsticks with Steamed Rice is a comforting journey through rich flavors and heartfelt home cooking. Enjoy!

Step‑by‑Step Instructions for Creamy Paprika Chicken Drumsticks with Steamed Rice

Step 1: Preheat the oven
Begin by preheating your oven to 400°F (200°C). This is crucial for ensuring that your Creamy Paprika Chicken Drumsticks roast evenly, developing that delightful golden-brown color. While the oven warms up, gather your chicken drumsticks and pat them dry with paper towels, preparing them to absorb the seasoning beautifully.

Step 2: Season the chicken
Generously season the chicken drumsticks with salt, pepper, and a liberal sprinkle of smoked paprika. Ensure each piece is coated evenly, which will infuse them with flavor as they cook. Once seasoned, set them aside and let them rest for about 10 minutes, allowing the spices to sink in for maximum taste.

Step 3: Sear the chicken
In a large, oven-safe skillet, heat a tablespoon of oil over medium-high heat. Once shimmering, carefully add the drumsticks, allowing them to sear for about 4-5 minutes per side until they are nicely browned. This process will help lock in the juices, creating a succulent base for your dish.

Step 4: Roast the chicken
After searing, transfer the skillet with the browned drumsticks into the preheated oven. Roast for 25-30 minutes, or until the internal temperature reaches 165°F (74°C). You’ll know they’re perfectly cooked when the juices run clear and the skin is crispy to the touch.

Step 5: Sauté the garlic
While the chicken is roasting, use the same skillet on the stovetop. Lower the heat to medium, and add minced garlic. Sauté for about 1-2 minutes, until you can smell its aromatic goodness, making sure not to let it brown too much. This step builds a flavorful foundation for the creamy sauce.

Step 6: Create the roux
Stir in the Dijon mustard and flour, mixing them together for about 1 minute to form a roux. This mixture will thicken your creamy sauce beautifully. Keep stirring until it’s well combined and begins to bubble softly, creating a rich base for your Creamy Paprika Chicken.

Step 7: Add liquids
Gradually whisk in the chicken broth, followed by the heavy cream, stirring continuously. Bring the mixture to a gentle simmer, which will allow it to thicken; this should take about 3-5 minutes. The sauce should be velvety and smooth, perfectly complementing the roasted chicken.

Step 8: Serve the dish
Once your chicken drumsticks are done, remove them from the oven and let them rest for a couple of minutes. Serve them over a bed of steamed rice, generously drizzled with the creamy paprika sauce. Make sure to spoon some of that luscious sauce over the chicken, enhancing every bite of your Creamy Paprika Chicken Drumsticks with Steamed Rice.

Make Ahead Options

These Creamy Paprika Chicken Drumsticks with Steamed Rice are a fantastic choice for meal prep, saving you precious time during busy weeknights. You can season the chicken drumsticks and refrigerate them for up to 24 hours before cooking; this allows the flavors to develop beautifully. The creamy sauce can be made ahead as well—store it in an airtight container in the fridge for up to 3 days. When you're ready to serve, simply reheat the sauce gently on the stovetop while roasting the chicken. This way, your dish remains just as delicious and flavorful, making weeknight dinners stress-free while keeping the comfort intact!

Creamy Paprika Chicken Drumsticks Variations

Feel free to get creative with this recipe—let your taste buds lead the way!

  • Boneless Option: Use boneless thighs or breasts instead of drumsticks for quicker cooking. They’ll still soak up that delicious sauce!

  • Vegetarian Delight: Swap out the chicken for tempeh or tofu, marinating them in the creamy sauce for a hearty twist that everyone can enjoy.

  • Grain Change-Up: Instead of steamed white rice, try pairing your dish with fluffy quinoa or nutty farro for added texture and flavor.

  • Herb Infusion: Toss in fresh herbs like thyme or rosemary while cooking for an enchanting aroma that elevates the entire dish.

  • Spice It Up: If you love a kick, add more crushed red pepper flakes or even a dash of cayenne pepper for an exciting flavor boost. Feel the heat!

  • Mustard Variation: Instead of Dijon, use a spicy brown mustard for a different tang that will dance on your palate, keeping things exciting.

  • Creamy Lightness: Swap heavy cream with half-and-half or coconut milk for a lighter sauce that still delivers on taste; it’s comfort food with a modern twist.

  • Citrus Zing: Squeeze some fresh lemon juice over the finished dish or zest some lemon into the sauce for a refreshing brightness that perfectly balances the creamy richness.

This dish can also pair wonderfully with a crisp salad, Chicken Salad Apples being a refreshing choice, or consider preparing a hearty bowl of Lemon Chicken Soup to warm up those chilly evenings. Enjoy making it your own!

How to Store and Freeze Creamy Paprika Chicken

Fridge: Store any leftovers in an airtight container for up to 3 days. Make sure the chicken is fully cooled before sealing the container to maintain freshness.

Freezer: You can freeze the Creamy Paprika Chicken for up to 2 months. Place it in a well-sealed freezer bag or container to avoid freezer burn.

Reheating: Thaw overnight in the fridge and reheat gently on the stovetop or in the microwave until heated through. Add a splash of broth to the sauce while reheating to maintain its creamy consistency.

Separation Prevention: If freezing, it's ideal to store the chicken and sauce separately to prevent the sauce from thickening too much.

What to Serve with Creamy Paprika Chicken Drumsticks with Steamed Rice

The perfect meal is just waiting to be completed around your dining table, enhancing the experience of this inviting dish.

  • Crisp Green Salad: A refreshing salad with mixed greens and a tangy vinaigrette balances the creamy richness and adds vibrant color.
  • Roasted Vegetables: Caramelized carrots and Brussels sprouts bring earthy flavors and a satisfying crunch, enhancing the dish's hearty essence.
  • Herb-infused Quinoa: Quinoa seasoned with parsley or cilantro introduces a nutty texture, providing an alternative to rice while remaining light and healthy.
  • Savory Garlic Bread: Golden, crusty bread is perfect for soaking up the creamy sauce and adds a satisfying crunch—making each meal shareable and delightful.
  • Zesty Lemonade: A chilled glass of freshly squeezed lemonade refreshes the palate, cutting through the richness of the dish with every sip.
  • Decadent Chocolate Mousse: A light, airy dessert to finish the meal on a sweet note, its rich chocolate flavor contrasts the savory notes of the chicken.
  • Homemade Coleslaw: The crispness of coleslaw provides a welcome crunch, and the creamy dressing complements the dish while offering added freshness.
  • Garlic Mashed Potatoes: Creamy mashed potatoes with roasted cloves of garlic create a luxurious side, harmonizing with the flavors of the chicken beautifully.
  • Grilled Asparagus: Lightly charred asparagus adds a smoky, tender bite, perfect for adding a pop of color and nutrition to your dinner table.

Expert Tips for Creamy Paprika Chicken

• Use a Meat Thermometer: Ensure your chicken reaches an internal temperature of 165°F (74°C) for safe consumption and avoid undercooking.

• Thick Sauce Trick: If you prefer a thicker sauce, let it simmer longer after adding the cream, or whisk in extra flour during the roux-making.

• Fresh Ingredients Matter: Use fresh garlic and smoked paprika for the best flavor depth; substitutes may compromise the dish's richness.

• Avoid Overcrowding: When searing chicken, make sure not to overcrowd the skillet, as this will prevent proper browning and juiciness.

• Leftover Love: This Creamy Paprika Chicken Drumsticks with Steamed Rice reheats beautifully, so don't hesitate to make extra for meal prep!

Creamy Paprika Chicken Drumsticks with Steamed Rice Recipe FAQs

How do I select ripe chicken drumsticks?
Absolutely! When choosing chicken drumsticks, look for ones that are plump, with smooth skin and a pink hue. Avoid any with dark spots, discoloration, or a foul odor. If possible, opt for organic or free-range chicken, as they tend to have better flavor and texture.

How should I store leftover Creamy Paprika Chicken Drumsticks?
Very easy! Store any leftovers in an airtight container in the refrigerator for up to 3 days. Ensure they are fully cooled before sealing to maintain freshness. Just reheat gently when you’re ready to enjoy leftovers!

Can Creamy Paprika Chicken Drumsticks be frozen?
Absolutely! You can freeze your Creamy Paprika Chicken Drumsticks for up to 2 months. For best results, place them in a well-sealed freezer bag or airtight container. If you can, separate the chicken from the sauce before freezing to prevent the sauce from thickening too much upon reheating.

What should I do if the sauce is too thick?
If your sauce is too thick, don’t fret! Simply whisk in a little chicken broth or water, a tablespoon at a time, while heating it on the stovetop. This will help achieve that velvety consistency you’re aiming for. Don’t forget to taste and adjust the seasoning if needed!

Are there any allergy concerns with this recipe?
Certainly! For those with dietary restrictions, ensure that the chicken broth used is gluten-free and check the mustard for any allergens, as some brands may contain gluten or other additives. This recipe is safe for most diets, including halal, but always check specific product labels to be sure.

How should I thaw frozen Creamy Paprika Chicken Drumsticks?
The best way to thaw frozen Creamy Paprika Chicken Drumsticks is to transfer them to the refrigerator and let them thaw overnight. If you’re short on time, you can use the microwave’s defrost setting, but make sure to reheat immediately after thawing to maintain food safety.

Creamy Paprika Chicken Drumsticks with Steamed Rice

Creamy Paprika Chicken Drumsticks with Steamed Rice Delight

Discover the heartwarming flavors of Creamy Paprika Chicken Drumsticks with Steamed Rice, a comforting dish perfect for family gatherings.
Print Recipe Pin Recipe
Prep Time 10 minutes mins
Cook Time 50 minutes mins
Total Time 1 hour hr
Servings: 4 drumsticks
Course: Dinner
Cuisine: European
Calories: 450
Ingredients Equipment Method Nutrition Notes

Ingredients
  

For the Chicken
  • 8 pieces Chicken Drumsticks Main protein for the dish
  • 1 teaspoon Crushed Red Pepper Flakes Adjust based on heat preference
For the Sauce
  • 2 tablespoons Smoked Paprika Essential for deep flavor
  • 3 cloves Garlic Fresh is preferable
  • 2 tablespoons Dijon Mustard Adds tanginess
  • 1 cup Heavy Cream For richness
  • 1 tablespoon Flour Or gluten-free alternative for thickening
  • 1 cup Chicken Broth Vegetable broth works for vegetarian option
For Serving
  • 2 cups Steamed White Rice Rice for serving

Equipment

  • Oven
  • Skillet
  • Meat Thermometer

Method
 

Preparation
  1. Preheat your oven to 400°F (200°C). Pat the chicken drumsticks dry with paper towels.
  2. Season the chicken with salt, pepper, and smoked paprika. Let rest for 10 minutes.
  3. Heat oil in a skillet over medium-high heat. Sear the drumsticks for 4-5 minutes on each side.
  4. Transfer the skillet to the oven and roast for 25-30 minutes until cooked through.
  5. Sauté minced garlic in the same skillet for 1-2 minutes.
  6. Stir in Dijon mustard and flour, mixing for 1 minute to create a roux.
  7. Gradually whisk in chicken broth and heavy cream, simmering until thickened.
  8. Serve the drumsticks over steamed rice and drizzle with creamy paprika sauce.

Nutrition

Serving: 1drumstickCalories: 450kcalCarbohydrates: 38gProtein: 30gFat: 22gSaturated Fat: 10gPolyunsaturated Fat: 2gMonounsaturated Fat: 8gCholesterol: 120mgSodium: 600mgPotassium: 500mgFiber: 1gSugar: 1gVitamin A: 500IUVitamin C: 2mgCalcium: 30mgIron: 2mg

Notes

Ensure chicken reaches an internal temperature of 165°F (74°C). Leftovers can be refrigerated for up to 3 days or frozen for 2 months.

Tried this recipe?

Let us know how it was!

Delicious Honey Garlic Chicken Bowls for Busy Weeknights

May 2, 2026 by Grace Snow Leave a Comment

As the aroma of sautéed garlic fills my kitchen, I can’t help but smile at the thought of a comforting, homemade dinner waiting to be enjoyed. These Quick and Easy Honey Garlic Chicken Bowls offer the perfect blend of crispy chicken simmered in a sweet, sticky sauce that clings to every piece. Not only are they a breeze to whip together after a long day, but they’re also incredibly customizable—perfect for using up those leftover veggies in your fridge. Whether served over fluffy white rice or nutritious quinoa, this dish transforms ordinary weeknights into something special. Ready to make mealtime magic happen? Let’s dive into the sticky sweetness!

Why Make Honey Garlic Chicken Bowls?

Flavorful Delight: These bowls are packed with a sweet and savory flavor that will keep you coming back for more.

Customizable: Use whatever veggies you have on hand, making it a versatile dish that fits your taste.

Quick Prep: Perfect for busy weeknights, these bowls are ready in under 30 minutes!

Crispy Texture: The chicken is crispy on the outside and tender on the inside, creating a satisfying bite.

Family-Friendly: Even the pickiest eaters will love this tasty meal. Pair it with a refreshing side salad or try it with a twist, like Honey Garlic Chicken for another scrumptious option!

Honey Garlic Chicken Bowls Ingredients

• Perfect for your weeknight dinner!

For the Chicken
• Boneless Skinless Chicken Breast – The main protein; for richer flavor, consider using thighs.
• Kosher Salt – Enhances the overall flavor; you can substitute with sea salt.
• Ground Black Pepper – Adds a nice seasoning; adjust according to your taste.
• All-Purpose Flour – Coats the chicken for that crispy texture; use cornstarch as a gluten-free alternative.

For the Sauce
• Olive Oil – Used for cooking, helping to brown the chicken; can be swapped for canola or avocado oil.
• Garlic (minced) – Essential for flavor; fresh is best, but garlic powder works in a pinch.
• Honey – Creates that distinctive sticky sauce; maple syrup can be a nice substitute for a different sweetness.
• Water – Adjusts sauce consistency; if the sauce is already thinned, you can omit it.
• Soy Sauce – Provides umami flavor and saltiness; tamari can be used for a gluten-free version.

Serving Options
• Cooked Rice – Choose between white, brown, quinoa, or cauliflower rice for a healthy base.
• Garnishes – Fresh green onions, Thai basil, or sesame seeds add a perfect finishing touch!

With these ingredients, you're just minutes away from indulging in delicious Honey Garlic Chicken Bowls!

Step‑by‑Step Instructions for Honey Garlic Chicken Bowls

Step 1: Prepare the Chicken
In a large bowl, combine the boneless skinless chicken breast pieces with kosher salt and ground black pepper, mixing thoroughly. Then, coat the chicken evenly with all-purpose flour, ensuring each piece is covered to create a crispy texture. This coating will give the chicken a golden-brown finish when cooked.

Step 2: Sauté the Chicken
Heat 2 tablespoons of olive oil in a large skillet over medium-high heat. Once the oil is shimmering, add the coated chicken pieces in a single layer. Cook for 6-8 minutes, turning occasionally, until the chicken is browned and cooked through, reaching an internal temperature of 165°F. Remove the chicken from the skillet and set aside.

Step 3: Sauté the Garlic
In the same skillet, add minced garlic and sauté for about 1 minute until fragrant, stirring constantly to avoid burning. This will enhance the flavor of your Honey Garlic Chicken Bowls. Be sure to scrape any browned bits from the bottom of the pan to incorporate the rich flavors into your sauce.

Step 4: Make the Sauce
In a small bowl, whisk together honey, water, and soy sauce until well combined. Pour this mixture into the skillet over the sautéed garlic, stirring to coat. Scrape any remaining bits from the skillet, allowing the flavors to meld beautifully as you heat the sauce.

Step 5: Thicken the Sauce
Bring the sauce to a gentle boil, then reduce the heat and let it simmer for about 2-3 minutes, stirring occasionally. The sauce should start to thicken, clinging to the chicken pieces. For an even thicker consistency, create a cornstarch slurry with a bit of water and add it to the sauce while stirring.

Step 6: Combine and Serve
Return the cooked chicken to the skillet and toss it in the sauce until fully coated. Serve your Honey Garlic Chicken Bowls immediately over your choice of cooked rice, quinoa, or cauliflower rice. Garnish with sliced green onions or sesame seeds for an appealing finish.

Tips for the Best Honey Garlic Chicken Bowls

  • Even Coating: Ensure the chicken is evenly coated in flour for a uniform crispy texture, which prevents soggy spots and enhances crunchiness.

  • Meal Prep Tip: For meal prepping, store the chicken separately from the rice to maintain texture. Reheat gently to avoid drying out the chicken.

  • Thicker Sauce: If you prefer a thicker sauce, consider creating a cornstarch slurry. Mix cornstarch with a bit of water and add it while cooking for that perfect honey garlic glaze.

  • Timing Matters: Keep an eye on the cooking time for the garlic; it burns quickly! Sauté until fragrant, about one minute, to keep the sauce flavorful.

  • Leftover Potential: If you have leftovers, they can be a delightful addition to salads or wraps. Just be sure to store in an airtight container for freshness.

These tips will ensure your Honey Garlic Chicken Bowls turn out delicious every time!

What to Serve with Honey Garlic Chicken Bowls?

These Honey Garlic Chicken Bowls are a fantastic starting point for a well-rounded, heartfelt meal that will delight your senses.

  • Steamed Broccoli: Adds a vibrant green touch and a nutritious crunch that perfectly complements the sweetness of the sauce.
  • Garlic Fried Rice: Flavorful and aromatic, this side dish enhances the dish's garlic notes while providing a satisfying texture. The warmth of the fried rice pairs beautifully with the chicken's sticky coating.
  • Cucumber Salad: Crisp cucumbers tossed in a light vinaigrette offer a refreshing contrast that cuts through the richness of the chicken. It’s a simple yet delightful palate cleanser!
  • Sesame Noodles: With a nutty finish, these noodles can absorb the sweet garlic essence, making every bite memorable. A bit of crunch from crushed peanuts adds an exciting texture.
  • Mango Smoothie: Creamy and fruity, a smoothie serves as a lovely refreshment to balance the savory flavors of the chicken bowls. The tropical sweetness will have everyone longing for a sunny beach!
  • Honey Garlic Brussels Sprouts: Continuity in flavor! Roasted sprouts drizzled with honey create a perfect harmony with the bowls, giving an earthy warmth to the meal.

With these delightful accompaniments, your dinner table will radiate warmth and comfort!

How to Store and Freeze Honey Garlic Chicken Bowls

Fridge: Store leftover Honey Garlic Chicken Bowls in an airtight container for up to 3 days to maintain freshness and flavor.

Freezer: For longer storage, freeze individual portions in freezer-safe containers for up to 3 months. Thaw overnight in the fridge before reheating.

Reheating: Gently reheat leftovers in the microwave or on the stovetop over low heat. Add a splash of water if the sauce becomes too thick.

Separation Tip: If storing for meal prep, keep chicken separate from rice to help maintain the texture of each component.

Honey Garlic Chicken Bowls Variations

Feel free to get creative and make these Honey Garlic Chicken Bowls your own with a variety of substitutions and twists!

  • Veggie Boost:
    Add fresh vegetables like broccoli, bell peppers, or snap peas during cooking for added nutrition and vibrant color.

  • Quinoa Substitute:
    Swap out rice for quinoa to pack in extra protein and a nutty flavor, making your meal even more wholesome.

  • Cauliflower Rice:
    Use cauliflower rice for a low-carb option, delivering great texture while keeping those calories in check.

  • Gluten-Free Twist:
    Replace soy sauce with tamari to cater to gluten sensitivities, providing the same savory umami kick.

  • Maple Sweetness:
    For a different flavor profile, substitute honey with maple syrup, imparting a rich sweetness that's equally delightful.

  • Crispy Air Fryer Method:
    Try cooking your chicken in the air fryer for an extra crunchy exterior, cutting down on excess oil while maintaining flavor!

  • Spice it Up:
    For a fiery kick, mix in some red pepper flakes or Sriracha sauce to the honey-garlic sauce for a delicious heat.

By mixing and matching these variations, you can create a new adventure each time you prepare these comforting bowls! If you're curious about other chicken options, don't forget to explore Crock Pot Chicken or try the zesty Chipotle Lime Chicken and Rice for a refreshing twist on your next weeknight dinner. Enjoy your culinary creativity!

Make Ahead Options

These Honey Garlic Chicken Bowls are ideal for meal prep, allowing you to save precious time on busy weeknights! You can marinate the chicken pieces (with salt, pepper, and flour) up to 24 hours in advance; this enhances the flavors and helps to create a crispy texture. The sauce can also be prepared ahead of time and stored in an airtight container in the refrigerator for up to 3 days. When you’re ready to serve, simply cook the chicken and garlic as instructed, add the prepared sauce, and heat until everything is warmed through. This way, you’ll enjoy just as delicious Honey Garlic Chicken Bowls with minimal effort!

Honey Garlic Chicken Bowls Recipe FAQs

What’s the best way to select chicken for this recipe?
Absolutely! For the best flavor and texture, I recommend using boneless skinless chicken breasts for these Honey Garlic Chicken Bowls. If you prefer a richer taste, chicken thighs are an excellent choice as they stay juicier during cooking. Look for fresh cuts without any dark spots or unpleasant odor. If you're opting for pre-packaged chicken, double-check the expiration date to ensure it's fresh!

How can I store leftovers of Honey Garlic Chicken Bowls?
Very simple! To store any leftovers, place them in an airtight container in the fridge, where they will stay fresh for up to 3 days. For strain on flavor and texture, it’s best to keep the chicken and rice separately if you can. Just pop them in the microwave or on a stovetop to reheat when you’re ready to enjoy them again!

Can I freeze Honey Garlic Chicken Bowls?
Yes, you can! To freeze, portion the Honey Garlic Chicken Bowls into freezer-safe containers and store them for up to 3 months. When you’re ready to eat, simply thaw in the fridge overnight. For reheating, gently warm on the stovetop over low heat, adding a splash of water if the sauce thickens too much during freezing. Your quick and easy dinner will be just as delicious when you pull it back out!

What if the garlic sauce is too thin?
Not to worry! If you find that the sauce is too thin after cooking, you can easily thicken it. Create a cornstarch slurry by mixing 1 tablespoon of cornstarch with 2 tablespoons of water. Gradually add this mixture to the sauce while stirring over low heat until it reaches your desired consistency. This process usually takes just a couple of minutes!

Are there any dietary considerations for this recipe?
Yes, absolutely! If you or anyone in your household has dietary restrictions, keep in mind that the soy sauce contains gluten. You can use tamari as a gluten-free alternative. Additionally, the recipe includes honey, which could be an allergen for some. For alternatives, consider maple syrup as a sweetener; it brings a different flavor profile while still keeping things delicious!

Can I add vegetables to my Honey Garlic Chicken Bowls?
Definitely! The more the merrier! I often recommend adding fresh vegetables like bell peppers, broccoli, or snap peas during the last few minutes of cooking the chicken. This not only boosts nutritional value but also adds vibrant color and texture to your meal. Just sauté them slightly before tossing everything together with the sauce. Enjoy your tasty creations!

Honey Garlic Chicken Bowls

Delicious Honey Garlic Chicken Bowls for Busy Weeknights

These Honey Garlic Chicken Bowls combine crispy chicken with a sweet and savory sauce, perfect for quick weeknight dinners.
Print Recipe Pin Recipe
Prep Time 10 minutes mins
Cook Time 20 minutes mins
Total Time 30 minutes mins
Servings: 4 bowls
Course: Dinner
Cuisine: Asian
Calories: 450
Ingredients Equipment Method Nutrition Notes

Ingredients
  

For the Chicken
  • 1 pound Boneless Skinless Chicken Breast Consider using thighs for richer flavor
  • 1 teaspoon Kosher Salt Substitute with sea salt if preferred
  • 1 teaspoon Ground Black Pepper Adjust according to taste
  • 1 cup All-Purpose Flour Use cornstarch as a gluten-free alternative
For the Sauce
  • 2 tablespoons Olive Oil Can be swapped for canola or avocado oil
  • 3 cloves Garlic (minced) Fresh is best, but garlic powder works in a pinch
  • 1/3 cup Honey Maple syrup can be used as a substitute
  • 1/4 cup Water Omit if sauce is already thinned
  • 1/4 cup Soy Sauce Tamari can be used for a gluten-free version
Serving Options
  • 4 cups Cooked Rice Options include white, brown, quinoa, or cauliflower rice
  • Garnishes Fresh green onions, Thai basil, or sesame seeds

Equipment

  • Large skillet
  • Mixing Bowl
  • small bowl

Method
 

Step-by-Step Instructions
  1. In a large bowl, combine the chicken breast pieces with salt and pepper, then coat with flour.
  2. Heat olive oil in a large skillet over medium-high heat and cook the chicken for 6-8 minutes until browned.
  3. Remove chicken and sauté minced garlic in the same skillet for about 1 minute.
  4. Whisk together honey, water, and soy sauce in a small bowl, then pour over the sautéed garlic.
  5. Bring the sauce to a gentle boil, then simmer for 2-3 minutes to thicken.
  6. Return the chicken to the skillet and toss until fully coated in the sauce. Serve immediately.

Nutrition

Serving: 1bowlCalories: 450kcalCarbohydrates: 40gProtein: 30gFat: 15gSaturated Fat: 3gPolyunsaturated Fat: 2gMonounsaturated Fat: 10gCholesterol: 70mgSodium: 900mgPotassium: 600mgFiber: 2gSugar: 12gVitamin A: 500IUVitamin C: 4mgCalcium: 25mgIron: 2mg

Notes

Ensure the chicken is evenly coated in flour for the best crispy texture. Meal prep storing chicken separately from rice for best results.

Tried this recipe?

Let us know how it was!

Creamy Coconut Chicken Rice Bowls for Cozy Nights In

May 2, 2026 by Grace Snow Leave a Comment

Cooking is often my emotional compass, pointing me toward comfort food that feels like a warm embrace. These Coconut Chicken Rice Bowls are my go-to recipe for those busy weeknights when I crave something soothing yet packed with flavor. The creamy coconut milk enveloping tender chicken and fragrant rice transforms a simple meal into a culinary escape. Not only is this dish incredibly easy to whip up, but it’s also versatile enough to accommodate any protein or rice substitution you might prefer. Think shrimp or tofu for a twist on the classic! As you gather around the table, sharing stories and laughter, these bowls will surely become a beloved staple in your recipe book. What flavors will you explore as you make this dish your own?

Why are Coconut Chicken Rice Bowls unforgettable?

Comforting, hearty dish: These bowls provide the perfect hug in a bowl, making them ideal for any cozy night in.

Endless adaptability: Whether you want to switch up the protein with shrimp or tofu or experiment with various rice types, this recipe is all about flexibility.

Quick and easy: With minimal prep and a simple cooking process, you’ll have a delicious dinner on the table in no time—perfect for busy evenings.

Flavor-packed goodness: The combination of fragrant rice and creamy coconut milk creates an irresistible balance that will keep everyone coming back for seconds.

Simply add a dash of lime for freshness, and serve alongside your favorite sides to elevate this meal even more! Enjoy it tonight or save time by prepping ingredients for an easy, make-ahead option.

Coconut Chicken Rice Bowls Ingredients

For the Chicken

  • Chicken – A great source of protein that brings a savory richness to the dish; feel free to substitute with shrimp or tofu for a different flavor.

For the Coconut Sauce

  • Coconut Milk – Adds a luscious creaminess and delightful tropical flavor; opting for full-fat coconut milk will enhance the dish's richness.

For the Rice

  • Rice – Acts as the heart of these Coconut Chicken Rice Bowls, providing a fluffy base; you may use any rice type you prefer, including brown or jasmine rice.

For the Seasonings

  • Garlic – Elevates the flavor profile with its aromatic essence; fresh cloves provide the best taste, but dried garlic works in a pinch.
  • Ginger – Infuses warmth and depth into the dish; use fresh ginger for vibrant flavor or ground ginger for convenience.

For the Vegetables

  • Bell Peppers – Add color, crunch, and a touch of sweetness; seasonal vegetables can enhance freshness and variety.
  • Peas – Contribute sweetness and a pop of color; feel free to swap in your favorite veggies for a personal touch.

Step‑by‑Step Instructions for Coconut Chicken Rice Bowls

Step 1: Prepare Ingredients
Begin by chopping the chicken into bite-sized pieces and dicing your choice of vibrant vegetables, such as bell peppers and peas. Measure out the rice and coconut milk, ensuring you have everything ready for a smooth cooking process. This prep step will make the execution of your Coconut Chicken Rice Bowls seamless and enjoyable.

Step 2: Cook Chicken
Heat a large skillet over medium-high heat and add a splash of oil. Once the oil is shimmering, add the chicken pieces, cooking for about 7-10 minutes until golden brown and cooked through. Stir occasionally to ensure even browning, and look for the chicken to be tender and no longer pink in the center, adding a savory base for your rice bowls.

Step 3: Add Aromatics
Reduce the heat to medium and incorporate minced garlic and ginger to the skillet. Sauté these aromatics for 1-2 minutes, stirring frequently, until they become fragrant and golden. This step will infuse your Coconut Chicken Rice Bowls with warmth and flavor, creating a delightful aroma in your kitchen.

Step 4: Combine Ingredients
To the skillet, add the rinsed rice and pour in the coconut milk, stirring well to combine all the elements. Bring the mixture to a gentle simmer over medium heat, ensuring everything is well mixed and fragrant. This is the moment where the creamy essence of coconut merges with the savory chicken.

Step 5: Simmer
Cover the skillet with a lid, reduce the heat to low, and allow the mixture to simmer for approximately 15-20 minutes. The goal is for the rice to absorb the coconut milk and soften, transforming into a rich and fluffy foundation for your Coconut Chicken Rice Bowls. Keep an eye on it, gently stirring occasionally to prevent sticking.

Step 6: Finish & Serve
Once the rice is tender and the coconut mixture has thickened, fluff your Coconut Chicken Rice Bowls with a fork. Serve hot, garnished with fresh herbs or a squeeze of lime for a delightful touch of brightness. This final step elevates the dish, readying it for your loved ones to enjoy a cozy and comforting meal together.

How to Store and Freeze Coconut Chicken Rice Bowls

Fridge: Store leftover Coconut Chicken Rice Bowls in an airtight container for up to 3 days. Allow the dish to cool completely before refrigerating to maintain freshness.

Freezer: If you want to enjoy this dish later, freeze it in a freezer-safe container for up to 3 months. To prevent freezer burn, ensure it’s tightly sealed.

Reheating: When ready to eat, thaw Overnight in the fridge, then reheat on the stove over low heat, adding a splash of coconut milk to keep it creamy and delightful.

Make-Ahead Tip: You can prepare the chicken mixture a day in advance; simply refrigerate it and reheat when you're ready to serve.

Make Ahead Options

These Coconut Chicken Rice Bowls are perfect for meal prep enthusiasts! You can chop the chicken, vegetables, and measure the rice and coconut milk up to 24 hours in advance, storing them in airtight containers in the refrigerator. Additionally, you can fully prepare the chicken mixture (steps 1-4) and refrigerate it for up to 3 days before serving, ensuring the flavors remain vibrant and cohesive. When you're ready to enjoy your bowls, simply reheat the mixture in a skillet over medium heat, add the rice and coconut milk, and simmer until everything is warmed through. With this make-ahead strategy, you'll enjoy restaurant-quality Coconut Chicken Rice Bowls with minimal effort during your busy weeknights!

Expert Tips for Coconut Chicken Rice Bowls

  • Perfect Protein: Ensure chicken is cooked through but not overdone. Use a meat thermometer; the internal temperature should reach 165°F for juicy results.
  • Creamy Texture: For the best texture, use full-fat coconut milk. This will enrich your Coconut Chicken Rice Bowls with a luxurious creaminess.
  • Flavor Boost: Fresh ginger and garlic make a noticeable difference over dried options. Always opt for fresh herbs when possible to elevate the dish.
  • Stir Gently: When combining rice and coconut milk, stir gently to avoid breaking up the rice grains too much—preserving fluffiness is key!
  • Veggie Variety: Feel free to use seasonal veggies for freshness; bell peppers and peas work well, but don’t hesitate to mix in your favorites!

What to Serve with Coconut Chicken Rice Bowls

Cozy up your dinner experience with delightful sides that bring out the flavors of these creamy rice bowls.

  • Crispy Garlic Green Beans: Their tender crunch balances the creamy coconut sauce, adding a fresh, vibrant element to your meal.

  • Mango Salsa: This sweet and tangy condiment perfectly complements the coconut and chicken, offering a refreshing burst of flavor. Try it as a topping for a tropical twist!

  • Coconut Lime Rice: Enhance the coconut theme with fragrant rice seasoned with a hint of lime, creating a harmonious flavor profile that accentuates the main dish.

  • Avocado Salad: Creamy avocado slices mixed with fresh greens and a light vinaigrette provide a cooling, nutritious contrast to the warm bowls.

  • Chili-Lime Corn on the Cob: Grilled corn drizzled with chili-lime seasoning adds a zesty kick that pairs beautifully with the multi-dimensional flavors of the rice bowls.

  • Pineapple Coconut Smoothie: For a sweet finish, blend tropical flavors into a creamy smoothie, delighting your palate with a refreshing drink that echoes your meal's essence.

  • Spiced Roasted Cauliflower: This dish’s earthy flavors and crispy texture serve as a fantastic counterpart to the bowls, making for a delightful mix of tastes and textures.

  • Chilled Cucumber Soup: Light and soothing, this cool soup provides a refreshing counterpoint to the warmth and richness of the Coconut Chicken Rice Bowls.

  • Lime-infused Sparkling Water: A bubbly drink with a squeeze of lime keeps the meal light and offers a refreshing palate cleanser with each bite.

Every bite of your Coconut Chicken Rice Bowls deserves to be complemented by dishes that enhance its warm and comforting essence. Enjoy!

Variations on Coconut Chicken Rice Bowls

Customize your Coconut Chicken Rice Bowls to match your cravings and dietary needs! The possibilities are endless and delicious.

  • Shrimp Substitute: Swap chicken for shrimp for a quick seafood twist, cooking them just until pink to preserve tenderness.
  • Vegan Option: Use tofu instead of chicken for a plant-based delight; press and marinate the tofu for extra flavor before cooking.
  • Brown Rice: Substitute white rice with brown rice for added nutty flavor and a healthier profile; simply adjust cooking time to ensure it's tender.
  • Spice it Up: Add a pinch of red pepper flakes or chopped jalapeños to kick up the heat and delight spice lovers. Just keep an eye on the heat, adjusting to your taste!
  • Coconut Curry: Mix in a tablespoon of curry paste for a richer, spiced flavor; this adds depth and complexity that enhances the creamy coconut.
  • Herb Boost: Toss in fresh herbs like basil or cilantro during the final moments of cooking to brighten up the dish with vibrant flavors! The fresh greens beautifully contrast against the creamy base.
  • Frozen Veggies: If fresh veggies are scarce, use frozen mixed vegetables instead for convenience without sacrificing flavor; they’ll add color and nutrition easily.
  • Lime Zing: Finish with a squeeze of fresh lime juice right before serving to elevate the dish with a burst of freshness that complements the coconut.

Looking for more inspiration? Don't forget to check out the flavors of Bbq Chicken Rice or for something cozy, try making some Crock Pot Chicken. The beauty of these variations is that you can confidently explore flavors while keeping the heart of the dish intact!

Coconut Chicken Rice Bowls Recipe FAQs

How do I select ripe ingredients for Coconut Chicken Rice Bowls?
Absolutely! When choosing vegetables, look for vibrant bell peppers without any dark spots or wrinkles. Fresh garlic should be firm and unblemished, and ginger should feel heavy and smooth. Opt for chicken that is fresh and has a pink hue without any strange odor.

What is the best way to store leftovers from Coconut Chicken Rice Bowls?
You can store any leftover Coconut Chicken Rice Bowls in an airtight container in the refrigerator for up to 3 days. Make sure the dish cools completely before sealing to maintain freshness, and when you're ready to enjoy it again, simply reheat on the stove or microwave!

Can I freeze Coconut Chicken Rice Bowls?
Yes! To freeze, place the cooled Coconut Chicken Rice Bowls in a freezer-safe container, ensuring it’s sealed tightly. They can last up to 3 months. When you’re ready to eat, thaw in the refrigerator overnight, and then reheat on the stove, adding a little extra coconut milk if it looks too dry.

What should I do if my rice is undercooked in the Coconut Chicken Rice Bowls?
No worries! If you find that your rice is undercooked, you can add a splash of water or coconut milk to the skillet and cover it again. Let it simmer on low heat for an additional 5-10 minutes. Stir gently to help it cook through, and keep an eye on the liquid level to prevent sticking.

Are there any dietary considerations for Coconut Chicken Rice Bowls?
If you're concerned about allergies, note that coconut milk is a common allergen. You can substitute it with a hypoallergenic milk alternative. For those with a gluten allergy, check your spices to ensure they’re gluten-free. If you have pets, avoid sharing any dishes containing garlic and onions, as they can be harmful to them.

Can I customize the protein in Coconut Chicken Rice Bowls?
Very! Feel free to swap out the chicken for shrimp or tofu if you prefer. For shrimp, simply cook until they turn pink and opaque, about 3-4 minutes. For tofu, try pressing to remove moisture, then sauté until golden. This recipe shines in its adaptability, making it perfect for what you have on hand!

Coconut Chicken Rice Bowls

Creamy Coconut Chicken Rice Bowls for Cozy Nights In

Coconut Chicken Rice Bowls are comforting and easy to make, perfect for busy weeknights filled with flavor and versatility.
Print Recipe Pin Recipe
Prep Time 10 minutes mins
Cook Time 25 minutes mins
Total Time 35 minutes mins
Servings: 4 bowls
Course: Dinner
Cuisine: Asian
Calories: 550
Ingredients Equipment Method Nutrition Notes

Ingredients
  

For the Chicken
  • 1 lb Chicken Great source of protein; can substitute with shrimp or tofu.
For the Coconut Sauce
  • 1 can Coconut Milk Full-fat will enhance richness.
For the Rice
  • 2 cups Rice Any type preferred, including brown or jasmine.
For the Seasonings
  • 3 cloves Garlic Fresh preferred, but dried works in a pinch.
  • 1 tbsp Ginger Fresh for vibrant flavor or ground for convenience.
For the Vegetables
  • 1 cup Bell Peppers Add color and sweetness.
  • 1 cup Peas Can swap for your favorite veggies.

Equipment

  • Large skillet

Method
 

Step‑by‑Step Instructions
  1. Begin by chopping the chicken into bite-sized pieces and dicing your choice of vibrant vegetables, such as bell peppers and peas. Measure out the rice and coconut milk, ensuring you have everything ready for a smooth cooking process.
  2. Heat a large skillet over medium-high heat and add a splash of oil. Once the oil is shimmering, add the chicken pieces, cooking for about 7-10 minutes until golden brown and cooked through.
  3. Reduce the heat to medium and incorporate minced garlic and ginger to the skillet. Sauté for 1-2 minutes until fragrant and golden.
  4. Add the rinsed rice and pour in the coconut milk, stirring well to combine. Bring to a gentle simmer.
  5. Cover with a lid, reduce heat to low, and simmer for approximately 15-20 minutes, stirring occasionally.
  6. Once the rice is tender and the mixture has thickened, fluff the rice with a fork, and serve hot, garnished with fresh herbs or a squeeze of lime.

Nutrition

Serving: 1bowlCalories: 550kcalCarbohydrates: 60gProtein: 30gFat: 25gSaturated Fat: 15gPolyunsaturated Fat: 5gMonounsaturated Fat: 5gCholesterol: 100mgSodium: 600mgPotassium: 800mgFiber: 4gSugar: 2gVitamin A: 500IUVitamin C: 30mgCalcium: 40mgIron: 2mg

Notes

Great dish to share with loved ones. Can be made ahead by prepping the chicken mixture a day in advance.

Tried this recipe?

Let us know how it was!

Creamy Smothered Chicken and Rice for Ultimate Comfort Tonight

May 2, 2026 by Grace Snow Leave a Comment

As I watched the sun dip below the horizon, filling the kitchen with warm light, I couldn’t resist the alluring aroma of my bubbling creation—Creamy Smothered Chicken and Rice. This dish is a beloved comfort food, effortlessly combining succulent seared chicken with a rich, cheesy sauce over fluffy rice. Not only is it an easy weeknight meal, but it’s also incredibly customizable, allowing for your choice of vegetables or spices to suit your family’s collective palate. Plus, it provides a delightful sense of coziness that turns any dinner into a special occasion. Ever thought of how one comforting bite of food can evoke the happiest memories? Keep reading—this recipe might just become your new favorite!

Why is Comfort Food So Special?

Comforting Taste: The blend of creamy sauce and tender chicken creates a cozy, nostalgic experience that’s hard to resist.
Quick to Make: With simple steps and minimal prep, you’ll have this delicious dish on your table in no time—perfect for busy weeknights!
Customizable Delights: Feel free to tailor this dish by including your favorite veggies or spices, making it a family favorite for all tastes. If you're in the mood for more chicken options, consider checking out my tasty Bbq Chicken Rice or Chicken Adobo Again.
Nutritious and Satisfying: Packed with proteins and healthy fats, you can enjoy the creamy indulgence without the guilt.
Crowd-Pleaser: Whether it’s a family dinner or a gathering with friends, this dish is sure to impress everyone at the table!

Creamy Smothered Chicken and Rice Ingredients

For the Chicken
• Chicken Breasts – Boneless, skinless chicken ensures tenderness and quick cooking.

For the Seasoning
• Garlic Powder – Adds a savory depth; fresh garlic can be used for a stronger flavor.
• Onion Powder – Provides a solid flavor base; fresh onions can substitute if diced finely.
• Smoked Paprika – Infuses the dish with a smoky essence; regular paprika works but lacks the depth.
• Salt and Black Pepper – Essential for seasoning; adjust according to your taste preference.

For Cooking
• Olive Oil – Ideal for searing the chicken; can be replaced with vegetable or canola oil if needed.

For the Rice
• Long-Grain White Rice – A fluffy base; substitute with brown rice for a healthier option but increase cooking time.
• Chicken Broth – Enhances the flavor of both the rice and sauce; use vegetable broth for a vegetarian alternative.

For the Sauce
• Unsalted Butter – Provides creaminess to the sauce; margarine may work as a substitute in a pinch.
• All-Purpose Flour – Thickens the sauce for a creamy consistency; gluten-free flour can be used if necessary.
• Whole Milk – Creates a rich, creamy sauce; almond or oat milk are excellent choices for a dairy-free option.
• Grated Cheddar & Parmesan Cheeses – Add richness and flavor; consider nutritional yeast for a non-dairy alternative.
• Thyme – Elevates the flavor profile; basil or oregano can be used as substitutions.

For Garnish
• Fresh Parsley – Adds a pop of freshness; can be omitted if it's not on hand.

Step‑by‑Step Instructions for Creamy Smothered Chicken and Rice

Step 1: Prepare Chicken
Start by seasoning the boneless, skinless chicken breasts with garlic powder, onion powder, smoked paprika, salt, and black pepper. In a large skillet, heat 2 tablespoons of olive oil over medium-high heat. Sear the chicken for about 4-5 minutes on each side until golden brown and cooked through. Once completed, remove the chicken from the skillet and set it aside on a plate.

Step 2: Cook Rice
In a saucepan, combine 1 cup of chicken broth and a pinch of salt, bringing it to a boil over medium heat. Carefully add in 1 cup of long-grain white rice, stirring briefly. Cover the saucepan with a lid, reduce the heat to low, and let it simmer for 15-18 minutes until the rice is tender and has absorbed all the liquid. Once done, remove from heat and keep it covered to stay warm.

Step 3: Make Sauce
Using the same skillet, melt 3 tablespoons of unsalted butter over medium heat. As the butter melts, whisk in 3 tablespoons of all-purpose flour, cooking it for about 1-2 minutes until it turns a light golden color. Gradually stir in 1 cup of whole milk and ½ cup of chicken broth, whisking continuously until the mixture is smooth and thickens, which should take about 3-4 minutes.

Step 4: Add Cheeses and Seasoning
Next, reduce the heat to low and stir in 1 cup of grated cheddar cheese and ½ cup of grated Parmesan cheese into the creamy sauce. Allow the cheese to melt fully, creating a velvety consistency. To enhance the flavor, add 1 teaspoon of dried thyme and stir until combined, ensuring the sauce is well seasoned.

Step 5: Combine Chicken and Sauce
Return the seared chicken breasts to the skillet, coating them in the creamy sauce you just prepared. Let everything simmer together over low heat for about 10 minutes, allowing the flavors to meld and ensuring the chicken is heated through completely. The sauce should be thick and bubbling gently, creating a delightful aroma.

Step 6: Serve
To serve your Creamy Smothered Chicken and Rice, spoon a generous helping of the fluffy rice onto each plate. Place the chicken on top and ladle additional sauce over it for extra creaminess. If you have fresh parsley, sprinkle it on as a garnish to add a pop of color before diving in. Enjoy the comfort food experience with your loved ones!

What to Serve with Creamy Smothered Chicken and Rice

Creating the perfect meal involves pairing flavors and textures that enhance each dish's charm. Let’s explore some delightful companions for this comforting dish.

  • Garlic Bread: The crispy, buttery goodness of garlic bread makes it an excellent side, perfect for soaking up the creamy sauce.

  • Steamed Broccoli: Tender, vibrant broccoli not only adds a pop of color but also brings a healthy crunch to balance the creamy dish. Pairing these two can turn a simple dinner into a wholesome feast.

  • Caesar Salad: Crisp romaine lettuce drizzled with tangy dressing and topped with crunchy croutons complements the richness of the chicken perfectly. This refreshing salad provides a wonderful contrast to the creamy texture.

  • Honey Glazed Carrots: Sweet, roasted carrots add a touch of sweetness that beautifully offsets the savory chicken and rice. Their tender bite alongside the dish creates a comforting harmony.

  • Corn on the Cob: The bright sweetness of summer corn offers a fun, juicy contrast. The vibrant flavors of the corn celebrate the dish's comforting spirit.

  • Chardonnay: A chilled glass of Chardonnay enriches the experience, with its buttery notes enhancing the cheese sauce. It’s a lovely accompaniment for a special dinner.

  • Apple Crisp: For dessert, a delicious apple crisp that’s warm and slightly spiced makes for a comforting finish. The sweetness of apples contrasts warmly with the savory flavors of the meal.

Mixing and matching these options with your Creamy Smothered Chicken and Rice will surely turn dinner into a heartwarming occasion. Enjoy!

How to Store and Freeze Creamy Smothered Chicken and Rice

Fridge: Store your Creamy Smothered Chicken and Rice in an airtight container for up to 3 days. This keeps the flavors intact and maintains its creamy texture.

Freezer: For longer storage, freeze the dish for up to 2 months. Ensure it’s in a freezer-safe container, leaving some space for expansion.

Reheating: To reheat, thaw overnight in the fridge, then warm in a skillet over low heat. Add a splash of broth or milk to restore creaminess, stirring gently until heated through.

Avoiding Spoilage: Always make sure to cool the dish down to room temperature before refrigerating or freezing to prevent moisture buildup, which can alter the texture.

Make Ahead Options

These Creamy Smothered Chicken and Rice are perfect for busy home cooks who want to save time during hectic weekdays! You can prepare the chicken and rice up to 24 hours in advance; simply season and sear the chicken, then store it in an airtight container in the fridge. Cook the rice and allow it to cool before refrigerating it as well. For the creamy sauce, you can whisk together the flour, milk, and cheese, but hold off on combining it with the chicken until you're ready to serve. When the time comes, simply combine everything in a skillet and heat it through until bubbling for delicious, ready-to-enjoy comfort food!

Creamy Smothered Chicken and Rice Variations

Get ready to elevate your Creamy Smothered Chicken and Rice by mixing up flavors and textures in delightful ways!

  • Vegetarian Option: Swap chicken for hearty mushrooms or cauliflower. Sauté them until golden before adding them to your creamy sauce for a filling twist!
  • Spice it Up: Add cayenne pepper or chili flakes for a touch of heat. A little spice makes every bite exciting and gives it a whole new personality!
  • Different Rice: Try jasmine rice or brown rice instead of long-grain white rice. Each type brings its own flavor and texture, making your dish uniquely satisfying.
  • Dairy-Free Delight: Replace whole milk and cheeses with almond milk and nutritional yeast. Enjoy the same creamy consistency and flavor without the dairy.
  • Flavor Boosts: Stir in fresh herbs like basil or oregano to really enhance the flavor profile. They add a garden-fresh touch that elevates the dish beautifully.
  • Creamy Dream: For an ultra-creamy sauce, add a dollop of cream cheese while whisking the sauce together. This will give your dish a stunning richness that’s simply irresistible!
  • Add Greens: Incorporate spinach or kale into your dish for added nutrition and color. Sauté them briefly before mixing into your creamy sauce—healthy and delicious!
  • Lemon Zest: Fresh lemon zest or juice can brighten the dish. Just a touch can balance the richness and add a burst of flavor that will have everyone reaching for seconds!

With these variations, you can keep your dinners exciting and tailored to your family's tastes! And if you're still looking for inspiration, check out my One Pot Rice or Chicken Dumplings Cozy recipes to satisfy your comfort food cravings!

Expert Tips for Creamy Smothered Chicken and Rice

  • Rest the Chicken: Allowing the chicken to rest for a few minutes post-cooking enhances juiciness, preventing it from drying out during cooking.
  • Adjust Sauce Thickness: If you find your creamy sauce too thick, simply add a splash of chicken broth or milk while stirring to reach your desired consistency.
  • Veggie Boost: Incorporate sautéed vegetables like spinach or mushrooms into your Creamy Smothered Chicken and Rice for added nutrition and flavor.
  • Even Cooking: Ensure chicken breasts are similar in size for even cooking; thicker pieces may require additional cooking time to ensure tenderness.
  • Flavor Variations: Experiment with adding spices like cayenne pepper or chili flakes to give your dish a delightful kick while personalizing the flavors to suit your family's taste.

Creamy Smothered Chicken and Rice Recipe FAQs

How do I know if my chicken is ripe for use?
Absolutely! When selecting chicken breasts, look for a bright pink color and no dark spots or off-putting odors. Fresh chicken should feel moist but not slimy, ensuring optimal tenderness in your dish. For the best results, make sure to purchase chicken from a reputable source.

What is the best way to store leftover Creamy Smothered Chicken and Rice?
You can store your Creamy Smothered Chicken and Rice in an airtight container in the fridge for up to 3 days. This helps maintain its creamy texture and flavor. Just ensure they are completely cooled before sealing to avoid moisture buildup that could affect the dish's quality.

Can I freeze Creamy Smothered Chicken and Rice?
Absolutely! To freeze, transfer the cooled dish into a freezer-safe container, leaving some space at the top for expansion, and seal tightly. It can be frozen for up to 2 months. When ready to enjoy, thaw it overnight in the fridge and reheat gently on the stovetop, adding a splash of chicken broth or milk for creaminess.

What should I do if my sauce is too thick?
If you find your creamy sauce has thickened too much, no need to worry! Start by adding a splash of chicken broth or whole milk while stirring over low heat. Continue to stir until the sauce reaches your desired consistency. This way, you won’t lose all that delicious flavor you’ve worked so hard to create!

Is this recipe suitable for someone with dairy allergies?
Yes! For a dairy-free version of Creamy Smothered Chicken and Rice, simply substitute the whole milk with almond or oat milk, and skip the cheese or use nutritional yeast for a cheesy flavor. Always double-check labels while shopping to ensure the products meet your dietary needs.

Can I add vegetables to the dish?
Very much so! I often recommend adding sautéed vegetables like spinach, mushrooms, or bell peppers to amp up both nutrition and taste. Simply sauté the veggies in the skillet before adding the sauce, allowing their flavors to meld beautifully with the chicken and rice for a comforting, veggie-packed meal.

Creamy Smothered Chicken and Rice

Creamy Smothered Chicken and Rice for Ultimate Comfort Tonight

Creamy Smothered Chicken and Rice is a comforting dish combining succulent chicken with a rich sauce over fluffy rice.
Print Recipe Pin Recipe
Prep Time 10 minutes mins
Cook Time 30 minutes mins
Total Time 40 minutes mins
Servings: 4 servings
Course: Dinner
Cuisine: American
Calories: 580
Ingredients Equipment Method Nutrition Notes

Ingredients
  

For the Chicken
  • 4 pieces Boneless, skinless chicken breasts
For the Seasoning
  • 1 teaspoon Garlic Powder
  • 1 teaspoon Onion Powder
  • 1 teaspoon Smoked Paprika
  • 1 teaspoon Salt
  • 1 teaspoon Black Pepper
For Cooking
  • 2 tablespoons Olive Oil Can substitute with vegetable or canola oil.
For the Rice
  • 1 cup Long-Grain White Rice Can substitute with brown rice.
  • 1 cup Chicken Broth Vegetable broth can be used for vegetarian option.
For the Sauce
  • 3 tablespoons Unsalted Butter Margarine can substitute.
  • 3 tablespoons All-Purpose Flour Gluten-free flour can be used.
  • 1 cup Whole Milk Almond or oat milk are alternatives.
  • 1 cup Grated Cheddar Cheese Nutritional yeast can be a non-dairy alternative.
  • ½ cup Grated Parmesan Cheese
  • 1 teaspoon Thyme Basil or oregano can be used.
For Garnish
  • 2 tablespoons Fresh Parsley Can be omitted if unavailable.

Equipment

  • Skillet
  • Saucepan
  • Whisk
  • measuring cups
  • Measuring Spoons

Method
 

Step-by-Step Instructions
  1. Season the chicken breasts with garlic powder, onion powder, smoked paprika, salt, and black pepper. Heat olive oil in a skillet over medium-high heat and sear the chicken for 4-5 minutes on each side until golden brown. Remove from skillet and set aside.
  2. In a saucepan, bring chicken broth and a pinch of salt to a boil. Add long-grain white rice, cover, reduce heat, and let simmer for 15-18 minutes until tender.
  3. Melt butter in the same skillet, whisk in flour, and cook until light golden. Gradually stir in milk and chicken broth, whisking until the mixture thickens, about 3-4 minutes.
  4. Reduce heat to low and stir in cheddar and parmesan cheeses until melted. Add thyme and stir until well combined.
  5. Return the chicken to the skillet and coat with the sauce. Simmer for 10 minutes to meld flavors and ensure chicken is heated through.
  6. Serve the chicken over a generous helping of rice and ladle extra sauce over the top. Garnish with fresh parsley if desired.

Nutrition

Serving: 1servingCalories: 580kcalCarbohydrates: 45gProtein: 37gFat: 25gSaturated Fat: 12gPolyunsaturated Fat: 2gMonounsaturated Fat: 8gCholesterol: 150mgSodium: 900mgPotassium: 600mgFiber: 1gSugar: 3gVitamin A: 600IUVitamin C: 2mgCalcium: 250mgIron: 2mg

Notes

Let chicken rest after cooking to enhance juiciness. Adjust sauce thickness by adding broth or milk. Incorporate sautéed vegetables for added nutrition. Ensure even cooking by using similarly sized chicken breasts. Experiment with spices for flavor variations.

Tried this recipe?

Let us know how it was!

Best Oven Baked Meatballs – Juicy, Easy, Family-Favorite Treats

May 1, 2026 by Grace Snow Leave a Comment

As the oven hums and fills the kitchen with warmth, the anticipation builds—could these possibly be the Best Oven Baked Meatballs? This recipe is a beloved staple in my home, blending juicy flavors with an easy approach that’s perfect for weeknight dinners. Not only do these meatballs come together without a hassle, but they’re family-friendly and versatile enough to shine in any meal, whether paired with pasta, stuffed in a sub, or savored as appetizers at a gathering. There's something incredibly satisfying about knowing you're serving up something homemade without spending all day in the kitchen. Ready to discover the secret to this comforting dish that the whole family will love? Let’s dive into the details!

Why Are These Meatballs So Special?

Juicy, Tender Perfection: The secret lies in the combination of quality ground beef and moist ingredients that create a melt-in-your-mouth texture.

Family-Favorite Appeal: These meatballs bring everyone to the table, pleasing both kids and adults alike. They’re perfect for quick weeknight meals or a cozy family gathering.

Easy to Make: With just a few simple steps and ingredients, you can have a batch of delicious oven-baked meatballs ready in no time.

Versatile Delight: Enjoy them with spaghetti, as meatball subs, or even as a party appetizer. The possibilities are endless! If you're looking for a unique twist, check out these Matcha Baked Doughnuts for dessert.

Meal Prep Champion: Make a big batch and store extras in the fridge or freezer for a convenient go-to meal. The flavor only gets better with time!

Best Oven Baked Meatballs Ingredients

• To create the perfect meatballs, gather these mouthwatering basics:

For the Meatballs

  • Ground Beef – Provides a rich, meaty base; substitute with ground turkey or chicken for a leaner option.
  • Breadcrumbs – Adds texture and helps bind the meatballs; opt for panko for extra crunch or gluten-free breadcrumbs for a gluten-free option.
  • Parmesan Cheese – Enhances flavor with salty depth; can be substituted with Pecorino Romano for a sharper taste.
  • Milk – Keeps meatballs moist; use almond milk or oat milk for a dairy-free alternative.
  • Egg – Acts as a binder to hold the meat together; a flax egg can be used for a vegan alternative.
  • Garlic – Adds aromatic flavor; you can substitute garlic powder if fresh isn't available.

Enjoy crafting your Best Oven Baked Meatballs with these simple yet essential ingredients!

Step‑by‑Step Instructions for Best Oven Baked Meatballs

Step 1: Preheat the Oven
Begin your journey to the Best Oven Baked Meatballs by preheating your oven to 400°F (200°C). While the oven warms, grab a baking sheet and line it with parchment paper. This ensures easy cleanup and prevents the meatballs from sticking. Once your oven reaches the desired temperature, the aroma of homemade goodness will soon fill your kitchen.

Step 2: Prepare the Breadcrumb Mixture
In a mixing bowl, combine the breadcrumbs with milk, allowing the mixture to sit for about 5 minutes. This soaking process helps the breadcrumbs absorb moisture, ensuring your meatballs remain tender and juicy. After a brief pause, you’ll see that the breadcrumbs have softened, ready to blend seamlessly with the other ingredients.

Step 3: Combine the Ingredients
Once the breadcrumb mixture is ready, add the ground beef, Parmesan cheese, egg, minced garlic, and your choice of seasonings into the bowl. Mix gently with your hands or a spoon until just combined; be careful not to overmix, which could make the meatballs tough. You want all the flavors to meld harmoniously while retaining a light texture.

Step 4: Form the Meatballs
Now it’s time to shape those delightful meatballs! Wet your hands slightly to prevent sticking, then scoop out portions of the mixture and roll them into balls about 1 to 1.5 inches in diameter. Carefully place each meatball onto the prepared baking sheet, ensuring they are evenly spaced. This allows for optimal heat circulation, leading to perfectly cooked meatballs.

Step 5: Bake to Perfection
Slide the baking sheet into your preheated oven and bake the meatballs for approximately 20 minutes. Watch for a beautiful golden-brown color to develop on the outside, which signals they're ready. To ensure perfect doneness, use a meat thermometer to check that the internal temperature has reached 165°F (74°C).

Step 6: Rest Before Serving
Once baked, remove the meatballs from the oven and allow them to rest for about 5 minutes. This resting period is essential for letting the juices redistribute, ensuring that your Best Oven Baked Meatballs are as juicy and tender as possible when served. After this wait, they’re ready to be enjoyed with pasta, on a sub, or as a tempting appetizer!

Storage Tips for Best Oven Baked Meatballs

  • Fridge: Store leftover cooked meatballs in an airtight container for up to 4 days. This keeps them fresh and ready for quick meals throughout the week.

  • Freezer: For longer storage, freeze the meatballs (cooked or uncooked) in a single layer on a baking sheet. Once frozen, transfer to a freezer bag for up to 3 months.

  • Reheating: When ready to enjoy, reheat cooked meatballs in the oven at 350°F (175°C) for about 15 minutes or until warmed through. You can also microwave them for a quick meal, adding a splash of water to keep them moist.

  • Serving: Consider pairing them with your favorite sauce for a delightful meal. The flavors of the Best Oven Baked Meatballs develop even further after resting, making them perfect for any last-minute dinner plan!

What to Serve With Best Oven Baked Meatballs?

Transform your meal into a delightful feast by pairing these juicy meatballs with savory sides and delicious drinks!

  • Spaghetti with Marinara: Classic choice that beautifully complements the meatballs’ rich flavors while providing a hearty, comforting texture.

  • Garlic Bread: Crispy on the outside and soft on the inside, garlic bread brings a wonderful crunch and aromatic flavor to every bite. Serve it with marinara for dipping!

  • Creamy Mashed Potatoes: Smooth and buttery, these mashed potatoes add a luxurious feel to the meal, softening the meatballs' robust taste.

  • Fresh Green Salad: A vibrant mix of greens with a zesty vinaigrette brightens up the plate, balancing the meatballs' savory depth. It’s a refreshing contrast everyone will enjoy!

  • Roasted Vegetables: Seasonal veggies roasted to perfection add a touch of sweetness and earthiness, enhancing the overall flavors of your dinner table.

  • Homemade Coleslaw: This crunchy, tangy side dish provides a delightful crunch that pairs perfectly with the juicy meatballs, adding a refreshing dimension to your meal.

  • Cheesy Garlic Rice: Fluffy rice infused with garlic and cheese brings a wonderful creaminess, making each bite a comforting indulgence.

  • Fruit Salad: A light dessert option that provides a natural sweetness to cleanse the palate after enjoying hearty meatballs.

  • Red Wine: A glass of bold red wine enhances the flavors of the meatballs, creating a cozy and indulgent dining experience.

  • Chocolate Brownies: End on a sweet note with fudgy brownies for dessert. Their rich chocolate flavor is a perfect way to conclude a comforting meal!

Best Oven Baked Meatballs Customizations

Feel free to make these meatballs your own with a few simple tweaks that can elevate their flavor and cater to your preferences!

  • Dairy-Free: Swap out regular milk with almond or oat milk to keep your meatballs moist without any dairy.

  • Lean Alternative: Use ground turkey or chicken instead of beef for a lighter meal option. These meats can be just as juicy and flavorful.

  • Breadcrumb Options: Experiment with panko for extra crunch or gluten-free breadcrumbs if you need to cater to dietary restrictions.

  • Herb-Infused: Add freshly chopped parsley, thyme, or basil into the mixture to brighten the overall flavor and introduce a delightful aromatic element.

  • Zesty Variants: Mix in some red pepper flakes or chopped jalapeños for a spicy kick that warms the soul. These extra touches can make your meal truly special.

  • Sauce Innovations: Besides classic marinara, try BBQ or teriyaki sauce to give a new twist to your serving style. Each sauce brings out different flavors, making your meatballs shine in new ways.

  • Mini Meatballs: Consider rolling smaller 1-inch meatballs for a fun appetizer option. They’re perfect for dipping and can be a great surprise at gatherings!

  • Flavorful Add-Ins: Finely dice and mix in sautéed onions or mushrooms for added moisture and an extra layer of savory indulgence.

There's no limit to the delicious possibilities! For a delightful dessert to follow your tasty meatballs, why not prepare some Matcha Baked Doughnuts? They make a sweet ending to a comforting meal.

Expert Tips for Best Oven Baked Meatballs

  • Mix Gently: Avoid overmixing your meatball mixture to ensure they remain tender. Overmixing can lead to a tough texture, robbing your meatballs of that juicy goodness.

  • Temperature Matters: Use a meat thermometer to check for doneness. Your Best Oven Baked Meatballs should reach an internal temperature of 165°F (74°C) for safe and delicious eating.

  • Let Them Rest: Allow the cooked meatballs to rest for a few minutes before serving. This helps the juices redistribute, enhancing their juiciness and flavor.

  • Space is Key: When placing the meatballs on the baking sheet, ensure they are evenly spaced. This promotes even cooking and prevents them from steaming.

  • Flavor Boost: Feel free to add herbs or spices to the mixture, such as oregano or basil, to elevate the taste of your meatballs and make them even more scrumptious!

Make Ahead Options

These Best Oven Baked Meatballs are perfect for meal prep enthusiasts! You can mix and form the meatballs and refrigerate them for up to 24 hours before baking, allowing the flavors to meld beautifully. Make sure to cover them tightly with plastic wrap or place them in an airtight container to maintain their quality. Alternatively, you can freeze uncooked meatballs for up to 3 months; just lay them flat on a baking sheet to freeze individually before transferring to a freezer bag. When you’re ready to enjoy, bake them straight from the fridge for about 25 minutes, or from frozen for 30–35 minutes, ensuring they reach an internal temperature of 165°F (74°C). With these make-ahead options, you'll have comforting, homemade meals ready with minimal effort!

Best Oven Baked Meatballs Recipe FAQs

How should I select ripe ingredients for my meatballs?
Absolutely! When picking ground beef, opt for a fresh batch with a bright red color and minimal brown spots, indicating it’s fresh. If you choose to use breadcrumbs, ensuring they are dry will help maintain the right texture in your meatballs. For cheese, go with a block of Parmesan instead of pre-grated, as it tends to have better flavor and quality.

What’s the best way to store leftover meatballs, and how long will they last?
Very! Store leftover cooked meatballs in an airtight container in the refrigerator for up to 4 days. Ensure they’re cooled completely before storing to maintain freshness. If you’d like to keep them longer, place them in a freezer bag and freeze for up to 3 months. Just remember to label your bags with the date to keep track of freshness!

Can I freeze the Best Oven Baked Meatballs? If so, how?
Of course! To freeze, lay the uncooked meatballs on a baking sheet lined with parchment paper, ensuring they’re spaced apart. Freeze them for about 1-2 hours until they are firm, then transfer the frozen meatballs into a freezer bag. Squeeze out as much air as possible before sealing to prevent freezer burn. They can be cooked directly from the freezer; just add an extra 5-10 minutes to the baking time.

What if my meatballs turn out dry or tough?
No worries! If your meatballs are dry, it may be due to overmixing or cooking them too long. Be sure to mix just until ingredients are combined and monitor their internal temperature closely, aiming for 165°F (74°C). If they happen to be tough, I recommend making sure you’re adding enough moisture through ingredients like milk and ensuring not to pack them too tightly when forming. Keeping these factors in mind should help create perfectly flavorful, tender meatballs every time!

Are there any dietary considerations with these meatballs for allergies or pets?
Absolutely! Since the Best Oven Baked Meatballs contain common allergens like dairy (Parmesan cheese) and eggs, those with lactose intolerance or egg allergies should consider substituting with dairy-free cheese and a flax egg respectively. As for pets, while meatballs can be a delicious treat for dogs, please ensure they don’t contain any ingredients harmful to them, such as onions or excessive garlic.

Can I add veggies or other ingredients for extra flavor?
Definitely! Adding finely chopped onions, bell peppers, or herbs like parsley or basil can enhance the flavor profile of your meatballs. Just be mindful not to add too much moisture, as this can affect the texture. If you're experimenting with flavors, feel free to infuse the meat mixture with other spices or sauces that your family enjoys!

Best Oven Baked Meatballs

Best Oven Baked Meatballs – Juicy, Easy, Family-Favorite Treats

Discover the Best Oven Baked Meatballs recipe, a juicy, easy, and family-favorite treat perfect for any meal.
Print Recipe Pin Recipe
Prep Time 10 minutes mins
Cook Time 20 minutes mins
Resting Time 5 minutes mins
Total Time 35 minutes mins
Servings: 4 meatballs
Course: Dinner
Cuisine: American
Calories: 150
Ingredients Equipment Method Nutrition Notes

Ingredients
  

For the Meatballs
  • 1 pound Ground Beef Can substitute with ground turkey or chicken.
  • 1 cup Breadcrumbs Panko adds extra crunch.
  • 1/2 cup Parmesan Cheese Can substitute with Pecorino Romano.
  • 1/4 cup Milk Use almond milk or oat milk for dairy-free.
  • 1 large Egg A flax egg can be used for a vegan alternative.
  • 2 cloves Garlic Can substitute with garlic powder.

Equipment

  • Oven
  • Baking Sheet
  • Mixing Bowl
  • Parchment Paper

Method
 

Step-by-Step Instructions
  1. Preheat your oven to 400°F (200°C) and line a baking sheet with parchment paper.
  2. Combine breadcrumbs with milk in a mixing bowl and let sit for about 5 minutes.
  3. Add ground beef, Parmesan cheese, egg, and minced garlic to the breadcrumb mixture and mix gently.
  4. Wet your hands slightly, scoop and shape the mixture into 1 to 1.5 inch meatballs and place on the baking sheet.
  5. Bake the meatballs in the preheated oven for approximately 20 minutes, checking for a golden-brown color.
  6. Remove from oven and let the meatballs rest for about 5 minutes before serving.

Nutrition

Serving: 1meatballCalories: 150kcalCarbohydrates: 10gProtein: 12gFat: 8gSaturated Fat: 3gPolyunsaturated Fat: 1gMonounsaturated Fat: 3gCholesterol: 50mgSodium: 300mgPotassium: 200mgFiber: 1gVitamin A: 150IUCalcium: 100mgIron: 2mg

Notes

These meatballs can be enjoyed in a variety of dishes, including pasta or meatball subs, and make a great appetizer.

Tried this recipe?

Let us know how it was!

Crispy Chicken Bacon Ranch Wrap: Your New Favorite Comfort Bite

May 1, 2026 by Grace Snow Leave a Comment

The first sizzling sound of chicken hitting the hot oil transports me back to my kitchen's joyful chaos. Today, I'm excited to share my recipe for a Crispy Chicken Bacon Ranch Wrap that perfectly balances comfort and flavor. This wrap brings together crunchy chicken strips, smoky bacon, and fresh veggies, all embraced by a warm tortilla, making it an ideal choice for lunch or a quick dinner. Not only is this dish customizable—swap in grilled chicken or even crispy tofu for a vegetarian option—but it’s also beginner-friendly, taking just about 55 minutes to whip up! Whether you’re feeding a crowd or enjoying a cozy meal at home, this wrap is sure to become a favorite. Curious about how to create this delicious harmony of flavors? Let’s dive into the recipe!

Why is this wrap your new favorite?

Crispy Texture: The combination of panko breadcrumbs and frying delivers a satisfyingly crunchy bite that will have you reaching for more!

Flavor Explosion: Juicy chicken, savory bacon, fresh veggies, and creamy ranch create a deliciously complex flavor profile that makes each bite a delight.

Customizable: This wrap is adaptable to your taste—try it with grilled chicken or even crispy tofu for a fun vegetarian twist! Don’t forget, if you’re in the mood for more chicken options, check out our Honey Garlic Chicken Thighs or Spatchcock Chicken Flavor for delicious alternatives.

Quick Prep: With a cooking time of around 55 minutes, you can easily whip this up for a weekday meal or a weekend gathering that will impress your guests.

Crowd-Pleaser: Perfect for casual family dinners or gatherings with friends, this wrap will surely satisfy all in attendance!

Crispy Chicken Bacon Ranch Wrap Ingredients

For the Chicken
• Boneless, Skinless Chicken Breasts – A juicy foundation protein; can substitute with chicken thighs for juiciness.
• All-Purpose Flour – Essential for dredging the chicken; gluten-free flour is a good alternative.
• Buttermilk – Helps tenderize the chicken; substitute with milk mixed with vinegar or lemon juice.
• Garlic Powder – Adds aromatic flavor depth; fresh garlic can be used for a stronger taste.
• Onion Powder – Rounds out flavors; optional if you prefer a simpler profile.
• Paprika – Gives color and warmth; try smoked paprika for a richer flavor.
• Salt and Black Pepper – Essential for seasoning; adjust to your taste preference.
• Panko Breadcrumbs – Creates a super crispy coating; regular breadcrumbs can be used if needed.
• Vegetable Oil – Used for frying; ensure it’s hot enough for optimal crispiness.

For the Wrap
• Flour Tortillas – The perfect vessel for all fillings; corn tortillas are a gluten-free option.
• Shredded Lettuce – Adds freshness and crunch; substitute with spinach or kale if desired.
• Diced Tomatoes – Offers juiciness and color; swap with avocado or other fresh veggies.
• Shredded Cheddar Cheese – Melts beautifully; feel free to use any cheese you like.
• Ranch Dressing – The creamy tie-in for all flavors; opt for a yogurt-based dressing for a lighter twist.

This Crispy Chicken Bacon Ranch Wrap is not just a meal; it's an experience laden with delightful contrasts and customizable options!

Step‑by‑Step Instructions for Crispy Chicken Bacon Ranch Wrap

Step 1: Prepare Chicken
Begin by slicing the boneless, skinless chicken breasts into strips about 1 inch wide. In a bowl, season the chicken strips with garlic powder, onion powder, paprika, salt, and black pepper, ensuring each piece is evenly coated. Allow the seasoned chicken to sit for 10 minutes, allowing the flavors to meld while you set up the dredging station.

Step 2: Set Dredging Station
Follow up by arranging your dredging station with three shallow dishes. Fill one with all-purpose flour, the second with buttermilk, and the third with panko breadcrumbs. This setup streamlines the coating process for your Crispy Chicken Bacon Ranch Wrap, keeping everything organized and making it easier to coat the chicken to achieve that perfect crunchy texture.

Step 3: Coat Chicken
Now it’s time to coat the chicken strips. Take each seasoned strip and dredge it first in the flour, shaking off any excess. Then, dip it into the buttermilk, letting any drips fall back into the dish before finally rolling it in the panko breadcrumbs. This three-step coating will create a beautifully crispy exterior when fried, ensuring each wrap delivers the crunch you crave.

Step 4: Fry Chicken
In a large skillet, heat vegetable oil over medium-high heat until it reaches about 350°F. Carefully add the coated chicken strips in batches, avoiding overcrowding the pan. Fry for 5-7 minutes or until the strips are golden brown and crispy, flipping them halfway through for even cooking. Remove the cooked chicken and let it drain on paper towels to absorb any excess oil.

Step 5: Cook Bacon
While the chicken is frying, take a separate pan and cook the bacon over medium heat until it's crispy, about 6-8 minutes. Once cooked, transfer the bacon to a plate lined with paper towels to drain and cool slightly. Crumble the crispy bacon into bite-sized pieces that will add that delicious smoky flavor to your Crispy Chicken Bacon Ranch Wrap.

Step 6: Assemble Wrap
To create your wrap, start by spreading a generous layer of ranch dressing over each flour tortilla. Layer with shredded lettuce, diced tomatoes, shredded cheddar cheese, and the crispy chicken strips. Finally, sprinkle the crumbled bacon on top, ensuring you fill the wrap with vibrant flavors and textures that balance beautifully together.

Step 7: Roll Wrap
Begin rolling the tortilla by folding in the sides and then rolling tightly from the bottom up to secure all the fillings inside. It’s crucial to roll tightly but gently so that all of your delicious ingredients are held snugly within the tortilla. Your Crispy Chicken Bacon Ranch Wrap is taking shape beautifully!

Step 8: Slice and Serve
Once your wraps are rolled, carefully cut each one in half at an angle to expose the colorful fillings inside. Arrange them on a plate and serve warm, perhaps with some extra ranch dressing on the side for dipping. You’re all set to enjoy a delightful meal that’s bursting with flavors and textures!

Crispy Chicken Bacon Ranch Wrap Variations

Feel free to put your own spin on this delightful wrap with these easy swaps and adaptations!

  • Grilled Chicken: Swap out fried chicken for marinated grilled chicken for a lighter, healthier option. Pair with a zesty herb marinade for added freshness.

  • Vegetarian Delight: Use crispy fried tofu or tempeh instead of chicken for a delicious vegetarian twist that still satisfies those cravings.

  • Spicy Kick: Add jalapeños or a sprinkle of red pepper flakes for a spicy dimension that can elevate your Crispy Chicken Bacon Ranch Wrap to new flavor heights.

  • Herbed Ranch: Mix fresh herbs like dill or parsley into your ranch dressing for a delightful flavor boost that can enhance the overall taste profile.

  • Different Cheeses: Experiment with cheeses such as pepper jack for a spicy kick, or feta for a tangy surprise that complements the other flavors beautifully.

  • Shell Swap: Use lettuce leaves instead of tortillas for a low-carb option that’s just as tasty, allowing the flavors to shine through in a fresh, crisp way.

  • Sautéed Veggies: Add sautéed bell peppers and onions for extra texture and sweetness, which can make each bite even more satisfying.

  • Crispy Potato Addition: For an indulgent twist, layer in some crispy potato strips or fries for extra crunch and a hearty touch!

With these creative variations, your Crispy Chicken Bacon Ranch Wrap will never feel boring. Grab your family’s favorite ingredients and enjoy customizing your meal! And if you're looking for more chicken inspiration, check out our Honey Bbq Chicken or delve into the bold flavors of Chicken Adobo Again!

How to Store and Freeze Crispy Chicken Bacon Ranch Wrap

Refrigerate: Store fully assembled wraps tightly wrapped in plastic wrap or in an airtight container for up to 2 days to keep the flavors fresh.

Freeze: For longer storage, freeze individual unassembled components (chicken, bacon, and fresh veggies) separately in airtight bags for up to 3 months. Avoid assembling wraps before freezing for best results.

Reheat: When ready to enjoy, bake the chicken strips in a preheated oven at 350°F for 10-15 minutes until crispy again. Assemble with fresh ingredients before serving to maintain texture and taste.

Tip: Always let any cooked chicken cool completely before wrapping or storing to ensure it doesn’t create excess moisture, which can affect the quality of your Crispy Chicken Bacon Ranch Wrap.

Make Ahead Options

These Crispy Chicken Bacon Ranch Wraps are a fantastic choice for busy home cooks looking to save time! You can prepare the chicken strips by seasoning and dredging them up to 24 hours in advance before frying. Simply coat the chicken and store it in an airtight container in the refrigerator. You can also chop the veggies and crumble the bacon up to 3 days ahead of time, keeping them fresh in separate containers. When you're ready to serve, fry the chicken strips and assemble the wraps with all your prepped ingredients for a hassle-free meal. This way, you’ll maintain quality while getting dinner on the table in no time!

What to Serve with Crispy Chicken Bacon Ranch Wrap

Nothing beats a satisfying meal after making a crispy chicken wrap filled with flavor; let’s elevate your dining experience!

  • Sweet Potato Fries: The natural sweetness and crispy texture of these fries beautifully complement the savory flavors in your wrap.

  • Coleslaw: A crunchy slaw adds a fresh and tangy bite, balancing the richness of the chicken and bacon perfectly.

  • Pickled Veggies: Their acidity cuts through the creaminess of the ranch sauce, adding a zesty twist that enhances every bite.

  • Garden Salad: A light salad with mixed greens, cherry tomatoes, and a vinaigrette dressing provides a refreshing contrast to the warm wrap.

  • Corn on the Cob: Grilled or boiled, the sweetness of corn pairs nicely with the hearty elements, making for a delightful summer meal.

  • Fruit Salad: A bowl of mixed fresh fruits adds a sweet and juicy element, making it a great, refreshing side during warm months.

  • Iced Tea: A glass of sweetened or unsweetened iced tea is a classic choice to accompany your savory wrap, offering a refreshing balance.

  • Chocolate Chip Cookies: For a sweet finish, a warm chocolate chip cookie brings a comforting end to your meal, making it truly complete.

Expert Tips for Crispy Chicken Bacon Ranch Wrap

Preparation Is Key: Ensure you set up your dredging station before seasoning the chicken—this keeps the process smooth and efficient.

Oil Temperature Matters: Use a thermometer to maintain oil at 350°F when frying; too cool and the chicken will absorb oil, leading to sogginess.

Don’t Rush the Coating: Make sure each chicken strip is completely coated in flour, buttermilk, and panko. This triple coating is essential for that signature crispy texture in your Crispy Chicken Bacon Ranch Wrap.

Leftover Handling: If you're saving leftovers, store the chicken and toppings separately. Reheat chicken in the oven to maintain crispiness rather than microwaving.

Customize Wisely: Feel free to adapt ingredients for dietary needs—like using turkey bacon or gluten-free tortillas. Just remember to keep the base flavors balanced for the best wrap experience!

Crispy Chicken Bacon Ranch Wrap Recipe FAQs

What type of chicken should I use for the wrap?
Absolutely! Boneless, skinless chicken breasts are ideal for this crispy delight. However, if you prefer a juicier alternative, chicken thighs work beautifully too. The key is ensuring they are cut into even strips for consistent cooking.

How should I store leftover wraps?
For the best preservation of flavors, wrap any fully assembled wraps tightly in plastic wrap or store them in an airtight container in the fridge. They’ll stay fresh for about 2 days. Remember, to keep that delicious crunch, it’s best not to heat them in the microwave.

Can I freeze the components of this wrap?
Yes! For longer storage, freeze the chicken strips and other fillings separately. Place them in airtight bags, and they can last up to 3 months. Remember not to assemble the wraps before freezing—this keeps the textures perfect! When you're ready to eat, simply reheat the chicken in the oven at 350°F for about 10-15 minutes, and then assemble with fresh ingredients.

What if my chicken coating isn’t crispy enough?
Very common—make sure your oil is hot enough! Using a thermometer, ensure the oil reaches about 350°F before frying. If the temperature is too low, the chicken will absorb oil and turn soggy. Also, ensure each piece is thoroughly coated in the flour, buttermilk, and panko; this three-step process is crucial for that ultimate crispiness.

Is there a vegetarian option for this wrap?
Definitely! For a vegetarian adaptation, consider using crispy fried tofu or tempeh instead of chicken. You can follow the same coating technique to achieve that satisfying crunch. Just remember to keep the ranch dressing or a yogurt-based alternative to tie all those vibrant flavors together!

What about storage for my pets?
As for pets, avoid sharing any part of this recipe with them, especially the bacon and ranch dressing, as they can be harmful to dogs and cats. Stick to pet-friendly snacks to keep your furry friends safe while you enjoy your Crispy Chicken Bacon Ranch Wrap!

Crispy Chicken Bacon Ranch Wrap

Crispy Chicken Bacon Ranch Wrap: Your New Favorite Comfort Bite

Delight in the Crispy Chicken Bacon Ranch Wrap, blending tender chicken, crisp bacon, and fresh veggies for a perfect comfort meal.
Print Recipe Pin Recipe
Prep Time 25 minutes mins
Cook Time 30 minutes mins
Total Time 55 minutes mins
Servings: 4 wraps
Course: Dinner
Cuisine: American
Calories: 450
Ingredients Equipment Method Nutrition Notes

Ingredients
  

For the Chicken
  • 2 pieces Boneless, Skinless Chicken Breasts Can substitute with chicken thighs
  • 1 cup All-Purpose Flour Gluten-free flour is a good alternative
  • 1 cup Buttermilk Substitute with milk mixed with vinegar or lemon juice
  • 1 teaspoon Garlic Powder Fresh garlic can be used for a stronger taste
  • 1 teaspoon Onion Powder Optional if you prefer a simpler profile
  • 1 teaspoon Paprika Try smoked paprika for a richer flavor
  • 1 teaspoon Salt Adjust to taste
  • 1 teaspoon Black Pepper Adjust to taste
  • 1 cup Panko Breadcrumbs Regular breadcrumbs can be used if needed
  • 2 cups Vegetable Oil Used for frying
For the Wrap
  • 4 pieces Flour Tortillas Corn tortillas are a gluten-free option
  • 2 cups Shredded Lettuce Substitute with spinach or kale if desired
  • 1 cup Diced Tomatoes Swap with avocado or other fresh veggies
  • 1 cup Shredded Cheddar Cheese Feel free to use any cheese you like
  • 1/2 cup Ranch Dressing Opt for a yogurt-based dressing for a lighter twist

Equipment

  • Large skillet
  • Shallow dishes for dredging

Method
 

Step-by-Step Instructions
  1. Prepare Chicken: Slice the boneless, skinless chicken breasts into strips about 1 inch wide. Season the chicken strips with garlic powder, onion powder, paprika, salt, and black pepper. Let the seasoned chicken sit for 10 minutes.
  2. Set Dredging Station: Arrange three shallow dishes with flour in one, buttermilk in the second, and panko breadcrumbs in the third.
  3. Coat Chicken: Dredge each seasoned chicken strip in flour, dip it in buttermilk, then roll it in panko breadcrumbs. Ensure each piece is well coated.
  4. Fry Chicken: Heat vegetable oil in a skillet to 350°F. Add coated chicken strips in batches and fry for 5-7 minutes until golden brown. Drain on paper towels.
  5. Cook Bacon: In a separate pan, cook the bacon over medium heat until crispy. Cool and crumble into bite-sized pieces.
  6. Assemble Wrap: Spread ranch dressing on tortillas. Layer with shredded lettuce, diced tomatoes, shredded cheddar cheese, crispy chicken strips, and crumbled bacon.
  7. Roll Wrap: Fold in the sides of the tortilla and roll tightly from the bottom to secure the fillings.
  8. Slice and Serve: Cut each wrap in half at an angle, arrange on a plate, and serve warm with extra ranch dressing for dipping.

Nutrition

Serving: 1wrapCalories: 450kcalCarbohydrates: 35gProtein: 25gFat: 25gSaturated Fat: 10gPolyunsaturated Fat: 3gMonounsaturated Fat: 7gCholesterol: 70mgSodium: 900mgPotassium: 600mgFiber: 3gSugar: 2gVitamin A: 2000IUVitamin C: 15mgCalcium: 250mgIron: 2mg

Notes

Ensure proper frying technique for optimal crispiness and customize ingredients to suit dietary needs.

Tried this recipe?

Let us know how it was!

Zesty Lemon Garlic Shrimp and Asparagus in 30 Minutes

May 1, 2026 by Grace Snow Leave a Comment

If you’ve ever found yourself craving something sweet yet refreshing, let me introduce you to my Easy No-Bake Cheesecake! This delightful dessert requires no oven, making it perfect for hot summer days when spending time by a hot stove is the last thing on your mind. With its creamy texture and customizable flavor variations—like strawberry or chocolate—this cheesecake is a guaranteed crowd-pleaser. Plus, it's gluten-free friendly for those avoiding wheat! It is easy to prepare and will impress your family and friends, whether you’re hosting a summer BBQ or a cozy dinner party. Ready to indulge in something that feels as good as it tastes? Let’s dive into this delectable recipe!

Why is this cheesecake a must-try?

Simplicity: This no-bake cheesecake is incredibly easy to whip up and requires no fancy equipment or baking skills.
Endless Variations: With options like strawberry, chocolate, or caramel, there’s a flavor for everyone—perfect for any occasion!
Crowd-Pleaser: Impress your family and friends with a dessert that screams indulgence but is a breeze to make.
Customizable Toppings: Add fresh fruits or a drizzle of chocolate for an extra touch of luxury. Want something else delicious and quick? Check out my Honey Garlic Chicken for a savory balance!
Light and Refreshing: Perfect for warm summer days, this cheesecake allows you to enjoy dessert without the heaviness of baked goods.
Gluten-Free Option: Easily adaptable for gluten-free diets, making it approachable for a wider audience.

Easy No-Bake Cheesecake Ingredients

For the Filling
• Cream Cheese – Provides rich flavor and creamy texture; soften before use for easier mixing.
• Sugar – Sweetens the cheesecake; can be adjusted to taste or replaced with a sugar substitute.
• Heavy Whipping Cream – Adds lightness and fluffiness; ensure it's cold for the best volume when whipped.
• Vanilla Extract – Enhances overall flavor; use pure vanilla for more depth.

For the Crust
• Graham Cracker Crumbs – Forms the crust base, providing crunch; can substitute with gluten-free crackers.
• Unsalted Butter – Binds crust ingredients together; melt before mixing with crumbs.

Optional Flavorings/Toppings
• Fresh Fruits – Strawberries or blueberries can add a fresh burst of flavor; ensure they are dry to prevent sogginess.
• Chocolate or Caramel Sauce – Drizzle for a rich finish; they complement the creamy cheesecake perfectly.

This easy no-bake cheesecake is not only super simple to create but also allows for a delightful twist with various toppings and flavors!

Step‑by‑Step Instructions for Easy No-Bake Cheesecake

Step 1: Prepare the Crust
In a mixing bowl, combine the graham cracker crumbs with melted unsalted butter, stirring until well mixed. Press this mixture evenly into the bottom of a 9-inch springform pan, creating a firm base. To enhance the crust’s flavor and texture, ensure it’s packed tightly. Now, place the pan in the refrigerator to chill while you prepare the cheesecake filling, letting it set for about 10 minutes.

Step 2: Mix the Filling
In a large mixing bowl, beat the softened cream cheese and granulated sugar together using an electric mixer until the mixture is smooth and creamy, about 2-3 minutes. Scrape down the sides of the bowl occasionally to ensure everything is well combined. Once smooth, add in pure vanilla extract and mix until fully integrated, resulting in a light and velvety cream cheese base for your no-bake cheesecake.

Step 3: Whip the Cream
In a separate, chilled bowl, pour in the heavy whipping cream. Using an electric mixer, whip the cream on medium-high speed until stiff peaks form, which should take about 4-5 minutes. This step is crucial, as the whipped cream will add a light and airy texture to your Easy No-Bake Cheesecake. Carefully fold the whipped cream into the cream cheese mixture using a spatula, ensuring you maintain that fluffy texture.

Step 4: Combine and Set
After folding, gently pour the cream cheese filling into the chilled crust, smoothing the top with a spatula for an even finish. Cover the cheesecake with plastic wrap and place it back in the refrigerator. Allow it to chill and set for at least 4 hours, or overnight, to achieve the perfect texture for your Easy No-Bake Cheesecake.

Step 5: Serve
Once chilled and set, carefully run a knife around the edges of the springform pan to loosen the cheesecake. Release the springform and remove the sides, revealing a beautifully set cheesecake. Top it with your favorite fresh fruits, chocolate, or caramel sauce before slicing into individual pieces to serve. Each slice promises a creamy delight ready to impress your friends and family!

No-Bake Cheesecake Variations

Feel free to explore these creative twists that will make your no-bake cheesecake uniquely delicious!

  • Fruit-Infused: Incorporate pureed fruits like strawberries or raspberries into the filling for a refreshing burst of flavor. This adds a beautiful color and a natural sweetness that will elevate your dessert!

  • Chocolate Delight: Stir in melted chocolate or cocoa powder into the filling for a rich chocolate version. You can also add chocolate shavings on top for an elegant touch.

  • Nutty Crunch: Add crushed nuts such as almonds or pecans to the crust for an extra layer of texture. This delightful crunch will contrast beautifully with the creamy filling.

  • Caramel Swirl: Drizzle homemade or store-bought caramel sauce into the filling just before setting in the refrigerator. The caramel adds a sweet, gooey surprise with every slice that’s simply irresistible!

  • Almond Twist: Substitute vanilla extract with almond extract for a delightful nutty flavor. Almond pairs beautifully with the creamy filling, giving it a unique twist.

  • Citrusy Zing: Add lemon or lime juice and zest to the filling for a refreshing citrus flavor. The bright acidity balances the richness of the cream for a well-rounded dessert.

  • Seasonal Spices: During the fall, consider adding cinnamon or pumpkin spice to create a cozy, autumn-inspired cheesecake. Just a pinch will transform the flavor profile!

  • Vegan Version: Swap cream cheese with a vegan cream cheese alternative and use coconut cream in place of heavy whipping cream for a plant-based twist. This way, everyone can enjoy the creamy decadence!

For more tasty treat options, you might enjoy these zesty Shrimp Tacos or dive into a comforting bowl of Asparagus Soup for a delightful meal balance!

How to Store and Freeze No-Bake Cheesecake

Refrigerator: Store the cheesecake in an airtight container for up to 5 days. This keeps it fresh while allowing the flavors to mellow beautifully.

Freezer: You can freeze the no-bake cheesecake for up to 2 months. Wrap it tightly in plastic wrap and then in aluminum foil to preserve its taste and texture.

Thawing: To serve a frozen cheesecake, thaw it overnight in the refrigerator before slicing. This helps maintain its creamy consistency without compromising on flavor.

Serving After Freezing: Ensure your chilled cheesecake is topped with fresh fruits or chocolate right before serving for an inviting touch that elevates each slice!

Make Ahead Options

These Easy No-Bake Cheesecakes are perfect for meal prep enthusiasts seeking a sweet treat without the hassle! You can prepare the crust and filling up to 24 hours in advance; simply store the crust in an airtight container and refrigerate the filling separately to maintain its creamy texture. When you're ready to serve, just pour the filling into the crust, smooth the top, and let it set in the fridge for at least 4 hours or overnight. For optimal quality, avoid adding fresh fruits or toppings until just before serving, preventing any moisture from making the crust soggy. Enjoy the convenience of having a delicious dessert ready to impress at a moment's notice!

Expert Tips for No-Bake Cheesecake

  • Chill Time Matters: Ensure you chill the cheesecake for at least 4 hours. Cutting it too early may result in a runny filling, so be patient!
  • Whip It Right: For the best light and airy texture, whip the heavy cream until stiff peaks form, and fold it gently into the cream cheese mixture.
  • Avoid Sogginess: If using fresh fruit as a topping, make sure it's dry to prevent excess moisture from affecting the cheesecake's texture.
  • Flavor Variations: Feel free to experiment with flavors! Adding cocoa powder or melted chocolate into the filling can create a decadent chocolate variation you’ll love.
  • Gluten-Free Friendly: If catering to gluten-free diets, swap out the graham cracker crumbs with gluten-free alternatives for a delicious crust everyone can enjoy.

What to Serve with Easy No-Bake Cheesecake

Prepare to tantalize your taste buds as you create the perfect meal to complement this heavenly dessert!

  • Refreshing Fruit Salad: A mix of seasonal fruits like strawberries, blueberries, and melons balances the richness of the cheesecake, adding a burst of freshness.
  • Rich Chocolate Drizzle: Pouring some warm chocolate sauce over each slice turns your cheesecake into a decadent experience that chocolate lovers will adore.
  • Crispy Biscotti: These crunchy cookies provide a delightful contrast in texture, perfect for dipping in a cup of coffee or tea after enjoying your cheesecake.
  • Sweet Whipped Cream: A dollop of freshly whipped cream brings an airy touch to every slice of cheesecake, making each bite feel indulgent and light.
  • Syrupy Caramel Sauce: Drizzling caramel adds a luscious sweetness that pairs beautifully with the creamy cheesecake, elevating the flavor profile instantly.

An amazing dessert deserves some equally delightful companions, so why not indulge a little? Create a spread that guests will remember!

Easy No-Bake Cheesecake Recipe FAQs

How do I choose ripe ingredients, especially for the toppings?
Absolutely! When selecting fruits for your cheesecake, look for vibrant colors and a firm yet slightly yielding texture. Strawberries should be deep red with their green tops still fresh, whereas blueberries should be plump and free from mold. If you're opting for bananas, choose ones that are ripe but not overly brown, as they can be too mushy.

How should I store the cheesecake, and how long does it last?
The no-bake cheesecake can be stored in an airtight container in the refrigerator for up to 5 days. Just remember to cover the cheesecake well to prevent it from absorbing any odors from the fridge. If you’re not planning to enjoy it soon, you can keep it in the freezer for up to 2 months. Thaw the cheesecake overnight in the refrigerator before serving for optimal taste and texture.

Can I freeze the cheesecake, and how do I do it properly?
Yes, you can freeze your no-bake cheesecake for future enjoyment! To do this, wrap the cheesecake tightly in plastic wrap, then cover it with aluminum foil to prevent freezer burn. This careful wrapping helps maintain its creamy texture. When you're ready to indulge, simply thaw it overnight in the refrigerator—it’ll be just as delicious as the day you made it!

What should I do if my cheesecake doesn’t set properly?
Very! If your cheesecake isn’t setting as it should, don’t worry; there are a few troubleshooting tips. First, make sure you’ve allowed enough chill time—at least 4 hours is ideal. If you’re after an even firmer texture next time, consider adding gelatine to your filling. Dissolve 1 tablespoon of gelatine in 3 tablespoons of water, then let it cool slightly before mixing it into the cream cheese filling. This will give your cheesecake that perfect firmness.

Are there any dietary considerations I should keep in mind?
Of course! If you have guests with allergies or dietary preferences, this no-bake cheesecake can easily cater to them. For a gluten-free option, substitute traditional graham cracker crumbs with gluten-free crackers. Additionally, if anyone is avoiding dairy, try using a dairy-free cream cheese alternative and coconut cream in place of heavy whipping cream. Always check labels, especially on sugar substitutes, to ensure they are compatible with different diets.

Can I customize the flavors of the no-bake cheesecake?
The more the merrier! Feel free to mix and match flavors to suit your taste buds. For a strawberry cheesecake, simply fold in fresh pureed strawberries into the cream cheese filling. For a chocolate version, mix in cocoa powder or some melted chocolate before folding in the whipped cream. Don’t hesitate to get creative—these little variations are what make this cheesecake a delightful experience!

Lemon Garlic Shrimp and Asparagus

Zesty Lemon Garlic Shrimp and Asparagus in 30 Minutes

This Lemon Garlic Shrimp and Asparagus recipe is a quick, refreshing dish perfect for any dinner.
Print Recipe Pin Recipe
Prep Time 10 minutes mins
Cook Time 20 minutes mins
Total Time 30 minutes mins
Servings: 4 servings
Course: Dinner
Cuisine: American
Calories: 300
Ingredients Equipment Method Nutrition Notes

Ingredients
  

For the Filling
  • 16 oz Cream Cheese soften before use
  • 3/4 cup Sugar adjust to taste
  • 2 cups Heavy Whipping Cream ensure cold
  • 1 tbsp Vanilla Extract use pure for depth
For the Crust
  • 1 cup Graham Cracker Crumbs or gluten-free crackers
  • 1/2 cup Unsalted Butter melt before mixing
Optional Flavorings/Toppings
  • 1 cup Fresh Fruits ensure dry for topping
  • 1/2 cup Chocolate or Caramel Sauce for drizzling

Equipment

  • Mixing Bowl
  • Electric mixer
  • Spatula
  • Springform pan
  • Refrigerator

Method
 

Step-by-Step Instructions
  1. Prepare the crust by mixing graham cracker crumbs with melted butter, press into a springform pan and chill for 10 minutes.
  2. Mix the filling by beating cream cheese and sugar until smooth, then add vanilla.
  3. Whip the heavy cream until stiff peaks form and fold into cream cheese mixture.
  4. Combine cream cheese filling with crust, smooth top, cover, and refrigerate for at least 4 hours.
  5. Serve with fresh fruits or sauces when set.

Nutrition

Serving: 1sliceCalories: 300kcalCarbohydrates: 25gProtein: 4gFat: 22gSaturated Fat: 13gPolyunsaturated Fat: 1gMonounsaturated Fat: 9gCholesterol: 70mgSodium: 200mgPotassium: 100mgSugar: 18gVitamin A: 600IUVitamin C: 1mgCalcium: 50mgIron: 1mg

Notes

Chill the cheesecake for at least 4 hours to set properly.

Tried this recipe?

Let us know how it was!

Loaded Potato Taco Bowl: A Crispy Comfort Food Delight

May 1, 2026 by Grace Snow Leave a Comment

Have you ever had one of those evenings where the mere thought of fast food makes your stomach groan? That’s when I turn to my comforting High-Protein Loaded Potato Taco Bowl. Picture this: crispy roasted potatoes served as a hearty base, piled high with flavorful, seasoned meat, black beans, and a colorful array of fresh toppings. This recipe doesn't just come together in a snap; it’s also packed with about 38 grams of protein per serving, making it both satisfying and nutritious for your family dinner. Plus, it's endlessly customizable, inviting everyone to pile on their favorite toppings. Ready to transform your dinner routine into a fiesta of flavor? Let’s dive into this delicious creation!

Why Choose Loaded Potato Taco Bowls?

Flavorful Foundations: The base of crispy roasted potatoes gives these bowls a delightful crunch, making each bite satisfying and delicious.

Protein Power: With 38 grams of protein per serving, this recipe ensures a hearty meal that fuels your day.

Customizable Options: Whether you prefer ground beef, turkey, or extra beans, you can easily personalize your bowl to fit your tastes.

Family-Friendly Fun: Perfect for busy evenings, this dish will please both kids and adults alike, much like our Fish Taco Bowls or Taco Spaghetti Cheesy.

Meal Prep Magic: Ideal for cooking ahead, you can prepare components in advance for quick weeknight dinners, allowing you to skip the fast food and enjoy home-cooked goodness!

Loaded Potato Taco Bowl Ingredients

• Dive into these delicious flavors with this Loaded Potato Taco Bowl ingredient list!

For the Crispy Potatoes

  • Russet Potatoes – The key to a crunchy yet fluffy base; sweet potatoes can be used for a sweeter taste.
  • Olive Oil – Essential for achieving that perfect crispy texture during roasting.
  • Garlic Powder – Adds a rich depth of flavor to the potatoes.
  • Onion Powder – A subtle enhancer that rounds out the taste.
  • Smoked Paprika – Introduces a lovely smokiness to the roasted potatoes.
  • Salt and Black Pepper – Must-haves for seasoning and flavor boosts.

For the Protein Filling

  • Ground Beef or Turkey (93/7 recommended) – Your main protein choice; opt for turkey for a lighter version or beef for richer flavor.
  • Chili Powder – Provides warmth and a delightful kick to the meat mixture.
  • Cumin – A classic taco seasoning that enhances the flavor profile.
  • Red Onion – Adds sweetness and moisture, making the meat even tastier.

For Additional Texture and Nutrition

  • Black Beans – Increase protein and fiber in the dish; they also add a great texture.
  • Corn Kernels – Bring in a natural sweetness; fresh, canned, or frozen work perfectly.

For Topping

  • Shredded Cheddar Cheese – Melts beautifully over the meat and adds creaminess.
  • Cherry Tomatoes – Brighten up the bowl with freshness when served.
  • Avocado – Contributes creaminess and healthy fats.
  • Fresh Cilantro – A burst of fresh flavor that elevates the dish.
  • Lime Wedges – Essential for a splash of acidity and brightness.
  • Sour Cream – An optional topping that adds richness and indulgence.

Keep these ingredients handy to create your very own Loaded Potato Taco Bowl that keeps the fast food chains at bay!

Step‑by‑Step Instructions for Loaded Potato Taco Bowl

Step 1: Preheat and Prepare the Potatoes
Begin by preheating your oven to 425°F (220°C). While the oven heats up, wash and dice the russet potatoes into bite-sized cubes. Place them on a baking sheet, then drizzle with olive oil and sprinkle garlic powder, onion powder, smoked paprika, salt, and black pepper. Toss everything until the potatoes are evenly coated. Spread them out in a single layer for optimal crispiness.

Step 2: Roast the Potatoes
Once the oven is ready, let the potatoes roast for 30–35 minutes. Be sure to flip them halfway through the cooking time to ensure they achieve a golden-brown color and crispy edges. Keep an eye on them as they roast and look for that satisfying crunch, which is essential for the Loaded Potato Taco Bowl.

Step 3: Cook the Protein
While the potatoes are roasting, heat a skillet over medium heat and add your choice of ground beef or turkey. Cook for 7–8 minutes, breaking the meat apart as it cooks until it's browned and fully cooked through. If any fat renders, drain it off to keep the dish lighter and healthier.

Step 4: Season the Meat
Add chili powder, cumin, and chopped red onion to the skillet with the cooked meat. Continue to cook for another 5 minutes, stirring regularly until the onions soften and the spices meld beautifully with the meat. This seasoning step sets the stage for the flavor-packed base of your Loaded Potato Taco Bowl.

Step 5: Incorporate Beans and Corn
Stir in the black beans and corn kernels into the seasoned meat mixture, cooking for an additional 3–4 minutes. Ensure everything is heated through, giving it a good stir to combine the flavors. Taste and adjust seasoning as needed, making sure the filling is flavorful and delicious for your taco bowl.

Step 6: Assemble the Bowls
In a serving bowl, create a hearty layer with the crispy roasted potatoes as the base. Generously top them with the warm meat, bean, and corn mixture, allowing the warmth to slightly melt the shredded cheddar cheese on top. Let the cheese sit for about 30 seconds for that extra gooey indulgence.

Step 7: Add Fresh Toppings
Now it’s time to finish your Loaded Potato Taco Bowl! Top with halved cherry tomatoes, diced avocado, and fresh cilantro. Serve immediately with lime wedges on the side for a citrusy kick and a dollop of sour cream if desired. Enjoy the bright, fresh flavors that beautifully complement the hearty layers below.

Expert Tips for the Best Loaded Potato Taco Bowl

  • Crispier Potatoes: Spread diced potatoes in a single layer on the baking sheet to ensure they roast evenly and get perfectly crispy edges for your Loaded Potato Taco Bowl.

  • Flavor Boost: Don't be shy with the seasonings! Taste the meat mixture before serving to adjust spices, allowing you to create a flavor-packed filling that everyone will love.

  • Meal Prep Efficiently: For easy meal prep, store roasted potatoes and the meat filling separately in airtight containers. Reheat potatoes in the oven for a satisfying crisp rather than the microwave.

  • Protein Alternatives: If you're looking for lighter options, substitute ground turkey or chicken. You can also add extra black beans for a vegetarian protein boost without sacrificing taste.

  • Toppings Galore: Encourage creativity with toppings! Offer a variety of options like jalapeños, diced bell peppers, or different types of cheese to make each bowl personal and enjoyable for every family member.

Make Ahead Options

These Loaded Potato Taco Bowls are perfect for meal prep enthusiasts! You can roast your potatoes up to 24 hours in advance; just let them cool completely before transferring them to an airtight container in the refrigerator to maintain their crispiness. Additionally, you can prepare the meat mixture (with black beans and corn) and refrigerate it for up to 3 days. To finish, simply reheat the potatoes in the oven (instead of the microwave for optimal texture), warm the meat mixture on the stove, and assemble them in bowls with your favorite toppings right before serving. This makes weeknight dinners a breeze while ensuring everything tastes just as delicious!

Loaded Potato Taco Bowl Variations

Feel free to get creative with your Loaded Potato Taco Bowl! Each twist allows you to savor new flavors and textures.

  • Sweet Potato Swap: Substitute sweet potatoes for a naturally sweeter base that adds a lovely contrast to the savory toppings.

  • Lean Chicken Option: Use ground chicken instead of beef or turkey for a lighter, yet equally flavorful, filling. It’s an easy switch that doesn’t compromise taste.

  • Vegetarian Boost: Add an extra can of black beans or chickpeas for a hearty veggie alternative, supplying even more protein and fiber while keeping it meat-free.

  • Spicy Kick: Mix in diced jalapeños or a splash of hot sauce to the meat mixture for a spicy version that’ll liven up your taco bowl!

  • Cheesy Delight: Try different cheeses like pepper jack or crumbled queso fresco for a delightful flavor variation that melts beautifully over the toppings.

  • Layered Sides: Serve with a zesty Mexican street corn or a side of cilantro lime rice—both elevate your bowl and enhance the experience.

  • Guacamole Goodness: Top it off with a dollop of homemade guacamole for an extra layer of creaminess that pairs perfectly with the crunchy potatoes.

  • Herb Infusion: Experiment with fresh herbs like dill or mint in addition to cilantro for a unique take that refreshes the flavor profile of your Loaded Potato Taco Bowl.

Now that you have these variations at your fingertips, feel free to explore them during your next family dinner—just like our Acai Bowl Nutritious or Taco Bell Crunchwrap!

How to Store and Freeze Loaded Potato Taco Bowl

Fridge: Store the components separately in airtight containers for up to 4 days to maintain freshness and texture.

Freezer: For longer storage, freeze the roasted potatoes and meat mixture in separate freezer-safe bags for up to 3 months.

Reheating: When ready to enjoy, reheat the potatoes in the oven for optimal crispiness while microwaving the meat mixture until warmed through.

Assembly Tip: For best results, avoid freezing the assembled Loaded Potato Taco Bowl; instead, prepare fresh toppings just before serving to experience full flavor and texture.

What to Serve with Loaded Potato Taco Bowl

Transform your cooking experience as you create an inviting, well-rounded meal alongside this delicious taco bowl.

  • Mixed Green Salad: A light, crisp salad adds freshness to balance the hearty flavors of the taco bowl, enhancing the meal.
  • Tortilla Chips & Guacamole: Crunchy chips paired with creamy guacamole provide satisfying textures that complement each bite of the bowl.
  • Cilantro Lime Rice: This fragrant side introduces zesty notes that unite beautifully with the savory elements of the Loaded Potato Taco Bowl.
  • Mexican Street Corn: Sweet and smoky grilled corn on the cob brings vibrant flavors, echoing the dish's warm and comforting essence.
  • Spicy Black Bean Soup: A bowl of spicy black bean soup acts as a warm starter, deepening the meal's protein-rich profile.
  • Margaritas: Refreshing margaritas serve as a delightful pairing, adding a celebratory vibe to your taco night.
  • Churros with Chocolate Sauce: For dessert, churros provide a sweet, crispy finish that is sure to please everyone after the savory feast.
  • Fruit Agua Fresca: This refreshing drink made with fruits and spices complements the rich flavors, washing down every bite with a pleasant sweetness.
  • Homemade Pickled Veggies: Tangy pickled vegetables add a delightful crunch and acidity, enhancing the layered flavors in the Loaded Potato Taco Bowl.

Loaded Potato Taco Bowl Recipe FAQs

What type of potatoes should I use for the Loaded Potato Taco Bowl?
For the best results, I recommend using russet potatoes! They become incredibly crispy on the outside while remaining fluffy inside. If you prefer a slightly sweeter taste, sweet potatoes can work, but keep in mind they will have a different texture.

How should I store leftovers from the Loaded Potato Taco Bowl?
Absolutely! To keep everything fresh, store the components separately in airtight containers in the fridge for up to 4 days. This way, the crispy potatoes will stay crunchy, and the meat will remain flavorful.

Can I freeze the Loaded Potato Taco Bowl?
Yes, you can! For longer storage, place the roasted potatoes and meat mixture into separate freezer-safe bags and freeze them for up to 3 months. When you’re ready to enjoy, simply reheat the potatoes in the oven to regain their crispiness and microwave the meat until heated through.

What should I do if my potatoes aren't crispy after roasting?
If your potatoes aren’t crispy, ensure that they are spread out in a single layer on the baking sheet without overcrowding. If they’re too close together, they’ll steam instead of roast. You can also try increasing the oven temperature slightly or cooking them for a bit longer, checking frequently until you achieve that golden brown perfection!

Are there any dietary considerations for pets or allergies with this recipe?
Definitely! If you're considering dietary restrictions, be mindful of any food allergies in your household. For pets, avoid sharing the Loaded Potato Taco Bowl as ingredients like onions and garlic can be harmful to them. If someone in your family is allergic to specific ingredients, feel free to customize the recipe by substituting or omitting those items.

Can I make this dish vegetarian?
Of course! To create a vegetarian version of the Loaded Potato Taco Bowl, simply substitute the ground meat with extra black beans or your favorite plant-based protein. This adjustment not only keeps the dish satisfying but also maintains the delightful flavors everyone loves!

Loaded Potato Taco Bowl

Loaded Potato Taco Bowl: A Crispy Comfort Food Delight

Enjoy a satisfying Loaded Potato Taco Bowl packed with protein and customizable toppings for a delightful family dinner.
Print Recipe Pin Recipe
Prep Time 15 minutes mins
Cook Time 35 minutes mins
Total Time 50 minutes mins
Servings: 4 bowls
Course: Dinner
Cuisine: Mexican
Calories: 550
Ingredients Equipment Method Nutrition Notes

Ingredients
  

For the Crispy Potatoes
  • 4 medium Russet Potatoes Can substitute with sweet potatoes
  • 3 tablespoons Olive Oil For roasting
  • 1 teaspoon Garlic Powder
  • 1 teaspoon Onion Powder
  • 1 teaspoon Smoked Paprika
  • 1 teaspoon Salt To taste
  • 1/2 teaspoon Black Pepper To taste
For the Protein Filling
  • 1 pound Ground Beef or Turkey (93/7 recommended) Choose turkey for a lighter version
  • 2 tablespoons Chili Powder For seasoning
  • 1 teaspoon Cumin For seasoning
  • 1 medium Red Onion Chopped
For Additional Texture and Nutrition
  • 1 can Black Beans Drained and rinsed
  • 1 cup Corn Kernels Fresh, canned, or frozen
For Topping
  • 1 cup Shredded Cheddar Cheese For melting
  • 1 cup Cherry Tomatoes Halved
  • 1 medium Avocado Diced
  • 1/4 cup Fresh Cilantro Chopped
  • 2 pieces Lime Wedges For serving
  • 1/2 cup Sour Cream Optional

Equipment

  • Oven
  • Baking Sheet
  • Skillet
  • measuring cups
  • Measuring Spoons
  • Knife
  • Cutting Board

Method
 

Preparation and Cooking
  1. Preheat your oven to 425°F (220°C). Wash and dice the russet potatoes into bite-sized cubes. Place on a baking sheet, drizzle with olive oil, and sprinkle with garlic powder, onion powder, smoked paprika, salt, and black pepper. Toss until evenly coated.
  2. Roast the potatoes for 30–35 minutes, flipping halfway through until golden-brown and crispy.
  3. While the potatoes roast, heat a skillet over medium heat and add ground beef or turkey. Cook for 7–8 minutes until browned, breaking apart as it cooks.
  4. Add chili powder, cumin, and chopped red onion to the cooked meat. Cook for an additional 5 minutes until onions soften.
  5. Stir in black beans and corn, cooking for another 3–4 minutes until heated through. Adjust seasoning as needed.
  6. In a serving bowl, layer crispy roasted potatoes as the base and top with the meat mixture allowing the heat to melt the cheese on top.
  7. Finish the bowl with halved cherry tomatoes, diced avocado, and fresh cilantro. Serve with lime wedges and sour cream if desired.

Nutrition

Serving: 1bowlCalories: 550kcalCarbohydrates: 65gProtein: 38gFat: 22gSaturated Fat: 10gPolyunsaturated Fat: 2gMonounsaturated Fat: 10gCholesterol: 80mgSodium: 800mgPotassium: 1000mgFiber: 12gSugar: 4gVitamin A: 500IUVitamin C: 30mgCalcium: 250mgIron: 4mg

Notes

Store components separately for freshness. Enjoy with various toppings for added flavor.

Tried this recipe?

Let us know how it was!
  • « Previous Page
  • 1
  • …
  • 16
  • 17
  • 18
  • 19
  • 20
  • …
  • 87
  • Next Page »

Welcome!

Hi, I’m Grace, a Sydney-based home cook with a passion for bold flavors and trending ingredients. Whether you’re a busy beginner or a seasoned foodie, you’ll find dishes here that are fresh, fun, and full of flavor.

More about me

Popular Recipes

  • One Pot Keto Tuna Casserole
    One Pot Keto Tuna Casserole: Creamy Comfort in Minutes
  • Ultimate Jalapeno Popper Chicken Salad
    Ultimate Jalapeno Popper Chicken Salad That'll Wow Your Tastebuds
  • Green Chile Cheese Dip
    Mouthwatering Green Chile Cheese Dip for Cozy Gatherings
  • Easy Chimichurri Sauce
    Fresh and Zesty Easy Chimichurri Sauce in Just Minutes

Footer

↑ back to top

About

  • Privacy Policy
  • Disclaimer
  • Terms & Conditions

Newsletter

  • Sign Up! for emails and updates

Contact

  • About me
  • Contact me

Copyright © 2025 TastyTrendIngredients