tastytrendingredients

  • Home
  • Recipes
    • Appetizers
    • Breakfast
    • Dessert
    • Dinner
    • Drinks
    • Salads
    • Snacks
    • Soups
  • About me
  • Contact me
menu icon
go to homepage
  • Home
  • Recipes
    • Appetizers
    • Breakfast
    • Dessert
    • Dinner
    • Drinks
    • Salads
    • Snacks
    • Soups
  • About me
  • Contact me
search icon
Homepage link
  • Home
  • Recipes
    • Appetizers
    • Breakfast
    • Dessert
    • Dinner
    • Drinks
    • Salads
    • Snacks
    • Soups
  • About me
  • Contact me
×

Cherry Cheesecake Puppy Chow: Easy No-Bake Sweet Bliss

February 12, 2026 by Grace Snow Leave a Comment

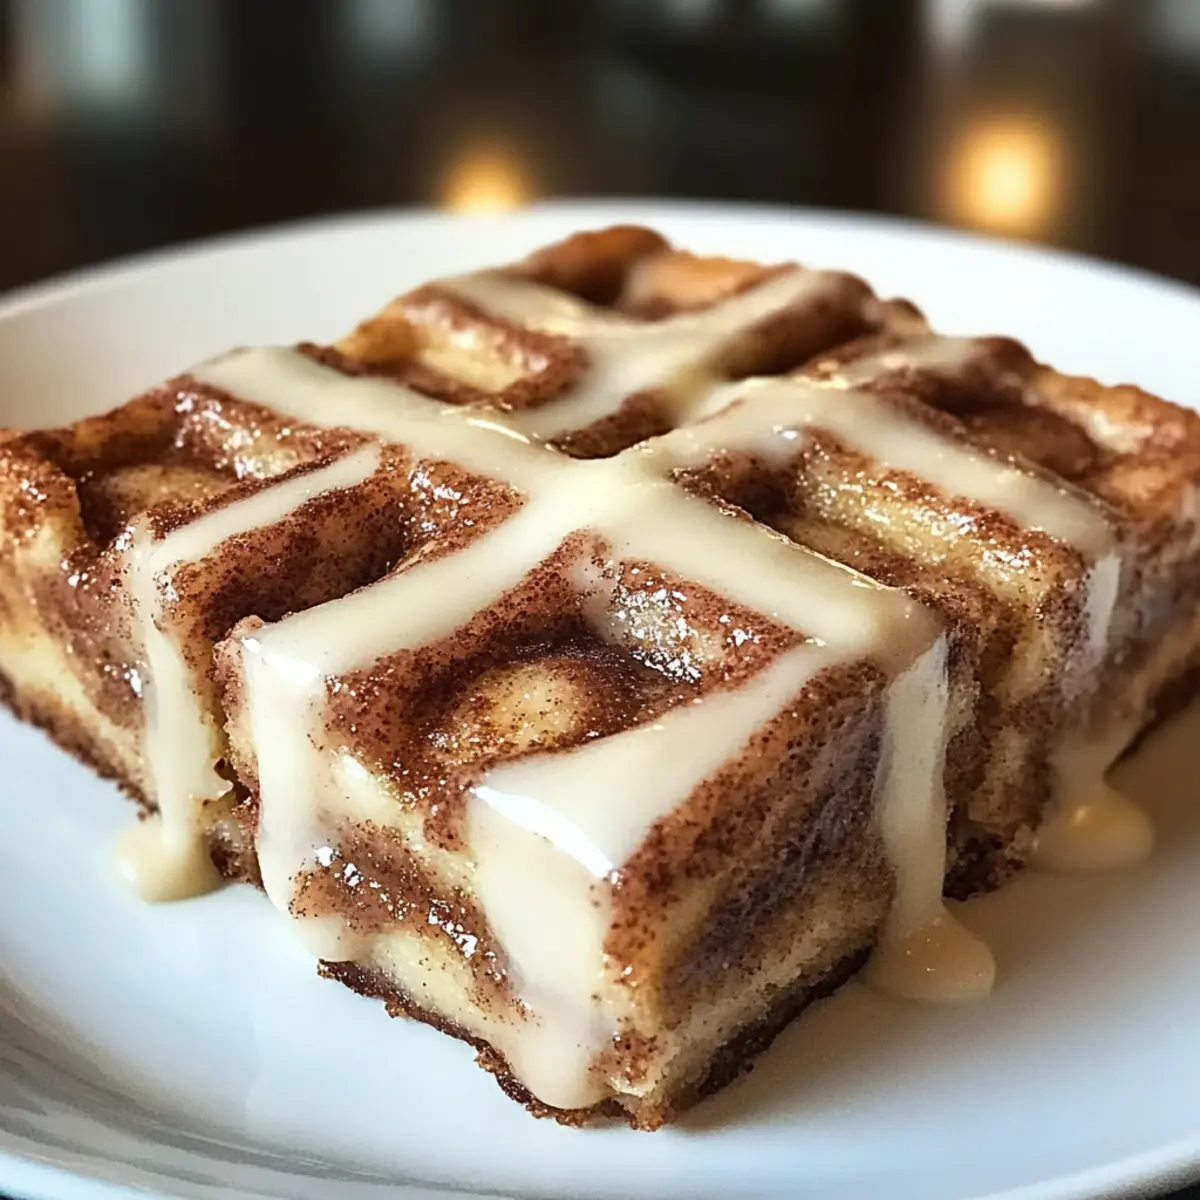
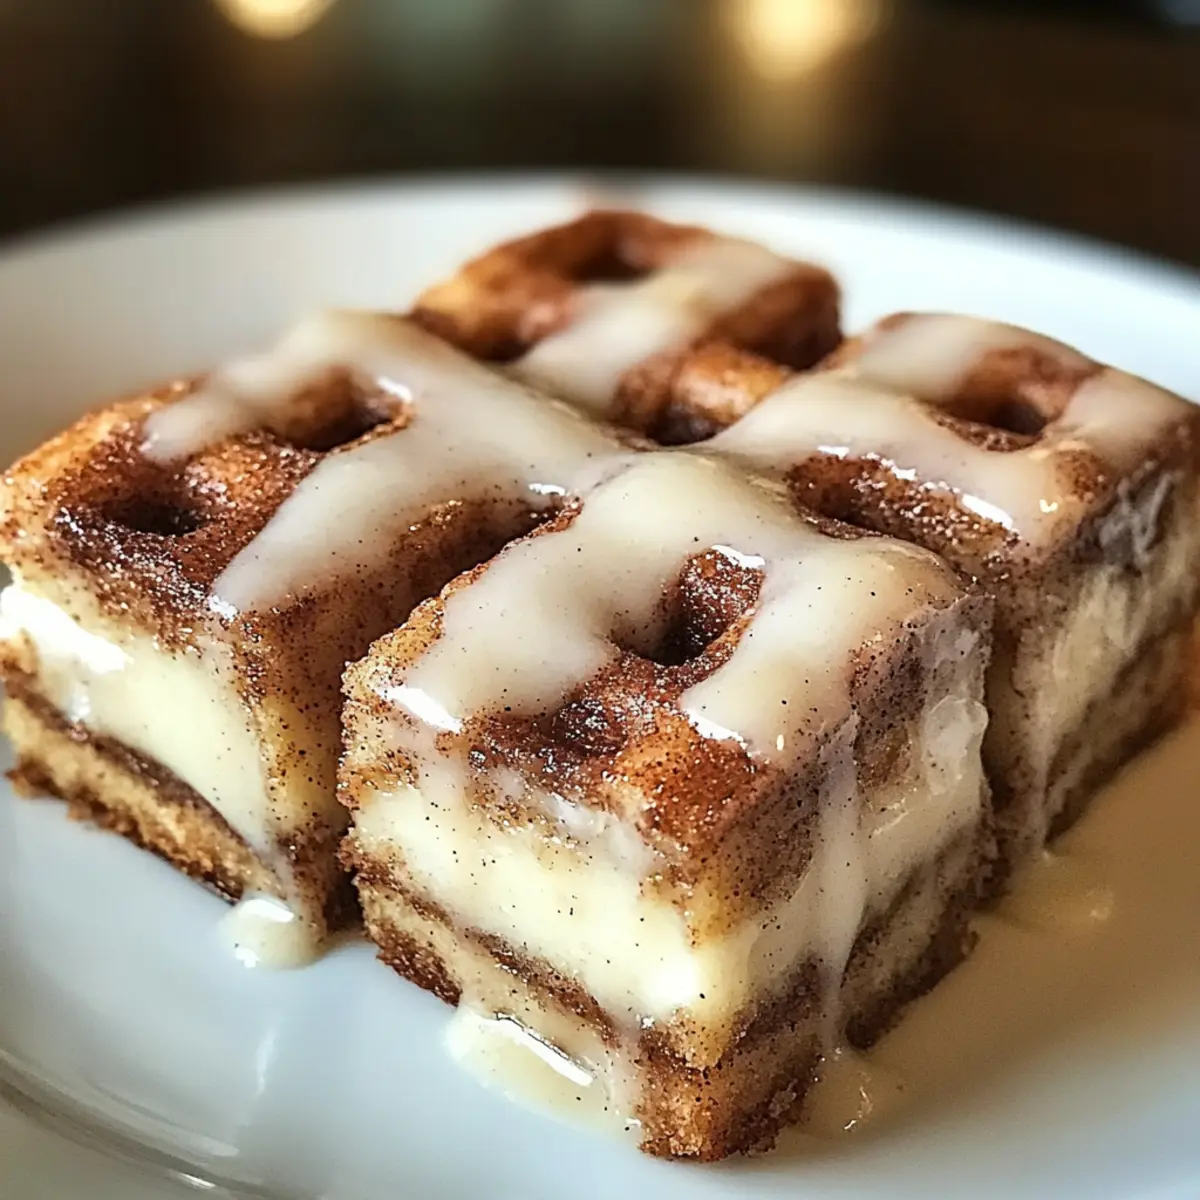
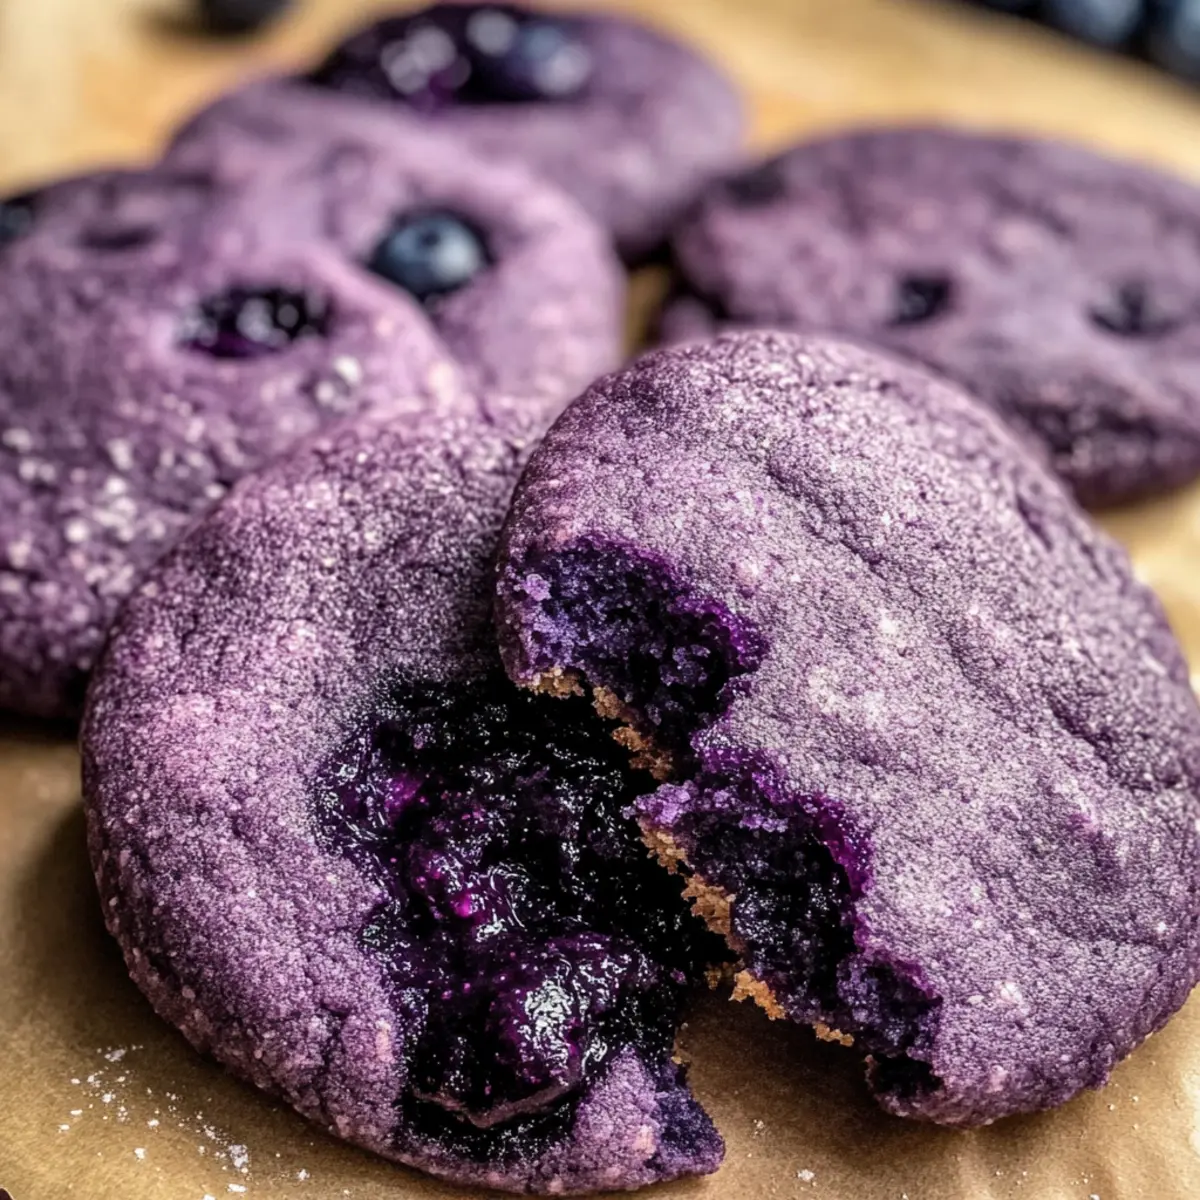
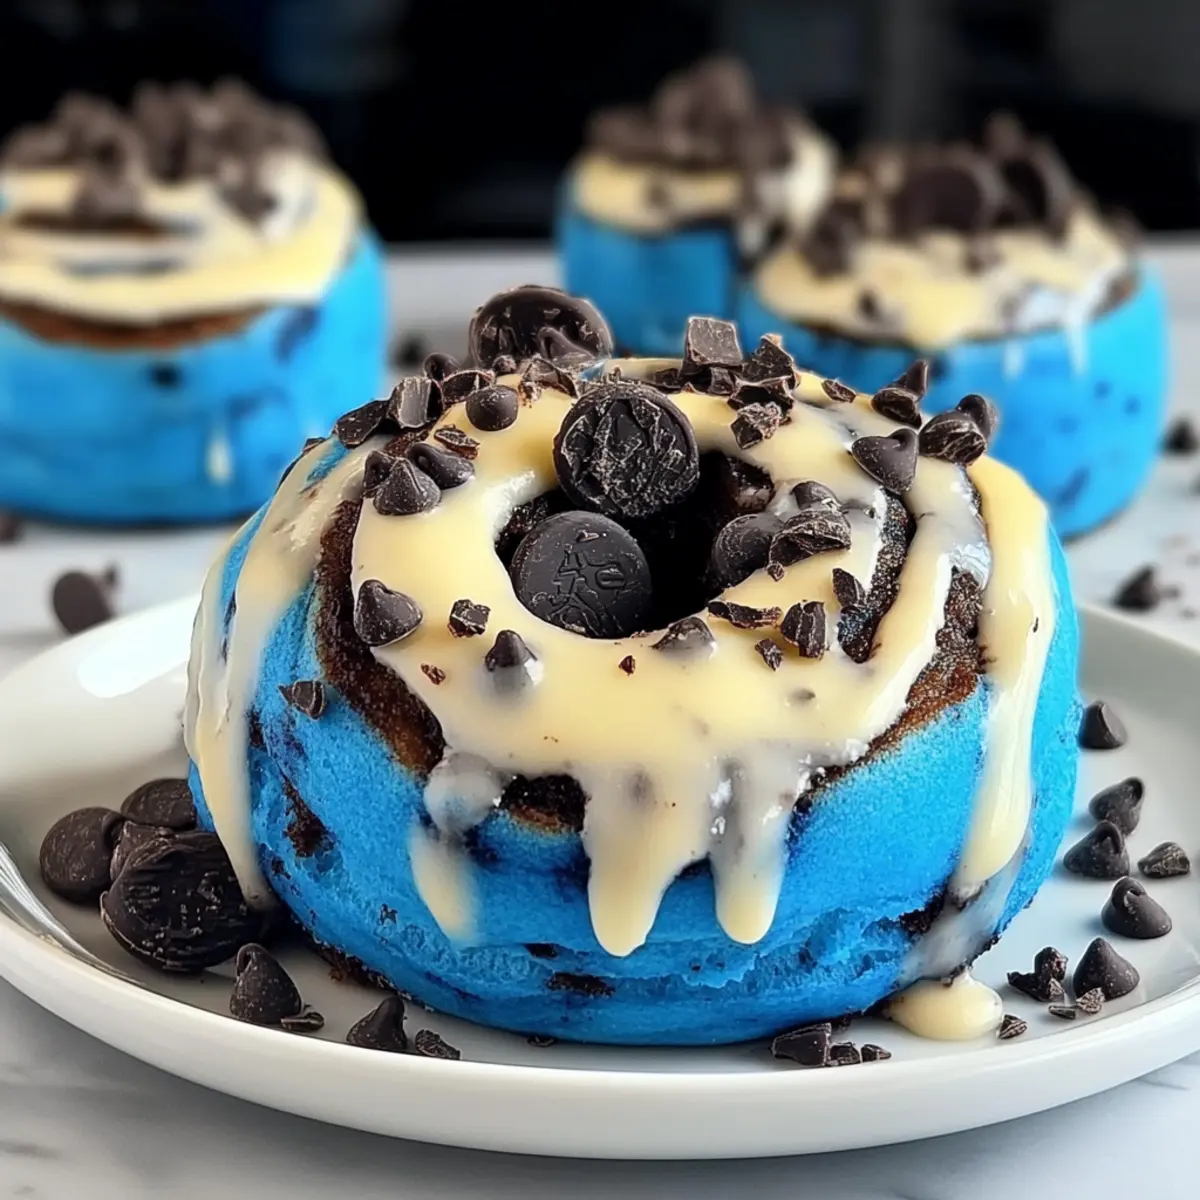
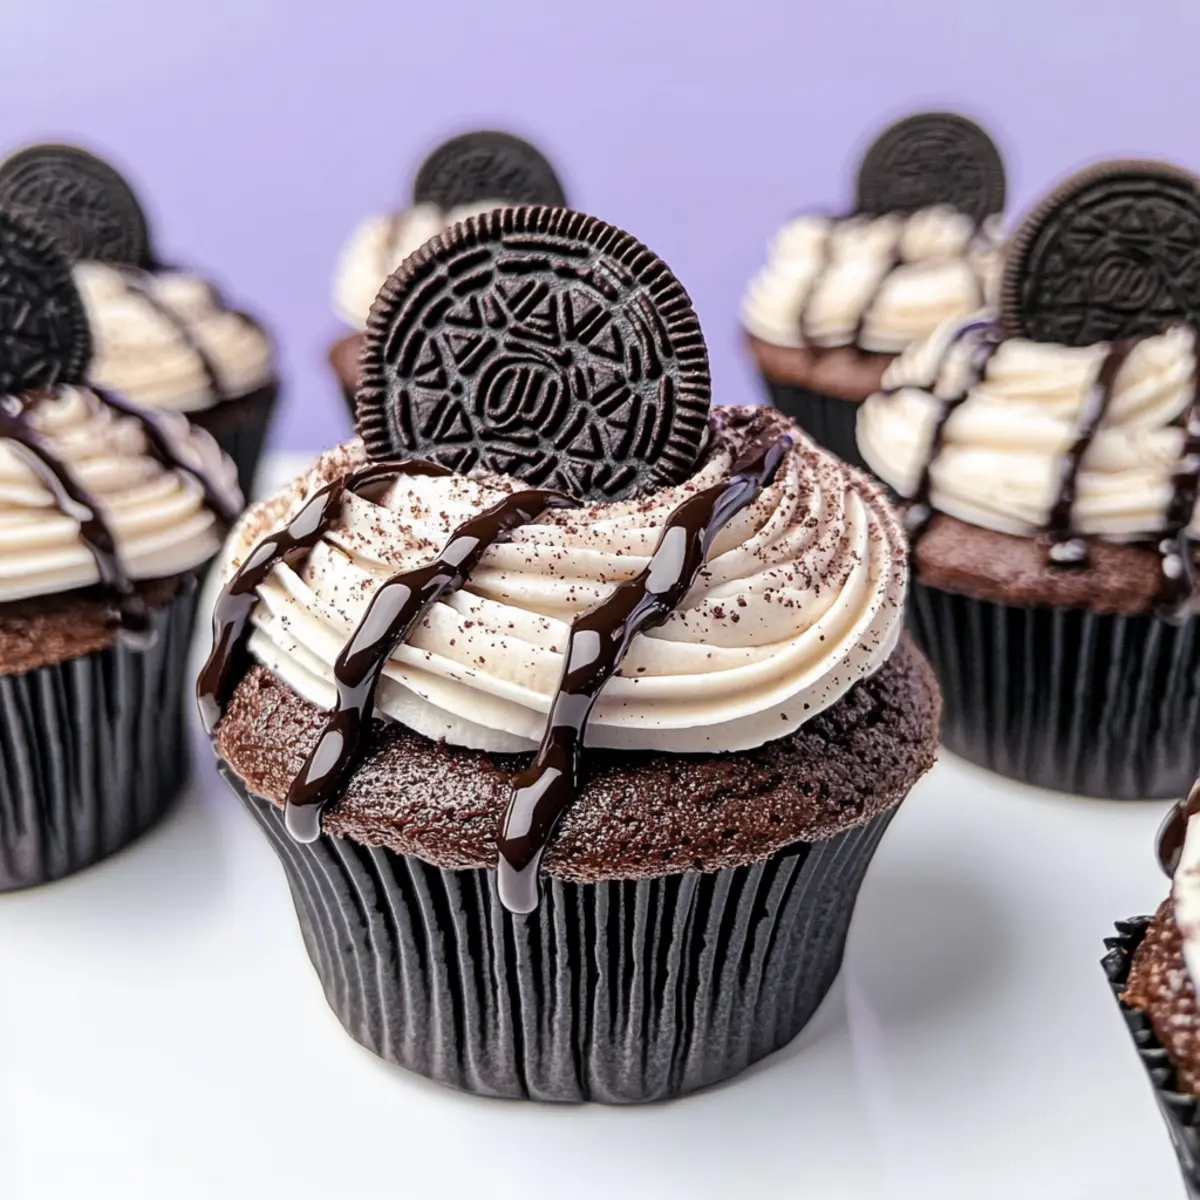
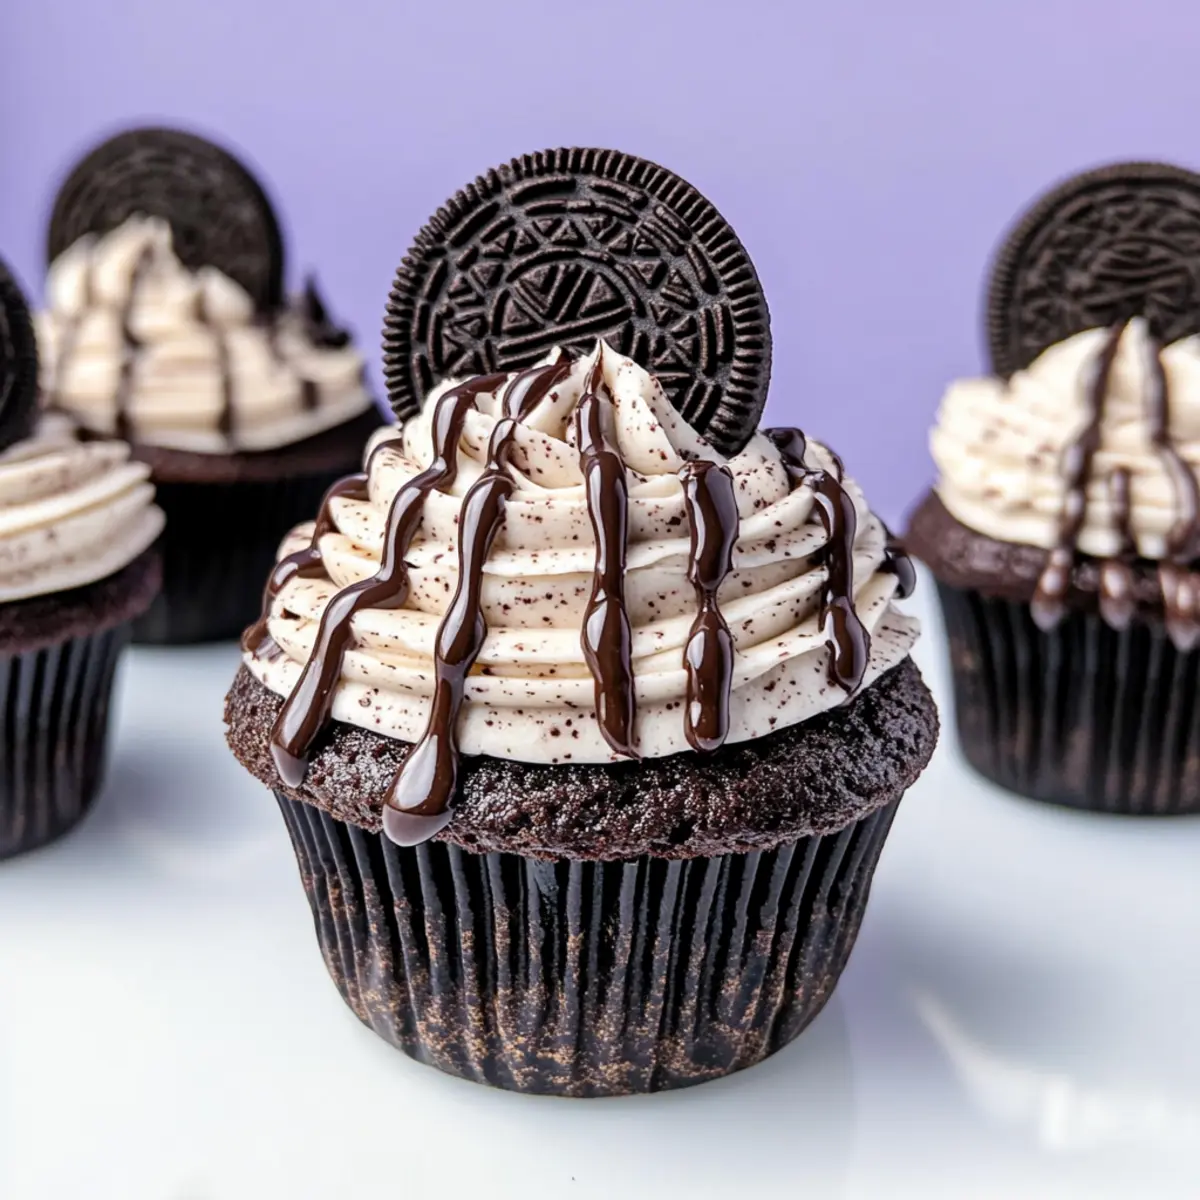
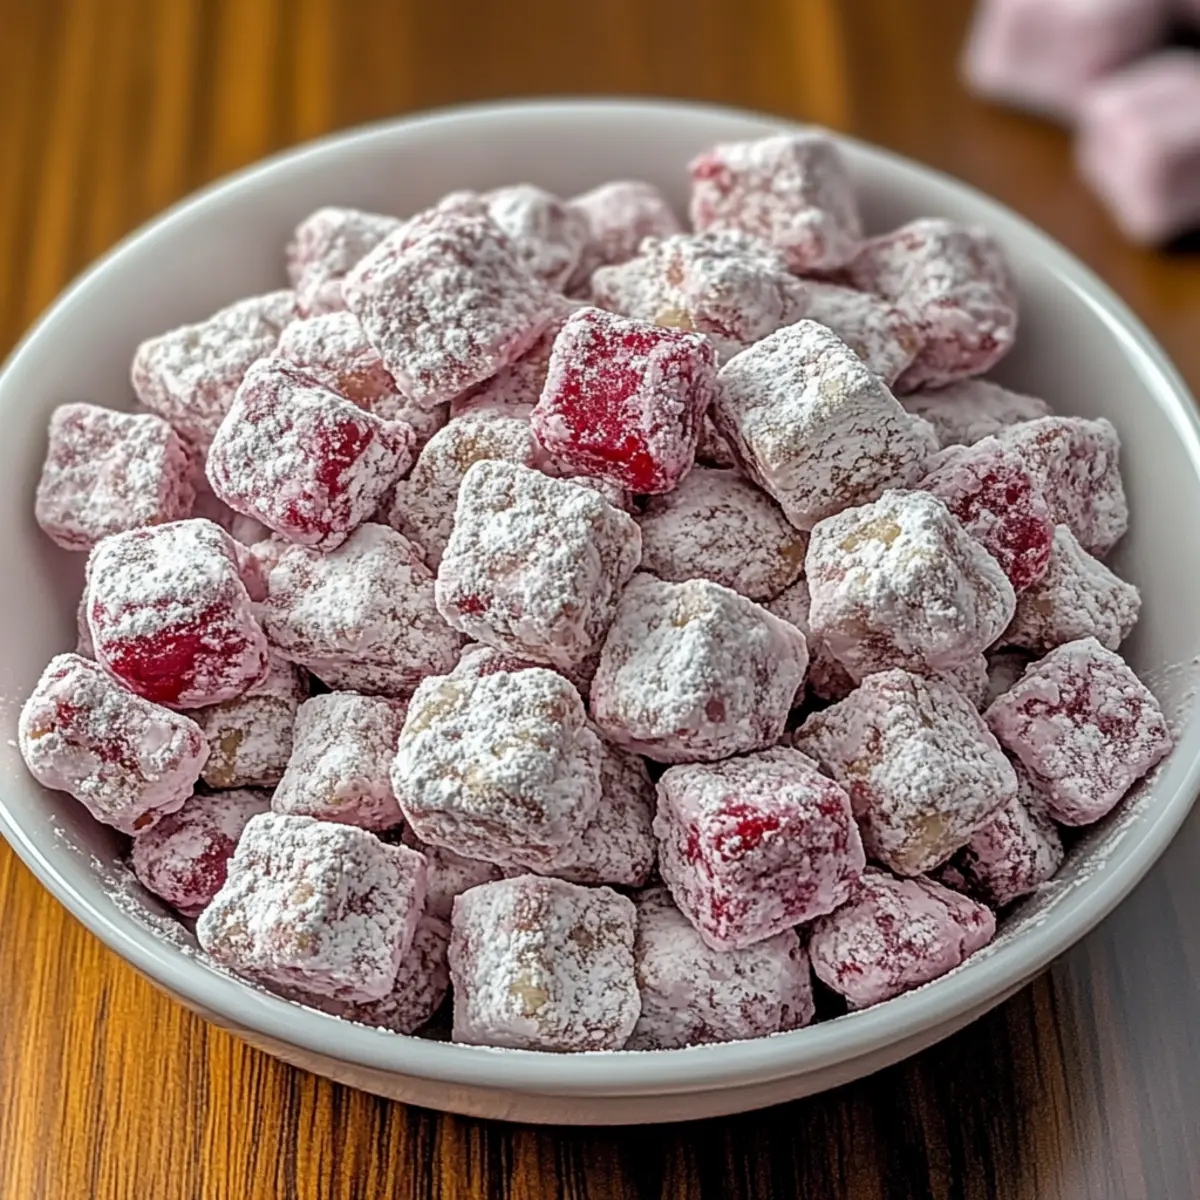
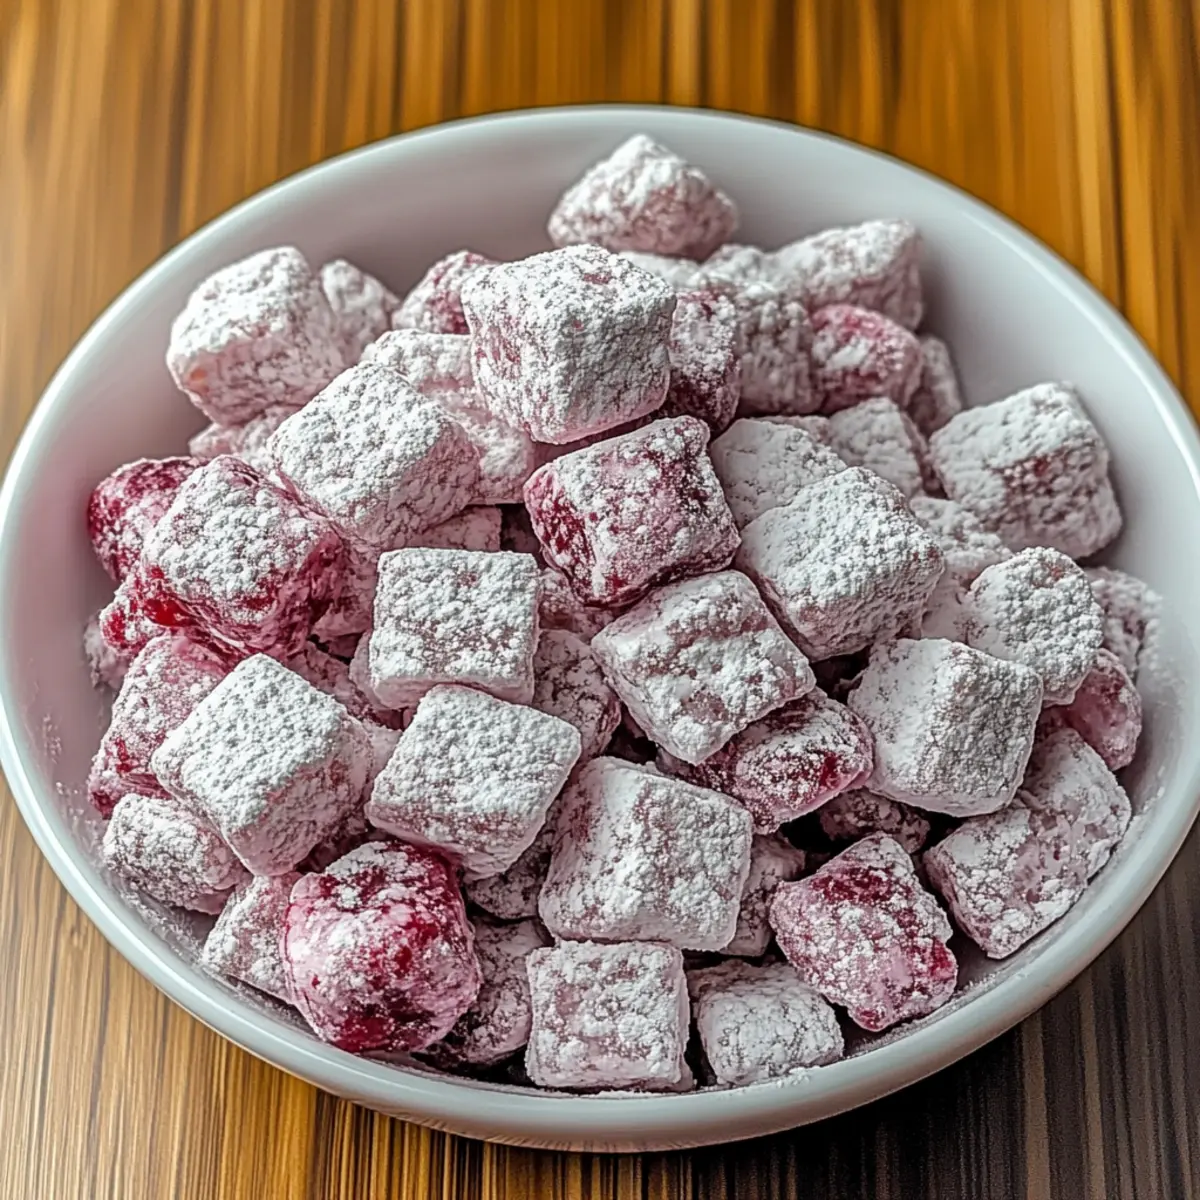
As I sifted through my pantry, a flash of nostalgia washed over me while eyeing a box of Chex cereal. Suddenly, I was transported back to carefree summer days spent at picnics with friends. So, I decided to create something fun and satisfying: Cherry Cheesecake Puppy Chow! This irresistible no-bake dessert snack effortlessly combines the creamy essence of cheesecake with a delightful crunch. In just 30 minutes, you can whip up a treat that’s perfect for gatherings, movie nights, or simply snacking at home. Plus, this recipe is easily adaptable, making it a breeze to cater to any taste. Are you ready to indulge in a little cherry-flavored nostalgia and create a sweet moment of joy?

Why is Cherry Cheesecake Puppy Chow a Must-Try?

Irresistible Flavor: The combination of creamy white chocolate and zesty cherry is an explosion of taste in your mouth, evoking fond summer memories. No Baking Required: You can whip this up in just 30 minutes, making it an ideal choice for last-minute gatherings. Versatile Treat: Easily adapt this recipe to satisfy any sweet tooth by swapping in different gelatin flavors or adding crunchy toppings. Crowd-Pleasing Snack: Perfect for parties or movie nights, everyone will love this delightful twist on a classic. Try pairing it with a refreshing Chocolate Cherry Smoothie for a perfect treat duo!

Cherry Cheesecake Puppy Chow Ingredients

For the Base
• Chex Cereal – Provides a crunchy foundation; feel free to use any flavor for a twist.
• White Chocolate Chips – Adds a creamy sweetness; almond bark is a great substitute for a different taste.
• Unsalted Butter – Enhances the richness of the mix; margarine works well for a dairy-free option.

For the Cheesecake Mixture
• Cream Cheese (softened) – Creates that essential creamy texture; use dairy-free cream cheese for a lactose-free version.
• Cherry-Flavored Gelatin – Infuses a bright cherry flavor into the mix; swap for raspberry or strawberry for a fun change.

For Coating
• Powdered Sugar – Provides the necessary sweetness and coating; adjust the quantity or use a sugar substitute for less sweetness.

With these simple ingredients, you're on your way to the wildly popular Cherry Cheesecake Puppy Chow—a no-bake dessert that will charm your taste buds and spruce up any gathering!

Step‑by‑Step Instructions for Cherry Cheesecake Puppy Chow

Step 1: Melt the Base
In a microwave-safe bowl, combine the white chocolate chips and unsalted butter. Heat in 30-second intervals, stirring until the mixture is smooth and fully melted, about 1-2 minutes total. You want a glossy, creamy consistency that will coat the cereal beautifully.

Step 2: Add Flavor
Once melted, stir in the softened cream cheese until fully combined and smooth. Then, sprinkle in the cherry-flavored gelatin, mixing until it’s well incorporated. This adds a delightful cherry taste to your Cherry Cheesecake Puppy Chow, ensuring each bite bursts with flavor.

Step 3: Coat the Cereal
In a large mixing bowl, pour the Chex cereal. Slowly drizzle the creamy chocolate mixture over the cereal, using a spatula to gently fold and coat each piece evenly. Aim for thorough coverage without breaking the cereal, creating a deliciously sweet and crunchy base.

Step 4: Sweeten Up
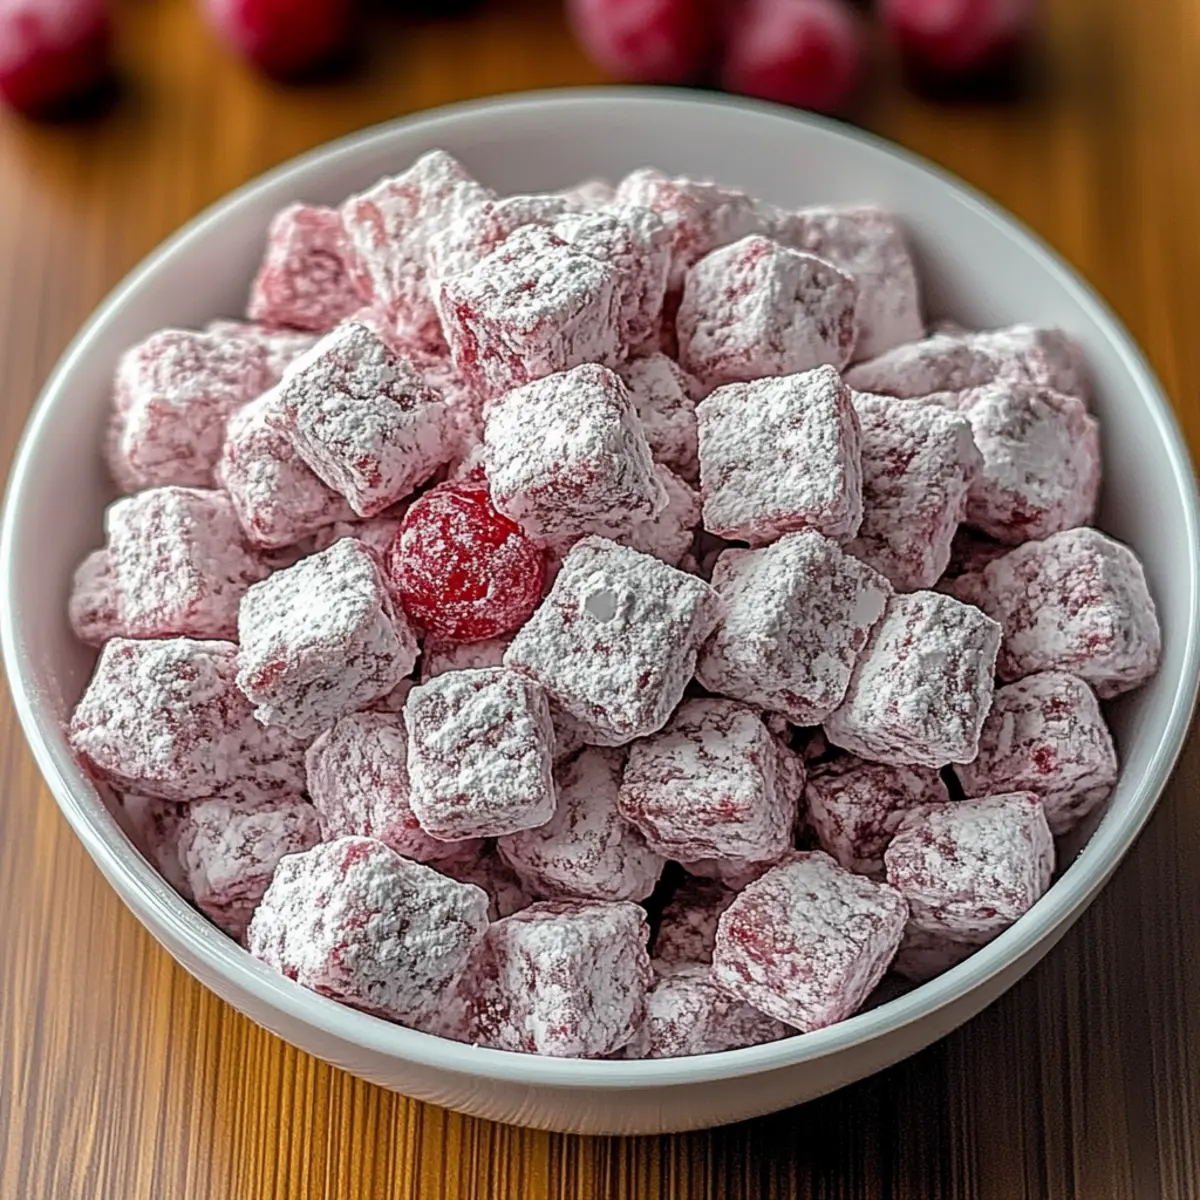
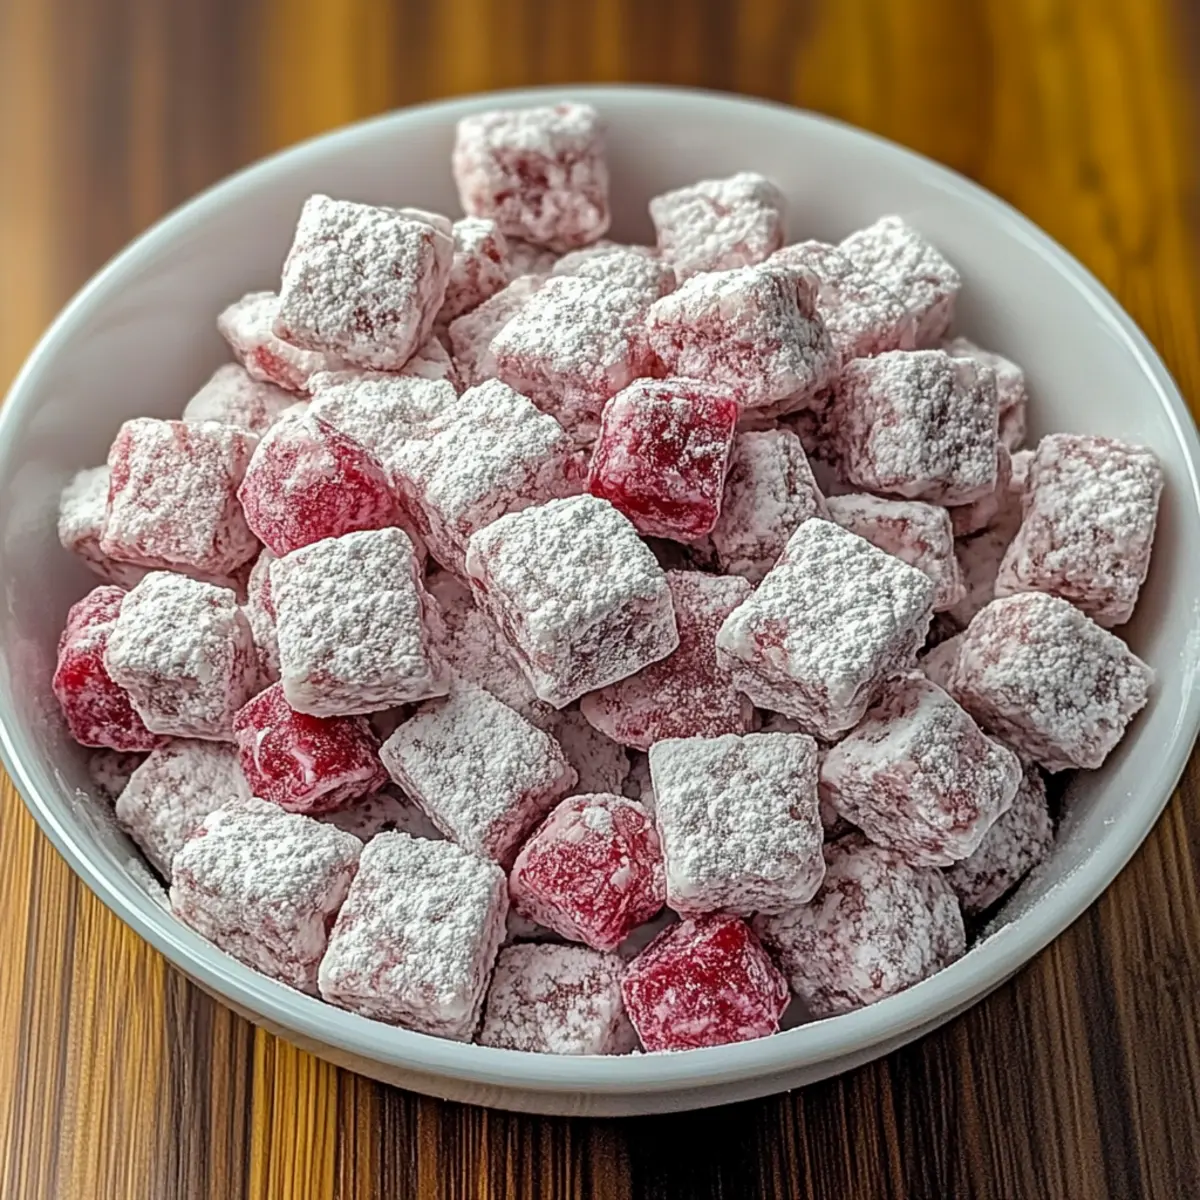
Transfer the coated cereal mixture into a resealable plastic bag. Add powdered sugar, seal the bag tightly, and shake vigorously until all the pieces are evenly coated. This step not only adds sweetness but also gives your Cherry Cheesecake Puppy Chow that signature sugary crunch.

Step 5: Chill and Set
Spread the puppy chow mixture evenly onto a parchment-lined baking sheet, ensuring it’s smoothed out in an even layer. Allow it to cool at room temperature for about 30 minutes, letting it firm up and set, enhancing the overall texture and flavor.

Step 6: Serve and Enjoy
Once cooled, break apart any clumps and transfer your Cherry Cheesecake Puppy Chow into a serving bowl or individual bags for easy sharing. This delightful no-bake dessert snack is now ready to be enjoyed at gatherings, movie nights, or when you simply need a sweet treat!

Cherry Cheesecake Puppy Chow Variations

Feel free to personalize this recipe and unleash your creativity with delightful tweaks and substitutions!

  • Dairy-Free: Use dairy-free cream cheese and margarine to ensure a luscious treat for lactose intolerant friends. A simple switch can make all the difference!

  • Different Gelatin Flavors: Swap the cherry-flavored gelatin for raspberry or strawberry for a unique twist that keeps your taste buds guessing. Each variation brings a fresh flavor that’s perfect for different occasions.

  • Nutty Addition: Toss in some chopped almonds or pecans to elevate the crunch factor and infuse a nutty flavor. This added texture pairs beautifully with the creamy cheesecake base.

  • Chocolate Drizzle: For a decadent upgrade, drizzle melted dark or milk chocolate over the finished puppy chow. The rich chocolate contrasts with the cherry flavor, creating a delightful combination you won’t forget!

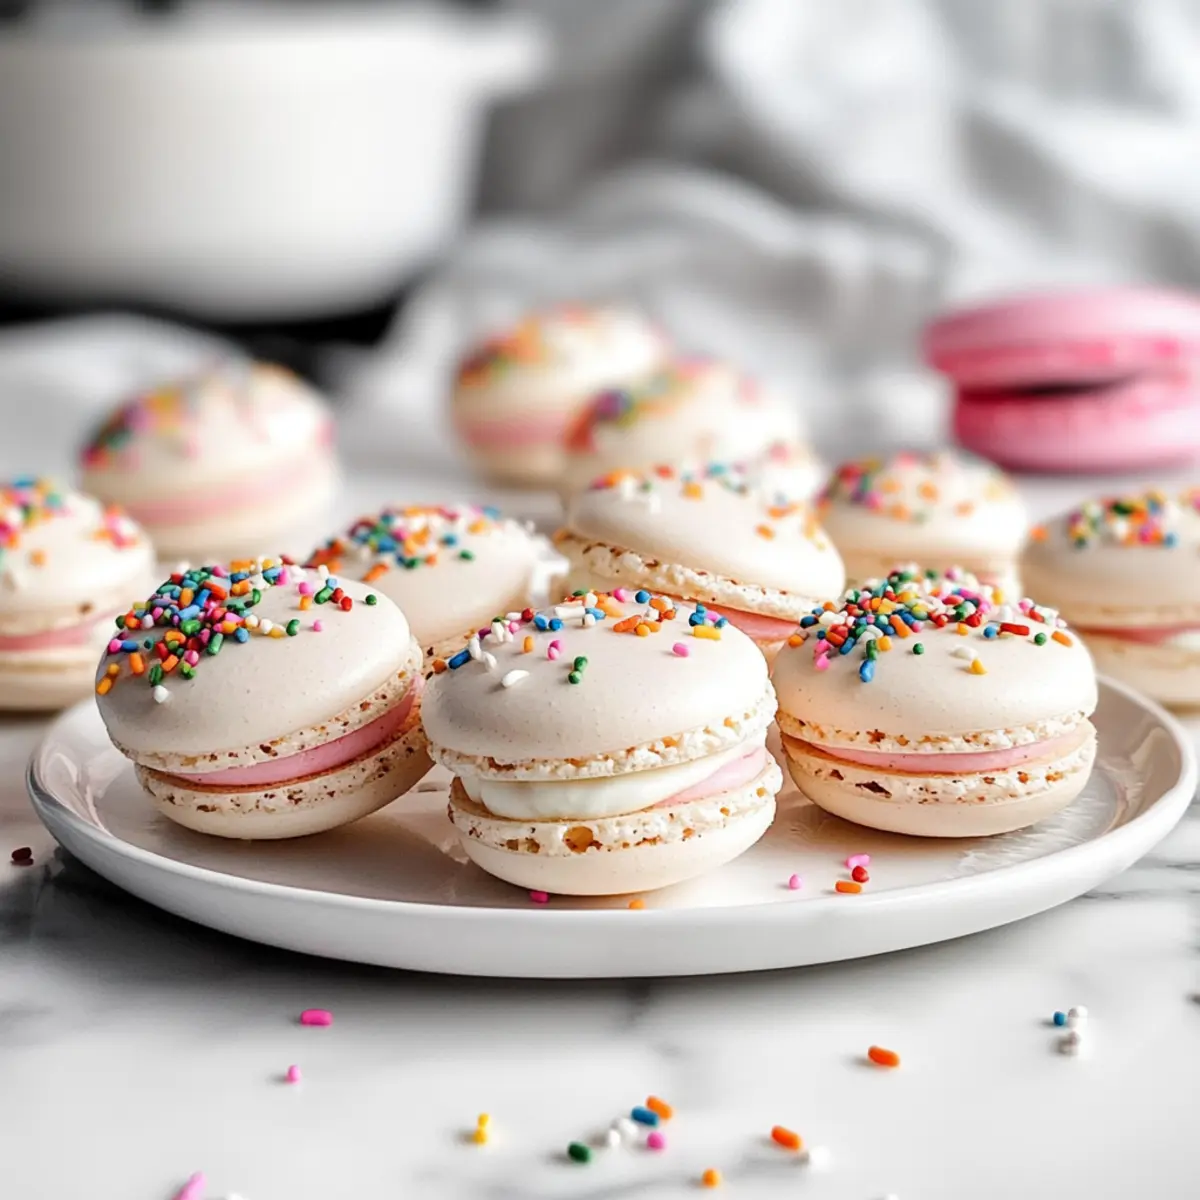
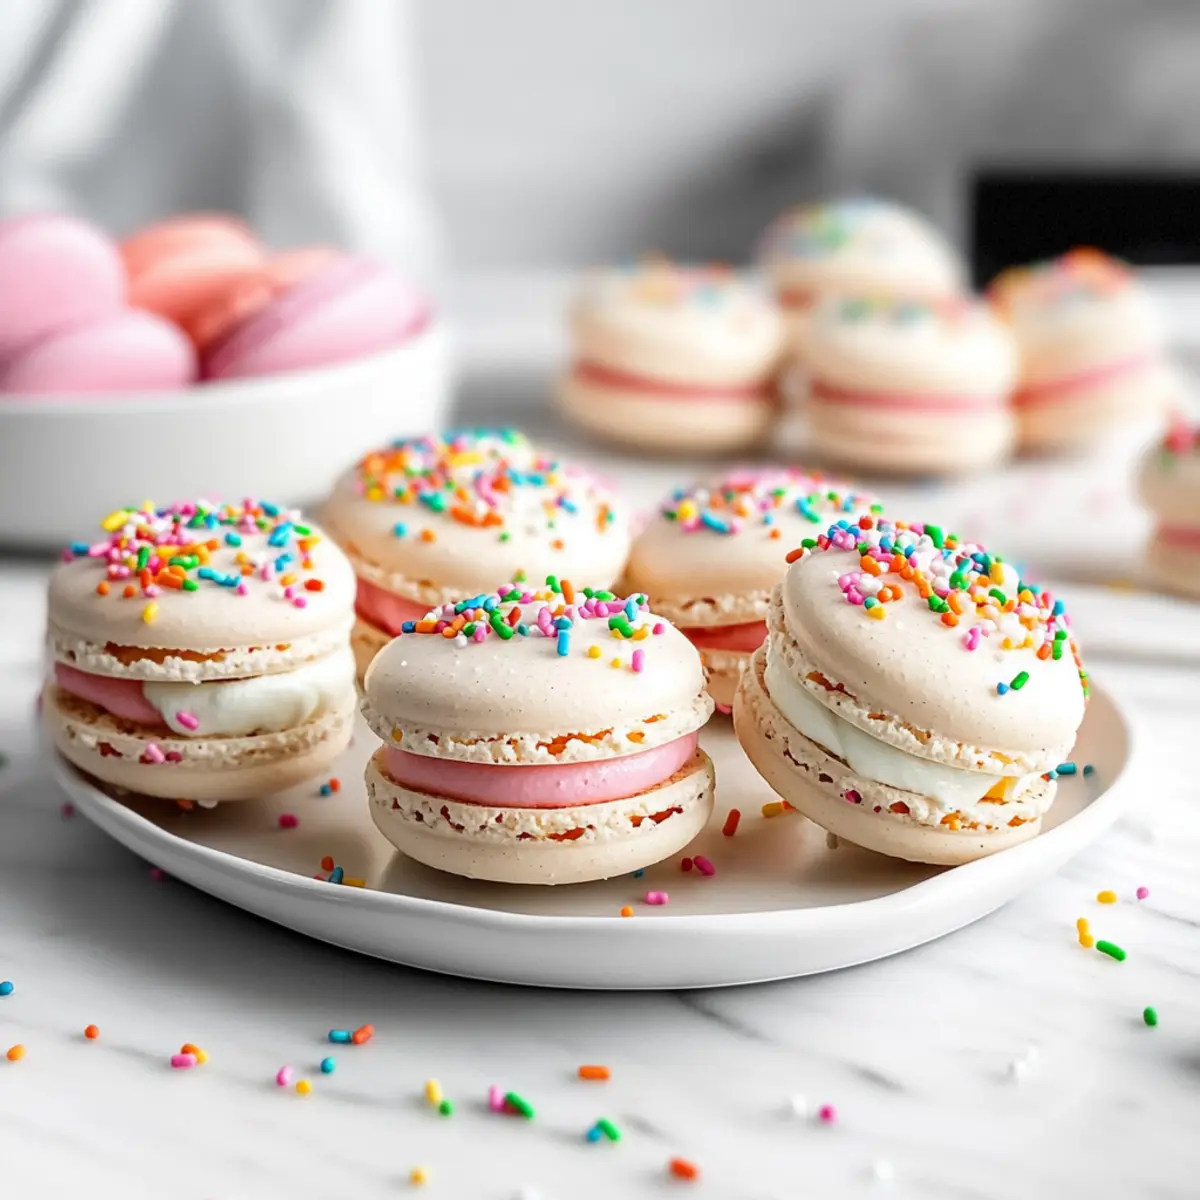
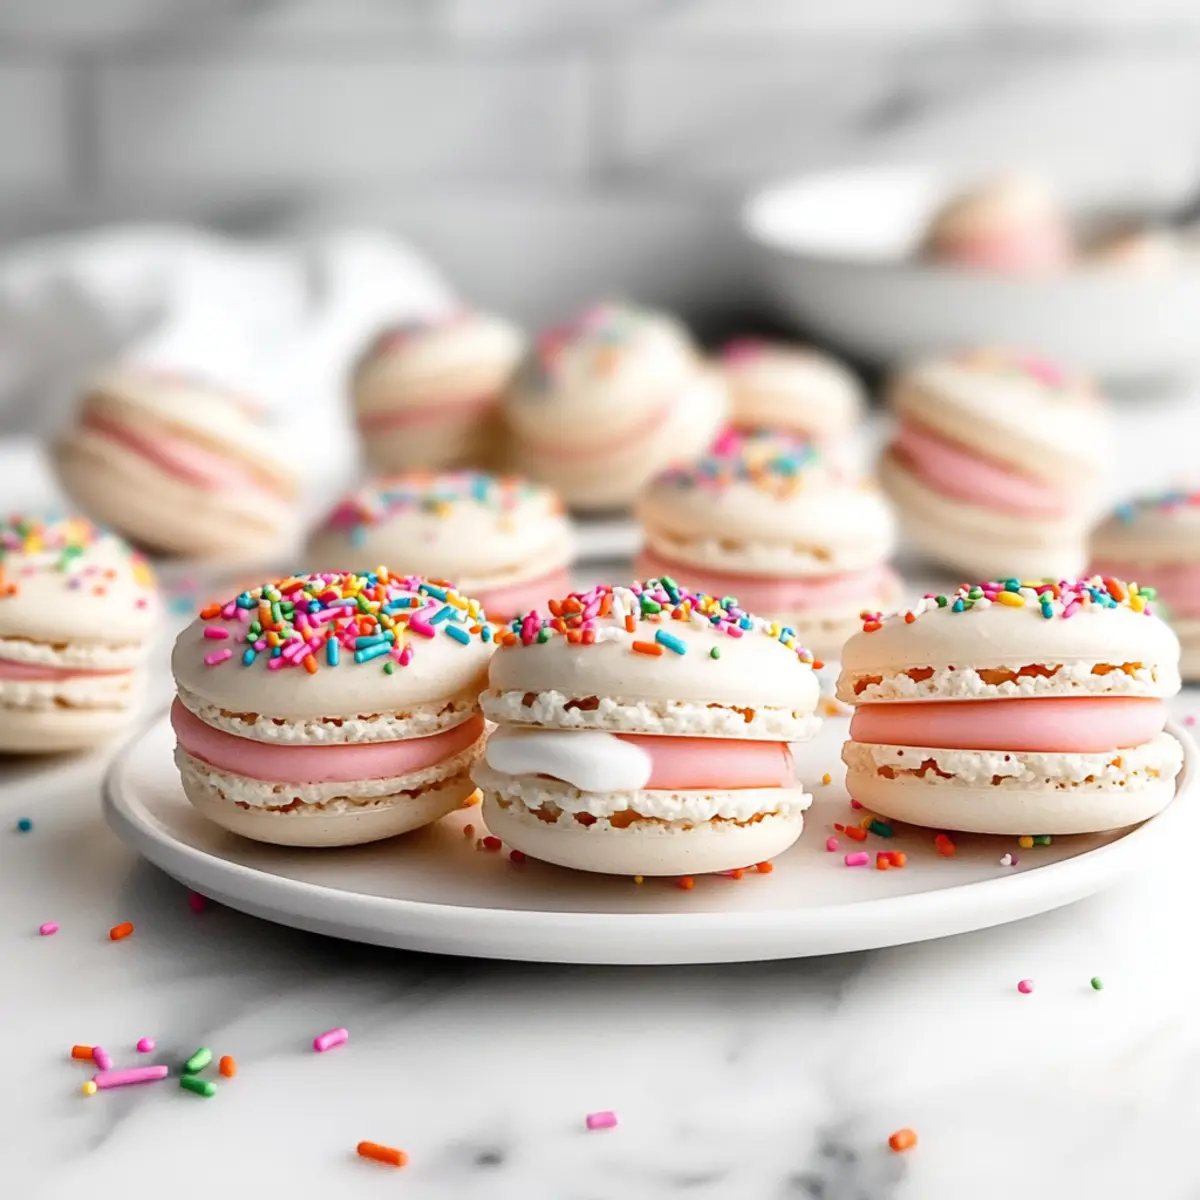
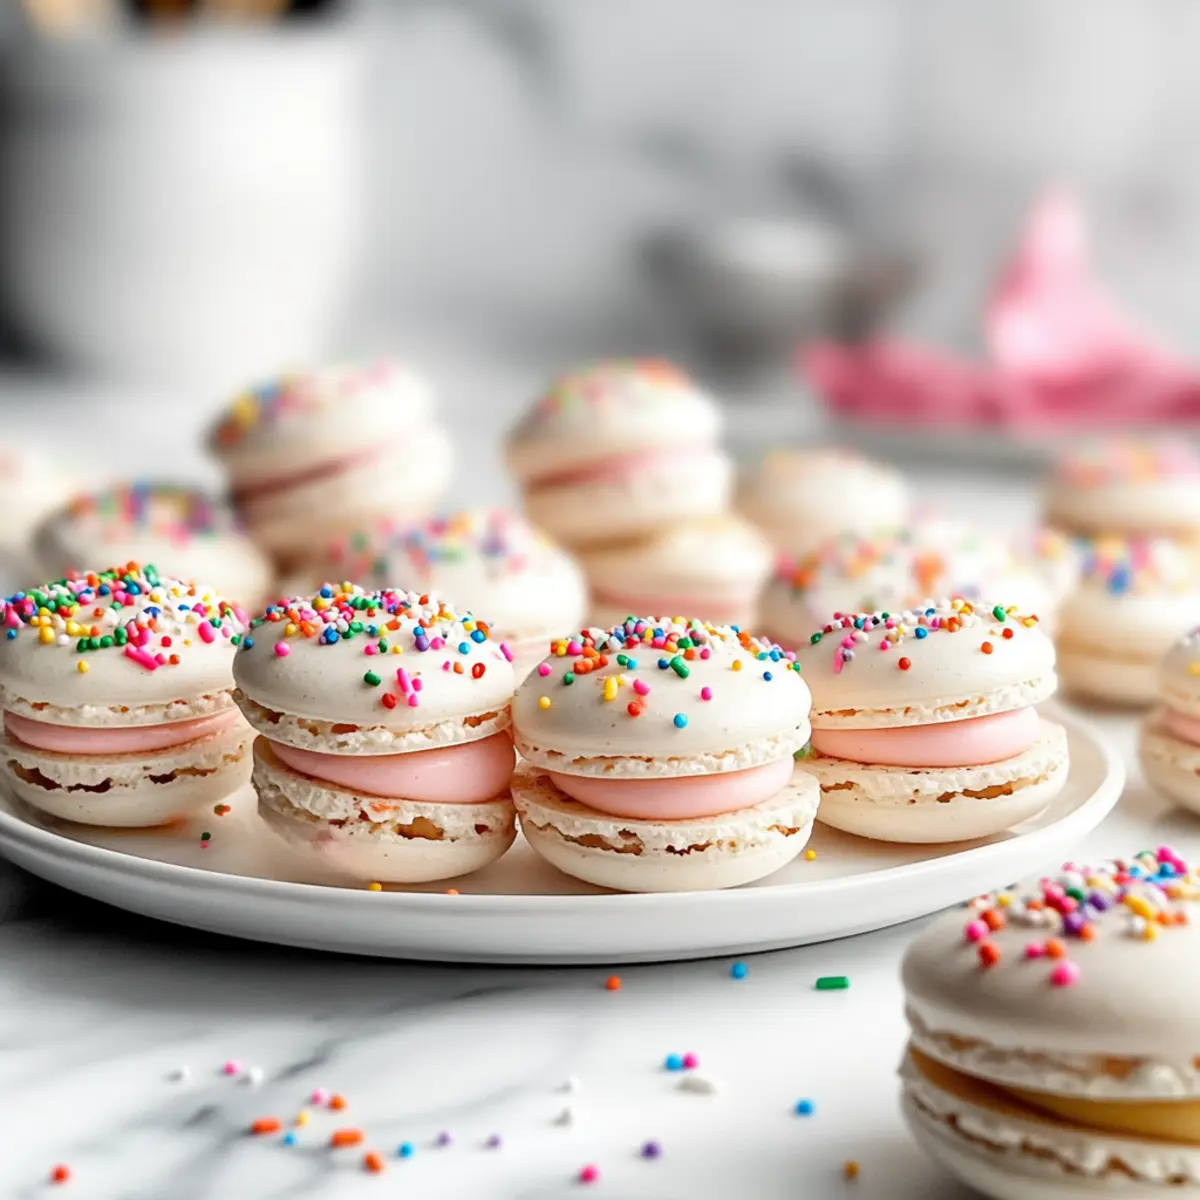
  • Sprinkle Magic: Add colorful sprinkles for a fun, festive look that’s perfect for parties. These little pops of color can make your treat visually stunning, catching everyone’s eyes!

  • Less Sweet Twist: If a lighter treat is what you're after, reduce the powdered sugar or replace it with a sugar substitute. This adjustment can cater to those watching their sugar intake, ensuring everyone can enjoy!

  • S'mores Style: Mix in mini marshmallows and crushed graham crackers for an exciting s'mores version! The combination of flavors delivers a nostalgic, campfire feel – perfect for sweet cravings!

  • Fruity Mix-Ins: Consider adding freeze-dried cherries or strawberries to the mix for an extra punch of fruity goodness. These dried fruits complement the cherry flavor while adding another layer of crunch.

These variations will keep your Cherry Cheesecake Puppy Chow feeling fresh and fun! You might also explore delicious pairings like a refreshing Chocolate Cherry Smoothie or indulge in a more traditional dessert by checking out a classic Cherry Clafoutis French for an unforgettable culinary adventure!

Expert Tips for Cherry Cheesecake Puppy Chow

  • Softened Cream Cheese: Ensure your cream cheese is softened to room temperature for easy blending. This prevents lumps in your Cherry Cheesecake Puppy Chow.
  • Gentle Mixing: When coating the cereal, use a gentle folding motion to avoid breaking the Chex pieces while ensuring even coverage.
  • Airtight Storage: To maintain freshness and crunch, store your puppy chow in an airtight container at room temperature, avoiding exposure to moisture.
  • Flavor Variations: Feel free to experiment with different gelatin flavors, such as raspberry or strawberry, to create unique twists on the original Cherry Cheesecake Puppy Chow.
  • Adjust Sweetness: If you prefer a less sweet treat, reduce the amount of powdered sugar used for coating; you can always taste-test and adjust as needed.

Make Ahead Options

These Cherry Cheesecake Puppy Chow bites are perfect for meal prep enthusiasts! You can prepare the cereal coating mixture up to 24 hours in advance. Simply melt the white chocolate and butter, mix in the cream cheese and gelatin, then coat the Chex cereal as instructed. Afterward, allow the coated cereal to cool and store it in an airtight container to maintain its crunchiness. Alternatively, you can complete the entire recipe and store the finished Puppy Chow in an airtight container at room temperature for up to 3 days. When you're ready to serve, simply break up any clumps and enjoy this delightful treat without any last-minute fuss!

How to Store and Freeze Cherry Cheesecake Puppy Chow

Room Temperature: Store in an airtight container at room temperature for up to 1 week. This keeps your Cherry Cheesecake Puppy Chow fresh and crunchy.

Fridge: Although refrigeration is possible, it may alter the texture. If you choose to refrigerate, consume within 5 days for the best quality.

Freezer: For extended storage, freeze in a sealed bag or container for up to 2 months. When ready to enjoy, let it thaw at room temperature for about an hour before serving.

Reheating: There's no need to reheat this treat, as it's best enjoyed chilled or at room temperature, maintaining its delightful crunch.

What to Serve with Cherry Cheesecake Puppy Chow?

Brighten up your dessert table or movie night with these delightful pairings that complement the sweet joy of the Cherry Cheesecake Puppy Chow.

  • Fresh Fruit Skewers: Juicy strawberries and pineapple pieces add freshness and a hint of tanginess, balancing the sweetness of the Puppy Chow beautifully.

  • Creamy Vanilla Ice Cream: A scoop of velvety vanilla ice cream elevates your dessert experience, creating a delightful contrast to the crunchiness of each bite.

  • Chocolate-Covered Pretzels: The salty crunch of these pretzels offers a fun textural contrast alongside the sweet and creamy flavors of Cherry Cheesecake Puppy Chow, making each snack irresistible.

  • Chilled Cherry Limeade: This fizzy beverage is refreshing and provides a zesty kick that enhances the cherry flavor, making sipping it a delightful experience.

  • Nutty Trail Mix: Combine nuts, seeds, and dried fruits for an energizing snack mix that adds a wholesome crunch to your dessert spread.

  • Mini Cheesecakes: Small cheesecake bites echo the creamy essence of your Puppy Chow, transforming your gathering into a true dessert feast with layered flavors.

These pairings will ensure your dessert table shines and keeps everyone coming back for more.

Cherry Cheesecake Puppy Chow Recipe FAQs

How do I select ripe cherries for my Cherry Cheesecake Puppy Chow?
For this recipe, fresh cherries aren't used, but if you ever want to experiment with a fruit topping, look for cherries that are firm and plump, with a deep, rich color. They should have a shiny appearance and no dark spots or blemishes. If you're opting for fresh fruit on the side, go for cherries that are in season, typically from late spring to summer for the best flavor!

How should I store my Cherry Cheesecake Puppy Chow?
To savor its delightful crunch, store your Cherry Cheesecake Puppy Chow in an airtight container at room temperature. It will last about 1 week this way. For the ultimate freshness, keep it away from moisture and direct sunlight. If you notice any clumping, just give it a gentle shake!

Can I freeze Cherry Cheesecake Puppy Chow?
Absolutely! To freeze, place your cooled Cherry Cheesecake Puppy Chow in a resealable freezer bag or a sturdy container. Remove as much air as possible before sealing. It can be frozen for up to 2 months. When you're ready to enjoy it, simply thaw it at room temperature for about an hour. This helps maintain that delightful crunch!

What should I do if my mixture is too sticky?
If your Cherry Cheesecake Puppy Chow ends up too sticky, don’t worry! This can happen if the melted chocolate mixture is too warm when mixed with the cereal. To troubleshoot, simply add a little bit more powdered sugar to the coated cereal in the bag, sealing it tightly, and shaking until you achieve the desired texture. Toss it around gently for an even coating!

Is Cherry Cheesecake Puppy Chow safe for dogs?
No, this treat is not safe for dogs due to the presence of ingredients like chocolate and sugar, which can be harmful to them. Always keep treats like these away from your furry friends. If you're looking for a pet-safe snack, consider puppy chow recipes specifically designed for dogs!

Cherry Cheesecake Puppy Chow

Cherry Cheesecake Puppy Chow: Easy No-Bake Sweet Bliss

Delight in Cherry Cheesecake Puppy Chow, a nostalgic no-bake dessert combining creamy cheesecake and cherry flavors.
Print Recipe Pin Recipe
Prep Time 30 minutes mins
Total Time 30 minutes mins
Servings: 8 cups
Course: Dessert
Cuisine: American
Calories: 250
Ingredients Equipment Method Nutrition Notes

Ingredients
  

For the Base
  • 6 cups Chex Cereal Any flavor can be used.
  • 1 cup White Chocolate Chips Almond bark is a substitute.
  • 1/4 cup Unsalted Butter Margarine works for dairy-free.
For the Cheesecake Mixture
  • 8 oz Cream Cheese (softened) Dairy-free cream cheese can be used.
  • 1 pkg Cherry-Flavored Gelatin Can be swapped for raspberry or strawberry.
For Coating
  • 1 cup Powdered Sugar Adjust for less sweetness.

Equipment

  • Microwave-safe bowl
  • large mixing bowl
  • Resealable plastic bag
  • Spatula
  • Baking Sheet
  • Parchment Paper

Method
 

Step‑by‑Step Instructions for Cherry Cheesecake Puppy Chow
  1. In a microwave-safe bowl, combine the white chocolate chips and unsalted butter. Heat in 30-second intervals, stirring until smooth, about 1-2 minutes total.
  2. Once melted, stir in the softened cream cheese until fully combined. Then, sprinkle in the cherry-flavored gelatin, mixing until well incorporated.
  3. In a large mixing bowl, pour the Chex cereal. Slowly drizzle the creamy mixture over the cereal, gently folding to coat each piece.
  4. Transfer the coated cereal into a resealable plastic bag. Add powdered sugar, seal tightly, and shake until coated.
  5. Spread the mixture onto a parchment-lined baking sheet and let it cool for about 30 minutes.
  6. Once cooled, break apart clumps and transfer to a serving bowl or individual bags.

Nutrition

Serving: 1cupCalories: 250kcalCarbohydrates: 30gProtein: 2gFat: 12gSaturated Fat: 7gCholesterol: 30mgSodium: 50mgPotassium: 60mgFiber: 1gSugar: 20gVitamin A: 300IUCalcium: 40mgIron: 0.5mg

Notes

Ensure cream cheese is softened for easy blending. Use gentle mixing to avoid breaking the cereal. Store in an airtight container to maintain freshness.

Tried this recipe?

Let us know how it was!

Cinnamon Roll Bliss Bars: Irresistibly Chewy & Easy to Make

February 12, 2026 by Grace Snow Leave a Comment

The sweet aroma of cinnamon and sugar wafting through the kitchen is like a warm hug on a chilly day. If you’re craving a dessert that’s both comforting and effortlessly delicious, let me introduce you to my Cinnamon Roll Bliss Bars. This delightful treat puts a fun twist on traditional cinnamon rolls, transforming them into soft, chewy bars that are incredibly easy to whip up in just 45 minutes! They’re perfect for sharing with family and friends, and the creamy frosting takes these bars to a whole new level. Plus, they’re vegetarian and easily adaptable for gluten-free diets, making them a versatile choice for any gathering. So, are you ready to indulge in a treat that marries nostalgia with simplicity? Let’s get baking!

Why Are Cinnamon Roll Bliss Bars So Irresistible?

Comforting Flavors: These bars blend the best of cinnamon rolls and cookies, creating a unique treat that’s sure to delight.

Quick & Easy: In under 45 minutes, you can bake a batch that impresses without complex steps or crazy ingredients.

Versatile Treat: Perfect for breakfast, brunch, or dessert, they pair delightfully with coffee or as a sweet snack throughout the day.

Adaptable: Whether you prefer gluten-free or dairy-free variations, these bars can easily be customized to suit your needs. Check out our recipes for Pumpkin Cinnamon Roll for another unique twist!

Irresistible Frosting: The creamy frosting on top adds a luscious finish, taking your experience from delicious to delectable.

Ingredients for Cinnamon Roll Bliss Bars

• • Here’s what you’ll need!

For the Bars

  • Butter – Adds richness and flavor; use softened butter for easier mixing.
  • Brown Sugar – Provides sweetness and moisture, contributing to the chewy texture.
  • Granulated Sugar – Balances flavor and adds sweetness to the bars.
  • Eggs – Binds ingredients and adds moisture; ensure they are at room temperature before use.
  • Sour Cream – Keeps the bars moist and adds a slight tang; can be substituted with plain yogurt if needed.
  • Vanilla Extract – Enhances flavor; try almond extract for a unique twist.
  • All-Purpose Flour – Provides structure; substitute with gluten-free flour blend for a gluten-free treat.
  • Baking Powder & Baking Soda – Crucial leavening agents that help the bars rise and stay fluffy.
  • Ground Cinnamon – Infuses a warm, comforting flavor, making these bars a cozy delight.
  • Salt – Balances sweetness and enhances all flavors in the bars.

For the Frosting

  • Powdered Sugar – Creates a silky-smooth frosting; sift for best results.
  • Milk – Helps achieve a creamy consistency; can use dairy-free milk for vegan options.
  • Vanilla Extract – Adds flavor; try substituting with almond extract for a twist.

Now that you're equipped with the ingredients, get excited to create your own delicious Cinnamon Roll Bliss Bars!

Step‑by‑Step Instructions for Cinnamon Roll Bliss Bars

Step 1: Preheat Oven
Begin by preheating your oven to 350°F (175°C). While the oven warms up, grab a 9x13 inch baking pan and generously grease it with butter or cooking spray to prevent the Cinnamon Roll Bliss Bars from sticking. This ensures a smooth release once baked, leading to beautiful bars ready to be frosted!

Step 2: Cream Butter and Sugars
In a large mixing bowl, beat together 1 cup of softened butter, ¾ cup of brown sugar, and ½ cup of granulated sugar until the mixture is creamy and smooth. Use a hand mixer or stand mixer on medium speed for about 2-3 minutes. You’ll know it’s ready when the mixture is light in color and fluffy—this adds wonderful airiness to your bars!

Step 3: Mix Wet Ingredients
Next, add in 2 room-temperature eggs, ½ cup of sour cream, and 2 teaspoons of vanilla extract. Mix these wet ingredients into the creamed butter and sugars, blending thoroughly until everything is well incorporated and the mixture is smooth. The sour cream helps keep the bars moist, resulting in a delightful texture!

Step 4: Combine Dry Ingredients
In a separate bowl, whisk together 2 cups of all-purpose flour, 1 teaspoon of baking powder, ½ teaspoon of baking soda, 2 teaspoons of ground cinnamon, and a pinch of salt. This ensures that all dry ingredients are evenly mixed and will blend harmoniously into your Cinnamon Roll Bliss Bars, contributing to their lovely flavor and structure.

Step 5: Combine Wet and Dry
Gradually fold the dry ingredient mixture into the wet mixture, stirring gently until just combined. Be careful not to overmix, as this can lead to tough bars. You want to maintain a soft, cohesive batter that will help your Cinnamon Roll Bliss Bars rise beautifully in the oven!

Step 6: Spread Batter
Pour the batter into your prepared baking pan and use a spatula to smooth it out evenly across the base. The batter should create a nice, even layer that will bake up into soft, chewy bars. Once spread, take a moment to appreciate the cinnamon aroma wafting through your kitchen!

Step 7: Add Topping
In a small bowl, combine 2 tablespoons of granulated sugar with an additional teaspoon of ground cinnamon. Sprinkle this mixture generously over the top of the batter, creating a delightful cinnamon-sugar layer that gives the bars a crisp, flavorful topping to contrast the soft base.

Step 8: Bake
Place the prepared pan into the preheated oven and bake for 25-30 minutes. You’ll know your Cinnamon Roll Bliss Bars are done when the edges are lightly golden and a toothpick inserted in the center comes out clean. This is when the kitchen fills with the most mouth-watering scents!

Step 9: Cool
Once baked to perfection, remove the pan from the oven and allow the bars to cool completely in the pan. This usually takes about 15-20 minutes. Patience is key here, as allowing them to cool will ensure that they hold together beautifully when cut.

Step 10: Make Frosting
While the bars cool, prepare the frosting by mixing 1 cup of powdered sugar, 2 tablespoons of milk, and 1 teaspoon of vanilla extract in a bowl. Whisk until smooth and creamy, adjusting the milk as needed to achieve your desired consistency. This luscious topping adds the perfect finishing touch to your Cinnamon Roll Bliss Bars!

Step 11: Frost and Serve
Once the bars have cooled completely, spread the creamy frosting generously over the top. Slice into squares or rectangles, and prepare to share these delectable Cinnamon Roll Bliss Bars with your family and friends. Their delightful texture and rich flavor will make them a favorite!

How to Store and Freeze Cinnamon Roll Bliss Bars

Room Temperature: Store the Cinnamon Roll Bliss Bars in an airtight container at room temperature for up to 3 days to maintain their soft and chewy texture.

Fridge: For longer freshness, place them in the refrigerator, where they will stay good for up to a week. Just be sure to let them come to room temperature before serving for the best taste.

Freezer: Freeze the bars in an airtight container or tightly wrapped in plastic wrap for up to 2 months. Thaw in the fridge overnight or at room temperature before enjoying.

Reheating: If you prefer warm bars, microwave individual pieces for about 10-15 seconds to enjoy the gooey goodness of the frosting once again!

What to Serve with Cinnamon Roll Bliss Bars?

The joy of indulging in these rich, chewy bars can be amplified by pairing them with delightful side offerings that enhance every bite.

  • Fresh Fruit Compote: A sweet and tangy compote made from berries will add a refreshing contrast to the indulgent bars. Each spoonful complements their rich, creamy frosting beautifully.

  • Vanilla Ice Cream: This classic pairing offers a wonderful cooling element to the warm, spiced bars. The creaminess of the ice cream brings a delightful balance, perfect for an after-dinner treat!

  • Coffee or Latte: A hot cup of coffee or a frothy latte can enhance the flavors of cinnamon and sugar in the bars, making your snack an even more satisfying ritual.

  • Nutty Granola: Crushed nutty granola sprinkled over the top adds a crunchy texture that balances the soft, chewy bliss of the bars. It's a perfect morning treat alongside your coffee.

  • Chai Tea: This spiced tea mirrors the warm flavors of the bars, making it a fantastic beverage choice that will warm your heart and home.

  • Cream Cheese Frosting Alternative: For a fun twist, whip up a tangy cream cheese frosting to top your bars. This simple change can elevate the sweetness into a deliciously creamy experience!

  • Chocolate Drizzle: Drizzling a bit of melted chocolate over the frosted bars creates an enticing visual and flavor contrast that will captivate any chocolate lover.

Mix and match these combinations to create a delightful spread that celebrates the comforting flavors of your Cinnamon Roll Bliss Bars!

Make Ahead Options

These Cinnamon Roll Bliss Bars are a fantastic choice for meal prep! You can prepare the batter and refrigerate it up to 24 hours in advance, which saves you valuable time on busy days. Simply mix all the ingredients and store the batter in an airtight container in the fridge. For the topping, you can also combine the cinnamon and sugar mixture ahead and keep it in a small container. When you’re ready to bake, pour the chilled batter into the greased pan, sprinkle the topping on, and bake as directed. This way, you’ll have warm, fresh Cinnamon Roll Bliss Bars ready to enjoy with minimal effort—just as delicious as if you made them from scratch in one go!

Expert Tips for Cinnamon Roll Bliss Bars

  • Room Temperature Ingredients: Always ensure your butter and eggs are at room temperature for a smoother batter and better mixing.

  • Avoid Overmixing: Mix the batter gently until just combined. Overmixing can lead to tough Cinnamon Roll Bliss Bars instead of soft and chewy ones.

  • Cooling is Crucial: Allow the bars to cool completely before frosting. Frosting on warm bars will melt, ruining that beautiful creamy topping!

  • Measure Accurately: Use proper measuring techniques for dry ingredients, like spooning flour into the measuring cup rather than scooping, to enhance texture.

  • Custom Frosting: Feel free to experiment with different frostings! Cream cheese frosting or chocolate ganache can add delightful twists on your delicious Cinnamon Roll Bliss Bars.

Cinnamon Roll Bliss Bars Variations

Customize your Cinnamon Roll Bliss Bars to suit your taste and dietary needs, making them even more delightful!

  • Gluten-Free: Substitute all-purpose flour with a gluten-free flour blend, ensuring everyone can enjoy these treats.
  • Dairy-Free: Use coconut oil instead of butter and plant-based milk for the frosting for a vegan-friendly option.
  • Nutty Delight: Add ½ cup of chopped walnuts or pecans for a wonderful crunch that complements the chewy texture.
  • Spiced Up: Mix in ½ teaspoon of nutmeg or cardamom with the cinnamon for a new flavor twist that adds warmth.
  • Fruity Addition: Stir in 1 cup of fresh blueberries or diced apples into the batter for a pop of natural sweetness and color.
  • Choco-Lover’s Twist: Add ½ cup of chocolate chips into the batter, creating a wonderful balance of cinnamon and chocolate in every bite.
  • Creamy Frosting Alternative: Swap the vanilla frosting for cream cheese frosting for a tangy contrast that pairs beautifully with the sweet bars.
  • Heat It Up: Add a pinch of cayenne or crushed red pepper to the cinnamon-sugar topping to give your bars an unexpected kick.

Feel inspired? Explore more variations with our delicious Pumpkin Cinnamon Roll recipes for another way to enjoy cinnamon-y goodness!

Cinnamon Roll Bliss Bars Recipe FAQs

What type of butter should I use for the Cinnamon Roll Bliss Bars?
I recommend using unsalted, softened butter for the best flavor and texture. This allows you to control the amount of salt in your recipe. Softened butter blends easily, creating a creamy mixture with the sugars.

How should I store my Cinnamon Roll Bliss Bars?
Store your Cinnamon Roll Bliss Bars in an airtight container at room temperature for up to 3 days. If you're looking to keep them fresh for longer, place them in the refrigerator, where they can last about a week. Just remember to let them come to room temperature before serving for the best flavor!

Can I freeze Cinnamon Roll Bliss Bars?
Absolutely! To freeze, wrap individual bars tightly in plastic wrap or place them in an airtight container. They can be stored in the freezer for up to 2 months. When you're ready to enjoy, simply thaw overnight in the fridge or allow to come to room temperature. For a gooey treat, microwave individual pieces for 10-15 seconds.

What should I do if my batter seems too thick?
If your batter appears too thick, it might be due to over-measuring the flour. To fix this, consider adding a tablespoon of milk at a time to the mixture until you reach the desired consistency. This will help ensure your Cinnamon Roll Bliss Bars bake up soft and chewy!

Are there any dietary considerations for the Cinnamon Roll Bliss Bars?
These bars are vegetarian and easily adaptable for gluten-free diets! You can substitute all-purpose flour with a gluten-free flour blend. For a dairy-free option, use dairy-free milk in the frosting, and replace sour cream with plain non-dairy yogurt. Enjoy guilt-free while catering to dietary restrictions!

How long will the frosting stay good on the bars?
The creamy vanilla frosting can typically stay good on the bars for up to 3 days stored at room temperature. However, if you refrigerate the bars, the frosting will last about a week before losing its creamy texture. Be sure to let them sit out for a few minutes before serving if they've been chilled!

Cinnamon Roll Bliss Bars

Cinnamon Roll Bliss Bars: Irresistibly Chewy & Easy to Make

Cinnamon Roll Bliss Bars are soft, chewy treats that blend comforting flavors and are incredibly easy to make, perfect for sharing.
Print Recipe Pin Recipe
Prep Time 15 minutes mins
Cook Time 30 minutes mins
Cooling Time 20 minutes mins
Total Time 45 minutes mins
Servings: 12 bars
Course: Dessert
Cuisine: American
Calories: 200
Ingredients Equipment Method Nutrition Notes

Ingredients
  

For the Bars
  • 1 cup Butter softened
  • 3/4 cup Brown Sugar
  • 1/2 cup Granulated Sugar
  • 2 pcs Eggs room temperature
  • 1/2 cup Sour Cream can be substituted with plain yogurt
  • 2 teaspoons Vanilla Extract try almond extract for a twist
  • 2 cups All-Purpose Flour substitute with gluten-free flour for gluten-free option
  • 1 teaspoon Baking Powder
  • 1/2 teaspoon Baking Soda
  • 2 teaspoons Ground Cinnamon
  • 1 teaspoon Salt
For the Frosting
  • 1 cup Powdered Sugar sifted for best results
  • 2 tablespoons Milk can use dairy-free milk
  • 1 teaspoon Vanilla Extract try substituting with almond extract

Equipment

  • 9x13-inch baking pan
  • Mixing Bowl
  • Spatula
  • Whisk
  • Electric mixer

Method
 

Step-by-Step Instructions
  1. Preheat your oven to 350°F (175°C). Grease a 9x13 inch baking pan with butter or cooking spray.
  2. In a large mixing bowl, beat together 1 cup of softened butter, ¾ cup of brown sugar, and ½ cup of granulated sugar until creamy.
  3. Add 2 room-temperature eggs, ½ cup of sour cream, and 2 teaspoons of vanilla extract. Mix until smooth.
  4. In a separate bowl, whisk together 2 cups of all-purpose flour, 1 teaspoon of baking powder, ½ teaspoon of baking soda, 2 teaspoons of ground cinnamon, and a pinch of salt.
  5. Gradually fold the dry ingredients into the wet ingredients until just combined.
  6. Pour the batter into the prepared baking pan and smooth it out evenly.
  7. Combine 2 tablespoons of granulated sugar with an additional teaspoon of ground cinnamon, and sprinkle it over the top.
  8. Bake for 25-30 minutes until edges are lightly golden and a toothpick comes out clean.
  9. Allow the bars to cool completely in the pan, about 15-20 minutes.
  10. In a bowl, mix 1 cup of powdered sugar, 2 tablespoons of milk, and 1 teaspoon of vanilla extract until smooth to make the frosting.
  11. Spread the frosting over the cooled bars, slice, and serve.

Nutrition

Serving: 1barCalories: 200kcalCarbohydrates: 30gProtein: 2gFat: 9gSaturated Fat: 5gMonounsaturated Fat: 3gCholesterol: 30mgSodium: 150mgPotassium: 80mgSugar: 15gVitamin A: 250IUCalcium: 10mgIron: 0.5mg

Notes

For best results, ensure ingredients are at room temperature and avoid overmixing to maintain the bars' chewy texture.

Tried this recipe?

Let us know how it was!

Shiroi Koibito Japanese Snack - Sweet Treats Made Easy

February 12, 2026 by Grace Snow Leave a Comment

As I unwrapped the delicate cookies, a sweet memory washed over me—sipping tea in a quaint Japanese tea house, indulging in each blissful bite of Shiroi Koibito. These beloved Japanese sandwich cookies are a delightful homage to that experience, featuring a buttery texture paired with a luscious white chocolate ganache. What I adore about making this Shiroi Koibito Japanese snack at home is how effortlessly they come together—perfect for novice bakers yet impressive enough to dazzle guests. And let’s not forget, their beautiful presentation not only elevates any dessert table but also offers a wholesome alternative to modern snacking habits. Curious about how to create these charming treats and customize your flavors? Let’s dive in!

Why are Shiroi Koibito a must-try?

Simplicity at its best: With a straightforward process, even novice bakers can create these delightful cookies in no time.

Customizable flavors: Feel free to experiment with flavors like dark chocolate or matcha, making each batch uniquely yours.

Impressive presentation: Their beautiful appearance will impress guests, making them perfect for celebrations or as a thoughtful homemade gift.

Wholesome alternative: Unlike fast food snacks, these cookies offer a comforting treat made from quality ingredients, ensuring a guilt-free indulgence.

Crowd favorite: Perfect for sharing, Shiroi Koibito cookies are sure to be a hit at gatherings! For more recipes like these, check out my section on homemade snacks.

Shiroi Koibito Cookie Ingredients

• Here’s what you need to make these delightful Shiroi Koibito Japanese snacks.

For the Cookies

  • Unsalted Butter – Provides richness and a creamy texture; ensure it's softened for easy mixing.
  • Powdered Sugar – Adds sweetness and a smooth texture; sift before measuring to prevent lumps.
  • Large Egg White – Acts as a binding agent for a light texture; use at room temperature for better incorporation.
  • All-Purpose Flour – The main structural component; sifted to prevent clumps and maintain fluffiness.
  • Cornstarch – Ensures a tender crumb in the cookies; sifted for even distribution.
  • Vanilla Extract – Optional, but a beautiful enhancer for the flavor profile.
  • Pinch of Salt – Balances sweetness and elevates overall flavor.

For the Ganache

  • High-Quality White Chocolate – Essential for a smooth, sweet ganache; avoid chocolate with vegetable oils or fillers.
  • Heavy Cream – Used to create a rich ganache; heat to just simmer for that silky consistency.
  • Unsalted Butter (for ganache) – Adds extra richness and smoothness to your chocolate filling.

Step‑by‑Step Instructions for Shiroi Koibito Japanese Snack

Step 1: Prepare Cookie Batter
In a large mixing bowl, beat 1 cup of softened unsalted butter and 1 cup of powdered sugar together with an electric mixer until the mixture is light and fluffy, about 3-5 minutes. Add in 1 large egg white and 1 teaspoon of vanilla extract, mixing until the batter becomes glossy and well combined, creating a rich base for your Shiroi Koibito cookies.

Step 2: Combine Dry Ingredients
In another bowl, whisk together 1 ¾ cups of all-purpose flour, ½ cup of cornstarch, and a pinch of salt. Gradually fold these dry ingredients into your wet mixture. Be careful to mix until just combined to avoid overworking the dough, which would lead to tougher cookies.

Step 3: Pipe Cookies
Transfer the cookie batter into a piping bag fitted with a small round tip. On a parchment-lined baking sheet, pipe small oval shapes, evenly spaced for proper baking. Aim for about 1 inch in length, as these Shiroi Koibito cookies will spread slightly when baked.

Step 4: Bake Cookies
Preheat your oven to 325°F (160°C). Once heated, carefully place the baking sheet in the oven and bake for 8-12 minutes. Keep a close eye on the cookies; they should turn lightly golden on the edges to ensure they are perfectly cooked, so consider rotating the baking sheets halfway through for even baking.

Step 5: Cool Cookies
After baking, remove the cookies from the oven and allow them to cool on the baking sheet for about 5 minutes. Then, carefully transfer them to a wire rack to cool completely. This step ensures your Shiroi Koibito cookies have a delightful texture and are ready for the ganache filling.

Step 6: Make Ganache
In a small saucepan, heat ½ cup of heavy cream on medium heat, bringing it to a simmer. Once simmering, pour it over 6 ounces of chopped high-quality white chocolate in a separate bowl and let it sit for 1 minute. Stir the mixture gently until it becomes smooth and creamy; this is the heart of your decadent filling.

Step 7: Finish Ganache
Mix in 2 tablespoons of unsalted butter into the warm ganache until fully incorporated. Allow the ganache to sit at room temperature for a few minutes until it thickens slightly. This thickened texture will make it easier to spread on your cookies without spilling.

Step 8: Assemble Cookies
Spread a generous layer of the cooled ganache on the flat side of half of the cookies. Top them with the remaining cookies to create delightful sandwich cookies. If you prefer, place these assembled cookies in the refrigerator for about 30 minutes to help the ganache set.

Step 9: Serve
Present your beautiful Shiroi Koibito Japanese snacks at room temperature or chilled, arranged elegantly on a serving platter. These delectable treats will not only impress your guests but also provide a satisfying and memorable sweet indulgence.

Shiroi Koibito Japanese Snack: Variations & Substitutions

Feel free to sprinkle your creativity into these cookies, transforming each batch into a unique delight that suits your palate!

  • Dairy-Free: Use coconut oil instead of butter for a delightful, plant-based version that still maintains a rich taste.
  • Gluten-Free: Substitute all-purpose flour with a 1:1 gluten-free flour blend for an equally tasty, accommodating treat.
  • Nutty Twist: Add almond or hazelnut flour to the batter for a lovely nutty flavor and extra richness.
  • Citrus Zest: Enhance the cookie batter with lemon or orange zest for a refreshing, zesty finish that brightens every bite.
  • Chocolate Variations: Swap the white chocolate ganache for dark chocolate or a blend of both to create a deeper, richer flavor profile.
  • Matcha Instead: Incorporate matcha powder into the ganache for a beautiful green hue and a unique taste that evokes the heart of Japan.
  • Spicy Kick: Add a pinch of chili powder to the ganache for a surprising heat that contrasts beautifully with the sweetness.
  • Herbal Infusion: Infuse the cream for the ganache with fresh mint or lavender to elevate the flavor profile and add an aromatic touch.

Each simple adjustment opens the door to new culinary adventures! If you're looking for more ideas, consider exploring my other recipes for homemade snacks that are sure to impress!

Storage Tips for Shiroi Koibito Japanese Snack

  • Room Temperature: Store cookies in an airtight container for up to 3 days to maintain freshness and prevent them from becoming stale.

  • Fridge: If you prefer, these cookies can be refrigerated for up to 5 days. Ensure they are in a sealed container to avoid absorbing unwanted odors.

  • Freezer: For longer storage, freeze the assembled cookies in an airtight container for up to 2 months. Allow them to thaw at room temperature before serving.

  • Reheating: If desired, you can gently heat them in the microwave for a few seconds to soften the ganache before enjoying your delightful Shiroi Koibito Japanese snack.

What to Serve with Shiroi Koibito Japanese Sandwich Cookies

Indulging in these delicate treats opens the door to beautiful meal pairings that complement their sweetness.

  • Green Tea: The earthy notes of freshly brewed matcha balance the sweetness of the cookies, providing a delightful contrast.

  • Fresh Berries: A vibrant assortment of strawberries, blueberries, and raspberries adds a refreshing tartness that pairs beautifully with the rich ganache.

  • Vanilla Ice Cream: A creamy scoop of vanilla ice cream creates a luscious texture combination, enhancing the overall dessert experience.

  • Espresso: The robust flavor of a rich espresso serves as the perfect accompaniment, making each bite feel indulgent and satisfying.

  • Coconut Whipped Cream: Light and airy, this tropical topping not only adds flavor but also introduces a unique texture that complements the buttery cookies.

  • Sake: A chilled glass of sweet or sparkling sake elevates the tasting experience, bringing a touch of authenticity to your Japanese-inspired treat.

  • Chocolate Dipped Fruit: Combining chocolate-dipped strawberries or bananas alongside these cookies introduces a playful element to your dessert spread.

  • Almond Biscotti: For those who enjoy crunchy textures, pairing a slice of almond biscotti enhances the snacking experience while adding depth to your flavor palette.

Each of these pairings will enhance the flavor of your Shiroi Koibito Japanese snack, making for a delightful and memorable gathering with friends or family.

Expert Tips for Shiroi Koibito

  • Butter Softness Matters: Using softened unsalted butter ensures proper creaming with powdered sugar, resulting in a light cookie texture.

  • Egg White Temperature: Always use room-temperature egg whites for better incorporation and a fluffier cookie. Cold egg whites can lead to clumping.

  • Mixing Cautions: Be careful not to overmix the dough after adding dry ingredients, as this can create toughness in your Shiroi Koibito cookies.

  • Piping Consistency: To achieve uniform cookie sizes, use a piping bag with a small round tip. This helps maintain the delicate shape during baking.

  • Watch the Bake: Keep an eye on the cookies as they bake; removing them too late can lead to over-browning, which affects texture.

  • Cool Ganache Before Assembly: Ensure the ganache has cooled slightly before assembling the cookies to prevent spillage and create a clean, beautiful sandwich.

Make Ahead Options

These Shiroi Koibito Japanese snacks are perfect for busy cooks looking to save time without sacrificing flavor! You can prepare the cookie dough up to 24 hours in advance by storing it in an airtight container in the refrigerator. The ganache can be made ahead as well and stored for up to 3 days; just remember to reheat it slightly before assembly to maintain its smooth consistency. When you’re ready to enjoy these delightful cookies, simply bake the dough and assemble with the ganache, and you’ll have fresh, impressive treats with minimal effort! This way, you can always have a sweet surprise handy for any occasion.

Shiroi Koibito Japanese Snack Recipe FAQs

How do I select the right ripeness of the ingredients?
Absolutely! For the best flavor and texture, use unsalted butter that is slightly softened but not melted—about room temperature is ideal. When it comes to the egg white, make sure it's at room temperature as this helps it incorporate better into the batter. This will ensure the cookies rise nicely and remain light.

What are the best storage methods for Shiroi Koibito cookies?
You can store your delightful Shiroi Koibito Japanese snacks in an airtight container at room temperature for up to 3 days. If you prefer them chilled, they'll last in the fridge for up to 5 days. Just make sure to check they’re well-sealed to keep them fresh and avoid moisture.

Can I freeze Shiroi Koibito cookies?
Yes! To freeze your Shiroi Koibito Japanese snacks, place the assembled cookies in an airtight container, ensuring they are well separated to avoid sticking. They can be frozen for up to 2 months. When you’re ready to enjoy them, simply allow them to thaw at room temperature for about 30 minutes or gently warm them in the microwave for a few seconds to soften the ganache.

What should I do if my cookies are too tough?
If your cookies turn out tough, don’t worry! This might happen if the dough was overmixed after adding the dry ingredients. To fix this in future batches, gently fold in the dry ingredients until just combined. Also, ensure you're using softened unsalted butter and room-temperature egg whites, which help achieve a lighter texture.

Can anyone with gluten intolerance enjoy these cookies?
Very! You can adapt this recipe to be gluten-free by substituting all-purpose flour with a gluten-free flour blend—just ensure that it has a good texture and design for baked goods. This way, everyone can enjoy a delightful homemade Shiroi Koibito Japanese snack without worry. Always double-check gluten-free labeling on your ingredients to be safe!

How long does the ganache need to cool before assembly?
For perfect assembly, let your ganache cool at room temperature for about 15-20 minutes after mixing in the butter. It should thicken slightly, making it easy to spread without spilling. If you find it too runny, simply give it a few extra minutes to cool more before using!

Shiroi Koibito Japanese Snack

Shiroi Koibito Japanese Snack - Sweet Treats Made Easy

Delight in making Shiroi Koibito, a Japanese snack of buttery cookies filled with rich white chocolate ganache.
Print Recipe Pin Recipe
Prep Time 30 minutes mins
Cook Time 12 minutes mins
Cooling Time 10 minutes mins
Total Time 52 minutes mins
Servings: 12 cookies
Course: Dessert
Cuisine: Japanese
Calories: 180
Ingredients Equipment Method Nutrition Notes

Ingredients
  

For the Cookies
  • 1 cup unsalted butter softened
  • 1 cup powdered sugar sifted
  • 1 large egg white room temperature
  • 1 ¾ cups all-purpose flour sifted
  • ½ cup cornstarch sifted
  • 1 teaspoon vanilla extract optional
  • 1 pinch salt
For the Ganache
  • 6 ounces high-quality white chocolate chopped
  • ½ cup heavy cream heated to simmer
  • 2 tablespoons unsalted butter for ganache

Equipment

  • Electric mixer
  • Mixing Bowl
  • piping bag
  • Baking Sheet
  • Parchment Paper
  • Saucepan
  • wire rack

Method
 

Step-by-Step Instructions
  1. In a large mixing bowl, beat the butter and powdered sugar together until light and fluffy, about 3-5 minutes. Add the egg white and vanilla extract, mixing until glossy.
  2. In another bowl, whisk together all-purpose flour, cornstarch, and salt. Gradually fold into the wet ingredients, mixing until just combined.
  3. Transfer the batter into a piping bag and pipe small oval shapes onto a parchment-lined baking sheet.
  4. Preheat oven to 325°F (160°C). Bake cookies for 8-12 minutes until lightly golden on edges.
  5. Let cookies cool on the baking sheet for 5 minutes, then transfer to a wire rack.
  6. Heat heavy cream on medium until simmering. Pour over chopped white chocolate, let sit for 1 minute, then stir until smooth.
  7. Mix in unsalted butter into the warm ganache until fully incorporated; let cool slightly.
  8. Spread ganache on the flat side of half of the cookies and top with the remaining cookies.
  9. Serve at room temperature or chilled, arranged elegantly on a serving platter.

Nutrition

Serving: 1cookieCalories: 180kcalCarbohydrates: 25gProtein: 2gFat: 8gSaturated Fat: 5gPolyunsaturated Fat: 0.5gMonounsaturated Fat: 2.5gCholesterol: 30mgSodium: 60mgPotassium: 50mgSugar: 10gVitamin A: 200IUCalcium: 10mgIron: 0.5mg

Notes

Ensure butter is softened for proper mixing and consistency. Allow the ganache to cool slightly before assembly.

Tried this recipe?

Let us know how it was!

Blueberry Cookies: Soft Chewy Bliss with Homemade Jam

February 12, 2026 by Grace Snow Leave a Comment

As I stood in my kitchen, the sweet, tangy scent of bubbling homemade blueberry jam filled the air, transporting me to countless summer days spent picking berries under a warm sun. Today, this delightful aroma melds into my latest creation: Blueberry Cookies. These soft and chewy treats not only showcase the vibrant flavor of ripe blueberries but also promise to be an absolute crowd-pleaser at any gathering. Plus, the best part? They’re incredibly easy to whip up, making them perfect for busy weeknights or spontaneous dessert cravings. As I took my first bite, the jammy goodness reminded me why I love making homemade cookies so much. Curious how to bring this deliciousness into your own kitchen? Let’s dive into this blueberry adventure together!

Why Are These Blueberry Cookies Irresistible?

Deliciously Chewy: These blueberry cookies offer the perfect balance of soft and chewy textures that will have everyone coming back for more.
Homemade Jam Magic: The use of homemade blueberry jam infuses each bite with a burst of sweet, fruity flavor, elevating your cookie game.
Quick and Easy: With straightforward steps, you can whip up a batch in no time, making it ideal for busy nights or last-minute dessert cravings.
Versatile Variations: Feel free to mix in white chocolate chips or lemon zest for an extra twist—options are endless! If you’re a fan of soft cookies, don’t miss out on these Eggnog Cookies Soft and Matcha Cookies Soft.
Perfect for Sharing: Impress friends and family at gatherings with these delightful treats, guaranteed to become a favorite among cookie lovers.

Blueberry Cookies Ingredients

Get ready to bake these delightful goodies!

For the Blueberry Jam

  • Fresh Blueberries – The star of the show! Use ripe berries for a burst of natural sweetness.
  • Granulated White Sugar – This helps balance the tartness of the blueberries and enhances flavor.
  • Lemon Juice – A splash of acidity brightens the jam, highlighting the blueberry essence.
  • Vanilla Extract – Adds warmth and a depth of flavor, making the jam extra special.
  • Cornstarch – Essential for thickening the blueberry jam to the perfect consistency.

For the Cookies

  • All-Purpose Flour – Provides the structure needed for a soft, chewy cookie; spoon and level for accuracy.
  • Baking Powder – Ensures the cookies rise just right, giving them that perfect fluffy texture.
  • Salt – Balances sweetness and enhances the overall flavor of the cookies.
  • Unsalted Butter – Use softened butter for a creamy texture that makes mixing a breeze.
  • Granulated White Sugar – Sweetens the dough and helps achieve a lovely golden brown color.
  • Egg – This binds everything together and contributes to the cookie's chewy texture; use at room temperature for best results.
  • Vanilla Extract – Just a touch more adds great flavor depth to the cookie base.
  • Additional Granulated Sugar (for sprinkling) – Optional, but perfect for a slightly crunchy topping.

Now that you have your ingredients ready, let’s turn your kitchen into a warm, inviting haven filled with the intoxicating aroma of freshly baked blueberry cookies! 🍪

Step‑by‑Step Instructions for Blueberry Cookies

Step 1: Make the Blueberry Jam
In a medium pot, combine fresh blueberries, granulated sugar, lemon juice, vanilla extract, and cornstarch. Cook this mixture over moderate heat for 30-40 minutes, stirring gently and mashing the blueberries occasionally with a fork. The jam should thicken and become glossy. Once ready, remove it from heat and let it cool completely near the stove.

Step 2: Prepare Dry Ingredients
In a separate mixing bowl, whisk together all-purpose flour, baking powder, and salt to ensure even distribution of the leavening agents. Set this bowl aside for later use. This step is key to keeping your Blueberry Cookies light and fluffy, so take your time mixing the dry ingredients thoroughly.

Step 3: Cream Butter and Sugar
In a large mixing bowl, beat the softened unsalted butter with granulated sugar using an electric mixer on medium speed until the mixture is fluffy and light, which should take about 2-3 minutes. Aim for a light-colored texture that will contribute to the cookie's soft and chewy consistency, perfect for the Blueberry Cookies.

Step 4: Combine Wet Ingredients
Add in the egg and extra vanilla extract to the butter-sugar mixture, continuing to mix on medium speed until it becomes light and well-blended, about 2 more minutes. This creates a smooth base that binds everything together and enhances the cookie's flavor profile.

Step 5: Mix Dry Ingredients
Gradually add your prepared dry ingredients into the wet mixture, mixing on low speed until just combined. Avoid overmixing to keep the texture tender. The dough should be slightly sticky but come together beautifully, setting the stage for your Blueberry Cookies.

Step 6: Fold in Jam
Using a spatula, gently fold in the cooled homemade blueberry jam into the cookie dough. Ensure the jam is evenly dispersed throughout the mixture, creating delightful pockets of blueberry goodness in each cookie. Take care not to overmix, as you want to retain the soft texture of the cookies.

Step 7: Scoop and Bake
Preheat your oven to 350°F (175°C) while you prepare to bake. Using a cookie scoop or two spoons, dollop the dough onto parchment-lined baking sheets, leaving space for them to spread. Optionally, sprinkle a little granulated sugar on top for a touch of sweetness, then bake for 10-13 minutes or until the edges are golden.

Step 8: Cool the Cookies
Once baked, remove the Blueberry Cookies from the oven and let them cool on the baking sheet for 5 minutes. This resting period helps them set properly before transferring them to a wire rack to cool completely. Enjoy the comforting aroma filling your kitchen as they cool!

Expert Tips for Blueberry Cookies

  • Jam Consistency: Ensure your homemade blueberry jam is thick enough; overly runny jam can lead to soggy cookies. Test thickness by letting it cool before adding to the dough.

  • Flour Measuring: Use the spoon and level method to measure flour accurately; packing it can result in dry, dense cookies rather than the soft, chewy texture you want.

  • Cooling Time: Don’t rush the cooling process! Allow cookies to set on the baking sheet; this helps them firm up before transferring and prevents them from breaking apart.

  • Optional Sugar Sprinkling: Sprinkle granulated sugar on top of the unbaked dough for an added crunch. This little step enhances the overall flavor and texture of your blueberry cookies.

  • Room Temperature Eggs: Using eggs at room temperature helps them mix more evenly, leading to a better cookie texture. Take them out of the fridge beforehand for best results.

Make Ahead Options

These Blueberry Cookies are perfect for busy home cooks looking to save time! You can prepare the homemade blueberry jam up to 3 days in advance; simply refrigerate it in an airtight container until ready to use. Also, you can mix the cookie dough and store it in the fridge for up to 24 hours. Just scoop the dough onto parchment-lined baking sheets, cover with plastic wrap, and chill to prevent flattening. When you’re ready to bake, simply preheat the oven and scoop the dough directly from the fridge onto the baking sheet—no need to let it come to room temperature. With these make-ahead options, you’ll have fresh, delicious Blueberry Cookies ready to enjoy with minimal effort!

What to Serve with Blueberry Cookies

These delightful treats will brighten up any dessert table and are perfect for sharing with loved ones.

  • Vanilla Ice Cream: The creamy texture pairs beautifully with the soft, chewy cookies, enhancing their sweetness.

  • Lemon Curd: A tart lemon curd brings a refreshing contrast to the cookies' sweetness, making each bite pop.

  • Coffee: The rich, bold flavors of coffee balance the sweetness of blueberry cookies, creating a perfect afternoon delight.

  • Milk: A classic combination, a chilled glass of milk is the ultimate comfort pairing that complements the soft texture beautifully.

  • Fruit Salad: A light and refreshing fruit salad adds freshness and balances the richness of blueberry cookies—great for summer gatherings.

  • Chocolate Drizzle: Drizzle melted dark or white chocolate on top for an indulgent twist that elevates these homemade treats to gourmet status.

  • Cheese Plate: Consider a mild, creamy cheese, such as brie, which creates a delightful contrast with the sweet blueberry flavors.

Let these pairings guide you toward crafting a memorable dessert experience!

Storage Tips for Blueberry Cookies

  • Room Temperature: Keep your Blueberry Cookies in an airtight container at room temperature for up to 3 days to maintain their soft and chewy texture.

  • Fridge: If you prefer longer storage, you can refrigerate them for up to 1 week. Just ensure they are in an airtight container to prevent drying out.

  • Freezer: For extended storage, freeze the cookies for up to 2 weeks. Place them in a single layer in a freezer-safe bag or container, separating layers with parchment paper.

  • Reheating: When ready to enjoy, thaw frozen cookies at room temperature and reheat in the microwave for about 10 seconds to bring back that freshly baked goodness!

Blueberry Cookies Variations & Substitutions

Customize your blueberry cookies to create different flavor experiences that will excite your taste buds!

  • Nutty Delight: Add ½ cup of chopped pecans or walnuts for a crunchy texture that pairs beautifully with blueberries. Imagine the delightful contrast in each bite!
  • Dairy-Free: Substitute the butter with coconut oil and use a dairy-free milk. This keeps the flavors bright while catering to lactose sensitivities.
  • Zesty Twist: Stir in the zest of one lemon to brighten the flavor profile and add a refreshing zing. Each bite will be like a burst of sunshine!
  • Gluten-Free: Replace all-purpose flour with a 1:1 gluten-free blend. This allows everyone to enjoy these delicious cookies without wheat.
  • White Chocolate Surprise: Fold in ½ cup of white chocolate chips for a creamy, rich twist that enhances the sweetness of the blueberries. It’s like a dessert extravaganza!
  • Spiced Up: Mix in a pinch of cinnamon or nutmeg for a warm spice that complements the blueberries beautifully. Perfect for cozy evenings!

These variations can be a playful way to enjoy the same recipe with a new flair! If you're exploring more options, consider trying out Matcha Cookies Soft or add a hearty layer of flavor with Thumbprint Cookies Melt. The possibilities are endless with these delightful cookie adaptations!

Blueberry Cookies Recipe FAQs

How do I choose the best blueberries for my cookies?
Absolutely! When selecting fresh blueberries, look for berries that are plump and firm with a deep blue color. Avoid any with dark spots or wrinkles, as these may be overripe. If you’re short on fresh blueberries, you can definitely use frozen ones—just keep in mind they'll release more moisture, so you might need to adjust cooking times slightly for the jam.

What is the best way to store leftover blueberry cookies?
The more the merrier! Store your Blueberry Cookies in an airtight container at room temperature for up to 3 days. If you want to keep them longer, you can refrigerate them for up to 1 week. Just be sure to keep them sealed tight to maintain their delicious softness!

Can I freeze blueberry cookies, and if so, how?
Absolutely! To freeze your Blueberry Cookies, let them cool completely first. Then, arrange them in a single layer in a freezer-safe bag or container, interleaving layers with parchment paper to prevent sticking. They will stay fresh in the freezer for up to 2 weeks. When you're ready to enjoy, just thaw at room temperature and reheat in the microwave for about 10 seconds.

What should I do if my cookie dough is too sticky?
If you find your cookie dough is too sticky to work with, don't worry—this can happen sometimes! Try adding a bit more flour, one tablespoon at a time, until you get a workable dough. Alternatively, chilling the dough in the fridge for 15-30 minutes can help firm it up, making it easier to scoop onto baking sheets.

Are these blueberry cookies suitable for those with allergies?
If you're considering dietary restrictions, keep in mind that the recipe contains gluten (from all-purpose flour) and dairy (from butter and egg). For gluten-free versions, try substituting the all-purpose flour with a gluten-free blend. You can use vegan butter and a flaxseed egg (1 tablespoon of ground flaxseed mixed with 2.5 tablespoons of water) for a vegan alternative. Always check with your guests regarding potential allergies before serving.

Blueberry Cookies

Blueberry Cookies: Soft Chewy Bliss with Homemade Jam

These Blueberry Cookies are soft, chewy, and filled with homemade jam for a delightful treat.
Print Recipe Pin Recipe
Prep Time 20 minutes mins
Cook Time 15 minutes mins
Cooling Time 5 minutes mins
Total Time 40 minutes mins
Servings: 12 cookies
Course: Dessert
Cuisine: American
Calories: 150
Ingredients Equipment Method Nutrition Notes

Ingredients
  

For the Blueberry Jam
  • 2 cups Fresh Blueberries The star of the show!
  • 1 cup Granulated White Sugar Balances tartness
  • 2 tablespoons Lemon Juice Brightens the jam
  • 1 teaspoon Vanilla Extract Adds depth of flavor
  • 1 tablespoon Cornstarch Thickens the jam
For the Cookies
  • 2 cups All-Purpose Flour Spoon and level for accuracy
  • 1 teaspoon Baking Powder Ensures cookies rise
  • 0.5 teaspoon Salt Balances sweetness
  • 0.5 cup Unsalted Butter Softened
  • 0.75 cup Granulated White Sugar Sweetens dough
  • 1 large Egg Room temperature
  • 1 teaspoon Vanilla Extract Enhances flavor
  • 2 tablespoons Additional Granulated Sugar For sprinkling on top

Equipment

  • Medium pot
  • Mixing bowls
  • Electric mixer
  • Cookie Scoop
  • Parchment Paper

Method
 

Step‑By‑Step Instructions
  1. In a medium pot, combine fresh blueberries, granulated sugar, lemon juice, vanilla extract, and cornstarch. Cook over moderate heat for 30-40 minutes, stirring gently until thickened.
  2. In a separate bowl, whisk together flour, baking powder, and salt. Set aside.
  3. In a large bowl, beat the softened butter with sugar until fluffy, about 2-3 minutes.
  4. Add the egg and vanilla extract, mixing until well-blended, about 2 more minutes.
  5. Gradually add dry ingredients to the wet mixture, mixing on low until just combined.
  6. Gently fold in the cooled blueberry jam into the cookie dough.
  7. Preheat the oven to 350°F (175°C). Scoop the dough onto parchment-lined baking sheets, sprinkle with sugar if desired, and bake for 10-13 minutes.
  8. Cool on the baking sheet for 5 minutes before transferring to a wire rack.

Nutrition

Serving: 1cookieCalories: 150kcalCarbohydrates: 22gProtein: 2gFat: 6gSaturated Fat: 4gMonounsaturated Fat: 2gCholesterol: 25mgSodium: 100mgPotassium: 50mgFiber: 1gSugar: 10gVitamin A: 200IUVitamin C: 3mgCalcium: 10mgIron: 0.5mg

Notes

Ensure jam is thick enough, use proper flour measuring, and let cookies cool properly.

Tried this recipe?

Let us know how it was!

Guilt-Free Healthy Homemade Butterfingers You’ll Love

February 12, 2026 by Grace Snow Leave a Comment

As I rummaged through the pantry for a treat, I stumbled upon the essence of nostalgia—those iconic Butterfinger bars. But what if I could create a version that satisfies my sweet tooth without the guilt? Enter my Healthy Homemade Butterfingers! Crafted from just five wholesome ingredients, this recipe is a game-changer, being both gluten-free and dairy-free while still packing a satisfying crunch and rich chocolate flavor. The best part? They’re quick to whip up, making them the perfect fix for your candy cravings. Whether you're looking to impress at a gathering or simply treat yourself, these homemade delights easily fit the bill. Intrigued about how to make this guilt-free indulgence? Let’s dive into the deliciousness!

Why Choose Healthy Homemade Butterfingers?

Irresistible Texture: These candy bars deliver a delightful crunch from corn flakes paired with a smooth, creamy peanut butter center, providing a satisfying bite every time.

Wholesome Ingredients: Crafted with just 5 simple ingredients, you know exactly what you're indulging in. Unlike store-bought candies, these Healthy Homemade Butterfingers are gluten-free and dairy-free, making them a guilt-free treat.

Quick and Easy: Preparation takes minimal time! In just a few easy steps, you can whip up these bars and have them ready to enjoy or freeze for later, just like my delicious Homemade Hot Chocolate.

Crowd-Pleasing Appeal: Perfect for sharing, these sweet treats are sure to impress guests at gatherings or satisfy family cravings. Your loved ones won't believe they're enjoying a healthier option!

Adaptable Recipes: Feel free to experiment! Substitute almond butter or rice cereal to customize the flavor and texture to meet your preferences. Try them with various chocolate coatings for an extra twist, or pair with a warm bowl of Asparagus Soup Healthy for a complete meal!

Healthy Homemade Butterfingers Ingredients

For the Bars
• Peanut Butter – Use natural, unsweetened peanut butter for the best flavor and creaminess.
• Maple Syrup or Honey – Provides sweetness and binds the mixture; opt for maple syrup for a vegan-friendly alternative.
• Corn Flakes – Gives the bars that delightful crunch; choose gluten-free corn flakes if necessary.

For the Coating
• Chocolate Chips – Dark chocolate chips work great for a richer, healthier option.
• Coconut Oil – Ensures the chocolate melts smoothly and adds a hint of coconut flavor. You can substitute with butter if preferred.

These Healthy Homemade Butterfingers are a delightful treat you'll love!

Step‑by‑Step Instructions for Healthy Homemade Butterfingers

Step 1: Crush the Corn Flakes
Begin by placing gluten-free corn flakes into a large zip-top bag. Use a rolling pin or your hands to crush them into small pieces, achieving a fine texture that still retains some crunch—this should take about 2 minutes. Set the crushed corn flakes aside, ensuring they're recognizable but broken enough to incorporate into the mixture.

Step 2: Mix Peanut Butter and Sweetener
In a large mixing bowl, combine natural, unsweetened peanut butter with your choice of maple syrup or honey. Use a spatula to stir the mixture vigorously until it’s completely smooth and well blended—about 2-3 minutes. You’ll know it’s ready when the texture is creamy and the ingredients are wholly combined, creating a luscious, sticky base for your Healthy Homemade Butterfingers.

Step 3: Combine with Corn Flakes
Add the crushed corn flakes to the peanut butter mixture, and fold them in using a spatula. Make sure the corn flakes are evenly distributed throughout the mixture, so each bite is equally crunchy. Continue mixing for about 1-2 minutes until you have a cohesive blend that’s thick enough to hold its shape when pressed.

Step 4: Shape and Freeze the Mixture
Line a loaf pan with parchment paper for easy removal, and transfer the mixture into the pan. Press down firmly using your hands or a spatula, creating an even layer, about 1 inch thick. Place the pan into the freezer and let it chill for at least 1 hour, allowing the bars to firm up and hold together for the next steps.

Step 5: Cut into Bars
Once the mixture is set and firm, remove it from the freezer. Lift the bars out of the pan using the parchment paper, and place it on a cutting board. Use a sharp knife to cut it into 12 equal pieces, ensuring you create delicious, bite-sized Healthy Homemade Butterfingers that are ready for coating.

Step 6: Prepare the Chocolate Coating
In a microwave-safe bowl or a double boiler, melt dark chocolate chips with coconut oil. If using the microwave, do it in 30-second intervals, stirring in between, until the mixture is smooth and glossy—this usually takes about 1-2 minutes. The melted chocolate should be warm and fluid for easy dipping.

Step 7: Coat the Bars
Carefully dip each bar into the melted chocolate, ensuring it’s thoroughly coated. Use a fork to lift it out, allowing any excess chocolate to drip back into the bowl. Place the coated bars on a parchment-lined plate to prevent sticking, making sure they're spaced apart for drying.

Step 8: Final Freeze for Hardening
Once all bars are coated, place the plate back in the freezer for about 10 minutes, allowing the chocolate to harden completely. You’ll know they’re ready to enjoy when the chocolate is solid and creates a beautiful, glossy finish on your Healthy Homemade Butterfingers.

Healthy Homemade Butterfingers Variations

Feel free to get creative with these Healthy Homemade Butterfingers and customize them to suit your palate!

  • Nut Butter Swap: Substitute almond butter for peanut butter for a nutty twist that’s equally delicious. You’ll love the change in flavor profile!

  • Rice Cereal Option: Use rice cereal instead of corn flakes to create a gluten-free crunchy sensation. This swap is perfect for those looking for a lighter texture.

  • Chocolate Coating Varieties: Experiment with different chocolate coatings like dark or white chocolate for a playful take on the classic flavor. Your taste buds will thank you!

  • Add Crunchy Toppings: Try tossing in some chopped nuts or seeds for an extra boost of crunch and nutrition. They will add an exciting texture dimension!

  • Flavor Enhancements: Mix in a teaspoon of vanilla extract or a pinch of sea salt for enhanced flavor depth. Small tweaks can make a big difference.

  • Chili Kick: For the adventurous, sprinkle a dash of cayenne pepper into the batter for a surprising spicy kick that contrasts beautifully with the sweetness!

  • Coconut Love: Incorporate shredded coconut into the mixture for a tropical vibe that's simply irresistible. It adds a lovely chewiness that pairs well with chocolate!

All of these variations allow you to personalize your Healthy Homemade Butterfingers. For more delicious ideas, check out my recipe for Shakshuka Savor Bold for a warm, fulfilling meal!

Make Ahead Options

These Healthy Homemade Butterfingers are perfect for meal prep, allowing you to indulge without the last-minute hassle! You can prepare the bars up to 24 hours in advance; simply follow the instructions until the coating step, then wrap the cut bars tightly in plastic wrap and refrigerate. If you want to make them even earlier, the bars can be frozen for up to 3 months. To maintain their quality, make sure they’re well-wrapped to prevent freezer burn. When you're ready to serve, melt the chocolate coating and dip each bar, then freeze again for about 10 minutes until the chocolate hardens. This way, you'll have delightful, guilt-free treats ready whenever cravings strike!

Expert Tips for Healthy Homemade Butterfingers

  • Choose Quality Ingredients: Use natural, unsweetened peanut butter and high-quality dark chocolate chips for the best flavor and health benefits in your Healthy Homemade Butterfingers.

  • Crush Corn Flakes Carefully: Ensure the corn flakes are broken but not pulverized; this balance gives your bars that perfect crunch. Avoid over-crushing, which can result in a soggy texture.

  • Firmly Pack the Mixture: Press the mixture tightly into the loaf pan for a dense structure, ensuring the bars hold together well once frozen. This step is crucial to prevent crumbly bars.

  • Melt Chocolate Gently: Use a double boiler or microwave in short bursts to melt chocolate without burning it. Stir often for a smooth, glossy finish when coating your bars.

  • Monitor Freezing Time: Keep an eye on the bars while freezing to achieve the right firmness. Over-freezing can make the chocolate too hard, making it difficult to enjoy your Healthy Homemade Butterfingers.

How to Store and Freeze Healthy Homemade Butterfingers

Fridge: Store your Healthy Homemade Butterfingers in an airtight container in the fridge for up to 1 week. This keeps them fresh and easy to grab for a quick snack.

Freezer: For longer storage, place the bars in an airtight container or freezer bag, separating layers with parchment paper. They can be frozen for up to 3 months while maintaining their delicious texture.

Reheating: Enjoy directly from the freezer for a refreshingly cool treat. If desired, let the bars sit at room temperature for a few minutes before indulging for softened chocolate!

Wrapping: Ensure the bars are well-wrapped to avoid freezer burn, helping to retain their rich flavor and delightful crunch inside the chocolate coating.

What to Serve with Healthy Homemade Butterfingers?

Make your homemade candy experience complete by pairing these delightful bars with some equally enticing options that will tantalize your taste buds.

  • Creamy Coconut Yogurt: A refreshing and tangy yogurt that balances well with the sweetness of the Butterfingers, adding a creamy texture to your snack.

  • Fresh Fruit Salad: Bright, juicy fruits like strawberries, blueberries, and kiwi provide a refreshing contrast to the rich chocolate flavor, making for a light, vibrant side.

  • Nutty Granola: Adding a crunchy granola is perfect for a wholesome breakfast pairing. Drizzle some maple syrup for an extra touch of sweetness.

  • Homemade Almond Milk: A nutty, silky beverage that perfectly complements the flavors of the bars while being dairy-free and satisfying your thirst.

  • Apple Slices with Almond Butter: The crispness of apple slices dipped in almond butter mirrors the Butterfinger's crunch while introducing a fresh, fruity flavor.

  • Mint Tea: A warm, herbal tea can refresh your palate after enjoying the rich sweetness of the Butterfingers, adding a soothing touch to your day.

Treat yourself to a complete sensory experience by incorporating these delightful pairings alongside your Healthy Homemade Butterfingers!

Healthy Homemade Butterfingers Recipe FAQs

How do I select the right ripeness for peanut butter?
Absolutely! When choosing peanut butter, opt for brands that list only peanuts as the ingredient. Look for natural, creamy varieties without added sugars or oils. The best choices are those that have a smooth texture and a rich, nutty flavor, which perfectly complements the other ingredients in your Healthy Homemade Butterfingers.

What’s the best way to store these bars, and how long do they last?
Very! You can store your Healthy Homemade Butterfingers in an airtight container in the fridge for up to 1 week. If you want to keep them for longer, I recommend freezing them. Store the bars in a freezer-safe container separated by parchment paper, so they don’t stick together. They can last for up to 3 months in the freezer, preserving their delicious crunch and flavor.

Can I freeze Healthy Homemade Butterfingers?
Of course! To freeze them properly, first, allow the bars to set completely in the freezer after coating with chocolate. Then, layer them in an airtight container or a freezer bag, making sure to place parchment paper between layers to prevent sticking. This way, you can enjoy them later without losing their delightful texture!

What if my bars are too crumbly? How can I fix that?
If your Healthy Homemade Butterfingers are too crumbly, it may be due to insufficient mixing or a lack of moisture. My tip is to ensure you've fully combined the peanut butter and sweetener before adding the corn flakes. If they still feel dry, try adding a bit more peanut butter or a splash of maple syrup to bind the mixture better. Remember to pack the mixture tightly into the loaf pan for better cohesion!

Are there any dietary considerations I should keep in mind?
Absolutely! These Healthy Homemade Butterfingers are gluten-free if you use gluten-free corn flakes, and they're naturally dairy-free, making them suitable for various dietary preferences. However, always double-check labels for allergies, especially if serving them to guests. If you're concerned about nut allergies, try using sun butter or seed butter as an alternative for the peanut butter.

Can I substitute any ingredients for different dietary needs?
Yes, you can! If you want to make your Healthy Homemade Butterfingers nut-free, simply substitute the peanut butter with sunflower seed butter. Additionally, if you're looking for a lower sugar option, you can reduce the amount of maple syrup or honey by half or use a natural sweetener like stevia. Just be sure to experiment carefully to maintain the balance of flavors!

Healthy Homemade Butterfingers

Guilt-Free Healthy Homemade Butterfingers You’ll Love

Delight in these Healthy Homemade Butterfingers, a guilt-free treat made with simple ingredients, satisfying your sweet cravings.
Print Recipe Pin Recipe
Prep Time 15 minutes mins
Freezing Time 1 hour hr 10 minutes mins
Total Time 1 hour hr 25 minutes mins
Servings: 12 bars
Course: Dessert
Calories: 150
Ingredients Equipment Method Nutrition Notes

Ingredients
  

For the Bars
  • 1 cup Peanut Butter Use natural, unsweetened
  • 1/3 cup Maple Syrup or Honey Maple syrup for vegan option
  • 3 cups Corn Flakes Gluten-free corn flakes if necessary
For the Coating
  • 1 cup Chocolate Chips Dark chocolate chips preferred
  • 2 tbsp Coconut Oil Can substitute with butter

Equipment

  • Loaf pan
  • Rolling Pin
  • Mixing Bowl
  • Spatula
  • Microwave-safe bowl

Method
 

Step-by-Step Instructions
  1. Crush the Corn Flakes by placing them in a zip-top bag and using a rolling pin to achieve a fine texture.
  2. Mix Peanut Butter and Sweetener until smooth and well blended in a large mixing bowl.
  3. Combine with Corn Flakes by folding them into the peanut butter mixture until evenly distributed.
  4. Shape and Freeze the Mixture in a lined loaf pan, pressing firmly to create an even layer.
  5. Cut into Bars once the mixture is firm, slicing into 12 equal pieces.
  6. Prepare the Chocolate Coating by melting chocolate chips with coconut oil until smooth.
  7. Coat the Bars by dipping each piece into the melted chocolate and placing on a lined plate.
  8. Final Freeze for Hardening by placing coated bars in the freezer for about 10 minutes.

Nutrition

Serving: 1barCalories: 150kcalCarbohydrates: 18gProtein: 4gFat: 7gSaturated Fat: 2gPolyunsaturated Fat: 1gMonounsaturated Fat: 4gSodium: 50mgPotassium: 150mgFiber: 2gSugar: 6gCalcium: 1mgIron: 4mg

Notes

Store in an airtight container in the fridge for up to 1 week or freeze for up to 3 months. Enjoy directly from the freezer for a refreshing treat.

Tried this recipe?

Let us know how it was!

Birthday Cake Macarons: Sweet Memories in Every Bite

February 12, 2026 by Grace Snow Leave a Comment

The vibrant colors of these Birthday Cake Macarons practically dance off the plate, calling to mind the sweet nostalgia of childhood memories. As I prepared to whip up this delightful treat, I couldn't help but feel the excitement that builds around a birthday celebration. With their crispy outer shell and chewy interior, these macarons are not just beautiful but gluten-free, making them suitable for a variety of dietary needs. Plus, they come together quickly, allowing you to impress your guests without spending hours in the kitchen. These playful bites, filled with creamy buttercream and a hint of cake mix flavor, create a celebratory atmosphere no matter the occasion. Are you ready to transform your next gathering into a festive feast with these colorful confections? Let’s dive into the recipe!

Why Are Birthday Cake Macarons So Special?

Nostalgic Flavors: Each bite transports you back to childhood birthdays, with sweet notes of classic cake mingling with creamy buttercream.

Gluten-Free Goodness: Made with almond flour, these macarons are friendly for those avoiding gluten without compromising flavor.

Quick and Easy: Perfect for busy bakers, this recipe comes together quickly—ideal for last-minute celebrations!

Impressive Presentation: Vibrantly colored and decorated, these macarons steal the show on any dessert table, making you the star of the party.

Versatile Variations: Experiment by switching up cake mix flavors or using different food colorings to personalize your treats!

These macarons are perfect for sweetening up gatherings or simply enjoying with a cup of coffee, just like my delightful Chocolate Pudding Cake.

Birthday Cake Macaron Ingredients

For the Macarons
• Sifted Super Fine Almond Flour – Use superfine almond flour for optimal texture.
• Sifted Confectioners Sugar – Traditional confectioners sugar should be used; no substitutes recommended.
• Egg Whites – Only fresh egg whites whip properly for meringue stability.
• White Sugar – Sweetens the meringue; maple sugar can be used but will alter the flavor.
• Egg White Powder (Meringue Powder) – Optional but highly recommended for best results.
• Artificial Vanilla – A flavor enhancer that captures the essence of birthday cake; real vanilla can be used if preferred.
• Nonpareils Rainbow Sprinkles – Add decoration and visual appeal; substitute with any preferred sprinkles.

For the Filling
• White or Yellow Boxed Cake Mix – Provides the classic birthday cake flavor; ensure it’s heat-treated for safety.
• Unsalted Butter – Base for buttercream, providing creaminess; salted butter can be used but skip additional salt.
• Heavy Cream – Adds richness to buttercream; milk can be a substitute but alters the texture.
• Pink Food Colouring – Optional to enhance the visual appeal of buttercream; any food coloring can be used.

Prepare to embark on a delightful baking adventure as you create these irresistible Birthday Cake Macarons!

Step‑by‑Step Instructions for Birthday Cake Macarons

Step 1: Prepare Baking Sheets
Begin by lining your baking sheets with either parchment paper or silicone baking mats to ensure easy removal of the macarons later. Make sure to use a template or draw circles on the paper if you want uniform macarons. Preheat your oven to 300°F, or 275°F if using a convection setting.

Step 2: Dry Ingredient Preparation
In a mixing bowl, sift together the sifted super fine almond flour and sifted confectioners sugar until well combined. This step is crucial as it helps achieve the smooth texture characteristic of the Birthday Cake Macarons. Set this dry mixture aside while you prepare the meringue.

Step 3: Make Meringue
In a stand mixer, combine the egg whites, white sugar, and egg white powder in a bowl placed over a bain-marie. Whisk continuously until the mixture reaches 140°F—this pasteurizes the egg whites. Once heated, transfer the bowl to the stand mixer and whip on high speed until stiff peaks form and the meringue is glossy.

Step 4: Macaronage
Carefully fold the dry ingredient mixture into the whipped meringue using a rubber spatula. Aim for a gentle motion to preserve the airiness while mixing until the batter flows like lava off the spatula and passes the figure-8 test, which signals that it's ready to pipe.

Step 5: Pipe Macarons
Transfer the batter into a piping bag fitted with a round tip, then pipe even circles onto your prepared baking sheets. Each circle should be about 1.5 inches in diameter, spaced apart to allow for spreading. Tap the sheets gently on the counter to release any air bubbles and sprinkle with nonpareils for a festive touch.

Step 6: Dry
Allow the piped macaron shells to sit at room temperature until a skin forms, which can take between 8 to 60 minutes depending on the humidity in your environment. You should be able to lightly touch the surface without any batter sticking to your finger, which indicates they are ready to bake.

Step 7: Bake
Carefully place the macarons in the preheated oven and bake for 15 to 20 minutes, monitoring closely. They are done when the shells have risen and formed a crisp outer layer without cracking. Turn the baking sheets halfway through if your oven has hot spots for even baking.

Step 8: Cool
Once baked, remove the macarons from the oven and let them cool completely on the baking sheets. This cooling time is essential to avoid breaking the delicate shells when you lift them off the mat.

Step 9: Make Buttercream Filling
While the macarons cool, make the filling by heat-treating the boxed cake mix in the microwave or the oven until it reaches 160°F. Allow it to cool, then mix it with softened unsalted butter and a splash of heavy cream until smooth and creamy. Adjust the color with pink food coloring if desired to match the joyous theme of your Birthday Cake Macarons.

Step 10: Assemble
Once the macaron shells have cooled, pair them up and pipe a generous amount of buttercream filling on the flat side of half of the shells. Sandwich them with their matching pairs and place the assembled macarons in the fridge overnight to let the flavors meld together beautifully.

What to Serve with Birthday Cake Macarons?

The joyous vibe of birthday treats can be elevated with delightful companions that complement the sweet experience.

  • Sparkling Lemonade: The citrusy fizz perfectly balances the sweetness of these macarons, making for a refreshing sip after each bite.
  • Classic Vanilla Ice Cream: Rich and creamy, a scoop alongside the macarons offers a delightful contrast to their chewy texture.
  • Fresh Berries: Strawberries or raspberries add a vibrant tartness, enhancing the overall experience with their natural sweetness.
  • Chocolate Ganache Dip: For a decadent twist, serve these macarons with a side of warm chocolate ganache for dipping—the ultimate indulgence!
  • Fragrant Herbal Teas: Pair these sweet treats with calming herbal teas like chamomile or peppermint for a cozy feel.
  • Whipped Cream: A dollop of homemade whipped cream on the side provides a delightful creaminess that enhances every macaron bite.
  • Mini Fruit Tarts: These colorful bites not only look beautiful on the plate but also bring a burst of freshness to the dessert spread.
  • Birthday Cake-flavored Milkshake: For the ultimate birthday experience, a milkshake mimicking the flavors of cake can be a nostalgic treat.
  • Coffee or Espresso: The warm bitterness of coffee or espresso pairs beautifully with the sweetness of macarons, creating a well-rounded dessert moment.

Birthday Cake Macarons Variations & Substitutions

Feel free to sprinkle your own magic on these birthday delights; with a few simple tweaks, you can create a personalized treat!

  • Nut-Free: Substitute almond flour with finely ground sunflower seed flour or cashew flour for a nut-free alternative that's still fun and delicious.

  • Flavor Twist: Experiment with chocolate or lemon cake mixes for a delightful variance in your buttercream filling. You might just discover a new favorite!

  • Natural Colors: Use natural food coloring extracts instead of artificial ones for a cleaner, dye-free version that captures the vibrant spirit of celebrations.

  • Dairy-Free: Swap unsalted butter for a vegan butter alternative and use coconut cream in place of heavy cream for a creamy, dairy-free filling.

  • Sprinkle Substitutes: If rainbow nonpareils aren’t your thing, feel free to switch them out for colored sugar or even festive candy decorations that match the occasion.

  • Mini Macarons: Pipe smaller circles for bite-sized macarons that are perfect little treats for a larger gathering or as cute party favors.

  • Layered Delight: For an extra layer of fun, consider adding a layer of jam or fruit puree between the buttercream filling for a fruity surprise!

These playful variations will make your Birthday Cake Macarons your own! Don't forget to check out my delightful Ice Cream Cake recipe for more inspiration on how to celebrate with sweet treats!

How to Store and Freeze Birthday Cake Macarons

Room Temperature: Macarons are best enjoyed fresh but can be stored at room temperature for up to 2 days in an airtight container to maintain their crispness.

Fridge: Store assembled Birthday Cake Macarons in the fridge for up to a week. The cool temperature enhances the flavors while keeping them fresh and creamy.

Freezer: For longer storage, freeze unfilled macaron shells for up to 3 months. Make sure they are placed in a single layer in an airtight container to avoid sticking. Assemble after thawing.

Reheating: If desired, let refrigerated macarons come to room temperature before serving for the best taste experience.

Make Ahead Options

These Birthday Cake Macarons are perfect for busy home cooks looking to save time without compromising on taste! You can prepare the macaron shells up to 24 hours in advance; simply bake and allow them to cool completely. Once cooled, store them in an airtight container at room temperature to maintain their delicate texture. As for the buttercream filling, it can be made ahead and refrigerated for up to 3 days—just bring it back to room temperature and give it a quick mix before piping. When you're ready to serve, assemble the macarons with the filling and let them chill for a bit to meld the flavors. This way, you’ll enjoy delicious, festive treats with minimal last-minute effort!

Expert Tips for Birthday Cake Macarons

• Measure by Weight: Use a digital scale for precise measurements. This helps achieve the perfect texture in your Birthday Cake Macarons.

• Use Fresh Egg Whites: For stable meringue, always opt for fresh egg whites rather than carton varieties, which can affect your macaron's texture.

• Watch the Humidity: High humidity can hinder macaron formation. If it's humid, extend the drying time of your piped shells to ensure a proper skin forms.

• Tap it Out: After piping, gently tap the baking sheet on the counter to release any trapped air bubbles. This prevents imperfections in your macarons.

• Cooling is Key: Allow macarons to cool completely before removing them from the sheets. Rushing this step can lead to breakage.

• Storage Matters: Keep your assembled Birthday Cake Macarons in an airtight container in the fridge. They taste even better after a day as the flavors meld!

Birthday Cake Macarons Recipe FAQs

How do I choose ripe ingredients for my macarons?
Absolutely! Using fresh ingredients is crucial for macarons. Opt for freshly cracked egg whites, as they whip better than carton versions. For almond flour, ensure you have superfine flour to achieve that perfect texture. Check your vanilla extract to ensure it’s not expired for the best flavor.

What’s the best way to store my Birthday Cake Macarons?
Very! To keep your macarons fresh, store them in an airtight container in the refrigerator for up to a week. This extends their shelf life while maintaining their chewy texture and flavor. If you’re storing them at room temperature, they are best consumed within 2 days to keep the shells crisp.

Can I freeze my Birthday Cake Macarons?
Absolutely! Freezing is a wonderful way to make macarons in advance. To freeze unfilled macaron shells, arrange them in a single layer in an airtight container for up to 3 months. When you're ready to enjoy, simply thaw them at room temperature, then fill with buttercream. Avoid freezing after assembly, as the filling may alter the texture.

What if my macarons don’t form the proper skin?
Very! If your macarons don’t develop a skin, it could be due to high humidity or not letting them rest long enough. Make sure to let the piped shells sit at room temperature until a skin forms, which can take 8 to 60 minutes. If it’s humid, extend the resting time. A good test is to lightly touch the surface without sticking.

Are Birthday Cake Macarons safe for people with allergies?
Absolutely! These macarons are gluten-free thanks to almond flour, but ensure that the individual doesn’t have nut allergies. If you want a nut-free alternative, consider substituting almond flour with finely ground sunflower seed flour. Always double-check labels for your boxed cake mix to avoid hidden allergens.

How can I troubleshoot common macaron issues?
Very! Common issues include hollow shells, cracked tops, or feet that don’t develop. For hollow shells, under-mixing could be the culprit; be sure to fold until the batter flows like lava. Cracks often come from excessive oven heat—try lowering the temperature slightly. Lastly, for feet issues, ensure you're piping consistently and that the batter is just the right consistency to flow smoothly.

Birthday Cake Macarons

Birthday Cake Macarons: Sweet Memories in Every Bite

Delightful Birthday Cake Macarons bring sweet nostalgia with their vibrant colors and creamy filling, perfect for any celebration.
Print Recipe Pin Recipe
Prep Time 30 minutes mins
Cook Time 20 minutes mins
Cooling Time 1 hour hr
Total Time 1 hour hr 50 minutes mins
Servings: 12 macarons
Course: Dessert
Cuisine: French
Calories: 90
Ingredients Equipment Method Nutrition Notes

Ingredients
  

For the Macarons
  • 1 cup Sifted Super Fine Almond Flour Use superfine almond flour for optimal texture.
  • 1 cup Sifted Confectioners Sugar Traditional confectioners sugar should be used; no substitutes recommended.
  • 3 large Egg Whites Only fresh egg whites whip properly for meringue stability.
  • 1/4 cup White Sugar Sweetens the meringue; maple sugar can be used but will alter the flavor.
  • 1 tbsp Egg White Powder (Meringue Powder) Optional but highly recommended for best results.
  • 1 tsp Artificial Vanilla A flavor enhancer that captures the essence of birthday cake; real vanilla can be used if preferred.
  • 1/4 cup Nonpareils Rainbow Sprinkles Add decoration and visual appeal; substitute with any preferred sprinkles.
For the Filling
  • 1 box White or Yellow Boxed Cake Mix Provides the classic birthday cake flavor; ensure it’s heat-treated for safety.
  • 1/2 cup Unsalted Butter Base for buttercream, providing creaminess; salted butter can be used but skip additional salt.
  • 1/4 cup Heavy Cream Adds richness to buttercream; milk can be a substitute but alters the texture.
  • 1 drop Pink Food Colouring Optional to enhance the visual appeal of buttercream; any food coloring can be used.

Equipment

  • Stand Mixer
  • Baking Sheets
  • piping bag
  • rubber spatula
  • Sifting Tool

Method
 

Step‑by‑Step Instructions
  1. Prepare Baking Sheets: Line your baking sheets with parchment paper or silicone baking mats. Preheat your oven to 300°F (275°F for convection).
  2. Dry Ingredient Preparation: Sift together the almond flour and confectioners sugar until well combined.
  3. Make Meringue: In a mixing bowl over a bain-marie, whisk egg whites, white sugar, and egg white powder until 140°F. Transfer to a stand mixer and whip until stiff peaks form.
  4. Macaronage: Fold the dry ingredients into the meringue until the batter flows like lava and passes the figure-8 test.
  5. Pipe Macarons: Transfer the batter into a piping bag and pipe circles onto baking sheets. Sprinkle with nonpareils.
  6. Dry: Allow macarons to sit until a skin forms, about 8 to 60 minutes.
  7. Bake: Bake for 15 to 20 minutes until they form a crisp outer layer.
  8. Cool: Remove from the oven and let cool completely on the baking sheets.
  9. Make Buttercream Filling: Heat-treat the boxed cake mix until it reaches 160°F. Mix with butter and cream until smooth.
  10. Assemble: Pair macaron shells, pipe buttercream on half, and sandwich with matching pairs. Refrigerate overnight.

Nutrition

Serving: 1macaronCalories: 90kcalCarbohydrates: 12gProtein: 1gFat: 4gSaturated Fat: 2gCholesterol: 20mgSodium: 30mgPotassium: 25mgSugar: 9g

Notes

For best results, use a digital scale for measuring ingredients and ensure fresh egg whites for stability. Reheat refrigerated macarons to room temperature before serving for optimal taste experience.

Tried this recipe?

Let us know how it was!

Cookie Monster Cinnamon Rolls: A Fun Twist on a Classic Treat

February 12, 2026 by Grace Snow Leave a Comment

A playful dessert that takes you back to your childhood, Cookie Monster Cinnamon Rolls are a delightful twist on a classic treat! Imagine soft, colorful dough wrapped around a sweet filling of cinnamon sugar, Oreos, and mini chocolate chips. With the vibrant blue color that captures the essence of fun, these rolls not only satisfy your sweet tooth but are also a perfect centerpiece for weekend brunches or birthday parties. Best of all, they come together quickly and can easily be made vegetarian, vegan, or even gluten-free! Just think of the smiles on your loved ones’ faces as they take their first bite. Are you ready to bake up a batch of these irresistible rolls?

Why are Cookie Monster Cinnamon Rolls a must-try?

Joyful Experience: Baking these rolls is a fun activity that brings the whole family together, letting everyone join in the colorful dough-making process.
Flavor Overload: The combination of cinnamon sugar, Oreos, and mini chocolate chips results in a sweet treat that's bursting with flavor and nostalgia.
Versatile Options: Easily adaptable for various dietary needs, you can swap ingredients for vegan or gluten-free alternatives, making it inclusive for all.
Quick Preparation: With straightforward steps, you'll whip up these delicious rolls in no time, perfect for any occasion or last-minute cravings.
Showstopper Presentation: The vibrant blue color and delightful toppings create a stunning centerpiece for birthday parties or brunch gatherings, ensuring smiles all around.

Cookie Monster Cinnamon Rolls Ingredients

For the Dough

  • Warm milk – Provides moisture and activates the yeast; can substitute with plant-based milk for a vegan option.
  • Active dry yeast – Causes the dough to rise and become fluffy.
  • Granulated sugar – Adds sweetness and feeds the yeast.
  • Egg + egg yolk – Adds richness and helps with dough structure; for vegan, use flax eggs.
  • Unsalted butter – Provides richness; can be replaced with a dairy-free alternative.
  • All-purpose flour – Gives structure; for gluten-free, use a 1:1 mix with xanthan gum.
  • Salt – Enhances flavor.
  • Vanilla extract – Adds flavor depth.
  • Blue gel food coloring – Gives the iconic blue hue; alternatives include butterfly pea powder or spirulina.

For the Filling

  • Unsalted butter – Provides spreadability and richness.
  • Brown sugar – Adds sweetness and moisture.
  • Ground cinnamon – Defines the classic cinnamon flavor.
  • Crushed chocolate sandwich cookies (e.g., Oreos) – For a rich, chocolatey fill, adding to the Cookie Monster Cinnamon Rolls fun.
  • Mini chocolate chips – Enhances gooeyness and sweetness.

For the Cream Cheese Icing

  • Cream cheese – Provides a tangy base for frosting.
  • Unsalted butter – Gives creaminess.
  • Powdered sugar – Sweetens and thickens the frosting.
  • Vanilla extract – Adds flavor.
  • Milk – Adjusts consistency for spreading.

For the Topping

  • Crushed chocolate cookies – Additional crunch and flavor.
  • Extra mini chocolate chips (optional) – For decoration and appeal.

Step‑by‑Step Instructions for Cookie Monster Cinnamon Rolls

Step 1: Make the Dough
In a large mixing bowl, combine 1 cup of warm milk (around 110°F) with 2 teaspoons of active dry yeast. Let it sit for about 5–10 minutes until frothy. Then, mix in 1/4 cup of granulated sugar, 1 egg, 1 egg yolk, 1/4 cup of unsalted butter (melted), and 1 teaspoon of vanilla extract. Gradually add 4 cups of all-purpose flour and a pinch of salt, mixing until a sticky dough forms.

Step 2: Knead and Color the Dough
Transfer the dough onto a floured surface and knead for about 5–7 minutes, until it's smooth and elastic. Once kneaded, add a few drops of blue gel food coloring, folding and kneading until the color is evenly distributed. Place the dough in a greased bowl, cover it with a clean cloth, and let it rise in a warm place for 1–1.5 hours, or until it doubles in size.

Step 3: Prepare the Filling
While the dough is rising, make the filling by creaming together 1/4 cup of softened unsalted butter, 1/2 cup of brown sugar, and 2 tablespoons of ground cinnamon in a separate bowl. Mix in 1 cup of crushed chocolate sandwich cookies (like Oreos) and 1/2 cup of mini chocolate chips until well combined. Set aside as the dough continues to rise.

Step 4: Roll and Fill the Dough
After the dough has risen, punch it down gently to release air. On a floured surface, roll it out into a large rectangle, about 12x18 inches. Spread the filling mixture evenly over the dough, leaving a small border around the edges. Starting from one long edge, tightly roll the dough into a log, sealing the edge well. Use a sharp knife or unflavored dental floss to slice the log into 12 equal rolls.

Step 5: Second Rise & Bake
Place the sliced rolls in a greased baking dish, ensuring they’re slightly spaced apart. Cover the dish with a towel and let it rise for 30–45 minutes until puffy. Meanwhile, preheat your oven to 350°F (175°C). Once risen, bake the Cookie Monster Cinnamon Rolls for 20–25 minutes or until they are golden brown on top.

Step 6: Make the Icing
While the rolls bake, prepare the cream cheese icing by beating together 4 ounces of softened cream cheese and 1/4 cup of unsalted butter until creamy. Gradually add 2 cups of powdered sugar, 1 teaspoon of vanilla extract, and a splash of milk to achieve a smooth, spreadable consistency. Mix until fully combined.

Step 7: Assemble & Serve
Once the Cookie Monster Cinnamon Rolls are out of the oven and cooled for about 5 minutes, drizzle the cream cheese icing generously over the warm rolls. For the finishing touch, sprinkle crushed chocolate cookies and extra mini chocolate chips on top. Serve warm and watch as smiles light up the room!

Make Ahead Options

These Cookie Monster Cinnamon Rolls are perfect for busy home cooks who want to save time without sacrificing flavor! You can prepare the dough and filling up to 24 hours in advance. Simply follow the initial steps until rolling and slicing the rolls, then cover the assembled rolls tightly with plastic wrap and refrigerate. When you're ready to bake, let them sit at room temperature for about 30 minutes to ensure a nice rise before popping them in the oven. Alternatively, you can freeze the unbaked rolls for up to 3 months; just thaw them overnight in the fridge and let them rise for about an hour before baking. This way, you can enjoy freshly baked, gooey Cookie Monster Cinnamon Rolls that are just as delightful and kid-approved with minimal effort!

How to Store and Freeze Cookie Monster Cinnamon Rolls

Fridge: Store leftover Cookie Monster Cinnamon Rolls in an airtight container for up to 3 days to maintain their moist texture.

Freezer: Freeze unbaked rolls individually; wrap each in plastic wrap and place them in a freezer bag. They can be stored for up to 2 months.

Reheating: To enjoy warm rolls, reheat them in the microwave for 10-15 seconds or in the oven at 350°F (175°C) for about 5 minutes until warmed through.

Make-Ahead Option: Assemble the rolls and refrigerate overnight; let them sit at room temperature for 30 minutes before baking to achieve perfect fluffiness.

What to Serve with Cookie Monster Cinnamon Rolls?

Delight in creating a beautifully balanced meal that complements the whimsical charm of your cinnamon rolls.

  • Fresh Fruit Salad: A refreshing mix of berries and citrus enhances the sweetness, providing a light contrast to the rich cinnamon rolls.
  • Scrambled Eggs: Fluffy eggs add protein to the table and their subtle flavors pair wonderfully with the sweetness of the rolls.
  • Bacon or Sausage: The savory and crispy texture of bacon or sausage offers a delicious contrast, making it a brunch favorite.
  • Vanilla Ice Cream: A scoop of creamy vanilla ice cream melts beautifully over warm rolls, intensifying the dessert experience.
  • Coffee or Espresso: The deep flavors of coffee highlight the sweetness of the rolls, creating a perfect morning or afternoon pick-me-up.
  • Milk or Chocolate Milk: A classic pairing, cold milk balances the sweetness while echoing the delightful flavors found in the cinnamon rolls.
  • Creamy Yogurt Parfait: Layered yogurt with granola and fruit adds a healthy touch while the creaminess complements the rich rolls.
  • Hot Chocolate: Rich hot chocolate brings a cozy warmth and enhances the experience with its chocolatey notes, perfect for a special weekend treat.
  • Cheese Platter: A selection of soft cheeses brings a touch of sophistication and balances the sweet notes of the rolls.

Cookie Monster Cinnamon Rolls Variations

Try these delightful twists to make your Cookie Monster Cinnamon Rolls even more fun and delicious!

  • Vegan Option: Substitute all dairy with plant-based alternatives and use flax eggs to keep it animal-friendly. Gather your loved ones for a baking session, and soon you'll have melt-in-your-mouth vegan treats!

  • Gluten-Free Twist: Use a 1:1 gluten-free flour blend with xanthan gum for a tasty twist that everyone can enjoy. Watch the smiles grow as your gluten-sensitive friends indulge in these soft rolls without worry.

  • White Chocolate Delight: Add white chocolate chips to the filling for an extra creamy, sweet surprise. Picture that tempting gooeyness pooling inside, creating a flavor experience that dazzles every palate!

  • Cookie Butter Drizzle: Top with a drizzle of cookie butter for a luscious layer of flavor. As you watch it ooze down the warm rolls, you can almost hear the delighted gasps of your guests!

  • Spiced Up: Incorporate a pinch of nutmeg or cloves into the filling for a warming spice profile. This little touch can take your rolls from delightful to unforgettable, adding depth that's perfect for chilly evenings.

  • Oreo Flavors: Switch up the crushed Oreos with different flavors such as mint or peanut butter. Each bite will be a fun little surprise, keeping everyone guessing and satiated!

  • Nutty Addition: Toss in some finely chopped nuts, like pecans or walnuts, for an enjoyable crunch. The combination of textures will make every bite uniquely satisfying and fun!

  • Extra Chocolate Chips: Can't get enough chocolate? Sprinkle more mini chocolate chips into the filling for that extra gooey deliciousness. You’ll appreciate the melty goodness as it creates a truly decadent experience, perfect for any chocolate lover.

Whether you're looking to please dietary needs or just add some creativity to your baking, these variations will help you create a memorable treat for all to enjoy. And if you're curious about more fun-filled desserts, check out our recipe for Pumpkin Cinnamon Roll, which brings cozy flavors that are equally delightful!

Expert Tips for Cookie Monster Cinnamon Rolls

  • Dough Consistency: Make sure your dough is sticky but not too wet; this ensures soft, fluffy rolls. Adjust flour as necessary if it's too tacky.

  • Yeast Activation: Always check that your yeast is fresh and properly activated before adding to the dough—bubbles or foam indicate it's ready.

  • Perfect Slicing: For perfectly sliced rolls, use unflavored dental floss instead of a knife for clean cuts that won't squish the dough.

  • Don't Skip the Rise: Allow the dough and rolls adequate rising time; this is crucial for achieving the light, airy texture of your Cookie Monster Cinnamon Rolls.

  • Experiment with Fillings: Feel free to customize the filling! Adding nuts or swapping Oreos for other cookies can create exciting new flavors.

  • Storage Tips: If you have leftovers, store them in an airtight container; they can be microwaved for a few seconds to restore their gooeyness.

Cookie Monster Cinnamon Rolls Recipe FAQs

What kind of milk should I use for the dough?
I recommend using warm milk to help activate the yeast, which creates fluffy rolls. If you're looking for a vegan option, you can substitute with plant-based milk like almond or oat milk—absolutely delicious!

How long can I store Cookie Monster Cinnamon Rolls?
Store your leftover Cookie Monster Cinnamon Rolls in an airtight container in the fridge for up to 3 days. To maintain their moist texture and freshness, make sure they are sealed well to prevent drying out.

Can I freeze Cookie Monster Cinnamon Rolls?
Yes! You can freeze unbaked rolls. Just wrap each roll in plastic wrap and place them in a freezer bag. They will keep in the freezer for up to 2 months. When you're ready to bake, thaw them in the fridge overnight and allow them to rise for about 30 minutes before baking.

What do I do if my dough doesn’t rise?
If your dough isn’t rising, it may be due to inactive yeast. Check that your yeast is fresh by adding it to warm water with a little sugar. If it bubbles after a few minutes, it’s good to go! Also, ensure that you’re letting the dough rise in a warm environment; drafts can slow down this process, so find a cozy spot!

Are Cookie Monster Cinnamon Rolls safe for those with allergies?
These rolls can be made vegetarian, vegan, or gluten-free, making them inclusive for all dietary needs. For those with allergies, always check the labels on cookies and other ingredients to ensure they don’t contain allergens. You can customize the filling to suit your needs, swapping out cookies or using allergy-friendly brands.

How should I assemble the icing?
To make the cream cheese icing, first beat together softened cream cheese and unsalted butter until creamy. Gradually add in powdered sugar and a splash of milk to reach your desired consistency—it's a simple step that makes each roll even more irresistible!

Cookie Monster Cinnamon Rolls

Cookie Monster Cinnamon Rolls: A Fun Twist on a Classic Treat

Cookie Monster Cinnamon Rolls are a playful dessert that combines cinnamon sugar, Oreos, and mini chocolate chips for a fun twist on a classic treat.
Print Recipe Pin Recipe
Prep Time 30 minutes mins
Cook Time 25 minutes mins
Rising Time 1 hour hr 30 minutes mins
Total Time 2 hours hrs 25 minutes mins
Servings: 12 rolls
Course: Dessert
Cuisine: American
Calories: 400
Ingredients Equipment Method Nutrition Notes

Ingredients
  

For the Dough
  • 1 cup Warm milk can substitute with plant-based milk for vegan
  • 2 teaspoons Active dry yeast
  • 1/4 cup Granulated sugar
  • 1 large Egg for vegan, use flax egg
  • 1 large Egg yolk
  • 1/4 cup Unsalted butter melted, can be replaced with a dairy-free alternative
  • 4 cups All-purpose flour for gluten-free, use a 1:1 mix with xanthan gum
  • 1 teaspoon Salt
  • 1 teaspoon Vanilla extract
  • a few drops Blue gel food coloring or alternatives like butterfly pea powder
For the Filling
  • 1/4 cup Unsalted butter softened
  • 1/2 cup Brown sugar
  • 2 tablespoons Ground cinnamon
  • 1 cup Crushed chocolate sandwich cookies like Oreos
  • 1/2 cup Mini chocolate chips
For the Cream Cheese Icing
  • 4 ounces Cream cheese softened
  • 1/4 cup Unsalted butter
  • 2 cups Powdered sugar
  • 1 teaspoon Vanilla extract
For the Topping
  • 1 cup Crushed chocolate cookies
  • to taste Extra mini chocolate chips optional

Equipment

  • Mixing Bowl
  • Rolling Pin
  • Baking Dish
  • Oven

Method
 

Step-by-Step Instructions
  1. In a large mixing bowl, combine warm milk with active dry yeast. Let it sit until frothy. Mix in granulated sugar, egg, egg yolk, melted butter, and vanilla extract. Gradually add flour and salt until a sticky dough forms.
  2. Transfer the dough to a floured surface and knead until smooth and elastic. Add blue gel food coloring, kneading until evenly distributed. Place in a greased bowl, cover, and let rise in a warm place until doubled.
  3. Make the filling by creaming together softened unsalted butter, brown sugar, and ground cinnamon. Mix in crushed chocolate sandwich cookies and mini chocolate chips until combined.
  4. After the dough has risen, punch it down and roll out into a large rectangle. Spread filling evenly over the dough, roll tightly into a log, and cut into 12 equal rolls.
  5. Place sliced rolls in a greased baking dish, cover, and let rise until puffy. Preheat the oven to 350°F (175°C), then bake rolls until golden brown.
  6. To make the icing, beat together softened cream cheese and unsalted butter, adding powdered sugar, vanilla extract, and milk until smooth.
  7. Once the rolls have cooled slightly, drizzle the icing over them and sprinkle with crushed chocolate cookies and extra mini chocolate chips.

Nutrition

Serving: 1rollCalories: 400kcalCarbohydrates: 55gProtein: 5gFat: 18gSaturated Fat: 10gPolyunsaturated Fat: 1gMonounsaturated Fat: 6gCholesterol: 40mgSodium: 300mgPotassium: 150mgFiber: 1gSugar: 20gVitamin A: 8IUCalcium: 4mgIron: 6mg

Notes

Ensure dough is sticky but not too wet for fluffy rolls. Always check yeast freshness before use.

Tried this recipe?

Let us know how it was!

Delight in Orange Creamsicle Mini Cheesecakes: No-Bake Bliss

February 12, 2026 by Grace Snow Leave a Comment

As I unearth my childhood memories of summer, the sweet, sunny aroma of oranges fills the air, instantly transporting me back to carefree days. It’s this delightful sensation that inspired my No-Bake Orange Creamsicle Mini Cheesecakes. Perfect for the sweltering heat, these easy-to-make desserts offer a light and fluffy cheesecake filling infused with zesty orange flavor, all perched atop a crunchy Oreo crust. Not only do these treats bring a pop of color and cheer to any gathering, but they also allow you to indulge your sweet tooth without spending hours in the kitchen. Ready to impress your friends and family with a homemade treat that’s as nostalgic as it is delicious? Let’s dive into this refreshing recipe together!

Why are these cheesecakes a must-try?

Delightful nostalgia: These No-Bake Orange Creamsicle Mini Cheesecakes will whisk you back to sunny days filled with sweet treats. Effortless preparation: With minimal steps involved, even novice bakers can create this stunning dessert. Guilt-free indulgence: Light yet creamy, they satisfy your sweet cravings without weighing you down. Visual appeal: Their vibrant colors and charming mini sizes make them perfect for gatherings—just like my Mini Tropical Pavlovas. Versatile twists: You can easily swap the flavors or crusts to suit your taste, ensuring every batch is unique. Ready to enjoy a taste of summer?

Orange Creamsicle Mini Cheesecake Ingredients

• Here’s everything you need to create these dreamy desserts!

For the Crust

  • Oreo Cookies – Offers a sweet, chocolatey base; you can use graham crackers if you prefer a lighter flavor.

For the Cheesecake Filling

  • Cream Cheese – 16 oz, at room temperature for easy blending; Neufchâtel can be used for a lighter option.
  • Powdered Sugar – ½ cup for a smooth sweetness; can be swapped with granulated sugar but will alter the texture slightly.
  • Vanilla Extract – 1 teaspoon to enhance the cheesecake flavor; almond extract makes a delightful alternative.
  • Heavy Whipping Cream – 1 cup to ensure a light and fluffy texture; coconut cream is great for a dairy-free option.
  • Orange Zest – Zest of one orange for that bright citrus aroma; feel free to substitute with lemon or lime zest for a different twist.
  • Orange Extract – ½ teaspoon to boost the orange flavor; omit if you are using fresh orange zest.
  • Orange Gel Food Coloring – 2-3 drops for added visual flair; skip it for a more natural look.

For Garnish

  • Whipped Cream – Optional, for a creamy topping; try coconut whipped cream for a dairy-free touch.

These Orange Creamsicle Mini Cheesecakes are sure to add a splash of summer joy to your dessert table!

Step‑by‑Step Instructions for Orange Creamsicle Mini Cheesecakes

Step 1: Prepare the Muffin Tin
Start by preheating your oven to 350°F (if you prefer a warm crust, otherwise no heat is needed). Line a standard muffin tin with 12 cupcake liners, placing one Oreo cookie in the bottom of each liner. Press down gently to create a solid base, ensuring each cookie is flat for a delightful crust in your Orange Creamsicle Mini Cheesecakes.

Step 2: Mix the Cream Cheese Filling
In a mixing bowl, combine room-temperature cream cheese and powdered sugar. Using an electric mixer, blend on medium speed until the mixture is smooth and creamy, about 2-3 minutes. This will create a luscious filling for your cheesecakes. Be sure to scrape down the sides of the bowl to fully incorporate the ingredients, enhancing the flavor of your Orange Creamsicle Mini Cheesecakes.

Step 3: Whip the Heavy Cream
In a separate bowl, pour in the heavy whipping cream. Using a hand mixer or a stand mixer, whip the cream until soft peaks form, usually around 3-5 minutes. Once you see the peaks start to hold, add in the orange extract and continue whipping until stiff peaks form. This step will give your mini cheesecakes that light and fluffy texture they deserve.

Step 4: Combine Mixtures
Carefully fold the whipped cream into the cream cheese mixture using a spatula. Be gentle to maintain the airy texture of the whipped cream. Continue to fold until just combined and smooth, ensuring no streaks remain. This blend is vital for the airy quality of your Orange Creamsicle Mini Cheesecakes, creating that perfect creamy filling everyone will love.

Step 5: Layer the Cheesecake Mixture
Divide the cheesecake mixture into two equal portions. Spread the first half over the Oreo crust in each cupcake liner, smoothing it gently with a spatula. Ensure an even layer across all cups. This base layer will provide the foundation for the citrus layer to come in your delightful Orange Creamsicle Mini Cheesecakes.

Step 6: Add Orange Zest and Color
With the remaining cheesecake mixture, fold in the orange zest and a few drops of orange gel food coloring, if using. Stir gently until all the zest is well distributed, aiming for a beautiful, vibrant color. Carefully spread this orange-infused layer over the first layer in each cupcake liner, creating a visually appealing contrast in your Orange Creamsicle Mini Cheesecakes.

Step 7: Swirl for Aesthetic Appeal
Using a toothpick or the end of a spoon, gently swirl the top layers of the cheesecake mixture to create a marbled effect. Be cautious not to overmix; you want to preserve the distinct layers. This simple technique adds an inviting look to your Orange Creamsicle Mini Cheesecakes, making them even more enticing.

Step 8: Refrigerate to Set
Cover the muffin tin with plastic wrap and place it in the refrigerator to set for at least 3-4 hours, or preferably overnight. This chilling step is crucial for achieving the right texture and firmness in your Orange Creamsicle Mini Cheesecakes. Just imagine how wonderful they’ll taste after that time!

Step 9: Garnish and Serve
Once set, remove your mini cheesecakes from the refrigerator. If desired, top each cheesecake with a dollop of whipped cream and a slice of orange for a beautiful finish. Serve these delightful Orange Creamsicle Mini Cheesecakes chilled, delighting friends and family with every light, creamy bite!

Orange Creamsicle Mini Cheesecakes Variations

Feel free to bring your creative flair to these delightful no-bake desserts!

  • Dairy-Free: Substitute cream cheese and whipped cream with vegan cream cheese and coconut whipped cream for a dairy-free version. This twist doesn’t compromise on flavor; your taste buds will still dance with joy!

  • Nutty Crust: Swap out the Oreo cookies for crushed almonds or pecans mixed with melted butter for a nut-based crust. The crunch of nuts adds a unique texture, taking your mini cheesecakes to another level.

  • Chocolate Twist: Incorporate a tablespoon of cocoa powder into the cream cheese mixture for a hint of chocolate. Imagine the rich fusion of orange and chocolate creating a delightful surprise in every bite!

  • Fruit-Infused: Blend in pureed strawberries or raspberries for a fruity variation that complements the orange beautifully. The vibrant red swirls will not only attract attention but also explode with flavor.

  • Extra Zesty: Add additional orange zest or a splash of fresh orange juice for a more intense citrus flavor. This will elevate the brightness and give your cheesecakes an extra kick of refreshing taste!

  • Mini Tropical Pavlovas: To embrace a tropical theme, serve these cheesecakes alongside my deliciously light Mini Tropical Pavlovas. They create a fabulous dessert trio that everyone will adore!

  • Spicy Kick: Introduce a pinch of cayenne pepper to the filling for a surprising spicy twist that complements the sweetness. Just a touch can create an unexpected but delightful depth of flavor!

  • Garnish Alternatives: Instead of whipped cream, top your cheesecakes with a layer of fruit compote or a sprinkle of toasted coconut for added visual appeal and texture. This makes for a picture-perfect presentation!

Storage Tips for Orange Creamsicle Mini Cheesecakes

Fridge: Store your mini cheesecakes in an airtight container in the refrigerator for up to 5 days to maintain freshness and flavor.

Freezer: Freeze the cheesecakes in a single layer on a baking sheet for 1-2 hours until firm, then transfer to an airtight container or wrap individually. They can last in the freezer for up to 3 months.

Thawing: To enjoy frozen Orange Creamsicle Mini Cheesecakes, transfer them to the refrigerator and let them thaw overnight before serving for the best texture.

Reheating: These cheesecakes are best served chilled, so no reheating is needed; simply garnish and enjoy their refreshing taste!

What to Serve with Orange Creamsicle Mini Cheesecakes

Looking to create an unforgettable spread that perfectly accompanies these delightful desserts?

  • Fresh Berries: These burst with flavor and provide a refreshing contrast to the creamy mini cheesecakes, enhancing the overall experience. Strawberries and blueberries on the side create a vibrant, colorful plate.

  • Ice Cream: A scoop of vanilla or orange sorbet adds a creamy, cold element that pairs wonderfully with the rich cheesecakes, rounding out the dessert pleasure.

  • Mint Tea: The light, herbal notes of mint tea cleanse the palate, balancing sweetness while offering a calming finish to your meal.

  • Citrus Salad: A light salad made with mixed greens, orange slices, and a honey-lime vinaigrette adds brightness and a fresh crunch. This symphony of flavors enhances the orange essence of the cheesecake while offering a refreshing contrast.

  • Chocolate Dipped Fruit: Pieces of fruit like bananas or strawberries dipped in chocolate bring a delightful sweetness, creating a dreamy, indulgent combo that pairs uniquely with the orange flavors.

  • Lemonade Sparklers: This zesty drink's carbonation and tangy flavor beautifully complement the sweetness of the mini cheesecakes, making every bite more refreshing and enjoyable.

  • Pistachio Crumble: A sprinkle of crushed pistachios adds a nutty crunch and a touch of elegance to your dessert presentation, enhancing both texture and flavor.

Make Ahead Options

These No-Bake Orange Creamsicle Mini Cheesecakes are a fantastic choice for meal prep, allowing you to savor their delightful flavors without the last-minute rush! You can prepare the entire cheesecake mixture up to 24 hours in advance; simply fill the muffin tin and refrigerate them overnight. For optimal quality, ensure they're well-covered with plastic wrap to prevent any absorption of fridge odors. When you're ready to serve, just garnish with whipped cream and an orange slice for a refreshing touch. This not only saves time but ensures you can impress your guests with a homemade dessert that tastes just as delicious as if it were freshly made!

Expert Tips for Orange Creamsicle Mini Cheesecakes

  • Room Temperature Ingredients: Ensure your cream cheese is at room temperature for a smooth combination. Cold cream cheese leads to lumps in your filling.

  • Whipping Technique: When whipping the heavy cream, be careful not to overwhip. Stiff peaks are crucial for a fluffy texture, but overwhipping can turn it grainy.

  • Chill Time Matters: Don't rush the refrigeration process; letting the mini cheesecakes set for at least 3-4 hours ensures they hold their shape perfectly when served.

  • Swirled Perfection: Use a toothpick to create a gentle swirl in the top layer. This not only enhances the aesthetics but also balances the flavors in each bite of your Orange Creamsicle Mini Cheesecakes.

  • Diverse Crust Options: Experiment with different cookie bases, like graham crackers or even shortbread, for a unique twist on your classic recipe.

  • Visual Appeal: For that pop of color, a few drops of orange gel food coloring can enhance the look of your mini cheesecakes, making them more inviting at gatherings.

Orange Creamsicle Mini Cheesecakes Recipe FAQs

How do I select the right orange for my recipe?
Absolutely! When choosing an orange, look for firm, vibrant oranges with a pleasant, fruity aroma. Avoid any with dark spots or blemishes, as these can indicate spoilage. If you're looking for added zest, navel oranges are a sweet option, while Valencia oranges are great if you're after juiciness.

How should I store my Orange Creamsicle Mini Cheesecakes?
These mini cheesecakes should be kept in an airtight container in the refrigerator for up to 5 days. Be sure to place them on a flat surface to maintain their shape. If you want to keep them longer, you can freeze them!

Can I freeze these mini cheesecakes, and how do I do it?
Of course! To freeze your Orange Creamsicle Mini Cheesecakes, allow them to set fully in the refrigerator first. Then, place them on a baking sheet in a single layer and freeze for 1-2 hours until firm. After that, transfer them to an airtight container or wrap them individually. They will stay fresh for up to 3 months. For the best texture, thaw in the refrigerator overnight before enjoying.

What if my cheesecake filling is too thick or lumpy?
No worries! If your filling is too thick, try mixing it a bit longer, ensuring your cream cheese is at room temperature before you begin. If lumps persist, you can gently fold in a bit more heavy whipping cream to achieve that desired light and fluffy texture without overwhipping. This will help create the smooth creaminess we all crave in a cheesecake!

Are there any dietary considerations for pets?
Very! While it’s tempting to share a treat, keep in mind that the ingredients, especially cream cheese and sugar, are not safe for pets. Always be cautious and keep these mini cheesecakes out of reach from our furry friends!

Orange Creamsicle Mini Cheesecakes

Delight in Orange Creamsicle Mini Cheesecakes: No-Bake Bliss

Enjoy the nostalgic flavors of Orange Creamsicle Mini Cheesecakes, a light and fluffy no-bake dessert perfect for summer gatherings.
Print Recipe Pin Recipe
Prep Time 30 minutes mins
Chilling Time 4 hours hrs
Total Time 4 hours hrs 30 minutes mins
Servings: 12 mini cheesecakes
Course: Dessert
Cuisine: American
Calories: 180
Ingredients Equipment Method Nutrition Notes

Ingredients
  

For the Crust
  • 12 pieces Oreo Cookies You can use graham crackers for a lighter flavor.
For the Cheesecake Filling
  • 16 oz Cream Cheese At room temperature; Neufchâtel can be used for a lighter option.
  • 0.5 cup Powdered Sugar Can be swapped with granulated sugar but will alter the texture slightly.
  • 1 teaspoon Vanilla Extract Almond extract makes a delightful alternative.
  • 1 cup Heavy Whipping Cream Coconut cream is great for a dairy-free option.
  • 1 orange Orange Zest Feel free to substitute with lemon or lime zest for a different twist.
  • 0.5 teaspoon Orange Extract Omit if you are using fresh orange zest.
  • 2-3 drops Orange Gel Food Coloring Skip it for a more natural look.
For Garnish
  • 1 cup Whipped Cream Optional; try coconut whipped cream for a dairy-free touch.

Equipment

  • Muffin tin
  • Electric mixer
  • Mixing bowls
  • Spatula
  • Cupcake liners

Method
 

Step-by-Step Instructions
  1. Preheat your oven to 350°F if you prefer a warm crust. Line a standard muffin tin with 12 cupcake liners, placing one Oreo cookie in the bottom of each liner.
  2. In a mixing bowl, combine room-temperature cream cheese and powdered sugar. Blend on medium speed for about 2-3 minutes until smooth.
  3. In a separate bowl, whip the heavy cream until soft peaks form. Add the orange extract and continue whipping until stiff peaks form.
  4. Carefully fold the whipped cream into the cream cheese mixture using a spatula until just combined and smooth.
  5. Divide the cheesecake mixture into two equal portions. Spread the first half over the Oreo crust in each cupcake liner.
  6. Fold in the orange zest and a few drops of orange gel food coloring to the remaining cheesecake mixture, then spread it over the first layer.
  7. Gently swirl the top layers of the cheesecake mixture with a toothpick to create a marbled effect.
  8. Cover the muffin tin with plastic wrap and refrigerate for at least 3-4 hours, preferably overnight.
  9. Once set, remove the cheesecakes and top with a dollop of whipped cream and an orange slice if desired.

Nutrition

Serving: 1mini cheesecakeCalories: 180kcalCarbohydrates: 20gProtein: 2gFat: 10gSaturated Fat: 6gPolyunsaturated Fat: 0.5gMonounsaturated Fat: 1.5gCholesterol: 30mgSodium: 150mgPotassium: 80mgFiber: 0.5gSugar: 10gVitamin A: 5IUVitamin C: 2mgCalcium: 3mgIron: 2mg

Notes

Ensure cream cheese is at room temperature for smooth mixing. Don't rush the chilling time for the best texture.

Tried this recipe?

Let us know how it was!

Irresistible Homemade Banana Split Cupcakes for Sweet Cravings

February 12, 2026 by Grace Snow Leave a Comment

The scent of ripe bananas mingling with the sweet aroma of baking fills my kitchen, drawing me back to childhood summers spent enjoying classic banana splits. Today, I’m excited to share my twist on this beloved dessert: Homemade Banana Split Cupcakes! These delightful treats capture all the nostalgic flavors we love, combining soft, moist banana cake with a creamy frosting, a luscious chocolate drizzle, and a pop of crunchy nuts. Not only are these cupcakes easy to whip up, making them perfect for impromptu gatherings, but they also bring the joy of a banana split into a convenient, portable form. Whether you’re looking to impress guests at your next potluck or simply satisfy a sweet craving, these cupcakes will be a hit. So, are you ready to dive into a baking adventure that’ll bring smiles all around?

Why are these cupcakes a must-try?

Indulge in a unique twist on the classic dessert! These Homemade Banana Split Cupcakes are wonderfully moist and bursting with flavor. Easy to make, they require minimal prep time, making them perfect for any occasion. The combination of textures—from fluffy cake to creamy frosting and crunchy nuts—will delight your taste buds. Plus, they can be enjoyed warm or chilled, making them versatile for every preference. Pair them with a scoop of ice cream for an unbeatable dessert experience, and if you love fruity treats, check out my Breakfast Banana Split for another delicious option!

Homemade Banana Split Cupcake Ingredients

• Ready to bake these delightful treats? Let’s gather the essentials!

For the Batter

  • All-purpose flour – Provides structure; gluten-free flour works as a substitute if needed.
  • Baking powder – A leavening agent to help your cupcakes rise; always check for freshness!
  • Salt – Balances the sweetness; kosher salt or table salt both work well.
  • Unsalted butter (melted) – Adds moisture and flavor; vegetable oil can be a creamy, dairy-free option.
  • Granulated sugar – Sweetens the batter and enhances the banana flavor; can be reduced to suit your taste.
  • Large eggs – Binds ingredients; for a vegan option, replace with flax eggs.
  • Vanilla extract – Adds a delicious aroma; almond extract is a great alternative!
  • Mashed ripe bananas – The star that brings flavor and moisture; frozen bananas (thawed and drained) are perfect here.

For the Toppings

  • Chocolate chips – Adds sweet indulgence and texture; opt for dairy-free chocolate for a vegan twist.
  • Chopped walnuts or pecans – Provide a delightful crunch; feel free to omit for a nut-free version.
  • Maraschino cherries – A classic topping that adds sweetness; fresh fruit can replace these for a lighter option.
  • Whipped cream or buttercream frosting – The perfect finishing touch; choose the frosting type based on your richness preference.

With these Homemade Banana Split Cupcake Ingredients, you’re well on your way to a delightful baking experience! Happy baking!

Step‑by‑Step Instructions for Homemade Banana Split Cupcakes

Step 1: Preheat and Prepare
Begin by preheating your oven to 350°F (175°C). While the oven warms up, line a muffin tin with cupcake liners to ensure easy removal of the cupcakes later. This is an important step to help create a perfect batch of Homemade Banana Split Cupcakes that will have beautifully soft exteriors, ready for delicious toppings.

Step 2: Combine Dry Ingredients
In a large mixing bowl, whisk together the all-purpose flour, baking powder, and salt until evenly combined. This ensures that the leavening agent is uniformly distributed in the batter, which is critical for the cupcakes’ rise. Set this mixture aside for now as you prepare the wet ingredients, keeping your workspace organized as you go.

Step 3: Mix Wet Ingredients
In another bowl, mix the melted unsalted butter and granulated sugar together until smooth and creamy, about 2–3 minutes. Then, add in the eggs and vanilla extract, stirring until fully incorporated. This mixture will add moisture and flavor to your Homemade Banana Split Cupcakes, creating a delightful base for your batter.

Step 4: Fold in Bananas
Next, gently fold the mashed ripe bananas into the wet mixture until the batter appears smooth and creamy. The ripe bananas are the star of this recipe, adding not only flavor but also moisture, which is essential for cupcakes. Take care to combine the bananas thoroughly without overmixing, preserving the airy texture you desire.

Step 5: Combine Wet and Dry Ingredients
Gradually add the flour mixture to your banana and butter combination, stirring gently until just combined. Make sure the flour is incorporated; you can leave a few small lumps to ensure you don’t overwork the batter, which is key to achieving that light, fluffy cupcake texture in your Homemade Banana Split Cupcakes.

Step 6: Fill Cupcake Liners
Using a scoop or a spoon, divide the batter equally among the prepared cupcake liners, filling each about two-thirds full. This ensures that they have enough room to rise beautifully in the oven. With this step, you are now on the verge of creating wonderful treats that will embody the classic banana split flavor.

Step 7: Bake in the Oven
Place the muffin tin in the preheated oven and bake for 18 to 20 minutes. You'll know they're ready when a toothpick inserted in the center comes out clean or with a few moist crumbs. Don’t rush this part; let the warmth of your kitchen fill the air with the sweet aroma of baking!

Step 8: Cool Cupcakes
Once baked, carefully remove the cupcakes from the oven and allow them to cool in the tin for about 5 minutes. After that, transfer the cupcakes to a wire rack for complete cooling. This cooling process is crucial for the perfect texture, ensuring they won’t crumble when you frost them.

Step 9: Frost and Decorate
When the cupcakes are completely cool, generously frost each with your choice of whipped cream or buttercream frosting, creating a delightful cloud on top. Then, drizzle melted chocolate over the frosting, sprinkle with chopped walnuts or pecans, and cap it all off with a bright maraschino cherry for that iconic banana split finish.

Step 10: Serve and Enjoy
Once decorated, your Homemade Banana Split Cupcakes are ready to serve! You might consider chilling them before serving to keep the frosting intact, enhancing their delightful appearance. These treats are perfect for any gathering or just a sweet indulgence at home, bringing smiles to everyone who tastes them!

Expert Tips for Homemade Banana Split Cupcakes

  • Choose Ripe Bananas: Use very ripe bananas for the sweetest flavor; they should have plenty of brown spots for optimal taste and moisture.

  • Avoid Overmixing: Once you combine the dry ingredients with the wet, stir gently to preserve the fluffy texture. Overmixing can lead to dense cupcakes.

  • Chill Before Decorating: If frosting and decorating immediately, chill the frosted cupcakes for a bit to prevent the frosting from melting when topped with warm chocolate or nuts.

  • Fresh Ingredients Matter: Make sure your baking powder is fresh for maximum rise in your Homemade Banana Split Cupcakes. This ensures a light, airy texture.

  • Customize Your Toppings: Feel free to substitute nuts with your favorite crunchy snacks or fresh fruit if you prefer a lighter version; it’s all about making these cupcakes your own!

Make Ahead Options

These Homemade Banana Split Cupcakes are perfect for busy bakers looking to save time without sacrificing flavor! You can prepare the cupcake batter up to 24 hours in advance. Simply mix all the dry ingredients and store them in an airtight container, while the wet ingredients (buttered sugar, eggs, and mashed bananas) can be combined and kept in the refrigerator. When you're ready to bake, just add the dry ingredients to the wet mixture, fill the liners, and bake as directed. For the toppings, frost the cooled cupcakes and refrigerate them for up to 3 days to maintain freshness. Just before serving, add the chocolate drizzle and maraschino cherry to keep everything looking vibrant and delicious!

Homemade Banana Split Cupcakes Variations

Feel free to get creative with your baking! These variations will let you personalize your cupcakes with exciting twists.

  • Dairy-Free: Use coconut milk and dairy-free butter for a creamy base; perfect for vegan friends.

  • Gluten-Free: Swap all-purpose flour with a 1:1 gluten-free baking mix; enjoy the same scrumptious flavors without worry.

  • Flavor Boost: Experiment by adding a teaspoon of cinnamon or nutmeg for a warm, cozy flavor that enhances the banana.

  • Nut-Free: Omit walnuts or pecans and use savory sunflower seeds for a delightful crunch without allergens.

  • Frosting Variations: Try chocolate ganache or cream cheese frosting to give it a different flavor profile; both will take this treat to a new level!

  • Extra Fun: Mix in mini marshmallows into the batter for a surprise flavor explosion in every bite.

  • Heat Lovers: Add a pinch of cayenne pepper or a few dashes of cinnamon spice to the cupcake batter for a warming twist that contrasts the sweetness.

And if you're looking for something lighter, why not pair these cupcakes with a refreshing scoop of ice cream? For a fruity kick, check out my Breakfast Banana Split or warm yourself up with a cup of Homemade Hot Chocolate. Let your imagination run wild with these delightful options!

What to Serve with Homemade Banana Split Cupcakes?

Looking to elevate your delightful dessert experience? Let's explore some perfect pairings that will bring joy to your table.

  • Vanilla Ice Cream: The classic companion that melts into the cupcakes, enhancing their banana flavors and adding creamy texture.
  • Fresh Berry Salad: Juicy strawberries, blueberries, and raspberries offer a refreshing contrast to the sweetness, adding brightness to your dessert spread.
  • Chocolate Milkshake: Rich and indulgent, this drink mirrors the dessert's flavors and makes for an exciting, nostalgic pairing.
  • Peanut Butter Drizzle: A luscious finish to your cupcakes, adding depth with nutty richness that beautifully complements the banana base.
  • Whipped Cream: Light and fluffy, this topping rounds out the overall texture while keeping things delightful and light.
  • Coffee or Espresso: A warm beverage that balances sweetness, creating a cozy afternoon pick-me-up to enjoy with your cupcakes.
  • Coconut Flakes: Toasted and sprinkled on top, these add a tropical twist, flavor contrast, and a lovely crunch to each bite.
  • Chocolate Fondue: Perfect for dipping your cupcakes into, this creates an interactive dessert experience that everyone will love!

Enjoy crafting your memorable dessert ensemble!

How to Store and Freeze Homemade Banana Split Cupcakes

Airtight Container: Store your cupcakes in an airtight container at room temperature for up to 2 days to maintain their moist texture and flavor.

Refrigeration: If frosted, keep the Homemade Banana Split Cupcakes in the fridge for up to an additional day. This will prolong their freshness and prevent frosting from melting.

Freezing: For longer storage, freeze unfrosted cupcakes in a single layer on a baking sheet, then transfer to a freezer-safe bag for up to 3 months. Thaw before frosting.

Reheating: If you want to enjoy them warm, pop the thawed cupcakes in the microwave for 10-15 seconds. Enjoy the delightful aroma all over again!

Homemade Banana Split Cupcakes Recipe FAQs

How do I select ripe bananas for the cupcakes?
Absolutely! For the best flavor and moisture, look for bananas that are very ripe, featuring plenty of brown spots. The sweeter and softer they are, the better your Homemade Banana Split Cupcakes will taste. If you happen to have some overripe bananas hanging around, don’t hesitate to use those—they’re perfect for baking!

What is the best way to store Homemade Banana Split Cupcakes?
To maintain their delightful moisture and flavor, store your cupcakes in an airtight container at room temperature for up to 2 days. If you've frosted them, you can refrigerate them for up to an additional day. Just remember to keep them covered to prevent drying out, or the frosting from melting.

Can I freeze Homemade Banana Split Cupcakes?
Absolutely! For longer storage, first freeze your unfrosted cupcakes in a single layer on a baking sheet for about 1-2 hours, until they are firm. Once frozen, transfer them to a freezer-safe bag or an airtight container and freeze for up to 3 months. When you're ready to enjoy, simply thaw them at room temperature before decorating with your favorite frosting.

What should I do if my cupcakes come out dense?
If your cupcakes turn out to be dense, it may be due to overmixing the batter once you combined the dry and wet ingredients. To avoid this, stir gently until just combined and don’t worry if you see a few small lumps—that's perfectly normal! Also, checking that your baking powder is fresh can help ensure a nice rise.

Are there any dietary considerations for pets or allergies regarding these cupcakes?
Very much so! Since these Homemade Banana Split Cupcakes contain ingredients like walnuts, chocolate, and sugar, which can be harmful to pets, it’s important to keep these treats away from furry friends. Additionally, if you’re baking for someone with allergies, consider using whipped coconut cream for frosting or flax eggs as substitutions, and be cautious with the nuts for those who may have nut allergies. Always read labels to ensure safety!

Homemade Banana Split Cupcakes

Irresistible Homemade Banana Split Cupcakes for Sweet Cravings

Delightful Homemade Banana Split Cupcakes capture nostalgic flavors with moist banana cake, creamy frosting, and a hint of chocolate drizzle.
Print Recipe Pin Recipe
Prep Time 15 minutes mins
Cook Time 20 minutes mins
Cooling Time 5 minutes mins
Total Time 40 minutes mins
Servings: 12 cupcakes
Course: Dessert
Cuisine: American
Calories: 250
Ingredients Equipment Method Nutrition Notes

Ingredients
  

For the Batter
  • 1 cup All-purpose flour Gluten-free flour works as a substitute if needed.
  • 1 tbsp Baking powder Always check for freshness!
  • 1/4 tsp Salt Kosher salt or table salt both work well.
  • 1/2 cup Unsalted butter (melted) Vegetable oil can be a dairy-free option.
  • 1 cup Granulated sugar Can be reduced to suit your taste.
  • 2 large Eggs For vegan option, replace with flax eggs.
  • 1 tsp Vanilla extract Almond extract is a great alternative.
  • 2 medium Mashed ripe bananas Frozen bananas (thawed and drained) are perfect.
For the Toppings
  • 1/2 cup Chocolate chips Opt for dairy-free chocolate for a vegan twist.
  • 1/2 cup Chopped walnuts or pecans Feel free to omit for a nut-free version.
  • 12 pieces Maraschino cherries Fresh fruit can replace these for a lighter option.
  • 1 cup Whipped cream or buttercream frosting Choose the frosting type based on your richness preference.

Equipment

  • Oven
  • Muffin tin
  • Mixing bowls
  • Whisk
  • Spoon or scoop

Method
 

Step-by-Step Instructions
  1. Preheat your oven to 350°F (175°C) and line a muffin tin with cupcake liners.
  2. In a large mixing bowl, whisk together the all-purpose flour, baking powder, and salt.
  3. In another bowl, mix the melted butter and granulated sugar until smooth. Add the eggs and vanilla, stirring until fully incorporated.
  4. Gently fold the mashed bananas into the wet mixture until creamy.
  5. Gradually add the flour mixture to the banana mixture, stirring gently until just combined.
  6. Divide the batter equally among the cupcake liners, filling each about two-thirds full.
  7. Bake for 18 to 20 minutes, or until a toothpick comes out clean.
  8. Remove cupcakes from the oven and let cool in the tin for about 5 minutes, then transfer to a wire rack.
  9. Frost each cooled cupcake with your choice of frosting, drizzle with melted chocolate, sprinkle with nuts, and top with a maraschino cherry.
  10. Serve chilled or at room temperature.

Nutrition

Serving: 1cupcakeCalories: 250kcalCarbohydrates: 35gProtein: 3gFat: 12gSaturated Fat: 7gPolyunsaturated Fat: 1gMonounsaturated Fat: 3gCholesterol: 30mgSodium: 150mgPotassium: 130mgFiber: 1gSugar: 15gVitamin A: 200IUVitamin C: 2mgCalcium: 20mgIron: 1mg

Notes

These cupcakes can be stored in an airtight container at room temperature for up to 2 days or in the refrigerator if frosted for an additional day.

Tried this recipe?

Let us know how it was!

Irresistible Cookies and Cream Cupcakes That Wow Every Time

February 12, 2026 by Grace Snow Leave a Comment

In the midst of my bustling kitchen, a delightful aroma floated through the air, pulling me toward the source of my latest sweet endeavor: Cookies and Cream Cupcakes. These mouthwatering treats are the perfect solution for anyone yearning for a homemade dessert that outshines any fast food option. Each moist chocolate cupcake, topped with rich cookies and cream buttercream frosting and drizzled with silky chocolate ganache, is sure to impress your family and friends. Plus, they offer a triple threat: they're easy to whip up, beautifully indulgent, and a guaranteed crowd-pleaser. Are you ready to dive into this deliciously sweet adventure? Let's discover how to create your very own cupcake masterpiece!

Why Are These Cupcakes So Special?

Irresistible Flavor: The rich combination of chocolate and Oreo creates a taste that's both nostalgic and delightful.

Moist and Decadent: These cupcakes are soft and tender, ensuring each bite is an explosion of chocolaty goodness.

Simple Steps: With straightforward instructions, even novice bakers can easily achieve a bakery-quality treat right at home.

Perfectly Frosted: The cookies and cream buttercream, drizzled with chocolate ganache, elevates each cupcake into a visual delight that's sure to impress.

Customizable: Feel free to experiment with different toppings or switch the chocolate types for a personalized twist! Or, for more delicious ideas, check out these Eggnog Cookies Soft for festive flavor or Matcha Cookies Soft for a vibrant touch.

With these Cookies and Cream Cupcakes, you're bound to transform ordinary moments into something extraordinary!

Cookies and Cream Cupcakes Ingredients

For the Cupcakes
• Semisweet Chocolate Chips – Adds a rich chocolate flavor to the cupcakes; substitute with milk chocolate for a sweeter profile.
• Dark Cocoa Powder – Provides a deep chocolate taste and color; unsweetened cocoa is a great alternative.
• Boiling Water – Melts the chocolate mixture and adds moisture; hot coffee enhances the chocolate flavor beautifully.
• All-Purpose Flour – Gives structure to the cupcakes; consider whole wheat flour for a healthier twist.
• Granulated Sugar – Sweetens the cupcakes; try coconut sugar for a less sugary option.
• Baking Soda – Helps the cupcakes rise; ensure freshness for best results.
• Salt – Enhances all the flavors; no substitutions necessary—opt for high-quality salt.
• Vegetable Oil – Keeps the cupcakes moist; melted coconut oil works well as an alternative.
• Large Eggs – Provide richness and stability; flax eggs can be used for a vegan version.
• Vanilla Extract – Adds depth of flavor; use pure vanilla for the best taste, or imitation vanilla in a hurry.

For the Frosting
• Unsalted Butter – Creates a creamy buttercream; substitute with margarine or plant-based butter for a dairy-free option.
• Powdered Sugar – Sweetener for the frosting that contributes to its luscious texture; you can blend granulated sugar to create your own.
• Heavy Cream – Adds a rich quality to the frosting and ganache; milk can be a substitute but will result in a less creamy mixture.
• Oreo Cookie Crumbs – Delivers that classic cookies and cream taste; any chocolate sandwich cookie can replace it.

For the Toppings
• Oreo Cookies – Perfect as a decorative final touch; other cookies may work, but the flavor will vary.

Dive into this delicious adventure and whip up these Cookies and Cream Cupcakes that are bound to wow everyone!

Step-By-Step Instructions for Cookies and Cream Cupcakes

Step 1: Preheat the Oven
Begin by preheating your oven to 350°F (177°C). While the oven warms up, line a cupcake pan with pretty liners to prepare for the batter. This step is crucial as it ensures that your Cookies and Cream Cupcakes will bake evenly and have that lovely dome shape once they're done.

Step 2: Prepare the Chocolate Mixture
In a small bowl, combine semisweet chocolate chips, dark cocoa powder, and boiling water. Stir until melted and smooth—this rich mixture adds depth to the cupcakes. Allow it to cool slightly; you want it warm, not hot, before adding it to the other ingredients, ensuring a perfect blend without cooking the eggs.

Step 3: Mix Dry Ingredients
In a large mixing bowl, whisk together the all-purpose flour, granulated sugar, baking soda, and salt until thoroughly combined. This will create a balanced base for your Cookies and Cream Cupcakes. Take a moment to enjoy the sweetness of this mixture—it's the foundation for your delicious treat!

Step 4: Combine Mixtures
Pour the cooled chocolate mixture into the bowl of dry ingredients. Add vegetable oil, large eggs, and vanilla extract. Using a spatula, gently mix everything together until just combined—avoid over-mixing to keep your cupcakes tender and fluffy. The mixture should be smooth and glossy, promising a delightful flavor.

Step 5: Bake the Cupcakes
Using a scoop, portion the batter into the lined cupcake pan, filling each liner about two-thirds full. Place the pan in the preheated oven and bake for 20 minutes, or until a toothpick inserted into the center comes out clean. Once baked, transfer the cupcakes to a wire rack to cool completely while you prepare the frosting.

Step 6: Make the Frosting
In a mixing bowl, cream together unsalted butter and gradually add powdered sugar, mixing until smooth and fluffy. Blend in vanilla extract and a pinch of salt. Pour in heavy cream and mix until you achieve a creamy consistency, then fold in the Oreo cookie crumbs. This cookies and cream buttercream is the star of the show!

Step 7: Prepare the Ganache
To create the decadent ganache, combine chocolate chips and heavy cream in a microwave-safe bowl. Heat in short bursts, stirring in between, until smooth and melted. This luxurious drizzle will give your Cookies and Cream Cupcakes that extra touch of indulgence and shine.

Step 8: Assemble Cupcakes
Once the cupcakes are completely cool, use a piping bag fitted with a star tip to generously pipe the cookies and cream frosting on top of each cupcake. Drizzle the ganache artfully over the frosted cupcakes, letting it cascade down the sides. Finally, finish with a halved Oreo on each cupcake for an irresistible touch.

Cookies and Cream Cupcakes Variations

Let your creativity shine as you personalize these delightful cupcakes with exciting twists and substitutions!

  • Dairy-Free: Use plant-based butter and coconut milk for the frosting to create a dairy-free treat that everyone can enjoy.
    You'll still achieve that creamy consistency and indulgent taste, perfect for any gathering.

  • Gluten-Free: Swap all-purpose flour with a 1:1 gluten-free flour blend to make these cupcakes friendly for gluten-sensitive friends.
    They'll be just as heavenly, maintaining their rich chocolate and creamy goodness without compromising on flavor.

  • Nutty and Crunchy: Add finely chopped nuts, such as walnuts or hazelnuts, to the batter for a delightful crunch.
    The added texture will take your Cookies and Cream Cupcakes to the next level—simply divine!

  • Mint Chocolate: Infuse your cupcake batter with peppermint extract for a refreshing minty twist.
    Pair this with a mint-flavored frosting for a cookies and cream variation that brings a cool zing to every bite.

  • Mini Treats: Transform this recipe into mini cupcakes by reducing the baking time to about 10 minutes.
    Perfect for parties or special occasions, these bite-sized goodies will delight guests of all ages!

  • Explore Ganache Flavors: Instead of standard chocolate, experiment with white chocolate or caramel ganache for a unique flavor profile.
    This simple change can create a visually stunning and deliciously different dessert experience.

  • Creative Toppings: Top your cupcakes with various candy bars or sprinkles for an extra celebratory touch.
    Not only will it add color, but the variety will entice everyone to enjoy a cupcake!

  • Bread Pudding Style: Use leftover cupcakes to create a decadent bread pudding.
    Simply tear them apart, mix with a custard base, and bake until golden brown for a fantastic dessert transformation!

Dive into these scrumptious variations and watch as your Cookies and Cream Cupcakes become a personalized masterpiece that captivates every taste bud.

How to Store and Freeze Cookies and Cream Cupcakes

Airtight Container: Store your cupcakes in an airtight container at room temperature for up to 2 days to maintain their moist texture.

Refrigeration: If you want to keep them longer, refrigerate the cupcakes for up to 3 days. Make sure they are in an airtight container to avoid drying out.

Freezing: For longer storage, freeze individual cupcakes by wrapping them tightly in plastic wrap and then placing them in a freezer-safe bag. They can last up to 3 months.

Reheating: When ready to enjoy, allow frozen cupcakes to thaw in the refrigerator overnight, then bring to room temperature before serving for the best taste experience.

Expert Tips for Cookies and Cream Cupcakes

• Room Temperature Eggs: Ensure your eggs are at room temperature for better blending, which helps create a smoother cupcake batter.

• Avoid Overmixing: Mix your batter until just combined to prevent dense cupcakes. Remember, the key to soft Cookies and Cream Cupcakes lies in minimal mixing!

• Use Quality Cocoa: Opt for a high-quality dark cocoa powder for the richest chocolate flavor—this really elevates your cupcakes.

• Piping Perfection: For clean and beautiful frosting decorations, use a piping bag with a star tip; it makes all the difference visually!

• Ganache Confidence: When preparing ganache, heat in short bursts and stir to achieve a smooth consistency; this step adds a luscious finish to your cupcakes.

What to Serve with Cookies and Cream Cupcakes?

Treat your taste buds to a delightful experience that perfectly complements these sweet masterpieces.

  • Classic Vanilla Ice Cream: The creamy, smooth texture of vanilla ice cream balances the rich flavors of chocolate and Oreo, making for an indulgent dessert duo.

  • Fresh Fruit Salad: Juicy strawberries, blueberries, and kiwi add a refreshing touch, contrasting with the sweetness of the cupcakes and enhancing the overall flavor profile.

  • Chocolate Milkshake: A thick, luscious chocolate milkshake brings back those childhood memories, creating a nostalgic pairing that will be a hit with both kids and adults.

  • Whipped Cream Topping: Light and airy, whipped cream adds a fluffy contrast to the dense cupcakes while enhancing the rich chocolate flavor.

  • Coffee or Espresso: A hot cup of coffee elevates the overall experience, as its slight bitterness complements the sweet chocolate and Oreo notes, making for the perfect tea-time treat.

  • Chocolate Ganache Dip: For those craving even more chocolate, a side of chocolate ganache for dipping elevates these cupcakes to a whole new level of indulgence—because more chocolate is always better!

  • Mint Mojito: A refreshing mint mojito provides a zesty twist, cleansing the palate and offering a light, bubbly contrast to the dense and rich cupcakes.

  • Caramel Sauce Drizzle: The addition of sweet, gooey caramel sauce over the cupcakes enhances flavors with its buttery richness, creating a heavenly dessert experience.

  • Nutty Biscotti: For a crunchy textural contrast, serve these cupcakes with a side of nutty biscotti, which adds a delightful crunch and pairs perfectly with coffee.

Make Ahead Options

These Cookies and Cream Cupcakes are perfect for meal prep enthusiasts looking to save time during busy evenings! You can bake the cupcakes up to 24 hours in advance; just make sure to store them in an airtight container at room temperature to keep them fresh and moist. The creamy frosting can also be prepared 2-3 days ahead; simply store it in the refrigerator and bring it to room temperature for a few minutes before piping it onto the cupcakes. When you're ready to serve, drizzle the ganache over the frosted cupcakes and add the halved Oreos for a delightful touch. This way, you can whip up a stunning dessert with minimal last-minute effort!

Cookies and Cream Cupcakes Recipe FAQs

What type of chocolate chips should I use for these cupcakes?
Absolutely use semisweet chocolate chips for a rich flavor! If you enjoy a sweeter profile, you can substitute with milk chocolate chips. Whatever you choose, ensure they’re made of high-quality chocolate for the best results.

How should I store my Cookies and Cream Cupcakes?
Store your cupcakes in an airtight container at room temperature for up to 2 days. If you want to keep them fresh longer, they can be refrigerated for up to 3 days. Just remember to bring them back to room temperature before serving for the best taste.

Can I freeze the cupcakes, and how does that work?
Yes, you can! To freeze the cupcakes, wrap each one tightly in plastic wrap individually. Place them in a freezer-safe bag and store them in the freezer for up to 3 months. When you’re ready to enjoy, simply remove a cupcake from the freezer, let it thaw in the refrigerator overnight, and then bring it to room temperature before indulging!

What should I do if my frosting isn't turning out the right consistency?
If your cookies and cream buttercream frosting is too thick, gradually add a little more heavy cream until you reach the desired creamy texture. If it’s too thin, add more powdered sugar, a tablespoon at a time, until it thickens up. Mix slowly to avoid air bubbles; achieving that perfect frosting is key!

Can I make these cupcakes gluten-free?
Absolutely! To make gluten-free Cookies and Cream Cupcakes, simply substitute the all-purpose flour with a 1-to-1 gluten-free baking flour blend. Many brands work great, but be sure to check that the blend contains xanthan gum, which helps mimic the structure provided by gluten. Happy baking, gluten-free friends!

Are there any dietary considerations when making these cupcakes?
When preparing these cupcakes, you can easily make them dairy-free by substituting unsalted butter with a plant-based butter and using dairy-free heavy cream. Make sure to check all product labels for allergens like gluten and dairy, especially if you’re serving to guests with food sensitivities. Enjoy making a treat everyone can savor!

Cookies and Cream Cupcakes

Irresistible Cookies and Cream Cupcakes That Wow Every Time

Delight in Cookies and Cream Cupcakes that combine chocolate and Oreo flavors for an irresistible dessert.
Print Recipe Pin Recipe
Prep Time 20 minutes mins
Cook Time 20 minutes mins
Cooling Time 20 minutes mins
Total Time 1 hour hr
Servings: 12 cupcakes
Course: Dessert
Cuisine: American
Calories: 350
Ingredients Equipment Method Nutrition Notes

Ingredients
  

For the Cupcakes
  • 1 cup Semisweet Chocolate Chips Adds a rich chocolate flavor; substitute with milk chocolate for a sweeter profile.
  • 1/2 cup Dark Cocoa Powder Provides a deep chocolate taste; unsweetened cocoa is a great alternative.
  • 1 cup Boiling Water Melts the chocolate mixture; hot coffee enhances the chocolate flavor.
  • 1 cup All-Purpose Flour Gives structure; consider whole wheat flour for a healthier twist.
  • 1 cup Granulated Sugar Sweetens the cupcakes; try coconut sugar for a less sugary option.
  • 1 tsp Baking Soda Helps the cupcakes rise; ensure freshness.
  • 1/2 tsp Salt Enhances flavors; opt for high-quality salt.
  • 1/2 cup Vegetable Oil Keeps the cupcakes moist; melted coconut oil works well.
  • 2 large Eggs Provide richness; flax eggs can be used for a vegan version.
  • 1 tsp Vanilla Extract Adds depth; use pure for the best taste.
For the Frosting
  • 1/2 cup Unsalted Butter Creates a creamy buttercream; substitute with margarine for dairy-free.
  • 2 cups Powdered Sugar Sweetener for frosting; blend granulated sugar for homemade.
  • 1/4 cup Heavy Cream Adds richness; milk can substitute but less creamy.
  • 1 cup Oreo Cookie Crumbs Delivers classic cookies and cream taste.
For the Toppings
  • 6 cookies Oreo Cookies Perfect as a decorative final touch.

Equipment

  • Cupcake pan
  • Mixing bowls
  • Spatula
  • piping bag
  • wire rack

Method
 

Step-By-Step Instructions for Cookies and Cream Cupcakes
  1. Preheat your oven to 350°F (177°C) and line a cupcake pan with liners.
  2. Combine semisweet chocolate chips, dark cocoa powder, and boiling water in a small bowl and stir until melted and smooth.
  3. In a large bowl, whisk together flour, sugar, baking soda, and salt until combined.
  4. Pour in the cooled chocolate mixture, along with vegetable oil, eggs, and vanilla extract; mix gently until just combined.
  5. Portion the batter into liners, filling each about two-thirds full and bake for 20 minutes.
  6. Cream together butter and gradually add powdered sugar until smooth; blend in vanilla, salt, and heavy cream, then fold in Oreo crumbs.
  7. Prepare ganache by combining chocolate chips and heavy cream, heating in short bursts until smooth.
  8. Pipe the cookies and cream frosting on cooled cupcakes, drizzle with ganache, and top with a halved Oreo.

Nutrition

Serving: 1cupcakeCalories: 350kcalCarbohydrates: 45gProtein: 3gFat: 18gSaturated Fat: 9gPolyunsaturated Fat: 2gMonounsaturated Fat: 5gCholesterol: 45mgSodium: 180mgPotassium: 120mgFiber: 1gSugar: 25gVitamin A: 300IUCalcium: 30mgIron: 1mg

Notes

Ensure eggs are at room temperature for better blending. Avoid over-mixing the batter for soft cupcakes.

Tried this recipe?

Let us know how it was!
  • « Previous Page
  • 1
  • …
  • 6
  • 7
  • 8
  • 9
  • 10
  • …
  • 49
  • Next Page »

Welcome!

Hi, I’m Grace, a Sydney-based home cook with a passion for bold flavors and trending ingredients. Whether you’re a busy beginner or a seasoned foodie, you’ll find dishes here that are fresh, fun, and full of flavor.

More about me

Popular Recipes

  • Cheesy Chicken Garlic Bread Sandwich
    Cheesy Chicken Garlic Bread Sandwich for Cozy Family Moments
  • Easy Chicken Ranch Wraps
    Easy Chicken Ranch Wraps: Quick, Creamy & Totally Satisfying
  • Chicken Caesar Sandwiches
    Delicious Chicken Caesar Sandwiches for Quick Comfort Food
  • best Cuban sandwich
    The Best Cuban Sandwich You’ll Want Every Weeknight!

Footer

↑ back to top

About

  • Privacy Policy
  • Disclaimer
  • Terms & Conditions

Newsletter

  • Sign Up! for emails and updates

Contact

  • About me
  • Contact me

Copyright © 2025 TastyTrendIngredients