tastytrendingredients

  • Home
  • Recipes
    • Appetizers
    • Breakfast
    • Dessert
    • Dinner
    • Drinks
    • Salads
    • Snacks
    • Soups
  • About me
  • Contact
menu icon
go to homepage
  • Home
  • Recipes
    • Appetizers
    • Breakfast
    • Dessert
    • Dinner
    • Drinks
    • Salads
    • Snacks
    • Soups
  • About me
  • Contact
search icon
Homepage link
  • Home
  • Recipes
    • Appetizers
    • Breakfast
    • Dessert
    • Dinner
    • Drinks
    • Salads
    • Snacks
    • Soups
  • About me
  • Contact
×

Chocolate Candle Cookies to Light Up Your Halloween Treats

September 24, 2025 by Grace Snow Leave a Comment

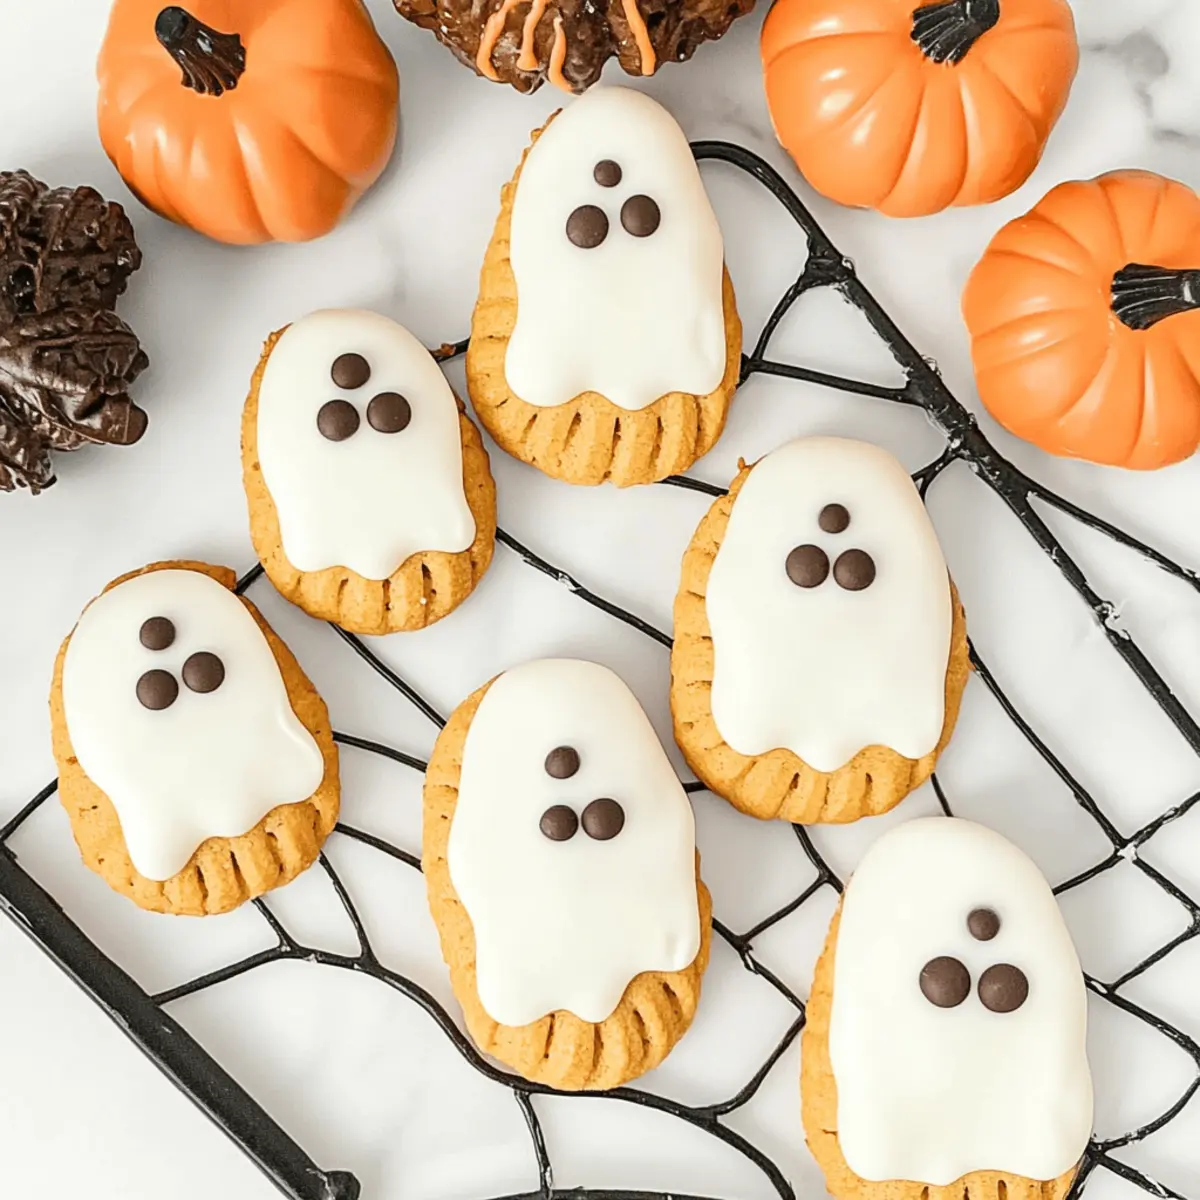
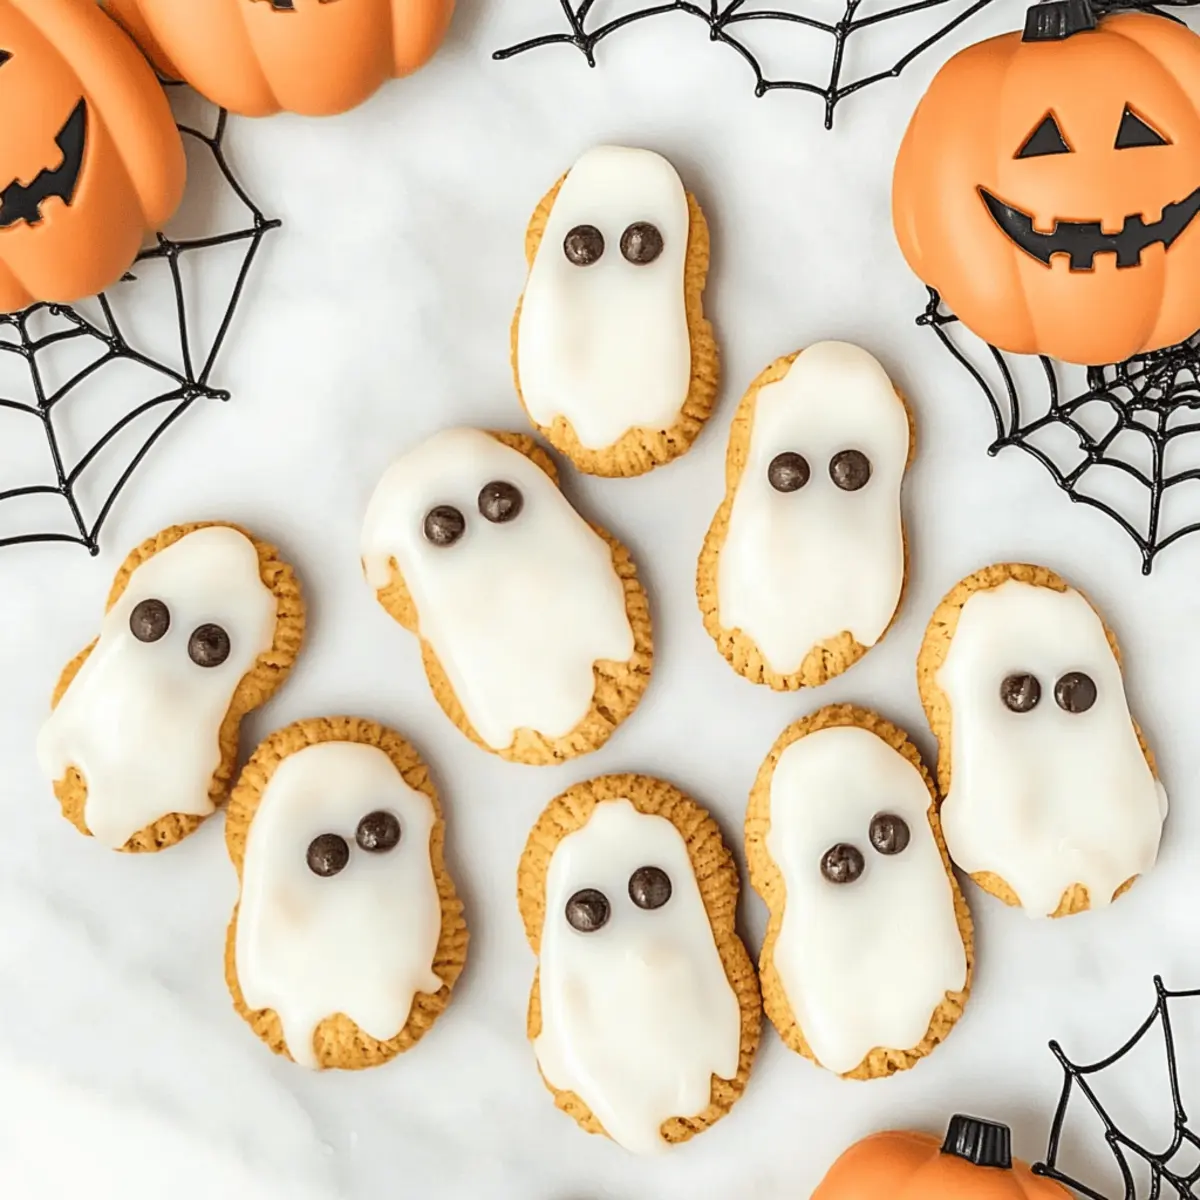
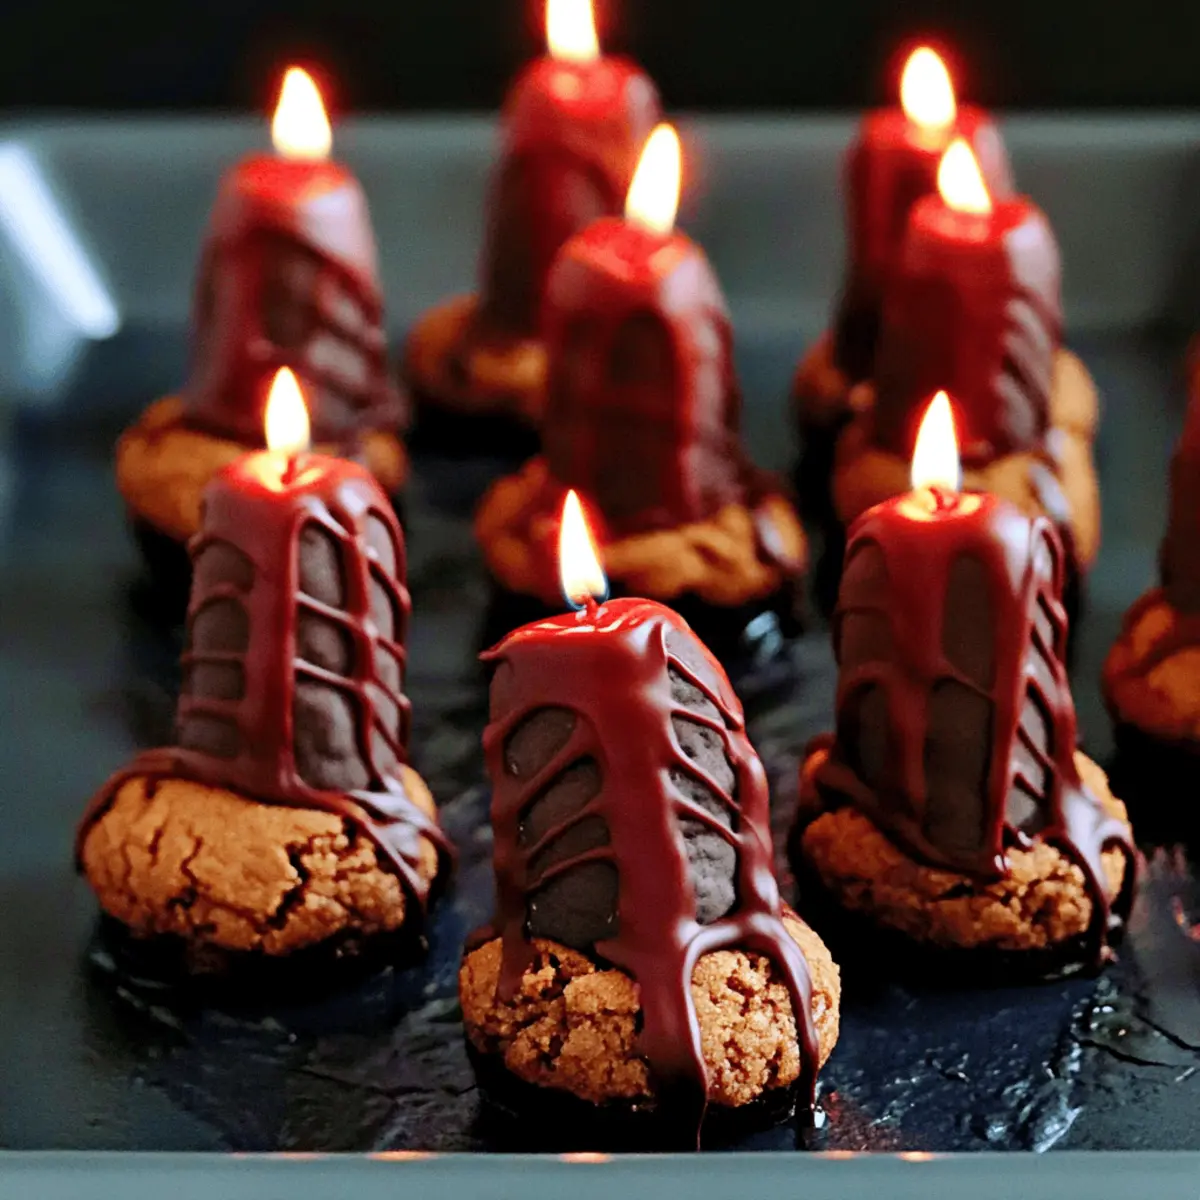
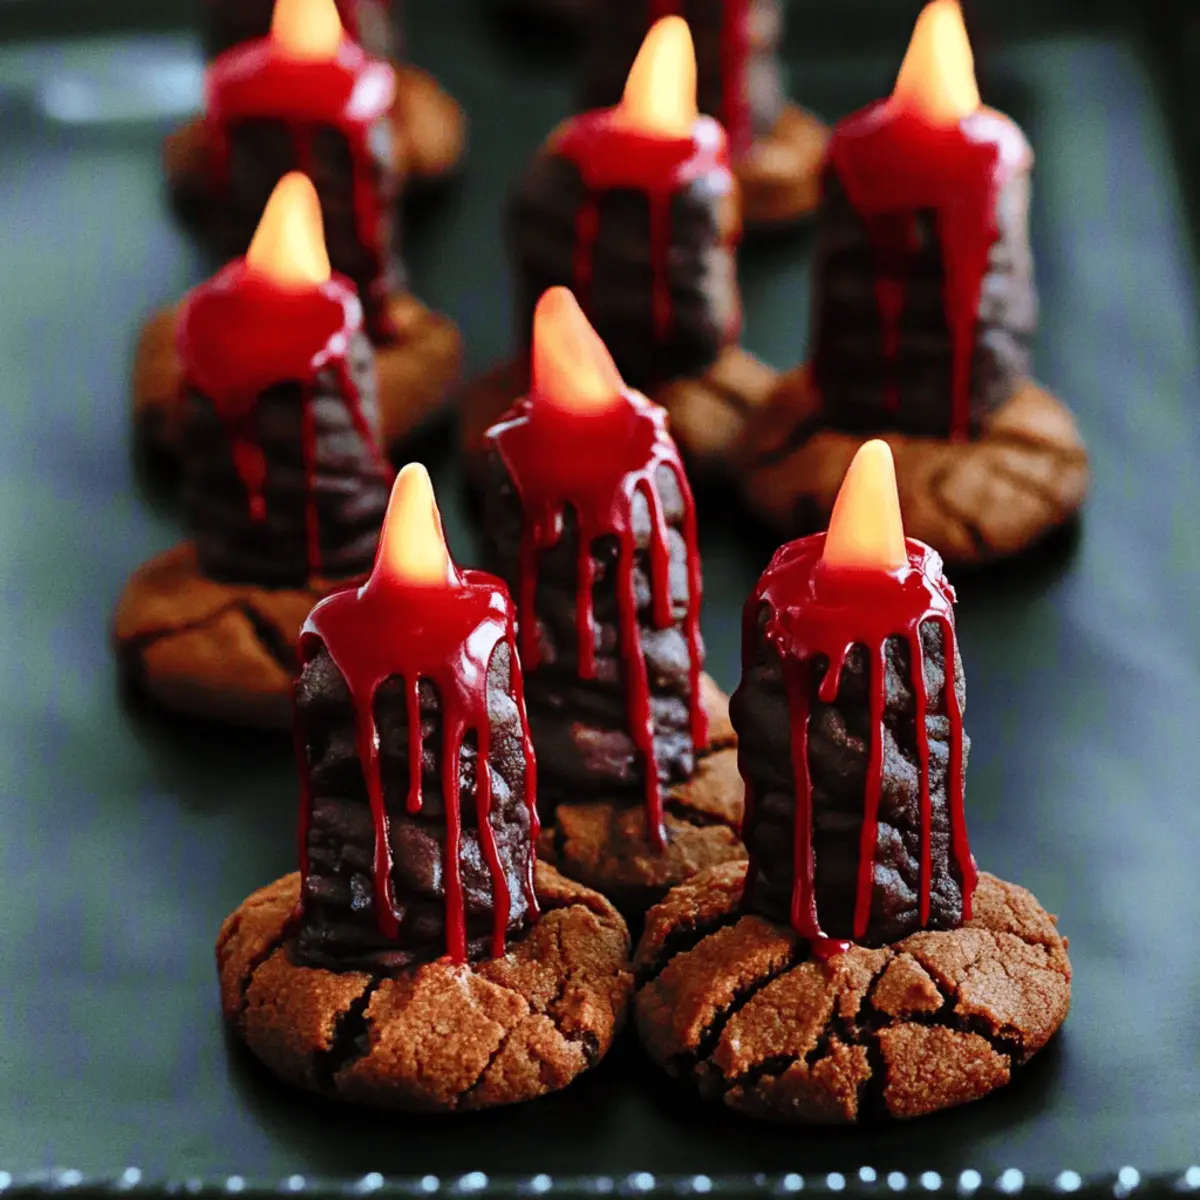
As I flipped through my favorite cookbook, a gleaming image of charming cookies shaped like candles caught my eye. Instantly, my mind was ablaze with ideas for a festive treat that could light up any Halloween gathering—enter my Spooky Candle Cookies. These delicious chocolate shortbread wonders are not just a feast for the eyes but also extremely simple to bake—no special tools required! With their rich taste and whimsical appearance, they are bound to be a hit at your table. Plus, they lend themselves beautifully to creative decorations, making them a fun project for anyone seeking to add a touch of homemade magic to their festivities. Curious about how to whip up these delightful treats? Let's dive into the recipe!

Why Are These Candle Cookies Unique?

Easy Preparation: No special tools needed—just basic kitchen essentials!

Festive Appeal: Designed for Halloween, their charming candle shape brings whimsy to your table.

Decadent Flavor: Rich chocolate shortbread delivers a satisfying treat that chocolate lovers will adore.

Creative Decorations: Unleash your imagination with colorful icing and unique toppings—try nuts or festive sprinkles!

Perfect for Sharing: These cookies are sure to impress at parties and gatherings—your guests will love them!

For a twist, pair them with Eggnog Cookies Soft or Thumbprint Cookies Melt for a delightful dessert spread!

Candle Cookies Ingredients

For the Cookies

  • All-Purpose Flour – Provides structure and body; substitute with gluten-free flour for a gluten-free option.
  • Cocoa Powder – Adds rich chocolate flavor; opt for unsweetened cocoa for the best results.
  • Salt – Enhances flavor; can be omitted or reduced for lower sodium.
  • Unsalted Butter – Creates a tender texture; use cold butter for firmer cookies if needed.
  • Confectioners Sugar – Sweetens the dough; powdered erythritol can be used for a sugar-free version.
  • Vanilla Extract – Adds depth of flavor; consider almond extract for a different twist.
  • Milk – Moistens the dough; use non-dairy milk for a vegan alternative.
  • Sliced Almonds – Used for decoration to simulate candle wicks; can be replaced with chocolate chips or nuts if preferred.

For the Icing

  • Confectioners Sugar – The base for icing; same substitutions apply as in the dough.
  • Water – Adjusts the icing consistency for the perfect drizzle.
  • Vanilla Extract – Flavors the icing; feel free to substitute with other extracts for a unique taste.
  • Red Gel Food Color – Provides a bleeding icing effect, adding a fun festive touch; use different gel colors for various holidays.

Step‑by‑Step Instructions for Candle Cookies

Step 1: Dough Preparation
In a medium bowl, whisk together 2 cups of all-purpose flour, ½ cup of unsweetened cocoa powder, and a pinch of salt until well combined. In a larger mixing bowl, beat together 1 cup of cold unsalted butter, 1 cup of confectioners sugar, and 1 teaspoon of vanilla extract until creamy and smooth. Gradually mix in the dry ingredients and 3 tablespoons of milk until the dough is crumbly and no dry flour remains.

Step 2: Shaping the Cookies
On a clean work surface, roll about 1 tablespoon of dough into a ball, then roll it into thick logs approximately 3 inches long. Place the logs on a wire rack lined with parchment paper to prevent sticking. At one end of each log, gently insert a few sliced almonds to mimic candle wicks, making sure they stay firmly attached for a festive touch.

Step 3: Chill the Dough
Cover the wire rack with plastic wrap and place it in the refrigerator to chill for at least 4 hours. This step is crucial for ensuring the Candle Cookies hold their shape during baking, resulting in beautifully formed, thick candle-like cookies that are ready for the oven.

Step 4: Baking the Cookies
Preheat your oven to 350°F (175°C) and line a baking sheet with parchment paper. Once the oven is ready, bake the chilled logs for about 25 minutes, or until they are firm to the touch and a darker shade of chocolate. Keep an eye on them to prevent over-baking, as you want that perfect shortbread texture.

Step 5: Preparing the Icing
While the cookies cool completely, prepare the icing by mixing 2 cups of confectioners sugar with 2 tablespoons of water and 1 teaspoon of vanilla extract in a small bowl. Stir until smooth, adjusting the water as necessary to achieve a thick drizzle consistency. Add red gel food coloring to create a festive bleeding effect, stirring until evenly colored.

Step 6: Icing the Cookies
Transfer the icing into a piping bag or a small plastic bag with the corner snipped off for easier drizzling. Once the Candle Cookies have completely cooled, drizzle the icing over them, allowing it to run down the sides to simulate dripping wax. Be creative and have fun with this step!

Step 7: Setting the Icing
After icing the cookies, place them on a wire rack to set for a few hours. This will allow the icing to harden properly, ensuring the stunning appearance of your Candle Cookies is preserved. Once set, they will be ready to serve and impress at your Halloween gatherings!

What to Serve with Spooky Candle Cookies

Imagine a celebration filled with laughter and joy, complemented by flavors that dance on your palate and warm your heart.

  • Warm Apple Cider: Its sweet, spiced flavors perfectly complement the rich chocolate of the Candle Cookies, making for a cozy pairing.
  • Pumpkin Pie: A classic fall dessert, its creamy texture and spiced notes enhance the festive spirit of Halloween.
  • Vanilla Ice Cream: The cool creaminess balances the cookies’ rich taste, providing a delightful contrast to every bite.
  • Chocolate Milkshake: Indulgent and nostalgic, this treat adds a delightful twist, creating a silky, sweet treat alongside the cookies.
  • Caramel Sauce: Drizzle over the Candle Cookies to enhance their festive appeal and add a luscious, gooey flavor that whispers autumn.
  • Spiced Pumpkin Bread: Its moist texture and spices evoke warm memories of fall, beautifully contrasting with the chocolatey goodness of the cookies.

Pair these delightful treats with your favorite drinks or enjoy as a decadent dessert display at your next gathering!

Make Ahead Options

These Candle Cookies are a fantastic option for busy home cooks looking to save time! You can prepare the cookie dough up to 24 hours in advance by following the first three steps: whisk together the dry ingredients, beat the butter and sugar, and mix in the dry components with milk until crumbly. Chill the formed logs in the refrigerator as directed, then simply bake them when you're ready for fresh cookies. To maintain quality, ensure that the dough is well-wrapped in plastic to prevent drying out. Once baked, let the cookies cool before icing; they can be decorated up to 3 days in advance to have a lovely festive treat ready for your Halloween festivities!

Storage Tips for Candle Cookies

  • Room Temperature: Store your Candle Cookies in an airtight container for up to 3 days. This helps maintain their delightful texture while ensuring they stay fresh.

  • Fridge: If you prefer, you can refrigerate the cookies to extend their freshness for up to 5 days, but this may alter the texture slightly—just let them come to room temperature before serving.

  • Freezer: For longer storage, freeze the baked cookies without icing in a zip lock bag for up to 2 months. When you're ready to enjoy, simply thaw at room temperature or warm them gently in the oven.

  • Reheating: If desired, reheat cookies at 300°F for about 5-10 minutes to restore their original texture before serving them again. Enjoy those delicious Candle Cookies whenever the craving strikes!

Candle Cookies Variations & Substitutions

Feel free to get creative and suit these Candle Cookies to your taste and occasion with these delightful twists!

  • Gluten-Free: Use a gluten-free flour blend in place of all-purpose flour for a deliciously accessible version.
  • Sugar-Free: Try powdered erythritol instead of confectioners sugar to make these cookies suitable for a sugar-free diet. They’ll still be sweet and delightful!
  • Dairy-Free: Substitute unsalted butter with vegan butter and replace milk with almond or oat milk for a completely dairy-free treat.
  • Flavor Infusion: Swap vanilla extract for almond extract to give your cookies a subtly unique flavor that pairs beautifully with the chocolate.
  • Nutty Variation: Use chopped walnuts or pecans instead of sliced almonds for decoration. This adds a lovely crunch and flavor twist to each bite.
  • Festive Colors: Change up the icing color by using green or orange gel food coloring for a Halloween theme, or even pastel shades for other holidays!
  • Textural Contrast: Add a handful of mini chocolate chips to the cookie dough for added richness and an extra gooey texture with each bite.
  • Hot and Spicy: For a kick, add a sprinkle of cayenne or chili powder to the dough. It’s an adventurous twist that provides a surprising heat to your cookies!

If these cookie variations inspire you, feel free to explore more festive delights like Eggnog Cookies Soft or Matcha Cookies Soft to fill your dessert platter!

Expert Tips for Candle Cookies

  • Dough Consistency Check: Roll a tablespoon of dough to ensure it holds together without cracks; if it crumbles, add a bit more milk for the perfect Candle Cookies.

  • Icing Thickness Matters: Aim for an icing consistency that's thick enough to drizzle slowly from the piping bag but not runny, ensuring a lovely dripping effect.

  • Prevent Cookie Sprawl: Chill the shaped dough for a minimum of 4 hours; this step is essential to maintain the cookies' charming candle shape during baking.

  • Choose Decor Wisely: While sliced almonds simulate wicks beautifully, feel free to experiment with chocolate chips or nuts as decoration for a fun twist on your Candle Cookies.

  • Storing Leftovers: Keep your cookies in an airtight container for up to 3 days, or freeze them without icing in a zip lock bag for a delightful treat later on!

Candle Cookies Recipe FAQs

How do I choose the right cocoa powder for my Candle Cookies?
Absolutely! For the best flavor in your Candle Cookies, opt for unsweetened cocoa powder. This variety offers a robust chocolate taste without added sweetness, enhancing the overall richness of your cookies.

What’s the best way to store my Candle Cookies?
To keep your Candle Cookies fresh, store them in an airtight container at room temperature for up to 3 days. If you want them to last longer, refrigerate them for up to 5 days, but remember to let them return to room temperature before serving for the best texture!

Can I freeze my Candle Cookies?
Very much! For longer storage, freeze the baked cookies without icing in a zip lock bag for up to 2 months. When you're ready to enjoy, simply thaw at room temperature. If you want to warm them slightly, preheat your oven to 300°F and bake for about 5-10 minutes until warm and comforting.

How can I troubleshoot crumbly dough when making Candle Cookies?
If your dough is crumbly, don’t worry! I recommend rolling about one tablespoon of the dough to check its consistency. If it cracks, try adding an extra tablespoon of milk at a time until the dough holds together smoothly without cracks. This will ensure that your Candle Cookies are perfectly shaped and delicious!

Are these Candle Cookies safe for dogs?
While the ingredients in Candle Cookies are generally safe for humans, they’re not suitable for dogs. The cocoa powder can be toxic to dogs in large amounts, so it's best to keep these delightful treats out of reach of your furry friends.

How can I decorate my Candle Cookies for different holidays?
Feel free to get creative! You can swap the red gel food coloring for green or white to celebrate other holidays. Additionally, using different nuts for decoration, such as walnuts or pecans, can give your cookies a unique twist while still maintaining the charming candle vibe!

Candle Cookies

Chocolate Candle Cookies to Light Up Your Halloween Treats

Delightful Chocolate Candle Cookies that are whimsical and easy to make, perfect for Halloween gatherings.
Print Recipe Pin Recipe
Prep Time 30 minutes mins
Cook Time 25 minutes mins
Chilling Time 4 hours hrs
Total Time 4 hours hrs 55 minutes mins
Servings: 24 cookies
Course: Dessert
Cuisine: American
Calories: 150
Ingredients Equipment Method Nutrition Notes

Ingredients
  

For the Cookies
  • 2 cups All-Purpose Flour Substitute with gluten-free flour for a gluten-free option.
  • 0.5 cups Cocoa Powder Opt for unsweetened cocoa for the best results.
  • 1 pinch Salt Can be omitted or reduced for lower sodium.
  • 1 cups Unsalted Butter Use cold butter for firmer cookies if needed.
  • 1 cups Confectioners Sugar Powdered erythritol can be used for a sugar-free version.
  • 1 teaspoon Vanilla Extract Consider almond extract for a different twist.
  • 3 tablespoons Milk Use non-dairy milk for a vegan alternative.
  • 0.5 cups Sliced Almonds Can be replaced with chocolate chips or nuts if preferred.
For the Icing
  • 2 cups Confectioners Sugar Same substitutions apply as in the dough.
  • 2 tablespoons Water Adjusts the icing consistency for the perfect drizzle.
  • 1 teaspoon Vanilla Extract Feel free to substitute with other extracts for a unique taste.
  • 1 drop Red Gel Food Color Use different gel colors for various holidays.

Equipment

  • Mixing bowls
  • Whisk
  • Rolling Pin
  • Baking Sheet
  • piping bag

Method
 

Step-by-Step Instructions
  1. In a medium bowl, whisk together 2 cups of all-purpose flour, ½ cup of unsweetened cocoa powder, and a pinch of salt until well combined.
  2. In a larger mixing bowl, beat together 1 cup of cold unsalted butter, 1 cup of confectioners sugar, and 1 teaspoon of vanilla extract until creamy and smooth.
  3. Gradually mix in the dry ingredients and 3 tablespoons of milk until the dough is crumbly and no dry flour remains.
  4. On a clean work surface, roll about 1 tablespoon of dough into a ball, then roll it into thick logs approximately 3 inches long.
  5. Place the logs on a wire rack lined with parchment paper to prevent sticking. At one end of each log, gently insert a few sliced almonds to mimic candle wicks.
  6. Cover the wire rack with plastic wrap and place it in the refrigerator to chill for at least 4 hours.
  7. Preheat your oven to 350°F (175°C) and line a baking sheet with parchment paper. Bake the chilled logs for about 25 minutes, or until they are firm to the touch.
  8. While the cookies cool completely, prepare the icing by mixing 2 cups of confectioners sugar with 2 tablespoons of water and 1 teaspoon of vanilla extract until smooth.
  9. Transfer the icing into a piping bag or a small plastic bag with the corner snipped off for easier drizzling.
  10. Once the Candle Cookies have completely cooled, drizzle the icing over them, allowing it to run down the sides.
  11. After icing the cookies, place them on a wire rack to set for a few hours.

Nutrition

Serving: 1cookieCalories: 150kcalCarbohydrates: 20gProtein: 1gFat: 7gSaturated Fat: 4gPolyunsaturated Fat: 2gMonounsaturated Fat: 1gCholesterol: 30mgSodium: 80mgPotassium: 100mgFiber: 1gSugar: 8gVitamin A: 200IUCalcium: 10mgIron: 1mg

Notes

Keep your cookies in an airtight container for up to 3 days, or freeze them without icing in a zip lock bag for a delightful treat later on!

Tried this recipe?

Let us know how it was!

Raspberry Zinger Poke Cake: A Refreshing Fruity Treat

September 24, 2025 by Grace Snow Leave a Comment

As I sifted through my collection of dessert recipes, a vibrant memory of summer picnics and family barbecues came rushing back, wrapped in the sweet aroma of a Raspberry Zinger Poke Cake. This delightful treat combines a soft white cake soaked in luscious raspberry gelatin, paired with smooth preserves and a fluffy topping, making it the ultimate easy dessert for any occasion. Not only does this poke cake deliver a delectable fruity flavor, but it also shines as a crowd-pleaser that requires minimal effort. Whether you're looking to impress guests at a festive gathering or indulge in a sweet bite after dinner, this recipe promises to delight both young and old alike. Ready to discover the simple steps to whip up this refreshing cake? Let’s dive in!

Why is Raspberry Zinger Poke Cake a Must-Try?

Irresistible Flavor: Bursting with sweet raspberry goodness, every bite offers a delightful symphony of fruitiness that your taste buds will adore.

Simple Preparation: With just a few ingredients, making this dessert is a breeze, even for novice bakers.

Perfect for Any Occasion: Whether it's a summer barbecue or a holiday gathering, this cake fits seamlessly into any menu and is sure to impress guests.

Versatile Variations: Feel free to experiment! Swap out the raspberry flavor with strawberry or peach for a new twist on this classic poke cake.

Make Ahead Convenience: You can easily prepare it the day before, allowing the flavors to meld beautifully and save you time on the day of your event.

Once you've tasted this amazing treat, you'll want to share it with friends! For more crowd-pleasing ideas, check out my delicious Ice Cream Cake for another fun dessert option!

Raspberry Zinger Poke Cake Ingredients

For the Cake
• White Cake Mix – A quality mix ensures a moist and fluffy base for the Raspberry Zinger Poke Cake.
• Hot Purified Water – Needed to dissolve the raspberry-flavored gelatin thoroughly for the perfect poke.

For the Raspberry Filling
• Raspberry-Flavored Gelatin – Adds that sweet, fruity essence essential for the poke cake effect; be sure it’s well-dissolved.
• Raspberry Preserves – Thick and luscious, these provide concentrated flavor; microwaving them for a few seconds helps with spreading.

For the Topping
• Whipped Topping – This light fluff creates a satisfying creaminess; feel free to substitute with fresh whipped cream.
• Unsweetened Shredded Coconut – Adds a delightful texture; if coconut's not your thing, try chopped nuts or white chocolate shavings.

Get ready to bring the refreshing taste of the Raspberry Zinger Poke Cake to life!

Step‑by‑Step Instructions for Raspberry Zinger Poke Cake

Step 1: Prepare the Cake
Start by preheating your oven to 350°F (175°C). In a large mixing bowl, follow the package instructions on your white cake mix to combine with water, oil, and eggs. Pour the batter into a greased 9x13-inch baking pan, spreading it evenly. Bake in the preheated oven for 25–30 minutes, or until a toothpick inserted in the center comes out clean. Allow the cake to cool for about 30 minutes at room temperature.

Step 2: Make the Holes
Once the cake has cooled, take the end of a wooden spoon and gently poke holes across the surface, about 1 inch apart and halfway deep. This step is crucial for the Raspberry Zinger Poke Cake, as it allows the gelatin to seep into the cake and infuse it with flavor. Make sure the holes are evenly distributed to ensure a delightful burst of raspberry goodness in every slice.

Step 3: Prepare and Pour the Gelatin
In a medium mixing bowl, dissolve the raspberry-flavored gelatin in 2 cups of hot purified water, stirring until fully dissolved. Carefully pour the vibrant gelatin mixture over the poked cake, ensuring that the holes fill completely. Let the cake sit for about 5 minutes to absorb the gelatin, which will give your Raspberry Zinger Poke Cake its signature moistness.

Step 4: Add Raspberry Preserves
For enhanced flavor, microwave the raspberry preserves for about 30 seconds to soften. Once warm, spread the preserves evenly over the gelatin-soaked cake using a spatula. This layer of rich raspberry preserves adds sweetness and depth to your cake. Take your time to ensure an even distribution, making the Raspberry Zinger Poke Cake both beautiful and delicious.

Step 5: Apply Whipped Topping
Next, take your whipped topping and dollop it over the layer of raspberry preserves. Using a spatula, gently spread the whipped topping to create a smooth and fluffy layer that covers the preserves completely. This light and airy topping is what makes the Raspberry Zinger Poke Cake so delightful. Make sure it’s spread evenly for a perfect finish.

Step 6: Sprinkle Coconut
To add texture and a tropical twist, evenly distribute the unsweetened shredded coconut over the whipped topping layer. This step not only enhances the flavor but also gives your Raspberry Zinger Poke Cake a visually appealing finish. You can use your hands or a spoon to sprinkle the coconut so that it covers the whipped cream generously.

Step 7: Chill the Cake
Finally, cover the cake with plastic wrap and refrigerate it for at least 4 hours, or overnight if time permits. Chilling allows the flavors to meld together beautifully, and it firms up the cake for easier slicing. When you're ready to serve, simply remove from the refrigerator, slice, and enjoy the refreshing taste of the Raspberry Zinger Poke Cake with family and friends!

How to Store and Freeze Raspberry Zinger Poke Cake

Fridge: Keep the Raspberry Zinger Poke Cake in an airtight container in the refrigerator for up to 5–7 days. This will maintain its freshness and flavor while preventing dryness.

Freezer: For longer storage, wrap portions tightly in plastic wrap and aluminum foil, then freeze for up to 3 months. Thaw in the fridge overnight before serving.

** serving:** When ready to enjoy, slice and serve chilled. Consider garnishing with fresh raspberries for a pop of color and added flavor.

Leftover Topping: If you have extra whipped topping, store it separately in the fridge, and use it within a few days to maintain its texture.

What to Serve with Raspberry Zinger Poke Cake

Creating a complete meal around this delightful dessert invites your family and friends to indulge in a lively experience filled with fresh, vibrant flavors.

  • Grilled Chicken Skewers: The smoky flavors from the grill enhance the sweetness of the cake, creating a beautiful flavor contrast.

  • Fresh Garden Salad: A crisp salad with mixed greens and balsamic vinaigrette provides a refreshing, tangy balance to the sweet poke cake.

  • Lemonade or Iced Tea: Both drinks offer a zest of citrus that complements the fruity notes of the Raspberry Zinger Poke Cake perfectly, making it a refreshing pairing.

  • Coconut Rice: The subtle sweetness and chewiness of coconut rice harmonize with the cake's coconut topping while providing a tropical theme to your meal.

  • Chocolate Chip Cookies: These classic treats serve as a delightful treat alongside the cake; their rich, buttery flavor pairs well with the delightfully fruity dessert.

  • Berries and Cream: Freshly whipped cream served with a medley of strawberries and blueberries brightens up the dessert table, echoing the raspberry flavor and adding a luxurious touch.

Invite loved ones to experience a complete feast that celebrates the joys of home-cooked flavors!

Raspberry Zinger Poke Cake Variations

Feel free to make this delicious dessert your own with fun and flavorful tweaks!

  • Nutty Flavor: Replace shredded coconut with chopped almonds for a crunchy twist that adds delightful texture.
  • Different Gelatins: Don’t hesitate to try strawberry or peach gelatin instead of raspberry for a fruity variation that’s equally refreshing.
  • Cream Cheese Layer: For a creamy surprise, mix in softened cream cheese with the whipped topping, creating a zesty flavor that balances the sweetness.
  • Chocolate Drizzle: Add a drizzle of chocolate syrup over the top for an indulgent finish that complements the fruity flavors beautifully.
  • Fruit Add-ins: Toss in fresh berries like blueberries or sliced strawberries atop the whipped topping for added taste and color.
  • No-Coconut Option: If coconut isn’t your favorite, simply substitute it with white chocolate shavings for a luscious finish.
  • Spicy Kick: For an adventurous flavor, add a pinch of cayenne pepper or jalapeño flakes to the raspberry preserves for a sweet-heat combo.
  • Layered Perfection: Create a layered dessert by serving individual portions in cups, alternating layers of cake, gelatin, and toppings for a stunning presentation.

Each of these variations introduces its own unique charm, just like this Ice Cream Cake can elevate any gathering! Explore and enjoy creating your perfect Raspberry Zinger Poke Cake!

Expert Tips for Raspberry Zinger Poke Cake

• Perfect Poking Technique: Ensure you poke holes deeply enough to let the gelatin seep into the cake, but not all the way through. This balance is key for a moist Raspberry Zinger Poke Cake.

• Gelatin Dissolving: Always use hot purified water for dissolving gelatin. This ensures it's completely mixed and will set properly, giving you that vibrant raspberry flavor.

• Preserve Warm-Up: Microwaving the raspberry preserves not only softens them for easier spreading but also enhances their flavor, allowing them to meld beautifully with the cake.

• Topping Options: Feel free to substitute whipped topping with homemade whipped cream for an extra touch. Just make sure to whip it to stiff peaks for the best texture in your Raspberry Zinger Poke Cake.

• Chill Time: For the best flavor and texture, chill the cake overnight. This allows the flavors to meld perfectly and makes for easier cutting and serving.

• Double the Recipe Cautiously: If you're making this for a crowd, consider using two pans instead of one to avoid overflow.

Make Ahead Options

These Raspberry Zinger Poke Cakes are perfect for meal prep enthusiasts! You can prepare the cake and poke the holes up to 24 hours in advance, refrigerating it to keep it fresh. Once cooled, simply cover the cake with plastic wrap and store it in the fridge. The raspberry gelatin can be made and poured over the cake just before serving to ensure it's perfectly hydrated. Additionally, you can microwave and spread the raspberry preserves ahead of time and store them separately in the fridge for up to 3 days. When you're ready to enjoy, just layer the preserves and whipped topping, sprinkle with coconut, and it's ready to impress your guests with minimal effort!

Raspberry Zinger Poke Cake Recipe FAQs

What type of white cake mix should I use?
I recommend using a high-quality white cake mix for the best results. Look for one that has a soft and fluffy texture, which will perfectly complement the fruity raspberry flavors in the Raspberry Zinger Poke Cake.

How should I store the Raspberry Zinger Poke Cake?
Store the Raspberry Zinger Poke Cake in an airtight container in the refrigerator for up to 5–7 days. This keeps it fresh and moist, ensuring that every slice is as delightful as the first. Just be sure to cover it well to prevent any dryness!

Can I freeze the leftover cake?
Absolutely! To freeze, slice the Raspberry Zinger Poke Cake into portions and wrap them tightly in plastic wrap and aluminum foil. This will prevent freezer burn and keep the cake fresh for up to 3 months. When you're ready to enjoy, thaw the slices in the refrigerator overnight.

Why is my cake not absorbing the gelatin well?
If the gelatin isn’t soaking in properly, you might not have poked the holes deep enough or evenly enough across the cake. Aim for holes that are halfway deep, about 1 inch apart, using the end of a wooden spoon. This allows the gelatin to seep in evenly, giving you that moist, flavorful texture you’re looking for in the Raspberry Zinger Poke Cake.

Are there any dietary considerations I should be aware of?
If you have guests with dietary restrictions, consider using gluten-free cake mix and whipped topping alternatives to cater to those needs. Additionally, always check the labels for potential allergens if serving to those with food sensitivities.

Can I make this cake in advance?
Yes, this cake is perfect for making ahead of time! In fact, I often prepare it a day in advance to allow the flavors to meld beautifully. Refrigerate it overnight for optimal taste and easy serving the next day.

Raspberry Zinger Poke Cake

Raspberry Zinger Poke Cake: A Refreshing Fruity Treat

This Raspberry Zinger Poke Cake is a delightful blend of fruity flavors and moist texture, perfect for summer gatherings and easy to prepare.
Print Recipe Pin Recipe
Prep Time 20 minutes mins
Cook Time 30 minutes mins
Chilling Time 4 hours hrs
Total Time 4 hours hrs 50 minutes mins
Servings: 12 slices
Course: Dessert
Cuisine: American
Calories: 300
Ingredients Equipment Method Nutrition Notes

Ingredients
  

For the Cake
  • 1 box White Cake Mix A quality mix ensures a moist and fluffy base.
  • 2 cups Hot Purified Water Needed to dissolve the raspberry-flavored gelatin.
For the Raspberry Filling
  • 1 box Raspberry-Flavored Gelatin Adds sweet, fruity essence.
  • 1 cup Raspberry Preserves Thick and luscious; microwave for easier spreading.
For the Topping
  • 1 container Whipped Topping Feel free to substitute with fresh whipped cream.
  • 1 cup Unsweetened Shredded Coconut Optional; can use chopped nuts or white chocolate shavings.

Equipment

  • 9x13-inch baking pan
  • Mixing Bowl
  • Spatula

Method
 

Preparation Steps
  1. Preheat your oven to 350°F (175°C). Combine white cake mix with water, oil, and eggs in a mixing bowl. Pour into a greased 9x13-inch baking pan and bake for 25–30 minutes, or until a toothpick comes out clean. Allow to cool for 30 minutes.
  2. Once cooled, poke holes across the surface of the cake about 1 inch apart and half deep using the end of a wooden spoon.
  3. Dissolve raspberry-flavored gelatin in 2 cups of hot purified water and pour it over the poked cake, letting it absorb for about 5 minutes.
  4. Microwave raspberry preserves for about 30 seconds to soften, then spread evenly over the gelatin-soaked cake.
  5. Dollop whipped topping over the raspberry preserves and spread evenly.
  6. Sprinkle unsweetened shredded coconut over the whipped topping layer.
  7. Cover with plastic wrap and refrigerate for at least 4 hours, or overnight, before serving.

Nutrition

Serving: 1sliceCalories: 300kcalCarbohydrates: 45gProtein: 3gFat: 12gSaturated Fat: 7gPolyunsaturated Fat: 1gMonounsaturated Fat: 3gCholesterol: 20mgSodium: 250mgPotassium: 150mgFiber: 1gSugar: 25gVitamin A: 2IUCalcium: 2mgIron: 4mg

Notes

For the best flavor and texture, chill the cake overnight. Consider garnishing with fresh raspberries for a pop of color and added flavor.

Tried this recipe?

Let us know how it was!

Easy Oreo Witch Hat Cookies: A Spooky, Fun Treat!

September 24, 2025 by Grace Snow Leave a Comment

As the leaves turn gold and the air gets crisp, there’s a certain magic in the kitchen that’s just waiting to be stirred up. I couldn’t resist diving into the festive spirit with these adorable Oreo Witch Hat Cookies—an easy, no-bake Halloween treat that’s sure to enchant kids and adults alike. With a crunchy Oreo base topped with creamy frosting and a whimsical chocolate kiss, they’re not only a visual delight but also super quick to whip up. Trust me, they’ll be a hit at any gathering or party! Plus, the best part? These cookies invite endless creativity; swap in your favorite cookies or customize frosting colors to match your Halloween theme. Are you ready to conjure up some fun? Let's get started!

Why are Oreo Witch Hat Cookies a must-make?

Quick and Easy: You only need a few simple ingredients and no baking required, making these a breeze to whip up.

Creative Customization: Whether you choose colorful frosting or festive sprinkles, the options are endless for making these treats uniquely yours.

Perfect for Parties: These cookies not only look adorable but are also a delightful treat to serve at Halloween gatherings, drawing in both kids and adults.

Delicious Textures: The combination of crunchy Oreo, smooth frosting, and rich chocolate kiss creates a delightful eating experience.

Versatile Variations: Try using other chocolate cookies like Keebler Fudge Stripes or Grasshopper Cookies for a twist!

Oreo Witch Hat Cookies Ingredients

• • Get ready to create some magic!

For the Cookies

  • Oreo cookies – The star of the show; their crunchy chocolate base is absolutely perfect for a Halloween treat.
  • Keebler Fudge Stripes – A delightful alternative that adds a unique flavor twist while still delivering deliciousness.

For the Frosting

  • Vanilla frosting – Provides the sweet creaminess that balances the chocolatey cookies; feel free to tint it with fun colors like orange or green!
  • Store-bought frosting – A quick option that saves time without sacrificing taste.

For the Decorations

  • Halloween sprinkles – These colorful toppings not only enhance presentation but also add a playful touch; highly recommended for that festive flair!
  • Chocolate kisses – These chocolatey “hats” complete the look, but you can use any chocolate-shaped candy if desired.

These Oreo Witch Hat Cookies are not only fun to make but also allow you to get creative in the kitchen this Halloween!

Step‑by‑Step Instructions for Oreo Witch Hat Cookies

Step 1: Prep the Frosting
Begin by placing your vanilla frosting in a mixing bowl. If you want to add some Halloween flair, tint it with food coloring, like orange or green, using a toothpick to achieve your desired shade. Stir until fully combined and smooth. This frosting serves as the magical glue that holds our Oreo Witch Hat Cookies together, so make sure it’s fluffy and vibrant before moving on.

Step 2: Assemble the Cookies
Grab your Oreo cookies and set them on a clean workspace. Fit a piping bag with a star or round frosting tip, then fill it with your prepared frosting. Pipe a generous dollop of frosting onto the center of each Oreo, creating a lovely, swirled mound that resembles a witch's hat. This step will give your Oreo Witch Hat Cookies their enchanting shape, so take your time for an even look.

Step 3: Add the Sprinkles
Before the frosting sets, it's time to decorate! Sprinkle Halloween-themed sprinkles over each dollop of frosting, ensuring they stick well. Use a variety of colors and shapes for added visual appeal, making your cookies festive and fun. This step not only enhances the presentation but also adds a delightful crunch to each bite of your Oreo Witch Hat Cookies.

Step 4: Finish with Kisses
Unwrap your chocolate kisses and gently press one into the center of each dollop of frosting. This chocolate “hat” will sit perfectly atop your cookies, creating that iconic witch hat shape we’re after. Be careful not to squish the frosting too much—you're aiming for a delightful balance of chocolate and creamy frosting in each delectable Oreo Witch Hat Cookie.

Step 5: Let Them Set
Once all your cookies are assembled, place them on a tray and let them set for about 15-20 minutes. This will allow the frosting to firm up slightly, ensuring that the chocolate kisses stay in place. Use this time to clean up your workspace and prepare for the fun of enjoying your finished creations. These Oreo Witch Hat Cookies are looking adorable and waiting to be devoured!

Make Ahead Options

These Oreo Witch Hat Cookies are perfect for making ahead, saving you precious time on busy party days! You can prepare both the cookies and the frosting up to 24 hours in advance. Simply assemble the cookies without the chocolate kisses and refrigerate them in an airtight container to maintain their freshness. When you’re ready to serve, simply add the kisses and sprinkles just before putting them out for your guests; this prevents any sogginess while keeping the cookies just as delicious. By prepping ahead, you’ll have a delightful treat ready to impress with minimal last-minute effort!

Expert Tips for Oreo Witch Hat Cookies

  • Frosting Technique: Use a star or round frosting tip to create different designs; this adds a fun touch to your Oreo Witch Hat Cookies.

  • Colorful Customization: Experiment with different food colors in your frosting to match your Halloween theme or your family’s favorite colors!

  • Avoid Overfilling: Don’t pipe too much frosting on the cookies as it can cause the chocolate kisses to topple over; a generous dollop is perfect.

  • Storage Solutions: Keep your cookies fresh by storing them in an airtight container, which will help maintain that delightful crunch for up to 3 days.

  • Try Other Cookies: Feel free to substitute with other chocolate cookies like Keebler Fudge Stripes or Grasshopper Cookies for a uniquely flavored twist.

How to Store and Freeze Oreo Witch Hat Cookies

Room Temperature: These cookies can be stored at room temperature in an airtight container for up to 3 days, helping maintain their crunchy texture.

Fridge: If you want to extend their freshness, store the cookies in the fridge. They will last for up to 1 week, but allow them to come to room temperature before serving for the best flavor.

Freezer: For longer storage, you can freeze the Oreo Witch Hat Cookies. Wrap them individually in plastic wrap and place them in a freezer-safe bag for up to 2 months.

Reheating: If desired, let the cookies thaw at room temperature. For a warm treat, microwave for a few seconds but be cautious to avoid melting the chocolate kiss too much.

What to Serve with Halloween Oreo Witch Hat Cookies

Delight in the festive spirit as you create the perfect spread to complement these enchanting treats.

  • Spooky Fruit Salad: A mix of seasonal fruits like oranges and blackberries, bringing a refreshing contrast to the sweet cookies.

  • Witch’s Brew Punch: This fun, spooky drink made with grape juice and soda adds a fizzy, festive touch to your Halloween gathering.

  • Mellow Marshmallow Treats: Soft marshmallow squares layered with rice cereal offer a chewy, gooey counterpart to the crunchy texture of the cookies.

  • Candy Corn Parfait: Layered candy corn with yogurt creates a colorful, tasty dessert that echoes Halloween’s iconic treats while balancing sweetness.

  • Pumpkin Spice Cupcakes: A nod to fall flavors, these cupcakes feature rich spices and a creamy frosting, perfectly pairing with the chocolaty cookies.

  • Chocolately Hot Cocoa: Warm, indulgent hot chocolate topped with whipped cream feels like a hug in a mug, complementing every bite of your Oreo Witch Hat Cookies perfectly.

  • Pumpkin Pie Milkshake: Creamy and decadent, this blend of pumpkin pie flavors with ice cream brings a delightful finish to your Halloween feast.

  • Gummy Worms Snack Cups: Create little fun cups filled with gummy worms, adding a whimsical touch to the dessert table while enhancing the spooky theme!

Oreo Witch Hat Cookies Variations

Dive into delightful tweaks for your Oreo Witch Hat Cookies that will excite your creativity and taste buds!

  • Chocolate Options: Swap Oreo cookies with Keebler Fudge Stripes or Grasshopper Cookies for a different chocolatey experience. Each bite will bring a unique twist to this classic treat.

  • Colorful Frosting: Create a festive vibe by using colored frosting to match your Halloween theme. Bright oranges, spooky greens, or ghostly purples make for eye-catching designs!

  • Crunchy Textures: For a fun twist, add crushed Halloween-themed candies or nuts atop the frosting for an extra crunch in every bite. This dimension elevates the cookie experience.

  • Non-Dairy Delight: Switch to vegan chocolate cookies and plant-based frosting for a dairy-free version that everyone can enjoy. You still get that enchanting look and taste!

  • Mini Variations: Make mini Oreo Witch Hats using mini Oreos for bite-sized fun. Perfect for sharing at gatherings or to delight little ones.

  • Spicy Kick: Add a dash of cinnamon or pumpkin spice into the frosting for a warm, autumn flavor profile that dances on your taste buds. You might just fall in love with this pumpkin-inspired twist!

  • Candy Toppers: Replace chocolate kisses with marshmallow ghosts or candy corn for a playful variation. The kids will be thrilled with these unexpected toppings!

  • Peanut Butter Lovers: Spread a thin layer of peanut butter between the Oreo and frosting for a nutty flavor boost that will delight any peanut butter fan!

If you’re in the mood for even more sweet options, why not pair your spooky cookies with some delightful Matcha Cookies Soft or try out the lovable Thumbprint Cookies Melt? Happy celebrating!

Oreo Witch Hat Cookies Recipe FAQs

How do I choose the best Oreo cookies?
Absolutely! For the best Oreo Witch Hat Cookies, look for cookies that are fresh and unbroken. If you prefer a different taste, chocolate sandwich cookies like Keebler Fudge Stripes or even homemade chocolate cookies can work beautifully. Just ensure they're not stale or overly crumbly for that perfect base!

How should I store these cookies?
Very! To keep your Oreo Witch Hat Cookies fresh, store them in an airtight container at room temperature for up to 3 days. If you want to extend their shelf life, place them in the fridge where they can last up to 1 week. Remember to let them come to room temperature before serving to enhance the flavors!

Can I freeze Oreo Witch Hat Cookies?
Of course! Freezing them is easy and a great way to keep some festive treats on hand. Wrap each cookie individually in plastic wrap and place them in a freezer-safe bag. They can be stored for up to 2 months. When you're ready to enjoy, let them thaw at room temperature. For an extra treat, microwave them for just a few seconds—just be cautious not to melt the chocolate kiss too much!

What if my frosting is too thick?
No worries! If you find your vanilla frosting too thick to pipe easily, simply add a teaspoon of milk at a time until you reach your desired consistency. Mix well after each addition to ensure it's evenly blended. This will make it much easier to pipe those perfect dollops on your cookies!

Are these cookies safe for people with allergies?
Great question! The Oreos themselves are typically safe for most, but always check the packaging for allergy information since they may contain traces of nuts or gluten. For a nut-free or gluten-free version, look for specialized cookies that meet dietary requirements. Always consider the icing and sprinkles, as some may also contain allergens.

What if I run out of frosting?
If you find yourself with less frosting than you need, no problem! You can easily whip up a small batch of homemade frosting using just butter, powdered sugar, a splash of milk, and a hint of vanilla extract. Mix until creamy and spreadable, and you’ll have just the right amount for your Oreo Witch Hat Cookies!

Oreo Witch Hat Cookies

Easy Oreo Witch Hat Cookies: A Spooky, Fun Treat!

Oreo Witch Hat Cookies are an easy, no-bake Halloween treat featuring crunchy Oreos, creamy frosting, and chocolate kisses.
Print Recipe Pin Recipe
Prep Time 20 minutes mins
Setting Time 20 minutes mins
Total Time 40 minutes mins
Servings: 12 cookies
Course: Dessert
Cuisine: American
Calories: 120
Ingredients Equipment Method Nutrition Notes

Ingredients
  

For the Cookies
  • 15 cookies Oreo cookies The star of the show
  • 15 cookies Keebler Fudge Stripes A delightful alternative
For the Frosting
  • 1 cup Vanilla frosting Can be tinted with food coloring
  • 1 cup Store-bought frosting
For the Decorations
  • 1 cup Halloween sprinkles Highly recommended for festive flair
  • 12 pieces Chocolate kisses Any chocolate-shaped candy can be used

Equipment

  • Mixing Bowl
  • piping bag
  • Star or round frosting tip

Method
 

Step-by-Step Instructions
  1. Prep the Frosting: Place vanilla frosting in a mixing bowl, tint if desired, stir until smooth.
  2. Assemble the Cookies: Pipe frosting onto the center of each Oreo, creating a swirled mound.
  3. Add the Sprinkles: Sprinkle Halloween-themed sprinkles over the frosting before it sets.
  4. Finish with Kisses: Press a chocolate kiss into the center of each dollop of frosting.
  5. Let Them Set: Place cookies on a tray and let them set for about 15-20 minutes.

Nutrition

Serving: 1cookieCalories: 120kcalCarbohydrates: 16gProtein: 1gFat: 6gSaturated Fat: 3gPolyunsaturated Fat: 1gMonounsaturated Fat: 1gCholesterol: 5mgSodium: 50mgPotassium: 50mgSugar: 10gCalcium: 2mgIron: 2mg

Notes

These cookies are customizable and can be made with various cookie types and frosting colors.

Tried this recipe?

Let us know how it was!

Nutter Butter Ghost Cookies for a Spooky Treat This Halloween

September 24, 2025 by Grace Snow Leave a Comment

As I rummaged through my pantry, I stumbled across a package of Nutter Butter cookies, sparking a delightful idea just in time for Halloween. These 4-ingredient Nutter Butter Ghost Cookies are the perfect treat to create some spooky joy without much fuss. With just a little melted candy coating and a few candy eyeballs, you can turn simple cookies into festive ghosts that are both fun to make and devour. Not only are they a fantastic quick fix for last-minute Halloween parties, but they also offer a no-bake option that’s perfect for anyone looking to whip up something homemade without the hassle. Curious to see how these ghoulish delights come together? Let’s dive into the sweet details!

Why Are Nutter Butter Ghost Cookies a Must-Try?

Unforgettable Fun: These ghost cookies are not just treats; they're a delightful way to engage in Halloween festivities, making them perfect for family bonding or classroom activities.

Quick and Easy: With only four ingredients, you can whip up these spooky snacks in no time, making them a fantastic last-minute party addition.

No-Bake Convenience: There's no need to turn on the oven! Simply melt and dip, saving you time and effort in the kitchen.

Customizable Creations: Whether you use Nutter Butter or opt for alternatives like Milano cookies, the variations allow everyone to enjoy a sweet bite, making them versatile for diverse diets.

Visually Appealing: Adorned with candy eyeballs, these cookies transform an ordinary cookie into an eye-catching delight, perfect for impressing your guests or kids.

For more quick cookie ideas, check out my Eggnog Cookies Soft or Mexican Wedding Cookies.

Nutter Butter Ghost Cookies Ingredients

• For the Cookies

  • Nutter Butter Cookies – These classic peanut butter cookies provide a delicious base; substitute with Milano cookies for a peanut-free option.
  • White Candy Melts – Used for coating, these add a smooth and creamy flavor; alternatively, use white chocolate chips if candy melts are unavailable.

• For the Decoration

  • Candy Eyeballs – Essential for creating the ghostly appearance, making your cookies fun and festive.
  • Mini Chocolate Chips – Perfect for adding the finishing touch as the mouth, giving your ghost a playful expression.

These Nutter Butter Ghost Cookies are sure to be a hit at any Halloween gathering!

Step‑by‑Step Instructions for Nutter Butter Ghost Cookies

Step 1: Prepare Your Workspace
Begin by lining a baking sheet with wax paper to hold your dipped Nutter Butter Ghost Cookies. This will prevent them from sticking, allowing for easy cleanup. Ensure your workspace is clear and gather all your ingredients, including Nutter Butter cookies, white candy melts, candy eyeballs, and mini chocolate chips.

Step 2: Melt the Candy Coating
Next, place the white candy melts in a microwave-safe bowl and microwave on 50% power. Stir every 30 seconds until fully melted, which should take about 4-5 minutes total. You'll know it's ready when the candy is smooth and glossy, without any lumps, making it perfect for dipping.

Step 3: Dip the Cookies
Once the candy melts are ready, carefully dip each Nutter Butter cookie into the melted coating. Cover 70-75% of the cookie, ensuring a nice ghostly effect. Allow any excess candy coating to drip off back into the bowl before moving to the next step for an even finish.

Step 4: Add the Ghostly Features
While the coating is still wet, immediately press two candy eyeballs and one mini chocolate chip onto each cookie to create the ghost's face. Position them playfully to give your Nutter Butter Ghost Cookies their spooky charm. Work quickly to ensure the decorations adhere well.

Step 5: Let the Cookies Set
Place the decorated cookies on the lined baking sheet and let them sit at room temperature for 5-10 minutes. Your Nutter Butter Ghost Cookies will set as the candy coating hardens. You'll know they're ready when the coating is firm to the touch, making them perfect for serving or storing.

How to Store and Freeze Nutter Butter Ghost Cookies

Room Temperature: Keep your cookies in an airtight container at room temperature for up to 5 days. This will prevent them from becoming stale while maintaining their delightful crunch.

Freezer: For longer storage, freeze the Nutter Butter Ghost Cookies for up to 2 weeks. Wrap each cookie individually in plastic wrap and place them in a freezer-safe container to keep them fresh.

Thawing: When you’re ready to enjoy, thaw the cookies in a dry place for about 30 minutes. Avoid using the microwave, as it can affect the texture of the candy coating.

Moisture Prevention: Always store cookies in a cool, dry place, away from moisture, as condensation can cause the candy coating to melt and lose its charm.

Make Ahead Options

These Nutter Butter Ghost Cookies are a fantastic option for meal prep! You can dip the cookies and decorate them up to 24 hours in advance, allowing the candy coating to set properly in the refrigerator. To maintain their delightful texture, store the finished cookies in an airtight container at room temperature until you’re ready to serve. If you wish to prepare components ahead, you can melt the candy coating and store it in an airtight container in the fridge for up to 3 days; simply reheat it gently in the microwave before dipping. When the time comes to enjoy your spooky treats, just serve them as is—no extra effort needed for ghostly deliciousness!

Nutter Butter Ghost Cookies Variations

Feel free to customize these delightful ghostly treats to suit your tastes and dietary needs. The options are spooky fun!

  • Dairy-Free: Use dairy-free white chocolate or coconut oil for coating instead of candy melts for a lactose-free version.
  • Gluten-Free: Swap Nutter Butter cookies with gluten-free alternatives like gluten-free vanilla sandwich cookies to accommodate dietary restrictions.
  • Color Variations: Go wild with colored candy melts for different holiday themes, like orange for Halloween or pastel colors for Easter!
  • Sugar-Free Options: Opt for sugar-free candy melts to create a lighter version that everyone can enjoy without the extra sweetness.
  • Add Sprinkles: Before the candy coating sets, sprinkle colorful edible decorations on top for an enchanting touch.
  • Flavor Twist: Mix in a hint of vanilla or almond extract into the melted candy for an unexpected flavor boost that pairs beautifully with the peanut butter.
  • Texture Fun: For extra crunch, consider adding finely crushed nuts or granola as a topping on the candy coating before it hardens.
  • Mini Ghost Cookies: Create bite-sized versions using mini Nutter Butter cookies for a fun party treat that will leave everyone wanting more!

For more delightful cookie ideas, check out my Matcha Cookies Soft or Peaches Cream Cookies.

Expert Tips for Nutter Butter Ghost Cookies

  • Melting Mastery: Use a microwave-safe bowl and melt the candy at 50% power. Stir every 30 seconds to prevent burning the chocolate.

  • Dip with Care: Avoid over-coating! Dip each cookie about 70-75% into the melted candy to ensure a balanced ghostly look without excess dripping.

  • Add Decor Quickly: Work fast when placing candy eyeballs and chocolate chips while the coating is still wet, ensuring they stick properly for that spooky character.

  • Storage Savvy: Keep cookies in an airtight container at room temperature for up to 5 days. If freezing, wrap them individually to maintain freshness for longer.

  • Peanut Allergy Alert: If serving to a group, confirm there are no peanut allergies. Substitute Nutter Butter cookies with Milano cookies for a safe, delightful alternative.

These helpful tips ensure your Nutter Butter Ghost Cookies turn out perfectly spooky and delicious every time!

What to Serve with Nutter Butter Ghost Cookies

As Halloween beckons with its playful spirit, these delightful ghost cookies become the centerpiece of any festive spread, ready to enchant guests young and old.

  • Crispy Apple Slices: The sweet and tangy flavor of fresh apple slices adds a refreshing crunch that balances the sweetness of the cookies. Pair them with caramel dip for an autumn twist.

  • Pumpkin Spice Hot Chocolate: Indulge in the warming flavors of autumn with a rich hot chocolate infused with pumpkin spice. The creamy texture complements the ghost cookies beautifully, creating a cozy treat.

  • Spooky Fruit Salad: A mix of seasonal fruits like oranges, pomegranate, and bananas can provide bright colors and fresh flavors. It adds a lively contrast to the rich, creamy cookies.

  • Cheese Platter: Offer a selection of soft cheeses, like brie or goat cheese, paired with honey and nuts. This savory contrast balances the sweet ghost cookies, making for an exciting culinary experience.

  • Witch’s Brew Smoothie: Blend spinach, banana, and almond milk for a green smoothie that's both nutritious and fun. It adds a vibrant touch, enticing kids and adults alike with its potion-like charm.

  • Ghostly Marshmallow Treats: Create even more spooky fun by serving rice cereal marshmallow treats shaped like ghosts. They’ll be a hit and echo the theme of your Nutter Butter Ghost Cookies.

  • Cinnamon Sugar Popcorn: Light and crunchy popcorn drizzled in butter and tossed with cinnamon sugar makes for a great crunchy snack that enhances the festive mood.

  • Mummy Dogs: Wrap crescent roll dough around hot dogs to create adorable “mummies.” They add a savory element that’s perfect alongside your sweet ghost cookies.

  • Apple Cider: Serve warm or chilled apple cider as a refreshing drink, enhancing the fall atmosphere and harmonizing with the flavors of the cookies.

  • Chocolate Creepy Crawlers: Decorate cookies with chocolate bugs or gummy worms for a playful presentation. These sweet surprises will thrill kids and amp up the Halloween spirit!

Nutter Butter Ghost Cookies Recipe FAQs

How do I choose the best Nutter Butter cookies?
When selecting Nutter Butter cookies for your spooky treat, look for packages without any signs of damage or moisture. Ideally, choose cookies with a smooth and even surface, as this will help create a great coating. If you need a peanut-free option, Milano cookies are a delicious alternative that safely keeps the spirit of the recipe.

What is the best way to store Nutter Butter Ghost Cookies?
To keep your cookies fresh, store them in an airtight container at room temperature for up to 5 days. Ensure the cookies are completely cool before sealing them, as any heat can create moisture, leading to soggy cookies. For longer preservation, wrap each cookie individually in plastic wrap and place them in a freezer-safe container to freeze for up to 2 weeks.

Can I freeze Nutter Butter Ghost Cookies? How?
Absolutely! To freeze, wrap each cookie in plastic wrap and place them in an airtight freezer-safe container. This method prevents freezer burn and helps maintain their delightful crunch. When you’re ready to enjoy them, simply thaw the cookies at room temperature for about 30 minutes. Avoid using the microwave for defrosting; this can melt the candy coating and affect the texture.

What should I do if the candy coating is too thick?
If you find that the candy coating is too thick for dipping, try adding a small amount of vegetable oil or shortening to the melted candy melts. Stir well and return to the microwave for a few seconds if needed. This will help create a smoother consistency, making it easier to dip your Nutter Butter cookies without leaving large clumps.

Can these cookies be made sugar-free?
Yes, you can easily make sugar-free Nutter Butter Ghost Cookies! Substitute the white candy melts with a sugar-free candy coating or sugar-free white chocolate chips. Additionally, when selecting your cookies, ensure they are also sugar-free or low-carb. These adaptations retain the festive spirit while catering to various dietary preferences.

Are there any allergy considerations for these cookies?
Definitely! If you're serving these Nutter Butter Ghost Cookies to a group, always check for peanut allergies, as the Nutter Butter cookies themselves contain peanuts. For a safe alternative, use Milano cookies or another nut-free cookie. Additionally, be mindful of any allergies to artificial colors or ingredients found in the candy eyeballs you choose to decorate with.

Nutter Butter Ghost Cookies

Nutter Butter Ghost Cookies for a Spooky Treat This Halloween

Delight in Nutter Butter Ghost Cookies, an easy Halloween treat made with just four ingredients for festive fun.
Print Recipe Pin Recipe
Prep Time 10 minutes mins
Setting Time 10 minutes mins
Total Time 20 minutes mins
Servings: 12 cookies
Course: Dessert
Calories: 150
Ingredients Equipment Method Nutrition Notes

Ingredients
  

For the Cookies
  • 1 package Nutter Butter Cookies Substitute with Milano cookies for a peanut-free option.
  • 1 cup White Candy Melts Alternatively, use white chocolate chips.
For the Decoration
  • 1 cup Candy Eyeballs
  • 1/4 cup Mini Chocolate Chips For adding facial features.

Equipment

  • Microwave-safe bowl
  • Baking Sheet
  • wax paper

Method
 

Step-by-Step Instructions for Nutter Butter Ghost Cookies
  1. Prepare your workspace by lining a baking sheet with wax paper.
  2. Melt the white candy melts in a microwave-safe bowl at 50% power, stirring every 30 seconds for about 4-5 minutes.
  3. Dip each Nutter Butter cookie into the melted coating, covering 70-75% of the cookie.
  4. Press two candy eyeballs and one mini chocolate chip onto each dipped cookie while the coating is still wet.
  5. Let the cookies sit at room temperature for 5-10 minutes to set.

Nutrition

Serving: 1cookieCalories: 150kcalCarbohydrates: 20gProtein: 2gFat: 7gSaturated Fat: 3gPolyunsaturated Fat: 1gMonounsaturated Fat: 2gSodium: 90mgPotassium: 30mgFiber: 1gSugar: 10gCalcium: 2mgIron: 4mg

Notes

Keep cookies in an airtight container at room temperature for up to 5 days. For longer storage, freeze them individually wrapped for up to 2 weeks.

Tried this recipe?

Let us know how it was!

Moist Pineapple Carrot Cream Cake: A Tropical Treat You’ll Love

September 23, 2025 by Grace Snow Leave a Comment

The warm aroma of freshly baked cake wafted through my kitchen as I prepared to dive into a tropical delight: the Hawaiian Pineapple Carrot Cream Cake. This inviting dessert combines subdued sweetness from fresh carrots with the zesty burst of crushed pineapple, creating a perfectly moist cake, ideal for any home chef yearning for a sweet escape. Not only is it beginner-friendly, but it also makes for an unforgettable crowd-pleaser at any gathering. The creamy cream cheese frosting adds a luxurious touch, balancing the cake's flavors beautifully. Curious to find out how to create this delectable treat that will have everyone asking for seconds? Let’s get started!

Why is this cake a must-try?

Beginner-Friendly: This recipe is perfect for novice bakers, requiring minimal skills yet delivering impressive results.

Tropical Twist: The combination of sweet carrots and crushed pineapple creates a refreshing flavor profile that transports you to a sunny beach with every bite.

Irresistibly Moist: With a rich cream cheese frosting, this cake remains incredibly moist, ensuring it’s an instant favorite at any gathering.

Quick to Make: Ready in just over an hour, this cake allows you to enjoy a delicious dessert without spending the entire day in the kitchen.

Customizable: The option to add walnuts or substitute ingredients makes it versatile, catering to various tastes and dietary preferences.

For more delightful offerings, don't miss out on my Chocolate Pudding Cake or try the refreshing Peaches Cream Cookies!

Pineapple Carrot Cream Cake Ingredients

• Gather these simple ingredients to make your delicious dessert!

For the Cake

  • All-purpose flour – Provides structure and texture for the cake. Substitution: Gluten-free flour blend for a gluten-free option.
  • Baking soda and powder – Leavening agents that help the cake rise.
  • Cinnamon – Adds warm, spicy flavor to enhance the cake.
  • Salt – Balances sweetness and enhances flavor.
  • Granulated sugar – Sweetens the cake; contributes to texture.
  • Brown sugar – Adds moisture and a slight caramel flavor.
  • Eggs – Bind ingredients and provide moisture. Use aquafaba (from chickpeas) for a vegan alternative.
  • Vegetable oil – Keeps the cake moist. Can substitute with melted coconut oil for a tropical touch.
  • Vanilla extract – Contributes to the overall flavor profile.
  • Grated carrots – Essential for moisture and texture, providing natural sweetness. Use freshly grated for best results.
  • Crushed pineapple, drained – Adds tropical flavor and moisture. Canned pineapple works; be sure to drain thoroughly.
  • Chopped walnuts (optional) – Adds crunch and nutty flavor. Omit for a nut-free version.

For the Cream Cheese Frosting

  • Cream cheese – Core ingredient for the frosting; provides tanginess and creaminess.
  • Unsalted butter – Adds richness to the frosting.
  • Powdered sugar – Sweetens and thickens the frosting; helps achieve a smooth texture.
  • Vanilla extract (for frosting) – Enhances the flavor of the frosting.
  • Pineapple juice (optional, for frosting) – Adds additional tropical flavor.

Gather these ingredients, and you'll be ready to bake a Pineapple Carrot Cream Cake that your friends and family will love!

Step‑by‑Step Instructions for Pineapple Carrot Cream Cake

Step 1: Preheat and Prepare Pans
Preheat your oven to 350°F (175°C) and prepare two 9-inch cake pans by greasing them with butter or cooking spray, then dusting them with flour. This ensures your Pineapple Carrot Cream Cake will slide out easily after baking. Set the prepared pans aside while you mix the batter.

Step 2: Mix the Wet Ingredients
In a large mixing bowl, whisk together the granulated sugar, brown sugar, eggs, vegetable oil, and vanilla extract until the mixture is smooth and well combined, taking about 2-3 minutes. The sugars should be fully dissolved, and the texture should look slightly creamy at this point, providing a rich base for your cake.

Step 3: Incorporate Carrots and Pineapple
Gently stir in the freshly grated carrots and the well-drained crushed pineapple into your wet mixture. Ensure that both ingredients are evenly distributed throughout the mixture to enhance the moisture and flavor of the Pineapple Carrot Cream Cake. This should take about 1-2 minutes of mixing.

Step 4: Combine the Dry Ingredients
In a separate bowl, whisk together the all-purpose flour, baking soda, baking powder, cinnamon, and salt. Gradually add this dry mixture to the wet bowl, mixing gently until just combined—avoid overmixing to keep your cake light and fluffy. You should see no dry flour remaining, but small lumps are perfectly fine.

Step 5: Add Walnuts (if using)
If you'd like some extra crunch, fold in the chopped walnuts gently, ensuring they are evenly dispersed in the batter. This step adds a delightful texture to your Pineapple Carrot Cream Cake, but feel free to skip this step if you prefer a nut-free version or if someone has a nut allergy.

Step 6: Bake the Cake
Divide the batter evenly between the two prepared cake pans. Place them in the preheated oven and bake for 30 to 35 minutes. The cakes are ready when a toothpick inserted into the center comes out clean, and the edges are lightly golden. Keep an eye on them closer to 30 minutes to avoid overbaking.

Step 7: Cool the Cakes
Once baked, remove the cake pans from the oven and let them cool in the pans for about 10 minutes. After that, gently transfer the cakes to a wire rack to cool completely. Cooling is crucial, as it prevents the frosting from melting into the cake later on.

Step 8: Prepare the Frosting
In a medium bowl, beat together the cream cheese and unsalted butter until the mixture is smooth and creamy, taking about 2-3 minutes. Gradually add the powdered sugar, mixing until fluffy and well combined. The frosting should be light and easy to spread, perfect for the Pineapple Carrot Cream Cake.

Step 9: Flavor the Frosting
Once the frosting reaches the desired consistency, stir in the vanilla extract and optional pineapple juice for an extra layer of flavor. This will enhance the tropical notes of the cake and give your frosting a delightful twist.

Step 10: Frost the Cake Layers
Place one cooled cake layer on a serving plate, and generously spread a layer of frosting on top. Add the second cake layer on top, then frost the top and sides of the entire cake for a beautiful finish. Be sure to smooth the frosting for an appealing appearance, showcasing your Pineapple Carrot Cream Cake!

Step 11: Garnish and Serve
To elevate the presentation, garnish your cake with additional walnuts or pineapple slices on top, if desired. This adds a lovely visual touch and hints at the delicious flavors within. Now, your Pineapple Carrot Cream Cake is ready to be sliced and shared with family and friends!

What to Serve with Pineapple Carrot Cream Cake

The allure of this tropical delight is simply irresistible, and finding the perfect accompaniments can turn a sweet treat into a delightful experience.

  • Fresh Fruit Salad: A medley of seasonal fruits adds a refreshing contrast, bringing out the cake's tropical flavors and enhancing its natural sweetness.

  • Whipped Cream Topping: Light and airy whipped cream dolloped on top provides a creamy softness that beautifully complements the moist cake texture.

  • Herbal Tea: A warm cup of chamomile or mint tea enhances the cake’s flavors while adding a soothing, calming vibe to your dessert experience.

  • Coconut Ice Cream: Creamy and decadent, this dessert addition brings a tropical flair, pairing perfectly with the pineapple in each slice of cake. The contrast in temperature and texture is divine!

  • Chocolate Drizzle: A light drizzle of melted chocolate not only adds an elegant touch but offers a rich and unexpected juxtaposition to the cake's sweetness.

  • Pineapple Mojito: This refreshing cocktail will elevate your dessert party, infusing zesty citrus and mint notes that harmonize beautifully with the cake's flavors.

Enjoy these pairings as they bring depth and excitement to the vibrant flavors of your Pineapple Carrot Cream Cake!

Expert Tips for Pineapple Carrot Cream Cake

  • Fresh Ingredients Matter: Use freshly grated carrots and well-drained crushed pineapple for the best moisture and flavor. Avoid canned carrots, as they can affect texture.

  • Mind the Mixing: Overmixing the batter can lead to a dense cake. Mix until just combined for a light, fluffy texture in your Pineapple Carrot Cream Cake.

  • Cool Before Frosting: Let the cake layers cool completely before frosting to prevent the icing from melting. A well-cooled cake makes for a perfectly frosted dessert.

  • Flavor Boost: Consider adding a pinch of nutmeg or coconut extract to your frosting for an extra layer of tropical flavor.

  • Check for Doneness: Test your cake with a toothpick inserted in the center; it should come out clean or with a few crumbs, ensuring a moist but fully baked cake.

Make Ahead Options

These Pineapple Carrot Cream Cakes are perfect for meal prep enthusiasts! You can bake the cake layers up to 3 days in advance. Just allow them to cool completely, wrap them tightly in plastic wrap, and store them in the refrigerator to maintain their moisture. The frosting can also be prepared up to 24 hours ahead; simply refrigerate in an airtight container and give it a quick stir before use. When you're ready to serve, frost the chilled layers and garnish as desired. This method allows you to create a show-stopping dessert with minimal effort, ensuring your cake is just as delicious as if it were freshly made!

Pineapple Carrot Cream Cake Variations

Feel free to get creative and customize your Pineapple Carrot Cream Cake with these delightful variations that enhance flavor and texture!

  • Nut-Free: Omit walnuts entirely for a cake that’s safe for nut allergies. You won’t miss the crunch but will still enjoy the moistness of this tropical treat.

  • Gluten-Free: Substitute all-purpose flour with a gluten-free flour blend to make this cake gluten-free. It’s an easy switch that doesn’t compromise flavor or texture!

  • Tropical Layering: For an added burst of flavor, layer a thin spread of crushed pineapple between the cake layers. This will elevate the tropical experience, making each slice a juicy delight.

  • Applesauce Substitute: Replace half the vegetable oil with unsweetened applesauce for a lighter cake that maintains moisture. This twist adds natural sweetness while keeping calories down.

  • Spicy Kick: Incorporate a pinch of nutmeg along with the cinnamon for a spicy depth. This little addition can surprise your taste buds and bring a warm twist!

  • Coconut Flour: Swap out a portion of the all-purpose flour for coconut flour to introduce a subtle coconut flavor. This will give your cake an extra flair that pairs beautifully with pineapple.

  • Cream Cheese Upgrade: Mix in some crushed pineapple along with a dash of coconut extract into your cream cheese frosting for an upgraded tropical flavor. It’s a creamy indulgence you won't forget!

  • Fruity Frosting: Top your cake with a fluffy whipped cream made with coconut cream, drizzling some extra pineapple juice for a refreshing change. It adds a lightness that perfectly complements the cake's richness.

With these variations, your Pineapple Carrot Cream Cake can evolve into a new family favorite every time you bake! If you're in the mood for more delightful desserts, try my moist Chocolate Pudding Cake or the refreshing Ice Cream Cake for a delicious treat!

Storage Tips for Pineapple Carrot Cream Cake

Fridge: Store your cake in an airtight container for up to 5 days to keep it moist and fresh. Ensure the frosting is well-covered to avoid drying out.

Freezer: Wrap individual slices tightly in plastic wrap and place them in a freezer-safe bag for up to 3 months. Thaw slices in the fridge before serving for the best texture.

Reheating: If you prefer warm cake, gently reheat individual slices in the microwave for about 15-20 seconds or until just warmed through. Enjoy your Pineapple Carrot Cream Cake even after storing!

Pineapple Carrot Cream Cake Recipe FAQs

What should I look for when selecting ingredients like carrots and pineapple?
Absolutely! For the best results, use fresh, firm carrots that are bright orange and free from dark spots or blemishes. When choosing pineapple, opt for canned crushed pineapple that has been thoroughly drained to avoid excess moisture, or use fresh pineapple that’s ripe but not overly soft.

How should I store the Pineapple Carrot Cream Cake after baking?
To keep your cake deliciously moist and fresh, store it in an airtight container in the refrigerator for up to 5 days. Make sure the frosting is covered well to prevent it from drying out. Enjoy it chilled or at room temperature for a delightful dessert!

Can I freeze individual slices of the Pineapple Carrot Cream Cake?
Very! To freeze individual slices, wrap each slice tightly in plastic wrap, and place them in a freezer-safe bag. They can be frozen for up to 3 months. When you're ready to indulge again, simply thaw them in the fridge overnight to maintain their texture.

What should I do if my cake comes out dense?
If your cake ends up dense, it could be due to overmixing the batter. Always mix until just combined when adding dry ingredients to avoid a heavy texture. Also, make sure your leavening agents aren’t expired, as they help the cake rise. If needed, you can lighten it up by replacing part of the oil with unsweetened applesauce in future batches.

Is this cake safe for people with allergies?
While this Pineapple Carrot Cream Cake contains common allergens like gluten and dairy, you can easily modify it! For a nut-free option, simply omit the walnuts. To make it gluten-free, use a gluten-free flour blend, and for a vegan twist, substitute eggs with aquafaba (the liquid from chickpeas) and use a dairy-free cream cheese for the frosting. Ensure all ingredients align with dietary needs for a safe and yummy dessert!

Pineapple Carrot Cream Cake

Moist Pineapple Carrot Cream Cake: A Tropical Treat You’ll Love

This Moist Pineapple Carrot Cream Cake is a delightful dessert combining sweet carrots and zesty pineapple, making it a must-try for any occasion.
Print Recipe Pin Recipe
Prep Time 15 minutes mins
Cook Time 35 minutes mins
Cooling Time 10 minutes mins
Total Time 1 hour hr
Servings: 12 slices
Course: Dessert
Cuisine: Hawaiian
Calories: 350
Ingredients Equipment Method Nutrition Notes

Ingredients
  

For the Cake
  • 2 cups all-purpose flour Substitution: Gluten-free flour blend for a gluten-free option.
  • 1 teaspoon baking soda
  • 1 teaspoon baking powder
  • 1 teaspoon cinnamon
  • 1/2 teaspoon salt
  • 1 cup granulated sugar
  • 1/2 cup brown sugar Adds moisture and a slight caramel flavor.
  • 3 large eggs Use aquafaba (from chickpeas) for a vegan alternative.
  • 1 cup vegetable oil Can substitute with melted coconut oil for a tropical touch.
  • 1 teaspoon vanilla extract
  • 2 cups grated carrots Use freshly grated for best results.
  • 1 cup crushed pineapple, drained Canned pineapple works; be sure to drain thoroughly.
  • 1/2 cup chopped walnuts (optional) Omit for a nut-free version.
For the Cream Cheese Frosting
  • 8 oz cream cheese
  • 1/2 cup unsalted butter
  • 4 cups powdered sugar
  • 1 teaspoon vanilla extract (for frosting)
  • 2 tablespoons pineapple juice (optional, for frosting) Adds additional tropical flavor.

Equipment

  • 9-inch cake pans
  • Mixing bowls
  • Whisk
  • Spatula
  • measuring cups
  • Measuring Spoons
  • wire rack

Method
 

Step-by-Step Instructions
  1. Preheat your oven to 350°F (175°C) and prepare two 9-inch cake pans by greasing them with butter or cooking spray, then dusting them with flour.
  2. In a large mixing bowl, whisk together the granulated sugar, brown sugar, eggs, vegetable oil, and vanilla extract until smooth.
  3. Gently stir in the grated carrots and drained crushed pineapple.
  4. In a separate bowl, whisk together the all-purpose flour, baking soda, baking powder, cinnamon, and salt, then gradually add to the wet mixture.
  5. If using, fold in the chopped walnuts.
  6. Divide the batter evenly between the two prepared cake pans and bake for 30 to 35 minutes.
  7. Once baked, let the cakes cool in the pans for about 10 minutes, then transfer them to a wire rack to cool completely.
  8. In a medium bowl, beat together the cream cheese and unsalted butter until smooth, then gradually mix in the powdered sugar.
  9. Stir in the vanilla extract and optional pineapple juice.
  10. Place one cooled cake layer on a serving plate, frost the top, add the second layer, then frost the top and sides of the cake.
  11. Garnish with walnuts or pineapple slices, if desired.

Nutrition

Serving: 1sliceCalories: 350kcalCarbohydrates: 45gProtein: 3gFat: 16gSaturated Fat: 8gPolyunsaturated Fat: 2gMonounsaturated Fat: 2gCholesterol: 70mgSodium: 250mgPotassium: 200mgFiber: 1gSugar: 32gVitamin A: 500IUVitamin C: 3mgCalcium: 50mgIron: 1mg

Notes

Use freshly grated carrots and well-drained crushed pineapple for best results. Let cake layers cool completely before frosting to prevent melting.

Tried this recipe?

Let us know how it was!

Churro Saltine Toffee: Sweet, Crunchy Bliss Awaits You

September 23, 2025 by Grace Snow Leave a Comment

In just 25 minutes, you can whip up a dessert that dazzles and delights like no other—the Churro Saltine Toffee. Picture the satisfying crunch of saltine crackers enveloped in buttery toffee, all enhanced by the warm, cozy notes of cinnamon that tickle the senses. This delightful treat marries the beloved flavors of churros with an innovative twist, making it a crowd-pleaser that's perfect for coffee breaks or sweet gifts. One of the best perks? It’s quick and easy to make, which means you can enjoy the fun of homemade baking without spending hours in the kitchen. Plus, it’s a treat that everyone will love, from kids to adults alike! Are you ready to dive into this irresistible combination?

Why is Churro Saltine Toffee a Must-Try?

Easily Prepared: Whipping up this dessert takes just 25 minutes, making it a perfect choice for those unexpected cravings or last-minute gatherings.

Deliciously Unique: The delightful blend of churro flavors adds a fun twist to traditional toffee, leaving your taste buds in pure bliss.

Crowd-Pleasing Appeal: This treat is a guaranteed hit at parties, potlucks, or cozy movie nights. Everyone, young and old, will be reaching for seconds!

Customizable Options: Don’t have saltines? Swap them for graham crackers or pretzel crisps to cater to your preferences.

Perfect Gift Idea: Wrapped in a cute box, this toffee makes for an impressive homemade gift, showcasing your culinary creativity.

Dive into this sweet shortcut and elevate your dessert game—your friends and family will be thanking you!

Churro Saltine Toffee Ingredients

• All the essentials for a tasty treat!

For the Base

  • Saltine Crackers – Provide a crunchy base; substitute with graham crackers or pretzel crisps for a fun twist.

For the Toffee

  • Unsalted Butter – Adds richness and helps form toffee; use vegan butter for a dairy-free option.
  • Brown Sugar – Creates that signature caramel flavor; light brown sugar works as a substitute if necessary.

For the Topping

  • Semi-Sweet Chocolate Chips – Offers sweetness and richness, you can opt for dark chocolate for less sweetness.
  • Granulated Sugar – Adds sweetness to the cinnamon-sugar topping; can be omitted for a lighter option.
  • Cinnamon – Enhances the churro flavor; nutmeg can be used as an intriguing alternative.
  • Sea Salt – Balances the sweetness and elevates flavor; flaky sea salt is ideal for garnish.

Now you’re all set with the ingredients for your delightful Churro Saltine Toffee! Enjoy creating this sweet, crunchy bliss!

Step‑by‑Step Instructions for Churro Saltine Toffee

Step 1: Preheat and Prepare
Start by preheating your oven to 400°F (200°C). Meanwhile, line a baking sheet with parchment paper, ensuring it’s large enough to hold all the saltine crackers. This makes cleanup a breeze later! Get your baking sheet ready so you can assemble your Churro Saltine Toffee quickly.

Step 2: Arrange the Crackers
Once your baking sheet is prepared, lay the saltine crackers in a single layer, covering the entire surface. It's okay if they touch, but make sure not to overlap them. This step is crucial, as the crunchy base will hold all the delicious toffee later.

Step 3: Make the Toffee Mixture
In a medium saucepan, combine the unsalted butter and brown sugar over medium heat. Stir continuously until the mixture starts to boil, which should take about 5 minutes. You want the toffee to become bubbly and thick, so keep an eye on it for that perfect caramel color.

Step 4: Pour Over Crackers
Once the toffee mixture has reached a boil, carefully pour it evenly over the arranged saltine crackers. Use a spatula to spread it gently, ensuring each cracker is coated. Bake this masterpiece for 5 to 7 minutes or until it’s bubbly all over and golden brown, keeping close watch to avoid burning.

Step 5: Add the Chocolate
After removing the baking sheet from the oven, immediately sprinkle semi-sweet chocolate chips over the hot toffee. The heat will melt the chocolate, creating a rich, glossy layer that enhances the flavors of your Churro Saltine Toffee. Allow it to sit for 2 to 3 minutes until the chocolate appears shiny.

Step 6: Sprinkle Cinnamon Sugar
While the chocolate is still warm, combine granulated sugar and cinnamon in a small bowl. Evenly sprinkle this sweet mixture over the melted chocolate, which will add that delightful churro flavor. The combination of cinnamon and chocolate creates a heavenly aroma that fills your kitchen!

Step 7: Finish with Sea Salt
To elevate the sweetness, lightly sprinkle flaky sea salt over the entire toffee treat. The salt will enhance the flavors, creating a perfect balance against the chocolate and toffee. It’s the finishing touch that makes your Churro Saltine Toffee truly unforgettable.

Step 8: Cool and Serve
Allow the toffee to cool completely at room temperature for about 30 minutes. Once set, gently break it into pieces. Your Churro Saltine Toffee is now ready to be served as a delightful treat that will surely impress your family and friends!

What to Serve with Churro Saltine Toffee

Looking to elevate your dessert experience? Discover delightful pairings that enhance the sweet, crunchy bliss of this irresistible treat!

  • Vanilla Ice Cream: The creamy, cool texture complements the crunchy toffee, creating a heavenly contrast that melts in your mouth.

  • Coffee: A warm cup of coffee boosts the flavors while enhancing the dessert's rich toffee and cinnamon notes—perfect for a cozy evening.

  • Spicy Hot Chocolate: For a fun twist, enjoy your toffee with a cup of rich hot chocolate spiced with cayenne or chili powder, enhancing the sweetness.

  • Churro Bites: Keep the churro vibes going with crispy churro bites coated in cinnamon sugar—because two treats are better than one!

  • Fruit Salad: A fresh, citrusy fruit salad adds brightness and balance, cutting through the sweetness and making the meal feel lighter.

  • Milk: Classic and comforting, pairing your toffee with a cold glass of milk is a nostalgic choice that simply works every time.

  • Nutty Cookie Crumble: Sprinkle some crushed cookies or nuts on top of your toffee for added crunch and flavor—think almond or pecan for a delicious contrast.

  • Sparkling Water: A refreshing bubbly drink cleanses the palate between bites, making every mouthful of your Churro Saltine Toffee enjoyable.

  • Caramel Sauce: Drizzle extra caramel sauce for a decadent touch that intensifies the already delightful flavors of your sweet treat!

Storage Tips for Churro Saltine Toffee

Room Temperature: Store your Churro Saltine Toffee in an airtight container at room temperature for up to 1 week to maintain its delicious crunch and flavor.

Fridge: If you prefer a longer shelf life, refrigerate the toffee for up to 2 weeks. Just ensure it’s sealed tightly to prevent moisture absorption.

Freezer: For even extended storage, freeze your toffee in a freezer-safe container for up to 3 months. Thaw it at room temperature before serving for the best texture.

Reheating: If you like it warm, briefly pop pieces in the microwave for about 10 seconds to bring back that gooey goodness without melting the chocolate completely.

Expert Tips for Churro Saltine Toffee

  • Perfect Boil: Ensure your butter and sugar mixture reaches a full boil before pouring it over the crackers; this is key for achieving that delicious toffee consistency.

  • Watch the Clock: Keep a close eye on the baking time; overbaking can result in burnt toffee. Aim for that perfect golden brown!

  • Chocolate Magic: For a silky chocolate finish, sprinkle chocolate chips immediately after baking while the toffee is still hot—let the heat do the melting!

  • Cinnamon Boost: Add a touch of vanilla extract to the toffee mixture for an extra hint of flavor that complements the churro essence beautifully.

  • Cooling Time: Allow ample cooling time after baking; breaking it apart too soon can lead to messy pieces. Be patient for a perfectly textured treat.

Make Ahead Options

These Churro Saltine Toffee treats are perfect for meal prep and can save you time during busy weeks! You can prepare the toffee mixture and spread it over the saltines up to 24 hours in advance. Simply cover the baking sheet tightly with plastic wrap and refrigerate to maintain freshness. When you're ready to finish the recipe, just pop the tray in the oven to bake for 5 to 7 minutes. After baking, sprinkle the chocolate chips and cinnamon sugar topping as detailed in the original recipe—your Churro Saltine Toffee will taste just as delightful and remain a crowd-pleaser! This way, you can indulge without the stress on the day of serving.

Variations & Substitutions for Churro Saltine Toffee

Feel free to get creative with your Churro Saltine Toffee! Your taste buds will thank you for exploring these delightful twists.

  • Graham Crackers: Swap saltines for graham crackers for a sweeter, softer base. The honey notes will harmonize beautifully with the toffee.

  • Peanut Butter Drizzle: Add a touch of melted peanut butter over the chocolate for a nutty twist that adds creamy richness and depth. Your peanut butter-loving friends will adore this variation!

  • Spiced Upgrade: Replace cinnamon with pumpkin pie spice for a seasonal flair that brings warmth and cozy vibes, perfect for fall gatherings.

  • Nutty Crunch: Toss in chopped pecans or almonds on top for added texture that enhances the crunch factor. Not only does it look lovely, but the nuts also contribute a wonderful flavor contrast.

  • Heat It Up: Add a sprinkle of cayenne pepper or chili powder to the cinnamon-sugar topping for a delightful kick that complements the sweetness.

  • Dark Chocolate Lovers: Use dark chocolate chips instead of semi-sweet for a more sophisticated flavor profile that balances the sweetness nicely. This creates an elegant dessert everyone will crave.

  • Coconut Flakes: Mix in some toasted coconut flakes to the topping for an exotic twist that adds a delightful chewiness.

  • Cereal Mix: Incorporate crispy rice cereal in the toffee layer for an extra crunch reminiscent of childhood treats. It's a fun and nostalgic touch!

With these variations, every batch of Churro Saltine Toffee can be uniquely yours! Whether you want to amplify flavors or introduce new textures, the options are vast. For additional texture ideas, check out how to incorporate flavors from a favorite chocolate bark recipe.

Churro Saltine Toffee Recipe FAQs

How do I select the best saltine crackers for this recipe?
Absolutely! Look for saltine crackers that are fresh and crisp, avoiding any with broken pieces or excessive crumbs in the packaging. These maintain the crunchiness required for the base. If you're feeling adventurous, try substituting saltines with graham crackers or pretzel crisps for a fun twist!

How should I store leftover Churro Saltine Toffee?
To keep your Churro Saltine Toffee fresh, store it in an airtight container at room temperature for up to 1 week. If you want to extend its shelf life, refrigerate it for up to 2 weeks, ensuring it's tightly sealed to prevent moisture from compromising its delightful crunch.

Can I freeze Churro Saltine Toffee, and how?
Yes, you can! To freeze your Churro Saltine Toffee, follow these simple steps: wrap it tightly in plastic wrap or place it in a freezer-safe container to minimize exposure to air. It can be stored in the freezer for up to 3 months. When you're ready to enjoy it, simply thaw it at room temperature for about 30 minutes for the best texture.

What should I do if my toffee mixture doesn’t boil properly?
Very! If your toffee mixture isn't boiling, make sure you're using medium heat and continuously stirring to help the butter and sugar combine. It might take a few extra minutes, but be patient! You want a full, bubbly boil to achieve that perfect caramel-like consistency before pouring it over the crackers.

Is this recipe suitable for people with nut allergies?
Indeed! The base recipe contains no nuts, making it suitable for those with nut allergies. However, if you decide to customize with optional nuts, like pecans or almonds, just be sure to let everyone know about those additions to keep everyone safe and enjoying!

Churro Saltine Toffee

Churro Saltine Toffee: Sweet, Crunchy Bliss Awaits You

Churro Saltine Toffee is a sweet and crunchy dessert that combines the flavors of churros with buttery toffee, perfect for parties and gifts.
Print Recipe Pin Recipe
Prep Time 10 minutes mins
Cook Time 15 minutes mins
Cooling Time 30 minutes mins
Total Time 55 minutes mins
Servings: 12 pieces
Course: Dessert
Cuisine: American
Calories: 150
Ingredients Equipment Method Nutrition Notes

Ingredients
  

For the Base
  • 1 package Saltine Crackers Can substitute with graham crackers or pretzel crisps
For the Toffee
  • 1 cup Unsalted Butter Use vegan butter for a dairy-free option
  • 1 cup Brown Sugar Light brown sugar works as a substitute
For the Topping
  • 1 cup Semi-Sweet Chocolate Chips Can opt for dark chocolate
  • 1/4 cup Granulated Sugar Can be omitted for a lighter option
  • 2 teaspoons Cinnamon Nutmeg can be used as an alternative
  • 1 teaspoon Sea Salt Flaky sea salt is ideal for garnish

Equipment

  • Oven
  • Baking Sheet
  • Parchment Paper
  • Medium saucepan
  • Spatula

Method
 

Preparation Steps
  1. Preheat your oven to 400°F (200°C) and line a baking sheet with parchment paper.
  2. Lay the saltine crackers in a single layer on the baking sheet.
  3. Combine the unsalted butter and brown sugar in a medium saucepan over medium heat and stir until it starts to boil, about 5 minutes.
  4. Pour the toffee mixture evenly over the arranged saltine crackers and bake for 5-7 minutes until bubbly and golden brown.
  5. Remove from the oven and immediately sprinkle chocolate chips over the hot toffee, allowing them to melt.
  6. Mix granulated sugar and cinnamon in a small bowl and sprinkle over the melted chocolate.
  7. Lightly sprinkle flaky sea salt over the entire toffee.
  8. Allow the toffee to cool completely for about 30 minutes before breaking it into pieces.

Nutrition

Serving: 1pieceCalories: 150kcalCarbohydrates: 20gProtein: 1gFat: 7gSaturated Fat: 4gMonounsaturated Fat: 3gCholesterol: 15mgSodium: 120mgPotassium: 50mgSugar: 10gVitamin A: 300IUCalcium: 10mgIron: 0.5mg

Notes

Store in an airtight container at room temperature for up to 1 week; refrigerate for up to 2 weeks or freeze for up to 3 months.

Tried this recipe?

Let us know how it was!

Decadent Date Caramels: Guilt-Free Indulgence Awaiting You

September 21, 2025 by Grace Snow Leave a Comment

You won’t believe how easy it is to make homemade candy that’s both delicious and healthy! These 4-Ingredient Date Caramels are a game changer, transforming simple ingredients into a chewy, chocolate-covered indulgence that you can feel good about. Not only are they incredibly quick to whip up, but they cater to various dietary needs, being vegan, gluten-free, and refined sugar-free. Perfect for snacking or gifting, these little squares of joy are sure to satisfy your sweet cravings without all the guilt. Who knew a homemade treat could be this effortless? Ready to take your candy game to the next level? Let’s dive in!

Why make date caramels at home?

Incredibly Easy: This recipe requires only four simple ingredients, making it a breeze for both beginners and seasoned chefs alike.

Healthy Choice: These date caramels are vegan, gluten-free, and refined sugar-free, promoting a guilt-free indulgence you can feel good about.

Decadent Flavor: Experience a delightful blend of rich chocolate and natural sweetness from Medjool dates, offering a satisfying treat without compromise.

Versatility for Everyone: Customize to your taste with different nut butters or toppings, making them suitable for various dietary needs.

Perfect Snack or Gift: Whether for a party or a personal treat, these caramels are sure to impress and are a great addition to any dessert platter. For more easy dessert ideas, check out our guide on no-bake treats.

Date Caramel Ingredients

• To create your delightful date caramels, gather these simple ingredients!

For the Caramels

  • Medjool Dates – Provides natural sweetness and a chewy texture; make sure they’re pitted and soft for the best results.
  • Almond Butter (or Seed Butter) – Adds creaminess and helps bind the mixture; for a nut-free option, sunflower seed butter works perfectly.
  • Coconut Oil – Aids in softening the mixture and is crucial for coating the caramels; use melted coconut oil for easier blending.

For the Chocolate Coating

  • Chocolate Chips (or Chocolate Bar) – This gives a rich and decadent outer layer; any dark chocolate variety will enhance the flavors beautifully.
  • Additional Coconut Oil – Used for melting chocolate, ensuring a smooth coating; it’s key for that glossy finish on your date caramels.

These easy-to-find ingredients will help you create the perfect date caramels that are both indulgent and guilt-free!

Step‑by‑Step Instructions for Date Caramels

Step 1: Soak the Dates
Begin by placing your pitted Medjool dates in a bowl and covering them with very hot water. Allow them to soak for about 10 minutes, which will soften the dates, making them easier to blend. Ensure they look plump and tender; this is key to achieving that smooth, chewy consistency in your date caramels.

Step 2: Blend the Mixture
After soaking, drain the dates and transfer them to a food processor. Add almond butter and melted coconut oil to the processor. Blend for around 1-2 minutes until the mixture is smooth and creamy, stopping occasionally to scrape down the sides. You want a homogenous, thick paste that will form the base of your delightful date caramels.

Step 3: Freeze to Firm Up
Line a loaf pan with parchment paper to prevent sticking, and transfer the blended date mixture into the pan. Spread it evenly with a spatula to ensure a consistent thickness. Place the pan in the freezer for 2-3 hours, until the mixture is firm to the touch; this will allow for easy cutting into squares later.

Step 4: Cut the Caramels
Once the date caramel mixture is fully firm, remove it from the freezer. Carefully lift the parchment paper out of the pan and place it on a cutting board. Use a sharp knife to cut the mixture into 12 even squares. These will be your delicious date caramels; set them aside as you prepare the chocolate coating.

Step 5: Melt the Chocolate
In a microwave-safe bowl, combine chocolate chips and the remaining coconut oil. Microwave in 30-second intervals, stirring in between, until the mixture is completely melted and smooth, which typically takes about 1-2 minutes total. The chocolate should have a glossy look—this will create a luxurious coating for your date caramels.

Step 6: Coat the Caramels
Take each square of date caramel and dip it into the melted chocolate, ensuring all sides are fully coated. Allow any excess chocolate to drip off before transferring the chocolate-covered dates onto a parchment-lined plate. Repeat the process until all squares are beautifully coated, creating that tempting layer of chocolate around your date caramels.

Step 7: Chill to Set
Once all the caramels are coated in chocolate, place the plate in the fridge for about 1 hour. This chilling time allows the chocolate to harden, giving your date caramels that delectable snap. After an hour, the treats will be ready to serve or to be stored for later indulgence!

Make Ahead Options

These 4 Ingredient Date Caramels are perfect for meal prep enthusiasts! You can prepare the date caramel mixture up to 3 days in advance; simply blend the soaked dates, almond butter, and coconut oil, then freeze it in a lined loaf pan as instructed. Once firm, cut into squares and dip in chocolate when you're ready to enjoy them. For optimal quality, store the squares in an airtight container in the fridge between layers of parchment paper to prevent sticking. When it's time to serve, just melt the chocolate and coat the caramels — you'll have a delicious, homemade treat ready to impress, all with minimal effort!

Date Caramels Variations & Substitutions

Feel free to elevate your date caramels with these delightful twists, perfect for satisfying every palate!

  • Nut-Free: Use sunflower seed butter instead of almond butter for a tasty, nut-free option. This will keep the caramel creamy and delicious while accommodating dietary restrictions.

  • Sea Salt Topping: Sprinkle a pinch of sea salt on top of the chocolate-covered date caramels for a burst of flavor. The contrast of sweet and salty amplifies the indulgence!

  • Flavor Infusion: Add a teaspoon of vanilla extract to the date mixture before blending for an aromatic layer of flavor that beautifully complements the chocolate.

  • Mix-In Wonders: Stir in some chopped nuts or dried fruits like cranberries or apricots into the caramel mixture for an added crunch and natural sweetness. These additions make each bite more exciting!

  • Coconut Twist: Incorporate shredded coconut into the blended mixture for a tropical flair. This will give your date caramels a chewy texture that complements the chocolate perfectly.

  • Spicy Kick: Adding a sprinkle of cayenne pepper or cinnamon to the chocolate coating or the caramel mixture will bring an unexpected warmth to the sweetness. It’s a delightful balance that will surprise and please your taste buds!

  • Chocolate Variety: Experiment with white chocolate or milk chocolate as a coating. This simple switch can create a whole new taste experience while keeping the delightful caramel intact.

These variations are just the beginning of your creativity! For more ways to enjoy chocolate treats, be sure to check out our guide on no-bake desserts.

Expert Tips for Date Caramels

  • Choose Soft Dates: Make sure your Medjool dates are fresh and very soft for the best blending results. If they’re dry or hard, soak them a bit longer in hot water.

  • Perfect Consistency: If your mixture seems too thick to blend smoothly, add a little more melted coconut oil to achieve the desired creamy texture in your date caramels.

  • Avoid Sticking: Line your loaf pan with parchment paper before pouring in the date mixture. This simple step ensures easy removal and clean squares.

  • Chill Adequately: Don’t skip the freezing step! Allow the date mixture to chill fully before cutting—this makes for neat, perfect squares that hold their shape beautifully.

  • Smooth Chocolate Coating: Stir the chocolate occasionally as it melts. This ensures it remains smooth and helps prevent burning, giving your date caramels a glossy finish.

  • Storage Tips: Store your chocolate-covered date caramels in an airtight container in the fridge or freezer to keep them fresh and prevent the chocolate from melting.

What to Serve with 4-Ingredient Date Caramels

Elevate your treat experience with these delightful pairings that will enhance the sweet, chewy indulgence of your date caramels.

  • Fresh Berries: Juicy strawberries or tart raspberries provide a refreshing contrast, enhancing the sweetness with a burst of acidity.

  • Nutty Granola: Crunchy granola not only adds texture but also complements the rich flavors of the date caramels, making for a satisfying snack mix.

  • Coconut Whipped Cream: This light, airy topping pairs beautifully, offering a creamy contrast that accentuates the caramel’s chewy texture.

  • Herbal Tea: A warm cup of chamomile or mint tea cleanses the palate and highlights the sweetness of the caramels, perfect for a cozy evening.

  • Dark Chocolate Drizzle: Enhance the experience by drizzling extra melted dark chocolate over your caramels, adding a gourmet touch and amplifying richness.

  • Sliced Apples: The crunch and freshness of crisp apple slices create a refreshing balance to the caramel's richness, making for a delightful combination.

  • Chia Seed Pudding: A simple vanilla or coconut chia pudding introduces a creamy texture and nutritional boost, wonderfully complementing the sweet treat.

Each pairing not only amplifies the joy of enjoying these date caramels but also creates a well-rounded tasting experience!

How to Store and Freeze Date Caramels

Fridge: Keep your date caramels in an airtight container in the fridge, where they will stay fresh for up to 2 weeks. This will help maintain their chewy texture and chocolate coating.

Freezer: For longer storage, place the date caramels in a freezer-safe container or a zip-top bag, separated by parchment paper. They can last up to 3 months in the freezer; simply thaw in the fridge before enjoying.

Room Temperature: It’s best to avoid keeping the date caramels at room temperature, as the chocolate may melt. If serving, keep them chilled until ready to impress your guests!

Reheating: If you prefer a warm treat, gently microwave a caramel for a few seconds to soften it before enjoying. Just be cautious not to overheat, as this may alter the texture.

4 Ingredient Date Caramels Recipe FAQs

How do I know if my Medjool dates are ripe?
Absolutely! When selecting Medjool dates, look for plump, soft, and shiny appearances. They should not have any dark spots or feel dry to the touch. If they seem a bit hard, soaking them in hot water for 10 minutes can revive their softness!

What is the best way to store date caramels?
To keep your delicious date caramels at their freshest, store them in an airtight container in the fridge. They can last up to 2 weeks while maintaining their chewy texture and chocolate coating. Remember, keep them chilled to avoid melting!

Can I freeze date caramels, and how do I do it?
Very! To freeze your date caramels, place them in a freezer-safe container or zip-top bag, ensuring to separate layers with parchment paper to prevent sticking. They can be stored for up to 3 months. When you’re ready to enjoy, simply thaw them in the fridge overnight!

What should I do if my chocolate coating isn’t smooth?
If your chocolate doesn't come out smooth, it might be overheating. Instead, melt it in 30-second intervals, stirring in between. This ensures gradual melting and maintains a glossy finish. If it’s still too thick, adding a teaspoon of coconut oil can help achieve that creamy consistency.

Are these date caramels safe for people with allergies?
Yes! These date caramels are naturally gluten-free and vegan, making them a great option for many dietary restrictions. However, be cautious with nut allergies if you're using nut butters. Opt for seed butter alternatives like sunflower for a nut-free treat. Always check packaging for cross-contamination warnings!

What if my date mixture is too thick to blend?
No problem! If your date mixture feels thick or crumbly, simply add another tablespoon of melted coconut oil. Blend again until you reach a smooth consistency. It’s essential for the perfect chewy texture in your date caramels, so don’t hesitate to adjust as needed!

Date Caramels

Decadent Date Caramels: Guilt-Free Indulgence Awaiting You

These Date Caramels are a guilt-free treat, combining simple ingredients into a deliciously healthy candy option.
Print Recipe Pin Recipe
Prep Time 10 minutes mins
Cook Time 20 minutes mins
Freezing Time 2 hours hrs
Total Time 2 hours hrs 30 minutes mins
Servings: 12 squares
Course: Dessert
Cuisine: Vegan
Calories: 120
Ingredients Equipment Method Nutrition Notes

Ingredients
  

For the Caramels
  • 2 cups Pitted Medjool Dates Soft for best results
  • 1/2 cup Almond Butter or Seed Butter for nut-free option
  • 2 tablespoons Coconut Oil Melted
For the Chocolate Coating
  • 1 cup Chocolate Chips or Chocolate Bar
  • 1 tablespoon Coconut Oil for melting chocolate

Equipment

  • Food Processor
  • Loaf pan
  • Microwave-safe bowl
  • Parchment Paper
  • Spatula
  • Sharp Knife

Method
 

Preparation Steps
  1. Soak the Pitted Medjool Dates in very hot water for 10 minutes to soften.
  2. Drain the dates and blend them with almond butter and melted coconut oil until smooth.
  3. Transfer the mixture to a lined loaf pan, spread evenly, and freeze for 2-3 hours.
  4. Cut the set mixture into 12 squares.
  5. Melt chocolate chips and remaining coconut oil in the microwave in 30-second increments.
  6. Dip each square in melted chocolate, ensuring full coverage, and transfer to a parchment-lined plate.
  7. Chill the coated caramels in the fridge for 1 hour to harden the chocolate.

Nutrition

Serving: 1squareCalories: 120kcalCarbohydrates: 14gProtein: 2gFat: 7gSaturated Fat: 4gPolyunsaturated Fat: 1gMonounsaturated Fat: 2gSodium: 1mgPotassium: 180mgFiber: 2gSugar: 10gCalcium: 2mgIron: 4mg

Notes

For best results, use fresh, soft dates and store in an airtight container in the fridge or freezer. Microwave for a few seconds to soften before serving if desired.

Tried this recipe?

Let us know how it was!

Coconut Cloud Cake Recipe: Your New Favorite Dessert Adventure

September 21, 2025 by Grace Snow Leave a Comment

As I stood in my kitchen, the sweet aroma of baked coconut wafted through the air, taking me back to sun-soaked beach vacations. This Coconut Cloud Cake Recipe is my go-to for bringing a slice of paradise into any gathering or quiet afternoon. With its incredibly soft, pillow-like sponge layers drenched in coconut richness and topped with a creamy frosting that invites second helpings, this dessert is bound to impress. Plus, it’s simple enough for even novice bakers to master—perfect for those craving a homemade treat without the fuss. So, are you ready to elevate your baking game and transport your taste buds to a tropical haven?

Why will you adore this cake?

Decadent, Tropical Flavor: Each bite of this Coconut Cloud Cake whisks you away to a warm beach, packed with rich coconut goodness.

Effortless Preparation: With straightforward steps, even novice bakers can impress loved ones without breaking a sweat.

Versatile Treat: Whether for birthdays, holidays, or everyday celebrations, this cake fits every occasion perfectly.

Mouthwatering Frosting: Topped with creamy coconut frosting and toasty shredded coconut, it delivers a delightful contrast in textures that will leave everyone wanting more.

For a similar indulgence, check out my recipes for Chocolate Pudding Cake or German Chocolate Poke Cake!

Coconut Cloud Cake Ingredients

  • For the Cake
    • All-Purpose Flour – Provides structure; substitute with a gluten-free blend for a gluten-free version.
    • Baking Powder – Leavening agent that helps the cake rise; no substitutes recommended.
    • Salt – Enhances flavor; it’s a key ingredient for balance.
    • Butter (softened) – Adds moisture and flavor; ensure it's at room temperature for better mixing.
    • Granulated Sugar – Sweetness and moisture retention; reduce for a less sweet version.
    • Eggs – Binds ingredients and adds structure; make sure they are at room temperature for even mixing.
    • Vanilla Extract – Adds aromatic sweetness; no substitutes recommended.
    • Coconut Extract – Intensifies coconut flavor; crucial for that rich taste.
    • Coconut Milk – Contributes to the cake's moistness and coconut richness; almond milk or whole milk can be used as alternatives.

  • For the Frosting
    • Heavy Cream – Used for frosting; creates a light texture, so chill before whipping for best results.
    • Cream Cheese – Adds a creamy base to the frosting; ensure it is softened for easy mixing.
    • Powdered Sugar – Sweetens and stabilizes the frosting; adjust for desired sweetness.

  • For the Topping
    • Shredded Coconut – Adds texture and flavor; toast for extra depth and to enhance its natural sweetness.

This Coconut Cloud Cake recipe is sure to be a delightful treat that transports your taste buds to a sunny getaway!

Step‑by‑Step Instructions for Coconut Cloud Cake Recipe

Step 1: Prep the Oven and Pans
Begin by preheating your oven to 350°F (175°C). While the oven heats, grease two 9-inch round cake pans and line the bottoms with parchment paper to ensure easy removal. This step sets the stage for your Coconut Cloud Cake, making sure it bakes evenly and doesn’t stick.

Step 2: Mix the Dry Ingredients
In a large mixing bowl, whisk together 2 cups of all-purpose flour, 1 tablespoon of baking powder, and a pinch of salt. This dry mixture is fundamental for the cake's structure. Ensure there are no lumps for a smooth batter; a well-mixed dry blend is key to a fluffy Coconut Cloud Cake.

Step 3: Cream Butter and Sugar
In a separate mixing bowl, beat together 1 cup of softened butter and 1 cup of granulated sugar using an electric mixer on medium speed for about 3–4 minutes, or until the mixture becomes light and fluffy. Gradually add in 4 room-temperature eggs, one at a time, mixing well after each addition to fully incorporate air.

Step 4: Combine Wet Ingredients
Next, add 2 teaspoons of vanilla extract and 1 teaspoon of coconut extract to the creamed butter and sugar. Mix these in until well blended. Then, alternately incorporate the dry ingredients and 1 cup of coconut milk into the mixture in three parts. Mix gently until just combined, aiming for a smooth batter without overmixing.

Step 5: Bake the Cakes
Evenly divide the batter between the prepared cake pans, gently smoothing the tops with a spatula. Bake for 25–30 minutes, or until a toothpick inserted into the center comes out clean. Once done, remove the pans from the oven, allow them to cool in the pans for about 10 minutes, then transfer the cakes to a wire rack to cool completely.

Step 6: Prepare the Frosting
For the frosting, start by beating 8 ounces of softened cream cheese until it’s smooth. Gradually add in about 2 cups of powdered sugar and mix until the frosting achieves a silky texture. In a separate bowl, whip 1 cup of heavy cream to stiff peaks, then gently fold it into the cream cheese mixture along with the remaining vanilla and coconut extracts.

Step 7: Assemble the Cake
Place one cooled cake layer on a serving plate, and generously spread frosting over the top. Carefully position the second layer on top, creating a delightful two-tiered effect. Use the remaining frosting to cover the sides and top of the cake, ensuring each inch is decorated with the creamy coconut frosting.

Step 8: Add the Finishing Touch
To finish, sprinkle a layer of shredded coconut on top, ideally using toasted coconut for extra flavor. This enhances the presentation and texture of your Coconut Cloud Cake. Refrigerate the entire cake for at least one hour, allowing the frosting to set perfectly before slicing into this delightful treat.

Storage Tips for Coconut Cloud Cake

  • Room Temperature: Store the Coconut Cloud Cake in an airtight container at room temperature for up to 3–4 days for the best flavor and texture.

  • Refrigeration: If you prefer a chilled dessert, the cake can be kept in the fridge for up to a week in an airtight container. Just let it come to room temperature for a few minutes before serving.

  • Freezer: For longer storage, freeze the unfrosted cake layers individually wrapped in plastic wrap and foil for up to 2 months. Thaw in the fridge overnight before frosting.

  • Reheating: If you’ve frozen frosted cake, allow it to thaw in the fridge, then serve cold, or microwave individual slices for 10-15 seconds for a warm treat.

Expert Tips for Coconut Cloud Cake

  • Room Temperature Ingredients: Ensure all ingredients, especially butter and eggs, are at room temperature for better blending and fluffiness in your Coconut Cloud Cake.

  • Gentle Folding: When combining whipped cream into the frosting, be gentle. This maintains the airy texture that makes it melt in your mouth.

  • Avoid Sinking: Don’t open the oven door too frequently while baking. This can cause your cakes to sink in the center, compromising that beautiful rise you want.

  • Perfectly Toasted Coconut: For maximum flavor, toast your shredded coconut lightly before adding it as a topping. It not only enhances taste but also adds a lovely crunch.

  • Make-Ahead Magic: If time allows, bake the cake layers a day ahead. Store them properly until you’re ready to frost and assemble for a stress-free baking experience!

What to Serve with Coconut Cloud Cake

Indulging in Coconut Cloud Cake opens up a world of delicious pairing possibilities that will elevate your dessert experience.

  • Fresh Fruit Salad: A colorful mix of berries and tropical fruits adds a refreshing contrast and complements the coconut flavor beautifully.
  • Coconut Sorbet: This icy treat takes the coconut theme to another level, providing a cool, creamy counterpart that’s perfect for warm days.
  • Whipped Cream: Lightly sweetened whipped cream adds a fluffy texture that enhances the cake’s richness, making each bite even more decadent.
  • Chocolate Ganache: Drizzling a rich chocolate ganache over the cake creates an exquisite flavor combination that balances sweetness with deep cocoa richness.
  • Almond Biscotti: The crunchy texture of these cookies offers a delightful contrast to the soft cake, making for an enjoyable munching experience.
  • Mango Mousse: A light mango mousse is airy and fruity, creating a beautiful harmony of flavors with the tropical essence of the cake.
  • Iced Coffee: A chilled brew complements the dessert’s sweet note with a subtle bitterness, making it a perfect drink option for a cozy afternoon.
  • Lemonade: The zesty freshness of lemonade brings a bright twist to the meal, cutting through the cake's richness for a truly refreshing sip.

Make Ahead Options

Preparing the Coconut Cloud Cake ahead of time is a fantastic way to save time, especially during busy weeks! You can bake the cake layers up to 24 hours in advance. Once they are completely cooled, wrap each layer tightly in plastic wrap and store them at room temperature. The frosting can also be made a day ahead; simply store it in an airtight container in the refrigerator. When you're ready to assemble, just bring the layers to room temperature, spread the frosting between them, and cover the cake as directed. This ensures that your Coconut Cloud Cake remains just as delicious, offering a stress-free treat for any occasion!

Coconut Cloud Cake Recipe Variations

Feel free to unleash your creativity and personalize this delightful treat to suit your tastes and dietary needs!

  • Gluten-Free: Use a gluten-free baking blend instead of all-purpose flour for a delicious gluten-free version.

  • Reduced Sugar: Cut back on the powdered sugar in the frosting to create a delightful balance of sweetness without overwhelming your taste buds.

  • Fresh Coconut: Swap out shredded coconut for fresh grated coconut for a more natural flavor and a softer texture that complements the cake beautifully.

  • Nutty Surprise: Introduce a layer of toasted almonds or pecans in between the cake layers for a satisfying crunch and additional flavor.

  • Coconut Cream: For a richer frosting, substitute half the heavy cream with coconut cream for an extra creaminess that's simply irresistible.

  • Fruity Twist: Add a layer of your favorite fruit, like pineapple or mango, between the cake layers to introduce a refreshing burst of flavor to each slice.

  • Chocolate Drizzle: Drizzle some melted dark chocolate on top of the cake for a decadent twist that pairs wonderfully with coconut.

  • Tropical Heat: Add a pinch of cayenne or crushed red pepper flakes to the frosting for a surprising touch of heat that contrasts beautifully with the sweetness.

For another scrumptious dessert that's sure to impress, take a look at my Chocolate Pudding Cake or explore the delicious layers of German Chocolate Poke Cake!

Coconut Cloud Cake Recipe FAQs

What is the best way to select ripe coconuts for baking?
When selecting coconuts, look for ones that feel heavy for their size, indicating good water content. Shake gently; if you hear sloshing, it’s fresh. The shell should be free from dark spots or cracks. To use, remove the meat and shred it for your cake—fabulous!

How should I store my Coconut Cloud Cake?
Absolutely! You can store the Coconut Cloud Cake in an airtight container at room temperature for 3 to 4 days. If you prefer it chilled, pop it in the fridge for up to a week. Just let it come to room temperature for optimal flavor when serving!

Can I freeze the Coconut Cloud Cake, and if so, how?
Yes, you can! To freeze the Coconut Cloud Cake, first wrap unfrosted cake layers tightly in plastic wrap, then in aluminum foil to prevent freezer burn. They can be frozen for up to 2 months. When ready to enjoy, thaw them overnight in the fridge before frosting and serving for the best texture.

What are some common pitfalls when making Coconut Cloud Cake?
One common pitfall is overmixing the batter, which can make the cake dense. Mix until just combined, and ensure all your ingredients are at room temperature for even mixing and fluffiness. It's also crucial to avoid opening the oven door too often, as this can cause the cake to sink.

Are there any dietary considerations for this Coconut Cloud Cake?
While this recipe isn't specifically gluten-free, you can substitute all-purpose flour with a gluten-free blend for a delicious alternative. Also, if you or your guests are allergic to coconut, consider using vanilla and almond flavors instead—but be aware, it won’t impart the same tropical essence!

What’s the best way to ensure my whipped cream holds its shape in the frosting?
To ensure your whipped cream maintains its structure in the frosting, chill your mixing bowl and beaters beforehand. Whip it to stiff peaks before gently folding it into the cream cheese mixture. This method keeps the frosting light and airy, which is perfect for your Coconut Cloud Cake!

Coconut Cloud Cake Recipe

Coconut Cloud Cake Recipe: Your New Favorite Dessert Adventure

Discover the Coconut Cloud Cake recipe, a delightful dessert that transports your taste buds to a tropical paradise.
Print Recipe Pin Recipe
Prep Time 30 minutes mins
Cook Time 30 minutes mins
Cooling Time 1 hour hr
Total Time 2 hours hrs
Servings: 12 slices
Course: Dessert
Cuisine: Tropical
Calories: 350
Ingredients Equipment Method Nutrition Notes

Ingredients
  

For the Cake
  • 2 cups all-purpose flour substitute with a gluten-free blend for a gluten-free version
  • 1 tablespoon baking powder no substitutes recommended
  • 1 teaspoon salt enhances flavor
  • 1 cup butter (softened) ensure it's at room temperature
  • 1 cup granulated sugar reduce for a less sweet version
  • 4 eggs make sure they are at room temperature
  • 2 teaspoons vanilla extract no substitutes recommended
  • 1 teaspoon coconut extract crucial for rich taste
  • 1 cup coconut milk almond milk or whole milk can be used as alternatives
For the Frosting
  • 1 cup heavy cream chill before whipping for best results
  • 8 ounces cream cheese ensure it is softened
  • 2 cups powdered sugar adjust for desired sweetness
For the Topping
  • 1 cup shredded coconut toast for extra flavor

Equipment

  • Mixing bowls
  • Electric mixer
  • 9-inch Round Cake Pans
  • Parchment Paper
  • Whisk
  • Spatula

Method
 

Step-by-Step Instructions
  1. Preheat your oven to 350°F (175°C). Grease two 9-inch round cake pans and line with parchment paper.
    Coconut Cloud Cake Recipe
  2. In a large mixing bowl, whisk together the dry ingredients: flour, baking powder, and salt.
    Coconut Cloud Cake Recipe
  3. Beat together softened butter and granulated sugar until light and fluffy. Gradually add eggs, mixing well after each.
    Coconut Cloud Cake Recipe
  4. Add vanilla and coconut extracts to the butter-sugar mixture, then alternately mix in dry ingredients and coconut milk until just combined.
    Coconut Cloud Cake Recipe
  5. Divide the batter between prepared pans and bake for 25–30 minutes or until a toothpick comes out clean.
    Coconut Cloud Cake Recipe
  6. For the frosting, beat cream cheese until smooth, add powdered sugar, then incorporate whipped heavy cream and remaining extracts gently.
    Coconut Cloud Cake Recipe
  7. Assemble the cake by layering frosting between the cooled cake layers and covering the entire cake with frosting.
    Coconut Cloud Cake Recipe
  8. Sprinkle toasted shredded coconut on top and refrigerate for at least one hour before serving.
    Coconut Cloud Cake Recipe

Nutrition

Serving: 1sliceCalories: 350kcalCarbohydrates: 45gProtein: 3gFat: 17gSaturated Fat: 10gPolyunsaturated Fat: 1gMonounsaturated Fat: 4gCholesterol: 75mgSodium: 180mgPotassium: 200mgFiber: 1gSugar: 30gVitamin A: 500IUCalcium: 50mgIron: 1mg

Notes

Ensure all ingredients are at room temperature for best results. Gently fold whipped cream into frosting for airy texture.

Tried this recipe?

Let us know how it was!

Muddy Buddy Rice Krispies: No-Bake Sweet Crunchy Bliss

September 21, 2025 by Grace Snow Leave a Comment

As I stood in my kitchen, the warm, sweet scent of melting chocolate filled the air, instantly lifting my spirits. In just a matter of minutes, I was about to create a no-bake treat that would bring smiles to everyone at the table: Muddy Buddy Rice Krispies. This delightful combination of crispy Rice Krispies, creamy peanut butter, and rich chocolate is not only irresistibly crunchy but also incredibly easy to whip up. Whether you’re hosting a gathering or simply craving a sweet snack, this quick dessert is a perfect choice that allows for carefree family fun without the fuss of baking. Plus, since they’re vegetarian, there's something for everyone to enjoy! Curious to see how simple it is to create this delightful treat? Let’s dive into the recipe!

Why Are Muddy Buddy Rice Krispies Irresistible?

Quick and Easy: You’ll love that this delicious treat requires no baking—perfect for those busy days when you want a sweet fix without the oven!

Crowd-Pleaser: With their crunchy texture and rich chocolate-peanut butter flavor, these treats are bound to impress guests at parties or family gatherings.

Versatile Options: Feeling creative? You can easily swap out ingredients—try almond butter for a nut-free version or add mini marshmallows for extra sweetness!

Kid-Friendly Fun: It’s a fantastic opportunity for the whole family to get involved in the kitchen, creating delightful memories together while mastering this fun recipe.

Satisfy Your Sweet Tooth: If you’re looking for a sweet and satisfying snack that truly delivers, you might also enjoy trying these variations: Furikake Fried Rice or for something savory, check out Bbq Chicken Rice.

Muddy Buddy Rice Krispies Ingredients

For the Base
• Rice Krispies Cereal – A light, crispy cereal that forms the foundation of this treat; you can substitute Chex cereal for a different crunch.
• Chocolate Chips – Provides that essential chocolaty sweetness; dark chocolate can be used for a richer flavor and added antioxidants.
• Creamy Peanut Butter – Offers a rich, nutty flavor while adding healthy fats; consider almond or sunflower seed butter for nut-free alternatives.
• Unsalted Butter – Melts into the mixture for richness and a smooth texture; margarine works great for a dairy-free version.
• Vanilla Extract – Adds a hint of depth to the flavor; if you're out, it's okay to skip it!

For the Coating
• Powdered Sugar – Sprinkles on top for a sweet finish; feel free to reduce the amount if you prefer a less sweet treat or swap for a sugar alternative.

Muddy Buddy Rice Krispies create a delightful combination of textures and flavors that are sure to please everyone!

Step‑by‑Step Instructions for Muddy Buddy Rice Krispies

Step 1: Melt the Chocolate and Peanut Butter
Begin by gathering a microwave-safe bowl and adding in your chocolate chips and creamy peanut butter. Microwave the mixture in 30-second intervals, stirring after each time, until it becomes a smooth and glossy consistency—this should take about 1 to 2 minutes total. Be mindful not to overheat, as burnt chocolate is not what we want for our Muddy Buddy Rice Krispies.

Step 2: Incorporate Butter and Vanilla
Once your chocolate and peanut butter mixture is perfectly melted, stir in the unsalted butter and a splash of vanilla extract. Mix thoroughly until everything is well combined and the texture is creamy. This step will add richness to the Muddy Buddy Rice Krispies, ensuring every bite is indulgent and delicious.

Step 3: Coat Rice Krispies
In a large mixing bowl, pour in the Rice Krispies cereal. Gently drizzle the melted chocolate-peanut butter mixture over the top. Using a spatula, carefully fold the two mixtures together. Make sure every piece of Rice Krispies is coated well without crushing them—this is key for achieving that perfect crunchy texture!

Step 4: Cool and Set
Prepare a lined baking sheet or pan by spreading the coated Rice Krispies mixture evenly across it. Use a spatula to press down slightly for an even surface. Allow your mixture to cool for about 15 to 20 minutes at room temperature, letting the chocolate set for a delightful finish.

Step 5: Add Powdered Sugar
Once set, transfer the Rice Krispies mixture to a large resealable bag. Add the powdered sugar, seal the bag, and shake it gently until all the goodies are coated. Alternatively, you can sprinkle the powdered sugar evenly over the top for a lighter coating—both methods will add a sweet touch to your Muddy Buddy Rice Krispies.

Step 6: Serve and Enjoy
After coating, you can cut the mixture into squares or break it into fun pieces with your hands for serving. Place them on a serving platter and watch as everyone dives in with excitement! These no-bake Muddy Buddy Rice Krispies are a delightful treat for any occasion, and they're best enjoyed within a week for ultimate freshness.

Muddy Buddy Rice Krispies Variations

Feel free to get creative and make this delightful treat your own in a few simple ways!

  • Different Cereal: Swap Rice Krispies for Chex cereal or cornflakes to add unique textures and flavors. Each choice offers a delightful crunch that brings variety to your treats.

  • Nut-Free Option: Substitute creamy peanut butter with almond or sunflower seed butter for a nut-free version. This way, everyone can join in on the deliciousness without worry!

  • Sugar-Free Sweetness: Use a sugar alternative like stevia or monk fruit to reduce the sweetness. You’ll still capture that delightful taste without all the sugar!

  • Chocolate Variety: Experiment with dark chocolate for a richer flavor or white chocolate for a sweeter twist. It opens up a whole new realm of sweetness!

  • Add Crunch: Mix in pretzels or crushed graham crackers before coating. The added crunch creates an exciting texture that makes every bite memorable.

  • Fun Flavors: Toss in mini marshmallows or flavored chips, such as caramel or butterscotch, to amplify the treat's sweetness and create a mouth-watering flavor explosion.

  • Spicy Kick: Add a sprinkle of cayenne pepper or chili powder to the melted mixture for a hint of heat. This delightful surprise will elevate the overall taste experience!

  • Garnish Ideas: Top your squares with chocolate drizzle or colorful sprinkles for an attractive presentation. It’s all about that added visual and flavorful appeal!

For those looking for even more culinary inspiration, don’t forget to check out One Pot Salmon and Shiitake Rice or savory Lime Chicken Rice, which can bring a world of flavor to your meal planning!

What to Serve with Muddy Buddy Rice Krispies

As you prepare these delightful treats, consider a few tasty accompaniments that will elevate your dessert experience and delight everyone at the table.

  • Milkshake Bliss: A classic chocolate milkshake pairs perfectly with the crunchy textures, adding a creamy richness that complements the chocolatey goodness.
  • Fresh Fruit Salad: Bright and refreshing, a fruit salad with berries and melons balances the sweetness of the Rice Krispies. This combo offers a burst of flavor that’s delightful for the palate.
  • Coffee or Espresso: Enjoy a warm cup of coffee or a shot of espresso alongside these treats. The robust flavors enhance the chocolate and peanut butter duo, making for a wonderful afternoon pick-me-up.
  • Creamy Ice Cream: Serve a scoop of vanilla or chocolate ice cream on the side for a decadent treat. The cold creaminess contrasts beautifully with the sweet crunch of the Muddy Buddy Rice Krispies.
  • Chocolate Dipped Pretzels: For a fun, salty-sweet pairing, chocolate-dipped pretzels provide an extra crunch and playful element that works wonderfully with the treats’ texture.
  • Nutty Granola Bars: A chewy granola bar with nuts adds another layer of flavor and texture. This combination makes for a satisfying snack that is both sweet and wholesome.
  • Homemade Whipped Cream: Light and airy, a dollop of homemade whipped cream can elevate your dessert experience, adding an indulgent touch that’s hard to resist.
  • Sparkling Water: For a refreshing drink, sparkling water with a slice of lemon or lime cleanses the palate, making it perfect for enjoying with sweet treats.
  • Chocolate Drizzled Rice Cakes: For a fun twist, offer rice cakes drizzled with chocolate as a crunchy side. They add an interesting texture contrast and extra chocolatey goodness to your dessert table!

Expert Tips for Muddy Buddy Rice Krispies

Watch the Heat: Ensure you melt the chocolate and peanut butter gently; overheating can lead to burning, ruining the texture of your Muddy Buddy Rice Krispies.

Perfect Coating: Gently fold the Rice Krispies in the melted mixture to avoid crushing them; this is key to maintaining that perfect crunch!

Sweetness Control: Feel free to adjust the sweetness—try dark chocolate or cut back on powdered sugar for a less sugary treat.

Add Fun Mix-ins: For extra texture and flavor, consider tossing in mini marshmallows, chopped nuts, or pretzels before coating your Muddy Buddy Rice Krispies.

Storage Tips: Store your treats in an airtight container at room temperature; they'll stay fresh for about a week, although they’re unlikely to last that long!

How to Store and Freeze Muddy Buddy Rice Krispies

Room Temperature: Store in an airtight container at room temperature for optimal freshness; they can last for up to 1 week, though they're likely to be eaten much sooner!

Freezer: For longer storage, you can freeze Muddy Buddy Rice Krispies. Place them in a single layer on a baking sheet to freeze until solid, then transfer them to an airtight container or freezer bag for up to 2 months.

Reheating: If frozen, simply allow them to thaw at room temperature for about 30 minutes before serving. No need to reheat, as they taste delightful chilled or at room temperature.

Coating Tip: If you prefer extra sweetness, consider adding a fresh dusting of powdered sugar after thawing for that perfect sugary finish!

Make Ahead Options

These Muddy Buddy Rice Krispies are perfect for meal prep enthusiasts! You can prepare the chocolate and peanut butter mixture up to 3 days in advance; simply store it in an airtight container in the refrigerator to maintain its quality. Additionally, you can coat the Rice Krispies in the melted mixture and allow them to set—this can also be done up to 24 hours ahead of time. When you're ready to serve, just shake the cooled treats in powdered sugar or sprinkle it on top for a delightful finish. This way, you’ll have a no-bake dessert ready to impress your family or guests with minimal effort!

Muddy Buddy Rice Krispies Recipe FAQs

What type of Rice Krispies should I use?
Absolutely, you can use classic Rice Krispies for a crispy base, but I also recommend Chex cereal or even cornflakes for a different crunch! These alternatives can bring unique textures that make your Muddy Buddy Rice Krispies even more delightful.

How should I store my Muddy Buddy Rice Krispies?
To keep them fresh, store your Muddy Buddy Rice Krispies in an airtight container at room temperature. They can last for up to 1 week this way. Just remember to keep them out of direct sunlight to prevent them from losing their delightful crunch!

Can I freeze my Muddy Buddy Rice Krispies?
Yes, definitely! To freeze, place your Muddy Buddy Rice Krispies in a single layer on a baking sheet and freeze until solid. After that, transfer them to an airtight container or a freezer bag. They can last for up to 2 months in the freezer. When you're ready to enjoy them, simply let them thaw at room temperature for about 30 minutes.

What should I do if the chocolate mixture is too thick?
If your mixture becomes too thick to coat the Rice Krispies evenly, don't fret! Simply add a little extra melted butter or a splash of vegetable oil to thin it out. This will help achieve the perfect consistency for coating, ensuring that each puff of Rice Krispies gets its delectable chocolatey envelope.

Are these Muddy Buddy Rice Krispies safe for allergies?
Great question! If you're looking for nut-free options, consider substituting the creamy peanut butter with almond or sunflower seed butter. Just be sure to check the labels for any potential allergens. They are vegetarian-friendly and can easily be made to accommodate various dietary needs.

Can I add other mix-ins to my Muddy Buddy Rice Krispies?
Very much so! Feel free to mix in some mini marshmallows, chopped nuts, or even pretzels before coating for added texture and flavor! This makes your Muddy Buddy Rice Krispies even more exciting and unique. Enjoy experimenting!

Muddy Buddy Rice Krispies

Muddy Buddy Rice Krispies: No-Bake Sweet Crunchy Bliss

Muddy Buddy Rice Krispies are a delicious no-bake dessert combining crispy cereal, peanut butter, and chocolate.
Print Recipe Pin Recipe
Prep Time 10 minutes mins
Cook Time 2 minutes mins
Cooling Time 20 minutes mins
Total Time 32 minutes mins
Servings: 12 squares
Course: Dessert
Cuisine: American
Calories: 150
Ingredients Equipment Method Nutrition Notes

Ingredients
  

For the Base
  • 6 cups Rice Krispies Cereal Can substitute Chex cereal.
  • 1 cup Chocolate Chips Dark chocolate can be used.
  • 1 cup Creamy Peanut Butter Almond or sunflower seed butter for nut-free.
  • 1/4 cup Unsalted Butter Margarine for dairy-free.
  • 1 teaspoon Vanilla Extract Optional.
For the Coating
  • 1 cup Powdered Sugar Adjust to desired sweetness.

Equipment

  • Microwave-safe bowl
  • Spatula
  • large mixing bowl
  • Baking sheet or pan
  • Resealable Bag

Method
 

Step-by-Step Instructions for Muddy Buddy Rice Krispies
  1. Melt the chocolate and peanut butter in a microwave-safe bowl, stirring every 30 seconds until smooth.
  2. Incorporate unsalted butter and vanilla extract, stirring until creamy.
  3. Coat Rice Krispies by drizzling the melted mixture over them and gently folding together.
  4. Spread the mixture onto a lined baking sheet and cool for 15-20 minutes.
  5. Add powdered sugar and shake in a resealable bag or sprinkle on top to coat.
  6. Cut or break into pieces, serve, and enjoy!

Nutrition

Serving: 1squareCalories: 150kcalCarbohydrates: 21gProtein: 2gFat: 7gSaturated Fat: 3.5gPolyunsaturated Fat: 1gMonounsaturated Fat: 3gCholesterol: 10mgSodium: 80mgPotassium: 60mgSugar: 11gVitamin A: 100IUCalcium: 20mgIron: 0.5mg

Notes

Store in an airtight container for up to 1 week at room temperature. For longer storage, freeze for up to 2 months.

Tried this recipe?

Let us know how it was!

Mini Bundt Cakes That Burst with Flavor and Joy

September 20, 2025 by Grace Snow Leave a Comment

The tantalizing aroma of freshly baked Mini Bundt Cakes wafts through my kitchen, instantly transporting me to cozy afternoons spent with friends over tea. These delightful little desserts are not just a treat for the taste buds; they are a canvas for creativity, inviting you to explore flavors like zesty citrus or rich chocolate. Best of all, they come together in no time, making them perfect for any occasion, from festive celebrations to casual get-togethers. With a luscious raspberry white chocolate glaze that drizzles beautifully over the top, each bite is a symphony of sweetness and decadence. Ready to elevate your dessert game? Let’s dive into this irresistible recipe and bring a touch of homemade magic to your table!

Why are Mini Bundt Cakes So Irresistible?

Versatile Flavors: These cakes allow for endless flavor adaptations. Whether you crave chocolate or citrus, the options are limitless!

Quick to Prepare: With minimal prep time, you’ll have delightful mini treats ready in no time—perfect when unexpected guests arrive!

Crowd-Pleasing Treat: They make stunning centerpieces at any gathering! Serve them at parties, afternoon teas, or simply treat yourself.

Decadent Texture: Each cake boasts a moist crumb with a luxurious raspberry white chocolate glaze, creating an unforgettable bite!

Easy Customization: Want to experiment? Try different glazes or mix-ins, like nuts or berries, for added fun—your guests will love the surprises!

For a delightful pairing, consider showcasing these mini cakes alongside Mini Tropical Pavlovas for a gorgeous dessert spread!

Mini Bundt Cakes Ingredients

• Perfect for delightful baking adventures!

For the Batter

  • Unsalted Butter – Adds richness and moisture; make sure it's softened for easy mixing.
  • Granulated Sugar – Sweetens the batter and contributes to its fluffy texture; feel free to reduce if you prefer less sweetness.
  • Vanilla Extract – Enhances the flavors; for the purest taste, opt for pure vanilla.
  • Eggs – Essential for structure and moisture; use room temperature eggs for best results.
  • Greek Yogurt – Keeps the cake moist and tender; plain yogurt or sour cream can be used as a substitute.
  • All-Purpose Flour – Provides the main structure; for gluten-free options, try blending with almond flour.
  • Baking Powder – Helps the cakes rise; ensure it's fresh for optimal results.
  • Baking Soda – Collaborates with acidic ingredients for a perfect rise; never skip this!
  • Salt – Balances the sweetness and enhances flavors; it's a must for delicious cakes.

For the Glaze

  • White Chocolate – Forms the creamy base of the glaze; choose a high-quality chocolate for the best flavor.
  • Heavy Cream – Adds creaminess to the glaze; substitute with full-fat coconut milk if desired.
  • Raspberry Puree – Infuses a natural fruity flavor; frozen raspberries work wonderfully when fresh are unavailable.
  • Unsalted Butter – Ensures a smooth and glossy glaze; using high-quality butter makes a difference.

With these Mini Bundt Cakes ingredients at hand, you’re all set to create an irresistible dessert that impresses!

Step‑by‑Step Instructions for Mini Bundt Cakes

Step 1: Preheat and Prepare
Begin by preheating your oven to 175°C (350°F) to ensure even baking. While it warms, grease your mini bundt pan thoroughly using cooking spray or softened butter to prevent sticking. A well-prepared pan is essential for the perfect release of your Mini Bundt Cakes, so take your time with this step.

Step 2: Cream Butter and Sugar
In a large mixing bowl, combine ½ cup of room temperature unsalted butter and ¾ cup of granulated sugar. Using an electric mixer, beat them together on medium speed until the mixture is light and fluffy, approximately 3-4 minutes. This creates a rich base for your cakes that enhances their texture and flavor.

Step 3: Incorporate Wet Ingredients
Add the eggs, one at a time, mixing well after each addition to fully integrate them. Then, introduce ⅓ cup of Greek yogurt and ½ teaspoon of vanilla extract, blending until smooth. These ingredients contribute to the moistness and delightful flavor of your Mini Bundt Cakes, so be sure to mix thoroughly.

Step 4: Combine Dry Ingredients
In a separate bowl, sift together 1½ cups of all-purpose flour, ½ teaspoon of baking powder, ½ teaspoon of baking soda, and ¼ teaspoon of salt. Gently fold the dry mixture into the wet ingredients until just combined, being careful not to overmix. This preserves the delicate crumb structure that makes your cakes so enjoyable.

Step 5: Fill the Bundt Pan
Spoon the batter into the prepared mini bundt pan, filling each cavity about ¾ full. Use a spatula to smooth the tops for even baking. Place the pan in the preheated oven and bake for about 25 minutes or until a toothpick inserted in the center comes out clean. Keep an eye on the cakes toward the end of the baking time.

Step 6: Cool and Release
Once baked, remove the mini bundt pan from the oven and allow it to cool for approximately 10-15 minutes. Gently run a knife around the edges to loosen the cakes. Carefully invert the pan onto a wire rack to release the cakes, allowing them to cool completely. Waiting helps the flavors to set properly before glazing.

Step 7: Prepare the Glaze
While your Mini Bundt Cakes cool, prepare the raspberry white chocolate glaze. In a small saucepan, melt ½ cup of white chocolate with ¼ cup of heavy cream over low heat, stirring until smooth. Then, add ¼ cup of strained raspberry puree and 1 tablespoon of unsalted butter. Mix until glossy, creating a luscious glaze.

Step 8: Glaze the Cakes
Once the cakes are completely cool, drizzle the raspberry white chocolate glaze over the top of each mini bundt cake. Let the glaze set for about 10-15 minutes before serving to allow it to firm up slightly. This step adds a striking finish and enhances the flavor profile of your delightful Mini Bundt Cakes.

What to Serve with Mini Bundt Cakes with Raspberry White Chocolate Glaze

Elevate your dining experience with delightful pairings that complement each luscious bite of these mini desserts.

  • Fresh Berries: A medley of strawberries, blueberries, and raspberries can add a burst of freshness, enhancing the fruitiness of the glaze.
  • Zesty Lemon Curd: The tangy sweetness of lemon curd offers a refreshing contrast, making each bite of the bundt cakes feel rejuvenating and bright.
  • Creamy Vanilla Ice Cream: Serving these cakes with a scoop of vanilla ice cream creates a rich and creamy balance that melts in your mouth, harmonizing flavors beautifully.
  • Sparkling Raspberry Lemonade: A bubbly drink adds a fun, refreshing twist, perfect for gatherings. Its effervescence enhances the sweetness of the cakes.
  • Chocolate Ganache: Drizzling a rich chocolate ganache will deepen the dessert's indulgence, offering a luxurious pairing to those chocolate cravings.
  • Herbal Tea: A warm cup of herbal tea pairs perfectly, providing a soothing balance to the sweetness of the bundt cakes; try chamomile or mint for a calming effect.
  • Whipped Cream: Light and airy whipped cream can elevate your cakes further, offering a creamy texture that perfectly complements the raspberry glaze. It’s a classic, for a reason!
  • Cheesecake Bites: Serving a few mini cheesecake bites alongside can provide a delightful contrast in flavors and textures, creating an irresistible dessert platter.

Pair any of these delightful accompaniments with your Mini Bundt Cakes to create a memorable culinary experience!

Expert Tips for Mini Bundt Cakes

  • Room Temperature Ingredients: Make sure all ingredients, especially butter and eggs, are at room temperature. This helps create a smoother batter and ensures even baking.

  • Avoid Overmixing: When folding dry ingredients into the wet, mix just until incorporated. Overmixing can lead to dense Mini Bundt Cakes, so be gentle!

  • Adjust Baking Time: Keep an eye on your cakes as they bake; ovens vary. Start checking for doneness at around 20 minutes to ensure they don't overbake.

  • Cool Completely: Let the cakes cool completely before glazing. If they're warm, the glaze will melt, losing that beautiful, drizzled effect.

  • Use Quality Chocolate: For the best flavor, use high-quality white chocolate in your glaze. It makes a significant difference in the overall indulgence of these cakes.

Mini Bundt Cakes Variations & Substitutions

Feel free to explore the delightful world of customization with these Mini Bundt Cakes, inviting your taste buds to a flavorful adventure!

  • Chocolate: Replace 20% of the flour with cocoa powder for rich, chocolatey goodness. Marbling the batters can create an eye-catching dessert.
  • Citrus: Add lemon or orange zest into the batter to brighten the flavor. A little zest goes a long way in lifting the overall appeal!
  • Berry Burst: Mix in fresh or frozen raspberries, blueberries, or strawberries for a fruity explosion. The added fruit will bring bursts of flavor in every delightful bite.
  • Glaze Variations: Swap raspberry puree for lemon juice or matcha powder in the glaze for exciting twists. Each version provides a unique taste and aesthetic that will wow your guests.
  • Nutty Touch: Fold in almond or pistachio flour instead of regular flour for a nutty, delightful crunch. This not only enhances flavor but adds a lovely texture.
  • Spicy Kick: Incorporate a pinch of cayenne or cinnamon to the batter for a subtle warmth. It's an unexpected surprise that will keep people guessing!
  • Different Glazes: Experiment with coffee glaze or even a mojito infusion for a refreshing twist to your Mini Bundt Cakes. Each glaze offers a new personality to your dessert.
  • Vegan Option: Swap eggs with flaxseed meal and use plant-based butter. The result will be just as satisfying for those following a vegan lifestyle.

For a delightful pairing, you might also want to consider serving these Mini Bundt Cakes alongside Mini Tropical Pavlovas for a gorgeous dessert spread!

Make Ahead Options

These Mini Bundt Cakes are fantastic for meal prep enthusiasts! You can prepare the batter up to 24 hours in advance by mixing all the wet and dry ingredients separately and refrigerating them until you’re ready to bake. Alternatively, bake the cakes a day ahead and store them in an airtight container at room temperature for up to three days or in the refrigerator to keep them fresh. To maintain their moist texture, avoid glazing until you're ready to serve; simply reheat the cakes slightly in the oven if desired, and then drizzle with the freshly made raspberry white chocolate glaze. This method ensures you'll have delightful cakes ready with minimal effort on busy days!

Storage Tips for Mini Bundt Cakes

Room Temperature: Store mini bundt cakes in an airtight container at room temperature for up to 2 days. Enjoy their fresh taste while they’re still soft and moist!

Fridge: If you want to keep them longer, refrigerate the mini bundt cakes in a sealed container for up to 5 days. Their flavor remains delightful, just make sure to bring them to room temperature before serving.

Freezer: For longer storage, freeze the unglazed mini bundt cakes for up to 2 months. Wrap them tightly in plastic wrap and aluminum foil to prevent freezer burn.

Reheating: To enjoy frozen cakes, thaw them in the fridge overnight, and if desired, warm them in the oven at 160°C (320°F) for about 10 minutes before glazing. Each bite of these mini bundt cakes will still be a delicious treat!

Mini Bundt Cakes with Raspberry White Chocolate Glaze Recipe FAQs

How do I choose the best raspberries for the glaze?
Absolutely! When selecting raspberries, look for plump, vibrant berries with no dark spots or mushiness, which indicates ripeness. Fresh raspberries tend to be fragrant and have a deep color. If fresh ones aren't available, frozen raspberries are a great alternative—just thaw and drain any excess liquid before making your glaze.

What is the best way to store leftover Mini Bundt Cakes?
To keep your Mini Bundt Cakes fresh, store them in an airtight container at room temperature for up to 2 days. If you want to preserve them longer, refrigerate them for up to 5 days. Just remember to let them return to room temperature before diving in for the best flavor!

Can I freeze Mini Bundt Cakes?
Yes! It’s very easy to freeze these delightful cakes. Before glazing, wrap each unglazed Mini Bundt Cake tightly in plastic wrap and then in aluminum foil to prevent freezer burn. They can be stored in the freezer for up to 2 months. When ready to enjoy, simply thaw them in the fridge overnight, and if you’d like them warm, give them about 10 minutes in a 160°C (320°F) oven before adding the glaze.

What if my cakes don’t rise properly?
If your Mini Bundt Cakes don’t rise, the culprit could be expired leavening agents—baking powder or baking soda. Always double-check their freshness before baking! Additionally, ensure you’re not overmixing the batter after adding the dry ingredients, as this can lead to dense cakes. Gentle folding keeps the airy texture intact.

Are these Mini Bundt Cakes suitable for people with nut allergies?
While the base recipe is nut-free, be cautious if you're using alternative flours or add-ins, such as nut flours for variations. It's wise to keep the kitchen and all utensils clean to avoid cross-contamination. Always double-check ingredient labels, especially with glazes or pre-packaged items!

Mini Bundt Cakes

Mini Bundt Cakes That Burst with Flavor and Joy

Indulge in mini bundt cakes that are truly irresistible, combining versatile flavors and delightful textures for any occasion.
Print Recipe Pin Recipe
Prep Time 15 minutes mins
Cook Time 25 minutes mins
Cooling Time 15 minutes mins
Total Time 55 minutes mins
Servings: 12 cakes
Course: Dessert
Cuisine: American
Calories: 210
Ingredients Equipment Method Nutrition Notes

Ingredients
  

For the Batter
  • 1/2 cup Unsalted Butter softened
  • 3/4 cup Granulated Sugar reduce for less sweetness
  • 1/2 teaspoon Vanilla Extract opt for pure vanilla
  • 2 large Eggs room temperature
  • 1/3 cup Greek Yogurt or plain yogurt
  • 1 1/2 cups All-Purpose Flour or blend with almond flour
  • 1/2 teaspoon Baking Powder ensure it's fresh
  • 1/2 teaspoon Baking Soda
  • 1/4 teaspoon Salt
For the Glaze
  • 1/2 cup White Chocolate high-quality
  • 1/4 cup Heavy Cream or full-fat coconut milk
  • 1/4 cup Raspberry Puree strained
  • 1 tablespoon Unsalted Butter high-quality

Equipment

  • Mini Bundt Pan
  • Mixer
  • Saucepan
  • Mixing bowls

Method
 

Step-by-Step Instructions
  1. Preheat your oven to 175°C (350°F) and grease the mini bundt pan.
  2. In a large bowl, beat the butter and sugar together for 3-4 minutes until fluffy.
  3. Add eggs one at a time, then mix in the yogurt and vanilla until smooth.
  4. Sift together the flour, baking powder, baking soda, and salt, then fold into wet ingredients.
  5. Fill the bundt pan 3/4 full and bake for about 25 minutes.
  6. Cool for 10-15 minutes, then release from the pan onto a wire rack.
  7. Melt the chocolate and cream over low heat, then stir in the raspberry puree and butter to create the glaze.
  8. Drizzle the glaze over cooled mini bundt cakes and let set for 10-15 minutes before serving.

Nutrition

Serving: 1cakeCalories: 210kcalCarbohydrates: 30gProtein: 3gFat: 10gSaturated Fat: 6gPolyunsaturated Fat: 1gMonounsaturated Fat: 2gCholesterol: 30mgSodium: 150mgPotassium: 100mgFiber: 1gSugar: 15gVitamin A: 5IUVitamin C: 2mgCalcium: 2mgIron: 4mg

Notes

Ensure all ingredients are at room temperature for best results. Avoid overmixing to maintain a light texture.

Tried this recipe?

Let us know how it was!
  • « Previous Page
  • 1
  • …
  • 51
  • 52
  • 53
  • 54
  • 55
  • …
  • 62
  • Next Page »

Welcome!

Hi, I’m Grace, a Sydney-based home cook with a passion for bold flavors and trending ingredients. Whether you’re a busy beginner or a seasoned foodie, you’ll find dishes here that are fresh, fun, and full of flavor.

More about me

Popular Recipes

  • One Pot Keto Tuna Casserole
    One Pot Keto Tuna Casserole: Creamy Comfort in Minutes
  • Ultimate Jalapeno Popper Chicken Salad
    Ultimate Jalapeno Popper Chicken Salad That'll Wow Your Tastebuds
  • Green Chile Cheese Dip
    Mouthwatering Green Chile Cheese Dip for Cozy Gatherings
  • Easy Chimichurri Sauce
    Fresh and Zesty Easy Chimichurri Sauce in Just Minutes

Footer

↑ back to top

About

  • Privacy Policy
  • Disclaimer
  • Terms & Conditions

Newsletter

  • Sign Up! for emails and updates

Contact

  • About me
  • Contact me

Copyright © 2025 TastyTrendIngredients