tastytrendingredients

  • Home
  • Recipes
    • Appetizers
    • Breakfast
    • Dessert
    • Dinner
    • Drinks
    • Salads
    • Snacks
    • Soups
  • About me
  • Contact
menu icon
go to homepage
  • Home
  • Recipes
    • Appetizers
    • Breakfast
    • Dessert
    • Dinner
    • Drinks
    • Salads
    • Snacks
    • Soups
  • About me
  • Contact
search icon
Homepage link
  • Home
  • Recipes
    • Appetizers
    • Breakfast
    • Dessert
    • Dinner
    • Drinks
    • Salads
    • Snacks
    • Soups
  • About me
  • Contact
×

Irresistible French Financiers: Delightful Nutty Teacakes

September 20, 2025 by Grace Snow Leave a Comment

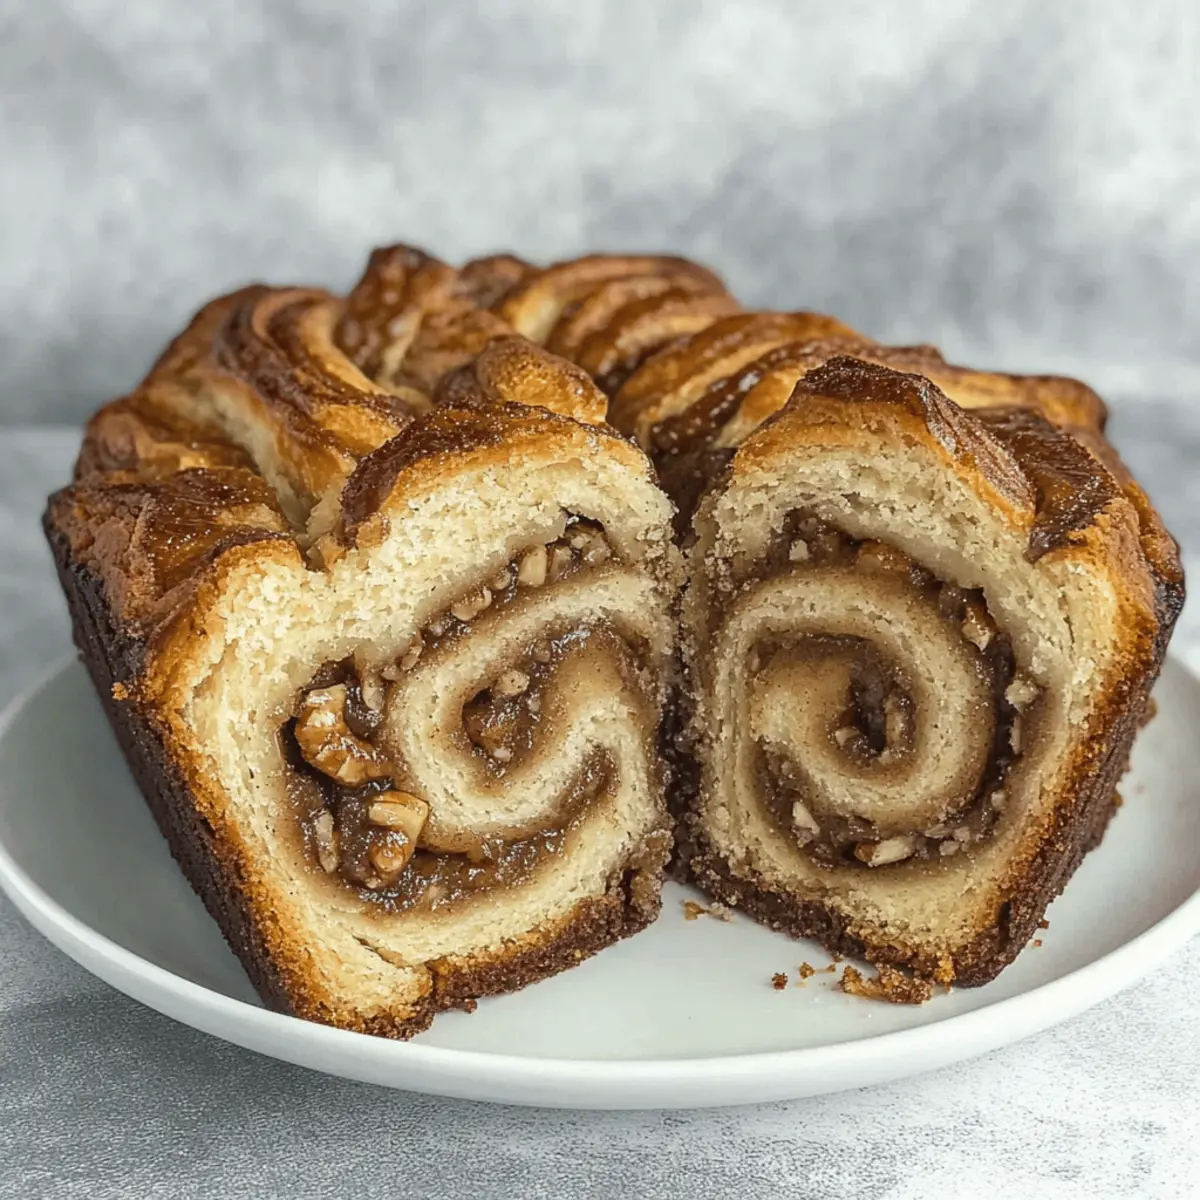
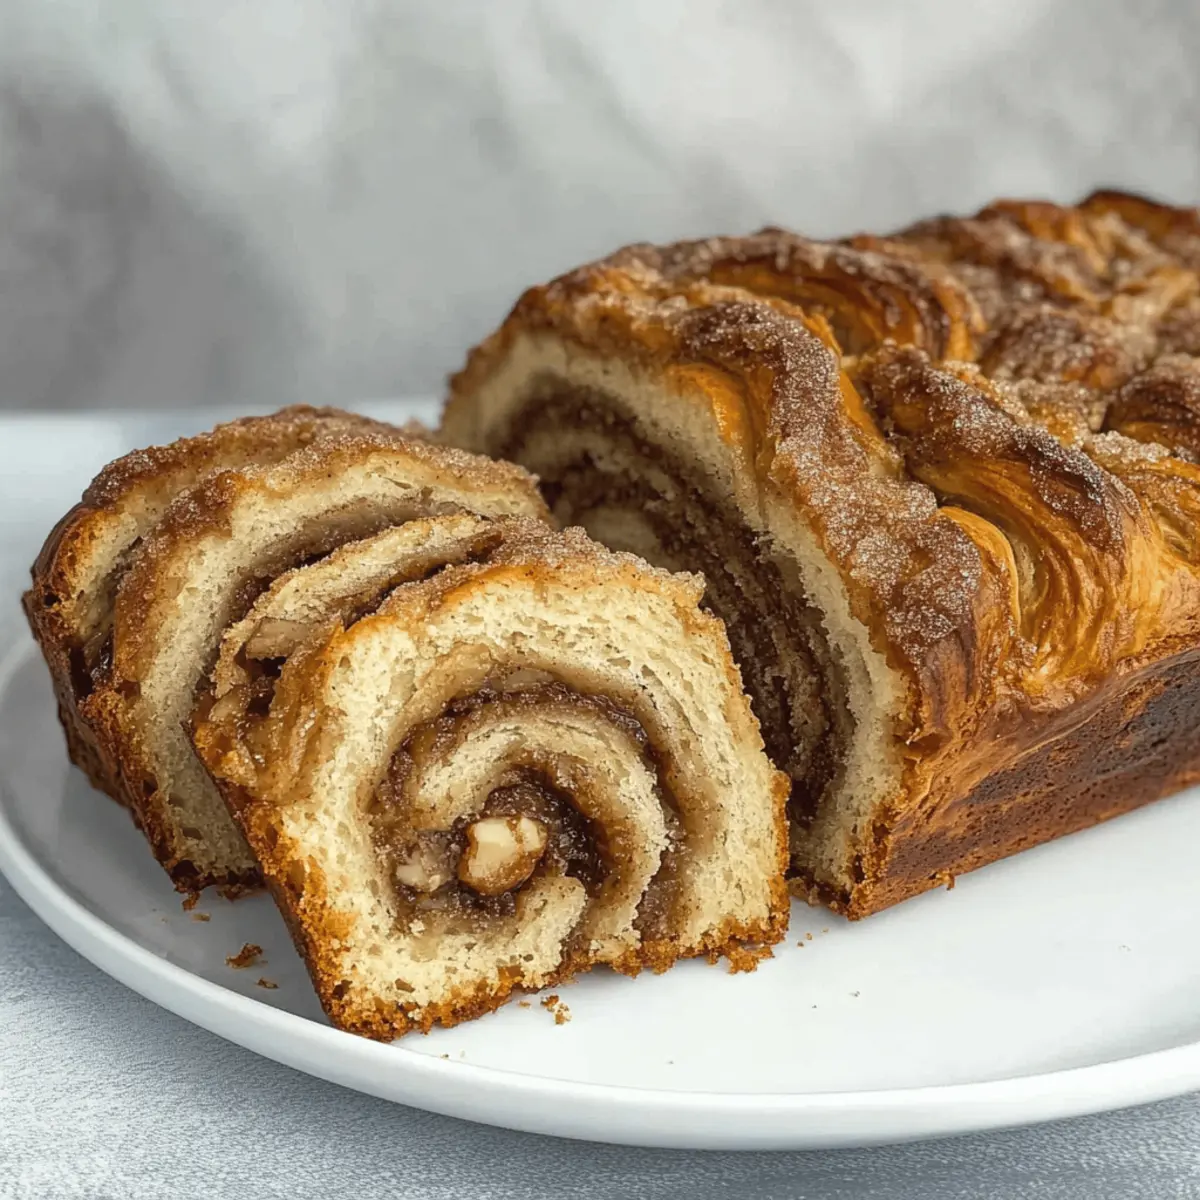
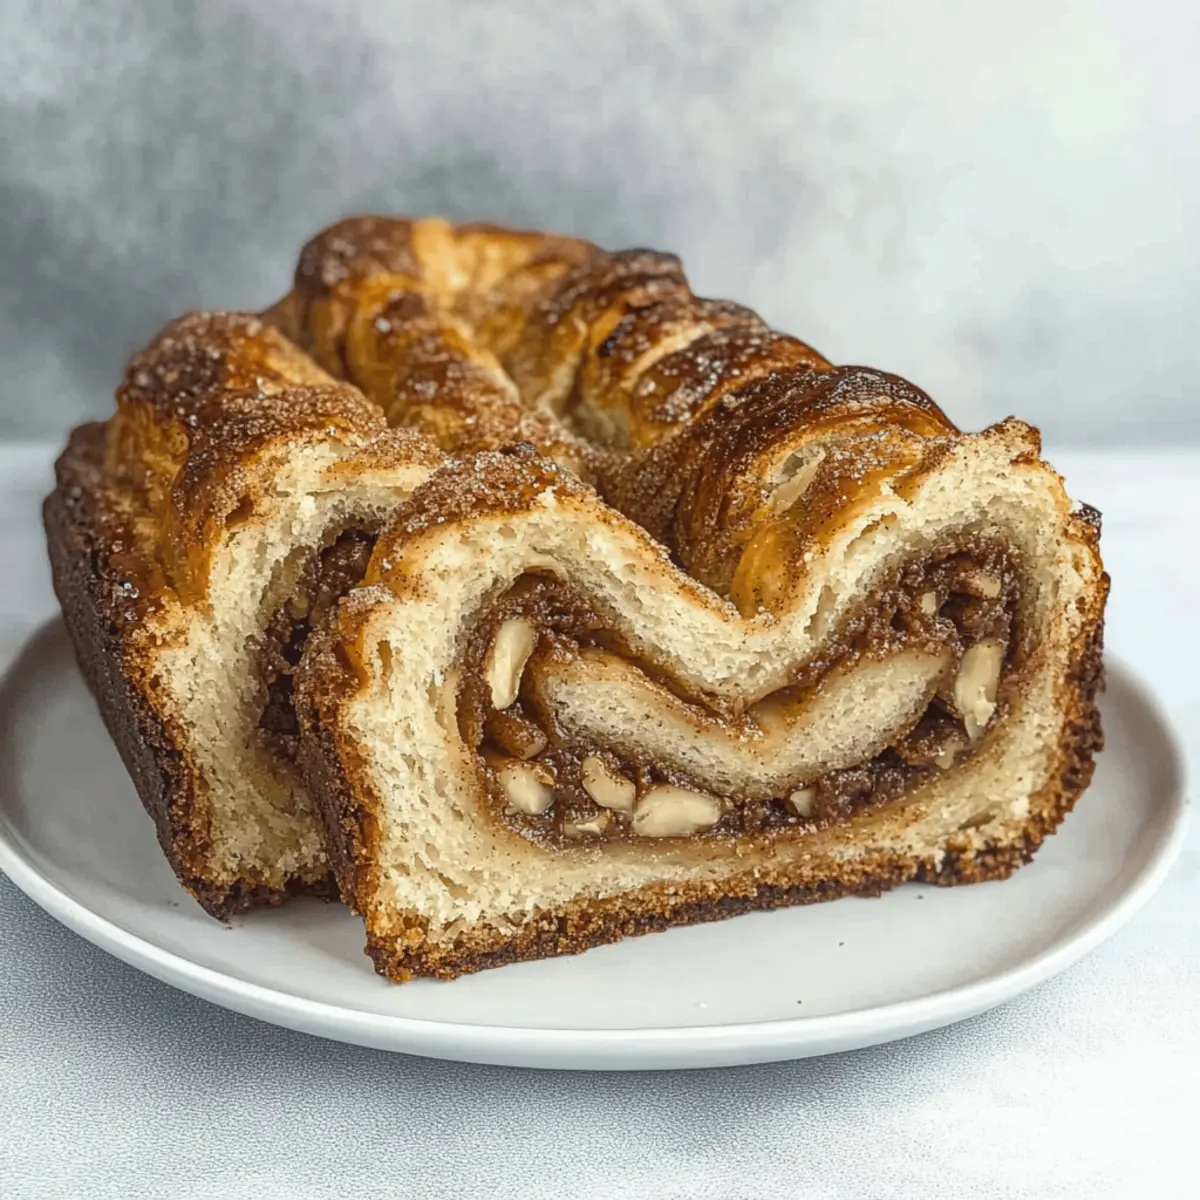
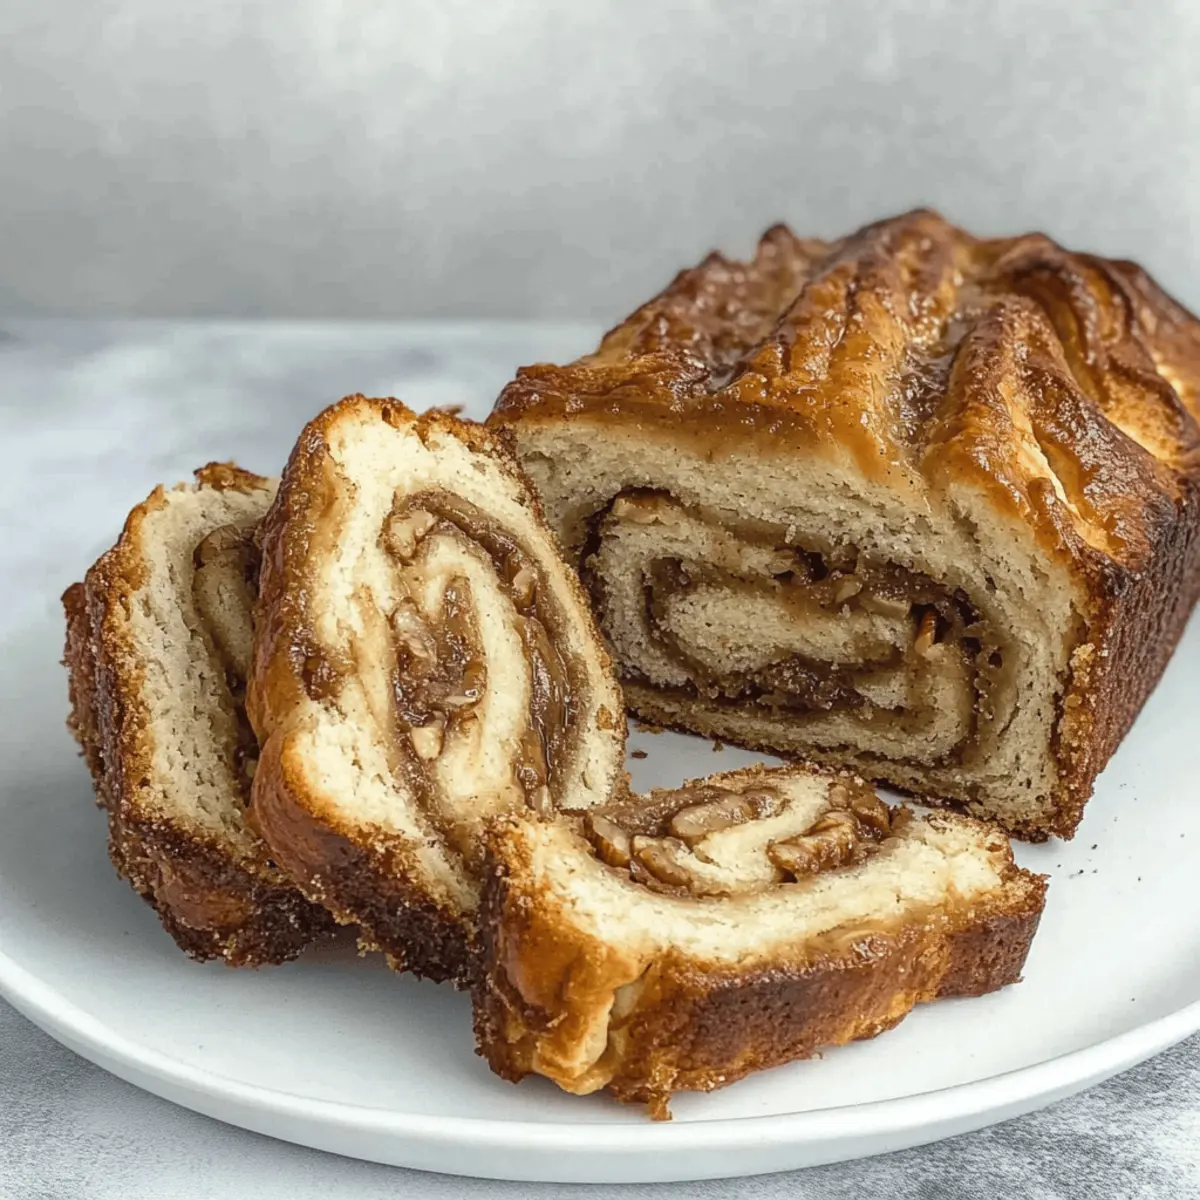
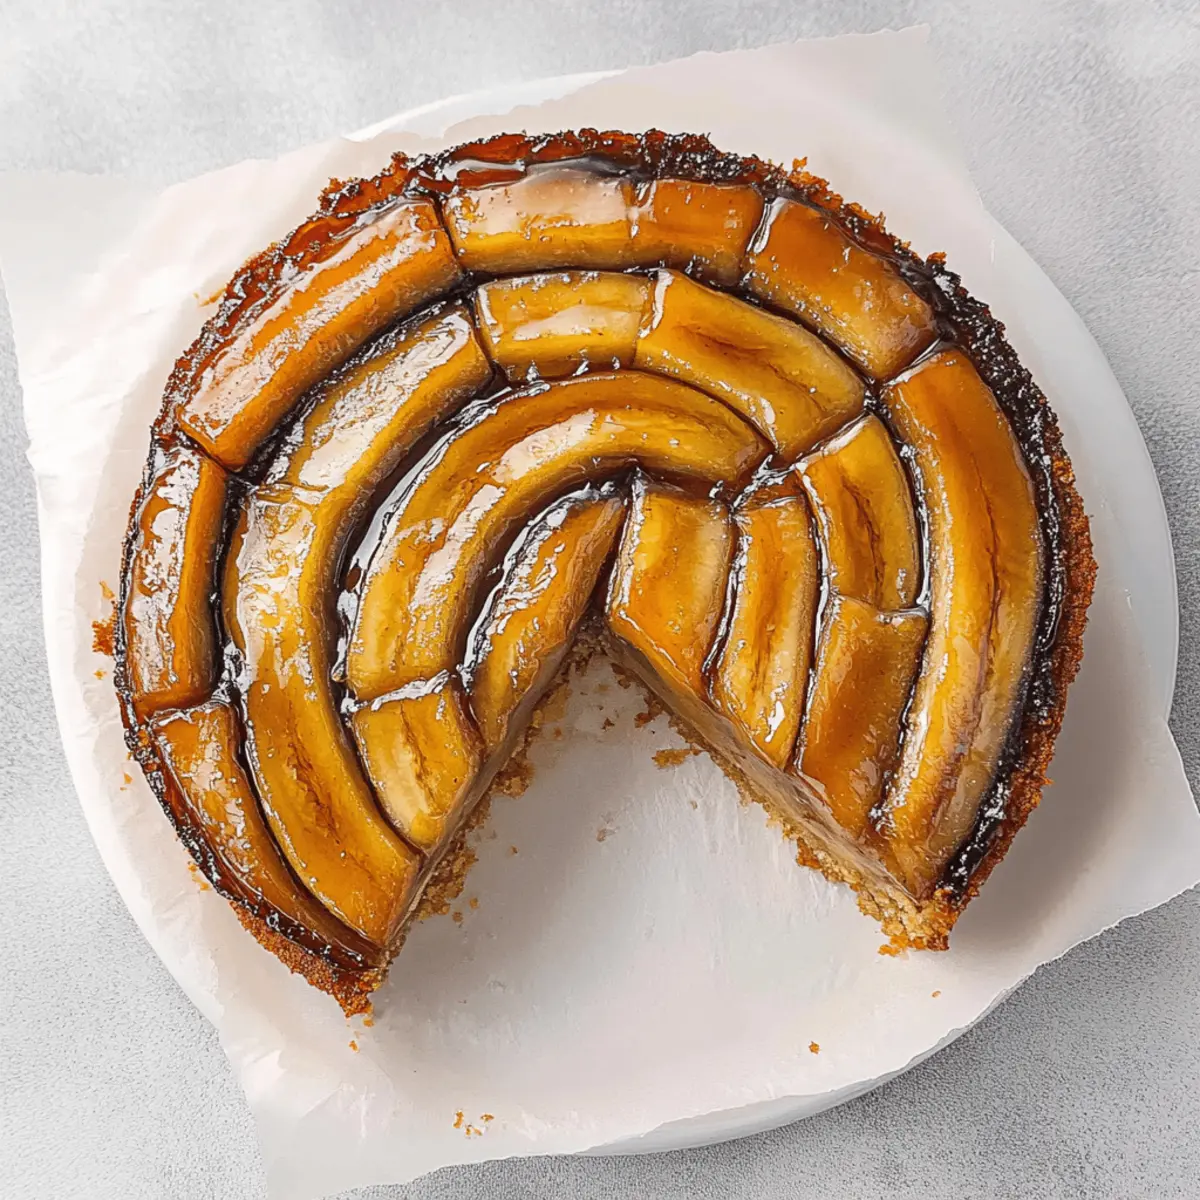
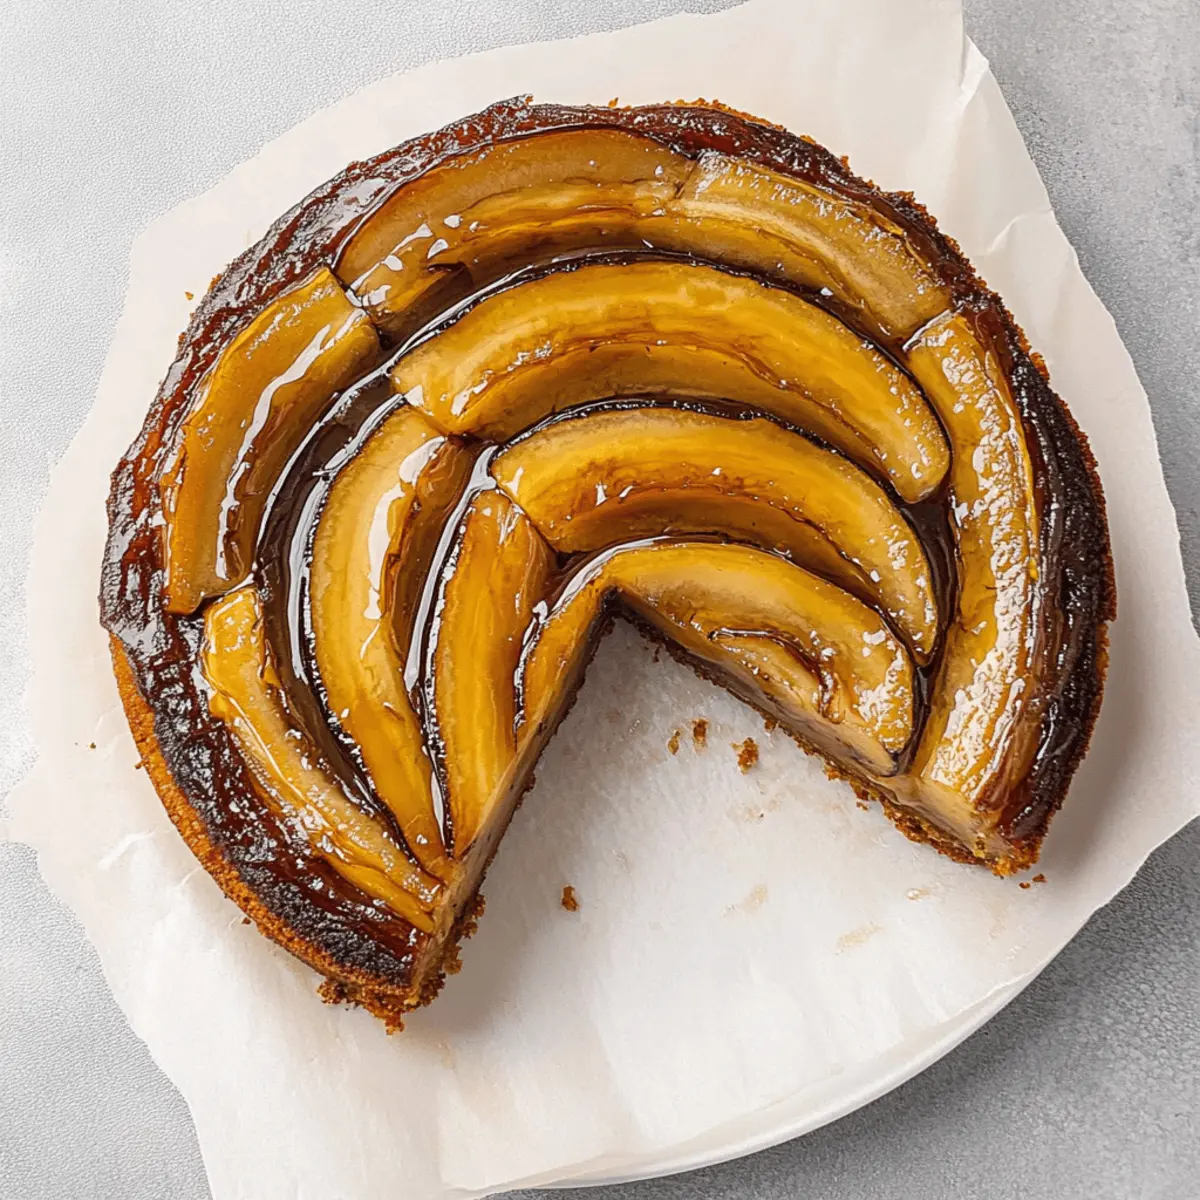
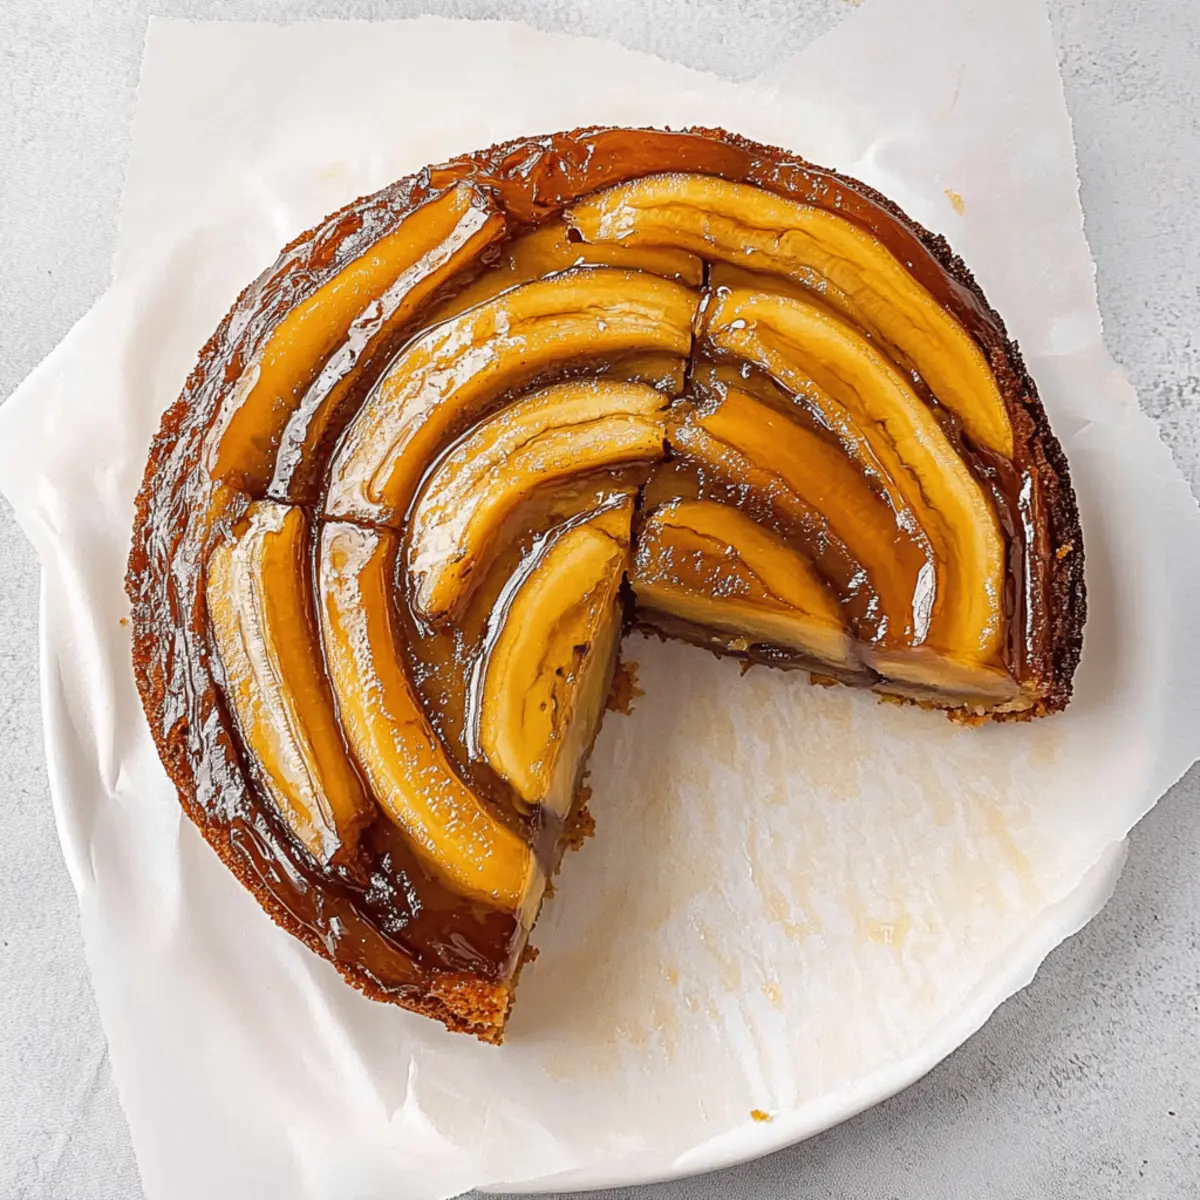
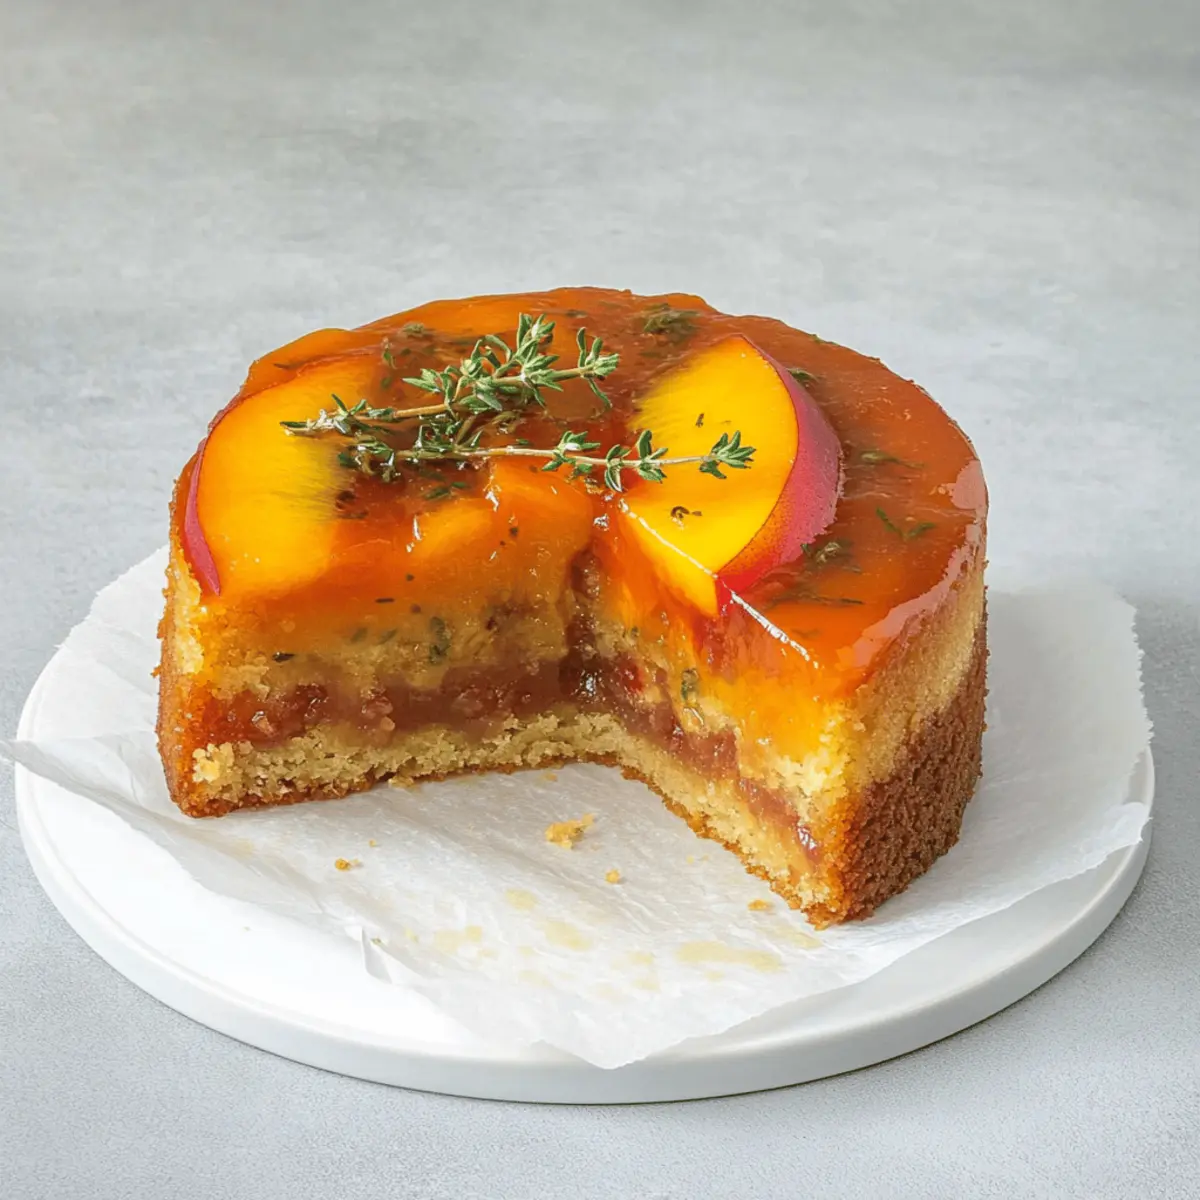
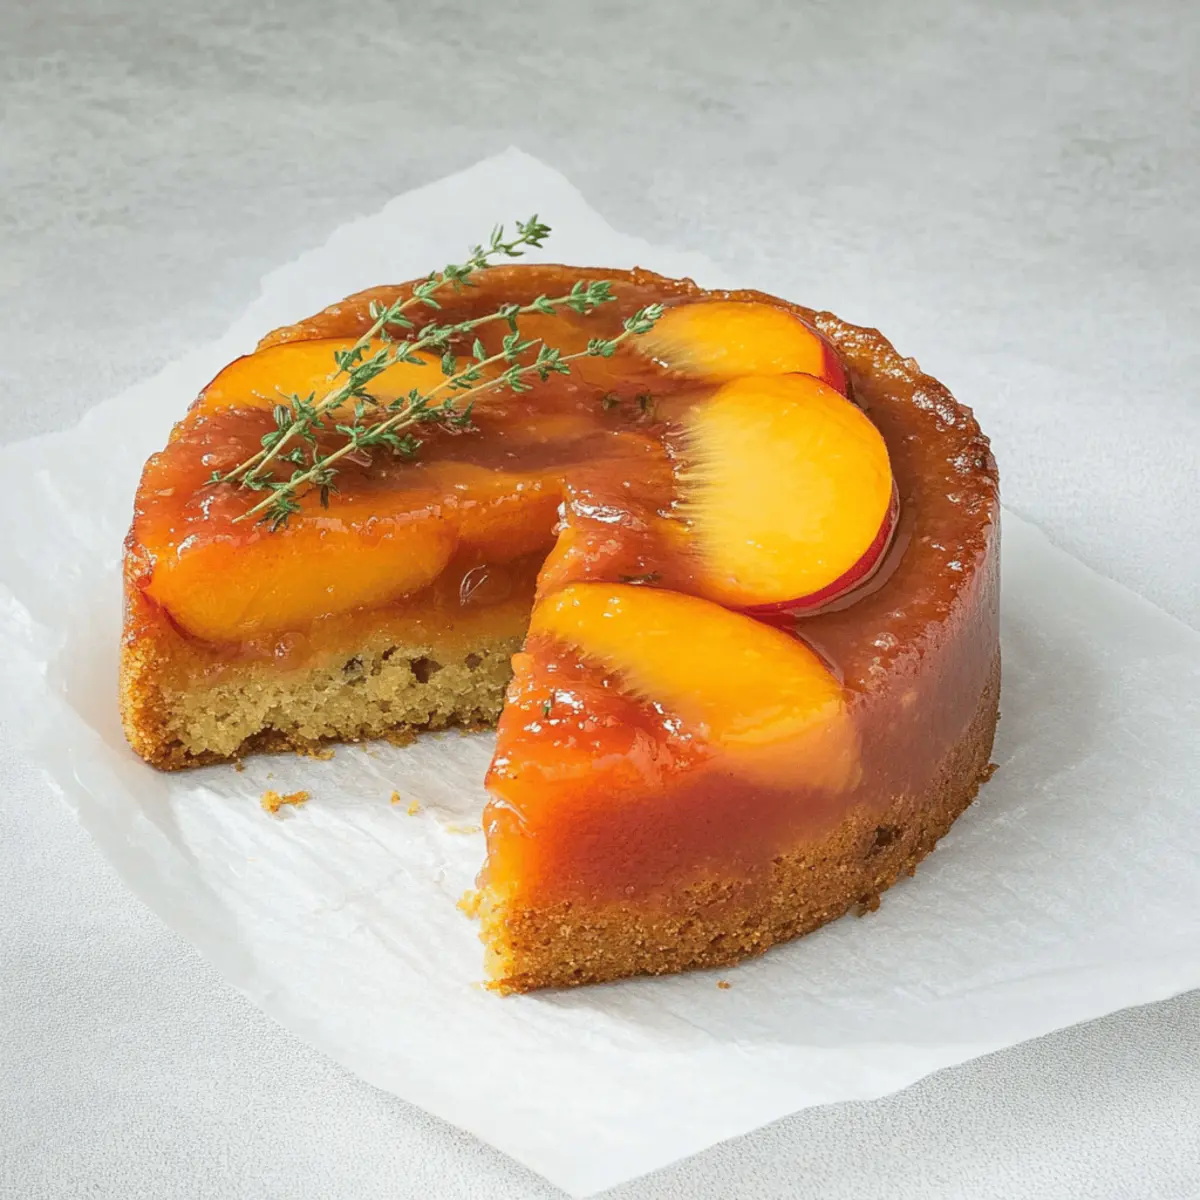
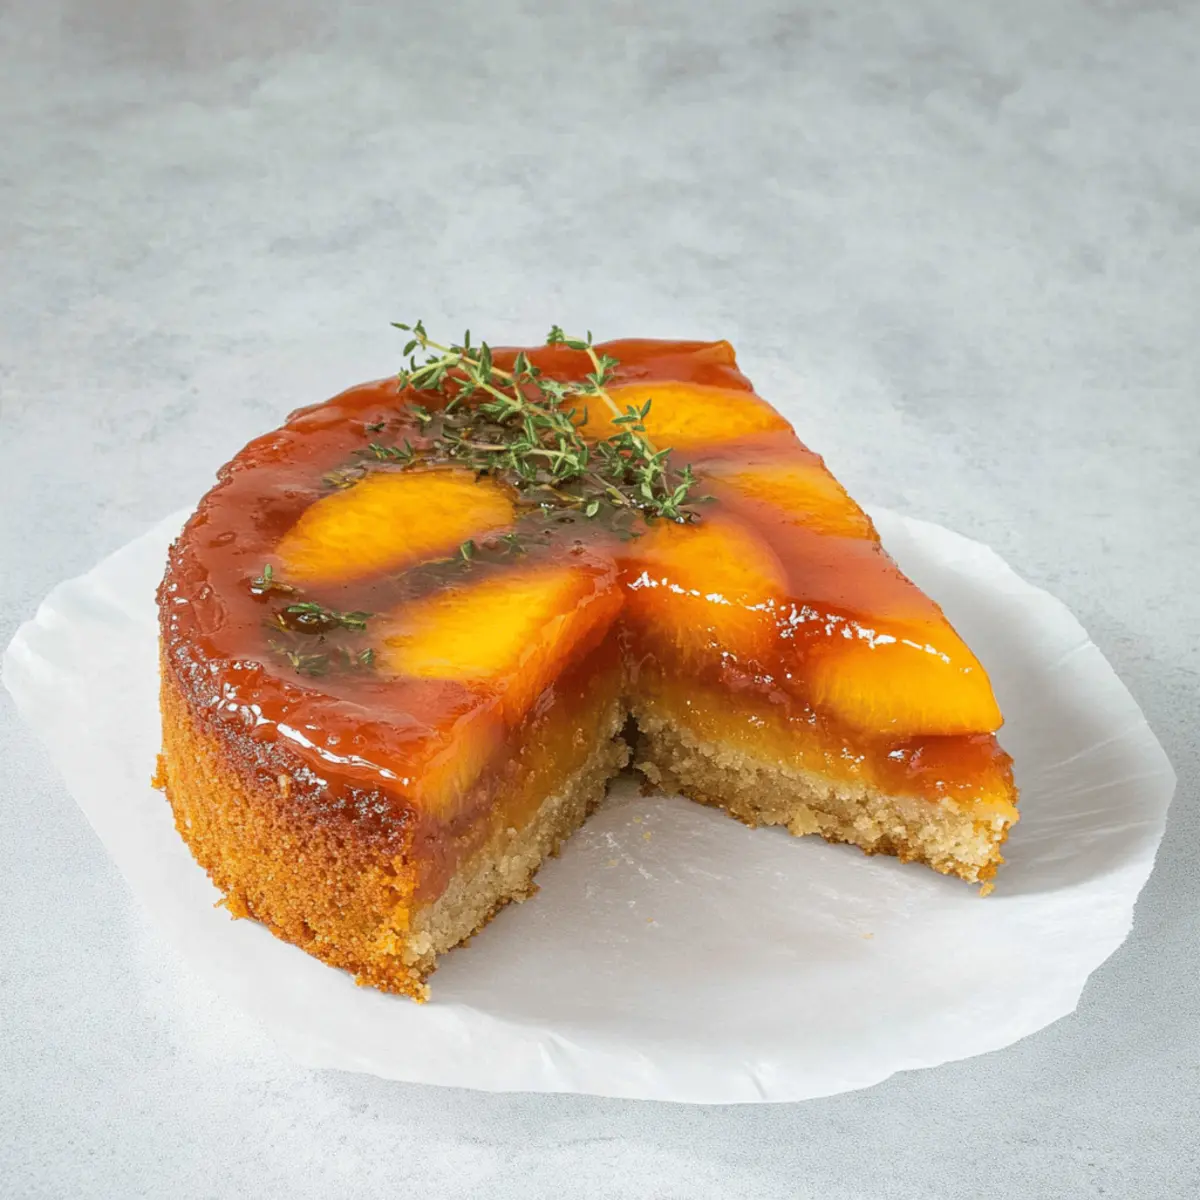
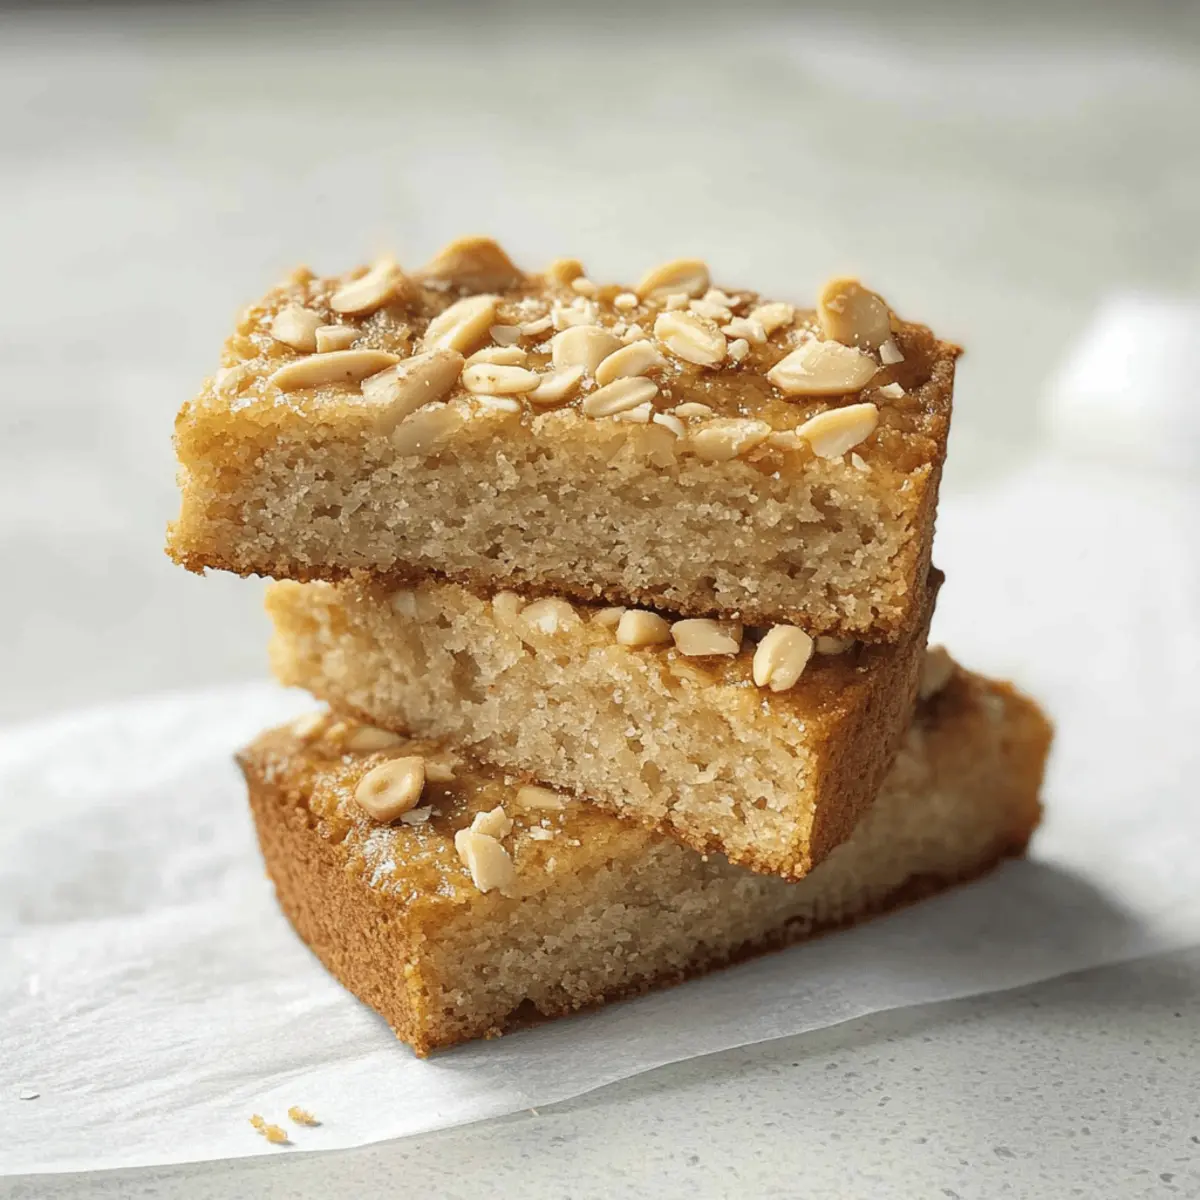
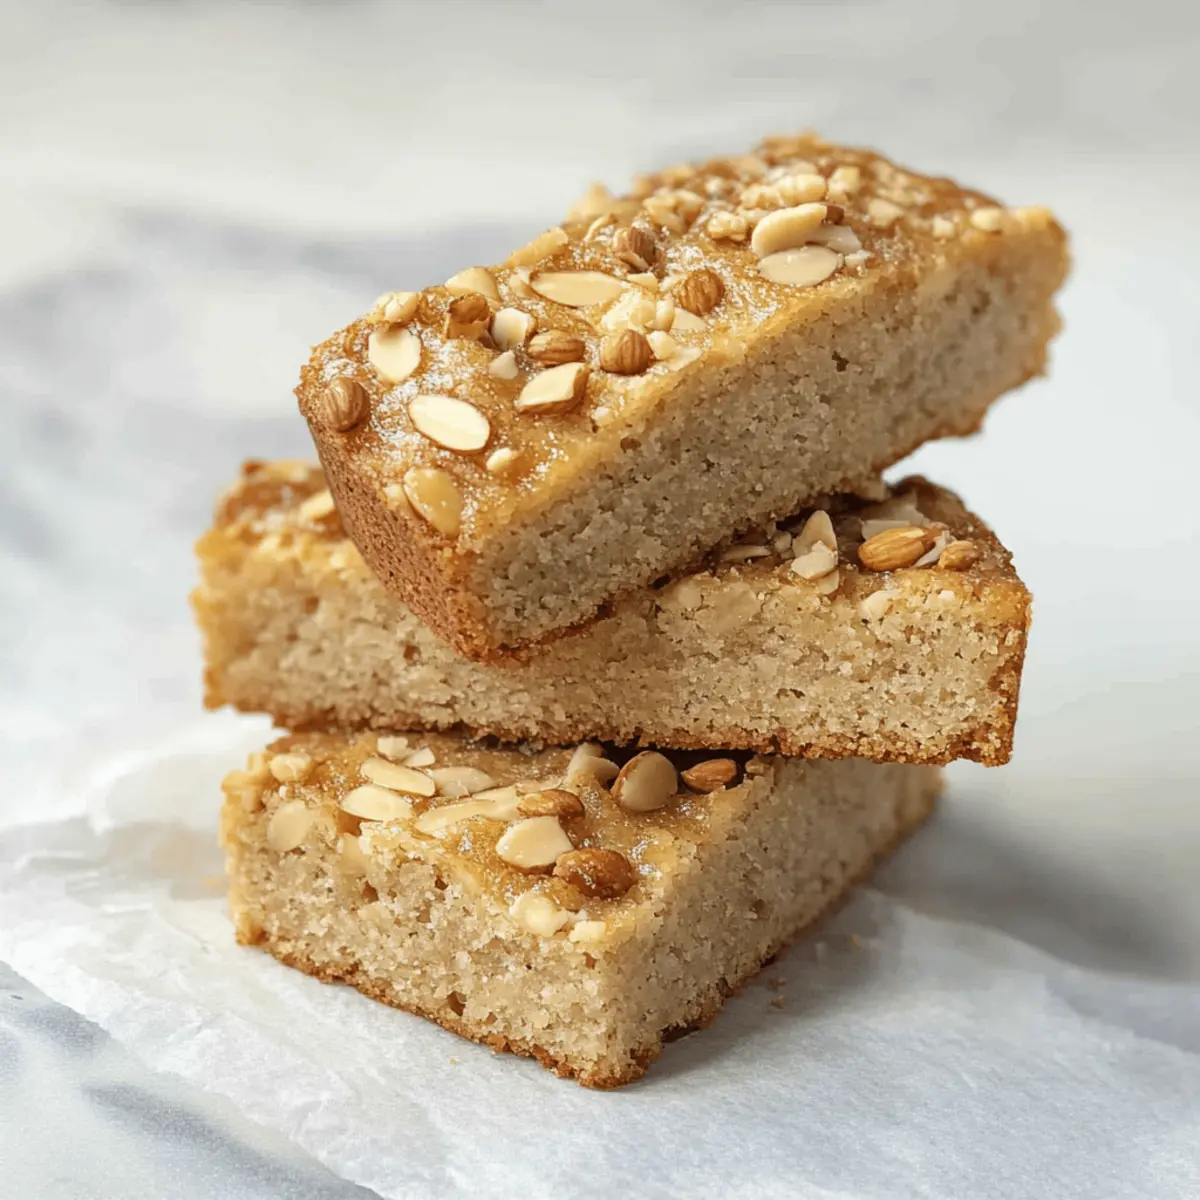
As I stepped into the world of French pastries, a magical discovery awaited me: French Financiers. These tiny teacakes, with their delicate texture and rich nutty flavors, encapsulate the essence of elegance in every bite. With almond, hazelnut, and pistachio variations, they offer a delicious twist to traditional desserts, making them perfect for any occasion. Not only are they quick to whip up—ideal for busy bakers—but they also bring a gluten-free option that doesn’t compromise on taste or texture. Whether paired with afternoon tea or savored as a sweet snack, French Financiers will charm your taste buds and elevate your dessert game. Curious about how to make these delightful bites at home? Let’s dive into the baking adventure together!

Why are French Financiers so special?

Delicate Texture: These little teacakes are incredibly light, thanks to their unique blend of nut flours and whipped egg whites, ensuring each bite is melt-in-your-mouth perfection.

Three Irresistible Flavors: Choose from almond, hazelnut, or pistachio to cater to your flavor cravings or impress guests with a variety platter!

Quick & Easy: This recipe is perfect for busy home bakers; with just a few simple steps, you can create gourmet treats in no time.

Gluten-Free Adaptation: With easy swaps, you can make these financiers gluten-free, making them accessible for everyone.

Perfect for Any Occasion: Whether served warm with coffee for brunch or as an elegant afternoon snack, these financiers elevate any gathering.

Discover more French-inspired delights like our Cherry Clafoutis French dessert for a full European experience!

French Financier Ingredients

For the Batter
• Unsalted Butter – Essential for making brown butter, which imparts a deep, nutty flavor to your financiers.
• Egg Whites – Provide structure and create a light texture; about 5 egg whites are needed for this delicious recipe.
• Icing Sugar – Adds the perfect sweetness while helping to create a smooth batter that’s irresistible.
• All-Purpose Flour – Offers structure; a total of 75g is divided among the different flavors for each batch.
• Nut Flour (Almond, Hazelnut, or Pistachio) – The heart of the flavors; choose based on your desired taste for these fantastic French financiers.
• Salt – A pinch enhances flavors and balances the sweetness for a well-rounded dessert experience.

For Toppings (Optional)
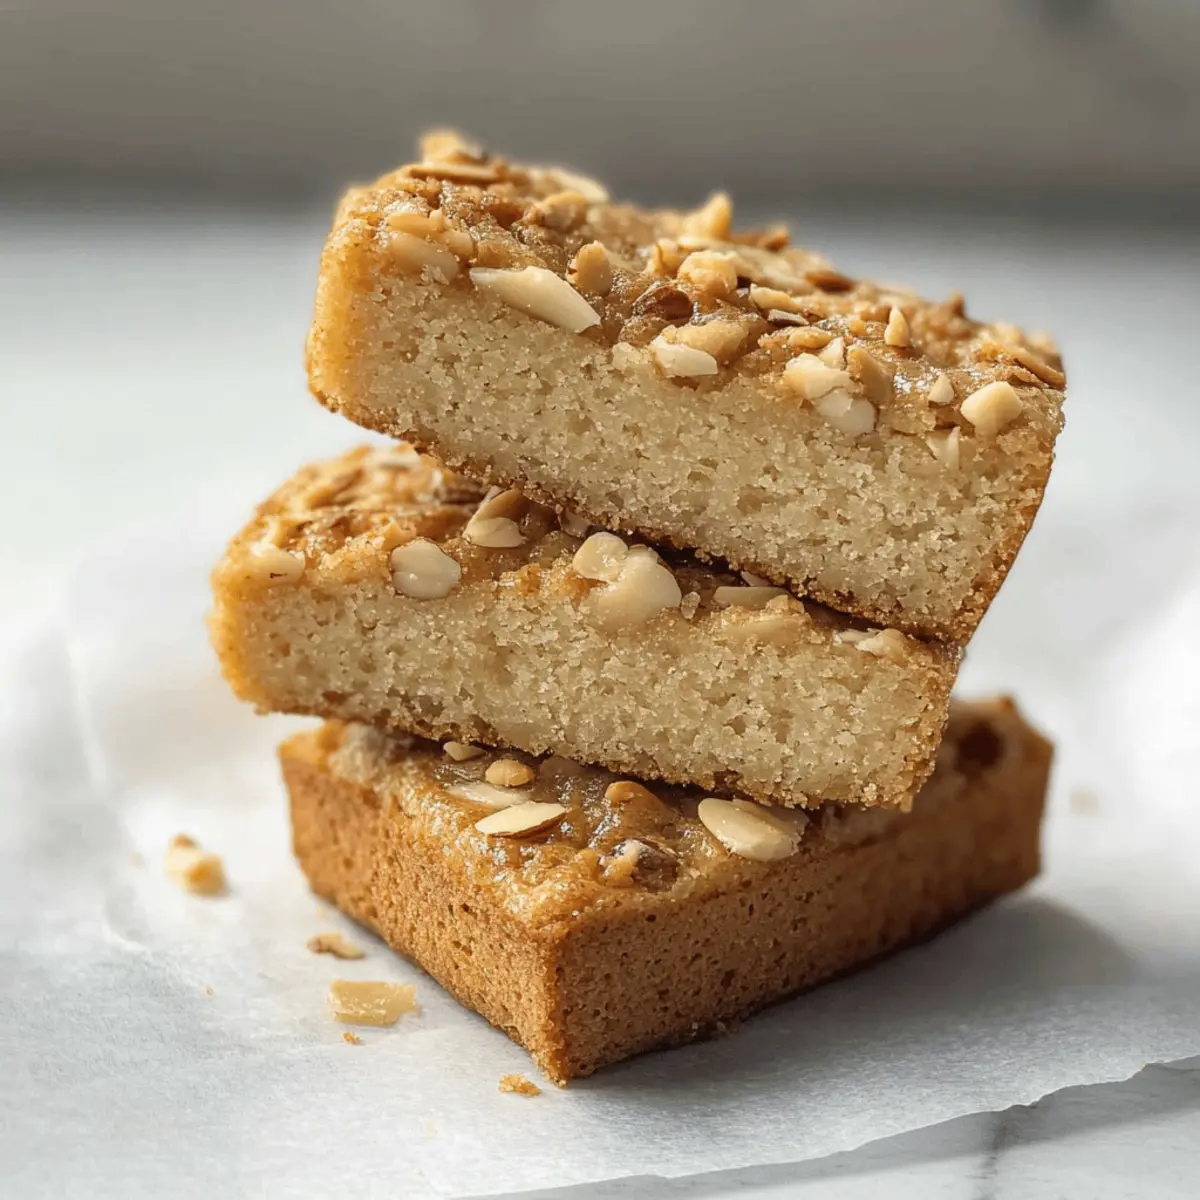
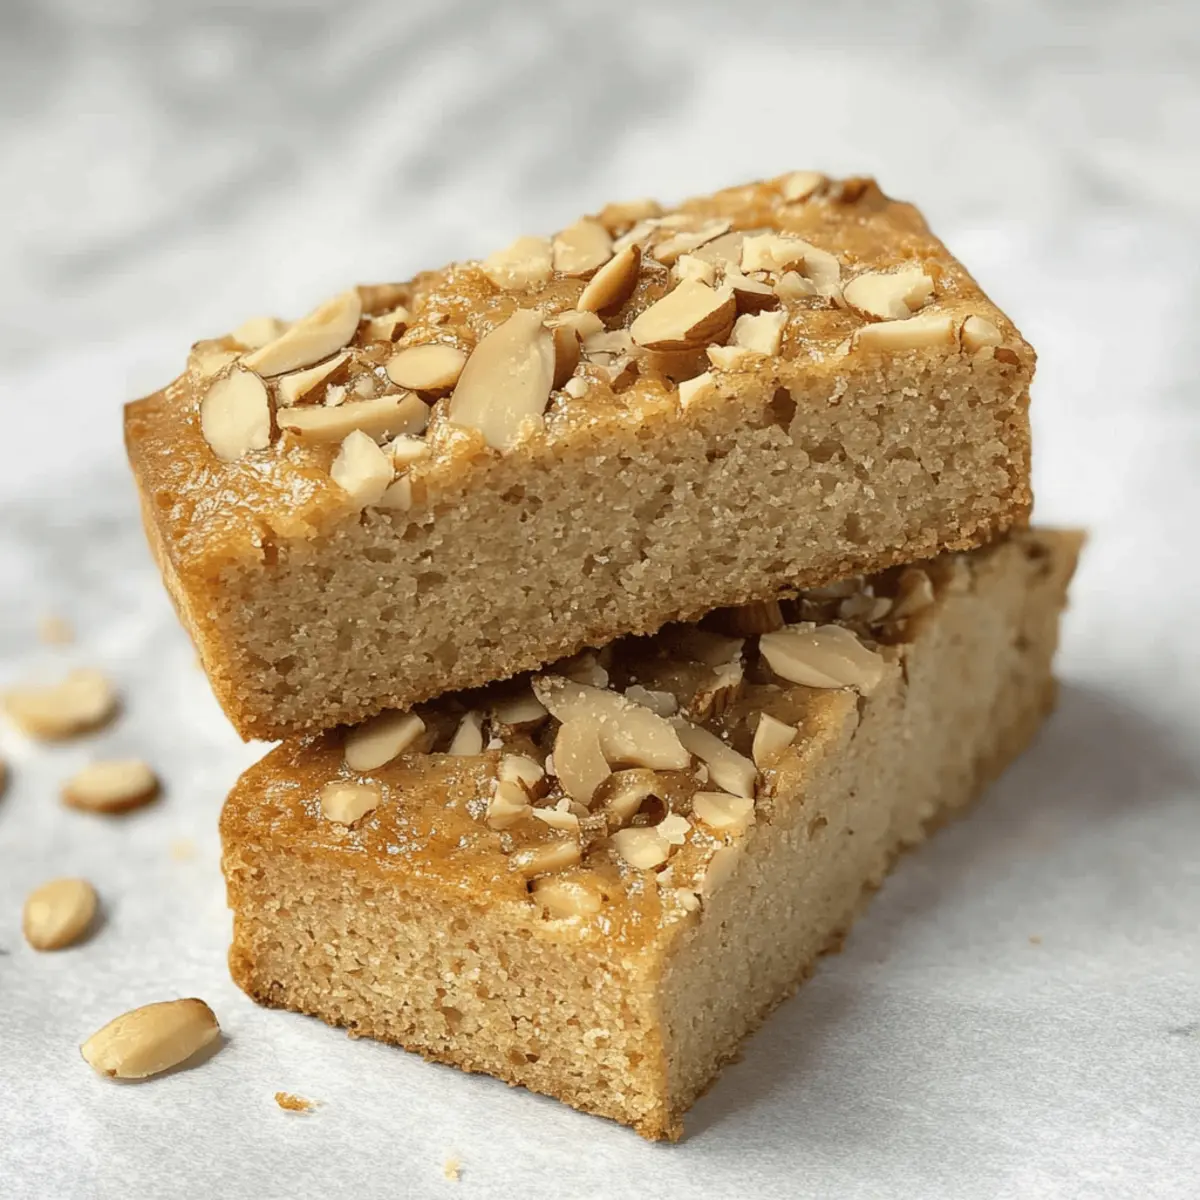
• Chopped Nuts – Use any of the same nuts you choose for flour, sprinkled on top for added texture and flavor.

Step‑by‑Step Instructions for French Financiers

Step 1: Make Brown Butter
In a small saucepan, melt 100g of unsalted butter over medium heat. Stir frequently until it becomes foamy and turns a rich golden brown, roughly 5–8 minutes. Watch closely to prevent burning, then remove it from the heat and let it cool slightly while retaining that nutty aroma; this brown butter is key to perfecting the flavor of your French financiers.

Step 2: Prepare Batter
In a mixing bowl, whisk together 5 egg whites until they become frothy and slightly increase in volume, about 2–3 minutes. Slowly incorporate 150g of icing sugar, ensuring it dissolves completely for a smooth batter. Gently mix in the cooled brown butter, allowing the rich flavors to meld together as you prepare for the next step in crafting these delightful teacakes.

Step 3: Divide & Flavor
Now, divide the batter into three bowls to create your three flavors of French financiers. Fold in 25g of almond flour into one bowl, 25g of hazelnut flour into another, and 25g of pistachio flour into the last, mixing each thoroughly. Remember to add a pinch of salt to each bowl; this enhances the flavors and enriches your nutty teacakes, making them all the more irresistible.

Step 4: Chill Batter
To achieve a fabulous texture, transfer each flavored batter into separate piping bags. Place them in the fridge and chill for about 1 hour. This chilling step is crucial, as it helps the concoction firm up, resulting in light and airy French financiers when baked, with a beautiful rise and lovely shape.

Step 5: Prepare Baking Tin
While the batter is chilling, preheat your oven to 175°C (347°F). Prepare your financier tin by brushing it generously with melted butter to ensure easy release after baking. Optionally, dust the tin lightly with flour or use a silicone mold to eliminate any prep, making it simple to turn out your dainty teacakes after they are baked to perfection.

Step 6: Pipe & Bake
Once the batter is chilled, carefully pipe it into the prepared molds, filling each cavity about three-quarters full, allowing room for expansion. If desired, sprinkle the tops with chopped nuts for added crunch and flavor. Bake the French financiers in the preheated oven for about 20 minutes, or until they turn golden brown around the edges; they should spring back when lightly pressed.

Step 7: Cool & Serve
After baking, remove the financiers from the oven and allow them to cool in the tin for about 5 minutes. This short cooling time helps them set while still warm. Gently remove them from the tin, placing them on a wire rack to cool completely. Enjoy these delightful French financiers warm or at room temperature, perfect for pairing with tea or coffee.

Expert Tips for French Financiers

  • Brown Butter Watch: Monitor your brown butter closely to achieve the perfect nutty flavor; keep it on medium heat and remove just before it darkens too much.

  • Chill Your Batter: Chilling the batter is essential for achieving the light and airy texture that French financiers are known for; don't skip this step!

  • Scale for Precision: Use a digital scale to measure your ingredients accurately; this ensures consistent results every time you make these delightful nutty teacakes.

  • Oven Temperature Check: Consider investing in a digital oven thermometer to maintain the right temperature while baking; small deviations can lead to over- or under-baked financiers.

  • Experiment with Flavors: Don’t hesitate to explore other flavors or toppings; a hint of citrus zest or a drizzle of chocolate can make joyful surprises—make these financiers truly yours!

French Financiers Variations & Substitutions

Feel free to get creative and make this delightful recipe truly your own with these simple variations.

  • Nut-Free:
    Replace nut flours with an equal weight of all-purpose flour to make a classic version safe for nut allergies.

  • Chocolate Twist:
    Add 25g of cocoa powder to the batter for a rich, chocolatey rendition that pairs beautifully with coffee.

  • Citrus Zest:
    Incorporate lemon or orange zest into the batter for a refreshing, citrusy burst that brightens every bite.

  • Spicy Kick:
    For a hint of warmth, add a dash of ground cinnamon or a pinch of cayenne pepper to elevate the flavor profile.

  • Gluten-Free Delight:
    Swap all-purpose flour with a gluten-free flour blend, adjusting the amounts based on consistency, ensuring everyone can enjoy these treats.

  • Fancy Toppings:
    After piping, top with a mix of chopped nuts and a drizzle of melted dark chocolate for an elegant finish.

  • Flavorful Infusions:
    Experiment with adding a splash of almond extract or vanilla bean paste to deepen the flavors and create a delightful aroma.

Explore even more stunning French desserts like our scrumptious Cherry Clafoutis French for an extraordinary sweet table!

Make Ahead Options

French Financiers are a delightful choice for meal prep, allowing you to savor the luxury of homemade treats without the last-minute rush! You can prepare the batter up to 24 hours in advance and refrigerate it in piping bags. This chilling not only enhances the flavor but ensures a light, airy texture. If you prefer, you can also bake the financiers ahead of time and store them in an airtight container at room temperature for up to 3 days. To regain that fresh-baked flavor, gently warm them in the oven before serving. These make-ahead tips will help you enjoy stress-free baking and treat your loved ones to exquisite French Financiers anytime!

How to Store and Freeze French Financiers

Airtight Container: Store your French Financiers in an airtight container at room temperature for up to 2 days to maintain their delightful texture and flavor.

Refrigeration: If you must refrigerate, place them in the container and consume within 3–4 days. Just remember that refrigeration may alter their light crunch slightly.

Freezing: For longer storage, freeze your financiers in a single layer on a baking sheet, then transfer to a sealed bag or container. They can be kept frozen for up to 1 month.

Reheating: When ready to enjoy, thaw them at room temperature or warm briefly in the oven at 150°C (302°F) for a few minutes to restore their freshness and lightness.

What to Serve with French Financiers

Indulge in a delightful culinary experience that perfectly complements the luxurious flavors of these nutty teacakes.

  • Fresh Berries: Juicy strawberries or raspberries add a vibrant pop of color and sweet-tart freshness that beautifully contrasts the rich financiers.

  • Classic Earl Grey Tea: The subtle bergamot notes in Earl Grey provide an aromatic pairing, enhancing the nutty flavor profile of the financiers remarkably well.

  • Whipped Cream: Lightly sweetened whipped cream adds creamy texture, serving as a luscious counterpoint to the delightful airiness of the financiers.

  • Chocolate Ganache: A dollop of smooth chocolate ganache introduces a rich, indulgent element that creates a delightful harmony with the nuttiness of the cakes.

  • Iced Coffee: A refreshing glass of iced coffee brings a beautiful bitterness to balance out the sweetness, making it an ideal companion for afternoon snacking.

  • Fruit Compote: A homemade compote, like a tart cherry or apricot, provides a tangy element that brightens the rich flavors of the financiers, making each bite exciting.

  • Almond Milk Lattes: For a modern twist, serve your financiers alongside almond milk lattes; the nutty base will enhance the overall nut flavor experience.

Savor these pairings to elevate your French Financiers and create a memorable dessert experience!

French Financiers Recipe FAQs

How do I choose the right nut flour for my financiers?
Absolutely! For your French Financiers, using nut flour is essential for authentic flavor. Opt for almond flour for a classic taste, or hazelnut and pistachio for a delightful twist. When selecting your nut flour, look for fine textures without any lumps, ensuring a smooth batter. Freshness is key; older flours may lose flavor, so check for any rancid smells or dark spots on the packaging.

What is the best way to store French Financiers?
Great question! To keep your French Financiers fresh, store them in an airtight container at room temperature for up to 2 days. If you prefer them chilled, they can last in the fridge for about 3–4 days. Just keep in mind that refrigerating might affect their delightful crispiness, so it’s best enjoyed at room temperature.

Can I freeze French Financiers? If so, how?
Yes, you can definitely freeze your delectable French Financiers! Start by placing them in a single layer on a baking sheet and freeze until solid. Once frozen, transfer them to a sealed freezer bag or an airtight container. They can be stored for up to 1 month. When you're ready to enjoy them, simply thaw at room temperature or warm them in the oven at 150°C (302°F) for a few minutes to revive their texture!

What should I do if my financiers don't rise properly?
Oh no! If your financiers are not rising as expected, it could be due to a couple of factors. First, ensure that your egg whites are whipped until they're frothy and have doubled in volume; this helps create the lightness necessary for proper rise. Also, be careful not to overmix the batter after adding the nut flour; gentle folding ensures air remains trapped in the batter for optimal puffiness. Lastly, always double-check your oven temperature; a too-cool oven can result in flat financiers.

Are French Financiers gluten-free?
Yes, they can be! If you want to make your French Financiers gluten-free, simply replace the all-purpose flour with a gluten-free flour blend. I recommend choosing one that contains a combination of rice flour, tapioca starch, and potato starch for the best results. Just be sure to adjust the amounts as needed, and keep an eye on the texture during baking!

French Financiers

Irresistible French Financiers: Delightful Nutty Teacakes

Discover the delicate elegance of French Financiers, nutty teacakes perfect for any occasion.
Print Recipe Pin Recipe
Prep Time 15 minutes mins
Cook Time 20 minutes mins
Chilling Time 1 hour hr
Total Time 1 hour hr 35 minutes mins
Servings: 12 teacakes
Course: Dessert
Cuisine: French
Calories: 150
Ingredients Equipment Method Nutrition Notes

Ingredients
  

For the Batter
  • 100 g Unsalted Butter For making brown butter.
  • 5 large Egg Whites Provides structure and light texture.
  • 150 g Icing Sugar Adds sweetness and smoothness.
  • 75 g All-Purpose Flour
  • 25 g Almond Flour For almond flavor variation.
  • 25 g Hazelnut Flour For hazelnut flavor variation.
  • 25 g Pistachio Flour For pistachio flavor variation.
  • 1 pinch Salt Enhances flavors.
For Toppings (Optional)
  • as needed Chopped Nuts For added texture and flavor.

Equipment

  • Mixing Bowl
  • Whisk
  • Saucepan
  • financier tin
  • piping bags

Method
 

Step-by-Step Instructions for French Financiers
  1. In a small saucepan, melt 100g of unsalted butter over medium heat until it becomes foamy and turns golden brown, about 5-8 minutes. Let it cool slightly.
  2. In a mixing bowl, whisk together 5 egg whites until frothy. Slowly incorporate 150g of icing sugar until dissolved. Mix in the cooled brown butter.
  3. Divide the batter into three bowls and fold in 25g of almond flour, hazelnut flour, and pistachio flour into each, respectively, adding a pinch of salt to each.
  4. Transfer each batter into piping bags and chill for about 1 hour.
  5. Preheat your oven to 175°C (347°F). Brush your financier tin with melted butter.
  6. Pipe the chilled batter into the molds, filling each cavity about three-quarters full. Optionally sprinkle with chopped nuts and bake for 20 minutes until golden brown.
  7. Let the financiers cool in the tin for 5 minutes, then remove and cool completely on a wire rack.

Nutrition

Serving: 1teacakeCalories: 150kcalCarbohydrates: 10gProtein: 2gFat: 10gSaturated Fat: 5gPolyunsaturated Fat: 2gMonounsaturated Fat: 3gCholesterol: 30mgSodium: 50mgPotassium: 80mgFiber: 1gSugar: 6gVitamin A: 300IUCalcium: 20mgIron: 1mg

Notes

Monitor the brown butter closely and chill the batter for the best texture. Use accurate measurements for consistent results.

Tried this recipe?

Let us know how it was!

Irresistible Walnut Babka Recipe for Cozy Baking Days

September 20, 2025 by Grace Snow Leave a Comment

As I pulled the warm, golden loaf from the oven, the rich aroma of cinnamon and toasted walnuts wrapped around me like a cozy hug. This Walnut Babka, a cherished traditional Jewish dessert, is not just a feast for the senses; it’s an inviting introduction to the art of yeast baking, perfect for both newbies and seasoned bakers alike. With its soft, buttery texture and the delightful sweetness of cinnamon-infused walnut filling, this recipe promises to elevate any gathering. Plus, it’s a wonderful treat to prepare ahead of time for those busy weekends or festive occasions. Ready to dive into making something truly special from scratch? Let’s get started!

Why is Walnut Babka a Must-Try?

Incredible Aroma: The moment you bake this Walnut Babka, your kitchen transforms into a cozy bakery, inviting everyone in with its intoxicating scent of cinnamon and butter.
Perfect for Sharing: This beautiful braided bread is not just delicious; it serves as a stunning centerpiece for gatherings. Imagine serving it at brunch alongside fresh coffee or tea!
Beginner-Friendly: With simple ingredients and clear steps, even novice bakers can master this delightful treat. It’s a great entry point into yeast-leavened dough that builds confidence.
Versatile Options: While this recipe shines with the traditional walnut filling, feel free to get creative! You can easily swap in chocolate or other nuts to suit your taste.
Make-Ahead Convenience: This Walnut Babka can be prepared in advance, giving you a hassle-free option for your busy days. It's perfect for leisurely weekend breakfasts or holiday festivities! For more delicious baked goods, check out my Skillet Pasta Feta.

Walnut Babka Ingredients

For the Dough
• Whole Milk – Ensure it’s lukewarm to properly activate the yeast.
• Granulated Sugar – This adds sweetness and helps with yeast activation.
• Fresh Yeast – Leavens the dough; substitute with instant dry yeast if necessary.
• Egg Yolk – Enriches the dough for added color and flavor.
• Egg – Works alongside the yolk for a richer texture.
• Bread Flour – The high protein content provides structure; avoid using cake flour.
• Salt – Enhances flavor and controls yeast activity.
• Unsalted Butter – Should be at room temperature for easy incorporation.

For the Filling
• Walnuts – The star of the filling; roast and chop for maximum flavor and texture.
• Cinnamon – Adds a warm aroma, complementing the rich walnut flavor.

For the Syrup
• Water – Used to create a glossy glaze for the baked babka.
• Lemon Juice – Adds a bright note to balance the sweetness of the syrup.

Get ready to indulge in the warmth of homemade Walnut Babka, a delightful and timeless treat!

Step‑by‑Step Instructions for Walnut Babka

Step 1: Prepare Yeast Mixture
Begin by heating 1 cup of whole milk in a saucepan until it is lukewarm (about 110°F). In a mixing bowl, combine half of the granulated sugar with the warm milk, then sprinkle in 2 teaspoons of fresh yeast. Allow it to sit undisturbed for about 5-10 minutes, until foamy, indicating that the yeast is active and ready for your Walnut Babka dough.

Step 2: Mix Dough
In a stand mixer fitted with a dough hook, combine the yeast mixture, 1 egg, 1 egg yolk, 3 cups of bread flour, and 1 teaspoon of salt along with the remaining sugar. Mix on low speed until the ingredients come together, then increase the speed and knead for about 5-8 minutes, until the dough is smooth and elastic, showcasing a soft, cohesive texture.

Step 3: Incorporate Butter
With the mixer running, gradually add 1/2 cup of room-temperature unsalted butter, one tablespoon at a time. Continue kneading for another 10 minutes, allowing the butter to fully incorporate into the dough. You’ll know it's ready when the dough is shiny and elastic, pulling away from the sides of the bowl, making it perfect for your Walnut Babka.

Step 4: First Rise
Transfer the dough to a lightly oiled bowl, cover it tightly with plastic wrap, and refrigerate overnight for approximately 12 hours. This slow fermentation will enhance the flavor and texture of your Walnut Babka, resulting in a beautifully soft and flavorful bread.

Step 5: Prepare Filling
While the dough rests, prepare the filling by mixing together 1 cup of finely chopped walnuts, 1/4 cup of granulated sugar, 1 tablespoon of ground cinnamon, and 1/4 cup of melted butter in a bowl. Stir until well combined and let it cool to room temperature; this flavorful mix will add a delightful crunch and sweetness to your Walnut Babka.

Step 6: Roll Out Dough
After the refrigeration period, lightly flour your surface and roll out the chilled dough into a rectangle measuring about 12x18 inches. Aim for a thickness of about 1/4 inch. The dough should feel soft and pliable, making it easy to layer with the filling, ensuring a rich texture in your Walnut Babka.

Step 7: Spread Filling & Shape
Evenly spread the walnut filling over the entire surface of the rolled-out dough. Starting from one long edge, tightly roll the dough into a log, pinching the seams to seal. Using a sharp knife, cut the log in half lengthwise, exposing the filling. Twist the two pieces together, creating a braided look, and shape it into a loaf.

Step 8: Second Rise
Place the shaped dough into a greased loaf pan and cover it loosely with a kitchen towel. Let it rise at room temperature for 1 to 2 hours, or until it has doubled in size. This second rise is crucial for achieving that fluffy texture in your Walnut Babka, so be patient and watch it grow!

Step 9: Preheat Oven & Bake
While the babka is rising, preheat your oven to 350°F (175°C). Once fully risen, bake the Walnut Babka in the center of the oven for about 35-40 minutes or until it turns golden brown and a toothpick inserted in the center comes out clean. Keep an eye on it to ensure a perfect bake!

Step 10: Make Syrup & Glaze
While the babka bakes, prepare the syrup by simmering 1/4 cup of water with 1/4 cup of granulated sugar and a splash of lemon juice in a small saucepan. Allow it to boil for about 5 minutes until slightly thickened. As soon as the babka comes out of the oven, brush the syrup generously over the warm loaf for a beautiful, glossy finish.

How to Store and Freeze Walnut Babka

Room Temperature: Store your freshly baked Walnut Babka in an airtight container at room temperature for up to 3 days to maintain its delightful softness.

Fridge: If you need to keep it longer, wrap the babka tightly in plastic wrap and place it in the fridge, where it will stay fresh for about a week.

Freezer: For longer storage, slice the babka and freeze it in a freezer-safe bag for up to 3 months. Thaw overnight in the fridge before enjoying!

Reheating: To revive its warmth and texture, reheat slices in a toaster or oven at 350°F (175°C) for about 5-10 minutes until warmed through.

What to Serve with Walnut Babka

Imagine a delightful spread that complements the rich, cinnamon-swathed layers of Walnut Babka, each option adding a new dimension to your homemade feast.

  • Fresh Fruit Salad: A vibrant mix of seasonal berries and citrus that brightens the palate and balances the sweetness of the babka.
  • Classic Coffee: A warm cup of your favorite brew enhances the comforting flavors of the babka, making for a cozy indulgence.
  • Whipped Cream Cheese Spread: Lightly sweetened cream cheese with a hint of vanilla provides a creamy contrast to the baked bread's fluffiness.
  • Maple Syrup Drizzle: Just a touch of natural sweetness over warm slices offers a luxurious twist, adding depth to every bite.
  • Dark Chocolate Shavings: A sprinkle of chocolate adds elegance; its bitterness beautifully contrasts with the sweet filling.
  • Tea Infused with Spices: A warm chai or spiced herbal tea creates a lovely aromatic experience, enhancing the cozy vibe.
  • Honey Glaze: Drizzling a bit of honey on top amplifies sweetness while adding a silky texture to each slice.
  • Ice Cream Scoop: A scoop of vanilla or nut-based ice cream turned into a decadent dessert, perfect for impressing guests.
  • Light Pastry Cream: A dollop of this sweet custard brings an extra layer of richness while keeping things light and airy.

Make Ahead Options

These Walnut Babka are perfect for meal prep enthusiasts! You can prepare the dough and refrigerate it overnight for up to 24 hours before baking, allowing the flavors to deepen beautifully. After mixing the dough in Step 2, simply cover it tightly with plastic wrap and let it rest in the fridge. You can also prepare the filling (Step 5) a day in advance—just store it in an airtight container at room temperature until you’re ready to use it. When you're ready to enjoy your Walnut Babka, let the dough come to room temperature for about 30 minutes, shape it, and then proceed with the second rise (Step 8) before baking to serve a fresh, delightful treat with minimal effort!

Expert Tips for Walnut Babka

  • Temperature Matters: Always ensure the whole milk is lukewarm. Too hot or too cold milk can inhibit yeast activation, affecting your Walnut Babka's rise.
  • Knead Properly: Knead until the dough is smooth and elastic. If the dough feels too sticky, don't add excessive flour; it will come together.
  • Proofing is Key: Allow the dough to fully rise before baking. A well-proofed dough will ensure a light and fluffy texture.
  • Stay Cool: When shaping the babka, keep the dough cool. If it warms up too much, consider chilling it briefly in the freezer to maintain its structure.
  • Flavor Combinations: Feel free to experiment with fillings! Swap in chocolate or dried fruits for a fun twist on the classic Walnut Babka flavor.

Walnut Babka Variations & Substitutions

Feel free to let your creativity shine and make this Walnut Babka your own with these delightful variations!

  • Nut Alternatives: Substitute walnuts with pecans or hazelnuts for a unique crunch and flavor. Each nut brings its own exciting taste profile, so experiment and find your favorite!

  • Chocolate Delight: Swirl in your choice of chocolate, whether dark, milk, or white, to infuse every slice with a rich, indulgent twist. Chocolate and walnuts are a match made in heaven, elevating this babka into a decadent dessert.

  • Fruity Filling: Add dried cherries, raisins, or cranberries alongside the walnuts for a sweet and tangy surprise in every bite. The combination of nuts and fruits creates a wonderful texture and extra flavor layers.

  • Spice It Up: Elevate the filling by mixing in a touch of nutmeg or cardamom along with the cinnamon, adding warmth and complexity. These spices will bring your Walnut Babka to a whole new aromatic level, tempting everyone long before it's even baked.

  • Vegan Version: Replace the eggs with a flaxseed mixture and use almond milk to create a vegan-friendly babka without losing the traditional taste. Just blend 1 tablespoon of flaxseed meal with 2.5 tablespoons of water and let it sit for 5 minutes to thicken before mixing into the dough.

  • Gluten-Free Option: Opt for a gluten-free flour blend specifically for baking bread to convert this savory treat for those with dietary restrictions. Just ensure to add extra moisture since gluten-free flours can absorb more liquid.

  • Extra Crunch: For an added bite, sprinkle chopped nuts on top of the babka before giving it that beautiful glaze. It not only enhances the texture but also creates an appealing visual when serving.

  • Maple Glaze: Instead of a lemon-infused syrup, try using maple syrup to drizzle over the warm babka for a sweet spin. The rich maple flavor complements the ingredients beautifully, perfect for cozy mornings with coffee.

Feel free to follow along with my Skillet Pasta Feta recipe as a delightful side to this sweet, yet savory creation!

Walnut Babka Recipe FAQs

How do I select ripened walnuts for the filling?
When selecting walnuts, look for ones that are raw and unsalted. They should be plump, with no dark spots all over, indicating freshness. Roasting raw walnuts at 350°F (175°C) for 8-10 minutes enhances their flavor, giving your Walnut Babka an irresistible nutty crunch.

How should I store my Walnut Babka once baked?
Store your Walnut Babka in an airtight container at room temperature for up to 3 days to keep it soft. If you want to extend its life, wrap it tightly in plastic wrap and refrigerate it, where it can last up to a week.

Can I freeze Walnut Babka, and if so, how?
Absolutely! To freeze your Walnut Babka, first slice it into pieces or leave it whole. Wrap it tightly in plastic wrap and place it in a freezer-safe bag, ensuring as much air is removed as possible. It will keep well for up to 3 months. To enjoy, simply thaw it overnight in the fridge and reheat slices in a toaster or oven at 350°F (175°C) for about 5-10 minutes.

What should I do if my babka doesn’t rise properly?
If your Walnut Babka doesn't rise, it may be due to inactive yeast. Always make sure your yeast is fresh and your milk temperature is just right—lukewarm, around 110°F (43°C). If it’s too hot or too cold, your dough won’t rise correctly. You can try letting it rise in a warmer spot or extending the rising time.

Is this recipe suitable for those with nut allergies?
This Walnut Babka recipe contains walnuts, making it unsuitable for anyone with a nut allergy. However, you can substitute the walnuts with seeds like pumpkin or sunflower seeds for a similar texture and flavor but without the allergens.

Can I use instant dry yeast instead of fresh yeast?
Of course! If you're using instant dry yeast instead of fresh, substitute it at a ratio of about 1 to 3. That means you'll need approximately 2 teaspoons of instant dry yeast for this recipe. Simply mix it with the flour directly, skipping the initial yeast-proofing step.

Walnut Babka

Irresistible Walnut Babka Recipe for Cozy Baking Days

This Walnut Babka is a delightful traditional dessert, perfect for cozy baking days and gatherings.
Print Recipe Pin Recipe
Prep Time 2 hours hrs
Cook Time 40 minutes mins
Refrigeration Time 12 hours hrs
Total Time 14 hours hrs 40 minutes mins
Servings: 12 slices
Course: Dessert
Cuisine: Jewish
Calories: 300
Ingredients Equipment Method Nutrition Notes

Ingredients
  

For the Dough
  • 1 cup Whole Milk Lukewarm
  • 1/2 cup Granulated Sugar
  • 2 teaspoons Fresh Yeast Or instant dry yeast
  • 1 large Egg Yolk
  • 1 large Egg
  • 3 cups Bread Flour High protein content
  • 1 teaspoon Salt
  • 1/2 cup Unsalted Butter Room temperature
For the Filling
  • 1 cup Walnuts Finely chopped, roasted
  • 1 tablespoon Cinnamon
  • 1/4 cup Granulated Sugar
  • 1/4 cup Melted Butter
For the Syrup
  • 1/4 cup Water
  • 1/4 cup Granulated Sugar
  • 1 tablespoon Lemon Juice

Equipment

  • Stand Mixer
  • Saucepan
  • Mixing Bowl
  • Loaf pan
  • Rolling Pin
  • plastic wrap

Method
 

Preparation
  1. Heat whole milk in a saucepan until lukewarm (about 110°F). Combine half of the sugar with the warm milk and sprinkle in fresh yeast. Let sit for 5-10 minutes until foamy.
  2. In a stand mixer, combine the yeast mixture, egg, egg yolk, bread flour, and salt along with the remaining sugar. Mix on low speed until combined, then knead for 5-8 minutes until smooth and elastic.
  3. Gradually add room-temperature unsalted butter, one tablespoon at a time, kneading for another 10 minutes until shiny and elastic.
  4. Transfer the dough to an oiled bowl, cover with plastic wrap, and refrigerate overnight for about 12 hours.
  5. Prepare the filling by mixing chopped walnuts, granulated sugar, ground cinnamon, and melted butter in a bowl. Let it cool to room temperature.
  6. Roll out the chilled dough into a rectangle (12x18 inches and 1/4 inch thick).
  7. Spread walnut filling over the dough. Roll tightly from one long edge and pinch seams to seal. Cut the log in half lengthwise and twist the two halves together.
  8. Place the shaped dough in a greased loaf pan and cover loosely. Let it rise at room temperature for 1 to 2 hours until doubled in size.
  9. Preheat the oven to 350°F (175°C). Bake the Walnut Babka for 35-40 minutes until golden brown and a toothpick comes out clean.
  10. Make the syrup by simmering water, granulated sugar, and lemon juice in a saucepan for 5 minutes until slightly thickened. Brush over warm babka after baking.

Nutrition

Serving: 1sliceCalories: 300kcalCarbohydrates: 40gProtein: 6gFat: 14gSaturated Fat: 8gPolyunsaturated Fat: 2gMonounsaturated Fat: 4gCholesterol: 100mgSodium: 200mgPotassium: 150mgFiber: 2gSugar: 12gVitamin A: 5IUCalcium: 2mgIron: 8mg

Notes

Store in an airtight container at room temperature for up to 3 days. Wrap tightly for fridge storage up to a week, or freeze for up to 3 months.

Tried this recipe?

Let us know how it was!

Caramelized Banana Upside Down Cake for Cozy Moments

September 20, 2025 by Grace Snow Leave a Comment

As the sweet scent of caramel wafts through the kitchen, I can’t help but feel a sense of warmth wash over me. There’s something magical about transforming simple bananas into a stunning, caramelized topping for a cake, and today, I'm excited to share my Easy Caramelized Banana Upside Down Cake recipe with you. This delightful dessert not only boasts a moist, yogurt-infused cake but also offers a fun twist on a classic favorite—perfect for that cozy family gathering or an indulgent treat after a long day. With minimal prep time and a stunning presentation, it’s sure to impress everyone at the table. Are you ready to bake a slice of happiness right at home? Let’s dive into this delicious journey!

Why Is This Cake a Must-Try?

Moist, Fluffy Texture: The combination of yogurt and butter results in a cake that is irresistibly tender.

Easy to Make: With simple ingredients and straightforward steps, even baking novices can create a stunning dessert.

Gorgeous Presentation: The caramelized bananas on top look and taste spectacular, making it a showstopper for gatherings.

Versatile Options: Swap bananas for other fruits like pineapple or strawberries for unique flavor twists—perfect when catering to different tastes!

Crowd-Pleasing Flavor: Everyone loves a sweet, comforting dessert, and this cake pairs beautifully with a scoop of vanilla ice cream or a drizzle of cream, making it a hit at any celebration.

Don’t forget to check out my Ice Cream Cake for another delicious treat!

Caramelized Banana Upside Down Cake Ingredients

  • For the Cake
    • Unsalted Butter (150 g / ½ cup) – Use room temperature butter for easier blending and optimal moisture.
    • Granulated Sugar (200 g / 1 cup) – Provides sweetness and structure; mixing with brown sugar can enhance flavor depth.
    • Vanilla Extract (1½ teaspoons) – Introduces a lovely aromatic sweetness to the cake.
    • Eggs (2, room temperature) – Essential for the cake’s structure and moisture.
    • Thick Greek or Turkish Yogurt (110 g / ½ cup) – Contributes to the cake's moistness while adding a slight tangy flavor.
    • Whole Milk (45 g / ⅓ cup) – Ensures the batter achieves a perfect consistency.
    • All-Purpose Flour (240 g / 2 cups) – Provides backbone to the cake; measure accurately for the best results.
    • Baking Powder (1½ teaspoons) – Acts as a leavening agent to help the cake rise.
    • Salt (½ teaspoon) – Enhances all the flavors in the cake.

  • For the Caramel Topping
    • Bananas (3-4, cut horizontally) – The star of the dessert; choose firm, ripe bananas for the best presentation after baking.
    • Sugar (60 g / ⅓ cup) – Ideal for caramelizing the bananas; brown sugar can be used for a richer flavor.
    • Unsalted Butter (60 g / ⅓ cup) – Necessary for the caramel mixture, adding richness.

  • For the Optional Glaze
    • Brown Sugar (optional for glaze) (40 g / ⅓ cup) – Adds extra sweetness and shine when mixed with water (40 g / ⅓ cup) for syrup.

This delicious Caramelized Banana Upside Down Cake is perfect for a cozy dessert evening!

Step‑by‑Step Instructions for Caramelized Banana Upside Down Cake

Step 1: Preheat the Oven
Begin by preheating your oven to 175°C (347°F) without using the fan. This ensures an even, gentle heat perfect for baking your Caramelized Banana Upside Down Cake. Allow the oven to fully reach this temperature before moving on to the next steps, as this is crucial for proper rising and texture.

Step 2: Prepare the Caramel Topping
Slice 3-4 firm bananas horizontally and arrange them cut-side down in a greased springform pan. In a small saucepan, combine 60 g of sugar and 60 g of unsalted butter over low to medium heat. Stir gently for about 1-2 minutes until the mixture is bubbly and light golden in color, then pour it evenly over the bananas.

Step 3: Make the Cake Batter
In a large mixing bowl, cream together 150 g of unsalted butter and 200 g of granulated sugar using an electric mixer for about 3-5 minutes until the mixture is light and fluffy. This creates air pockets that will contribute to the cake’s moistness. Gradually add in 1½ teaspoons of vanilla extract and 2 room-temperature eggs, mixing well after each addition to incorporate smoothly.

Step 4: Mix Dry Ingredients
In a separate bowl, sift together 240 g of all-purpose flour, 1½ teaspoons of baking powder, and ½ teaspoon of salt. This step is vital to ensure your dry ingredients are evenly distributed and free of lumps, which helps create a uniform batter for your Caramelized Banana Upside Down Cake.

Step 5: Combine Wet Ingredients
In another bowl, whisk together 110 g of thick Greek yogurt and 45 g of whole milk until smooth. Gradually fold this mixture into your egg mixture, alternating with the sifted dry ingredients. Stir gently until just combined, being careful not to overmix, as this helps retain the cake's fluffy texture.

Step 6: Pour Batter Over Bananas
Carefully pour the batter over your beautifully arranged caramelized bananas in the springform pan. Use a spatula to spread the batter evenly to cover all the bananas fully. This will create a beautiful, sweet base for your Cake once it is flipped out after baking.

Step 7: Bake the Cake
Place the pan in the preheated oven and bake for approximately 1 hour. To check for doneness, insert a toothpick into the center; it should come out clean with a few moist crumbs attached. Keep an eye on the cake towards the end of baking to prevent over-baking.

Step 8: Cool and Flip
Once baked, remove the cake from the oven and allow it to cool completely in the pan on a wire rack. This cooling step is crucial to prevent breakage when flipping. After about 30-40 minutes, gently run a knife around the edges and carefully flip the cake onto a serving plate to showcase the stunning caramelized bananas. For a shiny finish, brush with optional brown sugar syrup glaze if desired.

Make Ahead Options

These Caramelized Banana Upside Down Cakes are perfect for meal prep enthusiasts wanting to save time on busy days! You can prepare the caramel topping with the bananas, and cover it tightly in the refrigerator for up to 24 hours before baking; this allows the flavors to meld and enhances sweetness. Additionally, you can mix the cake batter ahead of time and store it separately in the fridge for up to 3 days. When you’re ready to bake, simply pour the batter over the cold caramelized bananas and follow the baking instructions as usual. This way, you’ll have a delectable dessert with minimal effort, just as delicious as if you made it fresh!

What to Serve with Easy Caramelized Banana Upside Down Cake

If you're looking to create a delightful dessert spread, let’s explore the perfect pairings that elevate this sweet, moist treat.

  • Whipped Cream: A dollop of airy, sweet whipped cream adds a light, creamy contrast to the dense cake and balances the sweetness of caramelized bananas.

  • Vanilla Ice Cream: A scoop of rich vanilla ice cream melts beautifully over the warm cake, creating a comforting, nostalgic dessert experience that guests will love.

  • Caramel Sauce Drizzle: Enhance the caramel notes by drizzling warm caramel sauce on top; it provides both flavor depth and a beautiful presentation on your dessert plate.

  • Fresh Berries: A side of fresh strawberries or raspberries introduces a tart contrast to the sweetness, brightening up each bite with a burst of freshness.

  • Coffee or Espresso: A warm cup of coffee or a shot of espresso pairs perfectly with dessert; the bitter notes complement the cake's sweetness, making it a perfect after-dinner treat.

  • Chopped Nuts: Consider sprinkling some toasted pecans or walnuts over the top; they bring a delightful crunch and earthy flavor that nicely contrasts the tender, moist cake.

  • Coconut Whipped Cream: For a tropical twist, serve with whipped coconut cream; its subtle flavor adds a unique flair that will surprise and delight your guests.

Expert Tips for Caramelized Banana Upside Down Cake

  • Room Temperature Ingredients: Make sure your butter, eggs, and yogurt are at room temperature to ensure proper mixing and a fluffy texture in your Caramelized Banana Upside Down Cake.

  • Watch Your Bananas: Choose firm, ripe bananas; overripe bananas can become mushy and unattractive post-baking. The goal is striking caramelized perfection!

  • Preheating Matters: Always preheat your oven fully before placing your cake inside. This helps the cake rise properly and achieve that delightful fluffy texture.

  • Avoid Overmixing: When combining wet and dry ingredients, mix until just combined to prevent the cake from becoming dense. Gently folding in helps maintain its lightness.

  • Cooling is Key: Allow the cake to cool completely in the pan before flipping it. This step prevents breakage and ensures the caramelized bananas stay intact for a beautiful presentation.

Caramelized Banana Upside Down Cake Variations

Feel free to put your personal spin on this delightful dessert to suit your taste buds!

  • Tropical Twist: Substitute bananas with pineapple slices for a summery flair that brings a tropical vibe to your cake.

  • Berry Good: Swap bananas for strawberries or raspberries, creating a fresh and vibrant topping that adds a pop of color and flavor.

  • Nutty Crunch: Add chopped walnuts or pecans to the batter or sprinkle them on top before baking for a delightful crunch.

  • Spice It Up: Incorporate a teaspoon of cinnamon or nutmeg in the batter for warm, aromatic notes that complement the sweetness beautifully.

  • Chocolate Drizzle: Drizzle melted chocolate over the cooled cake for a rich, indulgent touch that chocolate lovers will adore.

  • Gluten-Free Option: Replace all-purpose flour with a 1:1 gluten-free flour blend, perfect for those needing a gluten-free dessert!

  • Dairy-Free Delight: Use coconut yogurt and almond milk instead of yogurt and milk for a light dairy-free version that maintains moisture.

  • Heat It Up: Add a pinch of cayenne pepper or a dash of chili powder to the batter for a surprising kick that pairs well with the sweetness.

Once you've had a bite of this luscious cake, you might be tempted to explore other dessert options, like my delightful Chocolate Pudding Cake or the show-stopping Ice Cream Cake. Enjoy your delicious culinary adventure!

How to Store and Freeze Caramelized Banana Upside Down Cake

Fridge: Store the cake covered in the fridge for up to 3 days to retain its moisture and flavor. Ensure it’s in an airtight container to prevent drying.

Freezer: Wrap your sliced cake in plastic wrap, then in aluminum foil, and freeze for up to 2 months. Thaw in the fridge overnight before serving.

Reheating: To revive the cake's warmth, place individual slices in the microwave for 15-20 seconds or warm in a preheated oven at 175°C (347°F) for about 10 minutes.

Room Temperature: If consumed within a day, you can keep the cake covered at room temperature, but be mindful of humidity which may affect the cake texture.

Caramelized Banana Upside Down Cake Recipe FAQs

How do I choose the right bananas for this recipe?
Absolutely! For the best caramelization, select firm, slightly ripe bananas. Overripe bananas may become mushy and unattractive during baking, losing their appealing shape. Look for bananas with minimal dark spots, as these indicate they are still perfectly ripe but not overly soft.

What’s the best way to store leftover cake?
I often recommend storing any leftover Caramelized Banana Upside Down Cake in an airtight container in the fridge for up to 3 days. This keeps the cake fresh and retains its moist texture. If you'd prefer, you can also keep it covered at room temperature for the same duration, but be cautious about humidity and temperature changes, which could affect the cake's quality.

Can I freeze the Caramelized Banana Upside Down Cake?
Certainly! To freeze, slice the cake into portions and wrap each piece tightly in plastic wrap, followed by aluminum foil. This method ensures optimal protection against freezer burn. The cake can be frozen for up to 2 months. When you're ready to enjoy it, simply thaw in the fridge overnight and reheat individual slices in the microwave for about 15-20 seconds for a delightful treat!

What should I do if my cake sinks in the middle?
Very! If your cake sinks, it could stem from overmixing, too much batter for the pan size, or incorrect oven temperature. To troubleshoot, ensure that you don't overmix the wet and dry ingredients. Check your oven's temperature with a thermometer, and make sure you follow the recipe's suggested baking time and temperatures closely.

Does this recipe cater to specific dietary considerations?
That's a great question! This Caramelized Banana Upside Down Cake contains gluten, dairy, and eggs, which may not suit everyone. For a gluten-free version, consider using a gluten-free flour blend; just make sure to adjust any other ingredients accordingly. If you have allergies to bananas, you can substitute them with other fruits, like pineapple or strawberries, ensuring they adhere to similar preparation methods for the caramel layer.

Caramelized Banana Upside Down Cake

Caramelized Banana Upside Down Cake for Cozy Moments

This Caramelized Banana Upside Down Cake is a delightful dessert with a moist texture and a stunning presentation, perfect for any cozy gathering.
Print Recipe Pin Recipe
Prep Time 20 minutes mins
Cook Time 1 hour hr
Cooling Time 40 minutes mins
Total Time 2 hours hrs
Servings: 8 slices
Course: Dessert
Cuisine: American
Calories: 350
Ingredients Equipment Method Nutrition Notes

Ingredients
  

For the Cake
  • 150 g Unsalted Butter Use room temperature butter for easier blending and optimal moisture.
  • 200 g Granulated Sugar Provides sweetness and structure; mixing with brown sugar can enhance flavor depth.
  • 1.5 teaspoons Vanilla Extract Introduces a lovely aromatic sweetness to the cake.
  • 2 units Eggs Essential for the cake’s structure and moisture.
  • 110 g Thick Greek or Turkish Yogurt Contributes to the cake's moistness while adding a slight tangy flavor.
  • 45 g Whole Milk Ensures the batter achieves a perfect consistency.
  • 240 g All-Purpose Flour Provides backbone to the cake; measure accurately for the best results.
  • 1.5 teaspoons Baking Powder Acts as a leavening agent to help the cake rise.
  • 0.5 teaspoon Salt Enhances all the flavors in the cake.
For the Caramel Topping
  • 3-4 units Bananas The star of the dessert; choose firm, ripe bananas for the best presentation after baking.
  • 60 g Sugar Ideal for caramelizing the bananas; brown sugar can be used for a richer flavor.
  • 60 g Unsalted Butter Necessary for the caramel mixture, adding richness.
For the Optional Glaze
  • 40 g Brown Sugar (optional for glaze) Adds extra sweetness and shine when mixed with 40 g of water for syrup.

Equipment

  • Springform pan
  • Mixing bowls
  • Electric mixer
  • Saucepan

Method
 

Step-by-Step Instructions
  1. Preheat your oven to 175°C (347°F) without using the fan.
  2. Slice 3-4 firm bananas horizontally and arrange them cut-side down in a greased springform pan. In a small saucepan, combine 60 g of sugar and 60 g of unsalted butter over low to medium heat. Stir gently for about 1-2 minutes until bubbly and light golden, then pour it evenly over the bananas.
  3. In a large mixing bowl, cream together 150 g of unsalted butter and 200 g of granulated sugar using an electric mixer for about 3-5 minutes until light and fluffy.
  4. Sift together 240 g of all-purpose flour, 1.5 teaspoons of baking powder, and 0.5 teaspoon of salt in a separate bowl.
  5. In another bowl, whisk together 110 g of thick Greek yogurt and 45 g of whole milk until smooth. Gradually fold this into your egg mixture, alternating with the sifted dry ingredients.
  6. Pour the batter evenly over the caramelized bananas in the springform pan.
  7. Bake in the preheated oven for approximately 1 hour. Check for doneness by inserting a toothpick into the center.
  8. Cool completely in the pan on a wire rack, then carefully flip the cake onto a serving plate.

Nutrition

Serving: 1sliceCalories: 350kcalCarbohydrates: 48gProtein: 4gFat: 16gSaturated Fat: 10gPolyunsaturated Fat: 1gMonounsaturated Fat: 5gCholesterol: 80mgSodium: 200mgPotassium: 180mgFiber: 1gSugar: 28gVitamin A: 500IUVitamin C: 5mgCalcium: 50mgIron: 1mg

Notes

Ensure room temperature ingredients for a fluffier cake, and remember to watch your bananas for the best caramelization.

Tried this recipe?

Let us know how it was!

Delicious Earl Grey Macarons with Zesty Lemon Curd Filling

September 20, 2025 by Grace Snow Leave a Comment

As I stood in my kitchen, the warm aroma of freshly baked macarons filled the air, whisking me away to quaint Parisian cafes. These delightful Earl Grey macarons, infused with the fragrant notes of bergamot, are a true celebration of elegance in dessert form. Paired with a zesty lemon curd filling, they offer an inviting balance that both tea lovers and dessert aficionados will adore. What’s more, this recipe isn’t just about gratifying your sweet tooth; it’s also a perfect way to impress at your next gathering, providing a quick, yet refined, treat that’s suitable for any occasion. The joy of mastering the macaron technique can turn any home chef's day around, making it a rewarding experience that you won’t easily forget. Are you ready to elevate your baking game with these irresistible treats?

Why are these Macarons a Must-Try?

Elevating Treats: These Earl Grey macarons transform a classic French dessert with the delightful hint of bergamot. Unique Flavor Combination: The infusion of tea in the shells paired with tangy lemon curd creates an exciting flavor profile. Appealing Presentation: Their colorful aesthetic makes these macarons perfect for impressing guests at events or simply for your afternoon tea. Mastering Technique: Engaging in the macaron-making process can elevate your baking skills. Plus, quick and rewarding; they come together in a reasonable timeframe, leaving you with a sweet moment of triumph after your first successful batch! For more delightful ideas, check out our variations on macarons.

Earl Grey Macaron Ingredients

• Embrace the joy of cooking with these delicious Earl Grey macarons!

For the Macaron Shells

  • Almond Flour – Provides structure and texture; ensure it's finely ground for the best results.
  • Earl Grey Loose Tea – Infuses aromatic flavor; feel free to substitute with another flavored tea if desired.
  • Powdered Sugar – Sweetens the shells; you can use granulated sugar, but it may affect the texture.
  • Egg Whites – Essential for a stable meringue; make sure they are at room temperature for optimal aeration.
  • Granulated Sugar – Stabilizes the meringue when combined in the sugar syrup.
  • Water – Used to make the sugar syrup for meringue creation.

For the Lemon Curd Filling

  • Egg Yolks – Provide richness for the lemon curd; use fresh for the best flavor.
  • Lemon Juice – Adds a bright, tangy flavor; freshly squeezed is ideal, with about 5 lemons needed.
  • Lemon Zest – Enhances the lemon flavor within the curd.
  • Unsalted Butter – Contributes creaminess to the curd; can be substituted with a vegan alternative.
  • Gelatin Sheet – Stabilizes the lemon curd; opt for agar-agar as a vegetarian substitute if needed.

For Decoration

  • Melted White Chocolate & Yellow Food Coloring – Great for presentation; you can replace chocolate with a colored glaze for a cute touch.

Step‑by‑Step Instructions for Earl Grey Macarons

Step 1: Prep Ingredients
Begin your delightful journey by measuring all dry ingredients—almond flour, powdered sugar, and Earl Grey tea. Ensure your egg whites are at room temperature, which is crucial for achieving a stable meringue. This preparation sets the foundation for your Earl Grey macarons, ensuring everything is organized and ready to go.

Step 2: Make Sugar Syrup
In a small saucepan, combine granulated sugar and water, then place it over medium heat. Allow the mixture to heat until it reaches a temperature of 118°C-120°C (244°F-248°F), using a candy thermometer for precision. As the syrup boils and begins to thicken, keep an eye on it; this step is essential for stabilizing your meringue for the macarons.

Step 3: Whip Egg Whites
Using a stand mixer fitted with a whisk attachment, start whisking the egg whites on medium speed until foamy. Gradually add the superfine sugar as you continue whisking until soft peaks form. This step is crucial for achieving the perfect texture in your Earl Grey macaron shells, so watch for a fluffy consistency that holds soft peaks but isn’t yet stiff.

Step 4: Incorporate Syrup
Once your sugar syrup reaches the right temperature, carefully remove it from heat. While continuously whisking the egg whites on high speed, slowly pour in the hot syrup. Continue whisking until the meringue reaches stiff peaks and loses its glossy sheen, which usually takes about 5-8 minutes. This step is vital for creating the structure of your macarons.

Step 5: Mix Dry Ingredients
In a separate bowl, combine the almond flour, powdered sugar, and Earl Grey tea. Pulse the mixture a few times in a food processor until finely ground and well blended. This helps to aerate the dry ingredients, ensuring your Earl Grey macarons turn out light and delicate, free from lumps that could hinder their rise.

Step 6: Fold Mixtures
Gently fold the whipped meringue into the almond mixture using a spatula. This is where precision matters: fold until you reach the ribbon stage, which should take about 30-40 strokes. The final mixture should flow smoothly and resemble molten lava without any lumps. This step ensures your macarons achieve that beautiful, smooth surface.

Step 7: Pipe Shells
Prepare a piping bag fitted with a round tip, then fill it with the macaron batter. On a silicone mat or parchment-lined baking tray, pipe equal-sized rounds (about 3 cm in diameter), leaving space between each. This step is crucial for forming the perfect Earl Grey macaron shells; take your time to ensure even sizes for uniform baking.

Step 8: Rest Shells
Let the piped macarons rest at room temperature for 25-40 minutes, or until a skin forms on the surface. You’ll know they are ready when they are dry to the touch and a slight touch does not leave a mark. This step is essential to prevent cracks during baking and allows the macarons to rise properly.

Step 9: Bake
Preheat your oven to 155°C (311°F). Once ready, bake the macarons for 14-15 minutes, rotating the tray halfway through to ensure even baking. You’ll know they’re done when they have a slight sheen and lift easily from the mat. This baking step transforms the batter into the beautiful Earl Grey macarons you desire.

Step 10: Cool
Once out of the oven, allow the macarons to cool on the baking tray for about 5 minutes before transferring them to a wire rack. They must cool completely to maintain their delicate structure. Patience is key here, as this cooling step is essential for easy removal without breaking.

Step 11: Make Lemon Curd
In a heatproof bowl, whisk together egg yolks, lemon juice, and sugar over simmering water. Stir constantly until thickened, approximately 10-15 minutes. Once thick, remove from heat and incorporate the butter and softened gelatin, stirring until smooth. This lemon curd filling adds the perfect tangy contrast to your sweet Earl Grey macarons.

Step 12: Fill Macarons
Fit another piping bag with the lemon curd and pipe a small dollop onto the flat side of half the macarons. Gently press another shell on top to create a sandwich. This step enhances the flavors and textures, making every bite of your Earl Grey macarons delightful with zesty lemon.

Step 13: Decorate
Optionally, melt some white chocolate and add yellow food coloring for a charming decoration. Drizzle or dip the topped macarons in the melted chocolate, then dust with a little Earl Grey tea for an elegant touch. This decorative step not only adds flavor but also enhances presentation for an inviting treat.

Step 14: Aging
To achieve the best texture, refrigerate the filled macarons for at least 12 hours. This aging allows the flavors to meld and the filling to soften the macaron shells, making them irresistibly chewy and delicious. This essential aging step transforms your delectable Earl Grey macarons into a refined dessert perfect for any occasion.

Expert Tips for Earl Grey Macarons

  • Temperature Matters: Make sure your egg whites are room temperature; this maximizes aeration for the meringue, leading to better Earl Grey macarons.
  • No Overmixing: When folding the meringue into the dry ingredients, stop as soon as you reach the ribbon stage. Overmixing can deflate your batter, resulting in unwanted texture.
  • Resting is Key: Don’t skip the resting time after piping your shells; this crucial step helps form a skin that prevents cracking during baking.
  • Consistent Sizes: Use a template under your parchment paper to pipe evenly sized shells. Uniformity is vital for even baking and presentation.
  • Don’t Rush Cooling: Allow macarons to cool completely before filling to maintain their delicate texture and prevent breaking during assembly.
  • Aging Enhances Flavor: Refrigerate filled macarons for at least 12 hours before serving; this aging process brings out the best flavors and perfects the texture.

Storage Tips for Earl Grey Macarons

  • Room Temperature: Macarons are best enjoyed fresh, so consume them within a few hours of assembly. If left out, they should be eaten within the day for optimal texture.
  • Fridge: Store filled Earl Grey macarons in an airtight container in the refrigerator for up to 5 days. This keeps them fresh and maintains the delightful balance of flavors.
  • Freezer: For longer storage, freeze unfilled macaron shells in an airtight container. They can last up to 2 months; just ensure to thaw them completely before filling.
  • Reheating: If you prefer warm macarons, briefly heat them in a microwave for 5-10 seconds, but be cautious as this can affect their texture.

What to Serve with Earl Grey Macarons with Lemon Curd Filling

Elevate your baking experience by exploring delightful pairings that enhance each luscious bite of these unique macarons.

  • English Breakfast Tea: This robust tea complements the bergamot in the macarons while offsetting the tanginess of the lemon curd with its hearty flavor.
  • Scones with Clotted Cream: Light, flaky scones add a rustic touch and pair perfectly for a classic afternoon tea experience, balancing textures beautifully.
  • Fruit Salad: A fresh medley of berries and citrus fruits adds a vibrant touch and brightens the palate between bites of the sweet, creamy macarons.
  • Champagne or Prosecco: The bubbly effervescence cuts through the richness of the macarons, creating an elegant pairing that’s sure to impress at any gathering.
  • Lemonade or Herbal Iced Tea: Both beverages provide a complementary citrus twist, offering a refreshing contrast to the decadent treat and inviting a casual vibe.
  • Miniature Cheesecakes: Opt for lemon or berry-flavored cheesecakes to echo the flavors in the macarons while adding a creamy texture, making for delightful bites.
  • Butter Cookies: Lightly sweet, crisp butter cookies provide a lovely contrast in texture, making the macaron experience even more enjoyable for guests.
  • Chocolate-Covered Strawberries: The richness of chocolate and freshness of strawberries create a beautifully indulgent balance next to the delicate macaron.

Make Ahead Options

These Earl Grey macarons are perfect for meal prep enthusiasts looking to save time on busy days! You can prepare the macaron shells up to 24 hours in advance. Simply bake and cool them completely, then store the shells in an airtight container at room temperature to maintain their crispiness. The lemon curd filling can also be made up to 3 days ahead; refrigerate it in a covered container. When you're ready to serve, fill the macarons with the lemon curd and allow them to age in the fridge for at least 12 hours for optimal texture and flavor blending. This way, you’ll always have delightful treats ready at a moment's notice!

Earl Grey Macarons Variations & Substitutions

Feel free to play around with these delightful variations and substitutions to make the recipe your own! Each twist promises to accentuate your culinary creativity and excitement.

  • Flavored Tea: Substitute Earl Grey with chai or jasmine tea for a new aromatic experience. The fragrant infusion will create a unique pairing with the lemon curd filling.
  • Fruity Curd: Swap the lemon curd for passionfruit or raspberry curd to add an exciting burst of flavor that complements the floral notes of the macaron shells beautifully.
  • Vegan Option: Use aquafaba (the liquid from chickpeas) instead of egg whites to make this treat entirely plant-based, while still achieving that coveted meringue texture.
  • Chocolate Twist: Incorporate cocoa powder into the macaron shells for a rich chocolate version, perfect if you're a chocoholic at heart. Pair it with a raspberry or orange curd for a complementary pairing!
  • Nut-Free Alternative: Use sunflower seed flour in place of almond flour to cater to nut allergies; it offers a slightly different flavor with a beautiful result.
  • Spice Up: Add a pinch of cardamom or cinnamon to the shell mixture for a warm twist that enhances the overall taste experience. These spices work wonderfully with the bergamot undertones.
  • Zesty Kick: Mix in some zest from an orange or lime into the lemon curd for a refreshing citrus twist that brightens up each bite!
  • Different Fillings: Experiment with alternate fillings like a pastry cream or whipped cream cheese mixed with herbs for a savory touch. Pairing with rosemary or thyme can bring a unique charm to your desserts.

Remember, the beauty of baking lies in the exploration of flavors! If you need more guidance or inspiration, check out our tips on perfecting macaron techniques and crafting unique curds. Happy baking!

Earl Grey Macarons with Tangy Lemon Curd Filling Recipe FAQs

What should I look for when selecting Earl Grey tea?
Absolutely! When selecting Earl Grey tea, choose a high-quality loose leaf that prominently features bergamot oil. Look for leaves with a rich aroma and vibrant color, as these ensure a more robust infusion in your macarons. If you're uncertain, a good rule of thumb is to opt for brands known for their tea blends. Freshness matters here, so check the packaging date!

How should I store my Earl Grey macarons?
For the best taste, store your filled Earl Grey macarons in an airtight container in the fridge for up to 5 days. This prevents them from drying out and maintains that beautiful creamy lemon filling. If you prefer to keep them longer, consider separating the shells and filling, then storing the unfilled shells at room temperature.

Can I freeze the macarons, and what’s the best way?
Very! You can absolutely freeze unfilled macaron shells for longer preservation. To do this, place them in an airtight container, layer them carefully with parchment paper between each layer, and freeze for up to 2 months. When you're ready to fill them, allow them to thaw in the fridge overnight and pipe in your lemon curd once they're at room temperature.

What should I do if my macarons crack while baking?
Don't worry; this happens to the best of us! Cracks can occur if your macarons didn't rest long enough before baking, so make sure they form a skin that’s dry to the touch. Also, ensure your oven temperature is accurate; using an oven thermometer can help you achieve consistent results. If you're still having issues, try lowering your baking temperature by 10-15 degrees and extend the baking time slightly.

Are these macarons pet-friendly?
The ingredients in these Earl Grey macarons, specifically the lemon and tea, are not suitable for pets, particularly dogs and cats. If you're considering sharing a treat, stick with pet-safe snacks instead. Always err on the side of caution with your furry friends!

Can I make these macarons vegan or gluten-free?
You can definitely adapt them! For a vegan version, replace the egg whites with aquafaba (the liquid from canned chickpeas); use about 3 tablespoons for each egg white. For the lemon curd, swap the eggs and butter with a plant-based alternative like coconut cream and cornstarch to thicken. For gluten-free considerations, ensure your almond flour is certified gluten-free and that all other ingredients (like food coloring) are also safe. Enjoy experimenting!

Earl Grey Macarons

Delicious Earl Grey Macarons with Zesty Lemon Curd Filling

This Earl Grey Macarons recipe features a delightful bergamot flavor and a zesty lemon curd filling.
Print Recipe Pin Recipe
Prep Time 30 minutes mins
Cook Time 15 minutes mins
Resting Time 40 minutes mins
Total Time 1 hour hr 25 minutes mins
Servings: 24 macarons
Course: Dessert
Cuisine: French
Calories: 90
Ingredients Equipment Method Nutrition Notes

Ingredients
  

For the Macaron Shells
  • 120 g Almond Flour Ensure it's finely ground
  • 2 tbsp Earl Grey Loose Tea Can substitute with another flavored tea
  • 200 g Powdered Sugar Can use granulated sugar but may affect texture
  • 100 g Egg Whites Room temperature for optimal aeration
  • 200 g Granulated Sugar Stabilizes meringue
  • 50 ml Water Used for making sugar syrup
For the Lemon Curd Filling
  • 4 large Egg Yolks Use fresh for best flavor
  • 150 ml Lemon Juice Freshly squeezed, about 5 lemons needed
  • 1 tbsp Lemon Zest
  • 100 g Unsalted Butter Can substitute with a vegan alternative
  • 1 sheet Gelatin Sheet Opt for agar-agar as a vegetarian substitute
For Decoration
  • 50 g Melted White Chocolate Replace with colored glaze if desired
  • 1 dash Yellow Food Coloring

Equipment

  • Stand Mixer
  • piping bag
  • candy thermometer
  • Food Processor
  • Silicone Mat or Parchment Paper

Method
 

Step-by-Step Instructions for Earl Grey Macarons
  1. Begin your delightful journey by measuring all dry ingredients—almond flour, powdered sugar, and Earl Grey tea. Ensure your egg whites are at room temperature.
  2. In a small saucepan, combine granulated sugar and water, then place it over medium heat until it reaches 118°C-120°C (244°F-248°F).
  3. Using a stand mixer, whisk the egg whites on medium speed until foamy. Gradually add the superfine sugar until soft peaks form.
  4. Once the sugar syrup reaches the right temperature, remove it from heat and pour it into the egg whites while whisking.
  5. Combine the almond flour, powdered sugar, and Earl Grey tea in a separate bowl and pulse in a food processor.
  6. Gently fold the whipped meringue into the almond mixture until it reaches the ribbon stage.
  7. Prepare a piping bag and pipe equal-sized rounds (about 3 cm in diameter) on a baking tray.
  8. Let the piped macarons rest at room temperature for 25-40 minutes, until dry to the touch.
  9. Preheat your oven to 155°C (311°F) and bake the macarons for 14-15 minutes.
  10. Allow the macarons to cool on the baking tray for about 5 minutes before transferring them to a wire rack.
  11. Whisk together egg yolks, lemon juice, and sugar in a heatproof bowl over simmering water until thickened.
  12. Incorporate butter and softened gelatin into the lemon curd, stirring until smooth.
  13. Pipe a small dollop of lemon curd onto half of the macarons and press another shell on top.
  14. Melt white chocolate and add yellow food coloring for decoration, then drizzle over the macarons.
  15. Refrigerate filled macarons for at least 12 hours before serving to allow flavors to meld.

Nutrition

Serving: 1macaronCalories: 90kcalCarbohydrates: 10gProtein: 1gFat: 5gSaturated Fat: 3gMonounsaturated Fat: 2gCholesterol: 15mgSodium: 5mgPotassium: 20mgSugar: 8gVitamin A: 100IUVitamin C: 1mgCalcium: 10mgIron: 0.2mg

Notes

Macarons are best enjoyed fresh, ideally within hours of assembly. For longer storage, refrigerate or freeze appropriately.

Tried this recipe?

Let us know how it was!

Delicious Earl Grey Macarons with Zesty Lemon Curd Filling

September 20, 2025 by Grace Snow Leave a Comment

As I stood in my kitchen, the warm aroma of freshly baked macarons filled the air, whisking me away to quaint Parisian cafes. These delightful Earl Grey macarons, infused with the fragrant notes of bergamot, are a true celebration of elegance in dessert form. Paired with a zesty lemon curd filling, they offer an inviting balance that both tea lovers and dessert aficionados will adore. What’s more, this recipe isn’t just about gratifying your sweet tooth; it’s also a perfect way to impress at your next gathering, providing a quick, yet refined, treat that’s suitable for any occasion. The joy of mastering the macaron technique can turn any home chef's day around, making it a rewarding experience that you won’t easily forget. Are you ready to elevate your baking game with these irresistible treats?

Why are these Macarons a Must-Try?

Elevating Treats: These Earl Grey macarons transform a classic French dessert with the delightful hint of bergamot. Unique Flavor Combination: The infusion of tea in the shells paired with tangy lemon curd creates an exciting flavor profile. Appealing Presentation: Their colorful aesthetic makes these macarons perfect for impressing guests at events or simply for your afternoon tea. Mastering Technique: Engaging in the macaron-making process can elevate your baking skills. Plus, quick and rewarding; they come together in a reasonable timeframe, leaving you with a sweet moment of triumph after your first successful batch! For more delightful ideas, check out our variations on macarons.

Earl Grey Macaron Ingredients

• Embrace the joy of cooking with these delicious Earl Grey macarons!

For the Macaron Shells

  • Almond Flour – Provides structure and texture; ensure it's finely ground for the best results.
  • Earl Grey Loose Tea – Infuses aromatic flavor; feel free to substitute with another flavored tea if desired.
  • Powdered Sugar – Sweetens the shells; you can use granulated sugar, but it may affect the texture.
  • Egg Whites – Essential for a stable meringue; make sure they are at room temperature for optimal aeration.
  • Granulated Sugar – Stabilizes the meringue when combined in the sugar syrup.
  • Water – Used to make the sugar syrup for meringue creation.

For the Lemon Curd Filling

  • Egg Yolks – Provide richness for the lemon curd; use fresh for the best flavor.
  • Lemon Juice – Adds a bright, tangy flavor; freshly squeezed is ideal, with about 5 lemons needed.
  • Lemon Zest – Enhances the lemon flavor within the curd.
  • Unsalted Butter – Contributes creaminess to the curd; can be substituted with a vegan alternative.
  • Gelatin Sheet – Stabilizes the lemon curd; opt for agar-agar as a vegetarian substitute if needed.

For Decoration

  • Melted White Chocolate & Yellow Food Coloring – Great for presentation; you can replace chocolate with a colored glaze for a cute touch.

Step‑by‑Step Instructions for Earl Grey Macarons

Step 1: Prep Ingredients
Begin your delightful journey by measuring all dry ingredients—almond flour, powdered sugar, and Earl Grey tea. Ensure your egg whites are at room temperature, which is crucial for achieving a stable meringue. This preparation sets the foundation for your Earl Grey macarons, ensuring everything is organized and ready to go.

Step 2: Make Sugar Syrup
In a small saucepan, combine granulated sugar and water, then place it over medium heat. Allow the mixture to heat until it reaches a temperature of 118°C-120°C (244°F-248°F), using a candy thermometer for precision. As the syrup boils and begins to thicken, keep an eye on it; this step is essential for stabilizing your meringue for the macarons.

Step 3: Whip Egg Whites
Using a stand mixer fitted with a whisk attachment, start whisking the egg whites on medium speed until foamy. Gradually add the superfine sugar as you continue whisking until soft peaks form. This step is crucial for achieving the perfect texture in your Earl Grey macaron shells, so watch for a fluffy consistency that holds soft peaks but isn’t yet stiff.

Step 4: Incorporate Syrup
Once your sugar syrup reaches the right temperature, carefully remove it from heat. While continuously whisking the egg whites on high speed, slowly pour in the hot syrup. Continue whisking until the meringue reaches stiff peaks and loses its glossy sheen, which usually takes about 5-8 minutes. This step is vital for creating the structure of your macarons.

Step 5: Mix Dry Ingredients
In a separate bowl, combine the almond flour, powdered sugar, and Earl Grey tea. Pulse the mixture a few times in a food processor until finely ground and well blended. This helps to aerate the dry ingredients, ensuring your Earl Grey macarons turn out light and delicate, free from lumps that could hinder their rise.

Step 6: Fold Mixtures
Gently fold the whipped meringue into the almond mixture using a spatula. This is where precision matters: fold until you reach the ribbon stage, which should take about 30-40 strokes. The final mixture should flow smoothly and resemble molten lava without any lumps. This step ensures your macarons achieve that beautiful, smooth surface.

Step 7: Pipe Shells
Prepare a piping bag fitted with a round tip, then fill it with the macaron batter. On a silicone mat or parchment-lined baking tray, pipe equal-sized rounds (about 3 cm in diameter), leaving space between each. This step is crucial for forming the perfect Earl Grey macaron shells; take your time to ensure even sizes for uniform baking.

Step 8: Rest Shells
Let the piped macarons rest at room temperature for 25-40 minutes, or until a skin forms on the surface. You’ll know they are ready when they are dry to the touch and a slight touch does not leave a mark. This step is essential to prevent cracks during baking and allows the macarons to rise properly.

Step 9: Bake
Preheat your oven to 155°C (311°F). Once ready, bake the macarons for 14-15 minutes, rotating the tray halfway through to ensure even baking. You’ll know they’re done when they have a slight sheen and lift easily from the mat. This baking step transforms the batter into the beautiful Earl Grey macarons you desire.

Step 10: Cool
Once out of the oven, allow the macarons to cool on the baking tray for about 5 minutes before transferring them to a wire rack. They must cool completely to maintain their delicate structure. Patience is key here, as this cooling step is essential for easy removal without breaking.

Step 11: Make Lemon Curd
In a heatproof bowl, whisk together egg yolks, lemon juice, and sugar over simmering water. Stir constantly until thickened, approximately 10-15 minutes. Once thick, remove from heat and incorporate the butter and softened gelatin, stirring until smooth. This lemon curd filling adds the perfect tangy contrast to your sweet Earl Grey macarons.

Step 12: Fill Macarons
Fit another piping bag with the lemon curd and pipe a small dollop onto the flat side of half the macarons. Gently press another shell on top to create a sandwich. This step enhances the flavors and textures, making every bite of your Earl Grey macarons delightful with zesty lemon.

Step 13: Decorate
Optionally, melt some white chocolate and add yellow food coloring for a charming decoration. Drizzle or dip the topped macarons in the melted chocolate, then dust with a little Earl Grey tea for an elegant touch. This decorative step not only adds flavor but also enhances presentation for an inviting treat.

Step 14: Aging
To achieve the best texture, refrigerate the filled macarons for at least 12 hours. This aging allows the flavors to meld and the filling to soften the macaron shells, making them irresistibly chewy and delicious. This essential aging step transforms your delectable Earl Grey macarons into a refined dessert perfect for any occasion.

Make Ahead Options

These Earl Grey macarons are perfect for meal prep enthusiasts looking to save time on busy days! You can prepare the macaron shells up to 24 hours in advance. Simply bake and cool them completely, then store the shells in an airtight container at room temperature to maintain their crispiness. The lemon curd filling can also be made up to 3 days ahead; refrigerate it in a covered container. When you're ready to serve, fill the macarons with the lemon curd and allow them to age in the fridge for at least 12 hours for optimal texture and flavor blending. This way, you’ll always have delightful treats ready at a moment's notice!

What to Serve with Earl Grey Macarons with Lemon Curd Filling

Elevate your baking experience by exploring delightful pairings that enhance each luscious bite of these unique macarons.

  • English Breakfast Tea: This robust tea complements the bergamot in the macarons while offsetting the tanginess of the lemon curd with its hearty flavor.
  • Scones with Clotted Cream: Light, flaky scones add a rustic touch and pair perfectly for a classic afternoon tea experience, balancing textures beautifully.
  • Fruit Salad: A fresh medley of berries and citrus fruits adds a vibrant touch and brightens the palate between bites of the sweet, creamy macarons.
  • Champagne or Prosecco: The bubbly effervescence cuts through the richness of the macarons, creating an elegant pairing that’s sure to impress at any gathering.
  • Lemonade or Herbal Iced Tea: Both beverages provide a complementary citrus twist, offering a refreshing contrast to the decadent treat and inviting a casual vibe.
  • Miniature Cheesecakes: Opt for lemon or berry-flavored cheesecakes to echo the flavors in the macarons while adding a creamy texture, making for delightful bites.
  • Butter Cookies: Lightly sweet, crisp butter cookies provide a lovely contrast in texture, making the macaron experience even more enjoyable for guests.
  • Chocolate-Covered Strawberries: The richness of chocolate and freshness of strawberries create a beautifully indulgent balance next to the delicate macaron.

Earl Grey Macarons Variations & Substitutions

Feel free to play around with these delightful variations and substitutions to make the recipe your own! Each twist promises to accentuate your culinary creativity and excitement.

  • Flavored Tea: Substitute Earl Grey with chai or jasmine tea for a new aromatic experience. The fragrant infusion will create a unique pairing with the lemon curd filling.
  • Fruity Curd: Swap the lemon curd for passionfruit or raspberry curd to add an exciting burst of flavor that complements the floral notes of the macaron shells beautifully.
  • Vegan Option: Use aquafaba (the liquid from chickpeas) instead of egg whites to make this treat entirely plant-based, while still achieving that coveted meringue texture.
  • Chocolate Twist: Incorporate cocoa powder into the macaron shells for a rich chocolate version, perfect if you're a chocoholic at heart. Pair it with a raspberry or orange curd for a complementary pairing!
  • Nut-Free Alternative: Use sunflower seed flour in place of almond flour to cater to nut allergies; it offers a slightly different flavor with a beautiful result.
  • Spice Up: Add a pinch of cardamom or cinnamon to the shell mixture for a warm twist that enhances the overall taste experience. These spices work wonderfully with the bergamot undertones.
  • Zesty Kick: Mix in some zest from an orange or lime into the lemon curd for a refreshing citrus twist that brightens up each bite!
  • Different Fillings: Experiment with alternate fillings like a pastry cream or whipped cream cheese mixed with herbs for a savory touch. Pairing with rosemary or thyme can bring a unique charm to your desserts.

Remember, the beauty of baking lies in the exploration of flavors! If you need more guidance or inspiration, check out our tips on perfecting macaron techniques and crafting unique curds. Happy baking!

Storage Tips for Earl Grey Macarons

  • Room Temperature: Macarons are best enjoyed fresh, so consume them within a few hours of assembly. If left out, they should be eaten within the day for optimal texture.
  • Fridge: Store filled Earl Grey macarons in an airtight container in the refrigerator for up to 5 days. This keeps them fresh and maintains the delightful balance of flavors.
  • Freezer: For longer storage, freeze unfilled macaron shells in an airtight container. They can last up to 2 months; just ensure to thaw them completely before filling.
  • Reheating: If you prefer warm macarons, briefly heat them in a microwave for 5-10 seconds, but be cautious as this can affect their texture.

Expert Tips for Earl Grey Macarons

  • Temperature Matters: Make sure your egg whites are room temperature; this maximizes aeration for the meringue, leading to better Earl Grey macarons.
  • No Overmixing: When folding the meringue into the dry ingredients, stop as soon as you reach the ribbon stage. Overmixing can deflate your batter, resulting in unwanted texture.
  • Resting is Key: Don’t skip the resting time after piping your shells; this crucial step helps form a skin that prevents cracking during baking.
  • Consistent Sizes: Use a template under your parchment paper to pipe evenly sized shells. Uniformity is vital for even baking and presentation.
  • Don’t Rush Cooling: Allow macarons to cool completely before filling to maintain their delicate texture and prevent breaking during assembly.
  • Aging Enhances Flavor: Refrigerate filled macarons for at least 12 hours before serving; this aging process brings out the best flavors and perfects the texture.

Earl Grey Macarons with Tangy Lemon Curd Filling Recipe FAQs

What should I look for when selecting Earl Grey tea?
Absolutely! When selecting Earl Grey tea, choose a high-quality loose leaf that prominently features bergamot oil. Look for leaves with a rich aroma and vibrant color, as these ensure a more robust infusion in your macarons. If you're uncertain, a good rule of thumb is to opt for brands known for their tea blends. Freshness matters here, so check the packaging date!

How should I store my Earl Grey macarons?
For the best taste, store your filled Earl Grey macarons in an airtight container in the fridge for up to 5 days. This prevents them from drying out and maintains that beautiful creamy lemon filling. If you prefer to keep them longer, consider separating the shells and filling, then storing the unfilled shells at room temperature.

Can I freeze the macarons, and what’s the best way?
Very! You can absolutely freeze unfilled macaron shells for longer preservation. To do this, place them in an airtight container, layer them carefully with parchment paper between each layer, and freeze for up to 2 months. When you're ready to fill them, allow them to thaw in the fridge overnight and pipe in your lemon curd once they're at room temperature.

What should I do if my macarons crack while baking?
Don't worry; this happens to the best of us! Cracks can occur if your macarons didn't rest long enough before baking, so make sure they form a skin that’s dry to the touch. Also, ensure your oven temperature is accurate; using an oven thermometer can help you achieve consistent results. If you're still having issues, try lowering your baking temperature by 10-15 degrees and extend the baking time slightly.

Are these macarons pet-friendly?
The ingredients in these Earl Grey macarons, specifically the lemon and tea, are not suitable for pets, particularly dogs and cats. If you're considering sharing a treat, stick with pet-safe snacks instead. Always err on the side of caution with your furry friends!

Can I make these macarons vegan or gluten-free?
You can definitely adapt them! For a vegan version, replace the egg whites with aquafaba (the liquid from canned chickpeas); use about 3 tablespoons for each egg white. For the lemon curd, swap the eggs and butter with a plant-based alternative like coconut cream and cornstarch to thicken. For gluten-free considerations, ensure your almond flour is certified gluten-free and that all other ingredients (like food coloring) are also safe. Enjoy experimenting!

Earl Grey Macarons

Delicious Earl Grey Macarons with Zesty Lemon Curd Filling

This Earl Grey Macarons recipe features a delightful bergamot flavor and a zesty lemon curd filling.
Print Recipe Pin Recipe
Prep Time 30 minutes mins
Cook Time 15 minutes mins
Resting Time 40 minutes mins
Total Time 1 hour hr 25 minutes mins
Servings: 24 macarons
Course: Dessert
Cuisine: French
Calories: 90
Ingredients Equipment Method Nutrition Notes

Ingredients
  

For the Macaron Shells
  • 120 g Almond Flour Ensure it's finely ground
  • 2 tbsp Earl Grey Loose Tea Can substitute with another flavored tea
  • 200 g Powdered Sugar Can use granulated sugar but may affect texture
  • 100 g Egg Whites Room temperature for optimal aeration
  • 200 g Granulated Sugar Stabilizes meringue
  • 50 ml Water Used for making sugar syrup
For the Lemon Curd Filling
  • 4 large Egg Yolks Use fresh for best flavor
  • 150 ml Lemon Juice Freshly squeezed, about 5 lemons needed
  • 1 tbsp Lemon Zest
  • 100 g Unsalted Butter Can substitute with a vegan alternative
  • 1 sheet Gelatin Sheet Opt for agar-agar as a vegetarian substitute
For Decoration
  • 50 g Melted White Chocolate Replace with colored glaze if desired
  • 1 dash Yellow Food Coloring

Equipment

  • Stand Mixer
  • piping bag
  • candy thermometer
  • Food Processor
  • Silicone Mat or Parchment Paper

Method
 

Step-by-Step Instructions for Earl Grey Macarons
  1. Begin your delightful journey by measuring all dry ingredients—almond flour, powdered sugar, and Earl Grey tea. Ensure your egg whites are at room temperature.
  2. In a small saucepan, combine granulated sugar and water, then place it over medium heat until it reaches 118°C-120°C (244°F-248°F).
  3. Using a stand mixer, whisk the egg whites on medium speed until foamy. Gradually add the superfine sugar until soft peaks form.
  4. Once the sugar syrup reaches the right temperature, remove it from heat and pour it into the egg whites while whisking.
  5. Combine the almond flour, powdered sugar, and Earl Grey tea in a separate bowl and pulse in a food processor.
  6. Gently fold the whipped meringue into the almond mixture until it reaches the ribbon stage.
  7. Prepare a piping bag and pipe equal-sized rounds (about 3 cm in diameter) on a baking tray.
  8. Let the piped macarons rest at room temperature for 25-40 minutes, until dry to the touch.
  9. Preheat your oven to 155°C (311°F) and bake the macarons for 14-15 minutes.
  10. Allow the macarons to cool on the baking tray for about 5 minutes before transferring them to a wire rack.
  11. Whisk together egg yolks, lemon juice, and sugar in a heatproof bowl over simmering water until thickened.
  12. Incorporate butter and softened gelatin into the lemon curd, stirring until smooth.
  13. Pipe a small dollop of lemon curd onto half of the macarons and press another shell on top.
  14. Melt white chocolate and add yellow food coloring for decoration, then drizzle over the macarons.
  15. Refrigerate filled macarons for at least 12 hours before serving to allow flavors to meld.

Nutrition

Serving: 1macaronCalories: 90kcalCarbohydrates: 10gProtein: 1gFat: 5gSaturated Fat: 3gMonounsaturated Fat: 2gCholesterol: 15mgSodium: 5mgPotassium: 20mgSugar: 8gVitamin A: 100IUVitamin C: 1mgCalcium: 10mgIron: 0.2mg

Notes

Macarons are best enjoyed fresh, ideally within hours of assembly. For longer storage, refrigerate or freeze appropriately.

Tried this recipe?

Let us know how it was!

Delightfully Moist Peach Cake with Fresh Thyme Compote

September 20, 2025 by Grace Snow Leave a Comment

As the sun shines brightly and summer unfolds, I find myself daydreaming about afternoons filled with the sweet scent of ripe peaches wafting through my kitchen. That's where this Moist Yogurt Peach Cake comes into play, a recipe that's not only easy to whip up but also delivers a light, fluffy texture that's perfect for the season. Enhanced with a fresh peach and thyme compote, it's a stunning centerpiece for any gathering or simply a delightful treat for yourself. Plus, this cake is a great choice for those seeking a gluten-free alternative or anyone wanting a healthier dessert option without sacrificing flavor. Isn't it time we traded fast food for the joy of homemade goodness? Let's dive into making this unforgettable summer dessert!

Why is this Peach Cake irresistible?

Irresistible Flavors: The combination of fresh peaches and fragrant thyme creates a cake that bursts with summer essence.
Healthier Option: Yogurt makes this recipe a lighter choice, perfect for those watching their diet without compromising taste.
Versatile Variations: Swap peaches for your favorite fruits like cherries or strawberries to customize this treat for any occasion.
Simple Baking: With straightforward instructions and minimal ingredients, it's accessible for both novice and experienced bakers alike.
Crowd Favorite: This cake is sure to impress at gatherings, offering a stunning presentation and a delightful fresh taste that everyone will love!

Peach Cake Ingredients

Get ready to gather fresh flavors for this delightful treat!

For the Batter

  • Vegetable Oil – Provides moisture and richness; any neutral oil like canola works well.
  • Granulated Sugar – Adds sweetness and enhances browning; feel free to reduce for a less sweet cake.
  • Egg – Acts as a binder for structure; two egg whites can be substituted for a vegan option.
  • Egg Yolk – Adds richness and moisture; consider flaxseed meal as a replacement if needed.
  • Yogurt (Greek or Turkish) – Offers moisture and a tender crumb; applesauce is a great low-fat substitute.
  • Pastry Flour – Ensures a light, tender texture; you can swap in all-purpose flour if that's what you have.
  • Baking Powder & Baking Soda – These leavening agents help the cake rise perfectly.
  • Salt – Balances flavors beautifully.
  • Peaches (fresh and pureed) – Provide flavor and moisture; canned peaches can work if drained well.

For the Compote

  • Fresh Peaches – Adds a vibrant taste; feel free to mix in other fruits like cherries or strawberries for a unique twist.
  • Sugar – Sweetens the compote; adjust to your taste preferences.
  • Lemon Juice – Brightens the flavor profile; essential for balance.
  • Thyme – Adds an aromatic touch; fresh thyme enhances the cake beautifully!
  • Gelatin Sheets – Helps set the compote for a lovely texture; agar-agar can be used as a vegetarian alternative.

Step‑by‑Step Instructions for Moist Yogurt Peach Cake

Step 1: Preheat the Oven
Begin by preheating your oven to 180°C (356°F). While the oven warms up, take a 15cm round cake pan and line it with parchment paper, ensuring the bottom is well-covered to prevent sticking. Grease the sides lightly with vegetable oil to promote easy removal once your peach cake is baked.

Step 2: Mix the Wet Ingredients
In a mixing bowl, combine the yogurt, eggs, granulated sugar, and vegetable oil. Whisk these ingredients together until the mixture is smooth and creamy, which should take about 2-3 minutes. This yogurt mixture will add moisture and richness to your moist yogurt peach cake, so ensure it’s well-blended before proceeding.

Step 3: Combine the Dry Ingredients
In a separate bowl, sift together the pastry flour, baking powder, baking soda, and salt. This step is crucial as it ensures an even distribution of the leavening agents, contributing to the cake’s fluffy texture. Gently fold the dry mixture into the wet ingredients, mixing until just combined to prevent overmixing.

Step 4: Incorporate the Peaches
Carefully fold in the fresh peach pieces to the batter, ensuring they are evenly distributed throughout. This will enhance the cake’s flavor and provide delightful bursts of peach in every bite. Once the peaches are incorporated, pour the batter into your prepared cake pan and smooth the top with a spatula.

Step 5: Bake the Cake
Place the cake pan in your preheated oven and bake for approximately 30 minutes. Keep an eye on the cake; it’s done when a toothpick inserted into the center comes out clean. Once baked, remove the pan from the oven and allow your peach cake to cool on a wire rack for about 10-15 minutes.

Step 6: Prepare the Compote
In a medium saucepan, combine fresh peach segments, a little sugar, lemon juice, and thyme. Cook over medium heat for about 5 minutes, stirring occasionally, until the peaches soften and release their juices. This fragrant peach and thyme compote will complement your cake beautifully, adding a fresh and aromatic topping.

Step 7: Mix in the Gelatin
Soak the gelatin sheets in cold water for a few minutes until softened. Gently stir them into the warm peach compote until fully dissolved. This step will help set the compote, creating a luscious layer that will sit atop your cooled yogurt peach cake. Remove the compote from heat and let it cool slightly.

Step 8: Assemble the Cake
Once the cake has completely cooled, place it back in the mousse ring or on your serving plate. Carefully pour the cooled peach compote over the top, using an offset spatula to smooth it out evenly. Ensure the compote covers the entire surface for a beautiful presentation.

Step 9: Chill the Cake
Refrigerate the assembled cake for at least 4 hours to allow the compote to set properly. This chilling time is essential for melding the flavors together, making your moist yogurt peach cake a refreshing summer dessert that's sure to delight everyone.

Step 10: Serve and Enjoy
After the chilling period, gently remove the mousse ring from the cake. Slice yourself a generous piece and serve chilled, garnished with fresh thyme for an elegant touch. This delightful peach cake is not only a treat for the taste buds but also a visual feast for the eyes!

Peach Cake Variations & Substitutions

Feel free to experiment with these tempting ideas and tailor the recipe to your taste buds!

  • Fruit Swap: Substitute peaches with apples, pears, cherries, or strawberries based on the season. Each fruit brings its own unique sweetness and flavor!

  • Gluten-Free: Use gluten-free flour in place of pastry flour for a delightful gluten-free peach cake that still maintains its lovely moistness.

  • Vegan Option: Replace eggs with a flaxseed meal mixture (1 tablespoon flaxseed meal + 2.5 tablespoons water) for a vegan-friendly alternative.

  • Dairy-Free: Substitute yogurt with coconut yogurt or any plant-based yogurt for a dairy-free option without compromising taste.

  • Flavor Booster: Add a teaspoon of vanilla extract or almond extract to the batter for a deeper flavor profile that complements the peaches beautifully.

  • Spice It Up: Incorporate spices like cinnamon or nutmeg for added warmth and depth. This twist brings out the flavors of the fruit even more.

  • Fruit Compote Variation: Mix other fruits, like raspberries or blueberries, into the peach compote for a fruity explosion of flavor. The tangy berries add a lovely contrast to the sweetness.

  • Nutty Crunch: Fold in chopped nuts like pecans or almonds for a crunchy texture that contrasts the softness of the cake. It’s the perfect way to add a delightful twist to your peach cake.

For more delicious ideas, why not explore variations of our cake recipes? I recommend checking out our Chocolate Pudding Cake or the delightful Ice Cream Cake for more inspiration.

Storage Tips for Peach Cake

Fridge: Keep any leftover peach cake covered in the fridge for up to 2 days. This helps maintain its delicious moistness and keeps it fresh for your next serving.

Freezer: While it's best not to freeze the cake due to potential texture changes, if you must, wrap it tightly in plastic wrap and store it in an airtight container for up to 1 month.

Reheating: If you enjoy your peach cake warmed, reheat individual slices in the microwave for 15-20 seconds. This will slightly melt the compote and enhance its flavors.

Assembly Tip: Always chill your assembled peach cake for at least 4 hours before serving to ensure the compote sets properly and the flavors meld beautifully.

Expert Tips for Perfect Peach Cake

  • Avoid Overmixing: Gently fold the batter to keep the cake light and airy. Overmixing can lead to a dense texture that strays from the ideal moist cake.
  • Cool Completely: Make sure your peach cake is completely cool before adding the compote. This helps prevent the compote from melting and ensures a beautiful presentation.
  • Use Parchment Paper: Line your cake pan with parchment paper for easy removal. This prevents sticking and maintains the cake's lovely shape.
  • Check Doneness: Use a toothpick to test the cake; it should come out clean. If it has batter on it, give it a few more minutes in the oven.
  • Customize the Compote: Don’t hesitate to mix fruits! Peaches are delightful, but cherries or strawberries can add a fun twist to your summer dessert.

What to Serve with Moist Yogurt Peach Cake

As you savor each bite of this delightful cake, let your imagination wander to the array of complementary dishes that can elevate your dessert experience.

  • Creamy Vanilla Ice Cream: The smooth, rich texture melts beautifully against the fluffy cake, enhancing the refreshing peach flavors.
  • Citrus Salad: A bright mix of oranges and grapefruits awakens your palate and adds a zesty contrast to the cake's sweetness.
  • Honey Yogurt Dip: Serve with a dollop of honey-sweetened yogurt, which adds creaminess while tying in the yogurt from the cake for cohesion.
  • Sparkling Lemonade: The fizzy, tangy drink offers a refreshing lift alongside the moist cake, perfect for a summer gathering.
  • Fresh Mint Leaves: Garnishing the plate with fresh mint not only brightens the presentation but also adds an aromatic, herbaceous note.
  • Berry Compote: A warm berry topping could provide a beautiful, contrasting flavor that complements the cake’s moist, peachy essence.
  • Nutty Granola: Sprinkle a bit of granola on top for a delightful crunch that balances the soft cake texture with earthy notes.
  • Chocolate Sauce: Drizzle a light chocolate sauce over the cake for an indulgent twist that appeals to chocolate lovers.
  • Chilled White Wine: Pairing with a glass of chilled white wine can enhance the peach notes while creating a sophisticated dessert experience.

Make Ahead Options

These Moist Yogurt Peach Cakes are a wonderful choice for meal prep! You can prepare the batter up to 24 hours in advance by mixing the wet and dry ingredients (just leave out the peaches) and storing it in the refrigerator. Additionally, you can make the peach and thyme compote and refrigerate it for up to 3 days, which allows the flavors to meld. When you're ready to bake, simply fold in the fresh peach pieces, pour the batter into the pan, and bake as directed. This way, you’ll have a delightful dessert ready with minimal effort, perfect for busy weeknights or gatherings!

Peach Cake Recipe FAQs

How do I select ripe peaches for the cake?
Absolutely! When choosing peaches, look for ones that are slightly soft to the touch and have a sweet aroma. The skin should be free of dark spots and bruises. If they’re too firm, let them ripen at room temperature for a couple of days until they yield slightly when pressed.

How should I store leftover peach cake?
To maintain its moistness, cover any leftover peach cake tightly with plastic wrap or place it in an airtight container. Keep it in the refrigerator for up to 1-2 days. This ensures that each slice remains fresh and delightful for your next craving!

Can I freeze the moist yogurt peach cake?
While I recommend against freezing the whole cake due to texture changes, if needed, you can freeze individual slices. Wrap each slice tightly in plastic wrap followed by aluminum foil, and store them in an airtight container. They should stay fresh for up to 1 month. When ready to enjoy, thaw in the refrigerator overnight, then gently warm in the microwave if desired.

What should I do if my cake sinks in the middle?
Very! If your cake sinks, it could be due to overmixing the batter or not properly measuring the ingredients. To avoid this, mix until just combined and always use the correct amount of baking powder and soda. If the cake has already sunk, you can try slicing it and serving it with a bit more compote or cream on top to mask the appearance.

Is this recipe suitable for those with gluten allergies?
Yes! If you’re looking for a gluten-free option, you can substitute the pastry flour with a 1-to-1 gluten-free flour blend. Ensure that the blend contains xanthan gum to help with the cake's structure. This way, you can enjoy the same fabulous flavors without compromising on dietary needs.

Can I use frozen peaches instead of fresh?
Absolutely! Frozen peaches can be used if fresh ones are out of season. Just thaw them completely and drain any excess liquid before incorporating them into the batter. This will enhance the flavor without impacting the cake's moisture content!

Peach Cake

Delightfully Moist Peach Cake with Fresh Thyme Compote

This Peach Cake is a delightful dessert featuring a moist texture, fresh peaches, and aromatic thyme, perfect for summer gatherings.
Print Recipe Pin Recipe
Prep Time 20 minutes mins
Cook Time 30 minutes mins
Chilling Time 4 hours hrs
Total Time 4 hours hrs 50 minutes mins
Servings: 8 slices
Course: Dessert
Cuisine: American
Calories: 220
Ingredients Equipment Method Nutrition Notes

Ingredients
  

For the Batter
  • 1/2 cup Vegetable Oil Any neutral oil like canola
  • 1 cup Granulated Sugar Feel free to reduce for less sweetness
  • 1 large Egg Can substitute with two egg whites for vegan option
  • 1 large Egg Yolk Flaxseed meal can be used as a replacement
  • 1 cup Yogurt (Greek or Turkish) Applesauce is a great low-fat substitute
  • 1 cup Pastry Flour All-purpose flour can be used as a substitute
  • 1 teaspoon Baking Powder
  • 1 teaspoon Baking Soda
  • 1/4 teaspoon Salt
  • 2 cups Peaches (fresh and pureed) Canned peaches can be used if drained
For the Compote
  • 2 cups Fresh Peaches Chopped
  • 1/4 cup Sugar Adjust to taste
  • 2 tablespoons Lemon Juice Essential for flavor balance
  • 1 tablespoon Thyme Fresh thyme enhances the flavor
  • 2 sheets Gelatin Sheets Agar-agar can be used as a vegetarian alternative

Equipment

  • Mixing Bowl
  • Cake Pan
  • Saucepan
  • Whisk
  • Spatula

Method
 

Baking Instructions
  1. Preheat your oven to 180°C (356°F) and prepare a 15cm round cake pan by lining it with parchment paper and greasing the sides.
  2. In a mixing bowl, whisk together yogurt, eggs, granulated sugar, and vegetable oil until smooth and creamy.
  3. Sift together pastry flour, baking powder, baking soda, and salt in a separate bowl, then gently fold this dry mixture into the wet ingredients.
  4. Fold in fresh peach pieces and pour the batter into the prepared cake pan, smoothing the top.
  5. Bake for approximately 30 minutes, until a toothpick inserted in the center comes out clean.
  6. Allow the cake to cool on a wire rack for 10-15 minutes.
  7. In a medium saucepan, combine fresh peach segments, sugar, lemon juice, and thyme, cooking for about 5 minutes until softened.
  8. Soak gelatin sheets in cold water, then stir into the warm peach compote until fully dissolved.
  9. Once the cake is cooled, pour the compote over the top, smoothing it out evenly.
  10. Refrigerate the cake for at least 4 hours to allow the compote to set, then serve chilled garnished with fresh thyme.

Nutrition

Serving: 1sliceCalories: 220kcalCarbohydrates: 30gProtein: 3gFat: 10gSaturated Fat: 1.5gPolyunsaturated Fat: 0.5gMonounsaturated Fat: 8gCholesterol: 30mgSodium: 100mgPotassium: 150mgFiber: 1gSugar: 12gVitamin A: 150IUVitamin C: 5mgCalcium: 50mgIron: 1mg

Notes

This Peach Cake is a versatile and healthier dessert option, perfect for summer gatherings. Customize the fruits in the compote for varied flavors.

Tried this recipe?

Let us know how it was!

Peanut Butter Spider Cookies That Halloween Kids Will Love

September 19, 2025 by Grace Snow Leave a Comment

As Halloween approaches, the excitement in the air becomes almost palpable—especially when it comes to whipping up treats that delight ghouls and goblins alike. My Peanut Butter Spider Cookies are the perfect blend of fun and flavor, topped with creamy Reese's cups and adorable candy eyeballs! Not only are these cookies quick to prepare with no chilling time required, but they also make for a truly crowd-pleasing Halloween dessert. Imagine both kids and adults gathering around, marveling at these festive little delights—who wouldn’t want a bite of these spooky snacks? They are easily adaptable too, allowing you to modify them for gluten-free diets without sacrificing joy. Ready to impress your family this spooky season? Let’s dive into the recipe!

Why Are Peanut Butter Spider Cookies So Fun?

Irresistible Festive Appeal: These cookies are not just treats; they're playful creations that bring Halloween spirit to life!
No-Chill Convenience: Quickly whip up a batch without waiting around—perfect for when those sweet cravings hit!
Kid-Friendly Fun: Let the little ones get creative decorating with candy eyeballs; it's a great way to bond and make memories.
Delicious Flavor Combo: The blend of creamy peanut butter and chocolate is a match made in dessert heaven!
Easily Adaptable: Need a gluten-free option? Feel free to swap in a 1:1 gluten-free flour blend for everyone to enjoy!

You’ll love serving these Peanut Butter Spider Cookies at your Halloween gatherings, transforming them into treats that even your favorite classics like Eggnog Cookies Soft can’t compete with!

Peanut Butter Spider Cookies Ingredients

For the Cookies
• Unsalted Butter – Adds richness and moisture; make sure it's at room temperature for easier mixing.
• Brown Sugar – Provides moisture and chewiness; you can substitute with coconut sugar for deeper flavor.
• Granulated Sugar – Sweetens the cookies and helps achieve those delightful crispy edges.
• Creamy Peanut Butter – The star ingredient that gives flavor and texture; stick with conventional peanut butter for the best results.
• Large Egg – Binds the mixture together and contributes to the cookie's structure.
• Vanilla Extract – Enhances the overall flavor profile beautifully.
• All-Purpose Flour – Provides structure; a 1:1 gluten-free flour blend can be used for a gluten-free version.
• Baking Soda – Acts as a leavening agent for a slightly risen cookie.
• Baking Powder – Works alongside baking soda to ensure fluffiness.
• Salt – Balances out the cookie's sweetness.
• Granulated Sugar (for rolling) – Adds a sweet, crunchy crust.

For the Topping
• Mini Reese’s Peanut Butter Cups – Bring festive joy and flavor to your cookies, making them truly special.
• Semi-Sweet Chocolate Chips – Perfect for creating spider legs and attaching our fun candy eyes.
• Candy Eyeballs – These festive decorations make your cookies irresistibly cute and Halloween-ready!

Your festive Peanut Butter Spider Cookies are just waiting to be made, and I can guarantee they’ll be a hit with the whole family!

Step‑by‑Step Instructions for Peanut Butter Spider Cookies

Step 1: Chill the Reese’s
Begin by placing your unwrapped mini Reese's Peanut Butter Cups in the freezer for about 30 minutes. This helps them maintain their shape when baked into your Peanut Butter Spider Cookies. A quick chill ensures the delicious centers won't melt away completely, leaving you with perfectly festive treats!

Step 2: Prepare the Oven
Preheat your oven to 350°F (175°C). While the oven heats, you'll be ready to mix your cookie dough soon. Make sure to line two baking sheets with parchment paper for easy cleanup and to prevent sticking, ensuring your cookies bake evenly and come out beautifully golden.

Step 3: Mix Butter and Sugars
In a large mixing bowl, beat together ½ cup of unsalted butter, ½ cup of packed brown sugar, and ¼ cup of granulated sugar using an electric mixer. Mix until the mixture is smooth and fluffy—approximately 2-3 minutes. This creaming process helps incorporate air, giving your Peanut Butter Spider Cookies a delightful texture when baked.

Step 4: Combine the Wet Ingredients
Add ¾ cup of creamy peanut butter, one large egg, and 1 teaspoon of vanilla extract to the butter and sugars. Continue mixing until everything is well blended and creamy. This combination adds that essential nutty flavor that makes these cookies irresistible, ensuring each bite encapsulates the heart of Halloween!

Step 5: Incorporate the Dry Ingredients
Gradually mix in 1 cup of all-purpose flour, ½ teaspoon of baking soda, ½ teaspoon of baking powder, and ¼ teaspoon of salt. Stir just until combined, taking care not to overmix; the dough should be thick and slightly sticky. This step ensures your Peanut Butter Spider Cookies maintain the perfect chewiness and structure when baked.

Step 6: Shape the Cookies
Using a tablespoon, scoop out dough and form balls about the size of a golf ball. Roll each ball in granulated sugar for a sweet crust, then place them spaced 2 inches apart on your prepared baking sheets. This allows room for spreading while baking—give them a cozy but not crowded home on the tray!

Step 7: Bake the Cookies
Bake the cookies in the preheated oven for 8-11 minutes, until the edges are golden while the centers remain soft. Keep an eye on them as they bake; you want a nice golden hue without overbaking. When the timer goes off, the aroma of peanut butter will fill your kitchen—yum!

Step 8: Add the Toppings
As soon as they come out of the oven, gently press a chilled Reese’s cup into the center of each cookie while they are still warm. Allow the cookies to cool on the baking sheet for about 15-20 minutes. This helps the Reese’s melt slightly into the cookie, creating a deliciously sweet centerpiece!

Step 9: Decorate the Cookies
Melt ½ cup of semi-sweet chocolate chips in the microwave or over a double boiler until smooth. Use a squeeze bottle or a ziplock bag with a corner snipped off to create spider legs by drizzling the melted chocolate out from the Reese's. Attach candy eyeballs using some of the melted chocolate, letting everything set completely before serving. These Peanut Butter Spider Cookies will be a spooky treat that everyone will adore!

Make Ahead Options

These Peanut Butter Spider Cookies are perfect for busy home cooks looking to save time! You can prepare the cookie dough up to 24 hours in advance by mixing all the ingredients, rolling them into balls, and storing them in an airtight container in the refrigerator. For even longer storage, shape the dough balls, flash freeze them on a baking sheet, and then transfer to a ziplock bag—this allows you to bake fresh cookies later, even up to three months down the line! When you’re ready to bake, just preheat the oven, place them on a baking sheet, and bake as directed. You'll achieve those soft, chewy cookies just as delightful as when made fresh!

What to Serve with Peanut Butter Spider Cookies?

These delightful cookies will surely steal the spotlight, but pairing them with the right sides enhances your Halloween festivities.

  • Milk: A classic pairing that complements the chocolate and peanut butter, providing a creamy balance to each sweet bite.
  • Pumpkin Spice Latte: The warm spices from this seasonal favorite create a cozy experience, perfect for a Halloween gathering.
  • Caramel Apple Slices: Crisp apple slices dipped in caramel add a refreshing crunch that contrasts beautifully with the chewy cookies.
  • Ghostly Cupcakes: Whipped frosting and spooky décor on cupcakes mirror the fun spirit of your cookies, enticing everyone to indulge.
  • Hot Chocolate: Rich, creamy hot chocolate drizzled with chocolate adds a luxurious touch and indulgent experience to the evening.

These pairings will not only elevate your Peanut Butter Spider Cookies but also create a memorable dessert spread for all your Halloween celebrations!

Peanut Butter Spider Cookies Variations

Feel free to get creative with your Peanut Butter Spider Cookies and make them your own!

  • Nut-Free: Swap peanut butter for sun butter to create an allergen-friendly version that still delights.

  • Gluten-Free: Use a 1:1 gluten-free flour blend for a kid-friendly treat that everyone can enjoy.

  • Flavor Boost: Add ½ teaspoon of cinnamon or pumpkin spice to the dough for a warm, autumnal flavor.

  • Chocolate Lovers: Replace mini Reese’s with chocolate-covered pretzels for an extra crunch and sweet-salty twist.

  • Mix and Match Toppings: Experiment with different candies for the spider topping; crushed Oreos or gummy worms can make fun alternatives!

  • Choco-Peanut Butter Twist: Incorporate semi-sweet chocolate chips into the dough for a rich, chocolatey experience.

  • Festive Sprinkles: Add Halloween-themed sprinkles before the cookies cool for a pop of color and celebration.

  • Chopped Candy Bars: Substitute mini Reese’s with chopped fun-sized candy bars, like Snickers or Milky Way, for mixed flavor fun.

No matter which variations you choose, your spooky cookies will be sure to charm all ghosts and goblins at your Halloween gatherings. For holiday treats that are just as delightful, consider making Thumbprint Cookies Melt or Mexican Wedding Cookies to keep the festive spirit alive!

Expert Tips for Peanut Butter Spider Cookies

  • Chill the Reese's: Ensure your Reese's cups are frozen before baking; this keeps their shape intact and prevents melting into the cookie dough.

  • Don’t Overbake: Keep an eye on the cookies; they should be golden on the edges but still soft in the center. They continue to set while cooling.

  • Sugar Coating: Rolling the cookie dough balls in granulated sugar not only adds sweetness but also creates a delightful texture contrast in the finished cookies.

  • Parchment Paper: Use parchment paper on your baking sheets to prevent sticking and to make cleanup a breeze, enhancing your cookie baking experience.

  • Creative Toppings: Don’t hesitate to get festive with decorations—feel free to use different types of candy for variety, while keeping the peanut butter cookie goodness intact!

How to Store and Freeze Peanut Butter Spider Cookies

Airtight Container: Store cookies in an airtight container at room temperature for up to 3 days to keep them fresh and chewy. If stacking, place parchment paper between layers to prevent sticking.

Freezer Friendly: For longer storage, these Peanut Butter Spider Cookies can be frozen. Wrap each cookie individually in plastic wrap, then place them in a ziplock bag for up to 2 months.

Reheating: When ready to enjoy, thaw your cookies at room temperature, or pop them in the microwave for a few seconds to regain that soft, fresh-from-the-oven texture.

Dough Storage: If you'd like, you can also freeze the cookie dough! Shape into balls, flash freeze them on a baking sheet, and then transfer to a ziplock bag. Bake directly from frozen, adding a minute or two to the baking time.

Peanut Butter Spider Cookies Recipe FAQs

How do I choose the right peanut butter for this recipe?
Absolutely! For the best results when making your Peanut Butter Spider Cookies, I recommend using conventional creamy peanut butter. This type creates the ideal texture and flavor. Natural peanut butter may not work as well, as it can be too oily or dry, affecting the consistency of your cookie dough.

What’s the best way to store Peanut Butter Spider Cookies?
To keep your cookies fresh, store them in an airtight container at room temperature for up to 3 days. If you're stacking them, place parchment paper between layers to prevent them from sticking together. They truly taste best when enjoyed fresh!

Can I freeze Peanut Butter Spider Cookies?
Very! To freeze your Peanut Butter Spider Cookies, wrap each cookie individually in plastic wrap and then place them in a ziplock bag. They can be stored in the freezer for up to 2 months. When you're ready to enjoy them, simply thaw at room temperature or warm them in the microwave for a few seconds to regain that soft, fresh-from-the-oven texture!

What if my cookie dough is too dry?
If you find that your dough seems too dry, don’t worry! Simply add a teaspoon of milk or a little more peanut butter to the mix to achieve that perfect, slightly sticky consistency. This will enhance the moisture and ensure your cookies turn out delightfully chewy.

Can I make these cookies gluten-free?
Yes, absolutely! To create a gluten-free version of Peanut Butter Spider Cookies, simply replace all-purpose flour with a 1:1 gluten-free flour blend. This modification allows everyone to enjoy these festive treats without sacrificing flavor or texture!

What can I use instead of Reese's for the topping?
If you prefer, you can substitute mini candy bars instead of Reese's to top your cookies. Feel free to get creative! Using different types of chocolate or candies can add variety and fun to your Halloween treats while still keeping that delicious peanut butter cookie base intact.

Peanut Butter Spider Cookies

Peanut Butter Spider Cookies That Halloween Kids Will Love

Delight kids and adults alike with these fun and flavorful Peanut Butter Spider Cookies, perfect for Halloween gatherings.
Print Recipe Pin Recipe
Prep Time 20 minutes mins
Cook Time 11 minutes mins
Cooling Time 20 minutes mins
Total Time 51 minutes mins
Servings: 24 cookies
Course: Dessert
Cuisine: American
Calories: 150
Ingredients Equipment Method Nutrition Notes

Ingredients
  

For the Cookies
  • 0.5 cups Unsalted Butter At room temperature
  • 0.5 cups Brown Sugar Packed, can substitute with coconut sugar
  • 0.25 cups Granulated Sugar For sweetness
  • 0.75 cups Creamy Peanut Butter Conventional for best results
  • 1 large Egg Binds the mixture
  • 1 teaspoon Vanilla Extract
  • 1 cups All-Purpose Flour Can use a 1:1 gluten-free flour blend
  • 0.5 teaspoon Baking Soda
  • 0.5 teaspoon Baking Powder
  • 0.25 teaspoon Salt To balance sweetness
  • 0.25 cups Granulated Sugar (for rolling) For a crunchy crust
For the Topping
  • 12 pieces Mini Reese’s Peanut Butter Cups
  • 0.5 cups Semi-Sweet Chocolate Chips For spider legs
  • 1 cup Candy Eyeballs For decoration

Equipment

  • Mixing Bowl
  • Electric mixer
  • Baking Sheets
  • Parchment Paper
  • Squeeze bottle or ziplock bag

Method
 

Step-by-Step Instructions
  1. Chill the unwrapped mini Reese's Peanut Butter Cups in the freezer for about 30 minutes.
  2. Preheat your oven to 350°F (175°C) and line two baking sheets with parchment paper.
  3. In a large mixing bowl, beat together the butter, brown sugar, and granulated sugar until smooth and fluffy.
  4. Add peanut butter, egg, and vanilla extract to the mixture and mix until well blended.
  5. Gradually mix in flour, baking soda, baking powder, and salt until just combined.
  6. Scoop out dough and form golf ball-sized balls, roll in granulated sugar, and place them on prepared baking sheets.
  7. Bake for 8-11 minutes until edges are golden and centers are soft.
  8. As soon as they come out of the oven, press a chilled Reese’s cup into the center of each cookie.
  9. Cool on the baking sheet for about 15-20 minutes before decorating.
  10. Melt chocolate chips and create spider legs by drizzling from the Reese's. Attach candy eyeballs with chocolate.

Nutrition

Serving: 1cookieCalories: 150kcalCarbohydrates: 20gProtein: 3gFat: 7gSaturated Fat: 3gPolyunsaturated Fat: 1gMonounsaturated Fat: 2gCholesterol: 15mgSodium: 80mgPotassium: 90mgFiber: 1gSugar: 10gVitamin A: 100IUCalcium: 15mgIron: 1mg

Notes

These cookies can be adapted for gluten-free diets by using a 1:1 gluten-free flour blend.

Tried this recipe?

Let us know how it was!

Easy Cauldron Cookies That Will Bewitch Your Halloween Parties

September 19, 2025 by Grace Snow Leave a Comment

Every Halloween, the excitement of creating something fun in the kitchen is contagious! This year, I decided to whip up Easy Cauldron Cookies, a delightful concoction that combines rich chocolate flavor with a twist of whimsical charm. Not only are these adorable treats customizable—switching up the bases and fillings to suit your taste—but they also make for a fantastic activity to enjoy with the kids. With just a few ingredients and minimal prep time, you can have an eye-catching dessert that’ll steal the show at any spooky gathering. But do you think you can resist turning these cookie cups into bubbling potions? Let’s dive into the recipe and find out!

Why Are Cauldron Cookies So Magical?

Customizable Delight: With variations for both the base and filling, these Easy Cauldron Cookies let your creativity shine! Opt for cake mix cookies or mini brownies—whichever your heart desires.

Kid-Friendly Fun: Engage little chefs in the kitchen! These cookies are a perfect project for kids, allowing them to help with mixing, filling, and decorating their spooky treats.

Quick & Easy: Thanks to simple ingredients and a speedy process, you can whip these up in under an hour! Perfect for last-minute Halloween parties or school events.

Crowd-Pleasing Appeal: Everyone loves a delicious, playful treat! Serve these eye-catching cookies, and watch as they disappear faster than you can say "trick or treat!"

For more fun ideas, try making Matcha Cookies Soft or Eggnog Cookies Soft for the holiday season!

Easy Cauldron Cookies Ingredients

• Perfect for your Halloween baking!

For the Cookie Cups

  • Devil's Food Cake Mix – Provides structure and chocolate flavor; substitute with another chocolate cake mix for variety.
  • Large Eggs – Acts as a binding agent for the cookie mix; no substitute recommended.
  • Canola or Vegetable Oil – Ensures moistness in the cookie cups; olive oil can be used in a pinch.
  • Black Food Coloring (optional) – Enhances the spooky appearance; omit for a more traditional look.

For the Buttercream Frosting

  • Unsalted Butter – Forms the base of the buttercream frosting; margarine could work but may alter flavor.
  • Powdered Sugar – Sweetens and thickens the frosting; granulated sugar cannot be substituted directly.
  • Vanilla Extract – Adds depth of flavor to the buttercream; almond extract can be a flavorful alternative.
  • Salt – Balances sweetness in the frosting; necessary for flavor enhancement.
  • Milk – Adjusts the texture of frosting for a smoother consistency; plant-based milk can be an alternative.
  • Green Food Coloring – Tints the buttercream for festive appeal; omit if a neutral color is preferred.

Fun Decorations

  • Round Green Sprinkles, Halloween Sprinkles, Candy Eyeballs, Pretzel Sticks – Decorative toppings that elevate the fun visual; substitute with other Halloween-themed decorations as desired.

Get ready to enchant your guests with these Easy Cauldron Cookies!

Step‑by‑Step Instructions for Easy Cauldron Cookies

Step 1: Preheat the Oven
Preheat your oven to 350°F (175°C) and prepare your workspace by greasing three 12-count mini muffin pans. This ensures that your Easy Cauldron Cookies will easily release after baking. While the oven heats, gather your ingredients to streamline the mixing process.

Step 2: Mix the Dough
In a large bowl, combine the Devil's Food Cake Mix, large eggs, canola oil, and optional black food coloring. Use a spatula or wooden spoon to mix until the batter is smooth and glossy, approximately 1-2 minutes. The dough should be thick but cohesive, perfect for forming into cookie cups.

Step 3: Fill the Muffin Pans
Using a tablespoon, scoop about ½ tablespoon of dough into each muffin cup. Flatten the dough lightly with your fingers to create small cups. Ensure they are evenly filled to promote uniform baking for your Easy Cauldron Cookies.

Step 4: Bake the Cookies
Place the muffin pans in the preheated oven and bake for 8-10 minutes. Watch for the edges to set and the tops to look slightly firm. As soon as you remove them from the oven, gently press an indentation in the center of each cookie with a small spoon or your finger.

Step 5: Cool the Cookie Cups
Allow the cookie cups to cool in the pans for about 5 minutes before transferring them to a wire rack. It's important for the Easy Cauldron Cookies to cool completely to ensure they hold their shape while filling them with frosting later on.

Step 6: Make the Buttercream Frosting
In a mixing bowl, beat the softened unsalted butter with a hand mixer until creamy. Gradually add powdered sugar, vanilla extract, salt, and milk until the mixture is smooth and fluffy, about 3-5 minutes. Add in green food coloring, adjusting the shade to your preference for a fun, festive touch.

Step 7: Fill the Cookies
Once the cookie cups have completely cooled, it's time to fill them! Transfer the buttercream frosting into a piping bag and pipe it generously into each indentation. The frosting should resemble bubbling potions, making your Easy Cauldron Cookies look delightfully spooky.

Step 8: Decorate Your Treats
Finish off your cauldron cookies with an array of festive decorations. Sprinkle with round green sprinkles, candy eyeballs, or insert a pretzel stick into the frosting to mimic a stirring stick. This extra touch adds both visual appeal and fun to your cookies.

Step 9: Serve the Cookies
Your Easy Cauldron Cookies are now ready to dazzle your guests! Arrange them on a festive platter and watch as they disappear at your Halloween gathering. Enjoy the delight these treats bring to your spooky celebrations!

Storage Tips for Easy Cauldron Cookies

Room Temperature: Keep decorated cookies in an airtight container at room temperature for up to 3 days. This preserves their soft texture and delightful appearance.

Fridge: For extended freshness, store cookies in the refrigerator for up to a week. Just remember to allow them to come to room temperature before serving for the best flavor.

Freezer: Freeze undecorated cookie cups in an airtight container for up to three months. Thaw them before adding frosting to enjoy maximum freshness.

Reheating: If you prefer warm cookies, reheat in the microwave for 10-15 seconds before serving. This brings back that lovely softness in your Easy Cauldron Cookies!

What to Serve with Easy Cauldron Cookies

Get ready to create a magical Halloween feast full of delightful flavors and festive fun!

  • Warm Pumpkin Spice Latte: A cozy drink that complements the rich chocolate of the cookies, adding warmth and spice to your Halloween spread.

  • Chilled Apple Cider: Refreshing and sweet, apple cider provides a light, fruity balance, making it the perfect pairing for these indulgent treats.

  • Candy Corn Fudge: This colorful fudge mirrors the vibrant Halloween spirit and adds a creamy, sweet contrast to the cookie's texture.

  • Ghostly Fruit Salad: A mix of seasonal fruits like ghostly bananas and spooky berries offers a refreshing palate cleanser amidst the chocolatey indulgence. Fruit decorated with Halloween-themed toppings can be a fun addition!

  • Chocolate-Dipped Pretzels: Salty meets sweet in this snack, adding a crunchy texture that pairs perfectly with the soft cauldron cookies' rich filling.

  • Haunted Hot Chocolate: Rich, creamy, and topped with whipped cream and spooky sprinkles, this drink creates an enchanting experience that delights both kids and adults alike.

  • Mini Caramel Apples: Their crisp and chewy texture combined with sweet caramel is a fun bite alongside your Easy Cauldron Cookies, making for a classic Halloween treat that everyone loves.

  • Spooky Cheesecake Bites: These mini cheesecakes provide a creamy and indulgent dessert that playfully complements the cookies’ festive theme while offering a different texture.

  • Pumpkin Pie Bars: A deliciously spiced dessert that carries the essence of Halloween, with its smooth filling perfectly contrasting the cookie texture.

Embrace these pairings as you celebrate the season with your festive, delicious treats!

Make Ahead Options

These Easy Cauldron Cookies are perfect for busy cooks who want to save time! You can prepare the cookie cups up to 24 hours in advance; simply bake and let them cool completely before storing them in an airtight container at room temperature. The buttercream frosting can also be made ahead of time and refrigerated for up to 3 days—just remember to let it sit at room temperature for about 30 minutes before using, so it’s easy to pipe. When you’re ready to serve, fill the cooled cookie cups with buttercream, decorate with your favorite spooky toppings, and enjoy these delightful treats that still taste fresh and delicious!

Expert Tips for Easy Cauldron Cookies

Soften Butter: Ensure butter is softened (not melted) for the buttercream to whip to the desired consistency. This prevents a greasy texture.

Indent Successfully: Press indentations in cookies while warm for better filling retention. This small step makes a big difference in presentation!

Sift for Smoothness: Sift the cake mix before mixing it with the other ingredients. This helps achieve a smoother batter and a better consistency for your Easy Cauldron Cookies.

Decorate Before Serving: Decorate the cookies just before serving to maintain their festive appeal. This keeps the toppings fresh and visually enticing for your party guests!

Experiment with Fillings: Feel free to try different fillings like cream cheese frosting or chocolate ganache for a unique twist on your Easy Cauldron Cookies. Your creativity is the only limit!

Easy Cauldron Cookies Variations & Substitutions

Feel free to let your imagination run wild as you make these delightful cookies uniquely yours!

  • Brownie Base: Swap cake mix for mini brownies to create a denser, fudgy treat. This twist adds rich chocolate flavor and a satisfying chewiness.

  • Frosting Alternatives: Use cream cheese frosting for a tangy kick or opt for ready-made frosting for a quicker option. Both will elevate your cookies in different ways!

  • Fillings: Consider a luscious white chocolate ganache for added richness. The creamy texture complements the soft cookies beautifully, for a truly indulgent experience.

  • Nut-Free Option: Substitute your oil with nut-free options like sunflower seed oil, keeping the deliciousness intact while catering to allergies.

  • Vegan Twist: Replace eggs with flaxseed meal mixed with water and use plant-based butter for the frosting. These swaps make the recipe vegan-friendly without compromising on taste.

  • Chocolate Chip Additions: Mix in chocolate chips to the cookie dough for an extra burst of chocolatey goodness. Everyone loves a little surprise in their treats!

  • Spicy Surprise: Add a pinch of cayenne pepper or cinnamon to the batter for a hint of heat that can create an intriguing flavor contrast with the sweetness.

  • Decorative Delight: Instead of regular sprinkles, use candy corn or gummy worms as toppings for a festive Halloween flair! This small change adds a playful visual element.

For more adventurous baking, try incorporating ideas from Mexican Wedding Cookies or even Peaches Cream Cookies in your repertoire!

Easy Cauldron Cookies Recipe FAQs

What is the best way to select the right cake mix for Cauldron Cookies?
Absolutely! When choosing a cake mix for your Easy Cauldron Cookies, look for a devil's food cake mix to provide that rich chocolate flavor. If you prefer a twist, any chocolate cake mix will work. Always check the expiration date to ensure freshness!

How should I store my Easy Cauldron Cookies?
To maintain their delightful texture, keep your decorated Easy Cauldron Cookies in an airtight container at room temperature for up to 3 days. If you want them to last longer, you can refrigerate them for about a week. Just let them come to room temperature before serving for the best taste!

Can I freeze my Cauldron Cookies?
Very! To freeze your Easy Cauldron Cookies, it's best to leave them undecorated. Place the cooled cookie cups in an airtight container and freeze for up to three months. When you're ready to enjoy them, simply thaw on the counter for a few hours before adding your frosting and decorations.

What should I do if my cookie cups don’t hold their shape?
If your Easy Cauldron Cookies don’t hold their shape after baking, it might be because they were underbaked or the dough was too soft. Make sure to press down firmly in the center while they’re warm to create enough indentation. Try baking them a minute or two longer to ensure they set properly.

Are there any dietary considerations for these cookies?
For those with specific dietary needs, you can adapt the Easy Cauldron Cookies! Use a gluten-free cake mix for a gluten-free option, and substitute regular milk with plant-based milk if lactose intolerant. Just be cautious with decorating ingredients like sprinkles, as they may contain allergens.

How can I make these cookies more visually appealing?
To elevate the visual appeal of your Easy Cauldron Cookies, consider adding fun decorations like colorful sprinkles, candy eyeballs, or even edible glitter! You can also use a piping bag for the buttercream frosting to create delightful swirls, making each cookie a mini work of art. Enjoy the festive fun!

Easy Cauldron Cookies

Easy Cauldron Cookies That Will Bewitch Your Halloween Parties

Easy Cauldron Cookies are a fun, customizable treat perfect for Halloween parties.
Print Recipe Pin Recipe
Prep Time 15 minutes mins
Cook Time 10 minutes mins
Cooling Time 5 minutes mins
Total Time 30 minutes mins
Servings: 24 cookies
Course: Dessert
Calories: 180
Ingredients Equipment Method Nutrition Notes

Ingredients
  

For the Cookie Cups
  • 1 box Devil's Food Cake Mix Provides structure and chocolate flavor; substitute with another chocolate cake mix for variety.
  • 2 large Large Eggs Acts as a binding agent; no substitute recommended.
  • 1/2 cup Canola or Vegetable Oil Ensures moistness; olive oil can be used in a pinch.
  • 1 tsp Black Food Coloring (optional) Enhances the spooky appearance; omit for a more traditional look.
For the Buttercream Frosting
  • 1 cup Unsalted Butter Forms the base of the buttercream; margarine could work but may alter flavor.
  • 4 cups Powdered Sugar Sweetens and thickens the frosting; granulated sugar cannot be substituted directly.
  • 1 tsp Vanilla Extract Adds depth of flavor; almond extract can be a flavorful alternative.
  • 1/4 tsp Salt Balances sweetness; necessary for flavor enhancement.
  • 2 tbsp Milk Adjusts texture for smoother consistency; plant-based milk can be an alternative.
  • 1 tsp Green Food Coloring Tints the buttercream for festive appeal; omit if a neutral color is preferred.
Fun Decorations
  • 1 cup Round Green Sprinkles Decorative toppings that elevate the fun visual.
  • 1 cup Halloween Sprinkles Substitute with other Halloween-themed decorations as desired.
  • 1 cup Candy Eyeballs
  • 10 sticks Pretzel Sticks Mimic stirring sticks.

Equipment

  • Oven
  • Mixing Bowl
  • Muffin Pans
  • piping bag

Method
 

Step-by-Step Instructions for Easy Cauldron Cookies
  1. Preheat your oven to 350°F (175°C) and prepare your workspace by greasing three 12-count mini muffin pans.
  2. In a large bowl, combine the Devil's Food Cake Mix, large eggs, canola oil, and optional black food coloring. Mix until smooth.
  3. Scoop about ½ tablespoon of dough into each muffin cup and flatten lightly to create small cups.
  4. Bake for 8-10 minutes and watch for edges to set. Press an indentation in the center of each cookie.
  5. Allow the cookie cups to cool in the pans for about 5 minutes before transferring them to a wire rack.
  6. Beat the softened butter until creamy. Gradually add powdered sugar, vanilla extract, salt, and milk.
  7. Once the cookie cups have cooled, pipe the buttercream frosting into each indentation.
  8. Decorate your cookies with sprinkles, candy eyeballs, or pretzel sticks.
  9. Arrange the cookies on a platter and serve.

Nutrition

Serving: 1cookieCalories: 180kcalCarbohydrates: 25gProtein: 2gFat: 7gSaturated Fat: 4gPolyunsaturated Fat: 1gMonounsaturated Fat: 1gCholesterol: 30mgSodium: 150mgPotassium: 50mgFiber: 1gSugar: 12gVitamin A: 200IUCalcium: 10mgIron: 0.5mg

Notes

Ensure butter is softened for the buttercream. Decorate cookies just before serving for best appearance.

Tried this recipe?

Let us know how it was!

Irresistible Black Cat Cookies for a Spooktacular Treat

September 19, 2025 by Grace Snow Leave a Comment

In the heat of the kitchen, surrounded by the sweet aroma of baking, I stumbled upon a delightful surprise that whisked me straight into Halloween spirit: Black Cat Cookies! These festive treats, crafted from rich Devil's Food cake mix, offer a touch of whimsy that’s perfect for family-friendly baking sessions. Not only are they incredibly easy to whip up, but they also allow for fun and creative decorating that kids and adults alike will adore. Picture soft, chocolatey cookies adorned with playful frosting and adorable candy accents—what’s not to love? As the holidays approach, why not gather your loved ones for a fun-filled baking adventure? Let’s dive into the recipe and create some magical memories together!

Why are Black Cat Cookies a must-try?

Whimsical Fun: These Black Cat Cookies are not just treats; they're a delightful way to spark creativity in the kitchen!

Easy and Accessible: With just a few simple ingredients, you can create these festive cookies that are perfect for bakers of all levels, including those who might typically lean towards fast food.

Family-Friendly Activity: This recipe is a wonderful option for quality time with kids, making baking a joyful family experience.

Irresistible Flavor: The combination of soft, chocolatey cookies topped with creamy black cocoa frosting creates a mouthwatering treat that will leave everyone asking for seconds.

Versatile Options: Feel free to get creative with the decoration! Swap out the licorice for fruit leather, or use colorful M&Ms to make your cookie cats truly unique.

For more fun baking ideas, check out these delicious Matcha Cookies Soft or enchanting Thumbprint Cookies Melt!

Black Cat Cookie Ingredients

• Whip up these festive delights with easy-to-find ingredients!

For the Cookies

  • Devil’s Food Cake Mix – This rich mix forms the base for your soft, chocolatey cookies; feel free to use a homemade chocolate cookie recipe if you want a personalized touch.
  • Eggs – Essential for binding the dough and providing that perfect chewy texture.
  • Canola or Vegetable Oil – Adds moisture and tenderness; if using a 13.25 ounce mix, reduce the oil to 1/3 cup.
  • Black Food Coloring – An optional ingredient to enhance the cookie's spooky appearance; omit it for a classic look.

For the Frosting

  • Unsalted Butter – Make sure it's softened for a creamy frosting that's easy to spread.
  • Powdered Sugar – This key ingredient gives the frosting its sweetness and a lovely creamy texture.
  • Black Cocoa Powder – Provides a deep, rich chocolate flavor; regular cocoa can be used but will lighten the frosting's color.
  • Vanilla Extract – A splash of this enhances the overall flavor of the frosting.
  • Salt – Just a pinch balances the sweetness perfectly.
  • Milk – Use 1-3 tablespoons to adjust the frosting consistency; add as needed for spreading.

For Decorating

  • Green or Yellow M&Ms – These little gems will be your cat's amusing eyes; other small candies can work too!
  • Black Edible Marker – Great for adding a fun touch to M&Ms, creating pupils for an extra character.
  • Large Heart-Shaped Sprinkles – Perfect for the cat's nose; feel free to swap them for other shapes if you prefer.
  • Black Licorice – A fun choice for whiskers; you can substitute it with fruit leather or pretzel sticks for a different twist.
  • Hershey's Chocolate Bars – Cut into triangles for adorable cat ears; other plain chocolate bars are also an excellent alternative.

Now that you have all the essential Black Cat Cookies ingredients, it's time to gather your loved ones and start baking!

Step‑by‑Step Instructions for Black Cat Cookies

Step 1: Preheat the Oven and Prepare Baking Sheets
Begin by preheating your oven to 350°F (175°C). As the oven warms, take a couple of baking sheets and line them with parchment paper to prevent sticking. This will create an easy release for your delightful Black Cat Cookies once they're baked. A prepped workspace ensures everything is ready for the magic to happen!

Step 2: Mix the Cookie Dough
In a large mixing bowl, combine your Devil's Food cake mix, eggs, and canola oil. Stir until the mixture is smooth and well-combined. If you’re feeling festive, add a few drops of black food coloring to enhance the spooky appearance of your Black Cat Cookies. Make sure the dough has a nice, thick consistency that holds together perfectly!

Step 3: Scoop the Cookie Dough
Using a cookie scoop or tablespoon, portion the dough into balls about 1½ tablespoons each. Place these dough balls onto the prepared baking sheets, spacing them about 2 inches apart to allow for spreading during baking. The fun shapes and colors will help set the playful tone for your spooky cookies!

Step 4: Bake the Cookies
Slide the trays into your preheated oven and bake for 8-10 minutes. Keep a close eye during the last few minutes; the edges should be set, while the centers may appear slightly soft. Once done, remove the cookies from the oven and let them cool on the baking sheets for about 5 minutes before transferring them to a wire rack to cool completely.

Step 5: Prepare the Frosting
While the cookies cool, it's time to make a dreamy black cocoa frosting. In a bowl, beat the softened unsalted butter until creamy, then gradually add powdered sugar, black cocoa powder, vanilla extract, and a pinch of salt. Mix until smooth, adjusting the consistency with milk as needed for easy spreading. This rich frosting will make your Black Cat Cookies irresistibly delicious!

Step 6: Frost the Cookies
Once your cookies have cooled completely, generously spread the black cocoa frosting over each cookie. Use a smooth spatula or the back of a spoon for an even layer. The luscious frosting will not only add flavor but also create the perfect canvas for decorating your whimsical cat features!

Step 7: Decorate the Cookies
Get creative and decorate your frosted cookies with M&Ms for the eyes, a heart-shaped sprinkle for the nose, and licorice for the whiskers. For ears, cut Hershey's chocolate bars into triangles and place them on top. Use a black edible marker on M&Ms to draw pupils, giving your adorable Black Cat Cookies that playful character!

Step 8: Let the Frosting Set
Allow the frosting to set for a while at room temperature. This will help the decorations stay in place. Once the frosting is firm, your delightful Black Cat Cookies are ready to be served, making perfect treats for Halloween gatherings or simply a fun baking day with family!

Make Ahead Options

These Black Cat Cookies are an ideal choice for meal prep, allowing you to streamline your baking process! You can prepare the cookie dough up to 24 hours in advance. Just mix the dough, wrap it tightly in plastic wrap, and refrigerate until you're ready to bake. Additionally, you can pre-bake the cookies up to 3 days ahead and store them in an airtight container at room temperature. To maintain their soft, chewy texture, ensure they are cooled completely before storing. When it's time to frost your cookies, simply whip up the frosting and decorate as desired. You’ll have your whimsical treats ready for any occasion with minimal effort!

Black Cat Cookies: Creative Variations

Feel free to let your imagination run wild and customize these cookies in delightful ways!

  • Dairy-Free: Substitute unsalted butter with a dairy-free alternative and use almond or coconut milk for the frosting.
  • Gluten-Free: Use a gluten-free Devil’s Food cake mix to make these cookies accessible for everyone.
  • Spicy Twist: Add a pinch of cayenne pepper to the cookie dough for a surprisingly pleasant kick!
  • Nutty Flavor: Stir in finely chopped nuts, like walnuts or pecans, into the cookie dough for added crunch and flavor.
  • Colorful Frosting: Swap in orange or purple food coloring for the frosting, adding vibrant Halloween colors to your cookie display.
  • Fruity Enchantment: Instead of M&Ms, use small gummy candies to bring a different chewy texture and a fruity flavor kite to your cookies.
  • Choco-Lover’s Delight: Mix chocolate chips into the dough alongside the cake mix, enhancing the chocolate decadence with every bite.
  • Meringue Topping: For a fun twist, pipe meringue onto the cookies before baking to create a fluffy, cloud-like topping.

For more creative baking ideas, why not check out these enchanting Peaches Cream Cookies or festive Eggnog Cookies Soft for a burst of flavor?

Expert Tips for Black Cat Cookies

Cool Completely: Ensure your cookies cool completely before frosting to prevent the frosting from melting off and ruining their cute appearance.

Flash-Freezing Trick: Flash-freeze your decorated cookies before storing them to maintain their shape and freshness for longer.

Avoid Cloudy Eyes: Leave the M&M eyes off until after freezing; adding them later keeps them looking vibrant instead of clouded.

Precise Cutting: Use kitchen shears for cutting licorice and chocolate for whiskers and ears; this gives you better control and cleaner edges.

Fun with Food Colors: Experiment with black food coloring for an enhanced spooky look—omit for a classic chocolate treat if preferred.

Use Quality Ingredients: For rich flavor, don't skimp on high-quality cocoa powder or vanilla extract in your frosting; it makes all the difference for your Black Cat Cookies!

How to Store and Freeze Black Cat Cookies

Room Temperature: Store leftover cookies in an airtight container at room temperature for up to 3-4 days. This keeps them fresh and delicious for snacking.

Freezer: To freeze, flash-freeze the cookies on a baking sheet until solid, then transfer to an airtight container or freezer bag. They can be stored for up to 3 months without losing shape or flavor.

Reheating: When ready to enjoy, let them thaw at room temperature. For a warm treat, heat in the microwave for 10-15 seconds, but take care not to overheat.

Frosting Tip: If you plan to freeze the cookies, add M&M eyes and other decorations after thawing to ensure they stay vibrant and cute.

What to Serve with Black Cat Cookies?

Imagine the delight in sharing a cozy Halloween evening filled with enchanting treats and comforting flavors.

  • Cold Glass of Milk: The classic pairing, milk balances the sweetness of the cookies, providing a creamy contrast to the rich chocolate.
  • Hot Cocoa: On a chilly night, a cup of warm cocoa complements the cookies beautifully, turning dessert into a mini celebration.
  • Caramel Popcorn: The light crunch and sweet caramel of popcorn contrast the soft, chewy cookies, perfect for a fun snack spread.
  • Spiced Apple Cider: The warm, spiced notes of cider evoke memories of autumn, enhancing the cozy atmosphere with every sip.
  • Pumpkin Spice Ice Cream: A scoop of this creamy treat offers a festive twist, blending the beloved flavors of fall with your cookies.
  • Chocolate-Dipped Pretzels: The salty crunch of pretzels pair brilliantly with the sweet cocoa, adding an exciting texture to your dessert table.
  • Ghostly Marshmallows: Add a playful element by serving ghost-shaped marshmallows. They provide fun visuals while complementing the spookiness.
  • Fruit Salad: A refreshing fruit salad can lighten the evening and add a burst of freshness, balancing the sweetness of the cookies.
  • Cinnamon Sugar Tortilla Chips: Crispy and sweet, these chips create an interesting textural contrast and are delicious when paired with chocolate dips.

Black Cat Cookies Recipe FAQs

What type of cake mix is best for Black Cat Cookies?
Absolutely! Using Devil’s Food Cake Mix gives these cookies their rich chocolate flavor and soft texture. If you prefer a homemade option, feel free to substitute it with your favorite chocolate cookie recipe. Just be aware that the texture and flavor might vary a bit!

How should I store my Black Cat Cookies?
To keep your cookies fresh, store them in an airtight container at room temperature for up to 3-4 days. This ensures they stay soft and delicious. If you have extras, don't worry—freezing is a great option!

Can I freeze Black Cat Cookies? What’s the best method?
Definitely! To freeze, start by flash-freezing the cookies on a baking sheet until they are solid. This usually takes about 1-2 hours. Once firm, transfer them to an airtight container or freezer bag. They can be stored for up to 3 months. Just make sure to decorate them after they've thawed to keep the candy details vibrant!

What if my cookie dough is too sticky or dry?
Very! If your dough is too sticky, add a little more cake mix—1-2 tablespoons should do the trick. Conversely, if it’s too dry, mix in a teaspoon of milk, a little at a time until you reach the right consistency. The dough should be thick but manageable!

Are there any dietary considerations for Black Cat Cookies?
For those monitoring allergens, these cookies contain eggs and may have traces of nuts depending on the cake mix brand. You can substitute eggs with flaxseed meal or applesauce for an egg-free alternative. Be cautious with decorations, as certain candies may contain allergens. Always check ingredient labels to be safe for everyone!

How do I prevent my frosting from melting on top of the cookies?
To ensure your frosting holds its shape, let the cookies cool completely before spreading on the frosting. If you're preparing them in advance, freeze the decorated cookies as previously mentioned to keep everything intact. Just be patient and allow ample time for the frosting to set before serving!

Black Cat Cookies

Irresistible Black Cat Cookies for a Spooktacular Treat

These Black Cat Cookies are festive treats perfect for Halloween, combining soft chocolatey cookies with whimsical decorations.
Print Recipe Pin Recipe
Prep Time 15 minutes mins
Cook Time 10 minutes mins
Cooling Time 5 minutes mins
Total Time 30 minutes mins
Servings: 24 cookies
Course: Dessert
Cuisine: American
Calories: 150
Ingredients Equipment Method Nutrition Notes

Ingredients
  

For the Cookies
  • 1 box Devil’s Food Cake Mix
  • 2 large Eggs
  • 1/3 cup Canola or Vegetable Oil Reduce if using a 13.25 ounce mix
  • 1 teaspoon Black Food Coloring Optional
For the Frosting
  • 1 cup Unsalted Butter Softened
  • 4 cups Powdered Sugar
  • 1/2 cup Black Cocoa Powder
  • 1 teaspoon Vanilla Extract
  • 1 pinch Salt
  • 1-3 tablespoons Milk As needed for consistency
For Decorating
  • 1 cup Green or Yellow M&Ms For cat's eyes
  • 1 each Black Edible Marker
  • 1 cup Large Heart-Shaped Sprinkles For cat's nose
  • 1 cup Black Licorice For whiskers, optional
  • 2 bars Hershey's Chocolate Bars Cut into triangles for ears

Equipment

  • Mixing Bowl
  • Baking Sheets
  • Parchment Paper
  • Cookie Scoop
  • Spatula

Method
 

Step-by-Step Instructions
  1. Preheat your oven to 350°F (175°C) and prepare baking sheets lined with parchment paper.
  2. In a large bowl, combine Devil's Food cake mix, eggs, and canola oil. Stir until smooth, adding food coloring if desired.
  3. Scoop dough into balls of about 1½ tablespoons each, spacing them on the prepared baking sheets.
  4. Bake for 8-10 minutes, until edges are set. Let cool for about 5 minutes before transferring to a wire rack.
  5. In another bowl, beat softened butter, gradually add powdered sugar, cocoa, vanilla, and salt. Mix until smooth, adjusting with milk.
  6. Once cooled, spread frosting over each cookie evenly.
  7. Decorate the cookies with M&Ms for eyes, heart sprinkles for noses, and licorice for whiskers. Use chocolate pieces for ears.
  8. Allow frosting to set before serving.

Nutrition

Serving: 1cookieCalories: 150kcalCarbohydrates: 20gProtein: 1gFat: 7gSaturated Fat: 4gCholesterol: 20mgSodium: 50mgPotassium: 60mgSugar: 10gVitamin A: 100IUCalcium: 5mgIron: 0.5mg

Notes

Ensure cookies cool completely before frosting. Feel free to experiment with decorations and enjoy fun baking sessions with family!

Tried this recipe?

Let us know how it was!

Monster Rice Krispies Treats: Spooky Fun for Halloween

September 19, 2025 by Grace Snow Leave a Comment

“Look out! There’s a monster in the kitchen!” As laughter fills the air, I glance at my counter, where the vibrant colors of these Monstrous Halloween Rice Krispies Treats come to life. This delightful and easy no-bake recipe transforms the classic treat into a spooky sensation that's perfect for any Halloween gathering. With a crispy texture and a fun twist from colorful candy melts and googly eyes, it takes just about 50 minutes to whip up these family-friendly treats. Not only do they make for a wickedly fun project with the kids, but they’re also a hit at bake sales or Halloween parties! So, are you ready to conjure up some deliciously frightful fun in your kitchen? Let's get started!

Why Will You Love Monster Rice Krispies Treats?

Unleash your creativity! These Monster Rice Krispies Treats allow you to transform a classic dessert into a quirky Halloween masterpiece. No-bake convenience means anyone can whip these up in just 50 minutes, perfect for busy parents and last-minute party planners. Versatile options let you switch up the colors or add sprinkles to match your festive theme. Family-friendly fun is guaranteed, as kids love getting involved in the decorating process with googly eyes that bring the treats to life. Looking for more spooky treat ideas? Check out our delicious Lime Chicken Rice or Honey BBQ Chicken Rice recipes!

Monster Rice Krispies Treats Ingredients

For the Base

  • Cooking Spray – Prevents sticking; can substitute with butter for greasing.
  • Unsalted Butter – Adds richness; use salted butter for added flavor, but adjust the included salt.
  • Mini-Marshmallows – Provide sweetness and gooey texture; can substitute with regular marshmallows.
  • Rice Krispies or Other Puffed Rice Cereal – The base for the treats, offering a light crunch; use gluten-free options for gluten-free treats.

For the Decoration

  • Orange Candy Melts (12 oz) – Perfect for coating and decoration; substitute with white chocolate or colored melts as needed.
  • Green Candy Melts (12 oz) – Ideal for eyeball decorations; any other color can be used based on preference.
  • Small Candy Googly Eyes – Fun decorative element; optional, can replace with chocolate chips or mini-M&Ms if unavailable.

Dive into the spirit of Halloween with these delightful Monster Rice Krispies Treats!

Step‑by‑Step Instructions for Monster Rice Krispies Treats

Step 1: Prepare the Baking Dish
Start by preparing a large baking dish (about 9x13 inches) by generously spraying it with cooking spray to prevent sticking. Make sure to cover the corners and edges for easy release later. Set the dish aside while you gather your ingredients and get your cooking supplies ready.

Step 2: Melt the Butter and Marshmallows
In a large saucepan over medium heat, melt 4 tablespoons of unsalted butter until it begins to foam, which takes about 2–3 minutes. Once melted, add in 10 ounces of mini-marshmallows, stirring constantly until they are completely melted and smooth. This mixture should be glossy and well combined, taking about another 3–5 minutes.

Step 3: Combine with Rice Krispies
Remove the saucepan from heat and quickly mix in 6 cups of Rice Krispies cereal. Stir gently but thoroughly until all the cereal is evenly coated with the gooey marshmallow mixture. You should see a sticky yet cohesive texture forming; this process should take about 1–2 minutes.

Step 4: Spread the Mixture in the Dish
Transfer the Rice Krispies mixture to your prepared baking dish. Using a spatula or your greased hands, press it down firmly, spreading it into an even layer about 1 to 2 inches thick. This step is crucial for achieving a solid treat that holds its shape, and it should take around 5 minutes to ensure a firm base.

Step 5: Melt the Candy Melts
While the base cools, melt 12 ounces each of orange and green candy melts in separate microwave-safe bowls. Heat them in the microwave on medium power, stopping every 30 seconds to stir until melted and smooth, which should take about 1 to 2 minutes per color. Set aside to cool slightly before using.

Step 6: Decorate with Candy Melts
Carefully drizzle or pour the melted orange candy over the cooled Rice Krispies base, using a spoon to create a fun, playful design. Let the candy melt set slightly for about 5 minutes before adding the green candy melts as the "eyeballs," allowing for a fun contrast in colors.

Step 7: Apply the Googly Eyes
Before the candy hardens completely, add candy googly eyes onto the green melted candy. Place them strategically to give your Monster Rice Krispies Treats personality and charm. Work quickly, as the candy melt should still be slightly tacky, helping the eyes to stick properly.

Step 8: Cut and Serve
After everything has fully set, which might take about 30 minutes, use a sharp knife to cut the treats into squares or fun shapes. Serve them at your Halloween gathering and enjoy the delightful, spooky look of your Monster Rice Krispies Treats!

What to Serve with Monster Rice Krispies Treats

Looking to create a memorable Halloween feast? Pair these delightful treats with festive dishes that’ll thrill your guests and complement the fun!

  • Crispy Apple Slices:
    Bright, crunchy, and slightly tart, these apple slices can be dipped in caramel for a delicious sweet counterpoint.

  • Pumpkin Spice Cupcakes:
    Soft, spiced, and topped with cream cheese frosting, these cupcakes add warmth to your spooky spread and are a seasonal favorite.

  • Gooey Cheese Quesadillas:
    These warm, melty quesadillas provide a savory balance alongside the sweetness of the treats, making for a fun, finger-food meal.

  • Monster Punch:
    A refreshing blend of fruit juices and soda topped with spooky gummy worms creates a vibrant drink that’s both scary and tasty!

  • Chocolate Ghost Cookies:
    Soft, chocolate-flavored cookies decorated like little ghosts offer a playful addition to the dessert table and continue the Halloween theme.

  • Witch's Brew Soup:
    Creamy and green, this soup adds a savory touch and delightful color contrast while being enviously amusing next to your treats. It’s sure to keep everyone smiling!

  • Spooky Cheese Plate:
    Featuring a variety of cheeses, crackers, and aged meats, this platter provides a rich flavor element that pairs perfectly with the sweet treats.

  • Festive Fruit Skewers:
    Bright and colorful, fruit skewers are a lighter option that brings freshness to your Halloween spread, while kids will love their playful presentation!

Expert Tips for Monster Rice Krispies Treats

  • Marshmallow Care: Avoid overheating marshmallows, as this can make your Rice Krispies Treats too sticky or tough instead of gooey.

  • Firm Pressing: Be sure to press the Rice Krispies mixture firmly in the dish to ensure they hold their shape once cut; this step is crucial!

  • Cool Candy Melts: Allow the melted candy to cool slightly before drizzling; this helps create a beautiful, even coating without running off the edges.

  • Creative Colors: Feel free to mix up candy melt colors for a fun twist. Consider using purple and black for a spooky vibe instead of traditional orange and green.

  • Eye Placement: Work quickly when adding googly eyes, as they adhere better to the still slightly tacky candy melts on your Monster Rice Krispies Treats.

Monster Rice Krispies Treats Variations

Unleash your creativity in the kitchen! These delightful treats are easily adaptable to suit your taste buds and celebration theme.

  • Color Swap: Change orange and green candy melts to purple and black for a ghoulish look.
  • Sprinkle Surprise: Add colorful sprinkles or edible glitter for extra festive flair and a whimsical touch.
  • Chocolate Twist: Mix in mini chocolate chips with the Rice Krispies for a delicious chocolatey flavor that everyone will love.
  • Nutty Delight: Stir in chopped nuts like pecans or almonds for a crunchy texture contrast and a wholesome boost.
  • **CTreats: Use festive cookie cutters to make fun shapes like ghosts or pumpkins, adding an extra layer of fun to your treats!
  • Flavor Addition: Drizzle melted peanut butter or caramel over the top for a creamy, sweet, and savory touch.
  • Spicy Kick: Add a sprinkle of cinnamon or cayenne pepper to add a surprising heat that contrasts beautifully with the sweetness.
  • Dairy-Free Delight: Replace butter and marshmallows with dairy-free alternatives to accommodate lactose intolerance while keeping the fun intact!

For more creative ideas, consider trying these enticing recipes: One Pot Rice for a savory twist, or Furikake Fried Rice as a unique addition to your collection!

Make Ahead Options

These Monster Rice Krispies Treats are perfect for busy parents looking to save time during the Halloween rush! You can prepare the Rice Krispies base up to 24 hours in advance by following steps 1-4; simply cover the baking dish with plastic wrap and refrigerate to maintain that perfect chewy texture. When you're ready to finish, melt the candy melts, drizzle them over the treats, and decorate with googly eyes. This way, your Halloween masterpiece will remain just as delicious and visually spectacular while cutting down on last-minute prep. Trust me, having these treats ready ahead of time will make your Halloween celebrations even more enjoyable!

How to Store and Freeze Monster Rice Krispies Treats

  • Room Temperature: Store your Monster Rice Krispies Treats in an airtight container at room temperature for up to 3 days to keep them crispy and fresh.

  • Fridge: For extended freshness, you can refrigerate the treats. Just remember to keep them in an airtight container, which will maintain their texture and flavor for up to a week.

  • Freezer: If you need to make these treats in advance, freeze them in a single layer on a baking sheet, then transfer to an airtight container or freezer bag for up to 2 months. Thaw at room temperature before serving.

  • Reheating: If they lose some firmness after being stored, pop them in the microwave for about 10 seconds to bring back the gooeyness of your Monster Rice Krispies Treats. Enjoy the spookiness!

Monster Rice Krispies Treats Recipe FAQs

How do I choose the right marshmallows?
Absolutely! Mini-marshmallows provide a sweeter and gooey texture ideal for these treats. If you can't find mini-marshmallows, regular-sized ones can work too—just cut them into smaller pieces to ensure even melting.

How should I store my Monster Rice Krispies Treats?
The best way to store your treats is in an airtight container at room temperature for up to 3 days to keep them crispy and fresh. If you want to extend their freshness, refrigerating them can last up to a week. Always remember to keep the lid on tight!

Can I freeze Monster Rice Krispies Treats?
Definitely! To freeze, first, place your cut treats in a single layer on a baking sheet for a quick freeze. Once frozen, transfer them to an airtight container or freezer bag, where they can last for up to 2 months. When you're ready to enjoy them, simply thaw them at room temperature.

What if my Rice Krispies Treats are too sticky or tough?
Don't worry! If your treats become overly sticky, it could be due to overheating the marshmallows. If this happens, a problem-solving tip is to pop them in the microwave for about 10 seconds to soften them slightly and bring back that gooey texture when serving.

Are these treats safe for pets or people with allergies?
It’s very important to consider allergies! Since the treats contain butter, marshmallows, and candy melts, those with dairy, gluten, or specific food dye allergies should enjoy them cautiously. Always consult with guests about their dietary restrictions. For pets, chocolate and sugar can be harmful, so keep these treats away from them.

Monster Rice Krispies Treats

Monster Rice Krispies Treats: Spooky Fun for Halloween

Transform classic Rice Krispies Treats into spooky Monster Rice Krispies Treats for Halloween fun!
Print Recipe Pin Recipe
Prep Time 50 minutes mins
Cooling Time 30 minutes mins
Total Time 1 hour hr 20 minutes mins
Servings: 12 pieces
Course: Dessert
Cuisine: American
Calories: 180
Ingredients Equipment Method Nutrition Notes

Ingredients
  

For the Base
  • Cooking Spray Cooking Spray Prevents sticking; can substitute with butter for greasing.
  • 4 tablespoons Unsalted Butter Adds richness; use salted butter for added flavor, but adjust salt.
  • 10 ounces Mini-Marshmallows Provide sweetness and gooey texture; can substitute with regular marshmallows.
  • 6 cups Rice Krispies or Other Puffed Rice Cereal The base for the treats; use gluten-free options for gluten-free treats.
For the Decoration
  • 12 ounces Orange Candy Melts Perfect for coating and decoration; substitute with white chocolate or colored melts as needed.
  • 12 ounces Green Candy Melts Ideal for eyeball decorations; any other color can be used based on preference.
  • Small Candy Googly Eyes Fun decorative element; optional, can replace with chocolate chips or mini-M&Ms if unavailable.

Equipment

  • Large saucepan
  • Spatula
  • Microwave-safe bowls
  • Baking dish (9x13 inches)

Method
 

Step‑by‑Step Instructions for Monster Rice Krispies Treats
  1. Prepare a large baking dish (about 9x13 inches) by generously spraying it with cooking spray.
  2. In a large saucepan over medium heat, melt 4 tablespoons of unsalted butter until it begins to foam.
  3. Add 10 ounces of mini-marshmallows, stirring constantly until melted and smooth, about another 3–5 minutes.
  4. Remove from heat and quickly mix in 6 cups of Rice Krispies cereal, stirring gently until evenly coated.
  5. Transfer the mixture to the baking dish, pressing it down firmly into an even layer about 1 to 2 inches thick.
  6. Melt 12 ounces each of orange and green candy melts in separate microwave-safe bowls, stopping to stir until melted.
  7. Drizzle melted orange candy over the cooled Rice Krispies base, letting it set slightly for 5 minutes before adding green candy melts.
  8. Add googly eyes to the green melted candy before it hardens to give your treats personality.
  9. After everything has set (about 30 minutes), cut into squares or fun shapes and serve.

Nutrition

Serving: 1pieceCalories: 180kcalCarbohydrates: 28gProtein: 2gFat: 7gSaturated Fat: 4gCholesterol: 15mgSodium: 120mgPotassium: 30mgSugar: 14gVitamin A: 100IUCalcium: 10mgIron: 0.5mg

Notes

Store in an airtight container at room temperature for up to 3 days or refrigerate for up to a week.

Tried this recipe?

Let us know how it was!
  • « Previous Page
  • 1
  • …
  • 52
  • 53
  • 54
  • 55
  • 56
  • …
  • 62
  • Next Page »

Welcome!

Hi, I’m Grace, a Sydney-based home cook with a passion for bold flavors and trending ingredients. Whether you’re a busy beginner or a seasoned foodie, you’ll find dishes here that are fresh, fun, and full of flavor.

More about me

Popular Recipes

  • One Pot Keto Tuna Casserole
    One Pot Keto Tuna Casserole: Creamy Comfort in Minutes
  • Ultimate Jalapeno Popper Chicken Salad
    Ultimate Jalapeno Popper Chicken Salad That'll Wow Your Tastebuds
  • Green Chile Cheese Dip
    Mouthwatering Green Chile Cheese Dip for Cozy Gatherings
  • Easy Chimichurri Sauce
    Fresh and Zesty Easy Chimichurri Sauce in Just Minutes

Footer

↑ back to top

About

  • Privacy Policy
  • Disclaimer
  • Terms & Conditions

Newsletter

  • Sign Up! for emails and updates

Contact

  • About me
  • Contact me

Copyright © 2025 TastyTrendIngredients