tastytrendingredients

  • Home
  • Recipes
    • Appetizers
    • Breakfast
    • Dessert
    • Dinner
    • Drinks
    • Salads
    • Snacks
    • Soups
  • About me
  • Contact me
menu icon
go to homepage
  • Home
  • Recipes
    • Appetizers
    • Breakfast
    • Dessert
    • Dinner
    • Drinks
    • Salads
    • Snacks
    • Soups
  • About me
  • Contact me
search icon
Homepage link
  • Home
  • Recipes
    • Appetizers
    • Breakfast
    • Dessert
    • Dinner
    • Drinks
    • Salads
    • Snacks
    • Soups
  • About me
  • Contact me
×

Delicious Sugar Cookie Icing That Hardens in Minutes

October 11, 2025 by Grace Snow Leave a Comment

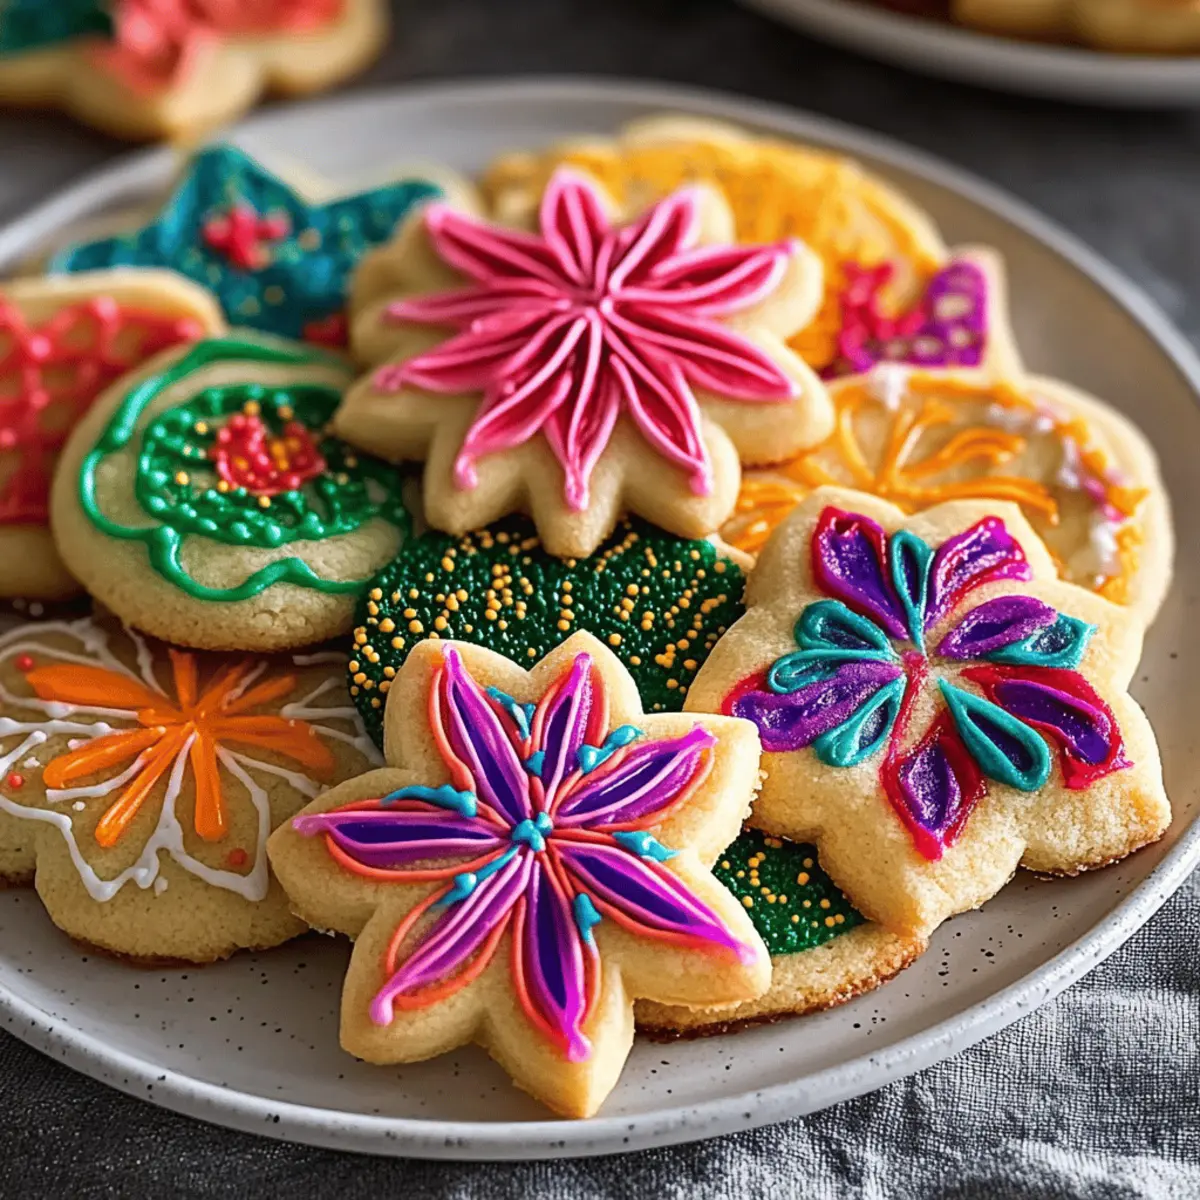
A sprinkle of magic awaits as you whip up a batch of sugar cookie icing that hardens flawlessly in just five minutes. There’s something incredibly satisfying about transforming ordinary cookies into edible works of art, and trust me, this recipe is the shortcut you didn’t know you needed. Not only is it quick to prepare, but the smooth, vibrant icing makes every cookie a showstopper, perfect for festive gatherings or just a cozy evening at home. Whether you're decking the halls for the holidays or celebrating a friend's birthday, this icing will elevate your treats and delight your loved ones. Ready to dive into the world of colorful creativity? Let’s get started on perfecting your sugar cookie icing!

Why is This Icing a Game Changer?

Simplicity at Its Finest: With just four ingredients, this icing is incredibly easy to whip up, making it perfect for bakers of any skill level.

Quick to Prepare: In just five minutes, you can create a smooth and beautiful icing without any fuss, giving you more time to bake cookies or clean up!

Customizable Colors: The addition of gel food coloring means you can tailor this icing to match any occasion, from vibrant birthday parties to festive holiday treats.

Sturdy and Attractive: Once it hardens, your cookies will boast a stunning finish that not only looks great but allows for stacking, so no more worries about smudges!

Versatile Use: This icing works wonders on various cookie shapes and sizes, making it a must-try for any cookie enthusiast. Looking for more icing inspiration? Check out these Thumbprint Cookies Melt for a tasty treat!

Sugar Cookie Icing Ingredients

For the Icing
• Powdered Sugar – Essential for sweetness and structure; make sure to sift it for a smooth finish.
• Milk – Adds creaminess for a perfect consistency; you can use almond milk for a dairy-free alternative.
• Corn Syrup – Ensures a glossy finish and helps the icing harden; honey can be a substitute if necessary, though it may change the flavor slightly.
• Gel Food Coloring – Perfect for tinting the icing, allowing you to customize colors for any occasion.

Get ready to transform your baking with this quick and delightful sugar cookie icing!

Step‑by‑Step Instructions for Sugar Cookie Icing

Step 1: Sift Powdered Sugar
Begin by sifting 3 cups of powdered sugar into a large mixing bowl. This crucial step removes any lumps and ensures your sugar cookie icing has a silky texture. Use a fine-mesh sieve or sifter, and watch as the fluffy sugar falls gracefully into the bowl.

Step 2: Mix Ingredients
Gradually pour in ¼ cup of milk and ¼ cup of corn syrup, then stir the mixture using a whisk until fully combined. You’re aiming for a consistency that slowly drips off the whisk, leaving a thick layer that holds its shape. If the mixture seems too thick, add a bit more milk, one teaspoon at a time.

Step 3: Color the Icing
Once your icing is smooth, evenly divide it into several small bowls based on how many colors you want to create. Add gel food coloring to each bowl, starting with a small amount and mixing thoroughly until you reach your desired hues. This is where your creativity shines, so don’t be afraid to experiment with different shades!

Step 4: Decorate Cookies
Prepare your cooled sugar cookies by laying them out on a wire rack or parchment paper. Using a piping bag or an offset spatula, spread or pipe the colored icing onto your cookies. Whether you prefer intricate designs or simple covers, let your imagination guide you, and remember, it’s all about having fun!

Step 5: Allow to Set
After decorating, leave the cookies at room temperature on a clean, flat surface for about 8–12 hours. This waiting period is essential for allowing your sugar cookie icing to harden completely. You’ll know it’s ready when the surface feels dry, and the colors retain their vibrant appearance without smudging.

What to Serve With Sugar Cookie Icing That Hardens?

Elevate your cookie decorating game by pairing delicious treats that complement the vibrant artistry of your icing.

  • Soft Sugar Cookies: Classic and tender, these cookies provide the perfect canvas for your beautiful icing, ensuring that each bite is a delight.
  • Chocolate Chip Cookies: The sweet richness of chocolate chips contrasts wonderfully with the smooth icing, creating a harmonious balance of flavors.
  • Cupcakes: Decorate fluffy cupcakes with the icing, creating dazzling designs that will impress guests at any gathering. Pair with sprinkles for added fun!
  • Fruit Platter: Fresh fruits like strawberries and apples offer a refreshing contrast to the sweet icing, cleansing the palate between bites of sugary treats.
  • Milk: This classic pairing is unbeatable; creamy milk balances the sweetness of the icing while enhancing the overall indulgence of your dessert experience.
  • Coffee or Tea: A warm beverage not only complements sweets but also enhances the flavors of the icing, making for a cozy afternoon treat.
  • Ice Cream: Top a scoop of vanilla or chocolate ice cream with bits of iced cookies, creating an unforgettable sundae that pleases everyone.
  • Dark Chocolate Dips: Drizzling or dipping cookies in dark chocolate accents the sweetness of your icing while adding a sophisticated twist to your offerings.
  • Candy Decorations: Add whimsical candy toppings to your cookies, using the icing to adhere gummy bears, sprinkles, or chocolate pieces for a playful touch.
  • Festive Brownies: The richness of fudge brownies pairs beautifully with the lightness of the icing, creating layers of texture and flavor for an indulgent dessert platter.

Variations & Substitutions for Sugar Cookie Icing

Feel free to play with this icing recipe and discover delightful twists that will make your cookies uniquely yours!

  • Dairy-Free: Substitute regular milk with almond or coconut milk for a dairy-free option while maintaining that luscious creaminess.
  • Flavor Infusions: Add a few drops of almond or lemon extract to the icing mixture for a burst of flavor that complements your cookies perfectly. These subtle hints can transform your treats into something truly special.
  • Honey Swap: Use light honey instead of corn syrup to achieve a similar glossy finish, though it will impart a slight sweetness that enhances the overall flavor.
  • Color Play: Mix colors to create fun gradients or use metallic food coloring for a festive shimmer on your cookies. Feel free to explore combinations that make your creation pop!
  • Thicker Icing: If you prefer a thicker icing for more elaborate designs, simply add extra powdered sugar until the desired consistency is reached. This can lead to beautiful, raised designs, adding an artistic touch to your cookies.
  • Heat Factor: For a touch of heat, incorporate a dash of cayenne or chili powder into the icing for an unexpected spicy twist. The sweet and savory balance will leave everyone talking!
  • Chocolate Variation: Mixing cocoa powder into part of your icing could create a rich chocolate version. Dip your cookies in this chocolatey goodness for an indulgent treat that pairs well with a cup of coffee.
  • Layered Icing: For a fun decorating challenge, layer different colors of icing for a stunning rainbow effect. This not only looks beautiful but also allows flavors to complement each other as guests bite into your cookies.

Passion and creativity are at the heart of your baking journey! If you’re looking for more inspiration, try your hand at these Mexican Wedding Cookies or add some charm to your treats with Eggnog Cookies Soft.

How to Store and Freeze Sugar Cookie Icing

Room Temperature: Keep any unused sugar cookie icing covered at room temperature if you plan to use it within a day; it will stay fresh for up to 24 hours.

Fridge: For longer storage, place any leftover icing in an airtight container in the fridge, where it can last for up to a week. Just give it a good stir before using!

Freezer: To store for a longer period, freeze the sugar cookie icing in a sealed plastic bag or airtight container, where it will stay good for up to three months. Thaw in the fridge overnight before using.

Reheating: If the icing becomes too thick after refrigeration, reheat gently in the microwave for a few seconds, stirring until you achieve the desired consistency.

Expert Tips for Sugar Cookie Icing

• Sifting is Key: Ensure you sift the powdered sugar thoroughly. Skipping this step may result in lumps that can ruin the smooth texture of your icing.

• Correct Consistency: Aim for an icing that slowly drips off the whisk. If it's too runny, add more powdered sugar; if too thick, add a bit of milk.

• Layer Wisely: Apply your icing in thin layers to avoid cracking once it dries. Thin layers help the icing harden evenly and beautifully.

• Vibrant Colors: Always start with a small amount of gel food coloring. You can always add more for bolder colors, but you can’t take it out if you use too much!

• Setting Time: Be patient while allowing your decorated cookies to set for 8-12 hours at room temperature; this guarantees that your sugar cookie icing hardens properly.

• Storage Secrets: Consider making a batch of icing ahead of time! Leftover icing can be stored in an airtight container for up to a week in the fridge or frozen for future decorating.

Make Ahead Options

These delightful sugar cookie icing batches are perfect for meal prep and can be made ahead to save time during your busy baking sessions. You can prepare the icing up to 24 hours in advance, storing it in an airtight container in the refrigerator. To maintain the smooth texture and vibrant colors, ensure the icing is properly covered to prevent it from drying out. When you're ready to decorate, simply give the icing a gentle stir to bring it back to its original consistency. You can also divide the icing and color it in advance; just be sure to allow it time to set at room temperature for 8-12 hours after application for that perfect hardened finish! This way, your sugar cookie decorating will be as seamless as possible, letting you enjoy the sweet moments!

Sugar Cookie Icing That Hardens Recipe FAQs

How do I choose the right powdered sugar for my icing?
Absolutely! When selecting powdered sugar, go for the finest and most refined one to avoid any graininess in your icing. Look for brands that specifically mention that it’s 10X or super-fine powdered sugar. This ensures that your icing will come out smooth and lump-free, giving your cookies that professional finish they deserve!

What’s the best way to store leftover sugar cookie icing?
Very! If you have any leftover sugar cookie icing, store it in an airtight container. It will keep well in the fridge for up to a week. Just make sure to give it a good stir to bring back its original texture before using it again. If you want to save it for later, you can freeze it in a sealed plastic bag or airtight container for up to three months.

Can I freeze sugar cookie icing?
Absolutely! Freezing sugar cookie icing is a great idea if you want to prepare it in advance. To do so, scoop the icing into a pre-labeled, airtight container or a heavy-duty freezer bag, removing as much air as possible. When you’re ready to use it, simply thaw it in the fridge overnight, then give it a stir to restore its texture.

What should I do if my icing is too thick?
I’ve been there! If you find your icing is too thick to spread or pipe, don’t fret. Just add a teaspoon of milk at a time, stirring well after each addition until it reaches the desired consistency. You want it to flow smoothly but still hold its shape when decorated. Patience is key here!

Are there any allergy considerations for this sugar cookie icing?
Very! This icing contains powdered sugar and corn syrup, which are generally safe for most people. However, if you know someone with dietary restrictions or allergies, consider using alternative ingredients. For instance, substitute the milk with almond or soy milk for lactose intolerance, and always check that your gel food coloring is free from allergens if you are decorating for someone with sensitivities.

How long does it take for the icing to harden completely?
Absolutely! It takes about 8 to 12 hours for the sugar cookie icing to fully harden at room temperature. Make sure to place the decorated cookies on a clean, flat surface while they set. You'll know they are ready when the surface feels dry and firm, allowing you to stack them without any smudging.

Sugar Cookie Icing

Delicious Sugar Cookie Icing That Hardens in Minutes

Create bright and beautifully detailed sugar cookie icing that hardens in minutes, perfect for festive occasions.
Print Recipe Pin Recipe
Prep Time 5 minutes mins
Setting Time 12 hours hrs
Total Time 12 hours hrs 5 minutes mins
Servings: 8 servings
Course: Dessert
Cuisine: American
Calories: 150
Ingredients Equipment Method Nutrition Notes

Ingredients
  

For the Icing
  • 3 cups Powdered Sugar Sifted for smooth finish
  • 1/4 cup Milk Dairy-free alternative: almond milk
  • 1/4 cup Corn Syrup Glossy finish
  • to taste Gel Food Coloring For coloring the icing

Equipment

  • Mixing Bowl
  • Whisk
  • piping bag
  • Fine-mesh sieve

Method
 

Step-by-Step Instructions for Sugar Cookie Icing
  1. Sift 3 cups of powdered sugar into a mixing bowl to remove lumps and ensure a silky texture.
  2. Pour in 1/4 cup of milk and 1/4 cup of corn syrup, whisk until combined, adjust with more milk if too thick.
  3. Divide the icing into bowls and add gel food coloring to each for desired colors.
  4. Decorate cooled sugar cookies on a wire rack or parchment paper with the icing using a piping bag or spatula.
  5. Let the cookies set at room temperature for 8-12 hours until the icing hardens completely.

Nutrition

Serving: 1servingCalories: 150kcalCarbohydrates: 36gSugar: 36g

Notes

Ensure proper consistency of icing; start with thin layers for even drying and vibrant colors. Store unused icing at room temperature for 24 hours or refrigerate in an airtight container for up to a week.

Tried this recipe?

Let us know how it was!

Melting Snowman Cupcakes: A Joyful Holiday Baking Adventure

October 11, 2025 by Grace Snow Leave a Comment

The aroma of freshly baked cupcakes wafts through the kitchen, instantly reminding me of joyful winter celebrations. Today, I'm excited to share a recipe for Melting Snowman Cupcakes that will bring smiles to both kids and adults alike! These whimsical holiday treats blend creativity with deliciousness, featuring light, fluffy cupcakes topped with creamy frosting and adorned with playful marshmallow snowmen. Not only are these cupcakes visually delightful, but they are also an entertaining kitchen project, perfect for family baking sessions during the festive season. And the best part? They’re an absolute hit at holiday gatherings, making them a must-have for your dessert spread. So, are you ready to unleash your inner pastry artist and create a snowy masterpiece? Let’s dive into this enchanting recipe!

Why are Melting Snowman Cupcakes a must-try?

Unforgettable Fun: These cupcakes combine creativity and sweetness, making them perfect for holiday gatherings or a cozy afternoon with the family.

Kid-Friendly: Let the little ones unleash their imaginations! They will adore decorating their own snowmen, making this a memorable activity.

Versatile Theme: Feel free to customize them with unique expressions and colors, ensuring each snowman is one-of-a-kind.

Deliciously Easy: With basic baking skills, you can whip up these treats in no time, leaving you more room for festive fun!

Crowd-Pleasing Treats: Their delightful appearance and flavors are sure to impress guests at any holiday party. Don't forget to check out tips for making these into a holiday gift!

Melting Snowman Cupcake Ingredients

• Perfect for festive fun!

For the Cupcakes

  • Cupcakes (6 pieces) – Base of the treat; can be store-bought or homemade for convenience.

For the Decorations

  • Pretzel Sticks (12 pieces) – Represent snowman arms; substitute with chocolate-covered pretzels for a sweet twist.
  • White Frosting (1 container) – Acts as ‘snow’ covering; a sturdy buttercream is recommended for better stability.
  • Orange Decorating Frosting (1 tube) – For detailing snowman noses; it adds a fun pop of color!
  • Black Decorating Frosting (1 tube) – Use for eyes and buttons to bring your snowmen to life!
  • Large Marshmallows (6 pieces) – Form the snowman heads; alternatively, try large cookies for a unique twist.

Each of these ingredients contributes to creating your delightful Melting Snowman Cupcakes, making your holiday baking experience truly magical!

Step‑by‑Step Instructions for Melting Snowman Cupcakes

Step 1: Preheat & Prepare
Preheat your oven to 350°F (175°C) and line a 6-cup cupcake pan with festive liners. This preparation sets the stage for your Melting Snowman Cupcakes. Ensure your ingredients are ready to go, so you can mix and bake with ease, creating that delightful aroma as they bake.

Step 2: Bake Cupcakes
Prepare your cupcake batter according to the package instructions if using a mix, or whip up your favorite homemade recipe. Fill each cupcake liner about two-thirds full to allow for rising. Bake for approximately 15 minutes, until a toothpick inserted in the center comes out clean. You'll know they’re ready when they spring back when gently touched.

Step 3: Cool
Once baked, remove the cupcakes from the oven and let them cool in the pan for about 5 minutes. Then, carefully transfer the cupcakes to a wire rack to cool completely. This process is crucial, as frosting them while warm could lead to melting, ruining the adorable snowman look of your Melting Snowman Cupcakes.

Step 4: Frost & Decorate
Once the cupcakes are completely cool, use a piping bag to frost each cupcake generously with white frosting, creating the snowy base. Next, take your large marshmallows and use black and orange decorating frosting to create snowman faces. Position these marshmallows on top of the frosted cupcakes to form your charming melting snowmen.

Step 5: Add Finishing Touches
Insert pretzel sticks into the sides of the marshmallows to create adorable snowman arms. Then, use the black frosting to add buttons on the marshmallow's body to give your Melting Snowman Cupcakes personality. Allow your creativity to shine as you customize the expressions and features of each snowman to make them unique!

Step 6: Serve or Store
Enjoy your delightful Melting Snowman Cupcakes immediately, or store them in an airtight container if making ahead of time. If you want to keep them fresh, they’ll last at room temperature for a couple of days or longer in the refrigerator. Gather your friends and family to share these festive treats that are sure to warm hearts during the holiday season!

What to Serve with Melting Snowman Cupcakes

Imagine a festive gathering filled with laughter, cheer, and the delightful aroma of holiday treats – and your Melting Snowman Cupcakes taking center stage!

  • Hot Chocolate: This cozy drink pairs wonderfully with your cupcakes, enhancing the festive spirit while satisfying a sweet tooth.

  • Peppermint Bark: The crisp, refreshing taste of peppermint complements the sweetness of the cupcakes, creating a delightful contrast.

  • Fruit Salad: A colorful medley of fruits adds a fresh and healthy balance to the table, offering a light counterpart to the rich frosting.

  • Holiday Cookies: Serve alongside a platter of assorted holiday cookies for a delightful dessert spread that will excite everyone's taste buds.

  • Spiced Apple Cider: Warm spiced cider will evoke the scents of the season, providing a comforting beverage that beautifully matches the theme.

  • Caramel Popcorn: Sweet and crunchy, caramel popcorn adds a fun texture that complements the soft fluffiness of the cupcakes.

  • Vanilla Ice Cream: For an indulgent treat, serve a scoop of creamy vanilla ice cream alongside your cupcakes to create a festive dessert duo.

  • Chocolate Milk: This kid-friendly drink adds to the fun atmosphere, perfectly accompanying the whimsical cupcakes for a playful pairing.

  • Snowman Sugar Cookies: Keep the theme going by serving snowy treats that will delight kids and adults alike, creating a cohesive festive experience.

Storage Tips for Melting Snowman Cupcakes

Room Temperature: Store unfrosted cupcakes at room temperature in an airtight container for up to 2 days. This keeps them fresh and fluffy, ready for frosting later.

Fridge: Frosted Melting Snowman Cupcakes can be kept in the refrigerator for up to 3 days. Be sure to use a container that won't crush the decorations.

Freezer: You can freeze unfrosted cupcakes for up to 3 months. Wrap them tightly in plastic wrap and place in a freezer-safe bag. Frost them once thawed for best results.

Reheating: If desired, bring refrigerated cupcakes to room temperature before serving. For a warm treat, microwave individual cupcakes for about 10-15 seconds. Enjoy your festive creation!

Make Ahead Options

These Melting Snowman Cupcakes are ideal for busy cooks looking to save time during the holiday rush! You can bake the cupcakes up to 3 days in advance; simply cool them completely and store in an airtight container at room temperature. If you like, you can also decorate the snowmen up to 24 hours ahead; just be sure to refrigerate them if you use a soft frosting, ensuring they stay fresh and the features intact. When you're ready to serve, allow the decorated cupcakes to come to room temperature for about 30 minutes. This will ensure every bite remains just as delightful as when they were freshly made, leaving your guests enchanted by these festive treats!

Melting Snowman Cupcakes Variations

Feel free to let your creativity flow and make these delightful cupcakes your own with these fun variations!

  • Dairy-Free: Substitute regular butter with vegan butter and use dairy-free frosting for a delicious alternative.

  • Gluten-Free: Use a gluten-free cupcake mix or flour for a treat that everyone can enjoy without worry. The taste won't miss a beat!

  • Chocolatey Twist: Swap the regular cupcakes for chocolate cupcakes, adding a rich flavor that pairs beautifully with the white frosting.

  • Fun Sprinkles: Add whimsical white or blue sprinkles on top of the frosting for an extra festive touch. These little bits of joy can create a winter wonderland on your cupcakes.

  • Fruit Accents: Incorporate dried cranberries or mini chocolate chips as “buttons” on your snowmen for an extra pop of taste and texture.

  • Spiced Flavor: Mix in a pinch of cinnamon or nutmeg to the cupcake batter for a warming spice that goes hand-in-hand with winter festivities. This adds a unique layer of flavor everyone will love!

  • Mini-Snowmen: Use mini marshmallows for a mini version of your snowmen, turning these cupcakes into bite-sized delights everyone will enjoy at gatherings.

  • Frosting Colors: Experiment with different frosting colors for your snowman’s accessories or expressions! Vibrant hues can elevate your snowy creations and truly reflect the holiday spirit.

For even more ideas on how to personalize your festive treats, check out these tips for creating unique cupcake designs that will leave everyone impressed.

Expert Tips for Melting Snowman Cupcakes

  • Frosting Consistency: Use a sturdy buttercream frosting to ensure your snowman remains intact. Thin frosting can lead to melting and a messy dessert.

  • Creative Decorating: Allow kids to express themselves! Encourage them to create unique snowmen with different expressions using various frosting colors.

  • Cooling Time: Don’t rush the cooling process! Ensure cupcakes are completely cool before frosting to prevent melting and keep your decorations intact.

  • Airtight Storage: Store leftover cupcakes in an airtight container at room temperature for up to two days. This helps maintain freshness in your Melting Snowman Cupcakes.

  • Make-Ahead Option: Consider preparing the cupcakes in advance. You can freeze un-frosted cupcakes and frost them on the day you plan to serve for the best results.

Melting Snowman Cupcakes Recipe FAQs

What type of cupcakes work best for Melting Snowman Cupcakes?
Absolutely! You can use store-bought cupcakes for convenience, but homemade cupcakes allow for personalization. Vanilla or chocolate flavors work well to complement the sweet decorations.

How should I store Melting Snowman Cupcakes?
Frosted Melting Snowman Cupcakes should be stored in an airtight container in the refrigerator for up to 3 days. This keeps the frosting fresh while protecting your adorable decorations. Just ensure the container is spacious enough!

Can I freeze Melting Snowman Cupcakes?
Yes, you can freeze unfrosted cupcakes for up to 3 months! Wrap each cupcake tightly in plastic wrap before placing them in a freezer-safe bag. When you're ready to serve, simply thaw at room temperature and frost them for a delightful treat!

What should I do if my frosting is melting?
If your frosting is too soft and melting, ensure that you're using a sturdy buttercream or cream cheese frosting. Chill the decorated cupcakes in the refrigerator for about 15-30 minutes to set the frosting before serving. This slight chill will help maintain their structure.

Are there any allergies I should consider when making these cupcakes?
Very! If you're serving these cupcakes to a group, check for common allergens like gluten (found in traditional flour) and dairy (in frosting). Consider using gluten-free flour and dairy-free frosting alternatives to accommodate guests' dietary restrictions.

Melting Snowman Cupcakes

Melting Snowman Cupcakes: A Joyful Holiday Baking Adventure

Enjoy holiday baking with Melting Snowman Cupcakes that delight kids and adults alike!
Print Recipe Pin Recipe
Prep Time 20 minutes mins
Cook Time 15 minutes mins
Cooling Time 5 minutes mins
Total Time 40 minutes mins
Servings: 6 cupcakes
Course: Dessert
Cuisine: American
Calories: 200
Ingredients Equipment Method Nutrition Notes

Ingredients
  

For the Cupcakes
  • 6 pieces Cupcakes Store-bought or homemade
For the Decorations
  • 12 pieces Pretzel Sticks Or chocolate-covered pretzels
  • 1 container White Frosting Sturdy buttercream recommended
  • 1 tube Orange Decorating Frosting For snowman noses
  • 1 tube Black Decorating Frosting For eyes and buttons
  • 6 pieces Large Marshmallows Or large cookies

Equipment

  • Cupcake pan
  • piping bag
  • Oven

Method
 

Baking Procedure
  1. Preheat your oven to 350°F (175°C) and line a 6-cup cupcake pan with festive liners.
  2. Prepare your cupcake batter according to the package instructions or use a homemade recipe. Fill each cupcake liner two-thirds full and bake for approximately 15 minutes.
  3. Remove the cupcakes from the oven and let them cool in the pan for about 5 minutes. Then, transfer to a wire rack to cool completely.
  4. Once cooled, frost each cupcake with white frosting using a piping bag. Top with large marshmallows for heads and decorate with black and orange frosting.
  5. Insert pretzel sticks into the marshmallows as arms and use black frosting for buttons.
  6. Enjoy your Melting Snowman Cupcakes or store them in an airtight container.

Nutrition

Serving: 1cupcakeCalories: 200kcalCarbohydrates: 30gProtein: 2gFat: 9gSaturated Fat: 3gCholesterol: 20mgSodium: 150mgPotassium: 50mgFiber: 1gSugar: 15gCalcium: 2mgIron: 4mg

Notes

Store cupcakes in an airtight container at room temperature for up to 2 days or in the fridge for up to 3 days. Unfrosted cupcakes can be frozen for up to 3 months.

Tried this recipe?

Let us know how it was!

Cozy Up with Maple Pecan Pumpkin Cobbler Delight

October 10, 2025 by Grace Snow Leave a Comment

As I was leafing through my recipe collection one chilly afternoon, the warm, inviting spices of autumn called to me, and I couldn’t resist the allure of creating the ultimate fall dessert. Enter the Maple Pecan Pumpkin Cobbler—a delightful and comforting treat that effortlessly brings cozy vibes to any gathering. In just a few easy steps, you can impress your family and friends with its rich pumpkin base, sweetened perfectly with maple syrup and topped with crunchy pecans. Not only does this cobbler thrill the taste buds, but it also makes for a fantastic crowd-pleaser and is easily adaptable for those looking to add a personal twist. Whether you serve it warm with a scoop of ice cream or savor it straight from the baking dish, this Maple Pecan Pumpkin Cobbler is sure to become a cherished fall favorite. Ready to dive into this seasonal delight? Let’s get started!

Why is this cobbler a must-try?

Comforting warmth: The Maple Pecan Pumpkin Cobbler combines rich pumpkin flavors with the cozy essence of fall spices, making it a seasonal favorite.
Effortless and impressive: With just a few simple steps, you can create a show-stopping dessert that will wow your guests!
Customizable options: Feel free to experiment by adding bourbon or swapping pecans for walnuts—this recipe is as versatile as it is delicious.
Ideal for gatherings: Whether it's a family dinner or a get-together with friends, this cobbler's crowd-pleasing appeal makes it perfect for any occasion.
Best served warm: Pair it with vanilla ice cream or whipped cream for that extra indulgence. Don’t forget to check out my Pumpkin Cinnamon Roll Muffins for another delightful autumn treat!

Maple Pecan Pumpkin Cobbler Ingredients

• What you need for this cozy dessert!

For the Filling

  • Pumpkin Puree – Provides the rich base flavor; you can substitute with homemade puree from fresh pumpkins for an extra touch.
  • Maple Syrup – Adds natural sweetness; feel free to adjust the amount based on your sweetness preference.
  • Brown Sugar – Enhances the depth of flavor; can be replaced with white sugar or coconut sugar if desired.
  • Spices (cinnamon, nutmeg) – Infuse warmth and aroma; adjust according to your personal taste.
  • Salt – Balances the sweetness to enhance the overall flavor profile.

For the Topping

  • Pecans – Offer a delightful crunch and nutty flavor; you can substitute with walnuts or omit for a nut-free version. Remember to toast them beforehand for an extra flavor boost!
  • Flour (all-purpose) – Provides structure to the topping; you can use gluten-free blends as a substitute if needed.
  • Butter – Adds richness and helps create that crumbly topping; ensure it is cold for the best texture.

This Maple Pecan Pumpkin Cobbler is more than just a dessert; it’s a celebration of fall flavors that will leave your loved ones coming back for seconds!

Step‑by‑Step Instructions for Maple Pecan Pumpkin Cobbler

Step 1: Preheat the Oven
Begin by preheating your oven to 350°F (175°C). This step is crucial to ensure your Maple Pecan Pumpkin Cobbler bakes evenly and thoroughly. While the oven warms up, you can prepare your ingredients and mix the filling, so everything is ready to go once the temperature is just right.

Step 2: Mix the Pumpkin Filling
In a large mixing bowl, combine the pumpkin puree, maple syrup, brown sugar, melted butter, and your chosen spices (cinnamon and nutmeg) until the mixture is smooth and well-blended. This will create a luscious filling that embodies the flavors of fall. The mixture should be creamy and fragrant, inviting a cozy atmosphere as you continue to prepare.

Step 3: Prepare the Dry Ingredients
In a separate bowl, whisk together the flour and salt. This dry mix will provide structure to your cobbler, allowing it to hold together beautifully. If you wish to add any additional spices for depth, now is the time to include them. Make sure the dry ingredients are evenly combined to avoid any clumps when mixed with the wet ingredients.

Step 4: Combine the Mixtures
Gradually add the dry ingredient blend into the pumpkin mixture, folding gently until just combined. Be careful not to overmix, as you want a tender texture in your Maple Pecan Pumpkin Cobbler. Once well combined, the batter should be slightly thick yet pourable, with a vibrant orange hue that signifies deliciousness ahead.

Step 5: Pour into Baking Dish
Grease a suitable baking dish with butter or non-stick spray, then pour in the pumpkin batter, spreading it evenly with a spatula. This ensures every bite of your cobbler is packed with flavor. The filling should fill the dish about two-thirds full to allow space for the topping and baking expansion, setting the stage for a scrumptious layered dessert.

Step 6: Make the Topping
In a small bowl, mix the chopped pecans with flour and cold butter until crumbly. This mixture will create a delightful topping that adds texture to your Maple Pecan Pumpkin Cobbler. The resulting crumble should be coarse yet cohesive, ready to bring that crunchy element to your soft pumpkin filling beneath.

Step 7: Assemble and Bake
Evenly sprinkle the pecan topping over the pumpkin filling in the baking dish. Place it in the oven and bake for about 45 minutes, until the top is golden brown and bubbly. You’ll know it’s ready when a toothpick inserted in the center comes out clean or with just a few moist crumbs—this indicates that the cobbler is cooked to perfection.

Step 8: Cool and Serve
Once baked, remove the cobbler from the oven and let it cool slightly on a wire rack. This resting period helps set the filling for better slicing and serving. Allow about 10-15 minutes of cooling before diving in. Enjoy your Maple Pecan Pumpkin Cobbler warm, perhaps with a scoop of vanilla ice cream or a dollop of whipped cream for that extra special touch!

What to Serve with Maple Pecan Pumpkin Cobbler

Warm, delightful, and bursting with fall flavors, this cozy dessert pairs beautifully with a variety of sides and drinks to create a complete meal experience.

  • Vanilla Ice Cream: The creamy, rich texture of vanilla ice cream hugs the cobbler’s warm filling, elevating the entire dessert experience.
  • Whipped Cream: Light and airy, whipped cream adds a touch of sweetness that complements the spiced pumpkin perfectly while enhancing the cobbler's velvety texture.
  • Spiced Apple Cider: A warm cup of spiced apple cider adds a festive touch, echoing the fall spices found in the cobbler and providing a lovely drink pairing.
  • Honey Glazed Carrots: Their sweetness and tender texture create a wonderful contrast to the rich and spiced cobbler, making for a well-rounded meal.
  • Cranberry Sauce: A tart and refreshing side that offers a zingy balance to the sweetness of the cobbler, enhancing the overall taste experience.
  • Autumn Harvest Salad: A mix of greens, apples, nuts, and cheese not only brings freshness but also adds a mix of textures to the table for a delightful crunch alongside the cobbler.
  • Pumpkin Spice Latte: For coffee lovers, a warm pumpkin spice latte is the perfect drink to sip while enjoying a slice of cobbler, harmonizing flavors in a magical way.

Maple Pecan Pumpkin Cobbler Variations

Feel free to personalize your cobbler and make it uniquely yours with these creative twists!

  • Bourbon Boost: Add a splash of bourbon to the pumpkin mixture for a warm, rich flavor that enhances the overall depth of the dessert.
    Adding bourbon not only amplifies the warm notes but also brings an adult twist, perfect for gatherings with friends.

  • Nut-Free Delight: Swap pecans for sunflower seeds or omit nuts entirely for a nut-free version that everyone can enjoy!
    This option retains the delightful texture and flavor while being accommodating to various dietary needs.

  • Chocolate Indulgence: Toss in a handful of chocolate chips into the pumpkin filling for a sweet surprise that appeals to chocolate lovers.
    This classic combination elevates the pumpkin flavors and adds a rich, gooey texture to every bite—it’s a chocolate pumpkin lover’s dream!

  • Fruit Fusion: Add dried cranberries or raisins for a fruity burst that complements the cobbler, giving it a nice chewiness.
    These dried fruits not only enhance sweetness but also add a delightful contrast to the crunchy topping—such a tasty way to include a little zing!

  • Spiced Up Version: Experiment with ginger or cardamom in the spice mix for a zesty twist that adds vibrance to your cobbler.
    These spices invoke warm, comforting feelings of fall, transforming the flavor profile with each delicious bite.

  • Gluten-Free Goodness: Substitute the all-purpose flour with a gluten-free blend to ensure everyone can savor this delightful dessert.
    This swap doesn’t compromise on flavor or texture, making it perfect for those needing gluten-free options!

  • Apple-Pumpkin Twist: Blend in finely chopped apples along with the pumpkin for a delightful texture and flavor combo that’s simply irresistible.
    The apples add a pleasant tartness that beautifully balances the pumpkin’s sweetness, making for a delicious fusion!

  • Maple Roast Pecans: Try using maple roasted pecans in place of regular nuts for an extra layer of flavor that sings autumn!
    This enhancement brings a sweet crunch that pairs perfectly with the rich pumpkin filling—definitely a delicious upgrade!

No matter which variation you choose, you're guaranteed a delightful experience with this Maple Pecan Pumpkin Cobbler! Don’t forget to explore the joys of creating other fall treats, like my Pumpkin Brownies Decadent or enjoy the flavors brought forth in the Maple Roasted Pecans.

Expert Tips for Maple Pecan Pumpkin Cobbler

• Perfectly Creamy Filling: Ensure your pumpkin puree is smooth and free of excess moisture by using either canned puree or homemade that's well-drained.

• Avoid Dry Topping: Check your topping mid-bake; if it looks dry, drizzle a little melted butter or maple syrup to maintain moisture.

• Chill the Butter: For a crumbly topping, ensure your butter is cold before mixing it in with the pecans and flour for the best texture.

• Don’t Overmix: When combining the wet and dry mixtures, mix gently until just combined to keep your cobbler light and tender.

• Check for Doneness: Use a toothpick to check if your Maple Pecan Pumpkin Cobbler is done; it should come out clean or with a few moist crumbs.

Make Ahead Options

Preparing Maple Pecan Pumpkin Cobbler ahead of time is a great way to save yourself some stress on busy days! You can make the pumpkin filling and the pecan topping separately up to 24 hours in advance. Simply refrigerate the filling in a tightly sealed container and store the topping mixture in the fridge as well. When you’re ready to bake, just combine the filling and topping in your baking dish and pop it in the oven for about 45 minutes. This method ensures the flavors meld beautifully while maintaining the cobbler's quality, making it just as delicious as if freshly made!

How to Store and Freeze Maple Pecan Pumpkin Cobbler

Fridge: Store leftovers in an airtight container for up to 3 days. Make sure to let it cool completely before sealing to maintain texture.

Freezer: You can freeze your Maple Pecan Pumpkin Cobbler for up to 3 months. Wrap it tightly in plastic wrap, followed by aluminum foil to prevent freezer burn.

Reheating: To enjoy, thaw overnight in the fridge, then reheat in a preheated oven at 300°F (150°C) for 10-15 minutes until warmed through.

Covering: If you're leaving it out for a short period before serving, cover with foil to keep it from drying out.

Maple Pecan Pumpkin Cobbler Recipe FAQs

How do I choose the right pumpkin puree?
When selecting pumpkin puree, opt for 100% pure pumpkin in a can, which is more consistent in texture and flavor. If you prefer fresh, be sure to roast and puree the pumpkin until smooth, avoiding any excess moisture. Look for deep orange color and a thick consistency for the best results in your cobbler.

What’s the best way to store leftovers?
To keep your Maple Pecan Pumpkin Cobbler fresh, store leftovers in an airtight container in the fridge for up to 3 days. Allow the cobbler to cool completely before sealing it; this prevents condensation that can make it soggy. You can also cover the dish with plastic wrap if you're short on containers.

Can I freeze the cobbler?
Absolutely! You can freeze your Maple Pecan Pumpkin Cobbler for up to 3 months. Simply wrap it tightly in plastic wrap, followed by aluminum foil to prevent freezer burn. To reheat, let it thaw overnight in the fridge, then warm it in a preheated oven at 300°F (150°C) for about 10-15 minutes, or until heated through and invitingly fragrant.

How do I know if my cobbler is done baking?
For perfect doneness, insert a toothpick into the center of your cobbler. It should come out clean or with just a few moist crumbs clinging to it. If you notice the top is turning too dark before it's set, you can cover it with foil to protect it while the filling continues to bake. The ideal cobbler will have a bubbly, golden brown top with a delightful texture beneath!

Are there any allergy considerations with this recipe?
Yes! If you’re serving guests with nut allergies, consider omitting the pecans or substituting them with sunflower seeds for a nut-free version. Additionally, if you're accommodating gluten-free diets, you can easily swap out the all-purpose flour for a gluten-free flour blend without sacrificing taste or texture. Always double-check the ingredient labels for allergens to ensure everyone's safety!

Can I make this cobbler ahead of time?
Definitely! You can prepare the pumpkin filling and topping separately a day in advance. Store them in the fridge, then assemble and bake the cobbler when you're ready to serve. This method not only saves time but also enhances the flavors, resulting in a cozy and comforting dessert that’s perfect for any occasion.

Maple Pecan Pumpkin Cobbler

Cozy Up with Maple Pecan Pumpkin Cobbler Delight

This Maple Pecan Pumpkin Cobbler is a delightful fall dessert that combines pumpkin flavors with cozy spices, making it a must-try for autumn gatherings.
Print Recipe Pin Recipe
Prep Time 15 minutes mins
Cook Time 45 minutes mins
Cooling Time 15 minutes mins
Total Time 1 hour hr 15 minutes mins
Servings: 8 slices
Course: Dessert
Cuisine: American
Calories: 350
Ingredients Equipment Method Nutrition Notes

Ingredients
  

Filling
  • 2 cups pumpkin puree can substitute with homemade puree
  • 3/4 cup maple syrup adjust based on sweetness preference
  • 1/2 cup brown sugar can replace with white or coconut sugar
  • 1 teaspoon cinnamon adjust according to taste
  • 1/2 teaspoon nutmeg adjust according to taste
  • 1/2 teaspoon salt balances sweetness
Topping
  • 1 cup pecans can substitute with walnuts or omit for nut-free
  • 1/2 cup all-purpose flour can use gluten-free blends
  • 1/3 cup cold butter for best texture

Equipment

  • Mixing Bowl
  • Whisk
  • Baking Dish
  • Spatula

Method
 

Preparation Steps
  1. Preheat your oven to 350°F (175°C).
  2. In a large mixing bowl, combine pumpkin puree, maple syrup, brown sugar, melted butter, and spices until smooth.
  3. In a separate bowl, whisk together flour and salt.
  4. Gradually fold the dry ingredient blend into the pumpkin mixture until just combined.
  5. Grease a baking dish, pour in the pumpkin batter, and spread evenly.
  6. In a small bowl, mix chopped pecans with flour and cold butter until crumbly.
  7. Sprinkle the pecan topping over the pumpkin filling and bake for about 45 minutes.
  8. Let the cobbler cool slightly before serving.

Nutrition

Serving: 1sliceCalories: 350kcalCarbohydrates: 50gProtein: 5gFat: 15gSaturated Fat: 8gPolyunsaturated Fat: 1gMonounsaturated Fat: 6gCholesterol: 30mgSodium: 200mgPotassium: 250mgFiber: 3gSugar: 25gVitamin A: 3000IUVitamin C: 2mgCalcium: 50mgIron: 1mg

Notes

Serve warm with vanilla ice cream or whipped cream for extra indulgence.

Tried this recipe?

Let us know how it was!

Cozy Up with Maple Pecan Pumpkin Cobbler Delight

October 10, 2025 by Grace Snow Leave a Comment

As I was leafing through my recipe collection one chilly afternoon, the warm, inviting spices of autumn called to me, and I couldn’t resist the allure of creating the ultimate fall dessert. Enter the Maple Pecan Pumpkin Cobbler—a delightful and comforting treat that effortlessly brings cozy vibes to any gathering. In just a few easy steps, you can impress your family and friends with its rich pumpkin base, sweetened perfectly with maple syrup and topped with crunchy pecans. Not only does this cobbler thrill the taste buds, but it also makes for a fantastic crowd-pleaser and is easily adaptable for those looking to add a personal twist. Whether you serve it warm with a scoop of ice cream or savor it straight from the baking dish, this Maple Pecan Pumpkin Cobbler is sure to become a cherished fall favorite. Ready to dive into this seasonal delight? Let’s get started!

Why is this cobbler a must-try?

Comforting warmth: The Maple Pecan Pumpkin Cobbler combines rich pumpkin flavors with the cozy essence of fall spices, making it a seasonal favorite.
Effortless and impressive: With just a few simple steps, you can create a show-stopping dessert that will wow your guests!
Customizable options: Feel free to experiment by adding bourbon or swapping pecans for walnuts—this recipe is as versatile as it is delicious.
Ideal for gatherings: Whether it's a family dinner or a get-together with friends, this cobbler's crowd-pleasing appeal makes it perfect for any occasion.
Best served warm: Pair it with vanilla ice cream or whipped cream for that extra indulgence. Don’t forget to check out my Pumpkin Cinnamon Roll Muffins for another delightful autumn treat!

Maple Pecan Pumpkin Cobbler Ingredients

• What you need for this cozy dessert!

For the Filling

  • Pumpkin Puree – Provides the rich base flavor; you can substitute with homemade puree from fresh pumpkins for an extra touch.
  • Maple Syrup – Adds natural sweetness; feel free to adjust the amount based on your sweetness preference.
  • Brown Sugar – Enhances the depth of flavor; can be replaced with white sugar or coconut sugar if desired.
  • Spices (cinnamon, nutmeg) – Infuse warmth and aroma; adjust according to your personal taste.
  • Salt – Balances the sweetness to enhance the overall flavor profile.

For the Topping

  • Pecans – Offer a delightful crunch and nutty flavor; you can substitute with walnuts or omit for a nut-free version. Remember to toast them beforehand for an extra flavor boost!
  • Flour (all-purpose) – Provides structure to the topping; you can use gluten-free blends as a substitute if needed.
  • Butter – Adds richness and helps create that crumbly topping; ensure it is cold for the best texture.

This Maple Pecan Pumpkin Cobbler is more than just a dessert; it’s a celebration of fall flavors that will leave your loved ones coming back for seconds!

Step‑by‑Step Instructions for Maple Pecan Pumpkin Cobbler

Step 1: Preheat the Oven
Begin by preheating your oven to 350°F (175°C). This step is crucial to ensure your Maple Pecan Pumpkin Cobbler bakes evenly and thoroughly. While the oven warms up, you can prepare your ingredients and mix the filling, so everything is ready to go once the temperature is just right.

Step 2: Mix the Pumpkin Filling
In a large mixing bowl, combine the pumpkin puree, maple syrup, brown sugar, melted butter, and your chosen spices (cinnamon and nutmeg) until the mixture is smooth and well-blended. This will create a luscious filling that embodies the flavors of fall. The mixture should be creamy and fragrant, inviting a cozy atmosphere as you continue to prepare.

Step 3: Prepare the Dry Ingredients
In a separate bowl, whisk together the flour and salt. This dry mix will provide structure to your cobbler, allowing it to hold together beautifully. If you wish to add any additional spices for depth, now is the time to include them. Make sure the dry ingredients are evenly combined to avoid any clumps when mixed with the wet ingredients.

Step 4: Combine the Mixtures
Gradually add the dry ingredient blend into the pumpkin mixture, folding gently until just combined. Be careful not to overmix, as you want a tender texture in your Maple Pecan Pumpkin Cobbler. Once well combined, the batter should be slightly thick yet pourable, with a vibrant orange hue that signifies deliciousness ahead.

Step 5: Pour into Baking Dish
Grease a suitable baking dish with butter or non-stick spray, then pour in the pumpkin batter, spreading it evenly with a spatula. This ensures every bite of your cobbler is packed with flavor. The filling should fill the dish about two-thirds full to allow space for the topping and baking expansion, setting the stage for a scrumptious layered dessert.

Step 6: Make the Topping
In a small bowl, mix the chopped pecans with flour and cold butter until crumbly. This mixture will create a delightful topping that adds texture to your Maple Pecan Pumpkin Cobbler. The resulting crumble should be coarse yet cohesive, ready to bring that crunchy element to your soft pumpkin filling beneath.

Step 7: Assemble and Bake
Evenly sprinkle the pecan topping over the pumpkin filling in the baking dish. Place it in the oven and bake for about 45 minutes, until the top is golden brown and bubbly. You’ll know it’s ready when a toothpick inserted in the center comes out clean or with just a few moist crumbs—this indicates that the cobbler is cooked to perfection.

Step 8: Cool and Serve
Once baked, remove the cobbler from the oven and let it cool slightly on a wire rack. This resting period helps set the filling for better slicing and serving. Allow about 10-15 minutes of cooling before diving in. Enjoy your Maple Pecan Pumpkin Cobbler warm, perhaps with a scoop of vanilla ice cream or a dollop of whipped cream for that extra special touch!

Make Ahead Options

Preparing Maple Pecan Pumpkin Cobbler ahead of time is a great way to save yourself some stress on busy days! You can make the pumpkin filling and the pecan topping separately up to 24 hours in advance. Simply refrigerate the filling in a tightly sealed container and store the topping mixture in the fridge as well. When you’re ready to bake, just combine the filling and topping in your baking dish and pop it in the oven for about 45 minutes. This method ensures the flavors meld beautifully while maintaining the cobbler's quality, making it just as delicious as if freshly made!

How to Store and Freeze Maple Pecan Pumpkin Cobbler

Fridge: Store leftovers in an airtight container for up to 3 days. Make sure to let it cool completely before sealing to maintain texture.

Freezer: You can freeze your Maple Pecan Pumpkin Cobbler for up to 3 months. Wrap it tightly in plastic wrap, followed by aluminum foil to prevent freezer burn.

Reheating: To enjoy, thaw overnight in the fridge, then reheat in a preheated oven at 300°F (150°C) for 10-15 minutes until warmed through.

Covering: If you're leaving it out for a short period before serving, cover with foil to keep it from drying out.

Expert Tips for Maple Pecan Pumpkin Cobbler

• Perfectly Creamy Filling: Ensure your pumpkin puree is smooth and free of excess moisture by using either canned puree or homemade that's well-drained.

• Avoid Dry Topping: Check your topping mid-bake; if it looks dry, drizzle a little melted butter or maple syrup to maintain moisture.

• Chill the Butter: For a crumbly topping, ensure your butter is cold before mixing it in with the pecans and flour for the best texture.

• Don’t Overmix: When combining the wet and dry mixtures, mix gently until just combined to keep your cobbler light and tender.

• Check for Doneness: Use a toothpick to check if your Maple Pecan Pumpkin Cobbler is done; it should come out clean or with a few moist crumbs.

Maple Pecan Pumpkin Cobbler Variations

Feel free to personalize your cobbler and make it uniquely yours with these creative twists!

  • Bourbon Boost: Add a splash of bourbon to the pumpkin mixture for a warm, rich flavor that enhances the overall depth of the dessert.
    Adding bourbon not only amplifies the warm notes but also brings an adult twist, perfect for gatherings with friends.

  • Nut-Free Delight: Swap pecans for sunflower seeds or omit nuts entirely for a nut-free version that everyone can enjoy!
    This option retains the delightful texture and flavor while being accommodating to various dietary needs.

  • Chocolate Indulgence: Toss in a handful of chocolate chips into the pumpkin filling for a sweet surprise that appeals to chocolate lovers.
    This classic combination elevates the pumpkin flavors and adds a rich, gooey texture to every bite—it’s a chocolate pumpkin lover’s dream!

  • Fruit Fusion: Add dried cranberries or raisins for a fruity burst that complements the cobbler, giving it a nice chewiness.
    These dried fruits not only enhance sweetness but also add a delightful contrast to the crunchy topping—such a tasty way to include a little zing!

  • Spiced Up Version: Experiment with ginger or cardamom in the spice mix for a zesty twist that adds vibrance to your cobbler.
    These spices invoke warm, comforting feelings of fall, transforming the flavor profile with each delicious bite.

  • Gluten-Free Goodness: Substitute the all-purpose flour with a gluten-free blend to ensure everyone can savor this delightful dessert.
    This swap doesn’t compromise on flavor or texture, making it perfect for those needing gluten-free options!

  • Apple-Pumpkin Twist: Blend in finely chopped apples along with the pumpkin for a delightful texture and flavor combo that’s simply irresistible.
    The apples add a pleasant tartness that beautifully balances the pumpkin’s sweetness, making for a delicious fusion!

  • Maple Roast Pecans: Try using maple roasted pecans in place of regular nuts for an extra layer of flavor that sings autumn!
    This enhancement brings a sweet crunch that pairs perfectly with the rich pumpkin filling—definitely a delicious upgrade!

No matter which variation you choose, you're guaranteed a delightful experience with this Maple Pecan Pumpkin Cobbler! Don’t forget to explore the joys of creating other fall treats, like my Pumpkin Brownies Decadent or enjoy the flavors brought forth in the Maple Roasted Pecans.

What to Serve with Maple Pecan Pumpkin Cobbler

Warm, delightful, and bursting with fall flavors, this cozy dessert pairs beautifully with a variety of sides and drinks to create a complete meal experience.

  • Vanilla Ice Cream: The creamy, rich texture of vanilla ice cream hugs the cobbler’s warm filling, elevating the entire dessert experience.
  • Whipped Cream: Light and airy, whipped cream adds a touch of sweetness that complements the spiced pumpkin perfectly while enhancing the cobbler's velvety texture.
  • Spiced Apple Cider: A warm cup of spiced apple cider adds a festive touch, echoing the fall spices found in the cobbler and providing a lovely drink pairing.
  • Honey Glazed Carrots: Their sweetness and tender texture create a wonderful contrast to the rich and spiced cobbler, making for a well-rounded meal.
  • Cranberry Sauce: A tart and refreshing side that offers a zingy balance to the sweetness of the cobbler, enhancing the overall taste experience.
  • Autumn Harvest Salad: A mix of greens, apples, nuts, and cheese not only brings freshness but also adds a mix of textures to the table for a delightful crunch alongside the cobbler.
  • Pumpkin Spice Latte: For coffee lovers, a warm pumpkin spice latte is the perfect drink to sip while enjoying a slice of cobbler, harmonizing flavors in a magical way.

Maple Pecan Pumpkin Cobbler Recipe FAQs

How do I choose the right pumpkin puree?
When selecting pumpkin puree, opt for 100% pure pumpkin in a can, which is more consistent in texture and flavor. If you prefer fresh, be sure to roast and puree the pumpkin until smooth, avoiding any excess moisture. Look for deep orange color and a thick consistency for the best results in your cobbler.

What’s the best way to store leftovers?
To keep your Maple Pecan Pumpkin Cobbler fresh, store leftovers in an airtight container in the fridge for up to 3 days. Allow the cobbler to cool completely before sealing it; this prevents condensation that can make it soggy. You can also cover the dish with plastic wrap if you're short on containers.

Can I freeze the cobbler?
Absolutely! You can freeze your Maple Pecan Pumpkin Cobbler for up to 3 months. Simply wrap it tightly in plastic wrap, followed by aluminum foil to prevent freezer burn. To reheat, let it thaw overnight in the fridge, then warm it in a preheated oven at 300°F (150°C) for about 10-15 minutes, or until heated through and invitingly fragrant.

How do I know if my cobbler is done baking?
For perfect doneness, insert a toothpick into the center of your cobbler. It should come out clean or with just a few moist crumbs clinging to it. If you notice the top is turning too dark before it's set, you can cover it with foil to protect it while the filling continues to bake. The ideal cobbler will have a bubbly, golden brown top with a delightful texture beneath!

Are there any allergy considerations with this recipe?
Yes! If you’re serving guests with nut allergies, consider omitting the pecans or substituting them with sunflower seeds for a nut-free version. Additionally, if you're accommodating gluten-free diets, you can easily swap out the all-purpose flour for a gluten-free flour blend without sacrificing taste or texture. Always double-check the ingredient labels for allergens to ensure everyone's safety!

Can I make this cobbler ahead of time?
Definitely! You can prepare the pumpkin filling and topping separately a day in advance. Store them in the fridge, then assemble and bake the cobbler when you're ready to serve. This method not only saves time but also enhances the flavors, resulting in a cozy and comforting dessert that’s perfect for any occasion.

Maple Pecan Pumpkin Cobbler

Cozy Up with Maple Pecan Pumpkin Cobbler Delight

This Maple Pecan Pumpkin Cobbler is a delightful fall dessert that combines pumpkin flavors with cozy spices, making it a must-try for autumn gatherings.
Print Recipe Pin Recipe
Prep Time 15 minutes mins
Cook Time 45 minutes mins
Cooling Time 15 minutes mins
Total Time 1 hour hr 15 minutes mins
Servings: 8 slices
Course: Dessert
Cuisine: American
Calories: 350
Ingredients Equipment Method Nutrition Notes

Ingredients
  

Filling
  • 2 cups pumpkin puree can substitute with homemade puree
  • 3/4 cup maple syrup adjust based on sweetness preference
  • 1/2 cup brown sugar can replace with white or coconut sugar
  • 1 teaspoon cinnamon adjust according to taste
  • 1/2 teaspoon nutmeg adjust according to taste
  • 1/2 teaspoon salt balances sweetness
Topping
  • 1 cup pecans can substitute with walnuts or omit for nut-free
  • 1/2 cup all-purpose flour can use gluten-free blends
  • 1/3 cup cold butter for best texture

Equipment

  • Mixing Bowl
  • Whisk
  • Baking Dish
  • Spatula

Method
 

Preparation Steps
  1. Preheat your oven to 350°F (175°C).
  2. In a large mixing bowl, combine pumpkin puree, maple syrup, brown sugar, melted butter, and spices until smooth.
  3. In a separate bowl, whisk together flour and salt.
  4. Gradually fold the dry ingredient blend into the pumpkin mixture until just combined.
  5. Grease a baking dish, pour in the pumpkin batter, and spread evenly.
  6. In a small bowl, mix chopped pecans with flour and cold butter until crumbly.
  7. Sprinkle the pecan topping over the pumpkin filling and bake for about 45 minutes.
  8. Let the cobbler cool slightly before serving.

Nutrition

Serving: 1sliceCalories: 350kcalCarbohydrates: 50gProtein: 5gFat: 15gSaturated Fat: 8gPolyunsaturated Fat: 1gMonounsaturated Fat: 6gCholesterol: 30mgSodium: 200mgPotassium: 250mgFiber: 3gSugar: 25gVitamin A: 3000IUVitamin C: 2mgCalcium: 50mgIron: 1mg

Notes

Serve warm with vanilla ice cream or whipped cream for extra indulgence.

Tried this recipe?

Let us know how it was!

Delicious Christmas Tree Cake Macarons for Festive Cheer

October 10, 2025 by Grace Snow Leave a Comment

As the scent of evergreen and cinnamon fills the air, the holiday spirit beckons us to create something unforgettable. Enter my Christmas Tree Cake Macarons—a whimsical twist on a beloved classic that combines festive flair with a touch of indulgence. These delightful treats are not only gluten-free but also quick to whip up, making them the perfect choice for busy holiday bakers eager to impress friends and family. With a crunchy exterior and a rich, creamy filling that tastes just like holiday cake, they will undoubtedly be the star of your dessert table. Are you ready to turn your kitchen into a winter wonderland with these enchanting macarons? Let’s get baking!

Why are Christmas Tree Cake Macarons special?

Festive Twist: These macarons aren’t just desserts; they add a magical touch to your holiday celebrations. Gluten-Free Delight: Perfect for guests with dietary restrictions, ensuring everyone can indulge. Quick Preparation: You'll have these baked and assembled in under two hours, making them a time-efficient treat. Impressive Presentation: Their vibrant green color and tree shape will dazzle your guests, making them ideal for social gatherings. Versatile Filling Options: Feel free to experiment with flavors like peppermint buttercream for extra flair! These macarons are not just food; they are a festive experience waiting to be shared!

Christmas Tree Cake Macaron Ingredients

For the Macaron Shells

  • Powdered Sugar – Provides sweetness and a smooth texture; can be substituted with coconut sugar for a unique twist.
  • Almond Flour – Delivers structure and a refined texture; swap with sunflower seed flour for a nut-free option.
  • Egg Whites – Key for creating the macaron structure; using room temperature egg whites gives better volume.
  • Granulated Sugar – Sweetens the meringue and stabilizes egg whites; no substitutions needed.
  • Cream of Tartar – Stabilizes egg whites during whipping; lemon juice makes a suitable alternative, but note it may alter the flavor.
  • Green Gel Food Coloring – Adds a festive touch; consider using natural food dye for a cleaner ingredient list.

For the Filling

  • Butter – Forms a rich base for the filling; opt for unsalted butter to have better control over flavors.
  • Heavy Cream – Enhances the filling's texture, making it creamy; can be replaced with whipped coconut cream for a dairy-free treat.
  • Vanilla Extract – Infuses fragrant notes into the filling; pure extract is preferable for the best taste.
  • Snack Cakes (crumbled) – Imparts that joyous holiday cake flavor to the filling; substitute with any moist cake like chocolate or vanilla for your liking.

Step‑by‑Step Instructions for Christmas Tree Cake Macarons

Step 1: Prepare the Batter
Begin by sifting together 1 cup of powdered sugar and 1 cup of almond flour twice to ensure a fine mixture. In a large mixing bowl, whip 3 room temperature egg whites until foamy, gradually adding ½ cup of granulated sugar. Continue to whisk until stiff peaks form, which should take about 5-7 minutes using a stand mixer, ensuring a glossy meringue that holds its shape.

Step 2: Color & Combine
Gently incorporate a few drops of green gel food coloring into the meringue until evenly mixed. Carefully fold in the sifted almond flour and powdered sugar blend using a spatula, being cautious not to deflate the meringue. The batter should flow smoothly, resembling molten lava, which indicates it's ready for piping. This delicate balance is crucial for creating perfect Christmas Tree Cake Macarons.

Step 3: Pipe Shapes
Transfer the macaron batter into a piping bag fitted with a round tip. On lined baking sheets, pipe tree shapes or circles that are about 1.5 inches wide, ensuring they’re evenly spaced. After piping, firmly tap the baking sheets on the counter to release any air bubbles. Allow the macarons to rest for 30-60 minutes until a skin forms on the surface; they should feel dry to the touch.

Step 4: Bake
Preheat your oven to 300°F (150°C) while the macarons rest. Once ready, bake the macarons for 14-16 minutes, rotating the trays halfway through to ensure even cooking. You'll know they’re done when they have formed a “foot” and lift cleanly from the baking mat without sticking. Allow them to cool completely on the baking sheets.

Step 5: Make Filling
In a mixing bowl, beat ½ cup of softened unsalted butter until it is light and fluffy, about 3 minutes. Gradually mix in 1 cup of powdered sugar, followed by 2 tablespoons of heavy cream and 1 teaspoon of vanilla extract. Fold in 1 cup of crumbled snack cakes until just combined, creating a rich and flavorful filling reminiscent of a festive holiday cake.

Step 6: Assemble Macarons
Pair similar-sized macaron shells together and pipe a generous amount of filling onto the flat side of one shell. Carefully sandwich it with the matching shell, pressing slightly to secure. For an extra festive touch, drizzle with melted white chocolate and sprinkle with festive decorations or edible glitter. This beautiful assembly will create delightful Christmas Tree Cake Macarons that are sure to impress.

Step 7: Mature
To allow the flavors to meld and enhance, refrigerate the assembled macarons in an airtight container for at least 24 hours before serving. This step is essential in achieving the perfect texture and taste. After chilling, your Christmas Tree Cake Macarons will be ready to be enjoyed at holiday gatherings or shared as delightful gifts!

What to Serve with Christmas Tree Cake Macarons

Elevate your holiday dessert table by pairing these festive treats with delightful accompaniments that will please all your guests.

  • Rich Hot Chocolate: A silky cup of hot chocolate provides the perfect creamy contrast to the crispness of the macarons, enhancing the indulgent experience.
  • Peppermint Bark: This sweet and minty treat adds a festive crunch that beautifully complements the flavors of the macarons. The delightful contrast of textures is sure to please your palate.
  • Sparkling Cider: The light effervescence of sparkling cider adds a refreshing zing to your dessert experience. It's the perfect non-alcoholic option that lets the macaron flavors shine!
  • Creamy Cheesecake: A slice of cheesecake brings richness and a hint of tartness that pairs perfectly with the sweet, festive notes of the macarons. Consider a cranberry swirl for an extra holiday touch!
  • Winter Fruit Salad: A medley of pomegranate, citrus, and pear adds brightness and freshness to your dessert spread, balancing the richness of the macarons with a healthy twist.
  • Chocolate Fondue: Create a fun, interactive dessert experience with a chocolate fondue fountain! Guests can dip the macarons into warm, melted chocolate for a decadent delight.
  • Gingerbread Cookies: The spiced warmth of gingerbread cookies brings another layer of festive cheer to your dessert table. Their robust flavor beautifully contrasts the sweet macarons.
  • Vanilla Ice Cream: Serve a scoop of creamy vanilla ice cream alongside the macarons; the cool, smooth texture contrasts delightfully with the crunchy outer shell and creamy filling.

Christmas Tree Cake Macarons Variations

Feel free to explore these delightful twists for your Christmas Tree Cake Macarons, adding a personal touch that elevates your holiday baking!

  • Nut-Free Option: Swap almond flour for finely ground oats or sunflower seed flour to cater to nut allergies. A unique flavor profile emerges, keeping the festive spirit alive!

  • Flavored Frosting: Substitute the filling with peppermint, chocolate, or hazelnut buttercream for a deliciously different taste. Each flavor can bring a new cheer to your festive gatherings.

  • Natural Coloring: Use beet or spirulina powder as a natural dye instead of green gel food coloring for a healthier twist. The earthy tones not only make your macarons more appealing but also align with clean eating principles.

  • Fun Shapes: Rather than traditional tree shapes, pipe your macarons into stars or gingerbread men to bring more holiday cheer. This twist can add an element of excitement to your dessert table!

  • Spicy Kick: Incorporate a pinch of cinnamon or nutmeg into the filling for a cozy warmth in each bite. These spices perfectly complement the festive theme of the season.

  • Dairy-Free Delight: Replace the heavy cream in the filling with whipped coconut cream for a vegan-friendly version. The creamy texture remains while accommodating those with dietary preferences.

  • Flavor Fusion: Combine unexpected flavors in the filling, like orange zest or chai spice. These can take your macarons to the next level, making each bite a cozy holiday surprise.

These variations ensure there's a flavor for everyone at your holiday gatherings! If you're looking for more festive inspiration, check out my delightful Chocolate Pudding Cake or consider a classic Ice Cream Cake that everyone loves to share!

How to Store and Freeze Christmas Tree Cake Macarons

Fridge: Store assembled macarons in an airtight container in the refrigerator for up to 3 days to maintain their delightful texture and flavor.

Freezer: To enjoy these festive treats later, freeze unfilled macaron shells in a single layer, then transfer to an airtight container for up to 3 months.

Reheating: When ready to enjoy, allow frozen shells to thaw at room temperature for about 30 minutes before decorating or filling. This helps preserve the perfect macaron experience!

Mature: After assembling, refrigerate for at least 24 hours before serving; this enhances the flavors and creates a delightful taste reminiscent of holiday cake.

Make Ahead Options

These Christmas Tree Cake Macarons are perfect for busy holiday bakers looking to save time! You can prepare the macaron shells up to 24 hours in advance; just keep them stored in an airtight container at room temperature to maintain their crisp texture. The filling can also be made ahead and stored in the refrigerator for up to 3 days, covered tightly to prevent drying out. When you’re ready to serve, simply assemble the macarons the same day for best results. Letting them mature in the fridge for at least 24 hours after assembly will enhance the flavor, making them just as delightful as when first baked!

Expert Tips for Christmas Tree Cake Macarons

  • Room Temperature Egg Whites: Ensure your egg whites are at room temperature for maximum volume, as cold egg whites won’t whip to stiff peaks effectively.

  • Gentle Folding Technique: Be cautious when folding in the almond flour mixture; overmixing can lead to flat shells. The goal is a smooth batter that flows gently.

  • Proper Resting Time: Allow the macarons to rest for 30-60 minutes until a skin forms before baking. This crucial step helps achieve that coveted macaron foot and ensures proper rise.

  • Cooling Patience: Let the macarons cool completely on the baking mat before attempting to remove them. This prevents breakage and ensures they maintain their shape.

  • Avoiding Color Change: If using sunflower seed flour, be aware that it can turn green while baking. To avoid this, consider using regular almond flour for a more vibrant appearance!

Christmas Tree Cake Macarons Recipe FAQs

What should I look for when selecting egg whites?
Absolutely! For the best results, use room temperature egg whites. They whip to a greater volume and create a fluffier meringue. Make sure they are fresh and free from any yolk, as even a little bit can prevent them from achieving stiff peaks.

How should I store the assembled macarons?
To keep your beautiful Christmas Tree Cake Macarons fresh, store them in an airtight container in the refrigerator for up to 3 days. This helps maintain their chewy texture and delightful flavor. If you need to keep them longer, freezing is a great option!

Can I freeze Christmas Tree Cake Macarons?
Yes! You can freeze unfilled macaron shells by placing them in a single layer on a baking sheet until firm, then transferring them to an airtight container or freezer bag. They will stay fresh for up to 3 months. When ready to enjoy, thaw them at room temperature for about 30 minutes before filling and decorating.

What if my macarons spread out instead of holding their shape?
Very well! If your macarons spread instead of forming those beautiful “feet,” it might be due to overmixing the batter or insufficient resting time before baking. Gently fold the almond flour into the meringue until just combined, and be sure to let them rest until a skin forms on the surface, which usually takes 30-60 minutes.

Are Christmas Tree Cake Macarons gluten-free?
Yes, indeed! These festive macarons are naturally gluten-free when made using almond flour. Always double-check your ingredient labels to ensure that there are no hidden gluten sources, especially in the snack cakes you choose for the filling. This way, everyone can indulge in these delicious holiday treats!

Christmas Tree Cake Macarons

Delicious Christmas Tree Cake Macarons for Festive Cheer

These Christmas Tree Cake Macarons are a whimsical twist on a classic, combining festive flair with rich flavor—perfect for holiday gatherings.
Print Recipe Pin Recipe
Prep Time 1 hour hr
Cook Time 15 minutes mins
Resting Time 1 hour hr
Total Time 2 hours hrs 15 minutes mins
Servings: 12 macarons
Course: Dessert
Cuisine: French
Calories: 150
Ingredients Equipment Method Nutrition Notes

Ingredients
  

For the Macaron Shells
  • 1 cup Powdered Sugar Can be substituted with coconut sugar
  • 1 cup Almond Flour Swap with sunflower seed flour for nut-free option
  • 3 large Egg Whites Room temperature for better volume
  • 0.5 cup Granulated Sugar No substitutions needed
  • 0.5 teaspoon Cream of Tartar Lemon juice can be used but may alter flavor
  • a few drops Green Gel Food Coloring Consider using natural food dye
For the Filling
  • 0.5 cup Butter Unsalted for better control over flavors
  • 1 cup Powdered Sugar
  • 2 tablespoons Heavy Cream Can be replaced with whipped coconut cream
  • 1 teaspoon Vanilla Extract Pure extract is preferable
  • 1 cup Snack Cakes (crumbled) Substitute with moist cake like chocolate or vanilla

Equipment

  • Mixing Bowl
  • Stand Mixer
  • piping bag
  • Baking Sheets

Method
 

Step-By-Step Instructions
  1. Sift together powdered sugar and almond flour twice to ensure a fine mixture. In a large bowl, whip egg whites until foamy, gradually adding granulated sugar. Whisk until stiff peaks form, about 5-7 minutes.
  2. Gently incorporate green gel food coloring into the meringue until mixed. Fold in the sifted mixture carefully to avoid deflating the meringue.
  3. Transfer the macaron batter into a piping bag and pipe tree shapes or circles about 1.5 inches wide on lined baking sheets. Rest for 30-60 minutes until a skin forms.
  4. Preheat oven to 300°F (150°C) and bake for 14-16 minutes, rotating trays halfway through. Remove when they have formed a ‘foot’ and cool on sheets.
  5. In a bowl, beat the softened butter until light and fluffy. Gradually mix in powdered sugar, heavy cream, and vanilla extract, then fold in crumbled snack cakes.
  6. Pair macaron shells, pipe filling on one shell, sandwich with another, and for an extra festive touch, drizzle with melted white chocolate and sprinkle decorations.
  7. Refrigerate assembled macarons in an airtight container for at least 24 hours to enhance flavors before serving.

Nutrition

Serving: 1macaronCalories: 150kcalCarbohydrates: 16gProtein: 2gFat: 9gSaturated Fat: 5gPolyunsaturated Fat: 1gMonounsaturated Fat: 3gCholesterol: 20mgSodium: 40mgPotassium: 50mgSugar: 12gVitamin A: 5IUCalcium: 15mgIron: 0.5mg

Notes

Ensure room temperature egg whites and avoid overmixing the batter for best results.

Tried this recipe?

Let us know how it was!

Strawberry Lemonade Cake: Summer's Sweetest Slice of Joy

October 10, 2025 by Grace Snow Leave a Comment

As the sun begins to shine brighter and the days grow longer, nothing captures the spirit of summer quite like a delightful Strawberry Lemonade Cake. This refreshing dessert combines the tangy zest of fresh lemons with the sweet burst of juicy strawberries, creating an experience that’s both invigorating and satisfying. Perfect for summer gatherings, it’s not just a stunning centerpiece; it’s also quick to prepare and adaptable for those seeking gluten-free or lower-sugar options. With layers of fluffy cake and creamy frosting, every slice offers a taste of sunny bliss. So, are you ready to elevate your summer dessert game and impress your friends with this seasonal delight? Let’s dive into the juicy details!

Why is Strawberry Lemonade Cake irresistible?

Bright, Summery Flavors: The combination of fresh strawberries and zesty lemon brings a burst of summer into every bite, making it a perfect dessert for sun-soaked gatherings.

Easy to Make: With simple steps and basic ingredients, you can whip up this cake faster than your favorite takeout.

Versatile Options: Whether you want to go gluten-free or cut down on sugar, this recipe allows for easy substitutions without compromising taste.

Visually Stunning: A delightful layered cake, garnished with fresh fruit, creates a showstopper you’ll be proud to present at any occasion.

Crowd-Pleasing Appeal: Whether it's a birthday party or a backyard barbecue, this Strawberry Lemonade Cake is sure to be a hit that everyone loves! For other delicious summer treats, check out this Ice Cream Cake.

Strawberry Lemonade Cake Ingredients

For the Cake
• Cake Flour – Necessary for structure and lightness; can use gluten-free flour for a gluten-free version.
• Fresh Strawberries – Provides sweetness and fruitiness; use organic strawberries for better flavor.
• Lemon Juice – Adds tanginess and bright flavor; fresh lemon juice is preferred over bottled for maximum flavor.
• Egg Whites – Essential for a light and airy texture; ensure they're at room temperature for better volume.
• Butter – Adds richness and moisture; can reduce the amount or substitute with Greek yogurt for lower fat.
• Granulated Sugar – Sweetens the cake and balances tartness from lemon; honey or maple syrup can be used for a natural sweetener version.

For the Frosting
• Cream Cheese – Used in frosting for creaminess and tangy flavor; Greek yogurt can also be an option for a lighter frosting.
• Whipped Cream – Lightens the frosting and adds a lush texture; use coconut cream as a dairy-free alternative.
• Powdered Sugar – Sweetens frosting and gives it a smooth texture; look for powdered sugar alternatives if needed.

For the Strawberry-Lemonade Jam
• Strawberries – Cooked with sugar and lemon juice until thickened; choose ripe, juicy strawberries for the best flavor.
• Granulated Sugar – Used to sweeten the jam; adjust based on your preferred sweetness level.
• Lemon Juice – Enhances the jam's flavor and adds a refreshing tang; fresh lemon juice works wonders here.

Step‑by‑Step Instructions for Strawberry Lemonade Cake

Step 1: Prepare Cake Batter
Preheat your oven to 350°F (175°C) and grease two 9-inch round cake pans. In a medium bowl, whisk together cake flour, baking powder, and salt. In a large mixing bowl, cream the softened butter and granulated sugar until light and fluffy, about 3-4 minutes. Add the egg whites and fresh lemon juice, mixing until just combined. Gradually fold in the dry ingredients, then gently incorporate the diced fresh strawberries until evenly distributed.

Step 2: Bake
Divide the luscious batter evenly between the prepared pans, spreading it out with a spatula for an even surface. Bake the cakes in your preheated oven for 25-30 minutes, or until a toothpick inserted into the center comes out clean. Once done, let them cool in the pans for 10 minutes before transferring to a wire rack to cool completely.

Step 3: Make Strawberry-Lemonade Jam
While your cakes are cooling, prepare the delicious strawberry-lemonade jam. In a saucepan over medium heat, combine the chopped strawberries, sugar, and fresh lemon juice. Stir occasionally until the mixture thickens, about 10-15 minutes. Once thickened, remove from heat and let it cool completely to achieve the perfect spreadable consistency.

Step 4: Prepare Strawberry Frosting
In a mixing bowl, beat the cream cheese and whipped cream together with the powdered sugar using an electric mixer on medium speed until smooth and fluffy. This should take about 3-5 minutes. The strawberry frosting should have a light, airy texture that’s perfect for spreading and complements the Strawberry Lemonade Cake beautifully.

Step 5: Assemble Cake
Once the cake layers are completely cool, place one layer on a serving platter. Spread a generous layer of strawberry-lemonade jam evenly on top. Carefully place the second cake layer on top and frost the top and sides of the cake with the delightful strawberry frosting, smoothing it with a spatula for an elegant finish.

Step 6: Chill and Garnish
To allow the flavors to meld, chill the assembled Strawberry Lemonade Cake in the refrigerator for at least 30 minutes. Before serving, garnish the top with fresh strawberries and a sprinkle of lemon zest for a vibrant, inviting appearance that truly celebrates the summer essence.

Expert Tips for Strawberry Lemonade Cake

  • Perfect Egg Whites: Beat egg whites until stiff peaks form; this ensures your cake rises beautifully and maintains a light texture while enjoying the refreshing flavors of the Strawberry Lemonade Cake.

  • Don’t Overmix: Gently fold the ingredients together; overmixing can lead to a dense cake, so keep it light and fluffy for the best results.

  • Room Temperature Ingredients: Use room temperature butter and egg whites for optimal mixing. This step helps achieve the smooth, integrated batter crucial for a tender cake.

  • Cool Completely: Allow your cake layers to cool completely before frosting; this prevents the frosting from melting and keeps your presentation lovely and neat.

  • Chill Before Serving: Refrigerating the finished cake for at least 30 minutes improves flavor and texture, ensuring each slice of Strawberry Lemonade Cake is refreshingly delightful.

Strawberry Lemonade Cake Variations & Substitutions

Feel free to customize the Strawberry Lemonade Cake with these delightful variations that will keep your taste buds dancing!

  • Gluten-Free: Replace cake flour with a gluten-free flour blend for a deliciously inclusive dessert option.
  • Lower Sugar: Swap granulated sugar for natural sweeteners like honey or maple syrup to reduce the overall sugar content.

For a little twist, you can also mix in some fresh lemon zest into your batter. It'll elevate the cake with an extra burst of citrus goodness.

  • Dairy-Free: Substitute Greek yogurt with coconut yogurt for a creamy, dairy-free frosting that doesn’t skimp on flavor.
  • Berry Mix: Swap strawberries with a medley of berries like blueberries or raspberries for a fruity remix that’s equally refreshing.

If you want a zesty surprise, try adding a layer of lemon curd between the cake layers. It adds a bright, tangy layer that perfectly complements the sweetness.

  • Nutty Flavor: Use almond flour instead of cake flour to incorporate a nutty dimension while keeping the cake moist and tender.

Finally, to add a little heat, consider sprinkling a pinch of cayenne pepper into the frosting for a surprising kick that’ll awaken your palate!

Check out more summer delights like Chocolate Pudding Cake or indulge in the richness of Chocolate Poke Cake as you explore all the ways to enjoy seasonal flavors.

Make Ahead Options

These Strawberry Lemonade Cakes are perfect for meal prep enthusiasts! You can bake the cake layers up to 24 hours in advance; simply allow them to cool completely, wrap each layer tightly in plastic wrap, and store them in the refrigerator. The strawberry-lemonade jam can also be prepared a day ahead, stored in an airtight container in the fridge to enhance flavors without compromising quality. On the day of serving, just whip up the frosting and assemble your cake with the chilled layers, ensuring it's as luscious and beautiful as if you made it all in one go. This makes for effortless entertaining and saves you valuable time on busy days!

What to Serve with Strawberry Lemonade Cake?

Elevate your dessert experience by exploring delightful pairings that enhance the refreshing essence of this summer cake.

  • Fresh Fruit Salad: A colorful mix of seasonal fruits adds lightness and a refreshing contrast that complements the sweetness of the cake perfectly.
  • Lemon Curd Tart: A zesty tart brings an additional layer of flavor, enhancing the citrusy notes of the Strawberry Lemonade Cake.
  • Mint-Infused Iced Tea: The cooling mint will refresh your palate, balancing the sweetness and enhancing the brightness of the lemon and strawberries.
  • Vanilla Ice Cream: A scoop of creamy vanilla ice cream brings a luscious chill, enhancing the cake's fruitiness in a delightful manner, creating a delicious melt-in-your-mouth experience.
  • Sparkling Water with Citrus Wedges: Crisp and bubbly, this drink cleanses the palate while echoing the summery flavors of the cake.
  • Chilled Rosé Wine: A light, fruity rosé offers a sophisticated twist, pairing beautifully with the refreshing flavors of strawberries and lemons.
  • Whipped Yogurt with Honey Drizzle: This light and slightly tangy topping can enhance the cake's flavors while providing a delightful contrast in texture.
  • Almond Biscotti: The nutty crunch of biscotti adds texture and a contrasting flavor that perfectly balances with the strawberry lemonade theme.
  • Lemon Sorbet: A scoop of tart and icy lemon sorbet serves as a refreshing palate cleanser, enhancing the cake's citrus elements.
  • Coconut Cream Clouds: Light and airy coconut cream offers a dairy-free alternative that adds a luscious tropical touch to every slice.

How to Store and Freeze Strawberry Lemonade Cake

Fridge: Store the Strawberry Lemonade Cake in an airtight container in the refrigerator for up to 3-4 days to maintain freshness and prevent drying out.

Freezer: For long-term storage, wrap individual cake layers tightly in plastic wrap and then aluminum foil before freezing for up to 2 months. Thaw in the refrigerator overnight before assembly.

Reheating: If you prefer to serve it warm, gently reheat slices in the microwave for 10-15 seconds, taking care not to overheat and dry out the cake.

Partial Freezing: If only partial amounts are needed, slice the cake and freeze individual portions. This way, you can enjoy a sweet slice of Strawberry Lemonade Cake anytime!

Strawberry Lemonade Cake Recipe FAQs

What type of strawberries should I use for the cake?
Absolutely! For the best flavor, I recommend using fresh, ripe strawberries—preferably organic. Look for strawberries that are bright red without any dark spots or mold. They should feel slightly firm but not hard, indicating they're sweet and juicy.

How should I store my Strawberry Lemonade Cake?
To keep it fresh, store your Strawberry Lemonade Cake in an airtight container in the refrigerator for up to 3-4 days. If you want to retain the cake’s moisture, you can lightly cover it with plastic wrap before placing it in the container.

Can I freeze the Strawberry Lemonade Cake?
Yes, indeed! For freezing, wrap individual cake layers tightly in plastic wrap followed by aluminum foil to protect them from freezer burn. You can freeze them for up to 2 months. When you're ready to enjoy, simply thaw the layers in the refrigerator overnight before assembling. This way, you'll be able to savor that delightful flavor anytime!

What can I do if the cake layers domed too much while baking?
If your cake layers domed while baking, don’t fret! Just let them cool completely, then use a serrated knife to level them out. This will create a flat surface for frosting and layering. Alternatively, be sure to carefully check your oven temperature; an excessively hot oven can cause cakes to rise too quickly.

Is this cake suitable for gluten-free diets?
Absolutely! You can easily modify this Strawberry Lemonade Cake to be gluten-free by substituting regular cake flour with a high-quality gluten-free flour blend. Just ensure that all other ingredients, especially additives like baking powder, are also certified gluten-free. This way, everyone can enjoy this refreshing dessert without worry!

Can I use bottled lemon juice instead of fresh?
While you can use bottled lemon juice in a pinch, I highly recommend using fresh lemon juice for the best flavor in your Strawberry Lemonade Cake. Fresh juice offers a brighter, more vibrant taste that really enhances the sweet and tangy profile of the cake. Plus, the zest from the lemon adds even more amazing flavor!

Strawberry Lemonade Cake

Strawberry Lemonade Cake: Summer's Sweetest Slice of Joy

This Strawberry Lemonade Cake combines fresh lemons and juicy strawberries for a refreshing summer dessert that's perfect for gatherings.
Print Recipe Pin Recipe
Prep Time 30 minutes mins
Cook Time 30 minutes mins
Chilling Time 30 minutes mins
Total Time 1 hour hr 30 minutes mins
Servings: 8 slices
Course: Dessert
Cuisine: American
Calories: 350
Ingredients Equipment Method Nutrition Notes

Ingredients
  

For the Cake
  • 2 cups Cake Flour Can use gluten-free flour for a gluten-free version.
  • 1 cup Fresh Strawberries Use organic strawberries for better flavor.
  • 3 tablespoons Lemon Juice Fresh lemon juice is preferred over bottled.
  • 4 large Egg Whites Ensure they're at room temperature for better volume.
  • 1/2 cup Butter Can substitute with Greek yogurt for lower fat.
  • 1 cup Granulated Sugar Honey or maple syrup can be used for a natural sweetener version.
For the Frosting
  • 8 oz Cream Cheese Greek yogurt can also be an option for a lighter frosting.
  • 1 cup Whipped Cream Coconut cream can be used as a dairy-free alternative.
  • 2 cups Powdered Sugar Look for powdered sugar alternatives if needed.
For the Strawberry-Lemonade Jam
  • 2 cups Strawberries Choose ripe, juicy strawberries for the best flavor.
  • 1/2 cup Granulated Sugar Adjust based on your preferred sweetness level.
  • 2 tablespoons Lemon Juice Fresh lemon juice works wonders here.

Equipment

  • Oven
  • 9-inch Round Cake Pans
  • Mixing bowls
  • Spatula
  • Electric mixer
  • Saucepan

Method
 

Step-by-Step Instructions
  1. Preheat your oven to 350°F (175°C) and grease two 9-inch round cake pans. In a medium bowl, whisk together cake flour, baking powder, and salt. In a large mixing bowl, cream the softened butter and granulated sugar until light and fluffy. Add the egg whites and fresh lemon juice, mixing until just combined. Gradually fold in the dry ingredients, then gently incorporate the diced fresh strawberries until evenly distributed.
  2. Divide the luscious batter evenly between the prepared pans and bake for 25-30 minutes, until a toothpick inserted into the center comes out clean. Let them cool in the pans for 10 minutes before transferring to a wire rack.
  3. In a saucepan over medium heat, combine chopped strawberries, sugar, and lemon juice for the jam. Stir until thickened, about 10-15 minutes. Let it cool completely.
  4. In a mixing bowl, beat cream cheese and whipped cream with powdered sugar until smooth and fluffy, about 3-5 minutes.
  5. Once the cake layers are completely cool, place one layer on a serving platter. Spread a generous layer of strawberry-lemonade jam evenly on top. Carefully place the second cake layer on top and frost with the strawberry frosting.
  6. Chill the assembled cake in the refrigerator for at least 30 minutes. Garnish with fresh strawberries and a sprinkle of lemon zest before serving.

Nutrition

Serving: 1sliceCalories: 350kcalCarbohydrates: 50gProtein: 5gFat: 15gSaturated Fat: 9gPolyunsaturated Fat: 1gMonounsaturated Fat: 3gCholesterol: 40mgSodium: 200mgPotassium: 150mgFiber: 1gSugar: 30gVitamin A: 500IUVitamin C: 20mgCalcium: 50mgIron: 1mg

Notes

For optimal results, ensure ingredients are at room temperature before mixing and allow cake layers to cool completely before frosting to maintain presentation.

Tried this recipe?

Let us know how it was!

Festive Christmas Cornflake Wreaths That Everyone Will Love

October 10, 2025 by Grace Snow Leave a Comment

The sweet aroma of melted marshmallows and buttery goodness instantly transports me back to my childhood, where crafting Christmas Cornflake Wreaths became an annual family tradition. These easy-to-make festive treats, using just three simple ingredients, are perfect for adding a touch of holiday cheer to any gathering. Not only do they provide a crunchy texture that contrasts beautifully with their gooey sweetness, but they also serve as delightful edible decorations that everyone will marvel at. Whether you're looking for a no-bake treat to whip up last minute or a fun activity to get the kids involved in, these Christmas Cornflake Wreaths offer both simplicity and joy. Are you ready to dive into a world of festive flavors and creativity? Let’s make some magic happen in the kitchen!

Why Are Christmas Cornflake Wreaths So Special?

Simplicity: With just three ingredients, creating these wreaths is a breeze, making it perfect for busy holiday schedules.
Festive Fun: Their vibrant colors and shapes not only taste delightful, but also make them a beautiful centerpiece for your holiday table.
No-Bake Joy: Skip the oven! These easy treats are perfect for last-minute holiday gatherings or when time is tight.
Family-Friendly: Involve your kids in the fun—shaping and decorating these wreaths can become a cherished family tradition.
Decorative Delight: Use red cinnamon candies or sparkling sprinkles to customize them for your celebration, ensuring each wreath is uniquely yours!
Crowd-Pleaser: Whether at a party or as a gift, these sweet treats are sure to bring smiles to faces of all ages.

Christmas Cornflake Wreaths Ingredients

• For the Base

  • Butter – Adds richness and helps to bind the ingredients. Use margarine as a substitute if preferred.
  • Mini Marshmallows – Provide sweetness and a chewy texture as they bind the cornflakes. Use regular marshmallows if mini are unavailable; just chop them into smaller pieces.
  • Cornflakes – The main structure of the wreath, providing crunch and holding the shape. Substitute with another cereal if needed.

• For the Color

  • Green Food Coloring – Enhances the festive appearance, giving wreaths their traditional color. Omit or use another color if desired.

• For the Decor

  • Red Cinnamon Candies (optional) – Add color and a spicy sweetness as decorative elements. Use holiday-themed chocolates or sprinkles as alternatives.
  • Red Pull-N-Peel Licorice (optional) – Can be used as decorative "bows." Gummy candy may be substituted for similar aesthetics.
  • Sixlets (optional) – Colorful candy that enhances decoration. Any small candy can replace this for added color.

Step‑by‑Step Instructions for Christmas Cornflake Wreaths

Step 1: Prep Cornflakes
Start by measuring the cornflakes into a large mixing bowl. This gives you a base to work with and keeps your workspace organized. You’ll want to see those crispy flakes ready and waiting, so make sure to use a bowl that holds at least 8 cups.

Step 2: Melt Mixture
In a large saucepan, melt ¼ cup of butter over low heat, stirring gently to avoid burning. Once the butter has melted, add in 4 cups of mini marshmallows. Continuously mix for about 4-5 minutes, or until the marshmallows are completely melted and smooth. Add several drops of green food coloring, folding it in until your mixture has that festive hue.

Step 3: Combine Ingredients
Carefully pour the melted marshmallow mixture over the prepared cornflakes in your bowl. Use a spatula or wooden spoon to gently fold the ingredients together, ensuring each cornflake is evenly coated with the sweet mixture. This step is crucial for achieving the perfect texture in your Christmas Cornflake Wreaths.

Step 4: Form Wreaths
Line a baking sheet with parchment paper for easy cleanup. Grease your hands with a bit of butter or cooking spray to prevent sticking. Scoop spoonfuls of the mixture and shape them into small wreaths, about 3-4 inches in diameter. Place each wreath on the parchment paper, ensuring they have enough space to set.

Step 5: Decorate
Once you’ve formed all the wreaths, it’s time to add some festive flair! Sprinkle red cinnamon candies or any other decorations of your choice on top of each wreath. Allow them to set for about 20-30 minutes at room temperature, keeping an eye on them as they firm up and become easy to handle.

Step 6: Serve or Store
When the wreaths are ready, they can be carefully peeled off the parchment paper. Serve them on a decorative platter at your holiday gatherings or package them as gifts. To store, place them in an airtight container with wax paper between layers to keep them fresh for up to a week.

Christmas Cornflake Wreaths Variations & Substitutions

Feel free to unleash your creativity and make these festive treats even more delightful with a few simple twists!

  • Chocolate Boost: Add ½ cup of mini chocolate chips to the mixture for a deliciously sweet and rich flavor.

  • Fruit Flavors: Mix in ½ cup of dried cranberries or chopped dried apricots for a chewy, fruity contrast to the crunchy cornflakes. These dried fruits offer a delightful sweetness and vibrant color, making each bite exciting!

  • Color Swaps: Use blue or red food coloring instead to create wreaths that match your holiday theme or personal favorites. This simple adjustment can completely transform the appearance of your treats.

  • Cereal Alternatives: Swap cornflakes for puffed rice or a gluten-free cereal for an equally tasty base that might fit certain dietary needs. Try rice puffs, which give a lighter texture and equally festive look.

  • Nutty Touch: Stir in ¼ cup of chopped nuts, such as pecans or walnuts, for an added crunch and nutty flavor. Nuts not only enhance the texture but also make your wreaths more filling.

  • Heat it Up: Add a pinch of cayenne pepper or sprinkle some chopped jalapeños in the melted mixture for a surprising kick! This spicy twist will leave everyone guessing about that unexpected zing.

  • Sweet Sprinkles: Top with colorful sprinkles or edible glitter for extra cheer and sparkle. These can elevate the visual appeal and make your wreaths even more festive!

  • Gummy Candy Décor: Use gummy bears or sour worms instead of traditional candies for a playful twist that kids will absolutely love. Their cheery colors and fun shapes add a whimsical touch.

Get creative and make these festive decorations truly your own! Whether you're experimenting with flavors or fun toppings, your Christmas Cornflake Wreaths will be a crowd-pleaser no matter how you spin them.

Expert Tips for Christmas Cornflake Wreaths

  • Melt Thoroughly: Ensure marshmallows are completely melted to prevent a grainy texture that can ruin your wreaths.
  • Grease Hands: Generously grease your hands to avoid stickiness when shaping the wreaths, making the process much easier.
  • Gradual Color: If using green food coloring, add it gradually to achieve your desired shade without overpowering the mixture.
  • Decoration Alternatives: Feel free to experiment with different colored candies to make your Christmas Cornflake Wreaths unique and festive!
  • Storage Method: To maintain freshness, store wreaths in an airtight container with wax paper between layers to prevent sticking.

Make Ahead Options

These Christmas Cornflake Wreaths are perfect for meal prep, allowing you to create a delightful holiday treat ahead of time. You can prepare the cornflake and marshmallow mixture up to 24 hours in advance; simply store it in an airtight container at room temperature. When you're ready to serve, shape the mixture into wreaths, decorate with your choice of candies, and let them set. If you prefer to make them even earlier, you can store the formed wreaths in an airtight container for up to 3 days, just be sure to place wax paper between layers to prevent sticking. With these make-ahead options, you'll savor the festive fun with minimal last-minute effort!

What to Serve with Easy Christmas Cornflake Wreaths

These festive treats are not just a delight in themselves but can be beautifully paired with delicious sides and drinks for a full holiday experience.

  • Hot Cocoa: The rich, creamy flavors of hot cocoa complement the sweetness of the wreaths, making for a cozy pairing during chilly evenings.
  • Sugar Cookies: Soft and sugary, these cookies provide a textural contrast to the crunchy cornflake wreaths, perfect for a dessert platter.
  • Fruit Salad: A refreshing burst of natural sweetness from seasonal fruits can balance the rich flavors of the wreaths and add a healthy touch.
  • Cheese Platter: A variety of cheeses, especially mild ones, will contrast nicely with the sugary wreaths, offering a savory element to the sweet treat.
  • Spiced Apple Cider: The warm spices in apple cider enhance the holiday spirit while balancing the sweetness of your Christmas Cornflake Wreaths.
  • Chocolate-Dipped Pretzels: These provide a wonderful salty contrast to the sweetness of the wreaths, making them a delightful snack combination.
  • Eggnog: Creamy and spiced, eggnog adds a festive touch and pairs beautifully with the sugary goodness of the wreaths.
  • Gingerbread Men: With their warm spices, gingerbread cookies create a nostalgic flavor that harmonizes with the wreaths, rounding out your holiday spread.
  • Mini Cupcakes: Lighter and fluffy, mini cupcakes offer another sweet option, perfect for those who want a variety of treats at the table.
  • Caramel Sauce for Dipping: A drizzle of warm caramel adds an indulgent touch; perfect for dipping your crunchy wreaths and making each bite even sweeter.

How to Store and Freeze Christmas Cornflake Wreaths

  • Room Temperature: Store your wreaths in an airtight container at room temperature for up to 3 days to maintain their freshness and crunchiness.
  • Fridge: If you want to keep them longer, place your container in the fridge for up to 1 week; however, be aware that the wreaths may lose some crunchiness.
  • Freezer: You can freeze the Christmas Cornflake Wreaths for up to 2 months. Place them in a single layer on a baking sheet until frozen, then transfer to an airtight freezer bag with wax paper between layers.
  • Reheating: When ready to enjoy, allow them to thaw at room temperature; there’s no need to reheat, as these no-bake treats are best enjoyed as is!

Christmas Cornflake Wreaths Recipe FAQs

What type of cornflakes should I use?
You can use any brand of cornflakes, but make sure they’re fresh! If you prefer a different texture, feel free to substitute with puffed rice or another cereal. Just ensure that whatever you choose can hold its shape.

How long do Christmas Cornflake Wreaths last?
When stored in an airtight container at room temperature, these festive treats will stay fresh for up to 3 days. If you want to extend their life, you can store them in the fridge for up to a week, though they may lose a bit of their crunchiness.

Can I freeze Christmas Cornflake Wreaths?
Absolutely! To freeze them, first, place the wreaths in a single layer on a baking sheet until they are frozen solid. Then, transfer them to an airtight freezer bag with wax paper between layers. They can be stored in the freezer for up to 2 months. When you’re ready to enjoy them, simply let them thaw at room temperature.

What should I do if my wreaths are sticky?
If you find your wreaths are a bit sticky after forming them, don’t fret! Make sure you greased your hands well when shaping them. If they are too sticky to handle, try placing them in the fridge for 15-20 minutes to firm them up.

Can I make these wreaths ahead of time?
Yes, you can! These no-bake Christmas Cornflake Wreaths can be made a day or two in advance. Just store them in an airtight container, and they’ll be perfect for your holiday celebrations. Just remember to keep a layer of wax paper between each wreath to prevent sticking.

Are Christmas Cornflake Wreaths safe for pets?
While they are a fun treat for humans, it’s best to keep these wreaths away from pets. The marshmallows and sugar could cause digestive issues for dogs and cats, so make sure they don’t sneak a taste!

Christmas Cornflake Wreaths

Festive Christmas Cornflake Wreaths That Everyone Will Love

These Christmas Cornflake Wreaths are delightful no-bake treats that bring festive cheer to any gathering.
Print Recipe Pin Recipe
Prep Time 15 minutes mins
Cook Time 5 minutes mins
Setting Time 30 minutes mins
Total Time 50 minutes mins
Servings: 12 wreaths
Course: Dessert
Cuisine: American
Calories: 150
Ingredients Equipment Method Nutrition Notes

Ingredients
  

For the Base
  • 1/4 cup Butter Use margarine as a substitute if preferred.
  • 4 cups Mini Marshmallows Use regular marshmallows if mini are unavailable; just chop them into smaller pieces.
  • 6 cups Cornflakes Substitute with another cereal if needed.
For the Color
  • several drops Green Food Coloring Omit or use another color if desired.
For the Decor
  • optional Red Cinnamon Candies Use holiday-themed chocolates or sprinkles as alternatives.
  • optional Red Pull-N-Peel Licorice Gummy candy may be substituted for similar aesthetics.
  • optional Sixlets Any small candy can replace this for added color.

Equipment

  • large mixing bowl
  • Large saucepan
  • Spatula
  • Baking Sheet

Method
 

Step-by-Step Instructions
  1. Start by measuring the cornflakes into a large mixing bowl.
  2. In a large saucepan, melt ¼ cup of butter over low heat, stirring gently. Once melted, add 4 cups of mini marshmallows and mix until completely melted.
  3. Carefully pour the melted marshmallow mixture over the cornflakes. Gently fold to coat each cornflake evenly.
  4. Line a baking sheet with parchment paper, grease your hands, scoop spoonfuls of the mixture, and shape them into wreaths about 3-4 inches in diameter.
  5. Add red cinnamon candies or your choice of decorations on top of each wreath and allow to set for about 20-30 minutes.
  6. Serve them on a decorative platter or store in an airtight container.

Nutrition

Serving: 1wreathCalories: 150kcalCarbohydrates: 24gProtein: 1gFat: 5gSaturated Fat: 3gCholesterol: 10mgSodium: 60mgPotassium: 30mgSugar: 10gVitamin A: 200IUCalcium: 10mgIron: 0.4mg

Notes

Ensure marshmallows are completely melted to avoid a grainy texture. Store wreaths in an airtight container with wax paper between layers for freshness.

Tried this recipe?

Let us know how it was!

Festive Christmas Pudding Cupcakes for a Joyful Holiday Treat

October 10, 2025 by Grace Snow Leave a Comment

Amid the bustling holiday season, I stumbled upon a delightful way to elevate our festive gatherings—the Festive Christmas Pudding Cupcakes. These scrumptious little treats embrace the comforting, spiced essence of traditional Christmas pudding but transform it into a lighter dessert that everyone will adore. Combining a fluffy cupcake base and moist, soaked dried fruits, topped with a velvety vanilla glaze, they strike the perfect balance of indulgence and approachability. Not only are these cupcakes a standout crowd-pleaser, but they also come together in no time, making them an ideal solution for those last-minute holiday festivities. Ready to impress your loved ones with a festive twist? Let’s get baking!

Why are these cupcakes a must-try?

Irresistibly Festive: These Festive Christmas Pudding Cupcakes bring the holiday spirit to your kitchen, featuring the classic flavors you love in a delightful new format.
Easy to Make: With straightforward steps, even beginner bakers will find joy in creating these treats—no complicated techniques here!
Moist & Flavorful: Each bite bursts with the rich, spiced essence of soaked dried fruits, creating a vibrant contrast to the fluffy cupcake base.
Versatile Decorations: Festival-ready with maraschino cherries and edible holly leaves, making them not just a treat but a visual delight for your holiday table!
Perfect for Sharing: These cupcakes are ideal for holiday parties, ensuring that they will be a hit with both family and friends—a crowd-friendly dessert everyone will love!
Make Ahead: Enjoy the convenience of preparing them in advance—store easily for lively gatherings, so you can focus on spending quality time with loved ones.

Festive Christmas Pudding Cupcake Ingredients

For the Cupcake Base

  • All-purpose flour – Structure; use gluten-free flour for a gluten-free version.
  • Baking powder – Leavening agent; ensure it's fresh for proper rise.
  • Baking soda – Additional leavening; helps achieve a light texture.
  • Ground cinnamon – Flavor; can substitute with pumpkin pie spice for a twist.
  • Ground nutmeg – Nutty warmth; freshly grated will enhance flavor.
  • Ground cloves – Spice depth; use whole cloves if preferred; grind before adding.
  • Unsalted butter – Richness; margarine can substitute for a dairy-free option.
  • Brown sugar – Sweetness and moisture; light brown sugar will also work.
  • Eggs – Binding agent; can be replaced with flax eggs for a vegan version.
  • Vanilla extract – Aroma; use pure extract for the best flavor.
  • Whole milk – Moisture; substitute with almond milk for a lactose-free option.
  • Mixed dried fruit – Flavor and texture; a mix of raisins, currants, and dried apricots provides traditional flavor.
  • Brandy or orange juice – Soaking liquid; use orange juice for a family-friendly version.

For the Vanilla Glaze

  • Powdered sugar – Glaze foundation; use a sugar substitute for lower calories.
  • Milk (for glaze) – Adjusts consistency; use almond milk to keep it dairy-free.
  • Vanilla extract (for glaze) – Flavor enhancer.

For Decoration

  • Maraschino cherries – Decoration; fresh cherries can be used for a more natural option.
  • Edible holly leaves – Decoration; fondant or marzipan can be alternatives.

These Festive Christmas Pudding Cupcakes are a wonderful holiday treat that will surely delight your guests!

Step‑by‑Step Instructions for Festive Christmas Pudding Cupcakes

Step 1: Prepare the Dried Fruits
Start by soaking the mixed dried fruits in either brandy or orange juice. For optimal flavor absorption, let them sit for at least 30 minutes, or even overnight if you have the time. This step not only enhances the fruit’s moisture but also infuses a delightful depth of flavor into your Festive Christmas Pudding Cupcakes.

Step 2: Cream Butter and Sugar
In a large mixing bowl, cream together the softened unsalted butter and brown sugar until the mixture turns light and fluffy. This should take about 3-5 minutes. Next, beat in the eggs one at a time, followed by the vanilla extract, ensuring each ingredient is fully incorporated before moving on. Your mixture should be smooth and creamy, setting a rich base for the cupcakes.

Step 3: Combine the Dry Ingredients
In a separate bowl, whisk together the all-purpose flour, baking powder, baking soda, ground cinnamon, nutmeg, and cloves until evenly mixed. This step helps to prevent clumping and ensures that the baking agents are evenly distributed, which is crucial for achieving that fluffy texture in your Festive Christmas Pudding Cupcakes.

Step 4: Mix Wet and Dry Ingredients
Gradually add the dry ingredients to the butter mixture, alternating with the whole milk. Begin with a third of the dry mixture, followed by half of the milk, mixing just until combined. Repeat this process until all ingredients are incorporated. Aim for a smooth batter without overmixing, keeping your cupcakes light and airy.

Step 5: Fold in the Soaked Fruits
Gently fold the soaked dried fruits into the batter, being careful to drain any excess liquid beforehand. Use a spatula to ensure the fruits are evenly distributed throughout the batter without overmixing. This step will bring those delightful, juicy bursts of flavor to each bite of your Festive Christmas Pudding Cupcakes.

Step 6: Bake the Cupcakes
Preheat your oven to 350°F (175°C) and line a cupcake tray with liners. Spoon the cupcake batter into the liners, filling each about two-thirds full. Bake for 18-22 minutes, or until a toothpick inserted into the center comes out clean. The cupcakes should be golden brown and spring back when lightly touched.

Step 7: Cool the Cupcakes
Once baked, let the cupcakes cool in the pan for about 5 minutes. Carefully transfer them to a wire rack to cool completely. This cooling process is essential for allowing the flavors to settle and preventing the vanilla glaze from melting when applied.

Step 8: Prepare the Vanilla Glaze
In a small bowl, mix the powdered sugar, milk, and vanilla extract until you achieve a smooth, pourable consistency. Adjust the thickness by adding more milk or powdered sugar as needed. This glossy glaze will complement your Festive Christmas Pudding Cupcakes perfectly, adding a touch of sweetness to each bite.

Step 9: Decorate with Festive Flair
Once the cupcakes have cooled and the glaze has set slightly, drizzle it generously over each one. Top with a maraschino cherry and a few edible holly leaves for a cheerful and festive touch. These simple decorations bring an extra layer of holiday spirit and make your Festive Christmas Pudding Cupcakes a visual delight on the dessert table.

What to Serve with Festive Christmas Pudding Cupcakes

Embrace the warmth of the holiday spirit with these delightful pairings that elevate your festive gatherings.

  • Spiced Cider: A cozy drink that blends well with the warm spices in the cupcakes, creating a comforting duo perfect for winter evenings.
  • Vanilla Ice Cream: The creamy richness adds a delightful contrast to the cupcakes' fluffy texture, making each bite utterly indulgent.
  • Hot Chocolate: A warm cup of rich hot chocolate complements the sweetness of the cupcakes, adding an inviting touch to any dessert table.
  • Roasted Chestnuts: Their nutty flavor enhances the traditional holiday vibe, providing a delightful crunch alongside the soft cupcakes.
  • Candied Ginger Cookies: The spiciness of these cookies pairs beautifully, bringing a zesty freshness that brightens the palate between bites.
  • Fruit Salad: A refreshing mix of citrus and berries lightens the meal, balancing the rich flavors of the cupcakes with its vibrant, juicy bursts.
  • Mulled Wine: A warm, aromatic blend of spices and fruits echoes the flavors in the cupcakes, adding festivity and cheer to your gatherings.
  • Cheese Platter: Introduce a savory element with creamy cheeses and crackers, offering a delightful contrast to the dessert’s sweetness.
  • Chai Latte: The warm, spiced notes in chai create a harmonious pairing, elevating the cupcake experience with each sip.
  • Cookie Platter: Serve assorted holiday cookies alongside for a sweet spread that invites guests to indulge in festive flavors.

How to Store and Freeze Festive Christmas Pudding Cupcakes

Room Temperature: Store unglazed cupcakes in an airtight container at room temperature for up to 3 days to maintain their freshness.

Fridge: If you have leftover glazed cupcakes, keep them in the fridge for up to 5 days, but they'll taste best when brought back to room temperature before serving.

Freezer: For longer storage, freeze unglazed cupcakes for up to 3 months. Place them in a freezer-safe container, separating layers with parchment paper to avoid sticking.

Reheating: When ready to enjoy, allow frozen cupcakes to thaw in the fridge overnight. For a warm treat, you can briefly microwave them (about 10-15 seconds) before serving.

Expert Tips for Festive Christmas Pudding Cupcakes

  • Soak Well: Ensure to soak the dried fruits overnight for maximum flavor absorption, enhancing the taste of your cupcakes.
  • Drain Excess Liquid: Always drain the soaked fruits well to prevent a soggy batter, ensuring your cupcakes come out light and fluffy.
  • Perfect Baking: Insert a toothpick into the center of a cupcake to test for doneness; it should come out clean to indicate they’re perfectly baked.
  • Gentle Mixing: Be cautious not to overmix the batter after adding the fruits to maintain the airy structure of your Festive Christmas Pudding Cupcakes.
  • Cool Completely: Allow cupcakes to cool entirely before glazing; this prevents the glaze from melting and preserves its beautiful appearance.

Festive Christmas Pudding Cupcake Variations

Feel free to get creative with these delightful cupcakes by personalizing them to your taste and dietary needs!

  • Dried Fruit Swap: Use prunes or figs instead of the traditional mix; they add a unique sweetness that surprises and delights.

  • Spiced Rum Twist: Replace brandy with spiced rum for a deeper, more aromatic flavor that'll warm your holiday spirit.

  • Gluten-Free: Substitute with a quality gluten-free flour blend to ensure everyone can enjoy these scrumptious treats without worry.

  • Vegan Option: Swap eggs for flax eggs and use dairy-free butter and almond milk for a completely plant-based version; these cupcakes will still shine with their festive charm!

  • Cream Cheese Glaze: Try a cream cheese glaze instead of vanilla for a rich and tangy flavor, perfect for those who love a little extra sweetness.

  • Chocolate Chip Twist: Add mini chocolate chips to the batter for a gooey surprise that contrasts beautifully with the fruity flavors.

  • Extra Spices: Incorporate ginger or even a hint of allspice into the batter for a warmly spiced cupcake that resonates with holiday cheer.

  • Zesty Citrusy Kick: A splash of orange or lemon zest in the batter can brighten the flavor and add a refreshing twist that complements the sweetness.

These versatile options cater to various preferences, making your Festive Christmas Pudding Cupcakes even more enjoyable. If you’re feeling adventurous, consider pairing these with a stunning Chocolate Pudding Cake at your holiday gathering for an extra touch of delight!

Make Ahead Options

These Festive Christmas Pudding Cupcakes are perfect for busy home cooks eager to save time during the hectic holiday season! You can prepare the cupcake batter and refrigerate it up to 24 hours in advance, ensuring that you’ve lightened your baking load. Additionally, soak the mixed dried fruits in brandy or orange juice and store them in an airtight container for up to 3 days to maintain their moisture and infuse flavor. When you’re ready to bake, simply mix the batter and proceed to bake as directed. For the best quality, cool the cupcakes completely before glazing, allowing you to create these delightful treats with minimal effort while still delivering a festive touch to your gatherings.

Festive Christmas Pudding Cupcakes Recipe FAQs

What type of dried fruits should I use for these cupcakes?
I recommend a mix of raisins, currants, and dried apricots for a traditional flavor. You can also experiment by incorporating prunes or figs for a delightful twist, which will add unique sweetness and chewiness to your Festive Christmas Pudding Cupcakes.

How should I store my cupcakes once baked?
To keep your Festive Christmas Pudding Cupcakes fresh, store them in an airtight container at room temperature for up to 3 days if unglazed. If you've already added the vanilla glaze, they can be kept in the fridge for up to 5 days, but it's best to serve them at room temperature for peak flavor.

Can I freeze these cupcakes? If so, how?
Absolutely! To freeze your Festive Christmas Pudding Cupcakes, place them unglazed in a freezer-safe container, layered with parchment paper to prevent sticking. They can be stored for up to 3 months. When you're ready to enjoy them, simply thaw in the fridge overnight, or microwave for 10-15 seconds for a warm treat.

What can I do if my cupcakes turn out dense?
If your cupcakes come out denser than you expected, it might be due to overmixing the batter after adding the dry ingredients or too much liquid from the soaked fruits. Always mix just until combined to maintain fluffiness and make sure to drain the fruits well before folding them in.

Are there any dietary alternatives for this recipe?
Certainly! To make your Festive Christmas Pudding Cupcakes more inclusive, you can substitute all-purpose flour with a gluten-free blend, use almond milk instead of whole milk for lactose-free options, and replace eggs with flax eggs for a vegan version. These swaps will not compromise the delightful flavors of your cupcakes!

Festive Christmas Pudding Cupcakes

Festive Christmas Pudding Cupcakes for a Joyful Holiday Treat

Delightful Festive Christmas Pudding Cupcakes combining traditional flavors in a lightweight dessert that’s perfect for holiday gatherings.
Print Recipe Pin Recipe
Prep Time 30 minutes mins
Cook Time 22 minutes mins
Cooling Time 5 minutes mins
Total Time 57 minutes mins
Servings: 12 cupcakes
Course: Dessert
Cuisine: Holiday
Calories: 220
Ingredients Equipment Method Nutrition Notes

Ingredients
  

Cupcake Base
  • 2 cups all-purpose flour use gluten-free flour for a gluten-free version
  • 2 teaspoons baking powder ensure it's fresh for proper rise
  • 1 teaspoon baking soda helps achieve a light texture
  • 1 teaspoon ground cinnamon can substitute with pumpkin pie spice for a twist
  • 1/2 teaspoon ground nutmeg freshly grated will enhance flavor
  • 1/2 teaspoon ground cloves use whole cloves if preferred; grind before adding
  • 1/2 cup unsalted butter margarine can substitute for a dairy-free option
  • 1 cup brown sugar light brown sugar will also work
  • 2 large eggs can be replaced with flax eggs for a vegan version
  • 1 teaspoon vanilla extract use pure extract for the best flavor
  • 1 cup whole milk substitute with almond milk for a lactose-free option
  • 2 cups mixed dried fruit a mix of raisins, currants, and dried apricots
  • 1/2 cup brandy or orange juice use orange juice for a family-friendly version
Vanilla Glaze
  • 1 cup powdered sugar use a sugar substitute for lower calories
  • 2 tablespoons milk use almond milk to keep it dairy-free
  • 1 teaspoon vanilla extract flavor enhancer
Decoration
  • 12 pieces maraschino cherries fresh cherries can be used for a more natural option
  • 12 pieces edible holly leaves fondant or marzipan can be alternatives

Equipment

  • Oven
  • Mixing Bowl
  • Whisk
  • Cupcake tray
  • Spatula

Method
 

Instructions
  1. Soak the mixed dried fruits in brandy or orange juice for at least 30 minutes, or overnight if possible.
  2. Cream together the softened unsalted butter and brown sugar until light and fluffy, about 3-5 minutes.
  3. Beat in the eggs one at a time, followed by the vanilla extract until smooth.
  4. Whisk together the all-purpose flour, baking powder, baking soda, ground cinnamon, nutmeg, and cloves in a separate bowl.
  5. Gradually add the dry ingredients to the butter mixture, alternating with whole milk, mixing until just combined.
  6. Fold the soaked dried fruits into the batter carefully to ensure even distribution.
  7. Preheat the oven to 350°F (175°C) and line a cupcake tray with liners. Fill each liner with batter about two-thirds full.
  8. Bake for 18-22 minutes until a toothpick inserted in the center comes out clean.
  9. Let the cupcakes cool in the pan for 5 minutes, then transfer to a wire rack to cool completely.
  10. Mix the powdered sugar, milk, and vanilla extract until smooth to prepare the glaze.
  11. Drizzle the glaze over cooled cupcakes and top with maraschino cherries and edible holly leaves.

Nutrition

Serving: 1cupcakeCalories: 220kcalCarbohydrates: 34gProtein: 3gFat: 10gSaturated Fat: 6gMonounsaturated Fat: 4gCholesterol: 30mgSodium: 180mgPotassium: 120mgFiber: 1gSugar: 14gVitamin A: 300IUCalcium: 20mgIron: 1mg

Notes

These cupcakes are perfect for holiday gatherings and can be made ahead to save time. Follow storage tips for best results.

Tried this recipe?

Let us know how it was!

Blue Curacao Christmas Truffles: Festive Treats to Wow Guests

October 10, 2025 by Grace Snow Leave a Comment

Amidst the twinkling lights and the scent of pine, I stumbled upon a festive gem that redefines holiday desserts: Blue Curacao Christmas Truffles. These no-bake delights are not just a treat for the taste buds but a visual spectacle, thanks to their stunning blue hue that captures the spirit of the season. Combining rich white chocolate, tangy cream cheese, and a whisper of cake mix, this easy recipe offers a perfect balance of flavors and textures. Whether you’re looking to dazzle guests at your holiday gathering or searching for adorable homemade gifts, these truffles effortlessly fit the bill. Curious to learn how to create this whimsical masterpiece? Let’s dive into the enchanting world of Blue Curacao Christmas Truffles!

Why are Blue Curacao Christmas Truffles irresistible?

Festive and Fun: These truffles are not only a delightful treat, but their vibrant blue color adds a fun pop to your holiday dessert table.

No-Bake Simplicity: Skip the oven! This easy no-bake recipe allows you to whip up these delicious truffles with minimal effort, perfect for busy holiday schedules.

Indulgent Flavor: The combination of creamy white chocolate and tangy cream cheese creates a rich, luxurious flavor profile that will impress any dessert lover.

Perfect for Gifting: Pack them in charming boxes or a decorated platter; they make thoughtful homemade gifts that will surely delight friends and family.

Endless Variations: Want to put your twist? Substitute the blue curacao for orange extract for a festive non-alcoholic option or explore different colorings for your truffles. Whatever your choice, these truffles guarantee a holiday treat everyone will love!

Blue Curacao Christmas Truffles Ingredients

For the Truffle Mixture

  • Finely Chopped White Chocolate – Adds creamy richness and forms the truffle coating; always choose high-quality chocolate for the best flavor.
  • Cream Cheese – Provides a tangy flavor that balances sweetness; ensure it's softened for easy mixing.
  • White Cake Mix – Delivers sweetness and structure to the truffle filling; you can use a box mix or make your own for a personal touch.
  • Blue Curacao Liqueur – Infuses the truffles with a citrusy, sweet flavor and vibrant color; for a non-alcoholic version, substitute with orange extract.
  • Blue Gel Food Coloring – Optional for enhancing the truffle color; adjust according to your desired intensity.

For Decoration

  • Blue Sanding Sugar or Edible Glitter – Adds a festive, sparkling touch to your truffles; completely optional, but highly recommended for presentation!

Step‑by‑Step Instructions for Blue Curacao Christmas Truffles

Step 1: Melt Chocolate
In a microwave-safe bowl or double boiler, melt 8 ounces of finely chopped white chocolate over low heat. Stir continuously until the chocolate is smooth and fully melted, taking care not to overheat, as it may seize. Remove from heat and allow to cool slightly before using in the truffle mixture.

Step 2: Mix Filling
In a large mixing bowl, combine 8 ounces of softened cream cheese with 1 cup of white cake mix and 3 tablespoons of Blue Curacao liqueur. Using an electric mixer, beat the mixture until smooth and creamy, ensuring there are no lumps. This filling will be the heart of your Blue Curacao Christmas Truffles, blending sweet and tangy flavors.

Step 3: Color Adjustment
If you desire a more vibrant blue color for your truffles, add a few drops of blue gel food coloring into the cream cheese filling. Mix well until the color is evenly dispersed, adjusting to your preferred shade. This delightful hue will enhance the festive look of your Blue Curacao Christmas Truffles.

Step 4: Combine Mixtures
Gently fold the melted white chocolate into the cream cheese filling using a spatula. Be careful not to overmix, as you want to maintain the light and airy texture. The combination should be smooth and well-incorporated, creating a luscious filling that encapsulates the essence of the Blue Curacao Christmas Truffles.

Step 5: Chill Mixture
Cover the bowl with plastic wrap and refrigerate the mixture for about 2 hours. This chilling time is crucial, allowing the truffle filling to firm up enough for easy handling. Once chilled, it should be pliable but hold its shape when scooped.

Step 6: Scoop Truffles
Using a spoon or a melon baller, scoop out small portions of the chilled mixture and roll them into approximately 36 balls. Place each ball on a parchment-lined tray, spacing them apart to keep them from sticking together. These rounded beauties will form the foundation of your delightful Blue Curacao Christmas Truffles.

Step 7: Dip in Chocolate
Melt an additional 8 ounces of white chocolate, similar to the first batch. Carefully dip each truffle ball into the melted chocolate, ensuring they are evenly coated. Allow any excess chocolate to drip off before setting them back on the parchment-lined tray for a smooth finish.

Step 8: Add Toppings
While the coating is still wet, sprinkle blue sanding sugar or edible glitter on top of each truffle for a festive sparkle. This decorative touch will elevate your Blue Curacao Christmas Truffles, making them visually stunning and inviting for any holiday celebration.

Step 9: Set Truffles
Refrigerate the truffles for an additional 30 minutes to allow the coating to harden completely. This step ensures that each truffle maintains its beautiful shape and provides a satisfying crunch when bitten into.

Step 10: Enjoy or Gift
Once set, arrange your Blue Curacao Christmas Truffles on a festive platter or package them in charming gift boxes. These delightful treats are ready to share or savor at your holiday gatherings, making them an unforgettable dessert that everyone will adore.

How to Store and Freeze Blue Curacao Christmas Truffles

Fridge: Store your Blue Curacao Christmas Truffles in an airtight container in the refrigerator for up to 1 week to maintain their freshness and flavor.

Freezer: If you want to keep them for longer, freeze the truffles in a single layer on a parchment-lined tray, then transfer to a container. They can last up to 3 months in the freezer.

Thawing: When ready to enjoy, thaw the truffles in the refrigerator for a few hours before serving. This ensures they retain their delightful texture and flavor.

Reheating: There's no need to reheat these truffles, as they are best enjoyed chilled or at room temperature for optimal taste.

What to Serve with Blue Curacao Christmas Truffles

Elevate your holiday gatherings with delightful pairings that enhance the enchanting experience of these vibrant treats.

  • Festive Champagne: The bubbles of a crisp, chilled champagne complement the rich flavors, adding a celebratory touch to your dessert table.
  • Coffee or Espresso: The boldness of coffee pairs beautifully, helping to balance the sweetness of the truffles, creating a perfect after-dinner treat.
  • Whipped Cream: Serve a dollop of freshly whipped cream alongside for a luscious contrast that enhances the creamy texture of the truffles.
  • Gingerbread Cookies: A warm, spiced gingerbread cookie adds an adorable and festive touch to your dessert spread, marrying spices with sweetness.
  • Fruit Platter: Fresh berries or citrus fruits provide a refreshing burst of flavor that brightens up the sweet, creamy truffles, making for a balanced dessert experience.
  • Hot Cocoa: A comforting cup of rich hot cocoa offers a cozy pairing, letting you enjoy a sweet, chocolatey moment with every truffle bite.
  • Caramel Sauce: Drizzle some warm caramel sauce over the truffles for an extra layer of indulgence, elevating the festive appeal.
  • Chocolate-Dipped Pretzels: The salty crunch of chocolate-dipped pretzels provides the perfect texture contrast, making your dessert table irresistible.
  • Chocolate Mint Cookies: Their refreshing mint flavor brings a delightful contrast to the sweet, creamy truffles, inviting guests to indulge.

Blue Curacao Christmas Truffles Variations

Feel free to unleash your creativity and customize these truffles to suit your taste and occasion!

  • Dairy-Free: Substitute cream cheese with a vegan cream cheese alternative, and use a dairy-free chocolate for a delightful treat.
    This version ensures everyone can enjoy the festive spirit, keeping the flavors intact with a little twist!

  • Flavor Boost: Add 1 teaspoon of orange zest to your mixture for a fresh citrus kick that perfectly complements the Blue Curacao.
    The zest will brighten the sweet and tangy profile of the truffles, elevating your dessert experience to new heights.

  • Nutty Profile: Mix in finely chopped nuts, such as pistachios or almonds, into the filling for added crunch and richness!
    This will create a lovely contrast in texture, taking these truffles from simple to extraordinary at your holiday gatherings.

  • Chocolate Choice: Swap white chocolate for dark or milk chocolate for a different flavor experience that’s still rich and delightful.
    Each variation dances on your palate and offers a new way to enjoy these festive bites.

  • Non-Alcoholic Alternative: Replace Blue Curacao with a splash of orange juice and a dash of vanilla extract for a lively, non-alcoholic version.
    These will still pack a flavorful punch and make anyone feel included in the festive fun!

  • Color Play: Experiment with different gel food colors, such as green or red, to fit various holiday themes or occasions.
    This playful twist allows you to match your truffles with decor or personal preference, perfect for any celebration!

  • Coconut Flakes: Incorporate shredded coconut into the filling or use it as a topping for a tropical touch.
    This addition will bring in a delightful chewiness and a hint of exotic flavor to your Christmas treats.

Explore these variations and discover the endless possibilities for your Blue Curacao Christmas Truffles; each bite will be a beautiful reminder of time spent in the kitchen! If you're curious about another delicious twist, consider trying out these Potato Blue Cheese as a savory counterpart to provide balance on your festive dessert table.

Expert Tips for Blue Curacao Christmas Truffles

  • Quality Matters: Use high-quality finely chopped white chocolate for the best creamy flavor in your Blue Curacao Christmas Truffles. Cheap chocolate may lead to a less satisfying result.

  • Room Temperature Cream Cheese: Ensure your cream cheese is softened to room temperature to blend smoothly; cold cream cheese can cause lumps, impacting texture.

  • Chill Time: Don’t rush the chilling of the mixture! It's crucial for proper shaping and prevents truffles from being too soft when rolling.

  • Avoid Overmixing: When combining melted chocolate with the cream cheese mixture, fold gently to maintain a light texture and avoid deflation.

  • Customization Fun: Experiment with different food colors for various occasions or substitute blue curacao with orange extract for a festive, non-alcoholic version of the truffles.

  • Presentation Perfect: For a more captivating presentation, consider using a mix of decorative toppings like edible glitter or sanding sugar to make your Blue Curacao Christmas Truffles truly stand out.

Make Ahead Options

These Blue Curacao Christmas Truffles are perfect for meal prep enthusiasts looking to save time during the busy holiday season! You can make the truffle filling up to 3 days in advance; simply mix the softened cream cheese, cake mix, and Blue Curacao, then refrigerate the mixture until needed. This allows the flavors to meld beautifully! When you’re ready to serve, just scoop, roll, and dip the truffles in melted white chocolate, then decorate with sanding sugar for a sparkling finish. To maintain their quality, be sure to store the truffles in an airtight container in the refrigerator until you're ready to present them, ensuring they remain just as delicious as if they were freshly made.

Blue Curacao Christmas Truffles Recipe FAQs

What type of white chocolate is best for the truffles?
I highly recommend using high-quality white chocolate, as it significantly impacts the flavor and texture of your Blue Curacao Christmas Truffles. Look for brands that contain cocoa butter instead of vegetable oils for a creamier taste.

How should I store the truffles for maximum freshness?
For the best freshness, store your Blue Curacao Christmas Truffles in an airtight container in the refrigerator. They will stay delicious for up to 1 week. Just be sure to place parchment paper between layers to prevent them from sticking together!

Can I freeze Blue Curacao Christmas Truffles?
Absolutely! To freeze the truffles, place them in a single layer on a parchment-lined tray and freeze until firm. Then transfer them to an airtight container or freezer bag. They can last up to 3 months in the freezer. Just remember to thaw them in the refrigerator for a few hours before serving.

What can I do if my truffle mixture is too soft?
If your truffle mixture is too soft to handle, don’t worry! Simply cover it and pop it in the refrigerator for an additional 30 minutes. This will help firm it up, making it easier to scoop and roll into balls for your Blue Curacao Christmas Truffles.

Are these truffles suitable for those with dietary restrictions?
These truffles contain cream cheese and white chocolate, which may not be suitable for those with dairy allergies. However, you can substitute dairy-free cream cheese and chocolate to create a delicious alternative. For a non-alcoholic version, feel free to replace Blue Curacao with orange extract.

How far in advance can I make these truffles?
You can make your Blue Curacao Christmas Truffles a few days in advance! They not only hold up well but the flavors tend to meld beautifully, enhancing the overall taste. Just store them properly in the refrigerator until you’re ready to serve!

Blue Curacao Christmas Truffles

Blue Curacao Christmas Truffles: Festive Treats to Wow Guests

Delight in Blue Curacao Christmas Truffles, no-bake holiday treats that are as stunning visually as they are delicious, perfect for entertaining and gifting.
Print Recipe Pin Recipe
Prep Time 30 minutes mins
Chilling Time 2 hours hrs
Total Time 2 hours hrs 30 minutes mins
Servings: 36 truffles
Course: Dessert
Cuisine: American
Calories: 120
Ingredients Equipment Method Nutrition Notes

Ingredients
  

Truffle Mixture
  • 8 ounces finely chopped white chocolate high-quality for best flavor
  • 8 ounces cream cheese softened
  • 1 cup white cake mix box mix or homemade
  • 3 tablespoons Blue Curacao liqueur substitute with orange extract for non-alcoholic
  • blue gel food coloring optional for color enhancement
Decoration
  • blue sanding sugar or edible glitter optional, recommended for presentation

Equipment

  • Microwave
  • Mixing Bowl
  • Electric mixer
  • Spatula
  • melon baller
  • Parchment Paper

Method
 

Instructions
  1. Melt 8 ounces of finely chopped white chocolate over low heat until smooth.
  2. Combine 8 ounces of softened cream cheese, 1 cup of white cake mix, and 3 tablespoons of Blue Curacao liqueur in a bowl. Beat until smooth.
  3. Add blue gel food coloring to the filling if desired, mixing until evenly distributed.
  4. Fold the melted white chocolate into the cream cheese filling without overmixing.
  5. Refrigerate the mixture for about 2 hours to firm it up.
  6. Scoop small portions and roll them into approximately 36 balls.
  7. Dip each truffle ball into melted white chocolate, then place on a parchment-lined tray.
  8. Sprinkle with blue sanding sugar or edible glitter while the coating is still wet.
  9. Refrigerate truffles for an additional 30 minutes to harden the coating.
  10. Arrange truffles on a platter or package them as gifts.

Nutrition

Serving: 1truffleCalories: 120kcalCarbohydrates: 14gProtein: 1gFat: 7gSaturated Fat: 4gCholesterol: 15mgSodium: 30mgPotassium: 20mgSugar: 10gVitamin A: 2IUCalcium: 4mgIron: 2mg

Notes

Ensure cream cheese is at room temperature for easy mixing and use high-quality ingredients for best results.

Tried this recipe?

Let us know how it was!

Magical Harry Potter Cauldron Cakes for Enchanted Treats

October 7, 2025 by Grace Snow Leave a Comment

The aroma of chocolate wafting through the kitchen instantly transports me to the enchanting world of Harry Potter. As I stood there, measuring flour and cocoa, I couldn’t help but feel like a wizard conjuring up something magical. These Harry Potter Cauldron Cakes are not just desserts; they bring a delightful charm to any celebration, capturing the essence of Hogwarts. With a moist texture and a whimsical presentation, these vegetarian treats are a breeze to whip up, making them perfect for both novice and experienced bakers. Plus, they invite creativity, as decorating them with chocolate frosting and a sprinkle of sparkling edible glitter transforms them into true showstoppers. Ready to embark on a sweet adventure? Let’s dive into creating these enchanting chocolate delights!

Why are these Cauldron Cakes special?

Magical, they are sure to cast a spell on anyone who takes a bite! Deliciously rich in chocolate flavor, these cakes provide a delightfully immersive experience, perfect for fans of all ages. Easy to make, even novice bakers can join in the fun without hassle. Plus, they’re endlessly versatile—try different frostings or fun toppings like edible stars! Looking for more cozy baking ideas? Check out Ricotta Protein Pancakes for a delightful breakfast option. With their crowd-pleasing charm, these Harry Potter Cauldron Cakes are perfect for themed parties or a magical afternoon treat!

Harry Potter Cauldron Cakes Ingredients

For the Cauldron Cakes

  • All-Purpose Flour – Provides structure and texture; substitute with gluten-free flour blend for gluten-free versions.
  • Granulated Sugar – Adds sweetness and moisture; consider brown sugar for a deeper flavor.
  • Unsweetened Cocoa Powder – Contributes a rich chocolate flavor; use Dutch-processed cocoa for a mellower taste.
  • Baking Powder – Acts as a leavening agent for a light cake; ensure it is fresh for best results.
  • Baking Soda – Balances acidity and serves as a leavening agent; can be omitted if using self-rising flour.
  • Salt – Enhances flavor; always use fine salt to prevent graininess.
  • Unsalted Butter – Adds richness and moisture; substitute with coconut oil for dairy-free cakes.
  • Eggs – Provide structure and binding; opt for flax eggs or applesauce for vegan versions.
  • Vanilla Extract – Adds aromatic flavor; use pure vanilla for best results, or almond extract for a twist.
  • Milk – Helps to create a smooth batter; substitute with almond milk for a dairy-free option.

For the Frosting

  • Chocolate Frosting – Adds richness for decorating; use store-bought or homemade; consider a vegan frosting for dairy-free.
  • Edible Glitter – A finishing touch for magical aesthetics; optional but enhances presentation.

These Harry Potter Cauldron Cakes are truly enchanting and a wonderful way to add a sprinkle of magic to your dessert table!

Step‑by‑Step Instructions for Harry Potter Cauldron Cakes

Step 1: Prepare Dry Ingredients
In a large mixing bowl, whisk together all-purpose flour, granulated sugar, unsweetened cocoa powder, baking powder, baking soda, and salt until smooth and no lumps remain. This step sets a solid foundation for your Harry Potter Cauldron Cakes, ensuring a fluffy texture. Take your time to mix well and enjoy the rich chocolate aroma filling the air.

Step 2: Combine Wet Ingredients
In a separate medium bowl, blend together the melted unsalted butter, eggs, and vanilla extract. Gradually whisk in the milk until the mixture is completely smooth. This creamy combination adds moisture to the batter, contributing to the delicious taste of your cauldron cakes. Be sure to incorporate everything well for an even batter consistency.

Step 3: Mix Batter
Slowly pour the wet ingredient mixture into the bowl with the dry ingredients, stirring gently. Mix until just combined, ensuring no dry flour pockets remain; the batter should remain slightly lumpy, which is perfect for your Harry Potter Cauldron Cakes. Overmixing may lead to denser cakes, so embrace the whimsy of a textured batter as you combine the ingredients.

Step 4: Bake
Preheat your oven to 350°F (175°C) while preparing your cauldron-shaped molds by greasing them lightly. Fill each mold about 3/4 full with the batter, creating that signature cauldron shape. Bake them for about 20-25 minutes, or until a toothpick inserted into the center comes out clean. You’ll know they are ready when the tops are slightly domed and look firm.

Step 5: Cool and Decorate
Once your Harry Potter Cauldron Cakes are done baking, remove them from the oven and allow them to cool in the molds for 10 minutes. Carefully transfer them to a wire rack to cool completely. Once cooled, frost each cake with rich chocolate frosting and sprinkle with edible glitter, making them sparkle like true enchanted treats before serving.

Harry Potter Cauldron Cakes Variations

Feel free to sprinkle your own magic into these delightful Cauldron Cakes! With endless possibilities, let’s brainstorm some fun and tasty twists to make them your own.

  • Gluten-Free: Use a gluten-free flour blend as a 1:1 substitute for all-purpose flour to cater to gluten sensitivities.

  • Vegan: Replace eggs with flax eggs or unsweetened applesauce, and use almond milk and coconut oil instead of milk and butter. These alterations lead to a moist, magical vegan creation!

  • Chocolate Chip Delight: Fold in semi-sweet or dark chocolate chips into the batter for an extra chocolatey punch that will delight every sweet tooth. They create pockets of gooey loveliness in each bite!

  • Flavor Fusion: Experiment with flavored extracts like peppermint or orange zest in place of vanilla for a whimsical twist. This adds a delightful surprise with each bite that brings an enchanting aroma to your kitchen.

  • Frosting Varieties: Swap your chocolate frosting for cream cheese frosting or a tangy raspberry glaze. Each option provides a unique taste that pairs beautifully with the cakes, turning them into an intriguing dessert experience.

  • Spicy Kick: Add a pinch of cayenne pepper or cinnamon to the batter for a subtle warmth that contrasts perfectly with the sweetness of chocolate. A little heat can make every dessert adventure more exciting!

  • Themed Decorations: Instead of edible glitter, try decorating with themed sprinkles like stars or mini chocolate frogs to keep with the magical theme while adding flair to your presentation.

  • Fruit-Filled: Stir in fresh raspberries or chopped strawberries for a burst of fruity freshness that contrasts wonderfully with the rich chocolate. This creates a delightful surprise and adds a splash of color to your enchanting treats!

For more delightful inspirations, check out these cozy recipes like Crab Cakes Forget or treat yourself to a lovely breakfast with Ricotta Protein Pancakes. Let your imagination and taste buds guide you!

Expert Tips for Harry Potter Cauldron Cakes

  • Use Fresh Ingredients: Ensure all your dry ingredients are fresh, particularly baking powder and cocoa powder, to maximize their leavening and flavor potential.

  • Don’t Overmix: To avoid dense cakes, mix the batter just until combined. A few lumps are perfectly fine, ensuring your Harry Potter Cauldron Cakes remain fluffy!

  • Cool Properly: Allow the cakes to cool completely before frosting. This prevents the chocolate frosting from melting and ensures a beautiful, thick layer on top.

  • High-Quality Cocoa: Invest in good-quality cocoa powder for a richer chocolate flavor. The taste difference will elevate your cauldron cakes to enchanting levels!

  • Creative Toppings: Get creative with your decorations! Use colored sprinkles or themed edible decorations to make your Harry Potter Cauldron Cakes even more magical.

  • Practice Patience: Baking is an art! Don’t rush through steps, especially cooling and decorating; good things come to those who wait.

What to Serve with Harry Potter Cauldron Cakes?

Imagine the delightful aromas wafting through your kitchen as these enchanting cakes steal the spotlight at your next gathering.

  • Butterbeer: This sweet, frothy drink captures the essence of Hogwarts and pairs perfectly with the rich chocolate of the cakes.
  • Pumpkin Spice Lattes: The warmth of spices in this classic fall drink complements the cocoa beautifully, adding a cozy touch to your dessert table.

For a whimsical pairing, consider serving a Chocolate Fondue: Set up a fondue station with fresh fruit and marshmallows. Guests can dip bites into warm chocolate, enhancing their sweet adventure with gooey goodness!

  • Ice Cream: A scoop of vanilla bean or a spiced pumpkin flavor adds creaminess and balances the richness of the cauldron cakes.
  • Edible Glitter Toppings: Serve with extra edible glitter for guests to sprinkle on their cakes, creating a magical finishing touch that sparks joy!

These delightful pairings not only elevate the experience but also ensure every bite is enchanting, making your get-together an unforgettable event.

Make Ahead Options

These delightful Harry Potter Cauldron Cakes are perfect for busy bakers looking to save time! You can prepare the batter up to 24 hours in advance; simply mix the dry ingredients and store them together in an airtight container. The wet ingredients can also be blended and kept in the fridge until you're ready to bake, ensuring freshness. When you're ready to whip them up, just combine the wet and dry ingredients, fill your molds, and bake as directed. To maintain their quality, allow the baked cakes to cool completely before frosting and refrigerating them for up to 3 days. Just bring them to room temperature before serving, and they'll be just as delicious!

Storage Tips for Harry Potter Cauldron Cakes

Room Temperature: Store the cauldron cakes in an airtight container for up to 3 days. This keeps them deliciously moist and ensures they capture all the magical flavors.

Fridge: If you want to extend their life, place the cakes in the refrigerator for up to a week. Allow them to come to room temperature before serving for the best taste experience.

Freezer: These Harry Potter Cauldron Cakes can be frozen for up to 2 months! Wrap each cake tightly in plastic wrap and then place in a freezer-safe container to preserve their enchantment.

Reheating: To enjoy your cakes warm, simply microwave for about 10-15 seconds. This will revive their soft texture, and they’ll taste freshly baked!

Harry Potter Cauldron Cakes Recipe FAQs

How do I select ripe ingredients for my Cauldron Cakes?
Absolutely! When baking, choose ingredients that are fresh and of good quality. For instance, select all-purpose flour that is free from lumps, and ensure your baking powder is recent (check the expiration date). Fresh eggs should have smooth shells without cracks, and for your cocoa powder, opt for a rich dark variety without clumps for the best flavor. Allowing your butter to reach room temperature before blending ensures a smooth and creamy batter, too!

What is the best way to store Cauldron Cakes, and how long do they last?
I often recommend storing your Harry Potter Cauldron Cakes in an airtight container at room temperature for up to 3 days. If you need to keep them fresher for longer, placing them in the refrigerator can extend their shelf life to up to a week. Just remember to let them come to room temperature before serving, ensuring those delightful flavors are perfectly revived!

Can I freeze Harry Potter Cauldron Cakes? If so, how?
Absolutely! You can freeze your Cauldron Cakes for up to 2 months. It's simple: first, allow the cakes to cool completely. Then, wrap each cake tightly in plastic wrap to prevent freezer burn, followed by placing them in a freezer-safe container or freezer bag. When you’re ready to enjoy a cake, just unwrap and thaw it in the refrigerator overnight or microwave for about 10–15 seconds for a warm treat.

What should I do if my cakes turn out too dense?
Very good question! If your cakes are dense, it may be a result of overmixing the batter. The key is to mix the wet and dry ingredients gently, just until combined. Aim for a slightly lumpy batter; it’s perfectly fine to have small flour pockets. Also, ensure your leavening agents, like baking powder, are fresh; old ingredients don’t rise as well and can lead to heavier textures. If you’re ever uncertain, you could do a little test batch to get the hang of it!

Are there any dietary considerations for these Cauldron Cakes?
Definitely! These Harry Potter Cauldron Cakes are vegetarian, but they can be easily adapted for other dietary needs. For a dairy-free version, swap unsalted butter with coconut oil and use almond milk instead. If you need them vegan, you can substitute eggs with flax eggs (mix 1 tablespoon ground flaxseed with 2.5 tablespoons water and let it sit for 5 min) or 1/4 cup applesauce. Always check labels for potential allergens, especially in store-bought frostings like chocolate frosting.

Harry Potter Cauldron Cakes

Magical Harry Potter Cauldron Cakes for Enchanted Treats

These Harry Potter Cauldron Cakes are delightful chocolate desserts, perfect for any celebration, bringing a touch of Hogwarts magic to your table.
Print Recipe Pin Recipe
Prep Time 20 minutes mins
Cook Time 25 minutes mins
Cooling Time 10 minutes mins
Total Time 55 minutes mins
Servings: 12 cakes
Course: Dessert
Cuisine: British
Calories: 210
Ingredients Equipment Method Nutrition Notes

Ingredients
  

For the Cauldron Cakes
  • 1 cup All-Purpose Flour substitute with gluten-free flour blend for gluten-free versions
  • 1 cup Granulated Sugar consider brown sugar for a deeper flavor
  • 1/2 cup Unsweetened Cocoa Powder use Dutch-processed cocoa for a mellower taste
  • 1 tbsp Baking Powder ensure it is fresh for best results
  • 1 tsp Baking Soda can be omitted if using self-rising flour
  • 1/4 tsp Salt always use fine salt to prevent graininess
  • 1/2 cup Unsalted Butter substitute with coconut oil for dairy-free cakes
  • 2 large Eggs opt for flax eggs or applesauce for vegan versions
  • 1 tsp Vanilla Extract use pure vanilla for best results, or almond extract for a twist
  • 1/2 cup Milk substitute with almond milk for a dairy-free option
For the Frosting
  • 1 cup Chocolate Frosting use store-bought or homemade; consider a vegan frosting for dairy-free
  • 1 tbsp Edible Glitter optional but enhances presentation

Equipment

  • Mixing bowls
  • Whisk
  • Cauldron-shaped molds
  • Oven
  • wire rack

Method
 

Preparation Steps
  1. In a large mixing bowl, whisk together all-purpose flour, granulated sugar, unsweetened cocoa powder, baking powder, baking soda, and salt until smooth and no lumps remain.
  2. In a separate medium bowl, blend together the melted unsalted butter, eggs, and vanilla extract. Gradually whisk in the milk until the mixture is completely smooth.
  3. Slowly pour the wet ingredient mixture into the bowl with the dry ingredients, stirring gently. Mix until just combined.
  4. Preheat your oven to 350°F (175°C). Fill each cauldron mold about 3/4 full with the batter and bake for about 20-25 minutes.
  5. Once baked, cool in the molds for 10 minutes, then transfer to a wire rack. Frost each cake with rich chocolate frosting and sprinkle with edible glitter.

Nutrition

Serving: 1cakeCalories: 210kcalCarbohydrates: 30gProtein: 3gFat: 9gSaturated Fat: 5gPolyunsaturated Fat: 1gMonounsaturated Fat: 3gCholesterol: 40mgSodium: 180mgPotassium: 120mgFiber: 2gSugar: 15gVitamin A: 250IUCalcium: 30mgIron: 1mg

Notes

These Harry Potter Cauldron Cakes are perfect for themed parties or magical afternoon treats. Get creative with decorations to enhance their whimsical appeal.

Tried this recipe?

Let us know how it was!
  • « Previous Page
  • 1
  • …
  • 33
  • 34
  • 35
  • 36
  • 37
  • …
  • 49
  • Next Page »

Welcome!

Hi, I’m Grace, a Sydney-based home cook with a passion for bold flavors and trending ingredients. Whether you’re a busy beginner or a seasoned foodie, you’ll find dishes here that are fresh, fun, and full of flavor.

More about me

Popular Recipes

  • Cheesy Chicken Garlic Bread Sandwich
    Cheesy Chicken Garlic Bread Sandwich for Cozy Family Moments
  • Easy Chicken Ranch Wraps
    Easy Chicken Ranch Wraps: Quick, Creamy & Totally Satisfying
  • Chicken Caesar Sandwiches
    Delicious Chicken Caesar Sandwiches for Quick Comfort Food
  • best Cuban sandwich
    The Best Cuban Sandwich You’ll Want Every Weeknight!

Footer

↑ back to top

About

  • Privacy Policy
  • Disclaimer
  • Terms & Conditions

Newsletter

  • Sign Up! for emails and updates

Contact

  • About me
  • Contact me

Copyright © 2025 TastyTrendIngredients