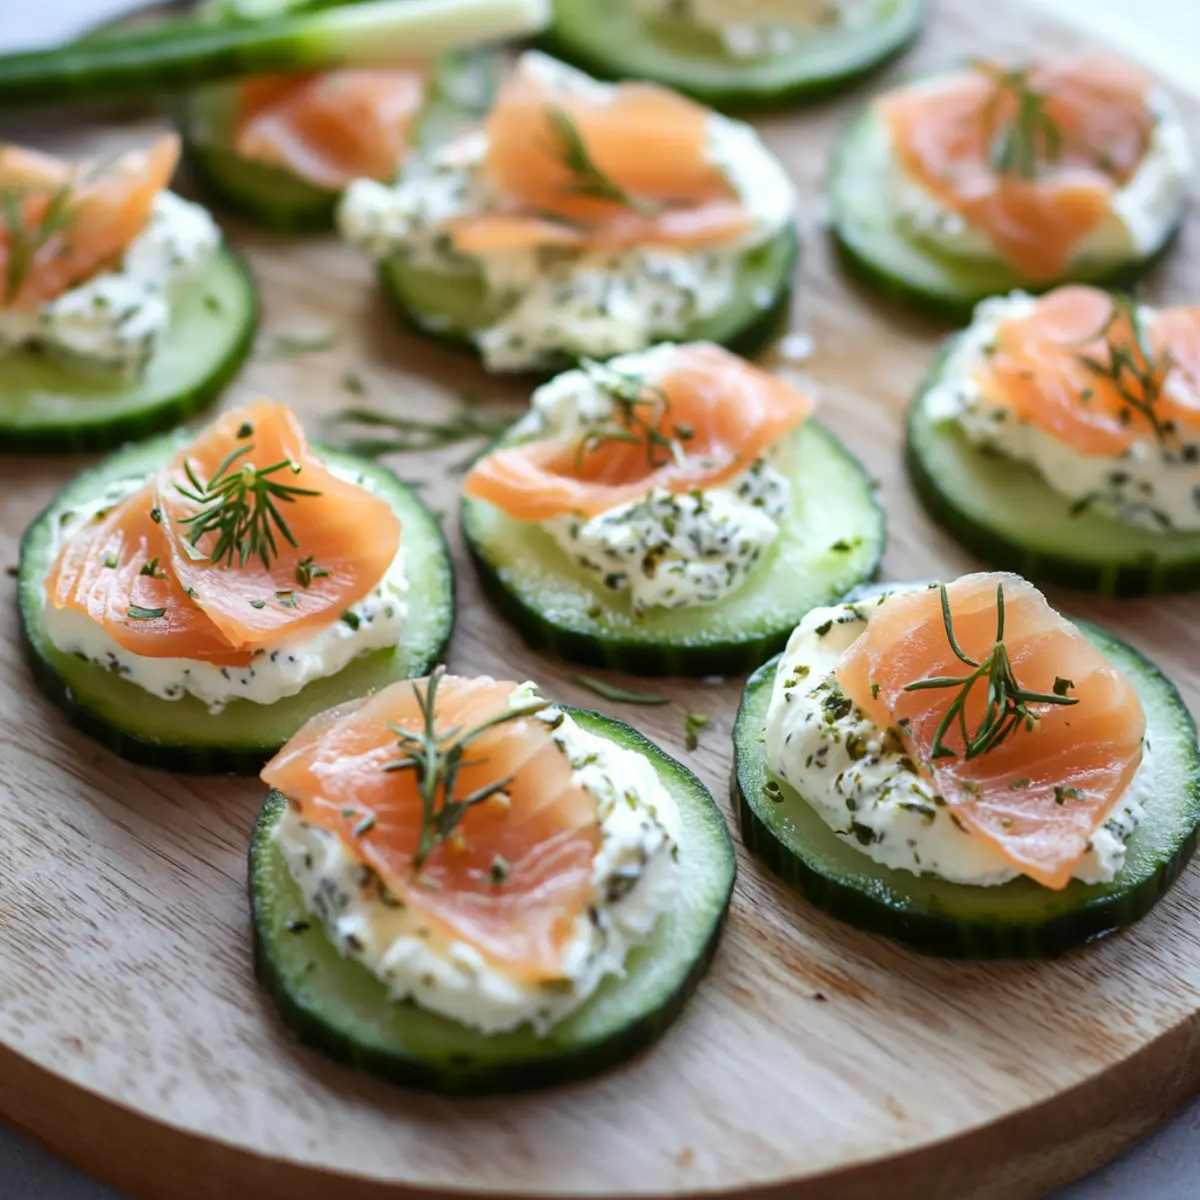
tastytrendingredients

  • Home
  • Recipes
    • Appetizers
    • Breakfast
    • Dessert
    • Dinner
    • Drinks
    • Salads
    • Snacks
    • Soups
  • About me
  • Contact me
menu icon
go to homepage
  • Home
  • Recipes
    • Appetizers
    • Breakfast
    • Dessert
    • Dinner
    • Drinks
    • Salads
    • Snacks
    • Soups
  • About me
  • Contact me
search icon
Homepage link
  • Home
  • Recipes
    • Appetizers
    • Breakfast
    • Dessert
    • Dinner
    • Drinks
    • Salads
    • Snacks
    • Soups
  • About me
  • Contact me
×

Cowboy Butter Chicken Bites: Flavor-Packed Party Pleaser

November 23, 2025 by Grace Snow Leave a Comment

The sizzle of butter hitting a hot skillet can be downright irresistible, can’t it? That’s how I feel each time I whip up these Cowboy Butter Chicken Bites; they’re simply delicious morsels that bring a taste of the wild West into my kitchen. This recipe offers a quick route to a savory sensation, making it perfect for busy weeknights or spontaneous gatherings with friends. Juicy chicken bites are enveloped in a rich, zesty cowboy butter sauce infused with garlic and fresh herbs, offering remarkable versatility that can easily cater to various dietary preferences. Whether served as a fun appetizer or a satisfying main dish, these bites promise to impress. Are you ready to dive into this flavorful feast?

Why are Cowboy Butter Chicken Bites a hit?

Simplicity at its finest: This recipe features easy-to-follow steps that even novice cooks can master in no time.

Rich, savory flavor: The harmonious blend of garlic, herbs, and creamy butter creates a taste explosion that will leave everyone wanting seconds.

Versatile dinner choice: Adapt it for different diets—swap in plant-based butter for a dairy-free delight, or change the protein to your preference.

Quick preparation time: With just 30 minutes from start to finish, these bites make weeknight dinners feel gourmet without the hassle.

Crowd-pleasing appeal: Perfect for parties or casual get-togethers, these bites are sure to impress guests when served alongside refreshing sides or tasty dips.

Looking for more delicious chicken options? Try my famous Crockpot Butter Chicken or explore my easy recipe for Honey Garlic Chicken.

Cowboy Butter Chicken Bites Ingredients

For the Chicken
• Boneless Skinless Chicken Breasts or Thighs (1.5 lbs) – This primary protein can be cut into bite-sized pieces for easy cooking and eating.
• Salt (1 tsp) – Essential for seasoning the chicken to enhance its flavor.
• Black Pepper (1/2 tsp) – Adds warmth; adjust according to your taste preferences.
• Smoked Paprika (1 tsp) – Provides a smokey depth to the bites; regular paprika can be used as a substitute.
• Garlic Powder (1/2 tsp) – Infuses additional garlic flavor; feel free to use fresh garlic for a bolder taste.

For the Cowboy Butter Sauce
• Olive Oil (1 tbsp) – Used for searing chicken; other cooking oils like avocado or canola work well too.
• Unsalted Butter (4 tbsp) – The base for the flavorful cowboy butter; substitute with plant-based butter for a dairy-free version.
• Garlic (4 cloves, minced) – Fresh garlic adds aromatic depth; adjust the quantity based on your preference.
• Lemon Juice (1 tbsp) – Brightens the sauce’s flavors; fresh lemon juice is recommended for the best taste.
• Dijon Mustard (1 tsp) – Adds tanginess and complexity; omit if you prefer a simpler flavor.
• Red Pepper Flakes (1/2 tsp) – Provides heat; adjust the amount based on your spice preference (perfect for those Cowboy Butter Chicken Bites!).
• Fresh Parsley (2 tbsp, chopped) – Adds freshness and color to your dish; can be substituted with other herbs like cilantro or thyme.

These ingredients set the foundation for your Cowboy Butter Chicken Bites, ensuring each bite is packed with flavor and warmth!

Step‑by‑Step Instructions for Cowboy Butter Chicken Bites

Step 1: Prepare the Chicken
Begin by cutting the boneless skinless chicken breasts or thighs into bite-sized pieces, ensuring they are all approximately uniform for even cooking. Pat the chicken dry with paper towels to promote a nice sear, then season generously with salt, black pepper, smoked paprika, and garlic powder for a flavor-packed base.

Step 2: Sear the Chicken
Heat a large skillet over medium-high heat and add 1 tablespoon of olive oil, swirling to coat the pan. Once the oil is shimmering, add the seasoned chicken in a single layer, ensuring not to overcrowd the pan. Sear for about 2-3 minutes until the chicken reaches a golden brown color, then flip and cook for an additional 3-4 minutes until fully cooked through, reaching an internal temperature of 165°F.

Step 3: Make the Cowboy Butter Sauce
While the chicken is cooking, melt 4 tablespoons of unsalted butter in a small saucepan or the same skillet over medium heat. Add the minced garlic and sauté for about 1 minute, until fragrant but not browned. Stir in the lemon juice, Dijon mustard, and red pepper flakes, letting the sauce simmer gently for another minute to meld the flavors together beautifully.

Step 4: Combine Chicken and Sauce
Once the chicken is thoroughly cooked, return it to the skillet with the cowboy butter sauce. Toss the chicken bites gently to ensure they are all coated in that rich, zesty sauce. Heat everything together for an additional 1-2 minutes, allowing the flavors to intertwine and the chicken to absorb that delightful buttery goodness.

Step 5: Serve and Garnish
Transfer the Cowboy Butter Chicken Bites to a serving dish, inviting everyone to feast on these savory morsels. Drizzle any remaining sauce over the chicken for an extra touch of flavor, and sprinkle with chopped fresh parsley for a pop of color. Serve these bites hot, perfect for a gathering or a delightful dinner at home.

Expert Tips for Cowboy Butter Chicken Bites

  • Dry Before Seasoning: Ensure chicken pieces are patted dry prior to seasoning. This helps achieve that irresistible golden-brown crust when searing!

  • Don't Overcrowd the Pan: Searing too many pieces at once can lead to steaming rather than browning. Cook in batches for perfect, crispy Cowboy Butter Chicken Bites.

  • Adjust Spice Levels: Tailor the amount of red pepper flakes to your heat preference. Start with less, and add more if you crave a spicier kick!

  • Use Fresh Ingredients: Fresh garlic and herbs elevate the flavors significantly; don’t shy away from choosing fresh over dried for the best taste.

  • Check Chicken Temp: Always ensure your chicken hits an internal temperature of 165°F to guarantee it's safely cooked and tender—no one wants dry bites!

Make Ahead Options

These Cowboy Butter Chicken Bites are perfect for meal prep enthusiasts! You can season and cut the chicken into bite-sized pieces up to 24 hours in advance, storing it in an airtight container in the refrigerator to maintain its flavor and freshness. Additionally, the cowboy butter sauce can be prepared ahead and stored separately for up to 3 days; simply refrigerate it in a sealed jar. When you're ready to serve, just reheat the chicken thoroughly in a skillet, toss it with the warmed sauce for another minute, and voilà! You’ll enjoy restaurant-quality results with minimal effort, saving precious time on busy weeknights.

Cowboy Butter Chicken Bites Variations

Feel free to make these delectable bites your own with a few easy tweaks that will entice your taste buds!

  • Plant-Based Swap: Use tofu or tempeh instead of chicken for a fantastic vegan alternate, marinating it to soak up those delicious flavors.
  • Herb Infusion: Substitute with fresh basil or cilantro for a fragrant twist that packs a fresh punch, enhancing the overall experience of each bite.
  • Spicy Kick: Feel adventurous? Add more red pepper flakes or minced jalapeños for an extra fiery flavor that can elevate the cowboy theme!
  • Cheesy Delight: Sprinkle grated Parmesan or feta cheese atop the finished dish for a creamy, savory layer that will make your guests swoon.
  • Crispy Coating: For a crunchier option, dip the chicken pieces in breadcrumbs before searing; this adds a delightful texture and a satisfying crunch.
  • Zesty Citrus: Add finely grated lime zest along with the lemon juice for a vibrant zing that brightens the flavors wonderfully.
  • Vegan Butter: Use a high-quality plant-based butter to achieve the same rich flavor while keeping it entirely dairy-free—perfect for vegan friends!

For more captivating chicken recipes, consider trying Chipotle Lime Chicken or my easy-to-make Crock Pot Chicken; your culinary adventures await!

How to Store and Freeze Cowboy Butter Chicken Bites

Fridge: Store leftovers in an airtight container in the refrigerator for up to 3 days; this keeps the Cowboy Butter Chicken Bites fresh and tasty.

Freezer: If you need to freeze them, place cooked chicken bites in a single layer on a baking sheet before transferring to a freezer bag once frozen; can last up to 3 months.

Reheating: To reheat, gently warm in a skillet over medium heat, adding a splash of water or broth to maintain moisture and prevent drying out.

Serving Suggestions: These bites are best enjoyed hot, so aim to reheat only what you'll eat at one time to savor their delightful flavor!

What to Serve with Cowboy Butter Chicken Bites

The sizzle of buttery goodness invites you to create a mouthwatering meal that’s both comforting and impressive.

  • Creamy Mashed Potatoes: The smooth, buttery texture pairs beautifully with the zesty chicken bites, absorbing the savory sauce. A classic that never disappoints!

  • Garlic Bread: Crunchy, herb-infused garlic bread brings a delightful crunch to the table, perfect for mopping up any leftover cowboy butter sauce.

  • Crunchy Coleslaw: This fresh side adds a refreshing crunch and tanginess that balances out the rich and buttery chicken, enhancing your dining experience.

  • Grilled Corn on the Cob: Charred and sweet, grilled corn pairs well with the cowboy flavors and adds a fun, summery element to your meal.

  • Herb Salad: A vibrant salad with mixed greens, cucumbers, and a zesty lemon vinaigrette brighten up the plate and complement the savory bites beautifully.

  • Spicy Pickles: These zesty, tangy bites provide a punchy contrast to the buttery chicken, adding an exciting crunch and flavor pop with each bite.

  • Sangria: A refreshing glass of sangria, with its fruity and sweet notes, complements the spicy and rich flavors of the chicken, making for a perfect pairing.

  • Chocolate Mousse: End your meal on a rich, sweet note with a silky chocolate mousse that contrasts the savory bites, leaving your taste buds singing.

Creating a full meal around these Cowboy Butter Chicken Bites can turn any gathering into a delightful feast!

Cowboy Butter Chicken Bites Recipe FAQs

What kind of chicken is best for this recipe?
Absolutely! For the best texture and flavor, boneless skinless chicken breasts or thighs work wonderfully. They provide juiciness and are easy to cut into bite-sized pieces. When selecting chicken, look for meat that is firm and has a pinkish color without any dark spots, which may indicate spoilage.

How should I store leftovers of these Cowboy Butter Chicken Bites?
To store leftovers, place them in an airtight container and refrigerate for up to 3 days. Make sure to let them cool down first to maintain their quality! When you’re ready to enjoy them again, gently reheat in a skillet over medium heat to help retain that crispy exterior.

Can I freeze Cowboy Butter Chicken Bites?
Yes, you can! To freeze, allow the cooked chicken bites to cool completely. Then, lay them out in a single layer on a baking sheet and freeze until firm. Once frozen, transfer the bites to a freezer-safe bag or container. They’ll stay fresh for up to 3 months. When ready to eat, thaw them in the fridge overnight, then reheat gently.

What if my chicken isn’t browning during searing?
If your chicken isn’t browning like you expect, it’s likely overcrowding in the pan is the culprit. Searing requires space for the chicken to develop that golden crust. Make sure to cook in batches, giving each piece enough room to form that delicious outer layer!

Can I make this dish vegetarian or vegan?
Very! You can swap the chicken for tofu or chickpeas for a plant-based version. Additionally, using plant-based butter will keep it dairy-free. Season the meat substitute well to infuse those lovely flavors we love in Cowboy Butter Chicken Bites while keeping everyone happy at the table!

Is this recipe safe for people with common allergies?
Always consider dietary restrictions, especially with guests. This recipe contains chicken, dairy (butter), and can include gluten if served with certain sides. If using substitutions, like plant-based butter, ensure everyone is aware of any potential allergens that may still be present, like garlic or mustard.

Cowboy Butter Chicken Bites

Cowboy Butter Chicken Bites: Flavor-Packed Party Pleaser

Cowboy Butter Chicken Bites are savory morsels with a taste of the wild West, perfect for parties and gatherings.
Print Recipe Pin Recipe
Prep Time 10 minutes mins
Cook Time 20 minutes mins
Total Time 30 minutes mins
Servings: 4 bites
Course: Appetizers
Cuisine: American
Calories: 370
Ingredients Equipment Method Nutrition Notes

Ingredients
  

For the Chicken
  • 1.5 lbs Boneless Skinless Chicken Breasts or Thighs Cut into bite-sized pieces.
  • 1 tsp Salt For seasoning.
  • 0.5 tsp Black Pepper Adjust to taste.
  • 1 tsp Smoked Paprika Provides smokiness.
  • 0.5 tsp Garlic Powder Can substitute with fresh garlic.
For the Cowboy Butter Sauce
  • 1 tbsp Olive Oil For searing chicken.
  • 4 tbsp Unsalted Butter Can substitute with plant-based butter.
  • 4 cloves Garlic Minced.
  • 1 tbsp Lemon Juice Fresh lemon juice recommended.
  • 1 tsp Dijon Mustard Optional for tanginess.
  • 0.5 tsp Red Pepper Flakes Adjust for spice level.
  • 2 tbsp Fresh Parsley Chopped, for garnish.

Equipment

  • Skillet
  • Saucepan
  • Cutting Board
  • Knife
  • Measuring Spoons

Method
 

Cooking Steps
  1. Cut the chicken into bite-sized pieces and season with salt, black pepper, smoked paprika, and garlic powder.
  2. Heat oil in a skillet over medium-high heat, then sear chicken for 2-3 minutes until golden brown.
  3. Melt butter in a saucepan, add minced garlic, lemon juice, Dijon mustard, and red pepper flakes; simmer for 1 minute.
  4. Combine the cooked chicken with the butter sauce in the skillet; heat for an additional 1-2 minutes.
  5. Serve on a plate with extra sauce drizzle and garnished with parsley.

Nutrition

Serving: 4bitesCalories: 370kcalCarbohydrates: 2gProtein: 30gFat: 27gSaturated Fat: 10gPolyunsaturated Fat: 2gMonounsaturated Fat: 11gCholesterol: 100mgSodium: 800mgPotassium: 450mgVitamin A: 500IUVitamin C: 5mgCalcium: 15mgIron: 1mg

Notes

Pat chicken dry before seasoning. Cook in batches to avoid overcrowding the pan. Adjust spice levels to preference. Use fresh ingredients for a vibrant flavor.

Tried this recipe?

Let us know how it was!

Melt-in-Your-Mouth Olive Garden Breadsticks Recipe at Home

November 17, 2025 by Grace Snow Leave a Comment

As I stood in my kitchen, the warm aroma of freshly baked bread enveloped me like a comforting hug. There’s something magical about the process of making Soft and Buttery Olive Garden Breadsticks—the gentle kneading, the rise of the dough, and the anticipation of that first bite. This Olive Garden Breadsticks Recipe is your ticket to creating those pillowy, garlic-flavored delights that pair perfectly with Italian dishes or stand alone as a delightful snack. Not only is it incredibly simple to whip up, but these breadsticks also bring a unique touch to your family dinners that they'll rave about. Whether you're serving them alongside a hearty pasta or enjoying them with a warm bowl of soup, these steamy, golden bites are bound to become a beloved staple in your home. Ready to transform your cooking routine with a dash of nostalgia? Let’s dive into this delightful journey together!

Why Make Olive Garden Breadsticks at Home?

Comforting, Nostalgic Flavors: These breadsticks capture the beloved taste of Olive Garden, allowing you to recreate cherished memories in your kitchen.
Simple Technique: With just a few basic ingredients and easy steps, anyone can master this recipe. Perfect for both beginners and seasoned chefs looking for a delightful challenge!
Versatile Pairing: Enjoy them alongside your favorite pasta dishes or soups; they elevate any meal and are perfect for family gatherings.
Crowd-Pleasing Appeal: Impress guests with homemade breadsticks that are soft, buttery, and simply irresistible—guaranteed to disappear quickly!
Make-Ahead Option: You can prep these ahead of time, letting your dough rise overnight for an even more convenient mealtime solution. Consider pairing them with a comforting bowl of Chicken Adobo Again or a zesty marinara sauce for dipping.

Olive Garden Breadsticks Recipe Ingredients

For the Dough

  • Warm Water (1 1/2 cups) – Activates the yeast; use lukewarm water for the best results.
  • Active Dry Yeast (2 1/4 tsp) – Essential for leavening; ensure it is fresh for proper rising.
  • Granulated Sugar (2 tbsp) – Feeds the yeast and adds slight sweetness; replace with brown sugar for a deeper flavor.
  • All-Purpose Flour (4 cups) – Provides structure and texture; bread flour can be used for chewier breadsticks.
  • Unsalted Butter (2 tbsp, softened) – Adds richness to the dough; can be swapped with margarine if preferred.
  • Salt (1 tbsp) – Enhances flavor and regulates yeast activity; sea salt works well as a substitute.

For the Topping

  • Melted Unsalted Butter (1/4 cup) – Gives a buttery finish; consider using olive oil for a healthier option.
  • Garlic Powder (1 tsp) – Infuses classic garlic flavor into the breadsticks; fresh minced garlic can provide a more robust taste.
  • Salt (1/2 tsp) – Balances the garlic flavor; adjust according to your taste preference.

These Olive Garden Breadsticks Recipe ingredients will help you create soft, buttery delights that are perfect for any Italian dish or enjoyed on their own!

Step‑by‑Step Instructions for Olive Garden Breadsticks Recipe

Step 1: Activate the Yeast
In a small bowl, combine 1 1/2 cups of warm water, 2 1/4 teaspoons of active dry yeast, and 2 tablespoons of granulated sugar. Stir gently to mix, then allow the mixture to sit for 5-10 minutes until it becomes frothy, indicating that the yeast is activated and ready to create the perfect rise for your Olive Garden Breadsticks.

Step 2: Prepare the Dough
In a large mixing bowl, whisk together 4 cups of all-purpose flour, 2 tablespoons of softened unsalted butter, and 1 tablespoon of salt until well combined. Pour in the activated yeast mixture and mix by hand or using a stand mixer on medium speed for 8-10 minutes. Knead until the dough is smooth and elastic, forming the base for your soft breadsticks.

Step 3: First Rise
Grease a large bowl with a little oil or melted butter, and transfer the kneaded dough into it, turning to coat. Cover the bowl with a kitchen towel or plastic wrap and place it in a warm area. Let it rise for about 1 hour, or until it has doubled in size. This step is crucial for achieving the airy texture of your Olive Garden Breadsticks.

Step 4: Shape the Breadsticks
After the dough has risen, gently punch it down to release the air. Divide the dough into 12-14 equal pieces and roll each piece into a 6-7 inch long rope, creating the classic breadstick shape. Arrange the shaped dough on a greased or parchment-lined baking sheet, ensuring there is space between each to allow for further rising.

Step 5: Second Rise
Cover the shaped breadsticks with a kitchen towel and let them rise again for 20-30 minutes in a warm spot. They should become puffy and nearly double in size during this time, ensuring they are light and fluffy when baked. This second rise is essential for that melt-in-your-mouth quality characteristic of Olive Garden Breadsticks.

Step 6: Preheat Oven
While the breadsticks are rising, preheat your oven to 400°F (200°C). This temperature will create the perfect environment for baking, allowing your breadsticks to become golden brown on the outside while remaining soft and buttery within, making them a delightful addition to any meal.

Step 7: Bake the Breadsticks
Once the oven is preheated, bake the breadsticks for 12-15 minutes, or until they are golden brown and slightly crispy on the outside. Keep a watchful eye, as the baking time may vary. The aroma of freshly baked Olive Garden Breadsticks will fill your kitchen and create an irresistible anticipation for the final product.

Step 8: Prepare Topping
As your breadsticks are baking, melt 1/4 cup of unsalted butter in a small saucepan or microwave. Mix in 1 teaspoon of garlic powder and 1/2 teaspoon of salt. This lovely buttery mixture will enhance the flavor of your warm breadsticks, giving them the characteristic taste that makes them so beloved.

Step 9: Finish
Once the breadsticks are done baking, remove them from the oven and immediately brush them generously with the melted butter mixture. Ensure every breadstick is coated to absorb the delicious flavors. Serve them warm alongside your favorite Italian dishes or enjoy them on their own—these Olive Garden Breadsticks are sure to become a cherished favorite!

Storage Tips for Olive Garden Breadsticks Recipe

  • Room Temperature: Keep leftover breadsticks in an airtight container at room temperature for up to 2 days. This preserves their soft texture and buttery flavor.
  • Fridge: If you prefer to store them longer, you can refrigerate for up to a week in an airtight container. Just be aware they may lose some of their original softness.
  • Freezer: For longer storage, freeze the breadsticks in a single layer in a freezer-safe bag for up to 3 months. Reheat directly from frozen for fresh-like results.
  • Reheating: To reheat, bake at 350°F (175°C) for about 10 minutes or until warmed through. Brush with melted butter before serving to restore their delightful flavors!

Expert Tips for Olive Garden Breadsticks

  • Yeast Activation: Ensure the yeast is frothy; this vital step confirms it's alive and will help your breadsticks rise beautifully.

  • Kneading Technique: Knead the dough until smooth and elastic, but be gentle during shaping to maintain air bubbles for a light texture.

  • Perfect Baking Time: Keep a close watch while baking. You're looking for a golden-brown color; overbaking can lead to dryness in your Olive Garden Breadsticks.

  • Flavor Variations: Consider swapping garlic powder for fresh minced garlic or adding herbs for a personal touch to your breadsticks.

  • Storing Leftovers: Store in an airtight container for up to 2 days or freeze for later enjoyment, ensuring you never miss out on these delightful treats!

Make Ahead Options

These Olive Garden Breadsticks are perfect for meal prep enthusiasts! You can prepare the dough and shape it into breadsticks up to 24 hours in advance. Simply follow the dough-making steps and then refrigerate the shaped breadsticks covered tightly with plastic wrap. This will keep them fresh and allow them to rise slowly, enhancing the flavor. When you're ready to serve, just take them out of the fridge for a quick 20-30 minute second rise at room temperature before baking at 400°F (200°C) for 12-15 minutes. This way, you'll enjoy soft, buttery breadsticks with minimal effort on busy weeknights!

What to Serve with Olive Garden Breadsticks Recipe

Bring the ultimate dining experience to your table with perfect side dishes that harmonize with warm, buttery breadsticks.

  • Creamy Alfredo Pasta: The rich, velvety sauce clings beautifully to your favorite pasta, creating an indulgent pairing with the breadsticks for an Italian feast.

  • Zesty Marinara Sauce: This classic dipping sauce not only complements the savory garlic flavor but also adds a deliciously tangy contrast that enhances the breadsticks.

  • Garden Salad: A crisp, refreshing salad filled with vibrant vegetables provides a light and healthy balance, brightening your meal while the breadsticks deliver the comfort.

  • Roasted Vegetables: Caramelized, seasoned veggies introduce a wonderful depth of flavor and texture, making for a colorful and nutritious addition to your dining experience.

  • Italian Wedding Soup: The warm broth, packed with tender meatballs and green veggies, is a cozy companion that turns mealtime into a heartwarming gathering.

  • Bruschetta: With its fresh tomatoes and basil on crispy bread, bruschetta brings a bright note that pairs delightfully with the soft texture of the breadsticks, ideal for appetizer lovers.

  • Red Wine: A glass of rich red wine completes the experience, its bold flavors accentuating both the breadsticks and your Italian entrées beautifully.

  • Tiramisu: For dessert, this luscious coffee-flavored treat offers a sweet ending that contrasts perfectly with the savory breadsticks, leaving a lasting impression on your taste buds.

Olive Garden Breadsticks Recipe Variations

Feel free to explore these exciting variations that will elevate your Olive Garden breadsticks with fresh flavors and textures!

  • Garlic Swaps: Swap garlic powder for fresh minced garlic for a more intense flavor. You’ll love the aromatic boost that fresh ingredients provide.

  • Herbal Infusion: Add dried herbs like oregano or rosemary to the dough for a flavorful twist. This adds a delightful depth that complements the garlic beautifully.

  • Cheesy Delight: Sprinkle grated Parmesan or mozzarella cheese on top before baking for a cheesy, golden crust that will make your breadsticks even more irresistible.

  • Dairy-Free: Substitute unsalted butter with vegan margarine or coconut oil to create a dairy-free version. Your bread will remain deliciously soft and flavorful!

  • Spicy Kick: Mix in red pepper flakes or a drizzle of hot oil to add a warming heat. This variation will add a surprising zing to your meal.

  • Seeded Crunch: Try adding sesame or poppy seeds on top before baking for a crunchy texture and added visual appeal. It offers a unique take on this classic.

  • Garlic Herb Butter: Blend fresh herbs and garlic into the melted butter before brushing it on the breadsticks after baking. The aroma will be heavenly and deeply satisfying!

  • Homemade Dipping Sauce: Pair these breadsticks with a homemade marinara sauce for a flavorful dip. It not only enhances the experience but also makes for a perfect appetizer. Consider trying it with a comforting bowl of Chicken Adobo Again for a complete meal.

Enjoy customizing your Olive Garden breadsticks with these simple substitutions and variations—a perfect way to make them your own!

Olive Garden Breadsticks Recipe FAQs

What is the best way to select ripe ingredients for this recipe?
Absolutely! When choosing your ingredients, opt for fresh active dry yeast; it should be within the expiration date and ideally foamy when activated. The flour should be finely milled and free from lumps for the best texture. For the butter, use unsalted to control the saltiness; it should be softened but not melted. And when it comes to garlic powder, look for a fragrant option to infuse a luscious flavor into your breadsticks.

How should I store leftover Olive Garden breadsticks?
I recommend storing leftover breadsticks in an airtight container at room temperature for up to 2 days. If you want to keep them longer, you can refrigerate them in an airtight container for up to a week, but be aware that they may lose some moisture. For optimal freshness, consider freezing them—just place them in a single layer in a freezer-safe bag for up to 3 months!

Can I freeze the Olive Garden breadsticks? How?
Absolutely, freezing is a fantastic option! Once your breadsticks are completely cooled, wrap them individually in plastic wrap or aluminum foil, then place them in a freezer-safe bag. This way, they’ll retain their delightful softness. When you're ready to enjoy them, simply reheat from frozen by baking at 350°F (175°C) for about 10 minutes, brushing them with melted butter for that fresh-out-of-the-oven flavor!

What if my dough doesn’t rise?
Very! If your dough isn’t rising, it’s most likely due to inactive yeast. Make sure your water temperature is around 110°F (43°C)—too hot can kill the yeast, and too cold won’t activate it. If after 10 minutes your yeast mixture doesn’t look frothy, try again with fresh yeast. Additionally, ensure your dough is rising in a warm area—if it’s too cool, it won’t rise well. You might also be motivated by the cozy scent of fresh bread to find a warm spot for rising!

Are these breadsticks suitable for people with dietary restrictions?
Definitely! For those following a dairy-free diet, you can easily replace the unsalted butter with margarine or a dairy-free butter alternative. If gluten is a concern, you can use gluten-free all-purpose flour for a delightful twist, though the texture may vary. Always check labels for any potential allergens, especially if serving to guests or family members with allergies. And remember, when it comes to sharing delicious homemade food, the more the merrier!

Can I make these breadsticks ahead of time?
Yes! I often prepare the dough ahead of time, letting it rise overnight in the refrigerator. After shaping the breadsticks, cover them and let them rise in the fridge for 8-12 hours. When you’re ready to bake, simply allow them to sit at room temperature for about 30 minutes before preheating your oven. This method not only saves time but also deepens the flavors—it’s a win-win!

Olive Garden Breadsticks Recipe

Melt-in-Your-Mouth Olive Garden Breadsticks Recipe at Home

A delightful Olive Garden Breadsticks Recipe that brings comforting flavors and simplicity to your kitchen, perfect for any meal.
Print Recipe Pin Recipe
Prep Time 20 minutes mins
Cook Time 15 minutes mins
Rising Time 1 hour hr 30 minutes mins
Total Time 2 hours hrs 5 minutes mins
Servings: 12 breadsticks
Course: Appetizers
Cuisine: Italian
Calories: 150
Ingredients Equipment Method Nutrition Notes

Ingredients
  

For the Dough
  • 1.5 cups warm water Use lukewarm water for the best results.
  • 2.25 tsp active dry yeast Essential for leavening; ensure it is fresh for proper rising.
  • 2 tbsp granulated sugar Feeds the yeast and adds slight sweetness.
  • 4 cups all-purpose flour Provides structure and texture.
  • 2 tbsp unsalted butter Softened; adds richness to the dough.
  • 1 tbsp salt Enhances flavor and regulates yeast activity.
For the Topping
  • 0.25 cups melted unsalted butter Gives a buttery finish.
  • 1 tsp garlic powder Infuses classic garlic flavor into the breadsticks.
  • 0.5 tsp salt Balances the garlic flavor.

Equipment

  • Mixing Bowl
  • Baking Sheet
  • Whisk
  • Oven
  • Spatula

Method
 

Breadstick Preparation
  1. Activate the yeast: In a small bowl, combine warm water, active dry yeast, and granulated sugar. Stir gently and let sit for 5-10 minutes until frothy.
  2. Prepare the dough: In a large bowl, whisk together flour, softened butter, and salt. Pour in the activated yeast mixture and mix for 8-10 minutes until smooth and elastic.
  3. First rise: Grease a large bowl, transfer the dough, cover, and let rise in a warm area for about 1 hour or until doubled in size.
  4. Shape the breadsticks: Punch down the dough, divide into 12-14 equal pieces, and roll into 6-7 inch long ropes. Arrange on a greased baking sheet.
  5. Second rise: Cover shaped breadsticks and let rise for 20-30 minutes until puffy.
  6. Preheat oven: While rising, preheat your oven to 400°F (200°C).
  7. Bake the breadsticks: Bake for 12-15 minutes, or until golden brown.
  8. Prepare topping: Melt unsalted butter and mix in garlic powder and salt.
  9. Finish: Brush the baked breadsticks generously with the melted butter mixture.

Nutrition

Serving: 1breadstickCalories: 150kcalCarbohydrates: 22gProtein: 3gFat: 6gSaturated Fat: 4gMonounsaturated Fat: 2gCholesterol: 15mgSodium: 300mgPotassium: 80mgFiber: 1gSugar: 1gVitamin A: 200IUCalcium: 20mgIron: 1mg

Notes

Store leftover breadsticks in an airtight container for up to 2 days at room temperature or freeze for up to 3 months. Reheat directly from frozen.

Tried this recipe?

Let us know how it was!

Tater Tot Appetizer: Crispy, Cheesy Bliss in Every Bite

November 13, 2025 by Grace Snow Leave a Comment

With the crisp air of autumn settling in, there's something magical about the combination of apples and caramel that instantly transports me to cozy gatherings. That’s how my Caramel Apple Bark came to life, a delightful creation that blends layers of crunchy pretzels, creamy chocolate, and tart green apples. This easy-to-make dessert captures the essence of fall, making it a perfect choice for sharing with family and friends or enjoying on a quiet night in. It’s not only a crowd-pleaser but also a fantastic way to indulge your sweet tooth without spending hours in the kitchen. Ready to whip up this charming treat and see why it’s a must-try?

Why is Caramel Apple Bark a Must-Try?

Simplicity at Its Finest: Preparing this delightful treat is incredibly straightforward, allowing you to whip it up without stressing over complicated techniques.

Sweet and Tangy Delight: The blend of tart green apples and gooey caramel ensures every bite bursts with flavor that perfectly embodies fall.

Crowd-Pleasing Appeal: This dessert is perfect for gatherings; its unique combination of textures and flavors will have everyone coming back for more!

Endless Customization: You can easily personalize this recipe by adding nuts or swapping apple varieties for a distinct taste; the possibilities are endless.

Perfect for Any Occasion: Whether it’s a festive gathering or a cozy night in, this Caramel Apple Bark is a sweet indulgence everyone will love. Enjoy it fresh for the best texture, and feel free to explore other easy dessert recipes for your next sweet creation!

Caramel Apple Bark Ingredients

For the Bark

  • Milk Chocolate Chips – Provides sweetness and a smooth, rich chocolate layer; dark chocolate can substitute for a less sweet option.
  • Green Apple – Adds crispness and a tart flavor contrast to the sweetness; always pat dry to minimize moisture.
  • Individual Wrapped Caramels (35 pieces) or 13.5 oz Caramel Dip – Gives that delicious caramel flavor and sticky texture; use caramel dip for a quicker option without unwrapping.
  • Pretzels (16 oz bag) – Contributes crunch and a salty balance to the dessert; choose pretzel sticks or twists based on your preference.

For the Drizzle

  • Remaining Milk Chocolate Chips – Adds a finishing touch of chocolatey goodness; melt and drizzle for that extra flair.

Step‑by‑Step Instructions for Caramel Apple Bark

Step 1: Melt the Chocolate
Start by placing 1¾ cups of milk chocolate chips in a microwave-safe bowl. Heat the chocolate in the microwave on high for 15 seconds at a time, stirring after each interval until the mixture is smooth and glossy, which should take about 1 to 2 minutes. This melted chocolate will serve as the luxurious base of your Caramel Apple Bark.

Step 2: Prepare the Base
Once your chocolate is melted, line a baking sheet with parchment paper. Pour the chocolate onto the parchment and use a spatula to spread it into a rectangular shape, about ¼ inch thick. Aim for an even layer so that your Caramel Apple Bark will have a uniform texture.

Step 3: Layer the Pretzels
Before the chocolate sets, take your pretzels and firmly press them into the melted chocolate, ensuring they are well-coated. Use around half the bag of pretzels and create a pattern that pleases your eyes—this will add crunch and a delightful salty kick to your dessert.

Step 4: Prepare the Apples
Next, take your green apple and dice it into small pieces, about ½ inch. After dicing, use a paper towel to pat the apple pieces dry to minimize moisture; this is crucial for preventing your bark from becoming soggy. Set the apple pieces aside for later.

Step 5: Melt the Caramels
If using individual wrapped caramels, unwrap approximately 35 pieces and place them in a microwave-safe bowl. Microwave the caramels on high for 15-second intervals, stirring between each, until fully melted and creamy, which typically takes about 1 minute. This gooey goodness will bind perfectly with the apple pieces.

Step 6: Combine Apples and Caramel
Once the caramels are melted, add the diced apple pieces into the bowl and mix until they are fully coated with the caramel. Spread this caramel apple mixture evenly over the pretzel layer in your chocolate base, ensuring an even distribution for delightful bites throughout your Caramel Apple Bark.

Step 7: Chill and Drizzle
Refrigerate the assembled bark for about 30 minutes or until the caramel has set. Meanwhile, melt any remaining chocolate chips in the microwave, just as you did prior. Once the bark is chilled, drizzle this melted chocolate over the top for that extra touch of richness.

Step 8: Final Chill and Slice
Place the bark back in the fridge for an additional hour to firm up completely. Once chilled and set, remove it from the fridge, lift it off the parchment, and cut into bite-sized pieces using a sharp knife. Serve immediately or keep refrigerated for the best quality until ready to share!

Tater Tot Appetizer Variations

Feel free to get creative and tailor this recipe to your liking; a little twist can bring out delightful new flavors!

  • Spicy Kick: Add diced jalapeños or a sprinkle of cayenne pepper for a fiery flavor boost. Your taste buds will love the warmth!
  • Cheesy Delight: Swap in pepper jack cheese for a zesty twist that melts deliciously in every bite. It's a cheesy experience you won’t forget!
  • Herb Infusion: Sprinkle fresh herbs like parsley or chives to elevate flavor and color. This adds a refreshing touch and a burst of brightness!
  • Bacon Bits: Introduce crispy bacon pieces for a smoky crunch that perfectly complements the tater tots’ fluffy texture. Who doesn’t love bacon?
  • Veggie Medley: Incorporate finely chopped bell peppers or broccoli for added texture and color, turning your appetizer into a mini veggie feast!
  • Sweet Treat: Drizzle with a hint of honey or maple syrup for a unique sweet and savory contrast. Trust me, you'll want to savor every bite!
  • Gourmet Sauce: Serve with a creamy ranch or zesty garlic aioli for dipping; it transforms your appetizer into an irresistible snack!
  • Seasoned Stars: Experiment with seasoning blends like ranch or taco seasoning to enhance the classic flavor profile in a new way. Your guests will be impressed!

For more inspiration, check out these easy appetizer ideas that will surely please a crowd!

Make Ahead Options

These Caramel Apple Bark delights are perfect for meal prep enthusiasts! You can prepare the chocolate base and layer the pretzels up to 24 hours in advance, allowing you to have a head start on creating this delicious treat. Simply store the chocolate-covered pretzels in an airtight container at room temperature to maintain their crunch. You can also dice and dry the apples ahead of time, keeping them in a sealed bag in the refrigerator to prevent browning. When you’re ready to serve, melt the caramels, combine them with the apples, and spread the mixture over the pretzels. Finish by chilling for an hour, and you'll have an effortless, crowd-pleasing dessert ready to impress!

How to Store and Freeze Caramel Apple Bark

Fridge: Store leftover Caramel Apple Bark in an airtight container in the refrigerator for up to 2 days to retain its delightful crunch and flavor.

Freezer: For longer storage, you can freeze the bark wrapped tightly in plastic wrap and then in foil for up to 1 month. Thaw in the fridge before enjoying.

Room Temperature: If serving at a gathering, you can keep the bark at room temperature for a few hours without compromising quality, but avoid direct sunlight to maintain freshness.

Reheating: There’s no need to reheat this treat; simply enjoy it chilled or at room temp for the best experience!

What to Serve with Caramel Apple Bark

Create a delightful spread that complements the sweet, crunchy goodness of this fall-inspired dessert!

  • Vanilla Ice Cream: The creamy and cool texture pairs beautifully with the warm flavors of caramel and apples, adding a refreshing contrast.
  • Hot Chocolate: Rich and chocolatey, this drink enhances the dessert's sweetness and invokes cozy vibes perfect for autumn.
  • Cinnamon Sugar Tortilla Chips: The crispy, sweet chips introduce an extra crunch and a hint of spice, perfectly matching the bark's flavors.
  • Caramel Drizzle: A generous drizzle of caramel on the side elevates the indulgence, inviting you to dip as you please.
  • Spiced Apple Cider: The warm apple notes tie in beautifully, wrapping you in a cozy hug with every sip alongside the bark.
  • Pecan Pie Bars: For a heartier dessert combo, these bars bring in nutty sweetness that complements the bark’s textures.

Mix and match these delightful pairings for an unforgettable dessert experience!

Expert Tips for Caramel Apple Bark

Serve Fresh: Make sure to enjoy your Caramel Apple Bark the same day it's made to keep the pretzels crunchy and the apples firm.

Chocolate Watch: Keep a close eye on the melting chocolate; it can burn quickly. Adjust the microwave time as needed to achieve that smooth finish.

Moisture Control: Always pat the diced apples dry to prevent extra moisture from ruining the bark's texture. This ensures a delightful crunch in every bite!

Customize Easily: Add your favorite nuts for added crunch, or swap apples for a different fruit. This simple tweak makes each batch uniquely yours.

Storage Know-How: If you have leftovers, store them in an airtight container in the refrigerator for up to two days to maintain their deliciousness!

Caramel Apple Bark Recipe FAQs

What type of apples should I use for Caramel Apple Bark?
Absolutely! For the best contrast in flavors, I recommend using tart green apples like Granny Smith. Their crispness and tanginess provide a delightful balance against the sweetness of caramel and chocolate. Just remember to pat them dry before adding to prevent excess moisture, which could make the bark soggy.

How should I store leftover Caramel Apple Bark?
You can store leftover Caramel Apple Bark in an airtight container in the refrigerator for up to 2 days. This way, you’ll maintain its crunchy texture and delicious flavors. If you need to keep it longer, wrap it tightly in plastic wrap and foil, then freeze it for up to a month. Thaw it in the fridge before savoring it again.

Can I freeze Caramel Apple Bark?
Yes! Freezing is a great option if you want to enjoy this treat later. Wrap the bark tightly in plastic wrap and then in foil to protect it from freezer burn. When you're ready to enjoy, simply thaw it in the refrigerator overnight. This way, you'll have a delightful treat ready when you're craving something sweet!

What can I do if my chocolate is burning while melting?
If you notice your chocolate starting to burn, immediately stop microwaving it. Instead, add a teaspoon of vegetable oil to the chocolate and stir it—this can help smoothen it out. Remember, melting chocolate in short intervals (15 seconds) while stirring in between is key to achieving a smooth finish. Keeping a close eye will prevent unwanted burning!

Is Caramel Apple Bark suitable for kids or people with allergies?
While Caramel Apple Bark is a delightful treat, if you're serving kids or guests with allergies, it's essential to check your ingredients. The recipe includes chocolate, pretzels, and caramel, which may contain allergens like nuts or gluten. Always opt for allergy-safe brands, and consider making your version using allergen-free alternatives if needed.

What toppings can I add to customize my Caramel Apple Bark?
The more the merrier! Feel free to get creative by adding toppings like chopped nuts for extra crunch, or you can try a drizzle of white chocolate for a visually appealing contrast. Dried fruits or sprinkles also make for fun additions, so don't hesitate to experiment and make this Caramel Apple Bark your own!

Tater Tot Appetizer

Tater Tot Appetizer: Crispy, Cheesy Bliss in Every Bite

This Tater Tot Appetizer is a delicious, crowd-pleasing treat packed with crispy, cheesy goodness.
Print Recipe Pin Recipe
Prep Time 15 minutes mins
Cook Time 30 minutes mins
Chilling Time 30 minutes mins
Total Time 1 hour hr 15 minutes mins
Servings: 8 pieces
Course: Appetizers
Cuisine: American
Calories: 220
Ingredients Equipment Method Nutrition Notes

Ingredients
  

For the Bark
  • 1.75 cups Milk Chocolate Chips Dark chocolate can substitute for a less sweet option.
  • 1 medium Green Apple Always pat dry to minimize moisture.
  • 35 pieces Individual Wrapped Caramels Use caramel dip for a quicker option without unwrapping.
  • 16 oz Pretzels Choose pretzel sticks or twists based on your preference.
For the Drizzle
  • 1.75 cups Remaining Milk Chocolate Chips Melt and drizzle for that extra flair.

Equipment

  • Microwave
  • Baking Sheet
  • Parchment Paper
  • Spatula
  • Knife
  • Microwave-safe bowl

Method
 

Step‑by‑Step Instructions for Caramel Apple Bark
  1. Melt the chocolate by placing 1¾ cups of milk chocolate chips in a microwave-safe bowl, heating on high for 15 seconds at a time until smooth, about 1 to 2 minutes.
  2. Line a baking sheet with parchment paper, pour the melted chocolate onto it, and spread it into a rectangular shape, approximately ¼ inch thick.
  3. Press pretzels into the melted chocolate before it sets, using around half the bag to create an appealing pattern.
  4. Dice the green apple into small pieces, about ½ inch, and pat them dry with a paper towel to minimize moisture.
  5. Unwrap around 35 caramels, place in a microwave-safe bowl, and microwave on high for 15-second intervals until fully melted and creamy.
  6. Mix the diced apple pieces with the melted caramels until fully coated, then spread this mixture evenly over the pretzel layer.
  7. Refrigerate the bark for about 30 minutes until the caramel sets, then melt any remaining chocolate chips and drizzle over the top.
  8. Return the bark to the fridge for an hour to firm up completely, then cut into bite-sized pieces.

Nutrition

Serving: 1pieceCalories: 220kcalCarbohydrates: 30gProtein: 3gFat: 10gSaturated Fat: 5gPolyunsaturated Fat: 0.5gMonounsaturated Fat: 4.5gCholesterol: 5mgSodium: 150mgPotassium: 100mgFiber: 1gSugar: 18gVitamin A: 200IUVitamin C: 5mgCalcium: 30mgIron: 1mg

Notes

Enjoy the Caramel Apple Bark the same day for the best crunch and flavor. Store leftovers in an airtight container in the refrigerator for up to 2 days.

Tried this recipe?

Let us know how it was!

Tater Tot Appetizer: Crispy, Cheesy Bliss in Every Bite

November 13, 2025 by Grace Snow Leave a Comment

With the crisp air of autumn settling in, there's something magical about the combination of apples and caramel that instantly transports me to cozy gatherings. That’s how my Caramel Apple Bark came to life, a delightful creation that blends layers of crunchy pretzels, creamy chocolate, and tart green apples. This easy-to-make dessert captures the essence of fall, making it a perfect choice for sharing with family and friends or enjoying on a quiet night in. It’s not only a crowd-pleaser but also a fantastic way to indulge your sweet tooth without spending hours in the kitchen. Ready to whip up this charming treat and see why it’s a must-try?

Why is Caramel Apple Bark a Must-Try?

Simplicity at Its Finest: Preparing this delightful treat is incredibly straightforward, allowing you to whip it up without stressing over complicated techniques.

Sweet and Tangy Delight: The blend of tart green apples and gooey caramel ensures every bite bursts with flavor that perfectly embodies fall.

Crowd-Pleasing Appeal: This dessert is perfect for gatherings; its unique combination of textures and flavors will have everyone coming back for more!

Endless Customization: You can easily personalize this recipe by adding nuts or swapping apple varieties for a distinct taste; the possibilities are endless.

Perfect for Any Occasion: Whether it’s a festive gathering or a cozy night in, this Caramel Apple Bark is a sweet indulgence everyone will love. Enjoy it fresh for the best texture, and feel free to explore other easy dessert recipes for your next sweet creation!

Caramel Apple Bark Ingredients

For the Bark

  • Milk Chocolate Chips – Provides sweetness and a smooth, rich chocolate layer; dark chocolate can substitute for a less sweet option.
  • Green Apple – Adds crispness and a tart flavor contrast to the sweetness; always pat dry to minimize moisture.
  • Individual Wrapped Caramels (35 pieces) or 13.5 oz Caramel Dip – Gives that delicious caramel flavor and sticky texture; use caramel dip for a quicker option without unwrapping.
  • Pretzels (16 oz bag) – Contributes crunch and a salty balance to the dessert; choose pretzel sticks or twists based on your preference.

For the Drizzle

  • Remaining Milk Chocolate Chips – Adds a finishing touch of chocolatey goodness; melt and drizzle for that extra flair.

Step‑by‑Step Instructions for Caramel Apple Bark

Step 1: Melt the Chocolate
Start by placing 1¾ cups of milk chocolate chips in a microwave-safe bowl. Heat the chocolate in the microwave on high for 15 seconds at a time, stirring after each interval until the mixture is smooth and glossy, which should take about 1 to 2 minutes. This melted chocolate will serve as the luxurious base of your Caramel Apple Bark.

Step 2: Prepare the Base
Once your chocolate is melted, line a baking sheet with parchment paper. Pour the chocolate onto the parchment and use a spatula to spread it into a rectangular shape, about ¼ inch thick. Aim for an even layer so that your Caramel Apple Bark will have a uniform texture.

Step 3: Layer the Pretzels
Before the chocolate sets, take your pretzels and firmly press them into the melted chocolate, ensuring they are well-coated. Use around half the bag of pretzels and create a pattern that pleases your eyes—this will add crunch and a delightful salty kick to your dessert.

Step 4: Prepare the Apples
Next, take your green apple and dice it into small pieces, about ½ inch. After dicing, use a paper towel to pat the apple pieces dry to minimize moisture; this is crucial for preventing your bark from becoming soggy. Set the apple pieces aside for later.

Step 5: Melt the Caramels
If using individual wrapped caramels, unwrap approximately 35 pieces and place them in a microwave-safe bowl. Microwave the caramels on high for 15-second intervals, stirring between each, until fully melted and creamy, which typically takes about 1 minute. This gooey goodness will bind perfectly with the apple pieces.

Step 6: Combine Apples and Caramel
Once the caramels are melted, add the diced apple pieces into the bowl and mix until they are fully coated with the caramel. Spread this caramel apple mixture evenly over the pretzel layer in your chocolate base, ensuring an even distribution for delightful bites throughout your Caramel Apple Bark.

Step 7: Chill and Drizzle
Refrigerate the assembled bark for about 30 minutes or until the caramel has set. Meanwhile, melt any remaining chocolate chips in the microwave, just as you did prior. Once the bark is chilled, drizzle this melted chocolate over the top for that extra touch of richness.

Step 8: Final Chill and Slice
Place the bark back in the fridge for an additional hour to firm up completely. Once chilled and set, remove it from the fridge, lift it off the parchment, and cut into bite-sized pieces using a sharp knife. Serve immediately or keep refrigerated for the best quality until ready to share!

Tater Tot Appetizer Variations & Substitutions

Feel free to explore these delightful twists and ideas, customizing the recipe to satisfy cravings and spark joy!

  • Vegetarian Option: Omit any meat and load up on roasted vegetables like bell peppers or zucchini for a fresh, vibrant flavor.

  • Cheesy Delight: Swap in pepper jack cheese for a spicy kick or add a blend of your favorite cheeses to amplify that gooey goodness.

  • Bacon Bits: Crumble crispy bacon on top for a salty crunch that pairs wonderfully with the rich flavors—perfect for bacon lovers!

  • Dipping Sauces: Serve with a variety of dips like spicy ranch, BBQ sauce, or a zesty salsa to elevate your game day experience.

  • Sweet Heat: Add a hint of crushed red pepper or jalapeños for a spicy kick to make your tater tots even more exciting!

  • Pesto Drizzle: Finish with a drizzle of fresh pesto for a gourmet touch, adding fragrant herbs that bring a burst of flavor.

  • Herb Infusion: Mix in chopped fresh herbs like chives or parsley to add a refreshing burst of color and flavor that complements the crispy bites.

  • Baked Variation: For a healthier approach, consider baking your tater tots. This allows for a crispy texture without all the frying fuss.

Don't forget, if you're preparing for a gathering, check out these flavorful ideas for Tater Tot Appetizer that will catch everyone's eye and taste buds!

Expert Tips for Caramel Apple Bark

Serve Fresh: Make sure to enjoy your Caramel Apple Bark the same day it's made to keep the pretzels crunchy and the apples firm.

Chocolate Watch: Keep a close eye on the melting chocolate; it can burn quickly. Adjust the microwave time as needed to achieve that smooth finish.

Moisture Control: Always pat the diced apples dry to prevent extra moisture from ruining the bark's texture. This ensures a delightful crunch in every bite!

Customize Easily: Add your favorite nuts for added crunch, or swap apples for a different fruit. This simple tweak makes each batch uniquely yours.

Storage Know-How: If you have leftovers, store them in an airtight container in the refrigerator for up to two days to maintain their deliciousness!

Make Ahead Options

These Caramel Apple Bark pieces are perfect for meal prep enthusiasts! You can prepare the chocolate layer and allow it to set up to 24 hours in advance. Just melt the chocolate, spread it on parchment, and let it chill. Additionally, you can dice and pat dry the green apple pieces and store them in an airtight container in the refrigerator for up to 3 days—this will prevent moisture from affecting their crispness. When you're ready to enjoy, simply melt and combine the caramels with the prepped apples, spread them over the hardened chocolate, drizzle with more chocolate, and chill again. This way, you’ll enjoy the delightful crunch and gooeyness of your Caramel Apple Bark with minimal last-minute effort!

What to Serve with Caramel Apple Bark

Satisfy your sweet cravings with a delightful array of pairings that elevate your Caramel Apple Bark experience.

  • Vanilla Ice Cream: A scoop of creamy vanilla ice cream adds a refreshing contrast to the sweet bark, creating a delightful flavor combination.
  • Hot Caramel Sauce: Drizzling warm caramel sauce over your bark intensifies that rich caramel flavor, making each bite even more indulgent.
  • Chilled Apple Cider: Enhance the apple essence by serving a glass of chilled apple cider, which complements the fruity notes of the bark beautifully.
  • Roasted Nuts: A handful of seasoned roasted nuts introduces a salty crunch, balancing the sweetness of your Caramel Apple Bark for a satisfying snack.
  • Dark Chocolate Drizzle: Elevate your dessert by adding a dark chocolate drizzle; its rich bitterness perfectly contrasts the sweet layers, creating depth.
  • Peppermint Hot Chocolate: Warm up with a cozy mug of peppermint hot chocolate; its festive flavors harmonize well with the fall-inspired bark.
  • Cheese Platter: A selection of creamy Brie or tangy goat cheese introduces an unexpected savory element that pairs nicely with the sweet treats.
  • Fruity Smoothie: A fresh fruit smoothie with greens offers a light, refreshing note that brightens your dessert table while keeping things healthy.

How to Store and Freeze Caramel Apple Bark

Fridge: Store leftover Caramel Apple Bark in an airtight container in the refrigerator for up to 2 days to retain its delightful crunch and flavor.

Freezer: For longer storage, you can freeze the bark wrapped tightly in plastic wrap and then in foil for up to 1 month. Thaw in the fridge before enjoying.

Room Temperature: If serving at a gathering, you can keep the bark at room temperature for a few hours without compromising quality, but avoid direct sunlight to maintain freshness.

Reheating: There’s no need to reheat this treat; simply enjoy it chilled or at room temp for the best experience!

Caramel Apple Bark Recipe FAQs

How do I choose ripe apples for the Caramel Apple Bark?
When selecting green apples, look for smooth skin with no dark spots or blemishes. The apples should feel firm to the touch, indicating freshness. Crispness is key for that delightful texture contrast in your bark, so avoid any apples that seem soft or mealy.

How should I store leftover Caramel Apple Bark?
To preserve its crunchy texture, store your Caramel Apple Bark in an airtight container in the refrigerator for up to 2 days. If you must keep it longer, you can freeze it. Just remember to separate layers with parchment paper to prevent sticking and maintain texture.

Can I freeze Caramel Apple Bark?
Absolutely! To freeze, place your Caramel Apple Bark in an airtight container, ensuring layers are separated by parchment paper to avoid sticking. It can be stored in the freezer for up to 1 month. When you're ready to enjoy, thaw it overnight in the refrigerator to maintain its delightful crunch!

What if my melted chocolate is clumpy when making the bark?
If you find your chocolate isn’t melting smoothly, it may have been heated too quickly. Try stirring it more frequently during melting, and if it's still clumpy, add a teaspoon of vegetable oil to help smooth it out. Just remember, it's important to keep a close eye on the microwave time to prevent burning!

Is this Caramel Apple Bark suitable for those with nut allergies?
Yes, this recipe can be tailored to be nut-free! If you're serving guests with nut allergies, simply omit any nuts you might wish to add. It remains delicious without them, letting the chocolate, caramel, and apples shine as the stars of the treat, ensuring everyone can enjoy this delightful dessert!

What’s the best way to ensure my pretzels stay crunchy in the bark?
To keep pretzels crunchy, serve the Caramel Apple Bark the same day it’s made. Additionally, make sure to dry the diced apples thoroughly with a paper towel before mixing them with the caramel, as moisture can lead to sogginess. This will help the pretzels maintain their delightful crunch!

Tater Tot Appetizer

Tater Tot Appetizer: Crispy, Cheesy Bliss in Every Bite

Tater Tot Appetizer is a deliciously crispy and cheesy treat perfect for gatherings or cozy nights in.
Print Recipe Pin Recipe
Prep Time 15 minutes mins
Cook Time 20 minutes mins
Chilling Time 30 minutes mins
Total Time 1 hour hr 5 minutes mins
Servings: 8 pieces
Course: Appetizers
Cuisine: American
Calories: 150
Ingredients Equipment Method Nutrition Notes

Ingredients
  

For the Chocolate Layer
  • 1.75 cups Milk Chocolate Chips Substitution: Dark chocolate can be used for a less sweet option.
For the Apple Layer
  • 1 medium Green Apple Always pat dry to minimize moisture.
For the Caramel Layer
  • 35 pieces Individual Wrapped Caramels Use caramel dip for a quicker option, without unwrapping individual pieces.
  • 13.5 oz Caramel Dip
For the Crunch
  • 16 oz Pretzels Choose pretzel sticks or twists based on preference.

Equipment

  • Microwave-safe bowl
  • Baking tray
  • Spatula
  • Sharp Knife
  • Parchment Paper

Method
 

Step-by-Step Instructions for Caramel Apple Bark
  1. Begin by microwaving 1¾ cups of milk chocolate chips in a large, microwave-safe bowl. Heat the chocolate in 15-second intervals, stirring vigorously between each interval until fully melted and smooth, which should take about 1-2 minutes total.
  2. Once the chocolate is melted, pour it onto a sheet of parchment paper laid out on a baking tray. Using a spatula, spread the chocolate into a rectangle shape, about ¼ inch thick.
  3. Press pretzels firmly into the melted chocolate, covering the surface evenly. Ensure the pretzels are partially submerged in the chocolate.
  4. Dice a green apple into small, bite-sized pieces and pat the diced apples dry with a paper towel.
  5. In a separate microwave-safe bowl, combine 35 individually wrapped caramels or 13.5 ounces of caramel dip. Microwave the caramels in 15-second intervals, stirring well until completely melted and creamy.
  6. Spread the caramel-apple mixture evenly over the pretzel layer and chill for about 30 minutes. Melt additional milk chocolate chips to drizzle over the top and chill again for an hour.
  7. Remove your Caramel Apple Bark from the refrigerator and use a sharp knife to cut it into bite-sized pieces.

Nutrition

Serving: 1pieceCalories: 150kcalCarbohydrates: 20gProtein: 1gFat: 7gSaturated Fat: 4gPolyunsaturated Fat: 0.5gMonounsaturated Fat: 2.5gCholesterol: 5mgSodium: 150mgPotassium: 50mgFiber: 1gSugar: 10gVitamin A: 2IUVitamin C: 5mgCalcium: 2mgIron: 2mg

Notes

Serve your Caramel Apple Bark the day it's made to ensure crunchy pretzels and fresh apples. Feel free to add chopped nuts or drizzle with white chocolate for extra flair and flavor.

Tried this recipe?

Let us know how it was!

Irresistible Stuffed Mushrooms with Creamy Cheese Delight

November 13, 2025 by Grace Snow Leave a Comment

As the holiday season approaches, the warm scent of garlic and herbs fills the air, promising something special for our festive gatherings. These Savory Keto Stuffed Mushrooms with Creamy Cheese Filling are not just a treat; they're a heartfelt nod to the joy of sharing delicious food with loved ones. In just 35-45 minutes, you can whip up these crowd-pleasers that are perfect for anyone watching their carbs. The beauty of this recipe lies in its make-ahead nature, allowing you to prepare them in advance and enjoy hassle-free hosting. Imagine the smiles on your guests' faces as they savor each bite of these tender mushrooms, filled with a delightful mix of creamy cheese and crunchy pecans. Ready to indulge your family and friends with this irresistible holiday appetizer?

Why Will You Adore Stuffed Mushrooms?

Irresistible: These stuffed mushrooms transform simple ingredients into a fabulous holiday appetizer that feels gourmet with minimal effort.
Make-Ahead Magic: Prep them in advance—just fill and refrigerate for up to 24 hours, baking just before serving to save you time on busy days.
Crowd-Pleaser: Their creamy cheese filling and earthy flavors appeal to both keto enthusiasts and traditional food lovers alike, making them a perfect addition to any festive table.
Flavor Explosion: Each bite is a delightful mix of savory creamy cheese, fresh herbs, and a satisfying crunch from the pecans, creating a memorable taste experience.
Customizable: Feel free to experiment! Swap in your favorite herbs or add ingredients like spinach or sausage for a personalized touch.
Don’t forget to check out my recipes for Grilled Mushrooms Savory or Herby Ricotta Stuffed for more amazing flavor combinations!

Stuffed Mushrooms Ingredients

• Discover the essential components for delightful stuffed mushrooms.

For the Filling

  • Baby Bella Mushrooms – These provide a meaty texture; white button mushrooms are a good substitute.
  • Cream Cheese – The creamy base adds richness; ensure it's at room temperature for easy mixing.
  • Butter – Adds a rich flavor to the filling; can substitute with olive oil for a vegan option.
  • Garlic – Fresh garlic enhances flavor dramatically; avoid using powdered garlic.
  • Onion – Sweetens and deepens the filling; shallots can be used for a milder taste.
  • Parmesan Cheese – Offers a savory umami flavor; nutritional yeast works as a dairy-free alternative.
  • Pecans – Crunchy texture that complements the filling; omit for a nut-free version or use breadcrumbs instead.
  • Fresh Parsley – Adds freshness and color; feel free to swap it with chives or dill.
  • Salt and Pepper – Essential for seasoning; adjust according to your taste preferences.

For Baking

  • Olive Oil – For greasing the baking sheet and ensuring mushrooms don't stick.

These stuffed mushrooms burst with flavor and are perfect for any festive gathering—your friends and family won't be able to resist!

Step‑by‑Step Instructions for Stuffed Mushrooms

Step 1: Preheat the Oven
Begin by preheating your oven to 400°F (200°C). While the oven heats up, grab a baking sheet and lightly grease it with olive oil to prevent the stuffed mushrooms from sticking. This simple step ensures a perfectly baked mushroom base, setting the stage for a delicious creation.

Step 2: Prepare the Mushrooms
Carefully rinse the baby bella mushrooms under cold water, making sure to dry them gently with a towel. Next, remove the stems from each mushroom cap and finely chop them. This preparation not only maximizes flavor but also ensures the stuffing includes that lovely earthy mushroom essence.

Step 3: Sauté the Filling
In a skillet, melt a tablespoon of butter over medium heat, then add the chopped mushroom stems. Sauté for about 5 minutes until the moisture evaporates and the mixture turns slightly golden, releasing a wonderful aroma. This process intensifies the flavor, making your stuffed mushrooms irresistible when baked.

Step 4: Add Aromatics
Once the mushroom stems are ready, toss in the diced onion and minced garlic along with a pinch of salt and pepper. Cook for an additional 1-2 minutes, stirring occasionally, until the onions soften and become translucent. This fragrant mixture adds depth and enhances the savory goodness of your stuffed mushrooms.

Step 5: Mix the Filling
Transfer the sautéed mixture to a mixing bowl and allow it to cool slightly for a couple of minutes. Then, stir in the room-temperature cream cheese, most of the grated Parmesan, fresh parsley, and chopped pecans. Blend until everything is well combined, creating a rich and creamy filling that will delight every guest.

Step 6: Stuff the Mushrooms
Time to fill those mushroom caps! Using a spoon, gently scoop the creamy cheese filling into each mushroom cap, packing it generously. Once filled, sprinkle the remaining Parmesan and a few extra chopped pecans on top for an added crunch. The combination of textures will create a memorable bite-sized treat.

Step 7: Bake to Perfection
Arrange the stuffed mushrooms on the prepared baking sheet and place them in the preheated oven. Bake for about 20-25 minutes or until the tops are golden brown and the mushrooms have softened slightly. Keep an eye on them to prevent overcooking; you want that perfect melt-in-your-mouth experience.

Step 8: Garnish & Serve
Once baked, remove your stuffed mushrooms from the oven and let them cool for a few minutes. Before serving, garnish with a sprinkle of fresh parsley for a pop of color and flavor. Now, enjoy these mouthwatering stuffed mushrooms as a delightful appetizer, sharing the warm holiday spirit with family and friends.

What to Serve with Savory Keto Stuffed Mushrooms?

Indulging in these creamy stuffed mushrooms is just the beginning; let’s create a full meal experience that delights the senses.

  • Fresh Garden Salad: A light, crisp salad with mixed greens and a tangy vinaigrette balances the rich flavors of the mushrooms beautifully.
  • Garlic Bread Sticks: Warm, buttery breadsticks with a hint of garlic provide a comforting crunch that pairs perfectly with the savory filling.
  • Classic Cheese Platter: Serve a selection of sharp, creamy cheeses alongside crackers and fruits for a delightful appetizer spread that invites mingling.
  • Roasted Vegetables: Sweet, caramelized roasted veggies add vibrant colors and textures, enhancing the meal’s overall warmth and heartiness.
  • Grilled Chicken Skewers: Juicy, marinated chicken skewers offer a protein-packed complement, adding a savory contrast to the creamy mushrooms.
  • Crisp White Wine: A chilled glass of Sauvignon Blanc or Pinot Grigio brings out the earthiness of the mushrooms and adds a refreshing touch to the meal.
  • Chocolate Mousse: Finish on a sweet note with a light and airy chocolate mousse, which contrasts the savory flavors of the stuffed mushrooms delightfully.
  • Sparkling Water with Citrus: Keep it refreshing with sparkling water infused with lemon or lime, cleansing the palate between bites for an invigorating meal experience.

How to Store and Freeze Stuffed Mushrooms

Fridge: Place any leftovers in an airtight container and store them in the fridge for up to 3 days. These stuffed mushrooms can still taste delicious after a quick reheat!

Freezer: If you want to prepare them in advance, you can freeze the uncooked stuffed mushrooms. Just wrap them tightly in plastic wrap, then place in a freezer bag. They can be frozen for up to 3 months.

Reheating: To reheat the baked stuffed mushrooms, place them in a preheated oven at 350°F (175°C) for about 10-15 minutes, or until warmed through. Enjoy them warm for the best taste experience!

Make-Ahead: You can assemble the stuffed mushrooms up to 24 hours in advance, covering them with plastic wrap or foil and storing them in the fridge before baking. This allows for stress-free entertaining!

Stuffed Mushrooms: Fun Variations Await

Feel free to explore delightful twists on these stuffed mushrooms that will excite your taste buds!

  • Add Meat: Incorporate crab meat or Italian sausage for a heartier, protein-packed filling that brings flavor to new heights. Imagine the savory notes balancing beautifully with every bite!
  • Nut-Free Option: Replace pecans with gluten-free breadcrumbs or crushed crackers. Both options maintain that lovely crunch while catering to nut allergies.
  • Spinach Addition: Toss in some fresh spinach for a nutritious boost. The leafy green adds vibrant color and extra flavor, making these even more irresistible.
  • Spice It Up: For an added kick, sprinkle red pepper flakes within the filling. Adjust the heat level to your liking while enhancing the overall flavor profile.
  • Vegan Delight: Swap cream cheese for a dairy-free alternative and use olive oil instead of butter. Enjoy a deliciously creamy filling without compromising on taste!
  • Cheese Alternatives: Experiment with different cheeses like feta or gouda for a unique flavor twist. Their distinct taste can elevate the mushrooms to new culinary heights.
  • Herb Variations: Use fresh chives, dill, or thyme instead of parsley for a fresh flavor burst. Customized herb selections create an entirely new experience with each batch.
  • Try Different Mushrooms: Opt for larger Portobello mushrooms for a more substantial appetizer or mini button mushrooms for bite-sized elegance. Each variety brings its own unique flair!

Looking for more flavor ideas? Check out my recipes for Grilled Mushrooms Savory or Herby Ricotta Stuffed to inspire your culinary creativity!

Expert Tips for Stuffed Mushrooms

  • Choose Uniform Sizes: Use mushrooms of similar size for even cooking. This ensures that all your stuffed mushrooms bake perfectly and have the same delightful texture.

  • Cool the Filling: Allow the filling to cool slightly before stuffing to prevent the cream cheese from melting prematurely. A cooler filling helps maintain the shape of each stuffed mushroom.

  • Fresh Herbs Rule: For maximum flavor, opt for fresh herbs over dried ones. They will elevate the taste and aroma of your stuffed mushrooms significantly.

  • Soften the Cream Cheese: Make sure the cream cheese is fully softened before mixing. This allows for a smooth and creamy filling that will delight your guests.

  • Experiment with Ingredients: Don’t hesitate to customize your filling! Swap in your favorite nuts or add a touch of spice to your stuffed mushrooms to suit your taste preferences.

Make Ahead Options

These Savory Keto Stuffed Mushrooms are perfect for meal prep enthusiasts! You can prepare the filling and stuff the mushrooms up to 24 hours in advance. To do this, simply complete steps 1-6 as outlined in the recipe, then cover the stuffed mushrooms tightly with plastic wrap or transfer them to an airtight container and refrigerate. This not only saves you time on a busy day but also allows the flavors to meld beautifully! When you're ready to serve, just bake them as instructed in step 7, and watch as they emerge a golden delight—just as delicious as if made fresh!

Stuffed Mushrooms Recipe FAQs

What kind of mushrooms should I use for stuffed mushrooms?
For stuffed mushrooms, I recommend using baby bella (cremini) mushrooms, as they offer a meaty texture and earthy flavor. However, if you can't find them, white button mushrooms work just fine as a suitable substitute!

How do I store leftover stuffed mushrooms?
Leftover stuffed mushrooms can be stored in an airtight container in the refrigerator for up to 3 days. When you're ready to enjoy them again, simply reheat in the oven at 350°F (175°C) for 10-15 minutes until warmed through. They'll taste delicious!

Can I freeze stuffed mushrooms?
Absolutely! To freeze stuffed mushrooms, it's best to prepare them uncooked. Wrap each stuffed mushroom tightly in plastic wrap and then place them in a freezer-safe bag. They can be frozen for up to 3 months. When you're ready to bake, no need to thaw; just pop them straight into the preheated oven and add a few extra minutes to the cooking time.

What if my stuffing is too wet or dry?
If your filling turns out too wet, consider adding a bit of breadcrumbs or crushed pecans to absorb excess moisture. On the other hand, if the stuffing is too dry, stir in a little more cream cheese or melted butter until you achieve the desired consistency. It should be creamy but firm enough to hold its shape!

Are these stuffed mushrooms suitable for a gluten-free diet?
Yes, these stuffed mushrooms can easily be made gluten-free! Just substitute any gluten-containing ingredients—like regular breadcrumbs—with gluten-free alternatives. Additionally, you can simply omit the pecans and use crushed gluten-free crackers if you prefer added crunch.

Can I prepare stuffed mushrooms ahead of time?
Yes, you can prepare these stuffed mushrooms up to 24 hours in advance. Simply stuff the mushrooms and place them on a baking sheet, cover them with plastic wrap, and refrigerate. When you're ready to serve, just bake them as directed! This makes hosting stress-free and enjoyable.

Stuffed Mushrooms

Irresistible Stuffed Mushrooms with Creamy Cheese Delight

Delightful stuffed mushrooms filled with creamy cheese, perfect for gatherings and keto-friendly diets.
Print Recipe Pin Recipe
Prep Time 15 minutes mins
Cook Time 25 minutes mins
Total Time 40 minutes mins
Servings: 8 mushrooms
Course: Appetizers
Cuisine: American
Calories: 120
Ingredients Equipment Method Nutrition Notes

Ingredients
  

For the Filling
  • 16 ounces Baby Bella Mushrooms White button mushrooms are a good substitute.
  • 8 ounces Cream Cheese Ensure it's at room temperature.
  • 1 tablespoon Butter Can substitute with olive oil.
  • 2 cloves Garlic Minced.
  • 1 medium Onion Diced; shallots can be used.
  • 1/2 cup Parmesan Cheese Grated.
  • 1/2 cup Pecans Chopped; omit for nut-free.
  • 1/4 cup Fresh Parsley Chopped; can substitute with chives or dill.
  • to taste Salt
  • to taste Pepper
For Baking
  • 1 tablespoon Olive Oil For greasing the baking sheet.

Equipment

  • Baking Sheet
  • Skillet
  • Mixing Bowl
  • Spoon
  • Oven

Method
 

Step-by-Step Instructions for Stuffed Mushrooms
  1. Preheat your oven to 400°F (200°C) and grease the baking sheet with olive oil.
  2. Rinse the mushrooms, dry them, and remove the stems, chopping them finely.
  3. Melt butter in a skillet, sauté the chopped mushroom stems for about 5 minutes.
  4. Add diced onion and minced garlic, cook for 1-2 minutes until softened.
  5. Mix sautéed ingredients with cream cheese, parmesan, parsley, and pecans.
  6. Stuff each mushroom cap with the filling, sprinkle extra parmesan and pecans on top.
  7. Bake for 20-25 minutes, until golden brown and mushrooms are softened.
  8. Garnish with fresh parsley and serve warm.

Nutrition

Serving: 1mushroomCalories: 120kcalCarbohydrates: 4gProtein: 3gFat: 10gSaturated Fat: 5gPolyunsaturated Fat: 1gMonounsaturated Fat: 3gCholesterol: 20mgSodium: 150mgPotassium: 200mgFiber: 1gSugar: 1gVitamin A: 200IUVitamin C: 2mgCalcium: 80mgIron: 1mg

Notes

These stuffed mushrooms can be prepared up to 24 hours in advance and baked just before serving.

Tried this recipe?

Let us know how it was!

Crispy Loaded Hasselback Potato Bites to Wow Your Guests

November 13, 2025 by Grace Snow Leave a Comment

As I sliced into those small potatoes, a sense of nostalgia washed over me, reminding me of cozy gatherings filled with laughter and delicious bites. My Crispy Loaded Hasselback Potato Bites transform humble spuds into a stunning appetizer that’s sure to impress friends and family alike. These little beauties are not only super easy to prepare, but they also deliver that delightful crispiness and gooey cheese we all crave—perfect for game day or a fun weeknight side! Plus, they’re loaded with flavors that will have everyone asking for the recipe. Ready to discover how to make this unexpected twist on a cherished classic? Keep reading!

Why Try These Potato Bites?

Ultimate Comfort Food: These Crispy Loaded Hasselback Potato Bites blend crunchy textures with gooey cheese for a cozy treat.

Effortless Preparation: With just a few ingredients and simple steps, you can whip these up quickly—perfect for busy weeknights or last-minute gatherings.

Crowd-Pleasing Appeal: Ideal for game day or parties, they’re an appetizer that everyone will love, making them a go-to for entertaining.

Customization Galore: Want a Mediterranean vibe? Swap in feta. Craving a kick? Toss on some jalapeños! The possibilities are endless.

Show-Stopping Presentation: The artistic Hasselback cut not only looks stunning but also enhances flavor by allowing toppings to seep into every crevice.

For more delicious ideas, don’t miss my Sweet Potato Casserole or Crispy Parmesan Artichoke Hearts!

Crispy Loaded Hasselback Potato Bites Ingredients

For the Potato Bites
• Small Potatoes – Red or Yukon potatoes are ideal for a tender interior with a crispy skin.
• Olive Oil – Helps achieve a beautiful golden color; can substitute with vegetable oil if needed.
• Kosher Salt – Enhances the flavor; you can also use sea salt for a subtle difference.

For the Toppings
• Sliced Cheese (Colby Jack) – Melts beautifully, adding creamy goodness; cheddar or pepper jack will also work well.
• Light Sour Cream – A creamy topping that balances the richness; Greek yogurt is a great healthier alternative.
• Cooked Bacon – Adds a crispy, savory touch; swap for turkey bacon or leave out for a vegetarian option.
• Sliced Green Onions – Freshness and color are provided by these; they're a perfect finishing touch for garnish.

Remember, these ingredients come together to create mouthwatering Crispy Loaded Hasselback Potato Bites that will enchant your guests!

Step‑by‑Step Instructions for Crispy Loaded Hasselback Potato Bites

Step 1: Preheat the Oven
Start by preheating your oven to 400°F (200°C) to ensure it's hot enough for perfect baking. While the oven warms up, grab a baking sheet and line it with aluminum foil for easy cleanup later. This step is essential for achieving the crispy exterior of your Crispy Loaded Hasselback Potato Bites.

Step 2: Prepare the Potatoes
Wash and dry your small potatoes thoroughly. Using a sharp knife, carefully make several thin cuts across the top of each potato, taking care not to slice all the way through. These cuts will create the Hasselback style, allowing the flavors to penetrate, so aim for evenly spaced cuts about every 1/4 inch apart.

Step 3: Season the Potatoes
Place your prepared potatoes on the lined baking sheet. Drizzle them generously with olive oil, using your hands to coat them evenly. Sprinkle kosher salt over each potato, ensuring they are well-seasoned. This will enhance the flavor and help achieve that delicious crispy layer as the potatoes roast.

Step 4: Bake the Potatoes
Slide the baking sheet into your preheated oven and allow the potatoes to bake for about 30 minutes. Keep an eye out for them to become fork-tender and start to crisp on the edges. This step is crucial to developing that soft, fluffy interior characteristic of Crispy Loaded Hasselback Potato Bites.

Step 5: Add the Cheese
Once the potatoes are tender, remove them from the oven and insert cheese squares into some of the cuts you made earlier. This is where the magic happens! Return them to the oven for an additional 5-10 minutes, watching closely for the cheese to melt and bubble, creating a gooey, irresistible topping.

Step 6: Cool and Top the Potatoes
After the cheese is beautifully melted, take the baking sheet out of the oven and let the potatoes cool for about 10 minutes. This cooling period will make them easier to handle while you add your favorite toppings.

Step 7: Serve and Enjoy
Finally, complete your Crispy Loaded Hasselback Potato Bites by adding generous dollops of light sour cream, crumbled cooked bacon, and freshly sliced green onions on top. These delightful bites are ready to be served warm or at room temperature, offering a stunning and delicious appetizer sure to impress your guests!

What to Serve with Crispy Loaded Hasselback Potato Bites

Elevate your meal experience by pairing these delightful bites with harmonious sides and drinks that will round out your gathering beautifully!

  • Creamy Mashed Potatoes: A comforting classic, these velvety mashed potatoes provide a soft contrast to the crunchy texture of the potato bites. The creaminess is a perfect match!

  • Garlic Butter Green Beans: Fresh and vibrant, these garlic butter green beans add a splash of color and a delightful crunch, complementing the richness of the loaded bites.

  • Fresh Garden Salad: A light, crisp salad with mixed greens and vinaigrette will refresh the palate and balance the savory flavors of the potatoes. Toss in some cherry tomatoes for a burst of sweetness!

  • Classic Coleslaw: Crunchy and tangy, coleslaw brings a refreshing crunch and a hint of acidity that cuts through the cheese's richness. It makes a lively accompaniment!

  • BBQ Chicken Wings: Let’s get the party going! Tender and smoky, BBQ chicken wings enhance the game-day vibe. The interplay of flavors will be a hit among your guests.

  • Spicy Jalapeño Poppers: A flavor-packed side! These spicy, cheesy bites will mirror the loaded potato bites while adding a fiery kick that spice lovers will adore.

  • Chilled Beer or Sparkling Cider: Pair with a cold beer or sparkling cider for the ultimate refreshment. The bubbles cleanse the palate between bites, enhancing every delicious mouthful!

Each of these options perfectly complements your Crispy Loaded Hasselback Potato Bites, creating a meal that truly delivers comfort and satisfaction. Enjoy!

Crispy Loaded Hasselback Potato Bites Variations

Feel free to let your imagination run wild and customize these delicious bites to suit your palate!

  • Cheese Swap: Use feta cheese for a Mediterranean flair or try blue cheese for a sharp kick. Both add unique character to the dish.

  • Spicy Kick: For those who enjoy a little heat, add sliced jalapeños as a topping or opt for spicy pepper jack cheese. It will elevate the flavor profile wonderfully.

  • Herb Infusion: Toss in fresh herbs like chives, dill, or rosemary with your toppings for a fragrant and flavorful twist. A sprinkle of herbs creates a bright contrast.

  • Smoky Flavor: Incorporate smoked paprika into the olive oil before drizzling it over the potatoes. This adds a rich, smoky flavor that pairs beautifully with bacon.

  • Bacon Alternatives: Try crispy turkey bacon for a leaner option or omit entirely for a delightful vegetarian version. You won’t miss the meat at all!

  • Vegetable Mix-In: Add sautéed mushrooms or spinach on top for a healthy boost and added texture. These veggies not only taste great but also enhance the overall look.

  • Gourmet Touch: Drizzle a balsamic reduction over the finished bites for a touch of elegance. This sweet-tangy addition elevates the dish for special occasions.

For more creative food ideas, how about pairing these yummy bites with a refreshing Fish Taco Bowl or savoring some smoky flavors with Smoky Sweet Potatoes?

Storage Tips for Crispy Loaded Hasselback Potato Bites

Room Temperature: Allow leftovers to cool completely before storing them in an airtight container. They can be kept at room temperature for up to 2 hours.

Fridge: Store your Crispy Loaded Hasselback Potato Bites in an airtight container in the fridge for up to 3 days. Reheat in the oven to help restore their crispiness.

Freezer: For longer storage, freeze the potato bites individually on a baking sheet before transferring them to a freezer-safe container. They can be kept for up to 2 months.

Reheating: Reheat from frozen in the oven at 375°F (190°C) for about 20-25 minutes, or until heated through and crispy.

Make Ahead Options

These Crispy Loaded Hasselback Potato Bites are fantastic for meal prep, saving you valuable time during busy weeknights or party preparations. You can prepare the potatoes (sliced but unseasoned) up to 24 hours in advance; simply store them in a bowl of cold water in the refrigerator to prevent browning. Additionally, you can slice and pre-cook the bacon up to 3 days ahead, keeping it refrigerated. When you’re ready to serve, drain the potatoes, season them with olive oil and salt, bake until tender, add cheese for a melty finish, then top with sour cream, bacon, and onions. This ensures your bites are just as delicious, with minimal last-minute effort!

Expert Tips for Crispy Loaded Hasselback Potato Bites

• Even Cuts Matter: Consistent cuts in the potatoes promote even cooking and ensure every bite is perfectly crispy.

• Broil for Extra Crispiness: For that ultimate crunch, consider broiling the potatoes for an additional 2-3 minutes after baking.

• Potato Size Consistency: Use uniform-sized potatoes to ensure they all cook evenly and reach that delectable tender state.

• Experiment with Cheese: Feel free to swap the cheese for personal preference; just remember that different varieties can change the melting texture of your Crispy Loaded Hasselback Potato Bites.

• Add Flavor Layers: Enhance taste by adding spices or herbs into the olive oil before coating, providing extra flavor depth with minimal effort.

Crispy Loaded Hasselback Potato Bites Recipe FAQs

How do I choose the right potatoes for this recipe?
Absolutely! For the Crispy Loaded Hasselback Potato Bites, small red or Yukon potatoes work wonderfully. Look for firm potatoes with smooth skin—avoid any with dark spots or blemishes. These varieties yield a tender interior with a delightful crispy skin, taking your appetizer to the next level.

How should I store leftovers?
Very well! Once cooled, keep any leftovers in an airtight container at room temperature for up to 2 hours. For longer storage, shift them to the refrigerator, where they’ll last up to 3 days. When you're ready to enjoy them again, reheat in the oven to restore their delightful crispiness.

Can I freeze the Crispy Loaded Hasselback Potato Bites?
Of course! To freeze these potato bites, first, arrange them in a single layer on a baking sheet and freeze them for a couple of hours until solid. Then, transfer the frozen bites into a freezer-safe container or bag, where they can last for up to 2 months. When you’re ready to enjoy, reheat directly from frozen at 375°F (190°C) for 20-25 minutes.

What if my potatoes aren’t cooking evenly?
Ah, that can happen! Ensure your cuts in the potatoes are consistent, around 1/4 inch apart, as this allows for even cooking. If you find some potatoes are still firm, you can cover them with foil and bake a little longer. Additionally, broiling for the last 2-3 minutes can help achieve that crispy finish.

Are there any dietary considerations for this recipe?
Indeed! This recipe can easily cater to different dietary needs. If you're cooking for vegetarians, simply omit the bacon or substitute it with turkey bacon. For those watching their calories, using light sour cream and reduced-fat cheese can help without sacrificing flavor. Always check for any specific allergies related to cheese or other ingredients you might use!

How should I reheat my potato bites after freezing?
To reheat, preheat your oven to 375°F (190°C). Place the frozen Crispy Loaded Hasselback Potato Bites on a baking sheet and heat for about 20-25 minutes. This method helps regain their crispy texture, so they taste almost as good as freshly made!

These FAQs should help you make the most out of your delicious Crispy Loaded Hasselback Potato Bites—enjoy!

Crispy Loaded Hasselback Potato Bites

Crispy Loaded Hasselback Potato Bites to Wow Your Guests

Crispy Loaded Hasselback Potato Bites transform humble spuds into a stunning appetizer that impresses guests with delightful crispiness and gooey cheese.
Print Recipe Pin Recipe
Prep Time 15 minutes mins
Cook Time 40 minutes mins
Cooling Time 10 minutes mins
Total Time 1 hour hr 5 minutes mins
Servings: 4 bites
Course: Appetizers
Cuisine: American
Calories: 220
Ingredients Equipment Method Nutrition Notes

Ingredients
  

For the Potato Bites
  • 1 pound small potatoes (Red or Yukon)
  • 2 tablespoons olive oil can substitute with vegetable oil
  • 1 teaspoon kosher salt or sea salt
For the Toppings
  • 1 cup sliced cheese (Colby Jack) or cheddar or pepper jack
  • 1/2 cup light sour cream or Greek yogurt
  • 1/2 cup cooked bacon or turkey bacon for vegetarian option
  • 1/4 cup sliced green onions for garnish

Equipment

  • Oven
  • Baking Sheet
  • Sharp Knife
  • Aluminum Foil

Method
 

Step-by-Step Instructions
  1. Preheat your oven to 400°F (200°C) and line a baking sheet with aluminum foil.
  2. Wash and dry the small potatoes, then make several thin cuts across the top of each potato.
  3. Place the potatoes on the baking sheet, drizzle with olive oil, and sprinkle with kosher salt.
  4. Bake the potatoes for about 30 minutes until fork-tender and starting to crisp.
  5. Remove from the oven, insert cheese squares into the cuts, and bake for another 5-10 minutes until melted.
  6. Let the potatoes cool for about 10 minutes before adding toppings.
  7. Top with light sour cream, crumbled bacon, and sliced green onions before serving.

Nutrition

Serving: 2bitesCalories: 220kcalCarbohydrates: 30gProtein: 6gFat: 10gSaturated Fat: 4gPolyunsaturated Fat: 2gMonounsaturated Fat: 3gCholesterol: 15mgSodium: 300mgPotassium: 450mgFiber: 3gSugar: 1gVitamin A: 500IUVitamin C: 12mgCalcium: 150mgIron: 1mg

Notes

Even cuts promote even cooking; for extra crispiness, broil for 2-3 minutes after baking. Store leftovers in an airtight container for up to 3 days or freeze for up to 2 months.

Tried this recipe?

Let us know how it was!

Taco Ranch Bites That Will Wow Your Guests Every Time

November 13, 2025 by Grace Snow Leave a Comment

As I stood in my kitchen contemplating what to whip up for my friends’ spontaneous gathering, a lightbulb moment struck—Taco Ranch Bites! These delightful little morsels combine the flavors of juicy ground beef, zesty taco seasoning, and melty cheddar cheese, all nestled in perfectly crisp phyllo shells. What makes these Taco Ranch Bites such a game-changer is their quick prep time and impressive crowd-pleasing appeal; anyone can whip them up and become the star of the evening! Whether you’re hosting a get-together, tailgating, or simply craving a delicious snack, these appetizers deliver comfort and excitement in every crunchy bite. Want to learn how to create a dish that will leave your guests raving? Let’s dive into this delicious recipe!

Why Are Taco Ranch Bites a Must-Try?

Crowd-Pleaser: These Taco Ranch Bites are sure to impress, making them perfect for any occasion—game day, parties, or just a cozy night in.

Quick Prep Time: With simple ingredients and easy steps, you can whip these up in no time, leaving you free to enjoy your guests' company.

Flavor Explosion: The combination of savory ground beef, zesty taco seasoning, and rich cheddar cheese creates a mouthwatering flavor that everyone will crave.

Versatile Options: Feel free to customize with different cheeses or even create a vegetarian version using black beans and corn for a delightful twist. You can also explore other delicious appetizers like Fish Taco Bowls or Taco Spaghetti Cheesy.

Light Yet Satisfying: The crispy phyllo shells give these bites a unique texture that contrasts beautifully with the cheesy filling, making them both satisfying and light.

Make-Ahead Friendly: Prep and freeze for future gatherings, ensuring you’re always ready to impress with minimal effort!

Taco Ranch Bites Ingredients

For the Filling
• Ground Beef – Provides the main protein; opt for lean meat to reduce fat content.
• Taco Seasoning – Adds essential flavor; store-bought is convenient, but homemade can elevate taste.
• Diced Tomatoes and Green Chiles – Introduces moisture and a kick of spice; canned works best for ease.
• Cheddar Cheese – Gives a creamy, rich texture; use freshly shredded for optimal melting.
• Ranch Dressing – Adds creaminess and tang; choose premium bottled or make your own for the best taste.

For the Shells
• Phyllo Tart Shells – The perfect base for these bites; pick up frozen ones for convenience or try homemade for an artisanal touch.

Step‑by‑Step Instructions for Taco Ranch Bites

Step 1: Preheat Your Oven
Begin by preheating your oven to 350ºF (175ºC). Take a moment to enjoy the anticipation of delicious Taco Ranch Bites bubbling in the oven! A well-preheated oven ensures that your phyllo shells turn golden and crisp, providing the perfect vessel for the savory filling you’re about to create.

Step 2: Brown the Ground Beef
In a large skillet over medium heat, add the ground beef and cook for about 5-7 minutes until it is nicely browned and no pink remains. Make sure to break up any large clumps with a spatula. Once fully cooked, drain any excess fat to keep your Taco Ranch Bites light and delicious.

Step 3: Season the Beef
Return the skillet to the heat, and add taco seasoning along with diced tomatoes and green chiles. Stir well to combine the ingredients, allowing the flavors to meld. Let this simmer for 5 minutes until the mixture is heated through and slightly thickened, creating a flavor-packed filling for your Taco Ranch Bites.

Step 4: Mix the Cheese and Dressing
In a separate mixing bowl, combine the freshly shredded cheddar cheese with the ranch dressing. This mixture will add a creamy texture and a delightful tang to your filling. Carefully fold in the cooked beef mixture until everything is thoroughly combined, ensuring every bite is bursting with flavor.

Step 5: Assemble the Taco Ranch Bites
Now it’s time to fill the phyllo tart shells! Spoon the cheesy beef mixture generously into each shell, allowing them to be heaping full for maximum flavor. If you're planning to freeze them for later, this is the perfect spot to do so. Just place them on a tray and freeze before transferring to a bag.

Step 6: Bake for Perfection
Place the assembled Taco Ranch Bites on a baking sheet and insert them into the preheated oven. Bake for 8-10 minutes until the shells are crispy and golden, and the filling is hot and bubbly. For frozen bites, extend the baking time by an additional 2-3 minutes for a perfect warm treat.

How to Store and Freeze Taco Ranch Bites

Fridge: Store cooled Taco Ranch Bites in an airtight container for up to 3-4 days to maintain their crispy texture and flavor.

Freezer: Freeze unbaked Taco Ranch Bites for up to 3 months. Place them on a tray to freeze individually before transferring to a zip-top bag to prevent sticking.

Reheating: To enjoy frozen bites, bake from frozen at 350ºF for an additional 2-3 minutes, ensuring they are hot throughout for optimal taste.

What to Serve with Taco Ranch Bites

Elevate your gathering with delightful sides that complement the bold flavors of these crispy, cheesy bites.

  • Fresh Guacamole: Creamy and rich, guacamole balances the savory spice of the Taco Ranch Bites while adding a refreshing touch. It's always a crowd favorite!

  • Salsa Verde: This tangy green sauce adds a splash of zest that enhances every bite. The herby notes bring a new depth and brighten up your plate.

  • Mexican Street Corn: Sweet corn finished with lime, cotija cheese, and chili powder creates a satisfying crunch and complements the savory filling perfectly.

  • Crispy Potato Wedges: Seasoned and golden brown, these hearty wedges provide a satisfying texture contrast, making your appetizer spread feel more complete.

  • Zesty Coleslaw: A crunchy, colorful slaw infused with lime and cilantro adds a refreshing crunch that cuts through the richness of the bites. It’s a delightful balance!

  • Classic Margaritas: Pair your Taco Ranch Bites with a chilled margarita for a refreshing drink that embodies the spirit of Mexican cuisine and adds a festive flair.

  • Mini Churros: For dessert, serve these sweet treats sprinkled with cinnamon sugar. Their warm, doughy sweetness is a delightful way to round out your meal.

Expert Tips for Taco Ranch Bites

• Meat Choice Matters: Use lean ground beef to reduce grease and enhance flavor without the heaviness.

• Rest the Beef: Allow seasoned beef to rest before filling the shells; this helps the flavors deepen and meld.

• Shell Handling: If using frozen phyllo tart shells, handle gently to avoid tearing. Allow them to thaw slightly for more ease in filling.

• Cheese Selection: Freshly shredded cheddar melts better and creates a creamier texture in your Taco Ranch Bites.

• Freezing Tips: If freezing assembled bites, lay them on a tray first to avoid sticking together, then transfer to a zip-top bag for convenient storage.

Make Ahead Options

These Taco Ranch Bites are perfect for meal prep, allowing you to save time and serve deliciousness on busy weeknights! You can assemble the bites and keep them in the refrigerator for up to 24 hours before baking. Alternatively, prepare them and freeze for up to 3 months—just lay them flat on a tray to freeze initially, then transfer to a zip-top bag once solid to prevent sticking. When you're ready to serve, bake directly from the freezer, adding an extra 2-3 minutes to the bake time. This ensures you’ll have fresh and crispy Taco Ranch Bites that are just as delightful as if they were made that day!

Taco Ranch Bites Variations & Substitutions

Feel free to get creative and customize these Taco Ranch Bites to satisfy any craving or dietary need!

  • Meat Alternatives: Substitute ground turkey or chicken for a lighter protein option. This twist still delivers incredible flavor without the extra fat.
  • Vegetarian Version: Swap meat for black beans, corn, and diced bell peppers to create a vibrant, plant-based delight. Each bite bursts with color, making it as appealing to the eyes as it is to the palate.
  • Cheese Choices: Use Monterey Jack or Pepper Jack instead of cheddar for a spicy kick. Experimenting with different cheeses elevates the flavor profile, bringing new dimensions to your bites.
  • Dressing Alternatives: Try spicy ranch or cilantro-lime dressing for a refreshing twist. These variations can transition your Taco Ranch Bites from classic to adventurous in moments!
  • Shell Alternatives: If you can’t find phyllo shells, corn tortillas can be baked into cups for a gluten-free alternative. The added corn flavor pairs nicely with the filling, creating a wholesome experience.
  • Heat Level: Add jalapeños or diced green chiles into the filling for those who enjoy a little more heat. This simple addition can transform the dish, making it a hit for spice lovers at the table.
  • Flavor Boost: Incorporate lime juice and zest into the beef mixture for a zesty brightness. Just a hint brings out those beloved taco flavors and pairs beautifully with the cheese.
  • Make it a Meal: Serve over a salad base with fresh greens, tomatoes, and avocado for a wholesome meal option. The crunchy bites on a bed of veggies create a deliciously satisfying dining experience.

These variations ensure you can keep things exciting while making your Taco Ranch Bites even more delectable. Plus, if you're looking for more tasty taco-inspired dishes, check out Taco Bell Crunchwrap for a fun twist, or indulge in the delicious flavors of Shrimp Tacos Zesty.

Taco Ranch Bites Recipe FAQs

What type of ground beef should I use for Taco Ranch Bites?
Opt for lean ground beef to reduce excess fat while still providing great flavor. It helps keep the Taco Ranch Bites light and prevents them from becoming greasy.

How can I store leftover Taco Ranch Bites?
Store cooled Taco Ranch Bites in an airtight container in the fridge for 3-4 days. This way, they maintain their crispy texture and delicious flavor, making for a perfect snack later.

Can I freeze Taco Ranch Bites?
Absolutely! You can freeze unbaked Taco Ranch Bites for up to 3 months. To do this, assemble the bites, lay them out on a tray, and freeze until solid before transferring them to a zip-top bag to prevent sticking.

What if my Taco Ranch Bites come out soggy?
If your bites turn out soggy, it could be due to excess moisture in the filling. Make sure to drain any liquids from the beef mixture well. Additionally, ensure the phyllo shells are fully baked until crispy. Consider baking them a bit longer if needed.

Are Taco Ranch Bites suitable for kids?
Very much! Taco Ranch Bites are a fun and tasty option for kids. You can adjust the spice level by using mild taco seasoning or omitting the green chiles for a gentler flavor. Plus, they're great for teaching kids how to assemble their food!

Is there a vegetarian version of Taco Ranch Bites?
Yes! To make a vegetarian-friendly option, substitute the ground beef with black beans, corn, and diced bell peppers. This creates a hearty and flavor-packed filling that everyone will enjoy!

Taco Ranch Bites

Taco Ranch Bites That Will Wow Your Guests Every Time

Taco Ranch Bites are a crowd-pleasing appetizer that combines ground beef, taco seasoning, and cheddar cheese in crispy phyllo shells.
Print Recipe Pin Recipe
Prep Time 15 minutes mins
Cook Time 20 minutes mins
Total Time 35 minutes mins
Servings: 8 bites
Course: Appetizers
Cuisine: Mexican
Calories: 250
Ingredients Equipment Method Nutrition Notes

Ingredients
  

For the Filling
  • 1 lb ground beef opt for lean meat
  • 1 packet taco seasoning store-bought or homemade
  • 1 can diced tomatoes and green chiles canned for ease
  • 1 cup cheddar cheese freshly shredded
  • 1/4 cup ranch dressing premium bottled or homemade
For the Shells
  • 12 pieces phyllo tart shells frozen for convenience

Equipment

  • Large skillet
  • Mixing Bowl
  • Baking Sheet

Method
 

Step-by-Step Instructions for Taco Ranch Bites
  1. Preheat your oven to 350ºF (175ºC).
  2. In a large skillet over medium heat, add the ground beef and cook for 5-7 minutes until browned.
  3. Return the skillet to heat, add taco seasoning and diced tomatoes, and stir, simmering for 5 minutes.
  4. In a mixing bowl, combine cheddar cheese and ranch dressing, then fold in the cooked beef mixture.
  5. Fill each phyllo tart shell with the cheesy beef mixture.
  6. Bake for 8-10 minutes until the shells are crispy and the filling is hot.

Nutrition

Serving: 2bitesCalories: 250kcalCarbohydrates: 15gProtein: 12gFat: 16gSaturated Fat: 7gCholesterol: 40mgSodium: 450mgPotassium: 300mgFiber: 2gSugar: 1gVitamin A: 500IUVitamin C: 5mgCalcium: 150mgIron: 2mg

Notes

Perfect for parties, can be prepped and frozen for future gatherings.

Tried this recipe?

Let us know how it was!

Smoked Shotgun Shells: Irresistibly Cheesy Bacon Delights

November 12, 2025 by Grace Snow Leave a Comment

As I lifted the lid of my smoker, a wave of smoky goodness swept through the kitchen, instantly igniting my appetite. What was bubbling with anticipation? A platter of Smoked Shotgun Shells, my go-to crowd-pleaser that never fails to impress. These crispy bacon-wrapped appetizers are not only easy to prepare, but they also pack a punch of flavor with every bite. Stuffed with a savory mix of ground beef, spicy sausage, and sharp cheddar, the manicotti shells magically transform into a delightful dish that's perfect for gatherings or cozy nights at home. Plus, the best part? They’re just as delicious when baked or air-fried for quick weeknight dinners. Ready to embark on this smoky adventure? Trust me, your taste buds are about to thank you!

Why Are Smoked Shotgun Shells a Must-Try?

Flavor Explosion: Each bite is a burst of rich, smoky flavor, combining savory meat and melted cheese encased in crispy bacon.

Easy to Prepare: This recipe requires minimal effort and kitchen skills, making it perfect for both novice cooks and seasoned chefs.

Versatile Options: Not a meat lover? Feel free to customize the fillings with veggies or tofu, or try different cheeses for a unique twist!

Crowd-Pleasing Appeal: These bites are always a hit at parties, serving as the ultimate appetizer that guests will love.

Quick Cooking Methods: While smoking delivers an unbeatable flavor, you can also bake or air-fry these shells for a speedy, delicious meal option, ideal for weeknights.

Embrace the deliciousness of these Smoked Shotgun Shells, and you’ll never look at appetizers the same way again!

Smoked Shotgun Shells Ingredients

For the Filling
• Ground Beef – the main protein source; can substitute with ground turkey for a leaner option.
• Hot Italian Sausage – adds spiciness; swap with mild sausage for less heat.
• Onion – brings sweetness and depth; finely dice for even distribution.
• Sharp Cheddar Cheese – provides flavorful richness; can be substituted with a milder cheese if desired.
• Cream Cheese – enhances creaminess; omit for a less rich filling.
• Jalapeño – adds heat and freshness; use poblano for a milder flavor.
• Garlic Powder – adds depth of flavor; fresh garlic can be used as an alternative.

For the Shell
• Manicotti Shells – perfect structure for stuffing; no need to pre-cook for optimal texture during smoking.

For Seasoning
• Slap Ya Mama Seasoning – adds a well-rounded spice; adjust or substitute with your preferred seasoning blend.
• Black Pepper – for heat and flavor; could be replaced with white pepper.
• Red Pepper Flakes – offers additional spice; omit for a milder taste.

For the Coating
• Bacon – the crunchy outer layer; thick cut is recommended for the best crispiness.
• Barbecue Sauce – enhances flavor and serves as a delicious coating; choose your favorite brand or homemade for tailored taste.

Get ready to savor these Smoked Shotgun Shells that will surely tantalize your taste buds!

Step‑by‑Step Instructions for Smoked Shotgun Shells

Step 1: Preheat the Smoker
Begin by preheating your smoker to 250°F. This temperature is key for achieving that perfect balance of smoky flavor and juicy tenderness in your Smoked Shotgun Shells. Allow the smoker to reach the desired heat before starting to prepare the filling, ensuring it’s ready to go once everything is assembled.

Step 2: Mix the Filling
In a large bowl, combine the ground beef, hot Italian sausage, finely diced onion, sharp cheddar cheese, cream cheese, jalapeño, garlic powder, and your preferred seasonings. Mix thoroughly until all ingredients are well incorporated, achieving a cohesive filling that will deliver delicious, savory notes in every bite of your Smoked Shotgun Shells.

Step 3: Stuff the Manicotti Shells
Take your uncooked manicotti shells and carefully stuff them with the meat mixture. It’s important to fill them gently to avoid creating air pockets that can affect cooking. Each shell should be packed with filling but not overstuffed, allowing for even cooking and infusing the flavors as they smoke.

Step 4: Wrap in Bacon
Once the shells are filled, take thick-cut bacon and wrap each manicotti shell completely, ensuring to cover the ends for maximum flavor retention. The bacon not only adds a delicious crunch but also ensures the filling remains moist while smoking. Secure with toothpicks if needed to keep everything in place.

Step 5: Brush with Barbecue Sauce
Before smoking, generously brush the wrapped shells with your favorite barbecue sauce, adding a sweet and tangy flavor that complements the savory meat. Make sure all sides are coated well, as this will enhance the smoky coating during the cooking process, providing extra flavor to your Smoked Shotgun Shells.

Step 6: Smoke the Shells
Place the bacon-wrapped manicotti shells on a baking sheet, then transfer them to the smoker. Smoke for 60 minutes, allowing the wood chips to impart a deep smoke flavor and the bacon to crisp up beautifully. Keep an eye on the shells to ensure the bacon remains intact and cooks evenly.

Step 7: Flip and Sauce Again
After the first hour, carefully flip the Smoked Shotgun Shells to the other side for an even cook. Brush them again with barbecue sauce, then continue to smoke for another 60 minutes. This second round will help the bacon get nice and crispy while the filling reaches the perfect doneness.

Step 8: Check for Doneness and Serve
Once the smoking is complete, check that the internal temperature of the filling has reached a safe level (at least 165°F). Remove the Smoked Shotgun Shells from the smoker, let them rest for a few minutes, and then serve. These flavorful bites are perfect for gatherings or cozy nights, ensuring every bite is packed with smoky goodness.

Smoked Shotgun Shells Variations & Substitutions

Feel free to unleash your creativity and customize these Smoked Shotgun Shells to match your taste preferences and dietary needs!

  • Turkey Swap: Substitute ground beef with ground turkey for a leaner, lighter option that’s just as delicious.

  • Vegetarian Delight: Create a meatless version by using a mix of beans, sautéed vegetables, and your favorite cheese for a savory filling.

  • Cheese Options: Try pepper jack cheese for an extra kick of spice or mozzarella for a milder, gooey experience. Each cheese variation adds a unique flavor twist.

  • Baking Alternative: If you don’t have a smoker, bake the stuffed shells at 375°F for about 30-40 minutes until the bacon is crispy and golden.

  • Air-Fryer Magic: Air-fry the bacon-wrapped shells for 20-25 minutes at 400°F for a quick and crispy alternative that’s full of flavor.

  • Heat Level Adjust: For the spice-sensitive, substitute jalapeño with bell peppers for a sweet crunch without the heat, ensuring everyone can enjoy these appetizers.

  • Seasoning Switch: Feel free to experiment with different spice blends like taco seasoning or Italian herbs instead of Slap Ya Mama for a new flavor experience.

  • Dipping Sauces: Enhance serving with tasty dips such as ranch, blue cheese, or a homemade garlic aioli for a flavor explosion while you're at it.

Enjoy tailoring these Smoked Shotgun Shells to your unique taste, and don't hesitate to share your favorite variations with fellow foodies!

Expert Tips for Smoked Shotgun Shells

• Bacon Coverage: Ensure every shell is fully wrapped in bacon to maintain moisture, flavor, and achieve that perfect crunch during smoking.

• Check Temperature: Use a meat thermometer to ensure the filling reaches at least 165°F for safe consumption, enhancing your Smoked Shotgun Shells experience.

• Avoid Overfilling: Stuff the manicotti shells gently to prevent air pockets, which can lead to uneven cooking and loss of flavor.

• Seasoning Flexibility: Adjust seasonings to your taste; if your crowd prefers milder flavors, reduce the jalapeño and red pepper flakes.

• Utilize Leftovers: Get creative with any remaining filling by making sliders or stuffed peppers, minimizing waste while exploring new flavors.

What to Serve with Smoked Shotgun Shells

Picture a lively gathering where every bite of smoky goodness tantalizes your taste buds and leaves you wanting more.

  • Creamy Coleslaw: A refreshing crunch complements the rich flavors of the shells, providing a cooling contrast after each savory bite.

  • Spicy Cornbread: With a hint of sweetness and a touch of spice, this bread is the perfect side to balance the smoky and cheesy notes.

  • Grilled Vegetables: Smoky grilled peppers, zucchini, and mushrooms add a fresh and vibrant element, making the meal more wholesome and colorful.

  • Garlic Breadsticks: Soft, buttery breadsticks are ideal for soaking up any leftover sauce, creating a delightful texture contrast with the crispy shells.

  • Pineapple Salsa: Bursting with sweetness and spice, this salsa brightens the palate and pairs beautifully with the deep flavors of the shotgun shells.

  • Beer or Cider: A refreshing beer or crisp cider complements the smoky richness, enhancing the entire flavor profile of your meal.

These pairing options create a delicious spread, ensuring that your Smoked Shotgun Shells stand out as the star of your next culinary adventure.

Make Ahead Options

These Smoked Shotgun Shells are a fantastic choice for meal prep, making your entertaining or weeknight dinners much simpler! You can prepare the filling and stuff the manicotti shells up to 24 hours in advance. Just be sure to keep them covered in the refrigerator to maintain freshness. Additionally, you can wrap the stuffed shells in bacon and brush them with barbecue sauce before refrigerating, ensuring every ingredient stays flavorful and moist. When you're ready to enjoy them, simply take the shells out of the fridge and place them directly into the smoker—no need to let them come to room temperature. Your Smoked Shotgun Shells will be just as delicious, saving you precious time while still satisfying your taste for a smoky treat!

How to Store and Freeze Smoked Shotgun Shells

Fridge: Store leftovers in an airtight container for up to 3-4 days. Make sure to keep them covered to retain moisture and freshness.

Freezer: For longer storage, wrap the smoked shotgun shells tightly in plastic wrap and foil, then freeze for up to 3 months. This keeps them tasty for your next craving!

Reheating: When ready to enjoy, thaw if frozen, then reheat in a covered dish with a bit of barbecue sauce added at 350°F for about 15 minutes until heated through.

Make-Ahead Tip: You can prepare the filling and stuff the shells a day in advance. Just store the assembled shells in the fridge, ready for smoking or baking!

Smoked Shotgun Shells Recipe FAQs

What type of manicotti shells should I use?
For this recipe, use uncooked manicotti shells as they provide the perfect structure for stuffing and don’t require pre-cooking. This ensures the best texture when smoked, allowing the flavors to meld beautifully while cooking.

How should I store leftovers?
Absolutely! Store any leftover Smoked Shotgun Shells in an airtight container in the refrigerator for up to 3-4 days. Be sure to keep them covered to retain moisture and prevent them from drying out.

Can I freeze Smoked Shotgun Shells?
Yes, you can freeze them for up to 3 months! To do so, wrap each shell tightly in plastic wrap and then in aluminum foil to prevent freezer burn. When you’re ready to enjoy them, simply thaw overnight in the refrigerator before reheating.

How do I reheat the smoked shotgun shells?
Reheating is simple! Preheat your oven to 350°F. Place the thawed shells in a covered dish, adding a little barbecue sauce on top to maintain moisture. Bake for about 15 minutes or until heated through. This method keeps them flavorful and moist!

Are there any dietary considerations I should keep in mind?
Definitely! If you or your guests have food allergies or dietary restrictions, you can easily customize these Smoked Shotgun Shells. Substitute the ground beef with ground turkey or a vegetarian mixture of beans and vegetables. Additionally, be mindful of the bacon and choose alternatives like turkey bacon or a plant-based option for a healthier choice.

What are common troubleshooting tips for this recipe?
If your bacon doesn’t crisp up properly, ensure it’s thick-cut and fully encases each manicotti shell. Also, make sure your smoker is preheated to 250°F before placing the shells inside. If you notice air pockets in the stuffed shells, gently squeeze the filling during assembly to pack it evenly and prevent any uneven cooking.

Smoked Shotgun Shells

Smoked Shotgun Shells: Irresistibly Cheesy Bacon Delights

Discover the flavor-packed Smoked Shotgun Shells, wrapped in bacon and stuffed with savory meats and cheese.
Print Recipe Pin Recipe
Prep Time 30 minutes mins
Cook Time 2 hours hrs
Resting Time 5 minutes mins
Total Time 2 hours hrs 35 minutes mins
Servings: 6 shells
Course: Appetizers
Cuisine: American
Calories: 350
Ingredients Equipment Method Nutrition Notes

Ingredients
  

For the Filling
  • 1 lb Ground Beef can substitute with ground turkey for a leaner option
  • 1 lb Hot Italian Sausage swap for mild sausage for less heat
  • 1 medium Onion finely diced
  • 8 oz Sharp Cheddar Cheese can be substituted with a milder cheese
  • 4 oz Cream Cheese omit for a less rich filling
  • 1 medium Jalapeño or use poblano for a milder flavor
  • 1 tsp Garlic Powder can use fresh garlic instead
For the Shell
  • 12 Manicotti Shells no need to pre-cook
For Seasoning
  • 1 tbsp Slap Ya Mama Seasoning adjust to taste
  • 1/2 tsp Black Pepper or replace with white pepper
  • 1/2 tsp Red Pepper Flakes omit for a milder taste
For the Coating
  • 12 slices Bacon thick-cut recommended
  • 1/2 cup Barbecue Sauce your favorite brand

Equipment

  • Smoker
  • Mixing Bowl
  • Baking Sheet

Method
 

Step-by-Step Instructions
  1. Preheat your smoker to 250°F.
  2. In a large bowl, combine the ground beef, hot Italian sausage, finely diced onion, sharp cheddar cheese, cream cheese, jalapeño, garlic powder, and your preferred seasonings. Mix thoroughly.
  3. Stuff the manicotti shells with the meat mixture.
  4. Wrap each manicotti shell with thick-cut bacon, ensuring coverage of the ends.
  5. Brush the wrapped shells with barbecue sauce.
  6. Place shells on a baking sheet and smoke for 60 minutes.
  7. Flip the shells after the first hour, brush with barbecue sauce again, and continue to smoke for another 60 minutes.
  8. Check for doneness, ensuring the internal temperature of the filling reaches at least 165°F before serving.

Nutrition

Serving: 1shellCalories: 350kcalCarbohydrates: 15gProtein: 20gFat: 25gSaturated Fat: 9gPolyunsaturated Fat: 2gMonounsaturated Fat: 8gCholesterol: 65mgSodium: 800mgPotassium: 300mgFiber: 1gSugar: 2gVitamin A: 500IUVitamin C: 5mgCalcium: 220mgIron: 3mg

Notes

These Smoked Shotgun Shells are perfect for gatherings, offering a burst of flavor in every bite.

Tried this recipe?

Let us know how it was!

Taco Pizza Magic: The Ultimate Comfort Food Delight

October 27, 2025 by Grace Snow Leave a Comment

As I pulled the golden crescent dough from the oven, a delightful aroma wafted through my kitchen, instantly sparking nostalgia for family gatherings filled with laughter and scrumptious food. This Taco Pizza Appetizer beautifully marries the zesty, savory essence of tacos with the comfort of a fresh pizza. It's an effortless option that's customizable, making it perfect for accommodating your guests’ taste preferences, whether you’re hosting a lively game day or enjoying a cozy night in. The crispy crust and creamy base give it a satisfying texture that will have everyone reaching for seconds. With this recipe, you’ll serve up a crowd-pleaser that’s not only easy to prepare but also gluten-free as an option! Ready to discover how to whip up this flavorful dish that’s sure to impress? Let’s dive in!

Why is Taco Pizza a Must-Try?

Irresistible Flavor Fusion: This Taco Pizza Appetizer combines classic taco spices with a gooey cheese topping, creating an explosion of flavor in every bite.
Easy to Customize: From extra veggies to alternative proteins, everyone can build their perfect slice. Think about trying it with a twist using Shrimp Tacos Zesty for a seafood option!
Family-Friendly Fun: It's a dish that appeals to both kids and adults, making it a surefire hit at any gathering.
Quick Preparation: Whipped up in no time, it’s the perfect last-minute dish for unexpected guests or spontaneous parties.
Gluten-Free Option: With the right dough, this appetizer can cater to gluten sensitivities, so no one misses out on the fun!

Taco Pizza Ingredients

For the Crust

  • Crescent Roll Dough – Provides a quick and tasty flaky base; store-bought dough enhances convenience.

For the Creamy Base

  • Cream Cheese – Adds a rich, creamy texture; Neufchâtel can be a lighter alternative.
  • Sour Cream – Offers a delicious tanginess; Greek yogurt works well as a healthier substitute.

For the Filling

  • Ground Beef (or Ground Turkey) – The main protein seasoned for that signature taco flavor; turkey is a leaner option.
  • Taco Seasoning – Key for authentic taco taste; try homemade to lower sodium content.

For the Toppings

  • Shredded Cheddar and Mozzarella Cheese – Melt together beautifully for a rich topping; feel free to mix and match your favorite melty cheeses.
  • Diced Tomatoes – Contributes freshness and moisture; fresh salsa can substitute if desired.
  • Shredded Lettuce – Provides a satisfying crunch; spinach can be an excellent alternative for a twist.
  • Optional Toppings – Customize with jalapeños, olives, or a variety of veggies to suit all tastes.

This delightful Taco Pizza offering will not only satisfy your cravings but also spotlight its customizable nature, inviting everyone to dive into their flavor journey!

Step‑by‑Step Instructions for Taco Pizza

Step 1: Prepare the Crescent Roll Crust
Preheat your oven to 375°F (190°C) and line a cookie sheet with parchment paper. Unroll the crescent roll dough and press it into a continuous sheet to form a crispy crust. Bake in the preheated oven for about 10 minutes until golden brown, then remove and allow it to cool completely before adding the creamy base.

Step 2: Make the Creamy Base
In a mixing bowl, combine softened cream cheese and sour cream, blending until smooth and creamy. Once thoroughly mixed, spread the creamy base evenly over the cooled crescent crust, ensuring a generous layer. Refrigerate for at least 15 minutes to allow the flavors to meld and the base to firm up nicely.

Step 3: Cook the Ground Beef
In a skillet over medium heat, add your ground beef (or ground turkey), cooking it for about 5-7 minutes while breaking it apart as it browns. Stir occasionally, ensuring all sides cook evenly. Once browned, drain any excess fat, then add taco seasoning to the meat, mixing well until all pieces are coated in that delicious flavor. Remove from heat and let the mixture cool.

Step 4: Assemble Taco Pizza
After your taco meat has cooled, spread it evenly over the creamy base, making certain to cover it completely. Next, sprinkle a generous amount of shredded cheddar and mozzarella cheese on top, allowing the cheeses to melt beautifully. Finally, add diced tomatoes and shredded lettuce, layering on colorful toppings that will enhance both the visual appeal and flavor of your Taco Pizza.

Step 5: Slice and Serve
Once everything is assembled, use a sharp knife to cut your Taco Pizza into eight tantalizing slices. Serve it fresh, and revel in the delightful contrast of gooey cheese and crispy crust. This vibrant appetizer is best enjoyed warm, so gather your family and friends. Dive in and savor the rich, hearty flavors of this incredible Taco Pizza!

How to Store and Freeze Taco Pizza

  • Fridge: Keep leftover Taco Pizza in an airtight container for up to 3 days. Reheat in the oven to maintain the crispy crust.
  • Freezer: For longer storage, wrap slices in plastic wrap and foil, then freeze for up to 2 months. Thaw overnight in the fridge before reheating.
  • Reheating: To enjoy the Taco Pizza again, preheat the oven to 350°F (175°C) and bake for about 10-15 minutes, ensuring the cheese is melted and toppings are warm.
  • Assembly Tip: If preparing in advance, you can assemble Taco Pizza but bake it fresh to enjoy out of the oven when ready!

Make Ahead Options

These Taco Pizza Appetizers are perfect for busy home cooks looking to save time without sacrificing flavor! You can prepare the crescent roll crust and make the creamy base up to 24 hours in advance. Simply bake the crust, let it cool, and then spread the cream cheese mixture over it before refrigerating. You can also brown and season the ground beef (or ground turkey) up to 3 days ahead; just ensure it cools before storing it in an airtight container. When you’re ready to serve, simply layer the taco meat and toppings on the prepared base and bake until everything is warmed through and the cheese is melted. This way, your Taco Pizza will be just as delicious with minimal effort!

Expert Tips for Taco Pizza

  • Meat Management: Make sure to drain the meat well to prevent a greasy pizza. This keeps every bite deliciously balanced.
  • Cool It Down: Allow the crescent crust to cool completely before spreading the creamy base. This prevents the cheese from melting prematurely.
  • Taste the Seasoning: Adjust the taco seasoning based on your preference. Adding a pinch of cayenne or extra herbs can really elevate your Taco Pizza.
  • Layer Wisely: Start with cream cheese before the meat to create a creamy barrier that enhances flavor and texture.
  • Creative Toppings: Don’t shy away from experimenting! Try different cheeses, proteins, or fresh herbs to tailor the Taco Pizza to your family’s tastes.

Taco Pizza Variations & Substitutions

Feel free to play with flavors and textures to craft your perfect Taco Pizza experience!

  • Veggie-Packed: Add diced bell peppers and onions for some crunchy freshness. These veggies break up the richness while adding a pop of color!
  • Spicy Twist: Top with sliced jalapeños or a drizzle of spicy hot sauce for an extra kick of heat. It's like inviting a fiesta to your taste buds!
  • Meat-Free: Swap ground beef for a blend of black beans and lentils to create a hearty vegetarian option. It’s nutritious, flavorful, and full of delightful surprises.
  • Dairy-Free: Use dairy-free cream cheese and cheese alternatives for a lactose-free option. It’s amazing how creamy and indulgent it can still taste!
  • BBQ Variant: Replace taco seasoning with a smoky BBQ sauce and shredded chicken for a different flavor profile. It’s a delicious pairing that adds a whole new layer of fun.
  • Crunchy Toppings: For added texture, include crushed tortilla chips or crispy onions on top just before serving. They provide a satisfying crunch that's hard to resist!
  • Mediterranean Remix: Try using feta cheese, olives, and artichoke hearts instead of traditional toppings for a Mediterranean flair. It’s like a pizza vacation for your palate!
  • For the Kids: Keep it simple and sprinkle on just cheese and mild salsa as toppings. Kid-approved and super easy for picky eaters!

Don’t forget to check out my recipes for Blue Cheese Pizza and Fish Taco Bowls for more flavorful inspiration in your kitchen!

What to Serve with Taco Pizza Appetizer

Elevate your meal with these delightful pairings that enhance the vibrant flavors of this scrumptious appetizer.

  • Fresh Guacamole: Creamy and rich, it adds a perfect cooling balance to the spice of the taco pizza. Don’t forget the lime for that zesty kick!
  • Crispy Tortilla Chips: The ideal crunchy companion, these are perfect for scooping up any toppings. Dip them in salsa for a flavor explosion!
  • Zesty Salsa: Bursting with fresh ingredients, salsa enhances the taco experience, complementing the flavors beautifully while adding a refreshing twist.
  • Mexican Street Corn Salad: This sweet and smoky salad brings a vibrant mix of flavors and textures, bringing a festive touch to your meal.
  • Savory Mexican Rice: Fluffy and flavorful, this dish provides a nice base to balance the richness of the taco pizza. Plus, it’s a great way to soak up any extra toppings!
  • Chilled Margarita: A classic pairing, the tartness of the margarita cuts through the heaviness of the cheese, creating a balanced and refreshing sip.
  • Iced Tea with Lime: A simple yet effective beverage choice that adds a touch of sweetness while keeping you cool and refreshed.
  • Creamy Coleslaw: Its crunch and tang provide a delightful contrast to the warm, cheesy pizza, making each bite more exciting.
  • Chocolate Flan: End your meal on a sweet note with this rich and creamy dessert that’s a delightful way to wrap up your taco-themed feast.

Dive into these pairings and watch your Taco Pizza transform into a full fiesta!

Taco Pizza Recipe FAQs

What kind of crescent roll dough should I use?
Absolutely, you can opt for store-bought crescent roll dough, which is incredibly convenient and gives you the flaky crust you want! If you prefer to make your own, you can use a homemade dough recipe designed for a similar texture.

How do I store leftover Taco Pizza?
Store leftover Taco Pizza in an airtight container in the fridge for up to 3 days. When you're ready to enjoy it again, reheat in the oven at 350°F (175°C) for about 10-15 minutes. This will keep the crust crispy and the toppings warm.

Can I freeze Taco Pizza?
Very! To freeze Taco Pizza, wrap individual slices in plastic wrap and then in aluminum foil. This helps prevent freezer burn. You can keep it in the freezer for up to 2 months. When you're ready to eat, thaw overnight in the fridge, then reheat in the oven.

What should I do if my crust is too soft?
If your crust turns out too soft, it might need a bit more baking time at the beginning. Make sure the crust is golden brown and completely cooled before adding the toppings. This helps it maintain its structure and avoids sogginess.

Are there any dietary considerations I should be aware of?
Of course! This Taco Pizza recipe can easily accommodate gluten-free needs by using gluten-free crescent roll dough. Additionally, pay attention to the taco seasoning if you have sodium restrictions—consider making a homemade blend to suit your dietary preferences!

Can I customize the toppings for a healthier option?
Absolutely! You can load it up with colorful veggies like bell peppers or zucchini, use ground turkey instead of beef for a leaner meat option, or even go meatless with beans for added fiber. The more the merrier when it comes to personalization!

Taco Pizza

Taco Pizza Magic: The Ultimate Comfort Food Delight

Taco Pizza Appetizer beautifully combines zesty taco flavors with comforting pizza, customizable for all tastes, making it perfect for gatherings.
Print Recipe Pin Recipe
Prep Time 15 minutes mins
Cook Time 10 minutes mins
Cooling Time 15 minutes mins
Total Time 40 minutes mins
Servings: 8 slices
Course: Appetizers
Cuisine: Mexican
Calories: 300
Ingredients Equipment Method Nutrition Notes

Ingredients
  

For the Crust
  • 1 roll Crescent Roll Dough Store-bought enhances convenience.
For the Creamy Base
  • 8 oz Cream Cheese Neufchâtel can be a lighter alternative.
  • 1 cup Sour Cream Greek yogurt works well as a healthier substitute.
For the Filling
  • 1 lb Ground Beef (or Ground Turkey) Turkey is a leaner option.
  • 1 packet Taco Seasoning Try homemade to lower sodium content.
For the Toppings
  • 1 cup Shredded Cheddar and Mozzarella Cheese Mix and match your favorite melty cheeses.
  • 1 cup Diced Tomatoes Fresh salsa can substitute if desired.
  • 1 cup Shredded Lettuce Spinach can be an excellent alternative.
  • Optional Toppings Customize with jalapeños, olives, or other veggies.

Equipment

  • Oven
  • Skillet
  • Mixing Bowl
  • Cookie Sheet
  • Parchment Paper
  • Knife

Method
 

Step-by-Step Instructions for Taco Pizza
  1. Preheat your oven to 375°F (190°C) and line a cookie sheet with parchment paper. Unroll the crescent roll dough and press it into a continuous sheet to form a crispy crust. Bake in the preheated oven for about 10 minutes until golden brown, then remove and allow it to cool completely before adding the creamy base.
  2. In a mixing bowl, combine softened cream cheese and sour cream, blending until smooth and creamy. Once thoroughly mixed, spread the creamy base evenly over the cooled crescent crust, ensuring a generous layer. Refrigerate for at least 15 minutes to allow the flavors to meld and the base to firm up nicely.
  3. In a skillet over medium heat, add your ground beef (or ground turkey), cooking it for about 5-7 minutes while breaking it apart as it browns. Stir occasionally, ensuring all sides cook evenly. Once browned, drain any excess fat, then add taco seasoning to the meat, mixing well until all pieces are coated in that delicious flavor. Remove from heat and let the mixture cool.
  4. After your taco meat has cooled, spread it evenly over the creamy base, making certain to cover it completely. Next, sprinkle a generous amount of shredded cheddar and mozzarella cheese on top, allowing the cheeses to melt beautifully. Finally, add diced tomatoes and shredded lettuce, layering on colorful toppings that will enhance both the visual appeal and flavor of your Taco Pizza.
  5. Once everything is assembled, use a sharp knife to cut your Taco Pizza into eight tantalizing slices. Serve it fresh, and revel in the delightful contrast of gooey cheese and crispy crust. Enjoy warm with family and friends!

Nutrition

Serving: 1sliceCalories: 300kcalCarbohydrates: 20gProtein: 15gFat: 18gSaturated Fat: 9gPolyunsaturated Fat: 0.5gMonounsaturated Fat: 2gCholesterol: 50mgSodium: 600mgPotassium: 350mgFiber: 2gSugar: 3gVitamin A: 600IUVitamin C: 3mgCalcium: 200mgIron: 2mg

Notes

Store leftovers in an airtight container for up to 3 days. Reheat in the oven to maintain the crispy crust. For longer storage, freeze for up to 2 months.

Tried this recipe?

Let us know how it was!

Taco Pizza: Your New Favorite Easy Appetizer Delight

October 27, 2025 by Grace Snow Leave a Comment

Crisp air, laughter echoing around the kitchen, and the scent of spices filling the room—it’s a moment many of us cherish. My Taco Pizza Appetizer effortlessly brings that festive vibe home, combining the beloved flavors of a taco with the comforts of pizza. This dish features a flaky crescent roll crust and a creamy base, making it an easy appetizer that is destined to impress any crowd. You’ll love how quickly it comes together, allowing you to spend less time cooking and more time enjoying your company. Plus, it’s entirely customizable—mix and match your favorite toppings to reflect your mood or satisfy your guests’ preferences. Are you ready to elevate your appetizer game? Let’s dive into this delicious fusion!

Why Is Taco Pizza So Appealing?

Easy and Quick: This recipe comes together in no time, making it a perfect choice for last-minute gatherings or busy weeknights.

Flavor Explosion: The combination of creamy cheeses, seasoned meat, and fresh toppings creates a taste experience that will keep everyone coming back for more.

Endless Customization: Tailor it to your taste! Swap out toppings, experiment with different proteins, or adjust spice levels—make it your own!

Crowd-Pleaser: Whether it's a family dinner or a party, this Taco Pizza is guaranteed to impress and satisfy all your guests. Serve it with some guacamole or salsa for an ultimate taco lover's experience! For more inspiration, check out my delicious Shrimp Tacos Zesty or Crispy Fish Taco Bowls catalog!

Taco Pizza Ingredients

• Get ready for a flavorful adventure!

For the Crust

  • Crescent Roll Dough – This forms the perfect crispy base; you can also use pizza dough or gluten-free dough for a different twist.

For the Creamy Base

  • Cream Cheese – Adds a rich, creamy texture; Greek yogurt can be a lighter alternative.
  • Sour Cream – Provides moisture and tanginess; substitute with dairy-free options if needed.

For the Filling

  • Ground Beef – Offers hearty flavor; ground turkey works well for a leaner option, or textured vegetable protein for a vegan substitute.
  • Taco Seasoning – Infuses that signature taco taste; homemade spice mix can substitute store-bought seasoning.

For the Toppings

  • Shredded Cheddar Cheese – Melts beautifully for a gooey topping; try Monterey Jack or dairy-free cheese if you prefer.
  • Shredded Mozzarella Cheese – Adds stretchy creaminess; any melty cheese will do!
  • Diced Tomatoes – Bring freshness and juiciness; use canned or fresh depending on what you have.
  • Shredded Lettuce – Adds a crunchy finish; arugula or spinach can elevate the flavor profile.
  • Optional toppings (e.g., jalapeños, sliced olives) – Personalize your pizza's heat and flavor—add according to preference!

Crafting your taco pizza with these ingredients will not just be a meal but an exhilarating culinary experience for everyone enjoying it!

Step‑by‑Step Instructions for Taco Pizza

Step 1: Prepare the Crust
Preheat your oven to 375°F (190°C) and line a cookie sheet with parchment paper. Unroll the crescent roll dough onto the sheet, ensuring to press the seams together firmly to create a seamless crust. Bake for 10 minutes until the dough is golden brown and fragrant, then remove from the oven and let it cool completely.

Step 2: Make the Base
While the crust cools, prepare the creamy base for your Taco Pizza. In a mixing bowl, blend the softened cream cheese and sour cream together using a hand mixer or a whisk until the mixture is smooth and creamy. Once combined, spread this delightful mixture evenly over the cooled crust, and place it in the refrigerator to chill and firm up for about 15 minutes.

Step 3: Cook the Meat
Next, heat a skillet over medium heat, and add the ground beef. Cook for 5-7 minutes, breaking it apart with a spatula until it's browned and no longer pink. Once cooked, drain any excess fat, then sprinkle the taco seasoning over the meat. Stir well and cook for an additional 2-3 minutes, allowing the flavors to meld beautifully, while the savory aroma fills your kitchen.

Step 4: Assemble the Pizza
Now it’s time to put your Taco Pizza together. Take the creamy base out of the fridge and spread the seasoned ground beef evenly over it. Sprinkle a generous layer of shredded cheddar and mozzarella cheese on top, followed by diced tomatoes and shredded lettuce. Feel free to get creative and add any optional toppings like jalapeños or olives for extra flair.

Step 5: Slice and Serve
Once you’ve beautifully assembled your Taco Pizza, use a sharp knife or pizza cutter to slice it into 8 equal pieces. Serve immediately to your eager guests, so they can experience the delightful combination of crunchy, creamy, and savory flavors while everything is still fresh and warm.

Make Ahead Options

These Taco Pizza Appetizers are perfect for busy home cooks looking to save time without compromising taste! You can prepare the crescent roll crust and the creamy base up to 24 hours in advance. Simply bake the crust, let it cool, and then spread the cream cheese and sour cream mixture over it. Cover and refrigerate until you’re ready to assemble. When it’s time to serve, warm the crust slightly in the oven if needed, then add the cooked meat and toppings before slicing. This way, you'll enjoy all the fresh flavors of Taco Pizza while reducing your prep time significantly!

How to Store and Freeze Taco Pizza

Fridge: Keep any leftovers in an airtight container in the fridge for up to 3 days. Reheat slices in the microwave or oven until warmed through.

Freezer: For longer storage, wrap individual pieces tightly in plastic wrap and then in aluminum foil. Freeze for up to 2 months.

Reheating: Thaw in the fridge overnight before reheating in the oven at 350°F (175°C) for about 10-15 minutes until warmed and crispy again.

Assembling Ahead: You can prepare the crust and creamy base a day in advance. Just assemble the toppings right before serving to keep the freshness and texture intact.

Tips for the Best Taco Pizza

  • Crispy Crust: Ensure the crescent roll dough is pressed tightly to form a uniform base; uneven seams can lead to a soggy pizza.

  • Chill the Base: Allow the cream cheese and sour cream mixture to chill for at least 15 minutes to achieve a firmer texture, making it easier to slice.

  • Season the Meat: Don’t skip draining the ground beef; excess grease can make your taco pizza heavy and less enjoyable.

  • Layer Wisely: Start with the creamy base followed by meat, then cheese, and lastly toppings. This layering helps everything stay in place without sliding off when served.

  • Customize It: Experiment with toppings based on your favorites or what you have on hand—think avocado, corn, or even hot sauce to elevate your taco pizza experience!

What to Serve with Taco Pizza Appetizer

Elevate your next gathering with a delightful spread that complements the vibrant flavors of your Taco Pizza.

  • Guacamole: The creamy, buttery texture of guacamole adds a rich contrast that enhances the taco flavor profile beautifully.

  • Fresh Salsa: A zesty, homemade salsa bursts with freshness and bright flavors, perfect for dipping and balancing the gooey cheese.

  • Tortilla Chips: Serve crunchy tortilla chips alongside for that satisfying texture contrast—great for scooping up every last bite.

  • Mexican Street Corn Salad: This sweet and savory corn salad brings a burst of flavor and a hint of sweetness to round out the meal.

  • Refried Beans: Velvety refried beans add a creaminess that pairs wonderfully with the crispy pizza, enhancing the overall experience.

  • Crispy Jalapeño Poppers: For those who love a little heat, these crunchy bites offer a fiery kick that complements the mildness of the pizza.

  • Cucumber Lime Water: Refreshing and light, this drink cleanses the palate and adds a bright, citrusy flair to the savory meal.

  • Flan or Churros: End your meal with a sweet touch—celebrate the flavors of Mexico with a traditional dessert that balances the savory delights of your meal.

Variations & Substitutions for Taco Pizza

Feel free to get creative with your Taco Pizza and explore these delicious variations that will tantalize your taste buds!

  • Vegetarian: Substitute ground beef with black beans or grilled veggies for a colorful, plant-based delight.

  • Gluten-Free: Use a gluten-free pizza dough or make a cauliflower crust for a lighter, gluten-free option. This way, everyone can enjoy the taco pizza fun!

  • Spicy Twist: Mix diced jalapeños into the meat or use pepper jack cheese for an extra kick. If you're feeling adventurous, try drizzling some hot sauce over the final result.

  • Herbed Cream Cheese: Blend in fresh herbs like chives or cilantro into the cream cheese for an aromatic infusion. This adds a fresh depth to the creamy layer that complements the taco flavors beautifully.

  • Savory Seafood: For a seafood twist, replace the beef with shrimp or crab meat, and enjoy a beachy vibe with every bite. Your guests will be blown away by this unique take!

  • Cheese Lovers: Use a combination of cheeses like feta or gouda to elevate the flavor profile. Experimenting with different cheese can really create a mouthwatering experience that keeps you guessing.

  • Flatbread Base: Swap crescent dough for a thin naan or lavash for a lovely, extra-crispy base—perfect for those who enjoy a crunchier bite!

  • Taco Sauce Drizzle: Drizzle taco sauce over the top before serving for an extra layer of flavor. This melds the taco essence into every slice even further.

With these variations, your Taco Pizza can become an exciting dish suitable for any palate. Serve it alongside some delicious Taco Bell Crunchwrap or refreshing Roasted Corn Tacos to create an unforgettable fiesta!

Taco Pizza Appetizer Recipe FAQs

How do I select ripe tomatoes for my Taco Pizza?
Absolutely! When choosing tomatoes, look for ones that are firm but slightly yielding to the touch. The skin should be smooth, and the color should be vibrant. Avoid tomatoes with dark spots or wrinkles, as they’re past their prime. Vine-ripened tomatoes are often the most flavorful option!

What’s the best way to store leftover Taco Pizza?
Very! To store, place any leftovers in an airtight container in the fridge, and they’ll stay fresh for up to 3 days. When you’re ready to enjoy it again, reheat slices in the microwave or oven at 350°F (175°C) until warmed through!

Can I freeze Taco Pizza for later?
Absolutely! To freeze, wrap individual slices tightly in plastic wrap and then in aluminum foil. This method prevents freezer burn. You can enjoy your Taco Pizza for up to 2 months. When ready to eat, thaw in the fridge overnight and reheat in the oven at 350°F (175°C) for about 10-15 minutes.

What should I do if my crust is soggy?
Oh no! If your crust turns out soggy, there are a few tricks! First, ensure the crescent roll dough is pressed tightly to prevent moisture from seeping in. Bake the crust longer than recommended if necessary, checking for a nice golden-brown color. If it’s already assembled, try reheating it briefly in the oven to crisp it up again.

Can I make this Taco Pizza vegetarian or vegan?
Very! To create a vegetarian Taco Pizza, simply substitute ground beef with textured vegetable protein or mushrooms. For a vegan version, swap the cream cheese and sour cream with vegan alternatives and use a plant-based cheese. Customize to your taste while enjoying that delicious fusion!

What are some allergy considerations for this recipe?
Absolutely! Always check with your guests regarding allergies. If dairy is a concern, using vegan cheese and yogurt can easily accommodate such needs. For gluten-free guests, a gluten-free dough option is a great alternative. Be sure to select taco seasonings and toppings that are free of potential allergens.

Taco Pizza

Taco Pizza: Your New Favorite Easy Appetizer Delight

Taco Pizza combines the flavors of a taco with pizza for a quick and customizable appetizer, perfect for any gathering.
Print Recipe Pin Recipe
Prep Time 15 minutes mins
Cook Time 10 minutes mins
Chilling Time 15 minutes mins
Total Time 40 minutes mins
Servings: 8 slices
Course: Appetizers
Cuisine: Mexican
Calories: 280
Ingredients Equipment Method Nutrition Notes

Ingredients
  

For the Crust
  • 1 package Crescent Roll Dough Can substitute with pizza dough or gluten-free dough.
For the Creamy Base
  • 8 oz Cream Cheese Can substitute with Greek yogurt for a lighter option.
  • 1 cup Sour Cream Dairy-free options can be used.
For the Filling
  • 1 lb Ground Beef Can substitute with ground turkey or textured vegetable protein.
  • 1 packet Taco Seasoning Homemade spice mix can substitute store-bought seasoning.
For the Toppings
  • 1 cup Shredded Cheddar Cheese Monterey Jack or dairy-free cheese can be used.
  • 1 cup Shredded Mozzarella Cheese Any melty cheese will work.
  • 1 cup Diced Tomatoes Use canned or fresh depending on availability.
  • 1 cup Shredded Lettuce Arugula or spinach can be used for additional flavor.
  • Optional toppings (e.g., jalapeños, sliced olives) Customize according to preference.

Equipment

  • Oven
  • Mixing Bowl
  • Skillet
  • Parchment Paper
  • Knife or pizza cutter

Method
 

Preparation Steps
  1. Preheat your oven to 375°F (190°C) and line a cookie sheet with parchment paper. Unroll the crescent roll dough onto the sheet, pressing the seams together to create a seamless crust. Bake for 10 minutes until golden brown, then let cool completely.
  2. In a mixing bowl, blend softened cream cheese and sour cream until smooth. Spread evenly over the cooled crust and refrigerate for about 15 minutes.
  3. In a skillet over medium heat, cook ground beef for 5-7 minutes until browned. Drain excess fat and mix in taco seasoning, cooking for an additional 2-3 minutes.
  4. Spread the seasoned ground beef over the creamy base, and top with shredded cheddar and mozzarella cheese, diced tomatoes, and shredded lettuce.
  5. Slice the Taco Pizza into 8 pieces and serve immediately.

Nutrition

Serving: 1sliceCalories: 280kcalCarbohydrates: 22gProtein: 12gFat: 18gSaturated Fat: 9gPolyunsaturated Fat: 1gMonounsaturated Fat: 5gCholesterol: 45mgSodium: 610mgPotassium: 200mgFiber: 2gSugar: 2gVitamin A: 10IUVitamin C: 4mgCalcium: 15mgIron: 6mg

Notes

Customize toppings based on your favorites or available ingredients. Serve with guacamole or salsa for extra flavor.

Tried this recipe?

Let us know how it was!
  • « Previous Page
  • 1
  • …
  • 4
  • 5
  • 6
  • 7
  • 8
  • …
  • 11
  • Next Page »

Welcome!

Hi, I’m Grace, a Sydney-based home cook with a passion for bold flavors and trending ingredients. Whether you’re a busy beginner or a seasoned foodie, you’ll find dishes here that are fresh, fun, and full of flavor.

More about me

Popular Recipes

  • Mushroom Crostini
    Deliciously Easy Mushroom Crostini for Your Next Gathering
  • Mini Phyllo Feta Bites
    Mini Phyllo Feta Bites for Effortless Entertaining
  • Onion Boil
    Savory Onion Boil Recipe: A Flavorful Vegan Delight
  • Sweet Potato Fondant with Smoked Almond Cream & Rosemary Oil
    Savory Sweet Potato Fondant with Smoked Almond Cream Delight

Footer

↑ back to top

About

  • Privacy Policy
  • Disclaimer
  • Terms & Conditions

Newsletter

  • Sign Up! for emails and updates

Contact

  • About me
  • Contact me

Copyright © 2025 TastyTrendIngredients