tastytrendingredients

  • Home
  • Recipes
    • Appetizers
    • Breakfast
    • Dessert
    • Dinner
    • Drinks
    • Salads
    • Snacks
    • Soups
  • About me
  • Contact me
menu icon
go to homepage
  • Home
  • Recipes
    • Appetizers
    • Breakfast
    • Dessert
    • Dinner
    • Drinks
    • Salads
    • Snacks
    • Soups
  • About me
  • Contact me
search icon
Homepage link
  • Home
  • Recipes
    • Appetizers
    • Breakfast
    • Dessert
    • Dinner
    • Drinks
    • Salads
    • Snacks
    • Soups
  • About me
  • Contact me
×

Zesty Jalapeno Popper Cheese Ball Recipe for Low Carb Fun

March 11, 2026 by Grace Snow Leave a Comment

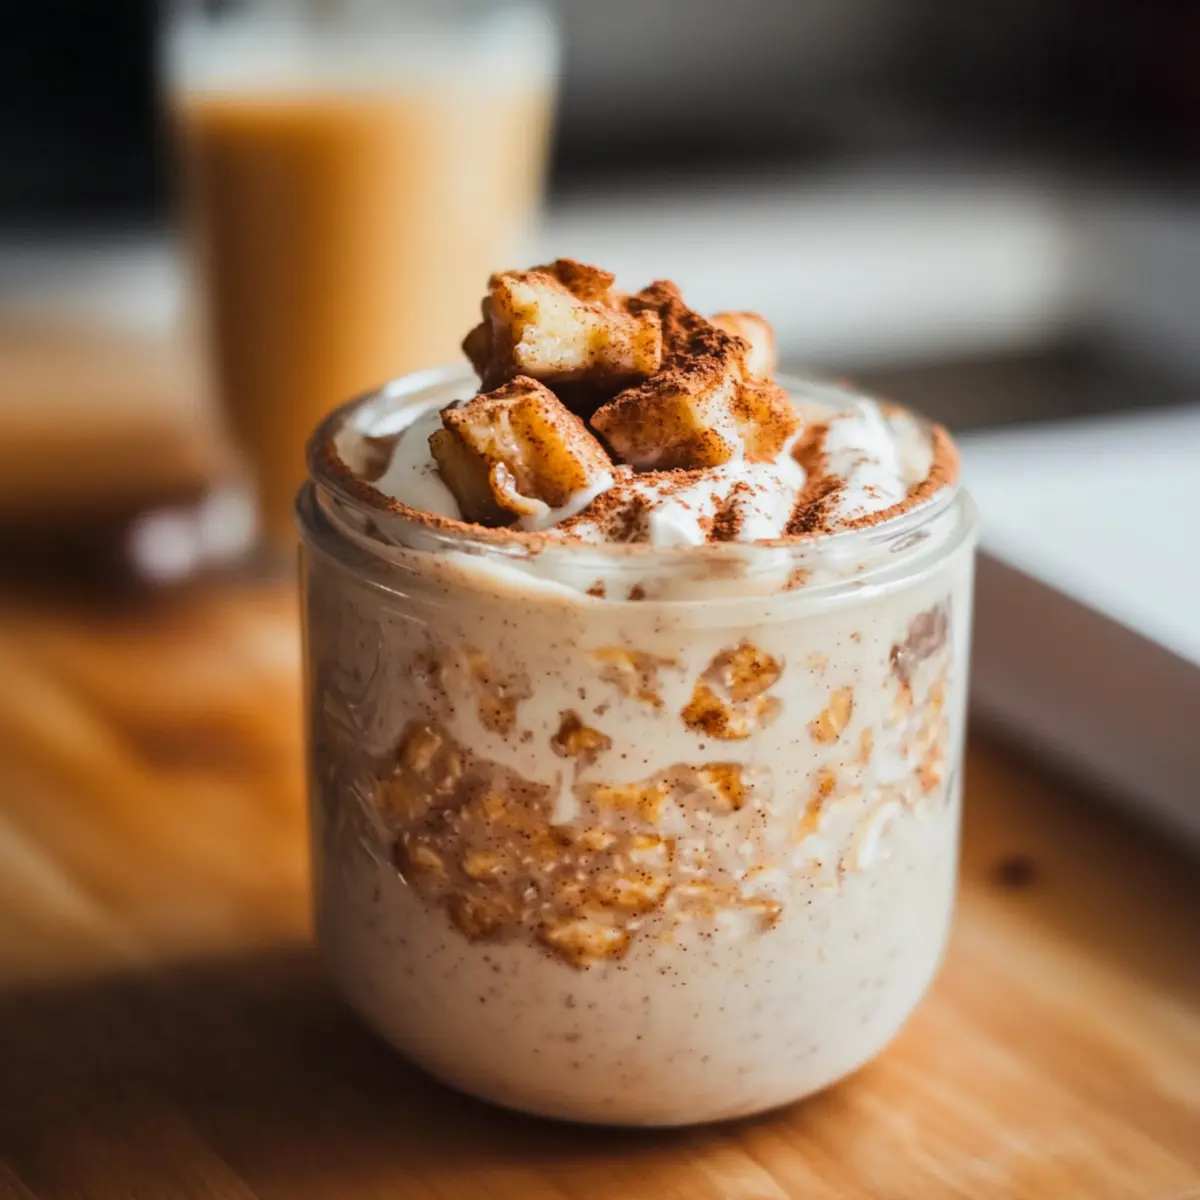
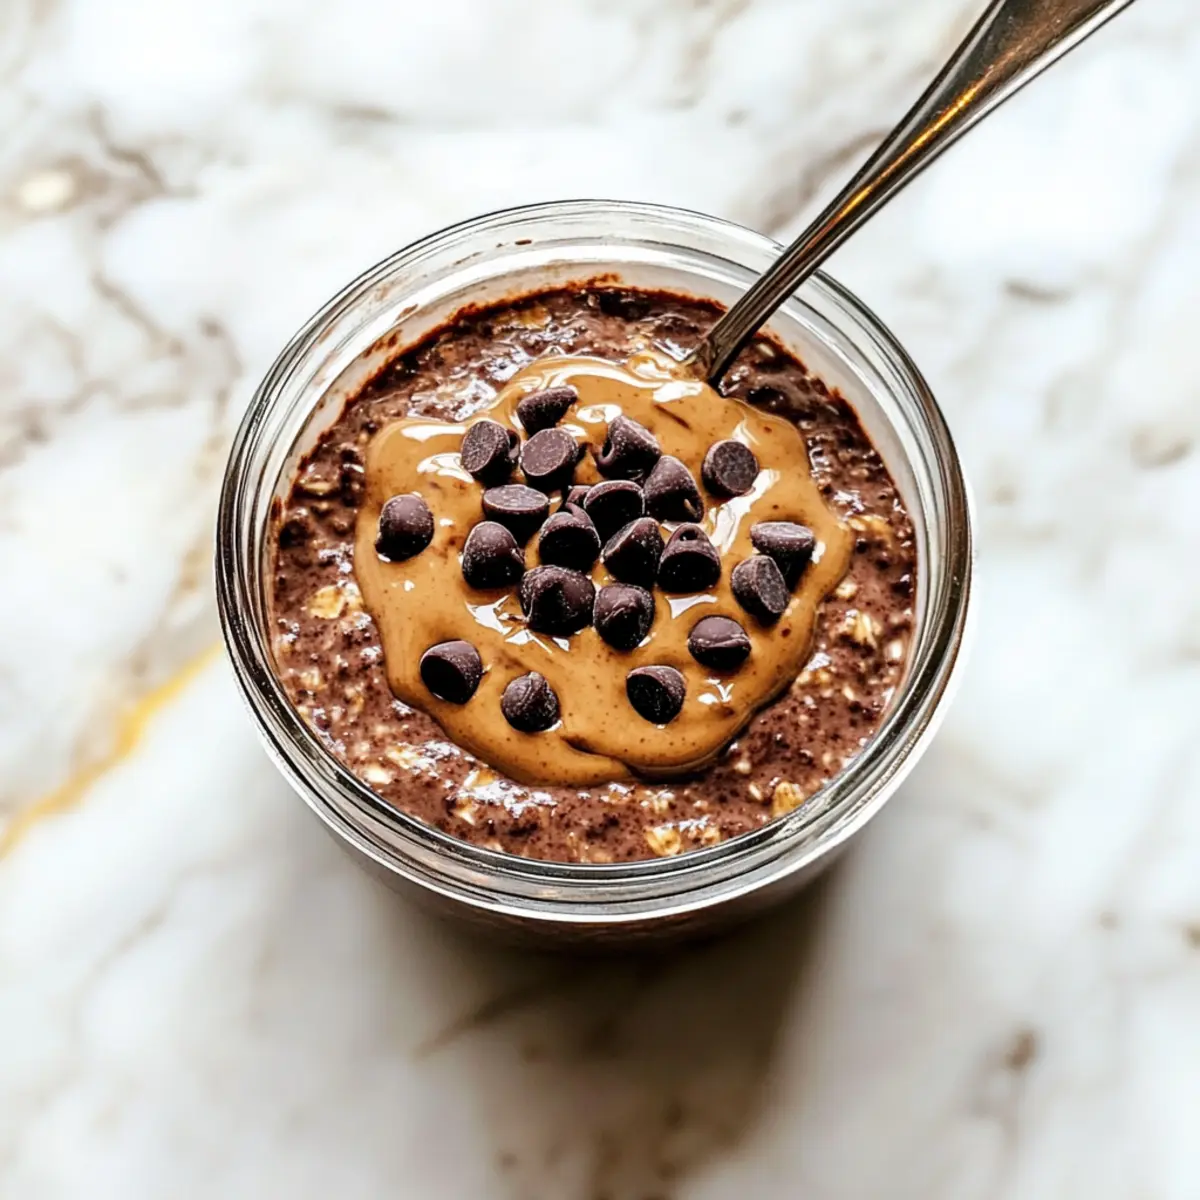
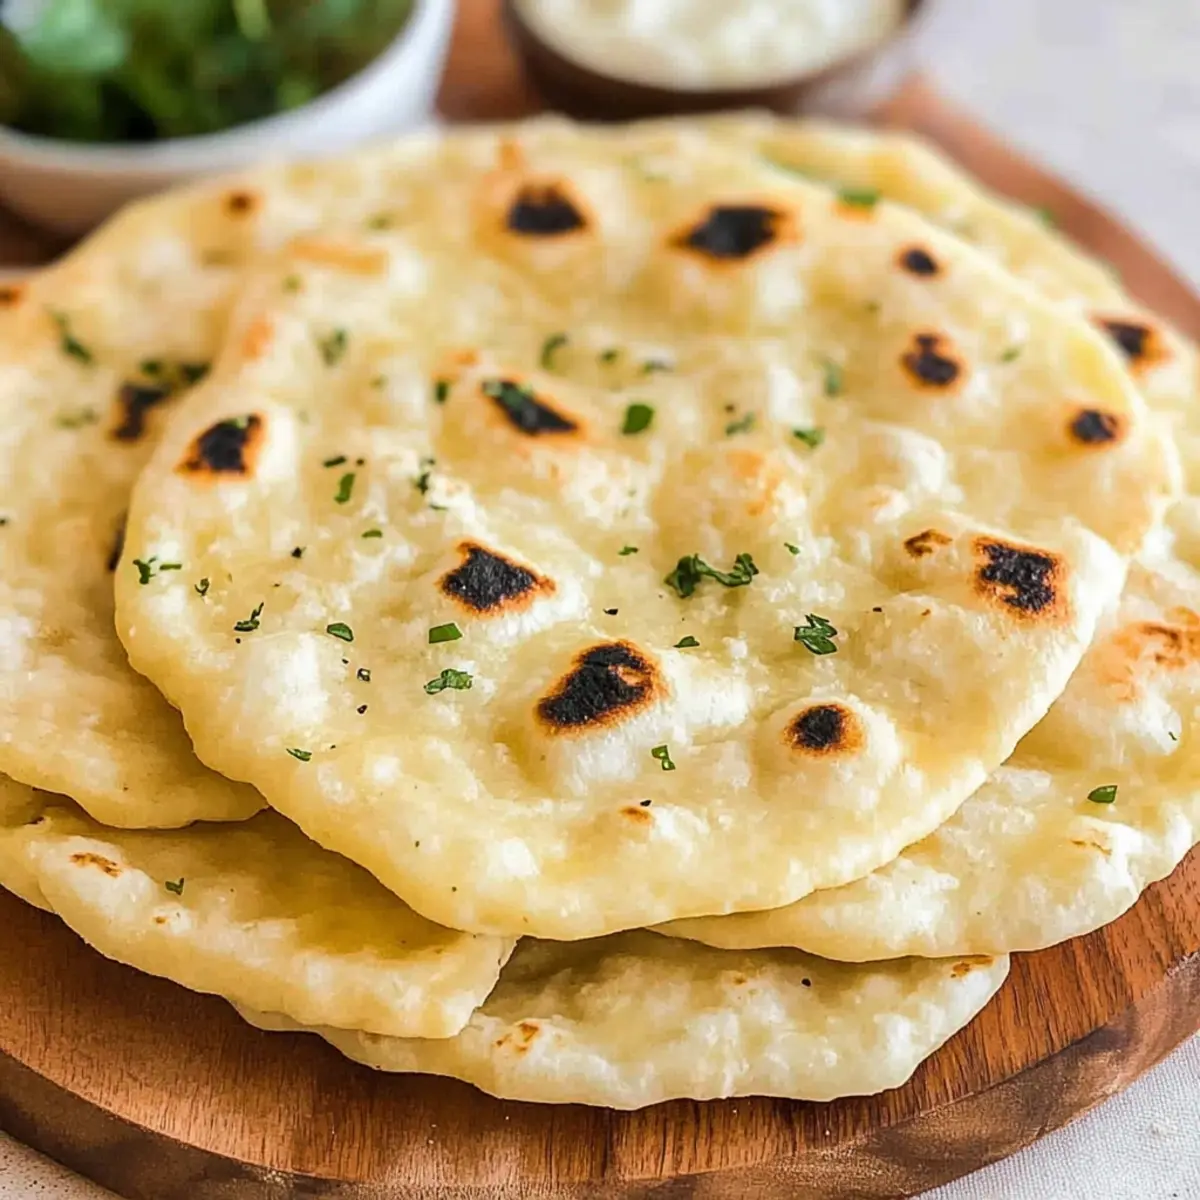
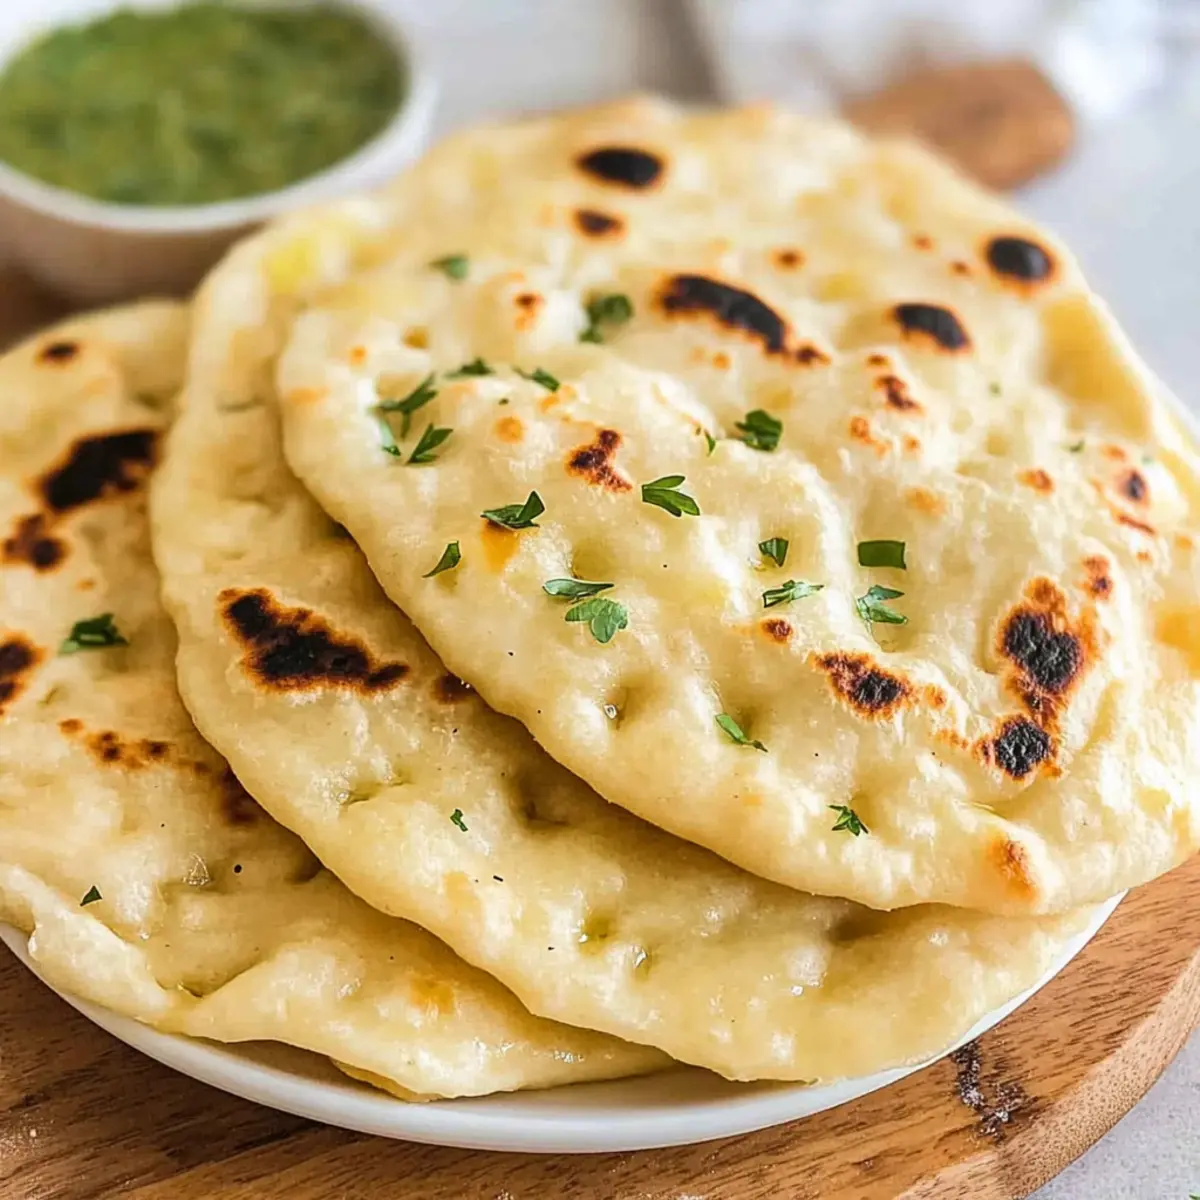
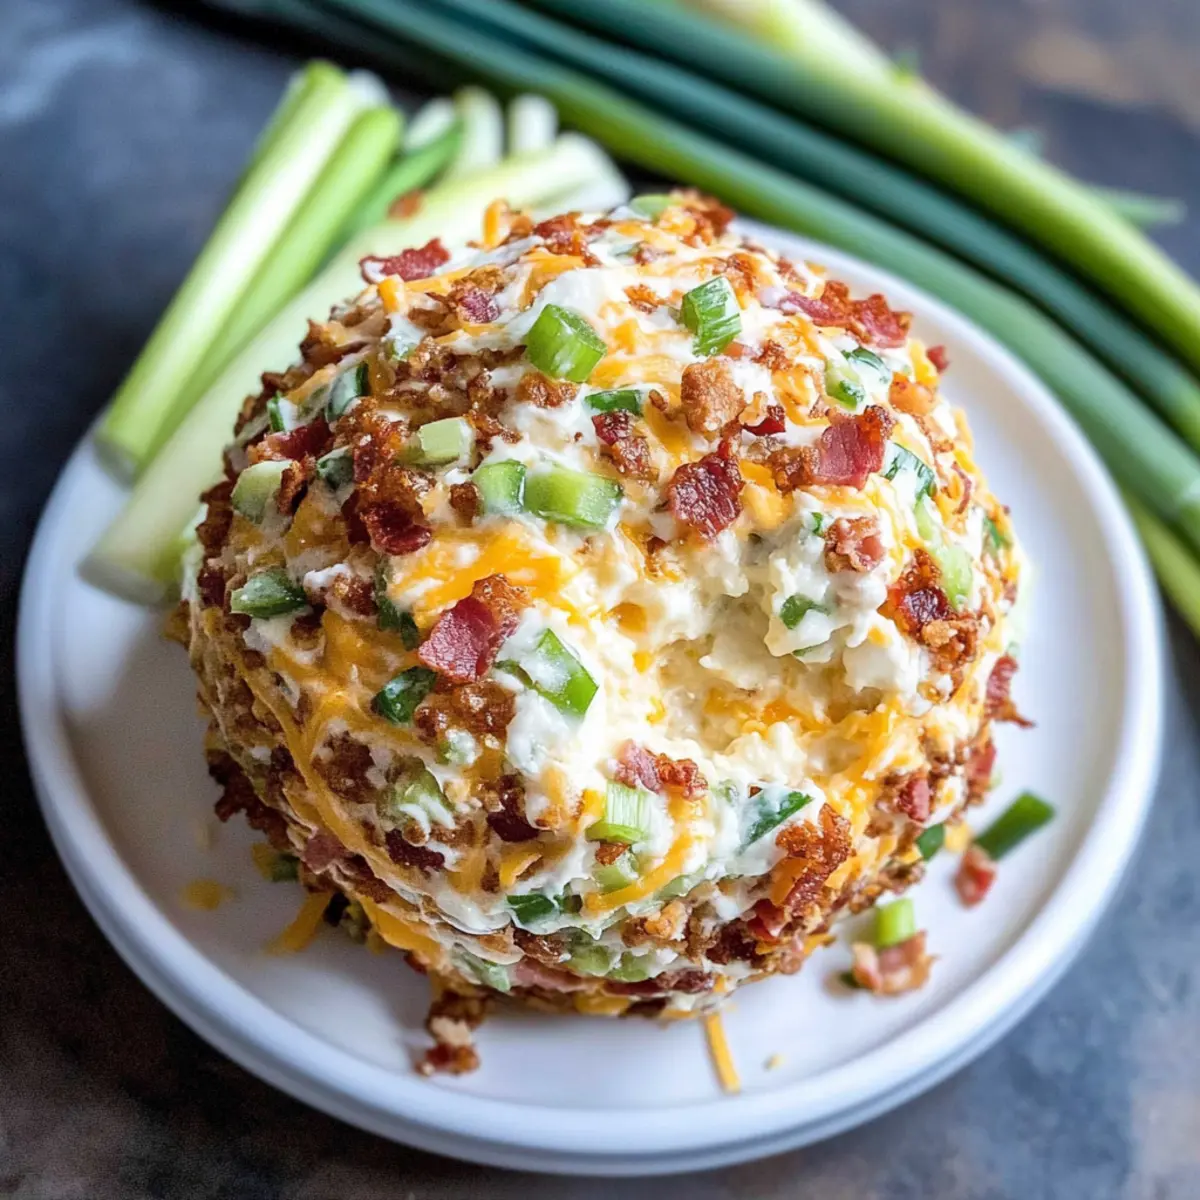
The spicy aroma of jalapeños always brings a certain excitement to any gathering. When it comes to appetizers, this Low Carb Jalapeño Popper Cheese Ball truly steals the spotlight—trust me, your friends and family will be asking for seconds! With a creamy texture that beautifully melds rich cream cheese, zesty jalapeños, and crispy bacon, this easy-to-make treat is the ultimate way to indulge without straying from your keto goals. Perfect for holiday feasts or casual get-togethers, it’s not only a low-carb delight but also an effortless showstopper that pairs wonderfully with fresh veggie dippers. Ready to elevate your next appetizer spread? Let's dive into the delicious details of this Jalapeño Popper Cheese Ball Recipe!

Why is this Jalapeño Popper Cheese Ball a Must-Try?

Creamy Bliss: This cheese ball is packed with velvety cream cheese and tangy sour cream, ensuring a smooth, delectable texture that makes each bite unforgettable.

Spicy Kick: Infused with fresh jalapeños, it offers just the right amount of heat to awaken your taste buds without overwhelming them.

Crowd-Pleaser: Perfect for parties, this appetizer will have everyone talking and coming back for more—trust me, a cheese ball like this is hard to resist!

Low-Carb Indulgence: Adhering to your keto routine? No problem! This recipe keeps the carb count low while delivering maximum flavor, making it a fitting addition to your low-carb lifestyle.

Versatile Pairings: Serve it alongside crunchy fresh veggies or with some low-carb crackers to create the ultimate grazing experience. For more creative dips, check out our Potato Blue Cheese for a change of pace!

Jalapeño Popper Cheese Ball Ingredients

For the Cheese Ball

  • Cream Cheese – the base for creaminess; swap with Neufchatel for a lighter option.
  • Sour Cream – introduces tanginess and lightens the mix; plain Greek yogurt works as a substitute.
  • Garlic Powder – enhances the cheese ball's flavor; using fresh minced garlic adds an extra punch.
  • Jalapeños – provides that signature heat; use just one for a milder kick.
  • Shredded Sharp Cheddar – adds depth to the flavor; medium cheddar can tone it down for a gentler taste.
  • Cooked Bacon – imparts a delicious smoky element; turkey bacon or omitting it altogether fits a vegetarian diet.
  • Salt/Pepper – essential to elevate flavor; adjust cautiously due to the saltiness from cheese and bacon.

For the Coating

  • Cooked Bacon – finely chopped for a crispy exterior that complements the creamy center.
  • Jalapeño – finely chopped to amp up the heat in the coating.
  • Shredded Cheddar Cheese – for an added layer of flavor on the outside.
  • Green Onions – brings a fresh crunch; feel free to use scallions for a milder taste.
  • Pecans – adds a nutty crunch; you can swap these for walnuts or leave them out entirely.

This Jalapeño Popper Cheese Ball Recipe is bound to become a hit at your next gathering!

Step‑by‑Step Instructions for Jalapeno Popper Cheese Ball Recipe

Step 1: Combine the Base
In a mixing bowl, blend 8 ounces of softened cream cheese and 1/2 cup of sour cream using a hand mixer. Beat on medium speed for about 2-3 minutes until the mixture is smooth and fluffy, signaling it's ready when the texture is creamy without lumps. This forms the delicious base of your Jalapeno Popper Cheese Ball.

Step 2: Mix the Flavors
Next, add 1 teaspoon of garlic powder, 2 finely chopped jalapeños (seeds removed for less heat if desired), 1 cup of shredded sharp cheddar, 1/2 cup of cooked bacon bits, and salt and pepper to taste. Stir gently with a spatula until all the ingredients are evenly incorporated, aiming for a consistent mixture filled with creamy goodness and vibrant colors.

Step 3: Form the Cheese Ball
Lay out a large piece of plastic wrap and scoop the cheese mixture onto it. Use the wrap to shape the cheese into a ball, smoothing the outside as you go for an even appearance. Tightly wrap the cheese ball in the plastic wrap and refrigerate it for at least 1 hour, allowing it to firm up and meld the flavors together beautifully.

Step 4: Prepare Coating Ingredients
While the cheese ball is chilling, prepare your coating by mixing 1/2 cup of finely chopped cooked bacon, 1 jalapeño (finely chopped), 1/2 cup of shredded cheddar cheese, 1/4 cup of chopped green onions, and 1/4 cup of chopped pecans. Spread these ingredients evenly on a flat surface, ensuring a colorful and flavorful coating ready to add texture to your Jalapeno Popper Cheese Ball.

Step 5: Coat the Cheese Ball
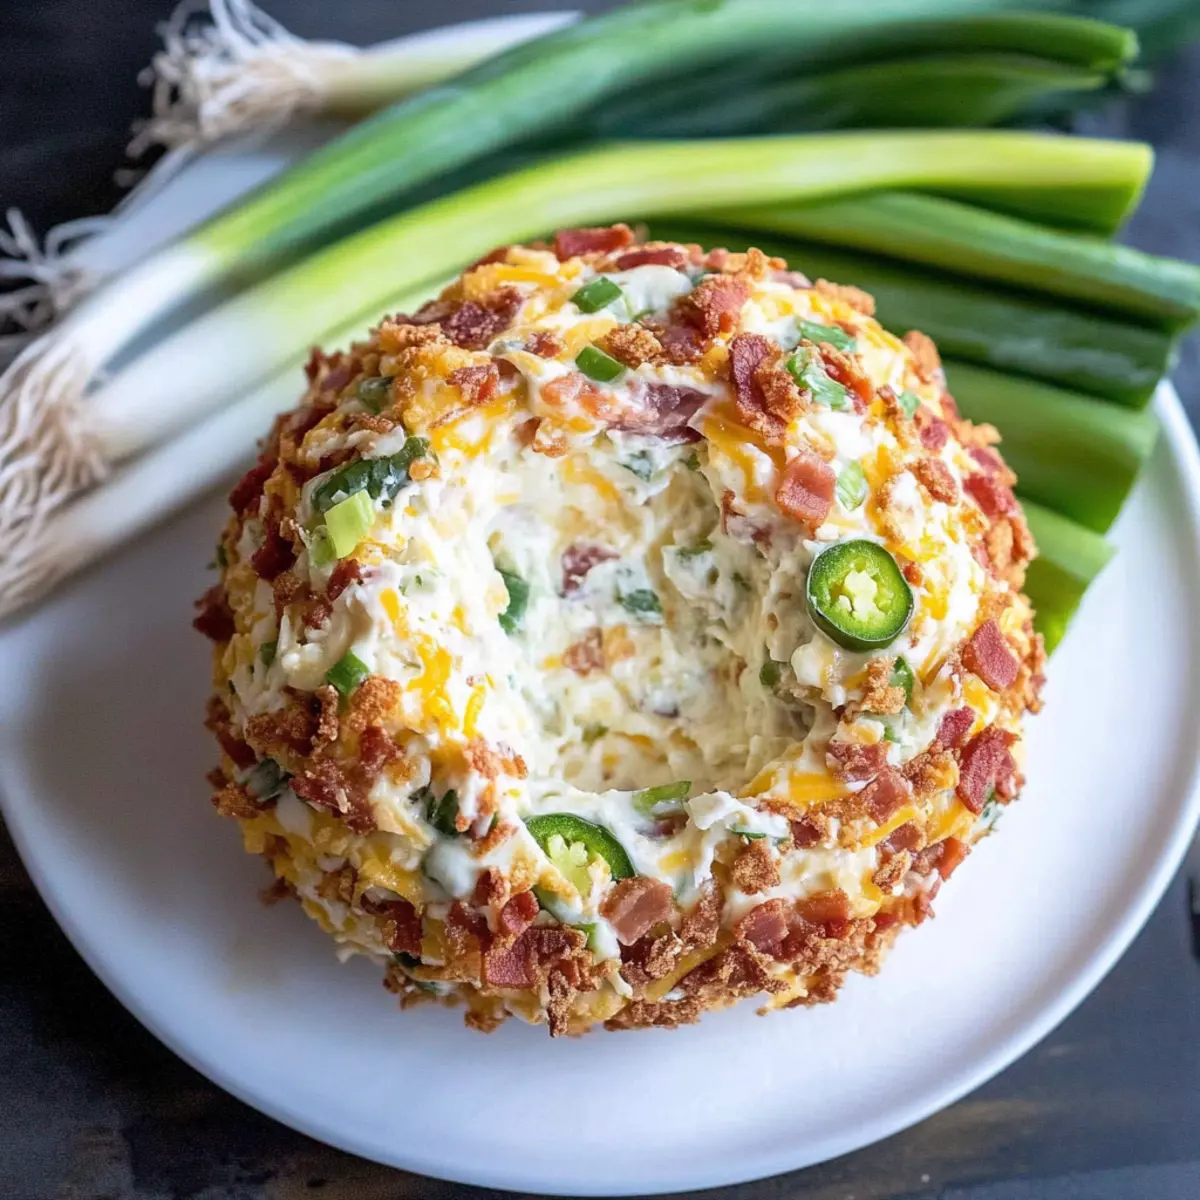
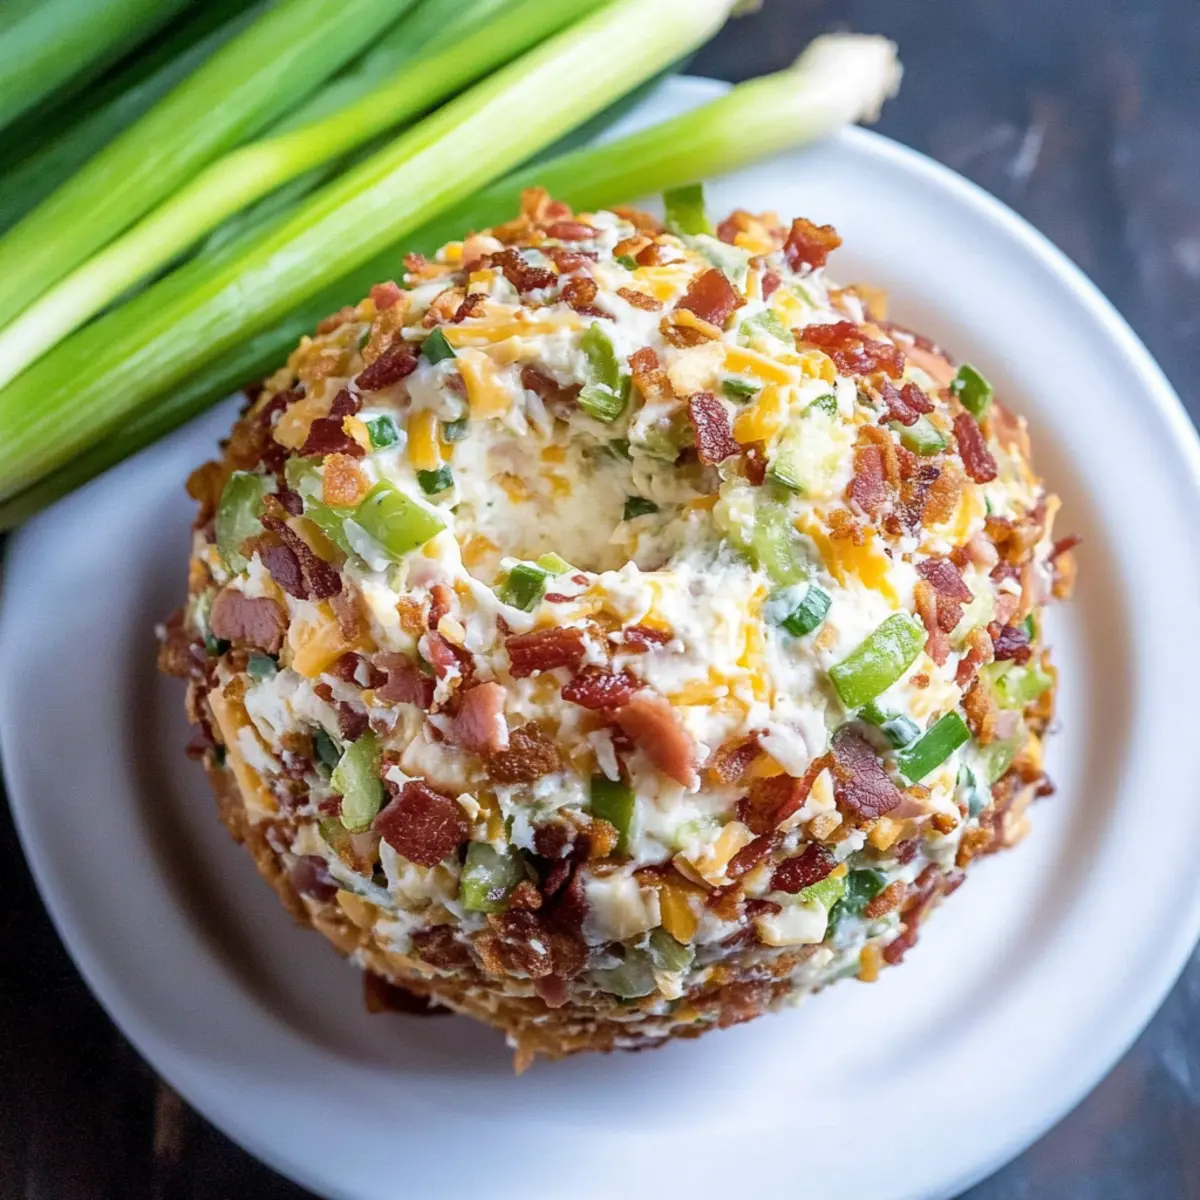
Once the cheese ball has set, unwrap it from the plastic wrap carefully. Roll the cheese ball in the coating mixture, pressing gently to ensure that it sticks well to the surface. Pay special attention to cover all sides, creating a mouthwatering, textured exterior that enhances the flavors of your decadent Jalapeno Popper Cheese Ball.

Step 6: Serve and Enjoy
Transfer the coated cheese ball to a serving platter and allow it to sit at room temperature for about 10 minutes before serving. This step enhances its creaminess for delicious dipping. Pair your Jalapeno Popper Cheese Ball with low-carb dippers like celery sticks or pork rinds for a delightful appetizer that guests will love!

Storage Tips for Jalapeno Popper Cheese Ball Recipe

Refrigerator: Keep your Jalapeno Popper Cheese Ball wrapped tightly in plastic wrap or an airtight container for up to 5 days. This helps preserve its creamy texture and flavor.

Freezer: You can also freeze the cheese ball for up to 2 months. Wrap it well in plastic wrap, followed by aluminum foil. Thaw it in the fridge overnight before serving.

Serving Temperature: Allow the cheese ball to sit at room temperature for about 10 minutes before serving. This enhances its creaminess and makes for easier dipping.

Reheating: For best results, avoid reheating. This recipe is best served cold or at room temperature to enjoy the vibrant flavors of the jalapeños and cheese!

Make Ahead Options

These Jalapeño Popper Cheese Balls are perfect for make ahead meal prep! You can prepare the cheese ball mixture up to 24 hours in advance. Simply complete steps 1 through 3, then wrap it tightly in plastic wrap and store it in the refrigerator to maintain its freshness and flavor. For the coating, you can also chop the bacon and other ingredients up to 3 days ahead; just keep them in an airtight container to preserve their crunch. When you're ready to serve, simply roll the chilled cheese ball in the coating mixture, let it sit at room temperature for 10 minutes, and you'll have a delicious appetizer that’s just as flavorful as if it were made fresh!

What to Serve with Jalapeño Popper Cheese Ball Recipe

Elevate your appetizer game with delightful pairings that complement the creamy, spicy goodness of this cheese ball.

  • Crunchy Veggie Sticks: Fresh celery, carrots, or bell peppers provide a crisp contrast, enhancing the savory flavors with a refreshing bite.

  • Low-Carb Crackers: Serve with your favorite low-carb crackers for the perfect dippable experience. Their crunch pairs beautifully with the creamy cheese ball.

  • Savory Bacon-Wrapped Jalapeños: Amplify the flavor fiesta by adding these spicy bites! They add another layer of smokiness and a delightful crunch.

  • Creamy Guacamole: The fresh creaminess of guacamole balances the heat of the cheese ball beautifully. A luscious addition to every dip!

  • Zesty Salsa: Brighten up your spread with a tangy salsa! It brings a fresh burst that complements the cheesiness perfectly.

  • Sparkling Water with Lime: Refresh your palate with a bubbly drink. The zesty lime ties together the savory elements while keeping it light.

  • Chilled White Wine: A crisp Sauvignon Blanc would pair nicely, accentuating the cheese ball’s flavors and adding a touch of elegance.

  • Decadent Dark Chocolate: For dessert, switch things up with a small piece of dark chocolate. The richness adds a surprising finish to the meal.

These pairings provide a delightful balance of flavors and textures, making your Jalapeño Popper Cheese Ball the star of the show!

Expert Tips for Jalapeno Popper Cheese Ball

  • Soften Cream Cheese: Ensure your cream cheese is at room temperature; this guarantees a smooth and cohesive mixture for your Jalapeño Popper Cheese Ball.
  • Adjust the Heat: Start with fewer jalapeños—taste as you go! It's easy to add more, but hard to take the spice away.
  • Use Fresh Ingredients: Opt for fresh garlic over garlic powder for a more vibrant flavor in your cheese ball.
  • Tight Wrap for Shape: When forming the ball, use plastic wrap to shape tightly; this helps maintain its beautiful form while chilling.
  • Watch the Salt: Given the saltiness of bacon and cheese, add salt gradually to avoid over-seasoning; taste as you go!
  • Chill for Flavor: Refrigerate the cheese ball for at least an hour; chilling allows flavors to meld beautifully, enhancing your Jalapeño Popper Cheese Ball experience.

Jalapeño Popper Cheese Ball Recipe Variations

Feel free to unleash your creativity with these delicious twists that will elevate your cheese ball to new heights!

  • Spicy Twist: Add chopped pickled jalapeños or a dash of hot sauce for an extra kick that spice lovers will adore. Feel the heat swirl through every bite!

  • Herbed Delight: Incorporate fresh herbs like chives or cilantro to complement the creaminess with vibrant flavors. A sprinkle of herbs will take this appetizer to a whole new level!

  • Creamy Cheese Combo: Mix in creamy feta with your cheddar for a zesty twist. The tanginess of feta beautifully balances the flavors, creating a delightful taste experience.

  • Vegan Option: Omit the bacon entirely or swap it out for crumbled tofu. This alternative still provides texture while keeping the dish animal-product free. It's a crowd-pleaser that everyone will enjoy!

  • Smoky Flavor: Try using smoked cheddar or adding a dash of smoked paprika to capture that irresistible smoky vibe. The depth it brings to the cheese ball will leave your guests raving!

  • Nutty Crunch: Swap pecans for walnuts or sunflower seeds to add a different crunch to the coating. This change introduces a delightful variation in texture with each bite.

  • Flavorful Addition: Experiment by folding in diced sun-dried tomatoes for bursts of sweetness. They add a lovely contrast to the spicy jalapeños!

For more flavor inspirations, consider layering your cheese ball with a delicious topping by trying out our lovely Spatchcock Chicken or serve it alongside savory bites like Chicken Adobo Again. The options are endless!

Jalapeño Popper Cheese Ball Recipe FAQs

How do I choose ripe jalapeños for this recipe?
Absolutely! Look for jalapeños that are firm and glossy, with no dark spots or wrinkles. Ideally, they should be a vibrant green color. If you prefer a milder flavor, smaller jalapeños tend to be less spicy. Remember, if you spot dark streaks, they may be bruised, so select the freshest ones for your cheese ball!

What’s the best way to store the Jalapeño Popper Cheese Ball?
Very! Store your Jalapeño Popper Cheese Ball wrapped tightly in plastic wrap or in an airtight container in the refrigerator for up to 5 days. This helps retain its creamy texture and flavor. Just make sure it's sealed well, as it can pick up odors from other foods!

Can I freeze the Jalapeño Popper Cheese Ball?
Indeed! You can freeze your cheese ball for up to 2 months. First, wrap it tightly in plastic wrap, then add an extra layer of aluminum foil to prevent freezer burn. When you’re ready to enjoy, simply thaw it in the fridge overnight before serving; this method helps it maintain its wonderful texture.

What if my cheese ball is too soft?
No worries! If your cheese ball turns out too soft, it could be due to insufficient chilling. Refrigerate it for an additional hour to help it firm up. If it still seems too loose, consider adding more shredded cheese or bacon bits to enhance the structure and flavor.

Are there any dietary considerations for this cheese ball recipe?
Absolutely! This Jalapeño Popper Cheese Ball is low-carb and keto-friendly, making it perfect for those following a ketogenic lifestyle. If you have vegetarian guests, you can easily omit the bacon or replace it with crumbled tofu. Be cautious of allergies—ensure there's no cross-contamination if you’re serving those with food sensitivities.

How long can I prepare this cheese ball in advance?
Very! You can prepare your Jalapeño Popper Cheese Ball a day in advance. Just wrap it tightly and store it in the refrigerator before serving. This not only saves time on the event day but also allows the flavors to meld beautifully, enhancing your appetizer experience!

Jalapeno Popper Cheese Ball Recipe

Zesty Jalapeno Popper Cheese Ball Recipe for Low Carb Fun

This Jalapeno Popper Cheese Ball is a low carb delight perfect for gatherings, blending spice and creamy flavors for a standout appetizer.
Print Recipe Pin Recipe
Prep Time 20 minutes mins
Chilling Time 1 hour hr
Total Time 1 hour hr 20 minutes mins
Servings: 8 servings
Course: Appetizers
Cuisine: American
Calories: 150
Ingredients Equipment Method Nutrition Notes

Ingredients
  

For the Cheese Ball
  • 8 ounces Cream Cheese softened
  • 1/2 cup Sour Cream can substitute with plain Greek yogurt
  • 1 teaspoon Garlic Powder or fresh minced garlic
  • 2 Jalapeños finely chopped; adjust for spice level
  • 1 cup Shredded Sharp Cheddar or medium cheddar for a milder taste
  • 1/2 cup Cooked Bacon can substitute with turkey bacon
  • Salt to taste
  • Pepper to taste
For the Coating
  • 1/2 cup Cooked Bacon finely chopped
  • 1 Jalapeño finely chopped
  • 1/2 cup Shredded Cheddar Cheese
  • 1/4 cup Chopped Green Onions or scallions
  • 1/4 cup Chopped Pecans or walnuts, optional

Equipment

  • Mixing Bowl
  • hand mixer
  • plastic wrap

Method
 

Preparation Steps
  1. In a mixing bowl, blend 8 ounces of softened cream cheese and 1/2 cup of sour cream using a hand mixer for 2-3 minutes until smooth.
  2. Add 1 teaspoon of garlic powder, 2 finely chopped jalapeños, 1 cup of shredded sharp cheddar, 1/2 cup of cooked bacon bits, and salt and pepper to taste. Mix gently until combined.
  3. Shape the mixture into a ball using plastic wrap and refrigerate for at least 1 hour.
  4. For the coating, mix 1/2 cup of finely chopped cooked bacon, 1 finely chopped jalapeño, 1/2 cup of shredded cheddar cheese, 1/4 cup of chopped green onions, and 1/4 cup of chopped pecans.
  5. Unwrap the cheese ball and roll it in the coating mixture until well coated.
  6. Allow the cheese ball to sit at room temperature for about 10 minutes before serving.

Nutrition

Serving: 1servingCalories: 150kcalCarbohydrates: 3gProtein: 8gFat: 12gSaturated Fat: 6gPolyunsaturated Fat: 1gMonounsaturated Fat: 5gCholesterol: 30mgSodium: 300mgPotassium: 100mgFiber: 1gSugar: 1gVitamin A: 500IUVitamin C: 2mgCalcium: 200mgIron: 1mg

Notes

Ensure cream cheese is softened for best mixing results. Adjust jalapeño quantity to control heat level. Refrigerate for a firm texture before serving.

Tried this recipe?

Let us know how it was!

Chai Spiced Overnight Oats for a Cozy Morning Boost

March 11, 2026 by Grace Snow Leave a Comment

As I sat with my morning coffee, I overheard a friend exclaim, “Breakfast needs to be more than just a quick fix!” That got me thinking; we often overlook the joy of a hearty, homemade meal to kickstart our day. Enter my Chai Spiced Overnight Oats—a delightful blend of cozy chai flavors and smooth oats that makes breakfast not only delicious but also practical. These oats are a dream for meal prep enthusiasts and health-conscious eaters alike, offering a high-fiber, gluten-free start to your morning that can be made in just minutes. No endless cooking or messy dishes here! Just creamy, spiced goodness waiting for you in the fridge. Ready to transform your breakfast routine with this easy recipe? Let’s embark on this flavorful journey together!

Why choose Chai Spiced Overnight Oats?

Deliciously Unique: The warm chai spices elevate your morning routine, delivering cozy flavors that set this recipe apart from mundane breakfasts.
Effortless Prep: With a quick mix and chill, you can save time in the morning and enjoy a nourishing meal ready when you wake up.
High-Fiber Goodness: Packed with nutritional benefits, these oats are rich in fiber, promoting digestion and keeping you fuller for longer.
Versatile Toppings: Customize your bowl with various toppings like fruits, nut butters, or crunchy granola, making each serving feel fresh and exciting.
Meal Prep Hero: Perfect for busy schedules, this recipe can be made days in advance, ensuring a healthy breakfast is always at your fingertips. Don’t forget to try out variations like Eggnog Cookies for added seasonal flair!

Chai Spiced Overnight Oats Ingredients

• Get ready for a cozy breakfast!

For the Oats

  • Rolled Oats – Use rolled oats (not quick oats) for best texture and fiber content.
  • Chia Seeds – Adds thickness and a boost of omega-3; can be substituted with flaxseeds if desired.
  • Chai Spice – Infuses your oats with warm flavors like cinnamon and cardamom; start with 1/2 tsp per serving and adjust to taste.
  • Plain Greek Yogurt – For creaminess and protein; substitute with dairy-free yogurt for a vegan option.
  • Milk of Choice – Hydrates the oats; use any milk (dairy, almond, oat, etc.) based on your preference.
  • Pure Maple Syrup – Sweetens the mixture naturally; feel free to use honey or agave syrup as alternatives.

Optional Toppings

  • Nut Butter – Elevates flavor and adds protein for a satisfying finish.
  • Granola – Provides a delightful crunch and extra fiber to your oats.
  • Sliced Banana, Apple, or Pear – Adds natural sweetness and a fresh touch to your bowl.

These Chai Spiced Overnight Oats are not just easy to whip up; they're packed with vibrant flavors and nutrients that will set your day off right!

Step‑by‑Step Instructions for Chai Spiced Overnight Oats

Step 1: Mix Dry Ingredients
In a large mixing bowl, combine rolled oats, chia seeds, and chai spice. Use a whisk to ensure all ingredients blend evenly, creating a fragrant base for your Chai Spiced Overnight Oats. This step takes only a couple of minutes, setting the stage for the creamy texture to come.

Step 2: Add Wet Ingredients
Next, stir in the plain Greek yogurt, your choice of milk, and pure maple syrup. Mix thoroughly until the ingredients are well combined and form a smooth, creamy mixture. Allow the enticing aroma of chai spices to fill your kitchen as you blend these wholesome ingredients together.

Step 3: Portion the Mixture
Carefully divide the oat mixture into three airtight containers or mason jars. Use a spatula to scrape every last bit from the bowl, ensuring each container has an equal amount of this delightful blend. This step sets up your easy breakfasts for the upcoming days, providing a quick grab-and-go meal.

Step 4: Chill in the Refrigerator
Seal the containers tightly and refrigerate them for at least 4 hours, though overnight is ideal for optimal thickness and flavor infusion. As they chill, the chia seeds will expand, creating a delightful texture that perfectly complements the oats.

Step 5: Serve and Enjoy
In the morning, remove your Chai Spiced Overnight Oats from the refrigerator. Top with your favorite additions, like nut butter, fresh fruit, or granola, to add flavor and crunch. The oats should be thick and creamy, ready to offer you a nutritious start to your day!

How to Store and Freeze Chai Spiced Overnight Oats

Fridge: Store in airtight containers for up to 4 days to maintain freshness and flavor. The oats will continue to thicken, making for a creamy breakfast that’s ready to enjoy.

Freezer: For longer storage, freeze the oats in individual portions for up to 3 months. Thaw in the refrigerator overnight before serving.

Reheating: If desired, reheat in the microwave for about 30-45 seconds until warm. Stir well after heating to ensure even temperature; enjoy your delicious Chai Spiced Overnight Oats!

Make-Ahead: Perfect for meal prep, you can easily whip up a batch in advance and have ready-to-eat breakfasts for busy mornings!

Chai Spiced Overnight Oats Variations

Feel free to make this recipe your own with these delightful twists and swaps that add a personal touch to your morning oats!

  • Fruit-Infused: Blend in mashed bananas or pureed strawberries for a naturally sweet touch. These fruits not only enhance flavor but also bring a pop of color to your breakfast!

  • Nutty Delight: Replace chia seeds with almond or peanut butter for a protein boost and nutty richness. The creaminess of nut butter perfectly complements the chai spices, creating a satisfyingly indulgent treat.

  • Spice It Up: Add a pinch of cayenne or black pepper for a surprising kick that takes your oats to the next level. The warmth from the spice merges beautifully with the chai flavors.

  • Creamy Coconut: Substitute regular milk with coconut milk for a tropical vibe. Coconut adds a rich, creamy texture that pairs beautifully with the chai spices for a refreshing twist on your breakfast routine.

  • Matcha Magic: For a unique flavor combination, whisk in a teaspoon of matcha powder along with the chai spice. This addition not only brings vibrant color but also loads of antioxidants to your morning boost!

  • Chocolate Chai: Mix in cocoa powder for a decadent twist and turn your breakfast into a dessert-like experience. Chocolate and chai are a match made in heaven, bringing warmth and joy to your morning!

  • Vegan Version: Use coconut yogurt and almond milk to make these overnight oats vegan-friendly. They remain deliciously creamy while providing all the nutrition you need.

If you're feeling adventurous, don't forget to try out these Chai Spiced Overnight Oats with toppings like fresh berries or a sprinkle of granola, similar to the comforting flavors found in my Eggnog Cookies. Enjoy the journey of flavor!

Expert Tips for Chai Spiced Overnight Oats

  • Flavor Adjustment: Start with 1/2 tsp of chai spice per serving. Gradually increase to find your perfect balance without overwhelming your palate.
  • Chill Time: For best texture and flavor, let your chai spiced overnight oats sit in the fridge for at least 8 hours. This allows the oats to absorb the liquids fully.
  • Mix and Match: Customize your oats with different toppings like fresh fruits or nut butters for added nutrition and to prevent monotony in flavor.
  • Storage Savvy: These oats are best consumed within 4 days; store them in airtight containers to maintain freshness and flavor.
  • Oats Type Matter: Always opt for rolled oats instead of quick oats for a creamy, satisfying texture that holds up beautifully overnight.

What to Serve with Chai Spiced Overnight Oats

As you embark on your delightful morning journey, think about these complementary dishes that elevate your breakfast experience.

  • Fresh Fruit Salad: A vibrant mix of juicy berries, bananas, and citrus adds a refreshing contrast that brightens each bite. The natural sweetness and acidity perfectly balance the spiced oats.

  • Crunchy Granola: Add some homemade or store-bought granola on top for an indulgent crunch. The chewy texture pairs beautifully with the creamy oats, creating a satisfying mouthfeel.

  • Nut Butter Bliss: A dollop of almond or peanut butter swirled into your oats introduces rich protein and healthy fats. This creamy addition boosts flavor while making each serving even more filling.

  • Creamy Yogurt Parfait: Serve with a side of Greek yogurt layered with honey and nuts. The tanginess of the yogurt enhances the warm chai spice, while the nuts add delightful crunch.

  • Herbal Tea or Chai Latte: A steaming cup of herbal tea or a spiced chai latte brings the flavors full circle. Sip your drink alongside the oats for a warm, soothing breakfast experience that feels like a cozy hug.

  • Cinnamon Toast: Simple yet classic, a slice of cinnamon toast on the side can resonate with the chai spices, providing a sweet and crunchy element that complements every spoonful of oats.

Each of these pairings enhances the overall breakfast experience while ensuring you start your day on a deliciously nutritious note!

Make Ahead Options

These Chai Spiced Overnight Oats are a meal prep superstar, allowing you to simplify your mornings! You can prepare the oat mixture up to 3 days in advance, making them perfect for busy weeks. To do this, simply combine rolled oats, chia seeds, chai spice, Greek yogurt, milk, and maple syrup as directed, then divide the mixture into airtight containers. Storing them properly in the fridge will keep them fresh and delicious. Just remember to add your desired toppings, like nut butter or sliced fruits, right before serving to maintain their crunch and flavor. With this make-ahead approach, you’ll enjoy a nutritious breakfast with minimal effort!

Chai Spiced Overnight Oats Recipe FAQs

What type of oats should I use for Chai Spiced Overnight Oats?
Absolutely, for the best texture and nutritional benefits, it's essential to use rolled oats. Quick oats may become too mushy overnight and won't give you the delightful chewiness that rolled oats provide.

How long do Chai Spiced Overnight Oats last in the fridge?
Your oats will keep well in the fridge for up to 4 days when stored in airtight containers. As they sit, they may thicken even more, resulting in a wonderfully creamy texture—a great reason to enjoy them within that timeframe!

Can I freeze Chai Spiced Overnight Oats?
Yes, you can freeze your prepared oats! Portion them into airtight containers and store them for up to 3 months. To enjoy, simply transfer the oats to the refrigerator the night before and allow them to thaw overnight. If you prefer a warm breakfast, microwave for 30 to 45 seconds until heated through.

What toppings work best for Chai Spiced Overnight Oats?
The more the merrier! You can elevate your oats with numerous toppings. I love adding sliced bananas or apples for sweetness, a dollop of nut butter for creaminess, or a crunchy granola topping for added texture. Experiment and find what makes your bowl perfect!

Can I adjust the sweetness of my Chai Spiced Overnight Oats?
Certainly! Start with the recommended amount of pure maple syrup, then taste it. You can always add a little more to suit your sweet tooth, or if you prefer a less sweet option, simply reduce the syrup. Honey or agave syrup can also be great alternatives!

Are Chai Spiced Overnight Oats suitable for those with nut allergies?
Yes, absolutely! If you're accommodating nut allergies, simply skip any nut-based toppings such as nut butters or granola. Instead, try adding seeds like pumpkin or sunflower seeds, or some fresh fruits, which would complement the chai flavors beautifully!

Chai Spiced Overnight Oats

Chai Spiced Overnight Oats for a Cozy Morning Boost

A delightful blend of cozy chai flavors and smooth oats, perfect for a healthy breakfast. Enjoy high-fiber, gluten-free goodness with Chai Spiced Overnight Oats!
Print Recipe Pin Recipe
Prep Time 10 minutes mins
Chill Time 4 hours hrs
Total Time 4 hours hrs 10 minutes mins
Servings: 3 servings
Course: Breakfast
Cuisine: American
Calories: 350
Ingredients Equipment Method Nutrition Notes

Ingredients
  

For the Oats
  • 1 cup Rolled Oats Use rolled oats (not quick oats) for best texture and fiber content.
  • 2 tablespoons Chia Seeds Adds thickness and a boost of omega-3; can be substituted with flaxseeds if desired.
  • 1/2 teaspoon Chai Spice Infuses your oats with warm flavors like cinnamon and cardamom; adjust to taste.
  • 1 cup Plain Greek Yogurt For creaminess and protein; substitute with dairy-free yogurt for a vegan option.
  • 1 cup Milk of Choice Use any milk (dairy, almond, oat, etc.) based on your preference.
  • 2 tablespoons Pure Maple Syrup Sweetens the mixture naturally; feel free to use honey or agave syrup as alternatives.
Optional Toppings
  • 2 tablespoons Nut Butter Elevates flavor and adds protein for a satisfying finish.
  • 1/4 cup Granola Provides a delightful crunch and extra fiber to your oats.
  • 1 medium Sliced Banana Adds natural sweetness and a fresh touch to your bowl.

Equipment

  • Mixing Bowl
  • Spatula
  • Airtight containers or mason jars

Method
 

Step-by-Step Instructions
  1. In a large mixing bowl, combine rolled oats, chia seeds, and chai spice. Use a whisk to ensure all ingredients blend evenly.
  2. Stir in the plain Greek yogurt, your choice of milk, and pure maple syrup. Mix thoroughly until combined.
  3. Divide the oat mixture into three airtight containers or mason jars.
  4. Seal the containers tightly and refrigerate for at least 4 hours, though overnight is ideal.
  5. In the morning, remove from the refrigerator. Top with nut butter, fresh fruit, or granola.

Nutrition

Serving: 1servingCalories: 350kcalCarbohydrates: 50gProtein: 12gFat: 10gSaturated Fat: 2gPolyunsaturated Fat: 1gMonounsaturated Fat: 1gCholesterol: 5mgSodium: 75mgPotassium: 300mgFiber: 10gSugar: 8gVitamin A: 200IUVitamin C: 1mgCalcium: 150mgIron: 2mg

Notes

These oats are best consumed within 4 days; store in airtight containers to maintain freshness and flavor.

Tried this recipe?

Let us know how it was!

Wholesome Cinnamon Roll Overnight Oats for Busy Mornings

March 11, 2026 by Grace Snow Leave a Comment

Every time I take a spoonful of these Cinnamon Roll Overnight Oats, I’m transported to a cozy kitchen, where the scent of cinnamon and sugar fills the air. This easy and wholesome recipe captures that beloved flavor in a healthy, quick breakfast format that even the busiest mornings can accommodate. With just 10 minutes of prep time, you can craft a creamy and sweet treat that’s both indulgent and nutritious. Not only does this dish save you from the clutches of fast food, but it also makes meal prep a breeze—perfect for those hectic weekdays. Curious about how something so delicious can also be good for you? Let's dive into this fantastic recipe!

Why Will You Love Cinnamon Roll Overnight Oats?

Deliciously Healthy: You’re savoring the irresistible flavors of cinnamon rolls without the guilt. These oats are a wholesome way to start your day.
Quick Prep Time: In just 10 minutes, you can whip up enough to fuel your mornings for days, saving you precious time.
Versatile Options: Whether you prefer traditional dairy or plant-based alternatives, this recipe is adaptable to your dietary needs.
Crowd-Pleasing Flavor: The cozy aroma and sweet taste make these overnight oats a hit, even with picky eaters. Pair them with fresh fruit or a cup of coffee for a complete breakfast experience! Try variations like our Delicious Cinnamon Roll Overnight Oats for a delightful twist.

Cinnamon Roll Overnight Oats Ingredients

• Dive into the fluffy goodness of these oats!

For the Base

  • Rolled Oats – The cornerstone of your dish, delivering essential fiber and texture; steel-cut oats can be used for a chewier bite but require more soak time.
  • Milk (dairy or non-dairy) – Adds creaminess while keeping your oats moist; use almond or oat milk for a delightful vegan option.
  • Chia Seeds – Provides thickness and a boost of omega-3 fatty acids; optional but great for nutritional benefits.

For the Flavor

  • Cinnamon – The star of the show, giving that warm, nostalgic cinnamon roll taste; adjust according to your preference or swap for pumpkin pie spice for a seasonal twist.
  • Vanilla Extract – Enhances overall sweetness and aroma; an easy substitute is almond extract for a nutty flavor profile.

For Sweetness

  • Maple Syrup or Honey – Natural sweeteners that mimic the delicious icing of cinnamon rolls; agave syrup works beautifully as a vegan alternative.

Optional Creaminess

  • Cream Cheese or Yogurt – Adds a rich creaminess akin to frosting; opt for dairy-free yogurt to keep it plant-based.

Feel free to get creative with additional toppings, and enjoy this wholesome treat that truly embodies the essence of Cinnamon Roll Overnight Oats!

Step‑by‑Step Instructions for Cinnamon Roll Overnight Oats

Step 1: Mix the Base
In a medium bowl, combine rolled oats, your choice of milk, chia seeds, ground cinnamon, vanilla extract, and your selected sweetener. Use a whisk or spoon to mix until all ingredients are well incorporated, and you have a uniform mixture. This step takes about 3 minutes and sets the foundation for your delicious Cinnamon Roll Overnight Oats.

Step 2: Portion the Mixture
Carefully divide the blended mixture into individual jars or containers, filling each about three-quarters full to allow for expansion. This not only helps with convenient meal prep but also makes for an appealing presentation. You can use 4 to 5 small jars, and this step should take around 2 minutes.

Step 3: Chill Overnight
Once your jars are filled, place them in the refrigerator. Allow the oats to chill and soak up the flavors for at least 4 hours, but overnight is best. During this time, the oats will absorb moisture and create a creamy consistency. Keep an eye on them; this step ensures your Cinnamon Roll Overnight Oats will be perfectly thick and delicious.

Step 4: Stir Before Serving
When you're ready to enjoy, remove the jars from the refrigerator and give each one a good stir to redistribute the mixture. If the oats have thickened too much, add a splash of milk to reach your desired consistency. This revitalization step rejuvenates your Cinnamon Roll Overnight Oats, making them creamy and delightful.

Step 5: Add Toppings
Finally, customize your meal by topping the oats with your favorite add-ins, such as fruits, nuts, or a dollop of yogurt for extra creaminess. This is your chance to personalize the flavors and textures, making each serving unique and enjoyable. Take a moment to savor the aroma; your Cinnamon Roll Overnight Oats are now ready to be devoured!

How to Store and Freeze Cinnamon Roll Overnight Oats

Fridge: Store your Cinnamon Roll Overnight Oats in an airtight container for up to 5 days. This keeps them fresh and ready for quick breakfasts throughout the week.

Freezer: For longer storage, freeze individual portions in freezer-safe containers for up to 3 months. Thaw in the fridge overnight before serving.

Reheating: If you prefer warm oats, heat in the microwave for 30–60 seconds after thawing, adding a splash of milk to restore the creamy texture.

Make-Ahead: Prepare multiple jars at once for hassle-free mornings during busy weeks. Just grab and go!

Expert Tips for Cinnamon Roll Overnight Oats

  • Thorough Stirring: Always stir well before eating. The oats can thicken overnight, and a good mix ensures a creamy texture.
  • Make Ahead: Prepare multiple jars at once! They'll stay fresh in the fridge for up to 5 days, making your breakfast routine seamless.
  • Adjust Sweetness: Taste the mixture before refrigerating and adjust the sweetness with maple syrup or honey to match your preference.
  • Topping Ideas: Get creative with toppings! Chopped nuts, fresh fruits, or even a scoop of yogurt can elevate your Cinnamon Roll Overnight Oats.
  • Use High-Quality Ingredients: Opt for pure vanilla extract and high-quality cinnamon for the best flavor. They truly make a difference in your oats!

Cinnamon Roll Overnight Oats Variations

Feel free to explore and customize these delicious Cinnamon Roll Overnight Oats to match your taste and dietary preferences!

  • Dairy-Free: Substitute any milk with almond or coconut milk for a vegan-friendly option that still delivers creaminess.

  • Flavor Boost: Add a scoop of vanilla or chocolate protein powder for a hearty breakfast that powers you through the day. It’s an easy way to enhance their nutritional value!

  • Sweetness Options: Swap maple syrup for honey or agave syrup, depending on your sweetness preference. Experiment with these to find your ideal level of sweetness!

  • Spice Twist: Swap out cinnamon for pumpkin pie spice to create a festive autumn-inspired version of your oats. This will bring warmth and depth to the flavor!

  • Nutty Crunch: Top your oats with chopped walnuts or pecans for added texture and healthy fats. A little crunch complements the creamy oats beautifully.

  • Fruity Goodness: Mix in fresh fruit, such as diced apples or bananas, before chilling to infuse your oats with natural sweetness and flavor.

  • Creamy Frosting: Stir in a tablespoon of cream cheese or Greek yogurt for an ultra-creamy texture reminiscent of frosting, further indulging your cinnamon roll craving.

  • Heat It Up: For a spicy kick, add a pinch of cayenne or nutmeg to the mix. This little twist can take the flavor profile to a whole new level!

With these variations, you can keep your breakfasts exciting while enjoying the comforting flavors of Cinnamon Roll Overnight Oats. Don't forget to check out Delicious Cinnamon Roll Overnight Oats for more inspiration!

Make Ahead Options

These Cinnamon Roll Overnight Oats are an ideal choice for meal prep enthusiasts looking to streamline their busy mornings! You can prepare the mixture of rolled oats, milk, chia seeds, cinnamon, vanilla extract, and sweetener up to 24 hours in advance by storing them in jars or containers in the refrigerator. This means your delicious breakfast is ready and waiting for you when you wake up! Just be sure to give the oats a good stir before serving, and if they have thickened too much overnight, simply add a splash of milk for a creamy consistency. With this simple prep, you’ll save time and enjoy a cozy, flavorful breakfast every morning!

What to Serve with Cinnamon Roll Overnight Oats

Elevate your breakfast experience by pairing these creamy, indulgent oats with delightful complements that add variety and nutrition.

  • Fresh Berries: Juicy strawberries or blueberries add a burst of color and a touch of sweetness that enhances the creamy oats.
  • Greek Yogurt: A dollop of tangy yogurt heightens creaminess and provides added protein for a satisfying start to your day.
  • Crunchy Granola: A sprinkle of granola introduces a delightful crunch, contrasting the creamy texture and making every bite exciting.
  • Sliced Bananas: Naturally sweet bananas bring a fruitiness that harmonizes wonderfully with the cinnamon flavor, making it even more comforting.
  • Nut Butter Swirl: A spoonful of almond or peanut butter not only adds richness but also boosts healthy fats, keeping you fuller longer.
  • Cinnamon Coffee: Enjoy a cozy cup of cinnamon-infused coffee beside your oats for a drink that echoes the flavors in your meal.
  • Coconut Chips: Tossing on some toasted coconut chips provides a tropical twist, adding both flavor and an appealing texture.
  • Chia Pudding: For extra nutrition, serve a scoop of chia pudding on the side; the nutty flavor beautifully complements the oats.

Cinnamon Roll Overnight Oats Recipe FAQs

How do I choose the right oats for my Cinnamon Roll Overnight Oats?
Absolutely! For this recipe, I recommend using rolled oats as they provide the perfect texture and absorb moisture well. If you prefer a chewier bite, you can substitute with steel-cut oats, but remember, you'll need to increase the soak time to allow those hearty oats to absorb enough liquid.

How should I store my Cinnamon Roll Overnight Oats?
Very simply! Store your Cinnamon Roll Overnight Oats in an airtight container in the fridge for up to 5 days. This keeps them fresh and ready for a quick breakfast during busy weekdays. Just grab a jar and you're good to go!

Can I freeze Cinnamon Roll Overnight Oats?
Certainly! To freeze, portion the oats into freezer-safe containers. They can last up to 3 months in the freezer. When you're ready to enjoy, transfer a jar to the fridge to thaw overnight. If you prefer to eat them warm, heat in the microwave for 30–60 seconds, adding a splash of milk if needed for a creamy texture.

What if my oats become too thick after refrigeration?
No worries! If you find your oats have thickened too much overnight, simply give them a good stir to break up any clumps. You can add a splash of your choice of milk to reach your desired consistency. This step is crucial to keep your breakfast enjoyable!

Are there any dietary considerations for Cinnamon Roll Overnight Oats?
Definitely! If you're concerned about dietary restrictions, this recipe is very versatile. For a vegan option, use almond or oat milk and substitute honey with agave syrup. Be mindful of any allergies by checking the ingredients, especially for additions like nuts or yogurt, which can be omitted or modified as needed.

Can pets eat Cinnamon Roll Overnight Oats?
Be cautious! While rolled oats are generally safe for pets in small amounts, be sure to avoid any sweeteners like maple syrup or honey. Also, cinnamon is safe for dogs in moderation, but it's best to consult your veterinarian if you're unsure.

Cinnamon Roll Overnight Oats

Wholesome Cinnamon Roll Overnight Oats for Busy Mornings

Enjoy the delicious flavors of Cinnamon Roll Overnight Oats, a healthy and quick breakfast option perfect for busy mornings.
Print Recipe Pin Recipe
Prep Time 10 minutes mins
Chill Time 4 hours hrs
Total Time 4 hours hrs 10 minutes mins
Servings: 4 jars
Course: Breakfast
Cuisine: American
Calories: 250
Ingredients Equipment Method Nutrition Notes

Ingredients
  

For the Base
  • 1 cup Rolled Oats Use steel-cut oats for a chewier bite
  • 1 cup Milk Dairy or non-dairy options available
  • 2 tablespoons Chia Seeds Optional but recommended for thickness
For the Flavor
  • 1 teaspoon Cinnamon Adjust as per taste
  • 1 teaspoon Vanilla Extract Substitute with almond extract if desired
For Sweetness
  • 2 tablespoons Maple Syrup or Honey Agave syrup works as a vegan alternative
Optional Creaminess
  • 2 tablespoons Cream Cheese or Yogurt Use dairy-free yogurt for a plant-based option

Equipment

  • medium bowl
  • Whisk or spoon
  • Jars or containers

Method
 

Step-by-Step Instructions
  1. In a medium bowl, combine rolled oats, your choice of milk, chia seeds, ground cinnamon, vanilla extract, and your selected sweetener. Mix until well incorporated.
  2. Carefully divide the mixture into individual jars, filling each about three-quarters full.
  3. Place jars in the refrigerator and allow to chill for at least 4 hours, preferably overnight.
  4. Remove jars from the refrigerator and stir to redistribute the mixture. Add a splash of milk if too thick.
  5. Top with your favorite add-ins such as fruits, nuts, or yogurt before serving.

Nutrition

Serving: 1jarCalories: 250kcalCarbohydrates: 40gProtein: 8gFat: 9gSaturated Fat: 3gPolyunsaturated Fat: 1gMonounsaturated Fat: 3gSodium: 150mgPotassium: 200mgFiber: 6gSugar: 6gCalcium: 10mgIron: 8mg

Notes

Prepare multiple jars at once for hassle-free breakfasts throughout the week. Customize toppings to match your taste preferences.

Tried this recipe?

Let us know how it was!

Indulge in Brownie Batter Overnight Oats for a Sweet Morning Boost

March 11, 2026 by Grace Snow Leave a Comment

As I stood in my kitchen with a half-empty jar of cocoa powder and a craving for something sweet, inspiration struck! What if I could enjoy the rich, indulgent flavor of brownie batter for breakfast? Enter my Rich Chocolate Brownie Batter Overnight Oats! This delightful concoction combines creamy Greek yogurt and rolled oats, creating a thick and satisfying meal that keeps you energized throughout the morning. Gluten-free and high in protein, these no-bake oats are not just a time-saver—they’re also a delicious way to kick off your day with a touch of sweetness. Plus, you can whip them up the night before for an effortless, decadent breakfast that’ll have everyone asking for seconds. Ready to transform your mornings into something extraordinary? Let’s dive in!

Why Choose Brownie Batter Overnight Oats?

Decadent Delight: Indulge your sweet tooth responsibly with these creamy oats that mimic your favorite brownie batter.

Effortless Preparation: No baking is required! Just mix, refrigerate, and enjoy—perfect for busy mornings.

Healthy Twist: Packed with protein and fiber, they sustain you all morning without the guilt.

Customizable Fun: Top with fresh fruit, nut butter, or more chocolate chips to suit your cravings. For other delightful alternatives, check out my Pumpkin Brownies Decadent recipe!

Gluten-Free Goodness: This recipe fits seamlessly into a gluten-free diet, making it inclusive for all.

Make Ahead Magic: Prepare these oats in advance—up to four days ahead—ensuring a sweet surprise awaits in your fridge!

Brownie Batter Overnight Oats Ingredients

For the Oats Mixture

  • Rolled Oats – They form the hearty base for your oats and provide a chewy texture; substitute quick oats for a softer bite if desired.
  • Chia Seeds – These little powerhouses add thickness and nutritional value with fiber and omega-3s; you can skip them for a thinner consistency, but remember to reduce the milk if you do.
  • Cocoa Powder (unsweetened) – Essential for that rich brownie flavor; choose Dutch-process for a smoother chocolate touch.
  • Maple Syrup – This natural sweetener brings a delightful touch of sweetness; feel free to swap in honey or agave syrup if you'd like.
  • Plain Greek Yogurt – Adds creaminess and a protein boost to your oats; regular yogurt or a dairy-free version works just as well for a lighter option.
  • Milk (any kind; almond preferred) – Helps hydrate the oats for that perfect creamy consistency; use any dairy or non-dairy milk that suits your taste.
  • Vanilla Extract – Elevates the overall flavor profile; it’s best to keep it for maximum taste.
  • Salt (pinch) – A tiny pinch balances the sweetness and enhances flavors beautifully.
  • Optional Chocolate Chips – For added sweetness and fun texture; mix in your favorite type of chocolate, whether dark or semi-sweet.

For Toppings

  • Optional Toppings (peanut butter drizzle, extra chocolate chips) – These give you the chance to customize each serving and add even more delicious flavor.

Enjoy indulging in your Brownie Batter Overnight Oats, guilt-free and full of joy!

Step‑by‑Step Instructions for Brownie Batter Overnight Oats

Step 1: Mix Dry Ingredients
In a medium mixing bowl, combine rolled oats, chia seeds, and unsweetened cocoa powder. Stir these ingredients thoroughly until they are evenly blended, creating a rich, chocolate base. This initial mix sets the foundation for your Brownie Batter Overnight Oats, so make sure there are no dry clumps remaining.

Step 2: Incorporate Wet Ingredients
Next, add the plain Greek yogurt and maple syrup to the bowl with the dry ingredients. Using a spatula, blend everything together until fully incorporated and smooth. The mixture should be thick but uniform, with the sweet and creamy flavors beginning to shine through.

Step 3: Add Milk and Season
Pour in your choice of milk, along with the vanilla extract and a pinch of salt. Mix again until the oats are well-hydrated and the consistency is creamy and smooth. This step ensures that your Brownie Batter Overnight Oats achieve that indulgent texture reminiscent of actual brownie batter.

Step 4: Fold in Chocolate Chips
If you're using optional chocolate chips, gently fold them into the mixture, making sure they’re evenly distributed throughout. This adds delightful pockets of sweetness and texture to your Brownie Batter Overnight Oats. Transfer the complete mixture into jars or storage containers for convenience.

Step 5: Chill Overnight
Cover the jars or container with lids and refrigerate overnight for at least 6-8 hours. During this time, the flavors will meld beautifully, and the oats will absorb the moisture, turning creamy and rich. In the morning, the anticipation of a chocolatey breakfast will be well worth the wait!

Step 6: Final Touches and Serve
In the morning, take the jars out of the refrigerator and give the oats a good stir. The mixture might thicken, so feel free to add a splash of milk to loosen it up to your desired consistency. Top with your favorite toppings such as a drizzle of peanut butter or extra chocolate chips, then indulge in your delicious Brownie Batter Overnight Oats!

Make Ahead Options

These Brownie Batter Overnight Oats are a meal prep dream come true! You can mix and refrigerate the oats mixture up to 4 days in advance, ensuring a delicious chocolatey breakfast is always on hand. Simply combine rolled oats, chia seeds, cocoa powder, Greek yogurt, maple syrup, milk, vanilla, a pinch of salt, and optional chocolate chips in a jar. Seal tightly and refrigerate overnight (or for up to 24 hours) to let the flavors meld. For the best quality, stir in a splash of milk before serving to achieve that perfect creamy texture again. With minimal effort, you'll have a decadent breakfast ready to help you navigate those busy mornings effortlessly!

Expert Tips for Brownie Batter Overnight Oats

  • Mix Thoroughly: Ensure all ingredients are well integrated to avoid dry clumps of cocoa or oats that could detract from the smooth, brownie batter experience.

  • Jars Ahead of Time: Prepare multiple jars in advance (up to 4 days) for effortless mornings. Just stir in extra milk before enjoying for the best texture!

  • Mind the Microwave: If you prefer your oats warm, heat in short bursts (30–45 seconds) to keep the creamy texture intact without overcooking.

  • Texture Adjustments: If you desire a thinner mixture, opt for less chia seeds or more milk. Be mindful; this can affect the overall richness of your Brownie Batter Overnight Oats.

  • Flavor Customization: Experiment with toppings! Adding fresh fruit, different nut butters, or varying the sweetness can elevate your oats to new levels of indulgence.

Brownie Batter Overnight Oats Variations

Get ready to personalize your Brownie Batter Overnight Oats with these delightful twists that can take your breakfast to the next level!

  • Dairy-Free Delight: Substitute Greek yogurt with coconut yogurt for a creamy, dairy-free alternative that adds a tropical flair.

  • Nutty Flavor Boost: Stir in a tablespoon of almond or peanut butter for an extra layer of richness and a protein punch. The nutty flavor compliments the chocolate beautifully!

  • Sweetness Switch: Adjust the maple syrup to your liking or try dates for a naturally sweet alternative. Using dates adds a caramel-like depth to your oats.

  • Fruit Fusion: Top off your oats with fresh berries or sliced bananas for a burst of natural sweetness and color. The freshness balances the chocolatey goodness perfectly.

  • Additional Crunch: Add a handful of nuts or granola on top to introduce a satisfying crunch that contrasts beautifully with the creamy oats. It’s like a little surprise in every bite!

  • Chocolate Dream: Pour in some chocolate almond milk instead of regular milk for an even richer chocolate flavor. This adds an extra layer of decadence to your breakfast!

  • Chili Kick: For a spicy twist, sprinkle in some cinnamon or cayenne pepper. A hint of heat can intensify the chocolate flavor and awaken your taste buds!

  • Layered Indulgence: For a fun presentation, layer the oats with mascarpone or ricotta cheese. This addition enhances creaminess and sophistication—perfect for a brunch spread!

Feel free to mix and match these ideas to craft your perfect bowl of Brownie Batter Overnight Oats. For more chocolatey inspirations, check out my Pumpkin Brownies Decadent recipe and explore a world of flavors!

How to Store and Freeze Brownie Batter Overnight Oats

Fridge: Store your Brownie Batter Overnight Oats in airtight containers for up to 4 days to maintain freshness and flavor.

Freezer: If you want to keep them longer, you can freeze the oats for up to 3 months. Thaw them in the fridge overnight before enjoying.

Reheating: For a warm treat, microwave cold oats in short increments of 30–45 seconds, stirring occasionally to maintain a creamy consistency.

Mixing: Stir well before serving to rehydrate any thickened oats, and feel free to add a splash of milk if needed for a smoother texture.

What to Serve with Brownie Batter Overnight Oats?

Transform your mornings into a comforting feast with delightful pairings that enhance the rich flavors of your chocolatey oats.

  • Fresh Berries: Their tartness adds a refreshing contrast to the sweet chocolate, brightening up every spoonful. Just imagine luscious strawberries or blueberries dancing on top!

  • Banana Slices: Creamy and naturally sweet, bananas harmonize beautifully with the brownie flavor, making every bite feel indulgent yet wholesome.

  • Nut Butter Drizzle: A drizzle of almond or peanut butter infuses a nutty richness, enhancing the creamy texture while adding a protein boost for energy.

  • Coconut Flakes: Toasted coconut adds a delightful crunch and tropical flair, creating a wonderful contrast against the soft oats.

  • Crunchy Granola: A sprinkle of granola on top provides a satisfying crunch with each creamy spoonful, helping to keep your breakfast exciting and filling.

  • Coffee: A warm cup of coffee pairs perfectly with the sweet, chocolaty notes of the oats, elevating your entire breakfast experience to new heights.

Consider these pairings not just as accompaniments, but as delicious companions that ensure your Brownie Batter Overnight Oats become your new morning ritual!

Brownie Batter Overnight Oats Recipe FAQs

How do I choose ripe ingredients for my Brownie Batter Overnight Oats?
Absolutely! When it comes to ripe ingredients, especially bananas or any fruit toppings, look for soft, blemish-free fruits to enhance the flavor. For yogurt, choose plain Greek yogurt that’s fresh and has a creamy texture. If you’re using chocolate chips, make sure they haven’t surpassed their recommended expiration date for the best taste.

How should I store Brownie Batter Overnight Oats?
Great question! Store your Brownie Batter Overnight Oats in airtight containers in the refrigerator for up to 4 days. This keeps them fresh and flavorful. If you’ve prepared multiple jars, simply grab one each morning for a quick breakfast!

Can I freeze Brownie Batter Overnight Oats?
Yes, you can! If you want a longer-lasting treat, freeze your oats in a freezer-safe container for up to 3 months. When ready to enjoy, transfer them to the fridge to thaw overnight. For best results, stir the mixture well after thawing and feel free to add a splash of milk to achieve your desired consistency.

What should I do if my oats seem too thick after refrigeration?
No worries! It’s very common for overnight oats to thicken up in the fridge. Simply stir in a bit of extra milk—just a tablespoon at a time—until you reach the desired creamy consistency. If you like them warm, heat them in short bursts of 30–45 seconds in the microwave, stirring in between to maintain that wonderful texture.

Are there any dietary considerations for Brownie Batter Overnight Oats?
Absolutely! This recipe is gluten-free if you ensure your oats are certified gluten-free. Additionally, you can easily make it dairy-free by substituting Greek yogurt with a plant-based yogurt and using almond, soy, or oat milk. If allergies are a concern, double-check the labels of ingredients like chocolate chips or any sweeteners you choose. Always feel free to adjust the recipe based on your dietary needs!

Brownie Batter Overnight Oats

Indulge in Brownie Batter Overnight Oats for a Sweet Morning Boost

Enjoy a delicious breakfast with Brownie Batter Overnight Oats, combining Greek yogurt and rolled oats for a sweet morning boost.
Print Recipe Pin Recipe
Prep Time 15 minutes mins
Chilling Time 8 hours hrs
Total Time 8 hours hrs 15 minutes mins
Servings: 2 jars
Course: Breakfast
Calories: 350
Ingredients Equipment Method Nutrition Notes

Ingredients
  

For the Oats Mixture
  • 1 cup Rolled Oats You can substitute quick oats for a softer bite.
  • 2 tablespoons Chia Seeds These add thickness; may skip for thinner consistency.
  • 1/3 cup Cocoa Powder (unsweetened) Use Dutch-process for smoother chocolate.
  • 3 tablespoons Maple Syrup Feel free to swap for honey or agave syrup.
  • 1 cup Plain Greek Yogurt Regular yogurt or dairy-free version can be used.
  • 1 cup Milk (any kind; almond preferred) Any dairy or non-dairy milk can be used.
  • 1 teaspoon Vanilla Extract Best to keep for maximum flavor.
  • a pinch Salt Balances sweetness.
  • 1/3 cup Optional Chocolate Chips Mix in your favorite type of chocolate.
For Toppings
  • Optional Toppings (peanut butter drizzle, extra chocolate chips) Customize each serving.

Equipment

  • medium mixing bowl
  • Spatula
  • jars or storage containers

Method
 

Step-by-Step Instructions for Brownie Batter Overnight Oats
  1. In a medium mixing bowl, combine rolled oats, chia seeds, and unsweetened cocoa powder. Stir until evenly blended.
  2. Add the plain Greek yogurt and maple syrup. Blend until fully incorporated and smooth.
  3. Pour in your choice of milk, vanilla extract, and a pinch of salt. Mix until well-hydrated and creamy.
  4. If using chocolate chips, gently fold them in. Transfer mixture into jars or storage containers.
  5. Cover jars and refrigerate overnight for at least 6-8 hours.
  6. In the morning, stir oats and add milk if needed for consistency. Top with desired toppings and enjoy.

Nutrition

Serving: 1jarCalories: 350kcalCarbohydrates: 50gProtein: 15gFat: 10gSaturated Fat: 3gPolyunsaturated Fat: 1gMonounsaturated Fat: 5gCholesterol: 5mgSodium: 150mgPotassium: 350mgFiber: 8gSugar: 12gVitamin A: 300IUVitamin C: 1mgCalcium: 200mgIron: 3mg

Notes

Store in airtight containers for up to 4 days in the fridge or freeze for up to 3 months.

Tried this recipe?

Let us know how it was!

Delicious Easy Flatbread Recipe in Just 25 Minutes

March 11, 2026 by Grace Snow Leave a Comment

As I stood in my kitchen the other day, I realized something magical about making bread: it doesn't have to be complicated! Enter the Easy No-Yeast Flatbread Recipe—a delightful revelation that turns the daunting task of bread-making into a 25-minute joyride. This flatbread boasts a soft texture with perfectly crisp edges, making it the perfect canvas for your favorite dips or a cozy accompaniment to soups. Not only is it incredibly quick to whip up, but there's even a gluten-free option to cater to varying dietary preferences. With this simple recipe in your arsenal, say goodbye to fast food and hello to wholesome homemade goodness! Curious to find out how you can elevate your meals with this versatile flatbread? Let's dive in!

Why Is This Flatbread Recipe Amazing?

Simplicity: This Easy Flatbread Recipe requires no yeast, meaning you can skip the long rising times usually associated with bread-making.

Quick & Easy: In just 25 minutes, you can enjoy freshly made flatbread from scratch—a perfect solution for busy weeknights or spontaneous gathering.

Perfectly Pliable: The combination of baking powder and the right technique creates a soft and pliable texture, ideal for wrapping your favorite fillings or serving with soups.

Gluten-Free Option: You can easily make this recipe gluten-free by swapping in gluten-free flour, ensuring everyone at the table can enjoy it.

Versatile Base: Use it as a canvas for countless toppings or dips. Pair it with hummus or soups like Chicken Adobo Again for a delightful meal!

Crowd-Pleaser: Whether it's a family dinner or a casual get-together, this flatbread is sure to impress and satisfy your guests, leaving fast food behind for good.

Easy Flatbread Recipe Ingredients

For the Flatbread
• All-Purpose Flour – Provides structure and texture for the flatbread; can substitute with gluten-free flour, adjusting moisture accordingly.
• Baking Powder – Acts as a leavening agent for softness; essential for the rising effect in this no-yeast recipe.
• Salt – Enhances flavor and is crucial for taste; do not omit.
• Olive Oil – Adds moisture and richness; can substitute with vegetable oil if preferred.
• Ice Water – Binds the ingredients and helps form dough; use chilled water for best results.
• Oil for Cooking – Prevents sticking while frying; olive or vegetable oil is recommended.

Optional Toppings
• Garlic Powder – Adds a delicious savory touch; brush on post-cooking for extra flavor.
• Olive Oil – A drizzle can enhance richness; great to combine with garlic powder for a tasty coating.
• Parsley – Provides freshness and a pop of color; sprinkle on before serving for visual appeal.

Step‑by‑Step Instructions for Easy Flatbread Recipe

Step 1: Combine the Dry Ingredients
In a mixing bowl, whisk together 2 cups of all-purpose flour, 1 tablespoon of baking powder, and 1 teaspoon of salt until well combined. This initial mixture is crucial for your Easy Flatbread Recipe, providing the structure and flavor. Properly blending these dry ingredients ensures an even rise when cooked.

Step 2: Mix in the Wet Ingredients
Gradually stir in 1 tablespoon of olive oil and 3/4 cup of ice water into the dry mixture using a wooden spoon. Continue mixing until a moist, shaggy dough forms; adjust with a bit more flour or water if necessary. The dough should be wet yet manageable to create that perfect pliable texture.

Step 3: Rest the Dough
Cover the dough with a clean kitchen towel and let it rest for 10 minutes at room temperature. This brief resting period helps relax the gluten, making the dough easier to roll out and perfect for your Easy Flatbread Recipe. It's a great time to prepare your cooking surface and skillet.

Step 4: Shape the Dough
Turn the rested dough onto a lightly floured surface and divide it into 10 to 12 equal pieces. Roll each piece into a ball and then flatten it with your hands. Use a rolling pin to roll each piece into a circle about ¼ inch thick. The uniform thickness ensures even cooking and a soft texture.

Step 5: Heat the Skillet
Preheat a non-stick skillet over medium heat and add a drizzle of oil to coat the bottom. You want to achieve a hot skillet that provides a nice sizzle when cooking your Easy Flatbread. Proper heat ensures the edges turn golden brown while the center remains soft and pliable.

Step 6: Cook the Flatbreads
Carefully place one rolled flatbread in the hot skillet and cook for about 2 to 3 minutes on one side, or until you see bubbles forming. Flip to the other side and cook for an additional 2 to 3 minutes until both sides are golden brown and puffed. Keep an eye on the temperature to avoid burning.

Step 7: Optional Toppings and Serving
Once cooked, transfer the flatbreads to a plate and, if desired, brush them with melted garlic butter or sprinkle with parsley for added flavor. This final touch enhances your Easy Flatbread Recipe, making it a delicious companion for dips, stews, or as a wrap for your favorite fillings.

Storage Tips for Easy Flatbread Recipe

Room Temperature: Store cooked flatbread at room temperature for up to 2 days in a sealed container to maintain freshness.

Fridge: If you need to keep it longer, refrigerate the flatbread in an airtight container for up to 3 days. This helps retain its softness.

Freezer: For longer storage, freeze flatbreads wrapped in foil or plastic wrap for up to 1 month. Thaw at room temperature or heat in a skillet before serving.

Reheating: To enjoy leftovers, reheat flatbreads in a skillet over low heat for about 1-2 minutes on each side, so they regain their flexible texture.

Expert Tips for Easy Flatbread

• Proper Dough Texture: Ensure the dough is moist but not sticky—add flour gradually if too wet. This balance is key for your Easy Flatbread Recipe.

• Control the Heat: Cook over medium heat; too high will lead to burnt edges while leaving the center undercooked.

• Resting Time Matters: Allowing the dough to rest for 10 minutes is crucial for achieving the right texture—don't skip this step!

• Uniform Thickness: Roll each piece to about ¼ inch thick for even cooking and flexibility when wrapping.

• Experiment with Flavors: Feel free to add herbs or spices to the dough for additional flavor—your Easy Flatbread can be as creative as you!

What to Serve with Easy No-Yeast Flatbread

Create a feast that delights the senses and warms the heart with these perfect pairings!

  • Hummus: A smooth, savory dip bursting with flavor, hummus complements the flatbread's texture beautifully, perfect for scooping.
  • Tomato Basil Soup: The rich, zesty taste of this classic soup creates a wonderful contrast with the soft flatbread, making it a comforting meal.
  • Greek Salad: Crisp vegetables and tangy feta cheese provide a refreshing crunch that enhances the flatbread, adding a vibrant element to your dining experience.
  • Spiced Chickpeas: Serve these crispy spiced chickpeas as a crunchy topping, providing an exciting texture that pairs perfectly with the soft flatbread.
  • Tzatziki Sauce: This cool, creamy yogurt sauce adds a refreshing zing and pairs wonderfully for delicious dipping or spreading.
  • Garlic Butter: Brushing your flatbread with garlic butter elevates its flavor and adds a fragrant touch, perfect for dipping or savoring on its own.
  • Grilled Vegetables: Smoky, charred veggies add depth and complement the warm, soft flatbread, creating a wholesome and filling combination.
  • Sweet Chili Sauce: Add a touch of sweetness and heat with this vibrant sauce, making for a delightful dipping experience that will tantalize your taste buds.
  • Crispy Fried Chicken: For a heartier meal, serve alongside golden fried chicken, where the flatbread becomes the perfect vessel for tender, flavorful bites.

Make Ahead Options

These Easy Flatbread Recipe preparations are a lifesaver for busy home cooks looking to save time during the week! You can prepare the flatbread dough up to 3 days in advance by storing it tightly wrapped in the refrigerator. This allows you to enjoy fresh, warm flatbreads on demand. When you're ready to cook, simply take the dough out, let it come to room temperature for about 30 minutes, and then shape and cook as directed. Alternatively, you can also cook the flatbreads ahead of time and freeze them for up to one month. To reheat, just warm them in a skillet over medium heat until heated through—ensuring you experience just as delicious results without any fuss!

Easy Flatbread Recipe Variations

Feel free to make this delicious Easy Flatbread Recipe your own with these fun and flavorful twists!

  • Herb-Infused: Add fresh or dried herbs like rosemary or thyme to the dough for an aromatic flavor lift. Your flatbread will not only taste fantastic but also smell divine while cooking.

  • Garlic Lovers: Mix garlic powder directly into the dough. This flavorful variation will satisfy all the garlic aficionados at your table.

  • Spiced Up: Incorporate a pinch of cayenne or chili powder for a subtle heat that makes each bite exciting. Just the right kick can transform your flatbread experience!

  • Sweet Twist: After cooking, brush your flatbread with melted butter mixed with cinnamon and sugar. Serve alongside fruit or yogurt for a delightful treat.

  • Cheesy Delight: Fold in shredded cheese into the dough, such as feta or mozzarella, for a cheesy-version. This adds a nice melty surprise when you tear it apart!

  • Vegetable Puree: Mix in some spinach or beet puree into the dough for a colorful, nutrient-packed twist. Not only does it look great, but it also adds a wonderful depth of flavor.

  • Mix and Match Toppings: Try topping your flatbread with a scoop of your favorite dips, like hummus or tzatziki, or use it in place of the traditional crust in a creative pizza, fitting it perfectly with your baked favorites like Spatchcock Chicken or Breakfast Egg Muffins.

With these variations, you can enjoy a fresh take on your Easy Flatbread Recipe every time you make it!

Easy Flatbread Recipe FAQs

How do I choose the right flour for this flatbread recipe?
Absolutely! For the best texture, I recommend using all-purpose flour. However, if you need a gluten-free option, you can substitute it with a gluten-free flour blend. Just be sure to adjust the moisture accordingly, as gluten-free flours can absorb water differently.

What is the best way to store leftover flatbread?
You can store cooked flatbreads at room temperature for up to 2 days in a sealed container. If you want to keep them longer, refrigerate them in an airtight container for up to 3 days. For longer storage, wrap them in foil or plastic wrap and freeze for up to 1 month. Just warm them in a skillet before serving, and they’ll be good as new!

Can I freeze the flatbread?
Yes, you can! After cooking and cooling the flatbread, wrap each piece individually in foil or plastic wrap. Place them in a freezer-safe bag or container for up to 1 month. To defrost, simply leave them at room temperature or heat them in a skillet for a couple of minutes to enjoy that freshly made texture again.

What should I do if the dough is too sticky?
If you find the dough is sticky after mixing, don’t worry! Start by gradually adding more flour, a tablespoon at a time, until the dough is moist but manageable. Alternatively, if it feels too dry, add a splash more of ice water, mixing well until you achieve a pliable consistency that's easy to work with.

Can I add herbs or spices to the flatbread for added flavor?
Very! Feel free to be creative and enhance your flatbread by mixing in chopped herbs or spices into the dough while combining the dry ingredients. Options like dried oregano or garlic powder can elevate the flavor, making your Easy Flatbread a standout addition to any meal!

Is this recipe suitable for pets or people with allergies?
It's important to note that this Easy Flatbread contains gluten (unless using gluten-free flour) and may not be suitable for those with gluten allergies. Always check the specific ingredients you use, especially if preparing them for others with dietary restrictions or allergies, including pets! For a healthier approach, try using whole grain flour or adjust toppings accordingly.

Easy Flatbread Recipe

Delicious Easy Flatbread Recipe in Just 25 Minutes

Enjoy this Easy Flatbread Recipe that transforms bread-making into a quick and delicious treat.
Print Recipe Pin Recipe
Prep Time 10 minutes mins
Cook Time 15 minutes mins
Resting Time 10 minutes mins
Total Time 25 minutes mins
Servings: 10 pieces
Course: Snacks
Cuisine: Global
Calories: 120
Ingredients Equipment Method Nutrition Notes

Ingredients
  

For the Flatbread
  • 2 cups All-Purpose Flour Can substitute with gluten-free flour.
  • 1 tablespoon Baking Powder Essential for the rising effect.
  • 1 teaspoon Salt Enhances flavor.
  • 1 tablespoon Olive Oil Can substitute with vegetable oil.
  • 3/4 cup Ice Water Use chilled for best results.
  • 1 tablespoon Oil for Cooking Use olive or vegetable oil.
Optional Toppings
  • 1 teaspoon Garlic Powder Brush on post-cooking for extra flavor.
  • Olive Oil A drizzle can enhance richness.
  • 1 tablespoon Parsley Sprinkle on before serving.

Equipment

  • Mixing Bowl
  • Wooden spoon
  • Rolling Pin
  • non-stick skillet

Method
 

Main Steps
  1. In a mixing bowl, whisk together 2 cups of all-purpose flour, 1 tablespoon of baking powder, and 1 teaspoon of salt until well combined.
  2. Gradually stir in 1 tablespoon of olive oil and 3/4 cup of ice water into the dry mixture using a wooden spoon.
  3. Cover the dough with a clean kitchen towel and let it rest for 10 minutes at room temperature.
  4. Turn the rested dough onto a lightly floured surface and divide it into 10 to 12 equal pieces.
  5. Preheat a non-stick skillet over medium heat and add a drizzle of oil to coat the bottom.
  6. Carefully place one rolled flatbread in the hot skillet and cook for about 2 to 3 minutes on one side.
  7. Once cooked, transfer the flatbreads to a plate and, if desired, brush them with melted garlic butter or sprinkle with parsley.

Nutrition

Serving: 1pieceCalories: 120kcalCarbohydrates: 20gProtein: 3gFat: 4gSaturated Fat: 0.5gPolyunsaturated Fat: 1gMonounsaturated Fat: 2gSodium: 200mgPotassium: 50mgFiber: 1gCalcium: 1mgIron: 5mg

Notes

Store cooked flatbread at room temperature for up to 2 days. Refrigerate for up to 3 days, or freeze for longer storage.

Tried this recipe?

Let us know how it was!

Creamy Blueberry Cheesecake Overnight Oats for a Sweet Wake-Up

March 11, 2026 by Grace Snow Leave a Comment

The aroma of blueberry fields wafts through my memory as I recall lazy Sunday mornings spent savoring sweet treats. This is why I’m so excited to share my recipe for Blueberry Cheesecake Overnight Oats—a delightful way to transform your breakfast routine into a dessert-inspired affair! These oats blend the rich, creamy texture of cheesecake with nutritious ingredients like whole rolled oats and chia seeds, topped with vibrant blueberries. Not only are they incredibly quick to prepare, but they also make for an energizing meal that you can easily grab on busy mornings. Plus, they’re gluten-free with simple substitutions available for a vegan twist! Ready to indulge without the guilt? Let’s dive into this deliciously easy recipe that will have you waking up eager to enjoy breakfast!

Why Are Overnight Oats So Popular?

Deliciously Indulgent: These Blueberry Cheesecake Overnight Oats taste like dessert for breakfast, combining the creamy richness of cheesecake with wholesome ingredients.

Quick & Easy: Just mix, layer, and refrigerate! Perfect for those busy mornings when you need a breakfast that’s ready when you are.

Meal Prep Friendly: Prepare a batch for the week! Enjoy them fresh each day by making these oats up to 4 days in advance, so breakfast is hassle-free.

Nutrient-Rich: Packed with fiber and protein, these overnight oats provide a balanced meal that keeps you energized. Plus, check out our nutritional notes for a healthy start!

Customizable: Make them your own by adding various toppings or swapping in your favorite fruits. This recipe is your canvas for a delightful morning treat!

Blueberry Cheesecake Overnight Oats Ingredients

Get ready to create a delightful breakfast!

For the Oats Base

  • Whole Rolled Oats – Provides structure and heartiness; use gluten-free oats for a gluten-free variant.
  • Chia Seeds – Adds fiber and helps thicken the oats.
  • Cream Cheese – Delivers a rich, creamy texture reminiscent of cheesecake; substitute with dairy-free cream cheese for a vegan option.
  • Greek Yogurt – Offers creaminess and protein; any type of yogurt, including dairy-free, works well.
  • Maple Syrup – Acts as a natural sweetener; adjust to your taste preference.
  • Vanilla Extract – Enhances flavor and aroma.
  • Almond Milk – Liquid base that hydrates oats; feel free to use any variety of milk, including dairy or plant-based.

For the Blueberry Layer

  • Blueberries – Adds natural sweetness and antioxidants; fresh or frozen blueberries work beautifully in this recipe.

Step‑by‑Step Instructions for Blueberry Cheesecake Overnight Oats

Step 1: Mix Ingredients
In a large mixing bowl, combine whole rolled oats, chia seeds, cream cheese, Greek yogurt, maple syrup, almond milk, and vanilla extract. Using a whisk, mix vigorously for about 2-3 minutes until the blend is creamy and smooth. Ensure there are no lumps of cream cheese left, as the smooth consistency is key to the deliciousness of your Blueberry Cheesecake Overnight Oats.

Step 2: Prepare Blueberries
If you're using frozen blueberries, place them in a microwave-safe bowl and heat for 30 seconds to thaw. Once softened, mash the blueberries with a fork until they resemble a jam-like consistency. Set the mixture aside, allowing it to cool slightly, so it can be layered smoothly over the oats later.

Step 3: Layer Oats
Evenly distribute the creamy oat mixture into five jars or containers. For a beautiful presentation, you can either layer the mashed blueberries on top of the oats or gently swirl them in to create a marbled effect. Both methods will enhance the flavor profile of the Blueberry Cheesecake Overnight Oats!

Step 4: Refrigerate
Seal each jar with a lid or cover with plastic wrap, then place the jars in the refrigerator. Allow the oats to soak for at least 4 hours, but preferably overnight. This soaking time is essential for attaining the perfect creamy texture and allowing the flavors to meld together beautifully.

Step 5: Serve
Once your oats have soaked and thickened, take them out of the refrigerator. Add your favorite toppings, such as additional blueberries or a sprinkle of granola for crunch. You can enjoy the Blueberry Cheesecake Overnight Oats cold straight from the jar, or warm them in the microwave for about 30 seconds for a cozy touch.

Blueberry Cheesecake Overnight Oats Variations

Feel free to make this recipe your own and enjoy delightful twists on these tasty oats!

  • Nut-Free: Substitute creamy almond milk with oat or coconut milk for a nut-free option.
    Try different plant-based milks to see which suits you best; it opens up a world of flavor while keeping you allergen-friendly!

  • Vegan-Friendly: Use dairy-free cream cheese and yogurt to create a completely plant-based dish.
    You won't sacrifice creaminess; this twist ensures everyone can indulge in this luscious breakfast!

  • Extra Protein: Add a scoop of your favorite protein powder to the oat mix for a protein-packed version.
    This is perfect for those aiming to start their day with a little extra energy boost while enjoying the cheesecake flavor!

  • Flavor Infusion: Try swapping out vanilla extract for almond extract to give your oats a nutty taste.
    It adds a delightful twist that enhances the sweetness of the blueberries and brings a whole new vibe to your breakfast ritual!

  • Crunchy Topping: Incorporate a handful of granola or crushed nuts on top before serving for added texture.
    That satisfying crunch alongside the creamy oats makes every bite an exciting experience, ensuring you savor the moment!

  • Berry Medley: Mix it up and add other berries like strawberries or raspberries for a colorful, fruity explosion.
    Combining different fruits provides a variety of flavors, making breakfast an adventure each day—delight in the taste of summer year-round!

  • Spice It Up: Sprinkle in a dash of cinnamon or nutmeg for a cozy warmth.
    The spices bolster the creamy, dreamy oatmeal and create an inviting aroma that makes breakfast feel like a hug!

  • Maple Twist: Swap maple syrup with honey or agave syrup for a different sweetening experience.
    This change brings out unique flavors depending on what you prefer, allowing you to play with sweetness while enjoying your oats!

For more scrumptious variations, you might also enjoy reading about our delightful Flavor Boosts for Breakfast and Nutritious Add-Ins!

How to Store and Freeze Blueberry Cheesecake Overnight Oats

Fridge: Keep your Blueberry Cheesecake Overnight Oats in airtight containers, where they will last up to 4 days. If they become too thick, stir in a splash of milk before enjoying.

Freezer: For longer storage, these oats can be frozen in a freezer-safe container for up to 1 month. Thaw them overnight in the refrigerator before eating for the best texture.

Assembly: If you plan on freezing, layer your oats and blueberries in separate containers to maintain freshness and prevent sogginess.

Reheating: To serve cold, simply grab your jar from the fridge. If you enjoy them warm, heat for about 30 seconds in the microwave, stirring gently before enjoying!

Expert Tips for Blueberry Cheesecake Overnight Oats

  • Soak Time Matters: Ensure you allow the oats to soak for at least 4 hours, preferably overnight, to achieve the creamy texture reminiscent of cheesecake.

  • Sweetness Balance: Tailor the amount of maple syrup used according to your taste. Start with less, as the blueberries add natural sweetness!

  • Store Smartly: Keep leftovers in airtight containers for up to 4 days. If they thicken too much, simply stir in a splash of milk before serving.

  • Vegan Substitutions: For a vegan version of Blueberry Cheesecake Overnight Oats, opt for dairy-free cream cheese and yogurt to maintain that delightful creaminess without dairy.

  • Muffling Mess: When mixing, be sure to whisk vigorously to avoid lumps in the cream cheese, ensuring a smooth, creamy final product that everyone will enjoy.

Make Ahead Options

These Blueberry Cheesecake Overnight Oats are perfect for meal prep enthusiasts! You can prepare the creamy oat mixture and layer the mashed blueberries up to 4 days in advance. Simply mix all the ingredients together, then distribute them into jars. Seal with lids and refrigerate right away to maintain their freshness. As the oats soak in the refrigerator, they'll absorb the flavors and achieve that delightful creamy texture. When you’re ready to serve, just add any desired toppings and enjoy them cold right from the jar or warm them in the microwave for about 30 seconds for a cozy breakfast treat. This simple prep saves you time on busy mornings!

What to Serve with Blueberry Cheesecake Overnight Oats

Imagine waking up to a breakfast that feels indulgent and satisfying—let's build a delightful meal around these delicious oats!

  • Creamy Yogurt Parfait: Top your oats with a dollop of Greek yogurt for an extra creamy texture and a boost of protein to kickstart your day.

  • Toasty Almonds: Add a sprinkle of toasted almonds for a crunchy contrast that pairs beautifully with the creamy oats and sweet blueberries.

  • Fresh Fruit Salad: Serve alongside a vibrant fruit salad for a refreshing burst of flavor, adding variety and nutrition to your breakfast.

  • Sweet Granola: A crunchy granola topping brings sweetness and an irresistible texture, making each bite even more delightful!

  • Spiced Chai Latte: Enjoy a warm spiced chai latte to balance the sweetness of the oats while adding comforting spices to your morning routine.

  • Maple-Drizzled Pancakes: If you’re feeling adventurous, serve with mini pancakes drizzled in maple syrup for a breakfast feast that satisfies every craving.

Transform your breakfast routine into a morning celebration with these thoughtful pairings!

Blueberry Cheesecake Overnight Oats Recipe FAQs

What type of oats should I use for this recipe?
It’s best to use whole rolled oats for the perfect texture in your Blueberry Cheesecake Overnight Oats. If you require a gluten-free option, be sure to choose certified gluten-free oats to suit your dietary needs.

How long can I store Blueberry Cheesecake Overnight Oats?
These oats can be stored in airtight containers in the refrigerator for up to 4 days. If they thicken too much, simply stir in a splash of milk before serving to bring back that creamy consistency!

Can I freeze Blueberry Cheesecake Overnight Oats?
Absolutely! You can freeze your Blueberry Cheesecake Overnight Oats in a freezer-safe container for up to 1 month. To enjoy them, thaw in the refrigerator overnight before serving. For the best results, layer the oats and blueberries in separate containers to maintain texture.

What should I do if my oats are lumpy after mixing?
If you notice lumps in your mixture, don’t worry! Just continue whisking vigorously until everything is well combined, aiming for a smooth consistency. If lumps persist, you can give the mixture a quick blend using an immersion blender for that indulgent creamy texture.

Can I make this recipe vegan?
Yes! For a vegan version of Blueberry Cheesecake Overnight Oats, simply swap out the cream cheese and Greek yogurt with your favorite dairy-free alternatives. This will still give you that delightful creaminess while keeping it plant-based.

Blueberry Cheesecake Overnight Oats

Creamy Blueberry Cheesecake Overnight Oats for a Sweet Wake-Up

Delight in these Blueberry Cheesecake Overnight Oats, a creamy and nutritious breakfast dessert.
Print Recipe Pin Recipe
Prep Time 10 minutes mins
Refrigeration Time 4 hours hrs
Total Time 4 hours hrs 10 minutes mins
Servings: 5 jars
Course: Breakfast
Cuisine: American
Calories: 300
Ingredients Equipment Method Nutrition Notes

Ingredients
  

Oats Base
  • 1 cup Whole Rolled Oats Use gluten-free oats for a gluten-free variant.
  • 2 tablespoons Chia Seeds
  • 4 ounces Cream Cheese Substitute with dairy-free cream cheese for a vegan option.
  • 1 cup Greek Yogurt Any type of yogurt, including dairy-free, works well.
  • 2 tablespoons Maple Syrup Adjust to your taste preference.
  • 1 teaspoon Vanilla Extract
  • 1 cup Almond Milk Feel free to use any variety of milk.
Blueberry Layer
  • 1 cup Blueberries Fresh or frozen blueberries work well.

Equipment

  • Mixing Bowl
  • Whisk
  • Microwave-safe bowl
  • Jars or containers

Method
 

Preparation
  1. In a large mixing bowl, combine whole rolled oats, chia seeds, cream cheese, Greek yogurt, maple syrup, almond milk, and vanilla extract. Using a whisk, mix vigorously for about 2-3 minutes until the blend is creamy and smooth.
  2. If using frozen blueberries, place them in a microwave-safe bowl and heat for 30 seconds to thaw. Mash the blueberries until they resemble a jam-like consistency.
  3. Evenly distribute the creamy oat mixture into five jars or containers. Layer or swirl the mashed blueberries on top.
  4. Seal each jar or cover and place them in the refrigerator. Allow the oats to soak for at least 4 hours, preferably overnight.
  5. Once soaked, serve with additional blueberries or granola. Enjoy cold or warm in the microwave for 30 seconds.

Nutrition

Serving: 1jarCalories: 300kcalCarbohydrates: 45gProtein: 10gFat: 10gSaturated Fat: 5gPolyunsaturated Fat: 0.5gMonounsaturated Fat: 4gCholesterol: 15mgSodium: 150mgPotassium: 300mgFiber: 6gSugar: 10gVitamin A: 200IUVitamin C: 5mgCalcium: 200mgIron: 1.5mg

Notes

Ensure to soak overnight for the best texture. Adjust sweetness to taste and store leftovers in airtight containers for up to 4 days.

Tried this recipe?

Let us know how it was!

Carrot Cake Overnight Oats for a Sweet, Healthy Start

March 11, 2026 by Grace Snow Leave a Comment

As I stood in my kitchen, the sweet aroma of spices wafting through the air, I was instantly transported back to my favorite childhood treats. These 10-Ingredient Carrot Cake Overnight Oats combine all the delightful flavors of classic carrot cake into a nutritious breakfast that'll have you grinning from ear to ear. Not only are they gluten-free and vegan, but they also require just a few minutes of prep the night before, making weekday breakfasts a breeze. With the morning rush, who wouldn’t want to savor a healthy meal that tastes like dessert? Plus, they keep you energized throughout the day, leaving you feeling great about your choices. Curious about how to whip up this delicious spin on a breakfast classic? Let’s dive into the recipe!

Why Choose Carrot Cake Overnight Oats?

Versatile: With simple substitutions like swapping oat milk for almond milk, you can easily tailor this recipe to fit your dietary needs.

Quick Prep: Combining ingredients takes only minutes, making these oats a fabulous option for busy mornings. Just prepare them the night before and breakfast is ready when you are!

Nutritious & Satisfying: Packed with fiber and healthy fats, this dish keeps you full and energized without the guilt. Each jar is a wholesome treat that fuels your day.

Sweet, Comforting Flavor: Enjoy the warm, nostalgic taste of carrot cake while nourishing your body. The unique blend of spices and sweetness makes breakfast feel indulgent!

Crowd-Pleaser: Perfect for family breakfasts or brunch with friends, these oats are sure to impress. They even work well as a make-ahead snack for any time of day!

Ready to indulge in a perfect morning treat? You’ll adore how these Carrot Cake Overnight Oats can make your mornings sweeter and healthier!

Carrot Cake Overnight Oats Ingredients

For the Base
• Rolled Oats – your main ingredient providing texture and fiber.
• Chia Seeds – adds thickness and healthy omega-3 fatty acids; substitute with ground flaxseed if needed.
• Oat Milk – serves as the liquid base; adjust for thickness or swap with almond milk for a nutty flavor.

For Flavor and Sweetness
• Ground Cinnamon – brings in the warm sweetness; feel free to substitute with pumpkin pie spice.
• Nutmeg – enhances the flavor profile; optional if you prefer a simpler taste.
• Salt – just a pinch enhances sweetness; keep it light at ⅛ teaspoon.
• Maple Syrup – a natural sweetener that pairs beautifully with carrots; substitute with agave syrup for a different sweetness.

For Creaminess
• Vegan Cream Cheese – adds creaminess and tang, reminiscent of classic carrot cake; plain vegan yogurt is a lighter alternative.
• Vanilla Bean Paste – adds aromatic sweetness; you can use vanilla extract instead for easier access.

For Nutrition
• Peeled & Grated Carrots – essential for the carrot cake flavor and nutrition; fresh or pre-packaged grated carrots work perfectly.

Now that you have your ingredients lined up, let’s get ready to create this delightful Carrot Cake Overnight Oats recipe that will elevate your breakfast game!

Step‑by‑Step Instructions for Carrot Cake Overnight Oats

Step 1: Whisk the Dry Ingredients
In a mixing bowl, combine 1 cup of rolled oats, 2 tablespoons of chia seeds, 1 teaspoon of ground cinnamon, a pinch of nutmeg (if using), and ⅛ teaspoon of salt. Whisk these ingredients together for about 30 seconds until they are well mixed. The dry ingredients should be evenly distributed, giving a warm and inviting aroma reminiscent of carrot cake spices.

Step 2: Incorporate the Wet Ingredients
Next, pour in 1 cup of oat milk and add 2 tablespoons of maple syrup, 2 tablespoons of vegan cream cheese, 1 teaspoon of vanilla bean paste, and 1 cup of peeled and grated carrots to the bowl. Use a spatula to gently fold these wet ingredients into the dry mixture, ensuring there are no clumps of cream cheese remaining. Stir until you achieve a thick, consistent batter that reflects the essence of delicious Carrot Cake Overnight Oats.

Step 3: Jar It Up
Once your mixture is combined, divide it evenly between two glass jars or airtight containers. Make sure to pack the mixture down gently to minimize air pockets. Seal the jars tightly with their lids, and ensure they are snugly closed to keep the flavors intact overnight. This step is essential to set the oats and blend the flavors.

Step 4: Chill Overnight
Place the sealed jars in the refrigerator and allow them to chill for at least 6 hours, preferably overnight. As they sit, the oats will absorb the liquid, softening and thickening into a delightful texture. By morning, the Carrot Cake Overnight Oats will be ready, having transformed into a creamy, flavorful breakfast treat that you can’t wait to enjoy.

Step 5: Add Toppings and Serve
In the morning, take the jars out of the fridge and give the oats a gentle stir. Add your favorite toppings like a dollop of plant-based yogurt, a sprinkle of crushed pecans, or even a drizzle of maple syrup for extra sweetness. Serve them cold for a refreshing breakfast that captures all the warmth of classic carrot cake flavors in each spoonful.

Expert Tips for Carrot Cake Overnight Oats

  • Mix Thoroughly: Ensure you break up any clumps of vegan cream cheese. A smooth mixture helps the oats achieve the perfect creamy texture.

  • Customize Ingredients: Feel free to swap ingredients like oat milk for almond milk. Adjust based on your taste preferences or dietary needs to enjoy your Carrot Cake Overnight Oats fully!

  • Storage Basics: Store in the fridge and consume within 3 days for the best flavor and texture. The oats are great as a make-ahead option for a busy week ahead.

  • Avoid Freezing: Freezing may alter the texture of your oats, so enjoy them fresh or within the specified storage time to maintain that delightful creaminess.

  • Experiment with Toppings: Top with fresh fruit, a drizzle of nut butter, or even a sprinkle of toasted coconut to elevate the flavors and nutrition of your breakfast treat.

Carrot Cake Overnight Oats Variations

Feel free to put your own twist on these delicious oats and make them uniquely yours!

  • Nut-Free: Omit walnuts entirely and replace with sunflower seeds for a safe, nut-free option. Enjoy the crunch without worry!
  • Fruit Boost: Toss in 1/2 a mashed banana for extra creaminess and natural sweetness. It adds a fantastic flavor twist that's simply divine!
  • Spiced Up: Add a pinch of ginger or cardamom for an exciting depth of flavor that transforms your breakfast into a fragrant experience.
  • Berry Bliss: Stir in a handful of fresh or frozen blueberries or raspberries before serving. Their tartness beautifully complements the sweetness of the oats!
  • Chocolate-Lover's Dream: Swirl in a spoonful of cocoa powder or dark chocolate chips for a cozy, indulgent dessert vibe in your morning meal. It’s a treat you won’t forget!
  • Creamy Coconut: Substitute oat milk with coconut milk and add shredded coconut on top for a tropical twist that feels like a vacation in a jar.
  • Healthy Crunch: Sprinkle some granola on top before serving for an extra crunch that tempts your taste buds. It turns breakfast into a delightful textural experience!
  • Sweet and Spicy: Infuse with a dash of cayenne pepper or chili flakes for a hint of heat alongside the sweetness. It’s an adventurous breakfast that packs a punch!

Now, if you're looking for even more inspiration, consider pairing your enchanting oats with a cup of rich Chocolate Pudding Cake for a delightful dessert. Or explore the delicious layers of an Ice Cream Cake for a lavish treat after your wholesome breakfast!

Make Ahead Options

These Carrot Cake Overnight Oats are a lifesaver for busy mornings! You can prepare the entire mixture up to 24 hours in advance, making them perfect for meal prep. Simply follow the recipe instructions up to Step 3 and divide the mixture into airtight jars. Seal and refrigerate overnight (or for at least 6 hours) to allow the flavors to meld. To maintain quality, ensure the jars are tightly sealed to prevent air exposure, which keeps the oats fresh and creamy. When you’re ready to enjoy, just give the jars a quick stir, add your favorite toppings, and look forward to a breakfast that tastes indulgent yet wholesome!

How to Store and Freeze Carrot Cake Overnight Oats

Fridge: Store the Carrot Cake Overnight Oats in a sealed container in the fridge for up to 3 days. This ensures they retain their delightful flavor and creamy texture.

Freezer: Avoid freezing your overnight oats, as the texture may change upon thawing, resulting in a less enjoyable experience.

Reheating: These oats are best enjoyed cold right out of the fridge. If you prefer them warm, heat gently in a microwave, adding a splash of oat milk if needed to restore creaminess.

Air-tight Storage: Use airtight containers to prevent moisture and maintain freshness for your overnight oats, ensuring they remain a delicious start to your day.

What to Serve with Carrot Cake Overnight Oats?

Transform your breakfast into a feast with these delightful pairings that complement the sweet and spicy flavors of carrot cake!

  • Fresh Fruit: The brightness of seasonal berries or sliced bananas adds a refreshing contrast while enhancing the overall nutritional content. Their juicy textures harmonize beautifully with the creamy oats.

  • Nuts & Seeds: A sprinkle of toasted walnuts or pecans provides a satisfying crunch that balances the creaminess, delivering that comforting, nutty flavor reminiscent of traditional carrot cake.

  • Nut Butter Drizzle: A smooth drizzle of almond or peanut butter adds depth and protein, creating a rich, indulgent feel that enhances the sweet, spiced oats.

  • Plant-Based Yogurt: A dollop of vanilla coconut yogurt atop your oats introduces a cool, creamy element that amplifies the dessert-like nature of the Carrot Cake Overnight Oats.

  • Maple Syrup: A touch of pure maple syrup as a topping enhances the sweetness while echoing the flavors of the dish, making each bite feel like a delightful indulgence.

  • Herbal Tea or Coffee: Sip on a warm cup of chai or your favorite brew alongside your oats, inviting aromatic spices and warmth to complement your breakfast experience.

Carrot Cake Overnight Oats Recipe FAQs

How do I choose ripe carrots for my overnight oats?
Absolutely! When selecting carrots, look for ones that are firm and vibrant in color. Avoid any that are limp or have dark spots or blemishes. Fresh carrots will have a sweet, earthy aroma, enhancing the overall flavor of your Carrot Cake Overnight Oats.

What is the best way to store Carrot Cake Overnight Oats?
Very! Store your Carrot Cake Overnight Oats in an airtight container in the fridge for up to 3 days. This ensures they stay fresh and maintain their creamy texture. Just make sure the lid is tightly sealed to keep out moisture and odors.

Can I freeze Carrot Cake Overnight Oats?
I recommend avoiding freezing your overnight oats. While technically possible, freezing can alter the texture of the oats and creaminess of the vegan cream cheese, resulting in an unappealing consistency when thawed. Instead, savor them fresh within the 3-day window for the best flavor and texture.

What should I do if my overnight oats are too thick?
Not an issue! If your Carrot Cake Overnight Oats end up thicker than you’d like, simply stir in a splash of oat milk in the morning to achieve your desired consistency. This will help rehydrate and soften the mixture for a perfect spoonful straight from the jar.

Are these overnight oats suitable for those with nut allergies?
Yes, they can be! The Carrot Cake Overnight Oats are naturally nut-free when using oat milk as the liquid base. If you add nuts like walnuts or pecans as toppings, simply choose your favorite alternatives or omit them to keep the recipe safe for your dietary needs.

Can I customize the sweetness in my overnight oats?
Absolutely! You can easily adjust the sweetness by adding more or less maple syrup based on your taste preferences. If you prefer a different sweetener, agave syrup or even a banana puree can also offer delightful alternatives for flavor customization.

Carrot Cake Overnight Oats

Carrot Cake Overnight Oats for a Sweet, Healthy Start

These Carrot Cake Overnight Oats are a nutritious breakfast that tastes like dessert, gluten-free and vegan.
Print Recipe Pin Recipe
Prep Time 10 minutes mins
Chill Time 6 hours hrs
Total Time 6 hours hrs 10 minutes mins
Servings: 2 jars
Course: Breakfast
Cuisine: Vegan
Calories: 350
Ingredients Equipment Method Nutrition Notes

Ingredients
  

For the Base
  • 1 cup Rolled Oats
  • 2 tablespoons Chia Seeds can substitute with ground flaxseed
  • 1 cup Oat Milk can substitute with almond milk
For Flavor and Sweetness
  • 1 teaspoon Ground Cinnamon can substitute with pumpkin pie spice
  • 1 pinch Nutmeg optional
  • ⅛ teaspoon Salt enhances sweetness
  • 2 tablespoons Maple Syrup can substitute with agave syrup
For Creaminess
  • 2 tablespoons Vegan Cream Cheese or use plain vegan yogurt
  • 1 teaspoon Vanilla Bean Paste can use vanilla extract instead
For Nutrition
  • 1 cup Peeled & Grated Carrots

Equipment

  • Mixing Bowl
  • Whisk
  • Spatula
  • glass jars or airtight containers

Method
 

Step-by-Step Instructions
  1. In a mixing bowl, combine 1 cup of rolled oats, 2 tablespoons of chia seeds, 1 teaspoon of ground cinnamon, a pinch of nutmeg (if using), and ⅛ teaspoon of salt. Whisk these ingredients together for about 30 seconds until they are well mixed.
  2. Pour in 1 cup of oat milk and add 2 tablespoons of maple syrup, 2 tablespoons of vegan cream cheese, 1 teaspoon of vanilla bean paste, and 1 cup of peeled and grated carrots to the bowl. Gently fold these wet ingredients into the dry mixture until you achieve a thick, consistent batter.
  3. Divide the mixture evenly between two glass jars or airtight containers, packing gently to minimize air pockets. Seal the jars tightly with their lids.
  4. Place the sealed jars in the refrigerator and allow them to chill for at least 6 hours, preferably overnight.
  5. In the morning, take the jars out of the fridge, stir, and add your favorite toppings like plant-based yogurt, crushed pecans, or a drizzle of maple syrup. Serve them cold.

Nutrition

Serving: 1jarCalories: 350kcalCarbohydrates: 50gProtein: 9gFat: 12gSaturated Fat: 2gPolyunsaturated Fat: 2gMonounsaturated Fat: 6gSodium: 150mgPotassium: 300mgFiber: 8gSugar: 10gVitamin A: 6000IUVitamin C: 2mgCalcium: 200mgIron: 2mg

Notes

Store in the fridge and consume within 3 days for the best flavor and texture. Avoid freezing to maintain texture.

Tried this recipe?

Let us know how it was!

Hot Honey Pepperoni Ricotta Pizza: Your New Summer Favorite

March 11, 2026 by Grace Snow Leave a Comment

As the sun sets on a warm summer evening, the smell of something incredible wafts through the air—it's not just any pizza; it's the Hot Honey Pepperoni Ricotta Pizza. With spicy pepperoni and velvety ricotta marrying together under a luscious drizzle of sweet hot honey, this homemade pizza promises a sensational burst of flavors in every bite. What I love most about this recipe is its effortless assembly and quick cook time, making it a perfect choice for impromptu gatherings or cozy nights in. Plus, it's a guaranteed crowd-pleaser, leaving everyone craving a second slice! Are you ready to elevate your pizza game and impress your friends and family this summer?

Why is this pizza a game-changer?

Flavor Explosion: This Hot Honey Pepperoni Ricotta Pizza delivers a perfect balance of sweet, spicy, and savory that tantalizes your taste buds.

Quick and Easy: You can whip it up in no time, making it ideal for last-minute summer cookouts or casual dinners.

Versatile Toppings: Feel free to mix and match toppings! Swap pepperoni for vegetables or try different cheeses like feta for a unique twist. Check out my recipe for Herby Ricotta Stuffed Peppers to inspire your creativity.

Perfect for Sharing: This pizza is not only satisfying but it’s also a crowd-pleaser, great for any gathering or family night.

Gourmet Experience: Elevate your pizza game and create a gourmet experience right at home with minimal effort, reminiscent of pizzeria favorites!

Get ready for a flavor-packed summer!

Hot Honey Pepperoni Ricotta Pizza Ingredients

For the Dough
• Pizza Dough – Use store-bought for convenience or make your own for a personal touch.

For the Sauce
• Tomato Sauce – Adds moisture and tang; feel free to swap it with pesto for a different flavor profile.

For the Cheese
• Mozzarella Cheese – Provides that melty goodness; consider using provolone or vegan cheese as a substitute.
• Ricotta Cheese – Adds a creamy texture; cottage cheese works too, just dollop it instead of spreading.

For the Toppings
• Pepperoni – Brings a spicy crunch; replace with sliced bell peppers for a vegetarian option.
• Hot Honey – The secret ingredient that adds sweetness and heat; you can make your own by infusing honey with chili flakes.
• Fresh Basil – Offers a delightful aroma; highly recommended for an extra layer of flavor.
• Red Pepper Flakes – Sprinkle for added heat; simply omit if you prefer a milder taste.

Enjoy making your Hot Honey Pepperoni Ricotta Pizza, where every bite is a delicious adventure!

Step‑by‑Step Instructions for Hot Honey Pepperoni Ricotta Pizza

Step 1: Preheat the Oven
Begin by preheating your oven to 500°F (260°C), placing a pizza stone or a baking sheet inside to heat for 30 minutes. This ensures a crispy crust for your Hot Honey Pepperoni Ricotta Pizza. While you wait, take in the anticipation of deliciousness to come as the oven warms up.

Step 2: Prepare the Dough
On a floured surface, roll out your pizza dough into a 12-inch round. Aim for an even thickness for a uniform bake, and create a slight border around the edges. This base will hold all those yummy toppings and provide a sturdy foundation for your flavorful pizza.

Step 3: Add Tomato Sauce
Spread a generous amount of tomato sauce over your rolled-out dough, leaving about a ½-inch border around the edges. Ensure an even layer, as this will keep the dough moist and flavorful without overwhelming the toppings. This layer adds the perfect tangy contrast to your Hot Honey Pepperoni Ricotta Pizza.

Step 4: Layer the Cheese
Next, sprinkle mozzarella cheese evenly across the sauce, covering it well for that melty goodness. Then, strategically place slices of pepperoni atop the cheese, ensuring they are evenly distributed. This arrangement allows the flavors to meld beautifully as you layer on dollops of creamy ricotta in the next step.

Step 5: Add Ricotta
Now, take your ricotta cheese and dollop it around the pizza, avoiding a complete spread to maintain its creamy texture. The ricotta's richness will create a delightful contrast to the spiciness of the pepperoni. This combination is what truly makes your Hot Honey Pepperoni Ricotta Pizza shine!

Step 6: Bake the Pizza
Carefully transfer your assembled pizza onto the preheated stone or baking sheet. Bake for 8–12 minutes, watching closely for the crust to turn golden brown and the cheese to bubble. The enticing aromas filling your kitchen will signal that your delicious pizza is nearly ready.

Step 7: Drizzle with Hot Honey
Once your pizza is golden and bubbling, remove it from the oven and immediately drizzle hot honey over the top. This step is crucial, as it elevates the flavors, balancing the savory and spicy elements with its sweet kick. The hot honey is what makes the Hot Honey Pepperoni Ricotta Pizza a standout!

Step 8: Garnish and Serve
Finish your pizza by topping it with fresh basil and a sprinkle of red pepper flakes if you want an extra kick. Slice into pieces and serve warm, allowing everyone to enjoy the delightful combination of flavors. This pizza is now ready to impress at your summer gatherings!

Expert Tips for Hot Honey Pepperoni Ricotta Pizza

• Preheat Properly: Ensure your oven is fully preheated with a pizza stone or baking sheet for the crispiest crust.

• Dollop the Ricotta: Avoid spreading ricotta; dollop it around the pizza to maintain its creamy texture and elevate each bite.

• Generous with Hot Honey: Drizzle a generous amount of hot honey after baking; it’s the star ingredient that beautifully ties all flavors together.

• Use a Pizza Peel: A pizza peel makes transferring your pizza to and from the oven easier, preventing any messy mishaps during cooking.

• Experiment with Toppings: Don’t hesitate to mix up toppings! The Hot Honey Pepperoni Ricotta Pizza is versatile—swap ingredients to suit your taste.

Storage Tips for Hot Honey Pepperoni Ricotta Pizza

Fridge: Store leftover pizza in an airtight container in the refrigerator for up to 3 days. This keeps it fresh while maintaining flavor.

Freezer: If you need to freeze your Hot Honey Pepperoni Ricotta Pizza, wrap it tightly in plastic wrap and aluminum foil. It can be frozen for up to 2 months.

Reheating: To restore crispiness, reheat individual slices in a preheated oven at 375°F (190°C) for about 10 minutes. This method helps keep the crust crunchy.

Avoid Moisture: Make sure the pizza is completely cooled before storing. Any moisture can lead to sogginess, diminishing that delightful taste!

Make Ahead Options

These Hot Honey Pepperoni Ricotta Pizza components are perfect for meal prep, saving you time on busy weeknights! You can prepare the pizza dough and toppings up to 24 hours in advance. Simply roll out the dough and store it in an airtight container in the refrigerator to prevent drying out. For the toppings, chop the pepperoni and prepare ricotta, storing them separately to maintain freshness. When you’re ready to bake, spread the sauce on the dough, layer the toppings, and bake as instructed. This way, you can enjoy a delicious homemade pizza with minimal effort and maximum flavor, keeping your evenings stress-free and delightful!

Hot Honey Pepperoni Ricotta Pizza Variations

Feel free to let your creativity run wild with these fun and delicious twists on this delightful pizza!

  • Gluten-Free: Use gluten-free pizza dough or a cauliflower crust for a lighter option. This makes it accessible for everyone to enjoy!
  • Vegetarian: Replace pepperoni with a colorful assortment of vegetables like bell peppers, onions, or mushrooms. Add a touch of brightness and flavor!
  • Spicy Kick: Add jalapeños or banana peppers for an extra spicy zing. Perfect for those who love a little more heat on their plate!
  • Herbed Twist: Mix fresh herbs like thyme and oregano into your ricotta for an aromatic flavor boost. You’ll enjoy a delightful herbaceous note with every bite.
  • Different Cheeses: Swap mozzarella for provolone, gouda, or even blue cheese for a unique flavor profile. Imagine the tanginess of blue cheese mingling with the sweet hot honey!
  • Barbecue Style: Replace the tomato sauce with barbecue sauce and add diced chicken for a BBQ chicken-inspired pizza. It’s a delicious change of pace! You can also try my recipe for Honey BBQ Chicken for more BBQ inspiration.
  • Sweet Twist: Top your pizza with thinly sliced figs or pears along with the ricotta for a sweet and savory combination. Each bite will be a delightful surprise!
  • Asian Influence: Drizzle with soy sauce or teriyaki sauce before serving for a flavor-packed pizza with an Asian flair. The sweet and salty accents complement the hot honey beautifully!

These variations will surely elevate your pizza experience to new heights. Enjoy experimenting!

What to Serve with Hot Honey Pepperoni Ricotta Pizza

As you prepare to savor this delicious pizza, consider these delightful pairings that will create a beautifully complete meal experience.

  • Fresh Green Salad: A crisp salad with mixed greens and a tangy vinaigrette lightens the meal, balancing the pizza's richness perfectly.
  • Garlic Bread: Warm, buttery garlic bread offers a comforting crunch that complements the soft, creamy pizza textures beautifully. A perfect precursor to the main event!
  • Grilled Vegetables: The smoky flavors of grilled zucchini, bell peppers, and eggplant add a refreshing contrast, enhancing the overall flavor profile of the meal.
  • Crispy Potato Wedges: Seasoned potato wedges provide a flavorful crunch. Their hearty nature makes them a satisfying addition alongside your pizza.
  • Red Wine: A light-bodied red wine like Pinot Noir pairs excellently, cutting through the richness of ricotta while enhancing the sweet heat of the hot honey.
  • Lemonade: Refreshing homemade lemonade balances the pizza's spicy notes with its citrusy sweetness— offering a delightful, thirst-quenching companion!
  • Panna Cotta: For dessert, consider a light panna cotta infused with vanilla. Its smooth creaminess stands in sweet contrast to the spicy pizza, providing a well-rounded finish to your meal.
  • Fruit Salad: A vibrant mix of seasonal fruits with a hint of mint offers a refreshing, sweet ending. The colors and flavors will brighten your dining table as well!
  • Craft Beer: A hoppy IPA complements the spicy pepperoni, enhancing the flavor while cleansing the palate after each cheesy bite.
  • Chocolate Mousse: For a rich dessert, a light and airy chocolate mousse provides a decadent yet refreshing end after your satisfying pizza.

Hot Honey Pepperoni Ricotta Pizza Recipe FAQs

How do I choose the right ripeness for my ingredients?
Absolutely! For this pizza, select fresh ingredients to enhance the flavor. Choose ripe tomatoes for your sauce and creamy ricotta without any excess moisture. When picking basil, look for vibrant green leaves with no dark spots. For the pepperoni, opt for quality slices that are firm and free of any discoloration.

How do I store leftover Hot Honey Pepperoni Ricotta Pizza?
You can store leftover pizza in an airtight container in the refrigerator for up to 3 days. This keeps it fresh while maintaining its delicious flavor. Just make sure to let the pizza cool down completely before sealing it away. You’ll love how it stays tasty!

Can I freeze Hot Honey Pepperoni Ricotta Pizza?
Certainly! To freeze, wrap the pizza tightly in plastic wrap and then in aluminum foil to prevent freezer burn. It can be frozen for up to 2 months. When you're ready to enjoy it again, just thaw in the fridge overnight before reheating, and enjoy that crispy crust!

What if my pizza doesn’t cook evenly?
If your pizza doesn’t cook evenly, it may be due to insufficient preheating. Ensure your pizza stone or baking sheet is preheated for a full 30 minutes before baking. Also, remember not to overload your pizza with toppings, as this can make it soggy. Stick to moderate amounts for the best results!

Are there any dietary considerations for this pizza?
Very! For a vegetarian option, you can easily swap the pepperoni for a variety of colorful veggies like bell peppers or mushrooms. If you're concerned about allergies, ensure your cheese, dough, and sauce are free from allergens, like nuts or gluten, depending on your needs. You can find gluten-free pizza dough at most grocery stores!

Hot Honey Pepperoni Ricotta Pizza

Hot Honey Pepperoni Ricotta Pizza

Experience a flavor explosion with the Hot Honey Pepperoni Ricotta Pizza, the perfect summer delight.
Print Recipe Pin Recipe
Prep Time 15 minutes mins
Cook Time 12 minutes mins
Total Time 27 minutes mins
Servings: 4 slices
Course: Dinner
Cuisine: Italian
Calories: 300
Ingredients Equipment Method Nutrition Notes

Ingredients
  

Dough
  • 1 lb Pizza Dough Store-bought or homemade
Sauce
  • 1 cup Tomato Sauce Or substitute with pesto
Cheese
  • 1 cup Mozzarella Cheese Or use provolone or vegan cheese
  • 1/2 cup Ricotta Cheese Can substitute with cottage cheese
Toppings
  • 1 cup Pepperoni Or substitute with sliced bell peppers
  • 1/4 cup Hot Honey Can make by infusing honey with chili flakes
  • 1 cup Fresh Basil Highly recommended for extra flavor
  • 1 tsp Red Pepper Flakes Omit if you prefer a milder taste

Equipment

  • Oven
  • Pizza stone
  • Baking Sheet
  • Rolling Pin
  • Pizza Peel

Method
 

Preparation Steps
  1. Preheat your oven to 500°F (260°C) with a pizza stone or baking sheet inside for 30 minutes.
  2. Roll out your pizza dough into a 12-inch round on a floured surface.
  3. Spread a generous amount of tomato sauce over the dough, leaving about a ½-inch border.
  4. Sprinkle mozzarella cheese evenly over the sauce, then add pepperoni slices.
  5. Dollop ricotta cheese around the pizza.
  6. Transfer the pizza to the preheated stone or baking sheet and bake for 8–12 minutes.
  7. Drizzle hot honey over the pizza once it’s baked.
  8. Garnish with fresh basil and red pepper flakes, slice, and serve.

Nutrition

Serving: 1sliceCalories: 300kcalCarbohydrates: 30gProtein: 15gFat: 12gSaturated Fat: 5gPolyunsaturated Fat: 1gMonounsaturated Fat: 4gCholesterol: 30mgSodium: 600mgPotassium: 200mgFiber: 2gSugar: 4gVitamin A: 500IUVitamin C: 2mgCalcium: 200mgIron: 1mg

Notes

Allow the pizza to cool before storing if you have leftovers. It can be stored in the fridge for 3 days or frozen for up to 2 months.

Tried this recipe?

Let us know how it was!

BBQ Chicken Flatbread Pizza: Quick, Flavorful Family Delight

March 8, 2026 by Grace Snow Leave a Comment

As I pulled my BBQ Chicken Flatbread Pizza from the oven, the enticing aroma of smoky BBQ mingled with bubbling cheese filled my kitchen like a warm embrace. This quick and flavorful dish is not only a delightful treat but also a lifesaver for busy weeknights, ready in just 22 minutes! Made with crispy flatbread, tender BBQ chicken, and customizable toppings, it’s a family-friendly meal that even the pickiest eaters will love. What's more, this recipe is a fantastic gluten-free option for those conscious of their dietary needs. Ready to dig into a satisfying slice of homemade comfort? Let’s get cooking!

Why is BBQ Chicken Flatbread Pizza a winner?

Quick Cooking: In just 22 minutes, you can serve up a delicious meal that caters to even the busiest schedules.

Family-Friendly: This recipe is a hit with both kids and adults, making it perfect for family dinners or gatherings.

Customizable: With endless topping options, everyone can build their perfect pizza! Add veggies, swap proteins, or even experiment with different cheeses.

Healthy Choices: Utilizing gluten-free flatbread and whole grains can make this dish a nutritious option for health-conscious families.

Flavor Explosion: The combination of smoky BBQ sauce, melted cheese, and crispy flatbread delivers an unforgettable flavor that rivals your favorite takeout.

Want more ideas? Check out our recipes for Honey BBQ Chicken or Crock Pot Chicken for more delicious options!

BBQ Chicken Flatbread Pizza Ingredients

• Perfect mix for a tasty meal!

For the Flatbread Base

  • Gluten-Free Flatbread – Use gluten-free options to cater to dietary needs without sacrificing taste.

For the Chicken Topping

  • Shredded Chicken – Main protein source; rotisserie chicken makes it quick and easy.
  • BBQ Sauce – Adds that smoky, tangy flavor; go for your favorite store-bought or homemade blend.

For Baking

  • Olive Oil – Brush the flatbread to achieve a crispy, golden crust.

For the Cheese

  • Shredded Mozzarella Cheese – Melts perfectly for a gooey texture; low-fat alternatives can reduce calories.

For Extra Flavor

  • Red Onion – Adds a satisfying crunch and sharp taste, elevating overall flavor.
  • Fresh Cilantro – Optional but fresh; it adds a pop of color and brightens the dish.

Feel free to mix and match these ingredients to make your own perfect BBQ Chicken Flatbread Pizza!

Step‑by‑Step Instructions for BBQ Chicken Flatbread Pizza

Step 1: Preheat the Oven
Begin by preheating your oven to 400°F (200°C). This step is crucial for achieving a perfectly crispy and golden flatbread base for your BBQ Chicken Flatbread Pizza. Allow the oven to reach the desired temperature while you prepare the rest of your ingredients.

Step 2: Combine Chicken & BBQ Sauce
In a mixing bowl, take your shredded chicken and generously coat it with your favorite BBQ sauce. Stir until the chicken is fully covered, ensuring every bite will be packed with flavor. This will take about 2-3 minutes.

Step 3: Prepare Flatbreads
Spread out your gluten-free flatbreads on a baking sheet, ensuring they have enough space between each one. With a brush or your fingers, lightly coat the surface of each flatbread with olive oil, which will help achieve a crispy texture during baking.

Step 4: Assemble Pizza
Now it’s time to assemble your BBQ Chicken Flatbread Pizza! Evenly distribute the BBQ chicken mixture over each flatbread, followed by a generous sprinkle of shredded mozzarella cheese. Finish by adding slices of red onion for an extra crunch and flavor in every bite.

Step 5: Bake
Carefully place the baking sheet in the preheated oven. Bake for 10-12 minutes, or until the cheese is bubbling and golden, and the edges of the flatbread are nicely crispy. Keep an eye on them during the last few minutes to prevent overbaking.

Step 6: Garnish & Serve
Once out of the oven, let the BBQ Chicken Flatbread Pizza cool for a minute. For a fresh touch, sprinkle with chopped cilantro. Slice into portions and serve hot. Your delicious, homemade comfort meal is ready to be enjoyed by the whole family!

Expert Tips for BBQ Chicken Flatbread Pizza

• Preheat Your Oven: Always make sure your oven is fully preheated at 400°F (200°C) to avoid a soggy flatbread base.

• Watch the Baking Time: Keep an eye on your pizza as it bakes; the last few minutes are crucial to achieving that perfect golden brown color without burning.

• Use Quality BBQ Sauce: A flavorful BBQ sauce enhances the overall taste of your BBQ Chicken Flatbread Pizza. Don't skimp on quality!

• Experiment with Toppings: Feel free to get creative with additional toppings like bell peppers, jalapeños, or even pineapple for a sweet contrast.

• Storage Savvy: If you have leftovers, store them in an airtight container in the fridge for up to 3 days. Reheat in the oven to maintain crispiness.

BBQ Chicken Flatbread Pizza Variations

Inviting your taste buds to explore flavors, this BBQ Chicken Flatbread Pizza is a wonderful canvas for creativity!

  • Vegetarian: Swap shredded chicken for black beans or grilled vegetables to create a heartwarming meatless option.
  • Spicy Twist: Add jalapeños or a sprinkle of red pepper flakes for those who crave an extra kick in their pizza experience.
  • Cheesy Delight: Experiment with different cheeses like sharp cheddar or creamy goat cheese for a unique flavor profile.
  • Herb Infusion: Toss in fresh basil or oregano with the cilantro for an aromatic twist that elevates every bite.
  • BBQ Sauce Alternatives: Try different sauces like honey mustard or chipotle for a smoky and sweet variation, adding depth to your dish.
  • Crunchy Veggies: Load your pizza with fresh spinach or diced bell peppers, giving it a nutritious boost and vibrant color.
  • Flatbread Alternatives: Switch to a cauliflower crust or whole grain flatbread for a health-conscious approach without sacrificing taste.
  • Fusion Flavors: Combine BBQ chicken with an Asian flair by adding sliced green onions and a drizzle of teriyaki sauce!

Ready to explore more recipes? Pair this pizza with refreshing options like Honey Garlic Chicken or delicious Chipotle Lime Chicken and Rice for a delightful spread!

Make Ahead Options

Preparing BBQ Chicken Flatbread Pizza in advance is a total lifesaver for busy weeknights! You can prepare the BBQ chicken mixture up to 24 hours in advance; simply mix shredded chicken with BBQ sauce and store it in an airtight container in the refrigerator. The flatbreads can also be brushed with olive oil and stored in a separate container. When you're ready to cook, just assemble the flatbreads with the prepped chicken, sprinkle with mozzarella and red onions, then bake as usual for 10-12 minutes. This method ensures your pizza comes out just as delicious, saving you time while still delivering that fresh, homemade taste your family loves!

How to Store and Freeze BBQ Chicken Flatbread Pizza

Fridge: Store leftovers in an airtight container for up to 3 days. Make sure to let the pizza cool completely before sealing to maintain texture.

Freezer: For longer storage, wrap the BBQ Chicken Flatbread Pizza tightly in plastic wrap followed by aluminum foil. It will keep well for up to three months.

Reheating: When ready to enjoy again, bake in a preheated oven at 350°F (175°C) for about 10-15 minutes to restore its crispy texture and melt the cheese.

Serving Suggestion: Add fresh toppings or a drizzle of warm BBQ sauce upon reheating to refresh the flavor of your leftover BBQ Chicken Flatbread Pizza.

What to Serve with BBQ Chicken Flatbread Pizza

Enhance your meal experience with delightful sides that complement the warm, smoky flavors of your BBQ Chicken Flatbread Pizza.

  • Crispy Sweet Potato Fries: Their natural sweetness and crunch create a lovely contrast to the savory pizza, making every bite memorable. Dip them in a zesty aioli for an extra flavor boost.

  • Garden Fresh Salad: A crisp salad full of mixed greens, cherry tomatoes, and a tangy vinaigrette adds a refreshing brightness that perfectly balances the richness of the pizza. The crunch of the veggies keeps the meal light and enjoyable.

  • Grilled Corn on the Cob: Smoky, charred corn brushed with lime butter brings a sweet, juicy flavor to your plate. It's perfect for summer BBQ vibes and is always a crowd-pleaser.

  • Garlic Breadsticks: Soft and buttery with a hint of garlic, these breadsticks provide that comforting, chewy texture that pairs beautifully with the BBQ Chicken Flatbread Pizza.

  • Roasted Veggies: A medley of seasonal roasted vegetables, like bell peppers and zucchini, not only adds color to your meal but also offers a healthy dose of nutrients. Their earthy warmth complements the bold flavors of the pizza.

  • Iced Tea or Lemonade: Refreshing and light, a glass of sweet iced tea or homemade lemonade offers a perfect cooling balance to the smoky richness of your pizza. Both drinks are family-friendly and easy to prepare!

BBQ Chicken Flatbread Pizza Recipe FAQs

How do I choose the right flatbread?
Absolutely! When selecting flatbread, look for options that are soft and pliable without dark spots all over, which indicates staleness. Gluten-free flatbreads are widely available and can be found in most grocery stores. I recommend checking the ingredient list for whole grains to enhance the nutritional value while maintaining that desirable texture.

What is the best way to store leftover BBQ Chicken Flatbread Pizza?
Leftovers can be stored in the fridge for up to 3 days. To do this, allow your pizza to cool completely, then place it in an airtight container or wrap it tightly in plastic wrap. This will help retain its flavor and texture. For longer storage, consider freezing it.

How can I freeze BBQ Chicken Flatbread Pizza properly?
Absolutely! To freeze your BBQ Chicken Flatbread Pizza, start by allowing it to cool completely. Wrap individual slices tightly in plastic wrap, then follow with aluminum foil to prevent freezer burn. This method allows you to enjoy the pizza for up to three months. Whenever you're ready to eat, simply reheat in a preheated oven at 350°F (175°C) for 10-15 minutes until the cheese is melty again.

What should I do if my flatbread is soggy after baking?
Very! Soggy flatbread might occur if the oven isn’t preheated properly or if too much BBQ sauce is used. To avoid this, make sure your oven reaches 400°F (200°C) before baking. If using a lot of sauce, consider draining some excess sauce from the chicken mixture to keep the texture crispy. Finally, keeping an eye on the baking time will help avoid overbaking or underbaking.

Can I make this BBQ Chicken Flatbread Pizza vegetarian?
Absolutely! For a delicious vegetarian version, swap the shredded chicken for grilled veggies or marinated tofu. You can also add toppings like bell peppers, mushrooms, or zucchini for an exciting flavor twist. Just ensure that your BBQ sauce is vegetarian-friendly, as some brands may contain meat-based ingredients.

Is BBQ Chicken Flatbread Pizza safe for my gluten-sensitive family members?
Yes! By using gluten-free flatbread and ensuring all other ingredients (like BBQ sauce and cheese) are gluten-free, you can create a delicious meal that caters to gluten-sensitive eaters. However, always double-check ingredient labels to ensure they are gluten-free. Your family can enjoy this comforting dish without worry!

BBQ Chicken Flatbread Pizza

BBQ Chicken Flatbread Pizza: Quick, Flavorful Family Delight

This BBQ Chicken Flatbread Pizza is a quick and flavorful family delight that caters to busy weeknights.
Print Recipe Pin Recipe
Prep Time 10 minutes mins
Cook Time 12 minutes mins
Total Time 22 minutes mins
Servings: 4 slices
Course: Dinner
Cuisine: American
Calories: 350
Ingredients Equipment Method Nutrition Notes

Ingredients
  

For the Flatbread Base
  • 2 pieces Gluten-Free Flatbread Use gluten-free options to cater to dietary needs without sacrificing taste.
For the Chicken Topping
  • 2 cups Shredded Chicken Rotisserie chicken makes it quick and easy.
  • 1/2 cup BBQ Sauce Adds smoky, tangy flavor.
For Baking
  • 1 tablespoon Olive Oil Brush the flatbread to achieve a crispy, golden crust.
For the Cheese
  • 1 cup Shredded Mozzarella Cheese Melts perfectly for a gooey texture.
For Extra Flavor
  • 1/4 cup Red Onion Adds crunch and sharp taste.
  • 1/4 cup Fresh Cilantro Optional but adds color.

Equipment

  • Oven
  • Baking Sheet
  • Mixing Bowl

Method
 

Step‑by‑Step Instructions
  1. Preheat your oven to 400°F (200°C).
  2. In a mixing bowl, take shredded chicken and coat it with BBQ sauce. Stir until fully covered.
  3. Spread out flatbreads on a baking sheet and lightly coat each with olive oil.
  4. Assemble the pizza by distributing BBQ chicken mixture over flatbreads, adding mozzarella cheese, and slices of red onion.
  5. Bake for 10-12 minutes until cheese is bubbly and flatbread is crispy.
  6. Let cool for a minute, garnish with cilantro, slice, and serve hot.

Nutrition

Serving: 1sliceCalories: 350kcalCarbohydrates: 35gProtein: 25gFat: 15gSaturated Fat: 7gPolyunsaturated Fat: 1gMonounsaturated Fat: 7gCholesterol: 70mgSodium: 800mgPotassium: 400mgFiber: 2gSugar: 5gVitamin A: 200IUVitamin C: 3mgCalcium: 200mgIron: 2mg

Notes

Feel free to mix and match ingredients to create your perfect BBQ Chicken Flatbread Pizza.

Tried this recipe?

Let us know how it was!

Decadent White Mushroom Pizza for Cozy Nights In

March 8, 2026 by Grace Snow Leave a Comment

As I pulled my latest creation from the oven, the warm aroma of garlic and sautéed mushrooms filled the kitchen—a comforting hug on a chilly evening. This Creamy White Pizza with Garlic Herb Mushrooms brings together the melty goodness of mozzarella and ricotta, creating an indulgent yet quick meal that will have everyone reaching for seconds. Whether you're hosting a casual get-together or enjoying a cozy night in, this vegetarian delight offers the perfect balance of flavors and textures that make it a true crowd-pleaser. Plus, it’s a fantastic way to elevate your homemade pizza game without breaking a sweat! Ready to discover how to whip up this scrumptious dish? Let’s dive in!

Why is this White Mushroom Pizza a must-try?

Simplicity at Its Best: Not only is this recipe quick to whip up, but it also uses everyday ingredients you likely already have in your kitchen.

Rich, Savory Flavor: The combination of garlic, cremini mushrooms, and two cheeses gives each bite an umami explosion that you won’t forget!

Perfect for Any Occasion: Serve this pizza for casual dinners or special gatherings—it's sure to impress family and friends alike.

Comforting and Satisfying: With its gooey mozzarella and creamy ricotta, this pizza provides a comforting experience, reminiscent of a cozy meal in your favorite Italian restaurant.

Versatile at Heart: Feel free to mix in sautéed spinach or swap cheeses for more variety. For an extra treat, serve it alongside a simple salad or some garlic knots to elevate your meal!

White Mushroom Pizza Ingredients

• Get ready to enjoy this cozy delight!

For the Pizza Base

  • Olive Oil – Adds flavor and helps crisp the crust. Can use any neutral oil.
  • Pizza Dough (1 pound) – The foundation of your pizza; can be homemade or store-bought. Whole wheat dough is a healthier option.
  • Yellow Cornmeal – Sprinkled on the baking surface to prevent sticking and create a crunchy bottom. Flour works as a substitute if needed.

For the Toppings

  • Unsalted Butter – Provides richness and enhances the flavor of sautéed garlic and mushrooms. Use additional olive oil for a dairy-free alternative.
  • Garlic (minced) – Adds aromatic depth; fresh garlic ensures the best flavor.
  • Cremini Mushrooms (thinly sliced) – The main topping; they offer a delicious umami flavor. Substitute with button mushrooms or shiitake if preferred.
  • Dried Thyme and Oregano – Give a lovely herbal note to the mushroom mix; fresh herbs can be used for three times the amount.
  • Kosher Salt and Freshly Ground Black Pepper – Essential for enhancing overall flavor; adjust to taste.

For the Cheese Layer

  • Wisconsin Fresh Mozzarella Cheese (8 ounces) – Melty cheese topping for that gooey texture. Any fresh mozzarella will work too.
  • Wisconsin Ricotta Cheese (1 cup) – Creamy dollops that provide a luscious texture; cottage cheese can be a lower-fat substitute.

Add these ingredients to your shopping list for a delightful White Mushroom Pizza that’s sure to impress!

Step‑by‑Step Instructions for Creamy White Pizza with Garlic Herb Mushrooms

Step 1: Preheat and Prepare the Baking Surface
Start by preheating your oven to 450°F (232°C) to ensure a hot environment for your Creamy White Pizza. While the oven heats, generously grease a baking sheet or pizza pan with olive oil, ensuring an even coating that will help create a crispy crust. Sprinkle yellow cornmeal on the surface to prevent sticking and add a delightful crunch to the bottom of the pizza.

Step 2: Sauté the Aromatics and Mushrooms
In a large skillet, melt 2 tablespoons of unsalted butter over medium heat. Once it’s bubbling, add 3 cloves of minced garlic and sauté for about 1-2 minutes until fragrant. Next, toss in 8 ounces of thinly sliced cremini mushrooms, 1 teaspoon of dried thyme, and 1 teaspoon of dried oregano. Season with kosher salt and freshly ground black pepper. Cook for 5-6 minutes, stirring occasionally until the mushrooms soften and take on a lovely golden brown color.

Step 3: Roll Out the Pizza Dough
On a clean, cornmeal-dusted surface, take your 1-pound pizza dough and roll it out into a 12-inch round. Use a rolling pin to achieve a uniform thickness, keeping an eye on the edges for evenness. If the dough resists stretching, let it rest for a few minutes. Prepare for the grand assembly of your delicious White Mushroom Pizza by ensuring it retains a nicely shaped round form.

Step 4: Assemble the Pizza
Carefully transfer your rolled-out dough to the prepared baking pan. Begin layering your toppings by evenly spreading 8 ounces of fresh mozzarella cheese across the surface, followed by generous dollops of 1 cup of ricotta cheese. Finally, evenly distribute the sautéed mushroom mixture on top, ensuring each slice will be bursting with flavor.

Step 5: Bake the Pizza
Place the assembled pizza into your preheated oven and bake for 15-20 minutes. Keep an eye on it as it bakes; you're looking for a golden brown crust and bubbling, melted cheeses. The tantalizing aroma of your White Mushroom Pizza wafting through the kitchen will surely whet your appetite as you await the finishing touches.

Step 6: Serve and Enjoy
Once your pizza is baked to perfection, remove it from the oven and let it cool for a minute. Cut the Creamy White Pizza into slices, savoring the gooey mozzarella and creamy ricotta atop the flavorful mushrooms. Serve it hot and enjoy this delightful dish with family or friends, relishing every bite of comfort food joy!

How to Store and Freeze White Mushroom Pizza

Fridge: Store leftovers in an airtight container for up to 3 days. Reheat in the oven at 350°F until warmed through to maintain the pizza's texture.

Freezer: Wrap slices tightly in plastic wrap or foil, then place in a freezer-safe container for up to 2 months. Thaw in the fridge before reheating.

Reheating: For the best taste and texture, reheat in the oven rather than the microwave. Bake at 350°F for about 10-15 minutes until heated.

Freshness Tip: For optimal flavor, consume your White Mushroom Pizza within a few days, and avoid letting it sit out for more than 2 hours to ensure food safety.

Expert Tips for White Mushroom Pizza

  • Mushroom Prep: Ensure mushrooms are well-dried: Pat them dry with paper towels to avoid excess moisture that can make your pizza soggy.

  • Dough Handling: Be gentle with the dough: If it resists stretching, let it rest for a few minutes before rolling to prevent tearing.

  • Flavor Boost: Add greens: Consider mixing sautéed spinach or arugula into the mushroom mixture for added nutrition and flavor.

  • Cheese Variations: Experiment with cheeses: Swap in different cheeses like goat or fontina for unique tastes and textures in your White Mushroom Pizza.

  • Oven Check: Keep an eye on baking time: Ovens can vary, so start checking around 15 minutes to ensure a perfectly golden crust.

Make Ahead Options

These Creamy White Pizza with Garlic Herb Mushrooms are perfect for meal prep enthusiasts! To save time on busy weeknights, you can sauté the mushrooms and prepare the cheese mixture up to 24 hours in advance. Simply store the mushroom mix in an airtight container in the refrigerator until you're ready to assemble the pizza. You can also roll out the dough in advance, just wrap it well to prevent it from drying out. When you're ready to enjoy your White Mushroom Pizza, preheat the oven, assemble with the cheese and mushroom mixture, and bake for 15-20 minutes. This way, you’ll have a delicious homemade pizza that’s ready to delight your family with minimal effort!

What to Serve with Creamy White Pizza with Garlic Herb Mushrooms

Elevate your pizza night by pairing this comforting dish with complementary sides and drinks that enhance its delicious flavors.

  • Simple Side Salad: A light, refreshing salad with mixed greens and a tangy vinaigrette balances the rich, cheesy pizza. The crispness of fresh vegetables adds a contrast that brightens every bite.

  • Garlic Knots: Soft, buttery garlic knots are perfect for sopping up any leftover cheese or sauce, making your meal feel indulgent and complete while keeping it cozy.

  • Roasted Vegetables: Roasted seasonal veggies offer a savory depth that harmonizes with the pizza's creamy texture and earthy mushroom flavor. The delightful caramelization enhances the overall experience.

  • Chilled White Wine: A glass of chilled Sauvignon Blanc pairs beautifully, enhancing the creamy cheese's richness while providing a refreshing, crisp counterpoint to the dish's warmth.

  • Herbed Olive Oil Dip: Serve a small dish of herbed olive oil for dipping your crusts. This simple addition brings an extra layer of flavor and encourages everyone to enjoy every last bite!

  • Chocolate Mousse: For dessert, a light and airy chocolate mousse provides a perfect sweet closure to your meal, with its creamy texture resonating well after the savory pizza.

  • Sparkling Water with Lemon: Quench your thirst with sparkling water adorned with a twist of lemon. Its effervescence refreshes the palate, making it a delightful addition to a cozy dinner table.

White Mushroom Pizza Variations

Feel free to customize this delicious recipe! Let your creativity shine as you explore exciting twists and substitutions for your pizza.

  • Meat Lover's Delight: Add cooked sausage or prosciutto on top for a savory protein boost that complements the rich cheeses beautifully.

  • Fresh Greens: Incorporate sautéed spinach or arugula for a burst of color and a fresh, earthy flavor that brightens each bite.

  • Cheese Swap: Try using goat cheese or fontina instead of mozzarella and ricotta for a unique flavor profile that surprises and delights.

  • Spicy Kick: Sprinkle red pepper flakes or drizzle with hot honey just before serving to introduce a delightful heat that elevates the take on comfort food.

  • Nutty Touch: Add crushed walnuts or pine nuts on top for extra crunch and a nutty flavor that contrasts beautifully with the creamy cheeses.

  • Herbaceous Twist: Fresh basil or thyme added on top just before serving can amplify the aroma, giving a pop of freshness that complements the rich flavors.

  • Veggie Heaven: Mix in roasted bell peppers or zucchini with your mushrooms; it adds flavor and nutrition, making the pizza even more wholesome.

  • Gourmet Touch: Drizzle a bit of truffle oil over the finished pizza for a luxurious finishing touch that elevates the overall flavor experience.

For more ideas on mixing flavors, try pairing this with sautéed greens or additional herbs, and don't forget to enjoy on the side with some of those delectable garlic knots that would make your meal complete!

White Mushroom Pizza Recipe FAQs

What type of mushrooms should I use for this pizza?
Absolutely! Cremini mushrooms are a fantastic choice as they offer a rich umami flavor. However, if they're not available, feel free to use button mushrooms or shiitake mushrooms for a slightly different taste profile.

How should I store leftovers of my White Mushroom Pizza?
Very simple! Just place any leftover slices in an airtight container and store them in the refrigerator for up to 3 days. To reheat, pop them in the oven at 350°F (175°C) until warmed through for a deliciously crispy crust.

Can I freeze this White Mushroom Pizza?
Yes, you can! Wrap individual slices tightly in plastic wrap or foil and store them in a freezer-safe container. It’s good for up to 2 months. When you're ready to enjoy it again, let it thaw in the refrigerator overnight, and reheat in the oven for the best results.

What’s the best way to avoid a soggy pizza?
To prevent sogginess, make sure to dry the sautéed mushrooms well before adding them to the pizza. Pat them down with paper towels to remove excess moisture. Additionally, preheating your oven adequately and using a cornmeal dusting on the baking surface helps keep that crust crispy!

Are there any dietary considerations I should keep in mind?
If you have dietary restrictions, this White Mushroom Pizza is vegetarian. For a dairy-free option, swap the butter with olive oil and use dairy-free cheese alternatives. Be mindful of any specific allergies related to mushrooms or dairy products and adjust accordingly.

White Mushroom Pizza

Decadent White Mushroom Pizza for Cozy Nights In

This White Mushroom Pizza is a creamy, comforting dish perfect for cozy nights, blending garlic, mushrooms, and two cheeses into a delicious pizza experience.
Print Recipe Pin Recipe
Prep Time 15 minutes mins
Cook Time 20 minutes mins
Total Time 35 minutes mins
Servings: 4 slices
Course: Dinner
Cuisine: Italian
Calories: 300
Ingredients Equipment Method Nutrition Notes

Ingredients
  

For the Pizza Base
  • 1 tablespoon Olive Oil Adds flavor and helps crisp the crust.
  • 1 pound Pizza Dough Can be homemade or store-bought.
  • 1 tablespoon Yellow Cornmeal Sprinkled to prevent sticking.
For the Toppings
  • 2 tablespoons Unsalted Butter Provides richness.
  • 3 cloves Garlic Minced; adds aromatic depth.
  • 8 ounces Cremini Mushrooms Thinly sliced; the main topping.
  • 1 teaspoon Dried Thyme Herbal note to the mixture.
  • 1 teaspoon Dried Oregano Herbal note to the mixture.
  • Kosher Salt Adjust to taste.
  • Freshly Ground Black Pepper Adjust to taste.
For the Cheese Layer
  • 8 ounces Wisconsin Fresh Mozzarella Cheese Melty cheese topping.
  • 1 cup Wisconsin Ricotta Cheese Creamy dollops.

Equipment

  • Oven
  • Baking Sheet
  • Large skillet
  • Rolling Pin

Method
 

Step-by-Step Instructions
  1. Preheat your oven to 450°F (232°C) and grease a baking sheet or pizza pan with olive oil. Sprinkle yellow cornmeal on the surface.
  2. Melt unsalted butter in a skillet over medium heat. Add garlic and sauté for 1-2 minutes. Stir in sliced mushrooms, thyme, oregano, salt, and pepper. Cook for 5-6 minutes until mushrooms are tender.
  3. Roll out the pizza dough on a cornmeal-dusted surface to a 12-inch round.
  4. Transfer the rolled-out dough to the prepared baking pan. Spread mozzarella cheese, followed by dollops of ricotta. Top with the sautéed mushroom mixture.
  5. Bake in the oven for 15-20 minutes until the crust is golden brown and cheese is bubbling.
  6. Remove, cool for a minute, slice, and serve hot.

Nutrition

Serving: 1sliceCalories: 300kcalCarbohydrates: 35gProtein: 12gFat: 15gSaturated Fat: 8gPolyunsaturated Fat: 1gMonounsaturated Fat: 6gCholesterol: 30mgSodium: 600mgPotassium: 400mgFiber: 2gSugar: 2gVitamin A: 15IUVitamin C: 4mgCalcium: 20mgIron: 10mg

Notes

For the best flavor, ensure mushrooms are well-dried and consider adding greens for additional nutrition.

Tried this recipe?

Let us know how it was!
  • « Previous Page
  • 1
  • …
  • 7
  • 8
  • 9
  • 10
  • 11
  • …
  • 179
  • Next Page »

Welcome!

Hi, I’m Grace, a Sydney-based home cook with a passion for bold flavors and trending ingredients. Whether you’re a busy beginner or a seasoned foodie, you’ll find dishes here that are fresh, fun, and full of flavor.

More about me

Popular Recipes

  • Cheesy Chicken Garlic Bread Sandwich
    Cheesy Chicken Garlic Bread Sandwich for Cozy Family Moments
  • Easy Chicken Ranch Wraps
    Easy Chicken Ranch Wraps: Quick, Creamy & Totally Satisfying
  • Chicken Caesar Sandwiches
    Delicious Chicken Caesar Sandwiches for Quick Comfort Food
  • best Cuban sandwich
    The Best Cuban Sandwich You’ll Want Every Weeknight!

Footer

↑ back to top

About

  • Privacy Policy
  • Disclaimer
  • Terms & Conditions

Newsletter

  • Sign Up! for emails and updates

Contact

  • About me
  • Contact me

Copyright © 2025 TastyTrendIngredients