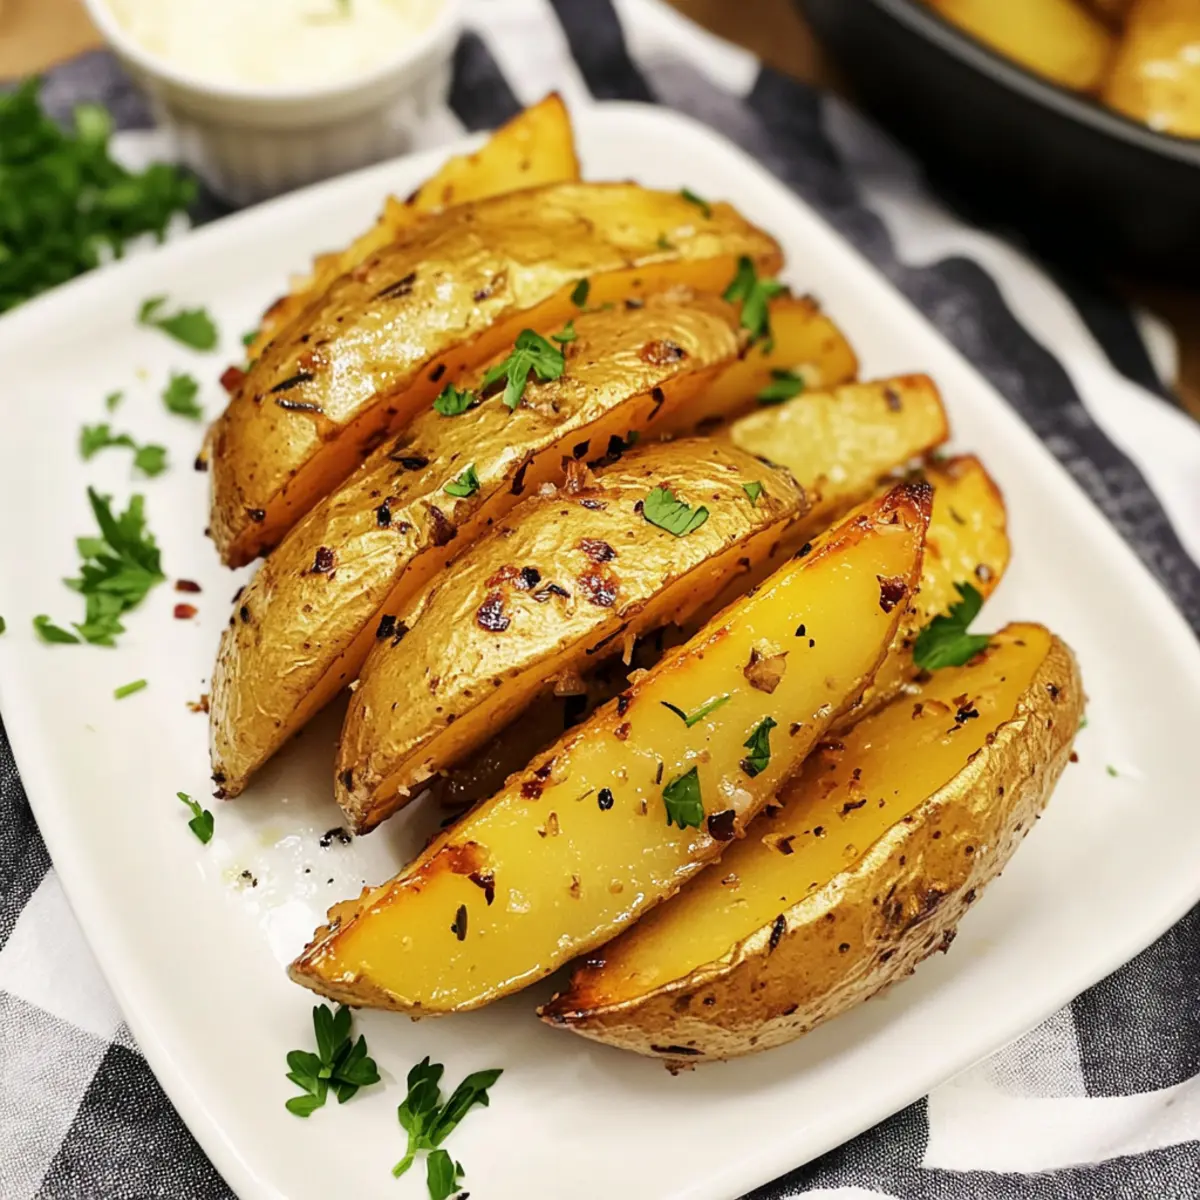
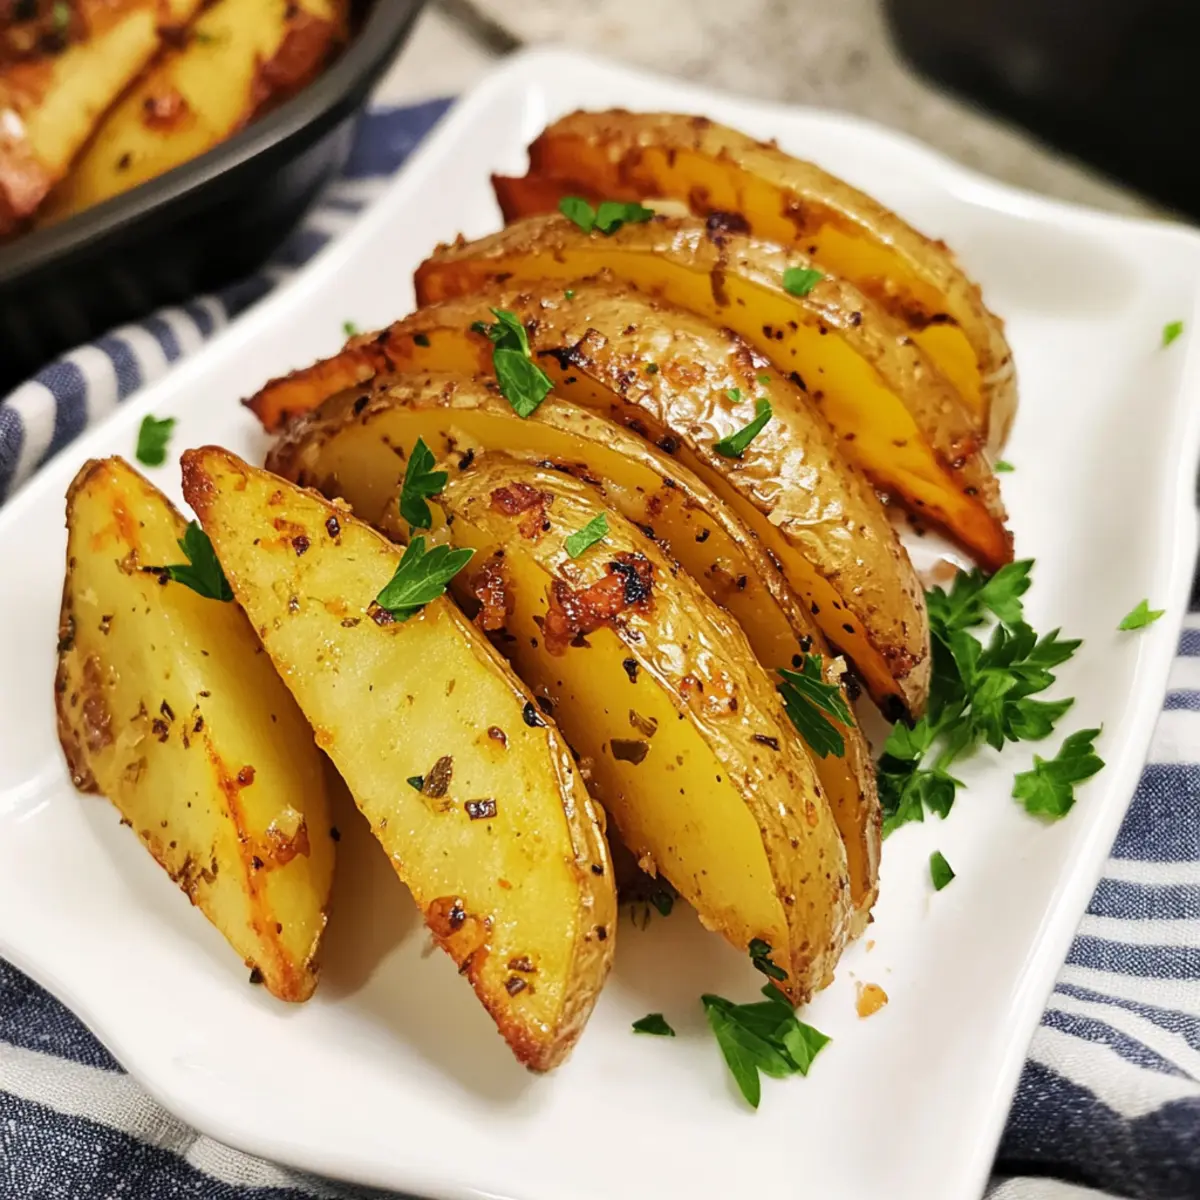
In the hustle and bustle of daily life, coming home to the warm aroma of freshly baked Garlic Butter Potato Wedges feels like a comforting embrace. These crispy delights transform your evenings into something special, all while being incredibly quick and easy to prepare. With just a handful of ingredients, you can whip up a batch of these delectable wedges in under 30 minutes, making them the perfect side dish for cozy family dinners or small gatherings. Not only do they deliver on flavor, but they also offer a twist on traditional fries—thanks to the luscious garlic butter sauce that envelops each wedge. Who needs takeout when homemade goodness is just a few steps away? Ready to impress your taste buds and your loved ones? Let's dive into this scrumptious recipe together!
Why are Garlic Butter Potato Wedges irresistible?
Quick and Easy: These Garlic Butter Potato Wedges are perfect for anyone who desires a delicious side dish without the hassle of complicated recipes.
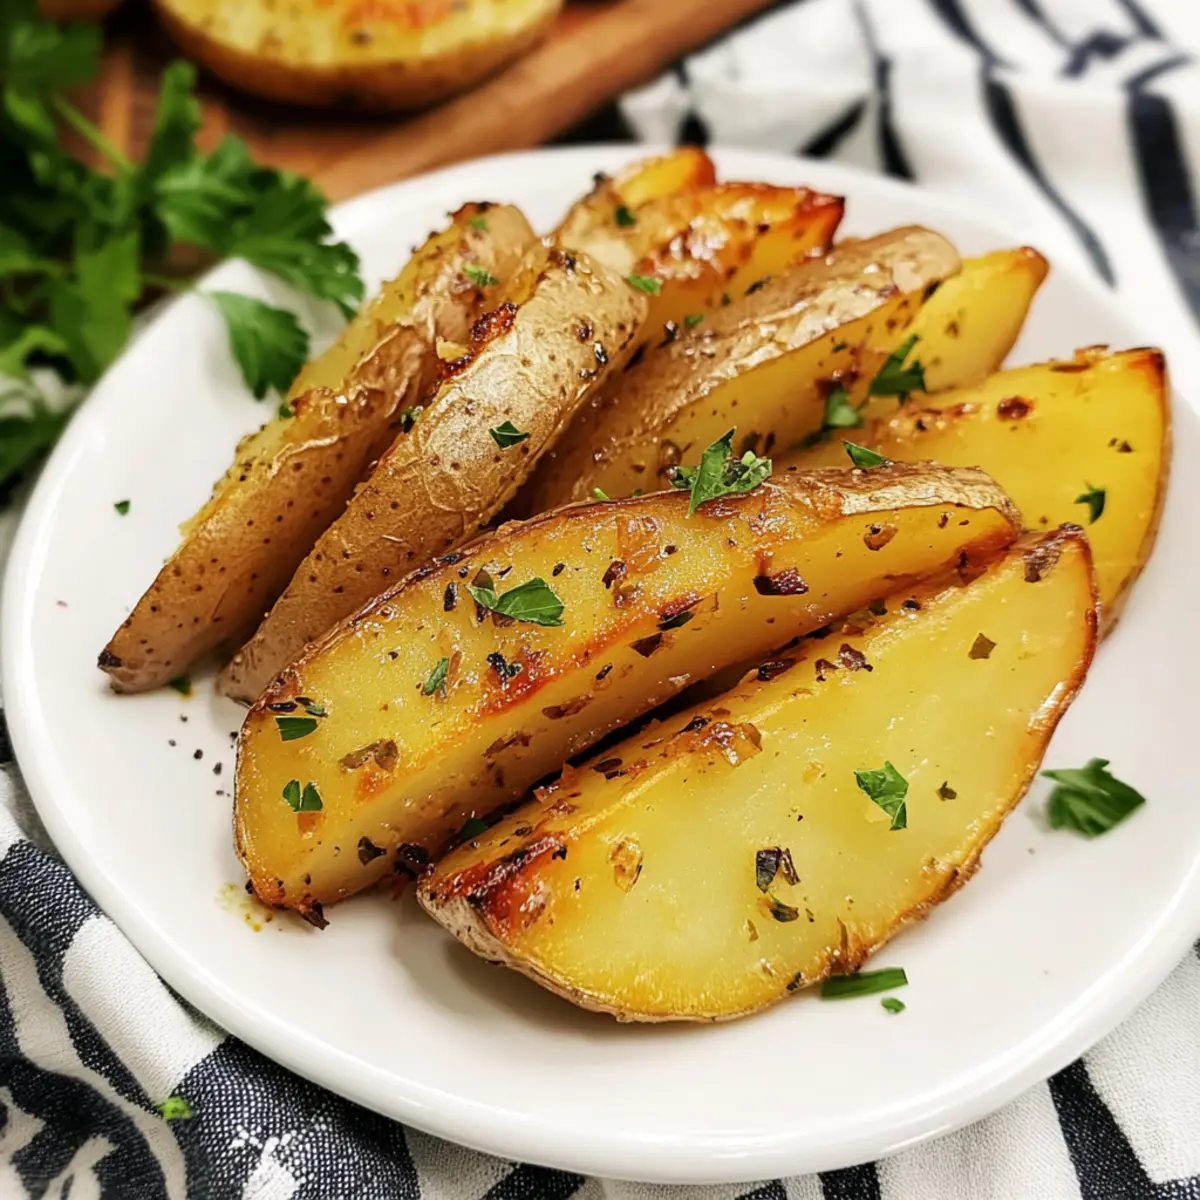
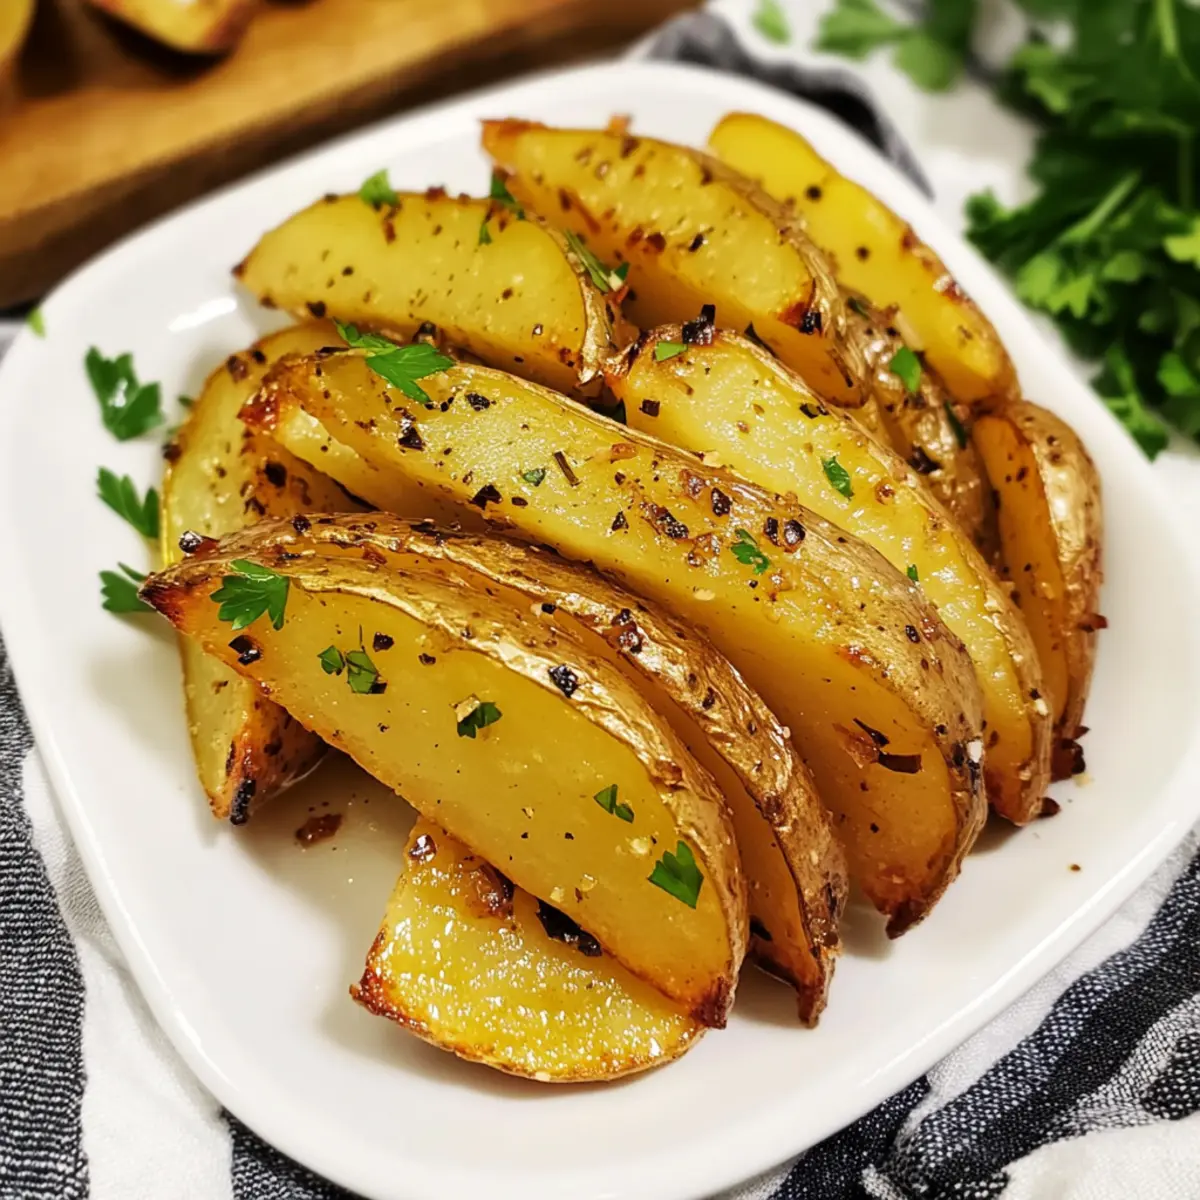
Crispy Goodness: Baked to perfection, their golden-brown edges create a satisfying crunch that contrasts beautifully with their fluffy interiors.
Flavor Explosion: The rich garlic butter sauce infuses each wedge with an irresistible savory flavor, ensuring that every bite is a delightful experience.
Versatile Side Dish: Pair them with burgers, grilled meats, or even a hearty salad, making them a flexible addition to any meal.
Crowd-Pleaser: Whether it’s a family dinner or a small gathering, these wedges bring people together with their mouthwatering aroma and taste.
Enhance your meal with a side of Garlic Aioli or some homemade ranch for that extra special touch!
Garlic Butter Potato Wedges Ingredients
For the Wedges
- Gold Potatoes – These provide a fluffy interior; starchy potatoes are your best bet for perfect wedges.
- Melted Butter – This is the heart of the garlic butter flavor; substitute with dairy-free margarine for a dairy-free option.
- Garlic (minced) – Essential for that fragrant flavor; in a pinch, garlic powder can serve as a quick substitute.
- Dried Rosemary or Preferred Herb – Enhances the dish with earthy notes; fresh herbs can brighten the flavor beautifully.
- Salt and Black Pepper – Brightens up the taste; feel free to adjust to your liking for the perfect seasoning.
- Fresh Parsley (optional) – Adds a pop of color and freshness when sprinkled on top before serving.
Ready to bring these crispy Garlic Butter Potato Wedges to life? Let's get cooking!
Step‑by‑Step Instructions for Garlic Butter Potato Wedges
Step 1: Preheat the Oven
Begin by preheating your oven to 425°F (220°C). While the oven warms up, line a baking sheet with parchment paper to prevent sticking and promote even cooking. This preparation ensures your Garlic Butter Potato Wedges will bake to crispy perfection without any fuss.
Step 2: Make the Garlic Butter Mixture
In a large mixing bowl, combine melted butter, minced garlic, dried rosemary, salt, and black pepper. Stir well until all the ingredients are thoroughly incorporated and the aroma of garlic fills the air. This rich mixture will be the foundational flavor for your wedges, setting the stage for a delicious side dish.
Step 3: Coat the Potato Wedges
Add your prepared potato wedges to the bowl containing the garlic butter mixture. Drizzle the mixture over the wedges, then use your hands or a spatula to toss them gently, ensuring each wedge is evenly coated. This crucial step is where the magic happens, transforming the simple potatoes into luscious Garlic Butter Potato Wedges.
Step 4: Arrange the Wedges on the Baking Sheet
Transfer the coated potato wedges to the lined baking sheet, placing them in a single layer. Make sure there's space between each wedge to allow for proper airflow and crispiness during baking. This arrangement is vital for achieving that golden-brown exterior everyone loves in Garlic Butter Potato Wedges.
Step 5: Bake to Crispy Perfection
Place the baking sheet in the preheated oven and let the wedges bake for 25 to 30 minutes. Halfway through the baking time, use a spatula to flip the wedges for even browning. When done, the exterior should be golden and crispy while the interior remains soft and tender—just what you want in Garlic Butter Potato Wedges.
Step 6: Serve and Garnish
Once baked, remove the potato wedges from the oven and let them cool for a minute. For a touch of freshness, sprinkle with optional chopped fresh parsley before serving. Dive in while they're hot, and indulge in the comforting flavors of your homemade Garlic Butter Potato Wedges!
Garlic Butter Potato Wedges Variations & Substitutions
Feel free to explore these delightful twists to your Garlic Butter Potato Wedges, enhancing flavors and catering to dietary preferences.
-
Dairy-Free: Substitute melted butter with dairy-free margarine or olive oil for a lightened-up version that still tastes delicious.
-
Herb Swap: Replace rosemary with thyme, oregano, or fresh parsley for a fresher, more vibrant flavor profile that can change the entire dish.
-
Cheesy Delight: Mix in grated Parmesan or cheddar cheese before baking for a creamy, cheesy layer that adds an irresistible twist to your wedges.
-
Spicy Kick: Add cayenne pepper or smoked paprika for a hint of heat, perfect for those who love a little spice in their life.
-
Zesty Lemon: Squeeze fresh lemon juice over the baked wedges just before serving to elevate the flavors, bringing a burst of freshness that pairs perfectly with garlic.
-
Sweet Potato Alternative: Use sweet potatoes in place of gold potatoes for a caramelized sweetness and a gorgeous orange hue to your dish.
-
Garlic Lovers: Add more minced garlic or even roasted garlic for an extra punch of aromatics that will make your kitchen smell heavenly!
-
Tyrolean Twist: For a heartier experience, consider tossing in some diced bacon pieces or pancetta before baking, introducing a savory depth to every bite.
As you experiment, imagine the magic of these flavors coming together, much like how a great dip complements your beloved Garlic Aioli or a comforting Sweet Potato Casserole warms up a chilly evening. The possibilities are endless!
How to Store and Freeze Garlic Butter Potato Wedges
Fridge: Keep leftover Garlic Butter Potato Wedges in an airtight container for up to 3 days. Reheat them in the oven for the best texture revival.
Freezer: For longer storage, freeze the cooled wedges in a single layer on a baking sheet, then transfer to a freezer-safe bag for up to 2 months.
Reheating: To enjoy your wedges after freezing, preheat the oven to 425°F (220°C) and bake directly from frozen for about 15-20 minutes until crispy.
Make-Ahead: You can prep and coat the wedges ahead of time; simply refrigerate them until ready to bake and enjoy fresh.
Expert Tips for Garlic Butter Potato Wedges
-
Perfectly Cut Wedges: Aim for uniform thickness when cutting your potatoes to ensure even cooking. Uneven pieces can lead to some being overdone while others are undercooked.
-
Soak for Crispiness: Try soaking the potato wedges in water for 30 minutes before baking. This simple step helps to remove excess starch, resulting in crispier Garlic Butter Potato Wedges.
-
Don’t Overcrowd: When placing the wedges on the baking sheet, ensure they’re not touching. Overcrowding can trap steam and prevent them from achieving that delightful crispy texture.
-
Flavor Variations: Experiment with different herbs or spices! Swap out rosemary for thyme or add some chili powder for a spicy kick in your Garlic Butter Potato Wedges.
-
Storage Tips: If you have leftovers, store them in an airtight container in the refrigerator. To reheat, use the oven or toaster oven for that freshly baked crispiness.
Make Ahead Options
These Garlic Butter Potato Wedges are perfect for busy weeknights and meal prep enthusiasts! You can prep and coat the potato wedges up to 24 hours in advance, allowing them to soak up all that delicious garlic butter flavor. To do this, simply follow the coating steps and then refrigerate the wedges in an airtight container. When you're ready to serve, bake them straight from the refrigerator to save time—there's no need to thaw! Just remember to check for crispiness during the baking process; they might need an extra few minutes. With this make-ahead option, you can enjoy the same mouthwatering, golden-brown results with minimal effort!
What to Serve with Garlic Butter Potato Wedges
These delightful wedges can easily become the star of your meal, but pairing them with the right dishes will elevate your dining experience!
-
Juicy Burgers: A classic pairing that never fails! The crunchy texture of the wedges perfectly complements a juicy burger’s tender bite, making every mouthful joyous.
-
Grilled Chicken Thighs: The smoky flavors of grilled chicken paired with buttery potato wedges create a comfort food symphony, perfect for a family feast!
-
Fresh Garden Salad: Adding a crisp salad brings a refreshing contrast to the richness of the wedges. Try mixed greens with a zesty vinaigrette for balance.
-
Spicy Dipping Sauce: Serve with garlic aioli or spicy ketchup to dip your wedges into; each bite becomes an explosion of flavor that adds fun to your meal.
-
Creamy Coleslaw: The crunch and tang of coleslaw provide a bright, refreshing note to the meal, harmonizing beautifully with the rich garlic butter flavor.
-
Cheesy Chili: Warm, hearty chili topped with cheese pairs wonderfully with the golden wedges, combining comfort and heartiness for a satisfying dinner.
-
Savory Grilled Corn: Grilled corn brushed with lime and spices adds a sweet and smoky taste that pairs exceptionally well with the rich potato wedges.
-
Chilled White Wine: A crisp, chilled Sauvignon Blanc or Pinot Grigio will complement the garlic flavors in the wedges, offering a delightful sip with each bite.
-
Chocolate Brownies: End your meal on a sweet note! The contrasting textures of warm chocolate brownies topped with ice cream balance the savory and buttery flavors of the wedges.
Garlic Butter Potato Wedges Recipe FAQs
How do I choose the right potatoes for Garlic Butter Potato Wedges?
Absolutely! I recommend using starchy potatoes like Gold Potatoes or Yukon Gold for their fluffy interior. Look for potatoes that are firm, with no dark spots or blemishes, ensuring they’re fresh and ready to create those perfect crispy wedges.
How should I store leftover Garlic Butter Potato Wedges?
For best results, store leftover wedges in an airtight container in the refrigerator for up to 3 days. When you’re ready to enjoy them again, simply reheat in the oven at 350°F (175°C) for about 10-15 minutes until they’re warm and crispy again!
Can I freeze Garlic Butter Potato Wedges?
Yes, you can! Allow your wedges to cool completely, then arrange them in a single layer on a baking sheet and place in the freezer for about 1 hour. Once frozen, transfer them to a freezer-safe bag, where they can last for up to 2 months. When ready to eat, bake them directly from frozen for about 15-20 minutes at 425°F (220°C).
What should I do if my Garlic Butter Potato Wedges aren't getting crispy?
Don’t worry, this happens sometimes! Make sure you’re spreading the wedges out on the baking sheet with enough space in between. If you notice they are still soggy, try soaking them in cold water for 30 minutes before coating with butter and baking. This helps remove excess starch, leading to crispier results.
Are Garlic Butter Potato Wedges suitable for a dairy-free diet?
Very! If you're making them dairy-free, simply substitute melted butter with a dairy-free margarine or olive oil. You won't lose the rich flavor, and your wedges will still turn out delicious!
Can pets eat Garlic Butter Potato Wedges?
I wouldn't recommend it. Garlic can be harmful to pets, especially dogs. If sharing is your goal, set aside a few plain baked potato wedges without any seasoning to keep your furry friends safe while you enjoy the full flavor of your Garlic Butter Potato Wedges.
Garlic Butter Potato Wedges for Ultimate Cozy Comfort
Ingredients
Equipment
Method
- Preheat your oven to 425°F (220°C) and prepare a baking sheet with parchment paper.
- In a large mixing bowl, combine melted butter, minced garlic, dried rosemary, salt, and black pepper.
- Add potato wedges to the bowl and toss gently with the garlic butter mixture.
- Transfer the wedges to the lined baking sheet, ensuring they are in a single layer.
- Bake in the oven for 25 to 30 minutes, flipping halfway through for even browning.
- Remove from the oven, let cool for a minute, and sprinkle with fresh parsley before serving.