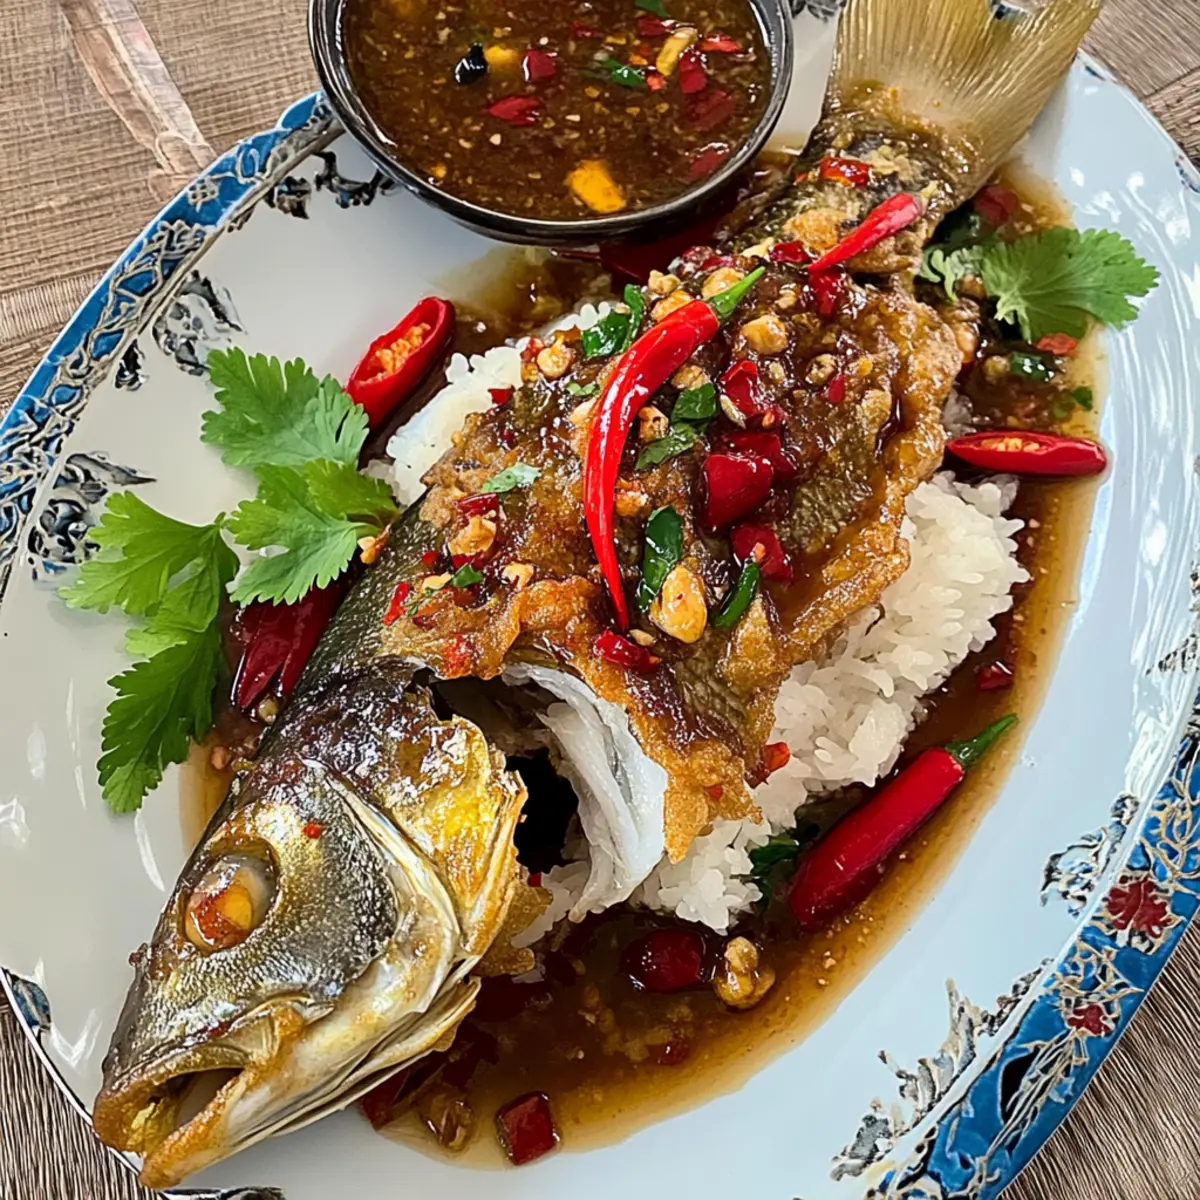
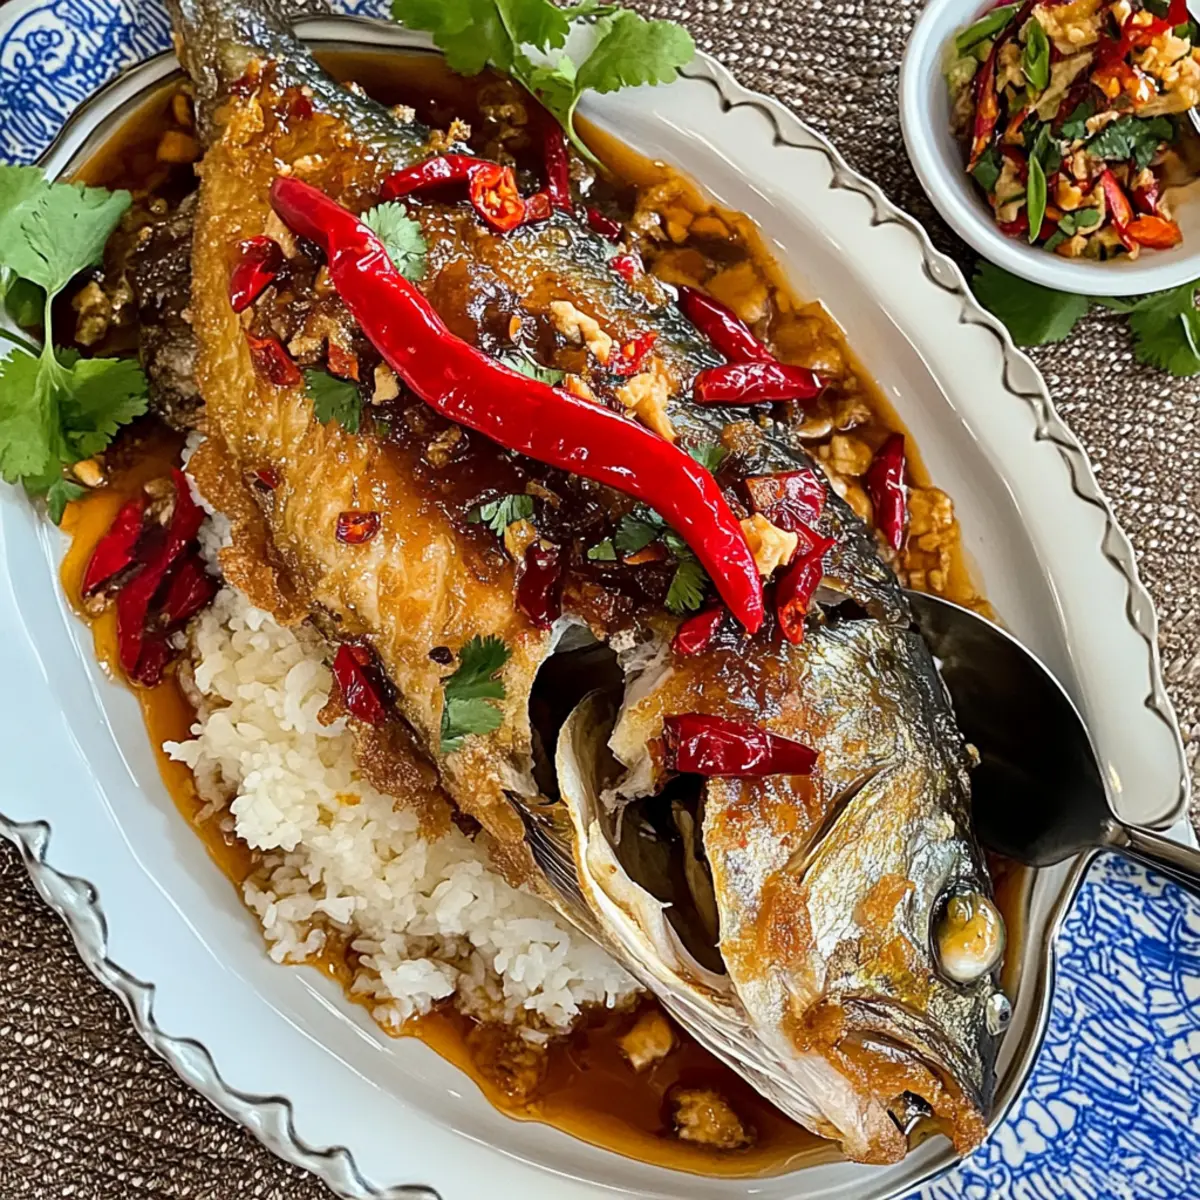
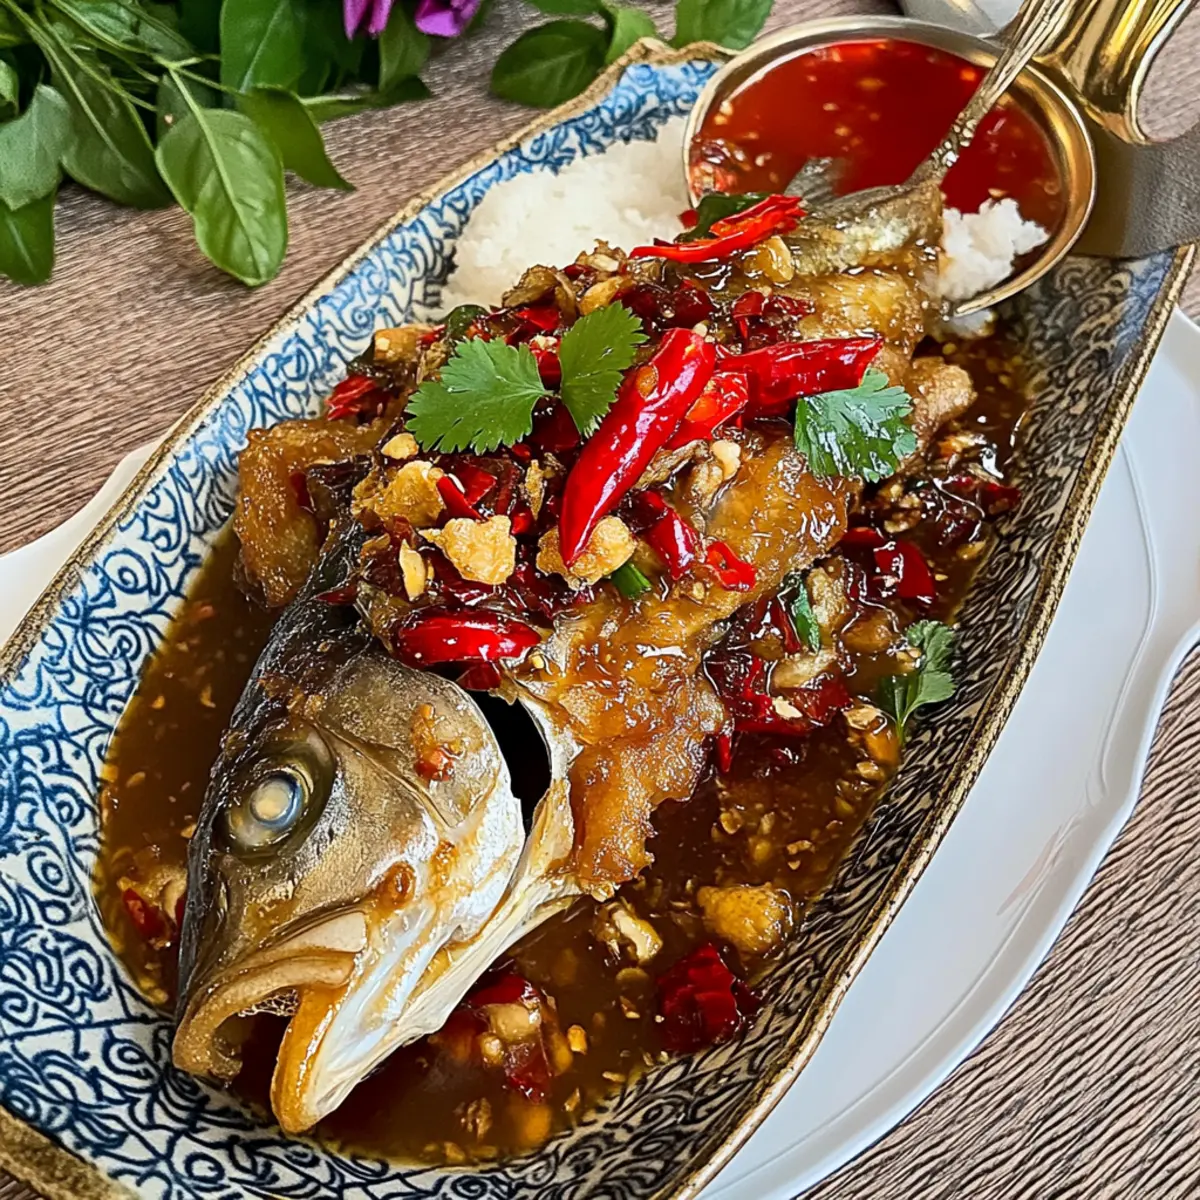
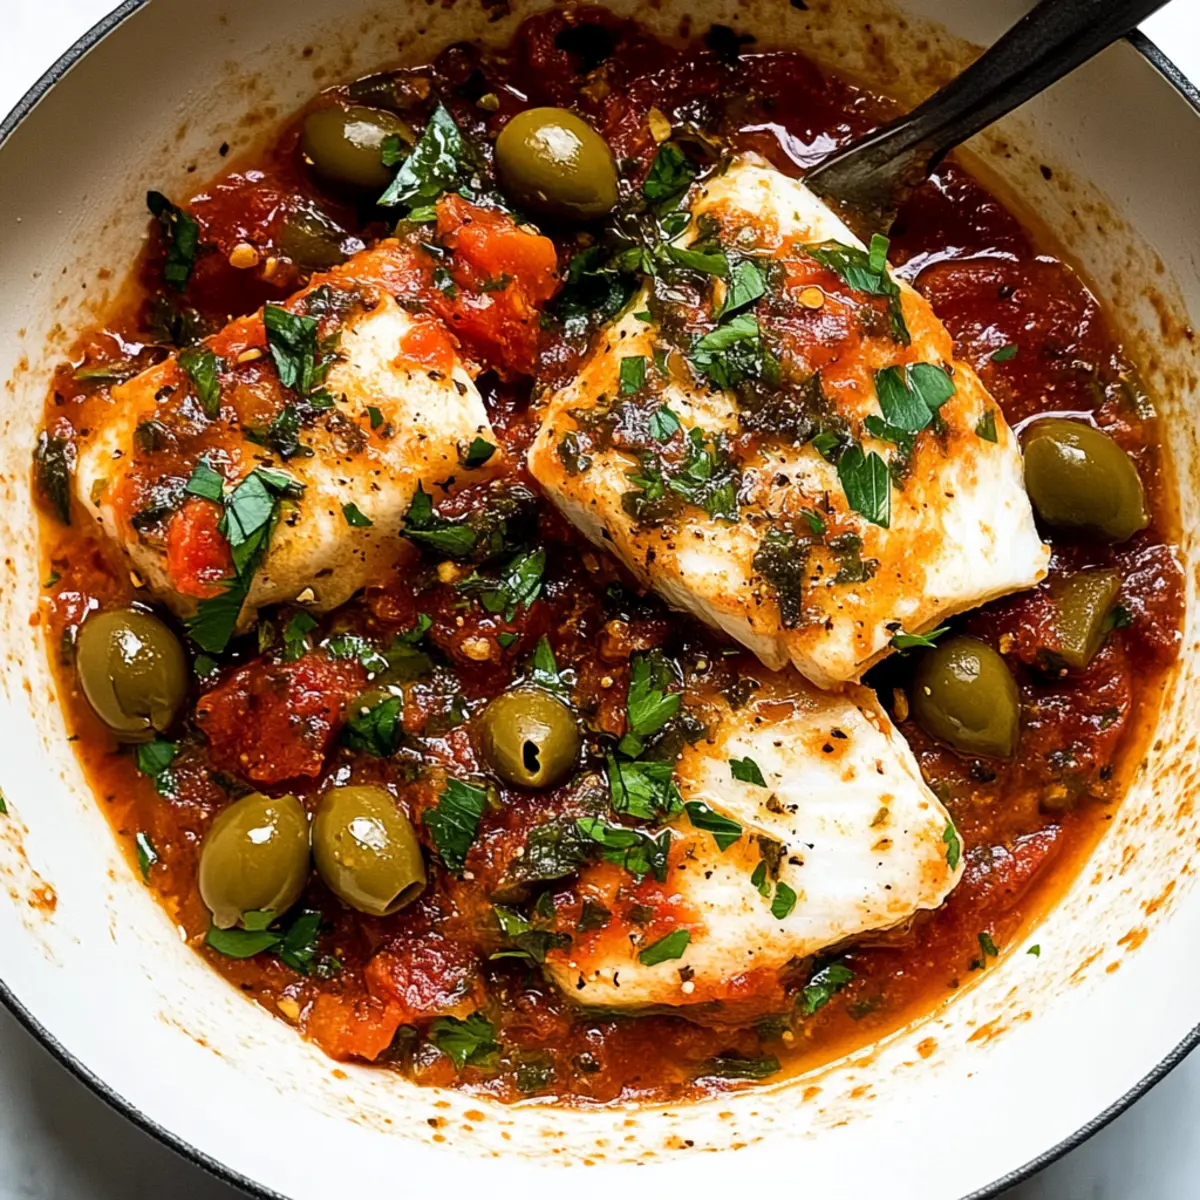
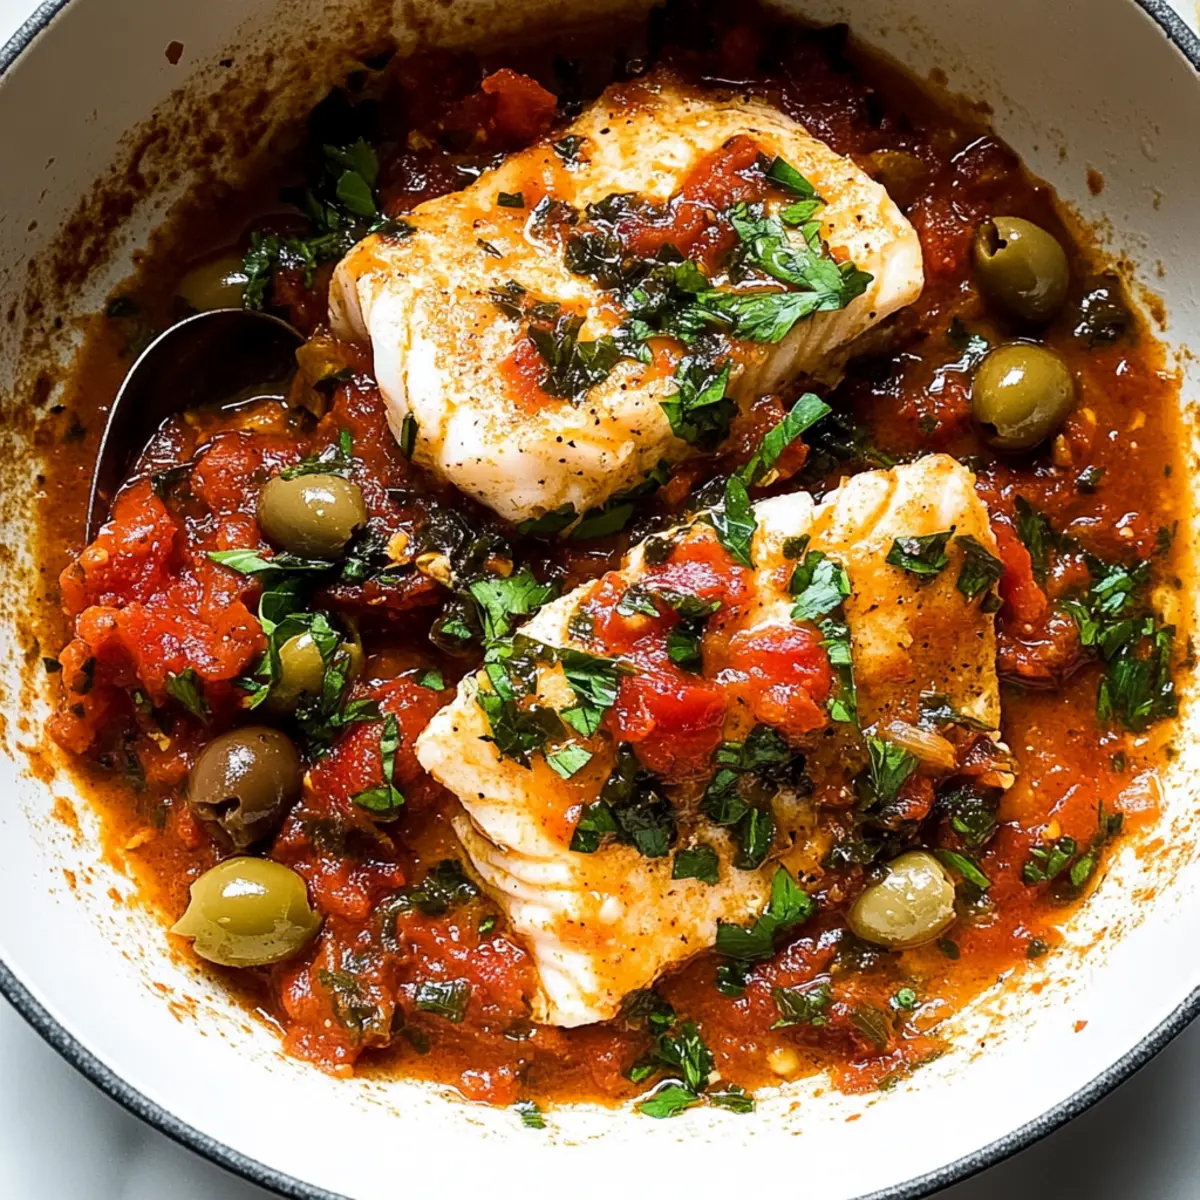
In the bustling world of weeknight dinners, finding a recipe that feels both special and effortless can be a challenge. Enter Fish Puttanesca, a vibrant Italian dish that transforms simple white fish into a culinary masterpiece with minimal effort. Using pantry staples, this easy recipe offers a cozy, comforting dinner that’s quick enough for busy evenings yet impressive enough to share with friends. The aromatic sauce—loaded with garlic, olives, and a hint of spice—mingles beautifully with the flaky fish, creating a satisfying meal that your family will love. Can you already imagine the delightful aromas wafting through your kitchen? Let’s dive into this flavor-packed recipe that’s destined to be a weeknight winner!
Why Try This Fish Puttanesca Recipe?
Easy and Quick: With just a few pantry staples, this recipe comes together in under 30 minutes, making it perfect for busy weeknights.
Flavor Explosion: The bold combination of garlic, anchovies, and olives creates a sauce that is bursting with savory goodness.
Versatile Dish: Whether you serve this dish with pasta or enjoy it on its own, Fish Puttanesca is adaptable to your favorite sides.
Impressive Presentation: The vibrant colors and rich sauce make this dish not only delicious but visually stunning—perfect for impressing dinner guests!
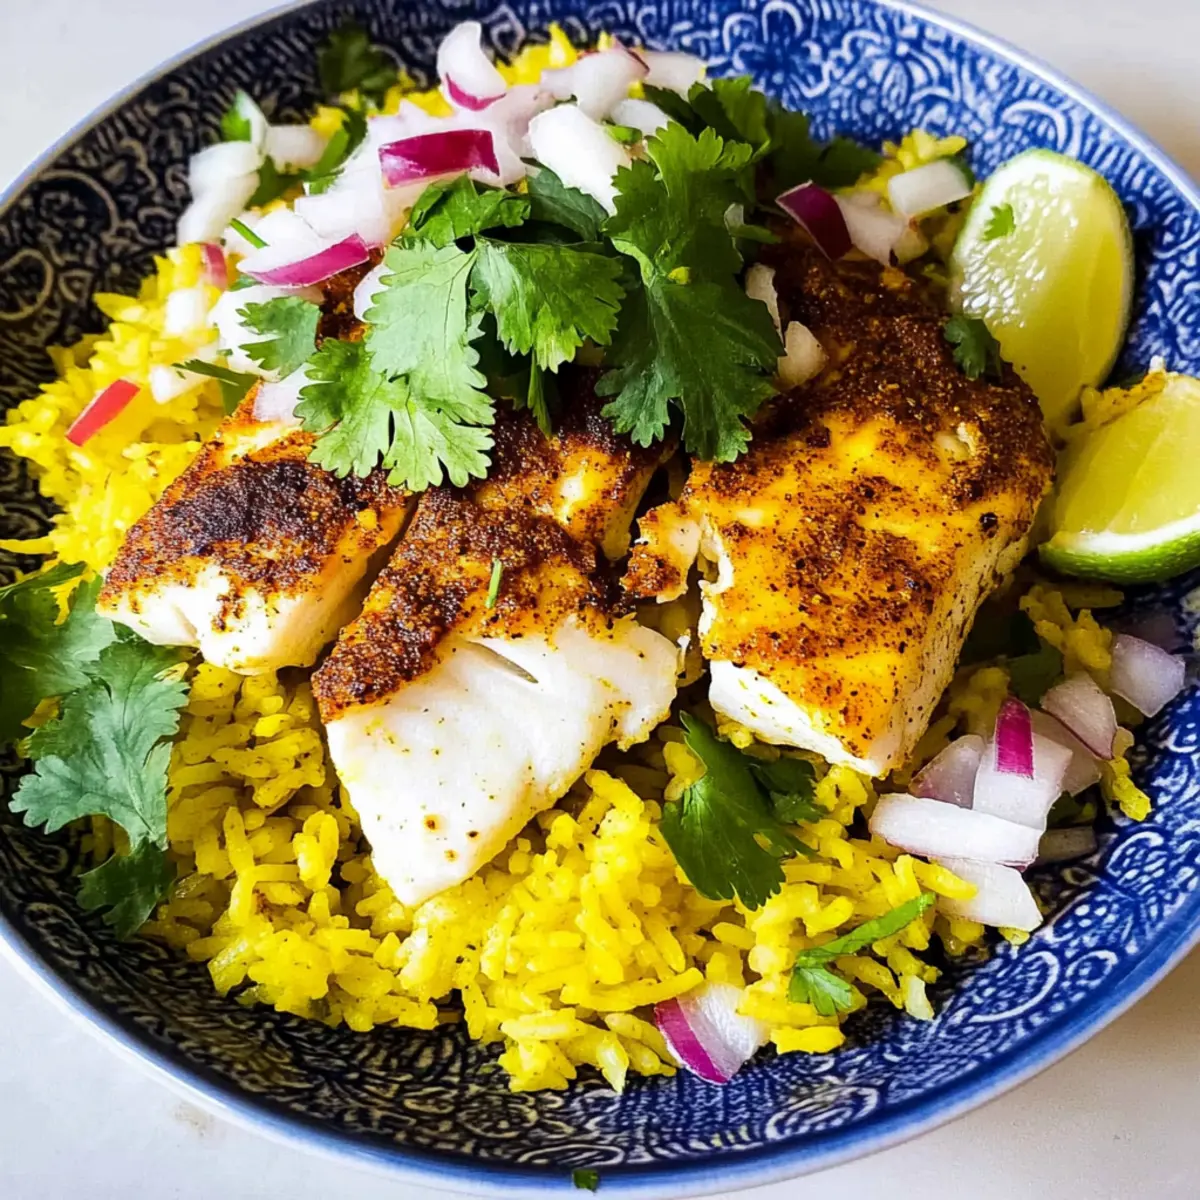
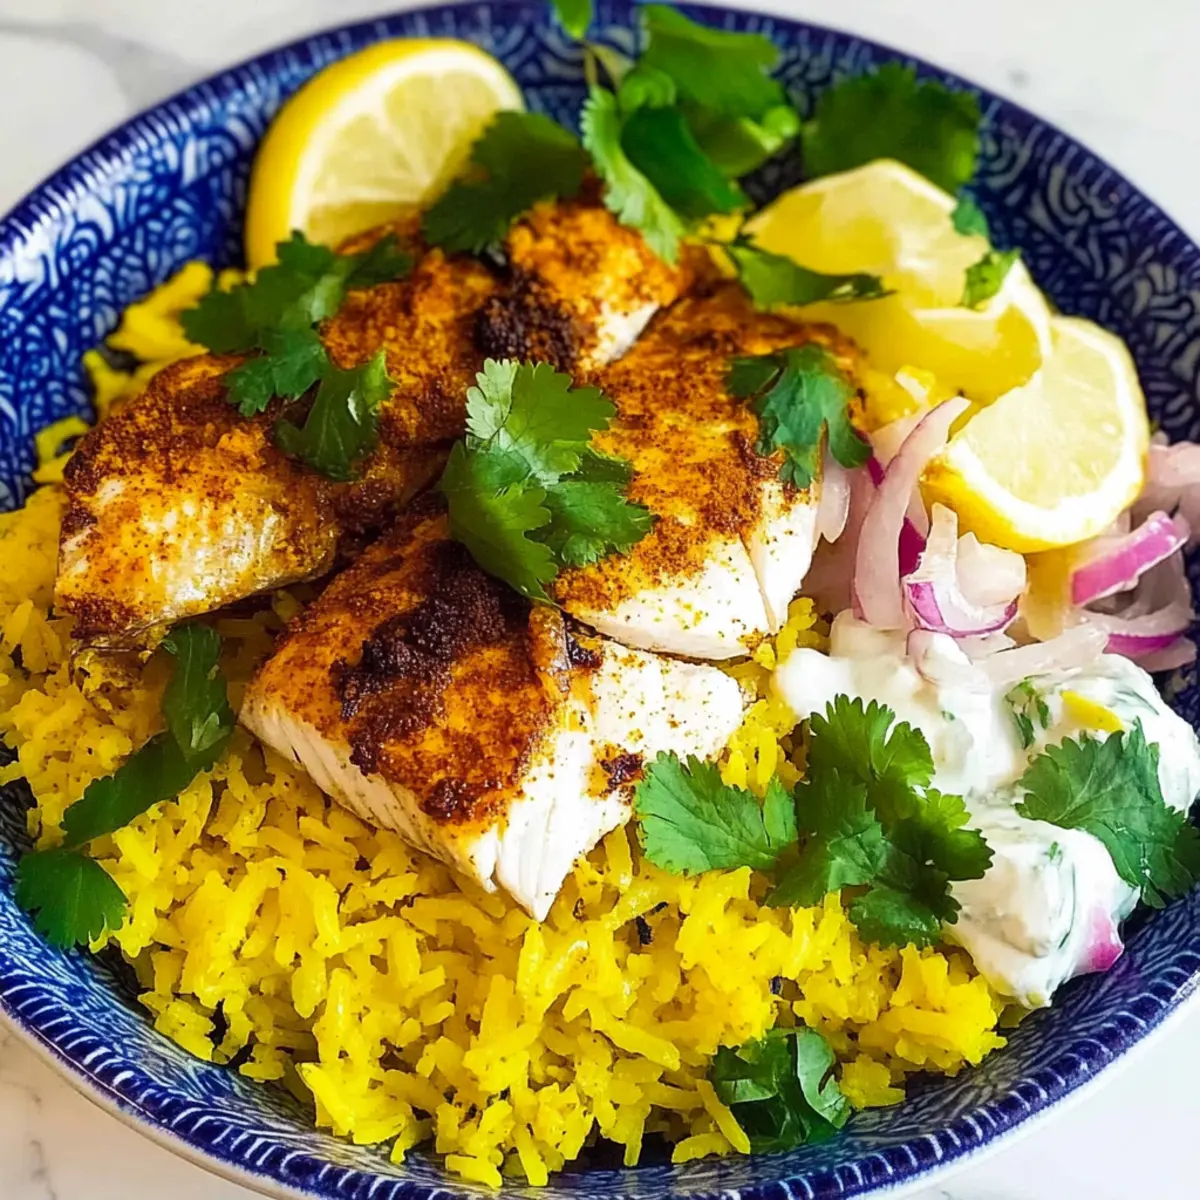
Comfort Food: This dish brings the warmth of Italian cuisine to your table, making it a cozy favorite for family dinners. Need more seafood inspiration? Check out our delicious Air Fryer Fish or explore the flavor of Fish Taco Bowls.
Fish Puttanesca Ingredients
For the Sauce
• Unsalted Butter – Adds a rich depth to the sauce; olive oil can be a great dairy-free substitute.
• Garlic – Provides foundational flavor; opt for fresh garlic cloves for the best aroma.
• Anchovy Fillets – Introduces a savory depth; if you prefer milder flavors, consider using anchovy paste instead.
• Dry White Wine – Enhances the overall flavor; you can swap it for chicken broth for a non-alcoholic option.
• Canned Whole Tomatoes – The sauce's base—preferably San Marzano—for superior taste; diced tomatoes are an acceptable alternative.
• Dried Oregano – Contributes herbal notes; fresh oregano makes a lovely substitute—just increase the amount to 1 teaspoon.
• Dried Thyme – Complements the sauce; feel free to use fresh thyme if that's what you have on hand.
• Black or Castelvetrano Olives – Adds saltiness and texture; any pitted black olives can nicely fill in.
• Capers – Offer a briny burst; you can omit them if they're unavailable.
For the Fish
• White Fish (Cod, Halibut, or Tilapia) – The main protein; remove skin and cut into fillets; fresh seasonal white fish works beautifully here.
• Sea Salt – Enhances flavor; adjust according to your preferred taste and the type of fish used.
For Garnish
• Fresh Basil or Flat Leaf Parsley – Optional fresh herb garnish; any fresh herbs can add a lovely touch.
• Red Pepper Flakes – Optional for serving; sprinkle them on according to your heat preference.
This Fish Puttanesca recipe not only relies on pantry ingredients but also promises to turn any dinner into a delicious event!
Step‑by‑Step Instructions for Fish Puttanesca
Step 1: Preheat the Oven
Start by preheating your oven to 400°F (200°C), placing the rack in the center. This ensures an even cooking temperature for your Fish Puttanesca. While the oven heats, gather your ingredients and get ready to prepare the sauce.
Step 2: Prepare the Sauce Base
In a large ovenproof skillet, melt 2 tablespoons of unsalted butter over medium heat. Add 4 minced garlic cloves and 2 anchovy fillets, cooking for 1-2 minutes until the garlic is fragrant and the anchovies dissolve into the butter. This forms a flavorful base for your sauce.
Step 3: Add the Wine and Tomatoes
Pour in ½ cup of dry white wine and let it reduce for about 4 minutes until the alcohol evaporates, intensifying the flavors. Next, add a 28-ounce can of whole tomatoes, along with 1 teaspoon of dried oregano and ½ teaspoon of dried thyme. Simmer for 10 minutes, allowing the sauce to thicken and the flavors to meld beautifully.
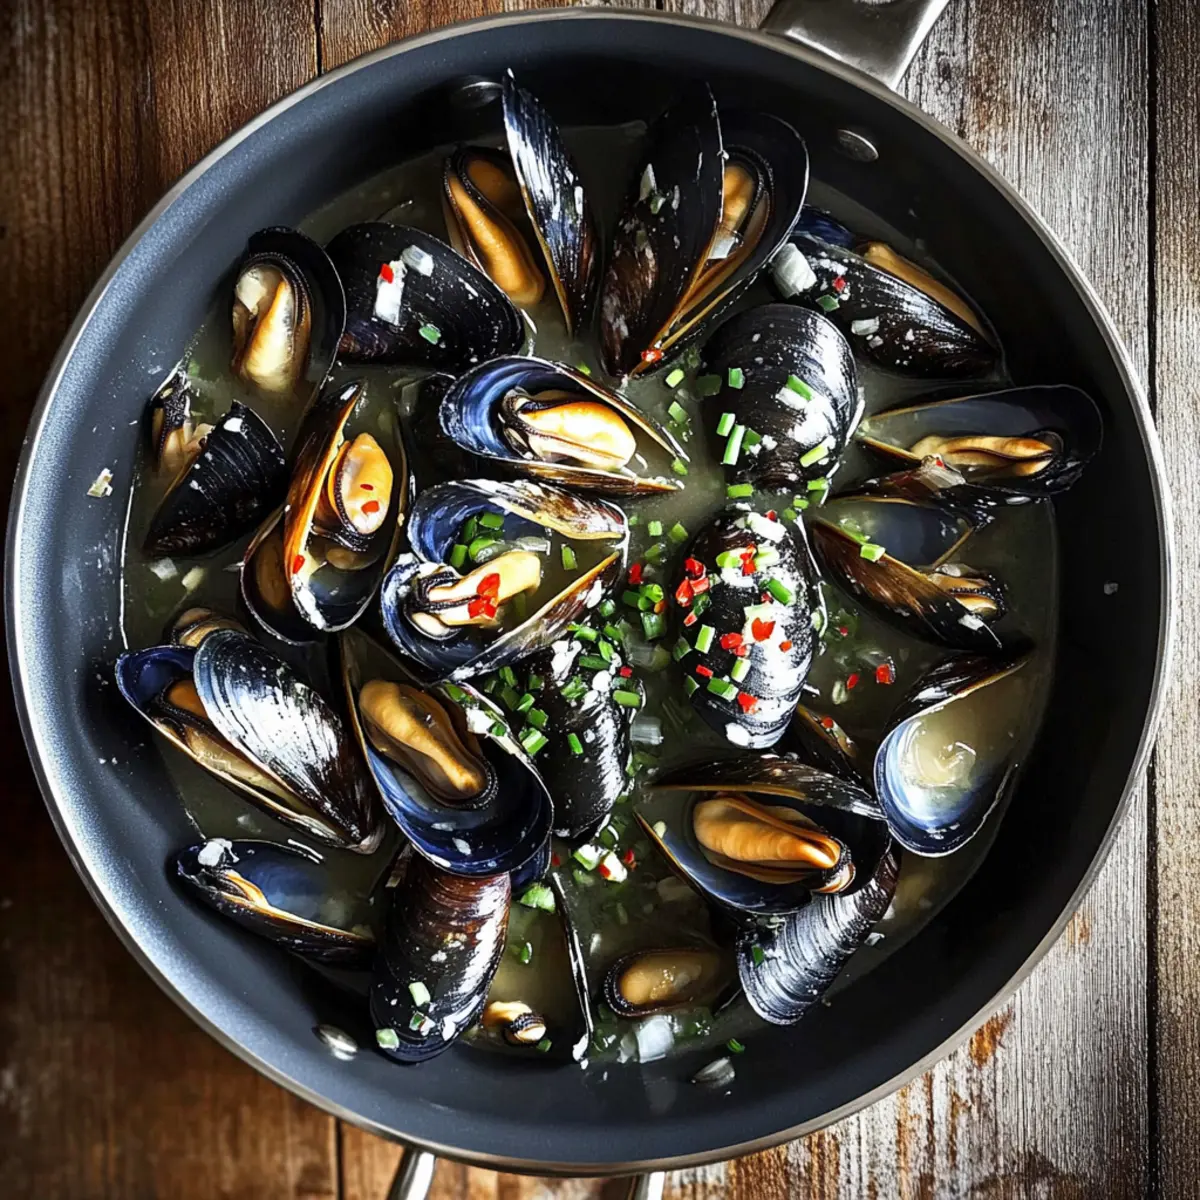
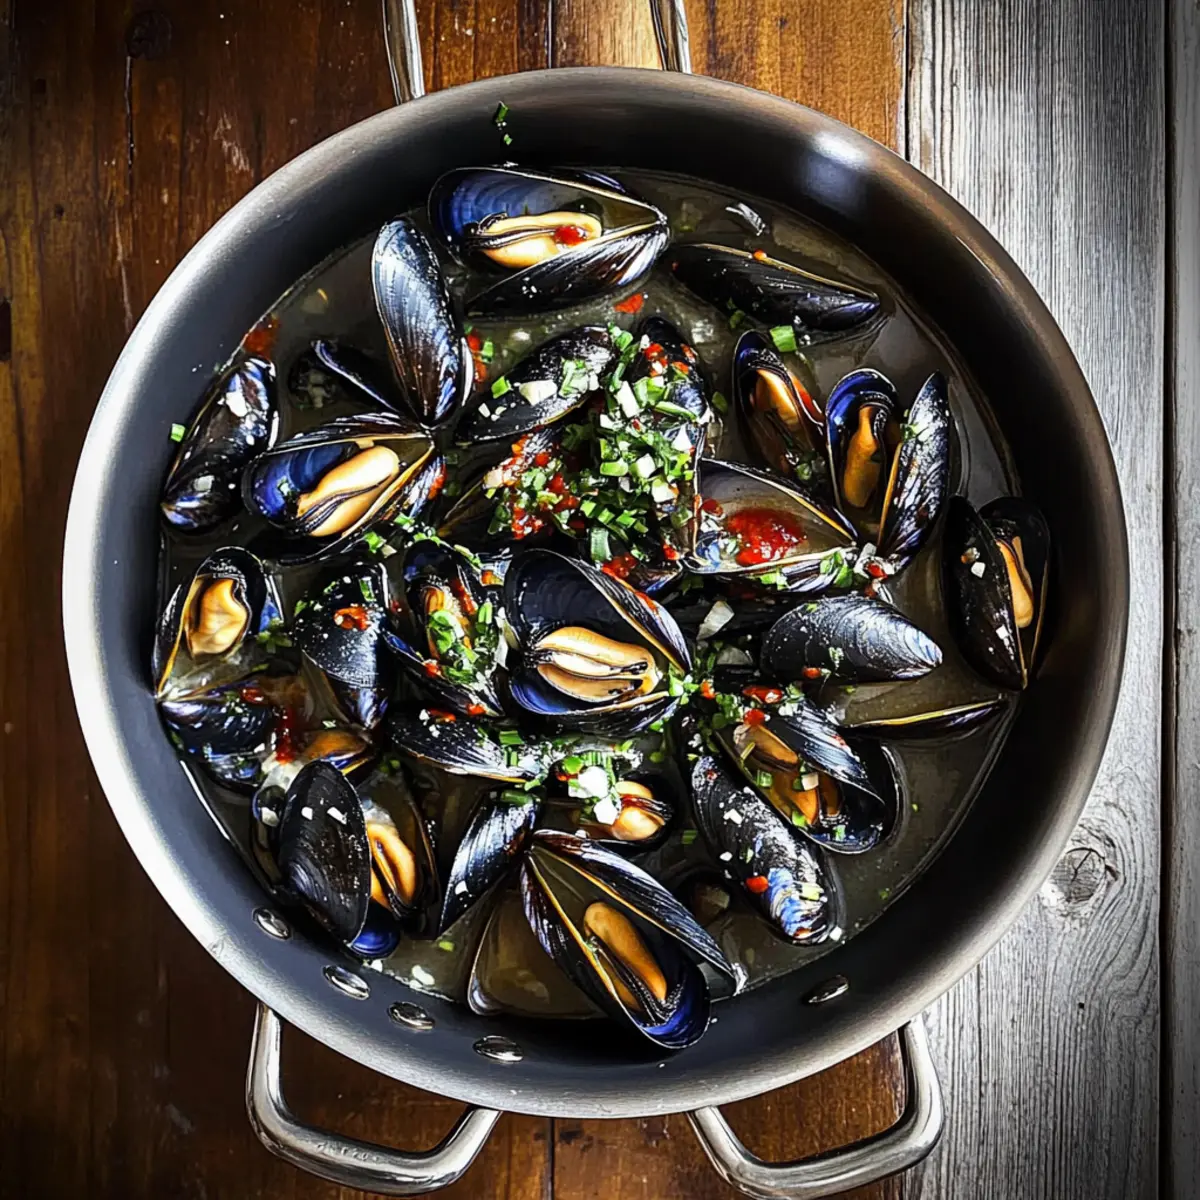
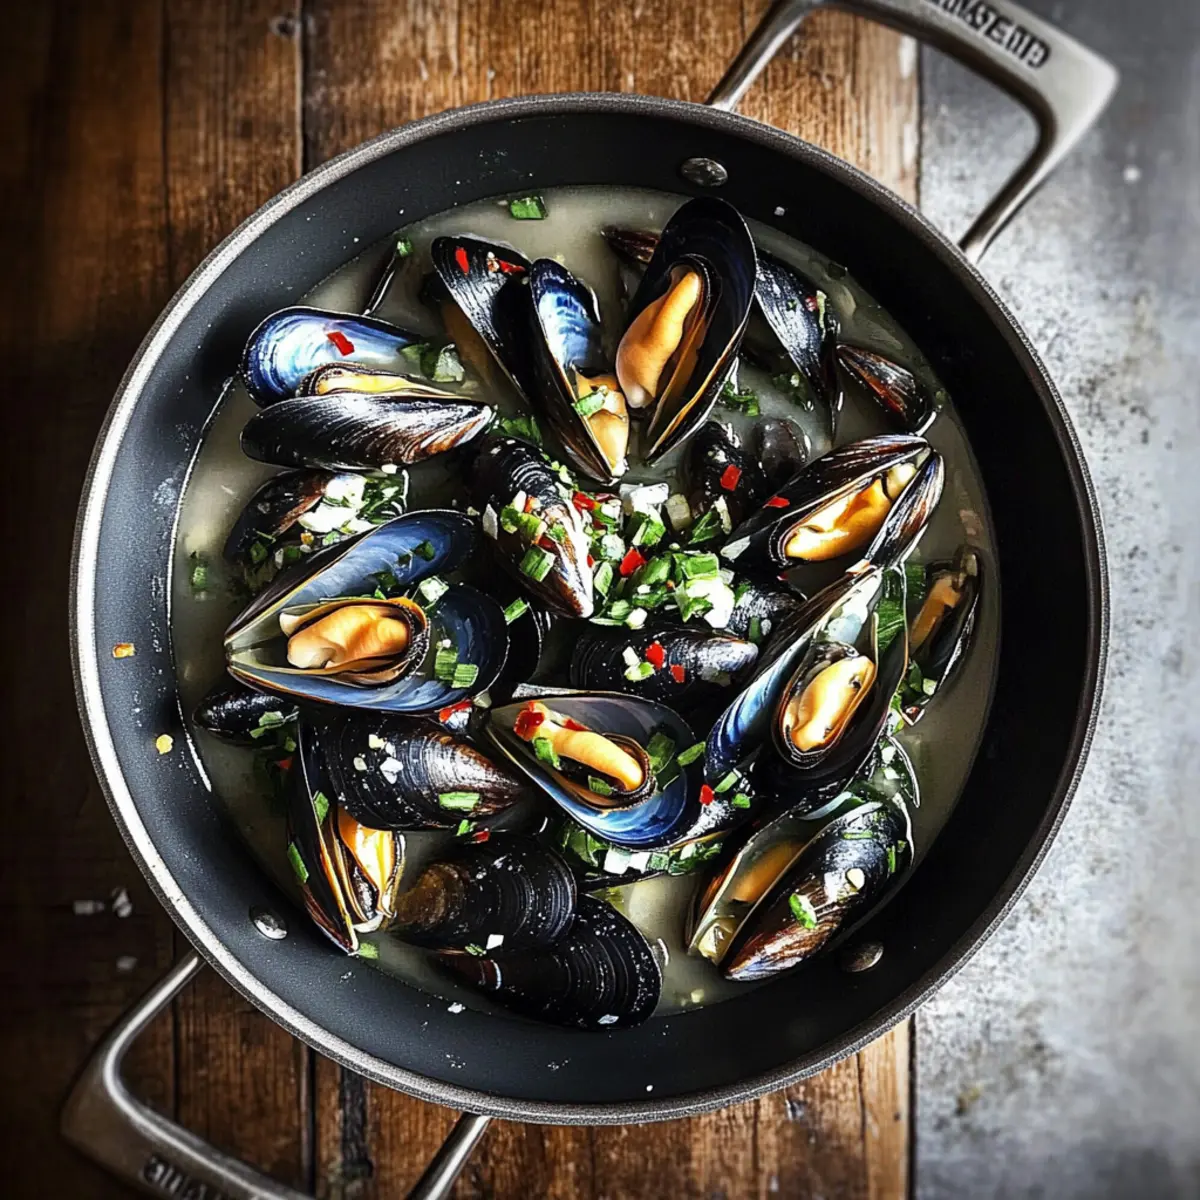
Step 4: Incorporate the Olives and Capers
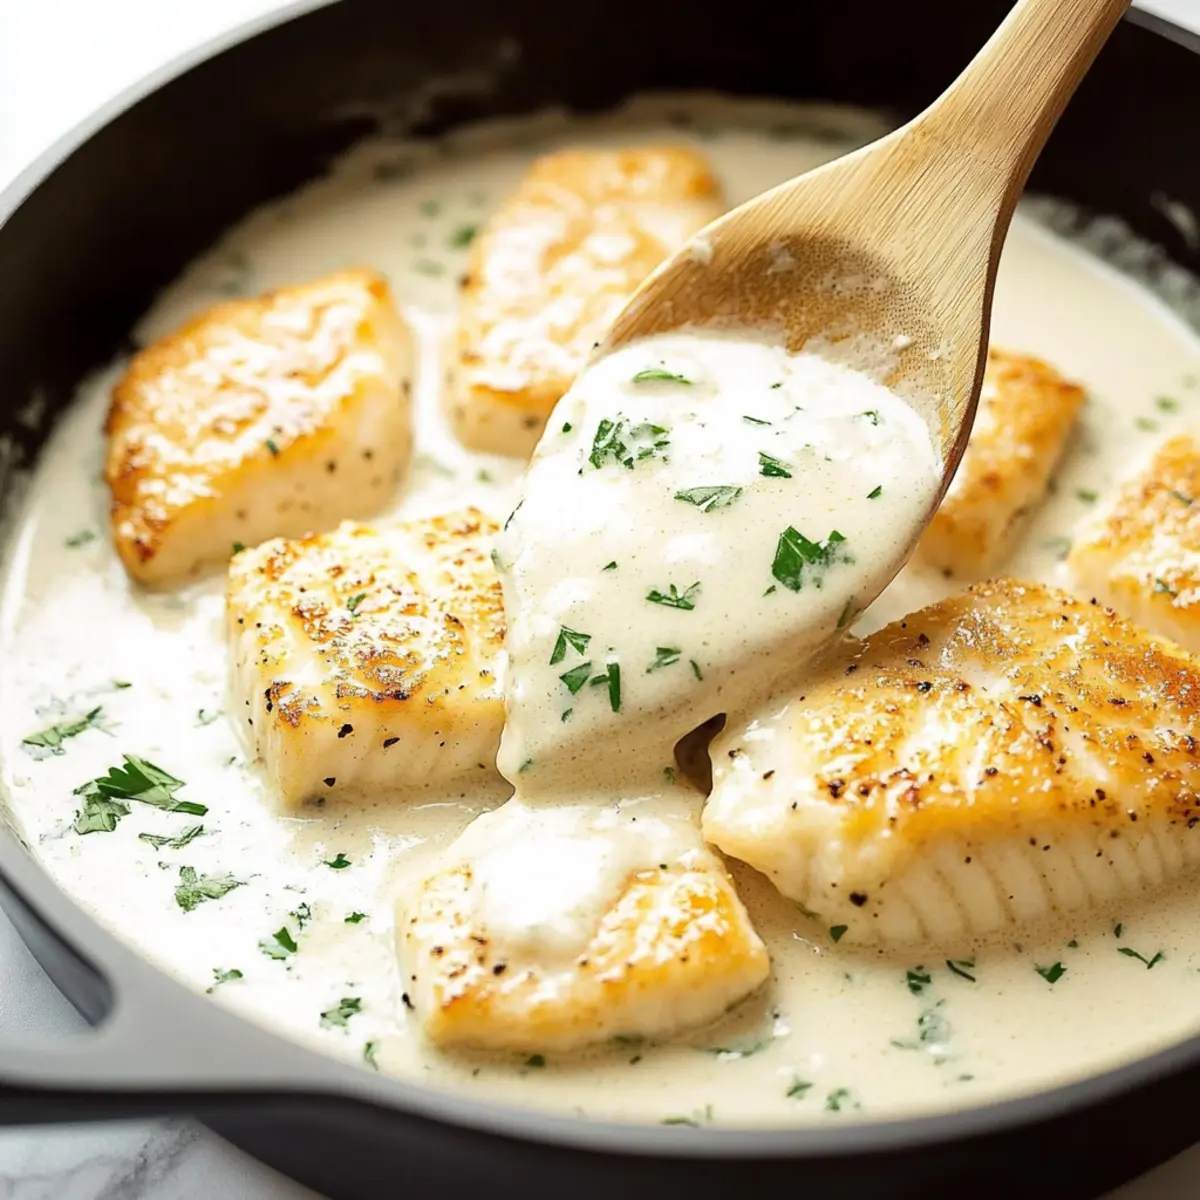
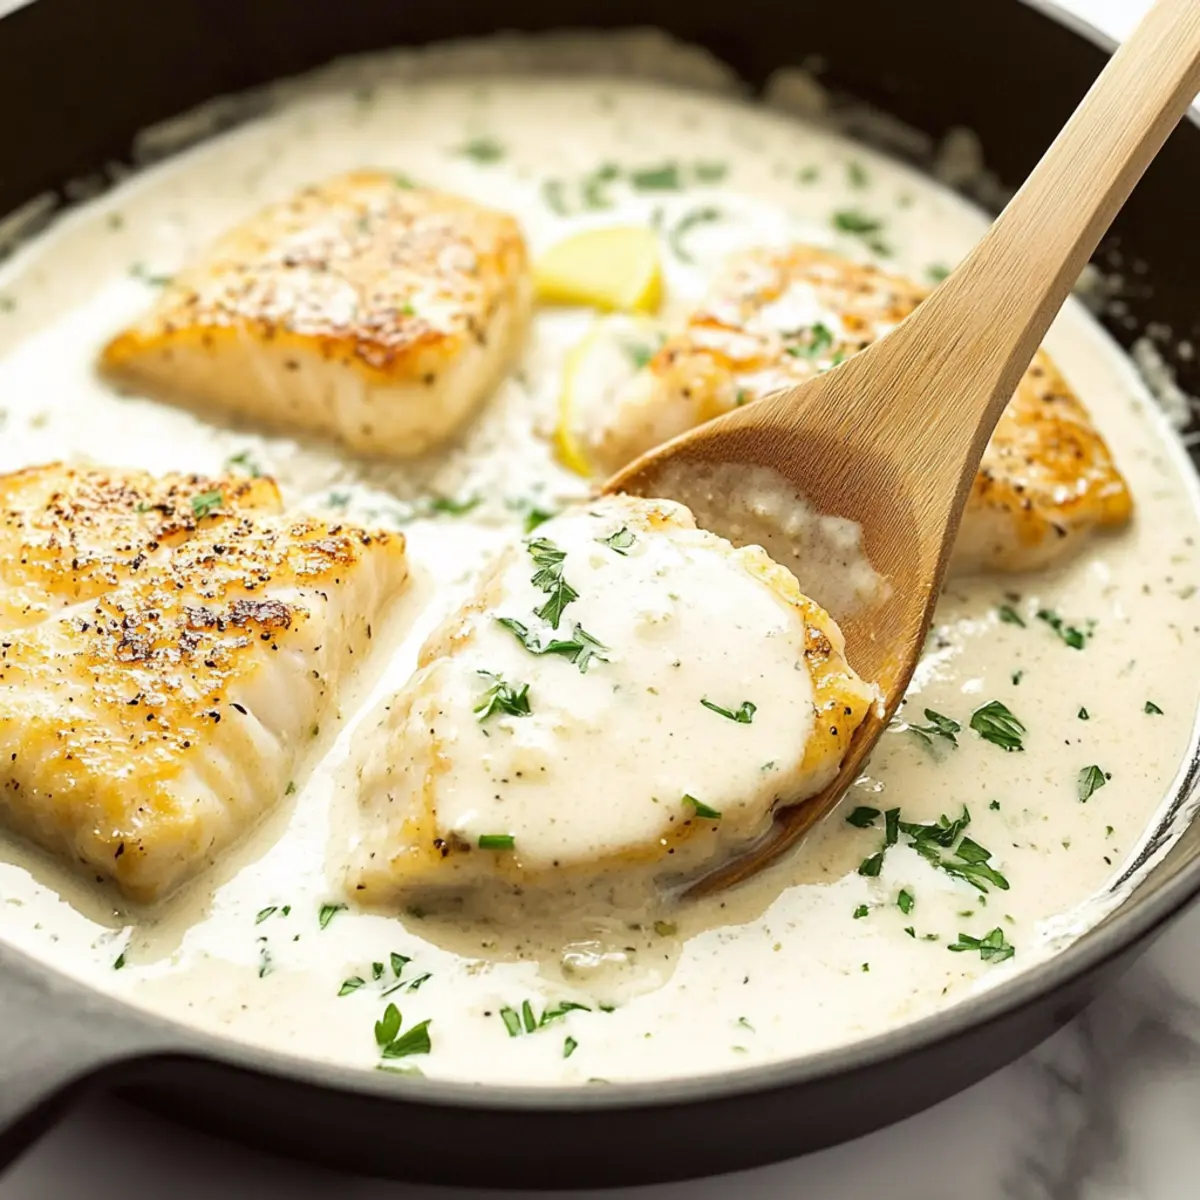
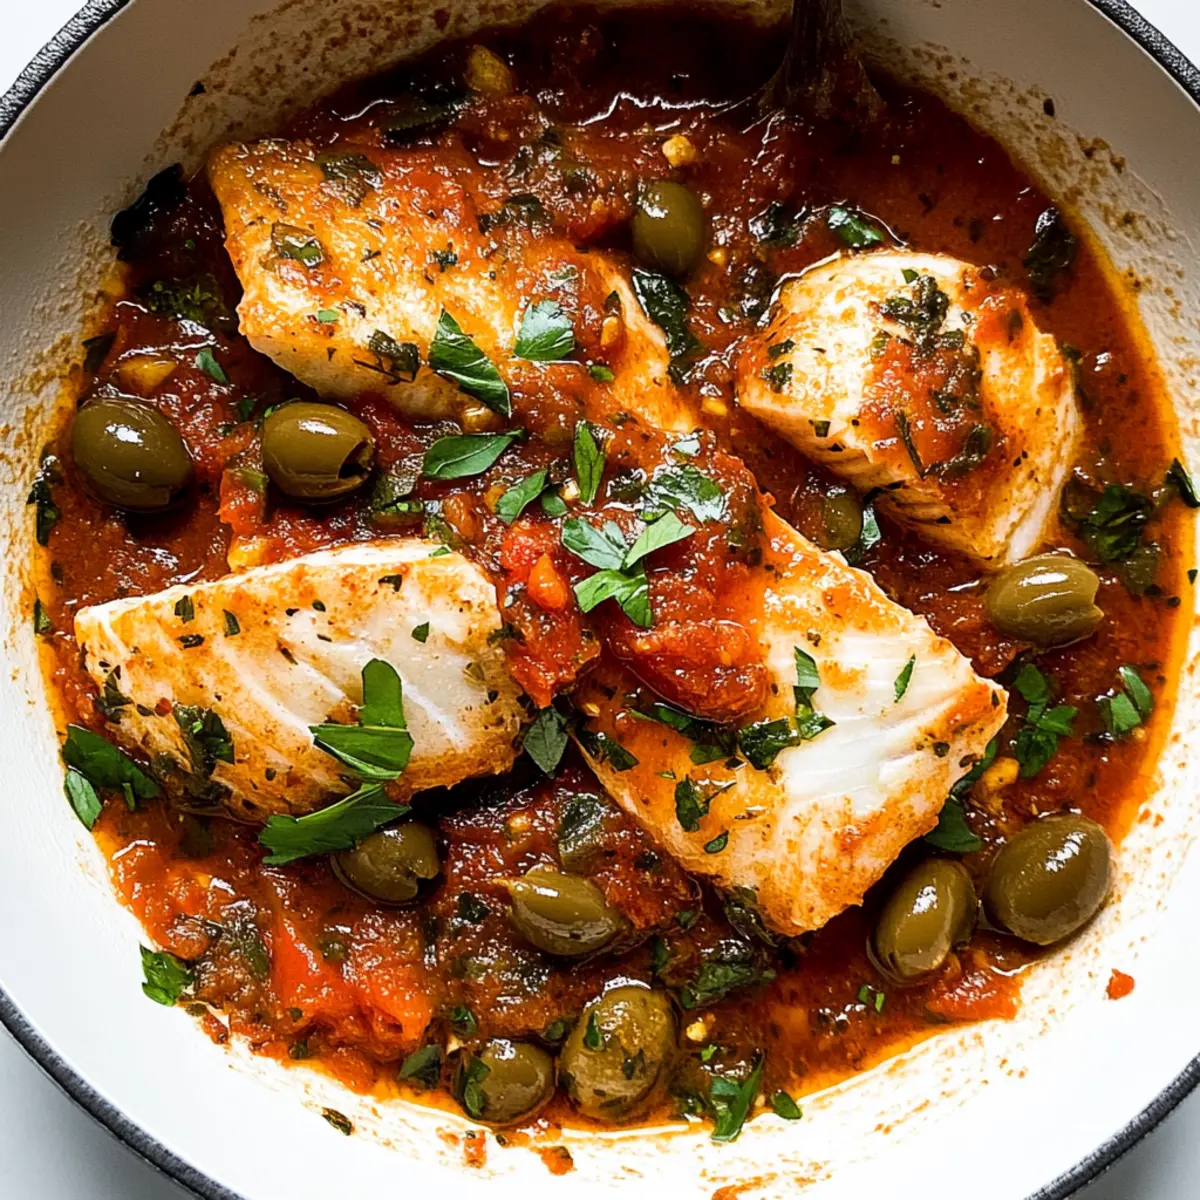
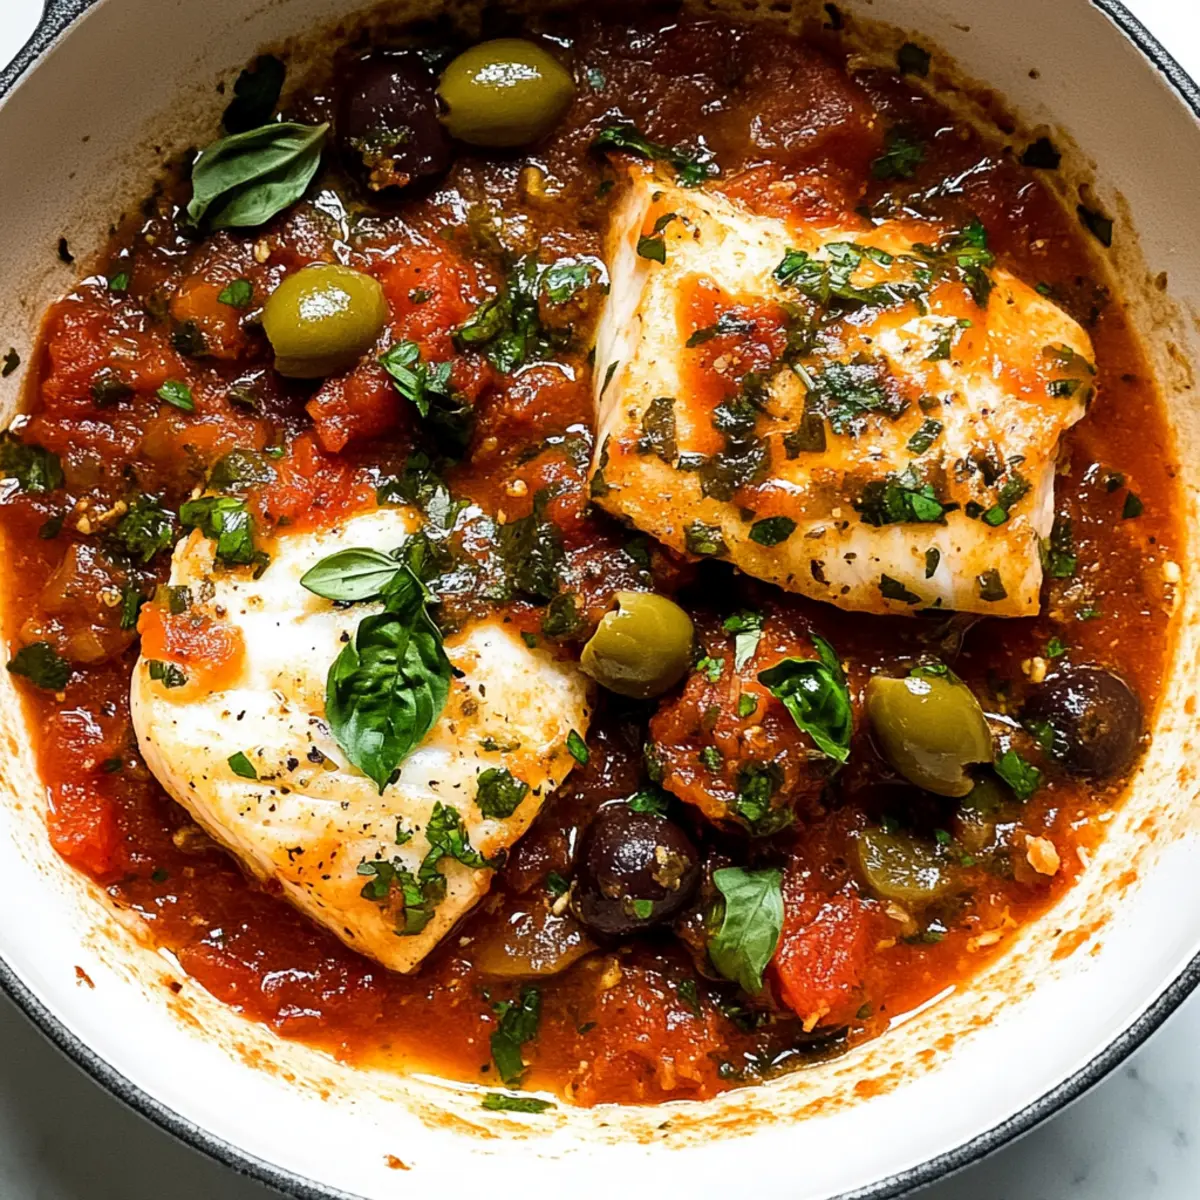
Stir in ½ cup of pitted black olives and 2 tablespoons of capers into the sauce. Season your fish fillets with sea salt before carefully placing them into the simmering blend. This step ensures the fish absorbs all those fantastic flavors from the Fish Puttanesca sauce.
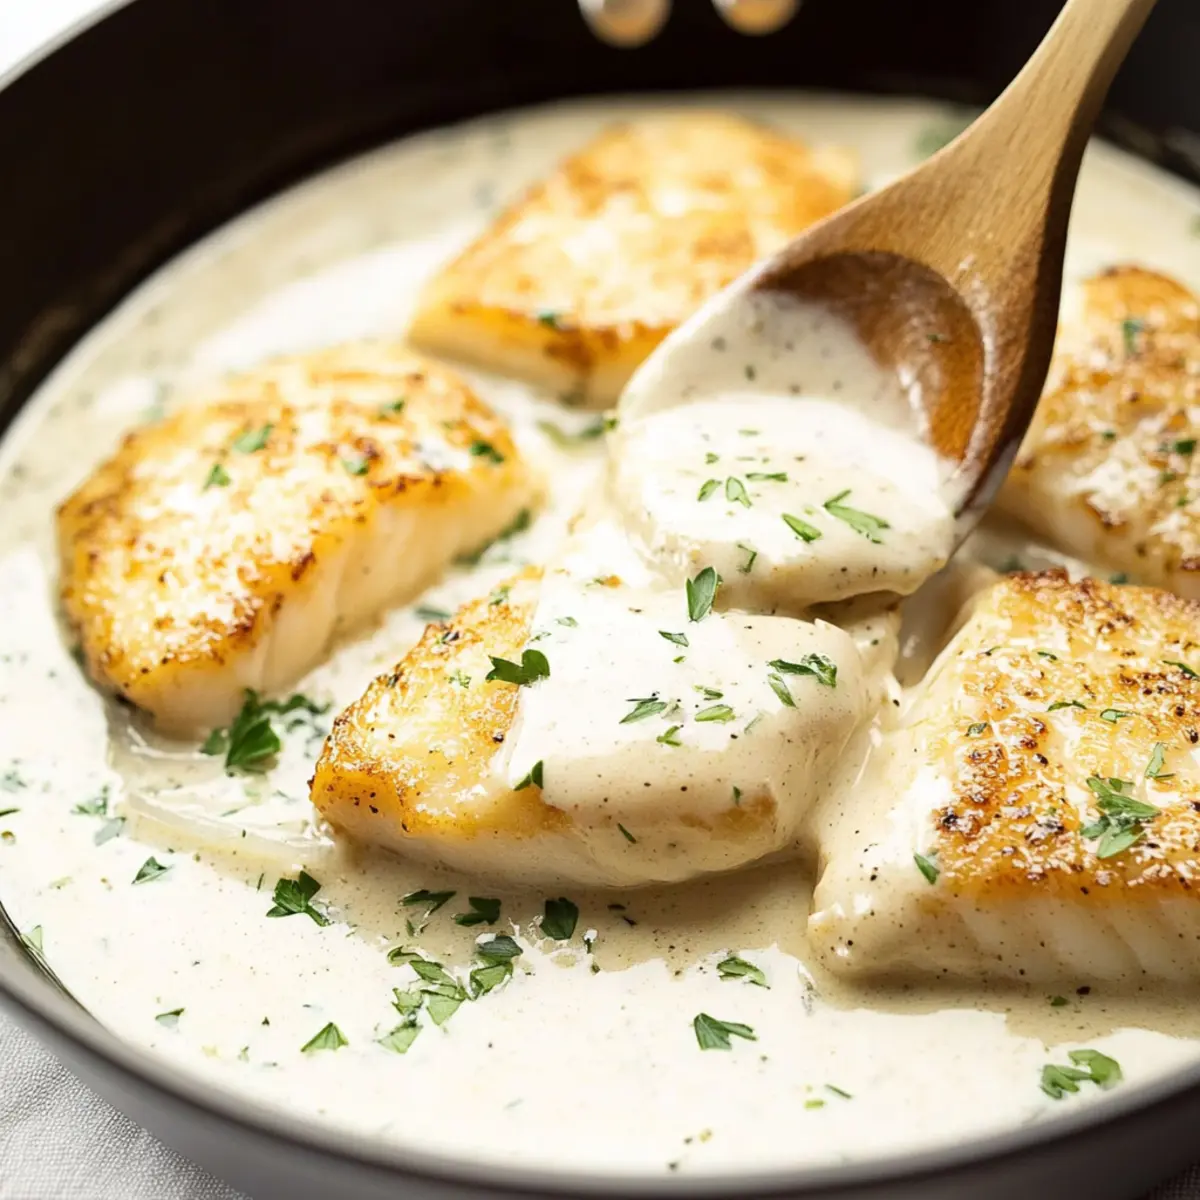
Step 5: Bake the Fish
Transfer the skillet to your preheated oven and bake for 8-10 minutes. Check for doneness: the fish should be opaque and flake easily with a fork. This is the moment when your kitchen fills with enticing aromas, signaling a delicious dinner is near!
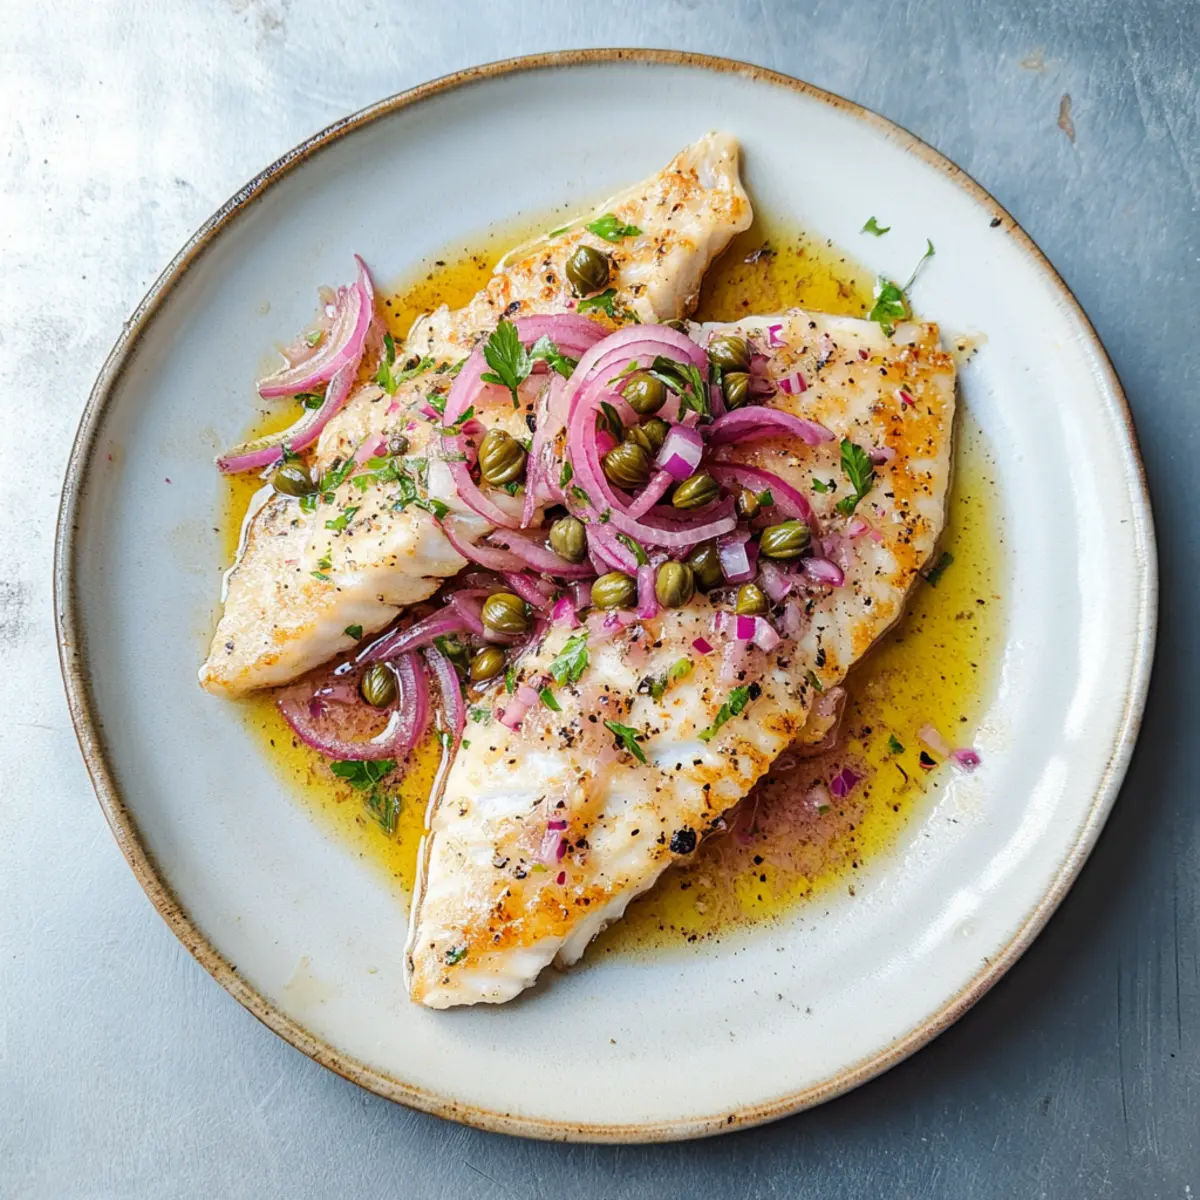
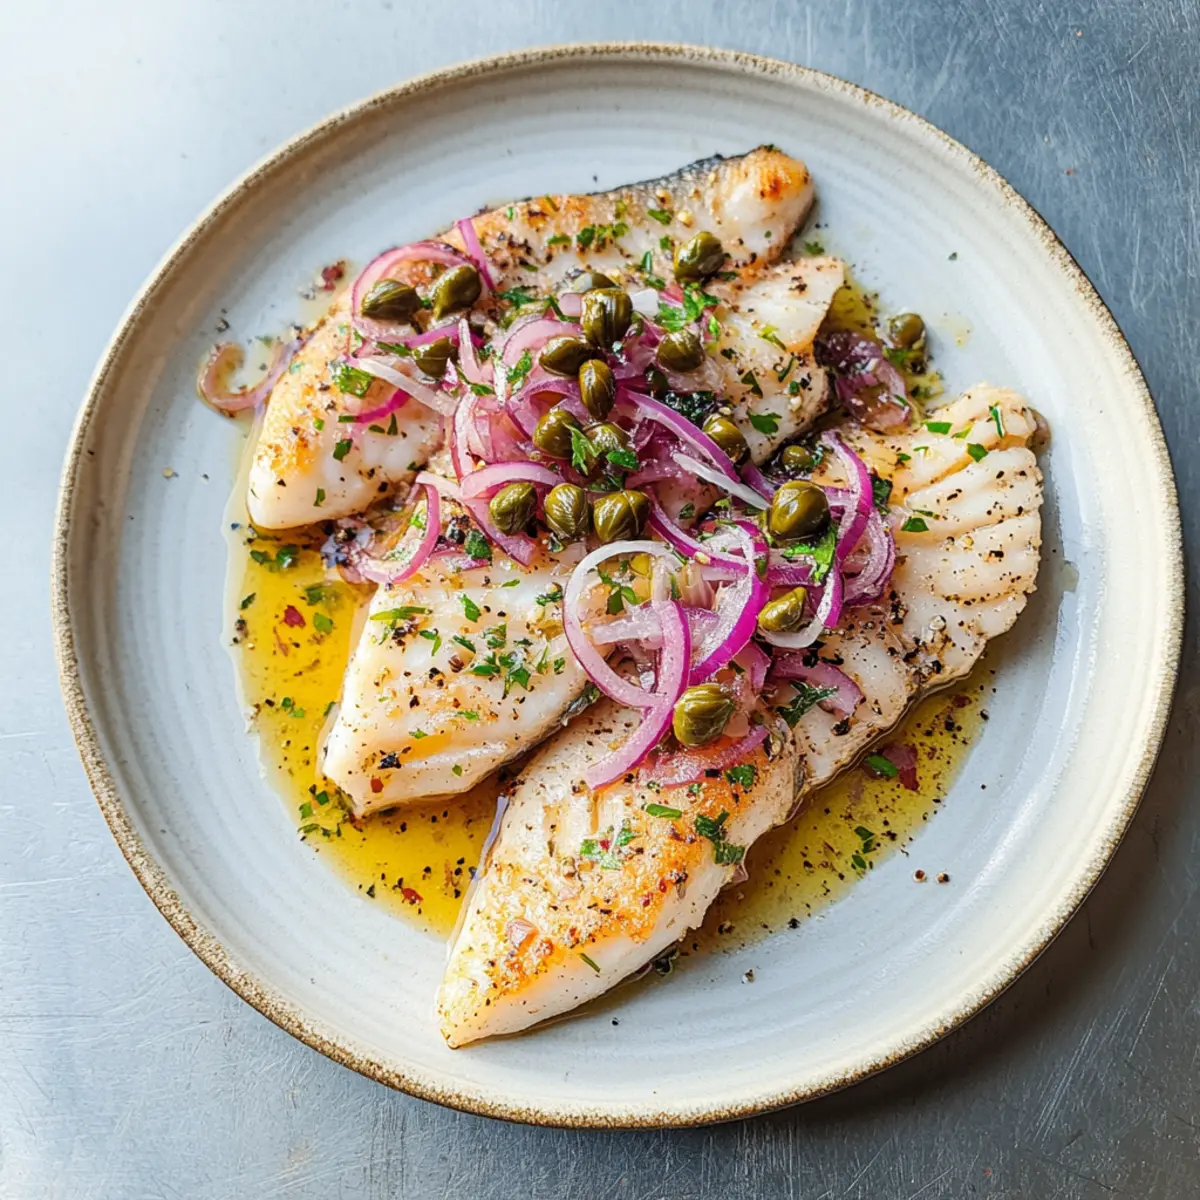
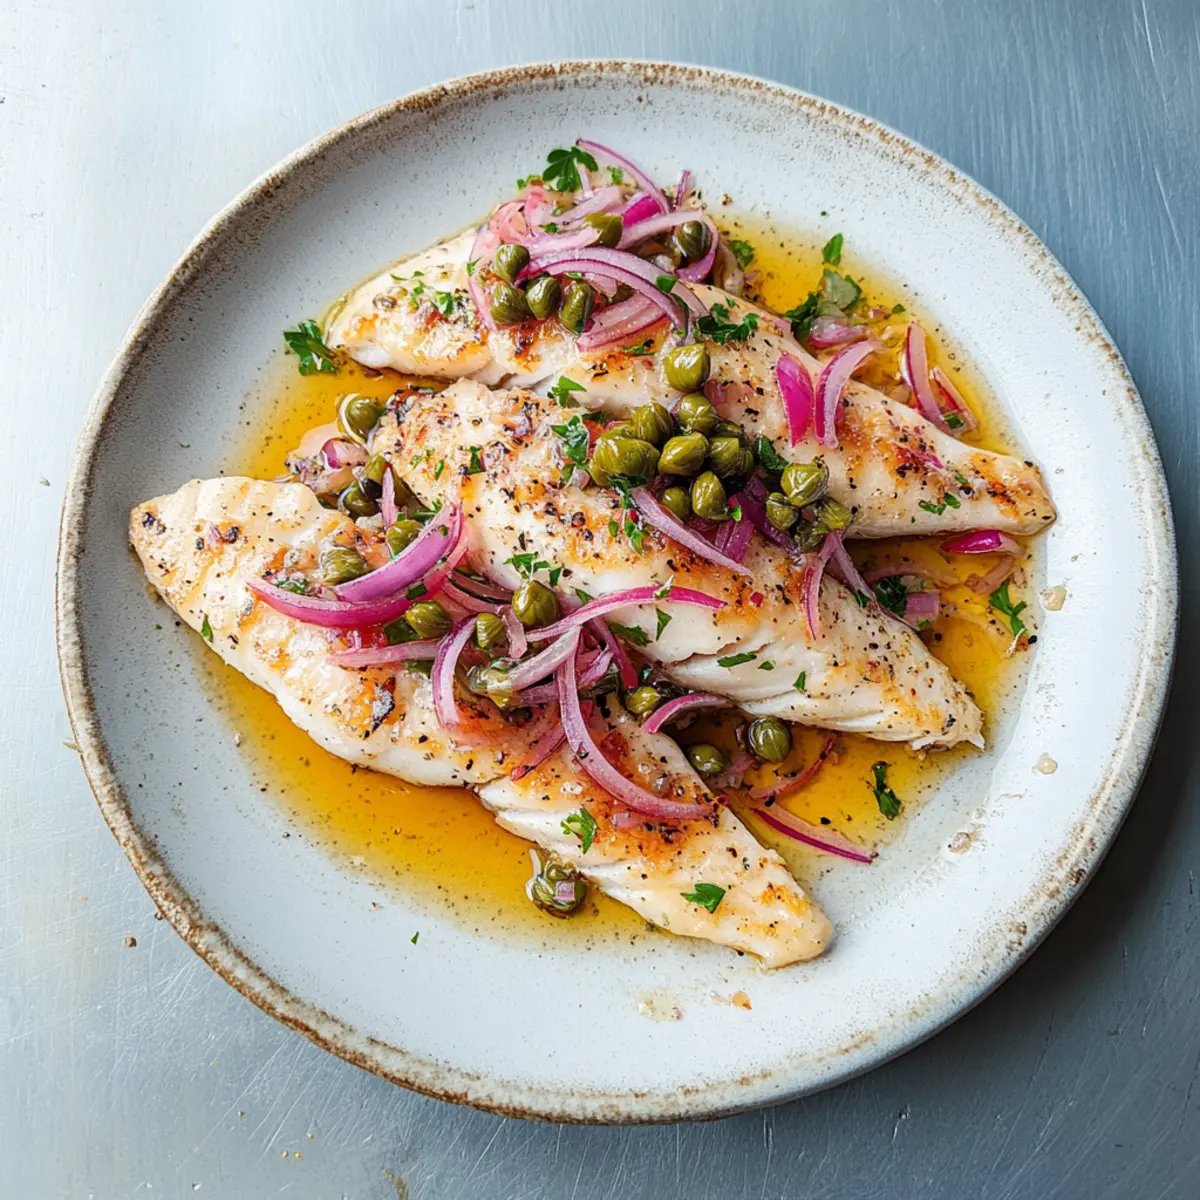
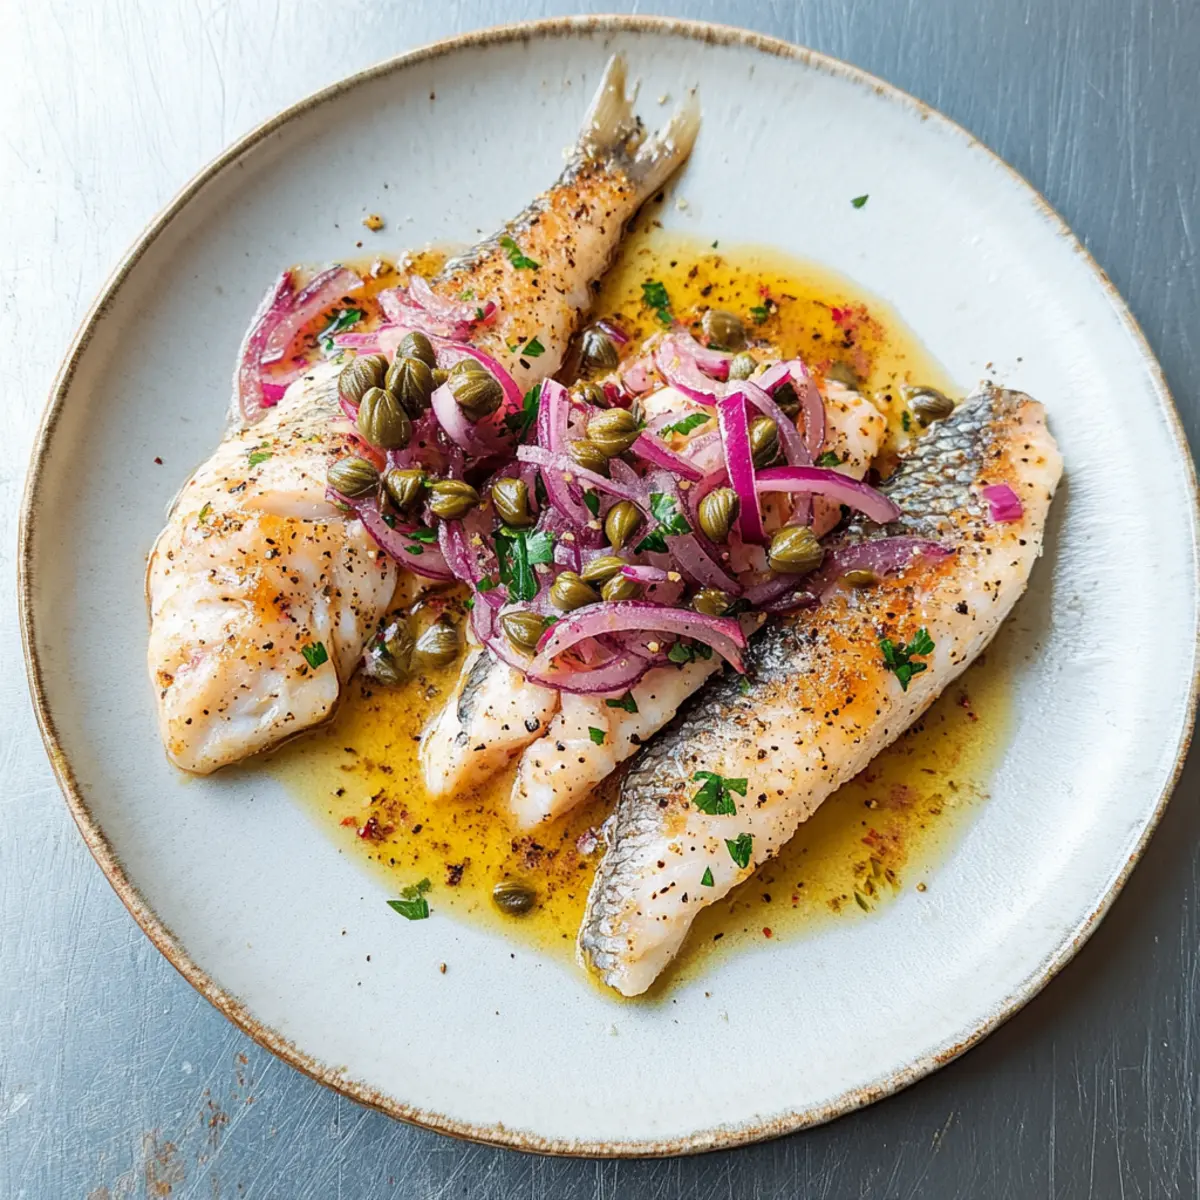
Step 6: Plate and Serve
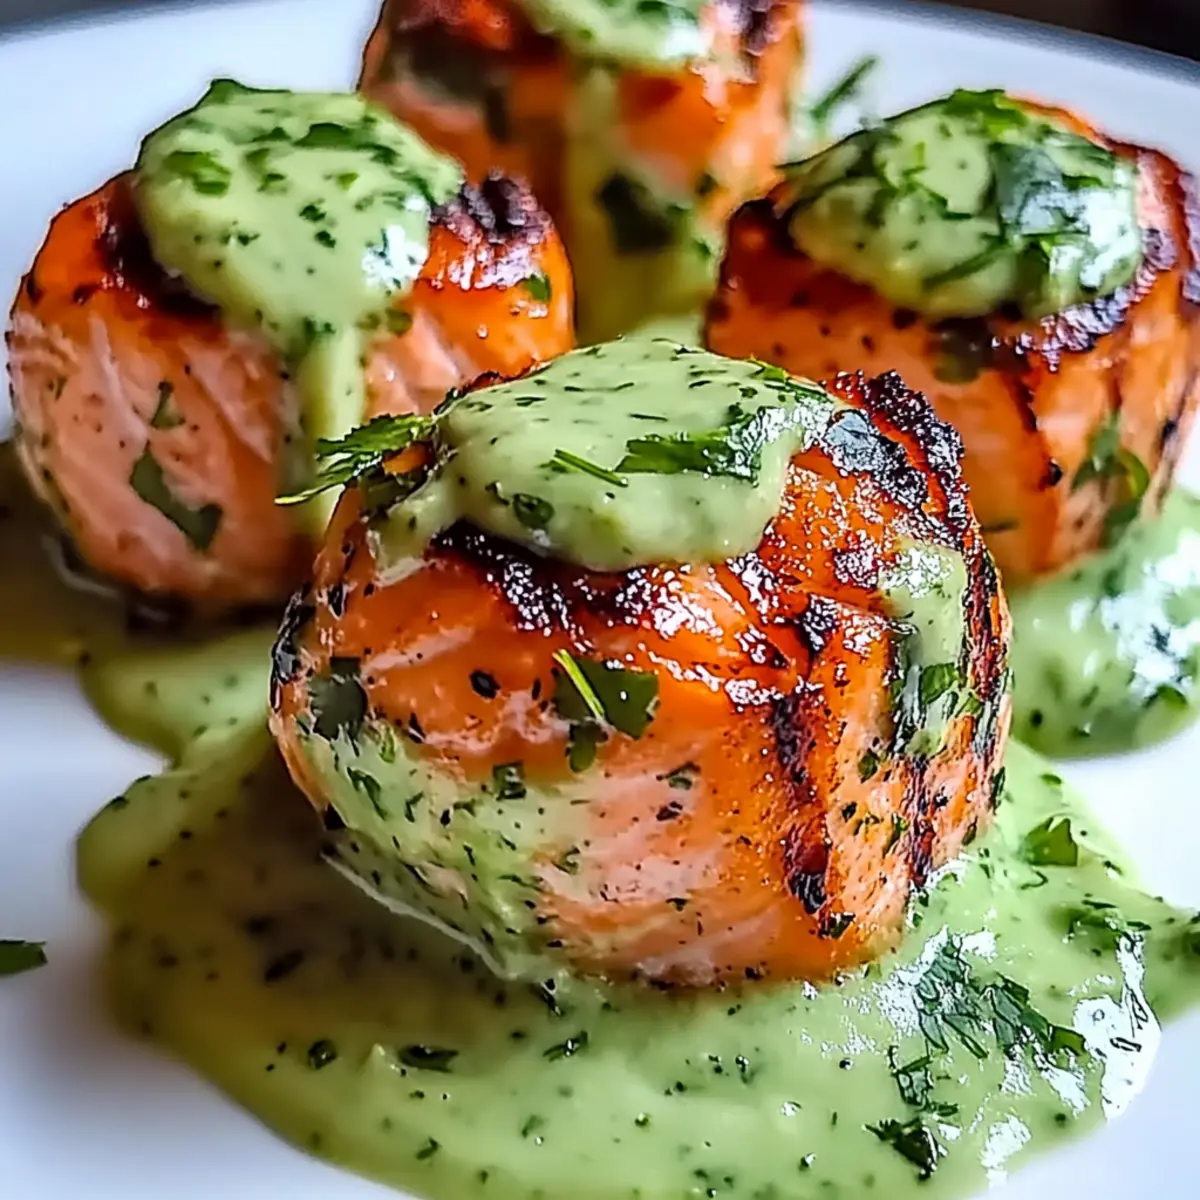
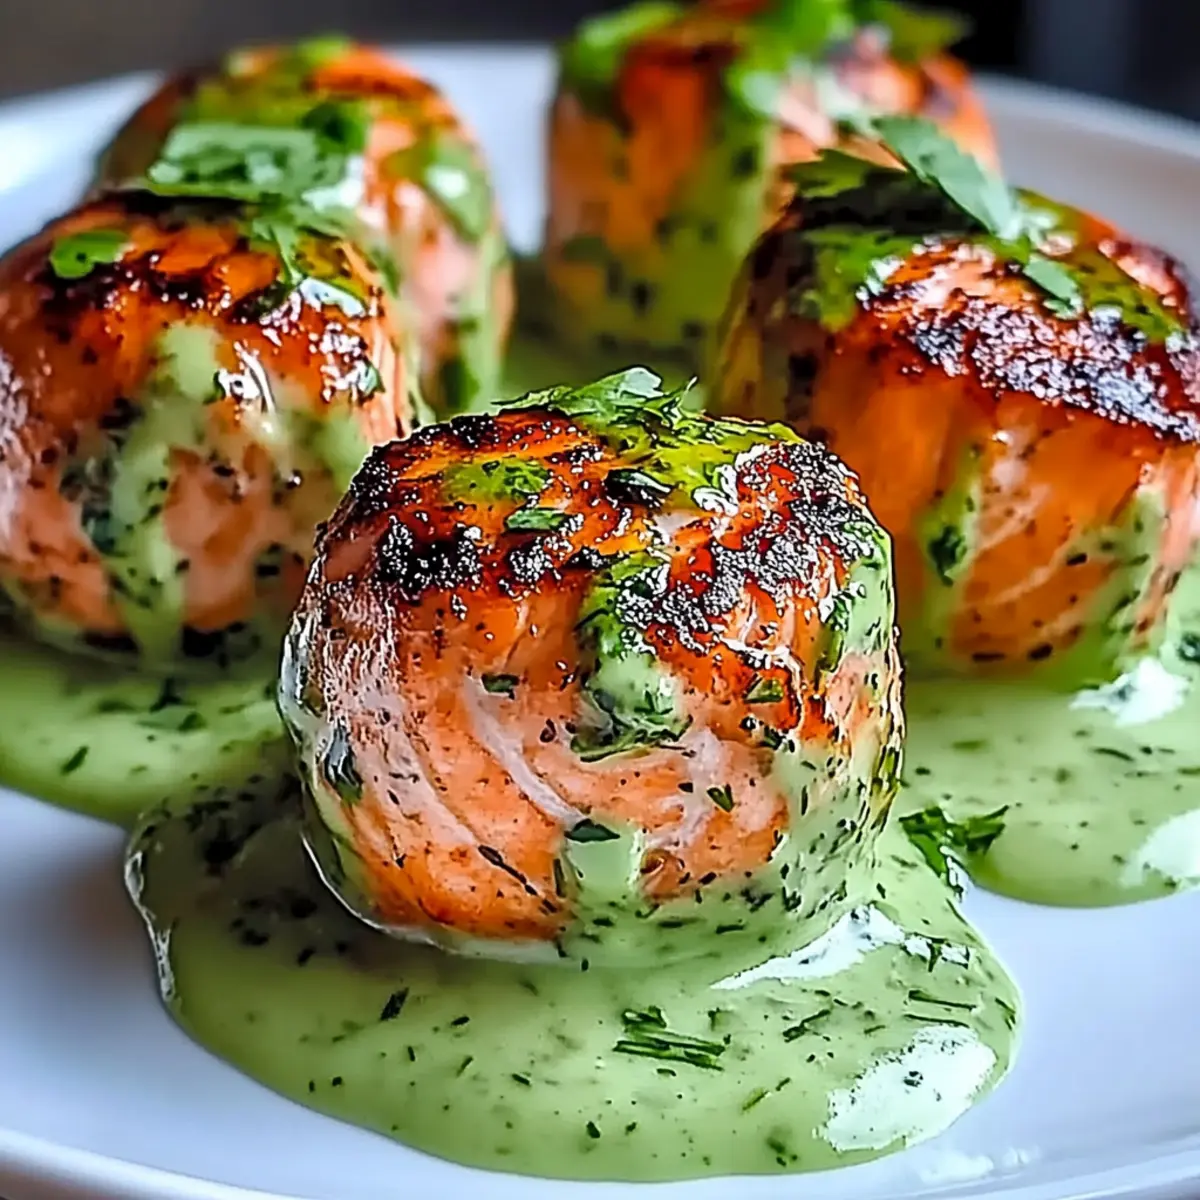
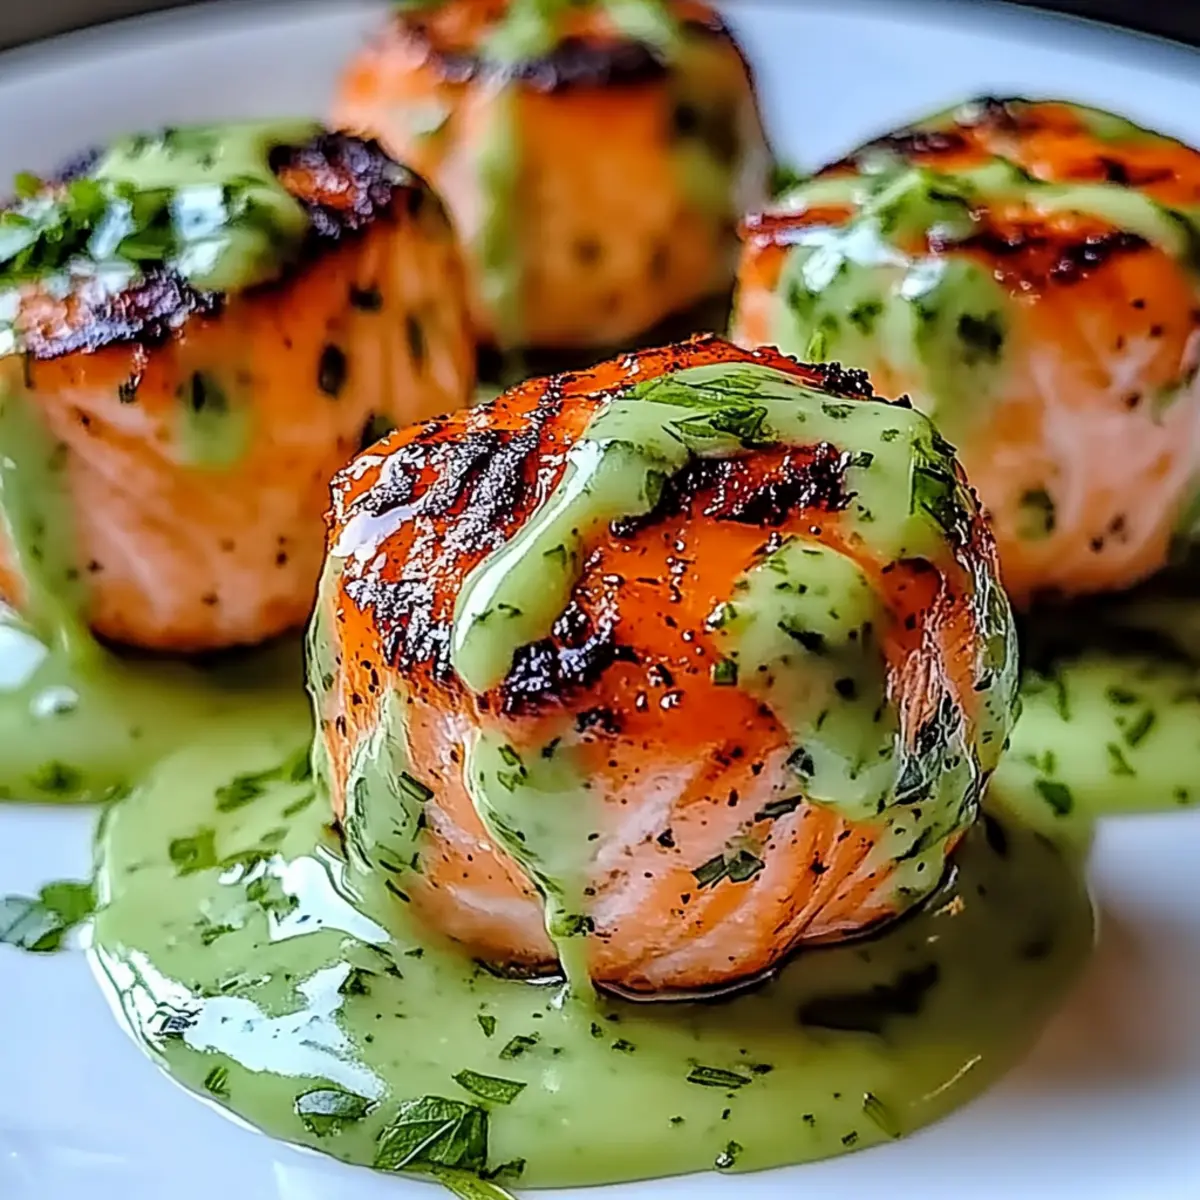
Using a spatula, carefully plate each fish fillet and generously spoon the rich sauce over the top. For a fresh finish, garnish with chopped basil or parsley, and sprinkle with red pepper flakes if you like a kick of heat. Your delightful Fish Puttanesca is now ready to be enjoyed!
Make Ahead Options
Fish Puttanesca is perfect for meal prep enthusiasts looking to save time during busy weeknights! You can prepare the puttanesca sauce up to 3 days in advance; simply store it in an airtight container in the refrigerator. Allowing the sauce to meld overnight will enhance its flavors. On the day you plan to serve, reheat the sauce gently on the stovetop, and while it warms, season your white fish fillets with sea salt. Carefully place them into the simmering sauce, then bake as directed (around 8-10 minutes). This way, you'll enjoy just as delicious, flavorful results with minimal effort, making dinner feel special without the last-minute stress!
What to Serve with Quick and Delicious Fish Puttanesca
Transform your delightful Fish Puttanesca into a full meal with these splendid pairings that enhance every bite.
-
Garlic Bread: The crispy crust and buttery garlic flavors are perfect for soaking up the rich sauce, creating a comforting experience.
-
Simple Green Salad: Fresh greens dressed with light vinaigrette provide a crisp contrast to the savory, rich fish dish, ensuring a balanced meal.
-
Lemon Risotto: Creamy risotto with a squeeze of lemon complements the fish beautifully, harmonizing with the tangy sauce for an indulgent side.
-
Roasted Asparagus: The earthy, tender asparagus pairs wonderfully with the vibrant sauce, adding a pop of color and nutrition to your dinner plate.
-
Pasta Aglio e Olio: This simple garlic and olive oil pasta offers a mild, comforting backdrop to the bold flavors of the Fish Puttanesca, perfect for pasta lovers.
-
Chilled White Wine: A crisp Pinot Grigio or Sauvignon Blanc elevates the dining experience, enhancing the dish's nuanced flavors with every sip.
-
Tiramisu: End your meal on a sweet note with this classic Italian dessert, providing a satisfying contrast to the savory notes of Fish Puttanesca.
Each of these pairings brings out the best in your Fish Puttanesca, making your dinner both memorable and delicious!
How to Store and Freeze Fish Puttanesca
Fridge: Store any leftover Fish Puttanesca in an airtight container for up to 3 days. Reheat it gently on the stovetop or in the microwave, adding a splash of water to loosen the sauce.
Freezer: For longer storage, freeze the Fish Puttanesca (without the fish) in a freezer-safe container for up to 3 months. Thaw in the fridge overnight before reheating and adding freshly cooked fish.
Reheating: When reheating, ensure the fish is plump and warmed throughout; it should remain moist and flaky. Avoid reheating the fish more than once for best texture and flavor.
Extra Tip: If the sauce thickens in the fridge or freezer, simply stir in a bit of olive oil or broth to revive its original creamy consistency before serving.
Expert Tips for Fish Puttanesca
-
Check Doneness: Monitor your fish closely while baking; it should flake easily when done. Thicker fillets may require additional time in the oven.
-
Use Fresh Ingredients: Fresh garlic and herbs deliver the best flavor. If you can, skip the dried variety for an authentic Fish Puttanesca experience.
-
Adjust Seasoning: Always taste your sauce before adding the fish. You may want to add more sea salt, especially if you're using low-sodium canned tomatoes.
-
Choose the Right Skillet: Opt for a large enough ovenproof skillet to ensure the fish pieces fit comfortably without crowding them, allowing for even cooking and flavor absorption.
-
Customize with Variations: Feel free to mix and match with your favorite white fish or adjust the level of spices according to your family's taste for a more personal touch.
Variations & Substitutions for Fish Puttanesca
Feel empowered to make this dish your own by experimenting with different flavors and ingredients!
- Dairy-Free: Substitute unsalted butter with olive oil or coconut oil for a smooth, dairy-free sauce.
- Vegetarian: Omit anchovies entirely and enhance the flavor with extra spices like smoked paprika or a dash of liquid smoke.
- Different Fish: Use salmon or even shrimp; just adjust the cooking time based on the fish's thickness.
- Add Vegetables: Toss in some spinach or artichoke hearts for added nutrition and texture; they'll soak up the sauce wonderfully.
- Pasta Version: Serve the sauce over pasta or quinoa to add heartiness; this is great for a filling meal.
- Herb Variations: Swap basil and parsley for fresh dill or cilantro for a unique herbal note.
- Spicy Kick: Increase the red pepper flakes or add sliced fresh jalapeños to kick up the heat level for those who love a bit of spice.
- Citrus Twist: Squeeze fresh lemon juice over the finished dish for a bright, zesty touch that complements the flavors beautifully.
Whichever variation you choose, you’ll find that this Fish Puttanesca remains as comforting and delicious as ever! If you’re in the mood for more seafood-inspired dishes, don’t forget to explore our tasty Air Fryer Fish or the fun flavors of Fish Taco Bowls.
Fish Puttanesca Recipe FAQs
What type of fish is best for Puttanesca?
Absolutely! For Fish Puttanesca, I recommend using white fish like cod, halibut, or tilapia. These fish have a mild flavor and flake beautifully when cooked. You can also experiment with other fresh seasonal white fish if you prefer.
How should I store leftover Fish Puttanesca?
Very simply! Store any leftover Fish Puttanesca in an airtight container in the refrigerator for up to 3 days. When you’re ready to enjoy it again, gently reheat it on the stovetop or in the microwave, adding a splash of water or broth to loosen the sauce if it thickens.
Can I freeze Fish Puttanesca?
Absolutely! To freeze Fish Puttanesca, I recommend freezing the sauce separately from the fish. You can store the sauce in a freezer-safe container for up to 3 months. When you’re ready to eat, thaw the sauce overnight in the refrigerator, then reheat and cook fresh fish to add just before serving.
How can I tell if the fish is cooked properly?
It's crucial to monitor the doneness! When the fish is opaque and flakes easily with a fork, it's ready. Thicker fillets may take a little longer, so keep an eye on them while baking. You want it perfectly juicy and not overcooked!
What can I use if I’m allergic to fish?
For a delightful vegetarian option, you can replace the fish with a hearty vegetable like eggplant or zucchini and enhance the flavor with additional spices. You could also use firm tofu, which absorbs the flavors of the Puttanesca sauce beautifully for a protein-packed alternative.
How do I make the sauce less salty if I’m sensitive to sodium?
I completely understand! To reduce the saltiness of the sauce, use low-sodium canned tomatoes, and you can limit or omit the capers and olives. Additionally, you may want to adjust the added sea salt according to your taste. Enjoy experimenting!
Easy Fish Puttanesca that Will Elevate Your Dinner Game
Ingredients
Equipment
Method
- Preheat your oven to 400°F (200°C), placing the rack in the center.
- In a large ovenproof skillet, melt 2 tablespoons of unsalted butter over medium heat. Add 4 minced garlic cloves and 2 anchovy fillets, cooking for 1-2 minutes until fragrant.
- Pour in ½ cup of dry white wine and let it reduce for 4 minutes. Add a can of whole tomatoes, 1 teaspoon of dried oregano, and ½ teaspoon of dried thyme. Simmer for 10 minutes.
- Stir in ½ cup of pitted black olives and 2 tablespoons of capers. Season fish fillets with sea salt and place them into the sauce.
- Transfer the skillet to the oven and bake for 8-10 minutes until the fish is opaque and flakes easily.
- Plate each fish fillet and spoon the sauce over. Garnish with chopped basil or parsley and sprinkle with red pepper flakes.