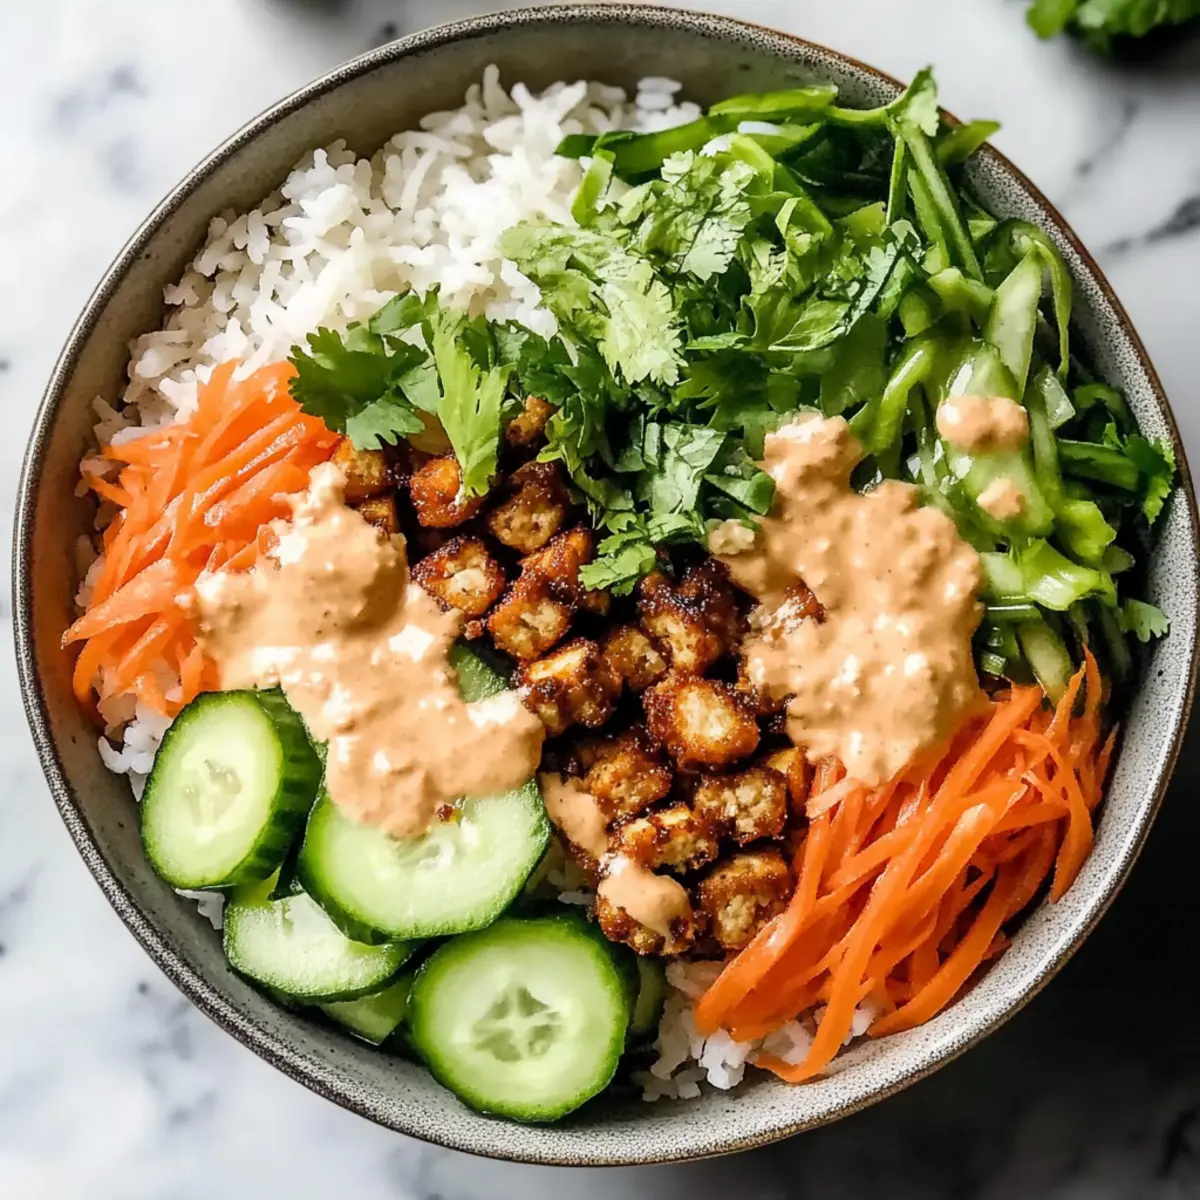
As I wandered through the bustling streets of Hanoi, the aroma of grilled meats mingled with fresh herbs and tangy pickles filled the air, drawing me toward a vibrant food stall. That memorable moment inspired me to recreate the flavors of Vietnam in my kitchen with a delightful Banh Mi Rice Bowl. This fusion dish combines fluffy jasmine rice, marinated proteins, and a colorful medley of crisp vegetables, making it a feast for both the eyes and the palate. Not only is this Banh Mi Rice Bowl quick to prepare, but it also offers a wholesome option for meal prep, perfect for busy cooks like us. With its balance of textures and flavors, it’s sure to become a family favorite. Are you ready to fill your kitchen with the irresistible scents of this Vietnamese-inspired dish?
Why Is This Banh Mi Rice Bowl Irresistible?
Flavor Explosion: With marinated proteins and tangy pickled veggies, each bite bursts with delightful contrasts.
Quick Prep: In just 30 minutes, you can enjoy a restaurant-quality meal at home!
Versatile & Customizable: Choose your favorite protein or add extra veggies—this dish is completely adaptable.
Meal Prep Friendly: Perfect for busy weeknights, you can prepare components in advance and assemble them quickly.
Family-Friendly: This dish brings everyone together; even picky eaters will love the colorful presentation!
If you're looking for other easy meal ideas, try our Furikake Fried Rice for a flavorful twist or the Lime Chicken Rice for something zesty!
Banh Mi Rice Bowl Ingredients
For the Rice
• Jasmine Rice – Fluffy and slightly fragrant, it forms the perfect base for your bowl. Substitution: Brown rice for a nuttier flavor.
For the Pickles
• Pickled Carrots – Adds a tangy crunch that brightens the dish. Preparation: Quick-pickle with vinegar, sugar, and salt.
• Pickled Daikon – Complements carrots with its refreshing taste and crisp texture. Preparation: Use the same quick-pickling method for best results.
For Freshness
• Cucumber – Provides a refreshing crunch to balance the flavors. Substitution: Zucchini for a similar texture.
• Fresh Cilantro – Brings a burst of brightness and aroma. Note: Add mint or Thai basil for a layered flavor.
For the Protein
• Tofu, Chicken, or Pork – The main protein source, marinated to infuse flavor. Substitution: Use tempeh for a vegan option.
For Flavor
• Soy Sauce – Delivers umami and saltiness to enhance all components. Substitution: Tamari for a gluten-free version.
• Sesame Oil – Adds richness and depth to your rice bowl. Note: Can substitute with olive oil for a different taste.
For Spice (Optional)
• Sriracha – Adds heat and spice, elevating your bowl's flavor profile. Note: Adjust to taste or omit if spice is not desired.
For Acidity
• Lime – Introduces bright acidity that ties all elements together. Note: Use lemon zest if lime is unavailable.
This Banh Mi Rice Bowl is not only a feast for your taste buds but also a simple way to bring the essence of Vietnamese cuisine into your home!
Step‑by‑Step Instructions for Banh Mi Rice Bowl:
Step 1: Prepare Rice
Begin by cooking jasmine rice according to the package instructions, usually about 15-20 minutes in boiling water. Once the rice is tender and water is absorbed, fluff it with a fork to separate the grains and let it steam off for a few minutes. This fluffy base will perfectly complement the vibrant flavors of the Banh Mi Rice Bowl.
Step 2: Marinate Protein
In a mixing bowl, combine your chosen protein—be it tofu, chicken, or pork—with soy sauce, sesame oil, and any preferred spices. Allow the mixture to marinate for at least 1 hour, preferably overnight in the refrigerator, to enhance the flavors. This step ensures your protein is infused with delicious taste that will elevate your bowl.
Step 3: Pickle Vegetables
Prepare the pickled carroty and daikon by mixing equal parts vinegar and water in a bowl, adding sugar and salt to taste. Submerge the cut vegetables in this mixture and let them soak for a minimum of 30 minutes. Their bright crunch will add an irresistible tang to your Banh Mi Rice Bowl, balancing the overall flavors.
Step 4: Cook Protein
Heat a non-stick skillet over medium-high heat and add a splash of oil. Once hot, add your marinated protein and cook for about 5-7 minutes, or until it’s nicely browned and cooked through. For chicken or pork, ensure the internal temperature reaches 165°F (74°C). This step will create a beautifully caramelized exterior full of flavor.
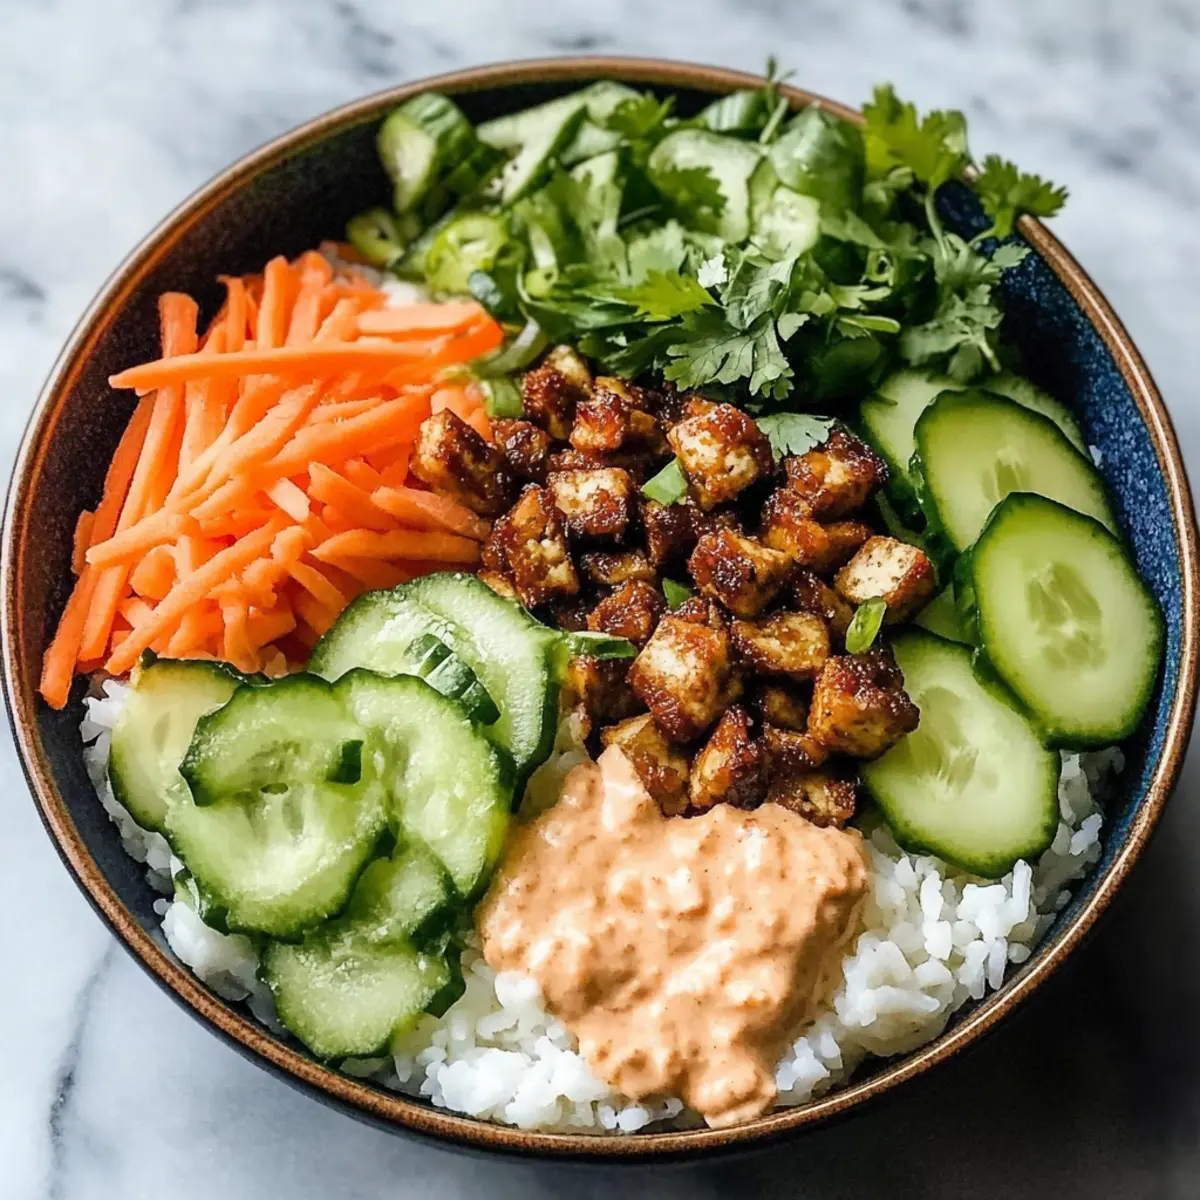
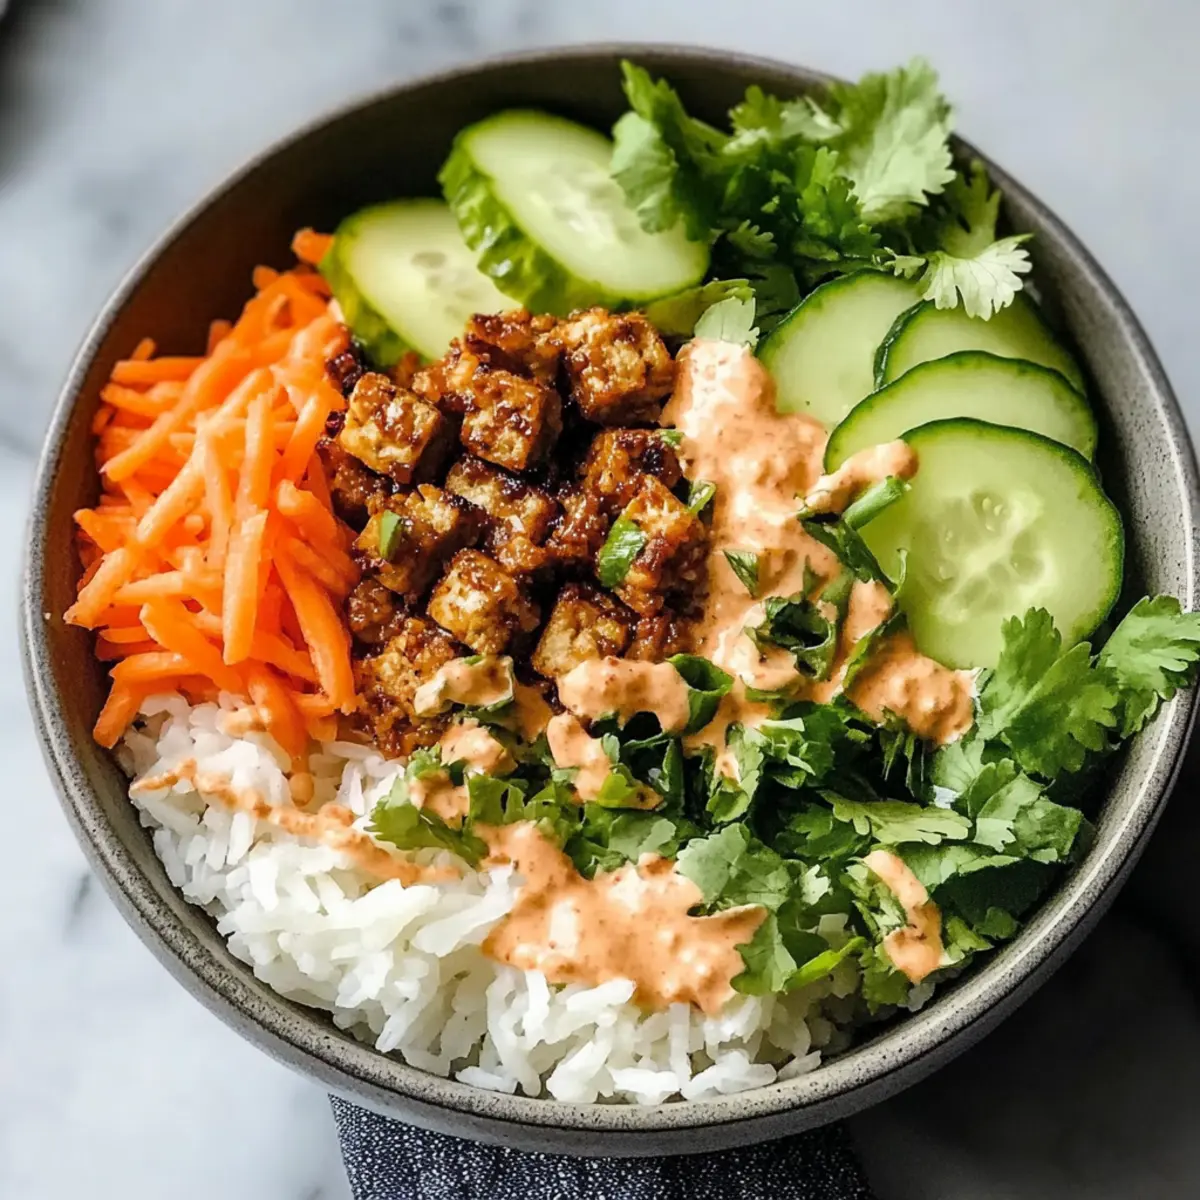
Step 5: Assemble Bowl
In a serving bowl, spoon in a generous portion of your fluffy jasmine rice. Next, layer on the cooked protein, followed by a colorful arrangement of pickled vegetables, fresh cucumber slices, and a handful of cilantro. The vibrant presentation makes this Banh Mi Rice Bowl not just delicious but visually appealing, perfect for sharing.
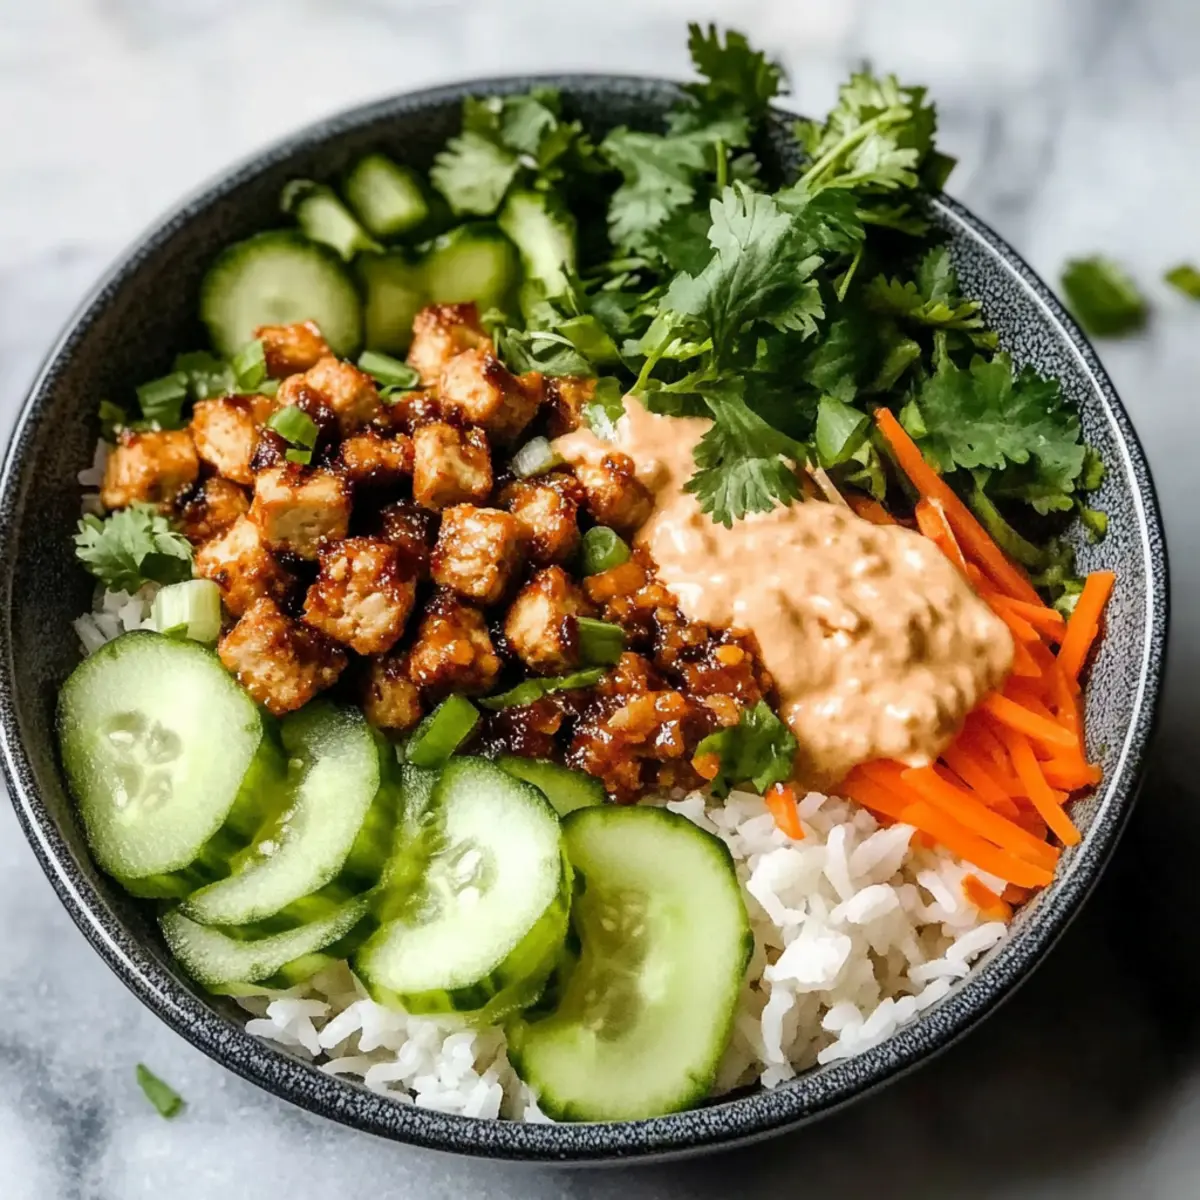
Step 6: Finish & Serve
To enhance the flavor, drizzle your Banh Mi Rice Bowl with sriracha for that delightful kick if desired, and serve with fresh lime wedges on the side. This bright acidity brings the dish together, making each bite an explosion of flavors. Enjoy your healthy and satisfying creation right away for the best experience!
Make Ahead Options
These Banh Mi Rice Bowls are perfect for meal prep enthusiasts! You can marinate your protein (tofu, chicken, or pork) up to 24 hours in advance to maximize flavor. Additionally, the quick-pickled carrots and daikon can be prepared up to 3 days in advance; simply store them in an airtight container in the refrigerator to maintain their crunchy texture. When you’re ready to enjoy your Banh Mi Rice Bowl, cook your marinated protein and assemble the bowl with rice and fresh veggies. By prepping these components ahead of time, you’ll have a delicious, homemade meal ready to serve with minimal effort during busy weeknights. Maintain quality by assembling the bowl just before eating for the freshest taste and appealing presentation!
How to Store and Freeze Banh Mi Rice Bowl
- Fridge: Store individual components in airtight containers for up to 3 days. Keeping the rice, protein, and pickled veggies separate helps maintain their textures and flavors.
- Freezer: You can freeze marinated protein and cooked rice for up to 3 months. Just ensure they're in airtight containers or freezer bags to prevent freezer burn.
- Reheating: Thaw overnight in the fridge before reheating. Warm the rice and protein in a microwave or on the stovetop until heated through.
- Pickled Vegetables: These can be stored in the fridge for up to a week, allowing their flavors to deepen while maintaining their crunch. They add a lovely zing to your Banh Mi Rice Bowl!
What to Serve with Banh Mi Rice Bowl
Prepare for a delightful dining experience that complements every bite of vibrant, flavorful goodness.
- Crispy Spring Rolls: These delectable rolls bring a satisfying crunch paired with a savory filling, making them a perfect appetizer alongside the bowl.
- Refreshing Green Salad: A light mix of greens and herbs tossed in a citrus dressing adds a crisp contrast to the richness of the rice bowl.
- Sesame Garlic Bok Choy: The tender, sautéed bok choy with nutty sesame notes brings a vibrant, earthy depth to the meal.
- Mango Ginger Smoothie: Electrifying your palate with its sweetness and zing, this drink balances the savory aspects of the dish beautifully.
- Coconut Milk Rice Pudding: For dessert, indulge in this creamy treat that softens the post-meal experience, offering a soothing finish.
- Iced Vietnamese Coffee: Refreshingly robust, this coffee adds a kick to your meal, highlighting the dish’s Vietnamese roots while inviting a cozy atmosphere.
- Thai Basil Lemonade: Sweet and tangy, this cool beverage brings brightness that pairs naturally with the bowl's rich flavors, rounding out your meal.
Expert Tips for Banh Mi Rice Bowl
- Marination Matters: Marinate proteins overnight to achieve maximum flavor infusion; less time can result in bland bites.
- Quick Pickling Technique: Use equal parts vinegar and water for pickling—this keeps veggies crunchy and vibrant without overwhelming flavors.
- Mindful Assembly: Layer ingredients thoughtfully in the bowl; not only does it look appealing, but it also ensures a balanced flavor in every spoonful.
- Fresh Herbs Abundance: Generously add fresh cilantro and other herbs to brighten the dish. Their freshness elevates the entire Banh Mi Rice Bowl experience.
- Watch Your Cooking Time: Avoid overcooking your protein. This can lead to a dry texture, so keep an eye on cooking times for juicy results.
- Explore Heat Options: Experiment with different chili sauces to suit your taste. Remember, a little spice can elevate your Banh Mi Rice Bowl without overwhelming it!
Banh Mi Rice Bowl Variations & Substitutions
Feel free to customize your Banh Mi Rice Bowl with these fun variations that will bring new flavors and fun textures to your table!
-
Dairy-Free: Swap any dairy products with coconut yogurt or simply omit them to keep it plant-based.
-
Spicy Kick: Add sliced jalapeños or a sprinkle of crushed red pepper for an extra layer of heat. It's a great way to turn up the flavor if you're feeling adventurous!
-
Grains Makeover: Try quinoa or brown rice instead of jasmine rice for a nuttier texture and extra nutrients. Both options pack in a delicious twist while keeping the dish wholesome!
-
Protein Swap: Use grilled shrimp or seitan for an exciting twist on your protein choice. Each option has its unique charm and taste—perfect for mixing things up.
-
Veggie Boost: Pack even more nutrition by adding extra veggies like bell peppers, snap peas, or steamed bok choy. Not only will they enhance the color, but they will also give that satisfying crunch!
-
Herb Variance: Experiment with fresh mint, Thai basil, or parsley in place of cilantro. Each herb offers a distinct flavor that can change the whole character of the dish.
-
Crispy Additions: For a delightful crunch, sprinkle some toasted sesame seeds or crushed peanuts on top before serving. It's a small touch that takes the bowl to the next level.
If you’re in the mood for more delicious meals, don’t forget to check out our Honey BBQ Chicken Rice or dive into a colorful Acai Bowl for a refreshing dessert!
Banh Mi Rice Bowl Recipe FAQs
What type of jasmine rice should I use for the Banh Mi Rice Bowl?
I recommend using medium-grain jasmine rice for its fluffy and slightly fragrant qualities that perfectly complement the flavors of the dish. If you prefer a nuttier flavor, feel free to substitute it with brown rice; just be aware that it will require a longer cooking time—about 40-45 minutes instead of the usual 15-20 minutes for jasmine rice.
How should I store the leftovers of my Banh Mi Rice Bowl?
To keep your leftovers fresh, store individual components in airtight containers in the fridge for up to 3 days. This method preserves the distinct textures of the rice, protein, and pickled vegetables, ensuring you can enjoy this vibrant dish again later without sacrificing flavor.
Can I freeze the components of the Banh Mi Rice Bowl?
Absolutely! You can freeze the marinated protein and cooked rice for up to 3 months. Just remember to place them in airtight containers or freezer bags to prevent freezer burn. When you're ready to eat, thaw overnight in the fridge, and reheat the rice and protein in a microwave or on the stovetop until they are heated through.
What do I do if my pickled vegetables aren't crunchy enough?
If your pickled vegetables turn out softer than you'd like, it could be due to over-soaking in the vinegar solution. To maintain their crunch, try using a quick pickling method: soak them for at least 30 minutes in a mixture of equal parts vinegar and water along with sugar and salt, but avoid leaving them for too long. Also, make sure to slice the vegetables thinly, as thinner pieces tend to retain a better crunch.
What dietary considerations should I keep in mind for this dish?
This Banh Mi Rice Bowl is customizable for various diets! You can easily make it vegan by using tofu or tempeh as your protein source and ensuring that your soy sauce is gluten-free. If you have specific allergies, check your ingredients, especially the sauces, to avoid any hidden allergens. Always be aware of your guests' dietary needs to make their experience enjoyable!
Banh Mi Rice Bowl: A Fresh Twist on Vietnamese Comfort Food
Ingredients
Equipment
Method
- Begin by cooking jasmine rice according to the package instructions, about 15-20 minutes in boiling water. Fluff with a fork and let steam off.
- Marinate your chosen protein with soy sauce, sesame oil, and spices. Let marinate for at least 1 hour, preferably overnight.
- Prepare the pickled carrots and daikon by mixing equal parts vinegar and water, adding sugar and salt. Submerge the veggies and let soak for 30 minutes.
- Heat a non-stick skillet over medium-high heat, add oil, and cook the marinated protein for about 5-7 minutes until browned and cooked through.
- In a serving bowl, layer jasmine rice, cooked protein, pickled vegetables, cucumber slices, and cilantro.
- Drizzle with sriracha if desired, serve with fresh lime wedges, and enjoy your healthy creation!