tastytrendingredients

  • Home
  • Recipes
    • Appetizers
    • Breakfast
    • Dessert
    • Dinner
    • Drinks
    • Salads
    • Snacks
    • Soups
  • About me
  • Contact
menu icon
go to homepage
  • Home
  • Recipes
    • Appetizers
    • Breakfast
    • Dessert
    • Dinner
    • Drinks
    • Salads
    • Snacks
    • Soups
  • About me
  • Contact
search icon
Homepage link
  • Home
  • Recipes
    • Appetizers
    • Breakfast
    • Dessert
    • Dinner
    • Drinks
    • Salads
    • Snacks
    • Soups
  • About me
  • Contact
×

Gordon Ramsay Ground Turkey Pasta: A Cozy Weeknight Delight

November 15, 2025 by Grace Snow Leave a Comment

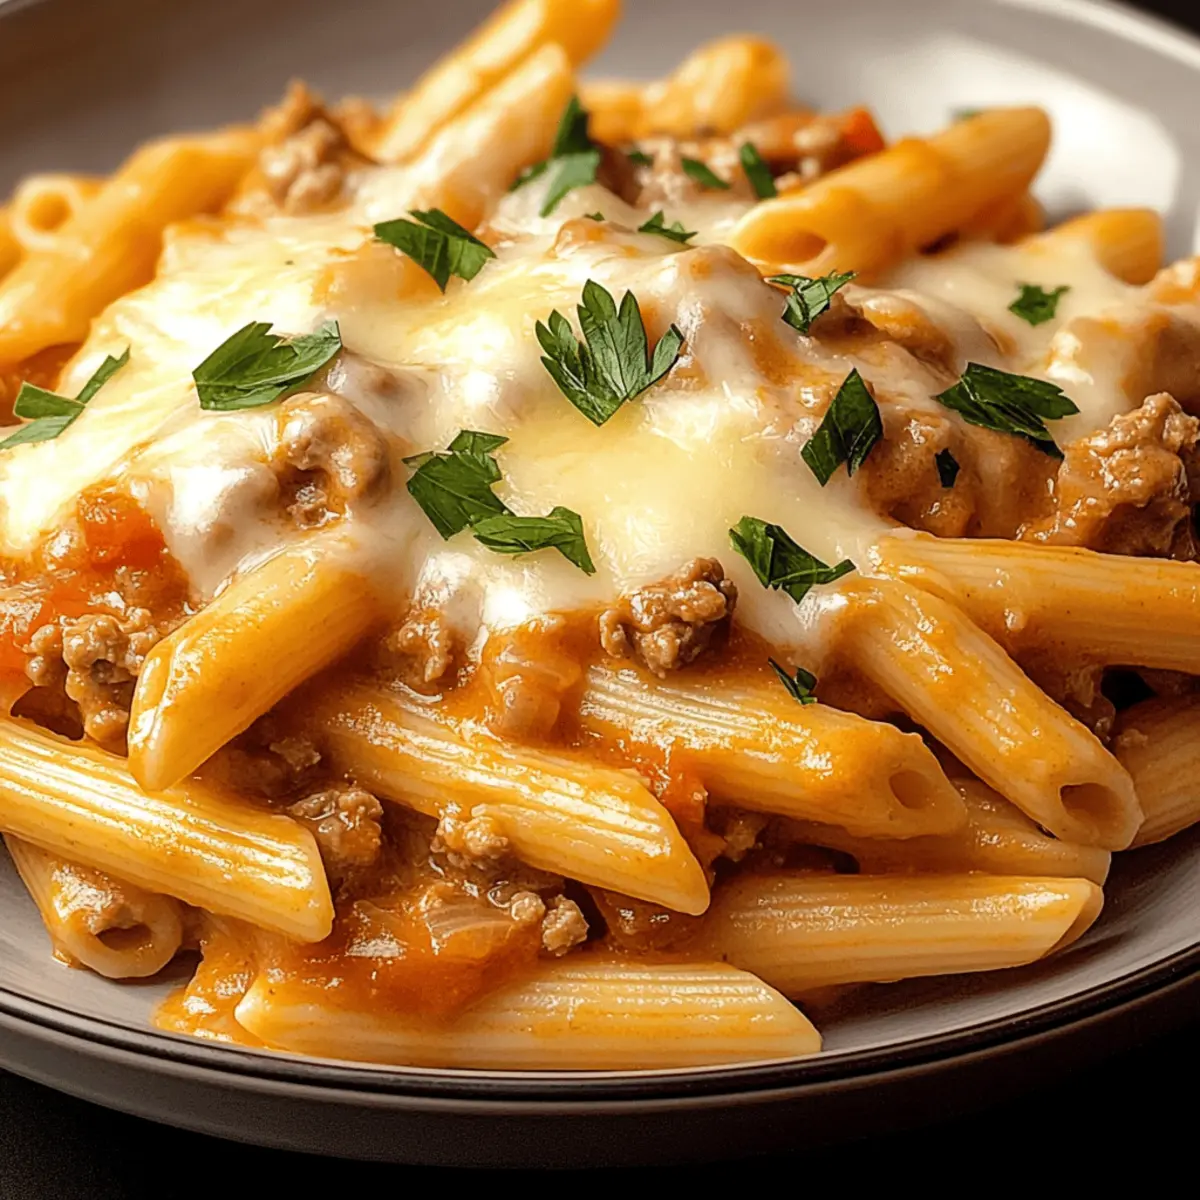
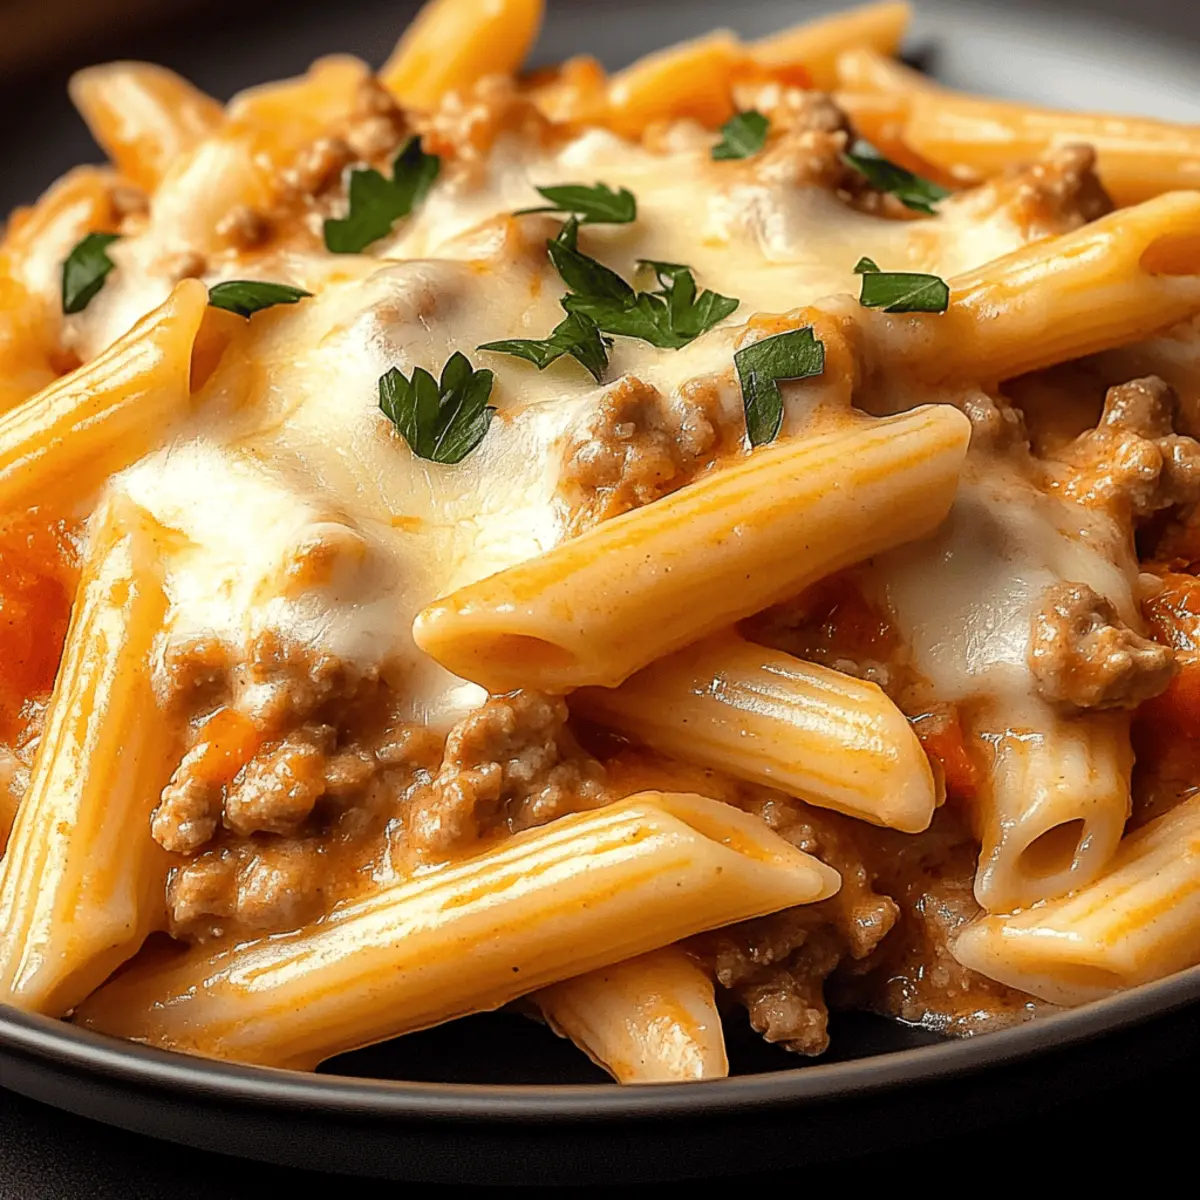
As I stood by the stove, I felt like a culinary magician, ready to transform humble ingredients into something extraordinary. Let me introduce you to Gordon Ramsay's Creamy Ground Turkey Pasta, a quick and easy dinner that elevates your weeknight routine in a matter of minutes. Not only is this dish packed with lean protein and rich flavors, it's also incredibly customizable—meaning it can easily adapt to whatever your pantry holds. Imagine a creamy sauce enveloping perfectly cooked pasta, making it a satisfying feast that even picky eaters will love. Double win! Are you curious to see how this delightful meal comes together? Let's dive in!

Why is This Pasta Recipe a Game Changer?

Quick and Easy: This dish comes together in under 30 minutes, perfect for busy weeknights when you crave something comforting yet nutritious.

Healthy Twist: Made with lean ground turkey, it's a guilt-free choice that keeps you feeling your best.

Customizable: Switch up the ingredients! Use your favorite pasta shape or add seasonal vegetables for extra nutrition—like in this Seafood Pasta variation.

Crowd-Pleaser: With its creamy flavors and cheesy goodness, it appeals to kids and adults alike, making it the ideal family meal.

One-Pan Wonder: Reducing cleanup time, it’s a simple, satisfying dish that doesn't require fussing around with multiple pots—just like my go-to Ground Beef Enchiladas.

Get ready to love this deliciously simple recipe!

Gordon Ramsay Ground Turkey Pasta Ingredients

Here’s what you’ll need to create this creamy delight.

For the Pasta
• Penne Pasta – Provides structure for the dish; substitute with any preferred pasta shape.

For the Sauce
• Olive Oil – Essential for sautéing aromatics; canola or vegetable oil can be used instead.
• Yellow Onion – Adds sweetness and depth; red onion can offer a sharper taste if desired.
• Ground Turkey – A lean protein source; can substitute with ground chicken or beef for variety.
• Salt – Enhances flavor; adjust to dietary needs.
• Black Pepper – Freshly cracked is recommended for maximum flavor.
• Italian Seasoning – Adds herby notes; can be substituted with dried oregano, basil, or thyme.
• Garlic – Vital for flavor; garlic powder may work in a pinch.
• All-Purpose Flour – Used for thickening the sauce; gluten-free flour is an alternative.
• Chicken Broth – Adds richness to the sauce; swap for vegetable broth for a vegetarian option.
• Tomato Sauce – Provides tangy acidity; canned diced tomatoes can give a chunkier texture.
• Half-and-Half – For creaminess; can be replaced with heavy cream or non-dairy milk.

For the Cheese
• Mozzarella Cheese – Melts beautifully; may substitute with provolone or dairy-free cheese.
• Cheddar Cheese – Adds sharp flavor; any melty cheese can be used.

For Garnish
• Fresh Parsley – Adds a pop of color and freshness.
• Red Chili Flakes – Optional for a bit of heat; can be omitted or replaced with fresh chili.

Now you’re ready to make Gordon Ramsay’s Ground Turkey Pasta!

Step‑by‑Step Instructions for Gordon Ramsay Ground Turkey Pasta

Step 1: Cook Pasta
Begin by bringing a large pot of salted water to a vigorous boil over high heat. Once boiling, add the penne pasta and cook for about 8-10 minutes until it's just shy of al dente. Reserve 1 cup of the pasta water, then carefully drain the pasta in a colander and set it aside while you prepare the sauce.

Step 2: Sauté Aromatics
In a spacious skillet, heat 2 tablespoons of olive oil over medium heat until shimmering. Add the diced yellow onion and sauté for around 5 minutes until it turns soft and translucent, stirring occasionally. This step helps to build a flavorful base for your Gordon Ramsay Ground Turkey Pasta.

Step 3: Brown Turkey
Once the onions are ready, increase the heat slightly and add the ground turkey to the skillet. Use a wooden spoon to break it apart and cook for 6-8 minutes until it's beautifully browned. Season the turkey with salt, pepper, and Italian seasoning, then stir in the minced garlic, cooking for an additional minute to release its delicious aroma.

Step 4: Build Sauce
Sprinkle all-purpose flour evenly over the turkey mixture, stirring it in for about 1 minute to eliminate raw flour taste. Gradually pour in the chicken broth and tomato sauce, stirring continuously until the mixture begins to thicken, which should take about 3-5 minutes. The sauce will become silky, perfect for coating your pasta.

Step 5: Combine Ingredients
Gently fold the cooked penne pasta into the turkey sauce, ensuring every piece is well-coated. Pour in the half-and-half for an extra creamy texture, and season the mixture as needed with additional salt and pepper. If the sauce is too thick, adjust the consistency by adding some reserved pasta water until you reach your preferred creaminess.

Step 6: Add Cheese
Reduce the skillet heat to low and sprinkle half of the mozzarella and cheddar cheese into the pasta mixture. Stir well until the cheese melts and incorporates fully into the sauce, creating a creamy, cheesy blend. Top with the remaining cheese and cover the skillet for a minute to melt everything perfectly.

Step 7: Serve
Remove the skillet from heat and garnish your Gordon Ramsay Ground Turkey Pasta with freshly chopped parsley and a sprinkle of red chili flakes for an optional kick. Serve immediately while hot, and watch as your family and friends enjoy this cozy weeknight delight, feeling utterly satisfied.

Gordon Ramsay Ground Turkey Pasta Variations

Feel free to personalize this dish to your taste and make it uniquely yours. Your kitchen is your canvas!

  • Gluten-Free: Substitute regular pasta with gluten-free alternatives for a lighter option.
  • Vegetable Boost: Toss in spinach, bell peppers, or broccoli for added nutrients and vibrant color. This makes the dish more filling and healthful.
  • Extra Creamy: For an indulgent twist, replace half-and-half with heavy cream or a rich non-dairy milk. This will amp up the creamy texture everyone loves!
  • Cheese Lovers: Incorporate ricotta or cream cheese for a rich layer of flavor and creaminess. Use this variation on a cozy night in!
  • Spicy Kick: Add red chili flakes, jalapeños, or a dash of hot sauce for a zingy twist. It’s a great way to spice things up!
  • Baked Pasta: Layer any leftovers with breadcrumbs and additional cheese, broil until bubbly and golden for a delightful crispy topping. Think of it like turning a simple meal into a gourmet dish!
  • Italian Twist: Introduce a splash of white wine during sauce preparation for depth and flavor. Pairing it with a glass of wine while cooking makes for the perfect evening!
  • Swap Meats: Use ground chicken or beef for a different but equally delicious flavor profile. Each option brings its own flair to the dish!

Explore these delicious variations to see what resonates with you and your family. And while you’re at it, check out my Skillet Pasta Sun recipe for even more inspiration!

What to Serve with Gordon Ramsay's Creamy Ground Turkey Pasta

To create a delightful dining experience, complement your creamy pasta with dishes that enhance its comforting flavors.

  • Garlic Bread: The warm, aromatic crunch of garlic bread is the perfect sidekick to this creamy dish, perfect for scraping up every last bit of sauce.

  • Fresh Green Salad: Crisp romaine or mixed greens provide a refreshing contrast to the rich pasta, while a light vinaigrette balances the meal beautifully.

  • Roasted Vegetables: Seasonal veggies like zucchini, bell peppers, and asparagus, roasted to perfection, add texture and a sweet earthiness that complements the pasta.

  • Steamed Broccoli: This vibrant green side not only offers a satisfying crunch but also brings a pop of color and nutrients to your plate.

  • Caesar Salad: The creamy dressing pairs perfectly with the flavors of the pasta, making this classic side fit right in with your cozy dinner.

  • A Light White Wine: A glass of chilled Chardonnay or Pinot Grigio elevates the meal, enhancing the flavors of the ground turkey and creamy sauce with every sip.

How to Store and Freeze Gordon Ramsay Ground Turkey Pasta

Fridge: Store leftovers in an airtight container in the refrigerator for up to 3 days. Allow to cool before sealing to maintain texture.

Freezer: For longer storage, freeze portions of the pasta in airtight containers for up to 3 months. Label with the date to keep track.

Reheating: When ready to enjoy, thaw overnight in the fridge if frozen. Reheat slowly on the stove over low heat, adding a splash of water or broth to restore creaminess.

Avoid Clumping: Stir well during reheating to prevent the cheese from clumping, ensuring a smooth and delightful Gordon Ramsay Ground Turkey Pasta experience.

Make Ahead Options

Gordon Ramsay's Creamy Ground Turkey Pasta is perfect for make ahead meal prep, allowing you to enjoy a comforting dinner with minimal effort during busy weeknights. You can prepare the turkey sauce (steps 2 through 4) up to 3 days in advance; simply refrigerate it in an airtight container. The cooked pasta can also be made up to 24 hours ahead and stored separately, as combining them too early can lead to sogginess. When you're ready to serve, gently reheat the sauce on the stovetop, adding a splash of broth to maintain its creamy texture, then toss in the cooked pasta and cheese just before serving. This way, you'll have a warm, delicious meal that tastes just as freshly made!

Expert Tips for Gordon Ramsay Ground Turkey Pasta

• Flavor Boost: Season generously: Don't be shy with salt and spices; they elevate the overall flavor and enhance the turkey's rich taste.

• Perfect Pasta: Cook al dente: Aim for pasta that's just shy of fully cooked to avoid any mushiness when combined with the sauce later.

• Smooth Sauce: Mix well: Ensure flour is fully incorporated into the turkey mixture to prevent clumps in your creamy sauce.

• Cheesy Goodness: Low heat: When adding cheese, keep the heat low to achieve a creamy melt without separating or curdling.

• Ingredient Substitution: Get creative: This Gordon Ramsay Ground Turkey Pasta is flexible—feel free to swap ingredients for whatever you have on hand!

Gordon Ramsay Ground Turkey Pasta Recipe FAQs

How do I choose the right pasta for this recipe?
It's absolutely your choice! I recommend using penne pasta as it holds onto the creamy sauce well, but feel free to experiment with any pasta shape you like. Just ensure it’s cooked al dente to prevent mushiness once mixed with the sauce.

How should I store leftovers of Gordon Ramsay Ground Turkey Pasta?
Store any leftovers in an airtight container in the fridge for up to 3 days. Be sure to let it cool to room temperature before sealing it to maintain the best texture when reheating.

Can I freeze Gordon Ramsay Ground Turkey Pasta?
Yes! You can freeze this dish for up to 3 months. Just portion it into airtight containers, and label them with the date. To reheat, thaw overnight in the fridge, then warm it gently on the stovetop, adding a splash of water or broth to keep it creamy.

What if the sauce turns out too thick?
No worries! If your sauce ends up thicker than desired, gently stir in a little of the reserved pasta water, one tablespoon at a time, until you reach your preferred consistency. This will help keep the sauce creamy without losing that rich flavor.

Can I make this recipe gluten-free?
Absolutely! To make this Gordon Ramsay Ground Turkey Pasta gluten-free, simply substitute regular pasta with a gluten-free alternative. You can also use gluten-free flour to thicken the sauce without compromising its deliciousness.

What about dietary concerns?
If you're concerned about allergies, be sure to check labels on your ingredients, especially on sauces and cheese. For dairy-free options, swap the mozzarella and cheddar for dairy-free cheese alternatives and use non-dairy milk or broth in place of half-and-half. Enjoy the adaptability of this dish!

Gordon Ramsay Ground Turkey Pasta

Gordon Ramsay Ground Turkey Pasta: A Cozy Weeknight Delight

Experience the comfort of Gordon Ramsay's Ground Turkey Pasta, a creamy, customizable dish packed with lean protein perfect for weeknights.
Print Recipe Pin Recipe
Prep Time 10 minutes mins
Cook Time 20 minutes mins
Total Time 30 minutes mins
Servings: 4 servings
Course: Dinner
Cuisine: American
Calories: 650
Ingredients Equipment Method Nutrition Notes

Ingredients
  

For the Pasta
  • 8 ounces Penne Pasta Substitute with any preferred pasta shape.
For the Sauce
  • 2 tablespoons Olive Oil Can substitute with canola or vegetable oil.
  • 1 medium Yellow Onion Red onion can be used for a sharper taste.
  • 1 pound Ground Turkey Can substitute with ground chicken or beef.
  • 1 teaspoon Salt Adjust to dietary needs.
  • 1 teaspoon Black Pepper Freshly cracked is recommended.
  • 1 teaspoon Italian Seasoning Can substitute with dried oregano, basil, or thyme.
  • 3 cloves Garlic Minced; garlic powder may work in a pinch.
  • 2 tablespoons All-Purpose Flour Gluten-free flour is an alternative.
  • 1 cup Chicken Broth Swap for vegetable broth for a vegetarian option.
  • 1 cup Tomato Sauce Canned diced tomatoes can be used for a chunkier texture.
  • 1 cup Half-and-Half Can be replaced with heavy cream or non-dairy milk.
For the Cheese
  • 1 cup Mozzarella Cheese May substitute with provolone or dairy-free cheese.
  • 1 cup Cheddar Cheese Any melty cheese can be used.
For Garnish
  • 2 tablespoons Fresh Parsley Chopped, for garnish.
  • 1/2 teaspoon Red Chili Flakes Optional for heat; can be omitted.

Equipment

  • Large pot
  • Skillet
  • Colander

Method
 

Cooking Steps
  1. Begin by bringing a large pot of salted water to a vigorous boil over high heat. Once boiling, add the penne pasta and cook for about 8-10 minutes until it's just shy of al dente. Reserve 1 cup of the pasta water, then carefully drain the pasta in a colander and set it aside while you prepare the sauce.
  2. In a spacious skillet, heat 2 tablespoons of olive oil over medium heat until shimmering. Add the diced yellow onion and sauté for around 5 minutes until it turns soft and translucent, stirring occasionally.
  3. Once the onions are ready, increase the heat slightly and add the ground turkey to the skillet. Use a wooden spoon to break it apart and cook for 6-8 minutes until it's beautifully browned. Season the turkey with salt, pepper, and Italian seasoning, then stir in the minced garlic, cooking for an additional minute.
  4. Sprinkle all-purpose flour evenly over the turkey mixture, stirring it in for about 1 minute. Gradually pour in the chicken broth and tomato sauce, stirring continuously until the mixture begins to thicken, which should take about 3-5 minutes.
  5. Gently fold the cooked penne pasta into the turkey sauce, ensuring every piece is well-coated. Pour in the half-and-half for an extra creamy texture, and season as needed with additional salt and pepper.
  6. Reduce the skillet heat to low and sprinkle half of the mozzarella and cheddar cheese into the pasta mixture. Stir well until the cheese melts and incorporates into the sauce, then top with the remaining cheese and cover the skillet for a minute.
  7. Remove the skillet from heat and garnish your Gordon Ramsay Ground Turkey Pasta with freshly chopped parsley and a sprinkle of red chili flakes for an optional kick. Serve immediately while hot.

Nutrition

Serving: 1servingCalories: 650kcalCarbohydrates: 50gProtein: 40gFat: 30gSaturated Fat: 15gPolyunsaturated Fat: 5gMonounsaturated Fat: 5gCholesterol: 100mgSodium: 800mgPotassium: 600mgFiber: 3gSugar: 5gVitamin A: 10IUVitamin C: 4mgCalcium: 30mgIron: 15mg

Notes

Store leftovers in an airtight container in the refrigerator for up to 3 days or freeze portions for up to 3 months. Reheat slowly on the stove to restore creaminess.

Tried this recipe?

Let us know how it was!

Savor Anthony Bourdain’s Beef Bourguignon: A French Classic

November 15, 2025 by Grace Snow Leave a Comment

Stepping into the world of French cuisine can feel like a transformative journey, and there’s no better destination than Anthony Bourdain's Beef Bourguignon. This rich beef stew invites you to savor the depth of tender beef simmered in a luxurious red wine sauce, kissed with herbs and adorned with caramelized onions. It’s not just comfort food; it’s a gourmet experience that turns an ordinary dinner into a remarkable feast. Plus, the beauty of this recipe lies in its simplicity and ability to please even the fussiest eaters. It takes a bit of time but the reward is a heavenly aroma wafting through your kitchen that’s sure to draw everyone in. Are you ready to take your taste buds on an adventure?

Why is Beef Bourguignon so special?

Unforgettable Flavor: This recipe is a celebration of rich, savory tastes, featuring tender beef that melts in your mouth, harmonized with the sweetness of caramelized onions and the depth of red wine.

Gourmet Comfort: Elevate your dining experience at home with this classic French dish that combines the warmth of comfort food with gourmet flair.

Crowd-Pleaser: Perfect for gatherings, this Beef Bourguignon is sure to impress your guests, making it a staple for any dinner party or family meal.

Make-Ahead Magic: The flavors deepen when made in advance, allowing you to prepare it the day before and enjoy more time with your guests. Reheat gently and serve it over creamy mashed potatoes or alongside crusty bread for a complete meal.

Easy Yet Elegant: Despite its gourmet appearance, the steps are manageable, making it accessible for both beginners and seasoned cooks alike. For more delectable home-cooked ideas, check out my post on Ground Beef Enchiladas for a twist on classic flavors.

Anthony Bourdain's Beef Bourguignon Ingredients

For the Stew

  • Boneless beef shoulder or chuck – This primary protein provides the richness and substance essential for a satisfying stew.
  • Kosher salt – Enhances the flavor and tenderness of the beef, giving it that melt-in-your-mouth quality.
  • Freshly ground black pepper – Adds seasoning and a touch of heat; fresh is always best for a bolder flavor.
  • Olive oil – Perfect for searing the beef and sautéing the onions, infusing the dish with its distinct taste.
  • Medium onions – Forms the base of the sauce, adding necessary sweetness and depth to the dish.
  • All-purpose flour – Helps to thicken the sauce for that rich, comforting texture.
  • Red burgundy wine (e.g., Pinot Noir) – Infuses the stew with complexity—opt for a good quality dry red for the best results.
  • Medium carrots – Adds a hint of sweetness and texture, balancing the dish beautifully.
  • Garlic – Introduces aromatic flavors that elevate the overall taste of the stew.
  • Bouquet garni (thyme, bay, parsley) – Infuses the stew with herby notes, lending freshness and depth.
  • Water – Adjusts the cooking liquid, but consider using low-sodium beef broth for added flavor.
  • Demi-glace (optional) – Intensifies the flavor and enriches the sauce, making it extra luxurious.
  • Chopped fresh flat-leaf parsley – For garnish, it adds a pop of color and freshness to the dish.

Planning to embark on this culinary adventure? Each bite of Anthony Bourdain's Beef Bourguignon promises to be a delightful revelation!

Step‑by‑Step Instructions for Anthony Bourdain’s Beef Bourguignon

Step 1: Prepare the Beef
Begin by patting the boneless beef shoulder or chuck dry with paper towels, ensuring an excellent sear. Generously season the beef chunks with kosher salt and freshly ground black pepper, creating a flavorful crust that will enhance the richness of Anthony Bourdain's Beef Bourguignon.

Step 2: Sear the Beef
In a heavy Dutch oven, heat half of the olive oil over high heat until shimmering. In batches, sear the seasoned beef for about 3-4 minutes on each side, allowing a deep brown crust to develop. Once browned on all sides, transfer the beef to a plate and reduce the heat to medium-high.

Step 3: Sauté the Onions
Add the remaining olive oil to the Dutch oven, letting it heat for a moment. Stir in the medium onions and cook for approximately 10 minutes until they soften and turn golden brown. This step is crucial, as the caramelized onions will contribute to the depth of flavor in your Beef Bourguignon.

Step 4: Thicken the Sauce
Sprinkle in the all-purpose flour while stirring continuously, allowing it to cook for 4-5 minutes. This process creates a roux that will thicken your stew and enhance its texture. You are looking for a slightly darkened color and a nutty aroma before moving on.

Step 5: Deglaze with Wine
Pour in the red burgundy wine, using a wooden spoon to scrape the flavorful bits stuck to the bottom of the pot. Bring the mixture to a rolling boil, which will concentrate flavors and add complexity. This step is essential for crafting the luxurious sauce that defines Anthony Bourdain's Beef Bourguignon.

Step 6: Combine Ingredients
Return the seared beef along with any juices back into the pot. Add in the medium carrots, minced garlic, bouquet garni, and enough water to cover the ingredients—consider using low-sodium beef broth for added richness. Bring the pot to a boil, then immediately reduce the heat to a gentle simmer.

Step 7: Simmer to Perfection
Allow the stew to simmer uncovered for 2 to 2.5 hours, stirring every 15-20 minutes. Keep an eye on the liquid level, adding water as necessary to maintain a sauce-like consistency. The beef should become fork-tender and fully absorb the aromatic flavors of the stew.

Step 8: Final Touches
Once the simmering time is complete, remove the bouquet garni from the pot. Taste the stew and adjust the seasoning with additional salt and pepper as needed. To finish, garnish your Beef Bourguignon with freshly chopped flat-leaf parsley, adding a vibrant touch before serving.

Anthony Bourdain's Beef Bourguignon Variations

Feel free to explore these delicious twists on the classic beef stew, each adding a unique touch to your culinary adventure.

  • Mushroom Medley: Add sautéed mushrooms with the onions for a richer, umami flavor. This will enhance the overall depth and balance of the dish.

  • Root Veggie Delight: Swap the carrots for parsnips or add potatoes for heartier fare. You can play with the flavors and textures, giving a comforting twist to your stew.

  • Brandy Boost: Incorporate a splash of brandy along with the red wine for an extra layer of complexity. A luxurious enhancement that’ll make everyone ask for seconds!

  • Herb Infusion: Experiment with fresh herbs like rosemary or oregano in place of the bouquet garni. This will give your stew a distinctive aroma and taste.

  • Sweet Potato Swirl: Substitute regular potatoes with sweet potatoes to add a hint of sweetness that pairs beautifully with the savory meat.

  • Heat it Up: Toss in some chili flakes or a diced jalapeño for a spicy kick, adding an exhilarating twist to the traditional flavor profile.

  • Dairy-Free Dream: For a dairy-free option, simply skip the demi-glace; it’s optional and won’t sacrifice the essential taste. This allows more people to enjoy this heartwarming dish.

  • Wine’s Wonders: If you want a non-alcoholic twist, use grape juice simmered with some vinegar instead of wine. It keeps the sweetness and depth without the alcohol.

No matter how you choose to customize, these variations are sure to make Anthony Bourdain’s Beef Bourguignon your own delicious masterpiece. Looking for a different flavor profile for your weeknight dinner? Check out my Ground Beef Enchiladas, a perfect alternative when you're craving something quick yet satisfying!

Make Ahead Options

Preparing Anthony Bourdain's Beef Bourguignon in advance is a fantastic way to simplify your meal planning and save time during busy weeknights. You can prepare the entire stew up to 24 hours ahead by cooking it completely, allowing it to cool, and then transferring it to an airtight container. Once refrigerated, the flavors will deepen, making it just as delicious when reheated. When you're ready to serve, gently reheat the stew on the stovetop over low heat, stirring occasionally to maintain a consistent texture. If the sauce thickens too much, feel free to add a splash of water or broth. These make-ahead options ensure a gourmet meal awaits you with minimal effort!

How to Store and Freeze Anthony Bourdain's Beef Bourguignon

Fridge: Store leftover Beef Bourguignon in an airtight container for up to 3 days. Allow it to cool down before refrigerating to preserve its rich flavors.

Freezer: For longer storage, transfer cooled Beef Bourguignon to freezer-safe containers. It can be kept for up to 3 months. Make sure to leave some space for expansion.

Reheating: Thaw overnight in the fridge before reheating gently on the stove or in the microwave with a splash of broth to restore consistency. Never rush the reheating process to maintain the stew's luxurious texture.

Make-Ahead Tip: Preparing this delightful dish in advance can enhance its flavors; enjoy the ease of having a gourmet meal ready to go!

Expert Tips for Anthony Bourdain's Beef Bourguignon

  • Sear in Batches: Always sizzle the beef in batches; overcrowding will lead to steaming instead of that delicious browning, which is essential for flavor.

  • Monitor the Liquid: Check the stew regularly to ensure it doesn’t stick to the pot; add water if it starts to thicken too much to maintain that luscious sauce consistency.

  • Season Generously: Don’t be shy about seasoning; adding salt and pepper at various stages enhances the depth of flavors in your Anthony Bourdain's Beef Bourguignon.

  • Use Quality Wine: Opt for a good quality dry red wine, like Pinot Noir, as it significantly impacts the flavor profile of the stew—your taste buds will thank you!

  • Fresh Herbs Matter: Whenever possible, utilize fresh herbs in the bouquet garni for a more robust flavor in the stew, elevating your culinary creation.

  • Let it Rest: For the best results, consider making it a day ahead; the flavors deepen overnight, making it even more satisfying when served.

What to Serve with Anthony Bourdain's Beef Bourguignon?

Creating a memorable meal is all about harmonious pairings, and this French classic opens the door to endless delicious possibilities.

  • Creamy Mashed Potatoes: This velvety dish soaks up the rich sauce beautifully, giving you a comforting bite in every forkful.
  • Crusty French Bread: Perfect for sopping up the delicious stew, its crispy outside complements the tender beef, creating a delightful textural contrast.
  • Buttered Noodles: Tossed in a light butter sauce, these noodles provide a soft, subtle base that enhances the stew's robust flavors.
  • Garlic Roasted Green Beans: Crisp and vibrant, these green beans add a burst of freshness to the meal, balancing the richness of the stew.
  • Caesar Salad: With its tangy dressing and crunchy croutons, this salad offers a refreshing side, creating a beautiful contrast to the warm beef.
  • Red Wine (Pinot Noir): Pairing a glass of the same wine used to cook enhances the flavor experience and elevates your dining atmosphere.
  • Chocolate Mousse: For dessert, this lightweight, rich treat completes the meal, providing a decadent finish to your French feast.
  • Herb and Cheese Quiche: As a savory alternative, this quiche complements the stew's depth while also serving as a delightful brunch option.
  • Apple Tart: A warm, spiced apple tart brings a cozy sweetness, rounding out the meal with an inviting dessert option.
  • Sparkling Water with Lemon: To cleanse the palate, this refreshing drink offers a crisp finish that pairs nicely with the hearty stew.

Anthony Bourdain's Beef Bourguignon Recipe FAQs

What is the best way to select beef for this recipe?
Absolutely! For the best flavor and tenderness in your Beef Bourguignon, I recommend using boneless beef shoulder or chuck. Look for meat with good marbling, which indicates flavor and juiciness. Avoid cuts that are overly lean, as they won’t develop that delicious richness during cooking.

How should I store leftover Beef Bourguignon?
You can keep your leftover Beef Bourguignon in an airtight container in the refrigerator for up to 3 days. Make sure it has cooled down completely before placing it in the fridge. For reheating, simply gently warm it on the stove or in the microwave. Remember to add a splash of broth or water if it seems too thick when reheating.

Can I freeze Beef Bourguignon? If so, how?
Yes, you can freeze Beef Bourguignon! To do this, let it cool completely before transferring it to freezer-safe containers. Be sure to leave some space at the top, as the stew will expand when frozen. It can be kept in the freezer for up to 3 months. When ready to enjoy, thaw it overnight in the fridge and reheat gently to preserve its rich texture.

What if my stew turns out too thick?
If your Beef Bourguignon is too thick after cooking, don’t worry! Just add a little more water or low-sodium beef broth, stirring it in while heating on low. If it's too thin, continue cooking uncovered for a bit longer to allow some liquid to evaporate, thickening the sauce naturally.

Are there any dietary considerations I should keep in mind?
When making Beef Bourguignon, keep in mind that it contains beef, wine, and gluten (from flour). If you need a gluten-free option, simply substitute the all-purpose flour with a gluten-free flour blend. As always, check for any personal allergies or dietary restrictions when serving to guests or family members.

Can I use different types of wine in this recipe?
Very much! While a good quality red burgundy wine like Pinot Noir is ideal for this Beef Bourguignon, you can substitute with any other dry red wine that you enjoy drinking. Just remember that the better the wine, the better the flavor of your stew. If you have any leftover wine, it makes for an excellent pairing!

Anthony Bourdain’s Beef Bourguignon

Savor Anthony Bourdain’s Beef Bourguignon: A French Classic

Experience the rich flavors of Anthony Bourdain’s Beef Bourguignon, a classic French dish that's perfect for any dinner.
Print Recipe Pin Recipe
Prep Time 30 minutes mins
Cook Time 2 hours hrs 30 minutes mins
Total Time 3 hours hrs
Servings: 6 servings
Course: Dinner
Cuisine: French
Calories: 350
Ingredients Equipment Method Nutrition Notes

Ingredients
  

For the Stew
  • 2 pounds boneless beef shoulder or chuck primary protein
  • 2 teaspoons kosher salt for seasoning
  • 1 teaspoon freshly ground black pepper for seasoning
  • 2 tablespoons olive oil for searing
  • 2 medium onions chopped
  • 2 tablespoons all-purpose flour for thickening
  • 1 bottle red burgundy wine (e.g., Pinot Noir) for flavor
  • 2 medium carrots chopped
  • 4 cloves garlic minced
  • 1 bunch bouquet garni (thyme, bay, parsley) for flavor
  • 3 cups water or low-sodium beef broth
  • 1 cup demi-glace optional for richness
  • 2 tablespoons chopped fresh flat-leaf parsley for garnish

Equipment

  • Dutch oven

Method
 

Step-by-Step Instructions
  1. Pat the beef dry with paper towels and season generously with kosher salt and black pepper.
  2. Heat half the olive oil in a Dutch oven over high heat, sear the beef in batches until browned on all sides.
  3. Add remaining olive oil, sauté onions until soft and golden brown, about 10 minutes.
  4. Stir in flour, cook for 4-5 minutes to create a roux.
  5. Deglaze with red wine, scraping any browned bits from the bottom, and bring to a boil.
  6. Return beef to pot with carrots, garlic, bouquet garni, and enough water to cover.
  7. Bring to a boil, then reduce heat to a gentle simmer and cover partially.
  8. Simmer uncovered for 2 to 2.5 hours, stirring occasionally, until beef is fork-tender.
  9. Remove bouquet garni, adjust seasoning with salt and pepper, garnish with parsley before serving.

Nutrition

Serving: 1servingCalories: 350kcalCarbohydrates: 15gProtein: 25gFat: 20gSaturated Fat: 8gPolyunsaturated Fat: 2gMonounsaturated Fat: 10gCholesterol: 70mgSodium: 800mgPotassium: 600mgFiber: 2gSugar: 3gVitamin A: 150IUVitamin C: 10mgCalcium: 40mgIron: 4mg

Notes

Serve with creamy mashed potatoes or crusty bread for a perfect meal.

Tried this recipe?

Let us know how it was!

Crock Pot Shipwreck Stew: Hearty Comfort in Every Bite

November 15, 2025 by Grace Snow Leave a Comment

On those chilly evenings when the wind howls outside, there's nothing more comforting than a warm bowl of stew. That’s where my Crock Pot Shipwreck Stew truly shines! This hearty, slow-cooked delight is packed with tender potatoes, vibrant carrots, and savory ground beef simmering in a rich tomato broth. Not only is it a crowd-pleaser, but it’s also incredibly budget-friendly—perfect for bringing family and friends together without breaking the bank. Plus, with minimal hands-on prep, you can set it and forget it while you tackle your evening plans or simply unwind. Ready to elevate your comfort food game? Join me in discovering how to make this cozy dish, and I promise you'll be coming back to it time and again! What unique twist will you add to your Shipwreck Stew?

What's so special about Shipwreck Stew?

Comforting Warmth: This Crock Pot Shipwreck Stew is like a hug in a bowl, perfect for chilly nights.

Budget-Friendly: With simple ingredients, it won’t break the bank while filling your family’s bellies.

Easy Prep: Just toss everything in the slow cooker and let it do the work for you.

Crowd-Pleaser: It’s perfect for game days or family gatherings, ensuring everyone leaves happy and satisfied.

Versatile Ingredients: Customize it with whatever veggies or beans you have on hand, like a heartwarming Beans Greens Stew.

Make-Ahead Friendly: Prep it ahead of time; it tastes even better the next day, just like my delicious Crock Pot Chicken!

Crock Pot Shipwreck Stew Ingredients

• Dive into making your own Crock Pot Shipwreck Stew with these essential ingredients!

For the Base

  • Ground Beef – A hearty protein that can be swapped for ground turkey, chicken, or plant-based crumbles for a lighter option.
  • Russet Potatoes – Break down slightly to thicken the stew; Yukon gold or red potatoes work well if you don’t have russets.
  • Carrots & Celery – These fresh aromatics add sweetness and texture to the stew; consider using a pinch of celery seed if celery is out of reach.
  • Yellow Onion & Garlic – Essential for depth of flavor; feel free to substitute with sweet onion or shallots as needed.

For the Broth

  • Diced Tomatoes + Tomato Sauce – The flavorful backbone of the stew; crushed tomatoes can also be used as an alternative.
  • Kidney Beans – Packed with protein and fiber; opt for pinto or black beans if you prefer, making sure to rinse canned beans.
  • Beef Broth – Adds richness; vegetable or chicken broth can be used if you want a different flavor profile.

For the Flavor

  • Worcestershire Sauce & Spices (Paprika, Bay Leaf, Thyme) – These enhance umami and flavor depth; soy sauce can substitute Worcestershire if necessary.

With these ingredients, you’re on your way to a delicious, comforting homestyle meal that’s bound to warm your heart and feed your soul!

Step‑by‑Step Instructions for Crock Pot Shipwreck Stew

Step 1: Brown the Ground Beef
In a large skillet, heat a drizzle of olive oil over medium heat. Add the ground beef and cook for about 4–5 minutes, breaking it apart with a wooden spoon. You want it nicely browned, with no pink remaining. This step adds rich flavor to your Crock Pot Shipwreck Stew.

Step 2: Sauté the Aromatics
Once the beef is browned, stir in the diced yellow onion and continue cooking for 3 minutes until the onions become translucent. Add minced garlic and sauté for an additional 30 seconds until fragrant. This fragrant mixture builds the foundation of flavor for your hearty stew.

Step 3: Combine Ingredients in the Slow Cooker
Transfer the beef and onion mixture to your slow cooker. Then, add in the diced russet potatoes, sweet carrots, and chopped celery. Sprinkle in the kidney beans, diced tomatoes, tomato sauce, beef broth, and Worcestershire sauce. Gently stir to combine everything, ensuring the ingredients are well-distributed in your Crock Pot Shipwreck Stew.

Step 4: Season the Stew
Next, add the spices: paprika, thyme, bay leaf, salt, and pepper, enhancing the savory depth of your stew. Stir one more time to blend the flavors. It’s important to tune the seasoning to your taste, as this will really elevate the comfort food experience.

Step 5: Set the Slow Cooker
Cover the slow cooker with its lid and set it to cook on LOW for 7–8 hours or on HIGH for 3–4 hours. Choose the low setting for a deeper flavor development. During this time, the vegetables will become fork-tender, and the broth will thicken to a comforting consistency.

Step 6: Final Touches and Serve
After cooking, carefully remove the bay leaf. Taste your Crock Pot Shipwreck Stew and adjust any seasoning if necessary. Serve hot, garnished with freshly chopped parsley, a dollop of sour cream, or sprinkle of shredded cheddar cheese for an extra layer of comfort in every bowl.

What to Serve with Crock Pot Shipwreck Stew?

Warm up your evening with perfect pairings that enhance the hearty goodness of your favorite stew.

  • Creamy Mashed Potatoes: The buttery creaminess complements the rich broth, making each bite a dreamy experience.
  • Crusty Bread: A fresh-baked loaf or breadsticks adds texture, perfect for soaking up the flavorful stew.
  • Garden Salad: A refreshing mix of greens and light vinaigrette balances the richness of the stew, adding a crisp, fresh element.
  • Cornbread Muffins: Sweet and crumbly, cornbread muffins bring a touch of sweetness that juxtaposes the savory stew beautifully.
  • Steamed Broccoli: The bright green color and mild crunch of steamed broccoli offer a nutritious contrast that rounds out the meal.
  • Pickle Chips: For a tangy kick, serve pickles on the side. Their acidity cuts through the stew's richness while adding flavor complexity.
  • Iced Tea or Lemonade: These refreshing drinks offer a sweet, tart balance, making each sip delightful against the hearty flavors of the meal.
  • Chocolate Chip Cookies: Complete your comforting feast with warm, gooey cookies. Their sweetness is the perfect finish after a savory stew meal.
  • Crispy Roasted Brussels Sprouts: The crispy texture and slightly nutty flavor provide a delightful contrast to the soft vegetables in your stew.
  • Classic Apple Pie: A slice of warm apple pie serves as a sweet conclusion, with its spicy notes connecting beautifully with the hearty stew.

Expert Tips for the Best Crock Pot Shipwreck Stew

  • Prep Ahead: Prepare and chop your ingredients up to 24 hours in advance. This makes assembling your Crock Pot Shipwreck Stew a breeze!
  • Avoid Peeking: Resist the urge to lift the lid during cooking. This helps maintain the cooking temperature and prevents extended cooking times.
  • Flavor Boost: To enhance richness, consider adding a splash of red wine along with the broth, elevating the flavors of your stew.
  • Taste & Adjust: Always taste before serving! Adjust salt and pepper or add a dash of hot sauce for a spicy kick.
  • Bean Choices: If using canned beans, rinse them first to reduce sodium content; this small step can greatly improve the health of your stew.

Crock Pot Shipwreck Stew Variations

Feel free to play with your ingredients and make this cozy stew truly your own!

  • Dairy-Free: Omit sour cream and cheese toppings for a lightened option, or use dairy-free alternatives like cashew cream.

  • Gluten-Free: Ensure all ingredients, especially Worcestershire sauce and broth, are marked gluten-free for a safe, delicious meal.

  • Spicy Kick: Add diced jalapeños or a dash of cayenne pepper to ignite your taste buds. Adjust to your preferred spice level!

For flavor-loving fans, the heat can transform your dish from cozy to exciting in no time.

  • Vegetarian: Swap ground beef for lentils or mushroom crumbles, combining with vegetable broth for a robust flavor without meat.

  • Bean Bliss: Experiment with different beans, such as black beans or chickpeas, for varied flavors and textures. Each type brings a unique twist to the stew.

  • Herbaceous Take: Incorporate fresh herbs like parsley, basil, or rosemary toward the end of cooking to brighten up the flavors of the stew.

If you’re inspired by these variations, you might also want to explore a comforting Crockpot Butter Chicken or my hearty Lamb Stew Hearty for more delicious options!

  • International Flair: Try adding a touch of curry powder or Italian seasoning for an unexpected, global twist that complements the tomato base beautifully.

Make Ahead Options

Planning ahead makes enjoying a hearty bowl of Crock Pot Shipwreck Stew even easier! You can brown the ground beef and sauté the onions and garlic up to 24 hours in advance, storing these components in an airtight container in the refrigerator. Additionally, chop your potatoes, carrots, and celery, and store them separately to maintain their freshness. When you're ready to cook, simply combine these prepped ingredients in your slow cooker with the remaining items and set it to low heat. This not only saves you time on busy weeknights but also enhances the flavors as they meld together throughout the cooking process. You'll have a comforting, delicious meal waiting for you with minimal effort!

Storage Tips for Crock Pot Shipwreck Stew

Fridge: Store cooled Crock Pot Shipwreck Stew in airtight containers for up to 4 days, ensuring to cool it completely before refrigerating to maintain freshness.

Freezer: For longer storage, freeze the stew in individual portions in freezer-safe containers for up to 3 months. Make sure to leave some space at the top for expansion.

Reheating: Thaw overnight in the fridge before reheating. Reheat gently on the stovetop or in the microwave, adding a splash of broth if needed to restore consistency.

Make-Ahead: This stew actually tastes even better the next day, so feel free to prepare it ahead of time for a delicious, hassle-free meal!

Crock Pot Shipwreck Stew Recipe FAQs

How do I choose the right ground beef for the stew?
Absolutely! When selecting ground beef, look for a higher fat content (around 80/20) for a juicy flavor. Avoid ground beef that's overly lean as it can lead to a dry stew. If you're opting for a healthier choice, consider ground turkey or chicken, which can be just as tasty in this dish!

How should I store leftovers of Crock Pot Shipwreck Stew?
You can refrigerate your cooled Crock Pot Shipwreck Stew in airtight containers for up to 4 days. Make sure to allow it to cool down before storing to keep it fresh. I often portion it out for easy reheating during the week!

Can I freeze this stew for later?
Yes, you can! Simply pour your cooled stew into freezer-safe containers, leaving a little space at the top for expansion, and freeze it for up to 3 months. To reheat, let it thaw overnight in the fridge, then warm gently on the stovetop or microwave, adding broth for the desired consistency.

What if the stew is too thick or too salty?
If your stew turns out too thick, simply add a splash of broth or water while reheating. For a salty flavor, you can balance it by adding a splash of vinegar or a small amount of sugar. Make sure to taste and adjust until you achieve the perfect balance!

Is this recipe suitable for gluten-free diets?
Very! Just ensure you use certified gluten-free Worcestershire sauce and broth. This Crock Pot Shipwreck Stew is naturally gluten-free when you follow these substitutions, allowing everyone to enjoy a warm, comforting meal together.

Can I substitute the vegetables in the stew?
Definitely! The beauty of this stew lies in its versatility. Feel free to mix in whatever vegetables you have on hand—peppers, green beans, or zucchini work beautifully. Just keep the balance of flavors in mind to maintain the comforting essence of the dish.

Crock Pot Shipwreck Stew

Crock Pot Shipwreck Stew: Hearty Comfort in Every Bite

Enjoy the comforting warmth of Crock Pot Shipwreck Stew, a budget-friendly, hearty dish perfect for chilly evenings.
Print Recipe Pin Recipe
Prep Time 15 minutes mins
Cook Time 8 hours hrs
Total Time 8 hours hrs 15 minutes mins
Servings: 6 servings
Course: Dinner
Cuisine: American
Calories: 350
Ingredients Equipment Method Nutrition Notes

Ingredients
  

For the Base
  • 1 lb Ground Beef can be substituted for ground turkey, chicken, or plant-based crumbles.
  • 2 large Russet Potatoes can replace with Yukon gold or red potatoes if needed.
  • 2 medium Carrots
  • 2 stalks Celery consider celery seed as a substitute.
  • 1 medium Yellow Onion can substitute with sweet onion or shallots.
  • 3 cloves Garlic minced.
For the Broth
  • 14.5 oz Diced Tomatoes or crushed tomatoes.
  • 8 oz Tomato Sauce
  • 2 cups Beef Broth or vegetable/chicken broth for variation.
  • 15 oz Kidney Beans drained and rinsed.
For the Flavor
  • 2 tbsp Worcestershire Sauce can substitute with soy sauce.
  • 1 tbsp Paprika
  • 1 leaf Bay Leaf
  • 1 tsp Thyme
  • to taste Salt
  • to taste Pepper

Equipment

  • Slow Cooker

Method
 

Cooking Steps
  1. In a large skillet, heat a drizzle of olive oil over medium heat. Add the ground beef and cook for about 4–5 minutes, breaking it apart with a wooden spoon until nicely browned with no pink remaining.
  2. Stir in the diced yellow onion and continue cooking for 3 minutes until the onions become translucent. Add minced garlic and sauté for an additional 30 seconds until fragrant.
  3. Transfer the beef and onion mixture to your slow cooker. Add in the diced russet potatoes, carrots, and chopped celery. Sprinkle in the kidney beans, diced tomatoes, tomato sauce, beef broth, and Worcestershire sauce. Gently stir to combine.
  4. Add the spices: paprika, thyme, bay leaf, salt, and pepper. Stir one more time to blend the flavors.
  5. Cover the slow cooker with its lid and set it to cook on LOW for 7–8 hours or on HIGH for 3–4 hours.
  6. After cooking, carefully remove the bay leaf. Taste and adjust seasoning if necessary. Serve hot, garnished with parsley, sour cream, or cheddar cheese.

Nutrition

Serving: 1bowlCalories: 350kcalCarbohydrates: 40gProtein: 25gFat: 12gSaturated Fat: 5gPolyunsaturated Fat: 1gMonounsaturated Fat: 4gCholesterol: 80mgSodium: 800mgPotassium: 800mgFiber: 10gSugar: 6gVitamin A: 900IUVitamin C: 15mgCalcium: 40mgIron: 3mg

Notes

This stew can actually taste better the next day, making it great for make-ahead meals. Avoid peeking while cooking to maintain heat.

Tried this recipe?

Let us know how it was!

Native American Three Sisters Stew: Comfort in a Bowl

November 15, 2025 by Grace Snow Leave a Comment

As the leaves begin to change and a crispness fills the air, I find myself reaching for my pot and the comforting embrace of a hearty Native American Three Sisters Stew. This nutritious vegetarian dish harmoniously blends the sweetness of corn, the creaminess of beans, and the earthiness of squash, simmering together into a warm, satisfying meal. It’s not just quick to prepare, but it also embraces seasonal ingredients, making it a perfect way to celebrate autumn. Plus, it’s wonderfully adaptable—your family will love it regardless of dietary needs. Are you ready to dive into a dish that nourishes both body and spirit? Let’s get started!

Why Is This Stew So Special?

Comforting, nourishing dish: The Native American Three Sisters Stew embraces cultural heritage while delivering a warm, heartening meal for chilly days.

Adaptable for everyone: Perfect for vegetarians, you can easily switch up ingredients to meet various dietary needs.

Easy preparation: With straightforward steps, even novice cooks can create this delightful stew without stress.

Vibrant flavors: The combination of sweet corn, creamy beans, and earthy squash creates a symphony of taste that will have everyone coming back for seconds!

Make-ahead magic: This stew stores well in the fridge or freezer; it’s a life-saver for busy weeknights or meal planning!

Pair it with crusty bread or a fresh salad for a complete meal inspired by traditions. If you’re interested in more hearty options, check out my Lamb Stew Hearty or Pot Chicken Stew!

Native American Three Sisters Stew Ingredients

For the Stew
• Corn – Adds sweetness and structure; best fresh, but frozen or canned can work in a pinch.
• Beans – Provides essential amino acids and protein; opt for dried beans for richer flavor, though canned are convenient.
• Squash (Butternut or other winter varieties) – Offers creaminess and nutrients; you can also use acorn or pumpkin squash as substitutes.
• Vegetable Broth – Acts as a flavorful base; homemade is preferred, but store-bought options are just fine.
• Onion – Adds depth of flavor; shallots can be used for a milder taste.
• Garlic – Imparts a fragrant aroma; fresh garlic is best for maximum flavor.
• Spices (e.g., cumin, chili powder) – Enhance the dish without overpowering; adjust based on your spice preference.
• Oil (olive or vegetable) – Used for sautéing the base ingredients; any neutral oil will work as a substitute.

This Native American Three Sisters Stew is not just a wholesome dish; it embodies a rich cultural history that will fill both your belly and your heart. Happy cooking!

Step‑by‑Step Instructions for Native American Three Sisters Stew

Step 1: Prep the Ingredients
Start by chopping one medium onion, mincing two cloves of garlic, and peeling and dicing your choice of squash (about 2 cups). If using dried beans, soak them overnight and cook until tender according to package instructions. Rinse any canned beans under cold water and drain. This preparation will ensure everything is ready for a smooth cooking process.

Step 2: Sauté the Base
In a large pot, heat 2 tablespoons of olive oil over medium heat. Once the oil shimmers (about 1-2 minutes), add the chopped onion and minced garlic. Sauté them for 4-5 minutes until the onion becomes translucent and fragrant. This step builds the aromatic foundation of your Native American Three Sisters Stew, creating a welcoming base for the other ingredients.

Step 3: Cook the Squash
Add the diced squash to the pot and sauté for an additional 5-7 minutes, stirring occasionally. The squash should start to soften but not completely break down. This step enhances the stew's rustic texture and ensures that the natural sweetness of the squash integrates beautifully with the onion and garlic.

Step 4: Add Beans and Corn
Stir in the rinsed beans and 1 cup of corn (fresh, frozen, or canned) into the pot. Mix everything thoroughly so that the ingredients are well distributed and colorful. Allow this mixture to cook together for about 2-3 minutes, letting the flavors meld and infusing richness into the Native American Three Sisters Stew.

Step 5: Pour in Broth and Season
Pour in 4 cups of vegetable broth and season with your chosen spices, such as 1 teaspoon of cumin and 1 teaspoon of chili powder. Stir to combine all ingredients well, ensuring the spices coat everything evenly. This adds deeply layered flavor and a delightful warmth to the stew as it cooks.

Step 6: Simmer the Stew
Bring the mixture to a rolling boil over high heat. Once boiling, reduce the heat to low and cover the pot. Allow the stew to simmer gently for at least 30 minutes, stirring occasionally. During this time, the flavors will develop, and the stew will thicken, transforming into a comforting dish that embodies the essence of Native American Three Sisters Stew.

Step 7: Adjust and Serve
After simmering, taste the stew to adjust the seasoning, adding salt or additional spices as needed. If desired, let it sit for a couple of minutes to cool slightly before serving. Serve hot, accompanied by crusty bread or a fresh salad, and enjoy this hearty, nourishing meal that celebrates cultural tradition and seasonal flavors.

Expert Tips for Native American Three Sisters Stew

  • Prep Ahead: Prepare your ingredients the day before to save time during cooking—chopped veggies and soaked beans are ready to go!

  • Flavor Development: For richer flavors, make the stew a day in advance. Letting it sit allows the ingredients to meld beautifully.

  • Adjust Spices: Always taste before serving; some batches may need a touch more salt or spices to enhance the savory notes of your Native American Three Sisters Stew.

  • Sauté Patience: Don’t rush the sautéing of onion and garlic; proper caramelization deepens their flavor and elevates the stew.

  • Freezer-Friendly: Portion leftovers into airtight containers and freeze for up to three months—perfect for quick meals on busy days!

Make Ahead Options

Making your Native American Three Sisters Stew ahead of time is a fantastic way to save time during your busy weeknights! You can chop the onion, garlic, and squash, and even prepare the dried beans (by soaking them overnight) up to 24 hours in advance. Simply refrigerate these prepped ingredients in airtight containers to maintain their freshness. When you're ready to cook, sauté the onion and garlic, then add the squash, beans, and corn as per the usual steps. This stew also holds well in the fridge for up to 4 days and can be frozen for up to 3 months—just let it cool completely before transferring to freezer-safe containers. Reheat gently on the stove or in the microwave, and you’ll enjoy a comforting meal that feels just as delicious as the day it was made!

What to Serve with Native American Three Sisters Stew?

Enhance your dining experience with delightful pairings that complement the rich and vibrant flavors of this nourishing stew.

  • Crusty Bread: Perfect for scooping up every last bite, its crispy texture contrasts beautifully with the stew’s hearty ingredients.

  • Cornbread: This sweet and fluffy bread adds a comforting touch, echoing the corn in the stew while offering a delightful balance.

  • Fresh Garden Salad: A light salad with seasonal greens brightens the meal, adding a refreshing crunch that pairs well with the stew's warmth.

  • Roasted Vegetables: Seasonal roasted veggies, like carrots and bell peppers, add caramelized sweetness, enriching the dish and providing varied textures.

  • Herbed Quinoa: This nutty, fluffy side dish complements the savory stew while adding a protein punch. Toss in some herbs for extra freshness!

  • Herbal Tea: A warm cup of chamomile or mint tea captivates the senses, providing a soothing end to your meal while enhancing the comforting vibe.

  • Chocolate Chip Cookies: For dessert, soft and chewy cookies offer a sweet finale that everyone will adore, creating a lovely contrast to the hearty stew.

  • Apple Crisp: This warm, spiced dessert with a crunchy topping rounds off the meal with a taste of autumn that harmonizes beautifully with the stew.

  • Sangria: A fruity, refreshing sangria adds color and a delightful burst of flavor, making it an enchanting drink choice to pair with your meal.

Native American Three Sisters Stew Variations

Customize this stew to make it uniquely yours by playing with flavors and textures that excite your senses!

  • Spicy Kick: Add a pinch of cayenne pepper or diced jalapeños for a bold, fiery flavor. You can easily increase or decrease the spice level to suit your family's preference. Just remember, a little heat goes a long way!

  • Extra Veggies: Toss in additional vegetables, like bell peppers or carrots, to amplify the color and texture. These not only boost the dish’s nutritional value but also introduce new flavors that blend beautifully with the base ingredients.

  • Protein Packed: For those who enjoy meat, consider adding cooked chicken or turkey for a hearty, protein-rich version. Simply stir in shredded or diced cooked meat when you add the beans and corn. It will transform your stew into a filling meal that meat-lovers will eagerly devour!

  • Herb Infusion: Experiment with fresh herbs like thyme or cilantro to brighten the flavor profile. A sprig of fresh herb can elevate the dish to a whole new level, providing a refreshing contrast to the rich base.

  • Creamy Twist: For a luscious addition, stir in a splash of coconut milk or cream towards the end of cooking. This will create a delightful creaminess that complements the earthiness of the squash and beans.

  • Seasonal Swaps: Like many great dishes, feel free to use seasonal vegetables based on availability, such as zucchini or sweet potatoes. It’s a fantastic way to keep the recipe versatile and exciting throughout the year!

  • Flavor Variants: Swap the spices for smoked paprika and herbs de Provence for a unique twist. It’ll deliver a captivating aroma and gentle warmth that enchants the palate.

  • Reinvent as Chili: Use the same base but transform it into a hearty chili by adding diced tomatoes and/or a can of tomato paste. Serve with your favorite toppings, like avocado or shredded cheese for a delectable blend of flavors.

Feeling inspired? Check out my quick and nourishing Beans Greens Stew or try the comforting Crock Pot Chicken Stew for more delightful ideas!

How to Store and Freeze Native American Three Sisters Stew

Fridge: Store your stew in an airtight container for up to 4 days. Make sure it cools down to room temperature before sealing to maintain freshness.

Freezer: Portion the stew into freezer-safe containers, ensuring there’s space for expansion, and freeze for up to 3 months. Thaw in the fridge overnight before reheating.

Reheating: Gently reheat on the stove over medium heat until warmed through, adding a splash of broth or water if needed to achieve desired consistency.

Make-Ahead Tip: This Native American Three Sisters Stew is even more flavorful the next day, making it a perfect make-ahead meal for busy weeknights!

Native American Three Sisters Stew Recipe FAQs

How do I choose the best corn for this stew?
Absolutely! Fresh corn is ideal because it adds sweetness and texture; look for ears with bright green husks and plump kernels. If fresh isn't available, frozen corn can be a great alternative, yielding similar sweetness and structure.

How should I store leftover Three Sisters Stew?
For optimum freshness, store your stew in an airtight container in the fridge for up to 4 days. Allow it to cool to room temperature before sealing, which helps preserve its delicious flavor and prevents excess condensation.

Can I freeze the Three Sisters Stew?
Very! Portion your cooled stew into freezer-safe containers, leaving some space at the top for expansion. It can be frozen for up to 3 months. To enjoy later, simply thaw in the fridge overnight before reheating gently on the stove.

What should I do if my stew is too thick?
If your stew has thickened beyond your liking, don't worry! Just add a splash of vegetable broth or water, mixing it in slowly until you reach your desired consistency. Stir gently over low heat to warm through, and taste-test before serving.

Are there any dietary concerns I should consider?
This Native American Three Sisters Stew is vegetarian-friendly! For those with allergies, it's usually free from common allergens when using just the base ingredients. However, always check the labels of canned beans and broth for hidden allergens, especially if cooking for guests.

How can I adapt this stew for a spicier flavor?
If you're craving heat, consider adding a pinch of cayenne pepper or a diced jalapeño during the sautéing step. You can also sprinkle in some red pepper flakes just before serving for an extra kick. The more the merrier!

Native American Three Sisters Stew

Native American Three Sisters Stew: Comfort in a Bowl

A nutritious vegetarian Native American Three Sisters Stew combining corn, beans, and squash for a warm, comforting meal.
Print Recipe Pin Recipe
Prep Time 15 minutes mins
Cook Time 30 minutes mins
Total Time 45 minutes mins
Servings: 4 bowls
Course: Soups
Cuisine: Native American
Calories: 250
Ingredients Equipment Method Nutrition Notes

Ingredients
  

For the Stew
  • 1 medium onion chopped
  • 2 cloves garlic minced
  • 2 cups squash peeled and diced, any winter variety
  • 1 cup corn fresh, frozen, or canned
  • 4 cups vegetable broth homemade preferred
  • 1 cup beans dried preferred or canned, rinsed
  • 2 tablespoons olive oil for sautéing
  • 1 teaspoon cumin
  • 1 teaspoon chili powder

Equipment

  • Large pot

Method
 

Step-by-Step Instructions
  1. Start by chopping the onion, mincing the garlic, and peeling and dicing the squash. Soak dried beans overnight and cook until tender, or rinse canned beans.
  2. In a large pot, heat the olive oil over medium heat. Add the chopped onion and minced garlic, and sauté for 4-5 minutes until the onion is translucent.
  3. Add the diced squash to the pot and sauté for an additional 5-7 minutes until it starts to soften.
  4. Stir in the rinsed beans and corn, mixing everything thoroughly. Cook for 2-3 minutes.
  5. Pour in the vegetable broth and season with cumin and chili powder. Stir to combine everything well.
  6. Bring to a boil, then reduce the heat to low and cover the pot. Allow the stew to simmer for at least 30 minutes.
  7. Taste and adjust the seasoning as needed. Serve hot with crusty bread or salad.

Nutrition

Serving: 1bowlCalories: 250kcalCarbohydrates: 45gProtein: 10gFat: 6gSaturated Fat: 1gPolyunsaturated Fat: 2gMonounsaturated Fat: 3gSodium: 500mgPotassium: 600mgFiber: 10gSugar: 5gVitamin A: 3000IUVitamin C: 20mgCalcium: 60mgIron: 3mg

Notes

This stew is adaptable and can be stored in the fridge for up to 4 days or frozen for up to 3 months. It tastes even better the next day!

Tried this recipe?

Let us know how it was!

Comforting Chicken Stew for Cozy Nights at Home

November 15, 2025 by Grace Snow Leave a Comment

The aroma of simmering chicken stew wafted through my kitchen, instantly transporting me to my grandmother's home on a chilly afternoon. This Easy One-Pot Chicken Stew is my go-to recipe for days when comfort food feels like a warm embrace, all while keeping clean-up to a minimum. With tender chicken and vibrant vegetables swimming in a rich, savory broth, it’s a meal that delivers both flavor and warmth in just 45 minutes. Plus, it’s a wonderful way to gather the family at the table, satisfying even the pickiest eaters. So, are you ready to whip up this heartwarming dish that’s sure to become a favorite?

Why is chicken stew a must-try?

Simplicity at its finest: This easy one-pot chicken stew requires minimal effort, making it perfect for busy weeknights. Rich, hearty flavor is achieved in just 45 minutes, allowing you to enjoy a comforting dish without spending hours in the kitchen. Flexibility reigns supreme as you can customize it with your favorite veggies or even swap the chicken for turkey. Crowd-pleaser status means it’s guaranteed to satisfy everyone at the table, from kids to adults. Serve it alongside a slice of crusty bread, and prepare for compliments! It’s also a great way to utilize leftovers, making it a resourceful option for meal planning.

Chicken Stew Ingredients

For the Stew Base

• Butter – Adds richness and depth to the stew. Note: Can be substituted with olive oil for a lighter option.
• Carrots (2 large) – Provides sweetness and texture. Substitution: Parsnips can add a unique flavor.
• Celery (1 stalk) – Enhances the stew's overall aroma and flavor profile. Substitution: Leeks work well too.
• Kosher Salt – Enhances all flavors of the dish. Adjust based on dietary needs.
• Black Pepper – Adds a mild heat; freshly ground is preferred for best flavor.
• Garlic (3 cloves, minced) – Provides a fragrant and savory base. Note: Can use garlic powder in absence of fresh.
• All-Purpose Flour (1 Tbsp) – Helps thicken the stew. Gluten-free options: Use cornstarch or a gluten-free flour blend.

For the Chicken and Broth

• Boneless Skinless Chicken Breasts (1.5 lbs) – The central protein source of the stew.
• Fresh Thyme (3 sprigs) – Adds a garden-fresh flavor. Substitution: Dried thyme (1 tsp) can be used.
• Bay Leaf (1) – Infuses a subtle depth of flavor. Remember to remove before serving.
• Baby Potatoes (3/4 lb, quartered) – Provides a comforting texture and heartiness. Can use Yukon gold or red potatoes.
• Low-Sodium Chicken Broth (3 cups) – Acts as the base for the stew, ensuring it's flavorful yet not too salty.

For Garnish

• Fresh Parsley (for garnish) – Adds a fresh touch and color to the finished dish.

Step‑by‑Step Instructions for Chicken Stew

Step 1: Melt the Butter
In a large pot, melt 2 tablespoons of butter over medium heat. Allow it to sizzle and foam, creating a rich aroma. This process should take about 2 minutes; watch for the butter to slightly brown, which adds depth to your Easy One-Pot Chicken Stew.

Step 2: Sauté the Vegetables
Add 2 chopped large carrots and 1 stalk of diced celery to the pot, seasoning them generously with kosher salt and freshly ground black pepper. Stir frequently and cook for about 5 minutes, until the vegetables soften and the vibrant colors are enhanced.

Step 3: Add Garlic
Stir in 3 minced garlic cloves and continue to cook for another 30 seconds. Allow the garlic to become fragrant and golden, ensuring it does not burn, as this will build the savory foundation of your chicken stew.

Step 4: Thicken the Mixture
Sprinkle in 1 tablespoon of all-purpose flour, stirring to coat the vegetables evenly. Cook for about 1 minute until the flour is lightly toasted, creating a thickening base for your Easy One-Pot Chicken Stew that will give the broth a hearty consistency.

Step 5: Incorporate the Chicken and Herbs
Place 1.5 lbs of boneless skinless chicken breasts into the pot, followed by 3 sprigs of fresh thyme and 1 bay leaf. Add 3/4 lb of quartered baby potatoes and 3 cups of low-sodium chicken broth, ensuring everything is well-mixed.

Step 6: Simmer the Stew
Season the mixture to taste with more salt and pepper. Bring the pot to a gentle simmer over medium-high heat, then reduce to medium-low, cover, and cook for 15 minutes. The chicken should be cooked through, and the potatoes tender when pierced with a fork.

Step 7: Shred the Chicken
Carefully remove the chicken from the pot with tongs or a slotted spoon and place it on a cutting board. Once it’s cool enough to handle, shred the chicken using two forks, then return the chicken back to the pot, stirring to incorporate it throughout the stew.

Step 8: Garnish and Serve
Before serving your Chicken Stew, remove the bay leaf and discard it. Ladle the stew into bowls and sprinkle with fresh parsley for a delightful garnish. Each bowl should have a thick, comforting consistency, filled with tender chicken and vibrant vegetables, perfect for cozy nights at home.

What to Serve With Easy One-Pot Chicken Stew

There's something about a warm, hearty stew that calls for the perfect side dishes to complement its rich flavors.

  • Crusty Bread: Nothing beats dripping warm bread into your savory broth. It's a classic pairing that elevates the comforting experience.

  • Simple Green Salad: A fresh salad with mixed greens and a light vinaigrette adds a crisp contrast, balancing the hearty nature of the stew.

  • Creamy Mashed Potatoes: The richness of mashed potatoes pairs nicely with the stew’s broth, soaking up every delicious drop.

  • Steamed Green Beans: Their crunchy texture and vibrant color provide a fresh element that lightens the meal without overwhelming the stew.

  • Rice Pilaf: This flavorful side complements the stew's savory profile, allowing the broth's essence to soak into every grain.

  • Garlic Breadsticks: Offering a hint of garlic, these perfectly chewy sticks provide a satisfying way to mop up the comforting juices.

  • Malty Beer: A smooth, malty beer enhances the stew's warmth while providing a delightful contrast to its rich flavors.

  • Red Wine: A glass of light-bodied red wine adds sophistication and a fruity note, creating an enjoyable dining experience.

  • Apple Crisp: End the meal with a warm, spiced apple crisp for a sweet contrast to the savory stew, making it a true comfort food feast.

Expert Tips for Chicken Stew

• Check Chicken Temperature: Ensure chicken is completely cooked to avoid foodborne illness; a meat thermometer should read 165°F for safety.

• Flavor Infusion: Shredding the chicken after cooking enhances its ability to absorb the rich flavors of the chicken stew, making every bite delightful.

• Rest for Better Taste: Allowing the stew to rest for about 10 minutes before serving lets the flavors meld beautifully, elevating the overall taste experience.

• Avoid Overcooking Vegetables: Keep an eye on the vegetables while sautéing; they should be tender but not mushy — aim for a perfect balance of texture in the dish.

• Season in Layers: Don’t be shy with seasoning; adding kosher salt and black pepper at different stages builds a depth of flavor that truly makes this chicken stew stand out.

How to Store and Freeze Chicken Stew

Room Temperature: Chicken stew should not be left out for more than 2 hours to prevent foodborne illness. Discard any remaining stew after that period.

Fridge: Store leftovers in an airtight container in the fridge for up to 3 days. This keeps the stew fresh while allowing flavors to develop further.

Freezer: For longer storage, freeze chicken stew in a freezer-safe container for up to 3 months. Thaw overnight in the refrigerator before reheating.

Reheating: When ready to enjoy, reheat the stew gently on the stove over medium heat until warmed through, stirring occasionally.

Make Ahead Options

These Easy One-Pot Chicken Stews are perfect for meal prep enthusiasts! You can chop the vegetables and shred the chicken up to 24 hours in advance, storing them separately in airtight containers in the refrigerator. Additionally, the stew itself can be cooked and refrigerated for up to 3 days before serving. To maintain quality, ensure you cool the stew completely before refrigerating, as this prevents sogginess. When you're ready to serve, simply reheat the stew on the stove over medium heat until warmed through, adding a splash of broth if necessary. This way, you'll have a comforting meal ready with minimal effort on busy weeknights!

Chicken Stew Variations & Substitutions

Feel free to customize this chicken stew to suit your taste or dietary preferences and create your own version of comfort in a bowl!

  • Dairy-Free: Swap butter with olive oil for a lighter, dairy-free alternative that still adds richness.

  • Extra Veggie Boost: Toss in frozen peas or corn during the last few minutes of cooking for a pop of color and nutrition.

  • Vegan Delight: Replace chicken with hearty chickpeas or lentils along with vegetable broth for a robust plant-based option.

  • Turkey Upgrade: Use leftover turkey instead of chicken for a delicious twist, especially after the holidays!

  • Spicy Kick: For those who love heat, add crushed red peppers or a splash of hot sauce to spice up the flavor profile.

  • Herb Sensation: Experiment with fresh herbs like rosemary or basil in place of thyme to create a different aromatic experience.

  • Creamy Texture: Stir in a splash of coconut milk or a spoonful of sour cream just before serving to add a creamy finish to the stew.

  • Asian Fusion: Consider adding soy sauce and ginger for an Asian-inspired twist; this will give your stew an exciting flair reminiscent of Chipotle Lime Chicken.

These variations allow you to play with flavors and ingredients while keeping that comforting essence of the original recipe. Enjoy your kitchen adventures!

Chicken Stew Recipe FAQs

What kind of chicken should I use for the stew?
I recommend using boneless skinless chicken breasts for a lean protein option that cooks quickly and easily absorbs the stew's flavors. If you prefer dark meat, thighs work wonderfully too—just be sure to adjust the cooking time as needed.

How should I store leftover chicken stew?
Store any leftovers in an airtight container in the fridge for up to 3 days. This helps preserve the flavors while keeping the stew delicious for another serving. Just remember to let it cool before sealing to avoid condensation forming inside the container.

Can I freeze chicken stew?
Absolutely! For longer storage, you can freeze chicken stew in a freezer-safe container for up to 3 months. To freeze, allow the stew to cool completely, then ladle it into containers, leaving some room for expansion. When you're ready to eat, thaw it overnight in the refrigerator before reheating on the stove.

What should I do if my stew is too thick?
If your chicken stew turns out too thick, don't worry! Simply add a little more chicken broth or water, a splash at a time, until you reach your desired consistency. Stir it in gently and let it simmer for a few minutes to warm through, making sure the flavors remain balanced.

Can I add more vegetables to my chicken stew?
Very much so! Feel free to add in any of your favorite vegetables like peas, corn, or even green beans. Just remember to chop them into similar sizes as the other ingredients for even cooking. You can toss them in during the last 5 to 10 minutes of simmering to ensure they remain vibrant and tender.

Are there any dietary considerations for this chicken stew?
This recipe can be made gluten-free by substituting all-purpose flour with cornstarch or a gluten-free flour blend. Always check your broth's ingredients if you're catering to allergies—opt for low-sodium varieties when possible to keep sodium levels in check.

Chicken Stew

Comforting Chicken Stew for Cozy Nights at Home

This Chicken Stew is a delightful blend of tender chicken and vegetables in a rich broth, perfect for a warm and comforting meal.
Print Recipe Pin Recipe
Prep Time 10 minutes mins
Cook Time 35 minutes mins
Resting Time 10 minutes mins
Total Time 45 minutes mins
Servings: 6 servings
Course: Soups
Cuisine: American
Calories: 350
Ingredients Equipment Method Nutrition Notes

Ingredients
  

Stew Base
  • 2 Tbsp Butter Can be substituted with olive oil for a lighter option.
  • 2 large Carrots Substitution: Parsnips can add a unique flavor.
  • 1 stalk Celery Substitution: Leeks work well too.
  • Kosher Salt Adjust based on dietary needs.
  • Black Pepper Adds a mild heat; freshly ground is preferred.
  • 3 cloves Garlic Can use garlic powder in absence of fresh.
  • 1 Tbsp All-Purpose Flour Gluten-free options: Use cornstarch or a gluten-free flour blend.
Chicken and Broth
  • 1.5 lbs Boneless Skinless Chicken Breasts
  • 3 sprigs Fresh Thyme Substitution: Dried thyme (1 tsp) can be used.
  • 1 Bay Leaf Remember to remove before serving.
  • 3/4 lbs Baby Potatoes Can use Yukon gold or red potatoes.
  • 3 cups Low-Sodium Chicken Broth Ensures it's flavorful yet not too salty.
Garnish
  • Fresh Parsley Adds a fresh touch and color to the finished dish.

Equipment

  • Large pot

Method
 

Preparation Steps
  1. Melt 2 tablespoons of butter in a large pot over medium heat, allowing it to sizzle and foam for about 2 minutes until slightly browned.
  2. Add 2 chopped large carrots and 1 stalk of diced celery, seasoning with kosher salt and black pepper. Cook for 5 minutes until softened.
  3. Stir in 3 minced garlic cloves and cook for another 30 seconds until fragrant.
  4. Sprinkle in 1 tablespoon of all-purpose flour, stirring to coat the vegetables and cook for 1 minute until lightly toasted.
  5. Add 1.5 lbs of chicken, 3 sprigs of thyme, 1 bay leaf, 3/4 lb of baby potatoes, and 3 cups of broth. Mix well.
  6. Season with salt and pepper, bring to a simmer, then cover and cook on medium-low for 15 minutes.
  7. Remove the chicken, shred it, and return it to the pot. Stir well to incorporate.
  8. Remove bay leaf and serve garnished with fresh parsley.

Nutrition

Serving: 1bowlCalories: 350kcalCarbohydrates: 30gProtein: 25gFat: 12gSaturated Fat: 5gPolyunsaturated Fat: 1gMonounsaturated Fat: 4gCholesterol: 80mgSodium: 800mgPotassium: 900mgFiber: 4gSugar: 3gVitamin A: 800IUVitamin C: 20mgCalcium: 60mgIron: 2mg

Notes

Check chicken temperature to ensure it's cooked to 165°F. Allowing the stew to rest for about 10 minutes enhances flavor.

Tried this recipe?

Let us know how it was!

Salisbury Steak Recipe: Comfort Food in Just 35 Minutes

November 15, 2025 by Grace Snow Leave a Comment

As the aroma of sizzling beef fills the kitchen, I can't help but smile at the thought of a meal that embodies pure comfort. This Easy Homemade Salisbury Steak Recipe is not just quick to whip up—taking only 35 minutes—but it’s also a wonderful way to bring your family together around the dinner table. Enveloped in a rich onion gravy, these flavorful beef patties create a nostalgic dining experience that reminds me of cozy nights spent sharing stories over hearty plates. Plus, with options for lighter meat substitutions like ground turkey or even gluten-free breadcrumbs, it’s a dish that everyone can enjoy without sacrificing taste. Ready to discover how to make this classic dish? Let’s dive in!

Why is this Salisbury Steak Recipe irresistible?

Ease of Preparation: This Easy Homemade Salisbury Steak comes together in just 35 minutes, perfect for those busy weeknights when you crave something hearty.

Rich, Savory Gravy: The onion gravy is rich and flavorful, enhancing the juicy patties, making each bite a satisfying experience.

Crowd-Pleaser: It’s a dish that everyone loves, from kids to adults, ensuring everyone sits down together for a delightful meal.

Versatile Ingredients: Feel free to substitute meats with ground turkey or explore gluten-free options—this recipe adapts to your preferences!

Comfort Food Classic: This dish packs in nostalgia, making you feel like a chef at home, reminiscent of cozy family gatherings. For more comfort food recipes, check out my Grilled Balsamic Steak Salad or try the flavors of Spatchcock Chicken.

Salisbury Steak Recipe Ingredients

For the Patties

  • Ground Beef – This serves as the base, providing rich flavor and a juicy texture. For a lighter option, use ground turkey or chicken, adjusting cooking time accordingly.
  • Breadcrumbs – These add structure to the patties. Substitute with panko for extra crunch, or gluten-free alternatives for a similar texture.
  • Onions – Essential for sweetness and flavor depth. Yellow onions are mild; shallots or green onions can be great alternatives.
  • Worcestershire Sauce – This enhances the umami profile. Soy sauce or a vinegar-sugar blend works well as substitutes.
  • Egg – Helps bind the ingredients together. No direct substitutions recommended for best results.
  • Milk – Contributes moisture to the patties. Feel free to use non-dairy alternatives if needed.
  • Garlic Powder – Adds a warming, aromatic touch. You can swap it with fresh minced garlic for a sharper flavor.

For the Gravy

  • Cornstarch – Used to thicken the rich gravy. Arrowroot powder is a nice gluten-free alternative.
  • Vegetable Oil – Necessary for frying the patties to a golden perfection. Olive oil or butter can offer a different and delicious flavor profile.

This Salisbury Steak Recipe promises to be a delightful addition to your family dinner, filled with warmth and flavor!

Step‑by‑Step Instructions for Salisbury Steak Recipe

Step 1: Mix the Patties
In a large mixing bowl, combine 1 pound of ground beef, ½ cup of breadcrumbs, ¼ cup of finely chopped onion, 1 beaten egg, and ¼ cup of milk. Add 2 tablespoons of Worcestershire sauce, 1 teaspoon of garlic powder, and a pinch of salt and pepper. Mix gently with your hands until just combined, ensuring not to overwork the mixture for tender patties.

Step 2: Shape the Patties
Divide the meat mixture into four equal portions and shape each one into oval patties about ½ inch thick. Aim for uniform thickness to ensure even cooking. Place the patties on a plate or a cutting board while you prepare to cook them. This Salisbury Steak Recipe begins to take shape as you create perfectly formed patties.

Step 3: Cook the Patties
Heat a large skillet over medium heat and add 2 tablespoons of vegetable oil. Once the oil is shimmering, carefully add the shaped patties. Cook for 4-5 minutes on each side until they are golden brown and cooked through, with an internal temperature of 160°F. Once finished, remove the patties from the skillet and set them aside on a plate to rest.

Step 4: Prepare the Gravy
In the same skillet, without cleaning it, sauté 1 large sliced onion over medium heat for 2-3 minutes until they are softened and slightly caramelized. Stir frequently to avoid burning, as this will add a rich flavor to the gravy. Once the onions are fragrant and tender, proceed to the next step.

Step 5: Thicken the Gravy
Add 1 cup of beef broth and 1 tablespoon of soy sauce to the skillet, scraping the bottom with a wooden spoon to incorporate any browned bits. Bring the mixture to a gentle simmer for about 5 minutes, allowing the flavors to meld. Meanwhile, in a small bowl, whisk together 1 tablespoon of cornstarch with 2 tablespoons of water until smooth.

Step 6: Combine and Serve
Stir the cornstarch mixture into the simmering gravy and cook for an additional 2-3 minutes until the gravy thickens to your desired consistency. Bring back the cooked Salisbury steak patties to the skillet, spoon the gravy over them, cover, and heat for another 5 minutes. Serve hot alongside creamy mashed potatoes or your favorite vegetables for the ultimate comfort meal.

Make Ahead Options

These Salisbury Steak patties are the perfect make-ahead option for busy home cooks! You can prepare the patties—mixing together the ground beef, breadcrumbs, onions, and seasonings—up to 24 hours in advance. Simply shape them and store them in an airtight container in the fridge. When you're ready to enjoy your meal, cook them directly from the fridge for the best results; they’ll be just as delicious! Additionally, the gravy can be made ahead of time and stored in the refrigerator for up to 3 days. Reheat gently on the stove before serving, and don’t forget to spoon it over the reheated patties for an effortless and satisfying dinner!

How to Store and Freeze Salisbury Steak

Fridge: Store leftover Salisbury steaks and gravy in an airtight container for up to 3 days. Be sure to let them cool before sealing to avoid trapping moisture, which can make the patties soggy.

Freezer: For longer storage, freeze the steaks and gravy in a freezer-safe container or heavy-duty zip-top bag for up to 3 months. Ensure everything is well-wrapped to prevent freezer burn.

Reheating: When ready to enjoy, thaw the frozen Salisbury steak overnight in the fridge. Reheat gently in a skillet over low heat or in the microwave until warmed through, sprinkling a little water on top to keep them moist.

Portion Control: Consider freezing individual portions so you can thaw just what you need for a quick, comforting meal that reminds you of home!

Salisbury Steak Recipe Variations & Substitutions

Feel free to get creative with this dish—there are so many ways to make it your own!

  • Healthier Swap: Use Ground Turkey instead of beef for a leaner option. It retains flavor while being a bit lighter on the palate.

  • Crunchy Texture: Swap regular breadcrumbs with Panko Breadcrumbs for a delightful crunch that brings a new texture to your patties.

  • Flavor Exploration: Experiment with Shallots or Green Onions in place of yellow onions for a unique flavor twist that enhances the dish beautifully.

  • Umami Boost: Add a splash of Soy Sauce to your gravy for an extra layer of richness. It complements the savory notes without overpowering.

  • Gluten-Free Option: For a gluten-free meal, use Crushed Rice Crackers instead of bread crumbs and thicken your gravy with Arrowroot Powder.

  • Herb Infusion: Mix in fresh Chopped Parsley or Thyme to the patties for a burst of freshness that brightens the overall flavor profile.

  • Spicy Kick: Add a dash of Cayenne Pepper or some chopped Jalapeño to the patties if you’re in the mood for a little heat!

  • Creamy Twist: For a rich alternative, consider stirring in a dollop of Cream Cheese into the gravy for a creamy texture that complements the savory patties.

Want to explore even more flavors? Pair your Salisbury steak with the hearty and delicious Cocoa Crusted Steak or elevate your meal with a refreshing Spatchcock Chicken. Happy cooking!

Expert Tips for Salisbury Steak Recipe

  • Uniform Thickness: Ensure your patties are evenly shaped to guarantee consistent cooking and avoid dry edges. This makes a difference in achieving that juicy texture!

  • Resting Time: Let the patties rest after frying to allow the juices to redistribute, ensuring a tender bite that bursts with flavor.

  • Cooking Temperature: If using lighter meats like ground turkey or chicken, be mindful to check that the internal temperature reaches 165°F for safety.

  • Smooth Gravy: To prevent lumps in your onion gravy, whisk the cornstarch mixture thoroughly before adding it and constantly stir as you combine it.

  • Flavor Variations: Don't hesitate to experiment with different onion types or spices in your Salisbury Steak Recipe to find the combination that your family loves best!

What to Serve with Easy Homemade Salisbury Steak

Elevate your dinner table with delightful sides and treats, creating a full experience around the warmth of home-cooked meals.

  • Creamy Mashed Potatoes: The silky texture adds comfort and soaks up the rich onion gravy beautifully, making every bite indulgent. Imagine creamy potatoes paired with savory beef—pure bliss!

  • Roasted Vegetables: Seasonal roasted carrots, Brussels sprouts, or broccoli bring a colorful, crisp contrast that balances the meal. Their slight caramelization enhances the meal's overall flavor profile.

  • Buttery Corn on the Cob: Classic and sweet, this side adds a juicy pop that complements the savory richness of the Salisbury steak without competing for attention.

  • Garden Salad: A fresh mix of greens with a light vinaigrette offers a refreshing bite to cleanse the palate and lighten the meal. Toss in cherry tomatoes and cucumber for an extra crunch.

  • Crusty Bread: A side of warm, crusty bread or dinner rolls allows for the delightful sopping of gravy left on your plate. Just picture the flavors mingling with the bread—absolutely heartwarming!

  • Red Wine: A glass of full-bodied red wine can heighten the experience, enhancing the flavors of the steak while providing a soothing backdrop to your dinner conversation.

  • Chocolate Cake: Finish the meal on a sweet note with a slice of rich chocolate cake. Its decadence perfectly contrasts the savory elements of your main dish, ensuring a joyous ending to the feast.

Easy Homemade Salisbury Steak Recipe FAQs

What should I look for when selecting ground beef for the Salisbury Steak?
Absolutely! When choosing ground beef, look for meat that has a bright red color and does not have dark spots or an off smell. I recommend an 80/20 blend for a good balance of flavor and moisture. If you're opting for a lighter option, you can certainly use ground turkey or chicken; just be sure to adjust your cooking time accordingly.

How should I store leftover Salisbury Steak and gravy?
Very easy! Store your leftover Salisbury steaks and gravy in an airtight container in the fridge for up to 3 days. Let them cool completely before sealing to avoid sogginess. For ultimate flavor preservation, consider freezing leftovers if you won't finish them within that timeframe!

Can I freeze my Salisbury Steak? If so, how?
Definitely! To freeze your Salisbury Steak, let the patties and gravy cool completely. Then, transfer them to a freezer-safe container or heavy-duty zip-top bag, making sure to remove as much air as possible. You can freeze them for up to 3 months. When ready to enjoy, simply thaw in the fridge overnight and reheat gently!

What can I do to prevent lumps in my gravy?
To avoid any lumpy gravy, it's key to whisk the cornstarch with water until smooth before adding it to the broth mixture. When incorporating it, stir continuously to ensure it's fully integrated. This simple method will help create that silky texture we all love.

Are there any dietary considerations I should take into account with this recipe?
If you have dietary restrictions, there are plenty of alternatives! Use gluten-free breadcrumbs for a suitable replacement. If someone has a dairy allergy, non-dairy milk can be used. Just be sure to communicate and adjust according to everyone's needs, as this Salisbury Steak Recipe can be easily customized for a variety of diets.

How long does cooked Salisbury Steak last in the refrigerator?
Cooked Salisbury Steak can be stored in the refrigerator for up to 3 days. When storing, ensure it's in an airtight container to maintain its moisture and flavor. If you're ever in doubt, trust your nose—if it smells off, it's best to discard. Enjoy your cozy meals!

Salisbury Steak Recipe

Salisbury Steak Recipe: Comfort Food in Just 35 Minutes

This Salisbury Steak Recipe brings comfort food to your table in just 35 minutes, perfect for family dinners.
Print Recipe Pin Recipe
Prep Time 15 minutes mins
Cook Time 20 minutes mins
Total Time 35 minutes mins
Servings: 4 patties
Course: Dinner
Cuisine: American
Calories: 350
Ingredients Equipment Method Nutrition Notes

Ingredients
  

For the Patties
  • 1 pound ground beef Use ground turkey for a lighter option.
  • 0.5 cup breadcrumbs Substitute with panko or gluten-free alternatives.
  • 0.25 cup onion Finely chopped; yellow onions recommended.
  • 2 tablespoons Worcestershire sauce Soy sauce can be used as a substitute.
  • 1 large egg
  • 0.25 cup milk Non-dairy alternatives are acceptable.
  • 1 teaspoon garlic powder Fresh minced garlic can be used instead.
For the Gravy
  • 1 tablespoon cornstarch Arrowroot powder is a gluten-free alternative.
  • 2 tablespoons vegetable oil Olive oil or butter can be used.

Equipment

  • large mixing bowl
  • Large skillet
  • Wooden spoon

Method
 

Step‑By‑Step Instructions
  1. In a large mixing bowl, combine ground beef, breadcrumbs, chopped onion, beaten egg, and milk. Add Worcestershire sauce, garlic powder, and a pinch of salt and pepper. Mix gently with your hands until just combined.
  2. Divide the mixture into four equal portions and shape into oval patties about ½ inch thick.
  3. Heat a large skillet over medium heat and add vegetable oil. Add the shaped patties and cook for 4-5 minutes on each side until golden brown and cooked through.
  4. In the same skillet, sauté sliced onion over medium heat for 2-3 minutes until softened.
  5. Add beef broth and soy sauce to the skillet, scraping the bottom to incorporate browned bits. Simmer for about 5 minutes.
  6. Whisk together cornstarch with water until smooth. Stir into the simmering gravy and cook for an additional 2-3 minutes until thickened.
  7. Return the cooked patties to the skillet, spoon the gravy over them, cover, and heat for 5 minutes before serving.

Nutrition

Serving: 1pattyCalories: 350kcalCarbohydrates: 20gProtein: 25gFat: 18gSaturated Fat: 6gPolyunsaturated Fat: 1gMonounsaturated Fat: 10gCholesterol: 80mgSodium: 700mgPotassium: 400mgFiber: 1gSugar: 2gVitamin A: 4IUVitamin C: 2mgCalcium: 50mgIron: 3mg

Notes

Ensure patties are evenly shaped for consistent cooking and allow to rest after frying for optimal juiciness. Experiment with different onion types for added flavor.

Tried this recipe?

Let us know how it was!

Melt-in-Your-Mouth Slow Cooker Beef Ragu for Cozy Sundays

November 15, 2025 by Grace Snow Leave a Comment

The kitchen was alive with chatter, laughter, and the irresistible scent of simmering beef, a sign that a delightful meal was on the way. This Sunday Slow Cooker Beef Ragu has a way of turning simple ingredients into a heartwarming family feast that beckons everyone to the table. Known for its melt-in-your-mouth tenderness and rich, layered flavors, this dish is the epitome of comfort food that warms both body and soul. The convenience of a slow cooker allows you to effortlessly prep, then let the magic happen as it transforms your kitchen into a haven of bold aromas. Plus, it's a crowd-pleaser that guarantees seconds! So why not gather your ingredients, set the cooker, and embark on an unforgettable culinary journey? What will you serve it with—the traditional pasta or perhaps a comforting crusty bread?

Why is Slow Cooker Beef Ragu so special?

Comforting, this melt-in-your-mouth dish transforms your kitchen into a haven of aroma, making it the perfect centerpiece for family gatherings. Effortless preparation means you can enjoy time with loved ones while it cooks! Rich flavors from tender beef soaking in savory broth and herbs ensure every bite is bursting with deliciousness. Versatile pairing options like pappardelle, crusty bread, or even delightful sides like Asparagus Soup Healthy elevate your meal. Plus, this hearty dish is ideal for meal prep, allowing leftovers to be enjoyed for days!

Slow Cooker Beef Ragu Ingredients

For the Ragu

  • Boneless Beef Chuck Roast – This tough cut becomes melt-in-your-mouth tender after slow cooking, making it perfect for shredding.
  • Olive Oil – Essential for browning the meat, which enhances the overall flavor profile.
  • Onion – A key aromatic base that contributes natural sweetness to the ragu.
  • Carrot – Adds a touch of sweetness and a lovely texture to the sauce.
  • Celery – Provides a flavorful background, vital for creating the mirepoix base.
  • Garlic – This aromatic ingredient deepens the flavor and enhances the ragu's overall aroma.
  • Red Wine – Optional for added complexity; feel free to substitute with extra beef broth if desired.
  • Beef Broth – Serves as the liquid foundation, enriching the sauce's flavor and consistency.
  • Bay Leaves – Infuses earthy notes and fragrance that elevate the dish.
  • Thyme – This herb complements the beef beautifully, enriching the overall flavor.
  • Salt and Pepper – Essential for seasoning; adjust according to your taste preferences.
  • Parmesan Cheese (optional) – Adds a savory finish when served on top of the ragu, enhancing the experience.

This Slow Cooker Beef Ragu is a delightful family meal that invites beautiful moments around the dinner table and delicious memories to savor!

Step‑by‑Step Instructions for Slow Cooker Beef Ragu

Step 1: Prep the Ingredients
Begin by finely chopping the onion, carrot, celery, and garlic to create a comforting mirepoix base. Season the boneless beef chuck roast generously with salt and pepper, ensuring each surface is well coated to enhance flavor. Set aside for a moment while you gather your slow cooker and a large skillet to start the browning process.

Step 2: Brown the Beef
Heat a tablespoon of olive oil in a large skillet over medium-high heat. Once shimmering, add the seasoned chuck roast and sear for about 4-5 minutes on each side, or until deeply browned. Look for a rich, golden crust forming on the meat as it cooks, enhancing the overall flavor. Once browned, transfer the beef to the slow cooker.

Step 3: Cook the Aromatics
In the same skillet, add a little more olive oil if needed and toss in the chopped onion, carrot, celery, and garlic. Sauté for about 5-7 minutes, stirring occasionally until the vegetables soften and the onion is translucent. Their sweet aromas will fill your kitchen—this step is essential for building the rich depth of flavor in your Slow Cooker Beef Ragu.

Step 4: Combine Ingredients in Slow Cooker
Once the vegetables are tender, pour them over the browned beef in the slow cooker. Add in a cup of red wine (or beef broth for a non-alcoholic version), along with the beef broth, bay leaves, and thyme. The liquid should nearly cover the beef; if necessary, add a bit more broth for a perfectly rich sauce. Stir gently to combine all the ingredients.

Step 5: Slow Cook
Cover the slow cooker and set it to cook on LOW for 6-8 hours or on HIGH for 3-4 hours. The goal is to have the beef become fork-tender, easily shredding as it simmers in the flavorful broth. Check for doneness about an hour before the cooking time ends; the meat should be easily shreddable and the sauce thickening nicely.

Step 6: Finish Sauce
Once cooked, carefully remove the beef from the slow cooker and use two forks to shred it into bite-sized pieces. Return the shredded beef to the pot and stir it into the robust sauce, allowing it to soak in the flavors for a few minutes. Take a moment to taste and adjust seasoning with salt and pepper as needed for your ideal flavor profile.

Step 7: Serve
Ladle the hearty Slow Cooker Beef Ragu over cooked pappardelle or your favorite pasta. For an extra touch of indulgence, top it with freshly grated Parmesan cheese that will melt slightly in the warmth of the ragu. Gather your loved ones around the table to savor this delightful family meal that’s sure to create lasting memories.

How to Store and Freeze Slow Cooker Beef Ragu

  • Fridge: Store leftover Slow Cooker Beef Ragu in an airtight container for up to 3-4 days. This ensures the flavors remain intact while keeping the dish safe to eat.
  • Freezer: For longer storage, freeze portions of the ragu in a freezer-safe container for up to 3 months. Make sure to label the container with the date to keep track.
  • Reheating: To reheat, thaw the ragu in the fridge overnight and gently warm it on the stovetop, stirring occasionally until heated through. Enjoy it with fresh pasta or crusty bread!
  • Airtight Guidance: When freezing, wrap the container tightly with plastic wrap or use freezer bags to reduce air exposure, which can lead to freezer burn.

Make Ahead Options

These Slow Cooker Beef Ragu are perfect for meal prep enthusiasts! You can brown the beef and sauté the aromatics up to 24 hours in advance. Simply refrigerate the browned beef and sautéed vegetables in airtight containers until you're ready to cook. On the day of serving, place the chilled beef and vegetables in the slow cooker, add your liquids (wine or broth), bay leaves, and thyme, then cook as directed. This method not only saves precious time on busy weekdays but also ensures a dish that's just as delicious as if you made it all at once. Enjoy tender, flavorful ragu with minimal effort!

Expert Tips for Slow Cooker Beef Ragu

  • Choose the Right Cut: Select a cut with some fat, like the boneless beef chuck roast, to ensure the meat remains juicy and tender after slow cooking.

  • Mind the Browning: Don't rush the beef browning step; a deep sear adds flavor and enhances the overall taste of the Slow Cooker Beef Ragu.

  • Adjust Consistency: If your sauce turns out thin, try simmering it uncovered for the last hour, or reduce it on the stovetop to thicken.

  • Herb Balance: Fresh herbs can enhance the dish's flavor; consider using fresh thyme instead of dried if available for a fresher taste.

  • Taste Before Serving: Always taste and adjust seasoning before serving to ensure your Slow Cooker Beef Ragu is flavorful and satisfying.

Slow Cooker Beef Ragu Variations

Feel free to personalize this comforting dish and create your own twist on the classic flavors!

  • Dairy-Free: Omit Parmesan cheese and use nutritional yeast for a savory, cheesy flavor without dairy.
  • Vegetable Boost: Add finely chopped mushrooms or bell peppers while sautéing the aromatics for extra texture and flavor.
  • Gluten-Free: Serve this ragu over gluten-free pasta or zucchini noodles for a healthy alternative.
  • Spicy Kick: Incorporate a pinch of red pepper flakes or a diced jalapeño for a delightful heat that warms the soul.
  • Red Wine-Free: Swap red wine with additional beef broth and a splash of balsamic vinegar for a rich depth without alcohol.
  • Added Sweetness: Introduce a tablespoon of brown sugar or a splash of balsamic vinegar to balance the acidity of the tomatoes.
  • Herb Variations: Experiment with different herbs; fresh rosemary or parsley can add a delightful twist to the flavor.
  • Family Favorite Pairing: Serve this ragu with your favorite Tagliatelle Asparagus Peas for a creamy and vibrant side dish that complements the ragu perfectly.

No matter how you choose to modify your Slow Cooker Beef Ragu, the journey of creating this beautiful dish will surely bring warmth and delight to your home!

What to Serve with Slow Cooker Beef Ragu?

Whether you're planning a cozy family dinner or an inviting gathering, complementing this hearty dish enhances the overall experience.

  • Pappardelle Pasta: The wide, flat noodles expertly cradle the rich sauce, allowing every bite to be a flavor explosion.
  • Crusty Bread: Perfect for soaking up leftover sauce, it adds a delightful crunch that contrasts beautifully with the tender ragu.
  • Garlic Bread: This aromatic side brings additional warmth and flavor, making it an irresistible addition to your table.
  • Creamy Polenta: Smooth and buttery, polenta pairs wonderfully with the ragu, offering a comforting, creamy base that elevates every mouthful.

Imagine a plate filled with luscious beef ragu over noodles, accompanied by a slice of golden garlic bread—pure magic on the dinner table.

  • Roasted Vegetables: Seasonal veggies like carrots and Brussels sprouts add vibrant color and nutrition, balancing the heartiness of the beef.
  • Caesar Salad: Crisp romaine lettuce tossed with tangy dressing complements the richness of the ragu, refreshing the palate.
  • Red Wine: A robust glass of your favorite red enhances the meal, harmonizing with the wine used in cooking.
  • Chocolate Cake: Finish on a sweet note; rich chocolate cake offers a decadent contrast to the savory flavors of the meal.

These pairings create a delightful dining experience that transforms your Slow Cooker Beef Ragu into a memorable feast.

Slow Cooker Beef Ragu Recipe FAQs

What cut of beef is best for Slow Cooker Beef Ragu?
I recommend using a boneless beef chuck roast for the best results. This cut is tough yet flavorful and becomes incredibly tender when slow-cooked, making it perfect for shredding into the ragu. The marbling in the chuck ensures a juicy, melt-in-your-mouth experience.

How do I store leftover Slow Cooker Beef Ragu?
To keep your Slow Cooker Beef Ragu fresh, store it in an airtight container and refrigerate it for up to 3-4 days. Ensure the container is sealed to maintain its rich flavors and prevent spoilage. If you want to savor it longer, consider freezing it!

Can I freeze Slow Cooker Beef Ragu?
Absolutely! For freezing, portion the ragu into airtight containers or freezer bags, squeezing out excess air to prevent freezer burn. It will keep well for up to 3 months. When you're ready to enjoy it again, simply thaw it in the fridge overnight and reheat on the stovetop.

What if my sauce is too thin?
No worries! If you find your sauce isn't thick enough, let it simmer uncovered in the slow cooker on HIGH for the last hour of cooking to reduce it down. Alternatively, transfer it to a saucepan and cook on the stovetop over medium heat until it thickens. Always taste and adjust the seasoning afterward!

Are there any dietary considerations for Slow Cooker Beef Ragu?
Yes, if you're cooking for someone with dietary restrictions, be mindful of allergies or preferences. The recipe contains beef and potentially gluten in the pasta. For a gluten-free alternative, serve it over zucchini noodles or mashed potatoes! You can also substitute beef broth with vegetable broth for a lighter, non-meat version.

Slow Cooker Beef Ragu

Melt-in-Your-Mouth Slow Cooker Beef Ragu for Cozy Sundays

This Slow Cooker Beef Ragu transforms simple ingredients into a melt-in-your-mouth comforting dish perfect for family gatherings.
Print Recipe Pin Recipe
Prep Time 15 minutes mins
Cook Time 8 hours hrs
Total Time 8 hours hrs 15 minutes mins
Servings: 6 servings
Course: Dinner
Cuisine: Italian
Calories: 450
Ingredients Equipment Method Nutrition Notes

Ingredients
  

For the Ragu
  • 2 pounds Boneless Beef Chuck Roast Perfect for shredding
  • 2 tablespoons Olive Oil For browning the meat
  • 1 medium Onion Finely chopped
  • 1 medium Carrot Finely chopped
  • 1 stalk Celery Finely chopped
  • 4 cloves Garlic Minced
  • 1 cup Red Wine Optional, can substitute with beef broth
  • 2 cups Beef Broth
  • 2 leaves Bay Leaves
  • 1 teaspoon Thyme Dried or fresh
  • 1 teaspoon Salt Adjust to taste
  • 1 teaspoon Pepper Adjust to taste
  • 1/2 cup Parmesan Cheese Optional, for serving

Equipment

  • Slow Cooker
  • Skillet

Method
 

Step-by-Step Instructions
  1. Prep the Ingredients: Finely chop the onion, carrot, celery, and garlic. Season the beef roast generously with salt and pepper.
  2. Brown the Beef: Heat olive oil in a skillet over medium-high heat. Add the beef and sear for about 4-5 minutes on each side until deeply browned. Transfer to slow cooker.
  3. Cook the Aromatics: In the same skillet, add more olive oil if needed, then sauté onion, carrot, celery, and garlic for 5-7 minutes until softened.
  4. Combine Ingredients in Slow Cooker: Pour sautéed vegetables over the beef. Add red wine, beef broth, bay leaves, and thyme. Stir gently.
  5. Slow Cook: Cover and set cooker to LOW for 6-8 hours or HIGH for 3-4 hours until beef is fork-tender.
  6. Finish Sauce: Remove beef and shred it into pieces. Return to pot and stir into sauce. Adjust seasoning with salt and pepper.
  7. Serve: Ladle the ragu over pasta and top with Parmesan cheese if desired. Serve warm.

Nutrition

Serving: 1servingCalories: 450kcalCarbohydrates: 20gProtein: 40gFat: 25gSaturated Fat: 10gPolyunsaturated Fat: 2gMonounsaturated Fat: 15gCholesterol: 100mgSodium: 800mgPotassium: 800mgFiber: 2gSugar: 4gVitamin A: 500IUVitamin C: 10mgCalcium: 100mgIron: 4mg

Notes

Ideal for meal prep and pairs wonderfully with pasta or crusty bread.

Tried this recipe?

Let us know how it was!

Creamy Cheeseburger Soup That Will Warm Your Heart

November 15, 2025 by Grace Snow Leave a Comment

As the chill of evening settles in, I often find myself craving something warm and comforting. That’s when my mind drifts to this Cheesy One-Pot Cheeseburger Soup. This delightful concoction merges the nostalgic flavors of a classic cheeseburger into a cozy bowl of comforting soup. Not only is it quick and easy to prepare—taking less than an hour, but it also ticks all the boxes for a family-friendly meal that even picky eaters will adore. Imagine a rich, creamy base filled with tender vegetables and savory beef, perfect for gathering everyone around the dinner table. Plus, you can customize it with your favorite toppings or ingredient swaps, making it limitless in its deliciousness! What would you add to make it your own?

Why is this cheeseburger soup irresistible?

Comforting warmth: The creamy texture and hearty ingredients make this soup a perfect companion on chilly nights.
Quick to prepare: Ready in under an hour, it’s ideal for busy weeknights and unexpected guests.
Family-friendly: Even picky eaters will devour this comforting bowl of goodness, thanks to the familiar flavors.
Customizable: With various toppings like crispy bacon or onion rings, you can elevate each bowl to your liking. If you love a delightful twist, try pairing it with a fresh side salad for a complete meal or check out our Lemon Chicken Soup for another cozy option!
One-pot wonder: Say goodbye to the mess of multiple dishes; everything cooks in one pot, simplifying cleanup.
Savory satisfaction: Each spoonful captures the essence of a cheeseburger, satisfying those cravings like no other!

Cheeseburger Soup Ingredients

For the Soup Base
• Ground Beef – Provides the meaty flavor; can be substituted with ground turkey for a leaner option.
• Butter – Adds richness and helps sauté the vegetables; divide usage for both roux and sautéing.
• Carrots (3/4 cup, diced) – Contributes sweetness and texture; substitute with bell peppers for variation.
• Celery (3/4 cup, diced) – Adds a fresh crunch; optional to omit if not preferred.
• Onion (3/4 cup, diced) – Provides foundational flavor; consider using shallots for a milder taste.
• Dried Basil & Dried Parsley (1 tsp each) – Enhance the soup's herbal aroma; fresh herbs can be used for a more vibrant flavor.
• Potatoes (4 cups, diced) – Offers heartiness to the soup; sweet potatoes can be substituted for a different flavor.
• Chicken Broth (3 cups) – Serves as the soup’s base for moisture and flavor; vegetable broth is a great alternative.

For Thickening
• All-Purpose Flour (1/4 cup) – Used to create roux for thickening the soup; can be substituted with cornstarch for gluten-free.

For the Creamy Finish
• Velveeta (1 to 2 cups, cubed) – Adds delicious creaminess and cheesiness; cheddar cheese can be used for a flavorful alternative.
• Whole Milk (1.5 cups) – Provides additional creaminess; can substitute with 2% milk or a non-dairy alternative for consistency.
• Salt (3/4 tsp) & Black Pepper (1/4 to 1/2 tsp) – Essential for seasoning to taste.
• Sour Cream (1/4 cup) – Adds tanginess and a creamy texture; Greek yogurt can serve as a lower-fat option.

Optional Toppings
• Onion Rings – Offer a delightful crunch to each bowl.
• Green Onions – Bring fresh flavor; sprinkle them on top for a vibrant touch.
• Crumbled Bacon – Adds extra savory flavor and a crispy texture.

This cheeseburger soup is not just a meal; it's a comforting hug in a bowl that can be customized to your heart's content!

Step‑by‑Step Instructions for Cheeseburger Soup

Step 1: Cook the Ground Beef
In a large pot over medium heat, cook and crumble 1 pound of ground beef for 6-8 minutes, stirring occasionally until browned and cooked through with no pink remaining. Drain any excess fat, allowing the beef to revel in its juicy flavor while staying rich and savory as the base of your delicious cheeseburger soup.

Step 2: Sauté the Vegetables
In the same pot, melt 2 tablespoons of butter over medium heat, then add 3/4 cup diced carrots, 3/4 cup diced celery, and 3/4 cup diced onion. Sauté the vegetables for about 10 minutes until they are tender and fragrant, stirring occasionally. This step builds a rich flavor base that complements the ground beef wonderfully.

Step 3: Add Potatoes and Broth
Next, stir in 4 cups of diced potatoes and 3 cups of chicken broth into the pot. Increase the heat to bring the mixture to a rolling boil, then reduce the heat to low and cover the pot. Let it simmer for 10-12 minutes, or until the potatoes are fork-tender, soaking up all the flavors from the beef and vegetables as they soften.

Step 4: Make the Roux
In a separate medium saucepan, melt 2 tablespoons of remaining butter over medium heat, whisking in 1/4 cup of all-purpose flour. Cook this roux for 3-5 minutes, stirring continuously until it starts bubbling and turns a light golden color. This roux is key for thickening your cheeseburger soup to achieve the perfect creamy consistency.

Step 5: Combine and Add Creaminess
Reduce the heat on the soup pot and gradually stir the roux into the pot until thickened. Add 1 to 2 cups of cubed Velveeta cheese, 1.5 cups of whole milk, 3/4 teaspoon salt, and 1/4 to 1/2 teaspoon black pepper. Continue stirring until the cheese is fully melted and the mixture is creamy and luscious, embracing that cheeseburger flavor.

Step 6: Finish with Sour Cream
Remove the pot from heat and gently stir in 1/4 cup of sour cream, enhancing the soup's creaminess and providing a delightful tang. Ensure everything is well combined for a heavenly texture and flavor in your cheeseburger soup. Now, it’s time to dish out your warm and comforting creation!

Step 7: Serve and Enjoy
Ladle the cheeseburger soup into bowls, and consider serving it hot with optional toppings like crispy onion rings, chopped green onions, or crumbled bacon for an added crunch. Each spoonful will bring warmth and comfort, perfect for sharing with family and friends around the dinner table.

Storage Tips for Cheeseburger Soup

Fridge: Store cooled leftovers in an airtight container for up to 3-4 days. This way, you can easily enjoy your delicious cheeseburger soup again!

Freezer: It’s best to avoid freezing this soup due to the potatoes and dairy; they may change texture once thawed.

Reheating: When ready to enjoy, reheat on the stovetop over low heat. Stir occasionally until warmed through and creamy once again—just as comforting as the first bowl!

Make-Ahead: Consider preparing the soup in advance and storing it without toppings for easy reheating. Just add those extra touches before serving!

Make Ahead Options

This Cheeseburger Soup is perfect for meal prep enthusiasts looking to save time on busy weeknights! You can prepare the soup base (without the dairy and toppings) up to 24 hours in advance by cooking the ground beef and sautéing the vegetables, then adding the potatoes and broth. Store it in the refrigerator in an airtight container. To maintain the creamy texture, wait to add Velveeta, milk, and sour cream until you’re ready to finish cooking. When it's time to serve, simply reheat the soup over medium heat until hot, stir in the dairy ingredients, and enjoy a delightful meal that feels freshly made with minimal effort!

Cheeseburger Soup Variations

Feel free to customize your cheeseburger soup to match your taste buds with these delightful twists!

  • Ground Turkey: Swap out beef for ground turkey for a lighter version without sacrificing flavor. It keeps the soup as comforting as ever.
  • Dairy-Free Delight: Use non-dairy milk and vegan cheese to make this soup plant-based while still creamy and delicious!
  • Extra Veggies: Add bell peppers or zucchini to amp up the nutritional value and bring extra color to your bowl. These veggies add a lovely crunch!
  • Spicy Kick: Stir in diced jalapeños or a splash of hot sauce for heat that spices up your cozy concoction. Perfect for those who crave a little excitement!
  • Sweet Potato Swap: Replace regular potatoes with sweet potatoes for a hint of natural sweetness and a vibrant pop of orange. It’s a nutritious twist!
  • Vegan Twist: Use lentils or chickpeas in place of meat to create a protein-packed vegan version that’s full of hearty goodness. Each bite is just as satisfying!
  • Herb Infusion: Experiment with fresh herbs like rosemary or thyme for a fragrant aroma that brings a new depth to your comforting soup pot.
  • Hearty Bacon: Add crispy, crumbled bacon to your soup for an extra layer of smokiness and texture. It pairs beautifully with the cheeseburger flavor!

As you explore these variations, consider pairing your soup with a crisp side salad or checking out our delightful Zuppa Toscana Soup for another comforting option! Enjoy personalizing your cheeseburger soup experience!

Tips for the Best Cheeseburger Soup

  • Cook Beef Thoroughly: Make sure the ground beef is fully cooked with no pink remaining for food safety and optimal flavor.
  • Stir Roux Constantly: When making the roux, stir continuously to avoid burning and clumping, ensuring a smooth, creamy cheeseburger soup.
  • Season to Taste: Don’t forget to taste and adjust seasoning as you go; little tweaks can elevate your soup from good to great!
  • Avoid Freezing Leftovers: The presence of potatoes and dairy can affect texture upon thawing; enjoy it fresh for the best experience.
  • Customize Toppings: Get creative with your toppings like crispy bacon or fresh herbs to add that extra pop of flavor to each bowl!

What to Serve with Cheeseburger Soup

This cheery and hearty meal invites a delightful ensemble of sides that complement the creamy flavors and warm essence of your cheeseburger soup.

  • Crusty Garlic Bread: The buttery, garlicky notes perfectly contrast the creamy soup, offering a satisfying crunch with every bite.
  • Simple Side Salad: Crisp greens drizzled with tangy vinaigrette bring a refreshing lightness that balances the richness of the soup.
  • Potato Chips: For extra crunch, pair with kettle-cooked potato chips that add a salty texture, echoing the comforting vibes of traditional cheeseburgers.
  • Coleslaw: The crunchy cabbage and sweet-tangy dressing create a refreshing contrast, plus a delightful crunch that adds layers to your meal.
  • Pickles or Pickled Veggies: A zesty bite of pickles balances the richness in the soup while providing a fun, nostalgic touch.
  • Homemade Onion Rings: These deliciously crispy rings can be placed atop each bowl for a whimsical garnish; each bite enhances the cheeseburger experience.
  • Soft Pretzels: Warm, salty pretzels make for a fun dipping companion, soaking up the cheesy goodness from the soup while adding a chewy texture.

Whether hosting family dinner or cozying up on a chilly night, these delightful sides will make your cheeseburger soup even more irresistible!

Cheeseburger Soup Recipe FAQs

How do I select ripe ingredients for my cheeseburger soup?
Absolutely! When choosing your vegetables, look for carrots and celery that are firm and free of dark spots. For fresh potatoes, pick those without any blemishes. The ground beef should be bright red, without any brown discoloration.

What is the best way to store leftovers of cheeseburger soup?
I recommend refrigerating cooled leftovers in an airtight container for 3-4 days. This helps maintain the flavor and ensures it's safe to eat. When you're ready to enjoy it again, reheat on the stovetop over low heat, stirring occasionally until warmed through.

Can I freeze cheeseburger soup?
Very! However, it's important to note that due to the potatoes and dairy, freezing is not recommended as the texture may become gritty or watery. If you still want to freeze it, I suggest omitting the dairy ingredients before freezing and adding them back in when you reheat.

What should I do if my cheeseburger soup is too thick?
If your soup turns out thicker than anticipated, don't worry—this can happen! Simply add a little extra chicken broth or milk while stirring gently on low heat until you reach your desired consistency. Always taste and adjust the seasonings afterwards!

Are there any dietary considerations I should keep in mind?
Of course! If you’re serving this to guests, remember to ask about allergies, especially concerning dairy and gluten. You can easily make this soup gluten-free by substituting all-purpose flour with cornstarch as a thickening agent and using gluten-free broth.

How can I customize the toppings for my cheeseburger soup?
The more the merrier! You can elevate your soup with various toppings like crispy onion rings, freshly chopped green onions, or crumbled bacon for that extra crunch. Feel free to get creative and even add sautéed mushrooms or jalapeños for a spicy kick!

Cheeseburger Soup

Creamy Cheeseburger Soup That Will Warm Your Heart

This comforting Cheeseburger Soup combines the flavors of a classic cheeseburger in a creamy, one-pot meal that everyone loves.
Print Recipe Pin Recipe
Prep Time 10 minutes mins
Cook Time 30 minutes mins
Total Time 40 minutes mins
Servings: 6 servings
Course: Soups
Cuisine: American
Calories: 400
Ingredients Equipment Method Nutrition Notes

Ingredients
  

For the Soup Base
  • 1 pound Ground Beef Can be substituted with ground turkey.
  • 2 tablespoons Butter Divide usage for both roux and sautéing.
  • 3/4 cup Carrots, diced Can substitute with bell peppers.
  • 3/4 cup Celery, diced Optional to omit.
  • 3/4 cup Onion, diced Consider using shallots for milder flavor.
  • 1 teaspoon Dried Basil
  • 1 teaspoon Dried Parsley Fresh herbs can be used for more flavor.
  • 4 cups Potatoes, diced Sweet potatoes can be substituted.
  • 3 cups Chicken Broth Vegetable broth is an alternative.
For Thickening
  • 1/4 cup All-Purpose Flour Can be substituted with cornstarch for gluten-free.
For the Creamy Finish
  • 1 to 2 cups Velveeta, cubed Cheddar cheese can be used as an alternative.
  • 1.5 cups Whole Milk Can substitute with 2% milk or non-dairy.
  • 3/4 teaspoon Salt
  • 1/4 to 1/2 teaspoon Black Pepper Adjust to taste.
  • 1/4 cup Sour Cream Greek yogurt can be a lower-fat option.
Optional Toppings
  • Onion Rings For added crunch.
  • Green Onions For fresh flavor.
  • Crumbled Bacon For extra savory flavor.

Equipment

  • Large pot
  • Medium saucepan

Method
 

Step-by-Step Instructions for Cheeseburger Soup
  1. In a large pot over medium heat, cook and crumble 1 pound of ground beef for 6-8 minutes, stirring occasionally until browned and cooked through. Drain excess fat.
  2. In the same pot, melt 2 tablespoons of butter over medium heat. Add 3/4 cup diced carrots, 3/4 cup diced celery, and 3/4 cup diced onion. Sauté for about 10 minutes until tender.
  3. Stir in 4 cups of diced potatoes and 3 cups of chicken broth. Bring to a boil, then reduce heat and simmer for 10-12 minutes until potatoes are fork-tender.
  4. In a separate saucepan, melt 2 tablespoons of remaining butter over medium heat and whisk in 1/4 cup of flour. Cook for 3-5 minutes until bubbling and light golden.
  5. Reduce heat on the soup pot. Gradually stir in the roux until thickened. Add 1 to 2 cups of cubed Velveeta, 1.5 cups of whole milk, salt, and black pepper. Stir until cheese is melted.
  6. Remove from heat and stir in 1/4 cup of sour cream until well combined.
  7. Serve hot in bowls, topping with optional ingredients like onion rings, green onions, or bacon.

Nutrition

Serving: 1bowlCalories: 400kcalCarbohydrates: 30gProtein: 25gFat: 20gSaturated Fat: 10gPolyunsaturated Fat: 2gMonounsaturated Fat: 8gCholesterol: 80mgSodium: 900mgPotassium: 800mgFiber: 5gSugar: 4gVitamin A: 1500IUVitamin C: 10mgCalcium: 200mgIron: 3mg

Notes

Customize with your favorite toppings for a personal touch.

Tried this recipe?

Let us know how it was!

Comforting Vegetable Beef Soup for Cozy Nights

November 15, 2025 by Grace Snow Leave a Comment

As the chill settles outside, there's nothing quite like the aroma of Hearty Vegetable Beef Soup warming your kitchen. Picture a pot bubbling with tender ground beef, vibrant mixed vegetables, and creamy potatoes, all steeped in a rich tomato broth. This Vegetable Beef Soup is the ultimate comfort food, perfect for those chilly evenings when you crave something satisfying yet nourishing. Not only is it quick to whip up for busy weeknights, but this recipe also makes for excellent meal prep, ready to serve in generous bowls that will leave everyone asking for seconds. So, ready to discover how to create a bowl of warmth that wraps you in a cozy embrace? Let’s get started!

Why is this Vegetable Beef Soup a must-try?

Comforting, Warmth in a Bowl: With each spoonful, you'll experience the thick consistency of hearty ingredients that warms the soul.

Simple to Prepare: A quick, straightforward recipe that requires minimal time, making it perfect for weeknight meals or meal prep.

Versatile Ingredients: Customize easily by swapping in ground turkey or adding extra veggies like green beans or corn for added nutrition and flair.

Nutrient-Dense Delight: Packed with protein from beef and essential vitamins from mixed vegetables, it's not just delicious but nourishing too!

Family Favorite: It's the kind of dish that beckons family to the table, inviting everyone to enjoy a hearty meal that satisfies cravings and kindles conversations.

Perfect Pairing: Serve it alongside crusty bread or garlic toast for a complete experience, ensuring every last drop of that rich broth is savored.

Vegetable Beef Soup Ingredients

• Hearty and Delicious Choices!

For the Soup Base
• Ground Beef – Provides protein and richness; for a lighter option, substitute with ground turkey or chicken.
• Beef Broth (3 1/2 cups) – A savory base for the soup; swap with vegetable broth for a lighter taste.
• Petite Diced Tomatoes (1 can, 15 oz) – Adds acidity; fresh tomatoes work beautifully when they’re in season.
• Condensed Tomato Soup (1 can, 10.5 oz) – Gives creaminess and depth; consider a homemade version for freshness.

For the Flavor
• Onion (1 small, diced) – Introduces sweetness and depth; try shallots or leeks for a milder note.
• Garlic (1 tsp, minced) – Elevates flavor complexity; garlic powder can serve as a quick substitute.
• Worcestershire Sauce (2 tsp) – Delivers umami goodness; use soy sauce for gluten-free options.
• Italian Seasoning (2 tsp) – Infuses aromatic herb flavors; thyme, oregano, or basil can be used individually.
• Salt & Pepper – Basic seasonings to enhance overall flavor; adjust to suit your taste buds.

For the Vegetables
• Frozen Mixed Vegetables (1 bag, 16 oz) – A convenient nutritional blend; opt for fresh vegetables for a vibrant twist.
• Potatoes (2 medium, diced) – Adds heartiness and helps thicken; any potato variety works, including sweet potatoes for a fun change.

This hearty Vegetable Beef Soup will not only warm you up but leave your family asking for more!

Step‑by‑Step Instructions for Vegetable Beef Soup

Step 1: Brown the Beef
In a large pot, heat over medium heat, then add ground beef, breaking it apart with a wooden spoon. Cook until the beef is browned, about 5-7 minutes, and begins to sizzle. Once browned, add the diced onion and minced garlic, sautéing for another 3-4 minutes until the onions are translucent and fragrant.

Step 2: Season
Sprinkle in salt and pepper to taste, stirring well to ensure the seasonings coat the beef and vegetables evenly. This key step enhances the flavors of your Vegetable Beef Soup, bringing warmth and depth as you mix everything together.

Step 3: Add Broth and Vegetables
Pour in 3 1/2 cups of beef broth along with the 15 oz can of petite diced tomatoes and the 10.5 oz can of condensed tomato soup. Stir in 2 teaspoons of Worcestershire sauce and 2 teaspoons of Italian seasoning. Next, add the bag of frozen mixed vegetables and the diced potatoes, integrating all ingredients thoroughly.

Step 4: Simmer
Increase the heat to bring the mixture to a gentle boil. Once boiling, reduce the heat to low, cover the pot, and let your Vegetable Beef Soup simmer for about 30 minutes. This allows the flavors to meld together as the potatoes become tender and the soup thickens slightly.

Step 5: Adjust Seasonings
After simmering, taste your soup and adjust the seasoning if necessary. Add more salt, pepper, or Worcestershire sauce according to your preference, ensuring a rich and satisfying flavor profile that leaves your family craving more.

Step 6: Serve
Ladle the hearty Vegetable Beef Soup into bowls, garnishing as desired. Consider topping with chopped parsley, grated Parmesan, or a dollop of sour cream for added flavor and presentation. Serve alongside crusty bread or crackers for a complete and comforting meal that's perfect for chilly evenings.

Storage Tips for Vegetable Beef Soup

  • Fridge: Store leftovers in an airtight container for up to 3 days. This keeps the flavors intact while preventing spoilage, ensuring your Vegetable Beef Soup remains delicious.

  • Freezer: Allow the soup to cool before transferring it to freezer-safe containers or bags. It can be stored for up to 3 months, making it perfect for future cozy meals.

  • Reheating: Thaw overnight in the refrigerator or defrost in the microwave. When reheating, add extra broth if the soup thickens, restoring its hearty texture.

Helpful Tricks for Vegetable Beef Soup

  • Choose the Right Beef: Use high-quality ground beef for deeper flavor. Leaner cuts will result in a lighter soup; just remember to drain excess fat after browning.

  • Vegetable Flexibility: Feel free to swap frozen mixed vegetables with fresh ones for added nutrition and taste. Just keep in mind that fresh veggies may require a longer cooking time.

  • Taste as You Go: Always taste your soup before serving. Adjust the seasonings, especially salt and pepper, to ensure your Vegetable Beef Soup is perfectly balanced.

  • Store Properly: To preserve freshness, store any leftovers in an airtight container. This helps the flavors develop even further for your next comforting bowl!

  • Thickening Tip: If your soup thickens too much upon cooling, simply add more broth or water when reheating to achieve your desired consistency.

Make Ahead Options

Preparing your Hearty Vegetable Beef Soup in advance is a fantastic time-saver for busy weeknights! You can chop your veggies and brown the ground beef up to 24 hours in advance. Simply refrigerate these components separately to maintain their freshness and prevent any browning. When it's time to cook, combine your prepped ingredients in a pot, add the broth and tomatoes, and simmer as usual. This method allows you to enjoy a homemade, heartwarming soup that tastes just as delicious as if it were made fresh on the spot. For longer storage, you can also freeze fully cooked soup for up to 3 months. Just thaw overnight in the fridge, reheat, and savor each comforting spoonful!

What to Serve with Hearty Vegetable Beef Soup

As the aroma of your Hearty Vegetable Beef Soup fills the kitchen, it's time to elevate your meal with perfect accompaniments that enhance the comforting experience.

  • Crusty Bread: A warm, rustic loaf is perfect for soaking up the savory broth, adding a delightful crunchy texture.
  • Garlic Toast: Crispy, buttery slices infused with garlic are irresistible and pair wonderfully, making each bite of soup even more satisfying.
  • Simple Green Salad: A fresh salad with crunchy mixed greens and a tangy vinaigrette balances the warmth of the soup, adding brightness to your meal.
  • Cheesy Toasts: Layer melted cheese on bread under the broiler for an indulgent twist that complements the heartiness of the soup.
  • Homemade Cornbread: Slightly sweet and fluffy cornbread is a comforting side that pairs perfectly, soaking up every bit of those rich flavors.
  • Savory Biscuits: Light and flaky biscuits provide a delightful contrast in texture and are fantastic for sopping up the excellent broth.
  • Roasted Vegetables: Seasonal roasted veggies introduce caramelized flavors that harmonize beautifully with the soup's comforting taste.
  • Red Wine: A glass of full-bodied red wine heightens the meal’s richness, enhancing the overall comforting experience.
  • Warm Apple Crisp: For dessert, a warm apple crisp topped with vanilla ice cream rounds off the meal with a sweet, cozy touch.

Vegetable Beef Soup Variations

Feel free to explore and customize your Vegetable Beef Soup with these delightful variations!

  • Gluten-Free: Use gluten-free Worcestershire sauce and vegetable broth for a delicious alternative without sacrificing flavor.

  • Turkey Twist: Swap ground beef for ground turkey or chicken for a lighter, leaner soup that still delivers on taste.

  • Extra Veggies: Boost nutrition by adding fresh vegetables like green beans, corn, or bell peppers. They bring vibrant colors and added crunch.

  • Beans Boost: Mix in cooked beans such as kidney or black beans for an extra protein punch and a hearty twist.

  • Herb Explosion: Experiment with herbs! Use fresh thyme, rosemary, or even some bay leaves to enhance the aromatic profile of your soup.

  • Spicy Kick: For those who love a bit of heat, add crushed red pepper flakes or diced jalapeños to spice things up.

  • Creamy Version: Stir in a splash of cream or half-and-half at the end of cooking for a luxurious, velvety finish.

  • Hearty Alternative: Replace regular potatoes with sweet potatoes for a slightly sweet and nutritious variation that adds depth to the flavor.

As you whip up this comforting soup, you may find a few variations to love—maybe you'll even discover a new family favorite! And if you ever want to try other warming recipes, consider making Zuppa Toscana Soup or Santa Fe Soup for variety. Happy cooking!

Vegetable Beef Soup Recipe FAQs

What kind of ground beef should I use for the soup?
Absolutely! Using high-quality ground beef will enhance the flavor of your Vegetable Beef Soup. I recommend a medium or lean cut; just remember to drain any excess fat after browning it to avoid a greasy soup. If you prefer a lighter option, ground turkey or chicken works beautifully too!

How long can I store leftover Vegetable Beef Soup?
Very simply, you can store leftovers in an airtight container in the refrigerator for up to 3 days. This way, you can enjoy a comforting bowl ready to be reheated after a busy day. If you want to keep it longer, consider freezing it!

Can I freeze Vegetable Beef Soup? How do I do it?
Certainly! To freeze your Vegetable Beef Soup, let it cool completely first. Then, transfer it to freezer-safe containers or heavy-duty freezer bags—make sure to leave about an inch of headspace for expansion. Written down, here’s how:

  1. Allow soup to cool at room temperature.
  2. Portion into containers or bags, removing excess air.
  3. Label with the date, then freeze for up to 3 months.
    When you're ready to enjoy, thaw overnight in the refrigerator or use the microwave for a quick defrost.

Can I use fresh vegetables instead of frozen for the soup?
Of course! In fact, fresh vegetables can bring added flavor and nutrition. If using fresh veggies, make sure to chop them into smaller pieces for even cooking. Just keep in mind they may take a touch longer to cook—start checking for tenderness a few minutes before the 30-minute simmer time is up.

What can I do if my soup is too thick?
No worries! If your Vegetable Beef Soup turns out too thick after cooling, simply add a little more broth or water when reheating. Warm it gently and stir until you reach your desired consistency. It’s a common occurrence, especially after freezing, but it’s easily fixed!

Is this soup suitable for all dietary needs?
While it's generally family-friendly, if you're considering allergies, you can make it gluten-free by using gluten-free Worcestershire sauce and broth. Also, for a vegetarian version, effortlessly replace the ground beef with more vegetables or beans and use vegetable broth as your base. The more, the merrier!

Vegetable Beef Soup

Comforting Vegetable Beef Soup for Cozy Nights

Enjoy a hearty bowl of Vegetable Beef Soup, the perfect comfort food for chilly evenings.
Print Recipe Pin Recipe
Prep Time 15 minutes mins
Cook Time 30 minutes mins
Total Time 45 minutes mins
Servings: 6 bowls
Course: Soups
Cuisine: American
Calories: 300
Ingredients Equipment Method Nutrition Notes

Ingredients
  

For the Soup Base
  • 1 lb Ground Beef Substitute with ground turkey for a lighter option.
  • 3.5 cups Beef Broth Can use vegetable broth for a lighter taste.
  • 1 can Petite Diced Tomatoes 15 oz can; fresh tomatoes work beautifully in season.
  • 1 can Condensed Tomato Soup 10.5 oz can; consider homemade for freshness.
For the Flavor
  • 1 small Onion Diced; shallots or leeks can be used for a milder note.
  • 1 tsp Garlic Minced; garlic powder can be a quick substitute.
  • 2 tsp Worcestershire Sauce Use soy sauce for gluten-free options.
  • 2 tsp Italian Seasoning Thyme, oregano, or basil can be used individually.
  • Salt & Pepper Adjust to suit your taste.
For the Vegetables
  • 1 bag Frozen Mixed Vegetables 16 oz; fresh vegetables can provide a vibrant twist.
  • 2 medium Potatoes Diced; any potato variety works, including sweet potatoes.

Equipment

  • Large pot

Method
 

Step-by-Step Instructions
  1. In a large pot, heat over medium heat, then add ground beef, breaking it apart with a wooden spoon. Cook until browned, about 5-7 minutes. Add the diced onion and minced garlic, sautéing until onions are translucent, about 3-4 minutes.
  2. Sprinkle in salt and pepper to taste, stirring well to coat the beef and vegetables evenly.
  3. Pour in the beef broth, petite diced tomatoes, and condensed tomato soup. Stir in Worcestershire sauce and Italian seasoning. Next, add the frozen mixed vegetables and the diced potatoes, integrating all ingredients thoroughly.
  4. Increase heat to bring the mixture to a gentle boil. Once boiling, reduce heat to low, cover, and let simmer for about 30 minutes.
  5. After simmering, taste your soup and adjust seasonings if necessary.
  6. Ladle the Vegetable Beef Soup into bowls, garnishing as desired and serving alongside crusty bread or crackers.

Nutrition

Serving: 1bowlCalories: 300kcalCarbohydrates: 36gProtein: 22gFat: 10gSaturated Fat: 4gPolyunsaturated Fat: 1gMonounsaturated Fat: 4gCholesterol: 60mgSodium: 800mgPotassium: 800mgFiber: 4gSugar: 5gVitamin A: 20IUVitamin C: 30mgCalcium: 5mgIron: 15mg

Notes

For best results, choose high-quality ground beef and adjust the seasoning to your preference. Store leftovers in an airtight container for up to 3 days, or freeze for up to 3 months.

Tried this recipe?

Let us know how it was!

Savor Homemade Creamy Tomato Bisque with Roasted Bell Peppers

November 15, 2025 by Grace Snow Leave a Comment

The aroma of roasting bell peppers filled my kitchen, instantly transporting me to a cozy trattoria nestled in the heart of Italy. With the vibrant flavors of sweet roasted peppers and sun-ripened tomatoes swirling together, I knew I was in for a delightful treat. Today, I'm excited to share my recipe for Creamy Tomato Bisque with Roasted Bell Peppers — a dish that’s not only gluten-free and vegetarian but also incredibly comforting. One of the best parts? It’s a quick and easy homemade version that can transform a busy weeknight into a gourmet experience. Plus, you'll be left with a velvety soup that’s both satisfying and nourishing, perfect for pairing with crusty bread. Isn’t it time we elevate our dinner game? Let’s dive into this delicious journey!

Why Is This Tomato Bisque Special?

Comforting Elegance: This creamy tomato bisque is ideal for anyone seeking a touch of fine dining at home, combining the warmth of a homemade meal with sophisticated flavors.
Endless Variations: With simple ingredient swaps like adding grilled chicken or beans, you can easily customize this dish to match your tastes or dietary needs.
Quick Preparation: In just about an hour and 40 minutes, enjoy a restaurant-worthy meal that brings smiles to the whole family.
Perfect Pairing: Serve it alongside grilled cheese sandwiches for a comforting combo that takes you back to childhood.
Freezer Friendly: Make a big batch and freeze portions for busy nights, ensuring a delicious meal is always just a thaw away!

Creamy Tomato Bisque Ingredients

Let’s gather the essentials to make your delightful creamy tomato bisque with roasted bell peppers shine!

For the Soup Base

  • Olive Oil – Provides richness and aids in the roasting of vegetables; substitute with butter for a richer flavor.
  • Yellow Onion – Adds depth and sweetness to the soup base; shallots can be used as a milder alternative.
  • Celery – Contributes aromatic flavor and texture; leeks may serve as a substitute.
  • Cherry Tomatoes – Base of the bisque; roasted for maximum sweetness; grape tomatoes or heirloom varieties can be substituted.
  • Red Bell Pepper – Adds sweetness and creaminess post-roast; yellow or orange bell peppers can be used as alternatives for similar flavor profiles.
  • Kosher Salt – Enhances all flavors; consider sea salt as an alternative.
  • Coarse Ground Black Pepper – Provides heat; white pepper may be used if you desire a milder flavor.
  • Red Pepper Flakes – Adds a slight kick; can be omitted for a milder soup.
  • Paprika – Introduces smokiness; smoked paprika can be an exciting variation.
  • Dried Basil – Offers herby undertones; fresh basil may be used; increase the quantity when substituting.
  • Garlic – Essential for flavor depth; more cloves can be added for an intense garlic taste.

For the Creaminess

  • Veggie or Chicken Broth – Provides the soup base; homemade broth adds richness, while water can be a last-minute substitute.
  • Crushed Tomatoes – Thickens the soup while adding robust tomato flavor; San Marzano tomatoes are recommended for their superior taste.
  • White Sugar – Balances acidity; honey can be an option for a more natural sweetener.
  • Heavy Cream – Creates the signature creaminess; coconut milk can cater to dairy-free diets.

Gather these ingredients, and you’re ready to create a comforting bowl of creamy tomato bisque that everyone will savor!

Step‑by‑Step Instructions for Creamy Tomato Bisque with Roasted Bell Peppers

Step 1: Preheat Oven
Begin by preheating your oven to 400°F (200°C). This temperature is perfect for caramelizing the sugars in your vegetables, enhancing their sweetness. While the oven heats up, prepare the fresh ingredients to ensure a smooth cooking process, setting the stage for your delicious creamy tomato bisque with roasted bell peppers.

Step 2: Prepare Veggies
In a large mixing bowl, combine 2 tablespoons of olive oil with the cherry tomatoes and sliced red bell pepper. Season generously with kosher salt and freshly ground black pepper, tossing everything together until evenly coated. This mixture will roast beautifully, bringing out rich flavors essential for the bisque.

Step 3: Roast
Spread the seasoned cherry tomatoes and red bell pepper in a single layer on a baking sheet. Roast them in the preheated oven for 20-30 minutes, or until they become tender and slightly caramelized. Keep an eye on them; you want them to be bursting with flavor, creating a delicious foundation for your creamy tomato bisque.

Step 4: Sauté Aromatics
While the vegetables roast, heat 2 tablespoons of olive oil in a Dutch oven over medium heat. Add diced yellow onion and celery, seasoning with salt, black pepper, red pepper flakes, paprika, and dried basil. Sauté for about 5-6 minutes until the onion turns translucent and fragrant. Then, add minced garlic and stir for another 30 seconds to infuse the mixture.

Step 5: Combine Ingredients
Once the roasted tomatoes and peppers are ready, add them to the Dutch oven along with vegetable or chicken broth, crushed tomatoes, and a pinch of white sugar. Stir well to combine, and then bring the mixture to a simmer. Let it cook for 30-40 minutes, allowing all the flavors to meld together while everything becomes tender and aromatic.

Step 6: Blend
After simmering, use an immersion blender to puree the soup directly in the pot until it reaches a luxuriously smooth consistency. If you don’t have an immersion blender, you can carefully transfer the soup in batches to a countertop blender, blending until silky. This step is crucial for achieving the signature texture of your creamy tomato bisque.

Step 7: Add Cream
Finally, stir in heavy cream, blending it into the bisque until smooth. Taste and adjust the seasoning with more salt or pepper if necessary. For an elegant touch, drizzle a bit of additional cream on top before serving. Your creamy tomato bisque with roasted bell peppers is now ready to warm your heart and satisfy your taste buds!

What to Serve with Creamy Tomato Bisque with Roasted Bell Peppers

Transform your creamy tomato bisque into a full meal by pairing it with delightful sides that enhance its rich flavors.

  • Crusty Baguette: Perfect for dipping, the crispy exterior and soft interior of a freshly baked baguette complement the bisque’s smooth texture beautifully.

  • Grilled Cheese Sandwiches: A nostalgic classic! The melted cheese and buttery toast offer a delightful contrast to the bisque, reminiscent of cozy childhood meals.

  • Herbed Garlic Bread: The aromatic herbs and buttery garlic slathered on warm bread elevate your dining experience, adding a fragrant touch to every spoonful of soup.

  • Simple Garden Salad: Fresh greens, crunchy cucumbers, and a zesty vinaigrette create a light, refreshing balance against the creamy richness of the bisque.

  • Roasted Asparagus: With its slight char and tender crunch, roasted asparagus brings out the earthiness of the tomatoes while adding a pop of color to your plate.

  • Avocado Toast: Creamy avocado on toasted bread offers a delicious, creamy texture that harmonizes wonderfully with the warm, velvety bisque.

  • Sparkling Lemonade: The bright, effervescent drink refreshes your palate between bites, enhancing the flavors of the tomato bisque with a zesty twist.

  • Chocolate Mousse: A small serving of light, airy chocolate mousse brings a delightful sweet ending to your meal, balancing the savory richness of the soup.

Make Ahead Options

These Creamy Tomato Bisque with Roasted Bell Peppers are perfect for busy home cooks looking to save time during hectic weeknights! You can roast the bell peppers and cherry tomatoes up to 24 hours in advance. Simply store them in an airtight container in the refrigerator. Additionally, you can prepare the soup base—sauté the onions and celery, and then store it separately for up to 3 days. When you're ready to serve, combine the roasted veggies with the sautéed aromatics, add the broth and crushed tomatoes, and simmer. Finally, blend in the heavy cream, and you'll enjoy a delicious bisque that feels just as fresh as when made the same day!

Storage Tips for Creamy Tomato Bisque

Fridge: Store your creamy tomato bisque in an airtight container for up to 3 days. Let it cool completely before refrigerating to preserve freshness.

Freezer: This bisque freezes beautifully! Portion it into ziplock bags or airtight containers, storing flat for easy thawing. Enjoy frozen bisque for up to 3 months.

Reheating: To reheat, gently warm the bisque on the stove over low heat, stirring occasionally. If it thickens, add a splash of broth or water to reach your desired consistency.

Make-Ahead: Consider making a double batch of the creamy tomato bisque and freezing half for those busy weeknights. It's a comforting, homemade meal always ready to go!

Creamy Tomato Bisque Variations

Feel free to get creative with your creamy tomato bisque! Each variation adds a new twist that will tantalize your taste buds.

  • Dairy-Free: Substitute heavy cream with coconut milk for a delightful tropical flair while keeping it creamy.
  • Spicy Kick: Boost the heat by adding jalapeños or a dash of hot sauce for those who love a fiery touch.
  • Herb Twist: Mix in fresh thyme or oregano along with the basil for an herbaceous explosion that'll brighten your bisque.
  • Flavorful Broth: Swap out veggie broth for homemade chicken broth to introduce a depth of flavor that enhances the entire dish.
  • Roasted Garlic: For an even richer layer of flavor, roast a head of garlic alongside your peppers and blend it into the bisque.
  • Quinoa Addition: Stir in cooked quinoa for added protein and a lovely texture that makes this dish even more satisfying.
  • Pasta Twist: Consider adding small pasta shapes or tortellini for an exciting, heartier variation that transforms it into a complete meal.

These variations not only enhance the flavors but also provide options to suit different dietary preferences. And if you're looking for something to pair with your bisque, why not try the comforting taste of grilled cheese sandwiches or the sweetness of maple roasted sweet potatoes with pecans? Explore these creative twists and elevate your creamy tomato bisque experience!

Expert Tips for Creamy Tomato Bisque

  • Choose Ripe Tomatoes: Make sure to use ripe tomatoes for the best sweetness; underripe ones can create an unpleasant, gritty texture in your soup.
  • Perfectly Blend: When using an immersion blender, blend for at least two minutes to achieve that luxuriously smooth consistency that's hallmark to a creamy tomato bisque.
  • Warm the Cream: Prevent curdling by gently warming the heavy cream with a bit of the bisque before adding it to the main pot; this ensures a seamless incorporation.
  • Always Roast: Roasting your vegetables maximizes their natural sweetness and flavor, completely transforming your creamy tomato bisque into something special.
  • Adjust Seasonings: Tasting as you go is key! Don’t hesitate to adjust the seasonings or add extra herbs to suit your palate, making this dish unique to you.

Creamy Tomato Bisque with Roasted Bell Peppers Recipe FAQs

What type of tomatoes should I use for this bisque?
Absolutely! For a rich flavor, you should use ripe cherry or grape tomatoes, as they roast beautifully and enhance the bisque's sweetness. If you can find them, heirloom varieties are a fantastic choice, too! Avoid underripe tomatoes as they can create a gritty texture.

How should I store leftover bisque?
You can store your creamy tomato bisque in an airtight container in the fridge for up to 3 days. Just make sure to let it cool completely before refrigerating. When you're ready to enjoy it again, simply reheat on the stove over low heat.

Can I freeze this creamy tomato bisque?
Very! This bisque freezes wonderfully. To freeze, portion it into ziplock bags or airtight containers. Store them flat for easy stacking in your freezer. It will keep for up to 3 months! When ready to enjoy, simply thaw in the fridge overnight and reheat on the stovetop.

What can I do if my bisque turned out too thick?
If you find your creamy tomato bisque is too thick, simply add a splash of vegetable or chicken broth while gently reheating on the stove. Stir well, and heat until it reaches the desired consistency. This keeps the flavor intact while making it perfectly silky.

Is this bisque suitable for those with dairy allergies?
Absolutely! To make this creamy tomato bisque dairy-free, substitute the heavy cream with coconut milk or a plant-based cream alternative. Just ensure that your broth is also free from animal products. It will still be deliciously creamy and satisfying!

Creamy Tomato Bisque with Roasted Bell Peppers

Savor Homemade Creamy Tomato Bisque with Roasted Bell Peppers

Delight in a comforting, gluten-free and vegetarian creamy tomato bisque with roasted bell peppers, perfect for any busy weeknight.
Print Recipe Pin Recipe
Prep Time 20 minutes mins
Cook Time 1 hour hr 20 minutes mins
Total Time 1 hour hr 40 minutes mins
Servings: 4 cups
Course: Soups
Cuisine: Italian
Calories: 300
Ingredients Equipment Method Nutrition Notes

Ingredients
  

For the Soup Base
  • 2 tablespoons Olive Oil Can substitute with butter
  • 1 medium Yellow Onion Shallots can be used as a milder alternative
  • 2 stalks Celery Leeks may serve as a substitute
  • 2 cups Cherry Tomatoes Grape or heirloom varieties can be substituted
  • 1 medium Red Bell Pepper Yellow or orange can be used as alternatives
  • 1 teaspoon Kosher Salt Consider sea salt as an alternative
  • 1 teaspoon Coarse Ground Black Pepper White pepper may be used for a milder flavor
  • 1/2 teaspoon Red Pepper Flakes Can be omitted for milder soup
  • 1 teaspoon Paprika Smoked paprika can be a variation
  • 1 teaspoon Dried Basil Fresh basil may be used; increase quantity when substituting
  • 3 cloves Garlic More cloves can be added for intense garlic taste
For the Creaminess
  • 4 cups Veggie or Chicken Broth Homemade broth adds richness
  • 1 can Crushed Tomatoes San Marzano tomatoes are recommended
  • 1 teaspoon White Sugar Honey can be an option
  • 1 cup Heavy Cream Coconut milk can cater to dairy-free diets

Equipment

  • Dutch oven
  • Baking Sheet
  • Immersion blender

Method
 

Step-by-Step Instructions
  1. Preheat your oven to 400°F (200°C).
  2. In a large mixing bowl, combine 2 tablespoons of olive oil with the cherry tomatoes and sliced red bell pepper. Season with kosher salt and pepper.
  3. Spread the seasoned tomatoes and red bell pepper on a baking sheet. Roast in the oven for 20-30 minutes until tender.
  4. Heat 2 tablespoons of olive oil in a Dutch oven over medium heat. Add diced onion and celery, season, and sauté until translucent.
  5. Add in minced garlic and stir for another 30 seconds.
  6. Combine roasted tomatoes and pepper with broth, crushed tomatoes, and sugar in the Dutch oven. Bring to a simmer for 30-40 minutes.
  7. Use an immersion blender to puree the soup until smooth.
  8. Stir in heavy cream until smooth. Adjust seasoning if necessary.

Nutrition

Serving: 1cupCalories: 300kcalCarbohydrates: 25gProtein: 5gFat: 20gSaturated Fat: 10gPolyunsaturated Fat: 1gMonounsaturated Fat: 8gCholesterol: 40mgSodium: 600mgPotassium: 800mgFiber: 3gSugar: 6gVitamin A: 1500IUVitamin C: 60mgCalcium: 100mgIron: 2mg

Notes

Consider making a double batch and freezing half for busy weeknights.

Tried this recipe?

Let us know how it was!
  • « Previous Page
  • 1
  • …
  • 169
  • 170
  • 171
  • 172
  • 173
  • …
  • 244
  • Next Page »

Welcome!

Hi, I’m Grace, a Sydney-based home cook with a passion for bold flavors and trending ingredients. Whether you’re a busy beginner or a seasoned foodie, you’ll find dishes here that are fresh, fun, and full of flavor.

More about me

Popular Recipes

  • twice baked potato casserole
    Indulge in This Creamy Twice Baked Potato Casserole Delight
  • Red Potato Casserole
    Irresistible Red Potato Casserole with Crunchy Topping
  • Cowboy Potato Casserole
    Comforting Cowboy Potato Casserole for Cozy Nights
  • Creamy Rotel Pasta with Ground Beef
    Creamy Rotel Pasta with Ground Beef for Ultimate Comfort

Footer

↑ back to top

About

  • Privacy Policy
  • Disclaimer
  • Terms & Conditions

Newsletter

  • Sign Up! for emails and updates

Contact

  • About me
  • Contact me

Copyright © 2025 TastyTrendIngredients