tastytrendingredients

  • Home
  • Recipes
    • Appetizers
    • Breakfast
    • Dessert
    • Dinner
    • Drinks
    • Salads
    • Snacks
    • Soups
  • About me
  • Contact
menu icon
go to homepage
  • Home
  • Recipes
    • Appetizers
    • Breakfast
    • Dessert
    • Dinner
    • Drinks
    • Salads
    • Snacks
    • Soups
  • About me
  • Contact
search icon
Homepage link
  • Home
  • Recipes
    • Appetizers
    • Breakfast
    • Dessert
    • Dinner
    • Drinks
    • Salads
    • Snacks
    • Soups
  • About me
  • Contact
×

Melt-in-Your-Mouth Peppermint Meltaways for the Holidays

November 19, 2025 by Grace Snow Leave a Comment

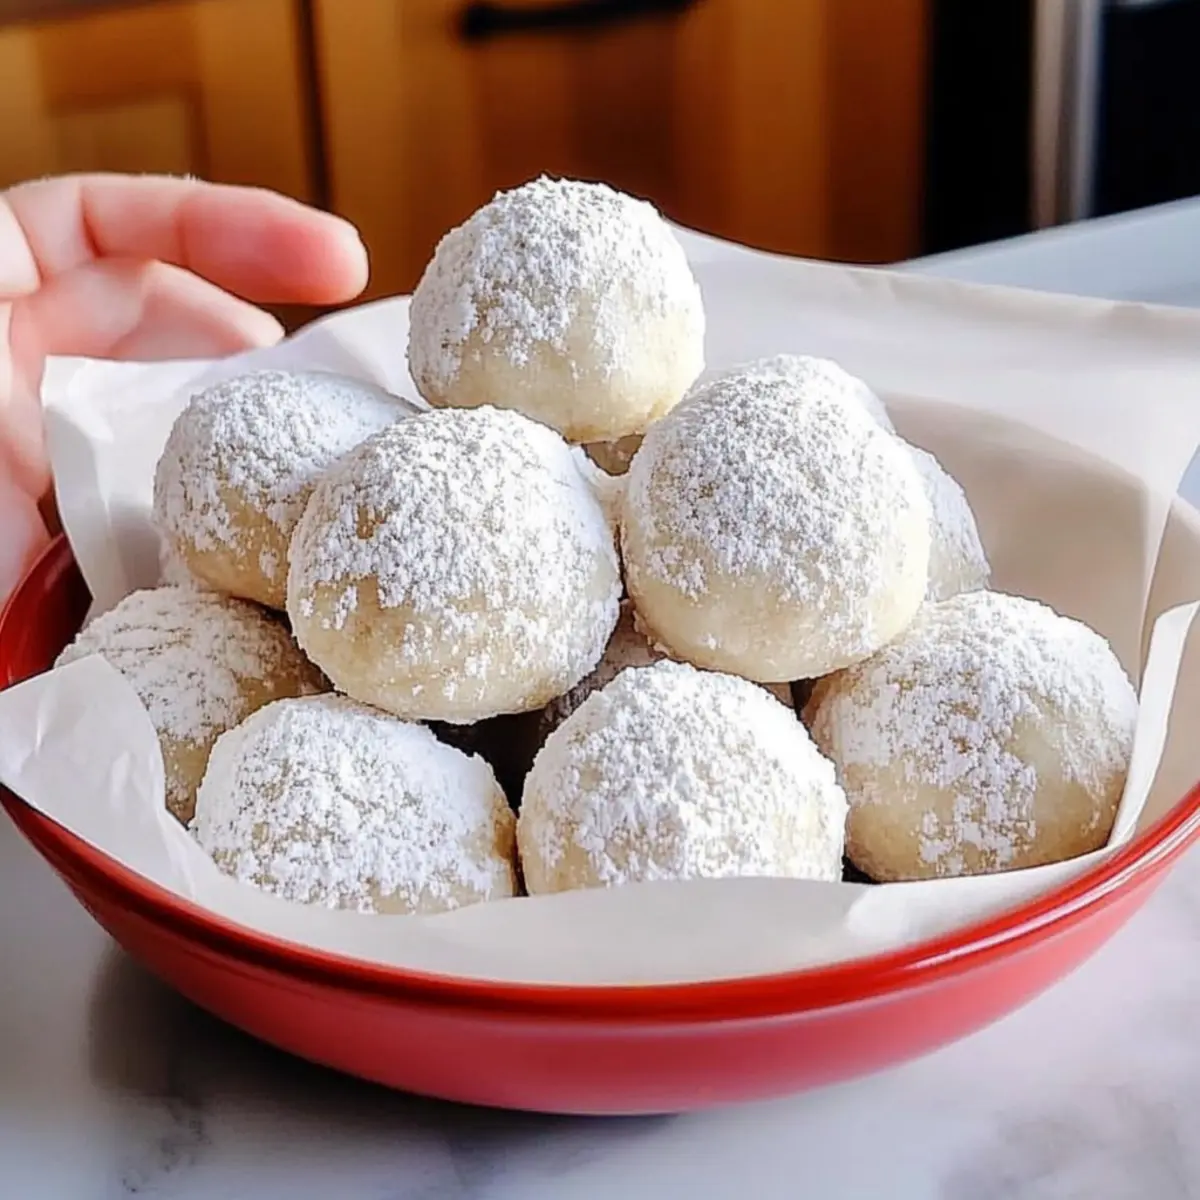
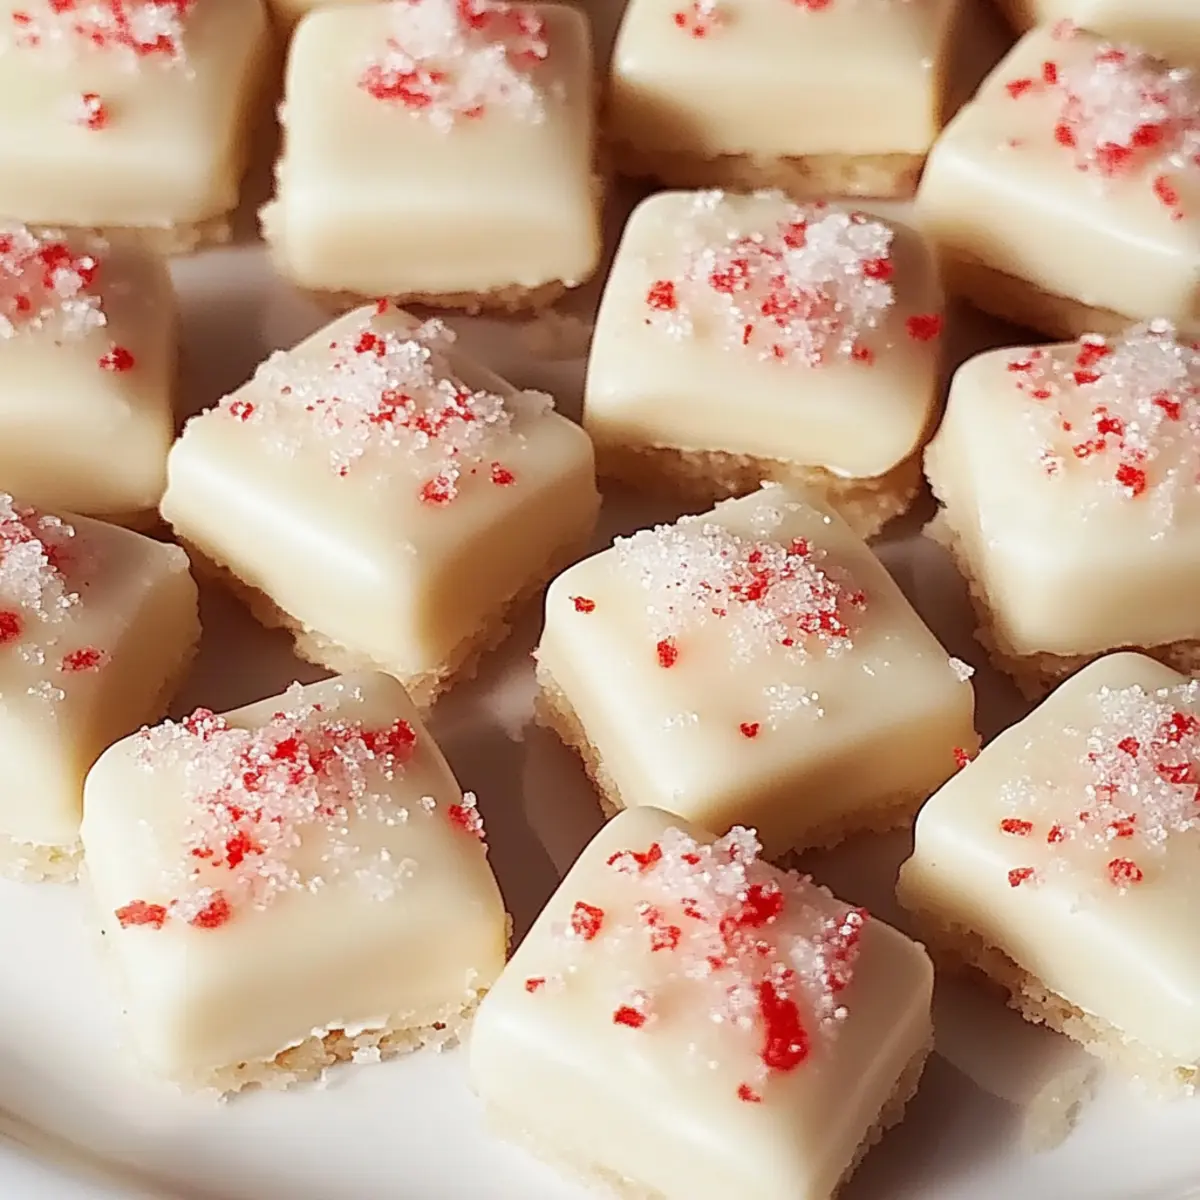
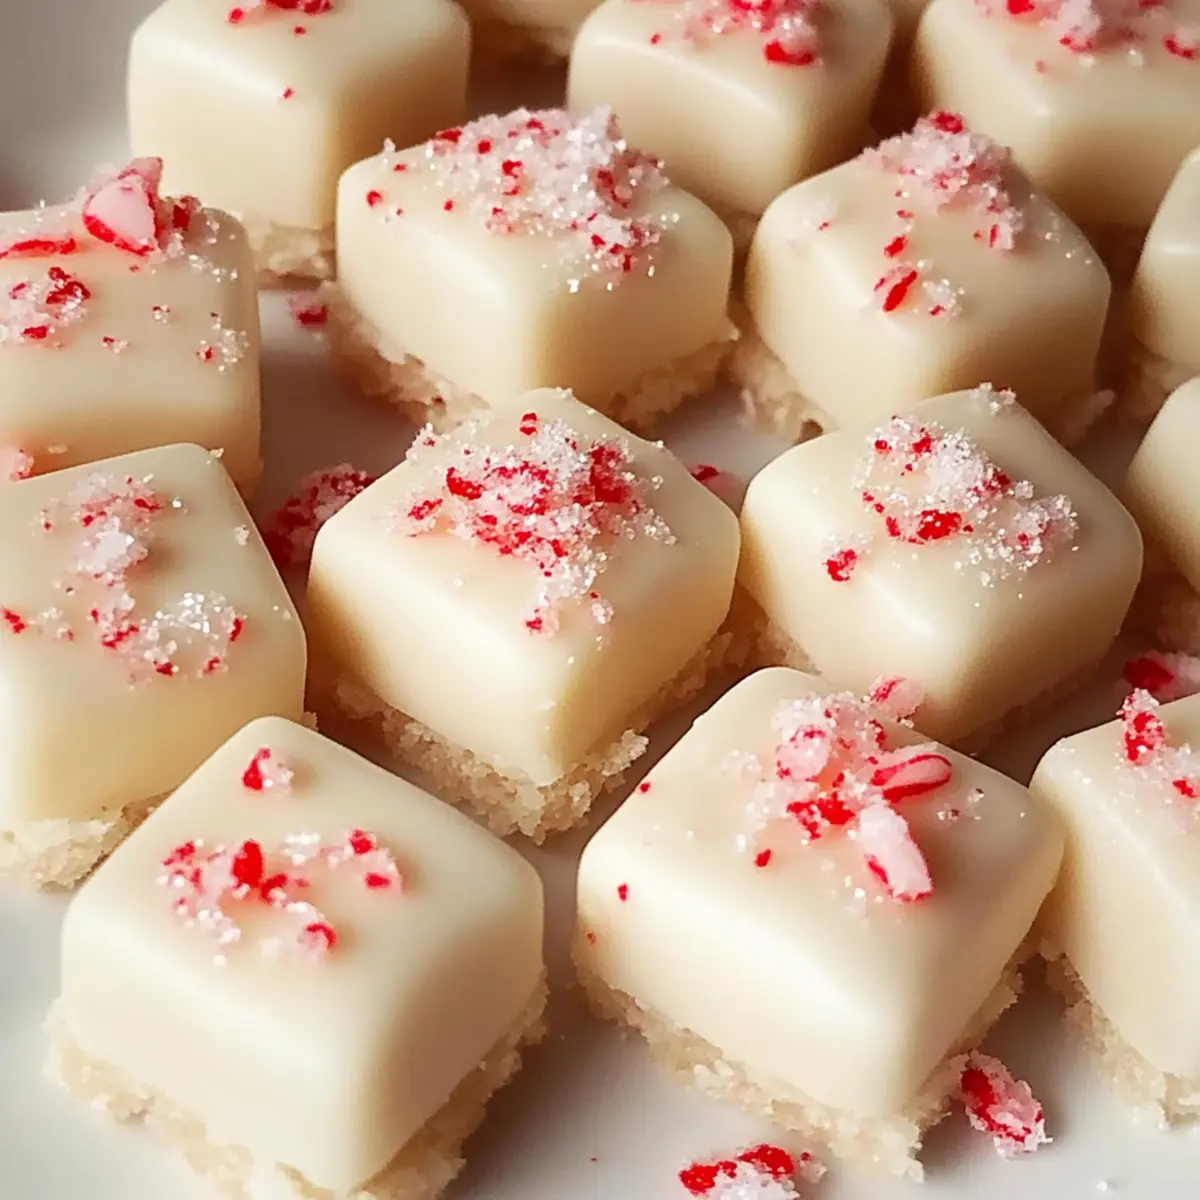
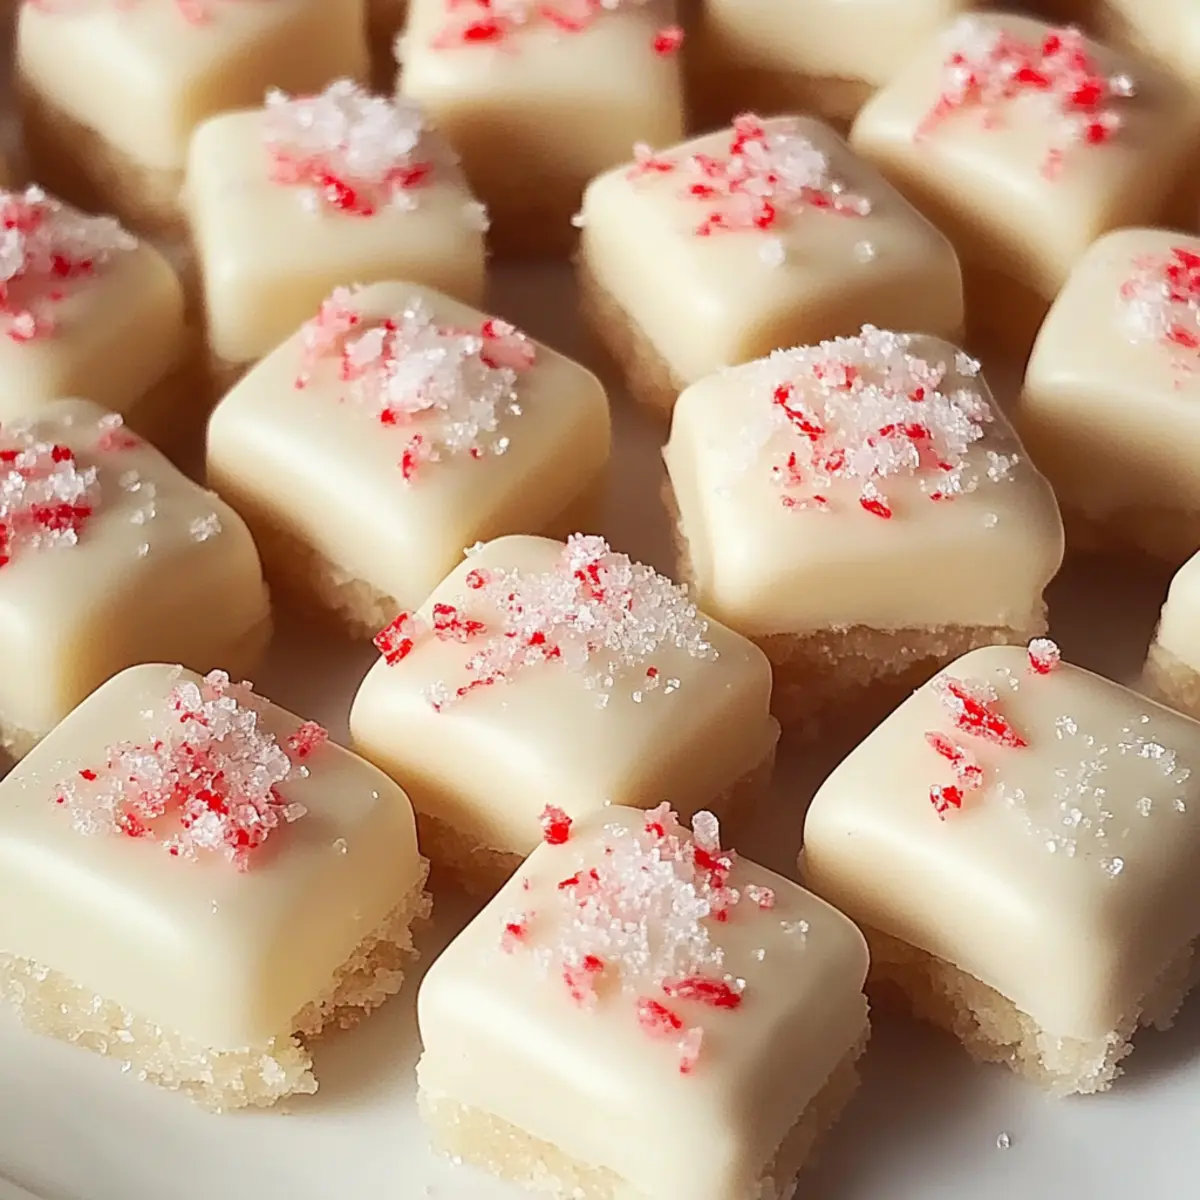
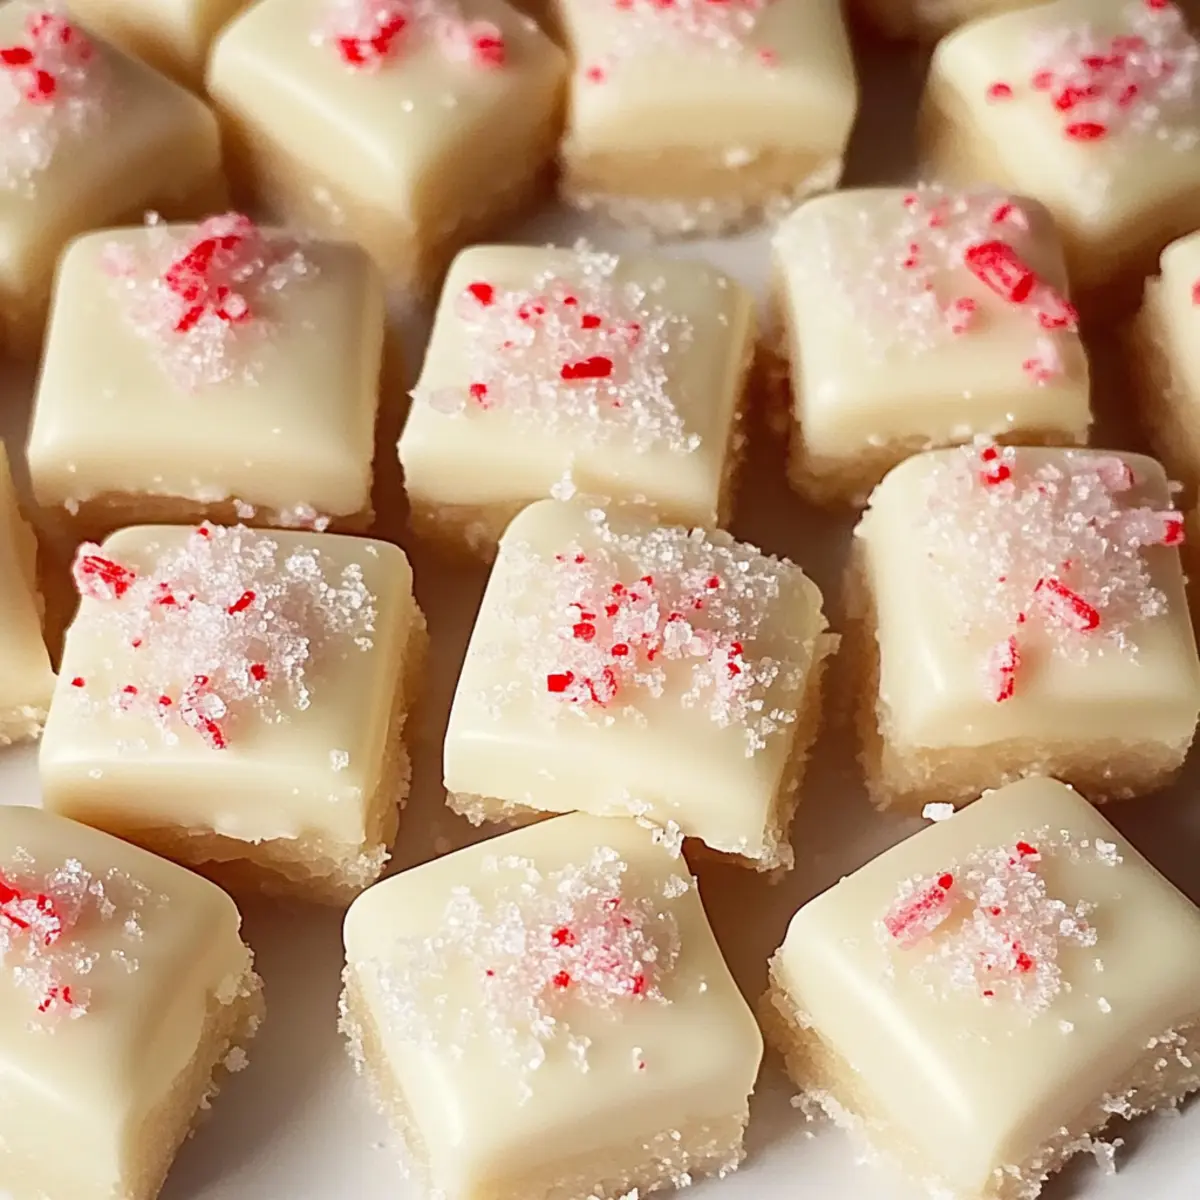
As the holiday buzz fills the air, there’s something enchanting about the kitchen—it’s where magic happens, especially with my Peppermint Meltaways. These delightful treats come together quickly, making them the perfect solution when you're short on time but still want to impress friends and family. With a dreamy, melt-in-your-mouth texture and a refreshing hint of peppermint, these cookies are not just a festive indulgence; they're also an effortless no-bake wonder that will have everyone reaching for more. Picture a cozy gathering where these soft, creamy delights become the star of the dessert table, bringing smiles and warmth to your guests. Curious about how to whip up these holiday gems? Let’s dive into the simple steps that will transform your kitchen into a festive wonderland!

Why Are Peppermint Meltaways So Irresistible?

Effortless Preparation: You won’t believe how simple these cookies are to whip up! With minimal baking time, they're perfect for spontaneous holiday gatherings.

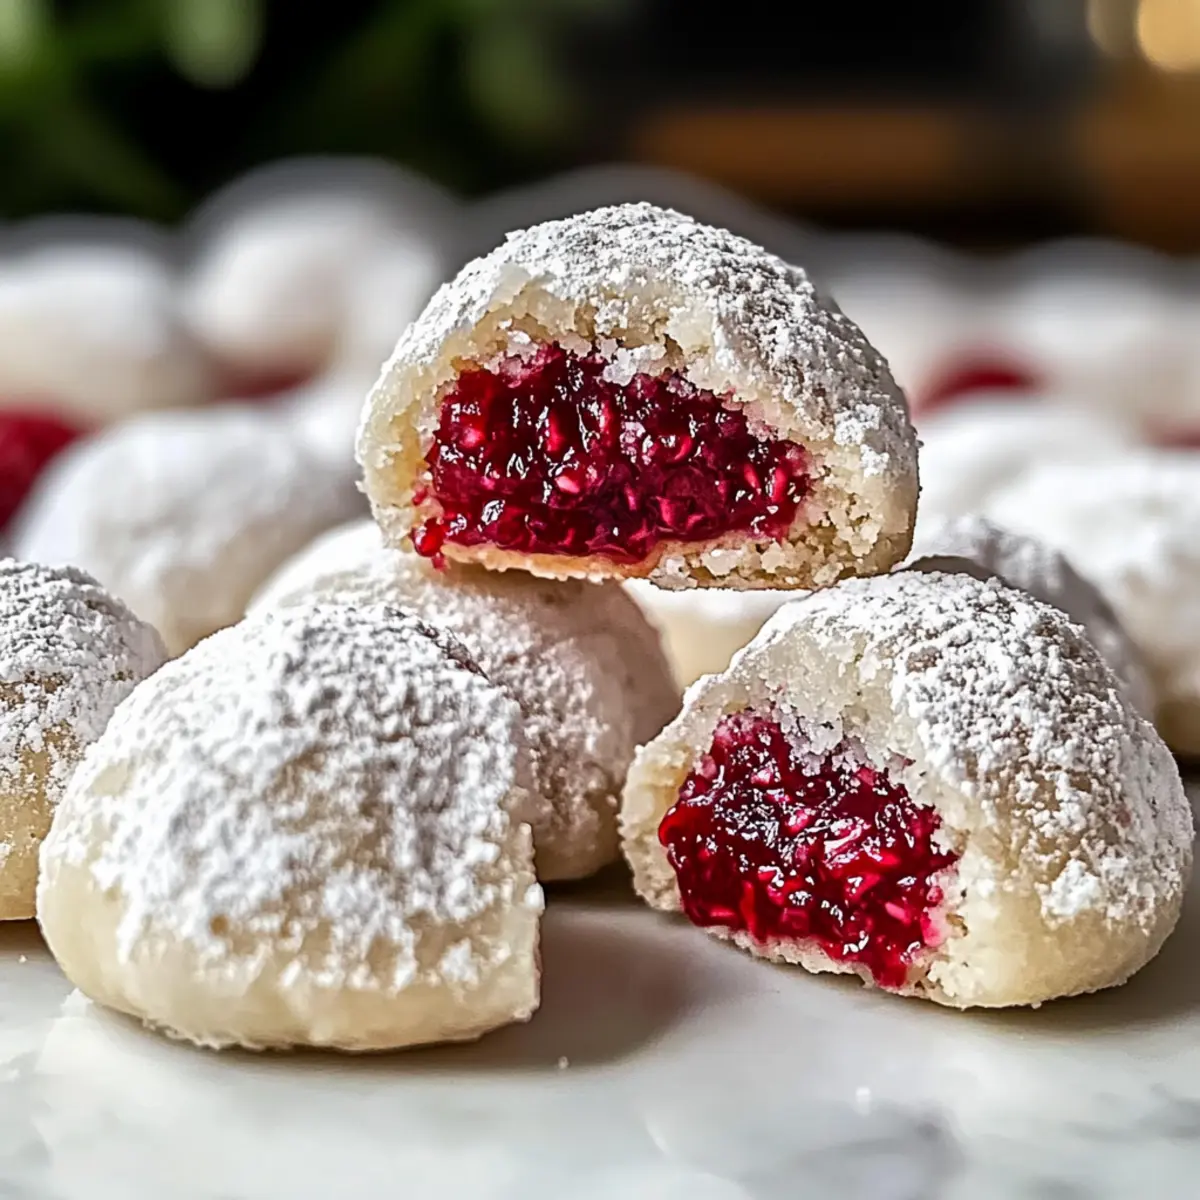
Melt-in-Your-Mouth Texture: Each bite is a soft delight, beautifully complemented by the refreshing peppermint flavor.

Crowd-Pleasing Treat: Whether it’s a family get-together or a festive party, these meltaways are sure to impress!

Versatile Customizations: Feel free to experiment with different extracts or toppings, making them uniquely yours. Check out other holiday cookie ideas for more inspiration!

Gift-Worthy Goodies: Package them beautifully, and you have the perfect homemade gift that friends and family will adore!

Peppermint Meltaways Ingredients

• Get ready to create these holiday delights!

For the Cookies

  • Butter – Provides richness and moisture for a creamy texture. Unsalted butter is preferred for better flavor control.
  • Confectioners' Sugar – Adds sweetness and aids in achieving a soft, meltaway consistency. Granulated sugar can be used, but the texture will differ.
  • Peppermint Extract – Infuses cookies with refreshing peppermint flavor. Ensure you use pure extract for best results.
  • All-Purpose Flour – Forms the structure of the cookies. Can be substituted with a gluten-free blend for a gluten-free version.
  • Cornstarch – Creates a tender texture that enhances the meltaway quality. Do not skip this ingredient for best results.
  • Salt – Balances sweetness and enhances overall flavors. A pinch of sea salt works well as a substitute.

For the Frosting

  • Butter – Adds creaminess to your frosting. Butter can be replaced with coconut oil for a dairy-free option.
  • Confectioners' Sugar – Creates the sweetness in your frosting. Adjust the quantity to taste.
  • Milk – Helps achieve the desired frosting consistency. Add more if the mixture is too thick.
  • Peppermint Extract – Enhances the peppermint flavor in your frosting. Use pure extract for best results.
  • Red Food Coloring – Adds a festive touch to your frosting. Optional, but it makes your cookies pop!

For Garnish

  • Crushed Peppermint Candies – Provides a festive garnish and extra peppermint delight. Chopped chocolate can be used as an alternative topping.

Step‑by‑Step Instructions for Peppermint Meltaways

Step 1: Cream the Butter and Sugar
In a large mixing bowl, combine one cup of softened unsalted butter with two cups of confectioners' sugar. Use an electric mixer on medium speed to blend these together until the mixture becomes light and fluffy, which should take about 3-5 minutes. This creaming step is crucial as it creates the airy texture that makes Peppermint Meltaways delightful.

Step 2: Add the Peppermint Extract
Next, mix in one teaspoon of pure peppermint extract into the creamed butter and sugar. Beat until fully incorporated, which should take about 30 seconds. The mixture will take on a lovely minty aroma that signals the refreshing flavor your Peppermint Meltaways will have, exciting your taste buds for what's to come!

Step 3: Combine Dry Ingredients
In a separate bowl, whisk together two cups of all-purpose flour, half a cup of cornstarch, and a pinch of salt. Gradually add this dry mixture into the wet ingredients, mixing on low speed to prevent flour from flying everywhere. Continue until a soft, cohesive dough forms, which should take about 2-3 minutes.

Step 4: Chill the Dough
Once the dough is mixed, wrap it tightly in plastic wrap and refrigerate for at least 30 minutes. This chilling step helps firm up the dough, making it easier to roll into balls later. While the dough chills, you can enjoy the festive atmosphere of your kitchen as the peppermint scent fills the air!

Step 5: Preheat the Oven
After the dough has chilled, preheat your oven to 350°F (175°C). Line a baking sheet with parchment paper to prevent sticking. This preparation ensures an even bake for your Peppermint Meltaways, resulting in the perfect soft texture when they come out of the oven.

Step 6: Shape the Cookies
Remove the dough from the refrigerator and use a small cookie scoop or your hands to roll the dough into small balls, about one inch in diameter. Place the shaped dough onto the prepared baking sheet, spacing them about 1-2 inches apart. This will allow the cookies to spread gently while baking.

Step 7: Bake the Cookies
Bake the cookies in the preheated oven for 10-12 minutes, or until they are set but not browned. You want them to look pale and slightly underbaked for that melt-in-your-mouth quality. Once baked, remove them from the oven and let them cool on the baking sheet for a few minutes before transferring them to a wire rack.

Step 8: Prepare the Frosting
While your cookies cool, make the frosting by beating together half a cup of softened butter, three cups of confectioners' sugar, 2 tablespoons of milk, and one teaspoon of peppermint extract in a mixing bowl. Mix until the frosting is smooth and fluffy, which should take about 2-3 minutes. If it’s too thick, add a splash more milk until the desired consistency is achieved.

Step 9: Frost the Cookies
Once the Peppermint Meltaways have cooled completely, spread or pipe the frosting generously onto each cookie. The smooth, creamy frosting is essential for enhancing the peppermint flavor and adding a festive touch to your holiday treats.

Step 10: Garnish
Finally, sprinkle the tops of the frosted cookies with crushed peppermint candies for that extra bit of festive flair. These little pieces not only add a charming decoration but also give a satisfying crunch when you bite into your delicious Peppermint Meltaways, leaving everyone wanting more!

What to Serve with Peppermint Meltaways

As the holiday spirit fills the air, pairing these delightful, creamy cookies with just the right sides can elevate your festive gatherings.

  • Hot Cocoa: The rich chocolate flavor of hot cocoa perfectly complements the refreshing peppermint, creating a cozy combination for chilly evenings.
  • Coffee: Enjoy a warm cup of coffee to balance the sweetness of the cookies, enhancing the overall experience with a comforting aroma.
  • Ice Cream: A scoop of vanilla or peppermint ice cream adds a creamy contrast, making for a delightful dessert duo that feels indulgent and festive.
  • Cheesecake Bites: These little bites bring a tangy flavor that contrasts beautifully with the soft sweetness of the Meltaways, creating an enticing dessert platter.
  • Fruit Salad: Fresh, bright fruits like strawberries and oranges provide a refreshing contrast and cleanse the palate between bites of rich, creamy cookies.
  • Chocolate Dipped Pretzels: The salty crunch of pretzels dipped in chocolate adds a fun texture and a savory note that balances the sweetness of the peppermint.
  • Spiced Apple Cider: Warm spiced cider complements the holiday vibe and enhances the minty freshness of the cookies. It's a delightful drink for gatherings.
  • Chocolate Mint Tea: Pair your cookies with a cup of chocolate mint tea for a soothing treat that echoes the peppermint flavor in the Meltaways.
  • Mini Cupcakes: Soft, frosted mini cupcakes can turn any dessert table into a festive display, adding variety and whimsy alongside your meltaways.
  • Holiday Fruit Cake: This traditional dessert adds a rich, fruity element that melds beautifully with the refreshing taste of Peppermint Meltaways, rounding out a festive meal.

How to Store and Freeze Peppermint Meltaways

Room Temperature: Store your Peppermint Meltaways in an airtight container at room temperature for up to one week to maintain their soft texture.

Fridge: For longer storage, keep the cookies in the refrigerator for up to two weeks in an airtight container. This helps to keep them fresh and delicious.

Freezer: Freeze the cookies in a single layer on a baking sheet, then transfer to an airtight container or freezer bag. They can be stored for up to three months.

Reheating: If desired, thaw frozen Peppermint Meltaways in the fridge overnight, then bring to room temperature before serving to ensure the best flavor and texture.

Peppermint Meltaways Customization Ideas

Feel free to make these delicious Peppermint Meltaways your own with these fun twists and substitutions!

  • Gluten-Free: Use a gluten-free all-purpose flour blend to make these cookies suitable for gluten-sensitive friends and family. Delight everyone without sacrificing that melt-in-your-mouth texture!

  • Dairy-Free: Swap the butter for coconut oil or vegan butter in both the dough and frosting for a creamy, delicious dairy-free treat. They’ll still deliver the same festive flavor!

  • Alternate Extracts: Replace the peppermint extract with almond or vanilla extract for a lovely change of pace. Almond gives it a warm, nutty essence, while vanilla adds a sweet delight—each option is a new adventure!

  • Chocolate Drizzle: Add a touch of indulgence with a drizzle of melted chocolate over the frosted cookies. The rich chocolate pairs beautifully with the mint flavor, creating a decadent treat that’s hard to resist!

  • Nutty Crunch: Incorporate finely chopped nuts, like walnuts or pecans, into the dough for an added texture twist. The nuts bring a delightful crunch that complements the meltaway quality.

  • Spicy Kick: For a bit of heat, mix in a dash of cayenne pepper or add a few pinches of cinnamon. It’s a surprising way to elevate the flavor profile while keeping the festive spirit alive!

  • Colorful Toppings: Use colorful sprinkles in place of crushed peppermint candies to make these meltaways even more festive for celebrations. They’ll look vibrant and cheerful on any holiday platter!

Embrace your creativity in the kitchen, and don’t forget to check out other delightful holiday cookie options to keep the season sweet and bright!

Expert Tips for Peppermint Meltaways

  • Room Temperature Butter: Ensure your butter is at room temperature for easier creaming with sugar, giving your cookies a light texture.

  • Chill the Dough: Refrigerating the dough for at least 30 minutes is key; it prevents the Peppermint Meltaways from spreading too much during baking.

  • Watch the Bake Time: Do not overbake! The cookies should remain soft and slightly underbaked to achieve that melt-in-your-mouth quality.

  • Adjust Frosting Consistency: If your frosting becomes too thick, simply add a little extra milk until you reach the desired smoothness for easy spreading.

  • Don't Skip Cornstarch: This ingredient is essential for achieving the meltaway texture, so make sure not to omit it from the recipe.

  • Experiment with Flavors: Feel free to adjust the peppermint extract; try almond or vanilla for a unique twist on these festive treats!

Make Ahead Options

These Peppermint Meltaways are perfect for meal prep, allowing you to enjoy the festive season without the last-minute hustle! You can prepare the dough up to 24 hours in advance by wrapping it tightly in plastic wrap and refrigerating it. This chilling not only saves you time but also enhances the flavors as they meld together. When you’re ready to bake, simply roll the chilled dough into balls and pop them in the oven. If you plan to frost them later, make the frosting ahead as well, and store it in the fridge, ensuring to give it a quick stir before use. This way, your cookies remain just as delicious and fresh, making holiday entertaining a breeze!

Peppermint Meltaways Recipe FAQs

What kind of butter should I use for Peppermint Meltaways?
I recommend using unsalted butter for better flavor control. This not only provides a rich taste but also gives you the flexibility to monitor the salt levels in your cookies.

How should I store my Peppermint Meltaways?
Store your cookies in an airtight container at room temperature for up to one week. If you want to keep them longer, refrigerating them can extend their freshness to about two weeks.

Can I freeze Peppermint Meltaways?
Absolutely! To freeze, first place the cookies in a single layer on a baking sheet and freeze until solid. Then, transfer them to an airtight container or a freezer bag. They can be stored for up to three months! When ready to enjoy, simply thaw them in the fridge overnight and let them come to room temperature.

What do I do if my dough is too sticky?
If you find your dough is too sticky to roll into balls, try chilling it in the refrigerator for a bit longer, about 15-20 minutes. This extra chilling will make it easier to handle. You can also lightly dust your hands with flour to help with rolling.

Can I make these cookies gluten-free?
Certainly! You can substitute the all-purpose flour with a gluten-free flour blend. Just ensure that the blend contains a binding agent for best results. It may take a little experimenting to find the combination you love, but it's totally doable!

What can I substitute for peppermint extract if needed?
If you don't have peppermint extract, you can use almond extract for a different flavor twist. Alternatively, adding a splash of vanilla extract can enhance the flavors beautifully without overpowering the cookie's uniqueness.

Peppermint Meltaways

Melt-in-Your-Mouth Peppermint Meltaways for the Holidays

Indulge in Peppermint Meltaways, a quick to prepare, no-bake holiday treat that melts in your mouth.
Print Recipe Pin Recipe
Prep Time 30 minutes mins
Cook Time 12 minutes mins
Chilling Time 30 minutes mins
Total Time 1 hour hr 12 minutes mins
Servings: 24 cookies
Course: Dessert
Cuisine: American
Calories: 150
Ingredients Equipment Method Nutrition Notes

Ingredients
  

For the Cookies
  • 1 cup unsalted butter softened
  • 2 cups confectioners' sugar
  • 1 teaspoon peppermint extract use pure extract
  • 2 cups all-purpose flour can be substituted with a gluten-free blend
  • 0.5 cup cornstarch essential for the texture
  • 1 pinch salt sea salt works well
For the Frosting
  • 0.5 cup butter softened
  • 3 cups confectioners' sugar adjust according to taste
  • 2 tablespoons milk add more if too thick
  • 1 teaspoon peppermint extract use pure extract
  • 1 teaspoon red food coloring optional
For Garnish
  • 0.5 cup crushed peppermint candies chopped chocolate can be used as an alternative

Equipment

  • Mixing Bowl
  • Electric mixer
  • Baking Sheet
  • Parchment Paper
  • Cookie Scoop

Method
 

Step‑by‑Step Instructions
  1. In a large mixing bowl, combine one cup of softened unsalted butter with two cups of confectioners' sugar. Use an electric mixer on medium speed to blend until light and fluffy, about 3-5 minutes.
  2. Mix in one teaspoon of pure peppermint extract until fully incorporated.
  3. In a separate bowl, whisk together two cups of all-purpose flour, half a cup of cornstarch, and a pinch of salt. Gradually add this to the wet mixture, mixing on low speed.
  4. Wrap the dough tightly in plastic wrap and refrigerate for at least 30 minutes.
  5. Preheat your oven to 350°F (175°C) and line a baking sheet with parchment paper.
  6. Remove the dough from the refrigerator and roll it into small balls, about one inch in diameter, placing them 1-2 inches apart on the baking sheet.
  7. Bake for 10-12 minutes, until set but not browned. Allow to cool on the baking sheet for a few minutes before transferring to a wire rack.
  8. Make the frosting by beating together half a cup of softened butter, three cups of confectioners' sugar, 2 tablespoons of milk, and one teaspoon of peppermint extract until smooth.
  9. Spread or pipe the frosting onto each cooled cookie.
  10. Sprinkle crushed peppermint candies on top of the frosted cookies.

Nutrition

Serving: 1cookieCalories: 150kcalCarbohydrates: 20gProtein: 1gFat: 7gSaturated Fat: 4gMonounsaturated Fat: 2gCholesterol: 20mgSodium: 40mgPotassium: 30mgSugar: 12gVitamin A: 200IUCalcium: 10mgIron: 0.3mg

Notes

Ensure butter is at room temperature for easier mixing. Chilling the dough is key for the perfect texture.

Tried this recipe?

Let us know how it was!

Christmas Pinwheel Cookies That Bring Holiday Cheer

November 19, 2025 by Grace Snow Leave a Comment

The aroma of freshly baked cookies fills the air, capturing the spirit of the season. These vibrant Christmas Pinwheel Cookies not only look stunning with their eye-catching swirls but also taste like a buttery slice of holiday cheer. With minimal effort and a fun twist, you can whip up these festive treats that make the perfect addition to any holiday gathering. What’s even better? They can be prepared ahead of time, allowing you to savor those spontaneous moments to share joy with family and friends. Ready to roll up your sleeves and create a colorful masterpiece that will leave everyone asking for seconds? Let's dive into this delightful holiday baking adventure together!

Why Are These Cookies So Festive?

Vibrant Colors: The stunning red and green swirls make these cookies a visual delight that capture the essence of the holiday season.
Buttery Goodness: Each bite offers a tender, buttery texture that melts in your mouth—definitely a crowd-pleaser!
Easy Preparation: With simple ingredients and straightforward steps, everyone from novice bakers to seasoned chefs can enjoy making these treats.
Make Ahead: You can prepare the dough in advance, making it easy to bake fresh cookies whenever festive gatherings arise.
Perfect for Sharing: Whether at a cookie exchange or a family gathering, these eye-catching cookies are sure to spark smiles and bring joy.
Delicious Variations: Want to mix it up? Try adding a hint of peppermint or experimenting with different colors; creativity is limitless!

Christmas Pinwheel Cookies Ingredients

• Get ready to create festive magic!

For the Dough

  • Unsalted Butter – Provides richness and a tender texture; substitute with margarine for a dairy-free version.
  • Sugar – Sweetens the cookies and aids in browning; light brown sugar can be used for a deeper flavor.
  • Egg – Binds the ingredients together and adds moisture; for a vegan option, use a flax egg (1 tbsp flaxseed meal + 2.5 tbsp water).
  • Vanilla Extract – Enhances flavor; try almond extract for a delightful twist.
  • All-Purpose Flour – Forms the structure of the cookies; gluten-free flour can be swapped for a gluten-free version.
  • Kosher Salt – Balances sweetness; regular salt can be used, but adjust quantity to taste.
  • Baking Soda – Helps the cookies rise; baking powder may be used as a substitute.

For the Colors

  • Red Gel Food Coloring – Adds festive color to part of the dough; liquid food coloring works too, but adjust for moisture.
  • Green Gel Food Coloring – Brings the other half of the dough to life with vibrant holiday cheer.

For the Finish

  • Red Sanding Sugar – Provides a sparkling festive touch; can be replaced with colored sprinkles or omitted entirely.

Get ready to indulge in the delightful experience of creating these beautiful Christmas Pinwheel Cookies!

Step‑by‑Step Instructions for Christmas Pinwheel Cookies

Step 1: Prepare the Dough
In a large mixing bowl, beat together 1 cup of softened unsalted butter and 1 cup of sugar until the mixture is light and fluffy, about 3-4 minutes. Then, add 1 egg and 1 teaspoon of vanilla extract, mixing well until fully incorporated. This is the creamy base for your Christmas Pinwheel Cookies, so make sure it's well blended for a tender result.

Step 2: Combine Dry Ingredients
In a separate bowl, whisk together 2 ½ cups of all-purpose flour, ½ teaspoon of kosher salt, and 1 teaspoon of baking soda. Gradually incorporate this dry mixture into the creamed butter and sugar mixture, mixing until a soft dough forms. This step is key to ensure that all flavors are well-distributed throughout your festive cookie batter.

Step 3: Color the Dough
Divide the dough into three equal parts. In two of the portions, add red and green gel food coloring, kneading each piece until the colors are fully incorporated and vibrant. The striking colors will create the classic swirl effect of your Christmas Pinwheel Cookies, so take your time to ensure the coloring is even and cheerful.

Step 4: Chill the Dough
Wrap each portion of colored dough in plastic wrap and refrigerate them for about 1 hour. Chilling the dough not only makes it easier to handle, but it also helps to enhance the flavors. This is a great time to prepare your workspace or catch a quick holiday break before the fun rolling begins.

Step 5: Roll Out Dough
Once chilled, place each colored dough portion on a sheet of parchment paper, rolling them out into squares approximately 7 inches wide. Carefully stack the red and green squares over the plain dough, then gently roll them into a tight log. This will ensure the beautiful swirls are properly formed in your Christmas Pinwheel Cookies.

Step 6: Freeze
Wrap the log tightly in parchment paper and freeze it for about 1 hour. Freezing solidifies the shape, making it much easier to cut evenly into slice-like rounds later. This step is crucial for achieving neat and visually appealing cookies that will wow your guests with their festive charm.

Step 7: Bake Cookies
Preheat your oven to 350°F (175°C). Remove the log from the freezer and slice it into 1/3-inch thick rounds with a serrated knife. Roll the edges of each round in red sanding sugar for a festive touch before placing them on a baking sheet lined with parchment paper. Bake for 8-10 minutes, or until the edges are lightly golden and the cookies look set.

Step 8: Cool and Store
After removing the baking sheet from the oven, allow the cookies to cool on the sheet for about 1 minute. Then, transfer them to a wire rack to cool completely. Once cooled, store your Christmas Pinwheel Cookies in an airtight container at room temperature for up to a week, allowing their festive flavor to shine during the holiday season.

Expert Tips for Christmas Pinwheel Cookies

  • Soften Butter: Make sure your unsalted butter is at room temperature for easy blending. This step affects the cookie’s texture significantly.
  • Chill Time Matters: Don’t skip the chilling process! It helps the dough firm up, making it easier to roll and slice without sticking.
  • Color Mixing: Ensure food coloring is thoroughly kneaded into the dough. Uneven colors can impact the visual appeal of your Christmas Pinwheel Cookies.
  • Roll Evenly: When rolling the dough, strive for uniform thickness, so all cookies bake consistently and look beautiful when served.
  • Use a Serrated Knife: For clean cuts, opt for a serrated knife when slicing the log. This helps maintain the integrity of the swirls without squishing the cookies.

How to Store and Freeze Christmas Pinwheel Cookies

Room Temperature: Store the baked cookies in an airtight container for up to 1 week to keep them fresh and delightful.

Fridge: If you prefer, you can refrigerate the cookies, but be sure to layer them with parchment paper to avoid sticking. This method keeps them fresh for up to 2 weeks.

Freezer: For longer storage, freeze the unbaked log of cookie dough wrapped in parchment and plastic wrap for up to 3 months. When ready to bake, thaw overnight in the fridge and slice as directed.

Reheating: If desired, warm the cookies slightly in the oven at 300°F for about 5 minutes for a fresh-baked taste, perfect for indulging in those Christmas Pinwheel Cookies!

Christmas Pinwheel Cookies Variations

Ready to add your own twist to these delightful cookies? Let your imagination run wild as you create delicious masterpieces!

  • Dairy-Free: Substitute unsalted butter with margarine for a buttery flavor that everyone can enjoy.
  • Vegan Option: Swap the egg for a flax egg by mixing 1 tablespoon of flaxseed meal with 2.5 tablespoons of water.
  • Choco-Mint Twist: Add a teaspoon of peppermint extract to the dough, creating a refreshing minty flavor.
  • Colorful Sprinkles: Instead of sanding sugar, roll the edges in colorful sprinkles for a fun finish, perfect for kids' parties.
  • Chocolate Chip Surprise: Fold in mini chocolate chips for added texture and richness that elevates these cookies to another level of deliciousness.
  • Pastel Palette: Use pastel gel food coloring to create softer shades for springtime celebrations or baby showers.
  • Spiced Little Delight: Add a pinch of cinnamon or nutmeg to the dough for a warm, cozy flavor that screams holiday.
  • Flavored Extract Variations: Experiment with almond or orange extract instead of vanilla for a unique taste that will keep everyone guessing!

Feeling inspired? These variations not only keep things interesting but can also lead to new family favorites, just like Eggnog Cookies Soft or Thumbprint Cookies Melt. Happy baking!

What to Serve with Christmas Pinwheel Cookies

Elevate your holiday gatherings effortlessly by adding delightful companions to your colorful cookie masterpiece.

  • Hot Cocoa: Rich and chocolatey, a warm cup of cocoa enhances the festive experience while complementing the sweet, buttery cookies perfectly.

  • Vanilla Ice Cream: Creamy and cool, vanilla ice cream balances the cookie's sweetness, creating a delightful contrast that many will love. Serve a scoop alongside for a delightful dessert duo.

  • Eggnog: This classic holiday drink, with its creamy texture and spiced flavor, pairs beautifully with the buttery richness of the pinwheel cookies, enhancing the festive spirit.

  • Peppermint Bark: The crunch of peppermint bark adds a refreshing twist to your cookie platter, introducing a delightful minty flavor that harmonizes with the sweetness of the cookies.

  • Sugar Cookies: Offer a variety by including classic sugar cookies. Their soft texture and sweet flavor provide a delightful contrast while still holding festive appeal.

  • Holiday Fruit Salad: Bright and fresh, a fruit salad offers a fruity balance to the rich cookies. Use seasonal fruits like pomegranate and citrus to maintain the holiday theme.

  • Gingerbread Men: The spicy warmth of gingerbread cookies not only adds a different flavor profile but represents the holidays beautifully, enhancing your cookie table's cheer.

  • Mulled Cider: Warm and fragrant, mulled cider adds a cozy backdrop to your cookie moment, filling the air with holiday aromas that complement these delicious treats.

  • Milk: Never underestimate the classic pairing of milk! This simple drink enhances the buttery, rich flavors of the cookies, evoking childhood nostalgia and joy.

Make Ahead Options

These Christmas Pinwheel Cookies are an excellent choice for meal prep during the busy holiday season! To make ahead, you can prepare the colored dough portions and refrigerate them for up to 24 hours before rolling and baking. Alternatively, you can freeze the rolled log of dough for up to 3 months. Just wrap it tightly in plastic wrap and then in foil to prevent freezer burn. When you’re ready to bake, simply slice the log while it's still frozen, roll the edges in red sanding sugar, and bake as directed. This way, you’ll enjoy the same festive flavors and beautiful presentation with minimal effort, making holiday baking a breeze!

Christmas Pinwheel Cookies Recipe FAQs

What type of butter should I use for the best flavor?
Using unsalted butter is ideal as it provides richness and tender texture. If you're looking for a dairy-free alternative, I recommend substituting with margarine, which works just as well.

How should I store Christmas Pinwheel Cookies after baking?
Store your baked Christmas Pinwheel Cookies in an airtight container at room temperature for up to 1 week. If you want to keep them fresh a bit longer, refrigerate the cookies layered with parchment paper for up to 2 weeks.

Can I freeze the cookie dough?
Absolutely! You can freeze the unbaked log of cookie dough tightly wrapped in parchment and plastic wrap for up to 3 months. When you're ready to bake, simply thaw it overnight in the fridge, slice, and bake as directed.

What can I do if my dough is too sticky?
If you find your dough to be too sticky during preparation, don't worry! Refrigerate it for another 30 minutes to firm it up. This will make it much easier to roll out and shape for those gorgeous swirls.

Are there any allergen concerns with this recipe?
Yes, this recipe contains common allergens such as eggs, dairy, and gluten from the flour. If you're baking for someone with allergies, you can make a vegan version by substituting the egg with a flax egg (1 tbsp flaxseed meal + 2.5 tbsp water) and replacing the butter with margarine. Always double-check ingredient labels to ensure they're safe for your dietary needs.

How can I make these cookies more colorful?
If you want to experiment with colors, feel free to use additional shades of gel food coloring! You can even create pastel colors for a spring theme or opt for darker colors around Halloween. Just be sure to fully incorporate the coloring for even swirls.

Christmas Pinwheel Cookies

Christmas Pinwheel Cookies That Bring Holiday Cheer

These vibrant Christmas Pinwheel Cookies are a beautiful and buttery addition to any holiday gathering.
Print Recipe Pin Recipe
Prep Time 30 minutes mins
Cook Time 10 minutes mins
Chilling Time 2 hours hrs
Total Time 2 hours hrs 40 minutes mins
Servings: 24 cookies
Course: Dessert
Cuisine: American
Calories: 150
Ingredients Equipment Method Nutrition Notes

Ingredients
  

For the Dough
  • 1 cup unsalted butter softened
  • 1 cup sugar can substitute with light brown sugar
  • 1 large egg or flax egg for vegan option
  • 1 teaspoon vanilla extract can use almond extract
  • 2.5 cups all-purpose flour or gluten-free flour
  • 0.5 teaspoon kosher salt adjust to taste
  • 1 teaspoon baking soda or baking powder
For the Colors
  • 1 drop red gel food coloring
  • 1 drop green gel food coloring
For the Finish
  • 0.25 cup red sanding sugar can be omitted or substituted

Equipment

  • Mixing Bowl
  • Whisk
  • Parchment Paper
  • Baking Sheet
  • Serrated knife

Method
 

Step-by-Step Instructions
  1. In a large mixing bowl, beat together unsalted butter and sugar until light and fluffy, about 3-4 minutes. Add egg and vanilla extract, mixing until incorporated.
  2. In a separate bowl, whisk together all-purpose flour, kosher salt, and baking soda. Gradually incorporate into the creamed butter mixture until soft dough forms.
  3. Divide dough into three parts. Add red and green food coloring to two portions, kneading until the colors are vibrant.
  4. Wrap each portion in plastic wrap and refrigerate for about 1 hour.
  5. Roll out each colored dough on parchment paper into squares approximately 7 inches wide. Stack the colors and roll into a tight log.
  6. Wrap the log in parchment paper and freeze for about 1 hour.
  7. Preheat oven to 350°F (175°C). Slice the log into 1/3-inch rounds, roll edges in red sanding sugar, and place on parchment-lined baking sheet. Bake for 8-10 minutes until edges are golden.
  8. Let cookies cool on the baking sheet for 1 minute, then transfer to a wire rack to cool completely. Store in an airtight container.

Nutrition

Serving: 1cookieCalories: 150kcalCarbohydrates: 20gProtein: 1gFat: 7gSaturated Fat: 4gPolyunsaturated Fat: 0.5gMonounsaturated Fat: 1.5gCholesterol: 20mgSodium: 50mgPotassium: 20mgSugar: 10gVitamin A: 200IUCalcium: 10mgIron: 0.5mg

Notes

These cookies can be made ahead of time and stored for delightfully festive treats throughout the holiday season.

Tried this recipe?

Let us know how it was!

Gooey S’mores Cookies That Bring Back Sweet Memories

November 19, 2025 by Grace Snow Leave a Comment

As I pulled these cookies from the oven, the aroma of toasted marshmallows and melted chocolate filled the kitchen, whisking me back to campfire nights under a starry sky. These Gooey S’mores Cookies, with their perfect blend of graham cracker crunch and gooey marshmallow goodness, capture that nostalgic delight with every bite. The best part? They're quick to whip up—all while being an unforgettable crowd-pleaser for cozy get-togethers or just a simple afternoon treat. If you're ready to bring the fun of s'mores to cookie form, you won't want to miss this recipe! Curious how to create this indulgent dessert that’s sure to lighten any mood? Let’s dive in!

Why Are S’mores Cookies So Irresistible?

Gooey Delight: Each bite of these cookies transports you to a carefree campfire night, with warm, melted marshmallows and rich chocolate.
Quick and Easy: With just a few simple steps, you can whip up these delightful treats in no time—perfect for impromptu gatherings!
Crowd-Pleaser: Whether it’s a family get-together or a cozy night at home, expect everyone to fall in love with these sweet delights.
Versatile Treat: Feel free to swap in dark chocolate chips or mix in nutty surprises for a unique twist, just like with our Thumbprint Cookies Melt.
Memorable Flavors: The combination of graham cracker crunch and caramelized marshmallows creates a nostalgic flavor that’s hard to resist!
Transform these S’mores Cookies into your go-to dessert any day of the year – you won’t regret it!

S’mores Cookies Ingredients

For the Cookie Base

  • Salted Butter – Provides rich flavor and tender texture; can substitute with unsalted butter for less saltiness.
  • Light Brown Sugar – Adds sweetness and moisture; pack it well for best results.
  • Granulated Sugar – Enhances sweetness and contributes to cookie crispness.
  • Large Eggs – Binds the ingredients and adds structure; ensure they’re at room temperature for easier mixing.
  • Vanilla Extract – Adds depth of flavor; use pure extract for the best taste.

For the Dry Ingredients

  • All-Purpose Flour – The main structure ingredient; no direct substitutions are suggested.
  • Cornstarch – Keeps cookies soft and prevents excessive spreading.
  • Baking Soda – A leavening agent for lift; make sure it’s fresh for optimal results.
  • Salt – Balances sweetness; adjust based on the type of butter used.

For the S’mores Experience

  • Mini Marshmallows – Provide the classic s’mores experience; divide them for mixing and topping.
  • Graham Crackers – Adds crunch and flavor; use about 9-10 crackers, crushed into small pieces.
  • Milk Chocolate Chips – Offers creaminess and sweetness; can replace with semisweet for a different taste.
  • Semisweet Chocolate Chips – Delivers a more intense chocolate flavor; feel free to substitute with any preferred chocolate.
  • Hershey's Bars – Adds classic flavor and chunks of chocolate on top for an indulgent touch.

Transform your baking with these incredible S’mores Cookies that promise to delight!

Step‑by‑Step Instructions for S’mores Cookies

Step 1: Preheat and Prepare
Start by preheating your oven to 375°F (190°C) to ensure the perfect bake for your S’mores Cookies. While the oven heats, line two baking sheets with parchment paper. This will keep your cookies from sticking and make for an easy cleanup once they’re done baking!

Step 2: Cream the Butters and Sugars
In a large mixing bowl, combine 1 cup of softened salted butter, ¾ cup of light brown sugar, and ½ cup of granulated sugar. Use a hand mixer or stand mixer to beat the mixture until it becomes light and creamy—about 2-3 minutes. You want it fluffy and well blended, as this will create a tender base for your cookies.

Step 3: Incorporate Eggs and Vanilla
Add in 2 large room-temperature eggs and 2 teaspoons of pure vanilla extract to the creamed mixture. Mix on medium speed until everything is well incorporated and smooth. This step gives your S’mores Cookies that delightful richness and a hint of sweetness with the vanilla enhancing the flavors.

Step 4: Mix the Dry Ingredients
In a separate bowl, whisk together 2 cups of all-purpose flour, 1 teaspoon of cornstarch, 1 teaspoon of baking soda, and ½ teaspoon of salt. Gradually combine this dry mixture into the wet ingredients using a spatula or mixer on low speed. Mix until just combined; avoid overmixing to keep your cookies soft and chewy.

Step 5: Add the S'mores Fixings
Fold in 1½ cups of crushed graham cracker pieces, 1½ cups of mini marshmallows, ½ cup of milk chocolate chips, and ½ cup of semisweet chocolate chips. Make sure everything is evenly distributed throughout the dough—these ingredients will give your S’mores Cookies their beloved chewy and gooey texture!

Step 6: Shape the Cookies
Using a cookie scoop, drop 2–3 tablespoons of dough onto the prepared baking sheets, spacing them about 2 inches apart to allow for spreading. The dough will be thick with chunks of marshmallow and chocolate peeking through—this is a good sign that your cookies will be deliciously gooey!

Step 7: Initial Baking
Place the baking sheets in the preheated oven and bake for 10 minutes. The edges should be lightly golden while the centers remain soft. This is the perfect stage for that gooey, squishy texture that everyone loves in a S’mores Cookie!

Step 8: Add More S'mores Goodness
After 10 minutes, quickly remove the cookies from the oven and top each one with an extra handful of mini marshmallows, graham cracker pieces, and chunks of Hershey's bar for that extra indulgent finish.

Step 9: Final Bake
Return the cookies to the oven and bake for an additional 1–2 minutes, keeping a close eye to prevent burning the marshmallows. If you desire a toasted finish, you can briefly broil them for about 30 seconds—just be cautious, as they can burn quickly!

Step 10: Cool and Enjoy
Once baked, let the cookies cool on the baking sheets for about 5 minutes. This will help them set better, making it easier to transfer them to a wire rack. Allow them to cool completely before dig in, and enjoy the delightful gooeyness of your freshly baked S’mores Cookies!

How to Store and Freeze S’mores Cookies

Room Temperature: Store your S’mores Cookies in an airtight container at room temperature for up to 4-5 days to maintain their soft and chewy texture.

Fridge: Refrigerating these cookies is not recommended as it may alter their delightful gooeyness. If you do, be sure to seal them tightly to prevent drying out.

Freezer: For longer storage, freeze the cookies in a single layer on a baking sheet, then transfer to a freezer-safe bag for up to 2 months. Thaw before serving.

Reheating: To revive the cookies’ original gooey goodness, pop them in the microwave for 10-15 seconds, allowing the marshmallows and chocolate to become melty once more.

Tips for the Best S’mores Cookies

Use Room Temperature Ingredients: Always ensure your eggs and butter are at room temperature for better mixing and a smoother dough.

Don’t Overmix: Once you add the flour, mix just until combined. Overmixing can lead to tough cookies instead of the soft, chewy S’mores Cookies you desire.

Watch the Marshmallows: While broiling, keep a close eye on the marshmallows to avoid burning. They can go from toasted to charred in seconds!

Chill the Dough: If your dough feels too soft, don’t hesitate to chill it for 15-30 minutes. This helps maintain shape and improves the texture of the final cookie.

Storage Solutions: Store your cookies in an airtight container for optimal freshness, but be aware that refrigeration can change their texture. Enjoy warmth for the best experience!

S’mores Cookies Variations to Try

Get ready to make these cookies even more your own; there are so many fun ideas just waiting for you!

  • Dark Chocolate: Swap milk chocolate chips for dark chocolate for a bolder, richer flavor that adds a delightful twist.
  • Gluten-Free: Use a gluten-free all-purpose flour blend for a version everyone can enjoy without sacrificing texture.
  • Caramel Chips: Add a fun sweetness by folding in caramel-flavored chocolate chips for a unique blend that pairs beautifully with marshmallows.
  • Nutty Surprise: Toss in a handful of chopped nuts, like pecans or walnuts, for an extra crunch that complements the chewy cookie base.
  • Spicy Kick: Sprinkle in a pinch of cayenne or chili powder for a surprising heat that contrasts beautifully with the sweetness—it's a flavor adventure!
  • Peanut Butter: Fold in some creamy or chunky peanut butter for lusciousness and a nutty flavor that elevates your cookie experience.
  • S’mores Bar Twist: Press the cookie dough into a baking dish, layer with chocolate and marshmallows, then bake for bars—perfect for slicing and sharing!
  • Flavor Infusion: Try infusing your vanilla extract with other flavors, like almond or hazelnut, for a fragrant twist on classic S’mores Cookies.

Feeling inspired? Just like with our Peaches Cream Cookies, there's no wrong way to make these cookies your own! Don’t be shy; let the sweet creativity flow!

Make Ahead Options

These S’mores Cookies are not only a delightful treat but also perfect for meal prep enthusiasts! You can prepare the dough up to 24 hours in advance by mixing all your ingredients and then refrigerating it. This helps the flavors meld beautifully while keeping the cookies just as delicious when baked. Additionally, you can scoop the dough into balls and place them in an airtight container in the freezer for up to three months. When you're ready to bake, simply add an extra minute or two to the baking time for perfectly gooey results. This way, you can enjoy fresh cookies anytime without the hassle of starting from scratch!

What to Serve with Gooey S’mores Cookies

Pairing these delectable cookies with complementary sides can create a delightful dessert experience that’ll feel like a cozy evening by the campfire.

  • Cold Milk: A classic choice that enhances the gooey chocolate and marshmallow, balancing the sweetness beautifully. Enjoying your cookies with a cold glass of milk can elevate the whole experience!

  • Ice Cream Sundae: Add a scoop of vanilla or chocolate ice cream on the side, drizzled with chocolate sauce. The cold, creamy texture perfectly contrasts the warm, chewy cookies, creating a decadent treat.

  • Fresh Berries: Light and refreshing, strawberries or raspberries add a nice tartness that cuts through the cookie's richness. They bring a pop of color and an additional layer of flavor!

  • Banana Slices: The natural sweetness of bananas pairs wonderfully with chocolate, and when served alongside the cookies, they create an irresistible combination.

  • Caramel Sauce: Drizzle some warm caramel over the cookies for a gooey indulgence that takes the flavor to another level. It adds a buttery richness that complements the s’mores experience perfectly.

  • Hot Cocoa: Warm and comforting, a rich mug of hot cocoa topped with whipped cream creates an indulgent dessert pairing that’s incredibly nostalgic.

  • S’mores-Inspired Milkshake: Blend vanilla ice cream with milk, graham cracker crumbs, and a hint of chocolate for a creamy, dreamy drink that mirrors the cookie flavors.

  • Toasted Coconut: Sprinkle some toasted coconut flakes on top of your cookies for an unexpected crunch and tropical twist that adds an exotic flair to your dessert spread.

S’mores Cookies Recipe FAQs

How do I choose the right ingredients for S’mores Cookies?
Absolutely! For the best flavor and texture, opt for high-quality ingredients: use real salted butter instead of margarine, and choose pure vanilla extract rather than imitation. When selecting your marshmallows, look for mini ones as they blend perfectly in the dough and provide a delightful gooey texture. Fresh eggs are a must; room temperature eggs mix more easily and help create a tender cookie!

What are the best storage methods for S’mores Cookies?
These cookies can be stored in an airtight container at room temperature for up to 4-5 days. Be sure to keep them away from direct sunlight and moisture to maintain their delightful softness! If you need to store them longer, stacking can be avoided by placing parchment paper between layers to preserve their shape and texture.

Can I freeze S’mores Cookies? How?
You bet! To freeze, scoop the cookie dough into balls and place them on a lined baking sheet in a single layer. Freeze until solid, then transfer to a freezer-safe bag. These can be frozen for up to 2 months! When you’re ready to bake, you can pop them straight into the oven from the freezer; just add a minute or two to the original baking time.

What should I do if my cookies spread too much during baking?
If your S’mores Cookies are spreading excessively, you may want to chill the dough for 15-30 minutes before baking. This helps solidify the butter, preventing the cookies from flattening too much. Additionally, ensuring your butter is not too soft when mixing can significantly help keep their shape intact.

Are there any dietary considerations for S’mores Cookies?
Absolutely! If you have dietary restrictions, you can easily modify this recipe. For a gluten-free option, simply substitute all-purpose flour with your favorite gluten-free blend. Additionally, ensure that you're using gluten-free graham crackers. If allergies to chocolate exist, you might try carob chips as a replacement for the chocolate varieties.

How can I revive stale S’mores Cookies?
If your cookies have lost their signature moistness, don’t worry! Place a slice of bread in the container with the cookies for a few hours. The bread will help to absorb excess air and moisten the cookies, giving them a fresh, just-baked taste again. Enjoy the revived gooey delight!

S’mores Cookies

Gooey S’mores Cookies That Bring Back Sweet Memories

These Gooey S’mores Cookies capture the nostalgic delight of campfire nights with toasted marshmallows and rich chocolate in every bite.
Print Recipe Pin Recipe
Prep Time 15 minutes mins
Cook Time 12 minutes mins
Cooling Time 5 minutes mins
Total Time 32 minutes mins
Servings: 24 cookies
Course: Dessert
Cuisine: American
Calories: 160
Ingredients Equipment Method Nutrition Notes

Ingredients
  

For the Cookie Base
  • 1 cup Salted Butter Can substitute with unsalted butter
  • 3/4 cup Light Brown Sugar Pack well for best results
  • 1/2 cup Granulated Sugar Enhances sweetness
  • 2 large Eggs At room temperature
  • 2 teaspoons Vanilla Extract Use pure extract for best taste
For the Dry Ingredients
  • 2 cups All-Purpose Flour No direct substitutions
  • 1 teaspoon Cornstarch Keeps cookies soft
  • 1 teaspoon Baking Soda Ensure it’s fresh
  • 1/2 teaspoon Salt Adjust based on butter
For the S’mores Experience
  • 1 1/2 cups Mini Marshmallows For mixing and topping
  • 9-10 pieces Graham Crackers Crushed into small pieces
  • 1/2 cup Milk Chocolate Chips Can replace with semisweet
  • 1/2 cup Semisweet Chocolate Chips Substitute with preferred chocolate
  • 1 bar Hershey's Bars Chopped for topping

Equipment

  • Oven
  • Mixing Bowl
  • Spatula
  • Cookie Scoop
  • Baking Sheets
  • Parchment Paper
  • hand mixer

Method
 

Step-by-Step Instructions
  1. Preheat your oven to 375°F (190°C) and line two baking sheets with parchment paper.
  2. In a large mixing bowl, combine 1 cup of softened salted butter, ¾ cup of light brown sugar, and ½ cup of granulated sugar. Beat until light and creamy.
  3. Add in 2 large eggs and 2 teaspoons of vanilla extract. Mix until well incorporated.
  4. In a separate bowl, whisk together 2 cups of all-purpose flour, 1 teaspoon of cornstarch, 1 teaspoon of baking soda, and ½ teaspoon of salt. Gradually combine with wet ingredients.
  5. Fold in 1½ cups of crushed graham cracker pieces, 1½ cups of mini marshmallows, ½ cup of milk chocolate chips, and ½ cup of semisweet chocolate chips.
  6. Drop 2-3 tablespoons of dough onto prepared baking sheets, spacing about 2 inches apart.
  7. Bake for 10 minutes until edges are lightly golden and centers remain soft.
  8. Top each cookie with additional mini marshmallows, graham cracker pieces, and chunks of Hershey's bar.
  9. Return to the oven for an additional 1-2 minutes, watching closely to prevent burning.
  10. Let the cookies cool on the baking sheets for about 5 minutes before transferring to a wire rack.

Nutrition

Serving: 1cookieCalories: 160kcalCarbohydrates: 21gProtein: 1gFat: 8gSaturated Fat: 5gPolyunsaturated Fat: 0.5gMonounsaturated Fat: 2gCholesterol: 30mgSodium: 100mgPotassium: 50mgSugar: 10gVitamin A: 200IUCalcium: 20mgIron: 0.5mg

Notes

Use room temperature ingredients for better mixing. Avoid overmixing to maintain softness. Store in an airtight container for freshness.

Tried this recipe?

Let us know how it was!

Raspberry Almond Snowball Cookies: A Festive Delight to Savor

November 19, 2025 by Grace Snow Leave a Comment

The aroma of baking cookies always stirs something magical in me. Nestled in this warmth are Raspberry Almond Snowball Cookies, a delightful treat that's become a staple in my kitchen over the years. With their nutty essence and a burst of sweet raspberry filling, these holiday cookies not only melt in your mouth but also brighten any gathering. They’re quick to whip up, making them perfect for when unexpected guests arrive or when I need a comforting moment in my day. Plus, they can easily be tailored to fit gluten-free diets without sacrificing flavor! What’s your favorite cookie to share during the holidays?

Why Are These Cookies So Irresistible?

Melting in your mouth, these Raspberry Almond Snowball Cookies offer an unparalleled texture that will have everyone reaching for seconds. Easy to make, you can whip them up in no time, making them perfect for impromptu gatherings or cozy family nights. Nutty flavors from blanched almonds elevate these cookies to something truly special, while the sweet raspberry filling adds a delightful fruity surprise. Versatile options mean you can play with different fillings or even go gluten-free without losing any of that tantalizing taste. Plus, these cookies are sure to impress your guests and become a festive favorite in no time!

Raspberry Almond Snowball Cookies Ingredients

• Here's everything you need to create these delightful treats!

For the Dough

  • Unsalted Butter – the heart of the cookie; it should be softened for perfect creaminess.
  • Powdered Sugar – adds sweetness and smoothness; remember to sift for a lump-free mix.
  • Blanched Almonds – for a nutty flavor; grinding your own yields the freshest taste.
  • All-Purpose Flour – provides structure; measure carefully to keep cookies tender.
  • Salt – enhances sweetness; just a pinch makes all the difference.

For the Filling

  • Raspberry Filling – brings a fruity and tart surprise; opt for seedless jam or homemade if possible.

Flavor Enhancer

  • Optional Flavor Extracts (almond, vanilla, or rum) – elevate the flavor; choose your favorite for a unique twist.

With these simple yet rich ingredients, your Raspberry Almond Snowball Cookies will enchant anyone lucky enough to try them!

Step‑by‑Step Instructions for Raspberry Almond Snowball Cookies

Step 1: Prep Dough
Begin by creaming 1 cup of softened unsalted butter and ¾ cup of powdered sugar in a large mixing bowl. Use an electric mixer on medium speed for about 3-4 minutes until the mixture is light and fluffy. Scrape down the sides of the bowl to ensure all ingredients are well combined, creating a smooth base for your Raspberry Almond Snowball Cookies.

Step 2: Combine Dry Ingredients
In a separate bowl, whisk together 2 cups of all-purpose flour, 1 cup of finely ground blanched almonds, and a pinch of salt. Gradually add this dry mixture to the creamed butter-sugar mixture, mixing gently on low speed until just combined. Be careful not to overmix, as this ensures the cookies remain tender and melt-in-your-mouth perfect.

Step 3: Form Cookies
Take about a tablespoon of the dough and roll it into a ball. Create an indentation in the center of each ball and fill it with a teaspoon of raspberry filling, using either seedless jam or your homemade version. Carefully fold the edges over the filling to seal it and reshape the ball, ensuring the raspberry filling is fully enclosed for these delicious Raspberry Almond Snowball Cookies.

Step 4: Bake
Preheat your oven to 350°F (175°C) and line baking sheets with parchment paper. Place the shaped cookie dough balls about 2 inches apart on the sheets. Bake for 10-12 minutes, or until the edges are lightly golden. Don’t forget to rotate the sheets halfway through baking for an even golden-brown finish!

Step 5: Cool and Coat
Once out of the oven, let the cookies cool on the baking sheet for about 5 minutes before transferring them to a wire rack. Allow them to cool completely. Once cooled, roll each cookie in a generous amount of powdered sugar twice to create that snowy finish that makes these Raspberry Almond Snowball Cookies even more delightful!

Make Ahead Options

These Raspberry Almond Snowball Cookies are a fantastic make-ahead treat for any busy home cook! You can prepare the cookie dough and shape the balls up to 24 hours in advance. Simply form the cookies and refrigerate them on a parchment-lined baking sheet, covered with plastic wrap, to maintain their freshness and prevent drying out. When you’re ready to bake, preheat your oven and follow the baking instructions, adding an extra minute if baking directly from the fridge. For even longer storage, you can freeze the shaped dough for up to 3 months; just thaw overnight in the fridge before baking. With these tips, you’ll have delightful cookies ready to impress your family at a moment's notice!

Raspberry Almond Snowball Cookies Variations

Feel free to get creative with these delightful cookies and explore tasty alternatives that suit your preferences!

  • Nut Alternatives: Substitute ground almonds with pecans, walnuts, or hazelnuts for unique flavors. Each nut brings its own character, transforming the cookie experience entirely!

  • Gluten-Free Twist: Use a gluten-free flour blend to make these cookies suitable for gluten-sensitive diets. Your guests won’t even notice the difference in taste!

  • Extra Flavor: Enhance your cookies' flavor by adding extracts like almond or vanilla. A few drops can elevate the experience and bring a new dimension to these beauties.

  • Classic Jam Swap: Try using different fruit fillings like blueberry, cherry, or even chocolate ganache. Each filling adds its own fruity surprise, making them truly versatile.

  • Cocoa Infusion: Add 2 tablespoons of unsweetened cocoa powder to the dry mix for a chocolate version. These indulgent morsels might just become your new favorite holiday treat!

  • Spice It Up: Incorporate a pinch of cinnamon or nutmeg for a warming, spicy note that complements the raspberry beautifully. It’s a delicious touch!

  • Chilled Cookie Delight: Chill the dough before baking for extra tenderness and a firmer texture. It’s also a great way to prepare ahead of a gathering.

  • Crunchy Coating: Coat the cookies in chopped nuts or crushed freeze-dried raspberries instead of powdered sugar for added texture and a pop of flavor. It's a fun change that looks beautiful too!

If you're interested in exploring various cookie sensations, you might enjoy making Matcha Cookies Soft or the richly flavored Eggnog Cookies Soft. Each offers a delightful twist that’s perfect for festive occasions!

What to Serve with Raspberry Almond Snowball Cookies

The sweetness and delicate flavor of these cookies create the perfect canvas for delightful pairings that elevate your dessert experience.

  • Hot Cocoa: The rich, creamy chocolate perfectly balances the cookie's nutty and fruity notes, making for a cozy pairing.

  • Fresh Berries: A side of mixed fresh berries adds a tart and refreshing contrast, enhancing the raspberry filling's brightness.

  • Whipped Cream: Light and airy, a dollop of homemade whipped cream lends a luxurious touch and is a delightful complement to the cookie's texture.

  • Vanilla Ice Cream: Creamy vanilla ice cream offers a cool contrast that enhances the warm, nutty flavors while providing a satisfying texture juxtaposition.

  • Nutty Biscotti: Crunchy and buttery, a few biscotti add a layered texture that echoes the almond flavor and invites a delightful crunch.

  • Almond Milk Latte: This smooth drink complements the almond flavor, making it perfect for a warm afternoon treat alongside your cookies.

  • Chocolate Truffles: Indulge in rich chocolate truffles for a decadent touch that contrasts sweet raspberry filling with dark chocolate richness.

  • Pineapple Sorbet: Light and refreshing, the tropical zing of pineapple sorbet cleanses the palate between bites, enhancing the cookie's flavors.

  • Spiced Chai Tea: Warm, spiced chai beautifully harmonizes with the cookies' nutty elements, providing a warm, fragrant beverage to sip on.

  • Lemon Tart: A zesty lemon tart offers a bright contrast to the sweet cookies, making each bite feel refreshing and indulgent.

Expert Tips for Raspberry Almond Snowball Cookies

  • Butter Awareness: Ensure your butter is softened but not melted to achieve the right dough consistency; over-softened butter can lead to spreading.
  • Gentle Mixing: Avoid overmixing the dough when combining wet and dry ingredients to keep your cookies tender and prevent a tough texture.
  • Cooling Time: Be patient and let your cookies cool completely before rolling them in powdered sugar; this way they won’t melt into a puddle.
  • Flavor Experimentation: Don’t hesitate to play around with different fillings, like chocolate or caramel; these Raspberry Almond Snowball Cookies can shine with various delicious flavors!
  • Storage Savvy: Store cookies in an airtight container for best freshness, ensuring these delightful treats maintain their melt-in-your-mouth quality for days.

Storage Tips for Raspberry Almond Snowball Cookies

Room Temperature: Store cookies in an airtight container at room temperature for up to 5 days to maintain their delicious melt-in-your-mouth texture.

Fridge: For slightly longer freshness, consider refrigerating the cookies, where they can stay good for up to a week. Just ensure they are well-sealed.

Freezer: Freeze Raspberry Almond Snowball Cookies for up to 2 months in an airtight container. Layer them with parchment paper to prevent sticking.

Thawing: When ready to enjoy, thaw cookies completely at room temperature before serving to restore their delightful texture and flavor.

Raspberry Almond Snowball Cookies Recipe FAQs

How do I choose the right raspberries for the filling?
Absolutely! Look for plump, firm raspberries that are fully ripe with a deep color. Avoid any that have dark spots or appear mushy, as these can affect the flavor and texture of your filling. If fresh raspberries aren't available, a quality seedless raspberry jam works wonderfully and saves you time!

How should I store leftover Raspberry Almond Snowball Cookies?
To keep your cookies fresh, store them in an airtight container at room temperature for up to 5 days. If you want to enjoy them longer, you can refrigerate them in a well-sealed container, extending their freshness to about a week. Remember, the cookies need to cool completely before sealing them to prevent moisture buildup.

Can I freeze my Raspberry Almond Snowball Cookies?
Absolutely! To freeze your cookies, place them in an airtight container or a freezer-safe bag, layering them with parchment paper to prevent sticking. They can be stored this way for up to 2 months. When you're ready to enjoy them, thaw the cookies completely at room temperature for the best taste and texture.

What should I do if my cookies spread too much while baking?
If your cookies spread more than desired, it might be due to overly softened butter. For next time, ensure your butter is softened to the ideal consistency—soft enough to cream but still slightly firm. Additionally, chilling the dough for about 30 minutes before baking can help maintain their shape more effectively.

Are Raspberry Almond Snowball Cookies gluten-free?
Yes! You can easily make these cookies gluten-free by substituting the all-purpose flour with a suitable gluten-free flour blend. Ensure the blend contains a stabilizer to mimic the elasticity of regular flour. The flavor will still be delightful, so everyone can enjoy this holiday treat!

Can I give these cookies to pets?
It's best to avoid giving these cookies to pets, as they contain ingredients like sugar and butter that can be harmful to them in large amounts. Always check with your veterinarian if you're unsure about the safety of certain foods!

Raspberry Almond Snowball Cookies

Raspberry Almond Snowball Cookies: A Festive Delight to Savor

Raspberry Almond Snowball Cookies are a delightful holiday treat with a nutty essence and sweet raspberry filling, perfect for gatherings.
Print Recipe Pin Recipe
Prep Time 20 minutes mins
Cook Time 12 minutes mins
Cooling Time 5 minutes mins
Total Time 37 minutes mins
Servings: 24 cookies
Course: Dessert
Cuisine: American
Calories: 100
Ingredients Equipment Method Nutrition Notes

Ingredients
  

For the Dough
  • 1 cup Unsalted Butter softened
  • ¾ cup Powdered Sugar sifted
  • 1 cup Blanched Almonds finely ground
  • 2 cups All-Purpose Flour measured carefully
  • 1 pinch Salt
For the Filling
  • 1 tsp Raspberry Filling seedless jam or homemade
Flavor Enhancer
  • to taste Optional Flavor Extracts almond, vanilla, or rum

Equipment

  • Mixing Bowl
  • Electric mixer
  • Baking Sheets
  • Parchment Paper
  • wire rack

Method
 

Instructions
  1. Cream the softened unsalted butter and powdered sugar in a large mixing bowl using an electric mixer on medium speed for 3-4 minutes until light and fluffy.
  2. In a separate bowl, whisk together the all-purpose flour, finely ground blanched almonds, and a pinch of salt, then gradually combine with the creamed mixture.
  3. Roll about a tablespoon of the dough into a ball, create an indentation in the center, fill with raspberry filling, fold the dough over, and reshape the ball.
  4. Preheat your oven to 350°F (175°C) and place the cookies on lined baking sheets; bake for 10-12 minutes until edges are lightly golden.
  5. Let cookies cool on the baking sheet for 5 minutes before transferring to a wire rack, then roll in powdered sugar once cooled.

Nutrition

Serving: 1cookieCalories: 100kcalCarbohydrates: 12gProtein: 1gFat: 5gSaturated Fat: 2gPolyunsaturated Fat: 0.5gMonounsaturated Fat: 2.5gCholesterol: 20mgSodium: 50mgPotassium: 40mgSugar: 4gVitamin A: 200IUCalcium: 5mgIron: 0.5mg

Notes

Ensure your butter is softened but not melted; avoid overmixing to keep cookies tender; store in an airtight container for optimal freshness.

Tried this recipe?

Let us know how it was!

Melt-in-Your-Mouth Snowball Cookies: A Sweet Holiday Treat

November 19, 2025 by Grace Snow Leave a Comment

As I stood in my kitchen, the aroma of warm butter and sugar wafting through the air, a wave of nostalgia hit me, transporting me back to childhood holidays spent baking with loved ones. There’s something truly magical about Snowball Cookies—those delightful morsels that melt in your mouth and bring a touch of sweetness to any festive gathering. This easy holiday recipe requires just four simple ingredients, making it a perfect choice for both seasoned bakers and those new to the kitchen alike. Whether you prefer classic flavors or are curious about fun variations like Vegan Snowball Cookies or Chocolate Snowball Cookies, this treat accommodates everyone. Plus, they make for an ideal make-ahead dessert, so you can savor the joy of baking without the last-minute rush. Ready to create a batch of these irresistible delights? Let’s get started!

Why are Snowball Cookies a Must-Bake?

Melt-in-your-Mouth Texture: Experience the joy of biting into a buttery, soft cookie that practically dissolves on your tongue—a truly delightful treat.

Simple Ingredients: With just four basic components, this recipe is incredibly easy to follow, making it perfect for both novice and experienced bakers.

Versatile Variations: From Vegan Snowball Cookies to Chocolate Snowball Cookies, you can customize this recipe to suit your taste and dietary needs. Whether you're in the mood for something classic or adventurous, there’s a snowball for everyone!

Crowd-Pleasing Delight: These cookies are a favorite at holiday gatherings and are sure to impress your guests. They'll be asking for seconds!

Make-Ahead Convenience: You can prepare the dough ahead of time, saving valuable time during busy holiday moments. Pop them in the oven just before your gathering for freshly baked goodness.

Get creative and serve an array of options alongside these classics, like Thumbprint Cookies Melt or consider adding a splash of lemon zest for a fresh twist!

Snowball Cookies Ingredients

For the Cookie Dough

  • Flour – Provides structure; you can use white, whole wheat pastry, spelt, or gluten-free flour for a different texture.
  • Nuts (Walnuts, Almonds, or Pecans) – Adds crunch and flavor; feel free to omit for nut-free cookies or swap with your preferred nut.
  • Butter or Coconut Oil – Adds richness and moisture; ensure all ingredients are at room temperature if using coconut oil to prevent hardening.
  • Powdered Sugar – Sweetens the cookies and gives that signature coating; substitute with sugar-free powdered sugar for a healthier twist.

For Rolling

  • Additional Powdered Sugar – Use for rolling the baked cookies to create that classic snowy appearance, enhancing the sweetness of these snowball cookies.

Step‑by‑Step Instructions for Snowball Cookies

Step 1: Preheat the Oven
Begin your snowball cookies adventure by preheating your oven to 325°F (163°C). This ensures that the heat is just right for baking these delightful treats. As the oven warms up, gather your ingredients and equipment, including a mixing bowl and a baking sheet lined with parchment paper to make cleanup easy.

Step 2: Cream the Butter and Sugar
In a medium bowl or using a stand mixer, add your softened butter and powdered sugar. Beat them together on medium speed until the mixture is light, creamy, and fluffy—around 2-3 minutes. This step is crucial in creating a melt-in-your-mouth texture for your snowball cookies, so take your time to achieve the perfect consistency.

Step 3: Combine Dry Ingredients
In a separate bowl, whisk together the flour and finely chopped nuts. Make sure to mix them thoroughly so that the nuts are evenly dispersed throughout the flour. This combination not only adds delicious flavor but also provides structure to your snowball cookies, setting the stage for their delightful crunchiness.

Step 4: Mix Wet and Dry Ingredients
Slowly incorporate the dry mixture into your creamed butter and sugar, stirring gently with a spatula until a smooth cookie dough forms. Keep mixing until there are no dry flour patches visible. This should take about 2 minutes. The dough should feel soft and slightly sticky, creating the perfect base for your snowball cookies.

Step 5: Shape the Cookies
Using your hands, pinch off small amounts of dough and roll them into balls, about 1 inch in diameter. Place these balls onto your prepared baking sheet, leaving some space between them as they will spread slightly while baking. You should be able to fit about 12 cookies per sheet, ensuring they have room to bake evenly.

Step 6: Bake the Cookies
Slide the baking sheet into your preheated oven and bake the snowball cookies for 20-25 minutes. Keep an eye on them; they should be lightly browned but not overly dark. Once baking time is up, you’ll know they’re ready when they feel set but still soft to the touch—this will ensure a melt-in-your-mouth texture.

Step 7: Roll in Powdered Sugar
Once out of the oven, give your warm cookies a moment to cool for about 5 minutes on the baking sheet. Then, while still warm, roll each snowball cookie in additional powdered sugar—this creates the signature snowy coating. Allow them to cool completely on a wire rack for additional texture before serving or storing.

Step 8: Serve and Enjoy
Your delightful snowball cookies are now ready to share! These treats are perfect for any holiday gathering, offering a sweet touch to your festive celebrations. Remember that they also store well, so feel free to make a batch ahead of time and enjoy the joy of homemade cookies at any occasion.

Make Ahead Options

These Snowball Cookies are perfect for meal prep, allowing you to enjoy homemade holiday treats without the last-minute rush! You can prepare the dough up to 3 days in advance by mixing all the ingredients and then covering it tightly in plastic wrap or storing it in an airtight container. When you're ready to bake, simply shape the dough into balls and follow the usual baking instructions. Alternatively, you can freeze the shaped cookie balls for up to 2 months; just place them on a baking sheet, freeze until solid, then transfer to a freezer bag. Baking straight from frozen may require an additional 2-3 minutes in the oven. This way, you can whip up fresh, melt-in-your-mouth Snowball Cookies with minimal effort!

Expert Tips for Snowball Cookies

  • Cool Before Handling: Allow your snowball cookies to cool on the baking sheet for about 5 minutes before moving them. This prevents breakage as they firm up.

  • Use Room Temperature Butter: Ensure your butter is softened to room temperature for a creamy texture, avoiding any graininess in your dough.

  • Choose Your Nuts Wisely: When selecting nuts like walnuts or pecans, make sure they are finely chopped for an even distribution in your snowball cookies, enhancing their flavor.

  • Monitor Baking Time: Bake until lightly browned; over-baking can lead to a dry texture. Remember, they should feel soft when you take them out!

  • Customize Your Coating: For added flair, consider rolling your cookies in different coatings, like chopped nuts or shredded coconut, alongside the powdered sugar for variety.

Snowball Cookies Variations & Substitutions

Get creative with these delightful snowball cookies and make them your own!

  • Vegan: Substitute butter with coconut oil or vegan butter to enjoy a plant-based version without losing the classic flavor.
    Experimenting with vegan options not only fits dietary needs but also retains that melt-in-your-mouth goodness.

  • Chocolate Lovers: Add 2 tablespoons of unsweetened cocoa powder for rich Chocolate Snowball Cookies.
    The chocolatey twist adds a decadent layer of flavor, perfect for those who crave a touch of indulgence.

  • Citrus Zing: Incorporate the zest of a lemon or orange for a fresh, zesty twist that adds brightness to each bite.
    The vibrant citrus notes complement the buttery texture beautifully, making them a refreshing festive treat.

  • Nut-Free: Omit the nuts completely or substitute with sunflower seeds for a nut-free option that's still delightful.
    This allows everyone to enjoy a piece of the holiday spirit without worrying about allergies.

  • Pink Snowball Cookies: A few drops of red food coloring or finely ground freeze-dried strawberries will create stunning pink snowball cookies.
    These visually appealing treats add a playful touch to your cookie platter—perfect for special occasions!

  • Herbal Infusion: Try adding a teaspoon of finely chopped fresh rosemary or thyme for a unique savory twist.
    This unexpected flavor pairing elevates your cookies and intrigues friends and family at gatherings.

  • Spiced Up: Add a pinch of cinnamon or nutmeg to the dough for a warm, inviting spice that complements the sweetness.
    It’s a delightful reminder of cozy holidays and adds depth to your classic cookie recipe.

For a delicious array, consider pairing your snowball cookies with Thumbprint Cookies Melt or adding a hint of nutmeg for that extra holiday warmth!

What to Serve with Easy Holiday Snowball Cookies

Imagine delighting your guests with an array of treats that perfectly complements the sweetness of these melt-in-your-mouth wonders.

  • Creamy Hot Chocolate: Rich and velvety, this warm drink adds a cozy element that pairs beautifully with the buttery texture of snowball cookies.

  • Fresh Berries: A burst of juicy sweetness from strawberries or raspberries provides a refreshing contrast to the sugary cookie, brightening up your dessert table.

  • Coffee or Espresso: The robust flavors of coffee balance the sweetness of the cookies, making each bite even more delightful while adding a comforting vibe to your gathering.

  • Citrus Salad: A mix of tangy oranges and grapefruits drizzled with honey offers a zesty twist that cuts through the richness of the cookies—perfect for a light, refreshing side.

  • Ice Cream: Serve these cookies alongside a scoop of vanilla or chocolate ice cream, creating a deliciously creamy experience that’s hard to resist!

  • Nutty Granola: A sprinkle of nutty granola on the side adds a satisfying crunch, harmonizing with the cookies' textures and enhancing their flavor profile.

Adding these scrumptious pairings will not only elevate your snowball cookies but also create a wonderful atmosphere that everyone will enjoy!

How to Store and Freeze Snowball Cookies

Fridge: Store snowball cookies in an airtight container in the refrigerator for up to 7 days. This helps maintain their melt-in-your-mouth texture while adding a bit of freshness.

Freezer: For longer storage, freeze the cookies in a single layer on a baking sheet before transferring them to a freezer bag. They can last for up to 3 months without losing their delicious taste.

Dough: You can refrigerate the cookie dough for up to 5 days or freeze it for 2-3 months. When ready to bake, simply thaw in the fridge overnight before shaping and baking.

Reheating: To enjoy a taste of fresh-baked snowball cookies, reheat them in a 350°F (175°C) oven for about 5-10 minutes, or until warmed through, ensuring that they remain soft and delightful.

Snowball Cookies Recipe FAQs

What type of flour should I use for snowball cookies?
You can use white flour, whole wheat pastry flour, spelt flour, or even gluten-free flour for these snowball cookies. Different flours will slightly alter the texture, so feel free to experiment and find your favorite combination!

How should I store snowball cookies?
Store your snowball cookies in an airtight container in the refrigerator for up to 7 days. This will help maintain their delightful melt-in-your-mouth texture while also keeping them fresh and enjoyable. For longer storage, consider freezing them.

Can I freeze snowball cookies?
Absolutely! To freeze snowball cookies, place them in a single layer on a baking sheet until frozen, then transfer them to a freezer bag. They can last for up to 3 months in the freezer. When you're ready to enjoy them, just thaw in the fridge overnight, or warm them in the oven for a freshly-baked experience.

What if my cookie dough is too sticky?
If your cookie dough feels too sticky, try chilling it in the refrigerator for about 30 minutes. This will make it easier to handle and shape into balls. Additionally, ensure you're measuring your flour accurately, as too little flour can result in a sticky dough.

Are snowball cookies safe for those with nut allergies?
Yes! You can easily adapt snowball cookies to be nut-free by omitting the nuts entirely. If you'd like to maintain some texture, consider adding a bit of shredded coconut or using seeds like sunflower or pumpkin seeds as a substitute.

How can I make snowball cookies vegan?
To make vegan snowball cookies, simply substitute the butter with coconut oil or a vegan butter alternative. Make sure to use powdered sugar that doesn’t contain any bone char in the processing. The cookies will still be wonderfully soft and delicious!

Snowball Cookies

Melt-in-Your-Mouth Snowball Cookies: A Sweet Holiday Treat

Delightful Snowball Cookies that melt in your mouth, perfect for holiday celebrations.
Print Recipe Pin Recipe
Prep Time 15 minutes mins
Cook Time 25 minutes mins
Cooling Time 5 minutes mins
Total Time 45 minutes mins
Servings: 24 cookies
Course: Dessert
Cuisine: Holiday
Calories: 100
Ingredients Equipment Method Nutrition Notes

Ingredients
  

Cookie Dough Ingredients
  • 2 cups All-purpose flour Can substitute with whole wheat or gluten-free flour
  • 1 cup Nuts (Walnuts, Almonds, or Pecans) Optional; omit for nut-free
  • 1 cup Butter or Coconut Oil Ensure at room temperature
  • 1/2 cup Powdered Sugar Substitute with sugar-free for a healthier option
Rolling Ingredients
  • 1/2 cup Additional Powdered Sugar For rolling baked cookies

Equipment

  • Mixing Bowl
  • Baking Sheet
  • Parchment Paper
  • Stand Mixer

Method
 

Baking Instructions
  1. Preheat your oven to 325°F (163°C). Gather ingredients and equipment.
  2. In a medium bowl, cream together butter and powdered sugar until light and fluffy, about 2-3 minutes.
  3. In a separate bowl, whisk together the flour and chopped nuts.
  4. Gradually mix dry ingredients into creamed butter and sugar until a smooth dough forms.
  5. Shape the dough into 1-inch balls and place them on a baking sheet.
  6. Bake for 20-25 minutes, until lightly browned. Cookies should feel set but soft.
  7. Let the cookies cool for 5 minutes, then roll in additional powdered sugar.
  8. Allow them to cool completely on a wire rack before serving or storing.

Nutrition

Serving: 1cookieCalories: 100kcalCarbohydrates: 12gProtein: 1gFat: 5gSaturated Fat: 3gPolyunsaturated Fat: 1gMonounsaturated Fat: 1gCholesterol: 15mgSodium: 50mgPotassium: 30mgSugar: 6gVitamin A: 200IUCalcium: 20mgIron: 0.3mg

Notes

Snowball Cookies can be customized with different nuts or coatings for variety. Perfect for holiday gatherings and make-ahead desserts.

Tried this recipe?

Let us know how it was!

Melt-in-Your-Mouth Olive Garden Breadsticks Recipe at Home

November 17, 2025 by Grace Snow Leave a Comment

As I stood in my kitchen, the warm aroma of freshly baked bread enveloped me like a comforting hug. There’s something magical about the process of making Soft and Buttery Olive Garden Breadsticks—the gentle kneading, the rise of the dough, and the anticipation of that first bite. This Olive Garden Breadsticks Recipe is your ticket to creating those pillowy, garlic-flavored delights that pair perfectly with Italian dishes or stand alone as a delightful snack. Not only is it incredibly simple to whip up, but these breadsticks also bring a unique touch to your family dinners that they'll rave about. Whether you're serving them alongside a hearty pasta or enjoying them with a warm bowl of soup, these steamy, golden bites are bound to become a beloved staple in your home. Ready to transform your cooking routine with a dash of nostalgia? Let’s dive into this delightful journey together!

Why Make Olive Garden Breadsticks at Home?

Comforting, Nostalgic Flavors: These breadsticks capture the beloved taste of Olive Garden, allowing you to recreate cherished memories in your kitchen.
Simple Technique: With just a few basic ingredients and easy steps, anyone can master this recipe. Perfect for both beginners and seasoned chefs looking for a delightful challenge!
Versatile Pairing: Enjoy them alongside your favorite pasta dishes or soups; they elevate any meal and are perfect for family gatherings.
Crowd-Pleasing Appeal: Impress guests with homemade breadsticks that are soft, buttery, and simply irresistible—guaranteed to disappear quickly!
Make-Ahead Option: You can prep these ahead of time, letting your dough rise overnight for an even more convenient mealtime solution. Consider pairing them with a comforting bowl of Chicken Adobo Again or a zesty marinara sauce for dipping.

Olive Garden Breadsticks Recipe Ingredients

For the Dough

  • Warm Water (1 1/2 cups) – Activates the yeast; use lukewarm water for the best results.
  • Active Dry Yeast (2 1/4 tsp) – Essential for leavening; ensure it is fresh for proper rising.
  • Granulated Sugar (2 tbsp) – Feeds the yeast and adds slight sweetness; replace with brown sugar for a deeper flavor.
  • All-Purpose Flour (4 cups) – Provides structure and texture; bread flour can be used for chewier breadsticks.
  • Unsalted Butter (2 tbsp, softened) – Adds richness to the dough; can be swapped with margarine if preferred.
  • Salt (1 tbsp) – Enhances flavor and regulates yeast activity; sea salt works well as a substitute.

For the Topping

  • Melted Unsalted Butter (1/4 cup) – Gives a buttery finish; consider using olive oil for a healthier option.
  • Garlic Powder (1 tsp) – Infuses classic garlic flavor into the breadsticks; fresh minced garlic can provide a more robust taste.
  • Salt (1/2 tsp) – Balances the garlic flavor; adjust according to your taste preference.

These Olive Garden Breadsticks Recipe ingredients will help you create soft, buttery delights that are perfect for any Italian dish or enjoyed on their own!

Step‑by‑Step Instructions for Olive Garden Breadsticks Recipe

Step 1: Activate the Yeast
In a small bowl, combine 1 1/2 cups of warm water, 2 1/4 teaspoons of active dry yeast, and 2 tablespoons of granulated sugar. Stir gently to mix, then allow the mixture to sit for 5-10 minutes until it becomes frothy, indicating that the yeast is activated and ready to create the perfect rise for your Olive Garden Breadsticks.

Step 2: Prepare the Dough
In a large mixing bowl, whisk together 4 cups of all-purpose flour, 2 tablespoons of softened unsalted butter, and 1 tablespoon of salt until well combined. Pour in the activated yeast mixture and mix by hand or using a stand mixer on medium speed for 8-10 minutes. Knead until the dough is smooth and elastic, forming the base for your soft breadsticks.

Step 3: First Rise
Grease a large bowl with a little oil or melted butter, and transfer the kneaded dough into it, turning to coat. Cover the bowl with a kitchen towel or plastic wrap and place it in a warm area. Let it rise for about 1 hour, or until it has doubled in size. This step is crucial for achieving the airy texture of your Olive Garden Breadsticks.

Step 4: Shape the Breadsticks
After the dough has risen, gently punch it down to release the air. Divide the dough into 12-14 equal pieces and roll each piece into a 6-7 inch long rope, creating the classic breadstick shape. Arrange the shaped dough on a greased or parchment-lined baking sheet, ensuring there is space between each to allow for further rising.

Step 5: Second Rise
Cover the shaped breadsticks with a kitchen towel and let them rise again for 20-30 minutes in a warm spot. They should become puffy and nearly double in size during this time, ensuring they are light and fluffy when baked. This second rise is essential for that melt-in-your-mouth quality characteristic of Olive Garden Breadsticks.

Step 6: Preheat Oven
While the breadsticks are rising, preheat your oven to 400°F (200°C). This temperature will create the perfect environment for baking, allowing your breadsticks to become golden brown on the outside while remaining soft and buttery within, making them a delightful addition to any meal.

Step 7: Bake the Breadsticks
Once the oven is preheated, bake the breadsticks for 12-15 minutes, or until they are golden brown and slightly crispy on the outside. Keep a watchful eye, as the baking time may vary. The aroma of freshly baked Olive Garden Breadsticks will fill your kitchen and create an irresistible anticipation for the final product.

Step 8: Prepare Topping
As your breadsticks are baking, melt 1/4 cup of unsalted butter in a small saucepan or microwave. Mix in 1 teaspoon of garlic powder and 1/2 teaspoon of salt. This lovely buttery mixture will enhance the flavor of your warm breadsticks, giving them the characteristic taste that makes them so beloved.

Step 9: Finish
Once the breadsticks are done baking, remove them from the oven and immediately brush them generously with the melted butter mixture. Ensure every breadstick is coated to absorb the delicious flavors. Serve them warm alongside your favorite Italian dishes or enjoy them on their own—these Olive Garden Breadsticks are sure to become a cherished favorite!

Storage Tips for Olive Garden Breadsticks Recipe

  • Room Temperature: Keep leftover breadsticks in an airtight container at room temperature for up to 2 days. This preserves their soft texture and buttery flavor.
  • Fridge: If you prefer to store them longer, you can refrigerate for up to a week in an airtight container. Just be aware they may lose some of their original softness.
  • Freezer: For longer storage, freeze the breadsticks in a single layer in a freezer-safe bag for up to 3 months. Reheat directly from frozen for fresh-like results.
  • Reheating: To reheat, bake at 350°F (175°C) for about 10 minutes or until warmed through. Brush with melted butter before serving to restore their delightful flavors!

Expert Tips for Olive Garden Breadsticks

  • Yeast Activation: Ensure the yeast is frothy; this vital step confirms it's alive and will help your breadsticks rise beautifully.

  • Kneading Technique: Knead the dough until smooth and elastic, but be gentle during shaping to maintain air bubbles for a light texture.

  • Perfect Baking Time: Keep a close watch while baking. You're looking for a golden-brown color; overbaking can lead to dryness in your Olive Garden Breadsticks.

  • Flavor Variations: Consider swapping garlic powder for fresh minced garlic or adding herbs for a personal touch to your breadsticks.

  • Storing Leftovers: Store in an airtight container for up to 2 days or freeze for later enjoyment, ensuring you never miss out on these delightful treats!

Make Ahead Options

These Olive Garden Breadsticks are perfect for meal prep enthusiasts! You can prepare the dough and shape it into breadsticks up to 24 hours in advance. Simply follow the dough-making steps and then refrigerate the shaped breadsticks covered tightly with plastic wrap. This will keep them fresh and allow them to rise slowly, enhancing the flavor. When you're ready to serve, just take them out of the fridge for a quick 20-30 minute second rise at room temperature before baking at 400°F (200°C) for 12-15 minutes. This way, you'll enjoy soft, buttery breadsticks with minimal effort on busy weeknights!

What to Serve with Olive Garden Breadsticks Recipe

Bring the ultimate dining experience to your table with perfect side dishes that harmonize with warm, buttery breadsticks.

  • Creamy Alfredo Pasta: The rich, velvety sauce clings beautifully to your favorite pasta, creating an indulgent pairing with the breadsticks for an Italian feast.

  • Zesty Marinara Sauce: This classic dipping sauce not only complements the savory garlic flavor but also adds a deliciously tangy contrast that enhances the breadsticks.

  • Garden Salad: A crisp, refreshing salad filled with vibrant vegetables provides a light and healthy balance, brightening your meal while the breadsticks deliver the comfort.

  • Roasted Vegetables: Caramelized, seasoned veggies introduce a wonderful depth of flavor and texture, making for a colorful and nutritious addition to your dining experience.

  • Italian Wedding Soup: The warm broth, packed with tender meatballs and green veggies, is a cozy companion that turns mealtime into a heartwarming gathering.

  • Bruschetta: With its fresh tomatoes and basil on crispy bread, bruschetta brings a bright note that pairs delightfully with the soft texture of the breadsticks, ideal for appetizer lovers.

  • Red Wine: A glass of rich red wine completes the experience, its bold flavors accentuating both the breadsticks and your Italian entrées beautifully.

  • Tiramisu: For dessert, this luscious coffee-flavored treat offers a sweet ending that contrasts perfectly with the savory breadsticks, leaving a lasting impression on your taste buds.

Olive Garden Breadsticks Recipe Variations

Feel free to explore these exciting variations that will elevate your Olive Garden breadsticks with fresh flavors and textures!

  • Garlic Swaps: Swap garlic powder for fresh minced garlic for a more intense flavor. You’ll love the aromatic boost that fresh ingredients provide.

  • Herbal Infusion: Add dried herbs like oregano or rosemary to the dough for a flavorful twist. This adds a delightful depth that complements the garlic beautifully.

  • Cheesy Delight: Sprinkle grated Parmesan or mozzarella cheese on top before baking for a cheesy, golden crust that will make your breadsticks even more irresistible.

  • Dairy-Free: Substitute unsalted butter with vegan margarine or coconut oil to create a dairy-free version. Your bread will remain deliciously soft and flavorful!

  • Spicy Kick: Mix in red pepper flakes or a drizzle of hot oil to add a warming heat. This variation will add a surprising zing to your meal.

  • Seeded Crunch: Try adding sesame or poppy seeds on top before baking for a crunchy texture and added visual appeal. It offers a unique take on this classic.

  • Garlic Herb Butter: Blend fresh herbs and garlic into the melted butter before brushing it on the breadsticks after baking. The aroma will be heavenly and deeply satisfying!

  • Homemade Dipping Sauce: Pair these breadsticks with a homemade marinara sauce for a flavorful dip. It not only enhances the experience but also makes for a perfect appetizer. Consider trying it with a comforting bowl of Chicken Adobo Again for a complete meal.

Enjoy customizing your Olive Garden breadsticks with these simple substitutions and variations—a perfect way to make them your own!

Olive Garden Breadsticks Recipe FAQs

What is the best way to select ripe ingredients for this recipe?
Absolutely! When choosing your ingredients, opt for fresh active dry yeast; it should be within the expiration date and ideally foamy when activated. The flour should be finely milled and free from lumps for the best texture. For the butter, use unsalted to control the saltiness; it should be softened but not melted. And when it comes to garlic powder, look for a fragrant option to infuse a luscious flavor into your breadsticks.

How should I store leftover Olive Garden breadsticks?
I recommend storing leftover breadsticks in an airtight container at room temperature for up to 2 days. If you want to keep them longer, you can refrigerate them in an airtight container for up to a week, but be aware that they may lose some moisture. For optimal freshness, consider freezing them—just place them in a single layer in a freezer-safe bag for up to 3 months!

Can I freeze the Olive Garden breadsticks? How?
Absolutely, freezing is a fantastic option! Once your breadsticks are completely cooled, wrap them individually in plastic wrap or aluminum foil, then place them in a freezer-safe bag. This way, they’ll retain their delightful softness. When you're ready to enjoy them, simply reheat from frozen by baking at 350°F (175°C) for about 10 minutes, brushing them with melted butter for that fresh-out-of-the-oven flavor!

What if my dough doesn’t rise?
Very! If your dough isn’t rising, it’s most likely due to inactive yeast. Make sure your water temperature is around 110°F (43°C)—too hot can kill the yeast, and too cold won’t activate it. If after 10 minutes your yeast mixture doesn’t look frothy, try again with fresh yeast. Additionally, ensure your dough is rising in a warm area—if it’s too cool, it won’t rise well. You might also be motivated by the cozy scent of fresh bread to find a warm spot for rising!

Are these breadsticks suitable for people with dietary restrictions?
Definitely! For those following a dairy-free diet, you can easily replace the unsalted butter with margarine or a dairy-free butter alternative. If gluten is a concern, you can use gluten-free all-purpose flour for a delightful twist, though the texture may vary. Always check labels for any potential allergens, especially if serving to guests or family members with allergies. And remember, when it comes to sharing delicious homemade food, the more the merrier!

Can I make these breadsticks ahead of time?
Yes! I often prepare the dough ahead of time, letting it rise overnight in the refrigerator. After shaping the breadsticks, cover them and let them rise in the fridge for 8-12 hours. When you’re ready to bake, simply allow them to sit at room temperature for about 30 minutes before preheating your oven. This method not only saves time but also deepens the flavors—it’s a win-win!

Olive Garden Breadsticks Recipe

Melt-in-Your-Mouth Olive Garden Breadsticks Recipe at Home

A delightful Olive Garden Breadsticks Recipe that brings comforting flavors and simplicity to your kitchen, perfect for any meal.
Print Recipe Pin Recipe
Prep Time 20 minutes mins
Cook Time 15 minutes mins
Rising Time 1 hour hr 30 minutes mins
Total Time 2 hours hrs 5 minutes mins
Servings: 12 breadsticks
Course: Appetizers
Cuisine: Italian
Calories: 150
Ingredients Equipment Method Nutrition Notes

Ingredients
  

For the Dough
  • 1.5 cups warm water Use lukewarm water for the best results.
  • 2.25 tsp active dry yeast Essential for leavening; ensure it is fresh for proper rising.
  • 2 tbsp granulated sugar Feeds the yeast and adds slight sweetness.
  • 4 cups all-purpose flour Provides structure and texture.
  • 2 tbsp unsalted butter Softened; adds richness to the dough.
  • 1 tbsp salt Enhances flavor and regulates yeast activity.
For the Topping
  • 0.25 cups melted unsalted butter Gives a buttery finish.
  • 1 tsp garlic powder Infuses classic garlic flavor into the breadsticks.
  • 0.5 tsp salt Balances the garlic flavor.

Equipment

  • Mixing Bowl
  • Baking Sheet
  • Whisk
  • Oven
  • Spatula

Method
 

Breadstick Preparation
  1. Activate the yeast: In a small bowl, combine warm water, active dry yeast, and granulated sugar. Stir gently and let sit for 5-10 minutes until frothy.
  2. Prepare the dough: In a large bowl, whisk together flour, softened butter, and salt. Pour in the activated yeast mixture and mix for 8-10 minutes until smooth and elastic.
  3. First rise: Grease a large bowl, transfer the dough, cover, and let rise in a warm area for about 1 hour or until doubled in size.
  4. Shape the breadsticks: Punch down the dough, divide into 12-14 equal pieces, and roll into 6-7 inch long ropes. Arrange on a greased baking sheet.
  5. Second rise: Cover shaped breadsticks and let rise for 20-30 minutes until puffy.
  6. Preheat oven: While rising, preheat your oven to 400°F (200°C).
  7. Bake the breadsticks: Bake for 12-15 minutes, or until golden brown.
  8. Prepare topping: Melt unsalted butter and mix in garlic powder and salt.
  9. Finish: Brush the baked breadsticks generously with the melted butter mixture.

Nutrition

Serving: 1breadstickCalories: 150kcalCarbohydrates: 22gProtein: 3gFat: 6gSaturated Fat: 4gMonounsaturated Fat: 2gCholesterol: 15mgSodium: 300mgPotassium: 80mgFiber: 1gSugar: 1gVitamin A: 200IUCalcium: 20mgIron: 1mg

Notes

Store leftover breadsticks in an airtight container for up to 2 days at room temperature or freeze for up to 3 months. Reheat directly from frozen.

Tried this recipe?

Let us know how it was!

McGriddle Bites: Sweet Sausage Muffins Everyone Craves

November 17, 2025 by Grace Snow Leave a Comment

Sifting through a busy morning, I found myself longing for a breakfast that could bridge the gap between comfort and convenience. Enter McGriddle Bites: sweet sausage muffins that transform the way we approach breakfast. These delightful morsels combine fluffy pancake batter with savory sausage and a hint of maple syrup, making them a deliciously satisfying option that’s perfect for meal prep. Not only are they quick to whip up, but they're also freezer-friendly, ensuring that a warm, homemade breakfast is always within reach. Whether you like them spicy with jalapeños or sweet with blueberries, the customizable nature of this recipe means every bite can bring something new to your plate! Are you ready to dive into the irresistible world of McGriddle Bites?

Why Are McGriddle Bites a Must-Try?

Irresistible Flavor: The blend of fluffy pancake batter and savory sausage creates a flavor explosion that’ll make your taste buds dance.

Customizable Options: From adding jalapeños for a kick to blueberries for a sweet twist, you can personalize these bites to suit your cravings.

Quick and Easy: With just a few simple steps, you can whip up a batch in no time, perfect for those hectic mornings!

Meal Prep Friendly: They store beautifully in the freezer, ready to heat and serve whenever hunger strikes—ideal for busy households wanting homemade goodness.

Crowd-Pleasing Delight: They're the perfect addition to any brunch spread, guaranteed to impress family and friends! Enjoy alongside a vibrant fresh fruit salad or paired with crispy bacon for an unforgettable breakfast experience!

McGriddle Bites Ingredients

Prepare for a delicious homemade adventure!

For the Batter
• Breakfast Sausage – Adds savory richness; for a leaner option, try turkey sausage.
• Hungry Jack Pancake Mix – Provides structure and fluffiness; make sure it only requires water.
• Water – Essential for batter consistency; filtered or tap water works well.
• Maple Syrup – Infuses sweetness; opt for pure maple syrup for the best flavor.
• Cheddar Cheese – Brings creaminess; shred it yourself for enhanced melting.

Optional Add-Ins
• Diced Jalapeños – Adds a spicy kick for the adventurous palate.
• Blueberries – Introduces a sweet contrast, perfect for a fruity twist in your McGriddle Bites.

Step‑by‑Step Instructions for McGriddle Bites: Sweet Sausage Muffins

Step 1: Preheat the Oven
Begin by preheating your oven to 400ºF (204ºC) while you prepare your mini muffin tin by greasing it with cooking spray or butter to prevent sticking. This temperature will ensure your McGriddle Bites bake evenly and turn golden brown, creating that irresistible flavor and texture everyone loves.

Step 2: Cook the Sausage
In a skillet over medium-high heat, cook the breakfast sausage for about 5-7 minutes, breaking it apart with a spatula until it is fully browned and crumbled. Once it reaches a rich brown color, remove excess grease by draining it, leaving you with perfectly savory sausage pieces to fold into your McGriddle Bites batter.

Step 3: Make the Batter
In a large mixing bowl, combine the Hungry Jack pancake mix, water, and maple syrup. Gently stir the mixture until just combined; be cautious not to overmix, as this could impact the fluffiness of your muffins. As the batter comes together, you’ll notice a delightful aroma of maple sweetness wafting through your kitchen.

Step 4: Fold in Sausage and Cheese
Now it’s time to add your cooked sausage and shredded cheddar cheese to the batter. Carefully fold these ingredients together until they are evenly distributed throughout the mixture. The sight of warm sausage and gooey cheese mingling with the batter will spark excitement for your McGriddle Bites!

Step 5: Fill the Muffin Tin
Using a spoon, fill each muffin cup in your prepared tin about three-quarters full with the McGriddle Bites batter. This will allow room for them to rise while baking, forming those fluffy, delectable bites. You’ll want them to be generously filled to ensure each muffin is packed with flavor.

Step 6: Bake the Muffins
Place the muffin tin in the preheated oven and bake for 12-15 minutes, or until the tops turn a beautiful golden brown and a toothpick inserted into the center comes out clean. As they bake, you’ll witness the transformation of your batter into delicious McGriddle Bites, and the kitchen will fill with mouthwatering aromas.

Step 7: Cool and Serve
Once baked, remove the McGriddle Bites from the oven and let them cool slightly in the pan for about 5 minutes. Then, carefully transfer them to a wire rack to cool further. Serve warm alongside extra maple syrup for dipping, and watch as family and friends gather around to enjoy these comforting breakfast treats.

What to Serve with McGriddle Bites: Sweet Sausage Muffins

Indulge in a delightful breakfast experience by pairing these sweet sausage muffins with complementary dishes that elevate the flavors and enhance the overall meal.

  • Fresh Fruit Salad: Bright and vibrant, a mix of berries, melons, and citrus complements the sweetness of the McGriddle Bites, adding refreshing notes to every bite.
  • Greek Yogurt Parfait: Creamy yogurt layered with granola and honey provides a contrast to the fluffy muffins, making for a wholesome and satisfying breakfast.
  • Crispy Maple-Glazed Bacon: The savory crunch of bacon highlights the sweetness of the McGriddle Bites while bringing a deliciously smoky flavor to the table.
  • Scrambled Eggs with Herbs: Fluffy and flavorful, eggs seasoned with fresh herbs add a protein boost, beautifully rounding out the breakfast experience.
  • Savory Spinach & Cheese Frittata: This light, baked egg dish provides a nutritious option that complements the muffins while adding wholesome greens to your plate.
  • Iced Coffee or Fresh Orange Juice: Kickstart your morning with a refreshing beverage. Iced coffee balances sweet flavors, while orange juice adds a zesty burst of freshness.

Mix and match these pairings to create the perfect breakfast spread that will delight your family and keep you coming back for more!

Make Ahead Options

These McGriddle Bites are perfect for meal prep enthusiasts! You can prepare the batter and fill the muffin tin up to 24 hours in advance, storing it covered in the refrigerator to ensure freshness. Alternatively, bake the bites and let them cool completely, then freeze them in a single layer for up to 3 months before transferring to a freezer bag. When ready to enjoy, simply reheat from frozen in the microwave for about a minute or in a toaster oven at half power for an even texture. This way, you’ll have delicious, homemade breakfast treats available at a moment's notice, making busy mornings just a little easier!

McGriddle Bites Variations & Substitutions

Feel free to unleash your creativity with these customizable options that will enhance your McGriddle Bites experience!

  • Bacon Swap: Replace breakfast sausage with crispy bacon for a smoky flavor punch that everyone will love. The combination of fluffy batter and crunchy bacon creates a delightful texture contrast.

  • Plant-Based Option: Use plant-based sausage or a mix of sautéed vegetables for a vegetarian-friendly twist. This change not only caters to diverse diets but also brightens the flavor profile.

  • Spicy Kick: Add diced jalapeños for a zesty version that brings the heat. Each bite will have an exciting burst of flavor, sure to wake up your taste buds in the best way!

  • Fruity Delight: Incorporate fresh blueberries into the batter for a sweet twist, creating a deliciously fruity contrast with the savory elements. The sweetness of the blueberries pairs beautifully with maple syrup.

  • Cheese Varieties: Try swapping cheddar cheese for pepper jack to bring an extra spicy warmth. This simple swap can elevate your muffins to new flavor heights!

  • Herb Infusion: Include fresh herbs like chives or parsley for added freshness and depth. This subtle addition can really brighten up the overall flavor.

  • Syrup Experimentation: Change up the syrup by using flavored varieties like honey or agave. This way, you can enjoy different sweetness levels that will perfectly complement your McGriddle Bites.

  • Sweetened Batter: Mix in a pinch of cinnamon or vanilla extract to the batter for a delightful flavor enhancement. These notes will beautifully elevate your breakfast bites and make them even more inviting.

For additional ideas on how to enjoy sweet potatoes as a side, the Maple Roasted Sweet or Smoky Sweet Potatoes pair wonderfully with your McGriddle Bites!

Expert Tips for McGriddle Bites

  • Gentle Mixing: Avoid overmixing the batter to preserve that fluffy texture; it’s okay if there are a few lumps.

  • Proper Cooling: Cool McGriddle Bites completely before freezing to prevent ice crystals and maintain their deliciousness.

  • Reheating Right: When reheating, use a microwave or toaster oven at half power for about a minute to keep them cozy and prevent sogginess.

  • Flavorful Additions: Don’t hesitate to customize! Adding jalapeños or blueberries can elevate your McGriddle Bites and create unique flavor profiles.

  • Storage Tips: Keep leftovers in an airtight container in the fridge for up to 5 days, or freeze for 3 months to enjoy homemade goodness anytime.

Storage Tips for McGriddle Bites

Fridge: Store McGriddle Bites in an airtight container for up to 5 days. Make sure they are completely cooled before refrigerating to maintain their fluffy texture.

Freezer: These sweet sausage muffins can be frozen for up to 3 months. Place them in a freezer-safe bag or container, ensuring they're wrapped tightly to prevent freezer burn.

Reheating: When ready to enjoy, reheat your McGriddle Bites in the microwave at half power for about a minute or use a toaster oven to regain their delightful texture.

Serving Warm: For the best experience, serve warm with a drizzle of maple syrup on the side—perfect for dunking each bite!

McGriddle Bites: Sweet Sausage Muffins Recipe FAQs

What’s the best way to choose ripe ingredients for McGriddle Bites?
Absolutely! When selecting your breakfast sausage, opt for one that appears fresh and smells savory. If you're using jalapeños, look for firm peppers with a vibrant green color, avoiding any with dark spots or wrinkles. For blueberries, choose plump, firm berries that have a deep blue color without any signs of mushiness.

How should I store McGriddle Bites, and how long do they last?
Very! Store your McGriddle Bites in an airtight container in the fridge for up to 5 days. Allow them to cool completely before placing them in the container to maintain their fluffy texture. If you want to enjoy them later, freezing is a great option!

Can I freeze McGriddle Bites, and how should I do it?
Yes, indeed! After baking, allow your McGriddle Bites to cool completely. Once cooled, place them in a single layer on a baking sheet and freeze for about 2 hours. Then, transfer them to a freezer-safe bag or container, making sure to remove excess air. They can be stored for up to 3 months. When you're ready to eat, just reheat as needed!

What should I do if my McGriddle Bites are too dense?
Ah, that's an easy fix! If your McGriddle Bites come out dense, it’s likely due to overmixing the batter. When combining your ingredients, be gentle—just stir until combined, and it’s okay if there are a few lumps! This method preserves the light and fluffy texture that’s key to the recipe.

Are there any dietary considerations for McGriddle Bites?
Of course, it's important to be mindful! If you or your loved ones have dietary restrictions or allergies, consider using gluten-free pancake mix and substituting the breakfast sausage with turkey or plant-based sausage. Always check the ingredient labels to avoid allergies specifically related to cheese or any additional add-ins you choose to incorporate.

Can I customize my McGriddle Bites with different ingredients?
Absolutely! The more the merrier! You can swap out breakfast sausage for crispy bacon for a twist or mix in jalapeños if you prefer a spicy kick. For a sweeter option, toss in fresh blueberries or consider using flavored syrups! Enjoy experimenting with flavors to make each batch uniquely yours.

McGriddle Bites: Sweet Sausage Muffins

McGriddle Bites: Sweet Sausage Muffins Everyone Craves

Experience McGriddle Bites: sweet sausage muffins that blend fluffy pancake batter with savory sausage and maple syrup for a delightful breakfast.
Print Recipe Pin Recipe
Prep Time 15 minutes mins
Cook Time 15 minutes mins
Cooling Time 5 minutes mins
Total Time 35 minutes mins
Servings: 12 muffins
Course: Breakfast
Cuisine: American
Calories: 180
Ingredients Equipment Method Nutrition Notes

Ingredients
  

For the Batter
  • 1 pound Breakfast Sausage For a leaner option, try turkey sausage.
  • 2 cups Hungry Jack Pancake Mix Ensure it only requires water.
  • 1 cup Water Filtered or tap water works well.
  • 1/4 cup Maple Syrup Opt for pure maple syrup for the best flavor.
  • 1 cup Cheddar Cheese Shred it yourself for enhanced melting.
Optional Add-Ins
  • 1/4 cup Diced Jalapeños Adds a spicy kick.
  • 1/2 cup Blueberries Perfect for a fruity twist.

Equipment

  • Oven
  • mini muffin tin
  • Skillet
  • Mixing Bowl
  • Spatula
  • Spoon

Method
 

Step-by-Step Instructions
  1. Begin by preheating your oven to 400ºF (204ºC) while you prepare your mini muffin tin by greasing it.
  2. In a skillet, cook the breakfast sausage for about 5-7 minutes until fully browned.
  3. In a large bowl, combine the pancake mix, water, and maple syrup; gently stir until just combined.
  4. Add your cooked sausage and shredded cheddar cheese to the batter and fold together.
  5. Fill each muffin cup about three-quarters full with the batter.
  6. Bake for 12-15 minutes, or until the tops turn golden brown and a toothpick comes out clean.
  7. Let them cool slightly in the pan for about 5 minutes before transferring to a wire rack.

Nutrition

Serving: 1muffinCalories: 180kcalCarbohydrates: 20gProtein: 6gFat: 8gSaturated Fat: 3gPolyunsaturated Fat: 1gMonounsaturated Fat: 2gCholesterol: 20mgSodium: 300mgPotassium: 200mgFiber: 1gSugar: 3gVitamin A: 200IUVitamin C: 1mgCalcium: 150mgIron: 1mg

Notes

These muffins can be frozen for up to 3 months; reheat in the microwave at half power for about a minute. Serve warm with maple syrup for the best experience.

Tried this recipe?

Let us know how it was!

Soft and Chewy Honey Oatmeal Cookies for Wholesome Snacking

November 17, 2025 by Grace Snow Leave a Comment

The aroma of freshly baked cookies wafted through my kitchen, a sweet invitation I simply couldn't resist. That's how these Honey Oatmeal Cookies came to life—a delightful recipe that combines wholesome oats with the natural sweetness of honey, making them a perfect choice for breakfast or a midday snack. What I love about this easy-to-make treat is that it suits everyone, from novice bakers to seasoned chefs, ensuring you can enjoy homemade goodness without the hassle. Plus, with the flexibility to experiment with different types of honey, each batch can bring a unique twist to the table. Are you ready to indulge in a snack that’s not only delicious but also wholesome? Let’s dive into this recipe together!

Why Are Honey Oatmeal Cookies So Special?

Irresistible Flavor: The combination of creamy honey and hearty oats brings out a natural sweetness that’s hard to resist.

Easy to Make: With simple ingredients and straightforward steps, even beginner bakers can whip these up!

Versatile Variations: Mix and match different honey types or add shredded coconut for a fun twist!

Perfect for Any Time: Enjoy them as a nourishing breakfast, a midday snack, or even a treat after dinner. Pair with a glass of milk or your favorite herbal tea for a cozy experience.

Healthy Indulgence: These cookies offer a wholesome guilt-free option, making it easy to satisfy your sweet tooth without the fast-food guilt. Check out more delights like our Eggnog Cookies Soft for your next baking adventure!

Honey Oatmeal Cookies Ingredients

For the Cookie Base

  • Creamed Honey – Adds natural sweetness and moisture; you can experiment with clover or orange blossom honey for a unique taste.
  • Butter – Provides richness and affects texture; using room temperature butter prevents a greasy outcome.
  • Egg – Binds ingredients and adds moisture; ensures the cookies hold together well.
  • Vanilla Extract – Enhances the flavor beautifully; opt for pure extract for the best results.
  • All-Purpose Flour – Forms the structure of the cookies; no gluten-free alternative specified for this recipe.
  • Oats – Gives the cookies a chewy texture and heartiness; rolled oats are recommended for the best results.
  • Baking Powder – A leavening agent that helps the cookies rise; crucial for achieving a light and fluffy texture.
  • Baking Soda – Works alongside baking powder to provide lift; essential for that perfect cookie bounce.
  • Salt – Balances sweetness and enhances flavors; a little goes a long way to elevate the taste.

With these simple yet wholesome Honey Oatmeal Cookies ingredients, you're well on your way to creating a delightful treat that's perfect for any time of the day!

Step‑by‑Step Instructions for Honey Oatmeal Cookies

Step 1: Preheat Your Oven
Begin by preheating your oven to 375°F (190°C). While it heats up, line a baking sheet with parchment paper, which will prevent the cookies from sticking. A warm oven ensures that your Honey Oatmeal Cookies will rise beautifully, creating that perfect chewy texture.

Step 2: Cream the Butter
In a mixing bowl, use an electric mixer to beat room temperature butter until it’s light and fluffy, which will take about 1-2 minutes. This step is crucial as it incorporates air into the butter, helping your cookies to be soft. A pale color and fluffy texture indicate you’re ready to mix in the next ingredients.

Step 3: Incorporate Wet Ingredients
Next, add the egg, creamed honey, and vanilla extract to the creamed butter. Beat this mixture on medium speed until it's smooth and well combined, about 1 minute. The honey will add a lovely sweetness, so make sure everything is blended evenly to form the base for your Honey Oatmeal Cookies.

Step 4: Combine Dry Ingredients
In a separate bowl, whisk together the oats, flour, baking powder, baking soda, and salt until they are fully blended. Gradually fold this dry mixture into the wet ingredients, using a spatula or wooden spoon. Stir until a uniform dough forms; the dough should be thick and slightly sticky, ensuring that it holds together well.

Step 5: Shape the Cookies
Using a cookie scoop or two tablespoons, form the dough into balls and place them on the prepared baking sheet, leaving about 1.5 inches between each cookie. Flatten each dough ball slightly with your fingers; this helps achieve an even bake for your Honey Oatmeal Cookies, ensuring they don’t spread too much.

Step 6: Bake the Cookies
Place the baking sheet in the preheated oven and bake for about 8 minutes, or until the edges turn golden brown. Keep an eye on them as the honey can cause the cookies to brown faster than traditional sugar cookies. You want them to be set but still soft in the middle for that perfect chewy bite.

Step 7: Cool Down
Once your Honey Oatmeal Cookies are done baking, remove them from the oven and let them sit on the baking sheet for about 5 minutes. This cooling time allows them to firm up a bit. Afterward, transfer the cookies to a wire rack to cool completely, ensuring they maintain their delightful texture.

Honey Oatmeal Cookies Variations & Substitutions

Feel free to get creative and give your Honey Oatmeal Cookies a personal twist that reflects your taste!

  • Flavor Boost: Experiment with different types of honey for diverse flavor profiles. Clover feels classic, while orange blossom adds a floral note.

  • Nutty Addition: For a protein-packed twist, mix in a handful of chopped nuts or seeds like walnuts or sunflower seeds. It adds a delightful crunch and extra nutrients!

  • Sweeten with Spice: Add a sprinkle of cinnamon or nutmeg for a warm, cozy flavor bracket. These spices complement the honey beautifully and elevate the cookie's taste.

  • Coconut Delight: Incorporate shredded coconut for a tropical twist! It adds a chewy texture and a hint of paradise with each bite, making your cookies extra special.

  • Chocolatey Indulgence: Toss in some chocolate chips for a sweet surprise! Semi-sweet or dark chocolate pairs wonderfully with oatmeal and honey, creating an irresistible dessert.

  • Fruitful Touch: Add raisins or dried cranberries for a sweet and chewy dimension. These little bursts of flavor will elevate your cookie game!

  • Gluten-Free Option: For a gluten-free version, swap out the all-purpose flour with almond flour or oat flour. Just be sure to add a bit more binding agent like an extra egg!

  • Heat It Up: Craving a little kick? Sprinkle in a pinch of cayenne pepper or chili powder for a surprising hint of heat that balances the sweetness perfectly!

These variations make each batch of Honey Oatmeal Cookies a fresh and delightful treat, just like our Honey Garlic Chicken or Honey BBQ Chicken! Enjoy exploring the many ways you can customize this classic cookie recipe!

What to Serve with Honey Oatmeal Cookies

Treat yourself to a delightful dining experience by combining these sweet and wholesome cookies with the perfect accompaniments.

  • Creamy Mashed Potatoes: These fluffy potatoes provide a comforting texture contrast to the chewy cookies and keep your meal hearty.
  • Fresh Fruit Salad: Bright, juicy fruits like berries or melon create a refreshing balance, enhancing the sweetness of the honey in the cookies.
  • Herbal Tea: A warm cup of chamomile or vanilla tea adds a soothing element, making for a cozy snack or breakfast experience. Sip these delightful brews alongside your cookies to savor the flavors.
  • Ice Cream: A scoop of vanilla or honey-flavored ice cream takes your cookies to the next level, adding a cold, creamy element that pairs beautifully with their chewy texture.
  • Nutty Granola: Crunchy granola complements the oats in the cookies while adding a nutty flavor that enhances each bite. This makes for a wonderful topping idea if you decide to enjoy them in a parfait!
  • Milk: A classic pairing, a cold glass of milk complements the sweetness of the honey and helps soften the cookies for the ultimate comforting treat.
  • Dark Chocolate Sauce: Drizzle this rich sauce over your cookies for a decadent touch, balancing the sweet honey with its bold, slightly bitter flavor.
  • Cheese Platter: A selection of mild cheeses can enhance the overall tasting experience; think creamy Brie or tangy goat cheese to contrast with the cookie's sweetness.
  • Coffee: A warm cup of coffee supports the cookie's flavors, while its bitterness contrasts beautifully, making every bite a pleasure.

Mix and match these ideas to create a beautifully rounded meal that highlights the charm of honey oatmeal cookies!

Make Ahead Options

These Honey Oatmeal Cookies are an excellent candidate for meal prep, making your busy weeknights a breeze! You can prepare the cookie dough and refrigerate it for up to 3 days or shape the dough into balls and freeze them for up to 3 months. To maintain their delightful chewy texture, be sure to use an airtight container when refrigerating or freezing. When you're ready to bake, simply preheat your oven and add an extra 1-2 minutes to the baking time if you're baking from frozen. This way, you can enjoy fresh, warm Honey Oatmeal Cookies with minimal effort, perfect for any snacking occasion!

How to Store and Freeze Honey Oatmeal Cookies

Room Temperature: Store cookies in an airtight container at room temperature for up to 5-7 days, keeping them fresh and chewy.

Fridge: If you prefer a softer cookie, you can store them in the fridge for a slightly longer shelf life, up to 10 days, but ensure they’re in a sealed container to avoid drying out.

Freezer: Honey Oatmeal Cookies can be frozen for up to 3 months. Place them in a freezer-safe bag, removing as much air as possible before sealing.

Reheating: For the best experience, reheat frozen cookies in the oven at 350°F (175°C) for about 5-7 minutes or until warmed through, ensuring that they regain their soft, chewy texture.

Expert Tips for Honey Oatmeal Cookies

  • Chill the Dough: Refrigerate your dough for 30 minutes before baking to prevent cookies from spreading too much and ensure a perfect shape.

  • Room Temperature Butter: Always use room temperature butter instead of melted butter for optimal consistency. This will keep your cookies fluffy and prevent them from being greasy.

  • Honey Tricks: Spray measuring cups with cooking spray to help the honey pour out easily. This way, you waste less and get the perfect sweetness in your cookies.

  • Watch the Bake Time: Honey-baked cookies can brown faster than those made with sugar. Keep a careful eye on them around the 7-minute mark to avoid burning.

  • Customize Your Cookies: Feel free to experiment with different types of honey for unique flavors and add-ins like nuts or chocolate chips to enhance your Honey Oatmeal Cookies!

Honey Oatmeal Cookies Recipe FAQs

How do I choose the best honey for my cookies?
Absolutely! The type of honey you choose can significantly affect the flavor of your Honey Oatmeal Cookies. I recommend trying clover honey for a mild sweetness, while orange blossom honey adds a delightful citrus aroma. Avoid darker honey varieties if you prefer a subtler taste. Always opt for creamed honey as it provides moisture and helps the cookies stay chewy!

How should I store my Honey Oatmeal Cookies?
To keep your cookies fresh and chewy, store them in an airtight container at room temperature for 5-7 days. If you want to maintain their softness, refrigerating them in a sealed container can extend their life to about 10 days. Just remember to keep them airtight to prevent them from drying out.

Can Honey Oatmeal Cookies be frozen?
Yes, indeed! You can freeze your Honey Oatmeal Cookies for up to 3 months. To do this, place the cooled cookies in a freezer-safe bag, removing as much air as possible before sealing. This helps to preserve their flavor and texture.

What should I do if my cookies spread too much while baking?
If you notice your cookies spreading excessively, don’t worry too much! This can happen due to melted butter or not chilling the dough. For future batches, make sure to use room temperature butter (not melted) and chill the dough for at least 30 minutes before baking. This can help the cookies maintain their shape during baking.

Are these cookies safe for pets or people with allergies?
While Honey Oatmeal Cookies are delicious, they should be avoided for dogs due to the honey content and potential for weight gain. If you're baking for someone with allergies, note that this recipe contains eggs and dairy (butter). Always check ingredients if you're unsure about allergies. Feel free to adapt the recipe by substituting butter with a dairy-free option to accommodate dietary needs!

Honey Oatmeal Cookies

Soft and Chewy Honey Oatmeal Cookies for Wholesome Snacking

These Honey Oatmeal Cookies combine wholesome oats with natural honey, creating a perfect sweet treat for any time of day.
Print Recipe Pin Recipe
Prep Time 15 minutes mins
Cook Time 8 minutes mins
Cooling Time 5 minutes mins
Total Time 28 minutes mins
Servings: 24 cookies
Course: Dessert
Cuisine: American
Calories: 120
Ingredients Equipment Method Nutrition Notes

Ingredients
  

Cookie Base
  • 1 cup Creamed Honey Experiment with clover or orange blossom honey.
  • 1 cup Butter Room temperature for best texture.
  • 1 large Egg Binds and adds moisture.
  • 1 teaspoon Vanilla Extract Opt for pure extract.
  • 1 cup All-Purpose Flour No gluten-free alternative specified.
  • 2 cups Oats Rolled oats recommended.
  • 1 teaspoon Baking Powder A leavening agent.
  • 1 teaspoon Baking Soda Essential for cookie bounce.
  • 1/2 teaspoon Salt Balances sweetness.

Equipment

  • Mixing Bowl
  • Electric mixer
  • Baking Sheet
  • Parchment Paper
  • Spatula
  • Cookie Scoop

Method
 

Baking Steps
  1. Preheat your oven to 375°F (190°C) and line a baking sheet with parchment paper.
  2. Beat room temperature butter until light and fluffy, about 1-2 minutes.
  3. Add egg, creamed honey, and vanilla to the butter and mix until smooth, about 1 minute.
  4. In a separate bowl, whisk together oats, flour, baking powder, baking soda, and salt. Fold into wet ingredients until a thick dough forms.
  5. Scoop dough into balls and place on the baking sheet, flattening slightly.
  6. Bake in the oven for about 8 minutes, until edges are golden brown but centers remain soft.
  7. Cool on the baking sheet for 5 minutes before transferring to a wire rack.

Nutrition

Serving: 1cookieCalories: 120kcalCarbohydrates: 16gProtein: 2gFat: 6gSaturated Fat: 4gPolyunsaturated Fat: 0.5gMonounsaturated Fat: 2gCholesterol: 20mgSodium: 90mgPotassium: 60mgFiber: 1gSugar: 7gVitamin A: 250IUCalcium: 20mgIron: 0.5mg

Notes

Refrigerate dough for 30 minutes before baking for better shape. Use room temperature butter for fluffier cookies. Experiment with different honey types for unique flavors.

Tried this recipe?

Let us know how it was!

Cinnamon Sugar Donut Bread: Your New Favorite Cozy Treat

November 17, 2025 by Grace Snow Leave a Comment

It’s a chilly Sunday morning, and the aroma wafting through my kitchen feels like a warm hug from my childhood. That’s right; I’m baking a loaf of Cinnamon Sugar Donut Bread, a cozy treat that brings back the magic of fresh donuts right at home. This easy-to-make recipe offers a delightful combo of sweetness and spice, making it perfect for breakfast or a comforting afternoon snack. Best of all, it’s a crowd-pleaser that can be whipped up in no time, giving you more moments to savor life’s simple pleasures. Whether enjoyed fresh out of the oven or toasted to perfection the next day, every slice promises satisfaction. What’s one of your favorite ways to enjoy warm, sweet bread?

Why Is This Bread So Irresistible?

Comforting Nostalgia: This Cinnamon Sugar Donut Bread brings the nostalgic joy of fresh donuts straight to your home.

Simplicity in Making: With just a few easy steps, anyone can create this delightful loaf using pantry staples.

Endless Customization: Feel free to mix in your favorite nuts or chocolate chips to make this treat uniquely yours!

Perfect for Any Occasion: Whether for breakfast, dessert, or an afternoon pick-me-up, this bread shines at any time of the day.

Crowd-Pleasing Appeal: It’s an instant hit, bringing smiles to the whole family. Try pairing it with a warm cup of coffee or some homemade butter for a delightful treat. Additionally, if you love cinnamon flavors, check out our Pumpkin Cinnamon Roll for another cozy recipe!

Cinnamon Sugar Donut Bread Ingredients

For the Batter

  • All-Purpose Flour – Provides structure and body to the bread; for a gluten-free version, use a 1:1 baking blend.
  • Baking Powder – Acts as a leavening agent for best results; make sure it’s fresh!
  • Salt – Enhances flavors and balances sweetness; use sea salt or table salt interchangeably.
  • Ground Cinnamon – Adds essential flavor and aroma; increase or decrease according to your taste.
  • Granulated Sugar – Sweetens the bread and contributes to its tender texture; substitute with brown sugar for a richer flavor.
  • Unsalted Butter – Creates a rich, moist texture; can be replaced with margarine or coconut oil for a dairy-free version.
  • Large Eggs – Bind ingredients and add moisture; for a vegan option, use flax eggs (1 tbsp ground flaxseed + 2.5 tbsp water per egg).
  • Milk – Adds moisture and richness; substitute with almond milk or oat milk for a dairy-free option.
  • Vanilla Extract – Enhances the overall flavor profile; can swap for almond extract for a different twist.

For the Topping

  • Cinnamon Sugar – A delightful mixture of granulated sugar and cinnamon that adds a sweet crust; adjust the ratios based on your sweetness preference.

This Cinnamon Sugar Donut Bread is sure to become a beloved addition to your baking repertoire, so gather these ingredients and get ready to create a warm, comforting treat!

Step‑by‑Step Instructions for Cinnamon Sugar Donut Bread:

Step 1: Preheat and Prepare
Begin by preheating your oven to 350°F (175°C). While it warms up, grease a 9x5-inch loaf pan with butter or non-stick spray. This will ensure your Cinnamon Sugar Donut Bread releases easily after baking. Set the pan aside and get ready to mix your dry ingredients.

Step 2: Whisk Together Dry Ingredients
In a mixing bowl, whisk together 2 cups of all-purpose flour, 2 teaspoons of baking powder, ½ teaspoon of salt, and 1 teaspoon of ground cinnamon. This combination will help create the structure of your bread and infuse it with that warm, familiar flavor. Once well-blended, set your dry mixture aside to focus on the wet ingredients.

Step 3: Cream Butter and Sugar
In another large bowl, cream together ½ cup of unsalted butter and 1 cup of granulated sugar until the mixture is light and fluffy, usually about 3-4 minutes using an electric mixer. This step incorporates air into the mixture, ensuring a soft texture in your Cinnamon Sugar Donut Bread. Don't rush—take your time and enjoy the process!

Step 4: Add Eggs and Wet Ingredients
Next, add 2 large eggs to the creamed mixture, one at a time, mixing well after each addition. Pour in ½ cup of milk and 1 teaspoon of vanilla extract, stirring until the batter is smooth and combined. Your batter should have a rich, inviting aroma as you blend these ingredients together.

Step 5: Combine Dry and Wet Mixtures
Now, gradually mix the dry ingredients into the wet mixture using a spatula or wooden spoon. Stir until just combined, being careful not to overmix, as this could toughen your Cinnamon Sugar Donut Bread. You want the batter to be slightly lumpy but well-blended for the best texture.

Step 6: Layer the Batter
Pour half of the batter into the greased loaf pan, smoothing it into an even layer. Sprinkle half of the prepared cinnamon sugar topping generously over the batter. This will create a deliciously sweet layer in your bread. Follow this by pouring the remaining batter on top, completing the layering process.

Step 7: Final Touch and Swirl
Top your batter with the remaining cinnamon sugar, allowing it to create a glittering crust. Use a knife to gently swirl the topping into the batter, making sure not to mix it too thoroughly. This simple technique will elevate the flavor and appearance of your Cinnamon Sugar Donut Bread once baked.

Step 8: Bake to Perfection
Slide the loaf pan into the preheated oven and bake for 50-60 minutes. You'll know it’s ready when a toothpick inserted into the center comes out clean, and the top is golden brown. Keep a keen eye on the baking progress, as this will ensure a perfectly baked loaf.

Step 9: Cool and Transfer
After baking, allow your Cinnamon Sugar Donut Bread to cool in the pan for about 10 minutes. This short resting period helps set the bread. Once cooled, gently transfer it to a wire rack to cool completely, allowing the flavors to meld beautifully before slicing.

Storage Tips for Cinnamon Sugar Donut Bread

Room Temperature: Keep the bread wrapped tightly in plastic wrap or placed in an airtight container to maintain freshness for up to 3 days.

Fridge: If you want to extend the life of your Cinnamon Sugar Donut Bread, store it in the fridge, where it will last for up to a week. Just remember to wrap it well to prevent drying out.

Freezer: For longer storage, freeze the bread for up to three months. Slice it beforehand for easy thawing. Wrap slices individually in plastic wrap and then in aluminum foil before placing them in a freezer bag.

Reheating: To enjoy your bread warm, simply toast slices in the toaster or heat in the microwave for about 10-15 seconds. Enjoy that cozy, fresh-baked flavor again!

Cinnamon Sugar Donut Bread: Customization Ideas

Get creative with your baking by making this delightful Cinnamon Sugar Donut Bread truly your own!

  • Nutty Goodness: Stir in ½ cup of chopped walnuts, pecans, or even almonds for a delightful crunch. Nuts add an earthy dimension, enhancing the overall experience.

  • Fruity Twist: Incorporate ½ cup of shredded apples or mashed bananas for a hint of natural sweetness and moisture. The fruity goodness will meld beautifully with the cinnamon.

  • Chocolate Lovers: Add ½ cup of mini chocolate chips to the batter for a gooey, decadent surprise in every slice. The sweetness of chocolate perfectly complements the cinnamon notes!

  • Dairy-Free Delight: Swap out regular milk for almond or coconut milk, and use coconut oil instead of butter for an entirely dairy-free treat without sacrificing flavor.

  • Almond Extract: For a unique flavor twist, replace vanilla extract with almond extract; it adds a delightful depth that pairs wonderfully with cinnamon.

  • Pumpkin Spice Variation: Mix in 1 cup of pumpkin puree and a sprinkle of pumpkin pie spice for a seasonal twist that’ll warm your heart and home. For something similar, don’t miss our tasty Pumpkin Cinnamon Roll.

  • Glazed Finish: Create a simple glaze with powdered sugar and a little milk, then drizzle over the cooled bread for an extra sweet touch that’s irresistible.

  • Spicy Kick: Enhance the flavor profile by adding a pinch of cayenne or nutmeg for a surprising kick that dances with the cinnamon. This bold twist will have everyone coming back for another slice!

Expert Tips for Cinnamon Sugar Donut Bread

  • Use Fresh Ingredients: Ensure your baking powder is fresh; expired leavening agents can lead to a dense loaf.

  • Don’t Overmix: Mix until just combined to keep your Cinnamon Sugar Donut Bread tender and fluffy; overmixing can make it tough.

  • Swirl Wisely: When swirling the cinnamon sugar into the batter, use a gentle hand to avoid fully mixing it in; this creates beautiful marbled layers.

  • Cool Correctly: Allow the bread to cool in the pan for 10 minutes before transferring to a wire rack, preventing a soggy bottom and enhancing texture.

  • Customize Your Flavors: Feel free to add nuts or chocolate chips to the batter for a unique twist—experimenting is part of the fun!

What to Serve with Cinnamon Sugar Donut Bread

Indulge in a delightful spread of flavors that perfectly complement this sweet, spiced delight.

  • Creamy Coffee: The rich, bold flavors of coffee enhance the sweetness of the bread, making each bite even more comforting.
  • Fresh Fruit Salad: A vibrant mix of seasonal fruits adds a refreshing contrast, balancing out the sweet richness of the bread.
  • Whipped Cream: Light and airy, whipped cream provides a luscious topping that elevates each slice to a gourmet treat.
  • Warm Maple Syrup: Drizzling warm syrup over a slice transforms your bread into a luxurious breakfast, reminiscent of French toast.
  • Vanilla Ice Cream: Creamy ice cream adds a delightful chill and sweetness, making it an irresistible dessert option for warm slices.
  • Nutty Granola: Crunchy granola sprinkled on top gives a delightful texture contrast, perfect for brunch or an afternoon snack.
  • Hot Cocoa: A steaming mug of cocoa creates a snug pairing for chilly evenings, enhancing the cozy bakery feel of your treat.
  • Homemade Butter: Slathering on a dollop of rich, homemade butter increases the indulgence, adding layers of flavor to every slice.
  • Spiced Chai Tea: The warm spices in chai beautifully complement the cinnamon flavor, creating an inviting beverage choice for any time of day.
  • Chocolate Glaze Drizzle: For those with a sweet tooth, a quick drizzle of chocolate glaze brings a decadent, dessert-worthy twist to your cinnamon bread.

Make Ahead Options

These Cinnamon Sugar Donut Bread loaves are perfect for busy meal prep! You can prepare the batter up to 24 hours in advance, storing it in an airtight container in the refrigerator to keep it fresh. Additionally, you can also pre-measure and combine your dry ingredients and refrigerate them, simplifying the process even further when you're ready to bake. Just be sure to let the batter come to room temperature before pouring it into the greased loaf pan. When you’re ready to bake, simply follow the remaining steps and enjoy warm, comforting slices that taste just as delicious as when freshly made! For longer storage, bake and then wrap the bread tightly in plastic wrap or foil; it will stay good for up to 3 days at room temperature or can be frozen for up to three months.

Cinnamon Sugar Donut Bread Recipe FAQs

What is the best way to select ripe ingredients for this Cinnamon Sugar Donut Bread?
Absolutely! For the best results, use fresh ingredients. Ensure your baking powder is active and check the expiration date on milk and eggs. Choose unsalted butter that is at room temperature for easy creaming, and make sure your cinnamon is fragrant, as this will greatly enhance the flavor of the bread.

How should I store leftover Cinnamon Sugar Donut Bread?
For optimal freshness, wrap the bread tightly in plastic wrap or store it in an airtight container at room temperature for up to 3 days. If you’d like to keep it longer, you can refrigerate it, where it will last about a week. Just remember to wrap it well to prevent it from drying out!

Can I freeze Cinnamon Sugar Donut Bread, and how?
Yes, you can! This bread freezes beautifully. To freeze, slice the bread after it has completely cooled. Wrap each slice tightly in plastic wrap, then in aluminum foil, and place them into a resealable freezer bag. This method helps prevent freezer burn, and the bread will stay fresh for up to three months. When you're ready to enjoy, simply thaw the slices at room temperature for a couple of hours or toast them directly from frozen!

What if my bread turns out dense or soggy?
No worries! If you find that your bread is dense, it’s likely due to overmixing the batter; always mix just until combined. If your bread is soggy in the middle, it might need a little more time in the oven. Insert a toothpick to check for doneness; if it comes out with wet batter, bake it for an additional 5-10 minutes. Keeping a close eye on your baking time and checking for doneness will help you bake a perfect loaf every time.

Are there any dietary considerations I should be aware of for this recipe?
Very! If you or your loved ones have dietary restrictions, this Cinnamon Sugar Donut Bread offers easy substitutions. For a dairy-free version, substitute with almond milk and use margarine or coconut oil in place of butter. To make it vegan, use flax eggs (1 tablespoon ground flaxseed mixed with 2.5 tablespoons water per egg) and almond milk instead of regular milk. Always double-check for potential allergies with any specific ingredients you use!

Cinnamon Sugar Donut Bread:

Cinnamon Sugar Donut Bread: Your New Favorite Cozy Treat

This Cinnamon Sugar Donut Bread is a delightful blend of sweetness and spice, perfect for breakfast or a cozy afternoon snack.
Print Recipe Pin Recipe
Prep Time 15 minutes mins
Cook Time 1 hour hr
Cooling Time 10 minutes mins
Total Time 1 hour hr 25 minutes mins
Servings: 8 slices
Course: Dessert
Cuisine: American
Calories: 180
Ingredients Equipment Method Nutrition Notes

Ingredients
  

For the Batter
  • 2 cups all-purpose flour Use a gluten-free blend for a gluten-free version
  • 2 teaspoons baking powder Ensure it’s fresh
  • 0.5 teaspoon salt Use sea or table salt interchangeably
  • 1 teaspoon ground cinnamon Adjust according to taste
  • 1 cup granulated sugar Substitute with brown sugar for a richer flavor
  • 0.5 cup unsalted butter Replace with margarine or coconut oil for dairy-free
  • 2 large eggs For vegan option, use flax eggs
  • 0.5 cup milk Substitute with almond milk or oat milk for dairy-free
  • 1 teaspoon vanilla extract Can swap for almond extract
For the Topping
  • 0.25 cup cinnamon sugar Adjust ratios based on sweetness preference

Equipment

  • Loaf pan
  • Mixing Bowl
  • Whisk
  • Spatula
  • Electric mixer

Method
 

Step-by-Step Instructions for Cinnamon Sugar Donut Bread
  1. Preheat your oven to 350°F (175°C) and grease a 9x5-inch loaf pan with butter or non-stick spray.
  2. Whisk together the flour, baking powder, salt, and cinnamon in a mixing bowl.
  3. Cream the softened butter and granulated sugar together until light and fluffy, about 3-4 minutes.
  4. Add the eggs, one at a time, mixing well after each addition, then stir in milk and vanilla extract until smooth.
  5. Gradually mix the dry ingredients into the wet mixture until just combined.
  6. Pour half of the batter into the prepared loaf pan and sprinkle half of the cinnamon sugar topping over it.
  7. Pour the remaining batter on top and sprinkle with the remaining cinnamon sugar.
  8. Bake for 50-60 minutes until a toothpick comes out clean and the top is golden brown.
  9. Let the bread cool in the pan for 10 minutes before transferring it to a wire rack to cool completely.

Nutrition

Serving: 1sliceCalories: 180kcalCarbohydrates: 25gProtein: 2gFat: 8gSaturated Fat: 5gPolyunsaturated Fat: 0.5gMonounsaturated Fat: 2gCholesterol: 40mgSodium: 150mgPotassium: 70mgFiber: 1gSugar: 10gVitamin A: 200IUCalcium: 20mgIron: 0.5mg

Notes

Store the bread in an airtight container for up to 3 days. It can be refrigerated for a week or frozen for up to three months.

Tried this recipe?

Let us know how it was!

Cinnamon-Sugar Air Fryer Banana Chips for Guilt-Free Snacking

November 17, 2025 by Grace Snow Leave a Comment

Strolling through the local market, I stumbled upon a vibrant display of bananas, their bright yellow skin begging to be transformed into something delightful. That moment sparked the creation of my Cinnamon-Sugar Air Fryer Banana Chips, a snack that's as easy to make as it is satisfying to munch on. With just three simple ingredients, these crispy treats provide a guilt-free way to indulge without sacrificing flavor. They're not only vegan and gluten-free but also a quick and healthy alternative to typical store-bought snacks. Whether you're looking to satisfy your sweet tooth or simply need a fun recipe for your next gathering, these air fryer chips deliver the perfect crunch and warmth of cinnamon that'll keep everyone reaching for more. Curious about how to make these delectable delights? Let’s dive in!

Why are these chips a must-try?

Crispy Delights: The Cinnamon-Sugar Air Fryer Banana Chips offer an irresistibly crunchy texture that will leave your taste buds thrilled.

Guilt-Free Indulgence: With only three ingredients, this recipe is not just simple but a healthy alternative to traditional snacks, making it a perfect choice for everyone.

Endless Versatility: Feel free to customize; add a splash of your favorite spices, or check out how to whip up a Breakfast Banana Split for a fun twist!

Quick and Easy: With minimal prep time and the air fryer doing the heavy lifting, you’ll have a delicious snack in no time!

Crowd-Pleasing Appeal: Whether you’re hosting a get-together or enjoying a quiet evening, these chips are sure to impress and leave your guests asking for the recipe!

Cinnamon-Sugar Air Fryer Banana Chips Ingredients

Prepare for a delightful treat with these simple ingredients!

For the Chips

  • Bananas – Use firm, slightly green bananas for the best texture to avoid mushiness.
  • Avocado Oil – This light oil helps achieve the perfect crispiness; feel free to substitute with coconut oil for added flavor.
  • Cinnamon – Sprinkle this warming spice to enhance the sweetness of the banana chips; adjust to taste or try nutmeg for a twist.

Enjoy making these Cinnamon-Sugar Air Fryer Banana Chips a part of your healthy snacking routine!

Step‑by‑Step Instructions for Cinnamon-Sugar Air Fryer Banana Chips

Step 1: Prep Bananas
Start by peeling 2–3 firm bananas and slice them into uniform ¼-inch thick rounds. This thickness ensures even cooking and crispiness when making your delicious Cinnamon-Sugar Air Fryer Banana Chips. Arrange the slices on a cutting board to prepare for the next steps.

Step 2: Mix Coating
In a medium-sized bowl, combine 1–2 tablespoons of avocado oil with 1 teaspoon of cinnamon. Stir until well blended and then gently toss the banana slices in the mixture, ensuring each piece is lightly coated. This coating is essential for achieving that scrumptious flavor and texture in your air fryer banana chips.

Step 3: Preheat Air Fryer
Preheat your air fryer to 350°F (175°C) for about 3–5 minutes. Preheating is crucial for even cooking and helps your banana chips turn out perfectly crispy. While the air fryer is warming, take a moment to check that your banana slices are well-coated with the cinnamon mixture.

Step 4: Arrange Slices
Once preheated, carefully place the banana slices in a single layer in the air fryer basket. Ensure there's space between them for proper airflow, which promotes even cooking and crispiness. Depending on your air fryer size, you may need to cook in batches to keep the chips from overcrowding.

Step 5: Air Fry
Set your air fryer to cook the banana slices at 350°F (175°C) for 25–28 minutes. Halfway through the cooking time, about 12–14 minutes in, pause the air fryer to flip the banana chips for even browning. Monitor closely during the final minutes, as the chips should turn golden brown and become crispy.

Step 6: Cool & Serve
Once your Cinnamon-Sugar Air Fryer Banana Chips have reached a crispy texture, carefully remove the basket and allow them to cool for 5–10 minutes. They will crisp up even more as they cool. Serve them up as a delightful snack, great for pairing with yogurt or enjoying on their own!

Make Ahead Options

These Cinnamon-Sugar Air Fryer Banana Chips are wonderfully adaptable for busy home cooks looking to save time! You can prep the banana slices—about 2-3 firm bananas—up to 24 hours in advance by slicing them and tossing them in the avocado oil and cinnamon mixture. Store the coated slices in an airtight container in the refrigerator to maintain quality and prevent browning. When you're ready to enjoy these crunchy delights, simply preheat your air fryer and cook the prepped slices as directed, adjusting for any moisture that may have formed. This way, you’ll have a delicious, healthy snack ready with minimal effort, perfect for those hectic days!

What to Serve with Cinnamon-Sugar Air Fryer Banana Chips

Indulging in these delightful chips opens up a world of appetizing possibilities to create a memorable snack experience.

  • Creamy Yogurt Dip: A smooth, tangy yogurt dip provides a refreshing contrast to the sweet chips and adds a protein boost.

  • Oatmeal Bowl: Sprinkle these banana chips over a warm bowl of oatmeal for an added crunch and natural sweetness that elevates your breakfast.

  • Trail Mix: Combine these crispy delights with nuts and dried fruits for a satisfying, energy-packed snack that’s great for on-the-go munching.

  • Nut Butter Spread: Pair your chips with almond or peanut butter for a delicious yet healthy treat that’s rich in flavor and nutrients.

The blend of textures and tastes makes each combination uniquely enjoyable, turning your snacking moment into something special!

Cinnamon-Sugar Air Fryer Banana Chips Variations

Inviting creativity into your kitchen is half the fun! Discover delightful twists to elevate your Cinnamon-Sugar Air Fryer Banana Chips.

  • Nutty Delight: Sprinkle 1 tablespoon of chopped nuts, like walnuts or almonds, for added crunch and flavor. The nutty elements will complement the sweet cinnamon beautifully.

  • Spicy Kick: Add a pinch of cayenne pepper to the coating mix for a surprising heat that perfectly balances the sweetness. Just a little will transform your snack into an exciting treat.

  • Cacao Bliss: Dust the chips with cacao powder after cooking for a chocolatey twist. Pairing chocolate with banana is always a winning combination that chocolate lovers can't resist!

  • Fruit Medley: Thinly slice apples or pears and air fry alongside bananas for a colorful fruit medley. Each fruit brings its own unique flavor and texture for a delightful snack.

  • Pumpkin Spice: Swap the cinnamon for pumpkin spice for a seasonal spin that's perfect for chilly fall days. This twist captures the essence of autumn in each bite!

  • Maple Sweetness: Drizzle maple syrup over the banana slices before air frying for a deliciously sweet alternative. The syrup caramelizes beautifully, creating a decadent treat.

  • Yogurt Dip: Serve with a side of yogurt mixed with honey and a sprinkle of cinnamon for a creamy dip. It’s a perfect way to add a nutritious touch and enhance the overall experience.

  • Try with Other Fruits: Don’t stop at bananas! Experiment with other fruits like mango or peach for a tropical twist on these chips, just be sure to adjust cooking time as needed.

These variations will make your air fryer chip experience even more delightful! If you love the simplicity of three ingredients, you might also enjoy a refreshing Breakfast Banana Split for a fun brunch idea or a tasty addition to your snack repertoire. Happy cooking!

Expert Tips for Cinnamon-Sugar Air Fryer Banana Chips

  • Banana Choice: Use firm, slightly green bananas for the best texture. Overripe bananas can become overly mushy and won’t crisp up well.

  • Coating Consistency: Ensure even coating by tossing banana slices gently in the oil and cinnamon mixture. This prevents uneven crispiness.

  • Air Fryer Space: Don't overcrowd the air fryer basket. Give each chip enough space for airflow, or fry in batches to avoid soggy chips.

  • Monitoring Time: Keep an eye on the chips as they cook. Cooking times may vary, so check during the last few minutes to prevent burning.

  • Storage Tips: Allow the chips to cool completely before storing them in an airtight container to maintain their crunchiness and freshness.

How to Store and Freeze Cinnamon-Sugar Air Fryer Banana Chips

Room Temperature: Store the banana chips in an airtight container at room temperature for up to 1 week. This keeps them crispy and delectable!

Fridge: While refrigeration is possible, it may result in a loss of crispiness. If you must, use a container lined with paper towels for moisture absorption, ensuring they’re consumed within 3 days.

Freezer: For longer storage, freeze the banana chips in a single layer on a baking sheet, then transfer to a freezer-safe bag. They can last for up to 2 months, but may lose some crunch.

Reheating: To revive the chips, simply pop them back into the air fryer at 350°F (175°C) for 3–5 minutes, until they regain their crispiness, allowing you to enjoy your Cinnamon-Sugar Air Fryer Banana Chips once more!

Cinnamon-Sugar Air Fryer Banana Chips Recipe FAQs

How do I know if my bananas are ripe enough for chips?
You should use firm, slightly green bananas for the best texture when making your Cinnamon-Sugar Air Fryer Banana Chips. Avoid overly ripe bananas, as they can become mushy and may not crisp up properly during the air frying process.

What’s the best way to store leftover banana chips?
Store the banana chips in an airtight container at room temperature for up to one week. This helps keep them crispy and tasty! If you refrigerate them, they may lose their crunch, so it's best to eat them fresh!

Can I freeze my banana chips for longer storage?
Absolutely! To freeze your banana chips, arrange them in a single layer on a baking sheet and place them in the freezer until solid. Once frozen, transfer the chips to a freezer-safe bag, removing excess air. They can be stored this way for up to two months. When you’re ready to enjoy some, simply reheat in your air fryer at 350°F (175°C) for about 3–5 minutes to restore their crispiness.

What should I do if my banana chips burn during cooking?
If your banana chips burn, it usually means they were too thick or overcrowded in the air fryer. To avoid this, ensure your slices are uniformly ¼-inch thick and keep them in a single layer with space around each chip. Next time, monitor them closely, especially in the last few minutes of cooking, to achieve that perfect golden-brown color without burning.

Are these banana chips suitable for pets or those with allergies?
While the Cinnamon-Sugar Air Fryer Banana Chips are made from simple, natural ingredients, it's important to note that bananas are generally safe for dogs and cats in small amounts. However, avoid giving them any added sugar or spices from the recipe! If you're concerned about allergies, ensure that everyone is aware of the ingredients, particularly if making for a group or kids.

Cinnamon-Sugar Air Fryer Banana Chips

Cinnamon-Sugar Air Fryer Banana Chips for Guilt-Free Snacking

Delight in these Cinnamon-Sugar Air Fryer Banana Chips, a healthy, vegan snack that's easy to make and irresistibly crunchy.
Print Recipe Pin Recipe
Prep Time 10 minutes mins
Cook Time 28 minutes mins
Cooling Time 10 minutes mins
Total Time 48 minutes mins
Servings: 4 servings
Course: Snacks
Cuisine: Vegan
Calories: 150
Ingredients Equipment Method Nutrition Notes

Ingredients
  

For the Chips
  • 2-3 medium Bananas Use firm, slightly green bananas for the best texture.
  • 1-2 tablespoons Avocado Oil Can be substituted with coconut oil for added flavor.
  • 1 teaspoon Cinnamon Adjust to taste or try nutmeg for a twist.

Equipment

  • Air fryer

Method
 

Step-by-Step Instructions
  1. Peel and slice bananas into uniform ¼-inch thick rounds.
  2. In a bowl, mix avocado oil and cinnamon, then toss banana slices to coat.
  3. Preheat air fryer to 350°F (175°C) for 3-5 minutes.
  4. Place banana slices in a single layer in the air fryer basket.
  5. Cook at 350°F (175°C) for 25-28 minutes, flipping halfway through.
  6. Let cool for 5-10 minutes before serving.

Nutrition

Serving: 1servingCalories: 150kcalCarbohydrates: 30gProtein: 1gFat: 7gSaturated Fat: 1gMonounsaturated Fat: 6gSodium: 5mgPotassium: 300mgFiber: 3gSugar: 12gVitamin C: 10mgCalcium: 20mgIron: 0.5mg

Notes

Store in an airtight container at room temperature for up to 1 week. Refrigerating may affect crispiness. For longer storage, freeze in a single layer and transfer to a freezer-safe bag.

Tried this recipe?

Let us know how it was!
  • « Previous Page
  • 1
  • …
  • 167
  • 168
  • 169
  • 170
  • 171
  • …
  • 244
  • Next Page »

Welcome!

Hi, I’m Grace, a Sydney-based home cook with a passion for bold flavors and trending ingredients. Whether you’re a busy beginner or a seasoned foodie, you’ll find dishes here that are fresh, fun, and full of flavor.

More about me

Popular Recipes

  • twice baked potato casserole
    Indulge in This Creamy Twice Baked Potato Casserole Delight
  • Red Potato Casserole
    Irresistible Red Potato Casserole with Crunchy Topping
  • Cowboy Potato Casserole
    Comforting Cowboy Potato Casserole for Cozy Nights
  • Creamy Rotel Pasta with Ground Beef
    Creamy Rotel Pasta with Ground Beef for Ultimate Comfort

Footer

↑ back to top

About

  • Privacy Policy
  • Disclaimer
  • Terms & Conditions

Newsletter

  • Sign Up! for emails and updates

Contact

  • About me
  • Contact me

Copyright © 2025 TastyTrendIngredients