tastytrendingredients

  • Home
  • Recipes
    • Appetizers
    • Breakfast
    • Dessert
    • Dinner
    • Drinks
    • Salads
    • Snacks
    • Soups
  • About me
  • Contact
menu icon
go to homepage
  • Home
  • Recipes
    • Appetizers
    • Breakfast
    • Dessert
    • Dinner
    • Drinks
    • Salads
    • Snacks
    • Soups
  • About me
  • Contact
search icon
Homepage link
  • Home
  • Recipes
    • Appetizers
    • Breakfast
    • Dessert
    • Dinner
    • Drinks
    • Salads
    • Snacks
    • Soups
  • About me
  • Contact
×

Soft Baked Maple Donut Bars: Your New Favorite Breakfast Treat

November 20, 2025 by Grace Snow Leave a Comment

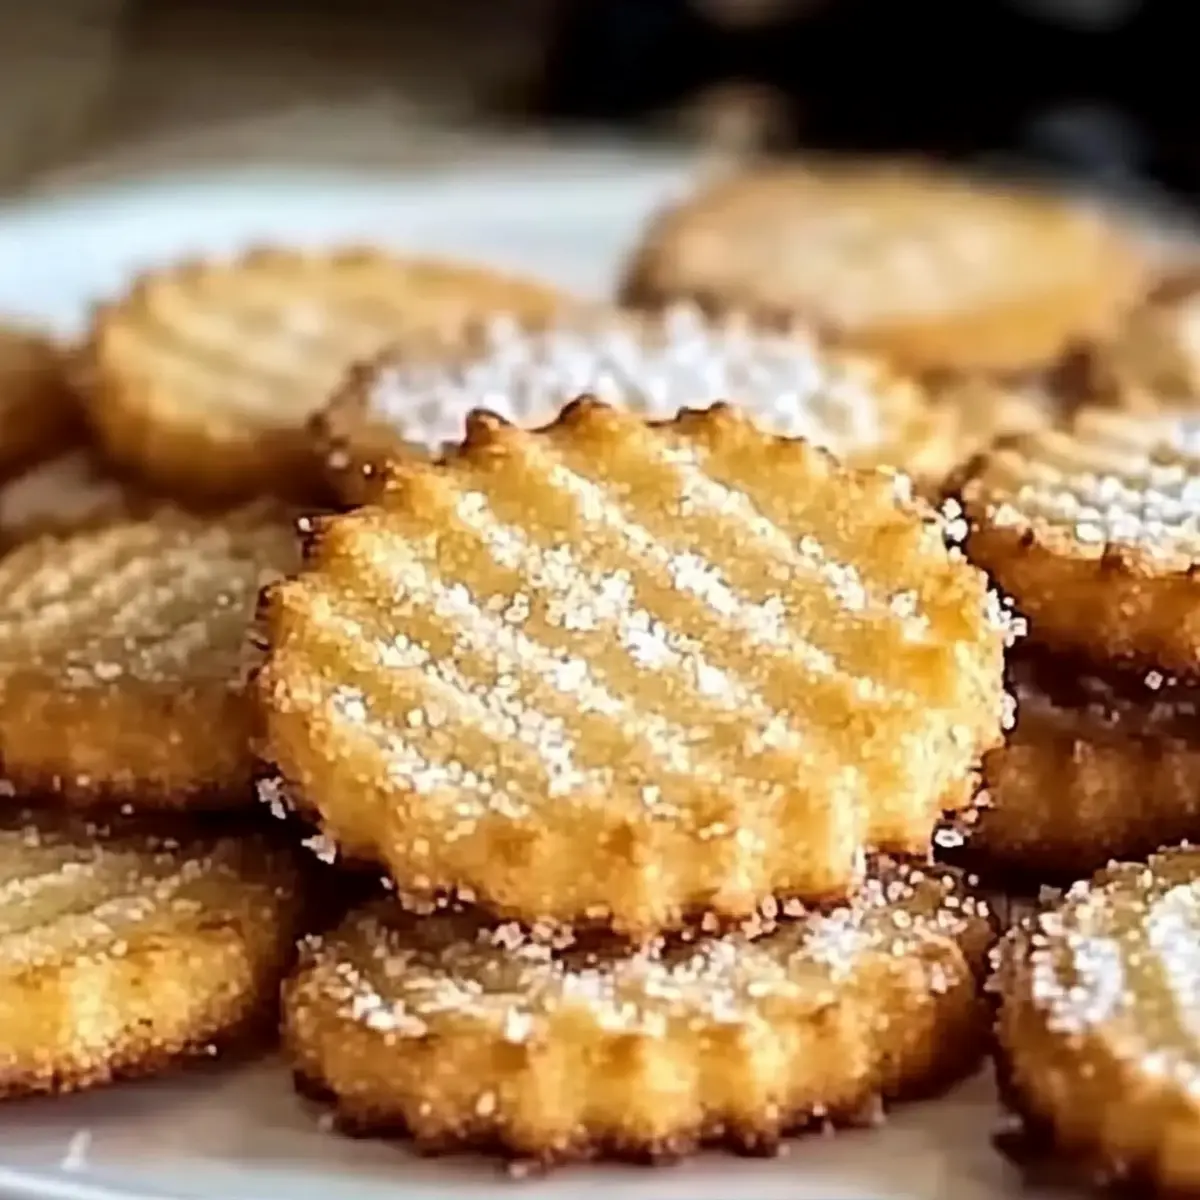
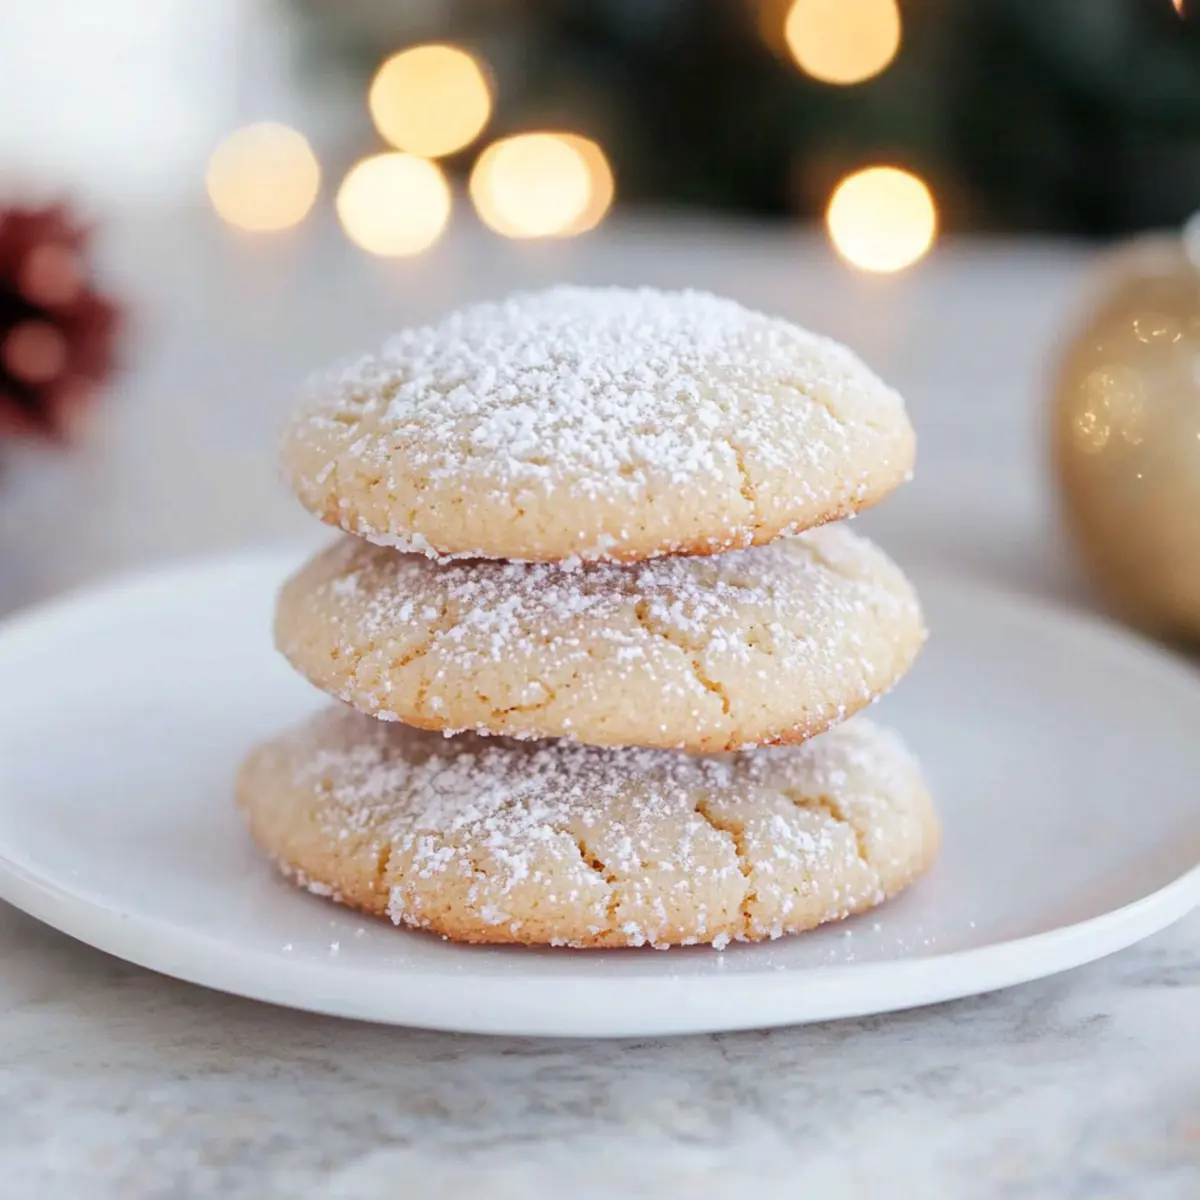
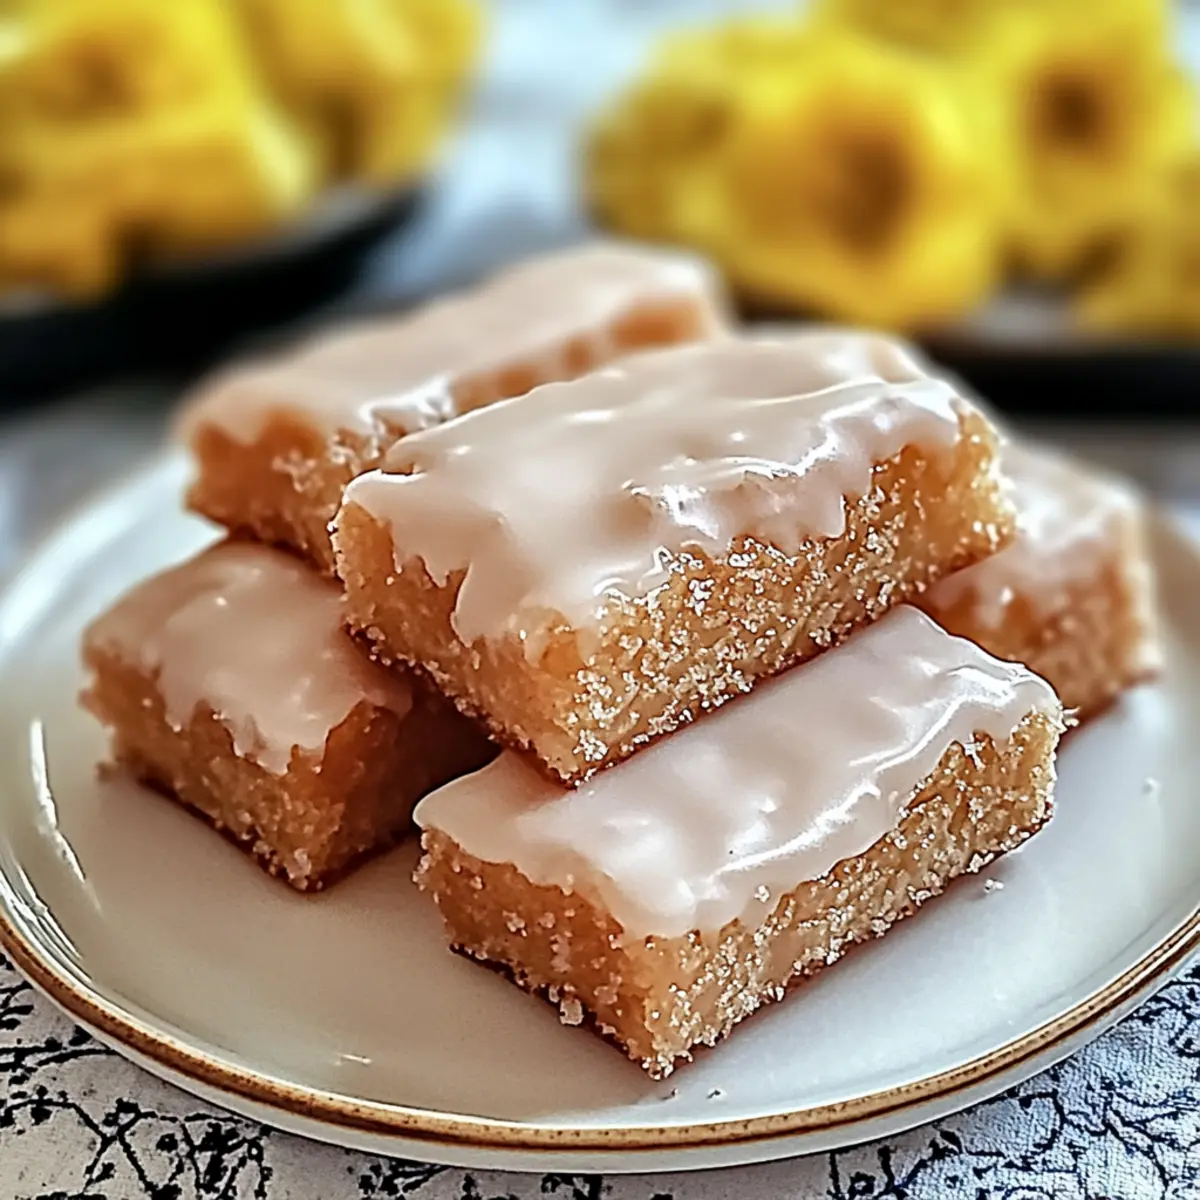
As the morning light filters through the kitchen, I can almost hear the joyful laughter of my kids waiting eagerly for something special. That’s when I reach for my trusty recipe for Soft Baked Maple Donut Bars, a delightful breakfast treat that's both fluffy and tender. These bars not only transport you back to those cozy childhood mornings with their warm maple aroma but are also incredibly simple to whip up, making them perfect for busy weekdays. They’re a hit with the little ones, making breakfast or snack time an absolute breeze. Plus, you can easily customize them to suit your family's tastes or dietary needs. Ready to find out how to create these mouthwatering delights? Let’s dive in!

What makes these donut bars irresistible?

Simplicity at Its Best: These Soft Baked Maple Donut Bars require minimal effort and basic ingredients, making them perfect for both novice bakers and seasoned chefs.

Nostalgic Flavor: The warm maple syrup creates a rich, comforting taste that brings back fond childhood memories for everyone at the table.

Kid-Friendly Treat: With their fluffy texture and sweet glaze, these bars are a guaranteed hit for kids, making breakfast or snack time a delightful experience.

Versatile Options: Try adding exciting mix-ins like chocolate chips or dried fruits, or swap maple syrup for honey to easily adapt to your family's preferences.

Make-Ahead Magic: Prepare the batter up to 24 hours in advance to save time during busy mornings, and you'll have a warm treat ready to enjoy!

Whether enjoyed warm or at room temperature, these delectable bars are sure to become a family favorite that brightens your breakfast table or snack lineup.

Soft Baked Maple Donut Bar Ingredients

For the Batter

  • All-Purpose Flour – Provides structure and texture; substitute with gluten-free flour for a different option.
  • Granulated Sugar – Adds sweetness; brown sugar can be used for a richer flavor.
  • Baking Powder – Acts as a leavening agent, so ensure it's fresh for optimal rise.
  • Salt – Enhances flavor; using kosher salt results in a cleaner taste.
  • Ground Cinnamon – Infuses warmth and spice; freshly ground is best for maximum flavor.
  • Large Eggs – Binds everything together and keeps them moist; using room temperature eggs creates a smoother batter.
  • Maple Syrup – The core flavor, adding both sweetness and richness; pure maple syrup is recommended for authenticity.
  • Milk – Adds moisture; you can choose whole, non-dairy, or almond milk as alternatives.
  • Butter – Contributes richness; for a dairy-free option, melted coconut oil is a great replacement.

For the Glaze

  • Powdered Sugar – Sweetens and decorates your bars; mix with a bit of milk to achieve the right consistency.

These Soft Baked Maple Donut Bars are not just easy to prepare; they can also satisfy your craving for something sweet and delightful!

Step‑by‑Step Instructions for Soft Baked Maple Donut Bars

Step 1: Preheat the Oven and Prepare the Pan
Begin by preheating your oven to 350°F (175°C). While it warms up, grab an 8x8 inch baking dish and line it with greased parchment paper, ensuring the sides are covered. This will help your Soft Baked Maple Donut Bars release easily after baking, keeping them beautifully intact for serving.

Step 2: Mix the Dry Ingredients
In a large mixing bowl, whisk together the dry ingredients: all-purpose flour, granulated sugar, baking powder, salt, and ground cinnamon. Whisking thoroughly ensures there are no lumps and that the baking powder is evenly distributed, which is essential for those light and fluffy bars. Set the dry mixture aside once combined, allowing the flavors to meld.

Step 3: Combine the Wet Ingredients
In a separate bowl, crack the room temperature large eggs and beat them well. Add the pure maple syrup, milk, and melted butter, mixing until the mixture is smooth and well-blended. This step is important to achieve that luscious and moist texture that makes the Soft Baked Maple Donut Bars such a delight.

Step 4: Blend the Mixtures Together
Gently fold the wet mixture into the dry ingredients using a spatula or wooden spoon. Be careful not to over-mix; the batter should just come together without any dry flour visible. This careful folding is crucial to maintaining the fluffy texture of your donut bars, which should be intriguing and airy when baked.

Step 5: Bake the Donut Bars
Pour the batter into your prepared baking dish, spreading it evenly into the corners. Place the dish in the preheated oven and bake for 20-25 minutes, or until the top is golden brown and a toothpick inserted in the center comes out clean. The delightful aroma of maple will fill your kitchen as they bake!

Step 6: Cool in the Pan
Once baked, remove the bars from the oven and let them cool in the pan for about 10 minutes. This cooling step allows the bars to set and makes transferring them to a wire rack easier, helping to maintain their soft and tender texture.

Step 7: Glaze the Bars
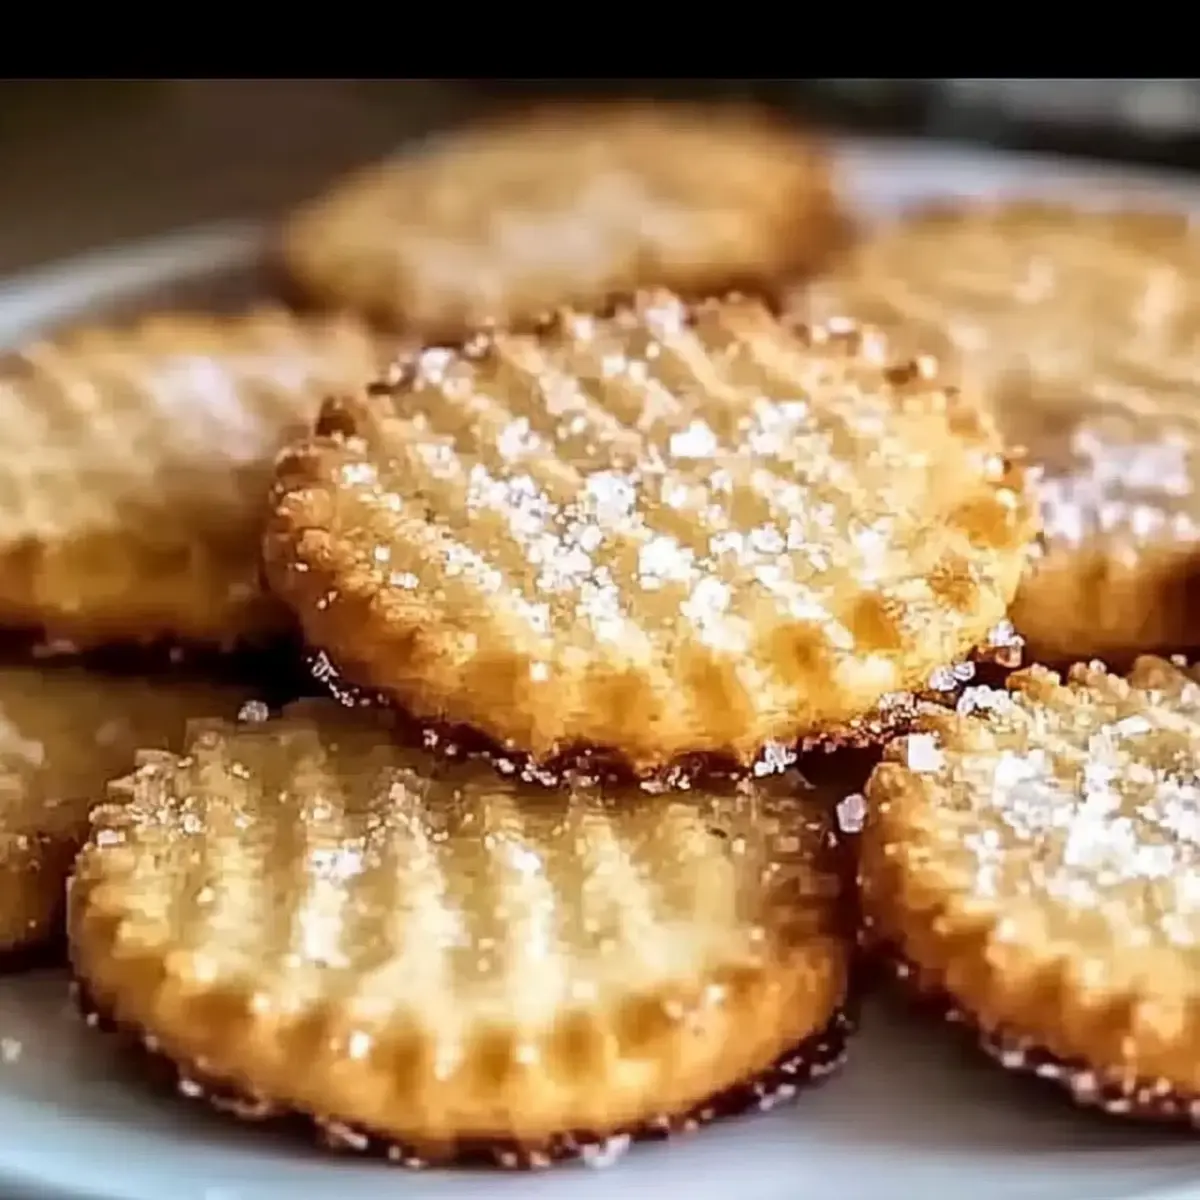
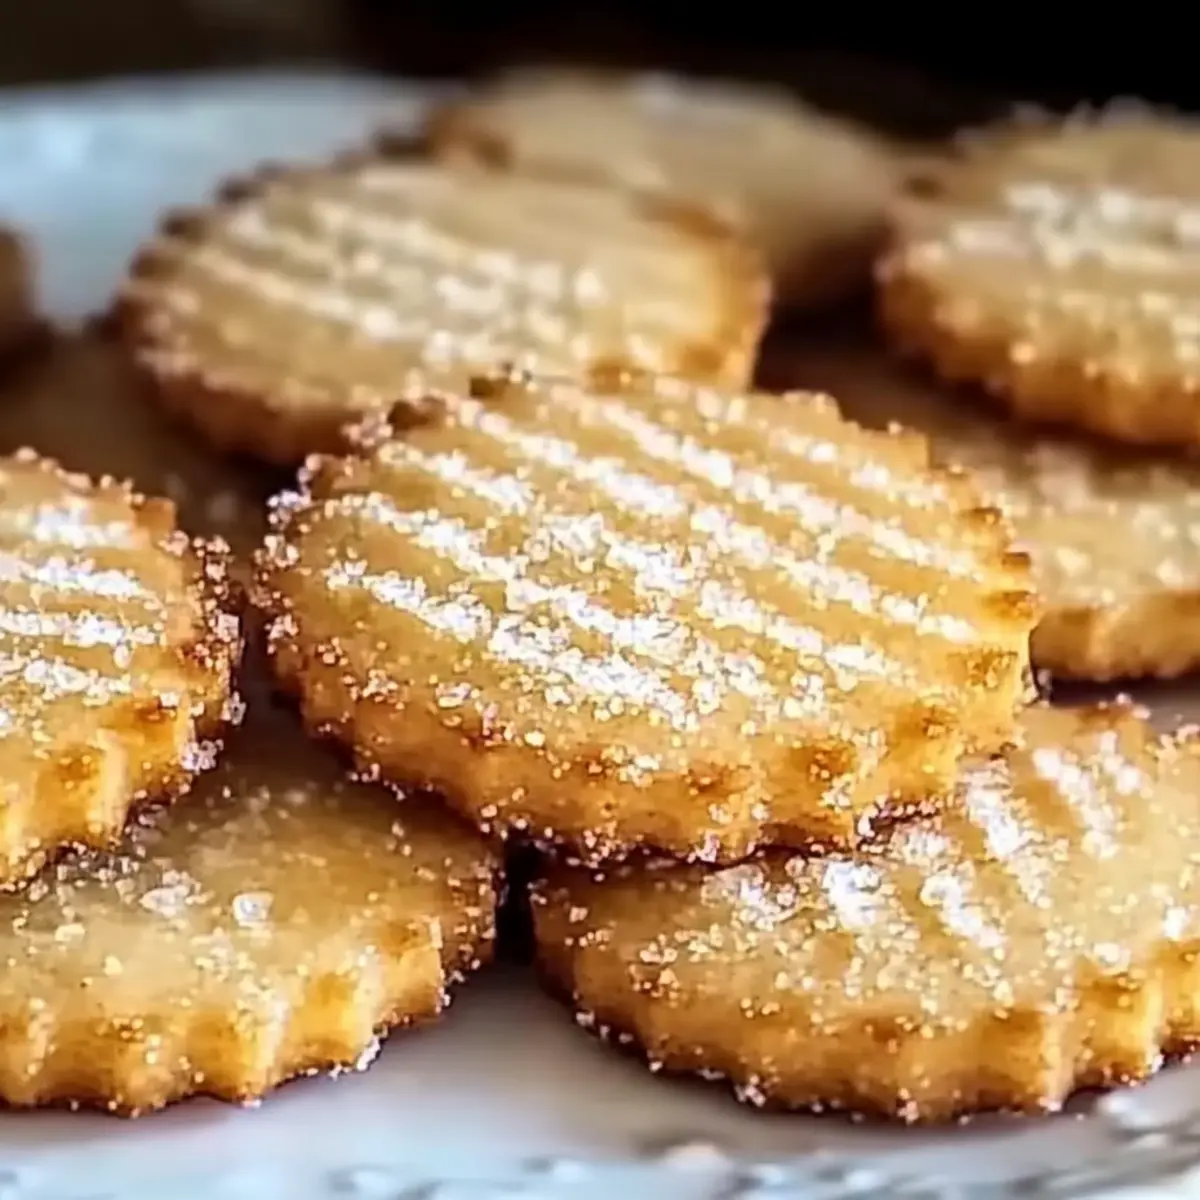
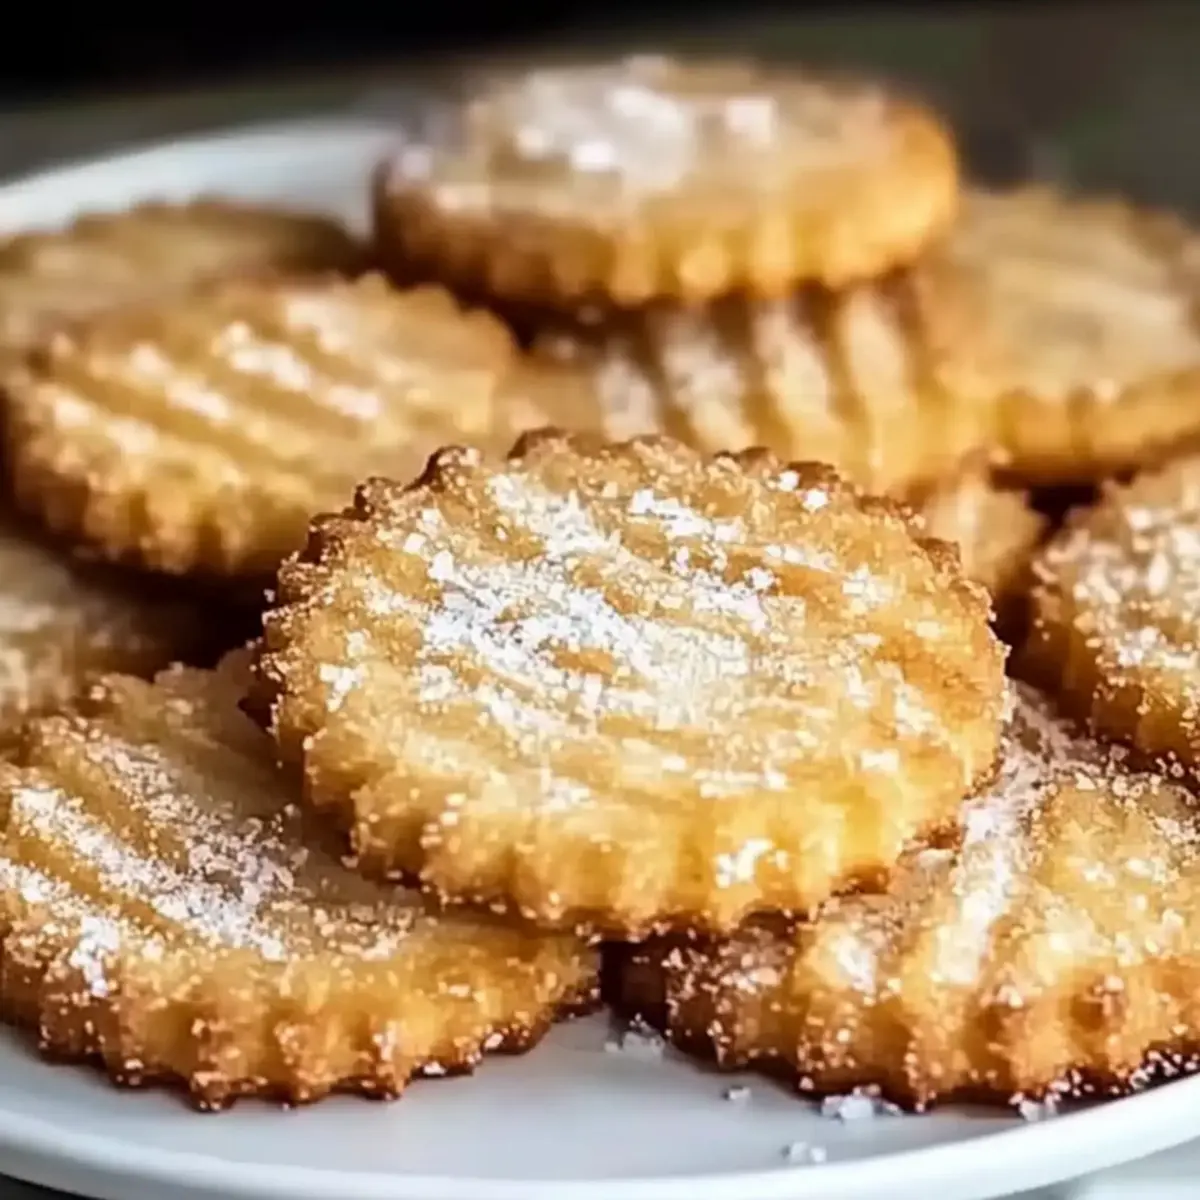
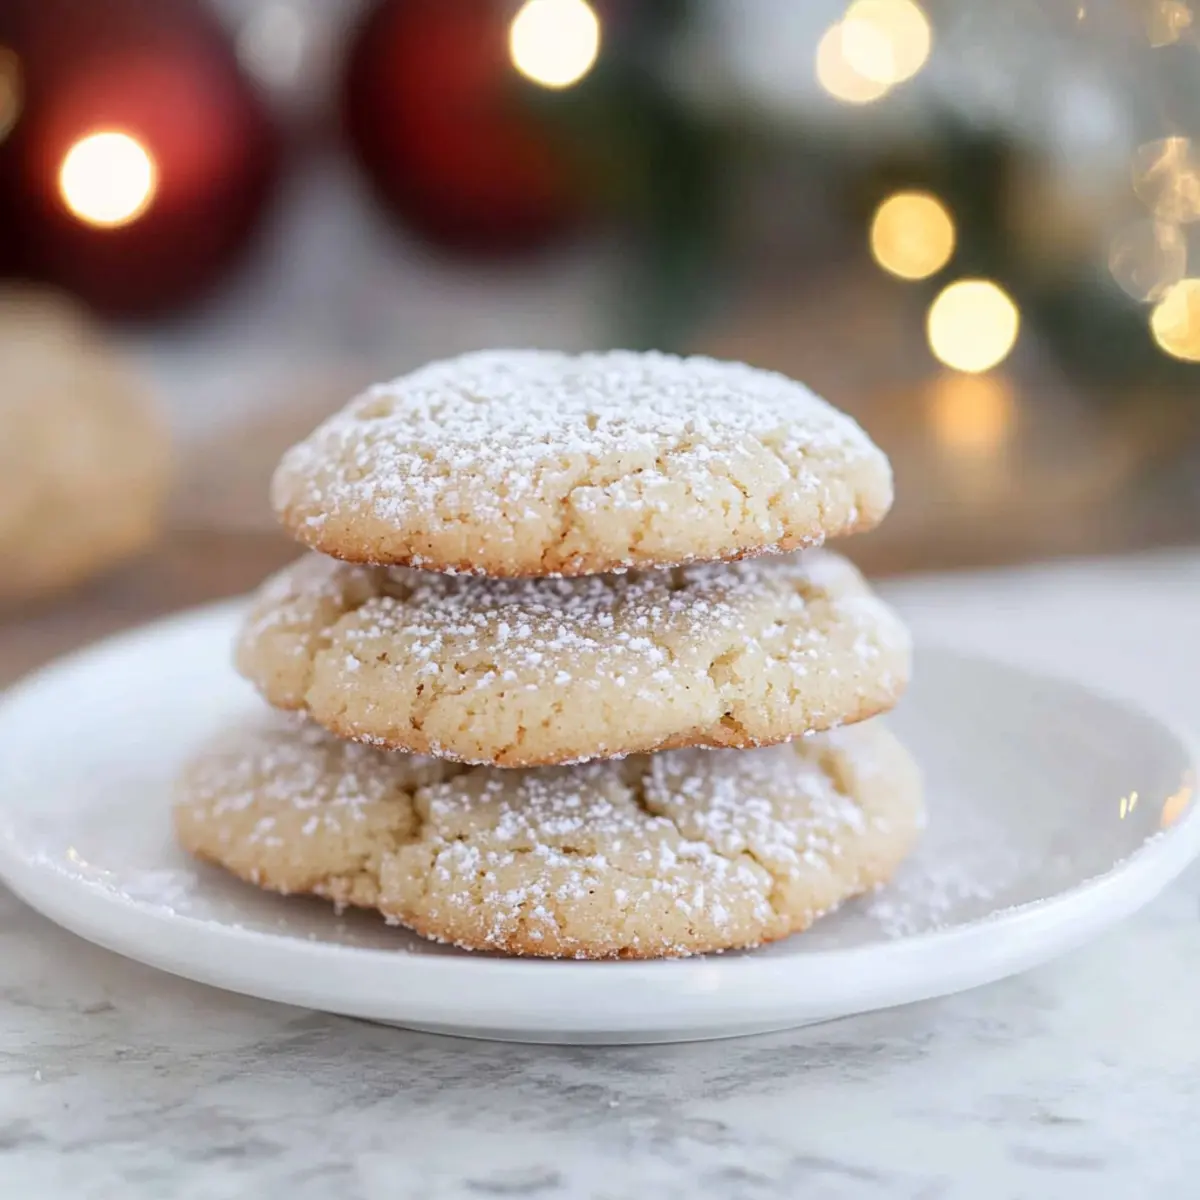
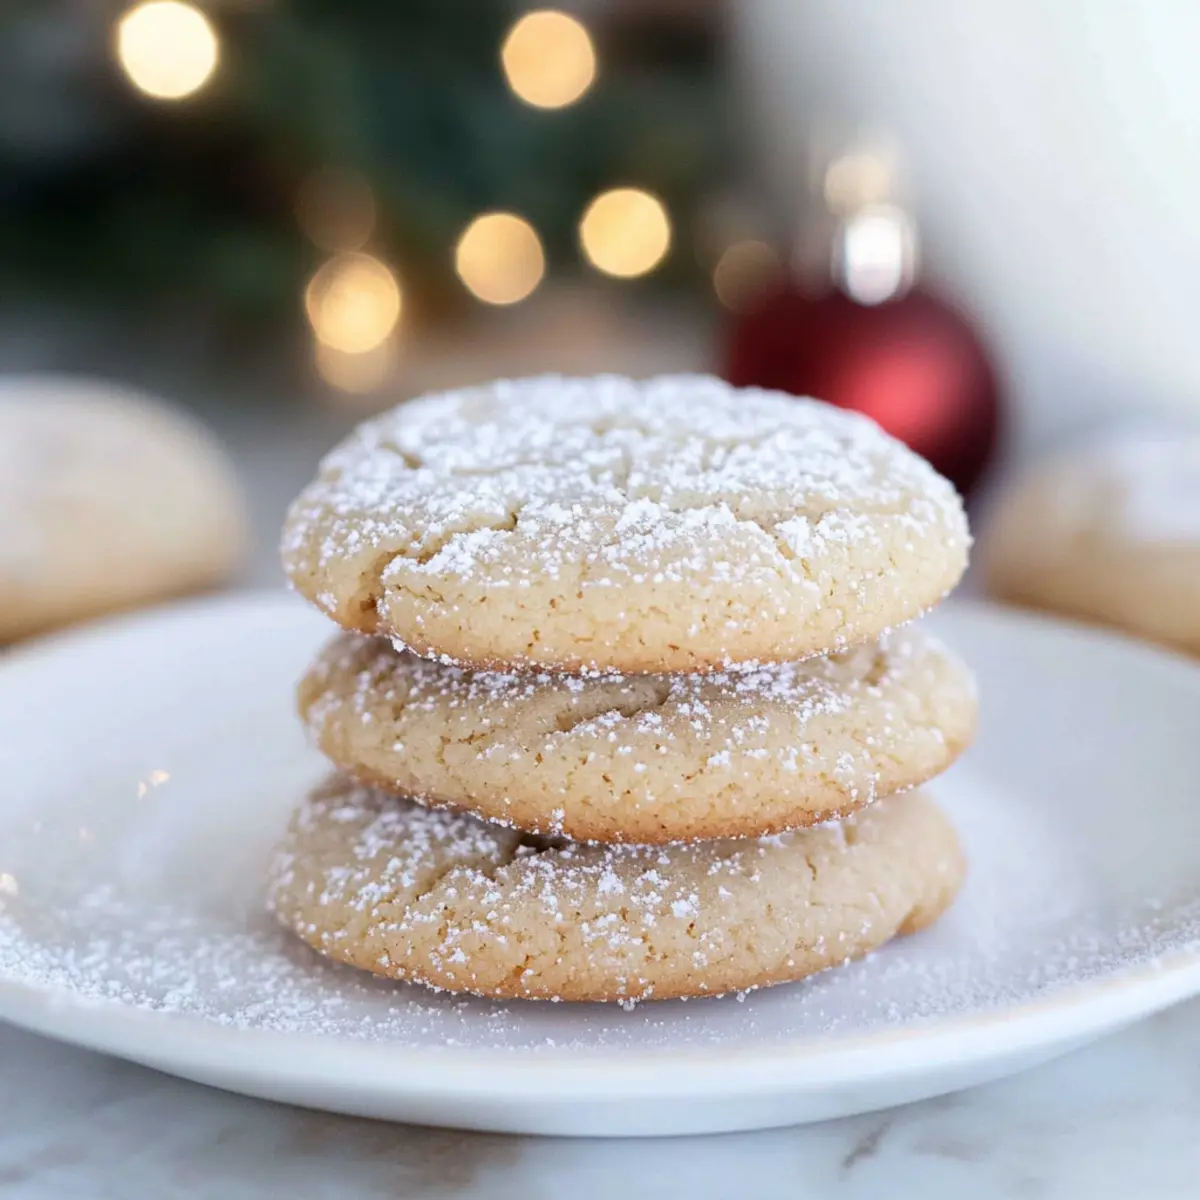
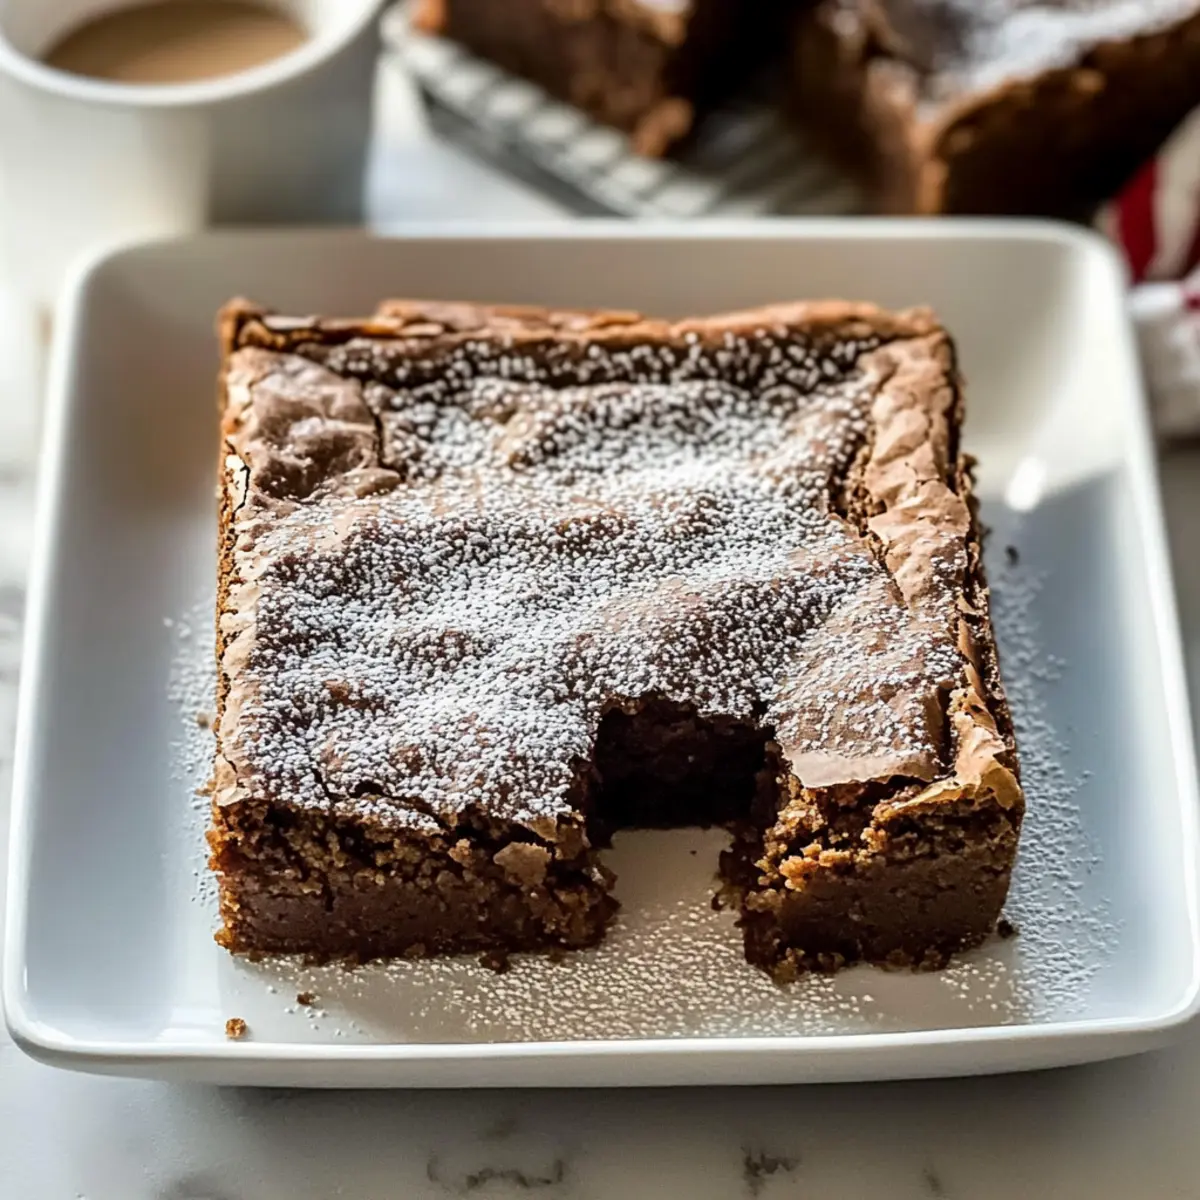
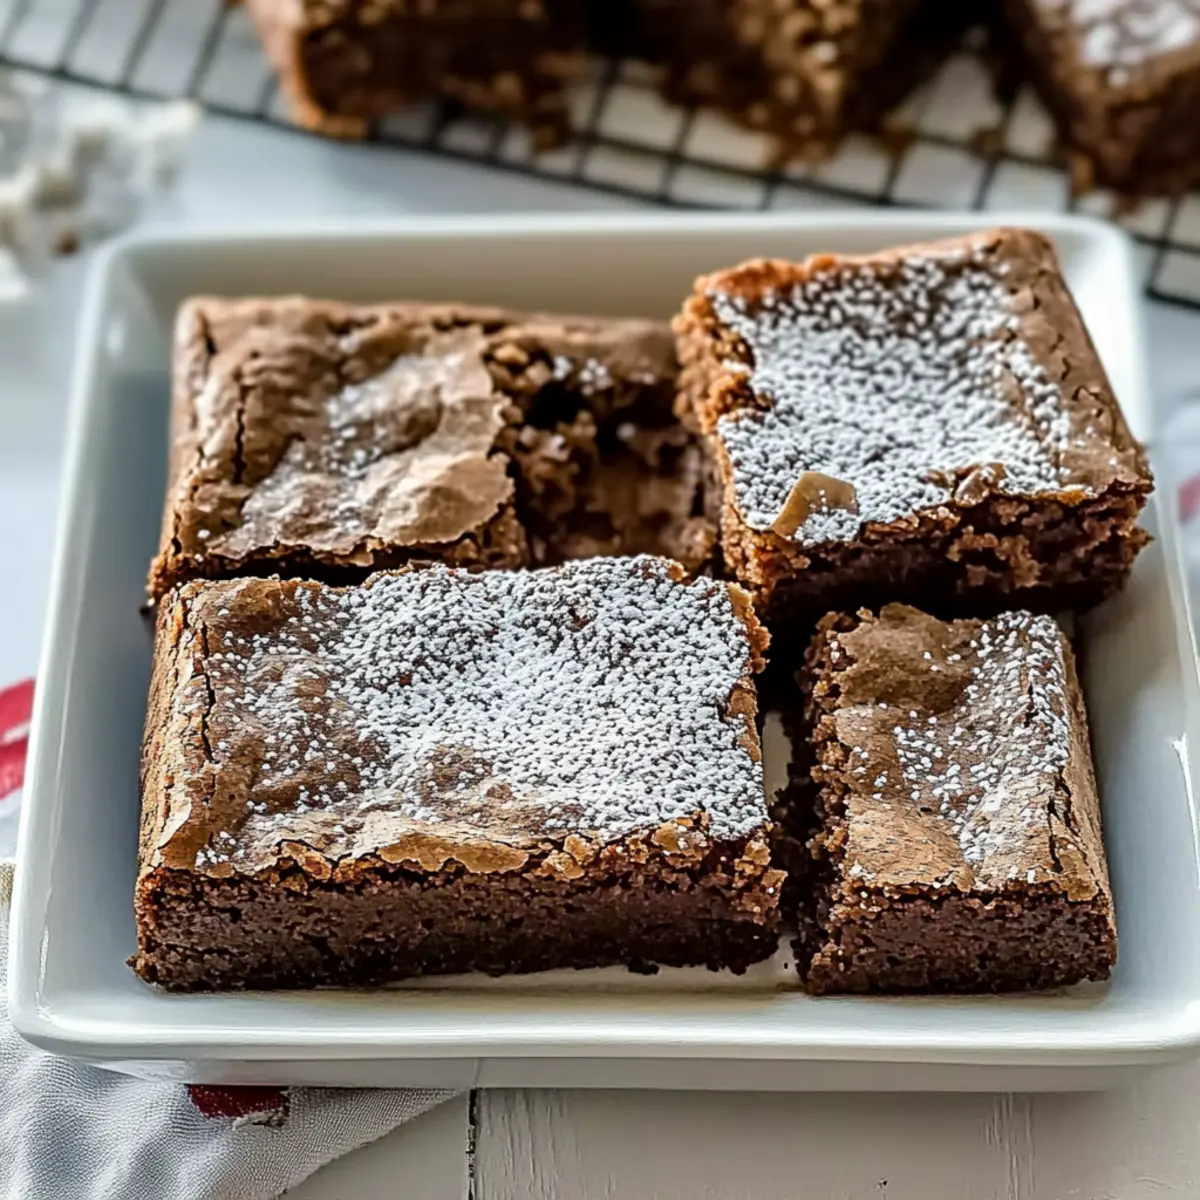
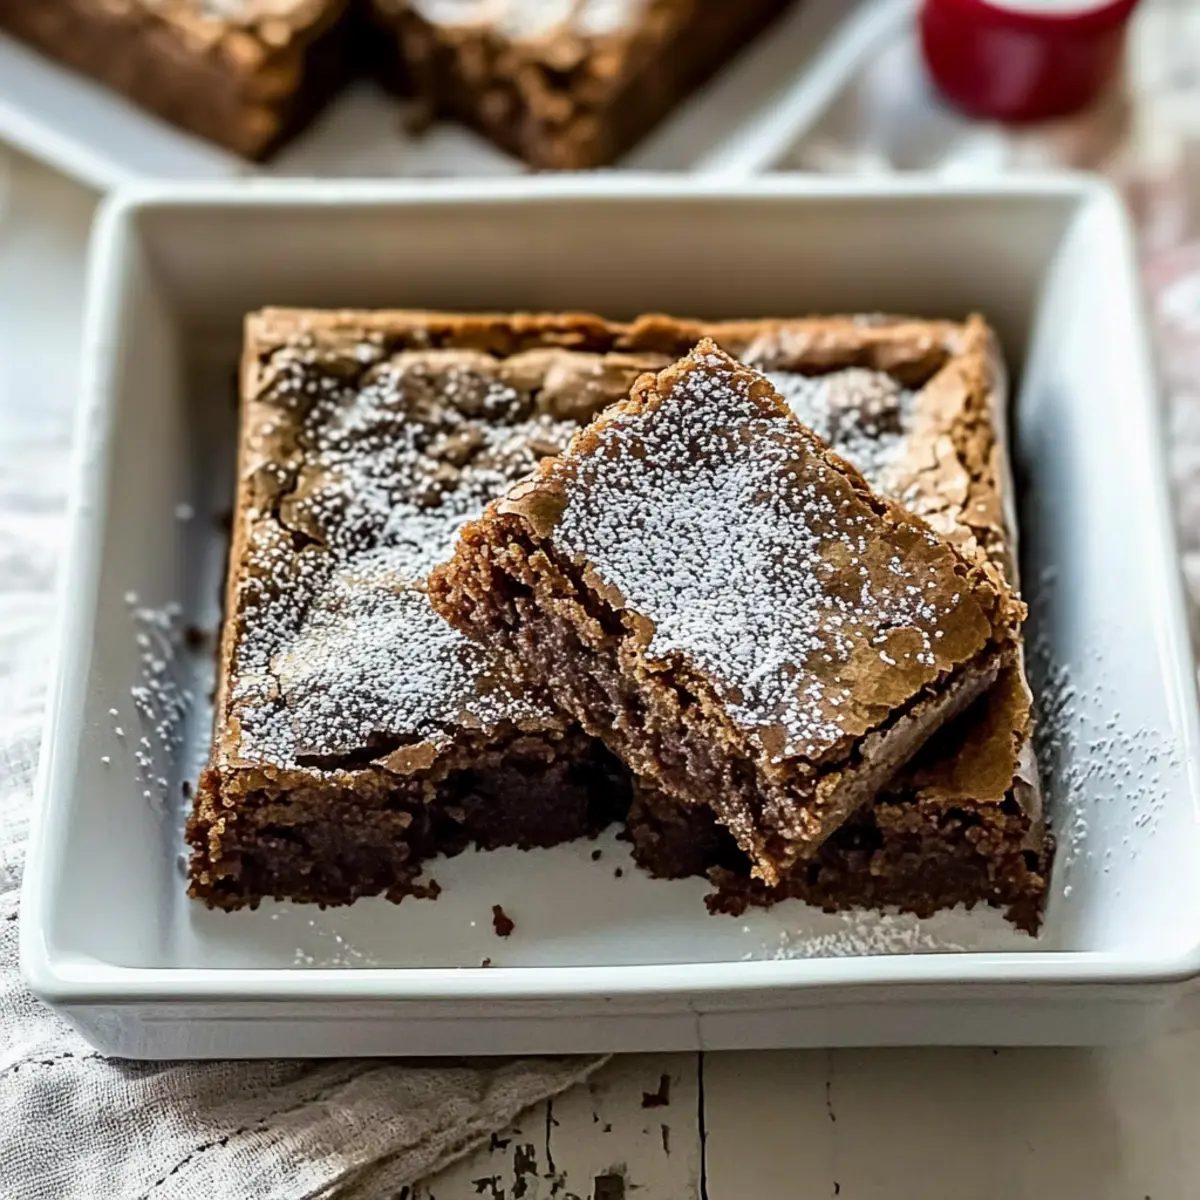
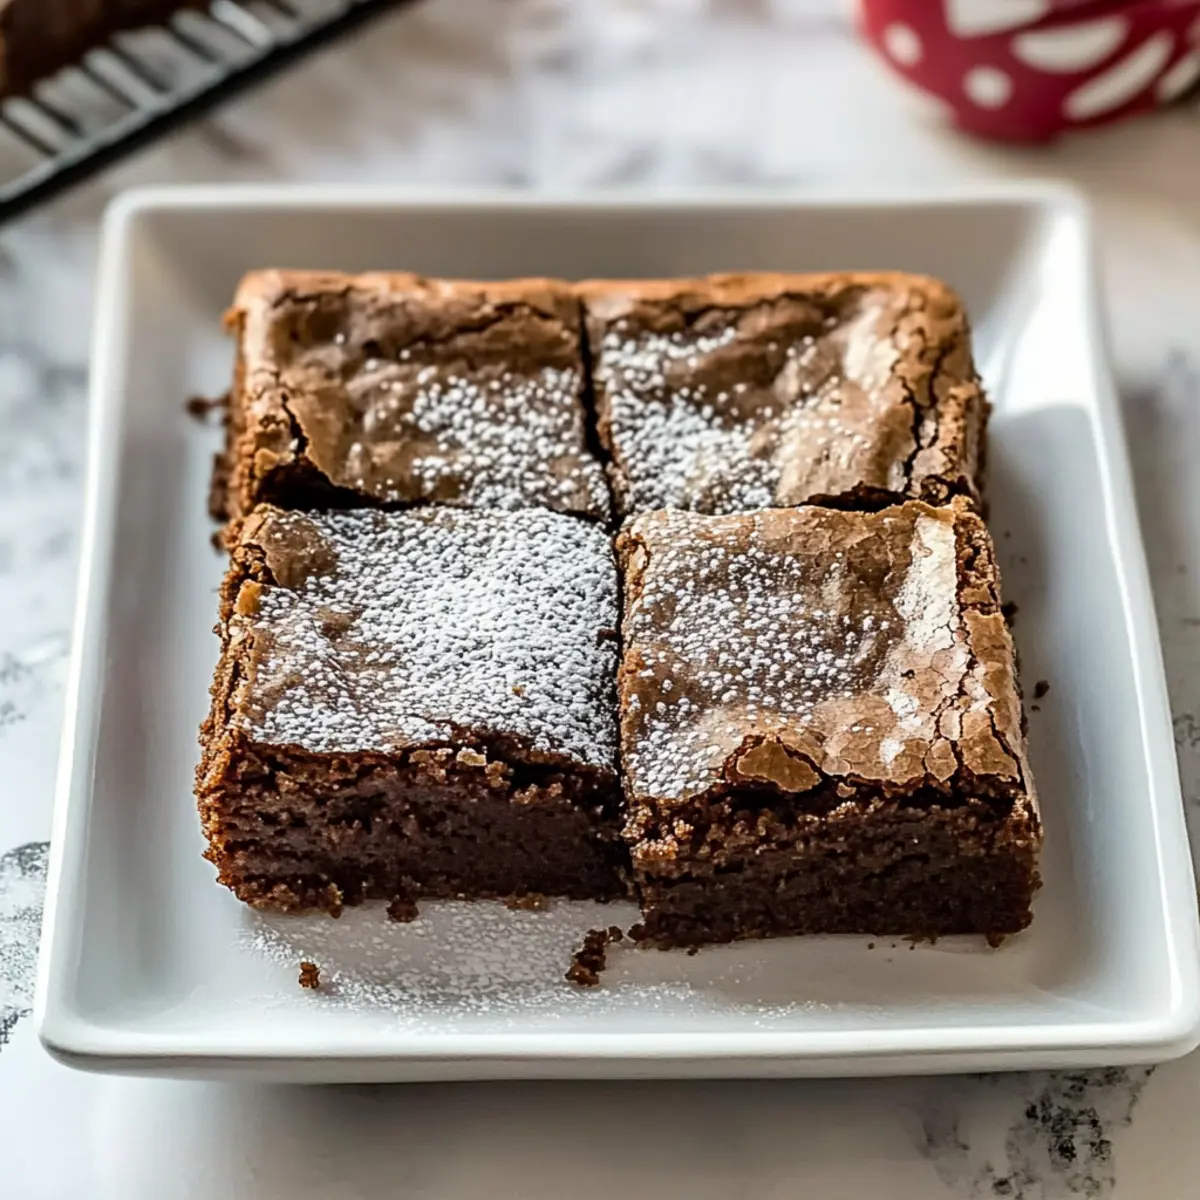
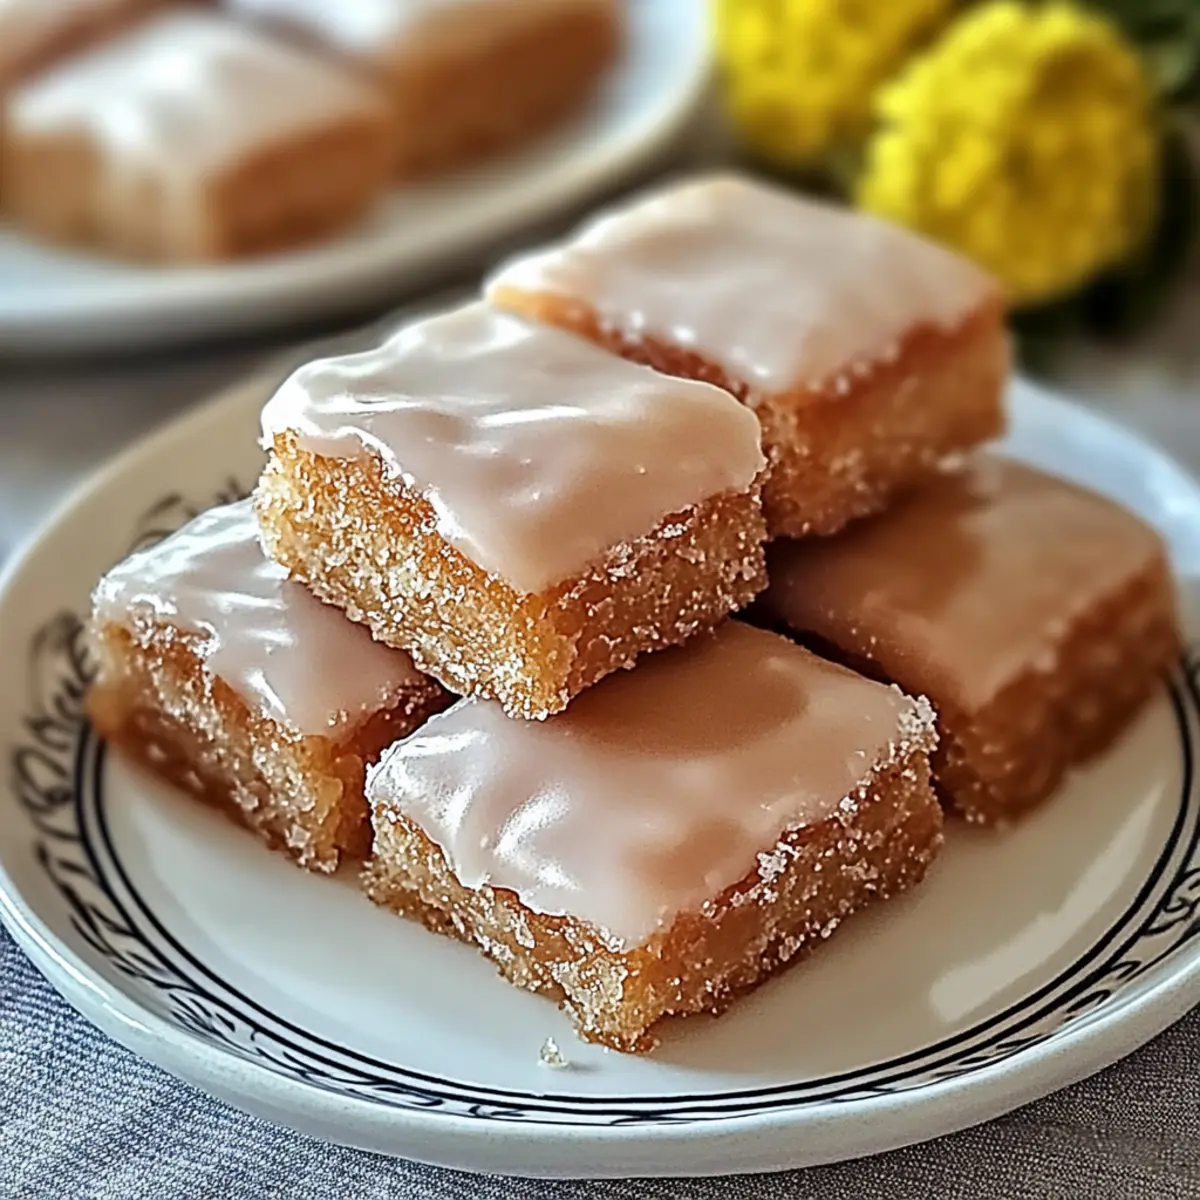
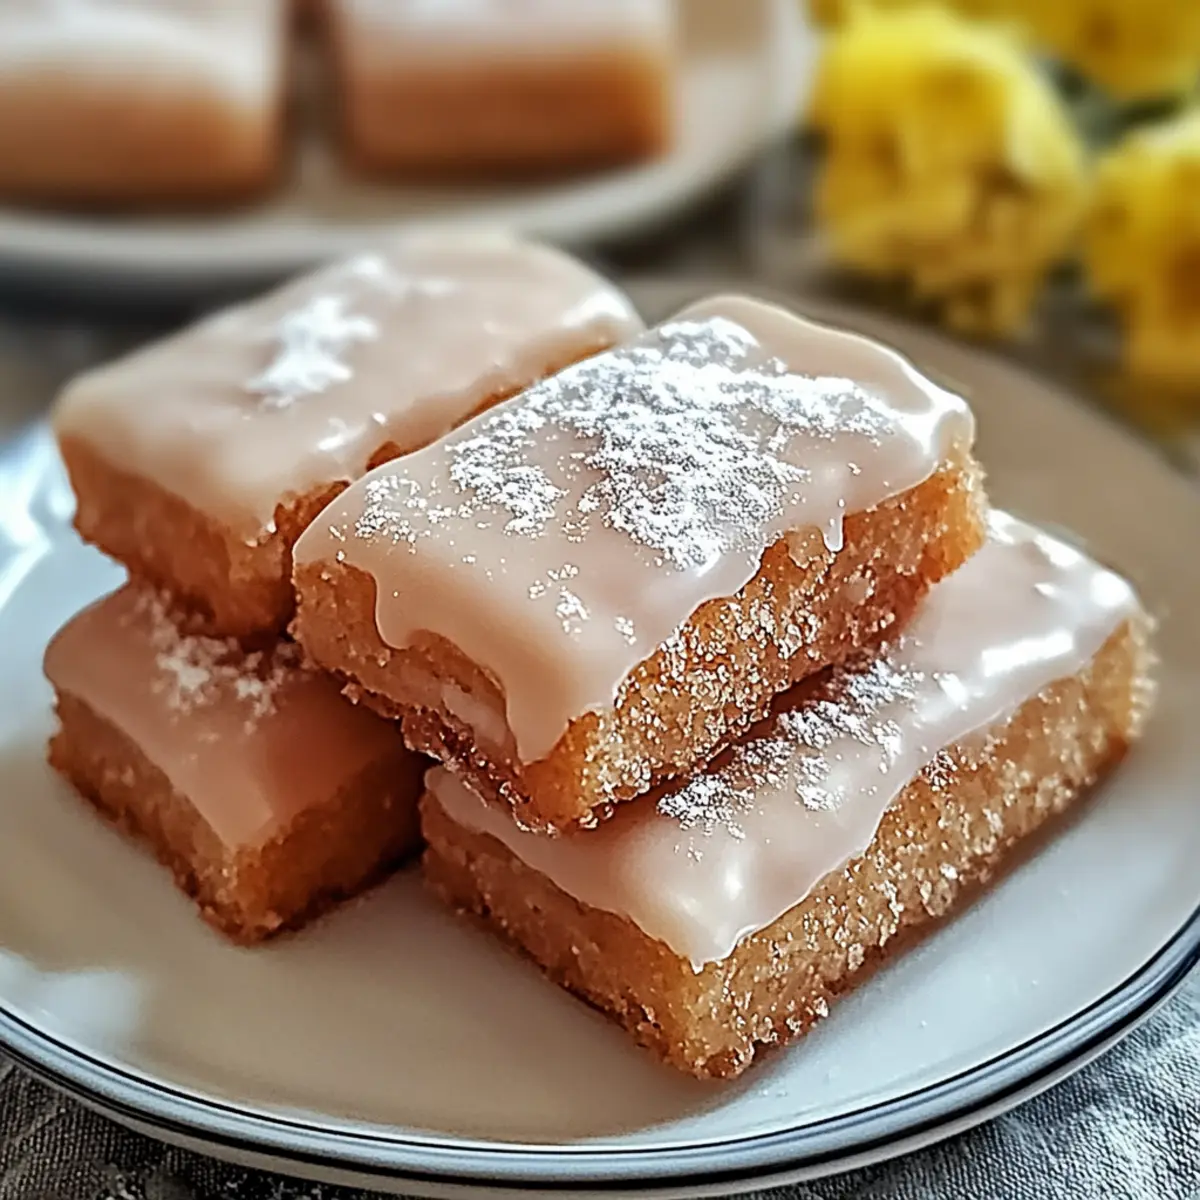
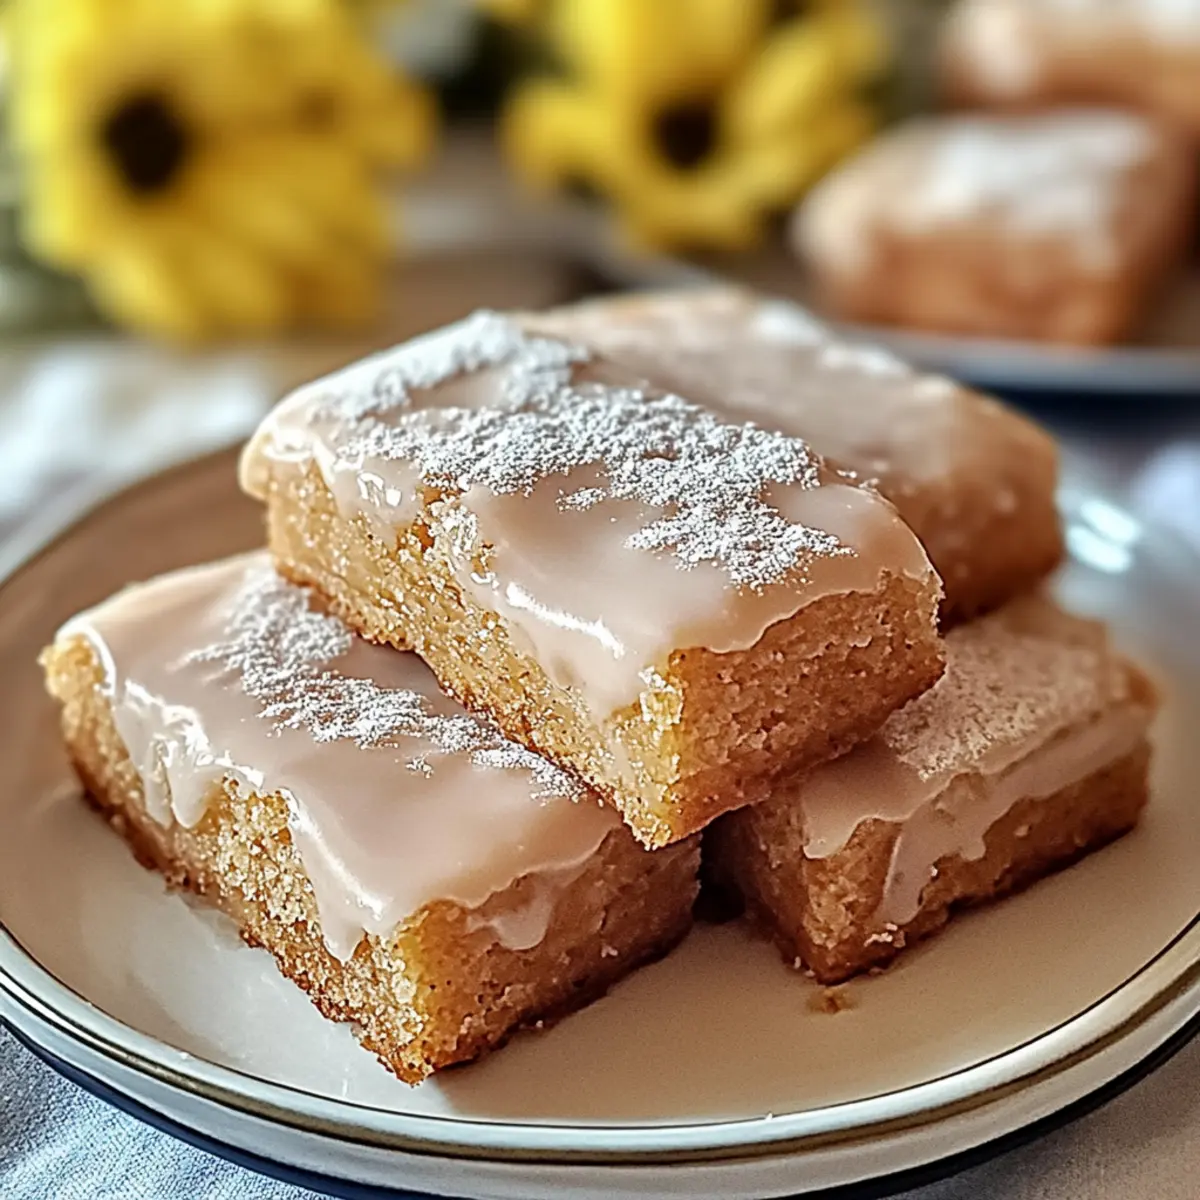
After the bars have cooled completely, prepare your glaze by mixing powdered sugar with a splash of milk until smooth and drizzling consistency. Drizzle this glaze over the top of your Soft Baked Maple Donut Bars, allowing a bit to drip down the sides for that visually appealing finish.

Step 8: Serve and Enjoy
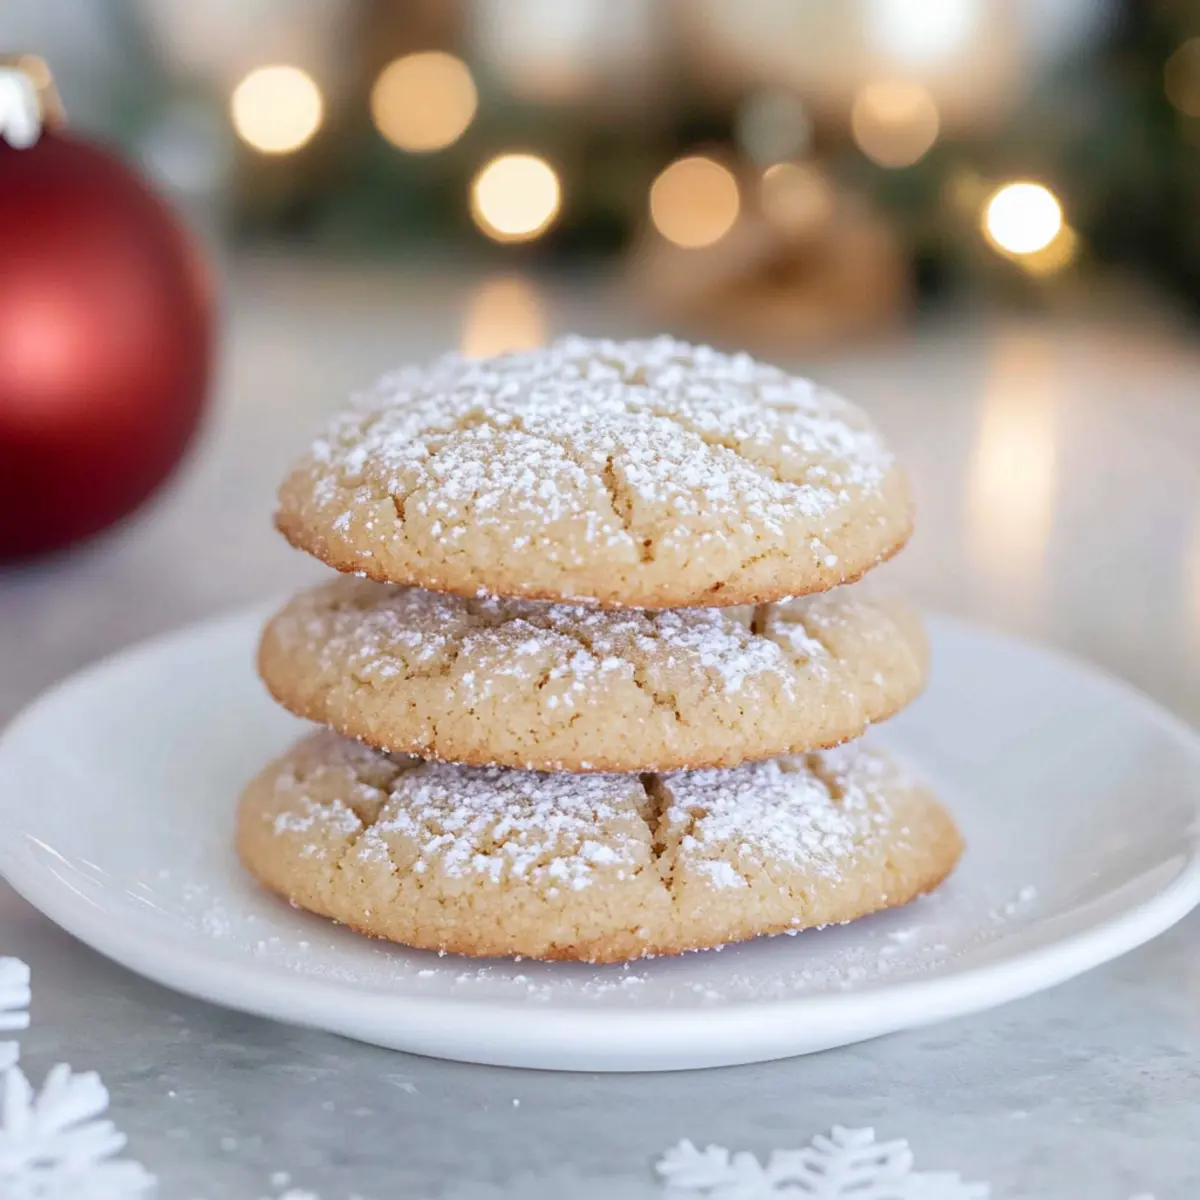
Cut the glazed bars into squares or rectangles and serve warm, or at room temperature. These Soft Baked Maple Donut Bars are perfect for breakfast or as an afternoon treat, and they’re even better when paired with fresh berries or a dollop of yogurt. Enjoy every fluffy, sweet bite!

How to Store and Freeze Soft Baked Maple Donut Bars

  • Room Temperature: Store the bars in an airtight container at room temperature for up to 3 days to maintain their fluffy texture and taste.

  • Fridge: If you prefer a chilled treat, keep them in the refrigerator for up to a week. Just ensure they’re well-wrapped to prevent drying out.

  • Freezer: For longer storage, freeze the bars individually wrapped in plastic wrap and placed in a freezer-safe bag for up to 3 months.

  • Reheating: To enjoy frozen Soft Baked Maple Donut Bars, thaw them overnight in the fridge. Reheat in the microwave for about 15-20 seconds, or until warm.

Soft Baked Maple Donut Bars Variations

Feel free to personalize your Soft Baked Maple Donut Bars by trying out these delicious twists that will surely excite your taste buds!

  • Honey Swap: Use honey instead of maple syrup for a subtly different sweetness that’s equally delightful.

  • Nutty Crunch: Add ½ cup of chopped nuts like walnuts or pecans for a satisfying crunch that complements the soft texture beautifully. Think about the joy of a little added crunch with every bite!

  • Chocolate Delight: Incorporate ½ cup of mini chocolate chips into the batter for a decadent treat that chocolate lovers will adore. The gooey surprises hidden within will have everyone coming back for more!

  • Fruity Boost: Fold in diced fruits such as apples or blueberries for a burst of freshness and added moisture. Nature's candy can elevate the flavor and make for a colorful presentation!

  • Spicy Twist: Experiment with spices like nutmeg or ginger for an extra layer of warmth and flavor that will warm your heart. A touch of spice can transform these bars into cozy delights perfect for any occasion.

  • Gluten-Free Option: Substitute the all-purpose flour with a gluten-free flour blend to make these donut bars suitable for gluten-sensitive family members without sacrificing flavor or texture.

  • Dairy-Free Delight: Use almond milk and melted coconut oil in place of regular milk and butter to create a vegan-friendly version that everyone can enjoy. Taste the creaminess without the dairy!

  • Cake Batter Flavor: For a birthday twist, add a sprinkle of funfetti or vanilla extract into the batter to capture that celebratory cake batter flavor that will make any morning feel special.

If you are interested in further customizing your treats, you might enjoy these warm accompaniments, like a side of creamy yogurt, fresh berries, or perhaps a scoop of Maple Roasted Sweet ice cream for that dreamy finish! Dive into your creativity and make these bars uniquely yours!

What to Serve with Soft Baked Maple Donut Bars

A delightful breakfast or snack experience followed by just the right accompaniments turns a good recipe into an unforgettable family memory.

  • Creamy Yogurt: The tang of yogurt adds a refreshing contrast, enhancing the sweet maple flavor and creating a delightful texture combination.

  • Fresh Berries: Bright and juicy berries like strawberries or blueberries bring a pop of color and freshness, making the meal feel vibrant and wholesome.

  • Maple Pecan Ice Cream: A scoop of this ice cream can indulge your sweet tooth while enhancing the creamy sweetness with a crunchy twist of pecans.

  • Warm Milk or Almond Milk: A warm drink complements the comfort of the donut bars, providing a cozy touch – perfect for chilly mornings!

  • Coffee or Tea: The slight bitterness of a rich coffee or calming tea balances the sweetness beautifully, making them ideal breakfast partners.

  • Nut Butter Spread: Add a layer of peanut or almond butter for a protein boost and rich flavor contrast that kids adore.

  • Cinnamon Sugar Dusting: A sprinkling on top before serving adds an extra layer of sweetness and spice, making every bite a delightful treat.

  • Chocolate Drizzle: Enhance your donut bars with a light chocolate drizzle for a decadent touch that will surprise and delight.

A warm and blissful pairing can transform your experience of Soft Baked Maple Donut Bars into everyday family joy!

Make Ahead Options

These Soft Baked Maple Donut Bars are a fantastic choice for meal prep enthusiasts! You can prepare the batter up to 24 hours in advance by chilling it in the refrigerator (this keeps it fresh and ready for baking). Additionally, you can bake the bars ahead of time and store them at room temperature in an airtight container for up to 3 days. For long-term enjoyment, freeze cooled bars for up to 3 months. When you’re ready to serve, simply reheat the bars gently in the oven or microwave for the perfect warm treat. This way, you’ll have a delightful homemade breakfast or snack at your fingertips during busy mornings!

Expert Tips for Soft Baked Maple Donut Bars

  • Fresh Ingredients: Ensure all ingredients, especially baking powder, are fresh for the best rise and texture in your Soft Baked Maple Donut Bars.

  • Gentle Mixing: Fold the wet and dry ingredients together gently to maintain a light, airy texture; over-mixing can lead to dense bars.

  • Cooling Time: Allow the bars to cool in the pan for 10 minutes before transferring them; this helps maintain their structure and prevents crumbling.

  • Perfect Glaze: Let the bars cool completely before glazing. Drizzling warm glaze can cause it to melt and run off, losing that beautiful finish.

  • Flavor Variations: Don’t hesitate to experiment! Try adding nuts or fruits in the batter for unique taste and texture variations that will surprise everyone.

Soft Baked Maple Donut Bars Recipe FAQs

How do I choose the best maple syrup for these donut bars?
Absolutely! For the best flavor, opt for pure maple syrup, which provides a rich, authentic taste. Look for bottles labeled “100% Pure Maple Syrup” to avoid imitation or corn syrup blends. The grade (such as Grade A or B) indicates flavor intensity, with Grade B often having a deeper, more robust flavor, perfect for baking.

How should I store leftover Soft Baked Maple Donut Bars?
Store your donut bars in an airtight container at room temperature for up to 3 days. If you want to keep them longer, refrigeration works too! Just wrap them well to avoid drying out, and they’ll stay fresh for up to a week.

Can I freeze these donut bars?
Absolutely! To freeze, first, let the bars cool completely. Then, wrap each bar individually in plastic wrap and place them in a freezer-safe bag. They can be frozen for up to 3 months. When you're ready to enjoy them, simply thaw overnight in the fridge and reheat in the microwave for about 15-20 seconds to warm them up.

What should I do if my donut bars come out dense?
If your bars turn out dense, it may be due to over-mixing the batter or using stale baking powder. Remember, after folding the wet and dry ingredients together, just mix until combined—some lumps are okay! Additionally, check that your baking powder is fresh; old leavening agents won’t help your bars rise properly.

Are there any dietary considerations I should keep in mind?
Yes, for those with dietary restrictions, you can easily adapt this recipe! Substitute all-purpose flour with a gluten-free blend to make it gluten-free. Also, use almond milk or coconut milk instead of regular milk for a dairy-free version. For anyone with egg allergies, a flaxseed egg (1 tablespoon ground flaxseed mixed with 2.5 tablespoons water) can work as a great binder, creating delicious results!

Can I make the batter ahead of time?
Very! You can prepare the batter in advance and store it in the refrigerator for up to 24 hours before baking. This is a fantastic option for busy mornings! Just give it a quick stir before spreading it into the prepared baking dish, and bake as usual. Enjoy the delightful smell of fresh donut bars filling your home!

Soft Baked Maple Donut Bars

Soft Baked Maple Donut Bars: Your New Favorite Breakfast Treat

These Soft Baked Maple Donut Bars are fluffy and tender, perfect for busy mornings and sure to be a hit with kids.
Print Recipe Pin Recipe
Prep Time 15 minutes mins
Cook Time 25 minutes mins
Cooling Time 10 minutes mins
Total Time 50 minutes mins
Servings: 9 bars
Course: Dessert
Cuisine: American
Calories: 200
Ingredients Equipment Method Nutrition Notes

Ingredients
  

For the Batter
  • 2 cups all-purpose flour Substitute with gluten-free flour for a different option.
  • 1 cup granulated sugar Brown sugar can be used for a richer flavor.
  • 2 teaspoons baking powder Ensure it's fresh for optimal rise.
  • 1/2 teaspoon salt Using kosher salt results in a cleaner taste.
  • 1 teaspoon ground cinnamon Freshly ground is best for maximum flavor.
  • 2 large eggs Using room temperature eggs creates a smoother batter.
  • 1/2 cup maple syrup Pure maple syrup is recommended for authenticity.
  • 1/2 cup milk Whole, non-dairy, or almond milk can be used as alternatives.
  • 1/4 cup butter For a dairy-free option, use melted coconut oil.
For the Glaze
  • 1 cup powdered sugar Mix with a bit of milk to achieve the right consistency.

Equipment

  • 8x8-inch baking dish
  • Mixing bowls
  • Whisk
  • Spatula

Method
 

Step-by-Step Instructions
  1. Preheat your oven to 350°F (175°C) and line an 8x8 inch baking dish with greased parchment paper.
  2. In a large mixing bowl, whisk together flour, sugar, baking powder, salt, and cinnamon. Set aside.
  3. In a separate bowl, beat the eggs, then add maple syrup, milk, and melted butter. Mix until smooth.
  4. Fold the wet mixture into the dry ingredients gently, ensuring no dry flour remains.
  5. Pour the batter into the prepared baking dish and bake for 20-25 minutes, or until golden brown.
  6. Allow to cool in the pan for about 10 minutes, then transfer to a wire rack.
  7. Prepare the glaze by mixing powdered sugar with milk until smooth, then drizzle over the cooled bars.
  8. Cut into squares or rectangles and serve warm or at room temperature.

Nutrition

Serving: 1barCalories: 200kcalCarbohydrates: 30gProtein: 2gFat: 9gSaturated Fat: 5gPolyunsaturated Fat: 1gMonounsaturated Fat: 2gCholesterol: 30mgSodium: 150mgPotassium: 100mgFiber: 1gSugar: 10gVitamin A: 300IUCalcium: 100mgIron: 1mg

Notes

These bars are perfect for breakfast or as an afternoon treat and pair well with fresh berries or yogurt.

Tried this recipe?

Let us know how it was!

Christmas Fruitcake Cookies Your New Holiday Favorite

November 19, 2025 by Grace Snow Leave a Comment

The scent of holiday spices and sweet fruits wafting through the kitchen can turn anyone into a festive cheerleader, and that’s exactly what these Easy Christmas Fruitcake Cookies offer! Inspired by the traditional fruitcake, these delightful cookies blend dried fruits with rich, buttery goodness. Not only are they incredibly easy to whip up, but they also cater to a variety of taste buds—making them a stand-out treat at any holiday gathering. Plus, their shipping-friendly format means you can share them with loved ones who are far away, spreading joy with every bite. Curious to discover how to make these adaptable festive delights? Let’s dive in!

Why are These Cookies a Holiday Must?

Delightful flavors: With a perfect blend of dried fruits and warm spices, each bite delivers a burst of holiday cheer.
Easy to make: Even novice bakers will shine with this straightforward recipe that requires minimal effort.
Customizable: Tailor the ingredients to suit your taste—swap fruits, try different extracts, or even go nut-free!
Versatile treats: These cookies are not just a holiday favorite; they make excellent gifts in festive baskets or packaged to share with distant family.
Freshness guaranteed: You'll find them easy to store, ensuring they stay moist and delicious for weeks—perfect for holiday indulgence!

Christmas Fruitcake Cookies Ingredients

• Curious about what makes these cookies so festive? Here’s everything you need!

For the Dough

  • Unsalted Butter – Provides richness and moisture; ensure butter is at room temperature for easy creaming.
  • Granulated Sugar – Adds sweetness and helps achieve a light, fluffy texture when creamed with butter.
  • Egg – Binds ingredients together and adds moisture; can be substituted with a mashed banana for a vegan option.
  • Vanilla Extract – Offers warmth and depth of flavor; if unavailable, use equal parts of other extracts.
  • Almond Extract – Enhances the flavor profile; can substitute with hazelnut or omit if preferred.
  • Lemon Extract – Brightens the cookie and complements the fruits; fresh lemon zest could also work.
  • All-Purpose Flour – Provides structure; measure correctly to avoid a dense cookie. Consider gluten-free flour for a gluten-free version.
  • Salt – Balances sweetness and enhances flavors; do not omit.
  • Baking Soda – Helps cookies rise and achieve a light texture; necessary for proper bake.

For the Sweetness

  • Candied Fruits (chopped) – The main component providing sweetness and chew; chop into small (1/4 inch) pieces for even distribution.
  • Pecans – Adds nutty flavor and crunch; can be replaced with walnuts or omitted for a nut-free version.

Get ready to bake your new favorite Christmas Fruitcake Cookies—each ingredient carefully selected to bring warmth and joy to your holiday celebrations!

Step‑by‑Step Instructions for Christmas Fruitcake Cookies

Step 1: Preheat the Oven
Start by preheating your oven to 300°F (150°C). While the oven is heating up, take a baking sheet and line it with either silicone baking mats or parchment paper to ensure your cookies don’t stick, making it easier to remove them once baked.

Step 2: Cream the Butter and Sugar
In a large mixing bowl, add room-temperature unsalted butter and granulated sugar. Using an electric mixer, cream them together on medium speed for about 3-5 minutes until the mixture is light and fluffy. This important step provides the base for your Christmas Fruitcake Cookies, creating a lovely texture.

Step 3: Incorporate the Wet Ingredients
Once your butter and sugar mix is fluffy, crack in an egg, and add the vanilla, almond, and lemon extracts. Mix on low speed until everything is well combined. This adds moisture and delicious flavor to your cookie batter, making your Christmas Fruitcake Cookies even more irresistible.

Step 4: Combine the Dry Ingredients
In a separate bowl, whisk together all-purpose flour, salt, and baking soda. Gradually fold the dry ingredients into the wet mixture. Stir gently until just combined, being careful not to over-mix, as this could lead to dense cookies instead of the tender texture we’re aiming for.

Step 5: Add the Candied Fruits and Nuts
Now, gently fold in the chopped candied fruits and pecans into the cookie dough. Make sure the fruits are evenly distributed, giving each bite of your Christmas Fruitcake Cookies a delightful chew and delightful nutty crunch.

Step 6: Portion the Dough
Using a tablespoon, scoop out heaping portions of dough and drop them onto the prepared cookie sheet, ensuring they are spaced about 3-4 inches apart. This spacing is crucial, as the cookies will spread during baking, allowing for perfect round shapes and lovely edges.

Step 7: Bake the Cookies
Place your cookie sheet in the preheated oven and bake for approximately 20-25 minutes. Keep an eye on them; when the edges have turned a golden brown but the centers still look slightly soft, it’s time to take them out, ensuring a tender cookie texture.

Step 8: Cool on Wire Rack
Let the cookies cool on the baking sheet for about 5 minutes. After that, carefully transfer them to a wire rack to cool completely. This step helps the cookies firm up while keeping them moist, contributing to the melt-in-your-mouth quality of your Christmas Fruitcake Cookies.

Expert Tips for Christmas Fruitcake Cookies

  • Dust Your Fruits: Coat chopped candied fruits with a tablespoon of flour before mixing to prevent clumping in your Christmas Fruitcake Cookies.

  • Watch Your Bake Time: Avoid overbaking by checking for golden edges and slightly soft centers. This ensures the cookies remain tender and delightful.

  • Chill the Dough: If your butter is too soft, refrigerate the dough for 15 minutes before baking to prevent unwanted spreading.

  • Store with Care: Keep your cookies in an airtight container with a slice of bread to maintain moisture and freshness for weeks of holiday enjoyment.

  • Experiment Freely: Don’t hesitate to customize! Swap dried fruits, nuts, or extracts to create a Christmas Fruitcake Cookies version that’s uniquely yours.

How to Store and Freeze Christmas Fruitcake Cookies

Room Temperature: Store cookies in an airtight container at room temperature for up to 1 week to keep them fresh and delicious.

Fridge: For extended freshness, place cookies in the fridge in a sealed container for up to 3 weeks; the cooler temperatures will help maintain their moist texture.

Freezer: Freeze cookies in an airtight container or freezer bag for up to 3 months. To enjoy later, thaw them in the fridge overnight before enjoying.

Reheating: Simply microwave for 10-15 seconds to warm them up; they'll be just as delightful as when first baked!

Christmas Fruitcake Cookies Variations

Feel free to personalize your Christmas Fruitcake Cookies with these delightful variations that will make each batch uniquely yours!

  • Nut-Free: Omit pecans altogether or replace them with crispy rice cereal for a fun crunch without the nuts. This is perfect for those with nut allergies.

  • Chocolate Lover: Replace the candied fruits with chocolate chips or chunks for a rich, indulgent twist. This variation adds a luscious cocoa flavor that complements the cookie's buttery base beautifully.

  • Spice It Up: Add a pinch of ground cinnamon or nutmeg for extra warmth and spice. The aromatic notes will elevate the holiday feel, making each bite feel even cozier.

  • Dried Fruit Medley: Instead of using just candied fruits, mix dried cranberries, raisins, and apricots for a chewy, tangy surprise in every cookie. The variety adds an unexpected romance to the taste profile.

  • Vegan Delight: Substitute the egg with a mashed banana or a flaxseed meal mixed with water for a delightful vegan option. This adjustment keeps the cookie moist while adding a unique flavor twist.

  • Different Extracts: Experiment with different extracts like maple or coconut to tailor the taste to your family's preferences. Each extract can add its own unique character, creating a fun cookie adventure!

  • Zesty Additions: Add fresh lemon or orange zest for a bright, citrusy flavor that beautifully complements the sweetness of the candied fruits. It’s a refreshing takeover on traditional holiday flavors!

  • Crunchy Granola: Fold in rolled oats or granola for added texture and a healthy twist. The added chewiness brings a heartiness that contrasts with the buttery base, making every bite a wholesome treat.

These variations will not only surprise your tastebuds but will also make your holiday gatherings even more special. If you love the idea of versatile cookies, be sure to check out my Matcha Cookies Soft and Eggnog Cookies Soft for more festive inspiration! Enjoy the journey of creating your perfect Christmas Fruitcake Cookies!

Make Ahead Options

These Easy Christmas Fruitcake Cookies are perfect for meal prep, saving you time during the bustling holiday season! You can prepare the cookie dough up to 24 hours in advance; simply refrigerate the dough in an airtight container to maintain its freshness and prevent browning. For even more convenience, you can also scoop the dough onto a baking sheet and freeze the unbaked cookies for up to 3 months. When you're ready to enjoy them, bake straight from the freezer, adding an extra minute or two to the baking time. With these make-ahead strategies, you’ll have delicious Christmas Fruitcake Cookies ready to share, ensuring you can savor the season without the last-minute rush!

What to Serve with Easy Christmas Fruitcake Cookies?

These delightful cookies are perfect for creating a full holiday spread that will warm hearts and fill bellies.

  • Creamy Mashed Potatoes: The buttery richness pairs beautifully with the sweet spice of the cookies, offering a lovely contrast in textures.
  • Spiced Apple Cider: Serve this warm drink alongside for a cozy, festive experience that enhances the cookies' fruity flavors.
  • Cheese Platter: A selection of sharp cheddar or creamy brie balances the sweet, chewy cookies and adds an elegant touch to your gathering.
  • Homemade Eggnog: This classic holiday drink provides a rich, creamy texture that complements the cookies perfectly. It's festive and fun!
  • Roasted Seasonal Vegetables: Their savory, earthy flavors create a delightful contrast to the sweetness of the cookies, keeping everything balanced.
  • Chocolate-Dipped Strawberries: For a sweet pairing, these fresh berries offer a juicy burst that pairs delectably with the spiced cookies.
  • Walnut Brownies: The fudgy richness of these brownies makes for a decadent dessert option alongside the cookies. Indulgence at its best!
  • Festive Fruit Salad: A bright, refreshing mix of seasonal fruits brightens up the holiday table, enhancing the overall cheerfulness of your spread.
  • Coffee or Tea: A warm cup can elevate your cookie experience, allowing the warm spices and flavors to shine even brighter.
  • Mini Cheesecakes: Their creamy texture and slight tartness provide a lovely counterpoint to the festive sweetness of the cookies.

Christmas Fruitcake Cookies Recipe FAQs

What type of candied fruit is best for these cookies?
Absolutely! The best candied fruits for Christmas Fruitcake Cookies include a mix of chopped cherries, pineapple, and citrus peel for that classic fruity flavor. Aim for pieces that are about 1/4 inch to ensure even distribution throughout the dough. Alternatively, you can also use dried fruits like raisins or apricots for a more natural sweetness.

How should I store Christmas Fruitcake Cookies?
Very easy! Store your cookies in an airtight container at room temperature for up to one week. If you'd like them to last longer, refrigerate them in a sealed container for up to 3 weeks. For maximum freshness, you can freeze them for up to 3 months, wrapped tightly in plastic wrap and then placed in a freezer bag. Just thaw overnight in the fridge before enjoying!

Can I freeze the dough for Christmas Fruitcake Cookies?
The more the merrier! Yes, you can freeze the cookie dough before baking. Simply scoop the dough into individual portions on parchment paper, freeze until solid, then transfer to an airtight container or freezer bag. The dough will keep well for up to 3 months. When you're ready to bake, let the dough thaw in the fridge overnight, then bake as per the instructions—your cookies will turn out just as delicious!

What if my cookies spread too much during baking?
No worries! If your Christmas Fruitcake Cookies are spreading too much, it may be due to the butter being too soft. To prevent this, I recommend refrigerating the dough for about 15 minutes before baking. Additionally, ensure you have measured your flour accurately and are using the right amount of baking soda—both are crucial for maintaining structure while baking.

Are these cookies suitable for those with nut allergies?
Absolutely! If you're baking for someone with nut allergies, you can easily omit the pecans or substitute them with pumpkin or sunflower seeds for a delightful crunch without the risk. Moreover, just be sure to check the labels on any ingredients you use, like extracts or candied fruits, to ensure there are no hidden nuts in them.

Christmas Fruitcake Cookies

Christmas Fruitcake Cookies Your New Holiday Favorite

Discover the joy of Christmas Fruitcake Cookies, blending dried fruits with rich flavors for a festive treat!
Print Recipe Pin Recipe
Prep Time 30 minutes mins
Cook Time 25 minutes mins
Cooling Time 5 minutes mins
Total Time 1 hour hr
Servings: 24 cookies
Course: Dessert
Cuisine: American
Calories: 150
Ingredients Equipment Method Nutrition Notes

Ingredients
  

For the Dough
  • 1 cup unsalted butter at room temperature
  • 1 cup granulated sugar light and fluffy texture
  • 1 large egg can substitute with mashed banana for vegan option
  • 1 teaspoon vanilla extract or other extracts
  • 1 teaspoon almond extract can substitute with hazelnut or omit
  • 1 teaspoon lemon extract or fresh lemon zest
  • 2 cups all-purpose flour consider gluten-free flour
  • 1/2 teaspoon salt
  • 1 teaspoon baking soda
For the Sweetness
  • 1 cup candied fruits chopped into small pieces
  • 1/2 cup pecans can be replaced with walnuts or omitted

Equipment

  • Electric mixer
  • Mixing Bowl
  • Baking Sheet
  • silicone baking mats or parchment paper
  • wire rack

Method
 

Step-by-Step Instructions
  1. Preheat your oven to 300°F (150°C) and line a baking sheet with silicone baking mats or parchment paper.
  2. Cream together the room-temperature unsalted butter and granulated sugar for about 3-5 minutes until light and fluffy.
  3. Add in the egg, vanilla, almond, and lemon extracts to the butter and sugar mixture, mixing until well combined.
  4. In another bowl, whisk together the all-purpose flour, salt, and baking soda, then gently fold into the wet mixture.
  5. Fold in the chopped candied fruits and pecans, ensuring even distribution throughout the cookie dough.
  6. Using a tablespoon, scoop out dough portions and drop them onto the prepared cookie sheet, spaced 3-4 inches apart.
  7. Bake for approximately 20-25 minutes, until edges are golden brown and centers are slightly soft.
  8. Allow cookies to cool on the baking sheet for 5 minutes before transferring to a wire rack to cool completely.

Nutrition

Serving: 1cookieCalories: 150kcalCarbohydrates: 20gProtein: 2gFat: 7gSaturated Fat: 4gPolyunsaturated Fat: 1gMonounsaturated Fat: 2gCholesterol: 20mgSodium: 80mgPotassium: 50mgFiber: 1gSugar: 8gVitamin A: 200IUCalcium: 20mgIron: 0.5mg

Notes

Dust chopped candied fruits with flour to prevent clumping. Avoid overbaking for a tender texture. Store cookies in an airtight container with a slice of bread to maintain moisture.

Tried this recipe?

Let us know how it was!

Delicious Christmas Cookies for Diabetics You'll Love

November 19, 2025 by Grace Snow Leave a Comment

As I stood in my kitchen, the scent of peppermint danced through the air, whisking me back to cozy holiday memories. This season, I'm thrilled to share a delightful twist on a classic treat: Diabetic-Friendly Mint Chocolate Christmas Cookies. Perfect for those mindful of their sugar intake, these cookies invite everyone to indulge without compromise. With their soft, chewy texture and festive appeal, they not only meet dietary needs but also make a wonderful addition to any holiday gathering. Plus, they’re incredibly easy to whip up, ensuring more time for laughter and cheer around the table. Who's ready to bake some magic this Christmas?

Why Are These Cookies a Must-Try?

Health-Conscious Indulgence: These delightful cookies let you treat yourself without the sugar overload, ensuring festive enjoyment for everyone.
Rich Chocolate Flavor: Savor the deep cocoa and minty aroma that will have you reaching for more.
Easy to Make: With simple steps and minimal ingredients, these cookies are quick to prepare—perfect for busy holiday seasons!
Festive Appeal: Their charming appearance makes them a hit at holiday gatherings—everyone will want a taste, especially when served alongside Eggnog Cookies Soft.
Versatile Variations: Feel free to mix things up using different extracts or flours to personalize your baking experience!
Guilt-Free Treats: Enjoy every bite knowing you're nourishing your body while celebrating the season with the best of both worlds!

Christmas Cookies for Diabetics Ingredients

• Get ready to bake deliciousness!

For the Batter

  • Butter – Provides richness and moisture; make sure it’s softened for easy mixing.
  • Swerve Confectioner’s Sugar – A fantastic sugar substitute that adds sweetness without the calories, making it perfect for Christmas cookies for diabetics.
  • Egg – Acts as a binder and moisture source; ensure it’s at room temperature for the best results.
  • Mint Extract – Gives a festive minty flavor; can be swapped with vanilla for a different taste twist.
  • Almond Flour – Our main gluten-free flour substitute, adding nutty flavor and tender texture.
  • Cocoa Powder – Essential for that rich chocolate taste; it also gives the cookies a beautiful color.
  • Salt – Balances sweetness and enhances overall flavor.

Step‑by‑Step Instructions for Diabetic-Friendly Mint Chocolate Christmas Cookies

Step 1: Preheat the Oven
Begin by preheating your oven to 325°F (163°C) to ensure an even baking temperature for your Diabetic-Friendly Mint Chocolate Christmas Cookies. This is a crucial step as it helps the cookies rise properly and achieve a delightful texture. Make sure to gather your baking sheets lined with parchment paper while the oven warms up for increased efficiency later on.

Step 2: Cream the Butter and Sugar
In a KitchenAid Mixer, add the softened butter and Swerve Confectioner's Sugar. Beat them together on medium speed for about 3 minutes, until you achieve a light and fluffy mixture. This step is essential for creating a creamy base that will elevate the sweetness without the sugar overload. Once fluffy, stop the mixer so you can proceed with the next ingredients.

Step 3: Incorporate Egg and Extract
Next, add one room-temperature egg and the mint extract to your fluffy butter mixture. Mix everything on medium speed for an additional 1 to 2 minutes, until the mixture is smooth and well combined. The egg acts as a binder, ensuring your cookies hold together perfectly. The mint extract will infuse a delightful aroma that captures the essence of the holiday season.

Step 4: Prepare the Dry Ingredients
In a separate bowl, whisk together the almond flour, cocoa powder, and salt. This dry mixture should be well combined to ensure the cocoa is evenly distributed throughout your Diabetic-Friendly Mint Chocolate Christmas Cookies. The almond flour not only provides a gluten-free base but also adds a unique nutty flavor that complements the chocolate beautifully.

Step 5: Combine Wet and Dry Ingredients
Gradually incorporate the dry ingredients into the wet mixture using a spatula or your mixer on low speed. Mix until a cohesive dough forms; if the dough appears too dry, add cold water a tablespoon at a time until it reaches a pliable consistency. This step is key to achieving the right texture for your cookies, allowing them to be soft yet sturdy once baked.

Step 6: Shape the Cookies
Once your dough is ready, roll it into 1-inch balls using your hands. Place the cookie balls on your parchment-lined baking sheets, spacing them about 2 inches apart to allow for spreading. This preparation ensures that your Diabetic-Friendly Mint Chocolate Christmas Cookies have enough room to expand as they bake, resulting in perfectly shaped treats.

Step 7: Bake the Cookies
Now it’s time to bake! Place your baking sheets in the preheated oven and set a timer for 12 minutes. Your cookies should be firm to the touch but still soft in the center, which is their ideal doneness. Keep an eye on them, as oven temperatures can vary and may affect baking times.

Step 8: Cool and Dust with Sugar
After baking, remove the cookies from the oven and let them cool on the sheets for about 5 minutes. Then, roll them in additional Swerve Confectioner’s Sugar while still warm for a sweet finishing touch. Finally, transfer the cookies to a wire rack to cool completely, ensuring they retain their delightful texture and hang onto that festive presentation.

Storage Tips for Christmas Cookies for Diabetics

Room Temperature: Store the cookies in an airtight container at room temperature for up to 1 week. This will keep them fresh while maintaining their delightful texture.

Fridge: For longer freshness, you can refrigerate them in an airtight container for up to 2 weeks, ensuring they maintain their chewy qualities without drying out.

Freezer: Freeze cookies in a single layer on a baking sheet until solid, then transfer them to a freezer-safe bag or container. They can last up to 3 months in the freezer, making them perfect for holiday meal prep.

Reheating: When ready to enjoy, simply thaw at room temperature or reheat in a microwave for about 10-15 seconds for that freshly baked taste!

What to Serve with Diabetic-Friendly Mint Chocolate Christmas Cookies

The festive season is all about sharing delightful treats, and these cookies are best enjoyed with charming accompaniments.

  • Herbal Tea: A warm cup of chamomile or peppermint tea beautifully complements the minty flavor, creating a comforting pairing. The soothing sip enhances the cookie's festive spirit.
  • Fruit Salad: A vibrant mix of seasonal fruits adds brightness and freshness, balancing the rich chocolate and mint. Think juicy oranges, crisp apples, and pops of pomegranate for a lovely contrast!
  • Greek Yogurt Parfait: Serve these cookies alongside creamy Greek yogurt layered with berries and a drizzle of honey. The tart fruitiness perfectly offsets the sweet cookies, making this a delightful duo.
  • Dark Hot Chocolate: Indulge in a cozy mug of low-sugar dark hot chocolate to sip between bites. The rich chocolate and cool mint flavors melt together in perfect harmony.
  • Spiced Nuts: A bowl of lightly salted or spiced nuts offers a crunchy texture and savory flavor that balance the sweetness of the cookies. Everyone loves a bit of crunch in their holiday spread!
  • Date and Nut Bites: These naturally sweet bites echo the cookies' flavors while providing a wholesome energy boost. Their chewy consistency and nutty essence serve as a delicious, healthful alternative.
  • Coconut Macaroons: These light and chewy treats complement the mint chocolate cookies beautifully while keeping with the festive theme of holiday baking. The subtle coconut flavor plays well with chocolate.
  • Sparkling Water with Lime: A refreshing bubbly drink can cleanse the palate after enjoying the sweet cookies, making it a perfect light accompaniment for your holiday treat platter.

Make Ahead Options

These Diabetic-Friendly Mint Chocolate Christmas Cookies are perfectly suited for meal prep enthusiasts! You can prepare the cookie dough up to 3 days in advance—simply mix the ingredients as directed, roll the dough into balls, and refrigerate them in an airtight container to preserve their freshness. When you're ready to enjoy them, just bake them straight from the fridge, adding an extra minute or two to the baking time for the best results. Alternatively, you can also bake the cookies and store them in an airtight container at room temperature for up to one week. This makes them a delightful option for holiday gatherings or busy weeknights, ensuring they remain just as delicious as when freshly made!

Expert Tips for Christmas Cookies for Diabetics

  • Check Dough Consistency: If your dough seems too crumbly, add cold water gradually; this will help it come together without compromising the cookie's texture.

  • Cooling is Key: Ensure cookies are fully cooled before serving or storing to keep their softness intact, preventing them from becoming too hard.

  • Watch Baking Time: Use a kitchen timer for precise baking; since ovens vary in temperature, the cookies might need slight adjustments to ensure they're perfectly baked.

Christmas Cookies for Diabetics Variations

Looking to personalize your cookies? Let your creativity shine with these delightful twists and substitutions!

  • Coconut Flour: Replace almond flour with coconut flour for a gluten-free option; use less as it's more absorbent.

  • Different Extracts: Substitute mint extract with orange, lemon, or almond extract for a refreshing twist that brightens the flavors.

  • Add Nuts: Incorporate chopped walnuts or pecans into the dough for a delightful crunch in every bite. The nutty flavor balances beautifully with chocolate.

  • Lower Carb: Use a low-carb sugar substitute like erythritol in place of Swerve to cater to unique dietary preferences without sacrificing sweetness.

  • Dairy-Free Option: Swap butter with coconut oil for a creamy texture, making these cookies dairy-free and infused with tropical notes.

  • Spicy Kick: Add a pinch of cayenne or cinnamon for a surprising warmth that will spice up the festive mood—pair it with your favorite herbal tea for balance.

  • Frosted Fun: Once cooled, consider drizzling a sugar-free chocolate glaze on top to elevate the holiday spirit! It adds a touch of elegance and irresistible chocolate flavor.

  • Flourless Version: For a unique twist, try a flourless version by blending black beans into your dough for added protein and fiber, keeping the cookies soft and chewy.

With options like these, your Diabetic-Friendly Mint Chocolate Christmas Cookies can become a personalized masterpiece for this festive season. For more delicious recipes, consider making Matcha Cookies Soft or indulge in some savory Thumbprint Cookies Melt. Enjoy baking!

Christmas Cookies for Diabetics Recipe FAQs

How can I tell if my ingredients are fresh enough?
Absolutely! Fresh ingredients are key to delicious cookies. For butter, make sure it’s softened and without any discoloration or sour smell. When choosing Swerve Confectioner's Sugar, check for a fresh packaging date. Eggs should be at room temperature and free from cracks—if you're unsure, perform the float test by placing them in water; fresh eggs will sink.

What’s the best way to store these cookies to keep them fresh?
Very! Store your Christmas cookies for diabetics in an airtight container at room temperature for up to 1 week to retain their softness. For more longevity, refrigerate them for up to 2 weeks. You can also freeze them for up to 3 months; just ensure they’re sealed tightly to avoid freezer burn.

Can I freeze the cookie dough before baking?
Absolutely! To freeze the dough, shape it into 1-inch balls and arrange them in a single layer on a baking sheet. Freeze until solid, then transfer to a freezer-safe bag. The dough can be kept for up to 3 months. When you're ready to bake, simply place the frozen dough balls on a baking sheet and bake them straight from the freezer, adding an additional minute or two to the baking time.

What can I do if the dough is crumbly and won't hold together?
If your dough seems too crumbly, don't worry! Just add cold water—start with 1 tablespoon at a time—and mix until a cohesive dough forms. This should help bind the ingredients without compromising the cookie's delightful texture, so just be patient and add it slowly!

Are there any dietary considerations I should keep in mind?
Yes! While these cookies are specifically designed to be diabetic-friendly, always check ingredient labels for potential allergens, especially if you have food sensitivities. Since the recipe includes almond flour, it’s not suitable for those with nut allergies. If serving to guests, please let them know what’s in the cookies to ensure everyone can enjoy them safely!

Christmas Cookies for Diabetics

Delicious Christmas Cookies for Diabetics You'll Love

Delight in Christmas cookies for diabetics with these Diabetic-Friendly Mint Chocolate Christmas Cookies, perfect for festive indulgence without the sugar overload.
Print Recipe Pin Recipe
Prep Time 15 minutes mins
Cook Time 12 minutes mins
Cooling Time 5 minutes mins
Total Time 32 minutes mins
Servings: 24 cookies
Course: Dessert
Cuisine: American
Calories: 90
Ingredients Equipment Method Nutrition Notes

Ingredients
  

For the Batter
  • 1 cup Butter softened
  • 1 cup Swerve Confectioner’s Sugar sugar substitute
  • 1 large Egg room temperature
  • 1 teaspoon Mint Extract festive flavor
  • 2 cups Almond Flour gluten-free flour substitute
  • 1/2 cup Cocoa Powder for rich chocolate taste
  • 1/4 teaspoon Salt to balance sweetness

Equipment

  • Oven
  • KitchenAid Mixer
  • Baking Sheets
  • Parchment Paper
  • Mixing Bowl

Method
 

Step‑by‑Step Instructions
  1. Preheat your oven to 325°F (163°C) and gather your baking sheets lined with parchment paper.
  2. In a KitchenAid Mixer, beat together softened butter and Swerve Confectioner's Sugar for about 3 minutes until light and fluffy.
  3. Add one room-temperature egg and the mint extract, mixing for 1 to 2 minutes until smooth.
  4. Whisk together almond flour, cocoa powder, and salt in a separate bowl.
  5. Gradually mix the dry ingredients into the wet mixture until a cohesive dough forms, adding cold water if necessary.
  6. Roll dough into 1-inch balls and place them on parchment-lined baking sheets, spaced 2 inches apart.
  7. Bake for 12 minutes until firm to the touch but soft in the center.
  8. Cool cookies on sheets for 5 minutes, then roll in additional Swerve Sugar before transferring to a wire rack.

Nutrition

Serving: 1cookieCalories: 90kcalCarbohydrates: 6gProtein: 3gFat: 7gSaturated Fat: 4gPolyunsaturated Fat: 1gMonounsaturated Fat: 2gCholesterol: 30mgSodium: 60mgPotassium: 80mgFiber: 2gSugar: 1gVitamin A: 200IUCalcium: 50mgIron: 1mg

Notes

For best results, ensure ingredients are at the correct temperature and follow the provided tips for consistent baking.

Tried this recipe?

Let us know how it was!

Irresistible Chocolate Thumbprint Cookies with Ganache Delight

November 19, 2025 by Grace Snow Leave a Comment

The aroma of chocolate wafts through the kitchen, wrapping me in a warm embrace—this is the moment I know I’m ready to bake my favorite treat: Chocolate Thumbprint Cookies. These delightful little gems are not just any cookies; they pack a rich, chewy texture that’s simply irresistible. Filled with luscious ganache, they turn every bite into a celebration, making them perfect for festive gatherings or a cozy evening at home. Plus, they’re incredibly quick to whip up, needing only a handful of ingredients! As a passionate home chef, I love how these cookies can easily impress guests while also satisfying my chocolate cravings. So, are you ready to embark on this sweet adventure with me? Let’s dive into these deliciously decadent cookies!

Why are Chocolate Thumbprint Cookies amazing?

Delectable Texture: The combination of a soft, chewy cookie with a smooth ganache center creates a delightful experience for your taste buds.

Quick and Simple: With just a few ingredients, you’ll have a batch of these cookies ready in no time, making them perfect for last-minute festive treats or cozy nights in.

Endless Variations: Feel free to swap chocolate types or add exciting flavors like peppermint to customize your cookie experience.

Showstopper Appeal: These cookies not only taste incredible but also look stunning on any dessert platter, making them a great conversation starter at gatherings.

Perfect for Pairing: Enjoy them with a glass of milk or a cup of coffee—these treats match beautifully with a variety of beverages.

Before you start, check out my delicious Eggnog Cookies Soft for another delectable holiday option that warms the heart!

Chocolate Thumbprint Cookies Ingredients

Get ready to gather the essentials for your delicious Chocolate Thumbprint Cookies!

For the Cookie Base

  • All-Purpose Flour – Provides structure to the cookies; ensure to spoon and level for accuracy.
  • Dutch Process Cocoa Powder – Imparts that deep, rich chocolate flavor; you can use natural unsweetened cocoa if desired.
  • Salt – Enhances the overall flavor beautifully.
  • Baking Powder – Helps achieve that perfect tender texture in each cookie.
  • Unsalted Butter – Adds a wonderful richness; make sure it's softened for easy creaming.
  • Light Brown Sugar – Contributes both moisture and a lovely caramel note to your cookies.
  • Granulated White Sugar – Offers sweetness and aids in developing a crisp exterior.
  • Egg Yolks – Provide binding and richness; using them at room temperature helps emulsify better.
  • Vanilla Bean Paste or Extract – Elevates the flavor profile; pure vanilla extract can be a delightful substitute.

For the Ganache Filling

  • Semi-Sweet Chocolate Chips – The star ingredient for making that luscious ganache; dark chocolate can be used for an even deeper flavor.
  • Heavy Whipping Cream – Makes for a creamy ganache; always choose full-fat for the best consistency.

For the Finishing Touch

  • Nonpareils (optional) – Use them for a delightful decorative touch on top of the ganache.

Now that you have your ingredients ready, you're just a step away from creating these irresistible Chocolate Thumbprint Cookies that will surely steal the show at any event!

Step‑by‑Step Instructions for Chocolate Thumbprint Cookies

Step 1: Preheat the Oven
Start by preheating your oven to 350°F (175°C). Then, line two baking sheets with parchment paper, ensuring they're ready to receive your delectable Chocolate Thumbprint Cookies. While the oven heats, you’ll have just enough time to prepare your ingredients and get everything ready for mixing.

Step 2: Mix the Dry Ingredients
In a medium bowl, whisk together the all-purpose flour, Dutch process cocoa powder, salt, and baking powder until well combined. This step is key for building a beautiful chocolate flavor throughout your cookies. Set your bowl aside, as you’ll be returning to it shortly as you create that rich cookie base.

Step 3: Cream the Butters and Sugars
In a large mixing bowl, cream together the softened unsalted butter, light brown sugar, and granulated sugar with an electric mixer for about 2 minutes, or until the mixture is light and fluffy. You’re aiming for a pale and airy consistency, which will give your cookies that melt-in-your-mouth texture.

Step 4: Add Eggs and Vanilla
Once your butter and sugar are perfectly combined, add the egg yolks and vanilla bean paste (or extract) to the bowl. Mix at medium speed until the mixture is pale and thoroughly combined, which should take about a minute. This is where the magic begins as the flavors meld beautifully.

Step 5: Combine Wet and Dry Ingredients
Gradually add the dry ingredient mixture to your creamed mixture, mixing gently until just combined. Be careful not to overmix; you want to retain the delicate texture of your Chocolate Thumbprint Cookies. The dough should be soft and slightly sticky, perfect for rolling into balls.

Step 6: Shape the Cookie Dough
Scoop the dough into 34 equal portions and roll each portion into a ball between your palms. Place the dough balls on the prepared baking sheets, leaving enough space for spreading. Using the back of a 1/4 teaspoon, create a small indent in the center of each ball—this will form the perfect shape for the ganache filling.

Step 7: Chill the Indented Dough
Refrigerate the indented cookie dough for at least 1 hour before baking. This chilling step is crucial, as it helps prevent the cookies from spreading too much in the oven, ensuring they keep their lovely shape and that delightful thumbprint.

Step 8: Bake the Cookies
Once chilled, place the baking sheets in the preheated oven and bake for 9-11 minutes. Keep a close eye on them; the edges should look set while the centers remain soft. If necessary, gently re-press the indents immediately after baking to ensure they hold the ganache filling well.

Step 9: Prepare the Ganache
While the cookies cool, prepare the ganache. In a small saucepan, heat the heavy whipping cream until it bubbles gently, then pour it over the semi-sweet chocolate chips in a heatproof bowl. Let it sit for a few minutes before stirring until the mixture is smooth and glossy—this rich chocolate ganache will complement your cookies perfectly.

Step 10: Assemble the Cookies
Once the cookies have cooled completely, fill each indentation with the luscious ganache using a spoon or piping bag. If desired, sprinkle nonpareils on top of the ganache for a festive touch. Lastly, chill the filled cookies briefly to allow the ganache to set, ensuring each bite is a little piece of heaven!

Storage Tips for Chocolate Thumbprint Cookies

Room Temperature: Store the cookies in an airtight container at room temperature for up to 3 days to maintain their soft, chewy texture.

Fridge: For longer freshness, you can refrigerate the cookies in an airtight container for up to a week, but be aware that they may lose some of their initial texture.

Freezer: Freeze the unfilled cookies for up to 2 weeks. Once cooled, wrap them tightly in plastic wrap and place them in a freezer bag. Add the ganache filling after thawing for the best flavor.

Reheating: If you want to enjoy the cookies warm, gently reheat them in the oven at 300°F (150°C) for about 5 minutes to restore their deliciousness before serving.

Chocolate Thumbprint Cookies Variations

Feel free to let your creativity shine by customizing these cookies to suit your taste buds!

  • Dark Chocolate: Swap semi-sweet chocolate chips for dark chocolate chips to deepen the flavor profile. Perfect for serious chocolate enthusiasts!
  • White Chocolate: Try white chocolate chips instead of semi-sweet for a sweet, creamy contrast that adds a lovely twist to the tradition.
  • Peppermint Twist: Add a teaspoon of peppermint extract to the dough for a refreshing, holiday-inspired flavor that will dazzle your taste buds.
  • Nutty Crunch: Incorporate chopped walnuts or hazelnuts into the dough for a delightful crunch that beautifully complements the rich, chewy cookie.
  • Spicy Touch: Mix in a pinch of cayenne pepper or cinnamon to the dough for unexpected warmth in every bite. A little heat pairs wonderfully with chocolate!
  • Nut Butter Swirl: Fold in a few tablespoons of your favorite nut butter, such as almond or peanut butter, for a creamy, nutty flavor that enhances the texture.
  • Candy Cane Crush: Top your ganache with crushed candy canes instead of nonpareils for a festive, minty crunch that will make this treat truly stand out.
  • Fruit Flavors: Add a tablespoon of orange or lemon zest to the dough for a bright citrusy note that perfectly balances the rich chocolate.

For more delightful cookie options, don't miss these delicious Thumbprint Cookies Melt or try the seasonal charm of Eggnog Cookies Soft—each variation will bring its own magical taste to any gathering!

Expert Tips for Chocolate Thumbprint Cookies

  • Correct Measurements: Always spoon and level your flour when measuring to avoid dense cookies; precise measurements make all the difference in your Chocolate Thumbprint Cookies.

  • Chill the Dough: Don’t skip chilling the indented dough for at least one hour. This critical step prevents the cookies from spreading too much while baking.

  • Re-Press Indents: If the indents puff up during baking, gently re-press them with a teaspoon right after removing them from the oven to ensure enough space for the ganache.

  • Ganache Consistency: Heat the cream until it’s bubbling, then let it sit with the chocolate before stirring. This technique helps achieve the perfect silky texture for your ganache.

  • Fun Variations: Remember to swap flavors by using dark chocolate or even adding peppermint extract to the dough for a festive twist that elevates your Chocolate Thumbprint Cookies!

Make Ahead Options

These Chocolate Thumbprint Cookies are perfect for busy weeknights and meal prep enthusiasts! You can prepare the cookie dough up to 24 hours in advance; simply roll the dough into balls and chill them in the refrigerator. This not only helps the flavors meld together but also prevents spreading during baking. Additionally, the ganache can be made ahead and stored in an airtight container for up to 3 days in the refrigerator. When you're ready to enjoy your cookies, bake them straight from the fridge, and then fill with your ganache once they've cooled. By prepping ahead, you'll have deliciously fresh cookies ready with minimal last-minute effort!

What to Serve with Chocolate Thumbprint Cookies

Indulging in these delightful cookies is just the beginning; let’s explore what can make your dessert experience even sweeter.

  • Fresh Berries: Juicy strawberries or raspberries provide a tart contrast that balances the rich chocolate flavors, adding a refreshing touch.
  • Vanilla Ice Cream: A scoop of creamy vanilla ice cream melts beautifully against the warm ganache, creating a decadent dessert combo.
  • Coffee or Espresso: Serve with a steaming cup of coffee or a shot of espresso, enhancing the cookie’s chocolate richness while giving you a cozy caffeine boost.
  • Whipped Cream: Light, fluffy whipped cream adds an airy texture that complements the dense cookies perfectly, making each bite feel indulgent.
  • Mint Tea: The refreshing flavor of mint tea cleanses the palate after each bite, providing a delightful contrast to the sweetness of the cookies.
  • Chocolate Milk: A classic pairing, chocolate milk mirrors the cookie's flavor while adding a whimsical childhood nostalgia to your dessert experience.
  • Spiced Chai: The warm spices of chai lift the chocolate notes, creating a comforting and aromatic combination that feels perfect for chilly evenings.
  • Caramel Sauce: Drizzling caramel sauce on top or alongside adds a rich sweetness that elevates the cookie experience to a new level of indulgence.
  • Peanut Butter Spread: A dab of creamy peanut butter balances the sweetness with its nutty richness, creating a delightful flavor harmony.
  • Festive Spritzers: Try serving with a sparkling berry spritzer for a touch of elegance and lightness, making your dessert feel even more special during celebrations.

Chocolate Thumbprint Cookies Recipe FAQs

How do I choose ripe ingredients for my Chocolate Thumbprint Cookies?
Absolutely! For the best results, ensure that your unsalted butter is softened to room temperature, around 68°F to 70°F (20°C to 21°C). This allows for easy creaming with sugars and achieves a fluffy texture. If you're using eggs, try to select farm-fresh ones, preferably at room temperature, for better emulsification when mixing.

How should I store my Chocolate Thumbprint Cookies, and how long do they last?
Store your cookies in an airtight container at room temperature for up to 3 days. If you want to keep them for longer, refrigerate them in an airtight container for about a week, although this may change their texture slightly. For the best results, I recommend freezing the unfilled cookies for up to 2 weeks. Once cooled, wrap them tightly in plastic wrap and place in a freezer bag. Remember to add the ganache only after thawing for optimal taste!

Can I freeze Chocolate Thumbprint Cookies, and if so, how?
Yes, indeed! To freeze your cookies properly, first, bake and fully cool them. Then, wrap the unfilled cookies tightly in plastic wrap, followed by placing them into a freezer-safe bag. They can be frozen for up to 2 weeks. When you're ready to enjoy them, just thaw at room temperature and fill with freshly made ganache for a delightful treat!

What should I do if my cookies spread too much while baking?
Very! If your cookies spread excessively, it could result from warm dough or not chilling them long enough. Always ensure you chill the indented dough for at least 1 hour before baking. If you forget this step, once they come out of the oven, gently re-press the indents immediately to maintain the classic thumbprint shape, allowing enough space for the ganache filling.

Are there any dietary considerations for Chocolate Thumbprint Cookies?
While this recipe is not gluten-free, you can substitute all-purpose flour with a gluten-free blend for those with gluten sensitivities. Additionally, watch out for allergies; ensure that any chocolate used is dairy-free if you're making these cookies for someone with a dairy allergy. For pets, chocolate is toxic, so always keep these cookies out of their reach!

Can I customize my Chocolate Thumbprint Cookies?
Absolutely! The beauty of these cookies lies in their versatility. You can swap out the semi-sweet chocolate chips for dark chocolate for a richer taste or even go for white chocolate for a sweeter profile. You may also add a few drops of peppermint extract to the dough around the holiday season or sprinkle crushed candy canes on top for festive flair. The more the merrier!

Chocolate Thumbprint Cookies

Irresistible Chocolate Thumbprint Cookies with Ganache Delight

These Chocolate Thumbprint Cookies are rich, chewy, and filled with luscious ganache, perfect for festive gatherings.
Print Recipe Pin Recipe
Prep Time 30 minutes mins
Cook Time 11 minutes mins
Chilling Time 1 hour hr
Total Time 1 hour hr 41 minutes mins
Servings: 34 cookies
Course: Dessert
Cuisine: American
Calories: 120
Ingredients Equipment Method Nutrition Notes

Ingredients
  

For the Cookie Base
  • 1 cup All-Purpose Flour spoon and leveled
  • 1/2 cup Dutch Process Cocoa Powder or natural unsweetened cocoa
  • 1/4 teaspoon Salt to enhance flavor
  • 1 teaspoon Baking Powder for tender texture
  • 1/2 cup Unsalted Butter softened
  • 1/2 cup Light Brown Sugar
  • 1/2 cup Granulated White Sugar
  • 2 large Egg Yolks at room temperature
  • 1 teaspoon Vanilla Bean Paste or Extract pure extract can substitute
For the Ganache Filling
  • 1 cup Semi-Sweet Chocolate Chips or dark chocolate for deeper flavor
  • 1/2 cup Heavy Whipping Cream full-fat for best consistency
For the Finishing Touch
  • as needed Nonpareils optional for decoration

Equipment

  • Mixing bowls
  • Electric mixer
  • Baking Sheets
  • Parchment Paper
  • Heatproof bowl
  • Saucepan

Method
 

Step-by-Step Instructions
  1. Preheat your oven to 350°F (175°C) and line two baking sheets with parchment paper.
  2. In a medium bowl, whisk together the flour, cocoa powder, salt, and baking powder.
  3. In a large bowl, cream the softened butter, light brown sugar, and granulated sugar until light and fluffy.
  4. Add the egg yolks and vanilla to the creamed mixture and mix until combined.
  5. Gradually add the dry mixture to the wet mixture, mixing until just combined.
  6. Scoop the dough into 34 equal portions, roll into balls, and create an indent in each ball.
  7. Chill the indented cookie dough for at least 1 hour before baking.
  8. Bake the cookies for 9-11 minutes and re-press indents if necessary.
  9. Prepare the ganache by heating the cream and pouring over the chocolate chips, stirring until smooth.
  10. Fill the indents with ganache and chill briefly to set.

Nutrition

Serving: 1cookieCalories: 120kcalCarbohydrates: 15gProtein: 2gFat: 6gSaturated Fat: 4gPolyunsaturated Fat: 0.5gMonounsaturated Fat: 1.5gCholesterol: 20mgSodium: 60mgPotassium: 50mgFiber: 1gSugar: 8gVitamin A: 200IUCalcium: 10mgIron: 0.5mg

Notes

For best results, ensure accurate measurements and do not skip the chilling step to maintain cookie shape.

Tried this recipe?

Let us know how it was!

French Salted Butter Cookies for a Melty, Buttery Experience

November 19, 2025 by Grace Snow Leave a Comment

As I rummaged through my pantry one afternoon, I stumbled upon a golden wrapper of rich butter that made my heart skip a beat. It was the perfect inspiration for baking French Salted Butter Cookies! These simple-but-elegant gems strike a beautiful balance between buttery goodness and a pinch of flaky sea salt, making them an irresistible treat for any occasion. With minimal prep time and the ability to impress even the pickiest of eaters, these cookies effortlessly combine tradition with a modern twist. Whether you're winding down with a cup of tea or hosting a festive gathering, you can't go wrong with this delightful recipe. Ready to create some magic in your kitchen? Let’s dive into making these mouthwatering cookies!

Why are French Salted Butter Cookies irresistible?

Mouthwatering Flavor: The luxurious combination of rich butter and subtle sea salt creates a unique flavor explosion.
Easy Prep: With just a few simple ingredients, you'll have a delightful dough in no time—perfect for busy days!
Versatile Treat: Whether enjoyed solo or paired with a warm beverage, these cookies shine at any gathering.
Elegant Presentation: Their golden edges and crumbly texture make them not only tasty but beautifully eye-catching.
Culinary Tradition: Experience the charm of French baking right at home—these cookies are a slice of culinary paradise!
Treat yourself and your loved ones to a moment of pure indulgence; don't forget to check out our Eggnog Cookies Soft for another fabulous recipe to enjoy!

French Salted Butter Cookies Ingredients

• Let’s create something delicious with these simple staples!

For the Dough

  • Unsalted Butter (1 cup / 225g) – High-quality, creamy butter for the best flavor and texture.
  • Granulated Sugar (1/2 cup / 100g) – Sweetness that perfectly balances the savory salt; whisk until fluffy with the butter.
  • All-Purpose Flour (2 cups / 250g) – Provides structure; be careful not to overmix for a tender finish.
  • Flaky Sea Salt (1/4 teaspoon) – A sprinkle enhances the cookies' rich flavor—add a bit more on top for that gourmet touch!
  • Pure Vanilla Extract (1 teaspoon) – Elevates the overall taste with aromatic depth; always choose pure for the best result.

Now that you have your ingredients ready, it’s time to mix them up and create these magnificent French Salted Butter Cookies!

Step‑by‑Step Instructions for French Salted Butter Cookies

Step 1: Preheat the Oven
Start by preheating your oven to 350°F (175°C) and prepare a baking sheet by lining it with parchment paper. This step ensures your French Salted Butter Cookies will bake evenly while keeping them from sticking. The aromatic scent of baking will soon fill your kitchen as you proceed with the preparation!

Step 2: Cream Butter and Sugar
In a large mixing bowl, use a hand mixer or stand mixer to cream 1 cup of softened unsalted butter with 1/2 cup of granulated sugar together for about 3-5 minutes. Beat the mixture until it becomes light and fluffy, and its color turns pale yellow. This aeration is essential for a tender texture in your cookies.

Step 3: Add Vanilla Extract
Once the butter and sugar are properly creamed, add 1 teaspoon of pure vanilla extract to the mixture. Mix on low speed until the vanilla is fully incorporated. This aromatic addition enhances the flavor profile of your French Salted Butter Cookies, giving them a delightful fragrance that will tempt anyone nearby.

Step 4: Incorporate the Flour
Gradually add 2 cups of all-purpose flour to the creamed mixture. Mix on low speed or gently fold using a spatula until just combined, being careful not to overmix. The dough should be soft but not sticky, forming a cohesive mass. This careful mixing ensures the cookies maintain a tender crumb.

Step 5: Chill the Dough
Shape the dough into a log about 2 inches in diameter and wrap it tightly in plastic wrap. Place the wrapped dough in the refrigerator and chill for at least 1 hour. Chilling is crucial for the cookies to hold their shape while baking, preventing them from spreading too much.

Step 6: Slice the Dough
After chilling, remove the dough from the fridge and unwrap it. Use a sharp knife to slice the log into 1/4-inch thick rounds. Arrange the cookies on your prepared baking sheet, ensuring they are spaced apart to allow for baking expansion. The anticipation builds as your French Salted Butter Cookies begin to take shape!

Step 7: Sprinkle with Sea Salt
Lightly sprinkle flaky sea salt on the top of each cookie before baking. This will add a charming crunch and amplify the cookies' rich flavors. The salt balances the sweetness, making each bite perfectly delicious. It’s a small but impactful step that elevates your baking.

Step 8: Bake the Cookies
Place the baking sheet in your preheated oven and bake the cookies for 12-15 minutes. Keep an eye on them; they should be golden around the edges while still pale in the center. The perfect baking time is crucial for achieving that desired melt-in-your-mouth texture characteristic of French Salted Butter Cookies.

Step 9: Cool and Enjoy
Remove the baking sheet from the oven and let the cookies cool on it for 5 minutes. This waiting time allows them to firm up slightly before transferring them to a wire rack to cool completely. Enjoy these buttery treats warm or at room temperature as you share them with family and friends!

How to Store and Freeze French Salted Butter Cookies

Room Temperature: Keep the cookies in an airtight container at room temperature for up to 2 weeks. They’ll maintain their delightful texture and flavor during this time.

Fridge: If you prefer, store them in the fridge for up to 3 weeks. Just remember to let them come to room temperature before enjoying so they can regain their melt-in-your-mouth goodness.

Freezer: For longer storage, wrap the cookies tightly in plastic wrap and place them in a sealed container. They can be frozen for up to 3 months, preserving their buttery flavor.

Reheating: When ready to enjoy, thaw cookies at room temperature. For a freshly baked taste, microwave them for about 10 seconds or warm them in a preheated oven at 300°F (150°C) for a few minutes.

What to Serve with French Salted Butter Cookies

Pair these delightful cookies with the perfect accompaniments to create a cozy and memorable experience for any gathering.

  • Earl Grey Tea: The floral notes and bergamot citrus of this tea beautifully complement the buttery richness of the cookies. It's a match made in heaven.
  • Espresso: A strong shot of espresso cuts through the cookie’s sweetness, balancing flavors and making for an energizing snack.
  • Fresh Berries: Juicy blueberries or raspberries add a refreshing brightness that contrasts well with the cookies' richness. They also add a pop of color to your plate!
  • Dark Chocolate: Pair the cookies with dark chocolate squares; their bitterness perfectly enhances the sweet and salty flavor profile, offering an indulgent experience.
  • Whipped Cream: A dollop of lightly sweetened whipped cream paired with the cookies makes for an elegant treat. The creaminess adds a luxurious touch.
  • Cheese Platter: Serve alongside soft cheeses like brie or goat cheese. The creaminess of the cheese complements the crisp texture of the cookies wonderfully.
  • Vanilla Ice Cream: A scoop of creamy vanilla ice cream brings a delightful chill and contrast to the warm butter cookies, creating a heavenly dessert experience.
  • Lemon Sorbet: This zesty sorbet provides a refreshing palate cleanser, pairing nicely with the richness of the cookies while awakening your taste buds.

French Salted Butter Cookies Variations

Get ready to play with flavors and textures to make these cookies truly your own!

  • Chocolate-Dipped: Dip half of each cookie in melted dark or milk chocolate for an indulgent twist. This rich addition creates a delightful contrast to the buttery base.

  • Nutty Variations: Fold in finely chopped nuts like almonds or pistachios for a satisfying crunch. It adds a lovely nutty depth that complements the buttery richness beautifully.

  • Flavored Additions: Infuse your dough with citrus zest, such as lemon or orange, or delicate herbs like lavender or rosemary for unique flavors. Each variation offers a fragrant surprise in every bite.

  • Sandwich Style: Create cookie sandwiches using your favorite jam, caramel, or luscious chocolate ganache. The richness of the filling takes these cookies to a whole new level of dessert bliss!

  • Savory Twist: Incorporate a dash of finely grated cheese (like Parmesan) into the dough for a subtle savory hint. This unexpected touch adds complexity while maintaining the cookie's buttery essence.

  • Spiced Cookies: Add a sprinkle of warm spices, like cinnamon or cardamom, to the dough for aromatic warmth. It's a perfect twist for cozy days and makes your kitchen smell divine.

  • Coconut Delight: Mix in unsweetened shredded coconut for a tropical flair. The chewy texture contrasts with the crisp cookie, bringing a delightful coconut flavor to the forefront.

Now, may I suggest pairing your cookies with a cup of Earl Grey tea for a refined afternoon treat? You might also enjoy exploring our Mexican Wedding Cookies for more delicious cookie choices!

Expert Tips for French Salted Butter Cookies

  • Perfect Butter Consistency: Ensure your butter is softened but not melted. This helps achieve the ideal creamy texture for your dough.
  • Chill for Success: Chilling the dough allows the flavors to meld and prevents cookies from spreading too much while baking. Don't skip this step!
  • Sharp Knife for Slicing: Use a sharp knife to cut the log into even rounds. Clean slices ensure consistent baking, preventing unevenly cooked cookies.
  • Watch the Bake Time: Keep a close eye on the cookies in the oven. They should be lightly golden around the edges while remaining pale in the center for the perfect melt-in-your-mouth experience.
  • Flaky Sea Salt Addition: Feel free to sprinkle a bit more flaky sea salt on top right before baking for an extra pop of flavor in these French Salted Butter Cookies.

Make Ahead Options

These French Salted Butter Cookies are perfect for busy home cooks looking to save time without sacrificing flavor! You can prepare the cookie dough up to 24 hours in advance; simply shape it into a log, wrap it tightly in plastic wrap, and refrigerate. This chilling step not only enhances the flavor but also prevents the dough from spreading too much while baking. When you're ready to bake, just slice the chilled log into rounds and sprinkle with flaky sea salt before placing them in a preheated oven. Your cookies will taste just as delightful as if they were freshly made, giving you restaurant-quality results with minimal effort and allowing you to enjoy your time with loved ones!

French Salted Butter Cookies Recipe FAQs

How do I select the right butter for French Salted Butter Cookies?
Absolutely! Always choose high-quality unsalted butter for the best flavor. Look for butter that is creamy with a rich color; this usually signals freshness and quality. I always select brands that specify they use milk from grass-fed cows, as they tend to impart a more pleasant, nuanced taste to your cookies.

What is the best way to store French Salted Butter Cookies?
To keep your cookies fresh, store them in an airtight container at room temperature for up to 2 weeks. If you'd like them to last longer, pop them in the fridge where they can stay fresh for about 3 weeks. Just let them warm up to room temperature before enjoying, as this enhances their melt-in-your-mouth experience.

Can I freeze French Salted Butter Cookies?
Absolutely! To freeze, wrap each cookie tightly in plastic wrap and place them in a sealed container, allowing them to maintain their buttery flavor. They will keep well for up to 3 months. When you're ready to enjoy, simply thaw them at room temperature or give them a quick warm-up in a 300°F (150°C) oven for a few minutes.

What should I do if my cookies spread too much while baking?
Very! If you find that your cookies spread excessively, it could be due to the dough being too warm when sliced or not chilling long enough. Be sure to chill the shaped dough for at least 1 hour in the fridge before baking. Also, sticking to the correct butter consistency—softened but not melted—will help maintain their shape too.

Are these cookies suitable for those with dietary restrictions?
While French Salted Butter Cookies are delicious, they do contain gluten and dairy, making them unsuitable for individuals with gluten intolerance or lactose intolerance. However, you can experiment with gluten-free flour and dairy-free butter substitutes if you want a gluten-free or dairy-free version. Always check labels for allergies to specific ingredients.

French Salted Butter Cookies

French Salted Butter Cookies for a Melty, Buttery Experience

Indulge in French Salted Butter Cookies, a delightful treat perfectly balancing buttery goodness and flaky sea salt.
Print Recipe Pin Recipe
Prep Time 15 minutes mins
Cook Time 15 minutes mins
Chilling Time 1 hour hr
Total Time 1 hour hr 30 minutes mins
Servings: 24 cookies
Course: Dessert
Cuisine: French
Calories: 150
Ingredients Equipment Method Nutrition Notes

Ingredients
  

For the Dough
  • 1 cup Unsalted Butter High-quality, creamy butter for the best flavor and texture.
  • 1/2 cup Granulated Sugar Sweetness that perfectly balances the savory salt.
  • 2 cups All-Purpose Flour Provides structure; be careful not to overmix for a tender finish.
  • 1/4 teaspoon Flaky Sea Salt Enhances the cookies' rich flavor—add a bit more on top for that gourmet touch!
  • 1 teaspoon Pure Vanilla Extract Elevates the overall taste with aromatic depth.

Equipment

  • Baking Sheet
  • Mixing Bowl
  • hand mixer
  • Spatula
  • plastic wrap
  • Knife

Method
 

Step-by-Step Instructions for French Salted Butter Cookies
  1. Preheat your oven to 350°F (175°C) and prepare a baking sheet by lining it with parchment paper.
  2. In a large mixing bowl, cream 1 cup of softened unsalted butter with 1/2 cup of granulated sugar for about 3-5 minutes.
  3. Add 1 teaspoon of pure vanilla extract to the mixture and mix on low speed until fully incorporated.
  4. Gradually add 2 cups of all-purpose flour to the creamed mixture and mix on low speed until just combined.
  5. Shape the dough into a log about 2 inches in diameter and wrap it tightly in plastic wrap. Chill in the refrigerator for at least 1 hour.
  6. After chilling, slice the log into 1/4-inch thick rounds and arrange them on the prepared baking sheet.
  7. Sprinkle flaky sea salt on the top of each cookie before baking.
  8. Bake the cookies for 12-15 minutes until golden around the edges while still pale in the center.
  9. Let the cookies cool on the baking sheet for 5 minutes before transferring to a wire rack to cool completely.

Nutrition

Serving: 1cookieCalories: 150kcalCarbohydrates: 20gProtein: 2gFat: 8gSaturated Fat: 5gCholesterol: 20mgSodium: 50mgPotassium: 60mgSugar: 8gVitamin A: 2IUIron: 2mg

Notes

Ensure your butter is softened but not melted. Chilling the dough is crucial for preventing spreading while baking.

Tried this recipe?

Let us know how it was!

Delightful Christmas Cookies with Nutmeg for Festive Cheer

November 19, 2025 by Grace Snow Leave a Comment

The scent of nutmeg wafting through the air instantly transports me to cozy holiday gatherings, where laughter and warmth blend seamlessly with the festive spirit. Today, I’m excited to share my recipe for Cozy Christmas Nutmeg Cookies – perfect for those who cherish homemade treats over fast food. Not only are these holiday cookies quick to whip up, but they also make delightful gifts for friends and family, instantly filling your home with joyful aromas. With a soft, chewy center and crispy edges, each bite speaks of comfort and togetherness, making them a perfect addition to your seasonal celebrations. Are you ready to embrace the magic of homemade cookies this season? Let’s dive into creating these delightful treats together!

Why are these Christmas cookies unforgettable?

Warm, Spicy Aroma: The enchanting scent of nutmeg fills your home, evoking memories of cherished holiday traditions.

Quick to Prepare: With a straightforward recipe, you'll be enjoying fresh cookies in no time, leaving more moments for family and friends.

Versatile Flavor Enhancements: Feel free to customize by adding chocolate chips or substituting almond flour for a nuttier twist!

Perfect for Gifting: Pack these cookies in festive tins, and spread joy to loved ones — they make a delightful surprise!

Comfort in Every Bite: Each cookie offers a soft middle with crisp edges, embodying the cozy spirit of the festive season.

Elevate your cookie game this year by pairing them with a warm mug of hot cocoa after making the delightful Mexican Wedding Cookies or the luscious Eggnog Cookies for a holiday cookie platter extravaganza!

Christmas Cookies with Nutmeg Ingredients

Here’s everything you need to whip up these delightful Christmas cookies with nutmeg!

For the Batter

  • All-purpose flour – Provides structure and texture; substitute with a gluten-free flour blend for a gluten-free version.
  • Ground nutmeg – Adds a warm, holiday flavor; using freshly grated nutmeg enhances the aroma.
  • Baking soda – Acts as a leavening agent, helping cookies rise.
  • Salt – Balances sweetness and enhances flavors.
  • Ground cinnamon – Complements nutmeg, deepening the spiced flavor profile.
  • Unsalted butter – Adds richness and moisture; can be substituted with coconut oil for a dairy-free alternative.
  • Granulated sugar – Sweetens the cookies, providing a crisp texture; brown sugar can create a chewier cookie.
  • Brown sugar – Adds moisture and a hint of caramel flavor.
  • Egg – Binds the ingredients together and adds moisture; for a vegan option, replace with flaxseed meal mixed with water.
  • Vanilla extract – Enhances the overall flavor of the cookies.

For the Topping

  • Powdered sugar – Creates a lovely sweet finish when sprinkled over warm cookies; add a pinch of nutmeg for extra flavor.

Now you’re all set to create these cozy Christmas cookies that will fill your kitchen with irresistible holiday scents!

Step‑by‑Step Instructions for Christmas Cookies with Nutmeg

Step 1: Preheat the Oven
Begin by preheating your oven to 350°F (180°C). While the oven heats, prepare a baking sheet by lining it with parchment paper. This will ensure that your Cozy Christmas Nutmeg Cookies won’t stick, making for easy transfers once they’re baked to perfection.

Step 2: Mix the Dry Ingredients
In a medium bowl, whisk together the all-purpose flour, ground nutmeg, baking soda, salt, and ground cinnamon. Mix until well combined, ensuring there are no lumps. This step is vital for creating that warm, spiced flavor profile that defines the Christmas Cookies with Nutmeg.

Step 3: Cream the Butter and Sugars
In a large mixing bowl, use a hand mixer to cream together the unsalted butter, granulated sugar, and brown sugar until the mixture is light and fluffy, about 2-3 minutes. The sugar should dissolve, helping to create a tender texture in your cozy cookies.

Step 4: Incorporate Egg and Vanilla
Add the egg and vanilla extract to the butter-sugar mixture, mixing until fully incorporated. This addition will not only bind your ingredients together but also enhance the flavor of the Cozy Christmas Nutmeg Cookies, making them irresistibly delicious.

Step 5: Combine Wet and Dry Ingredients
Gradually fold the dry ingredient mixture into the wet ingredients, using a spatula or wooden spoon. Stir gently until just combined; be careful not to overmix, as this will keep the cookies tender and chewy once baked.

Step 6: Portion the Dough
Using a teaspoon, scoop out dollops of the cookie dough and place them onto the prepared baking sheet, spacing them about 2 inches apart. This spacing allows room for your Christmas Cookies with Nutmeg to spread while baking, ensuring they maintain their lovely shape.

Step 7: Bake the Cookies
Place the baking sheet in the preheated oven and bake the cookies for 8-10 minutes. Keep an eye on them during the last few minutes; you want the edges to turn golden brown while the centers remain soft and slightly puffy.

Step 8: Cool Before Transferring
Once baked, remove the cookies from the oven and let them cool on the baking sheet for about 5 minutes. This brief cooling time will allow them to firm up slightly, making it easier to transfer them without breaking.

Step 9: Prepare the Topping
While the cookies are cooling, prepare the topping by combining powdered sugar with a pinch of nutmeg in a small bowl. Once the cookies have cooled slightly, sprinkle this mixture generously over them, adding a sweet finish that enhances the festive flavors of your Cozy Christmas Nutmeg Cookies.

Christmas Cookies with Nutmeg Variations

Feel free to let your creativity shine while making these delightful cookies!

  • Gluten-Free: Substitute all-purpose flour with a gluten-free blend to cater to dietary needs.
    This ensures that everyone at your holiday gathering can enjoy the cozy flavors without worry!

  • Dairy-Free: Use coconut oil in place of unsalted butter for a rich, dairy-free version.
    The subtle coconut flavor pairs beautifully with nutmeg while keeping the cookies soft and delicious.

  • Sugar Alternatives: Swap out granulated sugar for coconut sugar to add a touch of caramel flavor.
    Not only does it create a delightful depth of flavor, but it’s also a lower GI option!

  • Nutty Goodness: Substitute half of the flour with almond flour for an irresistible nutty twist.
    This variation offers a lovely texture and enhances the flavor profile while still honoring the classic recipe.

  • Chocoholic Delight: Fold in chocolate chips or chopped nuts to elevate your cookies with extra indulgence.
    The richness of chocolate complements the warm spices, making each bite an extra treat!

  • Cinnamon Sugar Finish: Roll the cookie dough balls in a cinnamon sugar mixture before baking for added sweetness.
    This delightful touch provides a perfect contrast to the warmth of nutmeg and cinnamon!

  • Spicy Kick: Add a pinch of cayenne pepper to the dough for a subtle heat that enhances the flavors.
    This surprising twist will leave your family wondering what makes these cookies so memorable!

  • Festive Add-ins: Incorporate dried cranberries or raisins into the dough for a burst of fruity flavor.
    The tartness complements the sweetness, creating a beautiful balance that’s perfect for holiday gatherings!

Don’t forget to pair these delightful treats with a warm mug of festive hot chocolate or after indulging in scrumptious Peaches Cream Cookies and Thumbprint Cookies Melt for the ultimate holiday cookie experience!

Expert Tips for Christmas Cookies with Nutmeg

Avoid Overmixing: Be gentle when combining wet and dry ingredients. Overmixing can lead to tough cookies, so aim for just combined.

Use Fresh Nutmeg: Freshly grated nutmeg offers a more aromatic and vibrant flavor compared to pre-ground. It truly elevates your Christmas Cookies with Nutmeg.

Proper Creaming Technique: Make sure your butter is at room temperature. Creaming the butter with sugar until light and fluffy helps achieve a tender texture.

Watch Baking Time: Keep an eye on your cookies as they bake. They can go from perfectly golden to overbaked in just a few moments.

Cooling is Key: Allow cookies to cool on the sheet briefly. This helps them firm up, so they don’t crumble when transferring to a cooling rack.

How to Store and Freeze Christmas Cookies with Nutmeg

Airtight Container: Store your cookies in an airtight container at room temperature for up to 1 week to maintain their freshness and delightful texture.

Freezer: To freeze, arrange the cookies in a single layer on a baking sheet to avoid sticking, then transfer to a freezer-safe bag for up to 3 months.

Thawing: When ready to enjoy, simply thaw at room temperature for 30 minutes. If you prefer them warm, pop them in the oven at 350°F (175°C) for a few minutes.

Reheating Tip: For a cozy experience, microwave a cookie for about 10 seconds before serving—it will enhance the soft, warm center of your Christmas Cookies with Nutmeg.

What to Serve with Cozy Christmas Nutmeg Cookies

The joy of the holiday season shines even brighter with thoughtful pairings that bring out the delightful flavors of these festive treats.

  • Creamy Hot Cocoa: A rich cup of hot cocoa complements the spiced cookies beautifully, allowing the nutmeg flavors to shine. Nestle by the fire with a warm mug, and let the cocoa’s sweetness balance the cookie's warmth.

  • Brewed Coffee: The robust flavor of freshly brewed coffee enhances the nutty notes, creating a match made in holiday heaven. The slight bitterness of the coffee contrasts delightfully with the cookies' sweetness.

  • Vanilla Ice Cream: The smooth, cold creaminess of vanilla ice cream provides a delightful textural contrast against the soft cookie. A scoop placed on top of a warm cookie creates a comforting dessert experience.

  • Spiced Apple Cider: Warm spiced apple cider melts into the festive spirit, complementing the nutmeg and cinnamon of the cookies. Serve it in holiday mugs to elevate your cozy gathering!

  • Christmas Fruit Platter: A vibrant assortment of seasonal fruits like pomegranates, apples, and citrus brings a refreshing bite that lightens the palate between cookie indulgences. The bright colors also add a festive touch to your dessert table.

  • Nutty Holiday Biscotti: Pair with crunchy biscotti for a delightful textural contrast. Dipping the biscotti into hot drinks brings the warmth of the season to every nibble.

  • Festive Eggnog: Rich and creamy eggnog mirrors the spices in your cookies, creating a warm and inviting pairing. Enjoy it chilled or warmed, and savor this classic holiday flavor.

  • Gingerbread Cookies: Serve alongside gingerbread cookies for a spectacular cookie platter. The combo of flavors allows guests to enjoy different textures and tastes, making every bite exciting!

  • Chocolate Mint Cookies: Pairing with mint-chocolate cookies creates a fun flavor dynamic that captures the excitement of the holidays in every bite.

  • Marzipan Treats: Sweet, almond-flavored marzipan sweets offer a delightful contrast to the spiced flavors. They’re lovely to nibble on while enjoying your warm cookies!

Make Ahead Options

These Cozy Christmas Nutmeg Cookies are perfect for meal prep enthusiasts! You can prepare the cookie dough up to 24 hours in advance, simply cover it tightly in plastic wrap and refrigerate. This not only saves time but also allows the flavors to deepen. If you'd like to prep even further, you can scoop the dough into individual portions and freeze them for up to 3 months; just be sure to place them in a freezer-safe bag. When you're ready to bake, allow the dough to thaw in the fridge overnight and then bake as instructed. This way, you’ll enjoy all the delightful flavors of freshly baked Christmas cookies with nutmeg, just as delicious as when made from scratch!

Christmas Cookies with Nutmeg Recipe FAQs

How should I select nutmeg for my cookies?
Absolutely, for the best flavor, choose whole nutmeg and grate it fresh just before using. This method gives your Christmas Cookies with Nutmeg a rich aroma that really elevates the holiday spirit. If you use pre-ground nutmeg, ensure it’s recent and stored in a cool, dark place to maintain its potency.

What are the best storage methods for these cookies?
To keep your cookies fresh, store them in an airtight container at room temperature for up to 1 week. For longer storage, you can freeze the cookies by placing them in a single layer on a baking sheet until firm. Then, transfer them to a freezer-safe bag for up to 3 months. Make sure to label the bag with the date for reference!

Can I freeze these Christmas Cookies with Nutmeg?
Yes, they freeze wonderfully! After cooling, lay the cookies in a single layer on a baking sheet. Once they're frozen solid (after about an hour), you can transfer them to a freezer-safe bag. They’ll maintain their flavor and texture for up to 3 months. When you're ready to enjoy them, let them thaw at room temperature for about 30 minutes or reheat in the oven for a warm treat.

What should I do if my cookies spread too much while baking?
If your cookies spread too much, there are a couple of things you can try next time. Make sure your butter is firm enough (not too soft), and chill the cookie dough for at least 30 minutes before baking. This helps the cookies maintain shape during the baking process. Additionally, be mindful not to overmix the dough, as that can also lead to excess spreading.

Are these cookies suitable for people with allergies?
Great question! The recipe contains common allergens like eggs and dairy. For a vegan version, you can replace the egg with a flaxseed meal substitute: mix 1 tablespoon of flaxseed meal with 2.5 tablespoons of water and let it sit for 5 minutes to thicken. For a dairy-free option, use coconut oil instead of butter. Always check the labels of your ingredients to ensure they're free from allergens if you're baking for someone with specific dietary needs.

Christmas Cookies with Nutmeg

Delightful Christmas Cookies with Nutmeg for Festive Cheer

Enjoy these delightful Christmas cookies with nutmeg, perfect for holiday gatherings and gifting.
Print Recipe Pin Recipe
Prep Time 20 minutes mins
Cook Time 10 minutes mins
Cooling Time 5 minutes mins
Total Time 35 minutes mins
Servings: 24 cookies
Course: Dessert
Cuisine: American
Calories: 120
Ingredients Equipment Method Nutrition Notes

Ingredients
  

For the Batter
  • 2 cups All-purpose flour can substitute with gluten-free flour blend
  • 1 teaspoon Ground nutmeg freshly grated enhances aroma
  • 1 teaspoon Baking soda
  • 1/2 teaspoon Salt
  • 1 teaspoon Ground cinnamon
  • 1/2 cup Unsalted butter can substitute with coconut oil for dairy-free
  • 1/2 cup Granulated sugar brown sugar can create chewier cookie
  • 1/2 cup Brown sugar
  • 1 large Egg for vegan option, replace with flaxseed meal mixed with water
  • 1 teaspoon Vanilla extract
For the Topping
  • 1 cup Powdered sugar add a pinch of nutmeg for extra flavor

Equipment

  • Mixing Bowl
  • Baking Sheet
  • Parchment Paper
  • hand mixer
  • Spatula
  • Teaspoon

Method
 

Step-by-Step Instructions
  1. Preheat your oven to 350°F (180°C) and prepare a baking sheet with parchment paper.
  2. In a medium bowl, whisk together the all-purpose flour, ground nutmeg, baking soda, salt, and ground cinnamon until well combined.
  3. In a large mixing bowl, cream together the unsalted butter, granulated sugar, and brown sugar until light and fluffy, about 2-3 minutes.
  4. Add the egg and vanilla extract to the butter-sugar mixture, mixing until fully incorporated.
  5. Gradually fold the dry ingredient mixture into the wet ingredients, stirring gently until just combined.
  6. Using a teaspoon, scoop dollops of the cookie dough onto the prepared baking sheet, spacing them about 2 inches apart.
  7. Bake the cookies for 8-10 minutes, keeping an eye on them to ensure the edges are golden brown while the centers remain soft.
  8. Let the cookies cool on the baking sheet for about 5 minutes before transferring them.
  9. Prepare the topping by combining powdered sugar with a pinch of nutmeg, and sprinkle it generously over the cookies once cooled.

Nutrition

Serving: 1cookieCalories: 120kcalCarbohydrates: 18gProtein: 1gFat: 5gSaturated Fat: 3gMonounsaturated Fat: 2gCholesterol: 20mgSodium: 70mgPotassium: 30mgSugar: 8gVitamin A: 150IUCalcium: 10mg

Notes

Using fresh nutmeg and proper creaming technique enhances the cookie's texture and flavor. Store in an airtight container for optimal freshness.

Tried this recipe?

Let us know how it was!

Delightful Christmas Cookies with Nutmeg for Festive Cheer

November 19, 2025 by Grace Snow Leave a Comment

The scent of nutmeg wafting through the air instantly transports me to cozy holiday gatherings, where laughter and warmth blend seamlessly with the festive spirit. Today, I’m excited to share my recipe for Cozy Christmas Nutmeg Cookies – perfect for those who cherish homemade treats over fast food. Not only are these holiday cookies quick to whip up, but they also make delightful gifts for friends and family, instantly filling your home with joyful aromas. With a soft, chewy center and crispy edges, each bite speaks of comfort and togetherness, making them a perfect addition to your seasonal celebrations. Are you ready to embrace the magic of homemade cookies this season? Let’s dive into creating these delightful treats together!

Why are these Christmas cookies unforgettable?

Warm, Spicy Aroma: The enchanting scent of nutmeg fills your home, evoking memories of cherished holiday traditions.

Quick to Prepare: With a straightforward recipe, you'll be enjoying fresh cookies in no time, leaving more moments for family and friends.

Versatile Flavor Enhancements: Feel free to customize by adding chocolate chips or substituting almond flour for a nuttier twist!

Perfect for Gifting: Pack these cookies in festive tins, and spread joy to loved ones — they make a delightful surprise!

Comfort in Every Bite: Each cookie offers a soft middle with crisp edges, embodying the cozy spirit of the festive season.

Elevate your cookie game this year by pairing them with a warm mug of hot cocoa after making the delightful Mexican Wedding Cookies or the luscious Eggnog Cookies for a holiday cookie platter extravaganza!

Christmas Cookies with Nutmeg Ingredients

Here’s everything you need to whip up these delightful Christmas cookies with nutmeg!

For the Batter

  • All-purpose flour – Provides structure and texture; substitute with a gluten-free flour blend for a gluten-free version.
  • Ground nutmeg – Adds a warm, holiday flavor; using freshly grated nutmeg enhances the aroma.
  • Baking soda – Acts as a leavening agent, helping cookies rise.
  • Salt – Balances sweetness and enhances flavors.
  • Ground cinnamon – Complements nutmeg, deepening the spiced flavor profile.
  • Unsalted butter – Adds richness and moisture; can be substituted with coconut oil for a dairy-free alternative.
  • Granulated sugar – Sweetens the cookies, providing a crisp texture; brown sugar can create a chewier cookie.
  • Brown sugar – Adds moisture and a hint of caramel flavor.
  • Egg – Binds the ingredients together and adds moisture; for a vegan option, replace with flaxseed meal mixed with water.
  • Vanilla extract – Enhances the overall flavor of the cookies.

For the Topping

  • Powdered sugar – Creates a lovely sweet finish when sprinkled over warm cookies; add a pinch of nutmeg for extra flavor.

Now you’re all set to create these cozy Christmas cookies that will fill your kitchen with irresistible holiday scents!

Step‑by‑Step Instructions for Christmas Cookies with Nutmeg

Step 1: Preheat the Oven
Begin by preheating your oven to 350°F (180°C). While the oven heats, prepare a baking sheet by lining it with parchment paper. This will ensure that your Cozy Christmas Nutmeg Cookies won’t stick, making for easy transfers once they’re baked to perfection.

Step 2: Mix the Dry Ingredients
In a medium bowl, whisk together the all-purpose flour, ground nutmeg, baking soda, salt, and ground cinnamon. Mix until well combined, ensuring there are no lumps. This step is vital for creating that warm, spiced flavor profile that defines the Christmas Cookies with Nutmeg.

Step 3: Cream the Butter and Sugars
In a large mixing bowl, use a hand mixer to cream together the unsalted butter, granulated sugar, and brown sugar until the mixture is light and fluffy, about 2-3 minutes. The sugar should dissolve, helping to create a tender texture in your cozy cookies.

Step 4: Incorporate Egg and Vanilla
Add the egg and vanilla extract to the butter-sugar mixture, mixing until fully incorporated. This addition will not only bind your ingredients together but also enhance the flavor of the Cozy Christmas Nutmeg Cookies, making them irresistibly delicious.

Step 5: Combine Wet and Dry Ingredients
Gradually fold the dry ingredient mixture into the wet ingredients, using a spatula or wooden spoon. Stir gently until just combined; be careful not to overmix, as this will keep the cookies tender and chewy once baked.

Step 6: Portion the Dough
Using a teaspoon, scoop out dollops of the cookie dough and place them onto the prepared baking sheet, spacing them about 2 inches apart. This spacing allows room for your Christmas Cookies with Nutmeg to spread while baking, ensuring they maintain their lovely shape.

Step 7: Bake the Cookies
Place the baking sheet in the preheated oven and bake the cookies for 8-10 minutes. Keep an eye on them during the last few minutes; you want the edges to turn golden brown while the centers remain soft and slightly puffy.

Step 8: Cool Before Transferring
Once baked, remove the cookies from the oven and let them cool on the baking sheet for about 5 minutes. This brief cooling time will allow them to firm up slightly, making it easier to transfer them without breaking.

Step 9: Prepare the Topping
While the cookies are cooling, prepare the topping by combining powdered sugar with a pinch of nutmeg in a small bowl. Once the cookies have cooled slightly, sprinkle this mixture generously over them, adding a sweet finish that enhances the festive flavors of your Cozy Christmas Nutmeg Cookies.

Make Ahead Options

These Cozy Christmas Nutmeg Cookies are perfect for meal prep enthusiasts! You can prepare the cookie dough up to 24 hours in advance, simply cover it tightly in plastic wrap and refrigerate. This not only saves time but also allows the flavors to deepen. If you'd like to prep even further, you can scoop the dough into individual portions and freeze them for up to 3 months; just be sure to place them in a freezer-safe bag. When you're ready to bake, allow the dough to thaw in the fridge overnight and then bake as instructed. This way, you’ll enjoy all the delightful flavors of freshly baked Christmas cookies with nutmeg, just as delicious as when made from scratch!

How to Store and Freeze Christmas Cookies with Nutmeg

Airtight Container: Store your cookies in an airtight container at room temperature for up to 1 week to maintain their freshness and delightful texture.

Freezer: To freeze, arrange the cookies in a single layer on a baking sheet to avoid sticking, then transfer to a freezer-safe bag for up to 3 months.

Thawing: When ready to enjoy, simply thaw at room temperature for 30 minutes. If you prefer them warm, pop them in the oven at 350°F (175°C) for a few minutes.

Reheating Tip: For a cozy experience, microwave a cookie for about 10 seconds before serving—it will enhance the soft, warm center of your Christmas Cookies with Nutmeg.

Expert Tips for Christmas Cookies with Nutmeg

Avoid Overmixing: Be gentle when combining wet and dry ingredients. Overmixing can lead to tough cookies, so aim for just combined.

Use Fresh Nutmeg: Freshly grated nutmeg offers a more aromatic and vibrant flavor compared to pre-ground. It truly elevates your Christmas Cookies with Nutmeg.

Proper Creaming Technique: Make sure your butter is at room temperature. Creaming the butter with sugar until light and fluffy helps achieve a tender texture.

Watch Baking Time: Keep an eye on your cookies as they bake. They can go from perfectly golden to overbaked in just a few moments.

Cooling is Key: Allow cookies to cool on the sheet briefly. This helps them firm up, so they don’t crumble when transferring to a cooling rack.

What to Serve with Cozy Christmas Nutmeg Cookies

The joy of the holiday season shines even brighter with thoughtful pairings that bring out the delightful flavors of these festive treats.

  • Creamy Hot Cocoa: A rich cup of hot cocoa complements the spiced cookies beautifully, allowing the nutmeg flavors to shine. Nestle by the fire with a warm mug, and let the cocoa’s sweetness balance the cookie's warmth.

  • Brewed Coffee: The robust flavor of freshly brewed coffee enhances the nutty notes, creating a match made in holiday heaven. The slight bitterness of the coffee contrasts delightfully with the cookies' sweetness.

  • Vanilla Ice Cream: The smooth, cold creaminess of vanilla ice cream provides a delightful textural contrast against the soft cookie. A scoop placed on top of a warm cookie creates a comforting dessert experience.

  • Spiced Apple Cider: Warm spiced apple cider melts into the festive spirit, complementing the nutmeg and cinnamon of the cookies. Serve it in holiday mugs to elevate your cozy gathering!

  • Christmas Fruit Platter: A vibrant assortment of seasonal fruits like pomegranates, apples, and citrus brings a refreshing bite that lightens the palate between cookie indulgences. The bright colors also add a festive touch to your dessert table.

  • Nutty Holiday Biscotti: Pair with crunchy biscotti for a delightful textural contrast. Dipping the biscotti into hot drinks brings the warmth of the season to every nibble.

  • Festive Eggnog: Rich and creamy eggnog mirrors the spices in your cookies, creating a warm and inviting pairing. Enjoy it chilled or warmed, and savor this classic holiday flavor.

  • Gingerbread Cookies: Serve alongside gingerbread cookies for a spectacular cookie platter. The combo of flavors allows guests to enjoy different textures and tastes, making every bite exciting!

  • Chocolate Mint Cookies: Pairing with mint-chocolate cookies creates a fun flavor dynamic that captures the excitement of the holidays in every bite.

  • Marzipan Treats: Sweet, almond-flavored marzipan sweets offer a delightful contrast to the spiced flavors. They’re lovely to nibble on while enjoying your warm cookies!

Christmas Cookies with Nutmeg Variations

Feel free to let your creativity shine while making these delightful cookies!

  • Gluten-Free: Substitute all-purpose flour with a gluten-free blend to cater to dietary needs.
    This ensures that everyone at your holiday gathering can enjoy the cozy flavors without worry!

  • Dairy-Free: Use coconut oil in place of unsalted butter for a rich, dairy-free version.
    The subtle coconut flavor pairs beautifully with nutmeg while keeping the cookies soft and delicious.

  • Sugar Alternatives: Swap out granulated sugar for coconut sugar to add a touch of caramel flavor.
    Not only does it create a delightful depth of flavor, but it’s also a lower GI option!

  • Nutty Goodness: Substitute half of the flour with almond flour for an irresistible nutty twist.
    This variation offers a lovely texture and enhances the flavor profile while still honoring the classic recipe.

  • Chocoholic Delight: Fold in chocolate chips or chopped nuts to elevate your cookies with extra indulgence.
    The richness of chocolate complements the warm spices, making each bite an extra treat!

  • Cinnamon Sugar Finish: Roll the cookie dough balls in a cinnamon sugar mixture before baking for added sweetness.
    This delightful touch provides a perfect contrast to the warmth of nutmeg and cinnamon!

  • Spicy Kick: Add a pinch of cayenne pepper to the dough for a subtle heat that enhances the flavors.
    This surprising twist will leave your family wondering what makes these cookies so memorable!

  • Festive Add-ins: Incorporate dried cranberries or raisins into the dough for a burst of fruity flavor.
    The tartness complements the sweetness, creating a beautiful balance that’s perfect for holiday gatherings!

Don’t forget to pair these delightful treats with a warm mug of festive hot chocolate or after indulging in scrumptious Peaches Cream Cookies and Thumbprint Cookies Melt for the ultimate holiday cookie experience!

Christmas Cookies with Nutmeg Recipe FAQs

How should I select nutmeg for my cookies?
Absolutely, for the best flavor, choose whole nutmeg and grate it fresh just before using. This method gives your Christmas Cookies with Nutmeg a rich aroma that really elevates the holiday spirit. If you use pre-ground nutmeg, ensure it’s recent and stored in a cool, dark place to maintain its potency.

What are the best storage methods for these cookies?
To keep your cookies fresh, store them in an airtight container at room temperature for up to 1 week. For longer storage, you can freeze the cookies by placing them in a single layer on a baking sheet until firm. Then, transfer them to a freezer-safe bag for up to 3 months. Make sure to label the bag with the date for reference!

Can I freeze these Christmas Cookies with Nutmeg?
Yes, they freeze wonderfully! After cooling, lay the cookies in a single layer on a baking sheet. Once they're frozen solid (after about an hour), you can transfer them to a freezer-safe bag. They’ll maintain their flavor and texture for up to 3 months. When you're ready to enjoy them, let them thaw at room temperature for about 30 minutes or reheat in the oven for a warm treat.

What should I do if my cookies spread too much while baking?
If your cookies spread too much, there are a couple of things you can try next time. Make sure your butter is firm enough (not too soft), and chill the cookie dough for at least 30 minutes before baking. This helps the cookies maintain shape during the baking process. Additionally, be mindful not to overmix the dough, as that can also lead to excess spreading.

Are these cookies suitable for people with allergies?
Great question! The recipe contains common allergens like eggs and dairy. For a vegan version, you can replace the egg with a flaxseed meal substitute: mix 1 tablespoon of flaxseed meal with 2.5 tablespoons of water and let it sit for 5 minutes to thicken. For a dairy-free option, use coconut oil instead of butter. Always check the labels of your ingredients to ensure they're free from allergens if you're baking for someone with specific dietary needs.

Christmas Cookies with Nutmeg

Delightful Christmas Cookies with Nutmeg for Festive Cheer

Enjoy these delightful Christmas cookies with nutmeg, perfect for holiday gatherings and gifting.
Print Recipe Pin Recipe
Prep Time 20 minutes mins
Cook Time 10 minutes mins
Cooling Time 5 minutes mins
Total Time 35 minutes mins
Servings: 24 cookies
Course: Dessert
Cuisine: American
Calories: 120
Ingredients Equipment Method Nutrition Notes

Ingredients
  

For the Batter
  • 2 cups All-purpose flour can substitute with gluten-free flour blend
  • 1 teaspoon Ground nutmeg freshly grated enhances aroma
  • 1 teaspoon Baking soda
  • 1/2 teaspoon Salt
  • 1 teaspoon Ground cinnamon
  • 1/2 cup Unsalted butter can substitute with coconut oil for dairy-free
  • 1/2 cup Granulated sugar brown sugar can create chewier cookie
  • 1/2 cup Brown sugar
  • 1 large Egg for vegan option, replace with flaxseed meal mixed with water
  • 1 teaspoon Vanilla extract
For the Topping
  • 1 cup Powdered sugar add a pinch of nutmeg for extra flavor

Equipment

  • Mixing Bowl
  • Baking Sheet
  • Parchment Paper
  • hand mixer
  • Spatula
  • Teaspoon

Method
 

Step-by-Step Instructions
  1. Preheat your oven to 350°F (180°C) and prepare a baking sheet with parchment paper.
  2. In a medium bowl, whisk together the all-purpose flour, ground nutmeg, baking soda, salt, and ground cinnamon until well combined.
  3. In a large mixing bowl, cream together the unsalted butter, granulated sugar, and brown sugar until light and fluffy, about 2-3 minutes.
  4. Add the egg and vanilla extract to the butter-sugar mixture, mixing until fully incorporated.
  5. Gradually fold the dry ingredient mixture into the wet ingredients, stirring gently until just combined.
  6. Using a teaspoon, scoop dollops of the cookie dough onto the prepared baking sheet, spacing them about 2 inches apart.
  7. Bake the cookies for 8-10 minutes, keeping an eye on them to ensure the edges are golden brown while the centers remain soft.
  8. Let the cookies cool on the baking sheet for about 5 minutes before transferring them.
  9. Prepare the topping by combining powdered sugar with a pinch of nutmeg, and sprinkle it generously over the cookies once cooled.

Nutrition

Serving: 1cookieCalories: 120kcalCarbohydrates: 18gProtein: 1gFat: 5gSaturated Fat: 3gMonounsaturated Fat: 2gCholesterol: 20mgSodium: 70mgPotassium: 30mgSugar: 8gVitamin A: 150IUCalcium: 10mg

Notes

Using fresh nutmeg and proper creaming technique enhances the cookie's texture and flavor. Store in an airtight container for optimal freshness.

Tried this recipe?

Let us know how it was!

Soft and Chewy Gingerbread Men Cookies Everyone Will Love

November 19, 2025 by Grace Snow Leave a Comment

While sipping on a warm cup of cocoa, I caught myself itching to fill my kitchen with the unforgettable smell of the holidays. That's when I decided it was time for Soft and Chewy Gingerbread Men Cookies—a delightful tradition that brings comfort and joy to any gathering. In less than an hour, these adorable cookies can be crafted with just one bowl, making them the ideal project for a cozy afternoon. Not only do they bring a festive touch to your dessert table, but they also become a fun activity for family members of all ages. Let’s dive into the world of spiced sweetness and discover how creating these gingerbread characters can spark creativity and nourishment in your home. Are you ready to take your baking to the next level?

Why Are Gingerbread Men Cookies So Irresistible?

Irresistible Flavor: The warm spices of ginger, cinnamon, and nutmeg create a cozy aroma that instantly evokes holiday nostalgia.
Easy Preparation: You only need one bowl and less than an hour to whip up these delightful cookies, making them a perfect choice for busy bakers.
Fun for Everyone: Whether you’re crafting them with kids or impressing guests, decorating these cookies adds a playful element to your kitchen.
Versatile Treat: Enjoy them plain or jazz them up with frosting; their versatility ensures there's something for everyone.
Make-Ahead Magic: Prepare the dough in advance and freeze for a quick, festive dessert ready to bake at a moment's notice.
Pair these cookies with a glass of milk or hot cocoa, just like my favorite Eggnog Cookies Soft or Mexican Wedding Cookies for an unforgettable holiday experience!

Gingerbread Men Cookies Ingredients

Get ready to bake up some magic with these essential ingredients!

For the Dough

  • Unsalted Butter – Provides richness and moisture; can be swapped with margarine.
  • Brown Sugar – Adds sweetness and contributes to a chewy texture; dark brown sugar enhances flavor.
  • Molasses – Key flavor component that gives gingerbread its characteristic taste; can substitute with honey for a lighter cookie.
  • Vanilla Extract – Enhances overall flavor; may substitute with almond extract for nuttiness.
  • Salt – Balances sweetness; do not omit.
  • Ground Cinnamon – Adds warmth; can use pumpkin pie spice for additional flavor complexity.
  • Ground Ginger – Essential for the gingerbread flavor; fresh ginger can be a substitute but may alter the texture.
  • Nutmeg – Adds warmth; can be omitted or replaced with allspice.
  • Cloves – Complements the gingerbread profile; can omit if desired.
  • Egg – Binds ingredients and adds moisture; flax egg could be an alternative for vegan diets.
  • Baking Soda – Acts as a leavening agent; ensure it is fresh for best results.
  • All-Purpose Flour – Provides structure; can substitute with gluten-free blend for a gluten-free version.

For the Frosting

  • Powdered Sugar – Main sweetening agent; necessary for frosting texture.
  • Vanilla Extract – Flavor enhancer for the frosting; almond extract can add a twist.
  • Milk – Adjusts frosting consistency; dairy-free milk can replace for vegan frosting.
  • Decorative Candies/Sprinkles – Optional for decoration; personalize as desired.

With this array of ingredients, you're just a whisk away from those enchanting Gingerbread Men Cookies!

Step‑by‑Step Instructions for Soft and Chewy Gingerbread Men Cookies

Step 1: Mix the Wet Ingredients
In a large mixing bowl, start by combining ½ cup of melted unsalted butter with 1 cup of packed brown sugar and ½ cup of molasses. Add in 1 teaspoon of vanilla extract, a pinch of salt, 1 teaspoon of ground cinnamon, 2 teaspoons of ground ginger, ¼ teaspoon of nutmeg, and ¼ teaspoon of cloves. Mix thoroughly until all ingredients are well blended and smooth, about 3-4 minutes.

Step 2: Incorporate Egg
Crack 1 large egg into the mixture and stir until fully integrated. The egg should combine seamlessly with the wet ingredients, creating a glossy batter. This step is crucial for binding your Soft and Chewy Gingerbread Men Cookies, so ensure there are no streaks of egg visible in the mixture.

Step 3: Combine Dry Ingredients
Next, add 1 teaspoon of baking soda and 3½ cups of all-purpose flour to the bowl. Use a wooden spoon or spatula to mix until a soft, slightly sticky dough forms. If the dough is too sticky, gradually sprinkle in a bit more flour, mixing until you achieve a dough that holds together nicely without being overly dry.

Step 4: Chill Dough
Divide the dough in half and wrap each portion tightly in plastic wrap. Place the wrapped dough in the refrigerator for at least 30 minutes. Chilling the dough helps to firm it up, making it easier to roll out later and ensuring your cookies maintain their shape while baking.

Step 5: Preheat and Prepare
While the dough chills, preheat your oven to 350°F (175°C). Line several baking sheets with parchment paper, which will prevent the cookies from sticking and allow for easy cleanup. This preparation ensures a smooth baking process once you are ready to cut and bake your Soft and Chewy Gingerbread Men Cookies.

Step 6: Roll and Cut
On a floured surface, take one portion of the chilled dough and roll it out to about ¼-inch thickness. Use festive cookie cutters to cut shapes, and remember to space them about an inch apart on the prepared baking sheets. This will give the cookies room to spread slightly as they bake while maintaining their adorable gingerbread man forms.

Step 7: Bake
Place the baking sheets in the preheated oven and bake for 7-8 minutes. Keep an eye on the cookies; they should be slightly underbaked with lightly browned edges for the best chewy texture. When done, the cookies will appear set but still soft, so don’t overbake them.

Step 8: Cool
Once baked, remove the cookies from the oven and let them cool for about 5 minutes on the sheets. This allows them to firm up before transferring them to a wire rack. After cooling on the sheets, move the cookies to the rack and let them cool completely, ready for decorating.

Step 9: Make Frosting
In a medium bowl, whisk together 2 cups of powdered sugar, 1 teaspoon of vanilla extract, and enough milk (about 2 tablespoons) to achieve a smooth, spreadable consistency. Adjust the thickness as needed by adding more sugar for a thicker frosting or more milk for a thinner spread. This simple frosting will perfectly complement your gingerbread men.

Step 10: Decorate
Finally, once the cookies are completely cooled, pipe or spread the frosting onto each cookie and add your favorite decorative candies or sprinkles. Personalize your Soft and Chewy Gingerbread Men Cookies to make them uniquely yours, and let your creativity shine as you create festive decorations to enjoy and share!

Make Ahead Options

These Soft and Chewy Gingerbread Men Cookies are perfect for busy home cooks looking to save time during the festive season! You can prepare the cookie dough up to 3 days in advance; simply wrap it tightly in plastic wrap and refrigerate. Alternatively, you can freeze the dough for up to 3 months—just thaw it in the refrigerator overnight before rolling out and cutting. If you have extra baked cookies, they can be stored unfrosted in an airtight container at room temperature for up to 2 weeks. When you're ready to enjoy, simply bake your prepped dough or serve the cooled cookies with frosting, and you'll have deliciously festive treats with minimal effort!

What to Serve with Soft and Chewy Gingerbread Men Cookies

Delight in the comfort of holiday flavors by pairing these adorable cookies with complementary treats that enhance your festive spirit.

  • Creamy Hot Cocoa: Rich and chocolatey, this warm beverage wraps around your senses, elevating the cookie experience while adding a touch of indulgence.
  • Spiced Chai Tea: The aromatic spices in chai harmonize wonderfully with the ginger and cinnamon of the cookies, creating a cozy, comforting duo.
  • Sweet Vanilla Ice Cream: The creaminess of vanilla ice cream juxtaposes the spiced cookies, making each bite a heavenly combination of texture and flavor.
  • Caramel Sauce Drizzle: A drizzle of warm caramel adds a luscious sweetness that perfectly balances the spiciness of the gingerbread, bringing a touch of decadence.
  • Cranberry Sauce: This tart and sweet condiment cuts through the cookie's sweetness, offering a refreshing contrast that’s perfect for festive gatherings.
  • Nutty Biscotti: The crunch of nutty biscotti pairs beautifully with gingerbread, perfect for dipping into warm beverages while enjoying the holidays.
  • Chocolate Gingerbread Trifle: Layer gingerbread cookies with whipped cream and chocolate pudding for a delightful dessert that takes the flavors to new heights.
  • Spiced Apple Cider: Enjoy a warm cup of this delicious spiced drink as it complements the spices in your cookies and fills the air with festive scent.
  • Fruits & Berries Plate: Fresh fruits like oranges or berries add a refreshing zing that enhances the cookies' warming spices, creating a well-rounded treat platter for everyone.

How to Store and Freeze Gingerbread Men Cookies

Room Temperature: Store unfrosted cookies in an airtight container at room temperature for up to 2 weeks to keep them soft and chewy.

Fridge: If you live in a particularly warm climate, you can refrigerate the cookies in an airtight container for up to a week. This helps preserve their freshness.

Freezer: For longer storage, freeze the unfrosted cookies in a single layer on a baking sheet for 1-2 hours, then transfer them to a freezer-safe bag or container for up to 3 months.

Reheating: When ready to enjoy, thaw the cookies at room temperature, then warm them slightly in the oven at 300°F for about 5 minutes for that freshly-baked feel!

Gingerbread Men Cookies Variations

Feel free to add your personal touch to these delightful cookies and make them uniquely yours!

  • Gluten-Free: Use a gluten-free flour blend for a wonderful version that everyone can enjoy without worries.

  • Vegan Delight: Swap the egg for a flax egg and use coconut oil instead of butter for a delicious vegan-friendly option.

  • Spiced Up: Add a pinch of cayenne or chili powder for a subtle kick that enhances the warm spices.

  • Chocolate Twist: Mix in 1/4 cup of cocoa powder for a rich chocolate gingerbread experience that’s simply irresistible.

  • Nutty Crunch: Stir in 1/2 cup of chopped nuts, like pecans or walnuts, to add delightful texture and flavor contrasts.

  • Iced Creation: Top with a simple icing made from powdered sugar and almond extract instead of vanilla for a unique flavor profile.

  • Seasonal Fruits: Incorporate dried cranberries or raisins for a fruity burst that complements the warm spices beautifully.

  • Full Frosting Fun: Consider drizzling your favorite royal icing over the cookies for a professional touch—perfect for holiday gatherings.

With these variations, your Gingerbread Men Cookies can easily adapt to various tastes and dietary preferences! If you're looking for more inspiration, don’t miss my Thumbprint Cookies Melt or lovely Peaches Cream Cookies that keep the festive spirit alive!

Expert Tips for Gingerbread Men Cookies

  • Proper Dough Temperature: Chill the dough for at least 30 minutes to ensure easy rolling and prevent cookies from spreading too much during baking.
  • Underbake for Chewy Texture: Aim to slightly underbake your cookies, as they will continue to firm up while cooling, resulting in that delightful chewy texture.
  • Flour on the Surface: Dust your rolling surface with flour to prevent sticking, but avoid over-flouring your dough, which can lead to tough cookies.
  • Quality Baking Soda: Ensure your baking soda is fresh; expired baking soda can hinder the rising action and affect the texture of your gingerbread men cookies.
  • Customizable Decorations: Have fun with decorations by using colored frosting or unique sprinkles, making each cookie a canvas for creativity and joy!

Soft and Chewy Gingerbread Men Cookies Recipe FAQs

What type of molasses should I use for gingerbread men cookies?
Absolutely! For the best flavor, I recommend using unsulfured dark molasses. Its rich taste adds depth and warmth to the cookies. If you don’t have dark molasses on hand, light molasses is a suitable substitute, but it’ll provide a milder flavor.

How should I store my gingerbread men cookies?
Store unfrosted cookies in an airtight container at room temperature for up to 2 weeks to maintain their soft and chewy texture. If you live in a warm climate, refrigerating them can help, keeping them fresh for about a week. Just make sure they're in a sealed bag or container!

Can I freeze gingerbread men cookies?
Definitely! To freeze unfrosted cookies, place them in a single layer on a baking sheet for about 1-2 hours until they're firm. Then, transfer them to a freezer-safe bag or container where they can be stored for up to 3 months. When you’re ready to enjoy, thaw them at room temperature for an hour and warm them slightly in the oven for that fresh-baked feel.

What can I do if my gingerbread dough is too sticky?
If your dough is too sticky, sprinkle in a bit more flour, about a tablespoon at a time, mixing until you achieve a soft dough that holds together well without being overly dry. You can also refrigerate the dough for 30 minutes to firm it up, making it easier to work with.

Are there any dietary considerations for my gingerbread cookies?
Great question! These cookies can easily be adapted for dietary preferences. For a vegan option, you can substitute the egg with a flax egg (1 tablespoon of ground flaxseed mixed with 2.5 tablespoons of water, left to sit until it thickens). Also, use dairy-free butter and milk for the frosting. Just remember to always check your ingredients for allergens, especially if making treats for others.

Can I decorate gingerbread men cookies?
The more the merrier! Once your cookies have cooled completely, feel free to pipe or spread frosting on them and add your favorite decorative candies or sprinkles. Get creative with it—baking should be as much about fun as it is about flavor!

Gingerbread Men Cookies

Soft and Chewy Gingerbread Men Cookies Everyone Will Love

Delight in Soft and Chewy Gingerbread Men Cookies, a festive treat perfect for holiday gatherings and family fun.
Print Recipe Pin Recipe
Prep Time 30 minutes mins
Cook Time 8 minutes mins
Chilling Time 30 minutes mins
Total Time 1 hour hr 8 minutes mins
Servings: 24 cookies
Course: Dessert
Cuisine: American, Holiday
Calories: 150
Ingredients Equipment Method Nutrition Notes

Ingredients
  

For the Dough
  • 0.5 cup Unsalted Butter melted
  • 1 cup Brown Sugar packed
  • 0.5 cup Molasses
  • 1 teaspoon Vanilla Extract
  • 1 pinch Salt do not omit
  • 1 teaspoon Ground Cinnamon
  • 2 teaspoons Ground Ginger
  • 0.25 teaspoon Nutmeg
  • 0.25 teaspoon Cloves optional
  • 1 large Egg
  • 1 teaspoon Baking Soda ensure it is fresh
  • 3.5 cups All-Purpose Flour
For the Frosting
  • 2 cups Powdered Sugar main sweetening agent
  • 1 teaspoon Vanilla Extract flavor enhancer
  • 2 tablespoons Milk adjust for consistency
  • Decorative Candies/Sprinkles optional

Equipment

  • Mixing Bowl
  • Baking Sheets
  • Parchment Paper
  • Whisk
  • Rolling Pin
  • Cookie Cutters

Method
 

Step-by-Step Instructions
  1. In a large mixing bowl, combine melted butter, brown sugar, molasses, vanilla extract, salt, cinnamon, ginger, nutmeg, and cloves. Mix until smooth.
  2. Add the egg and stir until fully combined.
  3. Incorporate baking soda and flour to form a soft, slightly sticky dough.
  4. Chill the dough wrapped in plastic wrap for at least 30 minutes.
  5. Preheat oven to 350°F and line baking sheets with parchment paper.
  6. Roll out the chilled dough to ¼-inch thickness, cut shapes, and space them on baking sheets.
  7. Bake for 7-8 minutes until lightly browned and slightly underbaked.
  8. Cool on sheets for 5 minutes before transferring to a wire rack.
  9. Mix powdered sugar, vanilla, and milk for frosting consistency.
  10. Decorate cooled cookies with frosting and candies or sprinkles.

Nutrition

Serving: 1cookieCalories: 150kcalCarbohydrates: 20gProtein: 1gFat: 7gSaturated Fat: 4gPolyunsaturated Fat: 0.5gMonounsaturated Fat: 2.5gCholesterol: 15mgSodium: 50mgPotassium: 50mgFiber: 0.5gSugar: 10gVitamin A: 200IUCalcium: 10mgIron: 0.5mg

Notes

Ensure to chill the dough for easy handling and to maintain cookie shape while baking. Allow cookies to cool properly for the best texture before decorating.

Tried this recipe?

Let us know how it was!

Gingerbread Brownies Recipe: Fudgy Bliss for the Holidays

November 19, 2025 by Grace Snow Leave a Comment

As the warm spices waft through the kitchen, I can’t help but smile at the magic unfolding. Today, I'm excited to share my Gingerbread Brownies Recipe, a festive twist that combines all the beloved flavors of gingerbread with the rich, fudgy texture of brownies. Perfect for holiday gatherings or just a cozy night in, these brownies are not only delightfully simple to whip up but also a guaranteed hit with family and friends. With flexible options for gluten-free and vegan variations, you can easily cater to everyone’s tastes. What better way to indulge in the season than with a warm plate of these soft, spiced treats? Are you ready to dive into the world of bathrobe baking bliss?

Why are Gingerbread Brownies a Must-Try?

Irresistible Flavor: These brownies offer a delicious fusion of rich chocolate and classic gingerbread spices that will keep you coming back for more.

Flexible Variations: With options for gluten-free and vegan adaptations, everyone can enjoy a piece of this festive treat.

Crowd-Pleaser: Perfect for gatherings, they are sure to delight guests, much like Pumpkin Brownies Decadent during the holiday season.

Quick and Easy: From mixing to baking, this recipe is simple and fast, so you can satisfy those brownie cravings without a hassle.

Comforting Texture: Expect a fudgy interior with a chewy crust, delivering a warm, cozy feel in every bite—a perfect companion for a chilly evening!

Gingerbread Brownies Ingredients

• For the Batter

  • Unsalted Butter – Adds richness and moisture; substitute with vegan butter for a dairy-free version.
  • Light Brown Sugar – Provides sweetness and chewy texture; dark brown sugar can be used for a deeper flavor.
  • Eggs – Bind ingredients and provide structure; use flax eggs (1 tbsp ground flaxseed + 3 tbsp water) for a vegan alternative.
  • Molasses – Key for the classic gingerbread flavor; substitute with honey or maple syrup if unavailable.
  • Vanilla Extract – Enhances overall flavor; can be omitted or substituted with almond extract.
  • All-Purpose Flour – Provides structure; a gluten-free flour blend works for a gluten-free option.
  • Ground Ginger – Contributes spiciness; fresh ginger can be used but will alter the texture.
  • Cinnamon – Adds warmth and flavor; other spices like nutmeg or allspice may also be included for variation.
  • Baking Powder – Helps the brownies rise; ensure it's fresh for proper leavening.
  • Kosher Salt – Enhances flavor; sea salt can also be used.

• For Topping

  • Confectioners’ Sugar – For dusting on top; optional but adds visual appeal to your Gingerbread Brownies.

Step‑by‑Step Instructions for Gingerbread Brownies Recipe

Step 1: Preheat and Prepare Baking Dish
Preheat your oven to 350°F (177°C) and prepare a 9x9-inch baking dish by lining it with parchment paper. This ensures easy removal of the brownies once they’re baked and allows for a lovely presentation. Set the dish aside while you gather the remaining ingredients for your delicious gingerbread brownies.

Step 2: Mix Wet Ingredients
In a large mixing bowl, combine melted unsalted butter with light brown sugar. Stir them together until the mixture is smooth and creamy, which should take about 1-2 minutes. Next, add in the eggs, molasses, and vanilla extract, mixing until fully incorporated and the batter appears glossy. This rich mixture is the heart of your gingerbread brownies.

Step 3: Combine Dry Ingredients
In a separate medium bowl, whisk together the all-purpose flour, ground ginger, cinnamon, baking powder, and kosher salt. Make sure all the dry ingredients are well mixed, as this will ensure an even distribution of flavor and rise throughout the brownies. This fragrant blend brings the classic gingerbread flavors to life, creating a delightful anticipation for the baking ahead.

Step 4: Incorporate Dry into Wet Mixture
Gradually add the dry ingredient mixture to the wet ingredients, stirring gently until just combined. Avoid over-mixing; you want a thick batter that’s well incorporated but still has some texture. This is the moment when your gingerbread brownies come together, transforming into a luscious batter that’s ready for baking.

Step 5: Pour and Spread Batter
Pour the brownie batter into your prepared baking dish, using a spatula to spread it evenly in the dish. Take care to ensure the surface is smooth, as this will lead to an even bake. The anticipation builds as your kitchen fills with the warm, spicy aroma of gingerbread as it begins to bake in the oven.

Step 6: Bake to Perfection
Place the baking dish in the preheated oven and bake for 30-35 minutes. To test for doneness, look for set edges and a center that no longer jiggles when gently shaken. A toothpick inserted in the center should come out with a few moist crumbs, indicating that your gingerbread brownies are perfectly baked.

Step 7: Cool and Dust
Once baked, remove the brownies from the oven and allow them to cool in the pan for at least 15-20 minutes. For the best flavor and texture, transfer them to a wire rack to cool completely. Once cooled, dust the top with confectioners' sugar for a sweet finishing touch that enhances the delightful look and taste of your gingerbread brownies.

Step 8: Slice and Serve
When the brownies are completely cooled, use a sharp knife to slice them into squares. These delicious gingerbread brownies are now ready to be enjoyed! You can serve them as they are or with a scoop of vanilla ice cream for an extra indulgent treat during the holiday season.

Gingerbread Brownies Recipe Variations

Feel free to get creative with this recipe, inviting different flavors and textures into your kitchen!

  • Gluten-Free: Substitute all-purpose flour with a gluten-free flour blend for a delicious version everyone can enjoy.
  • Vegan: Replace the eggs with flax eggs (1 tbsp ground flaxseed + 3 tbsp water) and use vegan butter for a plant-based treat.
  • Extra Chocolatey: Stir in ½ cup of dark or semi-sweet chocolate chips before baking to infuse your brownies with rich chocolate goodness.
  • Spicy Kick: Add a pinch of cayenne pepper for a subtle heat that complements the ginger's spice—perfect for adventurous palates!
  • Nutty Flavor: Incorporate ½ cup of chopped walnuts or pecans into the batter for a lovely crunch and added depth.
  • Maple Sweetness: Substitute molasses with pure maple syrup for a lighter flavor that still evokes that cozy gingerbread essence.
  • Citrus Zest: Add 1 teaspoon of orange or lemon zest to the batter for a fresh, zesty twist that brightens the flavor profile.
  • Serving Suggestions: These brownies are divine when paired with a scoop of vanilla ice cream or a dollop of whipped cream, much like how you’d enjoy them with Chicken Adobo at the dinner table!

Feel the magic of baking as you explore these variations—each bite can lead you to new flavor adventures!

Expert Tips for Gingerbread Brownies

• Check Doneness Early: Don't wait until the full 35 minutes; start checking your gingerbread brownies at 30 minutes. Look for set edges and a slightly moist center.

• Experiment with Spices: Consider adding nutmeg or allspice to deepen the flavor profile of your gingerbread brownies. Just a pinch can elevate your dessert!

• Avoid Over-Mixing: When combining wet and dry ingredients, mix until just combined. Over-mixing can lead to dense brownies rather than a tender, fudgy texture.

• Use Quality Ingredients: Fresh spices and quality dark chocolate chips can drastically enhance the flavors. Your gingerbread brownies will shine with premium ingredients.

• Cool Completely: Allow your brownies to cool fully before slicing to achieve clean cuts and the best texture. Enjoy them warm with a scoop of ice cream for extra indulgence!

How to Store and Freeze Gingerbread Brownies

Room Temperature: Store the brownies in an airtight container at room temperature for up to 4 days; this keeps them fresh and ready for snacking.

Fridge: For extended freshness, you can refrigerate the brownies for up to 1 week. Just ensure they're stored in an airtight container to prevent them from drying out.

Freezer: Freeze the brownies by wrapping them tightly in plastic wrap and then in aluminum foil. They can last for up to 3 months in the freezer.

Reheating: To enjoy them warm, simply thaw the brownies overnight in the fridge and then reheat for 10-15 seconds in the microwave before serving.

Make Ahead Options

These Gingerbread Brownies are perfect for busy home cooks wanting to save time without sacrificing flavor! You can prepare the brownie batter up to 24 hours in advance—just mix it and store it covered in the refrigerator. To maintain their delicious texture, avoid adding the powdered sugar until you’re ready to serve, as this will prevent them from becoming soggy. When ready to bake, simply spread the prepared batter into your lined baking dish and follow the baking instructions as usual for a fresh-from-the-oven delight. With this make-ahead option, you can enjoy warm, spiced brownies in no time, making your holiday entertaining or weeknight dessert effortless!

What to Serve with Gingerbread Brownies

As you relish these spiced nuggets of delight, consider pairing them with accompaniments that elevate their warm, festive charm.

  • Vanilla Ice Cream: The creamy, cold contrast to the warm brownies adds a delightful melty richness that enhances the overall experience.

  • Caramel Sauce: Drizzling warm caramel over the brownies infuses a luscious sweetness that pairs beautifully with the spiced notes of gingerbread.

  • Whipped Cream: A light pillow of freshly whipped cream adds a fluffy texture that beautifully balances the fudgy richness of the brownies.

  • Spiced Chai Latte: This fragrant drink ties in the warm spices of the brownies, creating a comforting cozy moment perfect for holiday gatherings.

  • Cranberry Compote: The tartness of a spiced cranberry sauce offers a refreshing zing, contrasting wonderfully with the sweet, rich brownies.

  • Coffee: A rich cup of coffee complements the flavors beautifully, enhancing the spices while providing a nice bitter balance to the sweetness.

  • Chocolate Ganache: A glossy layer of chocolate ganache on top will elevate your brownies to the next level of indulgence, making them irresistibly decadent.

  • Pumpkin Spice Latte: This seasonal favorite ushers in the holiday spirit and harmonizes gracefully with the spiced depth of these gingerbread brownies.

Combine any of these suggestions, and you’ll create a delightful spread that turns your gingerbread brownies into a truly festive feast!

Gingerbread Brownies Recipe FAQs

What type of molasses should I use for the best flavor?
Using unsulfured molasses is best for gingerbread brownies as it has a sweeter and more complex flavor. If you can’t find molasses, you can substitute it with honey or maple syrup, but the distinct gingerbread taste might be slightly different.

How should I store gingerbread brownies to keep them fresh?
Store the brownies in an airtight container at room temperature for up to 4 days. If you're looking to keep them fresh longer, refrigerate them for up to 1 week, ensuring they remain in an airtight container to avoid drying out.

Can I freeze gingerbread brownies?
Absolutely! To freeze gingerbread brownies, wrap them tightly in plastic wrap, followed by aluminum foil. This airtight seal will help keep them fresh for up to 3 months. When you’re ready to enjoy, thaw them overnight in the refrigerator and then reheat in the microwave for about 10-15 seconds for that freshly-baked warmth.

What can I do if my brownies are too dry?
If your brownies turn out dry, it's likely due to overbaking or not enough moisture in the batter. Make sure to check for doneness at 30 minutes. If they are overbaked, unfortunately, there's not much that can be done to regain moisture. However, serving them warm with a scoop of vanilla ice cream can mask the dryness.

Is this gingerbread brownies recipe suitable for dogs?
While most ingredients are safe for dogs, the high sugar content and chocolate could pose health risks. Avoid giving them brownies with chocolate, and opt for dog-safe treats instead. Always consult your vet if you have any concerns about sharing dessert with your furry friends!

Can I modify the recipe for dietary restrictions?
Yes! For a vegan version, replace the eggs with flax eggs (1 tbsp ground flaxseed + 3 tbsp water per egg). Swap the unsalted butter with vegan butter for a dairy-free option. For gluten-free brownies, simply use a gluten-free flour blend. These alternatives will still yield a delicious treat, so everyone can enjoy these gingerbread brownies!

Gingerbread Brownies Recipe

Gingerbread Brownies Recipe: Fudgy Bliss for the Holidays

Enjoy these Gingerbread Brownies Recipe, a perfect fusion of gingerbread spices and fudgy chocolate.
Print Recipe Pin Recipe
Prep Time 20 minutes mins
Cook Time 35 minutes mins
Cooling Time 20 minutes mins
Total Time 1 hour hr 15 minutes mins
Servings: 16 slices
Course: Dessert
Cuisine: American
Calories: 180
Ingredients Equipment Method Nutrition Notes

Ingredients
  

For the Batter
  • 1 cup Unsalted Butter Substitute with vegan butter for a dairy-free version.
  • 1 cup Light Brown Sugar Dark brown sugar can be used for a deeper flavor.
  • 3 large Eggs Use flax eggs for a vegan alternative.
  • 1/2 cup Molasses Substitute with honey or maple syrup if unavailable.
  • 1 teaspoon Vanilla Extract Can be omitted or substituted with almond extract.
  • 1 cup All-Purpose Flour A gluten-free flour blend works for a gluten-free option.
  • 2 teaspoons Ground Ginger Fresh ginger can be used but will alter the texture.
  • 1 teaspoon Cinnamon Other spices like nutmeg or allspice may also be included for variation.
  • 1 teaspoon Baking Powder Ensure it's fresh for proper leavening.
  • 1/2 teaspoon Kosher Salt Sea salt can also be used.
For Topping
  • 1 cup Confectioners’ Sugar Optional but adds visual appeal.

Equipment

  • Oven
  • Mixing Bowl
  • Baking Dish
  • Spatula
  • Whisk

Method
 

Step-by-Step Instructions
  1. Preheat your oven to 350°F (177°C) and prepare a 9x9-inch baking dish by lining it with parchment paper.
  2. In a large mixing bowl, combine melted unsalted butter with light brown sugar. Stir until smooth and creamy, about 1-2 minutes. Add in the eggs, molasses, and vanilla extract, mixing until fully incorporated.
  3. In a medium bowl, whisk together the all-purpose flour, ground ginger, cinnamon, baking powder, and kosher salt.
  4. Gradually add the dry mixture to the wet ingredients, stirring gently until just combined.
  5. Pour the batter into the prepared baking dish, spreading it evenly and smoothing the surface.
  6. Bake for 30-35 minutes until set edges and a center that no longer jiggles.
  7. Once baked, cool in the pan for 15-20 minutes, then transfer to a wire rack to cool completely. Dust with confectioners' sugar.
  8. Slice the cooled brownies into squares and serve as is or with a scoop of vanilla ice cream.

Nutrition

Serving: 1sliceCalories: 180kcalCarbohydrates: 25gProtein: 2gFat: 8gSaturated Fat: 5gMonounsaturated Fat: 3gCholesterol: 30mgSodium: 150mgPotassium: 100mgFiber: 1gSugar: 15gVitamin A: 150IUCalcium: 15mgIron: 1mg

Notes

Check doneness early; don't wait until 35 minutes. Experiment with spices for deeper flavors. Use quality ingredients for best results.

Tried this recipe?

Let us know how it was!

Fudgy Chocolate Cherry Cookies to Wow Your Sweet Tooth

November 19, 2025 by Grace Snow Leave a Comment

The warm aroma of freshly baked goodies wafting through the house can shift any dreary day into something magical. That's precisely what you'll experience with these fudgy Chocolate Cherry Thumbprint Cookies. They elegantly marry rich, dark chocolate with a silky cherry ganache filling that will transport you straight to dessert bliss. Whether you're whipping them up for a special occasion like Valentine's Day, or simply rewarding yourself for making it through the week, these cookies are quick to prepare and impressively delicious. Their chewy texture combined with a beautiful burst of chocolate and cherry flavor makes them a must-try for any dessert lover. So, ready to give your taste buds a delightful surprise? Let's dive into the recipe!

Why are Chocolate Cherry Cookies irresistible?

Decadent, Fudgy Delight: Each bite captures a rich chocolate experience thanks to the fudgy texture, bringing a truly indulgent treat.

Gourmet Touch: The luscious cherry ganache filling elevates these cookies, making them a show-stopper for any occasion.

Quick and Easy: Simple steps make these cookies accessible for both novice and seasoned bakers alike so anyone can create a gourmet dessert.

Perfect for Sharing: Whether at a holiday gathering or a cozy evening in, these cookies are sure to impress friends and family, resembling gourmet chocolates in flavor.

Versatile Options: Feel free to experiment with different fruit fillings or chocolate types to match your preferences. For more delicious ideas, why not try these Eggnog Cookies Soft next?

Memorable Experience: The delightful combination of flavors and textures makes these cookies an unforgettable treat, perfect for sweet celebrations or a cozy night in.

Chocolate Cherry Cookies Ingredients

For the Cookie Dough

  • All-Purpose Flour – Provides structure to the cookies; remember to spoon and level for accuracy.
  • Dutch-Process Cocoa Powder – Adds a deep, rich flavor; regular cocoa works if you don’t have it available.
  • Baking Powder – Ensures slight rise; avoid substituting with baking soda to maintain texture.
  • Sea Salt – Enhances the flavors; kosher salt is a great alternative if needed.
  • Unsalted Butter – Adds richness; use vegan butter alternative for a dairy-free version.
  • Light Brown Sugar – Contributes moisture and a touch of caramel flavor; dark brown sugar can be even richer.
  • Granulated White Sugar – Sweetens the cookies; you can reduce the amount for a less sweet bite.
  • Egg Yolks – Provide richness and binding; whole eggs can be used in a pinch, but may affect texture.
  • Vanilla Extract – Adds aromatic depth; opt for pure vanilla for best results.

For the Ganache

  • Chopped Chocolate – This is the star of the ganache; using high-quality dark chocolate like Endangered Species Chocolate is ideal.
  • Heavy Cream – Creates a creamy texture in the ganache; half-and-half can be a thinner substitute.
  • Cherry Preserves – Adds fruity sweetness; feel free to use fresh or frozen cherries cooked down as an alternative.

These chocolate cherry cookies are sure to impress anyone who has a sweet tooth!

Step‑by‑Step Instructions for Fudgy Chocolate Cherry Cookies

Step 1: Combine Dry Ingredients
In a medium bowl, whisk together 1 cup of all-purpose flour, ¼ cup of Dutch-process cocoa powder, ½ teaspoon of baking powder, and a pinch of sea salt. This mixture will provide essential structure and a deep chocolate flavor to your fudgy Chocolate Cherry Cookies. Set the dry ingredients aside while you prepare the wet mixture.

Step 2: Cream Butter and Sugars
In a large mixing bowl, beat together ½ cup of unsalted butter, ½ cup of light brown sugar, and ¼ cup of granulated white sugar using an electric mixer. Mix on medium speed until the mixture is light and fluffy, about 2-3 minutes. The creamy butter-sugar blend enhances the overall richness of the cookies, laying the groundwork for a delightful treat.

Step 3: Add Egg Yolks and Vanilla
Add 2 large egg yolks and 1 teaspoon of pure vanilla extract to the creamed mixture. Beat well on medium speed until everything is completely combined, about 1 minute. This addition not only enriches the cookie dough but also brings a wonderful aromatic depth that elevates the flavor profile of your Chocolate Cherry Cookies.

Step 4: Mix in Dry Ingredients
Gradually add the reserved dry ingredient mixture to the wet batter, mixing on low speed just until combined; about 30 seconds should suffice. Be careful not to overmix, as you want to maintain the fudgy texture of these cookies. The dough will be thick and luxurious, promising a delightful bake ahead.

Step 5: Shape the Dough
Using a tablespoon, scoop the dough and roll it into balls about 1 inch in diameter. Place each ball on a parchment-lined baking sheet, then make a small indent in the center of each using a ¼ teaspoon measuring spoon. Chill the shaped dough in the refrigerator for about 1 hour to ensure the cookies hold their shape during baking.

Step 6: Preheat Oven and Prepare for Baking
Preheat your oven to 350°F (175°C). While the oven heats, line your baking sheets with parchment paper, ensuring a non-stick surface for the fudgy Chocolate Cherry Cookies. Keeping an eye on the time, this will prepare you for a precise baking session that yields perfectly baked treats.

Step 7: Bake the Cookies
Bake the cookies in the preheated oven for 9-11 minutes or until they appear set on the edges and slightly soft in the center. If the indents have flattened during baking, gently reshape them with a spoon. This step ensures that the cookies are both visually appealing and perfectly designed to hold the upcoming ganache filling.

Step 8: Cool the Cookies
After baking, allow the cookies to cool on the sheet for 5 minutes. This resting time will help them firm up slightly before you transfer them to a wire rack. Once on the rack, let them cool completely. This cooling will create the ideal canvas for the rich chocolate cherry ganache.

Step 9: Prepare the Ganache
While the cookies cool, prepare the ganache by heating ½ cup of heavy cream in a saucepan over medium heat until it just starts to boil. Pour the hot cream over 8 ounces of chopped chocolate in a bowl, letting it sit for a minute before stirring until smooth. Finally, mix in 2 tablespoons of cherry preserves for that fruity burst in your ganache.

Step 10: Fill the Cookies
Once the cookies are completely cooled, fill each indent with the luscious chocolate cherry ganache. Use a small spoon or piping bag for a neat application. To set the ganache and allow the flavors to meld, place the filled cookies in the refrigerator for 10-15 minutes before serving. Your fudgy Chocolate Cherry Cookies are now ready to impress!

What to Serve with Fudgy Chocolate Cherry Thumbprint Cookies

Elevate your dessert experience with the perfect companions for these rich, fudgy delights that will tantalize your taste buds.

  • Coffee or Espresso: The robust flavor of coffee perfectly balances the sweetness of the cookies, enhancing their chocolate richness. Pairing a steaming cup of espresso elevates the experience and makes for an elegant dessert interplay.

  • Vanilla Ice Cream: A scoop of creamy vanilla ice cream brings a cool contrast to the warm fudgy cookies, creating a delightful mouthfeel that is both comforting and indulgent.

  • Fresh Berries: Raspberries or strawberries add a refreshing tartness that beautifully complements the rich chocolate cherry cookies, offering a lovely burst of fruitiness with every bite.

  • Milk: A classic pairing, a glass of cold milk softens the richness of the cookies and enhances their fudgy texture. Consider chocolate milk for an extra-chocolaty experience!

  • Whipped Cream: Light and airy, whipped cream adds a fluffy texture, making each bite feel indulgent while balancing the deep flavors of the cookies.

  • Chocolate Ganache Drizzle: For true chocolate lovers, a drizzle of extra ganache over each cookie amplifies their richness, making each bite truly decadent.

  • Red Wine: A fruity red wine, like Merlot, can enhance the cherry flavor within the cookies, creating a unique dessert experience that pairs beautifully with gourmet treats.

  • Cheese Platter: For a savory touch, a small cheese platter with soft cheeses like brie or camembert complements the sweet and tart flavors perfectly, offering a luxurious contrast.

  • Chocolate Dipped Fruits: Strawberries or cherries dipped in chocolate echo the flavors in your cookies, providing a delightful and visually stunning dessert spread.

  • Caramel Sauce: A drizzle of caramel sauce adds a sweet and buttery flavor that pairs exquisitely, enhancing the already sumptuous fudge and cherry mix.

How to Store and Freeze Chocolate Cherry Cookies

Room Temperature: Keep baked cookies in an airtight container at room temperature for up to 3 days. This maintains their fudgy texture and flavor.

Fridge: If you prefer, store cookies in the fridge for up to a week. Just be aware that chilling can slightly alter their texture to be firmer.

Freezer: Freeze cookie dough for up to 2 weeks before baking. Roll into balls, place on a baking sheet until frozen, then transfer to a freezer bag.

Reheating: To enjoy leftover cookies, simply warm in the microwave for about 10-15 seconds. This will revive their gooey, fudgy goodness!

Chocolate Cherry Cookies Variations

Feel free to explore these fun twists and substitutions to make your Chocolate Cherry Cookies even more delightful!

  • Dairy-Free: Substitute unsalted butter with coconut oil or a vegan butter alternative for a dairy-free treat that still tastes incredible. Your chocolate cherry cookies will maintain their rich flavor while catering to dietary preferences.

  • Flavor Explosion: Add a touch of almond extract along with the vanilla to bring a lovely, nutty undertone to your cookies. This will create a more complex flavor profile that complements chocolate beautifully.

  • Nutty Crunch: Fold in ½ cup of chopped walnuts or pecans into the cookie dough for added texture and a delightful crunch with each bite. These nuts provide a lovely contrast to the fudgy centers and enhance the overall experience.

  • Spicy Kick: Incorporate a pinch of cayenne pepper or cinnamon into the dry ingredients for a surprising warmth in your cookies. This twist adds an exciting layer of flavor that pairs wonderfully with the sweetness of the cherry.

  • Berry Swaps: If you want to shake things up fruit-wise, swap the cherry preserves for raspberry or strawberry preserves for a different fruity flair. Each variation creates a delightful new experience while keeping that luscious ganache center.

  • Fruity Fillings: Try swapping in homemade fruit curd, like lemon or passionfruit, for an exciting tart contrast against the chocolate. The bright flavors will bring a refreshing lift that delights the palate.

  • Seasonal Flavors: Use pumpkin spice in the dough for a seasonal twist and pair the cherry ganache with a dollop of creamy mascarpone. This transformation makes your cookies perfect for fall celebrations or autumn gatherings.

Pair these variations with other delectable treats, like German Chocolate Poke for a special dessert spread, or enjoy a cup of coffee with your cookies inspired by Chocolate Cherry Smoothie. Happy baking!

Expert Tips for Chocolate Cherry Cookies

  • Chill the Dough: Ensure you chill the shaped cookie dough for at least 1 hour. This step is crucial in maintaining the shape during baking and achieving that perfect fudgy texture.

  • Accurate Measurement: Spoon and level your flour rather than scooping directly from the bag. This avoids adding too much flour and resulting in dry cookies.

  • Custom Ganache: If your ganache seems thick or won't melt fully, consider using a double boiler or gently reheating. The addition of cherry preserves will provide that delightful burst of flavor in your chocolate cherry cookies.

  • Don't Overmix: When combining the wet and dry ingredients, mix on low speed just until incorporated. Overmixing can lead to tougher cookies—keep them fudgy!

  • Store Properly: Once baked, store your cookies in an airtight container at room temperature for up to three days. This helps maintain their wonderful texture while preserving that indulgent flavor.

Make Ahead Options

These fudgy Chocolate Cherry Cookies are perfect for busy home cooks looking to save time during meal prep! You can prepare the cookie dough up to 24 hours in advance; simply shape the cookies into balls and keep them in an airtight container in the refrigerator. For the ganache, you can also make it up to 3 days ahead and store it in the fridge—just reheat gently before filling the cookies. When you're ready to bake, pop the chilled cookie dough directly into the oven, adding a few extra minutes if they are still cold. This allows you to enjoy homemade cookies with minimal effort, perfect for any sweet occasion!

Chocolate Cherry Cookies Recipe FAQs

What type of flour should I use for Chocolate Cherry Cookies?
I recommend using all-purpose flour for the best structure! Make sure you spoon and level it to avoid excess flour, which can lead to dry cookies.

How long can I store Chocolate Cherry Cookies, and how should I do it?
Store your baked cookies in an airtight container at room temperature for up to 3 days. For longer shelf life, you can keep them in the fridge for up to a week, but their texture may firm up a bit.

Can I freeze the cookie dough before baking?
Absolutely! You can freeze the cookie dough for up to 2 weeks. To do this, roll the dough into balls, place them on a baking sheet until they freeze, then transfer to a freezer bag. When you're ready to bake, you can bake them straight from the freezer—just add a couple of minutes to the baking time!

What should I do if my ganache doesn’t melt properly?
If your ganache isn’t melting smoothly, try using a double boiler for gentle heating. Simply fill a pot with a bit of water, place a heat-safe bowl with your ganache over it, and heat slowly while stirring until melted and combined. This method helps achieve that glorious silky texture.

Are there any dietary considerations for Chocolate Cherry Cookies?
If you're making these cookies for someone with allergies or dietary restrictions, you can use vegan butter in place of unsalted butter and substitute the egg yolks with flax eggs (1 tablespoon of flaxseed meal mixed with 2.5 tablespoons of water per yolk, let sit until thickened). Always check your chocolate and preserves to ensure they’re free from allergens if needed!

Can I use different fruit fillings for the ganache?
Very! While cherry preserves add a delicious twist, you can experiment with raspberry or strawberry preserves for a new flavor profile. Just keep in mind that this will change the overall taste of your Chocolate Cherry Cookies!

Chocolate Cherry Cookies

Fudgy Chocolate Cherry Cookies to Wow Your Sweet Tooth

Indulge in these delicious Chocolate Cherry Cookies, combining rich chocolate with a silky cherry ganache for a truly magical dessert.
Print Recipe Pin Recipe
Prep Time 30 minutes mins
Cook Time 11 minutes mins
Chilling Time 1 hour hr
Total Time 1 hour hr 41 minutes mins
Servings: 24 cookies
Course: Dessert
Cuisine: American
Calories: 150
Ingredients Equipment Method Nutrition Notes

Ingredients
  

For the Cookie Dough
  • 1 cup All-Purpose Flour Spoon and level for accuracy.
  • 0.25 cup Dutch-Process Cocoa Powder Regular cocoa works if Dutch-process is not available.
  • 0.5 teaspoon Baking Powder Avoid substituting with baking soda.
  • pinch Sea Salt Kosher salt is a great alternative.
  • 0.5 cup Unsalted Butter Use dairy-free alternative for vegan version.
  • 0.5 cup Light Brown Sugar Dark brown sugar can add richness.
  • 0.25 cup Granulated White Sugar Reduce the amount for less sweetness.
  • 2 large Egg Yolks Whole eggs can be used in a pinch.
  • 1 teaspoon Vanilla Extract Opt for pure vanilla for best results.
For the Ganache
  • 8 ounces Chopped Chocolate Use high-quality dark chocolate.
  • 0.5 cup Heavy Cream Half-and-half can be a thinner substitute.
  • 2 tablespoons Cherry Preserves Fresh or frozen cherries cooked down can be used.

Equipment

  • Mixing Bowl
  • Electric mixer
  • Parchment Paper
  • Baking Sheet
  • Saucepan
  • wire rack

Method
 

Baking Instructions
  1. In a medium bowl, whisk together flour, cocoa powder, baking powder, and sea salt. Set aside.
  2. In a large mixing bowl, beat butter, brown sugar, and white sugar until fluffy, about 2-3 minutes.
  3. Add egg yolks and vanilla to the mixture, beating until fully combined, around 1 minute.
  4. Gradually mix in the dry ingredients until just combined, being careful not to overmix.
  5. Scoop dough into 1-inch balls, placing them on a lined baking sheet and making an indent in each.
  6. Chill the shaped dough in the refrigerator for about 1 hour.
  7. Preheat your oven to 350°F (175°C) and prepare baking sheets with parchment paper.
  8. Bake cookies for 9-11 minutes until set on the edges and soft in the center.
  9. Cool cookies on the sheet for 5 minutes before transferring to a wire rack.
  10. Prepare the ganache by heating heavy cream until boiling, then pour it over the chopped chocolate.
  11. Stir until smooth, then mix in cherry preserves.
  12. Fill each cooled cookie indent with the ganache and refrigerate for 10-15 minutes to set.

Nutrition

Serving: 1cookieCalories: 150kcalCarbohydrates: 20gProtein: 2gFat: 7gSaturated Fat: 4gPolyunsaturated Fat: 1gMonounsaturated Fat: 2gCholesterol: 30mgSodium: 80mgPotassium: 100mgFiber: 1gSugar: 10gVitamin A: 200IUCalcium: 20mgIron: 1mg

Notes

Chill the dough adequately to ensure the cookies maintain shape during baking. Store baked cookies in an airtight container for up to 3 days.

Tried this recipe?

Let us know how it was!
  • « Previous Page
  • 1
  • …
  • 166
  • 167
  • 168
  • 169
  • 170
  • …
  • 244
  • Next Page »

Welcome!

Hi, I’m Grace, a Sydney-based home cook with a passion for bold flavors and trending ingredients. Whether you’re a busy beginner or a seasoned foodie, you’ll find dishes here that are fresh, fun, and full of flavor.

More about me

Popular Recipes

  • twice baked potato casserole
    Indulge in This Creamy Twice Baked Potato Casserole Delight
  • Red Potato Casserole
    Irresistible Red Potato Casserole with Crunchy Topping
  • Cowboy Potato Casserole
    Comforting Cowboy Potato Casserole for Cozy Nights
  • Creamy Rotel Pasta with Ground Beef
    Creamy Rotel Pasta with Ground Beef for Ultimate Comfort

Footer

↑ back to top

About

  • Privacy Policy
  • Disclaimer
  • Terms & Conditions

Newsletter

  • Sign Up! for emails and updates

Contact

  • About me
  • Contact me

Copyright © 2025 TastyTrendIngredients