With every colorful swirl of these Strawberry Matcha Neapolitan Cookies, I’m reminded of a joyful summer picnic—where flavors dance like laughter and desserts bring us together. Ready in just 30 minutes, these visually stunning cookies not only brighten any table with their vibrant pink and green hues but also offer a delightful balance of sweet strawberries and earthy matcha in each bite. What’s better? They’re incredibly easy to whip up, making them a crowd-pleaser for gatherings or a special treat for yourself. Whether you’re indulging on a sunny afternoon or sharing them at a celebration, these cookies are the perfect blend of aesthetics and flavor. Ready to step into a world of colorful baking? Let’s get started!
Why are these cookies a must-try?
Quick & Easy: In just 30 minutes, you can create these delightful Strawberry Matcha Neapolitan Cookies, perfect for busy bakers who still want a homemade treat.
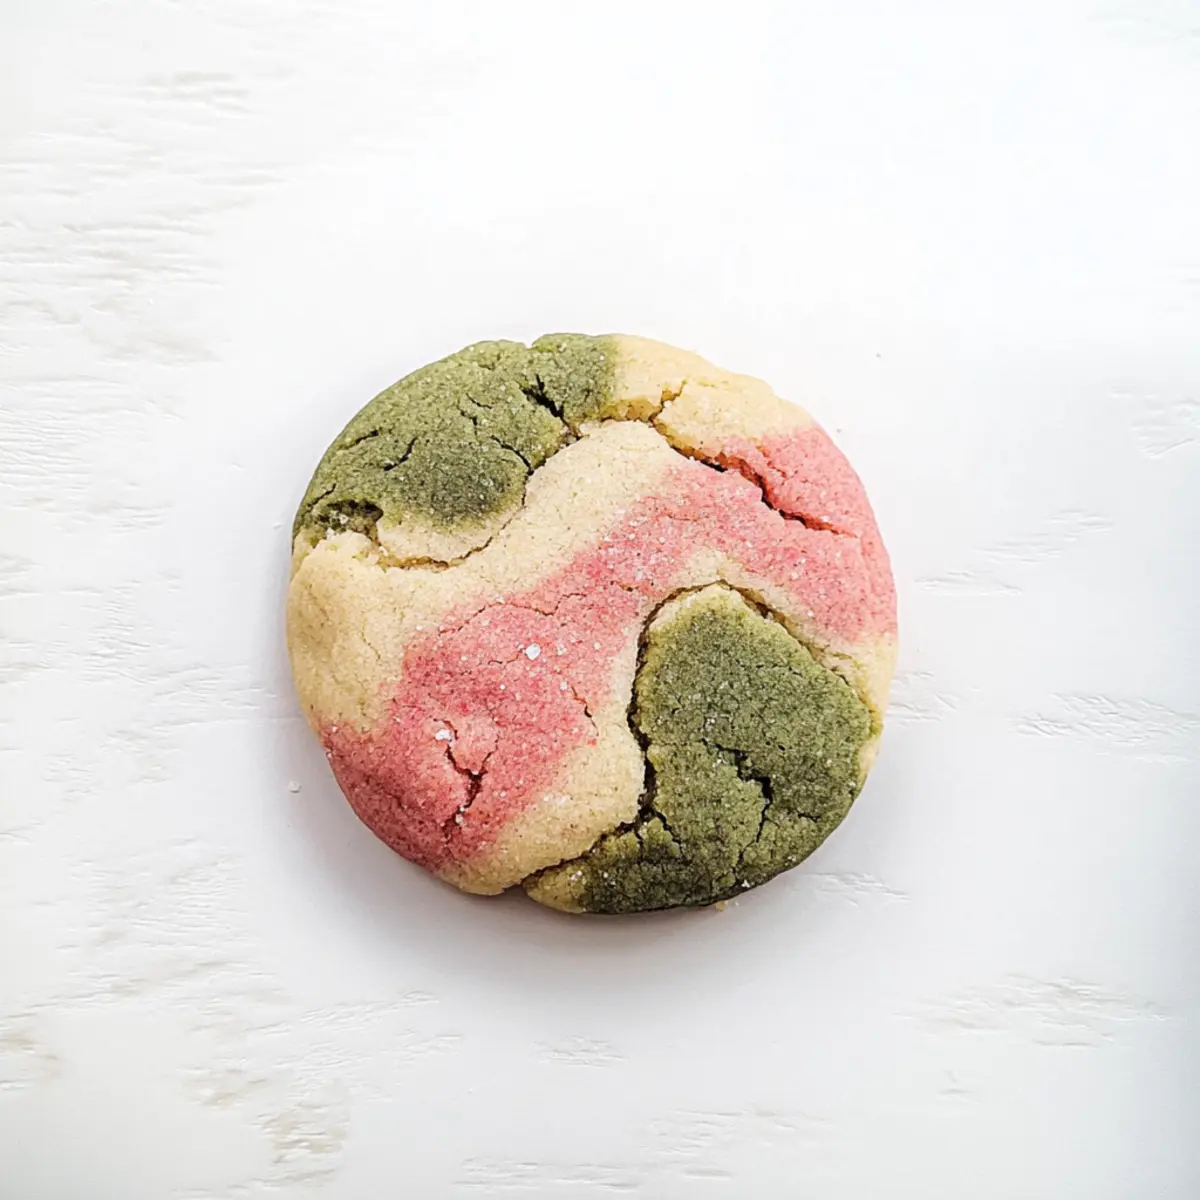
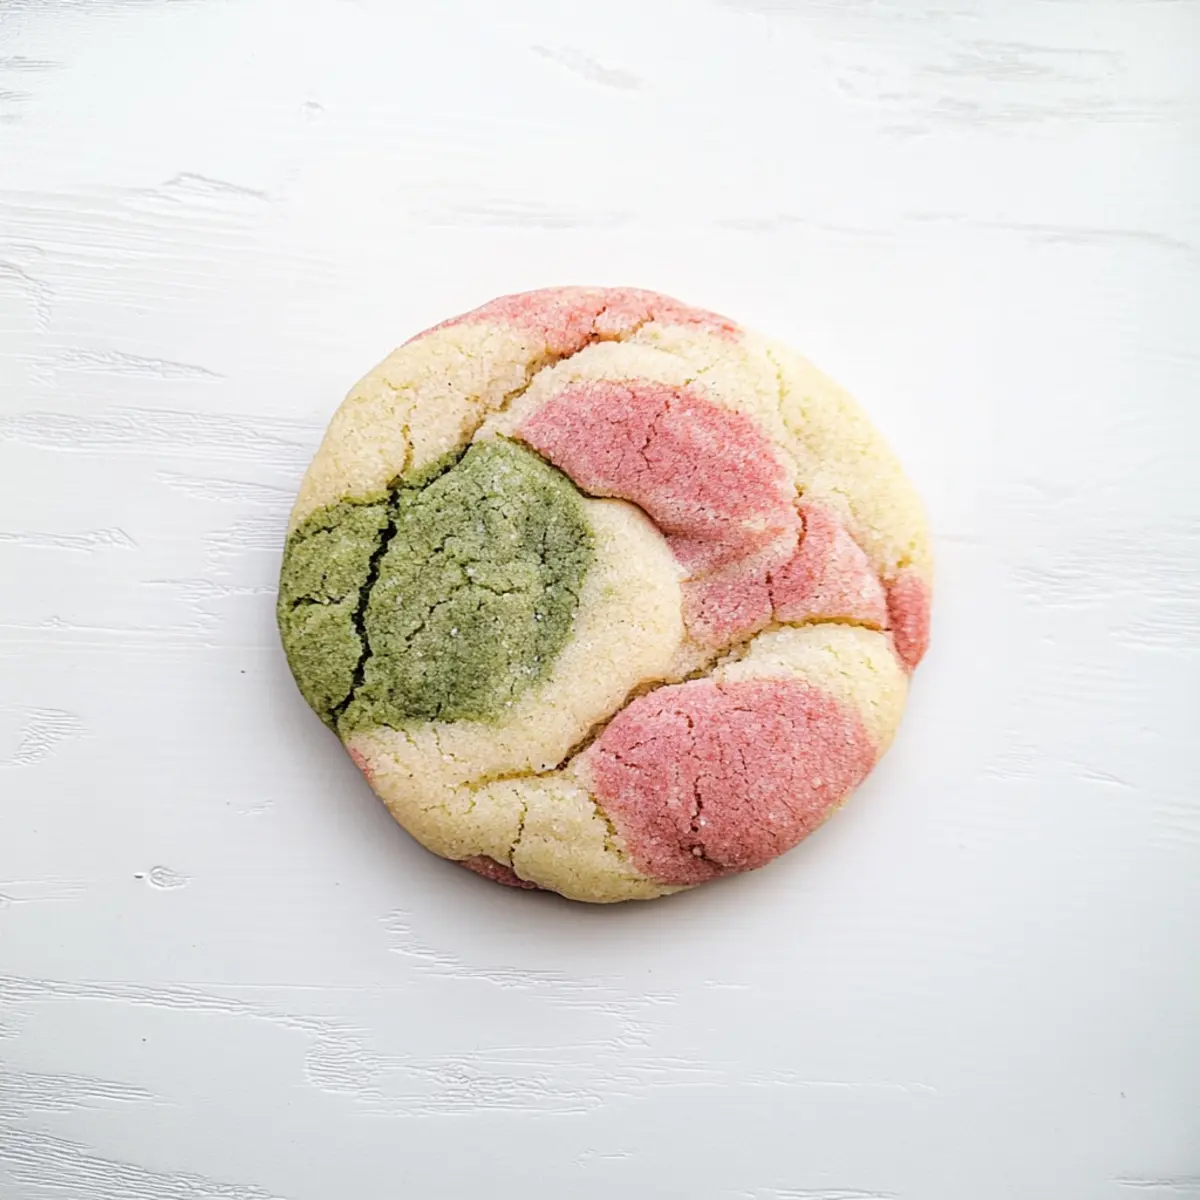
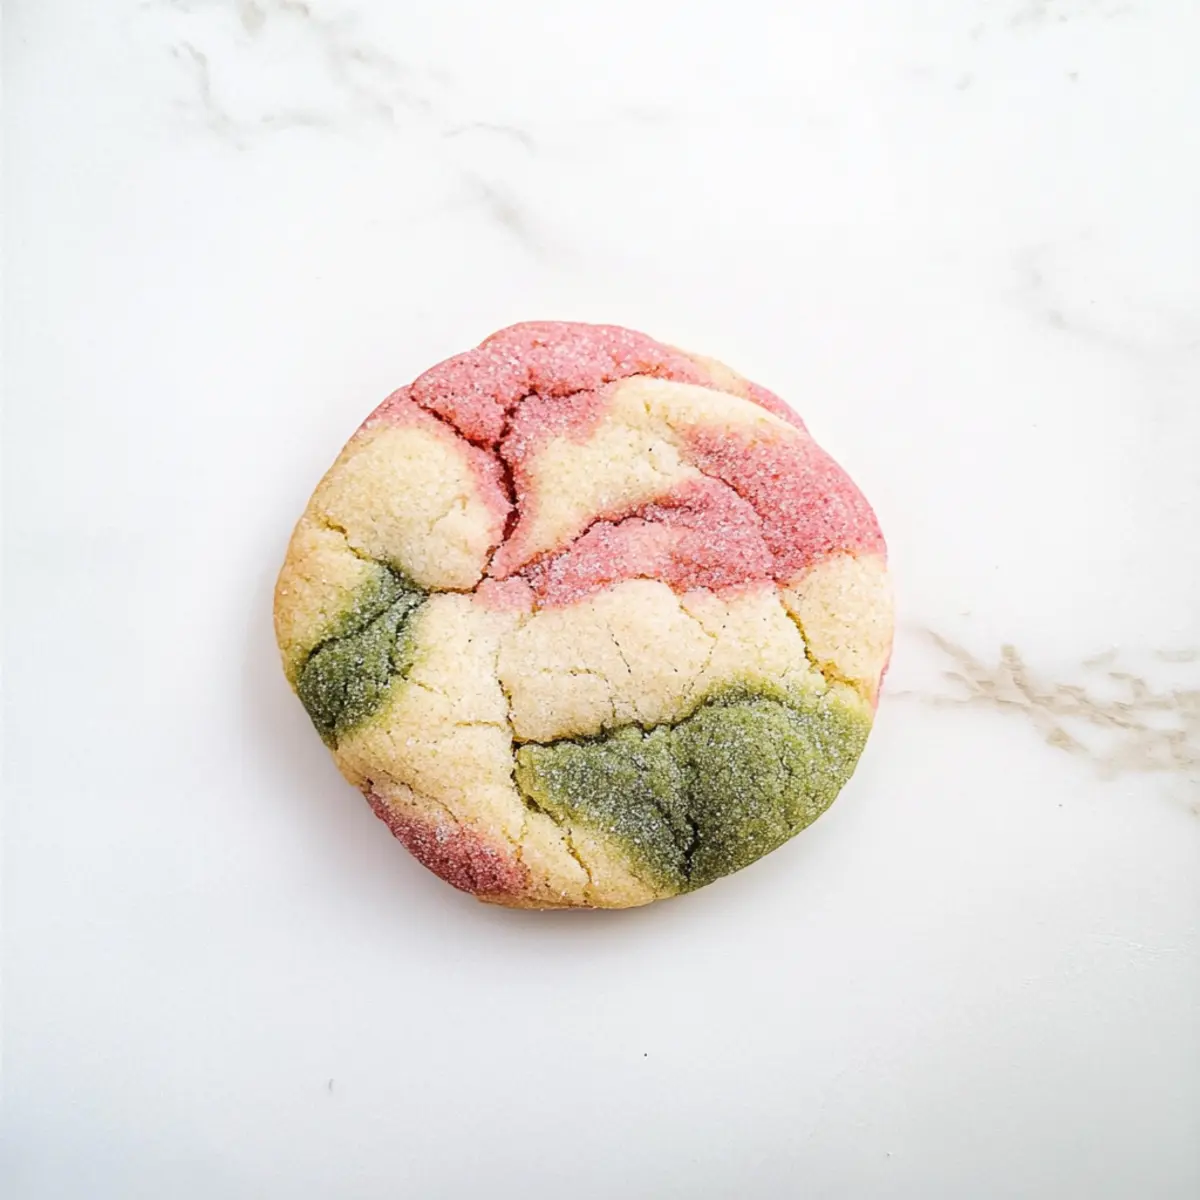
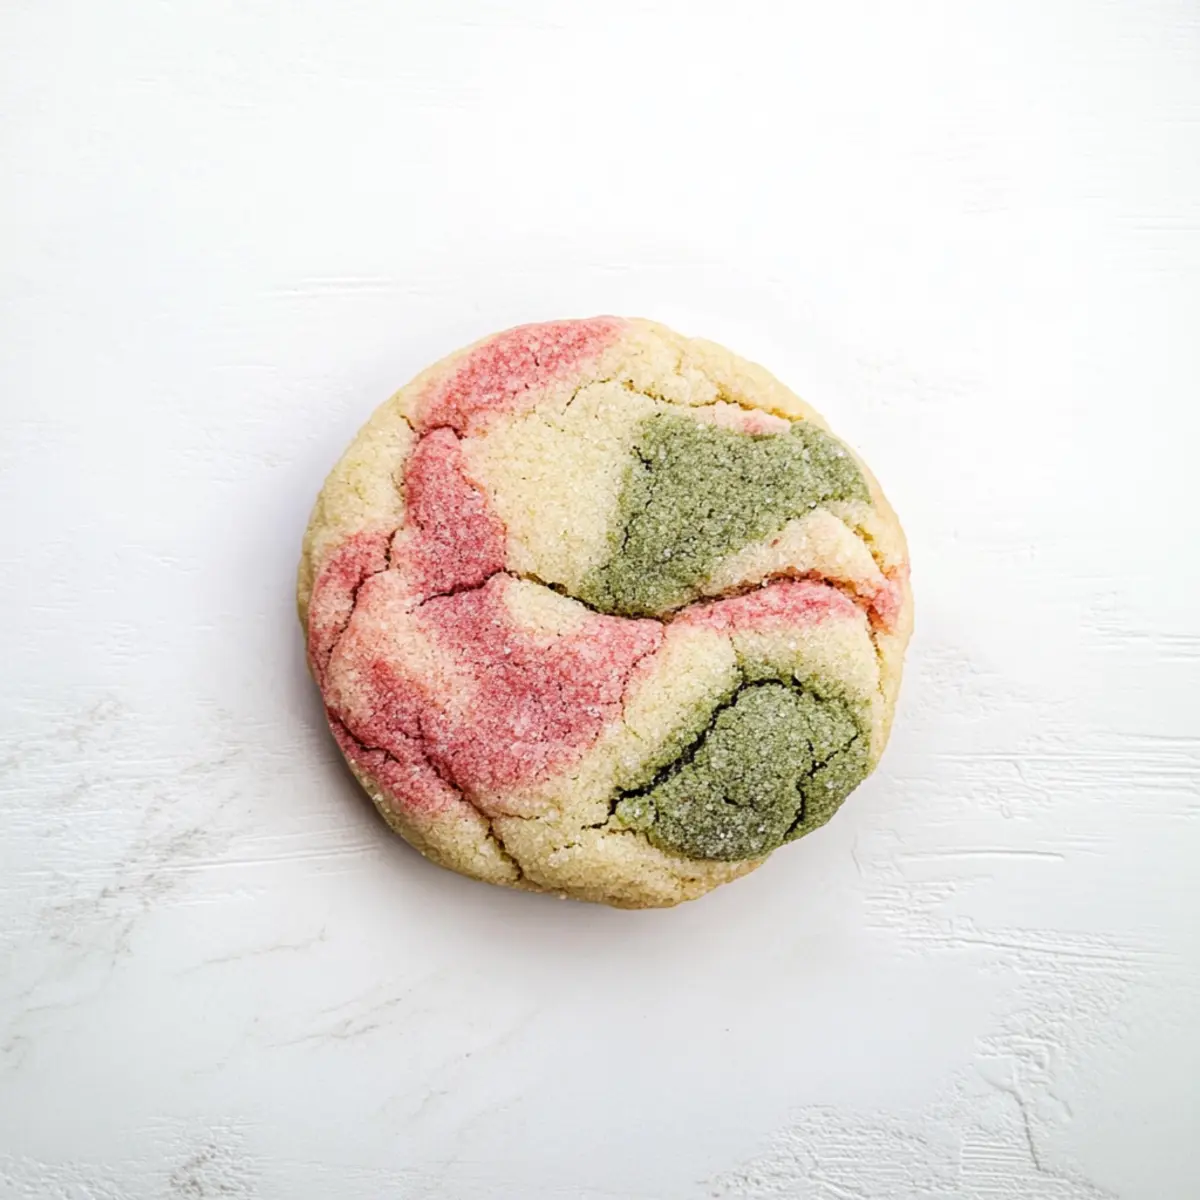
Visually Stunning: Their vibrant pink and green swirls make them the star of any dessert table—who can resist such a colorful creation?
Unique Flavor Combination: The sweetness of strawberries paired with earthy matcha provides a unique taste that’s both refreshing and satisfying.
Crowd-Pleasing Treat: Whether for family gatherings or a cozy afternoon tea, these cookies are sure to impress guests of all ages—add a fun twist to your cookie collection! For more delightful cookies, check out my Thumbprint Cookies Melt or Matcha Cookies Soft.
Chewy Delight: With a soft, chewy interior, each bite is a heavenly experience, encapsulating the joy of baking in every cookie!
Strawberry Matcha Neapolitan Cookies Ingredients
For the Cookie Base
- All-Purpose Flour – Provides structure and stability for the cookies; substitute with gluten-free flour for a gluten-free version.
- Baking Soda – Acts as a leavening agent, helping the cookies rise; essential for texture, no substitutions needed.
- Baking Powder – Works with baking soda for soft and fluffy cookies; no substitutions, please.
- Salt – Enhances the overall flavor; sea salt or table salt works well.
For the Flavor and Texture
- Unsalted Butter – Adds richness and moisture; ensure it’s at room temperature for better mixing, or substitute with vegan butter for dairy-free cookies.
- Granulated Sugar – Sweetens the cookies and aids in browning; reduce slightly for a less sweet option.
- Egg – Binds ingredients and adds moisture; for a vegan alternative, use a flaxseed egg.
- Vanilla Extract – Introduces a depth of flavor; pure vanilla delivers the best results.
For the Color and Flavor Burst
- Freeze Dried Strawberries – Delivers strawberry flavor and vivid color; they cannot be substituted as fresh strawberries will change the texture.
- Matcha Powder – Provides that distinct green color and earthy flavor; any quality culinary-grade matcha will suffice.
These Strawberry Matcha Neapolitan Cookies not only look pretty but are packed with flavor, making them a delightful treat for any occasion!
Step‑by‑Step Instructions for Strawberry Matcha Neapolitan Cookies
Step 1: Preheat the Oven and Prepare Baking Sheets
First, preheat your oven to 350°F (177°C). While the oven heats up, line two baking sheets with parchment paper. This will prevent the cookies from sticking and help achieve those beautiful edges. Make sure your baking sheets are ready so you can place your prepared cookies directly onto them later.
Step 2: Mix Dry Ingredients
In a small bowl, whisk together 2 cups of all-purpose flour, 1 teaspoon of baking soda, 1 teaspoon of baking powder, and ½ teaspoon of salt until well combined. This step ensures that your dry ingredients are evenly distributed, providing the perfect texture for your Strawberry Matcha Neapolitan Cookies. Set this mixture aside for later incorporation into your wet ingredients.
Step 3: Cream Butter and Sugar
In a large mixing bowl or a stand mixer, cream together ½ cup of room temperature unsalted butter and 1 cup of granulated sugar until the mixture is light and fluffy, which should take about 2-3 minutes. This fluffiness will help create that desired chewy cookie texture. Make sure to scrape down the sides of the bowl to incorporate all ingredients fully.
Step 4: Add Egg and Vanilla
Next, add 1 large egg and 1 teaspoon of vanilla extract to the creamed mixture. Mix until fully combined and smooth. The addition of these ingredients helps bind your cookies and enhances the flavor profile of your Strawberry Matcha Neapolitan Cookies. Take your time to ensure everything is well blended.
Step 5: Combine Dry and Wet Mixtures
Gradually incorporate the dry ingredient mixture into the wet ingredients, mixing gently. Stop mixing as soon as no streaks remain to prevent tough cookies. This step allows the flavors to meld together while still maintaining a soft and tender cookie dough that’s perfect for these delightful Strawberry Matcha Neapolitan Cookies.
Step 6: Divide the Dough
Once your dough is ready, divide it into three equal portions and place each portion in its own bowl. This separation allows you to create the three delicious flavors and colors of your Strawberry Matcha Neapolitan Cookies. It’s important to be even here, as this ensures a consistent design when shaping the cookies.
Step 7: Add Flavor and Color
To one portion, process freeze-dried strawberries into a powder to mix in for a burst of pink flavor. Add the powdered strawberries into one dough bowl and mix until well combined. In a second bowl, add 2 tablespoons of matcha powder to create that beautiful green color and earthy flavor. Stir each mixture until thoroughly combined, revealing the vibrant colors.
Step 8: Form Cookie Balls
Take one tablespoon of each dough color—strawberry, plain, and matcha—and roll them together into a ball, ensuring they form a lovely tri-color cookie. Roll each ball in granulated sugar to add a sweet sparkle before baking. This coating not only enhances appearance but also contributes a lovely texture once baked.
Step 9: Bake the Cookies
Place your beautifully formed cookie dough balls onto your prepared baking sheets, making sure to space them about 2 inches apart. Bake in the preheated oven for 10-12 minutes or until the edges are lightly golden and the centers appear set. Keep an eye on them, as visual cues are essential for achieving the perfect Strawberry Matcha Neapolitan Cookies.
Step 10: Cool and Serve
After baking, allow the cookies to cool on the baking sheet for about 10 minutes. This cooling period helps them firm up and retain their delightful chewy interior before transferring them to a wire rack for further cooling. Once cooled, these colorful Strawberry Matcha Neapolitan Cookies are ready to be enjoyed and shared!
Make Ahead Options
These Strawberry Matcha Neapolitan Cookies are fantastic for meal prep lovers! You can prepare the cookie dough up to 24 hours in advance by following the steps up to dividing the dough into three portions; cover each bowl with plastic wrap and refrigerate them. This not only saves time for busy weeknights but also allows the flavors to meld beautifully. If you want to keep them for longer, the formed cookie balls can be frozen and stored for up to 3 months. When ready to bake, simply place them directly on a baking sheet and follow the original baking instructions—this way, you’ll enjoy the same delicious flavor and chewy texture as if they were freshly made!
What to Serve with 30-Minute Strawberry Matcha Neapolitan Cookies
Indulging in these vibrant cookies is just the beginning—how about crafting a complete feast for the senses?
-
Refreshing Iced Green Tea: The grassy notes in green tea perfectly complement the earthy matcha flavor, creating a harmonious sipping experience alongside the cookies.
-
Whipped Cream and Berries: A dollop of freshly whipped cream with mixed berries adds a fruity freshness that enhances the sweetness of the cookies. This pairing also introduces a luxurious creaminess!
-
Fruit Salad: A colorful blend of seasonal fruits will provide a refreshing contrast to the rich flavors of the cookies, making each bite a delightful journey through sweetness and crunch.
-
Chocolate Dipped Strawberries: For a sweet treat that mirrors the cookie's flavors, serve chocolate-dipped strawberries. The chocolate’s richness pairs beautifully with the fruity and matcha layers in each cookie.
-
Sparkling Lemonade: The zesty brightness of sparkling lemonade cuts through the sweetness, making your dessert experience feel light and airy—perfect for summer gatherings!
-
Matcha Latte: Why not double down on matcha? A creamy matcha latte offers a soothing companion to the cookies, enhancing their flavor while providing a delightful coffee shop feel.
-
Mini Cheesecakes: Serve bite-sized vanilla or fruit-flavored cheesecakes for a touch of indulgence. Their rich texture complements the chewy cookies.
-
Vanilla Ice Cream: Consider serving a scoop of creamy vanilla ice cream alongside the cookies for an unbeatable classic dessert combo that’s ever so satisfying.
-
Dark Chocolate Tea: This warm and rich drink not only pairs well with the cookies’ flavors but also rounds out the dessert experience with its comforting notes.
Strawberry Matcha Neapolitan Cookies Variations
Feel free to let your creativity shine by customizing these delightful cookies to match your taste and dietary preferences!
-
Gluten-Free: Use a high-quality gluten-free flour blend to make these cookies gluten-free while keeping them deliciously chewy.
-
Dairy-Free: Substitute unsalted butter with vegan butter or coconut oil to create a rich flavor without any dairy.
-
Different Sweeteners: Swap granulated sugar for coconut sugar or honey for a touch of natural sweetness and a hint of caramel flavor.
-
Flavor Variations: Replace matcha with cocoa powder or ube powder for a delightful chocolatey twist or a unique purple hue.
-
Fruit Alternatives: Experiment with other freeze-dried fruits, such as raspberries or blueberries, to create fun color combos that are equally beautiful and tasty.
-
Nutty Crunch: Roll dough balls in crushed nuts or even sprinkles before baking for a crunchy texture that contrasts beautifully with the soft cookie center.
-
Intensified Flavor: Add a teaspoon of almond extract along with the vanilla for a nutty dimension that elevates the overall flavor.
Feel inspired? You can transform these cookies into something uniquely yours! For more delightful and visually stunning recipes, don’t miss my Matcha Cookies Soft or Eggnog Cookies Soft, which can also bring vibrant flavors to your dessert table!
Expert Tips for Strawberry Matcha Neapolitan Cookies
• Room Temperature Ingredients: Ensure that butter and eggs are at room temperature; this helps achieve a smooth and fluffy dough for your Strawberry Matcha Neapolitan Cookies.
• Mixing Technique: Be careful not to overmix after adding the dry ingredients. Overmixing can lead to tough cookies, so mix just until combined for a tender, chewy texture.
• Pro Tip for Storing: Store cookies in an airtight container at room temperature for up to 3 days. For longer freshness, freeze them, then thaw at room temperature to enjoy later.
• Flavor Experimentation: Feel free to experiment! Try substituting matcha powder with cocoa or using different freeze-dried fruits for unique flavors in your Strawberry Matcha Neapolitan Cookies.
• Perfect Cookie Size: When rolling the dough, aim for about a tablespoon for each cookie. This ensures even baking and consistent sizes for that perfect presentation.
How to Store and Freeze Strawberry Matcha Neapolitan Cookies
Room Temperature: Store cookies in an airtight container at room temperature for up to 3 days to maintain freshness and chewiness.
Fridge: If you prefer, you can refrigerate the cookies in an airtight container for up to a week. Just remember to let them come to room temperature before serving.
Freezer: For longer storage, freeze the cookies in a ziplock bag or airtight container for up to 3 months. Thaw at room temperature before enjoying your delicious Strawberry Matcha Neapolitan Cookies again.
Reheating: To warm them up, pop the cookies in a preheated oven at 300°F (150°C) for about 5 minutes to revive their soft and chewy texture.
30-Minute Strawberry Matcha Neapolitan Cookies Recipe FAQs
What should I look for when selecting freeze-dried strawberries?
Absolutely! When choosing freeze-dried strawberries, look for a vibrant color without any dark spots or signs of moisture. They should be crispy and lightweight. If you can taste them before buying, opt for the ones that have a naturally sweet flavor without added sugars—this will enhance the taste of your cookies beautifully!
How should I store leftover cookies?
I often store my cookies in an airtight container at room temperature for up to 3 days. This keeps them chewy and fresh! If you’d like to extend their life, you can refrigerate them for up to a week, but let them return to room temperature before enjoying for the best texture.
Can I freeze the Strawberry Matcha Neapolitan Cookies?
Very! To freeze your cookies, first, ensure they're completely cooled. Place them in a single layer on a baking sheet to freeze for about 1-2 hours, ensuring they don't stick together. Then, transfer them to a ziplock bag or airtight container, where they can be stored for up to 3 months. When you're ready, thaw at room temperature for a delightful treat!
What should I do if my cookies turn out too tough?
Oh no! If your cookies are too tough, it may be due to overmixing or too much flour. To avoid this in the future, mix until just combined when incorporating dry ingredients. I recommend using a kitchen scale for accurate measurements, especially for flour. For softening tough cookies, try placing a slice of bread in the container with them to help retain moisture.
Can I make these cookies vegan?
Definitely! To make these cookies vegan, substitute the egg with a flaxseed egg—just mix 1 tablespoon of ground flaxseed with 2.5 tablespoons of water, let it sit for a few minutes to thicken, and then incorporate it into the dough as you would the regular egg. Also, ensure to use vegan butter instead of the unsalted butter for that rich flavor.
What if someone has an allergy to nuts?
Absolutely, these Strawberry Matcha Neapolitan Cookies are nut-free as they don’t call for any nuts in the ingredients. However, it's always prudent to check the packaging of your ingredients, especially the freeze-dried strawberries and matcha powder, to confirm no hidden nut traces are present, especially if you're baking for someone with severe nut allergies.
Strawberry Matcha Neapolitan Cookies Ready in 30 Minutes
Ingredients
Equipment
Method
- Preheat your oven to 350°F (177°C) and line two baking sheets with parchment paper.
- In a small bowl, whisk together the flour, baking soda, baking powder, and salt.
- In a large bowl, cream together the butter and sugar until light and fluffy.
- Add the egg and vanilla extract, mixing until fully combined.
- Gradually incorporate the dry ingredient mixture into the wet ingredients, mixing gently.
- Divide the dough into three equal portions and place each in its own bowl.
- Process freeze-dried strawberries into a powder and mix into one portion; add matcha powder to the second portion.
- Take one tablespoon of each dough color and roll them together into a ball, rolling in granulated sugar.
- Place the cookie dough balls on the baking sheets, spaced about 2 inches apart, and bake for 10-12 minutes.
- Allow the cookies to cool on the baking sheet for about 10 minutes before transferring them to a wire rack.