tastytrendingredients

  • Home
  • Recipes
    • Appetizers
    • Breakfast
    • Dessert
    • Dinner
    • Drinks
    • Salads
    • Snacks
    • Soups
  • About me
  • Contact me
menu icon
go to homepage
  • Home
  • Recipes
    • Appetizers
    • Breakfast
    • Dessert
    • Dinner
    • Drinks
    • Salads
    • Snacks
    • Soups
  • About me
  • Contact me
search icon
Homepage link
  • Home
  • Recipes
    • Appetizers
    • Breakfast
    • Dessert
    • Dinner
    • Drinks
    • Salads
    • Snacks
    • Soups
  • About me
  • Contact me
×

Zesty Honeycrisp Apple and Feta Salad for Refreshing Crunch

October 31, 2025 by Grace Snow Leave a Comment

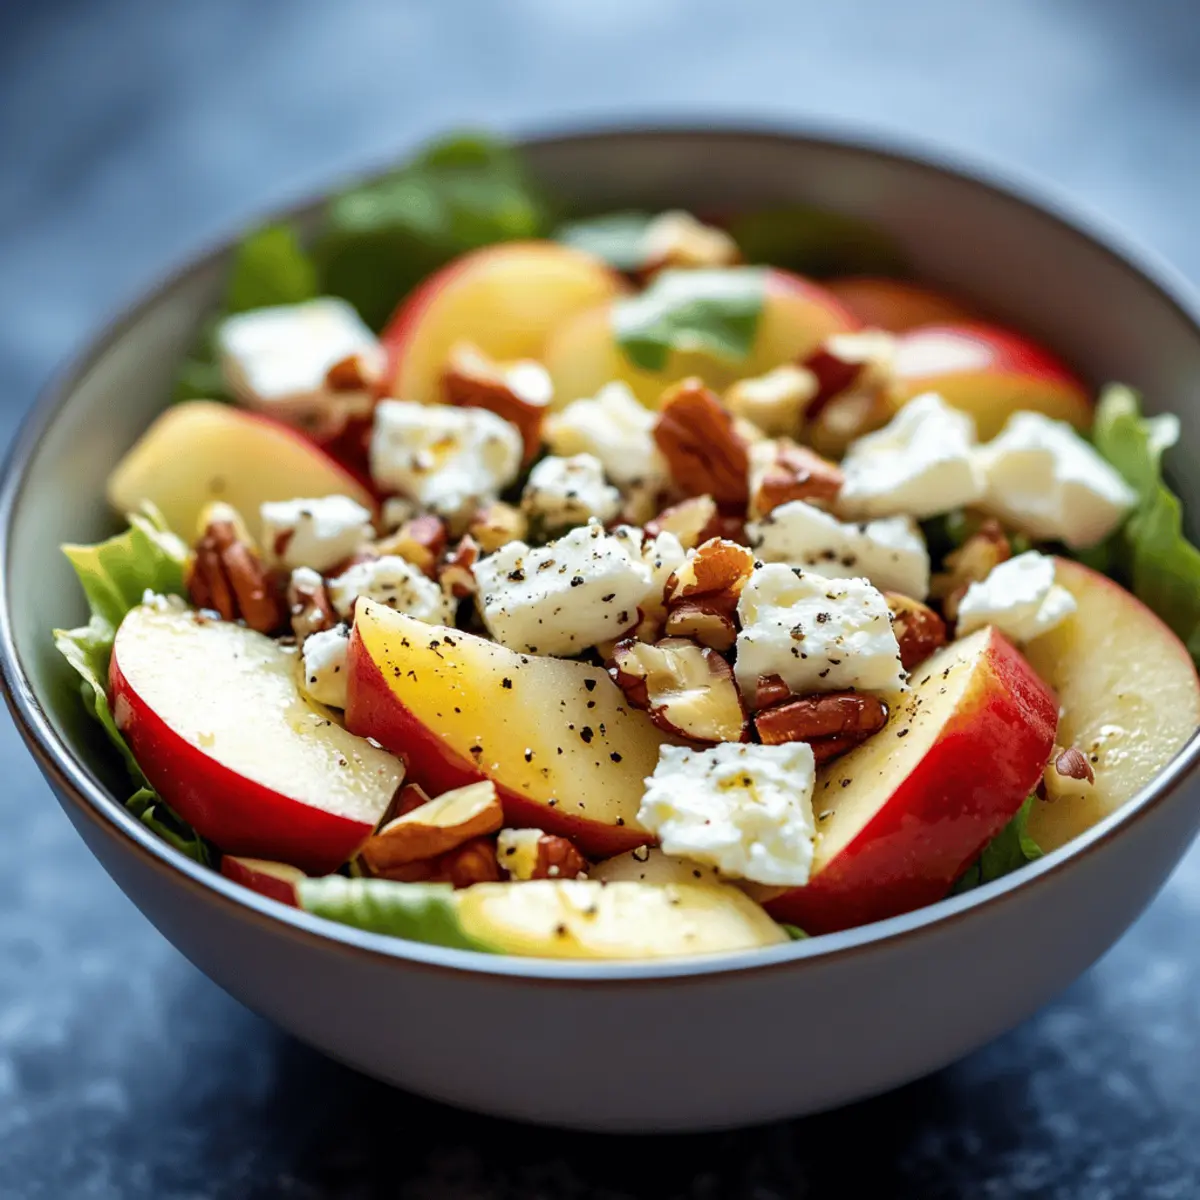
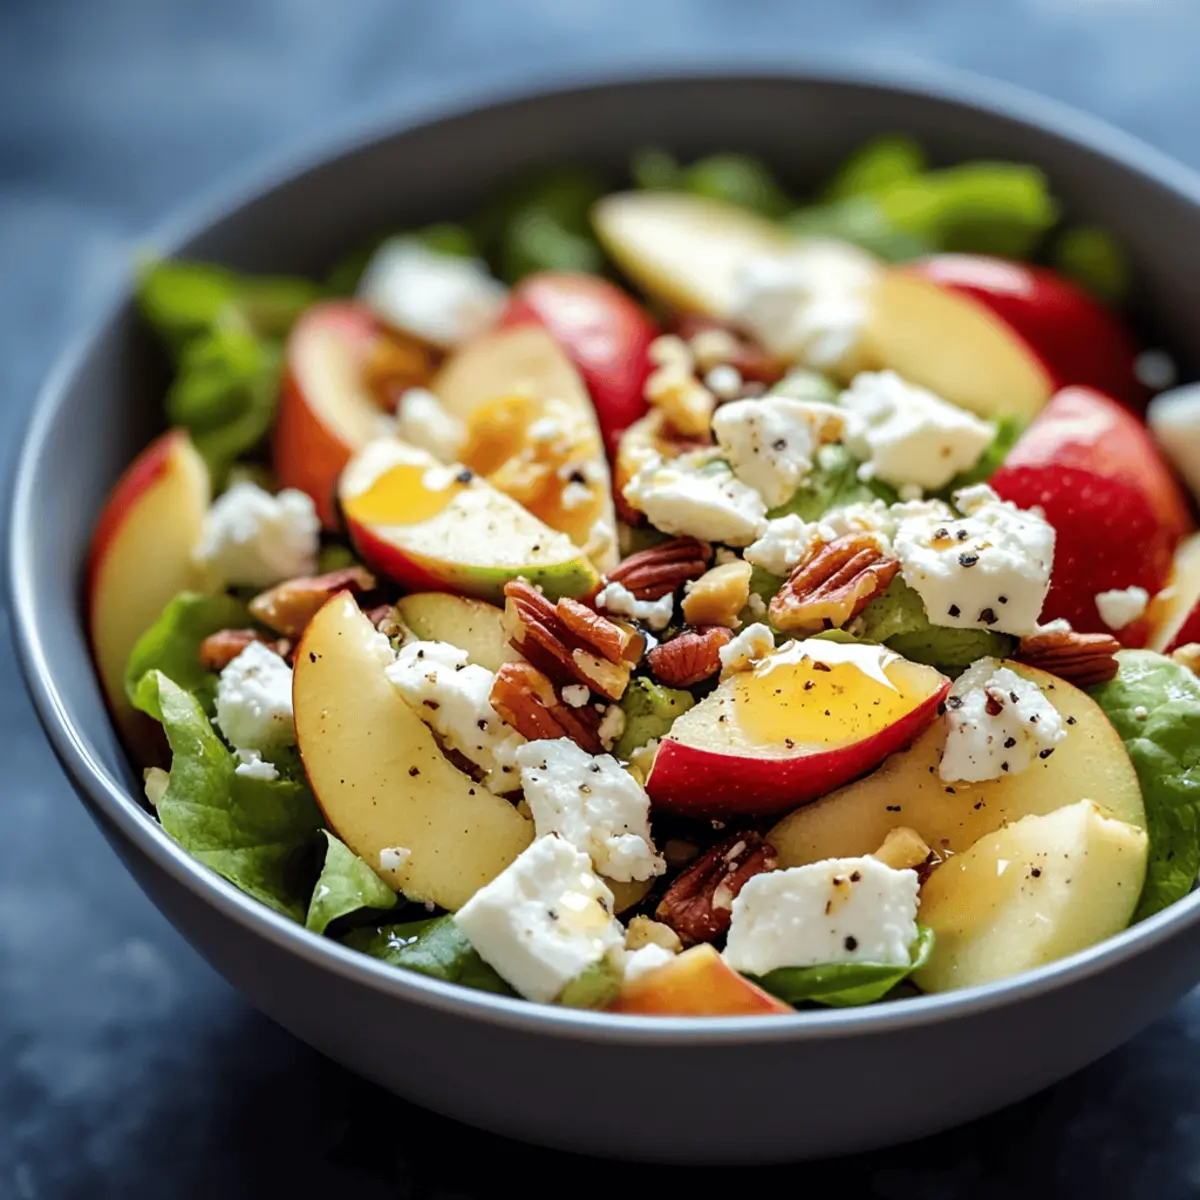
As the seasons shift, the allure of refreshing dishes grows stronger, and what could be more inviting than a vibrant Honeycrisp Apple and Feta Salad? This delightful recipe not only marries the sweet-tart crunch of Honeycrisp apples with the creamy richness of feta, but it also comes together in just 15 minutes. What’s more, it’s a versatile vegetarian option that doubles as a quick lunch or a lively side dish for any gathering. With the added crunch of nuts and a tangy honey mustard vinaigrette, this salad is bound to impress both family and friends alike. Ready to make your taste buds dance? Let's dive into this delicious creation!

Why is this salad so irresistible?

Vibrant Colors: The combination of crisp Honeycrisp apples and creamy feta creates a feast for the eyes.

Quick Preparation: Ready in just 15 minutes, this refreshing salad is perfect for busy weekdays or spontaneous gatherings.

Versatile Ingredients: Easily customize with your choice of nuts or even substitute for a nut-free version to suit dietary needs.

Flavor Harmony: The sweet-tart apples and tangy honey mustard vinaigrette create a well-balanced taste that excites the palate.

Crowd-Pleasing: Whether as a light lunch or a side at dinner, it’s sure to impress everyone at the table! Want more delicious salad ideas? Check out my Tofu Caesar Salad for another exciting option.

Honeycrisp Apple and Feta Salad Ingredients

• Get ready to create this delicious and refreshing dish!

For the Salad

  • Honeycrisp Apples – Adds a sweet-tart crunch; essential for flavor and texture—try Fuji or Pink Lady as alternatives.
  • Feta Cheese – Provides creamy contrast to the crunchy salad; use dairy-free feta for a vegan option.
  • Mixed Nuts – Contributes a delightful crunch and healthy fats; swap in sunflower seeds for a nut-free choice.

For the Dressing

  • Honey – Naturally sweetens the vinaigrette; consider maple syrup for a vegan alternative.
  • Dijon Mustard – Gives the dressing depth and a tangy kick.
  • Olive Oil – Serves as the flavorful base for the vinaigrette.
  • Salt and Pepper – Adjust to taste for enhanced overall flavor.

Step‑by‑Step Instructions for Honeycrisp Apple and Feta Salad

Step 1: Prepare the Ingredients
Begin by washing and drying the Honeycrisp apples, then core and dice them into bite-sized pieces, ensuring the vibrant skin remains intact for color. Next, crumble the feta cheese into small chunks for even distribution. Lastly, chop your mixed nuts of choice to enhance the crunch; this combination of textures will elevate your Honeycrisp Apple and Feta Salad.

Step 2: Make the Vinaigrette
In a medium bowl, whisk together 2 tablespoons of honey, 1 tablespoon of Dijon mustard, and 3 tablespoons of olive oil until fully emulsified, creating a smooth and creamy vinaigrette. Season with salt and pepper to taste, adjusting to your preference. This tangy dressing will perfectly complement the sweetness of the apples in your Honeycrisp Apple and Feta Salad.

Step 3: Combine Salad
In a large mixing bowl, add the diced Honeycrisp apples, crumbled feta cheese, and the chopped mixed nuts. Gently fold these ingredients together using a spatula, being careful not to mash the feta. This combination will create a colorful medley, ensuring that each component is well mixed for your Honeycrisp Apple and Feta Salad.

Step 4: Dress the Salad
Pour the prepared honey mustard vinaigrette over the apple, feta, and nut mixture. Toss gently to ensure the dressing coats each ingredient evenly, enhancing flavors while keeping the salad crisp. Be cautious not to overdress, as you want to maintain that delightful crunch in your Honeycrisp Apple and Feta Salad.

Step 5: Serve
Transfer the finished Honeycrisp Apple and Feta Salad to a serving platter or individual bowls. Serve immediately for optimal freshness, or cover and refrigerate if preparing in advance. If stored separately, combine right before serving to preserve the salad's zesty crunch and vibrant appearance.

Make Ahead Options

These Honeycrisp Apple and Feta Salad ingredients are perfect for meal prep enthusiasts! You can wash, peel, and dice the Honeycrisp apples up to 24 hours in advance, storing them in an airtight container with a little lemon juice to prevent browning. Crumble the feta and chop the mixed nuts, storing them separately in the refrigerator for up to 3 days. For the honey mustard vinaigrette, whisk together the honey, Dijon mustard, and olive oil, and refrigerate for up to 5 days. When you're ready to serve, simply combine the apples, feta, and nuts in a bowl, drizzle with dressing, and toss gently to enjoy a fresh, flavorful salad with minimal effort!

Expert Tips for Honeycrisp Apple and Feta Salad

  • Ingredient Prep: Ensure all components are prepared separately until serving to maintain the crispness of the salad.

  • Nut-Free Option: If allergies are a concern, substitute mixed nuts with sunflower seeds to keep the crunchy texture without the nuts.

  • Balanced Dressing: Start with a small amount of honey mustard vinaigrette when dressing the salad; you can always add more if needed to avoid a soggy Honeycrisp Apple and Feta Salad.

  • Flavor Variations: Don’t hesitate to experiment with roasted beets or citrus segments, adding a unique twist to your salad while maintaining its refreshing essence.

  • Make Ahead: Prepare individual ingredients in advance and store them in airtight containers; this allows for a quick assembly when you're ready to serve.

How to Store and Freeze Honeycrisp Apple and Feta Salad

  • Fridge: Store leftovers in an airtight container for up to 3 days. Keep the dressing separate until you're ready to enjoy the Honeycrisp Apple and Feta Salad to maintain freshness.
  • Freezer: It's not recommended to freeze this salad, as apples and feta may lose their texture and flavor when thawed. Enjoy it fresh!
  • Reheating: There’s no need to reheat this dish, as it’s best served chilled, allowing the crisp textures and flavors to shine.
  • Make-Ahead: Prep ingredients in advance and keep them stored separately in the refrigerator. Assemble and dress right before serving for the best results.

What to Serve with Honeycrisp Apple and Feta Salad

This salad isn't just a tasty dish; it opens the door to creating a complete meal experience that delights every craving.

  • Grilled Chicken: Juicy, flavorful, and packed with protein, grilled chicken enhances the salad's freshness while providing a satisfying, heartier option.

  • Quinoa: Fluffy and nutty, quinoa is a fantastic complement that adds additional texture while boosting fiber content, making your meal even more satisfying.

  • Crusty Bread: Warm, crusty bread is perfect for scooping up the salad—offering a wonderful contrast that rounds out the meal nicely with a comforting touch.

  • Roasted Vegetables: Earthy roasted veggies add depth to your dining experience, drawing out the sweet and savory notes in the salad and providing a warm contrast.

  • Sparkling Water with Lime: Refreshing and bubbly, this drink enhances the lightness of your meal and elevates the palate after every bite of salad.

  • Chocolate Mousse: For a sweet finish, this rich dessert contrasts beautifully with the tangy notes of the salad, making your meal feel indulgent without being too heavy.

  • Herbed Couscous: Light and fluffy, herbed couscous introduces a burst of flavor that beautifully complements the Honeycrisp Apple and Feta Salad’s sweetness.

  • Mediterranean Hummus: Paired with pita chips or fresh veggies, this creamy dip echoes the salad's flavors, making for a delightful, shared appetizer before the main event.

Honeycrisp Apple and Feta Salad Variations

Feel free to transform this delightful salad into your personal creation with these exciting twists!

  • Flavor Twist: Add roasted beets for an earthy sweetness that complements the apples beautifully. The combination will bring a stunning color contrast too!

  • Citrus Burst: Toss in citrus segments like oranges or grapefruit for a refreshing zing that brightens the overall flavor profile. It’s a simple way to enhance your salad experience.

  • Nut-Free Alternative: Replace mixed nuts with crunchy sunflower seeds for a nut-free version. This keeps the texture while catering to dietary restrictions.

  • Add Whole Grains: Mix in cooked quinoa or farro for a heartier version. Not only does this add texture, but it also boosts the nutritional value of your Honeycrisp Apple and Feta Salad.

  • Spicy Kick: Incorporate sliced jalapeños or a sprinkle of red pepper flakes to introduce some heat. This surprising element will elevate the flavor profile remarkably!

  • Cheese Swap: Try using goat cheese instead of feta for a creamier, tangy flavor. The richness of goat cheese pairs wonderfully with the sweetness of the apples.

  • Herbaceous Touch: Mix in fresh herbs like basil or mint for a refreshing pop of flavor that elevates this salad to new heights. Fresh herbs work magic in salads!

  • Fruit Medley: Experiment with different apple varieties or add other fruits like pears or pomegranates for a delightful medley. Each bite will bring new flavors and textures!

For more flavor inspirations, check out my Avocado Egg Salad or enjoy a comforting bowl of German Potato Salad. Your culinary journey is just beginning!

Honeycrisp Apple and Feta Salad Recipe FAQs

How do I choose the best Honeycrisp apples for this salad?
Absolutely! Look for Honeycrisp apples that are firm and have a vibrant, unblemished skin. Avoid those with dark spots or bruises, as this can indicate overripeness. A good Honeycrisp should feel crisp when you press on it—this ensures they’ll provide that delightful crunch in your salad.

How should I store leftovers of the Honeycrisp Apple and Feta Salad?
Very simple! Store any leftover salad in an airtight container in the refrigerator for up to 3 days. To retain maximum freshness, keep the dressing separate until you're ready to serve. This prevents the salad from becoming soggy and ensures all the flavors stay vibrant.

Can I freeze the Honeycrisp Apple and Feta Salad?
Unfortunately, I wouldn’t recommend freezing this salad. Apples and feta can lose their texture and taste once thawed, which may not give you the refreshing crunch and flavor profile you're looking for. It's best to enjoy this dish fresh!

What if I have a nut allergy—are there alternatives?
Of course! If nuts are a concern, you can easily substitute them with sunflower seeds or omit them entirely for a nut-free version. The salad will still maintain a delightful crunch and mouthfeel without compromising on flavor!

How can I adjust the sweetness of the vinaigrette for my taste?
Not a problem at all! If you find the vinaigrette a bit too sweet, start with less honey—perhaps just 1 tablespoon—and gradually add more to your liking. You could also add a splash of vinegar (like apple cider) to introduce more tang, balancing out the flavors beautifully.

Can this salad be prepared ahead of time?
Absolutely! You can prepare the ingredients in advance and store them separately in airtight containers in the refrigerator. The key is to wait to dress the salad until just before serving, which will help maintain the crispness and freshness of the Honeycrisp Apple and Feta Salad. Enjoy this delicious dish filled with vibrant flavors and textures!

Honeycrisp Apple and Feta Salad

Zesty Honeycrisp Apple and Feta Salad for Refreshing Crunch

Try this vibrant Honeycrisp Apple and Feta Salad, a delightful combination of sweet-tart apples and creamy feta, perfect for any gathering.
Print Recipe Pin Recipe
Prep Time 15 minutes mins
Total Time 15 minutes mins
Servings: 4 servings
Course: Salads
Cuisine: American
Calories: 220
Ingredients Equipment Method Nutrition Notes

Ingredients
  

For the Salad
  • 3 medium Honeycrisp Apples Try Fuji or Pink Lady as alternatives.
  • 1 cup Feta Cheese Use dairy-free feta for a vegan option.
  • 1 cup Mixed Nuts Swap in sunflower seeds for a nut-free choice.
For the Dressing
  • 2 tablespoons Honey Consider maple syrup for a vegan alternative.
  • 1 tablespoon Dijon Mustard
  • 3 tablespoons Olive Oil
  • to taste Salt
  • to taste Pepper

Equipment

  • Mixing Bowl
  • Whisk
  • Spatula

Method
 

Step-by-Step Instructions
  1. Begin by washing and drying the Honeycrisp apples, then core and dice them into bite-sized pieces, ensuring the vibrant skin remains intact for color.
  2. In a medium bowl, whisk together the honey, Dijon mustard, and olive oil until fully emulsified. Season with salt and pepper to taste.
  3. In a large mixing bowl, add the diced Honeycrisp apples, crumbled feta cheese, and chopped mixed nuts. Gently fold these ingredients together.
  4. Pour the prepared honey mustard vinaigrette over the mixture and toss gently to coat every ingredient evenly.
  5. Transfer the finished salad to a serving platter or individual bowls. Serve immediately or refrigerate if preparing in advance.

Nutrition

Serving: 1servingCalories: 220kcalCarbohydrates: 25gProtein: 5gFat: 12gSaturated Fat: 3gPolyunsaturated Fat: 2gMonounsaturated Fat: 7gCholesterol: 15mgSodium: 300mgPotassium: 150mgFiber: 3gSugar: 12gVitamin A: 300IUVitamin C: 10mgCalcium: 120mgIron: 1mg

Notes

Ensure all components are prepared separately until serving to maintain the crispness of the salad.

Tried this recipe?

Let us know how it was!

One-Pan Cajun Chicken Sausage & Rice for Busy Weeknights

October 31, 2025 by Grace Snow Leave a Comment

As I stirred the vibrant mix of spices and rice, the aroma of my One-Pan Cajun Chicken Sausage & Rice transported me straight to the lively streets of New Orleans. This dish isn’t just a meal; it’s a celebration of bold Cajun flavors, combining juicy chicken and smoky sausage into a hearty masterpiece—all made in one pan! With minimal prep and cleanup, it’s perfect for those busy weeknights when you crave something exciting yet comforting. Not to mention, it’s gluten-free, making it great for everyone at the table! Are you ready to embark on a flavorful journey that will instantly spice up your dinner routine?

Why is One-Pan Cooking a Game Changer?

Ease of Preparation: With just one pan, this dish minimizes clean-up and maximizes flavor.

Vibrant Cajun Flavors: Experience the zing of Cajun spices, bringing a taste of Louisiana right into your kitchen.

Customizable: Easily swap chicken for shrimp or add seasonal veggies like zucchinis for a fresh twist!

Perfect for Busy Nights: Get dinner on the table in under 30 minutes, making weeknight cooking a breeze.

Crowd-Pleasing Comfort: The combination of juicy chicken, smoky sausage, and tender rice will satisfy everyone, ensuring no one leaves the table hungry! For extra ideas, check out my Bbq Chicken Rice for more one-pan goodness!

One-Pan Cajun Chicken Sausage & Rice Ingredients

For the Protein

• Chicken – Provides protein and heartiness; consider using boneless, skinless chicken thighs for extra moisture.
• Sausage (e.g., Andouille) – Adds a smoky depth to the dish; pre-cooked sausage can be used for quick preparation.

For the Base

• Rice – Acts as the hearty base of the meal; can substitute with farro, bulgur, or couscous—just adjust cooking times.
• Chicken Broth – Adds moisture and flavor; vegetable broth is a great gluten-free alternative.

For the Flavor

• Cajun Seasoning – Infuses the dish with robust, spicy flavors; a homemade blend can bring freshness and zest.

For the Veggies

• Vegetables (e.g., bell peppers, onions) – Enhance flavor and texture; feel free to add fresh seasonal veggies for variety.

This flavorful dish showcases the essence of Cajun cuisine and is sure to delight your family!

Step‑by‑Step Instructions for One-Pan Cajun Chicken Sausage & Rice

Step 1: Brown the Chicken
Begin by heating a large skillet over medium-high heat. Add a splash of oil and once hot, place the chicken pieces in the pan. Sear them for about 5-7 minutes, turning occasionally until they are golden brown and cooked through. The chicken should be no longer pink in the center. Transfer the chicken to a plate and set aside.

Step 2: Cook the Sausage
In the same skillet, without wiping it clean, add the sliced sausage. Let it sizzle and brown for about 3-4 minutes, stirring occasionally until heated through and lightly crisped. This will infuse the pan with smoky flavors, perfect for your One-Pan Cajun Chicken Sausage & Rice.

Step 3: Sauté the Vegetables
Next, toss in the chopped onions and bell peppers into the skillet with the sausage. Sauté these vibrant veggies for about 4-5 minutes, until they start to soften and become fragrant. Keep an eye on them, stirring occasionally, and enjoy the delicious aroma filling your kitchen.

Step 4: Add Rice and Seasoning
Stir in the rice and your homemade or store-bought Cajun seasoning, making sure everything is well combined. Cook this mixture for about 1-2 minutes to toast the rice and allow it to soak up the flavors. The spices will add a beautiful color to your One-Pan Cajun Chicken Sausage & Rice.

Step 5: Combine and Simmer
Pour in the chicken broth and bring the mixture to a gentle simmer. Once you see it bubbling, return the browned chicken to the skillet, nestling it into the rice. Cover the skillet with a tight-fitting lid and let it cook for approximately 15-20 minutes, or until the rice is tender and has absorbed the liquid.

Step 6: Fluff and Serve
After the cooking time, remove the lid and fluff the rice gently with a fork. Taste and adjust the seasoning if needed, perhaps adding a little more Cajun spice or salt. Serve your One-Pan Cajun Chicken Sausage & Rice warm, garnished with fresh parsley and a squeeze of lemon for that extra zest.

What to Serve with One-Pan Cajun Chicken Sausage & Rice

Elevate your dinner spread with delightful sides that will complement the bold flavors of your main dish beautifully.

  • Creamy Mashed Potatoes: The buttery richness of mashed potatoes adds a comforting contrast to the spicy Cajun chicken and sausage.

  • Fresh Green Salad: A simple salad with vinaigrette adds a crisp, refreshing note, balancing the dish’s heartiness and spiciness.

  • Garlic Bread: Warm, buttery garlic bread not only soaks up the savory broth but also provides a satisfying crunch to every bite.

  • Cornbread Muffins: The slightly sweet cornbread contrasts well with the bold spices, making for a delightful pairing that captures Southern comfort.

  • Roasted Seasonal Vegetables: Colorful roasted veggies bring sweetness and texture to the table, creating a beautiful and wholesome meal.

  • Iced Tea: A glass of refreshing iced tea, sweetened or unsweetened, complements the spice, making every bite more enjoyable.

  • Lemon Sorbet: For dessert, a light lemon sorbet serves as a refreshing palate cleanser, softening the spicy heat of the main dish.

By choosing a few of these options, you'll create a well-rounded meal that will surely please everyone at the table!

Expert Tips for One-Pan Cajun Chicken Sausage & Rice

  • Don’t Rush Chicken: Ensure the chicken is golden brown and cooked through, but avoid overcooking to keep it juicy for your One-Pan Cajun Chicken Sausage & Rice.

  • Spice Adjustments: Taste before serving; you can always add more Cajun seasoning or fresh cayenne for extra heat, catering to everyone’s palate.

  • Cover While Cooking: Keeping the skillet covered helps steam the rice evenly and enhances the flavors, preventing a dry texture.

  • Veggie Variety: Feel free to mix in seasonal vegetables like zucchini or frozen peas—this adds freshness and nutrition without complicating your one-pan meal.

  • Meal Prep Ready: This dish can be prepared in advance and chilled; just reheat for a quick, satisfying dinner during hectic weeknights.

Storage Tips for One-Pan Cajun Chicken Sausage & Rice

Fridge: Store leftovers in an airtight container for up to 3 days. This allows the flavors to meld even more while keeping your One-Pan Cajun Chicken Sausage & Rice fresh.

Freezer: Portion out cooled leftovers into freezer-safe containers. It can be frozen for up to 3 months. Just make sure to leave a little space at the top for expansion.

Reheating: Reheat in a skillet over medium heat with a splash of chicken broth, stirring gently until warmed through. This prevents the rice from drying out and keeps the dish hearty.

Make-Ahead: Prepare this dish ahead of time and simply reheat when you're ready to enjoy it. This makes your busy weeknight dinners easy and convenient!

Make Ahead Options

These One-Pan Cajun Chicken Sausage & Rice are perfect for meal prep enthusiasts! You can chop the vegetables and measure out the spices up to 3 days in advance, storing them in airtight containers in the refrigerator to maintain freshness. Additionally, you can brown the chicken and sausage the night before, allowing them to cool before refrigerating. When you’re ready to serve, simply reheat the chicken and sausage in the skillet, add the rice and broth, and follow the remaining cooking steps. This approach ensures your meal stays just as delicious, saving you valuable time on busy weeknights!

One-Pan Cajun Chicken Sausage & Rice Variations

Feel free to get creative with your One-Pan Cajun Chicken Sausage & Rice, exploring exciting flavors and textures that suit your taste.

  • Shrimp Swap: Replace the chicken with shrimp for a delightful seafood twist. Cooking time may be shorter, just until shrimp is pink and cooked through!

  • Vegetarian Delight: Swap chicken and sausage for plant-based alternatives like smoked tempeh or vegan sausage. This variation packs the same flavor punch without the meat.

  • Spice it Up: Love heat? Add sliced jalapeños or a dash of hot sauce for an extra kick that’ll tantalize your taste buds.

  • Seasonal Veggies: Mix in fresh vegetables like zucchini or asparagus during the sautéing step for a lively, nutrient-packed dish that varies with the seasons.

  • Cajun Flavor Boost: For an intense flavor kick, try adding diced smoked paprika or a few teaspoons of Cajun spice mix during the cooking process. It enhances the dish beautifully!

  • Rice Alternatives: Instead of traditional rice, experiment with quinoa or cauliflower rice for a nutty taste that's gluten-free and low-carb.

  • Creamy Texture: For a comforting twist, stir in a splash of cream or coconut milk at the end for a rich, creamy version of this dish.

  • Mix and Match: Pair with cornbread or a green salad for a well-rounded meal. Check out my link for a tasty Bbq Chicken Rice which complements these flavors perfectly!

One-Pan Cajun Chicken Sausage & Rice Recipe FAQs

How do I choose the right chicken for this recipe?
Absolutely! For the best results, I recommend using boneless, skinless chicken thighs. They provide more flavor and moisture than chicken breasts, ensuring your One-Pan Cajun Chicken Sausage & Rice stays juicy and delicious. If you prefer chicken breasts, just be sure to not overcook them, as they can dry out quickly.

What is the best way to store leftovers?
Very! After enjoying your One-Pan Cajun Chicken Sausage & Rice, place any leftovers into an airtight container and store it in the refrigerator for up to 3 days. The flavors will continue to mingle and develop, making for an incredible next-day meal!

Can I freeze this dish? If yes, how?
Of course! To freeze your One-Pan Cajun Chicken Sausage & Rice, let it cool completely, then divide it into portions and place them in freezer-safe containers. Be sure to leave a little space at the top for expansion. You can freeze it for up to 3 months. When you're ready to eat, simply thaw it in the fridge overnight and reheat it gently in a skillet with a splash of broth to keep it moist.

What can I do if the rice is too hard after cooking?
No worries! If the rice turns out too hard or undercooked, simply add a bit more chicken broth or water to the skillet and cover it again. Let it simmer on low heat for an additional 5-10 minutes. This should help the rice absorb the liquid and soften up, providing a perfect texture for your One-Pan Cajun Chicken Sausage & Rice.

Are there any dietary considerations I should know?
Absolutely! If you're cooking for someone with gluten sensitivity, make sure all ingredients—including your sausage and Cajun seasoning—are gluten-free. You can easily make a homemade Cajun seasoning blend using spices like paprika, garlic powder, onion powder, dried thyme, and cayenne pepper to cater to dietary needs.

Can I customize the vegetables I use?
Very! The beauty of this One-Pan Cajun Chicken Sausage & Rice is its versatility. Feel free to mix in seasonal vegetables like zucchini, spinach, or peas based on your preference and availability. Just chop them into bite-sized pieces and sauté them with the onions and bell peppers for a healthy twist!

One-Pan Cajun Chicken Sausage & Rice

One-Pan Cajun Chicken Sausage & Rice for Busy Weeknights

This One-Pan Cajun Chicken Sausage & Rice offers bold flavors and ease of preparation for busy weeknights.
Print Recipe Pin Recipe
Prep Time 10 minutes mins
Cook Time 20 minutes mins
Total Time 30 minutes mins
Servings: 4 servings
Course: Dinner
Cuisine: Cajun
Calories: 450
Ingredients Equipment Method Nutrition Notes

Ingredients
  

For the Protein
  • 1 pound boneless, skinless chicken thighs for extra moisture
  • 12 ounces Andouille sausage pre-cooked for quick preparation
For the Base
  • 1 cup rice can substitute with farro, bulgur, or couscous
  • 2 cups chicken broth vegetable broth is a gluten-free alternative
For the Flavor
  • 2 tablespoons Cajun seasoning homemade blend recommended
For the Veggies
  • 1 cup bell peppers chopped
  • 1 cup onions chopped

Equipment

  • Large skillet

Method
 

Step-by-Step Instructions
  1. Heat a large skillet over medium-high heat. Add a splash of oil, then sear chicken for 5-7 minutes until cooked through. Set aside.
  2. In the same skillet, add sausage and cook for 3-4 minutes until browned.
  3. Add chopped onions and bell peppers, sauté for 4-5 minutes until softened.
  4. Stir in rice and Cajun seasoning, cook for 1-2 minutes to toast the rice.
  5. Pour in chicken broth, bring to simmer, return chicken to skillet, cover, and cook for 15-20 minutes until rice is tender.
  6. Remove the lid, fluff rice with a fork, adjust seasoning as needed, and serve warm.

Nutrition

Serving: 1servingCalories: 450kcalCarbohydrates: 50gProtein: 30gFat: 15gSaturated Fat: 4gPolyunsaturated Fat: 1gMonounsaturated Fat: 9gCholesterol: 80mgSodium: 900mgPotassium: 600mgFiber: 3gSugar: 2gVitamin A: 500IUVitamin C: 60mgCalcium: 30mgIron: 2mg

Notes

This dish showcases Cajun cuisine and allows customization with seasonal vegetables.

Tried this recipe?

Let us know how it was!

Spicy Voodoo Shrimp: Bold Flavors in Every Bite

October 31, 2025 by Grace Snow Leave a Comment

Walking through the vibrant streets of New Orleans, I stumbled upon a hidden gem serving the most mouthwatering Spicy Voodoo Shrimp I had ever tasted. This dish, rich in Cajun heritage, perfectly marries juicy shrimp with a bold, smoky tomato sauce infused with the iconic “holy trinity” of vegetables. Not only is Spicy Voodoo Shrimp a feast for the senses, but it also offers an effortless way to enjoy a satisfying meal in under 40 minutes—ideal for busy weeknights or lively gatherings. With its gluten-free and low-carb perks, this recipe stands out as a crowd-pleaser, inviting everyone to the table. Ready to dive into the world of flavors, and explore how you can customize the spice level to suit your taste? Let’s get cooking!

Why Is Spicy Voodoo Shrimp Amazing?

Bold Flavors: The combination of spices creates an unforgettable taste experience that’ll tantalize your taste buds.

Quick Prep: Ready in under 40 minutes, this dish is a lifesaver for busy weeknights, allowing you to serve up something special without hours in the kitchen.

Versatile Fun: Adjust the heat level! Enjoy it with rice, creamy grits, or even in tacos—your dinner, your choice.

Healthy and Satisfying: At about 280 calories per serving, it’s not just delicious; it also packs a protein punch with 25 grams, making it perfect for keto and gluten-free diets.

Cajun Culture: This recipe is a flavorful nod to the rich culinary traditions of Louisiana, inviting everyone to appreciate the fusion of cultures with each bite.

Spicy Voodoo Shrimp Ingredients

For the Shrimp
• Shrimp – 1 pound large shrimp, peeled and deveined; the star protein that soaks up all the amazing flavors.
• Cajun Seasoning – 1 teaspoon; adds that authentic Cajun flavor you can't resist.
• Smoked Paprika – 1/2 teaspoon for shrimp; infuses a smoky depth to each bite.
• Cayenne Pepper – 1/4 teaspoon (optional); if you love heat, adjust this to pack more punch!
• Olive Oil – 2 tablespoons (1 for shrimp, 1 for sauce); also works perfectly with butter for a richer taste.

For the Sauce
• Unsalted Butter – 2 tablespoons; ensures a rich and velvety sauce.
• Onion – 1 small, finely diced; an essential flavor base from the Cajun "trinity."
• Green Bell Pepper – 1 small, finely diced; adds sweetness and texture to the mix.
• Celery – 1 stalk, finely diced; complements the "trinity" beautifully.
• Garlic – 3 cloves, minced; enhances the entire dish with aromatic goodness.
• Tomato Paste – 1/4 cup; provides rich sweetness—there's no real substitute without changing flavors.
• Worcestershire Sauce – 1 teaspoon; brings that irresistible umami depth.
• Dried Thyme – 1/2 teaspoon; offers earthy flavor notes that round out the taste.
• Dried Oregano – 1/2 teaspoon; adds aromatic herbal notes to the sauce.
• Chicken or Seafood Stock – 1 cup; the base of the sauce; swap for vegetable stock for a lighter dish.
• Hot Sauce – 1 teaspoon (to taste); customize the heat level just the way you like it!
• Salt – 1/4 teaspoon; enhances all the outstanding flavors.
• Black Pepper – 1/4 teaspoon; adds a subtle bit of warmth.

For Garnish
• Fresh Parsley – 2 tablespoons, chopped; a pop of freshness and color on top.
• Lemon Wedges – for serving; brightens the flavors of your Spicy Voodoo Shrimp perfectly!

Feel ready to cook this delectable dish? Gather your ingredients and let's bring those flavors to life!

Step‑by‑Step Instructions for Spicy Voodoo Shrimp

Step 1: Marinate the Shrimp
In a bowl, combine your peeled and deveined shrimp with Cajun seasoning, smoked paprika, and cayenne pepper if you love extra heat. Toss well to ensure the shrimp are evenly coated in the spices. Let this marinate for about 15 minutes while you prepare the rich sauce, allowing those bold flavors to infuse deeply.

Step 2: Sauté Aromatics
In a large skillet over medium heat, melt 2 tablespoons of unsalted butter combined with 1 tablespoon of olive oil. Once the butter is bubbly, add the finely diced onion, green bell pepper, and celery. Sauté for 5–7 minutes, stirring occasionally until the vegetables are softened and fragrant. Then, add 3 minced garlic cloves and cook for an additional minute until aromatic.

Step 3: Build the Sauce
Stir in 1/4 cup of tomato paste and let it cook for 1–2 minutes, stirring consistently until it becomes a deep, vibrant red. Next, add in Worcestershire sauce, 1 cup of chicken or seafood stock, hot sauce to taste, dried thyme, dried oregano, salt, and black pepper. Bring to a gentle simmer and let it thicken for 5–7 minutes, stirring occasionally to prevent sticking.

Step 4: Cook the Shrimp
In another skillet, heat 1 tablespoon of olive oil over medium-high heat. Add the marinated shrimp in a single layer and sear them for 2–3 minutes on each side. Look for that lovely pink color and make sure they become opaque. This step is essential for achieving that perfectly tender texture that makes Spicy Voodoo Shrimp so irresistible.

Step 5: Combine and Finish
Once shrimp are beautifully cooked, transfer them into the rich sauce from the first skillet. Let everything simmer together for about 1–2 minutes, allowing the shrimp to soak up the incredible flavors of the sauce. Gently stir to combine, making sure the shrimp are coated in that vibrant, spicy mixture.

Step 6: Serve
Spoon your delicious Spicy Voodoo Shrimp over a bed of fluffy white rice, creamy grits, or crusty bread for dipping. For a touch of freshness, garnish with chopped parsley and serve with lemon wedges on the side. Enjoy this lively dish that transports you straight to the heart of Cajun culture!

Expert Tips for Spicy Voodoo Shrimp

  • Choose Fresh Shrimp: For the best flavor and texture, opt for wild-caught shrimp. Fresh seafood truly elevates your Spicy Voodoo Shrimp experience.

  • Marinate Longer: If time allows, marinate the shrimp for up to 30 minutes. This allows the spices to penetrate deeper, intensifying the flavors.

  • Adjust Spice Carefully: Taste the sauce as you adjust the heat. Remember, you can always add more hot sauce, but it's harder to tone down the spice in the Spicy Voodoo Shrimp.

  • Don't Overcook: Keep an eye on the shrimp while cooking; they are done when pink and opaque. Overcooking can lead to rubbery shrimp, so stick to the timing!

  • Make Ahead: Prepare the sauce in advance and refrigerate it for up to 2 days. Add the shrimp fresh before serving for the best taste and texture.

Spicy Voodoo Shrimp Variations

Feel free to make your culinary creativity shine by customizing this recipe to match your tastes and dietary needs!

  • Light & Fresh: Swap out rice for zoodles or sautéed greens for a refreshing, low-carb meal.
    Enjoy the crispiness of fresh veggies instead of grains while still savoring that decadent sauce.

  • Vegetarian Delight: Replace shrimp with mushrooms, zucchini, or tofu for a satisfying vegetarian version.
    These substitutes soak up the bold flavors just like shrimp, ensuring each bite is still deeply satisfying.

  • Taco Twist: Serve the Spicy Voodoo Shrimp in soft tacos topped with slaw for a fun, hand-held meal.
    It’s a lively way to enjoy the flavors while adding a crunchy texture that’s utterly delightful!

  • Seafood Mix: Combine shrimp with scallops or crab for a decadent seafood medley that enhances the dish.
    Each scoop will bring new layers of flavor and texture that seafood lovers will adore.

  • Heat Adjustments: Proudly crank up the heat with jalapeños or switch it up with a milder variety, like poblano peppers.
    This way, you can invite your friends or family to adjust the spice to their liking!

  • Creamy Indulgence: Add a splash of heavy cream or coconut milk to the sauce for a rich, creamy twist.
    This variation adds another layer of depth while still maintaining that signature spicy kick.

  • Herbal Infusion: Toss in freshly chopped herbs like basil or cilantro just before serving for a fresh burst of flavor.
    It brightens up the dish and gives it a vibrant finish that’s simply irresistible.

For more exciting seafood recipes, consider trying out Pan Fried Shrimp with Cabbage Slaw and Gochujang Mayo or explore a zesty Shrimp Ceviche. Dive into the world of deliciousness, and see where your taste takes you!

Make Ahead Options

Spicy Voodoo Shrimp is perfect for meal prep, allowing busy home cooks to save time during the week! You can marinate the shrimp with Cajun seasoning and smoked paprika up to 24 hours in advance for maximum flavor. The sauce can be prepared ahead as well and stored in the refrigerator for up to 3 days. To maintain quality, refrigerate the shrimp and sauce separately. When you're ready to enjoy this delightful dish, simply reheat the sauce on the stovetop while you quickly sear the marinated shrimp, then combine them for a delicious meal that tastes just as fresh as if you'd made it all in one go!

How to Store and Freeze Spicy Voodoo Shrimp

Fridge: Store leftovers in an airtight container for up to 3 days. Keep shrimp and sauce separately for the best texture when reheating.

Freezer: The sauce can be frozen for up to 2 months. Allow it to cool completely before pouring it into a freezer-friendly container.

Reheating: To reheat, thaw the sauce in the fridge overnight and warm it gently on the stove. Add freshly cooked shrimp or simply heat and enjoy it over a bed of rice or grits.

Room Temperature: Avoid leaving Spicy Voodoo Shrimp at room temperature for longer than 2 hours to prevent bacterial growth.

What to Serve with Spicy Voodoo Shrimp?

Elevate your dining experience by pairing this fiery delight with some scrumptious sides that enhance its vibrant flavors.

  • Steamy White Rice: This classic staple soaks up the rich sauce perfectly, providing a comforting base for the zesty shrimp.

  • Creamy Grits: Velvety grits offer a delightful contrast to the spicy sauce, balancing heat with creaminess, making each bite a pleasure.

  • Crusty French Bread: Perfect for dipping and soaking up every last drop of that delicious sauce, crusty bread brings a satisfying crunch to the meal.

  • Fresh Cilantro Lime Slaw: A light, crunchy slaw adds a refreshing zing and helps to cut through the richness of the shrimp, creating a delightful combination.

  • Sautéed Greens: Tangy sautéed greens like spinach or kale pair beautifully, bringing freshness and vibrant color to your plate.

  • Chilled White Wine: A glass of crisp Chardonnay or Sauvignon Blanc complements the spicy shrimp, enhancing your meal with its cool, fruity notes.

The vibrant flavors of Spicy Voodoo Shrimp shine even brighter when served with these tasty accompaniments, creating a mouthwatering feast!

Spicy Voodoo Shrimp Recipe FAQs

How do I choose the best shrimp for Spicy Voodoo Shrimp?
Absolutely! When shopping for shrimp, look for wild-caught options; they're more flavorful and sustainable. Choose shrimp that is firm, has a mild sea scent, and is free from any dark spots or blemishes on the shell. If you’re unsure, ask your fishmonger about their freshest selection.

How should I store leftovers of Spicy Voodoo Shrimp?
To keep your Spicy Voodoo Shrimp fresh, store leftovers in an airtight container in the refrigerator for up to 3 days. I recommend keeping the shrimp and sauce separately to maintain their textures when reheating—just scoop out what you need and enjoy!

Can I freeze Spicy Voodoo Shrimp?
Of course! The sauce can be frozen for up to 2 months. Allow it to cool completely before transferring to a freezer-friendly container or zip-top bag. When you’re ready to enjoy it again, thaw it overnight in the fridge and gently reheat on the stove. If you want the best texture, cook fresh shrimp and add it to the sauce just before serving.

What if I overcooked the shrimp?
Very easily done! If you find that your shrimp are rubbery, consider this a lesson for next time. Quick cooking is key—aim for 2-3 minutes on each side until they turn pink and opaque. If you’ve already overcooked them, try incorporating the shrimp into a creamy pasta dish or chowder where they can soak up some moisture and flavor!

Are there any dietary considerations for Spicy Voodoo Shrimp?
Absolutely! This dish is gluten-free and low-carb, making it keto-friendly. However, always check the labels of your Cajun seasoning and hot sauces for any hidden gluten. If you have shellfish allergies, feel free to substitute shrimp with alternatives such as mushrooms or firm tofu, adjusting marinating and cooking times as needed.

Is it safe to leave Spicy Voodoo Shrimp at room temperature?
Definitely keep an eye on it! To prevent bacterial growth, avoid letting your dish sit at room temperature for longer than 2 hours. If it’s a hot day or serving at a gathering, keep it over a warmer or in a chafing dish to maintain a safe temperature.

Spicy Voodoo Shrimp

Spicy Voodoo Shrimp: Bold Flavors in Every Bite

Experience bold flavors with Spicy Voodoo Shrimp, a Cajun classic that combines juicy shrimp with a smoky tomato sauce in under 40 minutes.
Print Recipe Pin Recipe
Prep Time 15 minutes mins
Cook Time 25 minutes mins
Total Time 40 minutes mins
Servings: 4 servings
Course: Dinner
Cuisine: Cajun, Southern
Calories: 280
Ingredients Equipment Method Nutrition Notes

Ingredients
  

For the Shrimp
  • 1 pound large shrimp, peeled and deveined the star protein that soaks up all the amazing flavors.
  • 1 teaspoon Cajun seasoning adds that authentic Cajun flavor you can't resist.
  • 1/2 teaspoon smoked paprika infuses a smoky depth to each bite.
  • 1/4 teaspoon cayenne pepper optional; adjust this to pack more punch!
  • 2 tablespoons olive oil also works perfectly with butter for a richer taste.
For the Sauce
  • 2 tablespoons unsalted butter ensures a rich and velvety sauce.
  • 1 small onion, finely diced an essential flavor base from the Cajun 'trinity'.
  • 1 small green bell pepper, finely diced adds sweetness and texture to the mix.
  • 1 stalk celery, finely diced complements the 'trinity' beautifully.
  • 3 cloves garlic, minced enhances the entire dish with aromatic goodness.
  • 1/4 cup tomato paste provides rich sweetness.
  • 1 teaspoon Worcestershire sauce brings that irresistible umami depth.
  • 1/2 teaspoon dried thyme offers earthy flavor notes.
  • 1/2 teaspoon dried oregano adds aromatic herbal notes to the sauce.
  • 1 cup chicken or seafood stock the base of the sauce.
  • 1 teaspoon hot sauce customize the heat level just the way you like it!
  • 1/4 teaspoon salt enhances all the outstanding flavors.
  • 1/4 teaspoon black pepper adds a subtle bit of warmth.
For Garnish
  • 2 tablespoons fresh parsley, chopped a pop of freshness and color on top.
  • lemon wedges for serving; brightens the flavors perfectly!

Equipment

  • Large skillet
  • Cutting Board
  • Knife
  • Mixing Bowl

Method
 

Step-by-Step Instructions
  1. In a bowl, combine your peeled and deveined shrimp with Cajun seasoning, smoked paprika, and cayenne pepper if you love extra heat. Toss well to ensure the shrimp are evenly coated in the spices. Let this marinate for about 15 minutes while you prepare the rich sauce.
  2. In a large skillet over medium heat, melt 2 tablespoons of unsalted butter combined with 1 tablespoon of olive oil. Once the butter is bubbly, add the finely diced onion, green bell pepper, and celery. Sauté for 5-7 minutes, stirring occasionally until the vegetables are softened and fragrant. Then, add 3 minced garlic cloves and cook for an additional minute until aromatic.
  3. Stir in 1/4 cup of tomato paste and let it cook for 1-2 minutes, stirring consistently until it becomes a deep, vibrant red. Next, add in Worcestershire sauce, 1 cup of chicken or seafood stock, hot sauce to taste, dried thyme, dried oregano, salt, and black pepper. Bring to a gentle simmer and let it thicken for 5-7 minutes, stirring occasionally to prevent sticking.
  4. In another skillet, heat 1 tablespoon of olive oil over medium-high heat. Add the marinated shrimp in a single layer and sear them for 2-3 minutes on each side until they become opaque. This step is essential for achieving that perfectly tender texture.
  5. Once shrimp are beautifully cooked, transfer them into the rich sauce from the first skillet. Let everything simmer together for about 1-2 minutes, allowing the shrimp to soak up the incredible flavors of the sauce. Gently stir to combine.
  6. Spoon your delicious Spicy Voodoo Shrimp over a bed of fluffy white rice, creamy grits, or crusty bread for dipping. For a touch of freshness, garnish with chopped parsley and serve with lemon wedges on the side.

Nutrition

Serving: 1servingCalories: 280kcalCarbohydrates: 10gProtein: 25gFat: 18gSaturated Fat: 7gPolyunsaturated Fat: 1gMonounsaturated Fat: 8gCholesterol: 200mgSodium: 800mgPotassium: 400mgFiber: 3gSugar: 4gVitamin A: 500IUVitamin C: 30mgCalcium: 50mgIron: 1.5mg

Notes

For the best flavor and texture, opt for wild-caught shrimp. Prepare the sauce in advance for up to 2 days for best taste.

Tried this recipe?

Let us know how it was!

Creamy Chicken Bacon Ranch Pasta for Cozy Family Nights

October 31, 2025 by Grace Snow Leave a Comment

As I stood in the kitchen, the irresistible aroma of sizzling bacon wafted through the air, instantly transporting me to a cozy family gathering. That’s the magic of Creamy Chicken Bacon Ranch Pasta—an easy, comforting dish that brings everyone together. Tender chicken, crispy bacon, and a creamy ranch sauce blend seamlessly with hearty pasta, creating a meal that is perfect for busy weeknights or leisurely weekends. With its quick preparation and kid-friendly appeal, this recipe is a go-to solution for anyone longing for a satisfying homemade dinner. Plus, you can easily adapt it for different dietary preferences without compromising on flavor. Curious about how to whip up this delightful dish and make it your family’s new favorite? Let’s dive in!

Why is Chicken Bacon Ranch Pasta a Must-Try?

Comforting Bliss: This dish wraps you in a warm embrace of creamy goodness that satisfies even the heartiest of appetites.

Easy Preparation: Whipping this up is a breeze—even novice cooks will shine with just a few straightforward steps!

Versatile Options: Feel free to swap in your favorite pasta or even incorporate veggies for a nutritious twist.

Crowd-Pleasing Flavor: The delightful combination of crispy bacon, tender chicken, and zesty ranch makes it a hit at any dinner table, perfect for gatherings.

Time-Saving Delight: With minimal cooking time, you can serve up greatness in under 30 minutes, making it ideal for busy weeknights.

Whether you enjoy it as is, or you explore variations like Seafood Pasta Savory, this recipe is bound to become a household favorite!

Chicken Bacon Ranch Pasta Ingredients

  • For the Sauce
    • Butter – Adds richness and flavor to the creamy ranch sauce.
    • Garlic – Fresh garlic is best for a fragrant aroma; garlic powder can substitute in a pinch.
    • Flour – Thickens the sauce to achieve that perfect creamy consistency; use gluten-free flour if needed.
    • Half and Half – Creates the rich creaminess in the sauce; a mix of milk and heavy cream can be swapped in.
    • Dry Ranch Dressing Seasoning Mix – Delivers that unmistakable ranch flavor; consider homemade ranch seasoning for a personal touch.
    • Cheddar Cheese – Adds sharp flavor and creaminess; swap with Monterey Jack or a melting cheese of choice for variation.

  • For the Main Ingredients
    • Boneless Skinless Chicken Breasts – A hearty protein to satisfy; chicken thighs can provide more juiciness.
    • Bacon – Introduces a savory, smoky crunch; opt for turkey bacon for a lighter alternative.
    • Salt/Pepper – Essential for enhancing overall flavor; adjust to taste or use garlic salt for an extra kick.
    • Italian Seasoning – Infuses aromatic herbs into the dish; can be substituted with dried basil, oregano, and thyme.

  • For the Pasta
    • Uncooked Pasta (Rotini recommended) – Serves as the delicious base for the dish; alternative shapes like penne or fusilli work wonderfully too.

  • Optional Enhancements
    • Onion Powder – Adds depth; fresh onions can be finely chopped and sautéed for extra flavor.
    • Vegetables – Feel free to add sautéed veggies like bell peppers or spinach for added nutrition and color.

Enjoy crafting your Chicken Bacon Ranch Pasta with this straightforward ingredient list!

Step‑by‑Step Instructions for Chicken Bacon Ranch Pasta

Step 1: Cook the Bacon
In a large skillet over low heat, cook diced bacon until crispy, about 8–10 minutes, stirring occasionally to ensure even cooking. Once done, remove the bacon using a slotted spoon and set it aside, keeping the delicious bacon drippings in the skillet for added flavor in the later steps.

Step 2: Prepare the Chicken
Slice boneless, skinless chicken breasts thinly and season with salt, pepper, onion powder, and Italian seasoning. Heat the skillet over medium-high heat and add the chicken to the reserved bacon drippings. Sear the chicken for 6–8 minutes, or until golden brown and cooked through, with no pink remaining. Let it rest, then cube it.

Step 3: Boil the Pasta
In a large pot, bring salted water to a rolling boil. Add uncooked rotini and cook according to package instructions until al dente, typically about 8–10 minutes. Once cooked, drain the pasta, reserving a bit of the cooking water, and set aside to prevent sticking while you prepare the creamy sauce.

Step 4: Make the Sauce
Using the same skillet, reduce the heat to medium and add 2 tablespoons of butter, melting it completely. Sauté 2 minced garlic cloves for 1–2 minutes until fragrant, then whisk in 2 tablespoons of flour to create a roux. Gradually pour in 1 cup of half and half, stirring continuously to avoid lumps, until the mixture thickens.

Step 5: Mix in Flavor
Stir in the dry ranch dressing seasoning mix and 1 cup of shredded cheddar cheese into the sauce. Continue to stir until the cheese has melted completely, creating a smooth and creamy ranch sauce. Adjust seasoning with salt and pepper as needed to enhance the flavor of your Chicken Bacon Ranch Pasta.

Step 6: Combine Ingredients
Add the cooked rotini and cubed chicken to the sauce in the skillet, gently folding the ingredients together until they are fully coated in the creamy ranch sauce. Toss in the crispy bacon and mix well, letting the flavors meld together for about 2–3 minutes over low heat before serving.

Step 7: Serve and Enjoy
Scoop generous portions of your Chicken Bacon Ranch Pasta onto plates or in bowls while hot. Garnish with extra cheddar cheese or freshly cracked black pepper, if desired. Serve warm, enjoying the rich, comforting flavors that make this dish a family favorite on busy nights.

How to Store and Freeze Chicken Bacon Ranch Pasta

  • Fridge: Store leftovers in an airtight container for up to 3-4 days. Make sure the pasta is completely cooled before refrigerating to maintain freshness.

  • Freezer: Although freezing is not recommended due to potential dairy separation, you can freeze it if you must. It may last in the freezer for up to 2 months, but with possible texture changes upon thawing.

  • Reheating: To reheat, warm the pasta gently on the stove over low heat, adding a splash of milk or broth to return creaminess to the Chicken Bacon Ranch Pasta. Stir frequently until heated through.

  • Make-Ahead: For a make-ahead option, prepare the pasta as directed but store the sauce separately from the pasta until ready to serve. This helps preserve the sauce's creamy texture.

Chicken Bacon Ranch Pasta Variations

Feel free to let your creativity run wild as you explore delightful variations of this beloved dish, tweaking it to suit your taste buds!

  • Gluten-Free: Use gluten-free pasta to cater to dietary restrictions; enjoy the same creamy goodness without worry.

  • Veggie-Packed: Toss in sautéed spinach or zucchini for a nutritious twist—these vegetables add color and texture seamlessly.

  • Smoky Flavor Boost: Try adding smoked paprika to the sauce for an extra layer of flavor that brings out the richness of the bacon.

  • Spicy Kick: Add some crushed red pepper flakes to the sauce for a pleasant heat that elevates the dish to new heights.

  • Cheese Blend: Swap out cheddar for a blend of mozzarella and pepper jack for a creamy texture with a spice-filled punch.

  • Chicken Alternatives: Go for shredded rotisserie chicken or even grilled shrimp from a Chipotle Lime Chicken recipe for a quick protein boost.

  • Homemade Ranch: Use a homemade ranch seasoning for a fresh take that highlights your cooking prowess, enhancing the overall flavor profile magnificently.

  • Pasta Shapes: Explore different pasta shapes; try spiral or even cauliflower pasta to give this dish a new twist—each shape holds sauce differently, making every bite unique!

Creating your unique version of Chicken Bacon Ranch Pasta is a fun journey, and don't forget to try some comforting Skillet Pasta Sun if you want to branch out to another creamy favorite!

What to Serve with Creamy Chicken Bacon Ranch Pasta

Add a delightful touch to your meal with these scrumptious side options that balance flavors and textures beautifully.

  • Garlic Bread: The warm, buttery crunch perfectly complements the creamy pasta, adding a comforting finish to your meal. Every bite of garlic bread soaks up the rich sauce, making it simply irresistible.

  • Steamed Broccoli: This bright, fresh vegetable not only adds a pop of color but provides a nutrient-packed balance to the richness of the dish. Its slight crunch contrasts wonderfully with the creamy texture.

  • Caesar Salad: The crisp romaine and tangy dressing bring a refreshing bite, cutting through the heaviness and enhancing flavor. Toss in some croutons for an extra crunch!

  • Roasted Brussels Sprouts: Their caramelized outer layers and tender insides create a flavor contrast to the savory pasta, making every mouthful exciting. A sprinkle of parmesan can add a delightful touch.

  • Coleslaw: A cool, crunchy side, its zesty flavor complements the creamy chicken bacon ranch pasta, offering a refreshing palate cleanser. Plus, its vibrant colors brighten the plate!

  • Iced Tea: This refreshing beverage balances the dish's richness nicely, providing a light, sweet contrast. A splash of lemon can elevate the flavors even further.

  • Chocolate Chip Cookies: End the meal on a sweet note with these classic treats. Their gooeyness and comforting flavor pair beautifully alongside the savory pasta, creating a satisfying finish.

  • Balsamic Glazed Carrots: Their sweetness and tangy flavor add character to your plate, while the glaze enhances their natural taste. These tender carrots make a bright and beautiful addition.

Expert Tips for Chicken Bacon Ranch Pasta

  • Avoid Overcrowding: When searing chicken, make sure not to overcrowd the skillet. This helps achieve that perfect golden crust—each piece deserves its space.

  • Revive Leftovers: If the sauce thickens too much upon reheating, add a splash of milk or broth. This keeps your Chicken Bacon Ranch Pasta creamy and delicious.

  • Taste as You Go: Adjust flavors gradually by tasting along the way. Adding salt, pepper, or a touch more ranch seasoning can elevate your dish beautifully.

  • Cheese Variations: Don’t hesitate to swap out cheddar for a cheese blend or pepper jack for a spicy twist. Experimentation can lead to your new favorite version!

  • Perfect Pasta: Cook pasta until just al dente. It will continue to soften in the sauce, giving you the best texture when it’s served.

Make Ahead Options

These Chicken Bacon Ranch Pasta bowls are perfect for meal prep, saving you time on busy weeknights! You can cook and store the chicken, bacon, and pasta components up to 3 days in advance. To maintain their quality, refrigerate each component separately in airtight containers. On the day you plan to enjoy this dish, simply reheat the chicken and bacon in the skillet until warmed through, and then mix them into the creamy sauce you prepare freshly. Combine everything together right before serving for a comforting family meal that brings everyone to the table with ease!

Chicken Bacon Ranch Pasta Recipe FAQs

How do I select the right ripeness for the chicken?
Absolutely! For this recipe, choose boneless skinless chicken breasts that are firm and have a pink hue without any dark spots. Avoid any that look dull or have an off smell, as these are signs of spoilage.

What are the best storage methods for this dish?
Store leftovers in an airtight container in the refrigerator for up to 3-4 days. Make sure the pasta has completely cooled before sealing it away. This helps retain its freshness and prevents sogginess!

Can I freeze Chicken Bacon Ranch Pasta?
While I generally don't recommend freezing due to the risk of separating dairy, if you must, ensure it's in a freezer-safe container and consume it within 1-2 months. When thawing, reheat it gently on the stove, adding a splash of cream or broth to restore its creamy texture.

What can I do if the sauce is too thick when reheating?
Very good question! If your Chicken Bacon Ranch Pasta sauce thickens, simply add a splash of milk or chicken broth while reheating. Stir it through gently over low heat until the sauce is creamy again—perfect for a delicious second serving!

Are there any dietary considerations for this recipe?
Yes! If you need to adapt it for allergies or dietary preferences, consider using gluten-free pasta and gluten-free ranch seasoning. Turkey bacon is a great substitute for those avoiding pork. Always double-check ingredients for any potential allergens!

What if I want to add vegetables to the dish?
The more, the merrier! To incorporate veggies, sauté bell peppers, spinach, or zucchini alongside the chicken. Just add them during the chicken cooking step, and they’ll infuse the dish with flavor while boosting nutrition. Enjoy customizing your Chicken Bacon Ranch Pasta!

Chicken Bacon Ranch Pasta

Creamy Chicken Bacon Ranch Pasta for Cozy Family Nights

Creamy Chicken Bacon Ranch Pasta combines tender chicken, crispy bacon, and a rich ranch sauce for a comforting dinner, perfect for family nights.
Print Recipe Pin Recipe
Prep Time 10 minutes mins
Cook Time 20 minutes mins
Total Time 30 minutes mins
Servings: 4 servings
Course: Dinner
Cuisine: American
Calories: 600
Ingredients Equipment Method Nutrition Notes

Ingredients
  

For the Sauce
  • 2 tablespoons Butter Adds richness and flavor to the creamy ranch sauce.
  • 2 cloves Garlic Fresh garlic is best, garlic powder can substitute.
  • 2 tablespoons Flour Thickens the sauce; use gluten-free if needed.
  • 1 cup Half and Half Creates the creaminess; milk and heavy cream can be swapped.
  • 1 packet Dry Ranch Dressing Seasoning Mix Delivers ranch flavor; homemade can be used.
  • 1 cup Shredded Cheddar Cheese Adds sharp flavor; can swap with Monterey Jack.
For the Main Ingredients
  • 2 large Boneless Skinless Chicken Breasts A hearty protein; chicken thighs can be juicier.
  • 8 slices Bacon Introduces smoky crunch; turkey bacon is a lighter option.
  • to taste Salt Essential for flavor.
  • to taste Pepper Essential for flavor; garlic salt can add flavor.
  • 1 teaspoon Italian Seasoning Infuses herbs; can substitute dried basil or oregano.
For the Pasta
  • 12 ounces Uncooked Pasta (Rotini recommended) Base for the dish; penne or fusilli are good alternatives.
Optional Enhancements
  • 1 teaspoon Onion Powder Adds depth; fresh onions can be used.
  • 1 cup Vegetables Add sautéed veggies like bell peppers or spinach.

Equipment

  • Large skillet
  • Large pot
  • slotted spoon

Method
 

Step-by-Step Instructions
  1. In a large skillet over low heat, cook diced bacon until crispy, about 8–10 minutes. Remove and set aside.
  2. Season sliced chicken breasts with salt, pepper, onion powder, and Italian seasoning. Sear chicken in bacon drippings for 6–8 minutes until cooked through. Let it rest and cube.
  3. In a large pot, bring salted water to a boil. Add rotini and cook until al dente, about 8–10 minutes. Drain pasta and set aside.
  4. In the same skillet, melt butter, sauté garlic for 1–2 minutes, then whisk in flour. Gradually add half and half until thickened.
  5. Stir in ranch seasoning and cheese until melted and smooth. Adjust seasoning with salt and pepper.
  6. Combine cooked rotini and cubed chicken into the sauce, fold until coated. Incorporate crispy bacon and mix well.
  7. Serve in bowls garnished with extra cheese or pepper if desired. Enjoy warm.

Nutrition

Serving: 1servingCalories: 600kcalCarbohydrates: 60gProtein: 35gFat: 30gSaturated Fat: 15gPolyunsaturated Fat: 5gMonounsaturated Fat: 10gTrans Fat: 1gCholesterol: 120mgSodium: 900mgPotassium: 700mgFiber: 3gSugar: 3gVitamin A: 500IUVitamin C: 2mgCalcium: 350mgIron: 2mg

Notes

This recipe is perfect for any family night. Feel free to customize pasta and cheese varieties to suit your taste.

Tried this recipe?

Let us know how it was!

Delicious Tuscan Marry Me Butter Beans You’ll Want to Share

October 31, 2025 by Grace Snow Leave a Comment

As I unwrapped the rich scent of freshly baked cookies wafting through my kitchen, the memories of family gatherings and laughter flooded back. This Easy Vegan Chocolate Chip Cookies recipe became my go-to treat, capturing the hearts of everyone with its soft, chewy texture and decadent chocolate goodness. These cookies don’t just satisfy your sweet tooth— they also offer gluten-free and dairy-free options, making them friendly for various dietary needs. Whether you're hosting a gathering or simply indulging yourself, the quick prep time means you can whip them up in no time! Curious how to create these irresistibly delicious cookies that are sure to impress? Let’s dive in!

Want a Delicious Vegan Cookie Experience?

Irresistible Flavor: Each bite reveals rich, chocolatey goodness that will have your taste buds dancing with joy.
Quick & Easy: Just a few simple steps make this recipe perfect for busy bakers, fitting into any schedule.
Customizable Options: Whether you're gluten-free or dairy-free, these cookies cater to various dietary needs without compromising flavor.
Crowd-Pleasing Delight: Perfect for gatherings, they’re sure to impress friends and family alike—everyone will want the recipe!
Memorable Moments: Baking these cookies brings the happiness of shared moments, just like enjoying a plate of Tuscan White Bean Pasta or Crockpot Butter Chicken does! Don’t miss out on pure comfort food.

Vegan Chocolate Chip Cookie Ingredients

For the Batter
• All-Purpose Flour – Provides structure; substitute with almond flour for a gluten-free option.
• Baking Soda – Helps cookies rise; always check for freshness!
• Salt – Enhances flavor; sea salt works wonderfully for a more pronounced taste.
• Coconut Oil – Contributes to chewiness; feel free to swap with vegan butter for a richer flavor.
• Brown Sugar – Adds a delightful sweetness and moisture; consider coconut sugar for a lower glycemic choice.
• Non-dairy Milk – Binds everything together; almond, soy, or oat milk are great options.
• Vegan Chocolate Chips – The delicious star of the show; choose dark chocolate chips to deepen the flavor while ensuring they're dairy-free.

For Serving
• Chopped Nuts – Add walnuts or pecans for crunch; enhance texture and flavor.
• Dried Fruit – Incorporate for a chewy twist; raisins or cranberries bring extra sweetness and surprise!

Indulging in these vegan chocolate chip cookies combines warmth and comfort, much like enjoying a savory plate of Tuscan Marry Me Butter Beans. Live that delicious experience today!

Step‑by‑Step Instructions for Easy Vegan Chocolate Chip Cookies

Step 1: Preheat and Prepare
Begin by preheating your oven to 350°F (175°C) and lining a baking sheet with parchment paper. This will ensure your cookies don’t stick and bake evenly. While the oven heats up, gather all your ingredients so you can easily access them as you move through the recipe.

Step 2: Mix Dry Ingredients
In a large mixing bowl, combine the all-purpose flour, baking soda, and salt. Using a whisk, mix these dry ingredients together until they are well blended and free of lumps. You want to ensure that the baking soda and salt are evenly distributed throughout the flour for perfect cookie texture.

Step 3: Combine Wet Ingredients
In another bowl, whisk together the melted coconut oil and brown sugar until the mixture is fully combined and smooth, achieving a creamy consistency. Then, stir in your chosen non-dairy milk until the mixture is even and luscious. This forms the flavorful base for your Easy Vegan Chocolate Chip Cookies.

Step 4: Form the Dough
Gradually add the dry ingredients from the first bowl into the wet mixture while gently folding them together with a spatula or wooden spoon. Mix until just combined; be careful to avoid overmixing, which might lead to denser cookies. It’s okay if a few streaks of flour remain in the dough, as this will help maintain a soft texture.

Step 5: Add the Chocolate Chips
Once your dough is formed, fold in the vegan chocolate chips until they’re evenly distributed throughout. Take your time to ensure that every cookie will get a delightful burst of chocolate goodness. At this stage, feel free to add any optional ingredients like nuts or dried fruit for extra flavor and texture.

Step 6: Scoop the Dough
Use a cookie scoop or tablespoon to drop rounded balls of dough onto your prepared baking sheet. Space them about 2 inches apart to allow for spreading while baking. Each scoop should be generous enough to ensure that your cookies come out thick and chewy, embodying the essence of these Easy Vegan Chocolate Chip Cookies.

Step 7: Bake to Perfection
Place your baking sheet in the preheated oven and bake for 10 to 12 minutes. Keep an eye on them; you want the edges to be golden while the centers look slightly underbaked. This will give you that perfect soft and chewy texture after they cool.

Step 8: Cool and Enjoy
Once baked, remove the cookies from the oven and let them cool on the baking sheet for about 5 minutes. This resting period allows them to set before transferring them to a wire rack. Give them time to cool completely before indulging in these scrumptious Easy Vegan Chocolate Chip Cookies, allowing their full flavors to develop!

What to Serve with Easy Vegan Chocolate Chip Cookies

These delightful cookies are the perfect sweet treat to share with loved ones, inviting a warm and cozy gathering around your table.

  • Almond Milk: The creamy texture of this non-dairy alternative beautifully balances the richness of the cookies, making for a delightful pairing.
  • Fresh Fruit Salad: A refreshing mix of seasonal fruits like berries and melons adds a burst of color and brightness, complementing the cookies' sweet flavors.
  • Vegan Ice Cream: Serve these cookies warm alongside a scoop of your favorite vegan ice cream; the contrast of temperatures is simply divine!
  • Chocolate Dipped Strawberries: These indulgent delights offer a playful twist on dessert that echoes the chocolatey goodness of the cookies, creating a cohesive sweet experience.
  • Espresso or Coffee: A bold cup of espresso beautifully enhances the chocolate notes in the cookies, perfect for a comforting afternoon treat.
  • Peanut Butter Drizzle: Adding a touch of nutty flavor with a warm peanut butter drizzle takes these cookies to the next level; it’s all about balancing textures and flavors!
  • Vegan Milk Shake: Blend almond, coconut, or even oat milk with a banana for a creamy, dreamy shake; it’s a delightful way to wash down those delicious cookies!
  • Nutty Granola Bars: For a healthier companion, serve homemade granola bars that add a bit of crunch and heartiness to your dessert table.
  • Chai Tea: A hot cup of chai, with its warming spices, creates a comforting ambiance while harmonizing beautifully with the cookies' sweet flavors.
  • Lemon Sorbet: For a refreshing finish, serve a scoop of tangy lemon sorbet to cleanse the palate after indulging in your warm, chocolatey treats.

Make Ahead Options

These Easy Vegan Chocolate Chip Cookies are fantastic for meal prep enthusiasts! You can prepare the cookie dough up to 24 hours in advance by mixing all the ingredients and refrigerating the dough in an airtight container. This not only saves time on busy days but also allows the flavors to meld beautifully. Additionally, if you want to store baked cookies, they can be kept at room temperature in an airtight container for up to a week. To enjoy them fresh, simply reheat for a few seconds in the microwave before serving. This way, you ensure that your cookies stay just as delicious and chewy!

Expert Tips for Easy Vegan Chocolate Chip Cookies

Don’t Overmix: Be cautious not to overmix the dough. This helps achieve the soft and chewy texture you desire in Easy Vegan Chocolate Chip Cookies.

Chill the Dough: Letting the dough sit for about an hour in the fridge before baking enhances the flavors and texture, making your cookies even more delicious.

Use Fresh Ingredients: Always check that your baking soda is fresh. Expired baking soda can lead to flat cookies that don’t rise properly.

Perfect Baking Time: Keep an eye on your cookies while baking; the edges should be golden, but the centers may look slightly underbaked for the best texture.

Store Properly: To maintain their softness, store the cookies in an airtight container at room temperature or freeze them for longer freshness.

Variations & Substitutions for Vegan Chocolate Chip Cookies

Feel free to personalize these cookies with delightful twists that enhance their flavor and cater to your unique tastes!

  • Gluten-Free: Substitute all-purpose flour with almond flour or a 1:1 gluten-free flour blend for a gluten-free cookie.
  • Nut-Free: Use sunflower seed butter instead of coconut oil for a nut-free option while keeping that delicious flavor intact.
  • Sweetness Control: Replace brown sugar with coconut sugar for a lower glycemic version that doesn’t sacrifice taste.
  • Extra Chocolatey: Add cacao nibs along with the chocolate chips for an intense chocolate experience that chocolate lovers will adore.
  • Spice It Up: Mix in a teaspoon of cinnamon or a pinch of nutmeg for a warm, aromatic flavor that adds depth.
  • Dried Fruit Delight: Incorporate raisins or dried cranberries to satisfy those cravings for something sweet and chewy while promoting texture.
  • Chunky Cookies: Toss in chopped dark chocolate or white chocolate for big chunks that deliver delightful bursts with every bite.
  • Flavorful Nuts: Add walnuts or pecans for a satisfying crunch, enhancing both flavor and texture in your cookies.

These variations make it easy to tailor each batch to your preferences, much like customizing a comforting plate of Coconutty Beans Greens or indulging in a serving of Smoky Sweet Potatoes. Embrace your creativity and enjoy the delightful results!

How to Store and Freeze Vegan Chocolate Chip Cookies

Room Temperature: Store cookies in an airtight container at room temperature for up to 1 week to maintain their soft and chewy texture.

Freezer: For longer storage, place cookies in a single layer on a baking sheet to freeze individually, then transfer to a freezer-safe bag for up to 3 months.

Reheating: When ready to enjoy, thaw at room temperature for 30 minutes or warm in the oven at 350°F (175°C) for 5 minutes to restore their delightful texture.

Dough Storage: You can also freeze the cookie dough! Scoop into balls and freeze on a tray, then store in an airtight container for up to 3 months; bake directly from frozen, adding a couple of extra minutes.

Vegan Chocolate Chip Cookies Recipe FAQs

How do I choose ripe ingredients for my vegan chocolate chip cookies?
Absolutely! When selecting ingredients, focus on using fresh, high-quality items. For brown sugar, opt for soft ones without hard clumps. Choose coconut oil that’s not rancid and vegan chocolate chips that are dairy-free to ensure the best flavor in your cookies. Fresh baking soda is key as expired soda can prevent your cookies from rising properly.

What’s the best way to store leftover cookies?
I often recommend storing cookies in an airtight container at room temperature for up to 1 week. This helps maintain their delightful soft and chewy texture. If you want to keep them even longer, freeze the cookies in a single layer before transferring them to a freezer-safe bag, where they can last for up to 3 months. Just make sure to label your container with the date!

Can I freeze the cookie dough to bake later?
Absolutely! Freezing the cookie dough is a great option. After scooping the dough into balls, place them in a single layer on a baking sheet and freeze until solid. Then transfer them to an airtight container or bag for up to 3 months. When you're ready to bake, you can pop the frozen dough directly into the oven, just add an extra 2 minutes to your baking time.

What if my cookies turn out too flat?
Very! If your cookies spread too much, it could be due to several factors. First, make sure your coconut oil is solid rather than melted, as using melted oil can lead to flatter cookies. You may also want to chill the dough for at least 30 minutes before baking to help them hold their shape. Another tip is to ensure your baking soda is fresh and correctly measured, as too much can contribute to excessive spreading.

Are these vegan chocolate chip cookies safe for people with allergies?
Yes! These cookies are dairy-free and can be made gluten-free by substituting all-purpose flour with gluten-free flour like almond or oat flour. However, always check labels to confirm that your ingredients, especially chocolate chips, are dairy-free. If you have nut allergies, skip or substitute the nuts in the recipe. Remember to inform guests about any ingredients that may pose an allergy risk.

Can I use alternative flours in this recipe?
Definitely! For a gluten-free option, almond flour works beautifully. If you want a higher fiber option, spelt flour can be a fantastic substitute as well. Just keep in mind that different flours may require slight adjustments in liquid ingredients, so don't hesitate to experiment until you find your perfect balance!

These Vegan Chocolate Chip Cookies recipe FAQs are here to help you create the most scrumptious treats without any hitches. Enjoy your baking journey!

Tuscan Marry Me Butter Beans

Delicious Tuscan Marry Me Butter Beans You’ll Want to Share

These Tuscan Marry Me Butter Beans are a delightful vegan dish that offers rich flavors and comforting satisfaction, perfect for sharing.
Print Recipe Pin Recipe
Prep Time 15 minutes mins
Cook Time 30 minutes mins
Cooling Time 5 minutes mins
Total Time 50 minutes mins
Servings: 4 servings
Course: Uncategorized
Cuisine: Italian
Calories: 150
Ingredients Equipment Method Nutrition Notes

Ingredients
  

For the Batter
  • 2 cups All-Purpose Flour Substitute with almond flour for a gluten-free option.
  • 1 teaspoon Baking Soda Check for freshness.
  • 1/2 teaspoon Salt Sea salt works wonderfully.
  • 1/2 cup Coconut Oil Swap with vegan butter for richer flavor.
  • 3/4 cup Brown Sugar Consider coconut sugar for a lower glycemic choice.
  • 1 cup Non-dairy Milk Almond, soy, or oat milk are great options.
  • 1 cup Vegan Chocolate Chips Choose dark chocolate chips for a richer flavor.
For Serving
  • 1/2 cup Chopped Nuts Walnuts or pecans for crunch.
  • 1/2 cup Dried Fruit Raisins or cranberries for extra sweetness.

Equipment

  • Oven
  • Mixing Bowl
  • Whisk
  • Spatula
  • Baking Sheet

Method
 

Step-by-Step Instructions
  1. Preheat your oven to 350°F (175°C) and line a baking sheet with parchment paper.
  2. In a large mixing bowl, combine the all-purpose flour, baking soda, and salt.
  3. In another bowl, whisk together melted coconut oil and brown sugar until smooth, then stir in non-dairy milk.
  4. Gradually add dry ingredients to wet mixture, folding gently until just combined.
  5. Fold in the vegan chocolate chips until evenly distributed.
  6. Drop rounded balls of dough onto the prepared baking sheet, spacing them about 2 inches apart.
  7. Bake for 10 to 12 minutes until edges are golden and centers slightly underbaked.
  8. Let cool on the baking sheet for about 5 minutes before transferring to a wire rack.

Nutrition

Serving: 1cookieCalories: 150kcalCarbohydrates: 20gProtein: 2gFat: 7gSaturated Fat: 4gPolyunsaturated Fat: 1gMonounsaturated Fat: 2gSodium: 100mgPotassium: 50mgFiber: 1gSugar: 8gCalcium: 2mgIron: 6mg

Notes

Store cookies in an airtight container at room temperature for up to 1 week. Freeze for longer storage.

Tried this recipe?

Let us know how it was!

Hearty Philly Cheese Steak Soup: Comfort in Every Spoonful

October 30, 2025 by Grace Snow Leave a Comment

As the aroma of sizzling beef fills the kitchen, I can’t help but feel a rush of comfort that only a hearty bowl of Creamy Philly Cheese Steak Soup can bring. This savory sensation beautifully marries the classic flavors of the beloved cheesesteak into an easy-to-make soup that’s perfect for those chilly evenings. With tender beef, velvety provolone, and bright vegetables, this dish not only warms the soul but is also quick to prepare—making it ideal for busy weeknights or casual gatherings with friends and family. Plus, it offers versatile substitutions for your dietary needs, ensuring everyone can indulge in this cozy treat. Curious to see how you can make this creamy delight sing with your own twist? Let’s dive in!

Why is This Soup a Must-Try?

Comforting Warmth: Each bowl of this Philly Cheese Steak Soup envelops you with rich flavors and a creamy texture that feels like a warm hug on a cold day.

Versatile Ingredients: With simple swaps like ribeye for sirloin or vegetable broth for a lighter option, you can easily customize this dish to suit your preferences.

Family-Friendliness: Perfect for families, this recipe can bring everyone together for a cozy meal. Consider pairing it with some crusty bread or a refreshing side salad like Santa Soup Savory for a complete dining experience!

Time-Saving Delight: Whipping up this hearty soup can be done in under 30 minutes, making it an ideal choice for those busy weeknights when you want something nourishing without spending hours in the kitchen.

Nutritional Balance: Each serving packs a punch with 35 grams of protein, offering a hearty and satisfying meal that helps keep your energy up while staying mindful of health. Enjoy comfort food without the guilt!

Philly Cheese Steak Soup Ingredients

For the Soup Base
• Beef Sirloin – The primary protein source, giving depth and flavor; ribeye or flank steak can substitute for a richer bite.
• Olive Oil – Used for sautéing, adding richness; can be replaced with butter for a different flavor profile.
• Onion – Brings sweetness and depth; shallots work well as a milder alternative.
• Green Bell Pepper – Offers crunch and color, packed with vitamin C; feel free to swap in red or yellow peppers for a sweeter taste.
• Garlic – Enhances the overall flavor with its aromatic quality; minced garlic or garlic powder can be used if needed.

For the Creamy Finish
• Beef Broth – The base providing umami richness; a lighter option would be using vegetable broth.
• Heavy Cream – Creates a smooth, velvety texture; substitute with half-and-half or whole milk to cut down on fat.
• Provolone Cheese – Melts beautifully into the soup for a creamy finish; try mozzarella or mild cheddar for a different cheese twist.

Seasonings
• Salt – Essential for enhancing flavors; season to taste.
• Pepper – Adds necessary spice; fresh cracked pepper elevates this comfort dish even more.

Now that you have all the ingredients ready, it’s time to create a bowl of warmth and comfort with this Philly Cheese Steak Soup!

Step‑by‑Step Instructions for Philly Cheese Steak Soup

Step 1: Sear the Beef
In a large pot, heat 2 tablespoons of olive oil over medium heat. Once shimmering, add 1 pound of sliced beef sirloin and sear until browned, about 5-7 minutes. Ensure the beef is well-coated with oil for even cooking. Remove the beef from the pot and set it aside on a plate, allowing the flavors to develop in the fond left behind.

Step 2: Sauté the Vegetables
In the same pot, add the chopped onion and green bell pepper, stirring to combine. Sauté for 3-5 minutes until the vegetables are tender and the onion is translucent. Add 2 cloves of minced garlic, cooking for an additional minute until fragrant. This step builds the foundation of flavor for your Philly Cheese Steak Soup.

Step 3: Combine Ingredients
Return the seared beef to the pot with the sautéed vegetables. Pour in 4 cups of beef broth, scraping up any browned bits from the bottom of the pot for extra flavor. Bring the mixture to a simmer over medium heat, letting it cook for 15 minutes. This simmering time allows the ingredients to meld beautifully, creating a hearty soup base.

Step 4: Add Cream and Cheese
Lower the heat and stir in 1 cup of heavy cream, combined with 1 cup of shredded provolone cheese. Stir gently until the cheese is melted and incorporated into the soup, about 5 minutes. The mixture should be creamy and smooth, showcasing the rich comfort of the Philly Cheese Steak Soup.

Step 5: Season to Taste
Taste the soup and add salt and pepper as needed to enhance the flavors. If desired, sprinkle in some crushed red pepper flakes for a bit of heat. Once seasoned, allow the soup to heat through for another 2-3 minutes over low heat. This final touch ensures your flavorful Philly Cheese Steak Soup is ready to be enjoyed.

Make Ahead Options

Preparing your Philly Cheese Steak Soup in advance is a fantastic option for busy weeknights! You can chop the vegetables (onion, bell pepper, and garlic) and store them in an airtight container in the refrigerator for up to 3 days. Additionally, you can slice the beef sirloin and season it, keeping it in the fridge overnight to infuse flavors. When you’re ready to cook, simply sauté the prepped veggies, add the beef and broth, and then stir in the cream and cheese—everything comes together seamlessly! This meal prep not only saves you time but ensures that your soup is just as delicious, allowing you to enjoy a cozy dish without the hassle.

Expert Tips for Philly Cheese Steak Soup

  • Choose Quality Meat: Use good-quality beef sirloin for a tender and flavorful soup; tough cuts will alter the texture negatively.
  • Avoid Overcooking: Take care not to overcook the vegetables; aim for tender yet crisp bell peppers to add great texture to your Philly Cheese Steak Soup.
  • Whisking Cream: When adding heavy cream, whisk it gently into the soup to prevent curdling and ensure a smooth consistency throughout.
  • Herb Garnish: Fresh herbs like parsley or chives sprinkled on top not only enhance the presentation but also add a fresh flavor contrast.
  • Thickening Tip: For a thicker soup, consider using a cornstarch slurry; add it gradually and stir until reaching your desired consistency.
  • Taste as You Go: Make sure to regularly taste and adjust seasoning while cooking; this helps you create the perfect balance of flavors in your soup.

How to Store and Freeze Philly Cheese Steak Soup

Fridge: Store your Philly Cheese Steak Soup in an airtight container for up to 3 days. Allow it to cool completely before sealing to maintain freshness.

Freezer: Since the soup contains cream, it's not recommended to freeze it as it may separate upon thawing. Instead, enjoy freshly made or refrigerated portions for the best taste.

Reheating: When you're ready to enjoy leftovers, gently reheat the soup on the stove over low heat until warmed through. Stir occasionally to maintain the creamy texture.

Make-Ahead Tip: If you want to prep in advance, consider making the soup up to the point of adding cream and cheese; add these right before serving for optimal creaminess.

Variations & Substitutions for Philly Cheese Steak Soup

Feel free to explore these delightful twists to make your Philly Cheese Steak Soup uniquely yours!

  • Ribeye Alternative: Opt for ribeye for even richer flavor and tenderness. Its marbling adds an indulgent quality that’s simply irresistible.

  • Vegetarian Delight: Swap the beef for sautéed mushrooms and use vegetable broth. This creates a savory option that nourishes without meat.

  • Lighter Option: Replace heavy cream with half-and-half for a lighter texture without sacrificing creaminess. Your soup will still be just as indulgent!

  • Gluten-Free Goodness: Ensure your beef broth is gluten-free and serve with gluten-free bread for a comforting meal that everyone can enjoy.

  • Cheese Swap: Use mozzarella or even a sprinkle of blue cheese for a bold twist. The different cheeses can dramatically change the flavor profile of your soup!

  • Extra Veggies: Want to sneak in more nutrition? Toss in some spinach or kale towards the end for added color and health benefits.

  • Kick It Up a Notch: Add crushed red pepper flakes or a dash of hot sauce for some exciting heat! It elevates the whole experience and is perfect for spice lovers.

  • Potato Boost: For an even heartier soup, add diced potatoes while simmering. They’ll create a thicker, more filling base that comforts on a chilly day.

As you enhance your soup, consider pairing it with a side of Potato Blue Cheese or a refreshing bowl of Asparagus Soup Healthy for a balanced experience that's sure to delight your family and friends!

What to Serve with Creamy Philly Cheese Steak Soup

Serve this delightful soup along with complementary dishes for a complete, heartwarming meal.

  • Crusty Bread: Perfect for dipping, fresh-baked bread will absorb the rich broth and enhance the meal’s comforting feel.

  • Mixed Green Salad: A light salad with a tangy vinaigrette balances the creamy soup, providing freshness and crunch. It's a delightful contrast to the warmth of the soup.

  • Garlic Parmesan Breadsticks: These cheesy, buttery sticks add a savory touch, making each bite even more indulgent. They are ideal for mopping up the soup!

  • Roasted Vegetables: Opt for seasonal veggies like carrots and brussels sprouts, tossed in olive oil and roasted to perfection. Their earthy flavor will add depth next to the soup.

  • Cheesy Cauliflower Rice: This low-carb side is creamy and absorbs flavors beautifully; it pairs well with the hearty meatiness of the soup.

  • Sparkling Water with Lemon: For a refreshing beverage, try sparkling water with a splash of lemon juice. Its brightness cuts through the richness of the soup perfectly.

Combining these elements will not only create a delightful dining experience but will also keep your belly happy and content on cooler nights!

Philly Cheese Steak Soup Recipe FAQs

What type of beef is best for Philly Cheese Steak Soup?
Absolutely! I recommend using beef sirloin for a tender and flavorful base. If you want to try something a little richer, ribeye or flank steak can also bring delightful juiciness to your soup. Make sure the beef is well-marbled for the most flavor!

How do I store leftovers of the Philly Cheese Steak Soup?
You can store your Philly Cheese Steak Soup in an airtight container in the fridge for up to 3 days. Let the soup cool completely before sealing it, as this helps maintain freshness. When you’re ready to enjoy a warm bowl again, simply reheat it gently on the stove over low heat.

Can I freeze Philly Cheese Steak Soup?
I typically advise against freezing this soup due to the heavy cream. Freezing can cause the cream to separate and change texture when thawed. Instead, enjoy the soup freshly made or refrigerate any leftovers.

What if my soup is too thick?
If your soup turns out thicker than desired, you can thin it out by adding a little more beef broth or water. Start with 1/4 cup and stir it into the soup until you reach your desired consistency. Just be sure to reheat it gently so the flavors blend well.

Is this recipe suitable for gluten-free diets?
Yes, it can be made gluten-free! Just ensure that the beef broth you use is certified gluten-free and serve it with gluten-free bread if you're looking for a perfect pairing. Additionally, always double-check ingredients to avoid any hidden gluten sources.

How do I know when the vegetables are perfectly cooked?
You’ll want the vegetables to be tender but still have a slight crunch. Sauté the onions and bell peppers for about 3-5 minutes until the onions are translucent—this way, they preserve their flavor and texture while complementing the rich broth of your Philly Cheese Steak Soup!

Philly Cheese Steak Soup

Hearty Philly Cheese Steak Soup: Comfort in Every Spoonful

Experience comforting warmth with this Philly Cheese Steak Soup, a hearty and creamy dish perfect for chilly evenings.
Print Recipe Pin Recipe
Prep Time 10 minutes mins
Cook Time 20 minutes mins
Total Time 30 minutes mins
Servings: 6 bowls
Course: Soups
Cuisine: American
Calories: 450
Ingredients Equipment Method Nutrition Notes

Ingredients
  

For the Soup Base
  • 1 lb Beef Sirloin or ribeye/flank steak for richer taste
  • 2 tbsp Olive Oil can substitute with butter
  • 1 medium Onion or shallots for a milder flavor
  • 1 medium Green Bell Pepper can substitute with red or yellow peppers
  • 2 cloves Garlic minced
For the Creamy Finish
  • 4 cups Beef Broth or vegetable broth for a lighter option
  • 1 cup Heavy Cream can substitute with half-and-half or whole milk
  • 1 cup Provolone Cheese or mozzarella/mild cheddar
Seasonings
  • to taste Salt
  • to taste Pepper fresh cracked preferred

Equipment

  • Large pot

Method
 

Step-by-Step Instructions
  1. In a large pot, heat 2 tablespoons of olive oil over medium heat. Add the sliced beef sirloin and sear until browned for 5-7 minutes. Remove beef and set aside.
  2. In the same pot, add the chopped onion and green bell pepper. Sauté for 3-5 minutes until tender, add 2 cloves of minced garlic, and cook for an additional minute.
  3. Return the seared beef to the pot and pour in 4 cups of beef broth. Bring to a simmer over medium heat and cook for 15 minutes.
  4. Lower the heat, stir in 1 cup of heavy cream and 1 cup of shredded provolone cheese until melted.
  5. Taste the soup and add salt and pepper as needed. Heat through for another 2-3 minutes before serving.

Nutrition

Serving: 1bowlCalories: 450kcalCarbohydrates: 10gProtein: 35gFat: 30gSaturated Fat: 15gCholesterol: 100mgSodium: 900mgPotassium: 800mgFiber: 1gSugar: 2gVitamin A: 500IUVitamin C: 60mgCalcium: 200mgIron: 3mg

Notes

Pairs beautifully with crusty bread or a side salad. For a thicker consistency, consider using a cornstarch slurry.

Tried this recipe?

Let us know how it was!

Hearty Dublin Coddle: A Warm Hug in a Bowl

October 30, 2025 by Grace Snow Leave a Comment

If there’s one dish that feels like a warm hug on a chilly evening, it’s Dublin Coddle. This traditional Irish dish is a delightful one-pot meal, rich with the smoky essence of sausages and bacon, complemented by tender potatoes and sweet onions. As winter settles in or festive gatherings arise, nothing beats the comfort of a hearty Dublin Coddle to bring friends and family together. Not only is it easy to prepare, but its filling nature makes it a go-to for cozy nights in. Plus, the recipe offers plenty of room for creativity; from swapping in different sausages to adding your favorite vegetables like leeks or parsnips, you can truly make it your own. Curious to dive into the flavors of Ireland? Let’s get cooking!

Why is Dublin Coddle So Irresistible?

Simplicity: With just a few ingredients, this one-pot meal is as easy to make as it is enjoyable. Perfect for both novice cooks and seasoned chefs!

Heartwarming Flavor: The combination of smoky bacon and savory sausages creates a rich taste that warms you up from the inside out, making it an ideal recipe for chilly evenings.

Versatile: Swap out ingredients to customize your dish—try different types of sausages or add seasonal vegetables like parsnips for a personal touch that keeps mealtime exciting.

Nostalgic Comfort: Dublin Coddle is steeped in Irish history and brings a touch of tradition to your table, offering a hearty dish cherished by many families for generations.

Make-Ahead Marvel: This dish keeps beautifully in the fridge, and its flavors only deepen with time, making it a perfect dish for meal prep. Just reheat and enjoy!

Dublin Coddle Ingredients

For the Stew
• Irish Sausages – Primary protein that adds richness and flavor to the broth; substitute with beef or chicken sausages for variation.
• Smoked Bacon – Provides essential smokiness and depth; use unsmoked bacon if a milder taste is desired.
• Onions – Adds sweetness and aromatics to the dish; yellow onions are recommended, while shallots offer a sweeter profile.
• Potatoes – The main carbohydrate that absorbs flavors from the broth; opt for waxy potatoes for creaminess, avoiding starchy varieties.
• Carrots (optional) – Adds sweetness and texture; can be replaced with parsnips for an earthy flavor.

For the Broth
• Beer or White Wine (optional) – Enhances the broth's depth for even more richness; non-alcoholic beer can be used for a similar effect.
• Salt and Pepper – Essential for seasoning; adjust based on the saltiness of bacon and sausages.

Step‑by‑Step Instructions for Dublin Coddle

Step 1: Prepare the Ingredients
Begin by slicing the Irish sausages and smoked bacon into bite-sized pieces, roughly 1-inch thick. Chop the onions and peel the potatoes before cutting them into evenly sized chunks. If using, slice the carrots as well. Gather all your ingredients together, ensuring everything is prepped for a smooth cooking process.

Step 2: Layer the Pot
In a large pot or Dutch oven, layer the sliced sausages, bacon, onions, and potatoes. If you’re adding carrots or any other vegetables, include them now for extra flavor and texture. Arrange everything in the pot so that the ingredients are well-distributed and ready to soak up the savory broth as they cook.

Step 3: Add the Broth
Pour enough water or broth into the pot to cover the layered ingredients by at least an inch. For a richer flavor profile, you can optionally add beer or white wine at this stage. Gently stir the mixture to combine everything, but be careful not to break the potatoes as you want them to maintain their integrity while cooking.

Step 4: Season the Dish
Sprinkle a generous amount of salt and pepper over the contents of the pot, adjusting according to your taste preference. Remember that the bacon and sausages provide saltiness, so keep that in mind as you season. Stir lightly to incorporate the seasoning, ensuring every layer has the opportunity to absorb the flavors.

Step 5: Bring to a Simmer
Set the pot over medium heat and bring the mixture to a gentle simmer. Once bubbles begin to rise, reduce the heat to low and cover the pot with a lid. Allow the Dublin Coddle to simmer gently for about one hour, occasionally checking to ensure it doesn’t boil, as you want a steady, soothing simmer for optimal flavor melding.

Step 6: Check for Doneness
After an hour, carefully lift the lid and check the potatoes with a fork; they should be tender but firm enough to hold their shape. If everything is cooked through, give it a gentle stir, ensuring no ingredients have stuck to the bottom. Taste the broth and adjust the seasoning if necessary for a perfect blend of flavors.

Step 7: Serve the Coddle
Once done, ladle the hearty Dublin Coddle into bowls, ensuring each serving has a mix of sausage, bacon, and potatoes. Pair this comforting dish with thick slices of Irish soda bread or crusty brown bread for a perfect complement that soaks up the flavorful broth. Enjoy this traditional Irish meal warm and cozy!

Make Ahead Options

Dublin Coddle is a fantastic choice for meal prep enthusiasts, allowing you to savor its rich flavors without a last-minute rush! You can slice the sausages, bacon, onions, and potatoes up to 24 hours in advance; simply store them in an airtight container in the refrigerator to maintain their freshness. If you'd like, you can also layer the ingredients in your pot and refrigerate them overnight, ensuring they’re ready to simmer when you need them. When it's time to cook, just add the broth and seasonings, then bring to a simmer. This way, you’ll have a comforting, delicious Dublin Coddle ready with minimal effort on busy weeknights!

Dublin Coddle Variations & Substitutions

Embrace your creativity with these delightful twists on the classic Dublin Coddle, perfect for personalizing your dish!

  • Sausage Swap: Try chicken or turkey sausage for a lighter flavor that still delivers on heartiness. Or, for a vegetarian option, use plant-based sausages to enjoy this comfort dish without meat.

  • Veggie Boost: Adding leeks or celery introduces fresh flavors. They bring a subtle crunch and enhance the dish's aromatic profile, creating an even deeper connection to the earthiness of a traditional Irish meal.

  • Root Veggies: Replace carrots with parsnips or sweet potatoes for a touch of sweetness and extra texture. These veggies complement the smoky flavors beautifully while offering a delightful twist.

  • Heat It Up: Add a pinch of red pepper flakes or diced jalapeños for a spicy kick. This brings an exciting depth of flavor that warms you from the inside out, perfect for those who love a zesty surprise.

  • Beer Boost: While the traditional recipe may include beer, consider using a dark stout for richer flavor. It enhances the broth's complexity, providing a luxurious mouthfeel that echoes Irish heritage.

  • Fresh Herbs: Stir in freshly chopped parsley or thyme at the end to brighten up the dish. This not only adds color but also creates a fragrant aroma that elevates each serving to new heights.

  • Mushroom Medley: Incorporate sliced mushrooms for an umami boost. They bring an earthy richness and pair wonderfully with the sausages, making every bite more satisfying.

  • Savory Spice: Sprinkle in some mustard powder or smoked paprika for added depth. These spices infuse the dish with warmth and personality without overpowering the classic flavors.

So go ahead, let your imagination run wild while crafting your perfect bowl of Dublin Coddle! The traditional Irish charm awaits, and with each variation, you’re sure to bring a cozy piece of Ireland into your home. If you're thinking about adding more delightful sides or drink pairings, check out our suggestions like Irish Soda Bread or classic Irish stouts.

Expert Tips for Dublin Coddle

  • Simmer Long Enough: Let your Dublin Coddle simmer for a full hour; this allows the flavors to meld beautifully, creating that deep, hearty taste.

  • Gentle Stirring: Stir gently to avoid breaking the potatoes. You want them tender yet intact to absorb the rich broth.

  • Season to Taste: Taste your broth before serving; adjust salt and pepper based on the saltiness of your sausages and bacon for the best flavor.

  • Veggie Variations: Feel free to add leeks or parsnips for a twist on this comforting dish. Just remember to cut them uniform for even cooking.

  • Make Ahead: This dish tastes even better the next day! Prepare it in advance and let the flavors develop overnight for a truly satisfying meal.

What to Serve with Dublin Coddle

Nothing pairs better with the cozy warmth of this traditional Irish dish than simple, hearty sides that elevate the meal.

  • Irish Soda Bread: Thick slices of this soda bread are perfect for soaking up the savory broth, adding a delightful texture to every bite.

  • Steamed Greens: Lightly steamed greens like cabbage or kale bring a fresh, vibrant contrast to the rich flavors, balancing the heaviness of the stew with a burst of color.

  • Mashed Potatoes: Creamy, buttery mashed potatoes create a comforting duo with Dublin Coddle, ensuring every spoonful is a cozy experience.

  • Apple Cider: A glass of crisp, slightly sweet apple cider enhances the flavors of the dish, providing a refreshing, fruity note that complements the savory elements beautifully.

  • Colcannon: This traditional Irish dish of mashed potatoes with cabbage brings a hint of familiarity and complements the coddle's hearty essence perfectly.

  • Parsnip Chips: Crispy, roasted parsnip chips offer a light crunch and a mildly sweet flavor that contrast nicely with the soft textures of the coddle.

  • Chocolate Guinness Cake: To finish, a slice of rich chocolate Guinness cake offers a decadent, luxurious end to the meal that celebrates Irish flavors.

  • Irish Coffee: A warm glass of Irish coffee rounds out the experience, blending robust flavors with the perfect touch of sweetness and creaminess.

How to Store and Freeze Dublin Coddle

Fridge: Store leftover Dublin Coddle in an airtight container for up to 3 days. Allow it to cool completely before sealing to retain flavor and texture.

Freezer: For longer storage, freeze the coddle in freezer-safe containers or bags for up to 3 months. Remember to portion it for easy reheating later!

Reheating: Thaw overnight in the fridge if frozen, then reheat gently on the stove over low heat until warmed through. Add a splash of broth if needed to keep it moist.

Reviving Flavor: Re-season with a touch of salt and pepper after reheating, as flavors may mellow during storage. Enjoy this comforting dish just as delicious as the first serving!

Dublin Coddle Recipe FAQs

How do I choose the best sausages for Dublin Coddle?
When selecting sausages for your Dublin Coddle, go for traditional Irish sausages for the most authentic flavor. Look for plump, fresh sausages without dark spots. If you prefer alternatives, beef or chicken sausages also work well, but keep in mind that they will change the dish's classic taste.

What is the best way to store leftover Dublin Coddle?
To store leftover Dublin Coddle, transfer it to an airtight container and refrigerate it. It should remain fresh for up to 3 days. Make sure to let it cool completely before sealing to maintain its flavors and texture. Reheating it on the stovetop is best to retain its hearty consistency.

Can I freeze Dublin Coddle? If so, how?
Absolutely! You can freeze Dublin Coddle for up to 3 months. To freeze, let the dish cool entirely, then portion it into freezer-safe containers or bags. Make sure to leave some space at the top of the bags for expansion. To reheat, thaw overnight in the fridge and warm gently in a pot, adding a splash of broth if needed.

What can I do if my potatoes disintegrate during cooking?
To avoid potatoes breaking down during cooking, choose waxy varieties, as they hold their shape better. If you've already experienced disintegration, don’t worry! You can salvage it by gently stirring the mixture and allowing it to cook for a shorter time, ensuring a more cohesive dish.

Is Dublin Coddle suitable for people with dietary restrictions?
Dublin Coddle can be easily adapted for various diets. For gluten-free options, use gluten-free sausages and check the broth ingredients. For those avoiding pork, turkey or chicken sausages work well. If cooking for pets, it’s best to avoid shared plates due to seasonings like salt and pepper that can be harmful to animals.

How can I enhance the flavors in my Dublin Coddle?
You can enhance the flavors by adding a splash of beer or white wine to the broth; this enhances richness beautifully. Also, tossing in extra seasoning or spices like mustard or fresh herbs can give your Coddle a delightful twist. After cooking, taste and adjust the seasoning, as flavors can mellow out overnight!

Dublin Coddle

Hearty Dublin Coddle: A Warm Hug in a Bowl

Dublin Coddle is a comforting traditional Irish dish, perfect for cozy nights, filled with smoky sausages, bacon, potatoes, and onions.
Print Recipe Pin Recipe
Prep Time 15 minutes mins
Cook Time 1 hour hr
Total Time 1 hour hr 15 minutes mins
Servings: 4 bowls
Course: Dinner
Cuisine: Irish
Calories: 450
Ingredients Equipment Method Nutrition Notes

Ingredients
  

For the Stew
  • 4 links Irish Sausages or beef/chicken sausages for variation
  • 200 grams Smoked Bacon or unsmoked for milder taste
  • 2 medium Onions yellow onions recommended
  • 4 medium Potatoes waxy potatoes preferred
  • 2 medium Carrots optional; can replace with parsnips
For the Broth
  • 1 cup Beer or White Wine optional; can use non-alcoholic beer
  • to taste Salt adjust according to bacon and sausage saltiness
  • to taste Pepper adjust as needed

Equipment

  • Large pot or Dutch oven

Method
 

Preparation Steps
  1. Slice the Irish sausages and smoked bacon into bite-sized pieces, roughly 1-inch thick.
  2. Chop the onions and peel the potatoes before cutting them into evenly sized chunks.
  3. If using, slice the carrots as well and gather all your ingredients.
  4. In a large pot, layer the sausages, bacon, onions, and potatoes.
  5. If adding carrots or other vegetables, include them now.
  6. Pour enough water or broth to cover the ingredients by at least an inch.
  7. Optionally add beer or white wine for richer flavor.
  8. Stir gently, being careful not to break the potatoes.
  9. Sprinkle salt and pepper over the pot, adjusting to taste.
  10. Bring to a gentle simmer over medium heat.
  11. Once simmering, reduce heat to low, cover, and simmer for about one hour.
  12. Check for tenderness of potatoes with a fork; they should hold their shape.
  13. Ladle into bowls and serve with soda or crusty brown bread.

Nutrition

Serving: 1bowlCalories: 450kcalCarbohydrates: 40gProtein: 25gFat: 20gSaturated Fat: 7gPolyunsaturated Fat: 1gMonounsaturated Fat: 12gCholesterol: 80mgSodium: 900mgPotassium: 800mgFiber: 5gSugar: 2gVitamin A: 500IUVitamin C: 15mgCalcium: 40mgIron: 3mg

Notes

This dish tastes even better the next day; prepare in advance for deeper flavors.

Tried this recipe?

Let us know how it was!

Creamy German Goulash: Cozy Comfort for Cold Nights

October 30, 2025 by Grace Snow Leave a Comment

As the first gusts of autumn chill the air, I find myself craving the kind of home-cooked magic that warms both body and soul. This is where my beloved Creamy German Goulash steps in, a hearty comfort food that effortlessly delivers rich flavors and a loving embrace on chilly evenings. Imagine tender chunks of beef swimming in a luscious, paprika-spiced sauce, all brought together with a swirl of velvety cream. What I appreciate most about this dish is not just its comforting warmth but also its surprising ease of preparation—perfect for both seasoned cooks and those just getting started. Whether you're a long-time devotee of satisfying meals or just looking for a delicious way to shake off the fast-food routine, this goulash is sure to become a cherished go-to. Are you ready to dive into a bowl of cozy goodness?

Why Choose Creamy German Goulash?

Comforting Warmth: This goulash serves as a delicious hug on cold nights, bringing together tender beef and creamy sauce.

Flavor Explosion: Rich paprika and aromatic spices make each bite a delightful experience that keeps you coming back for more.

Easy to Make: With simple ingredients and straightforward steps, anyone can whip up this masterpiece, whether you're an experienced chef or a novice.

Versatile Options: Not feeling meat? Consider mushrooms for a vegetarian twist without sacrificing flavor.

Crowd-Pleasing Appeal: Perfect for family gatherings or cozy dinners with friends, this dish is sure to impress and satisfy.

Effortlessly Delicious: Just let it simmer and transform into a hearty meal that encapsulates everything you love about homemade cooking. Try serving it with fluffy noodles or a side of crusty bread for a complete experience!

Creamy German Goulash Ingredients

For the Goulash
• Beef chuck (2 lbs) – A hearty, flavorful protein that becomes tender when simmered; for a vegetarian twist, substitute with seitan.
• Onions (2 large, chopped) – Adds sweetness and depth to the dish; opting for yellow onions works beautifully.
• Olive oil (2 tbsp) – Ideal for browning meat; vegetable oil can serve as a suitable replacement.
• Sweet paprika (2 tbsp) – The cornerstone spice that defines flavor; Hungarian paprika can enhance authenticity.
• Smoked paprika (1 tbsp) – Infuses a wonderful smoky aroma to the dish.
• Caraway seeds (1 tsp) – Adds a unique, slightly sweet flavor profile; could be omitted if unavailable.
• Marjoram (1/2 tsp) – Introduces delicate herbal notes; thyme is an excellent alternative.
• Cayenne pepper (1/4 tsp, optional) – Kick up the heat according to your preference!
• Garlic (4 cloves, minced) – Essential for aromatic depth and savory flavor.
• Tomato paste (1 tbsp) – Thickens the sauce and adds rich umami notes.
• Beef broth (1 cup) – Contributes moisture and robust flavor; use vegetable broth for a vegetarian version.
• Dry red wine (1 cup, optional) – Deepens the flavor but can be replaced with additional broth if preferred.
• Diced tomatoes (1 [14.5 oz] can, undrained) – Introduces a pop of acidity and texture.
• Red bell pepper (1, chopped) – Offers sweetness and vibrant color; can use other varieties for variety.
• Yellow bell pepper (1, chopped) – Adds more sweetness; feel free to mix colors for a beautiful presentation.
• Potatoes (1 lb, peeled and cubed) – Thick and hearty, these absorb all the wonderful flavors.
• Sour cream (1 cup) – Ensures creaminess; Greek yogurt provides a great substitute.
• All-purpose flour (2 tbsp) – Aids in thickening the goulash's sauce.
• Salt and freshly ground black pepper – Key seasonings to enhance flavors; adjust to taste.
• Fresh parsley (for garnish) – Gives a fresh touch for visual appeal.
• Noodles or Spätzle (optional for serving) – Perfect for soaking up the luscious sauce, pairing beautifully with the goulash.

This Creamy German Goulash is truly a delightful exploration of comfort food that you'll want to savor and share!

Step‑by‑Step Instructions for Creamy German Goulash

Step 1: Prepare the Beef
Begin by patting the beef chuck cubes dry with paper towels, which helps them brown better. Season the cubes generously with salt and freshly ground black pepper. In a large Dutch oven, heat 2 tablespoons of olive oil over medium-high heat until shimmering. Working in batches, add the beef cubes and brown them for about 2-3 minutes on each side until a deep golden color forms. Remove the browned beef from the pot and set aside.

Step 2: Sauté the Onions
In the same Dutch oven, add the chopped onions and sauté them for about 5-7 minutes. Stir frequently until they become soft and translucent. This step builds the aromatic base for your Creamy German Goulash. As the onions cook, scrape up any browned bits from the bottom of the pot to enhance the flavors in your dish.

Step 3: Add Aromatics and Spices
Once the onions are softened, add the minced garlic, sweet paprika, smoked paprika, caraway seeds, marjoram, and cayenne pepper. Stir constantly for about 1 minute, allowing the spices to bloom and release their fragrant aromas. This step transforms your goulash into a flavorful embrace filled with rich spices, setting the stage for the creamy sauce to come.

Step 4: Incorporate Tomato Paste
Stir in the tomato paste and cook for another minute, mixing thoroughly with the aromatic onion and spice mixture. The tomato paste adds depth to the sauce and a touch of sweetness that balances perfectly with the other spices. Continue to cook until it darkens slightly, ensuring it melds well with the other ingredients, intensifying the flavor of your Creamy German Goulash.

Step 5: Deglaze with Broth and Wine
Pour in the beef broth and dry red wine, if using, and use a wooden spoon to scrape any remaining browned bits from the pot. Bring the mixture to a gentle simmer, ensuring all flavors combine beautifully. This step creates a base for your goulash, uplifting the tender beef with a rich, comforting sauce that will envelop each bite.

Step 6: Add the Beef and Vegetables
Return the browned beef cubes to the Dutch oven, along with the undrained diced tomatoes, and both chopped red and yellow bell peppers. Stir to combine everything evenly. Bring the mixture back to a simmer before reducing the heat to low. Cover the pot and let it simmer for 2-3 hours. The long cooking time ensures the beef becomes tender and infused with the comforting flavors of the Creamy German Goulash.

Step 7: Incorporate Potatoes
After simmering, add the peeled and cubed potatoes into the pot. Stir gently so they are evenly distributed within the goulash. Cover the pot again and continue to let it simmer for an additional 30-45 minutes or until the potatoes become fork-tender. This step not only adds heartiness to the dish but also absorbs all the wonderful flavors surrounding them.

Step 8: Add Cream and Flour Mixture
In a small bowl, combine the sour cream with all-purpose flour, creating a smooth paste. Temper this mixture by gradually adding a ladleful of the hot broth from the pot, stirring constantly. This prevents the sour cream from curdling. Once tempered, stir the mixture back into the goulash, allowing it to simmer for an additional 5-10 minutes without boiling. This step adds that essential creamy texture, making your Creamy German Goulash truly dreamy.

Step 9: Final Seasoning and Serve
Taste the goulash and adjust seasoning with more salt and pepper if needed. Once satisfied, remove from heat. Serve the Creamy German Goulash hot, optionally garnished with fresh parsley for a burst of color and freshness. Traditionally, it pairs beautifully with noodles or Spätzle, perfect for soaking up that luscious sauce. Enjoy a warm, cozy bowl filled with love!

Expert Tips for Creamy German Goulash

  • Don’t Rush Browning: Ensure not to overcrowd the pot when browning beef; this allows for a proper sear, enhancing the overall flavor of your Creamy German Goulash.

  • Monitor Liquid Levels: During simmering, check the liquid level frequently. If it looks too dry, add more broth to prevent burning and ensure a luscious sauce consistency.

  • Temper the Cream: Always temper the sour cream mixture with hot broth before adding it to the goulash. This step prevents curdling and maintains that creamy texture.

  • Season Wisely: Before serving, taste and adjust seasoning. Each ingredient plays a role in flavor, so balancing salt and pepper makes all the difference for your final dish.

  • Storage Smarts: If you have leftovers, store them in the refrigerator for up to 3 days. Reheat gently, adding broth as needed to keep the sauce from thickening too much.

What to Serve with Creamy German Goulash?

As you nestle into a bowl of this cozy delight, consider adding side dishes that enhance the goulash's rich flavors for a delightful complete meal.

  • Fluffy Noodles: These tender strands soak up the luscious sauce, making every bite a blissful indulgence that beautifully complements the goulash.

  • Spätzle: This traditional German egg noodle is the perfect vehicle for your goulash’s creamy goodness, offering a delightful chew and satisfying texture.

  • Crusty Bread: A hearty slice of sourdough or a rustic baguette provides the ideal crunch to scoop up the rich goulash, rounding out your dish beautifully.

  • Green Salad: A crisp salad with a tangy vinaigrette adds freshness and brightness, balancing the rich, creamy flavors with a refreshing contrast.

  • Roasted Root Vegetables: Caramelized carrots and parsnips enhance the comforting aspect of the meal while offering earthy flavors that pair wonderfully with the robust goulash.

  • Pickled Cucumber Salad: The tangy crunch cuts through the richness of the goulash, adding a zesty, refreshing element that awakens the palate.

  • Beer or Mulled Wine: A robust lager or a warm cup of mulled wine can further elevate the meal, complementing the hearty flavors of the goulash beautifully.

  • Apple Strudel: For dessert, this classic sweet treat with its flaky crust and cinnamon-spiced apples provides a delightful finish to your satisfying meal.

Creamy German Goulash Variations

Feel free to customize your goulash to match your tastes and dietary needs with these delightful twists!

  • Vegetarian: Swap beef for hearty mushrooms or seitan to create a satisfying meat-free version.
  • Extra Veggies: Toss in diced carrots or peas for added nutrition and a pop of color.
  • Spicy Kick: Add more cayenne pepper or crushed red pepper flakes to heat things up.
  • Herb Infusion: Use fresh thyme in place of marjoram to infuse more earthiness into your goulash.
  • Creamy Twist: For a tangier flavor, replace sour cream with crème fraîche or rich Greek yogurt.
  • Wine-Free: Omit the dry red wine and increase the broth for a lighter, family-friendly version.
  • Sweet Touch: A touch of brown sugar can bring gentle sweetness that balances the spices beautifully.
  • Serving Suggestion: Over a bed of fluffy noodles or Spaetzle to soak up that luscious sauce.

Whichever variations you choose, your Creamy German Goulash will still deliver a heartwarming experience that’s perfect for those chilly nights!

Storage Tips for Creamy German Goulash

Fridge: Store leftover Creamy German Goulash in an airtight container for up to 3 days. Allow it to cool completely before sealing to maintain freshness.

Freezer: For longer storage, freeze your goulash in freezer-safe containers or bags for up to 3 months. Make sure to leave some space for expansion as it freezes.

Reheating: When ready to enjoy leftovers, reheat gently on the stove over low heat, adding a splash of broth to loosen the sauce if it has thickened.

Thawing: If frozen, thaw your Creamy German Goulash in the fridge overnight before reheating for the best texture and flavor.

Make Ahead Options

These Creamy German Goulash preparations are a lifesaver for busy weeknights! You can chop the onions, bell peppers, and potatoes up to 24 hours in advance and store them in airtight containers in the refrigerator. Additionally, you can brown the beef and combine it with the spices and tomato paste, letting the flavors meld overnight for a richer taste. When you’re ready to enjoy your goulash, simply sauté the prepped veggies, add the pre-mixed beef mixture, pour in the broth and wine, then let it simmer. Finish by adding the flour and sour cream mixture, and you'll have a comforting meal that tastes just as delicious as if you made it fresh!

Creamy German Goulash Recipe FAQs

How do I choose the right beef for goulash?
For the best results, select beef chuck, as it’s both flavorful and becomes tender with slow cooking. Look for well-marbled cuts, as the fat enhances richness. If you’re opting for a vegetarian version, seitan or mushrooms make great alternatives that maintain a hearty, satisfying texture.

What is the best way to store leftover goulash?
To keep your Creamy German Goulash fresh, store it in an airtight container in the refrigerator for up to 3 days. Allow it to cool completely before sealing. The flavors often deepen after a day in the fridge, making it even more delicious.

Can I freeze Creamy German Goulash?
Absolutely! You can freeze your goulash in freezer-safe containers for up to 3 months. Make sure to leave some space at the top of the container for expansion. When you’re ready to enjoy it, thaw it in the fridge overnight before reheating gently on the stove, adding broth to loosen the sauce if it thickens too much during freezing.

What should I do if my goulash is too thick?
If you find your Creamy German Goulash has become too thick during cooking, you can easily adjust the consistency. Add a splash of beef or vegetable broth while stirring until you reach your desired thickness. Remember to taste and adjust seasoning afterward, as adding liquid may dilute the flavors slightly.

Are there any dietary considerations for this dish?
Yes, if you have dietary restrictions, be sure to check the ingredients used. You can substitute sour cream with Greek yogurt for a healthier option, and if you're avoiding gluten, use a gluten-free flour in the cream mixture. Additionally, for those with allergies, ensure there are no cross-contaminants with the ingredients, especially when using packaged items like broth and noodles.

What’s the best way to reheat the goulash?
Reheat leftover Creamy German Goulash gently on the stove over low heat. Stir occasionally and add a splash of broth or water to loosen the sauce if needed, ensuring that it warms evenly without boiling, which can affect the texture of the cream. Enjoy your cozy meal again with newfound warmth!

Creamy German Goulash

Creamy German Goulash: Cozy Comfort for Cold Nights

Creamy German Goulash is a hearty comfort food with tender beef in a paprika-spiced sauce, perfect for cold nights.
Print Recipe Pin Recipe
Prep Time 30 minutes mins
Cook Time 3 hours hrs
Total Time 3 hours hrs 30 minutes mins
Servings: 6 servings
Course: Dinner
Cuisine: German
Calories: 450
Ingredients Equipment Method Nutrition Notes

Ingredients
  

For the Goulash
  • 2 lbs Beef chuck A hearty, flavorful protein that becomes tender when simmered; substitute with seitan for vegetarian.
  • 2 large Onions, chopped Opt for yellow onions for best results.
  • 2 tbsp Olive oil Ideal for browning meat; vegetable oil can substitute.
  • 2 tbsp Sweet paprika Cornerstone spice that defines flavor; Hungarian paprika enhances authenticity.
  • 1 tbsp Smoked paprika Infuses a wonderful smoky aroma.
  • 1 tsp Caraway seeds Adds a unique, slightly sweet flavor; can be omitted if unavailable.
  • 1/2 tsp Marjoram Introduces delicate herbal notes; thyme is an alternative.
  • 1/4 tsp Cayenne pepper Optional; adjust to taste.
  • 4 cloves Garlic, minced Essential for aromatic depth and savory flavor.
  • 1 tbsp Tomato paste Thickens the sauce and adds rich umami notes.
  • 1 cup Beef broth Contributes moisture and robust flavor; use vegetable broth for a vegetarian version.
  • 1 cup Dry red wine Optional; deepens the flavor.
  • 1 can (14.5 oz) Diced tomatoes, undrained Introduces acidity and texture.
  • 1 Red bell pepper, chopped Offers sweetness and vibrant color.
  • 1 Yellow bell pepper, chopped Adds sweetness; feel free to mix colors.
  • 1 lb Potatoes, peeled and cubed Thick and hearty, absorbs flavors.
  • 1 cup Sour cream Ensures creaminess; Greek yogurt is a good substitute.
  • 2 tbsp All-purpose flour Aids in thickening the sauce.
  • Salt and freshly ground black pepper Key seasonings to enhance flavors.
  • Fresh parsley For garnish and visual appeal.
  • Noodles or Spätzle Optional for serving; perfect for soaking up the sauce.

Equipment

  • Dutch oven

Method
 

Step-by-Step Instructions
  1. Pat the beef chuck cubes dry with paper towels, season with salt and pepper, and brown in a large Dutch oven with olive oil for 2-3 minutes on each side.
  2. Sauté the chopped onions in the same pot for 5-7 minutes until soft and translucent, scraping up browned bits.
  3. Add minced garlic, sweet paprika, smoked paprika, caraway seeds, marjoram, and cayenne pepper, and stir for 1 minute to release aromas.
  4. Stir in the tomato paste and cook for another minute until it darkens slightly.
  5. Pour in the beef broth and dry red wine, scrape browned bits, and bring to a gentle simmer.
  6. Return the browned beef, diced tomatoes, and chopped bell peppers to the pot, return to a simmer, then cover and let simmer for 2-3 hours.
  7. Add potatoes to the pot, stir gently, cover, and simmer for an additional 30-45 minutes until fork-tender.
  8. Combine sour cream and flour in a bowl, temper with hot broth, then stir back into the goulash and simmer for 5-10 minutes without boiling.
  9. Taste and adjust seasoning, then serve hot, optionally garnished with fresh parsley, alongside noodles or Spätzle.

Nutrition

Serving: 1bowlCalories: 450kcalCarbohydrates: 35gProtein: 30gFat: 20gSaturated Fat: 8gPolyunsaturated Fat: 2gMonounsaturated Fat: 10gCholesterol: 80mgSodium: 600mgPotassium: 950mgFiber: 5gSugar: 4gVitamin A: 800IUVitamin C: 25mgCalcium: 50mgIron: 4mg

Notes

Store leftovers in the refrigerator for up to 3 days or freeze for up to 3 months. Reheat gently, adding broth if needed.

Tried this recipe?

Let us know how it was!

Cozy Up with Spicy Chorizo Pumpkin Soup This Fall

October 30, 2025 by Grace Snow Leave a Comment

As the autumn leaves crunch beneath my feet and the air turns crisp, I can’t help but crave something warm and comforting. Enter my creamy spicy chorizo pumpkin soup—a perfect blend of savory chorizo, sweet pumpkin puree, and a zing of chipotle peppers that will fill your kitchen with inviting aromas. This hearty dish not only warms your soul but can be ready in just 25 minutes, making it a delightful option for busy weeknights. Plus, it’s so versatile! You can easily swap the chorizo for tofu or turkey sausage for a vegetarian or lighter meal twist. Curious how to whip up this comforting fall favorite? Let’s dive in!

Why is This Soup So Special?

Rich, Flavor-Packed Ingredients: This spicy chorizo pumpkin soup features a mouthwatering blend of savory chorizo and creamy pumpkin puree for a luxurious taste experience.

Quick and Easy: Whipping up this comforting dish takes only 25 minutes, perfect for busy weeknights when you crave a homemade meal.

Versatile Options: You can easily adapt this recipe with pork, beef, or tofu chorizo, allowing everyone to enjoy it, regardless of dietary preferences.

Perfect for Fall: With its warm flavors and vibrant colors, it captures the essence of autumn, making it the ideal companion for chilly evenings.

Crowd-Pleaser: Serve this delicious soup at your next gathering or cozy dinner, and watch it disappear faster than you can say "comfort food"! Pair with some fresh bread or sprinkle with roasted pumpkin seeds for that extra layer of flavor.

Spicy Chorizo Pumpkin Soup Ingredients

• Here’s everything you need to create this delicious soup in no time!

For the Soup Base

  • Chorizo – Provides a spicy, savory flavor that forms the hearty backbone of this soup; consider tofu chorizo for a vegetarian option.
  • Onion – Adds sweetness and depth; finely chop for even cooking to enhance the flavors.
  • Garlic – Enhances the aroma and overall flavor profile; freshly minced garlic is always best!
  • Cumin – Offers warmth and an earthy note; this spice adds depth, so adjust according to your taste.
  • Salt – Essential for flavor enhancement; remember to taste and adjust as needed.
  • Black Pepper – Adds mild heat and earthiness; increase the amount for an extra kick!
  • Broth (Chicken or Beef) – Acts as the soup’s base liquid; vegetable broth works well for a vegetarian version.
  • Chipotle Peppers – Imparts a delicious smokiness and spice; use according to your desired heat level.
  • Pumpkin Puree – The star ingredient that creates a creamy texture and sweet flavor; ensure you use pure pumpkin puree—not pie filling.
  • Cream – Adds richness to the soup; substitute with coconut cream or half-and-half for a lighter option.

Optional Garnish

  • Roasted Pumpkin Seeds – Add a delightful crunch and nutty flavor as a topping; they also look lovely for presentation!
  • Chopped Green Onions – Adds freshness and vibrant color to your hearty dish; sprinkle on top before serving.

Step‑by‑Step Instructions for Spicy Chorizo Pumpkin Soup

Step 1: Cook Chorizo
In a heavy-bottom pot over medium heat, add the chorizo, letting it simmer for about 5 minutes. Stir frequently until the chorizo is fully cooked and has released its flavorful oils, becoming nicely browned. Once cooked, drain any excess fat from the pot for a less greasy foundation.

Step 2: Sauté Onions
Next, incorporate the finely chopped onion into the pot with the cooked chorizo. Sauté for about 3-4 minutes, stirring occasionally, until the onions become soft, translucent, and fragrant. This step builds a fragrant base for your spicy chorizo pumpkin soup, enhancing its overall depth of flavor.

Step 3: Add Garlic and Spices
Now, add the freshly minced garlic along with the cumin, salt, and black pepper to the pot. Sauté everything together for an additional minute until the garlic becomes fragrant. The aromatic layers of spices and garlic will lift the flavor profile of the soup, creating a warm foundation for the next ingredients.

Step 4: Combine Ingredients
Pour in the broth (chicken or vegetable) and then add the pumpkin puree along with the chipotle peppers. Stir well to combine all ingredients fully, ensuring the pumpkin puree is smoothly blended into the mixture. The vibrant colors at this stage provide a delightful visual cue for the delicious spicy chorizo pumpkin soup you’re preparing.

Step 5: Simmer the Soup
Bring the mixture to a gentle simmer over medium-low heat, allowing it to cook for about 10 minutes. Avoid boiling; instead, let it bubble gently to meld the flavors beautifully. As time passes, a wonderful aroma will fill your kitchen, signaling that your soup is developing rich layers of taste.

Step 6: Add Cream
After simmering, stir in the cream, mixing well until it's fully incorporated into the soup. This final addition brings a luscious creaminess to your spicy chorizo pumpkin soup, making it comforting and smooth. Allow the soup to heat through for a couple of minutes, then turn off the heat.

Step 7: Serve with Garnishes
Ladle the soup into warm bowls and garnish with roasted pumpkin seeds and chopped green onions for added texture and brightness. The contrasting colors and textures enhance both the presentation and the flavor of your hearty creation. Enjoy this comforting dish as a perfect warm embrace on a chilly day!

What to Serve with Spicy Chorizo Pumpkin Soup

As you savor each spoonful of this creamy, rich soup, consider these delectable pairings that will create a cozy, heartwarming meal.

  • Crusty Artisan Bread: Perfect for dipping, this fresh and crusty bread enhances the soup's rich flavors while adding satisfying texture.

  • Garlic Breadsticks: These warm, buttery delights have a hint of garlic that'll complement the spicy notes from the soup, making each bite irresistible.

  • Mixed Green Salad: A light, refreshing salad with a tangy vinaigrette balances the soup's warmth, adding a crisp contrast that brightens your meal.

  • Cheesy Quesadillas: Serve with melty cheese and fresh herbs, these quesadillas will add a delightful cheesy indulgence that pairs beautifully with the soup’s spice.

  • Sour Cream or Greek Yogurt: A dollop of either brings a cooling creaminess that counteracts the heat, creating a perfect harmony with the soup's savory depth.

  • Craft Beer or Cider: A slightly hoppy beer or a refreshing cider not only cleanses the palate but also complements the flavors in the spicy chorizo pumpkin soup.

  • Pumpkin Spice Muffins: For a sweet finish, these warm treats echo the soup's pumpkin flavor, providing a comforting end to your autumn-inspired meal!

  • Chocolates or Brownies: Rich, fudgy brownies or spiced chocolates can add an indulgent dessert note, rounding out the cozy vibes of this comforting meal.

Make Ahead Options

Preparing this spicy chorizo pumpkin soup in advance is a game-changer for busy weeknights! You can chop the onions and mince the garlic up to 24 hours in advance, storing them in an airtight container in the refrigerator to maintain their freshness. You can also cook the chorizo and combine it with the spices and pumpkin puree up to 3 days ahead; simply refrigerate and reheat gently when ready to finish the soup. When you’re ready to serve, stir in the cream and let it heat through for a quick and comforting meal with minimum effort. By following these prep steps, you'll enjoy the same delicious flavors without a last-minute rush!

Variations & Substitutions for Spicy Chorizo Pumpkin Soup

Feel free to play around with this recipe and customize it to suit your tastes and dietary needs!

  • Tofu Chorizo: Swap chorizo for tofu chorizo for a wholesome vegetarian option. The flavors will still shine bright!
  • Turkey Sausage: Use lean turkey sausage instead of chorizo for a lighter, yet still flavorful version. It's a perfect alternative without losing that savory kick.
  • Sweet Potatoes: Replace pumpkin with sweet potatoes for a slightly sweeter twist. Roasting them beforehand enhances their natural sugars, creating a delightful depth.
  • Coconut Cream: Substitute heavy cream with coconut cream for a dairy-free, tropical flavor. It will add a new richness that perfectly complements the spices.
  • Spice Level: For a milder flavor, reduce the amount of chipotle peppers or substitute with sweet bell peppers. Adjust according to your family’s taste preferences.
  • Herb Infusion: Experiment with adding herbs like thyme or cilantro for a fresh contrast. They provide a burst of brightness and an aromatic layer that livens up the soup.
  • Broth Alternatives: Swap chicken or beef broth with vegetable broth to keep it vegetarian-friendly while still maintaining a robust flavor.
  • Finish with Lime: Squeeze fresh lime juice just before serving to add acidity and balance the soup's richness. It elevates the flavors beautifully, giving each bite a fresh zing.

With these variations, your spicy chorizo pumpkin soup can evolve with your mood and dietary needs. If you’re looking for something else to warm up your kitchen, why not try a comforting bowl of Asparagus Soup Healthy or indulge in some Pumpkin Brownies Decadent? Happy cooking!

Expert Tips for Spicy Chorizo Pumpkin Soup

  • Drain Chorizo Fat: Properly drain excess fat from the chorizo to keep the soup light and flavors balanced. Too much fat can overpower the dish.
  • Quality Pumpkin: Opt for high-quality pumpkin puree for the best taste. If using fresh pumpkin, roast it until tender, then blend until smooth.
  • Adjust Spice Levels: Modify the number of chipotle peppers based on your spice preference. Consider adding sweet bell peppers for a milder flavor.
  • Sautéing Technique: Cook the onions until they're translucent and fragrant—this builds a strong flavor base for your spicy chorizo pumpkin soup. Don’t rush this step!
  • Storage Tips: Store leftover soup in an airtight container for up to three days. Reheat gently on the stove to maintain texture and flavor.
  • Garnish Variety: Experiment with different garnishes such as croutons, feta cheese, or fresh herbs to elevate the soup and attract all taste buds!

How to Store and Freeze Spicy Chorizo Pumpkin Soup

Fridge: Store leftover spicy chorizo pumpkin soup in an airtight container for up to 3 days. This ensures freshness while retaining the delicious flavors.

Freezer: For longer storage, freeze the soup in a freezer-safe container for up to 3 months. Leave some space to allow for expansion as it freezes.

Reheating: When ready to enjoy, thaw in the fridge overnight and reheat gently on the stove over low heat, stirring occasionally until warmed through.

Enjoying Later: If you’ve made a large batch, store in smaller portions to conveniently enjoy this comforting soup at your leisure!

Spicy Chorizo Pumpkin Soup Recipe FAQs

What type of chorizo should I use for this soup?
Absolutely! You can use traditional pork or beef chorizo for a robust flavor, or swap it out for tofu chorizo if you prefer a vegetarian option. The choice you make will slightly alter the flavor profile but will still result in a delicious soup!

How long can I store leftovers of this soup?
Store your spicy chorizo pumpkin soup in an airtight container in the refrigerator for up to 3 days. This allows the flavors to continue melding together while keeping your soup fresh and tasty!

Can I freeze Spicy Chorizo Pumpkin Soup?
Yes, you can freeze this soup! Pour it into freezer-safe containers, leaving a little space for expansion, and it will last for up to 3 months in the freezer. When you're ready to enjoy it, thaw it overnight in the fridge before reheating gently on the stove.

What should I do if the soup turns out too spicy?
Very! If your soup ends up spicier than you anticipated, stir in a bit more cream to help mellow the heat. You can also dilute it with additional broth or water, and add extra pumpkin puree to restore texture while reducing the spice.

How can I make this soup dairy-free?
To achieve a creamy, dairy-free version of this spicy chorizo pumpkin soup, simply substitute the cream with coconut cream or a dairy-free milk alternative like almond or oat milk. This will provide that luxurious texture without the dairy!

What’s the best way to prepare homemade pumpkin puree for this soup?
Certainly! If you want to make your own pumpkin puree, start by selecting a sugar pumpkin. Cut it in half, remove the seeds, and roast the halves face down in a baking dish at 350°F (175°C) for about 45-60 minutes or until tender. Once cooled, scoop out the flesh and blend it until smooth. Use this puree in your soup for a fresh flavor that shines through!

Spicy Chorizo Pumpkin Soup Recipe FAQs

Spicy chorizo pumpkin soup

Cozy Up with Spicy Chorizo Pumpkin Soup This Fall

Warm up this autumn with a delicious Spicy Chorizo Pumpkin Soup made with savory chorizo, creamy pumpkin puree, and chipotle peppers.
Print Recipe Pin Recipe
Prep Time 10 minutes mins
Cook Time 15 minutes mins
Total Time 25 minutes mins
Servings: 4 bowls
Course: Soups
Cuisine: American
Calories: 350
Ingredients Equipment Method Nutrition Notes

Ingredients
  

For the Soup Base
  • 1 lb Chorizo or tofu chorizo for a vegetarian option
  • 1 medium Onion finely chopped
  • 3 cloves Garlic freshly minced
  • 1 tsp Cumin
  • 1 tsp Salt adjust to taste
  • 1/2 tsp Black Pepper adjust to taste
  • 4 cups Broth (Chicken or Vegetable)
  • 1 can Chipotle Peppers use according to desired heat level
  • 2 cups Pumpkin Puree not pie filling
  • 1 cup Cream or coconut cream for a lighter option
Optional Garnish
  • 1/2 cup Roasted Pumpkin Seeds
  • 1/4 cup Chopped Green Onions

Equipment

  • heavy-bottom pot

Method
 

Step-by-Step Instructions for Spicy Chorizo Pumpkin Soup
  1. In a heavy-bottom pot over medium heat, add the chorizo, simmer for about 5 minutes until browned. Drain excess fat.
  2. Add the finely chopped onion to the pot with the cooked chorizo. Sauté for about 3-4 minutes until soft and translucent.
  3. Add the minced garlic, cumin, salt, and black pepper. Sauté for another minute until garlic is fragrant.
  4. Pour in the broth and add pumpkin puree along with chipotle peppers. Stir to combine everything smoothly.
  5. Bring to a gentle simmer over medium-low heat for about 10 minutes to meld flavors.
  6. Stir in the cream, mix well, and heat through for a couple of minutes. Turn off heat.
  7. Ladle into bowls and garnish with roasted pumpkin seeds and chopped green onions before serving.

Nutrition

Serving: 1bowlCalories: 350kcalCarbohydrates: 25gProtein: 15gFat: 20gSaturated Fat: 10gPolyunsaturated Fat: 2gMonounsaturated Fat: 7gCholesterol: 60mgSodium: 800mgPotassium: 700mgFiber: 5gSugar: 5gVitamin A: 5000IUVitamin C: 10mgCalcium: 80mgIron: 3mg

Notes

Store leftovers in an airtight container for up to 3 days. Freezing is possible for up to 3 months.

Tried this recipe?

Let us know how it was!

Broccoli Chicken Divan Casserole That's Pure Comfort Bliss

October 29, 2025 by Grace Snow Leave a Comment

As I whisk together all the ingredients for this Broccoli Chicken Divan Casserole, I can’t help but smile at the thought of cozy evenings ahead. This comforting dish effortlessly blends tender chicken and vibrant broccoli in a creamy, cheesy sauce that warms the heart. On those busy weeknights when time is of the essence, this recipe shines with its quick prep time and the flexibility to customize ingredients to fit your family’s preferences. Whether you’re using leftover chicken, going gluten-free, or even exploring vegetarian options, there's a version for everyone at the table. So, how will you make this delicious dish your own? Let’s dive into the recipe!

Why is Broccoli Chicken Divan Casserole a Must-Try?

Comfort Food at its finest: This Broccoli Chicken Divan Casserole brings warmth and familiarity, making it perfect for family dinners.

Quick and Easy: With minimal prep time, you can have a hearty meal on the table in no time, ideal for busy weeknights.

Versatile Ingredients: Tailor this recipe to your tastes with suggestions like substituting chicken for chickpeas or using gluten-free breadcrumbs.

Flavorful Layers: Enjoy a delightful blend of cheesy goodness and vibrant veggies that everyone will love.

Crowd-Pleasing: It's a sure-fire hit with both kids and adults, perfect for gatherings or cozy nights in.

Try pairing it with a crisp side salad or crusty bread for a satisfying meal. Don't forget to check out other great chicken recipes like Honey Garlic Chicken Thighs or Crock Pot Chicken Stew for more culinary inspiration!

Broccoli Chicken Divan Casserole Ingredients

Whether you're using leftovers or fresh ingredients, prepping for this delicious dish is a breeze.

For the Casserole

  • Cooked Chicken – Use leftover or rotisserie chicken for convenience.
  • Broccoli Florets – Fresh broccoli adds color and nutrition; cauliflower can be a fun substitute.
  • Mayonnaise – Creates a creamy base, but Greek yogurt is a lighter option.
  • Sour Cream – Enhances richness; you can swap it for full-fat yogurt if needed.
  • Grated Parmesan – Infuses flavor; Romano or Pecorino cheese are great alternatives.
  • Lemon Juice – Brightens the dish beautifully; there’s no effective substitute for this ingredient.
  • Dijon Mustard – Adds a tangy kick; yellow mustard is an option but will change the flavor profile.
  • Garlic Powder & Onion Powder – Essential for seasoning; feel free to use fresh if you prefer.
  • Salt & Pepper – Basic seasoning for balance; adjust amounts to taste.
  • Shredded Cheddar Cheese – Provides a gooey topping experience; consider dairy-free cheese for a different option.
  • Breadcrumbs – Adds a delightful crunch; gluten-free breadcrumbs can maintain the dish's integrity.
  • Extra Shredded Cheddar Cheese – For an even cheesier crust, but can be excluded for a lighter dish.

Step‑by‑Step Instructions for Broccoli Chicken Divan Casserole

Step 1: Prepare Ingredients
Begin by gathering all your ingredients for the Broccoli Chicken Divan Casserole. If your chicken isn’t cooked yet, you can poach or roast it before shredding into bite-sized pieces. Meanwhile, bring a pot of water to a boil and blanch the broccoli florets for 2-3 minutes until they turn bright green, then immediately transfer them to a bowl of ice water to halt the cooking process.

Step 2: Make Sauce
In a large mixing bowl, combine mayonnaise, sour cream, grated Parmesan, lemon juice, and Dijon mustard. Use a whisk to blend these ingredients until your sauce is creamy and smooth, ensuring there are no lumps. Sprinkle in the garlic powder, onion powder, salt, and pepper to taste, mixing well to incorporate all the flavors.

Step 3: Assemble Casserole
Preheat your oven to 350°F (175°C). Grease a 9x13 inch baking dish with cooking spray or butter to prevent sticking. Start layering the casserole by placing the shredded chicken evenly at the bottom of the dish. Next, gently arrange the blanched broccoli florets on top of the chicken, preparing a solid base for your creamy sauce.

Step 4: Pour Sauce and Add Toppings
Carefully pour your prepared sauce over the layers in the baking dish, making sure to cover the chicken and broccoli evenly. This will create a luscious, creamy texture throughout the casserole. Then, sprinkle the shredded cheddar cheese and breadcrumbs generously over the top to create a delicious, crunchy crust that will enhance the flavor of the Broccoli Chicken Divan Casserole.

Step 5: Bake and Serve
Place the assembled casserole in the preheated oven and bake for 25–30 minutes. You’ll know it’s done when the cheese is melted, bubbly, and slightly golden on top. Once out of the oven, let it rest for 5-10 minutes to allow the flavors to meld. Serve warm, garnishing as desired, for a beautiful presentation that is sure to please everyone at your table.

Make Ahead Options

Preparing this Broccoli Chicken Divan Casserole ahead of time is a smart move for busy home cooks! You can easily assemble the casserole up to 24 hours in advance; simply layer the chicken, broccoli, and sauce in a greased baking dish, then cover tightly and refrigerate. This allows the flavors to meld beautifully. To maintain quality, keep the breadcrumbs and cheese separate until just before baking. When you're ready to serve, preheat your oven and sprinkle on the toppings before baking at 350°F (175°C) for 25–30 minutes until bubbly and golden. This effortless planning saves time and ensures your casserole is just as delicious!

Expert Tips for Broccoli Chicken Divan Casserole

Prep Ahead: Prepare the ingredients ahead of time to streamline your cooking process, allowing for quick assembly.

Smooth Sauce: Whisk the sauce well to avoid clumps; a smooth sauce ensures even flavor throughout the Broccoli Chicken Divan Casserole.

Layer Wisely: Place chicken at the bottom and broccoli on top to ensure the best texture and flavor blending when baked.

Customize Wisely: Explore ingredient substitutions but keep balance in mind; avoid dramatic shifts that might compromise the dish's core flavors.

Crispy Topping: For an extra crispy topping, consider broiling for the last few minutes of baking, but watch closely to prevent burning.

Rest Before Serving: Let the casserole sit for 5-10 minutes after baking; this helps the flavors meld together and makes for easier serving.

Broccoli Chicken Divan Casserole Variations

Feel free to personalize this Broccoli Chicken Divan Casserole to make it fit your taste buds and dietary preferences!

  • Gluten-Free: Replace regular breadcrumbs with gluten-free breadcrumbs to keep it light and delicious.
  • Vegetarian: Swap out chicken for cooked chickpeas or diced tofu for a hearty plant-based alternative.
  • Add Spinach: Toss in some fresh or frozen spinach to boost nutrition and flavor; it pairs wonderfully with the creamy sauce.
  • Spicy Option: For those who crave heat, stir in cayenne pepper or red pepper flakes; it adds a lovely kick without overpowering the dish.
  • Cheesy Upgrade: Mix in additional delicious cheeses like Gouda or Pepper Jack to enhance the flavor even further; cheese lovers will rejoice!
  • Seasonal Vegetables: Get creative with the seasons; zucchini or asparagus can be tasty alternatives that brighten up the casserole.
  • Creamy Dream: Experiment with different creamy bases like sour cream mixed with cream cheese for a richer texture.
  • Nutty Finish: Add slivered almonds or pine nuts on top before baking for an unexpected crunch and lovely nutty flavor.

These variations allow you to enjoy the comfort of your favorite casserole while customizing it to suit everyone’s cravings! If you’re looking for more choices, consider trying out Honey Bbq Chicken or Chipotle Lime Chicken and Rice for exciting flavor profiles.

What to Serve with Broccoli Chicken Divan Casserole

Comfort and flavor are just a dash away when you explore delightful side dishes that elevate your meal.

  • Garlic Bread: The warm, toasted flavors of garlic bread create a delightful contrast to the creamy casserole, perfect for sopping up the sauce.

  • Mixed Green Salad: A refreshing salad, drizzled with a zesty vinaigrette, balances the richness of the casserole and adds a pop of color and texture.

  • Steamed Rice: Fluffy white or brown rice absorbs the sauce beautifully, making every bite a comforting experience. It's a classic pairing that adds heartiness.

  • Roasted Vegetables: Seasonal roasted vegetables bring caramelized sweetness and a crispy texture that harmonizes with the creamy dish, providing a well-rounded plate.

  • Cheesy Garlic Mashed Potatoes: Creamy and rich, these mashed potatoes mirror the flavors of the casserole while providing a different texture that everyone loves.

  • Cranberry Sauce: A dollop of tangy cranberry sauce offers a surprising twist, cutting through the richness with its vibrant acidity, perfect for achieving that contrast.

  • Chardonnay or Sauvignon Blanc: Pair your meal with a crisp white wine, which can elevate the flavors and cleanse your palate between the rich bites.

These sides not only complement the Broccoli Chicken Divan Casserole but also encourage hearty conversations around the dinner table. Enjoy your family meal made complete!

How to Store and Freeze Broccoli Chicken Divan Casserole

  • Room Temperature: Allow the casserole to cool completely before storing at room temperature for no longer than 2 hours to prevent bacteria growth.

  • Fridge: Store leftover Broccoli Chicken Divan Casserole in an airtight container in the refrigerator for up to 3 days; reheat portions in the microwave or oven until heated through.

  • Freezer: For longer storage, cover the casserole tightly with plastic wrap and aluminum foil; it can be frozen for up to 2 months. Thaw overnight in the fridge before reheating.

  • Reheating: To reheat, place the casserole in a 350°F (175°C) oven until it’s hot and bubbly, about 25-30 minutes; cover with foil if the top browns too quickly.

Broccoli Chicken Divan Casserole Recipe FAQs

What kind of chicken is best for Broccoli Chicken Divan Casserole?
Absolutely! Using leftover or rotisserie chicken is ideal for this recipe, as it saves time and adds great flavor. If you need to cook chicken, poaching or roasting it before shredding will work wonderfully too.

How do I store leftover Broccoli Chicken Divan Casserole?
Very! Allow the casserole to cool completely before transferring it to an airtight container. In the refrigerator, it will keep for up to 3 days. You can easily reheat portions in the microwave or a preheated oven until heated through.

Can I freeze Broccoli Chicken Divan Casserole?
Of course! To freeze, cover the assembled casserole tightly with plastic wrap and aluminum foil. It can be stored in the freezer for up to 2 months. When you’re ready to enjoy it again, thaw it overnight in the fridge before reheating.

What should I do if my sauce is too thick?
Not a problem! If your sauce thickens too much, simply add a splash of milk or chicken broth until it reaches your desired consistency. Whisk thoroughly to incorporate the liquid evenly. It usually helps achieve a smooth texture that’s perfect for this casserole.

Are there any dietary considerations for this dish?
Definitely! This Broccoli Chicken Divan Casserole can easily be made gluten-free by using gluten-free breadcrumbs. For a vegetarian option, swapping chicken for chickpeas or tofu will give you a hearty alternative without compromising taste.

How can I customize the ingredients?
The more the merrier! This recipe is super versatile. You can mix in spinach for added nutrition, use different cheeses like Gouda or Pepper Jack for flavor, or add spices like cayenne pepper if you enjoy some heat. Feel free to explore and make this dish your own!

Broccoli Chicken Divan Casserole

Broccoli Chicken Divan Casserole That's Pure Comfort Bliss

This Broccoli Chicken Divan Casserole blends tender chicken and vibrant broccoli in a creamy, cheesy sauce, making it a must-try comfort food.
Print Recipe Pin Recipe
Prep Time 15 minutes mins
Cook Time 30 minutes mins
Resting Time 10 minutes mins
Total Time 55 minutes mins
Servings: 6 servings
Course: Dinner
Cuisine: American
Calories: 400
Ingredients Equipment Method Nutrition Notes

Ingredients
  

For the Casserole
  • 4 cups Cooked Chicken Use leftover or rotisserie chicken
  • 4 cups Broccoli Florets Fresh broccoli adds color and nutrition
  • 1 cup Mayonnaise Creates a creamy base
  • 1 cup Sour Cream Enhances richness; can swap for full-fat yogurt
  • 1 cup Grated Parmesan Infuses flavor; Romano or Pecorino are alternatives
  • 2 tablespoons Lemon Juice Brightens the dish beautifully
  • 1 tablespoon Dijon Mustard Adds a tangy kick
  • 1 teaspoon Garlic Powder Essential for seasoning
  • 1 teaspoon Onion Powder Essential for seasoning
  • 1 teaspoon Salt Basic seasoning for balance
  • 1 teaspoon Pepper Basic seasoning for balance
  • 2 cups Shredded Cheddar Cheese Provides a gooey topping experience
  • 1 cup Breadcrumbs Adds a delightful crunch
  • 1 cup Extra Shredded Cheddar Cheese For an even cheesier crust

Equipment

  • 9x13-inch baking dish
  • Mixing Bowl
  • Whisk
  • pot

Method
 

Step-by-Step Instructions
  1. Gather all your ingredients. If your chicken isn’t cooked, poach or roast before shredding into bite-sized pieces. Blanch broccoli florets in boiling water for 2-3 minutes, then transfer to ice water.
  2. In a mixing bowl, combine mayonnaise, sour cream, grated Parmesan, lemon juice, and Dijon mustard. Whisk until creamy and smooth, then add garlic powder, onion powder, salt, and pepper to taste.
  3. Preheat your oven to 350°F (175°C). Grease a 9x13 inch baking dish. Layer shredded chicken at the bottom, followed by the blanched broccoli.
  4. Pour the prepared sauce over the chicken and broccoli, ensuring even coverage. Sprinkle shredded cheddar cheese and breadcrumbs on top.
  5. Bake in the preheated oven for 25-30 minutes until the cheese is melted and bubbly. Let it rest for 5-10 minutes before serving.

Nutrition

Serving: 1servingCalories: 400kcalCarbohydrates: 30gProtein: 25gFat: 24gSaturated Fat: 12gPolyunsaturated Fat: 2gMonounsaturated Fat: 8gCholesterol: 85mgSodium: 700mgPotassium: 600mgFiber: 3gSugar: 4gVitamin A: 800IUVitamin C: 90mgCalcium: 400mgIron: 2mg

Notes

Customize ingredient substitutions but ensure balance in flavors. Serve with a side salad or crusty bread for a complete meal.

Tried this recipe?

Let us know how it was!
  • « Previous Page
  • 1
  • …
  • 112
  • 113
  • 114
  • 115
  • 116
  • …
  • 180
  • Next Page »

Welcome!

Hi, I’m Grace, a Sydney-based home cook with a passion for bold flavors and trending ingredients. Whether you’re a busy beginner or a seasoned foodie, you’ll find dishes here that are fresh, fun, and full of flavor.

More about me

Popular Recipes

  • Butter Pecan Cookies
    Irresistibly Soft Butter Pecan Cookies for Cozy Moments
  • Decadent Turtle Bars
    Decadent Turtle Bars: Indulge in Sweet Gooey Perfection
  • Salted Caramel Butter Bars
    Decadent Salted Caramel Butter Bars You Can't Resist
  • Easy Italian Pasta Salad
    Easy Italian Pasta Salad: A Summer Delight to Share

Footer

↑ back to top

About

  • Privacy Policy
  • Disclaimer
  • Terms & Conditions

Newsletter

  • Sign Up! for emails and updates

Contact

  • About me
  • Contact me

Copyright © 2025 TastyTrendIngredients