tastytrendingredients

  • Home
  • Recipes
    • Appetizers
    • Breakfast
    • Dessert
    • Dinner
    • Drinks
    • Salads
    • Snacks
    • Soups
  • About me
  • Contact
menu icon
go to homepage
  • Home
  • Recipes
    • Appetizers
    • Breakfast
    • Dessert
    • Dinner
    • Drinks
    • Salads
    • Snacks
    • Soups
  • About me
  • Contact
search icon
Homepage link
  • Home
  • Recipes
    • Appetizers
    • Breakfast
    • Dessert
    • Dinner
    • Drinks
    • Salads
    • Snacks
    • Soups
  • About me
  • Contact
×

Savory Philly Cheesesteak Soup for Ultimate Comfort Cravings

September 22, 2025 by Grace Snow Leave a Comment

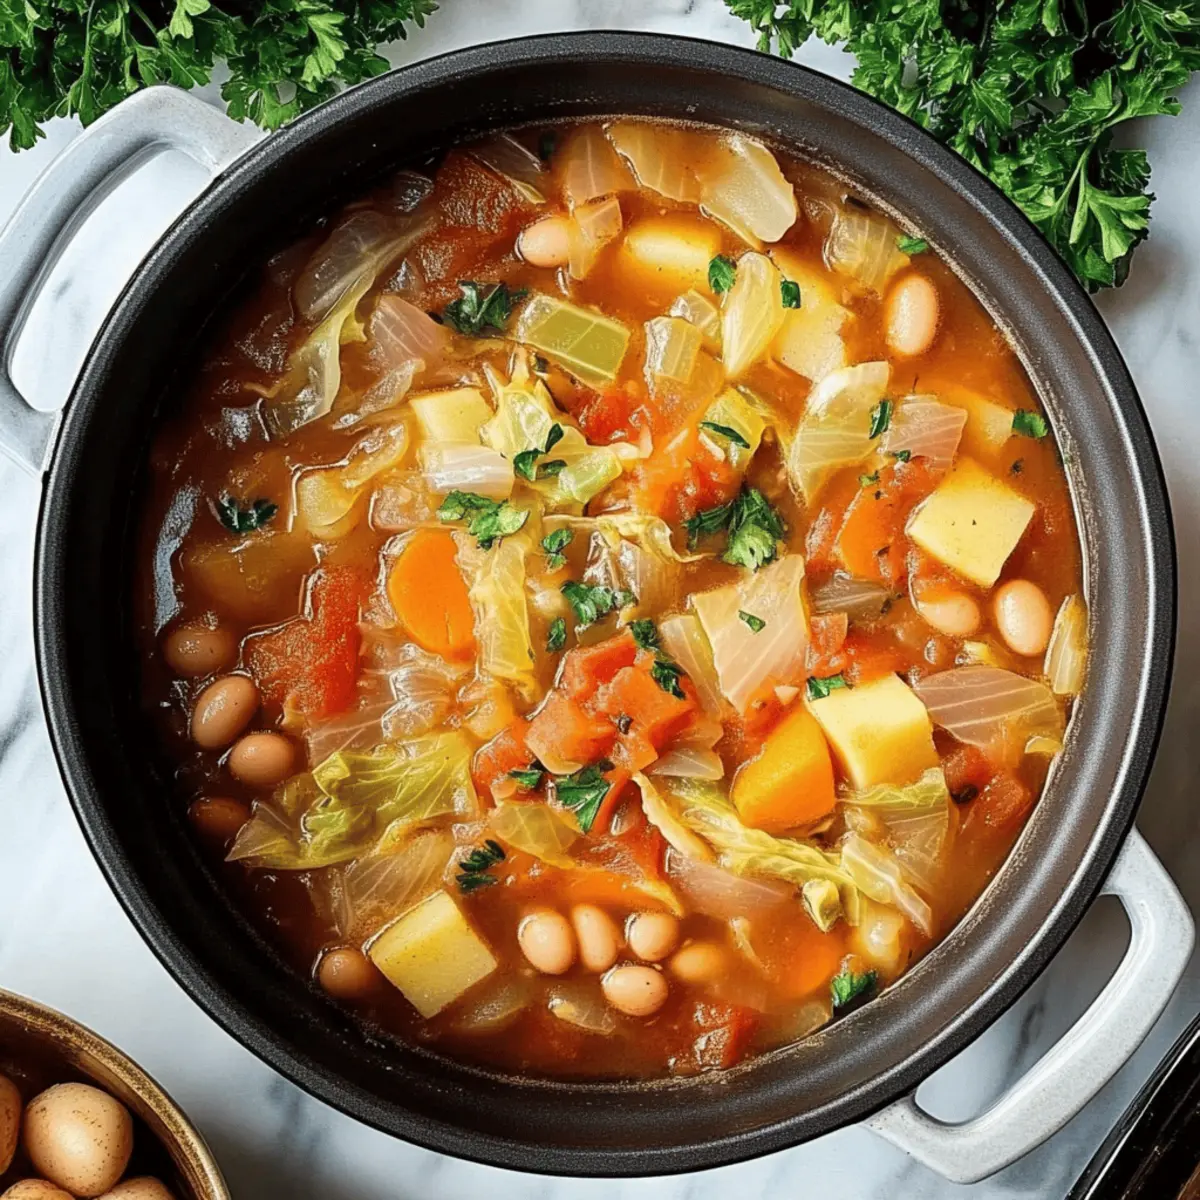
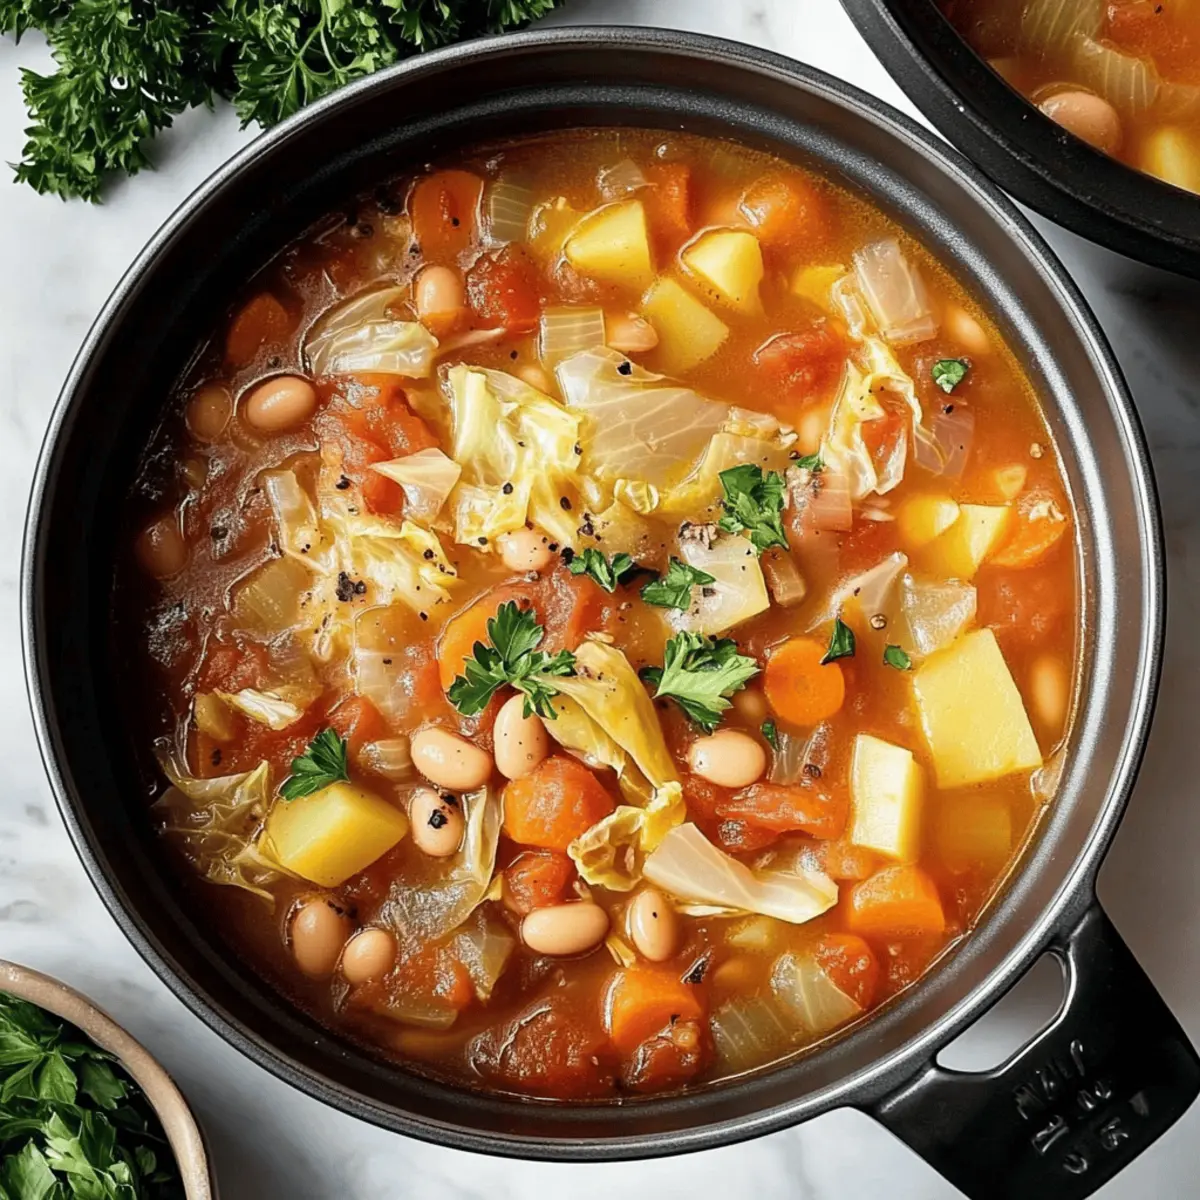
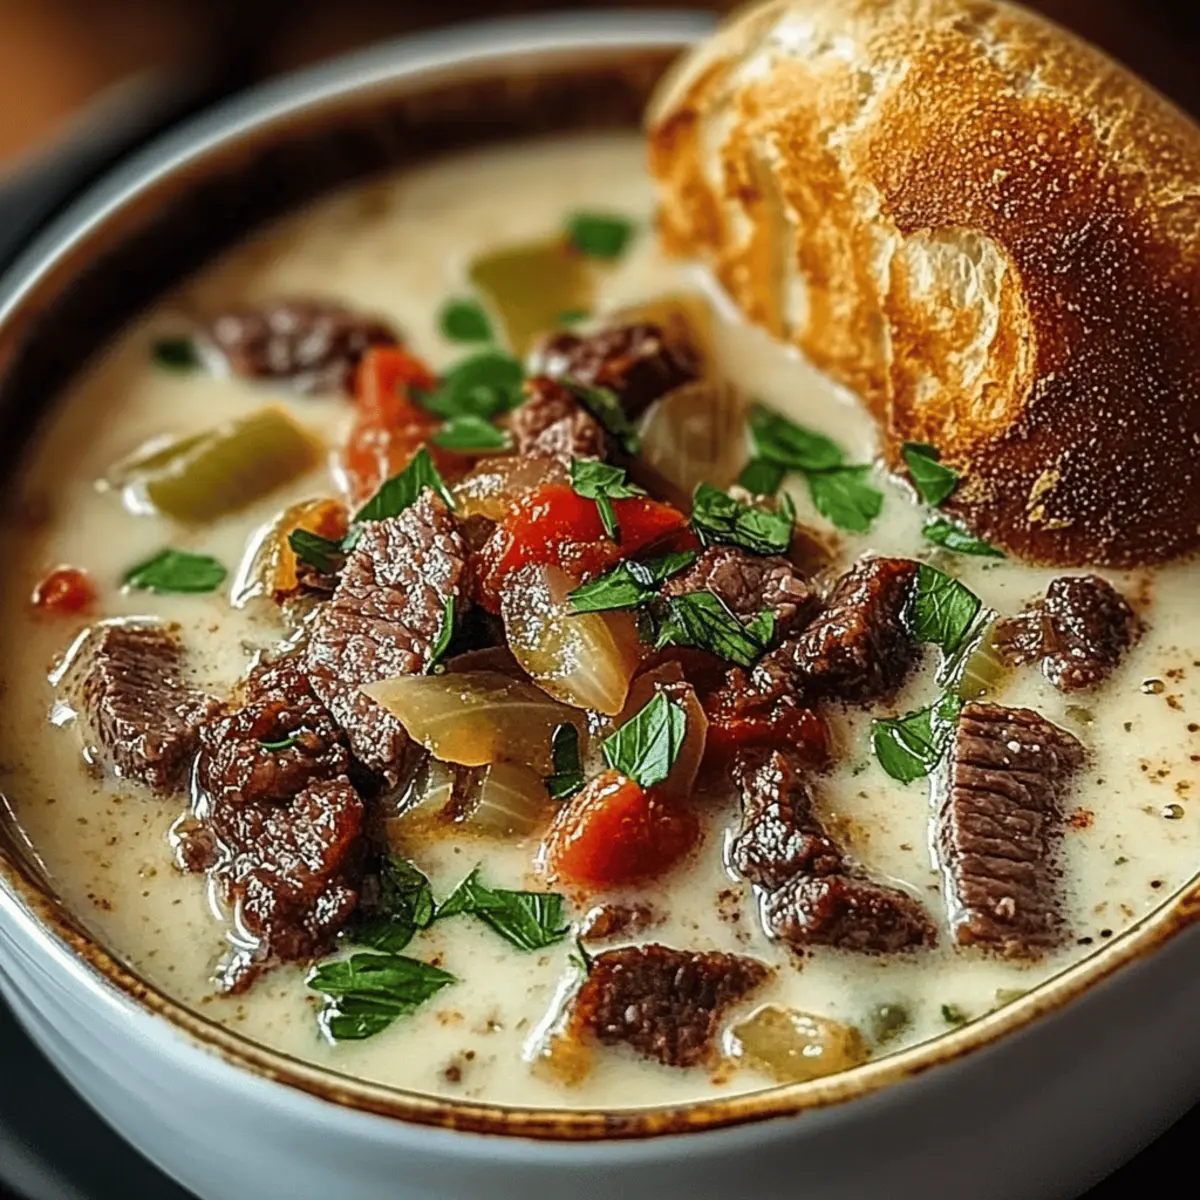
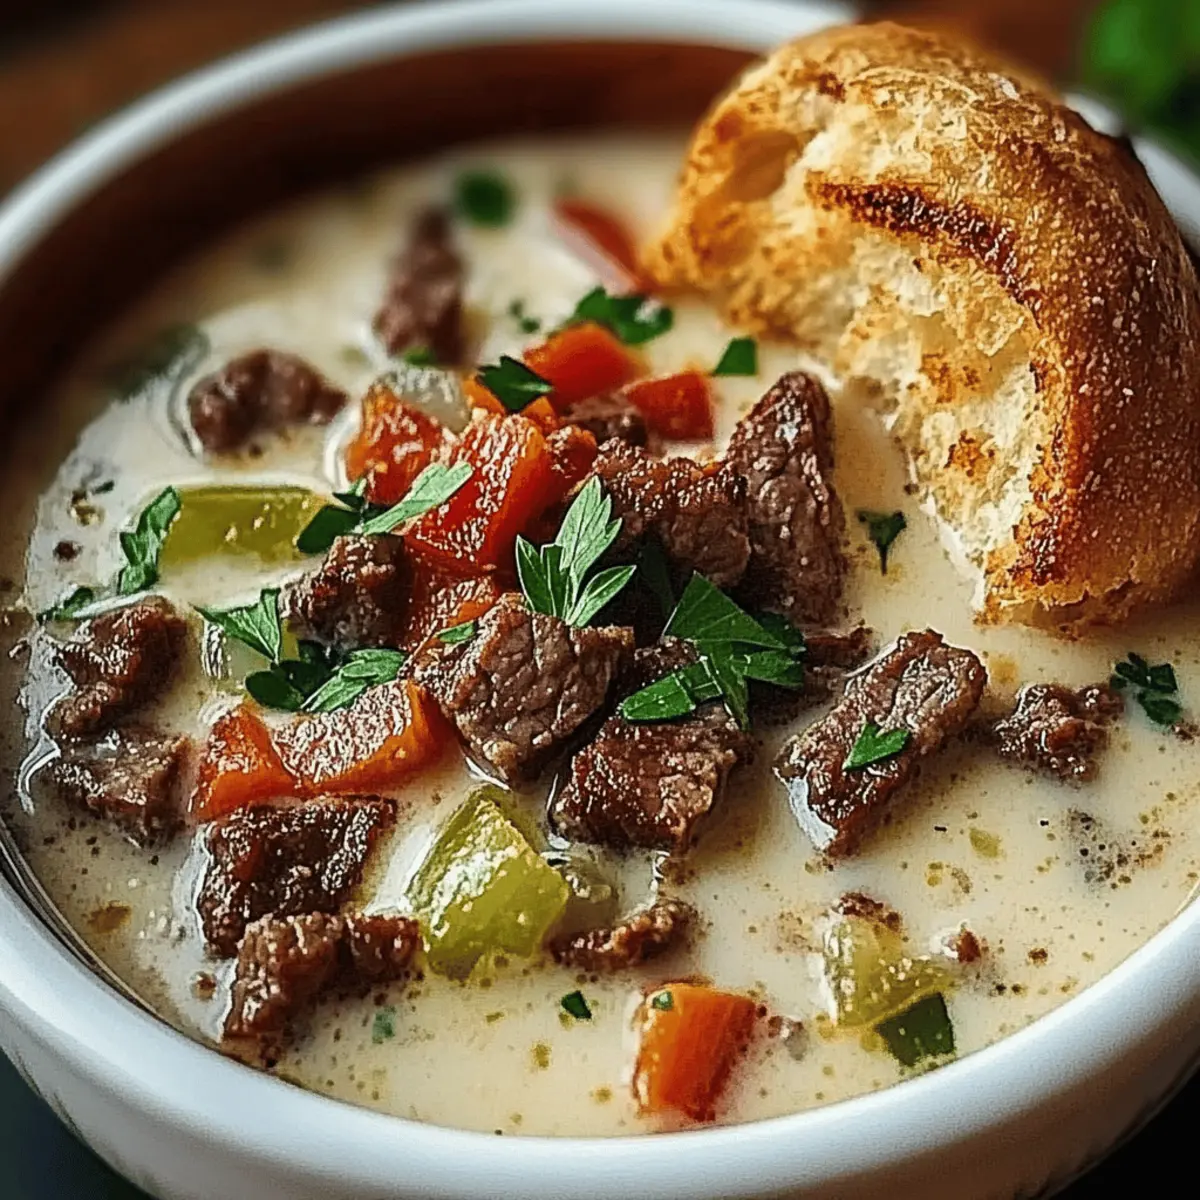
The aroma of sizzling beef paired with sweet caramelized onions transports me straight to a bustling Philly street corner, where the iconic cheesesteak sandwich reigns supreme. Enter my Hearty Philly Cheesesteak Soup—a cozy twist on this classic, where tender sirloin, vibrant peppers, and a creamy, cheesy broth unite to create a bowl of comfort food that’s simply irresistible. Perfect for those hectic weeknights or lazy weekends, this soup delivers all the savory goodness you crave without requiring the fuss of a traditional sandwich. Plus, it's easy to make and leaves you feeling warm and satisfied. Curious about how to bring this deliciousness to your kitchen? Let's dive right into the recipe!

Why is this soup a must-try?

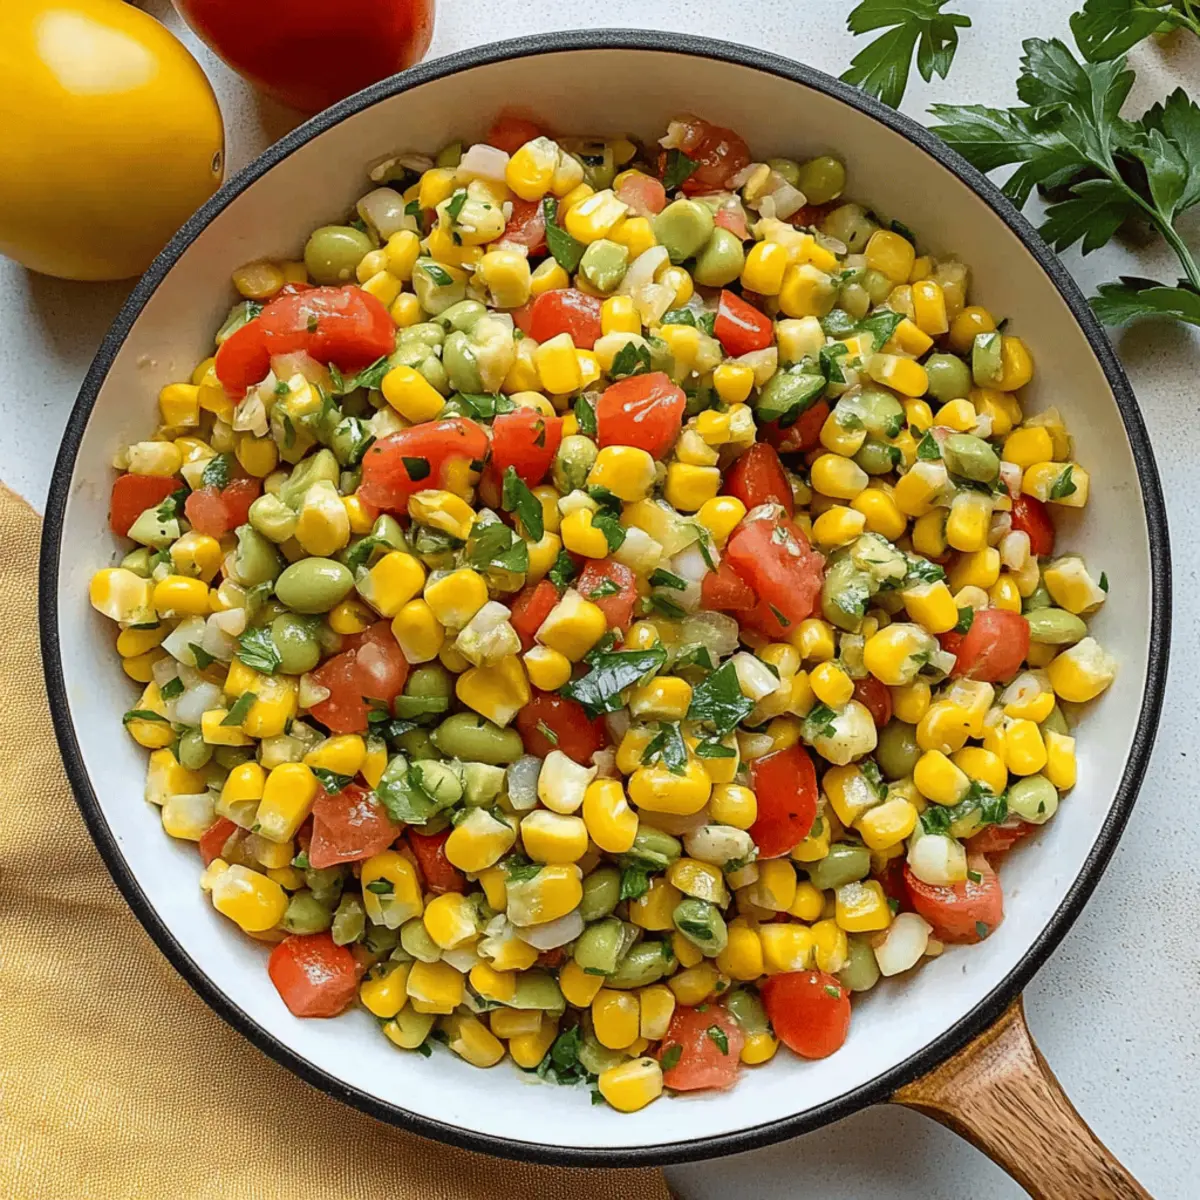
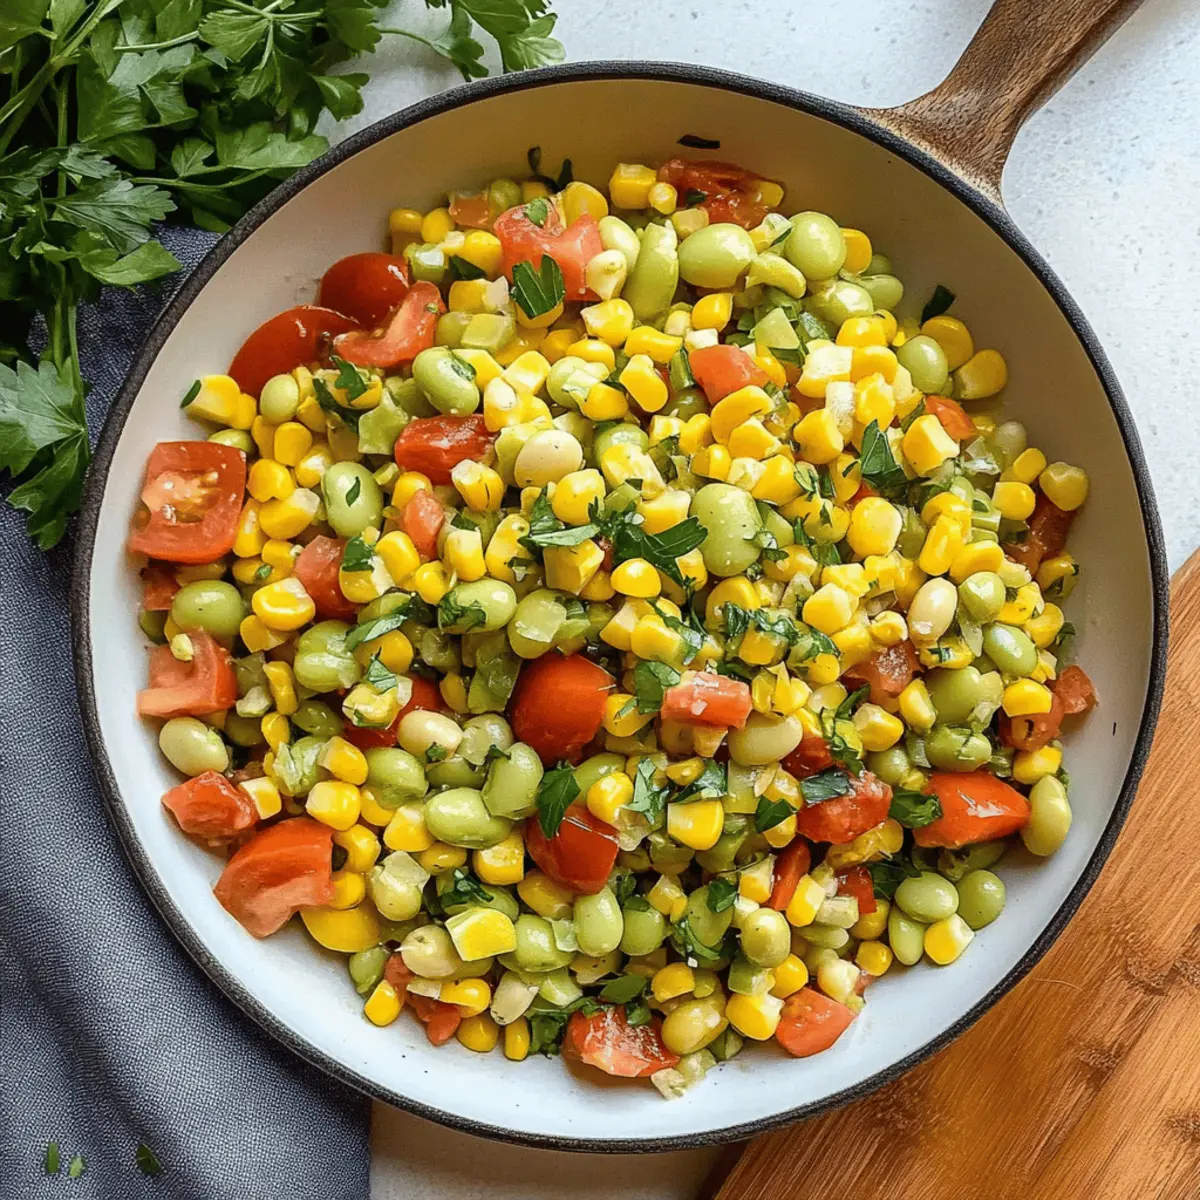
Comforting flavors: Philly Cheesesteak Soup combines all your favorite elements of the classic sandwich—savory beef, creamy cheese, and sweet peppers—into one delicious bowl. Quick and easy: With straightforward steps and minimal prep time, you’ll have a hearty meal ready in no time. Customizable: Feel free to switch up ingredients; try adding mushrooms for a richer flavor or use different cheeses to create your perfect version! Pair it with crunchy crusty rolls for a delightful dip. If you're a fan of hearty soups, make sure to check out other favorites like Lemon Chicken Soup for cozy days or Zuppa Toscana Soup for something with a kick!

Philly Cheesesteak Soup Ingredients

• Discover the flavorful components for a comforting bowl!

For the Soup Base
• Olive Oil – Ideal for sautéing vegetables; swap with vegetable oil if necessary.
• Onion (1 large, chopped) – Adds sweetness and depth; yellow or white varieties work best.
• Green Bell Pepper (1, chopped) – Introduces crunch; any color bell pepper is a great alternative.
• Red Bell Pepper (1, chopped) – Enhances sweetness and color; can be substituted with yellow or orange.
• Sirloin Steak (1 lb, thinly sliced against the grain) – The heart of the soup, providing a rich flavor; consider ribeye or flank steak as alternatives.
• Beef Broth (8 cups) – Serves as the flavorful base; low-sodium broth is best for controlling saltiness.
• Diced Tomatoes (1 can, 14.5 oz, undrained) – Adds texture and acidity; fresh tomatoes are a delightful substitute.
• Worcestershire Sauce (1 tsp) – Provides umami flavor balance; soy sauce is a suitable swap.
• Dried Thyme (1/2 tsp) – Elevates the soup's flavor profile; fresh thyme can be used in greater quantities.
• Red Pepper Flakes (1/4 tsp, optional) – Introduces a touch of heat; adjust to personal preference or omit for mildness.
• Salt and Pepper – Essential for seasoning to taste.

For the Cheese Sauce
• Butter (4 tbsp) – Used for making the roux; margarine is an alternative if needed.
• All-Purpose Flour (4 tbsp) – Thickens the cheese sauce; gluten-free flour can serve as a substitute.
• Milk (3 cups) – Contributes to a creamy consistency; any milk or plant-based milk can work here.
• Cream Cheese (8 oz, softened) – Adds rich creaminess; consider Neufchâtel cheese for a lighter option.
• Shredded Provolone Cheese (8 oz) – The cheese that captures the cheesesteak essence; mozzarella or cheddar can be swappable for variety.
• Shredded Mozzarella Cheese (4 oz) – Offers stretchiness; more provolone can be added for extra flavor.
• Garlic Powder (1/4 tsp) – Boosts flavor profile; fresh minced garlic can be used for a stronger taste.
• Onion Powder (1/4 tsp) – Brings depth to the flavor; fresh onion may be used, but will vary the texture.

For Garnish and Serving
• Chopped Fresh Parsley – Adds a burst of freshness; substitute with chives for a different herbaceous note.
• Crusty Rolls – Perfect accompaniments for dipping; any sturdy bread works well to complement the soup.

Whip up your own delightful bowl of Philly Cheesesteak Soup and indulge in the ultimate comfort food experience!

Step‑by‑Step Instructions for Philly Cheesesteak Soup

Step 1: Sauté the Vegetables
In a large pot, heat 2 tablespoons of olive oil over medium heat. Add the chopped onion, green bell pepper, and red bell pepper. Sauté for 8-10 minutes, stirring occasionally, until the vegetables are softened and caramelized. This step is essential for building the flavor base of your Philly Cheesesteak Soup.

Step 2: Cook the Steak
Increase the heat to medium-high and add 1 pound of thinly sliced sirloin steak to the pot. Cook for about 5-7 minutes, stirring frequently, until the beef is browned all over. Make sure not to overcrowd the pot, as this helps achieve that perfectly seared flavor in your soup.

Step 3: Add Broth and Seasonings
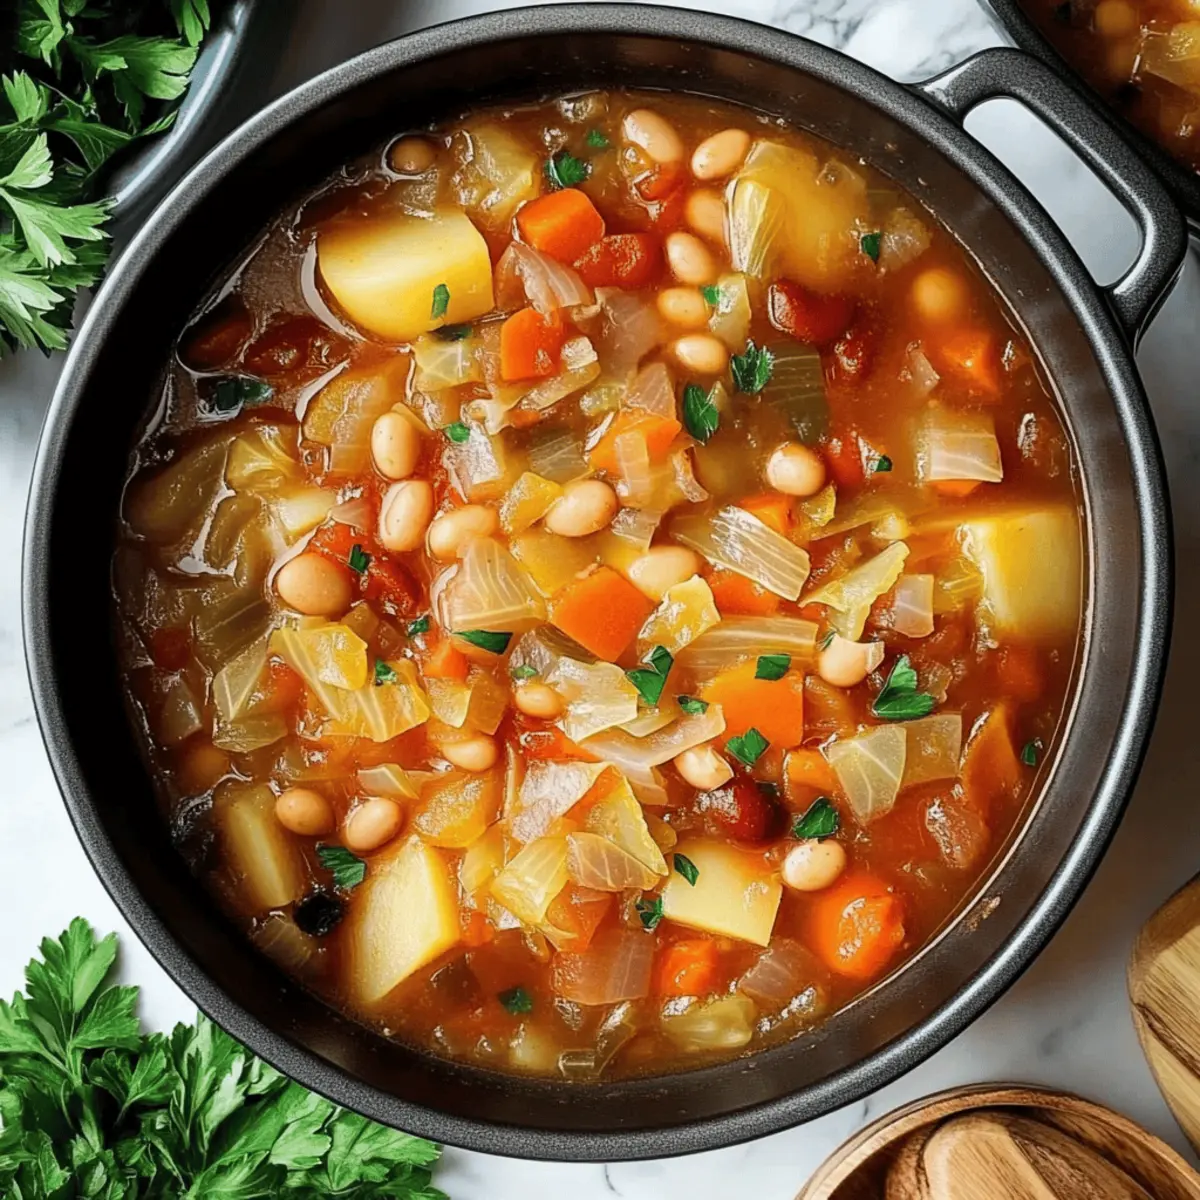
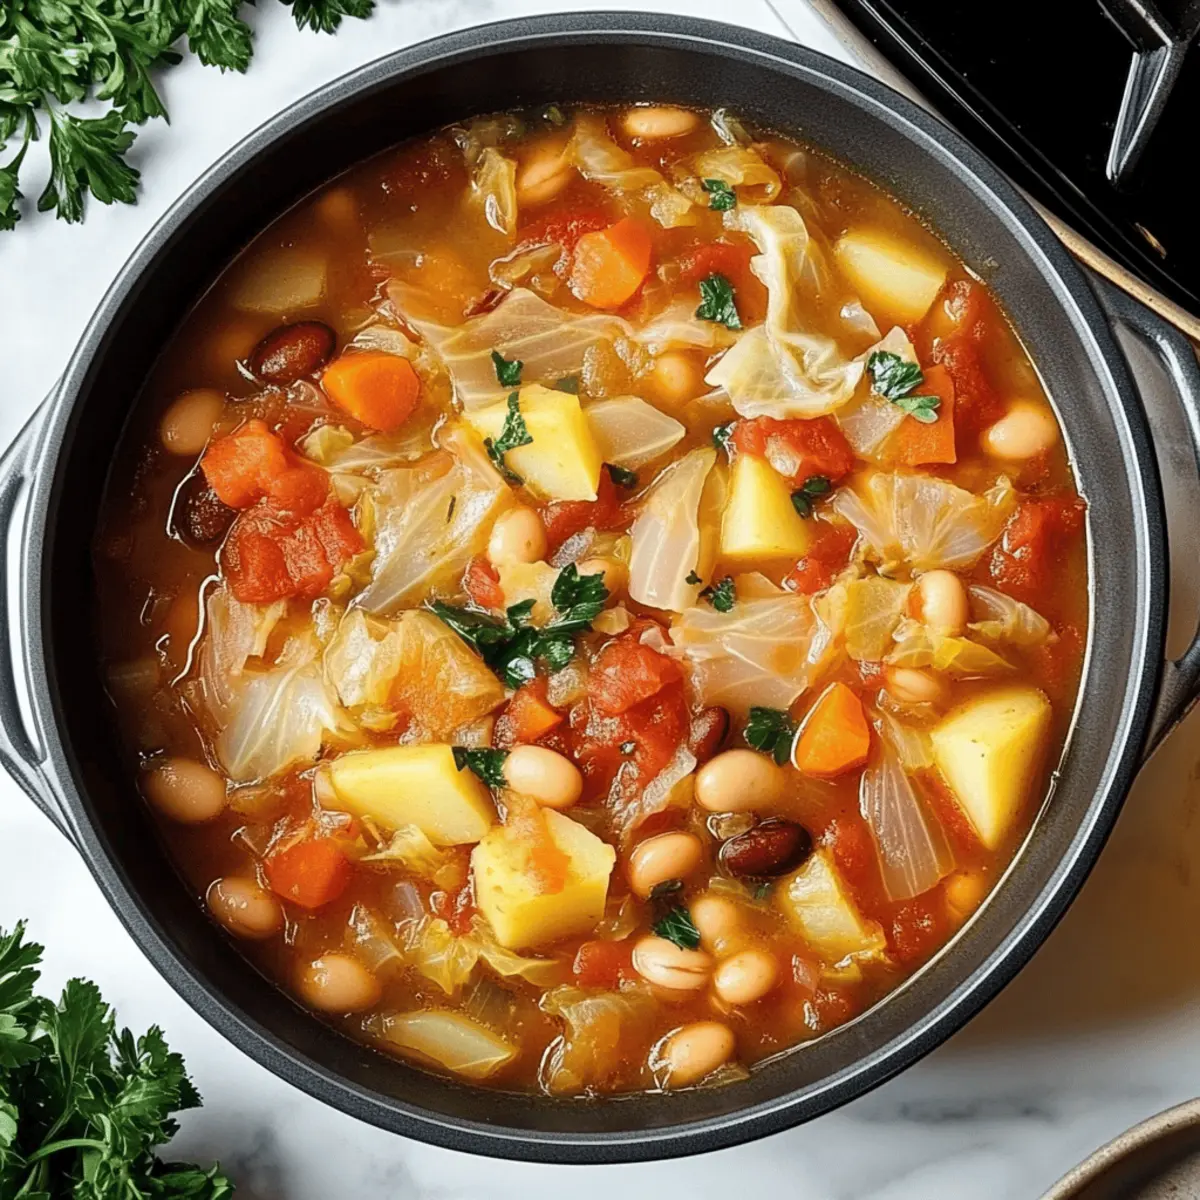
Pour in 8 cups of beef broth along with 1 can of diced tomatoes, undrained. Scrape up any browned bits from the bottom of the pot to enhance the flavor. Stir in 1 teaspoon of Worcestershire sauce, 1/2 teaspoon of dried thyme, and optional red pepper flakes. Season generously with salt and pepper, then bring to a simmer. Let it cook for 30 minutes, allowing the flavors to meld.

Step 4: Make the Cheese Sauce
While the soup simmers, prepare the cheese sauce in a separate saucepan. Melt 4 tablespoons of butter over medium heat, then whisk in 4 tablespoons of all-purpose flour to create a roux. Cook for 1-2 minutes until it starts to bubble, then gradually whisk in 3 cups of milk. Continue cooking for about 5 minutes, stirring constantly, until the mixture thickens.

Step 5: Add Creaminess with Cheese
Stir in 8 ounces of softened cream cheese, 8 ounces of shredded provolone cheese, and 4 ounces of shredded mozzarella cheese into the thickened milk mixture. Keep stirring until the cheeses are melted and the sauce is smooth. Season your cheese sauce with 1/4 teaspoon of garlic powder and onion powder to enhance its flavor.

Step 6: Combine Soup and Cheese Sauce
Carefully combine the creamy cheese sauce with your Philly Cheesesteak Soup base in the large pot. Stir gently to incorporate the cheese sauce without bringing it to a boil, which could cause the cheese to separate. If the soup is too thick, adjust its consistency by adding a bit more beef broth.

Step 7: Serve and Garnish
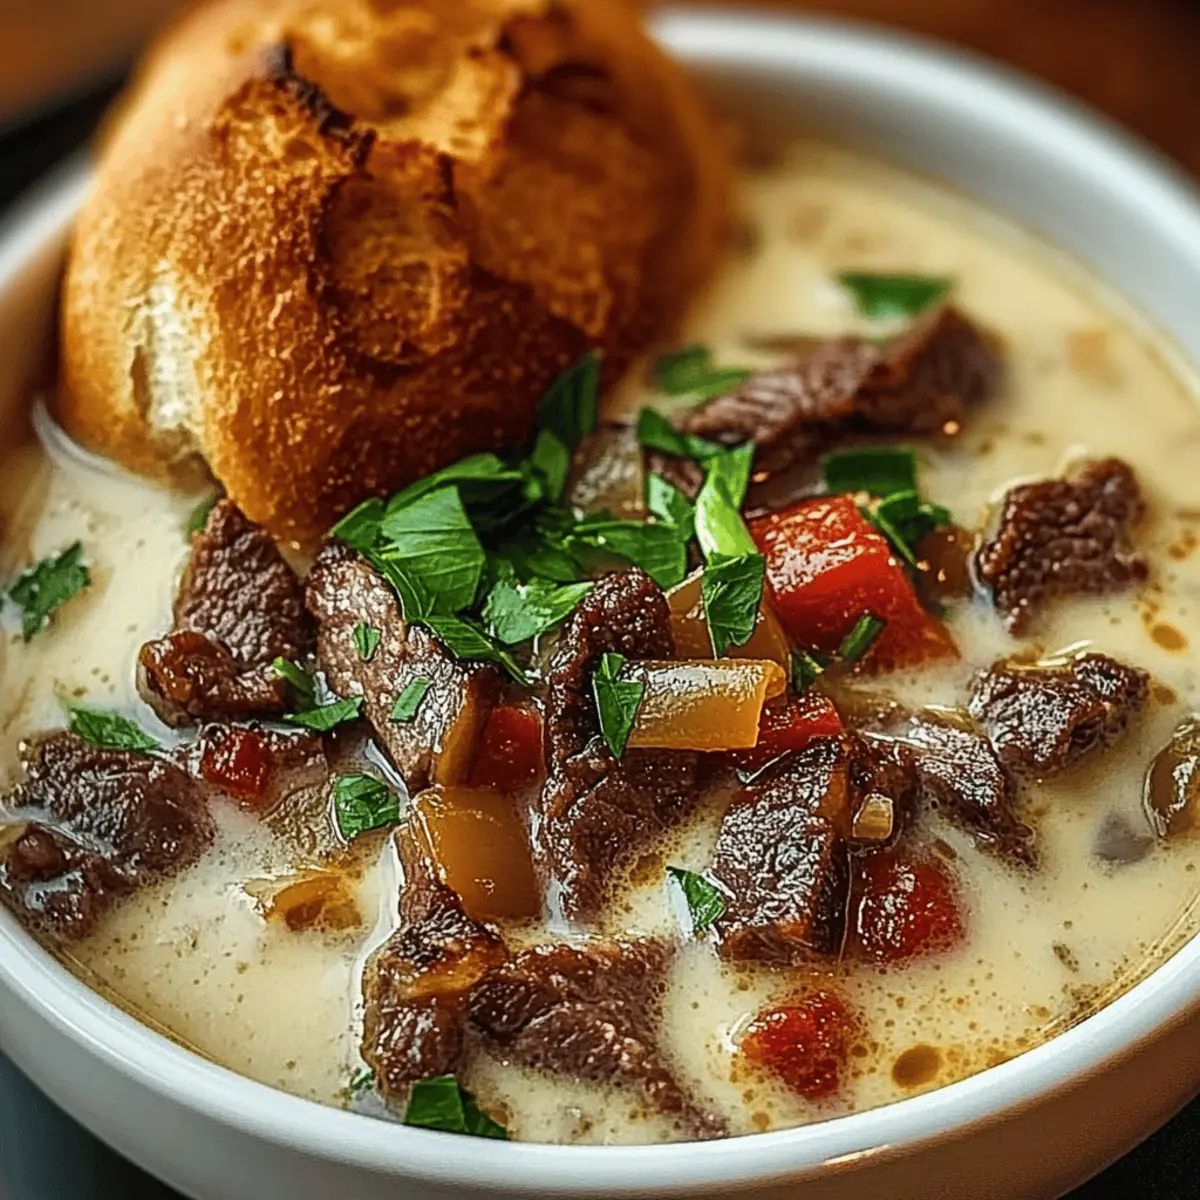
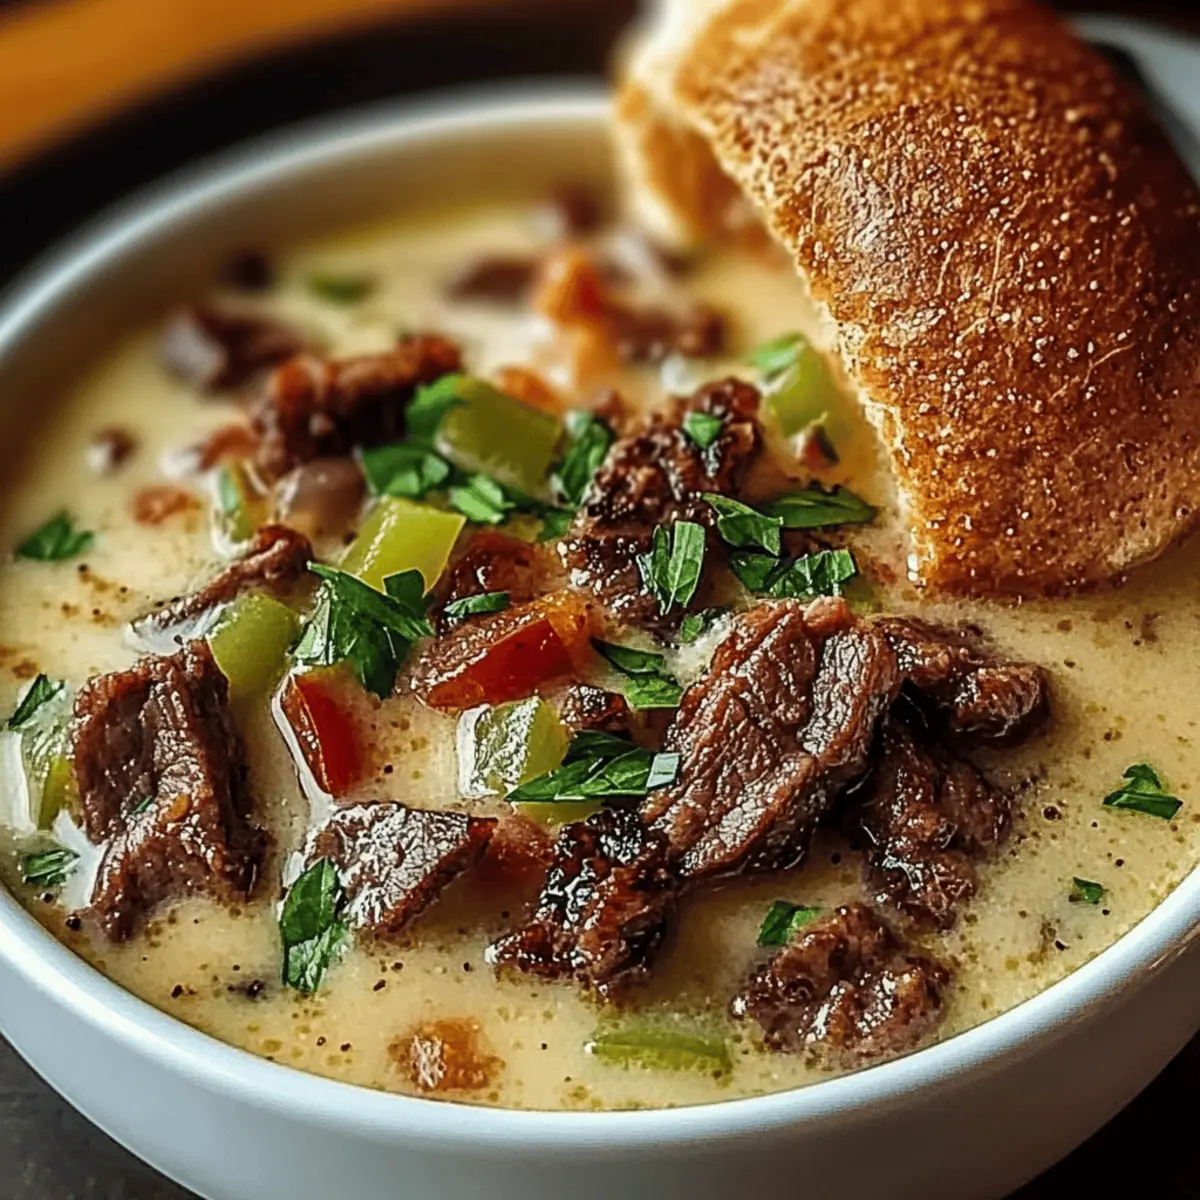
Ladle the hot Philly Cheesesteak Soup into bowls, then top each serving with extra cheese and a sprinkle of chopped fresh parsley for a pop of color. Serve alongside warm, crusty rolls for dipping, and watch as everyone enjoys this comforting, hearty meal that’s perfect for sharing.

Expert Tips for Philly Cheesesteak Soup

  • Quality Ingredients: Use high-quality steak for the best flavor and tenderness; slicing against the grain makes a significant difference in texture.
  • Flavor Base Magic: Make sure to sauté the onion and peppers until they're caramelized, enhancing the flavor depth of your Philly Cheesesteak Soup.
  • Broth Choice: Opt for low-sodium beef broth to maintain control over the soup's saltiness and let other flavors shine without overwhelming the dish.
  • Cheese Caution: Avoid overheating the cheese sauce after combining it with the soup, as this can lead to separation; keep the soup at a gentle simmer.
  • Creative Variations: Don't hesitate to customize the soup by adding sautéed mushrooms or using different cheeses, which can elevate the comfort food experience even more!

How to Store and Freeze Philly Cheesesteak Soup

Fridge: Keep leftovers in an airtight container for up to 3 days, ensuring to let the soup cool completely before sealing.

Freezer: Freeze Philly Cheesesteak Soup in freezer-safe containers for up to 3 months. Allow it to cool, then portion before sealing tightly to prevent freezer burn.

Reheating: Thaw overnight in the fridge, then gently reheat on the stove over low heat, stirring frequently to combine the creamy cheese sauce back into the soup. Add a splash of broth if needed for consistency.

What to Serve with Philly Cheesesteak Soup

A bowl of Philly Cheesesteak Soup is comforting and rich, but pairing it with delightful sides can take your meal to the next level.

  • Crunchy Crusty Rolls: Perfect for dipping! These golden rolls soak up the creamy broth and add a satisfying crunch to each bite.
  • Garlic Bread: The flavors of roasted garlic spread on bread enhance the savory elements of the soup, making every dip even tastier.
  • Caesar Salad: A crisp, refreshing salad with crunchy romaine and creamy dressing contrasts beautifully with the hearty soup.
  • Roasted Vegetables: The natural sweetness of roasted carrots and bell peppers complements the savory soup, adding both color and health benefits.
  • Cheesy Garlic Biscuits: Soft and cheesy, these biscuits can act as a perfect complement to the soup's creamy texture—one bite and you'll be hooked!
  • Coleslaw: This crunchy, tangy side dish offers a refreshing balance to the rich flavors of the Philly Cheesesteak Soup, providing a delightful crunch.
  • Potato Chips: Give a satisfying crunch with a flavored or plain potato chip—who can resist that delightful mix of textures?
  • Sweet Potato Fries: The sweet and salty combo of these fries works wonderfully against the backdrop of the savory soup.

Make Ahead Options

These Philly Cheesesteak Soup preparations are perfect for busy home cooks looking to save time! You can chop the vegetables (onions and bell peppers) and slice the steak up to 24 hours in advance; just refrigerate them in separate airtight containers to maintain their freshness. Additionally, you can make the cheese sauce ahead of time and store it in the refrigerator for up to 3 days. When you're ready to serve, reheat the soup base and cheese sauce separately, then combine them without boiling to prevent separation. This way, you’ll enjoy all the comforting flavors of your Philly Cheesesteak Soup without the last-minute rush!

Philly Cheesesteak Soup Variations

Feel free to make this charming soup your own with these delicious twists!

  • Cut Swap: Substitute sirloin with ribeye or flank steak for richer flavors in every bite. You'll elevate the dish while still keeping that savory essence!
  • Veggie Boost: Add grilled mushrooms or sautéed zucchini for added depth and essential nutrients. This twist can also give your soup a delightful texture contrast.
  • Cheese Adjustment: Use cheddar or pepper jack cheese for a bolder, spicier profile. With these options, each bowl can take on a unique flavor that excites the palate!
  • Spice it Up: Top your soup with crispy jalapeños or a dash of hot sauce for an added kick. Mixing in these spicy elements turns up the heat just the way you like it!
  • Herb Variations: Try swapping fresh parsley for chives or cilantro to refresh the flavor. Each herb offers a distinct note that can brighten or complement the dish beautifully.
  • Gluten-Free Option: Use gluten-free flour to create your cheese sauce without sacrificing creaminess. This makes a comforting bowl accessible for everyone!
  • Dairy-Free Delight: Opt for cashew cream and dairy-free cheese alternatives to craft a vegan version of this classic soup. It’s a savory twist that doesn't skimp on flavor.
  • Hearty Add-Ins: Throw in some cooked pasta or quinoa for a heartier meal that sustains your hunger. It’s a creative way to add bulk and make the dish even more filling!

Want to discover other hearty soups? Don’t miss the comforting flavors of Zuppa Toscana Soup or the rich warmth of Lemon Chicken Soup!

Philly Cheesesteak Soup Recipe FAQs

How do I choose the right steak for my Philly Cheesesteak Soup?
Absolutely! Look for high-quality sirloin, ribeye, or flank steak. Sirloin is lean and flavorful, while ribeye provides more marbling for richness. Whichever you choose, slice it thinly against the grain for maximum tenderness.

What is the best way to store leftover Philly Cheesesteak Soup?
For sure! Store leftovers in an airtight container in the fridge for up to 3 days. Be sure to let the soup cool completely before sealing to prevent condensation, which can affect the texture.

Can I freeze Philly Cheesesteak Soup, and how do I do it?
Absolutely! Let the soup cool entirely, then spoon it into freezer-safe containers, leaving some space at the top for expansion. Seal tightly and freeze for up to 3 months. To reheat, thaw overnight in the fridge and warm slowly on the stove, adding a splash of broth if necessary.

What should I do if my cheese sauce separates after adding it to the soup?
Very! If you notice separation, don’t panic. Start by gently reheating the soup on low heat, stirring continuously. If it remains separated, you can whisk in a bit of fresh cream or milk to help smooth it out. Make sure to avoid boiling the soup, as this can cause further separation.

Can I adjust the recipe for dietary restrictions, like gluten allergies?
Definitely! To make this recipe gluten-free, swap all-purpose flour with a gluten-free flour blend. Make sure your broth and cheese are also gluten-free. For a dairy-free alternative, use plant-based milk and dairy-free cheese options—just keep an eye on the consistency and flavor adjustments!

Is this Philly Cheesesteak Soup pet-friendly?
Not at all! Many ingredients in this soup, like onion and garlic, can be harmful to pets. It’s best to keep your furry friends away from this dish. If you wish to make a pet-friendly version, consider using simple cooked beef without sauce and seasonings.

Philly Cheesesteak Soup

Savory Philly Cheesesteak Soup for Ultimate Comfort Cravings

Enjoy a bowl of hearty Philly Cheesesteak Soup, combining savory ingredients for ultimate comfort.
Print Recipe Pin Recipe
Prep Time 15 minutes mins
Cook Time 1 hour hr
Total Time 1 hour hr 15 minutes mins
Servings: 6 cups
Course: Soups
Cuisine: American
Calories: 450
Ingredients Equipment Method Nutrition Notes

Ingredients
  

For the Soup Base
  • 2 tbsp Olive Oil Ideal for sautéing vegetables; swap with vegetable oil if necessary.
  • 1 large Onion, chopped Adds sweetness and depth; yellow or white varieties work best.
  • 1 Green Bell Pepper, chopped Introduces crunch; any color bell pepper is a great alternative.
  • 1 Red Bell Pepper, chopped Enhances sweetness and color; can be substituted with yellow or orange.
  • 1 lb Sirloin Steak, thinly sliced The heart of the soup, rich flavor; consider ribeye or flank steak as alternatives.
  • 8 cups Beef Broth Serves as the flavorful base; low-sodium broth is best for controlling saltiness.
  • 1 can (14.5 oz) Diced Tomatoes, undrained Adds texture and acidity; fresh tomatoes are a delightful substitute.
  • 1 tsp Worcestershire Sauce Provides umami flavor; soy sauce is a suitable swap.
  • 1/2 tsp Dried Thyme Elevates the soup's flavor profile; fresh thyme can be used in greater quantities.
  • 1/4 tsp Red Pepper Flakes Introduces a touch of heat; adjust to preference or omit for mildness.
  • Salt Essential for seasoning to taste.
  • Pepper Essential for seasoning to taste.
For the Cheese Sauce
  • 4 tbsp Butter Used for making the roux; margarine is an alternative if needed.
  • 4 tbsp All-Purpose Flour Thickens the cheese sauce; gluten-free flour can serve as a substitute.
  • 3 cups Milk Contributes to a creamy consistency; any milk or plant-based milk can work.
  • 8 oz Cream Cheese, softened Adds rich creaminess; consider Neufchâtel cheese for a lighter option.
  • 8 oz Shredded Provolone Cheese Captures the cheesesteak essence; mozzarella or cheddar can be swapped.
  • 4 oz Shredded Mozzarella Cheese Offers stretchiness; more provolone can be added for extra flavor.
  • 1/4 tsp Garlic Powder Boosts flavor profile; fresh minced garlic can be used.
  • 1/4 tsp Onion Powder Brings depth to the flavor; fresh onion may be used.
For Garnish and Serving
  • Chopped Fresh Parsley Adds freshness; substitute with chives for a different herbaceous note.
  • Crusty Rolls Perfect accompaniments for dipping; any sturdy bread works well.

Equipment

  • Large pot
  • Saucepan
  • Whisk

Method
 

Step-by-Step Instructions
  1. In a large pot, heat 2 tablespoons of olive oil over medium heat. Add the chopped onion, green bell pepper, and red bell pepper. Sauté for 8-10 minutes until softened and caramelized.
  2. Increase heat to medium-high and add 1 pound of thinly sliced sirloin steak to the pot. Cook for about 5-7 minutes, stirring frequently, until browned all over.
  3. Pour in 8 cups of beef broth and 1 can of diced tomatoes. Scrape the bottom of the pot to enhance flavor. Stir in 1 teaspoon of Worcestershire sauce, 1/2 teaspoon of dried thyme, and optional red pepper flakes. Season with salt and pepper, then bring to a simmer.
  4. Melt 4 tablespoons of butter in a separate saucepan. Whisk in 4 tablespoons of all-purpose flour to create a roux. Cook for 1-2 minutes until bubbling, then gradually whisk in 3 cups of milk. Continue cooking for about 5 minutes, stirring constantly, until thickened.
  5. Stir in 8 ounces of softened cream cheese, 8 ounces of shredded provolone, and 4 ounces of shredded mozzarella into the thickened mixture. Keep stirring until melted and smooth. Season with garlic powder and onion powder.
  6. Carefully combine the cheese sauce with the Philly Cheesesteak Soup base in the large pot. Stir gently to incorporate without boiling.
  7. Ladle soup into bowls, top with extra cheese and chopped fresh parsley. Serve alongside warm, crusty rolls.

Nutrition

Serving: 1cupCalories: 450kcalCarbohydrates: 30gProtein: 35gFat: 25gSaturated Fat: 15gPolyunsaturated Fat: 2gMonounsaturated Fat: 8gCholesterol: 85mgSodium: 1200mgPotassium: 800mgFiber: 2gSugar: 5gVitamin A: 800IUVitamin C: 60mgCalcium: 300mgIron: 3mg

Notes

Use high-quality steak for best flavor and tenderness; avoid overheating cheese sauce after combining.

Tried this recipe?

Let us know how it was!

Creamy Super-Green Risotto Soup that Warms Your Soul

September 10, 2025 by Grace Snow Leave a Comment

As the chill of autumn settles in, my kitchen transforms into a sanctuary of warmth and comfort. This is when I eagerly whip up my Super-Green Risotto Soup with Crispy Leeks & Toasted Hazelnuts, a vibrant dish that dances with both flavor and nutrition. It's the perfect way to sneak in three of your five daily servings of vegetables while savoring a creamy, delightful bowl of soup that practically requires no effort. With just a bit of simmering and a quick blend, you’ll have a nourishing meal on the table in no time—no slaving over a hot stove! Plus, the added crunch of hazelnuts and crispy leeks elevates it into an elegant yet cozy dish that friends and family will adore. Ready to dive into a warm, green hug? Let’s get cooking!

Why is this soup a must-try?

Comforting, Creamy Texture: This creamy risotto soup offers a warm hug in every spoonful, making it perfect for chilly evenings.

Nutritious Boost: Packed with three servings of vegetables, it’s an easy way to meet your daily nutrient needs without sacrificing flavor.

Quick and Easy: With a quick prep time, you can have dinner on the table in no time—just simmer and blend!

Versatile Ingredients: Feel free to customize with other greens like kale or even substitute nuts according to your preference, keeping things fresh each time.

Crowd-Pleasing: Its beautiful green hue and delicious crispy leeks are sure to impress both family and friends. For another healthy soup idea, check out my Lemon Chicken Soup for a refreshing twist!

Incredibly Satisfying: Each bite is rich and flavorful, transforming simple ingredients into an elegant meal that everyone will look forward to.

Super-Green Risotto Soup Ingredients

• Ready to create this delicious super-green risotto soup? Here’s what you need!

For the Soup Base

  • Celery – Adds crunch and a mild flavor; substitute with fennel for a different taste.
  • Leek – Provides sweetness and depth; ensure to clean thoroughly as sand can hide between layers.
  • Olive Oil – For sautéing and enhancing flavor; use vegetable oil as an alternative for a lighter option.
  • Lemon – Brightens the dish with acidity; can replace with lime in a pinch.
  • Organic Vegetable Stock Cube – The base for the soup’s flavor; use homemade stock for richer taste.
  • Risotto Rice – Key ingredient for creaminess; Arborio or Carnaroli are both perfect choices.

For the Greens & Garnish

  • Baby Spinach – Provides nutrients and color; Swiss chard can be used for a similar effect.
  • Blanched Hazelnuts – Adds crunch and nutty flavor; almonds can be used as a substitute.
  • Parmesan Cheese – Adds richness and umami; use nutritional yeast for a vegan option.
  • Extra Virgin Olive Oil – For drizzling before serving; a flavored oil can add extra pizzazz.

Step‑by‑Step Instructions for Super-green risotto soup

Step 1: Prep Vegetables
Begin by finely chopping the celery and leek, ensuring you rinse the leek thoroughly to remove any hidden sand. To prepare for the creamy texture of your super-green risotto soup, wash the baby spinach in cold water and set it aside in a colander to drain while you proceed to the next step.

Step 2: Sauté
In a large pot, heat 2 tablespoons of olive oil over medium heat. Once the oil shimmers, add the finely chopped leeks and celery. Sauté them for about 5 to 7 minutes, stirring occasionally, until the leeks become translucent and the celery softens—a wonderful aroma will fill your kitchen, indicating it’s time to add the next ingredients.

Step 3: Add Stock & Rice
Pour approximately 4 cups of water into the pot, followed by the organic vegetable stock cube. Stir until the stock cube dissolves completely. Next, add 1 cup of risotto rice, gently stirring to combine. Bring the mixture to a gentle boil, allowing the flavors to meld beautifully; this should take about 2-3 minutes.

Step 4: Simmer
Lower the heat to a soft simmer, cover the pot partially, and let it cook for 18-20 minutes, stirring occasionally. Keep an eye on the rice; it should absorb most of the liquid and become al dente. If it starts to stick to the bottom, simply add a splash more water and give it a gentle stir.

Step 5: Blend
Once the rice is cooked, stir in the washed spinach until it wilts, approximately 2-3 minutes. Remove the pot from heat and use an immersion blender to blend the soup until smooth and creamy. If you prefer a thicker consistency, blend a bit longer; the vibrant green color will shine through effortlessly in your super-green risotto soup.

Step 6: Finish
In a dry skillet over medium heat, toast the blanched hazelnuts for about 4 minutes until they are golden and fragrant, stirring frequently to avoid burning. Serve the soup hot, drizzled with extra virgin olive oil, and garnished with the crispy hazelnuts. Your warm bowl of super-green risotto soup is now ready to enjoy!

Make Ahead Options

These Super-Green Risotto Soup meal prep options are ideal for busy weeknights! You can prep your vegetables, including the celery and leek, up to 24 hours in advance. Simply chop them and store in an airtight container in the refrigerator. The risotto rice can be measured out ahead of time as well. When you're ready to serve, sauté the vegetables and continue with the recipe as usual; the soup will still be just as delicious! For optimal freshness, store the blended soup in the fridge for up to 3 days or freeze for up to 1 month. Reheat gently on the stove and stir in fresh spinach just before serving for that vibrant green touch.

Storage Tips for Super-Green Risotto Soup

Fridge: Store leftover soup in an airtight container for up to 3 days. Reheat on the stove, adding a splash of water to restore creaminess.

Freezer: For longer storage, freeze the super-green risotto soup in freezer-safe containers for up to 1 month. Thaw overnight in the fridge before reheating.

Reheating: Gently reheat the soup on low heat, stirring occasionally to avoid sticking. If it thickens too much, add a bit of vegetable stock or water for desired consistency.

Serving Size: This soup makes a great batch. Always portion it out before freezing to make meal prep even easier for those busy days ahead!

Expert Tips for Super-Green Risotto Soup

  • Perfect Rice Texture: Ensure you use Arborio or Carnaroli rice for that creamy consistency; other rice varieties won't yield the same result.
  • Avoid Over-Stirring: Unlike traditional risotto, resist the temptation to stir too frequently when simmering. This helps achieve a lovely creamy texture without excessive effort.
  • Tailored Greens: Feel free to mix in other greens like kale or swiss chard to boost nutrition and keep your super-green risotto soup exciting!
  • Toasting Hazelnuts: Pay close attention while toasting the hazelnuts; they can burn quickly—looking for a nice golden color and fragrant aroma is key.
  • Serving Suggestions: Pair the soup with crusty bread for a complete meal that balances warmth and satisfaction, making it even more comforting.
  • Batch Cooking: Make extra and store in the fridge for up to 3 days or freeze for a month. It’s always great to have a serving ready for busy days!

What to Serve with Super-Green Risotto Soup

Warm, inviting meals come together best with delightful pairings that enhance each flavor and texture.

  • Crusty Bread:
    This is the perfect accompaniment for scooping up the creamy soup, adding a satisfying crunch to each bite.

  • Simple Green Salad:
    A fresh mix of arugula, cucumber, and avocado adds brightness and balances the richness of the soup.

  • Garlic Breadsticks:
    Their garlicky aroma and buttery texture offer a wonderful contrast to the soup's vibrant flavors.

  • Roasted Vegetables:
    Caramelized carrots and brussels sprouts bring extra warmth and heartiness, beautifully complementing the soup.

  • Herbed Quinoa:
    The nutty flavor and light texture of quinoa make it a nutritious, protein-rich addition to the meal's profile.

  • Chilled White Wine:
    A crisp, chilled Sauvignon Blanc or a light Pinot Grigio cuts through the richness and elevates the dining experience.

  • Zesty Lemon Bars:
    For a refreshing dessert, the tartness of lemon bars cleanses the palate and rounds off the meal beautifully.

Super-green risotto soup Variations

Feel free to personalize your super-green risotto soup, infusing it with your unique flair and creativity!

  • Kale Twist: Add chopped kale for a heartier texture and nutrient boost. It wilts beautifully into the soup.
  • Spicy Kick: Toss in a pinch of red pepper flakes during sautéing for a zesty, warm adventure in every spoonful.
  • Creamier Delight: Substitute a splash of coconut milk for some of the vegetable stock for a richer, tropical twist. Just imagine that silky texture!
  • Nutty Alternatives: Swap hazelnuts for toasted pine nuts for a different nutty flavor profile, giving your soup another delightful crunch.
  • Dairy-Free: Use a vegan cheese substitute for Parmesan or simply match nutritional yeast for that cheesy, umami flavor without the dairy.
  • Extra Veggies: Mix in roasted zucchini or peas for an additional veggie kick, providing bursts of color and taste. It keeps things fresh and exciting!
  • Herb Infusion: Experiment with adding fresh herbs like basil or parsley right before blending to elevate the flavor profile with a garden-fresh essence.
  • Pea Power: Blend in some frozen green peas along with the spinach for added sweetness and a pop of color for your soup.

For more exciting soup ideas, be sure to check out my delicious Santa Soup Savory for a unique twist on a classic!

Super-Green Risotto Soup Recipe FAQs

How do I know if my vegetables are ripe enough for this soup?
For maximum flavor, ensure your celery is firm and crunchy without any dark spots. Leeks should be pale green and white with no signs of wilting. Fresh spinach should be vibrant green with no slimy leaves. Trust your senses; the fresher the ingredients, the better your super-green risotto soup will taste!

What is the best way to store leftovers of this soup?
Store leftover super-green risotto soup in an airtight container in the fridge for up to 3 days. Make sure to let it cool fully before placing it in the fridge. To reheat, simply pour it in a pot on low heat, adding a splash of water or vegetable stock if needed to restore its creamy consistency.

Can I freeze this soup for later?
Absolutely! To freeze, let the super-green risotto soup cool completely. Then, portion it into freezer-safe containers or resealable bags, making sure to leave some space at the top for expansion. It can be frozen for up to 1 month. When you’re ready to enjoy, thaw overnight in the fridge and reheat gently on the stove.

What should I do if my soup turns out too thick?
If your super-green risotto soup is thicker than you'd like, don’t worry! Simply add a bit of vegetable stock or water to reach your desired consistency. Stir it in while reheating on low heat, and it will blend beautifully. This is a great way to customize the soup to your liking, so go ahead and adjust it!

Are there any dietary considerations I should be aware of?
Yes! This super-green risotto soup is vegetarian-friendly, and by using nutritional yeast in place of Parmesan, it can easily be made vegan. If you're cooking for guests with nut allergies, simply skip the hazelnuts or replace them with sunflower seeds for a crunchy finish. Always double-check ingredient labels for hidden allergens!

How long can I keep this soup in the freezer?
You can store your super-green risotto soup in the freezer for up to 1 month. When you’re ready to have some, just let it thaw in the fridge overnight, and warm it gently on the stove while stirring occasionally. Enjoy the same delicious flavor even after freezing!

Super-green risotto soup

Creamy Super-Green Risotto Soup that Warms Your Soul

Savor the comforting Creamy Super-Green Risotto Soup, a delightful meal with a nourishing blend of vegetables.
Print Recipe Pin Recipe
Prep Time 10 minutes mins
Cook Time 30 minutes mins
Total Time 40 minutes mins
Servings: 4 bowls
Course: Soups
Cuisine: Italian
Calories: 250
Ingredients Equipment Method Nutrition Notes

Ingredients
  

For the Soup Base
  • 2 stalks Celery Adds crunch and a mild flavor; substitute with fennel for a different taste.
  • 1 large Leek Provides sweetness and depth; ensure to clean thoroughly.
  • 2 tablespoons Olive Oil For sautéing and enhancing flavor; use vegetable oil as an alternative.
  • 1 medium Lemon Brightens the dish with acidity; can replace with lime.
  • 1 cube Organic Vegetable Stock The base for the soup’s flavor; use homemade stock for richer taste.
  • 1 cup Risotto Rice Key ingredient for creaminess.
For the Greens & Garnish
  • 4 cups Baby Spinach Provides nutrients and color.
  • 1/2 cup Blanched Hazelnuts Adds crunch and nutty flavor; almonds can be used as a substitute.
  • 1/4 cup Parmesan Cheese Adds richness and umami; use nutritional yeast for a vegan option.
  • 1 tablespoon Extra Virgin Olive Oil For drizzling before serving.

Equipment

  • Large pot
  • Immersion blender
  • Skillet

Method
 

Preparation Steps
  1. Finely chop the celery and leek, rinse the leek thoroughly. Wash the baby spinach in cold water and set aside to drain.
  2. In a large pot, heat 2 tablespoons of olive oil over medium heat. Add the leeks and celery, sauté for about 5 to 7 minutes until leeks are translucent.
  3. Pour approximately 4 cups of water into the pot, followed by the vegetable stock cube. Stir until it dissolves completely. Add 1 cup of risotto rice and gently stir.
  4. Bring the mixture to a gentle boil and allow to meld for 2-3 minutes.
  5. Lower the heat to a soft simmer, cover partially and let cook for 18-20 minutes, stirring occasionally.
  6. Once rice is cooked, stir in spinach until wilted, about 2-3 minutes. Remove from heat and blend until smooth and creamy.
  7. Toast the hazelnuts in a dry skillet over medium heat for about 4 minutes until golden. Serve the soup hot, drizzled with olive oil and garnished with hazelnuts.

Nutrition

Serving: 1bowlCalories: 250kcalCarbohydrates: 30gProtein: 8gFat: 12gSaturated Fat: 2gPolyunsaturated Fat: 5gMonounsaturated Fat: 5gCholesterol: 5mgSodium: 600mgPotassium: 400mgFiber: 4gSugar: 2gVitamin A: 600IUVitamin C: 25mgCalcium: 150mgIron: 2mg

Notes

Make extra and store in the fridge for up to 3 days or freeze for a month. Pair with crusty bread for a complete meal.

Tried this recipe?

Let us know how it was!

Healthy Miso Ramen with Chicken for Ultimate Comfort Food

September 9, 2025 by Grace Snow Leave a Comment

As the sun sets and the chill of evening creeps in, nothing warms the soul quite like a steaming bowl of Healthy Miso Ramen with Chicken. This nourishing dish envelops you in a cozy embrace, featuring a rich, umami-packed miso broth with tender pieces of chicken and an array of vibrant toppings. It's not just comfort food; it's a quick meal that you can whip up on busy weeknights without sacrificing your health goals. Plus, if you ever want to switch things up, you can easily make it vegan by swapping in your favorite plant-based protein. How does that sound for a hearty dinner? Let’s dive into the recipe!

Why is Miso Ramen So Comforting?

Warmth in Each Bite: This Healthy Miso Ramen with Chicken is your ticket to a cozy night in, featuring a heartwarming broth that infuses every spoonful with rich umami goodness.

Quick and Tasty: With minimal prep time, you can serve up a satisfying meal in just 30 minutes, making it perfect for busy evenings.

Customizable Delight: Whether you’re in the mood for mushrooms or extra veggies, you can easily tailor this dish to your liking.

Health-Conscious Satisfaction: Packed with protein and fiber, it’s a guilt-free indulgence that supports your health goals, perfect for those looking to escape bland, fast food options.

If you love comfort food that’s both nourishing and quick, you might also enjoy my Chicken Salad with Apples or a warm bowl of Lemon Chicken Soup. This Healthy Miso Ramen recipe combines the best of flavor, simplicity, and customization—making it your new go-to for cold nights!

Healthy Miso Ramen with Chicken Ingredients

For the Broth

  • Tomato – Adds natural sweetness and acidity; substitute with carrot for a sweeter flavor.
  • Miso Paste – Provides depth and umami flavor; choose red or white miso for varied intensity levels.
  • Onions – Brings sweetness and savoriness; shallots can be used for a milder alternative.
  • Garlic – Enhances flavor with aromatic notes; freshly minced is ideal, but garlic powder can work in a pinch.
  • Ginger – Offers warmth and spiciness; ground ginger can be a convenient replacement.

For the Noodles and Protein

  • Ramen Noodles – Serves as the main carbohydrate; egg noodles make a great gluten-free substitute.
  • Chicken Breast – Delivers protein and richness; you can swap this out for tofu or tempeh for a vegetarian option.

For the Toppings

  • Scallions – Adds freshness and crunch; chives or green onions are perfect alternatives.
  • Seaweed (Nori) – Brings umami and is a traditional topping; skip it if avoiding sea vegetables.
  • Carrots & Sweet Corn – Use for added texture and color; feel free to substitute with your preferred vegetables.

Whether you're diving into a cozy night in or simply craving a delicious bowl, this Healthy Miso Ramen with Chicken is packed with flavor and nourishment!

Step‑by‑Step Instructions for Healthy Miso Ramen with Chicken

Step 1: Prepare the Broth
Begin by heating a large pot over medium heat. Add a drizzle of oil and sauté minced garlic, ginger, and diced onions for about 3-4 minutes until they become fragrant and translucent. Next, stir in miso paste and chopped tomato, mixing until well combined. Pour in 4 cups of water and bring the mixture to a boil, then reduce to a simmer. Let it cook for 20 minutes, allowing the flavors of the Healthy Miso Ramen to deepen.

Step 2: Cook the Chicken
While the broth simmers, prepare the chicken breast. Marinate it with your choice of seasonings such as salt, pepper, and a touch of soy sauce for added flavor. Heat a grill pan or skillet over medium-high heat. Cook the chicken for about 6-7 minutes on each side or until it reaches an internal temperature of 165°F (75°C). Once cooked, allow the chicken to rest for a few minutes before slicing it into thin strips.

Step 3: Cook the Ramen Noodles
In a separate pot, bring water to a boil and add the ramen noodles. Cook according to package instructions, usually around 3-5 minutes, until they are tender and al dente. Once done, drain the noodles and rinse them briefly under cold water to stop the cooking process. This step ensures that your noodles maintain their perfect texture when served with the Healthy Miso Ramen broth.

Step 4: Assemble the Bowls
Now it's time to assemble your delicious bowls of Healthy Miso Ramen! In each bowl, place a generous serving of the cooked ramen noodles. Carefully ladle the hot, simmering broth over the noodles, making sure to cover them completely. Top each bowl with slices of grilled chicken breast, and then add sliced scallions, a few pieces of seaweed, and vibrant toppings like carrots and sweet corn for that added crunch and flavor.

Step 5: Serve Immediately
Your wonderful Healthy Miso Ramen with Chicken is now ready to be enjoyed! Serve the bowls immediately while everything is hot and fresh. As the flavors meld together, each spoonful will offer the warmth and comfort you crave. Feel free to sprinkle extra toppings based on your preferences or left-overs, and indulge in this delightful and nourishing dish!

Make Ahead Options

These Healthy Miso Ramen with Chicken are perfect for busy weeknights, allowing you to savor homemade goodness without the hassle! You can prepare the broth up to 3 days in advance; just allow it to cool, then refrigerate in an airtight container to keep it fresh. Additionally, cook the chicken and slice it ahead of time to enjoy flavors that meld overnight. When you're ready to serve, simply reheat the broth on the stove, cook the ramen noodles fresh (they only take about 3-5 minutes!), and assemble your bowls with the chicken and delicious toppings. This approach saves you time while ensuring each bowl is just as delicious and comforting as if made fresh!

What to Serve with Healthy Miso Ramen with Chicken

Pairing delicious side dishes and refreshing drinks can elevate your dining experience beyond just a bowl of ramen, creating a heartwarming meal that lingers on your palate.

  • Crispy Tempura Vegetables: These light and airy bites add a crunchy texture, perfectly complementing the silky noodles and rich broth. The flavor contrasts make each bite delightful!

  • Pickled Vegetables: The tangy crunch of pickled radishes or cucumbers brightens the palate and balances the umami richness of the miso ramen. A small side of these will bring a refreshing zing to your meal.

  • Sesame Garlic Spinach: Lightly sautéed in garlic, this tender green adds a nutritious element, providing a burst of flavor that complements the bowl while enhancing the overall meal.

  • Edamame with Sea Salt: These protein-packed pods are a fantastic starter. Their light, earthy flavor pairs well with the miso broth, adding a fun element to your dining experience.

  • Sushi Rolls: A couple of fresh sushi rolls filled with cucumber or avocado can be a delightful addition, offering a contrast in texture while enhancing the Asian-inspired meal theme.

  • Iced Green Tea: A refreshing drink option, its subtle flavors and health benefits make it a perfect match for your ramen. Sip this chilled beverage alongside your warm bowl for a comforting contrast.

  • Mochi Ice Cream: End your meal on a sweet note with mochi ice cream in various flavors. The chewy texture offers a fun experience that contrasts nicely with the savory ramen.

These delightful additions will round out your dinner, transforming a simple Healthy Miso Ramen with Chicken into a culinary experience that warms hearts and nourish souls.

Storage Tips for Healthy Miso Ramen with Chicken

Fridge: Store leftover Healthy Miso Ramen broth and toppings separately in airtight containers for up to 3-4 days to maintain freshness and flavor.

Freezer: You can freeze the broth in freezer-safe containers for up to 3 months. Just remember to leave some space for expansion.

Reheating: To reheat, thaw over low heat on the stove and bring to a gentle simmer before adding freshly cooked noodles and toppings. Avoid microwaving broth to retain its texture.

Noodle Storage: If you have leftover noodles, store them in the fridge and consume within 2 days for the best texture.

Expert Tips for Healthy Miso Ramen

  • Broth Consistency: Adjust the thickness of your Healthy Miso Ramen broth by experimenting with water. A thicker, cloudier broth yields richer flavors.

  • Quality Miso Matters: Use high-quality miso paste for the most authentic depth of flavor. Don't settle for lower-quality options.

  • Cooked Chicken Tips: Ensure your chicken reaches an internal temperature of 165°F (75°C) to guarantee it's safe and juicy. Avoid overcooking for the best texture.

  • Customize Toppings: Feel free to swap toppings according to your taste or what's on hand. More veggies or alternative proteins can elevate your Healthy Miso Ramen.

  • Prep Ahead: Make the broth in advance and store it separate from the noodles to enhance flavors overnight. Just reheat and serve fresh the next day!

Healthy Miso Ramen with Chicken Variations

Feel free to explore and personalize this delightful recipe to make it your own!

  • Protein Swap: Replace chicken with grilled shrimp or tofu for a delicious twist without compromising on flavor.

  • Veggie Boost: Add mushrooms or bok choy for an earthy flavor while increasing the nutritional value of your ramen.

  • Different Miso: Experiment with various types of miso, like yellow or black, for a distinct taste experience; each brings a unique umami characteristic.

  • Spicy Kick: For those who love some heat, sprinkle in chili flakes or drizzle with sriracha to add an exhilarating spice level to your bowl.

  • Add a Crunch: Consider topping your ramen with crispy fried onions or shallots to introduce a delightful crunch that enhances every bite.

  • Noodle Alternatives: Swap traditional ramen noodles for soba or zucchini noodles to suit gluten-free or low-carb diets, still keeping the essence of the dish.

  • Sesame Flavor: Drizzle a bit of sesame oil or sprinkle sesame seeds over the ramen to introduce a gorgeous nutty aroma that complements the broth.

  • Fresh Herbs: Garnish with a handful of fresh herbs like cilantro or basil to bring brightness and freshness, enhancing the overall enjoyment of your meal.

If you’re looking for more comforting options, try a tasty Lemon Chicken Soup or my vibrant Chipotle Lime Chicken and Rice. The world of flavor is yours to explore!

Healthy Miso Ramen with Chicken Recipe FAQs

What type of miso paste should I use?
Absolutely! You can use either red or white miso paste, depending on your flavor preferences. Red miso is richer and saltier, while white miso is milder and sweeter. For this Healthy Miso Ramen with Chicken recipe, I recommend starting with white miso if you're looking for a subtler flavor.

How should I store leftover ramen?
To keep your Healthy Miso Ramen fresh, store the broth and toppings separately in airtight containers in the fridge. They should last for about 3-4 days. Storing them separately preserves the texture of the noodles and crunch of the toppings, ensuring a delightful bowl the next time you’re hungry!

Can I freeze the broth?
Yes, you can freeze the Healthy Miso Ramen broth! Pour it into freezer-safe containers, leaving a bit of space at the top for expansion, and it can be frozen for up to 3 months. When you're ready to enjoy it again, thaw it slowly in the refrigerator overnight, then gently reheat over low heat.

What should I do if my broth is too salty?
If you find your broth is too salty, a great way to balance it out is by adding more water or even vegetable stock to dilute the flavors. You can also toss in a peeled potato into the simmering broth, letting it soak up some saltiness. Remove the potato before serving! Adjusting gradually can help you find that perfect umami-rich balance.

Are there any common allergies I should consider with this dish?
Very! If cooking for someone with allergies, be cautious with ingredients like miso, which often contains soy, and the nori seaweed, which may cause reactions in those allergic to shellfish or sea vegetables. For a vegan version, replace chicken with tofu or tempeh, and always check your specific ingredients for added allergens.

Healthy Miso Ramen with Chicken

Healthy Miso Ramen with Chicken for Ultimate Comfort Food

This Healthy Miso Ramen with Chicken delivers comforting warmth and nourishment in a bowl, combining rich umami broth, tender chicken, and vibrant toppings.
Print Recipe Pin Recipe
Prep Time 10 minutes mins
Cook Time 30 minutes mins
Resting Time 5 minutes mins
Total Time 45 minutes mins
Servings: 2 bowls
Course: Soups
Cuisine: Japanese
Calories: 450
Ingredients Equipment Method Nutrition Notes

Ingredients
  

For the Broth
  • 1 medium Tomato Adds natural sweetness; substitute with carrot for a sweeter flavor.
  • 3 tablespoons Miso Paste Choose red or white miso for varied intensity levels.
  • 1 medium Onion Shallots can be used for a milder alternative.
  • 2 cloves Garlic Freshly minced is ideal.
  • 1 inch Ginger Ground ginger can be a convenient replacement.
For the Noodles and Protein
  • 200 grams Ramen Noodles Egg noodles make a great gluten-free substitute.
  • 2 medium Chicken Breasts Can be swapped for tofu or tempeh for a vegetarian option.
For the Toppings
  • 2 stalks Scallions Chives or green onions are perfect alternatives.
  • 1 sheet Seaweed (Nori) Skip it if avoiding sea vegetables.
  • 1 cup Carrots Use for added texture and color.
  • 1 cup Sweet Corn Feel free to substitute with your preferred vegetables.

Equipment

  • Large pot
  • Grill pan or skillet
  • Separate pot for noodles

Method
 

Prepare the Broth
  1. Heat a large pot over medium heat. Add oil and sauté minced garlic, ginger, and diced onions for 3-4 minutes until fragrant and translucent.
  2. Stir in miso paste and chopped tomato, mixing until well combined. Pour in 4 cups of water and bring to a boil, then reduce to a simmer. Cook for 20 minutes.
Cook the Chicken
  1. Marinate chicken breast with salt, pepper, and a touch of soy sauce. Heat a grill pan and cook chicken for 6-7 minutes on each side until cooked through.
  2. Allow the chicken to rest for a few minutes before slicing into thin strips.
Cook the Ramen Noodles
  1. In a separate pot, bring water to a boil and add ramen noodles. Cook according to package instructions, about 3-5 minutes.
  2. Drain and rinse noodles briefly under cold water to stop cooking.
Assemble the Bowls
  1. In each bowl, place cooked ramen noodles and ladle hot broth over them. Top with sliced chicken, scallions, seaweed, carrots, and sweet corn.
Serve Immediately
  1. Serve the Healthy Miso Ramen with Chicken immediately while hot. Enjoy your comforting bowl!

Nutrition

Serving: 1bowlCalories: 450kcalCarbohydrates: 60gProtein: 30gFat: 10gSaturated Fat: 2gPolyunsaturated Fat: 1gMonounsaturated Fat: 1gCholesterol: 75mgSodium: 900mgPotassium: 800mgFiber: 5gSugar: 5gVitamin A: 150IUVitamin C: 20mgCalcium: 30mgIron: 3mg

Notes

Feel free to customize the toppings and use high-quality miso for the best flavor. The broth can be made ahead of time to enhance flavors overnight.

Tried this recipe?

Let us know how it was!

Easy Olive Tapenade Recipe for Ultimate Flavor Happiness

September 6, 2025 by Grace Snow Leave a Comment

As I whisked together the vibrant ingredients of my 5-Minute Mediterranean Olive Tapenade, the aromas transported me straight to a sun-soaked terrace overlooking the azure sea. This quick and satisfying vegan delight not only takes just five minutes to whip up, but it’s also the perfect accompaniment for those breezy summer evenings or cozy gatherings with loved ones. Imagine spreading this briny, savory concoction over fresh-baked bread or crostini—it's a game-changer for any appetizer spread! With a combination of rich olives and zesty capers, you’ll find that each bite packs a bold punch of flavor, making it an ideal choice for anyone looking to elevate their cooking game with minimal effort. Ready to dive into a taste of the Mediterranean? Let's get started on this savory adventure!

Why is this Olive Tapenade a Must-Try?

Simplicity and Speed: Whip up this flavorful tapenade in just 5 minutes—perfect for busy days or unexpected guests!

Vegan-Friendly Twist: It's 100% vegan and easily adaptable, ensuring everyone can enjoy its rich taste.

Bursting with Flavor: The earthy blend of olives and capers creates an unforgettable savory experience that'll have your taste buds dancing.

Endless Versatility: Use it as a dip, spread, or even a drizzle over grilled veggies; the possibilities are endless!

Great for Entertaining: Impress your friends and family with a dish that looks fancy but is incredibly easy to make. Take your appetizer spread to the next level with this delightful vegan Olive Tapenade that embodies the essence of Mediterranean cuisine!

Olive Tapenade Ingredients

For the Tapenade
• Olives – A mix of Kalamata and ripe black olives provides a well-rounded flavor; feel free to use Kalamatas alone for simplicity.
• Capers – These tiny, salty gems add a tangy kick that amplifies the overall taste.
• Anchovy Paste (optional) – This adds depth and umami; skip it for a vegan version and adjust salt accordingly.
• Olive Oil – Extra virgin is best for blending, helping achieve that perfect, creamy consistency.
• Garlic – Fresh garlic enriches the tapenade with a savory aroma and depth.

For Variations
• Green Olives – Substitute Kalamatas for green olives for a milder, yet still delicious, flavor.
• Sun-Dried Tomatoes – Toss in some chopped sun-dried tomatoes for an added sweet and tangy dimension.

Indulge in the robust world of Olive Tapenade and enjoy its vibrant burst of Mediterranean-inspired flavors!

Step‑by‑Step Instructions for Olive Tapenade

Step 1: Prep Ingredients
Begin by gathering all your ingredients: a mix of Kalamata and ripe black olives, capers, olive oil, garlic, and optionally, anchovy paste. Ensure your olives are pitted to achieve a smooth texture in your Olive Tapenade. Take a moment to measure out your ingredients, as having everything ready will streamline the blending process.

Step 2: Blend
In a food processor, add the prepared olives, capers, anchovy paste (if using), and peeled garlic cloves. Pour in a splash of olive oil to help with blending. Pulse the mixture until it reaches a chunky, spreadable consistency, around 15-20 seconds. You want your Olive Tapenade to retain some texture, so be careful not to over-process.

Step 3: Adjust Consistency
After blending, check the texture of your tapenade. If it seems too thick, gradually add more olive oil—about a teaspoon at a time—while pulsing, until you achieve your desired smoothness. This step will help your Olive Tapenade reach that perfect creamy consistency while enhancing its rich flavor.

Step 4: Taste and Season
Once you’re happy with the texture, taste your Olive Tapenade. If it's lacking in flavor, consider adding a pinch of salt or adjusting the anchovy paste for a deeper umami taste. Sample it on a small piece of bread to ensure the seasoning is spot on for your palette before serving.

Step 5: Serve and Enjoy
Transfer your vibrant Olive Tapenade to a serving dish, garnishing with a drizzle of extra virgin olive oil if you like. This delicious spread is perfect for dipping with crusty bread or as a flavorful topping on crostini, bringing a taste of the Mediterranean to your table. Serve immediately or let it chill for a bit to enhance flavors.

Make Ahead Options

These Olive Tapenade preparations are tailor-made for busy cooks looking to save time! You can easily prepare the tapenade up to 3 days in advance by blending all the ingredients together and storing it in an airtight container in the refrigerator. This allows the flavors to meld beautifully, making the tapenade even more delicious when you go to serve it. Just remember to give it a quick stir and a taste before serving, as the flavors may intensify over time. For optimal quality, ensure it’s well-contained to prevent drying out or absorbing other odors. When it’s time to enjoy, simply plate it and indulge in your bold, savory creation, ready to impress your guests!

Expert Tips for Olive Tapenade

  • Choose Quality Olives: Select high-quality olives for the best flavor; cheaper varieties can be overly salty and lack depth.

  • Mind the Saltiness: Always taste your olives and capers first to avoid an overly salty tapenade—adjust anchovy paste accordingly if needed.

  • Customize Texture: For a chunkier spread, pulse the mixture less; for a smoother texture, blend longer but avoid puréeing completely.

  • Enhance Flavor: Let the Olive Tapenade sit for 30 minutes before serving to allow the flavors to meld beautifully.

  • Storage Perfection: Keep leftovers in an airtight container in the refrigerator for up to a week. Allow reaching room temperature before serving again.

  • Experiment Freely: Don’t be afraid to mix in additional spices or herbs—like fresh basil or parsley—for a unique twist on your Olive Tapenade!

Olive Tapenade Variations & Substitutions

Feel free to get creative and make this Olive Tapenade your own with these exciting variations!

  • Green Olives: Swap Kalamata olives for green olives for a mild and bright twist. This minor change brings a fresh flavor profile that can be surprisingly delightful.

  • Sun-Dried Tomatoes: Add 2 tablespoons of chopped sun-dried tomatoes for an unexpected sweetness that beautifully balances the salty olives. Imagine the vibrant color and delightful taste they lend to your tapenade!

  • Dairy-Free Creaminess: Blend in a tablespoon of nutritional yeast for a cheesy flavor without the dairy, perfect for those who are vegan or lactose-intolerant. You'll love this nutritious boost!

  • Spicy Kick: Toss in a pinch of red pepper flakes or a diced jalapeño for an added layer of heat. This simple adjustment takes the tapenade to a whole new level, perfect for spice lovers!

  • Herb Infusion: Incorporate fresh herbs like basil or parsley for a fragrant touch that brightens the dish. Not only does it enhance the flavor, but it also adds an inviting pop of color to your spread!

  • Citrusy Zest: Add a splash of fresh lemon juice or a teaspoon of lemon zest to brighten the flavors, providing a zesty enhancement that keeps it fresh. This small tweak can make a huge difference in elevating your tapenade!

  • Nutty Texture: For a unique twist, fold in some finely chopped walnuts or pistachios for added texture and richness. The nuttiness creates a delightful contrast to the olives and enhances the overall experience.

  • Garlic Variations: Substitute roasted garlic for fresh garlic for a milder, sweeter flavor. This switch can completely transform the overall profile of your tapenade, offering a more nuanced taste that’s deeply satisfying.

With these variations, you can easily personalize your homemade Olive Tapenade to suit any occasion or preference!

What to Serve with 5-Minute Mediterranean Olive Tapenade?

Pair your savory tapenade with delightful accompaniments that enhance its Mediterranean flair and make every bite a celebration.

  • Crusty Baguette: The perfect vehicle for your tapenade, its chewy crust and soft interior provide a wonderful texture balance.

  • Grilled Vegetables: Charred zucchini, bell peppers, and eggplant add a smoky depth to your appetizer spread that plays beautifully against the tapenade's brininess.

  • Cheese Platter: A variety of creamy cheeses offer a rich contrast to the salty tapenade, making for a well-rounded and indulgent snacking experience.

  • Chickpea Salad: Fresh herbs, juicy tomatoes, and a lemony dressing bring a refreshing brightness that harmonizes with the savory notes of the tapenade.

  • Sparkling Wine: A crisp and bubbly sipper cleanses the palate beautifully, enhancing the rich flavors of your Olive Tapenade while elevating the evening's festivities.

  • Stuffed Peppers: Mini bell peppers filled with a herby cream cheese provide a creamy contrast, creating a delightful bite when enjoyed alongside your spread.

  • Olives Variety: Offering an assortment of marinated olives can enrich the platter, enriching the Mediterranean theme while adding layers of flavor.

  • Dark Chocolate: For those who enjoy a unique twist, dark chocolate adds a surprising sweetness that rounds out your savory experience perfectly.

Storage Tips for Olive Tapenade

Fridge: Store your Olive Tapenade in an airtight container in the refrigerator for up to 1 week. This helps to preserve its vibrant flavors while keeping it fresh.

Freezer: For longer storage, freeze the tapenade in small portions using ice cube trays. It will last up to 3 months. Thaw overnight in the fridge for later use.

Room Temperature: If serving, allow the Olive Tapenade to sit at room temperature for about 20 minutes before enjoying, as this enhances the flavors and aroma.

Reheating: There’s no need to reheat the tapenade, but if desired, gently warm it in a pan over low heat for a few minutes.

Olive Tapenade Recipe FAQs

What type of olives should I use for my Olive Tapenade?
Absolutely! I recommend a mix of Kalamata and ripe black olives for a well-rounded flavor. However, if you prefer simplicity, using only Kalamata olives will give you a delicious tapenade too!

How should I store leftover Olive Tapenade?
Store your Olive Tapenade in an airtight container in the refrigerator for up to 1 week. Make sure to let the tapenade reach room temperature for about 20 minutes before serving it again to enhance its flavors.

Can I freeze Olive Tapenade, and how do I do it?
Yes, you can freeze Olive Tapenade! Portion it into ice cube trays or small containers and freeze for up to 3 months. To use, simply thaw it overnight in the fridge. Enjoy the convenience of having a vibrant Mediterranean spread ready when you need it!

What if my Olive Tapenade turns out too salty?
If your tapenade ends up too salty, that could be from the saltiness of the olives or capers. To balance it, try adding a bit more olive oil or blending in a few extra olives to dilute the saltiness. Taste as you go—you want that perfect blend of salty and savory!

Are there any dietary considerations for pets or allergies with this recipe?
Definitely! Keep in mind that while Olive Tapenade is vegan and vegetarian-friendly, if you’re using anchovy paste, be cautious if serving to someone with seafood allergies. Additionally, since olives can be high in sodium, it’s better to avoid offering this to pets. Always double-check ingredients if you're cooking for someone with specific dietary needs!

Olive Tapenad

Easy Olive Tapenade Recipe for Ultimate Flavor Happiness

This easy Olive Tapenade recipe brings a burst of Mediterranean flavors to your table in just 5 minutes.
Print Recipe Pin Recipe
Prep Time 5 minutes mins
Total Time 5 minutes mins
Servings: 4 servings
Course: Appetizers
Cuisine: Mediterranean
Calories: 70
Ingredients Equipment Method Nutrition Notes

Ingredients
  

For the Tapenade
  • 1 cup Kalamata olives pitted
  • 1 cup ripe black olives pitted
  • 2 tablespoons capers
  • 1 teaspoon anchovy paste optional for umami
  • 1/4 cup extra virgin olive oil
  • 2 cloves garlic peeled
For Variations
  • 1 cup green olives optional, substitute for Kalamatas
  • 1/2 cup sun-dried tomatoes chopped, optional

Equipment

  • Food Processor

Method
 

Step-by-Step Instructions for Olive Tapenade
  1. Gather all your ingredients: a mix of Kalamata and ripe black olives, capers, olive oil, garlic, and optionally, anchovy paste. Ensure your olives are pitted.
  2. In a food processor, add the prepared olives, capers, anchovy paste (if using), and peeled garlic cloves. Pour in a splash of olive oil and pulse until chunky, about 15-20 seconds.
  3. Check the texture of your tapenade and add more olive oil if too thick, about a teaspoon at a time, while pulsing until desired smoothness is achieved.
  4. Taste your Olive Tapenade and adjust salt or anchovy paste if needed. Serve on a small piece of bread to check seasoning.
  5. Transfer the tapenade to a serving dish, garnishing with a drizzle of olive oil if desired. Serve with crusty bread or crostini.

Nutrition

Serving: 1tablespoonCalories: 70kcalCarbohydrates: 5gProtein: 1gFat: 6gSaturated Fat: 1gMonounsaturated Fat: 5gSodium: 150mgPotassium: 40mgFiber: 1gCalcium: 2mgIron: 1mg

Notes

Store leftovers in an airtight container in the fridge for up to 1 week. Allow it to sit at room temperature for about 20 minutes before serving to enhance flavors.

Tried this recipe?

Let us know how it was!

Comforting Cabbage Soup: A Hearty, Healthy Delight

September 5, 2025 by Grace Snow Leave a Comment

As the crisp air begins to chill, I crave something that warms my soul and nourishes my body. This Hearty 1-Pot Cabbage Soup is just the comforting embrace I need on a quiet evening. Packed with vibrant vegetables and a touch of fire-roasted tomatoes, this healthy and easy-to-make soup showcases cabbage in a delicious way. Not only does it utilize an entire head of cabbage, promoting a fantastic green-centric meal, but it’s also a crowd-pleaser—perfect for sharing with family or savoring alone. With minimal prep time, you’ll find this soup is a lifesaver for those busy weeks when you desire something wholesome and satisfying. Curious about how to whip up this inviting, nourishing bowl of joy? Let’s dive in!

Why is Cabbage Soup a Delight?

Healthy Comfort: This soup embodies the essence of nutritious eating, packed with vitamins and minerals from its vibrant ingredients.

One-Pot Wonder: Embrace simplicity with minimal cleanup; all it takes is one pot to create this hearty meal!

Flavorful Fusion: The fire-roasted tomatoes combined with tender cabbage deliver an explosion of tastes that will warm you from the inside out.

Customizable Goodness: Feel free to adapt ingredients and add your favorite beans or grains for variety; this recipe is as versatile as it is delicious.

Satisfying & Filling: It’s not just soup; each bowl offers a nourishing experience that keeps hunger at bay, making mealtime truly satisfying.

If you're also in the mood for a soul-soothing experience, consider pairing it with a delightful Egg Drop Soup for a balanced meal!

Cabbage Soup Ingredients

For the Base

  • Extra-Virgin Olive Oil – Adds richness and subtle flavor; can substitute with vegetable oil if needed.
  • Carrots – Provide sweetness and color to the soup; try parsnips for a different twist.
  • Yellow Onion – Contributes depth of flavor; red onion can work in a pinch.
  • Celery – Offers a crisp texture and flavor base; can be omitted if not on hand.
  • Sea Salt – Enhances the overall flavor profile; kosher salt is a good alternative.
  • Freshly Ground Black Pepper – Adds spice and warmth; feel free to adjust to your taste.

For the Flavor Burst

  • White Wine Vinegar – Introduces tanginess; apple cider vinegar makes a great substitute.
  • Fire-Roasted Diced Tomatoes – Bring a smoky flavor to the mix; regular diced tomatoes can replace if necessary.
  • Vegetable Broth – Forms the soul of the soup; chicken broth can be used for non-vegetarians.
  • Garlic – Elevates the flavor—fresh garlic is best, but garlic powder can be a quick substitute.

For the Hearty Texture

  • Cooked White Beans – Provide protein and creaminess; any canned beans will do, just remember to drain and rinse well.
  • Yukon Gold Potatoes – Add heartiness and texture; any starchy potato makes a good stand-in.
  • Green Cabbage – The star of this dish, packed with health benefits; can be swapped with savoy or Napa cabbage.

For the Herbal Notes

  • Dried Thyme – Infuses earthy notes; fresh thyme works beautifully too—just use three times the amount.
  • Fresh Parsley – Adds a splash of brightness as a garnish; you can skip it if it's not available.

This comforting cabbage soup is sure to warm your heart, and with these ingredients, you'll be well on your way to creating a nourishing bowl of joy!

Step‑by‑Step Instructions for Hearty 1-Pot Cabbage Soup

Step 1: Heat the Oil
Begin by heating 2 tablespoons of extra-virgin olive oil in a large pot over medium heat. Allow the oil to shimmer, signaling that it’s hot enough for cooking. This step sets the foundation for the flavorful cabbage soup you're about to create.

Step 2: Sauté the Aromatics
Add 1 cup of chopped carrots, 1 diced yellow onion, and 1 diced celery stalk to the pot. Season with 1 teaspoon of sea salt and ½ teaspoon of freshly ground black pepper. Sauté these ingredients for about 8 minutes, stirring occasionally, until they soften and the onion becomes translucent, filling your kitchen with a delicious aroma.

Step 3: Deglaze with Vinegar
Pour in 2 tablespoons of white wine vinegar, stirring well to combine with the sautéed vegetables. Cook for an additional minute, allowing the vinegar to reduce slightly and mingle with the flavors. This step brightens the mixture and adds a lovely tang that enhances the overall taste of the cabbage soup.

Step 4: Add the Base Ingredients
Next, introduce a 14-ounce can of fire-roasted diced tomatoes, 4 cups of vegetable broth, 1 can of drained and rinsed white beans, 3 cloves of grated garlic, and 2 medium Yukon Gold potatoes, diced. Add 4 cups of chopped green cabbage and 1 teaspoon of dried thyme. Stir everything together, creating a vibrant medley of ingredients that will become the heart of your soup.

Step 5: Simmer to Perfection
Cover the pot and let the mixture simmer on medium-low heat for 20 to 30 minutes. As the soup cooks, the potatoes and cabbage will become tender. Check occasionally, giving it a gentle stir and enjoying the enticing smell of your cooking cabbage soup.

Step 6: Final Touches
After the simmering time, taste the soup and adjust the seasoning if needed. You can add more salt or pepper to suit your palate. Once satisfied, remove the pot from heat and let it stand for 5 minutes to let the flavors meld beautifully.

Step 7: Serve and Enjoy
Ladle the hearty cabbage soup into bowls, garnishing each with a sprinkle of fresh parsley for a pop of color and freshness. Serve hot, alongside crusty bread or a side salad, creating a nourishing and satisfying meal for you and your loved ones.

Cabbage Soup Variations & Substitutions

Feel free to get creative and make this nourishing dish your own with these delightful twists!

  • Spicy Kick: Add red pepper flakes during sautéing for a punch of heat that complements the savory flavors beautifully.
    Enhancing the warmth of the soup can elevate your culinary experience, making each bowl more exciting.

  • Earthy Lentils: Swap white beans with green or brown lentils for added texture and a protein boost.
    Lentils not only make the soup heartier but also lend a unique earthiness that pairs wonderfully with cabbage.

  • Savory Chicken: For a non-vegetarian option, toss in shredded cooked chicken or even some diced sausage.
    Adding leftover meat transforms this soup into a comforting feast, ensuring every bite is satisfying and filled with flavor.

  • Smooth & Creamy: Blend in some coconut milk or a splash of cream for a rich texture.
    This creamy twist makes your cabbage soup feel indulgent, providing a warm, velvety experience with every spoonful.

  • Veggie Boost: Incorporate zucchini or bell peppers for extra veggies.
    These additions can provide a pop of color and flavor, making your soup even more nutritious and visually appealing.

  • Herb Infusion: Use fresh herbs like basil or cilantro for a fragrant finish.
    Garnishing with fresh herbs can brighten up the dish, not only in flavor but also visually, creating a mouthwatering experience.

  • Grain Goodness: Add in some quinoa or barley for a filling grain option.
    These hearty grains can turn your soup into a satisfying meal, perfect for a chilly day.

  • Zesty Lemon: A squeeze of lemon juice at the end brightens up the flavors impeccably.
    The zesty addition can brighten the soup, balancing the richness while enhancing the overall taste.

If you're in the mood for more delicious soups, consider trying out a bowl of Asparagus Soup Healthy or the comforting Zuppa Toscana Soup for variety!

Make Ahead Options

These Cabbage Soup ingredients are perfect for meal prep enthusiasts! You can chop the vegetables (carrots, onion, celery, potatoes, and cabbage) and store them in airtight containers in the refrigerator for up to 3 days. This allows you to save time during busy weeknights. Additionally, you can sauté the aromatics (carrots, onion, and celery) ahead of time and refrigerate them, which keeps their flavors fresh and vibrant. When you’re ready to enjoy your soup, simply add the prepped ingredients to your pot along with the broth and other components, simmer, and you'll have a comforting meal ready in no time, just as delicious as if made fresh!

How to Store and Freeze Cabbage Soup

Fridge: Store leftover cabbage soup in an airtight container in the fridge for up to 4 days. Make sure it cools down to room temperature before sealing to lock in freshness.

Freezer: This nourishing cabbage soup can be frozen for up to 3 months. Cool completely before transferring to freezer-safe containers, leaving some space for expansion.

Thawing: To enjoy frozen soup, place it in the fridge overnight to thaw, ensuring it's ready to reheat the next day while maintaining its rich flavors.

Reheating: Reheat on the stovetop over low heat, stirring occasionally until heated through, or microwave in short intervals, making sure to stir to avoid hot spots.

What to Serve with Hearty 1-Pot Cabbage Soup

The wonderful aroma of this nourishing soup makes your kitchen feel like home, and pairing it right can elevate your meal further.

  • Crusty Bread: Perfect for dipping, crusty bread adds a delightful crunch, soaking up all the tasty broth while enhancing the cozy vibe.

  • Simple Green Salad: Fresh greens with a splash of lemon provide a refreshing contrast to the warm, hearty soup, balancing textures beautifully.

  • Grilled Cheese Sandwich: A classic pairing! The gooey, melty cheese complements the soup’s comforting flavors and adds satisfying richness.

  • Herb-Infused Couscous: Light and fluffy, couscous tossed with herbs not only adds a lovely texture but also makes each bite a flavorful adventure.

  • Roasted Vegetables: Seasoning seasonal veggies with herbs and roasting them brings out their natural sweetness, harmonizing perfectly with the soup's savory goodness.

  • Pickled Beets: Their tangy zip cuts through the richness of the soup, providing a delightful contrast and an extra pop of color on the plate.

  • Chilled White Wine: A glass of chilled Sauvignon Blanc enhances the soup’s bright flavors, making your meal feel extra special and inviting.

  • Apple Crisp: For dessert, a serving of warm apple crisp brings sweetness and texture, rounding off the meal with a comforting touch that lingers long after the last bite.

Expert Tips for Cabbage Soup

  • Cook the Cabbage Well: Ensure the cabbage is tender enough to blend into the soup, enhancing the overall flavor while remaining mellow and enjoyable.

  • Let It Rest: Allow the cabbage soup to sit for 30 minutes after cooking to let the flavors meld together, resulting in a more harmonious taste.

  • Freezing Properly: This soup freezes excellently; cool it completely before transferring to freezer-safe containers to maintain its delightful texture.

  • Flavor Variations: Don't hesitate to add a pinch of red pepper flakes for a kick, or substitute white beans with lentils for texture and protein diversity.

  • Season Thoughtfully: Always taste and adjust seasoning before serving; a little extra salt or pepper can elevate your cabbage soup beautifully.

Cabbage Soup Recipe FAQs

How do I select the best cabbage for my soup?
Absolutely! Look for a cabbage that feels heavy for its size with tightly packed leaves. Avoid any heads with dark spots all over or those that feel too soft. If possible, choose a crisp green cabbage with a vibrant color; this typically indicates freshness and flavor. A medium-sized head, around 2 to 3 pounds, will give you just the right amount for this recipe.

How long can I store leftover cabbage soup?
Very! Your delicious leftover cabbage soup can be stored in an airtight container in the fridge for up to 4 days. Make sure it has cooled to room temperature before sealing it. When you’re ready to enjoy it again, a gentle reheat will bring back its comforting warmth.

Can I freeze cabbage soup, and how should I do it?
Yes, indeed! Cabbage soup can be frozen for up to 3 months, making it perfect for meal prep. First, let the soup cool completely. Then, transfer it into freezer-safe containers, leaving some headspace as the soup can expand as it freezes. Label with the date and pop it in the freezer. When you're ready to enjoy it, just thaw in the fridge overnight before reheating.

What if my cabbage soup turns out too watery or bland?
No worries! If your soup is too watery, you can simmer it uncovered for a bit to allow some liquid to evaporate, thickening your soup. For blandness, consider adding more salt, herbs, or even a splash of white wine vinegar to brighten the flavor. Always taste as you go, and feel free to enhance it with additional cooked beans or a dash of hot sauce for a kick!

Are there any dietary considerations for cabbage soup?
Absolutely! This cabbage soup is vegetarian and can easily be made vegan by ensuring all ingredients (like broth) are plant-based. For those with allergies, check substitute ingredients like vegetable broth, as some brands may contain allergens. If you're preparing it for children or pets, ensure that none of the spices or added ingredients are unsuitable for their diets.

Why is it suggested to let the cabbage soup rest after cooking?
Great question! Allowing the soup to sit for about 30 minutes after cooking lets the flavors meld beautifully, enhancing the overall taste. The resting period allows the aromas to develop and intensify, making each bowl even more delicious when you finally serve it up!

Cabbage Soup

Comforting Cabbage Soup: A Hearty, Healthy Delight

This refreshing Cabbage Soup is a wholesome blend of vibrant vegetables, perfect for warming your soul while nourishing your body.
Print Recipe Pin Recipe
Prep Time 15 minutes mins
Cook Time 30 minutes mins
Resting Time 5 minutes mins
Total Time 50 minutes mins
Servings: 6 cups
Course: Soups
Cuisine: Healthy
Calories: 180
Ingredients Equipment Method Nutrition Notes

Ingredients
  

For the Base
  • 2 tablespoons extra-virgin olive oil can substitute with vegetable oil
  • 1 cup chopped carrots or parsnips for a twist
  • 1 large yellow onion can use red onion
  • 1 stalk celery can omit if not available
  • 1 teaspoon sea salt kosher salt is an alternative
  • 0.5 teaspoon freshly ground black pepper adjust to taste
For the Flavor Burst
  • 2 tablespoons white wine vinegar apple cider vinegar is a substitute
  • 14 ounces fire-roasted diced tomatoes can substitute with regular diced tomatoes
  • 4 cups vegetable broth can use chicken broth for non-vegetarians
  • 3 cloves garlic grated, fresh garlic is best
For the Hearty Texture
  • 1 can cooked white beans drained and rinsed
  • 2 medium Yukon Gold potatoes diced, can substitute with any starchy potato
  • 4 cups chopped green cabbage can swap with savoy or Napa cabbage
For the Herbal Notes
  • 1 teaspoon dried thyme can use fresh thyme (3x the amount)
  • fresh parsley for garnish, optional

Equipment

  • Large pot

Method
 

Step-by-Step Instructions for Hearty 1-Pot Cabbage Soup
  1. Heat the olive oil in a large pot over medium heat until shimmering.
  2. Add chopped carrots, diced onion, and celery stalk; season with salt and pepper. Sauté for about 8 minutes until translucent.
  3. Pour in white wine vinegar and stir well; cook for 1 additional minute.
  4. Add diced tomatoes, vegetable broth, drained beans, grated garlic, diced Yukon Gold potatoes, chopped cabbage, and thyme. Stir everything together.
  5. Cover and let simmer on medium-low heat for 20 to 30 minutes until vegetables are tender.
  6. Taste and adjust seasoning if necessary; let stand for 5 minutes.
  7. Ladle soup into bowls and garnish with fresh parsley.

Nutrition

Serving: 1cupCalories: 180kcalCarbohydrates: 35gProtein: 6gFat: 4gSaturated Fat: 0.5gPolyunsaturated Fat: 2gMonounsaturated Fat: 1gSodium: 600mgPotassium: 700mgFiber: 10gSugar: 5gVitamin A: 120IUVitamin C: 60mgCalcium: 50mgIron: 2mg

Notes

This cabbage soup freezes well; cool completely before storing in freezer-safe containers.

Tried this recipe?

Let us know how it was!

Delicious Succotash: A Colorful and Easy Side Dish to Love

August 19, 2025 by Grace Snow Leave a Comment

As I stood in the kitchen, the vibrant colors of fresh vegetables caught my eye, and I knew it was time to whip up a batch of succotash. This wonderful dish combines sweet corn, creamy lima beans, and juicy tomatoes, creating a nourishing and budget-friendly side that’s perfect for any meal. In just 30 minutes, you’ll unveil a comforting, hearty dish that not only satisfies the palate but also makes your meal prep a breeze. Whether you enjoy it as a vegetarian option or want to jazz it up with some bacon, this simple and delicious succotash is a delightful addition to your cooking repertoire. Are you ready to explore the many variations this classic dish has to offer?

What makes succotash a must-try?

Vibrant Colors: This succotash bursts with a stunning palette of vegetables that brighten up any plate, making it as visually appealing as it is tasty.

Quick & Easy: In just 30 minutes, you can whip up this budget-friendly dish, proving that delicious doesn’t have to be time-consuming.

Versatile Base: Swap in seasonal vegetables or add in cooked bacon for a twist—this recipe easily adapts to your flavor preferences!

Nutritious Choice: With each serving being low in calories yet rich in protein and nutrients, it's a perfect guilt-free side dish that fits any diet.

Crowd-Pleaser: Whether you serve it at family dinners or holiday gatherings, succotash is sure to impress and satisfy guests of all ages.

Explore this delicious succotash and discover more wonderful vegetable creations in your kitchen!

Succotash Ingredients

• Discover the delightful components of succotash that create its flavorful charm!

For the Base

  • Yellow Onion – Adds sweetness and flavor; Try shallots for a milder taste.
  • Butter (4 Tbsp) – Provides richness and enhances flavor; Olive oil works as a vegan substitute.
  • Frozen Lima Beans (12oz.) – The main protein source; Edamame is a great alternative if preferred.
  • Frozen Sweet Corn (12oz.) – Offers natural sweetness and texture; Use fresh corn in peak season for extra freshness.
  • Chicken Broth (1 cup) – Delivers savory flavor and moisture; Vegetable broth is perfect for a vegetarian version.

For Flavoring

  • Dried Thyme (1/2 tsp) – Adds aromatic flavor; Opt for fresh thyme for a bolder taste.
  • Black Pepper (1/4 tsp) – Adds warmth and depth; Freshly cracked pepper is recommended for best flavor.
  • Salt (1 tsp, divided) – Enhances the overall flavor; Adjust according to the broth used for a better taste.

For Freshness

  • Large Tomato – Brings acidity and freshness; Canned tomatoes can be used in a pinch.
  • Chopped Parsley (1 Tbsp) – A garnish that adds brightness; Cilantro can impart a unique flavor twist.

Step‑by‑Step Instructions for Succotash

Step 1: Sauté Onion
Begin by dicing a yellow onion into small pieces. In a large skillet, melt 2 tablespoons of butter over medium heat. Add the diced onion and sauté for about 5 minutes, stirring occasionally, until it becomes translucent and fragrant. This step lays a flavorful base for your succotash.

Step 2: Add Main Ingredients
Stir in 12 ounces of frozen lima beans and 12 ounces of frozen sweet corn to the skillet. Pour in 1 cup of chicken broth, 1/2 teaspoon of dried thyme, 1/4 teaspoon of black pepper, and 1/2 teaspoon of salt. Bring the mixture to a gentle simmer, allowing the vibrant colors to come alive as they cook together for about 3 minutes.

Step 3: Simmer
Reduce the heat to low and let the succotash simmer uncovered for around 10 minutes. Stir occasionally to ensure nothing sticks to the bottom of the pan. You will notice the lima beans and corn will soften while absorbing the flavors from the broth, creating a delightful medley of vegetables.

Step 4: Incorporate Tomato
While the succotash is simmering, dice a large tomato and set it aside. After 10 minutes, stir in the diced tomato and continue to simmer for an additional 5 minutes. This will infuse the dish with fresh acidity and brightness, enhancing the overall taste of your succotash.

Step 5: Final Seasoning
Once the tomatoes have softened and melded into the succotash, taste the dish and adjust the salt if needed. Stir in the remaining 2 tablespoons of butter, letting it melt completely before removing the skillet from heat. This final touch adds a richness that elevates the entire dish.

Step 6: Serve
Spoon the colorful succotash into serving bowls and garnish with a tablespoon of chopped parsley and an extra sprinkle of freshly cracked black pepper. Serve this warm and inviting dish alongside your favorite proteins or as a standalone highlight on your table.

Make Ahead Options

These succotash are a perfect choice for meal prep enthusiasts looking to save time during busy weeknights! You can chop the yellow onion, dice the tomato, and measure out the frozen lima beans and corn up to 24 hours in advance, storing them in the refrigerator to keep ingredients fresh. If you want to prep even further, you can cook the succotash and refrigerate it for up to 3 days; just be sure to store it in an airtight container. When you're ready to serve, simply reheat on the stovetop over low heat until warmed through, stirring occasionally, and finish by adding the remaining butter to restore that comforting richness. Enjoy delicious succotash with minimal effort!

Expert Tips for Succotash

  • Stir Occasionally: To avoid sticking, give your succotash a gentle stir every few minutes while simmering, ensuring even cooking and flavor distribution.

  • Use Fresh Pepper: For the best flavor, opt for freshly cracked black pepper instead of pre-ground. It enhances the dish's taste remarkably.

  • Add Extra Flavor: Consider tossing in cooked bacon or sausage for a heartier version of succotash. This adds depth and richness to the dish.

  • Storing Secrets: Keep your succotash in an airtight container in the fridge for up to 2 days. Freezing it is also an option for up to 3 months, though expect some texture changes.

  • Customize Your Veggies: Feel free to substitute seasonal vegetables or add in some okra for variety. This flexibility keeps the dish exciting and tailored to your preferences.

What to Serve with Succotash

Elevate your meal experience by complementing succotash with delicious sides and refreshing drinks that harmonize beautifully together.

  • Grilled Chicken: Juicy, tender chicken contrasts the succotash’s vibrant flavors while adding protein and heartiness to your plate.
  • Baked Salmon: The rich flavor of salmon pairs well with the sweetness of the succotash, making for a nutritious, balanced meal.
  • Garlic Bread: A crispy, buttery garlic bread offers a delightful crunch that complements the creamy texture of the succotash.
  • Fresh Green Salad: A light, crisp salad with a zesty vinaigrette elevates the meal, balancing the warming flavors of succotash.
  • Roasted Asparagus: Tender, roasted asparagus brings an earthy depth that harmonizes with the dish’s sweetness, creating a sophisticated touch.
  • Homemade Cornbread: Soft, buttery cornbread serves as a delightful accompaniment, soaking up the succotash’s buttery goodness while adding a comforting element.
  • Lemonade: A refreshing glass of lemonade cuts through the richness of the succotash with a zesty pop, leaving your palate refreshed.
  • Chocolate Brownies: End your meal on a sweet note with fudgy brownies, providing a decadent contrast to the lightness of the succotash.
  • Sparkling Water: A crisp glass of sparkling water is the perfect way to cleanse your palate, highlighting the dish’s vibrant flavors throughout your dining experience.

Succotash Variations & Substitutions

Feel free to get creative and customize your succotash to match your taste buds!

  • Dairy-Free: Swap butter for olive oil to keep the recipe vegan-friendly while enjoying the same rich flavors.
  • Spicy Kick: Add diced jalapeños or a sprinkle of red pepper flakes for a vibrant heat that dances on your palate.
  • Meat Lover's Delight: Toss in crispy bacon or sausage to elevate the dish and add a smoky depth that's absolutely irresistible.
  • Fresh Seasonal Veggies: Incorporate fresh bell peppers, zucchini, or okra depending on what’s at the market, enhancing both flavor and nutrition.
  • Herb Infusion: Use fresh herbs like basil or cilantro instead of parsley to provide a unique flavor twist that brightens every bite.
  • Nutty Crunch: Top with toasted almonds or walnuts for a delightful crunch that contrasts beautifully with the creamy lima beans.
  • Canned Convenience: If you're short on time, use canned beans and corn, saving invaluable prep time without sacrificing flavor.
  • Citrusy Brightness: A squeeze of lemon juice or lime just before serving will elevate the succotash with a zesty brightness, making it even more refreshing.

Experiment with these variations to discover a unique rendition that suits your family’s tastes! For more colorful vegetable ideas, don’t forget to check out our healthy vegetable recipes and budget-friendly meal ideas.

How to Store and Freeze Succotash

Fridge: Store your succotash in an airtight container for up to 2 days. Make sure it cools completely before sealing to maintain freshness.

Freezer: For longer storage, freeze succotash in portion-sized containers for up to 3 months. Lay parchment paper between layers if stacking to prevent sticking.

Reheating: Reheat succotash in the microwave or stovetop until heated through, but expect slight texture changes after freezing. Stir gently to refresh the flavors before serving.

Serving Suggestions: Toss in fresh herbs or a splash of lemon juice after reheating for added brightness, making this delicious succotash an exciting dish every time!

Succotash Recipe FAQs

How do I choose the best ingredients for succotash?
Absolutely! For the best flavor in your succotash, select fresh, vibrant vegetables. Look for bright yellow corn and firm, plump tomatoes. When it comes to frozen lima beans, choose brands that don't have any dark spots or freezer burn. If using fresh corn, it should feel firm with a sweet aroma. If you're selecting onions, pick ones that are firm and free of soft spots.

What is the best way to store leftover succotash?
To store your succotash, let it cool completely, then transfer it to an airtight container. It will stay fresh in the refrigerator for about 2 days. Make sure to label it with the date—it’s easy to forget what’s in there! If you’re not planning to eat it within that timeframe, you can freeze it.

Can I freeze succotash for later use, and if so, how?
Very much! To freeze succotash, divide it into portion-sized containers or freezer bags, removing as much air as possible to prevent freezer burn. Lay parchment paper between layers if stacking containers. It can stay in the freezer for up to 3 months. When you're ready to enjoy it again, simply reheat on the stove or microwave until warmed through, keeping in mind that the texture might change slightly.

What should I do if my succotash is too salty?
If your succotash comes out too salty, don’t fret! You can rescue it by adding more unsalted vegetables—consider incorporating an additional diced tomato or a handful of frozen corn. Another trick is to add a bit of cooked rice or quinoa, helping to absorb some of that saltiness. Just remember to taste as you go!

Are there any dietary considerations for succotash?
Absolutely! For a vegetarian or vegan version, simply use vegetable broth instead of chicken broth, and substitute butter with olive oil. This makes it not only flavorful but also suitable for a variety of diets. If you're serving this dish to pets, it's a safe option as many of the ingredients are pet-friendly! Just be cautious with seasonings, as salt isn't advisable for our furry friends.

Succotash

Delicious Succotash: A Colorful and Easy Side Dish to Love

Enjoy this vibrant and easy succotash, a nourishing side dish featuring sweet corn, lima beans, and tomatoes.
Print Recipe Pin Recipe
Prep Time 10 minutes mins
Cook Time 20 minutes mins
Total Time 30 minutes mins
Servings: 4 cups
Course: Side Dishes
Cuisine: American
Calories: 180
Ingredients Equipment Method Nutrition Notes

Ingredients
  

For the Base
  • 1 medium Yellow Onion Adds sweetness and flavor; Try shallots for a milder taste.
  • 4 Tbsp Butter Provides richness and enhances flavor; Olive oil works as a vegan substitute.
  • 12 oz. Frozen Lima Beans The main protein source; Edamame is a great alternative if preferred.
  • 12 oz. Frozen Sweet Corn Offers natural sweetness and texture; Use fresh corn in peak season for extra freshness.
  • 1 cup Chicken Broth Delivers savory flavor and moisture; Vegetable broth is perfect for a vegetarian version.
For Flavoring
  • 1/2 tsp Dried Thyme Adds aromatic flavor; Opt for fresh thyme for a bolder taste.
  • 1/4 tsp Black Pepper Adds warmth and depth; Freshly cracked pepper is recommended for best flavor.
  • 1 tsp Salt Enhances the overall flavor; Adjust according to the broth used for a better taste.
For Freshness
  • 1 large Tomato Brings acidity and freshness; Canned tomatoes can be used in a pinch.
  • 1 Tbsp Chopped Parsley A garnish that adds brightness; Cilantro can impart a unique flavor twist.

Equipment

  • Large skillet

Method
 

Step-by-Step Instructions for Succotash
  1. Begin by dicing a yellow onion into small pieces. In a large skillet, melt 2 tablespoons of butter over medium heat. Add the diced onion and sauté for about 5 minutes, stirring occasionally, until it becomes translucent and fragrant.
  2. Stir in 12 ounces of frozen lima beans and 12 ounces of frozen sweet corn to the skillet. Pour in 1 cup of chicken broth, 1/2 teaspoon of dried thyme, 1/4 teaspoon of black pepper, and 1/2 teaspoon of salt. Bring the mixture to a gentle simmer for about 3 minutes.
  3. Reduce the heat to low and let the succotash simmer uncovered for around 10 minutes, stirring occasionally.
  4. Dice a large tomato and stir it into the skillet, continuing to simmer for an additional 5 minutes.
  5. Taste the dish and adjust the salt if needed. Stir in the remaining 2 tablespoons of butter and let it melt completely before removing from heat.
  6. Spoon the colorful succotash into serving bowls and garnish with a tablespoon of chopped parsley and an extra sprinkle of freshly cracked black pepper.

Nutrition

Serving: 1cupCalories: 180kcalCarbohydrates: 25gProtein: 6gFat: 7gSaturated Fat: 4gPolyunsaturated Fat: 1gMonounsaturated Fat: 2gCholesterol: 15mgSodium: 550mgPotassium: 400mgFiber: 5gSugar: 3gVitamin A: 800IUVitamin C: 15mgCalcium: 30mgIron: 1mg

Notes

Ensure to stir occasionally while cooking to prevent sticking. Consider adding cooked bacon or sausage for a heartier version.

Tried this recipe?

Let us know how it was!
  • « Previous Page
  • 1
  • 2

Welcome!

Hi, I’m Grace, a Sydney-based home cook with a passion for bold flavors and trending ingredients. Whether you’re a busy beginner or a seasoned foodie, you’ll find dishes here that are fresh, fun, and full of flavor.

More about me

Popular Recipes

  • Texas Roadhouse Rattlesnake Bites
    Homemade Texas Roadhouse Rattlesnake Bites You’ll Crave
  • Lemon Blueberry Lasagna
    Creamy Lemon Blueberry Lasagna for Effortless Summer Bliss
  • 4th of July Creamy BLT Pasta Salad
    4th of July Creamy BLT Pasta Salad That's a Summer Hit
  • 4th of July Swirl Pie
    4th of July Swirl Pie: A Festive No-Bake Delight for Summer

Footer

↑ back to top

About

  • Privacy Policy
  • Disclaimer
  • Terms & Conditions

Newsletter

  • Sign Up! for emails and updates

Contact

  • About me
  • Contact me

Copyright © 2025 TastyTrendIngredients