tastytrendingredients

  • Home
  • Recipes
    • Appetizers
    • Breakfast
    • Dessert
    • Dinner
    • Drinks
    • Salads
    • Snacks
    • Soups
  • About me
  • Contact
menu icon
go to homepage
  • Home
  • Recipes
    • Appetizers
    • Breakfast
    • Dessert
    • Dinner
    • Drinks
    • Salads
    • Snacks
    • Soups
  • About me
  • Contact
search icon
Homepage link
  • Home
  • Recipes
    • Appetizers
    • Breakfast
    • Dessert
    • Dinner
    • Drinks
    • Salads
    • Snacks
    • Soups
  • About me
  • Contact
×

Creamy Garlic Chicken Ramen: Your Cozy Weeknight Delight

June 1, 2026 by Grace Snow Leave a Comment

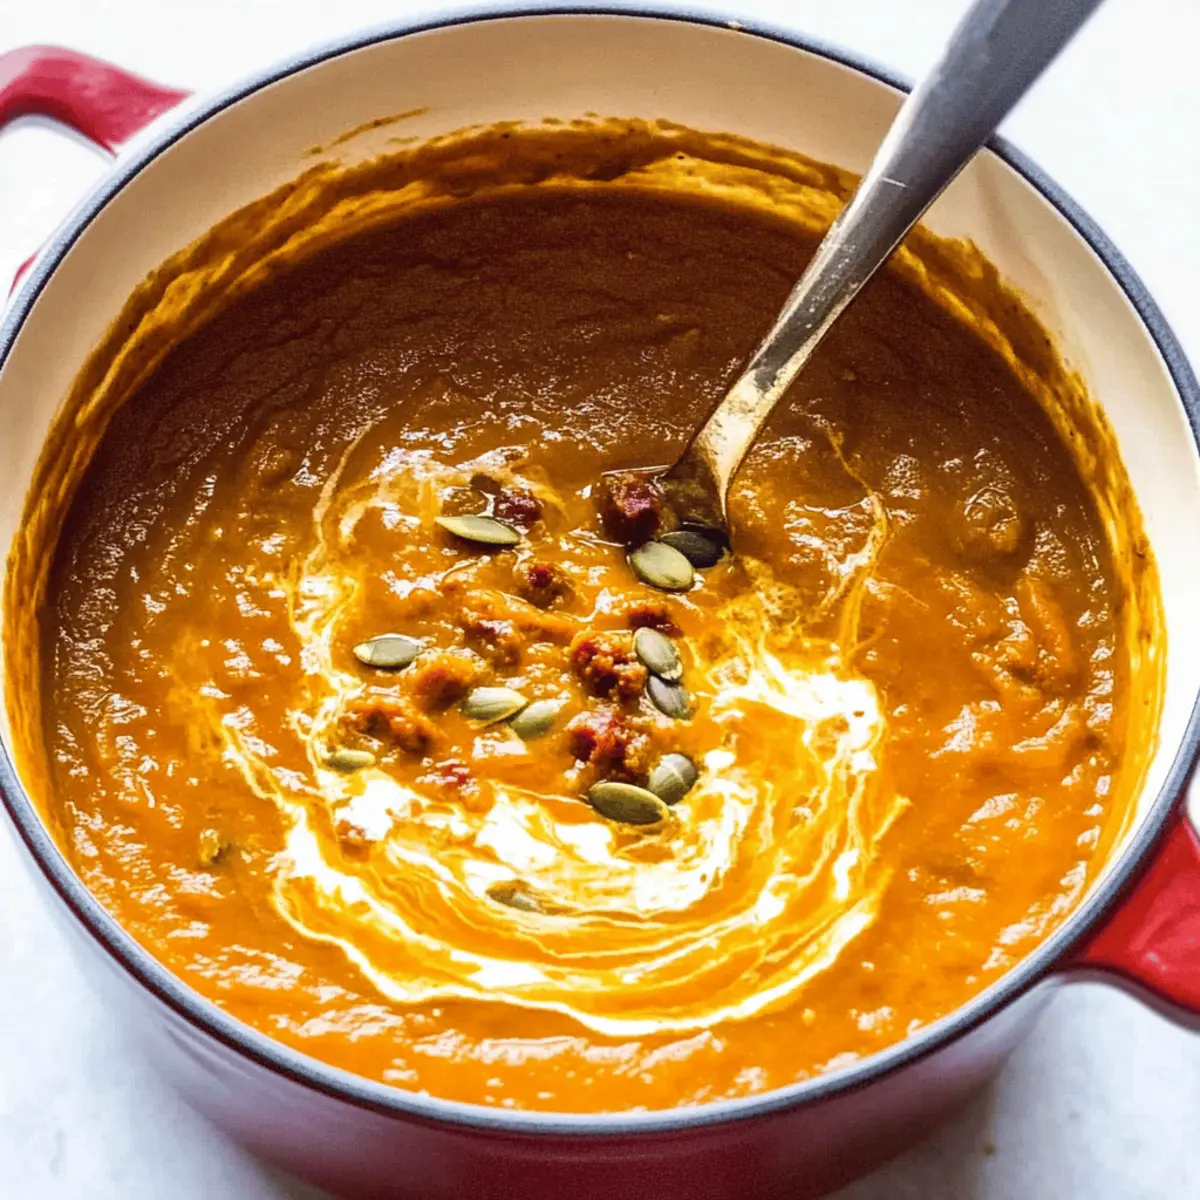
There I was, standing in my kitchen, the clock ticking down to dinnertime, wondering what to whip up that would satisfy my craving for something warm and comforting. That's when it hit me: Creamy Garlic Chicken Ramen! This dish not only comes together in mere minutes, making it the perfect quick meal for busy weeknights, but it also has a creamy, luscious texture that wraps around tender chicken and noodles like a cozy hug. And if you’re looking for flexibility, you'll love how easily it adapts—toss in some tofu for a delightful plant-based twist or swap heavy cream for coconut milk to keep it dairy-free. Ready to dive into this deliciousness? Let’s get started!

Why is this ramen your new favorite?

Quick and Easy: This Creamy Garlic Chicken Ramen is ready in no time, perfect for those hectic weeknights when you crave comfort without the fuss.
Customizable Goodness: Whether you're a meat lover or vegetarian, this dish easily adapts to your dietary needs—try adding tofu for a delicious plant-based option!
Irresistible Creaminess: The combination of heavy cream or coconut milk elevates the flavors, resulting in a rich, velvety sauce you'll want to savor.
One-Pot Wonder: Cut down on cleanup with a meal that only requires one pot—less mess, more time to enjoy your cozy bowl!
Family-Friendly Flavor: Everyone—from kids to adults—will love the aromatic blend of garlic and tender chicken, making it an instant crowd-pleaser. Pair it with a side of steamed broccoli or some garlic breadsticks for a complete meal experience.

Creamy Garlic Chicken Ramen Ingredients

For the Chicken
• Chicken Breast – Tender and quick-cooking; can substitute with chicken thighs for added flavor.

For the Sauce
• Olive Oil – For sautéing chicken; enhances flavor. Use any cooking oil of choice.
• Garlic – Adds rich aroma and flavor. Fresh garlic recommended; do not substitute with garlic powder for the same depth.
• Chicken Broth – Base for the sauce. Unsalted preferred to control saltiness.
• Soy Sauce – Adds umami and depth. Opt for low-sodium to manage overall salt content.
• Heavy Cream – Provides creaminess to the sauce. Substitute with full-fat coconut milk for a dairy-free option.

For the Noodles
• Ramen Noodles – Main carbohydrate; quick-cooking instant noodles are ideal. Adjust cooking time based on package instructions.

For the Garnish
• Green Onions – For garnish; adds freshness. Can substitute with scallions or chives.
• Salt and Black Pepper – Seasoning to taste; adjust based on personal preference.

Elevate your meal experience with these easy-to-find ingredients for the ultimate Creamy Garlic Chicken Ramen!

Step‑by‑Step Instructions for Creamy Garlic Chicken Ramen

Step 1: Sauté the Chicken
Heat 2 tablespoons of olive oil in a large pot over medium heat until shimmering. Add the thinly sliced chicken breast and sauté for 5-7 minutes, stirring occasionally, until the chicken is golden brown and cooked through. Once done, carefully remove the chicken from the pot and set it aside on a plate.

Step 2: Cook the Garlic
In the same pot, add the minced garlic and sauté for about 1 minute, stirring constantly, until fragrant but not browned. This step is crucial for bringing out the rich flavors of the garlic, which will infuse the creamy sauce in your Creamy Garlic Chicken Ramen.

Step 3: Build the Sauce
Pour in 4 cups of unsalted chicken broth and 2 tablespoons of soy sauce, stirring the mixture gently. Increase the heat and bring the broth to a gentle simmer, allowing it to bubble softly for about 5 minutes. This will deepen the flavors of your garlic-infused broth.

Step 4: Cook the Ramen Noodles
Add the ramen noodles directly to the simmering broth and cook according to package instructions, usually around 3-4 minutes. Stir occasionally to ensure the noodles separate and cook evenly. Once cooked, use tongs to remove the noodles and place them on the plate with the chicken.

Step 5: Combine the Chicken and Sauce
Lower the heat to a simmer and return the seared chicken to the pot. Gradually stir in 1 cup of heavy cream or full-fat coconut milk, mixing until smooth. Ensure you do not bring the mixture to a rapid boil, as this can affect the cream's texture in your Creamy Garlic Chicken Ramen.

Step 6: Serve and Garnish
To serve, place the cooked ramen noodles in bowls and ladle the creamy garlic chicken sauce over them. Garnish each bowl with sliced green onions for freshness, and season to taste with salt and black pepper. Enjoy this comforting dish!

What to Serve with Creamy Garlic Chicken Ramen

Transform your dinner into a delightful affair with flavorful sides and refreshing touches that enhance every creamy bite.

  • Steamed Broccoli: Adds a vibrant crunch and complements the creamy sauce, providing a fresh contrast that brightens your meal.

  • Garlic Breadsticks: Perfect for dipping into the rich broth, these warm, buttery sticks offer an irresistible garlic flavor that ties everything together.

  • Spicy Cucumber Salad: A zesty blend of cucumbers in a tangy dressing brings a refreshing coolness, balancing the richness of the ramen beautifully.

  • Edamame: Tossed in sea salt, these tender beans make for a fun finger food, adding protein and a satisfying pop to your plate.

  • Soft-Boiled Eggs: With their creamy yolks, these eggs add elegance and heartiness, enriching your ramen experience with additional flavors and textures.

  • Chardonnay or Riesling: A glass of chilled white wine complements the garlic flavors wonderfully, offering a lightness that promises to enhance your dining experience.

  • Mango Sticky Rice: If you're craving something sweet, this dessert's creamy coconut rice and fresh mango provide a delightful end to your meal, leaving you fully satisfied.

How to Store and Freeze Creamy Garlic Chicken Ramen

Fridge: Store leftover Creamy Garlic Chicken Ramen in an airtight container for up to 3 days. To maintain texture, keep noodles separate from the sauce during storage.

Freezer: To freeze, portion the ramen into freezer-safe containers. It’s best to keep noodles and sauce separate, allowing for optimal reheating. Thaw overnight in the fridge before warming up.

Reheating: When ready to enjoy, reheat the chicken and sauce over medium heat in a pot, adding a splash of broth or water to loosen the sauce. This ensures a creamy consistency.

Leftover Tips: For the freshest flavor, consume the leftovers within 2-3 days. Reheating the noodles may alter their texture, so enjoy them in a timely manner!

Make Ahead Options

These Creamy Garlic Chicken Ramen are a lifesaver for busy weeknights! You can prepare the chicken and sauce up to 24 hours in advance for incredible ease later on. Simply sauté your chicken and garlic, and then mix in the broth and soy sauce—allow to cool before storing in an airtight container in the refrigerator. Keep the noodles separate, as they can become mushy when refrigerated. When you’re ready to enjoy your meal, just simmer the sauce to heat through, cook the noodles according to package instructions, and combine everything together. This way, you’ll have a comforting, homemade dinner waiting for you with minimal effort!

Expert Tips for Creamy Garlic Chicken Ramen

  • Perfect Garlic Flavor: Sauté garlic only until fragrant to avoid bitterness. Fresh garlic is key for the rich flavor in your Creamy Garlic Chicken Ramen.

  • Control the Salt: Use unsalted chicken broth to manage salt levels in your dish, ensuring a well-balanced flavor profile that resonates with everyone.

  • Slow Cream Addition: Stir in cream or coconut milk gradually over low heat to prevent separation and keep your sauce luxurious and smooth.

  • Follow Noodle Instructions: Pay close attention to the cooking time on your ramen noodle package. Overcooking can lead to a mushy texture, which we want to avoid.

  • Spice It Up: For those who enjoy a kick, add sriracha or chili flakes to the sauce or garnish. This wonderful enhancement will take your Creamy Garlic Chicken Ramen to a new level!

Creamy Garlic Chicken Ramen Variations

Feel free to make this dish your own with these delightful twists that enhance flavor and cater to your dietary needs!

  • Tofu Swap: Exchange chicken for firm tofu for a scrumptious plant-based option. It’s perfect for a cozy vegetarian meal!

  • Veggie Add-Ins: amp up the nutrition by adding bok choy, baby spinach, or zucchini. These vibrant greens bring color and taste to your bowl.

  • Chicken Thighs: Use boneless chicken thighs for a richer flavor profile. The extra juiciness takes this dish to a whole new level!

  • Coconut Cream: Opt for full-fat coconut milk instead of heavy cream for a tropical twist. The subtle sweetness enhances the overall depth of flavor.

  • Egg Topping: Add a soft-boiled egg for richness and added protein. It creates a beautiful presentation and extra creaminess in every bite.

  • Spicy Kick: Stir in some sriracha or chili flakes for heat. If you love a spicy punch, this twist will elevate your ramen experience.

  • Mushroom Upgrade: Toss in shiitake or cremini mushrooms for an earthy depth. They blend wonderfully with the creamy sauce and provide extra umami.

Explore these variations and create your favorite version of Honey Garlic Chicken or try your hand at other delectable chicken recipes like Crock Pot Chicken for a fun twist!

Creamy Garlic Chicken Ramen Recipe FAQs

How do I select ripe ingredients for my Creamy Garlic Chicken Ramen?
Absolutely! For the best flavors, choose fresh garlic bulbs with tight, firm skins and no dark spots. If you're using green onions for garnish, look for firm stalks with vibrant green tops. When selecting chicken, go for breasts or thighs that are pink and moist, while avoiding any that have a greyish hue.

What’s the best way to store leftover Creamy Garlic Chicken Ramen?
Store your leftovers in an airtight container in the fridge for up to 3 days. For optimal reheating later, it's best to keep the noodles separate from the creamy sauce, as this prevents the noodles from becoming mushy. When ready to reheat, just combine them in a pot over medium heat with a splash of broth to bring everything back together!

Can I freeze Creamy Garlic Chicken Ramen?
Yes, you can! To freeze, portion the ramen into freezer-safe containers, keeping the noodles and sauce separate for best results. This allows for even reheating later. Simply thaw overnight in the fridge before warming it up gently. When reheating, add a bit of chicken broth or water to reconstitute the sauce, ensuring it retains that creamy goodness.

What if my ramen turns out too thick?
No worries! If you find your creamy sauce is too thick after cooking, just stirred in a little bit of broth or water while reheating to loosen it up to your desired consistency. This will also reinvigorate the flavors without compromising on creaminess.

Is this recipe safe for my allergies?
It's important to note that this Creamy Garlic Chicken Ramen contains common allergens like chicken and dairy. If you have specific dietary restrictions, you can easily swap the chicken for firm tofu for a plant-based version, and use full-fat coconut milk to make it dairy-free. Always check labels for any hidden allergens, especially in condiments like soy sauce, which can contain wheat.

How long can I keep leftovers?
For the best flavor and quality, aim to eat leftovers within 2 to 3 days. Storing them properly in an airtight container helps, but keep in mind that reheating the noodles might affect their texture. Aim to enjoy them sooner rather than later for the best experience!

Sweet & Spicy 5-Minute Stir Fry Sauce for Quick Flavor Fixes

May 28, 2026 by Grace Snow Leave a Comment

The fiery aroma of garlic and ginger sizzling in a hot pan instantly transports me to my favorite Asian street markets. Today, I’m excited to share my go-to Sweet & Spicy 5-Minute Stir Fry Sauce—the ultimate solution for busy weeknight dinners. Ready in just five minutes, this sauce effortlessly elevates any dish with a perfect blend of umami and customizable heat, ensuring your meals are anything but boring. Whether you’re a vegetarian seeking to jazz up your veggies or a meal prep enthusiast wanting a flavorful, low-sodium option, this quick stir-fry sauce is your answer. As a delightful bonus, you can tweak the sweetness and spice to your personal taste, making every dish uniquely yours. Ready to ditch the takeout and become your own culinary hero? Let’s dive into this quick and tasty recipe!

Why is This Sauce a Must-Try?

Quick prep time: You'll whip this up in just five minutes, perfect for those busy weeknights.
Customizable heat: Adjust the spice level to suit your taste, whether you like it mild or extra fiery!
Flavor packed: A harmonious blend of umami, sweetness, and a kick of heat transforms your meals.
Healthy choice: Lower in sodium than store-bought options, it’s a great fit for health-conscious cooks.
Versatile usage: Use it as a stir fry sauce, marinade, or even a dipping sauce for appetizers!
Explore your creativity in the kitchen with simple variations to keep every meal exciting! For delicious pairings, try this sauce over Smoky Sweet Potatoes or mix it with a refreshing salad.

Sweet & Spicy 5-Minute Stir Fry Sauce Ingredients

For the Sauce
• Low-sodium soy sauce – Provides savory depth; substitute with tamari for a gluten-free option.
• Low-sodium vegetable stock (or water) – Adds a flavor base; water can be used for a lighter taste.
• Sesame oil – Contributes a nutty aroma; use toasted sesame oil for a more robust flavor.
• Rice vinegar – Offers mild tanginess; apple cider vinegar can be used as a substitute.
• Garlic (minced) – Enhances flavor distribution; use garlic powder in a pinch.
• Ginger (grated) – Adds freshness and warmth; adjust to taste; ground ginger can be an alternative.
• Sugar or honey – Sweetens the sauce; use maple syrup for a vegan version or coconut sugar for a healthier sweetener.
• Cornstarch – Thickens the sauce; arrowroot powder can be a gluten-free substitute.
• Red pepper flakes – Introduces heat; adjust based on spice preference; cayenne pepper can add more heat.
• Sriracha (or chili garlic sauce) – For additional spice and flavor; adjust quantity for desired heat level.
• Chili powder or crushed chili paste (optional) – For extra spice; omit if not desired.

Ready to create a burst of flavor with this Sweet & Spicy 5-Minute Stir Fry Sauce? Let's keep the excitement going in the kitchen!

Step‑by‑Step Instructions for Sweet & Spicy 5-Minute Stir Fry Sauce

Step 1: Combine Ingredients
In a medium bowl or quart-sized mason jar, add 1/4 cup of low-sodium soy sauce, 1/4 cup of low-sodium vegetable stock, 2 tablespoons of sesame oil, and 2 tablespoons of rice vinegar. Next, incorporate 2 cloves of minced garlic, 1 tablespoon of grated ginger, and 1 tablespoon of sugar or honey. This colorful mixture will become the base of your Sweet & Spicy 5-Minute Stir Fry Sauce.

Step 2: Add Thickening Agent
Sprinkle in 1 tablespoon of cornstarch along with 1/2 teaspoon of red pepper flakes for that desired kick. If using sriracha, add 1 tablespoon now, adjusting to your heat preference. Whisk or seal the jar and shake vigorously for about 30 seconds until all ingredients are fully combined, and you can see no lumps from the cornstarch.

Step 3: Heat Your Stir Fry
In a heated skillet over medium-high heat, add your choice of vegetables, proteins, or a combination. Sauté for about 3–4 minutes, stirring frequently until everything is tender and starting to caramelize. This step is crucial for developing rich flavors, so keep an eye on those vibrant colors in your pan!

Step 4: Incorporate the Sauce
Once your stir fry ingredients are cooked to your liking, pour the Sweet & Spicy Stir Fry Sauce over them. Allow it to simmer for 1–2 minutes, stirring continuously to ensure even coating. The sauce will start to thicken and cling beautifully to your vegetables and proteins, creating a glossy finish.

Step 5: Final Touches
As your stir fry simmers, keep stirring gently to prevent the sauce from scorching. Continue to cook for another minute or so, allowing the flavors to meld and the sauce to reach your desired thickness. Once it coats the back of a spoon, you know it’s ready to be served!

Step 6: Serve and Enjoy
Remove the pan from heat and transfer your delicious stir fry to a serving platter or individual bowls. Drizzle with a bit more sriracha if desired, or sprinkle fresh herbs on top. You’ve created a delightful Sweet & Spicy 5-Minute Stir Fry Sauce that will elevate your meal and impress your family!

Sweet & Spicy 5-Minute Stir Fry Sauce Variations

Feel free to make this sauce your own with these cheerful twists and substitutions!

  • Soy-Free: Swap low-sodium soy sauce for coconut aminos to keep it soy-free while maintaining depth.
  • Sweetness Boost: For a richer flavor, use honey or maple syrup instead of sugar for a natural sweetness.
  • Herb Infusion: Add chopped fresh herbs like cilantro or basil right before serving for a pop of color and fresh flavor.
  • Protein Marinade: Use this sauce as a marinade for chicken, tofu, or shrimp, letting it soak in for 30 minutes before cooking.
  • Extra Zing: For more acidity, squeeze in some fresh lime juice or a splash of lemon right before serving.
  • Crunch Factor: Stir in some crushed peanuts or cashews at the end for added texture and nutty flavor.
  • Heat Lover’s Delight: Throw in some sliced fresh chilies along with red pepper flakes to amp up the heat level.
  • Savory Twist: Mix in some miso paste for an umami explosion that complements the sweetness beautifully.

Embrace the creative culinary journey as you adjust this sauce to match every meal! Whether it's complementing a dish of Maple Roasted Sweet potatoes or enhancing a vibrant stir fry, your personalized sauce will surely shine.

What to Serve with Sweet & Spicy 5-Minute Stir Fry Sauce

Transform your meal into a celebration of flavors and textures with these tempting pairings that perfectly complement your quick stir fry!

  • Steamed Jasmine Rice: This fragrant rice soaks up the sauce beautifully, making every bite a delightful taste experience.
  • Crunchy Vegetable Spring Rolls: Fresh, crisp veggies wrapped in rice paper offer a refreshing contrast to the warm, saucy stir fry.
  • Sesame Noodles: The nutty flavor harmonizes with the sauce, creating a comforting dish that’s perfect for slurping up!

Pair your stir fry with a colorful side to enhance its visual appeal. Vibrant vegetable medleys, featuring bell peppers, carrots, and snap peas, brightens your plate and adds nutritional value.

  • Grilled Tofu Skewers: These protein-packed skewers, marinated in a bit of the same sauce, echo the sweet and spicy elements perfectly.
  • Cucumber Salad: A light and tangy salad with rice vinegar and sesame seeds is a refreshing contrast to the bold stir fry.
  • Ginger Ale or Iced Tea: Refreshing drinks like ginger ale or iced tea balance the heat, ensuring a well-rounded dining experience.

Don’t forget to round off your meal with a tempting dessert like mango sticky rice for a sweet finale!

Expert Tips for Sweet & Spicy Stir Fry Sauce

  • Thorough Mixing: Ensure cornstarch is fully dissolved to avoid clumps before using the sauce; mix until you see no residue at the bottom.
  • Adjust Spice Level: Start with a small amount of sriracha and red pepper flakes, then gradually increase for a personalized kick in your Sweet & Spicy 5-Minute Stir Fry Sauce.
  • Storage Savvy: Keep leftovers in an airtight container in the refrigerator and use within one week to maintain freshness.
  • Cooking Technique: Stir continuously over medium heat once added to the stir fry to ensure the sauce thickens evenly without scorching.
  • Keep It Colorful: For a visually appealing dish, mix in colorful veggies that contrast nicely with the glossy sauce—think bell peppers, broccoli, and carrots.

How to Store and Freeze Sweet & Spicy 5-Minute Stir Fry Sauce

Fridge: Store any leftover Sweet & Spicy 5-Minute Stir Fry Sauce in an airtight container in the refrigerator for up to 1 week. Give it a good shake or stir before using.

Freezer: If you want to freeze the sauce, pour it into ice cube trays or silicone molds. Once frozen, transfer the cubes into a freezer bag; they can last up to 3 months.

Thawing: To use frozen sauce, simply transfer the desired cubes to the fridge overnight or defrost them in the microwave, stirring to mix well after thawing.

Reheating: When ready to enjoy, reheat your sauce in a saucepan over low heat, stirring frequently until warmed through.

Make Ahead Options

These Sweet & Spicy 5-Minute Stir Fry Sauce preparations are perfect for meal prep enthusiasts looking to save time during busy weeknights! You can make the sauce up to 3 days in advance. Simply mix all the ingredients in a quart-sized mason jar and refrigerate, shaking well before each use to ensure the cornstarch is fully incorporated. To maintain the sauce’s delicious quality, store it in an airtight container and place it in the refrigerator, which prevents spoilage. When you're ready to serve, just pour the prepped sauce over your fresh stir fry in the last few minutes of cooking to let it thicken nicely. With this make-ahead strategy, you’ll enjoy a fast, flavorful meal with minimal effort!

Sweet & Spicy 5-Minute Stir Fry Sauce Recipe FAQs

How do I select the right ingredients for my sauce?
Absolutely! For the best flavor, select low-sodium soy sauce that’s rich in umami without excess salt. Fresh ginger should be firm and aromatic, while garlic should be free of dark spots. If you see any blemishes, choose a different bulb for a fresher taste!

What’s the best way to store leftovers?
Very! Store any leftover sauce in an airtight container in the refrigerator for up to 1 week. Make sure to give it a good shake or stir before using, as the ingredients may separate after sitting.

Can I freeze the Sweet & Spicy Stir Fry Sauce?
Yes, you can! Pour the sauce into ice cube trays or silicone molds and freeze until solid. Once frozen, transfer the cubes into a freezer-safe bag, and they can last up to 3 months! When you’re ready to use them, simply thaw in the fridge overnight or microwave them for quick use.

What should I do if the sauce isn't thickening?
Don’t worry! If your sauce hasn’t thickened in the skillet, return it to medium heat and ensure you continuously stir. You can mix an additional teaspoon of cornstarch with a little cold water to create a slurry and then slowly add it into your simmering sauce while stirring consistently.

Is this sauce safe for those with dietary restrictions?
Absolutely! This Sweet & Spicy 5-Minute Stir Fry Sauce is vegetarian and vegan-friendly. However, if you have soy allergies, try substituting with coconut aminos for a soy-free version. Always check ingredient labels for allergens if you have concerns!

How can I adjust the spice and sweetness levels?
Very easy! Start by using less sriracha and red pepper flakes, then taste the sauce as you go. If you want it sweeter, add a bit more sugar or honey. Just remember to mix well after each adjustment to ensure the flavors meld beautifully!

Sweet & Spicy 5-Minute Stir Fry Sauce

Sweet & Spicy 5-Minute Stir Fry Sauce for Quick Flavor Fixes

This Sweet & Spicy 5-Minute Stir Fry Sauce is perfect for quick, flavorful meals.
Print Recipe Pin Recipe
Prep Time 5 minutes mins
Total Time 5 minutes mins
Servings: 4 servings
Course: Uncategorized
Cuisine: Asian
Calories: 40
Ingredients Equipment Method Nutrition Notes

Ingredients
  

For the Sauce
  • 1/4 cup low-sodium soy sauce substitute with tamari for gluten-free
  • 1/4 cup low-sodium vegetable stock or water
  • 2 tablespoons sesame oil use toasted for more flavor
  • 2 tablespoons rice vinegar substitute with apple cider vinegar
  • 2 cloves garlic minced; use garlic powder if necessary
  • 1 tablespoon ginger grated; adjust to taste
  • 1 tablespoon sugar or honey use maple syrup for vegan
  • 1 tablespoon cornstarch or arrowroot powder for gluten-free
  • 1/2 teaspoon red pepper flakes adjust based on preference
  • 1 tablespoon sriracha or chili garlic sauce; adjust for heat
  • chili powder or crushed chili paste optional; omit if not desired

Equipment

  • medium bowl
  • Whisk
  • Skillet
  • mason jar

Method
 

Preparation Instructions
  1. In a medium bowl or quart-sized mason jar, add the low-sodium soy sauce, vegetable stock, sesame oil, and rice vinegar. Incorporate minced garlic, grated ginger, and sugar or honey.
  2. Sprinkle in cornstarch and red pepper flakes. Optionally add sriracha, and whisk or shake until fully combined.
  3. In a skillet over medium-high heat, sauté your choice of vegetables or proteins until tender and caramelized, about 3-4 minutes.
  4. Once cooked, pour the sauce over the stir fry, and simmer for 1-2 minutes, stirring continuously.
  5. Continue cooking, stirring gently until the sauce reaches desired thickness.
  6. Serve immediately, drizzling with more sriracha or garnishing with fresh herbs if desired.

Nutrition

Serving: 2tablespoonsCalories: 40kcalCarbohydrates: 6gProtein: 1gFat: 2gSodium: 250mgPotassium: 150mgSugar: 3g

Notes

Store leftovers in an airtight container in the refrigerator for up to a week, or freeze in ice cube trays for up to 3 months.

Tried this recipe?

Let us know how it was!

Delicious Lemon Lavender Thumbprint Cookies for Spring Celebrations

April 26, 2026 by Grace Snow Leave a Comment

A fragrant wave of citrus and lavender greeted me as I stepped into my kitchen, signaling the perfect afternoon. Today, I’m diving into the delightful world of Lemon Lavender Thumbprint Cookies, an elegant spring treat that pairs beautifully with any occasion, from cozy tea parties to thoughtful gift-giving. The buttery shortbread base melts in your mouth while the zesty lemon curd provides a refreshing pop that transforms an ordinary day into an extraordinary one. Plus, these cookies are not only visually captivating but also make for a quick and easy baking project—a true triumph for any busy home chef! Ready to impress your friends and family with this sophisticated dessert? Let’s bring some sunshine into our kitchens!

Why Are These Cookies So Special?

Delightful Combination: The blend of zesty lemon and aromatic lavender creates a unique flavor sensation that’s both refreshing and elegant. Easy to Make: With just a few simple steps, you can whip up these delicious cookies in no time, perfect for busy bakers. Versatile Options: Swap lemon curd for berry jams or chocolate drizzle for varied tastes, making them suitable for any occasion. Elegant Presentation: These cookies not only taste divine but also look stunning, making them ideal for gifting or serving at tea parties. Explore pairing them with a warm cup of tea or even a delightful side of Lemon Chicken Soup for a well-rounded treat!

Lemon Lavender Thumbprint Cookies Ingredients

For the Cookies

  • Unsalted Butter – Provides richness and creates a tender crumb; make sure it's softened for easy creaming.
  • Powdered Sugar – Adds sweetness and helps create a delicate cookie texture; substitute with granulated sugar for a crunchier bite.
  • Lemon Zest – Infuses cookies with bright citrus flavor; opt for fresh lemons for the best taste, typically requiring zest from about 2 lemons for 1 tablespoon.
  • Dried Culinary Lavender – Introduces delicate floral notes; ensure it's food-grade and finely ground for even distribution.
  • Vanilla Extract – Enhances the floral flavor; feel free to substitute with almond extract if desired.
  • All-Purpose Flour – Key structural component for these cookies; vital for achieving that perfect chewy texture.
  • Salt – Balances the sweetness; don't skip it as it’s essential for flavor development.

For the Filling

  • Lemon Curd – This tangy filling adds moisture and brightness; you can use store-bought or homemade for the best results.

Tip

  • Keep in mind, the delightful Lemon Lavender Thumbprint Cookies will shine even more when paired with quality ingredients!

Step‑by‑Step Instructions for Lemon Lavender Thumbprint Cookies

Step 1: Cream the Butter and Sugar
In a medium mixing bowl, use an electric mixer to beat together 1 cup of softened unsalted butter and ½ cup of powdered sugar on medium speed until light and fluffy, about 3 minutes. The mixture should turn a pale yellow color and have a creamy consistency, indicating it’s ready for the next step.

Step 2: Mix in Flavorings
Add 1 tablespoon of fresh lemon zest, 1 teaspoon of finely ground dried culinary lavender, and 1 teaspoon of vanilla extract to the creamed mixture. Mix on low speed until just combined, and take a moment to enjoy the fragrant aroma filling your kitchen—it sets the stage for your Lemon Lavender Thumbprint Cookies.

Step 3: Combine Dry Ingredients
Gradually sift in 2 cups of all-purpose flour along with a pinch of salt while mixing on low speed. Continue mixing just until the flour disappears and the dough forms; be careful not to overmix, as this could lead to tough cookies. The dough should feel soft yet slightly sticky, ready for shaping.

Step 4: Shape Cookies
Preheat your oven to 350°F (175°C) and line two baking sheets with parchment paper. Roll the cookie dough into 1-inch balls and place them on the prepared baking sheets, spacing them about 2 inches apart. Press your thumb into the center of each ball to create an indent that will hold the tangy lemon curd.

Step 5: Bake
Carefully place the baking sheets in your preheated oven and bake for 12-15 minutes, or until the edges of the cookies turn golden while the centers remain soft. Keep an eye on them to prevent overbaking; they should look slightly puffy and pale in the middle, promising a delightful melt-in-your-mouth experience.

Step 6: Fill with Lemon Curd
Once baked, remove the cookies from the oven and allow them to cool for 5 minutes on the baking sheets. While they’re still warm, fill each thumbprint indentation with a teaspoon of lemon curd. The warmth of the cookie will help the curd adhere nicely, creating a deliciously sweet and tangy centerpiece in your Lemon Lavender Thumbprint Cookies.

Make Ahead Options

These Lemon Lavender Thumbprint Cookies are perfect for meal prep enthusiasts! You can prepare the cookie dough up to 24 hours in advance by rolling the dough into balls and refrigerating them in an airtight container. Alternatively, you can freeze the unbaked dough balls for up to 3 months; just place them on a baking sheet until firm, then transfer to a freezer-safe bag. When you're ready to bake, simply add an extra minute or two to the baking time if baking from frozen. This helps maintain their delicate texture and ensures they stay just as delicious as when freshly made. Enjoy the convenience of having these elegant treats ready to bake at a moment's notice!

Expert Tips for Lemon Lavender Thumbprint Cookies

  • Precision Matters: Use a kitchen scale for accuracy in measuring flour and sugar to ensure perfect cookie texture.
  • Butter Temperature: Make sure your butter is at room temperature to achieve the ideal creamy consistency when creaming it with sugar.
  • Chill the Dough: If the dough feels too soft, refrigerate for 15-20 minutes before shaping to maintain uniform cookie shapes while baking.
  • Lemon Curd Filling: Use room temperature lemon curd for easier filling. Cold curd can be difficult to spread into the thumbprints.
  • Experiment with Flavors: Don’t hesitate to explore variations like chocolate drizzle or berry jams, creating a unique twist on these Lemon Lavender Thumbprint Cookies.

Lemon Lavender Thumbprint Cookies Variations

Feel free to let your creativity shine as you customize these delightful cookies!

  • Berry Lavender: Replace lemon curd with raspberry or blackberry jam for a fruity twist that offers a beautiful burst of color and flavor. Imagine the sweet-tart surprises in each bite!
  • Chocolate Drizzle: Add melted white chocolate drizzled over cooled cookies for a luscious touch that pairs wonderfully with the lemon brightness. It’s all about that sophisticated flair!
  • Orange Blossom: Swap culinary lavender for orange blossom water and use orange curd for an equally refreshing yet different experience, perfect for spring gatherings.
  • Nutty Crunch: Fold in chopped walnuts or pecans into the cookie dough before baking for added texture and nutty flavors that elevate each bite. The crunch complements the soft crumb beautifully.
  • Herbal Infusion: Experiment with fresh herbs like rosemary or thyme to replace the lavender, giving your cookies a fragrant and earthy richness that’s unexpected yet delicious.
  • Gluten-Free: Substitute all-purpose flour with a gluten-free blend or almond flour for those sensitive to gluten, ensuring everyone can indulge!
  • Lemon Lavender Shortbread Bars: Press cookie dough into a baking dish instead of shaping cookies for shortbread bars that are easy to slice and serve. Perfect for casual gatherings!
  • Citrus Zing: Kick up the citrus flavor by adding a bit of lime or orange zest along with the lemon zest for a vibrant and zesty variant that sings of springtime joy!

Whether you're hosting a delightful tea party or simply craving a sweet treat, explore these variations to truly make the recipe your own! Don’t forget to save some for yourself when serving with a hot cup of Lemon Chicken Soup for a perfectly balanced indulgent snack!

What to Serve with Lemon Lavender Thumbprint Cookies

These charming cookies are perfect for brightening up any gathering, effortlessly taking your culinary experience to the next level.

  • Earl Grey Tea: The bergamot flavors in Earl Grey beautifully complement the floral notes of the cookies, making each bite feel like a sophisticated afternoon delight.
  • Fresh Fruit Platter: A medley of berries offers a refreshing tartness, balancing the sweetness of the thumbprint cookies for a vibrant, colorful addition.
  • Vanilla Ice Cream: The creamy richness of vanilla ice cream melts away the tanginess of the lemon curd, creating a delightful contrast in flavors and textures.
  • Sparkling Lemonade: A glass of sparkling lemonade enhances the citrus notes in the cookies, providing a crisp and bubbly refreshment that uplifts your palate.
  • Lavender-Infused Honey: Drizzling this on top of the cookies elevates the floral aroma while adding an interesting twist to both the taste and presentation – a true feast for the senses!
  • Zesty Lemon Sorbet: Its icy coolness offers a palate-cleansing experience, harmonizing with the lemony goodness of the cookies for a refreshing finish.
  • Chocolate Dipped Strawberries: The rich, dark chocolate pairs nicely with the light sweetness of the cookies, making for a decadent and elegant treat that's hard to resist.
  • Lemon Chicken Soup: Pairing with a light soup balances the sweetness and adds depth to your meal, perfect for a cozy afternoon gathering.

Storage Tips for Lemon Lavender Thumbprint Cookies

  • Room Temperature: Keep the cookies in an airtight container at room temperature for up to 5 days to maintain their tender texture and flavor.
  • Freezer: For longer storage, these Lemon Lavender Thumbprint Cookies can be frozen for up to 2 months. Place them in a single layer on a baking sheet to freeze, then transfer to an airtight container.
  • Thawing: Thaw frozen cookies at room temperature for about 30 minutes before serving to enjoy their delightful taste and texture.
  • Make-Ahead Tips: You can also freeze unbaked dough balls for up to 3 months. Bake them straight from frozen, adding an additional minute or two to the baking time for perfect results.

Lemon Lavender Thumbprint Cookies Recipe FAQs

How do I choose ripe lemons for this recipe?
Absolutely! When selecting lemons, look for firm, smooth-skinned ones that feel heavy for their size. Avoid lemons with dark spots or any signs of blemishes. Fresh lemons will yield vibrant zest—a key component to making your Lemon Lavender Thumbprint Cookies truly shine!

What is the best way to store Lemon Lavender Thumbprint Cookies?
To keep your cookies fresh, store them in an airtight container at room temperature for up to 5 days. This method helps maintain their soft texture. If you've made a big batch, they can also be frozen for up to 2 months. Just make sure to label the container with the date!

Can I freeze the dough for Lemon Lavender Thumbprint Cookies?
Definitely! You can freeze the unbaked dough balls for up to 3 months. Place them on a baking sheet in a single layer and freeze until solid. Then transfer the frozen dough balls to an airtight container. When you're ready to bake, simply preheat the oven and bake straight from frozen, adding an extra minute or two as needed.

What happens if my cookies spread too much during baking?
Very! If your cookies spread too much, it’s usually due to warm dough. To troubleshoot, refrigerate the dough for 15-20 minutes before shaping, which helps maintain their shape. Additionally, ensure your butter is softened but not melted, and be careful not to overmix the dough, as this can lead to overly warm consistency.

Do these cookies contain allergens I should be aware of?
Absolutely! If you're baking for someone with allergies, be cautious with ingredients. The Lemon Lavender Thumbprint Cookies contain butter and flour, which are not suitable for those with lactose intolerance or gluten allergies. You can experiment with dairy-free and gluten-free substitutes if needed! For the lavender, make sure you're using food-grade dried lavender to avoid any contaminants.

How can I make variations of these cookies?
The more the merrier! To vary your Lemon Lavender Thumbprint Cookies, consider substituting the lemon curd with berry jams like raspberry or blackberry. For a decadent twist, drizzle melted white chocolate over the cooled cookies. Don’t forget about trying orange blossom water in place of the lavender for a fresh citrus alternative!

Lemon Lavender Thumbprint Cookies

Delicious Lemon Lavender Thumbprint Cookies for Spring Celebrations

Lemon Lavender Thumbprint Cookies are an elegant spring treat with a buttery shortbread base and zesty lemon curd that transform any occasion.
Print Recipe Pin Recipe
Prep Time 20 minutes mins
Cook Time 15 minutes mins
Cooling Time 5 minutes mins
Total Time 40 minutes mins
Servings: 24 cookies
Course: Dessert
Cuisine: American
Calories: 150
Ingredients Equipment Method Nutrition Notes

Ingredients
  

For the Cookies
  • 1 cup unsalted butter softened
  • 0.5 cup powdered sugar or granulated sugar for crunchier cookies
  • 1 tbsp lemon zest zest from about 2 lemons
  • 1 tsp dried culinary lavender finely ground
  • 1 tsp vanilla extract or almond extract
  • 2 cups all-purpose flour
  • 1 pinch salt essential for flavor
For the Filling
  • 1 cup lemon curd store-bought or homemade

Equipment

  • Mixing Bowl
  • Electric mixer
  • Baking Sheets
  • Parchment Paper
  • sifter

Method
 

Step‑by‑Step Instructions
  1. Cream the butter and sugar by beating together the softened unsalted butter and powdered sugar until light and fluffy, about 3 minutes.
  2. Mix in flavorings by adding lemon zest, dried culinary lavender, and vanilla extract to the creamed mixture, then mix until just combined.
  3. Combine dry ingredients by sifting in all-purpose flour and salt while mixing, being careful not to overmix.
  4. Shape the cookies by rolling the dough into 1-inch balls and pressing a thumbprint into each before baking.
  5. Bake in a preheated oven for 12-15 minutes until edges are golden and centers remain soft.
  6. Fill the cookies with lemon curd while still warm, allowing the curd to adhere nicely.

Nutrition

Serving: 1cookieCalories: 150kcalCarbohydrates: 20gProtein: 1gFat: 7gSaturated Fat: 4gMonounsaturated Fat: 2gCholesterol: 30mgSodium: 50mgPotassium: 30mgSugar: 8gVitamin A: 200IUVitamin C: 1mgCalcium: 10mgIron: 0.5mg

Notes

These cookies pair well with a warm cup of tea and can be varied with chocolate drizzle or berry jams.

Tried this recipe?

Let us know how it was!

Tennessee Onions: The Ultimate Comfort Side Dish You’ll Love

November 25, 2025 by Grace Snow Leave a Comment

As I stood in my kitchen, the aroma of sweet onions began to fill the air, instantly drawing me in like a comforting hug. That’s when I realized I was about to whip up something magical: Tennessee Onions. This cheesy delight takes simple ingredients and transforms them into a luxurious side dish that will have your family clamoring for more. The beauty of this recipe lies not only in its golden, bubbling crust but also in its easy preparation—ready in just 10 minutes! Whether paired with a hearty steak or served solo at a cozy gathering, these Tennessee Onions are a crowd-pleaser that elevates any meal. Ready to indulge in this irresistible side? Let’s dive into the recipe!

Why Are Tennessee Onions So Irresistible?

Comforting goodness: Tennessee Onions combine simple ingredients into a delightful dish that everyone will love.

Cheesy perfection: The melty, golden cheese crust offers a rich flavor that keeps you coming back for more.

Easy prep: With a quick 10-minute prep time, this recipe is perfect for weeknight dinners or unexpected guests.

Versatile pairing: These onions complement grilled meats beautifully, making them an excellent choice, whether you're serving steak or chicken.

Crowd favorite: Serve them at your next gathering, and watch as they disappear from the table—everyone will want the recipe! For a delicious twist, try adding some bacon or serve them alongside Bratwurst Peppers Onions for a complete meal!

Tennessee Onions Ingredients

• Perfect for a cheesy side dish.

For the Onions

  • Sweet Onions – Choose Vidalia or similar varieties for the best natural sweetness.

For the Cheese Mixture

  • Cheddar Cheese – Provides a sharp flavor; feel free to mix in your favorite cheese for a twist.
  • Monterey Jack Cheese – Adds creaminess and meltability; swap it with mozzarella for extra stretch.
  • Parmesan Cheese – Offers a nutty depth; grated Pecorino Romano is a wonderful substitute.

For the Seasoning

  • Unsalted Butter – Enhances richness; olive oil can be used for a lighter alternative.
  • Garlic Powder – Delivers aroma and flavor; fresh minced garlic boosts taste.
  • Dried Thyme – Infuses earthy notes; oregano or Italian seasoning works well if thyme is unavailable.
  • Salt & Black Pepper – Essential for balancing flavors; adjust according to preference.

Step‑by‑Step Instructions for Tennessee Onions

Step 1: Preheat the Oven
Begin by preheating your oven to 375°F (190°C). While the oven warms up, grab a 9x13-inch baking dish and generously grease it with cooking spray or butter to prevent sticking. This step is crucial for achieving that beautiful, golden crust on your Tennessee Onions later on.

Step 2: Slice the Onions
Carefully peel and slice your sweet onions into even rings, aiming for about a quarter-inch thickness. Once sliced, arrange the onion rings in the greased baking dish, ensuring they are spread out and not overcrowded. This will allow the onions to cook evenly, becoming tender and sweet in the oven.

Step 3: Season the Onions
Melt a few tablespoons of unsalted butter and drizzle it evenly over the layered onions. Sprinkle the garlic powder, dried thyme, salt, and black pepper liberally across the onions for a burst of flavor. As you do this, the aroma of the butter and spices will begin to fill your kitchen, tempting your taste buds.

Step 4: Add the Cheese
Next, take your cheddar, Monterey Jack, and Parmesan cheeses, and evenly distribute them on top of the seasoned onions. Be generous with the cheese; it’s what makes these Tennessee Onions indulgently comforting! The layers of cheese will melt together, creating a rich, gooey topping.

Step 5: Bake the Dish
Cover the baking dish tightly with aluminum foil to prevent the cheese from browning too early. Place it in your preheated oven and bake for 25 minutes. The steam will help soften the onions, making them melt-in-your-mouth tender.

Step 6: Uncover and Finish Baking
After 25 minutes, carefully remove the foil from your Tennessee Onions. Bake the dish uncovered for an additional 10 minutes, allowing the cheese to bubble and turn a lovely golden brown. Keep an eye on it to ensure you achieve that perfect crispy cheese crust without burning.

Step 7: Cool Before Serving
Once the cheese is beautifully browned and bubbling, take the dish out of the oven. Let it cool for about 5-10 minutes before serving. This short waiting period helps the layers settle, making it easier to scoop out and serve warm, cheesy goodness to your family.

Make Ahead Options

These Cheesy Tennessee Onions are perfect for meal prep enthusiasts looking to save time during busy weeknights! You can slice the onions and layer them in the baking dish up to 24 hours in advance, covering it tightly with plastic wrap to keep them fresh and prevent browning. The cheese mixture can also be prepared separately and refrigerated, ensuring maximum flavor when combined later. When you're ready to serve, simply drizzle the melted butter, sprinkle the seasonings, and top with the cheese before baking. By prepping ahead, you'll enjoy the same comforting taste with minimal effort, making family dinners feel effortless!

Storage Tips for Tennessee Onions

  • Fridge: Store leftover Tennessee Onions in an airtight container for up to 3 days to maintain their delicious flavor and texture.

  • Freezer: For longer storage, freeze portions in airtight containers or freezer bags for up to 2 months. Make sure to cool completely before freezing to avoid ice crystals.

  • Reheating: To reheat, place in a preheated oven at 350°F (175°C) for about 15-20 minutes until warmed through and the cheese is bubbling again. Alternatively, microwave on a low setting for a quick option.

What to Serve with Cheesy Tennessee Onions?

These golden cheesy delights are the perfect side kick, ready to elevate your meal to heavenly new heights!

  • Grilled Steak: This rich and juicy pairing creates a balance of flavors that satisfy meat lovers and cheese enthusiasts alike.

  • Roasted Chicken: The savory flavors of tender chicken will complement the sweet, creamy onions, making every bite a mouthwatering experience.

  • Seasoned Grilled Vegetables: A vibrant medley of grilled zucchini, bell peppers, and asparagus adds a fresh crunch that contrasts beautifully with the gooey cheese.

  • Crispy Green Salad: A light, tangy salad with a zesty vinaigrette will refresh your palate, making each comforting onion bite feel balanced.

  • Buttery Corn on the Cob: The natural sweetness of corn enhances the onion’s flavor profile while introducing a fun, summery element to the meal.

  • Chardonnay: A glass of chilled Chardonnay, with its fruity notes, will elevate the cheese's rich flavor, making your dining experience even more delightful.

  • Homemade Biscuit: Fluffy biscuits make a delightful accompaniment, perfect for soaking up any melting cheese or onion goodness left on your plate.

These pairings not only accentuate the comforting elements of Tennessee Onions but create a meal that will have your family asking for seconds—and maybe even thirds!

Tennessee Onions: Delicious Variations Await

The beauty of Tennessee Onions lies in their versatility; feel free to get creative and enhance this comforting dish in your own way!

  • Spicy Kick: Add sliced jalapeños or a pinch of red pepper flakes for a zesty twist that will wake up your taste buds. This fiery addition enhances flavor without overpowering the dish.

  • Bacon Lovers: Incorporate crispy cooked bacon or ham pieces to bring in a savory, smoky depth. This hearty variation makes for a filling side that pairs beautifully with grilled meats!

  • Vegetable Medley: Mix in roasted bell peppers, mushrooms, or spinach for added nutrition and flavor. These vibrant veggies bring color and texture, making the dish even more delightful.

  • Dairy-Free Delight: Use cashew cheese or a plant-based cheese alternative for a comforting, vegan option. It’s a great way to enjoy the same creamy texture without dairy.

  • Herb Infusion: Sprinkle fresh herbs like rosemary or basil on top before baking for an aromatic boost. These herbs add an extra layer of flavor and elevate the overall dish!

  • Sourdough Crust: Top with a layer of crushed, seasoned sourdough bread crumbs before the final baking to introduce a delightful crunch. This crispy topping contrasts beautifully with the soft onions.

  • Cheese Blend: Experiment with cheese combinations like Gouda or pepper jack to create unique flavor profiles. A melty, spicy cheese can turn the dish into a savory delight for adventurous eaters.

  • Sweet Touch: Drizzle a bit of balsamic glaze over the finished dish to add a hint of sweetness. This touch complements the onions and cheese, making every bite even more irresistible!

For an extra delicious meal, consider pairing these Tennessee Onions with Bratwurst Peppers Onions for a satisfying experience. Happy cooking!

Expert Tips for Tennessee Onions

  • Even Slicing: Ensure your onions are sliced uniformly; this guarantees they cook evenly and achieve that tender, melt-in-your-mouth texture.

  • Foil Usage: Cover tightly with foil during the first baking phase to create steam, softening the onions. Remove it later for that crispy cheese topping!

  • Cheese Variety: Experiment with different cheeses that melt well, combining them for unique flavors. For instance, Gruyère can bring a wonderful nuttiness to your Tennessee Onions.

  • Meat Add-Ins: For added heartiness, consider mixing in cooked bacon or ham; just be mindful of the salt to balance the dish.

  • Storage Solutions: If leftovers remain, store them in an airtight container in the fridge for up to 3 days—reheat in the oven for the best texture.

Tennessee Onions Recipe FAQs

How do I choose the best onions for Tennessee Onions?
Absolutely! For the best flavor and sweetness, I recommend using Vidalia onions or other sweet varieties. Look for onions that are firm, with no dark spots or blemishes. A good onion will feel heavy for its size and have a smooth, papery skin. Avoid any onions that have begun to sprout or feel soft.

What’s the best way to store leftover Tennessee Onions?
To keep your Tennessee Onions fresh, store them in an airtight container in the refrigerator for up to 3 days. This helps to retain their flavors while preventing them from drying out. Make sure they are completely cooled before sealing to avoid trapping steam.

Can I freeze Tennessee Onions for later use?
Absolutely! You can freeze your Tennessee Onions for up to 2 months. To do this, allow them to cool completely and then portion them into airtight containers or freezer bags. Be sure to label them with the date. When ready to enjoy, place them in the refrigerator to thaw overnight before reheating in the oven.

What do I do if my onions are too crunchy after baking?
If your onions still feel crunchy after baking, it’s likely they were sliced too thickly or not layered properly in the pan. For next time, aim for even slices of about a quarter-inch thick, and ensure the onion rings are separated in the baking dish. Baking them covered initially helps to steam and soften the onions; you might also consider baking a bit longer covered if you prefer them softer.

Are Tennessee Onions suitable for people with dietary restrictions?
Very! If you're considering dietary restrictions, you can still enjoy Tennessee Onions. Substitute regular cheese with lactose-free cheese for those with lactose intolerance, or use vegan cheese options for a dairy-free version. For those with onion allergies, unfortunately, this dish may not be suitable, though you could explore similar recipes using safe vegetables.

How do I ensure my cheese crust turns out perfectly golden?
The key to a beautiful golden cheese crust lies in the baking process! Make sure to cover the dish with foil during the first 25 minutes of baking to allow the onions to steam and soften. Then, uncover the dish for the last 10 minutes to achieve that desirable, bubbly, golden surface. Keep an eye on it, and if you prefer an even browner crust, you can broil it on low for an additional minute, watching closely to avoid burning.

Tennessee Onions

Tennessee Onions: The Ultimate Comfort Side Dish You’ll Love

Tennessee Onions are a cheesy delight that transforms sweet onions into a luxurious side dish, perfect for any meal.
Print Recipe Pin Recipe
Prep Time 10 minutes mins
Cook Time 35 minutes mins
Cooling Time 10 minutes mins
Total Time 45 minutes mins
Servings: 4 servings
Course: Side Dishes
Cuisine: American
Calories: 250
Ingredients Equipment Method Nutrition Notes

Ingredients
  

For the Onions
  • 4 large Sweet Onions Choose Vidalia or similar varieties for the best natural sweetness.
For the Cheese Mixture
  • 1 cup Cheddar Cheese Provides a sharp flavor; feel free to mix in your favorite cheese for a twist.
  • 1 cup Monterey Jack Cheese Adds creaminess and meltability; swap it with mozzarella for extra stretch.
  • 1/2 cup Parmesan Cheese Offers a nutty depth; grated Pecorino Romano is a wonderful substitute.
For the Seasoning
  • 4 tablespoons Unsalted Butter Enhances richness; olive oil can be used for a lighter alternative.
  • 1 teaspoon Garlic Powder Delivers aroma and flavor; fresh minced garlic boosts taste.
  • 1 teaspoon Dried Thyme Infuses earthy notes; oregano or Italian seasoning works well if thyme is unavailable.
  • 1 teaspoon Salt Essential for balancing flavors; adjust according to preference.
  • 1/2 teaspoon Black Pepper Essential for balancing flavors; adjust according to preference.

Equipment

  • 9x13-inch baking dish
  • Aluminum Foil

Method
 

Step-by-Step Instructions for Tennessee Onions
  1. Preheat your oven to 375°F (190°C) and grease a 9x13-inch baking dish with cooking spray or butter.
  2. Peel and slice the sweet onions into even rings, about a quarter-inch thick, and arrange them in the greased baking dish.
  3. Melt the butter and drizzle it over the onions. Sprinkle with garlic powder, dried thyme, salt, and black pepper.
  4. Layer the cheddar, Monterey Jack, and Parmesan cheeses on top of the seasoned onions.
  5. Cover the baking dish with aluminum foil and bake for 25 minutes.
  6. Remove the foil and bake uncovered for an additional 10 minutes until the cheese is bubbly and golden brown.
  7. Let the dish cool for about 5-10 minutes before serving.

Nutrition

Serving: 1servingCalories: 250kcalCarbohydrates: 20gProtein: 8gFat: 18gSaturated Fat: 10gPolyunsaturated Fat: 1gMonounsaturated Fat: 6gCholesterol: 50mgSodium: 600mgPotassium: 230mgFiber: 2gSugar: 5gVitamin A: 500IUVitamin C: 10mgCalcium: 200mgIron: 1mg

Notes

For additional flavors, consider adding cooked bacon or experimenting with different cheese varieties.

Tried this recipe?

Let us know how it was!

Savor Homemade Creamy Tomato Bisque with Roasted Bell Peppers

November 15, 2025 by Grace Snow Leave a Comment

The aroma of roasting bell peppers filled my kitchen, instantly transporting me to a cozy trattoria nestled in the heart of Italy. With the vibrant flavors of sweet roasted peppers and sun-ripened tomatoes swirling together, I knew I was in for a delightful treat. Today, I'm excited to share my recipe for Creamy Tomato Bisque with Roasted Bell Peppers — a dish that’s not only gluten-free and vegetarian but also incredibly comforting. One of the best parts? It’s a quick and easy homemade version that can transform a busy weeknight into a gourmet experience. Plus, you'll be left with a velvety soup that’s both satisfying and nourishing, perfect for pairing with crusty bread. Isn’t it time we elevate our dinner game? Let’s dive into this delicious journey!

Why Is This Tomato Bisque Special?

Comforting Elegance: This creamy tomato bisque is ideal for anyone seeking a touch of fine dining at home, combining the warmth of a homemade meal with sophisticated flavors.
Endless Variations: With simple ingredient swaps like adding grilled chicken or beans, you can easily customize this dish to match your tastes or dietary needs.
Quick Preparation: In just about an hour and 40 minutes, enjoy a restaurant-worthy meal that brings smiles to the whole family.
Perfect Pairing: Serve it alongside grilled cheese sandwiches for a comforting combo that takes you back to childhood.
Freezer Friendly: Make a big batch and freeze portions for busy nights, ensuring a delicious meal is always just a thaw away!

Creamy Tomato Bisque Ingredients

Let’s gather the essentials to make your delightful creamy tomato bisque with roasted bell peppers shine!

For the Soup Base

  • Olive Oil – Provides richness and aids in the roasting of vegetables; substitute with butter for a richer flavor.
  • Yellow Onion – Adds depth and sweetness to the soup base; shallots can be used as a milder alternative.
  • Celery – Contributes aromatic flavor and texture; leeks may serve as a substitute.
  • Cherry Tomatoes – Base of the bisque; roasted for maximum sweetness; grape tomatoes or heirloom varieties can be substituted.
  • Red Bell Pepper – Adds sweetness and creaminess post-roast; yellow or orange bell peppers can be used as alternatives for similar flavor profiles.
  • Kosher Salt – Enhances all flavors; consider sea salt as an alternative.
  • Coarse Ground Black Pepper – Provides heat; white pepper may be used if you desire a milder flavor.
  • Red Pepper Flakes – Adds a slight kick; can be omitted for a milder soup.
  • Paprika – Introduces smokiness; smoked paprika can be an exciting variation.
  • Dried Basil – Offers herby undertones; fresh basil may be used; increase the quantity when substituting.
  • Garlic – Essential for flavor depth; more cloves can be added for an intense garlic taste.

For the Creaminess

  • Veggie or Chicken Broth – Provides the soup base; homemade broth adds richness, while water can be a last-minute substitute.
  • Crushed Tomatoes – Thickens the soup while adding robust tomato flavor; San Marzano tomatoes are recommended for their superior taste.
  • White Sugar – Balances acidity; honey can be an option for a more natural sweetener.
  • Heavy Cream – Creates the signature creaminess; coconut milk can cater to dairy-free diets.

Gather these ingredients, and you’re ready to create a comforting bowl of creamy tomato bisque that everyone will savor!

Step‑by‑Step Instructions for Creamy Tomato Bisque with Roasted Bell Peppers

Step 1: Preheat Oven
Begin by preheating your oven to 400°F (200°C). This temperature is perfect for caramelizing the sugars in your vegetables, enhancing their sweetness. While the oven heats up, prepare the fresh ingredients to ensure a smooth cooking process, setting the stage for your delicious creamy tomato bisque with roasted bell peppers.

Step 2: Prepare Veggies
In a large mixing bowl, combine 2 tablespoons of olive oil with the cherry tomatoes and sliced red bell pepper. Season generously with kosher salt and freshly ground black pepper, tossing everything together until evenly coated. This mixture will roast beautifully, bringing out rich flavors essential for the bisque.

Step 3: Roast
Spread the seasoned cherry tomatoes and red bell pepper in a single layer on a baking sheet. Roast them in the preheated oven for 20-30 minutes, or until they become tender and slightly caramelized. Keep an eye on them; you want them to be bursting with flavor, creating a delicious foundation for your creamy tomato bisque.

Step 4: Sauté Aromatics
While the vegetables roast, heat 2 tablespoons of olive oil in a Dutch oven over medium heat. Add diced yellow onion and celery, seasoning with salt, black pepper, red pepper flakes, paprika, and dried basil. Sauté for about 5-6 minutes until the onion turns translucent and fragrant. Then, add minced garlic and stir for another 30 seconds to infuse the mixture.

Step 5: Combine Ingredients
Once the roasted tomatoes and peppers are ready, add them to the Dutch oven along with vegetable or chicken broth, crushed tomatoes, and a pinch of white sugar. Stir well to combine, and then bring the mixture to a simmer. Let it cook for 30-40 minutes, allowing all the flavors to meld together while everything becomes tender and aromatic.

Step 6: Blend
After simmering, use an immersion blender to puree the soup directly in the pot until it reaches a luxuriously smooth consistency. If you don’t have an immersion blender, you can carefully transfer the soup in batches to a countertop blender, blending until silky. This step is crucial for achieving the signature texture of your creamy tomato bisque.

Step 7: Add Cream
Finally, stir in heavy cream, blending it into the bisque until smooth. Taste and adjust the seasoning with more salt or pepper if necessary. For an elegant touch, drizzle a bit of additional cream on top before serving. Your creamy tomato bisque with roasted bell peppers is now ready to warm your heart and satisfy your taste buds!

What to Serve with Creamy Tomato Bisque with Roasted Bell Peppers

Transform your creamy tomato bisque into a full meal by pairing it with delightful sides that enhance its rich flavors.

  • Crusty Baguette: Perfect for dipping, the crispy exterior and soft interior of a freshly baked baguette complement the bisque’s smooth texture beautifully.

  • Grilled Cheese Sandwiches: A nostalgic classic! The melted cheese and buttery toast offer a delightful contrast to the bisque, reminiscent of cozy childhood meals.

  • Herbed Garlic Bread: The aromatic herbs and buttery garlic slathered on warm bread elevate your dining experience, adding a fragrant touch to every spoonful of soup.

  • Simple Garden Salad: Fresh greens, crunchy cucumbers, and a zesty vinaigrette create a light, refreshing balance against the creamy richness of the bisque.

  • Roasted Asparagus: With its slight char and tender crunch, roasted asparagus brings out the earthiness of the tomatoes while adding a pop of color to your plate.

  • Avocado Toast: Creamy avocado on toasted bread offers a delicious, creamy texture that harmonizes wonderfully with the warm, velvety bisque.

  • Sparkling Lemonade: The bright, effervescent drink refreshes your palate between bites, enhancing the flavors of the tomato bisque with a zesty twist.

  • Chocolate Mousse: A small serving of light, airy chocolate mousse brings a delightful sweet ending to your meal, balancing the savory richness of the soup.

Make Ahead Options

These Creamy Tomato Bisque with Roasted Bell Peppers are perfect for busy home cooks looking to save time during hectic weeknights! You can roast the bell peppers and cherry tomatoes up to 24 hours in advance. Simply store them in an airtight container in the refrigerator. Additionally, you can prepare the soup base—sauté the onions and celery, and then store it separately for up to 3 days. When you're ready to serve, combine the roasted veggies with the sautéed aromatics, add the broth and crushed tomatoes, and simmer. Finally, blend in the heavy cream, and you'll enjoy a delicious bisque that feels just as fresh as when made the same day!

Storage Tips for Creamy Tomato Bisque

Fridge: Store your creamy tomato bisque in an airtight container for up to 3 days. Let it cool completely before refrigerating to preserve freshness.

Freezer: This bisque freezes beautifully! Portion it into ziplock bags or airtight containers, storing flat for easy thawing. Enjoy frozen bisque for up to 3 months.

Reheating: To reheat, gently warm the bisque on the stove over low heat, stirring occasionally. If it thickens, add a splash of broth or water to reach your desired consistency.

Make-Ahead: Consider making a double batch of the creamy tomato bisque and freezing half for those busy weeknights. It's a comforting, homemade meal always ready to go!

Creamy Tomato Bisque Variations

Feel free to get creative with your creamy tomato bisque! Each variation adds a new twist that will tantalize your taste buds.

  • Dairy-Free: Substitute heavy cream with coconut milk for a delightful tropical flair while keeping it creamy.
  • Spicy Kick: Boost the heat by adding jalapeños or a dash of hot sauce for those who love a fiery touch.
  • Herb Twist: Mix in fresh thyme or oregano along with the basil for an herbaceous explosion that'll brighten your bisque.
  • Flavorful Broth: Swap out veggie broth for homemade chicken broth to introduce a depth of flavor that enhances the entire dish.
  • Roasted Garlic: For an even richer layer of flavor, roast a head of garlic alongside your peppers and blend it into the bisque.
  • Quinoa Addition: Stir in cooked quinoa for added protein and a lovely texture that makes this dish even more satisfying.
  • Pasta Twist: Consider adding small pasta shapes or tortellini for an exciting, heartier variation that transforms it into a complete meal.

These variations not only enhance the flavors but also provide options to suit different dietary preferences. And if you're looking for something to pair with your bisque, why not try the comforting taste of grilled cheese sandwiches or the sweetness of maple roasted sweet potatoes with pecans? Explore these creative twists and elevate your creamy tomato bisque experience!

Expert Tips for Creamy Tomato Bisque

  • Choose Ripe Tomatoes: Make sure to use ripe tomatoes for the best sweetness; underripe ones can create an unpleasant, gritty texture in your soup.
  • Perfectly Blend: When using an immersion blender, blend for at least two minutes to achieve that luxuriously smooth consistency that's hallmark to a creamy tomato bisque.
  • Warm the Cream: Prevent curdling by gently warming the heavy cream with a bit of the bisque before adding it to the main pot; this ensures a seamless incorporation.
  • Always Roast: Roasting your vegetables maximizes their natural sweetness and flavor, completely transforming your creamy tomato bisque into something special.
  • Adjust Seasonings: Tasting as you go is key! Don’t hesitate to adjust the seasonings or add extra herbs to suit your palate, making this dish unique to you.

Creamy Tomato Bisque with Roasted Bell Peppers Recipe FAQs

What type of tomatoes should I use for this bisque?
Absolutely! For a rich flavor, you should use ripe cherry or grape tomatoes, as they roast beautifully and enhance the bisque's sweetness. If you can find them, heirloom varieties are a fantastic choice, too! Avoid underripe tomatoes as they can create a gritty texture.

How should I store leftover bisque?
You can store your creamy tomato bisque in an airtight container in the fridge for up to 3 days. Just make sure to let it cool completely before refrigerating. When you're ready to enjoy it again, simply reheat on the stove over low heat.

Can I freeze this creamy tomato bisque?
Very! This bisque freezes wonderfully. To freeze, portion it into ziplock bags or airtight containers. Store them flat for easy stacking in your freezer. It will keep for up to 3 months! When ready to enjoy, simply thaw in the fridge overnight and reheat on the stovetop.

What can I do if my bisque turned out too thick?
If you find your creamy tomato bisque is too thick, simply add a splash of vegetable or chicken broth while gently reheating on the stove. Stir well, and heat until it reaches the desired consistency. This keeps the flavor intact while making it perfectly silky.

Is this bisque suitable for those with dairy allergies?
Absolutely! To make this creamy tomato bisque dairy-free, substitute the heavy cream with coconut milk or a plant-based cream alternative. Just ensure that your broth is also free from animal products. It will still be deliciously creamy and satisfying!

Creamy Tomato Bisque with Roasted Bell Peppers

Savor Homemade Creamy Tomato Bisque with Roasted Bell Peppers

Delight in a comforting, gluten-free and vegetarian creamy tomato bisque with roasted bell peppers, perfect for any busy weeknight.
Print Recipe Pin Recipe
Prep Time 20 minutes mins
Cook Time 1 hour hr 20 minutes mins
Total Time 1 hour hr 40 minutes mins
Servings: 4 cups
Course: Soups
Cuisine: Italian
Calories: 300
Ingredients Equipment Method Nutrition Notes

Ingredients
  

For the Soup Base
  • 2 tablespoons Olive Oil Can substitute with butter
  • 1 medium Yellow Onion Shallots can be used as a milder alternative
  • 2 stalks Celery Leeks may serve as a substitute
  • 2 cups Cherry Tomatoes Grape or heirloom varieties can be substituted
  • 1 medium Red Bell Pepper Yellow or orange can be used as alternatives
  • 1 teaspoon Kosher Salt Consider sea salt as an alternative
  • 1 teaspoon Coarse Ground Black Pepper White pepper may be used for a milder flavor
  • 1/2 teaspoon Red Pepper Flakes Can be omitted for milder soup
  • 1 teaspoon Paprika Smoked paprika can be a variation
  • 1 teaspoon Dried Basil Fresh basil may be used; increase quantity when substituting
  • 3 cloves Garlic More cloves can be added for intense garlic taste
For the Creaminess
  • 4 cups Veggie or Chicken Broth Homemade broth adds richness
  • 1 can Crushed Tomatoes San Marzano tomatoes are recommended
  • 1 teaspoon White Sugar Honey can be an option
  • 1 cup Heavy Cream Coconut milk can cater to dairy-free diets

Equipment

  • Dutch oven
  • Baking Sheet
  • Immersion blender

Method
 

Step-by-Step Instructions
  1. Preheat your oven to 400°F (200°C).
  2. In a large mixing bowl, combine 2 tablespoons of olive oil with the cherry tomatoes and sliced red bell pepper. Season with kosher salt and pepper.
  3. Spread the seasoned tomatoes and red bell pepper on a baking sheet. Roast in the oven for 20-30 minutes until tender.
  4. Heat 2 tablespoons of olive oil in a Dutch oven over medium heat. Add diced onion and celery, season, and sauté until translucent.
  5. Add in minced garlic and stir for another 30 seconds.
  6. Combine roasted tomatoes and pepper with broth, crushed tomatoes, and sugar in the Dutch oven. Bring to a simmer for 30-40 minutes.
  7. Use an immersion blender to puree the soup until smooth.
  8. Stir in heavy cream until smooth. Adjust seasoning if necessary.

Nutrition

Serving: 1cupCalories: 300kcalCarbohydrates: 25gProtein: 5gFat: 20gSaturated Fat: 10gPolyunsaturated Fat: 1gMonounsaturated Fat: 8gCholesterol: 40mgSodium: 600mgPotassium: 800mgFiber: 3gSugar: 6gVitamin A: 1500IUVitamin C: 60mgCalcium: 100mgIron: 2mg

Notes

Consider making a double batch and freezing half for busy weeknights.

Tried this recipe?

Let us know how it was!

Savory Orzo Stuffed Banana Peppers Soup for Cozy Nights

November 14, 2025 by Grace Snow Leave a Comment

As the aroma of sautéed onions and garlic waft through my kitchen, I can’t help but feel transported back to kitchen memories filled with laughter and shared meals. Today, I'm excited to share my recipe for Savory Orzo Stuffed Banana Peppers Soup, a delightful one-pot meal that perfectly blends the classic comfort of stuffed peppers with the heartwarming simplicity of a soup. With minimal prep required, this cozy dish is not just family-friendly but also perfect for busy weeknights. The creamy texture, vibrant peppers, and tender orzo create a warm embrace in every bowl—ideal for anyone looking to swap fast food for homemade goodness. Are you ready to dive into this comforting Italian-inspired delight?

Why is this soup a must-try?

Comforting and Hearty: This Savory Orzo Stuffed Banana Peppers Soup wraps you in warmth with every spoonful, perfect for chilly nights.
Minimal Effort: A one-pot meal means less cleanup, allowing you more time to enjoy family time or relax after a busy day.
Flavor Explosion: The combination of sweet banana peppers, robust Italian sausage, and creamy cheeses delivers a taste sensation that will leave everyone at the table asking for seconds!
Endless Versatility: Whether you switch fresh banana peppers for pickled ones or whip up a vegetarian version, this soup adapts beautifully to your taste preferences. Pair it with crusty Italian bread for a complete meal that outshines any fast food option.
Crowd-Pleasing: Easy to make and hearty enough to satisfy all ages, it’s sure to become a staple in your household, just like my Asparagus Soup Healthy or Breakfast Banana Split.

Savory Orzo Stuffed Banana Peppers Soup Ingredients

• Get ready to create a cozy dish!

For the Soup Base

  • Banana Peppers – Adds color and sweetness; use fresh for milder flavor or pickled for a tangy twist.
  • Green Pepper – Enhances the overall pepper flavor profile, bringing depth to your soup.
  • Italian Sausage – Provides protein and rich flavor; be sure to break it up for even cooking.
  • Onion – Offers natural sweetness and depth to the soup base; caramelizes beautifully.
  • Garlic – Infuses aroma and richness into the dish; use fresh for the best flavor.
  • Chicken Broth – The liquid gold that forms the flavorful soup base necessary for moisture.
  • Evaporated Milk – Contributes a luscious creaminess without being overly heavy.

For Creaminess & Flavor

  • Parmesan Cheese – Adds a savory umami kick, melting perfectly into the warm soup.
  • Cream Cheese – Delivers a rich, smooth texture, making each bite indulgent.

For the Pasta Addition

  • Orzo – A delightful tiny pasta that makes the soup hearty; cook separately to avoid mushiness.

For Sautéing

  • Butter & Olive Oil – Utilized for sautéing vegetables, adding a layer of flavor to your soup.

Now you have everything you need to bring this delicious Savory Orzo Stuffed Banana Peppers Soup to life! Happy cooking!

Step‑by‑Step Instructions for Savory Orzo Stuffed Banana Peppers Soup

Step 1: Prepare the Peppers
Start by washing four medium-sized banana peppers, then slice off the tops and carefully remove the seeds to reduce heat. Dice the tops and set aside to use later. This step ensures that the peppers will fill beautifully with the savory orzo and sausage mixture, later contributing to the delightful flavors of your Savory Orzo Stuffed Banana Peppers Soup.

Step 2: Sauté the Italian Sausage
In a large stockpot, heat a drizzle of olive oil over medium heat. Add 1 pound of Italian sausage, breaking it apart with a spatula, and sauté until browned and cooked through, about 5-7 minutes. Once the sausage has a nice golden color and is no longer pink, remove it from the pot and set it aside. This will infuse your soup with rich, savory flavors.

Step 3: Cook the Vegetables
In the same pot, add 1 tablespoon of butter and a splash more olive oil. Toss in the diced onion, the reserved diced banana pepper tops, and 2 cloves of minced garlic. Sauté these ingredients for about 5 minutes, or until the onions are translucent and the mixture is aromatic. This blend will form the flavorful base of your Savory Orzo Stuffed Banana Peppers Soup.

Step 4: Combine the Soup Base
Return the sautéed sausage to the pot and add 4 cups of chicken broth along with 1 cup of evaporated milk. Stir everything together and bring the mixture to a gentle boil over medium-high heat. As it heats, you’ll start to see bubbles forming; keep an eye on it for about 5 minutes as it comes together, enhancing all the rich flavors throughout the soup.

Step 5: Melt in the Cheeses
Once boiling, stir in ½ cup of grated Parmesan cheese and 4 ounces of cream cheese. Reduce the heat to low and mix until the cheeses melt smoothly into the soup—about 3-4 minutes. This step brings a comforting creaminess to your Savory Orzo Stuffed Banana Peppers Soup, giving it that inviting texture everyone loves.

Step 6: Simmer the Soup
Add your favorite seasonings, like Italian herbs, to the soup mixture, then cover the pot and let it simmer on low for 25 minutes. Make sure to stir occasionally, allowing the flavors to meld beautifully. The delicious aroma of your Savory Orzo Stuffed Banana Peppers Soup will fill your kitchen, making it hard to wait for the next step!

Step 7: Add the Orzo
After 25 minutes, introduce 1 cup of uncooked orzo into the soup. Cook for an additional 10 minutes, stirring as needed to avoid clumping. Check the orzo for doneness; it should be tender but still al dente. This hearty addition completes your cozy one-pot meal, making it satisfying and filling.

Step 8: Garnish and Serve
Remove the pot from heat and allow it to cool for a few minutes. Spoon the savory orzo stuffed banana peppers soup into bowls, garnishing with reserved banana pepper slices for a vibrant touch. Enjoy this hearty dish with some crusty Italian bread, creating an even more delightful mealtime experience for you and your loved ones.

How to Store and Freeze Savory Orzo Stuffed Banana Peppers Soup

Fridge: Store the soup in an airtight container for up to 4 days. Ensure it's fully cooled before sealing to prevent condensation.

Freezer: For long-term storage, freeze the soup before adding orzo in an airtight container for up to 3 months, helping to maintain texture.

Reheating: Thaw overnight in the fridge before reheating on the stovetop over low heat. Add a splash of chicken broth or evaporated milk to restore creaminess if needed.

Leftovers Tip: If the soup thickens while stored, simply stir in some chicken stock or milk to rehydrate before serving.

Make Ahead Options

These Savory Orzo Stuffed Banana Peppers Soup preparations are perfect for meal prep enthusiasts looking to save time during busy weeknights! You can sauté the sausage, onions, and peppers, then combine them with the broth and evaporated milk up to 3 days in advance, refrigerating everything in an airtight container. The orzo can be cooked separately and added just before serving to maintain its texture. When you're ready to enjoy, simply reheat the soup on the stove until warmed through, stirring in the pre-cooked orzo. This approach ensures all the comforting flavors of your Savory Orzo Stuffed Banana Peppers Soup are just as delightful, allowing you to savor a homemade meal with minimal effort!

What to Serve With Savory Orzo Stuffed Banana Peppers Soup

Indulging in a warm bowl of this comforting soup calls for delightful accompaniments to elevate your dining experience.

  • Crusty Italian Bread: The perfect vessel for scooping up every creamy bite, this bread enhances the soup's comforting nature.
  • Garlic Breadsticks: A tasty and crispy contrast that complements the soup’s rich flavors while adding a hint of garlic.
  • Light Side Salad: A fresh blend of greens, tomatoes, and vinaigrette balances the soup’s richness; it’s refreshing and brightens the meal.
  • Antipasto Platter: A colorful assortment of cured meats, olives, and cheeses brings an Italian flair, enhancing the cozy atmosphere.
  • Parmesan Crisps: Crunchy and cheesy, these are great for dipping or simply snacking alongside the soup, offering a delightful texture contrast.
  • Red Wine: A robust Chianti or Sangiovese pairs beautifully, bringing out the flavors of the Italian sausage and peppers.

Expert Tips for Savory Orzo Stuffed Banana Peppers Soup

  • Assess Pepper Heat: Taste banana peppers before using; if too spicy, consider swapping for milder varieties to keep the soup enjoyable for everyone.
  • Brown the Sausage: Properly browning the Italian sausage not only enhances its flavor but also adds depth to your savory orzo stuffed banana peppers soup.
  • Cheese Mixing: Stir cheeses in slowly over low heat to prevent curdling, ensuring a creamy texture without lumps.
  • Adjust Consistency: If the soup thickens when stored, simply add chicken broth or evaporated milk to rehydrate and restore creamy consistency.
  • Substitution Ideas: Feel free to replace fresh banana peppers with pickled ones for a tangy twist, or use vegetarian sausage for a plant-based variant.

Savory Orzo Stuffed Banana Peppers Soup Variations

Feel free to use your creativity and make this soup truly your own with these delightful twists!

  • Fresh vs. Pickled: Substitute fresh banana peppers with pickled for an added tang that brightens every bite.
  • Vegetarian Sausage: Swap Italian sausage for vegetarian sausage or beans for a delicious plant-based version. It's hearty and satisfying!
  • Spice It Up: Add crushed red pepper flakes or a dash of hot sauce for a delightful kick that warms you from the inside out.
  • Cheesy Upgrade: Mix in additional cheeses like mozzarella or even a sprinkle of feta on top before serving for even more creamy goodness.
  • Grain Variation: Try using other small pasta shapes or grains like quinoa for a unique texture twist that's equally delicious.
  • Veggie Boost: Toss in additional vegetables such as spinach, zucchini, or carrots to increase the nutrient content and give a colorful pop to your soup.
  • Broth Options: Experiment with vegetable stock instead of chicken broth for a lighter, vegetarian-friendly base that brings out the essence of the vegetables.
  • Garnishing Ideas: Top with fresh herbs like basil or parsley to elevate the flavor profile, making each bowl visually stunning and refreshing.

No matter how you decide to adapt this Savory Orzo Stuffed Banana Peppers Soup, it’s sure to be a cozy hit with your loved ones! For more family-friendly recipes, don’t miss out on my Santa Soup Savory or Roasted Bratwurst Peppers. Enjoy your creative cooking journey!

Savory Orzo Stuffed Banana Peppers Soup Recipe FAQs

What type of banana peppers should I use?
Absolutely! Fresh banana peppers offer a milder flavor that enhances the sweetness of your soup, while pickled banana peppers add a delightful tang. I often recommend trying both to see which you enjoy best in your Savory Orzo Stuffed Banana Peppers Soup.

How long can I store the soup in the refrigerator?
You can refrigerate your Savory Orzo Stuffed Banana Peppers Soup in an airtight container for up to 4 days. Be sure to let it cool completely before storing to avoid excess moisture and keep it fresh!

Can I freeze the soup, and if so, how?
Yes, you can freeze the soup! I recommend doing this before adding the orzo. Simply pour the cooled soup into airtight containers or freezer bags and freeze for up to 3 months. To reheat, thaw overnight in the fridge and warm gently on the stove, adding a splash of chicken broth or evaporated milk to restore its creamy consistency.

What if the soup thickens too much after storage?
If your soup thickens when stored, no worries! Simply stir in some chicken broth or evaporated milk while reheating to bring back that lovely creamy texture. I’ve found this is an easy fix to ensure every bowl is just as delicious as the first!

Are there any dietary considerations for this recipe?
Very! If you’re cooking for someone with dietary restrictions, you can easily swap out the Italian sausage for a plant-based version or completely omit it for a vegetarian soup. Additionally, taste the banana peppers first to assess spice levels and ensure it suits everyone at the table.

Savory Orzo Stuffed Banana Peppers Soup

Savory Orzo Stuffed Banana Peppers Soup for Cozy Nights

A cozy one-pot meal blending stuffed peppers with soup, perfect for busy weeknights and hearty enough for the whole family. Try this Savory Orzo Stuffed Banana Peppers Soup!
Print Recipe Pin Recipe
Prep Time 15 minutes mins
Cook Time 1 hour hr
Total Time 1 hour hr 15 minutes mins
Servings: 6 cups
Course: Soups
Cuisine: Italian
Calories: 320
Ingredients Equipment Method Nutrition Notes

Ingredients
  

For the Soup Base
  • 4 medium Banana Peppers adds color and sweetness
  • 1 medium Green Pepper enhances flavor profile
  • 1 pound Italian Sausage break up for even cooking
  • 1 medium Onion offers natural sweetness
  • 2 cloves Garlic use fresh for best flavor
  • 4 cups Chicken Broth base of the soup
  • 1 cup Evaporated Milk contributes creaminess
For Creaminess & Flavor
  • 1/2 cup Parmesan Cheese adds an umami kick
  • 4 ounces Cream Cheese delivers a smooth texture
For the Pasta Addition
  • 1 cup Orzo cook separately to avoid mushiness
For Sautéing
  • 1 tablespoon Butter for sautéing vegetables
  • as needed Olive Oil for frying

Equipment

  • Large Stockpot

Method
 

Step-by-Step Instructions
  1. Prepare the Peppers: Wash the banana peppers, slice off the tops, and remove seeds. Dice the tops and set aside.
  2. Sauté the Italian Sausage: Heat olive oil in a stockpot, add sausage and sauté until browned, about 5-7 minutes. Remove and set aside.
  3. Cook the Vegetables: In the same pot, add butter and more olive oil. Add diced onion, reserved banana pepper tops, and minced garlic. Sauté for 5 minutes until translucent.
  4. Combine the Soup Base: Add sausage back to the pot, then chicken broth and evaporated milk. Bring to a boil over medium-high heat, stirring occasionally for 5 minutes.
  5. Melt in the Cheeses: Stir in Parmesan and cream cheese, reduce heat and mix until cheeses melt, about 3-4 minutes.
  6. Simmer the Soup: Add seasonings, cover, and let it simmer on low for 25 minutes, stirring occasionally.
  7. Add the Orzo: Introduce uncooked orzo and cook for an additional 10 minutes until tender.
  8. Garnish and Serve: Spoon into bowls, garnish with reserved banana pepper slices, and serve with crusty bread.

Nutrition

Serving: 1cupCalories: 320kcalCarbohydrates: 30gProtein: 15gFat: 18gSaturated Fat: 9gPolyunsaturated Fat: 3gMonounsaturated Fat: 10gCholesterol: 50mgSodium: 800mgPotassium: 800mgFiber: 3gSugar: 4gVitamin A: 500IUVitamin C: 70mgCalcium: 200mgIron: 2mg

Notes

Consider tasting the banana peppers before using; if too spicy, swap for milder varieties. Cheese should be stirred slowly over low heat to ensure a creamy texture.

Tried this recipe?

Let us know how it was!

Cozy Up with Spicy Chorizo Pumpkin Soup This Fall

October 30, 2025 by Grace Snow Leave a Comment

As the autumn leaves crunch beneath my feet and the air turns crisp, I can’t help but crave something warm and comforting. Enter my creamy spicy chorizo pumpkin soup—a perfect blend of savory chorizo, sweet pumpkin puree, and a zing of chipotle peppers that will fill your kitchen with inviting aromas. This hearty dish not only warms your soul but can be ready in just 25 minutes, making it a delightful option for busy weeknights. Plus, it’s so versatile! You can easily swap the chorizo for tofu or turkey sausage for a vegetarian or lighter meal twist. Curious how to whip up this comforting fall favorite? Let’s dive in!

Why is This Soup So Special?

Rich, Flavor-Packed Ingredients: This spicy chorizo pumpkin soup features a mouthwatering blend of savory chorizo and creamy pumpkin puree for a luxurious taste experience.

Quick and Easy: Whipping up this comforting dish takes only 25 minutes, perfect for busy weeknights when you crave a homemade meal.

Versatile Options: You can easily adapt this recipe with pork, beef, or tofu chorizo, allowing everyone to enjoy it, regardless of dietary preferences.

Perfect for Fall: With its warm flavors and vibrant colors, it captures the essence of autumn, making it the ideal companion for chilly evenings.

Crowd-Pleaser: Serve this delicious soup at your next gathering or cozy dinner, and watch it disappear faster than you can say "comfort food"! Pair with some fresh bread or sprinkle with roasted pumpkin seeds for that extra layer of flavor.

Spicy Chorizo Pumpkin Soup Ingredients

• Here’s everything you need to create this delicious soup in no time!

For the Soup Base

  • Chorizo – Provides a spicy, savory flavor that forms the hearty backbone of this soup; consider tofu chorizo for a vegetarian option.
  • Onion – Adds sweetness and depth; finely chop for even cooking to enhance the flavors.
  • Garlic – Enhances the aroma and overall flavor profile; freshly minced garlic is always best!
  • Cumin – Offers warmth and an earthy note; this spice adds depth, so adjust according to your taste.
  • Salt – Essential for flavor enhancement; remember to taste and adjust as needed.
  • Black Pepper – Adds mild heat and earthiness; increase the amount for an extra kick!
  • Broth (Chicken or Beef) – Acts as the soup’s base liquid; vegetable broth works well for a vegetarian version.
  • Chipotle Peppers – Imparts a delicious smokiness and spice; use according to your desired heat level.
  • Pumpkin Puree – The star ingredient that creates a creamy texture and sweet flavor; ensure you use pure pumpkin puree—not pie filling.
  • Cream – Adds richness to the soup; substitute with coconut cream or half-and-half for a lighter option.

Optional Garnish

  • Roasted Pumpkin Seeds – Add a delightful crunch and nutty flavor as a topping; they also look lovely for presentation!
  • Chopped Green Onions – Adds freshness and vibrant color to your hearty dish; sprinkle on top before serving.

Step‑by‑Step Instructions for Spicy Chorizo Pumpkin Soup

Step 1: Cook Chorizo
In a heavy-bottom pot over medium heat, add the chorizo, letting it simmer for about 5 minutes. Stir frequently until the chorizo is fully cooked and has released its flavorful oils, becoming nicely browned. Once cooked, drain any excess fat from the pot for a less greasy foundation.

Step 2: Sauté Onions
Next, incorporate the finely chopped onion into the pot with the cooked chorizo. Sauté for about 3-4 minutes, stirring occasionally, until the onions become soft, translucent, and fragrant. This step builds a fragrant base for your spicy chorizo pumpkin soup, enhancing its overall depth of flavor.

Step 3: Add Garlic and Spices
Now, add the freshly minced garlic along with the cumin, salt, and black pepper to the pot. Sauté everything together for an additional minute until the garlic becomes fragrant. The aromatic layers of spices and garlic will lift the flavor profile of the soup, creating a warm foundation for the next ingredients.

Step 4: Combine Ingredients
Pour in the broth (chicken or vegetable) and then add the pumpkin puree along with the chipotle peppers. Stir well to combine all ingredients fully, ensuring the pumpkin puree is smoothly blended into the mixture. The vibrant colors at this stage provide a delightful visual cue for the delicious spicy chorizo pumpkin soup you’re preparing.

Step 5: Simmer the Soup
Bring the mixture to a gentle simmer over medium-low heat, allowing it to cook for about 10 minutes. Avoid boiling; instead, let it bubble gently to meld the flavors beautifully. As time passes, a wonderful aroma will fill your kitchen, signaling that your soup is developing rich layers of taste.

Step 6: Add Cream
After simmering, stir in the cream, mixing well until it's fully incorporated into the soup. This final addition brings a luscious creaminess to your spicy chorizo pumpkin soup, making it comforting and smooth. Allow the soup to heat through for a couple of minutes, then turn off the heat.

Step 7: Serve with Garnishes
Ladle the soup into warm bowls and garnish with roasted pumpkin seeds and chopped green onions for added texture and brightness. The contrasting colors and textures enhance both the presentation and the flavor of your hearty creation. Enjoy this comforting dish as a perfect warm embrace on a chilly day!

What to Serve with Spicy Chorizo Pumpkin Soup

As you savor each spoonful of this creamy, rich soup, consider these delectable pairings that will create a cozy, heartwarming meal.

  • Crusty Artisan Bread: Perfect for dipping, this fresh and crusty bread enhances the soup's rich flavors while adding satisfying texture.

  • Garlic Breadsticks: These warm, buttery delights have a hint of garlic that'll complement the spicy notes from the soup, making each bite irresistible.

  • Mixed Green Salad: A light, refreshing salad with a tangy vinaigrette balances the soup's warmth, adding a crisp contrast that brightens your meal.

  • Cheesy Quesadillas: Serve with melty cheese and fresh herbs, these quesadillas will add a delightful cheesy indulgence that pairs beautifully with the soup’s spice.

  • Sour Cream or Greek Yogurt: A dollop of either brings a cooling creaminess that counteracts the heat, creating a perfect harmony with the soup's savory depth.

  • Craft Beer or Cider: A slightly hoppy beer or a refreshing cider not only cleanses the palate but also complements the flavors in the spicy chorizo pumpkin soup.

  • Pumpkin Spice Muffins: For a sweet finish, these warm treats echo the soup's pumpkin flavor, providing a comforting end to your autumn-inspired meal!

  • Chocolates or Brownies: Rich, fudgy brownies or spiced chocolates can add an indulgent dessert note, rounding out the cozy vibes of this comforting meal.

Make Ahead Options

Preparing this spicy chorizo pumpkin soup in advance is a game-changer for busy weeknights! You can chop the onions and mince the garlic up to 24 hours in advance, storing them in an airtight container in the refrigerator to maintain their freshness. You can also cook the chorizo and combine it with the spices and pumpkin puree up to 3 days ahead; simply refrigerate and reheat gently when ready to finish the soup. When you’re ready to serve, stir in the cream and let it heat through for a quick and comforting meal with minimum effort. By following these prep steps, you'll enjoy the same delicious flavors without a last-minute rush!

Variations & Substitutions for Spicy Chorizo Pumpkin Soup

Feel free to play around with this recipe and customize it to suit your tastes and dietary needs!

  • Tofu Chorizo: Swap chorizo for tofu chorizo for a wholesome vegetarian option. The flavors will still shine bright!
  • Turkey Sausage: Use lean turkey sausage instead of chorizo for a lighter, yet still flavorful version. It's a perfect alternative without losing that savory kick.
  • Sweet Potatoes: Replace pumpkin with sweet potatoes for a slightly sweeter twist. Roasting them beforehand enhances their natural sugars, creating a delightful depth.
  • Coconut Cream: Substitute heavy cream with coconut cream for a dairy-free, tropical flavor. It will add a new richness that perfectly complements the spices.
  • Spice Level: For a milder flavor, reduce the amount of chipotle peppers or substitute with sweet bell peppers. Adjust according to your family’s taste preferences.
  • Herb Infusion: Experiment with adding herbs like thyme or cilantro for a fresh contrast. They provide a burst of brightness and an aromatic layer that livens up the soup.
  • Broth Alternatives: Swap chicken or beef broth with vegetable broth to keep it vegetarian-friendly while still maintaining a robust flavor.
  • Finish with Lime: Squeeze fresh lime juice just before serving to add acidity and balance the soup's richness. It elevates the flavors beautifully, giving each bite a fresh zing.

With these variations, your spicy chorizo pumpkin soup can evolve with your mood and dietary needs. If you’re looking for something else to warm up your kitchen, why not try a comforting bowl of Asparagus Soup Healthy or indulge in some Pumpkin Brownies Decadent? Happy cooking!

Expert Tips for Spicy Chorizo Pumpkin Soup

  • Drain Chorizo Fat: Properly drain excess fat from the chorizo to keep the soup light and flavors balanced. Too much fat can overpower the dish.
  • Quality Pumpkin: Opt for high-quality pumpkin puree for the best taste. If using fresh pumpkin, roast it until tender, then blend until smooth.
  • Adjust Spice Levels: Modify the number of chipotle peppers based on your spice preference. Consider adding sweet bell peppers for a milder flavor.
  • Sautéing Technique: Cook the onions until they're translucent and fragrant—this builds a strong flavor base for your spicy chorizo pumpkin soup. Don’t rush this step!
  • Storage Tips: Store leftover soup in an airtight container for up to three days. Reheat gently on the stove to maintain texture and flavor.
  • Garnish Variety: Experiment with different garnishes such as croutons, feta cheese, or fresh herbs to elevate the soup and attract all taste buds!

How to Store and Freeze Spicy Chorizo Pumpkin Soup

Fridge: Store leftover spicy chorizo pumpkin soup in an airtight container for up to 3 days. This ensures freshness while retaining the delicious flavors.

Freezer: For longer storage, freeze the soup in a freezer-safe container for up to 3 months. Leave some space to allow for expansion as it freezes.

Reheating: When ready to enjoy, thaw in the fridge overnight and reheat gently on the stove over low heat, stirring occasionally until warmed through.

Enjoying Later: If you’ve made a large batch, store in smaller portions to conveniently enjoy this comforting soup at your leisure!

Spicy Chorizo Pumpkin Soup Recipe FAQs

What type of chorizo should I use for this soup?
Absolutely! You can use traditional pork or beef chorizo for a robust flavor, or swap it out for tofu chorizo if you prefer a vegetarian option. The choice you make will slightly alter the flavor profile but will still result in a delicious soup!

How long can I store leftovers of this soup?
Store your spicy chorizo pumpkin soup in an airtight container in the refrigerator for up to 3 days. This allows the flavors to continue melding together while keeping your soup fresh and tasty!

Can I freeze Spicy Chorizo Pumpkin Soup?
Yes, you can freeze this soup! Pour it into freezer-safe containers, leaving a little space for expansion, and it will last for up to 3 months in the freezer. When you're ready to enjoy it, thaw it overnight in the fridge before reheating gently on the stove.

What should I do if the soup turns out too spicy?
Very! If your soup ends up spicier than you anticipated, stir in a bit more cream to help mellow the heat. You can also dilute it with additional broth or water, and add extra pumpkin puree to restore texture while reducing the spice.

How can I make this soup dairy-free?
To achieve a creamy, dairy-free version of this spicy chorizo pumpkin soup, simply substitute the cream with coconut cream or a dairy-free milk alternative like almond or oat milk. This will provide that luxurious texture without the dairy!

What’s the best way to prepare homemade pumpkin puree for this soup?
Certainly! If you want to make your own pumpkin puree, start by selecting a sugar pumpkin. Cut it in half, remove the seeds, and roast the halves face down in a baking dish at 350°F (175°C) for about 45-60 minutes or until tender. Once cooled, scoop out the flesh and blend it until smooth. Use this puree in your soup for a fresh flavor that shines through!

Spicy Chorizo Pumpkin Soup Recipe FAQs

Spicy chorizo pumpkin soup

Cozy Up with Spicy Chorizo Pumpkin Soup This Fall

Warm up this autumn with a delicious Spicy Chorizo Pumpkin Soup made with savory chorizo, creamy pumpkin puree, and chipotle peppers.
Print Recipe Pin Recipe
Prep Time 10 minutes mins
Cook Time 15 minutes mins
Total Time 25 minutes mins
Servings: 4 bowls
Course: Soups
Cuisine: American
Calories: 350
Ingredients Equipment Method Nutrition Notes

Ingredients
  

For the Soup Base
  • 1 lb Chorizo or tofu chorizo for a vegetarian option
  • 1 medium Onion finely chopped
  • 3 cloves Garlic freshly minced
  • 1 tsp Cumin
  • 1 tsp Salt adjust to taste
  • 1/2 tsp Black Pepper adjust to taste
  • 4 cups Broth (Chicken or Vegetable)
  • 1 can Chipotle Peppers use according to desired heat level
  • 2 cups Pumpkin Puree not pie filling
  • 1 cup Cream or coconut cream for a lighter option
Optional Garnish
  • 1/2 cup Roasted Pumpkin Seeds
  • 1/4 cup Chopped Green Onions

Equipment

  • heavy-bottom pot

Method
 

Step-by-Step Instructions for Spicy Chorizo Pumpkin Soup
  1. In a heavy-bottom pot over medium heat, add the chorizo, simmer for about 5 minutes until browned. Drain excess fat.
  2. Add the finely chopped onion to the pot with the cooked chorizo. Sauté for about 3-4 minutes until soft and translucent.
  3. Add the minced garlic, cumin, salt, and black pepper. Sauté for another minute until garlic is fragrant.
  4. Pour in the broth and add pumpkin puree along with chipotle peppers. Stir to combine everything smoothly.
  5. Bring to a gentle simmer over medium-low heat for about 10 minutes to meld flavors.
  6. Stir in the cream, mix well, and heat through for a couple of minutes. Turn off heat.
  7. Ladle into bowls and garnish with roasted pumpkin seeds and chopped green onions before serving.

Nutrition

Serving: 1bowlCalories: 350kcalCarbohydrates: 25gProtein: 15gFat: 20gSaturated Fat: 10gPolyunsaturated Fat: 2gMonounsaturated Fat: 7gCholesterol: 60mgSodium: 800mgPotassium: 700mgFiber: 5gSugar: 5gVitamin A: 5000IUVitamin C: 10mgCalcium: 80mgIron: 3mg

Notes

Store leftovers in an airtight container for up to 3 days. Freezing is possible for up to 3 months.

Tried this recipe?

Let us know how it was!

Crockpot Sweet Corn & Pepper Jack White Chicken Chili Bliss

October 28, 2025 by Grace Snow Leave a Comment

As I stood at the crossroads of a busy week, a comforting thought emerged: the simmering magic of my slow cooker. That's when I realized it was the perfect time for my Crockpot Sweet Corn & Pepper Jack White Chicken Chili, a dish that brings warmth and joy with little effort. This creamy delight melds the sweetness of corn with the zesty kick of pepper jack cheese and tender chicken, turning a chaotic day into a cozy, satisfying experience. With just a few minutes of prep, you can set it and forget it, leaving you free to focus on life while it transforms itself into a hearty meal. Plus, this dish is gluten-free if you choose the right broth, making it a wholesome option for everyone. So, are you ready to fill your home with luscious aromas and tantalizing flavors? Let’s dive into this creamy creation!

Why is this chili a must-try?

Comforting, creamy goodness: This Crockpot Sweet Corn & Pepper Jack White Chicken Chili wraps you in a warm embrace, perfect for busy days when you crave a satisfying meal.

Effortlessly prepared: Just toss in your ingredients, set your slow cooker, and let it do the work—no fuss, no stress!

Flavor-packed: The balance of sweet corn and spicy pepper jack cheese creates a delightful taste that keeps everyone coming back for more.

Versatile: Want to switch it up? Easily adapt this recipe for vegetarians or use raw chicken for those days when prep time is minimal.

Healthy and hearty: Packed with protein and fiber, it's not just a treat; it’s a nourishing meal that adds wholesome nutrition to your table.

Perfect pairings: Serve it alongside cornbread, or consider complementing it with a fresh salad for a delightful dining experience.

Crockpot Sweet Corn & Pepper Jack White Chicken Chili Ingredients

• To create this comforting dish, gather your flavorful ingredients!

For the Base

  • Yellow onion – Adds depth of flavor; substitute with shallots for a milder taste.
  • Garlic cloves – Provide aromatic warmth; use garlic powder if fresh is unavailable (1/4 teaspoon per clove).
  • Ground cumin – Offers an earthy flavor; can be substituted with coriander for a different spice profile.
  • Dried oregano – Contributes a herbaceous note; substitute with Italian seasoning for a more complex flavor.
  • Chili powder – Adds heat; adjust to taste; smoked chili powder could enhance smokiness.
  • Salt – Enhances overall flavor; use low-sodium options to control salt intake.
  • Black pepper – Adds pungency; use white pepper for a milder touch.

For the Chili

  • Diced green chiles – Provide a mild kick; canned jalapeños can be used for added spiciness.
  • Shredded cooked chicken – Serves as the protein base; rotisserie chicken is a great time-saver.
  • White beans – Adds creaminess and fiber; substitute with chickpeas or more beans for a vegetarian option.
  • Frozen sweet corn – Adds sweetness and texture; fresh corn can be used for an even sweeter flavor.
  • Low-sodium chicken broth – Keeps the dish flavorful without excess sodium; vegetable broth can be used for a vegetarian version.

For Creaminess

  • Cream cheese – Provides creaminess and richness; use Neufchâtel for a lower-fat alternative.
  • Shredded pepper jack cheese – Adds flavor and a bit of heat; can be replaced with Monterey Jack for a milder flavor.
  • Sour cream – Offers tang and creaminess; Greek yogurt can serve as a healthy alternative.
  • Lime juice – Adds acidity and brightness; lemon juice is a suitable substitute.

For Garnish

  • Fresh cilantro – Used as a garnish for freshness; omit if not preferred.

Equipped with these ingredients, you'll be on your way to crafting a comforting bowl of Crockpot Sweet Corn & Pepper Jack White Chicken Chili that the whole family will love!

Step‑by‑Step Instructions for Crockpot Sweet Corn & Pepper Jack White Chicken Chili

Step 1: Combine the Base Ingredients
In your crockpot, start by adding the diced yellow onion and minced garlic cloves. Sprinkle in the ground cumin, dried oregano, chili powder, salt, and black pepper. Give the mixture a good stir to integrate all the spices and set the stage for your flavorful Crockpot Sweet Corn & Pepper Jack White Chicken Chili.

Step 2: Add the Main Ingredients
Next, incorporate the diced green chiles, shredded cooked chicken, white beans, and frozen sweet corn into the mix. Pour in the low-sodium chicken broth, ensuring every ingredient is well-coated. This combination of savory and sweet sets the foundation for a hearty chili that will meld beautifully as it cooks.

Step 3: Set to Cook
Cover your crockpot with the lid and set it to cook on low for 4 to 6 hours. Avoid stirring during this time, allowing the flavors to meld undisturbed. As the chili simmers, your home will be filled with an enticing aroma that builds anticipation for the creamy delight to come.

Step 4: Incorporate Creaminess
After the cooking time, carefully lift the lid of your crockpot, and stir in the softened cream cheese. Allow it to melt for about 5 minutes, stirring gently until it creates a smooth, creamy consistency in your chili. This step transforms your Crockpot Sweet Corn & Pepper Jack White Chicken Chili into a comforting dish with luscious texture.

Step 5: Finish with Cheesy Goodness
Once cream cheese is fully blended, mix in the shredded pepper jack cheese, sour cream, and lime juice. Stir thoroughly to ensure everything is combined well. This adds an extra layer of richness and zest, making your chili feel indulgent while maintaining its comforting essence.

Step 6: Serve and Garnish
Spoon the hot chili into bowls and garnish with fresh cilantro, extra cheese, or a dollop of sour cream, if desired. Each serving of your Crockpot Sweet Corn & Pepper Jack White Chicken Chili is a warm hug in a bowl, ready to warm your heart and satisfy your hunger.

Crockpot Sweet Corn & Pepper Jack White Chicken Chili Variations

Feel free to get creative with this delicious chili—these simple swaps and twists will elevate your dish into something uniquely yours!

  • Vegetarian: Swap the chicken for additional white beans or chickpeas to create a hearty, meatless option. You’ll maintain the satisfying creaminess while embracing plant-based goodness.

  • Extra Veggies: Toss in diced bell peppers, zucchini, or even corn salsa for a delightful explosion of color and nutrients. Each added veggie contributes a fresh flavor that complements the chili's rich base perfectly.

  • Smoky Depth: Replace some of the chili powder with smoked paprika for an extra layer of smokiness. It can transform the chili's flavor profile, making it deeply satisfying.

  • Creamy Texture Boost: For an extra creamy bowl, consider stirring in a touch of coconut milk or cream after cooking. This adds a luxurious, silky finish to your Crockpot Sweet Corn & Pepper Jack White Chicken Chili.

  • Heat it Up: Craving some spice? Add diced jalapeños or a pinch of cayenne pepper to crank up the heat level. Adjust to your family's taste—every bite is sure to please!

  • Cheese Variety: Experiment with different cheese blends—like sharp cheddar or a hint of blue cheese for something bold. Each cheese adds its own personality to the overall taste!

  • Flavorful Broth: Try using homemade broth or a bold vegetable broth instead of store-bought to enhance the flavor. It’s a simple step that can make a significant impact on this comforting dish.

  • Toppings Galore: Step up your garnishing game with toppings like avocado slices, crispy tortilla strips, or even a drizzle of hot sauce for a fun, vibrant chili experience.

By incorporating these variations, you'll create a memorable and delightful chili experience worth sharing. Pair it with some Roasted Corn Fried or enjoy it alongside Crockpot Butter Chicken for an inviting family meal everyone will love!

What to Serve with Crockpot Sweet Corn & Pepper Jack White Chicken Chili

Looking to create a delightful meal alongside your chili? Let these scrumptious pairings elevate your dining experience!

  • Cornbread: Soft and buttery, cornbread adds a sweet contrast that complements the chili’s creamy texture beautifully.
  • Tortilla Chips: Crunchy and perfect for dipping, they offer a satisfying texture that pairs well with the hearty chili. Enjoy with a side of fresh salsa for a vibrant kick!
  • Simple Green Salad: A crisp salad with mixed greens, cucumbers, and a light vinaigrette brings freshness to balance the chili's richness.
  • Guacamole: Creamy and zesty, guacamole provides a delightful richness that pairs wonderfully with the tortilla chips or directly with the chili.
  • Sour Cream and Lime Wedges: Classic garnishes that add a tangy touch and enhance the flavors in your chili, ensuring every bite is luscious and refreshing.
  • Pickled Jalapeños: For spice enthusiasts, these tangy additions provide a punch of flavor that complements the creaminess with some heat.
  • Homemade Coleslaw: Crunchy and cool, coleslaw can offer a refreshing contrast and enhance the overall dining experience with its creamy dressing.
  • Refreshing Lemonade: A glass of chilled lemonade pairs perfectly, cutting through the richness with its bright, sweet-tart flavor.
  • Chocolate Chip Cookies: For dessert, finish on a sweet note with warm, gooey chocolate chip cookies that contrast wonderfully with the savory chili.
  • Spiced Apple Cider: A warm beverage that's perfect for fall, spiced apple cider brings cozy, comforting flavors that echo the warmth of the chili.

Make Ahead Options

These Crockpot Sweet Corn & Pepper Jack White Chicken Chili preparations are perfect for busy home cooks looking to save time! You can chop the vegetables (onion and garlic) and combine the spices up to 24 hours in advance. Just store them in an airtight container in the refrigerator to keep them fresh. Additionally, you can shred the chicken and have the white beans and corn ready to go. When you're ready to cook, simply add all the prepped ingredients to your slow cooker, pour in the broth, and let it simmer. This way, you'll enjoy a cozy, delicious meal with minimal effort, making weeknight dinners a breeze!

Expert Tips for Your Crockpot Chili

  • Cook Low and Slow: For the best flavors, always cook on low. High can lead to uneven cooking and dried-out chicken.

  • Use Rotisserie Chicken: Save time by using rotisserie chicken instead of raw; it adds flavor and moisture without extra effort.

  • Be Careful with Dairy: If planning to freeze leftovers, do so before adding cream cheese and sour cream. Stir these in when reheating for the best texture.

  • Adjust the Spice Level: If you're sensitive to spice, start with less chili powder and add more as desired—it's easier to increase heat than to take it away!

  • Vegetarian Options: Want a meatless meal? Swap in extra beans or lentils as a protein source; the Crockpot Sweet Corn & Pepper Jack White Chicken Chili will still be delicious!

How to Store and Freeze Crockpot Sweet Corn & Pepper Jack White Chicken Chili

Fridge: Store leftovers in an airtight container for up to 3 days. Make sure the chili is cooled to room temperature before sealing to maintain freshness.

Freezer: Place cooled chili in freezer-safe containers or bags, leaving some space for expansion. It will keep well for up to 3 months.

Reheating: Thaw in the refrigerator overnight before reheating. Warm on the stovetop or in the microwave, adding a splash of broth to restore creaminess.

Dairy Addition: If you plan to freeze your Crockpot Sweet Corn & Pepper Jack White Chicken Chili, do so before adding cream cheese and sour cream. Stir in the dairy when reheating for the best texture.

Crockpot Sweet Corn & Pepper Jack White Chicken Chili Recipe FAQs

What type of corn should I use?
For the best sweetness and texture, I recommend using frozen sweet corn. However, if you're lucky enough to have fresh corn, that can elevate the flavor even more! Just make sure to cut the kernels off the cob for the perfect bite-sized pieces.

How should I store leftovers?
Absolutely! Store any leftovers in an airtight container in the refrigerator for up to 3 days. Make sure it’s cooled to room temperature before sealing it to keep it fresh and delicious.

Can I freeze this chili?
Yes, you can! To freeze your Crockpot Sweet Corn & Pepper Jack White Chicken Chili, allow it to cool completely, then place it in freezer-safe containers or bags. It will stay fresh for up to 3 months. Just remember, it's best to freeze before adding any dairy ingredients like cream cheese or sour cream. When you’re ready to enjoy, thaw in the refrigerator overnight and stir in the dairy when reheating.

What should I do if my chili is too thick?
If your chili turns out thicker than you like, don't fret! Simply stir in a bit of low-sodium chicken broth or water until you reach your desired consistency. Adding a little more broth at a time is the best way to gradually adjust the texture without watering down the flavor.

Are there any dietary considerations for this recipe?
Definitely! This Crockpot Sweet Corn & Pepper Jack White Chicken Chili can easily be made gluten-free by using the right broth. It’s also simple to make it vegetarian; just swap the shredded chicken for extra beans or a plant-based protein of your choice. Always check for allergies, especially with dairy ingredients, to ensure everyone can enjoy this creamy goodness.

Can I use raw chicken?
Yes, you can! If you prefer to use raw chicken, place the uncooked chicken in the crockpot, cover, and cook on low for 6 to 7 hours. After cooking, shred the chicken and return it to the chili before adding cream cheese for that creamy finish.

Crockpot Sweet Corn & Pepper Jack White Chicken Chili

Crockpot Sweet Corn & Pepper Jack White Chicken Chili Bliss

Crockpot Sweet Corn & Pepper Jack White Chicken Chili is a comforting, creamy dish that brings warmth and joy, filled with flavors of sweet corn and pepper jack cheese.
Print Recipe Pin Recipe
Prep Time 15 minutes mins
Cook Time 5 hours hrs
Total Time 5 hours hrs 15 minutes mins
Servings: 6 servings
Course: Soups
Cuisine: American
Calories: 350
Ingredients Equipment Method Nutrition Notes

Ingredients
  

For the Base
  • 1 medium yellow onion Adds depth of flavor
  • 3 cloves garlic Minced, provide aromatic warmth
  • 1 teaspoon ground cumin Offers an earthy flavor
  • 1 teaspoon dried oregano Contributes a herbaceous note
  • 2 tablespoons chili powder Adds heat, adjust to taste
  • 1 teaspoon salt Enhances overall flavor
  • 1 teaspoon black pepper Adds pungency
For the Chili
  • 1 can diced green chiles Provides a mild kick
  • 3 cups shredded cooked chicken Serves as the protein base
  • 1 can white beans Adds creaminess and fiber
  • 2 cups frozen sweet corn Adds sweetness and texture
  • 4 cups low-sodium chicken broth Keeps the dish flavorful
For Creaminess
  • 8 ounces cream cheese Provides creaminess and richness
  • 1 cup shredded pepper jack cheese Adds flavor and a bit of heat
  • 1 cup sour cream Offers tang and creaminess
  • 2 tablespoons lime juice Adds acidity and brightness
For Garnish
  • 1 cup fresh cilantro Used as a garnish for freshness

Equipment

  • Crockpot

Method
 

Base Ingredients
  1. In your crockpot, start by adding the diced yellow onion and minced garlic cloves. Sprinkle in the ground cumin, dried oregano, chili powder, salt, and black pepper. Stir to integrate all the spices.
Main Ingredients
  1. Incorporate the diced green chiles, shredded cooked chicken, white beans, and frozen sweet corn into the mix. Pour in the low-sodium chicken broth.
Cooking
  1. Cover your crockpot and set it to cook on low for 4 to 6 hours. Avoid stirring during this time.
Incorporate Creaminess
  1. After cooking, stir in the softened cream cheese and allow it to melt for about 5 minutes.
Finish with Cheesy Goodness
  1. Mix in the shredded pepper jack cheese, sour cream, and lime juice. Stir thoroughly.
Serve and Garnish
  1. Spoon the hot chili into bowls and garnish with fresh cilantro, extra cheese, or a dollop of sour cream, if desired.

Nutrition

Serving: 1cupCalories: 350kcalCarbohydrates: 30gProtein: 28gFat: 15gSaturated Fat: 8gCholesterol: 65mgSodium: 800mgPotassium: 650mgFiber: 6gSugar: 5gVitamin A: 600IUVitamin C: 10mgCalcium: 200mgIron: 2mg

Notes

Serve alongside cornbread or a fresh salad for a delightful dining experience.

Tried this recipe?

Let us know how it was!

Cozy Turkey Pot Pie Soup Perfect for Holiday Leftovers

October 25, 2025 by Grace Snow Leave a Comment

The rich aroma of turkey simmering away in a savory broth harks back to cozy family gatherings, doesn’t it? Enter my Creamy Turkey Pot Pie Soup, a delightful one-pot wonder that transforms holiday leftovers into a heartwarming meal. Not only is this soup a brilliant way to use up that leftover turkey, but it also comes together quickly using simple ingredients you likely have on hand. Easy to make and incredibly comforting, this soup wraps you in its creamy embrace after a long day. Whether you're a seasoned home chef or just looking to craft something warm and inviting, this Turkey Pot Pie Soup is here to coax you into the kitchen. Are you ready to stir up some deliciousness and create a bowl of comfort? Let’s dive in!

Why is Turkey Pot Pie Soup So Irresistible?

Comforting warmth: There’s nothing like a bowl of creamy goodness to wrap you in a hug! This Turkey Pot Pie Soup is your go-to recipe for cozy nights in.

Simple ingredients: With just common pantry staples, preparing this soup is a breeze.

Waste not, want not: Perfect for using up leftover turkey or chicken, this dish minimizes waste while maximizing flavor.

One pot wonder: All the magic happens in a single pot, saving you time on cleanup.

Family favorite: Its hearty texture and rich taste are sure to please everyone at the table, making it a crowd-pleaser.

Whether you're enjoying it alongside a fresh salad or with crusty bread, this soup is a delicious way to bring comfort home.

Turkey Pot Pie Soup Ingredients

Transform your holiday leftovers into a cozy bowl of comfort with these easy ingredients!

For the Soup Base

  • Flour – Thickens the soup for a creamy texture. Substitute with cornstarch for gluten-free.
  • Unsalted Butter – Adds richness and flavor. Can be replaced with olive oil for a dairy-free option.
  • Yellow Onion – Provides a savory base flavor. Shallots can also be used if desired.
  • Minced Garlic – Enhances the overall flavor profile; fresh is preferred, but garlic powder can be a substitute.
  • Kosher Salt – Essential for seasoning; sea salt works as an alternative.
  • Pepper – Adds a mild heat; freshly cracked black pepper enhances the taste.
  • Italian Seasoning – Provides aromatic herbal notes; adjust based on personal preference.
  • White Wine Vinegar – Brightens the flavors; lemon juice can serve as a substitute.

For the Heartiness

  • Yukon Potatoes – Contributes structure and heartiness; russet or red potatoes can be used as substitutes.
  • Chicken Broth – Forms the soup base; using low-sodium is preferable for salt control.
  • Shredded Cooked Turkey – The main protein source adding substance; leftover chicken works excellently as a substitute.

For a Nutrient Boost

  • Frozen Vegetables Mix – Conveniently adds nutrition; feel free to use fresh vegetables for added flavor.

For Creamy Goodness

  • Heavy Cream – Adds creaminess and richness; half-and-half or coconut cream can be used for a lighter option.

Gather these components for a delightful Turkey Pot Pie Soup that’s sure to become a cherished family favorite!

Step‑by‑Step Instructions for Turkey Pot Pie Soup

Step 1: Create the Slurry
In a small bowl, whisk together ¼ cup of flour with ½ cup of cold water or broth until smooth to form a slurry. Set this aside for later to ensure your Turkey Pot Pie Soup has the creamy texture you desire.

Step 2: Sauté Aromatics
In a large pot, melt 3 tablespoons of unsalted butter over medium heat. Once melted, add 1 diced yellow onion and 2 cloves of minced garlic. Sauté for about 4-5 minutes, stirring occasionally, until the onion becomes translucent and fragrant, creating a savory foundation for your soup.

Step 3: Season and Deglaze
Stir in 1 teaspoon of kosher salt, ½ teaspoon of freshly cracked black pepper, and 1 teaspoon of Italian seasoning. Pour in 2 tablespoons of white wine vinegar to deglaze the pot, scraping up any flavorful bits stuck to the bottom, for an added depth of flavor in your Turkey Pot Pie Soup.

Step 4: Add Base Ingredients
Mix in 2 cups of diced Yukon potatoes and 4 cups of chicken broth to the pot. Then, add the prepared slurry, stirring thoroughly to combine all ingredients. This will create the base for the heartiness and creaminess of the soup as it cooks.

Step 5: Simmer Until Tender
Cover the pot and bring the soup to a gentle boil over medium-high heat. Once boiling, reduce the heat to low for a simmer and let it cook for about 30 minutes. Stir occasionally; when the potatoes are fork-tender, the soup is at the perfect stage to incorporate the turkey and vegetables.

Step 6: Incorporate Turkey and Vegetables
Add 2 cups of shredded cooked turkey and 1 cup of frozen vegetable mix to the pot. Stir gently, allowing the flavors to meld, and let it simmer for another 5 minutes, or until everything is heated through and the soup is rich and inviting.

Step 7: Finish with Cream
Finally, stir in 1 cup of heavy cream, ensuring it blends well with the Turkey Pot Pie Soup. Allow the soup to simmer for an additional 2-3 minutes, thickening gracefully while ensuring it’s perfectly creamy and luxuriously smooth.

Step 8: Serve and Enjoy
Ladle the Turkey Pot Pie Soup into warm bowls and serve it hot. For an extra touch of indulgence, consider topping with puff pastry or crusty bread on the side, inviting everyone at the table to enjoy a comforting and hearty meal.

How to Store and Freeze Turkey Pot Pie Soup

Fridge: Store leftover Turkey Pot Pie Soup in an airtight container for up to 3–4 days. Make sure it cools to room temperature before sealing to maintain freshness.

Freezer: You can freeze the soup for up to three months. Portion it into freezer-safe containers, leaving some space at the top for expansion as it freezes.

Reheating: Reheat gently on the stovetop or in the microwave until warmed through. Stir occasionally; adding a splash of broth or cream can restore its creamy texture.

To note: Enjoy your Turkey Pot Pie Soup again without sacrificing flavor or quality!

What to Serve with Turkey Pot Pie Soup

There's no better way to elevate your cozy culinary experience than to pair your hearty soup with delicious accompaniments.

  • Crusty Bread: Perfect for dipping, the crunch of fresh bread contrasts beautifully with the creamy soup, making each bite a delight.
  • Simple Green Salad: A light, fresh salad with a tangy vinaigrette balances the richness of the soup, adding a refreshing crunch.
  • Buttery Puff Pastry: Placing a flaky puff pastry on top not only adds a gourmet feel but creates a delightful crispy texture with every spoonful.
  • Garlic Breadsticks: Soft and warm, they’re perfect for soaking up every last bit of the flavorful broth, making them a sumptuous side.
  • Mashed Potatoes: A side of creamy mashed potatoes can enhance the comfort factor, offering a hearty bite to complement the soup's flavors.
  • Roasted Vegetables: Seasoned and caramelized veggies add a sweet and savory touch that harmonizes beautifully with the soup's robust tones.
  • Savory Fruit Chutney: A dollop of tangy chutney brings a pop of sweetness that contrasts nicely with the rich turkey flavors, enhancing the overall taste.
  • Sparkling Apple Cider: This bubbly drink adds a festive flair that brightens the meal while its sweetness complements the savory notes of the soup.
  • Chocolate Chip Cookies: For dessert, warm cookies offer a comforting finish; their rich sweetness is the perfect way to round out your cozy meal.

Expert Tips for Turkey Pot Pie Soup

  • Sauté Until Soft: Make sure the onions and garlic are nice and translucent; this builds a robust flavor base for your Turkey Pot Pie Soup.

  • Adjust Thickness: If you prefer a thicker soup, let it simmer longer or gradually add the slurry. Stir well to avoid any lumps!

  • Perfect Veggies: Avoid overcooking the frozen vegetables; add them near the end of cooking to keep that vibrant texture and nutritional value intact.

  • Ingredient Substitutions: If you're out of a specific ingredient, feel free to switch! For instance, use olive oil for butter or lemon juice instead of vinegar.

  • Timing Matters: Allow the soup to simmer just long enough—about 30 minutes—to ensure the potatoes are fork-tender without becoming mushy.

  • Leftover Love: Don’t hesitate to experiment by using leftover chicken or adding extra vegetables. It’s a flexible recipe that loves to adapt!

Turkey Pot Pie Soup Variations & Substitutions

Feel free to get creative with this recipe and make it your own, tailoring it to your taste and dietary needs!

  • Dairy-Free: Replace heavy cream with coconut milk for a vegan twist that maintains creaminess without dairy.

  • Vegetarian Option: Swap shredded turkey for chickpeas or lentils to create a hearty vegetarian version that’s packed with protein.

  • Spicy Kick: Add diced jalapeños or a pinch of cayenne pepper for a flavorful heat that warms you right up. Imagine the comforting aroma mingling with a pleasant spice that tantalizes your taste buds.

  • Flavor Boost: Incorporate a splash of balsamic vinegar or a teaspoon of soy sauce to deepen the savory profile of the soup; this subtle change can elevate the overall flavor experience.

  • Chunky Veggies: Instead of frozen mixed vegetables, opt for fresh, chopped veggies like carrots, celery, or bell peppers for a vibrant textural twist.

  • Potato Alternatives: Replace Yukon potatoes with sweet potatoes for a different, slightly sweet flavor, adding a nutritious flair to this comforting dish.

  • Herb Swap: Experiment with fresh herbs like thyme or rosemary in place of Italian seasoning for a delightful aroma that enhances the cozy vibes.

  • Hearty Grains: Add cooked barley or quinoa for an extra layer of texture, turning it into a robust meal that’s satisfying and filling.

Whichever variation you choose, your customized Turkey Pot Pie Soup is sure to become a beloved staple in your kitchen! For additional comforting inspiration, check out One Pot Salmon or try a delightful Asparagus Soup Healthy for a seasonal twist.

Make Ahead Options

These Turkey Pot Pie Soup preparations are perfect for busy home cooks looking to save time during the week! You can chop your vegetables (like onion and Yukon potatoes) and store them in an airtight container in the refrigerator for up to 3 days. Additionally, you can prepare the flour slurry and keep it refrigerated for 24 hours, ensuring it remains smooth when you’re ready to cook. When you’re set to enjoy your comforting soup, simply follow the instructions starting from sautéing the aromatics, and stir in the prepared ingredients. This way, you’ll have a homemade meal that’s just as delicious with minimal effort—perfect for those hectic weeknights!

Turkey Pot Pie Soup Recipe FAQs

What kind of turkey is best for this soup?
Absolutely! For the best flavor, use leftover turkey from your holiday feast. If you don’t have any, poached turkey breast works great too, adding a lovely tenderness to your soup. Leftover chicken is also an excellent substitute if turkey isn’t available. The key is to make sure the meat is shredded or chopped into bite-sized pieces for even distribution throughout the soup.

How long can I store Turkey Pot Pie Soup in the refrigerator?
You can safely store your Turkey Pot Pie Soup in an airtight container in the refrigerator for up to 3 to 4 days. Be sure to let the soup cool completely before sealing it to help maintain its flavor and freshness. When you're ready to enjoy it again, simply reheat gently on the stovetop or in the microwave.

Can I freeze Turkey Pot Pie Soup? How do I do that?
Yes, you can freeze this soup for up to three months! To do so, portion it into freezer-safe containers or resealable bags, leaving a little space at the top to allow for expansion as it freezes. Make sure to label the containers with the date so you can keep track. When it’s time to enjoy it again, thaw it overnight in the fridge and reheat gently on the stove, adding a splash of broth or cream to restore its creamy texture if needed.

What should I do if my soup is too thick?
Very good question! If your Turkey Pot Pie Soup ends up thicker than you’d like, don’t worry. Just add a little chicken broth or water, stirring it in gradually until you reach your desired consistency. It's best to do this over low heat to warm the soup back up without cooking it further. Taste and adjust the seasonings as needed to keep those delicious flavors coming!

Are there any dietary considerations for this soup?
Certainly! If you or your family members have dietary restrictions, there are plenty of adaptations available. For a gluten-free option, substitute the flour with cornstarch to thicken the soup. If you're looking for a dairy-free choice, use olive oil instead of butter and opt for coconut cream or a non-dairy milk alternative to replace the heavy cream. Always ensure that any mixed vegetables used are free from common allergens if needed.

Can I add more vegetables to this soup?
The more, the merrier! Feel free to add additional vegetables like carrots, peas, or green beans for extra nutrition and flavor. This recipe is quite versatile—just remember to add fresh veggies towards the end of cooking to maintain their color and crunch, and make sure to chop them into small, uniform pieces for even cooking. Enjoy the flexibility and creativity in your kitchen!

Turkey Pot Pie Soup

Cozy Turkey Pot Pie Soup Perfect for Holiday Leftovers

A warm and comforting Turkey Pot Pie Soup that makes great use of holiday leftovers.
Print Recipe Pin Recipe
Prep Time 10 minutes mins
Cook Time 45 minutes mins
Total Time 55 minutes mins
Servings: 6 cups
Course: Soups
Cuisine: American
Calories: 350
Ingredients Equipment Method Nutrition Notes

Ingredients
  

Soup Base
  • ¼ cup flour or cornstarch for gluten-free
  • 3 tablespoons unsalted butter or olive oil for dairy-free
  • 1 medium yellow onion diced
  • 2 cloves minced garlic fresh preferred
  • 1 teaspoon kosher salt or sea salt
  • ½ teaspoon freshly cracked black pepper
  • 1 teaspoon Italian seasoning
  • 2 tablespoons white wine vinegar or lemon juice
Heartiness
  • 2 cups diced Yukon potatoes or russet/red potatoes
  • 4 cups chicken broth low-sodium preferred
  • 2 cups shredded cooked turkey or leftover chicken
Nutrient Boost
  • 1 cup frozen vegetable mix or fresh vegetables
Creamy Goodness
  • 1 cup heavy cream or half-and-half/coconut cream

Equipment

  • Large pot
  • small bowl

Method
 

Preparation
  1. In a small bowl, whisk together ¼ cup of flour with ½ cup of cold water or broth until smooth to form a slurry. Set aside.
  2. In a large pot, melt 3 tablespoons of unsalted butter over medium heat. Then, add 1 diced yellow onion and 2 cloves of minced garlic. Sauté for 4-5 minutes until onion is translucent.
  3. Stir in 1 teaspoon of kosher salt, ½ teaspoon of freshly cracked black pepper, and 1 teaspoon of Italian seasoning. Pour in 2 tablespoons of white wine vinegar to deglaze the pot.
  4. Mix in 2 cups of diced Yukon potatoes and 4 cups of chicken broth. Then, add the prepared slurry, stirring thoroughly.
  5. Cover the pot and bring the soup to a gentle boil. Once boiling, reduce the heat to low and let it simmer for about 30 minutes.
  6. Add 2 cups of shredded cooked turkey and 1 cup of frozen vegetable mix to the pot. Stir gently and let it simmer for another 5 minutes.
  7. Stir in 1 cup of heavy cream and allow the soup to simmer an additional 2-3 minutes, thickening it.
  8. Ladle the soup into warm bowls and serve it hot, optionally topping with puff pastry or crusty bread.

Nutrition

Serving: 1cupCalories: 350kcalCarbohydrates: 30gProtein: 22gFat: 18gSaturated Fat: 10gPolyunsaturated Fat: 3gMonounsaturated Fat: 5gCholesterol: 70mgSodium: 800mgPotassium: 600mgFiber: 3gSugar: 2gVitamin A: 500IUVitamin C: 20mgCalcium: 80mgIron: 2mg

Notes

Great for using leftover turkey; feel free to substitute ingredients as needed.

Tried this recipe?

Let us know how it was!

Lemon Dill Cabbage Soup: Comfort in Every Cozy Spoonful

September 23, 2025 by Grace Snow Leave a Comment

As I stood over the stove, the comforting scent of sautéing garlic and onions wafted through my kitchen, instantly transporting me to a cozy café nestled on a rainy street corner. There's something incredibly fulfilling about crafting a bowl of Lemon Dill Cabbage Soup, especially when it comes together in under 30 minutes! This hearty soup is made with protein-packed cannellini beans and comes alive with the zest of fresh lemon and the delightful aroma of dill. It's a naturally vegetarian dish that doesn't skimp on flavor or nourishment, making it perfect for a quick lunch or a satisfying dinner. Best of all, it’s versatile! You can make a vegan version that’s just as creamy and comforting without missing out on taste. Curious about how this simple soup can transform your weeknight meals? Let’s dive into the recipe!

Why is Lemon Dill Cabbage Soup a Must-Try?

Comforting and Quick: This soup is a perfect solution for busy evenings, as it comes together in under 30 minutes, allowing you to enjoy homemade goodness without a long wait.

Nutritious Ingredients: Packed with protein-rich cannellini beans and fresh veggies, it's a nourishing choice that makes you feel good inside and out.

Bright Flavors: The zesty lemon juice and aromatic dill work together to create a refreshing burst of flavor, elevating your taste buds with every spoonful.

Versatile Recipe: Whether you're looking for a cozy vegetarian meal or a satisfying vegan option, this soup adapts easily. Just swap the cheese and egg for coconut milk or nutritional yeast!

Crowd-Pleaser: With its hearty texture and savory aroma, this dish is sure to impress family and friends. Serve it alongside some crusty bread or a light salad, like a lemon vinaigrette mix, for a complete experience.

This Lemon Dill Cabbage Soup is truly a delightful dish that will quickly become a staple in your kitchen!

Lemon Dill Cabbage Soup Ingredients

For the Soup
• Olive Oil – Ideal for sautéing aromatics; extra virgin enhances the flavor profile.
• Onion – Provides a flavorful base; use yellow or sweet onions for a milder taste.
• Garlic – Infuses depth into the soup; slice thinly for even melting in the broth.
• Green Cabbage – Hearty and tender; can substitute with kale or spinach for a twist.
• Cannellini Beans – Creamy and protein-packed; chickpeas or navy beans work as excellent substitutes.
• Vegetable Broth – Choose reduced sodium for balanced flavor without overwhelming saltiness.
• Parmesan Cheese & Egg – Whisk together for a velvety finish; omit for a vegan option or add nutritional yeast for a cheesy flavor.
• Lemon Juice – Essential for brightness and acidity in the soup; don’t skip on this!
• Fresh Dill – Offers herbal notes; dried dill can substitute, but use half the amount for best results.

For Serving
• Crusty Bread – Pair with anything from a baguette to garlic toast for a hearty meal.
• Extra Dill & Black Pepper – Garnish your soup for added flavor and a pleasing presentation.

Incorporate this Lemon Dill Cabbage Soup into your culinary repertoire for a nourishing and comforting meal that your family will love!

Step‑by‑Step Instructions for Lemon Dill Cabbage Soup

Step 1: Sauté Aromatics
In a large Dutch oven, heat 2 tablespoons of olive oil over medium heat. Once shimmering, add a diced onion and 2 cloves of thinly sliced garlic, stirring often for about 4 minutes until the onions become translucent and fragrant. This aromatic base will set the stage for your delicious Lemon Dill Cabbage Soup.

Step 2: Soften Cabbage
Next, stir in 4 cups of chopped green cabbage along with a pinch of dried oregano and black pepper. Continue to sauté for another 3 minutes, gently stirring as the cabbage begins to soften and reduces in volume. The vibrant greens will look luscious and inviting, ready to blend with the other ingredients.

Step 3: Simmer with Beans
Pour in 4 cups of vegetable broth and add 1 can of rinsed cannellini beans, bringing the mixture to a gentle boil. Once bubbling, reduce the heat to a simmer and cover the pot, letting it cook for about 8 minutes until the cabbage is tender. You’ll want to see the cabbage wilt down nicely for that comforting texture.

Step 4: Prepare Egg Mixture
While the soup simmers, whisk together ½ cup of freshly grated Parmesan cheese, the juice of 1 lemon, and 1 large egg in a medium bowl. To temper the mixture, slowly drizzle in about a cup of the hot soup broth while whisking continuously. This step ensures a creamy integration without curdling, enhancing your Lemon Dill Cabbage Soup.

Step 5: Finish the Soup
Remove the pot from the heat and carefully stir in the tempered egg mixture along with ¼ cup of freshly chopped dill. This will give the soup a rich and velvety texture, while the dill adds a burst of herbal flavor. Season the soup with salt to taste, giving it a tantalizing, aromatic finish.

Step 6: Serve
Ladle the warm Lemon Dill Cabbage Soup into bowls, garnishing each serving with a sprinkle of extra dill and freshly cracked black pepper. For a complete meal, serve it alongside crusty bread, allowing you to savor every delightful spoonful of this cozy dish.

Make Ahead Options

These Lemon Dill Cabbage Soup is perfect for meal prep enthusiasts! You can sauté the aromatics (onion and garlic) and soften the cabbage up to 24 hours in advance; just store them refrigerated in an airtight container. The soup can also be prepared and refrigerated for up to 3 days without the egg mixture, ensuring it stays fresh and flavorful. When you're ready to serve, bring the soup back to a gentle simmer, whisk in the tempered egg mixture, and finish with fresh dill. This way, you have a cozy, homemade meal ready to enjoy with minimal effort, all while maintaining the vibrant taste of your Lemon Dill Cabbage Soup!

What to Serve with Lemon Dill Cabbage Soup

Pairing this cozy soup with complementary sides creates a delightful dining experience.

  • Crusty Baguette: A warm, crusty baguette is perfect for dipping and soaking up the rich, velvety broth.
  • Garlic Toast: Crunchy garlic toast adds a savory crunch that balances the soup's creamy texture, making each bite satisfying.
  • Side Salad: A light side salad drizzled with lemon vinaigrette brings a fresh, zesty note that complements the soup's bright flavors. With crisp greens and a hint of acidity, this pairing adds a wholesome touch to your meal.
  • Steamed Asparagus: Bright green asparagus spears topped with a sprinkle of lemon zest provide a crisp and refreshing side, enhancing the overall vibrancy of your dining table.
  • Roasted Potatoes: Crispy roasted potatoes seasoned with herbs offer a hearty, comforting contrast to the light soup, making for a filling meal.
  • Dessert: A slice of lemon sorbet or light fruit tart can serve as a refreshing finish, echoing the soup's citrusy notes while cleansing the palate.
  • Herbal Tea: A warm cup of herbal tea, perhaps chamomile or lemon verbena, can complement the soothing nature of the soup, providing a calm end to your meal.
  • Sparkling Water: The effervescence of sparkling water with a twist of lemon enhances the meal's brightness and freshness, invigorating your palate with each sip.

Lemon Dill Cabbage Soup Variations

Feel free to explore these delightful twists to make your Lemon Dill Cabbage Soup even more exciting and personalized!

  • Kale Swap: Substitute green cabbage with kale for a heartier, nutrient-packed version. Kale adds a lovely texture and depth to the flavor.

  • Chickpea Option: Replace cannellini beans with chickpeas for a different protein source. This swap creates a lovely earthiness, which pairs beautifully with the zesty lemon.

  • Creamy Coconut: Make it vegan by omitting the egg and Parmesan; instead, stir in a splash of coconut milk for a creamy finish without losing rich flavor.

  • Spicy Kick: Add crushed red pepper flakes for a hint of heat. This will elevate the soup, providing a warm, comforting spice that delights the palate.

  • Lemon Zest Boost: For an enhanced lemon flavor, grate in some lemon zest along with the juice. This adds an aromatic brightness that will keep your taste buds humming.

  • Garlic Lovers: Increase the garlic to up to 4 cloves for extra depth. The delicious aroma will envelop your kitchen, enticing everyone to gather around the table.

  • Herbal Harmony: Mix in fresh thyme along with dill for a unique aromatic experience. Thyme brings a warm, earthy note that balances well with the lemon.

  • Corral Extra Veggies: Toss in diced carrots or celery for added texture and sweetness. These vibrant veggies will brighten your soup both in taste and color.

These variations can easily transform your Lemon Dill Cabbage Soup into something new and keep weeknight dinners vibrant and fun! And if you're ever in the mood for another cozy dish, try our Lemon Chicken Soup or Asparagus Soup Healthy for more nourishing comfort options. Enjoy your culinary adventure!

Expert Tips for Lemon Dill Cabbage Soup

  • Tempering Technique: To prevent curdling, always temper the egg mixture by gradually adding hot broth while whisking continuously. This will create a smooth, creamy texture.

  • Fresh vs. Dried Dill: Fresh dill offers superior flavor. If you must use dried, cut the quantity in half to avoid overpowering the soup.

  • Adding Greens: Consider adding a handful of baby spinach or kale for an extra nutrient boost, enhancing the soup's color and health benefits.

  • Flavor Balancing: Adjust the lemon juice to your taste; more acidity brightens the dish, but be careful not to overpower the delicate flavors.

  • Storing Leftovers: Refrigerate any leftovers in an airtight container for up to 4 days. Reheat gently over low heat to prevent boiling the egg mixture, ensuring a delightful experience with each serving.

Storage Tips for Lemon Dill Cabbage Soup

Fridge: Store leftovers in an airtight container for up to 4 days. Allow the soup to cool before sealing to preserve freshness.

Freezer: This soup is not recommended for freezing due to the egg content, which may curdle upon thawing.

Reheating: Gently reheat on the stove over low heat, stirring occasionally to maintain a creamy texture. Avoid boiling to prevent the egg from curdling.

Make-Ahead: Prepare the soup in advance, but add the egg mixture just before serving to keep it velvety and delicious.

Lemon Dill Cabbage Soup Recipe FAQs

How do I select the best cabbage for this soup?
Absolutely! Look for heads of green cabbage that feel heavy for their size and have crisp, tightly packed leaves. Avoid any that show dark spots or wilted leaves, as these may indicate aged cabbage. Fresh cabbage should feel firm and smell fresh, contributing a vibrant flavor to your Lemon Dill Cabbage Soup.

What’s the best way to store leftovers?
Very! Allow leftover Lemon Dill Cabbage Soup to cool to room temperature before transferring to an airtight container. It keeps well in the fridge for up to 4 days. For optimal flavor and texture, reheat gently on the stovetop over low heat to avoid curdling the egg mixture.

Can I freeze Lemon Dill Cabbage Soup?
Not recommended! Because of the egg content, freezing can cause curdling, which affects the soup's creamy consistency. However, you can prepare the soup base (without the egg and cheese) and freeze it for up to 3 months. When you're ready to serve, thaw it in the fridge overnight, then heat and add the egg mixture just before enjoying.

What if my soup turns out too thick?
No worries! If the soup is thicker than you'd like, simply stir in additional vegetable broth or water a little at a time until it reaches your desired consistency. Taste as you go, and adjust seasoning if needed. This tip can help maximize the enjoyment of your Lemon Dill Cabbage Soup!

Is this soup suitable for vegan diets?
Absolutely! To make a vegan version of Lemon Dill Cabbage Soup, simply omit the egg and Parmesan cheese. For a creamy finish, consider adding a splash of coconut milk or a handful of nutritional yeast for that delicious cheesy flavor without dairy.

Can my pets have any of the ingredients in this soup?
Very! While many of the ingredients like cabbage and beans can be safe for pets, it's best to avoid giving them anything with garlic or onion, as these can be harmful. If you're sharing with your furry friend, stick to plain cooked cabbage and beans!

Lemon Dill Cabbage Soup

Lemon Dill Cabbage Soup: Comfort in Every Cozy Spoonful

This Lemon Dill Cabbage Soup is a comforting dish made with cannellini beans, fresh lemon, and dill, perfect for a cozy meal.
Print Recipe Pin Recipe
Prep Time 10 minutes mins
Cook Time 20 minutes mins
Total Time 30 minutes mins
Servings: 4 bowls
Course: Soups
Cuisine: Vegetarian
Calories: 320
Ingredients Equipment Method Nutrition Notes

Ingredients
  

For the Soup
  • 2 tablespoons olive oil extra virgin enhances flavor
  • 1 medium onion diced; yellow or sweet for mild taste
  • 2 cloves garlic thinly sliced
  • 4 cups green cabbage chopped; can substitute with kale or spinach
  • 1 can cannellini beans rinsed; chickpeas or navy beans can substitute
  • 4 cups vegetable broth choose reduced sodium for balanced flavor
  • ½ cup Parmesan cheese freshly grated; omit for vegan
  • 1 large egg omit for vegan or substitute with nutritional yeast
  • 1 juice lemon essential for brightness
  • ¼ cup fresh dill offers herbal notes; dried can substitute
For Serving
  • crusty bread pair with baguette or garlic toast
  • extra dill for garnish
  • black pepper for garnish

Equipment

  • Large Dutch oven

Method
 

Step-by-Step Instructions
  1. In a large Dutch oven, heat 2 tablespoons of olive oil over medium heat. Add a diced onion and 2 cloves of thinly sliced garlic, stirring often for about 4 minutes until the onions become translucent and fragrant.
  2. Stir in 4 cups of chopped green cabbage along with a pinch of dried oregano and black pepper. Sauté for another 3 minutes, gently stirring as the cabbage begins to soften.
  3. Pour in 4 cups of vegetable broth and add 1 can of rinsed cannellini beans. Bring to a gentle boil, then reduce the heat to a simmer and cover the pot, letting it cook for about 8 minutes until the cabbage is tender.
  4. Whisk together ½ cup of freshly grated Parmesan cheese, the juice of 1 lemon, and 1 large egg in a medium bowl. Slowly drizzle in about a cup of the hot soup broth while whisking continuously.
  5. Remove the pot from the heat and carefully stir in the tempered egg mixture along with ¼ cup of freshly chopped dill. Season the soup with salt to taste.
  6. Ladle the warm soup into bowls, garnishing each serving with extra dill and freshly cracked black pepper. Serve alongside crusty bread.

Nutrition

Serving: 1bowlCalories: 320kcalCarbohydrates: 40gProtein: 15gFat: 10gSaturated Fat: 3gPolyunsaturated Fat: 1gMonounsaturated Fat: 5gCholesterol: 80mgSodium: 600mgPotassium: 800mgFiber: 10gSugar: 3gVitamin A: 500IUVitamin C: 70mgCalcium: 200mgIron: 3mg

Notes

Consider adding baby spinach or kale for extra nutrients. Adjust lemon juice to taste and refrigerate leftovers for up to 4 days.

Tried this recipe?

Let us know how it was!
  • 1
  • 2
  • Next Page »

Welcome!

Hi, I’m Grace, a Sydney-based home cook with a passion for bold flavors and trending ingredients. Whether you’re a busy beginner or a seasoned foodie, you’ll find dishes here that are fresh, fun, and full of flavor.

More about me

Popular Recipes

  • Texas Roadhouse Rattlesnake Bites
    Homemade Texas Roadhouse Rattlesnake Bites You’ll Crave
  • Lemon Blueberry Lasagna
    Creamy Lemon Blueberry Lasagna for Effortless Summer Bliss
  • 4th of July Creamy BLT Pasta Salad
    4th of July Creamy BLT Pasta Salad That's a Summer Hit
  • 4th of July Swirl Pie
    4th of July Swirl Pie: A Festive No-Bake Delight for Summer

Footer

↑ back to top

About

  • Privacy Policy
  • Disclaimer
  • Terms & Conditions

Newsletter

  • Sign Up! for emails and updates

Contact

  • About me
  • Contact me

Copyright © 2025 TastyTrendIngredients