tastytrendingredients

  • Home
  • Recipes
    • Appetizers
    • Breakfast
    • Dessert
    • Dinner
    • Drinks
    • Salads
    • Snacks
    • Soups
  • About me
  • Contact me
menu icon
go to homepage
  • Home
  • Recipes
    • Appetizers
    • Breakfast
    • Dessert
    • Dinner
    • Drinks
    • Salads
    • Snacks
    • Soups
  • About me
  • Contact me
search icon
Homepage link
  • Home
  • Recipes
    • Appetizers
    • Breakfast
    • Dessert
    • Dinner
    • Drinks
    • Salads
    • Snacks
    • Soups
  • About me
  • Contact me
×

Mushroom Poblano Posole Verde: A Cozy Vegan Comfort Bowl

September 1, 2025 by Grace Snow Leave a Comment

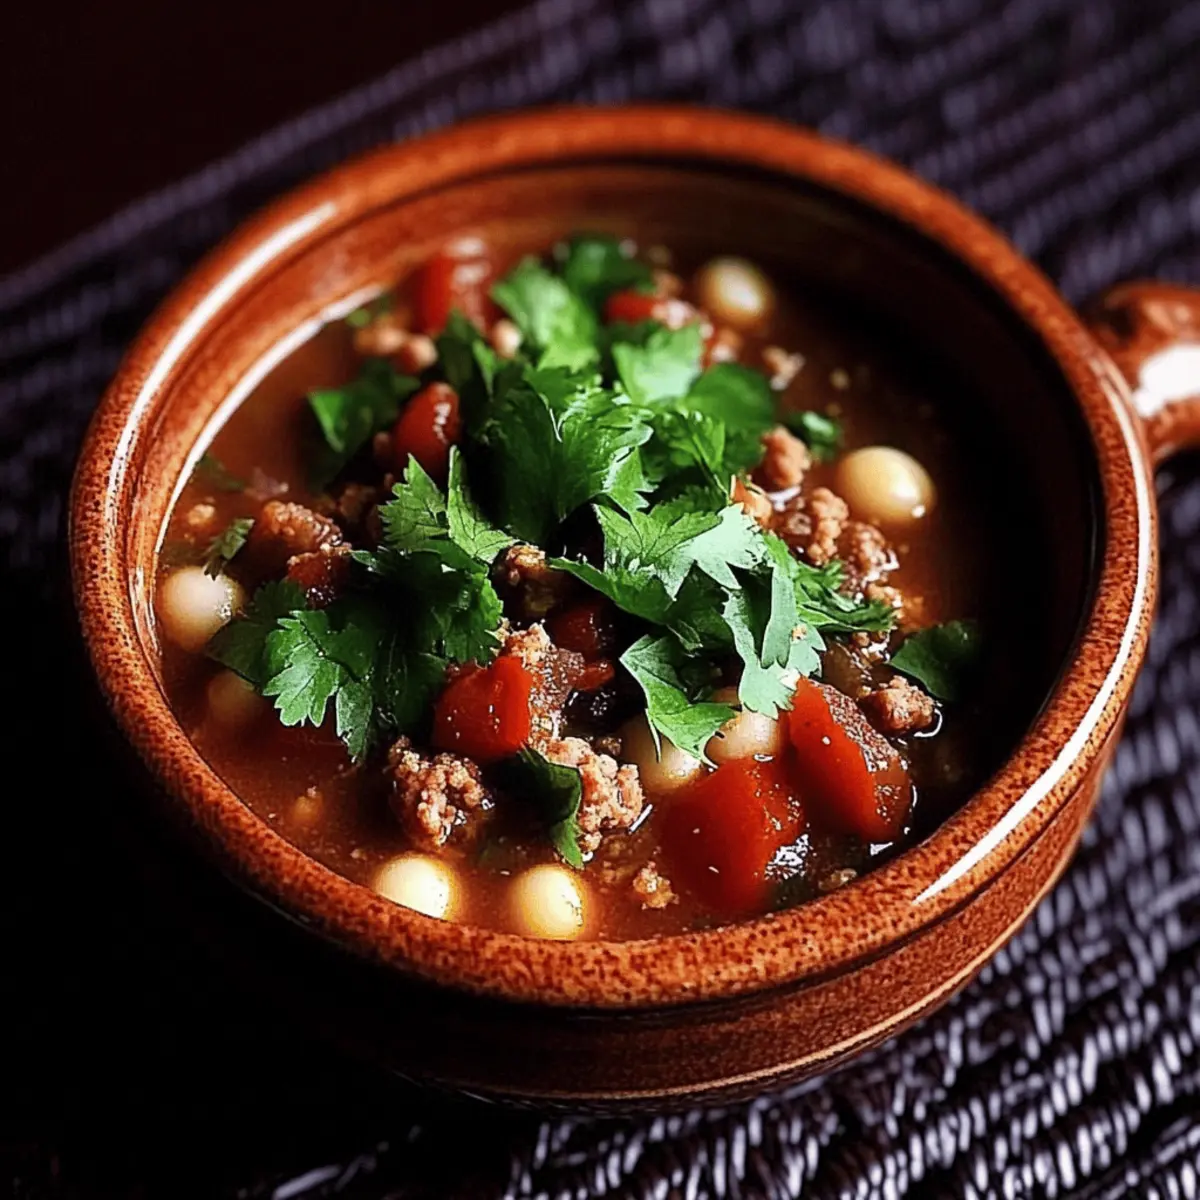
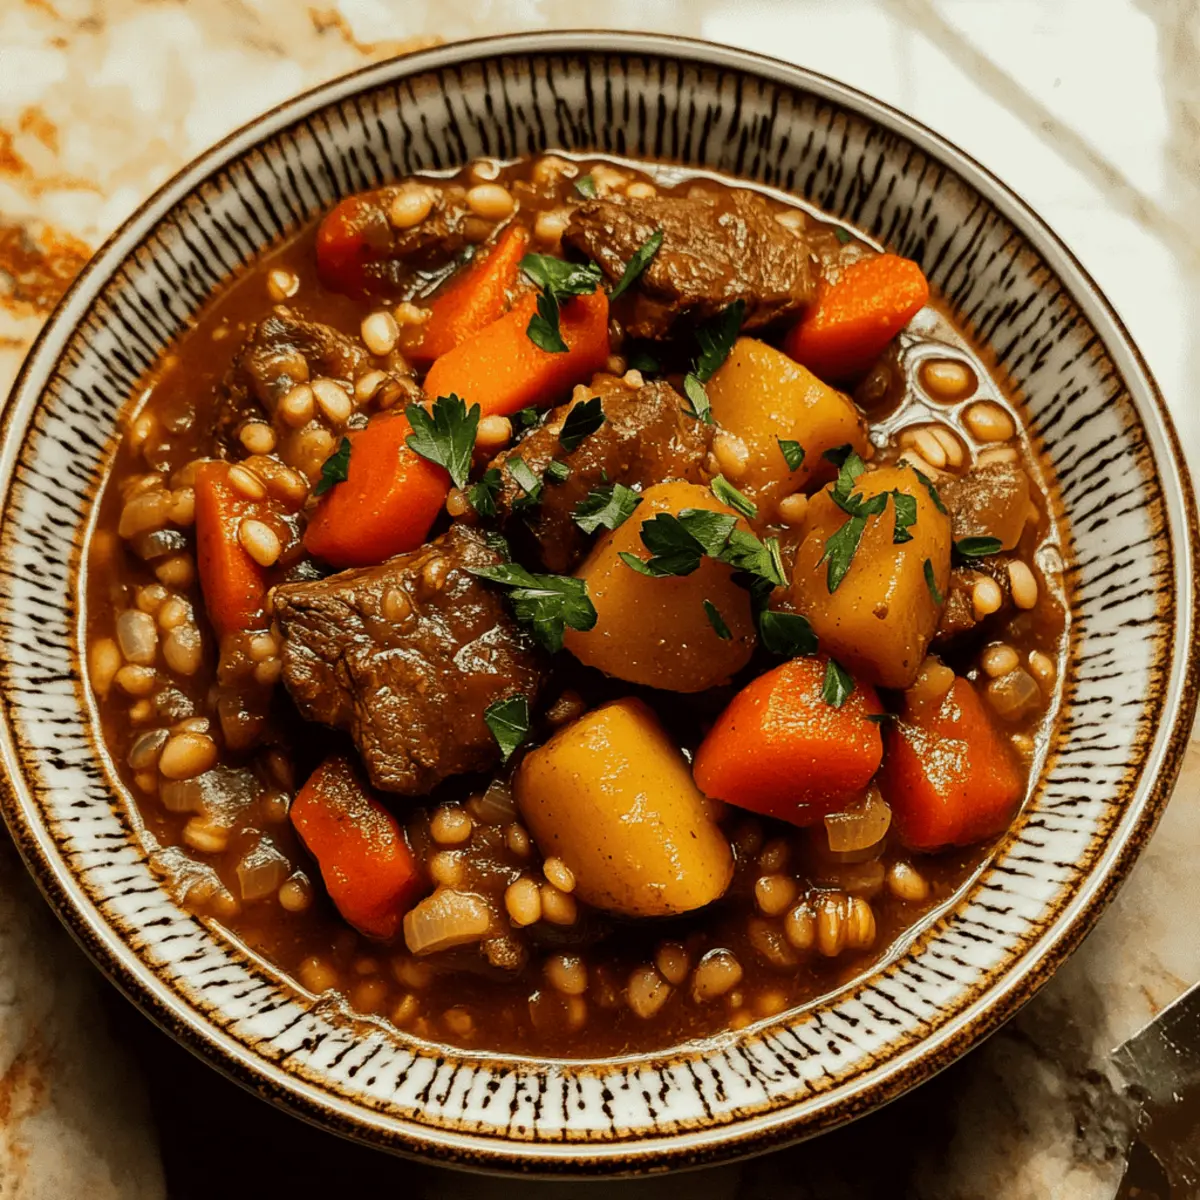
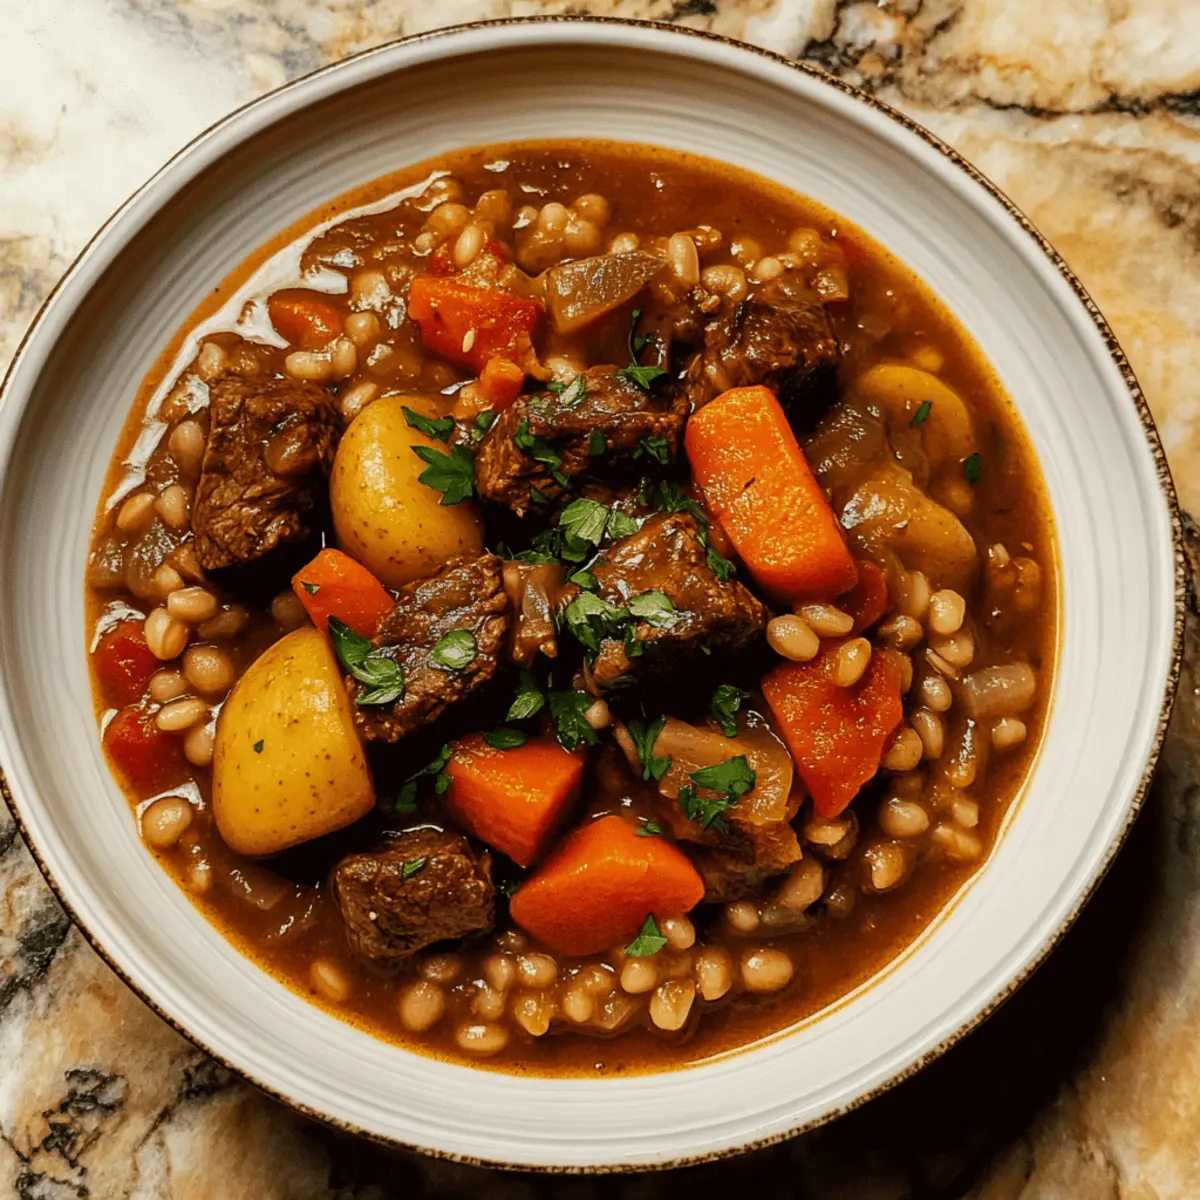
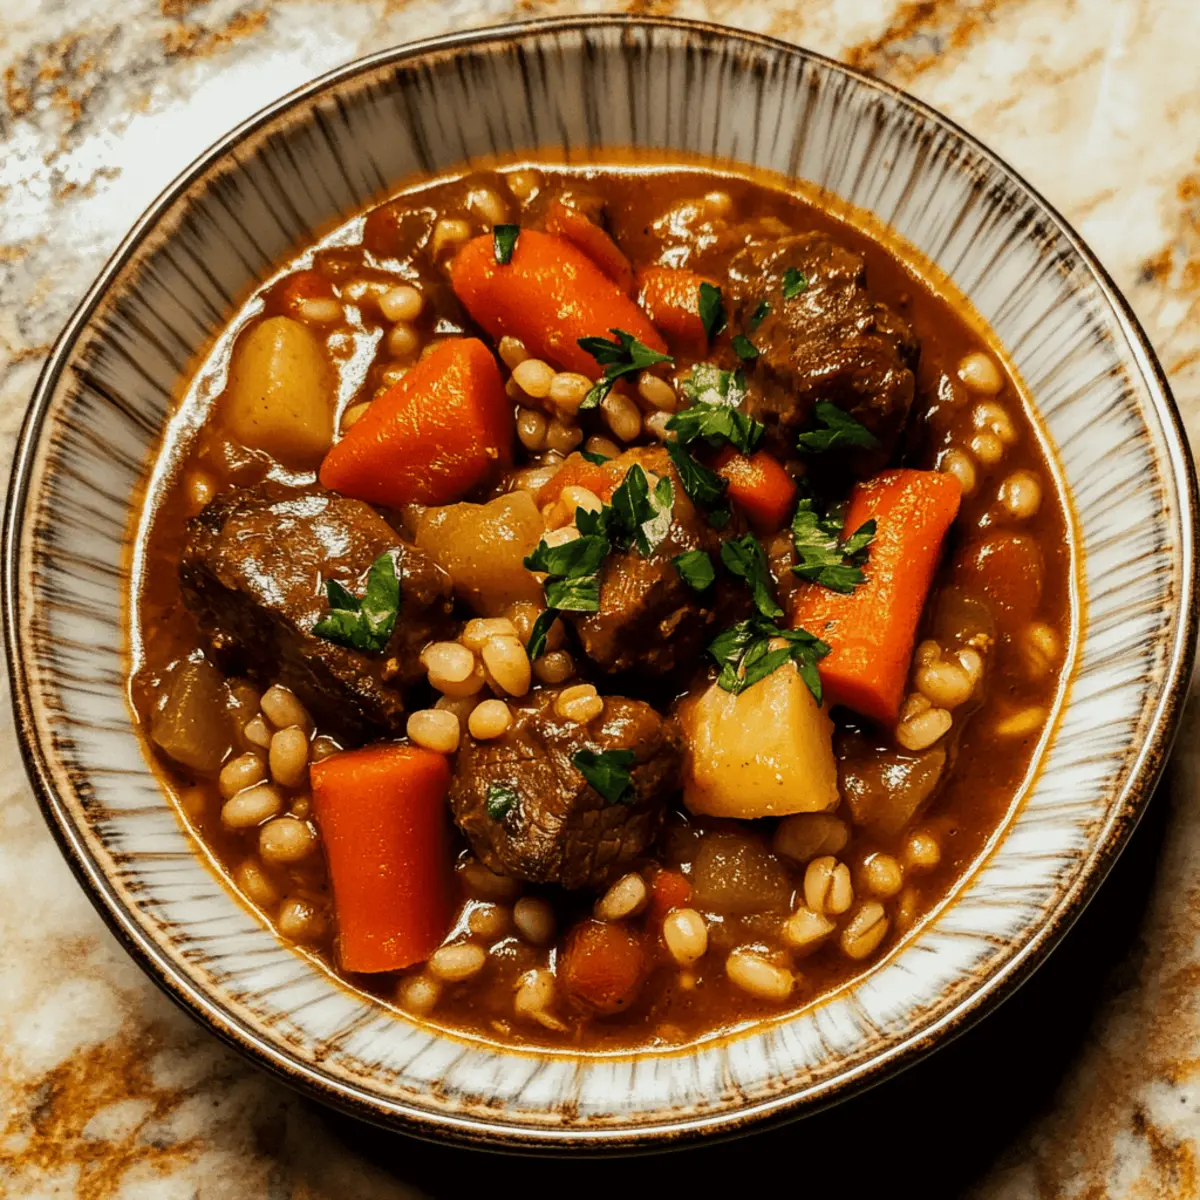
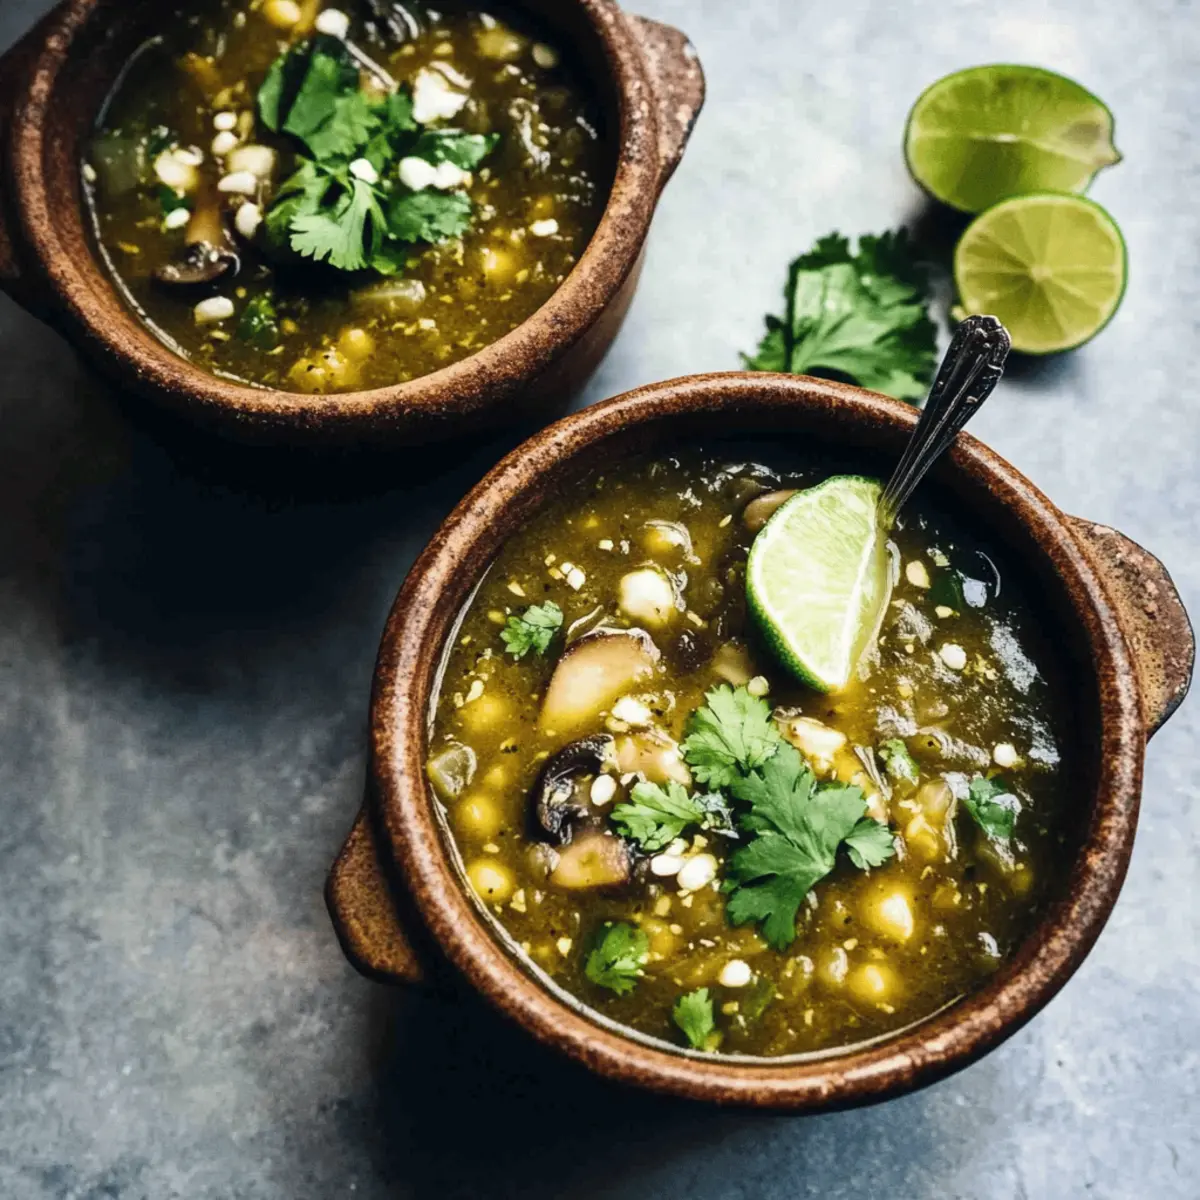
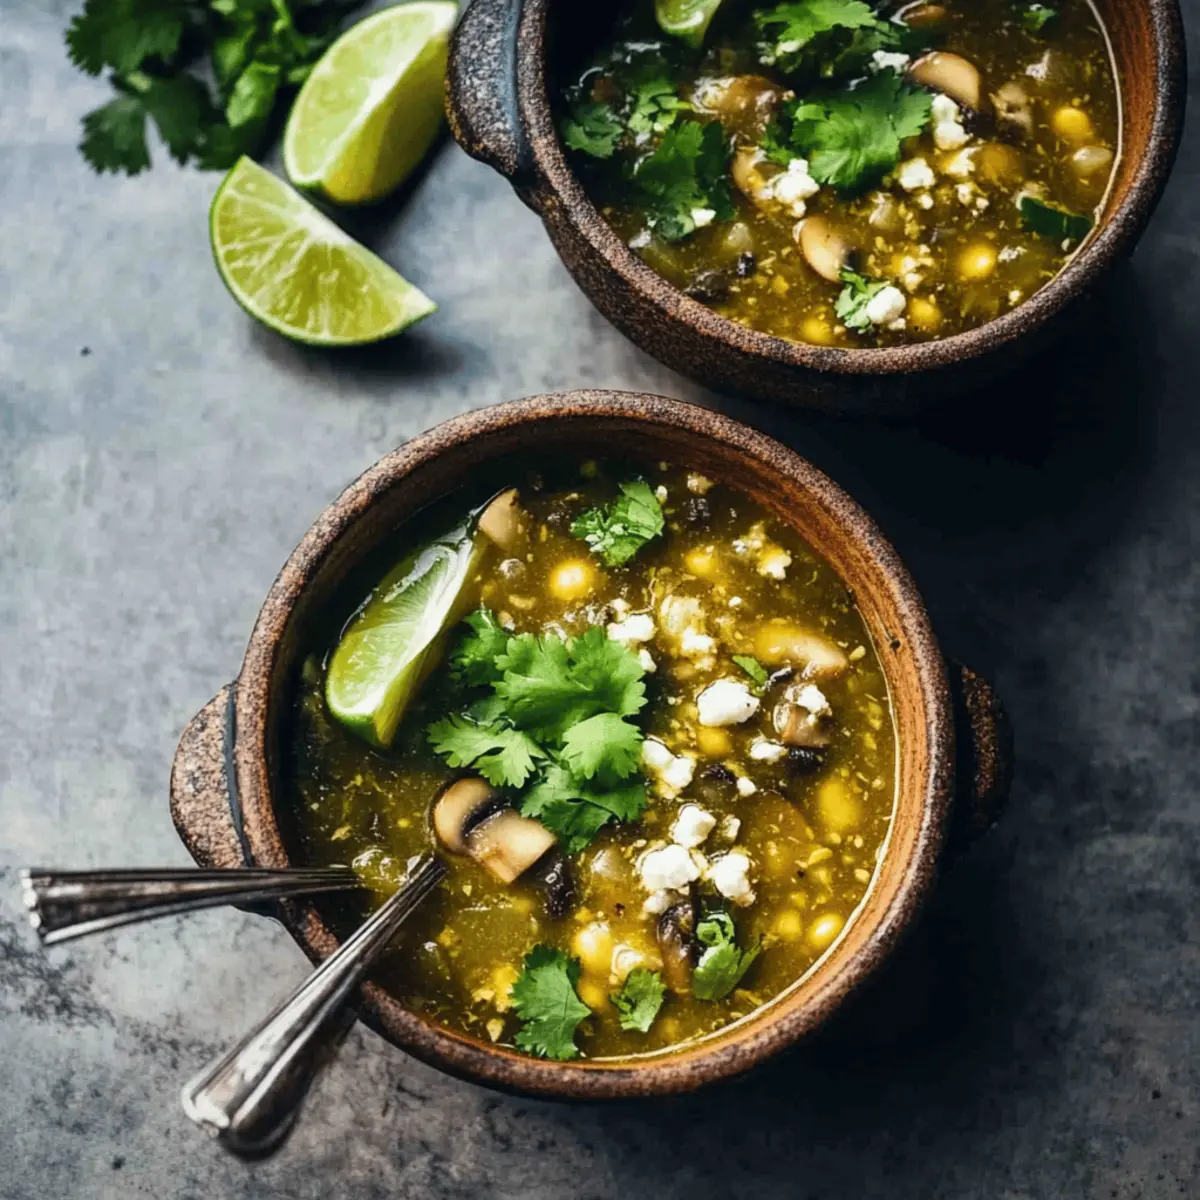
As I stirred the pot, wafts of earthy mushrooms and smoky poblano peppers danced around my kitchen, instantly warming my soul. This Mushroom Poblano Posole Verde captures the heart of Mexican comfort food while embracing a vibrant, vegan-friendly twist. Imagine cozying up with a hearty bowl of this zesty soup, loaded with nutritious hominy and a hit of tomatillo salsa that makes every spoonful a delightful experience. Not only does this recipe promise to be a crowd-pleaser, but it also comes together in no time—perfect for busy weeknights or when you're simply eager to indulge. Whether you enjoy it as is or with creative spice adjustments, I guarantee this dish will soon become a favorite in your home. So, are you ready to fill your kitchen with the irresistible aromas of posole? Let’s dive in!

Why is this Posole Verde a Must-Try?

Bold Flavors: Each bowl of this Mushroom Poblano Posole Verde bursts with the earthy richness of mushrooms and a spicy kick from poblanos, creating a flavor profile that’s both comforting and exciting.
Healthy Choice: Packed with fiber-rich hominy and nutritious bulgur, this soup is not only satisfying but also supports a healthy diet, making it a guilt-free indulgence.
Quick Preparation: Ready in just about 30 minutes, it’s the ideal recipe for busy weeknights when you want something homemade without the fuss.
Customizable Goodness: Feel free to modify the spice level or add your favorite toppings like avocado or sour cream—this dish is all about personal preference! For additional layers of flavor, consider serving it alongside some Grilled Mushrooms Savory that complement the soup perfectly.
Warm & Cozy: The zesty broth combined with the chewy hominy delivers a delightful texture that wraps you in warmth, perfect for chilly days or when cravings hit.
Crowd-Pleasing: Whether you’re serving family or hosting friends, this soup is sure to impress—each hearty spoonful is a testament to the joy of home-cooked meals!

Mushroom Poblano Posole Verde Ingredients

For the Soup
• Mushrooms – Adds umami flavor and texture; you can substitute with hearty vegetables like zucchini for variation.
• Poblano Peppers – Provides gentle heat and depth; choose milder peppers if you prefer a less spicy dish.
• Tomatillo Salsa – Acts as the base liquid and flavor enhancer; use green salsa as an alternative if tomatillos aren't available.
• Broth – Adds richness to the soup; opt for vegetable broth for a vegetarian option.
• Soft White Hominy – Creates a chewy texture that is a hallmark of posole; canned hominy is a convenient substitute.
• Bulgur – Brings a nutty flavor and additional nutrition; you can swap it for quinoa to keep it gluten-free.
• Cilantro – Offers freshness and a burst of aroma; feel free to omit or substitute with parsley for a different taste.
• Lime Juice – Brightens the soup's overall flavor; lemon juice works well as a substitute.

Optional Toppings
• Avocado Slices – Creaminess that balances the soup's spice; add for a delightful finish.
• Sour Cream – Adds richness and smoothness; can be swapped for a vegan option like cashew cream.
• Tortilla Chips – Provides a crunchy contrast; sprinkle some for added texture with each spoonful.

This Mushroom Poblano Posole Verde is destined to become a staple in your kitchen, showcasing the beauty of wholesome, homemade ingredients that anyone can enjoy.

Step‑by‑Step Instructions for Mushroom Poblano Posole Verde

Step 1: Sauté Vegetables
In a large pot, heat 2 tablespoons of olive oil over medium heat. Once hot, add 8 ounces of sliced mushrooms and 2 chopped poblano peppers. Cook for about 5-7 minutes until the mushrooms are golden and the peppers are softened, stirring occasionally. This step infuses the base of your Mushroom Poblano Posole Verde with rich, savory flavors.

Step 2: Add Salsa and Broth
Next, stir in 1 cup of tomatillo salsa and 4 cups of vegetable broth, bringing the mixture to a gentle simmer. Allow it to bubble for about 2-3 minutes, letting the flavors meld together. Watch for steam rising and make sure the broth is well incorporated with the vegetables, creating a fragrant foundation for your soup.

Step 3: Incorporate Hominy and Bulgur
Add 1 can (15 ounces) of drained and rinsed hominy along with 1 cup of bulgur to the pot. Stir well and allow the mixture to simmer for about 20 minutes. You want the bulgur to become tender and the hominy to soften slightly while absorbing all the delicious flavors of the broth in your Mushroom Poblano Posole Verde.

Step 4: Final Touches
Remove the pot from heat and stir in the juice of 1 lime and a handful of freshly chopped cilantro. Let it sit for a few minutes to allow the herbs' freshness to enhance the soup's taste. The vibrant green and zesty aroma mark the final enhancement to your hearty Mushroom Poblano Posole Verde.

Step 5: Serve
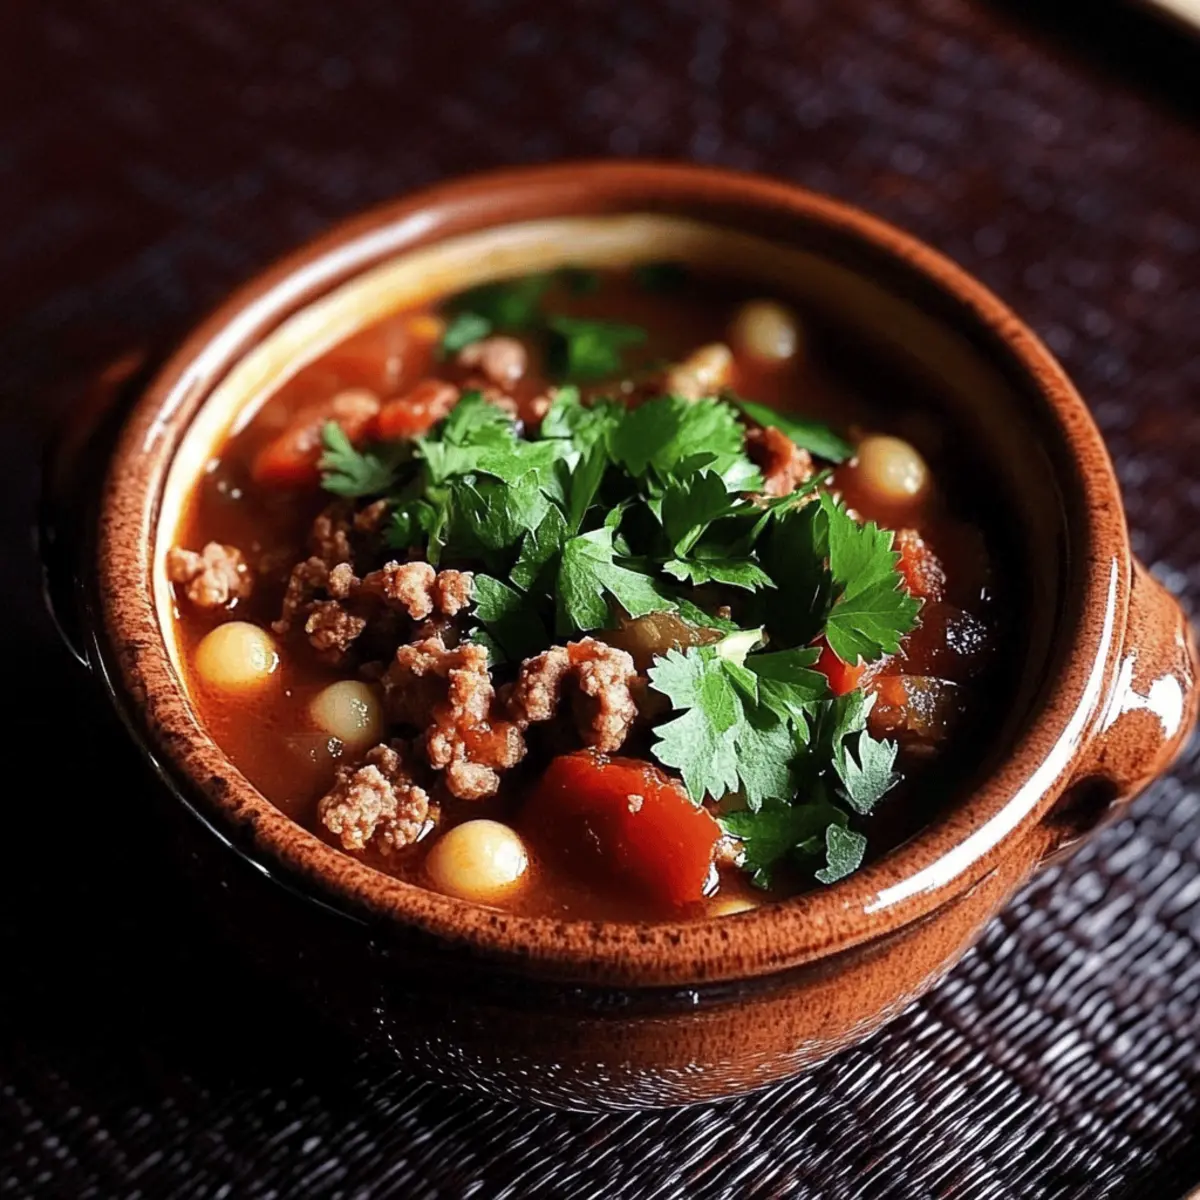
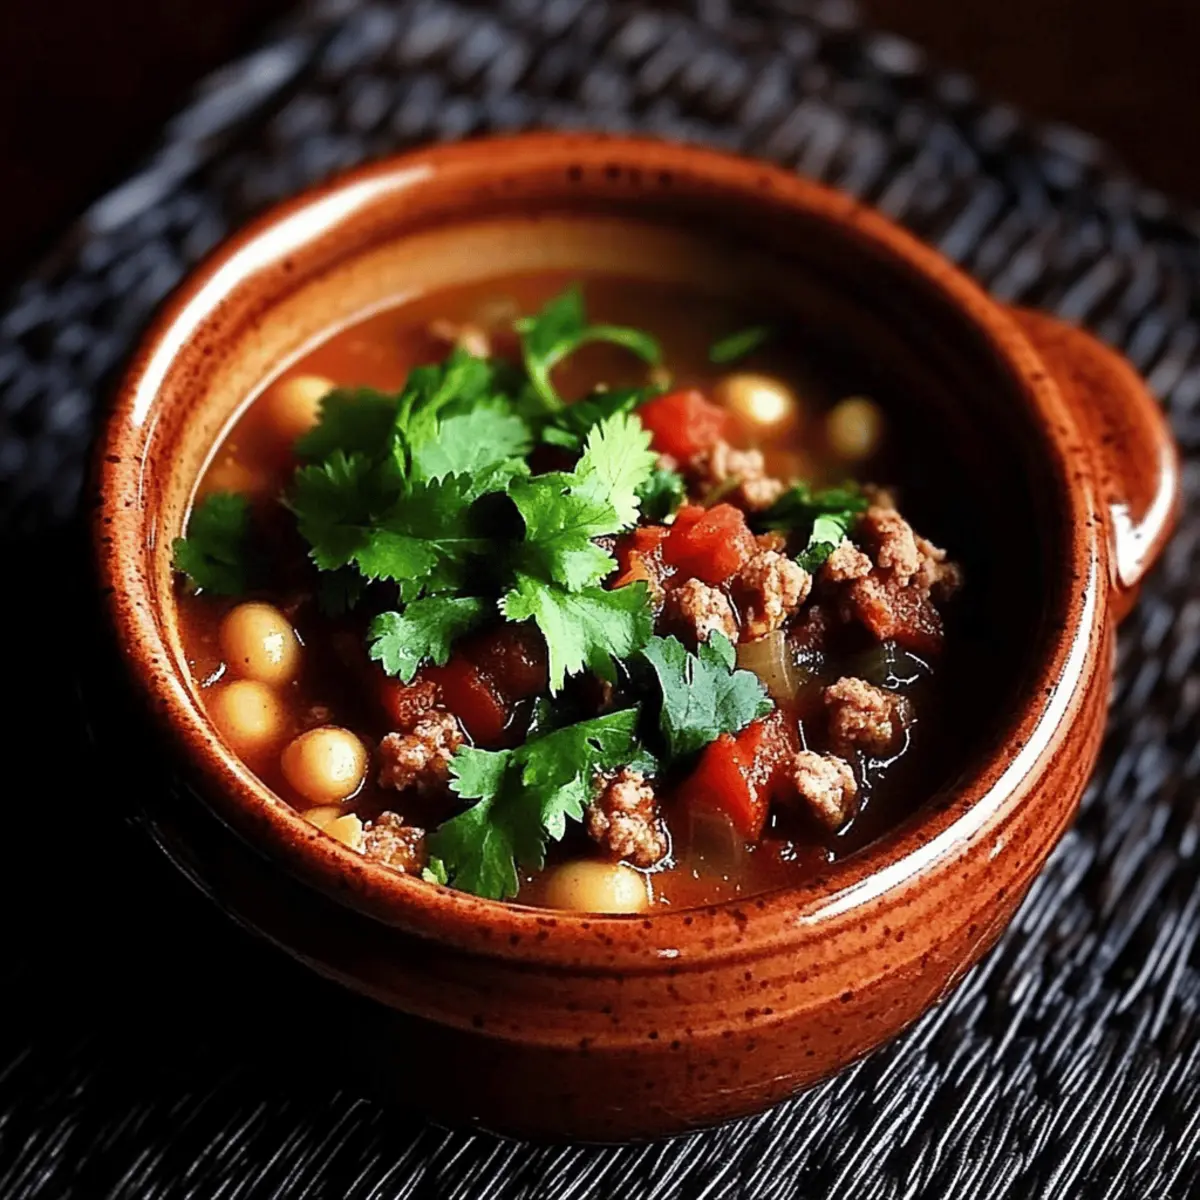
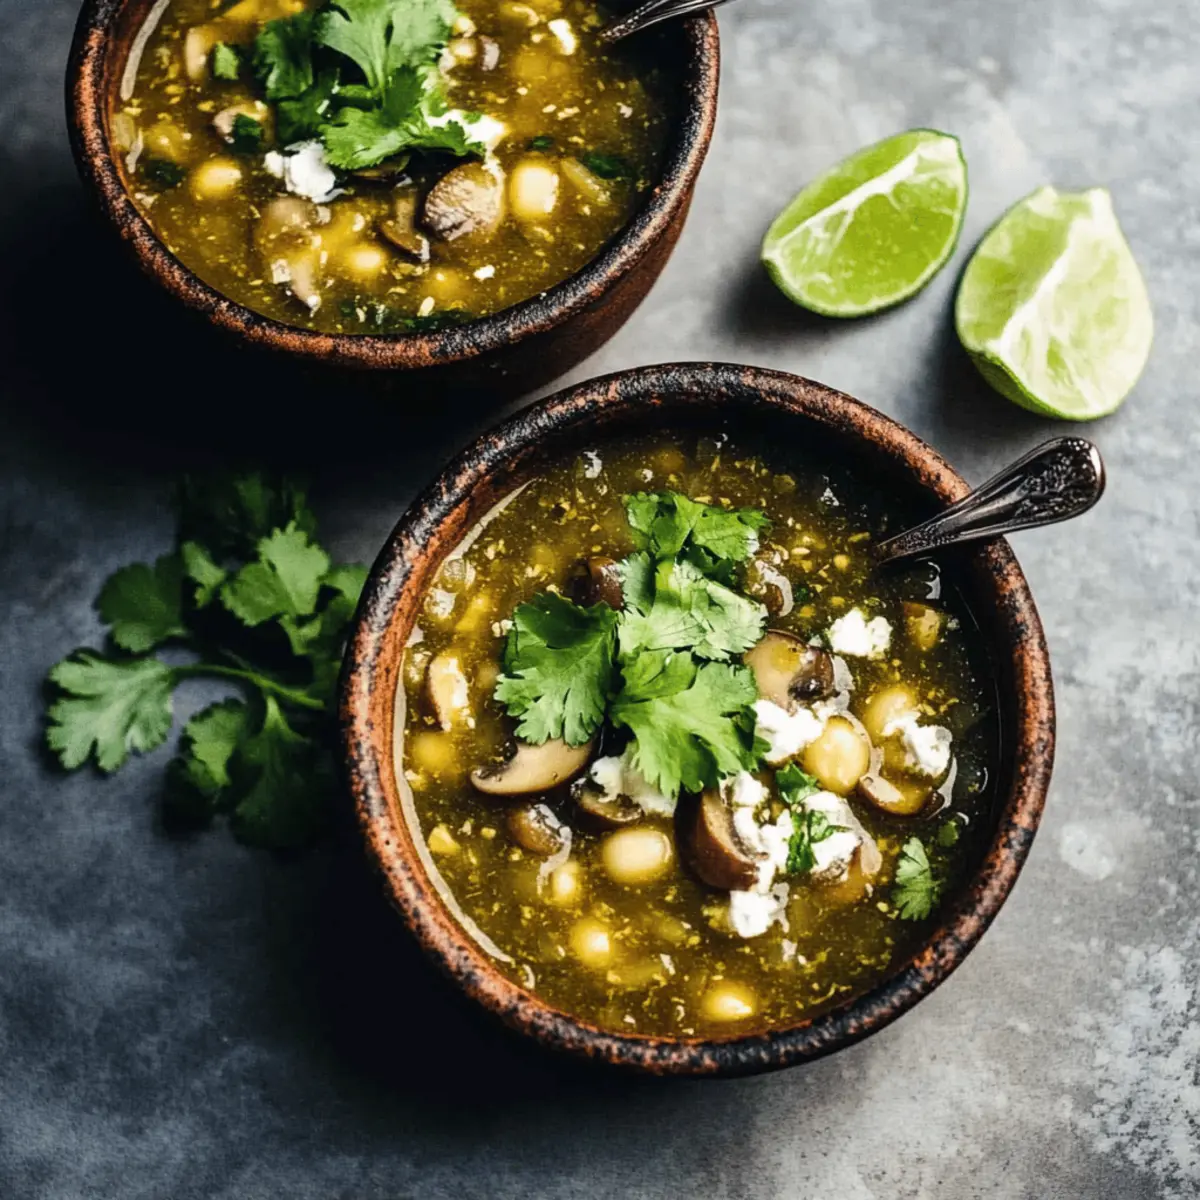
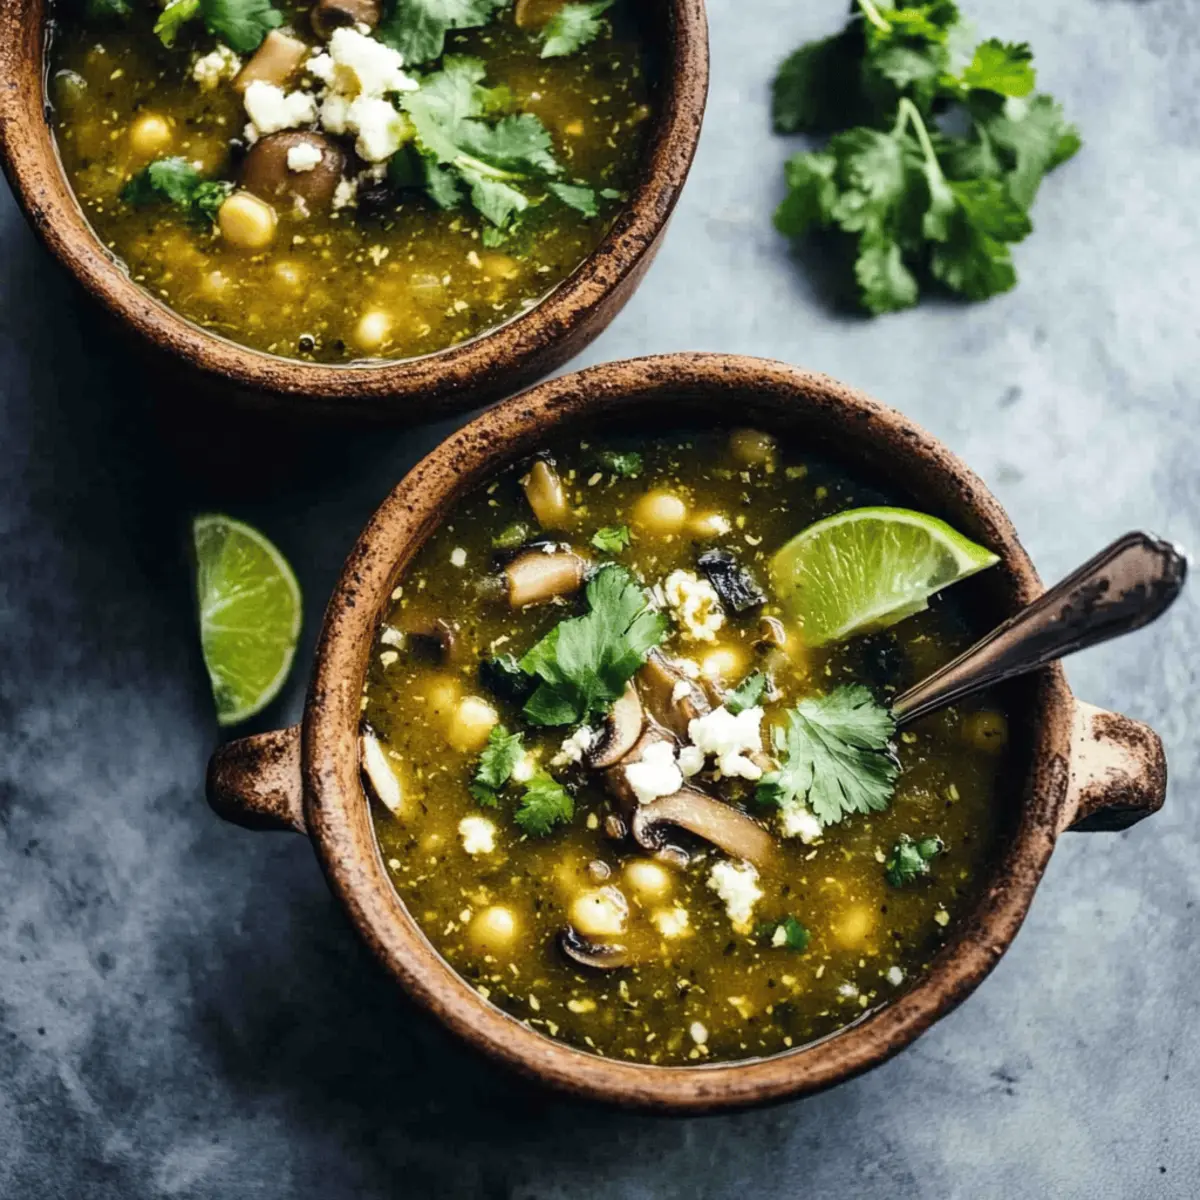
Ladle the soup into bowls and serve hot, garnishing with extra cilantro and lime wedges if desired. For added richness, consider adding toppings like avocado slices or tortilla chips. Each bowl of Mushroom Poblano Posole Verde offers warmth and comfort, making it a delightful meal for any occasion.

Storage Tips for Mushroom Poblano Posole Verde

Fridge: Store leftovers in an airtight container for up to 3 days. Make sure the soup has cooled down before sealing to maintain freshness.

Freezer: This Mushroom Poblano Posole Verde can be frozen for up to 3 months. Portion the soup into freezer-safe containers and label with the date.

Reheating: When ready to enjoy, thaw overnight in the fridge if frozen, and reheat on the stove over low heat, adding extra broth if needed to loosen.

Airtight Containers: Use glass or BPA-free plastic containers with tight-fitting lids to prevent freezer burn and keep flavors intact.

Mushroom Poblano Posole Verde Variations

Feel free to get creative and make this comforting soup your own!

  • Spicier Kick: Add chopped jalapeños or serrano peppers for an extra layer of heat. This variation enhances the warmth and flavor profile beautifully!
  • Creamy Touch: Stir in a splash of coconut milk or cashew cream for a rich, velvety texture that pairs lovely with the zesty broth.
  • Plant-Based Protein: Toss in canned black beans or lentils to boost the protein content while keeping your dish hearty and wholesome.
  • Vegetable Medley: Mix in finely chopped carrots or spinach for added nutrients and color. These veggies will not only enrich the dish but also add a delightful crunch.
  • Thick and Hearty: Blend a portion of the soup for a thicker consistency that delivers robustness in every spoonful. Perfect for those cozy days!
  • Citrusy Twist: Experiment with grapefruit or orange juice instead of lime for a unique refreshing zing that brightens up the entire dish.
  • Savory Additions: Top with your favorite cheese or serve alongside a bowl of Grilled Mushrooms Savory for an extra umami punch.
  • Herb Variations: For a fresh taste, consider adding chopped green onions or dill instead of cilantro. A delightful twist sure to engage your senses!

No matter how you choose to customize this Mushroom Poblano Posole Verde, each variation will transform your bowl into a unique experience that warms the heart and satisfies the palate. Enjoy the journey of flavor exploration!

Expert Tips for Mushroom Poblano Posole Verde

  • Spice Control: Adjust the heat level by removing seeds from the poblanos or using milder varieties for a friendly balance in your Mushroom Poblano Posole Verde.
  • Texture Boost: For a heartier feel, blend a portion of the soup before serving—it creates a thicker consistency that enhances the overall experience.
  • Fresh Herbs: Always add cilantro and lime juice just before serving. This ensures their flavors pop and keep the soup aromatic and fresh!
  • Ingredient Swaps: Don’t hesitate to use canned hominy for convenience or substitute bulgur with quinoa for a gluten-free take on this comfort dish.
  • Serving Suggestions: Elevate your bowl with toppings like creamy avocado, cheese, or a sprinkle of tortilla chips for added richness and contrast!

Make Ahead Options

This Mushroom Poblano Posole Verde is perfect for meal prep, allowing you to savor its rich flavors even on your busiest days! You can prepare the soup base—sauté the mushrooms and poblanos, add the tomatillo salsa, broth, hominy, and bulgur—up to 24 hours in advance. Simply store it in an airtight container in the refrigerator. When you’re ready to serve, reheat the mixture on the stove over medium heat until warmed through, then stir in the lime juice and cilantro just before enjoying. This way, you’ll maintain its delicious taste and texture, delivering a cozy bowl of comfort every time!

What to Serve with Mushroom Poblano Posole Verde

Elevate your dining experience with delightful accompaniments that perfectly complement the vibrant flavors of your posole.

  • Creamy Avocado Slices: Their lush creaminess balances the spicy broth beautifully, creating a harmonious spoonful of flavors.
  • Crispy Tortilla Chips: Enjoy a satisfying crunch that contrasts the soup's texture, adding an exciting element to your meal.
  • Tangy Lime Wedges: A squeeze of fresh lime elevates taste, amplifying the zesty notes in the posole with each bite.
  • Savory Grilled Corn: The sweetness of grilled corn adds a delightful pop of flavor, enhancing the overall complexity of the dish.

Imagine a warm evening with friends, gathering around as you share your Mushroom Poblano Posole Verde alongside these comforting sides.

  • Refreshing Cilantro Salad: Light and herbaceous, this salad brings a refreshing crunch that complements the richness of the posole.
  • Chilled Mexican Beer: Perfect for sipping, a light lager enhances the bold flavors while cooling your palate.
  • Rich Sour Cream or Cashew Cream: For a creamy touch, these toppings offer a soothing contrast to the vibrant spices in the soup.

Each pairing enriches your meal, creating a cozy atmosphere filled with warmth and flavor that everyone will cherish.

Mushroom Poblano Posole Verde Recipe FAQs

What should I look for when selecting mushrooms for this recipe?
Absolutely! Opt for fresh, firm mushrooms without any dark spots or slime. The ideal choice for this Mushroom Poblano Posole Verde is cremini or button mushrooms, as their umami flavor complements the soup beautifully. If you can, try to avoid any mushrooms that appear limp or soggy, as they won’t provide the needed texture for your dish.

How can I store leftover Mushroom Poblano Posole Verde?
You can store any leftovers in an airtight container in the refrigerator for up to 3 days. Make sure the soup has cooled completely before sealing to maintain its quality. If you want to enjoy it later, it can be frozen for up to 3 months. Just portion it into freezer-safe containers, label them with the date, and don't forget to leave some space at the top as the soup will expand when frozen!

What’s the best way to freeze this soup?
To freeze your Mushroom Poblano Posole Verde, first, let it cool down to room temperature. Then, ladle the soup into freezer-safe containers, leaving about an inch of space at the top of each container to allow for expansion. Seal tightly and label with the date for easy identification. When ready to enjoy, simply thaw overnight in the refrigerator and reheat on the stove, adding a splash of broth to restore its creamy goodness if needed.

How can I adjust the spice level in this recipe?
Very! You can easily control the heat by choosing milder poblano peppers or by removing the seeds and membranes from the peppers before cooking, as they contain most of the heat. If you want an extra kick, consider adding a pinch of cayenne pepper or a dash of hot sauce to your Mushroom Poblano Posole Verde while it simmers. Also, partnering it with creamy avocado or sour cream can help balance the spice for those who may be sensitive to heat.

Is this Mushroom Poblano Posole Verde suitable for a vegan diet?
Absolutely! This recipe is entirely plant-based, making it perfect for anyone following a vegan diet. It includes hearty vegetables, beans, and grains to ensure it’s satisfying and nutritious. Just be sure to use vegetable broth and avoid any non-vegan toppings like sour cream or cheese if you wish to keep it vegan-friendly.

Can I add or substitute ingredients in this recipe?
Of course! The beauty of this Mushroom Poblano Posole Verde lies in its versatility. You can substitute bulgur with quinoa for a gluten-free option or add cooked rotisserie chicken for a non-vegetarian version. Feel free to mix in additional vegetables like zucchini or even beans to customize it to your taste. The recipe welcomes creativity, so make it your own!

Mushroom Poblano Posole Verde

Mushroom Poblano Posole Verde: A Cozy Vegan Comfort Bowl

This Mushroom Poblano Posole Verde is a vibrant, vegan-friendly twist on comfort food, bursting with earthy flavors and nutritious ingredients.
Print Recipe Pin Recipe
Prep Time 10 minutes mins
Cook Time 30 minutes mins
Total Time 40 minutes mins
Servings: 4 bowls
Course: Soups
Cuisine: Mexican
Calories: 250
Ingredients Equipment Method Nutrition Notes

Ingredients
  

For the Soup
  • 8 ounces sliced mushrooms Adds umami flavor and texture; can substitute with hearty vegetables like zucchini.
  • 2 chopped poblano peppers Provides gentle heat; choose milder peppers for less spice.
  • 1 cup tomatillo salsa Acts as the base liquid; use green salsa if tomatillos aren't available.
  • 4 cups vegetable broth Adds richness to the soup.
  • 1 can (15 ounces) drained and rinsed hominy Creates a chewy texture.
  • 1 cup bulgur Provides a nutty flavor; can swap for quinoa for gluten-free.
  • 1 bunch fresh cilantro Offers freshness; can substitute with parsley.
  • 1 tablespoon lime juice Brightens the flavor; lemon juice can be used as a substitute.
Optional Toppings
  • 1 avocado slices For creaminess that balances the soup's spice.
  • 1 cup sour cream Adds richness; can be swapped for vegan options.
  • 1 cup tortilla chips Provides a crunchy contrast.

Equipment

  • Large pot

Method
 

Step-by-Step Instructions
  1. In a large pot, heat 2 tablespoons of olive oil over medium heat. Add 8 ounces of sliced mushrooms and 2 chopped poblano peppers, cooking for 5-7 minutes until golden.
  2. Stir in 1 cup of tomatillo salsa and 4 cups of vegetable broth, bringing to a gentle simmer for 2-3 minutes.
  3. Add 1 can of drained and rinsed hominy along with 1 cup of bulgur. Stir well and simmer for 20 minutes.
  4. Remove from heat and stir in the juice of 1 lime and a handful of freshly chopped cilantro. Let it sit for a few minutes.
  5. Ladle the soup into bowls, garnishing with cilantro and lime wedges. Optionally add avocado slices or tortilla chips.

Nutrition

Serving: 1bowlCalories: 250kcalCarbohydrates: 40gProtein: 10gFat: 6gSaturated Fat: 1gPolyunsaturated Fat: 2gMonounsaturated Fat: 3gSodium: 800mgPotassium: 500mgFiber: 10gSugar: 3gVitamin A: 500IUVitamin C: 20mgCalcium: 50mgIron: 2mg

Notes

This Mushroom Poblano Posole Verde showcases the beauty of wholesome, homemade ingredients, making it a staple in any kitchen.

Tried this recipe?

Let us know how it was!

Indulge in Comfort with Smoked Salmon Chowder Tonight

September 1, 2025 by Grace Snow Leave a Comment

As I stirred the pot, the air was filled with the inviting scent of sautéing onions and herbs, drawing me closer to a moment of cozy culinary magic. This Cozy Smoked Salmon Chowder captures everything comforting about home-cooked meals, combining the rich smokiness of salmon with tender vegetables and a creamy broth. Not only is it a delight to the senses, but you'll also find that it comes together in just 30 minutes, making it perfect for busy evenings or unexpected guests. This chowder isn't just a meal; it's a warm embrace in a bowl, ideal for those chilly nights when all you want is a hug from your kitchen. Are you ready to warm up with a cozy bowl of chowder that will have everyone asking for seconds?

Why is Smoked Salmon Chowder a Must-Try?

Comforting warmth: Imagine a bowl filled with creamy goodness and the delightful smokiness of salmon, perfect for chilly nights.
Quick to make: In just 30 minutes, you can whip up this delicious dish without compromising on flavor.
Versatile ingredients: Feel free to substitute veggies or proteins; try shrimp or even crab for an exciting twist!
Crowd-pleaser: Serve it at gatherings, and watch as friends and family rave about your culinary skills.
Perfect pairing: Enjoy with crusty bread or a fresh salad for a complete meal. Dive into this cozy experience, and if you're looking for another quick dish, check out our One Pot Salmon recipe for more delicious ideas!

Smoked Salmon Chowder Ingredients

For the Chowder Base
• Smoked Salmon – Use hot smoked salmon for the best texture; cold smoked can be used but may alter flavor.
• Butter – This adds a rich flavor for sautéing; substitute with olive oil for a lighter version.
• Onion – Yellow or white onion creates an aromatic foundation; avoid red due to its strong taste.
• Carrots – These add sweetness and vibrant color; parsnips or celery can be used as alternatives.
• Celery – Adds crunch and depth; fennel can be a flavorful substitute.
• Thyme – Fresh thyme enhances aroma; dried thyme can be used in smaller amounts if fresh is unavailable.

For the Creamy Texture
• White Wine – Provides depth; if avoiding alcohol, chicken or vegetable broth works beautifully.
• Potatoes – Yukon golds create a creamy consistency; russets can be used but will break down more.
• Cream – Adds richness; half-and-half or vegan cream can substitute for a lighter chowder.
• Milk – Balances the creaminess; whole or 2% is ideal; consider non-dairy milk as an alternative.
• Fish Stock – Enhances seafood flavor; vegetable or chicken broth can be a great swap.

This Smoked Salmon Chowder is not just a meal; it’s a comforting experience waiting to be savored!

Step‑by‑Step Instructions for Smoked Salmon Chowder

Step 1: Sauté Vegetables
In a large pot over medium heat, melt 2 tablespoons of butter until foamy. Add 1 finely chopped onion, 1 diced carrot, and 1 diced celery stalk. Sauté for about 5-7 minutes, stirring regularly, until the vegetables are softened and fragrant. The onions should become translucent, creating a flavorful base for your Smoked Salmon Chowder.

Step 2: Add Wine and Thicken
Pour in 1 cup of white wine and bring to a gentle simmer. Allow the mixture to cook for 3-4 minutes, until the wine has reduced slightly, intensifying the underlying flavors. This step enhances the chowder's depth, creating a beautiful balance with the smokiness of the salmon to come.

Step 3: Incorporate Thyme and Potatoes
Stir in 2 medium Yukon gold potatoes, peeled and diced, along with 1 teaspoon of fresh thyme leaves. Pour in 4 cups of fish stock, stirring to combine all ingredients thoroughly. Increase the heat to bring the chowder to a boil, then reduce it to low heat and simmer for about 15 minutes until the potatoes are tender. They should be easily pierced with a fork when done.

Step 4: Add Cream and Salmon
Lower the heat to medium and stir in 1 cup of heavy cream, followed by 6 ounces of hot smoked salmon, torn into bite-sized pieces. Gently heat through for about 3-5 minutes without boiling, ensuring the chowder remains creamy and smooth. The salmon will warm and meld into the rich broth, contributing to your delightful Smoked Salmon Chowder.

Step 5: Season & Serve
Taste your chowder and adjust the seasoning with salt and freshly ground pepper to your liking before serving. Ladle the piping hot Smoked Salmon Chowder into bowls, garnishing with fresh herbs like dill or parsley if desired. Serve with crusty bread on the side for the perfect accompaniment to this comforting dish.

What to Serve with Smoked Salmon Chowder

Cozy up with flavors that enhance each satisfying spoonful of this delicious chowder, creating a full meal experience.

  • Crusty Bread: Perfect for dipping, crusty bread makes the ideal companion, soaking up the creamy broth and adding satisfying texture.

  • Garlic Bread: Add a fragrant touch with garlic-infused butter on toasted bread, making every bite more delectable alongside the chowder.

  • Garden Salad: A fresh green salad brings a crisp, refreshing contrast, balancing the rich flavors of the chowder beautifully.

  • Roasted Vegetables: Enhance the hearty feel of the meal with some roasted seasonal vegetables, their caramelization adding depth.

  • Herb-Infused Rice: Fluffy rice infused with herbs perfectly complements the chowder's flavors while providing a wholesome base to enjoy.

  • Chardonnay: Enjoy a glass of crisp Chardonnay to enhance the dish’s creaminess and smokiness, creating a harmonious dining experience.

  • Apple Pie: For dessert, a slice of warm apple pie offers a sweet finish to the meal, bringing comforting nostalgia to your dinner table.

Expert Tips for Smoked Salmon Chowder

  • Quality Salmon: Use hot smoked salmon for the best flavor and texture; cold smoked can lead to a less satisfying chowder.
  • Cream Care: Avoid boiling after adding cream to prevent separation; warm it gently for a silky finish to your smoked salmon chowder.
  • Seasoning Savvy: Taste and adjust seasoning at the end, as the saltiness of smoked salmon varies. This ensures perfect flavor balance.
  • Texture Troubles: If using russet potatoes, be aware they may break down more than Yukon golds. Choose wisely for the ideal chowder thickness.
  • Fresh Herbs: Enhance the aroma by using fresh thyme instead of dried when possible; it elevates the dish to a new level of comfort.

Smoked Salmon Chowder Variations

Feel free to elevate your Smoked Salmon Chowder with these creative tweaks that will surprise your taste buds!

  • Seafood Twist: Swap the smoked salmon for shrimp or crab to explore the depths of ocean flavors in your chowder. The change adds a delightful seafood medley that will impress your guests.

  • Veggie Boost: Toss in sweet corn or peas for a hint of natural sweetness. Their bright colors and texture complement the rich chowder beautifully, making it even more appealing.

  • Spicy Kick: Add red pepper flakes or diced jalapeños to inject some heat into your comforting dish. A little spice will warm your soul and elevate the experience!

  • Creamy Vegan Option: Use coconut cream or a nut-based cream alternative to substitute the heavy cream. This keeps it rich while catering to vegan diets, ensuring everyone can enjoy a bowl of comfort.

  • Herb Infusion: Experiment with fresh dill or parsley instead of thyme for a fragrant twist. Their vibrant flavors harmonize with the smoky salmon, creating a refreshing contrast.

  • Bready Bliss: Top your chowder with crispy croutons or even a flaky biscuit instead of bread for a unique texture. It's a delightful way to enjoy your soup while adding a crunchy element to each spoonful.

  • Mushroom Medley: Incorporate sautéed shiitake or cremini mushrooms for an earthy depth in flavor. Their umami richness pairs perfectly with the chowder's creamy aspect.

  • One Pot Inspiration: If you're short on time, try our One Pot Salmon recipe for a quick dinner solution that still brings lots of flavor!

With these variations, you can make your Smoked Salmon Chowder uniquely yours each time you serve it!

Make Ahead Options

These Cozy Smoked Salmon Chowder is a dream come true for meal prep enthusiasts! You can sauté the onions, carrots, and celery up to 24 hours in advance, storing them in an airtight container in the refrigerator. Additionally, chop the potatoes and keep them submerged in water to prevent browning until you're ready to cook. When you're prepared to serve, simply reheat the sautéed vegetables in your pot, add the potatoes and stock, then follow the remaining steps to incorporate cream and salmon. This will ensure you have a flavorful and comforting chowder that tastes just as delicious as when freshly made! Enjoy the time-saving benefits on those busy weeknights!

How to Store and Freeze Smoked Salmon Chowder

Fridge: Store leftovers in an airtight container for up to 3 days. Reheat gently on the stovetop over low heat to keep the creamy texture intact.

Freezer: For longer storage, freeze the chowder in freezer-friendly containers for up to 2 months. Thaw overnight in the fridge before reheating, as freezing may alter the creaminess.

Reheating: When reheating from the fridge or after thawing, do so slowly over low heat, stirring frequently to prevent separation and ensure even warming of the smoked salmon chowder.

Avoid Long Storage: It's best not to freeze the chowder if you've added milk or cream; fully cooked chowders with these ingredients may not retain their texture after freezing.

Smoked Salmon Chowder Recipe FAQs

What type of smoked salmon should I use for the best flavor?
Absolutely! I recommend using hot smoked salmon for your chowder as it provides a rich texture and deep flavor. Cold smoked salmon can work in a pinch, but it may alter the dish's overall texture and finish. If you opt for cold smoked, add it just before serving to avoid overcooking.

How should I store leftover smoked salmon chowder?
You can store your chowder in an airtight container in the refrigerator for up to 3 days. When you're ready to enjoy the leftovers, gently reheat the chowder on the stovetop over low heat. This method ensures that the creamy texture remains intact and doesn't separate, keeping your cozy meal just as comforting as when it was freshly made.

Can I freeze smoked salmon chowder?
Yes, you can freeze it! Pour the cooled chowder into freezer-safe containers and store it for up to 2 months. When you're ready to enjoy it, thaw the chowder overnight in the refrigerator. To reheat, do so gently on the stovetop over low heat, stirring often for even warming. Keep in mind that the creamy elements may slightly change in texture after freezing, so it's best to consume it fresh when possible.

What if my chowder turns out too thick?
Very! If your chowder is thicker than desired, simply stir in some additional fish stock or milk until you reach your preferred consistency. Heat gently while stirring to incorporate the liquid, and adjust the seasoning afterward as needed. Remember, perfecting consistency is key to achieving that dreamy chowder experience!

Are there any dietary considerations I should keep in mind?
Definitely! If cooking for someone with allergies, always check that your smoked salmon and other ingredients do not contain allergens. Substitute dairy with non-dairy alternatives for those who are lactose intolerant, and use vegetable broth instead of fish stock for a vegetarian version. This chowder can be beautifully adapted to fit various dietary needs while still being absolutely delicious!

Smoked Salmon Chowder

Indulge in Comfort with Smoked Salmon Chowder Tonight

This Smoked Salmon Chowder is a warming dish combining rich flavors in just 30 minutes, perfect for cozy evenings.
Print Recipe Pin Recipe
Prep Time 10 minutes mins
Cook Time 20 minutes mins
Total Time 30 minutes mins
Servings: 4 bowls
Course: Soups
Cuisine: Comfort Food
Calories: 350
Ingredients Equipment Method Nutrition Notes

Ingredients
  

Chowder Base
  • 6 ounces hot smoked salmon tear into bite-sized pieces
  • 2 tablespoons butter can substitute with olive oil
  • 1 medium onion finely chopped
  • 1 medium carrot diced
  • 1 stalk celery diced
  • 1 teaspoon fresh thyme or dried in smaller amounts
For Creamy Texture
  • 1 cup white wine can substitute with broth
  • 2 medium Yukon gold potatoes peeled and diced
  • 1 cup heavy cream or half-and-half for lighter option
  • 4 cups fish stock or vegetable/chicken broth

Equipment

  • Large pot

Method
 

Chowder Instructions
  1. Melt butter in a large pot over medium heat. Add onion, carrot, and celery. Sauté for 5-7 minutes until soft and fragrant.
  2. Pour in white wine and bring to a gentle simmer. Cook for 3-4 minutes until reduced slightly.
  3. Add potatoes and thyme; stir in fish stock. Bring to a boil, then simmer for 15 minutes until potatoes are tender.
  4. Stir in heavy cream and hot smoked salmon. Heat through gently for 3-5 minutes without boiling.
  5. Taste and adjust seasoning before serving. Ladle into bowls and garnish with fresh herbs if desired.

Nutrition

Serving: 1bowlCalories: 350kcalCarbohydrates: 30gProtein: 15gFat: 20gSaturated Fat: 12gPolyunsaturated Fat: 1gMonounsaturated Fat: 8gCholesterol: 60mgSodium: 800mgPotassium: 800mgFiber: 4gSugar: 3gVitamin A: 250IUVitamin C: 10mgCalcium: 150mgIron: 2mg

Notes

Serve with crusty bread for a complete meal. Store leftovers in an airtight container for up to 3 days. Reheat gently to maintain texture.

Tried this recipe?

Let us know how it was!

Spicy Sausage Posole: Quick, Hearty Comfort in a Bowl

September 1, 2025 by Grace Snow Leave a Comment

The aroma of sizzling sausage wafts through the kitchen as I toss together a pot of Spicy Sausage Posole. This quick weeknight dinner transforms simple ingredients into a flavorful Mexican delight that warms the soul. With just five main components and ready in 20 minutes, this hearty soup is here to save you from the clutches of last-minute takeout. The savory pork sausage and crunchy hominy blend effortlessly, creating a comforting bowl that’s not only gluten-free but also a guaranteed crowd-pleaser. Whether you’re cooking for family or treating yourself after a long day, this posole is the perfect solution. What special toppings will you choose to elevate your soup tonight?

Why is Spicy Sausage Posole a Must-Try?

Quick and Easy: This recipe comes together in just 20 minutes, perfect for busy weeknights when time is of the essence.

Bursting with Flavor: A combination of savory sausage and zesty taco seasoning gives each bite an irresistible kick.

Hearty Texture: The richness of the hominy adds a unique, satisfying crunch that will leave you wanting more.

Versatile Toppings: Elevate your posole with toppings like sour cream and tortilla chips for added flavor and crunch! You can even customize with Spicy Miso Tuna for a fusion twist.

Crowd-Pleaser: This dish is a sure hit, delightful for everyone at the table, making it an exceptional choice for gatherings or cozy family dinners.

Spicy Sausage Posole Ingredients

For the Soup

  • Ground Pork Sausage – Provides the main protein and savory flavor; swap for turkey sausage for a lighter option.
  • Taco Seasoning – Adds spice and depth; use pre-made or blend cumin, chili powder, and garlic powder for a homemade mix.
  • Fire-Roasted Tomatoes (14 oz cans) – Contributes acidity and sweetness; if unavailable, regular diced tomatoes work just fine.
  • White Hominy (2 1/2 cups) – The key ingredient for that unique posole texture; crushed corn can be a quick substitute.
  • Fresh Cilantro (1/2 cup packed) – Adds a fresh, herbal note; feel free to use parsley if cilantro isn't your favorite.

For the Toppings

  • Sour Cream – Offers a cool, creamy contrast; Greek yogurt can be a healthier alternative.
  • Tortilla Chips – Adds crunch and flavor; potato chips or crushed tortilla strips can be used as a substitution.

Elevate your Spicy Sausage Posole experience by exploring various toppings that can enhance the overall flavor!

Step‑by‑Step Instructions for Spicy Sausage Posole

Step 1: Cook the Sausage
In a large pot, heat over medium-high heat, adding the ground pork sausage. Use a wooden spoon to break it apart as it cooks, about 5-7 minutes, until browned and no longer pink. Drain any excess fat carefully, ensuring a rich, flavorful base for your Spicy Sausage Posole.

Step 2: Add Spices and Tomatoes
Return the pot to the heat, sprinkling in the taco seasoning as you stir for about 1 minute, allowing the spices to bloom. Then, add the fire-roasted tomatoes along with their juices, stirring to combine. Cook for another 2-3 minutes, letting the mixture become aromatic and flavorful.

Step 3: Incorporate the Hominy
Pour in the white hominy and about 2 cups of water into the pot, stirring thoroughly to mix all the ingredients. Bring the soup to a gentle simmer over medium heat, cooking for 10-15 minutes. Keep an eye on it, ensuring the hominy is heated through but still retains its texture, creating the perfect consistency for your posole.

Step 4: Add Fresh Herbs
Just before serving, stir in the fresh cilantro to infuse your Spicy Sausage Posole with a burst of color and flavor. Allow it to heat through for an additional 1-2 minutes. The vibrant greens will brighten your dish and enhance its overall freshness, setting the stage for a delightful meal.

Step 5: Serve and Top
Ladle the hot posole into bowls, ensuring each serving has a hearty amount of sausage and hominy. Top generously with a dollop of sour cream and a handful of crunchy tortilla chips for added texture and flavor. Serve immediately, allowing everyone to enjoy their own customized bowl of comfort!

Spicy Sausage Posole Variations

Customize your Spicy Sausage Posole to match your cravings or dietary needs with these delightful twists!

  • Vegetarian: Replace sausage with black beans or lentils for a hearty plant-based version. This maintains the satisfying texture while still being deliciously filling!

  • Spicy Kick: Add diced jalapeños or a dash of hot sauce for an extra layer of heat. It transforms the soup into a fiery delight that spice lovers crave.

  • Gluten-Free: Ensure all ingredients, including taco seasoning, are certified gluten-free. This way, everyone can enjoy this comforting dish without concern!

  • Creamy Twist: Swap sour cream for avocado crema or a dollop of Greek yogurt. This addition brings a unique creaminess and delicious health boost to your bowl.

  • Different Proteins: Try swapping ground pork sausage for chicken or turkey sausage for a lighter option. The flavors will still shine, making it a tasty alternative!

  • Mix Up the Herbs: If cilantro isn’t your favorite, use fresh parsley or green onions instead. Each herb adds its own unique flavor profile to your posole!

  • Topping Variety: Experiment with toppings! Diced radishes, crumbled queso fresco, or even pickled onions add wonderful flavor and crunch. Consider a twist with Spicy Miso Tuna for an unexpected flavor journey!

  • Different Types of Hominy: Don’t have white hominy? Use yellow or even canned corn for a different texture while maintaining that comforting essence of posole. Enjoy the variations and create your perfect bowl!

Expert Tips for Spicy Sausage Posole

  • Drain the Sausage: Make sure to drain excess fat after cooking the sausage. This prevents a greasy soup and ensures a cleaner taste.

  • Watch the Simmer: Keep an eye on the soup while it simmers; cook just enough to heat through without mushy hominy. You want that unique texture!

  • Adjust the Spice: Don’t hesitate to tweak the amount of taco seasoning to suit your taste. Start with less and add more for a personalized kick in your Spicy Sausage Posole.

  • Use Fresh Herbs: Stir in cilantro just before serving. This preserves its vibrant color and fresh flavor, enhancing your soup beautifully.

  • Experiment with Toppings: Get creative with toppings beyond sour cream and tortilla chips. Sliced avocado or jalapeños can give your posole a unique twist!

How to Store and Freeze Spicy Sausage Posole

  • Fridge: Store your Spicy Sausage Posole in an airtight container for up to 3 days. Make sure it cools down to room temperature before sealing to preserve freshness.

  • Freezer: For longer storage, freeze the posole in freezer-safe containers for up to 1 month. Portioning it out helps with easy reheating later.

  • Reheating: When ready to enjoy, reheat the soup gently on the stove. Add a splash of water to help loosen the posole and restore its original texture.

  • Thawing: If frozen, thaw in the refrigerator overnight for the best results before reheating, ensuring that it maintains its delicious flavor and consistency.

What to Serve with Spicy Sausage Posole?

Creating the perfect meal around your Spicy Sausage Posole elevates your dining experience while tantalizing your taste buds.

  • Warm Corn Tortillas: Perfectly soft and slightly smoky, they complement the soup beautifully, allowing for delightful scooping and a satisfying contrast.
  • Avocado Salad: Fresh and creamy, with a hint of lime, this salad provides a refreshing balance to the spicy depths of the posole.
  • Rice and Beans: A simple side of cilantro-lime rice with black beans adds heartiness and additional protein while enhancing the Mexican theme.
  • Mexican Street Corn: The sweetness of grilled corn topped with chili and lime brings out the bold flavors of the soup, creating an irresistible fusion.

Pairing your Spicy Sausage Posole with these delicious options transforms your meal into a vibrant celebration of flavors. Let your taste buds dance!

Make Ahead Options

These Spicy Sausage Posole ingredients are perfect for meal prep, allowing you to enjoy hearty, comforting soup even on the busiest nights! You can cook the ground pork sausage and mix in the taco seasoning up to 24 hours ahead; simply refrigerate the mixture in an airtight container. Furthermore, you can also have the hominy and fire-roasted tomatoes combined in another container, ready to toss in. To maintain the quality of your posole, store components separately to prevent sogginess. When you're ready to serve, just reheat the sausage mixture in the pot, then add the hominy and tomatoes, simmer for 10-15 minutes, and finish with fresh cilantro. This way, you'll have a delightful dinner with minimal effort!

Spicy Sausage Posole Recipe FAQs

How do I choose ripe tomatoes for this recipe?
Absolutely! When selecting tomatoes, look for firm ones that are slightly tender to the touch. They should have a rich red color without dark spots. Avoid any that seem mushy or have blemishes. If you opt for canned fire-roasted tomatoes, just ensure they are from a trusted brand for the best flavor.

What’s the best way to store leftover Spicy Sausage Posole?
You can store your Spicy Sausage Posole in an airtight container in the refrigerator for up to 3 days. Make sure to let it cool to room temperature before sealing. This helps maintain freshness and flavor!

Can I freeze Spicy Sausage Posole? How?
Certainly! To freeze your posole, transfer it into freezer-safe containers. Make sure to leave some space at the top, as the soup will expand when frozen. It can be stored in the freezer for up to 1 month. When you’re ready to enjoy it, simply thaw it in the refrigerator overnight, then reheat it gently on the stove with a splash of water to rejuvenate its texture.

What if my posole turns out too spicy?
Very easy to fix! If you find the spice level too much, you can dilute it. Simply add some low-sodium chicken broth or water to soften the heat. Mixing in a dollop of sour cream when serving can also help tame the spice while adding a creamy texture!

Are there any dietary considerations for this recipe?
Good question! This recipe is naturally gluten-free, making it suitable for those with gluten sensitivities. However, if you’re serving it to pets, avoid any toppings like sour cream, which can upset their stomachs. You can also make it vegetarian by swapping the sausage with plant-based options or using beans or lentils, which I often recommend for a delicious alternative!

How long should I simmer the posole?
For the perfect texture, let the posole simmer for about 10-15 minutes. This duration will ensure the hominy is warmed through but maintains a pleasant bite. Just keep an eye on it, stirring occasionally to prevent any sticking at the bottom. This step is crucial for achieving that comforting, hearty consistency you're after!

Spicy Sausage Posole

Spicy Sausage Posole: Quick, Hearty Comfort in a Bowl

Experience the warmth of Spicy Sausage Posole, a flavorful Mexican soup ready in 20 minutes.
Print Recipe Pin Recipe
Prep Time 10 minutes mins
Cook Time 10 minutes mins
Total Time 20 minutes mins
Servings: 4 bowls
Course: Soups
Cuisine: Mexican
Calories: 350
Ingredients Equipment Method Nutrition Notes

Ingredients
  

For the Soup
  • 1 pound Ground Pork Sausage can substitute with turkey sausage
  • 2 tablespoons Taco Seasoning homemade blend possible
  • 2 cans (14 oz) Fire-Roasted Tomatoes can substitute with regular diced tomatoes
  • 2.5 cups White Hominy crushed corn can be a quick substitute
  • 0.5 cups Fresh Cilantro can use parsley if not a fan of cilantro
For the Toppings
  • 1 cup Sour Cream Greek yogurt can be a healthier alternative
  • 2 cups Tortilla Chips can substitute with potato chips or crushed tortilla strips

Equipment

  • Large pot

Method
 

Step-by-Step Instructions
  1. In a large pot, heat over medium-high heat, adding the ground pork sausage. Use a wooden spoon to break it apart as it cooks, about 5-7 minutes, until browned and no longer pink. Drain any excess fat carefully.
  2. Return the pot to the heat, sprinkling in the taco seasoning as you stir for about 1 minute. Then, add the fire-roasted tomatoes along with their juices, stirring to combine. Cook for another 2-3 minutes.
  3. Pour in the white hominy and about 2 cups of water into the pot, stirring thoroughly to mix all the ingredients. Bring the soup to a gentle simmer over medium heat, cooking for 10-15 minutes.
  4. Just before serving, stir in the fresh cilantro to infuse your Spicy Sausage Posole with a burst of color and flavor. Allow it to heat through for an additional 1-2 minutes.
  5. Ladle the hot posole into bowls. Top generously with a dollop of sour cream and a handful of crunchy tortilla chips for added texture and flavor. Serve immediately.

Nutrition

Serving: 1bowlCalories: 350kcalCarbohydrates: 30gProtein: 20gFat: 15gSaturated Fat: 5gPolyunsaturated Fat: 2gMonounsaturated Fat: 8gCholesterol: 50mgSodium: 900mgPotassium: 600mgFiber: 5gSugar: 4gVitamin A: 800IUVitamin C: 10mgCalcium: 80mgIron: 2mg

Notes

Ensure to drain excess fat after cooking the sausage. Adjust taco seasoning to taste and consider experimenting with toppings for variety.

Tried this recipe?

Let us know how it was!

Comforting Carrot-Ginger Soup for Cozy Nights In

August 28, 2025 by Grace Snow Leave a Comment

As the autumn leaves begin to swirl outside, I find myself dreaming of the warming comfort that only a bowl of cozy carrot-ginger soup can offer. With its vibrant orange hue and the delightful aroma of roasted vegetables mingling with zesty ginger, this soup is like a gentle hug on a chilly day. Not only is this Carrot-Ginger Soup easy to prepare, making it a hassle-free choice for busy evenings, but it's also a healthy, satisfying option for anyone looking to embrace home-cooked goodness over fast food. With a few simple ingredients, you can create a nourishing dish that’s packed with flavor and perfect for sharing around the table. Are you ready to discover the secrets to making this heartwarming soup? Let’s dive in!

Why Is This Soup So Irresistible?

Comforting, this Carrot-Ginger Soup is the ultimate hug-in-a-bowl, ideal for cool nights. Easy to make, it requires minimal prep—perfect for busy weeknights or leisurely weekends. Healthy too, packed with vibrant veggies and zesty ginger, it’s a nourishing alternative to takeout. Adaptable, feel free to swap sweet potato for butternut squash or toss in sautéed spinach for extra greens. Plus, serve it with a side of crusty bread or a fresh salad to make it a complete meal! This soup really can transform any night into a cozy dining experience.

Carrot-Ginger Soup Ingredients

For the Soup
• Carrots – Provide sweetness and vibrant color; use peeled and chopped for even cooking.
• Sweet Potato – Adds creaminess and extra sweetness; can be substituted with butternut squash.
• Parsnip (Optional) – Contributes earthiness; omit if preferred.
• Onion – Enhances flavor and sweetness when roasted; use yellow or white onion for best results.
• Olive Oil – Essential for roasting—helps to caramelize vegetables; can substitute with coconut oil for added flavor.
• Fresh Ginger – Provides a zingy kick and warmth; grate freshly for optimal flavor.
• Vegetable Broth – Acts as the soup base and enhances flavor; opt for low-sodium broth if desired.
• Salt & Pepper – Crucial for seasoning; adjust to taste.
• Optional Spices (Cumin or Turmeric) – Offers warmth and depth; add according to your preference.

For Serving
• Coconut Milk – Adds creaminess and richness; can be substituted with Greek yogurt for a non-vegan option.
• Chopped Parsley or Cilantro – Fresh herbs for garnish—adds brightness to your bowl.
• Toasted Pumpkin Seeds – Provides a crunchy texture and nutty flavor as a delightful topping.

Dive into these ingredients and prepare to create a bowl of Carrot-Ginger Soup that’s sure to warm you from the inside out!

Step‑by‑Step Instructions for Cozy Carrot-Ginger Soup with Roasted Vegetables

Step 1: Roast the Veggies
Preheat your oven to 425°F (220°C). In a large mixing bowl, toss the peeled and chopped carrots, sweet potatoes, parsnips, and onion with olive oil, salt, and pepper until well-coated. Spread the mixture out evenly on a baking sheet and roast for 25-30 minutes, or until the vegetables are tender and golden, stirring halfway through for even browning.

Step 2: Sauté Ginger
While the vegetables are roasting, heat a tablespoon of olive oil in a soup pot over medium heat. Add the freshly grated ginger and sauté for 1-2 minutes, stirring frequently until fragrant. The aroma will fill your kitchen, setting the stage for the delightful flavors to come in your Carrot-Ginger Soup.

Step 3: Simmer
Once the veggies are roasted, transfer them into the soup pot with the sautéed ginger. Pour in enough vegetable broth to cover the vegetables, typically around 4 cups, and bring the mixture to a gentle simmer. Allow it to cook for about 10 minutes, stirring occasionally, to let the flavors meld beautifully together. If desired, stir in optional spices like cumin or turmeric for an added depth.

Step 4: Blend
Remove the soup from heat and use an immersion blender to blend the mixture until it's smooth and creamy. If you’re using a stand blender, allow the soup to cool slightly before blending in batches. Adjust the soup’s thickness by adding more broth if needed, until you reach a velvety consistency that’s just right for your warm bowl of Carrot-Ginger Soup.

Step 5: Season & Serve
Taste the soup and adjust the seasoning with salt and pepper as needed. Ladle the steaming soup into bowls and drizzle with coconut milk for an added layer of creaminess. Garnish with freshly chopped parsley or cilantro and sprinkle toasted pumpkin seeds on top for a delightful crunch, making your cozy Carrot-Ginger Soup the perfect dish for sharing on a chilly evening.

What to Serve with Cozy Carrot-Ginger Soup with Roasted Vegetables

As the warm aroma of carrot-ginger soup wafts through your kitchen, you might be wondering what delightful sides can enhance this comforting dish.

  • Crusty Bread:
    Freshly baked, crusty bread is perfect for dipping and adds a delightful texture contrast to the smooth soup.

  • Green Salad:
    A crisp green salad with a zesty vinaigrette brightens the palate, balancing the rich flavors of the soup beautifully.

  • Savory Grilled Cheese:
    The gooey comfort of a grilled cheese sandwich pairs perfectly, making each bite a nostalgic experience.

  • Roasted Brussels Sprouts:
    Their earthy flavor and crispy edges create a delicious complement, enhancing the overall warmth of the meal.

  • Stuffed Sweet Potatoes:
    Filled with black beans and topped with avocado, stuffed sweet potatoes add heartiness and nutrients to your dinner.

  • Herb-Infused Rice:
    Fluffy rice with fresh herbs provides a light, fragrant base that harmonizes nicely with the soup's flavors.

  • Chilled Cucumber Soup:
    For a refreshing touch, a chilled cucumber soup offers a bright contrast that excites the taste buds and enhances the meal.

  • Sparkling Water with Lemon:
    A refreshing drink option, sparkling water with a squeeze of lemon cleanses the palate, complementing the zing of ginger.

  • Butter Pecan Pie:
    For dessert, a slice of buttery pecan pie serves as a sweet ending, perfectly balancing the comforting notes of the soup.

How to Store and Freeze Carrot-Ginger Soup

Fridge: Store your Carrot-Ginger Soup in an airtight container for up to 2 days. This way, you can enjoy the deepening flavors of the soup as they meld together.

Freezer: For longer storage, freeze the soup in airtight containers or freezer bags for up to 3 months. Leave some space for expansion as it freezes, and label with the date for easy tracking.

Reheating: When you're ready to enjoy your soup, thaw overnight in the fridge and reheat on the stovetop over low heat, stirring occasionally. If the soup thickens, add a splash of broth until it reaches your desired consistency.

Carrot-Ginger Soup Variations & Substitutions

Feel free to explore these delightful twists that will elevate your Carrot-Ginger Soup, adding personal flair and flavor!

  • Sweet Potato Swap: Substitute sweet potatoes with butternut squash for a different, but equally sweet flavor profile. This lovely swap maintains that creamy texture while offering a unique sweetness.

  • Add a Twist: Toss in an apple along with the other veggies while roasting. The gradual caramelization brings an extra layer of sweetness, perfect for those chilly fall days, making every bite even more delightful!

  • Spice it Up: Introduce some heat by adding chopped jalapeño or a sprinkle of cayenne pepper. Just a pinch can turn up the zing, creating a warm, comforting bowl that dances on your palate.

  • Protein Boost: For a heartier meal, top your soup with chickpeas or white beans after blending. This not only adds protein but gives a lovely contrast in texture—making each spoonful even more satisfying.

  • Coconut Cream Alternate: If you're looking for a dairy option, replace coconut milk with Greek yogurt for a tangy twist. The creaminess holds beautifully, while creating a delightful richness, a perfect balance to the ginger's warmth.

  • Herb Infusion: Add fresh spinach or kale during the simmering phase. It enhances both nutritional value and color, making your Carrot-Ginger Soup visually striking and extra nourishing!

  • Nutty Flavor: Toasted pumpkin seeds are fantastic, but consider pecans or walnuts for a different crunch. Chop them finely and sprinkle on top—offering an earthy and nutty flavor that complements the sweetness of the soup beautifully.

  • Zesty Citrus: A squeeze of lemon or orange juice before serving can brighten up the flavors. It provides a refreshing contrast that rounds out the heartiness of the dish, making your cozy creation even more delightful.

For more comforting soup recipes, check out our Lemon Chicken Soup for a zesty flavor feast or try the Zuppa Toscana Soup for a hearty option! Enjoy experimenting with your soup!

Expert Tips for Carrot-Ginger Soup

  • Roast for Flavor: Roasting vegetables until they have crispy edges enhances the sweetness and depth of flavor in your Carrot-Ginger Soup.

  • Scrape the Pan: Always scrape the bottom of the roasting pan into the soup; those caramelized bits are full of wonderful flavor that will elevate your dish.

  • Cool Before Blending: If using a stand blender, let the soup cool slightly before blending to avoid hot splatters. An immersion blender keeps things easy and safe!

  • Taste & Adjust: Season your soup after blending; flavors can develop and deepen as it sits, so tasting is key before serving.

  • Spice It Up: Don’t hesitate to experiment with spices! A pinch of cayenne or a dash of cumin can add an exciting kick to your comforting Carrot-Ginger Soup.

Make Ahead Options

Making this Carrot-Ginger Soup ahead of time is a wonderful way to save yourself some precious moments during busy weeknights! You can roast the vegetables and store them in the fridge for up to 3 days. Just allow them to cool completely before placing them in an airtight container to maintain their flavor and freshness. Alternatively, you can prepare the soup entirely and refrigerate it for up to 2 days, allowing the flavors to meld beautifully. When you're ready to enjoy your soup, simply reheat it on the stovetop over medium heat, stirring occasionally, and adjust the consistency with additional broth if needed for that velvety finish!

Carrot-Ginger Soup Recipe FAQs

How do I choose the best carrots for this soup?
Absolutely! Look for vibrant orange carrots that are firm without any soft spots or visible blemishes. Ideally, choose medium-sized carrots as they tend to have a sweeter flavor. If you notice dark spots or wrinkling, those are signs of age—grab those fresh ones instead!

What’s the best way to store leftover Carrot-Ginger Soup?
Very! Store your Carrot-Ginger Soup in an airtight container in the fridge for up to 2 days. The flavors often get even better as they meld. Just be sure to let it cool to room temperature before sealing it. If you want to keep it longer, freezing is your best option!

Can I freeze Carrot-Ginger Soup? If so, how?
Absolutely, freezing is a great option! Pour the cooled soup into airtight containers or freezer bags, leaving some space at the top for expansion. Seal tightly, label with the date, and freeze for up to 3 months. When you’re ready to enjoy, thaw it in the refrigerator overnight and reheat on the stove for a cozy treat!

What if my soup is too thick after blending?
Not a problem at all! If you find your Carrot-Ginger Soup is too thick, simply add a bit of vegetable broth or water to loosen it up. Start with a small amount and stir, continuing to add liquid until you reach your desired consistency. This way, you can enjoy a beautifully silky soup!

Is this soup safe for those with allergies?
Definitely! This Carrot-Ginger Soup is inherently gluten-free and vegetarian. However, always check ingredient labels, especially for vegetable broth or any store-bought items. If anyone in your household has allergies, feel free to substitute ingredients as needed—like using Greek yogurt instead of coconut milk or skipping the peanuts if desired.

Can I use other vegetables in this soup?
Very! You can absolutely customize your soup. Consider adding parsnips for earthiness or even some sweet apple for a hint of sweetness. Don’t hesitate to get creative with seasonal vegetables—like squash or zucchini—just keep in mind the roasting time may vary!

Carrot-Ginger Soup

Comforting Carrot-Ginger Soup for Cozy Nights In

This Carrot-Ginger Soup is a warming, healthy dish perfect for cozy nights in.
Print Recipe Pin Recipe
Prep Time 15 minutes mins
Cook Time 40 minutes mins
Total Time 55 minutes mins
Servings: 4 bowls
Course: Soups
Cuisine: American
Calories: 220
Ingredients Equipment Method Nutrition Notes

Ingredients
  

For the Soup
  • 4 cups chopped Carrots peeled and chopped
  • 2 cups Sweet Potato peeled and chopped
  • 1 cup Parsnip optional, contributes earthiness
  • 1 medium Onion yellow or white for best results
  • 2 tbsp Olive Oil or coconut oil for added flavor
  • 2 tbsp Fresh Ginger grated for optimal flavor
  • 4 cups Vegetable Broth low-sodium preferred
  • to taste Salt adjust seasoning as needed
  • to taste Pepper adjust seasoning as needed
  • to taste Optional Spices (Cumin or Turmeric) add according to preference
For Serving
  • 1 cup Coconut Milk or Greek yogurt for a non-vegan option
  • 1/4 cup Chopped Parsley or Cilantro for garnish
  • 1/4 cup Toasted Pumpkin Seeds for topping

Equipment

  • Mixing Bowl
  • Baking Sheet
  • Soup Pot
  • Immersion blender

Method
 

Step-by-Step Instructions
  1. Preheat your oven to 425°F (220°C). Toss carrots, sweet potatoes, parsnips, and onion with olive oil, salt, and pepper. Spread on a baking sheet and roast for 25-30 minutes.
  2. Heat a tablespoon of olive oil in a soup pot over medium heat. Add grated ginger and sauté for 1-2 minutes until fragrant.
  3. Transfer roasted veggies to the pot, pour in enough vegetable broth to cover, and simmer for about 10 minutes.
  4. Blend the mixture until smooth using an immersion blender. Adjust thickness by adding more broth if needed.
  5. Taste and adjust seasoning. Serve hot, drizzled with coconut milk, garnished with parsley or cilantro and pumpkin seeds.

Nutrition

Serving: 1bowlCalories: 220kcalCarbohydrates: 40gProtein: 4gFat: 8gSaturated Fat: 3gPolyunsaturated Fat: 2gMonounsaturated Fat: 3gSodium: 400mgPotassium: 600mgFiber: 6gSugar: 10gVitamin A: 18000IUVitamin C: 25mgCalcium: 70mgIron: 1.5mg

Notes

Roasting enhances flavor; always scrape the pan for caramelized bits. Taste and adjust seasoning before serving.

Tried this recipe?

Let us know how it was!

Hearty Potato-Leek Soup with Mini Pierogi for Cozy Nights

August 28, 2025 by Grace Snow Leave a Comment

As I stood stirring a bubbling pot of potato-leek soup, the savory aroma filled the kitchen, conjuring memories of cozy family dinners. This Creamy Potato-Leek Soup with Mini Pierogi is the epitome of comfort food, perfect for those chilly evenings when you crave something warm and satisfying. It brings together a silky, rich blend of tender potatoes and leeks, elevated by the crunch of crispy mini pierogi that add a delightful texture. Not only is this dish quick enough to whip up on a busy weeknight, but it’s also an impressive crowd-pleaser that will leave your guests asking for seconds. Are you ready to dive into this heartwarming bowl of goodness? Let’s get cooking!

Why is this soup a must-try?

Comforting warmth: This Creamy Potato-Leek Soup feels like a hug in a bowl, perfect for any chilly night.
Flavor explosion: The heavenly combination of leeks and garlic creates an aromatic base, while crispy mini pierogi add depth and texture.
Quick preparation: With easy steps, you’ll have this delicious meal ready in no time, making it an excellent choice for busy weeknights.
Customizable goodness: Switch up your pierogi fillings for unique flavors or toss in some spinach for added nutrition, just like in my Asparagus Soup Healthy.
Crowd-pleaser: Whether for a cozy family meal or entertaining guests, this soup will impress everyone at the table.

Potato-Leek Soup with Mini Pierogi Ingredients

For the Soup

  • Butter – Adds richness and flavor; use olive oil for a dairy-free option.
  • Leeks – Provide a mild, sweet onion flavor; thoroughly clean to remove grit between layers.
  • Garlic – Adds depth and aroma; optionally use garlic powder if fresh is unavailable.
  • Yukon Gold Potatoes – Create creaminess while holding their shape; substitute with Russet potatoes for a fluffier texture.
  • Low-Sodium Broth – Forms the soup base without overwhelming saltiness; use vegetable broth for a vegetarian option.
  • Heavy Cream – Introduces a luscious finish; substitute with whole milk or coconut cream for a lighter option.
  • Salt & Pepper – Essential for seasoning to taste; adjust based on broth salinity.

For the Mini Pierogi

  • Mini Frozen Pierogi – Adds texture and heartiness; can replace with frozen gnocchi or tater tots in a pinch.
  • Bacon – Provides savory depth and crunch; use crispy shallots as a vegetarian alternative.

This hearty Potato-Leek Soup with Mini Pierogi is not only comforting but full of depth and flavor!

Step‑by‑Step Instructions for Potato-Leek Soup with Mini Pierogi

Step 1: Sauté leeks
In a large pot, melt 2 tablespoons of butter over medium heat. Add 2 chopped leeks along with a pinch of salt, stirring often for about 5 minutes until they become softened and translucent. Introduce 2 minced garlic cloves, cooking for an additional minute until fragrant, which will lay a flavorful foundation for your creamy Potato-Leek Soup.

Step 2: Simmer potatoes
Next, add 4 cups of chopped Yukon Gold potatoes and 6 cups of low-sodium broth to the pot. Increase the heat to high to bring it to a rolling boil. Once boiling, reduce the heat to a gentle simmer, covering the pot and letting it cook for 15-20 minutes, or until the potatoes are fork-tender and easily break apart, enriching the soup's texture.

Step 3: Blend soup
Once the potatoes are tender, carefully remove the pot from the heat and allow it to cool slightly for about 5 minutes to prevent splattering. Using an immersion blender or a regular blender, puree the soup until it reaches a smooth consistency. Stir in 1 cup of heavy cream, adjusting the seasoning with salt and pepper to taste, ensuring the flavors of your Potato-Leek Soup harmonize beautifully.

Step 4: Cook pierogi
While the soup is blending, prepare the mini pierogi. In a separate skillet, heat 2 tablespoons of bacon fat (or butter) over medium heat. Add the mini frozen pierogi and cook for about 4-5 minutes, turning them occasionally until they are golden brown and crispy on the outside, perfectly complementing the velvety soup.

Step 5: Serve
To present your Potato-Leek Soup with Mini Pierogi, ladle the creamy soup into deep bowls. Top generously with the crisp fried pierogi, a sprinkle of crumbled bacon bits, and freshly chopped chives. For an extra indulgent touch, add a dollop of sour cream on top, transforming this dish into a comforting meal that warms the heart and soul.

Make Ahead Options

Preparing this Creamy Potato-Leek Soup with Mini Pierogi ahead of time is a game-changer for busy weeknights! You can make the soup base and refrigerate it for up to 3 days. Simply sauté the leeks and garlic, simmer the potatoes in broth, and blend the mixture until smooth—store it in an airtight container. For optimal flavor, hold off on adding the cream; incorporate it just before serving to maintain the soup's luscious texture. The mini pierogi can be cooked fresh, keeping their crispy texture intact. When you're ready to enjoy, reheat the soup gently on the stove, then top it with the freshly pan-fried pierogi for a delightful, comforting meal that tastes just as delicious as when it was first made.

Potato-Leek Soup with Mini Pierogi Variations

Feel free to explore these delightful twists and substitutions that can make your creamy potato-leek soup even more exciting!

  • Dairy-Free: Substitute heavy cream with coconut cream for a rich, vegan-friendly option that adds a hint of tropical flavor.
  • Herb-Infused: Stir in fresh thyme or dill for a fragrant touch; these herbs beautifully enhance the earthy flavors of the leeks.
  • Extra Crunch: Top with crispy fried onions in place of bacon bits for a satisfying crunch without the meat.
  • Savory Additions: Incorporate sautéed mushrooms or fresh spinach into the soup for an extra nutritional boost and unexpected depth.
  • Spicy Kick: Add a pinch of red pepper flakes to the soup for a warming, spicy twist that brings some heat to your cozy meal.
  • Cheesy Delight: Sprinkle grated Parmesan or smoked Gouda into the soup just before serving for an indulgent, creamy finish that melts beautifully.
  • Thicker Texture: Mash some of the potatoes instead of blending them to create a chunkier soup that offers a hearty bite.
  • Pierogi Variations: Experiment with fillings such as sweet potato, cheese, or sauerkraut for a unique take on the traditional mini pierogi.

For more inspiration, check out my recipe for Zuppa Toscana Soup or try adding some delicious components from Santa Soup Savory. Embrace your creativity!

How to Store and Freeze Potato-Leek Soup with Mini Pierogi

  • Room Temperature: Let the soup cool completely before storing it at room temperature for up to 2 hours to avoid bacterial growth.
  • Fridge: Store leftover Potato-Leek Soup in an airtight container in the fridge for up to 3 days; reheat on the stove over low heat for the best texture.
  • Freezer: Freeze the soup for up to 3 months in a freezer-safe container. Omit the cream before freezing; stir it in during reheating for a fresh taste.
  • Reheating: To reheat, warm the soup gently on the stove or in the microwave, adding cream if desired, and stir well to combine.

Expert Tips for Potato-Leek Soup

  • Sautéing Leeks: Start with low heat to prevent burning and develop sweetness; a pinch of salt helps soften them faster.
  • Blending Safety: Allow the soup to cool slightly before blending to avoid splattering hot soup everywhere.
  • Texture Matters: For a creamier soup, strain it through a fine-mesh sieve after blending to remove any lumps—silky smoothness makes all the difference!
  • Cooking Pierogi: If using frozen mini pierogi, do not overcrowd the pan; this ensures they crisp up nicely rather than steam.
  • Storage Tip: This Potato-Leek Soup freezes well, but skip adding cream until you reheat it to maintain the best flavor and texture.

What to Serve with Creamy Potato-Leek Soup with Crispy Mini Pierogi

Looking to round out your meal with delightful sides? Here are some perfect pairings that will elevate your dining experience.

  • Garlic Breadsticks:
    Warm, buttery, and aromatic, these breadsticks add a satisfying crunch to balance your creamy soup. Perfect for dipping!

  • Crisp Side Salad:
    A refreshing mix of greens with a tangy vinaigrette complements the richness of the soup, adding a vibrant pop of flavor.

  • Roasted Vegetables:
    Caramelized, tender veggies like carrots and Brussels sprouts bring earthy sweetness to the table and harmonize beautifully with the soup's flavors.

  • Herbed Rice Pilaf:
    Fluffy rice seasoned with fresh herbs provides a delightful texture contrast, soaking up the delicious broth with each bite.

  • Bacon-Wrapped Asparagus:
    This savory, crunchy side pairs exceptionally well with the smoky flavors of the pierogi, adding an elegant touch to your meal.

  • Chilled White Wine:
    A chilled glass of crisp sauvignon blanc or chardonnay complements the creamy soup, enhancing the overall culinary experience with its refreshing notes.

  • Dessert Option:
    End the meal with a light fruit sorbet, cleansing the palate after the rich soup and leaving a delightful, refreshing finish.

Each of these pairings will not only round out your dining experience but also create memorable moments around your table. Enjoy!

Potato-Leek Soup with Mini Pierogi Recipe FAQs

How do I choose the best leeks for my soup?
Absolutely! Look for leeks that are firm to the touch and have a vibrant green color, as these indicate freshness. Avoid leeks with wilting or dark spots, as they may be past their prime. When cleaning, slice them lengthwise to thoroughly rinse away any grit that hides between the layers.

How should I store leftover Potato-Leek Soup?
Very simply! Allow the soup to cool completely, then transfer it to an airtight container and refrigerate for up to 3 days. Reheat on the stove over low heat, stirring often to maintain its creamy texture. Avoid high heat settings to prevent it from separating.

Can I freeze Potato-Leek Soup?
Absolutely! To freeze, pour the cooled soup into freezer-safe containers, leaving some space at the top for expansion. For the best flavor, omit the heavy cream when freezing; you can add that in during reheating. It will keep well for up to 3 months! Just thaw overnight in the fridge before reheating.

What should I do if my soup is too thick?
If your Potato-Leek Soup turns out thicker than desired, no worries! You can easily adjust the consistency by stirring in more broth or water, a little at a time, until you reach your preferred smoothness. Just remember to taste and adjust the seasoning afterward, as you might dilute the flavors.

Is this soup safe for my pet?
It's best to avoid sharing any soup with your pet, especially if it contains ingredients like onions, which are toxic to dogs and cats. Always check the ingredients and consult your veterinarian before introducing new foods to your pet's diet.

What if I have a dairy allergy — can I still enjoy this soup?
Absolutely! You can easily make the Potato-Leek Soup dairy-free. Just substitute heavy cream with coconut cream or a non-dairy milk like almond or cashew milk. Use olive oil instead of butter, and check that your broth is also free from dairy products to keep it safe for your dietary needs.

Potato-Leek Soup with Mini Pierogi

Hearty Potato-Leek Soup with Mini Pierogi for Cozy Nights

This Potato-Leek Soup with Mini Pierogi is perfect for chilly nights, offering a warm and comforting experience.
Print Recipe Pin Recipe
Prep Time 10 minutes mins
Cook Time 30 minutes mins
Cooling Time 5 minutes mins
Total Time 45 minutes mins
Servings: 4 bowls
Course: Soups
Cuisine: American
Calories: 450
Ingredients Equipment Method Nutrition Notes

Ingredients
  

For the Soup
  • 2 tablespoons Butter Use olive oil for a dairy-free option.
  • 2 pieces Leeks Thoroughly clean to remove grit.
  • 2 cloves Garlic Optionally use garlic powder if fresh is unavailable.
  • 4 cups Yukon Gold Potatoes Substitute with Russet potatoes for fluffier texture.
  • 6 cups Low-Sodium Broth Use vegetable broth for a vegetarian option.
  • 1 cup Heavy Cream Substitute with whole milk or coconut cream for a lighter option.
  • to taste Salt
  • to taste Pepper
For the Mini Pierogi
  • 1 package Mini Frozen Pierogi Can replace with frozen gnocchi or tater tots.
  • 2 tablespoons Bacon Use crispy shallots as vegetarian alternative.

Equipment

  • Large pot
  • Skillet
  • Immersion blender

Method
 

Step-by-Step Instructions
  1. Melt 2 tablespoons of butter in a large pot over medium heat. Add 2 chopped leeks and a pinch of salt, stirring often for 5 minutes until softened. Add 2 minced garlic cloves, cooking for an additional minute.
  2. Add 4 cups of chopped Yukon Gold potatoes and 6 cups of low-sodium broth. Bring to a boil, then reduce heat to simmer and cover for 15-20 minutes.
  3. Once potatoes are tender, carefully remove from heat and cool for 5 minutes. Blend the soup until smooth, then stir in 1 cup of heavy cream and season with salt and pepper.
  4. In a skillet, heat 2 tablespoons of bacon fat over medium heat. Cook mini frozen pierogi for 4-5 minutes until golden and crispy.
  5. Ladle soup into bowls, top with fried pierogi, crumbled bacon, and chopped chives. Optionally add a dollop of sour cream.

Nutrition

Serving: 1bowlCalories: 450kcalCarbohydrates: 50gProtein: 12gFat: 22gSaturated Fat: 12gPolyunsaturated Fat: 1gMonounsaturated Fat: 8gCholesterol: 70mgSodium: 800mgPotassium: 800mgFiber: 6gSugar: 4gVitamin A: 600IUVitamin C: 15mgCalcium: 100mgIron: 2mg

Notes

This soup is customizable. Add different fillings to your pierogi or some spinach for added nutrition.

Tried this recipe?

Let us know how it was!

Savor the Warmth of Ginger-Scallion Chicken Soup Tonight

August 27, 2025 by Grace Snow Leave a Comment

“Did you hear that? A pot of bubbling broth, fragrant with ginger and scallions, is the perfect antidote to a hectic day.” That’s exactly how I felt when I first created this Quick Ginger-Scallion Chicken Soup, a recipe that transformed my busy weeknights. Utilizing rotisserie chicken makes this dish not just quick but also wonderfully nourishing—ideal for lunch, dinner, or even brunch. The punchy ginger paired with fresh scallions brings a magical balance of comfort and energy to your bowl. Plus, it’s a gluten-free option that fits perfectly into a healthy lifestyle without sacrificing flavor. Are you ready to cozy up to a steaming bowl of deliciousness? Let’s dive into this heartwarming recipe you’ll want to make over and over again!

Why is this soup your new favorite?

Quick and Easy: This Ginger-Scallion Chicken Soup comes together in minutes, making it perfect for those weeknights when you're short on time.

Healthy and Nourishing: Using rotisserie chicken not only speeds up the process but also packs in protein, making it a satisfying meal.

Flavor Explosion: The zesty ginger combined with scallions offers a fresh taste that invigorates your palate, turning an ordinary soup into something extraordinary.

Versatile Recipe: Feel free to customize with your favorite veggies or swap in rice noodles for a gluten-free option. You can even toss in leftover turkey for a delightful twist!

Crowd-Pleasing Comfort: Whether served at family dinner or a cozy gathering with friends, this soup is sure to impress everyone seated at your table. For another comforting option, check out my delicious Crock Pot Chicken.

Ginger-Scallion Chicken Soup Ingredients

For the Soup
• Rotisserie Chicken – Provides protein and flavor; can substitute with homemade cooked chicken for a fresher taste.
• Neutral Oil (1 tablespoon) – Used for sautéing the vegetables and to prevent sticking; can use olive oil or sunflower oil.
• Yellow Onion (1, diced) – Adds sweetness and depth; substitute with shallots for a milder flavor.
• Carrots (3, sliced) – Offers sweetness and texture; can replace with peas or bell peppers if desired.
• Celery (3 ribs, diced) – Contributes crunch and aroma; can omit if not available.
• Minced Ginger (1 tablespoon) – Key source of spiciness and warmth; fresh ginger is recommended, but ground ginger can be used in a pinch.
• Thai Chili Peppers (1-2, optional) – Adds heat; omit if you prefer a milder soup or substitute with red pepper flakes.
• Scallions (10, minced, white and green parts kept separate) – Provides freshness and a mild onion flavor; green onions can be used as a substitute.
• Chicken Broth (6 cups) – Main liquid used, enriching the soup; use low-sodium for less salt or vegetable broth for a vegetarian version.
• Frozen Ramen Noodles (16 ounces) – Quick to cook and adds heartiness; substitute with soba or udon noodles as desired.
• Sesame Oil (4 teaspoons, divided) – Adds a nutty flavor; can use additional olive oil for a lighter taste.
• Sesame Seeds (2 teaspoons) – Garnish that adds texture; can be omitted or replaced with chopped peanuts for crunch.
• Salt – Enhances flavor; adjust to taste or use soy sauce for added umami.

Feel excited about crafting this Ginger-Scallion Chicken Soup? Each ingredient plays a vital role in delivering that comforting yet energizing flavor you’ll adore!

Step‑by‑Step Instructions for Ginger-Scallion Chicken Soup

Step 1: Prepare Chicken
Start by shredding the meat from the rotisserie chicken into bite-sized pieces, discarding the carcass. This quick step ensures you have tender chicken ready to be added to your Ginger-Scallion Chicken Soup. Set the shredded chicken aside while you prepare the vegetables, making the cooking process smoother and faster.

Step 2: Cook Vegetables
In a large pot, heat the neutral oil over medium heat until shimmering. Add the diced onion, sliced carrots, and diced celery. Sauté the vegetables for about 3-4 minutes until they soften and the onion turns translucent. Season with a pinch of salt to enhance their natural sweetness, creating a flavorful base for your soup.

Step 3: Add Aroma
Stir in the minced ginger, optional Thai chili peppers, and the white parts of the scallions. Cook for an additional minute, allowing the aromatic ingredients to release their enticing fragrance. This step elevates your Ginger-Scallion Chicken Soup with a vibrant burst of flavor that will have your kitchen smelling amazing!

Step 4: Combine Broth and Chicken
Pour in the chicken broth and add the shredded chicken to the pot. Increase the heat to bring the mixture to a boil, then reduce it to a simmer. Allow the soup to gently simmer for 30 minutes, stirring occasionally and tasting to adjust the seasoning. This simmering time helps meld the flavors beautifully.

Step 5: Cook Noodles
While the soup simmers, cook the frozen ramen noodles in a separate pot according to the package instructions. Once cooked, drain and rinse the noodles under cold water to wash away excess starch. Divide the noodles among four serving bowls, ready for the delicious soup to be ladled over them.

Step 6: Finish Soup
Stir half of the minced scallion greens and 2 teaspoons of sesame oil into the simmering soup. Let the soup cook for an additional 5 minutes, allowing the scallions to wilt slightly and impart their fresh, mild flavor. This finishing touch brings the Ginger-Scallion Chicken Soup to life, making it comforting and satisfying.

Step 7: Prepare Garnish
In a small bowl, combine the remaining scallion greens with the last 2 teaspoons of sesame oil and a pinch of salt. This simple garnish adds a delightful crunch and enhances the dish’s presentation, making your Ginger-Scallion Chicken Soup not only delicious but visually appealing as well.

Step 8: Serve
Ladle the flavorful soup over the noodles in each bowl. Garnish with the scallion mixture and additional chili if desired for an extra kick. Your Ginger-Scallion Chicken Soup is now ready to be enjoyed, promising a heartwarming meal that is sure to please everyone at your table!

Ginger-Scallion Chicken Soup Variations

Feel free to elevate your culinary creativity with these delightful twists and swaps for the Ginger-Scallion Chicken Soup!

  • Dairy-Free: Omit any dairy-based garnishes and replace with coconut milk for a creamy texture.
  • Gluten-Free Noodles: Swap ramen for rice noodles or quinoa to keep the dish gluten-free without sacrificing heartiness.
  • Extra Veggie Power: Toss in more vegetables like bok choy or spinach, adding a colorful nutrient boost to your soup.
  • Protein Alternatives: Use leftover turkey or tofu for a hearty protein variation that still brings that comforting essence. Each option offers its unique flavor profile and texture!
  • Heat Level: Adjust the spice by using milder bell peppers instead of chili peppers, or act as a heat hero by adding more Thai chilies or sriracha.
  • Savory Depth: Enhance the umami flavor by adding a splash of soy sauce or a dollop of miso paste during the simmering process.
  • Citrus Zest: Refresh your soup by adding a squeeze of lime or lemon juice just before serving for a bright finish.
  • Spice Blend: Introduce garlic or a dash of curry powder for an exotic spin that will tantalize your taste buds.

Experimenting with these variations is a fun way to discover new favorites! If you also enjoy vibrant chicken recipes, why not try my Honey Garlic Chicken Thighs or dive into the flavors of Chipotle Lime Chicken? Explore, savor, and enjoy your soup adventure!

Tips for the Best Ginger-Scallion Chicken Soup

Finely Mince: Ensure your vegetables, especially ginger and scallions, are minced finely to speed up cooking and enhance flavor.

Watch the Salt: When adding chicken broth, taste first before seasoning. Many broths are already salty, so adjust with caution.

Noodle Timing: Cook ramen noodles separately to avoid mushiness; rinse them to remove excess starch and keep a delightful texture in the soup.

Customize Wisely: Feel free to add extra veggies, but keep their cooking times in mind for a balanced, evenly cooked Ginger-Scallion Chicken Soup.

Leftover Magic: Use leftover chicken, turkey, or even tofu for an effortless switch, ensuring your soup remains a comforting staple in your home!

How to Store and Freeze Ginger-Scallion Chicken Soup

Fridge: Store leftovers in an airtight container in the refrigerator for up to 3 days. This allows you to enjoy the warm, comforting soup again while maintaining its flavorful profile.

Freezer: For longer storage, freeze the soup in individual portions in airtight containers or freezer bags for up to 3 months. Just make sure to leave some space at the top for expansion during freezing.

Reheating: When you're ready to enjoy your Ginger-Scallion Chicken Soup, thaw it overnight in the fridge or use the microwave. Gently reheat on the stovetop over low heat, stirring occasionally until warmed through.

Noodle Storage: If you’ve added noodles to your soup, consider storing the noodles separately. This prevents them from becoming mushy after freezing and allows for better texture upon reheating.

What to Serve with Quick Ginger-Scallion Chicken Soup

A warm bowl of soup is just the beginning; let’s explore side dishes that elevate your meal experience.

  • Crusty Bread: Perfect for dipping, this bread adds a satisfying crunch and complements the soup's richness.
  • Simple Green Salad: A fresh salad with crisp greens and a light vinaigrette balances the hearty flavors of the soup.
  • Garlic Toast: The buttery, garlic-infused toast enhances the comforting elements of the soup while providing a flavorful crunch.
  • Steamed Broccoli: Adding this vibrant veggie infuses your meal with nutrients and color, enhancing the overall presentation.
  • Pickled Vegetables: A tangy side introduces an exciting contrast to the warming broth, adding layers of flavor and texture.
  • Green Tea: A soothing cup of tea cleanses the palate and serves as a peaceful complement to your comforting meal.
  • Chili Oil Drizzle: For those who crave spice, an extra drizzle of chili oil over the soup will kick things up a notch.
  • Fruit Sorbet: A light and refreshing dessert rounds out the meal, balancing the savory flavors with a sweet finish.

Make Ahead Options

These Ginger-Scallion Chicken Soup is perfect for meal prep enthusiasts! You can shred the rotisserie chicken and chop the vegetables up to 24 hours in advance, storing them separately in airtight containers in the refrigerator to maintain their freshness. Additionally, the ginger and scallion mixture can be prepared ahead, preventing any browning and ensuring vibrant flavors. When you're ready to serve, simply sauté your prepped vegetables, add the broth and chicken, and simmer to finish the soup. Cook the ramen noodles fresh right before serving for the best texture, and enjoy a delicious, heartwarming meal with minimal effort on busy nights!

Ginger-Scallion Chicken Soup Recipe FAQs

How do I choose the right rotisserie chicken?
Absolutely! When selecting a rotisserie chicken, look for one that is golden-brown with a crispy skin and avoid those with visible dark spots all over. You want a chicken that looks fresh and succulent for the best flavor in your Ginger-Scallion Chicken Soup.

What is the best way to store leftovers?
Store any leftover Ginger-Scallion Chicken Soup in an airtight container in the refrigerator for up to 3 days. Let it cool completely before sealing the container to avoid condensation inside, which can affect taste and texture. Reheat gently on the stovetop or in the microwave to enjoy it again!

Can I freeze Ginger-Scallion Chicken Soup?
Yes, you can! To freeze the soup, portion it into airtight containers or freezer bags. I recommend pouring the soup into bags, laying them flat to freeze, as they’ll take up less space. It can be stored for up to 3 months. Just remember to leave some room at the top of the container or bag for expansion!

What should I do if my soup is too salty?
If your soup turns out too salty, don't worry! You can add additional low-sodium chicken broth to dilute the saltiness or throw in a peeled potato while simmering for 10-15 minutes, as it will absorb some of the excess salt. After cooking, just remove the potato.

Is this soup suitable for gluten-free diets?
Very! This Ginger-Scallion Chicken Soup can easily be made gluten-free by swapping the ramen noodles for gluten-free rice noodles or quinoa. Additionally, ensure that the chicken broth and any sauces used are gluten-free as well to keep it safe for those with gluten sensitivities.

What vegetables can I add to enhance the soup?
The more the merrier! You can add vegetables like bok choy, spinach, or bell peppers to your Ginger-Scallion Chicken Soup for extra nutrition. Just remember to chop them into small pieces for even cooking and add them in with the other vegetables at the beginning!

Ginger-Scallion Chicken Soup

Savor the Warmth of Ginger-Scallion Chicken Soup Tonight

Ginger-Scallion Chicken Soup is the perfect antidote to a hectic day, nourishing and flavorful.
Print Recipe Pin Recipe
Prep Time 10 minutes mins
Cook Time 30 minutes mins
Total Time 40 minutes mins
Servings: 4 bowls
Course: Soups
Cuisine: Asian
Calories: 300
Ingredients Equipment Method Nutrition Notes

Ingredients
  

For the Soup
  • 1 whole Rotisserie Chicken Provides protein and flavor; can substitute with homemade cooked chicken for a fresher taste.
  • 1 tablespoon Neutral Oil Used for sautéing the vegetables and to prevent sticking; can use olive oil or sunflower oil.
  • 1 Yellow Onion Adds sweetness and depth; substitute with shallots for a milder flavor.
  • 3 Carrots Offers sweetness and texture; can replace with peas or bell peppers if desired.
  • 3 Celery Contributes crunch and aroma; can omit if not available.
  • 1 tablespoon Minced Ginger Key source of spiciness and warmth; fresh ginger is recommended, but ground ginger can be used in a pinch.
  • 1-2 Thai Chili Peppers Adds heat; omit if you prefer a milder soup or substitute with red pepper flakes.
  • 10 Scallions Provides freshness and a mild onion flavor; green onions can be used as a substitute.
  • 6 cups Chicken Broth Main liquid used, enriching the soup; use low-sodium for less salt or vegetable broth for a vegetarian version.
  • 16 ounces Frozen Ramen Noodles Quick to cook and adds heartiness; substitute with soba or udon noodles as desired.
  • 4 teaspoons Sesame Oil Adds a nutty flavor; can use additional olive oil for a lighter taste.
  • 2 teaspoons Sesame Seeds Garnish that adds texture; can be omitted or replaced with chopped peanuts for crunch.
  • Salt Enhances flavor; adjust to taste or use soy sauce for added umami.

Equipment

  • Large pot
  • Cutting Board
  • Knife
  • Ladle

Method
 

Step-by-Step Instructions
  1. Prepare Chicken: Start by shredding the meat from the rotisserie chicken into bite-sized pieces, discarding the carcass.
  2. Cook Vegetables: In a large pot, heat the neutral oil over medium heat until shimmering. Add the diced onion, sliced carrots, and diced celery. Sauté the vegetables for about 3-4 minutes until they soften.
  3. Add Aroma: Stir in the minced ginger, optional Thai chili peppers, and the white parts of the scallions. Cook for an additional minute.
  4. Combine Broth and Chicken: Pour in the chicken broth and add the shredded chicken to the pot. Increase the heat to bring the mixture to a boil, then reduce it to a simmer for 30 minutes.
  5. Cook Noodles: While the soup simmers, cook the frozen ramen noodles in a separate pot according to the package instructions.
  6. Finish Soup: Stir half of the minced scallion greens and 2 teaspoons of sesame oil into the simmering soup. Let cook for an additional 5 minutes.
  7. Prepare Garnish: In a small bowl, combine the remaining scallion greens with the last 2 teaspoons of sesame oil and a pinch of salt.
  8. Serve: Ladle the flavorful soup over the noodles in each bowl and garnish.

Nutrition

Serving: 1bowlCalories: 300kcalCarbohydrates: 30gProtein: 25gFat: 10gSaturated Fat: 2gPolyunsaturated Fat: 3gMonounsaturated Fat: 4gCholesterol: 60mgSodium: 800mgPotassium: 650mgFiber: 4gSugar: 2gVitamin A: 180IUVitamin C: 20mgCalcium: 40mgIron: 2mg

Notes

Ensure vegetables are minced finely for quicker cooking. Adjust salt based on broth's saltiness.

Tried this recipe?

Let us know how it was!

Hearty Beef Barley Stew for Ultimate Comfort and Warmth

August 27, 2025 by Grace Snow Leave a Comment

As the chilly winds start to rustle through the trees, I find myself yearning for the heartwarming embrace of a classic comfort food: Beef Barley Stew. This nourishing dish boasts a thick, velvety texture and delightful, rich flavors that make it a favorite for cozy gatherings or a quiet evening at home. Infused with sweet vermouth and a medley of wholesome vegetables, this stew is not only easy to whip up but also a true crowd-pleaser that warms both body and soul. Plus, with a simple swap of beef for mushrooms or beans, it's accessible for those seeking a vegan option. So, are you ready to dive into a bowl of warmth and comfort? Let's get cooking!

Why is Beef Barley Stew So Irresistible?

Comforting and Hearty: This beef barley stew is the definition of a warming hug in a bowl, perfect for chilly evenings.
Flavor-Packed: The sweet vermouth infuses a depth of flavor that harmonizes beautifully with the tender beef and vegetables.
Versatile: Easily adaptable, simply swap beef for mushrooms or beans to create a delightful vegan version!
Quick Preparation: With straightforward steps, you can have this rich stew simmering away in no time, making it an ideal choice for busy weeknights.
Crowd-Pleasing: Whether it’s a family dinner or a gathering with friends, this stew is sure to impress and satisfy every palate! Your guests will be asking for seconds, just like they do for my popular Lamb Stew Hearty.

Beef Barley Stew Ingredients

Get ready to create a comforting masterpiece with these essential ingredients!

For the Stew

  • Neutral Oil – Provides fat for browning the meat and sautéing vegetables; can substitute with olive oil for added flavor.
  • Top Sirloin/Rump Roast/Chuck Roast (1½ pounds) – Main protein that gives depth; trim excess fat before cutting into 1-inch cubes for even cooking.
  • Yellow Onion (1) – Adds sweetness and savoriness; swapping for white onion gives a sharper flavor profile.
  • Celery (3 ribs) – Contributes a crunchy texture and aromatic flavor; fennel can be substituted for a unique taste.
  • Carrots (4) – Bring natural sweetness and vibrant color; cut into thick rounds for better texture retention during cooking.
  • Garlic (5 cloves) – Enhances overall flavor; mincing allows better blending into the stew for a rich taste.
  • Dry Thyme (2 teaspoons) – Imparts earthy notes; can replace with Italian seasoning for a herb blend twist.
  • Flour (¼ cup) – Acts as a thickening agent for the stew, ensuring a velvety finish.
  • Sweet Vermouth (4 ounces) – Adds depth and a hint of sweetness; can substitute with red wine or omit for a non-alcoholic version.
  • Beef Broth (6 cups) – The rich base for the stew; adjust for desired consistency.
  • Potatoes (1 pound) – Provides heartiness; cut into 1-inch cubes for the perfect bite.
  • Pearl Barley (1 cup) – Offers chewiness and thickens the stew; rinsing before use removes excess starch.
  • Salt & Pepper – Essential for seasoning; adjust to taste for optimal flavor.
  • Crushed Red Pepper (to taste) – Adds a touch of heat; optional for those who prefer a milder dish.
  • Parsley (½ cup, plus more for serving) – Brings freshness and vibrant color; cilantro can be used as a fun substitute.

Feel the warmth and excitement as you gather these ingredients for your comforting beef barley stew—it's a dish that's sure to evoke joy at every hearty spoonful!

Step‑by‑Step Instructions for Beef Barley Stew

Step 1: Brown the Beef
Begin by seasoning 1½ pounds of cut beef with salt and pepper generously. In a wide pot, heat a splash of neutral oil over medium-high heat until shimmering, then add the beef in a single layer. Brown each side for 3-5 minutes until caramelized and a deep color develops, forming that irresistible flavor base for your beef barley stew.

Step 2: Cook the Aromatics
Once the beef is beautifully browned, reduce the heat to medium and add one chopped yellow onion, three sliced celery ribs, and four thick-cut carrot rounds to the pot. Sauté for about 5 minutes until the vegetables soften slightly, then stir in five minced garlic cloves and two teaspoons of dry thyme. Cook for an additional 1-2 minutes until fragrant, seasoning further with salt, pepper, and crushed red pepper if you like a hint of heat.

Step 3: Cook the Flour
Sprinkle ¼ cup of flour evenly over the aromatic mixture in the pot. Toss everything together to coat thoroughly, allowing the flour to toast lightly for about 1-2 minutes. This step is essential for thickening your beef barley stew and developing a rich, hearty texture for each delicious spoonful.

Step 4: Simmer the Stew
Next, pour in 4 ounces of sweet vermouth, whisking until smooth to deglaze the pot. Then add 6 cups of beef broth, ensuring the mixture comes to a vigorous boil. Once boiling, reduce the heat to low, cover, and let it simmer gently for 1 hour and 20 minutes, allowing the flavors of the beef barley stew to meld beautifully.

Step 5: Add Potatoes and Barley
After the initial simmering time, carefully remove the lid and taste for seasoning adjustments. Add 1 pound of diced potatoes and 1 cup of rinsed pearl barley into the stew, stirring them in well. Return the pot to a boil, then cover again and simmer for an additional 30-40 minutes until the potatoes and barley are tender and inviting.

Step 6: Finalize the Stew
Once everything is perfectly cooked, remove the pot from heat and taste again for any last-minute adjustments in seasoning. Stir in half a cup of chopped fresh parsley, adding a burst of color and freshness to your savory beef barley stew. Let the stew sit for 5-10 minutes to allow the flavors to settle before serving, filling your home with delightful aromas.

Make Ahead Options

These Beef Barley Stew are ideal for busy home cooks looking to save time during hectic weeknights! You can chop the vegetables (onion, celery, carrots, and potatoes) and store them in an airtight container in the refrigerator for up to 3 days. Additionally, you can brown the beef in advance and refrigerate it, which enhances flavors and makes the cooking process smoother. When you’re ready to enjoy your hearty stew, simply combine the prepped ingredients in your pot and proceed with the simmering steps as detailed. This method ensures that your beef barley stew tastes just as delicious while saving you precious time during meal prep!

Beef Barley Stew Variations & Substitutions

Feel free to personalize this stew to suit your taste buds and dietary preferences with these delightful variations!

  • Vegetarian Option: Substitute beef with mushrooms or beans to create a hearty, plant-based version. The umami flavors of the mushrooms complement the stew beautifully.
  • Root Vegetable Twist: Experiment with parsnips or turnips in place of carrots for a different flavor dynamic. Their earthy tones add depth while offering a nutritious alternative.
  • Add More Greens: Toss in fresh spinach or kale during the last 10 minutes of cooking for a burst of color and nutrition. It not only enhances the appearance but also elevates the health factor.
  • Spicy Kick: Adding a pinch of cayenne pepper or diced jalapeños will turn up the heat! This twist suits those who love a warm, spicy kick with their comfort food.
  • Citrus Brightness: A squeeze of lemon juice before serving can elevate the flavors, adding a refreshing zing that brightens the rich stew. It's a surprising twist that complements the savory notes wonderfully.
  • Barley Swap: For a gluten-free alternative, replace pearl barley with quinoa or rice; both will add texture and heartiness to the dish, making it just as filling.
  • Herbal Infusion: Swap out dry thyme for herbes de Provence or rosemary for unique herbal notes. This small change can significantly shift the flavor profile, giving your stew a fresh take.
  • Umami Boost: Add a splash of soy sauce or Worcestershire sauce for a deeper umami flavor. This not only enhances the taste but also adds richness to your stew.

With these variations, your cozy Beef Barley Stew will take on new life each time you prepare it! And if you're looking for more comforting recipes, check out this delicious Coconutty Beans and Greens Stew or my family-favorite Crock Pot Chicken Stew. Happy cooking!

Expert Tips for Beef Barley Stew

  • Avoid Crowding: When browning the beef, cook in batches if necessary. Overcrowding leads to steaming instead of browning, which affects flavor.
  • Season Gradually: Taste your stew as it cooks and adjust the salt and pepper gradually. It’s easier to add than to fix an overly salty stew!
  • Perfect Thickness: If your beef barley stew turns out too watery, simply remove the lid during the last 30 minutes to let some liquid evaporate.
  • Choosing Barley: Use pearl barley for a chewier texture, and remember to rinse it to remove excess starch before adding it to the pot.
  • Storage Smart: This stew thickens as it cools, making it excellent for leftovers. Store in an airtight container up to 3 days in the fridge, or freeze for later.
  • Flavor Boost: For added depth, consider a splash of Worcestershire sauce during the simmering process—it enhances the umami profile of your beef barley stew.

How to Store and Freeze Beef Barley Stew

Fridge: Store leftovers in an airtight container for up to 3 days. The stew may thicken as it cools, so a splash of broth can revive its original consistency when reheating.

Freezer: For longer storage, allow the stew to cool completely, then transfer to freezer-safe containers. It can be frozen for up to 3 months.

Reheating: When ready to enjoy, thaw overnight in the refrigerator, then reheat on the stove over low heat, adding a little broth if necessary to reach your desired consistency.

Quick Tip: Always label your containers with the date, so you know when to indulge in your hearty beef barley stew again!

What to Serve with Comforting Beef Barley Stew

Create the perfect dining experience by pairing this rich stew with delicious sides that elevate your meal.

  • Crusty Bread: Perfect for soaking up the savory broth and adding a satisfying crunch with each bite.
  • Mixed Greens Salad: A refreshing salad with bright vinaigrette balances the stew’s hearty richness, adding a crisp texture.
  • Garlic Butter Noodles: Soft and buttery noodles complement the stew's bold flavors and provide a comforting, familiar mouthfeel.
  • Roasted Vegetables: Seasoned and caramelized, they bring in additional layers of flavor and roasted sweetness that beautifully harmonizes with the dish.
  • Herb-Infused Rice: Light and fluffy, this rice offers a delicate base to accompany the robust flavors of the stew without being overwhelming.
  • Fruit Sorbet: A light, icy dessert can cleanse the palate after a hearty meal, providing a refreshing finish to your cozy dinner.

Whether it’s a casual family gathering or a cozy night in, these pairings transform your comforting beef barley stew into a truly memorable feast!

Beef Barley Stew Recipe FAQs

What type of beef is best for this stew?
I recommend using top sirloin, rump roast, or chuck roast for their tenderness and flavor. Trim any excess fat before cutting into 1-inch cubes to help the meat cook evenly and release those flavorful juices.

How should I store leftover Beef Barley Stew?
Leftovers should be cooled completely before transferring to an airtight container. They can be stored in the refrigerator for up to 3 days. If you find the stew thickens upon cooling, adding a splash of beef broth when reheating will help restore its original consistency.

Can I freeze Beef Barley Stew?
Absolutely! Once the stew has cooled, transfer it to freezer-safe containers. It will keep in the freezer for up to 3 months. When you’re ready to enjoy, thaw overnight in the fridge and reheat on the stove over low heat, adding a bit of broth if necessary.

What can I do if my stew is too watery?
If you notice your stew has become too watery, don't worry! Remove the lid for the last 30 minutes of cooking to allow some liquid to evaporate. You can also stir in a little extra flour to thicken it, whisking it well to avoid lumps.

Are there any dietary considerations for this stew?
For those with dietary restrictions, you can easily make a vegan version by substituting the beef with hearty mushrooms or beans like kidney or black beans. Additionally, check the broth to ensure it's vegetable-based to keep it plant-friendly.

How can I tell if my vegetables are ripened and ready for the stew?
Look for vegetables that are firm to the touch with vibrant colors. For instance, onions should be dry and have crisp skin, while carrots should be brightly colored without any dark spots or soft patches. Fresh produce ensures a more flavorful stew!

Beef Barley Stew

Hearty Beef Barley Stew for Ultimate Comfort and Warmth

This Beef Barley Stew is a comforting dish infused with rich flavors, perfect for chilly evenings.
Print Recipe Pin Recipe
Prep Time 20 minutes mins
Cook Time 1 hour hr 40 minutes mins
Resting Time 10 minutes mins
Total Time 2 hours hrs 10 minutes mins
Servings: 6 servings
Course: Soups
Cuisine: American
Calories: 450
Ingredients Equipment Method Nutrition Notes

Ingredients
  

For the Stew
  • 2 tablespoons Neutral Oil Can substitute with olive oil for added flavor.
  • 1.5 pounds Top Sirloin/Rump Roast/Chuck Roast Trim excess fat before cutting into 1-inch cubes.
  • 1 Yellow Onion Swapping for white onion gives a sharper flavor profile.
  • 3 ribs Celery Fennel can be substituted for a unique taste.
  • 4 Carrots Cut into thick rounds for better texture retention.
  • 5 cloves Garlic Mincing allows better blending into the stew.
  • 2 teaspoons Dry Thyme Can replace with Italian seasoning.
  • 0.25 cup Flour Acts as a thickening agent for the stew.
  • 4 ounces Sweet Vermouth Can substitute with red wine or omit for a non-alcoholic version.
  • 6 cups Beef Broth Adjust for desired consistency.
  • 1 pound Potatoes Cut into 1-inch cubes.
  • 1 cup Pearl Barley Rinse before use to remove excess starch.
  • Salt & Pepper Adjust to taste.
  • Crushed Red Pepper Optional for those who prefer a milder dish.
  • 0.5 cup Parsley Plus more for serving.

Equipment

  • wide pot

Method
 

Step-by-Step Instructions for Beef Barley Stew
  1. Brown the beef by seasoning 1½ pounds of cut beef with salt and pepper, then brown each side for 3-5 minutes in a wide pot with oil.
  2. Cook the aromatics by adding chopped yellow onion, celery, and carrots to the pot, sautéing for about 5 minutes, then adding garlic and thyme.
  3. Cook the flour by sprinkling it over the mixture, tossing to coat, and toasting for 1-2 minutes.
  4. Simmer the stew by adding sweet vermouth and beef broth, bringing to a boil, then simmering gently for 1 hour and 20 minutes.
  5. Add potatoes and barley, stirring them in, returning to a boil, and simmering for an additional 30-40 minutes.
  6. Finalize the stew by stirring in chopped parsley and allowing to sit for 5-10 minutes before serving.

Nutrition

Serving: 1cupCalories: 450kcalCarbohydrates: 40gProtein: 35gFat: 15gSaturated Fat: 5gPolyunsaturated Fat: 2gMonounsaturated Fat: 7gCholesterol: 100mgSodium: 800mgPotassium: 700mgFiber: 5gSugar: 3gVitamin A: 500IUVitamin C: 15mgCalcium: 50mgIron: 5mg

Notes

This stew thickens as it cools and can be stored in airtight containers for up to 3 days, or frozen for later use.

Tried this recipe?

Let us know how it was!

One-Pot Pumpkin Chili: Warmth and Comfort in Every Bite

August 22, 2025 by Grace Snow Leave a Comment

As the leaves turn and the air gets crisper, there's nothing quite like the scent of a simmering pot of chili wafting through the kitchen. Enter my One-Pot Pumpkin Chili, a hearty vegan delight that combines the creamy richness of pumpkin puree with a medley of fresh vegetables, beans, and lentils. This dish is not just easy to whip up; it’s a cozy hug in a bowl that makes perfect leftovers for busy weeknights or gathering with friends. Plus, it’s gluten-free and packed with plant-based protein, ensuring everyone can indulge without a worry. Are you ready to warm up your cooking routine with this comforting fall favorite? Let’s dive in!

Why is this chili a must-try?

Hearty Comfort: Each spoonful of this One-Pot Pumpkin Chili offers a warm embrace, making it perfect for chilly evenings.

Easy One-Pot Wonder: Save time on cleanup with this single-pot recipe that minimizes fuss and maximizes flavor.

Plant-Based Goodness: Loaded with protein-rich lentils and beans, it’s a delicious way to enjoy vegan comfort food.

Versatile Ingredients: Feel free to customize it with seasonal veggies or your favorite beans; the possibilities are endless!

Crowd-Pleasing Flavor: This chili is sure to impress at potlucks or family dinners, leaving everyone asking for seconds.

To explore more delightful pumpkin recipes, check out my Pumpkin Brownies Decadent for a sweet treat!

One-Pot Pumpkin Chili Ingredients

For the Chili Base
• Pumpkin Puree – Adds creaminess and depth of flavor; use canned or homemade pureed pumpkin.
• Onion – Provides a savory base; substitute with shallots for a sweeter note.
• Bell Peppers – Contribute sweetness and color; any color bell pepper works beautifully.
• Jalapeños – Adds heat; omit for a milder chili or use banana peppers for less spice.
• Garlic – Enhances flavor; garlic powder can substitute if fresh is unavailable.
• Diced Tomatoes – Adds acidity and texture; use fresh when in season for best results.

For Protein & Fiber
• Red Lentils – Thickens the chili and adds protein; green lentils can substitute, but adjust cooking time.
• Black Beans – Provide protein and fiber; replace with chickpeas for a different texture.

For Flavor & Spice
• Vegetable Broth – The base for the chili; use homemade or store-bought depending on your time.
• Chili Powder – Essential for flavor; adjust based on your spice preference.
• Cumin Powder – Adds earthiness; no direct substitutes are recommended.
• Cayenne Pepper – For extra heat; adjust according to your spice tolerance.
• Pumpkin Spice – Optional for a hint of warmth; nutmeg or cinnamon can also be used for fall vibes.

This One-Pot Pumpkin Chili brings warmth and comfort to your table—perfect for those chilly evenings! Enjoy crafting this delightful dish.

Step‑by‑Step Instructions for One-Pot Pumpkin Chili

Step 1: Sauté the Aromatics
Heat 2 tablespoons of olive oil in a large pot over medium heat. Add the chopped onions and sauté for about 3 minutes until they become translucent and soft. This step is essential as it builds a flavorful base for your One-Pot Pumpkin Chili. Stir occasionally to prevent sticking and ensure even cooking.

Step 2: Add Vegetables and Seasoning
Next, incorporate the chopped bell peppers, diced jalapeños, minced garlic, salt, and pepper into the pot. Continue cooking for another 4-5 minutes until the vegetables are tender and fragrant. Stir continuously to prevent burning and to evenly mix the spices, allowing their flavors to meld together.

Step 3: Incorporate Pumpkin and Broth
With the vegetables softened, it's time to stir in the pumpkin puree, diced tomatoes, red lentils, black beans, vegetable broth, chili powder, cumin, cayenne pepper, and optional pumpkin spice. Bring this colorful mixture to a boil over high heat, watching for bubbles to form. This step adds depth and creaminess, making the chili a delicious dish.

Step 4: Simmer to Perfection
Once boiling, reduce the heat to low and cover the pot. Let the One-Pot Pumpkin Chili simmer for 20-25 minutes, stirring occasionally. The lentils are cooked when they're tender but still hold their shape. Keep an eye on the texture, adding a splash of water if necessary to maintain the desired consistency.

Step 5: Taste and Serve
After simmering, taste the chili and adjust seasoning as needed with additional salt, pepper, or spices. Once you're satisfied with the flavor, serve the One-Pot Pumpkin Chili warm in bowls. Garnish with your favorite toppings such as avocado slices, fresh cilantro, or dairy-free sour cream for an added touch of taste and presentation.

Make Ahead Options

These One-Pot Pumpkin Chili options are a lifesaver for busy weeknights! You can sauté the vegetables and spices up to 24 hours in advance; just refrigerate them in an airtight container. Additionally, the chili itself can be fully cooked and stored in the fridge for up to 3 days—it actually develops deeper flavors over time! When ready to serve, simply reheat the chili in a pot over low heat, stirring occasionally until warmed through. For optimal quality, add a splash of vegetable broth if it thickens too much during storage. This means effortless meals with just a little bit of planning, making your time in the kitchen a breeze!

One-Pot Pumpkin Chili Variations

Feel free to get creative and make this cozy dish your own with these delightful twists!

  • Extra Veggies: Toss in chopped carrots, sweet potatoes, or corn for added sweetness and nutrition. These colorful additions will enhance the chili's texture and flavor.

  • Bean Swaps: Try using kidney beans or pinto beans instead of black beans. Each bean brings its unique flavor, making each pot a little different and exciting!

  • Herbal Boost: Add a handful of fresh spinach or kale during the last few minutes of cooking for a vibrant green touch and a boost of nutrients. Not only does it elevate the dish, but it also adds a lovely color contrast.

  • Spice It Up: Feeling adventurous? Add diced green chiles for a spicy kick, perfect for those who crave extra heat. Just remember, a little goes a long way!

  • Dairy-Free Creaminess: For a richer texture, swirl in some dairy-free sour cream or coconut cream just before serving. This adds a smoothness that pairs wonderfully with the chili's spices.

  • Savory Toppings: Serve with a sprinkle of crispy tortilla chips or crunchy fried onions on top. They add a delightful crunch to every spoonful, making each bite fun to enjoy.

For even more pumpkin-inspired treats, don't miss my delightful Pumpkin Cinnamon Roll Muffins that make for a perfect breakfast pairing!

  • Flavor Variations: Don’t shy away from experimenting with spices! Try adding smoked paprika or a dash of liquid smoke for a BBQ flavor profile. This twist could transform your One-Pot Pumpkin Chili into an entirely new experience.

Embrace these variations to find your favorite spin on this comforting recipe!

How to Store and Freeze One-Pot Pumpkin Chili

Fridge: Keep your One-Pot Pumpkin Chili in an airtight container for up to 3 days. This way, you can enjoy delicious leftovers without compromising flavor.

Freezer: For longer storage, freeze the chili in freezer-safe containers for up to 3 months. Portion it out for convenient meal prep on busy days!

Reheating: When ready to enjoy, simply thaw in the refrigerator overnight and reheat on the stovetop over medium heat, stirring occasionally until warmed through.

Serving Note: Don't be afraid to add a splash of vegetable broth while reheating if the chili seems too thick; this keeps it creamy and satisfying!

What to Serve with One-Pot Pumpkin Chili

As you prepare to fill your bowls with this creamy, comforting chili, consider a few delightful sides that will round out your meal.

  • Crunchy Tortilla Chips: Perfect for scooping, these chips add a delightful crunch that contrasts beautifully with the creamy chili.
  • Avocado Slices: Fresh and creamy avocado brings a cool contrast to the spice of the chili, amplifying the overall flavor experience.
  • Tangy Cornbread: Moist and slightly sweet, cornbread pairs wonderfully with chili by soaking up every delicious drop while adding a hint of sweetness.
  • Zesty Coleslaw: A crunchy, tangy slaw provides a refreshing contrast to the heartiness of the chili, balancing the meal perfectly.
  • Fresh Fruit Salad: A light and refreshing fruit salad can cleanse your palate between bites, enhancing the enjoyment of this warming dish.
  • Crisp Green Salad: A mixed greens salad with a light vinaigrette adds a fresh element that complements the richness of the chili.
  • Herbal Iced Tea: A refreshing herbal iced tea offers a soothing drink option that pairs well without overwhelming the flavors of the meal.
  • Chocolate Avocado Mousse: For dessert, this rich, creamy mousse gives a decadent finish and is a delightful health-conscious treat that everyone will love.
  • Pumpkin Spice Latte: Chase the meal with this warm coffee drink to heighten the autumnal flavors in the meal, blending beautifully with the chili's spices.

Expert Tips for One-Pot Pumpkin Chili

  • Check Lentil Tenderness: Always ensure lentils are fully cooked—test for tenderness before removing from heat to maintain the right texture.

  • Add Veggies Wisely: Incorporate delicate vegetables like mushrooms late in the cooking process to prevent them from becoming mushy and losing their shape.

  • Storage Savvy: Store any leftovers in an airtight container in the refrigerator for up to 3 days, or freeze for future quick meals.

  • Season to Taste: Taste the chili before serving and adjust seasoning as needed. Remember, the flavors deepen upon resting!

  • Customize Your Beans: Feel free to experiment! Substitute black beans with kidney beans or chickpeas for variety; just keep the flavor, comfort, and health benefits of your One-Pot Pumpkin Chili in mind.

One-Pot Pumpkin Chili Recipe FAQs

What is the best way to select ripe pumpkins for this recipe?
Absolutely! When choosing a pumpkin, look for one that is firm, with a smooth, unblemished skin. Avoid any with dark spots or soft areas, as these indicate overripeness. A good pumpkin should feel heavy for its size, which is a great sign of quality and moisture content.

How should I store leftovers of One-Pot Pumpkin Chili?
To keep your One-Pot Pumpkin Chili fresh, store it in an airtight container in the refrigerator for up to 3 days. If you'd like to savor it beyond that, simply freeze it in freezer-safe containers for up to 3 months. Just ensure it's cooled down before transferring to avoid condensation creating ice crystals!

Can I freeze One-Pot Pumpkin Chili?
Yes, you can! To freeze, portion the cooled chili into airtight, freezer-safe containers. Make sure to leave some space at the top for expansion. When you're ready to eat, simply thaw the chili overnight in the refrigerator, then reheat on the stovetop or microwave, adding a splash of broth if it seems too thick.

What should I do if the chili is too thick or too watery?
If your One-Pot Pumpkin Chili turns out too thick, you can add a bit of vegetable broth or water to achieve your desired consistency. Stir it in gradually until you reach the thickness you prefer. On the flip side, if it’s too watery, let it simmer uncovered for a few more minutes to allow some of the liquid to evaporate and thicken the chili.

Is this chili suitable for those with dietary restrictions?
Very! This One-Pot Pumpkin Chili is vegan and gluten-free, making it a fantastic option for those with dietary considerations. However, always check your canned goods (like broth and beans) to ensure they are certified gluten-free. If catering to allergies, make sure to avoid common allergens like certain beans or spices, and feel free to modify the recipe as needed to suit your needs.

One-Pot Pumpkin Chili

One-Pot Pumpkin Chili: Warmth and Comfort in Every Bite

Enjoy a hearty One-Pot Pumpkin Chili, a warm and comforting vegan dish perfect for autumn nights.
Print Recipe Pin Recipe
Prep Time 10 minutes mins
Cook Time 30 minutes mins
Total Time 40 minutes mins
Servings: 6 servings
Course: Soups
Cuisine: Vegan
Calories: 250
Ingredients Equipment Method Nutrition Notes

Ingredients
  

Chili Base
  • 1 cup Pumpkin Puree use canned or homemade
  • 1 Onion chopped; substitute with shallots for sweeter note
  • 1 Bell Peppers any color, chopped
  • 1 Jalapeños chopped; adjust based on spice preference
  • 3 cloves Garlic minced
  • 1 can Diced Tomatoes fresh preferred when in season
Protein & Fiber
  • 1 cup Red Lentils green lentils can substitute
  • 1 can Black Beans can replace with chickpeas
Flavor & Spice
  • 4 cups Vegetable Broth homemade or store-bought
  • 2 tablespoons Chili Powder adjust according to spice preference
  • 1 teaspoon Cumin Powder
  • 1/4 teaspoon Cayenne Pepper adjust for heat
  • 1 teaspoon Pumpkin Spice optional

Equipment

  • Large pot

Method
 

Cooking Instructions
  1. Heat 2 tablespoons of olive oil in a large pot over medium heat. Add the chopped onions and sauté for about 3 minutes until translucent.
  2. Incorporate the chopped bell peppers, diced jalapeños, minced garlic, salt, and pepper into the pot. Cook for another 4-5 minutes until tender.
  3. Stir in pumpkin puree, diced tomatoes, red lentils, black beans, vegetable broth, chili powder, cumin, cayenne pepper, and optional pumpkin spice. Bring to a boil.
  4. Reduce the heat to low, cover, and let simmer for 20-25 minutes, stirring occasionally.
  5. Taste and adjust seasoning as needed. Serve warm in bowls with desired toppings.

Nutrition

Serving: 1bowlCalories: 250kcalCarbohydrates: 40gProtein: 10gFat: 5gSaturated Fat: 1gPolyunsaturated Fat: 2gMonounsaturated Fat: 2gSodium: 500mgPotassium: 700mgFiber: 10gSugar: 5gVitamin A: 150IUVitamin C: 70mgCalcium: 6mgIron: 15mg

Notes

Store leftovers in an airtight container for up to 3 days or freeze for up to 3 months. Reheat on stovetop, adding a splash of vegetable broth if too thick.

Tried this recipe?

Let us know how it was!

Savory Santa Fe Soup Ready in 30 Minutes for Cozy Nights

August 18, 2025 by Grace Snow Leave a Comment

As the sun sets on a chilly evening, the warmth of homemade goodness wraps around me like a comforting hug. I can’t resist the aroma of my Santa Fe Soup simmering away—the perfect hearty companion for nights when I crave something cozy yet exciting. This Tex-Mex-inspired Taco Soup is not only quick to prepare but also customizable, allowing everyone at the table to add their favorite toppings. It's packed with flavor from tender ground beef, protein-rich beans, and sweet corn, creating a dish that's sure to please family and friends alike. Whether you're seeking relief from fast food fatigue or just want to elevate your weeknight dinners, this one-pot wonder is the answer. So, what toppings will you choose to make it your own?

Why Is Santa Fe Soup So Irresistible?

Simplicity: This cozy soup comes together in just 30 minutes, making it a perfect weeknight meal without the fuss.

Flavor Explosion: Packed with Tex-Mex goodness, it offers layers of flavor from a delightful mix of beans and spices, ensuring satisfaction in every bite.

Customizable: Ideal for picky eaters, everyone can personalize their bowl with toppings like sour cream, avocado, or cheese, turning it into a unique creation.

One-Pot Wonder: Cleanup is a breeze with this recipe as everything cooks in a single pot, giving you more time to enjoy with loved ones.

Comfort in a Bowl: Every spoonful is a warm embrace, reminiscent of your favorite taco filling. You won't want to miss trying this soup alongside a refreshing Lemon Chicken Soup for another comforting yet exciting dish!

Santa Fe Soup Ingredients

A delightful blend of flavors awaits!

For the Soup Base

  • Ground Beef – Adds protein and richness; substitute with ground turkey or chicken for a lighter option.
  • Onion (1 cup, diced) – Provides sweetness and depth; ensure it's finely diced for even cooking.
  • Garlic (2 cloves, minced) – Adds aromatic flavor that enhances the overall taste; use garlic powder if fresh is unavailable.
  • Salt (1 teaspoon) – Enhances the flavor of all ingredients; adjust to taste based on dietary needs.
  • Ground Black Pepper (1 teaspoon) – Introduces warmth and a little spice.
  • Rotel (10 oz can) – Offers a mix of tomatoes and green chilies for acidity and spice; can be substituted with diced tomatoes and jalapeños for a milder flavor.

For the Beans

  • Pinto Beans (16 oz can, drained) – Adds creaminess and bulk; can swap with black beans or chickpeas.
  • Black Beans (15 oz can, drained) – Provides fiber and protein; ensure cans are rinsed to reduce sodium.
  • Kidney Beans (16 oz can, drained) – Another source of protein and texture; skip if a single type of bean is preferred.

For the Extras

  • Corn (1 can, drained) – Sweetness and texture contrast; fresh or frozen corn can also be used.
  • Taco Seasoning (1 oz pack) – Infuses classic taco flavors; homestyle blends can be made with cumin, paprika, and chili powder if desired.
  • Ranch Seasoning (1 oz pack) – Adds a creamy herb flavor; optional but highly recommended for extra depth.
  • Beef Broth (2 cups) – Base for the soup's flavor; use vegetable broth for a vegetarian option.

With these ingredients, you're just a few steps away from savoring a steaming bowl of Santa Fe Soup, perfect for cozy nights!

Step‑by‑Step Instructions for Santa Fe Soup

Step 1: Brown the Meat
In a large pot or Dutch oven, heat over medium heat and add the ground beef. Cook for about 6–8 minutes, breaking it apart with a wooden spoon until fully browned and no longer pink. Once cooked through, drain any excess grease to keep the Santa Fe Soup hearty yet not overly fatty.

Step 2: Sauté the Aromatics
Add the diced onion to the pot and sauté for 3–4 minutes until translucent, stirring occasionally to prevent sticking. Then, introduce the minced garlic along with salt and black pepper. Cook for an additional 30 seconds until the garlic becomes fragrant, creating a delicious base for your soup.

Step 3: Incorporate the Seasonings
Stir in the taco seasoning and ranch seasoning, allowing the spices to coat the meat and onion mixture for about 1 minute. Then, pour in the beef broth and add in the Rotel, pinto beans, black beans, kidney beans, and corn. Mix everything together until well combined, ensuring each ingredient is nestled in the flavors of the Santa Fe Soup.

Step 4: Simmer to Perfection
Bring the mixture to a gentle simmer, then cover the pot with a lid, allowing it to cook over medium-low heat for 30 minutes. Stir occasionally to prevent sticking and promote even cooking, letting the flavors meld together and transform into a savory, thickened soup.

Step 5: Adjust and Serve
After simmering, taste the Santa Fe Soup and adjust the seasoning if necessary with additional salt, pepper, or hot sauce for extra spice. Ladle the warm soup into bowls, and offer a variety of toppings like sour cream, cheese, or avocado for a customized meal that everyone will love!

How to Store and Freeze Santa Fe Soup

Fridge: Keep leftovers in an airtight container and refrigerate for up to 4 days. This will help maintain the soup’s flavors and quality.

Freezer: Store in a freezer-safe container for up to 3 months. Be sure to leave some space at the top, as the soup may expand when frozen.

Reheating: For best results, thaw overnight in the fridge before reheating. Warm on the stovetop over medium heat, stirring occasionally, until heated through.

Portioning: Consider freezing individual portions for quick meals later. This way, you can enjoy a comforting bowl of Santa Fe Soup whenever the craving strikes!

Expert Tips for Santa Fe Soup

  • Simmer for Best Flavor: Let the soup simmer for at least 30 minutes to allow all flavors to meld together beautifully.

  • Bean Rinse: Always rinse and drain the canned beans and corn. This helps reduce sodium and enhances the overall taste of your Santa Fe Soup.

  • Customize Spiciness: If you prefer more heat, add fresh jalapeños or your favorite hot sauce. Taste as you go to find your perfect balance!

  • Protein Switch-Up: For a lighter version, substitute ground beef with ground turkey or plant-based protein, maintaining the soup's heartiness.

  • Extra Creaminess: Consider stirring in a dollop of sour cream or cream cheese just before serving for an extra creamy texture.

  • Leftover Magic: This soup tastes even better the next day! Make a big batch and enjoy the leftovers for lunch or dinner throughout the week.

Santa Fe Soup Variations & Substitutions

Feel free to explore different options and make this recipe your own delightfully delicious creation.

  • Ground Beef Swap: Use ground turkey or chicken for a lean alternative, while maintaining that satisfying texture.
  • Vegetarian Option: Replace beef broth with vegetable broth and incorporate plant-based protein for a meat-free variation. It’s equally comforting!
  • Bean Medley: Mix and match with black beans, kidney beans, or chickpeas, tailoring the flavor and texture to your liking. Don’t hesitate to get inventive!
  • Fresh Herb Infusion: Consider adding fresh cilantro or parsley at the end for a burst of freshness and vibrant color in your soup. It elevates the dish to new heights!
  • Spiciness Boost: Add diced jalapeños or a splash of your favorite hot sauce to kick the heat up a notch. Perfect for those who enjoy a fiery flavor!
  • Corn Variations: Fresh or frozen corn can replace canned corn, offering a more vibrant taste and texture that enhances the overall experience.
  • Creamy Finish: Stir in a dollop of sour cream or cream cheese for a rich and creamy finish that takes the soup to the next level of indulgence.

Enhancing your Santa Fe Soup allows you to serve delicious meals that satisfy every craving. Plus, if you're looking for other cozy soup recipes, check out this comforting Egg Drop Soup or a flavorful Zuppa Toscana Soup for variety!

What to Serve with Santa Fe Soup?

Elevate your cozy meal experience with delicious sides that perfectly complement the bold flavors of this Tex-Mex favorite!

  • Creamy Avocado Salad:
    Its rich and buttery taste offers a refreshing contrast to the zingy soup, making each bite a delight.

  • Crispy Tortilla Chips:
    Perfect for dipping, these crunchy chips add texture and a fun way to enjoy the soup.

  • Cheesy Cornbread:
    This warm, fluffy bread brings a touch of sweetness, balancing the savory notes of the soup beautifully.

  • Zesty Lime Rice:
    Light and fluffy with a citrusy kick, it makes a lovely base to soak up the hearty soup.

  • Sour Cream & Toppings Bar:
    Set out a variety of toppings like shredded cheese, green onions, and jalapeños, allowing everyone to customize their bowls.

  • Refreshing Cucumber Salsa:
    Cool and tangy, this fresh salsa enhances the soup's robust flavors while adding a vibrant splash of color to your table.

  • Fruity Sangria:
    This fruity drink pairs well with the Tex-Mex flavors, bringing a refreshing sweetness that complements the soup's spices.

Embrace these delightful pairings, and turn your Santa Fe Soup into a full-flavored feast that will warm both your heart and your home!

Make Ahead Options

This Santa Fe Soup is a meal prep dream! You can prepare the soup base—browning the ground beef, sautéing the onions, and adding the spices—up to 24 hours in advance, then refrigerate it in an airtight container. To maintain its delicious quality, be sure to cool the mixture to room temperature before sealing it. When you're ready to enjoy, simply add the broth, beans, corn, and Rotel to the pot, and simmer for about 30 minutes until everything is heated through. This easy prep allows for a hearty, homemade dish that’s just as flavorful and satisfying, perfect for busy weeknights!

Santa Fe Soup Recipe FAQs

What type of meat should I use for Santa Fe Soup?
Absolutely! Ground beef is traditional, but you can easily substitute it with ground turkey or chicken for a leaner option. For a vegetarian version, try using crumbled tofu or plant-based meat substitutes that mimic the texture of ground beef.

How do I select ripe ingredients for my Santa Fe Soup?
When choosing ingredients, look for firm, vibrant-colored bell peppers and ripe tomatoes. Avoid any vegetables with dark spots or soft spots, as they may indicate spoilage. Fresh ingredients elevate the flavors and textures of your soup!

How should I store leftover Santa Fe Soup?
Store leftovers in an airtight container in the refrigerator for up to 4 days. Make sure the soup is completely cooled before sealing and refrigerating, as this helps maintain its taste and quality over time.

Can I freeze Santa Fe Soup, and how do I do it?
Yes! Freeze your Santa Fe Soup in a freezer-safe container for up to 3 months. Make sure to leave a little space at the top of the container, as the soup will expand when frozen. Thaw overnight in the fridge before reheating on the stovetop over medium heat.

What if my Santa Fe Soup is too salty?
If your soup turns out too salty, stir in a peeled potato and let it simmer for 10-15 minutes. The potato will absorb some of the excess salt. Remove it before serving, and your soup should taste much better!

Are there any dietary considerations I should keep in mind for Santa Fe Soup?
Certainly! This soup is quite versatile. If you're serving guests with dietary restrictions, use vegetable broth instead of beef broth for a vegan option. Be sure to omit the ground beef, as well, if they’re vegetarian. Always check labels on canned ingredients for allergens like gluten or specific preservatives.

Santa Fe Soup

Savory Santa Fe Soup Ready in 30 Minutes for Cozy Nights

Santa Fe Soup is a hearty, customizable Tex-Mex soup, perfect for chilly nights, quick to prepare, and packed with flavor.
Print Recipe Pin Recipe
Prep Time 15 minutes mins
Cook Time 15 minutes mins
Total Time 30 minutes mins
Servings: 4 bowls
Course: Soups
Cuisine: Tex-Mex
Calories: 450
Ingredients Equipment Method Nutrition Notes

Ingredients
  

For the Soup Base
  • 1 lb Ground Beef Substitute with ground turkey or chicken for a lighter option.
  • 1 cup Onion, diced Ensure it's finely diced for even cooking.
  • 2 cloves Garlic, minced Use garlic powder if fresh is unavailable.
  • 1 tsp Salt Adjust to taste based on dietary needs.
  • 1 tsp Ground Black Pepper
  • 10 oz Rotel Can be substituted with diced tomatoes and jalapeños for a milder flavor.
For the Beans
  • 16 oz Pinto Beans, drained Can swap with black beans or chickpeas.
  • 15 oz Black Beans, drained Ensure cans are rinsed to reduce sodium.
  • 16 oz Kidney Beans, drained Skip if a single type of bean is preferred.
For the Extras
  • 1 can Corn, drained Fresh or frozen corn can also be used.
  • 1 oz Taco Seasoning Homestyle blends can be made with cumin, paprika, and chili powder.
  • 1 oz Ranch Seasoning Optional but highly recommended for extra depth.
  • 2 cups Beef Broth Use vegetable broth for a vegetarian option.

Equipment

  • Large pot or Dutch oven

Method
 

Cooking Steps
  1. In a large pot or Dutch oven, heat over medium heat and add the ground beef. Cook for about 6–8 minutes, breaking it apart until fully browned and no longer pink. Drain excess grease.
  2. Add the diced onion and sauté for 3–4 minutes until translucent. Then, introduce the minced garlic, salt, and black pepper, cooking for an additional 30 seconds until fragrant.
  3. Stir in the taco seasoning and ranch seasoning. Pour in the beef broth and add in the Rotel, pinto beans, black beans, kidney beans, and corn. Mix everything together.
  4. Bring the mixture to a gentle simmer, cover the pot, and cook over medium-low heat for 30 minutes. Stir occasionally to promote even cooking.
  5. After simmering, taste the soup and adjust seasoning if needed. Ladle into bowls and offer toppings like sour cream, cheese, or avocado.

Nutrition

Serving: 1bowlCalories: 450kcalCarbohydrates: 40gProtein: 30gFat: 20gSaturated Fat: 8gPolyunsaturated Fat: 0.5gMonounsaturated Fat: 10gCholesterol: 70mgSodium: 800mgPotassium: 800mgFiber: 10gSugar: 5gVitamin A: 400IUVitamin C: 15mgCalcium: 60mgIron: 4mg

Notes

Consider stirring in sour cream or cream cheese for extra creaminess. This soup tastes even better the next day!

Tried this recipe?

Let us know how it was!

Zesty Lemon Chicken Soup That Bursts with Flavor

August 18, 2025 by Grace Snow Leave a Comment

The aroma of simmering chicken and bright lemon slices wafting through the kitchen feels like a warm embrace on a chilly evening. This Healthy Greek Lemon Chicken Soup isn't just a meal; it’s a comforting hug in a bowl that makes every spoonful an experience to savor. Packed with gorgeous flavors and nutrition, this lemon chicken soup offers a quick and healthy escape from the fast-food frenzy. With various cooking methods like stovetop, crockpot, or instant pot, it's a fantastic choice for busy nights when you need something hearty yet simple. Plus, with options for gluten-free pasta or zoodles, it caters to everyone at the table. So, are you ready to dive into a recipe that will brighten your weeknight dinners? Let’s get cooking!

Why Is This Soup So Irresistible?

Comforting, this Healthy Greek Lemon Chicken Soup wraps you in warmth, making every bowl feel like a cozy hug. Bright, zesty flavors from fresh lemons elevate the dish, offering a refreshing twist. Versatile cooking methods mean you can whip it up in the stovetop, crockpot, or instant pot, saving you time! Health-conscious options like gluten-free pasta or zoodles cater to all diets, ensuring everyone can enjoy a hearty meal. Perfect for busy weeknights, this soup is a delicious escape, reminiscent of homemade comfort food that never goes out of style.

Lemon Chicken Soup Ingredients

  • For the Soup Base
    • Olive Oil – Adds richness and depth; substitute with avocado oil or melted butter if preferred.
    • Carrots – Provides sweetness and texture; fresh or frozen can be used.
    • Onion – Enhances the flavor base; can be substituted with shallots for a milder taste.
    • Celery – Adds crunch and flavor; use any available crisp vegetables as substitutes.
    • Garlic – Boosts flavor; around 3 cloves minced; garlic powder can be used if in a pinch.
    • Black Pepper – Adds mild heat; adjust to taste or substitute with white pepper.
    • Dried Parsley – For herbal notes; swap with fresh parsley or oregano if desired.
    • Dried Thyme – Contributes earthy flavor; use rosemary or basil as alternatives.
    • Salt – Essential for overall flavor; adjust for dietary needs.
    • Bay Leaves – Adds subtle depth; remove before serving.
    • Chicken Breasts (1.5 pounds) – The main protein source; thighs or pre-cooked chicken can also be used.
    • Low Sodium Chicken Broth (6 cups) – The soup base; any broth works.

  • For the Pasta
    • Dry Orzo Pasta (1 cup) – Provides heartiness; substitute with any small pasta or quinoa for gluten-free variations.

  • For the Finish
    • Fresh Squeezed Lemon Juice (½ cup) – Brings brightness to the soup; adjust for personal taste.

This Lemon Chicken Soup is not just a recipe; it's a vibrant dish bursting with flavor. Enjoy exploring the various cooking methods while you savor every comforting spoonful!

Step‑by‑Step Instructions for Lemon Chicken Soup

Step 1: Sauté Vegetables
In a large pot, heat 2 tablespoons of olive oil over medium heat. Add in 1 cup of diced carrots, 1 chopped onion, and 1 cup of chopped celery along with 3 minced garlic cloves. Sauté for about 5 minutes, stirring occasionally, until the vegetables are softened and fragrant, creating a flavorful base for your Lemon Chicken Soup.

Step 2: Combine Ingredients
Next, stir in 1 teaspoon of black pepper, 1 tablespoon of dried parsley, 1 teaspoon of dried thyme, and 1 teaspoon of salt. Toss in 2 bay leaves, 1.5 pounds of chicken breasts, and 6 cups of low sodium chicken broth. Bring the mixture to a boil over high heat, which should take approximately 10 minutes, allowing all the flavors to meld beautifully.

Step 3: Simmer the Soup
Once boiling, reduce the heat to low, and let your Lemon Chicken Soup simmer uncovered for 15 minutes. Keep an eye on it as it bubbles gently; the chicken should be cooked through and tender. After simmering, carefully remove the bay leaves and chicken breasts from the pot, setting them aside to cool slightly.

Step 4: Shred Chicken
Once the chicken has cooled for a few minutes, use two forks to shred it into bite-sized pieces. This step adds texture and allows the juicy chicken to integrate perfectly back into the soup. Set aside the shredded chicken, savoring the lovely aroma of the lemon-infused broth that fills your kitchen.

Step 5: Cook the Orzo
Return the pot to medium heat and add 1 cup of dry orzo pasta. Cook for half the package time, usually around 5-7 minutes, stirring occasionally. As the orzo cooks, it envelops the soup in heartiness and takes on that delightful lemon flavor, making this Lemon Chicken Soup truly comforting.

Step 6: Finish and Serve
Once the orzo is just tender, return the shredded chicken to the pot along with ½ cup of freshly squeezed lemon juice. Stir well to combine and let simmer for an additional 2-3 minutes to heat through. Taste and adjust seasoning if needed before serving the soup hot, garnished with fresh parsley for a final burst of flavor.

Lemon Chicken Soup Variations Made Easy

Feel free to get creative and tailor this soup to your tastes, making it even more delightful and personal!

  • Vegetarian Option: Replace chicken with beans and use vegetable broth for a hearty alternative; lentils work wonderfully too.

  • Low-Carb Option: Substitute orzo with zucchini noodles or cauliflower rice for a fresh, low-carb twist that's just as comforting.

  • Gluten-Free Pasta: Swap dry orzo with any gluten-free pasta or quinoa to keep this dish accessible for all dietary needs.

  • Herb Variations: Experiment with dill or cilantro for a refreshing finish; these herbs can brighten the overall flavor and add a unique touch.

  • Greek Influence: Add in chickpeas and feta cheese to bring extra protein and that classic Greek flavor, reminiscent of a Mediterranean feast.

  • Citrus Twist: Try adding orange zest along with the lemon juice for an unexpected but delightful flavor boost that complements the soup's brightness.

  • Spicy Kick: For those who love heat, toss in some red pepper flakes or sliced jalapeños to elevate the flavor profile and keep things exciting.

  • Broth Boost: Enhance the depth by simmering a Parmesan rind in the broth; it infuses the soup with an additional layer of savory richness, making every bite unforgettable.

As you personalize your soup, why not explore how these variations change the flavor? You might even find inspiration for your next favorite dish, like a Spatchcock Chicken to pair on the side! Enjoy!

How to Store and Freeze Lemon Chicken Soup

Fridge: Store your Lemon Chicken Soup in an airtight container for up to 4 days. This keeps it fresh and full of flavor, perfect for reheating on busy nights.

Freezer: This soup freezes beautifully! Pour it into airtight containers, leaving space at the top for expansion, and freeze for up to 3 months.

Reheating: When you're ready to enjoy your frozen Lemon Chicken Soup, thaw it in the fridge overnight and reheat gently on the stovetop or in the microwave until warmed through.

Separation Tip: If you’ve used orzo, note that it may absorb broth and become mushy over time. Consider storing orzo separately if you plan to freeze leftovers.

What to Serve with Healthy Greek Lemon Chicken Soup

Brighten your dinner table and pair your warm bowl of soup with delicious accompaniments that enhance every bite.

  • Crispy Garlic Bread: This crunchy side adds a satisfying texture, perfect for dipping into the tangy broth. The buttery, garlicky flavor will elevate your meal experience.

  • Arugula Salad: A fresh salad with peppery arugula and a light vinaigrette adds a crisp contrast. The brightness of the greens complements the zesty soup beautifully.

  • Mediterranean Quinoa: Packed with nutrients, fluffy quinoa tossed with tomatoes, cucumbers, and olives will add heartiness. This dish brings a refreshing, wholesome element to your meal.

  • Roasted Veggies: A mix of roasted zucchini, bell peppers, and carrots caramelizes their natural sweetness. Their smoky flavor pairs well with the citrus notes in the soup.

  • Tzatziki Sauce: This cool, yogurt-based dip provides a refreshing bite, ideal for balancing the warmth of the soup. Serve it alongside pita chips or fresh veggies for a delightful twist.

  • White Wine Spritzer: A light bubbly drink made with white wine and soda water will complement the lemony flavors without overpowering. It’s a refreshing choice for a cozy dinner setting.

  • Pistachio Baklava: End your meal on a sweet note with this flaky, nutty dessert. The honey syrup and crunchy pistachios provide an indulgent contrast to the comforting soup.

Let your Lemon Chicken Soup shine even brighter with these delicious accompaniments that cater to all flavors and textures!

Expert Tips for Lemon Chicken Soup

  • Perfectly Tender Chicken: Make sure to simmer the chicken just until cooked through; overcooking can lead to dryness, diminishing the soup's flavor.

  • Orzo Timing: Keep a close watch on the orzo while cooking. It can overcook quickly, turning mushy. Aim for al dente for the best texture in your Lemon Chicken Soup.

  • Citrus Freshness: Use fresh lemons for juicing to get the brightest flavor. A citrus juicer can simplify the process and maximize juice extraction.

  • Vegetable Variations: Don't hesitate to add other vegetables like spinach or zucchini towards the end for extra nutrition and flavor without compromising cooking times.

  • Storage Success: Solidify your soup’s flavor even more by letting it sit for a day before serving. Store it in an airtight container in the fridge for up to 4 days for optimal taste.

  • Broth Boost: For a robust flavor profile, consider adding a Parmesan rind while simmering. Just remember to remove it before serving!

Make Ahead Options

These Greek Lemon Chicken Soup components are perfect for meal prep! You can chop the vegetables and store them in an airtight container in the refrigerator for up to 3 days, streamlining your cooking process. Additionally, you can poach the chicken breasts in advance and shred them, storing them in the fridge for up to 24 hours. To maintain the soup’s bright flavors, add the fresh lemon juice just before serving. When you're ready to enjoy your soup, simply heat the broth, stir in the prepped chicken and cooked orzo, and simmer for a few minutes for a comforting meal with minimal effort. This way, you can savor the delicious taste of your Lemon Chicken Soup without the hassle on busier nights!

Greek Lemon Chicken Soup Recipe FAQs

How do I select the best ingredients for the soup?
Absolutely! When choosing your vegetables, look for vibrant and fresh options. Carrots should be bright orange and firm, with no dark spots or blemishes. For the chicken, select skinless breasts or thighs that feel cool and firm; avoid any that seem slimy. Fresh lemons should be heavy for their size, with a glossy skin, indicating juiciness.

How can I store and reheat leftovers?
Very! Store your Lemon Chicken Soup in an airtight container in the fridge for up to 4 days. When you're ready to enjoy, simply reheat on the stovetop over medium heat, stirring occasionally until warmed through. You could also use the microwave—just make sure to cover it and heat in intervals to ensure even warming.

Can I freeze the Lemon Chicken Soup?
Yes, it freezes beautifully! To freeze, pour the cooled soup into airtight containers or freezer bags, leaving some space at the top for expansion, and label with the date. It will keep well for up to 3 months. When ready to enjoy, thaw it overnight in the refrigerator and reheat gently on the stovetop or in the microwave.

What should I do if the orzo becomes mushy?
Ah, a common issue! To prevent this, aim to cook the orzo for only half the package time in the soup. This helps maintain its al dente texture. If it does become too soft, consider adding a splash of chicken broth to help balance the soup’s texture upon reheating. For future batches, you might want to cook the orzo separately and add it just before serving.

Is this soup suitable for those with dietary restrictions?
Absolutely! This Greek Lemon Chicken Soup is naturally gluten-free if you substitute the orzo with gluten-free pasta or zoodles. For those avoiding meat, simply replace the chicken with beans and use vegetable broth to create a delightful vegetarian version. Always double-check your ingredients for specific allergies, especially with prepared broths.

Can I add extra vegetables to the soup?
Yes, the more, the merrier! Feel free to include more veggies like spinach, zucchini, or even peas for added nutrition and flavor. Just add these towards the end of cooking to keep their color and texture vibrant. Experimenting with different vegetables can make this lemon chicken soup a new dish each time!

Lemon Chicken Soup

Zesty Lemon Chicken Soup That Bursts with Flavor

This Lemon Chicken Soup is a comforting dish packed with zesty flavors, perfect for chilly evenings.
Print Recipe Pin Recipe
Prep Time 15 minutes mins
Cook Time 40 minutes mins
Total Time 55 minutes mins
Servings: 6 cups
Course: Soups
Cuisine: Greek
Calories: 300
Ingredients Equipment Method Nutrition Notes

Ingredients
  

Soup Base
  • 2 tablespoons Olive Oil Can substitute with avocado oil or melted butter
  • 1 cup Carrots Fresh or frozen
  • 1 cup Onion Can be substituted with shallots
  • 1 cup Celery Use any available crisp vegetables as substitutes
  • 3 cloves Garlic Minced; garlic powder can be used in a pinch
  • 1 teaspoon Black Pepper Adjust to taste
  • 1 tablespoon Dried Parsley Swap with fresh parsley or oregano if desired
  • 1 teaspoon Dried Thyme Use rosemary or basil as alternatives
  • 1 teaspoon Salt Adjust for dietary needs
  • 2 leaves Bay Leaves Remove before serving
  • 1.5 pounds Chicken Breasts Can also use thighs or pre-cooked chicken
  • 6 cups Low Sodium Chicken Broth Any broth works
Pasta
  • 1 cup Dry Orzo Pasta Can substitute with any small pasta or quinoa
Finish
  • ½ cup Fresh Squeezed Lemon Juice Adjust for personal taste

Equipment

  • Large pot

Method
 

Cooking Steps
  1. In a large pot, heat 2 tablespoons of olive oil over medium heat. Add in 1 cup of diced carrots, 1 chopped onion, and 1 cup of chopped celery along with 3 minced garlic cloves. Sauté for about 5 minutes until the vegetables are softened.
  2. Stir in 1 teaspoon of black pepper, 1 tablespoon of dried parsley, 1 teaspoon of dried thyme, and 1 teaspoon of salt. Toss in 2 bay leaves, 1.5 pounds of chicken breasts, and 6 cups of low sodium chicken broth. Bring to a boil for approximately 10 minutes.
  3. Once boiling, reduce heat to low and let simmer uncovered for 15 minutes. Remove bay leaves and chicken breasts once cooked through.
  4. Shred the chicken into bite-sized pieces and return to the pot.
  5. Add 1 cup of dry orzo pasta and cook for 5-7 minutes until just tender.
  6. Return shredded chicken to the pot along with ½ cup of freshly squeezed lemon juice. Stir well and let simmer for an additional 2-3 minutes before serving.

Nutrition

Serving: 1cupCalories: 300kcalCarbohydrates: 30gProtein: 25gFat: 10gSaturated Fat: 2gPolyunsaturated Fat: 1gMonounsaturated Fat: 7gCholesterol: 70mgSodium: 800mgPotassium: 700mgFiber: 2gSugar: 4gVitamin A: 500IUVitamin C: 15mgCalcium: 50mgIron: 2mg

Notes

Let the soup sit for a day before serving for enhanced flavor. Store in an airtight container in the fridge for up to 4 days.

Tried this recipe?

Let us know how it was!
  • « Previous Page
  • 1
  • …
  • 10
  • 11
  • 12
  • 13
  • Next Page »

Welcome!

Hi, I’m Grace, a Sydney-based home cook with a passion for bold flavors and trending ingredients. Whether you’re a busy beginner or a seasoned foodie, you’ll find dishes here that are fresh, fun, and full of flavor.

More about me

Popular Recipes

  • Cheesy Chicken Garlic Bread Sandwich
    Cheesy Chicken Garlic Bread Sandwich for Cozy Family Moments
  • Easy Chicken Ranch Wraps
    Easy Chicken Ranch Wraps: Quick, Creamy & Totally Satisfying
  • Chicken Caesar Sandwiches
    Delicious Chicken Caesar Sandwiches for Quick Comfort Food
  • best Cuban sandwich
    The Best Cuban Sandwich You’ll Want Every Weeknight!

Footer

↑ back to top

About

  • Privacy Policy
  • Disclaimer
  • Terms & Conditions

Newsletter

  • Sign Up! for emails and updates

Contact

  • About me
  • Contact me

Copyright © 2025 TastyTrendIngredients