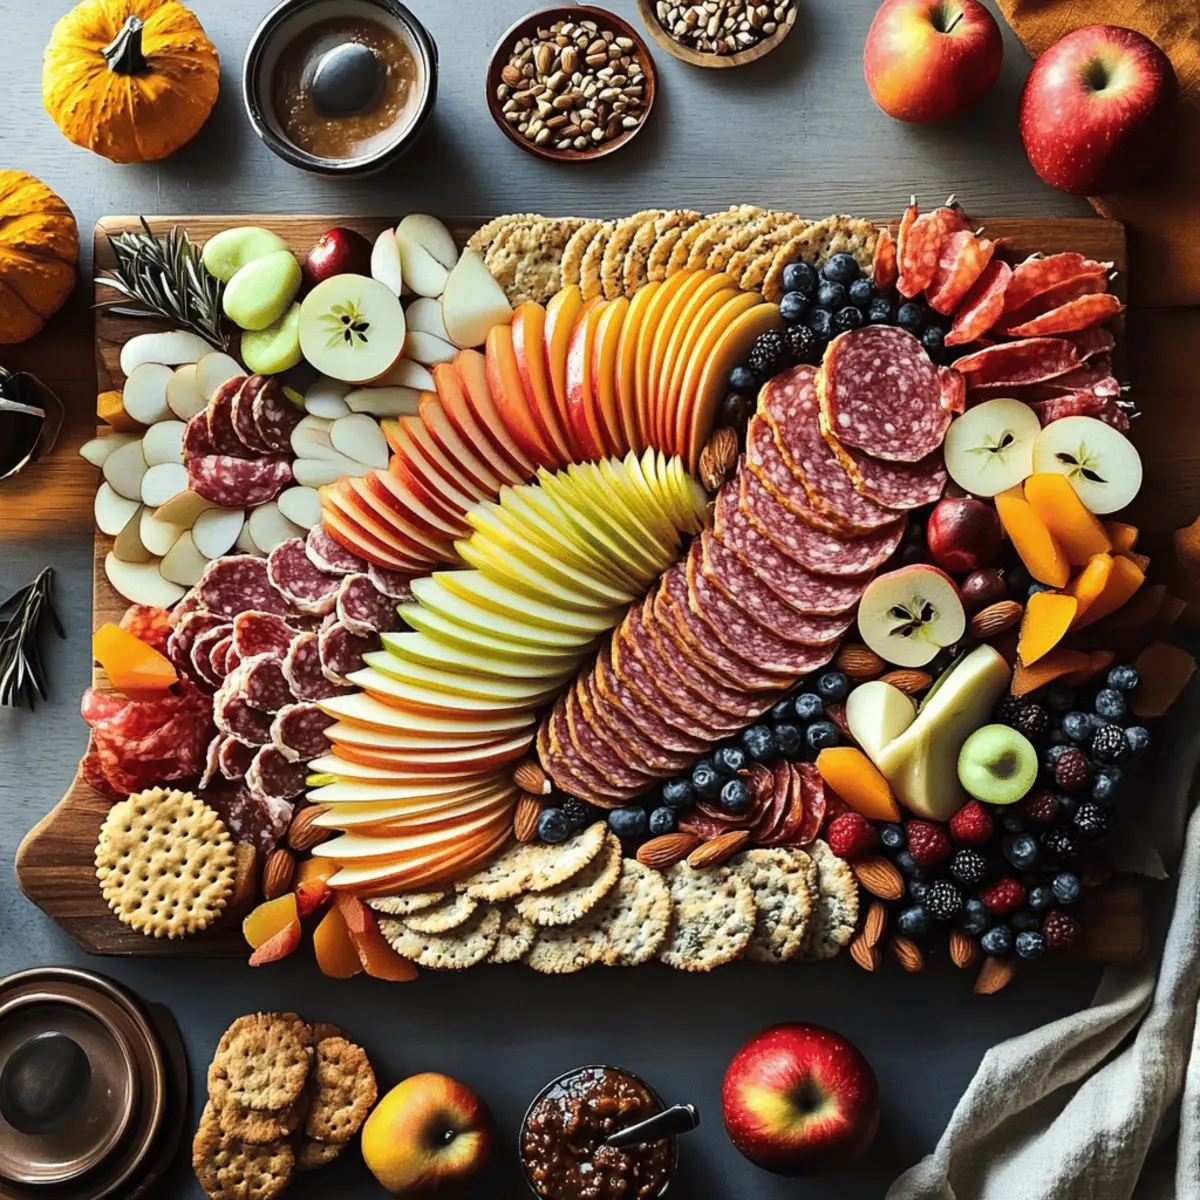
As the golden leaves flutter to the ground, it’s the perfect time to gather friends and family around a table brimming with seasonal delights. Enter the Thanksgiving Charcuterie Board—your ultimate answer to easy entertaining during the most festive time of the year. This assembly of fall flavors showcases sharp cheddar, crunchy apples, and savory meats, turning your get-together into a memorable feast. Not only is it a visual stunner, but the variety of snacks promotes mingling, allowing everyone to savor each bite while the turkey cooks in the oven. Plus, it’s a breeze to put together, so you can focus on more exciting aspects of the holiday. Ready to create a centerpiece that’s as fun to assemble as it is delicious? Let’s dive into the colorful layers and delightful arrangements that will leave your guests talking long after the last cracker is gone!
Why is a Thanksgiving Charcuterie Board Perfect?
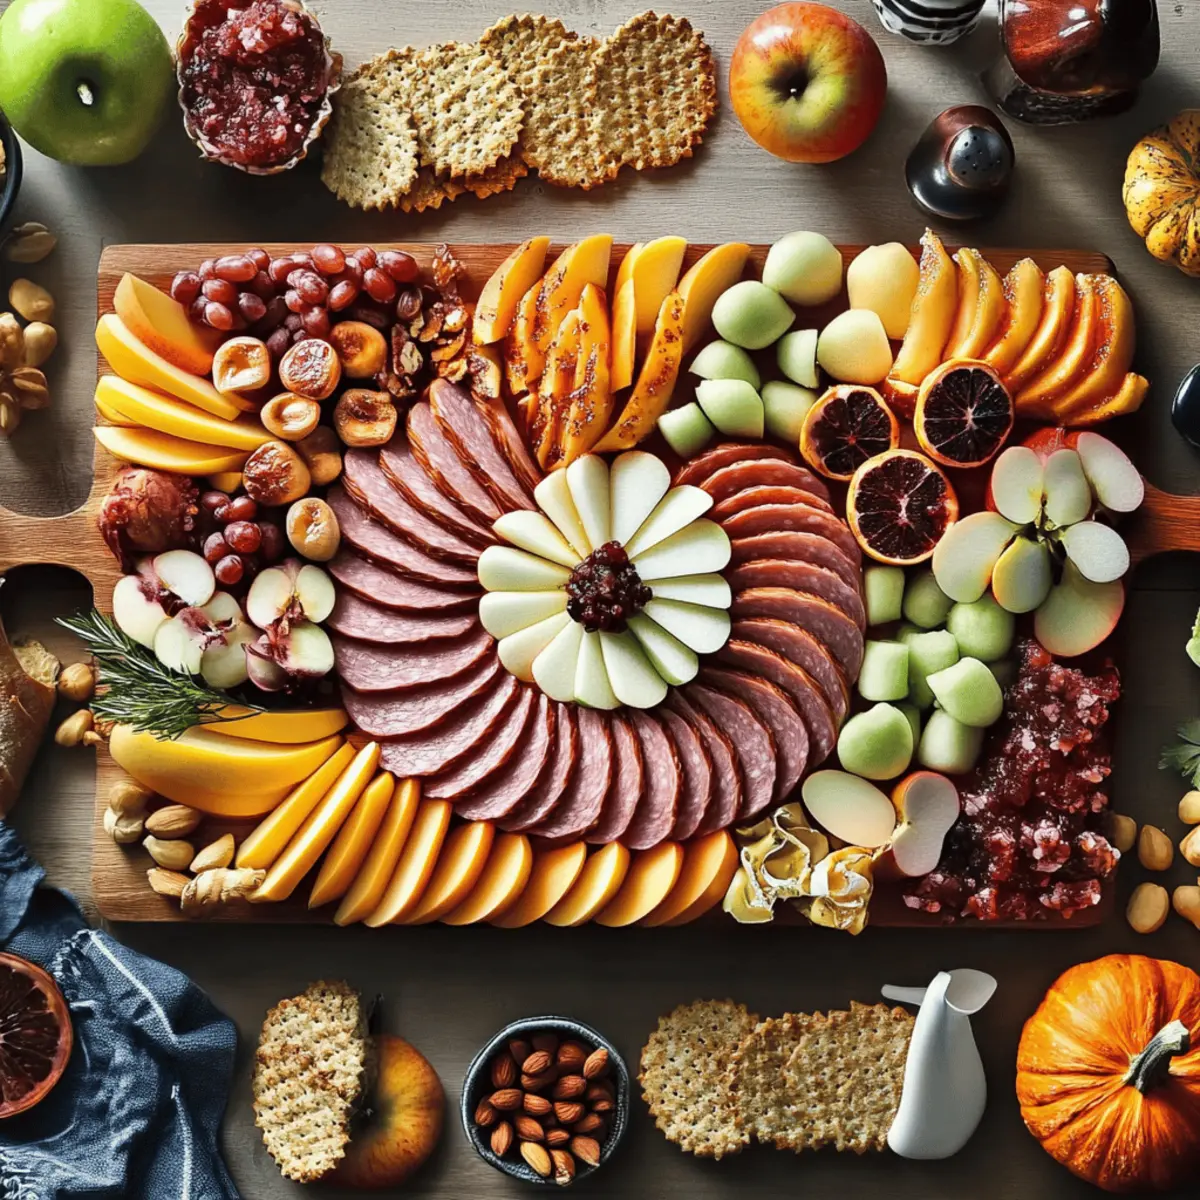
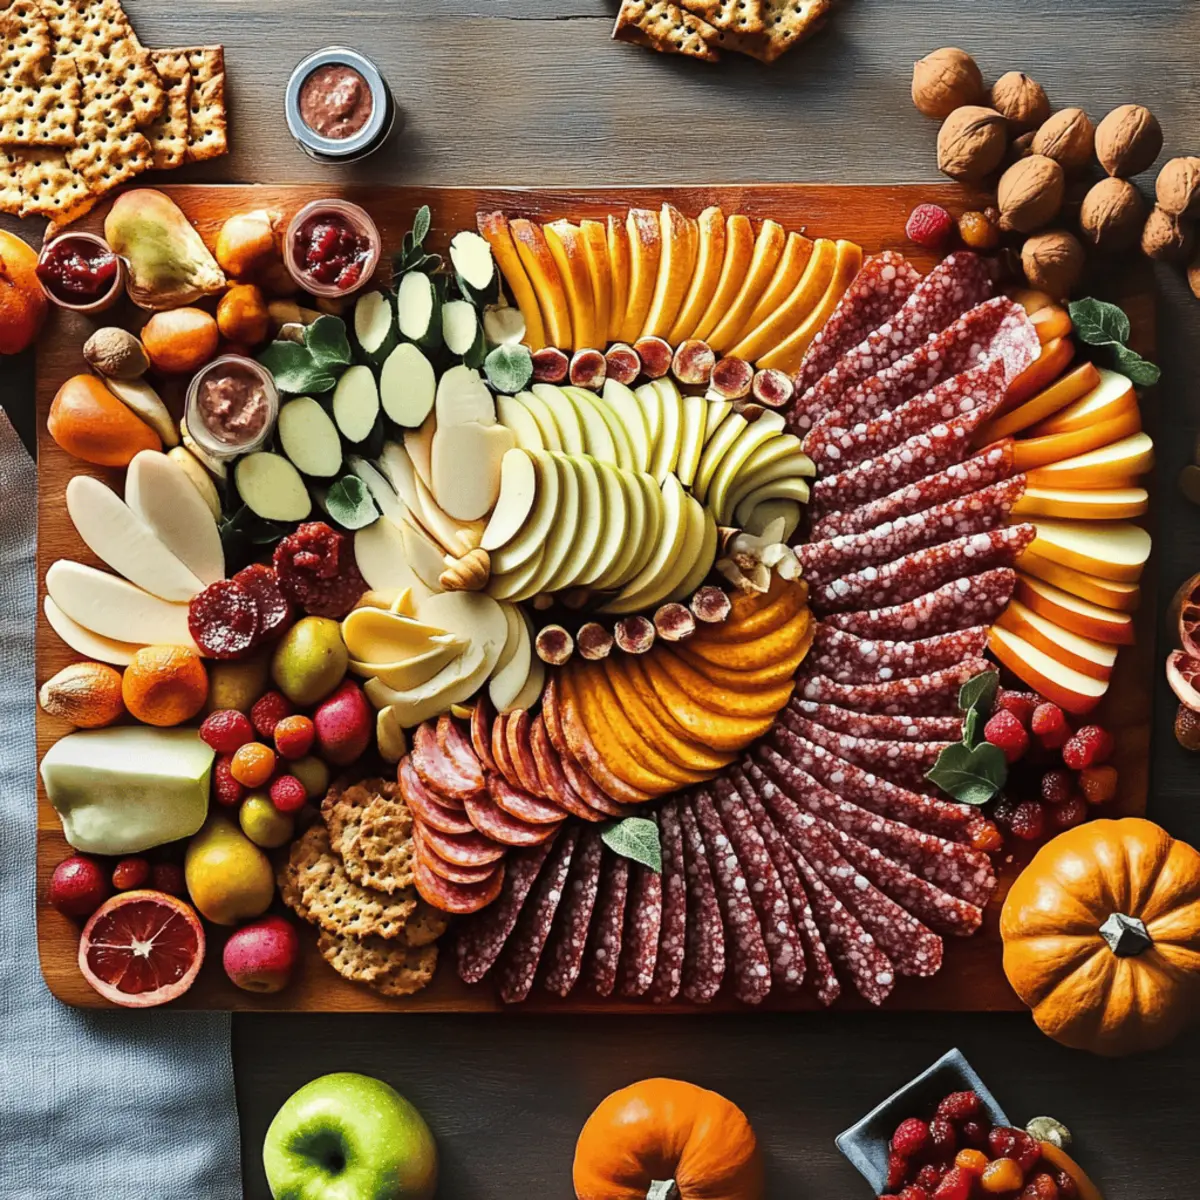
Visual Feast: The Thanksgiving Charcuterie Board is a stunning centerpiece that showcases the vibrant colors of fall, inviting your guests to dig in.
Effortless Assembly: With just a few simple steps, this board can be put together quickly, giving you more time to enjoy the festivities.
Flavor Combos: Experience the delightful blend of creamy cheeses, crisp fruits, and savory meats that capture the essence of the season.
Versatile Choices: Easily adapt the board to accommodate dietary preferences by swapping types of cheese, meats, or dips—making it perfect for any crowd.
Creative Touches: From decorative mini pumpkins to fresh herbs, you'll have fun personalizing the board to celebrate the holiday for seasonal decorations and flavor pairings!
Thanksgiving Charcuterie Board Ingredients
For the Cheese and Meats
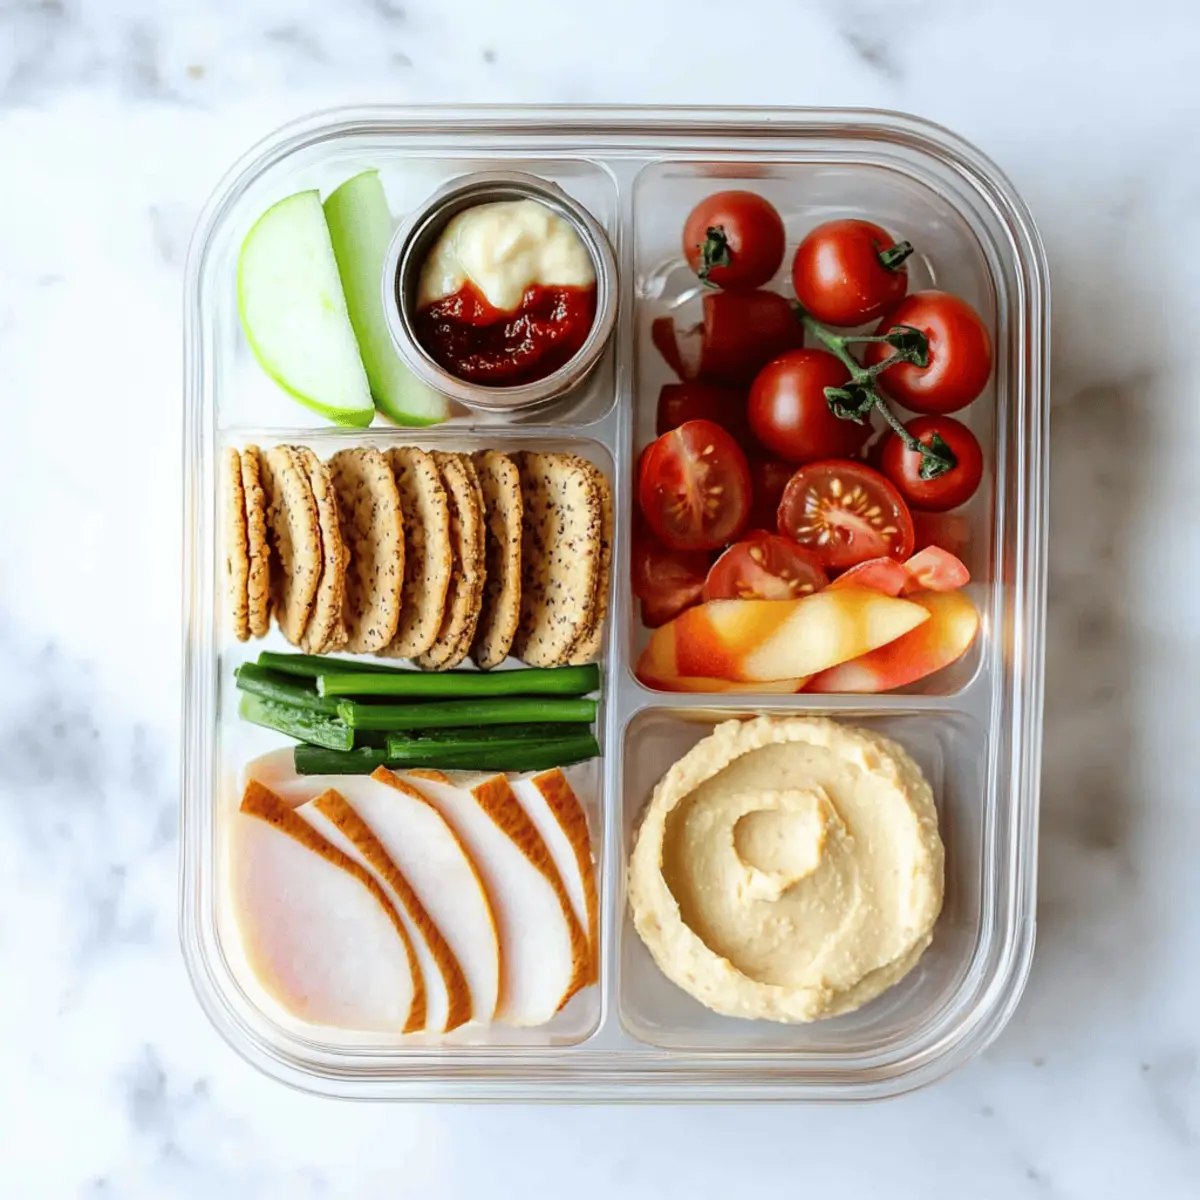
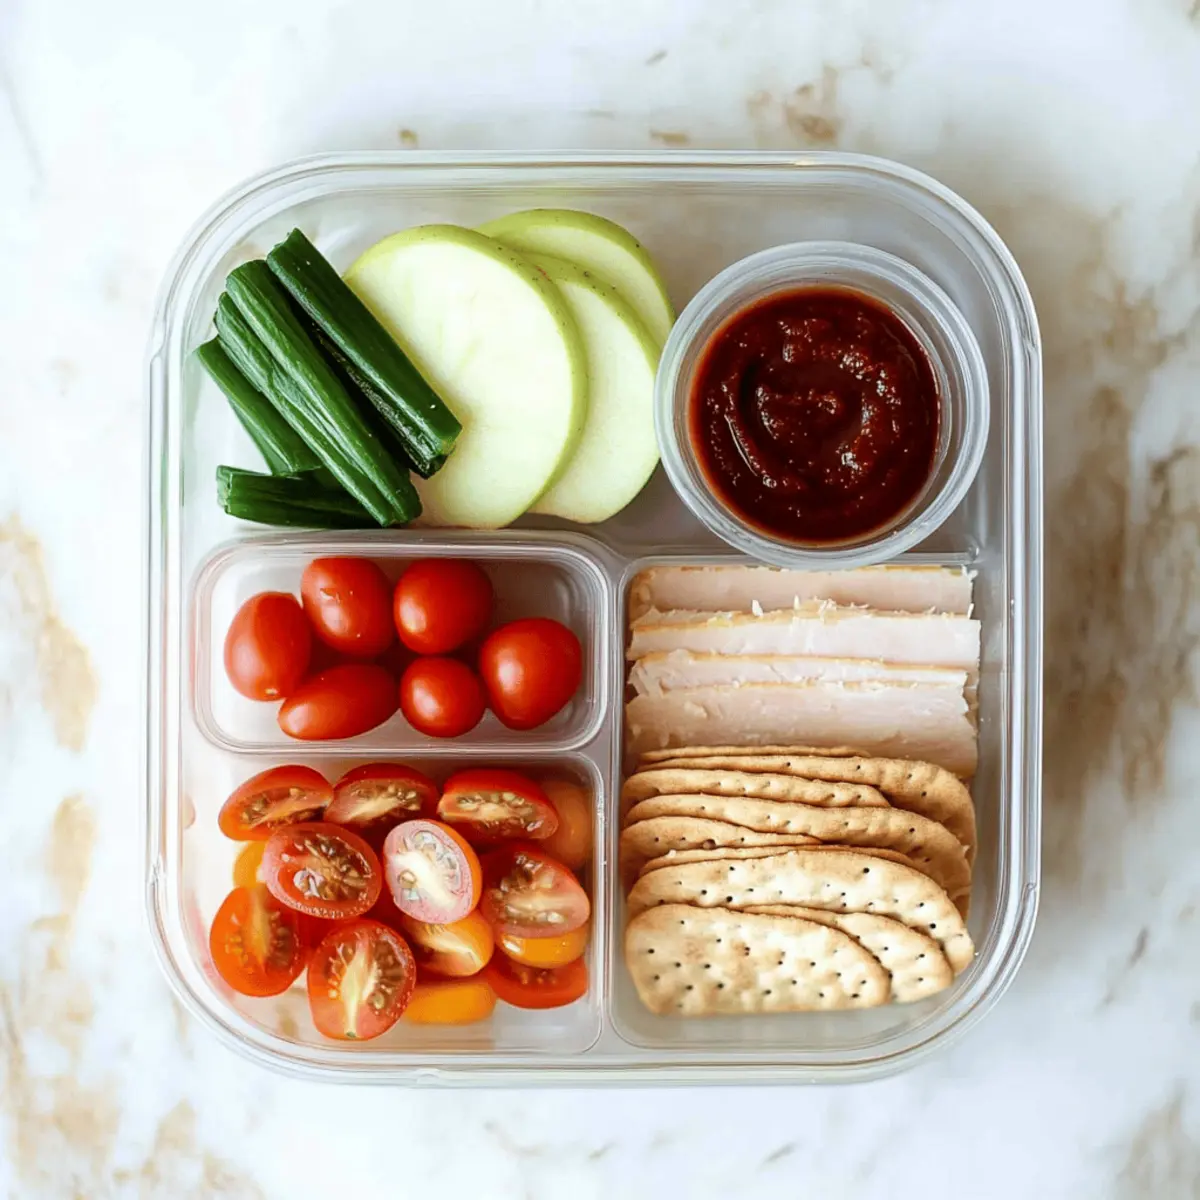
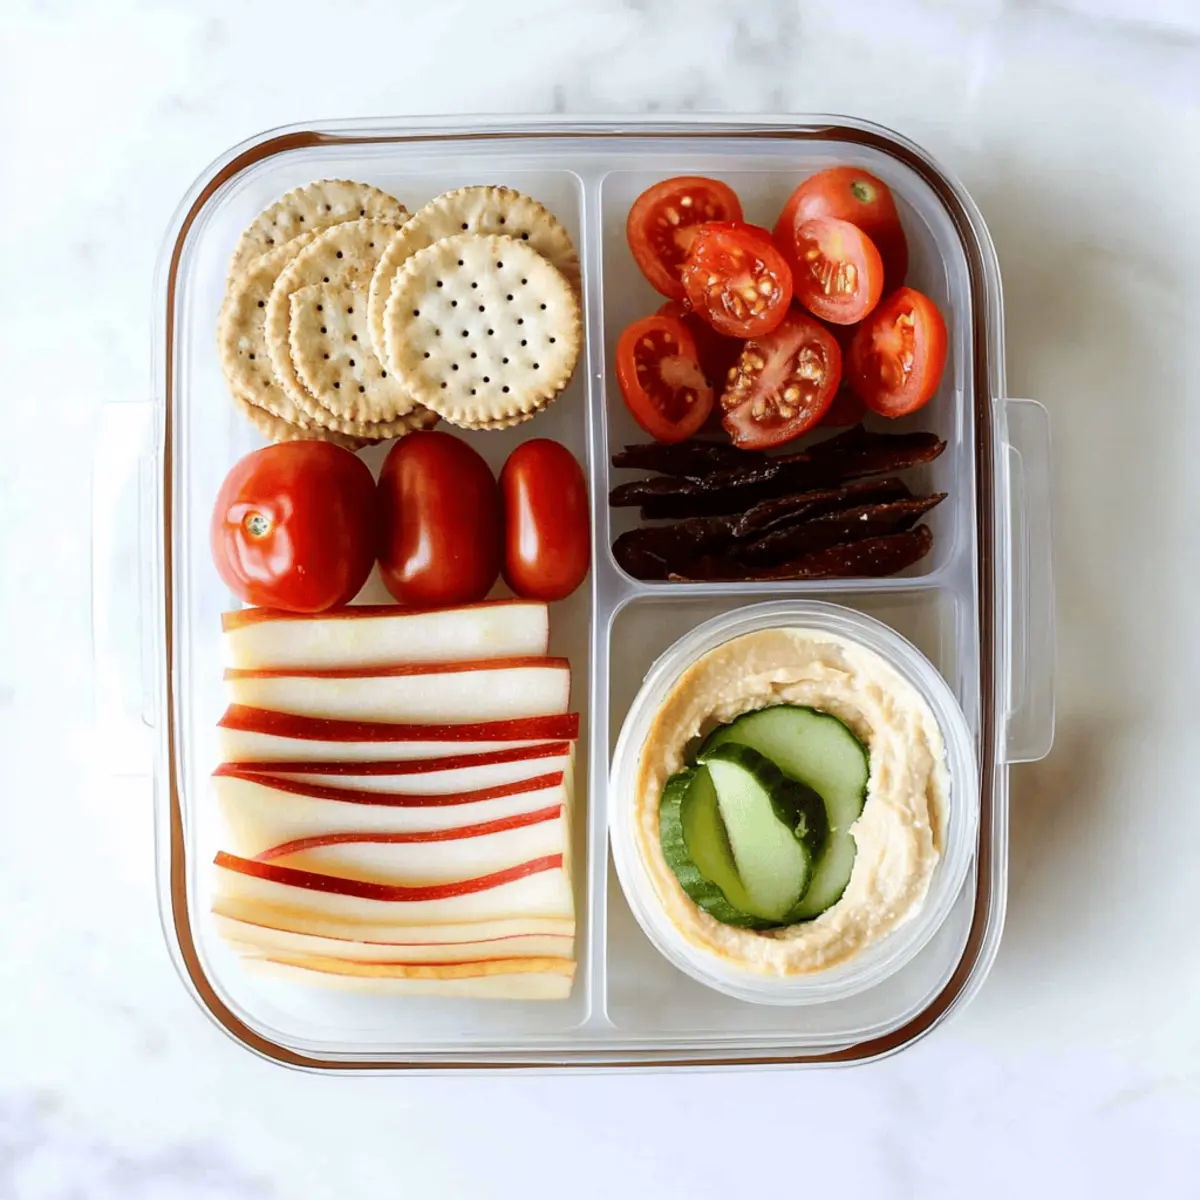
• Cheddar Cheese – Provides a sharp flavor that serves as a rich base; can substitute with Gouda for a milder taste.
• Salty Turkey or Salami – Offers protein and saltiness to balance the sweetness of fruits; replace with ham or prosciutto if preferred.
For the Fruits
• Sliced Apples – Adds sweetness and a crisp texture; pears can be used as a substitute for variety.
For the Base
• Crackers – Act as the foundational element for guests to combine bites; gluten-free options are available for dietary restrictions.
For the Dips
• Cranberry Dip – Enhances autumn flavor profiles; use fig or apple chutney as an alternative.
For Crunch and Decoration
• Nuts (e.g., walnuts, pecans) – Add crunch and heartiness; omit for nut allergies or substitute with seeds.
• Fresh Herbs (e.g., rosemary) – Provides aroma and a decorative touch; thyme or sage can serve as suitable substitutes.
• Mini Pumpkins or Edible Flowers – Serve purely for decoration, adding a festive visual element.
This Thanksgiving Charcuterie Board is designed to delight your taste buds while sparking conversations among your guests!
Step‑by‑Step Instructions for Thanksgiving Charcuterie Board
Step 1: Set the Foundation
Begin by selecting a large, sturdy wooden or slate board as your base for the Thanksgiving Charcuterie Board. Place it on a cleared surface, ensuring enough room for assembly. Start by arranging an even layer of sliced cheddar cheese in the center, creating a visually appealing focal point that will anchor the rest of your ingredients.
Step 2: Add Crackers and Fruits
Next, place an assortment of crackers around your cheese, allowing for easy nibbling. Aim for a mix of textures, such as crunchy and soft. Fill in the gaps with vibrant slices of apples, ensuring they are visually appealing and varied in color to complement the cheese. This combination of flavors will encourage guests to dive right in.
Step 3: Layer in the Meats
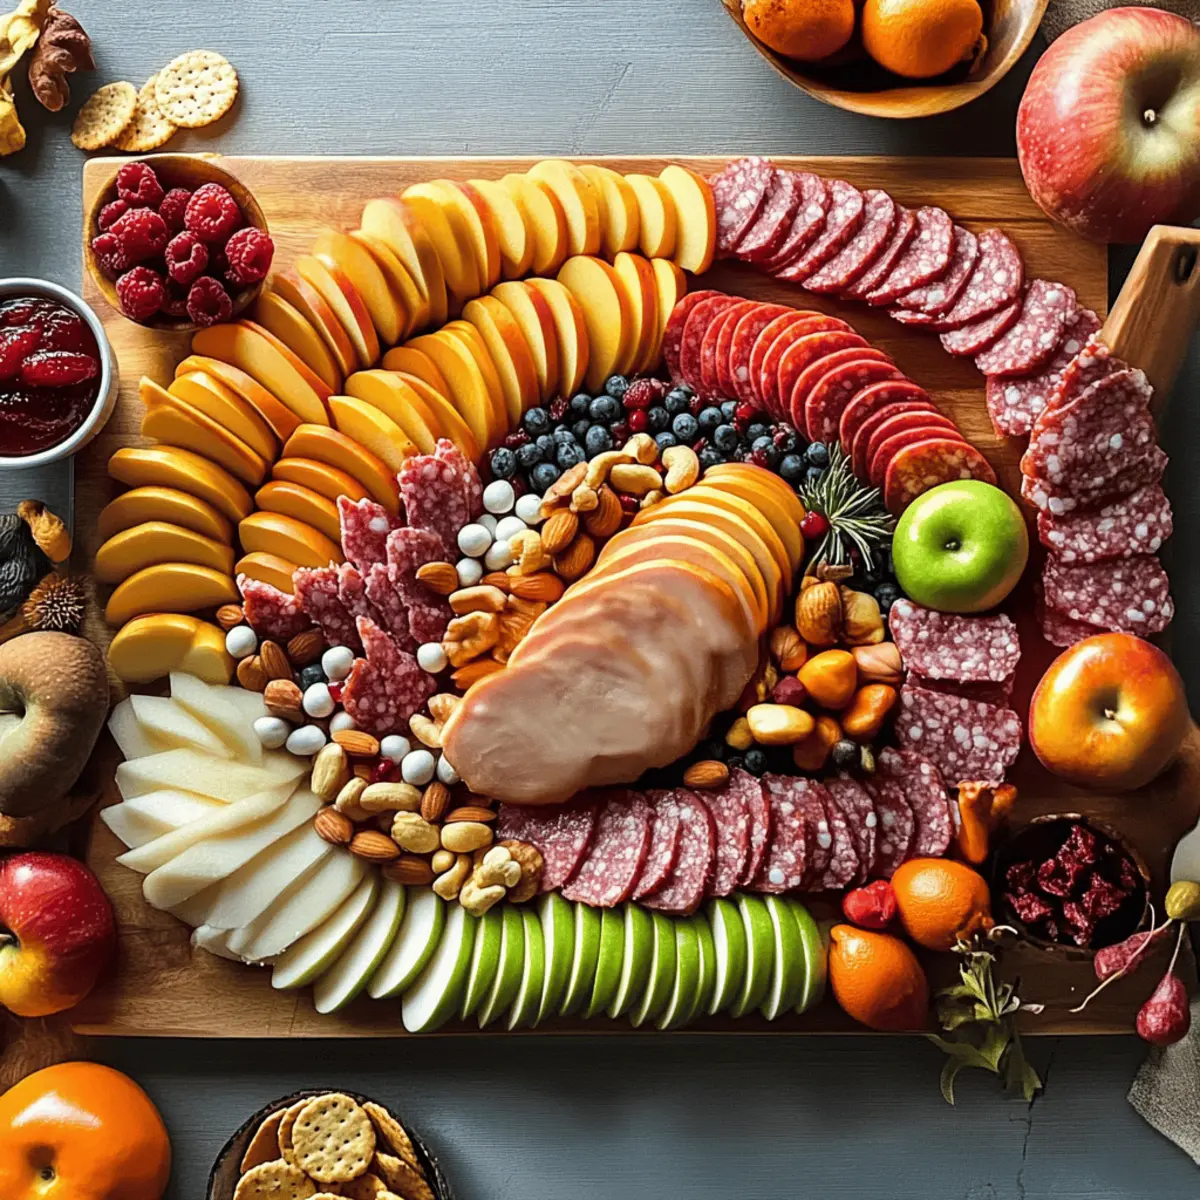
Now, it’s time for the savory elements! Neatly arrange slices of salty turkey or salami between the cheese and fruits. For a festive touch, tuck the meat into a turkey shape or layer them flat. This variety not only introduces delicious flavors but also adds richness to your Thanksgiving Charcuterie Board.
Step 4: Introduce the Dips
To enhance the flavors further, incorporate small jars of cranberry dip or your chosen alternative. Position them strategically in the gaps, ensuring they’re easily accessible for your guests to scoop their favorites onto crackers or fruit. This balancing act of dips adds an inviting aroma, drawing everyone to the board.
Step 5: Garnish with Nuts and Herbs
Elevate your board's appearance by sprinkling nuts such as walnuts or pecans around the edges, adding crunch and heartiness. Complement this with sprigs of fresh herbs like rosemary for a fragrant and visually appealing garnish. The combination of colors and textures will create an inviting and festive scene.
Step 6: Add Decorative Touches
For a last flourish, place mini pumpkins or edible flowers intermittently across the board. These decorative elements will not only enhance the festive spirit but also introduce new visual dimensions, making your Thanksgiving Charcuterie Board a true centerpiece.
Step 7: Final Adjustments and Balance
Take a step back and assess your board, adjusting the placements to ensure a balanced look without overcrowding. Make sure that all elements are easily reachable, and there are no gaps left behind. Your beautifully arranged Thanksgiving Charcuterie Board is now ready to entice guests and elevate your holiday gathering!
Tips for the Best Thanksgiving Charcuterie Board
- Color Balance: Aim for a harmonious mix of colors. Incorporate vibrant fruits like red apples and green herbs, making your Thanksgiving Charcuterie Board visually appealing.
- Texture Variety: Combine different textures, from creamy cheeses to crunchy nuts. This delightful contrast will enhance the overall experience for your guests.
- Avoid Overcrowding: While it’s tempting to fill every space, overcrowding can make it challenging for guests to navigate. Leave space for easy access to snacks.
- Seasonal Ingredients: Use seasonal fruits and flavors to keep the theme cohesive. Think about swapping in pears or quince when apples aren't in season.
- Interactive Dips: Ensure dips are easily reachable and scoop-friendly. This makes it fun for guests to mix and match flavors without any mess!
Make Ahead Options
The Thanksgiving Charcuterie Board is perfect for meal prep, allowing you to gather flavors ahead of time for a stress-free holiday gathering. You can slice cheeses and fruits up to 24 hours in advance; simply refrigerate them in airtight containers to maintain their freshness. You can also prep and arrange the crackers and dips in advance—just keep them separate until party time to prevent sogginess. When ready to serve, lay everything out on your board and garnish with nuts and herbs to add that fresh touch. This way, you can enjoy quality time with your loved ones while your beautiful Thanksgiving Charcuterie Board stands ready to impress!
Thanksgiving Charcuterie Board Variations
Feel free to experiment and make this Thanksgiving Charcuterie Board uniquely yours, enhancing flavors and textures along the way!
- Dairy-Free: Use nut-based cheeses like almond or cashew to keep flavors rich without the dairy.
- Fruity Twist: Swap out apples for seasonal pears or roasted persimmons, adding a twist to the classic sweetness.
- Savory Addition: Incorporate smoky gouda or blue cheese for a complex flavor profile that excites the palate.
This twist introduces depth to the board, giving your guests something special to talk about. - Spiced Dips: Add unique dips like roasted garlic or pumpkin hummus to bring festive warmth and complimentary flavors.
The right dip can make all the difference, transforming basic bites into an exciting culinary adventure. - Gluten-Free: Select gluten-free crackers or veggie sticks to ensure everyone can join in on the fun.
- Nuts & Seeds: Opt for sunflower seeds or pumpkin seeds, especially if you're accommodating nut allergies.
- Herb Infusion: Try adding fresh herbs like thyme or sage to mimic traditional Thanksgiving stuffing flavors, creating an aromatic experience.
It’s amazing how fresh herbs can elevate the overall scent and enjoyment of your board. - Heat It Up: Introduce spicy elements like pepper jack cheese or jalapeño-infused meats for those who love a kick.
This adds an unexpected surprise that keeps guests reaching for more!
Enhancing your Thanksgiving Charcuterie Board opens up a world of flavors that will delight your guests and create memorable moments around the table.
What to Serve with Thanksgiving Charcuterie Board
The perfect accompaniment can elevate your Thanksgiving gathering, creating an unforgettable feast that dazzles the senses.
- Creamy Mashed Potatoes: Their buttery texture and rich flavor create a comforting contrast to the savory bites on your board.
- Roasted Brussels Sprouts: Crispy on the outside and tender within, these bring a delightful earthiness that plays beautifully with the season’s flavors.
- Warm Bread Rolls: Soft and pillowy, these rolls are perfect for mopping up dips, adding a cozy warmth to your festive spread.
- Pumpkin Soup: A velvety autumn classic, its creamy sweetness will harmonize with the sharpness of the cheeses and the saltiness of the meats.
- Spiced Apple Cider: Offering a touch of warmth with fragrant spices, this drink adds a lovely seasonal twist that pairs well with the charcuterie.
- Pecan Pie: For dessert, this nutty, sweet favorite rounds off the meal with a rich contrast to the savory elements on the board.
Creating a full meal around your Thanksgiving Charcuterie Board means thinking of flavor, texture, and seasonality; these selections do just that!
How to Store and Freeze Thanksgiving Charcuterie Board
Airtight Container: Store any leftover ingredients in an airtight container in the fridge for up to 3 days to maintain freshness.
Fridge: Keep assembled boards in the fridge, but note that fruits and crackers may get soggy; best to store them separately.
Freezer: While not ideal for freezing, uncut cheeses and meats can be frozen for up to 2 months; thaw in the fridge before using.
Reheating: If warming any meats, heat them gently in a microwave or oven to retain flavor, but serve cold items fresh for best taste.
Thanksgiving Charcuterie Board Recipe FAQs
How do I select the best fruits for my Thanksgiving Charcuterie Board?
Absolutely! When choosing fruits, look for vibrant colors and firm textures. Crisp and sweet options like apples should be free of dark spots and bruises. Pears can be a lovely alternative if you're after variety. Remember that freshness is key, so select fruits that are in season for the best flavor!
What’s the best way to store leftovers from the Thanksgiving Charcuterie Board?
You can easily store any leftover ingredients in an airtight container in the fridge for up to 3 days. To maintain the freshness of fruits and crackers, I recommend keeping them separate from other components. If you're dealing with an assembled board, be aware that it may not hold up well, as fruits can get mushy and crackers may become soggy.
Can I freeze ingredients from my Thanksgiving Charcuterie Board?
While it's not ideal to freeze an assembled charcuterie board, you can freeze uncut cheeses and meats. Wrap them tightly in plastic wrap and then place them in a freezer-safe bag. They can last for up to 2 months in the freezer. When you're ready to use them, simply thaw them in the fridge overnight for best results.
What if my cheeses or meats start to smell or look odd?
Very! If you notice any undesirable odors—whether an off-smell from the cheese or discoloration in the meats—it's best to discard them. Always trust your instincts! For fresh items like fruits, look out for any mushiness or dark spots that indicate spoilage.
Are there any dietary considerations for my Thanksgiving Charcuterie Board?
When serving guests, consider dietary restrictions such as nut allergies and gluten intolerance. You can easily provide gluten-free crackers or omit nuts altogether and substitute with seeds for added crunch. Additionally, I often make a point to label each item on my board so everyone can avoid allergens and enjoy the festivities worry-free.
Craft the Perfect Thanksgiving Charcuterie Board for Festive Flavors
Ingredients
Equipment
Method
- Begin by selecting a large, sturdy wooden or slate board as your base. Arrange an even layer of sliced cheddar cheese in the center.
- Place an assortment of crackers around your cheese. Fill in gaps with vibrant slices of apples.
- Neatly arrange slices of salty turkey or salami between the cheese and fruits.
- Incorporate small jars of cranberry dip or your chosen alternative in the gaps.
- Sprinkle nuts around the edges, adding crunch and complement with sprigs of fresh herbs for garnish.
- Place mini pumpkins or edible flowers intermittently across the board for decoration.
- Assess your board for balance and ensure all elements are easily reachable.