tastytrendingredients

  • Home
  • Recipes
    • Appetizers
    • Breakfast
    • Dessert
    • Dinner
    • Drinks
    • Salads
    • Snacks
    • Soups
  • About me
  • Contact
menu icon
go to homepage
  • Home
  • Recipes
    • Appetizers
    • Breakfast
    • Dessert
    • Dinner
    • Drinks
    • Salads
    • Snacks
    • Soups
  • About me
  • Contact
search icon
Homepage link
  • Home
  • Recipes
    • Appetizers
    • Breakfast
    • Dessert
    • Dinner
    • Drinks
    • Salads
    • Snacks
    • Soups
  • About me
  • Contact
×

Cemetery Flatbread Pizza That's Spooktacularly Fun to Make

October 14, 2025 by Grace Snow Leave a Comment

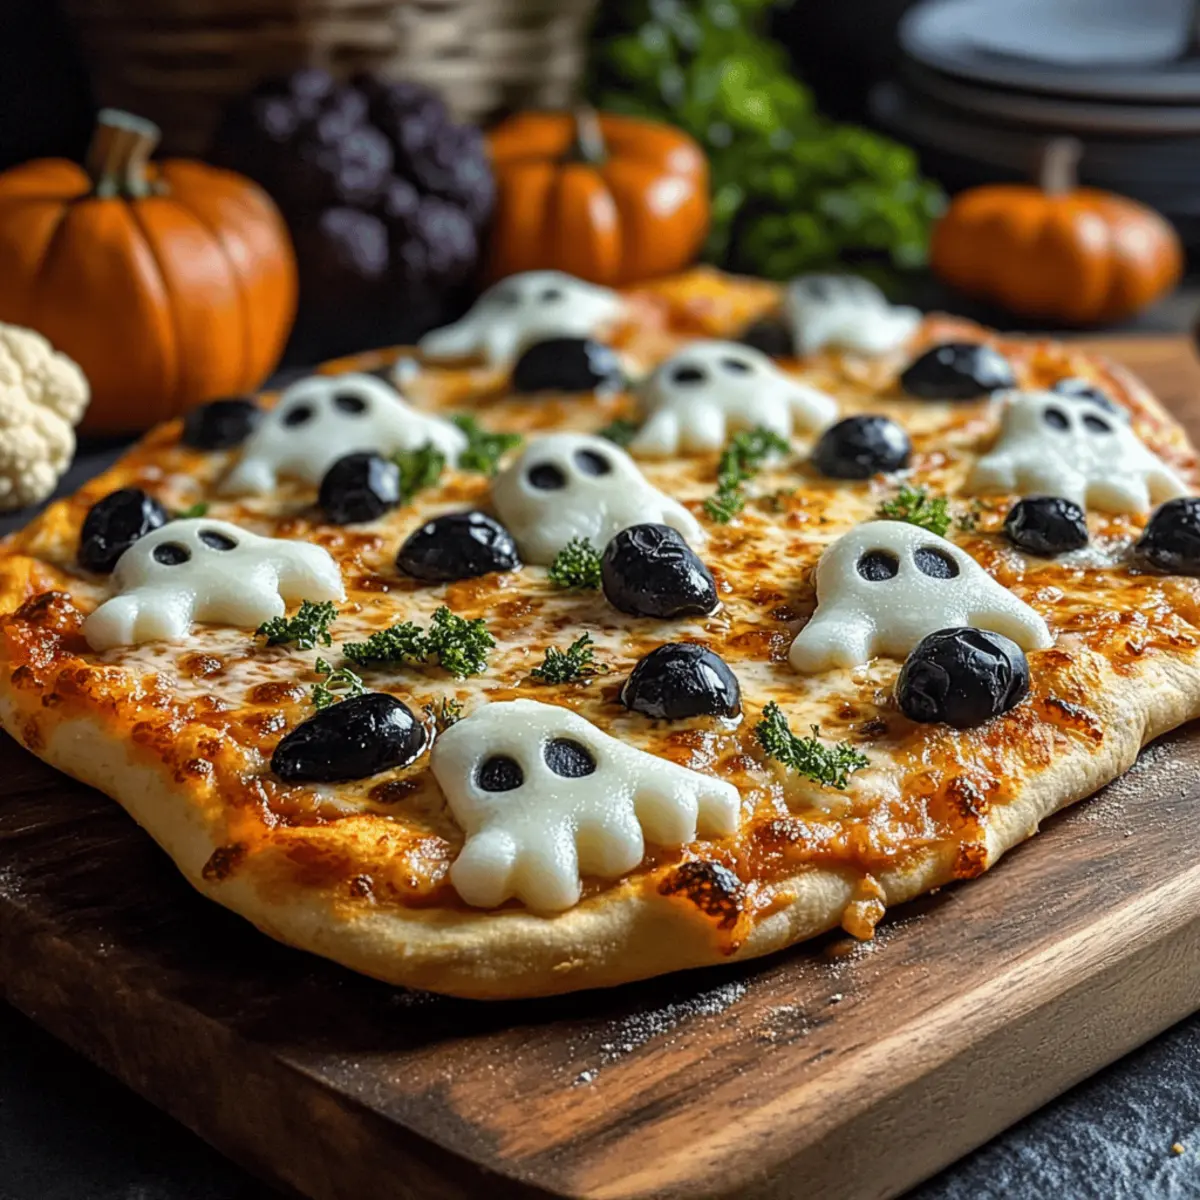
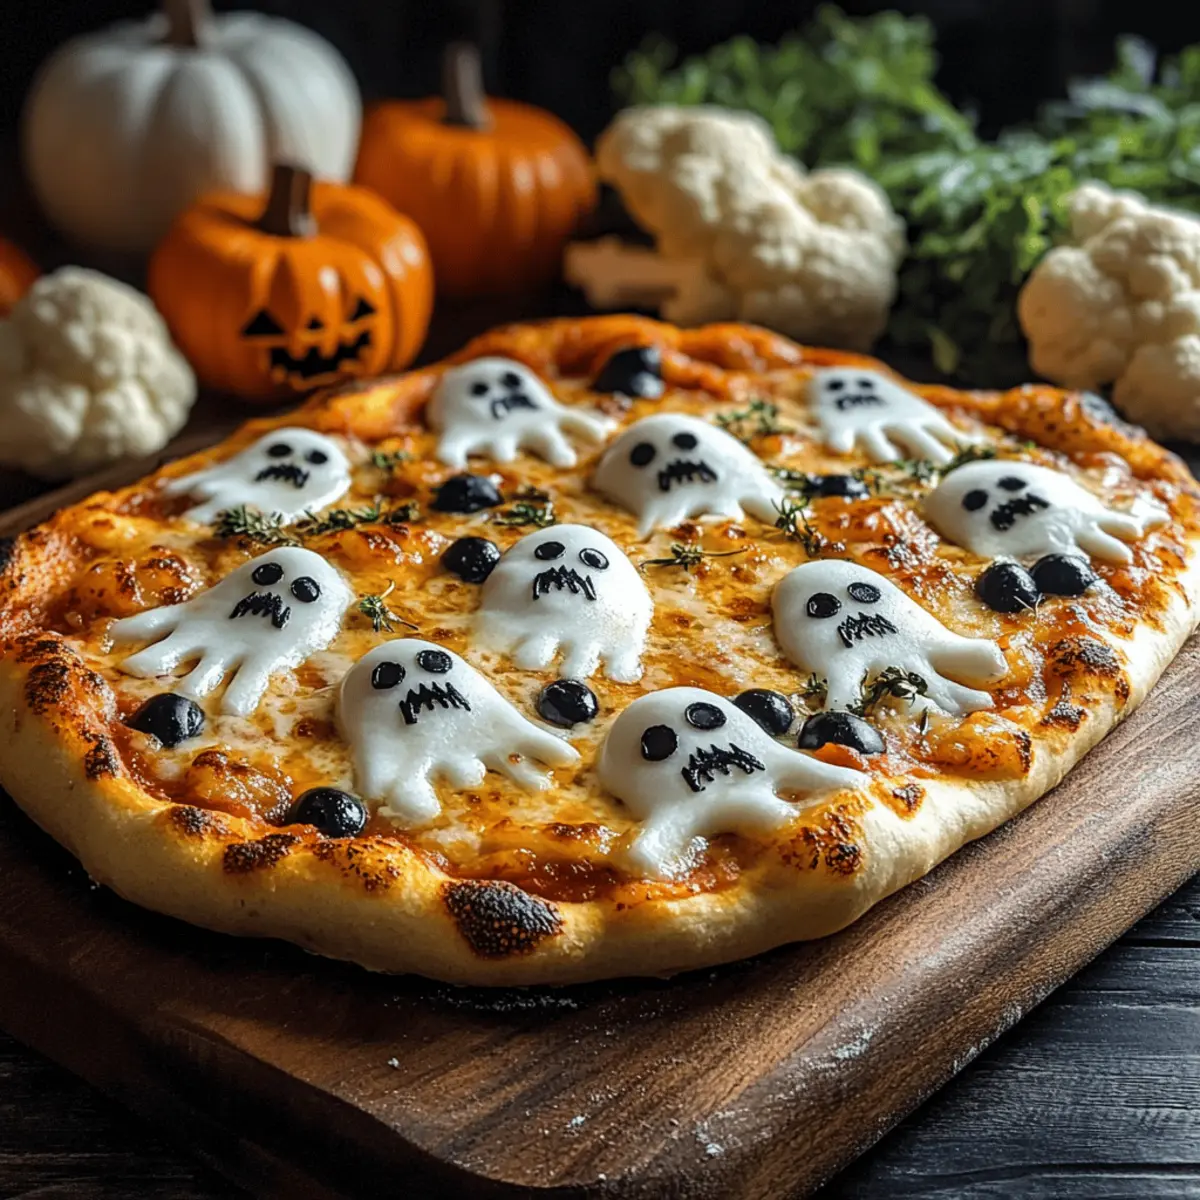
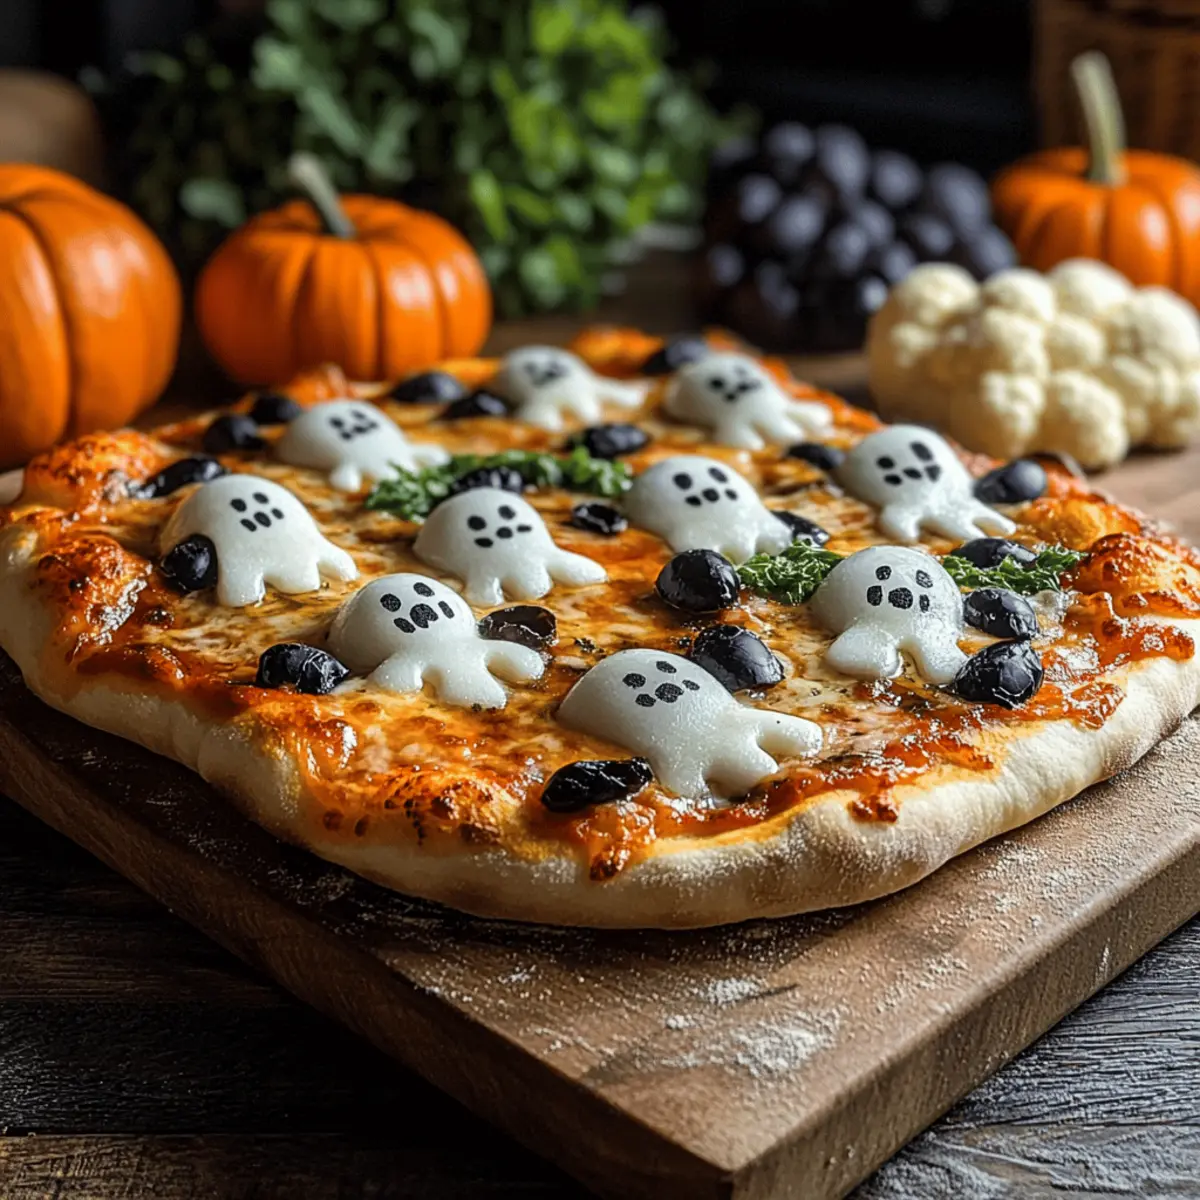
The air is tinged with a hint of spookiness, and I can’t help but smile at the thought of Halloween festivities. This year, I’m stirring things up with my Cemetery Flatbread Pizza, a playful twist on an all-time favorite. Complete with melted mozzarella ghosts, black olive gravestones, and roasted cauliflower bones, this dish is both a showstopper and a sure crowd-pleaser. What I love most about this recipe is its adaptability—it's perfect for kids and adults alike, and its simple prep means more time for laughter and less time in the kitchen. Whether you’re hosting a Halloween bash or simply want to bring some whimsical fun to dinner, this pizza sets the stage for delightful memories. Ready to create a haunted culinary masterpiece? Let’s dive in!
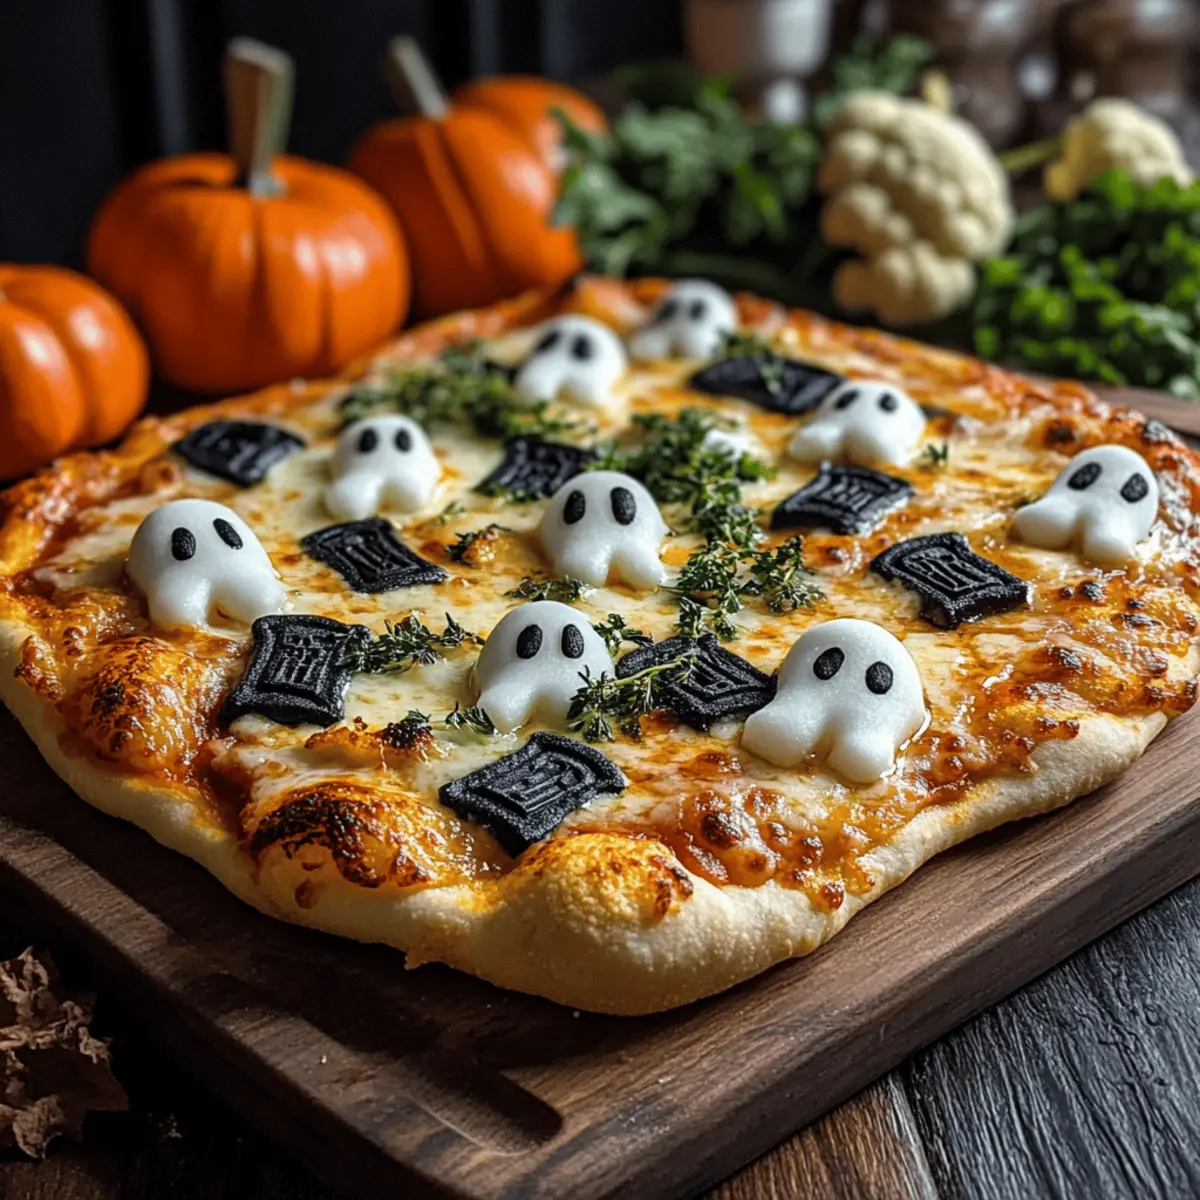
Why is This Pizza Perfect for Halloween?

Festive Fun: The Cemetery Flatbread Pizza brings creativity to your Halloween table, transforming ordinary pizza into a spooktacular masterpiece.

Kid-Friendly: With its playful ghost shapes and gravestone designs, it makes for a fun cooking project with the little ones.

Quick and Easy: This recipe is designed to be simple; you can whip it up in under 20 minutes, leaving plenty of time for other festivities.

Customizable Delight: Use whatever toppings you have on hand, making it versatile—perfect for even the pickiest of eaters!

Visual Impact: The eerie yet delightful presentation of melted cheeses and veggies isn’t just a treat for the taste buds—it’s a showstopper that will wow your guests.

Try pairing it with some themed sides like pumpkin cheese balls to enhance your Halloween menu!

Cemetery Flatbread Pizza Ingredients

Discover the essential ingredients to create your spooky masterpiece!

For the Flatbread Base

  • Flatbread Dough – This forms the base structure for the pizza; feel free to use homemade or store-bought options for convenience.
  • Olive Oil – Adds moisture and helps brown the crust; vegetable oil can work as a suitable substitute.

For the Saucy Goodness

  • Pizza Sauce – Adds flavor and moisture to your pizza; any tomato-based brand works perfectly.

For the Cheesy Decor

  • Shredded Mozzarella Cheese – The main cheese that melts beautifully; a dairy-free cheese alternative can be used here.
  • Mozzarella Slices – Cut into playful ghost shapes to enhance the Halloween theme; consider other cheeses like cheddar for a different taste.

For the Spooky Accents

  • Black Olives – Used to create gravestone shapes; try swapping with green olives for a unique look.
  • Cauliflower Florets – Acts as skeleton bones; you can replace them with other veggies like carrots or parsnips for an alternate texture.
  • Fresh Parsley/Cilantro – Optional garnish that adds a fresh touch right before serving.
  • Salt and Pepper – Essential for seasoning and balancing the flavors.

Now you have everything you need to create your Cemetery Flatbread Pizza that’s bound to be a hit at your Halloween gathering!

Step‑by‑Step Instructions for Cemetery Flatbread Pizza

Step 1: Preheat and Prepare
Begin by preheating your oven to 475°F (245°C). While it heats, take a baking sheet and lightly oil it with olive oil to ensure your Cemetery Flatbread Pizza doesn't stick. This step is crucial for achieving that beautiful, crisp crust we all love!

Step 2: Shape the Dough
Roll out the flatbread dough into a rectangular shape on a lightly floured surface. Aim for about ¼-inch thickness for the perfect bite. Once shaped, brush the surface generously with olive oil, allowing it to glisten—a visual cue that the dough is ready to hold all your spooky toppings.

Step 3: Spread the Sauce
Using a spoon, spread a layer of pizza sauce evenly over the flatbread, leaving a ½-inch border around the edges. This border will help contain those delightful toppings, ensuring your Cemetery Flatbread Pizza remains intact while baking. Visualize a painted canvas awaiting its colorful toppings!

Step 4: Add the Cheese and Veggies
Next, sprinkle a generous layer of shredded mozzarella cheese over the sauced base, ensuring even coverage. Gently scatter cauliflower florets across the cheese, placing them strategically to resemble spooky skeleton bones. The greenish hue of the cauliflower against the cheese will create a striking visual effect.

Step 5: Bake to Golden Perfection
Transfer your flatbread pizza to the preheated oven and bake for 8 minutes. Watch carefully as the cheese melts and the edges begin to crisp up; you want them just shy of a golden brown. This is your signal that it’s almost time for the fun additions!

Step 6: Ghostly Additions
Once baked, quickly remove the flatbread from the oven. Add the ghost-shaped mozzarella cutouts and press black olive slices into them for eyes and mouths. The ooey-gooey melted cheese creates a whimsical look, ensuring your Cemetery Flatbread Pizza embodies the Halloween spirit.

Step 7: Gravestone Assembly
Now, arrange black olives horizontally on the pizza to resemble gravestones. Space them out cleverly to enhance your Halloween presentation, making it feel like a playful graveyard. Return your masterpiece to the oven for an additional 5-7 minutes, allowing everything to meld beautifully.

Step 8: Garnish and Serve
After the final bake, remove your Cemetery Flatbread Pizza from the oven and let it cool slightly. For an extra touch of festivity, sprinkle fresh parsley or cilantro on top before slicing. This fresh touch balances the flavors beautifully, making it as attractive as it is delicious!
How to Store and Freeze Cemetery Flatbread Pizza

Room Temperature: Enjoy your Cemetery Flatbread Pizza fresh from the oven for the best taste, but if leftovers remain, they can be stored at room temperature for up to 2 hours before refrigeration.

Fridge: Store leftover slices in an airtight container, where they can last for up to 3 days. Reheat individual slices in the microwave or oven until heated through.

Freezer: For longer storage, freeze unbaked flatbreads wrapped tightly in plastic wrap and then in foil. They can be stored for up to 3 months. Bake directly from frozen, adding a few extra minutes to the cooking time.

Reheating: To reheat, place leftover slices in a preheated oven at 350°F (175°C) for about 10 minutes or until heated through, keeping the crust crispy while melting the cheese.

Make Ahead Options

These Cemetery Flatbread Pizza components are perfect for meal prep enthusiasts looking to save time on busy Halloween nights! You can prepare the flatbread dough up to 24 hours in advance, refrigerating it wrapped in plastic to maintain freshness. Both the pizza sauce and shredded mozzarella can be prepped and stored in airtight containers for up to 3 days. For assembly, simply roll out the dough, spread the sauce, add the cheese, and other toppings as outlined in the recipe right before baking. This keeps the crust and cheese just as delicious while allowing you to enjoy quality time with family or friends when it’s time to serve!

Expert Tips for Cemetery Flatbread Pizza

  • Keep it Spooky: To ensure cheese ghosts hold their shape, bake only until they start to melt, preventing them from turning into a puddle.

  • Present with Prowess: Space gravestones creatively for an authentic cemetery look; this enhances visual appeal and adds to the Halloween spirit.

  • Easy Cleanup: Using parchment paper on your baking sheet simplifies post-baking cleanup, allowing you to enjoy the spooky festivities without hassle.

  • Cool Before Cutting: Let the baked flatbread cool for a few minutes before slicing to maintain ghost and gravestone shapes for a fun presentation.

  • Customize to Taste: Use any veggies or cheese you have on hand, making your Cemetery Flatbread Pizza as unique as your Halloween celebration!

Cemetery Flatbread Pizza: Spooky Customizations

Make this Halloween-themed pizza even more fun and personalized to match your tastes!

  • Dairy-Free: Substitute mozzarella cheese with a dairy-free alternative for a delicious, kid-friendly option that's still spooky.

  • Vegetable Delight: Add colorful peppers or mushrooms for a burst of flavor and texture, turning your graveyard into a vibrant vegetable patch.

  • Cheese Adventure: Experiment with different cheese types, such as zingy sharp cheddar or spicy pepper jack, to create a flavor explosion on every slice.

  • Meaty Addition: For those who love protein, top with crumbled sausage or pepperoni to ensure no ghostly cravings go unsatisfied!

  • Hot and Spicy: Spice things up by adding jalapeño slices or a sprinkle of red pepper flakes for those who enjoy a fiery kick.

  • Gluten-Free Option: Use a gluten-free flatbread dough or crust to accommodate dietary needs while keeping all the fun!

  • Fun Dips: Serve your Cemetery Flatbread Pizza with spooky-themed dips like “mummy dip” or pumpkin hummus for a complete Halloween feast.

Consider pairing it with a side of themed treats, like pumpkin cheese balls, for an unforgettable festive meal!

These variations make it a versatile dish that your guests will find both delicious and entertaining!

What to Serve with Cemetery Flatbread Pizza?

Create a festive Halloween feast with delightful accompaniments that elevate your spooky masterpiece.

  • Crispy Garlic Bread: A warm, buttery side that complements the cheesy flatbread perfectly, adding a satisfying crunch to every bite.

  • Pumpkin Cheese Balls: These cute and delicious appetizers mimic pumpkin shapes, echoing the Halloween theme and offering a creamy contrast. They’re always a crowd favorite!

  • Roasted Veggie Platter: Seasonal veggies like carrots and broccoli drizzled with olive oil bring vibrant color and healthful goodness, balancing the richness of the pizza. Pairing this with a splash of balsamic glaze adds an exciting zing!

  • Witches’ Brew Punch: A festive drink with a mix of fruit juices and ginger ale, garnished with spooky fruit shapes; refreshing and fun, perfect for all ages!

  • Chocolate Spider Cookies: Indulge your sweet tooth with these playful cookies topped with chocolate, providing a spooky yet delightful finish to the meal.

  • Graveyard Salad: Toss together mixed greens, cherry tomatoes, and croutons for a fresh, crunchy side that contrasts beautifully with the rich flavors of the Cemetery Flatbread Pizza.

  • Deviled Eyeballs: These creepy yet delicious bites, made with seasoned egg yolk and olive "eyeballs," are not just tasty but also enhance the eerie atmosphere of your Halloween table.
Cemetery Flatbread Pizza Recipe FAQs

How do I choose the right flatbread for this pizza?
Absolutely! If you're going for store-bought, select a flatbread that's soft yet sturdy, allowing it to support the toppings. For homemade, a simple recipe with flour, water, and a touch of salt works wonders. Just make sure it’s rolled out to about a ¼-inch thickness for that perfect bite!

How long will my leftover Cemetery Flatbread Pizza stay fresh?
Very! Leftover slices can be stored in an airtight container in the fridge for up to 3 days. Just remember to let them cool to room temperature before sealing, so they stay delicious and reduce moisture buildup.

Can I freeze Cemetery Flatbread Pizza?
Absolutely! To freeze the pizza, wrap the unbaked flatbread tightly in plastic wrap and then in aluminum foil. It can last in the freezer for up to 3 months! When you're ready to bake, simply pop it in the oven directly—from frozen—and add a few extra minutes to the cooking time to ensure a beautifully cooked crust.

What if I can't find black olives for the gravestones?
Not a problem at all! You can use green olives for a twist on the gravestones, or even slice up cucumbers or bell peppers if you're looking for a fresh and crunchy alternative. Feel free to get creative—Halloween is all about having fun!

Are there any dietary considerations for this recipe?
Very! To cater to allergies, you can easily swap dairy products with lactose-free or vegan cheese alternatives. Additionally, if there are any concerns regarding gluten, look for gluten-free flatbread options, which can work just as wonderfully in this Cemetery Flatbread Pizza.
Cemetery Flatbread Pizza

Cemetery Flatbread Pizza That's Spooktacularly Fun to Make

Cemetery Flatbread Pizza is a fun and spooky delight, perfect for Halloween festivities.
Print Recipe Pin Recipe
Prep Time 10 minutes mins
Cook Time 8 minutes mins
Cooling Time 5 minutes mins
Total Time 23 minutes mins
Servings: 4 slices
Course: Dinner
Cuisine: American
Calories: 300
Ingredients Equipment Method Nutrition Notes

Ingredients
  

For the Flatbread Base
  • 1 package Flatbread Dough Homemade or store-bought
  • 2 tablespoons Olive Oil Can substitute with vegetable oil
For the Saucy Goodness
  • 1 cup Pizza Sauce Any tomato-based brand
For the Cheesy Decor
  • 2 cups Shredded Mozzarella Cheese Dairy-free alternative can be used
  • 3 slices Mozzarella Slices Cut into ghost shapes
For the Spooky Accents
  • 1 cup Black Olives Can swap with green olives
  • 1 cup Cauliflower Florets Substitute with carrots or parsnips
  • 2 tablespoons Fresh Parsley/Cilantro Optional garnish
  • to taste Salt
  • to taste Pepper

Equipment

  • Oven
  • Baking Sheet
  • Rolling Pin
  • Spoon
  • measuring cups

Method
 

Step-by-Step Instructions for Cemetery Flatbread Pizza
  1. Preheat your oven to 475°F (245°C) and lightly oil a baking sheet.
  2. Roll out the flatbread dough into a rectangular shape about ¼-inch thick.
  3. Spread pizza sauce evenly over the flatbread, leaving a ½-inch border.
  4. Sprinkle shredded mozzarella cheese over the sauce, then scatter cauliflower florets.
  5. Bake in preheated oven for 8 minutes until cheese is melted and edges are crisp.
  6. Add ghost-shaped mozzarella cutouts and black olive slices for faces.
  7. Arrange black olives as gravestones and return to the oven for another 5-7 minutes.
  8. Garnish with fresh parsley or cilantro before slicing and serving.
Nutrition

Serving: 1sliceCalories: 300kcalCarbohydrates: 30gProtein: 12gFat: 15gSaturated Fat: 7gPolyunsaturated Fat: 1gMonounsaturated Fat: 5gCholesterol: 30mgSodium: 500mgPotassium: 200mgFiber: 2gSugar: 2gVitamin A: 10IUVitamin C: 15mgCalcium: 20mgIron: 10mg

Notes

Customize toppings as desired for a unique and fun Halloween pizza experience.

Tried this recipe?

Let us know how it was!

Cozy Up with French Onion Broccoli Cheese Casserole

October 10, 2025 by Grace Snow Leave a Comment

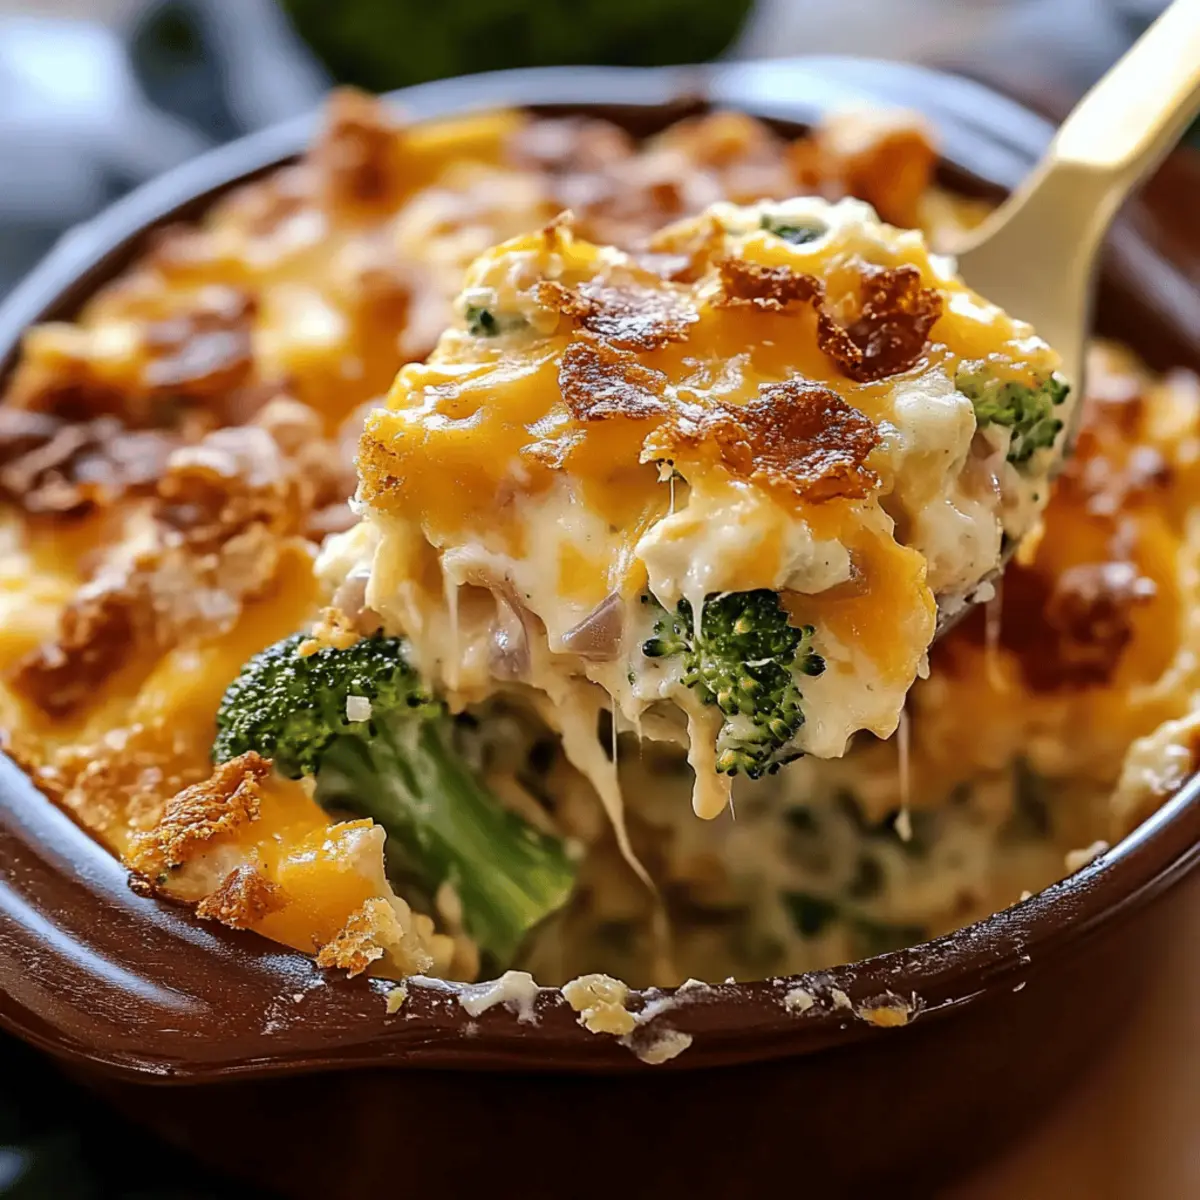
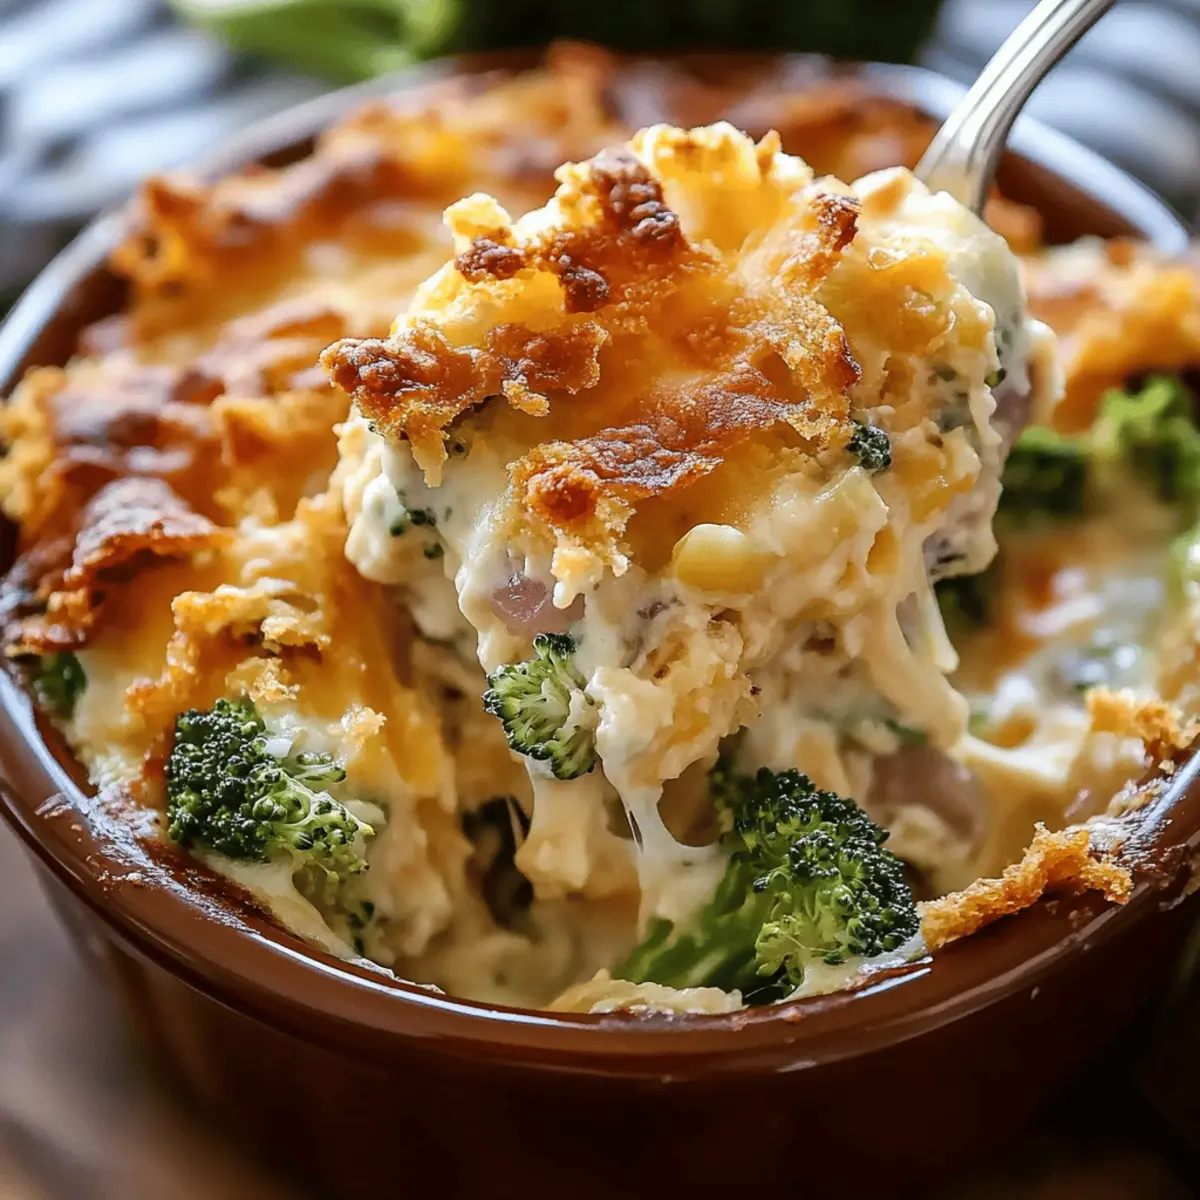
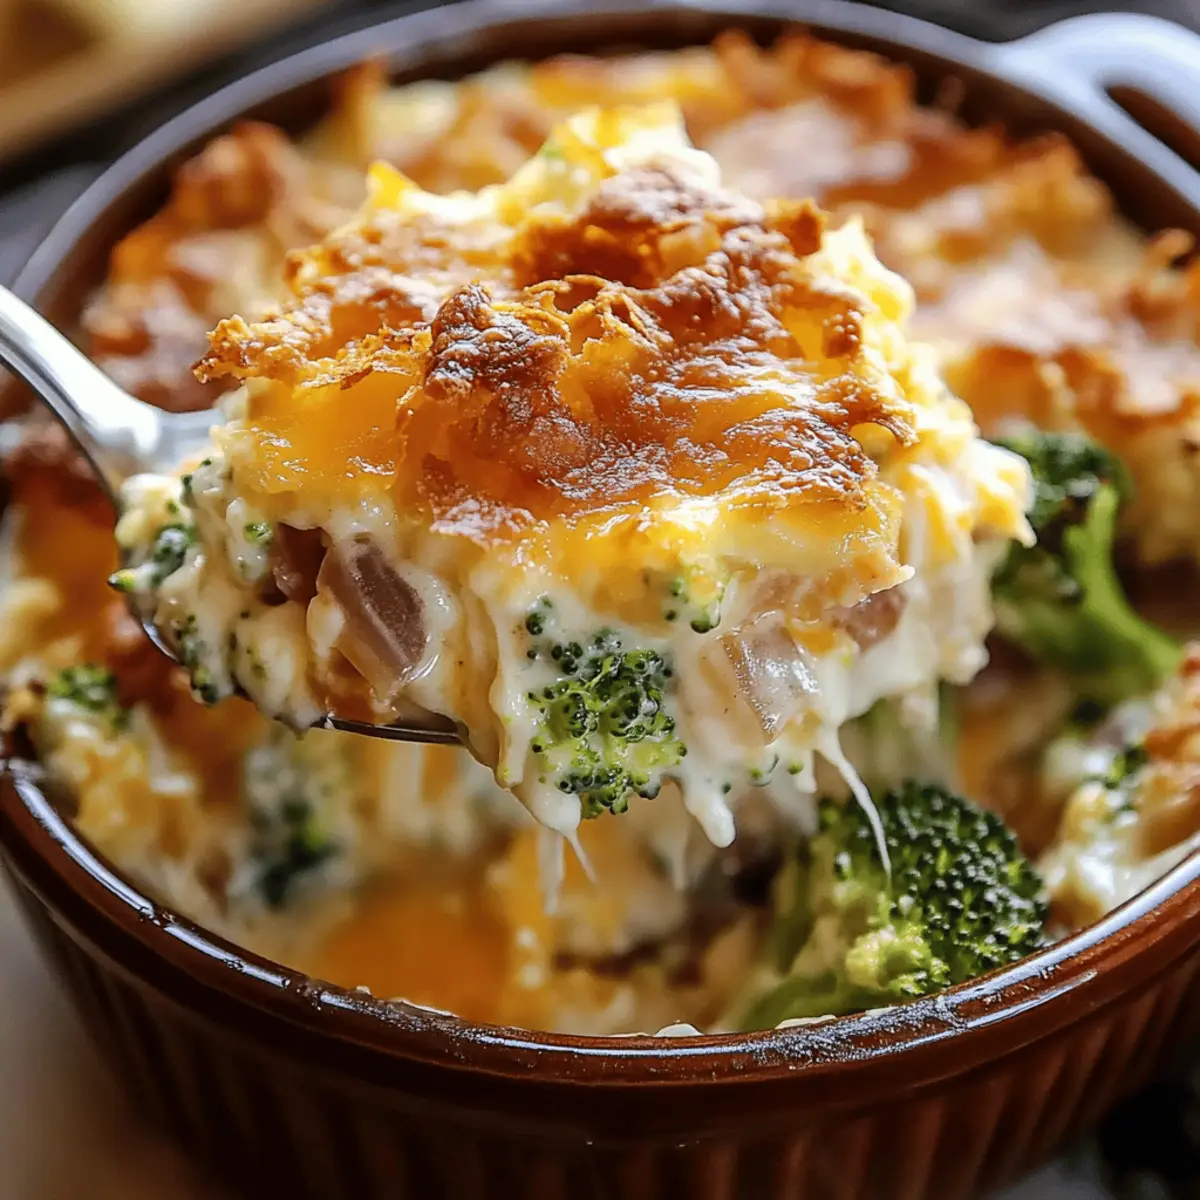
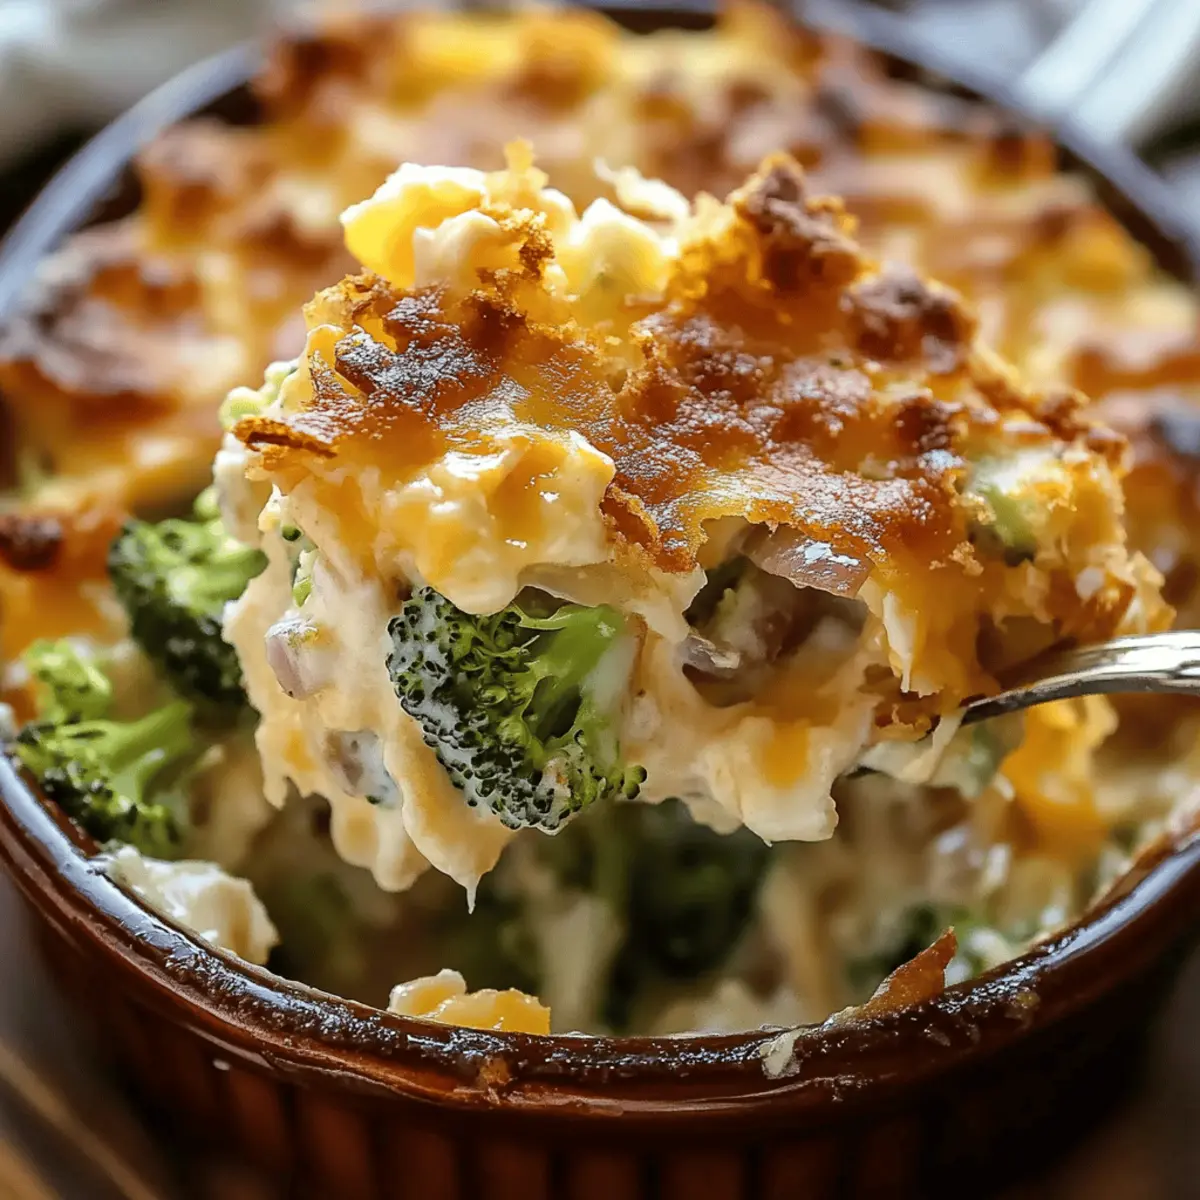
As I stirred the bubbling mix of creamy cheese and tender broccoli, the warm aroma of caramelized onions filled the kitchen, instantly transporting me to a cozy bistro in France. This French Onion Broccoli Cheese Casserole is my go-to comfort dish, striking that perfect balance between savory and satisfying. Not only is it a crowd-pleaser at family gatherings and potlucks, but it’s also a remarkable way to sneak in some veggies while indulging in rich flavors. With its crispy fried onion topping and gooey cheese, every bite is a delightful experience that you won’t want to miss. Are you ready to bring a touch of French-inspired goodness to your dinner table?

Why is this casserole a must-try?

Heavenly Combination: The blend of creamy cheese, tender broccoli, and sweet caramelized onions creates a flavor explosion that’s hard to resist.
Loaded with Nutrients: Packed with veggies, this dish allows you to indulge while still enjoying a healthy twist.
Crispy Topping Delight: Those crispy fried onions add that perfect crunch, elevating the casserole experience.
Versatile Serving: Perfect as a side for roasted meats or a satisfying vegetarian main with crusty bread. Try pairing it with favorites like Bratwurst Peppers Onions for the ultimate feast!
Make-Ahead Magic: Easily prepare this casserole in advance and pop it in the oven when you’re ready; ideal for busy nights.
Crowd-Pleasing Comfort: Whether for holidays or cozy dinners, this French Onion Broccoli Cheese Casserole will impress everyone!

French Onion Broccoli Cheese Casserole Ingredients

• Here’s everything you need to create this delightful dish.

For the Casserole

  • Broccoli – A nutrient-packed base that should be drained well after steaming to avoid excess moisture.
  • Cheddar Cheese – Adds a creamy texture and robust flavor; Gruyère makes a fabulous substitute if you're craving a twist.
  • Onions – Caramelize these for sweetness! Sauté with a pinch of sugar and salt for an extra flavor boost.
  • Beef Broth – Provides depth, but you can use vegetable broth for a comforting vegetarian edition.
  • Butter – Enhances richness in the dish; feel free to swap for a non-dairy alternative if you're going vegan.

For the Topping

  • Fried Onions – A delightful crunchy topping that brings texture; consider using crispy shallots if desired.
  • Panko Breadcrumbs – These lend a nice crunch; crushed crackers or additional fried onions work well in a pinch.

This French Onion Broccoli Cheese Casserole is sure to become a beloved favorite, filled with layers of flavor and comfort!

Step‑by‑Step Instructions for French Onion Broccoli Cheese Casserole

Step 1: Preheat the Oven
Start by preheating your oven to 375°F (190°C). This ensures that your French Onion Broccoli Cheese Casserole bakes evenly and achieves that perfectly golden finish. While the oven heats up, gather your ingredients so you’re ready to create a wonderful, comforting dish.

Step 2: Prepare the Broccoli
Bring a pot of water to a boil and steam or blanch the broccoli for about 3-5 minutes, until it’s bright green and tender-crisp. Drain the broccoli thoroughly to avoid excess moisture in the casserole that could make it soggy. Once drained, set it aside and let it cool slightly.

Step 3: Caramelize the Onions
In a large skillet, melt 2 tablespoons of butter over low heat. Add the sliced onions along with a pinch of sugar and salt. Sauté for about 15-20 minutes, stirring frequently, until the onions turn a deep, golden brown, and become beautifully caramelized. This step is key, as it creates that sweet, rich flavor essential in your casserole.

Step 4: Mix the Casserole Ingredients
In a large mixing bowl, combine the steamed broccoli, caramelized onions, shredded cheddar cheese, and your choice of beef or vegetable broth. Stir well until everything is evenly coated and incorporated. This mixture will be the flavorful heart of your French Onion Broccoli Cheese Casserole, so make sure it’s all mixed together nicely.

Step 5: Transfer to Baking Dish
Grease a 9x13-inch baking dish with a little butter or cooking spray to prevent sticking. Carefully pour the broccoli and cheese mixture into the dish, spreading it out evenly. This will create a hearty base for your casserole that will be topped with a delightful crunch.

Step 6: Add the Topping
Sprinkle a generous layer of fried onions or panko breadcrumbs over the top of the casserole. This topping will provide that irresistible crispy texture you look forward to in every bite. Use your hands to distribute it evenly for an even bake.

Step 7: Bake to Perfection
Place the casserole in the preheated oven and bake for 25-30 minutes. You’ll know it’s ready when the top is bubbly and golden brown, creating a beautiful contrast against the creamy filling underneath. Your kitchen will fill with an inviting aroma that’s sure to whet your appetite.

Step 8: Serve and Enjoy
Once baked, carefully remove the casserole from the oven and let it sit for about 5 minutes before diving in. This gives everything a chance to set up slightly. Serve warm, and enjoy your delicious French Onion Broccoli Cheese Casserole as a comforting side dish or even a main course.

Expert Tips for French Onion Broccoli Cheese Casserole

  • Perfect Broccoli: Ensure it's drained well after steaming to avoid a soggy casserole; excess moisture is the enemy here!
  • Caramelization Counts: Keep the heat low and stir frequently when caramelizing onions so they become sweet and golden without burning.
  • Cheese Choices: While cheddar shines here, trying Gruyère or a mix of cheeses can elevate your French Onion Broccoli Cheese Casserole to new heights of flavor.
  • Make Ahead: Assemble the casserole up to 24 hours in advance, refrigerate, and add the topping right before baking for a fresh-out-of-the-oven taste.
  • Top it Right: Use a mix of fried onions and panko breadcrumbs for an extra crunchy topping that contrasts beautifully with the creamy filling.

What to Serve with French Onion Broccoli Cheese Casserole

This sumptuous casserole is a delightful centerpiece, but pairing it with the right sides can turn your meal into a feast.

  • Garlic Bread: Its crunchy, buttery texture complements the creamy casserole beautifully, making every bite even more indulgent.
  • Roasted Chicken: Serve alongside juicy roasted chicken for a hearty dinner that melds flavors effortlessly. The savory chicken enhances the richness of the casserole.
  • Garden Salad: A light, crisp salad provides a refreshing contrast to the warm casserole, adding a burst of freshness to your plate. Toss in citrus fruits for an extra zing!
  • Quinoa Pilaf: Nutty quinoa adds a grainy texture that balances the softness of the casserole, and it's a fantastic way to sneak in more nutrients.
  • Steamed Green Beans: These vibrant veggies add color and crunch, making for a well-rounded meal; their slight snap plays nicely with the casserole's creaminess.
  • Chardonnay: A glass of chilled Chardonnay elevates the dining experience, with its buttery finish echoing the richness of the casserole.

French Onion Broccoli Cheese Casserole Customization

Feel free to make this casserole your own with these delightful twists and substitutions, enhancing the flavors to your liking!

  • Cheese Swap: Replace cheddar with Gruyère or Swiss cheese for a unique flavor profile. The creaminess will still shine, making it equally delicious.
  • Vegan Delight: Use non-dairy cheese and vegetable broth instead of beef broth to create a vegan version that's still rich in flavor!
  • Extra Crunch: Mix panko breadcrumbs with a bit of garlic powder for a savory twist. This introduces an amazing depth of flavor that pairs perfectly with the cheesy casserole.
  • Herb Infusion: Add fresh thyme or rosemary to the broccoli mixture for an aromatic touch, elevating the overall experience to a herb-infused delight.
  • Spicy Kick: For a bit of heat, sprinkle in some red pepper flakes or add a diced jalapeño to the onion mixture. It’ll create a delightful contrast to the creamy cheese.
  • Mushroom Boost: Incorporate sautéed mushrooms into the casserole for an earthy flavor that complements the caramelized onions beautifully.
  • Bread Crumb Variations: Use crushed tortilla chips or seasoned breadcrumbs instead of fried onions for a fun twist. It adds both crunch and a burst of flavor.
  • Veggie Medley: Mix in other veggies like carrots or cauliflower to up your nutrition game while keeping the casserole colorful and vibrant!

Feel inspired? This French Onion Broccoli Cheese Casserole is a versatile dish that can cater to any palate. Whether you choose to try new toppings or substitute ingredients, it’s bound to become a cherished staple in your kitchen!

Storage Tips for French Onion Broccoli Cheese Casserole

Fridge: Store leftovers in an airtight container for up to 3 days. This helps maintain the casserole's creamy texture and rich flavors.

Freezer: For longer storage, freeze the casserole without the topping for up to 2 months. When ready to enjoy, thaw overnight in the fridge and bake with toppings until bubbly.

Reheating: Reheat individual servings in the microwave or cover and warm in the oven at 350°F (175°C) for about 15-20 minutes, ensuring it's heated through.

Make-Ahead: Assemble your French Onion Broccoli Cheese Casserole up to 24 hours ahead, cover, and refrigerate. Add the topping before baking for a freshly baked dish!

Make Ahead Options

This French Onion Broccoli Cheese Casserole is perfect for meal prep, allowing you to enjoy its comforting flavors with ease during busy weeknights! You can assemble the casserole up to 24 hours in advance, combining the broccoli, caramelized onions, cheese, and broth, and then refrigerate it without the crispy topping. To maintain quality, be sure to cover it tightly with plastic wrap or foil. When you're ready to bake, simply sprinkle the fried onions or panko breadcrumbs on top and pop it in the oven for about 25-30 minutes. This way, you’ll have a delicious dish ready to serve with minimal effort, making it a stress-free addition to your meal planning!

French Onion Broccoli Cheese Casserole Recipe FAQs

How do I choose the best broccoli for this casserole?
Absolutely! Look for broccoli that is bright green with firm florets and crispy stems. Avoid any with yellowing or dark spots all over, as this indicates it's overripe. Fresh broccoli adds great flavor and texture to your dish!

How should I store leftovers of the casserole?
Store your French Onion Broccoli Cheese Casserole in an airtight container in the refrigerator for up to 3 days. Make sure it's completely cooled before sealing to maintain its creamy texture. It's one of those comforting dishes that taste even better the next day!

Can I freeze the casserole for later use?
Yes, you can freeze it! For best results, assemble the casserole without the toppings, then cover tightly and freeze for up to 2 months. When you're ready to enjoy it, simply thaw overnight in the fridge, add your fried onion topping, and bake until bubbly. This makes for a hassle-free dinner on hectic days!

What should I do if the casserole is too watery after baking?
If your casserole ends up too watery, it probably means excess moisture was present in the broccoli or it wasn’t drained enough after steaming. A great tip is to slightly sauté the broccoli before mixing it in, which will help eliminate moisture. Always let any leftovers cool thoroughly before storing as well!

Are there any dietary considerations for this recipe?
Very! This French Onion Broccoli Cheese Casserole can easily be made vegetarian by using vegetable broth instead of beef broth. Also, for a vegan option, substitute the cheese and butter with non-dairy alternatives. Just be sure to check labels for any allergens, as cheese can often vary in ingredients.

How long can I keep the casserole in the fridge?
Leftovers can last in the refrigerator for up to 3 days. Make sure to store it in an airtight container to preserve its flavors. Reheating is best done in the oven at 350°F (175°C) for about 15-20 minutes for that fresh-baked taste!

French Onion Broccoli Cheese Casserole

Cozy Up with French Onion Broccoli Cheese Casserole

This French Onion Broccoli Cheese Casserole is a comforting dish with rich flavors and veggies, perfect for gatherings and potlucks.
Print Recipe Pin Recipe
Prep Time 15 minutes mins
Cook Time 30 minutes mins
Total Time 45 minutes mins
Servings: 6 servings
Course: Dinner
Cuisine: French
Calories: 320
Ingredients Equipment Method Nutrition Notes

Ingredients
  

For the Casserole
  • 1 lb Broccoli Drain well after steaming
  • 2 cups Cheddar Cheese Shredded; Gruyère can be a substitute
  • 2 medium Onions Sliced; to be caramelized
  • 1 cup Beef Broth Or vegetable broth for vegetarian version
  • 2 tbsp Butter Can be swapped for non-dairy alternative
For the Topping
  • 1 cup Fried Onions Consider crispy shallots as an alternative
  • 1 cup Panko Breadcrumbs Crushed crackers can be used if needed

Equipment

  • Large skillet
  • 9x13-inch baking dish
  • Mixing Bowl
  • Pot for Steaming

Method
 

Step-by-Step Instructions
  1. Preheat oven to 375°F (190°C). Gather ingredients.
  2. Steam or blanch broccoli for 3-5 minutes, drain thoroughly.
  3. Melt butter in a large skillet, add onions, sugar, and salt. Caramelize for 15-20 minutes until golden brown.
  4. In a mixing bowl, combine broccoli, onions, cheddar cheese, and broth. Mix well.
  5. Grease a 9x13-inch baking dish and pour the mixture in, spreading evenly.
  6. Sprinkle fried onions and panko breadcrumbs over the top.
  7. Bake for 25-30 minutes until golden brown and bubbly.
  8. Let sit for 5 minutes before serving.
Nutrition

Serving: 1servingCalories: 320kcalCarbohydrates: 20gProtein: 10gFat: 22gSaturated Fat: 12gPolyunsaturated Fat: 2gMonounsaturated Fat: 8gCholesterol: 58mgSodium: 700mgPotassium: 500mgFiber: 3gSugar: 2gVitamin A: 400IUVitamin C: 60mgCalcium: 350mgIron: 2mg

Notes

Ensure broccoli is well-drained to avoid sogginess. Caramelization is key for sweet flavor.

Tried this recipe?

Let us know how it was!

Spinach Mushroom Chicken Crepes: Comfort Food Made Easy

October 10, 2025 by Grace Snow Leave a Comment

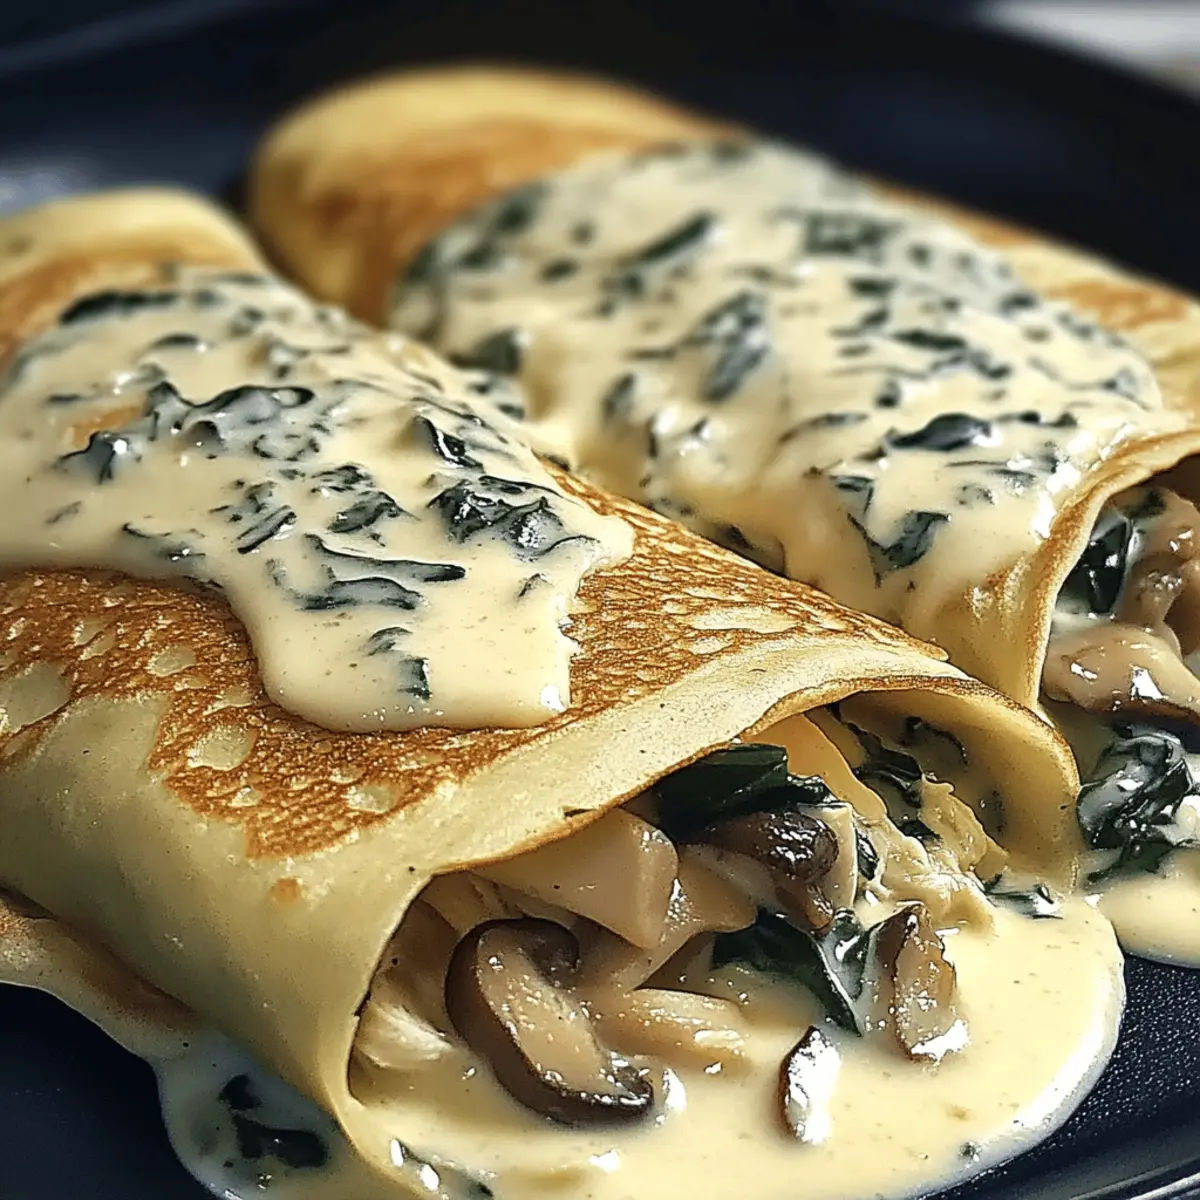
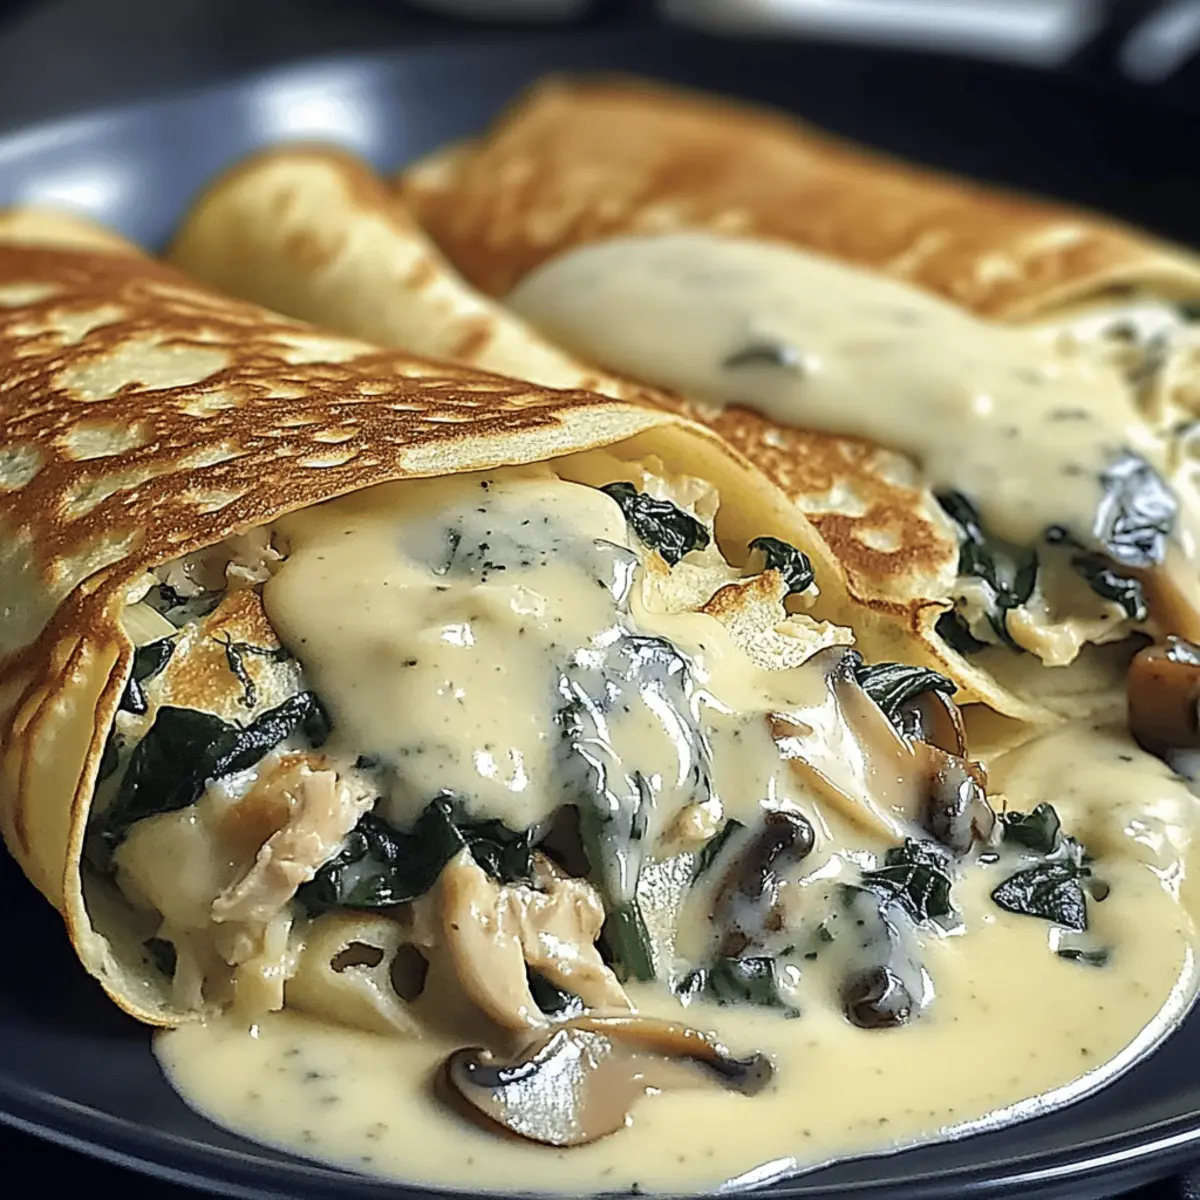
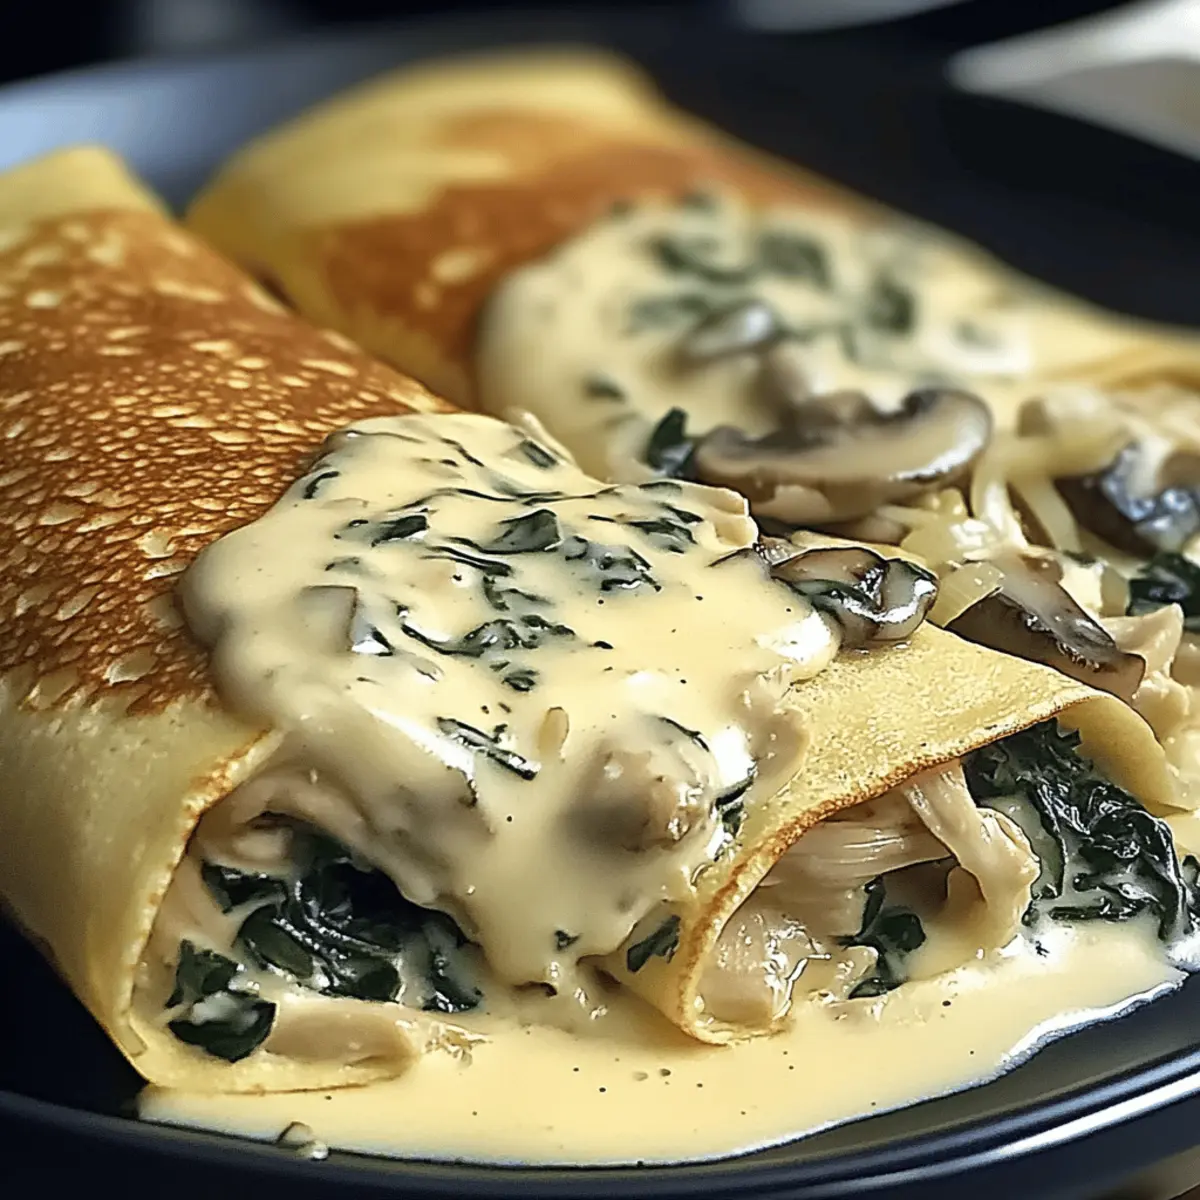
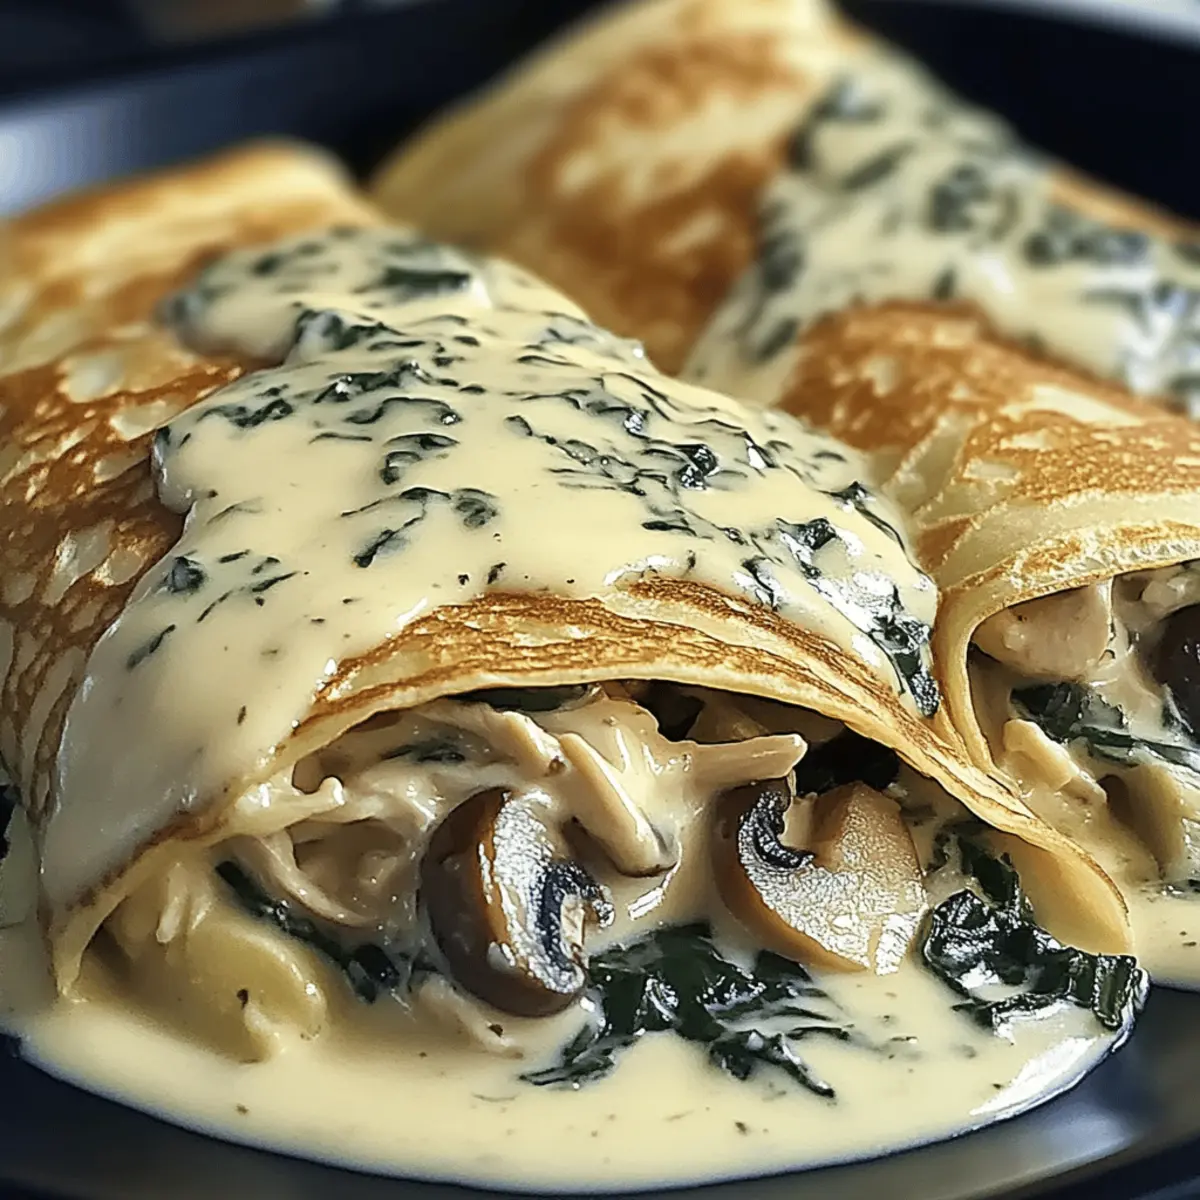
The soft, inviting sound of sizzling batter hitting a hot skillet is music to my ears, especially when it promises a delightful dish like Spinach Mushroom Chicken Crepes with Creamy Béchamel Sauce. These delicate crepes are packed with tender shredded chicken, earthy mushrooms, and sautéed leeks, making them a true comfort food classic. What’s even better? They whip up quickly, transforming any ordinary evening into a gourmet experience, whether you're hosting friends or treating yourself to a cozy night in. Plus, this recipe is versatile enough to accommodate gluten-free and vegetarian diets, ensuring no one is left behind. Ready to dive into these indulgent yet easy-to-make crepes? Let’s get started!

Why Will You Crave These Crepes?

Comforting Flavors: Each bite of these Spinach Mushroom Chicken Crepes offers a symphony of savory goodness, thanks to a luscious creamy béchamel sauce that elevates the dish.

Quick & Easy: With minimal prep time, you can enjoy restaurant-quality fare without the hassle, making it perfect for busy weeknights or a leisurely brunch.

Versatile Substitutions: Need it gluten-free or vegetarian? No worries! Customize the filling with alternatives like tofu or bell peppers to suit your dietary needs.

Crowd-Pleasing Appeal: Impress your guests with this gourmet delight, which is sure to be the talk of the table, just like Spinach Pie Deliciously will!

Easy to Store: Leftovers? Store in the fridge for up to three days or freeze for later indulgence; they reheated beautifully without losing their charm.

Dive into this recipe, and you’ll find yourself going back for seconds!

Spinach Mushroom Chicken Crepes Ingredients

For the Crepes
• Gluten-free Flour – Offers structure for these delicate crepes; substitute with regular flour if gluten is not a concern.
• Large Eggs – Binds the crepe batter, ensuring that they hold together well; use a flax egg for egg-free versions.
• Milk – Creates a smooth and creamy batter; substitute with almond or oat milk for a dairy-free option.
• Salt – Enhances the flavors of your batter; just a pinch is sufficient for a delicious base.

For the Filling
• Shredded Chicken – Adds a hearty protein element that balances the dish; rotisserie chicken is a convenient time saver.
• Mushrooms – Provides umami flavor and moisture, perfect for complementing the richness; zucchini or bell peppers can be used instead.
• Leeks – Offers a mild onion flavor and natural sweetness to the filling; shallots or green onions are great alternatives.

For the Béchamel Sauce
• Butter – Essential for cooking both the crepes and the sauce, bringing everything together with flavor; use unsalted for better control.
• Flour (for Béchamel) – Thickens your creamy sauce beautifully; cornstarch is a gluten-free option if necessary.
• Milk (for Béchamel) – Use warm milk for a creamy, lump-free sauce; any dairy-free milk will work too.
• Gruyere Cheese – Melts beautifully and adds depth to the béchamel; consider Comté or mozzarella for a milder taste.

Get ready to savor these Spinach Mushroom Chicken Crepes; they’re a treat you won't want to miss!

Step‑by‑Step Instructions for Spinach Mushroom Chicken Crepes

Step 1: Prepare Crepe Batter
In a medium bowl, whisk together gluten-free flour, large eggs, milk, and a pinch of salt until the mixture is smooth and free of lumps. Allow the batter to rest for 30 minutes at room temperature; this helps gluten-free flour relax for a more delicate crepe. You'll know it's ready when it becomes slightly thicker.

Step 2: Cook Crepes
Heat a non-stick skillet over medium heat and lightly grease it with butter. Pour in about ¼ cup of the crepe batter and swirl the pan to evenly coat the surface. Cook for 1-2 minutes until the edges start to lift and the bottom is lightly golden. Flip the crepe and cook for another 30 seconds. Repeat this step for all remaining batter, stacking the cooked crepes on a plate and keeping them warm.

Step 3: Make Filling
In the same skillet, add more butter if needed and sauté sliced leeks and chopped mushrooms over medium heat. Cook for 5-7 minutes until they are golden and fragrant. Once ready, stir in the shredded chicken to warm it through, mixing well to combine the savory flavors. This filling will complement the Spinach Mushroom Chicken Crepes beautifully.

Step 4: Prepare Béchamel Sauce
In a medium saucepan over low heat, melt 3 tablespoons of butter. Whisk in an equal amount of flour until blended into a smooth paste, cooking for 1-2 minutes. Gradually pour in warm milk, continually whisking until the sauce thickens, which takes about 5-7 minutes. Season the béchamel with salt and pepper to taste; it should be creamy without any lumps.

Step 5: Assemble and Bake
Preheat your oven to 350°F (175°C). Take a crepe and fill it with a generous spoonful of the chicken, mushroom, and leek mixture, then roll it tightly. Place the filled crepes in a greased baking dish. Pour the creamy béchamel sauce generously over the tops, followed by a sprinkle of Gruyere cheese. Bake for 20-25 minutes until the sauce is bubbly and golden brown, creating a deliciously comforting finish.

How to Store and Freeze Spinach Mushroom Chicken Crepes

Fridge: Store leftovers in an airtight container for up to 3 days. This keeps the crepes fresh, ready for a quick reheat.

Freezer: Freeze baked crepes individually wrapped in plastic for up to 2 months. Thaw them overnight in the fridge before reheating.

Reheating: To enjoy, reheat in a preheated oven at 350°F (175°C) for about 15-20 minutes until warmed through and bubbly. These tips will help you savor your Spinach Mushroom Chicken Crepes long after dinner!

Make Ahead Options

These Spinach Mushroom Chicken Crepes are perfect for meal prep enthusiasts! You can prepare the crepe batter and cook the crepes up to 24 hours in advance; just refrigerate them in an airtight container to maintain their softness and prevent drying out. The filling can also be made ahead by sautéing the leeks and mushrooms, then mixing in the shredded chicken, which can be stored in the fridge for up to 3 days. When you’re ready to serve, simply reheat the filling and assemble the crepes. Pour the béchamel over, sprinkle with Gruyere, and bake as directed for a comforting meal that feels fresh and gourmet, despite your busy schedule!

Tips for the Best Spinach Mushroom Chicken Crepes

  • Room Temperature Ingredients: Using room temperature eggs and milk helps create a smoother crepe batter and prevents lumps.

  • Watch Your Heat: Cooking the crepes on medium heat is key; too high can cause them to toughen, while too low may not yield that golden color.

  • Don't Skip the Resting Time: Letting the batter rest for 30 minutes allows the flour to hydrate, resulting in more tender and delicate Spinach Mushroom Chicken Crepes.

  • Secure the Fillings: Make sure to not overfill the crepes to avoid tearing. A generous tablespoon of filling per crepe is often just right.

  • Béchamel Options: For a lighter béchamel, use less cheese or substitute with a dairy-free cheese to keep it friendly for different diets.

  • Check for Substitutions: Ensure any substitutes for gluten-free or dairy-free options are indeed labeled safe to avoid allergens.

What to Serve with Spinach Mushroom Chicken Crepes

Imagine delighting your senses with a full meal that perfectly complements the rich and creamy flavors of these delightful crepes!

  • Crispy Green Salad: A bright, refreshing accompaniment that balances the creamy béchamel and adds a crunch to your plate.

  • Garlic Roasted Asparagus: Tender, roasted asparagus with a hint of garlic offers an inviting earthy flavor that enhances the dish's richness.

  • Herb-Infused Quinoa: Light yet filling, quinoa flavored with fresh herbs provides a nutty texture that pairs beautifully with the savory crepes.

  • Sautéed Spinach with Garlic: A quick sauté of fresh spinach with garlic keeps the meal light, while staying aligned with the flavors of the crepes.

  • Creamy Coleslaw: The tangy crunch of coleslaw cuts through the richness, offering a delightful contrast with every bite.

  • Sparkling White Wine: A refreshing glass of sparkling white enhances the dining experience, making every bite feel like a special occasion.

  • Chocolate Mousse: For dessert, enjoy a light, airy chocolate mousse, bringing a sweet and decadent finish to a savory meal.

These delightful pairings will not only elevate your meal but also provide a memorable dining experience. Enjoy!

Spinach Mushroom Chicken Crepes Variations

Feel free to make these hearty Spinach Mushroom Chicken Crepes your own with some tasty twists and swaps!

  • Gluten-Free: Use your favorite gluten-free flour blend for the crepes to maintain that delicate texture without the gluten.

  • Dairy-Free: Replace the milk in the batter and the béchamel with oat or almond milk to keep it creamy yet dairy-free. You won’t miss a thing!

  • Vegetarian Delight: Swap shredded chicken for sautéed tofu or chickpeas. This ensures everyone can enjoy a good meal without compromising flavor.

  • Veggie Boost: Add chopped spinach or bell peppers to the filling for extra color and nutrients, providing a delightful freshness to each crepe.

  • Extra Creamy Béchamel: For a richer sauce, incorporate nutritional yeast into your béchamel for a cheesy flavor without the dairy!

  • Zesty Flavor: Consider adding a squeeze of lemon juice to the filling or a dash of cayenne to the béchamel for a subtle kick. A little heat can awaken flavors beautifully.

  • Cheese Alternatives: Use vegan cheese if you’re sticking to a dairy-free diet, or mix in cream cheese for a tangier flavor profile.

For variations that truly shine, try out Honey Garlic Chicken or Crock Pot Chicken if you’re craving something hearty alongside! Customize away, and happy cooking!

Spinach Mushroom Chicken Crepes Recipe FAQs

How do I select the right mushrooms?
Absolutely! When choosing mushrooms, look for firm, plump specimens with a smooth surface. Avoid ones with dark spots or wilted edges. Fresh mushrooms should have a pleasant earthy aroma, while dried mushrooms can be used too—just remember to soak them in warm water for about 20-30 minutes before cooking.

How should I store leftover Spinach Mushroom Chicken Crepes?
You can store leftovers in an airtight container in the fridge for up to 3 days. If you want to keep them for a longer period, wrapping individual crepes in plastic and storing them in a freezer-safe bag will allow you to freeze them for up to 2 months. Just thaw them overnight in the fridge before reheating!

Can I freeze these crepes?
Certainly! To freeze Spinach Mushroom Chicken Crepes, assemble and bake them first. Once cooled, wrap them individually in plastic wrap and place them in a freezer-safe container. They can be frozen for up to 2 months. When ready to enjoy, simply thaw in the fridge overnight and reheat in a preheated oven at 350°F (175°C) for about 15-20 minutes until heated through.

What if my béchamel sauce is lumpy?
Very good question! If you find lumps in your béchamel sauce, don't panic. One way to remedy this is to use an immersion blender to smooth it out—just be sure to blend on low to start. Alternatively, you can strain the sauce through a fine sieve, which will remove any lumps while retaining that creamy goodness. Remember that whisking continuously while adding the milk can prevent lumps from forming in the first place!

Is this recipe suitable for people with dietary restrictions?
Yes! This Spinach Mushroom Chicken Crepes recipe can easily accommodate various dietary needs. For gluten-free options, just use gluten-free flour; for dairy-free, opt for almond or oat milk and substitute the cheese with a dairy-free alternative. If you're making it vegetarian, simply replace chicken with sautéed zucchini or bell peppers. Make sure to check all labels for allergen safety, and enjoy!

How can I ensure my crepes are tender and not tough?
To ensure tender crepes, it's crucial to use room temperature ingredients and let your batter rest for at least 30 minutes—this allows the flour to hydrate fully. Cook the crepes over medium heat so they get that beautiful golden color without becoming tough. Flipping when the edges lift is also key! Keeping the filling modestly portioned will help too; overstuffing can lead to tearing. Enjoy the delicious process!

Spinach Mushroom Chicken Crepes

Spinach Mushroom Chicken Crepes: Comfort Food Made Easy

Indulge in delicious Spinach Mushroom Chicken Crepes with creamy béchamel sauce, perfect for any occasion.
Print Recipe Pin Recipe
Prep Time 30 minutes mins
Cook Time 35 minutes mins
Resting Time 30 minutes mins
Total Time 1 hour hr 35 minutes mins
Servings: 4 crepes
Course: Dinner
Cuisine: French
Calories: 350
Ingredients Equipment Method Nutrition Notes

Ingredients
  

For the Crepes
  • 1 cup gluten-free flour substitute with regular flour if gluten is not a concern
  • 2 large eggs use a flax egg for egg-free versions
  • 1 cup milk substitute with almond or oat milk for dairy-free option
  • 1 pinch salt just a pinch is sufficient
For the Filling
  • 2 cups shredded chicken rotisserie chicken is a time saver
  • 1 cup mushrooms zucchini or bell peppers can be used instead
  • 1 cup leeks shallots or green onions are alternatives
For the Béchamel Sauce
  • 3 tablespoons butter use unsalted for better control
  • 3 tablespoons flour cornstarch is a gluten-free option
  • 2 cups milk any dairy-free milk will work too
  • 1 cup Gruyere cheese consider Comté or mozzarella for milder taste

Equipment

  • non-stick skillet
  • medium bowl
  • Medium saucepan

Method
 

Step-by-Step Instructions
  1. In a medium bowl, whisk together gluten-free flour, large eggs, milk, and a pinch of salt until smooth. Let it rest for 30 minutes.
  2. Heat a non-stick skillet over medium heat, lightly grease with butter. Pour ¼ cup of the crepe batter, swirl to coat, and cook for 1-2 minutes until edges lift. Flip and cook for another 30 seconds. Repeat.
  3. Add butter to the skillet, sauté sliced leeks and mushrooms over medium heat for 5-7 minutes until golden. Stir in shredded chicken to warm.
  4. In a medium saucepan over low heat, melt 3 tablespoons of butter. Whisk in 3 tablespoons of flour, cooking for 1-2 minutes. Gradually add warm milk, whisking until thick, about 5-7 minutes.
  5. Preheat oven to 350°F (175°C). Fill crepes with the chicken mixture, roll tightly, and place in a greased baking dish. Pour béchamel sauce and sprinkle Gruyere cheese on top. Bake for 20-25 minutes until bubbly.

Nutrition

Serving: 1crepeCalories: 350kcalCarbohydrates: 40gProtein: 25gFat: 15gSaturated Fat: 8gPolyunsaturated Fat: 2gMonounsaturated Fat: 3gCholesterol: 150mgSodium: 500mgPotassium: 600mgFiber: 3gSugar: 2gVitamin A: 500IUVitamin C: 5mgCalcium: 150mgIron: 3mg

Notes

Use room temperature ingredients for the batter and avoid overfilling crepes to prevent tearing.

Tried this recipe?

Let us know how it was!

Reindeer Sloppy Joe Sliders for a Fun Holiday Feast

October 10, 2025 by Grace Snow Leave a Comment

As I pulled out the decorations for our holiday feast, I couldn't help but smile at the idea of turning a beloved classic into something playful and festive. These Reindeer Sloppy Joe Sliders are not only a twist on a family favorite, but they also make for a delightful centerpiece at any holiday gathering. Combining seasoned meat in a sweet and tangy sauce nestled in soft Hawaiian rolls, this recipe effortlessly brings joy to both kids and adults alike. Plus, they’re quick to whip up and perfect for get-togethers, making them a fantastic choice for anyone looking to swap out fast food for homemade charm. Ready to spread some holiday cheer in your kitchen? Let's dive into the fun!

Why Are These Sliders So Special?

Joyful memories await as you gather family and friends! With easy preparation, these Reindeer Sloppy Joe Sliders are perfect for even novice cooks. Creative presentation means everyone can join in on the fun, while delicious flavors from sweet and tangy sauce will have your guests coming back for more. Plus, the versatility allows for ingredient swaps—make it vegetarian or spice it up with your favorite toppings! Check out our serving suggestions to elevate your holiday meal.

Reindeer Sloppy Joe Sliders Ingredients

• Gather the essentials for making these playful and delicious sliders!

For the Filling

  • Ground turkey or beef – Main protein for Sloppy Joe filling; substitute with plant-based meat for a vegetarian option.
  • Ketchup – Provides sweetness and moisture; use tomato sauce with added sugar for a lower-sugar alternative.
  • Water – Thins the sauce for proper consistency; can be omitted or replaced with broth for added flavor.
  • Brown sugar – Adds sweetness and depth; substitute with honey or maple syrup if preferred.
  • Worcestershire sauce – Enhances flavor with umami; use soy sauce as a gluten-free option.
  • Brown mustard – Offers tanginess; yellow mustard can be swapped for a milder flavor.
  • Garlic powder – Adds aromatic flavor; fresh minced garlic could be used for a bolder taste.
  • Onion powder – Contributes sweetness and depth; opt for chopped fresh onion instead.
  • Salt – Enhances overall flavor; be cautious with substitutes if using flavored or low-sodium options.
  • Kings Hawaiian Rolls – Soft buns that cradle the filling; substitute with slider-sized whole wheat or gluten-free rolls.

For the Decoration

  • Cherry tomatoes – Used for reindeer noses; strawberries work for a sweeter twist.
  • White sliced cheese – Cut into circles for eyes; vegan cheese can replace traditional cheese for dietary preferences.
  • Raisins – Serve as pupils; alternate with chocolate chips for a fun twist.
  • Pretzel twists – Create antlers; pretzel sticks or other crunchy snacks can serve as alternatives.

With these ingredients, your Reindeer Sloppy Joe Sliders will shine at any holiday gathering, blending playfulness and deliciousness in every bite!

Step‑by‑Step Instructions for Reindeer Sloppy Joe Sliders

Step 1: Prepare Filling
Heat a large skillet over medium heat and add 1 pound of ground turkey or beef. Cook for about 5-7 minutes, stirring occasionally, until the meat is cooked through and no longer pink. Be sure to break it up with a spatula for even cooking. Once done, drain any excess fat, leaving you with a healthier base for your Reindeer Sloppy Joe Sliders.

Step 2: Make Sauce
Next, add the flavor-packed ingredients to your cooked meat. Stir in 1 cup of ketchup, ½ cup of water, 2 tablespoons of Worcestershire sauce, 2 tablespoons of brown sugar, 1 tablespoon of brown mustard, ½ teaspoon of garlic powder, ½ teaspoon of onion powder, and a pinch of salt. Bring the mixture to a gentle boil, then reduce the heat and cover, allowing it to simmer for 15-20 minutes until thickened and bubbly.

Step 3: Assemble Sliders
While the filling simmers, prepare your Kings Hawaiian rolls. Carefully split each roll in half and place the bottom halves on a serving platter. Scoop a generous portion of the Sloppy Joe mixture onto each bottom half, ensuring they are well-filled. Allow the delightful filling to slightly cool, which will make handling easier when you top them off with the roll lids.

Step 4: Decorate
Now comes the fun part! Take your cherry tomatoes and slice them in half, placing one half on each slider as a reindeer's nose. Cut circles from your white cheese slices to create eyes and secure them atop the filling. Add raisins as pupils to give your reindeer some character, and finally, insert pretzel halves into the sides for the iconic antlers, giving your Reindeer Sloppy Joe Sliders a playful holiday presentation.

Make Ahead Options

These Reindeer Sloppy Joe Sliders are the perfect option for meal prep, saving you time on busy holiday days! You can prepare the Sloppy Joe filling up to 3 days in advance; simply store it in an airtight container in the refrigerator. To maintain the quality and prevent the rolls from becoming soggy, wait to assemble the sliders until just before serving. When you're ready to enjoy, heat the filling in a saucepan until warmed through, then scoop it onto the split Hawaiian rolls and proceed with the fun decoration. With this make-ahead strategy, you'll have a delightful holiday dish ready to impress with minimal effort!
Reindeer Sloppy Joe Sliders Variations

Feel free to mix things up and make these sliders your own with these fun and flavorful twists!

  • Vegetarian Delight: Substitute ground turkey with lentils or chickpeas for a hearty, plant-based filling. The flavor stays rich and satisfying, ensuring everyone enjoys them.

  • Creamy Twist: Add a layer of sliced avocado or cream cheese for a creamy texture that pairs beautifully with the savory filling. This surprise element will keep everyone coming back for more!

  • Cheese Swap: Experiment with different cheeses! Try pepper jack for a spicy kick or goat cheese for a tangy finish. Each cheese offers a unique flavor profile that can elevate the sliders.

  • Get Spicy: Add diced jalapeños or a splash of hot sauce to the mixture for a delightful heat that will impress your spice-loving guests. It adds a fun twist that complements the sweet flavors.

  • Sweet Toppings: Instead of raisins, use chocolate chips or mini marshmallows for an unexpected burst of sweetness. This playful swap adds a fun and festive touch!

  • Flavorful Broth: Replace water with beef or vegetable broth to deepen the flavor of the sauce. This simple change enhances the overall richness and complexity.

  • Fun Shapes: Use cookie cutters to cut the cheese into festive shapes instead of circles. It’s a fun touch that adds to the holiday spirit while letting creativity shine!

  • Alternative Rolls: Experiment with different types of rolls! Try slider-sized pretzel buns or even lettuce wraps for a lighter option. Each brings a unique texture that can change up the whole dish.

Feel free to explore these ideas and create a version of the Reindeer Sloppy Joe Sliders that's perfect for your holiday feast! Looking for more delicious ideas? Don't forget to check out our sweet potato fries or a vibrant side salad for a balanced meal.

Expert Tips for Reindeer Sloppy Joe Sliders

  • Lean Meat Choice: Using leaner ground turkey or beef keeps your sliders from becoming too greasy while still being tasty.
  • Sauce Consistency: Don’t skip the simmering step! This helps the flavors meld together and thicken the sauce for the perfect Sloppy Joe consistency.
  • Fresh Roll Assembly: Assemble your Reindeer Sloppy Joe Sliders just before serving to keep the rolls soft and avoid sogginess, enhancing the overall experience.
  • Creative Decorations: Get the kids involved! Encourage them to help decorate the sliders, making family cooking time memorable and engaging.
  • Make-Ahead Option: Prepare the Sloppy Joe filling in advance. It saves time and allows you to enjoy the festivities with your guests on the holiday.

Storage Tips for Reindeer Sloppy Joe Sliders

  • Fridge: Store leftover sliders in an airtight container, separating the filling and rolls to maintain freshness. They will keep well for up to 3 days.
  • Freezer: If you want to save them for later, freeze the filling in a sealed bag and the rolls separately. They can last up to 1 month in the freezer.
  • Reheating: To reheat, thaw the filling in the fridge overnight and warm it on the stove or microwave. Assemble the sliders with fresh rolls just before serving for the best texture.

What to Serve with Reindeer Sloppy Joe Sliders

Gather some delightful sides to complete your holiday table and make every bite a celebration of flavor!

  • Crispy Sweet Potato Fries: The sweetness of the fries pairs beautifully with the tangy Sloppy Joes, adding a crunchy contrast that everyone will love.
  • Refreshing Cucumber Salad: Light and crisp, this salad with a tangy vinaigrette helps balance the richness of the sliders while keeping the meal fresh.
  • Creamy Coleslaw: The cool, creamy texture complements the hearty filling, providing a perfect counterpoint to the savory sliders. Try adding a sprinkle of nuts for crunch!
  • Warm Cornbread: Sweet cornbread is soft and comforting, enhancing the festive feel and soaking up any leftover sauce beautifully.
  • Roasted Vegetables: A mix of colorful seasonal vegetables brings vibrant flavors and a nutrient boost to your meal. Their caramelization adds a delightful sweetness.
  • Sparkling Cranberry Mocktail: Celebrate with a refreshing drink that echoes the holiday spirit. The tartness clears the palate between bites, making every flavor pop!
  • Homemade Potato Chips: These crunchy delights give a satisfying texture contrast to the sliders. You can even season them to match your flavor preferences!
  • Chocolate Chip Cookies: End the feast on a sweet note with warm cookies. Their gooey chocolate will delight both kids and adults, rounding off the meal perfectly.

With these delectable accompaniments, your Reindeer Sloppy Joe Sliders will shine at the center of a festive and fun family gathering!

Reindeer Sloppy Joe Sliders Recipe FAQs

What kind of meat is best for Reindeer Sloppy Joe Sliders?
Absolutely! You can use either ground turkey or beef for these sliders. Leaner options are ideal to prevent the sliders from being greasy. For a vegetarian twist, plant-based meats work wonderfully too.

How should I store leftover Reindeer Sloppy Joe Sliders?
Very simple! Store any leftovers in an airtight container, making sure to separate the filling from the rolls. This helps keep the sliders fresh, and they’ll be good for up to 3 days in the fridge.

Can I freeze the Sloppy Joe filling?
Absolutely! To freeze, scoop the cooled filling into a freezer-safe bag, removing as much air as possible before sealing. This way, it can last up to 1 month. Make sure to thaw it in the fridge overnight before reheating.

What if my Sloppy Joe filling is too runny?
If your filling turns out too runny, don’t worry! Simply continue simmering it uncovered for an additional 5-10 minutes. This will help the excess moisture evaporate, thickening the sauce to achieve that perfect Sloppy Joe consistency.

Are there any allergy considerations I should keep in mind?
Yes, it's wise to be cautious! If anyone has gluten allergies, you can use gluten-free rolls and soy sauce in place of Worcestershire sauce. For dairy-free options, vegan cheese can be a suitable replacement, ensuring everyone can enjoy these holiday sliders!

How can I make the sliders more colorful or playful?
The more the merrier! Encourage creativity by introducing colorful toppings like diced bell peppers or olives added to the filling. For decoration, consider using different types of cheese or fruits to make adorable faces that catch the eye. Let the kids help out for even more fun!

Reindeer Sloppy Joe Sliders

Reindeer Sloppy Joe Sliders for a Fun Holiday Feast

Delight everyone with playful Reindeer Sloppy Joe Sliders, a festive twist on a classic meal perfect for holiday gatherings.
Print Recipe Pin Recipe
Prep Time 15 minutes mins
Cook Time 20 minutes mins
Total Time 35 minutes mins
Servings: 12 sliders
Course: Dinner
Cuisine: American
Calories: 250
Ingredients Equipment Method Nutrition Notes

Ingredients
  

Filling
  • 1 pound ground turkey or beef can substitute with plant-based meat
  • 1 cup ketchup or use tomato sauce with added sugar
  • 0.5 cup water can be replaced with broth for flavor
  • 2 tablespoons brown sugar or substitute with honey or maple syrup
  • 2 tablespoons Worcestershire sauce Soy sauce can be used as a gluten-free option
  • 1 tablespoon brown mustard yellow mustard can be swapped
  • 0.5 teaspoon garlic powder fresh minced garlic is an alternative
  • 0.5 teaspoon onion powder or opt for chopped fresh onion
  • 1 pinch salt be cautious with substitutes
  • 12 rolls Kings Hawaiian Rolls can use whole wheat or gluten-free rolls
Decoration
  • 6 cherry tomatoes for reindeer noses; strawberries can be a sweeter option
  • 4 slices of white cheese vegan cheese can be substituted
  • 12 raisins alternatively use chocolate chips
  • 12 pretzel twists pretzel sticks can be used too

Equipment

  • Large skillet
  • Spatula
  • Serving Platter

Method
 

Preparation
  1. Heat a large skillet over medium heat and add ground turkey or beef. Cook for about 5-7 minutes, stirring occasionally, until the meat is no longer pink. Drain excess fat.
  2. Add ketchup, water, Worcestershire sauce, brown sugar, brown mustard, garlic powder, onion powder, and salt to the cooked meat. Bring to a gentle boil, then reduce heat and simmer for 15-20 minutes.
  3. Split Kings Hawaiian rolls in half, place the bottom halves on a serving platter, and fill each with the Sloppy Joe mixture.
  4. Slice cherry tomatoes in half and place on sliders as reindeer's noses. Cut cheese into circles for eyes, add raisins as pupils, and insert pretzel halves for antlers.

Nutrition

Serving: 1sliderCalories: 250kcalCarbohydrates: 30gProtein: 15gFat: 10gSaturated Fat: 3gPolyunsaturated Fat: 0.5gMonounsaturated Fat: 4gCholesterol: 50mgSodium: 600mgPotassium: 300mgFiber: 2gSugar: 6gVitamin A: 10IUVitamin C: 15mgCalcium: 8mgIron: 10mg

Notes

Assemble sliders right before serving to keep the rolls from becoming soggy. Prepare filling in advance for convenience.

Tried this recipe?

Let us know how it was!

Creepy Shepherd’s Pie: Spooky Comfort for Halloween Fun

October 7, 2025 by Grace Snow Leave a Comment

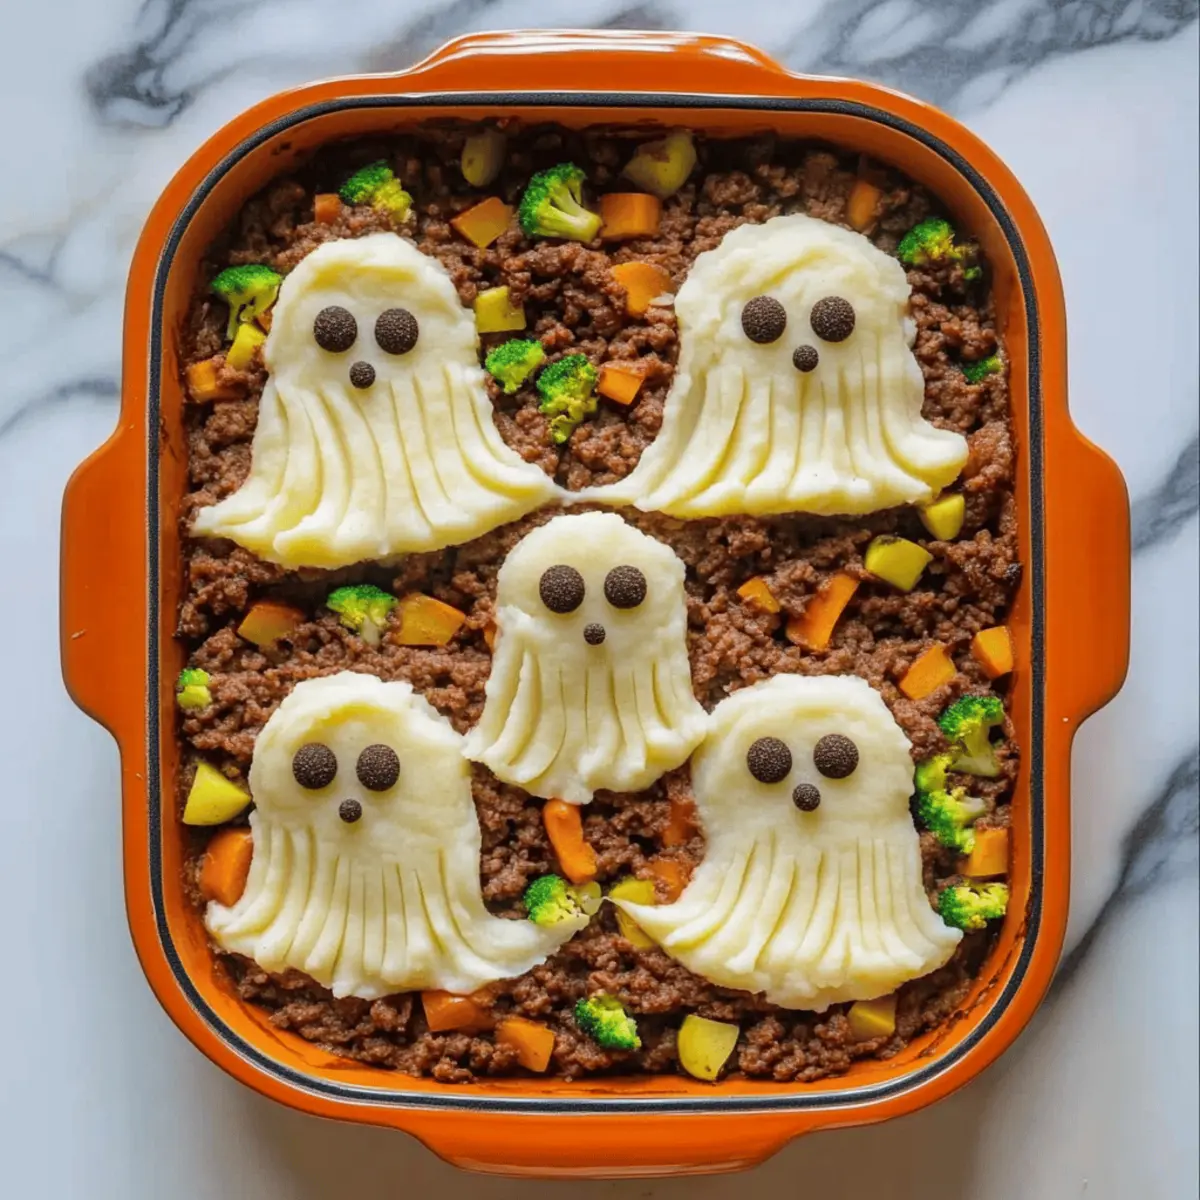
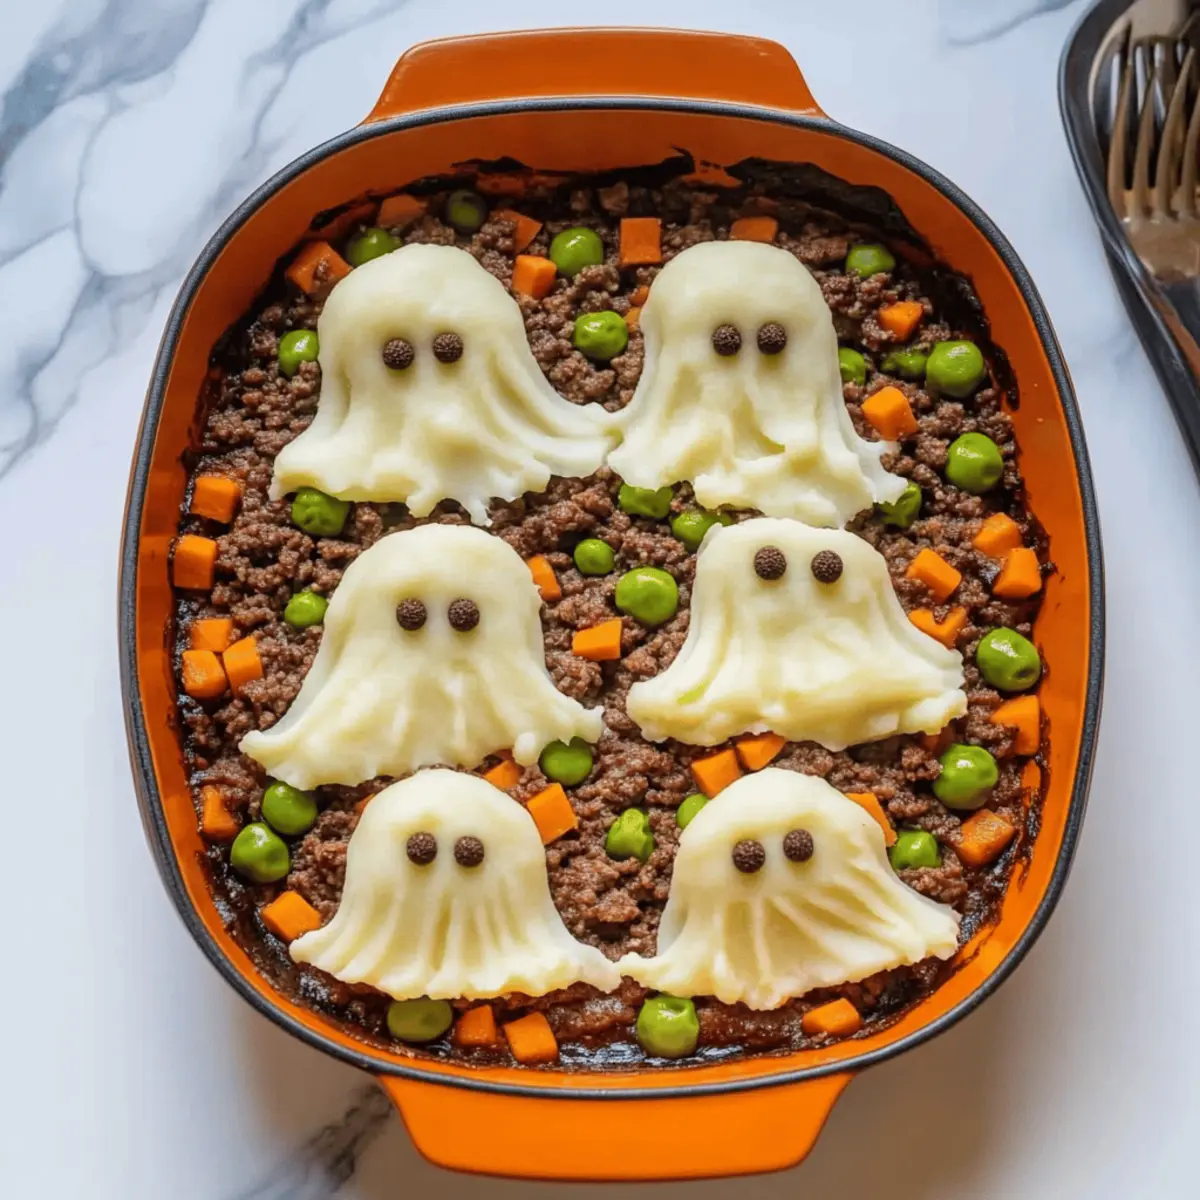
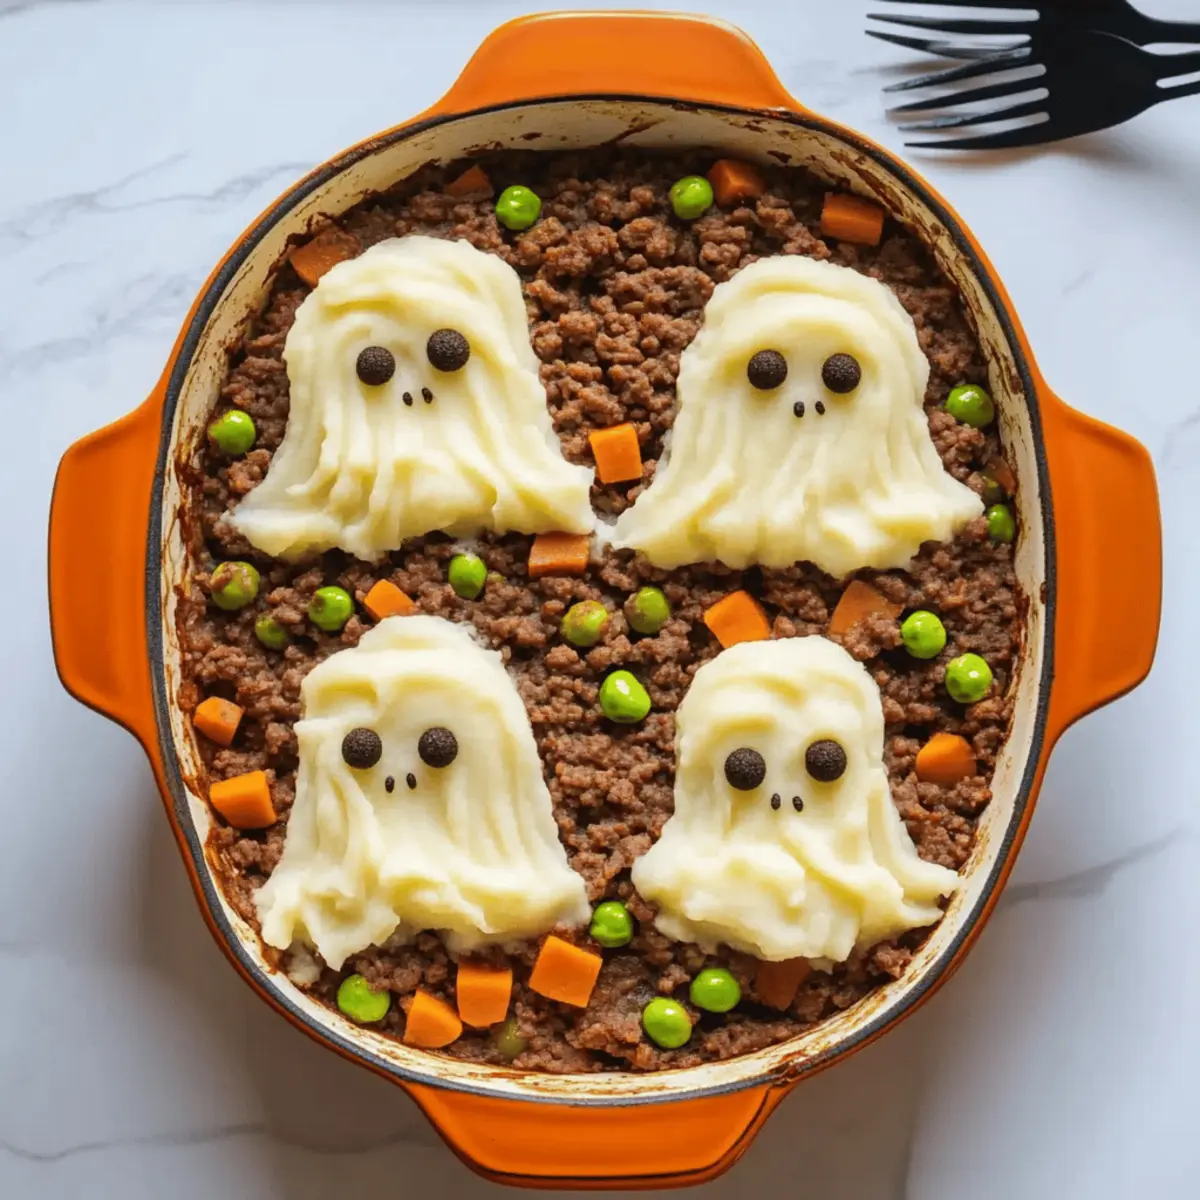
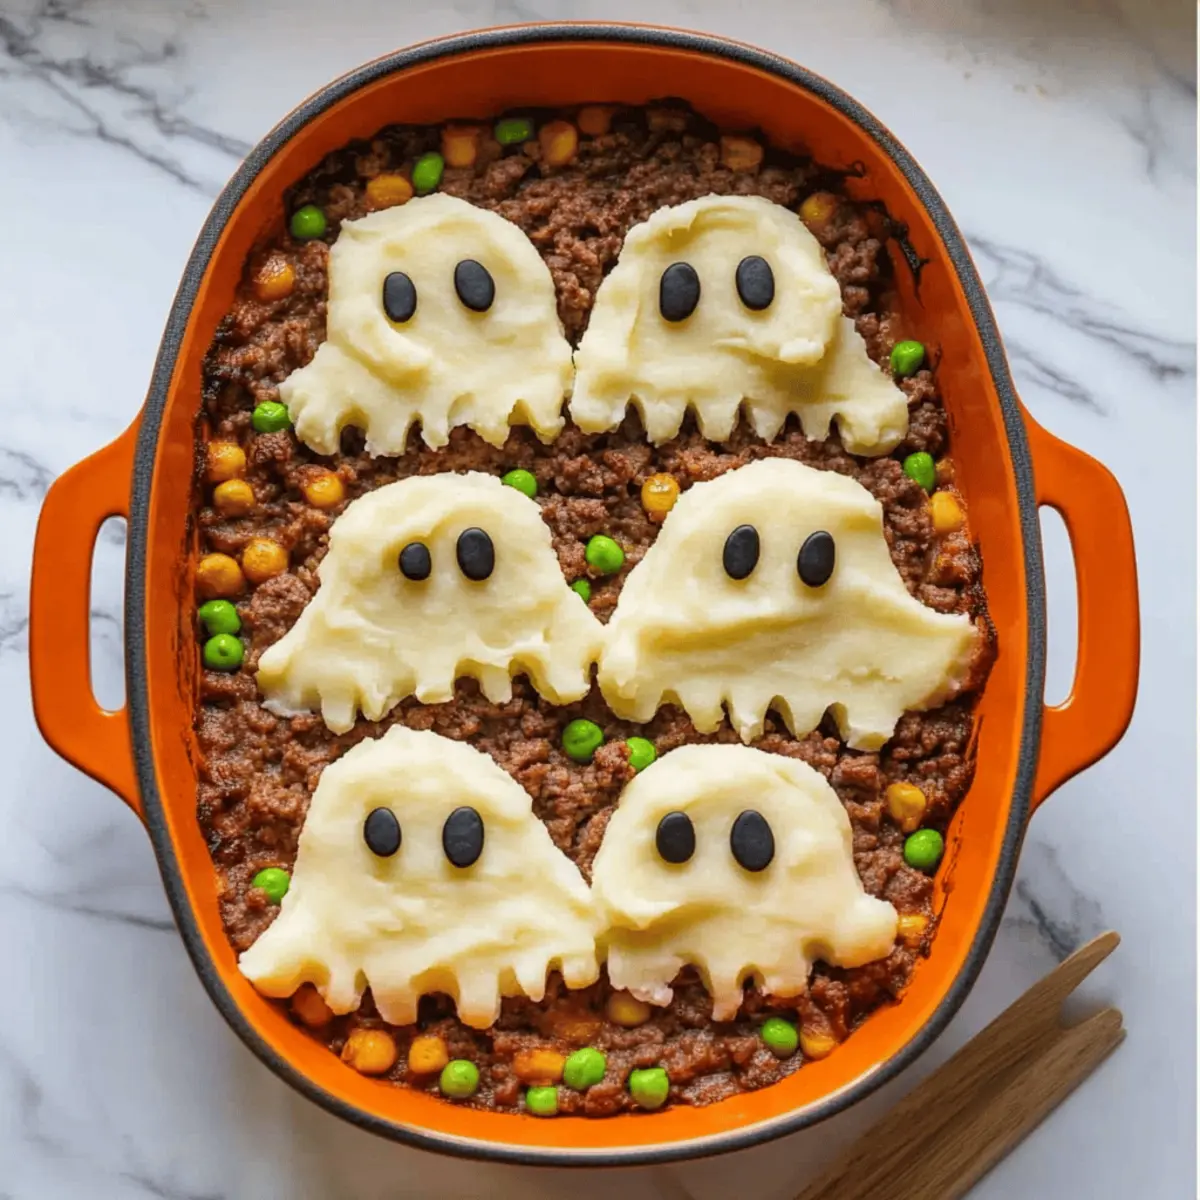
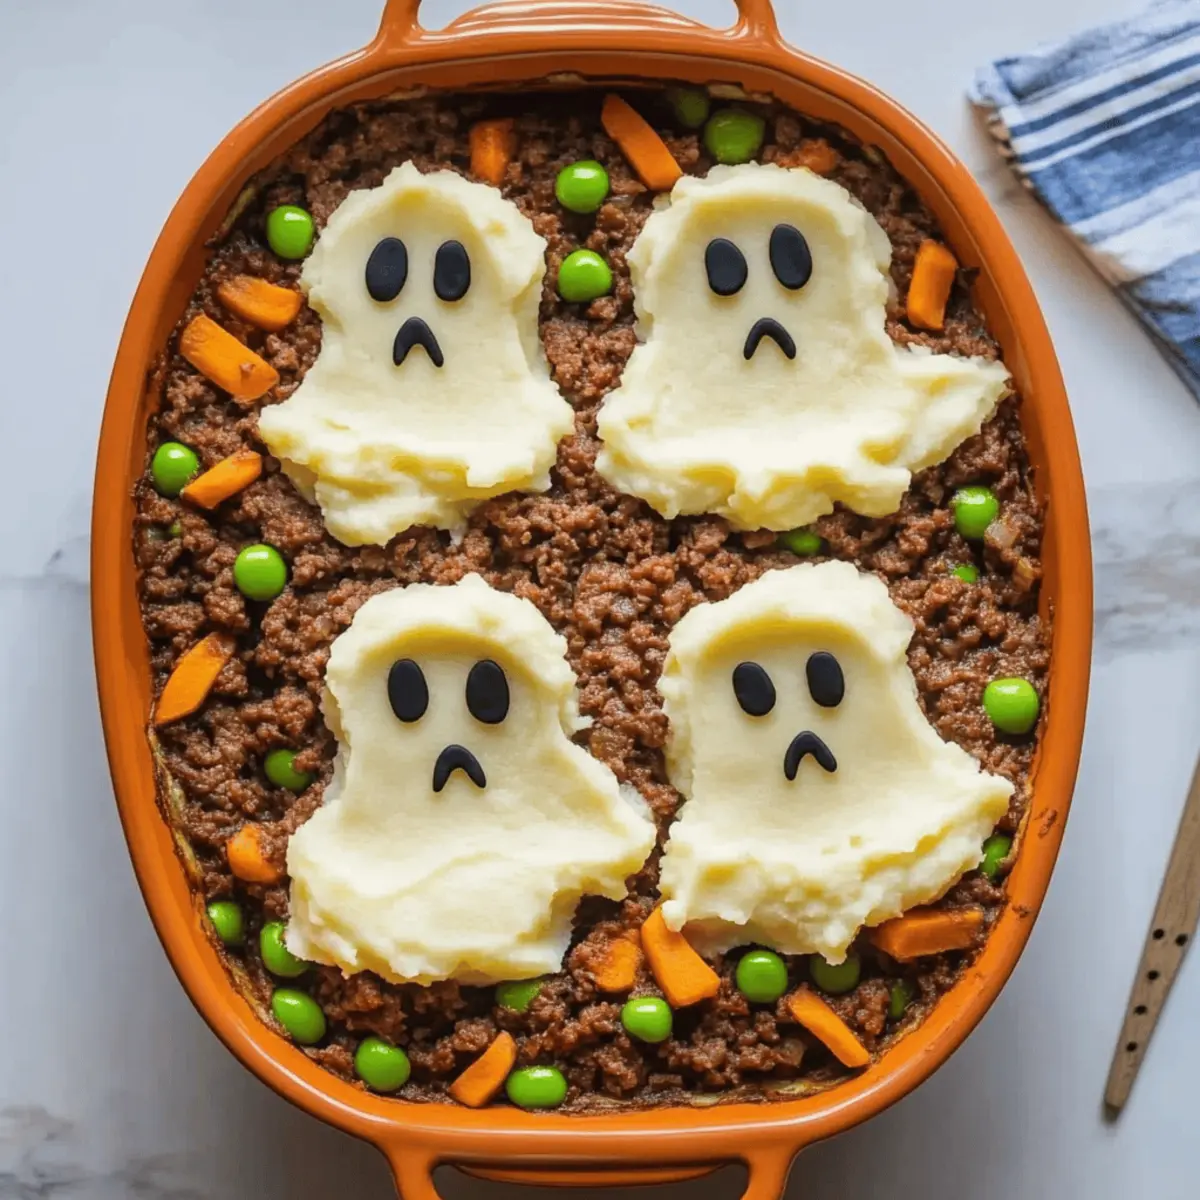
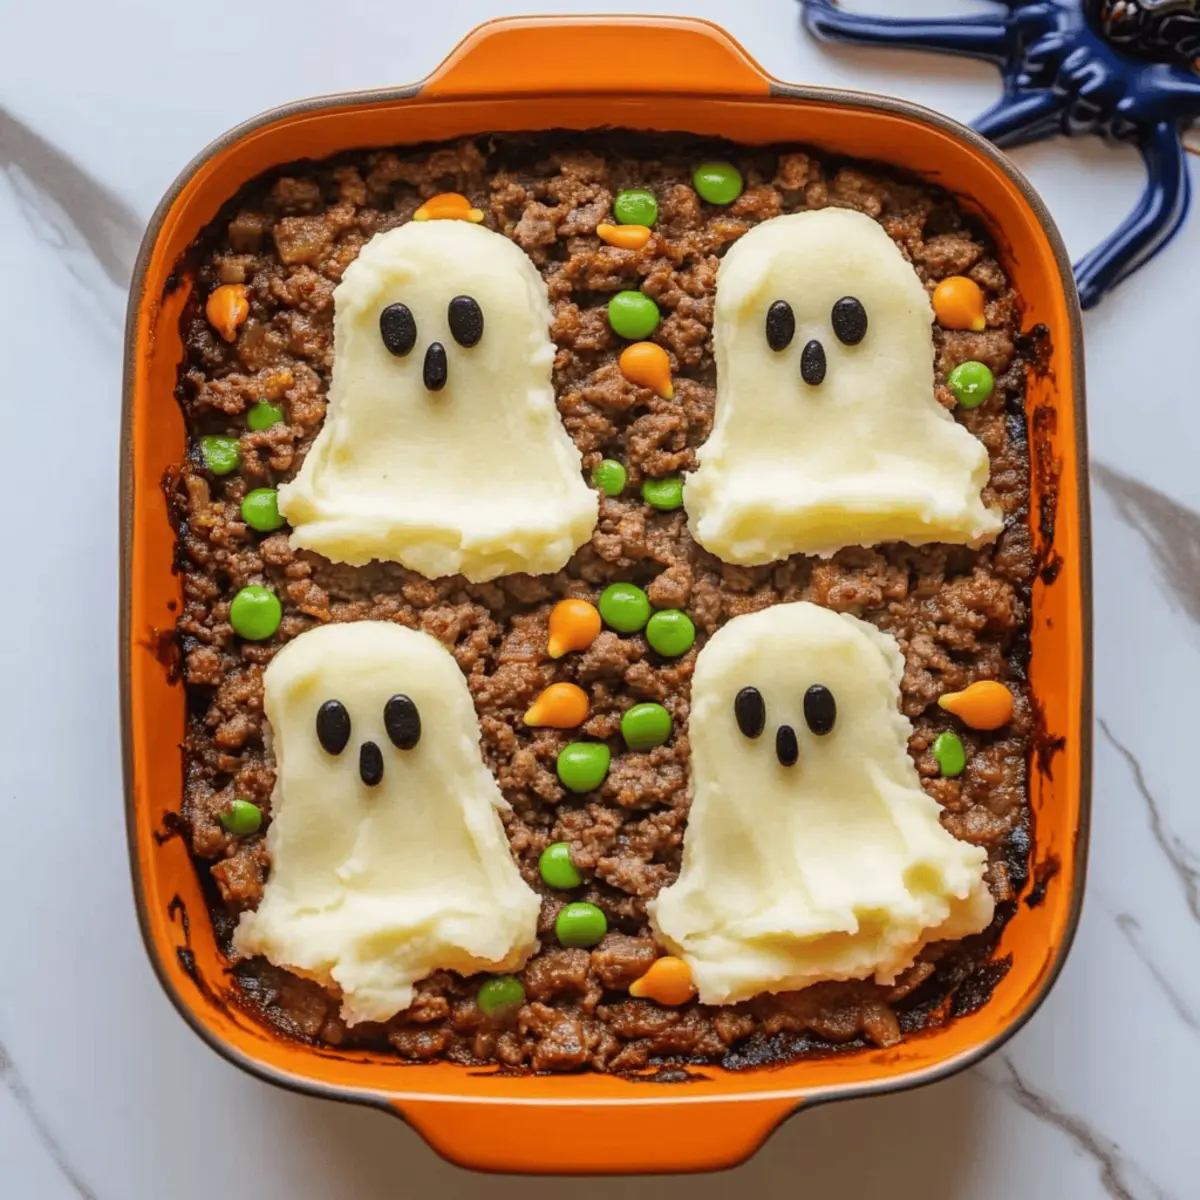
As I was stirring up my favorite comfort food last Halloween, inspiration struck—why not add a playful twist to a classic? Enter my Creepy Shepherd’s Pie: a delightful creation where creamy mashed potatoes are whimsically piped into ghostly shapes, perfect for your festive table. This dish isn’t just a conversation starter; it also brings heartwarming flavors and a sense of nostalgia that everyone craves on chilly nights. Plus, it’s an easy way to turn a family dinner into a spooky celebration without the stress! So, whether you’re a seasoned home chef or just starting your culinary journey, you’ll find this recipe both fun and family-friendly. Are you ready to bring this ghostly delight to your kitchen?

Why is Creepy Shepherd’s Pie so special?

Heartwarming Comfort: This dish delivers all the cozy goodness you expect from a classic shepherd's pie while adding a whimsical twist appropriate for Halloween festivities.

Visual Appeal: Piped ghostly potatoes create a playful look that’s sure to impress at any gathering, making it a great centerpiece for your holiday table.

Easy to Customize: Swap ground beef for lentils or grilled veggies to cater to different dietary preferences, just like in my Tamale Pie Hearty recipe.

Family-Friendly Fun: Involve kids in the decorating process, turning dinner prep into an exciting activity that fosters family bonding.

Quick and Simple: With straightforward steps, this recipe comes together in no time, so you can focus on enjoying spooky stories instead of being stuck in the kitchen.

Crowd-Pleasing Favorite: Rich, flavorful, and visually striking, this dish is perfect for impressing guests while keeping everyone’s comfort food cravings satisfied. For more fun options, don’t miss my delicious Spinach Pie Deliciously recipe!

Creepy Shepherd’s Pie Ingredients

Ready to embark on a ghostly culinary adventure? Gather these ingredients to create your Creepy Shepherd’s Pie with its charming potato "ghosts"!

For the Ghost Potatoes

  • Potatoes – The base for those delightful ghost shapes; sweet potatoes can be used for a sweeter twist.
  • Butter – Adds creaminess to the mash; swap for vegan butter for a dairy-free option.
  • Milk – Smooths out the consistency; try almond milk for a non-dairy alternative.
  • Garlic Powder – Enhances flavor; fresh garlic is great for those who love a bolder taste.
  • Salt & Pepper – Essential for balancing flavors.

For the Filling

  • Olive Oil – Used for sautéing your aromatics; feel free to substitute with vegetable oil.
  • Onion – Brings depth to your filling; shallots can be a milder alternative.
  • Garlic – Fresh garlic brings an extra layer of flavor.
  • Ground Beef – The main protein source; substitute with ground turkey or a meat alternative for a lighter dish.
  • Tomato Paste – Thickens and enriches the filling.
  • Worcestershire Sauce – Adds savory umami; consider soy sauce or tamari for a gluten-free version.
  • Vegetables (Mixed) – Adds nutrition and color; carrots, peas, or corn work beautifully.
  • Broth – Provides moisture for the filling; vegetable broth can be a wonderful meat-free option.

For Decoration

  • Peppercorns – Serve as the spooky "eyes" on your ghost potatoes; black olives or black sesame seeds can make a fun substitute.

Now that you're all set with your ingredients, let's get cooking! This Creepy Shepherd’s Pie is sure to be the highlight of your Halloween gatherings.

Step‑by‑Step Instructions for Creepy Shepherd’s Pie

Step 1: Prepare the Potatoes
Begin by peeling and chopping your potatoes into evenly sized cubes. Place them in a large pot filled with salted water, bringing it to a boil over high heat. Cook for about 15 minutes, or until fork-tender. Once cooked, drain the potatoes well, ensuring there’s no excess water, which could make your Creepy Shepherd’s Pie mushy.

Step 2: Mash the Potatoes
While the potatoes are still hot, transfer them to a large mixing bowl. Add butter, milk, garlic powder, salt, and pepper to the potatoes. Use a potato masher to mash everything together until smooth and creamy, showing no lumps. Allow the mashed potatoes to cool slightly; this will make them easier to pipe for the ghostly design later.

Step 3: Cook the Filling
In a large skillet, heat olive oil over medium heat. Add the diced onion and minced garlic, sautéing for about 2-3 minutes, or until fragrant and the onion is translucent. Be sure to stir frequently to prevent browning. This aromatic base will enhance the overall flavor of your Creepy Shepherd’s Pie filling.

Step 4: Brown the Meat
Next, add the ground beef to the skillet, breaking it apart with a spatula. Cook for about 5-7 minutes until the beef is browned through, with no pink remaining. Mix in the tomato paste and Worcestershire sauce, stirring well. Add your mixed vegetables and broth, seasoning with salt and pepper. Allow the filling to simmer for 5-7 minutes until thickened.

Step 5: Assemble the Pie
Preheat your oven to 375°F (190°C). Transfer the beef filling into a baking dish, spreading it evenly across the bottom. Using a piping bag fitted with a large round tip, pipe the cream of mashed potatoes over the filling in ghostly swirls and shapes. For a fun presentation, add peppercorns or other decorations as “eyes” to each mashed potato ghost.

Step 6: Bake the Pie
Place your assembled Creepy Shepherd’s Pie in the preheated oven and bake for 20-25 minutes. You’ll know it’s done when the potato topping is golden brown and the filling is bubbling around the edges. Remove it from the oven, allowing it to cool slightly before serving to ensure the spooky ghosts hold their shape.

Make Ahead Options

These Creepy Shepherd’s Pie creations are perfect for meal prep enthusiasts! You can prepare the filling and mashed potatoes separately up to 3 days in advance. Simply cook the beef mixture and allow it to cool before storing it in an airtight container in the refrigerator. Make the mashed potatoes, cool them slightly, and transfer to another container. When you're ready to serve, just reheat both components in the microwave or stovetop, then assemble your pie by piping the mashed potatoes on top and baking at 375°F until it's golden brown, ensuring that the final dish is just as delicious as when freshly made! This method not only saves time but allows you to enjoy the Halloween festivities with less stress.

What to Serve with Creepy Shepherd’s Pie

Delight your family and friends with complementary sides that burst with flavor and enhance the comfort of your Halloween meal.

  • Crisp Garden Salad: A refreshing mix of greens and colorful veggies balances the warmth of the pie and adds a crunch to your plate.

  • Garlic Bread: Perfect for soaking up the savory filling, this crispy treat introduces a delightful aroma that complements each bite of pie.

  • Roasted Seasonal Vegetables: Caramelized carrots and Brussels sprouts offer a rustic flavor; their sweetness pairs beautifully with the hearty shepherd's pie.

  • Fragrant Herb Rice: Light and fluffy, a rice side packed with fresh herbs will provide a lovely contrast to the creamy richness of the Creepy Shepherd's Pie.

  • Savory Stuffed Mushrooms: These bite-sized delights bring an earthy richness that harmonizes with the comforting flavors of your spooky main dish.

  • Buttery Corn on the Cob: Simple yet delicious, this classic side adds sweetness and a fun touch that kids will love alongside your festive feast.

  • Pumpkin Spice Latte: A cozy drink choice that ties the Halloween theme together, its warm spices will complement the comforting notes of the pie.

Feel free to mix and match these dishes to create a delightful spread that captures the spirit of Halloween while satisfying every appetite!

Expert Tips for Creepy Shepherd’s Pie

  • Perfect Potatoes: Drain thoroughly after boiling to prevent a watery texture in your Creepy Shepherd’s Pie. A dry mash is essential for shaping those playful ghosts!

  • Flavor Boost: For deeper flavors, let the beef filling cool slightly before adding the mashed potatoes. This enhances the mix and prevents sogginess.

  • Mashed Potato Magic: If you want to save time, consider using a mix for the potatoes if you're in a pinch. Just remember it may not hold shape as well.

  • Veggie Vibes: Feel free to pack in seasonal vegetables or leftovers to the filling. A mix of zucchini or mushrooms adds a hearty twist while keeping it family-friendly.

  • Eye-Catching Details: Get creative with your ghost decorations! Instead of peppercorns, use black olives or sesame seeds to give your spooky shepherd’s pie a unique look.

Creepy Shepherd’s Pie Variations & Substitutions

Feel free to get creative and personalize your Creepy Shepherd’s Pie for a truly unique experience!

  • Vegetarian Filling: Swap ground beef for lentils or grilled vegetables for a hearty vegetarian twist. This adds a delightful meatiness without the meat!

  • Seasonal Vegetables: Customize the filling with seasonal vegetables like zucchini or mushrooms to suit your taste and what's fresh. They'll add color and nutrition!

  • Dairy-Free Creaminess: Use vegan butter and almond milk in the mashed potatoes for a completely dairy-free version. Your ghosts will still be fluffy and delicious!

  • Spicy Kick: Add a pinch of cayenne pepper or some diced jalapeños to the beef mixture for an unexpected punch of heat. It’s the perfect twist for spice lovers!

  • Sweet Potato Ghosts: Substitute regular potatoes with sweet potatoes for a sweeter, vibrant topping. The flavor contrast will be surprisingly delightful!

  • Fun Shapes: Get creative with piping! Use different tips or cookie cutters to shape the ghost potatoes into your favorite spooky designs. The kids will love it!

  • Umami Boost: Instead of Worcestershire sauce, try a dash of miso paste or soy sauce for an extra depth of flavor. Both will enhance the savory notes beautifully!

For more delicious meals, check out my Tamale Pie Hearty and Spinach Pie Deliciously recipes that offer their own unique spins on comfort food!

How to Store and Freeze Creepy Shepherd’s Pie

Fridge: Store any leftovers in an airtight container in the refrigerator for up to 3 days. Reheat in the microwave or oven until heated through for best flavors.

Freezer (Uncooked): Assemble your Creepy Shepherd’s Pie but do not bake. Wrap tightly in foil or plastic wrap and freeze for up to 2 months. Thaw in the fridge overnight before baking.

Freezer (Cooked): You can also freeze it after baking. Cool completely, then seal in an airtight container and freeze for up to 2 months. To reheat, bake at 350°F until warmed through.

Reheating: For both cooked and uncooked pies, ensure proper heating to maintain texture. Baking will help recreate that delightful creamy potato topping while keeping the filling moist.

Creepy Shepherd’s Pie Recipe FAQs

What kind of potatoes are best for the ghost decorations?
Absolutely! For the ghost decorations, I recommend using starchy potatoes like Russets or Yukon Golds for their creamy texture. If you prefer a sweeter flavor, sweet potatoes are a fun alternative. Just remember, the creaminess is key to achieving those delightful ghost shapes!

How should I store leftover Creepy Shepherd’s Pie?
Very simple! Store any leftovers in an airtight container in the refrigerator. They’ll last for up to 3 days. Just reheat in the microwave or oven until warmed through. If you want to preserve that creamy texture, ensure it’s covered while reheating.

Can I freeze Creepy Shepherd’s Pie?
Absolutely! You can freeze it in two ways: either uncooked or cooked. To freeze it uncooked, assemble the pie, wrap it tightly in foil or plastic wrap, and freeze for up to 2 months. Thaw it in the fridge overnight before baking. If you decide to freeze it after baking, allow it to cool completely, then place it in an airtight container for up to 2 months. Just reheat at 350°F until heated through.

What dietary adaptations can I make for Creepy Shepherd’s Pie?
There are plenty! If you're catering to dietary preferences, you can use ground turkey or plant-based meat alternatives instead of ground beef for a lighter version. For a vegetarian option, swap the meat for lentils or a variety of grilled vegetables. Additionally, use vegan butter and almond milk to make the mash dairy-free.

How can I avoid a watery texture in my mashed potatoes?
To ensure your mashed potatoes are fluffy and not watery, make sure you drain them thoroughly after boiling. Allow them to sit for a minute or two in the colander so that any excess moisture evaporates before mashing. A step I always take is to call for hot potatoes when adding your liquids and seasonings—that helps to achieve the perfect creamy consistency!

Can I customize the vegetables in the filling?
The more the merrier! Feel free to customize the vegetables based on your family's preferences or seasonal availability. Carrots, peas, corn, zucchini, or even mushrooms can add nutrition and depth to your filling. Just chop them into small, even pieces so they cook nicely and blend seamlessly into the savory mixture.

Creepy Shepherd’s Pie

Creepy Shepherd’s Pie: Spooky Comfort for Halloween Fun

A delightful Creepy Shepherd’s Pie with ghostly mashed potatoes perfect for Halloween festivities.
Print Recipe Pin Recipe
Prep Time 30 minutes mins
Cook Time 45 minutes mins
Total Time 1 hour hr 15 minutes mins
Servings: 6 slices
Course: Dinner
Cuisine: American
Calories: 350
Ingredients Equipment Method Nutrition Notes

Ingredients
  

For the Ghost Potatoes
  • 4 large Potatoes sweet potatoes can be used for a sweeter twist
  • 4 tablespoons Butter swap for vegan butter for a dairy-free option
  • 1/2 cup Milk try almond milk for a non-dairy alternative
  • 1 teaspoon Garlic Powder fresh garlic is great for bolder taste
  • 1 teaspoon Salt
  • 1 teaspoon Pepper
For the Filling
  • 2 tablespoons Olive Oil feel free to substitute with vegetable oil
  • 1 medium Onion shallots can be a milder alternative
  • 2 cloves Garlic fresh garlic brings extra flavor
  • 1 pound Ground Beef substitute with ground turkey or meat alternative
  • 2 tablespoons Tomato Paste
  • 1 tablespoon Worcestershire Sauce consider soy sauce or tamari for gluten-free
  • 2 cups Vegetables (Mixed) carrots, peas, or corn work beautifully
  • 1 cup Broth vegetable broth can be a meat-free option
For Decoration
  • 12 pieces Peppercorns can substitute with black olives or black sesame seeds

Equipment

  • Large pot
  • large mixing bowl
  • Skillet
  • piping bag
  • Baking Dish

Method
 

Preparation Steps
  1. Begin by peeling and chopping your potatoes into evenly sized cubes. Place them in a large pot filled with salted water, bringing it to a boil over high heat. Cook for about 15 minutes, or until fork-tender. Once cooked, drain the potatoes well, ensuring there’s no excess water.
  2. While the potatoes are still hot, transfer them to a large mixing bowl. Add butter, milk, garlic powder, salt, and pepper. Mash everything together until smooth and creamy.
  3. In a large skillet, heat olive oil over medium heat. Add diced onion and minced garlic, sautéing for about 2-3 minutes until fragrant and the onion is translucent.
  4. Add the ground beef to the skillet, breaking it apart with a spatula. Cook for about 5-7 minutes until browned. Mix in tomato paste and Worcestershire sauce, stirring well. Add mixed vegetables and broth, seasoning with salt and pepper. Allow to simmer for 5-7 minutes until thickened.
  5. Preheat your oven to 375°F. Transfer the beef filling into a baking dish, spreading it evenly. Pipe the cream of mashed potatoes over the filling in ghostly shapes using a piping bag.
  6. Place your assembled Creepy Shepherd’s Pie in the preheated oven and bake for 20-25 minutes until golden brown.

Nutrition

Serving: 1sliceCalories: 350kcalCarbohydrates: 45gProtein: 25gFat: 10gSaturated Fat: 4gPolyunsaturated Fat: 0.5gMonounsaturated Fat: 3gCholesterol: 70mgSodium: 600mgPotassium: 800mgFiber: 4gSugar: 2gVitamin A: 1000IUVitamin C: 15mgCalcium: 50mgIron: 3mg

Notes

For deeper flavors, let the beef filling cool slightly before adding the mashed potatoes. Consider using a mix for the potatoes to save time.

Tried this recipe?

Let us know how it was!

Creepy Shepherd’s Pie: A Fun Halloween Comfort Food Treat

October 7, 2025 by Grace Snow Leave a Comment

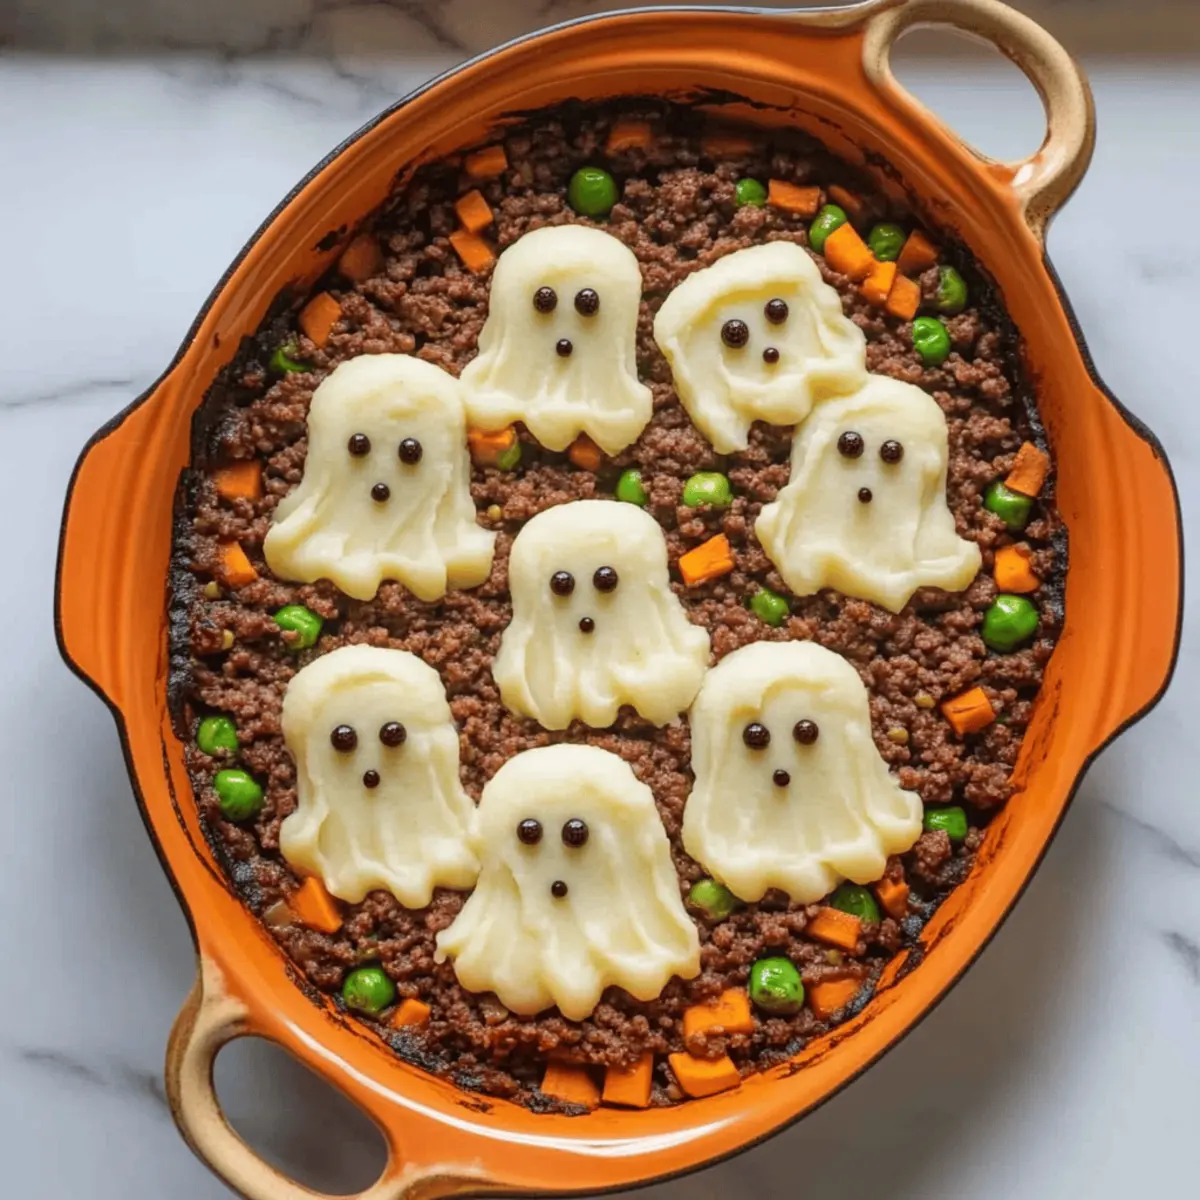
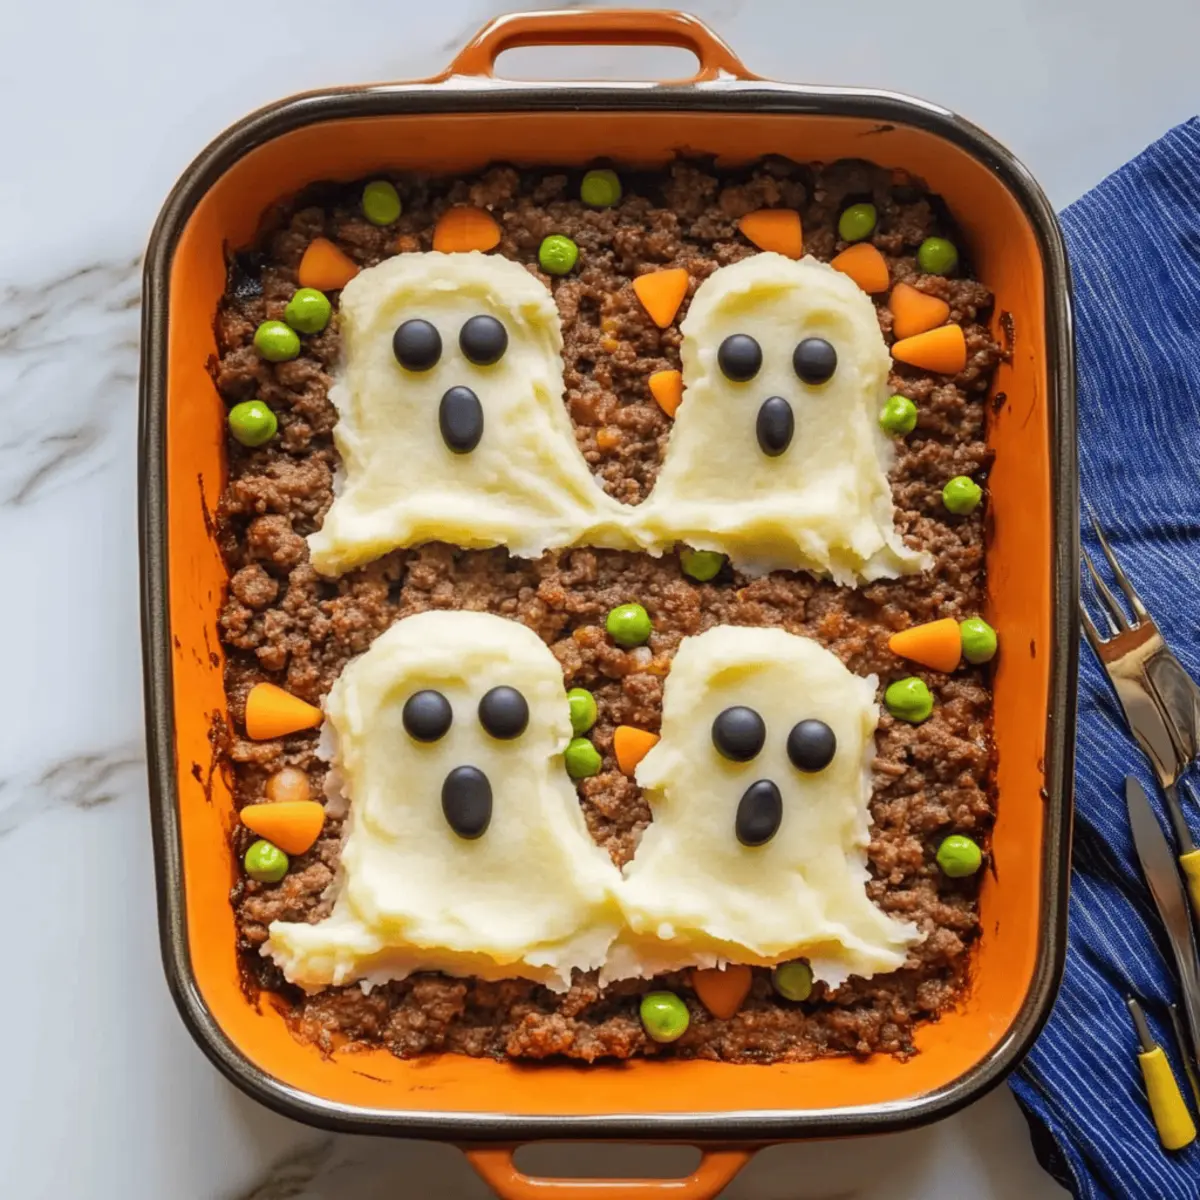
As the chill of October settles in, I find myself surrounded by pumpkins, spooky decor, and the tantalizing scent of comfort food wafting through my kitchen. Enter this Creepy Shepherd’s Pie with ghost potatoes—a whimsical twist on a classic dish that brings warmth and joy to chilly evenings. Not only is this fun Halloween recipe easy to assemble, but it also serves as a hearty crowd-pleaser, ensuring your family and friends are brought together over a deliciously savory filling topped with the most adorable ghostly mash. Whether you’re hosting a Halloween gathering or simply want to add a festive flair to dinner, I promise this dish will be a delightful surprise. Are you ready to scare up some smiles with your cooking?

Why is Creepy Shepherd's Pie a must-try?

Fun and Festive: This dish is the ultimate Halloween comfort food, cleverly transforming a classic shepherd's pie into a playful, spooky masterpiece.
Hearty and Filling: With a savory beef filling and creamy ghost potatoes, it’s sure to satisfy everyone's hunger.
Family-Friendly: Kids and adults alike will enjoy decorating their own "ghosts", making dinner a memorable experience!
Easy to Customize: Swap in your favorite veggies or use lentils for a vegetarian twist, just like in my Tamale Pie Hearty recipe.
Perfect for Gatherings: This pie is an impressive dish that brings people together, ideal for any festive occasion.
Quick Assembly: With simple prep and bake steps, you'll spend less time in the kitchen and more time enjoying the festivities!

Creepy Shepherd’s Pie Ingredients

For the Ghost Potatoes

  • Potatoes – The base for both the ghost decoration and the creamy filling; try sweet potatoes for a sweeter twist.
  • Butter – Adds richness and creaminess; vegan butter works well for a dairy-free option.
  • Milk – Ensures smooth, fluffy mashed potatoes; substitute with almond milk for a non-dairy alternative.
  • Garlic Powder – Boosts the flavor of the potatoes; using fresh garlic can enhance the depth even more.
  • Salt & Pepper – Essential for seasoning and flavor balance.

For the Filling

  • Olive Oil – Used for sautéing onions and garlic; vegetable oil can be a suitable substitute.
  • Onion – Brings depth and sweetness to the filling; shallots can be used for a milder taste.
  • Garlic – Fresh garlic elevates the flavor in the hearty filling.
  • Ground Beef – The main protein; ground turkey or plant-based meat alternatives are great lighter choices.
  • Tomato Paste – Helps thicken the mixture and adds richness.
  • Worcestershire Sauce – Enhances umami flavor; for gluten-free, use soy sauce or tamari.
  • Vegetables (Mixed) – Adds nutrition and texture; feel free to choose carrots, peas, or corn.
  • Broth – Provides moisture in the filling; vegetable broth is perfect for a meat-free option.

For the Decorations

  • Peppercorns – Create spooky "eyes" for your ghost potatoes; black olives or sesame seeds could work too!

With these ingredients in hand, you're well on your way to making a memorable Creepy Shepherd's Pie that will delight your guests! Happy cooking!

Step‑by‑Step Instructions for Creepy Shepherd’s Pie

Step 1: Prepare Potatoes
Start by peeling and chopping your potatoes into even chunks. In a large pot, fill with salted water and bring to a boil over high heat. Add the potatoes and cook until they are fork-tender, which should take about 15 minutes. Drain the potatoes thoroughly in a colander and let them sit for a moment to steam dry.

Step 2: Mash Potatoes
In a mixing bowl, combine the hot, drained potatoes with butter, milk, garlic powder, salt, and pepper. Use a potato masher or a hand mixer to mash until completely smooth and creamy. Allow the mashed potatoes to cool slightly while you prepare the filling; this will help maintain their structure when assembled.

Step 3: Cook Filling
Heat a large skillet over medium heat and add a drizzle of olive oil. Once hot, sauté the diced onion and minced garlic for about 2-3 minutes until they are fragrant and translucent. This aromatic base will add deep flavor to your Creepy Shepherd’s Pie filling. Stir occasionally to avoid burning.

Step 4: Brown the Meat
Add the ground beef to the skillet and cook it, breaking it apart with a spatula until browned. This should take about 5-7 minutes. Once browned, mix in the tomato paste, Worcestershire sauce, mixed vegetables, and broth. Season with salt and pepper, then let the mixture simmer until thickened, stirring occasionally.

Step 5: Assemble Pie
Preheat your oven to 375°F (190°C). Transfer the thickened beef filling into a baking dish, spreading it evenly. Now, using a piping bag or a spoon, pipe the creamy mashed potatoes on top, creating ghostly shapes. Add peppercorns or alternative decorations for spooky "eyes" to complete your Creepy Shepherd’s Pie.

Step 6: Bake
Place the assembled shepherd's pie in the preheated oven and bake for 20-25 minutes. Look for the tops of the ghostly potatoes to turn golden brown and for the filling to bubble around the edges. This final touch will render your dish inviting and festive, perfect for Halloween gatherings!

How to Store and Freeze Creepy Shepherd’s Pie

Fridge: Store any leftover Creepy Shepherd's Pie in an airtight container for up to 3 days. Reheat individual servings in the microwave or in a preheated oven until warmed through.

Freezer: You can freeze the Creepy Shepherd's Pie either fully assembled (uncooked) or after baking. Wrap it tightly in plastic wrap and aluminum foil for optimal preservation.

Thawing: When ready to enjoy, thaw the frozen pie in the refrigerator overnight before baking. For best results, reheat in the oven at 350°F until heated thoroughly.

Reheating: If reheating a previously baked pie, cover it with foil to prevent over-browning and bake until warmed throughout, usually about 25-30 minutes.

Creepy Shepherd’s Pie Variations

Feel free to let your creativity shine and personalize this delightful dish to suit your taste!

  • Vegetarian Delight: Replace ground beef with lentils or a mix of grilled vegetables. This keeps the heartiness while catering to veggie lovers. A filled, colorful filling makes it not only tasty but appealing on the plate!

  • Sweet Potato Ghosts: Switch out regular potatoes for sweet potatoes for a naturally sweet twist. This adds a lovely hint of caramel flavor, making the ghosts even more irresistible!

  • Extra Cheese: Stir in some shredded cheese into the mashed potatoes before piping for a gooey layer of goodness. Who can say no to cheesy ghosts?

  • Spicy Kick: Feeling adventurous? Add a diced jalapeño or a pinch of cayenne to the meat filling for a little heat. This fiery tweak will surprise and thrill!

  • Herb-Infused: Stir fresh herbs like thyme or rosemary into the mashed potatoes for a fragrant twist. This adds an aromatic flavor that elevates the dish substantially.

  • Decadent Toppings: Consider topping the ghost potatoes with crispy bacon bits or fried onion strings. These crunchy accents provide a delightful texture contrast.

  • Different Shapes: Have fun with your ghost decoration! Use cookie cutters for spooky shapes beyond ghosts—think bats or pumpkins. It’s a playful way to excite the little ones!

  • Global Flavors: For a fun twist, add curry powder or tamari to the filling for an international flair. You might just bring an exciting fusion of tastes to your dinner table!

Let your imagination run wild as you craft your own unique version of this Creepy Shepherd's Pie—it’s a recipe that truly allows for delicious customization! If you're looking for another comforting option, check out my Spinach Pie Deliciously for more inspiration!

What to Serve with Creepy Shepherd’s Pie

As you gather around the table for this playful meal, consider adding these delightful sides that enhance each bite of your ghostly creation.

  • Crisp Side Salad: A fresh salad with mixed greens and a tangy vinaigrette adds brightness and crunch, perfectly balancing the hearty pie.
  • Garlic Bread: Warm, buttery garlic bread complements the rich flavors of the shepherd’s pie, providing an irresistible dipping option for any leftover gravy.
  • Roasted Vegetables: Seasoned roasted carrots and Brussels sprouts bring caramelized sweetness and a smoky depth that pairs beautifully with the creamy topping.
  • Colcannon: A twist on traditional mashed potatoes, colcannon features cabbage or kale, offering a unique flavor that elevates the comfort food experience.
  • Pumpkin Soup: For a festive touch, a warm pumpkin soup enhances the autumnal vibe and provides a silky-smooth contrast to the pie's texture.
  • Spiced Apple Cider: Warm spiced apple cider served in mugs can round out the meal, offering a sweet and aromatic drink that captures the essence of Halloween.

Expert Tips for Creepy Shepherd’s Pie

• Perfect Potato Texture: Use starchy potatoes like Russets for a fluffy and creamy mash. Avoid waxy potatoes to prevent a gluey texture.

• Meat Alternatives: For a lighter version, try swapping ground beef with lentils or plant-based meat. Just remember to adjust seasoning accordingly!

• Assembly Tip: Let the beef filling cool slightly before topping with mashed potatoes. This helps keep distinct layers without mixing.

• Tasty Variations: Experiment with different seasonal veggies like butternut squash or mushrooms for added flavor and nutrition in your Creepy Shepherd’s Pie.

• Baking Tip: For an extra crispy top, broil the pie for the last few minutes of baking. Just keep an eye on it to prevent burning!

• Storage Solution: Leftovers can be refrigerated for up to 3 days. For longer storage, freeze the pie before baking, then defrost and bake when ready to enjoy.

Make Ahead Options

Preparing your Creepy Shepherd’s Pie in advance is a fantastic way to save time on busy nights! You can make the filling up to 3 days ahead of time; just cook it as directed, then let it cool completely before transferring it to an airtight container. For the ghost potatoes, you can prepare and pipe them onto the filling up to 24 hours before baking. Simply cover the assembled pie tightly with plastic wrap and refrigerate to keep the potatoes from browning and drying out. When you’re ready to serve, just bake it from the fridge for an extra 5 minutes longer to ensure it's heated through and bubbly, providing you with a deliciously festive meal with minimal fuss.

Creepy Shepherd’s Pie Recipe FAQs

What kind of potatoes should I use for the ghost decoration?
For the best ghostly effect, I recommend using starchy potatoes like Russets or Yukon Golds, as they create a fluffy and creamy mash. Avoid waxy potatoes to prevent a gluey texture. If you want a sweeter twist, sweet potatoes can also make delightful ghosts!

How long can I store leftover Creepy Shepherd's Pie?
You can keep leftover Creepy Shepherd's Pie in an airtight container in the refrigerator for up to 3 days. Just reheat individual servings in the microwave or in a preheated oven until warmed all the way through.

Can I freeze Creepy Shepherd’s Pie?
Absolutely! You can freeze the Creepy Shepherd's Pie either uncooked or after baking. If freezing uncooked, wrap it tightly in plastic wrap and aluminum foil. For cooked pies, allow it to cool completely, then wrap it the same way. It can last in the freezer for about 3 months!

What should I do if my mashed potatoes are too watery?
If your mashed potatoes end up too watery, a great fix is to drain them well and return them to the heat for a minute, stirring gently to evaporate some of the moisture. You can also mix in a bit more butter or even a thickener like instant potato flakes to reach the desired texture.

Are there any dietary considerations with this dish?
Yes! The Creepy Shepherd's Pie can easily be adjusted to fit various dietary needs. Use ground turkey or plant-based meat alternatives for a lighter option. For a gluten-free version, replace Worcestershire sauce with tamari or soy sauce. If anyone in your household has allergies, be sure to check labels on all pre-packaged ingredients.

What’s the best way to create the ghostly effect for the potatoes?
To achieve those spooky ghostly swirls, I love using a piping bag with a star tip. Once your mashed potatoes are smooth and cool, transfer them to the piping bag and pipe them in playful shapes atop the filling. Don't forget to add peppercorns or black olives for adorable “eyes”!

Creepy Shepherd’s Pie

Creepy Shepherd’s Pie: A Fun Halloween Comfort Food Treat

Creepy Shepherd’s Pie is a whimsical take on a classic dish, perfect for Halloween gatherings.
Print Recipe Pin Recipe
Prep Time 30 minutes mins
Cook Time 25 minutes mins
Total Time 55 minutes mins
Servings: 6 pieces
Course: Dinner
Cuisine: American
Calories: 450
Ingredients Equipment Method Nutrition Notes

Ingredients
  

For the Ghost Potatoes
  • 2 pounds Potatoes or sweet potatoes for a sweeter twist
  • 4 tablespoons Butter vegan butter for dairy-free
  • 1/2 cup Milk almond milk for non-dairy
  • 1 teaspoon Garlic Powder or fresh garlic
  • to taste Salt & Pepper
For the Filling
  • 2 tablespoons Olive Oil or vegetable oil
  • 1 large Onion or shallots for milder taste
  • 2 cloves Garlic minced
  • 1 pound Ground Beef or ground turkey/plant-based meat
  • 2 tablespoons Tomato Paste
  • 1 tablespoon Worcestershire Sauce or gluten-free soy sauce
  • 1 cup Vegetables (Mixed) e.g., carrots, peas, corn
  • 1/2 cup Broth vegetable broth for meat-free
For the Decorations
  • 1 tablespoon Peppercorns for spooky 'eyes'

Equipment

  • Large pot
  • Mixing Bowl
  • Skillet
  • Baking Dish
  • potato masher
  • piping bag

Method
 

Step-by-Step Instructions
  1. Start by peeling and chopping your potatoes into even chunks. In a large pot, fill with salted water and bring to a boil over high heat. Add the potatoes and cook until fork-tender, about 15 minutes. Drain the potatoes thoroughly and let them sit to steam dry.
  2. In a mixing bowl, combine the hot, drained potatoes with butter, milk, garlic powder, salt, and pepper. Mash until smooth and creamy. Let cool slightly while preparing the filling.
  3. Heat a skillet over medium heat and add olive oil. Sauté diced onion and minced garlic for 2-3 minutes until fragrant and translucent.
  4. Add ground beef to the skillet and cook until browned, about 5-7 minutes. Mix in tomato paste, Worcestershire sauce, mixed vegetables, and broth. Season with salt and pepper and let simmer until thickened.
  5. Preheat oven to 375°F (190°C). Transfer the beef filling into a baking dish and spread evenly. Pipe the creamy mashed potatoes on top, creating ghostly shapes. Add peppercorns for spooky 'eyes'.
  6. Place the pie in the oven and bake for 20-25 minutes until potatoes are golden brown and filling bubbles around edges.

Nutrition

Serving: 1pieceCalories: 450kcalCarbohydrates: 45gProtein: 25gFat: 20gSaturated Fat: 10gPolyunsaturated Fat: 2gMonounsaturated Fat: 6gCholesterol: 80mgSodium: 600mgPotassium: 800mgFiber: 5gSugar: 3gVitamin A: 500IUVitamin C: 10mgCalcium: 40mgIron: 3mg

Notes

Leftovers can be refrigerated for up to 3 days. Freezing is possible if uncooked or after baking. Thaw overnight before reheating.

Tried this recipe?

Let us know how it was!

Devil’s Snare Black Pasta: A Spooky and Creamy Delight

October 7, 2025 by Grace Snow Leave a Comment

In the midst of Halloween festivities, I found myself searching for a dish that could capture both the whimsy and thrill of the season. That’s when I stumbled upon the enchanting Devil’s Snare Black Pasta. This spooky dish, with its striking black hue, becomes the star of any dinner table, especially during a cozy movie night with Harry Potter. What’s more, it’s a breeze to make and light enough to leave you room for all your favorite Halloween treats. Whether you're cooking for a crowd or just indulging in a personal treat, this vegetarian delight promises a unique flavor experience that’s both comforting and exciting. So, are you ready to weave a little magic into your next meal?

Why is Devil's Snare Black Pasta special?

Unique Visual Appeal: The striking black hue of this pasta makes it a showstopper at any gathering.
Deliciously Rich Sauce: The creamy blend of heavy cream and Parmesan offers a sumptuous mouthfeel.
Quick to Prepare: With just a few ingredients, you'll whip this up in no time, perfect for last-minute gatherings.
Flexible Recipe: This dish can easily be tailored; switch out for traditional linguine or go vegan with coconut milk. Enjoy this spooky delight paired with a light salad or some garlic bread for an ultimate dining experience! Explore more festive ideas like Skillet Pasta Sun to complete your Halloween menu.

Devil's Snare Black Pasta Ingredients

For the Pasta

  • Black Squid Ink Pasta – Provides an eye-catching color and unique flavor; substitute with regular linguine for a lighter option.

For the Sauce

  • Olive Oil – Use extra virgin for a richer taste while sautéing.
  • Yellow Onion – Finely diced for sweetness and depth; ensures even cooking.
  • Garlic – Freshly minced enhances the overall flavor; garlic powder can be used as a substitute.
  • Red Pepper Flakes – Adds a pinch of heat; adjust to your spice preference.
  • Dry White Wine – Contributes acidity; replace with chicken stock for a non-alcoholic option.
  • Heavy Cream – Creates a rich sauce; canned coconut milk works for a vegan alternative.
  • Parmesan Cheese – Provides creaminess and umami; nutritional yeast is a great vegan substitute.

For Garnish

  • Chopped Parsley – Adds freshness and enhances visual appeal; it’s optional but recommended.

Step‑by‑Step Instructions for Devil’s Snare Black Pasta

Step 1: Boil the Pasta
Start by bringing 3 quarts of salted water to a rolling boil in a large pot over high heat. Once it reaches a boil, add the black squid ink pasta. Cook according to the package directions, about 9–11 minutes, until al dente. Stir occasionally to prevent sticking. When perfectly cooked, the pasta should be firm yet tender, so taste a strand to check for doneness.

Step 2: Sauté the Onions
While the pasta cooks, heat half a tablespoon of extra virgin olive oil in a 10-inch skillet over medium heat. Add the finely diced yellow onion, sautéing for 4–7 minutes until it becomes translucent and fragrant. Stir occasionally, allowing the onions to soften without browning, which will ensure a sweet base for your sauce in the Devil’s Snare Black Pasta.

Step 3: Add Garlic and Spices
Next, add the minced garlic and a pinch of red pepper flakes to the skillet. Cook for about 1 minute, stirring constantly, until the garlic is fragrant but not browned. The aroma of garlic merging with onions will fill your kitchen, setting the stage for the rich flavors of the sauce that will coat your black pasta.

Step 4: Incorporate Wine
Pour in 2 tablespoons of dry white wine and allow it to simmer for 1–2 minutes. This reduction will concentrate the flavors, enhancing the overall depth of the Devil’s Snare Black Pasta. You’ll know it’s ready when the wine reduces by half, leaving a fragrant base that pairs perfectly with the creamy elements to come.

Step 5: Create the Creamy Sauce
Reduce the heat to low and stir in a quarter cup of heavy cream and 2 tablespoons of grated Parmesan cheese. Mix until the cheese melts and the sauce thickens, about 2–3 minutes. Season with kosher salt and black pepper to taste. The sauce should become smooth and creamy, beautifully enveloping the other ingredients for an enchanting finish.

Step 6: Combine Pasta and Sauce
Once the pasta is cooked and drained, add it directly to the skillet with your creamy sauce. Toss thoroughly for about 1-2 minutes to ensure the black squid ink pasta is evenly coated. The glossy strands should soak up the rich flavors of the sauce, creating a captivating and spooky dish ready for a Halloween feast.

Step 7: Serve and Garnish
Finally, plate the Devil’s Snare Black Pasta in bowls or on plates. Garnish generously with additional Parmesan cheese and chopped parsley for a fresh touch. This striking presentation, alongside the creamy goodness, will surely delight your guests, making it a memorable centerpiece for your Halloween dinner gathering.

How to Store and Freeze Devil's Snare Black Pasta

Fridge: Leftover Devil's Snare Black Pasta can be stored in an airtight container in the fridge for up to 3 days. Make sure to let it cool down before placing it into the container to maintain freshness.

Freezer: For longer storage, you can freeze the cooked pasta in a freezer-safe container for up to 2 months. Just be sure to separate it from the sauce to prevent clumping.

Reheating: When ready to enjoy leftovers, thaw in the fridge overnight, and reheat gently on the stove with a splash of water or additional cream to revive its creamy texture. Avoid microwave reheating for best results.

What to Serve with Devil's Snare Black Pasta

Transform your Halloween dinner into a memorable feast by complementing your spooky pasta dish with delightful sides and drinks.

  • Garlic Bread:
    Crispy and buttery, it’s the perfect vehicle for soaking up all the creamy sauce. The toasted crunch offers a comforting contrast.

  • Simple Green Salad:
    A fresh mix of greens dressed lightly balances the richness of the pasta, adding brightness and a refreshing crunch to your meal.

  • Roasted Brussels Sprouts:
    Savory and slightly sweet, these caramelized bites bring depth and a satisfying texture that pairs beautifully with the black pasta.

  • Mushroom Risotto:
    Creamy and earthy, it enriches the dining experience with its umami flavors, enhancing the overall richness of the meal.

  • Chardonnay:
    This crisp white wine harmonizes with the creamy sauce, cutting through the decadence while adding a lovely fruity note.

  • Pumpkin Spice Muffins:
    End your meal on a sweet note with these fluffy muffins. The warm spices echo the Halloween spirit, making for a seasonal treat.

Expert Tips for Devil's Snare Black Pasta

  • Perfect Pasta Texture: Avoid overcooking by testing for al dente at the minimum time recommended—trust your taste buds for the best results!

  • Onion Sautéing Skills: Keep the heat on medium while sautéing onions to prevent browning; this ensures a sweet base that enhances the sauce in the Devil's Snare Black Pasta.

  • Wine Reduction: Allow the white wine to reduce by half; this concentrates flavor—an easy mistake is to rush this step, leading to a less complex sauce.

  • Rest Before Serving: Let the pasta sit in the sauce for a few minutes before serving. This allows the flavors to marry beautifully and enhances the overall taste.
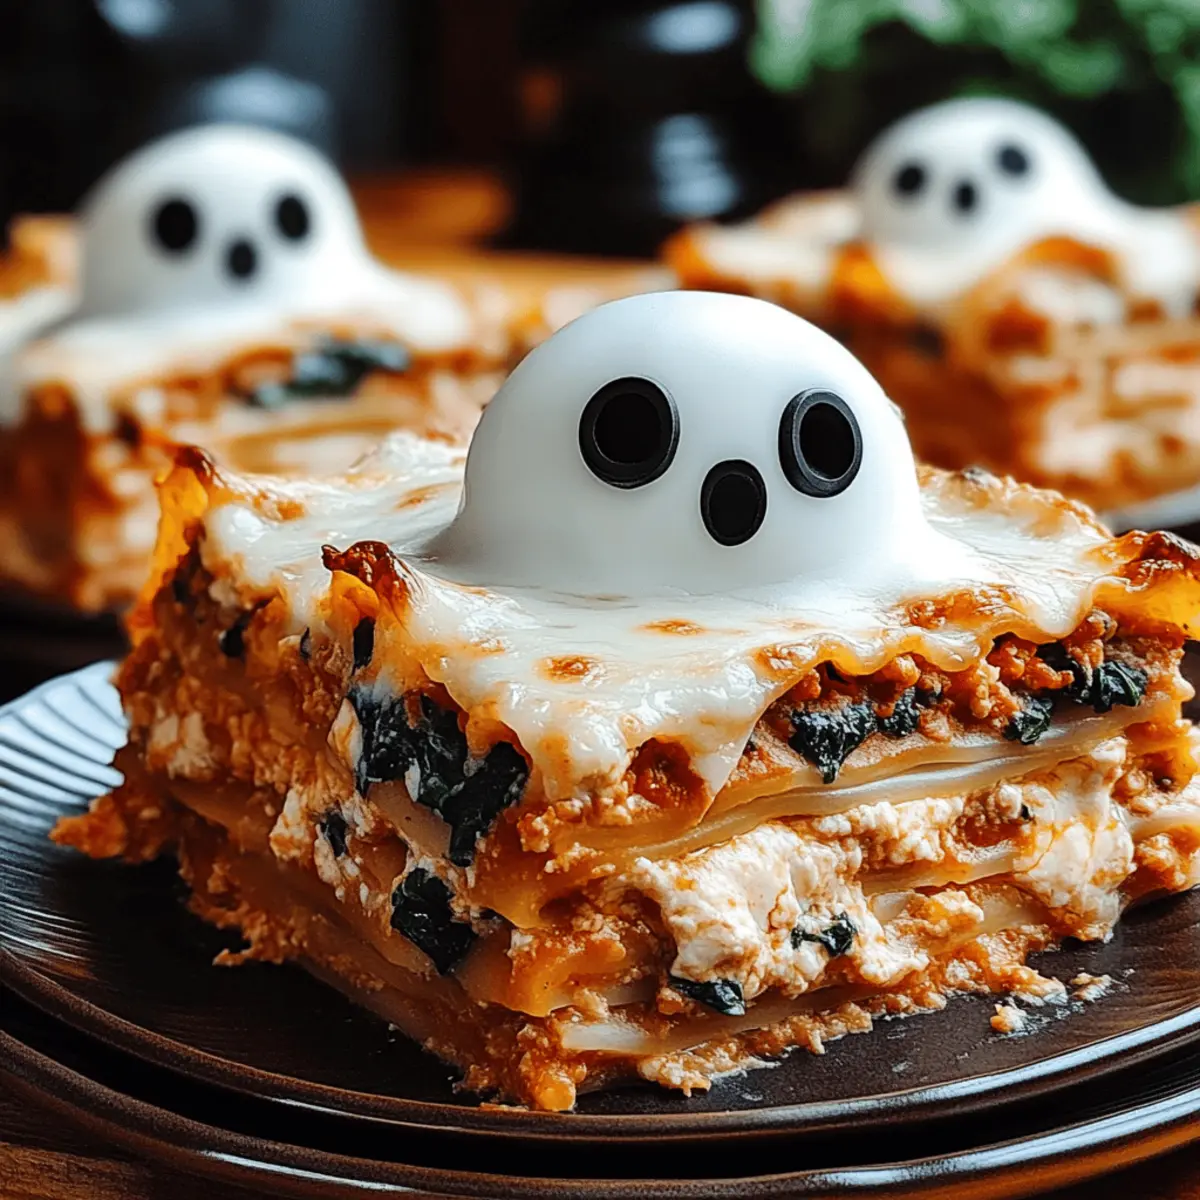
  • Make it Vegan: Want a vegan version? Simply substitute heavy cream with coconut milk and Parmesan with nutritional yeast, keeping all the spooky goodness!

Devil's Snare Black Pasta Variations

Feel free to sprinkle in your own creative twists and substitutions to elevate this spooky dish!

  • Vegan Option: Replace heavy cream with coconut milk and Parmesan with nutritional yeast for a completely plant-based delight.
  • Protein Boost: Add sautéed shrimp or grilled chicken for extra protein and heartiness, balancing flavors beautifully.
  • Spicy Delight: Amp up the heat by increasing the red pepper flakes or incorporating sautéed crushed red peppers for a fiery kick.
  • Light and Bright: Use vegetable broth instead of white wine for a lighter sauce that still maintains depth without the alcohol.
  • Mushroom Medley: Introduce sliced mushrooms for an earthy flavor profile that complements the black pasta's richness.
  • Caprese Style: Mix in cherry tomatoes and mozzarella balls for a fresh twist, creating a vibrant contrast against the dark pasta.
  • Herbaceous Touch: Add fresh basil or oregano along with the parsley for an aromatic burst that will take your dish to the next level.
  • Cheesy Goodness: Use a blend of cheeses, like Fontina or goat cheese, to give the sauce a unique, creamy texture and flavor profile.

If you're looking for more pasta inspiration, why not try out Tuscan White Bean Pasta or indulge in rich Seafood Pasta Savory? The possibilities are endless, and your dinner table is about to get a whole lot more exciting!

Make Ahead Options

These Devil's Snare Black Pasta preparations are perfect for busy home cooks looking to save time during the Halloween rush! You can prepare the creamy sauce (excluding the pasta) up to 3 days in advance; simply sauté the onions, garlic, and spices, then stir in the cream and parmesan until thickened. Allow it to cool before refrigerating in an airtight container to maintain its rich flavor and smooth texture. You can also cook the pasta and toss it with a bit of olive oil to prevent sticking up to 24 hours before serving. When you’re ready to feast, gently reheat the sauce and add the cooked pasta, tossing until well-coated for a delicious dish that's just as delightful as when freshly made!
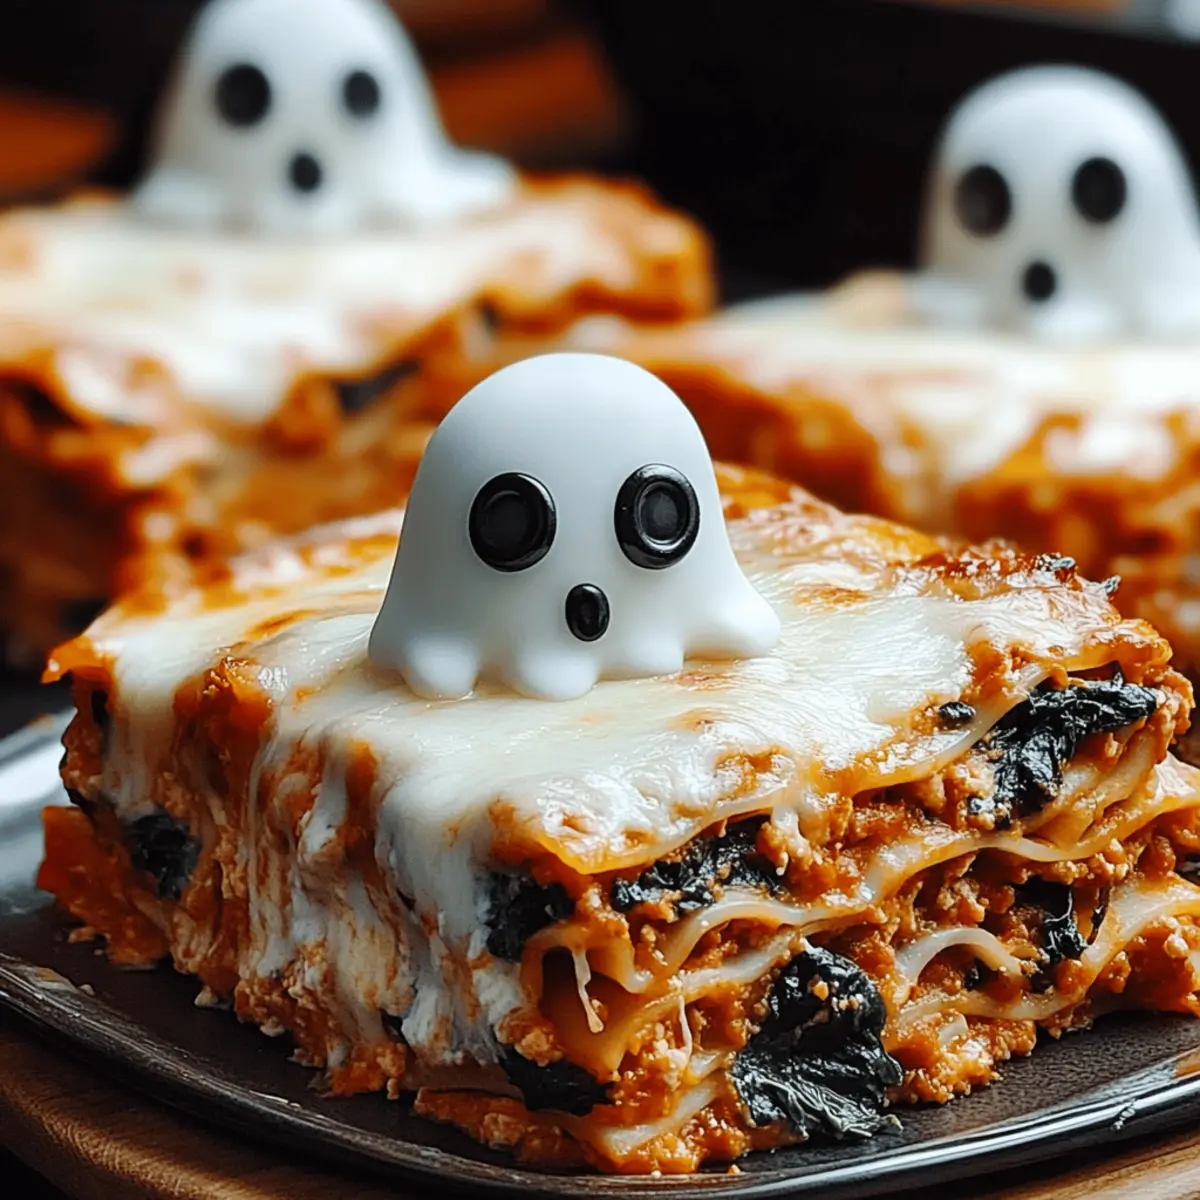
Devil's Snare Black Pasta Recipe FAQs

What type of black pasta should I use?
Absolutely, the key ingredient for your Devil's Snare Black Pasta is black squid ink pasta, which gives it that signature spooky hue and unique flavor. If you can't find it, don't worry! Regular linguine also works perfectly, allowing you to still enjoy a delicious pasta dish, albeit without the dramatic visuals.

How long can I store leftover Devil's Snare Black Pasta?
Leftover Devil's Snare Black Pasta can be stored in an airtight container in the fridge for up to 3 days. To maintain its freshness, allow it to cool completely before storing. When you're ready to enjoy it again, gently reheat it on the stove to preserve its creamy sauce.
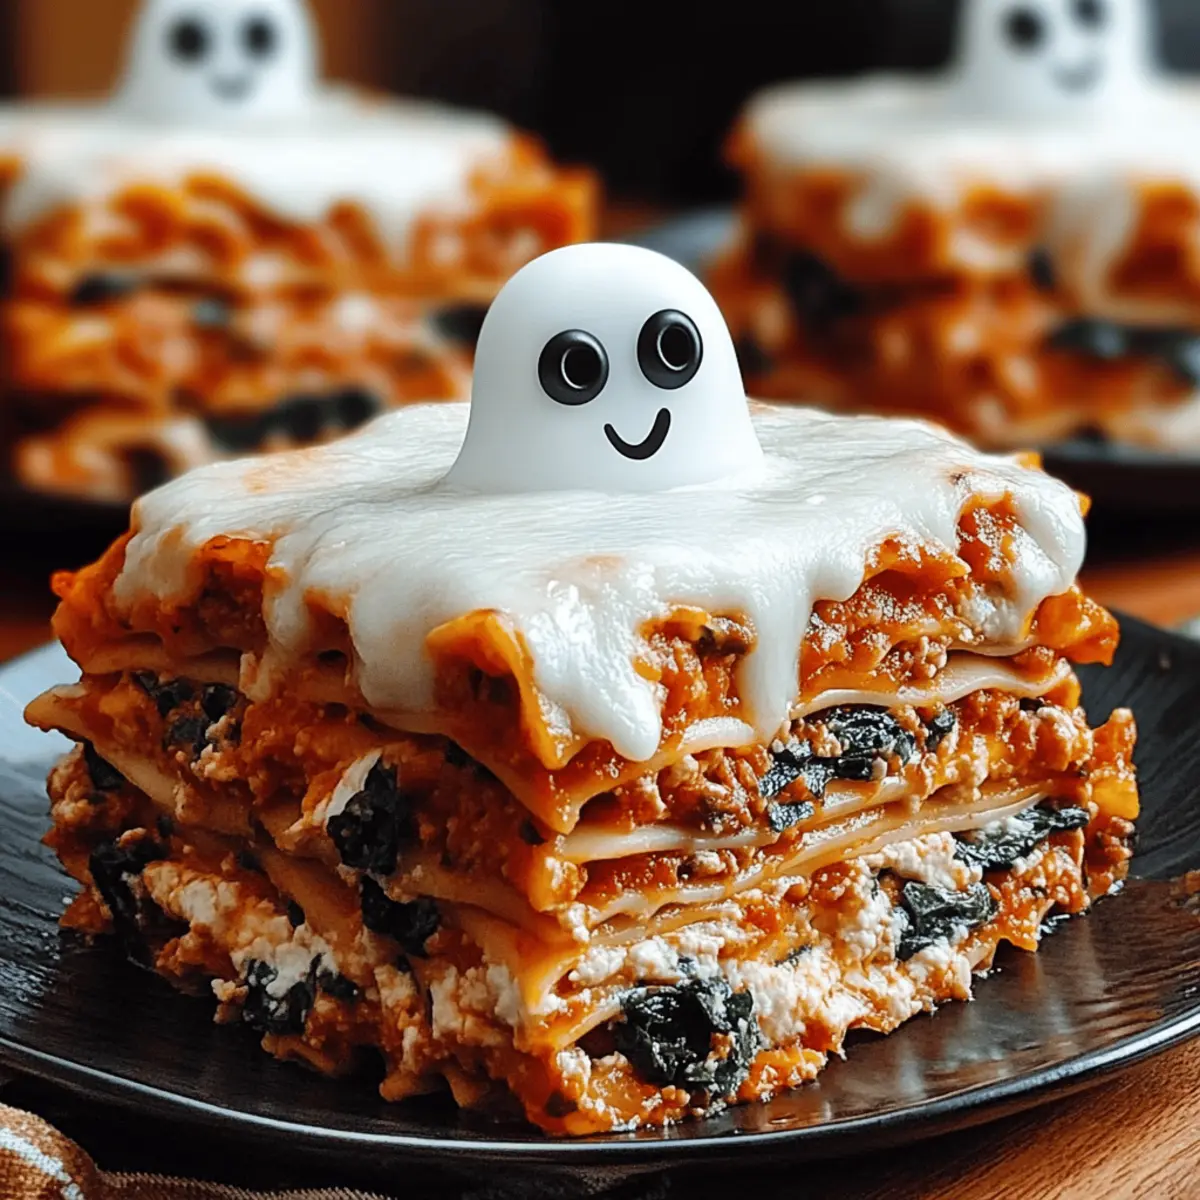
Can I freeze this black pasta dish?
Yes! To freeze your Devil's Snare Black Pasta, it's best to separate the pasta from the sauce. You can freeze the cooked pasta in a freezer-safe container for up to 2 months. When you're ready to enjoy it, thaw in the refrigerator overnight and reheating it gently on the stove, adding a splash of water or extra cream to revitalize its texture.

What if my sauce is too thick?
If your sauce turns out to be thicker than you'd like, no worries! You can easily adjust it. Simply add a splash of pasta cooking water or a bit of cream while gently stirring on low heat until you reach your desired consistency. The starchy water helps bind the sauce to the pasta while thin it out without losing flavor.

Is this recipe suitable for vegetarians and vegans?
Yes! The Devil's Snare Black Pasta is naturally vegetarian. To cater to a vegan diet, simply replace heavy cream with coconut milk and Parmesan cheese with nutritional yeast. This way, you can keep all the spooky charm while accommodating different dietary preferences.

How can I enhance the flavor of my Devil's Snare Black Pasta?
For an extra layer of flavor, consider adding sautéed mushrooms or spinach to your sauce for additional richness and nutrition. You can also experiment with various herbs, such as adding fresh basil or a touch of thyme, to elevate your dish even further. The more the merrier when it comes to flavor exploration!

Devil’s Snare Black Pasta

Devil’s Snare Black Pasta: A Spooky and Creamy Delight

A spooky and creamy delight, Devil’s Snare Black Pasta captivates with its unique black hue and rich flavors, perfect for Halloween festivities.
Print Recipe Pin Recipe
Prep Time 10 minutes mins
Cook Time 20 minutes mins
Total Time 30 minutes mins
Servings: 4 servings
Course: Dinner
Cuisine: Italian
Calories: 450
Ingredients Equipment Method Nutrition Notes

Ingredients
  

For the Pasta
  • 12 ounces Black Squid Ink Pasta Substitute with regular linguine for a lighter option.
For the Sauce
  • 1/2 tablespoon Extra Virgin Olive Oil Use for sautéing.
  • 1 medium Yellow Onion Finely diced.
  • 3 cloves Garlic Freshly minced.
  • 1/4 teaspoon Red Pepper Flakes Adjust to your spice preference.
  • 2 tablespoons Dry White Wine Replace with chicken stock for non-alcoholic option.
  • 1/4 cup Heavy Cream Canned coconut milk works for a vegan alternative.
  • 2 tablespoons Grated Parmesan Cheese Nutritional yeast is a great vegan substitute.
For Garnish
  • 2 tablespoons Chopped Parsley Optional but recommended.

Equipment

  • Large pot
  • 10-inch skillet

Method
 

Step-by-Step Instructions
  1. Start by bringing 3 quarts of salted water to a rolling boil in a large pot. Once it reaches a boil, add the black squid ink pasta and cook according to the package directions, about 9–11 minutes, until al dente.
  2. While the pasta cooks, heat half a tablespoon of extra virgin olive oil in a 10-inch skillet over medium heat. Add the finely diced yellow onion and sauté for 4–7 minutes until translucent.
  3. Add the minced garlic and a pinch of red pepper flakes to the skillet. Cook for about 1 minute, stirring constantly, until fragrant.
  4. Pour in 2 tablespoons of dry white wine and let it simmer for 1–2 minutes until reduced by half.
  5. Reduce the heat to low and stir in a quarter cup of heavy cream and 2 tablespoons of grated Parmesan cheese. Mix until melted and the sauce thickens.
  6. Once the pasta is cooked and drained, add it to the skillet with the creamy sauce. Toss thoroughly for 1-2 minutes until coated.
  7. Plate the Devil’s Snare Black Pasta and garnish with additional Parmesan cheese and chopped parsley.

Nutrition

Serving: 1servingCalories: 450kcalCarbohydrates: 60gProtein: 12gFat: 20gSaturated Fat: 10gPolyunsaturated Fat: 2gMonounsaturated Fat: 6gCholesterol: 50mgSodium: 500mgPotassium: 400mgFiber: 3gSugar: 2gVitamin A: 500IUVitamin C: 5mgCalcium: 200mgIron: 2mg

Notes

For best results, test pasta for doneness at the minimum time and let the pasta sit in the sauce before serving to marry the flavors.

Tried this recipe?

Let us know how it was!

Mushroom Skulls Spooky Pasta for a Fun Halloween Feast

October 7, 2025 by Grace Snow Leave a Comment

As I rummaged through my pantry, a surprising burst of inspiration struck: Halloween was just around the corner! To celebrate this spooky season, I instantly thought of the Mushroom Skulls Spooky Pasta—an enchanting dish that’s as much fun to make as it is to eat. Made with striking squid ink spaghetti and topped with playful, carved mushroom skulls, this family-friendly recipe is perfect for fostering creativity and enjoying quality time together. Plus, its creamy, savory sauce comes together in no time, making it an ideal choice for busy weeknights when you need something both festive and quick. Just wait until you see the faces of your loved ones as they dive into this whimsical dinner. Ready to get started? Let’s make some kitchen magic!

Why is Mushroom Skulls Pasta a Must-Try?

Fun and Festive: This quirky Halloween dish adds a playful twist to your dinner table, making it a hit for family gatherings.

Quick and Easy: With simple steps and ingredients, you can whip up this eye-catching pasta in under 30 minutes, perfect for busy nights.

Creamy Delight: The rich, savory sauce coats the squid ink spaghetti beautifully, creating a satisfying flavor explosion that everyone will love.

Endless Variations: Customize it to fit dietary needs—swap out the squid ink spaghetti for whole wheat or gluten-free options, or make it vegan with coconut cream.

Crowd Winner: Everyone, from kids to adults, will be enchanted by those adorable mushroom skulls, turning mealtime into a fun adventure!

As a side note, consider serving this alongside some roasted veggies or a fresh salad for a complete meal perfect for the season.

Mushroom Skulls Spooky Pasta Ingredients

Get ready to create something truly magical for Halloween!

For the Pasta

  • Squid Ink Spaghetti – Adds a striking dark hue and a unique flavor; feel free to substitute with your favorite pasta.
  • Butter – Enhances richness and helps brown the mushrooms to perfection.
  • Olive Oil – Prevents butter from burning and adds a delightful flavor.

For the Sauce

  • Brown Onion – Serves as a fragrant base for the sauce; shallots or leeks can be great alternatives.
  • Bacon – Introduces depth and savory goodness; consider turkey bacon or shredded chicken for a healthier option.
  • Garlic – Boosts the overall flavor of the creamy sauce.
  • Dry White Wine – Contributes acidity and depth to the sauce; use vegetable broth for a non-alcoholic alternative.
  • Thickened Cream – Creates a velvety sauce; coconut cream works well for a dairy-free version.
  • Parmesan Cheese – Adds umami; it can be omitted for a vegan dish.
  • Fresh Thyme – Complements the dish with a fragrant herbal note.

For the Spooky Mushrooms

  • Button Mushrooms – Perfect for carving into spooky skull shapes; try cremini or portobello for a deeper flavor.

Now that you've gathered everything, you're one step closer to delighting your family with this Mushroom Skulls Spooky Pasta that’s not just delicious but bursting with Halloween fun!

Step‑by‑Step Instructions for Mushroom Skulls Spooky Pasta

Step 1: Prepare Mushroom Skulls
Begin by preheating your oven to 400°F (200°C). While it heats, take your button mushrooms and carve spooky faces into them using a small knife; feel free to halve them for easier cooking. Arrange the carved mushroom skulls cut side up on a baking sheet, ready to transform into adorable edible decorations for your Mushroom Skulls Spooky Pasta.

Step 2: Boil Water
Fill a large pot with salted water and bring it to a rapid boil over high heat. This will be the cooking water for your squid ink spaghetti. Once boiling, keep an eye on it, as the pasta will be added shortly—make sure you have your ingredients ready for the next steps!

Step 3: Sauté Mushrooms
In a large frying pan over medium heat, melt 2 tablespoons of butter and 1 tablespoon of olive oil together. Add your carved mushroom skulls, cut side down, and sauté for about 4–5 minutes until they are golden brown and fragrant. Remove them from the pan and set them aside, allowing the flavor to deepen while you move on to creating the sauce.

Step 4: Make Sauce
Using the same pan, add a finely chopped brown onion, 4 strips of chopped bacon, and 2 minced garlic cloves. Cook these ingredients together for about 7–8 minutes, stirring until the onions are translucent and the bacon is crispy. Pour in ½ cup of dry white wine, scraping the bottom of the pan, and let it simmer for about 5 minutes until reduced by half.

Step 5: Add Cream
Stir in 1 cup of thickened cream and ½ cup of grated Parmesan cheese into the pan. Continue to cook on low heat for about 2–3 minutes, stirring frequently, until the cheese has melted and the sauce has thickened. This creamy sauce will coat your spaghetti beautifully, making the Mushroom Skulls Spooky Pasta irresistible.

Step 6: Cook Pasta
Once the water is boiling, add your squid ink spaghetti and cook according to the package instructions, usually around 8–10 minutes for al dente. Stir occasionally to ensure the pasta doesn't stick together. Keep an eye on it, as you want the pasta to be tender but firm to the bite.

Step 7: Combine
After draining the pasta (reserve about ½ cup of pasta water), add it directly to the creamy sauce in the frying pan. Gently fold in the sautéed mushroom skulls, mixing everything together to ensure the pasta is evenly coated. If needed, add a splash of reserved pasta water to reach your desired sauce consistency.

Step 8: Serve
Plate your Mushroom Skulls Spooky Pasta with care. Garnish with fresh thyme and extra Parmesan on top for an added touch of flavor and visual appeal. Serve immediately while hot to delight your family with this festive Halloween dish that’s sure to be a hit around the dinner table!

Expert Tips for Mushroom Skulls Spooky Pasta

  • Mushroom Skull Prep: Carve mushrooms carefully to avoid breakage. Use a small knife for detailed faces and ensure even cuts for consistent cooking.

  • Sauce Thickening: Allow the sauce to simmer adequately before adding cream. If it’s too thin, create a cornstarch slurry by mixing 1 tablespoon of cornstarch with 2 tablespoons of cold water.

  • Pasta Alert: Watch the squid ink spaghetti closely while cooking. Overcooking can lead to mushy pasta. Aim for al dente for the best texture.

  • Flavor Boost: You can enhance the flavor by sautéing the garlic slightly longer until fragrant before adding other ingredients for the sauce.

  • Mushroom Variations: Switch up the types of mushrooms based on personal preference or seasonal availability to give your Mushroom Skulls Spooky Pasta a unique twist each time!

Mushroom Skulls Spooky Pasta Variations

Get ready to create your own unique twist on this festive dish with these fun and tasty variations!

  • Whole Wheat: Swap squid ink spaghetti for whole wheat pasta to add fiber and a nuttier flavor. It’s a wholesome choice that still delivers on taste!

  • Gluten-Free: Use gluten-free pasta instead to accommodate dietary needs without compromising on the enjoyment of this delightful Halloween meal.

  • Vegan: Replace the bacon with smoky tempeh and use coconut cream plus plant-based cheese for a delicious vegan version that everyone will appreciate.

  • Spicy Kick: Add a pinch of red pepper flakes to the sauce for a little heat that contrasts beautifully with the creamy texture, making it a thrilling dish!

  • Different Mushrooms: Experiment with cremini, shiitake, or portobello mushrooms for unexpected flavors and an exciting medley of textures—each brings something special to the plate!

  • Extra Veggies: Toss in some sautéed spinach or broccoli florets for a colorful boost of nutrition. It not only makes the dish pop but also adds great texture.

  • Herb Variations: Instead of thyme, try fresh basil or parsley for a bright, herbal note that complements the richness of the sauce perfectly.

  • Seafood Twist: Incorporate shrimp or scallops for a luxurious seafood variation that adds depth and elegance to your Mushroom Skulls Spooky Pasta adventure.

Consider pairing your pasta with some Garlic Bread or a light Caesar Salad to round out your festive Halloween feast!

What to Serve with Mushroom Skulls Spooky Pasta

The perfect Halloween-themed dinner deserves equally delightful accompaniments to round out your family meal.

  • Garlic Bread: A classic side that complements the creamy sauce beautifully, perfect for soaking up every drop.
  • Roasted Vegetables: Seasonal veggies like Brussels sprouts and carrots bring a healthy crunch and vibrant color to the table.
  • Caesar Salad: Crisp romaine tossed with creamy dressing and croutons offers a refreshing contrast to the richness of the pasta.
  • Pumpkin Soup: Silky and slightly sweet, this seasonal favorite adds a cozy touch to your spooky feast.
  • Apple Cider: A warm and spiced beverage that enhances the autumnal flavors and brings a festive spirit to your table.
  • Chocolate Mousse: For dessert, a light and airy mousse delicately rounds out your spooky dinner adventure with a sweet finish.

Make Ahead Options

These Mushroom Skulls Spooky Pasta are perfect for busy home cooks looking to save time! You can prepare the carved mushroom skulls and creamy sauce up to 3 days in advance, storing them in airtight containers in the refrigerator. To maintain quality, keep the mushroom skulls and sauce separate until you're ready to serve. When you’re ready to enjoy this festive dish, simply reheat the sauce on the stove over low heat and sauté the mushroom skulls for about 3-5 minutes until warm. Meanwhile, cook the squid ink spaghetti fresh, combine everything, and dinner is served with minimal effort—just as delicious and delightfully spooky!

How to Store and Freeze Mushroom Skulls Spooky Pasta

Room Temperature: It's best to avoid leaving any leftovers out. Store them promptly after serving to maintain freshness.

Fridge: Store the Mushroom Skulls Spooky Pasta in an airtight container for up to 3 days. Reheat gently on the stovetop or microwave for best results.

Freezer: You can freeze the pasta for up to 2 months. For optimal quality, separate the creamy sauce from the pasta before freezing. Thaw overnight in the fridge before reheating.

Reheating: When reheating, add a splash of milk or reserved pasta water to revive the creamy texture of the sauce. Enjoy your spooky pasta!

Mushroom Skulls Spooky Pasta Recipe FAQs

How do I choose ripe mushrooms for this recipe?
Absolutely! When selecting mushrooms, look for firm button mushrooms with a smooth surface. Avoid mushrooms that have dark spots or wrinkles, which can indicate they are past their prime. Fresh mushrooms should have a light, earthy aroma, while those with a strong, unpleasant smell should be avoided.

What’s the best way to store leftover Mushroom Skulls Spooky Pasta?
To keep your leftovers fresh, store them in an airtight container in the refrigerator for up to 3 days. When reheating, gently warm it on the stovetop or in the microwave, adding a splash of water or milk to restore the sauce's creamy texture.

Can I freeze Mushroom Skulls Spooky Pasta?
You can indeed! I recommend separating the creamy sauce from the pasta to maintain its texture when stored. Place each in airtight containers and freeze for up to 2 months. When you're ready to enjoy, thaw the pasta and sauce overnight in the fridge, then reheat gently on the stovetop.

What if my sauce doesn’t thicken?
If your sauce is still thin after simmering, don’t worry—it happens! Create a cornstarch slurry by mixing 1 tablespoon of cornstarch with 2 tablespoons of cold water. Stir this mixture into the sauce, and let it simmer for a few minutes until it thickens up nicely.

Are there any dietary considerations for my family or pets?
Very! For those with dietary restrictions, consider swapping out the bacon for turkey bacon or shredded chicken for a healthier option. Additionally, you can use coconut cream and plant-based cheese for a vegan version of the Mushroom Skulls Spooky Pasta. As for pets, avoid feeding them anything containing garlic or onions, which can be harmful to them.

Mushroom Skulls Spooky Pasta

Mushroom Skulls Spooky Pasta for a Fun Halloween Feast

Mushroom Skulls Spooky Pasta is a delicious Halloween-themed dish featuring squid ink spaghetti and playful mushroom skulls.
Print Recipe Pin Recipe
Prep Time 10 minutes mins
Cook Time 20 minutes mins
Total Time 30 minutes mins
Servings: 4 plates
Course: Dinner
Cuisine: Halloween, Italian
Calories: 600
Ingredients Equipment Method Nutrition Notes

Ingredients
  

For the Pasta
  • 12 ounces Squid Ink Spaghetti or your favorite pasta
  • 2 tablespoons Butter for richness
  • 1 tablespoon Olive Oil to prevent burning
For the Sauce
  • 1 medium Brown Onion can substitute with shallots or leeks
  • 4 strips Bacon can use turkey bacon or chicken
  • 2 cloves Garlic minced
  • 0.5 cup Dry White Wine or vegetable broth
  • 1 cup Thickened Cream or coconut cream for dairy-free
  • 0.5 cup Parmesan Cheese omit for vegan
  • 1 teaspoon Fresh Thyme for flavor
For the Spooky Mushrooms
  • 8 ounces Button Mushrooms or cremini/portobello

Equipment

  • Oven
  • pot
  • frying pan
  • Baking Sheet
  • Knife

Method
 

Preparation
  1. Preheat your oven to 400°F (200°C) and carve spooky faces into the button mushrooms.
  2. Fill a large pot with salted water and bring it to a rapid boil.
Cooking
  1. In a large frying pan, melt the butter and olive oil over medium heat and sauté the carved mushroom skulls for 4-5 minutes.
  2. In the same pan, add the chopped onion, bacon, and garlic; cook until onions are translucent and bacon is crispy.
  3. Pour in the dry white wine and simmer for 5 minutes until reduced by half.
  4. Stir in the cream and Parmesan, and cook on low until the cheese melts and the sauce thickens.
  5. Cook the squid ink spaghetti in boiling water for 8-10 minutes until al dente.
  6. Combine the drained pasta with the sauce and sautéed mushroom skulls, adding reserved pasta water as needed.
  7. Plate your Mushroom Skulls Spooky Pasta and garnish with fresh thyme and extra Parmesan. Serve immediately.

Nutrition

Serving: 1plateCalories: 600kcalCarbohydrates: 80gProtein: 15gFat: 25gSaturated Fat: 10gPolyunsaturated Fat: 5gMonounsaturated Fat: 5gCholesterol: 50mgSodium: 800mgPotassium: 600mgFiber: 4gSugar: 5gVitamin A: 500IUVitamin C: 2mgCalcium: 200mgIron: 3mg

Notes

Consider serving alongside roasted veggies or a fresh salad for a complete meal.

Tried this recipe?

Let us know how it was!

Mushroom Skulls Spooky Pasta for a Fun Halloween Feast

October 7, 2025 by Grace Snow Leave a Comment

As the autumn leaves begin to swirl, I find myself drawn into the kitchen, excited to whip up something special for Halloween. This year, I’m thrilled to share my Mushroom Skulls Spooky Pasta recipe, a delightful dish that invites both fun and flavor to the table. With its striking squid ink spaghetti and whimsical mushroom skulls, this pasta is not only a feast for the eyes but also a creamy, savory comfort food the whole family will adore. Best of all, it comes together in a snap—perfect for busy weeknights when the promise of treats lingers in the air. Ready to give your dinner a spooky twist? Let’s dive into this delicious Halloween creation!

Why is Spooky Pasta a Must-Try?

Family-Friendly Fun: This Mushroom Skulls Spooky Pasta is an exciting dish that makes dinner a memorable event for everyone, even picky eaters!

Quick and Easy: With a preparation time that fits seamlessly into your busy evening, this cheerful meal can be on the table in no time.

Unique Presentation: The spooky skull-shaped mushrooms and rich black spaghetti bring an element of surprise that’s perfect for Halloween gatherings or themed dinners.

Creamy and Savory: The luscious sauce pairs beautifully with the squid ink spaghetti, creating a dreamy plate that’s indulgent and satisfying.

Versatile Dish: Whether you choose to go with traditional ingredients or opt for gluten-free or vegan versions, this recipe can easily be tailored to fit any dietary needs.

Mix in some fun sides like roasted veggies or garlic bread for a complete meal that will keep your family and friends coming back for seconds!

Mushroom Skulls Spooky Pasta Ingredients

For the Pasta
• Squid Ink Spaghetti – Offers a striking dark hue and a unique flavor; feel free to substitute with any preferred pasta.

For the Mushroom Skulls
• Button Mushrooms – Ideal for creating spooky skull shapes; you can use cremini or portobello for a richer taste.

For the Sauce
• Butter – Adds a rich flavor and helps brown the mushrooms nicely.
• Olive Oil – Prevents butter from burning while adding a delicious depth of flavor.
• Brown Onion – Serves as an aromatic base; shallots or leeks are great alternatives.
• Bacon – Introduces depth and savory flavor; consider turkey bacon or shredded chicken for a healthier option.
• Garlic – Boosts the overall flavor profile of the sauce.
• Dry White Wine – Brings acidity and depth to the sauce; use vegetable broth as a non-alcoholic substitute if desired.
• Thickened Cream – Creates a rich and velvety sauce; for a dairy-free alternative, coconut cream works nicely.
• Parmesan Cheese – Adds umami and creaminess; can be omitted for a dairy-free version.
• Fresh Thyme – Lends a fresh herbal note, perfect for finishing the dish.

This Mushroom Skulls Spooky Pasta is sure to be a hit at your Halloween table, bringing both fun and delightful flavor!

Step‑by‑Step Instructions for Mushroom Skulls Spooky Pasta

Step 1: Prepare Mushroom Skulls
Begin by carving spooky faces into the button mushrooms to create the skulls—this will make your Mushroom Skulls Spooky Pasta a festive hit. If the mushrooms are larger, halve them to enhance cooking and ensure even browning. Set aside the carved mushrooms for later use in your creamy sauce.

Step 2: Boil Water
In a large pot, fill with salted water and bring it to a rapid boil over high heat. This salted water will be used for cooking the squid ink spaghetti, ensuring that each strand is flavorful. Once boiling, keep an eye on it as you prepare the other components of the dish.

Step 3: Sauté Mushrooms
In a frying pan over medium heat, melt together 1 tablespoon of butter and 1 tablespoon of olive oil. Once the butter is bubbling, carefully add the mushroom skulls cut-side down and sauté for 4–5 minutes until they are golden brown and crisp. After browning, remove them from the pan and set aside.

Step 4: Make Sauce
In the same pan, add another tablespoon of butter, along with chopped onions and diced bacon. Cook over medium heat until the onions become translucent and the bacon is crispy, about 5–7 minutes. Stir in minced garlic and cook for another minute until fragrant, then pour in dry white wine, allowing it to reduce by half, approximately 5 minutes.

Step 5: Add Cream
Once the wine has reduced, lower the heat and stir in the thickened cream and grated Parmesan cheese. Keep stirring until the cheese melts and the sauce thickens, which should take about 2–3 minutes. The creamy sauce is now the perfect complement for your Mushroom Skulls Spooky Pasta.

Step 6: Cook Pasta
Add the squid ink spaghetti to the boiling water and cook according to package instructions until al dente, usually about 8–10 minutes. Stir occasionally to prevent the pasta from sticking and keep an eye on it to achieve the right level of tenderness.

Step 7: Combine
Once the pasta is cooked, drain it, reserving about half a cup of the pasta water. Add the drained squid ink spaghetti directly to the creamy sauce in the frying pan, tossing gently to combine. Fold in the sautéed mushroom skulls and, if the sauce seems too thick, add in a splash of the reserved pasta water to reach your desired consistency.

Step 8: Serve
Plate the Mushroom Skulls Spooky Pasta and garnish with fresh thyme and extra Parmesan cheese for a delightful finish. Serve immediately while the dish is hot and creamy, ensuring everyone enjoys the festive flavors of this Halloween treat!

Expert Tips for Mushroom Skulls Spooky Pasta

  • Simmer for Flavor: Allow the sauce to simmer adequately before adding cream to enhance its flavor and ensure it thickens properly.

  • Thickening Aid: If your sauce remains too thin after adding cream, mix 1 tablespoon of cornstarch with 2 tablespoons of cold water and stir it into the sauce until it thickens.

  • Mushroom Prep: When carving the mushroom skulls, keep your designs simple; intricate faces can be tricky and might not hold up during cooking.

  • Pasta Timing: Always check your squid ink spaghetti a minute or two before the package instructions recommend for that perfect al dente bite!

  • Make Ahead Magic: For convenience, prepare the mushroom skulls and sauce ahead of time and refrigerate them separately. Reheat before combining with pasta for dinner.

  • Healthy Substitutions: To lighten up this Mushroom Skulls Spooky Pasta, swap out regular bacon for turkey bacon or a plant-based alternative, maintaining flavor while reducing fat content.

Mushroom Skulls Spooky Pasta Variations

Feel free to get creative with your Mushroom Skulls Spooky Pasta! Whip up something truly unique with these fun twists to enjoy.

  • Gluten-Free: Swap squid ink spaghetti for your favorite gluten-free pasta to accommodate dietary needs while maintaining flavor.
  • Vegan Delight: Use coconut cream and plant-based cheese for a fully vegan adaptation that doesn’t skimp on taste.
  • Veggie Boost: Toss in spinach or roasted red bell peppers for another layer of color and nutrition—everyone loves a bit of extra greenery!
  • Herb Infusion: Sprinkle fresh basil or parsley instead of thyme to add a different herbal note that brightens your creamy sauce.
  • Mushroom Variety: Experiment with different kinds of mushrooms such as shiitake or oyster mushrooms for an exciting mix of textures and flavors.
  • Cheesy Twist: Add a sprinkle of mozzarella on top before serving for a melty finish that takes comfort food to another level.
  • Spicy Kick: Stir in some red pepper flakes or diced jalapeños to give your dish a fiery boost—perfect for those who love some heat!

Already love your spooky pasta? You might also enjoy whipping up some Skillet Pasta Sun or trying a wholesome Cauliflower Pasta Ready as a delightful twist to your pasta nights!

Make Ahead Options

These Mushroom Skulls Spooky Pasta are perfect for busy home cooks looking to save time during Halloween festivities! You can prepare the mushroom skulls and creamy sauce up to 3 days in advance. Simply carve the spooky faces in the mushrooms and sauté them, then store them in an airtight container in the refrigerator. Prepare the sauce, allowing it to cool before refrigerating separately. When you’re ready to serve, just reheat the sauce over low heat while cooking the squid ink spaghetti—this quick approach ensures your meal is just as delicious when served! For the best quality, avoid mixing the pasta with the sauce until right before serving to keep everything fresh and flavorful.

What to Serve with Mushroom Skulls Spooky Pasta

Elevate your Halloween dining experience by pairing this spooky pasta dish with delightful sides that will enchant your family and friends.

  • Creamy Garlic Bread: Perfectly toasted, this garlic bread adds a crispy texture that beautifully complements the rich creaminess of the pasta. With each bite, you’ll enjoy the flavor meld of the buttery, garlicky crunch that pairs well with the savory mushrooms.

  • Roasted Seasonal Vegetables: Roasting brings out the natural sweetness of vegetables like squash, carrots, and Brussels sprouts. Tossed with a hint of olive oil and herbs, their earthy flavors enhance the pasta’s rich sauce, creating a balanced plate that’s both healthy and satisfying.

  • Mixed Green Salad: A light, refreshing salad with crunchy lettuce, colorful bell peppers, and a tangy vinaigrette offers a wonderful contrast to the indulgent pasta dish. The crisp greens and zesty dressing awaken the palate, ensuring your meal feels bright and lively.

  • Pumpkin Spice Muffins: Embrace the autumn spirit with these soft, flavorful muffins that introduce a hint of sweetness to the meal. Their warm spices echo the cozy feelings of the season, making them a delightful way to end your Halloween dinner.

  • Spooky Themed Drinks: Pair your meal with fun Halloween-themed drinks like a bright orange pumpkin punch or a fizzy apple cider cocktail. Their vibrant colors and festive flavors will create a fun atmosphere that complements the whimsy of your Mushroom Skulls Spooky Pasta.

These exceptional pairings will not only enhance your Halloween feast but ensure that your table is filled with warmth, flavor, and festive charm!

How to Store and Freeze Mushroom Skulls Spooky Pasta

Fridge: Store leftovers in an airtight container for up to 3 days. Be sure to let the pasta cool before sealing to maintain freshness.

Freezer: Freeze the Mushroom Skulls Spooky Pasta for up to 2 months. For best quality, separate the sauce from the pasta before freezing to avoid sogginess upon reheating.

Reheating: When ready to enjoy again, thaw overnight in the fridge, then reheat on the stovetop over low heat, adding a splash of milk or reserved pasta water to revive the creamy texture.

Make-Ahead Tip: The mushroom skulls can be prepared ahead of time and stored in the fridge, while the sauce can be made and kept for up to 3 days before using.

Mushroom Skulls Spooky Pasta Recipe FAQs

How do I select the perfect mushrooms for this dish?
Absolutely! When choosing mushrooms for your Mushroom Skulls Spooky Pasta, look for button mushrooms that are firm and devoid of dark spots or blemishes. They should feel smooth to the touch and have a fresh, earthy scent. For a more robust flavor, opt for cremini or portobello mushrooms.

What is the best way to store leftover Mushroom Skulls Spooky Pasta?
Very! Store any leftovers in an airtight container in the fridge for up to 3 days. Allow the pasta to cool completely before sealing to maintain its freshness and flavor. Reheat gently on the stovetop with a bit of water or cream to restore its creamy texture when you're ready to enjoy it again.

Can I freeze Mushroom Skulls Spooky Pasta?
Absolutely! You can freeze this dish for up to 2 months. For optimal quality, I recommend separating the sauce from the pasta before freezing. To do this, let everything cool down, then store them in airtight containers. When you're ready to feast again, thaw the sauce overnight in the fridge, then reheat it gently while cooking the pasta fresh.

What should I do if my sauce doesn’t thicken properly?
Not a problem! If your sauce fails to thicken, you can create a cornstarch slurry by mixing 1 tablespoon of cornstarch with 2 tablespoons of cold water. Stir this mixture into the sauce gradually, keeping it on low heat until it reaches your desired consistency. This method works like a charm!

Are there any dietary considerations I should keep in mind?
Absolutely! If you're catering to dietary restrictions, you can easily adapt this recipe. For a gluten-free version, choose a gluten-free pasta; for a dairy-free dish, use coconut cream and skip the Parmesan. If considering allergies, always double-check packaging to ensure that none of the ingredients contain allergens widespread in your group.

Can I prepare the Mushroom Skulls in advance?
Very! You can prepare the mushroom skulls a day ahead. Just carve spooky faces into them and store them in an airtight container in the refrigerator. This makes for a quick assembly when you’re ready to whip up your Mushroom Skulls Spooky Pasta on Halloween night!

Mushroom Skulls Spooky Pasta

Mushroom Skulls Spooky Pasta for a Fun Halloween Feast

A delightful Halloween dish featuring squid ink spaghetti and whimsical mushroom skulls, perfect for a spooky family dinner.
Print Recipe Pin Recipe
Prep Time 15 minutes mins
Cook Time 30 minutes mins
Total Time 45 minutes mins
Servings: 4 servings
Course: Dinner
Cuisine: Halloween, Italian
Calories: 450
Ingredients Equipment Method Nutrition Notes

Ingredients
  

For the Pasta
  • 8 ounces Squid Ink Spaghetti Feel free to substitute with any preferred pasta.
For the Mushroom Skulls
  • 10 ounces Button Mushrooms You can use cremini or portobello.
For the Sauce
  • 2 tablespoons Butter Adds rich flavor.
  • 1 tablespoon Olive Oil Prevents butter from burning.
  • 1 medium Brown Onion Can substitute shallots or leeks.
  • 4 slices Bacon Consider turkey bacon for a healthier option.
  • 2 cloves Garlic Boosts flavor.
  • 1/2 cup Dry White Wine Use vegetable broth as a non-alcoholic substitute.
  • 1 cup Thickened Cream Coconut cream works for a dairy-free version.
  • 1/2 cup Parmesan Cheese Can be omitted for dairy-free.
  • 1 tablespoon Fresh Thyme

Equipment

  • Large pot
  • frying pan
  • Knife
  • Cutting Board

Method
 

Preparation Steps
  1. Begin by carving spooky faces into the button mushrooms to create the skulls. Halve larger mushrooms to enhance cooking. Set aside.
  2. In a large pot, fill with salted water and bring to a rapid boil for cooking the squid ink spaghetti.
  3. In a frying pan, melt together 1 tablespoon of butter and 1 tablespoon of olive oil. Add the mushroom skulls cut-side down and sauté for 4-5 minutes until golden brown.
  4. In the same pan, add another tablespoon of butter, chopped onions, and diced bacon. Cook until onions are translucent and bacon is crispy, about 5-7 minutes. Add minced garlic and cook for another minute. Pour in dry white wine and reduce by half for about 5 minutes.
  5. Once the wine has reduced, lower the heat and stir in thickened cream and grated Parmesan cheese. Stir until cheese melts and sauce thickens, about 2-3 minutes.
  6. Add squid ink spaghetti to boiling water and cook according to package instructions until al dente, about 8-10 minutes.
  7. Drain the pasta, reserving about half a cup of pasta water. Add drained spaghetti directly to creamy sauce, tossing gently to combine. Fold in sautéed mushroom skulls and add reserved pasta water if sauce is too thick.
  8. Plate the Mushroom Skulls Spooky Pasta, garnish with fresh thyme and extra Parmesan cheese, and serve immediately.

Nutrition

Serving: 1plateCalories: 450kcalCarbohydrates: 65gProtein: 18gFat: 15gSaturated Fat: 8gPolyunsaturated Fat: 0.5gMonounsaturated Fat: 4gCholesterol: 40mgSodium: 800mgPotassium: 450mgFiber: 4gSugar: 3gVitamin A: 10IUVitamin C: 5mgCalcium: 15mgIron: 10mg

Notes

For convenience, prepare the mushroom skulls and sauce ahead of time and refrigerate them separately. Reheat before combining with pasta for dinner.

Tried this recipe?

Let us know how it was!

Ghostly Lasagna: Spooktacular Comfort Food for Family Fun

October 4, 2025 by Grace Snow Leave a Comment

As I strolled through my local farmer's market, the vibrant colors and scents of autumn embraced me. It was then that the playful idea of making Ghostly Lasagna struck—a comforting dish that would bring warmth and smiles to our Halloween gathering. Bursting with layers of tender chicken, creamy ricotta, and fresh spinach, this recipe is not just easy to prepare but is also a fantastic make-ahead option, leaving you more time to create lasting memories with loved ones. Whether you're a seasoned home chef or a kitchen beginner, this family-friendly meal invites everyone to partake, offering variation for dietary preferences like gluten-free and vegetarian options. Ready to add a little spooky fun to your dinner table? Let's dive into crafting this delightful lasagna together!

Why is Ghostly Lasagna a must-try?

Comforting and Whimsical: This delightful dish combines comforting flavors with a fun Halloween twist, making it perfect for family gatherings or spooky parties.
Easy to Prepare: With simple steps and easy-to-find ingredients, even novice cooks can create a stunning centerpiece.
Versatile: Gluten-free or vegetarian? No problem! This recipe offers variations to suit everyone's needs without sacrificing taste.
Make-Ahead Convenience: Prep it a day ahead for stress-free entertaining, allowing you to enjoy more time with your loved ones.
Crowd-Pleasing Appeal: The playful mozzarella ghosts and delicious layers ensure this lasagna is a hit among kids and adults alike. Enjoy with a side of crispy garlic bread or a refreshing caesar salad for a complete meal!

Ghostly Lasagna Ingredients

Get ready to craft the most delightful and spooky dish of the season with these key ingredients!

For the Pasta
• Lasagna Noodles – Essential for the structure of this Ghostly Lasagna; gluten-free options are available to suit dietary needs.

For the Filling
• Cooked Chicken (4 cups, shredded) – A hearty protein source; rotisserie chicken makes preparation quick and convenient.
• Spinach (4 cups, chopped) – Adds freshness and nutrients; can be switched with kale or drained frozen spinach for convenience.
• Ricotta Cheese (4 cups) – Provides creaminess and richness; you can substitute with cottage cheese for a lighter option.

For the Topping
• Shredded Mozzarella Cheese (4 cups) – Key for creating the whimsical ghosts on top; lower moisture content helps retain shape.
• Grated Parmesan Cheese (1 cup) – Enhances flavor and contributes a crispy, golden top layer.
• Black Olives – Serve as spooky “eyes” for the mozzarella ghosts; optional based on preference.

For the Sauce
• Marinara Sauce (6 cups) – The flavorful binder for all the layers; homemade is preferred for an extra touch of freshness.
• Salt and Pepper – Essential for seasoning to your taste.

Now that you have everything you need, let’s prepare to bring some spooky fun into your kitchen with this Ghostly Lasagna!

Step‑by‑Step Instructions for Ghostly Lasagna

Step 1: Preheat the Oven
Begin by preheating your oven to 375°F (190°C) to ensure it’s hot and ready for the Ghostly Lasagna. This temperature will give the cheese a perfect melt while creating a golden-brown topping. Set out a large baking dish and gather your ingredients to streamline the process.

Step 2: Cook the Noodles
In a large pot, bring water to a boil and add a generous amount of salt. Cook the lasagna noodles for about 8-10 minutes, until they are al dente—firm but tender. Once done, drain the noodles and gently lay them flat on a clean kitchen towel to prevent sticking while you prepare the filling.

Step 3: Prepare the Filling
In a medium bowl, thoroughly mix together the ricotta cheese, chopped spinach, salt, and pepper until well combined. This creamy filling is the heart of the Ghostly Lasagna, offering a delightful blend of flavors. Make sure the spinach is evenly distributed, ensuring each bite is packed with goodness.

Step 4: Create the Sauce Layer
Spread a thin layer of marinara sauce across the bottom of your baking dish—this will prevent the noodles from sticking and infuse flavor into the base. Use a spatula to ensure an even coating, creating a solid foundation for the layers to come.

Step 5: Layer the Ingredients
Start layering by placing a layer of cooked noodles over the marinara sauce. Then, add a generous scoop of the ricotta-spinach mixture, followed by the shredded chicken and a handful of shredded mozzarella. Repeat this process until you've exhausted all your ingredients, finishing with a final layer of marinara sauce topped with mozzarella to create a bubbly crown.

Step 6: Form the Mozzarella Ghosts
Use small pieces of mozzarella to fashion ghost shapes atop the last layer of cheese. Space them out to ensure a playful design and, for extra fun, press black olives into the cheese to create spooky eyes. This whimsical touch will elevate your Ghostly Lasagna to a festive masterpiece!

Step 7: Bake the Lasagna
Cover the assembled lasagna with aluminum foil to trap moisture and bake in the preheated oven for 30 minutes. This initial baking will meld the flavors beautifully. After 30 minutes, carefully remove the foil and bake for an additional 10-15 minutes until the cheese is bubbly and golden brown, giving it an inviting look.

Step 8: Rest Before Slicing
Once out of the oven, let your Ghostly Lasagna rest for 10-15 minutes. This crucial step allows the layers to set, making it easier to slice. During this time, the comforting aromas will fill the kitchen, enticing everyone to gather around the table for a delicious meal.

Expert Tips for Ghostly Lasagna

  • Dry the Spinach: Make sure to thoroughly dry your spinach after washing. Excess moisture can lead to a watery lasagna, ruining the delightful layers.

  • Layer Smartly: Stagger your ingredient layers, adding marinara sauce between each. This helps enhance flavors and keeps the lasagna well-bound.

  • Perfect Mozzarella Ghosts: Add the mozzarella ghosts during the last 5 minutes of baking to maintain their playful shape. Alternatively, broil them separately for quick melting.

  • Resting Time: Don’t skip the resting period after baking! Letting the lasagna sit for 10-15 minutes minimizes liquid loss and makes slicing easier, allowing each piece to look as great as it tastes.

  • Make-Ahead Magic: Prepare the Ghostly Lasagna a day in advance and refrigerate it. Just adjust the baking time if it’s cold from the fridge for a stress-free meal.

Ghostly Lasagna Variations & Substitutions

Feel free to personalize your Ghostly Lasagna with these delightful twists that elevate both flavor and comfort!

  • Gluten-Free: Swap in gluten-free lasagna noodles for a dish that fits your dietary needs while keeping all the delicious layers.

  • Vegetarian Delight: Eliminate the chicken and add a variety of veggies, like roasted mushrooms or zucchini, for a hearty, plant-rich option. This gives your lasagna a unique and vibrant flavor profile.

  • Spicy Kick: Stir in diced jalapeños or sprinkle crushed red pepper flakes into the marinara to bring some heat, making each bite an exciting adventure for your taste buds.

  • Plant-Based Option: Replace chicken with hearty lentils or chickpeas. This not only gives protein but also enhances the nutritional value while keeping the flavors robust.

  • Creamy Spin: For those craving richness, incorporate a dollop of mascarpone or cream cheese into the ricotta filling. This extra layer of creaminess can take the texture to a whole new level.

  • Olive Alternatives: If black olives aren't your thing, try cherry tomatoes or mozzarella pearls for the eyes. This playful substitution can bring new flavors and presentation styles that will bring a smile to your table!

When exploring these variations, don't hesitate to pair your Ghostly Lasagna with a side of roasted vegetable medley or a refreshing caesar salad to complete your festive feast. Create your own twist and make this dish truly your own!

Storage Tips for Ghostly Lasagna

Fridge: Store leftovers in an airtight container for up to 3 days. Reheat with a splash of marinara sauce to retain moisture and invigorate the flavors.

Freezer: Unbaked Ghostly Lasagna can be frozen for up to 3 months. Assemble it in advance, cover tightly, and just bake it directly from the freezer with a slight increase in cooking time.

Reheating: When reheating, warm individual portions in the microwave or re-bake in the oven at 350°F (175°C) for approximately 20 minutes until warmed through.

Make-Ahead: Prepare everything a day ahead for a stress-free gathering. Just store the assembled dish in the fridge and adjust baking times as needed.

Make Ahead Options

These Ghostly Lasagna layers are perfect for meal prep enthusiasts! You can assemble the entire dish up to 24 hours in advance, making dinnertime seamless for busy weeknights. Simply prepare the lasagna, cover it tightly with aluminum foil, and refrigerate until you’re ready to bake. When it's time to serve, preheat your oven and bake for an additional 10-15 minutes if chilled. To maintain the quality, be sure to lightly grease the baking dish and ensure your ingredients are fresh prior to assembly. You’ll savor every bite just as much as if it were freshly made, giving you the freedom to focus on what truly matters—creating spooky memories with your loved ones!

What to Serve with Ghostly Lasagna?

Enhance your Halloween feast with delightful pairings that will complement the comforting layers of ghostly goodness.

  • Crispy Garlic Bread: The crunchy texture and rich garlic flavor are the perfect contrast to the creamy lasagna, giving every bite a delightful zing.
  • Roasted Vegetable Medley: A mix of seasonal veggies brings freshness and color to your plate, while the caramelized sweetness complements the savory lasagna beautifully.
  • Caesar Salad: The crisp romaine and creamy dressing provide a refreshing balance to the rich layers of ghostly lasagna, making it a classic accompaniment.
  • Festive Sangria: This fruity drink adds a fun and colorful touch, echoing the playful spirit of Halloween while keeping things light and refreshing.
  • Pumpkin Spice Cupcakes: Finish on a sweet note with these cozy treats, their warm spices harmonizing perfectly with the comforting flavors of the lasagna.
  • Garlicky Spinach Sauté: Reinforce those fresh spinach notes with a quick sauté, offering a delightful texture and enhancing the overall plate with another layer of flavor.
  • Apple Cider: Warm or chilled, this seasonal beverage brightens up the table and pairs wonderfully with the savory elements of your Halloween spread.
  • Chocolate-Dipped Pretzels: For a crunchy, salty-sweet dessert, these treats are both fun and festive, making them a perfect conclusion to your meal that kids will love!

Ghostly Lasagna Recipe FAQs

What type of lasagna noodles should I use?
You can use regular lasagna noodles for this Ghostly Lasagna, but if you're looking for a gluten-free option, I highly recommend using gluten-free lasagna noodles. Many brands offer great alternatives that cook up beautifully, so you won't miss out on the comforting flavors.

How long can I store leftovers in the fridge?
Absolutely! Leftovers can be stored in an airtight container in the fridge for up to 3 days. I usually reheat mine with a splash of marinara sauce to keep it moist and give it a flavor boost, making each bite just as delicious as the first!

Can I freeze unbaked Ghostly Lasagna?
Yes, you can! Assemble your Ghostly Lasagna and cover it tightly with plastic wrap and then aluminum foil. It can be frozen for up to 3 months. When you’re ready to enjoy it, bake it directly from the freezer—just increase the cooking time by about 10-15 minutes.

What if my lasagna turns out watery?
Great question! To prevent a watery lasagna, make sure to dry your spinach thoroughly after washing. Excess moisture is often the culprit. Layering ingredients wisely by staggering with marinara sauce will help too, as it binds flavors and keeps everything together nicely.

Are there any allergy considerations with this recipe?
Yes, definitely! This Ghostly Lasagna contains dairy (ricotta, mozzarella, Parmesan) and gluten (unless using gluten-free noodles). If you're cooking for someone with allergies, I suggest looking for lactose-free cheese options and ensuring that your noodles are certified gluten-free.

Can I make this dish vegetarian-friendly?
Very much so! To adapt the Ghostly Lasagna for vegetarians, simply omit the chicken and amplify the veggie options—think mushrooms, zucchini, or even some delicious roasted red peppers. This way, everyone at your gathering can partake in this spooky delight!

Ghostly Lasagna

Ghostly Lasagna: Spooktacular Comfort Food for Family Fun

Ghostly Lasagna is a comforting, festive dish perfect for Halloween gatherings, featuring layers of chicken, ricotta, and whimsical mozzarella ghosts.
Print Recipe Pin Recipe
Prep Time 30 minutes mins
Cook Time 45 minutes mins
Resting Time 15 minutes mins
Total Time 1 hour hr 30 minutes mins
Servings: 8 slices
Course: Dinner
Cuisine: American
Calories: 400
Ingredients Equipment Method Nutrition Notes

Ingredients
  

For the Pasta
  • 12 oz Lasagna Noodles Gluten-free options available.
For the Filling
  • 4 cups Cooked Chicken Shredded; rotisserie chicken works well.
  • 4 cups Spinach Chopped; can substitute with kale or drained frozen spinach.
  • 4 cups Ricotta Cheese Can substitute with cottage cheese for a lighter option.
For the Topping
  • 4 cups Shredded Mozzarella Cheese Lower moisture content helps retain shape.
  • 1 cup Grated Parmesan Cheese Enhances flavor and provides a crispy top.
  • Black Olives Optional for spooky 'eyes'.
For the Sauce
  • 6 cups Marinara Sauce Homemade preferred for freshness.
  • Salt Essential for seasoning.
  • Pepper Essential for seasoning.

Equipment

  • Large baking dish
  • Large pot
  • medium bowl
  • Spatula
  • Kitchen Towel

Method
 

Step-by-Step Instructions
  1. Preheat your oven to 375°F (190°C).
  2. In a large pot, boil water and add salt. Cook lasagna noodles for 8-10 minutes until al dente, then drain and lay flat on a towel.
  3. Mix ricotta, spinach, salt, and pepper in a medium bowl until well combined.
  4. Spread a layer of marinara sauce on the bottom of the baking dish.
  5. Layer cooked noodles over sauce, add ricotta-spinach mixture, shredded chicken, and mozzarella. Repeat layers and finish with marinara and mozzarella on top.
  6. Form mozzarella ghosts on top and add olive eyes if desired.
  7. Cover with foil and bake for 30 minutes. Remove foil and bake for an additional 10-15 minutes until cheese is bubbly and golden.
  8. Let the lasagna rest for 10-15 minutes before slicing.

Nutrition

Serving: 1sliceCalories: 400kcalCarbohydrates: 40gProtein: 30gFat: 15gSaturated Fat: 8gCholesterol: 70mgSodium: 800mgPotassium: 600mgFiber: 2gSugar: 5gVitamin A: 20IUVitamin C: 15mgCalcium: 25mgIron: 10mg

Notes

For a stress-free meal, prepare Ghostly Lasagna a day prior and refrigerate. Adjust baking times as needed.

Tried this recipe?

Let us know how it was!
  • « Previous Page
  • 1
  • …
  • 84
  • 85
  • 86
  • 87
  • 88
  • …
  • 102
  • Next Page »

Welcome!

Hi, I’m Grace, a Sydney-based home cook with a passion for bold flavors and trending ingredients. Whether you’re a busy beginner or a seasoned foodie, you’ll find dishes here that are fresh, fun, and full of flavor.

More about me

Popular Recipes

  • Honey Sriracha Salmon Bowls
    Delicious Honey Sriracha Salmon Bowls for Quick Dinners
  • Air Fryer Apple Pie Taquitos
    Crispy Air Fryer Apple Pie Taquitos for a Sweet Treat
  • Crispy Parmesan Crusted Cod
    Crispy Parmesan Crusted Cod: A Healthy Flavor Explosion
  • Air Fryer French Toast Bites
    Delicious Air Fryer French Toast Bites for Busy Mornings

Footer

↑ back to top

About

  • Privacy Policy
  • Disclaimer
  • Terms & Conditions

Newsletter

  • Sign Up! for emails and updates

Contact

  • About me
  • Contact me

Copyright © 2025 TastyTrendIngredients