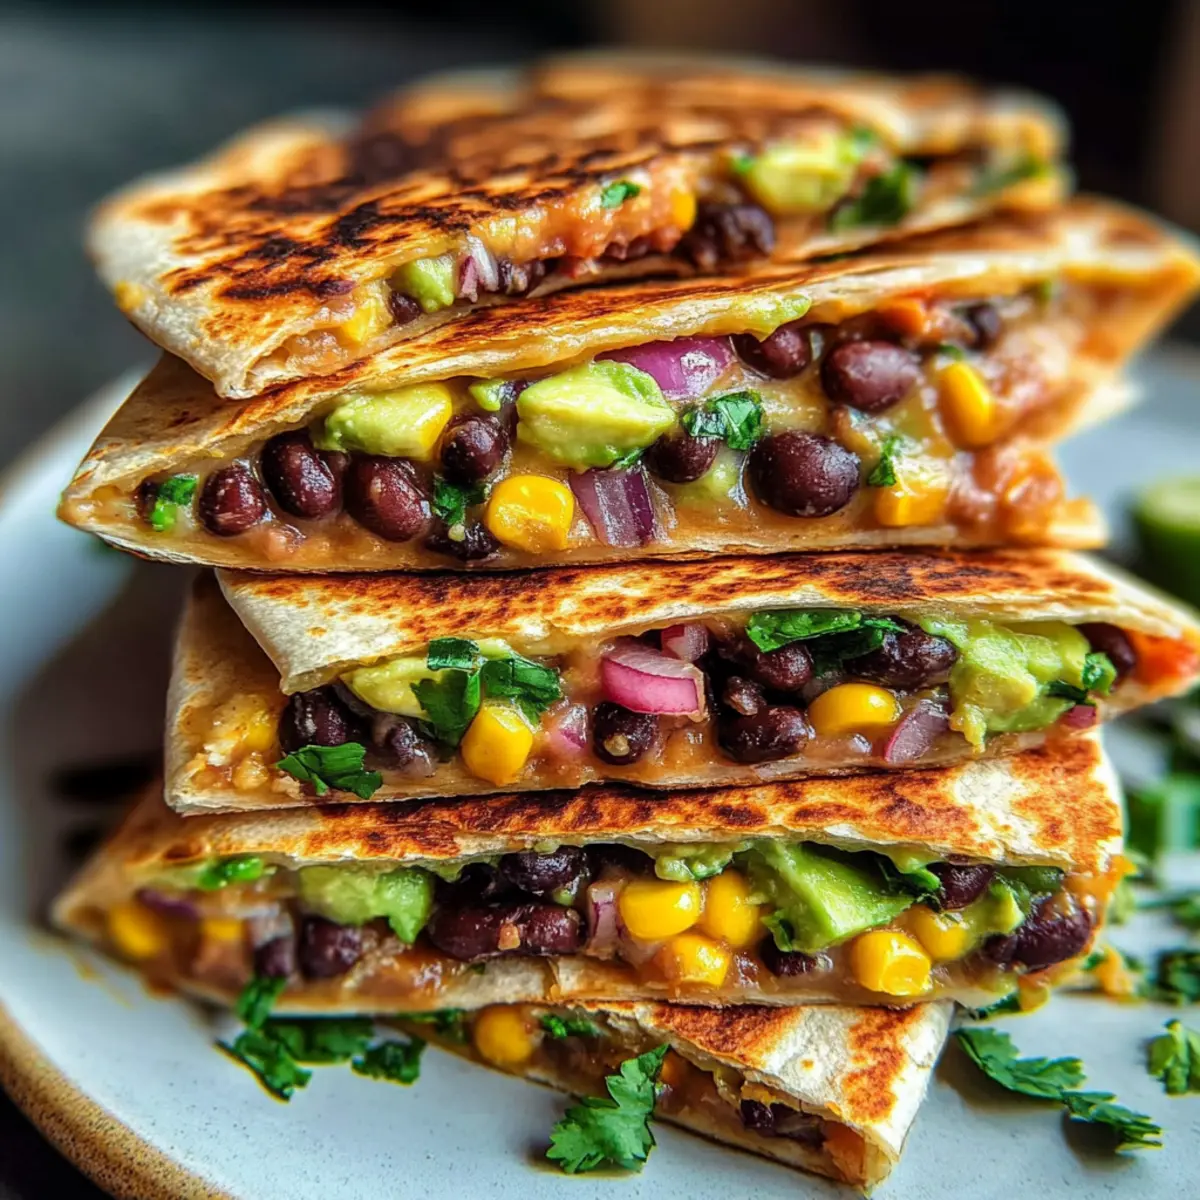
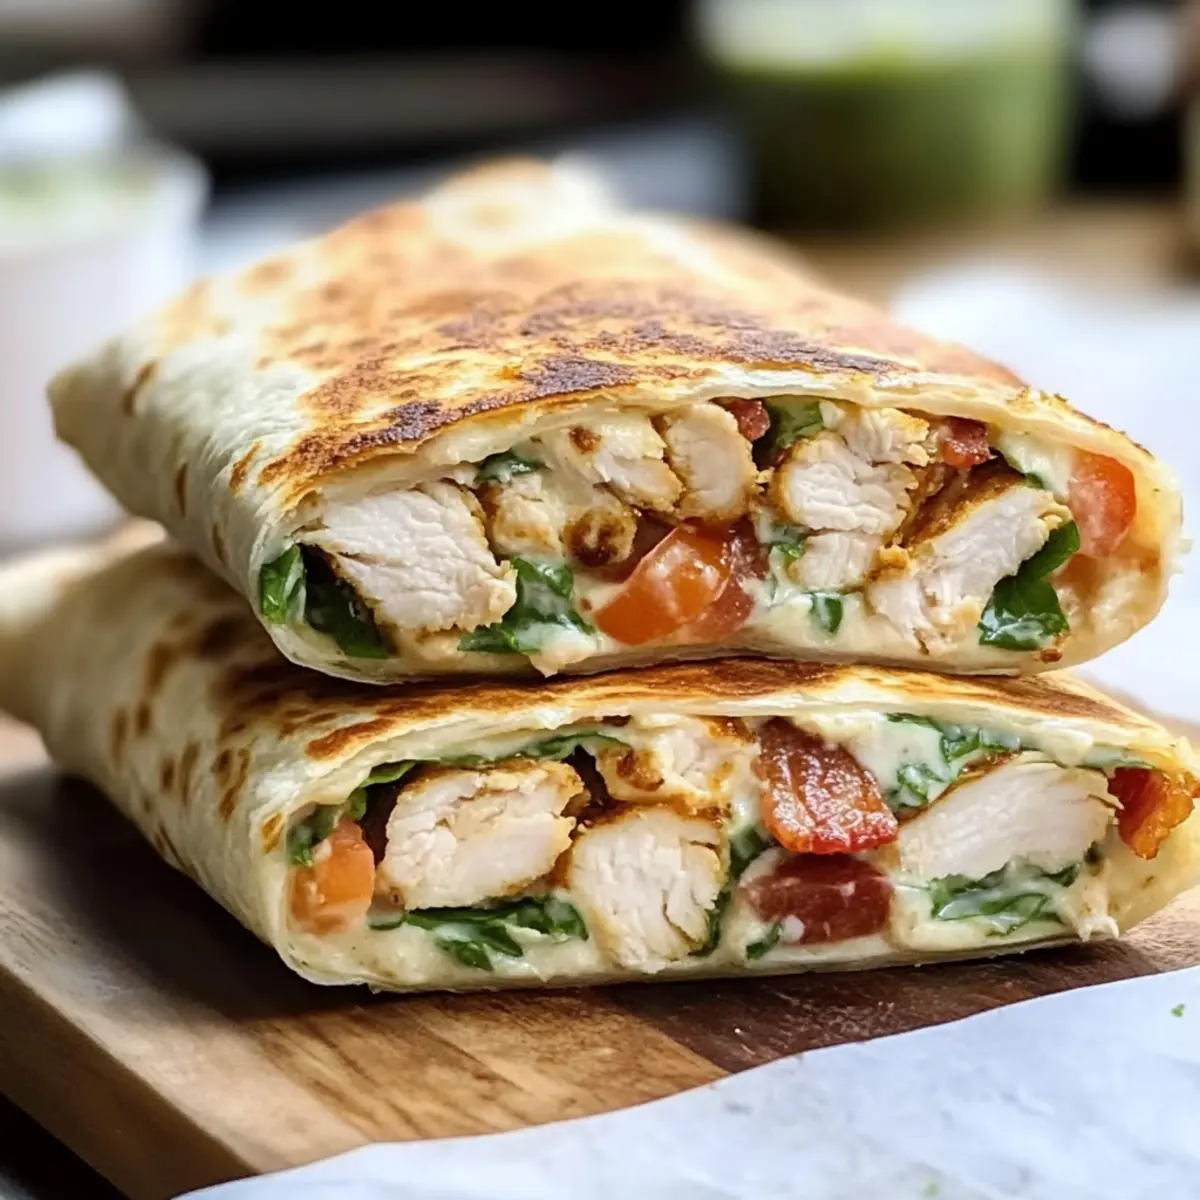
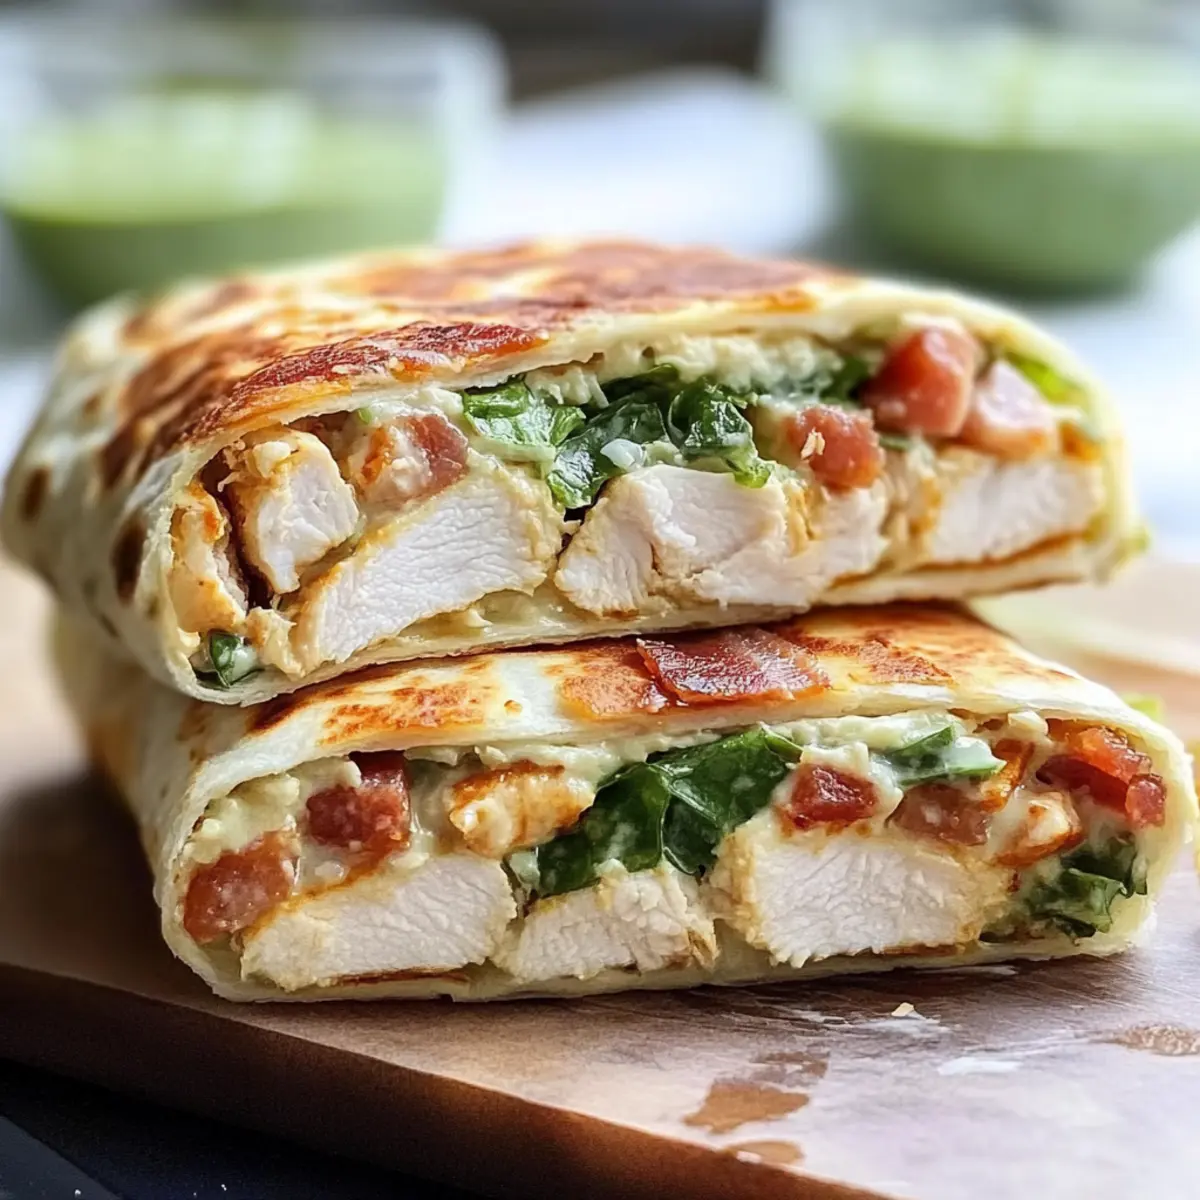
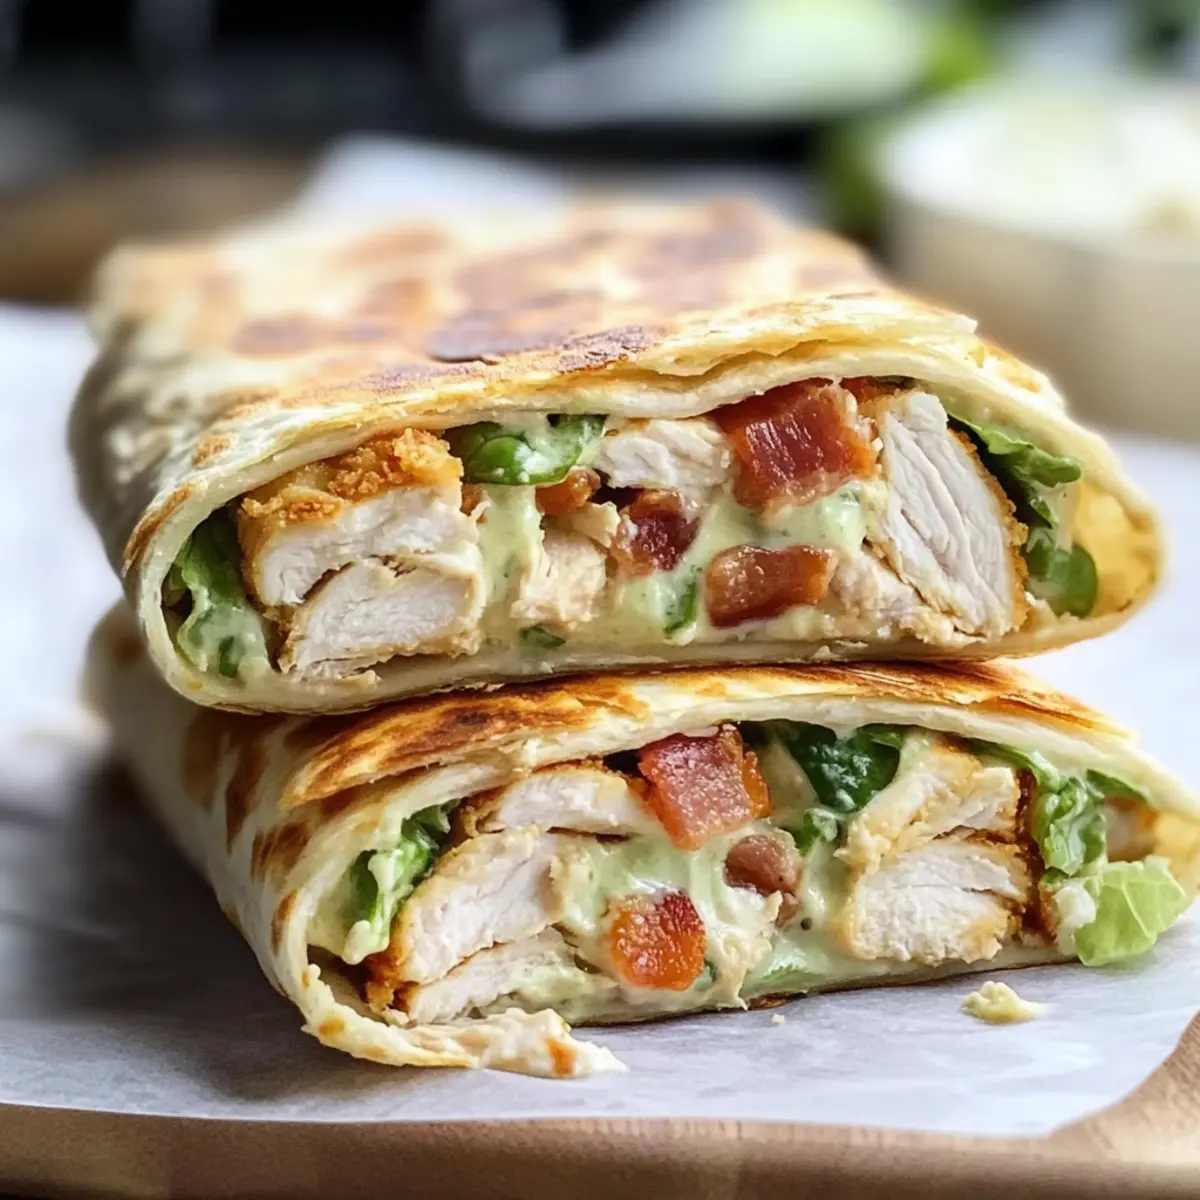
“Did you hear that sizzle?” That’s the sound of crispy chicken coming to life, and boy, does it set the stage for my ultimate Crispy Chicken Bacon Ranch Wrap. This creation isn’t just a convenient meal; it’s a canvas for your culinary creativity. With its crunchy, breaded chicken perfectly complemented by the rich bites of bacon and a swirl of creamy ranch, this wrap makes for an easy, family-friendly choice that’s as satisfying as your favorite takeout. What’s more, this recipe is quick to whip up, making it an ideal solution for those busy weeknights when you want something delicious without the fuss. Whether you're meal prepping for the week or serving it fresh for dinner, this wrap is about to become your go-to favorite. Ready to roll up those flavors? Let’s dive in!
Why is this wrap a must-try?
Quick and Easy: This Crispy Chicken Bacon Ranch Wrap can be made in just minutes, perfect for busy days. Flavor Explosion: The blend of crispy chicken, savory bacon, and creamy ranch creates a taste sensation that your family will love. Customizable: Switch up the ingredients with your favorite toppings, making it your own every time. Meal Prep Friendly: Prepare multiple wraps in advance for quick lunches or dinners throughout the week. Crowd-Pleaser: Whether for a family meal or a gathering with friends, this wrap is sure to impress and satisfy. Spice things up by pairing it with a delicious side like Crock Pot Chicken or add a twist with some Honey Garlic Chicken Thighs!
Crispy Chicken Bacon Ranch Wrap Ingredients
For the Wrap
• Large flour tortillas – The perfect wrap base; try whole wheat or spinach tortillas for added nutrition.
• Chopped crispy chicken – Adds both protein and crunch; feel free to use fried, baked, or grilled chicken for your preference.
• Crispy bacon – Delivers that rich flavor and delightful crunch; swap for turkey bacon for a leaner option.
• Shredded cheese – Brings that creamy dimension; cheddar works beautifully, or choose dairy-free cheese for a lactose-free alternative.
For the Fresh Veggies
• Lettuce – Provides a refreshing crunch; you can't go wrong with romaine or iceberg.
• Tomato – Adds juicy sweetness; cherry tomatoes can make a great alternative if you prefer smaller bites.
For the Dressing
• Ranch dressing – The star of the show; substitute with dairy-free ranch for a vegan-friendly approach.
Now you’re all set to gather your ingredients and create a deliciously satisfying Crispy Chicken Bacon Ranch Wrap!
Step‑by‑Step Instructions for Crispy Chicken Bacon Ranch Wrap
Step 1: Warm the Tortillas
Start by warming your large flour tortillas to make them pliable and easy to roll. You can do this by microwaving them for about 15-20 seconds or briefly heating them in a skillet over medium heat until they're soft and warm to the touch. This crucial first step helps prevent tearing when you fill them with all those delicious ingredients for your Crispy Chicken Bacon Ranch Wrap.
Step 2: Layer the Ingredients
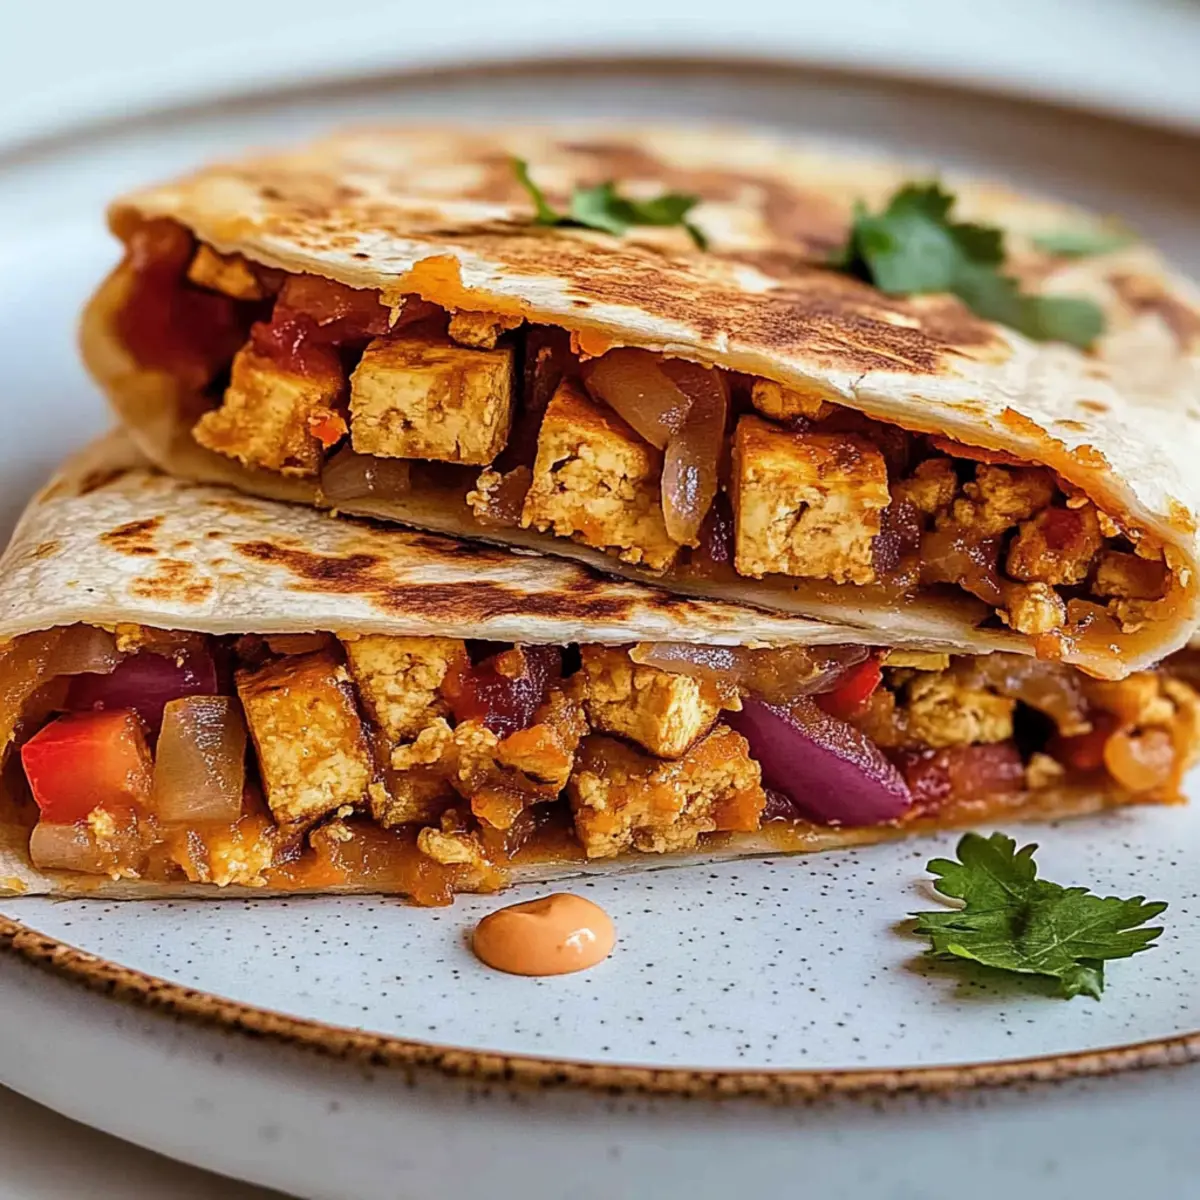
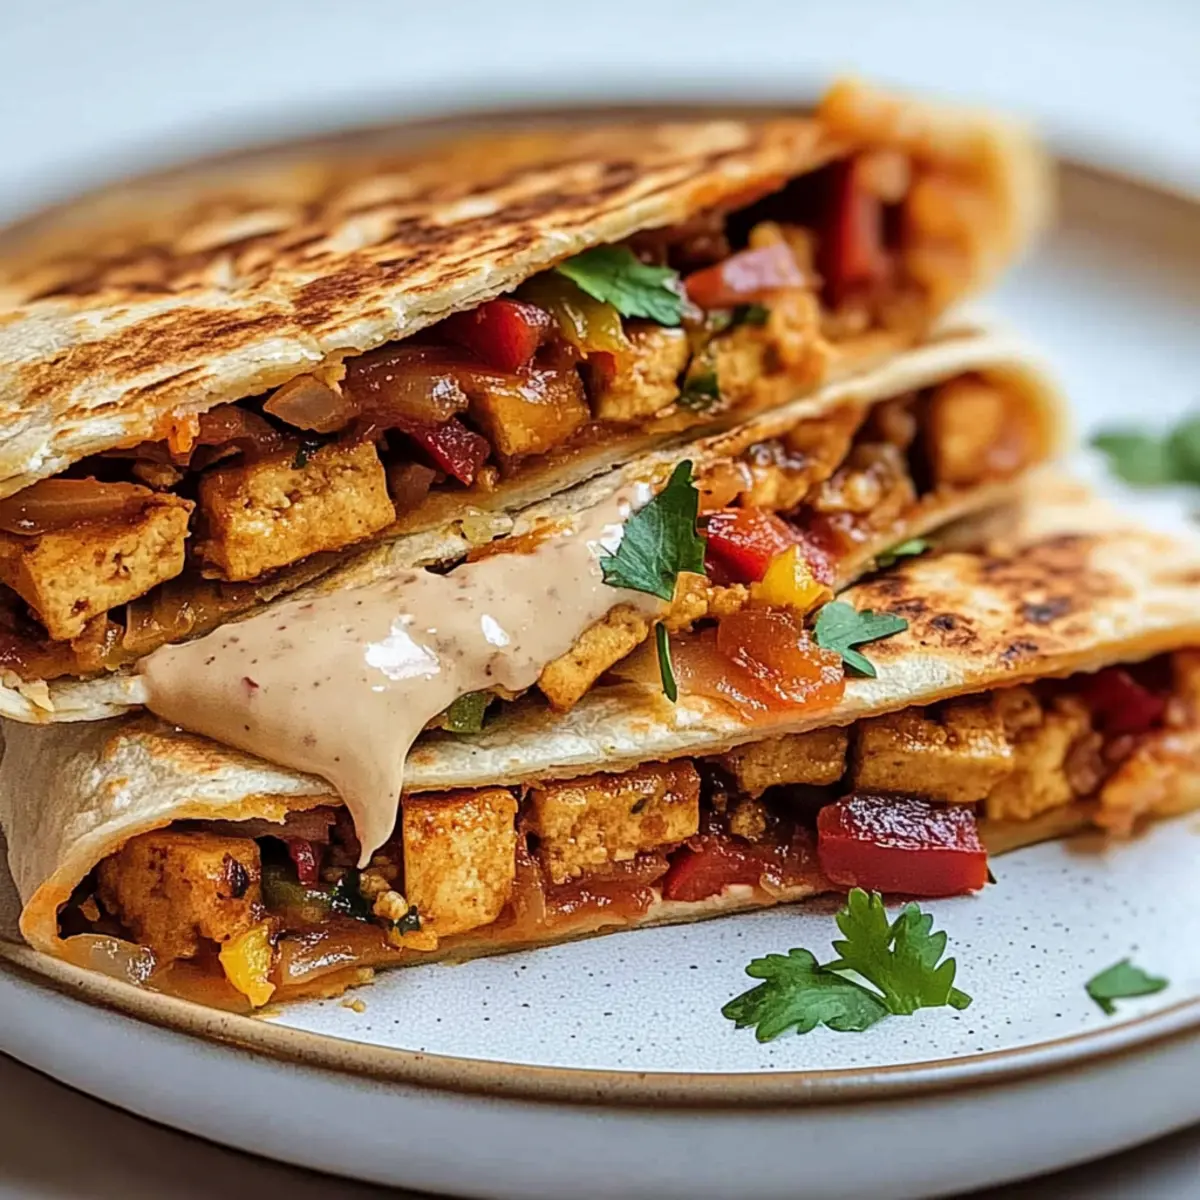
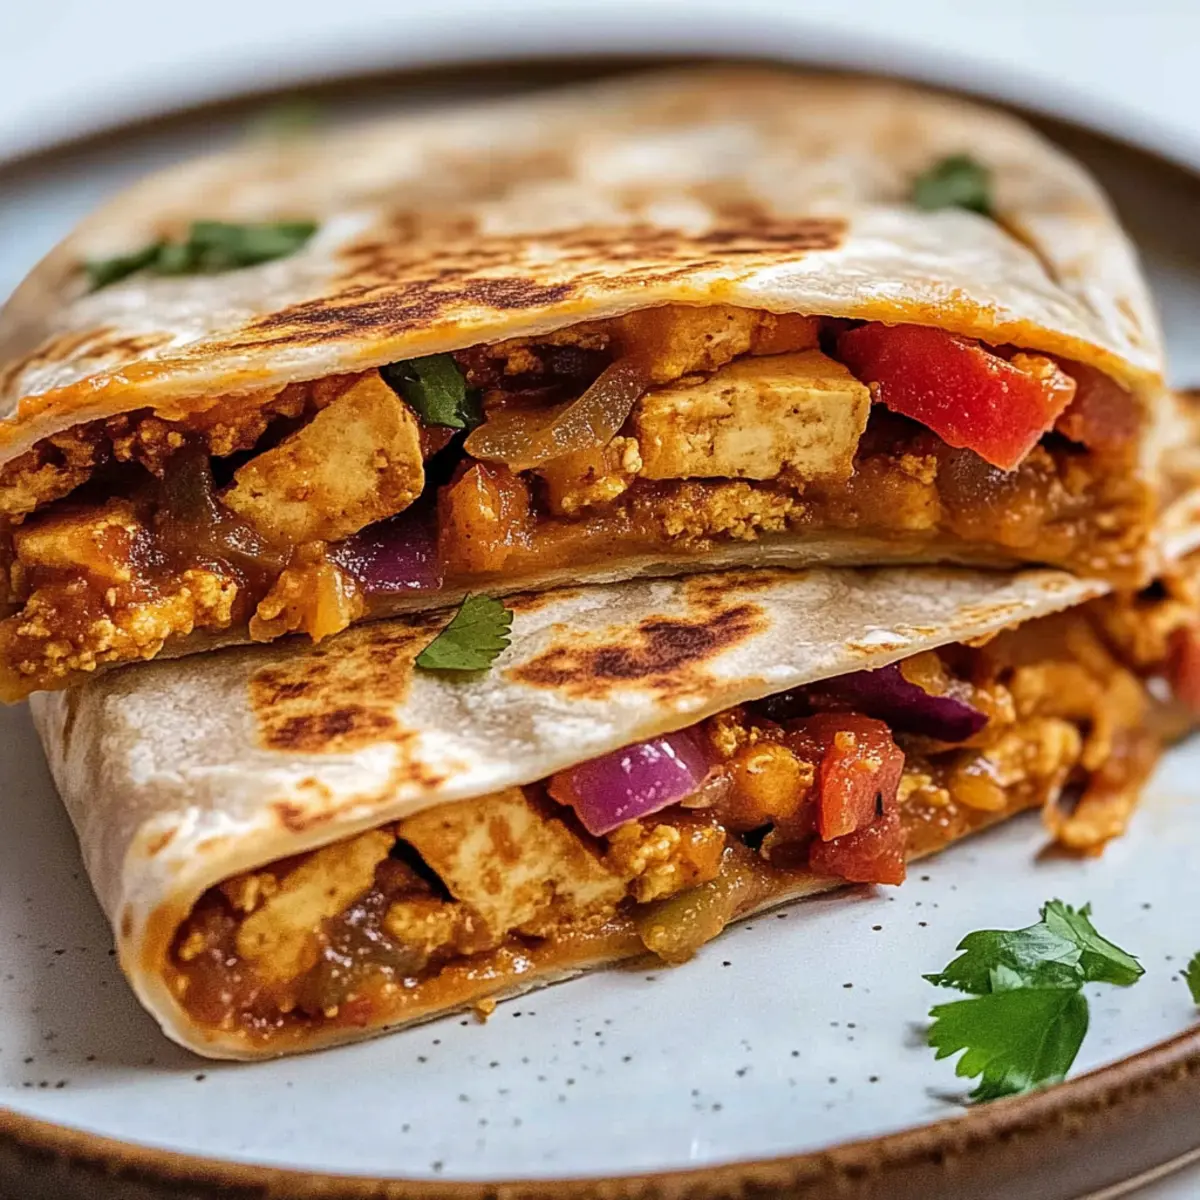
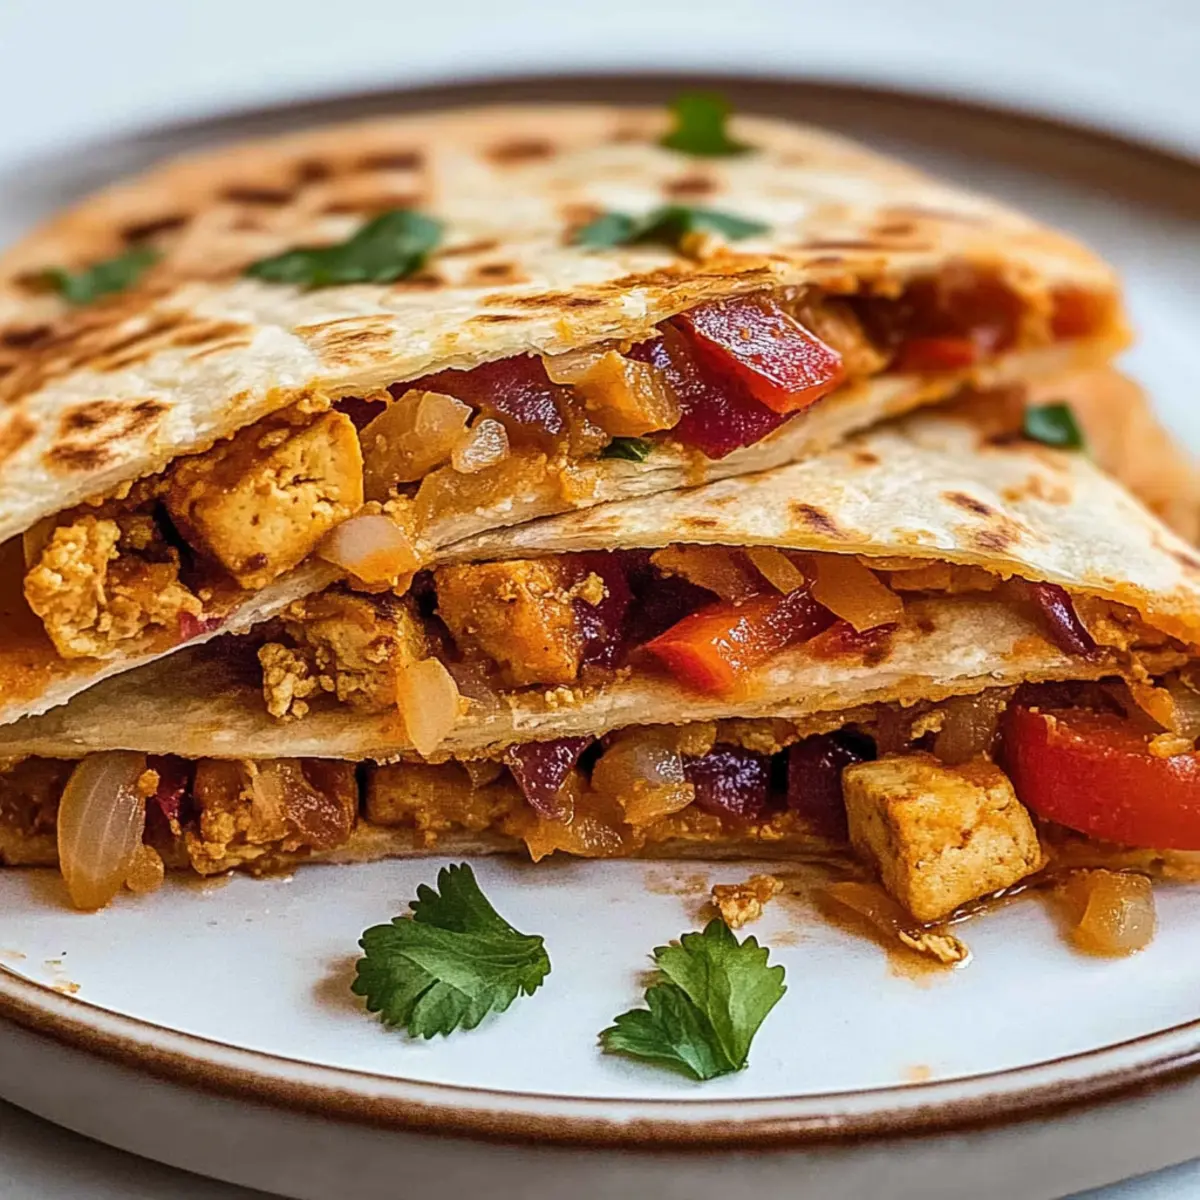
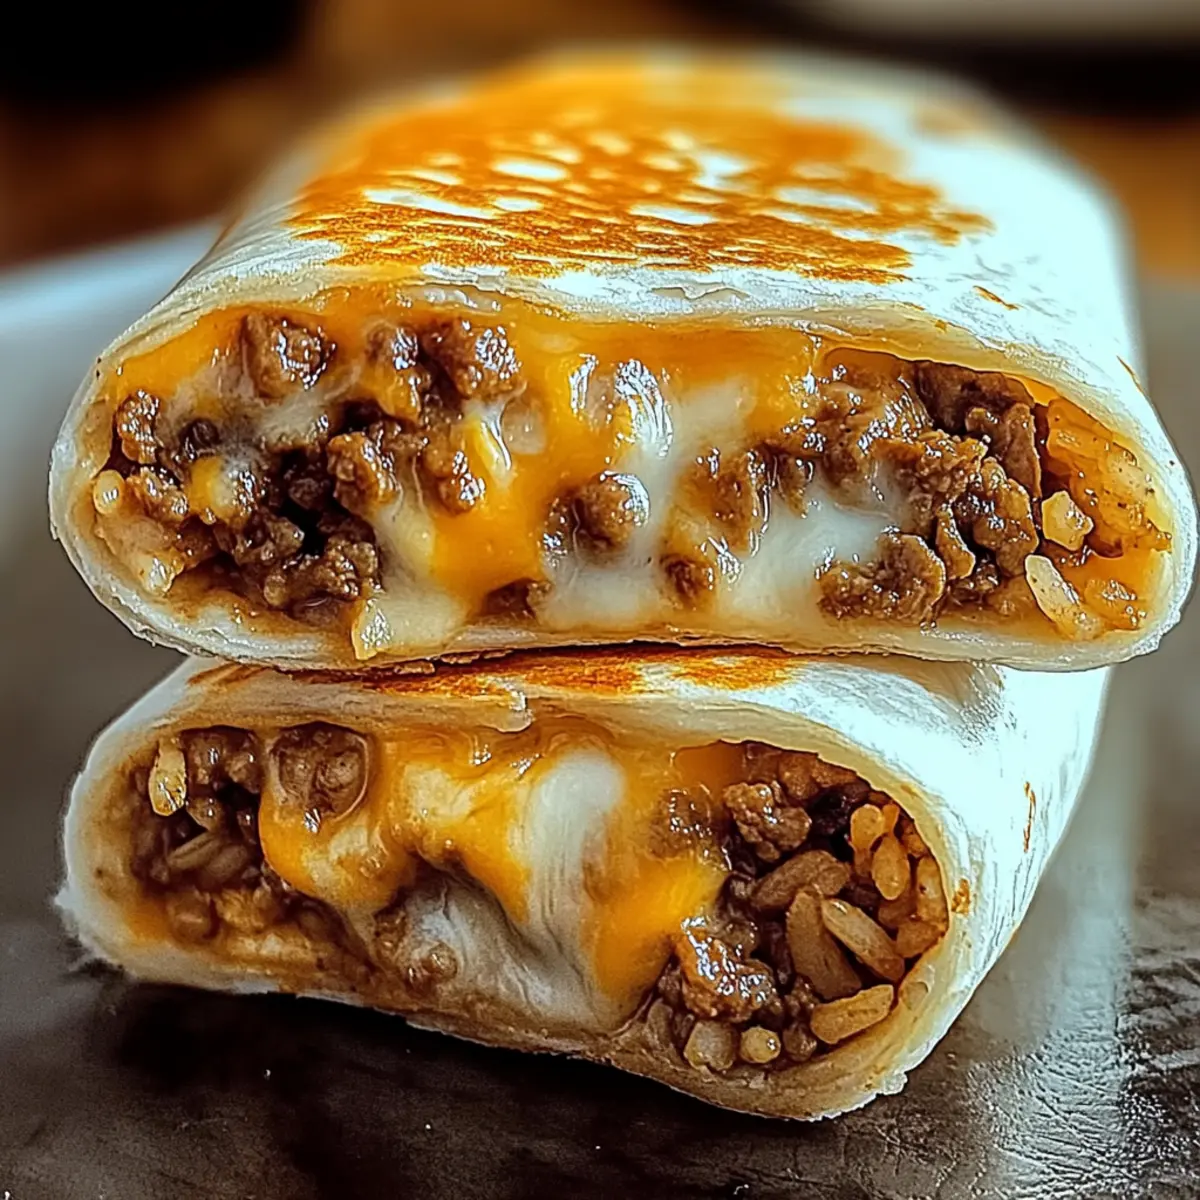
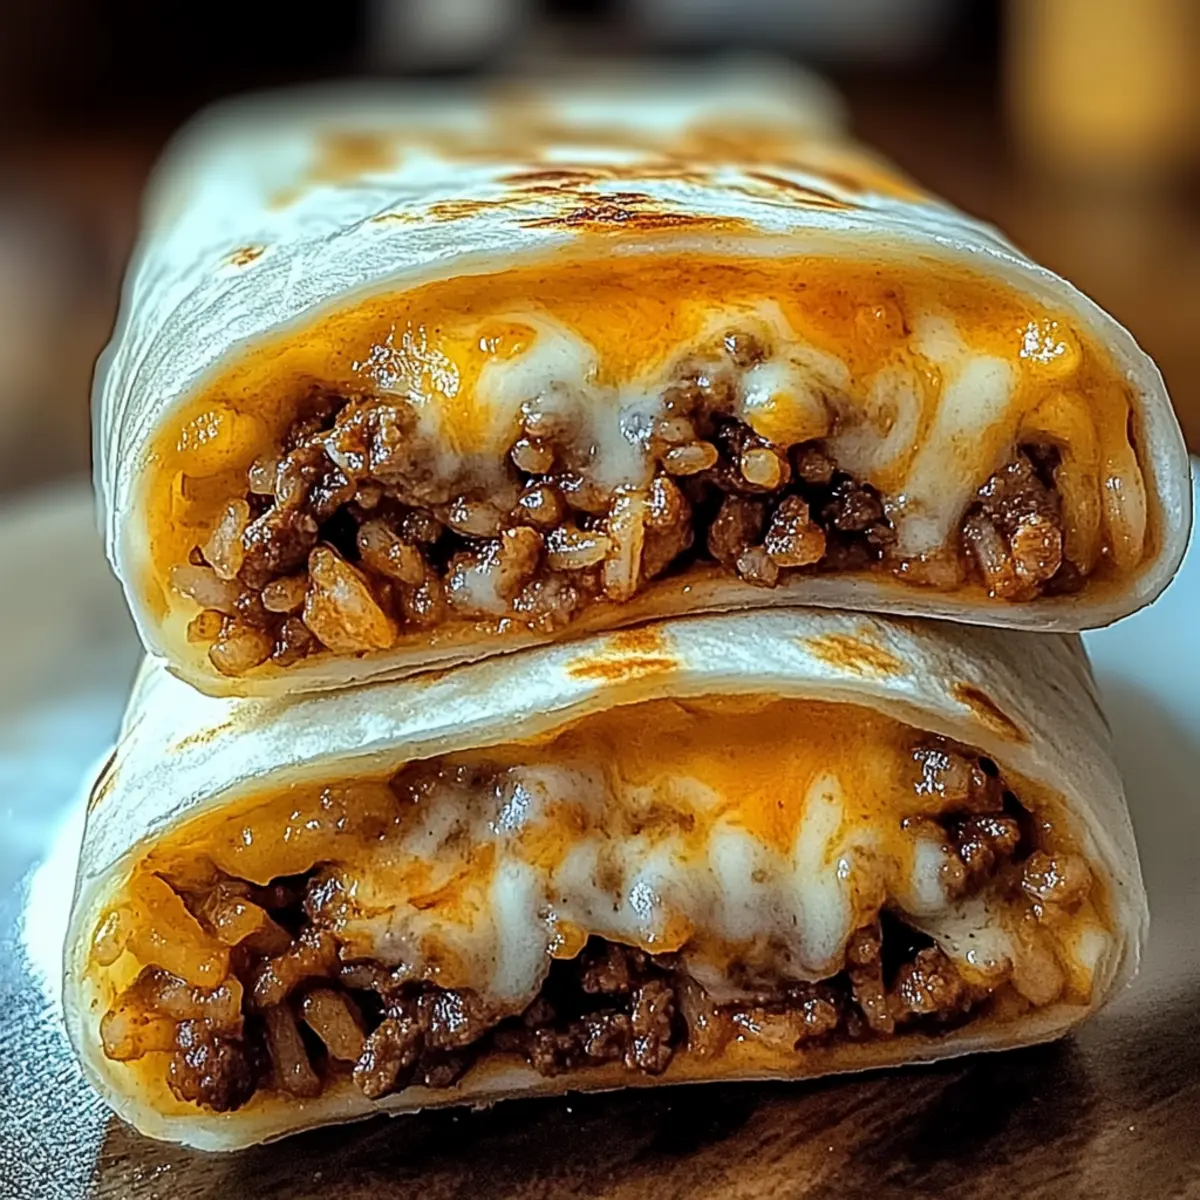
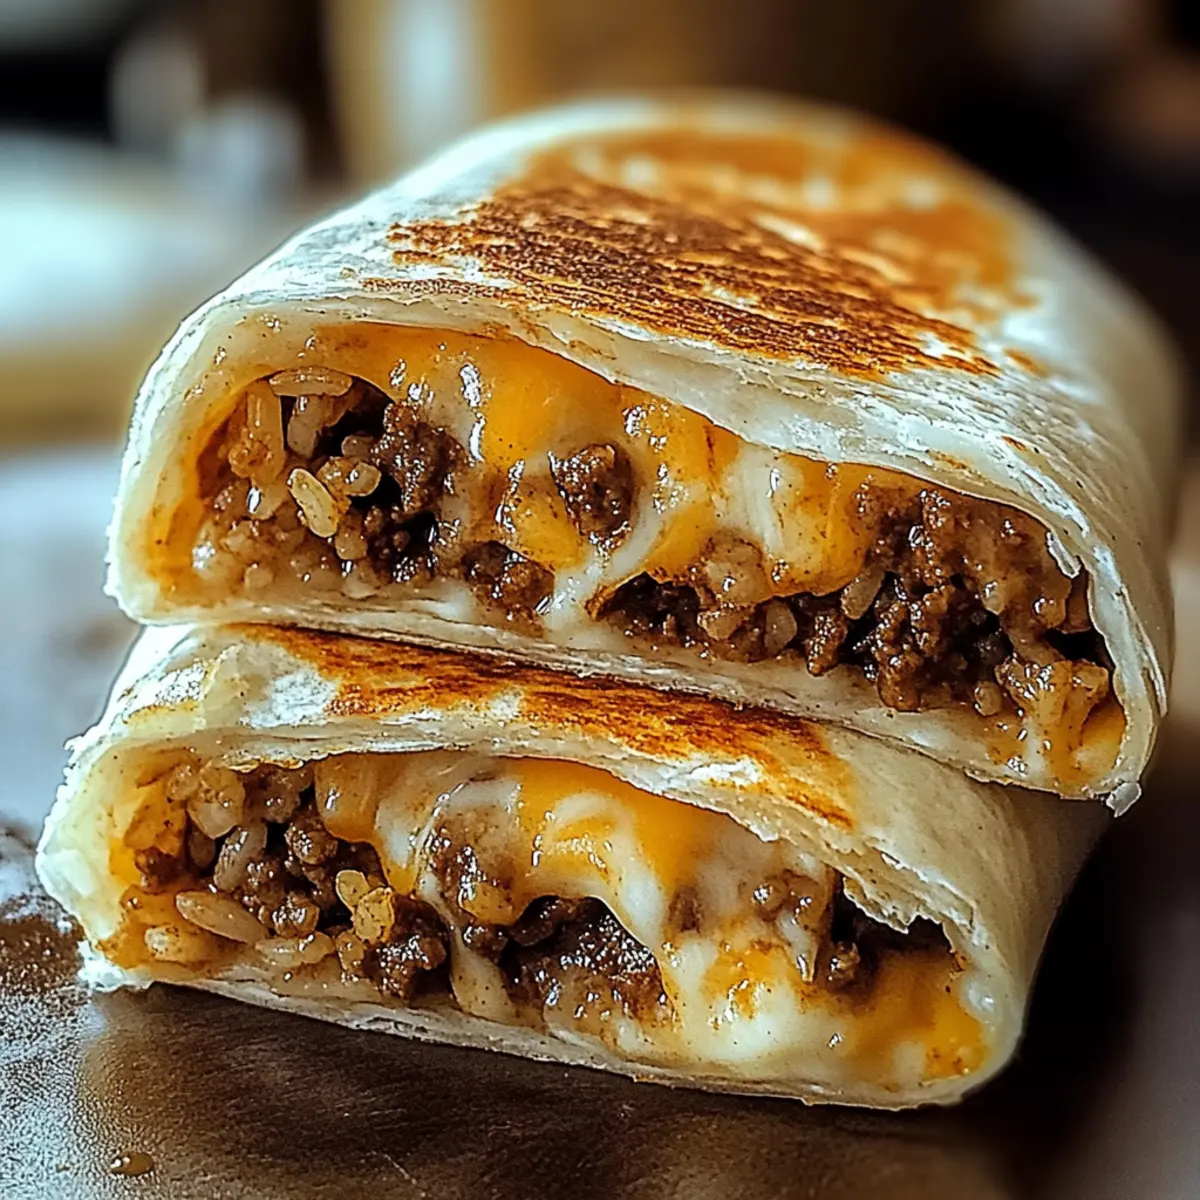
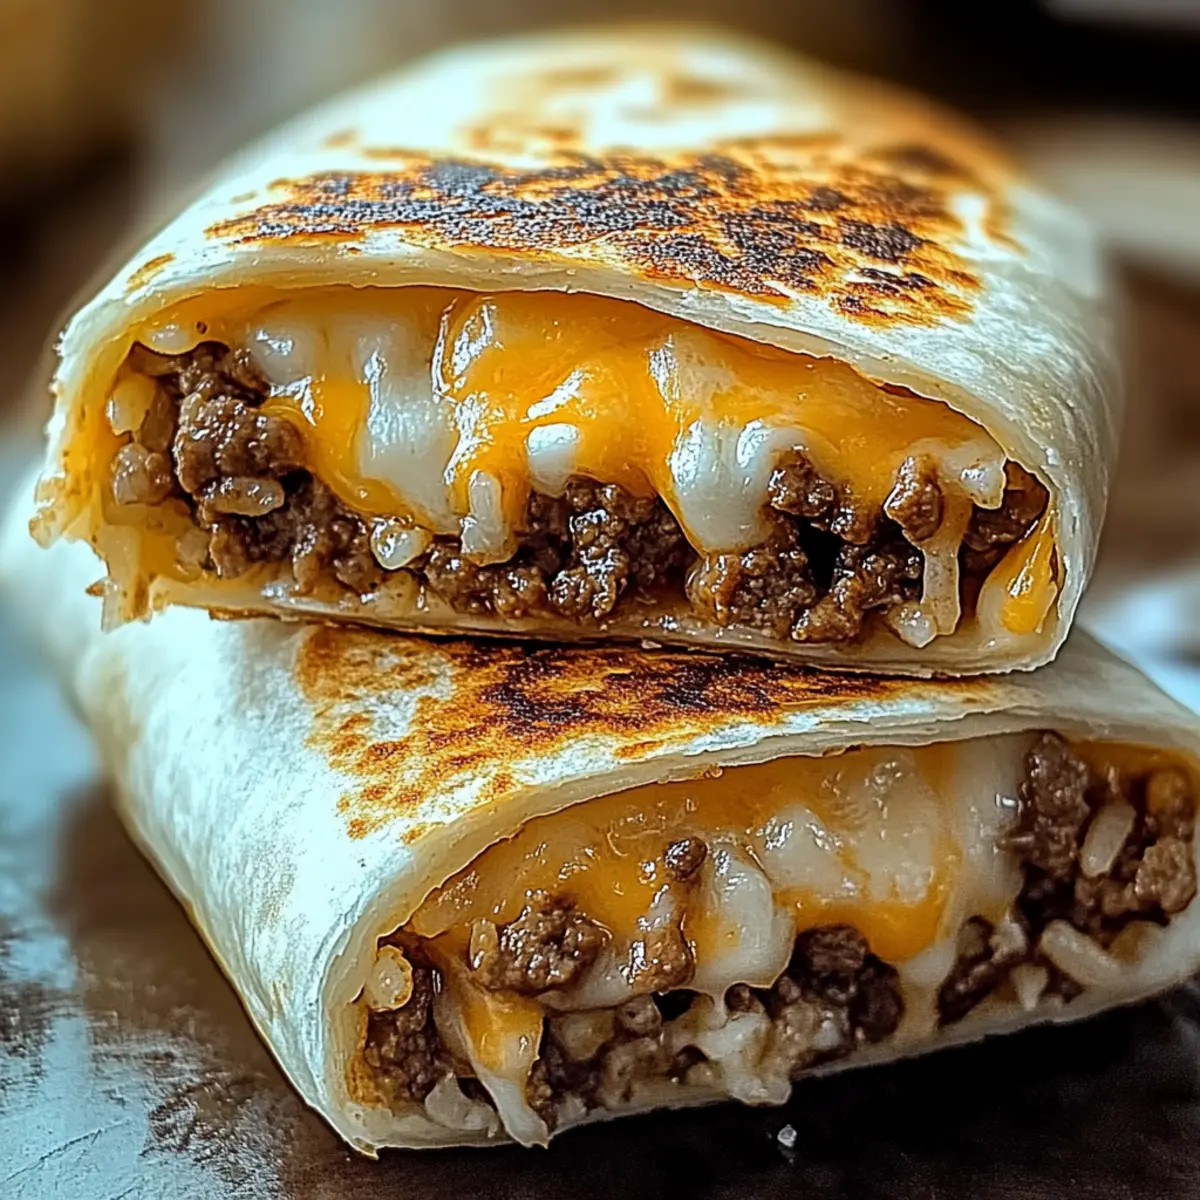
Once your tortillas are warm, place them flat on a clean surface. Begin layering by adding about ½ cup of chopped crispy chicken in the center, followed by two slices of crispy bacon. Sprinkle a generous amount of shredded cheese to give it that creamy texture, then top with fresh lettuce and a few slices of tomato. Finally, drizzle approximately 2 tablespoons of ranch dressing over the top, adding that signature flavor to your wrap.
Step 3: Fold the Wrap
Now it's time to fold your Crispy Chicken Bacon Ranch Wrap! Start by folding in the sides of the tortilla to tuck in the fillings, and then roll tightly from the bottom up, burrito-style. Make sure to keep the ingredients secure as you roll, ensuring each bite will be packed with flavor. The end result should be a neatly wrapped tortilla, ready to be toasted or served.
Step 4: Toast the Wrap (Optional)
For an extra layer of crunch, consider toasting your wrapped creation. Heat a skillet over medium heat and lightly brush it with oil or butter to prevent sticking. Place your prepared wrap seam-side down in the skillet and cook for about 2-3 minutes on each side, or until the tortilla is golden brown and crispy. This step adds a delightful texture to your Crispy Chicken Bacon Ranch Wrap.
Step 5: Slice and Serve
Once your wrap is beautifully toasted, remove it from the skillet and place it on a cutting board. Use a sharp knife to cut the wrap diagonally in half—this makes it easier to handle and visually appealing for serving. You can serve your Crispy Chicken Bacon Ranch Wrap warm alongside extra ranch dressing for dipping or other favorite sides to complete the meal.
Expert Tips for the Crispy Chicken Bacon Ranch Wrap
-
Crispy Chicken Success: Ensure your chicken is thoroughly crisped for the best texture in your Crispy Chicken Bacon Ranch Wrap. Use fried, baked, or grilled options to suit your taste.
-
Bacon Perfection: Cook the bacon until it's crisp and let it rest on paper towels. This helps absorb excess grease, ensuring every bite remains crunchy and flavorful.
-
Avoid Overfilling: Less is more when it comes to filling your wrap. Overfilling can lead to breakage, so keep layers even and manageable for easy rolling.
-
Warm Tortillas: Always warm your tortillas before assembling. This makes them more pliable, preventing tears and allowing for a smoother roll.
-
Creative Dressings: Experiment with different dressings! While ranch is a classic, trying buffalo sauce or a spicy mayo can add a twist to your Crispy Chicken Bacon Ranch Wrap.
Crispy Chicken Bacon Ranch Wrap Variations
Feel free to let your culinary creativity flourish with these fun twists on the Crispy Chicken Bacon Ranch Wrap!
-
Vegetarian Delight: Substitute chicken with grilled vegetables like zucchini and bell peppers for a fresh, meatless option. It’s a vibrant, colorful wrap bursting with flavors!
-
Spicy Kick: Switch out the ranch dressing for buffalo sauce to add a spicy zing. The heat will give your wrap a bold new dimension that’s hard to resist.
-
Sassy Southwest: Add a few spoonfuls of pico de gallo and a sprinkle of cilantro for a Southwestern twist. It elevates the flavor profile and adds a refreshing crunch.
-
Creamy Avocado: Boost creaminess by incorporating sliced avocado. This addition not only tastes amazing but also provides healthy fats, making the wrap even more satisfying.
-
Cheese Change-Up: Instead of cheddar, try pepper jack or feta cheese for a unique flavor kick. Each type of cheese will create a whole new taste experience!
-
Jalapeño Heat: If you love some heat, throw in sliced jalapeños for an extra spicy crunch. They’ll make each bite exciting and adventurous.
Explore delicious variations like those found in our Chipotle Lime Chicken for a Mexican flair or add a touch of sweetness with our Honey Garlic Chicken. The possibilities are endless!
How to Store and Freeze Crispy Chicken Bacon Ranch Wrap
Fridge: Store the wrap wrapped tightly in plastic wrap or aluminum foil for freshness, and keep it in the refrigerator for up to 2 days.
Freezer: For longer storage, freeze the wrapped Crispy Chicken Bacon Ranch Wrap in an airtight container for up to 3 months.
Reheating: To reheat, thaw overnight in the fridge, then warm in a skillet over medium heat until heated through, about 5 minutes per side. This keeps the wrap crispy.
Make-Ahead Tip: Prepare the wrap a day in advance, leaving out lettuce and tomato until ready to eat to maintain freshness.
Make Ahead Options
These Crispy Chicken Bacon Ranch Wraps are fantastic for meal prep, allowing you to enjoy delicious meals on busy days! You can prepare the wraps up to 24 hours in advance by assembling them without the lettuce and tomato, which helps prevent sogginess. Simply layer the crispy chicken, bacon, cheese, and ranch dressing in the tortilla, then wrap tightly in plastic wrap and refrigerate. When you're ready to serve, just add fresh lettuce and sliced tomato, and if desired, toast your wraps for 2-3 minutes in a skillet until golden brown for extra crunch. This way, you'll savor just as fresh and flavorful a wrap as if you made it on the spot!
What to Serve with Crispy Chicken Bacon Ranch Wrap
Elevate your mealtime with delightful sides that perfectly complement the zesty flavors of your wrap.
-
Crispy Sweet Potato Fries: These flavorful fries offer a sweet contrast to the savory wrap while adding a satisfying crunch. Perfect for dipping in ranch dressing, they bring a lovely sweetness to your plate.
-
Fresh Garden Salad: A light and refreshing salad balances the richness of the wrap. Toss in seasonal veggies and a citrus vinaigrette for an uplifting crunch that brightens up every bite.
-
Zesty Coleslaw: Creamy coleslaw adds a delightful crunch and tang that pairs beautifully with the crispy chicken and bacon. The coolness of the slaw also perfectly offsets the warm wrap, creating a fabulous texture combination.
-
Grilled Corn on the Cob: Sweet, juicy corn brings a fun, summery vibe to your meal. Slather it with butter and sprinkle with chili powder for a mouthwatering side that everyone will adore.
-
Stuffed Jalapeños: For spice lovers, stuffed jalapeños filled with cream cheese and herbs create an exciting, creamy contrast to the wrap. They add a kick that enhances the overall flavor experience.
-
Iced Lemonade: Refreshment is key, and a chilled glass of iced lemonade cuts through the richness of the wrap. The tangy, sweet flavor is a perfect pairing on a warm day, making for a delightful dining experience.
-
Chocolate Chip Cookies: For dessert, warm chocolate chip cookies offer a classic, nostalgic sweet ending. The melty chocolate provides a delicious contrast to your savory meal, satisfying that sweet tooth in a charming way.
Crispy Chicken Bacon Ranch Wrap Recipe FAQs
What type of chicken works best for this wrap?
Absolutely! For the Crispy Chicken Bacon Ranch Wrap, you can use fried, baked, or grilled chicken depending on your preference. Each option brings a unique flavor and texture. Fried chicken offers maximum crunch, while baked or grilled chicken provides a leaner alternative.
How should I store leftover wraps?
Very important! Wrap any remaining Crispy Chicken Bacon Ranch Wrap tightly in plastic wrap or aluminum foil and refrigerate for up to 2 days. This helps to keep the flavors fresh and prevents them from drying out. When you're ready to enjoy, simply reheat in a skillet for the best texture.
Can I freeze the Crispy Chicken Bacon Ranch Wrap?
You absolutely can! To freeze the wrap, first prepare it without the fresh vegetables, like lettuce and tomatoes, which can affect texture. Wrap the prepared Crispy Chicken Bacon Ranch Wrap securely in plastic wrap and then place it in an airtight container. It can be frozen for up to 3 months. When you're ready to eat, thaw it overnight in the fridge and reheat in a skillet for about 5 minutes on each side.
What if my wrap is too soggy?
Very common! If your wrap ends up soggy, ensure that any wet ingredients are applied sparingly. Layer drier components first, like the chicken and cheese, followed by lettuce and tomatoes. You can also try toasting the wrap after assembling to crisp it up, adding that delightful crunch.
Are there any allergy considerations I should keep in mind?
Absolutely! This recipe contains chicken, bacon, and dairy products, so keep allergies in mind. You can easily customize your wrap to be more allergen-friendly by using turkey bacon for those looking to reduce saturated fats or substituting with plant-based ingredients for lactose-intolerant individuals. Opt for a dairy-free ranch dressing if necessary too!
How can I make my wraps more kid-friendly?
The more the merrier! To cater to younger picky eaters, consider shortening the wrap and making smaller versions with less robust flavors. You could also offer additional dipping sauces, like honey mustard or barbecue, to make it more exciting for them. Letting kids participate in assembling their own wraps can also make it a fun family activity!

Crispy Chicken Bacon Ranch Wrap: A Flavorful Family Favorite
Ingredients
Equipment
Method
- Warm the large flour tortillas in the microwave for about 15-20 seconds or in a skillet until soft.
- Layer about ½ cup of chopped crispy chicken in the center of each tortilla, followed by two slices of crispy bacon, shredded cheese, lettuce, tomato, and ranch dressing.
- Fold the sides of the tortilla in and roll tightly from the bottom up, ensuring fillings are secure.
- Optional: Toast the wrapped creation in a skillet brushed with oil for 2-3 minutes on each side until golden brown.
- Slice the wrap diagonally and serve warm with extra ranch dressing on the side.