tastytrendingredients

  • Home
  • Recipes
    • Appetizers
    • Breakfast
    • Dessert
    • Dinner
    • Drinks
    • Salads
    • Snacks
    • Soups
  • About me
  • Contact me
menu icon
go to homepage
  • Home
  • Recipes
    • Appetizers
    • Breakfast
    • Dessert
    • Dinner
    • Drinks
    • Salads
    • Snacks
    • Soups
  • About me
  • Contact me
search icon
Homepage link
  • Home
  • Recipes
    • Appetizers
    • Breakfast
    • Dessert
    • Dinner
    • Drinks
    • Salads
    • Snacks
    • Soups
  • About me
  • Contact me
×

Tangy & Creamy Orange Dreamsicle Salad for Joyful Gatherings

August 23, 2025 by Grace Snow Leave a Comment

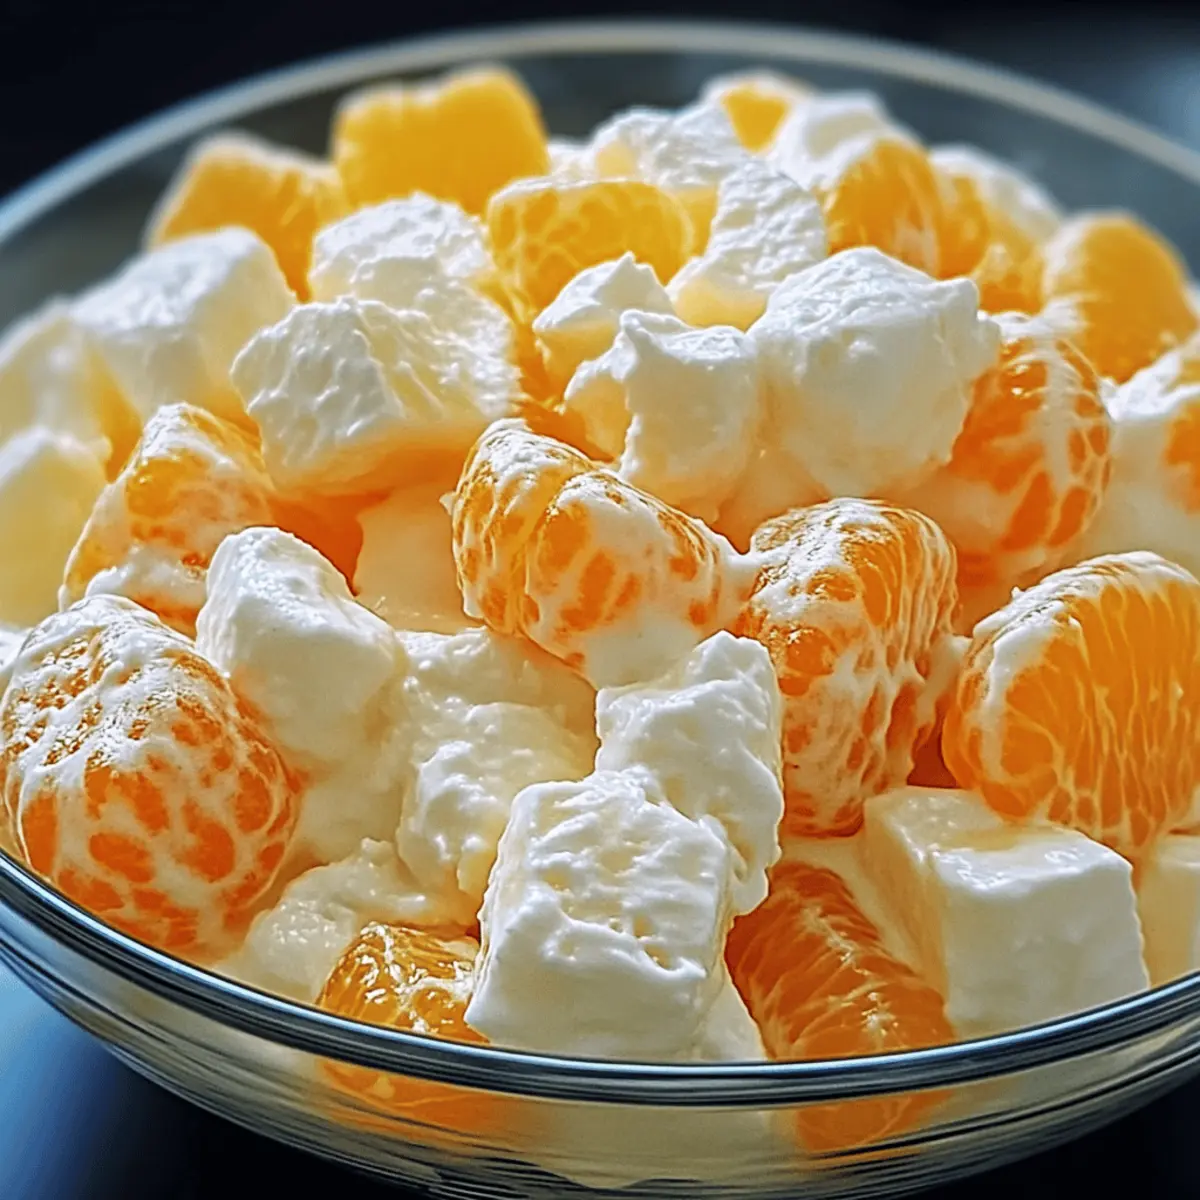
As I stood in my kitchen, the sweet scent of citrus wafted through the air, instantly transporting me back to carefree summers spent indulging in popsicles. That nostalgic feeling is exactly what you’ll experience when you whip up this Easy Orange Dreamsicle Salad. With its creamy texture and vibrant bursts of fruit, it’s not only a breeze to prepare—perfect for those busy days—but also a guaranteed crowd-pleaser at any gathering. This no-bake delight captures the essence of childhood treats, offering a refreshing twist that everyone can enjoy. Ready to revive those cherished memories and impress your friends and family? Let’s dive into the recipe!

Why is this salad so delightful?

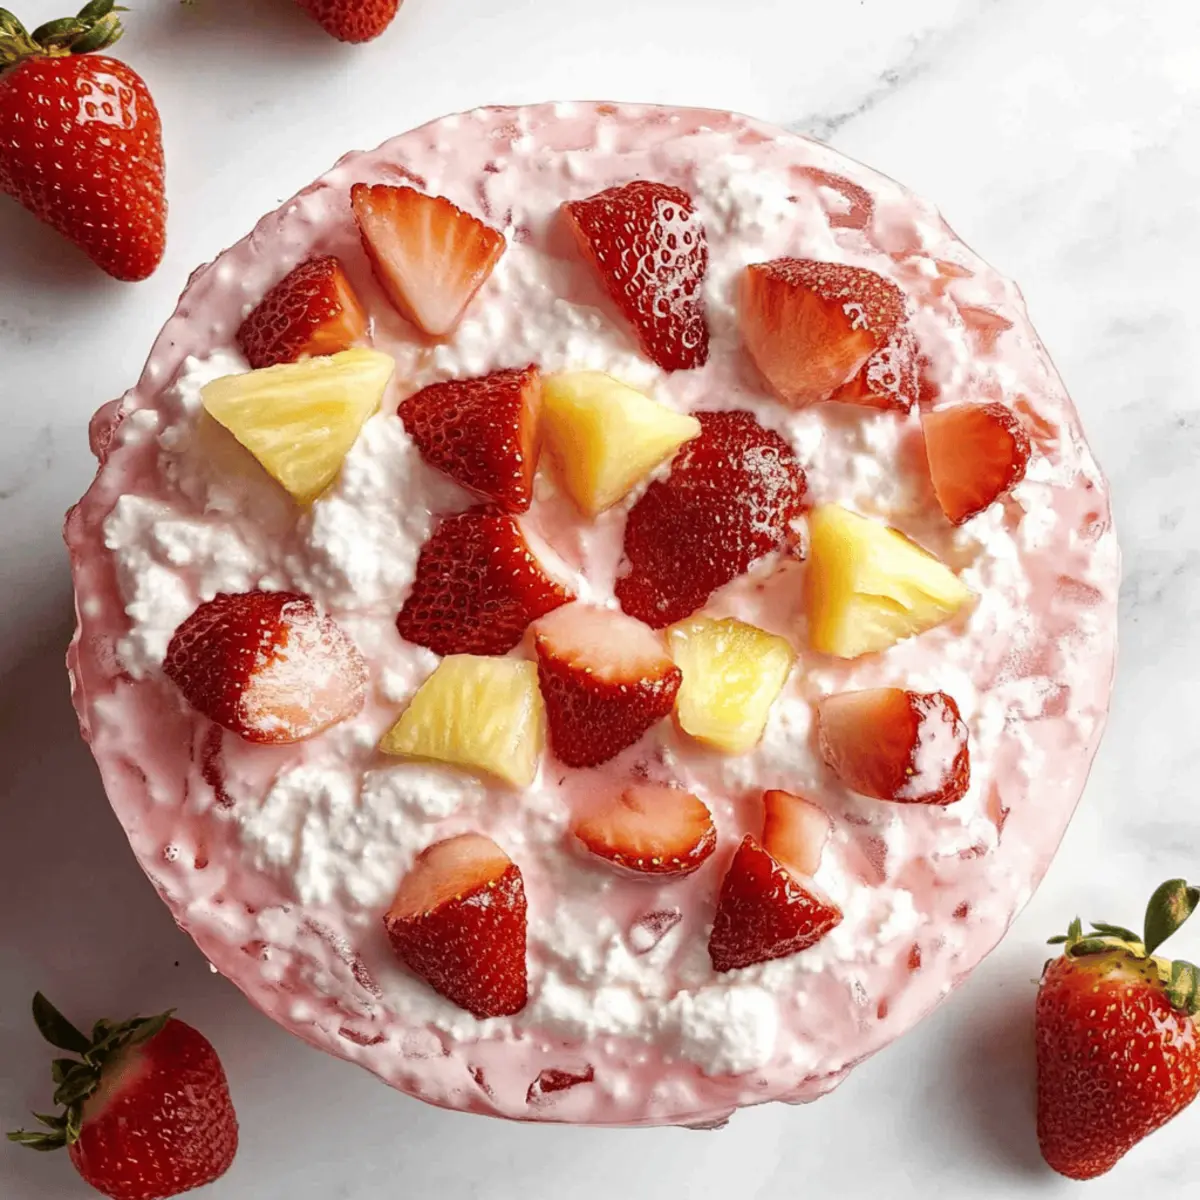
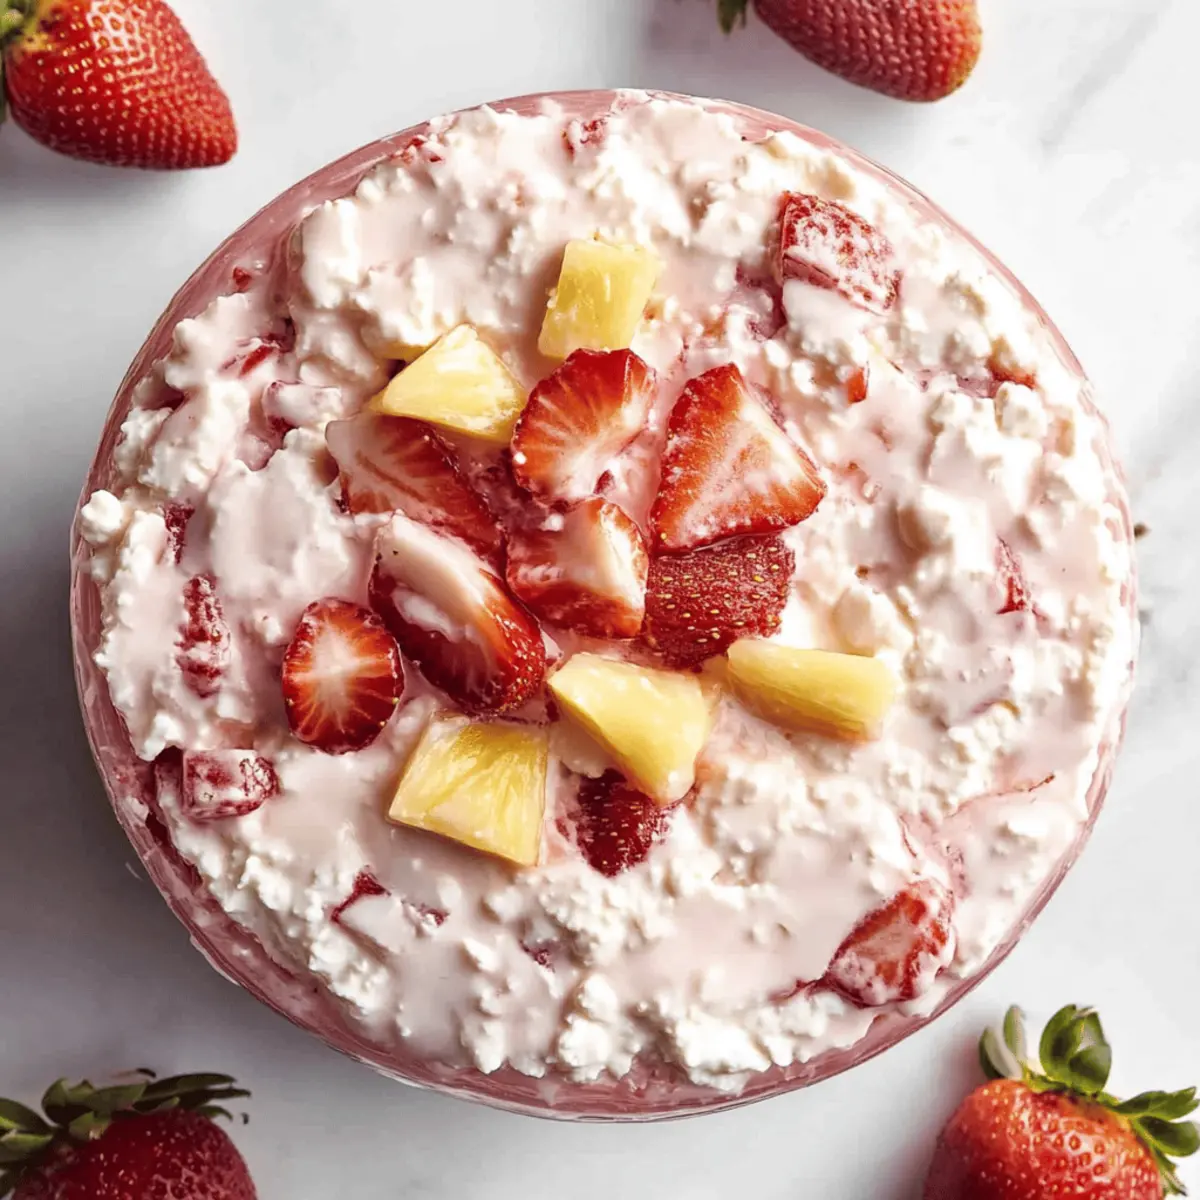
Nostalgic Flavor: This Orange Dreamsicle Salad is a deliciously creamy throwback to childhood summers, reminiscent of your favorite popsicles.

Easy to Prepare: With just a few simple ingredients and no baking required, it’s perfect for bustling weeknights or last-minute gatherings.

Crowd-Pleasing Appeal: Bring joy to any potluck or family dinner; it’s a delightful dish that everyone—from kids to adults—will love.

Versatile Ingredients: Feel free to tailor it with fresh fruit, like strawberries or kiwi, to add your personal touch, or try it alongside a refreshing Tofu Caesar Salad for variety.

Make-Ahead Friendly: Prep it the night before to save time on busy days, ensuring you have a vibrant dessert ready to impress at a moment's notice.

Colorful Presentation: Its bright, appealing colors make for an eye-catching centerpiece on any table, instantly drawing attention and sparking conversations.

Orange Dreamsicle Salad Ingredients

For the Base

  • Orange Jell-O – Base flavor and sets the salad. Substitution: Use sugar-free Jell-O for a lighter version.
  • Instant Vanilla Pudding Mix – Adds creaminess and a sweet depth. Substitution: Use a sugar-free version if desired.
  • Instant Tapioca Pudding Mix – Provides chewy texture and enhances creaminess. Note: Essential for texture contrast.
  • Water – Used to dissolve the gelatin and pudding mixes. No substitutes.

For the Fruit

  • Mandarin Oranges (canned) – Adds sweetness and vibrant color. Substitution: Fresh oranges can be used for a fresher taste.
  • Crushed Pineapple (canned) – Contributes natural sweetness and juicy texture. Substitution: Use fresh pineapple for added freshness and flavor.

For the Creaminess

  • Cool Whip – Incorporates airy lightness and balances sweetness. Substitution: Homemade whipped cream can be used but will not hold as long.

Step‑by‑Step Instructions for Orange Dreamsicle Salad

Step 1: Prepare the Base Mixture
In a medium saucepan, whisk together the orange Jell-O, instant vanilla pudding mix, instant tapioca pudding mix, and 4 cups of water. Heat the mixture over medium heat, stirring continuously for about 5 to 7 minutes, or until it thickens to a pudding-like consistency. Once you see a substantial change in texture, remove it from the heat and allow it to cool completely in the saucepan.

Step 2: Incorporate the Cool Whip
Once the Jell-O mixture has cooled down to room temperature, gently fold in the Cool Whip using a spatula. Stir slowly to create a smooth and fluffy texture, being careful not to deflate the airy qualities of the whipped topping. This step is crucial for achieving the lightness associated with the Orange Dreamsicle Salad, so take your time here.

Step 3: Add the Fruit
Next, drain the mandarin oranges and crushed pineapple thoroughly to avoid excess moisture in the salad. With the Cool Whip and Jell-O mixture prepared, gently fold the fruit into the mixture until evenly distributed. You should see bright bursts of color as the vibrant oranges and pineapple become incorporated, enhancing the nostalgic appeal of your Orange Dreamsicle Salad.

Step 4: Chill the Salad
Transfer your salad mixture into a large serving dish or individual cups for a perfect presentation. Cover it with plastic wrap or a lid, and refrigerate for at least 4 hours or, ideally, overnight. Chilling allows the flavors to meld and ensures a beautifully set texture, allowing your Orange Dreamsicle Salad to develop that creamy, refreshing character.

Step 5: Serve and Enjoy
When ready to serve, remove the Orange Dreamsicle Salad from the refrigerator. Use a spoon to scoop out portions for serving, and enjoy it chilled in bowls or dessert cups. Its airy texture and fruity flavors will bring smiles to the faces of everyone at your gathering, making it a nostalgic favorite for both young and old.

How to Store and Freeze Orange Dreamsicle Salad

Fridge: Store covered in the refrigerator for up to 3 days. This salad tastes best when enjoyed chilled and fresh, so keep it airtight.

Freezer: If you want to freeze the Orange Dreamsicle Salad, portion it out into individual servings in airtight containers. It can be frozen for up to 2 months, though the texture may change slightly upon thawing.

Reheating: For best results, do not reheat this salad as it is meant to be served cold. Just remove from the fridge or freezer and enjoy right away!

Make-Ahead: This delightful dessert can be made a day in advance for convenience, allowing the flavors to meld and develop beautifully overnight.

Expert Tips for Orange Dreamsicle Salad

  • Cool Ingredients: Ensure all ingredients, especially Cool Whip, are at room temperature before mixing for the best texture and flavor in your Orange Dreamsicle Salad.

  • Watch the Fruit: Drain your canned fruits thoroughly to prevent excess moisture, which can make the salad watery and compromise its delightful creamy texture.

  • Gentle Folding: When incorporating Cool Whip and fruit, fold gently to maintain the airiness of the mixture. This keeps your salad fluffy and light.

  • Chill Time: For the fullest flavor and perfect texture, chill the salad overnight. This not only enhances taste but also allows it to set beautifully.

  • Serving Suggestion: Consider serving your salad in small cups or mason jars for an adorable single-serving treat at gatherings, making it easy for guests to enjoy.

  • Ingredient Substitution: Don't hesitate to swap in fresh fruit or sugar-free mixes; this flexibility allows you to cater to various dietary preferences while still keeping the nostalgia of your Orange Dreamsicle Salad alive.

Orange Dreamsicle Salad Variations

Get ready to unleash your creativity with this refreshing Orange Dreamsicle Salad by adding your personal touch!

  • Dairy-Free: Substitute Cool Whip with coconut whipped cream for a tropical twist that’s both creamy and dairy-free. Embrace the natural sweetness of coconut; it pairs beautifully with the citrus.

  • Fresh Fruit Boost: Add fresh strawberries or kiwi slices to elevate the fruit level and introduce new flavors. The bright colors of these fruits will make your salad even more eye-catching.

  • Crunchy Texture: Incorporate crushed graham crackers or vanilla wafers for a delightful crunch. The contrast in texture will have everyone reaching for another spoonful.

  • Nutty Delight: Sprinkle in chopped pecans or almonds for a nourishing crunch. Not only does this add extra flavor, but it also brings a satisfying bite to every spoonful.

  • Tropical Flavor: Swap crushed pineapple for diced mango for a taste of the tropics. This fruity variation will surely transport you straight to sandy beaches with every bite!

  • Mini Mason Jars: Serve portions in mini mason jars for whimsical individual servings at gatherings. They'll be a hit, and guests will love the charming presentation.

  • Maraschino Cherries: Top each serving with a maraschino cherry for a touch of color and a hint of sweetness. A little red makes everything look prettier, doesn't it?

Don’t forget, you can also enjoy this salad with side dishes like German Potato Salad for a fun, light meal! Keep experimenting until you find the perfect blend that makes this dish uniquely yours.

Make Ahead Options

This Orange Dreamsicle Salad is a fantastic choice for meal prep, ensuring you can enjoy a delightful dessert without the last-minute rush. You can prepare the base mixture up to 24 hours in advance by cooking the orange Jell-O, vanilla pudding mix, and tapioca pudding mix together, then cooling it completely before adding the Cool Whip. It’s important to drain the fruit well to prevent excess moisture, ensuring your salad stays deliciously creamy. Once you're ready to serve, simply fold in the fruit, transfer it to a serving dish, and refrigerate for at least 4 hours (preferably overnight). This makes it easy to impress guests, allowing the flavors to meld beautifully while saving you precious time!

What to Serve with Orange Dreamsicle Salad

Indulge in the perfect symphony of flavors and textures to elevate your delightful dessert experience!

  • Creamy Cheesecake:
    The rich and tangy flavors of cheesecake provide a luscious balance to the lightness of the salad. It’s a sophisticated touch for special occasions.

  • Fruity Tart:
    A fresh fruit tart adds a crispy texture and bright flavors that perfectly complement the Orange Dreamsicle Salad. Both desserts together create a colorful feast for the eyes.

  • Savory Grilled Chicken:
    Pairing this salad with savory grilled chicken enhances your meal, offering a delightful contrast between sweet and savory. The grilled chicken's smoky flavor beautifully balances the creamy sweetness.

  • Crisp Green Salad:
    A simple green salad with vinaigrette adds freshness to your meal, providing a refreshing contrast to the creamy dessert. The crunch of fresh greens and tangy dressing awaken your palate.

  • Sparkling Citrus Drink:
    Serve with a sparkling citrus beverage for a refreshing palate cleanser. This bubbly drink enhances the bright flavors of the salad, making it a true celebration.

  • Chocolate Mousse:
    For those who truly love dessert, pairing the Orange Dreamsicle Salad with chocolate mousse creates a decadent double treat. The richness of chocolate beautifully contrasts with the citrusy brightness.

Orange Dreamsicle Salad Recipe FAQs

How do I choose ripe fruits for the Orange Dreamsicle Salad?
Absolutely! For the best flavor, choose mandarin oranges that are bright and have firm skins without any dark spots. If you opt for fresh oranges, look for ones that are heavy for their size, indicating juiciness. For pineapple, a golden-yellow color with a sweet aroma at the base indicates ripeness.

How should I store the Orange Dreamsicle Salad?
Very! Cover the salad with plastic wrap or transfer it to an airtight container. It can be stored in the refrigerator for up to 3 days, but it's best enjoyed within the first couple of days for optimal freshness and flavor.

Can I freeze Orange Dreamsicle Salad?
Yes! To freeze, portion the salad into individual servings using airtight containers. You can freeze it for up to 2 months. When you're ready to enjoy it, simply transfer it to the refrigerator to thaw overnight or during the day before serving, but keep in mind that the texture may change slightly upon thawing.

What should I do if my salad looks watery?
If you notice excess moisture, it usually means that the canned fruit wasn’t drained well enough. Next time, make sure to drain your mandarin oranges and pineapple thoroughly before adding them to the mixture. If your salad is already watery, try adding a bit more instant tapioca pudding mix—it can help absorb some of that moisture and restore creaminess.

Can the Orange Dreamsicle Salad be made healthier?
Absolutely! To cater to various dietary preferences, use sugar-free options for the Jell-O and pudding mixes, and feel free to add fresh fruit such as berries or bananas for added nutrition. This way, you can enjoy the beloved flavors while keeping it lighter and healthier!

Is Orange Dreamsicle Salad suitable for pets?
No, it’s not recommended. The salad contains ingredients like Cool Whip and Jell-O that are not suitable for pets, particularly dogs and cats. Always keep the salad away from pets, as these ingredients can be harmful to them.

Orange Dreamsicle Salad

Tangy & Creamy Orange Dreamsicle Salad for Joyful Gatherings

Revive childhood memories with this Easy Orange Dreamsicle Salad, a creamy and refreshing dessert that delights everyone at gatherings.
Print Recipe Pin Recipe
Prep Time 15 minutes mins
Cook Time 7 minutes mins
Chill Time 4 hours hrs
Total Time 4 hours hrs 22 minutes mins
Servings: 8 cups
Course: Dessert
Cuisine: American
Calories: 210
Ingredients Equipment Method Nutrition Notes

Ingredients
  

For the Base
  • 1 pkg Orange Jell-O Substitution: Use sugar-free Jell-O for a lighter version.
  • 1 pkg Instant Vanilla Pudding Mix Substitution: Use a sugar-free version if desired.
  • 1 pkg Instant Tapioca Pudding Mix Essential for texture contrast.
  • 4 cups Water No substitutes.
For the Fruit
  • 1 can Mandarin Oranges Substitution: Fresh oranges can be used for a fresher taste.
  • 1 can Crushed Pineapple Substitution: Use fresh pineapple for added freshness and flavor.
For the Creaminess
  • 1 container Cool Whip Substitution: Homemade whipped cream can be used but will not hold as long.

Equipment

  • Medium saucepan
  • Spatula
  • Large serving dish

Method
 

Step-by-Step Instructions
  1. In a medium saucepan, whisk together the orange Jell-O, instant vanilla pudding mix, instant tapioca pudding mix, and 4 cups of water. Heat over medium heat, stirring continuously for about 5 to 7 minutes, until thickened. Remove from heat and allow to cool completely.
  2. Once cooled, gently fold in the Cool Whip using a spatula to create a smooth and fluffy texture.
  3. Drain the mandarin oranges and crushed pineapple thoroughly. Fold the fruit into the Jell-O and Cool Whip mixture until evenly distributed.
  4. Transfer the salad mixture into a large serving dish or individual cups. Cover and refrigerate for at least 4 hours or overnight.
  5. When ready to serve, scoop out portions and enjoy chilled.

Nutrition

Serving: 1cupCalories: 210kcalCarbohydrates: 32gProtein: 2gFat: 8gSaturated Fat: 5gCholesterol: 15mgSodium: 150mgPotassium: 200mgFiber: 1gSugar: 18gVitamin A: 500IUVitamin C: 15mgCalcium: 50mg

Notes

Ensure ingredients like Cool Whip are at room temperature for the best texture. Serve in small cups for easy distribution at gatherings.

Tried this recipe?

Let us know how it was!

Raspberry Swirl Brioche Loaf: A Sweet Festive Delight

August 20, 2025 by Grace Snow Leave a Comment

In the heart of my kitchen, the inviting aroma of freshly baked bread mingles with a hint of sweet raspberries, instantly lifting my spirits. If you're looking for a holiday baking project that combines visual appeal with delectable flavor, you have to try this Raspberry Swirl Brioche Loaf! With its tender, buttery layers and vibrant raspberry filling, this loaf is a stunning centerpiece for any festive gathering, offering both a nostalgic comfort and a delightful surprise. Not only is it naturally a crowd-pleaser, but it’s also surprisingly simple to make at home, allowing you to impress loved ones without the fuss of complex baking. Are you ready to roll up your sleeves and transform your kitchen into a bakery?

Why is this Brioche Loaf Special?

Irresistible Flavor: The perfect fusion of sweet and tangy raspberry preserves against buttery brioche makes every bite an explosion of joy.

Eye-Catching Presentation: With its vibrant swirls, it’s a show-stopper at any holiday gathering or brunch.

Versatile Pairings: Whether with coffee in the morning or as a sweet dessert, this loaf works for any occasion.

Reliable Recipe: Even novice bakers will find this easy. You can nail that perfect rise and texture every time!

Make-Ahead Friendly: Prepare it in advance and bake later, making it a time-saver on busy holiday days or gatherings.

Elevate your next celebration with this stunning Raspberry Swirl Brioche Loaf that’s sure to impress! If you love baking with fresh flavors, don’t forget to check out my tips for holiday baking to truly master your kitchen skills.

Raspberry Swirl Brioche Loaf Ingredients

For the Dough

  • All-purpose flour – Provides structure and elasticity; substitute with gluten-free flour for a gluten-free version.
  • Active dry yeast – Essential for fermentation; ensure it’s fresh for maximum rise.
  • Granulated sugar – Sweetens the dough and activates the yeast; can be replaced with a sugar alternative for fewer calories.
  • Salt – Enhances flavor and controls yeast fermentation.
  • Warm milk (about 110°F) – Activates the yeast and adds moisture; use dairy-free milk for a non-dairy option.
  • Unsalted butter – Enriches flavor and texture; substitute with margarine for dairy-free.
  • Large eggs – Provide moisture and binding; for egg-free versions, use flax eggs or applesauce.
  • Vanilla extract – Adds depth; almond extract can be used for a fun twist.
  • Lemon zest (optional) – Brightens the flavor profile; feel free to omit if desired.

For the Raspberry Filling

  • Raspberry preserves or jam – The star ingredient that provides sweet-tart excitement; try any berry jam as a substitute.
  • Cornstarch – Thickens the jam to prevent seepage; essential for maintaining loaf integrity.
  • Water – Adjusts the filling’s consistency for the perfect spreadability.

For Topping and Glaze

  • Melted butter (for brushing) – Creates a golden crust; olive oil can be used for a lighter option.
  • Powdered sugar – For the optional glaze, adding extra sweetness; substitute with powdered erythritol for a low-sugar option.
  • Lemon juice – Provides a tangy kick to the glaze, balancing the sweetness.

Dive into the joy of baking with this amazing Raspberry Swirl Brioche Loaf—the ultimate festive treat!

Step‑by‑Step Instructions for Raspberry Swirl Brioche Loaf

Step 1: Prepare the Dough
In a large mixing bowl, combine 2¼ teaspoons of active dry yeast, ½ cup of warm milk (about 110°F), and 2 tablespoons of granulated sugar. Allow this mixture to sit for about 5 to 10 minutes until it becomes frothy. Then, add 3½ cups of all-purpose flour, 1 teaspoon of salt, ½ cup of softened unsalted butter, 3 large eggs, 1 teaspoon of vanilla extract, and optional lemon zest. Mix until combined and knead the dough until smooth for about 10-12 minutes.

Step 2: First Rise
Place the dough in a lightly greased bowl, cover it with a clean kitchen towel or plastic wrap, and let it rise in a warm area for 1 to 1.5 hours. It should double in size and feel soft and pillowy. A warm oven, turned off with the light on, makes a perfect environment for this first rise.

Step 3: Make Raspberry Filling
While the dough is rising, prepare the raspberry filling. In a medium saucepan over low heat, combine 1 cup of raspberry preserves, 1 tablespoon of cornstarch, and 2 tablespoons of water. Stir continuously until the mixture thickens, which takes about 5 minutes. Once thickened, remove it from heat and let it cool to room temperature.

Step 4: Shape the Loaf
After the dough has risen, punch it down gently to release air bubbles. Roll the dough out on a lightly floured surface into a large rectangle, approximately 12x18 inches. Spread the cooled raspberry filling evenly over the surface, leaving a small border. Roll the dough tightly into a log, slice it lengthwise down the center, and twist the two halves together.

Step 5: Second Rise
Transfer the twisted loaf into a greased 9x5-inch loaf pan. Cover with a kitchen towel and let it rise again for 30-45 minutes until it has puffed up. The loaf should fill the pan and look fluffy, preparing it for the warmth of the oven.

Step 6: Bake
Preheat your oven to 350°F (175°C). Once the loaf has risen, brush the top with melted butter for a golden crust. Bake for 35-40 minutes, covering the loaf with foil for the last 10 minutes to prevent over-browning. The loaf is done when it is golden brown and sounds hollow when tapped.

Step 7: Cool and Glaze
Remove the Raspberry Swirl Brioche Loaf from the oven and allow it to cool in the pan for about 10 minutes. Then, transfer it to a wire rack. To make the glaze, mix 1 cup of powdered sugar with a splash of lemon juice and a tablespoon of milk. Drizzle this over the cooled loaf for a sweet finishing touch.

What to Serve with Raspberry Swirl Brioche Loaf

Indulge your senses by pairing this delightful loaf with complementary flavors and textures that enhance its charm.

  • Creamy Mashed Potatoes: The rich, buttery flavor of mashed potatoes creates a divine contrast to the fruity sweetness of the brioche.

  • Fresh Fruit Salad: A vibrant mix of seasonal fruits adds brightness and a refreshing sweetness, perfect for breakfast or brunch.

  • Classic Coffee: A warm, aromatic cup balances the sweet-tartness of the raspberry, making for a cozy pairing to enjoy any time of day.

  • Whipped Cream: Dollop some lightly sweetened whipped cream on the side, enhancing every bite while adding a luscious creaminess.

  • Dark Chocolate Drizzle: A simple drizzle of melted dark chocolate can elevate the brioche's flavor profile, mirroring the sweetness of the raspberries.

  • Vanilla Ice Cream: Serve each slice warm with a scoop of vanilla ice cream for a hot-and-cold dessert experience that feels indulgent and festive.

How to Store and Freeze Raspberry Swirl Brioche Loaf

Room Temperature: If you plan to enjoy your Raspberry Swirl Brioche Loaf within 2 days, store it wrapped in foil or in an airtight container at room temperature to keep it soft.

Fridge: To extend freshness, refrigerate the loaf for up to 5 days, wrapped tightly to prevent drying out. Allow it to reach room temperature before serving for the best flavor and texture.

Freezer: For longer storage, freeze the loaf after completely cooling. Wrap it tightly in plastic wrap followed by aluminum foil, and it will keep well for up to 3 months.

Reheating: Thaw overnight in the fridge and allow it to rise at room temperature before reheating. Warm gently in the oven at 350°F for about 10-15 minutes to restore its fresh-baked goodness.

Make Ahead Options

The Raspberry Swirl Brioche Loaf is a fantastic recipe for meal prep enthusiasts looking to save time on busy days! You can refrigerate the dough after the first rise for up to 24 hours, allowing the flavors to deepen. Simply punch down the dough and cover it well before refrigerating. In addition, the raspberry filling can be made in advance and kept in the fridge for up to 3 days—just ensure it’s cooled and stored in an airtight container. When ready to bake, let the dough come to room temperature before shaping and allowing it to rise again. You'll have a stunning loaf that’s just as delicious and impressive, saving you time without sacrificing quality!

Raspberry Swirl Brioche Loaf Variations

Feel free to sprinkle your own creative twist on this delightful loaf, making it truly yours!

  • Gluten-Free: Substitute all-purpose flour with a gluten-free flour blend to enjoy this treat without gluten.
  • Alternative Fillings: Swap raspberry preserves for strawberry or blackberry jam to experiment with new flavors.
  • Nutty Addition: Add chopped walnuts or pecans for a delightful crunch that complements the soft brioche.
  • Spiced Depth: Incorporate spices like cinnamon or nutmeg into the dough for a cozy, warm aroma and taste.
  • Dairy-Free: Use coconut oil instead of butter and dairy-free milk to whip up a vegan version of this wonderful loaf. Many people love the rich flavor that coconut oil adds!
  • Citrusy Brightness: Stir in orange zest along with the lemon for an extra zesty kick in both the dough and glaze.
  • Savory Twist: Include finely chopped herbs like rosemary or thyme for a unique savory brioche that pairs beautifully with cheese.
  • Decadent Topping: Top with a cream cheese glaze instead of a powdered sugar glaze for a rich, creamy finish that elevates every bite.

No matter how you choose to customize your Raspberry Swirl Brioche Loaf, each variation opens up a world of delicious possibilities. If you're eager for more fun tips and suggestions, don't miss my guide on holiday baking to elevate your culinary experience this season!

Expert Tips for Raspberry Swirl Brioche Loaf

  • Fresh Yeast: Always ensure your active dry yeast is fresh and hasn’t expired for the best rise and texture in your Raspberry Swirl Brioche Loaf.

  • Prevent Leakage: When spreading the raspberry filling, leave a small border of dough to avoid overflow during baking. This will keep the swirls intact.

  • Cooling the Filling: Chill the raspberry filling slightly after mixing; this makes it less runny and easier to handle while shaping the loaf.

  • Monitor Baking: Keep an eye on the loaf during the last 10 minutes of baking; loosely cover with foil to prevent over-browning while maintaining that perfect golden crust.

  • Flavor Twists: For variations, feel free to swap out raspberry preserves with strawberry or blueberry jam for a delightful twist on this classic loaf!

Raspberry Swirl Brioche Loaf Recipe FAQs

What kind of yeast should I use for this recipe?
I recommend using active dry yeast for the best results; just make sure it's fresh! If you’re not sure, you can activate it by combining it with warm milk and sugar to check for fizzing—this indicates it’s good to go!

How should I store my Raspberry Swirl Brioche Loaf?
For the freshest experience, store your loaf at room temperature wrapped in foil or in an airtight container for up to 2 days. If it's not going to be eaten right away, refrigeration works too—just wrap tightly and it will last up to 5 days.

Can I freeze Raspberry Swirl Brioche Loaf?
Absolutely! Once cooled, wrap your loaf tightly in plastic wrap followed by aluminum foil. It can be frozen for up to 3 months. When you're ready to enjoy it, thaw it overnight in the fridge, then let it rise at room temperature before gently reheating in the oven at 350°F for about 10-15 minutes.

What can I do if my dough isn't rising properly?
The most common reason for dough not rising is using expired yeast. Always check your yeast's expiration date and consider a warm environment for rising. If your dough hasn't doubled after 1.5 hours, try moving it to a warmer spot (like a turned-off oven with the light on) or give it a little more time.

Are there any dietary considerations for this recipe?
Yes! If you want it to be dairy-free, substitute the butter with margarine or coconut oil, and use dairy-free milk. For an egg-free version, you can swap the eggs for flax eggs (1 tablespoon ground flaxseed + 2.5 tablespoons water = 1 egg). Also, ensure your raspberry preserves are free from allergens if you have specific dietary needs.

Can I use a different fruit filling?
Very! If raspberry doesn’t suit your fancy, you can experiment with strawberry or blueberry jam instead of raspberry preserves for a delightful twist. Just make sure the consistency is similar; overly runny jam might make your loaf difficult to shape!

Raspberry Swirl Brioche Loaf

Raspberry Swirl Brioche Loaf: A Sweet Festive Delight

Experience the joy of baking with this Raspberry Swirl Brioche Loaf, a festive treat combining sweet raspberry filling and tender brioche layers.
Print Recipe Pin Recipe
Prep Time 1 hour hr
Cook Time 40 minutes mins
Rising Time 2 hours hrs
Total Time 3 hours hrs 40 minutes mins
Servings: 10 slices
Course: Dessert
Cuisine: American
Calories: 250
Ingredients Equipment Method Nutrition Notes

Ingredients
  

For the Dough
  • 3.5 cups All-purpose flour Can be substituted with gluten-free flour
  • 2.25 teaspoons Active dry yeast Ensure freshness for maximum rise
  • 0.5 cups Granulated sugar Optional sugar alternatives available
  • 1 teaspoon Salt
  • 0.5 cups Warm milk About 110°F, can use dairy-free milk
  • 0.5 cups Unsalted butter Substitutable with margarine for dairy-free
  • 3 large Eggs Alternatives include flax eggs or applesauce
  • 1 teaspoon Vanilla extract Almond extract can be used instead
  • Lemon zest Optional
For the Raspberry Filling
  • 1 cup Raspberry preserves or jam Any berry jam can be a substitute
  • 1 tablespoon Cornstarch Essential for maintaining loaf integrity
  • 2 tablespoons Water
For Topping and Glaze
  • 2 tablespoons Melted butter Olive oil is a lighter option
  • 1 cup Powdered sugar Low-sugar option can be used
  • 1 tablespoon Lemon juice

Equipment

  • Mixing Bowl
  • Loaf pan
  • Saucepan
  • wire rack

Method
 

Dough Preparation
  1. Combine active dry yeast, warm milk, and granulated sugar. Let sit for 5-10 minutes until frothy.
  2. Add flour, salt, butter, eggs, vanilla extract, and optional lemon zest. Mix and knead until smooth, about 10-12 minutes.
First Rise
  1. Place the dough in a greased bowl, cover, and let it rise in a warm area for 1-1.5 hours until doubled.
Raspberry Filling
  1. In a saucepan, combine raspberry preserves, cornstarch, and water. Stir over low heat until thickened, about 5 minutes.
  2. Remove from heat and cool to room temperature.
Shaping the Loaf
  1. Punch down the dough, roll into a rectangle, spread raspberry filling, roll tightly, slice, and twist.
Second Rise
  1. Place the twisted loaf in a greased pan, cover, and let rise for 30-45 minutes until puffy.
Bake
  1. Preheat the oven to 350°F. Brush with melted butter, bake for 35-40 minutes, covering with foil if needed.
Cool and Glaze
  1. Cool in the pan for 10 minutes, then transfer to a wire rack. Drizzle with glaze made from powdered sugar and lemon juice.

Nutrition

Serving: 1sliceCalories: 250kcalCarbohydrates: 34gProtein: 4gFat: 11gSaturated Fat: 7gCholesterol: 50mgSodium: 200mgPotassium: 160mgFiber: 1gSugar: 8gVitamin A: 500IUVitamin C: 1mgCalcium: 50mgIron: 1mg

Notes

For best results, ensure your yeast is fresh. Control filling amounts to prevent leakage during baking. Chill filling slightly for easier handling.

Tried this recipe?

Let us know how it was!

Irresistible Chocolate Truffles - 3 Ingredients of Pure Joy

August 20, 2025 by Grace Snow Leave a Comment

The moment I unwrapped those homemade Chocolate Truffles, a wave of nostalgia hit me. With just three simple ingredients, this recipe beckons with promises of velvety goodness and customizable delight. Whether you're preparing an indulgent treat for a cozy night in or surprising friends with a thoughtful gift, these truffles deliver on both taste and ease. They are not only incredibly quick to whip up but can also cater to various dietary preferences thanks to their adaptable ingredients. Imagine the joy of rolling these little bites of heaven in your favorite toppings, like crushed nuts or colorful sprinkles, making each batch uniquely yours. Ready to dive into a world of chocolatey bliss and creativity in the kitchen? Let’s get started!

Why are these truffles a must-try?

Simplicity at Its Best: With just three ingredients, these Chocolate Truffles are incredibly easy to make.

Customizable Delight: Tailor them to your taste by substituting the chocolate or toppings, whether you prefer vegan chocolate or a sprinkle of crushed nuts.

Crowd-Pleasing Treat: Perfect for gifting or celebrations, they’ll impress friends and family at any gathering.

Decadent Creaminess: Each truffle is rich and creamy, creating a luxurious experience that feels indulgent without a lot of effort—just wait until you try them with a side of Homemade Hot Chocolate!

Quick and Versatile: These truffles can be whipped up in no time, making them a go-to recipe for spontaneous cravings or events.

Chocolate Truffles Ingredients

For the Truffle Base
• Semi-Sweet Chocolate Chips – The star ingredient providing rich flavor and smooth texture; consider using vegan chocolate chips for a dairy-free option.
• Sweetened Condensed Milk (14 oz can) – This ingredient binds the truffles together and adds sweetness; opt for sweetened condensed coconut milk for a dairy-free twist.

For the Coating
• Walnut Pieces (¼ cup) – These offer a delightful nutty crunch; feel free to swap with chopped nuts, cocoa powder, or dried fruits for variety.

Enjoy crafting your own delicious Chocolate Truffles and don’t forget to experiment with toppings and variations to make them uniquely yours!

Step‑by‑Step Instructions for Chocolate Truffles

Step 1: Melt the Chocolate
In a microwave-safe bowl, combine 1 cup of semi-sweet chocolate chips. Heat in the microwave at 20-second intervals, stirring between each session until the chocolate is completely melted and smooth, which should take about 1-2 minutes. Be careful not to overheat, as burnt chocolate will lose its silky texture.

Step 2: Mix in Condensed Milk
Once your chocolate is melted, immediately stir in a 14 oz can of sweetened condensed milk. Mix thoroughly until the two ingredients are fully incorporated, creating a glossy mixture. The chocolate should look rich and creamy. Afterward, cover the bowl and refrigerate the mixture for at least 30 minutes, or until it firms up.

Step 3: Prepare Your Toppings
While the chocolate mixture is chilling, process ¼ cup of walnut pieces in a food processor until they resemble small crumbs. This crunchy coating will enhance your Chocolate Truffles, adding texture and flavor. Set the crushed walnuts aside for easy access once the chocolate base is ready.

Step 4: Shape the Truffles
After the mixture has cooled in the refrigerator, remove it and use a 1-ounce cookie scoop or your hands to portion out the chocolate dough. Roll each portion into a smooth ball, creating a uniform size for your truffles. The warmth from your hands will make this process easier, yielding a perfect round shape.

Step 5: Coat the Truffles
Next, gently roll each chocolate ball in the processed walnut crumbs until completely coated. Ensure that all sides are covered, allowing the truffles to gain that delightful crunchy texture. You can also have fun here by using different toppings like crushed nuts or cocoa powder if you prefer variety.

Step 6: Final Chill
Once all the truffles are rolled and coated, place them on a baking sheet lined with parchment paper. Refrigerate for an additional 15-20 minutes to set. They will firm up nicely, creating the ideal texture for your indulgent Chocolate Truffles. Once they are set, your homemade treats are ready to be shared or stored!

Expert Tips for Chocolate Truffles

• Choose Quality Chocolate: Using high-quality semi-sweet chocolate chips will elevate the flavor of your truffles significantly, making each bite a rich delight.

• Avoid Overheating: When melting the chocolate, be vigilant to avoid overheating. Stir frequently and choose shorter heating intervals to maintain a smooth texture for your Chocolate Truffles.

• Chill for Firmness: Refrigerate the chocolate mixture sufficiently before shaping. Chilling helps achieve the perfect consistency, allowing easy rolling into balls without sticking to your hands.

• Explore Toppings: Don’t hesitate to get creative with coatings! Try crushed cookies, colorful sprinkles, or shredded coconut for a fun twist on your Chocolate Truffles.

• Use Different Bindings: For a dairy-free option, substitute sweetened condensed milk with sweetened condensed coconut milk. This keeps the dessert delicious while accommodating dietary preferences.

• Keep Portions Consistent: Use a cookie scoop to ensure each truffle is the same size, allowing for even coating and a professional look that impresses everyone!

Make Ahead Options

These Chocolate Truffles are perfect for meal prep enthusiasts! You can mix the chocolate and sweetened condensed milk up to 24 hours in advance and refrigerate it until you’re ready to roll them into truffles. Additionally, if desired, you can prepare the walnut coating (or other toppings) ahead of time and store them in an airtight container for up to three days. Just remember to keep the mixture tightly covered in the refrigerator to maintain its rich flavor and creamy texture. When you’re ready to serve, simply scoop, roll, and coat the truffles as instructed, and you’ll have a delicious treat with minimal effort, ready to impress!

Chocolate Truffles Variations & Substitutions

Feel free to personalize these Chocolate Truffles, creating your own delightful versions that satisfy every sweet tooth!

  • Dairy-Free: Swap semi-sweet chocolate chips for vegan chocolate chips and sweetened condensed milk for sweetened condensed coconut milk.

  • White Chocolate Twist: Use white chocolate chips instead of semi-sweet for a creamy, sweet flavor that contrasts beautifully with the nutty coating.

  • Nut-Free Option: Replace walnuts with crushed graham crackers or cocoa powder to avoid allergens while maintaining a delightful crunch.

  • Flavor Infusion: Add a teaspoon of your favorite extract, such as mint or orange, to the chocolate mixture for an enhanced flavor experience.

  • Crunchy Alternatives: Roll the truffles in crushed pretzels or caramelized nuts instead of walnuts for a sweet-salty surprise!

  • Spicy Kick: For a bit of heat, sprinkle in a pinch of cayenne pepper or chili powder to the chocolate mixture before chilling.

  • Colorful Toppings: Experiment with fun coatings like colorful sprinkles or edible glitter to make your truffles festive and visually appealing. Picture a platter adorned with these beauties, just waiting for an eager crowd!

  • Fruit Fusion: Incorporate finely chopped dried fruits, such as cranberries or apricots, into the chocolate mix for a chewy, fruity surprise that adds a lovely burst of flavor.

Get creative and make these truffles your new go-to treat. For another delicious chocolatey delight, you might enjoy German Chocolate Poke or try incorporating some rich flavor into your adventures with Homemade Hot Chocolate!

What to Serve with 3-Ingredient Easy Chocolate Truffles

Indulge in a symphony of flavors by pairing these rich truffles with delightful accompaniments that elevate every bite.

  • Homemade Hot Chocolate: The ultimate pairing, this warm drink's chocolatey depth beautifully complements the truffles’ creamy sweetness.

  • Fresh Berries: Bright and tart, berries like raspberries or strawberries provide a refreshing contrast that balances the truffles’ richness. Their vibrant color also enhances the presentation.

  • Coffee or Espresso: The bold notes of coffee harmonize beautifully with the chocolate, enhancing the truffles’ complex flavors. Whether served hot or as an iced drink, it's a perfect match.

  • Whipped Cream: Light and airy, a dollop of freshly whipped cream adds a luscious texture that harmonizes with the truffles’ creamy ganache. Consider dusting with cocoa powder for a chic look.

  • Nutty Biscotti: Their crisp texture makes an enticing contrast, and the nutty flavors echo the walnut coating on the truffles, creating a delightful pairing.

  • Coconut Milk Ice Cream: This dairy-free dessert plays well with the chocolaty richness while offering a cool, creamy counterpoint. A scoop adds a delightful chill to your chocolate experience.

Enhance your Chocolate Truffles feast with these appetizing companions, ensuring a truly memorable dessert experience!

Storage Tips for Chocolate Truffles

Room Temperature: Store chocolate truffles in an airtight container at room temperature for up to 3-4 days, ensuring they remain fresh and flavorful.

Fridge: For extended freshness, keep the truffles in the fridge for up to 2 weeks. Just remember to let them sit at room temperature for a few minutes before enjoying for the best texture.

Freezer: If you want to save these delightful treats for later, freeze the truffles for up to 3 months. Place them in a single layer on a baking sheet until firm, then transfer to a freezer-safe bag or container.

Reheating: To thaw, simply transfer the frozen chocolate truffles to the fridge overnight before serving. This gentle thawing method retains their rich taste and decadent texture.

Chocolate Truffles Recipe FAQs

How do I choose the right chocolate for my truffles?
Absolutely! Selecting quality chocolate is key to delicious truffles. Look for semi-sweet chocolate chips with a cocoa percentage between 60-70% for rich flavor. If you want a dairy-free option, vegan chocolate chips are a great alternative. Always remember, the better the chocolate, the more indulgent your truffles will be!

How should I store leftover chocolate truffles?
For sure! Store chocolate truffles in an airtight container at room temperature for up to 3-4 days. If you want to keep them longer, refrigerate for up to 2 weeks. Just make sure to let them sit at room temperature for a few minutes before eating, as this helps them regain their texture.

Can I freeze chocolate truffles, and how do I do it?
Yes, definitely! To freeze chocolate truffles, place them in a single layer on a baking sheet until they are firm—this usually takes about 1-2 hours. Then, transfer the firm truffles to a freezer-safe bag or container, and they will keep well for up to 3 months. When you’re ready to enjoy them, simply thaw them overnight in the fridge.

What should I do if my chocolate mixture is too thick?
Not a problem! If your chocolate mixture thickens too much after chilling, gently stir in a teaspoon of warm milk or dairy-free alternative to loosen it. If you need to, you can also place it back in the microwave for a few seconds to achieve a smoother consistency. Just be cautious not to overheat!

Are there any allergy considerations with these truffles?
Very much so! This recipe typically contains chocolate and condensed milk, which can pose issues for individuals with dairy allergies. To accommodate dietary needs, opt for dairy-free chocolate and use sweetened condensed coconut milk. Always check labels for potential allergens, especially if serving to others.

Can I customize the flavors of my chocolate truffles?
The more the merrier! You can absolutely customize your chocolate truffles. Consider using white chocolate chips for a different taste or adding flavor extracts like vanilla or peppermint to the chocolate mixture. For toppings, get creative with crushed nuts, sprinkles, or even matcha powder for a unique twist!

Chocolate Truffles

Irresistible Chocolate Truffles - 3 Ingredients of Pure Joy

These Chocolate Truffles are a simple, customizable treat made with just three ingredients, perfect for any occasion.
Print Recipe Pin Recipe
Prep Time 10 minutes mins
Cook Time 2 minutes mins
Chilling Time 30 minutes mins
Total Time 42 minutes mins
Servings: 10 truffles
Course: Dessert
Cuisine: American
Calories: 80
Ingredients Equipment Method Nutrition Notes

Ingredients
  

For the Truffle Base
  • 1 cup Semi-Sweet Chocolate Chips Consider using vegan chocolate chips for a dairy-free option.
  • 1 14 oz can Sweetened Condensed Milk Opt for sweetened condensed coconut milk for a dairy-free twist.
For the Coating
  • 0.25 cup Walnut Pieces Feel free to swap with chopped nuts, cocoa powder, or dried fruits for variety.

Equipment

  • Microwave-safe bowl
  • Food Processor
  • Cookie Scoop
  • Baking Sheet
  • Parchment Paper

Method
 

Preparation Steps
  1. In a microwave-safe bowl, combine 1 cup of semi-sweet chocolate chips. Heat in the microwave at 20-second intervals, stirring until melted and smooth.
    Chocolate Truffles
  2. Once your chocolate is melted, stir in the 14 oz can of sweetened condensed milk until fully incorporated.
    Chocolate Truffles
  3. Process ¼ cup of walnut pieces in a food processor until they resemble small crumbs.
    Chocolate Truffles
  4. Use a 1-ounce cookie scoop or your hands to portion out the chocolate dough and roll each into a smooth ball.
    Chocolate Truffles
  5. Gently roll each chocolate ball in the processed walnut crumbs until completely coated.
    Chocolate Truffles
  6. Place the truffles on a baking sheet lined with parchment paper and refrigerate for an additional 15-20 minutes to set.
    Chocolate Truffles

Nutrition

Serving: 1truffleCalories: 80kcalCarbohydrates: 10gProtein: 1gFat: 4gSaturated Fat: 2gPolyunsaturated Fat: 1gMonounsaturated Fat: 1gSodium: 10mgPotassium: 40mgFiber: 1gSugar: 7gCalcium: 2mgIron: 2mg

Notes

Experiment with different toppings like crushed cookies, colorful sprinkles, or shredded coconut for unique variations.

Tried this recipe?

Let us know how it was!

Delicious Cherry Blondies: Easy Fudgy Treats for Everyone

August 19, 2025 by Grace Snow Leave a Comment

As I stood in my kitchen, the sweet aroma of browned butter wafted through the air, instantly whisking my thoughts to the cozy vibes of childhood baking. That's when I knew it was time to whip up a batch of Cherry Blondies with White Chocolate and Almonds. This simple recipe turns the classic dessert into a delightful experience, combining fudgy, chewy goodness with the sweet-tart zing of cherry pie filling. Plus, they come together in just 10 minutes of hands-on prep, making them a perfect choice for anyone looking to indulge in a homemade treat without the hassle. Whether you’re planning a gathering or just need a little something sweet for yourself, these budget-friendly bars are sure to hit the spot. Curious about how to make this easy dessert? Let’s dive right in!

Why are Cherry Blondies so irresistible?

Quick Prep Time: These blondies come together in just 10 minutes of hands-on time, making them a breeze for busy bakers.

Fudgy Texture: The chewy, fudgy consistency resembles brownies, satisfying any dessert lover's cravings.

Flavorful Bite: With white chocolate and almond notes complementing the tangy cherry pie filling, each bite is a delightful explosion of flavor!

Versatile Treat: Customize with different fruits or nuts to keep things exciting, ensuring this recipe never gets old.

Crowd-Pleaser: Whether for a family gathering or a casual get-together, these Cherry Blondies will disappear in no time. And if you’re in the mood for another fruity dish, consider making a Chocolate Cherry Smoothie to round out your dessert repertoire.

Cherry Blondies Ingredients

• Note: Get ready to gather your ingredients for these Doughy Cherry Blondies.

For the Blondie Batter

  • All-Purpose Flour – Provides structure; can be swapped with gluten-free flour for those with dietary restrictions.
  • Baking Powder – Acts as a leavening agent to give the blondies a delightful rise; don’t substitute if using self-rising flour.
  • Salt – Enhances all the flavors; feel free to reduce if you’re cutting back on sodium.
  • Large Egg – Binds ingredients and adds moisture; a flax egg can replace it for a vegan version.
  • Vanilla Extract – Infuses a warm flavor; always opt for pure vanilla extract for the best taste.
  • Almond Extract – Adds a nutty aroma; use sparingly or omit if you'd like to keep it simple.
  • Cherry Pie Filling – Provides that sweet-tart essence with zero fuss; fresh cherries work great, too—just dust them with cornstarch.
  • Salted Butter – Brings richness and moisture; unsalted butter is fine if you prefer, just add a pinch of salt.
  • Granulated Sugar – Helps sweeten and stabilize the texture; brown sugar can offer extra moisture if substituted.
  • Brown Sugar – Enhances chewiness and adds depth; you can use either light or dark brown sugar interchangeably.
  • White Chocolate Chips – Contributes sweetness and creaminess; you might swap them for dark or milk chocolate chips to change the flavor profile.
  • Slivered Almonds – Provides a crunchy texture; feel free to use any nut or skip them for nut-free blondies.

These ingredients come together to create an unforgettable batch of Cherry Blondies that will keep your taste buds dancing!

Step‑by‑Step Instructions for Cherry Blondies

Step 1: Preheat and Prepare the Dish
Begin by preheating your oven to 350°F (175°C). While it warms, take an 8x8” baking dish and grease it lightly with butter or cooking spray. For easy removal later, line the bottom and sides with parchment paper, ensuring you leave some overhang. This little step will make serving your Cherry Blondies a breeze!

Step 2: Mix the Dry Ingredients
In a medium mixing bowl, whisk together 1¾ cups of all-purpose flour, ½ teaspoon of baking powder, and ¼ teaspoon of salt. Ensure the mixture is well combined, which will help your blondies rise perfectly in the oven. Set this bowl aside as you will incorporate it later into the moist ingredients.

Step 3: Combine the Wet Ingredients
In another bowl, whisk together 1 large egg, 1 teaspoon of vanilla extract, ½ teaspoon of almond extract, and ½ cup of cherry pie filling until blended. The cherry filling will add sweetness and moisture, enhancing the overall texture of your Cherry Blondies, so give it a good mix to incorporate everything smoothly.

Step 4: Brown the Butter
Now, take a medium saucepan over medium heat and melt 1½ sticks of salted butter, stirring continuously. Keep an eye on it as it melts for about 5-8 minutes; you want to achieve a golden brown color with a nutty aroma. This step is crucial as it will deepen the flavor of your Cherry Blondies.

Step 5: Combine Butter and Sugars
Once the butter is browned, remove it from heat and pour it into a mixing bowl. Add ½ cup of granulated sugar and 1 cup of brown sugar, whisking until well combined. The sugars will dissolve into the warm butter, creating a smooth, inviting mixture that’s perfect for your Cherry Blondies.

Step 6: Mix Everything Together
Next, add the wet cherry mixture from Step 3 into the butter-sugar combination, stirring until fully combined. Gradually add the flour mixture from Step 2, using a spatula to fold it in gently. Aim for a thick batter that showcases the delicious chunks of cherry and sweetness throughout.

Step 7: Fold in Chocolate and Nuts
Gently fold in ¼ cup of white chocolate chips and ¼ cup of slivered almonds into your batter until evenly distributed. This will introduce lovely pockets of sweetness and crunch in your Cherry Blondies. Once everything is well combined, pour the batter into your prepared baking dish, spreading it evenly across the surface.

Step 8: Bake the Blondies
Place the baking dish in the preheated oven and bake for 50-55 minutes. Keep an eye on them towards the end; you want a toothpick inserted into the center to come out clean, indicating that your Cherry Blondies are ready. The edges may look slightly golden, and the center will be set yet soft.

Step 9: Cool and Slice
Once baked, remove your Cherry Blondies from the oven and let them cool in the pan for about 20 minutes. This helps them maintain their chewy texture. After cooling, use the parchment overhang to lift the blondies out of the pan, then slice them into 9 squares, revealing the gooey interior that pairs perfectly with the chewiness.

How to Store and Freeze Cherry Blondies

Fridge: Store your cooled Cherry Blondies in an airtight container for up to 3-4 days. This helps maintain their chewy texture while keeping them fresh and delightful.

Freezer: For longer storage, freeze the blondies by wrapping them individually in foil or parchment. They can last for up to 3 months, making it easy to have a sweet treat ready at any time.

Reheating: To enjoy your frozen Cherry Blondies, simply thaw them in the fridge overnight. Reheat in the microwave for a few seconds or warm in the oven for a couple of minutes to restore that fudgy goodness.

Grab-and-Go Treats: When storing, consider slicing them first for quick grab-and-go treats. This way, you can easily satisfy your sweet cravings any day!

What to Serve with Fudgy Cherry Blondies

Imagine sinking your teeth into a rich, fudgy blondie, and pairing it with delightful accompaniments that elevate the experience to heavenly.

  • Vanilla Ice Cream: The creamy sweetness of vanilla ice cream contrasts beautifully with the cherry tartness, creating a harmonious balance of flavors.

  • Whipped Cream: A dollop of whipped cream adds lightness and a delicate touch, enhancing the overall richness of your dessert. You can even sprinkle a little cinnamon or cocoa on top for an extra kick!

  • Fresh Berries: A side of fresh raspberries or blueberries provides a refreshing burst, complementing the cherry filling perfectly while adding a pop of color to your plate.

  • Chocolate Sauce: Drizzling warm chocolate sauce over each blondie intensifies the dessert's sweetness, inviting indulgence with every bite.

  • Coffee or Espresso: A warm cup of coffee or espresso pairs splendidly, the bold flavors cutting through the blondie's richness and prolonging the delightful experience.

  • Almond Milkshake: For a fun twist, blend almond milk, ice cream, and almond extract for an almond milkshake that echoes the nutty notes in the blondies.

  • Caramel Sauce: Drizzle melted caramel over your blondies for a decadent touch that introduces a luscious, buttery sweetness, making each bite even more dreamy.

  • Cheesecake Fluff: Serve a light, fluffy cheesecake dip on the side, bringing a tangy twist that pairs beautifully with the sweet, fudgy blondies.

Pairing each of these delightful sides with your Cherry Blondies can transform dessert time into a mood-lifting moment, perfect for sharing with family or savoring solo.

Make Ahead Options

These Cherry Blondies are perfect for meal prep enthusiasts looking to save time! You can prepare the blondie batter up to 24 hours in advance, storing it in an airtight container in the refrigerator. To maintain their delicious texture, be sure to cover the bowl tightly to prevent drying out. When you're ready to bake, simply follow Steps 8 and 9 of the recipe, pouring the chilled batter into the prepared baking dish and baking as instructed. This way, you'll have fresh, fudgy Cherry Blondies hot out of the oven, effortlessly ready to impress your family and friends! Enjoy the convenience without sacrificing flavor!

Expert Tips for Cherry Blondies

  • Butter Browning: Keep a close eye on the butter while browning to prevent it from burning; look for a nutty aroma and golden color.

  • Chewy vs. Cake-like: Remember, these Cherry Blondies are meant to be chewy, not cake-like. Don’t overbake for the perfect fudgy texture!

  • Cooling Time: Allow the blondies to cool in the pan for at least 20 minutes to set properly, ensuring easier slicing and that delightful gooeyness.

  • Storage Tips: Store your cooled Cherry Blondies in an airtight container in the fridge for up to 3-4 days, or freeze them for a delightful treat later on.

  • Ingredient Swaps: Feel free to experiment by substituting different nuts or fruits in the recipe; this keeps your Cherry Blondies exciting every time you make them!

Cherry Blondies Variations & Substitutions

Get ready to unleash your creativity in the kitchen! These delightful Cherry Blondies invite an array of tempting variations that will elevate your baking experience.

  • Fruit Swap: Replace cherry pie filling with fresh blueberries or raspberries for a different fruity punch.
  • Nuts Change: Use walnuts or pecans instead of slivered almonds for a new texture and flavor combination.
  • Dairy-Free Delight: Substitute the butter with coconut oil and use dairy-free chocolate chips to create a vegan version.
  • Flavor Burst: Add a tablespoon of orange or lemon zest to the batter for a refreshing citrus twist.
  • Chocolate Lovers: Swap white chocolate chips for dark chocolate or milk chocolate chips to deepen that sweet richness.
  • Gluten-Free Option: Utilize a gluten-free flour blend to make these scrumptious blondies accessible for gluten-sensitive friends.
  • Caramel Drizzle: After baking, drizzle a homemade or store-bought caramel sauce on top for added sweetness and richness.
  • Nut-Free: Omit the almonds entirely, or replace them with sunflower seeds for a nut-free treat that everyone can enjoy.

Remember, the possibilities are endless! Have fun experimenting with your own variations, and while you're at it, you might find inspiration for other delicious desserts like a warm slice of Cherry Clafoutis French or a refreshing Chocolate Cherry Smoothie. Enjoy your culinary journey!

Cherry Blondies Recipe FAQs

How do I select the best cherry pie filling?
When choosing cherry pie filling, look for a brand that uses whole cherries without too much added sugar. If you can find one with minimal preservatives, that’s even better! Alternatively, using fresh pitted cherries is delightful—just remember to coat them lightly in cornstarch to prevent excess moisture in the blondies.

What’s the best way to store Cherry Blondies?
Store your cooled Cherry Blondies in an airtight container in the fridge for up to 3-4 days. This will help maintain their soft, chewy texture while keeping them fresh. If you notice any dark spots or unusual odors, it’s best to discard them.

Can I freeze Cherry Blondies, and how?
Absolutely! To freeze your Cherry Blondies, wrap each square individually in foil or parchment paper before placing them in a freezer-safe bag or container. They can last up to 3 months in the freezer. When you're ready to enjoy them, simply thaw in the fridge overnight and heat in the microwave or oven for a few moments for that fresh-out-of-the-oven taste!

What should I do if my blondies are too dry?
If your Cherry Blondies turn out dry, it might be due to overbaking or using too much flour. To ensure a fudgier texture next time, follow the baking times closely and check for doneness using a toothpick—just a few moist crumbs will indicate they’re perfectly baked! Also, consider adding a bit more cherry filling for added moisture.

Are there any dietary restrictions with Cherry Blondies?
These Cherry Blondies can easily be made vegetarian and can be adjusted for vegan diets by using a flax egg and dairy-free butter. If you or your guests have nut allergies, simply omit the slivered almonds or replace them with seeds like sunflower or pumpkin seeds for added crunch without the risk!

Can I use different flavors or fruits in this recipe?
Very much! Feel free to swap the cherry pie filling for other fruits like blueberries or raspberries for a delightful twist. You can also mix and match nuts, using pecans or walnuts instead of slivered almonds. This versatility allows you to keep experimenting with different flavor profiles in each batch of Cherry Blondies while creating a new favorite!

Cherry Blondies

Delicious Cherry Blondies: Easy Fudgy Treats for Everyone

Cherry Blondies are a delightful dessert, combining fudgy, chewy goodness with the sweet-tart zing of cherry pie filling.
Print Recipe Pin Recipe
Prep Time 10 minutes mins
Cook Time 55 minutes mins
Cooling Time 20 minutes mins
Total Time 1 hour hr 25 minutes mins
Servings: 9 squares
Course: Dessert
Cuisine: American
Calories: 200
Ingredients Equipment Method Nutrition Notes

Ingredients
  

For the Blondie Batter
  • 1¾ cups all-purpose flour Can swap for gluten-free flour.
  • ½ teaspoon baking powder Don't substitute if using self-rising flour.
  • ¼ teaspoon salt Reduce if cutting back on sodium.
  • 1 large egg A flax egg can replace it for vegan.
  • 1 teaspoon vanilla extract Opt for pure for best taste.
  • ½ teaspoon almond extract Use sparingly or omit.
  • ½ cup cherry pie filling Fresh cherries work great, dust with cornstarch.
  • 1½ sticks salted butter Unsalted is fine; add a pinch of salt.
  • ½ cup granulated sugar Brown sugar can be used for extra moisture.
  • 1 cup brown sugar Light or dark can be used interchangeably.
  • ¼ cup white chocolate chips May substitute for dark or milk chocolate chips.
  • ¼ cup slivered almonds Use any nut or skip for nut-free.

Equipment

  • 8x8-inch baking dish
  • Mixing bowls
  • Whisk
  • Medium saucepan
  • Spatula

Method
 

Preparation Steps
  1. Preheat your oven to 350°F (175°C) and grease an 8x8” baking dish with butter or cooking spray. Line with parchment paper.
  2. In a bowl, whisk together the flour, baking powder, and salt. Set aside.
  3. In another bowl, whisk together the egg, vanilla extract, almond extract, and cherry pie filling until blended.
  4. Melt the butter in a saucepan over medium heat, stirring continuously until it turns golden brown.
  5. Remove from heat, combine with granulated sugar and brown sugar, whisking until smooth.
  6. Stir in the wet cherry mixture, then gradually fold in the flour mixture until combined.
  7. Fold in the white chocolate chips and slivered almonds, then pour the batter into the prepared dish.
  8. Bake for 50-55 minutes until a toothpick comes out clean. Edges should be slightly golden.
  9. Cool for about 20 minutes in the pan, then slice into 9 squares.

Nutrition

Serving: 1squareCalories: 200kcalCarbohydrates: 28gProtein: 2gFat: 9gSaturated Fat: 5gCholesterol: 20mgSodium: 150mgPotassium: 60mgFiber: 1gSugar: 15gVitamin A: 200IUCalcium: 15mgIron: 0.5mg

Notes

For a fudgy texture, do not overbake and ensure to cool before slicing. Experiment with different fruits or nuts to keep the recipe exciting.

Tried this recipe?

Let us know how it was!

Peaches and Cream Cookies That Scream Summer Bliss

August 19, 2025 by Grace Snow Leave a Comment

Summer whispers a sweet invitation, and there’s no better way to answer than with a batch of Peaches and Cream Cookies. Each bite reveals a soft texture packed with the vibrant essence of fresh peaches, creamy white chocolate, and the satisfying crunch of pecans. This recipe is a breeze to whip up, making it the ideal solution for those sunny afternoons when you want something homemade yet uncomplicated. Not only are these cookies a delightful treat, but they also serve as a budget-friendly way to incorporate seasonal fruit into your baking. So, why not treat yourself to an irresistible treasure that’s sure to enchant family and friends? What will your kitchen smell like first, the sweet peaches or the warm cookies?

Why Are These Cookies a Must-Bake?

Freshness: The use of ripe, seasonal peaches ensures a burst of juicy flavor in every enjoyable bite.
Effortless Preparation: This recipe is simple enough for bakers of all levels, allowing you to create delicious treats without a hassle.
Decadent Twist: The creamy white chocolate chips add a luscious richness that elevates these cookies to crowd favorites.
Versatile Options: Feel free to substitute nuts or experiment with different types of chocolate, giving you room to personalize! Enjoy them fresh from the oven or pair them with a scoop of vanilla ice cream for a heavenly experience. If you're craving other scrumptious cookie ideas, check out these Eggnog Cookies Soft for the holidays or Matcha Cookies Soft for a unique twist!

Peaches and Cream Cookies Ingredients

• Get ready for a sweet summer delight with these Peaches and Cream Cookies!

For the Batter

  • Fresh Peaches – Adds natural sweetness and a juicy texture; substitute with canned peaches, but drain and pat dry thoroughly to reduce excess moisture.
  • Salted Butter (Room Temperature) – Provides richness and helps create a tender cookie structure; can substitute with unsalted butter, adding a pinch of salt as necessary.
  • Light Brown Sugar – Contributes moisture and a deep caramel flavor; can substitute with dark brown sugar for a richer flavor profile.
  • Granulated Sugar – Adds sweetness and aids in cookie spread; can be replaced with coconut sugar for a deeper flavor but may alter texture slightly.
  • Large Egg – Binds the ingredients together and helps with leavening; for an egg-free version, use 1/4 cup unsweetened applesauce or a flax egg.
  • Vanilla Extract – Enhances the overall flavor; no substitutes necessary, but can use almond extract for a unique twist.
  • All-Purpose Flour – Provides structure; for gluten-free options, substitute with a 1:1 gluten-free flour blend.
  • Sea Salt – Balances sweetness and enhances flavors; essential for taste; no alternative necessary.
  • Ground Cinnamon – Adds warmth and depth to the flavor; replace with nutmeg for a different spice profile.
  • Baking Powder – Acts as a leavening agent to help cookies rise; no substitute recommended.

For the Mix-ins

  • Pecans (Chopped) – Provides crunch and nutty flavor; can substitute with walnuts or leave out for nut-free cookies.
  • White Chocolate Chips – Adds creaminess and sweetness; dark chocolate chips can be used for a richer flavor.

Enjoy the delightful experience of making these Peaches and Cream Cookies—perfect for those summer gatherings or just a sweet afternoon treat!

Step‑by‑Step Instructions for Peaches and Cream Cookies

Step 1: Preheat and Prepare
Start by preheating your oven to 350°F (175°C). While it heats, line two large cookie sheets with parchment paper to prevent sticking. This setup ensures that your Peaches and Cream Cookies will bake evenly and release effortlessly once done.

Step 2: Dice Fresh Fruit
Take your fresh peaches and carefully dice them until you have about 1 cup total. Set the diced peaches aside for later; their sweet, juicy goodness will bring your cookies to life, adding a delightful burst of flavor to each bite.

Step 3: Cream Butter and Sugars
In a mixing bowl, combine 8 tablespoons of room temperature salted butter with 1 cup of light brown sugar and ½ cup of granulated sugar. Using a hand mixer on medium speed, beat the mixture until it becomes light and fluffy, which should take about 2-3 minutes, ensuring a perfect cookie texture.

Step 4: Add Wet Ingredients
Next, crack in 1 large egg and pour in 1 teaspoon of vanilla extract into the creamed mixture. Mix these wet ingredients on low speed until fully incorporated, creating a smooth and homogenous batter that will bind the flavors beautifully together.

Step 5: Mix Dry Ingredients
In a separate bowl, whisk together 2 cups of all-purpose flour with 1 teaspoon of sea salt, ½ teaspoon of ground cinnamon, and 1 teaspoon of baking powder. This dry mixture is crucial for providing structure and flavor to your Peaches and Cream Cookies, so take a moment to ensure everything is well combined.

Step 6: Combine Mixtures
Gradually add the dry ingredient mix to the wet mixture while mixing on low speed. Blend until just combined; avoid overmixing to keep your cookies tender. This step incorporates all the delicious flavors and gives rise to your cookie dough.

Step 7: Gently Fold in Add-Ins
Now, it's time to enhance your cookie dough! Gently fold in the diced peaches, ¼ cup of chopped pecans, and ¼ cup of white chocolate chips using a spatula. Be careful not to overmix; you want to keep those chunks of fruit and chocolate intact for delightful pockets of flavor.

Step 8: Scoop and Shape Cookies
Using a 2 oz cookie scoop, carefully place dough on the prepared cookie sheets, ensuring to leave 1-2 inches of space between each scoop. This spacing is important, as it allows the cookies to spread nicely while baking, resulting in beautiful Peaches and Cream Cookies.

Step 9: Optional Toppings
For an extra touch of elegance, you can press a few additional white chocolate chips or chopped pecans on top of each cookie scoop before baking. This not only enhances the appearance but adds a delightful finishing touch to your scrumptious cookies.

Step 10: Bake the Cookies
Place your cookie sheets in the preheated oven and bake for 20-25 minutes. Keep an eye on them; you’ll know they’re ready when the edges are just lightly golden, signaling a perfectly baked cookie with a soft center.

Step 11: Cool and Transfer
Once baked, allow the cookies to cool on the baking sheet for a few minutes. This helps them firm up before transferring them to a wire rack to cool completely. As they cool, they’ll become even more delicious, making your Peaches and Cream Cookies a true delight!

Make Ahead Options

These Peaches and Cream Cookies are perfect for meal prep enthusiasts! You can dice and refrigerate the fresh peaches up to 24 hours in advance to save time without sacrificing flavor. Additionally, you can prepare the cookie dough and refrigerate it for up to 3 days. Just shape the dough into cookie scoops, place them on a baking sheet lined with parchment, and cover tightly before storing. When you’re ready to bake, simply let the dough sit at room temperature for about 10-15 minutes before baking as directed. This way, you'll enjoy the same fresh-baked goodness with minimal effort, making your cookie experience just as delightful!

Peaches and Cream Cookies Variations

Feel free to explore new flavors and textures that will make these cookies your own!

  • Nut-Free: Omit pecans and substitute with a 1/4 cup of sunflower seeds for crunch. This keeps your cookies safe for those with nut allergies.

  • Coconut Twist: Add 1/2 cup of sweetened shredded coconut to the dough for a tropical flair. The coconut will enhance the cookie's sweetness and provide a chewy texture.

  • Dark Chocolate: Swap white chocolate chips for dark chocolate for a richer, more decadent taste. This change pairs wonderfully with the sweetness of the peaches.

  • Spiced Version: Add pumpkin pie spice instead of cinnamon for a warm, fall-inspired twist. This can invoke cozy vibes while still celebrating summer flavors.

  • Vegan Option: Replace butter with coconut oil and the egg with a flax egg for an entirely plant-based delight. The coconut oil will impart a wonderful flavor, making these cookies irresistible.

  • Peach Puree: Incorporate 1/3 cup of peach puree into the batter for an intensified peach flavor and added moisture. It adds a lovely softness to your cookies, ensuring each bite is delightful.

  • Lemon Zest: Add the zest of one lemon to the cookie dough for a bright note. This zesty touch can elevate your summer treat and enhance the peachy flavor beautifully.

  • Berries Addition: Mix in 1/2 cup of fresh blueberries or raspberries along with the peaches for a burst of color and extra fruity goodness. This helps create a multi-layered flavor experience that’s bursting with summer joy.

By experimenting with these variations, you can create a new favorite in your cookie lineup! If you're looking for more sweet inspiration, considering trying out these Thumbprint Cookies Melt or indulge in a creamy scoop of Vegan Cacao Cream. Enjoy your baking journey!

Storage Tips for Peaches and Cream Cookies

Fridge: Store your cookies in an airtight container in the refrigerator for up to one week. This keeps them fresh while maintaining their delightful softness.

Freezer: For longer storage, freeze the cookies in a single layer on a baking sheet, then transfer to an airtight container or freezer bag. They can last for up to 3 months this way.

Reheating: To enjoy the cookies warm, reheat them in the microwave for about 10-15 seconds or in a preheated oven at 350°F (175°C) for 5-7 minutes. This will refresh the flavors and texture of your Peaches and Cream Cookies.

Room Temperature: If you prefer, you can also keep them at room temperature in a cool, dry place for up to 3 days, though they might soften slightly over time.

What to Serve with Peaches and Cream Cookies

Summer's warmth beckons for delightful pairings that elevate your homemade treats.

  • Fresh Berry Salad: Vibrant, juicy berries provide a refreshing contrast that complements the sweetness of the cookies and add a beautiful pop of color to your dessert table.

  • Vanilla Bean Ice Cream: Creamy and rich, ice cream melds perfectly with the warm cookies, creating a delightful, melty experience that’s pure bliss on a warm day.

  • Iced Herbal Tea: A light and fragrant herbal tea aids digestion and matches the cookies’ sweetness with its refreshing notes. Serve it chilled for the perfect summer sip.

  • Lemon Zest Pound Cake: The bright citrus flavors in the pound cake uplift the cookies, making for a balanced dessert experience that’s both rich and zesty.

  • Peach Sangria: A pitcher of peach sangria brings a festive touch to your gathering, enhancing the peach flavors in the cookies while offering a chilled refreshment.

  • Chilled Coconut Milk: For a unique twist, serving cookies with chilled coconut milk enhances their flavors while providing a tropical feel to every bite.

  • Chocolate-Dipped Strawberries: Indulge in these decadent treats for a special touch, as the luscious chocolate perfectly contrasts with the cookie's fruity elements.

Enjoy your Peaches and Cream Cookies with these delightful additions that will surely impress family and friends!

Expert Tips for Peaches and Cream Cookies

  • Use Ripe Peaches: Choose peaches that are ripe and slightly soft to ensure maximum sweetness and moisture. This will enhance the flavor of your Peaches and Cream Cookies.

  • Avoid Overmixing: Mix the dough until just combined to maintain a tender texture. Overmixing can lead to tough cookies, so fold in the peaches and mix-ins gently.

  • Room Temperature Ingredients: Make sure your butter and egg are at room temperature. This helps create a smoother batter and better cookie structure.

  • Bake Time Awareness: Keep an eye on your cookies during the last few minutes of baking. Every oven is different, and they can easily go from perfect to overbaked.

  • Cooling is Key: Let the cookies cool on the baking sheet for a bit before transferring them to a wire rack. This will help them set and prevent them from falling apart.

  • Experiment with Mix-Ins: Don’t be afraid to customize! Try different nuts or chocolate types based on your preferences—these variations can elevate your Peaches and Cream Cookies experience.

Peaches and Cream Cookies Recipe FAQs

What should I look for when selecting fresh peaches?
Absolutely! When choosing fresh peaches, opt for fruits that are slightly soft to the touch and free from dark spots or blemishes. Ripe peaches should have a sweet aroma and vibrant color, ensuring they'll provide that juicy sweetness in your Peaches and Cream Cookies. If they're a bit unripe, let them sit at room temperature for a couple of days to ripen.

How should I store leftover cookies, and how long do they last?
I recommend storing your Peaches and Cream Cookies in an airtight container in the refrigerator for up to one week. This helps maintain their delightful softness. If you want to keep them for longer, freeze them in a single layer on a baking sheet, then transfer to an airtight container or freezer bag. They can last up to 3 months!

Can I freeze these cookies, and what's the best way to do it?
Yes, you can freeze your Peaches and Cream Cookies! After they cool completely, place them in a single layer on a baking sheet and freeze for about 1-2 hours until firm. Then, transfer them to an airtight container or freezer bag, separating layers with parchment paper to prevent sticking. This method keeps them fresh, and they’re great to have on hand.

What can I do if my cookie dough seems too dry?
Very! If your cookie dough seems a bit dry, avoid adding extra water. Instead, try mixing in a tablespoon of milk or even a bit more of your diced peaches to add moisture. Remember, the natural juices from the ripe peaches should help, so don’t worry if it seems a little crumbly – it’ll come together as it bakes.

Are these cookies suitable for people with nut allergies?
For sure! To make your Peaches and Cream Cookies nut-free, simply omit the pecans from the recipe. These cookies will still be delicious and chewy without them. If you're cooking for someone with specific allergies, always check the other ingredients like chocolate chips, as some may contain traces of nuts.

Can I substitute ingredients in this recipe for dietary restrictions?
Definitely! If you need to make some substitutions, here’s a rundown:

  • For a vegan option, replace the egg with 1/4 cup unsweetened applesauce or a flax egg (1 tablespoon ground flaxseed mixed with 2.5 tablespoons of water).
  • Gluten-free? Use a 1:1 gluten-free flour blend in place of all-purpose flour.
  • If you want a richer flavor, swap light brown sugar with dark brown sugar. The possibilities are wonderful!
Peaches and Cream Cookies

Peaches and Cream Cookies That Scream Summer Bliss

Delight in Peaches and Cream Cookies, bursting with summer sweetness and creamy richness.
Print Recipe Pin Recipe
Prep Time 15 minutes mins
Cook Time 25 minutes mins
Total Time 40 minutes mins
Servings: 24 cookies
Course: Dessert
Cuisine: American
Calories: 150
Ingredients Equipment Method Nutrition Notes

Ingredients
  

For the Batter
  • 1 cup Fresh Peaches, diced Use canned if fresh is unavailable, drain well.
  • 8 tablespoons Salted Butter, room temperature Unsalted butter can substitute.
  • 1 cup Light Brown Sugar Can substitute with dark brown sugar.
  • ½ cup Granulated Sugar Coconut sugar can be used.
  • 1 Large Egg Use applesauce for an egg-free version.
  • 1 teaspoon Vanilla Extract Almond extract is a good alternative.
  • 2 cups All-Purpose Flour 1:1 gluten-free blend can be used.
  • 1 teaspoon Sea Salt Essential for flavor.
  • ½ teaspoon Ground Cinnamon Nutmeg can be substituted.
  • 1 teaspoon Baking Powder No substitutes recommended.
For the Mix-ins
  • ¼ cup Pecans, chopped Can substitute with walnuts or omit.
  • ¼ cup White Chocolate Chips Dark chocolate chips can be used.

Equipment

  • Mixing Bowl
  • hand mixer
  • cookie sheets
  • Parchment Paper
  • Cookie Scoop
  • wire rack

Method
 

Preparation
  1. Preheat your oven to 350°F (175°C) and line two large cookie sheets with parchment paper.
  2. Dice the fresh peaches until you have about 1 cup total and set aside.
  3. In a mixing bowl, cream together the salted butter, light brown sugar, and granulated sugar until light and fluffy, about 2-3 minutes.
  4. Add the egg and vanilla extract to the mixture, mixing on low speed until fully incorporated.
  5. In another bowl, whisk together the all-purpose flour, sea salt, ground cinnamon, and baking powder.
  6. Gradually add the dry ingredients to the wet mixture while mixing on low speed until just combined.
  7. Gently fold in the diced peaches, chopped pecans, and white chocolate chips using a spatula.
  8. Scoop the dough onto the prepared cookie sheets, leaving 1-2 inches between each scoop.
  9. Optionally, press a few additional white chocolate chips or chopped pecans on top of each scoop before baking.
  10. Bake in the preheated oven for 20-25 minutes until the edges are lightly golden.
  11. Allow the cookies to cool on the baking sheet for a few minutes before transferring to a wire rack to cool completely.

Nutrition

Serving: 1cookieCalories: 150kcalCarbohydrates: 20gProtein: 2gFat: 7gSaturated Fat: 4gPolyunsaturated Fat: 1gMonounsaturated Fat: 2gCholesterol: 20mgSodium: 100mgPotassium: 50mgFiber: 1gSugar: 10gVitamin A: 200IUVitamin C: 5mgCalcium: 10mgIron: 1mg

Notes

Ensure to use ripe peaches for best flavor. Room temperature ingredients help with batter smoothness. Avoid overmixing for tender cookies.

Tried this recipe?

Let us know how it was!

Decadent Pumpkin Brownies for a Cozy Fall Treat

August 19, 2025 by Grace Snow Leave a Comment

As I rummaged through my pantry one chilly afternoon, I stumbled upon a can of pumpkin purée, igniting a delightful burst of inspiration. That's how these Moist Pumpkin Brownies with Cream Cheese Swirl came into play. Rich, fudgy, and surprising in their chocolatey decadence, they marry the comforting essence of pumpkin spice with a creamy cheesecake ribbon on top. These budget-friendly brownies are a fantastic way to infuse your fall gatherings with warmth and joy, making them the perfect dessert for any occasion or just a cozy night in. Plus, they easily accommodate dietary needs with simple ingredient swaps, ensuring everyone can indulge. Ready to fall in love with the flavors of autumn? Let’s dive deeper into this scrumptious adventure!

Why are Pumpkin Brownies a Must-Try?

Indulgent and chocolatey, these Pumpkin Brownies offer a unique twist on a classic dessert, blending luscious pumpkin purée with rich cocoa. Easy to make, with straightforward steps and common pantry ingredients, they're perfect for busy home cooks. Versatile too! Feel free to substitute ingredients based on your dietary preferences—whether it's swapping in gluten-free flour or opting out of nuts. Ideal for fall gatherings, they capture that cozy autumn vibe, sure to impress friends and family alike. Enjoy them warm with a scoop of ice cream or wrapped for a delightful treat on the go.

Pumpkin Brownie Ingredients

For the Brownies

  • Flour – Structure for the brownies; substitution: Use gluten-free flour for a gluten-free option.
  • Cinnamon – Adds warm, aromatic spice; substitution: Pumpkin pie spice can be used for a more complex flavor.
  • Salt – Enhances sweetness and balances flavors.
  • Salted Butter – Provides richness; melted but not hot to prevent cooking eggs; substitution: Unsalted butter with added salt can be used.
  • Vegetable Oil – Keeps the brownies moist.
  • Granulated Sugar – Sweetens the brownies and aids in texture.
  • Light Brown Sugar – Adds moisture and depth of flavor.
  • Cocoa Powder – Provides the chocolate flavor.
  • Eggs – Binds the ingredients and adds moisture.
  • Vanilla Extract – Enhances overall flavor.
  • Pumpkin Purée – Adds flavor and moisture to brownies; substitution: Applesauce can be used for a lighter option.
  • Chocolate Chips – Adds bursts of chocolate; note: Use dark chocolate chips for a richer taste.
  • Cooking Spray – Prevents sticking in the baking dish.

For the Cream Cheese Topping

  • Cream Cheese – Forms the creamy topping; room temperature for easy blending; substitution: Goat cheese can be an interesting alternative.
  • Pecans – Adds crunch and nutty flavor; note: Substitute walnuts or leave out for nut-free.

Step‑by‑Step Instructions for Moist Pumpkin Brownies with Cream Cheese Swirl

Step 1: Preheat and Prepare
Begin by preheating your oven to 350°F (175°C). While it’s heating, prepare an 8x8-inch baking dish by coating it with cooking spray or lining it with parchment paper for easy removal. This step ensures your Moist Pumpkin Brownies will come out perfectly without sticking, making the process smoother and more enjoyable.

Step 2: Whisk Dry Ingredients
In a medium bowl, whisk together the flour, cinnamon, and salt until well combined. This is essential for evenly distributing the dry ingredients throughout the batter, ensuring your brownies are flavorful. Set this mixture aside as you move on to the next step, keeping the textures balanced.

Step 3: Mix Wet Ingredients
In a large bowl, combine the melted butter, vegetable oil, granulated sugar, light brown sugar, and cocoa powder. Stir together until you achieve a smooth and glossy mixture. This rich blend is the foundation of your brownies, bringing in all the decadent flavors. Take a moment to enjoy the heavenly aroma as you move to the next step.

Step 4: Combine Eggs and Pumpkin
In a separate bowl, beat together the eggs, vanilla extract, and pumpkin purée until well-mixed. This mixture adds moisture and a vibrant pumpkin flavor to your brownies. Once combined, fold this velvety concoction into the chocolate mix, creating a luscious batter that embodies the essence of fall.

Step 5: Incorporate Dry Ingredients
Gradually fold the dry flour mixture into the wet ingredients, mixing gently until just combined. Be careful not to overmix, as you want your brownies to remain tender and fudgy. To elevate your Pumpkin Brownies further, fold in 3 tablespoons of chocolate chips for an extra burst of chocolate delight.

Step 6: Prepare the Cream Cheese Topping
For the creamy topping, blend the cream cheese, brown sugar, pumpkin pie spice, and pumpkin purée in a bowl until smooth. Ensure the cream cheese is at room temperature to facilitate easy mixing. This delightful topping will add a delicious, tangy layer to your brownies, making them truly irresistible.

Step 7: Combine and Swirl
Pour the brownie batter into the prepared baking dish, spreading it evenly. Next, dollop the cream cheese mixture over the top of the brownie batter. Using a toothpick, gently swirl it into the brownies for a rustic and inviting design. This step enhances both flavor and presentation, teasing the taste of that creamy topping.

Step 8: Bake to Perfection
Place your dish in the preheated oven and bake for 40 minutes. The brownies are done when a toothpick inserted into the center comes out clean or with just a few moist crumbs. Keep an eye on them during baking, as ovens can vary, ensuring your Moist Pumpkin Brownies achieve that perfect fudgy consistency.

Step 9: Cool and Slice
Once out of the oven, allow your brownies to cool in the pan for 30 minutes. This cooling time is crucial for achieving clean cuts. Once set, use a sharp knife to slice into squares, revealing the delicate layers of chocolate and cream cheese. Serve these delightful treats to loved ones, bringing warmth and joy to your autumn gatherings.

Expert Tips for Pumpkin Brownies

  • Cool Before Cutting: Let your brownies cool completely for about 30 minutes to achieve clean, neat slices. A sharp knife does wonders here!
  • Avoid Overmixing: When combining the dry ingredients into the wet, mix just until combined. Overmixing can lead to dense and less fudgy Pumpkin Brownies.
  • Check Doneness Wisely: If you're doubling the recipe, extend the baking time and check for doneness in several spots with a toothpick.
  • Pumpkin Purée Care: If your pumpkin purée is very moist, consider drying it on a paper towel slightly to maintain the right consistency in your brownies.
  • Experiment with Toppings: Feel free to swap pecans for walnuts or even leave them out altogether for nut-free Pumpkin Brownies. Enjoy getting creative!

What to Serve with Pumpkin Brownies

Indulge in the delightful experience of complementing your rich, fudgy brownies with the perfect pairings for a truly unforgettable meal.

  • Vanilla Ice Cream: A classic choice that adds creaminess, balancing the dense texture of the brownies beautifully. The warmth of the brownies against the cold ice cream creates a comforting contrast.
  • Whipped Cream: Light and airy, whipped cream enhances the pumpkin flavor, adding a dreamy finish to every bite of your brownies. A sprinkle of cinnamon on top elevates it further, capturing the essence of fall.
  • Caramel Sauce: Drizzle warm caramel over the brownies for a sweet, buttery kick that melds wonderfully with the chocolate and pumpkin. It adds a glossy shine that's simply irresistible!
  • Coffee or Espresso: The bitter notes of coffee contrast the sweetness, enhancing the rich chocolate flavor. Serve it alongside your brownies to create a cozy café experience right at home.
  • Chai Tea: A spiced chai brings warmth and a hint of spice that complements the pumpkin nicely. Sip while enjoying your brownies for a delightful flavorsome journey.
  • Pumpkin Spice Latte: Keep the pumpkin theme alive! This beloved fall drink pairs perfectly, stimulating your senses and adding a festive touch to your dessert.
  • Milk: A cold glass of milk is a comforting match for any dessert. Its mildness soothes the flavors of the brownies, making each bite all the more enjoyable.
  • Pecan Pie: For a more elaborate dessert spread, pair the brownies with a slice of pecan pie. The rich, nutty flavors and contrasting textures create a festive harmony that celebrates the season.
  • Cheesecake: For a delicious contrast, serve with mini pumpkin cheesecakes. These rich, creamy treats echo the brownie’s flavors while adding an extra layer of indulgence.

Storage Tips for Pumpkin Brownies

  • Room Temperature: Store your Pumpkin Brownies in an airtight container at room temperature for up to 3-4 days to keep them fresh and fudgy.
  • Fridge: If you'd like to extend their shelf life, refrigerate the brownies for up to a week. Just make sure they're well-wrapped to avoid drying out.
  • Freezer: For longer storage, freeze your brownies in a layer of plastic wrap followed by foil for up to 3 months. Thaw at room temperature before serving.
  • Reheating: If you prefer them warm, pop a slice in the microwave for about 10-15 seconds. This will bring back the delightful melting chocolate experience!

Pumpkin Brownies Variations & Substitutions

Feel free to switch things up in these Pumpkin Brownies for a delightful twist on your favorite fall treat!

  • Gluten-Free: Substitute regular flour with gluten-free flour to enjoy a similar texture without gluten.

  • Nut-Free: Omit pecans altogether or use sunflower seeds for a nice crunch without nuts, making these brownies more accessible.

  • Dairy-Free: Swap out cream cheese for a dairy-free alternative, such as a cashew cream, for an equally creamy topping without the dairy.

  • Fruit-Tastic: Replace pecans with dried cranberries or cherries for a fruity burst that complements the pumpkin flavor beautifully.

  • Pumpkin Pie Spice Boost: Instead of cinnamon, use pumpkin pie spice to amp up the autumn flavor profile and add complexity.

  • Chocolate Lovers: For an extra chocolate kick, substitute some of the granulated sugar with chocolate syrup.

  • Pumpkin Purée Twist: Use sweet potato purée instead of pumpkin for a different but equally delicious flavor.

  • Boozy Surprise: Add a splash of bourbon or rum to the chocolate mixture for a warming, adult twist that marries beautifully with the flavors of fall.

Each of these variations allows you to enjoy the beloved essence of these brownies in a way that suits every taste and dietary preference. If you're looking for more pumpkin goodness, don't miss out on my other delightful recipes, like these Pumpkin Cinnamon Rolls. Happy baking!

Make Ahead Options

These Moist Pumpkin Brownies with Cream Cheese Swirl are perfect for those busy weeknights or fall gatherings! You can prepare the brownie batter and the cream cheese topping up to 24 hours in advance; simply store the brownie batter in an airtight container in the refrigerator and pour it into the baking dish just before baking. For the cream cheese mixture, refrigerate it in a separate container; make sure it’s tightly covered to maintain its creamy texture. When you're ready to bake, combine them, swirl, and pop into the oven as directed. Trust me, they’ll taste just as delicious, allowing you to enjoy this delightful dessert with minimal last-minute effort!

Pumpkin Brownies with Cream Cheese Topping Recipe FAQs

How do I select the best pumpkin purée?
When choosing pumpkin purée, look for 100% pure pumpkin without any added sugars or spices. Canned pumpkin works well, but make sure it’s labeled as “pure” or “100% pumpkin.” If you prefer fresh, select small sugar pumpkins (also known as pie pumpkins) and roast them for a fresh flavor. Overripe pumpkins have dark spots or an overly soft texture, so aim for firm and vibrant ones instead!

How should I store Pumpkin Brownies?
To keep your Pumpkin Brownies fresh, store them in an airtight container at room temperature for 3-4 days. If you want to extend their life, move them to the fridge where they can last for up to a week. Just ensure they're well-wrapped to avoid drying out. Enjoy the brownie bliss while it lasts!

Can I freeze Pumpkin Brownies?
Absolutely! To freeze your Pumpkin Brownies, first let them cool completely. Then wrap individual slices in plastic wrap and place them in a freezer-safe bag or container. They’ll keep well for up to 3 months. When you're ready to indulge, simply thaw them at room temperature or reheat in the microwave for that freshly baked taste!

What if my brownies turn out too cakey?
If your Pumpkin Brownies end up too cakey, it may be due to overmixing the batter or baking them too long. Lightly folding the dry ingredients into the wet, and keeping a close eye on them while baking can help maintain a moist and fudgy texture. Remember, a toothpick should come out with a few moist crumbs, not completely clean!

Are Pumpkin Brownies safe for pets?
While the ingredients in Pumpkin Brownies are generally safe for humans, they’re not ideal for pets due to sugar and chocolate content. Chocolate, in particular, is toxic to dogs and cats. If you’re looking to share some pumpkin joy with your furry friends, try plain cooked pumpkin instead—it's much healthier for them!

Can I substitute for allergies?
Yes, you can easily adapt this recipe! For nut allergies, simply omit the pecans or substitute them with seeds like pumpkin or sunflower seeds. If gluten is a concern, using a gluten-free flour blend works beautifully. You can also try using a flaxseed or chia seed mixture (1 tablespoon of seeds mixed with 2.5 tablespoons of water) in place of eggs for a vegan approach. Enjoy making it work for everyone!

Pumpkin Brownies

Decadent Pumpkin Brownies for a Cozy Fall Treat

Indulge in rich and chocolatey Pumpkin Brownies, a perfect fall dessert with a creamy cheese swirl.
Print Recipe Pin Recipe
Prep Time 30 minutes mins
Cook Time 40 minutes mins
Cooling Time 30 minutes mins
Total Time 1 hour hr 40 minutes mins
Servings: 16 slices
Course: Dessert
Cuisine: American
Calories: 210
Ingredients Equipment Method Nutrition Notes

Ingredients
  

For the Brownies
  • 1 cup All-purpose Flour Use gluten-free flour for a gluten-free option.
  • 1 tsp Cinnamon Pumpkin pie spice can be used for a more complex flavor.
  • 1/2 tsp Salt
  • 1/2 cup Salted Butter Use unsalted butter with added salt as a substitute.
  • 1/4 cup Vegetable Oil
  • 1 cup Granulated Sugar
  • 1/2 cup Light Brown Sugar
  • 1/2 cup Cocoa Powder
  • 2 large Eggs
  • 1 tsp Vanilla Extract
  • 1 cup Pumpkin Purée Use applesauce for a lighter option.
  • 3 tbsp Chocolate Chips Use dark chocolate chips for a richer taste.
  • 1 spray Cooking Spray Prevents sticking in the baking dish.
For the Cream Cheese Topping
  • 8 oz Cream Cheese Room temperature for easy blending; goat cheese can be an alternative.
  • 1/4 cup Brown Sugar
  • 1 tsp Pumpkin Pie Spice
  • 1/4 cup Pumpkin Purée
  • 1/2 cup Pecans Substitute walnuts or leave out for nut-free.

Equipment

  • 8x8-inch baking dish
  • Mixing bowls
  • Whisk
  • Spatula
  • toothpick

Method
 

Step-by-Step Instructions
  1. Preheat the oven to 350°F (175°C) and prepare an 8x8-inch baking dish with cooking spray or parchment paper.
  2. In a medium bowl, whisk together the flour, cinnamon, and salt until combined.
  3. In a large bowl, combine melted butter, vegetable oil, granulated sugar, light brown sugar, and cocoa powder until smooth.
  4. In a separate bowl, beat eggs, vanilla extract, and pumpkin purée together. Fold this into the chocolate mixture.
  5. Gradually fold the dry mixture into the wet ingredients until just combined. Add 3 tablespoons of chocolate chips.
  6. Blend cream cheese, brown sugar, pumpkin pie spice, and pumpkin purée in a bowl until smooth.
  7. Pour the brownie batter into the prepared dish and dollop the cream cheese mixture on top. Swirl with a toothpick.
  8. Bake for 40 minutes; check doneness with a toothpick.
  9. Cool for 30 minutes before slicing into squares and serving.

Nutrition

Serving: 1sliceCalories: 210kcalCarbohydrates: 29gProtein: 3gFat: 10gSaturated Fat: 5gPolyunsaturated Fat: 1gMonounsaturated Fat: 3gCholesterol: 40mgSodium: 150mgPotassium: 150mgFiber: 1gSugar: 15gVitamin A: 500IUVitamin C: 1mgCalcium: 40mgIron: 1mg

Notes

Let brownies cool completely for clean slices. Avoid overmixing to keep them fudgy.

Tried this recipe?

Let us know how it was!

Delicious Jello Salad with Cottage Cheese for Any Occasion

August 19, 2025 by Grace Snow Leave a Comment

As I rummaged through my recipe box, an old gem caught my eye: Jello Salad. This retro delight isn't just a blast from the past; it’s a nostalgic crowd-pleaser that effortlessly marries sweetness and creaminess. Featuring vibrant strawberry gelatin, luscious cottage cheese, and juicy fruit, it’s the perfect easy addition to any potluck or summer BBQ. Not only can you whip it up with minimal effort, but it’s also budget-friendly, ensuring you can gather family and friends without breaking the bank. Want to impress your guests with a charming, retro dessert that everyone can enjoy? Let’s dive into this delightful recipe that’s sure to become a new favorite!

Why is Jello Salad a must-try?

Nostalgic Appeal: This Jello Salad is a throwback to simpler times, evoking sweet memories at family gatherings.
Unique Twist: Unlike the standard recipes, the addition of cottage cheese creates a creamy texture that elevates the dish.
Effortless Preparation: This recipe requires minimal steps, making it easy for anyone to create a stunning dessert without any fuss.
Versatile Flavor Options: Swap out the strawberry gelatin for any flavor you love, creating variations suited for every season.
Perfect for Sharing: Ideal for potlucks and BBQs, this crowd-pleaser brings smiles to everyone's faces, sandwiching nostalgia and flavor in every bite. Don’t miss out on serving this alongside other favorites like Chicken Salad Apples or Balsamic Steak Salad.

Jello Salad Ingredients

• Here's everything you need for this delightful dessert!

  • For the Salad
  • Strawberry Flavored Gelatin – Use a 3 oz package for that iconic sweetness and bright color that everyone remembers.
  • Cottage Cheese (small curd) – This adds a creamy tanginess that beautifully complements the gelatin; use whipped cream for a smoother texture if preferred.
  • Canned Crushed Pineapple (drained) – Provides juiciness; make sure to drain it well to help your Jello Salad set perfectly.
  • Fresh Strawberries (½ lb) – These enhance the salad’s freshness; substitute with mixed berries if strawberries aren’t in season.
  • Cold Heavy Whipping Cream – Whips up beautifully for that light, airy texture; store-bought whipped topping can be used for convenience.
  • Vanilla Extract – A dash of this elevates the flavor; it's best without substitutions.
  • Granulated Sugar (2 Tbsp) – Adjust according to your taste for that perfect balance of sweetness.

Get ready to whip up this nostalgic Jello Salad that is not just easy to make, but sure to bring smiles all around!

Step‑by‑Step Instructions for Classic Retro Jello Salad with Cottage Cheese

Step 1: Prepare the Strawberries
Start by washing the fresh strawberries thoroughly under cool running water. Remove the stems and quarter them into bite-sized pieces. This process should take about 5 minutes, and you’ll want to admire their vibrant color as you prepare them to add freshness to your Classic Retro Jello Salad.

Step 2: Drain the Pineapple
Take the can of crushed pineapple and open it, draining the juice into a bowl for later use. Ensure you press the pineapple gently to eliminate excess liquid, as this is crucial for your Jello Salad to set properly. This step should take around 3 minutes, and the pineapple should look moist but well-drained.

Step 3: Blend the Gelatin Mixture
In a blender, combine the strawberry gelatin powder, cottage cheese, and ⅓ cup of the reserved pineapple juice. Blend the mixture until it’s silky smooth—approximately 1 to 2 minutes. This will create a creamy base for your Jello Salad that is both colorful and inviting in appearance.

Step 4: Whip the Cream
In a separate chilled mixing bowl, pour in the cold heavy whipping cream, followed by the vanilla extract and granulated sugar. Using an electric mixer, whip the ingredients on medium-high speed until stiff peaks form, which should take about 3 to 5 minutes. The whipped cream should look fluffy and hold its shape beautifully, ready to add lightness to your Jello Salad.

Step 5: Combine the Mixtures
Gently fold the whipped cream into the gelatin mixture using a spatula or large spoon. Be careful to incorporate without deflating the whipped cream—this will create the light, airy texture that makes the Classic Retro Jello Salad so delightful. This step should take about 2 minutes.

Step 6: Add the Fruits
Once combined, fold in the drained crushed pineapple and your quartered strawberries. Stir gently until everything is evenly mixed, showcasing vibrant flecks of fruit throughout the mixture. This step allows the fresh flavors to meld beautifully, creating a visually appealing Classic Retro Jello Salad.

Step 7: Chill and Set
Transfer the mixture into a serving bowl or individual cups, smoothing the top with a spatula. Cover it with plastic wrap and refrigerate for at least 2 hours, allowing the Jello Salad to set completely. You’ll know it’s ready when it’s firm to the touch and holds its shape, perfect for presentation at any gathering.

Storage Tips for Jello Salad

  • Fridge: Store uneaten Jello Salad in an airtight container in the refrigerator; it’s best enjoyed within 2–3 days for optimal flavor and texture.
  • Freezer: While freezing isn't recommended because it may alter the texture, leftover Jello Salad can be frozen for up to 1 month. Thaw overnight in the fridge before serving.
  • Reheating: There’s no need to reheat Jello Salad; serve it chilled straight from the fridge for the best experience!
  • Wrapping: If covering with plastic wrap, ensure it's snug to prevent any odors from the fridge altering the fresh taste of your classic Jello Salad.

Expert Tips for Jello Salad

  • Blend for Smoothness: Blending the cottage cheese with the gelatin creates a silky texture. A well-blended mixture prevents lumps, ensuring a delightful mouthfeel in your Jello Salad.

  • Drain Well: Make sure your crushed pineapple is thoroughly drained. Excess liquid can prevent the Jello Salad from setting correctly, ruining its texture.

  • Stabilize Whipped Cream: If serving outdoors, consider using store-bought whipped topping instead of homemade. It's more stable and holds up better in warmer temperatures.

  • Watch the Chill Time: Refrigerating the Jello Salad for at least 2 hours is essential so it sets properly. Give it plenty of time to firm up for the best results.

  • Explore Flavor Variations: Feel free to experiment! Swap out strawberry gelatin for other flavors like peach or berry, creating a unique twist with each version of your Jello Salad.

What to Serve with Classic Retro Jello Salad with Cottage Cheese

Elevate your next gathering with delightful pairings that compliment this iconic dessert.

  • Classic Fried Chicken: The savory, crispy chicken contrasts perfectly with the sweet and creamy flavors of the Jello Salad, creating a well-rounded meal. A southern staple that's always a crowd favorite!

  • Tangy Coleslaw: This crunchy, tangy side brings a refreshing balance to the creamy Jello Salad, making it ideal for BBQs or potlucks. The contrast in textures keeps every bite exciting.

  • Grilled Veggie Skewers: Lightly seasoned grilled vegetables add a vibrant pop of color and flavor to your spread, refreshing your palate before indulging in the Jello Salad.

  • Light Garden Salad: Crisp greens paired with a zesty vinaigrette will complement the sweetness of the Jello Salad without overwhelming it, making for a pleasant balance on your plate.

  • Deviled Eggs: Creamy and savory, these bite-sized treats make an excellent appetizer. Their rich flavor profile provides a delightful contrast to the sweet dessert.

  • Lemonade Iced Tea: A refreshing drink option, this fusion of sweet and tangy sips beautifully alongside the creamy sweetness of the Jello Salad, ensuring your guests are refreshed.

  • Vanilla Ice Cream: For a touch of indulgence, serve a scoop of vanilla ice cream alongside the Jello Salad. The creamy richness pairs seamlessly with the light, fluffy dessert, making it a double treat.

Make Ahead Options

These Classic Retro Jello Salad with Cottage Cheese are perfect for busy home cooks looking to save time! You can prepare the gelatin and cottage cheese mixture up to 24 hours in advance and store it in the refrigerator. Just make sure to cover it tightly to maintain freshness. Additionally, you can wash and quarter the strawberries and drain the pineapple up to 3 days ahead; keep them in separate airtight containers to keep them fresh until you’re ready to mix. When it's time to serve, simply whip the cream and fold everything together. Your guests will enjoy a delicious dessert that tastes just as vibrant and delightful!

Jello Salad Variations & Substitutions

Feel free to let your creativity shine and customize your Jello Salad to suit your taste preferences!

  • Other Flavors: Swap strawberry gelatin for berry, orange, or peach varieties for a new taste experience.
  • Cream Cheese: Substitute cottage cheese with cream cheese for a richer, tangy flavor that pairs wonderfully with fruity components.
  • Add-Ins: Toss in mini marshmallows or chopped nuts for delightful texture and extra crunch in every bite.
  • Seasonal Fruits: Use fresh seasonal fruits like peaches in summer or cranberries in winter to keep your salad vibrant and fresh.
  • Yogurt Twist: For a lighter option, replace heavy whipping cream with Greek yogurt for a creamy, tangy twist while cutting down calories.
  • Extra Sweetness: If you prefer a sweeter salad, consider adding more sugar or a drizzle of honey to elevate the flavor profile.
  • Dairy-Free: Opt for coconut cream and a dairy-free gelatin alternative for a delightful vegan twist. Enjoy the tropical flavors this brings!
  • Flavor Boost: A splash of almond or coconut extract can enhance the flavor, adding a beautiful aromatic note to your Jello Salad.

Don't forget to serve it alongside other crowd-pleasers like Chicken Salad Apples or Balsamic Steak Salad for a well-rounded meal that's sure to impress!

Classic Retro Jello Salad with Cottage Cheese Recipe FAQs

What type of fruit should I use in Jello Salad?
You can use fresh strawberries, as specified in the recipe, but feel free to substitute with any seasonal fruits like blueberries, raspberries, or even peaches! Just remember, if you're using things like fresh pineapple, it should be avoided as it prevents the gelatin from setting properly.

How long can I store Jello Salad in the refrigerator?
Absolutely! Store your Jello Salad in an airtight container in the refrigerator for about 2 to 3 days. For the best flavor and texture, it’s ideal to consume it within this timeframe, but it will still be safe for longer if stored correctly.

Can I freeze Jello Salad?
While freezing is not typically recommended due to texture changes, leftover Jello Salad can be frozen for up to 1 month. To freeze, gently scoop the salad into an airtight container, leaving some space for expansion. When you’re ready to enjoy it again, thaw it in the refrigerator overnight before serving.

What do I do if my Jello Salad isn't setting properly?
If your Jello Salad doesn't set, it’s often due to excess liquid from the crushed pineapple. It's essential to drain it thoroughly before adding it to the mixture. If it still doesn't set after chilling for the recommended time, consider blending the gelatin with the cottage cheese more vigorously next time, ensuring it's completely incorporated without any lumps.

Is this Jello Salad recipe safe for people with dairy allergies?
If someone has a dairy allergy, I recommend substituting the cottage cheese with a non-dairy whipped topping or using silken tofu blended until smooth. However, avoid gelatin as it's usually derived from animal products. For a vegan-friendly option, look for plant-based gelatin alternatives available in stores.

What’s the best way to serve Jello Salad?
For a delightful presentation, you can serve this Classic Retro Jello Salad in a large bowl or individual mason jars. Layering the Jello Salad with fresh fruit on top makes for a stunning and inviting display that will get your guests excited!

Jello Salad

Delicious Jello Salad with Cottage Cheese for Any Occasion

Jello Salad is a nostalgic and creamy dessert perfect for any gathering, featuring vibrant strawberry gelatin and cottage cheese.
Print Recipe Pin Recipe
Prep Time 15 minutes mins
Chill Time 2 hours hrs
Total Time 2 hours hrs 15 minutes mins
Servings: 8 servings
Course: Dessert
Cuisine: American
Calories: 150
Ingredients Equipment Method Nutrition Notes

Ingredients
  

For the Salad
  • 1 3 oz package Strawberry Flavored Gelatin For iconic sweetness and color.
  • 1 cup Cottage Cheese (small curd) Use whipped cream for a smoother texture if preferred.
  • 1 can Canned Crushed Pineapple (drained) Drain well to help the Jello Salad set.
  • ½ lb Fresh Strawberries Substitute with mixed berries if not in season.
  • 1 cup Cold Heavy Whipping Cream Can use store-bought whipped topping.
  • 1 tsp Vanilla Extract Best without substitutions.
  • 2 Tbsp Granulated Sugar Adjust according to taste.

Equipment

  • Blender
  • Mixing Bowl
  • Electric mixer

Method
 

Preparation Steps
  1. Prepare the Strawberries: Wash and quarter strawberries. This should take about 5 minutes.
  2. Drain the Pineapple: Open and drain the crushed pineapple, ensuring it's well-drained. This step takes around 3 minutes.
  3. Blend the Gelatin Mixture: In a blender, combine strawberry gelatin powder, cottage cheese, and ⅓ cup reserved pineapple juice. Blend until silky smooth—about 1 to 2 minutes.
  4. Whip the Cream: In a chilled bowl, combine whipping cream, vanilla, and sugar. Whip on medium-high speed until stiff peaks form, about 3 to 5 minutes.
  5. Combine the Mixtures: Gently fold whipped cream into the gelatin mixture without deflating it. This takes about 2 minutes.
  6. Add the Fruits: Fold in the drained pineapple and quartered strawberries until evenly mixed.
  7. Chill and Set: Transfer to serving bowl, cover with plastic wrap, and refrigerate for at least 2 hours to set.

Nutrition

Serving: 1servedCalories: 150kcalCarbohydrates: 20gProtein: 3gFat: 7gSaturated Fat: 4gCholesterol: 20mgSodium: 50mgPotassium: 100mgFiber: 1gSugar: 10gVitamin A: 200IUVitamin C: 10mgCalcium: 50mgIron: 0.5mg

Notes

Ensure that the crushed pineapple is thoroughly drained and refrigerate for at least 2 hours for the best texture.

Tried this recipe?

Let us know how it was!

Irresistibly Moist German Chocolate Poke Cake You’ll Love

August 18, 2025 by Grace Snow Leave a Comment

As I lifted the warm, fragrant slice of German Chocolate Poke Cake from the pan, the sweet aroma of chocolate intertwined with coconut and pecans swept through my kitchen like an echo of joyful gatherings past. This easy, make-ahead dessert is the ultimate solution for anyone seeking to swap the mundane for something truly indulgent. With its delightfully moist texture and irresistible flavors, it’s not just a cake; it’s a centerpiece that brings friends and family together. Whether you're hosting a get-together or simply treating yourself after a long day, this recipe guarantees smiles with its simple preparation and delectable taste. Curious about how to create this chocolatey delight that everyone will rave about? Let's dive into the details!

Why is this cake so irresistible?

Moisture Made Magical: This German Chocolate Poke Cake is a moisture magnet, soaking up sweetness through delectable poke holes that keep every bite blissfully rich.

Flavor Explosion: The combination of chocolate, creamy coconut, and crunchy pecans creates a symphony of flavors that’s simply unforgettable.

Simplistic Elegance: With straightforward instructions, this recipe is perfect for bakers of all skill levels, turning your kitchen into a delightful pastry haven.

Make-Ahead Marvel: Ideal for parties, this cake actually tastes better the next day! Whip it up ahead of time and let the flavors meld.

Crowd-Pleasing Favorite: Whether it’s a dinner gathering or a cozy night in, this cake is sure to impress, much like a warm bowl of Homemade Hot Chocolate paired alongside.

Versatile Substitutions: Personalize your cake experience by swapping ingredients like pecans for walnuts or using almond milk for a dairy-free delight.

German Chocolate Poke Cake Ingredients

For the Cake
• All-purpose flour – Provides structure; substitute with gluten-free flour for a gluten-free option.
• Granulated sugar – Adds sweetness and moisture; can use brown sugar for a richer flavor.
• Baking powder – Acts as a leavening agent for a light cake; ensure freshness for best results.
• Baking soda – Enhances rising; crucial for achieving a fluffy texture.
• Salt – Balances sweetness and enhances flavor.
• Unsweetened cocoa powder – Delivers rich chocolate flavor; Dutch-process cocoa offers a deeper taste.
• Whole milk – Adds moisture; substitute with almond milk for a dairy-free option.
• Vegetable oil – Ensures tenderness; can replace with melted coconut oil.
• Large eggs – Binds the ingredients together; use flax eggs as a vegan substitute.
• Vanilla extract – Amplifies flavor; pure vanilla is the best choice.
• Boiling water – Creates a thin batter that results in a moist cake.

For the Topping
• Sweetened shredded coconut – Adds a delightful texture; unsweetened coconut can be used if preferred.
• Chopped pecans – Contributes crunch and richness; swap for walnuts or omit for a nut-free cake.
• Sweetened condensed milk – Forms the base for the coconut-pecan mixture, essential for flavor.
• Chocolate frosting – Adds a rich finishing touch; use store-bought for convenience or homemade for a personal flair.

This German Chocolate Poke Cake is not only a treat for the taste buds but also a heartwarming way to gather loved ones around the table!

Step‑by‑Step Instructions for German Chocolate Poke Cake

Step 1: Preheat the Oven
Begin by preheating your oven to 350°F (175°C). While the oven warms up, take a moment to grease and flour your 9x13-inch baking pan, ensuring it's ready to hold the luscious batter of your German Chocolate Poke Cake.

Step 2: Mix the Dry Ingredients
In a large mixing bowl, whisk together the all-purpose flour, granulated sugar, baking powder, baking soda, salt, and unsweetened cocoa powder until well combined. This step ensures that your dry ingredients are evenly distributed, which is crucial for achieving the perfect texture in your cake.

Step 3: Combine the Wet Ingredients
Now, add the whole milk, vegetable oil, large eggs, and vanilla extract to the dry mixture. Using a hand mixer, beat these ingredients on medium speed for about 2 minutes until the batter is smooth and well blended. The mixture will be slightly thick, but that’s exactly what you want.

Step 4: Add Boiling Water
Carefully stir in the boiling water, being cautious of splashes. This step is essential as the boiling water will create a thin batter that contributes to the moistness of your German Chocolate Poke Cake. Mix until the batter is smooth and well combined, then prepare to pour it into the pan.

Step 5: Bake the Cake
Pour the thin batter into your prepared baking pan, spreading it evenly with a spatula. Place it in the preheated oven and bake for 30-35 minutes. To check for doneness, insert a toothpick into the center; it should come out clean or with a few moist crumbs attached.

Step 6: Prepare the Poke Holes
Once baked, remove the cake from the oven and let it cool in the pan for about 10 minutes. After cooling slightly, use the handle of a wooden spoon to poke holes throughout the top of the cake, allowing for the delicious topping to seep in.

Step 7: Make the Topping
In a small bowl, combine the sweetened condensed milk, shredded coconut, and chopped pecans. This mixture will create a sumptuous topping for your cake. Pour it generously over the cake, ensuring it fills the poke holes for maximum flavor infusion.

Step 8: Cool Completely
Allow your German Chocolate Poke Cake to cool completely in the pan. This cooling process is important as it helps the flavors meld beautifully while also allowing the topping to set slightly, ensuring each slice is packed with that irresistible goodness.

Step 9: Frost the Cake
Once the cake has cooled, it’s time to top it off! Spread chocolate frosting evenly over the surface of the cake using a spatula. This rich frosting will complement the flavors and texture of the cake, bringing everything together for a delightful finish. Serve and savor each bite!

How to Store and Freeze German Chocolate Poke Cake

Fridge: Store your German Chocolate Poke Cake in an airtight container in the refrigerator for up to 3 days. This helps maintain its moisture and flavor.

Freezer: For longer storage, wrap the cake tightly in plastic wrap and then aluminum foil before freezing. It can be frozen for up to 3 months.

Thawing: To enjoy your frozen cake, transfer it to the fridge to thaw overnight. This gradual process will keep it moist and delicious.

Reheating: If you prefer your cake warm, microwave individual slices for about 15-20 seconds, but ensure not to overheat to maintain its delightful texture.

Make Ahead Options

You can absolutely make the German Chocolate Poke Cake ahead of time to save precious hours on busy days! Prep the cake itself (from mixing the batter to baking) and let it cool, then poke holes and add the topping—this can be done up to 24 hours in advance. Simply cover the cake with plastic wrap or foil and refrigerate it. If you want to keep it longer, this delicious cake lasts for up to 3 days in the fridge, gaining even more flavor as it sits. When it's time to serve, simply frost it and enjoy this indulgent dessert that’s just as delicious yet made easier for you!

What to Serve with German Chocolate Poke Cake

This decadent dessert pairs beautifully with a variety of side dishes and beverages, perfect for elevating your serving experience.

  • Vanilla Ice Cream: The creamy, cold contrast to the warm cake punctuates every bite, creating a delightful balance. A scoop of ice cream adds an indulgent touch that complements the rich flavors.

  • Fresh Berries: Juicy strawberries or tart raspberries add a refreshing zing, cutting through the sweetness of the cake. Their bright colors also bring a beautiful presentation to your dessert table.

  • Whipped Cream: Light and airy, whipped cream adds a luscious texture and mild sweetness that beautifully enhances the chocolate and coconut flavors. A dollop on top brings elegance to your slice!

  • Chocolate Fondue: For the chocolate lovers, serve melted chocolate fondue on the side with assorted fruits and cake pieces for dipping. This interactive dessert is sure to impress guests and create a fun, memorable experience.

  • Coffee: A rich cup of coffee balances out the sweetness of the cake, grounding the decadent flavors. Experiment with flavored varieties to find your perfect pairing.

  • Mint Tea: The refreshing notes of mint tea provide a beautifully light end to a heavy meal, refreshing your palate after indulging in rich chocolate cake.

  • Caramel Sauce: Drizzling warm caramel sauce over the cake adds an extra layer of sweetness and a delightful gooey texture that takes each bite to the next level of indulgence.

  • Coconut Macaroons: These chewy treats echo the coconut in the cake, making a sweet harmony of flavors that guests will appreciate. Their crispy exterior and soft center create a lovely contrast.

Feel free to mix and match these delicious companions to create the perfect spread alongside your German Chocolate Poke Cake!

Expert Tips for German Chocolate Poke Cake

• Ingredient Freshness: Always check the freshness of your baking powder and soda; stale leavening agents can lead to a dense cake.

• Poking Technique: Use the handle of a wooden spoon gently to poke holes; too deep may cause the cake to crumble when adding the topping.

• Topping Timing: Pour the topping over the cake while it’s still warm; this allows the sweetened condensed milk mixture to soak in more effectively.

• Storage Wisdom: Store leftovers in an airtight container in the fridge to keep the cake moist; it often tastes even better the next day!

• Diverse Substitutions: Experiment with ingredient swaps, such as using almond milk instead of regular milk for a delightful dairy-free option in your German Chocolate Poke Cake.

German Chocolate Poke Cake Variations

Feel free to get creative with this delightful dessert by letting your culinary imagination run wild!

  • Gluten-Free: Substitute all-purpose flour with a gluten-free blend to make this cake accessible for everyone.
  • Dairy-Free: Use almond milk in place of whole milk and melted coconut oil instead of vegetable oil for a dairy-free delight.
  • Nut-Free: Simply omit the chopped pecans or swap them for sunflower seeds, keeping the flavors intact without the crunch.
  • Flavor Twist: Add a teaspoon of espresso powder to the batter to amplify the rich chocolate flavor, creating a deeper, complex taste.
  • Coconut Alternative: If you prefer a less sweet option, use unsweetened shredded coconut in the topping for a more balanced flavor.
  • Berries Boost: Incorporate fresh raspberries or strawberries in the poke holes for a vibrant fruity surprise with each bite.
  • Caramel Drizzle: Drizzle homemade or store-bought caramel sauce over the frosted cake to add another layer of indulgence.
  • Chocolate Chip Surprise: Fold in chocolate chips into the batter for extra gooey chocolate pockets that will make your cake even more irresistible.

Let your taste buds guide you, and enjoy personalizing this cake to suit your style! If you're looking for some comforting accompaniments, consider pairing your cake with a warm cup of Homemade Hot Chocolate for a truly cozy experience, or try adding a scoop of vanilla ice cream alongside a slice for extra indulgence. Happy baking!

German Chocolate Poke Cake Recipe FAQs

How do I choose the right cocoa powder?
Absolutely! When selecting cocoa powder, always opt for high-quality unsweetened cocoa for the best flavor. If you'd like a deeper taste, Dutch-process cocoa can elevate your German Chocolate Poke Cake. Check the packaging for freshness; it should have a rich aroma without any musty scent.

What’s the best way to store leftovers?
Very! Store your German Chocolate Poke Cake in an airtight container in the refrigerator for up to 3 days. This method keeps the cake moist and flavorful. Just make sure to seal it tightly to prevent any drying out or absorption of other odors in the fridge.

Can I freeze this cake?
Absolutely! To freeze your German Chocolate Poke Cake, wrap it tightly in plastic wrap and then in aluminum foil to prevent freezer burn. It can be frozen for up to 3 months. When you’re ready to enjoy it, thaw it overnight in the refrigerator for the best texture.

What should I do if my cake sinks in the middle?
If your cake sinks in the middle, it could be caused by several factors, such as underbaking, using too much liquid in the batter, or opening the oven door too early. Ensure you follow the baking time recommended in the recipe. Additionally, use a toothpick to check for doneness; if it comes out clean, your cake should be set all the way through!

Are there any allergy considerations for this recipe?
Yes! This German Chocolate Poke Cake contains several common allergens like eggs, gluten (from flour), and dairy (from milk and chocolate). For those with gluten sensitivity, you can substitute all-purpose flour with gluten-free flour. Additionally, use almond milk in place of whole milk for a dairy-free version, and replace eggs with flax eggs to accommodate vegan diets. Always check ingredient labels for potential allergens!

Can I use a different topping instead of chocolate frosting?
Very! While chocolate frosting is a classic choice, feel free to get creative with the topping! You could use whipped cream for a light finish, a vanilla glaze for a sweeter twist, or even a layer of ganache for an extra indulgent dessert. Enjoy experimenting and make it your own!

German Chocolate Poke Cake

Irresistibly Moist German Chocolate Poke Cake You’ll Love

A delightful German Chocolate Poke Cake that's moist and bursting with flavors, perfect for gatherings.
Print Recipe Pin Recipe
Prep Time 20 minutes mins
Cook Time 35 minutes mins
Cooling Time 10 minutes mins
Total Time 1 hour hr 5 minutes mins
Servings: 12 slices
Course: Dessert
Cuisine: German
Calories: 350
Ingredients Equipment Method Nutrition Notes

Ingredients
  

For the Cake
  • 2 cups all-purpose flour substitute with gluten-free flour for a gluten-free option
  • 2 cups granulated sugar can use brown sugar for a richer flavor
  • 1 tbsp baking powder ensure freshness for best results
  • 1 tsp baking soda crucial for achieving a fluffy texture
  • 1 tsp salt balances sweetness and enhances flavor
  • 3/4 cup unsweetened cocoa powder Dutch-process cocoa offers a deeper taste
  • 1 cup whole milk substitute with almond milk for a dairy-free option
  • 1/2 cup vegetable oil can replace with melted coconut oil
  • 2 large eggs use flax eggs as a vegan substitute
  • 2 tsp vanilla extract pure vanilla is the best choice
  • 1 cup boiling water creates a thin batter for moist cake
For the Topping
  • 1 cup sweetened shredded coconut unsweetened coconut can be used if preferred
  • 1 cup chopped pecans swap for walnuts or omit for a nut-free cake
  • 1 can sweetened condensed milk essential for flavor
  • 1 cup chocolate frosting use store-bought or homemade

Equipment

  • 9x13-inch baking pan
  • Mixing Bowl
  • hand mixer
  • Spatula
  • Wooden spoon

Method
 

Preparation Steps
  1. Preheat your oven to 350°F (175°C) and grease and flour your 9x13-inch baking pan.
  2. In a large mixing bowl, whisk together the flour, sugar, baking powder, baking soda, salt, and cocoa powder.
  3. Add the milk, oil, eggs, and vanilla to the dry ingredients, and beat on medium speed for 2 minutes.
  4. Carefully stir in the boiling water until the batter is smooth.
  5. Pour the batter into the prepared baking pan and bake for 30-35 minutes.
  6. Remove the cake from the oven and let it cool in the pan for 10 minutes before poking holes in the top.
  7. In a bowl, combine the sweetened condensed milk, coconut, and pecans; pour over the cake.
  8. Allow the cake to cool completely in the pan.
  9. Spread chocolate frosting over the cake once cooled.

Nutrition

Serving: 1sliceCalories: 350kcalCarbohydrates: 45gProtein: 5gFat: 15gSaturated Fat: 5gPolyunsaturated Fat: 2gMonounsaturated Fat: 7gCholesterol: 40mgSodium: 200mgPotassium: 200mgFiber: 2gSugar: 30gVitamin A: 200IUCalcium: 50mgIron: 1.5mg

Notes

Check the freshness of your baking ingredients to ensure best results. Store leftovers in an airtight container in the fridge for up to 3 days.

Tried this recipe?

Let us know how it was!

Ultimate German Chocolate Poke Cake: The Decadent Dessert Delight

August 18, 2025 by Grace Snow Leave a Comment

The aroma of chocolate lingers in the air, beckoning you to the kitchen for a sweet escape. I can almost hear the joyful laughter of family and friends gathered around a table, eagerly waiting for just one slice of my German Chocolate Poke Cake. This delightful dessert is more than just a cake; it's a showstopper that effortlessly combines rich chocolate with creamy coconut and crunchy pecans in a way that’s both easy and utterly delicious. Whether you're planning a festive gathering or simply treating yourself to some homemade goodness, this make-ahead dessert will surely impress and satisfy. I can assure you, every bite is a warm hug of comfort, perfect for any occasion. Are you ready to bring a slice of happiness to your table?

Why is German Chocolate Poke Cake a Must-Try?

Irresistible Flavor Fusion: This dessert boasts a heavenly combination of chocolate, coconut, and pecans that dance harmoniously on your taste buds.

Easy to Make: With simple ingredients and minimal steps, this poke cake is perfect for both novice bakers and seasoned chefs alike.

Make-Ahead Convenience: Prepare it in advance! Each passing day only enhances its flavors, making it a fantastic go-to dessert for busy schedules.

Perfect for Gatherings: Impress your guests with a showstopping dessert that will have everyone reaching for seconds—just like in my Homemade Hot Chocolate, this will be the highlight of any gathering.

Crowd Favorite: It’s a cake that bridges generations, loved by both kids and adults—truly a timeless classic sure to bring smiles.

German Chocolate Poke Cake Ingredients

• Dive into the world of flavors with these essential components for your delightful German Chocolate Poke Cake!

For the Cake

  • All-purpose flour – Provides structure to the cake; swap with gluten-free flour for a gluten-free option.
  • Granulated sugar – Adds sweetness and moisture; brown sugar can enhance flavor and create extra moisture.
  • Baking powder – A leavening agent; ensure it's fresh for the best rise.
  • Baking soda – Boosts leavening; crucial for a light cake texture.
  • Salt – Balances sweetness and enhances overall flavor.
  • Unsweetened cocoa powder – Grants rich chocolate flavor; choose Dutch-process cocoa for a deeper taste.
  • Whole milk – Contributes moisture and richness; substitute with almond milk for a dairy-free version.
  • Vegetable oil – Ensures moisture and tenderness; melted coconut oil can be used instead.
  • Large eggs – Binds the ingredients and adds stability; consider flax eggs for a vegan alternative.
  • Vanilla extract – Amplifies flavors; pure vanilla extract works best for dessert perfection.
  • Boiling water – Creates a thin batter for an incredibly moist cake.

For the Topping

  • Sweetened shredded coconut – Adds delightful texture and flavor; use unsweetened coconut if you prefer.
  • Chopped pecans – Delivers a lovely crunch; walnuts can be switched in, or omit for a nut-free treat.
  • Sweetened condensed milk – Forms the base for the rich coconut-pecan mixture.
  • Chocolate frosting – Provides a luscious richness; use store-bought for ease or whip up your favorite homemade version.

Let’s gather these ingredients, and get ready to create a show-stopping German Chocolate Poke Cake that will make your taste buds do a happy dance!

Step‑by‑Step Instructions for German Chocolate Poke Cake

Step 1: Preheat the Oven
Begin by preheating your oven to 350°F (175°C). While the oven is heating, grab a 9x13-inch baking pan and generously grease and flour it to prevent sticking. This preparation is essential for a beautiful German Chocolate Poke Cake that will release easily once baked.

Step 2: Mix Dry Ingredients
In a large mixing bowl, whisk together the all-purpose flour, granulated sugar, baking powder, baking soda, salt, and unsweetened cocoa powder. Ensure that these dry ingredients are well combined and free of lumps, as this step lays the foundation for a light and fluffy cake. Set this mixture aside while you prepare the wet ingredients.

Step 3: Combine Wet Ingredients
Next, add the whole milk, vegetable oil, large eggs, and vanilla extract to your bowl of dry ingredients. Using an electric mixer, blend everything together on medium speed for about 2 minutes. You’ll notice the batter becoming smooth and glossy, ensuring a delightful texture for your German Chocolate Poke Cake once it bakes.

Step 4: Incorporate Boiling Water
Now, carefully stir in the boiling water until the batter is fully combined and smooth; it will be quite thin, which is normal. This step is crucial for achieving the rich, moist texture that characterizes the German Chocolate Poke Cake. Be mindful of splashback while mixing, as the batter will be hot!

Step 5: Bake the Cake
Pour the cake batter into the prepared baking pan, spreading it evenly. Place it in the preheated oven and bake for 30 to 35 minutes. To check for doneness, insert a toothpick into the center; it should come out clean or with just a few moist crumbs attached. Remove the cake from the oven and let it cool in the pan for about 10 minutes.

Step 6: Make the Poke Holes
Once the cake has cooled for 10 minutes, use the handle of a wooden spoon to poke holes evenly across the surface. These holes will allow the delicious topping to seep into the cake, enhancing the flavor and moisture of your German Chocolate Poke Cake. Don't worry if they seem deep; that's the key to infusing flavor.

Step 7: Prepare the Topping
In a small bowl, combine the sweetened condensed milk, shredded coconut, and chopped pecans. Mix until all ingredients are well incorporated. Slowly pour this mixture over the warm cake, aiming to fill each poke hole. This topping will soak into the cake, creating a luscious texture and flavor.

Step 8: Cool Completely
Allow your cake to cool completely in the pan. This cooling period is vital for the topping to set, making for a perfect slice later on. Place the cake in the refrigerator if you're in a hurry; this will also enhance the flavors of the German Chocolate Poke Cake as it melds together.

Step 9: Frost the Cake
Once the cake has cooled and absorbed the topping, spread your favorite chocolate frosting evenly over the top. This final touch adds a rich layer of indulgence to the already satisfying German Chocolate Poke Cake. Use a spatula for a smooth finish and enjoy the anticipation of serving this delightful dessert.

How to Store and Freeze German Chocolate Poke Cake

  • Room Temperature: If you plan to enjoy your cake within a day, cover it with plastic wrap or place it in an airtight container; it’ll stay fresh for a few hours at room temperature.
  • Fridge: Store leftover German Chocolate Poke Cake in an airtight container in the refrigerator for up to 3 days. The flavors meld beautifully while chilling, enhancing your dessert experience.
  • Freezer: For longer storage, wrap the cooled cake tightly in plastic wrap, then in aluminum foil, and freeze for up to 3 months. Thaw overnight in the fridge before serving to maintain its moist texture.
  • Reheating: If you prefer a warm slice, gently heat your cake in the microwave for 10-15 seconds. Enjoy it warm with a scoop of ice cream for a delightful treat!

Expert Tips for German Chocolate Poke Cake

  • Fresh Ingredients: Always check the expiration dates on your baking powder and baking soda to ensure your cake rises perfectly. Stale ingredients can lead to flat cakes.

  • Mix Thoroughly: When combining dry ingredients, ensure they are well-blended to avoid lumps, which can affect the texture of your German Chocolate Poke Cake.

  • Poke with Care: Be gentle when poking holes into the cake; overly deep holes can cause the topping to seep out excessively. Aim for a gentle touch.

  • Cool Before Frosting: Allow the cake to cool completely before frosting. This crucial step avoids melting the frosting into the cake and maintains the beautiful layers.

  • Flavor Enhancements: For an added depth of flavor, consider mixing in a teaspoon of espresso powder to the batter; it beautifully enhances the chocolate.

Make Ahead Options

These German Chocolate Poke Cakes are perfect for meal prep, allowing you to savor their delightful flavors any day of the week! You can bake the cake up to 24 hours in advance and let it cool completely before refrigerating it. Additionally, prepare the coconut-pecan topping ahead of time and store it in an airtight container in the fridge for up to three days. When you’re ready to enjoy, simply pour the topping over the cake and frost as desired. By prepping ahead, you'll have an effortlessly indulgent dessert that’s just as delicious and perfect for busy weeknights.

German Chocolate Poke Cake Variations

Feel free to get creative with your German Chocolate Poke Cake and experiment with these delightful variations. Each option offers a unique twist to elevate your dessert experience!

  • Gluten-Free: Swap all-purpose flour for a gluten-free blend to delight those with gluten sensitivities without losing any flavor.

  • Dairy-Free: Use almond milk in place of whole milk and substitute vegetable oil with coconut oil for a tasty dairy-free treat.

  • Nut-Free: Simply omit the pecans or replace them with sunflower seeds for a crunchy, nut-free alternative that everyone can enjoy.

  • Chocolate Lovers: Add a teaspoon of espresso powder to the batter to amplify the chocolate flavor for an indulgent experience reminiscent of my delicious Chocolate Pudding Cake.

  • Coconut Twist: For an extra coconut punch, sprinkle additional shredded coconut on top before frosting; it’ll create a wonderfully tropical look and taste.

  • Caramel Drizzle: Drizzle caramel sauce over the frosted cake for a sweet, gooey addition that complements the chocolate and coconut beautifully.

  • Mini Cakes: Pour the batter into muffin tins to create mini poke cakes and adjust the baking time, making for adorable personal servings that are perfect for gatherings.

  • Chocolate Cherry Smoothie Flavor: Blend the batter with a bit of cherry juice; let the cherry flavor seep in for an exciting combination, a nod to my refreshing Chocolate Cherry Smoothie.

Explore these variations to make your German Chocolate Poke Cake uniquely yours—each twist is sure to bring smiles all around!

What to Serve with German Chocolate Poke Cake

Picture the laughter of family and friends as they gather around to enjoy this decadent dessert; the full meal experience is just as exciting as the cake itself.

  • Vanilla Ice Cream: A classic pairing that beautifully balances the cake’s richness, adding a creamy, cold contrast that melts in your mouth.
  • Fresh Berries: The tartness of raspberries or strawberries cuts through the sweetness, offering a refreshing burst of flavor and a pop of color.
  • Whipped Cream: Light and airy, it perfectly complements the dense cake while adding a delightful, airy texture that encourages another slice.
  • Chocolate Coffee: A warm cup enhances the chocolate flavor profile, creating a cozy vibe and making every bite feel extra special.
  • Toasted Coconut: Sprinkle some on top for an added crunch and toasted flavor, enhancing the cake’s own coconut notes for a delightful twist.
  • Nutty Brownies: Serve alongside for a double-chocolate experience; the fudgy texture complements the poke cake’s moistness and flavor variance.
  • Caramel Drizzle: A sweet, silky topping adds depth and a luscious finish, while also adding an element of extravagance to this homey dessert experience.
  • Espresso: A shot of espresso beside your dessert elevates the chocolate flavor and makes for a perfect pick-me-up after a hearty meal.
  • Chocolate Ganache: If you dare, pour a rich, warm ganache over the cake; it creates a decadent layer that chocolate lovers will adore!

German Chocolate Poke Cake Recipe FAQs

How do I choose the right ripeness for my ingredients?
When selecting ingredients for your German Chocolate Poke Cake, opt for fresh items for the best flavor and texture. Check the expiration dates on baking powder and baking soda to ensure they are active; stale leavening agents will hinder your cake's rise. For eggs, choose ones that are clean and without cracks, as fresher eggs will bind the batter better.

What’s the best way to store leftover German Chocolate Poke Cake?
To keep your cake fresh, once you've finished indulging, cover it tightly with plastic wrap or transfer it to an airtight container. It will stay delicious for up to 3 days in the refrigerator. Storing the cake in the fridge not only maintains its moisture but also allows the flavors to meld more beautifully over time.

Can I freeze German Chocolate Poke Cake, and if so, how?
Absolutely! To freeze your German Chocolate Poke Cake, first ensure it’s completely cooled. Wrap it tightly in plastic wrap, followed by aluminum foil to prevent freezer burn, and place it in the freezer. It can be stored for up to 3 months! When you’re ready to enjoy, simply thaw it overnight in the fridge, then serve after frosting it again if desired.

What are some common troubleshooting tips for this cake?
If your German Chocolate Poke Cake turns out too dry, this can be due to overbaking or not using enough moisture-rich ingredients. Always keep an eye on the baking time and test with a toothpick a few minutes before the suggested baking time ends. For stronger chocolate flavor, consider adding a teaspoon of espresso powder to the batter. If it sinks in the middle, it might be due to opening the oven door too early; avoid that temptation!

Are there any dietary considerations for ingredients in this cake?
Yes! For those with nut allergies, you can easily substitute pecans with walnuts or omit nuts entirely for a nut-free version. Also, this cake can be made dairy-free by using almond milk instead of whole milk and opting for a dairy-free chocolate frosting. If you’re looking for a vegan alternative, try using flax eggs in place of large eggs to bind the ingredients without compromising flavor.

Can pets eat any of the ingredients?
No, it’s best to avoid giving this cake to your pets. Ingredients like chocolate, xylitol (often found in sugar-free products), and nuts can be harmful to pets. Keep this delectable German Chocolate Poke Cake safely out of reach from any furry friends!

German Chocolate Poke Cake

Ultimate German Chocolate Poke Cake: The Decadent Dessert Delight

This German Chocolate Poke Cake combines rich chocolate with creamy coconut and crunchy pecans for a delightful dessert experience.
Print Recipe Pin Recipe
Prep Time 20 minutes mins
Cook Time 35 minutes mins
Cooling Time 10 minutes mins
Total Time 1 hour hr 5 minutes mins
Servings: 12 slices
Course: Dessert
Cuisine: German
Calories: 350
Ingredients Equipment Method Nutrition Notes

Ingredients
  

For the Cake
  • 2 cups all-purpose flour swap with gluten-free flour for a gluten-free option
  • 2 cups granulated sugar brown sugar can enhance flavor
  • 1 tablespoon baking powder ensure it's fresh
  • 1 teaspoon baking soda boosts leavening
  • 1 teaspoon salt balances sweetness
  • 3/4 cup unsweetened cocoa powder choose Dutch-process for deeper taste
  • 1 cup whole milk substitute with almond milk for dairy-free
  • 1/2 cup vegetable oil melted coconut oil can be used
  • 2 large eggs consider flax eggs for vegan option
  • 2 teaspoons vanilla extract pure extract works best
  • 1 cup boiling water
For the Topping
  • 1 cup sweetened shredded coconut or use unsweetened
  • 1 cup chopped pecans or omit for a nut-free treat
  • 1 can sweetened condensed milk
  • 1 cup chocolate frosting store-bought or homemade

Equipment

  • 9x13-inch baking pan
  • Mixing Bowl
  • Electric mixer
  • Whisk
  • Spatula

Method
 

Step-by-Step Instructions
  1. Preheat the oven to 350°F (175°C) and grease and flour a 9x13-inch baking pan.
  2. In a large mixing bowl, whisk together the all-purpose flour, granulated sugar, baking powder, baking soda, salt, and unsweetened cocoa powder.
  3. Add the whole milk, vegetable oil, large eggs, and vanilla extract to the dry ingredients and mix on medium speed for about 2 minutes until smooth.
  4. Carefully stir in the boiling water until fully combined; the batter will be thin.
  5. Pour the batter into the prepared pan and bake for 30 to 35 minutes, checking for doneness with a toothpick.
  6. Once cooled for 10 minutes, poke holes evenly across the cake surface with a wooden spoon handle.
  7. In a bowl, mix the sweetened condensed milk, shredded coconut, and chopped pecans, then pour over the warm cake.
  8. Allow the cake to cool completely in the pan; refrigerate if in a hurry.
  9. Spread chocolate frosting over the cooled cake and serve.

Nutrition

Serving: 1sliceCalories: 350kcalCarbohydrates: 50gProtein: 5gFat: 15gSaturated Fat: 7gPolyunsaturated Fat: 2gMonounsaturated Fat: 3gCholesterol: 50mgSodium: 200mgPotassium: 150mgFiber: 2gSugar: 30gVitamin A: 200IUCalcium: 50mgIron: 1mg

Notes

Check expiration dates on baking powder and soda, and ensure dry ingredients are well-blended to avoid lumps.

Tried this recipe?

Let us know how it was!

Ultimate German Chocolate Poke Cake: The Decadent Dessert Delight

August 18, 2025 by Grace Snow Leave a Comment

The aroma of chocolate lingers in the air, beckoning you to the kitchen for a sweet escape. I can almost hear the joyful laughter of family and friends gathered around a table, eagerly waiting for just one slice of my German Chocolate Poke Cake. This delightful dessert is more than just a cake; it's a showstopper that effortlessly combines rich chocolate with creamy coconut and crunchy pecans in a way that’s both easy and utterly delicious. Whether you're planning a festive gathering or simply treating yourself to some homemade goodness, this make-ahead dessert will surely impress and satisfy. I can assure you, every bite is a warm hug of comfort, perfect for any occasion. Are you ready to bring a slice of happiness to your table?

Why is German Chocolate Poke Cake a Must-Try?

Irresistible Flavor Fusion: This dessert boasts a heavenly combination of chocolate, coconut, and pecans that dance harmoniously on your taste buds.

Easy to Make: With simple ingredients and minimal steps, this poke cake is perfect for both novice bakers and seasoned chefs alike.

Make-Ahead Convenience: Prepare it in advance! Each passing day only enhances its flavors, making it a fantastic go-to dessert for busy schedules.

Perfect for Gatherings: Impress your guests with a showstopping dessert that will have everyone reaching for seconds—just like in my Homemade Hot Chocolate, this will be the highlight of any gathering.

Crowd Favorite: It’s a cake that bridges generations, loved by both kids and adults—truly a timeless classic sure to bring smiles.

German Chocolate Poke Cake Ingredients

• If you're ready to create this moist and delightful dessert, here’s what you’ll need!

For the Cake
• All-purpose flour – Provides structure to the cake; substitute with gluten-free flour for a gluten-free option.
• Granulated sugar – Adds sweetness and moisture; can use brown sugar for extra depth.
• Baking powder – Acts as a leavening agent; ensure it's fresh for optimal rise.
• Baking soda – Enhances leavening for a light texture; this ingredient is essential.
• Salt – Balances sweetness and enhances flavors; don’t skip this vital component.
• Unsweetened cocoa powder – Delivers that rich chocolate flavor; Dutch-process cocoa offers an even deeper taste.
• Whole milk – Makes the cake moist and rich; swap it with almond milk for a dairy-free version.
• Vegetable oil – Contributes to moisture and tenderness; melted coconut oil is a nice alternative.
• Large eggs – Bind the ingredients and add stability; flax eggs can be used for a vegan substitute.
• Vanilla extract – Enhances the overall flavor; opt for pure vanilla for the best results.
• Boiling water – Makes for a thin batter, resulting in a wonderfully moist cake.

For the Topping
• Sweetened shredded coconut – Adds texture and a delightful coconut flavor; unsweetened can be used if preferred.
• Chopped pecans – Provide that wonderful crunch and richness; walnuts or simply omitting them works too.
• Sweetened condensed milk – Forms the base of the coconut-pecan mixture; it’s key to the poke effect.
• Chocolate frosting – Adds a layer of richness on top; store-bought is a great time-saver.

Now that you're well-equipped with the ingredients for your German Chocolate Poke Cake, let’s dive into the joy of baking!

Step‑by‑Step Instructions for German Chocolate Poke Cake

Step 1: Preheat the Oven
Begin by preheating your oven to 350°F (175°C). While it heats, generously grease and flour a 9x13-inch baking pan to ensure your German Chocolate Poke Cake doesn’t stick. This step is crucial for a perfectly baked cake that releases easily.

Step 2: Mix Dry Ingredients
In a large mixing bowl, sift together the all-purpose flour, granulated sugar, baking powder, baking soda, salt, and unsweetened cocoa powder. Whisk these dry ingredients until well combined, ensuring there are no lumps. This process helps to evenly distribute the leavening agents, which is key for a light, airy cake.

Step 3: Combine Wet Ingredients
Add the whole milk, vegetable oil, large eggs, and vanilla extract to the bowl with the dry ingredients. Using a hand mixer, mix on medium speed for about 2 minutes until the batter is smooth and well-blended. The mixture will be slightly thick but should have a creamy consistency with no visible lumps.

Step 4: Add Boiling Water
Carefully stir in the boiling water to the cake batter. This step is essential as it creates a thinner batter, which results in a moist German Chocolate Poke Cake. Mix until the batter is smooth, taking care not to over-mix; a few tiny lumps are perfectly fine.

Step 5: Bake the Cake
Pour the prepared batter into your greased 9x13-inch pan, spreading it evenly with a spatula. Bake in the preheated oven for 30 to 35 minutes, or until a toothpick inserted in the center comes out clean. This ensures a tender cake with a rich chocolate flavor.

Step 6: Prepare Poke Holes
Once baked, remove the cake from the oven and let it cool in the pan for about 10 minutes. Using a wooden spoon handle, gently poke holes all over the top of the cake. These holes will allow the delicious coconut-pecan topping to seep in, enhancing the flavors of your German Chocolate Poke Cake.

Step 7: Make the Topping
In a small mixing bowl, combine the sweetened condensed milk, sweetened shredded coconut, and chopped pecans. Mix well until evenly combined. Pour this delicious topping over the warm cake, making sure to fill the poke holes generously. This step is what makes the cake irresistibly moist and flavorful.

Step 8: Cool Completely
Allow the cake to cool completely in the pan before frosting. This is important to ensure that the frosting does not melt and to allow the flavors to meld beautifully. Cooling aids in achieving that perfect texture for your German Chocolate Poke Cake.

Step 9: Frost the Cake
Once completely cooled, spread your choice of chocolate frosting evenly over the top of the cake. For a homemade touch, opt for a rich, creamy chocolate frosting to complement the cake's delightful flavors. Serve chilled or at room temperature for an irresistible dessert.

What to Serve with German Chocolate Poke Cake

The perfect meal starts with a delicious dessert in mind, and this decadent cake needs just the right accompaniments to shine even brighter.

  • Vanilla Ice Cream: The creamy, cold texture of vanilla ice cream contrasts beautifully with the warm, rich cake, enhancing each bite.
  • Fresh Berries: Bright and tart raspberries or strawberries add a refreshing zing, balancing the sweetness of the poke cake.
  • Whipped Cream: Light and airy, a dollop of homemade whipped cream adds just the right touch of elegance and creaminess to each serving.
  • Coffee or Espresso: A warm cup of coffee or a shot of espresso pairs perfectly with the chocolatey richness, elevating the dessert experience.
  • Chocolate Sauce Drizzle: For the true chocoholic, a drizzle of rich chocolate sauce enhances the cake and adds an extra layer of indulgence.
  • Chopped Nuts: A sprinkle of extra toasted pecans or walnuts on top provides added crunch and a nutty flavor that ties into the cake.
  • Cocoa Dusted Meringues: Light and airy meringues dusted with cocoa powder offer a delightful contrast and a touch of whimsy to your dessert spread.
  • Coconut Macaroons: These chewy, sweet treats echo the cake’s coconut flavor, creating a harmonious dessert menu that will delight all.

Make Ahead Options

These German Chocolate Poke Cake is perfect for busy home cooks looking to save time! You can prepare the cake itself up to 24 hours in advance, just be sure to let it cool completely before poking holes and adding the toppings. The coconut-pecan mixture can also be made 2 to 3 days ahead and stored in an airtight container in the refrigerator, ensuring it stays fresh and flavorful. To maintain the cake's moisture, be sure to cover it tightly with plastic wrap if storing in the fridge. When ready to serve, simply frost it and let it sit at room temperature for about 30 minutes for that decadent dessert experience. Enjoy the comfort of having this delightful treat ready to go!

German Chocolate Poke Cake Variations

Embrace the creativity in the kitchen and make this cake your own with these delightful twists!

  • Gluten-Free: Substitute all-purpose flour with a gluten-free blend to enjoy a delectable treat without the gluten.

  • Dairy-Free: Swap whole milk for almond milk and vegetable oil for melted coconut oil to enjoy dairy-free bliss.

  • Vegan: Use flax eggs instead of large eggs and coconut milk in place of whole milk for a plant-based delight.

  • Nut-Free: Omit the chopped pecans entirely or replace them with sunflower seeds for a different crunch without the nuts.

  • Flavor Boost: Add a teaspoon of espresso powder to the batter to amplify the chocolate flavor and add a sophisticated touch.

  • Fruity Twist: Incorporate mashed bananas or apple sauce for added moisture and a hint of fruity sweetness. You'll be surprised by how well it pairs with the chocolate!

  • Coconut Lovers: Increase the shredded coconut in the topping for an extra tropical feel and texture.

  • Chocolate Overload: Opt for a chocolate ganache instead of traditional frosting for an indulgent finish. A drizzle of warm ganache will steal the show!

Feel free to explore these variations and don't forget to check out German Potato Salad or Ice Cream Cake for more culinary inspiration as you navigate your baking adventure!

How to Store and Freeze German Chocolate Poke Cake

Fridge: Store the cake in an airtight container for up to 3 days to maintain its moistness and flavor. This delightful German Chocolate Poke Cake actually tastes better the next day!

Freezer: Wrap slices tightly in plastic wrap and then in aluminum foil for up to 2 months. Thaw in the refrigerator overnight before serving to enjoy a slice of its sweet decadence.

Reheating: If desired, warm individual slices in the microwave for about 10-15 seconds for that freshly-baked taste. Just be careful not to overheat it!

Expert Tips for German Chocolate Poke Cake

  • Choose Quality Cocoa: Use high-quality unsweetened cocoa powder for a deeper, richer chocolate flavor in your German Chocolate Poke Cake.

  • Avoid Overmixing: When combining the wet and dry ingredients, mix just until combined to prevent a dense cake.

  • Check for Freshness: Ensure your baking powder and baking soda are fresh for optimal leavening, as expired ingredients can lead to a flat cake.

  • Fill Generously: When pouring the coconut-pecan topping over the cake, fill the holes generously to allow the flavors to infuse into the cake thoroughly.

  • Cool Completely: Allow your cake to cool completely before frosting to prevent the frosting from melting and ensure a beautiful finish.

German Chocolate Poke Cake Recipe FAQs

How do I know if my ingredients are fresh?
To ensure the best results for your German Chocolate Poke Cake, check that your baking powder and baking soda are fresh. Simply add a teaspoon of baking powder to a small bowl of warm water; if it fizzes, it's still good! For baking soda, add a teaspoon to vinegar; a strong fizz means it's fresh.

How should I store leftover cake?
Store any leftover German Chocolate Poke Cake in an airtight container in the refrigerator for up to 3 days. This cake actually tastes even better the next day as the flavors meld, creating a more decadent bite with each slice!

Can I freeze German Chocolate Poke Cake?
Absolutely! To freeze your cake, wrap individual slices tightly in plastic wrap, then place them in an airtight container or wrap again in aluminum foil to protect against freezer burn. It can last up to 2 months frozen. When you're ready to enjoy a piece, simply thaw it in the refrigerator overnight before serving.

What if my cake doesn’t rise?
If your German Chocolate Poke Cake doesn’t rise, the most common culprits are expired baking powder or baking soda. Always check for freshness before use. Additionally, be mindful not to overmix the batter, as that can create a dense cake that doesn’t rise well.

Is this cake suitable for people with nut allergies?
For a nut-free version of the German Chocolate Poke Cake, simply omit the pecans in the topping and ensure that your ingredients, especially the coconut, are free from any cross-contamination with nuts. This makes it a delicious option for those with nut allergies while still keeping the irresistible flavor intact!

Can I make substitutions in the recipe?
Of course! You can substitute all-purpose flour with gluten-free flour for a gluten-free option. Dairy products can also be swapped for their non-dairy counterparts, such as using almond milk instead of whole milk. Be sure to experiment; this cake is versatile, and many substitutions can still lead to a delightful result!

German Chocolate Poke Cake

German Chocolate Poke Cake: Moist Bliss in Every Bite

Experience the indulgent German Chocolate Poke Cake with rich chocolate, creamy coconut, and crunchy pecans. A delightful dessert for any occasion.
Print Recipe Pin Recipe
Prep Time 20 minutes mins
Cook Time 35 minutes mins
Cooling Time 10 minutes mins
Total Time 1 hour hr 5 minutes mins
Servings: 12 slices
Course: Dessert
Cuisine: German
Calories: 350
Ingredients Equipment Method Nutrition Notes

Ingredients
  

For the Cake
  • 2 cups all-purpose flour substitute with gluten-free flour for a gluten-free option
  • 2 cups granulated sugar can use brown sugar for extra depth
  • 1 tablespoon baking powder ensure it's fresh for optimal rise
  • 1 teaspoon baking soda this ingredient is essential
  • 1 teaspoon salt don’t skip this vital component
  • 3/4 cup unsweetened cocoa powder Dutch-process cocoa offers an even deeper taste
  • 1 cup whole milk swap with almond milk for a dairy-free version
  • 1/2 cup vegetable oil melted coconut oil is a nice alternative
  • 2 large eggs flax eggs can be used for a vegan substitute
  • 2 teaspoons vanilla extract opt for pure vanilla for the best results
  • 1 cup boiling water
For the Topping
  • 1 cup sweetened shredded coconut unsweetened can be used if preferred
  • 1 cup chopped pecans walnuts or simply omitting them works too
  • 1 14-ounce can sweetened condensed milk it’s key to the poke effect
  • 1 cup chocolate frosting store-bought is a great time-saver

Equipment

  • 9x13-inch baking pan
  • large mixing bowl
  • Whisk
  • hand mixer
  • Spatula
  • Wooden spoon
  • small mixing bowl

Method
 

Instructions
  1. Preheat your oven to 350°F (175°C) and grease and flour a 9x13-inch baking pan.
  2. In a large mixing bowl, sift together the all-purpose flour, granulated sugar, baking powder, baking soda, salt, and unsweetened cocoa powder. Whisk until well combined.
  3. Add the whole milk, vegetable oil, large eggs, and vanilla extract to the dry ingredients. Mix on medium speed for about 2 minutes until smooth.
  4. Stir in the boiling water carefully, mixing until smooth but not over-mixing.
  5. Pour the batter into the prepared pan and bake for 30 to 35 minutes until a toothpick comes out clean.
  6. Let the cake cool in the pan for about 10 minutes, then poke holes all over the top.
  7. In a small bowl, mix the sweetened condensed milk, sweetened shredded coconut, and chopped pecans. Pour this over the warm cake, filling the holes.
  8. Allow the cake to cool completely in the pan.
  9. Spread chocolate frosting evenly over the cooled cake before serving.

Nutrition

Serving: 1sliceCalories: 350kcalCarbohydrates: 48gProtein: 4gFat: 16gSaturated Fat: 5gPolyunsaturated Fat: 6gMonounsaturated Fat: 4gCholesterol: 35mgSodium: 250mgPotassium: 150mgFiber: 2gSugar: 28gVitamin A: 200IUCalcium: 50mgIron: 2mg

Notes

For best results, use high-quality cocoa powder and ensure ingredients are fresh. Allow the cake to cool before frosting.

Tried this recipe?

Let us know how it was!
  • « Previous Page
  • 1
  • …
  • 45
  • 46
  • 47
  • 48
  • 49
  • Next Page »

Welcome!

Hi, I’m Grace, a Sydney-based home cook with a passion for bold flavors and trending ingredients. Whether you’re a busy beginner or a seasoned foodie, you’ll find dishes here that are fresh, fun, and full of flavor.

More about me

Popular Recipes

  • Cheesy Chicken Garlic Bread Sandwich
    Cheesy Chicken Garlic Bread Sandwich for Cozy Family Moments
  • Easy Chicken Ranch Wraps
    Easy Chicken Ranch Wraps: Quick, Creamy & Totally Satisfying
  • Chicken Caesar Sandwiches
    Delicious Chicken Caesar Sandwiches for Quick Comfort Food
  • best Cuban sandwich
    The Best Cuban Sandwich You’ll Want Every Weeknight!

Footer

↑ back to top

About

  • Privacy Policy
  • Disclaimer
  • Terms & Conditions

Newsletter

  • Sign Up! for emails and updates

Contact

  • About me
  • Contact me

Copyright © 2025 TastyTrendIngredients