tastytrendingredients

  • Home
  • Recipes
    • Appetizers
    • Breakfast
    • Dessert
    • Dinner
    • Drinks
    • Salads
    • Snacks
    • Soups
  • About me
  • Contact me
menu icon
go to homepage
  • Home
  • Recipes
    • Appetizers
    • Breakfast
    • Dessert
    • Dinner
    • Drinks
    • Salads
    • Snacks
    • Soups
  • About me
  • Contact me
search icon
Homepage link
  • Home
  • Recipes
    • Appetizers
    • Breakfast
    • Dessert
    • Dinner
    • Drinks
    • Salads
    • Snacks
    • Soups
  • About me
  • Contact me
×

Irresistibly Flaky Blackberry Cream Cheese Danish Delight

March 13, 2026 by Grace Snow Leave a Comment

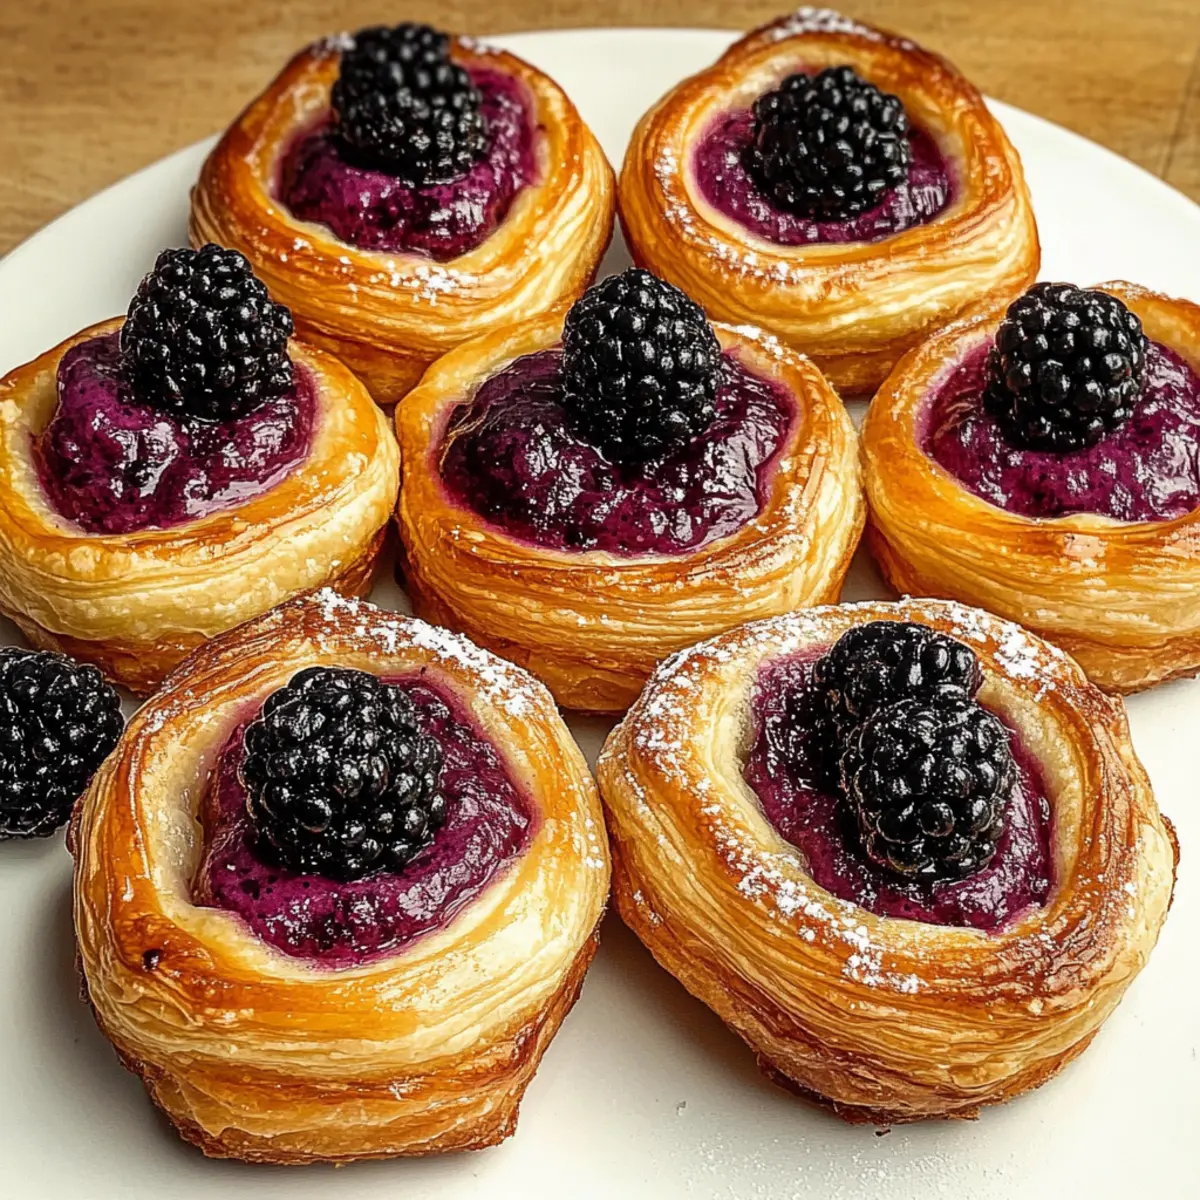
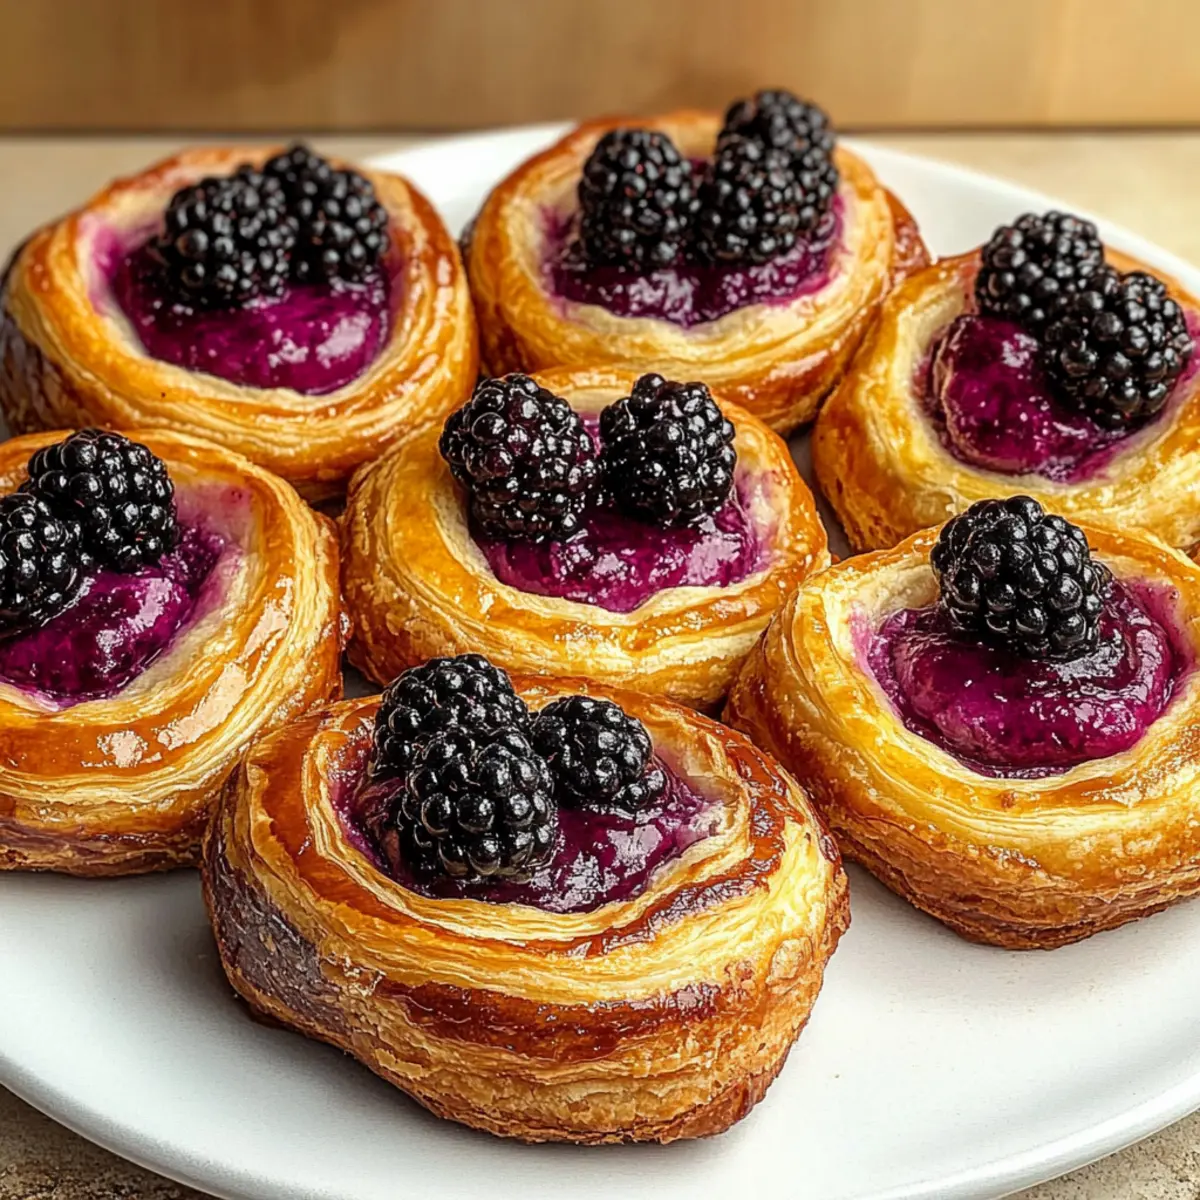
As I was savoring a perfectly flaky pastry on a sunny afternoon, I realized there’s nothing quite like the indulgence of a homemade Blackberry Cream Cheese Danish. Imagine biting into a golden crust that cradles a rich and creamy filling, perfectly balanced by a tart blackberry curd. This delightful pastry is not just a crowd-pleaser but also a quick whip-up, thanks to store-bought puff pastry. You can have gourmet-level indulgence with minimal effort. It’s the ideal dessert to impress guests or simply treat yourself after a long day. Ready to create this sensational treat? Let’s dive into the delicious details!

Why Will You Love This Danish?

Irresistible flavor shines through the combination of rich cream cheese and vibrant blackberry curd, creating an addictive taste experience. Simplicity is key—this recipe uses store-bought puff pastry, making preparation a breeze. Versatile enough for any occasion, these pastries can be served warm with coffee or as a stunning dessert at your next gathering. Impressive appearance with a golden-brown finish guarantees they'll be the star of your table. Want a fruity variation? Try them with lemon or raspberry curd for a delightful twist! Enjoy your homemade gourmet moment today!

Blackberry Cream Cheese Danish Ingredients

  • For the Curd
    • Blackberries – Fresh or frozen, these provide the vibrant flavor for the curd. Adjust sweetness based on berry ripeness for the best results.
    • Granulated Sugar – Sweetens both curd and filling; substitute with coconut sugar for a lower glycemic option.
    • Large Egg – Provides structure; for a vegan alternative, use a flax egg.
    • Large Egg Yolks – These contribute to the richness of the curd.
    • Lemon Juice – Adds acidity to balance the flavors; fresh lemon juice is best for brightness.
    • Butter – Adds a luxurious richness; vegan butter is recommended for a dairy-free version.

  • For the Cream Cheese Filling
    • Cream Cheese – Use softened cream cheese for easy mixing and a creamy texture.
    • Granulated Sugar – Also sweetens the filling; same substitution option applies here.
    • Large Egg Yolk – Adds depth and richness to the filling.
    • Vanilla Extract – Enhances flavor; feel free to swap with almond extract for a twist.

  • For Assembly
    • Puff Pastry – The flaky pastry base; make sure to thaw before use. Substitute with crescent dough if needed, but results may vary.
    • Turbinado Sugar – Sprinkle on pastry edges for a crunchy texture; regular sugar works in a pinch.

  • For Garnish
    • Fresh Blackberries – Used for a lovely finish; feel free to adjust as desired for presentation.
    • Powdered Sugar – An optional garnish for a touch of sweetness when serving.

Dive in and prepare to delight in your homemade Blackberry Cream Cheese Danish experience!

Step‑by‑Step Instructions for Blackberry Cream Cheese Danish

Step 1: Make the Blackberry Curd
Begin by pureeing the blackberries in a blender, then strain the mixture through a fine mesh sieve to eliminate seeds. In a saucepan, combine the blackberry puree with granulated sugar, egg, egg yolks, and lemon juice. Cook over medium heat, stirring constantly for about 5 minutes until the curd thickens and coats the back of a spoon. Remove from heat, whisk in butter, strain again for smoothness, and let cool.

Step 2: Prepare Cream Cheese Filling
In a mixing bowl, beat the softened cream cheese, granulated sugar, egg yolk, and vanilla extract using an electric mixer on medium speed until the mixture is creamy and well-blended, approximately 2-3 minutes. This step is crucial for achieving a smooth filling for your Blackberry Cream Cheese Danish, so ensure there are no lumps before moving on.

Step 3: Assemble the Pastries
Preheat your oven to 400°F (200°C) and roll out the thawed puff pastry on a lightly floured surface. Cut the pastry into 3 ½-inch rounds using a sharp knife or round cutter, then prick the centers with a fork to prevent bubbling. Spoon about 1 tablespoon of the cream cheese filling into the center of each round, brush the edges with an egg wash, and sprinkle turbinado sugar over the top edges for a delightful crunch.

Step 4: Bake
Place the prepared pastries on a baking sheet lined with parchment paper, spacing them apart. Bake in the preheated oven for 15-18 minutes, or until the Danish are golden brown and puffed up beautifully. Keep an eye on them towards the end to achieve that perfect golden hue, as this visual cue indicates they are ready to be enjoyed.

Step 5: Finish
Once the pastries have cooled completely, carefully fill the centers with the prepared blackberry curd. For a final touch, garnish each Danish with fresh blackberries and, if desired, dust lightly with powdered sugar for a touch of sweetness. Serve your delightful Blackberry Cream Cheese Danishes warm or at room temperature for the ultimate treat.

Storage Tips for Blackberry Cream Cheese Danish

  • Room Temperature: These pastries are best enjoyed fresh, but if left out, they should be consumed within 1 day for optimal taste and texture.

  • Fridge: Store your Blackberry Cream Cheese Danishes in an airtight container for up to 3 days. This keeps the filling creamy and helps maintain the pastry's flakiness.

  • Freezer: For longer storage, freeze the Danishes individually wrapped in plastic wrap, then place them in a zip-top bag. They can be kept in the freezer for up to 2 months.

  • Reheating: To enjoy your Danishes after storing, reheat them in a preheated oven at 350°F (175°C) for about 10-15 minutes, until warmed through and crispy again.

Blackberry Cream Cheese Danish Variations

Feel free to play around with these delightful twists on the classic pastry, and watch your kitchen come alive with tempting aromas!

  • Berry Medley: Combine blackberries with raspberries or blueberries for a vibrant and mixed-berry curd. The more, the merrier when it comes to flavor!

  • Citrus Zest: Add some zest from an orange or lemon into the cream cheese filling for a refreshing burst. This zest elevates the flavor profile, making every bite a little brighter.

  • Spiced Twist: Incorporate a teaspoon of cinnamon or nutmeg into the cream cheese mixture for a warm, inviting aroma that’s perfect for chilly days. The spices add a comforting touch you’ll adore.

  • Nutty Addition: Fold in chopped almonds or walnuts into the cream cheese filling for delightful texture and enhanced flavor. It’s a satisfying crunch that’ll surprise your taste buds!

  • Vegan Option: Swap the cream cheese for a dairy-free alternative like blended soaked cashews for a rich and creamy filling that’s entirely plant-based. It’s deliciously inclusive!

  • Chocolate Drizzle: Top your finished Danishes with a drizzle of dark chocolate for an extra layer of indulgence. Who can resist that decadent combination?

  • Savory Spin: Try replacing blackberry curd with a savory option, such as spinach and feta, for a unique brunch twist. This savory version is sure to intrigue even the pickiest eaters!

  • Syrup Soak: Serve with a drizzle of maple or honey syrup once baked for an added touch of sweet sophistication. That extra shine can make all the difference!

For more delightful dessert ideas, don’t forget to explore Blackberry Crisp Amp or whip up a batch of Ice Cream Cake to satisfy that sweet craving!

Make Ahead Options

These Blackberry Cream Cheese Danishes are perfect for meal prep enthusiasts looking to save time on busy days! You can prepare the blackberry curd and the cream cheese filling up to 24 hours in advance; simply store them in separate airtight containers in the refrigerator to maintain their fresh flavors. Additionally, assemble the pastries (without baking them) and keep them covered in the fridge for up to 3 days. When you’re ready to enjoy these delightful treats, just pop them in the oven at 400°F (200°C) for 15-18 minutes until golden. This way, you’ll have delicious, freshly baked Blackberry Cream Cheese Danishes with minimal effort, perfect for impressing guests or savoring a moment of indulgence!

Expert Tips for Blackberry Cream Cheese Danish

  • Cream Cheese Preparation: Ensure cream cheese is at room temperature before mixing to achieve a velvety filling without lumps.

  • Puff Pastry Handling: Avoid stretching the puff pastry while rolling; this ensures it puffs beautifully during baking.

  • Perfectly Filled Pastries: Do not overfill the danishes with cream cheese mixture to prevent spillage and maintain neat edges.

  • Whisking Technique: Continuously whisk the blackberry curd while heating to prevent the eggs from scrambling for a smooth consistency.

  • Baking Watchfulness: Keep an eye on the pastries during the last few minutes of baking to achieve that desirable golden-brown color, perfect for your Blackberry Cream Cheese Danish.

What to Serve with Blackberry Cream Cheese Danish

Indulging in fluffy pastries deserves a well-rounded meal; let’s explore delightful pairings that will elevate your experience.

  • Rich Coffee: A warm cup brings out the sweetness of the pastry while offering a comforting contrast to its creamy filling.

  • Creamy Vanilla Ice Cream: The cool, creamy treat contrasts beautifully with the warm danish, adding a luscious touch to your dessert experience.

  • Fruit Salad: A refreshing medley of seasonal fruits balances the richness, providing a burst of flavor and color that enhances each bite.

  • Herbal Tea: Chamomile or mint tea complements the danish’s flavors seamlessly and offers a soothing finish to your sweet indulgence.

  • Cheese Plate: Include slices of sharp cheddar or brie for a delightful savory contrast; the cheese's creaminess pairs beautifully with the blackberry curd.

  • Lemonade Spritz: A fizzy, citrus drink brightens the palate and enhances the tartness of the blackberry, making each bite more vibrant.

  • Chocolate Drizzle: Add a touch of melted dark chocolate on top for an extra layer of richness that beautifully complements the cream cheese filling.

  • Almond Croissant: This addition adds an extra layer of indulgence while maintaining a delightful pastry experience.

  • Simple Whipped Cream: Serve with a dollop of lightly sweetened whipped cream to create a dreamy texture combination with the blackberry curd.

Blackberry Cream Cheese Danish Recipe FAQs

How do I select ripe blackberries for the curd?
Absolutely! When choosing blackberries, look for ones that are plump, firm, and have a deep, rich color. Avoid any with dark spots or mushiness, as these might indicate overripeness. Fresh blackberries should slightly "give" when pressed but still hold their shape. If you opt for frozen, ensure there are no ice crystals, as they can compromise texture.

How should I store leftover Blackberry Cream Cheese Danishes?
After you've enjoyed your pastries, store them in an airtight container in the refrigerator. They will stay fresh for up to 3 days. If you want them to retain their flaky texture, reheat them in the oven before serving—just pop them in at 350°F (175°C) for about 10-15 minutes.

Can I freeze Blackberry Cream Cheese Danishes?
Certainly! For freezing, wrap each cooled Danish individually in plastic wrap, ensuring they're tightly sealed to prevent freezer burn. Place them in a zip-top freezer bag, and they can be stored for up to 2 months. When you’re ready to enjoy, thaw in the refrigerator overnight and reheat in the oven for that flaky freshness.

What if my blackberry curd is too runny?
If your curd turns out too runny, you can fix this by simply returning it to the saucepan over medium heat. Stir frequently for about 1-2 minutes until it thickens to your desired consistency. Make sure to constantly whisk to prevent any eggs from scrambling. For a smoother final product, a quick strain through a fine mesh sieve can help!

Are there any dietary considerations for this recipe?
Very! If you need to accommodate dietary restrictions, you can easily substitute ingredients. Use vegan butter and a flax egg instead of traditional eggs for a dairy-free and egg-free option. Additionally, opting for coconut sugar in place of granulated sugar helps create a lower glycemic index pastry, making it a great choice for those mindful of sugar intake.

Blackberry Cream Cheese Danish

Irresistibly Flaky Blackberry Cream Cheese Danish Delight

Indulge in a homemade Blackberry Cream Cheese Danish that combines rich cream cheese and tart blackberry curd for a delightful dessert experience.
Print Recipe Pin Recipe
Prep Time 30 minutes mins
Cook Time 18 minutes mins
Cooling Time 10 minutes mins
Total Time 58 minutes mins
Servings: 8 pastries
Course: Dessert
Cuisine: American
Calories: 250
Ingredients Equipment Method Nutrition Notes

Ingredients
  

For the Curd
  • 2 cups Blackberries Fresh or frozen
  • 1 cup Granulated Sugar Substitute with coconut sugar for a lower glycemic option
  • 1 whole Large Egg For structure; can substitute with a flax egg
  • 2 large Large Egg Yolks Adds richness
  • 2 tablespoons Lemon Juice Fresh is best for brightness
  • 2 tablespoons Butter Use vegan butter for dairy-free
For the Cream Cheese Filling
  • 8 ounces Cream Cheese Softened
  • 1/2 cup Granulated Sugar Same substitution option applies
  • 1 large Egg Yolk For depth and richness
  • 1 teaspoon Vanilla Extract Can swap with almond extract
For Assembly
  • 1 sheet Puff Pastry Thaw before use; crescent dough may substitute
  • 2 tablespoons Turbinado Sugar For crunchy texture
For Garnish
  • 1 cup Fresh Blackberries Adjust as desired for presentation
  • 1 tablespoon Powdered Sugar Optional for serving

Equipment

  • Blender
  • Saucepan
  • Mixer
  • Rolling Pin
  • Baking Sheet
  • Parchment Paper
  • Fine-mesh sieve
  • Knife or Round Cutter

Method
 

Step-by-Step Instructions
  1. Make the Blackberry Curd: Puree blackberries in a blender, strain, and combine with sugar, egg, yolks, and lemon juice in a saucepan. Cook over medium heat for 5 minutes until thickened, whisk in butter, strain, and let cool.
  2. Prepare Cream Cheese Filling: Beat softened cream cheese, sugar, egg yolk, and vanilla with an electric mixer at medium speed for 2-3 minutes until creamy and well-blended.
  3. Assemble the Pastries: Preheat oven to 400°F (200°C). Roll out puff pastry and cut into 3 ½-inch rounds. Spoon filling into centers, brush edges with egg wash, and sprinkle with turbinado sugar.
  4. Bake: Place pastries on a lined baking sheet and bake for 15-18 minutes until golden brown and puffed.
  5. Finish: Once cooled, fill centers with blackberry curd, garnish with fresh blackberries, and dust with powdered sugar if desired.

Nutrition

Serving: 1pastryCalories: 250kcalCarbohydrates: 30gProtein: 3gFat: 14gSaturated Fat: 8gPolyunsaturated Fat: 0.5gMonounsaturated Fat: 5gCholesterol: 45mgSodium: 150mgPotassium: 120mgFiber: 1gSugar: 10gVitamin A: 500IUVitamin C: 6mgCalcium: 50mgIron: 1mg

Notes

Ensure cream cheese is at room temperature before mixing. Avoid stretching the puff pastry while rolling, and keep an eye on pastries towards the end of baking for a perfect golden hue.

Tried this recipe?

Let us know how it was!

Cinnamon Roll Sugar Cookies That Will Melt Your Heart

March 13, 2026 by Grace Snow Leave a Comment

As I stood in my kitchen, the sweet scent of cinnamon danced through the air, instantly transporting me to cozy mornings spent enjoying warm pastries. That’s when I realized: what if I could capture that beloved cinnamon roll experience in a cookie? Enter my Cinnamon Roll Sugar Cookies—perfectly soft morsels that marry the essence of cinnamon rolls with the texture of classic sugar cookies. With minimal fuss and maximum flavor, these delightful treats not only come together quickly but also make for a crowd-pleasing snack at any gathering. Whether you’re hosting a festive holiday party or simply craving a warm, comforting bite, these cookies are bound to bring smiles all around. Curious how to whip up a batch that’ll become a favorite? Let’s dive into the recipe!

Why Are Cinnamon Roll Sugar Cookies Irresistible?

Comforting, familiar flavors: These cookies deliver all the warm, cozy nostalgia of cinnamon rolls in a handheld treat.

Effortless baking: With straightforward steps, they come together quickly—perfect for those busy days when you crave something sweet without the stress.

Texture perfection: Expect a soft, tender crumb that melts in your mouth, enhanced by delightful swirls of cinnamon sugar.

Customization possibilities: Feel free to personalize with your favorite mix-ins or spices, like adding a hint of nutmeg, or even incorporating dried cranberries for a fruity twist.

Crowd-pleasing delight: Whether at holiday gatherings or afternoon tea, these cookies are sure to impress and disappear fast! Try pairing them with your favorite beverage for an unforgettable treat.

Cinnamon Roll Sugar Cookies Ingredients

For the Cookie Dough
• Unsalted Butter – Provides richness and moisture; stick with real butter for the best flavor.
• Granulated Sugar – Sweetens the dough; necessary for that classic cookie texture.
• Brown Sugar – Adds moisture and a hint of caramel for depth; light brown is perfect, while dark brown gives a richer taste.
• All-Purpose Flour – Forms the structure of these delightful cookies; you can substitute with a gluten-free blend on a one-to-one basis.
• Cornstarch – Ensures a tender crumb; optional, but recommended if you're aiming for that melt-in-your-mouth texture.
• Baking Powder – Provides leavening; in a pinch, you could use baking soda, although it might change the flavor slightly.
• Cinnamon – The key player here, giving warmth and that quintessential cinnamon roll taste; feel free to adjust based on your spice preference.
• Salt – Enhances sweetness and balances flavors; reduce if you're using salted butter.
• Egg – Binds everything together; no substitutes here for the best consistency.

For the Cinnamon Sugar Filling
• Brown Sugar – Adds sweetness and depth to the filling blend; light brown works beautifully here.
• Cinnamon – The star of the filling; adjust as desired for your preferred spiciness.
• Unsalted Butter – A must for spreading that sweet cinnamon goodness evenly; softened for easy mixing.

Each bite of these Cinnamon Roll Sugar Cookies offers a delectable journey through warm flavors, begging to be shared with friends and family!

Step‑by‑Step Instructions for Cinnamon Roll Sugar Cookies

Step 1: Prepare Cinnamon Sugar Filling
In a mixing bowl, combine softened unsalted butter, brown sugar, flour, cinnamon, and a pinch of salt. Mix until the mixture is smooth with a slightly chunky texture. Once combined, refrigerate this cinnamon sugar filling for about 10 minutes to allow it to firm up while you prepare the dough.

Step 2: Make Cookie Dough
In a large bowl, cream together 1 cup of unsalted butter and 1 cup of granulated sugar using an electric mixer until the mixture is light and fluffy, about 3-4 minutes. Add in 1 tablespoon of vanilla extract, 1 egg, and 1 egg yolk, mixing until everything is well combined, creating a rich and creamy cookie dough base.

Step 3: Combine Dry Ingredients
In a separate bowl, whisk together 2 ¾ cups of all-purpose flour, 1 teaspoon of baking powder, 2 tablespoons of cornstarch, and ½ teaspoon of salt. Gradually add this dry mixture into the wet ingredients, stirring gently to combine until no flour streaks remain. Be careful not to overmix to ensure the soft texture of your Cinnamon Roll Sugar Cookies.

Step 4: Layering Dough
Divide the cookie dough in half, placing one half in a lined baking dish, and spread it evenly. Next, sprinkle half of the chilled cinnamon sugar filling over the dough. Take the second half of the dough and spread it gently over the filling before adding the remaining cinnamon sugar mixture on top for that signature swirl.

Step 5: Portioning and Chilling
Using a cookie scoop, portion out 2 tablespoons of the dough, placing them on a parchment-lined baking tray. After scooping, freeze the dough balls for about 10 minutes; this step helps maintain their shape during baking and results in thicker, perfectly baked Cinnamon Roll Sugar Cookies.

Step 6: Baking
Preheat your oven to 350°F (175°C). Once the dough balls have chilled, place them on the prepared baking sheets, spacing them a few inches apart. Bake for 10-12 minutes, or until the edges are golden brown while the centers remain soft and slightly puffy, giving off that irresistible cinnamon aroma.

Step 7: Cooling and Serving
Once baked, remove the trays from the oven and let the Cinnamon Roll Sugar Cookies cool on the baking sheet for about 5 minutes. Then, transfer them to a wire rack to cool completely. These delightful treats are now ready to be enjoyed with your favorite beverage!

Expert Tips for Cinnamon Roll Sugar Cookies

  • Butter Temperature: Ensure your unsalted butter is softened at room temperature. Cold butter makes it difficult to achieve a smooth dough texture.

  • Avoid Overmixing: When combining the dry ingredients, stir gently to prevent gluten formation; overmixing can lead to tough cookies instead of the soft texture you're aiming for.

  • Chill the Dough: Don't skip the freezing step before baking! Chilling the dough balls for 10 minutes helps them maintain their shape and results in thicker Cinnamon Roll Sugar Cookies.

  • Proper Measuring: Use the spoon and level method for measuring flour rather than scooping directly from the bag; this ensures you're using the right quantity for a perfect cookie.

  • Taste Adjustment: Feel free to adjust the cinnamon in both the dough and filling to suit your taste preferences. A pinch more can enhance that classic cinnamon roll flavor.

  • Special Presentation: For an extra touch, dust the finished Cinnamon Roll Sugar Cookies with powdered sugar or drizzle with cream cheese glaze just before serving.

Make Ahead Options

These Cinnamon Roll Sugar Cookies are perfect for busy home cooks looking to save time during hectic weeks! You can prepare the cookie dough and refrigerate it for up to 3 days. Simply follow all the steps until it's time to freeze the scooped dough balls. Store the dough in an airtight container or wrapped tightly in plastic wrap to maintain freshness. When you're ready to bake, just preheat your oven and bake directly from the fridge, adjusting the cooking time by a minute or two if necessary. You can also freeze the unbaked dough balls for up to 3 months—brilliant for last-minute cravings! Enjoy bakery-fresh cookies any time with minimal effort!

How to Store and Freeze Cinnamon Roll Sugar Cookies

Room Temperature: Store cookies in an airtight container at room temperature for up to 3-4 days to maintain their softness and flavor.

Fridge: For longer freshness, keep the cookies in the fridge, where they can last up to 1 week. Bring to room temperature before serving for the best taste.

Freezer: Freeze unbaked cookie dough balls in an airtight container for up to 3 months. When ready to bake, simply add a few extra minutes to the baking time.

Reheating: To enjoy leftover cookies warm, pop them in the microwave for about 10-15 seconds—perfect for reviving that fresh-out-of-the-oven taste!

What to Serve with Cinnamon Roll Sugar Cookies

Indulging in these delightful treats is just the beginning; complement your cozy cookie experience with a few perfect pairings.

  • Creamy Chai Latte: The warm spices in chai enhance the cinnamon flavors, creating a harmonious and comforting drink choice.

  • Coffee with Cream: Enjoy a classic pairing where the richness of coffee beautifully contrasts the sweetness of the cookies.

  • Vanilla Ice Cream: A scoop of vanilla ice cream adds a creamy, cool element that makes every bite an unforgettable delight.

  • Fruit Salad: Fresh, bright fruits introduce a refreshing twist to balance the sweetness of the cookies while adding a pop of color.

  • Hot Cocoa: A cozy blend of chocolate with a hint of vanilla offers a delightful contrast to the spiced cookie. Perfect for chilly evenings!

  • Maple Glazed Carrots: The natural sweetness of roasted carrots paired with a maple glaze echoes the cookies' flavors, making a sweet side dish for meals.

  • Cinnamon-Spiced Tea: This aromatic tea will amplify the warm essence of the cookies, making for a perfect snack or dessert moment any time of day.

  • Cheese Platter: Pairing with a selection of creamy cheeses introduces a savory note, making a delightful contrast to the sugary treat.

  • Pumpkin Spice Doughnuts: For a festive touch, serve alongside these tender doughnuts that share a cozy spice profile, ideal for autumn gatherings or holiday cheer.

Cinnamon Roll Sugar Cookies Variations

Feel inspired to add your own personal touch to these delightful cookies! Here are some fun twists to enhance flavor and texture.

  • Gluten-Free: Use a gluten-free all-purpose flour blend to ensure everyone can enjoy these cookies without sacrificing taste or texture.

  • Spicy Variation: Add a pinch of nutmeg or allspice to the dough and filling for an extra layer of warmth. This subtle change can elevate the cinnamon flavor!

  • Dried Fruit Delight: Fold in dried cranberries or raisins into the dough for bursts of sweetness and chewy texture. The fruity addition complements the spice beautifully!

  • Coconut Oil Swap: Substitute unsalted butter with coconut oil for a nutty flavor and a dairy-free option perfect for those with lactose sensitivities.

  • Choco-Cinnamon Swirl: Incorporate mini chocolate chips into the filling or the dough for a deliciously sweet chocolate-cinnamon twist. It's an indulgent pairing!

  • Maple Glaze: Drizzle a simple maple glaze over the cooled cookies to enhance sweetness and offer a delightful contrast to the spiced flavors. It’s a wonderful finishing touch!

  • Nutty Crunch: Add chopped pecans or walnuts to the cookie dough for crunch and nutty flavor, creating added texture and richness.

Feel free to mix and match these ideas or try different combinations to create your signature version of these fabulous Cinnamon Roll Sugar Cookies! If you're in the mood for more variations, don’t forget to check out some of my other creations, like these scrumptious Pumpkin Cinnamon Roll or even Pumpkin Cinnamon Roll! Enjoy the baking adventure!

Cinnamon Roll Sugar Cookies Recipe FAQs

How do I choose ripe ingredients for my Cinnamon Roll Sugar Cookies?
Absolutely! For the best flavor, use unsalted butter that is at room temperature, as it creams better with sugar, creating a fluffy texture. As for the egg, make sure it’s fresh—this will enhance the flavor and help bind the ingredients. If using brown sugar, check that it’s moist and not hard; fresh brown sugar will bring that rich caramel flavor to your cookies.

What is the best way to store Cinnamon Roll Sugar Cookies?
To keep your cookies fresh, store them in an airtight container at room temperature for about 3-4 days; they’ll maintain their softness and flavor wonderfully. If you’d like to extend their life, refrigerate them, where they can last up to a week. Just be sure to bring them back to room temperature before serving for the best taste!

Can I freeze Cinnamon Roll Sugar Cookies and how?
Yes! Freezing the unbaked dough is a fantastic way to have cookie-making simplicity on hand. Scoop the dough into balls and place them on a parchment-lined tray, then freeze until firm. Once frozen, transfer the dough balls to an airtight container. They can be stored for up to 3 months. When you’re ready to bake, add an extra minute or two to the baking time for that fresh-from-the-oven feel!

What should I do if my cookie dough is too sticky?
Very! If your dough feels too sticky and is hard to work with, try chilling it in the refrigerator for 15-30 minutes. This sets the butter and makes it much easier to scoop and shape. Alternatively, you can sprinkle a little extra flour while shaping, but be careful not to add too much, as this can affect the final texture of your lovely Cinnamon Roll Sugar Cookies.

Are there any dietary considerations I should keep in mind?
Absolutely! If you're making these cookies for someone with gluten sensitivities, you can substitute all-purpose flour with a gluten-free baking blend on a one-to-one basis. Make sure to check that all your chosen ingredients, like baking powder, are gluten-free as well. For those with egg allergies, we recommend using a flax egg (1 tablespoon of ground flaxseed mixed with 2.5 tablespoons of water, let sit until gelatinous) for binding. Always adjust based on individual dietary restrictions.

How can I add a personal twist to these cookies?
Very! Try incorporating different spices like nutmeg or even allspice to elevate the cookie flavor. You might also consider adding chopped nuts or dried fruits like cranberries or raisins to add texture. Just remember to adjust the cinnamon levels according to your taste preference for that signature cinnamon roll experience!

Cinnamon Roll Sugar Cookies

Cinnamon Roll Sugar Cookies That Will Melt Your Heart

Indulge in Cinnamon Roll Sugar Cookies that combine the essence of cinnamon rolls with classic cookie texture.
Print Recipe Pin Recipe
Prep Time 20 minutes mins
Cook Time 12 minutes mins
Chilling Time 10 minutes mins
Total Time 42 minutes mins
Servings: 24 cookies
Course: Dessert
Cuisine: American
Calories: 150
Ingredients Equipment Method Nutrition Notes

Ingredients
  

For the Cookie Dough
  • 1 cup unsalted butter softened
  • 1 cup granulated sugar
  • 1 cup brown sugar light brown
  • 2 ¾ cups all-purpose flour
  • 2 tablespoons cornstarch optional
  • 1 teaspoon baking powder
  • 2 teaspoons cinnamon adjust to taste
  • ½ teaspoon salt
  • 1 large egg
For the Cinnamon Sugar Filling
  • 1 cup brown sugar light brown
  • 2 tablespoons cinnamon adjust to taste
  • ½ cup unsalted butter softened

Equipment

  • Mixing Bowl
  • Electric mixer
  • Whisk
  • Baking Sheet
  • Parchment Paper
  • Cookie Scoop
  • wire rack

Method
 

Step-by-Step Instructions
  1. In a mixing bowl, combine softened unsalted butter, brown sugar, flour, cinnamon, and a pinch of salt. Mix until smooth and chunky. Refrigerate for 10 minutes.
  2. In a large bowl, cream together 1 cup of unsalted butter and 1 cup of granulated sugar until light and fluffy, about 3-4 minutes.
  3. Add in 1 tablespoon of vanilla extract, 1 egg, and 1 egg yolk, mixing until well combined.
  4. Whisk together 2 ¾ cups of all-purpose flour, 1 teaspoon of baking powder, 2 tablespoons of cornstarch, and ½ teaspoon of salt in a separate bowl.
  5. Gradually add the dry mixture into the wet ingredients and stir gently until no flour streaks remain.
  6. Divide the cookie dough in half and spread one half in a lined baking dish, then sprinkle half of the cinnamon sugar filling over it.
  7. Spread the second half of the dough over the filling, then add the remaining cinnamon sugar mixture on top.
  8. Using a cookie scoop, portion out 2 tablespoons of the dough on a parchment-lined baking tray and freeze for 10 minutes.
  9. Preheat the oven to 350°F (175°C). Bake the dough balls for 10-12 minutes or until edges are golden brown.
  10. Cool on baking sheets for 5 minutes, then transfer to a wire rack to cool completely.

Nutrition

Serving: 1cookieCalories: 150kcalCarbohydrates: 22gProtein: 1gFat: 7gSaturated Fat: 4gPolyunsaturated Fat: 0.5gMonounsaturated Fat: 2gCholesterol: 15mgSodium: 85mgPotassium: 45mgSugar: 12gVitamin A: 200IUCalcium: 10mgIron: 0.5mg

Notes

Dust with powdered sugar or drizzle with cream cheese glaze for special presentation.

Tried this recipe?

Let us know how it was!

Creamy White Garlic Pizza Sauce: Elevate Your Pizzas Today

March 8, 2026 by Grace Snow Leave a Comment

The aroma of sautéed garlic filled my kitchen, and just like that, I was transported to an Italian trattoria. This creamy White Garlic Pizza Sauce is a game-changer for your pizza nights, transforming a simple dish into a rich, flavorful experience. Ready in just 30 minutes, this quick and easy recipe not only saves you from the fast-food trap but also lets you customize garlic intensity and add a dash of heat, making it perfect for any palate. Imagine the delight of family and friends as you serve pizzas topped with this velvety sauce—it's the kind of comfort food that brings everyone together. Are you ready to elevate your homemade pizza game? Let's dive into the details!

Why Is This Sauce a Must-Try?

Creamy Texture: The rich blend of heavy cream and Parmesan creates a velvety sauce that enhances your favorite pizza or pasta.

Quick Preparation: With just 30 minutes required, you can whip up this sauce in no time, making it a fantastic option for those busy weeknights.

Versatile Flavor: Customize the garlic intensity and spice level to match your taste, whether you're a garlic lover or just want a hint of heat.

Crowd-Pleasing Appeal: Impress friends and family with this indulgent sauce that guarantees rave reviews at your next gathering or pizza night.

Make-It-Your-Own: Easily swap in fresh herbs or cheese to create unique flavor profiles; try pairing it with Cheesy Garlic Bread for a truly delightful meal.

  1. Ingredients
    • • White Garlic Pizza Sauce Ingredients

  2. For the Sauce

  • Heavy cream – Provides richness and creaminess to the sauce; can substitute half with whole milk for a lighter version.
  • Garlic, minced – Offers robust flavor essential to the sauce; fresh garlic is recommended for best results.
  • Olive oil – Used for sautéing garlic and providing a base flavor; other oils can be used, but olive oil is preferred.
  • All-purpose flour – Thickens the sauce to the desired consistency; add an extra tablespoon for a creamier sauce if needed.
  • Salt – Enhances overall flavor; no substitutions necessary.
  • Black pepper – Adds a mild heat and flavor depth; use freshly ground for the best taste.
  • Dried oregano – Provides classic Italian herb flavor; substitute with dried basil if desired.
  • Dried basil – Complements the flavor profile alongside oregano; fresh basil can be used but adjust quantity.
  • Red pepper flakes (optional) – Adds spiciness to the sauce; adjust the quantity based on your heat preference.
  • Parmesan cheese, grated – Adds a salty, nutty flavor and creaminess to the sauce; Pecorino Romano can be a substitute for a sharper taste.

This delightful White Garlic Pizza Sauce is ready to transform your homemade meals into extraordinary creations!

Step‑by‑Step Instructions for White Garlic Pizza Sauce

Step 1: Prepare Garlic Base
Heat 2 tablespoons of olive oil in a medium saucepan over medium heat. Once the oil shimmers, add 4 minced garlic cloves and sauté for 1–2 minutes, stirring frequently until the garlic is fragrant and lightly golden. Be careful not to let it brown too much, as it can become bitter.

Step 2: Make Roux
Sprinkle 2 tablespoons of all-purpose flour over the sautéed garlic, stirring constantly for about 1 minute. This forms a roux that will help thicken your White Garlic Pizza Sauce. Ensure there are no lumps, and cook until the mixture is lightly golden, releasing a nutty aroma.

Step 3: Add Cream and Spices
Gradually whisk in 1 cup of heavy cream, ensuring a smooth mixture without any lumps. Then, add 1/2 teaspoon of salt, 1/4 teaspoon of freshly ground black pepper, 1 teaspoon of dried oregano, and 1 teaspoon of dried basil for that classic Italian flavor. If you like some heat, add a pinch of red pepper flakes at this stage.

Step 4: Thicken Sauce
Continue to cook the sauce over medium heat, whisking continuously for about 5–7 minutes, until it thickens to your desired consistency. You’ll know it’s ready when the sauce coats the back of a spoon and has a creamy texture that invites you to taste.

Step 5: Incorporate Cheese
Remove the saucepan from heat and stir in 1 cup of grated Parmesan cheese until it melts completely and integrates into the sauce. This will enrich the flavor of your White Garlic Pizza Sauce and enhance its creamy texture.

Step 6: Cool and Use
Allow the sauce to cool slightly for about 5 minutes before spreading it on your pizza dough. The cooling period will help it thicken a bit more and make it easier to work with. This delicious White Garlic Pizza Sauce is now ready to elevate your pizzas effortlessly!

What to Serve with Creamy White Garlic Pizza Sauce

Picture a home-cooked meal where every bite is a comforting burst of flavor, inviting friends and family to the table.

  • Crispy Garlic Bread: The buttery crunch of this bread pairs beautifully with the creamy sauce, perfect for dipping.
    Enjoy a side of garlic bread with this sauce—imagine the aroma wafting through your kitchen as you pull it fresh from the oven.

  • Fresh Arugula Salad: A peppery, vibrant salad adds a crisp contrast to the velvety sauce.
    Toss together arugula, cherry tomatoes, and a light vinaigrette for a refreshing crunch that complements your creamy pizza.

  • Roasted Vegetables: Caramelized veggies introduce earthy flavors and textures that enhance the dish.
    Oven-roasting carrots, zucchini, and bell peppers brings out their natural sweetness, making them an irresistible sidekick to the sauce.

  • Homemade Pizza Dough: Elevate your pizza game by crafting your own dough.
    A buttery, warm crust provides the ideal foundation for spreading that deliciously rich garlic sauce.

  • Classic Caesar Salad: Crisp romaine, tart dressing, and croutons create a classic pairing.
    The bold flavors of a Caesar salad balance the creaminess, providing a refreshing palate cleanser each time.

  • Wine Pairing: A chilled Sauvignon Blanc can brighten the meal with its zesty notes.
    Sip on a glass while enjoying your pizza—this harmonious pairing enhances the overall dining experience.

  • Lemon Sorbet: This light, refreshing dessert cleanses the palate post-meal.
    The citrusy brightness of sorbet contrasts with the sauce’s richness, leaving you with a satisfying finish.

White Garlic Pizza Sauce Variations

Feel free to play with this sauce to suit your preferences; the possibilities are almost endless!

  • Butter Swap: Replace olive oil with butter for a richer, creamier flavor. This adds a delightful depth to your sauce.

  • Fresh Herbs: For a garden-fresh taste, use fresh herbs like thyme, rosemary, or parsley instead of dried ones. They can invigorate the sauce with vibrant flavors.

  • Cheesy Addition: Mix in some shredded mozzarella cheese for extra cheesiness. It will melt beautifully and create a gooey texture.

  • Almond Milk: For a lighter option, substitute heavy cream with almond milk. You’ll get a creamy sauce that’s dairy-free and still delicious.

  • Lemon Zest: Add a hint of brightness by incorporating a teaspoon of lemon zest. It’s an unexpected twist that freshens up the flavor profile.

  • Spicier Kick: Want some heat? Increase the amount of red pepper flakes or add sliced jalapeños for a fiery version. This can turn your pizza night into an exciting adventure!

  • Shrimp Pairing: For a unique twist, try mixing in cooked shrimp with the sauce. This pairs perfectly if you’re inspired to create gourmet pizzas—perhaps with some spinach or artichokes.

Try some of these variations next time you make your Cheesy Garlic Bread or serve it alongside Honey Garlic Chicken to elevate your meal even further!

How to Store and Freeze White Garlic Pizza Sauce

Fridge: Store unused White Garlic Pizza Sauce in an airtight container for up to 4 days. Ensure it cools to room temperature before sealing to maintain freshness.

Freezer: For longer storage, freeze the sauce in a freezer-safe container for up to 2 months. Leave some space at the top for expansion as it freezes.

Reheating: When ready to use, thaw the sauce in the refrigerator overnight and reheat gently on low heat, stirring frequently to combine any separated ingredients.

Make-Ahead Tip: This creamy sauce can be prepared ahead of time, making it a convenient option for busy meal planning. Just remember to stir while reheating!

Make Ahead Options

Want to save time on busy weeknights? This creamy White Garlic Pizza Sauce is perfect for meal prep! You can prepare the entire sauce up to 3 days in advance. Simply follow the recipe through to incorporating the cheese, then let the sauce cool. After cooling, transfer it to an airtight container and refrigerate. To maintain quality, make sure to press plastic wrap directly onto the surface of the sauce before sealing your container, which will prevent any unwanted air contact. When you're ready to use it, just reheat gently on the stove over low heat, stirring until smooth, and you'll enjoy delicious pizza sauce just as fresh as the day you made it!

Expert Tips for White Garlic Pizza Sauce

  • Garlic Selection: Use fresh garlic cloves for a more vibrant flavor; if you must substitute, use garlic powder sparingly to avoid overpowering the sauce.

  • Roux Consistency: Ensure you stir the flour into the garlic thoroughly to avoid lumps in your White Garlic Pizza Sauce; cook it just long enough to eliminate the raw taste.

  • Custom Creaminess: Adjust the thickness by modifying the cooking time or adding more flour; a longer simmer yields a richer sauce perfect for thick crust pizzas.

  • Spice it Up: Feel free to enhance the heat by increasing red pepper flakes; remember to taste as you go for a balanced flavor.

  • Storage Secrets: Store any leftovers in an airtight container in the fridge for up to 4 days; reheat gently on low heat and stir well before use.

White Garlic Pizza Sauce Recipe FAQs

How do I select the best garlic for this sauce?
Absolutely! For the best flavor, use fresh garlic cloves that are firm and free of any dark spots. Avoid garlic that feels soft or has started to sprout, as it can have a bitter taste. If you're looking for convenience, you can use pre-minced garlic in a pinch, but the fresh stuff really shines in this creamy sauce.

How do I store leftover White Garlic Pizza Sauce?
Very simple! Store any unused White Garlic Pizza Sauce in an airtight container in the fridge for up to 4 days. Make sure the sauce cools to room temperature before sealing it to preserve its creamy texture and flavor. When you’re ready to use it again, gently reheat on low heat, stirring to maintain that luscious consistency.

Can I freeze White Garlic Pizza Sauce?
Absolutely! You can freeze your White Garlic Pizza Sauce in an airtight, freezer-safe container for up to 2 months. Leave some space at the top of the container when sealing, as the sauce may expand when frozen. To use, simply thaw in the fridge overnight, then reheat gently on the stove, stirring frequently to combine any potentially separated ingredients.

What if my sauce is too thick?
If you find your sauce is thicker than you'd like, simply whisk in a little more heavy cream or whole milk over low heat until you reach your desired consistency. If the sauce seems too thin after adding liquid, let it simmer a bit longer to thicken. Taste-testing along the way ensures the flavor remains just right!

Are there any dietary considerations for this recipe?
This recipe is vegetarian, but it does contain dairy ingredients which may not be suitable for those with lactose intolerance or dairy allergies. For a dairy-free alternative, try using a creamy plant-based milk and nutritional yeast for flavor, adjusting the other ingredients as necessary. Always consider personal dietary needs and preferences when adapting the recipe.

Can I customize the spice level of the sauce?
Very much so! You can easily adjust the heat level of your White Garlic Pizza Sauce by varying the amount of red pepper flakes you add. For a milder sauce, start with a pinch and increase according to your preference. If you love heat, don’t hesitate to double the amount or even experiment with other spices like cayenne pepper!

White Garlic Pizza Sauce

Creamy White Garlic Pizza Sauce

This creamy White Garlic Pizza Sauce enhances your pizza with rich flavors and is ready in just 30 minutes.
Print Recipe Pin Recipe
Prep Time 10 minutes mins
Cook Time 20 minutes mins
Cooling Time 5 minutes mins
Total Time 30 minutes mins
Servings: 2 cups
Course: Uncategorized
Cuisine: Italian
Calories: 320
Ingredients Equipment Method Nutrition Notes

Ingredients
  

For the Sauce
  • 1 cup Heavy cream Can substitute half with whole milk for a lighter version.
  • 4 cloves Garlic, minced Fresh garlic is recommended for best results.
  • 2 tablespoons Olive oil Preferred for sautéing garlic.
  • 2 tablespoons All-purpose flour Add an extra tablespoon for a creamier sauce if needed.
  • 0.5 teaspoon Salt No substitutions necessary.
  • 0.25 teaspoon Black pepper Use freshly ground for best taste.
  • 1 teaspoon Dried oregano Substitute with dried basil if desired.
  • 1 teaspoon Dried basil Fresh can be used but adjust quantity.
  • 1 pinch Red pepper flakes (optional) Adjust based on your heat preference.
  • 1 cup Parmesan cheese, grated Pecorino Romano can be a substitute.

Equipment

  • Medium saucepan

Method
 

Step-by-Step Instructions
  1. Heat 2 tablespoons of olive oil in a medium saucepan over medium heat. Once the oil shimmers, add 4 minced garlic cloves and sauté for 1–2 minutes until fragrant.
  2. Sprinkle 2 tablespoons of all-purpose flour over the sautéed garlic, stirring constantly for about 1 minute to form a roux.
  3. Gradually whisk in 1 cup of heavy cream, ensuring a smooth mixture without lumps. Add 0.5 teaspoon of salt, 0.25 teaspoon of freshly ground black pepper, 1 teaspoon of dried oregano, and 1 teaspoon of dried basil.
  4. Continue to cook over medium heat, whisking for about 5–7 minutes until thickened.
  5. Remove from heat and stir in 1 cup of grated Parmesan cheese.
  6. Allow to cool slightly for about 5 minutes before using.

Nutrition

Serving: 1cupCalories: 320kcalCarbohydrates: 8gProtein: 8gFat: 30gSaturated Fat: 18gMonounsaturated Fat: 12gCholesterol: 80mgSodium: 500mgPotassium: 150mgSugar: 1gVitamin A: 150IUCalcium: 300mg

Notes

This creamy sauce can be prepared ahead of time. Store in an airtight container in the fridge for up to 4 days.

Tried this recipe?

Let us know how it was!

Decadent Almond & Medjool Date Tart You’ll Crave Again!

March 8, 2026 by Grace Snow Leave a Comment

As I stood in my kitchen one rainy afternoon, the rich scent of almonds and sweet dates wrapped around me like a comforting hug. This is when I knew I had to share my go-to dessert: the Almond & Medjool Date Tart. A vegan and gluten-free delight, this tart whisks you away from the mundane with its creamy, refined sugar-free filling nestled in a deliciously crumbly almond crust. Not only does it serve as a stunning centerpiece for any gathering, but this healthier option is also packed with wholesome ingredients, making it such a guilt-free indulgence for everyone. Plus, the tart is so easy to whip up, perfect for a spontaneous craving or when you want to impress your guests without the stress. Curious about how to create this dreamy dessert? Let's get baking!

Why is this tart a must-try?

Decadent Delight: This Almond & Medjool Date Tart is a perfect blend of creamy sweetness and nutty richness, offering you a dessert experience that feels luxury without guilt.

Health-Conscious Indulgence: Enjoy a treat that's vegan, gluten-free, and refined sugar-free, making it suitable for a variety of dietary needs and preferences.

Quick & Easy: Get this tart ready with minimal fuss—ideal for those busy days when you crave something special without spending hours in the kitchen.

Versatile Flavor: With options for personalization, you can easily adapt this recipe by adding spices or swapping out ingredients, ensuring it matches your taste perfectly.

Crowd-Pleasing Finish: Serve this beautiful tart at gatherings, and watch it disappear in no time; everyone will be asking for seconds! If you’re interested in other delightful vegan desserts, check out our vegan dessert ideas.

Almond & Medjool Date Tart Ingredients

For the Crust
• Almond Flour – Provides structure and a nutty flavor; ensure finely ground for best results.
• Maple Syrup – Acts as a natural sweetener and binder; you can also use coconut oil and a flax egg instead.
• Water – Helps achieve the desired crust consistency; adjust as needed based on almond flour absorbency.

For the Filling
• Medjool Dates – Offers sweetness and a natural caramel-like flavor; choose soft varieties for the best texture.
• Coconut Milk – Delivers a creamy consistency to the filling; for non-vegan options, you can substitute with full-fat regular milk.
• Vanilla Extract – Adds aromatic flavor to the mix; optional if you prefer a simpler taste.
• Sea Salt – Enhances the overall flavors; always stick with sea salt for the best results.
• Cornstarch – Thickens the filling for the perfect creamy texture; arrowroot or tapioca starch can also be used as substitutes.

Embrace the joy of creating this Almond & Medjool Date Tart with wholesome ingredients that bring indulgence to your table without the guilt!

Step‑by‑Step Instructions for Almond & Medjool Date Tart

Step 1: Prepare the Crust
In a mixing bowl, combine almond flour, maple syrup, and just enough water to create a clump. This should take about 2-3 minutes; the mixture should feel slightly sticky. Carefully press the mixture into the bottom and up the sides of a greased tart pan, ensuring an even layer throughout.

Step 2: Bake the Crust
Preheat your oven to 350°F (175°C) while you shape the crust. Once ready, bake in the oven for 10-12 minutes, or until the crust turns a delicious golden brown and slightly firm to the touch. Keep an eye on it to prevent over-baking, as you want it just right for your Almond & Medjool Date Tart.

Step 3: Make the Filling
In a blender, combine the Medjool dates, coconut milk, vanilla extract, sea salt, and cornstarch. Blend until the mixture is silky smooth, which should take about 1-2 minutes. Make sure to set aside any chopped dates you want to sprinkle on top later for added texture and sweetness.

Step 4: Combine Layers
Once your crust is baked and cooled slightly, pour the creamy filling into the prepared crust, smoothing it out with a spatula. Sprinkle the reserved chopped dates evenly over the top, adding a delightful surprise in each slice of the Almond & Medjool Date Tart.

Step 5: Bake Again
Return the tart to the oven and bake for an additional 30-35 minutes. You’ll know it’s done when the filling is set but still slightly soft in the center. Look for a golden hue around the edges to indicate it's just right.

Step 6: Cool and Serve
Remove the Almond & Medjool Date Tart from the oven and let it cool at room temperature for at least 20 minutes. For a firmer texture, chill it in the refrigerator for an hour before slicing and serving. This delightful tart will become a cherished dessert at any gathering!

Expert Tips for Almond & Medjool Date Tart

  • Crust Consistency: Ensure the crust mixture is well-pressed into the tart pan evenly. A neglected crust might lead to a soggy base, which no one wants!

  • Watch the Bake Time: Keep an eye on the baking process—the perfect crust should be golden brown. Over-bake, and the crust may become too hard, affecting the overall texture of your Almond & Medjool Date Tart.

  • Filling Smoothness: Blend your filling until it's silky smooth and free of lumps. If it's too thick, add a splash more coconut milk; if too runny, refrigerate to thicken.

  • Cooling Time: Allow the tart to cool completely before serving. Cooling at room temperature will help the filling firm up nicely and enhance the overall flavor.

  • Storage Tips: Keep your tart covered in the fridge for up to 5 days, or freeze it for one month. The flavors deepen over time, making the tart even tastier!

What to Serve with Almond & Medjool Date Tart

Elevate your dessert experience with these delightful pairings that complement the rich flavors and textures of this vegan tart.

  • Coconut Whipped Cream: A light and fluffy topping that adds creamy sweetness, enhancing the tart's delicious layers.

  • Fresh Berries: Start your meal with a burst of freshness; strawberries or raspberries add a tart contrast to the sweet tart.

  • Chopped Nuts: Sprinkle some toasted almonds or walnuts for an extra crunch, reinforcing the nutty essence of the tart.

  • Herbal Tea: A fragrant chamomile or mint tea serves as a refreshing palate cleanser, balancing the rich and creamy dessert.

  • Dark Chocolate Drizzle: Elevate the indulgence with a drizzle of melted dark chocolate that pairs beautifully with the caramel-like dates.

  • Citrus Sorbet: A clean, zesty finish that contrasts beautifully with the tart’s richness while keeping everything light and refreshing.

  • Coffee or Espresso: For coffee lovers, a robust espresso or cappuccino enhances the flavors, making for a comforting after-dinner treat.

  • Vanilla Ice Cream: Creamy and cold, a scoop of non-dairy vanilla ice cream harmonizes with the nutty tart while providing a delightful temperature contrast.

Make Ahead Options

The Almond & Medjool Date Tart is perfect for meal prep, allowing you to save time during busy weeks! You can prepare the crust up to 24 hours in advance; simply make it as directed, press it into the tart pan, and store it covered in the refrigerator. For the filling, blend everything except the reserved chopped dates, which can also be prepped ahead and stored separately in an airtight container for up to 3 days. When you’re ready to serve, just pour the filling into the crust, top with the chopped dates, and bake as instructed. This ensures your tart will be just as delicious and fresh, making entertaining a breeze!

Storage Tips for Almond & Medjool Date Tart

Fridge: Store your Almond & Medjool Date Tart covered in the refrigerator for up to 5 days. This keeps the flavors fresh and the crust from becoming soggy.

Freezer: For longer storage, freeze the tart for up to one month. Wrap it tightly in plastic wrap and aluminum foil to prevent freezer burn.

Thawing: To enjoy, simply thaw the tart overnight in the refrigerator before serving. This allows the texture to return to its creamy goodness.

Reheating: If you prefer a warm slice, gently heat individual portions in the microwave for 10-15 seconds. Enjoy the delightful blend of flavors!

Almond & Medjool Date Tart Variations

Feel free to explore these exciting twists for your Almond & Medjool Date Tart to make it truly your own!

  • Coconut Flour: Substitute almond flour with coconut flour, adjusting water for moisture. This creates a unique flavor and texture.

  • Spice It Up: Add a teaspoon of cinnamon or nutmeg to the filling for a warm and cozy flavor that enhances the overall sweetness.

  • Nutty Additions: Fold in chopped pecans or walnuts to the filling for an extra crunchy texture that beautifully contrasts the creaminess of the tart.

  • Chocolate Drizzle: Melt dark dairy-free chocolate and drizzle it over the finished tart for an indulgent touch of decadence that chocolate lovers will adore.

  • Fruit Topping: Add sliced fresh fruits like berries or bananas on top before serving for a refreshing twist that brightens every slice.

  • Flavored Extracts: Experiment with different extracts, such as almond or orange, to personalize the flavor profile of your tart. A splash will change everything!

  • Make it Spicy: For those who love a kick, add a pinch of cayenne pepper to the filling for a surprising heat that contrasts delightfully with the sweetness.

  • Matcha Twist: Incorporate a teaspoon of matcha powder into the filling for a gorgeous green hue and an earthy depth of flavor that will impress your guests.

Each variation opens up a new world of flavor and creativity in your baking—so get inspired and enjoy making this tart uniquely yours! If you're looking for more fun ideas, check out our vegan dessert options!

Almond & Medjool Date Tart Recipe FAQs

What type of almond flour should I use?
I recommend using finely ground almond flour to achieve the best texture for your crust. You can also use store-bought almond flour for convenience, but ensure it’s not coarse as this might affect the consistency of your tart.

How do I store the Almond & Medjool Date Tart?
Store your Almond & Medjool Date Tart covered in the refrigerator for up to 5 days. Keeping it covered will help preserve its freshness and prevent the crust from becoming soggy.

Can I freeze the tart?
Absolutely! You can freeze the tart for up to one month. It’s best to wrap it tightly in plastic wrap followed by aluminum foil to prevent freezer burn. When you're ready to enjoy it, just thaw it overnight in the refrigerator before slicing.

What should I do if the filling turns out too runny?
If you find your filling is a bit too runny, don’t worry! Simply pour it back into the blender and add a little more cornstarch, then blend again. Heat it gently in a pan on low, stirring constantly until it thickens, and then re-pour it into the crust and bake again for a few minutes to set.

Are there any dietary concerns I should keep in mind?
This Almond & Medjool Date Tart is vegan, gluten-free, refined sugar-free, and oil-free, making it a fantastic choice for a wide variety of dietary preferences. However, ensure that those with nut allergies are aware that almond flour is used in this recipe.

Could I substitute Medjool dates with another type of date?
Yes, you can substitute Medjool dates with other varieties such as Deglet Noor or Barhi dates. However, Medjool dates are preferred because they are soft and have a rich caramel-like flavor, which enhances the tart's sweetness beautifully.

Almond & Medjool Date Tart

Decadent Almond & Medjool Date Tart You’ll Crave Again!

This Almond & Medjool Date Tart is a vegan and gluten-free dessert, combining creamy sweetness with nutty richness, making it a guilt-free indulgence.
Print Recipe Pin Recipe
Prep Time 15 minutes mins
Cook Time 45 minutes mins
Cooling Time 20 minutes mins
Total Time 1 hour hr 20 minutes mins
Servings: 8 slices
Course: Dessert
Cuisine: Vegan
Calories: 250
Ingredients Equipment Method Nutrition Notes

Ingredients
  

For the Crust
  • 1 cup Almond Flour Finely ground for best results.
  • 1 tbsp Maple Syrup Can substitute with coconut oil and a flax egg.
  • 2-4 tbsp Water Adjust as needed based on almond flour absorbency.
For the Filling
  • 1 cup Medjool Dates Choose soft varieties for the best texture.
  • 1 cup Coconut Milk For non-vegan options, substitute with full-fat regular milk.
  • 1 tbsp Vanilla Extract Optional.
  • 1/4 tsp Sea Salt Always stick with sea salt for the best results.
  • 2 tbsp Cornstarch Can substitute with arrowroot or tapioca starch.

Equipment

  • Mixing Bowl
  • Blender
  • tart pan
  • Spatula

Method
 

Step-by-Step Instructions
  1. In a mixing bowl, combine almond flour, maple syrup, and just enough water to create a clump. Press the mixture into the bottom and up the sides of a greased tart pan.
  2. Preheat your oven to 350°F (175°C) while shaping the crust. Bake for 10-12 minutes until golden brown and firm.
  3. In a blender, combine Medjool dates, coconut milk, vanilla extract, sea salt, and cornstarch. Blend until silky smooth.
  4. Pour the creamy filling into the baked crust, smoothing it out. Sprinkle reserved chopped dates on top.
  5. Bake again for an additional 30-35 minutes until the filling is set but slightly soft in the center.
  6. Cool the tart at room temperature for at least 20 minutes. Chill in the refrigerator for an hour before serving.

Nutrition

Serving: 1sliceCalories: 250kcalCarbohydrates: 30gProtein: 4gFat: 12gSaturated Fat: 8gPolyunsaturated Fat: 1gMonounsaturated Fat: 3gSodium: 150mgPotassium: 200mgFiber: 5gSugar: 15gCalcium: 5mgIron: 6mg

Notes

Store covered in the fridge for up to 5 days or freeze for one month. Reheat individual portions in the microwave for 10-15 seconds if desired.

Tried this recipe?

Let us know how it was!

Delicious Baklava Stuffed Dates to Satisfy Your Sweet Cravings

March 8, 2026 by Grace Snow Leave a Comment

As I reached for a bite of something sweet, I found myself in a mini crisis—torn between indulging my cravings and sticking to healthier options. Enter my savior: No-Bake Baklava Stuffed Dates. These delightful treats marry the caramel-like sweetness of medjool dates with a nutty filling of walnuts and pistachios, all spiced up with cinnamon. They're ready in just five minutes and are not only a crowd-pleaser but also a delight for those of us craving a healthier snack. With gluten-free and vegan options, these Baklava Stuffed Dates promise a nutrient-dense indulgence that won't leave you with any guilt. Curious how this quick and easy recipe transforms simple ingredients into a show-stopping treat? Let’s dive in!

Why Choose Baklava Stuffed Dates?

Quick Preparation: In just 5 minutes, you can whip up a sweet treat that requires no baking at all. Perfect for last-minute gatherings or a cozy afternoon snack.

Nutritious Indulgence: Packed with healthy fats, fiber, and potassium, these stuffed dates offer guilt-free pleasure without sacrificing taste.

Versatile: Feel free to swap out nuts or add toppings like dark chocolate—these dates fit perfectly with any flavor preference.

Crowd-Pleasing: They're not just good for you; guests will devour them at parties or gatherings, leaving everyone impressed.

Healthy Options: With easy vegan substitutions, Baklava Stuffed Dates cater to a wide range of dietary needs, making them a great choice for anyone.

Storage Friendly: Enjoy the convenience of making ahead, as they last up to a week in the fridge for a quick grab-and-go snack! For delightful variety, check out our Herby Ricotta Stuffed options to compare flavors!

Baklava Stuffed Dates Ingredients

For the Filling
• Medjool Dates – The key ingredient, bringing natural sweetness; make sure they're pitted for the best experience.
• Chopped Walnuts – These nuts add a rich, buttery crunch that perfectly complements the chewy dates.
• Chopped Pistachios – Introduce a vibrant color and unique flavor; feel free to substitute with almonds or other nuts.

For Sweetness
• Honey – A natural sweetener that binds the mixture together; can be replaced with maple syrup or agave for a vegan alternative.

For Flavor
• Cinnamon – Provides warm, aromatic notes that enhance the overall taste of the stuffed dates.
• Vanilla Extract – A splash of this elevates the sweetness and rounds out the flavor beautifully.

Step‑by‑Step Instructions for Baklava Stuffed Dates

Step 1: Prepare the Dates
Start by ensuring you have pitted Medjool dates. If they are not already pitted, carefully slice each date along one side with a sharp knife, being cautious not to cut all the way through. Remove the pit and set the dates aside on a clean plate. This step is crucial for creating the perfect base for your Baklava Stuffed Dates.

Step 2: Mix the Filling
In a medium-sized mixing bowl, combine the chopped walnuts, chopped pistachios, honey (or maple syrup for a vegan option), cinnamon, and vanilla extract. Stir the mixture thoroughly until all ingredients are well combined and the nuts are evenly coated with the sweet and aromatic flavors. This delightful filling is what will make your Baklava Stuffed Dates truly irresistible.

Step 3: Stuff the Dates
Using a small spoon or your fingers, gently fill each opened date with the nut mixture, packing it in lightly but firmly. Aim to have each date fully stuffed, creating a generous scoop of the nutty filling. As you fill the dates, you’ll notice how they transform into decadent treats that echo the rich flavors of baklava.

Step 4: Serve and Store
Once all dates are filled, you can enjoy them immediately as a delightful snack or dessert. For later enjoyment, arrange the Baklava Stuffed Dates in an airtight container and store them in the refrigerator. These treats will stay fresh for up to one week, making them perfect for meal prep or last-minute cravings!

How to Store and Freeze Baklava Stuffed Dates

Fridge: Store Baklava Stuffed Dates in an airtight container for up to 1 week to maintain freshness and flavor. They make a perfect grab-and-go snack!

Freezer: For longer storage, place stuffed dates in a freezer-safe container lined with parchment paper. They can last for about 3 months. Just thaw in the fridge before serving.

Room Temperature: It’s best to avoid keeping Baklava Stuffed Dates at room temperature for more than a few hours. They may lose moisture and become sticky.

Reheating: These treats are best enjoyed cold or at room temperature. If you prefer a warm bite, heat them gently in the microwave for 10-15 seconds, but be careful not to overheat.

Baklava Stuffed Dates Variations & Substitutions

Feel free to let your creativity shine with these delicious twists on Baklava Stuffed Dates, each guaranteed to tantalize your taste buds!

  • Nut-Free: Use sunflower seeds or pumpkin seeds instead of nuts for a safe, allergen-friendly alternative.

  • Sweeten Up: Swap honey for agave for a completely vegan-friendly treat while keeping the sweetness intact.

  • Chocolate Drizzle: Melt some dark chocolate and drizzle over the stuffed dates for an indulgent twist that satisfies any chocolate lover.

  • Spicy Kick: Add a pinch of cayenne pepper to the nut mixture for an unexpected heat that complements the sweetness beautifully.

  • Fruit-Filled: Stuff the dates with a combination of cranberries or dried apricots alongside the nuts for an extra burst of flavor and texture.

  • Coconut Flakes: Roll the filled dates in shredded coconut before serving for a tropical twist and added chewiness.

  • Tea Pairing: For a delightful experience, serve your Baklava Stuffed Dates alongside a warm cup of chai. The spices from the tea beautifully enhance the flavors of the dates.

If you're craving more delicious ideas, don’t forget to check out our Herby Ricotta Stuffed options for more tasty variations!

Expert Tips for Baklava Stuffed Dates

  • Choose Quality Dates: Always opt for fresh medjool dates, as they are plump and sweet. Avoid overly dried out ones to enhance the flavor of your Baklava Stuffed Dates.

  • Even Filling Distribution: Make sure to evenly distribute the nut mixture among the dates. This helps in maintaining a balanced flavor and ensures that every bite is delicious.

  • Vegan Adaptations: If making a vegan version, substitute honey with maple syrup or agave nectar. This small swap keeps the sweetness while catering to dietary needs.

  • Keep them Fresh: Store Baklava Stuffed Dates in an airtight container in the fridge. This keeps them fresh for up to a week and prevents them from drying out.

  • Don’t Rush the Mixing: Take your time when mixing the filling to ensure all nuts are coated evenly with the honey or syrup and spices. This ensures maximum flavor in each date.

  • Experiment with Flavors: Don’t hesitate to play with spices or add other nuts. Variations like adding a pinch of nutmeg or using different nut combinations can elevate your Baklava Stuffed Dates!

Make Ahead Options

These Baklava Stuffed Dates are perfect for meal prep, allowing you to enjoy sweet indulgence without the last-minute fuss! You can prepare the filling of chopped walnuts, chopped pistachios, honey (or maple syrup for a vegan alternative), cinnamon, and vanilla extract up to 24 hours in advance. Simply mix all the ingredients and store them in an airtight container in the fridge. When you’re ready to serve, all you need to do is stuff the mixture into pitted Medjool dates and enjoy! This method ensures the ingredients remain fresh and flavorful, giving you that delightful treat just as delicious as when freshly made.

What to Serve with Baklava Stuffed Dates?

These delightful treats pair beautifully with a variety of flavors and textures, creating a full culinary experience.

  • Mint Tea: Its refreshing notes complement the sweet, nutty richness of the dates, providing a perfect balance.

  • Greek Yogurt: A creamy dollop adds a tangy contrast that enhances the flavors of the stuffed dates. The richness and creaminess come together beautifully for a delightful snack.

  • Dark Chocolate Drizzle: A decadent touch that contrasts with the sweetness of the filled dates, making for an indulgent treat.

  • Fresh Berries: Their tartness brightens each bite, creating a vibrant medley that dances on your palate.

  • Cinnamon Almond Milk: This lightly spiced drink mirrors the flavors inside the dates, wrapping you in warmth and comfort.

  • Trail Mix: A crunchy blend of nuts and dried fruits echoes the ingredients in the Baklava Stuffed Dates, making them a complementary snack for sharing.

  • Almond Biscotti: Their crunchy texture and subtle sweetness make for a delightful pairing with the chewy dates, creating a satisfying contrast.

  • Iced Coffee: A chilled cup serves as a refreshing counterpart, balancing the flavors and ensuring an invigorating experience with every bite.

Baklava Stuffed Dates Recipe FAQs

What type of dates should I use?
Absolutely! Medjool dates are the best choice for this recipe due to their natural sweetness and chewy texture. Always ensure they are pitted to prevent any crunch from seeds disrupting your delightful treat.

How do I store Baklava Stuffed Dates?
To keep your Baklava Stuffed Dates fresh, store them in an airtight container in the refrigerator for up to 1 week. This method preserves their flavor and prevents them from drying out.

Can I freeze Baklava Stuffed Dates?
Yes, you can! To freeze, place the stuffed dates in a single layer on a baking sheet lined with parchment paper for 1-2 hours until firm. Then transfer them to a freezer-safe container or bag. They will last for about 3 months. When ready to enjoy, thaw them in the fridge overnight.

What if my dates are too dry?
If you find your dates are too dry, try soaking them in warm water for 10-15 minutes before using them. This helps rehydrate the dates and makes them softer, ensuring a delightful bite. Just remember to pat them dry after soaking!

Are there any dietary considerations for Baklava Stuffed Dates?
Very! These Baklava Stuffed Dates can easily be adapted to various dietary needs. For a vegan option, simply substitute honey with maple syrup or agave nectar. They are also gluten-free as long as the nuts and sweeteners used are certified gluten-free.

How can I customize the filling for Baklava Stuffed Dates?
You can personalize your filling according to your taste! Feel free to swap nuts based on your preference, experimenting with almonds, cashews, or even adding coconut flakes. Additionally, a drizzle of melted dark chocolate can take them over the top for a decadent twist!

Baklava Stuffed Dates

Delicious Baklava Stuffed Dates to Satisfy Your Sweet Cravings

Try these Baklava Stuffed Dates, a sweet blend of medjool dates filled with nuts and spices, perfect for a healthy snack.
Print Recipe Pin Recipe
Prep Time 5 minutes mins
Total Time 5 minutes mins
Servings: 12 dates
Course: Dessert
Cuisine: Middle Eastern
Calories: 80
Ingredients Equipment Method Nutrition Notes

Ingredients
  

For the Filling
  • 12 pieces Medjool Dates pitted
  • 1/2 cup Chopped Walnuts
  • 1/2 cup Chopped Pistachios or substitute with almonds
For Sweetness
  • 2 tablespoons Honey can substitute with maple syrup
For Flavor
  • 1 teaspoon Cinnamon
  • 1 teaspoon Vanilla Extract

Equipment

  • Mixing Bowl
  • Knife
  • Spoon
  • Airtight Container

Method
 

Step-by-Step Instructions for Baklava Stuffed Dates
  1. Start by ensuring you have pitted Medjool dates. Slice each date along one side and remove the pit.
  2. In a mixing bowl, combine the chopped walnuts, chopped pistachios, honey, cinnamon, and vanilla extract. Stir until well mixed.
  3. Using a spoon or fingers, gently fill each date with the nut mixture, packing it in firmly.
  4. Enjoy immediately or store in an airtight container in the refrigerator for up to one week.

Nutrition

Serving: 1dateCalories: 80kcalCarbohydrates: 18gProtein: 1gFat: 1.5gSaturated Fat: 0.2gPolyunsaturated Fat: 0.5gMonounsaturated Fat: 0.8gSodium: 1mgPotassium: 150mgFiber: 2gSugar: 15gVitamin C: 1mgCalcium: 2mgIron: 2mg

Notes

These Baklava Stuffed Dates can be enjoyed cold or at room temperature. For longer storage, they can also be frozen for about 3 months.

Tried this recipe?

Let us know how it was!

Indulge in Moist Chocolate Almond Yogurt Cake Bliss

March 8, 2026 by Grace Snow Leave a Comment

As I stood in my kitchen, the inviting aroma of dark chocolate began to swirl around me, instantly lifting my spirits. This Chocolate Almond Yogurt Cake is more than just a dessert; it’s a wholesome treat that speaks to my love for simple, delectable baking. Moist, fudgy, and gluten-free, it combines the tangy richness of Greek yogurt with the nutty goodness of almond flour, creating a one-bowl wonder that requires minimal dish cleanup! With its healthier twist on traditional cakes, it’s perfect for those of us looking to satisfy chocolate cravings without the guilt. Plus, it’s a fantastic crowd-pleaser, making it a go-to for gatherings or a cozy dessert at home. Curious to dive into this deliciously simple recipe? Let’s get baking!

Why is this cake a must-try?

**Decadent ** Indulge in the rich, chocolatey goodness of this moist Chocolate Almond Yogurt Cake that’s sure to satisfy any sweet tooth. One-Bowl Wonder Enjoy effortless cleanup with this easy one-bowl recipe—perfect for busy bakers! Healthy Twist Gluten-free and made with Greek yogurt, it's a guilt-free pleasure. **Versatile **Dress it up with toppings like fresh berries or a drizzle of yogurt for a delightful twist. Crowd Favorite Bring smiles to any gathering with this fudgy, irresistible dessert that everyone will adore! Dive into more sweet inspiration with our Chocolate Pudding Cake for another indulgent delight!

Chocolate Almond Yogurt Cake Ingredients

For the Batter
• Plain Greek Yogurt – Provides moisture and a rich texture; substitute with dairy-free yogurt for a vegan option.
• Large Eggs – Binds the ingredients and adds structure; no direct substitute for this crucial role.
• Sweetener (Maple Syrup/Honey/Coconut Sugar) – Adds sweetness; choose based on preferred flavor profile, adjusting for desired sweetness.
• Melted Coconut Oil or Butter – Adds fat for moisture and richness; for a dairy-free version, use coconut oil.
• Vanilla Extract – Enhances flavor; use pure extract for the best taste.
• Almond Flour – Creates structure without gluten; feel free to substitute with hazelnut flour if needed, but avoid coconut flour.
• Unsweetened Cocoa Powder – Provides chocolate flavor and color; ensure it’s unsweetened for a balanced taste.
• Baking Powder – Gives the cake lift; make sure it’s fresh for optimal rise.
• Pinch of Salt – Balances sweetness and enhances overall flavor.
• Dark Chocolate Chips (Optional) – Adds extra fudginess; use dairy-free chips for a vegan option.

Step‑by‑Step Instructions for Chocolate Almond Yogurt Cake

Step 1: Preheat and Prepare
Begin by preheating your oven to 350°F (175°C). While it's warming up, grease an 8-inch round cake pan with a bit of coconut oil or butter, and line the bottom with parchment paper for easy removal. This helps the Chocolate Almond Yogurt Cake come out perfectly smooth and intact once it’s baked.

Step 2: Mix the Wet Ingredients
In a large mixing bowl, combine the plain Greek yogurt, large eggs, your choice of sweetener, melted coconut oil (or butter), and vanilla extract. Whisk these ingredients together until smooth and well blended, creating a luscious base for your cake. The mixture should be creamy without any lumps—this will result in a moist texture.

Step 3: Combine the Dry Ingredients
Now, add the almond flour, unsweetened cocoa powder, baking powder, and a pinch of salt to the wet mixture. Stir these dry ingredients into the batter until fully combined and no streaks remain. This step ensures that the chocolate flavor of your Chocolate Almond Yogurt Cake is rich and delicious, without any clumps of dry ingredients.

Step 4: Fold in Chocolate Chips
If you're feeling indulgent, gently fold in the dark chocolate chips into the batter, mixing until they are evenly distributed throughout. This will add even more fudginess to the cake, making every bite a chocolate lover’s dream. The batter should be thick and luscious, beckoning you to bake it into a delightful treat.

Step 5: Pour and Smooth
Pour the rich batter into the prepared cake pan, smoothing the top with a spatula for an even surface. Make sure to tap the pan gently on the countertop to remove any air bubbles trapped in the batter, helping your Chocolate Almond Yogurt Cake rise beautifully while baking.

Step 6: Bake to Perfection
Place the cake in the preheated oven and bake for 30–35 minutes. You’ll know it’s done when a toothpick inserted into the center comes out with a few moist crumbs; this indicates the fudgy texture that makes this cake so special. Keep an eye on the time to avoid overbaking, which can dry out the cake.

Step 7: Cool and Serve
Once baked, remove the Chocolate Almond Yogurt Cake from the oven and allow it to cool in the pan for about 10 minutes. Then, carefully turn it out onto a wire rack to cool completely. This cooling step ensures the cake maintains its rich, moist texture before slicing and enjoying. Optionally, you can dust the top with cocoa powder or serve it with a dollop of yogurt or whipped cream for a delightful finish.

What to Serve with Chocolate Almond Yogurt Cake?

Pairing this decadent delight with the perfect accompaniments makes for a truly memorable meal experience. Whether you're entertaining guests or enjoying a simple family night, these ideas will elevate your dessert!

  • Whipped Cream: A dollop of lightly sweetened whipped cream adds a luscious, airy contrast to the rich, fudgy cake.

  • Fresh Berries: Bright, tart berries like raspberries or strawberries offer a refreshing bite, balancing the cake's sweetness. Their vibrant color also makes for a beautiful presentation.

  • Greek Yogurt Topping: The creaminess of Greek yogurt is a fantastic contrast, enhancing the cake's texture while keeping it healthy. Sprinkle some honey over the yogurt for a touch of sweetness!

  • Chocolate Ganache: Elevate your dessert by drizzling a rich chocolate ganache over the cake, satisfying any chocoholic cravings and adding an extra layer of indulgence.

  • Coffee or Espresso: The bold flavor of coffee complements the chocolate beautifully, enhancing its richness. It’s the perfect pairing for an after-dinner treat!

  • Nutty Ice Cream: A scoop of almond or hazelnut ice cream adds a delightful creaminess and blends well with the cake's nutty flavor. This is a treat that will leave everyone wanting more!

  • Mint Tea: The refreshing notes of mint tea provide a soothing finish to the chocolate experience, cleansing the palate while being a fantastic warm drink option.

  • Coconut Flakes: Toasted coconut flakes sprinkled on top or served alongside add a chewy texture and enhance the cake's tropical undertones for an elevated sweet treat.

  • Honey Drizzle: A simple drizzle of honey enhances the cake’s flavors and adds a hint of natural sweetness that pairs beautifully with the rich chocolate.

  • Chilled Dessert Wine: A glass of sweet dessert wine or a moderately sweet red wine can elevate the experience, bringing out the chocolate flavors in a sophisticated way.

Storage Tips for Chocolate Almond Yogurt Cake

Room Temperature: Keep the cake at room temperature in an airtight container for up to 2 days to maintain its moist and fudgy texture.

Fridge: Refrigerate leftover slices in an airtight container for up to 5 days. This helps preserve the freshness and flavor of the Chocolate Almond Yogurt Cake.

Freezer: Freeze individual slices wrapped tightly in plastic wrap and then in aluminum foil for up to 3 months. Thaw in the fridge overnight before enjoying.

Reheating: For a warm treat, reheat slices in the microwave for about 10-15 seconds, or in the oven at 350°F (175°C) for 8-10 minutes until warm.

Expert Tips for Chocolate Almond Yogurt Cake

  • Egg Preparation: Ensure your eggs are whisked until pale and fluffy for the best cake texture. This helps achieve that light, decadent feel.

  • Check Doneness: Keep an eye on the baking time and test with a toothpick to avoid overbaking, which can dry out your Chocolate Almond Yogurt Cake.

  • Ingredient Room Temperature: Use room temperature ingredients, especially your yogurt and eggs. This helps them combine better for a smooth batter.

  • Flavor Boost: For added richness, consider topping your cake with a homemade ganache made from melted dark chocolate and cream or a sprinkle of sea salt.

  • Storage Tips: Store any leftovers in an airtight container; the cake stays fresh for up to 2 days at room temperature or 5 days in the fridge.

Make Ahead Options

These Chocolate Almond Yogurt Cakes are perfect for busy home cooks looking to save time without sacrificing taste! You can prepare the batter up to 24 hours in advance; simply cover it tightly and refrigerate. For best results, consider baking the cake the day before your gathering—this allows the flavors to meld beautifully. Once baked, the cake can stay fresh in an airtight container at room temperature for up to 2 days or be refrigerated for up to 5 days. When ready to serve, you can dust with cocoa powder or top with yogurt or whipped cream, giving you a delicious dessert with minimal last-minute effort!

Chocolate Almond Yogurt Cake Variations

Feel free to experiment with this recipe to create a version that delights your taste buds!

  • Dairy-Free: Substitute Greek yogurt with a dairy-free yogurt and use coconut oil for a vegan twist. Enjoy the same rich flavor!

  • Nut-Free: Use sunflower seed flour instead of almond flour for those with nut allergies. It yields a different but delicious flavor profile!

  • Sweet Variants: Swap maple syrup for agave nectar or honey, adjusting sweetness to your preference for a unique flavor journey.

  • Berries: Stir in a handful of fresh raspberries or blueberries for bursts of fruity flavor throughout the cake. The combination of chocolate and berries is always a winner!

  • Zesty Kick: Add finely grated orange or lemon zest to the batter for a burst of citrus that beautifully complements the chocolate richness.

  • Spicy Touch: Sprinkle in a pinch of cayenne pepper or cinnamon to introduce a subtle heat that enhances the chocolate's depth.

  • More Texture: Fold in chopped nuts or coconut flakes for an extra crunch, elevating the overall experience of each indulging bite.

  • Fudgy Layer Cake: Use this batter to create a layered cake! Bake two identical rounds and layer them with chocolate ganache or whipped cream in between for a stunning presentation.

For more tasty ideas, don’t miss our luscious Chocolate Pudding Cake—it’s another delightful way to satisfy your chocolate cravings!

Chocolate Almond Yogurt Cake Recipe FAQs

What kind of yogurt should I use for this recipe?
Absolutely! Plain Greek yogurt is recommended for its rich texture and moisture. If you prefer a dairy-free option, you can substitute it with a plant-based yogurt. Just make sure it has a similar consistency to achieve the desired fudgy cake texture.

How should I store any leftovers?
Store your Chocolate Almond Yogurt Cake in an airtight container at room temperature for up to 2 days. If you want to keep it fresh for longer, refrigerate it for up to 5 days. Just ensure it's covered well to maintain its moisture!

Can I freeze the cake and how?
Yes, you can freeze it! Wrap individual slices tightly in plastic wrap, then place them in an airtight container or a freezer bag. This protects the cake from freezer burn. You can enjoy it for up to 3 months. To thaw, simply place it in the fridge overnight before enjoying!

What if my cake doesn't rise properly?
If your Chocolate Almond Yogurt Cake doesn't rise as expected, check your baking powder's freshness; it should be within its expiry date. Make sure it’s mixed evenly into the batter and that your oven is preheated to the correct temperature. Lastly, overmixing the batter can deflate the air bubbles that help it rise, so mix until just combined.

Is this cake safe for my gluten-sensitive friends?
Absolutely! This Chocolate Almond Yogurt Cake is gluten-free, making it a great option for those who are gluten-sensitive. However, always check the labels of your ingredients to ensure they’re certified gluten-free. If you or your guests have nut allergies, use a suitable alternative to almond flour, like a gluten-free baking mix.

How can I enhance the chocolate flavor in this cake?
For an extra chocolatey experience, try adding more dark chocolate chips to the batter or topping it with a rich chocolate ganache made from melted dark chocolate and cream. You can also dust the cooled cake with cocoa powder for a delightful finish!

Chocolate Almond Yogurt Cake

Indulge in Moist Chocolate Almond Yogurt Cake Bliss

This Chocolate Almond Yogurt Cake is a wholesome, gluten-free dessert delight that satisfies your chocolate cravings with its fudgy texture.
Print Recipe Pin Recipe
Prep Time 10 minutes mins
Cook Time 35 minutes mins
Cooling Time 10 minutes mins
Total Time 55 minutes mins
Servings: 8 slices
Course: Dessert
Cuisine: American
Calories: 210
Ingredients Equipment Method Nutrition Notes

Ingredients
  

For the Batter
  • 1 cup Plain Greek Yogurt or dairy-free yogurt for a vegan option
  • 3 large Eggs No direct substitute
  • 1/2 cup Sweetener (Maple Syrup/Honey/Coconut Sugar) Adjust for desired sweetness
  • 1/2 cup Melted Coconut Oil or Butter Use coconut oil for dairy-free option
  • 1 teaspoon Vanilla Extract Use pure extract for best taste
  • 1 cup Almond Flour substitute with hazelnut flour if needed
  • 1/2 cup Unsweetened Cocoa Powder Ensure it's unsweetened
  • 1 teaspoon Baking Powder Make sure it’s fresh
  • 1 pinch Salt Balances sweetness
  • 1/2 cup Dark Chocolate Chips (Optional) Use dairy-free chips for vegan option

Equipment

  • Mixing Bowl
  • Whisk
  • 8-inch round cake pan
  • Spatula
  • Oven

Method
 

Step-by-Step Instructions
  1. Preheat your oven to 350°F (175°C) and grease an 8-inch round cake pan with coconut oil or butter, lining the bottom with parchment paper.
  2. In a large mixing bowl, whisk together Greek yogurt, eggs, sweetener, melted coconut oil (or butter), and vanilla extract until smooth.
  3. Add almond flour, cocoa powder, baking powder, and salt to the mixture, stirring until fully combined.
  4. Fold in dark chocolate chips gently until evenly distributed in the batter.
  5. Pour the batter into the prepared cake pan, smoothing the top and tapping out air bubbles.
  6. Bake for 30-35 minutes until a toothpick comes out with a few moist crumbs.
  7. Allow the cake to cool in the pan for 10 minutes, then transfer to a wire rack to cool completely.

Nutrition

Serving: 1sliceCalories: 210kcalCarbohydrates: 18gProtein: 5gFat: 12gSaturated Fat: 8gPolyunsaturated Fat: 1gMonounsaturated Fat: 2gCholesterol: 70mgSodium: 100mgPotassium: 200mgFiber: 2gSugar: 8gVitamin A: 300IUCalcium: 50mgIron: 1mg

Notes

This cake can be topped with powdered cocoa or served with yogurt or whipped cream for added delight. Store leftovers in an airtight container.

Tried this recipe?

Let us know how it was!

Deliciously Moist Healthy Carrot Cake That's Gluten-Free

February 27, 2026 by Grace Snow Leave a Comment

As the warm aroma of cinnamon and ginger wraps around me, I can’t help but feel a wave of nostalgia. Baking is one of those rare moments that can transform an ordinary day into something magical, and today, I’m excited to share my Healthy Gluten-Free Carrot Cake recipe with you. This delightful dessert offers a big win for those of us looking for indulgence without the guilt, combining fluffy white cake textures with the rich flavors of fresh grated carrots. It's not just a treat for your taste buds; the use of wholesome ingredients like oat flour and Greek yogurt means it's a nutritious option, too! Perfect for family gatherings or a quiet afternoon with friends, this cake is a guaranteed crowd-pleaser that's as versatile as it is delicious. Ready to discover how to make this healthy carrot cake that's sure to impress? Let’s get started!

Why Choose a Healthy Carrot Cake?

Healthier Option: This gluten-free carrot cake is a delightful twist on a classic that allows you to indulge without guilt.

Moist and Flavorful: Expect a cake that's not just delectable but also infused with beautiful spices that remind you of home.

Simple Ingredients: Made with everyday, wholesome ingredients, it’s a great option for both beginners and seasoned bakers.

Easy Variations: With substitutions like honey for maple syrup or even sweet potatoes instead of carrots, the possibilities are endless!

Crowd-Pleasing: This cake will have your family and friends asking for seconds and even thirds!

You might also enjoy pairing it with a refreshing drink or trying out a different dessert like Ice Cream Cake for a fun twist!

Healthy Carrot Cake Ingredients

For the Cake

  • Grated Carrots – Provides natural sweetness and moisture; use about 2-3 large carrots, ensuring they're freshly grated.
  • Eggs – Essential for structure and moisture; this recipe calls for 3 large eggs, with no substitute options tested.
  • Maple Syrup – Acts as a natural sweetener; honey can work as a substitute, but steer clear of granulated sugars as they might dry out the cake.
  • Coconut Oil – Offers healthy fats while replacing traditional butter; any neutral oil, like avocado, can effectively be used.
  • Greek Yogurt – Enhances moisture and texture; full-fat is recommended for a rich flavor, and no substitutes have been tested.
  • Vanilla Extract – Adds depth of flavor; using pure extract is a better choice over imitation for this tasty cake.
  • Oat Flour – The gluten-free base flour for the cake; can be homemade, but ensure it’s certified gluten-free if needed.
  • Baking Powder and Baking Soda – Important leavening agents that ensure rise and a light texture.
  • Ground Spices (Cinnamon, Ginger, Nutmeg) – Infuses classic carrot cake flavors; can be substituted with pumpkin pie spice in a pinch.
  • Sea Salt – A must to balance the flavors in the cake.

For the Frosting

  • Neufchatel Cheese – A lower-fat alternative to cream cheese; can substitute with regular cream cheese if it's not available.
  • Additional Greek Yogurt – Adds creaminess to the frosting; balances richness and sweetness beautifully.
  • Maple Syrup (or Honey) – Sweetens the frosting; choose based on personal preference or dietary needs.
  • Pinch of Sea Salt – Enhances the overall flavor of the frosting, tying it nicely with the cake.

This Healthy Carrot Cake is not just indulgent but also a flavorful treat that works perfectly for any occasion! Enjoy exploring the delightful layers of flavor this cake has to offer.

Step‑by‑Step Instructions for Healthy Carrot Cake

Step 1: Preheat and Prepare the Pan
Begin by preheating your oven to 350°F (175°C). While the oven heats, take an 8x8-inch baking pan and grease it generously with coconut oil or cooking spray. Next, line the bottom with parchment paper for easy removal after baking. This preparation ensures your Healthy Carrot Cake will come out perfectly without sticking.

Step 2: Combine Wet Ingredients
In a large mixing bowl, grate 2-3 large carrots until finely shredded. Then, crack in 3 large eggs and pour in ½ cup of maple syrup, ⅓ cup melted coconut oil, ½ cup Greek yogurt, and 1 teaspoon of vanilla extract. Whisk these ingredients together until they're well combined, forming a smooth, vibrant mixture that showcases the natural sweetness of the carrots.

Step 3: Mix Dry Ingredients
Grab another bowl and sift together 1 ¾ cups of oat flour, 1 teaspoon of baking powder, ½ teaspoon of baking soda, a pinch of sea salt, and 1 teaspoon each of ground cinnamon and ginger. This step is crucial for evenly distributing the leavening agents and spices. Mix well until all dry ingredients are fully integrated and free of lumps, creating a fragrant base for your Healthy Carrot Cake.

Step 4: Combine Wet and Dry Mixtures
Gently fold the dry ingredient mixture into the bowl with the wet ingredients. Using a handheld mixer, blend the two mixtures on low speed just until combined—be careful not to overmix, as this can lead to a denser cake. Aim for a smooth batter with a few streaks of flour remaining, which will result in a light and fluffy Healthy Carrot Cake.

Step 5: Bake the Cake
Pour the batter into the prepared baking pan and spread it evenly with a spatula. Place it in the preheated oven and bake for 20-25 minutes, or until a toothpick inserted into the center comes out clean. You'll know your Healthy Carrot Cake is ready when it is lightly golden on top and springs back when gently pressed.

Step 6: Cool Before Frosting
Once baked, remove the cake from the oven and let it cool in the pan for about 10 minutes. After that, carefully transfer it to a wire rack to cool completely for about 30 minutes. Allowing your Healthy Carrot Cake to cool ensures the frosting adheres well without tearing the cake.

Step 7: Prepare the Creamy Frosting
While the cake cools, prepare the frosting by beating together 8 ounces of Neufchatel cheese, ½ cup of Greek yogurt, ¼ cup of maple syrup, and a pinch of sea salt in a medium bowl. Mix on medium speed until smooth and creamy, resulting in a tangy yet sweet frosting that perfectly complements the flavors of your Healthy Carrot Cake.

Step 8: Frosting the Cake
Once the cake has cooled completely, use a spatula to generously spread the creamy frosting over the top. For a beautiful finish, consider swirling the frosting to create an elegant design. This luscious topping adds a delightful contrast to the moist cake layers and enhances the overall taste of your Healthy Carrot Cake.

Healthy Carrot Cake Variations & Substitutions

Feel free to make this delightful cake your own with these fun twists and substitutes that will spark your creativity in the kitchen!

  • Nut-Free: Substitute crushed nuts with pumpkin seeds or sunflower seeds for added crunch without allergens. They'll give your cake a delightful texture alongside the moistness of the carrots.

  • Dairy-Free: Replace Greek yogurt with coconut yogurt and Neufchatel cheese with cashew cream for a creamy frosting alternative. You won't miss the dairy at all!

  • Egg-Free: Use flaxseeds or chia seeds as an egg replacer—mix 1 tablespoon of flaxseed meal or chia seeds with 2.5 tablespoons of water and let it sit until it becomes gelatinous. It’s a perfect binding agent!

  • Low Sugar: If you're watching your sugar intake, try using stevia or monk fruit sweetener in place of maple syrup. Adjust according to the package instructions for sweetness.

  • Extra Spices: Add a pinch of ground cardamom or nutmeg to the spice mixture for a holiday twist that enhances the warm flavors of the cake. The aroma will be enchanting!

  • Zucchini Twist: Swap out some of the grated carrots for grated zucchini to sneak in extra veggies. It adds moisture and lightness without a strong flavor impact.

  • Tropical Flavor: Incorporate crushed pineapple for a sweet and tropical hint; be sure to drain it well to avoid adding too much moisture to the batter.

You might also enjoy this Chocolate Pudding Cake for a rich and indulgent treat that balances the lightness of our carrot cake! Explore and discover your favorite variations; the possibilities are endless!

Make Ahead Options

Preparing your Healthy Carrot Cake ahead of time is a fantastic way to save precious moments during busy weekdays! You can grate the carrots and mix the dry ingredients up to 3 days in advance, storing them separately in airtight containers in the refrigerator to maintain freshness. For the cake batter, combine the wet ingredients up to 24 hours ahead, but refrain from mixing in the dry ingredients until you're ready to bake, ensuring the cake remains fluffy. When ready to serve, bake the prepared batter and let it cool completely before frosting, which can also be made ahead and stored in the fridge for up to 3 days. This way, your Healthy Carrot Cake becomes a quick assembly process, delivering delightful flavors with minimal effort!

What to Serve with Healthy Gluten-Free Carrot Cake

This moist and flavorful cake is perfect for any occasion, pairing deliciously with various side dishes and drinks.

  • Creamy Mashed Potatoes: The rich texture of creamy mashed potatoes contrasts beautifully with the fluffy cake, making for a comforting meal.
  • Crisp Green Salad: A fresh salad with mixed greens, walnuts, and a light vinaigrette adds a refreshing crunch to balance the sweetness of the cake.
  • Vanilla Ice Cream: The cold, creamy sweetness of vanilla ice cream is a classic pairing that enhances the flavors of the carrot cake.
  • Herbed Quinoa: A nutty quinoa dish tossed with herbs provides a wholesome, protein-packed side that complements the cake's richness without overpowering it.
  • Steamed Asparagus: The slight bitterness of asparagus adds an elegant touch to your plate, cutting through the cake's sweetness and offering a vibrant color contrast.
  • Chai Tea: The aromatic spices in chai tea mirror those in the cake, creating a warm, comforting drink to enjoy alongside each slice.
  • Fruit Compote: A tangy berry or citrus compote offers a zesty contrast to the sweet frosting, enhancing every bite with a burst of fresh flavor.
  • Lemon Sorbet: This light, refreshing dessert serves as a palate cleanser and pairs well with the warm spices in the carrot cake, leaving your taste buds dancing.

How to Store and Freeze Healthy Carrot Cake

Fridge: Store in an airtight container in the refrigerator for up to 4 days. Allow the cake to chill slightly before serving to enhance flavors.

Freezer: For longer storage, wrap individual slices tightly in plastic wrap, then place them in a freezer bag. It can be frozen for up to 3 months; thaw in the fridge overnight.

Reheating: If desired, reheat slices in the microwave for about 10-15 seconds for that freshly-baked taste. Enjoy your healthy carrot cake warm or chilled!

Room Temperature: If serving on the same day, you can keep the cake at room temperature for up to 3 hours, but be sure to refrigerate any leftovers to maintain freshness.

Expert Tips for Healthy Carrot Cake

  • Cool Completely: Allow your cake to cool fully before frosting to prevent tearing the delicate texture. Patience pays off for a gorgeous finish!

  • Don’t Overmix: When combining wet and dry ingredients, mix just until blended. Overmixing can make the cake dense instead of light and fluffy.

  • Add Texture: For an extra crunch, consider mixing in ½ cup of crushed nuts or ¼ cup of soaked raisins to the batter before baking.

  • Test for Doneness: Always insert a toothpick into the center to check for doneness. If it comes out clean or with a few crumbs, your Healthy Carrot Cake is ready!

  • Make Ahead: This cake actually tastes better the next day! Making it in advance allows flavors to meld beautifully, making it a fantastic option for gatherings.

Healthy Carrot Cake Recipe FAQs

How do I choose the right carrots for this recipe?
Absolutely! For the best results, look for firm, vibrant carrots, preferably organic. Carrots with dark orange color promise sweetness and flavor. Avoid carrots that have dark spots or feel soft, as these may affect the cake's texture. Grate 2-3 large carrots for optimal moisture.

What is the best way to store the Healthy Carrot Cake?
You can store the Healthy Carrot Cake in an airtight container in the refrigerator for up to 4 days. It’s beneficial to let it chill slightly before serving, as this will elevate its flavors. If you’re planning to enjoy it later, I recommend slicing the cake before storing to make serving easier.

Can I freeze Healthy Carrot Cake?
Absolutely! To freeze, first allow the cake to cool completely. Wrap individual slices tightly in plastic wrap, then place them in a freezer-safe bag. The cake can be frozen for up to 3 months. When you’re ready to enjoy, thaw the slices overnight in the fridge and reheat briefly in the microwave for a fresh-baked taste.

What should I do if the cake turns out too dense?
Very often, a dense cake stems from overmixing the batter. When you combine your wet and dry ingredients, mix just until incorporated. Additionally, check whether your leavening agents (baking powder and baking soda) are fresh, as expired ones might not provide the rise needed for a light cake. If you’re worried, simply test for doneness earlier than the suggested time.

Are there any dietary restrictions I should consider?
Absolutely! This Healthy Carrot Cake is gluten-free, making it an excellent option for gluten-sensitive individuals. However, if you’re baking for someone with allergies, ensure the ingredients, like Neufchatel cheese or Greek yogurt, are suitable for them. If you're making it for young children or pets, take care not to use honey in the frosting due to its potential risk for infants.

Healthy Carrot Cake

Deliciously Moist Healthy Carrot Cake That's Gluten-Free

This Healthy Carrot Cake offers indulgence without guilt, blending fluffy textures with rich flavors of fresh carrots.
Print Recipe Pin Recipe
Prep Time 20 minutes mins
Cook Time 25 minutes mins
Cooling Time 40 minutes mins
Total Time 1 hour hr 25 minutes mins
Servings: 10 slices
Course: Dessert
Cuisine: American
Calories: 215
Ingredients Equipment Method Nutrition Notes

Ingredients
  

For the Cake
  • 2-3 large Grated Carrots Provides natural sweetness and moisture
  • 3 large Eggs Essential for structure and moisture
  • ½ cup Maple Syrup Acts as a natural sweetener
  • ⅓ cup Coconut Oil Offers healthy fats
  • ½ cup Greek Yogurt Enhances moisture and texture
  • 1 teaspoon Vanilla Extract Adds depth of flavor
  • 1 ¾ cups Oat Flour Gluten-free base flour
  • 1 teaspoon Baking Powder Important leavening agent
  • ½ teaspoon Baking Soda Important leavening agent
  • 1 teaspoon Ground Cinnamon Infuses classic carrot cake flavors
  • 1 teaspoon Ground Ginger Infuses classic carrot cake flavors
  • 1 pinch Sea Salt Balances flavors
For the Frosting
  • 8 ounces Neufchatel Cheese Lower-fat alternative to cream cheese
  • ½ cup Additional Greek Yogurt Adds creaminess
  • ¼ cup Maple Syrup Sweetens the frosting
  • 1 pinch Sea Salt Enhances overall flavor

Equipment

  • 8x8-inch baking pan
  • Mixing Bowl
  • handheld mixer

Method
 

Step-by-Step Instructions
  1. Preheat your oven to 350°F (175°C). Grease an 8x8-inch baking pan with coconut oil and line with parchment paper.
  2. In a large bowl, grate 2-3 large carrots and add 3 large eggs, ½ cup maple syrup, ⅓ cup melted coconut oil, ½ cup Greek yogurt, and 1 teaspoon vanilla extract. Whisk until well combined.
  3. In another bowl, sift together 1 ¾ cups oat flour, 1 teaspoon baking powder, ½ teaspoon baking soda, a pinch of sea salt, and 1 teaspoon each of ground cinnamon and ginger. Mix well.
  4. Gently fold the dry ingredients into the wet mixture until combined, being careful not to overmix.
  5. Pour the batter into the prepared pan and bake for 20-25 minutes or until a toothpick comes out clean.
  6. Allow the cake to cool in the pan for about 10 minutes, then transfer to a wire rack to cool completely for about 30 minutes.
  7. For the frosting, beat together 8 ounces Neufchatel cheese, ½ cup Greek yogurt, ¼ cup maple syrup, and a pinch of sea salt until smooth.
  8. Once the cake has cooled, spread the frosting over the top and enjoy!

Nutrition

Serving: 1sliceCalories: 215kcalCarbohydrates: 32gProtein: 4gFat: 8gSaturated Fat: 4gPolyunsaturated Fat: 1gMonounsaturated Fat: 3gCholesterol: 70mgSodium: 150mgPotassium: 160mgFiber: 2gSugar: 10gVitamin A: 400IUVitamin C: 2mgCalcium: 50mgIron: 1mg

Notes

Cool completely before frosting to prevent tearing. Don't overmix for a light cake. Consider adding crushed nuts or raisins for added texture.

Tried this recipe?

Let us know how it was!

Strawberry Matcha Neapolitan Cookies Ready in 30 Minutes

February 26, 2026 by Grace Snow Leave a Comment

With every colorful swirl of these Strawberry Matcha Neapolitan Cookies, I’m reminded of a joyful summer picnic—where flavors dance like laughter and desserts bring us together. Ready in just 30 minutes, these visually stunning cookies not only brighten any table with their vibrant pink and green hues but also offer a delightful balance of sweet strawberries and earthy matcha in each bite. What’s better? They’re incredibly easy to whip up, making them a crowd-pleaser for gatherings or a special treat for yourself. Whether you’re indulging on a sunny afternoon or sharing them at a celebration, these cookies are the perfect blend of aesthetics and flavor. Ready to step into a world of colorful baking? Let’s get started!

Why are these cookies a must-try?

Quick & Easy: In just 30 minutes, you can create these delightful Strawberry Matcha Neapolitan Cookies, perfect for busy bakers who still want a homemade treat.

Visually Stunning: Their vibrant pink and green swirls make them the star of any dessert table—who can resist such a colorful creation?

Unique Flavor Combination: The sweetness of strawberries paired with earthy matcha provides a unique taste that’s both refreshing and satisfying.

Crowd-Pleasing Treat: Whether for family gatherings or a cozy afternoon tea, these cookies are sure to impress guests of all ages—add a fun twist to your cookie collection! For more delightful cookies, check out my Thumbprint Cookies Melt or Matcha Cookies Soft.

Chewy Delight: With a soft, chewy interior, each bite is a heavenly experience, encapsulating the joy of baking in every cookie!

Strawberry Matcha Neapolitan Cookies Ingredients

For the Cookie Base

  • All-Purpose Flour – Provides structure and stability for the cookies; substitute with gluten-free flour for a gluten-free version.
  • Baking Soda – Acts as a leavening agent, helping the cookies rise; essential for texture, no substitutions needed.
  • Baking Powder – Works with baking soda for soft and fluffy cookies; no substitutions, please.
  • Salt – Enhances the overall flavor; sea salt or table salt works well.

For the Flavor and Texture

  • Unsalted Butter – Adds richness and moisture; ensure it’s at room temperature for better mixing, or substitute with vegan butter for dairy-free cookies.
  • Granulated Sugar – Sweetens the cookies and aids in browning; reduce slightly for a less sweet option.
  • Egg – Binds ingredients and adds moisture; for a vegan alternative, use a flaxseed egg.
  • Vanilla Extract – Introduces a depth of flavor; pure vanilla delivers the best results.

For the Color and Flavor Burst

  • Freeze Dried Strawberries – Delivers strawberry flavor and vivid color; they cannot be substituted as fresh strawberries will change the texture.
  • Matcha Powder – Provides that distinct green color and earthy flavor; any quality culinary-grade matcha will suffice.

These Strawberry Matcha Neapolitan Cookies not only look pretty but are packed with flavor, making them a delightful treat for any occasion!

Step‑by‑Step Instructions for Strawberry Matcha Neapolitan Cookies

Step 1: Preheat the Oven and Prepare Baking Sheets
First, preheat your oven to 350°F (177°C). While the oven heats up, line two baking sheets with parchment paper. This will prevent the cookies from sticking and help achieve those beautiful edges. Make sure your baking sheets are ready so you can place your prepared cookies directly onto them later.

Step 2: Mix Dry Ingredients
In a small bowl, whisk together 2 cups of all-purpose flour, 1 teaspoon of baking soda, 1 teaspoon of baking powder, and ½ teaspoon of salt until well combined. This step ensures that your dry ingredients are evenly distributed, providing the perfect texture for your Strawberry Matcha Neapolitan Cookies. Set this mixture aside for later incorporation into your wet ingredients.

Step 3: Cream Butter and Sugar
In a large mixing bowl or a stand mixer, cream together ½ cup of room temperature unsalted butter and 1 cup of granulated sugar until the mixture is light and fluffy, which should take about 2-3 minutes. This fluffiness will help create that desired chewy cookie texture. Make sure to scrape down the sides of the bowl to incorporate all ingredients fully.

Step 4: Add Egg and Vanilla
Next, add 1 large egg and 1 teaspoon of vanilla extract to the creamed mixture. Mix until fully combined and smooth. The addition of these ingredients helps bind your cookies and enhances the flavor profile of your Strawberry Matcha Neapolitan Cookies. Take your time to ensure everything is well blended.

Step 5: Combine Dry and Wet Mixtures
Gradually incorporate the dry ingredient mixture into the wet ingredients, mixing gently. Stop mixing as soon as no streaks remain to prevent tough cookies. This step allows the flavors to meld together while still maintaining a soft and tender cookie dough that’s perfect for these delightful Strawberry Matcha Neapolitan Cookies.

Step 6: Divide the Dough
Once your dough is ready, divide it into three equal portions and place each portion in its own bowl. This separation allows you to create the three delicious flavors and colors of your Strawberry Matcha Neapolitan Cookies. It’s important to be even here, as this ensures a consistent design when shaping the cookies.

Step 7: Add Flavor and Color
To one portion, process freeze-dried strawberries into a powder to mix in for a burst of pink flavor. Add the powdered strawberries into one dough bowl and mix until well combined. In a second bowl, add 2 tablespoons of matcha powder to create that beautiful green color and earthy flavor. Stir each mixture until thoroughly combined, revealing the vibrant colors.

Step 8: Form Cookie Balls
Take one tablespoon of each dough color—strawberry, plain, and matcha—and roll them together into a ball, ensuring they form a lovely tri-color cookie. Roll each ball in granulated sugar to add a sweet sparkle before baking. This coating not only enhances appearance but also contributes a lovely texture once baked.

Step 9: Bake the Cookies
Place your beautifully formed cookie dough balls onto your prepared baking sheets, making sure to space them about 2 inches apart. Bake in the preheated oven for 10-12 minutes or until the edges are lightly golden and the centers appear set. Keep an eye on them, as visual cues are essential for achieving the perfect Strawberry Matcha Neapolitan Cookies.

Step 10: Cool and Serve
After baking, allow the cookies to cool on the baking sheet for about 10 minutes. This cooling period helps them firm up and retain their delightful chewy interior before transferring them to a wire rack for further cooling. Once cooled, these colorful Strawberry Matcha Neapolitan Cookies are ready to be enjoyed and shared!

Make Ahead Options

These Strawberry Matcha Neapolitan Cookies are fantastic for meal prep lovers! You can prepare the cookie dough up to 24 hours in advance by following the steps up to dividing the dough into three portions; cover each bowl with plastic wrap and refrigerate them. This not only saves time for busy weeknights but also allows the flavors to meld beautifully. If you want to keep them for longer, the formed cookie balls can be frozen and stored for up to 3 months. When ready to bake, simply place them directly on a baking sheet and follow the original baking instructions—this way, you’ll enjoy the same delicious flavor and chewy texture as if they were freshly made!

What to Serve with 30-Minute Strawberry Matcha Neapolitan Cookies

Indulging in these vibrant cookies is just the beginning—how about crafting a complete feast for the senses?

  • Refreshing Iced Green Tea: The grassy notes in green tea perfectly complement the earthy matcha flavor, creating a harmonious sipping experience alongside the cookies.

  • Whipped Cream and Berries: A dollop of freshly whipped cream with mixed berries adds a fruity freshness that enhances the sweetness of the cookies. This pairing also introduces a luxurious creaminess!

  • Fruit Salad: A colorful blend of seasonal fruits will provide a refreshing contrast to the rich flavors of the cookies, making each bite a delightful journey through sweetness and crunch.

  • Chocolate Dipped Strawberries: For a sweet treat that mirrors the cookie's flavors, serve chocolate-dipped strawberries. The chocolate’s richness pairs beautifully with the fruity and matcha layers in each cookie.

  • Sparkling Lemonade: The zesty brightness of sparkling lemonade cuts through the sweetness, making your dessert experience feel light and airy—perfect for summer gatherings!

  • Matcha Latte: Why not double down on matcha? A creamy matcha latte offers a soothing companion to the cookies, enhancing their flavor while providing a delightful coffee shop feel.

  • Mini Cheesecakes: Serve bite-sized vanilla or fruit-flavored cheesecakes for a touch of indulgence. Their rich texture complements the chewy cookies.

  • Vanilla Ice Cream: Consider serving a scoop of creamy vanilla ice cream alongside the cookies for an unbeatable classic dessert combo that’s ever so satisfying.

  • Dark Chocolate Tea: This warm and rich drink not only pairs well with the cookies’ flavors but also rounds out the dessert experience with its comforting notes.

Strawberry Matcha Neapolitan Cookies Variations

Feel free to let your creativity shine by customizing these delightful cookies to match your taste and dietary preferences!

  • Gluten-Free: Use a high-quality gluten-free flour blend to make these cookies gluten-free while keeping them deliciously chewy.

  • Dairy-Free: Substitute unsalted butter with vegan butter or coconut oil to create a rich flavor without any dairy.

  • Different Sweeteners: Swap granulated sugar for coconut sugar or honey for a touch of natural sweetness and a hint of caramel flavor.

  • Flavor Variations: Replace matcha with cocoa powder or ube powder for a delightful chocolatey twist or a unique purple hue.

  • Fruit Alternatives: Experiment with other freeze-dried fruits, such as raspberries or blueberries, to create fun color combos that are equally beautiful and tasty.

  • Nutty Crunch: Roll dough balls in crushed nuts or even sprinkles before baking for a crunchy texture that contrasts beautifully with the soft cookie center.

  • Intensified Flavor: Add a teaspoon of almond extract along with the vanilla for a nutty dimension that elevates the overall flavor.

Feel inspired? You can transform these cookies into something uniquely yours! For more delightful and visually stunning recipes, don’t miss my Matcha Cookies Soft or Eggnog Cookies Soft, which can also bring vibrant flavors to your dessert table!

Expert Tips for Strawberry Matcha Neapolitan Cookies

• Room Temperature Ingredients: Ensure that butter and eggs are at room temperature; this helps achieve a smooth and fluffy dough for your Strawberry Matcha Neapolitan Cookies.

• Mixing Technique: Be careful not to overmix after adding the dry ingredients. Overmixing can lead to tough cookies, so mix just until combined for a tender, chewy texture.

• Pro Tip for Storing: Store cookies in an airtight container at room temperature for up to 3 days. For longer freshness, freeze them, then thaw at room temperature to enjoy later.

• Flavor Experimentation: Feel free to experiment! Try substituting matcha powder with cocoa or using different freeze-dried fruits for unique flavors in your Strawberry Matcha Neapolitan Cookies.

• Perfect Cookie Size: When rolling the dough, aim for about a tablespoon for each cookie. This ensures even baking and consistent sizes for that perfect presentation.

How to Store and Freeze Strawberry Matcha Neapolitan Cookies

Room Temperature: Store cookies in an airtight container at room temperature for up to 3 days to maintain freshness and chewiness.

Fridge: If you prefer, you can refrigerate the cookies in an airtight container for up to a week. Just remember to let them come to room temperature before serving.

Freezer: For longer storage, freeze the cookies in a ziplock bag or airtight container for up to 3 months. Thaw at room temperature before enjoying your delicious Strawberry Matcha Neapolitan Cookies again.

Reheating: To warm them up, pop the cookies in a preheated oven at 300°F (150°C) for about 5 minutes to revive their soft and chewy texture.

30-Minute Strawberry Matcha Neapolitan Cookies Recipe FAQs

What should I look for when selecting freeze-dried strawberries?
Absolutely! When choosing freeze-dried strawberries, look for a vibrant color without any dark spots or signs of moisture. They should be crispy and lightweight. If you can taste them before buying, opt for the ones that have a naturally sweet flavor without added sugars—this will enhance the taste of your cookies beautifully!

How should I store leftover cookies?
I often store my cookies in an airtight container at room temperature for up to 3 days. This keeps them chewy and fresh! If you’d like to extend their life, you can refrigerate them for up to a week, but let them return to room temperature before enjoying for the best texture.

Can I freeze the Strawberry Matcha Neapolitan Cookies?
Very! To freeze your cookies, first, ensure they're completely cooled. Place them in a single layer on a baking sheet to freeze for about 1-2 hours, ensuring they don't stick together. Then, transfer them to a ziplock bag or airtight container, where they can be stored for up to 3 months. When you're ready, thaw at room temperature for a delightful treat!

What should I do if my cookies turn out too tough?
Oh no! If your cookies are too tough, it may be due to overmixing or too much flour. To avoid this in the future, mix until just combined when incorporating dry ingredients. I recommend using a kitchen scale for accurate measurements, especially for flour. For softening tough cookies, try placing a slice of bread in the container with them to help retain moisture.

Can I make these cookies vegan?
Definitely! To make these cookies vegan, substitute the egg with a flaxseed egg—just mix 1 tablespoon of ground flaxseed with 2.5 tablespoons of water, let it sit for a few minutes to thicken, and then incorporate it into the dough as you would the regular egg. Also, ensure to use vegan butter instead of the unsalted butter for that rich flavor.

What if someone has an allergy to nuts?
Absolutely, these Strawberry Matcha Neapolitan Cookies are nut-free as they don’t call for any nuts in the ingredients. However, it's always prudent to check the packaging of your ingredients, especially the freeze-dried strawberries and matcha powder, to confirm no hidden nut traces are present, especially if you're baking for someone with severe nut allergies.

Strawberry Matcha Neapolitan Cookies

Strawberry Matcha Neapolitan Cookies Ready in 30 Minutes

Delight in the colorful swirls of Strawberry Matcha Neapolitan Cookies, combining sweet strawberries and earthy matcha in a fun baking experience.
Print Recipe Pin Recipe
Prep Time 15 minutes mins
Cook Time 12 minutes mins
Cooling Time 10 minutes mins
Total Time 30 minutes mins
Servings: 24 cookies
Course: Dessert
Cuisine: American
Calories: 150
Ingredients Equipment Method Nutrition Notes

Ingredients
  

For the Cookie Base
  • 2 cups All-Purpose Flour substitute with gluten-free flour for a gluten-free version
  • 1 teaspoon Baking Soda essential for texture, no substitutions needed
  • 1 teaspoon Baking Powder no substitutions, please
  • 0.5 teaspoon Salt sea salt or table salt works well
For the Flavor and Texture
  • 0.5 cups Unsalted Butter ensure it’s at room temperature for better mixing
  • 1 cups Granulated Sugar reduce slightly for a less sweet option
  • 1 large Egg for a vegan alternative, use a flaxseed egg
  • 1 teaspoon Vanilla Extract pure vanilla delivers the best results
For the Color and Flavor Burst
  • 0.5 cups Freeze Dried Strawberries they cannot be substituted with fresh strawberries
  • 2 tablespoons Matcha Powder any quality culinary-grade matcha will suffice

Equipment

  • Oven
  • Mixing Bowl
  • Stand Mixer
  • Baking Sheets
  • Parchment Paper
  • Whisk

Method
 

Step-by-Step Instructions
  1. Preheat your oven to 350°F (177°C) and line two baking sheets with parchment paper.
  2. In a small bowl, whisk together the flour, baking soda, baking powder, and salt.
  3. In a large bowl, cream together the butter and sugar until light and fluffy.
  4. Add the egg and vanilla extract, mixing until fully combined.
  5. Gradually incorporate the dry ingredient mixture into the wet ingredients, mixing gently.
  6. Divide the dough into three equal portions and place each in its own bowl.
  7. Process freeze-dried strawberries into a powder and mix into one portion; add matcha powder to the second portion.
  8. Take one tablespoon of each dough color and roll them together into a ball, rolling in granulated sugar.
  9. Place the cookie dough balls on the baking sheets, spaced about 2 inches apart, and bake for 10-12 minutes.
  10. Allow the cookies to cool on the baking sheet for about 10 minutes before transferring them to a wire rack.

Nutrition

Serving: 1cookieCalories: 150kcalCarbohydrates: 20gProtein: 2gFat: 7gSaturated Fat: 4gPolyunsaturated Fat: 1gMonounsaturated Fat: 2gCholesterol: 20mgSodium: 100mgPotassium: 50mgFiber: 1gSugar: 10gVitamin A: 200IUVitamin C: 2mgCalcium: 10mgIron: 1mg

Notes

Ensure that butter and eggs are at room temperature. Don't overmix the dough for a tender texture. Cookies can be stored in an airtight container for up to 3 days or frozen for longer storage.

Tried this recipe?

Let us know how it was!

Irresistible Vanilla Macarons Made from Scratch at Home

February 26, 2026 by Grace Snow Leave a Comment

As I stood in my kitchen, the sweet scent of vanilla wafting through the air, I realized I was about to embark on a delightful journey into the world of French pastries. I couldn’t resist the allure of Classic Vanilla Macarons—those delicate, colorful treats that have the uncanny ability to transport anyone to a quaint Parisian café. Made from scratch, these macarons boast a crisp exterior with a luscious vanilla bean white chocolate ganache inside, making them the perfect crowd-pleaser for any occasion. Plus, they offer a satisfying sense of accomplishment that is hard to find in store-bought sweets! Whether you’re celebrating a special moment or simply treating yourself to something extraordinary, these macarons will undoubtedly elevate your dessert game. Ready to discover the secrets behind crafting these elegant delights? Let’s dive in!

Why Make Vanilla Macarons at Home?

Irresistible, these vanilla macarons will impress your friends and family with their delicate appearance and delightful taste. Versatile, you can customize them with various fillings or flavors for every occasion. Satisfying, baking these treats from scratch offers a sense of achievement that store-bought sweets just can't match. Freshness matters—you'll enjoy the unparalleled quality of homemade macarons. Plus, crowd-pleasing at any gathering, they bring a touch of gourmet to your dessert table. Ready to elevate your dessert game? Join me in creating these marvelous treats!

Vanilla Macaron Ingredients

For the Macaron Shells
• Almond Flour – Provides structure and a soft texture in macarons; ensure it's finely ground for best results.
• Powdered Sugar – Adds sweetness and helps create a smooth shell; no substitutions needed, but you can use homemade if finely sifted.
• Egg Whites – Essential for the meringue structure, contributing to lightness; use room temperature egg whites for better volume.
• Granulated Sugar – Sweetens and stabilizes the meringue; helps achieve that glossy finish; no substitutes recommended.
• Vanilla Bean or Extract – Imparts a rich vanilla flavor; pure vanilla extract can replace the bean—use 1 to 1½ teaspoons for substitution.

For the Ganache Filling
• Heavy Cream – This adds richness to the ganache; should have at least 30% fat content for the best texture.
• White Chocolate – Forms the base of the ganache, ensuring a smooth texture; can substitute with high-quality white chocolate chips.

Dive into making these delightful vanilla macarons at home and savor the joy of baking from scratch!

Step‑by‑Step Instructions for Classic Vanilla Macarons with Creamy White Chocolate Ganache

Step 1: Prepare Macaron Batter
Sift together 1 cup of almond flour and 1 ¾ cups of powdered sugar into a large bowl, ensuring a fine texture for your vanilla macarons. In a separate mixing bowl, beat 3 large egg whites until frothy. Meanwhile, combine 1 cup of granulated sugar and ¼ cup of water in a small saucepan, heating until the sugar syrup reaches 244°F (118°C).

Step 2: Make Meringue
Once your sugar syrup is at the right temperature, slowly drizzle it into the frothy egg whites while mixing on low speed. Gradually increase the speed to high, whipping until the mixture is glossy and forms stiff peaks, which should take about 5-7 minutes. Your meringue should have a beautiful sheen, indicating it's ready to incorporate into your macaron batter.

Step 3: Macaronage
Gently fold a small portion of the meringue into the almond flour mixture, which helps to loosen it. Carefully add the remaining meringue, folding meticulously until the batter flows like lava and forms a “figure-eight” when lifted with a spatula. This step is crucial for achieving the perfect texture of your vanilla macarons.

Step 4: Pipe and Bake
Using a piping bag fitted with a plain round tip, pipe small, even rounds onto a parchment-lined baking sheet, leaving space between each one. After piping, tap the tray firmly on the counter to release any trapped air bubbles. Bake in a preheated oven at 320°F (160°C) for 12-14 minutes, checking for feet formation and that they don't stick to the parchment.

Step 5: Make Ganache
While the vanilla macaron shells cool completely, prepare the ganache. In a saucepan, heat ½ cup of heavy cream with 1 teaspoon of vanilla until it reaches a simmer. Pour the hot cream over 8 ounces of chopped white chocolate in a heatproof bowl, allowing it to sit for a minute. Gently stir until the mixture is smooth and glossy, which should take just a few moments.

Step 6: Assemble
Once the ganache has cooled and thickened slightly, whip it until creamy. Pair up your macaron shells by size, then pipe a dollop of ganache onto the flat side of one shell. Place another shell on top, gently pressing to create a sandwich, allowing the ganache to ooze slightly out the sides for that decadent touch.

Step 7: Rest
Transfer the filled macarons to an airtight container and refrigerate for at least 1 hour—ideally overnight. This resting period allows the flavors to meld beautifully, enhancing your classic vanilla macarons' overall taste and texture, making the anticipation all the more delightful!

How to Store and Freeze Vanilla Macarons

Airtight Container: Store filled vanilla macarons in an airtight container in the fridge for up to 4-5 days. This helps maintain their delicate texture and flavor.

Room Temperature: Unfilled macaron shells can be kept at room temperature for up to 5 days in a cool, dry place. Make sure to let them cool completely before storage to avoid moisture.

Freezer Tips: To freeze filled macarons, place them in a single layer in an airtight container, separating layers with parchment paper. They can be frozen for up to 1 month; simply thaw in the fridge before serving.

Reheating Instructions: If you prefer warm macarons, briefly place them in a preheated oven at 300°F (150°C) for a couple of minutes. This will revitalize the texture without compromising the flavor.

Make Ahead Options

These vanilla macarons are perfect for meal prep, saving you time on busy days! You can prepare the macaron shells up to 24 hours in advance—just store them in an airtight container at room temperature to maintain their crispness. The creamy white chocolate ganache can also be made and refrigerated for up to 3 days. To finish, simply whip the ganache until creamy, then assemble the macarons right before serving. This way, you’ll have decadent vanilla macarons ready to impress your guests with minimal last-minute effort, ensuring they taste just as delicious as if they were freshly made!

Expert Tips for Perfect Vanilla Macarons

  • Proper Mixing: Ensure your macaronage is just right; under-mixing results in rough shells, while over-mixing leads to dribbly batter. Aim for a “lava-like” consistency!

  • Baking Sheet Taps: Don’t skip tapping the baking tray before baking! This releases air bubbles preventing cracks and ensures smooth, even shells on your vanilla macarons.

  • Temperature Matters: Use room temperature egg whites for better meringue volume; cold egg whites can affect the texture and rise of your macarons.

  • Resting Time: Allow your assembled macarons to rest in the fridge for at least an hour or overnight. This step enhances the flavor and marries the ganache and shells beautifully.

  • Storage Secrets: Store filled vanilla macarons in an airtight container in the fridge for up to 4-5 days, but they taste even better the next day!

What to Serve with Classic Vanilla Macarons?

Indulging in homemade vanilla macarons opens the door to a delightful world of pairing possibilities that elevate their sweet charm.

  • Rich Espresso: A strong espresso balances the sweetness and enhances the vanilla notes, creating a delightful contrast.
  • Fresh Berries: Ripe strawberries or raspberries add a burst of freshness, providing a juicy, tart complement to the macarons' sweetness.
  • Creamy Chocolate Mousse: The richness of chocolate mousse adds a luscious layer that pairs beautifully with the delicate vanilla flavors.
  • Whipped Cream: Light and airy whipped cream serves as a perfect dip, enhancing the macarons’ elegant texture.
  • Sparkling Wine: A glass of sparkling wine brings effervescence that cuts through the sweetness of the macarons, making each bite even more enjoyable.
  • Fruit Tart: A slice of fruit tart provides a lovely mix of textures and flavors, balancing the macarons with its creamy and fruity components.

These pairings will create not just a meal, but an experience. Enjoy the delightful union of flavors that showcases the beauty of your homemade macarons!

Vanilla Macarons Customizations

Feel free to let your creativity shine as you personalize these delightful treats with various twists and substitutions!

  • Nut-Free: Replace almond flour with finely ground sunflower seeds for a nut-free version that’s just as delicious.
  • Chocolate Lovers: Swap the white chocolate ganache for dark chocolate to create a rich and indulgent filling that chocolate enthusiasts will adore.
  • Fruit Fusion: Add a splash of fruit puree, such as raspberry or passionfruit, to the ganache for a vibrant burst of flavor.
  • Dairy-Free: Use coconut cream in place of heavy cream and a dairy-free chocolate alternative for a vegan take on these macarons.
  • Herbal Touch: Infuse your ganache with a hint of fresh mint or lavender for a refreshing flavor twist that will surprise your palate.
  • Colorful Celebration: Add food coloring to your macaron batter to make these treats extra festive for birthdays and special occasions.
  • Spicy Kick: Incorporate a pinch of cayenne pepper or chili powder into the batter for an unexpected spicy flavor that offers a delightful contrast to the sweetness.
  • Nutty Crunch: Fold in some finely chopped pistachios or walnuts into the ganache for added texture and an earthy flavor that pairs beautifully with vanilla.

For further inspiration, consider experimenting with additional flavors like lemon zest or using different types of chocolate for your ganache!

Vanilla Macarons Recipe FAQs

What should I look for when selecting almond flour?
Absolutely! When choosing almond flour, aim for a finely ground product. Look for flour that is pale in color and free from dark spots, which can indicate rancidity. If grinding your own, ensure the almonds are blanched for the best texture.

How should I store my vanilla macarons?
To keep your vanilla macarons fresh, store filled ones in an airtight container in the fridge for up to 4-5 days. This helps maintain their delicious texture. If you have unfilled shells, they can stay at room temperature in a cool, dry place for 5 days—just let them cool completely before storage!

Can I freeze my macarons for future enjoyment?
Very! To freeze filled macarons, place them in a single layer in an airtight container, separating each layer with parchment paper. They’ll keep well in the freezer for up to 1 month. When ready to enjoy, simply thaw them in the fridge overnight for the best texture.

What if my macarons crack while baking?
If your macarons are cracking, it may be due to excessive humidity or over-baking. Tap the baking sheet firmly after piping to release air bubbles, and consider lowering the oven temperature slightly if you notice they’re browning too quickly. Also, ensure proper resting before baking to form that all-important skin on the shells!

Are there any allergies I should consider with this recipe?
Absolutely! Almond flour contains nuts, so it’s essential to consider nut allergies. For those with egg allergies, this recipe isn't suitable, as egg whites are a key ingredient. If someone has dairy restrictions, you could substitute the heavy cream with a non-dairy alternative, just ensure it’s appropriate for making ganache!

Vanilla Macarons

Irresistible Vanilla Macarons Made from Scratch at Home

Delightful vanilla macarons crafted from scratch, perfect for any occasion.
Print Recipe Pin Recipe
Prep Time 30 minutes mins
Cook Time 14 minutes mins
Resting Time 1 hour hr
Total Time 1 hour hr 44 minutes mins
Servings: 24 macarons
Course: Dessert
Cuisine: French
Calories: 100
Ingredients Equipment Method Nutrition Notes

Ingredients
  

For the Macaron Shells
  • 1 cup Almond Flour Finely ground for best results.
  • 1.75 cups Powdered Sugar Ensure it's finely sifted.
  • 3 large Egg Whites Room temperature for better volume.
  • 1 cup Granulated Sugar
  • 1 teaspoon Vanilla Bean or Extract Replace with 1 to 1½ tsp of extract if needed.
For the Ganache Filling
  • 0.5 cup Heavy Cream At least 30% fat content.
  • 8 ounces White Chocolate Chopped or high-quality white chocolate chips.

Equipment

  • Mixing bowls
  • Electric mixer
  • piping bag
  • Parchment Paper
  • Saucepan
  • Oven

Method
 

Step‑by‑Step Instructions
  1. Sift together almond flour and powdered sugar into a large bowl for the macaron shells.
  2. In a separate bowl, beat egg whites until frothy. Heat granulated sugar and water until syrup reaches 244°F (118°C).
  3. Slowly drizzle sugar syrup into egg whites while mixing on low, then increase to high and whip until glossy and stiff peaks form.
  4. Gently fold a small portion of meringue into almond mixture, then add remaining meringue and fold until batter flows like lava.
  5. Pipe small rounds onto parchment-lined baking sheet, tap to release air bubbles, and bake at 320°F (160°C) for 12-14 minutes.
  6. Heat heavy cream with vanilla until simmer, pour over chopped white chocolate, and let sit for a minute before stirring until smooth.
  7. Whip cooled ganache until creamy, pair macaron shells by size, and pipe ganache onto one shell before sandwiching with another.
  8. Transfer filled macarons to an airtight container and refrigerate for at least 1 hour or overnight before serving.

Nutrition

Serving: 1macaronCalories: 100kcalCarbohydrates: 12gProtein: 1gFat: 5gSaturated Fat: 3gMonounsaturated Fat: 1gCholesterol: 10mgSodium: 30mgPotassium: 30mgSugar: 9gCalcium: 10mg

Notes

Ensure proper whisking and resting times for the best results. Store macarons in an airtight container in the fridge for optimal freshness.

Tried this recipe?

Let us know how it was!

Fluffy Strawberry Shortcake Cake for Your Perfect Summer Treat

February 26, 2026 by Grace Snow Leave a Comment

As I stood in my kitchen, the sweet aroma of strawberries wafted through the air, transporting me back to sun-drenched summer picnics. There’s something undeniably nostalgic about making a Strawberry Shortcake Cake, with its light vanilla sponge and layers of fresh fruit. This recipe isn’t just a charming dessert; it’s a vibrant centerpiece for birthdays, family gatherings, or a sweet indulgence on a warm afternoon. With quick prep and a beautiful presentation, this cake truly captivates everyone at the table. Whether you choose to keep it simple with a two-layer delight or go extravagant with three tiers, you’ll savor each moment as you assemble this culinary masterpiece. Are you ready to dive into a delightful blend of flavors and textures that elevate this classic recipe? Let’s explore how to create your own slice of summer joy!

Why Try This Strawberry Shortcake Cake?

Elevated Flavor: The sweet, juicy strawberries paired with light vanilla sponge create a delightful burst of flavor in every bite.
Versatile Layers: This cake can easily adapt to your needs—serve it as two or three layers, or transform it into an eye-catching trifle!
Effortless Preparation: With straightforward steps, even novice bakers will shine with this recipe.
Stunning Presentation: Its beautiful layers and fresh fruit topping make it an impressive centerpiece for any gathering.
Nostalgic Comfort: Enjoy a classic dessert that brings back memories of sunny days and family celebrations. So, whether you enjoy it on a cozy afternoon or at a birthday party, this Strawberry Shortcake Cake will leave everyone craving more!

Strawberry Shortcake Cake Ingredients

• Get ready to gather these delightful ingredients!

For the Cake

  • All-purpose flour – Provides structure to the cake. Substitution: Cake flour for a lighter texture.
  • Baking powder – Leavening agent to help the cake rise. Ensure it’s fresh for the best results.
  • Kosher salt – Enhances the flavor of the cake. Regular salt can be used in equal amounts.
  • Eggs (separated) – The whites create a light meringue; the yolks add richness. Room temperature eggs whip better.
  • Lemon juice or white vinegar – Stabilizes the egg whites for meringue. Substitution: Cream of tartar (1/2 teaspoon).
  • Granulated sugar – Sweetens the cake and meringue. Some can be replaced with a sugar alternative for lower-calorie options.
  • Vegetable oil – Keeps the cake moist. Substitution: Melted butter for richer flavor.
  • Warm water – Helps in combining ingredients smoothly.
  • Vanilla paste or extract – Adds flavor to the cake. Substitution: Pure vanilla extract or almond extract in moderation.
  • Sliced strawberries – Provides the fruity flavor and moisture in the layers. Fresh or frozen can be used, but fresh is preferred for texture.

For the Whipped Cream Frosting

  • Heavy whipping cream – The base for whipped cream frosting. Substitution: Coconut cream for a non-dairy option.
  • Powdered sugar – Sweetens whipped cream while stabilizing it.
  • Cream cheese – Adds creaminess to the frosting. Can be omitted in a solely whipped cream frosting.

For the Strawberry Simple Syrup (and Optional Puree)

  • Strawberry puree (optional) – For decorating the cake with an extra layer of strawberry flavor. Uses blended cooked strawberries.
  • Additional strawberries for syrup – Cooked with sugar and water to create a delightful syrup for soaking the cake layers.

Step‑by‑Step Instructions for Strawberry Shortcake Cake

Step 1: Preheat the Oven and Prepare Pan
Begin by preheating your oven to 350°F (175°C). While the oven heats, take a 9-inch round cake pan and line the bottom with parchment paper to prevent sticking. Grease the sides lightly with non-stick spray or butter, ensuring that it’s ready for the delicate batter of your Strawberry Shortcake Cake.

Step 2: Whisk Dry Ingredients
In a large mixing bowl, whisk together 2 cups of all-purpose flour, 2 teaspoons of baking powder, and ½ teaspoon of kosher salt. This mix will form the foundation of your cake, so ensure it’s well combined and free of lumps. Set aside as you progress to the next step of the sugary sponge delight.

Step 3: Prepare Meringue
In the bowl of a stand mixer, whisk 4 egg whites and 1 teaspoon of lemon juice together until foamy. Gradually add in half of the 1 cup of granulated sugar while continuing to whisk until stiff peaks form, about 5-7 minutes. This airy meringue will provide lift for the Strawberry Shortcake Cake, making it light and fluffy.

Step 4: Beat Egg Yolks with Sugar
In the same mixing bowl (no need to clean), beat the 4 egg yolks and the remaining sugar until the mixture is pale and creamy, around 3-4 minutes. Then, mix in ½ cup of vegetable oil, ½ cup of warm water, and 1 teaspoon of vanilla extract. This step intermingles rich flavors for a moist cake.

Step 5: Combine Mixtures
Carefully fold the dry flour mixture into the egg yolk mixture, followed by slowly incorporating the prepared meringue. Use a spatula to gently fold until just combined, being careful not to deflate the airy meringue. The batter for your Strawberry Shortcake Cake should be light and smooth, indicating that you're ready for the next step.

Step 6: Bake the Cake
Pour the batter into your prepared cake pan, smoothing out the top with a spatula for an even bake. Place it in the oven and bake for 25-30 minutes, or until a toothpick inserted in the center comes out clean. Once done, remove it from the oven and allow it to cool in the pan for 10 minutes before transferring it to a wire rack.

Step 7: Make Strawberry Simple Syrup
While the cake cools, prepare the strawberry simple syrup by combining 1 cup of sliced strawberries with ½ cup of sugar and ½ cup of water in a saucepan over medium heat. Stir occasionally until the mixture dissolves and becomes syrupy, about 5-7 minutes. Allow it to cool completely before using.

Step 8: Optional Strawberry Puree
For an extra burst of flavor, you can make a strawberry puree. In a saucepan, cook 1 cup of sliced strawberries with 2 tablespoons of sugar and 1 tablespoon of cornstarch over medium heat for 5-6 minutes, then blend until smooth. Cool this puree to use as decoration or additional flavor for your layers.

Step 9: Make Whipped Cream Frosting
Chill a mixing bowl and beat together 8 ounces of cream cheese with 1 cup of powdered sugar and 1 teaspoon of vanilla extract until creamy. Gradually add 1 cup of heavy whipping cream, continuing to beat until stiff peaks form, about 3-5 minutes. This silky frosting will complement your Strawberry Shortcake Cake beautifully.

Step 10: Assemble the Cake
Slice the cooled sponge cake into even layers using a serrated knife. Begin stacking by soaking each layer with the strawberry simple syrup, followed by spreading a generous layer of whipped cream and a layer of sliced strawberries in between. This method ensures each bite is juicy and flavorful.

Step 11: Frost and Garnish
Finish assembling your Strawberry Shortcake Cake by frosting the top and sides with the remaining whipped cream. For a touch of elegance, drizzle the optional strawberry puree on top and garnish with fresh strawberry slices. This stunning presentation will surely impress everyone around the table.

Expert Tips for Strawberry Shortcake Cake

Stiff Peaks: Ensure your meringue forms stiff peaks—this will add the height and lightness needed for a perfect strawberry shortcake cake.

Egg Temperature: Use room temperature eggs for the best volume when whipping the egg whites; they'll whip up fluffier.

Slicing Layers: A serrated knife is your best friend for slicing even cake layers without squishing them—take your time and let the knife do the work!

Chill for Whipping: Keep your utensils and mixing bowl chill when preparing the whipped cream; cold environments yield better volume and texture.

Watch the Bake Time: Your kitchen's environment affects baking; start checking for doneness around 25 minutes to prevent overbaking.

Cool Completely: Let the cake cool in the pan before removing it and assembling; this will help maintain its delicate structure.

Make Ahead Options

These Strawberry Shortcake Cakes are perfect for busy home cooks looking to save time while still serving an exquisite dessert! You can prepare the vanilla sponge cake and the strawberry simple syrup up to 24 hours in advance. Just let the cooled cake wrap tightly in plastic wrap to keep it fresh and moist. The whipped cream frosting can also be made ahead and stored in the refrigerator for up to 3 days; just ensure it’s in an airtight container. When you're ready to assemble, slice the cake layers, soak them with the syrup, and add the whipped cream and strawberries. This way, you’ll have a stunning dessert with minimal last-minute effort!

How to Store and Freeze Strawberry Shortcake Cake

Room Temperature: Keep the cake covered with plastic wrap or in an airtight container at room temperature for up to 2 days to maintain its freshness.

Fridge: To extend its life, store the Strawberry Shortcake Cake in the refrigerator for up to 5 days, ensuring it’s covered to prevent it from absorbing odors.

Freezer: For longer storage, wrap the cake or cut it into slices and freeze in airtight containers for up to 3 months. Thaw in the fridge overnight before serving.

Reheating: If you prefer a slightly warm slice, gently reheat individual pieces in the microwave for 10-15 seconds; this enhances the flavor without compromising texture.

Strawberry Shortcake Cake Variations

Feel free to get creative with your cake and tailor it to your tastes or dietary needs!

  • Berry Delight: Replace strawberries with other berries such as raspberries or blueberries for a different fruity twist. Each berry adds its own unique flavor and color!

  • Trifle Transformation: Convert this cake into a delicious trifle by layering broken cake pieces with strawberries and whipped cream in a glass dish. It's not only a gorgeous presentation but also a fun way to serve at gatherings.

  • Lemon Zest: Incorporate lemon zest into the cake batter for a refreshing citrus burst that works beautifully with the strawberries. It will elevate your flavors to new heights!

  • Almond Flavor: Add a dash of almond extract instead of vanilla for a nutty twist that complements the strawberry flavor perfectly. Your guests will be pleasantly surprised by this twist.

  • Vegan Version: Substitute eggs with flaxseed meal or unsweetened applesauce, and use almond milk or coconut milk in the batter for a delightful vegan alternative. It’s a delicious way to share the love!

  • Chocolate Indulgence: For chocolate lovers, add a layer of chocolate ganache or chocolate shavings between the layers. This decadence pairs flawlessly with strawberries, creating a rich flavor experience.

  • Spiced Up: Mix in a touch of ground cinnamon or nutmeg into the batter for warming spice notes that harmonize beautifully with the sweet strawberries.

  • Ice Cream Pairing: Serve with a scoop of strawberry ice cream or a dollop of whipped cream on the side. It’s a summery treat that enhances the whole experience!

No matter how you choose to variations, your Strawberry Shortcake Cake will always shine! Looking for more inspiration? Don’t forget about the rich flavors of a Chocolate Pudding Cake or a summery Ice Cream Cake to complement your delightful creations.

What to Serve with Strawberry Shortcake Cake?

Indulging in a slice of this delightful dessert opens a world of flavorful pairings that enhance its light and fruity essence.

  • Whipped Cream:
    This classic topping adds extra creaminess, heightening the overall bliss of each strawberry-laden bite.

  • Fresh Mint Leaves:
    Bright and aromatic, fresh mint offers a refreshing contrast that elevates the cake's summery vibe.

  • Vanilla Ice Cream:
    Scoop up a serving alongside the cake for a delightful temperature contrast and creamy richness that complements the strawberries.

  • Sparkling Lemonade:
    The light, citrusy effervescence cuts through the sweetness, providing a refreshing balance against the cake's soft layers.

  • Chocolate-Dipped Strawberries:
    These add an indulgent touch, enhancing the fruit flavors of your dessert while delighting with each chocolatey bite.

  • Berry Salad:
    A mix of fresh berries with a drizzle of honey provides a vibrant, fruity counterpart to the cake.

  • Coffee or Espresso:
    The warmth and slight bitterness of coffee create a comforting contrast, perfect for winding down along with dessert.

  • Pistachio Biscotti:
    These crunchy delights add texture and a nutty flavor, perfectly complementing the cake without overpowering it.

  • Moscato Wine:
    The sweetness and lightness of this fruity wine pairs beautifully, adding sophistication to your serving experience.

Embrace these suggestions to create an unforgettable spread that friends and family will cherish!

Strawberry Shortcake Cake Recipe FAQs

What are the best strawberries to use for this recipe?
Fresh strawberries are ideal as they retain texture and flavor, providing a juicy burst in every bite. Look for strawberries that are bright red, firm, and without dark spots, as those may be overripe. If fresh is not available, you can use frozen strawberries, but be sure to drain them well to avoid excess moisture in your cake.

How should I store leftover Strawberry Shortcake Cake?
To enjoy leftover Strawberry Shortcake Cake at its best, store it in the refrigerator, covered with plastic wrap or in an airtight container. It will keep well for up to 5 days. Just remember, the cream may start to lose its texture after a couple of days, so it's best enjoyed freshly made when possible!

Can I freeze Strawberry Shortcake Cake?
Absolutely! You can freeze the cake for up to 3 months. To do this, wrap it tightly in plastic wrap and then in aluminum foil to prevent freezer burn. If you’ve assembled the cake, it’s best to freeze it before adding the whipped cream layer. To thaw, place it in the refrigerator overnight. Enjoy each slice warmed slightly in the microwave for added delight!

What should I do if my meringue doesn't form stiff peaks?
If your meringue isn’t reaching stiff peaks, make sure there’s no yolk contamination in your egg whites, as even a small amount can hinder the process. Also, ensure your mixing bowl is completely clean and dry. It might help to add a tiny pinch of cream of tartar to stabilize the meringue as you whip it. Keep beating for a few more minutes to see if it firms up. Don’t be afraid to try again; practice makes perfect!

Is there a way to modify this recipe for gluten-free diets?
Certainly! To make a gluten-free Strawberry Shortcake Cake, you can substitute the all-purpose flour with a gluten-free baking blend. Ensure the blend includes xanthan gum, which helps mimic the structure provided by gluten. Follow the same measurements in the recipe, and you’ll be able to create a delightful treat suitable for those with gluten sensitivities. Enjoy your dessert worry-free!

Strawberry Shortcake Cake

Fluffy Strawberry Shortcake Cake for Your Perfect Summer Treat

This Strawberry Shortcake Cake is a perfect summer treat featuring layers of vanilla sponge and fresh strawberries.
Print Recipe Pin Recipe
Prep Time 20 minutes mins
Cook Time 30 minutes mins
Cooling Time 10 minutes mins
Total Time 1 hour hr
Servings: 8 slices
Course: Dessert
Cuisine: American
Calories: 350
Ingredients Equipment Method Nutrition Notes

Ingredients
  

For the Cake
  • 2 cups all-purpose flour Substitution: Cake flour for a lighter texture.
  • 2 teaspoons baking powder Ensure it’s fresh for the best results.
  • ½ teaspoon kosher salt Regular salt can be used in equal amounts.
  • 4 large eggs (separated) Room temperature eggs whip better.
  • 1 teaspoon lemon juice or white vinegar Substitution: Cream of tartar (1/2 teaspoon).
  • 1 cup granulated sugar Some can be replaced with a sugar alternative for lower-calorie options.
  • ½ cup vegetable oil Substitution: Melted butter for richer flavor.
  • ½ cup warm water
  • 1 teaspoon vanilla paste or extract Substitution: Pure vanilla extract or almond extract in moderation.
  • 2 cups sliced strawberries Fresh or frozen can be used, but fresh is preferred for texture.
For the Whipped Cream Frosting
  • 8 ounces heavy whipping cream Substitution: Coconut cream for a non-dairy option.
  • 1 cup powdered sugar
  • 8 ounces cream cheese Can be omitted in a solely whipped cream frosting.
For the Strawberry Simple Syrup (and Optional Puree)
  • 1 cup strawberry puree (optional) Uses blended cooked strawberries.
  • 1 cup additional strawberries for syrup Cooked with sugar and water.

Equipment

  • 9-inch round cake pan
  • Mixing bowls
  • Stand Mixer
  • Spatula
  • Saucepan
  • Serrated knife

Method
 

Step‑by‑Step Instructions
  1. Preheat your oven to 350°F (175°C). Line the bottom of a 9-inch round cake pan with parchment paper and grease the sides lightly.
  2. In a large bowl, whisk together 2 cups of all-purpose flour, 2 teaspoons of baking powder, and ½ teaspoon of kosher salt.
  3. In a stand mixer, whisk 4 egg whites and 1 teaspoon of lemon juice until foamy; gradually add in half of the 1 cup of granulated sugar until stiff peaks form.
  4. In the same bowl, beat 4 egg yolks with the remaining sugar until pale, then mix in ½ cup of vegetable oil, ½ cup of warm water, and 1 teaspoon of vanilla extract.
  5. Fold the dry flour mixture into the egg yolk mixture, then carefully incorporate the meringue.
  6. Pour the batter into the prepared cake pan and bake for 25-30 minutes or until a toothpick comes out clean.
  7. Combine 1 cup of sliced strawberries with ½ cup of sugar and ½ cup of water in a saucepan over medium heat to make syrup; cool completely.
  8. Optionally, cook 1 cup of sliced strawberries with 2 tablespoons of sugar and 1 tablespoon of cornstarch; blend until smooth to make puree.
  9. Beat together 8 ounces of cream cheese with 1 cup of powdered sugar and 1 teaspoon of vanilla extract, then gradually add 1 cup of heavy whipping cream until stiff peaks form.
  10. Slice the cooled cake into layers, soak each layer with the strawberry syrup, then spread whipped cream and sliced strawberries between layers.
  11. Frost the top and sides of the cake with remaining whipped cream, drizzle optional strawberry puree on top, and garnish with fresh strawberries.

Nutrition

Serving: 1sliceCalories: 350kcalCarbohydrates: 45gProtein: 5gFat: 18gSaturated Fat: 10gPolyunsaturated Fat: 1gMonounsaturated Fat: 5gCholesterol: 70mgSodium: 200mgPotassium: 150mgFiber: 1gSugar: 30gVitamin A: 500IUVitamin C: 15mgCalcium: 75mgIron: 1mg

Notes

Ensure your meringue forms stiff peaks for added height and lightness. Use room temperature eggs and a serrated knife for even layers.

Tried this recipe?

Let us know how it was!
  • « Previous Page
  • 1
  • 2
  • 3
  • 4
  • 5
  • …
  • 49
  • Next Page »

Welcome!

Hi, I’m Grace, a Sydney-based home cook with a passion for bold flavors and trending ingredients. Whether you’re a busy beginner or a seasoned foodie, you’ll find dishes here that are fresh, fun, and full of flavor.

More about me

Popular Recipes

  • Cheesy Chicken Garlic Bread Sandwich
    Cheesy Chicken Garlic Bread Sandwich for Cozy Family Moments
  • Easy Chicken Ranch Wraps
    Easy Chicken Ranch Wraps: Quick, Creamy & Totally Satisfying
  • Chicken Caesar Sandwiches
    Delicious Chicken Caesar Sandwiches for Quick Comfort Food
  • best Cuban sandwich
    The Best Cuban Sandwich You’ll Want Every Weeknight!

Footer

↑ back to top

About

  • Privacy Policy
  • Disclaimer
  • Terms & Conditions

Newsletter

  • Sign Up! for emails and updates

Contact

  • About me
  • Contact me

Copyright © 2025 TastyTrendIngredients