tastytrendingredients

  • Home
  • Recipes
    • Appetizers
    • Breakfast
    • Dessert
    • Dinner
    • Drinks
    • Salads
    • Snacks
    • Soups
  • About me
  • Contact me
menu icon
go to homepage
  • Home
  • Recipes
    • Appetizers
    • Breakfast
    • Dessert
    • Dinner
    • Drinks
    • Salads
    • Snacks
    • Soups
  • About me
  • Contact me
search icon
Homepage link
  • Home
  • Recipes
    • Appetizers
    • Breakfast
    • Dessert
    • Dinner
    • Drinks
    • Salads
    • Snacks
    • Soups
  • About me
  • Contact me
×

Savory Texas Kolaches: Your New Breakfast Obsession

January 26, 2026 by Grace Snow Leave a Comment

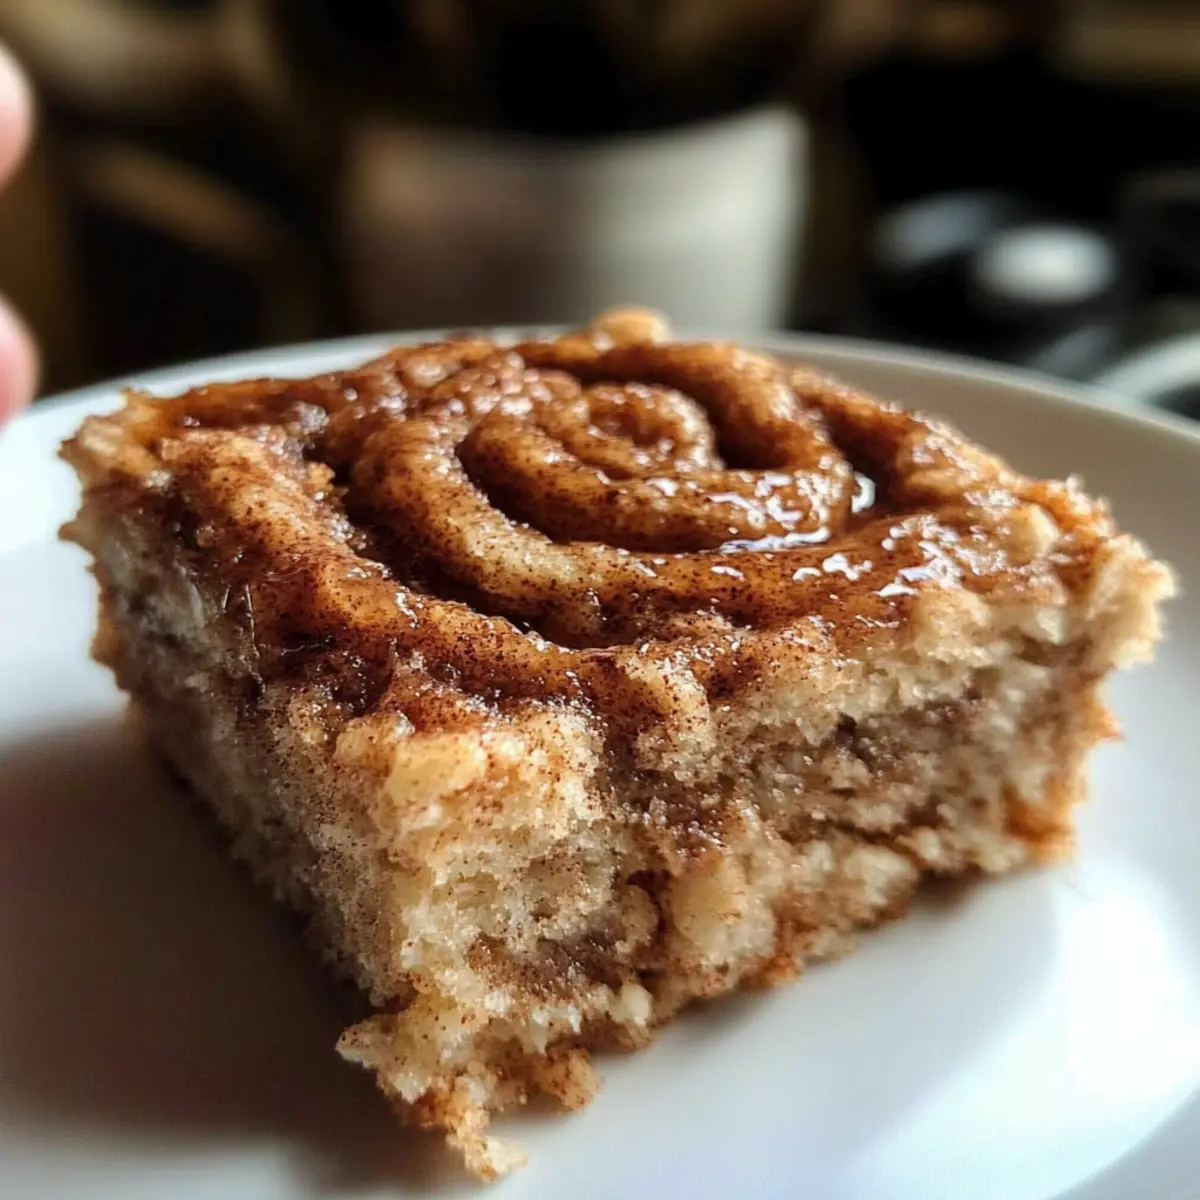
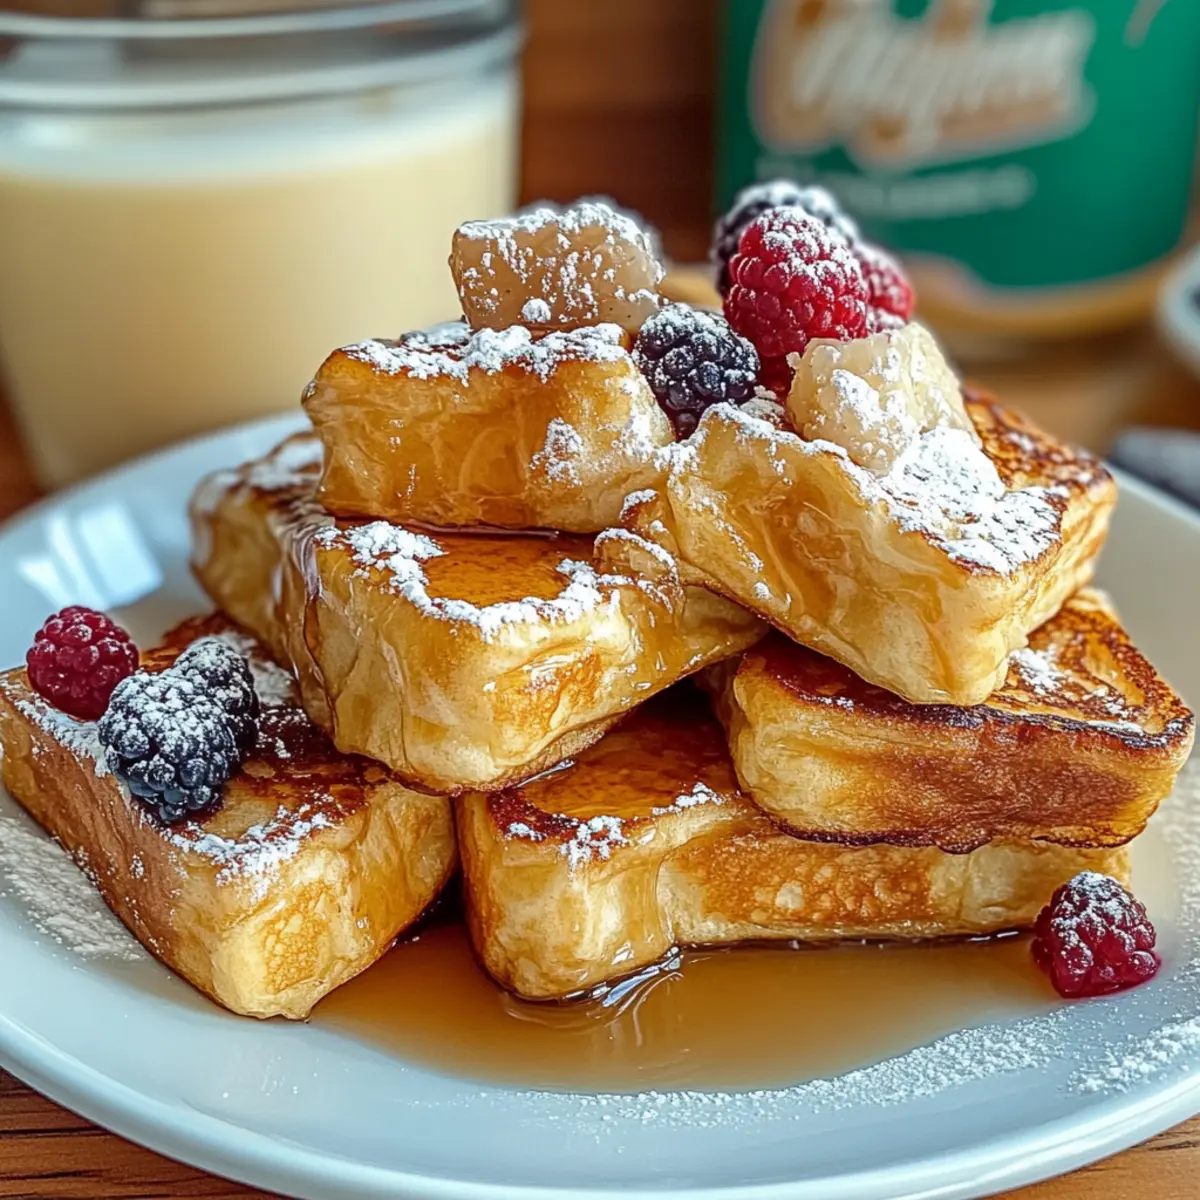
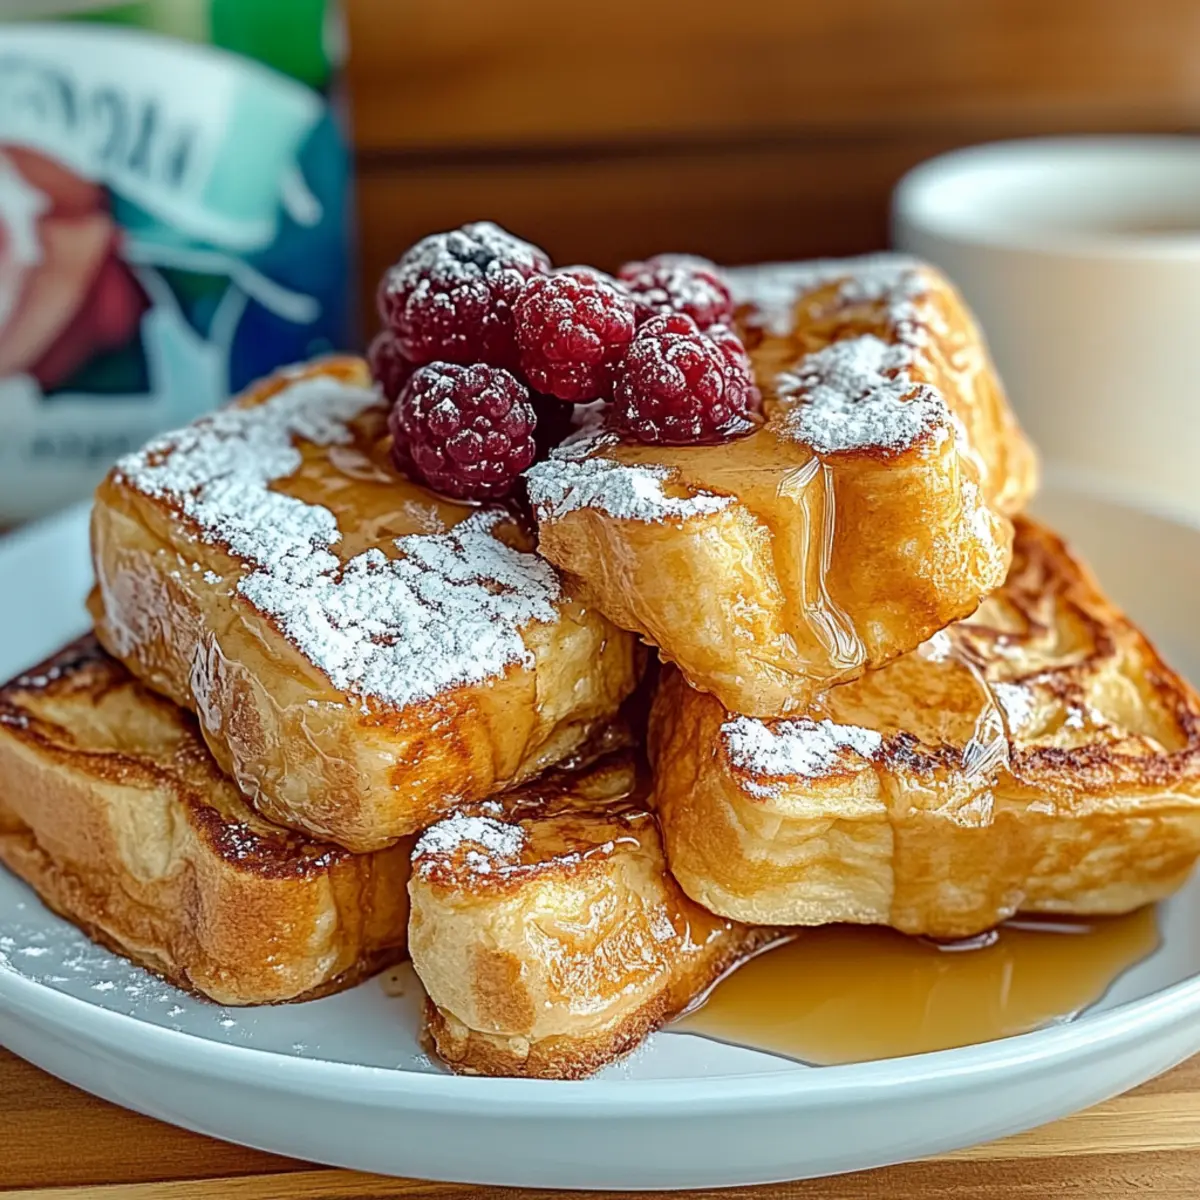
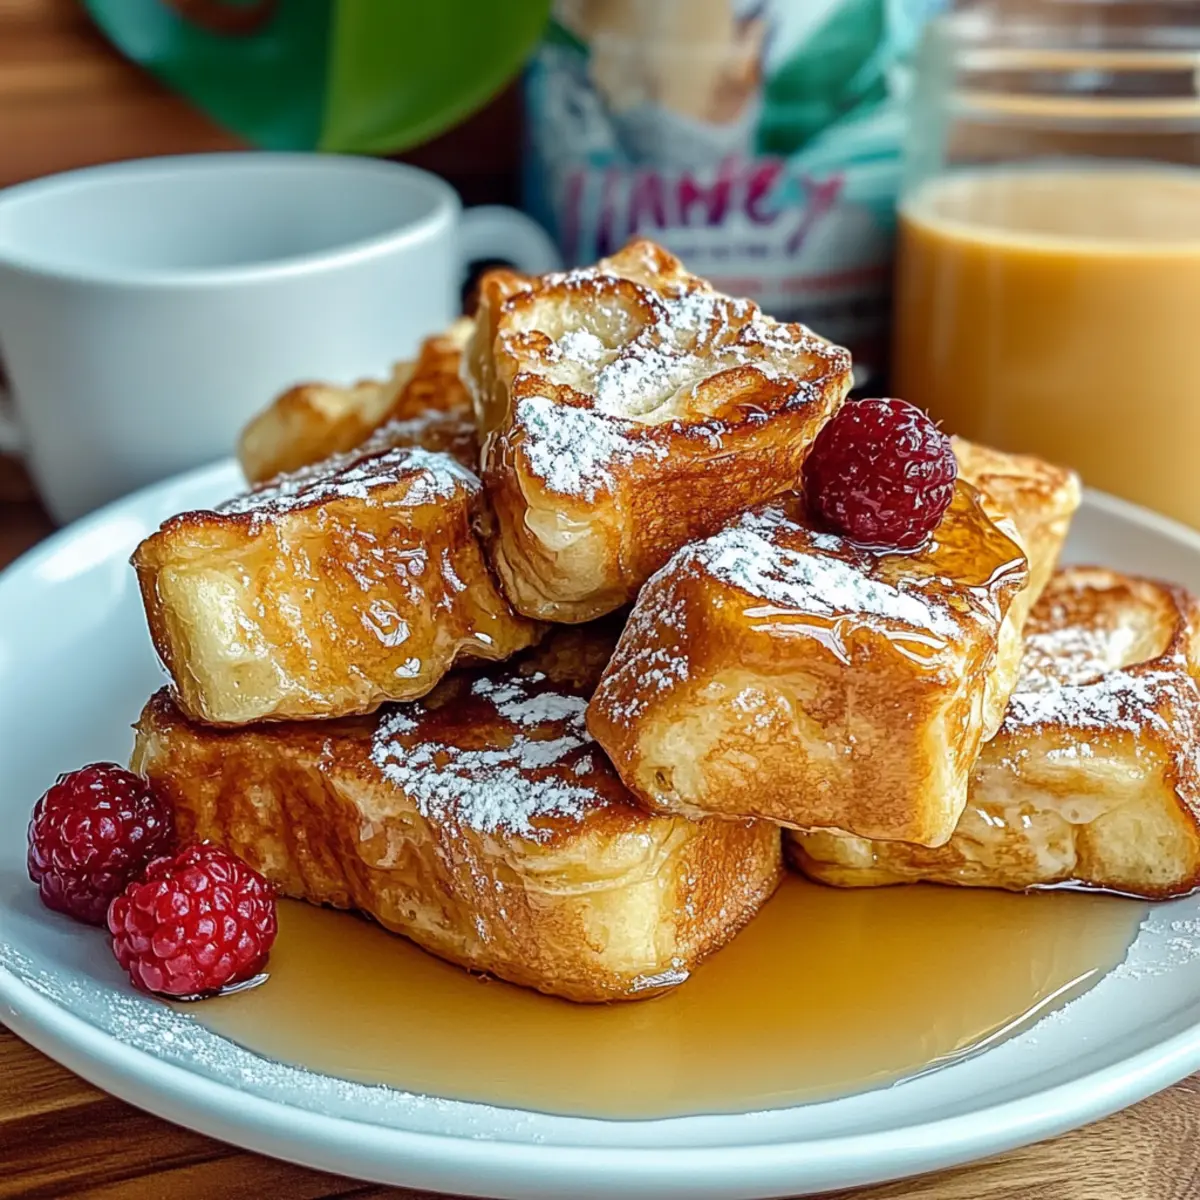
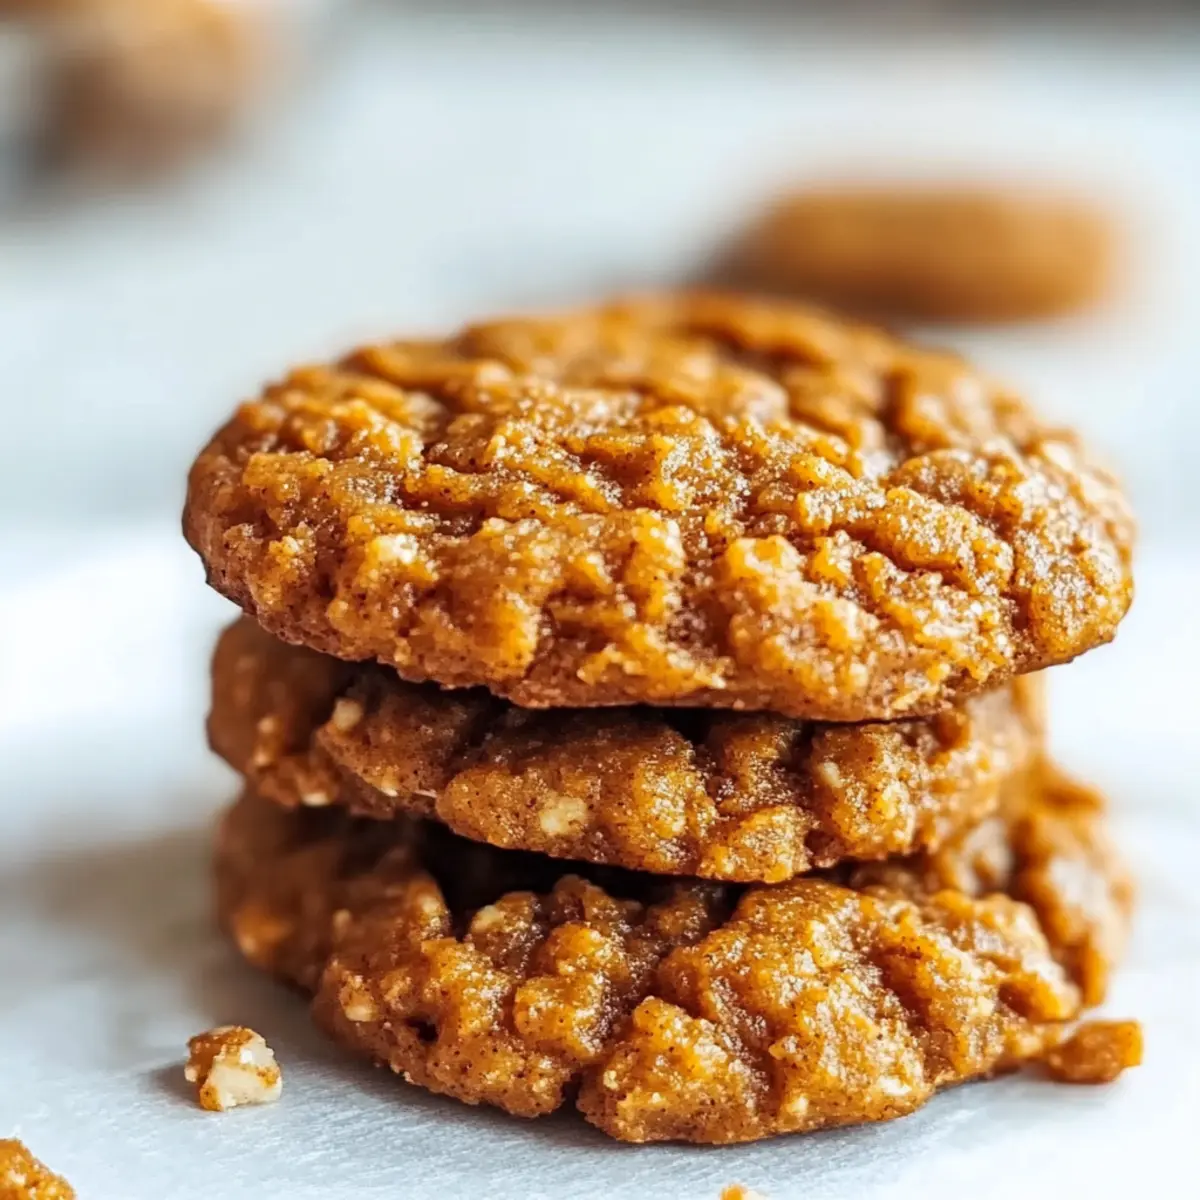
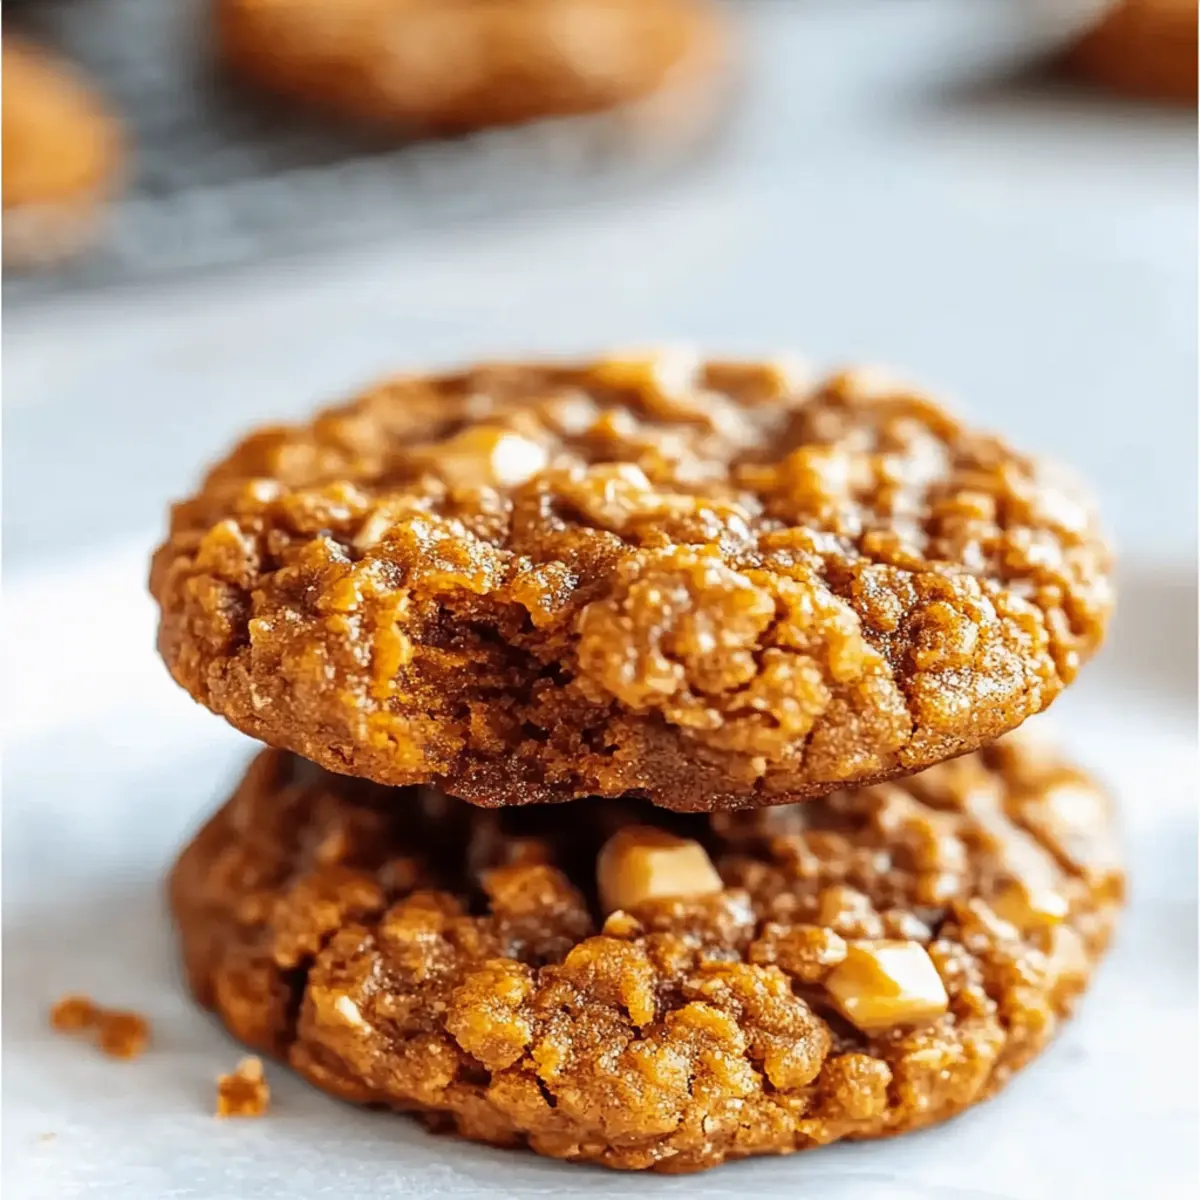
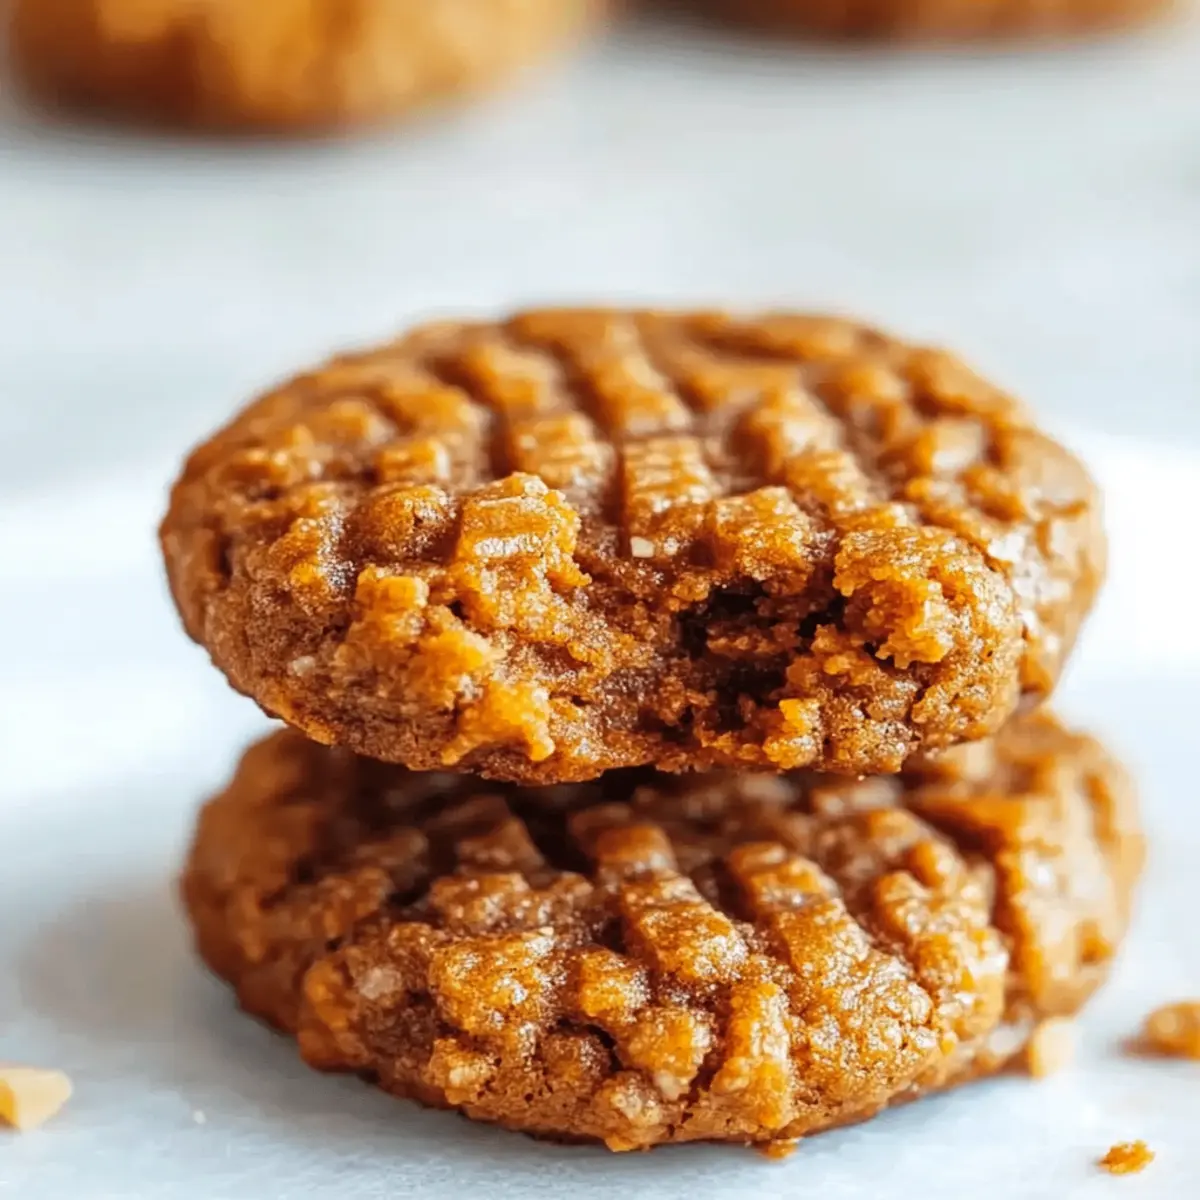
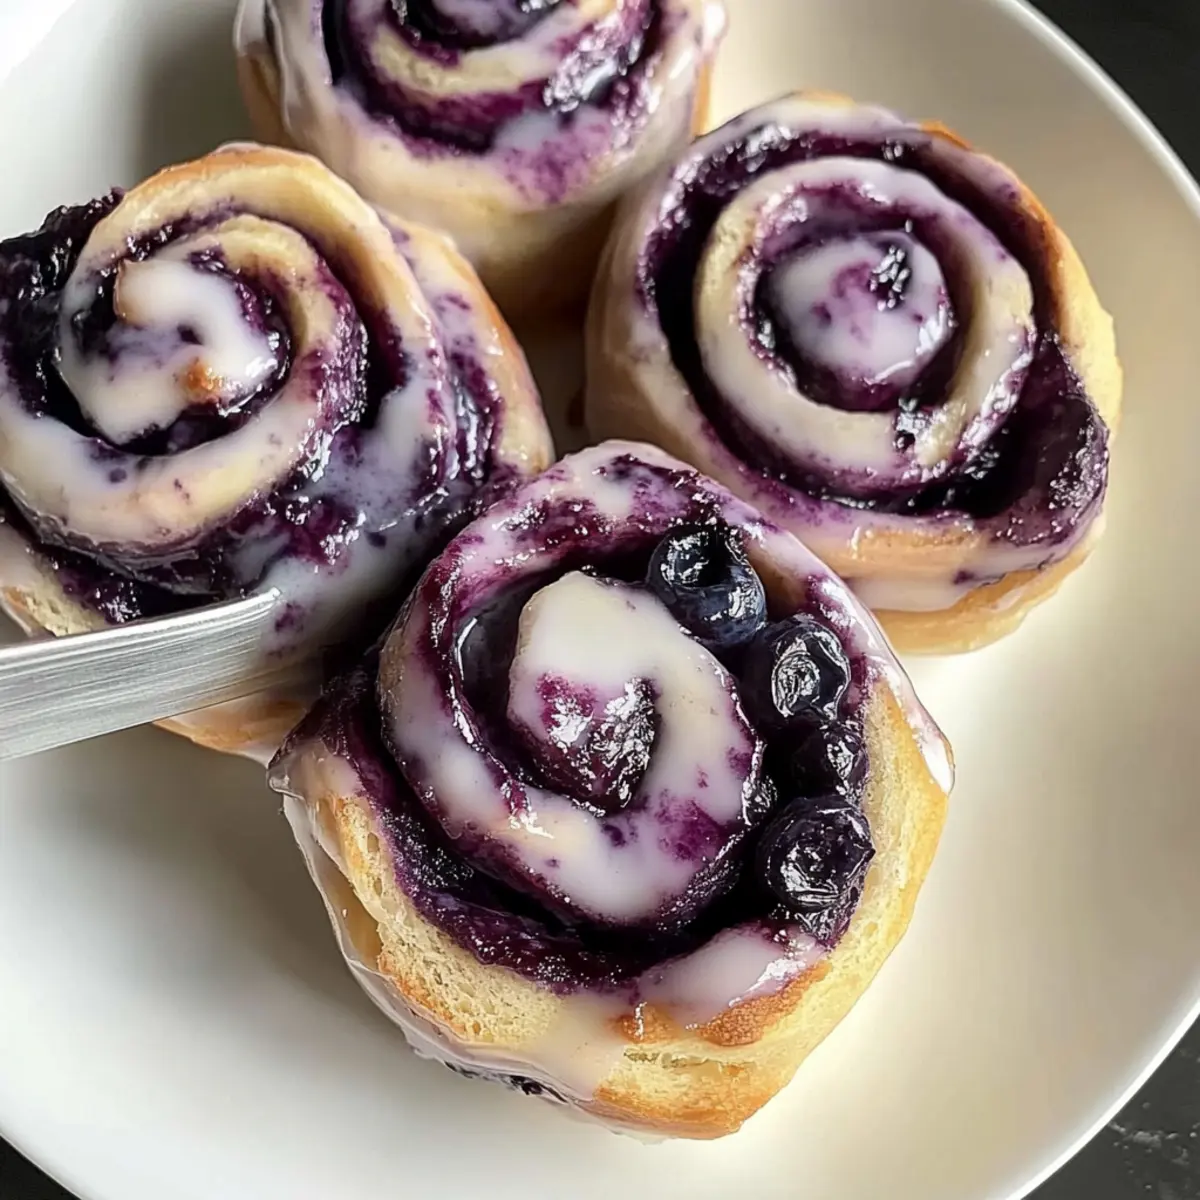
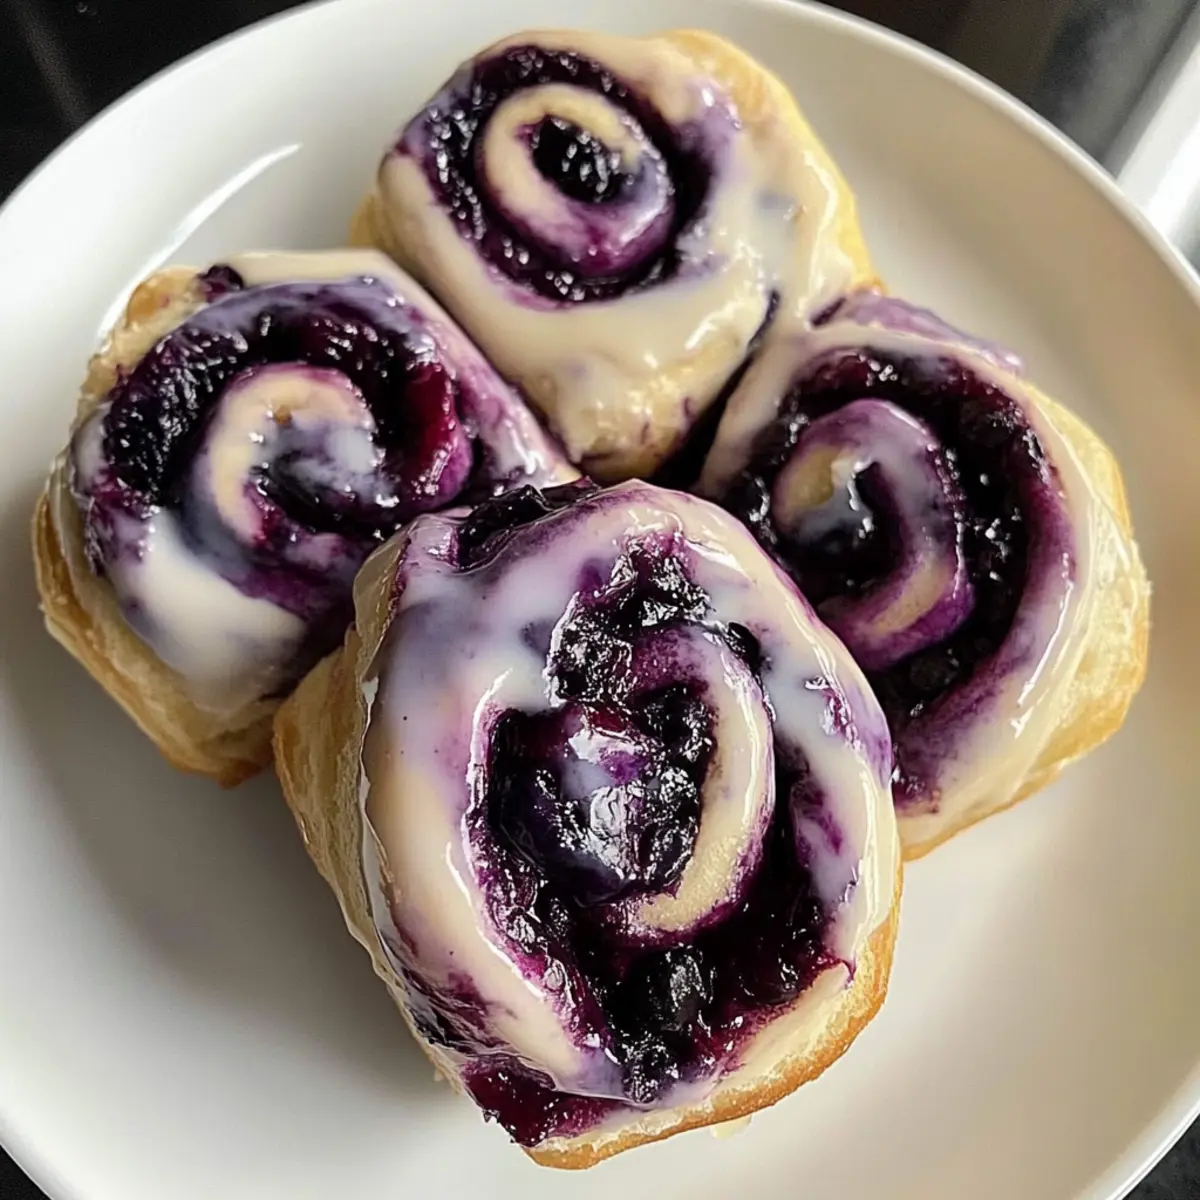
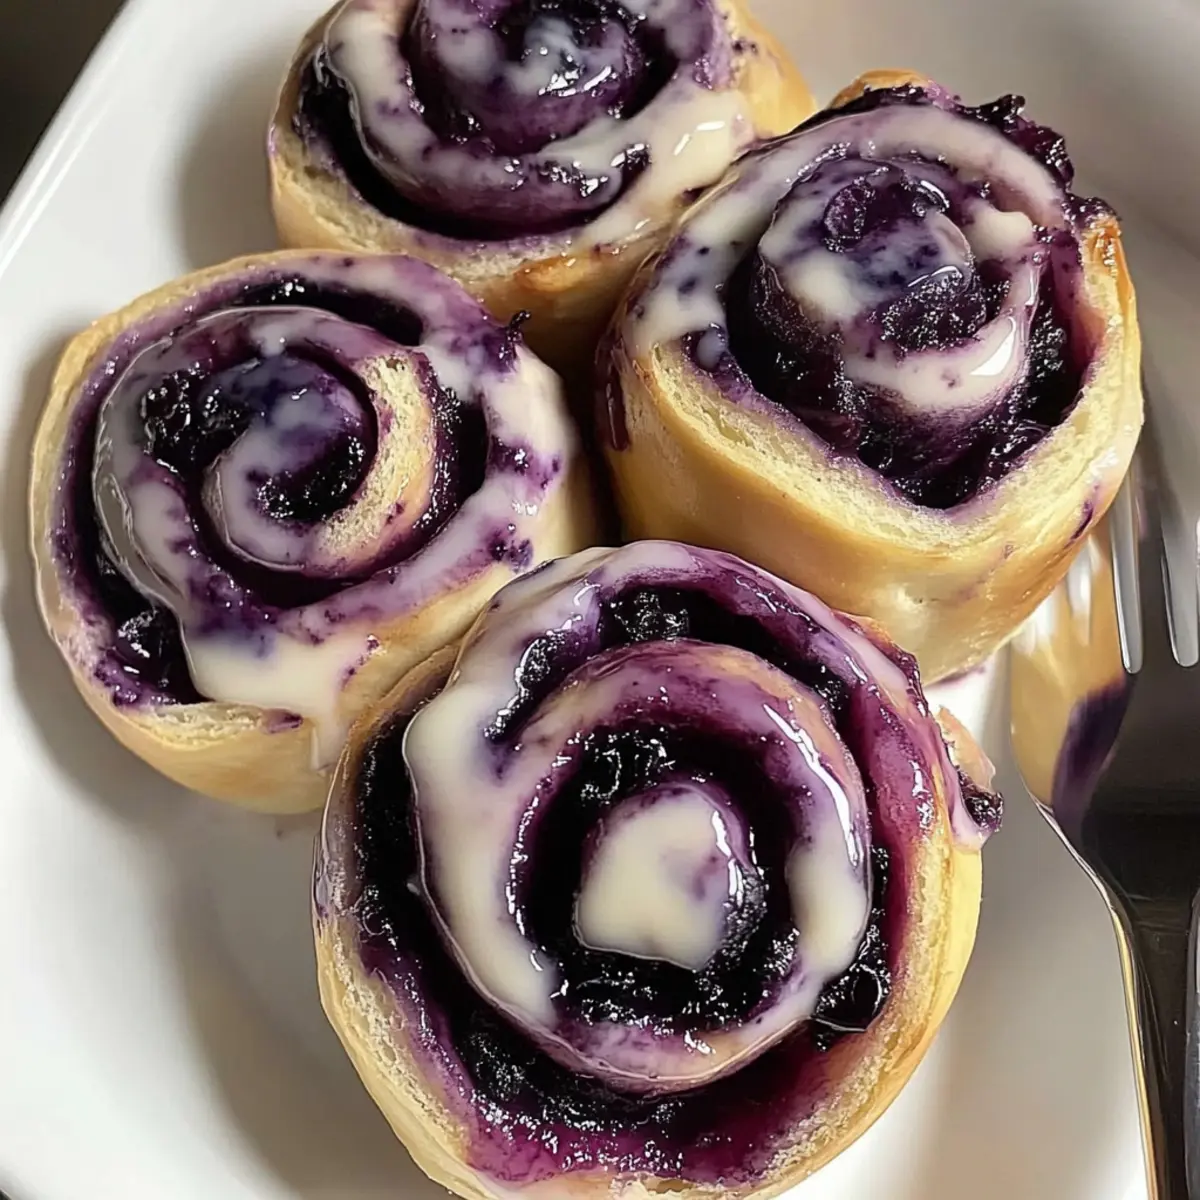
There’s something magical about biting into a warm pastry that envelops a delicious savory filling, isn’t there? Texas Kolaches, also known as Klobasneks, are a beloved breakfast staple that transform this simple joy into something remarkable. With their tender, pillowy dough wrapped around savory sausages, these kolaches are not only easy to prepare but also serve as the perfect crowd-pleaser for brunch gatherings or quick breakfasts during busy weekdays. Plus, you can easily customize them with different fillings like cheese, ham, or even jalapenos to suit your unique taste. Ready to create your own batch of these delightful treats? Let’s roll up our sleeves and dive into the delicious world of Texas Kolaches!

Why are Texas Kolaches a must-try?

Warm, Fluffy Goodness: There’s nothing quite like the tender texture of these kolaches, wrapping savory sausage in a soft, sweet dough.

Customizable Fillings: Whether you prefer cheese, ham, or jalapenos, the versatility of this recipe lets you explore unique flavors.

Perfect for Any Occasion: Ideal for brunch or a grab-and-go breakfast, these kolaches are guaranteed to please a crowd.

Time-Saving Delight: Quick to prepare, they fit perfectly into your busy mornings, allowing you to enjoy homemade goodness without the hassle.

Family-Friendly Recipe: Everyone will love these delicious bites, making them a surefire hit at family gatherings!

Texas Kolaches Ingredients

• For those craving the ultimate breakfast treat!

For the Dough

  • Unsalted Butter – Provides richness and tenderness to the dough. Use salted butter if unsalted isn’t available, but reduce the added salt.
  • Whole Milk – Contributes moisture and a soft texture to the dough. Can substitute with any non-dairy milk for lactose-free options.
  • All-Purpose Flour – Main structural component that provides shape. Bread flour can be used for a chewier texture.
  • Granulated Sugar – Adds sweetness and helps activate the yeast. Use coconut sugar for a lower glycemic index alternative.
  • Rapid Rise Yeast – Leavening agent that ensures quick dough rising. Active dry yeast can be used; just activate it in warm water before mixing.
  • Salt – Enhances flavor and strengthens dough. No substitutions recommended for flavor balance.
  • Egg + Egg Yolk (slightly beaten) – Enhances richness and aids in browning. Replace with a flaxseed egg for a vegan version.

For the Filling

  • Smoked Sausage Links – The key filling that transforms the dough into a savory treat. Different varieties can be used like ham, boudin, or brisket for alternative flavors.

Now you're all set to embark on this delightful journey of making Texas Kolaches! Enjoy every warm, fluffy bite.

Step‑by‑Step Instructions for Texas Kolaches

Step 1: Prepare the Dough
Begin by melting 5 tablespoons of unsalted butter in a small saucepan over low heat until just melted—avoid browning. In a stand mixer, combine 4 cups of all-purpose flour, 1/4 cup of granulated sugar, 2 tablespoons of rapid rise yeast, and 1 teaspoon of salt. Slowly add the warm milk and melted butter mixture along with 1 beaten egg. Mix using a dough hook for 8 minutes until the dough is sticky and smooth.

Step 2: Proof the Dough
Grease a large bowl with a bit of cooking oil and place the dough inside, turning to coat. Cover the bowl with a clean kitchen towel and place it in a warm area for about 1 to 1.5 hours, or until the dough has doubled in size. You’ll know it’s ready when it looks puffy and fills the bowl, indicating optimal fermentation for your Texas Kolaches.

Step 3: Shape the Dough
Once the dough has risen, punch it down gently to release the air, then turn it out onto a floured surface. Divide the dough into 16 equal pieces, rolling each piece into a ball. Arrange the dough balls on two baking sheets lined with parchment paper, ensuring there's enough space between them. Cover with the kitchen towel again and allow them to proof for another 90 minutes until they have expanded in size.

Step 4: Prepare Filling
While the dough is proofing, take 16 smoked sausage links and slice each into 3-inch pieces. Set the sausage pieces aside on a cutting board or plate. This filling is what transforms your Texas Kolaches into a hearty breakfast treat, providing that savory flavor contrast to the sweet dough.

Step 5: Assemble Kolaches
Preheat your oven to 350°F (175°C). After the final proofing period, take each dough ball and flatten it slightly in your palm. Place a piece of sausage in the center, then wrap the dough around it, ensuring that you seal it tightly. This step is essential to prevent the filling from leaking during baking.

Step 6: Bake
Once all kolaches are shaped and secured, place them in the preheated oven. Bake for 22-25 minutes, or until they are golden brown. You’ll know they’re ready when the tops are lightly golden and a toothpick comes out clean from the dough. Let them cool slightly on a wire rack before serving your delightful Texas Kolaches.

Storage Tips for Texas Kolaches

Room Temperature: Keep baked Texas Kolaches covered at room temperature for up to 1 day, ensuring they remain soft and fresh.

Fridge: Store in an airtight container in the refrigerator for up to 4 days. This helps maintain their delicious flavor and texture.

Freezer: To freeze, wrap each kolache tightly in wax paper, then place in a freezer-safe container or bag. They can be frozen for up to 3 months.

Reheating: When ready to enjoy, reheat in the oven at 350°F for about 10 minutes or until warmed through for the best results.

Make Ahead Options

These Texas Kolaches are perfect for meal prep and can save you time on busy mornings! You can prepare the dough up to 24 hours in advance—simply follow the initial steps and let the dough rise before refrigerating it in a well-greased bowl covered with plastic wrap. The next day, allow the dough to come to room temperature for about 30 minutes before shaping and filling. Alternatively, you can assemble the kolaches with the filling and refrigerate for up to 3 days. To maintain their quality, cover the kolaches tightly after assembly. When you’re ready to enjoy them, just bake directly from the refrigerator, adding a few extra minutes to the baking time for delicious, freshly baked Texas Kolaches!

Texas Kolaches Variations & Substitutions

Feel free to get creative with your Texas Kolaches and cater them to your family’s tastes or dietary needs!

  • Vegetarian Option: Swap smoked sausage for plant-based sausage or sautéed mushrooms for a hearty meat-free filling. Trust me, they’ll be just as delightful!

  • Cheesy Delight: Add shredded cheddar or pepper jack cheese into the filling alongside sausage for an oozy, melty twist. The cheese melds beautifully with the savory sausage.

  • Spicy Kick: Incorporate diced jalapeños into the sausage filling for a zesty kick. If you love heat, this is a surefire way to turn up the flavor!

  • Sweet Treat: For a dessert version, fill with fruit preserves or sweetened cream cheese instead of sausage. Picture a delightful, sweet bite to balance those hearty brunch flavors!

  • Brisket Bliss: Instead of sausage, try shredded brisket for an authentic Texas barbecue spin. This adds a rich, smoky flavor that will wow your guests.

  • Breakfast Lovers’ Mix: Combine cooked, crumbled breakfast sausage with scrambled eggs and cheese for a breakfast-themed kolache. Each bite will feel like a delicious morning in a pastry!

  • Herby Goodness: Add fresh herbs like rosemary or chives into the dough for an aromatic flavor profile that complements the filling. It’s like a welcome embrace of taste!

  • Gluten-Free Alternative: Use a gluten-free flour blend to make the dough, ensuring that everyone can enjoy these fluffy wonders. Just be sure to adjust the liquid slightly for consistency!

These variations let you explore countless flavors! Don't hesitate to mix and match, and if you're feeling adventurous, try out my other recipes like Savory Breakfast Burritos or a classic Cheesy Potato Casserole for a brunch that everyone will be talking about!

What to Serve with Perfectly Pillowy Texas Kolaches (Klobasneks)

Elevate your breakfast experience with delightful pairings that bring out the savory goodness of these kolaches.

  • Scrambled Eggs: The fluffy texture of scrambled eggs complements the kolaches wonderfully, adding a light and creamy element to your meal.

  • Fresh Fruit Salad: A vibrant mix of seasonal fruits brings a refreshing contrast to the rich flavors of the kolaches, enhancing your breakfast plate.

  • Crispy Hash Browns: Their crunchy exterior and soft inside create a satisfying textural balance, making every bite of this traditional breakfast a delight.

  • Savory Cheese Dip: Creamy cheese dip for dunking adds a touch of indulgence while enhancing the flavors, perfect for any cheese lover.

  • Sweet Maple Syrup: Drizzling a bit of syrup on your kolaches adds a delightful sweetness, marrying perfectly with the savory sausage filling.

  • Iced Coffee: A chill on summer mornings or refreshing wake-up call, iced coffee pairs powerfully with the flavors of the kolaches, making for an energizing start.

  • Zesty Jalapeño Jam: This spicy-sweet condiment enhances the hearty sausage filling and adds an unexpected kick that spice lovers will adore.

  • Chocolate Chip Muffins: For a treat-yourself breakfast, the sweet burst of chocolate in muffins beautifully contrasts with the savory sausages.

Expert Tips for Texas Kolaches

  • Perfect Temperature: Ensure the milk and butter mixture is warm but not hot. Too much heat can kill the yeast and prevent proper rising.

  • Easy Kneading: Knead the dough until it’s smooth and slightly sticky. Over-kneading can lead to tough kolaches, while under-kneading can result in dense pastries.

  • Room Temperature Ingredients: Use room temperature eggs and milk for better blending, ensuring a softer texture in your Texas Kolaches.

  • Watch the Proofing: Don’t rush the proofing process; if the dough hasn’t doubled in size, it won’t achieve that light, fluffy texture we love.

  • Sealing Well: Be sure to tightly seal the dough around the filling to prevent any sausage from leaking out while baking, keeping your kolaches perfect.

Texas Kolaches (Klobasneks) Recipe FAQs

How do I choose the right sausage for my kolaches?
Absolutely! For the best flavor, select high-quality smoked sausage links. I often recommend using varieties such as kielbasa, and you can also get creative with links like boudin or spicy andouille for an extra kick. Just ensure the sausages are fully cooked if you're using a type that's not pre-cooked.

How should I store leftover Texas Kolaches?
You can keep your baked Texas Kolaches in an airtight container at room temperature for up to 1 day to maintain their softness. For longer storage, place them in the refrigerator where they'll stay fresh for up to 4 days. Just make sure they’re covered so they don’t dry out!

Can I freeze Texas Kolaches?
You can absolutely freeze these delightful pastries! Wrap each kolache tightly in wax paper, then place them in a freezer-safe container or bag. They can be stored in the freezer for up to 3 months. When you’re ready to enjoy, simply reheat them in the oven at 350°F for about 10 minutes, and they’ll taste freshly baked!

What should I do if my dough isn’t rising properly?
If your dough isn't rising, it could be due to a few factors. Make sure your yeast is fresh—activated yeast should bubble in warm water. The environment should also be warm during proofing; consider placing the bowl near a preheated oven or inside a turned-off oven with boiling water to create steam. If this still doesn’t help, a little patience may be needed; sometimes dough can take longer to proof, especially in cooler environments.

Are these kolaches safe for pets or those with allergies?
When making Texas Kolaches, remember that they are not suitable for pets, especially due to the sausage content and possible garlic or onion. If you have specific allergies, be mindful of ingredients like wheat, dairy, and eggs. You can easily modify them by using non-dairy milk and a flaxseed egg for a vegan option. Always check labels on sausage for allergens, and choose fillings that fit dietary restrictions.

Can I use non-dairy substitutes in this recipe?
Very! You can substitute whole milk with any non-dairy milk like almond or soy for a lactose-free version. For the butter, vegan margarine works as a great alternative. And if you need to make it egg-free, a flaxseed egg (1 tablespoon ground flaxseed mixed with 2.5 tablespoons water, let sit for 5 minutes) can stand in beautifully. Enjoy experimenting with these substitutions while whipping up your Texas Kolaches!

Texas Kolaches

Savory Texas Kolaches: Your New Breakfast Obsession

Discover the joy of Texas Kolaches, a delightful pastry filled with savory goodness perfect for breakfast.
Print Recipe Pin Recipe
Prep Time 30 minutes mins
Cook Time 25 minutes mins
Proofing Time 1 hour hr 30 minutes mins
Total Time 2 hours hrs 25 minutes mins
Servings: 16 kolaches
Course: Breakfast
Cuisine: American
Calories: 250
Ingredients Equipment Method Nutrition Notes

Ingredients
  

For the Dough
  • 5 tablespoons Unsalted Butter Use salted butter if unsalted isn’t available, but reduce the added salt.
  • 4 cups All-Purpose Flour Bread flour can be used for a chewier texture.
  • 1/4 cup Granulated Sugar Use coconut sugar for a lower glycemic index alternative.
  • 2 tablespoons Rapid Rise Yeast Active dry yeast can be used; just activate it in warm water before mixing.
  • 1 teaspoon Salt No substitutions recommended for flavor balance.
  • 1 cup Whole Milk Can substitute with any non-dairy milk for lactose-free options.
  • 1 each Egg + Egg Yolk (slightly beaten) Replace with a flaxseed egg for a vegan version.
For the Filling
  • 16 links Smoked Sausage Different varieties can be used like ham, boudin, or brisket for alternative flavors.

Equipment

  • Stand Mixer
  • small saucepan
  • Baking Sheets
  • Parchment Paper
  • wire rack

Method
 

Step-by-Step Instructions
  1. Melt 5 tablespoons of unsalted butter, then combine with 4 cups of flour, 1/4 cup of sugar, 2 tablespoons of yeast, and 1 teaspoon of salt in a mixer. Slowly add 1 cup of warm milk and 1 beaten egg. Mix for 8 minutes until sticky and smooth.
  2. Grease a large bowl with oil, place the dough inside, cover, and proof for 1 to 1.5 hours until doubled in size.
  3. Punch down the dough, divide into 16 pieces, roll into balls, and arrange on two lined baking sheets. Cover and proof for another 90 minutes.
  4. Slice smoked sausage into 3-inch pieces while the dough is proofing.
  5. Preheat oven to 350°F. Flatten a dough ball, insert a sausage piece, and wrap tightly to seal.
  6. Bake for 22-25 minutes until golden brown. Cool slightly on a wire rack before serving.

Nutrition

Serving: 1kolacheCalories: 250kcalCarbohydrates: 30gProtein: 10gFat: 10gSaturated Fat: 5gPolyunsaturated Fat: 1gMonounsaturated Fat: 3gCholesterol: 30mgSodium: 300mgPotassium: 200mgFiber: 1gSugar: 2gVitamin A: 200IUCalcium: 50mgIron: 1.5mg

Notes

Ensure the milk and butter mixture is warm but not hot; use room temperature ingredients for better blending. Watch the proofing time closely for optimal texture.

Tried this recipe?

Let us know how it was!

Savory Breakfast Pot Pie: Your Ultimate Morning Comfort Food

January 26, 2026 by Grace Snow Leave a Comment

As the sun peeks through the kitchen window, the aroma of fresh-baked biscuits envelops the room, instantly transforming my morning. There’s something so heartwarming about this Savory Breakfast Pot Pie with Honey Butter Biscuit Topping; it's the perfect blend of fluffy scrambled eggs, savory sausage gravy, and vibrant sautéed vegetables, all tucked under a golden, flaky crust. This dish isn’t just a comforting start to your day; it’s also incredibly customizable, so you can tailor it to whatever you have on hand. Plus, it's quick to whip up and effortlessly turns a usual breakfast into an extraordinary feast that pleases everyone at the table. Are you ready to elevate your morning routine with this delightful recipe?

Why Will You Love This Pot Pie?

Versatile: This Savory Breakfast Pot Pie allows for endless customization! Use your favorite veggies or cheeses to match your taste preferences.

Family Favorite: Its comforting flavors and delightful presentation make it a hit with both kids and adults, perfect for any breakfast gathering.

Easy to Prepare: With straightforward steps, you can easily whip this up on busy mornings or for leisurely brunches, just like our delicious Breakfast Egg Muffins.

Crowd-Pleasing: Serve it fresh out of the oven, and watch everyone at your table dig in happily.

Meal Prep Friendly: You can prepare the filling and biscuit dough ahead of time, making it a lifesaver for those hectic weekdays!

Embrace the joy of homemade comfort with this irresistible meal that promises a satisfying breakfast experience!

Savory Breakfast Pot Pie Ingredients

For the Filling

  • Breakfast Sausage – Provides a savory filling; can substitute with turkey or veggie sausage for a lighter option.
  • Mild Cheddar Cheese – Adds creaminess and flavor; Monterey Jack works as a great alternative.
  • Bell Peppers – Chopped for sweetness and color; swap with zucchini or spinach for variety.
  • Onion – Chopped, yellow or red varieties deliver great taste.
  • Salt – Enhances flavors; use kosher salt for more control over seasoning.
  • Pepper – Adds heat; adjust to your liking.
  • Eggs – Beaten, they're essential for the recipe's integrity.
  • Heavy Cream – Creates a rich gravy; substitute with half-and-half for a lighter dish.
  • Flour – Thickens the gravy; use a gluten-free blend if needed.

For the Biscuits

  • Red Lobster Honey Butter Biscuit Mix – Forms the base for the topping; feel free to use any biscuit mix.
  • Unsalted Butter – Adds richness; olive oil is a suitable alternative if desired.
  • Milk – Necessary for biscuit preparation; any type works just fine.
  • Honey – Sweetens the biscuit topping; maple syrup can be used instead.

For Cooking

  • Cooking Oil – For sautéing vegetables; olive oil or butter will do perfectly.

Each ingredient plays a vital role in making this Savory Breakfast Pot Pie a delightful and comforting experience, ensuring every bite is full of flavor!

Step‑by‑Step Instructions for Savory Breakfast Pot Pie

Step 1: Prepare Filling
In a large skillet, heat a drizzle of cooking oil over medium heat. Add the chopped bell peppers and onions, sautéing for about 3-4 minutes until softened and lightly browned. Next, crumble in the breakfast sausage and cook for 5-6 minutes until fully cooked and crispy. Stir in flour and pour in heavy cream, seasoning generously with salt and pepper. Cook until the mixture thickens, about 2-3 minutes, creating a rich gravy for your Savory Breakfast Pot Pie.

Step 2: Prep Biscuit Dough
In a large mixing bowl, combine the Red Lobster Honey Butter Biscuit Mix with milk. Stir gently until just combined, forming a shaggy dough—avoid overmixing to ensure tender biscuits. Allow the dough to sit for a couple of minutes while you prepare the eggs; this will help the biscuit topping rise perfectly when baked, complementing your savory filling beautifully.

Step 3: Cook Eggs
In a separate skillet, melt a tablespoon of unsalted butter along with a splash of olive oil over medium-low heat. Add the beaten eggs and cook gently, stirring frequently until they are just set but still soft, about 4-5 minutes. Season to taste with salt and pepper. Once cooked, remove from heat and set aside to cool slightly as you prepare to assemble the pot pies.

Step 4: Assemble Pot Pies
Preheat your oven to 425°F (220°C). Gather ramekins or a suitable baking dish and layer in the following order: a generous scoop of scrambled eggs, followed by the sautéed vegetable and sausage filling, a sprinkle of mild cheddar cheese, and finally, a rich layer of sausage gravy. Spoon the prepared biscuit dough on top, leaving a little space for expansion as it bakes.

Step 5: Bake
Place the ramekins on a baking sheet to catch any drips and bake in the preheated oven for 18-20 minutes. Keep an eye on them; you want the biscuit tops to rise and turn a beautiful golden brown. The savory aromas will fill your kitchen, signaling that your Savory Breakfast Pot Pie is close to perfection!

Step 6: Finish
As soon as the pot pies are out of the oven, brush the tops with a mixture of melted butter and honey for an added touch of sweetness and shine. This quick step enhances the flavor of the biscuits and adds a delightful sheen to your golden topping. Serve warm and enjoy the comforting goodness of your Savory Breakfast Pot Pie!

Make Ahead Options

These Savory Breakfast Pot Pies are perfect for meal prep enthusiasts! You can prepare the filling and biscuit dough up to 24 hours in advance. Simply sauté the vegetables and sausage, then let the mixture cool before refrigerating it in an airtight container. Likewise, prepare the biscuit dough and store it separately to prevent it from becoming too moist. When you're ready to serve, just layer everything in your ramekins as directed, top with the dough, and bake until golden brown. This method ensures you enjoy a homemade breakfast that's just as delicious, saving time on busy mornings while still indulging in comforting flavors!

Expert Tips for Savory Breakfast Pot Pie

• Cook Thoroughly: Ensure the breakfast sausage is fully cooked before combining with other ingredients for a rich, flavorsome filling.

• Don’t Overmix: Mix the biscuit dough just until combined to avoid tough biscuits; a shaggy consistency is perfect for a tender topping.

• Maintain Texture: When reheating leftovers of your Savory Breakfast Pot Pie, avoid the microwave. Instead, use the oven to keep it crispy and delicious.

• Flavor Variations: Experiment with different cheeses or veggies. For a unique twist, try feta cheese or swap bell peppers for spinach.

• Prep Ahead: Make the filling and biscuit dough the day before and store separately; this makes morning preparation a breeze!

Storage Tips for Savory Breakfast Pot Pie

• Fridge: Store leftover Savory Breakfast Pot Pie in an airtight container for up to 3 days. This ensures the flavors remain fresh while preserving the texture.

• Freezer: For longer storage, freeze portions in airtight containers or freezer bags for up to 2 months. This way, you can enjoy this comforting dish whenever the craving strikes!

• Reheating: When ready to enjoy, reheat in the oven at 350°F (175°C) for about 15-20 minutes or until warmed through. This keeps the biscuit topping crispy and enhances the savory filling.

• Make-Ahead Tips: Prepare the filling and biscuit dough up to 24 hours in advance; simply store them separately in the fridge before assembling and baking.

Savory Breakfast Pot Pie Variations

Customize your Savory Breakfast Pot Pie for a delightful twist that creates a flavor adventure with each bite!

  • Dairy-Free: Use a plant-based milk and cheese for a rich, creamy alternative that caters to dairy sensitivities.
    Dairy-free options still deliver delicious flavor and texture, making everyone feel included at the breakfast table!

  • Spicy Kick: Add diced jalapeños or a sprinkle of cayenne pepper to the filling for an exciting heat that wakes up your taste buds.
    This fiery addition complements the creamy gravy and adds a delicious contrast to the savory sausage.

  • Veggie-Packed: Swap out the sausage for a mix of mushrooms, spinach, and kale to create a wholesome vegetarian version.
    With the hearty veggie blend, you'll enjoy a fresh, colorful take on this comforting breakfast dish!

  • Herbed Goodness: Enhance flavor by adding fresh herbs like thyme or rosemary to the filling—freshness takes it to another level!
    The aromatic essence of these herbs adds depth, making your pot pie all the more enjoyable.

  • Sweet Twist: Try adding a touch of diced apples or pears to the filling for a sweet-savory combination that’s irresistible.
    This subtly sweet element can transform your breakfast experience into something uniquely delightful.

  • Cheese Lovers: Mix different cheeses like feta, gouda, or pepper jack with the cheddar for bold flavor variations.
    Each cheese brings its own personality to the dish, turning it into a cheesy delight that everyone will want seconds of!

  • Frozen Convenience: For a quicker meal prep, use frozen mixed vegetables instead of fresh; they make assembly faster without sacrificing taste.
    Just toss them straight into the filling for an easy, crowd-pleasing solution you can whip up any morning.

Elevate your breakfast game while mixing and matching these variations! For other delicious recipes to enjoy, you might also like our Cornbread Breakfast Casserole or the scrumptious Tamale Pie Hearty for more comforting options.

What to Serve with Savory Breakfast Pot Pie

Warm up your breakfast table and brighten your morning with these delightful pairings that complement your comforting creation perfectly.

  • Fresh Fruit Salad: Bursting with vibrant colors and sweet flavors, it adds a refreshing contrast to the savory pie.

  • Crispy Hash Browns: The golden, crispy texture of hash browns pairs beautifully with the soft, flaky pot pie, enhancing the breakfast experience.

  • Mixed Green Salad: A light and zesty salad balances the richness of the pot pie, offering a refreshing crunch with every forkful.

  • Sautéed Spinach: Tender sautéed spinach introduces earthy flavors, brightening your plate while providing a nutritious element alongside your hearty dish.

  • Breakfast Smoothie: A chilled smoothie, filled with fruits and yogurt, offers a sweet and creamy sip, complementing the savory warmth of the pot pie.

  • Maple Syrup Drizzle: A touch of maple syrup over individual servings can provide a delightful sweet contrast to the hearty filling.

Let your breakfast table sing with color and flavor, turning a comforting indulgence into a well-rounded meal experience!

Savory Breakfast Pot Pie Recipe FAQs

What type of sausage works best for this recipe?
I recommend using breakfast sausage for its rich flavor, but if you prefer a lighter option, turkey or veggie sausage works beautifully too!

How can I tell if my vegetables are fresh for the pot pie?
Look for vibrant colors and firm textures. Bell peppers shouldn't have dark spots all over, and the skin should be smooth and shiny. Fresh vegetables will enhance the flavors of your Savory Breakfast Pot Pie.

What's the best way to store leftovers?
Store leftover Savory Breakfast Pot Pie in an airtight container in the refrigerator for up to 3 days. To maintain their original texture, reheat them in the oven at 350°F (175°C) for 15-20 minutes until the filling is heated through and the biscuit topping remains crispy.

Can I freeze the Savory Breakfast Pot Pie?
Absolutely! To freeze, allow any leftovers to cool completely. Then, wrap the portions tightly in plastic wrap and place them in a freezer-safe bag or container. They can be frozen for up to 2 months. Just remember to thaw in the fridge before reheating to retain the best texture.

What if my biscuit topping doesn't rise properly?
If your biscuit topping doesn't rise, it could be because the dough was overmixed or the baking powder was old. Always mix until just combined to keep them fluffy, and check your leavening agents before baking for the best results!

Are there any dietary considerations to keep in mind?
Yes! If you or your guests have dietary restrictions, you can easily customize the filling. For a gluten-free option, use a gluten-free biscuit mix and flour. Also, double-check that the sausage and cheese are suitable for your dietary needs. Enjoy the versatility of this dish!

Savory Breakfast Pot Pie

Savory Breakfast Pot Pie: Your Ultimate Morning Comfort Food

This Savory Breakfast Pot Pie is your ultimate morning comfort food, filled with fluffy scrambled eggs, savory sausage gravy, and vibrant sautéed vegetables.
Print Recipe Pin Recipe
Prep Time 20 minutes mins
Cook Time 25 minutes mins
Total Time 45 minutes mins
Servings: 4 pot pies
Course: Breakfast
Cuisine: American
Calories: 350
Ingredients Equipment Method Nutrition Notes

Ingredients
  

For the Filling
  • 1 lb Breakfast Sausage Can substitute with turkey or veggie sausage
  • 1 cup Mild Cheddar Cheese Monterey Jack works as a great alternative
  • 1 cup Bell Peppers Chopped; swap with zucchini or spinach for variety
  • 1 medium Onion Chopped; yellow or red varieties deliver great taste
  • 1 tsp Salt Use kosher salt for more control over seasoning
  • 1/2 tsp Pepper Adjust to your liking
  • 4 large Eggs Beaten
  • 1/2 cup Heavy Cream Substitute with half-and-half for a lighter dish
  • 1/4 cup Flour Use a gluten-free blend if needed
For the Biscuits
  • 1 pkg Red Lobster Honey Butter Biscuit Mix Feel free to use any biscuit mix
  • 1/4 cup Unsalted Butter Add richness; olive oil is a suitable alternative
  • 3/4 cup Milk Any type works just fine
  • 2 tbsp Honey Maple syrup can be used instead
For Cooking
  • 1 tbsp Cooking Oil Olive oil or butter will do perfectly

Equipment

  • Skillet
  • Mixing Bowl
  • Baking Dish
  • Baking Sheet

Method
 

Step‑by‑Step Instructions
  1. In a large skillet, heat a drizzle of cooking oil over medium heat. Add the chopped bell peppers and onions, sautéing for about 3-4 minutes until softened and lightly browned. Next, crumble in the breakfast sausage and cook for 5-6 minutes until fully cooked and crispy. Stir in flour and pour in heavy cream, seasoning generously with salt and pepper. Cook until the mixture thickens, about 2-3 minutes, creating a rich gravy for your Savory Breakfast Pot Pie.
  2. In a large mixing bowl, combine the Red Lobster Honey Butter Biscuit Mix with milk. Stir gently until just combined, forming a shaggy dough—avoid overmixing to ensure tender biscuits. Allow the dough to sit for a couple of minutes while you prepare the eggs.
  3. In a separate skillet, melt a tablespoon of unsalted butter along with a splash of olive oil over medium-low heat. Add the beaten eggs and cook gently, stirring frequently until they are just set but still soft, about 4-5 minutes. Season to taste with salt and pepper. Once cooked, remove from heat and set aside to cool slightly.
  4. Preheat your oven to 425°F (220°C). Layer in the following order: a scoop of scrambled eggs, sautéed vegetable and sausage filling, a sprinkle of cheddar cheese, and biscuit dough on top.
  5. Place the ramekins on a baking sheet and bake for 18-20 minutes until golden brown.
  6. Brush the tops with melted butter and honey when out of the oven for added flavor. Serve warm.

Nutrition

Serving: 1pot pieCalories: 350kcalCarbohydrates: 30gProtein: 15gFat: 20gSaturated Fat: 10gPolyunsaturated Fat: 2gMonounsaturated Fat: 6gCholesterol: 180mgSodium: 800mgPotassium: 300mgFiber: 2gSugar: 4gVitamin A: 15IUVitamin C: 20mgCalcium: 10mgIron: 10mg

Notes

Ensure that all ingredients are fresh for the best flavor and texture.

Tried this recipe?

Let us know how it was!

Cinnamon Roll Baked Oatmeal Squares for a Cozy Morning Boost

January 26, 2026 by Grace Snow Leave a Comment

As the morning sun peeks through the windows, a delicious aroma fills the air—cinnamon warm and inviting, just begging to be savored. That’s the magic of my Cinnamon Roll Baked Oatmeal Squares, a delightful way to enjoy the comforting flavors of cinnamon rolls without the usual bustle of traditional baking. Best of all, this breakfast wonder is not just simple to prepare; it’s also perfect for those busy mornings when you crave something hearty yet wholesome. With the heartiness of oats and a touch of sweetness, each square becomes a delightful start to your day. Ready to indulge in this cozy morning treat? Let's dive in and create a batch that will keep everyone coming back for more!

Why are these oatmeal squares irresistible?

Comforting, warm flavors of cinnamon and maple syrup create a delightful start to your day. Simple to prepare, these squares come together effortlessly, making them perfect for busy mornings. Nutrient-packed with wholesome oats, they provide lasting energy. Plus, they’re versatile—add nuts or fruits to customize your treat! For a heartfelt breakfast experience, pair them with yogurt or fresh fruit as suggested in Pumpkin Cinnamon Roll recipes. Prep them in advance, and you’ll have a delicious breakfast ready to go!

Cinnamon Roll Baked Oatmeal Squares Ingredients

• Get ready to treat yourself!

For the Oatmeal Base

  • Rolled Oats – Old-fashioned oats are preferred for the best chewy texture!
  • Baking Powder – This helps create a light and fluffy texture for your squares.
  • Ground Cinnamon – Adds that warm, cozy flavor reminiscent of classic cinnamon rolls.
  • Salt – A crucial component that balances the sweetness beautifully.
  • Large Egg – Binds the ingredients together, adding moisture and richness.
  • Milk – Choose dairy or a non-dairy alternative for creamy goodness.
  • Maple Syrup or Honey – This will sweeten your squares naturally—pick your favorite!
  • Melted Butter or Coconut Oil – Incorporates richness and flavor; coconut oil is great for a dairy-free option.
  • Vanilla Extract – A splash elevates the flavor profile with warmth.

For the Swirl

  • Melted Butter or Coconut Oil – This adds richness to your delightful cinnamon swirl.
  • Brown Sugar – Brings a lovely sweetness with a hint of caramel flavor, perfect for the swirl!

These Cinnamon Roll Baked Oatmeal Squares offer heartiness and warmth, making them a staple in your breakfast rotation!

Step‑by‑Step Instructions for Cinnamon Roll Baked Oatmeal Squares

Step 1: Preheat the Oven
Begin by preheating your oven to 350°F (175°C). This temperature ensures that your Cinnamon Roll Baked Oatmeal Squares bake evenly, resulting in that perfect golden top. While the oven warms up, gather your baking dish—an 8x8 inch square pan works great—and grease it lightly to prevent sticking.

Step 2: Combine Dry Ingredients
In a large mixing bowl, combine the rolled oats, baking powder, ground cinnamon, and salt. Stir these ingredients together until they’re well blended, allowing the warm cinnamon scent to fill your kitchen. This blend will form the heart of your oatmeal squares, providing texture and flavor for every delicious bite.

Step 3: Mix Wet Ingredients
In a separate bowl, whisk together the large egg, milk, maple syrup or honey, melted butter (or coconut oil), and vanilla extract until smooth. This mixture adds moisture and sweetness to your Cinnamon Roll Baked Oatmeal Squares. Look for a lovely, creamy consistency before incorporating it into your dry ingredients.

Step 4: Combine Wet and Dry Ingredients
Pour the wet mixture into the bowl with the dry ingredients. Using a spatula, gently fold everything together until just combined. Be careful not to overmix; a few lumps are perfectly fine! This will ensure that your oatmeal squares remain soft and chewy after baking.

Step 5: Prepare the Cinnamon Swirl
In a small bowl, mix the melted butter or coconut oil with brown sugar and a sprinkle of cinnamon to create the swirl. Stir until well combined, forming a crumbly mixture. This step will add a delightful cinnamon flavor and sweetness that mimics the traditional cinnamon roll experience.

Step 6: Assemble the Mixture in the Baking Dish
Spread the oatmeal mixture evenly into the prepared baking dish, using a spatula to smooth the top. Next, drizzle the cinnamon swirl mixture over the oat base. Use a knife or skewer to gently swirl the mixture into the oatmeal, creating beautiful patterns without fully mixing it in.

Step 7: Bake the Oatmeal Squares
Place the baking dish in the preheated oven and bake for 25-30 minutes. You’ll know the Cinnamon Roll Baked Oatmeal Squares are done when the edges turn golden and a toothpick inserted into the center comes out mostly clean. Check around the 25-minute mark for best results.

Step 8: Cool and Slice
Once baked, remove the dish from the oven and allow it to cool for about 10 minutes. This cooling time makes it easier to slice into squares without crumbling. Use a sharp knife to cut them into squares, revealing layers of deliciousness waiting to be enjoyed.

Cinnamon Roll Baked Oatmeal Squares Variations

Feel free to mix it up! Your Cinnamon Roll Baked Oatmeal Squares can be customized to suit your taste and dietary needs.

  • Sweetener Swap: Use agave syrup or brown rice syrup for a different sweetness profile that caters to your preference.
  • Nutty Delight: Add chopped walnuts or pecans to the oat mixture for an irresistible crunch and texture.
  • Fruity Twist: Stir in some dried cranberries or banana slices before baking for a fruity explosion in every square.
  • Dairy-Free: Swap regular milk for almond, soy, or oat milk to keep it vegan-friendly and still scrumptiously creamy.
  • Extra Spice: Try adding nutmeg or pumpkin pie spice alongside cinnamon for an aromatic twist to your flavor palette.
  • Vegan Treat: Replace the egg with a flaxseed egg (1 tablespoon ground flaxseed + 2.5 tablespoons water) for a delightful vegan option.
  • Coconut Flake Fun: Fold in shredded coconut for a tropical flair—coconut pairs beautifully with cinnamon!
  • Cream Cheese Drizzle: Make a simple icing from cream cheese and a little sugar to drizzle on top of your squares for a decadent finish.

These variations keep your breakfast exciting and fresh! When you enjoy a batch of these sweet treats, consider trying them alongside a cup of coffee or paired with the dreamy flavor of Pumpkin Cinnamon Roll recipes for a delightful experience. You’ll find the perfect combination for everyone in your family!

Make Ahead Options

These Cinnamon Roll Baked Oatmeal Squares are a fantastic solution for busy mornings! You can prepare the entire oat mixture up to 24 hours in advance—simply make and combine your wet and dry ingredients, then store them in the fridge. For best results, keep the cinnamon swirl mixture separate until right before baking to maintain its textural integrity. When you're ready to enjoy them, just pour the oat mix into your baking dish, drizzle the swirl on top, and bake as directed. This method not only saves you time but ensures your breakfast is just as delicious in the morning as it was the day before!

What to Serve with Cinnamon Roll Baked Oatmeal Squares

Treat your senses to a complete breakfast experience that pairs beautifully with these squares' warm cinnamon goodness.

  • Creamy Yogurt: A dollop of Greek yogurt adds tangy creaminess, balancing the sweetness of your oatmeal squares while enhancing their wholesome texture.

  • Fresh Berries: Add a burst of freshness with strawberries or blueberries—these fruits provide a juicy contrast and vibrant color to your breakfast plate. Enjoying them together makes for a delightful morning!

  • Nutty Granola: A sprinkle of your favorite granola brings extra crunch and flavor depth, elevating each bite of the oatmeal squares with wonderful textures. This combination is sure to please everyone at the table.

  • Banana Slices: Sliced bananas complement the oatmeal's cinnamon flavor, adding natural sweetness and creaminess while making your plate visually appealing.

  • Maple Syrup Drizzle: Elevate the blissful flavors by drizzling warm maple syrup over the squares for an extra touch of sweetness that lingers perfectly on your palate.

  • Herbal Tea: Sip on a soothing cup of chamomile or peppermint tea, which calms the senses and makes for a cozy pairing with your Cinnamon Roll Baked Oatmeal Squares.

  • Cinnamon Spiced Milk: Warm up a glass of milk flavored with a pinch of cinnamon for an irresistible, comforting drink that echoes the flavors of your breakfast.

Each of these pairings enhances the experience of these heavenly Cinnamon Roll Baked Oatmeal Squares, ensuring a delightful start to your day!

Expert Tips for Cinnamon Roll Baked Oatmeal Squares

  • Use Old-Fashioned Oats: Always opt for old-fashioned rolled oats for the best texture. Instant or steel-cut oats will lead to undesirable results in your Cinnamon Roll Baked Oatmeal Squares.

  • Avoid Overmixing: Be careful not to overmix the wet and dry ingredients. A few lumps are fine and essential for maintaining a soft and chewy texture.

  • Proper Swirl Technique: Don't overmix the cinnamon swirl topping. A slightly crumbly mixture is perfect for achieving that beautiful swirl effect without losing texture.

  • Check for Doneness: Test for doneness by using a toothpick; it should come out mostly clean. A slight moistness is okay for a tender finish in your squares.

  • Customize Sweetness: Feel free to adjust the sweetness to your preference. You can reduce the maple syrup or brown sugar based on your taste preference while keeping the flavors in balance.

How to Store and Freeze Cinnamon Roll Baked Oatmeal Squares

Room Temperature: Keep the squares in an airtight container at room temperature for up to 3 days to maintain freshness, making it easy to grab for breakfast on busy mornings.

Fridge: For longer-lasting freshness, store the oatmeal squares in the fridge for up to 4 days. Just make sure to cover them well to prevent drying out.

Freezer: These delicious Cinnamon Roll Baked Oatmeal Squares freeze beautifully! Wrap each square in plastic wrap and place them in a freezer-safe bag for up to 3 months—perfect for meal prep!

Reheating: To enjoy the squares warm, simply reheat them in the microwave for about 20-30 seconds, or until warmed through.

Cinnamon Roll Baked Oatmeal Squares Recipe FAQs

How do I select the right rolled oats for this recipe?
Absolutely! For the best texture in your Cinnamon Roll Baked Oatmeal Squares, I recommend using old-fashioned rolled oats. They provide the perfect chewiness and structure you’re looking for. Avoid instant or steel-cut oats, as they won’t yield the same delightful result.

What’s the best way to store leftover oatmeal squares?
Very! You can store your Cinnamon Roll Baked Oatmeal Squares in an airtight container at room temperature for up to 3 days. For longer-lasting freshness, pop them in the fridge, where they’ll stay good for about 4 days. Just be sure they’re covered to prevent drying out!

Can I freeze the oatmeal squares, and how should I do it?
Absolutely! Freezing these oatmeal squares is a fantastic option. Wrap each square in plastic wrap, then place them in a freezer-safe bag or container. You can keep them frozen for up to 3 months. When you’re ready to enjoy, simply reheat them in the microwave for about 20-30 seconds until warmed through!

What should I do if my oatmeal squares are too dry after baking?
Ah, no worries! If your Cinnamon Roll Baked Oatmeal Squares turn out too dry, it might be a sign that they were overbaked or the oven temperature was too high. For a softer texture, make sure to check for doneness around the 25-minute mark and pull them out once the toothpick comes out mostly clean but still with a little moisture clinging. If you find them dry, you can enjoy them with a dollop of yogurt or some fresh fruit to add moisture back!

Are there any dietary restrictions I should keep in mind for this recipe?
Very! This recipe is vegetarian-friendly, and you can easily make it dairy-free by using non-dairy milk and coconut oil instead of butter. If you or someone enjoying these squares has allergies, be mindful of which sweeteners you choose and ensure they fit within individual dietary needs. These oatmeal squares are versatile and can accommodate many tweaks!

Can I add extra ingredients to the oatmeal squares?
Absolutely! You can customize your Cinnamon Roll Baked Oatmeal Squares by mixing in nuts, seeds, or dried fruits like raisins or cranberries for extra texture and nutrients. You could even experiment with different spices, such as nutmeg or allspice, to create unique flavor profiles while keeping the base the same!

Cinnamon Roll Baked Oatmeal Squares

Cinnamon Roll Baked Oatmeal Squares for a Cozy Morning Boost

Cinnamon Roll Baked Oatmeal Squares are a delightful way to enjoy the comforting flavors of cinnamon rolls without the usual bustle of traditional baking.
Print Recipe Pin Recipe
Prep Time 10 minutes mins
Cook Time 30 minutes mins
Cooling Time 10 minutes mins
Total Time 50 minutes mins
Servings: 9 squares
Course: Breakfast
Cuisine: American
Calories: 200
Ingredients Equipment Method Nutrition Notes

Ingredients
  

For the Oatmeal Base
  • 2 cups Old-fashioned Rolled Oats preferred for the best chewy texture
  • 1 tbsp Baking Powder helps create a light and fluffy texture
  • 2 tsps Ground Cinnamon adds warm, cozy flavor
  • 1/4 tsp Salt balances sweetness
  • 1 large Egg binds ingredients, adds moisture
  • 1 cup Milk dairy or non-dairy alternative
  • 1/4 cup Maple Syrup or Honey natural sweetener
  • 1/4 cup Melted Butter or Coconut Oil for richness and flavor
  • 1 tsp Vanilla Extract elevates flavor profile
For the Swirl
  • 2 tbsp Melted Butter or Coconut Oil adds richness to the swirl
  • 1/4 cup Brown Sugar provides sweetness and caramel flavor

Equipment

  • 8x8 inch square baking dish

Method
 

Step‑by‑Step Instructions
  1. Preheat your oven to 350°F (175°C). Grease an 8x8 inch square baking dish lightly.
  2. In a large mixing bowl, combine the rolled oats, baking powder, ground cinnamon, and salt.
  3. In a separate bowl, whisk together the egg, milk, maple syrup or honey, melted butter (or coconut oil), and vanilla extract until smooth.
  4. Pour the wet mixture into the bowl with the dry ingredients, and gently fold together until just combined.
  5. In a small bowl, mix the melted butter or coconut oil with brown sugar and a sprinkle of cinnamon to create the swirl.
  6. Spread the oatmeal mixture evenly into the prepared baking dish. Drizzle the cinnamon swirl mixture over the top and gently swirl it in.
  7. Bake for 25-30 minutes until golden and a toothpick inserted comes out mostly clean.
  8. Allow to cool for about 10 minutes before cutting into squares.

Nutrition

Serving: 1squareCalories: 200kcalCarbohydrates: 30gProtein: 4gFat: 8gSaturated Fat: 4gPolyunsaturated Fat: 1gMonounsaturated Fat: 2gCholesterol: 50mgSodium: 150mgPotassium: 150mgFiber: 3gSugar: 6gVitamin A: 500IUCalcium: 150mgIron: 1mg

Notes

Use old-fashioned oats for the best texture. Avoid overmixing to maintain a soft and chewy texture. Customize sweetness according to your taste.

Tried this recipe?

Let us know how it was!

Savory Cheddar & Bacon Dutch Baby: A Cozy Breakfast Delight

January 26, 2026 by Grace Snow Leave a Comment

As I flipped through an old cookbook, a forgotten recipe caught my eye: the Savory Cheddar & Bacon Dutch Baby. It beckoned with promises of fluffy indulgence and savory bites, perfect for welcoming a new day. In just 35 minutes, you can whip up this impressive breakfast that brings a delightful twist to your usual morning fare. The beauty of this dish lies not only in its warm, comforting texture but also in its versatility—offering a gluten-free option without compromising on flavor. Picture yourself serving this golden, puffed pancake straight from the skillet, delighting family and friends with every forkful. Ready to create a breakfast masterpiece that outshines fast food? Let’s dive in!

Why is this Dutch Baby a must-try?

Simplicity: With just a few ingredients and a quick prep time, achieving this stunning breakfast is a breeze.

Unforgettable Flavor: The combination of sharp cheddar and crispy bacon makes for a savory delight that’s hard to resist.

Gluten-Free Option: This recipe allows you to swap in a gluten-free flour blend, ensuring everyone can enjoy it!

Heightened Appeal: Serve it straight from the skillet to impress family and friends, creating a cozy kitchen atmosphere.

Versatile Ingredients: Feel free to experiment with different cheeses or substitute bacon with sautéed mushrooms to tailor it to your taste. Looking for more inspired recipes? Check out Grilled Mushrooms Savory or try a delightful Seafood Pasta Savory for variety!

Savory Cheddar & Bacon Dutch Baby Ingredients

For the Batter

  • Eggs – Provide structure and richness; no substitutions recommended for best results.
  • All-purpose Flour – Creates the body of the Dutch baby; substitute with gluten-free flour blend for a gluten-free option.
  • Milk – Adds moisture and flavor; any milk variety (dairy or plant-based) can be used.
  • Melted Butter – Contributes flavor and helps prevent sticking; can replace with oil if needed.
  • Salt – Enhances overall flavor.
  • Black Pepper – Adds a subtle spice; optional if a milder flavor is desired.

For the Filling

  • Sharp Cheddar Cheese – Provides a savory, tangy flavor; can substitute with gouda, feta, or pepper jack.
  • Crispy Bacon – Delivers a crunchy texture and savory depth; can replace with sautéed mushrooms or crispy tempeh for a vegetarian option.

For Garnishing

  • Fresh Parsley and Chives – For garnish and added brightness to the dish; optional.

Elevate your mornings with this Savory Cheddar & Bacon Dutch Baby that’s sure to impress!

Step‑by‑Step Instructions for Savory Cheddar & Bacon Dutch Baby

Step 1: Preheat the Skillet
Begin by preheating your oven to 425°F (220°C). While the oven warms up, place a cast-iron skillet inside to heat for about 10 minutes. This step is crucial for achieving that spectacular puff that makes the Savory Cheddar & Bacon Dutch Baby so irresistible. Ensure your skillet is very hot before moving on to the next step.

Step 2: Prepare the Batter
In a mixing bowl, combine the eggs, all-purpose flour, milk, melted butter, salt, and black pepper. Using a whisk or a blender, mix until you achieve a smooth, homogenous batter. Let the batter rest for 5 minutes, as this resting time is key to creating a fluffy texture in your Dutch baby.

Step 3: Coat the Skillet
Carefully remove the hot skillet from the oven—remember it will be very hot! Add a bit more melted butter to the skillet, swirling it around to coat the bottom and sides evenly. Immediately pour your rested batter into the skillet, ensuring it spreads evenly across the surface.

Step 4: Add the Fillings
Once the batter is in place, generously sprinkle the sharp cheddar cheese and crispy bacon on top. These ingredients will melt into the batter as it bakes, infusing the Savory Cheddar & Bacon Dutch Baby with rich, savory flavors and delightful textures.

Step 5: Bake to Perfection
Place the skillet back in the oven and bake for 20-25 minutes. Keep a close eye on it as the edges rise and turn a beautiful golden brown. Avoid opening the oven door during this time, as the heat is essential for that impressive puff!

Step 6: Garnish and Serve
When the edges are puffed and golden, carefully remove the skillet from the oven. Let the Dutch baby cool slightly, then garnish with fresh chopped parsley and chives for a pop of color and brightness. Serve hot from the skillet, allowing everyone to dig into the delicious Savory Cheddar & Bacon Dutch Baby.

Make Ahead Options

These Savory Cheddar & Bacon Dutch Babies are fantastic for meal prep and can save you precious time on busy mornings! You can prepare the batter up to 24 hours in advance; simply blend the ingredients and store it in an airtight container in the refrigerator. Additionally, you can cook the bacon ahead of time, storing it in the fridge for up to 3 days. When you're ready to serve, preheat your oven and skillet, pour the batter, top with the bacon and cheese, and bake until puffed and golden. This way, you’ll enjoy a delicious, homemade breakfast with minimal effort—all while impressing your family with this delightful dish!

What to Serve with Savory Cheddar & Bacon Dutch Baby

Imagine a cozy breakfast table adorned with delightful flavors and textures, designed to awaken your senses and nourish your soul.

  • Fresh Fruit Salad: A burst of sweet and juicy fruits balances the savory nature of the Dutch baby, creating a refreshing contrast. Think berries, melons, and citrus for vibrant colors!

  • Crisp Green Salad: A light salad with mixed greens, cherry tomatoes, and a tangy vinaigrette adds a delightful crunch and tanginess, enhancing the dish’s richness.

  • Roasted Vegetables: Warm, caramelized veggies such as bell peppers and zucchini provide a wholesome, savory element, complementing that cheesy, bacon-filled delight beautifully.

  • Herbed Yogurt Dip: A dollop of herbed yogurt adds a creamy tang and fresh notes, elevating each forkful of the Dutch baby with a soothing taste.

  • Spicy Maple Syrup: For a sweet-savory twist, drizzle spicy maple syrup over your serving. The hint of heat with the sweetness is irresistible!

  • Hot Coffee or Tea: A warm mug of rich coffee or herbal tea creates the perfect beverage pairing, enhancing the breakfast experience and warming your mornings.

Indulge in these delightful pairings that take your Savory Cheddar & Bacon Dutch Baby breakfast to the next level!

Savory Cheddar & Bacon Dutch Baby Variations

Feel free to make this dish your own by experimenting with mouthwatering variations that tantalize your taste buds!

  • Vegetarian Option: Replace crispy bacon with sautéed mushrooms or crispy tempeh for a hearty twist. The earthy flavors from the mushrooms will complement the cheesy goodness beautifully.

  • Cheese Swap: Try different cheeses like gouda or pepper jack for a unique flavor profile. Each cheese brings its own charm, allowing you to personalize every bite.

  • Add Zest: Incorporate jalapeños or diced green chiles for a spicy kick. This twist will awaken your senses and elevate your breakfast experience.

  • Sweet Touch: Drizzle your Dutch baby with honey or hot honey after baking for a delightful sweet-savory balance. The sweetness will beautifully contrast with the savory flavors, making each forkful a joy.

  • Herb Infusion: Mix in fresh herbs like thyme or rosemary into the batter for an aromatic twist. This subtle enhancement can elevate your dish to gourmet status.

  • Caramelized Onions: Add some sweet caramelized onions for added depth. Their sweet and savory flavor will create a rich layer of taste that will have your friends asking for seconds!

  • Nutty Crunch: Toss in some toasted walnuts or pecans for a surprising crunch. The nutty flavor will pair wonderfully with the creamy cheese and crispy edges.

For more delightful ideas, consider pairing your Dutch baby with a bowl of Santa Fe Soup Savory or enjoy a fresh side of Grilled Mushrooms Savory for a savory meal that warms the heart.

Expert Tips for Savory Cheddar & Bacon Dutch Baby

  • Skillet Safety: Always handle the hot skillet with care. Use oven mitts and be cautious during the transfer to avoid burns.

  • Resting Time Matters: Resting the batter for 5 minutes is essential. Skipping this step can result in a denser texture instead of the light, airy result you want.

  • Avoid Oven Door Dilemma: Resist the urge to open the oven door while baking. It can cause the batter to deflate, compromising the perfect puffiness of your Savory Cheddar & Bacon Dutch Baby.

  • Choice of Flour: If you're opting for the gluten-free variant, ensure you use a high-quality gluten-free flour blend for the best results in texture and flavor.

  • Creative Fillings: Don’t hesitate to get creative! Substitute bacon with sautéed mushrooms or add different cheeses to tailor the dish to your preferences.

How to Store and Freeze Savory Cheddar & Bacon Dutch Baby

Fridge: Store leftover Savory Cheddar & Bacon Dutch Baby in an airtight container in the fridge for up to 2 days.

Freezer: Allow it to cool completely, then wrap slices tightly in plastic wrap and aluminum foil before freezing for up to 2 months.

Reheating: For best results, reheat in the oven at 350°F (175°C) for about 10-15 minutes until warmed through and slightly crispy.

Serving Suggestion: Enjoy the reheated Dutch baby as-is or with a drizzle of honey for a delightful twist!

Savory Cheddar & Bacon Dutch Baby Recipe FAQs

What type of flour should I use for the Savory Cheddar & Bacon Dutch Baby?
The recipe calls for all-purpose flour, but if you're looking for a gluten-free option, simply substitute with a gluten-free flour blend. I've had great success with brands that include xanthan gum, which helps mimic the elasticity of gluten.

How should I store leftovers of the Savory Cheddar & Bacon Dutch Baby?
To keep your leftovers fresh, store them in an airtight container in the fridge for up to 2 days. For optimal texture, enjoy them within this timeframe, as they can dry out after that.

Can I freeze the Savory Cheddar & Bacon Dutch Baby?
Absolutely! Once it’s completely cooled, wrap slices tightly in plastic wrap followed by aluminum foil. You can freeze them for up to 2 months. When you're ready to enjoy, just reheat them in the oven at 350°F (175°C) for about 10-15 minutes until warmed through and slightly crispy.

What can I do if my Dutch baby is not puffing up?
If your Dutch baby isn’t puffing as expected, make sure your oven is fully preheated to 425°F (220°C) and avoid opening the oven door during baking, as this releases heat. Additionally, make sure your batter is smooth, and don’t skip the resting time, as it’s crucial for achieving that lovely fluffy texture.

Are there any dietary considerations for pets or allergies with this dish?
Yes, the Savory Cheddar & Bacon Dutch Baby contains eggs, dairy, and bacon, which should be kept away from pets, particularly dogs, as these ingredients can upset their stomachs. If you have allergies, make sure to double-check that all substitutes used are safe for your needs.

How long does it take to prepare and cook the Savory Cheddar & Bacon Dutch Baby?
From start to finish, including prep and baking time, you’re looking at about 35 minutes. It’s a quick and delightful way to start your day!

Savory Cheddar & Bacon Dutch Baby

Savory Cheddar & Bacon Dutch Baby: A Cozy Breakfast Delight

Savory Cheddar & Bacon Dutch Baby is a fluffy breakfast that combines sharp cheddar and crispy bacon for a deliciously indulgent start to your day.
Print Recipe Pin Recipe
Prep Time 10 minutes mins
Cook Time 25 minutes mins
Resting Time 5 minutes mins
Total Time 35 minutes mins
Servings: 4 slices
Course: Breakfast
Cuisine: American
Calories: 250
Ingredients Equipment Method Nutrition Notes

Ingredients
  

For the Batter
  • 3 large Eggs Provide structure and richness; no substitutions recommended for best results.
  • 1 cup All-purpose Flour Creates the body of the Dutch baby; substitute with gluten-free flour blend for a gluten-free option.
  • 1 cup Milk Adds moisture and flavor; any milk variety (dairy or plant-based) can be used.
  • 3 tablespoons Melted Butter Contributes flavor and helps prevent sticking; can replace with oil if needed.
  • 1/2 teaspoon Salt Enhances overall flavor.
  • 1/4 teaspoon Black Pepper Adds a subtle spice; optional if a milder flavor is desired.
For the Filling
  • 1 cup Sharp Cheddar Cheese Provides a savory, tangy flavor; can substitute with gouda, feta, or pepper jack.
  • 6 slices Crispy Bacon Delivers a crunchy texture and savory depth; can replace with sautéed mushrooms or crispy tempeh for a vegetarian option.
For Garnishing
  • 2 tablespoons Fresh Parsley Optional for garnish and added brightness to the dish.
  • 2 tablespoons Chives Optional for garnish and added brightness to the dish.

Equipment

  • cast iron skillet
  • Mixing Bowl
  • Whisk

Method
 

Cooking Steps
  1. Preheat your oven to 425°F (220°C) and place a cast-iron skillet inside to heat for about 10 minutes.
  2. In a mixing bowl, combine the eggs, all-purpose flour, milk, melted butter, salt, and black pepper. Whisk until smooth, then let rest for 5 minutes.
  3. Remove the hot skillet from the oven, add more melted butter, and swirl to coat. Pour the rested batter evenly into the skillet.
  4. Sprinkle the sharp cheddar cheese and crispy bacon on top of the batter.
  5. Bake for 20-25 minutes, watching for the edges to rise and turn golden brown.
  6. Remove from the oven, let cool slightly, and garnish with fresh chopped parsley and chives before serving.

Nutrition

Serving: 1sliceCalories: 250kcalCarbohydrates: 20gProtein: 10gFat: 15gSaturated Fat: 7gPolyunsaturated Fat: 1gMonounsaturated Fat: 3gCholesterol: 125mgSodium: 500mgPotassium: 200mgFiber: 1gSugar: 1gVitamin A: 500IUVitamin C: 2mgCalcium: 200mgIron: 1.5mg

Notes

Ensure to let the batter rest for 5 minutes for a fluffier texture and avoid opening the oven door during baking to prevent deflation.

Tried this recipe?

Let us know how it was!

Savory Breakfast Protein Biscuits for Energizing Mornings

January 26, 2026 by Grace Snow Leave a Comment

As I stood in my kitchen, juggling a busy morning schedule, it hit me—those store-bought breakfast options just weren't cutting it anymore. That’s when I decided to whip up a batch of my High-Protein Breakfast Biscuits, and let me tell you, they changed everything. Packed with gooey cheddar cheese and fresh spinach, these savory goodies deliciously bridge the gap between health and convenience. Perfect for meal prep, they make breakfast a breeze, so you can seize the day without compromising on nutrition. Whether you’re a fitness enthusiast or simply searching for a quick, homemade pantry staple, these biscuits fit the bill in just 37 minutes. Curious about how to elevate your morning routine? Let’s dive in!

Why are Breakfast Protein Biscuits a Game Changer?

Nourishing and Satisfying: Each biscuit is a delightful fusion of flavors, featuring gooey cheddar cheese and nutrient-rich spinach that keep you full and energized.
Quick and Easy: Ready in just 37 minutes, these biscuits are perfect for hectic mornings, proving that homemade doesn't have to mean time-consuming.
Meal Prep Hero: Make a batch ahead of time to enjoy throughout the week. Pair them with your favorite Breakfast Egg Muffins or a fresh side of Greek yogurt to round out your breakfast.
Versatile Ingredients: Customize with different cheeses, greens, or spices to suit your taste. Whether you're a fan of feta or prefer a blend of herbs, the options are endless!
Crowd Pleaser: These savory bites are a hit with everyone, making them ideal for family brunches or shared breakfasts. Ditch the fast food and grab a delicious biscuit instead!

Breakfast Protein Biscuits Ingredients

For the Batter
• Plain 2% Greek Yogurt – Provides moisture and protein; use non-fat or full-fat yogurt as alternatives.
• Large Eggs – Acts as a binding agent and adds richness; room temperature eggs work best for a uniform mix.
• All-Purpose Flour – Gives structure and texture; for gluten-free, substitute with a 1:1 gluten-free all-purpose blend.
• Ground Flaxseed – Adds fiber and omega-3 fatty acids; can be omitted if not available.
• Baking Powder – Leavening agent for lightness; make sure it’s fresh for optimal rise.
• Salt – Enhances flavor; essential for balancing the taste.
• Garlic Powder – Adds savory depth; optional to adjust flavor intensity.
• Red Pepper Flakes – Provides a hint of heat; optional for those preferring milder flavors.

For the Extras
• Spinach – Adds nutrients and moisture; can substitute with other greens, but squeeze out excess water.
• Chives – Contributes onion-like flavor; can replace with green onions for a different kick.
• Cheddar Cheese – Adds creaminess and flavor; reserve half for topping or substitute with other cheeses like mozzarella for variety.

With these Breakfast Protein Biscuits ingredients, you’re on your way to creating a nourishing start to your day!

Step‑by‑Step Instructions for Breakfast Protein Biscuits

Step 1: Preheat the Oven
Start by preheating your oven to 375°F (190°C). Meanwhile, grease a 12-cup muffin tin generously with cooking spray or butter to ensure your Breakfast Protein Biscuits release easily once baked. This step sets the stage for achieving that delightful golden finish.

Step 2: Mix Dry Ingredients
In a large mixing bowl, whisk together 2 cups of all-purpose flour, 1 tablespoon of ground flaxseed, 1 tablespoon of baking powder, 1 teaspoon of salt, 1 teaspoon of garlic powder, and a pinch of red pepper flakes until everything is well combined. You want a uniform mixture to ensure that each biscuit is perfectly seasoned and raises nicely in the oven.

Step 3: Combine Wet Ingredients
In a separate bowl, mix together 1 cup of plain 2% Greek yogurt and 2 large room-temperature eggs until the mixture is smooth and creamy. This blend will provide moisture and protein to your Breakfast Protein Biscuits, contributing to their delightful texture.

Step 4: Fold Wet into Dry Ingredients
Gently fold the creamy wet mixture into the dry ingredients, using a spatula until just combined. Be careful not to overmix, as this can lead to denser biscuits. You want to maintain a light and fluffy texture for the best results.

Step 5: Add Spinach, Chives, and Cheese
Next, stir in about 1 cup of wilted and squeezed spinach, 1/4 cup of chopped chives, and 1 cup of shredded cheddar cheese into the dough, ensuring even distribution. The addition of these ingredients not only boosts nutrition but enhances the flavor of your Breakfast Protein Biscuits.

Step 6: Fill Muffin Tin
Evenly distribute the batter among the muffin cups in your greased tin, filling each about 3/4 full to allow room for rising. Sprinkle the reserved half-cup of cheddar cheese generously on top of each biscuit for a melty, cheesy finish that adds visual appeal.

Step 7: Bake the Biscuits
Slide the muffin tin into your preheated oven and bake for 20–22 minutes. Keep an eye on them—you're looking for a golden-brown top and a toothpick inserted into the center to come out clean. This means your Breakfast Protein Biscuits are perfectly baked and ready to be devoured.

Step 8: Cool and Serve
Once baked, remove the biscuits from the oven and let them cool slightly in the tin for about 5 minutes. Then, transfer them to a wire rack to cool completely, allowing the flavors to settle. These savory Breakfast Protein Biscuits are now ready to enjoy as a delicious, nourishing start to your day!

Make Ahead Options

These Breakfast Protein Biscuits are perfect for meal prep enthusiasts! You can prepare the biscuit dough up to 24 hours in advance, storing it in an airtight container in the refrigerator to keep it fresh. Simply mix all the ingredients, then cover and refrigerate until you're ready to bake. If you'd like to bake them later, you can shape and fill the muffin tin, then cover it tightly with plastic wrap and refrigerate for up to 3 days to retain quality. When you're ready to enjoy, simply bake straight from the fridge for about 5 extra minutes, and you'll have warm, savory biscuits just like fresh from the oven!

Breakfast Protein Biscuits Variations

Feel free to get creative and make these biscuits your own with delightful twists and substitutions.

  • Kale Swap: Replace spinach with finely chopped kale for a robust flavor and extra nutrients. Kale is hearty and will add a lovely texture!
  • Cheese Variants: Try feta or gouda for a completely different flavor experience. Each cheese brings its own personality, adding complexity to your biscuits.
  • Herb Infusion: Add fresh herbs like parsley or dill to create a fragrant and vibrant twist. These herbs will elevate your breakfast with fresh garden goodness!
  • Spicy Kick: Mix in jalapeños or diced chili for an extra kick of heat. This spicy addition will awaken your taste buds and add a delightful surprise!
  • Texture Twist: Fold in some chopped walnuts or almonds for a satisfying crunch. Not only will this add texture, but it also boosts the health factor!
  • Savory Add-Ins: Toss in sun-dried tomatoes or roasted peppers for a Mediterranean flair. Their rich flavors will transport your taste buds while adding a splash of color!
  • Breakfast-Based Sub: Use this biscuit base to create mini breakfast sandwiches with eggs and avocado. A nourishing breakfast that’s still quick and satiating!
  • Sweet Treat: For a sweeter version, swap some cheese for a touch of honey and add cinnamon. Perfect if you’re in the mood for a unique breakfast biscuit!

Don't forget to pair these with a side of your favorite Breakfast Banana Split or a serving of the delightful Cornbread Breakfast Casserole for a breakfast feast!

Tips for the Best Breakfast Protein Biscuits

  • Avoid Overmixing: Gently combine your ingredients to maintain the light and fluffy texture in your Breakfast Protein Biscuits. Overmixing can lead to denser biscuits.

  • Drain Greens Thoroughly: Always squeeze out excess water from spinach (or any greens) before adding to the batter to prevent soggy biscuits that lose their intended texture.

  • Fresh Baking Powder: Ensure your baking powder is fresh for a good rise. An expired baking powder can result in flat, dense biscuits.

  • Room Temperature Eggs: Using room temperature eggs allows for a smoother mix, ensuring your ingredients blend seamlessly for the best final outcome.

  • Customize Wisely: Feel free to experiment with different cheeses or greens, but keep an eye on hydration levels. Baking can be a science, so adjust any added ingredients carefully!

What to Serve with Breakfast Protein Biscuits?

Pair these delightful morsels with a variety of sides that will turn your breakfast into a heartwarming feast.

  • Greek Yogurt Bowl: A creamy side that adds a refreshing balance, topped with honey and fresh berries for a sweet contrast.
  • Sliced Avocado: Creamy avocado provides healthy fats, making it a satisfying accompaniment that brings a vibrant, fresh element to your morning.
  • Scrambled Eggs: Fluffy eggs seasoned with herbs offer protein-packed content to enhance your breakfast while complementing the biscuits' flavors beautifully.
  • Fruit Salad: A colorful mix of seasonal fruits adds a sweet and juicy touch, awakening your taste buds and making each bite a delightful surprise.
  • Roasted Sweet Potatoes: These crunchy, naturally sweet potatoes provide a lovely texture and a hint of earthiness that pairs well with the biscuits’ savory notes.
  • Herb Blended Cream Cheese: Spread this over the biscuits for a rich and tangy kick. It elevates the flavor profile and fans out the deliciousness!
  • Coffee or Herbal Tea: Kickstart your morning with a warm drink. Pair with a smooth latte or a soothing herbal tea to balance the meal beautifully.
  • Baked Beans: The hearty, savory flavor of beans can add an unexpected twist, bringing a comforting warmth to your breakfast spread.

Elevate your mornings and enjoy these hearty Breakfast Protein Biscuits with some delightful complements that will surely energize your day!

Storage Tips for Breakfast Protein Biscuits

Fridge: Store the biscuits in an airtight container for up to 5 days. This keeps them fresh and ready for those busy morning grabs!

Freezer: To freeze, wrap each biscuit individually in plastic wrap or foil, then place them in a freezer-safe bag. They can last up to 2 months this way.

Reheating: For the best texture, reheat frozen biscuits in the microwave for about 30 seconds or place in a toaster oven until warmed through and slightly crispy.

Enjoyability: Remember, these Breakfast Protein Biscuits are tasty right out of the fridge, but a little warmth enhances that cheesy goodness!

Breakfast Protein Biscuits Recipe FAQs

How do I select ripe ingredients for my biscuits?
Absolutely! When choosing spinach, look for vibrant green leaves without dark spots or wilting. For the cheddar cheese, opt for a block of cheese rather than pre-shredded varieties, as it melts better and has fuller flavor. Eggs should be fresh—check the sell-by date on the carton to ensure they’re at their peak.

What’s the best way to store my Breakfast Protein Biscuits?
To keep your biscuits fresh for up to 5 days, store them in an airtight container in the fridge. If you want to prep ahead, divide them into portions and wrap each one in plastic wrap, placing them in a freezer-safe bag. This way, they can remain delicious for up to 2 months!

Can I freeze the Breakfast Protein Biscuits?
Certainly! To freeze, first let the biscuits cool completely. Then, wrap each biscuit tightly in plastic wrap or foil. Place them in a freezer-safe bag, labeling it with the date. When you're ready to enjoy, simply reheat them in the microwave for about 30 seconds or in a toaster oven until warmed through—perfect for busy mornings!

What if my dough is too dry or too wet?
Very often, this can happen due to variations in ingredient sizes or measuring methods. If your batter feels too dry, gradually add a tablespoon of Greek yogurt until you reach the desired consistency. Conversely, if it’s too wet, you can sprinkle in a little more flour gradually, folding it in until the texture feels just right—aim for a chunky but moist dough.

Are these biscuits suitable for people with dietary restrictions?
Absolutely! These Breakfast Protein Biscuits can easily be made gluten-free by substituting with a 1:1 gluten-free flour blend. For dairy-free options, you could use non-dairy yogurt and a dairy-free cheese alternative. Always check the specific ingredients to ensure they meet your dietary needs, especially if allergies are a concern.

Can I customize the spices or ingredients in the recipe?
The more the merrier! Feel free to swap the spices to suit your palate; you can use Italian seasoning or smoked paprika for a different flavor profile. If you want extra nutrition, adding in sun-dried tomatoes or zucchini can enhance both flavor and texture. Tailor this recipe according to your taste preferences!

Breakfast Protein Biscuits

Savory Breakfast Protein Biscuits for Energizing Mornings

These Breakfast Protein Biscuits are a quick, nourishing option perfect for busy mornings, combining gooey cheddar cheese and fresh spinach for a delightful start to your day.
Print Recipe Pin Recipe
Prep Time 15 minutes mins
Cook Time 22 minutes mins
Total Time 37 minutes mins
Servings: 12 biscuits
Course: Breakfast
Cuisine: American
Calories: 160
Ingredients Equipment Method Nutrition Notes

Ingredients
  

For the Batter
  • 1 cup Plain 2% Greek Yogurt Can use non-fat or full-fat as alternatives.
  • 2 large Eggs Room temperature works best.
  • 2 cups All-Purpose Flour For gluten-free, substitute with a 1:1 blend.
  • 1 tablespoon Ground Flaxseed Can be omitted if not available.
  • 1 tablespoon Baking Powder Ensure freshness for optimal rise.
  • 1 teaspoon Salt Essential for balancing flavor.
  • 1 teaspoon Garlic Powder Optional to adjust flavor intensity.
  • 1 teaspoon Red Pepper Flakes Optional for those preferring milder flavors.
For the Extras
  • 1 cup Spinach Squeeze out excess water.
  • 1/4 cup Chives Can replace with green onions.
  • 1 cup Cheddar Cheese Reserve half for topping or substitute with other cheeses.

Equipment

  • Oven
  • Muffin tin
  • Mixing bowls
  • Whisk
  • Spatula

Method
 

Step‑by‑Step Instructions for Breakfast Protein Biscuits
  1. Preheat your oven to 375°F (190°C) and grease a 12-cup muffin tin.
  2. In a large mixing bowl, whisk together flour, flaxseed, baking powder, salt, garlic powder, and red pepper flakes.
  3. In a separate bowl, mix Greek yogurt and eggs until smooth and creamy.
  4. Gently fold the wet mixture into the dry ingredients using a spatula until just combined.
  5. Stir in spinach, chives, and cheddar cheese until evenly distributed.
  6. Evenly distribute the batter among the muffin cups, filling each about 3/4 full and sprinkle with reserved cheddar cheese.
  7. Bake for 20–22 minutes until golden brown and a toothpick comes out clean.
  8. Cool in the tin for 5 minutes before transferring to a wire rack to cool completely.

Nutrition

Serving: 1biscuitCalories: 160kcalCarbohydrates: 23gProtein: 6gFat: 5gSaturated Fat: 3gPolyunsaturated Fat: 0.5gMonounsaturated Fat: 1gCholesterol: 55mgSodium: 300mgPotassium: 120mgFiber: 1gSugar: 1gVitamin A: 200IUVitamin C: 3mgCalcium: 150mgIron: 1mg

Notes

Avoid overmixing to keep biscuits light and fluffy. Drain greens thoroughly and ensure fresh baking powder for best results.

Tried this recipe?

Let us know how it was!

Melt-in-Your-Mouth Hawaiian Roll French Toast Bliss

January 26, 2026 by Grace Snow Leave a Comment

As I flipped through the pages of my favorite brunch cookbook, a golden slice of nostalgia caught my eye. That's when I discovered the magic of Hawaiian Roll French Toast, and my breakfast routine would never be the same. This recipe transforms sweet, soft King's Hawaiian Rolls into a comforting dish that combines the best of French toast with a tropical twist. Picture crispy edges and a fluffy center, making it a crowd-pleaser for lazy weekends or holiday gatherings. Not only is it quick to whip up in just 15 minutes, but it also brings a fun and unique approach to brunch. Are you ready to bring sunshine to your mornings with this delightful dish?

Why is Hawaiian Roll French Toast special?

Simplicity at its finest: With just a handful of ingredients, this recipe transforms the ordinary into the extraordinary using King's Hawaiian Rolls.

Fluffy and Flavorful: Each bite melts in your mouth, combining the soft texture of the rolls with rich custard, cinnamon, and a hint of sweetness.

Quick Preparation: Ready in only 15 minutes, it's perfect for busy mornings or last-minute brunch plans.

Versatile Toppings: Pair with fruits, maple syrup, or even whipped cream for a customized experience.

Crowd-Pleaser: Its delicious appeal is sure to impress family and friends alike, making it the star of any brunch gathering or holiday celebration.

Ready to explore more delightful breakfast options? You might also enjoy these Pumpkin Cinnamon Roll treats for a seasonal twist!

Hawaiian Roll French Toast Ingredients

Explore the sweet simplicity of Hawaiian Roll French Toast with these essential ingredients!

For the Custard

  • Large Eggs (3) – Vital for rich texture, ensure they're at room temperature for better mixing.
  • Half and Half or Whole Milk (3/4 cup) – Offers creaminess for the custard; almond milk works well as a dairy-free substitute.
  • Vanilla Extract (1 tablespoon) – Deepens flavor; opt for pure vanilla for a more aromatic experience.
  • Ground Cinnamon (1 teaspoon) – Adds that warm spice synonymous with traditional French toast.
  • Brown Sugar (2 tablespoons) – Sweetens the mixture while enhancing caramelization; granulated sugar can be used, but may lack depth.

For the Rolls

  • King's Hawaiian Rolls (6) – The foundation of this dish, providing sweet, soft goodness; any soft dinner roll can be substituted if needed.

For Cooking

  • Butter (4 tablespoons) – Essential for frying, it contributes rich flavor; use clarified butter for a higher smoke point.
  • Pinch of Salt – Balances sweetness and elevates overall taste.

For Serving

  • Powdered Sugar – Dust on top just before serving for a delightful sweetness.
  • Fresh Fruit & Maple Syrup – Recommended toppings that add freshness and elegance to your presentation.

Get ready to indulge in the melt-in-your-mouth bliss of Hawaiian Roll French Toast!

Step‑by‑Step Instructions for Heavenly Hawaiian Roll French Toast

Step 1: Prepare the Custard Mixture
In a large mixing bowl, whisk together 3 large eggs and 3/4 cup of half and half until the mixture is smooth and well combined, forming a creamy custard base. Add in 1 tablespoon of vanilla extract, 1 teaspoon of ground cinnamon, 2 tablespoons of brown sugar, and a pinch of salt. Continue whisking until all the ingredients are fully blended, creating a fragrant custard ready for soaking the rolls.

Step 2: Prepare the Rolls
Take 6 King's Hawaiian Rolls and poke holes in the bottoms using a toothpick. This allows the delicious custard to penetrate into the rolls, ensuring each bite of your Hawaiian Roll French Toast is flavorful. Set the rolls aside on a cutting board or clean surface while you prepare to dip them into the custard, letting the anticipation build for this delightful breakfast treat.

Step 3: Soak the Rolls
Working in batches, gently dip each Hawaiian Roll into the custard mixture, allowing about 30 seconds for each roll to soak. Ensure you coat all sides of the roll but avoid over-soaking to prevent sogginess. As you soak, you’ll notice the custard starting to saturate the rolls, making them plump and ready for cooking—the secret to creating that melt-in-your-mouth texture.

Step 4: Heat the Skillet
In a large skillet, melt 2 tablespoons of butter over medium-low heat. Allow the butter to fully melt and begin to sizzle gently, coating the pan well to prevent the rolls from sticking. The right temperature is crucial here, as it ensures that your Hawaiian Roll French Toast develops a golden-brown color while cooking evenly without burning.

Step 5: Cook the Rolls
Carefully place the soaked Hawaiian Rolls in the melted buttered skillet and cook for 30 to 60 seconds on each side. You’ll know they are ready to flip when they achieve a lovely golden-brown color and feel crisp to the touch. Turn each roll to achieve an even crust, using a spatula to gently turn them over while savoring the delightful aroma filling your kitchen.

Step 6: Serve and Delight
Once the rolls are beautifully golden brown, remove them from the skillet and plate them warm. Dust with powdered sugar for a touch of sweetness and serve with fresh berries and maple syrup for added delight. Each bite of your Heavenly Hawaiian Roll French Toast promises a burst of flavor and the comfort of home-cooked bliss.

Expert Tips for Hawaiian Roll French Toast

  • Soak Smartly: Avoid sogginess by soaking Hawaiian Rolls just long enough to absorb the custard without falling apart. About 30 seconds is ideal!

  • Non-Stick for Success: Use a non-stick skillet for easy cooking and clean-up. This prevents sticking and helps achieve that perfect golden-brown crust.

  • Temperature Matters: Cook on medium-low heat for even cooking. Too high, and you risk burning the outside before the inside is fully set.

  • Serve Fresh: For the best texture, serve your Hawaiian Roll French Toast right after cooking. Reheating can alter its delightful melt-in-your-mouth quality.

  • Customizing Comfort: Feel free to add your favorite toppings like whipped cream or berries for an extra special twist!

Hawaiian Roll French Toast Variations

Feel free to sprinkle your own magic on this delightful dish with these customization ideas!

  • Dairy-Free: Substitute half and half with almond or coconut milk for a lactose-free twist. This gives a nutty flavor that surprises your taste buds!

  • Richer Custard: Add 2 tablespoons of cream cheese to the custard mixture for a delightfully creamy consistency that elevates the breakfast experience.

  • Tropical Delight: Toss in some crushed pineapple or coconut flakes to the custard mix to enhance that Hawaiian vibe. It’ll create a lush, sweet backdrop that transports you to paradise!

  • Chocolate Lovers: Mix in a handful of chocolate chips into the custard or sprinkle them on top while cooking. The melty chocolate creates a heavenly, indulgent version of your French toast.

  • Nutty Crunch: Add a handful of chopped nuts, like walnuts or pecans, to the mixture or sprinkle as a topping. This will provide a delightful crunch that complements the soft texture of the rolls.

  • Cinnamon Roll Twist: Drizzle a simple icing made of powdered sugar and milk over the top for a cinnamon roll-inspired flair. This brings an extra sweetness that pancake lovers will adore.

  • Spicy Kick: Sprinkle a pinch of cayenne pepper or chili powder into the custard for those who love their breakfast with a little heat. It adds an exciting layer to the overall flavor.

  • Fruit Fusions: Enhance with various fresh fruits, like strawberries, bananas, or blueberries, either in the custard or as toppings. They’ll create a burst of freshness that perfectly balances the richness of the dish.

Looking for additional breakfast ideas? You may also want to try the delightful Pumpkin Cinnamon Roll for a cozy alternative!

Storage Tips for Hawaiian Roll French Toast

Fridge: Store leftover Hawaiian Roll French Toast in an airtight container for up to 2 days. Make sure to let it cool completely before sealing to avoid excess moisture.

Freezer: For longer storage, freeze individual pieces on a baking sheet until solid, then transfer them to a freezer-safe bag for up to 1 month. This helps maintain their texture.

Reheating: Reheat thawed Hawaiian Roll French Toast in a preheated oven at 350°F (175°C) for 10-15 minutes, or until heated through. You can also use an air fryer for 5-7 minutes, bringing back that crispy texture.

Tip: For best results, enjoy your Hawaiian Roll French Toast fresh. But with these simple storage and reheating tips, leftovers can still offer a delightful treat!

Make Ahead Options

These Heavenly Hawaiian Roll French Toast are perfect for meal prep enthusiasts looking to save time on busy mornings! You can prepare the custard mixture (eggs, half and half, vanilla, cinnamon, brown sugar, and salt) up to 24 hours in advance and refrigerate it in a sealed container. Additionally, you can poke holes in the bottoms of the Hawaiian Rolls the day before, which allows for maximum custard absorption. When you’re ready to indulge, simply dip the rolls in the custard mixture, cook in a skillet as instructed, and serve warm. This method ensures every bite remains just as delicious and fluffy!

What to Serve with Hawaiian Roll French Toast

Elevate your brunch experience with these delicious pairings that will complement the sweet, fluffy goodness of your Hawaiian Roll French Toast.

  • Crispy Bacon: The savory and salty crunch of crispy bacon balances the sweetness of the French toast, creating a delightful contrast in every bite. It's the classic pairing that never disappoints!

  • Fresh Berries: Bright and juicy berries like strawberries and blueberries add a refreshing pop of color and flavor, enhancing the dish's visual appeal and natural sweetness. Top your toast with these for a vibrant finish.

  • Maple Syrup: The rich, golden sweetness of pure maple syrup melts into every nook and cranny of the French toast, adding a luscious layer of flavor. It's a must-have drizzle for that quintessential breakfast experience.

  • Whipped Cream: Light and airy whipped cream takes this breakfast treat to dessert-like levels. A dollop adds creaminess that beautifully contrasts the warm, crispy exterior of the rolls.

  • Coconut Flavored Yogurt: For a refreshing and creamy element, serve with coconut-flavored yogurt. Its tropical vibes echo the Hawaiian roots of the dish while providing a tangy balance.

  • Coffee or Latte: A warm cup of coffee or a frothy latte will perfectly accompany your breakfast. The bitter notes of coffee complement the sweetness, making each sip a pleasure.

  • Chocolate Sauce: For a decadent twist, drizzle chocolate sauce over your French toast. This indulgent pairing transforms your meal into a dessert-like experience.

  • Fruit Salad: A side of mixed fruit salad provides a refreshing, bright note to the plate. The natural sweetness of various fruits complements the overall meal beautifully.

  • Pineapple Juice: Capture the essence of a tropical morning with a glass of pineapple juice. Its tangy sweetness pairs wonderfully, and it serves as a refreshing beverage alongside your breakfast.

Hawaiian Roll French Toast Recipe FAQs

How ripe should my King's Hawaiian Rolls be for this recipe?
Absolutely, the fresher the King's Hawaiian Rolls, the better! Look for rolls that are soft and pillowy, ideally without any dark spots or mold. If you can squeeze them gently without losing their shape, they’re perfect for this melting delight!

What’s the best way to store leftover Hawaiian Roll French Toast?
Very! Store any leftover Hawaiian Roll French Toast in an airtight container in the refrigerator for up to 2 days. Be sure to let them cool completely before sealing them away to avoid any moisture buildup that might make them soggy.

Can I freeze Hawaiian Roll French Toast?
Absolutely! To freeze, first let your Hawaiian Roll French Toast cool completely. Then, place individual slices on a baking sheet in a single layer and freeze until solid, about an hour. After they are frozen, transfer the slices to a freezer-safe bag or container and they’ll keep for up to 3 months. Just remember to label your bag with the date!

What should I do if my French toast ends up soggy?
If your Hawaiian Roll French Toast is soggy, it might be due to soaking them for too long or not cooking at the right temperature. Next time, ensure to soak each roll for just about 30 seconds and cook them on medium-low heat. This will help create that crispy exterior while keeping the inside fluffy and delicious.

Are there any dietary considerations for this Hawaiian Roll French Toast?
Definitely! If you're catering to allergies, consider using almond milk instead of half-and-half or whole milk for a dairy-free alternative. Check the ingredient list on the Hawaiian Rolls for potential allergens like gluten or specific preservatives. If you’re making it for pets, it’s best to avoid feeding them any human foods, especially those with added sugars or spices.

Can I substitute any ingredients in this recipe?
Yes, feel free to get creative! If you’re out of half-and-half, regular milk or almond milk will work just fine as a substitute. For added flavor, you might also consider infusing some coconut milk into your custard mix for a tropical flair. And if you want something sweeter, throw in some chocolate chips or top it with caramel sauce instead of syrup. The more the merrier when it comes to making this Hawaiian Roll French Toast your own!

Hawaiian Roll French Toast

Melt-in-Your-Mouth Hawaiian Roll French Toast Bliss

Discover the delightful Hawaiian Roll French Toast, a quick breakfast recipe combining soft rolls and rich custard for a truly tropical experience.
Print Recipe Pin Recipe
Prep Time 15 minutes mins
Cook Time 10 minutes mins
Total Time 25 minutes mins
Servings: 6 slices
Course: Breakfast
Cuisine: Hawaiian
Calories: 320
Ingredients Equipment Method Nutrition Notes

Ingredients
  

For the Custard
  • 3 large Eggs Ensure they're at room temperature for better mixing.
  • 3/4 cup Half and Half or Whole Milk Almond milk works as a dairy-free substitute.
  • 1 tablespoon Vanilla Extract Opt for pure vanilla for a more aromatic experience.
  • 1 teaspoon Ground Cinnamon Adds warm spice.
  • 2 tablespoons Brown Sugar Granulated sugar can be used, but may lack depth.
For the Rolls
  • 6 pieces King's Hawaiian Rolls Providing sweet, soft goodness.
For Cooking
  • 4 tablespoons Butter Use clarified butter for a higher smoke point.
  • 1 pinch Salt Balances sweetness.
For Serving
  • Powdered Sugar Dust on top before serving.
  • Fresh Fruit & Maple Syrup Recommended toppings.

Equipment

  • large mixing bowl
  • Skillet
  • Spatula

Method
 

Step-by-Step Instructions
  1. In a large mixing bowl, whisk together eggs and half and half until smooth, then add vanilla extract, cinnamon, brown sugar, and a pinch of salt.
  2. Poke holes in the bottoms of the Hawaiian Rolls to allow custard to penetrate.
  3. Gently dip each Hawaiian Roll into the custard mixture for about 30 seconds, ensuring all sides are coated.
  4. Melt butter in a skillet over medium-low heat.
  5. Cook soaked Hawaiian Rolls in the skillet for 30 to 60 seconds on each side until golden brown.
  6. Plate the rolls warm, dust with powdered sugar, and serve with fresh berries and maple syrup.

Nutrition

Serving: 1sliceCalories: 320kcalCarbohydrates: 35gProtein: 6gFat: 18gSaturated Fat: 10gCholesterol: 150mgSodium: 300mgPotassium: 200mgFiber: 1gSugar: 10gVitamin A: 500IUCalcium: 150mgIron: 1mg

Notes

For best results, serve fresh just after cooking to retain the melt-in-your-mouth quality.

Tried this recipe?

Let us know how it was!

Cinnamon Sweet Potato Breakfast Cookies That'll Brighten Mornings

January 16, 2026 by Grace Snow Leave a Comment

The moment I inhaled the warm, spicy aroma wafting from the oven, I knew I had stumbled upon something special—Cinnamon Sweet Potato Breakfast Cookies. These delightful treats aren’t just a tasty morning pick-me-up; they are a heavenly blend of wholesome ingredients that cater to both your cravings and dietary needs. Made with creamy sweet potato and hearty oats, these cookies are naturally sweetened with maple syrup or honey, making them gluten-free and refined sugar-free. What's more, they’re incredibly quick to whip up and perfect for busy mornings, afternoon snacking, or even satisfying those late-night cravings. Trust me, you’ll want to keep this recipe close at hand! Ready to indulge in some chewy goodness? Let’s dive in!

Why Are These Cookies a Must-Try?

Unmatched Nutrition: Packed with wholesome ingredients, these cookies are not just delicious but also gluten-free and refined sugar-free, making them a guilt-free treat.

Quick and Easy: In just a few simple steps, you can enjoy these soft, chewy cookies in no time, perfect for those busy mornings or snack attacks.

Customizable Delights: Whether you prefer raisins, nuts, or even chocolate chips, this recipe easily accommodates your favorite mix-ins for a personalized touch.

A Family Favorite: These cookies are bound to please everyone—from picky eaters to health enthusiasts—ensuring smiles all around at breakfast or snack time!

So, if you're looking for a wholesome breakfast option that showcases the delightful flavors of sweet potato, you might also want to check out my recipe for Smoky Sweet Potatoes for more inspiration!

Cinnamon Sweet Potato Breakfast Cookies Ingredients

For the Cookies

  • Mashed Sweet Potato – About 1 medium sweet potato, cooked and mashed; this adds moisture and natural sweetness.
  • Rolled Oats – Stick to rolled oats for optimal texture; do not use steel-cut oats for the best chewiness.
  • Almond Flour – Gluten-free option that contributes to the cookie's texture; substitute regular flour if necessary.
  • Cinnamon – Adds a warm, spicy flavor; feel free to adjust the amount to suit your taste.
  • Nutmeg – Complements the cinnamon for that cozy flavor.
  • Baking Soda – Aids in the cookie's slight rise.
  • Salt – Enhances the overall flavor of the cookies.
  • Maple Syrup or Honey – Natural sweeteners; choose one based on your preference for sweetness.
  • Egg – Binds all the ingredients together; a flax egg works as a vegan substitute (1 tbsp flaxseed + 3 tbsp water).
  • Melted Coconut Oil or Butter – Adds moisture and enhances flavor; choose based on dietary needs.
  • Vanilla Extract – Gives a lovely aroma and extra sweetness to the cookies.

Optional Mix-Ins

  • Chopped Pecans or Walnuts – Adds a delightful crunch and nuttiness.
  • Raisins or Dried Cranberries – Bursts of sweetness in every bite.

These Cinnamon Sweet Potato Breakfast Cookies are not only delicious but also cater to your healthy lifestyle. Now, let's get baking!

Step‑by‑Step Instructions for Cinnamon Sweet Potato Breakfast Cookies

Step 1: Preheat the Oven
Begin by preheating your oven to 350°F (175°C). While the oven warms up, take a moment to line a large baking sheet with parchment paper. This will prevent the cookies from sticking and ensure they bake evenly.

Step 2: Mix Wet Ingredients
In a large mixing bowl, combine the mashed sweet potato, egg, maple syrup or honey, melted coconut oil, and vanilla extract. Use a whisk or fork to blend these ingredients until smooth and fully incorporated, creating a creamy base for your Cinnamon Sweet Potato Breakfast Cookies.

Step 3: Combine Dry Ingredients
Next, sprinkle in the rolled oats, almond flour, cinnamon, nutmeg, baking soda, and salt. Gently mix the dry ingredients into the wet ones until just combined, avoiding overmixing. The dough should be cohesive, with the oats and flour evenly distributed throughout.

Step 4: Add Optional Mix-Ins
If you’re feeling adventurous, now is the time to fold in any optional mix-ins like chopped pecans, walnuts, or dried fruits such as raisins or cranberries. These additions will bring extra texture and flavor to your Cinnamon Sweet Potato Breakfast Cookies, making them even more delightful.

Step 5: Scoop the Dough
Using a tablespoon or a cookie scoop, portion out about 2 tablespoons of dough for each cookie. Carefully place them onto the prepared baking sheet, leaving space between each one. Gently flatten the dough balls slightly to help them spread as they bake.

Step 6: Bake the Cookies
Place the baking sheet in the preheated oven and bake the cookies for 12–15 minutes. Keep an eye on them; they should be set and light golden underneath when done. The sweet, warm aroma will fill your kitchen as they bake—an inviting sign of deliciousness to come.

Step 7: Cool the Cookies
Once baked, remove the cookies from the oven and allow them to cool on the baking sheet for about 5 minutes. Then, transfer them to a wire rack to cool completely. This step is crucial as the cookies will firm up as they cool, ensuring the perfect chewy texture of your Cinnamon Sweet Potato Breakfast Cookies.

What to Serve with Cinnamon Sweet Potato Breakfast Cookies

Indulging in these warm, spiced cookies opens a world of delightful pairings that elevate your breakfast or snack experience.

  • Creamy Yogurt: A dollop of Greek yogurt adds a tangy creaminess that balances the sweetness of the cookies.
  • Fresh Fruit Salad: Juicy berries or sliced bananas provide freshness and brighten up the meal, complementing the spices beautifully.
  • Hot Coffee or Tea: The rich flavors of coffee or a warm herbal tea create a cozy atmosphere, perfect for savoring each bite.
  • Nut Butter Spread: A smear of almond or peanut butter enhances the cookie's chewiness with a delightful nutty flavor.
  • Oatmeal Bowl: Pairing cookies with a warm bowl of oatmeal makes for a comforting breakfast that's full of wholesome goodness.
  • Dark Chocolate Drizzle: For an indulgent twist, a light drizzle of dark chocolate provides a rich contrast to the sweet potato cookies.
  • Cottage Cheese: This protein-packed addition offers a creamy texture that enriches the experience while keeping it healthy.
  • Milk Alternatives: Try pairing with almond or oat milk for a satisfying balance that enhances the nutty notes in the cookies.
  • Honey or Maple Syrup Dip: A drizzle on the side creates a lovely extra touch, adding sweetness to each bite as you enjoy your treat.

Expert Tips for Cinnamon Sweet Potato Breakfast Cookies

• Choose Fresh Potatoes: Use fresh, cooked sweet potatoes for the best texture and sweetness. Canned options can be too watery.

• Measure Accurately: Measuring almond flour and oats precisely is key; too much can lead to dry cookies, while too little may alter the consistency.

• Cooling Time: Allow the cookies to cool completely on a wire rack. They will continue to firm up as they cool, achieving that desirable chewy texture.

• Custom Mix-Ins: Don’t hesitate to experiment with mix-ins! However, avoid adding too many extras or they may overwhelm the base flavor of the Cinnamon Sweet Potato Breakfast Cookies.

• Storage Tips: Keep cookies stored in an airtight container for up to one week. For longer storage, freeze them and thaw as needed without compromising on quality.

How to Store and Freeze Cinnamon Sweet Potato Breakfast Cookies

Room Temperature: Store cookies in an airtight container at room temperature for up to 3 days to maintain their soft, chewy texture.

Fridge: If you want them to last longer, refrigerate the cookies in an airtight container for up to a week, keeping them fresh and delicious.

Freezer: For extended storage, freeze the cookies in a single layer on a baking sheet, then transfer them to a freezer bag for up to 3 months; thaw at room temperature when ready to enjoy.

Reheating: To warm, microwave the cookies for about 10-15 seconds for a cozy, gooey treat. Enjoy your Cinnamon Sweet Potato Breakfast Cookies anytime!

Cinnamon Sweet Potato Breakfast Cookies Variations

Feel free to mix and match to create your perfect cookie experience!

  • Dairy-Free: Swap melted butter for coconut oil to keep the recipe vegan-friendly while adding a hint of tropical flavor.

  • Nut-Free: Use a seed butter, like sunflower seed butter, in place of almond flour or nuts if you're nut-sensitive; it gives a unique, creamy texture.

  • Chocolate Lovers: Fold in dark chocolate chips instead of dried fruits for a sweet, indulgent twist that’s sure to delight.

  • Extra Fiber: Add chia seeds or flax seeds to the dough; both options boost nutrition and add a pleasant crunch.

  • Flavor Adventure: Experiment with spices like cardamom or ginger for a taste boost; these spices complement sweet potato beautifully, offering an exciting new angle on the classic cookie flavor.

  • Fruitful Additions: Substitute the optional raisins with chunks of dried apricots or figs; they'll bring a burst of fruity sweetness that'll keep your taste buds dancing.

  • Pumpkin Twist: Can't find sweet potatoes? Use canned pumpkin puree instead; it provides a deliciously similar texture with a slightly different yet delightful flavor profile.

These variations not only keep the fun in baking alive but also help cater to dietary needs. If you’re also looking for more ways to use sweet potatoes, check out my recipe for Roasted Sweet Potatoes—delicious and versatile!

Make Ahead Options

These Cinnamon Sweet Potato Breakfast Cookies are perfect for meal prep enthusiasts looking to save time! You can prepare the cookie dough up to 24 hours in advance; simply mix all the ingredients except for the optional mix-ins, cover the bowl, and refrigerate. This helps maintain the cookies' freshness and flavors. When you're ready to bake, fold in any mix-ins, scoop the dough onto a baking sheet, and bake as directed. For longer storage, you can also freeze the formed cookies for up to 3 months; just pull them out and bake straight from the freezer, adding an extra minute or two to the baking time. Enjoy the convenience of having delicious, homemade cookies ready with minimal effort!

Cinnamon Sweet Potato Breakfast Cookies Recipe FAQs

What kind of sweet potatoes should I use for the cookies?
Absolutely! I recommend using fresh, cooked sweet potatoes for the best flavor and moisture. One medium sweet potato, baked or steamed until soft, should do the trick. Avoid using canned versions as they can be too watery.

How do I store Cinnamon Sweet Potato Breakfast Cookies?
You can store these delicious cookies in an airtight container at room temperature for up to 3 days to keep them soft and chewy. If you want to preserve them longer, refrigerate them for up to a week.

Can I freeze the cookies for later?
Yes! To freeze your Cinnamon Sweet Potato Breakfast Cookies, first place them in a single layer on a baking sheet until they're solid. Then, transfer them to a freezer-safe bag or container and store them for up to 3 months. To thaw, simply let them sit at room temperature or warm them briefly in the microwave for that fresh-baked goodness!

What if my cookies spread too much while baking?
Very! If your cookies spread excessively, it could be due to using too much liquid or not enough flour. Make sure to measure your ingredients accurately, and if you find your dough to be too runny, adding a couple of tablespoons of almond flour can help thicken it up. Always let the dough chill in the fridge for about 30 minutes before baking if you’re having trouble!

Are these cookies safe for people with nut allergies?
Definitely! If you need a nut-free option, you can substitute the almond flour with an equal amount of oat flour or another gluten-free flour blend. Just double-check that your other ingredients, like oats and any mix-ins, are also nut-free to ensure safety for those sensitive to nuts.

Can I substitute the egg in the recipe?
Yes! For a vegan option, you can make a flax egg by mixing 1 tablespoon of flaxseed meal with 3 tablespoons of water. Let it sit for about 5 minutes until it thickens before adding it to your cookie mixture. This works wonderfully to bind the ingredients together just like an egg would!

Cinnamon Sweet Potato Breakfast Cookies

Cinnamon Sweet Potato Breakfast Cookies That'll Brighten Mornings

Indulge in these Cinnamon Sweet Potato Breakfast Cookies, a wholesome and delicious pick-me-up for your mornings.
Print Recipe Pin Recipe
Prep Time 10 minutes mins
Cook Time 15 minutes mins
Cooling Time 5 minutes mins
Total Time 30 minutes mins
Servings: 12 cookies
Course: Breakfast
Cuisine: American
Calories: 120
Ingredients Equipment Method Nutrition Notes

Ingredients
  

For the Cookies
  • 1 medium sweet potato, cooked and mashed adds moisture and natural sweetness
  • 2 cups rolled oats do not use steel-cut oats
  • 1 cup almond flour gluten-free option
  • 1 teaspoon cinnamon adjust to taste
  • 1 teaspoon nutmeg complements cinnamon
  • 1 teaspoon baking soda aids in slight rise
  • 1/2 teaspoon salt enhances flavor
  • 1/3 cup maple syrup or honey natural sweeteners
  • 1 large egg binds ingredients together
  • 1/4 cup melted coconut oil or butter adds moisture and flavor
  • 1 teaspoon vanilla extract adds aroma
Optional Mix-Ins
  • 1/2 cup chopped pecans or walnuts adds crunch and nuttiness
  • 1/2 cup raisins or dried cranberries bursts of sweetness

Equipment

  • Oven
  • Baking Sheet
  • Mixing Bowl
  • Whisk
  • Spatula

Method
 

Step‑by‑Step Instructions
  1. Preheat your oven to 350°F (175°C) and line a baking sheet with parchment paper.
  2. In a mixing bowl, combine the mashed sweet potato, egg, maple syrup or honey, melted coconut oil, and vanilla extract until smooth.
  3. Add the rolled oats, almond flour, cinnamon, nutmeg, baking soda, and salt, mixing gently until just combined.
  4. Fold in any optional mix-ins like chopped pecans, walnuts, or dried fruits.
  5. Scoop about 2 tablespoons of dough for each cookie onto the prepared baking sheet, leaving space between them.
  6. Bake for 12–15 minutes until light golden underneath. Let cool for 5 minutes, then transfer to a wire rack to cool completely.

Nutrition

Serving: 1cookieCalories: 120kcalCarbohydrates: 18gProtein: 2gFat: 5gSaturated Fat: 3gPolyunsaturated Fat: 0.5gMonounsaturated Fat: 1.5gCholesterol: 20mgSodium: 90mgPotassium: 140mgFiber: 2gSugar: 5gVitamin A: 2000IUVitamin C: 5mgCalcium: 40mgIron: 1mg

Notes

These cookies can be customized with your favorite mix-ins and stored in an airtight container for freshness.

Tried this recipe?

Let us know how it was!

Seedy Quinoa Breakfast Cookies for a Nutritious Morning Boost

January 16, 2026 by Grace Snow Leave a Comment

As I was sorting through my pantry, I stumbled upon a forgotten bag of quinoa and a rainbow of seeds that sparked an idea. This moment led me to create these delightful Seedy Quinoa Breakfast Cookies, perfect for those hectic mornings when you crave something nutritious but need it quick. Not only are they vegan and gluten-free, but they’re also packed with powerful nutrition—each cookie contains a satisfying 5 grams of protein! These cookies make meal prep a breeze and satisfy both your sweet tooth and hunger, allowing you to start your day with a wholesome boost. Curious about how these goodies come together? Let’s dive into the recipe!

Why Choose Seedy Quinoa Breakfast Cookies?

Wholesome Ingredients: Packed with quinoa and nutritious seeds, these cookies offer a healthful start to your day.

Easy Meal Prep: Whip up a batch ahead of time, making busy mornings stress-free and delicious.

Vegan & Gluten-Free: Perfect for diverse dietary needs, they cater to everyone at the table.

Satisfying Crunch: Each bite delivers a delightful texture, reminiscent of your favorite granola clusters.

Naturally Sweetened: With a hint of maple syrup, you'll enjoy a touch of sweetness without the guilt.

Perfect for those on-the-go moments or as an addition to lunchboxes, these cookies are sure to win hearts. If you love easy-to-make snacks, you might also enjoy my Breakfast Egg Muffins for a savory twist!

Seedy Quinoa Breakfast Cookies Ingredients

• Looking to whip up some delightful cookies? Here’s what you’ll need!

For the Cookie Base

  • Cooked Quinoa – Provides structure and nutrition; use leftover cooked quinoa or prepare from dry.
  • Rolled Oats – Adds bulk and texture; ensure gluten-free if needed.
  • Raw Pumpkin Seeds – Contributes crunch and healthy fats; use unsalted for optimal flavor.
  • Hemp Seeds – Adds protein and omega-3 fatty acids; can substitute with more chia seeds if unavailable.
  • Chia Seeds – Functions as a binding agent and source of fiber; substitute flax seeds if preferred.

For the Wet Ingredients

  • Tahini – Serves as a creamy base and healthy fat; can use almond or sunflower seed butter as a substitute.
  • Maple Syrup – Provides natural sweetness; honey can be used in non-vegan versions.

For Flavor & Texture

  • Baking Soda – Helps the cookies rise and achieve a light texture.
  • Sea Salt – Enhances flavor; use coarse or fine based on preference.
  • Semisweet Chocolate Chips – Optional sweetness and flavor; ensure dairy-free if needed.

Get ready to enjoy these Seedy Quinoa Breakfast Cookies that not only taste fantastic but also provide a nutritious boost for your mornings!

Step‑by‑Step Instructions for Seedy Quinoa Breakfast Cookies

Step 1: Prepare Quinoa
If you don’t have leftover cooked quinoa, start by rinsing 1/3 cup of dry quinoa under cold water. Cook it in a saucepan with 2/3 cup of water over medium heat for about 15 minutes, or until the water is absorbed and the quinoa is fluffy. Allow it to cool completely, as this will help your Seedy Quinoa Breakfast Cookies hold together better.

Step 2: Preheat Oven
Preheat your oven to 350°F (176°C). While it warms up, line a baking sheet with parchment paper to prevent your cookies from sticking. This step is crucial, as a properly preheated oven ensures that your cookies bake evenly, resulting in a deliciously chewy texture.

Step 3: Mix Dry Ingredients
In a medium mixing bowl, combine the cooled quinoa, 1 cup of rolled oats, 1/3 cup of pumpkin seeds, 1/4 cup of hemp seeds, 2 tablespoons of chia seeds, 1/2 teaspoon of baking soda, and 1/4 teaspoon of sea salt. Stir well to evenly distribute the dry ingredients, creating a solid foundation for your Seedy Quinoa Breakfast Cookies.

Step 4: Incorporate Wet Ingredients
Add 1/4 cup of tahini and 1/4 cup of maple syrup to the dry mixture. Stir until everything is well combined, forming a thick cookie dough. This blend of flavors will provide the perfect sweetness and creaminess to your cookies. Make sure to scrape the sides of the bowl to capture all ingredients.

Step 5: Shape Cookies
Using a cookie scoop or your hands, portion out about 1.5 tablespoons of dough and place it on the prepared baking sheet. Gently press each cookie to flatten them slightly, creating an even surface for baking. You should have about 12 cookies, allowing space between them to expand while baking.

Step 6: Bake
Place the baking sheet in the oven and bake the Seedy Quinoa Breakfast Cookies for 14-18 minutes, until the edges turn a golden brown. Keep an eye on them towards the end for optimal doneness—golden edges mean the cookies are ready.

Step 7: Cool and Transfer
Once baked, remove the cookies from the oven and let them cool on the baking sheet for 5-10 minutes. This cooling period allows them to firm up. After that, gently transfer them to a wire rack to cool completely, ensuring a delightful chewy texture in every bite.

What to Serve with Seedy Quinoa Breakfast Cookies

Elevate your mornings with delightful pairings that complement these nutritious cookies, enriching your breakfast experience.

  • Fresh Fruit Salad: A medley of vibrant fruits adds a refreshing contrast, bringing juicy sweetness to every bite.

  • Creamy Almond Butter: Spread a layer of almond butter on these cookies for added protein and a rich, nutty flavor.

  • Smoothie Bowl: Serve alongside a creamy smoothie bowl topped with granola for a well-rounded meal that fuels your day.

The crunch of granola paired with a smoothie’s creaminess is a match made in breakfast heaven, ensuring you’re fully satisfied.

  • Herbal Tea: A warm cup of chamomile or mint tea provides a soothing complement, enhancing your relaxing morning.

  • Yogurt Parfait: Layer yogurt with fruit and a sprinkle of seeds for a decadent yet healthy treat.

This parfait not only boosts protein but offers a beautiful presentation that’s perfect for brunch.

  • Coconut Milk Latte: The rich, creamy texture of a latte made with coconut milk pairs perfectly with the subtle sweetness of the cookies.

  • Dark Chocolate: For a decadent treat, enjoy a piece of dark chocolate on the side for a delightful indulgence.

Each of these options will add a special touch, making your Seedy Quinoa Breakfast Cookies the star of the meal.

Storage Tips for Seedy Quinoa Breakfast Cookies

Room Temperature: Store cookies in an airtight container at room temperature for up to 2-3 days to maintain their chewy texture.

Fridge: If you prefer a cooler treat, refrigerate the cookies for up to 4-5 days; this can also enhance their flavor profile.

Freezer: For longer storage, freeze your Seedy Quinoa Breakfast Cookies by placing them in a freezer-safe bag or container for up to 1 month.

Reheating: Enjoy your cookies warm by microwaving them for about 10-15 seconds, bringing back that fresh-baked taste!

Expert Tips for Seedy Quinoa Breakfast Cookies

Dough Consistency: Keep dough moist: If the mixture feels too dry or crumbly, add a touch more tahini or maple syrup to achieve a better consistency.

Cooling Time: Be patient: Allow the cookies to cool completely before handling. This step helps them firm up and enhances their chewy goodness.

Portion Control: Uniform Size: Using a cookie scoop ensures evenly sized cookies, which bake consistently and maintain the perfect texture in your Seedy Quinoa Breakfast Cookies.

Flavor Boost: Experiment with add-ins: Feel free to mix in chocolate chips, dried fruit, or nuts for extra flavor and nutrition without compromising the healthy base.

Storage Tips: Keep them fresh: Store your cookies in an airtight container. They last up to 2-3 days at room temperature and even longer if refrigerated.

Variations & Substitutions for Seedy Quinoa Breakfast Cookies

Feel encouraged to play with these flavors—it’s all about creating your perfect cookie experience!

  • Sweetener Swap: Use agave syrup or date syrup in place of maple syrup for a different sweetness.

  • Seed Substitution: Replace pumpkin seeds with sunflower seeds for a nutty twist; it will still deliver that delightful crunch!

  • Add-ins: Mix in dried fruits such as raisins or cranberries to introduce bursts of flavor—your family will adore the juicy bites nestled within!

  • Chocolate Delight: Feel free to add dark chocolate chips or cacao nibs for a rich chocolatey experience; it’s a delicious way to indulge your sweet tooth while keeping things wholesome.

  • Nut Butters: Swap tahini for almond butter or peanut butter to cater to your taste buds—you’ll introduce a lovely creaminess and distinct flavor!

  • Protein Boost: For an extra protein punch, consider adding a scoop of your favorite plant-based protein powder to the mix; it’s an easy way to enhance your morning nutrition.

  • Spicy Kick: If you’re feeling adventurous, add a pinch of cinnamon or a dash of cayenne pepper for a surprising burst of warmth!

  • Flavorful Oats: Try using flavored rolled oats, like apple-cinnamon or maple, to infuse your cookies with a hint of spice and sweetness!

Creating your own variations can truly elevate your baking experience. While you're at it, why not check out my Quinoa Tabbouleh Vibrant for another delightful way to enjoy quinoa?

Make Ahead Options

These Seedy Quinoa Breakfast Cookies are a fantastic choice for meal prep, saving you precious time during busy mornings! You can prepare the cookie dough up to 24 hours in advance; simply mix all the ingredients together, scoop, and store the formed dough balls in an airtight container in the refrigerator. This prevents any browning and ensures the cookies retain their delightful texture. When you're ready to bake, just preheat your oven and place the cookies directly onto the baking sheet—no need to thaw! Enjoy the convenience of having a nutritious grab-and-go breakfast option without the last-minute rush.

Seedy Quinoa Breakfast Cookies Recipe FAQs

What is the best way to select ripe quinoa?
Absolutely! For cooking quinoa, you'll want to look for dry, unprocessed quinoa seeds. Ensure they’re free from any dark spots or signs of moisture. Store your quinoa in a cool, dry place to maintain its freshness!

How should I store my Seedy Quinoa Breakfast Cookies?
To keep those flavors intact, store your cookies in an airtight container at room temperature for up to 2-3 days. If you’d like them to last longer, refrigerate them for up to 4-5 days.

Can I freeze the Seedy Quinoa Breakfast Cookies?
Very! To freeze, let your cookies cool completely, then place them in a single layer on a baking sheet in the freezer for about 1 hour. Once firm, transfer them to a freezer-safe bag or container. They’ll keep well for up to 1 month. When ready to enjoy, you can thaw them in the fridge or pop them in the microwave for 10-15 seconds to warm.

What should I do if my cookie dough is too crumbly?
If your dough feels a bit dry, try adding a little more tahini or maple syrup, one teaspoon at a time, until the dough holds together better. Dampen your hands slightly when shaping the cookies to help with any stickiness during the process!

Are these cookies safe for people with nut allergies?
Absolutely! The Seedy Quinoa Breakfast Cookies are nut-free as long as you use tahini or sunflower seed butter instead of nut-based alternatives. However, always check that the seeds and any additional ingredients are processed in a nut-free environment to avoid cross-contamination.

Can I adjust the sweetness in this recipe?
Certainly! If you prefer a sweeter cookie, you can increase the amount of maple syrup or swap it out entirely for agave syrup. Alternatively, adding a handful of chocolate chips can provide that extra sweetness you might be craving!

Seedy Quinoa Breakfast Cookies

Seedy Quinoa Breakfast Cookies for a Nutritious Morning Boost

These Seedy Quinoa Breakfast Cookies are vegan, gluten-free, and packed with protein, perfect for a quick nutritious start.
Print Recipe Pin Recipe
Prep Time 15 minutes mins
Cook Time 18 minutes mins
Cooling Time 10 minutes mins
Total Time 43 minutes mins
Servings: 12 cookies
Course: Breakfast
Cuisine: Healthy
Calories: 150
Ingredients Equipment Method Nutrition Notes

Ingredients
  

For the Cookie Base
  • 1 cup Cooked Quinoa Use leftover cooked quinoa or prepare from dry.
  • 1 cup Rolled Oats Ensure gluten-free if needed.
  • 1/3 cup Raw Pumpkin Seeds Use unsalted for optimal flavor.
  • 1/4 cup Hemp Seeds Can substitute with more chia seeds if unavailable.
  • 2 tablespoons Chia Seeds Substitute flax seeds if preferred.
For the Wet Ingredients
  • 1/4 cup Tahini Can use almond or sunflower seed butter as a substitute.
  • 1/4 cup Maple Syrup Honey can be used in non-vegan versions.
For Flavor & Texture
  • 1/2 teaspoon Baking Soda Helps the cookies rise.
  • 1/4 teaspoon Sea Salt Enhances flavor.
  • 1/2 cup Semisweet Chocolate Chips Ensure dairy-free if needed.

Equipment

  • Oven
  • Baking Sheet
  • Mixing Bowl
  • Cookie Scoop

Method
 

Step-by-Step Instructions
  1. Prepare Quinoa: If you don’t have leftover cooked quinoa, start by rinsing 1/3 cup of dry quinoa under cold water. Cook it in a saucepan with 2/3 cup of water over medium heat for about 15 minutes, or until the water is absorbed and the quinoa is fluffy. Allow it to cool completely.
  2. Preheat Oven: Preheat your oven to 350°F (176°C). Line a baking sheet with parchment paper.
  3. Mix Dry Ingredients: Combine the cooled quinoa, rolled oats, pumpkin seeds, hemp seeds, chia seeds, baking soda, and sea salt in a mixing bowl.
  4. Incorporate Wet Ingredients: Add tahini and maple syrup to the dry mixture, stirring until well combined to form a thick cookie dough.
  5. Shape Cookies: Portion out about 1.5 tablespoons of dough and place it on the prepared baking sheet, pressing each cookie slightly to flatten.
  6. Bake: Place the baking sheet in the oven and bake for 14-18 minutes, until the edges turn golden brown.
  7. Cool and Transfer: Let the cookies cool on the baking sheet for 5-10 minutes before transferring to a wire rack to cool completely.

Nutrition

Serving: 1cookieCalories: 150kcalCarbohydrates: 14gProtein: 5gFat: 8gSaturated Fat: 1gPolyunsaturated Fat: 2gMonounsaturated Fat: 3gSodium: 50mgPotassium: 180mgFiber: 2gSugar: 3gCalcium: 3mgIron: 10mg

Notes

Keep dough moist by adding more tahini or maple syrup if necessary. Allow cookies to cool completely for optimal texture. Use a cookie scoop for uniform cookies and store in an airtight container.

Tried this recipe?

Let us know how it was!

Raspberry Pistachio Sourdough Bagels for a Delightful Breakfast

January 12, 2026 by Grace Snow Leave a Comment

The sweet aroma of freshly baked goods wafting through the kitchen is like a warm hug on a chilly morning. Today, I’m excited to share a delightful treat that takes this comfort to new heights: Raspberry Pistachio Sourdough Bagels. With their gorgeous, vibrant hues and a chewiness that’s hard to resist, these bagels are the perfect blend of tangy raspberry and nutty pistachio—ideal for a special breakfast or a tantalizing snack. Not only are they a feast for the eyes, but their sourdough base also offers gut-friendly benefits thanks to the fermentation process. Plus, they’re surprisingly easy to make at home! Ready to roll up your sleeves and elevate your breakfast game? Let’s dive into this scrumptious adventure together!

Why are These Bagels Unique?

Flavor Explosion: The convergence of tangy raspberry and nutty pistachio creates a unique flavor profile that's both refreshing and satisfying.

Sourdough Benefits: With a base of sourdough, these bagels not only boast a delightful chewiness but also offer gut-friendly benefits.

Vibrant Aesthetics: The gorgeous colors from the raspberries and optional food coloring make these bagels not just delicious, but visually stunning as well—perfect for impressing guests!

Crowd-Pleasing Option: Whether for breakfast, brunch, or a snack, these bagels deliver on taste, ensuring they’re a hit among family and friends.

Easy Preparation: Despite their impressive looks, this recipe is simple to follow, making it suitable for both novice and experienced bakers.

Elevate your breakfast experience and indulge in the deliciousness of these creative Raspberry Pistachio Sourdough Bagels!

Raspberry Pistachio Sourdough Bagels Ingredients

For the Raspberry Dough

  • Bread Flour – 330 g (2 ¾ cups) – Provides structure and elasticity to the dough for those perfect bagel rolls.
  • Fresh or Frozen Raspberries – 125 g (½ cup, mashed) – Adds natural sweetness and vibrant flavor; warm frozen raspberries before mashing for the best results.
  • Water – 80–115 g (⅓–½ cups) – Hydrates the flour; adjust to a moist dough that isn’t sticky.
  • Sourdough Starter – 85 g (⅓ cup) – This fermentation agent helps your bagels rise and enhances their delightful flavor.
  • Honey – 8 g (1.5 tsp) – Sweetens the dough and helps the yeast thrive, making your bagels fluffy.
  • Sea Salt – 7 g (1 ¼ tsp) – Boosts the flavor of the bagels and strengthens the dough's gluten structure.
  • Freeze-Dried Raspberries – 1.5 Tablespoons (crushed) – Adding texture and concentrated raspberry flavor for a delicious twist.
  • Plant-Based Pink Food Coloring (optional) – For a pop of color and aesthetic appeal in the dough.

For the Pistachio Dough

  • Bread Flour – 200 g (1 ½ cups) – Similar role as for the raspberry dough, contributing to a sturdy but chewy texture.
  • Water – 120 g (½ cup) – Ensures proper hydration in the pistachio dough.
  • Sourdough Starter – 40 g (⅓ cup) – A portion of your total starter, vital for the leavening process.
  • Sea Salt – 3 g (½ tsp) – Enhances the flavor while keeping your dough balanced.
  • Honey – 6 g (1 tsp) – Adds a touch of sweetness to the nutty flavors.
  • Finely Ground/Chopped Pistachios – 20 g (2 Tablespoons) – Infuses nutty goodness and unique texture into the dough.
  • Coarsely Chopped Pistachios – 20 g (2 Tablespoons, for topping) – Provides a crunchy finish on your delicious bagels.
  • Plant-Based Green and Yellow Food Coloring (optional) – For a delightful hue in the pistachio dough.
  • Almond Extract (optional) – ½ tsp for an extra layer of pistachio flavor that will captivate your taste buds.

Get ready to whip up these Raspberry Pistachio Sourdough Bagels that will not only satisfy your morning cravings but also fill your kitchen with wonderful aromas!

Step‑by‑Step Instructions for Raspberry Pistachio Sourdough Bagels

Step 1: Feed the Sourdough Starter
Begin by feeding your active sourdough starter 25g of the starter with 90g of water and flour 8-12 hours before you plan to make the dough. This ensures your starter is vigorous and bubbly, essential for creating those delightful Raspberry Pistachio Sourdough Bagels.

Step 2: Prepare Raspberries
If you're using frozen raspberries, warm them slightly to make mashing easier, then mash until smooth. If using fresh raspberries, simply dice and reserve any juice. You'll need about 125g (½ cup) for the raspberry dough, which will bring a burst of tangy flavor to the bagels.

Step 3: Mix Raspberry Dough
In a mixing bowl, combine the all-purpose flour, mashed raspberries, water, sourdough starter, honey, sea salt, and optional freeze-dried raspberries. Mix until smooth for about 6-7 minutes with a mixer or 8-10 minutes by hand. It should form a cohesive, somewhat sticky but not overly wet dough.

Step 4: Transfer Dough
Once mixed, place the raspberry dough into a lightly greased bowl, cover it with a clean kitchen towel or plastic wrap, and let it rise in a warm spot for 6-8 hours. You’ll know it’s ready when the dough has doubled in size, becoming puffy and airy.

Step 5: Make Pistachio Dough
After the raspberry dough has risen, wash your mixing bowl and prepare the pistachio dough. Combine bread flour, water, sourdough starter, sea salt, honey, and finely ground pistachios. Mix as you did the raspberry dough for about 6-7 minutes until a smooth, elastic dough forms.

Step 6: First Rise
Cover both the raspberry and pistachio dough with cloths and allow them to rise at room temperature for an additional 6-8 hours. After they have risen, place them in the refrigerator overnight. This process enhances the flavor and texture of your Raspberry Pistachio Sourdough Bagels.

Step 7: Shape Bagels
When ready to shape, divide each dough into 8 equal pieces. Roll them into logs and twist the raspberry and pistachio logs together into a braided form. Join the ends of each to form circles, creating beautiful bagels that showcase the vibrant colors of the dough.

Step 8: Final Rise
Arrange the shaped bagels on a lightly floured surface, cover them loosely with a clean towel, and let them rise until puffy, which typically takes 1-3 hours. As they rise, they will grow in size, becoming light and airy.

Step 9: Boil Bagels
Preheat your oven to 425°F (220°C). In a large pot, bring water to a gentle boil, then carefully drop in each bagel, boiling for 1 minute on each side. This step is crucial for developing that characteristic bagel texture, so keep an eye on the clock!

Step 10: Bake Bagels
Using a slotted spoon, transfer the boiled bagels to a lined baking sheet. Bake in the preheated oven for 20-25 minutes or until you see a golden brown crust forming. They should feel firm to the touch when done, with a delightful aroma filling your kitchen.

Expert Tips for Raspberry Pistachio Sourdough Bagels

  • Active Starter: Ensure your sourdough starter is active and bubbly. This is crucial for achieving the right rise and texture in your bagels.

  • Texture Check: Avoid over-mixing the dough for the raspberry and pistachio flavors to shine through. The dough should be smooth yet slightly tacky.

  • Proper Boiling: Keep an eye on the boiling time; over-boiling can lead to bagels that are too dense. One minute per side is ideal for the perfect chew.

  • Dough Hydration: Adjust water amounts based on your flour's absorbency. A hydrated dough yields a better textured Raspberry Pistachio Sourdough Bagels.

  • Colorful Presentation: If using food coloring, mix it in well to ensure even color distribution, enhancing the visual appeal of your bagels before baking.

  • Rise Time: Patience is key! Allow enough time for both rises to ensure fluffy, airy bagels that make breakfast a delight.

How to Store and Freeze Raspberry Pistachio Sourdough Bagels

Room Temperature: Store your bagels in an airtight container for up to 3 days to maintain their chewy texture and freshness.

Fridge: If you prefer, these bagels can be stored in the fridge for up to one week. Just make sure they're well-wrapped to prevent them from drying out.

Freezer: For longer storage, freeze the bagels individually in plastic wrap, then place them in a freezer-safe bag or container. They can last up to 3 months.

Reheating: To enjoy the bagels from frozen, simply thaw them at room temperature, then reheat in a toaster or oven at 350°F (175°C) for about 10 minutes for that freshly baked feel.

Raspberry Pistachio Sourdough Bagels Variations

Feel free to get creative with this recipe to suit your taste buds or dietary preferences. Let’s sprinkle some fun on those bagels!

  • Berry Swap: Replace raspberries with blueberries or strawberries for a fresh twist. Each fruit brings its unique flavor profile, making your bagels delightful in different ways.

  • Nutty Alternatives: Swap pistachios for walnuts or almonds for a different nutty flavor. Each alternative brings its own crunch and sweetness, perfect for diversifying your bagel experience.

  • Sweet Surprise: Add chocolate chips for a surprising sweet treat. Imagine biting into a chewy bagel with bursts of melted chocolate—what’s not to love?

  • Herb Infusion: Toss in some finely chopped fresh herbs like basil or rosemary to your dough for an aromatic twist. This unique flavor can elevate your breakfast game to a whole new level.

  • Seeds Galore: Incorporate chia seeds or poppy seeds into the dough for added crunch and nutrition. A sprinkle on top before baking promotes a beautiful finish as well.

  • Zesty Citrus: Add a hint of lemon or orange zest to the raspberry dough for an invigorating citrus note. This bright flavor will make your breakfast truly pop!

  • Spicy Kick: Sprinkle in some crushed red pepper flakes for a heat infusion. This unexpected element will awaken your taste buds and transform your bagels into a savory sensation.

  • Vegan-Friendly: Replace honey with maple syrup or agave nectar for a completely vegan-friendly alternative. You can enjoy the same great taste while catering to your dietary preferences.

Experiment with these variations to craft a bagel that truly resonates with your palate. Whether you're enjoying them fresh with cream cheese or trying out different toppings, you’re sure to find a combination that makes your breakfast special! For more delightful twists, don’t forget to check out our excellent suggestions on complementary toppings like homemade cream cheese or a luscious avocado spread.

Make Ahead Options

These Raspberry Pistachio Sourdough Bagels are perfect for busy home cooks looking to save time! You can prepare the dough up to 24 hours in advance—simply follow the first rise instructions, then refrigerate both the raspberry and pistachio dough overnight to enhance their flavors. When you're ready to enjoy, shape the bagels and let them rise until puffy, usually 1-3 hours. Just remember, keeping the dough tightly covered helps maintain its moisture and quality. Once boiled and baked, these bagels remain just as delicious for up to 3 days when stored in an airtight container at room temperature. Enjoy effortless mornings with delightful, homemade bagels on hand!

What to Serve with Raspberry Pistachio Sourdough Bagels

The warm, inviting aroma of these bagels offers the perfect opportunity to create an unforgettable meal experience.

  • Cream Cheese Spread: A generous layer of creamy cheese adds richness that beautifully complements the tart notes of raspberries.

  • Honey Drizzle: A light drizzle of honey enhances the sweetness, creating a delightful contrast with the sourdough’s tang.

  • Fresh Fruit Salad: A mix of seasonal fruits provides a fresh brightness, balancing the rich flavors of the bagels perfectly.

  • Avocado Toast: Top slices of toasted bagel with creamy avocado for a satisfying, nutrient-packed bite that feels indulgent without the guilt.

  • Herbal Tea: Pair with soothing herbal tea for a comforting touch; the warmth melds beautifully with the fruity flavors of the bagel.

  • Sparkling Citrus Water: Refresh with fizzy citrus-infused water; its effervescent quality cleanses the palate splendidly.

Enjoy your Raspberry Pistachio Sourdough Bagels as more than just a breakfast treat—the right pairings elevate them to new culinary heights!

Raspberry Pistachio Sourdough Bagels Recipe FAQs

How do I choose the right raspberries?
Absolutely! When selecting raspberries, look for berries that are plump, firm, and free of dark spots or mold. Fresh raspberries should be evenly colored and fragrant. If you can, go for organic options as they typically offer better flavor and quality. If using frozen, ensure they are free from ice crystals and packed tightly for optimal sweetness.

How should I store leftover bagels?
Very good question! You should store your Raspberry Pistachio Sourdough Bagels in an airtight container at room temperature for up to 3 days. This helps maintain their delightful chewy texture. If you'd like them to last longer, you can refrigerate them for up to a week, but make sure they’re well-wrapped to prevent drying out.

Can I freeze these bagels?
Absolutely! To freeze your bagels, wrap each one individually in plastic wrap. Then, place them into a freezer-safe bag or container. They’ll stay fresh for up to 3 months! When you’re ready to enjoy them, thaw the bagels at room temperature and reheat them in a toaster or oven at 350°F (175°C) for about 10 minutes, and they’ll taste just like fresh!

What if my dough doesn’t rise properly?
If your dough isn’t rising, don’t fret! First, check if your sourdough starter is active and bubbly. If it hasn’t been fed recently, it may lack the yeast needed for rise. Another possibility is that the dough might need a warmer environment to rise. Consider placing it in a slightly warmed oven or near a sunny window. If it still doesn’t rise after about 8 hours, you can try gently kneading in a pinch of flour and a small amount of water to reshape and encourage activity.

Are there any dietary considerations for this recipe?
Great question! These Raspberry Pistachio Sourdough Bagels contain gluten from bread flour, making them not suitable for those with gluten allergies or celiac disease. Additionally, those with nut allergies should avoid pistachios or swap them for alternative toppings. Always check labels for any additional ingredients you might add. And if you’re making these for pets, remember that bread and nuts aren’t recommended for dogs or cats.

Raspberry Pistachio Sourdough Bagels

Raspberry Pistachio Sourdough Bagels for a Delightful Breakfast

Delight in the perfect blend of tangy raspberry and nutty pistachio with these Raspberry Pistachio Sourdough Bagels, ideal for breakfast.
Print Recipe Pin Recipe
Prep Time 20 minutes mins
Cook Time 25 minutes mins
Rising Time 8 hours hrs
Total Time 8 hours hrs 45 minutes mins
Servings: 8 bagels
Course: Breakfast
Cuisine: American
Calories: 250
Ingredients Equipment Method Nutrition Notes

Ingredients
  

Raspberry Dough
  • 330 g Bread Flour Provides structure and elasticity to the dough for those perfect bagel rolls.
  • 125 g Fresh or Frozen Raspberries Adds natural sweetness and vibrant flavor; warm frozen raspberries before mashing.
  • 80–115 g Water Adjust to a moist dough that isn’t sticky.
  • 85 g Sourdough Starter This fermentation agent helps your bagels rise.
  • 8 g Honey Sweetens the dough and helps the yeast thrive.
  • 7 g Sea Salt Boosts the flavor of the bagels.
  • 1.5 Tablespoons Freeze-Dried Raspberries Adding texture and concentrated raspberry flavor.
  • Plant-Based Pink Food Coloring For a pop of color and aesthetic appeal in the dough.
Pistachio Dough
  • 200 g Bread Flour Contributing to a sturdy but chewy texture.
  • 120 g Water Ensures proper hydration in the pistachio dough.
  • 40 g Sourdough Starter A portion of your total starter, vital for the leavening process.
  • 3 g Sea Salt Enhances the flavor while keeping your dough balanced.
  • 6 g Honey Adds a touch of sweetness to the nutty flavors.
  • 20 g Finely Ground/Chopped Pistachios Infuses nutty goodness and unique texture into the dough.
  • 20 g Coarsely Chopped Pistachios Provides a crunchy finish on your bagels.
  • Plant-Based Green and Yellow Food Coloring For a delightful hue in the pistachio dough.
  • ½ tsp Almond Extract For an extra layer of pistachio flavor.

Equipment

  • Mixing Bowl
  • slotted spoon
  • Baking Sheet
  • Large pot
  • Oven

Method
 

Bagel Preparation
  1. Feed your active sourdough starter 25g of starter with 90g of water and flour 8-12 hours before making the dough.
  2. If using frozen raspberries, warm them slightly and mash until smooth; if using fresh, reserve juice after dicing.
  3. In a mixing bowl, combine all raspberry dough ingredients and mix until smooth for about 6-7 minutes.
  4. Place the raspberry dough into a greased bowl, cover, and let rise in a warm spot for 6-8 hours.
  5. After the raspberry dough has risen, prepare the pistachio dough by mixing its ingredients until smooth.
  6. Cover both doughs and let them rise for another 6-8 hours, then refrigerate overnight.
  7. Divide each dough into 8 pieces, roll into logs, and twist together into a braided form to shape bagels.
  8. Arrange shaped bagels on a floured surface, cover with a towel, and let rise for 1-3 hours.
  9. Preheat your oven to 425°F (220°C). Boil the bagels for 1 minute on each side.
  10. Transfer boiled bagels to a lined baking sheet and bake for 20-25 minutes until golden brown.

Nutrition

Serving: 1bagelCalories: 250kcalCarbohydrates: 40gProtein: 8gFat: 7gSaturated Fat: 1gPolyunsaturated Fat: 2gMonounsaturated Fat: 4gSodium: 300mgPotassium: 150mgFiber: 2gSugar: 3gVitamin C: 3mgCalcium: 30mgIron: 1.5mg

Notes

Ensure your sourdough starter is active for the best results. Adjust hydration based on flour absorption and be patient during rise times for fluffy bagels.

Tried this recipe?

Let us know how it was!

Delicious Vegan Blueberry Rolls That Melt in Your Mouth

January 12, 2026 by Grace Snow Leave a Comment

The first bite of my Best Vegan Blueberry Rolls transforms a regular morning into an extraordinary experience. With a soft, fluffy texture and a swirl of vibrant blueberry goodness, these rolls are not just a treat—they're a celebration of flavor and simplicity. Thanks to their easy preparation and minimal ingredients, you can whip these up without spending hours in the kitchen, making them a perfect addition to your breakfast lineup or brunch gatherings. Moreover, they’re vegan and can be customized with variations that fit your dietary preferences. Curious about how to indulge without the guilt? Let’s dive into this delightful recipe that promises to satisfy your sweet cravings while keeping things wholesome!

Why Make Vegan Blueberry Rolls?

Irresistible, Fruity Delight: The tangy blueberry filling bursts with flavor, making each roll a mini explosion of joy.
Quick and Easy: With simple steps and minimal ingredients, you can create these delightful rolls without any fuss.
Customizable: Feel free to swap in your favorite berries or adjust sweetness to cater to your palate. If you’re up for a unique treat, try these paired with Vegan Cacao Nib for dessert later!
Perfect for Any Occasion: Whether it’s a cozy brunch or just a treat for yourself, these rolls impress with their fluffy goodness.
Health-Conscious Indulgence: Wholesome ingredients keep them guilt-free, so you can enjoy that sweet moment every morning! Make sure to save some for later by following my storage tips while you enjoy these along with a comforting Blackberry Crisp.

Vegan Blueberry Rolls Ingredients

For the Dough

  • All Purpose Organic Unbleached Flour – Provides structure to the rolls; feel free to substitute with gluten-free flour if desired.
  • Rapid Rise Yeast – Helps the dough rise quickly, creating those fluffy rolls; no substitutions recommended.
  • Avocado Oil (or Extra Virgin Olive Oil) – Adds moisture and richness to the dough; any neutral oil works as a substitute.
  • Maple Syrup – A natural sweetener that contributes a lovely flavor; agave syrup is a great alternative for maintaining vegan standards.
  • Unsweetened Almond Milk – Adds moisture to the dough and filling; any plant-based milk or even water can be used in its place.

For the Filling

  • Frozen Blueberries – The star of the filling, bursting with flavor; fresh blueberries can be swapped if seasonally available.
  • Vegan Butter – Enhances richness in the filling; coconut oil is a suitable substitute for a dairy-free option.
  • Vanilla Extract – Adds depth of flavor to your filling; no substitutions recommended here!
  • Vegan Cream Cheese – Brings creaminess to the filling; consider using silken tofu for a lower-calorie alternative.

For Topping (Optional)

  • Organic Cane Sugar – A sprinkle before baking adds extra sweetness and a delightful crunch to the top of your rolls.

Step‑by‑Step Instructions for Vegan Blueberry Rolls

Step 1: Prepare the Dough
Begin by warming 1 cup of unsweetened almond milk over low heat until it's just warm to the touch (about 100°F). In a mixing bowl, combine the warm milk with 2 tablespoons of avocado oil and 2 tablespoons of maple syrup. Sprinkle in 2 teaspoons of rapid rise yeast, gently stir, and let it rest for about 5 minutes until foamy, signaling that your Vegan Blueberry Rolls dough is ready to rise.

Step 2: Combine Ingredients
Gradually add 3 cups of all-purpose organic unbleached flour to the yeast mixture, stirring until fully combined. Transfer the mixture to a floured surface and knead for about 5-7 minutes until the dough is smooth and elastic. If the dough feels sticky, add a little extra flour as needed. Once ready, place it in a greased bowl, cover with a cloth, and allow it to rise in a warm spot for about 1 hour or until doubled in size.

Step 3: Make the Filling
While the dough is rising, prepare the blueberry filling. In a saucepan over medium heat, combine 2 cups of frozen blueberries with 2 tablespoons of maple syrup. Cook for 5-7 minutes until the blueberries begin to burst and create a bubbly sauce. Remove from heat and stir in 2 tablespoons of vegan butter and 1 teaspoon of vanilla extract for a rich and creamy filling that will elevate your Vegan Blueberry Rolls.

Step 4: Assemble the Rolls
Once the dough has risen, punch it down and roll it out on a floured surface into a rectangle about 1/4 inch thick. Spread the blueberry filling evenly over the dough, leaving a small border around the edges. Starting from one long side, roll the dough tightly into a log shape. Pinch the seams to seal, then slice the log into 12 even rolls with a sharp knife, ready to fill your kitchen with aromatic sweetness.

Step 5: Bake the Rolls
Place the rolled slices in a greased baking dish, leaving some space between them for rising. Cover with a cloth and let them rest for 30 minutes to rise again. Preheat your oven to 350°F (175°C). Once the rolls have puffed up, bake for 25-30 minutes or until they are golden brown and have a light crust on top, signaling your Vegan Blueberry Rolls are ready to devour.

Step 6: Finishing Touches
For an extra touch of sweetness, sprinkle some organic cane sugar over the tops of the Vegan Blueberry Rolls just before they go into the oven. This will create a delightful crunchy topping. After baking, let the rolls cool for a few minutes in the pan before serving, allowing the blueberry filling to settle for an indulgent treat sure to impress everyone at the table.

What to Serve with Best Vegan Blueberry Rolls

Delight in creating a full breakfast experience that dances with sweet and savory flavors alongside your fluffy rolls.

  • Fresh Fruit Salad: A colorful mix of seasonal fruits complements the sweetness while adding a refreshing crunch.
  • Vegan Yogurt Parfait: Layer creamy vegan yogurt with granola and berries for a wholesome, textural contrast to your rolls.
  • Maple Syrup Drizzle: A splash of pure maple syrup over the rolls enhances their sweet flavor, making each bite irresistible.
  • Cinnamon Oatmeal: Serve a warm bowl of spiced oatmeal on the side to create a comforting breakfast harmony that keeps the cozy vibes going.
  • Herbal Tea: A calming cup of chamomile or mint tea pairs beautifully, allowing the blueberry filling to shine without overpowering.
  • Vegan Glaze: Drizzling a simple vegan glaze made of powdered sugar and almond milk adds an extra touch of sweetness and elegance to your rolls.
  • Espresso or Coffee: Enjoy a bold coffee or espresso, which contrasts perfectly with the sweetness of the blueberry rolls for a delightful brunch experience.
  • Chia Seed Pudding: A rich chia pudding topped with berries works well to balance flavors, bringing nutritious elements to your table.
  • Vegan Sausages: For a heartier brunch, serve vegan sausages that introduce savory flavors, perfectly complementing those sweet rolls.

Make Ahead Options

These Best Vegan Blueberry Rolls are perfect for busy mornings! You can prepare the dough and filling up to 24 hours in advance. Simply follow the steps to make the dough, knead it, and let it rise; then cover it tightly and refrigerate. Additionally, prepare the blueberry filling, let it cool, and store it in an airtight container in the refrigerator. When you're ready to bake, take the dough out, let it come to room temperature (approximately 30 minutes), then roll it out, spread the filling, shape your rolls, and allow them to rise again before baking. This way, you’ll enjoy warm, fresh Vegan Blueberry Rolls with minimal effort for a delightful start to your day!

Vegan Blueberry Rolls Variations

Feel free to explore these creative twists and substitutions to make these rolls uniquely yours.

  • Berry Swap: Replace blueberries with raspberries or mixed berries for a vibrant flavor boost. The tartness of raspberries creates a delicious contrast to the sweetness.

  • Spiced Up: Add a pinch of cinnamon or nutmeg to the dough or filling for a warm, inviting spice. This little twist transports your rolls to comfort food heaven!

  • Sugar Adjustment: Customize the sweetness by adjusting the amount of maple syrup in both the dough and filling. This way, you can cater to your family's taste preferences.

  • Creamy Twist: Use silken tofu instead of vegan cream cheese for a lower-calorie filling that’s just as creamy and delicious. It’s a wonderful option for those looking to lighten things up!

  • Gluten-Free: Substitute all-purpose flour with a gluten-free blend for a similar fluffy texture without the gluten. Make sure to include a binding agent like xanthan gum for the best results.

  • Nutty Addition: Fold in chopped walnuts or pecans into the filling for an added crunch. The nuts not only add texture but also enrich the flavor profile beautifully.

  • Layered Flavors: Drizzle in some lemon zest with the blueberries for a zesty contrast that brightens the whole experience. It adds a fresh brightness that pairs perfectly with the sweet filling.

  • Chocolate Delight: Sprinkle some vegan chocolate chips into the blueberry filling for a decadent dessert option. Who can resist the combination of blueberries and chocolate?

Feel adventurous today! And if you're looking for more delightful recipes, why not indulge in this comforting Blackberry Crisp afterward? It could be the perfect ending to a delicious brunch!

Expert Tips for Vegan Blueberry Rolls

• Flavor Depth: Enhance richness by refrigerating formed rolls overnight before baking; this allows flavors to deepen beautifully.

• Dough Consistency: If your dough feels sticky while kneading, add a little extra flour, but be careful not to overwork it for the best Vegan Blueberry Rolls texture.

• Baking Time Vigilance: Ovens can vary greatly, so keep an eye on your rolls during baking to prevent over-browning; you want that lovely golden hue!

• Filling Balance: For an added dimension, consider tossing in a pinch of cinnamon to your blueberry filling for a cozy warmth without overpowering the fruit flavor.

• Berry Variations: Feel free to switch out blueberries for fresh raspberries or mixed berries if you want to explore different flavor profiles!

Storage Tips for Vegan Blueberry Rolls

Room Temperature: Store leftover Vegan Blueberry Rolls in an airtight container at room temperature for up to 3 days to keep them fresh and soft.

Fridge: If you need them to last a bit longer, you can refrigerate the rolls in an airtight container for up to 5 days. Just be sure to warm them up before serving for that fresh-from-the-oven feel!

Freezer: For longer storage, freeze the rolls in a single layer, then transfer to a freezer-safe container or bag for up to 3 months. Reheat from frozen in the oven or microwave before serving.

Reheating: To reheat, place the rolls in a preheated oven at 350°F (175°C) for about 10-15 minutes, or microwave individually for about 20-30 seconds until warm and inviting.

Best Vegan Blueberry Rolls Recipe FAQs

What type of blueberries should I use?
Using frozen blueberries is perfectly fine for this recipe as they create a juicy filling and are easy to work with. However, if you have fresh blueberries available, feel free to use them! Look for berries that are plump and firm with no dark spots or mold.

How should I store leftover Vegan Blueberry Rolls?
Store any leftover Vegan Blueberry Rolls in an airtight container at room temperature for up to 3 days to maintain their freshness. If you want to extend their shelf life, they can be refrigerated for up to 5 days. Just remember to warm them up before serving to enjoy that soft, fluffy texture again!

Can I freeze Vegan Blueberry Rolls?
Absolutely! To freeze the rolls, place them in a single layer on a baking sheet until frozen solid. Then, transfer them to a freezer-safe container or bag for up to 3 months. When you're ready to enjoy them, reheat directly from frozen in a preheated oven at 350°F (175°C) for about 15-20 minutes until warmed through.

What if my dough is too sticky?
If your dough feels sticky during kneading, simply add a little more flour—just a tablespoon at a time—until it reaches a smooth and elastic consistency. Be careful not to overwork the dough, as that can lead to tough rolls. A well-kneaded dough should be soft and easily workable!

Are Vegan Blueberry Rolls safe for my pet?
While blueberries are generally safe for dogs and many pets in moderation, be cautious with ingredient combinations, particularly any sweeteners like maple syrup, which might not suit all animals. Always consult your veterinarian before introducing new foods, especially for pets that have dietary restrictions or concerns.

Can I adjust the sweetness of the rolls?
The sweetness of your Vegan Blueberry Rolls can be easily tailored! If you prefer a sweeter roll, increase the amount of maple syrup in both the dough and filling. Alternatively, for a less sweet version, simply reduce the syrup quantity gradually until it suits your taste.

Vegan Blueberry Rolls

Delicious Vegan Blueberry Rolls That Melt in Your Mouth

These Vegan Blueberry Rolls transform a regular morning into a flavorful celebration, featuring a soft texture and vibrant blueberry filling.
Print Recipe Pin Recipe
Prep Time 1 hour hr
Cook Time 30 minutes mins
Rising Time 30 minutes mins
Total Time 2 hours hrs
Servings: 12 rolls
Course: Breakfast
Cuisine: Vegan
Calories: 250
Ingredients Equipment Method Nutrition Notes

Ingredients
  

Dough Ingredients
  • 3 cups All Purpose Organic Unbleached Flour Substitute with gluten-free flour if desired.
  • 1 cup Unsweetened Almond Milk Any plant-based milk can be used.
  • 2 tablespoons Avocado Oil Extra Virgin Olive Oil can be used.
  • 2 tablespoons Maple Syrup Agave syrup is a suitable alternative.
  • 2 teaspoons Rapid Rise Yeast No substitutions recommended.
Filling Ingredients
  • 2 cups Frozen Blueberries Fresh blueberries can be swapped if available.
  • 2 tablespoons Vegan Butter Coconut oil is a suitable substitute.
  • 1 teaspoon Vanilla Extract No substitutions recommended.
  • 1 cup Vegan Cream Cheese Silken tofu can be used instead.
Topping Ingredients
  • to taste Organic Cane Sugar Sprinkle before baking for extra sweetness.

Equipment

  • Mixing Bowl
  • Saucepan
  • Baking Dish
  • Rolling Pin
  • Knife

Method
 

Prepare the Dough
  1. Warm 1 cup of unsweetened almond milk over low heat until just warm to touch. In a bowl, combine warm milk with 2 tablespoons of avocado oil and 2 tablespoons of maple syrup. Sprinkle in 2 teaspoons of rapid rise yeast, stir gently, and let rest for about 5 minutes until foamy.
Combine Ingredients
  1. Gradually add 3 cups of flour to the yeast mixture, stirring until fully combined. Knead for about 5-7 minutes until smooth and elastic. Let rise in a greased bowl for about 1 hour.
Make the Filling
  1. In a saucepan, combine 2 cups of frozen blueberries with 2 tablespoons of maple syrup. Cook for 5-7 minutes until blueberries burst. Stir in 2 tablespoons of vegan butter and 1 teaspoon of vanilla extract.
Assemble the Rolls
  1. Roll out the dough into a rectangle. Spread blueberry filling over the dough, roll it tightly, pinch seams and slice into 12 rolls.
Bake the Rolls
  1. Place rolled slices in a greased dish, let rest for 30 minutes. Preheat oven to 350°F (175°C), bake rolls for 25-30 minutes until golden.
Finishing Touches
  1. Sprinkle organic cane sugar over rolls before baking. Let cool slightly before serving.

Nutrition

Serving: 1rollCalories: 250kcalCarbohydrates: 40gProtein: 4gFat: 10gSaturated Fat: 1gPolyunsaturated Fat: 3gMonounsaturated Fat: 6gSodium: 200mgPotassium: 150mgFiber: 2gSugar: 8gVitamin C: 10mgCalcium: 10mgIron: 10mg

Notes

For deeper flavor, refrigerate formed rolls overnight before baking. Monitor baking time to prevent over-browning.

Tried this recipe?

Let us know how it was!
  • « Previous Page
  • 1
  • …
  • 5
  • 6
  • 7
  • 8
  • 9
  • …
  • 17
  • Next Page »

Welcome!

Hi, I’m Grace, a Sydney-based home cook with a passion for bold flavors and trending ingredients. Whether you’re a busy beginner or a seasoned foodie, you’ll find dishes here that are fresh, fun, and full of flavor.

More about me

Popular Recipes

  • Cheesy Chicken Garlic Bread Sandwich
    Cheesy Chicken Garlic Bread Sandwich for Cozy Family Moments
  • Easy Chicken Ranch Wraps
    Easy Chicken Ranch Wraps: Quick, Creamy & Totally Satisfying
  • Chicken Caesar Sandwiches
    Delicious Chicken Caesar Sandwiches for Quick Comfort Food
  • best Cuban sandwich
    The Best Cuban Sandwich You’ll Want Every Weeknight!

Footer

↑ back to top

About

  • Privacy Policy
  • Disclaimer
  • Terms & Conditions

Newsletter

  • Sign Up! for emails and updates

Contact

  • About me
  • Contact me

Copyright © 2025 TastyTrendIngredients