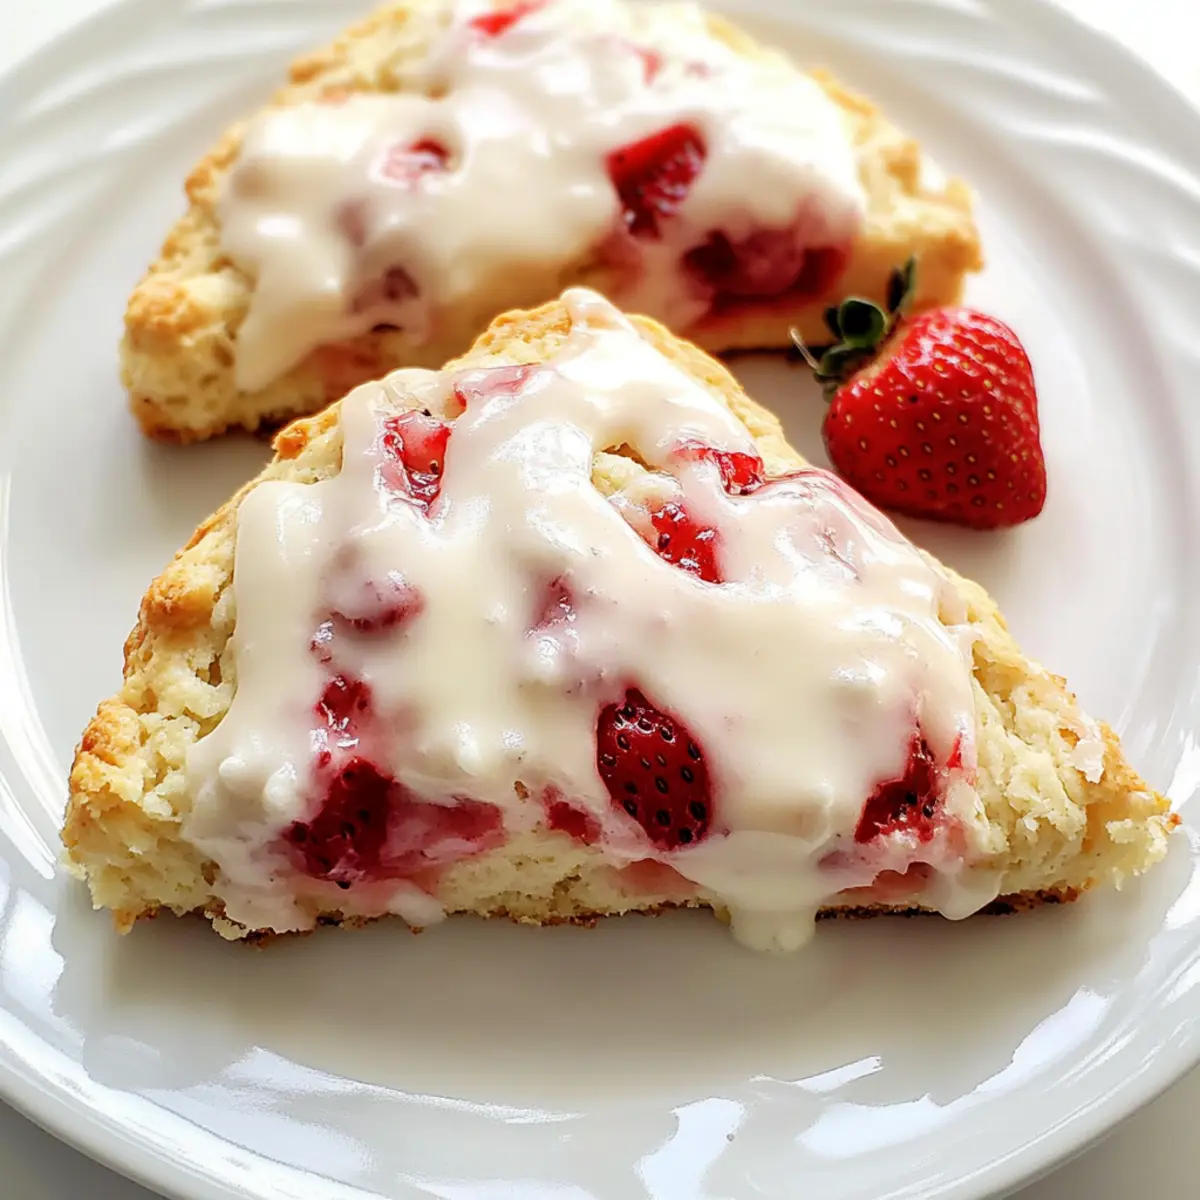
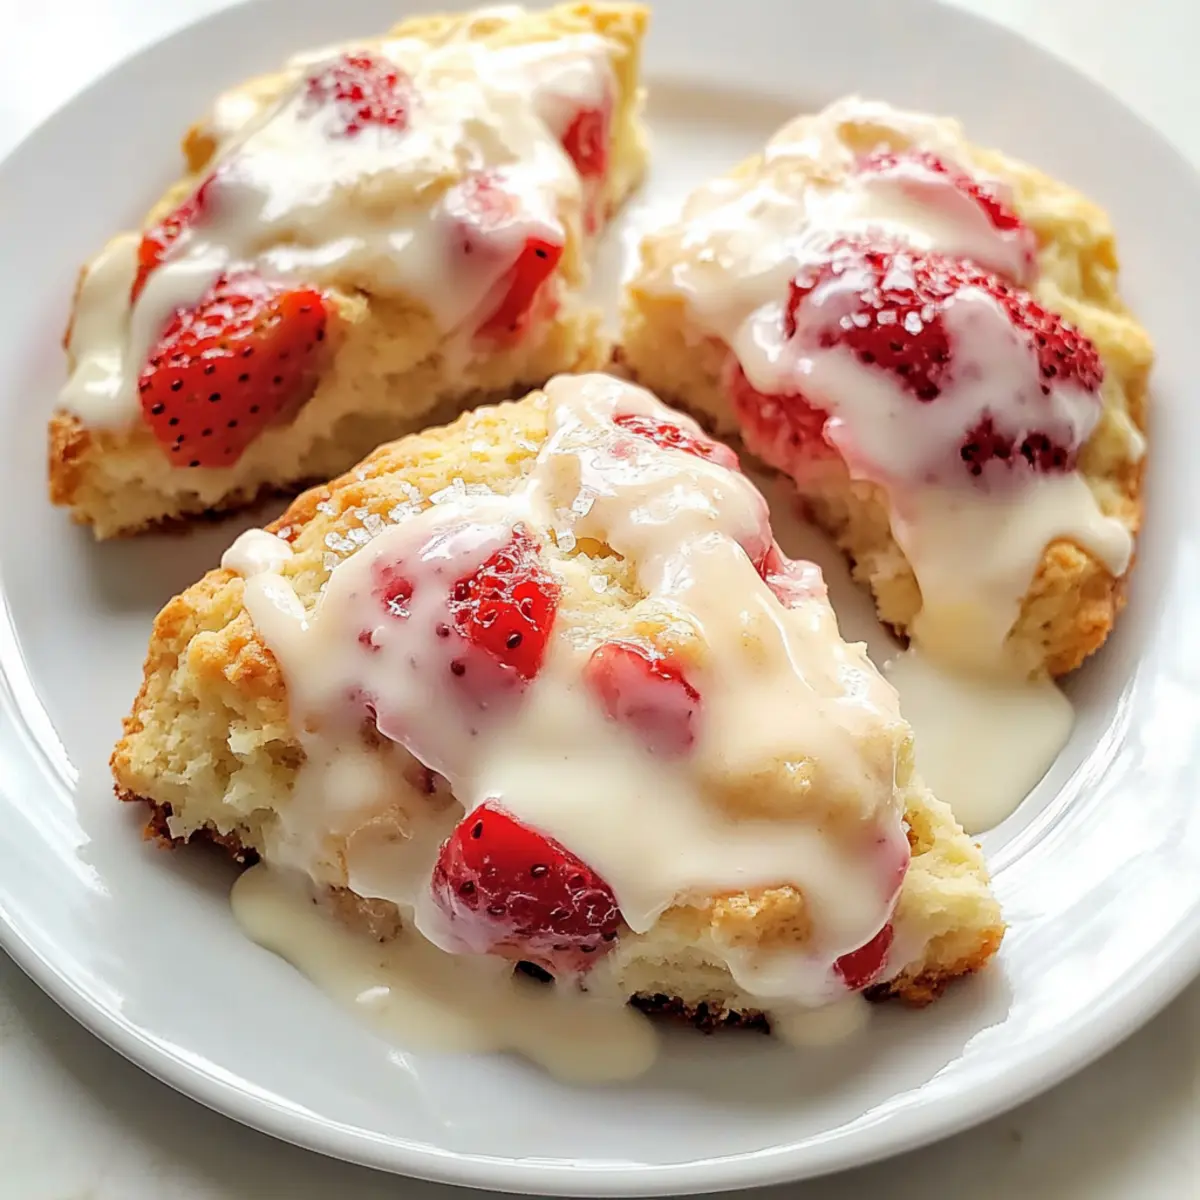
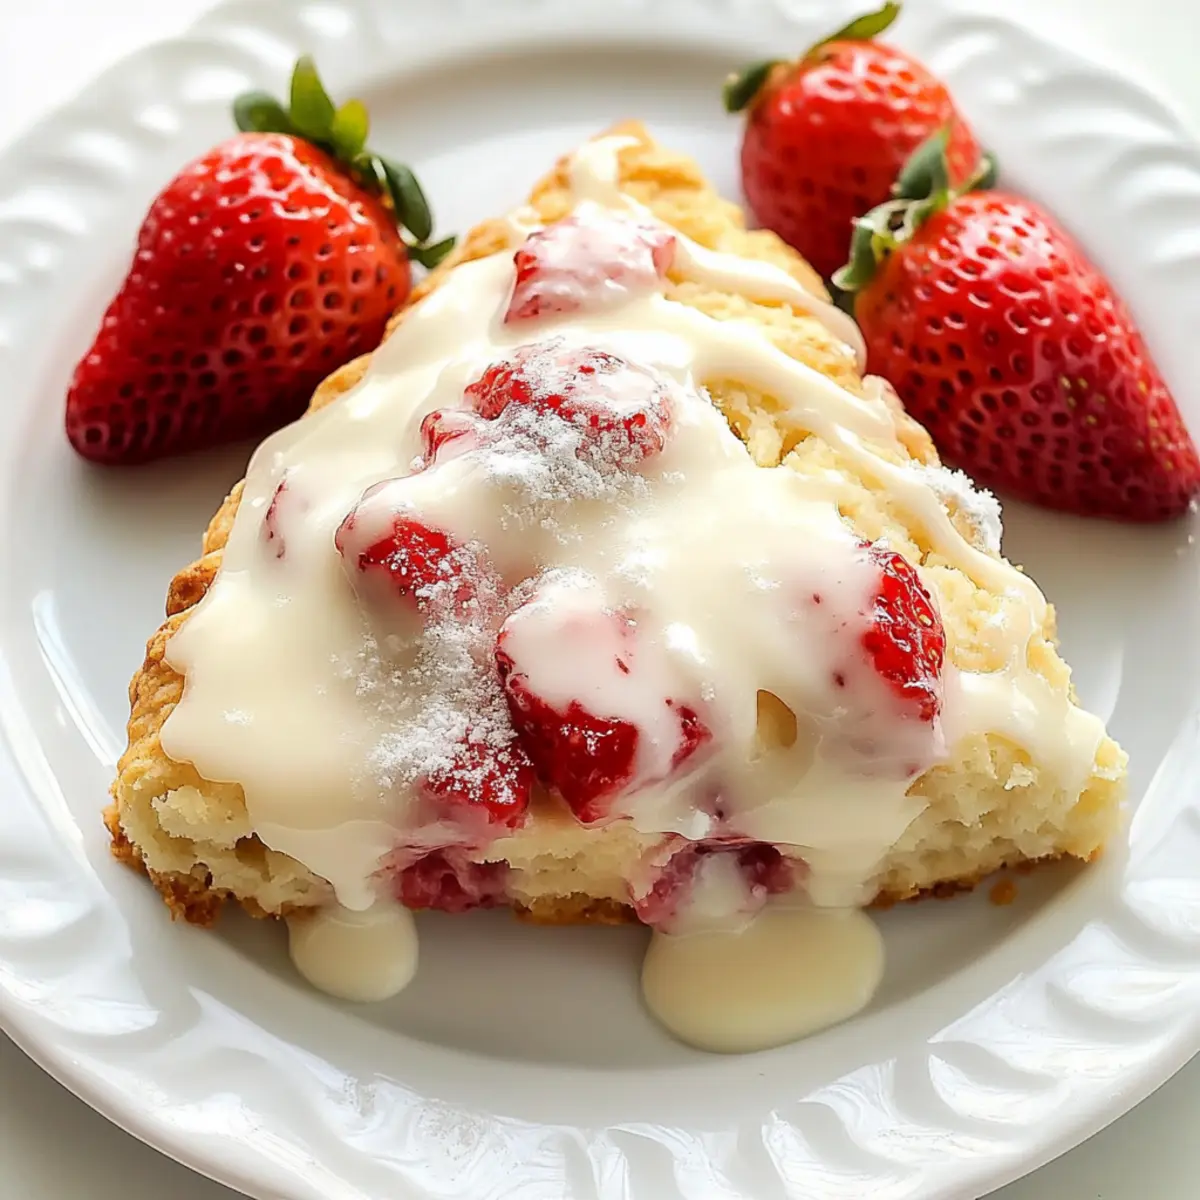
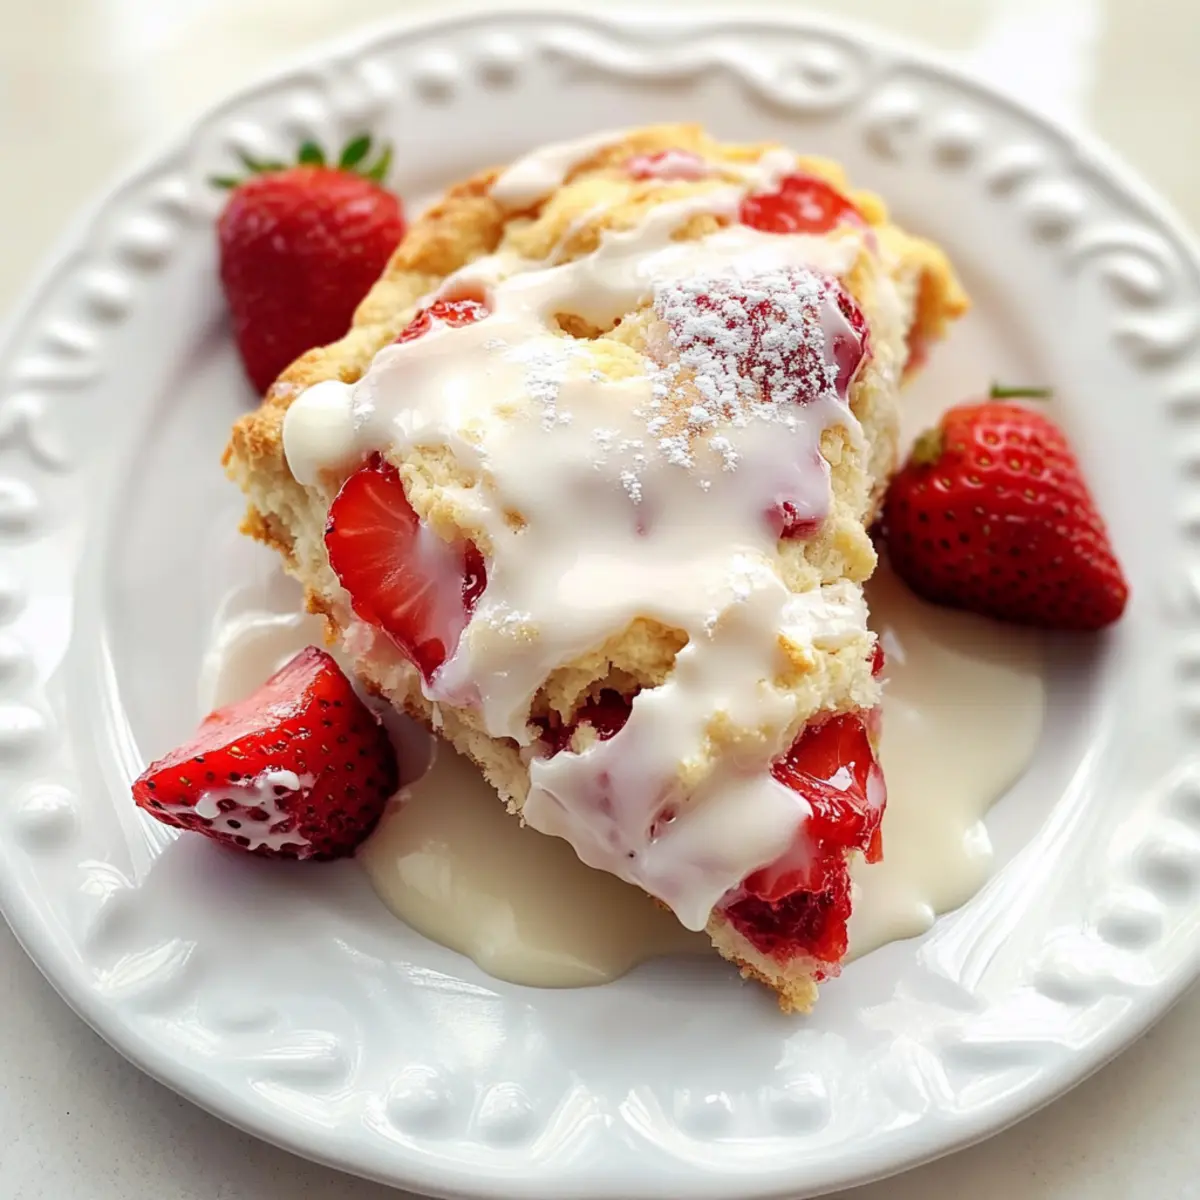
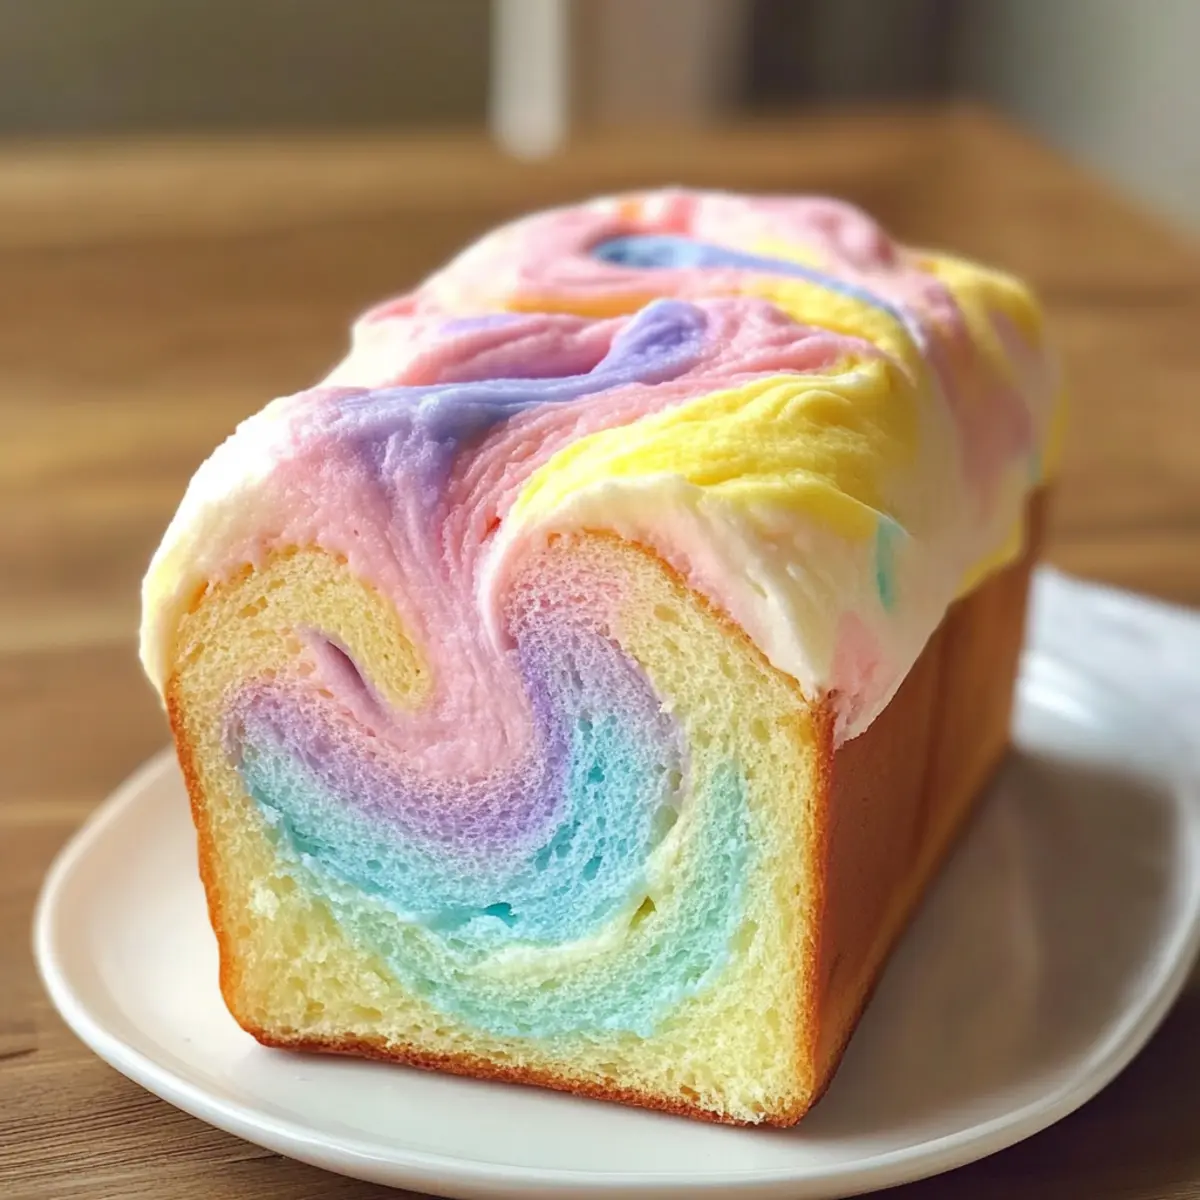
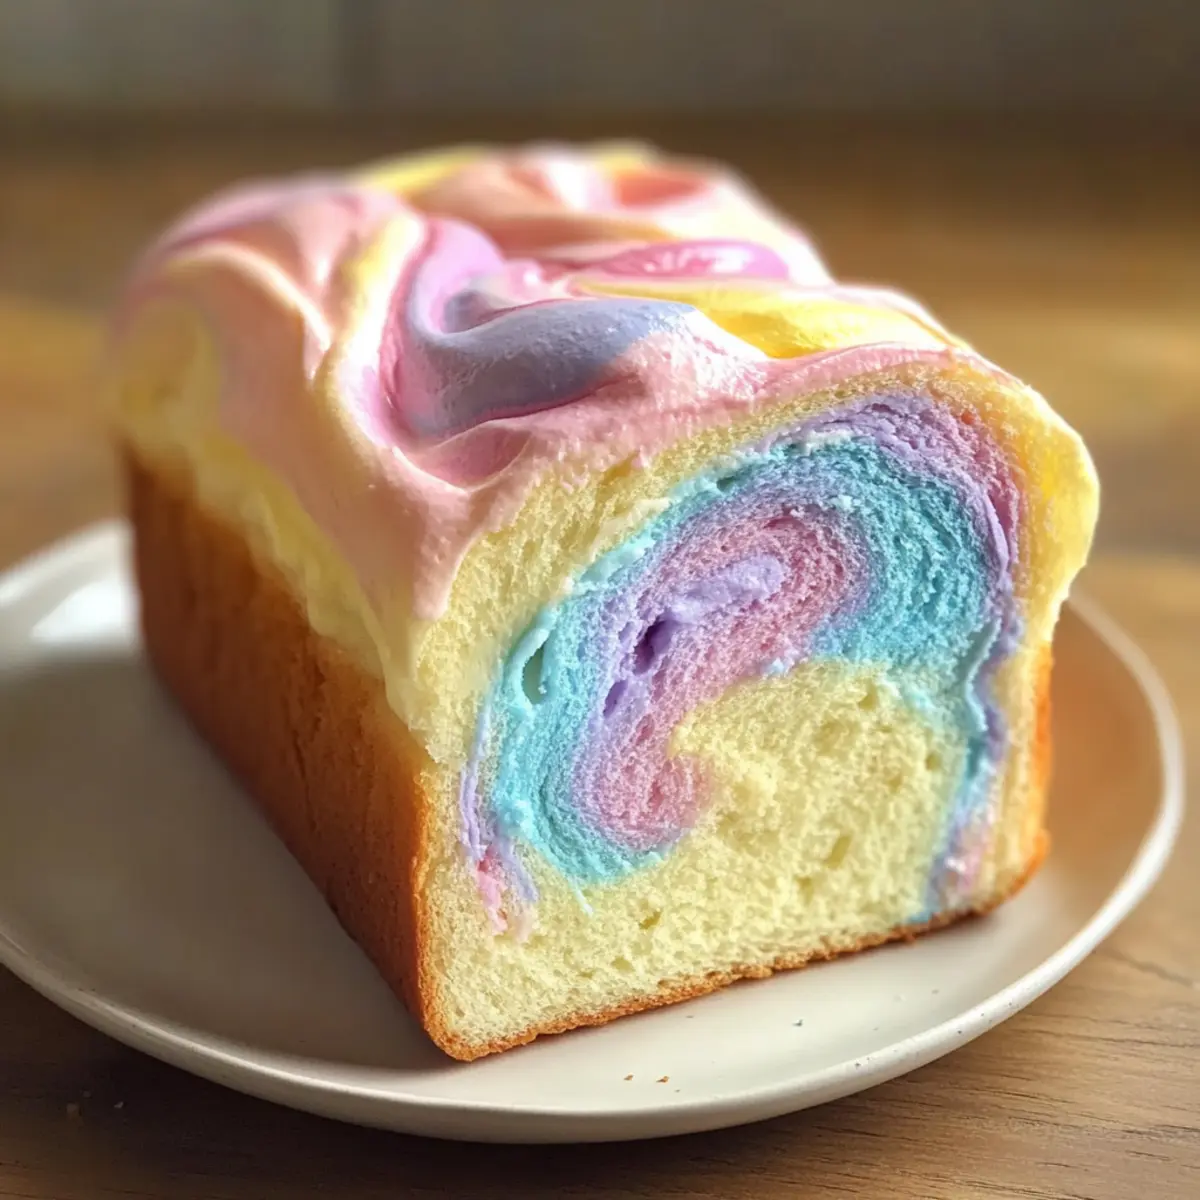
As I stood in my kitchen, the bright morning sun streaming through the window, I felt an urge to create something both beautiful and delicious. Enter the Cloud Bread Pastel Swirl Loaf — a delightful bread that’s not only gluten-free and low-carb but also a feast for the eyes. This airy loaf combines a soft, fluffy texture with charming pastel swirls, making it perfect for brunch gatherings or simply enjoying with a cozy cup of tea. With just a handful of ingredients, it allows you to craft an impressive centerpiece that’s sure to impress friends and family alike. Ready to whip up this colorful indulgence and surprise yourself with how easy it is? Let’s dive in!
Why is Cloud Bread a Must-Try?
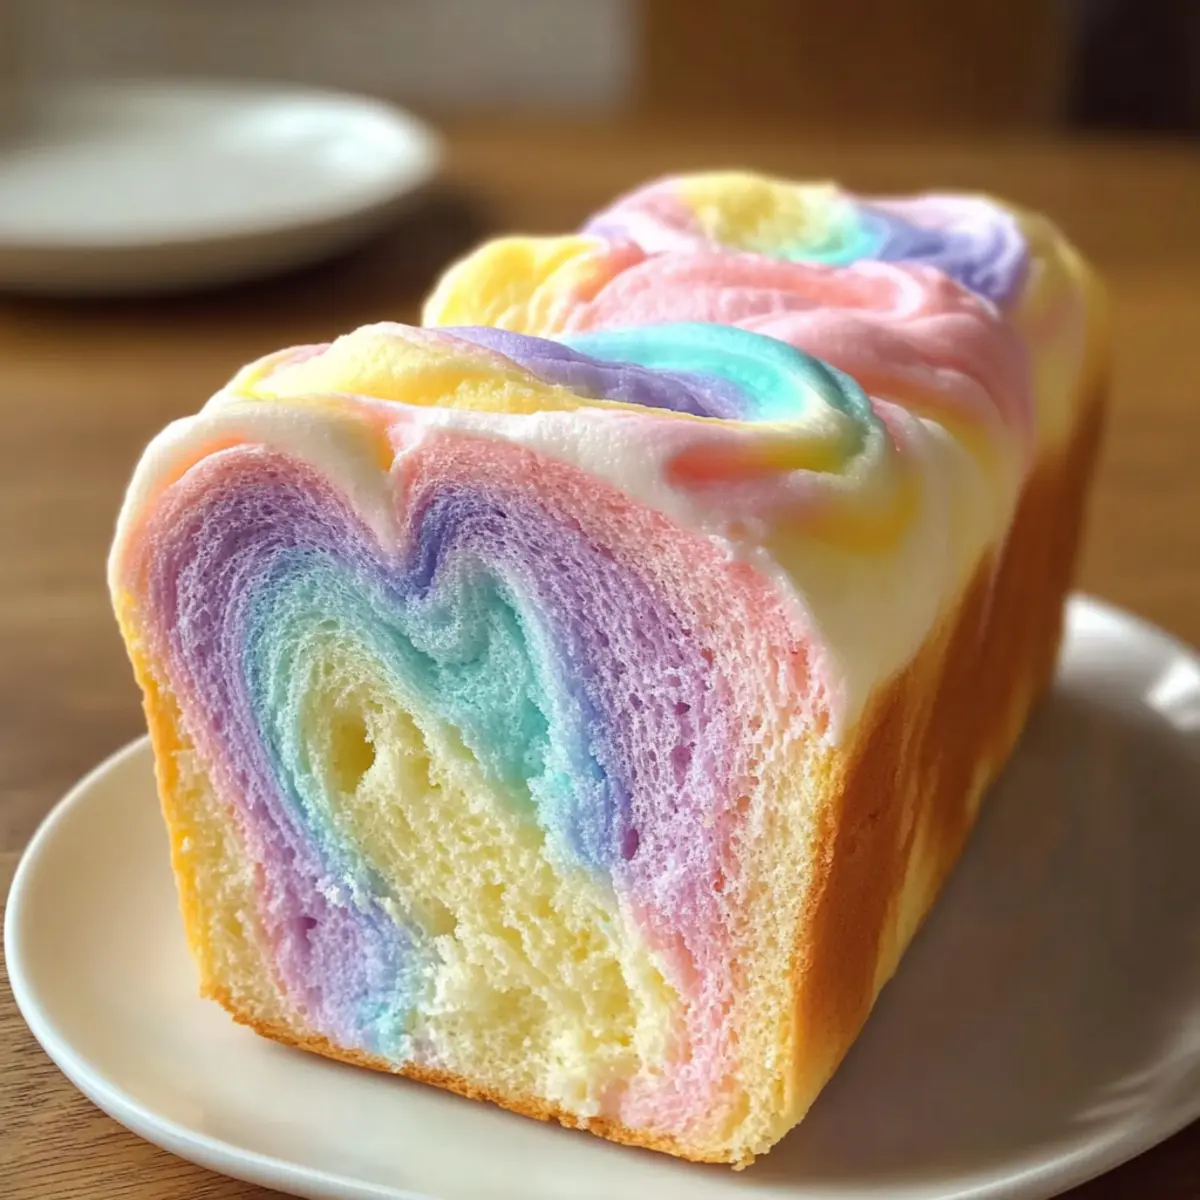
Light and Fluffy: The Cloud Bread Pastel Swirl Loaf offers a delightful texture that feels like biting into a soft cloud. Visually Stunning: With its colorful pastel swirls, this bread not only tastes fantastic but also makes a gorgeous centerpiece for your table. Gluten-Free and Low-Carb: Perfect for those with dietary restrictions, this loaf is both gluten-free and low in carbohydrates, allowing you to enjoy without guilt. Quick and Simple: It requires minimal ingredients and time, making it an accessible recipe for both novice and seasoned bakers. Perfect for Any Occasion: Whether you're hosting a brunch or enjoying a quiet afternoon snack, this loaf will impress every guest. Don't forget to try it toasted with some butter or alongside a dollop of jam for an extra treat!
Cloud Bread Recipe Pastel Swirl Loaf Ingredients
• Here's everything you need to create this delectable Cloud Bread Recipe Pastel Swirl Loaf:
For the Batter
- Egg Whites – Provides structure and volume; ensure no yolk mixes in for optimal whipping.
- Cream of Tartar – Stabilizes the egg whites during whipping, crucial for achieving stiff peaks.
- Egg Yolks – Adds richness and color while combining the base mixture.
- Cream Cheese – Contributes creaminess and moisture; can be substituted with mascarpone for a similar texture.
- Salt – Enhances flavor; just a pinch will do!
- Sugar or Honey (optional) – Adds a touch of sweetness; adjust or omit based on your preference.
- Gel Food Coloring – Perfect for creating pastel swirls; consider natural colorings for a healthier option.
Step‑by‑Step Instructions for Cloud Bread Recipe Pastel Swirl Loaf
Step 1: Preheat and Prepare
Begin by preheating your oven to 300°F (150°C). While the oven warms up, line a loaf pan with parchment paper, allowing some overhang on the edges for easy removal later. This preparation ensures your Cloud Bread Pastel Swirl Loaf maintains its beautiful shape and arrives effortlessly onto your serving platter after baking.
Step 2: Separate the Eggs
Carefully separate the egg whites from the yolks, placing them into two different bowls. Make sure no egg yolk contaminates the whites as this will hinder their ability to whip up into fluffy peaks. The key to achieving that airy texture in your Cloud Bread Recipe Pastel Swirl Loaf lies in the purity of your egg whites.
Step 3: Whip the Egg Whites
Now it’s time to add the cream of tartar to the bowl with the egg whites. Using an electric mixer, beat on high speed until stiff peaks form, typically around 5-7 minutes. This step is crucial for the volume and lightness of your loaf, so keep an eye out for the glossy texture and peaks that hold their shape firmly.
Step 4: Mix the Yolk Mixture
In the second bowl containing the yolks, mix in the cream cheese and a pinch of salt. Blend until smooth and creamy, ensuring there are no lumps. If you’d like your loaf to have a touch of sweetness, this is the moment to incorporate sugar or honey as desired, stirring until well combined into your gorgeous base mixture.
Step 5: Fold in the Egg Whites
With utmost care, start folding the whipped egg whites into the yolk mixture. It’s important to do this in batches; scoop a portion of the whites into the yolk blend and gently fold, maintaining the airiness. This gentle folding technique is essential in preserving the fluffy texture that defines your Cloud Bread Pastel Swirl Loaf.
Step 6: Color the Batter
Once combined, it’s time to divide the batter into several bowls, depending on how many pastel colors you’d like to create. Add gel food coloring to each bowl, mixing gently until you achieve your desired shades. These vibrant hues will give your Cloud Bread Pastel Swirl Loaf its charming, whimsical appearance.
Step 7: Create the Swirls
Transfer alternating dollops of the colored batter into the prepared loaf pan, ensuring you create a beautiful marbled effect. Use a skewer or the back of a spoon to gently swirl the colors together for a stunning presentation. The visual appeal is as important as the taste, so make this step count with your artistic flair!
Step 8: Bake the Loaf
Place your loaf pan in the preheated oven and bake for 30-40 minutes. Keep a close watch on your creation; it’s done when the top is lightly golden and springs back when touched lightly. The Cloud Bread Pastel Swirl Loaf should fill your kitchen with delightful aromas as it bakes to perfection.
Step 9: Cool and Serve
After baking, let the loaf cool in the pan for about 5-10 minutes. Then, carefully lift it out using the parchment overhang and transfer it to a wire rack. Allow it to cool completely before slicing, as this ensures a neat cut and preserves the airy texture of your beautiful Cloud Bread Recipe Pastel Swirl Loaf.
Make Ahead Options
These Cloud Bread Pastel Swirl Loaf preparations are perfect for busy home cooks looking to save time! You can prepare the batter up to 24 hours in advance by whipping the egg whites and mixing the yolk mixture separately. Store each component in airtight containers in the refrigerator to maintain freshness and prevent any loss of volume. When you're ready to enjoy your beautiful loaf, simply fold the whipped egg whites into the yolk mixture and proceed by adding your gel food coloring, creating those stunning swirls, and baking. This approach lets you serve a delightful treat effortlessly, ensuring your Cloud Bread Pastel Swirl Loaf is just as fluffy and visually appealing as if made fresh!
What to Serve with Cloud Bread Pastel Swirl Loaf?
Pairing this delightful loaf with the right accompaniments elevates your dining experience to a new level of bliss.
-
Fresh Berry Compote: The sweet-tart flavor of berries perfectly complements the soft, airy texture of the loaf. A vibrant, colorful topping adds a lush touch to your table.
-
Creamy Avocado Spread: This rich spread mingles beautifully with the loaf, adding a creamy texture while enhancing the gluten-free goodness with healthy fats.
-
Herbed Cream Cheese: A savory herbed cream cheese offers a rich and tangy contrast to the mild sweetness of the Cloud Bread Pastel Swirl Loaf, tantalizing your taste buds.
-
Seasonal Salads: Light, fresh salads with citrus or berries provide a delightful crunch that balances the cloud-like softness of the loaf, making it perfect for brunch or lunch.
-
Honey or Maple Drizzle: A drizzle of honey or maple syrup adds a touch of sweetness, enhancing the flavors of the loaf while keeping things simply delicious.
-
Sparkling Lemonade or Iced Tea: Refreshing drinks like sparkling lemonade or iced tea enhance your enjoyment of the colorful loaf, making for a lovely summer brunch.
Embrace these pairings for a meal that’s not just about taste, but about a feast for the senses, perfect for sharing with loved ones.
Cloud Bread Recipe Pastel Swirl Loaf Variations
Explore delightful ways to make this Cloud Bread Pastel Swirl Loaf uniquely yours.
-
Flavor Infusions: Add vanilla or almond extract to the yolk mixture for a subtle but flavorful twist. The added warmth enhances the overall taste, making it even more comforting.
-
Fruit Swirls: Incorporate mashed berries like strawberries or blueberries for a fruity color and flavor boost. This will not only add sweetness but also a lovely, natural hue to your loaf.
-
Sweetener Swap: Use coconut sugar or agave syrup instead of regular sugar to cater to different dietary needs. This can add a richer, caramel-like flavor to your Cloud Bread.
-
Dairy-Free: Substitute cream cheese with vegan cream cheese or blended silken tofu for a creamy texture without dairy. It’s a great option that keeps the pastel swirls intact.
-
Spice It Up: Sprinkle a dash of cinnamon or nutmeg into the yolk mixture for a warm, cozy flavor. These spices offer a wonderful contrast to the sweet, airy elements of the bread.
-
Cheesy Delight: Fold in a handful of grated cheese, like mozzarella or cheddar, into your batter before baking for a savory twist. Cheese adds a delightful richness that pairs perfectly with the soft texture.
-
Nutty Addition: Toss in crushed nuts such as walnuts or almonds for a crunchier texture. They’ll provide great contrast to the fluffy loaf while adding healthy fats.
-
Layered Presentation: Create a layered effect by alternating the colored batter in the pan for a striped appearance. This enhances the visual appeal and makes each slice stylish.
Don’t forget to try this lovely loaf toasted with butter or paired with some jam, or enjoy a slice alongside a refreshing cup of tea. And if you're looking for more recipes that bring a touch of elegance to your table, consider whipping up some Cheesy Garlic Bread or a hearty Cornbread Breakfast Casserole. Happy baking!
Expert Tips for Cloud Bread Recipe Pastel Swirl Loaf
-
Egg White Purity: Ensure complete separation of egg whites and yolks. Even a tiny bit of yolk can prevent proper whipping, which is crucial for a fluffy texture.
-
Gentle Folding: When incorporating the whipped egg whites into the yolk mixture, be gentle. This maintains the airiness that's essential for the Cloud Bread Recipe Pastel Swirl Loaf.
-
Coloring Caution: Use gel food coloring sparingly. Too much can alter the batter's texture and affect the final loaf's rise.
-
Check for Doneness: Bake until lightly golden and springy. Avoid overbaking, as this can dry out the loaf and diminish its fluffy quality.
-
Cooling Time: Allow the loaf to cool completely before slicing. This step helps maintain the cloud-like texture, giving you perfect, airy slices every time.
Storage Tips for Cloud Bread Recipe Pastel Swirl Loaf
-
Room Temperature: Keep the Cloud Bread Pastel Swirl Loaf in an airtight container at room temperature for up to 2 days to maintain its fluffy texture.
-
Fridge: If you need to store it longer, refrigerate the loaf in an airtight container for up to 5 days. This helps preserve moisture while keeping it fresh.
-
Freezer: For extended storage, wrap slices individually in plastic wrap, then place them in a freezer-safe bag or container. They can be frozen for up to 2 months without losing their delightful texture.
-
Reheating: To enjoy your frozen slices, thaw in the fridge overnight and toast or warm in the oven at 300°F (150°C) for several minutes before serving for the best results.
Cloud Bread Recipe Pastel Swirl Loaf Recipe FAQs
What is the best way to ensure my egg whites whip properly?
Absolutely! The key is to ensure that no yolk mixes in with the egg whites. Even a small amount can prevent them from achieving the fluffiness you desire. Use separate bowls to crack your eggs—this ensures you can easily dispose of any problematic yolks. Additionally, make sure your mixing bowl is clean and free from grease. For best results, allow the egg whites to come to room temperature before whipping; this typically enhances the volume.
How long can I store the Cloud Bread Pastel Swirl Loaf?
You can keep your Cloud Bread Pastel Swirl Loaf in an airtight container at room temperature for up to 2 days. If you plan to enjoy it longer, refrigerate it in an airtight container for up to 5 days. This helps maintain its soft, pillowy texture. When storing, remember to cool the loaf completely to avoid any condensation that could lead to sogginess.
Can I freeze Cloud Bread Pastel Swirl Loaf?
Yes, you can freeze the adorable Cloud Bread Pastel Swirl Loaf with ease! Wrap individual slices tightly in plastic wrap and place them in a freezer-safe bag or container. This method not only protects them from freezer burn but also helps preserve their lovely texture. They can be frozen for up to 2 months. When you’re ready to enjoy, simply thaw a slice overnight in the fridge and warm it gently in the oven at 300°F (150°C) for a few minutes for the best experience.
What if my loaf didn’t rise properly?
If your Cloud Bread didn’t achieve that fluffy rise, it may have been due to improperly whipped egg whites. Ensure you beat them until stiff peaks form and be careful while folding them into the yolk mixture. Folding too vigorously can deflate the batter. Also, check that your baking powder or cream of tartar is fresh, as using expired products can hinder rising. It’s a delicate balance, but with a little practice, you’ll master the fluffy texture!
Are there any dietary considerations I should keep in mind?
Very! The Cloud Bread Pastel Swirl Loaf is naturally gluten-free and low-carb, which makes it a great alternative for those with gluten sensitivities or those following low-carb diets. However, if you or your guests have dairy allergies, consider substituting the cream cheese with a dairy-free option like cashew cream or vegan cream cheese. This way, everyone can enjoy the fluffy goodness without worry!
How can I enhance the flavor of my Cloud Bread Pastel Swirl Loaf?
To add a touch of delightful flavor, consider incorporating extracts like vanilla or almond into your yolk mixture. Feel free to explore adding a pinch of cinnamon or lemon zest for a unique twist! Each variation can subtly elevate the loaf’s taste while maintaining the beautiful pastel swirls. Have fun experimenting; the more flavor, the merrier!

Cloud Bread Recipe Pastel Swirl Loaf: Fluffy Colorful Delight
Ingredients
Equipment
Method
- Preheat your oven to 300°F (150°C) and line a loaf pan with parchment paper.
- Separate the egg whites and yolks into two bowls, ensuring no yolk contaminates the whites.
- Add cream of tartar to the egg whites and whip on high until stiff peaks form, about 5-7 minutes.
- In the yolk bowl, mix cream cheese and salt until smooth. Optional: stir in sugar or honey.
- Gently fold the whipped egg whites into the yolk mixture, in batches, to maintain airiness.
- Divide the batter into several bowls and add gel food coloring to each, mixing gently.
- Transfer alternating dollops of colored batter into the loaf pan and swirl gently with a skewer.
- Bake for 30-40 minutes until the top is lightly golden and springs back when touched.
- Cool in the pan for 5-10 minutes, then lift out and transfer to a wire rack to cool completely.