tastytrendingredients

  • Home
  • Recipes
    • Appetizers
    • Breakfast
    • Dessert
    • Dinner
    • Drinks
    • Salads
    • Snacks
    • Soups
  • About me
  • Contact me
menu icon
go to homepage
  • Home
  • Recipes
    • Appetizers
    • Breakfast
    • Dessert
    • Dinner
    • Drinks
    • Salads
    • Snacks
    • Soups
  • About me
  • Contact me
search icon
Homepage link
  • Home
  • Recipes
    • Appetizers
    • Breakfast
    • Dessert
    • Dinner
    • Drinks
    • Salads
    • Snacks
    • Soups
  • About me
  • Contact me
×

Crispy Japanese Katsu Bowls with Tonkatsu Sauce Bliss

December 9, 2025 by Grace Snow Leave a Comment

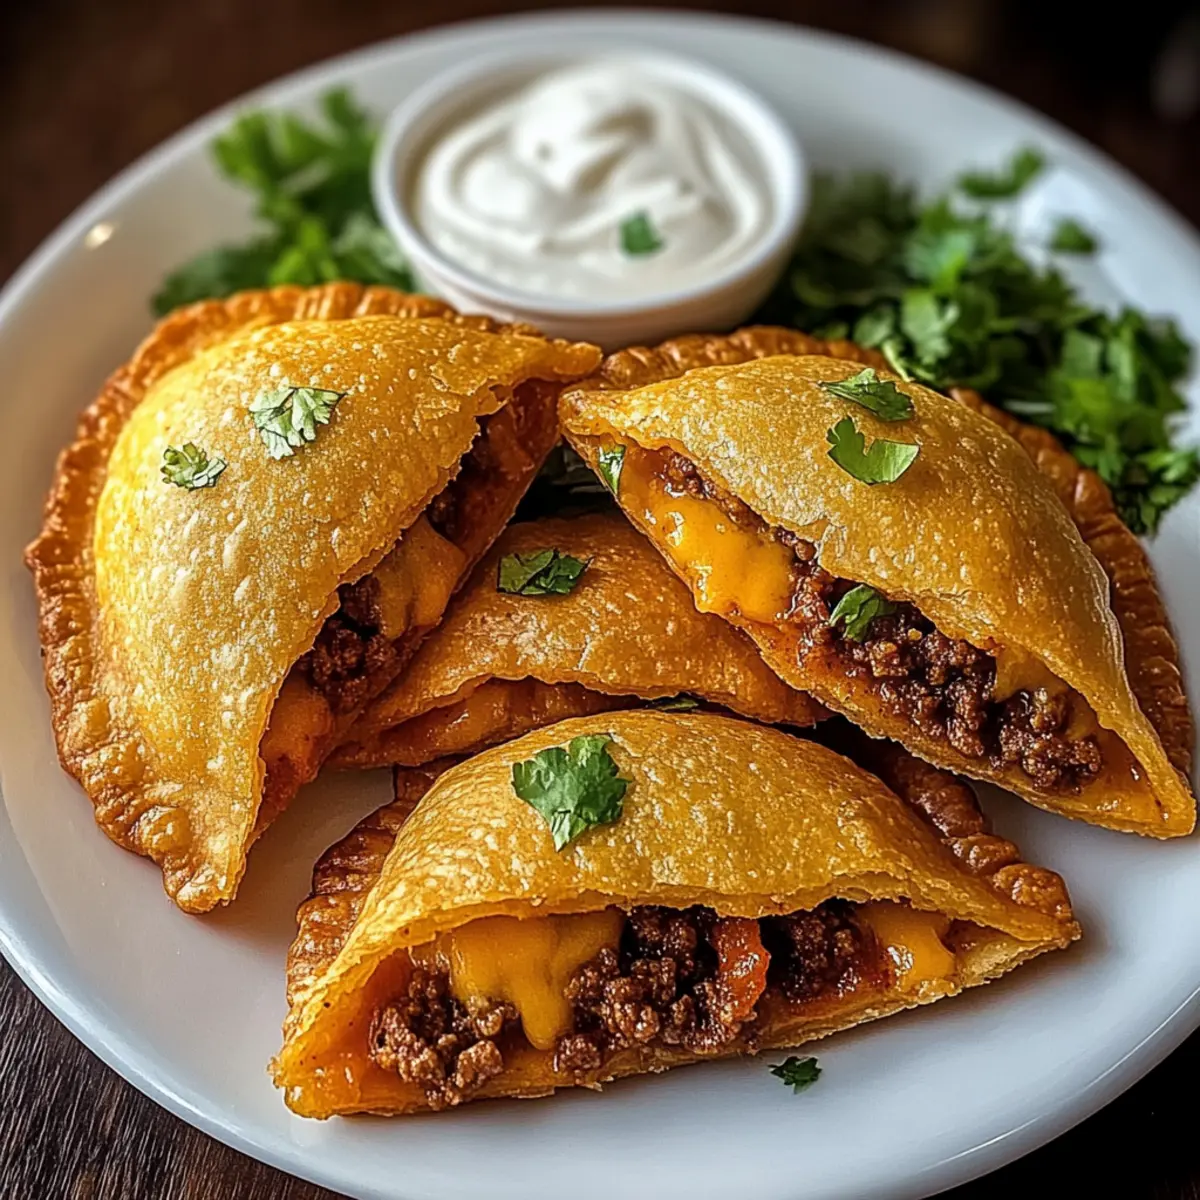
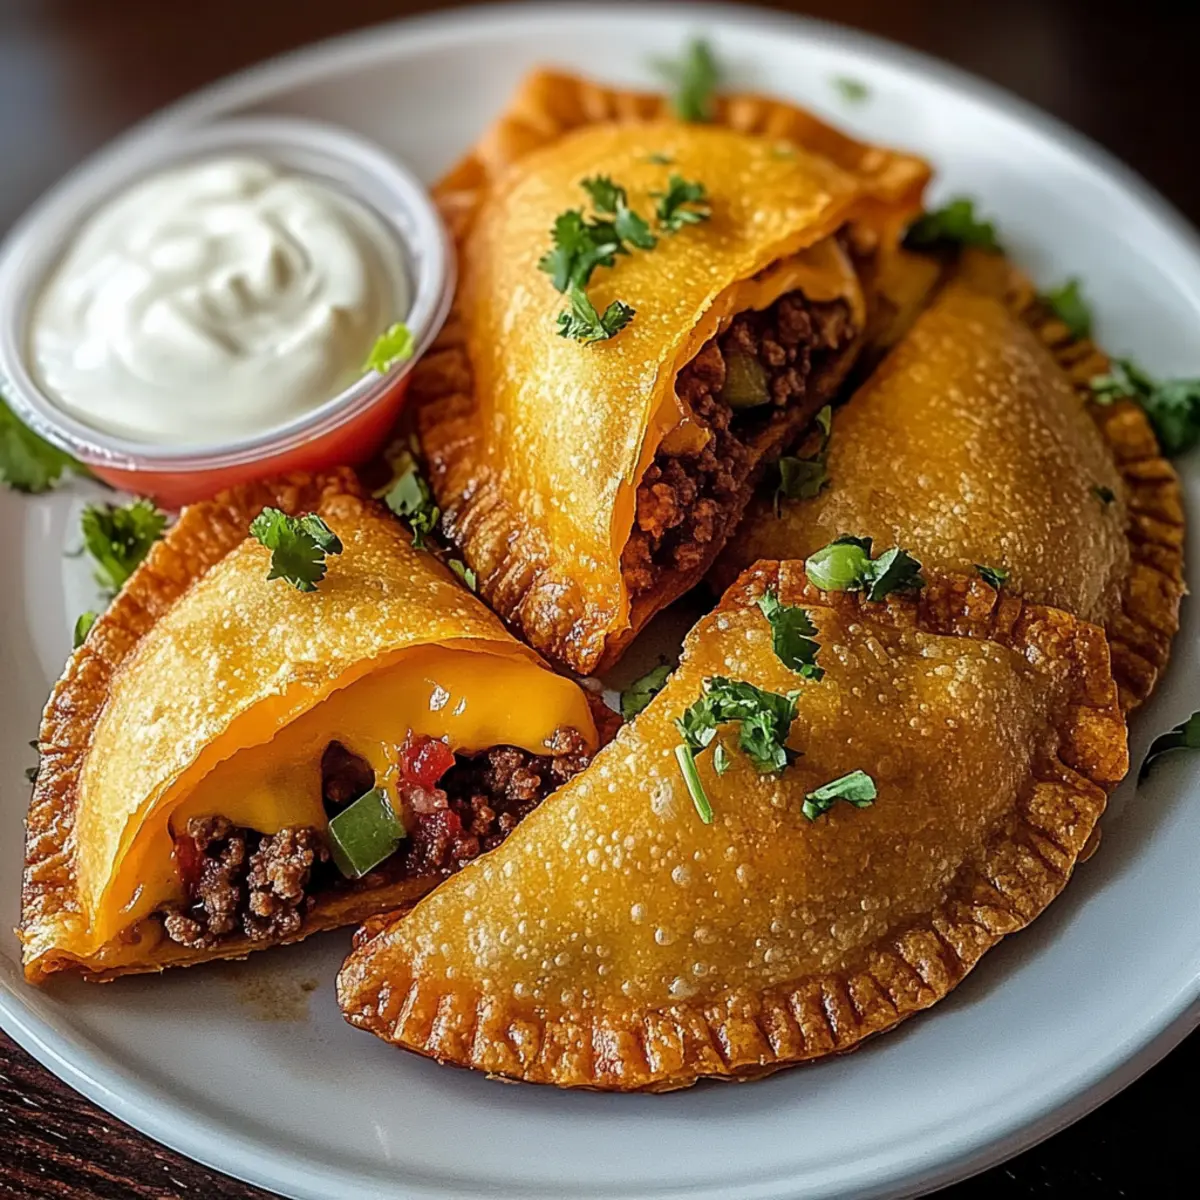
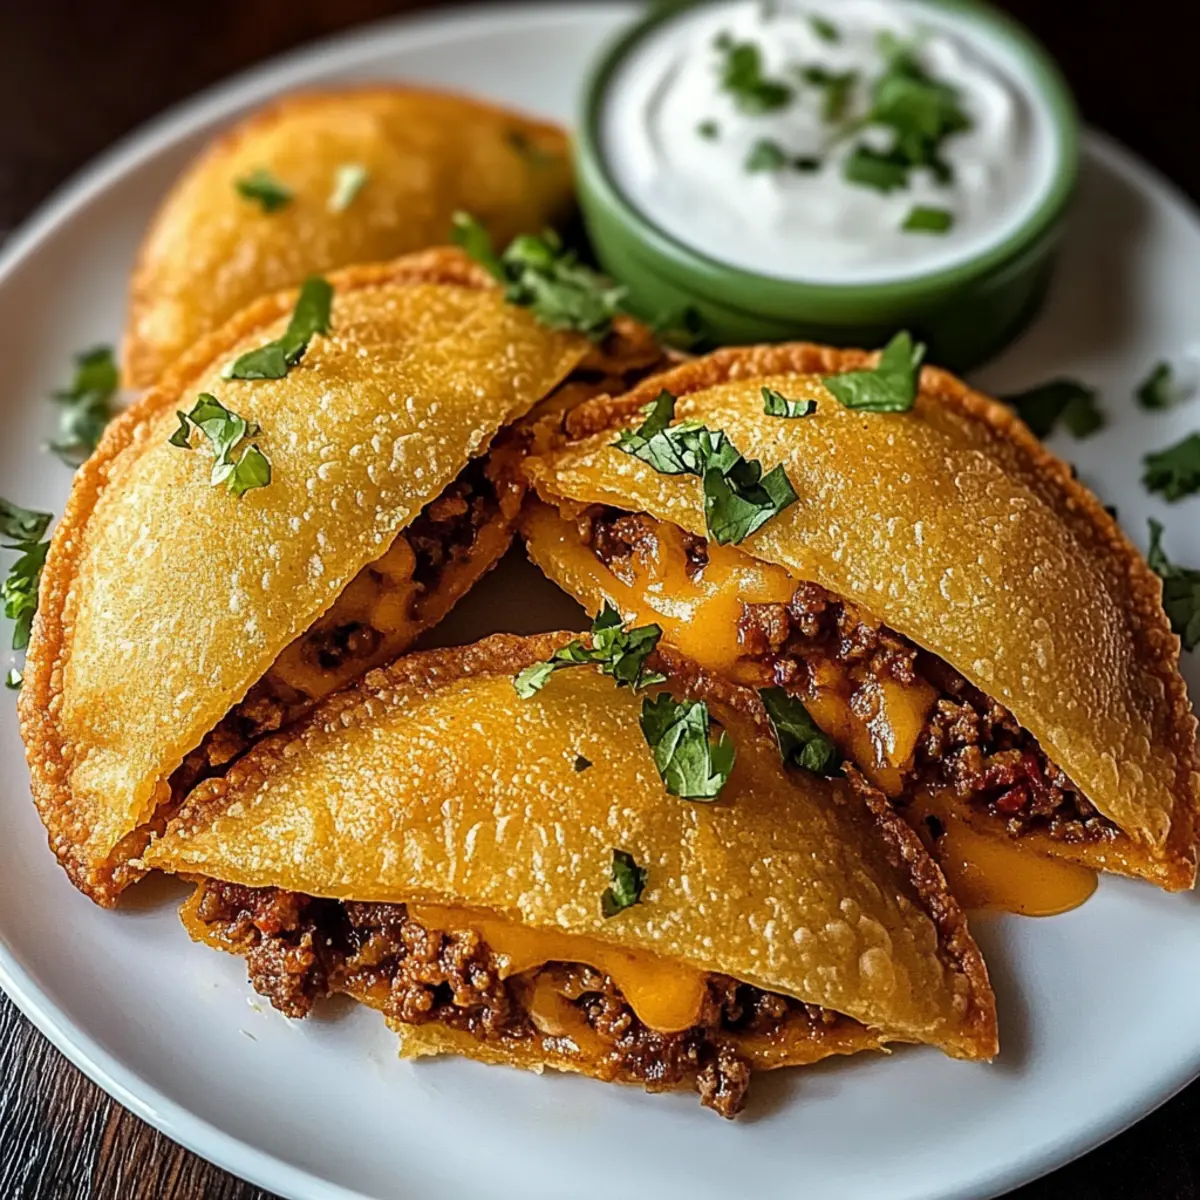
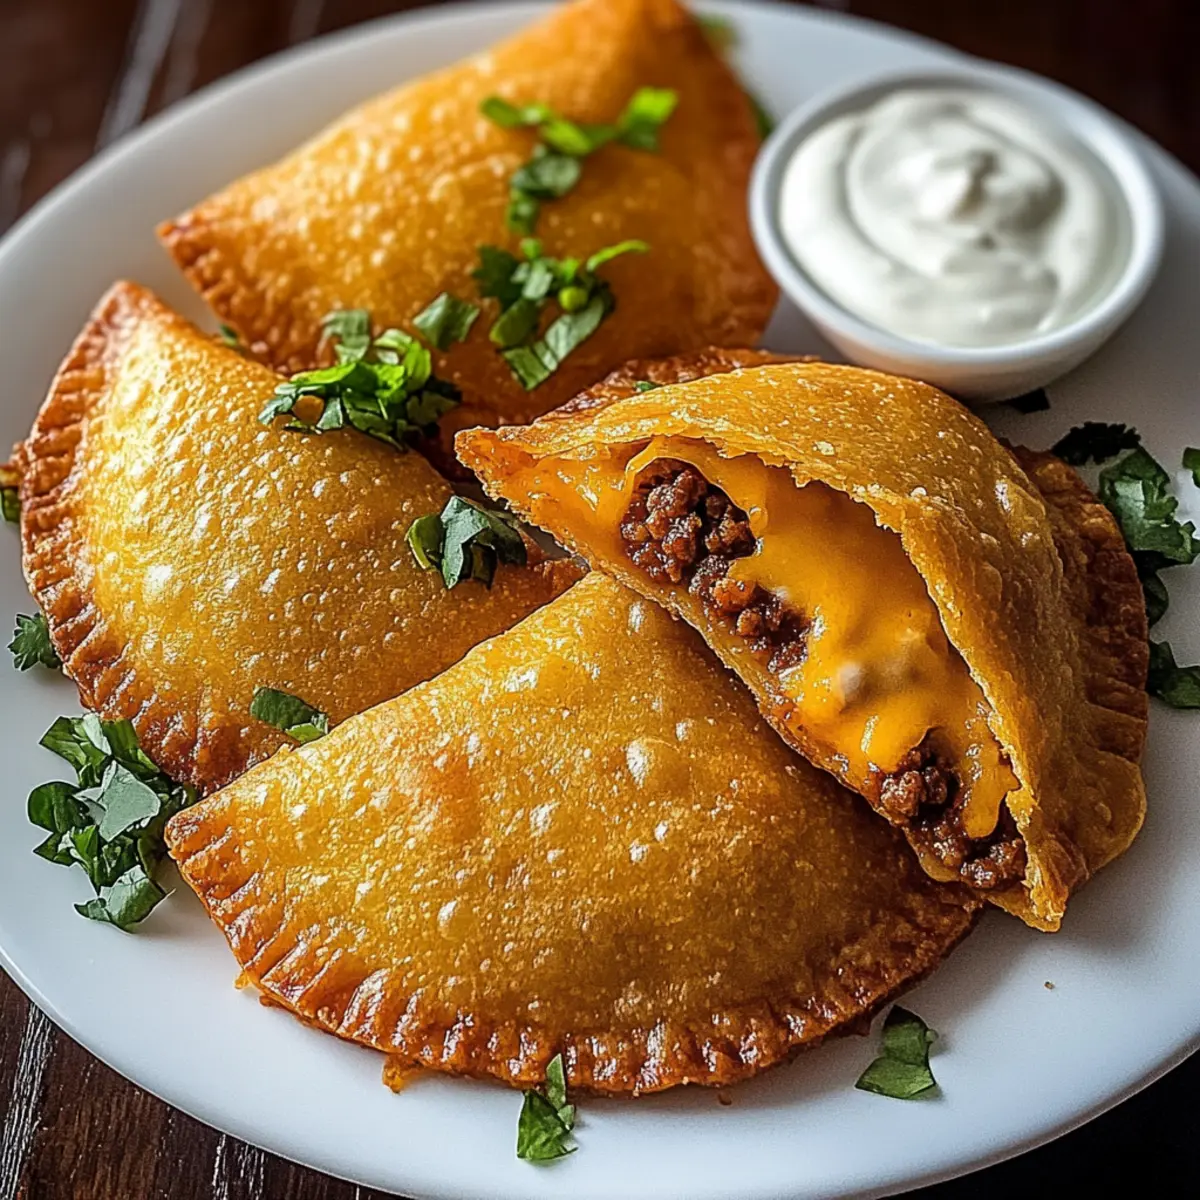
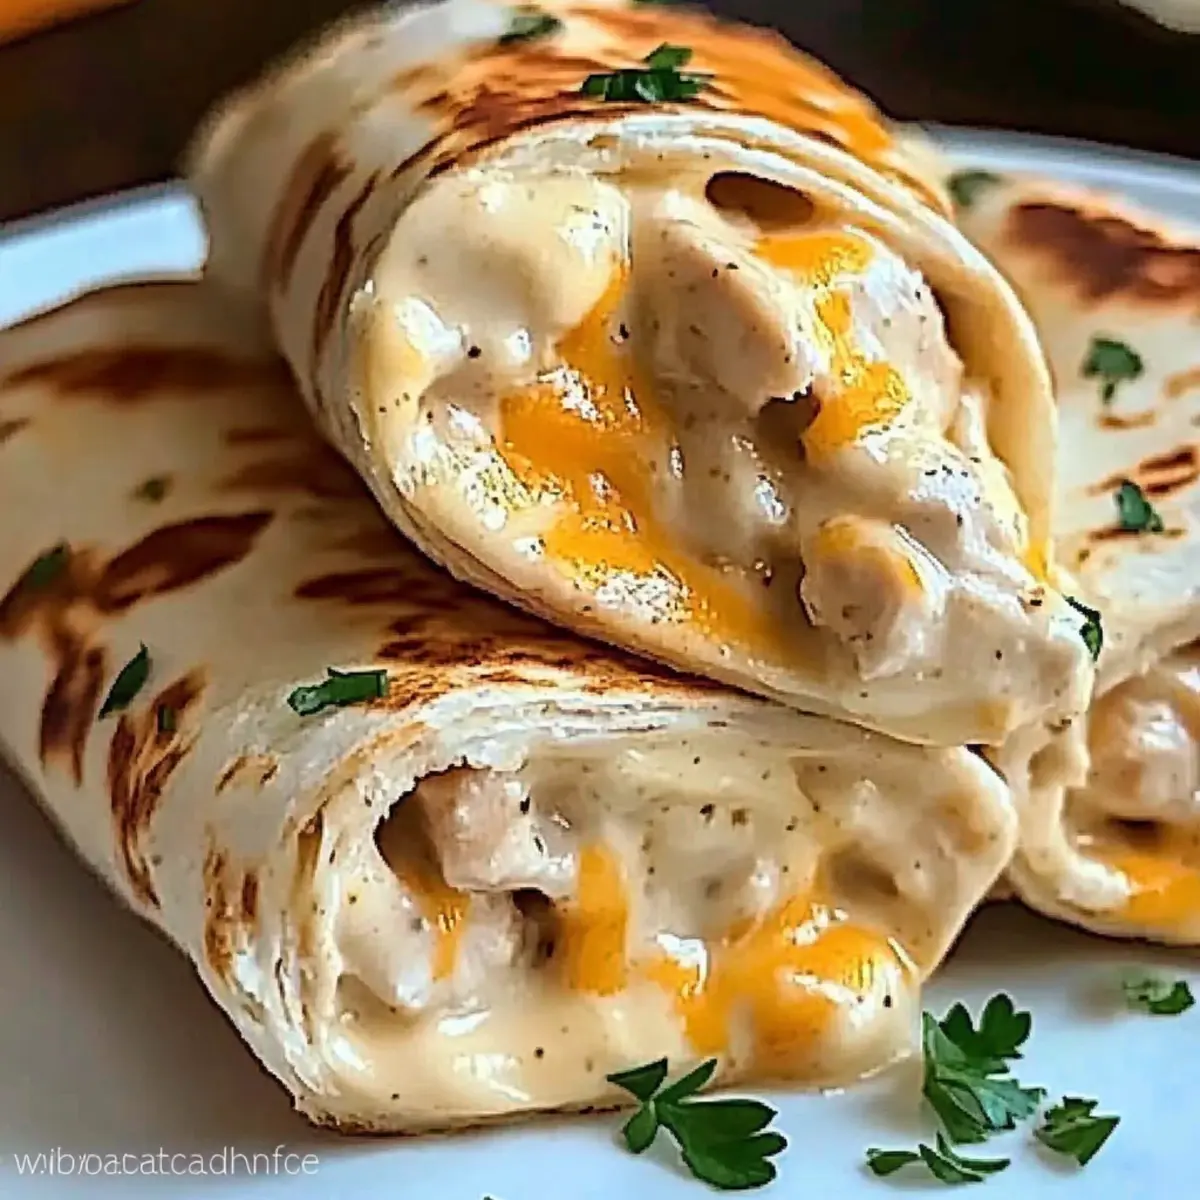
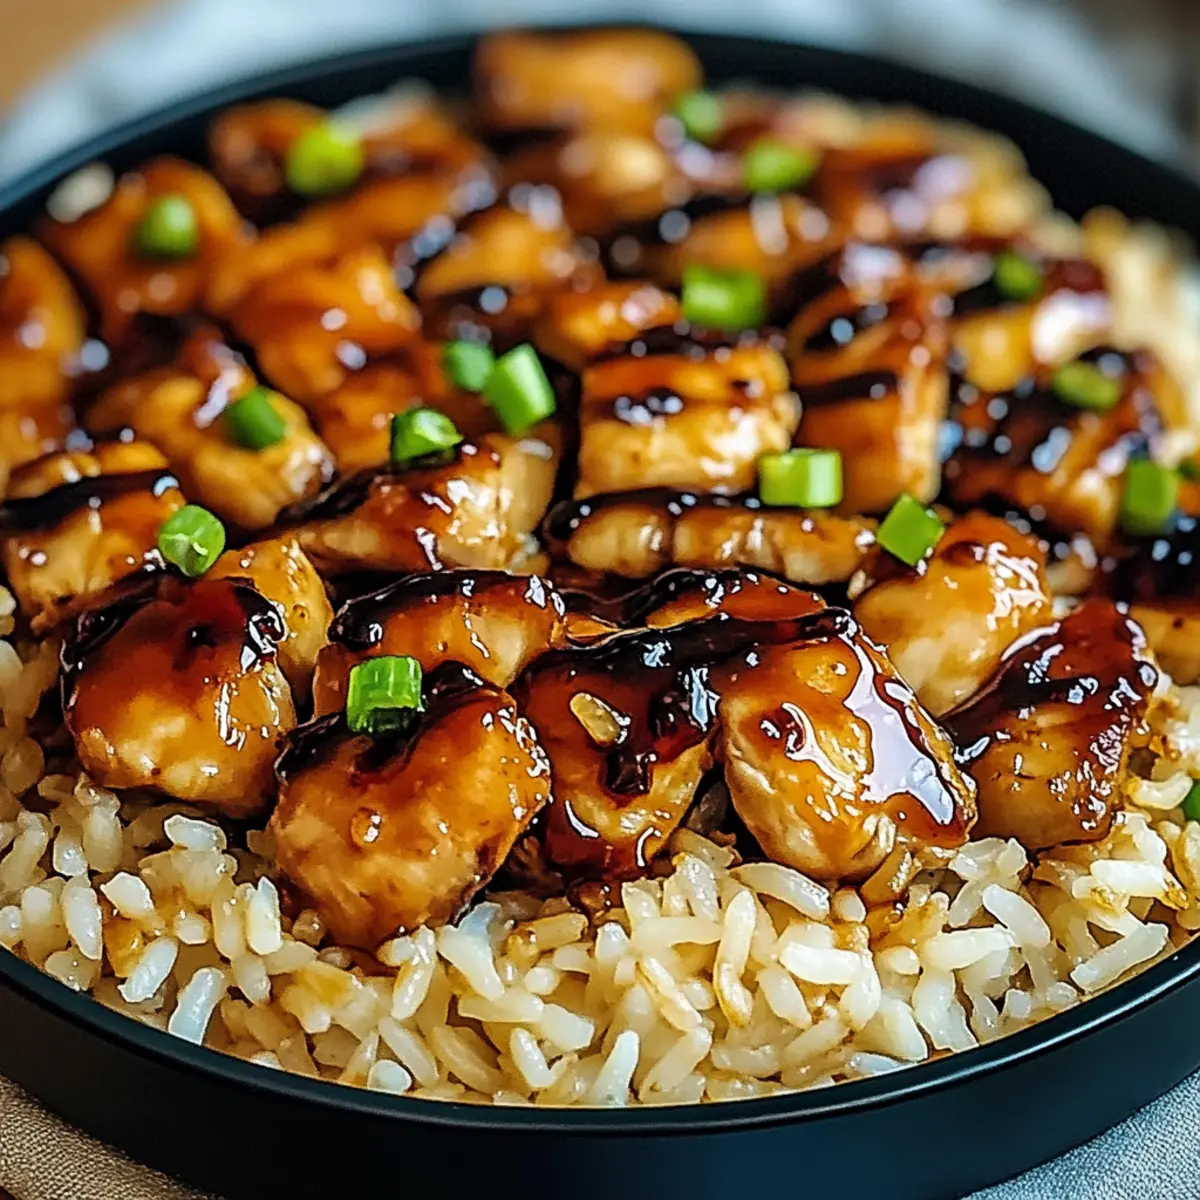
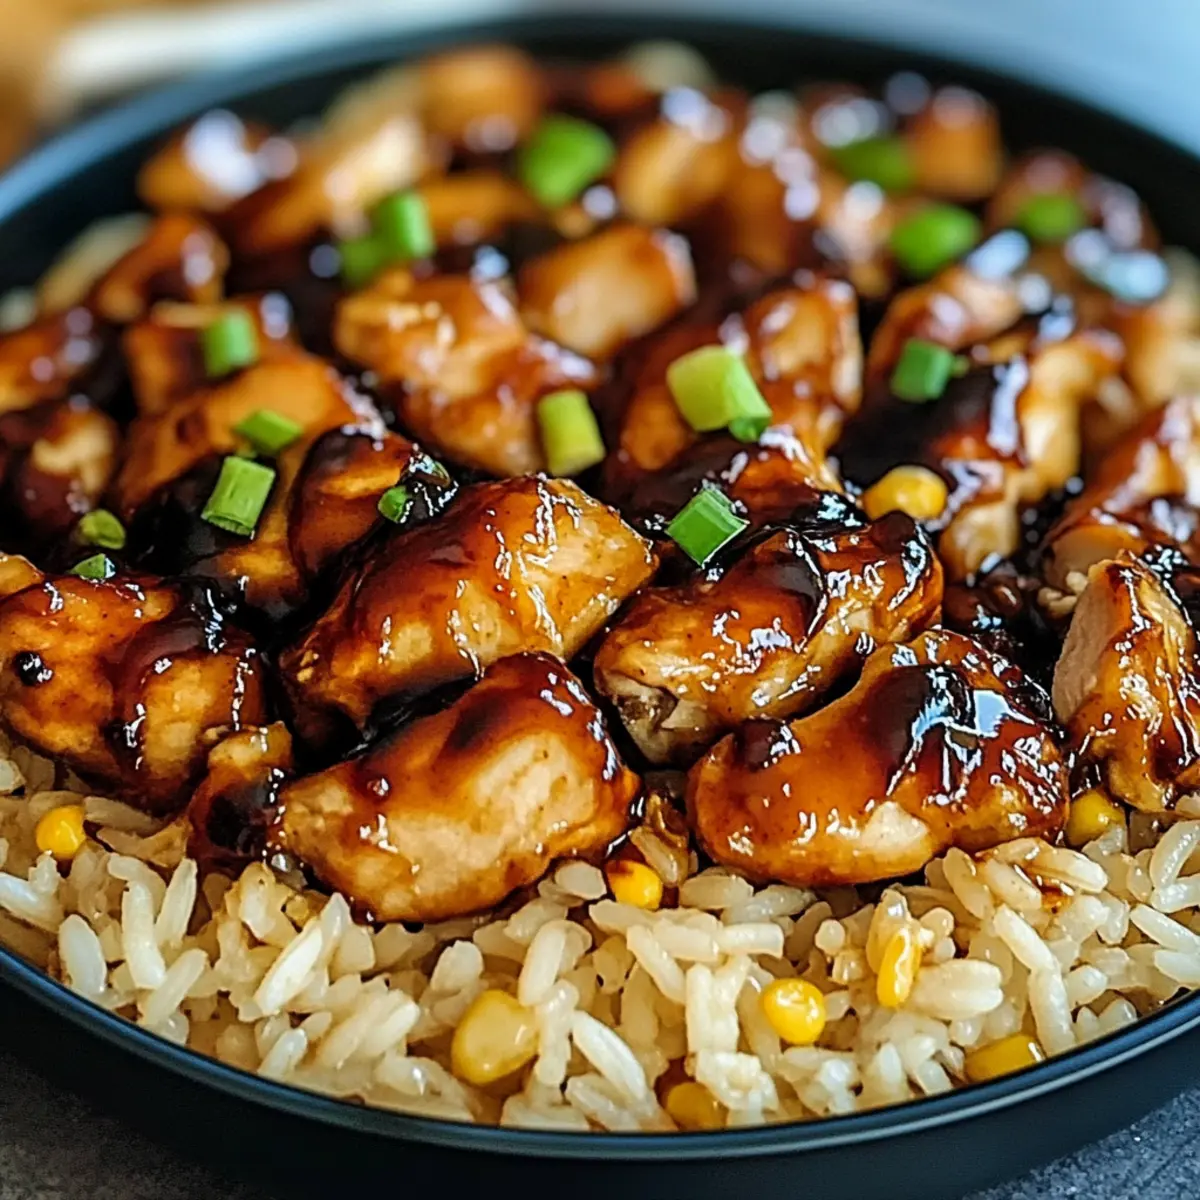
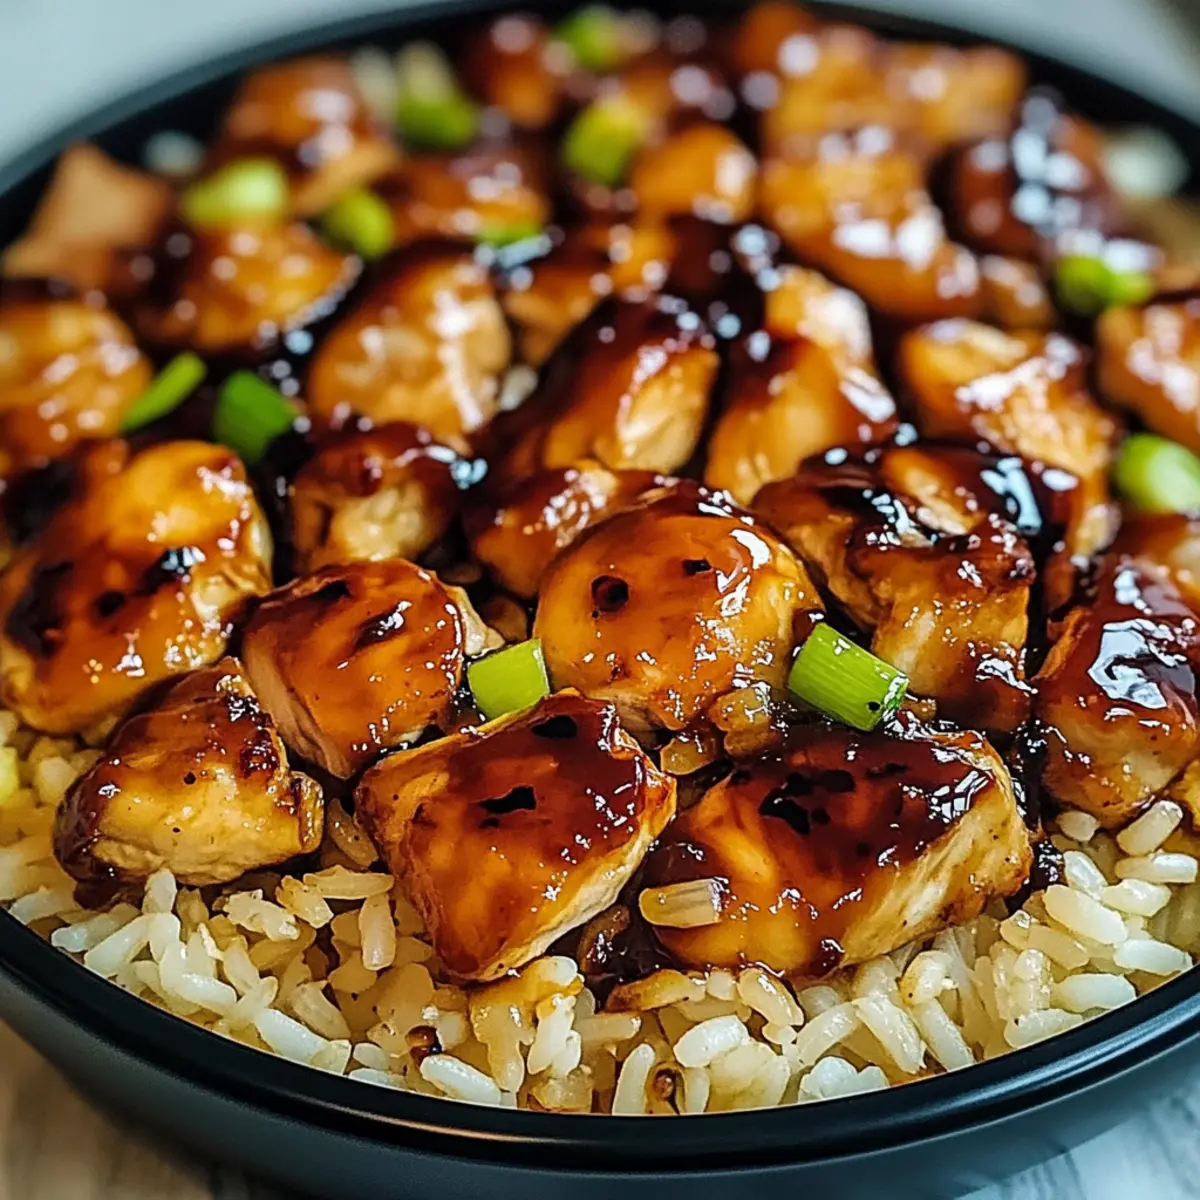
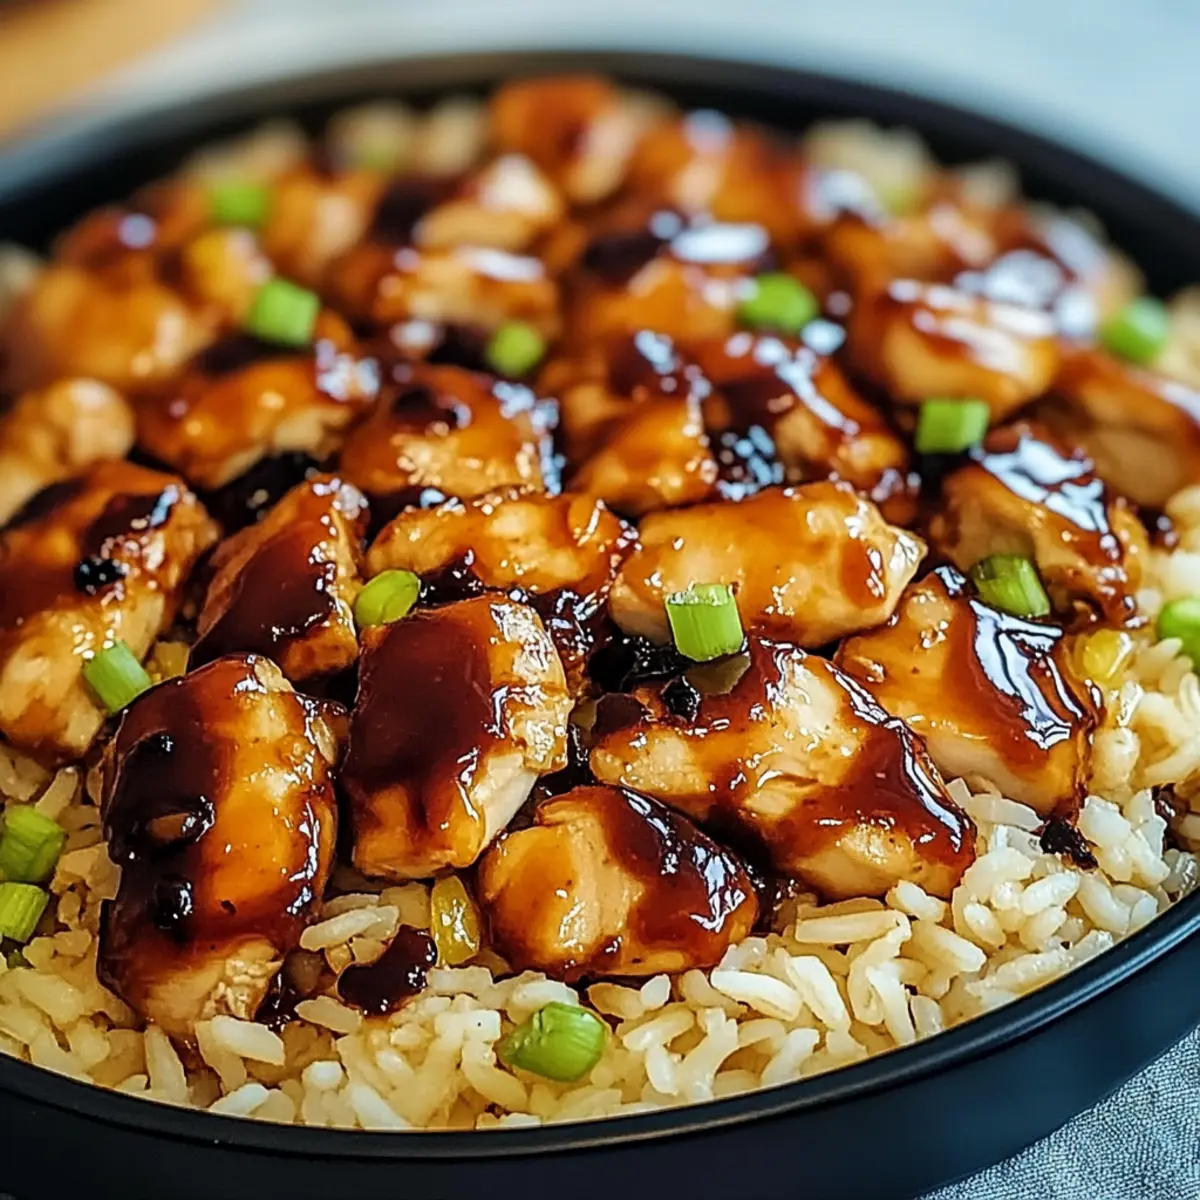
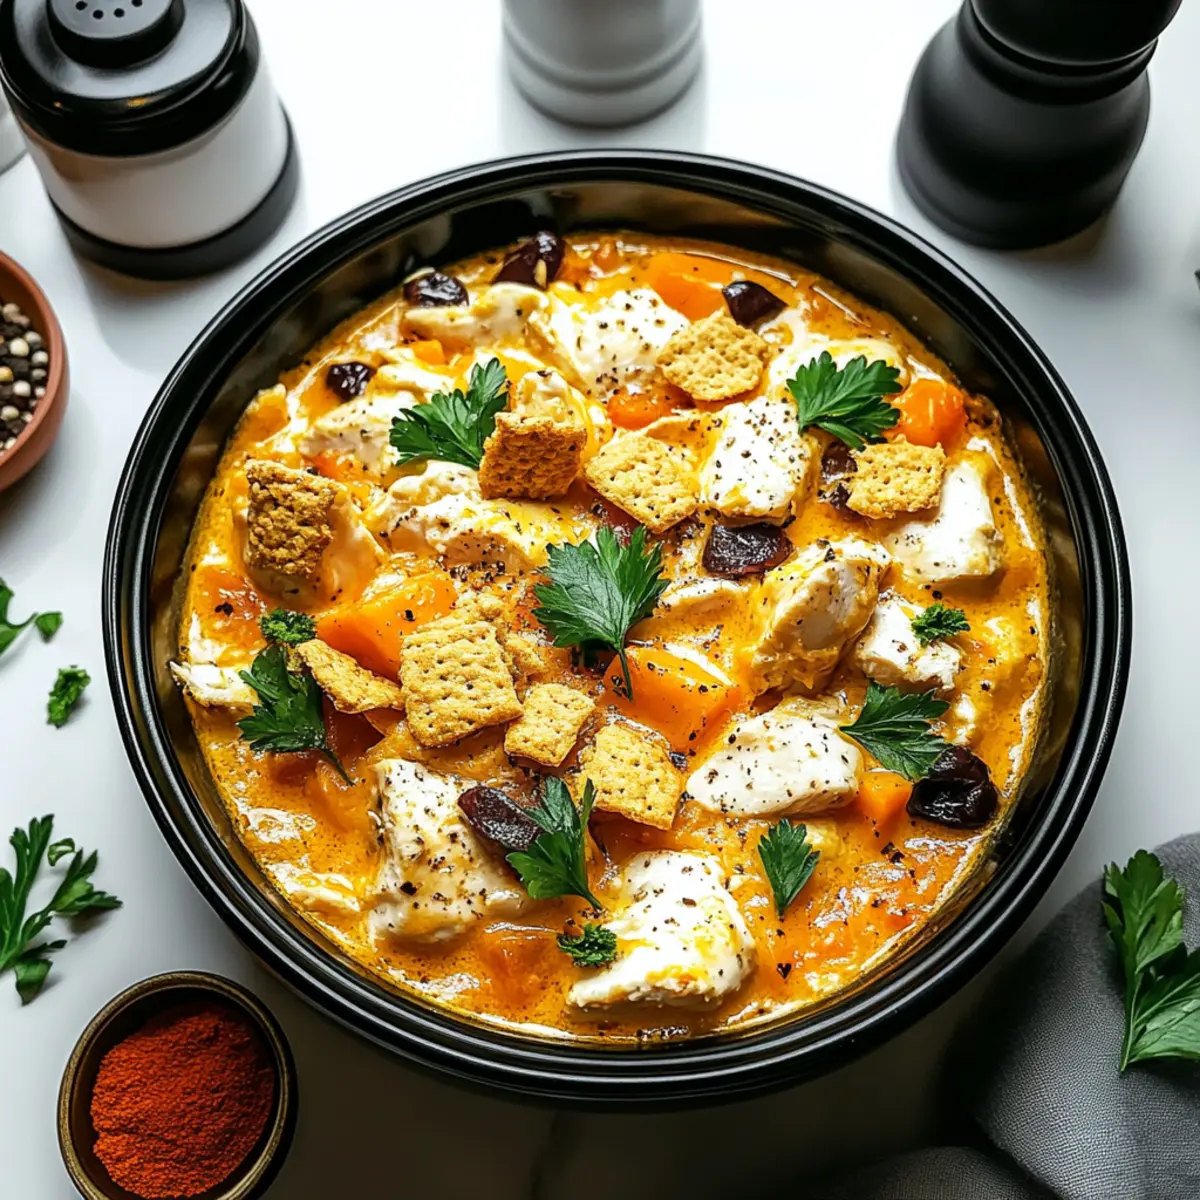
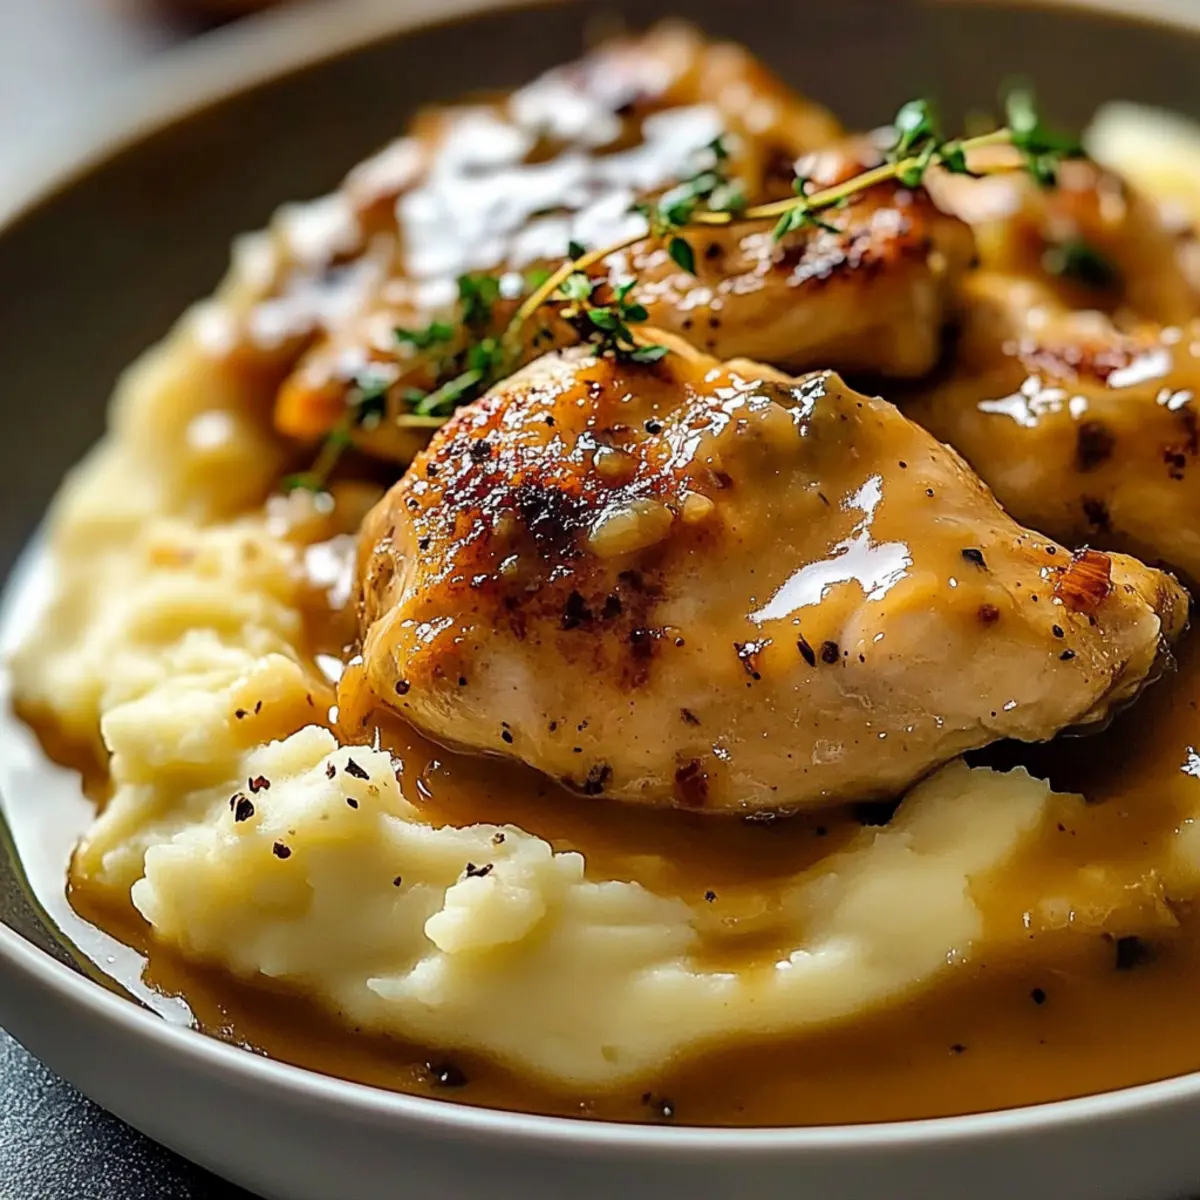
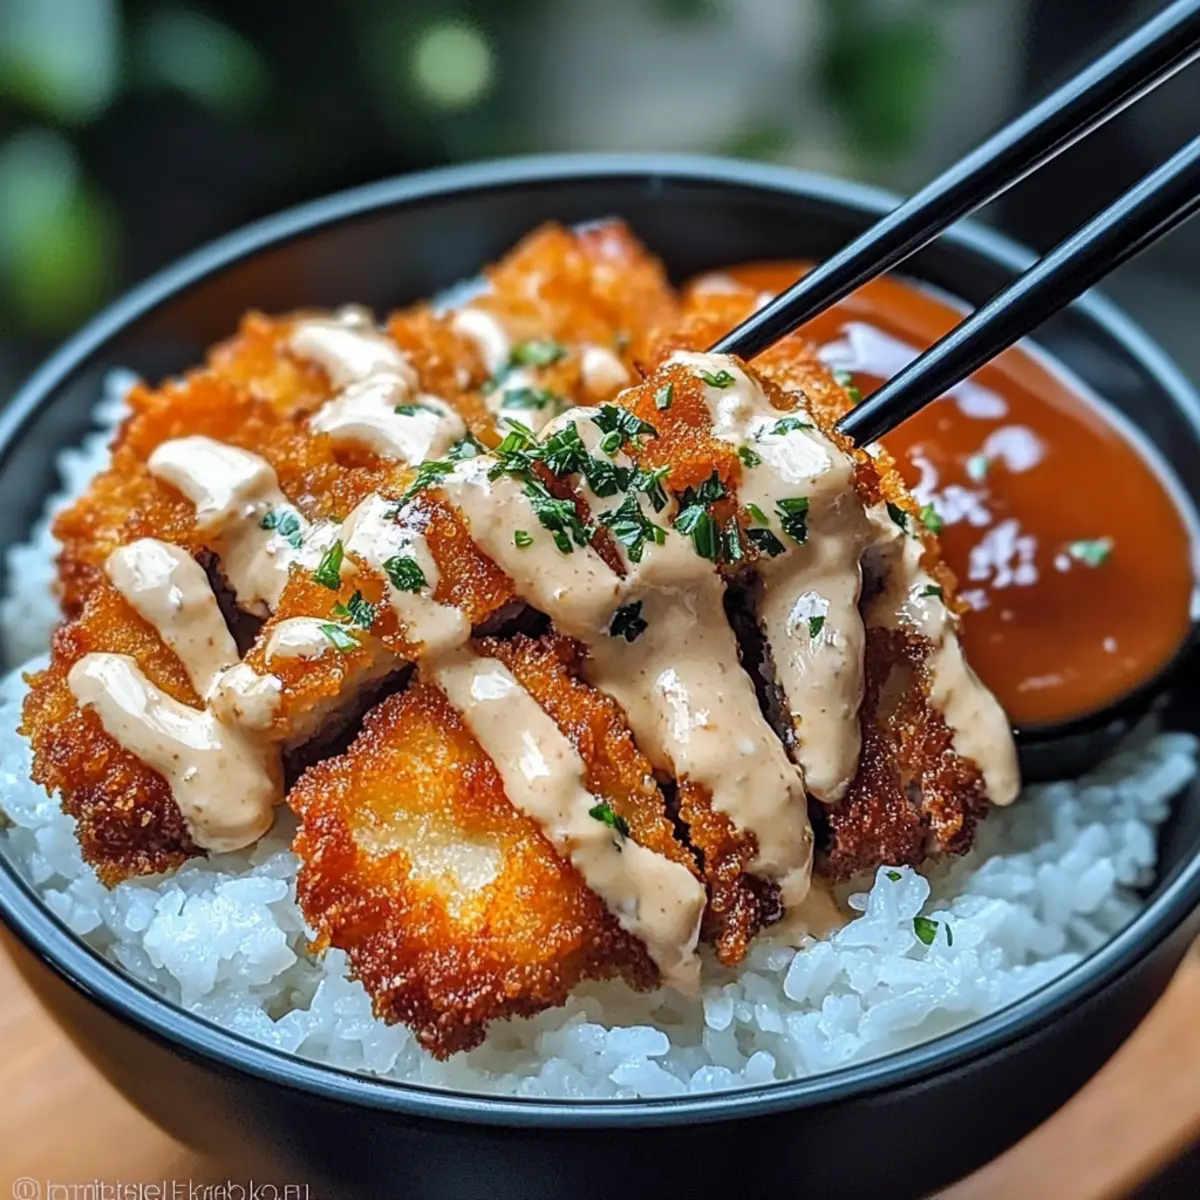
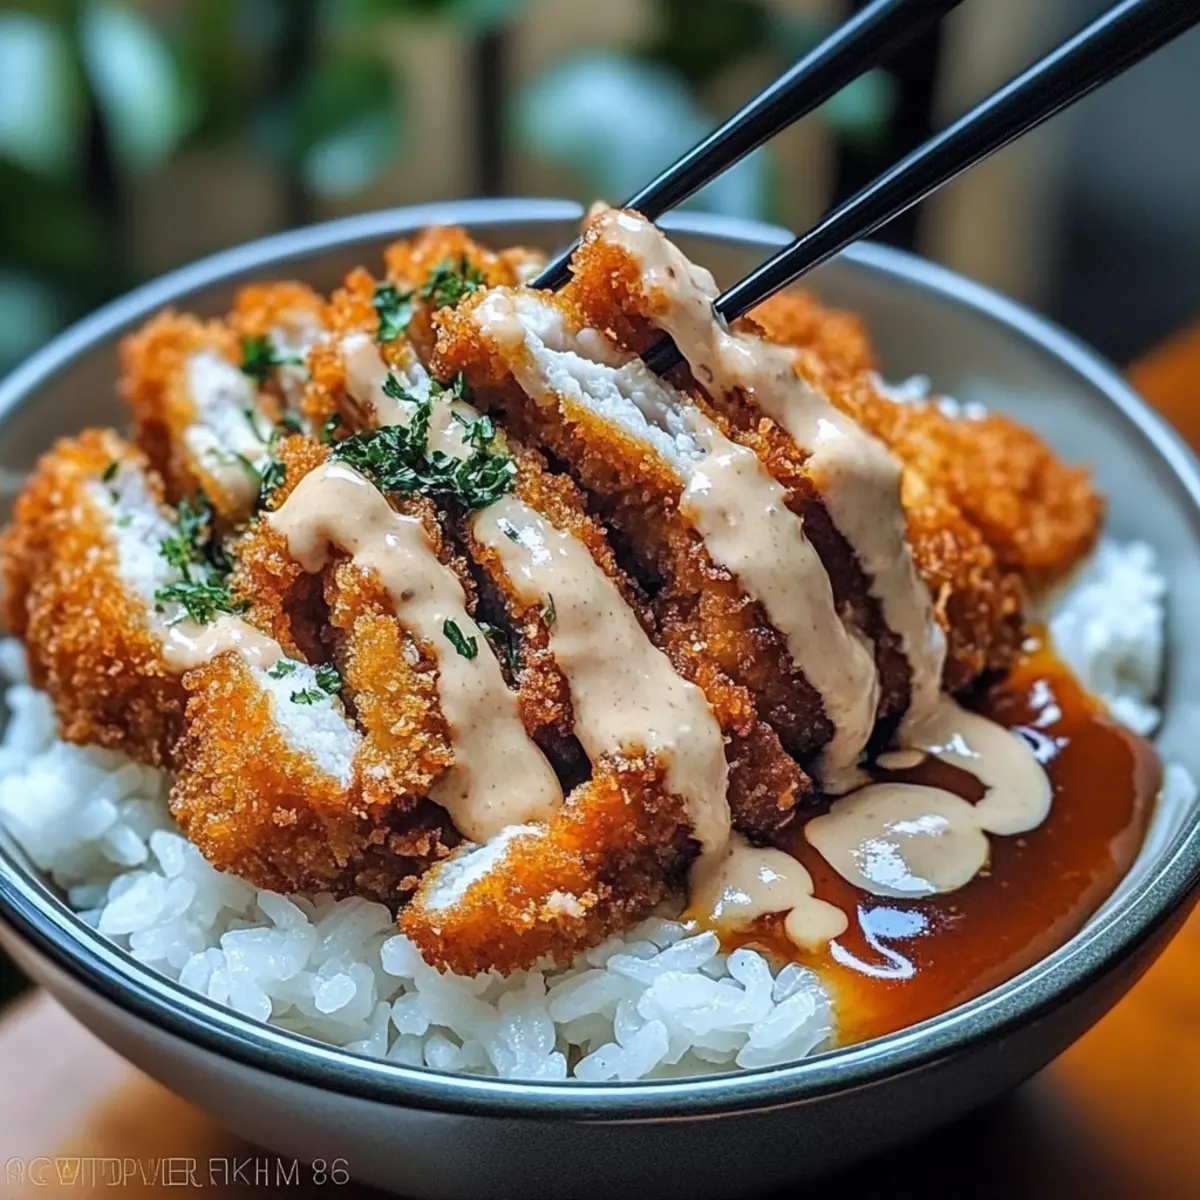
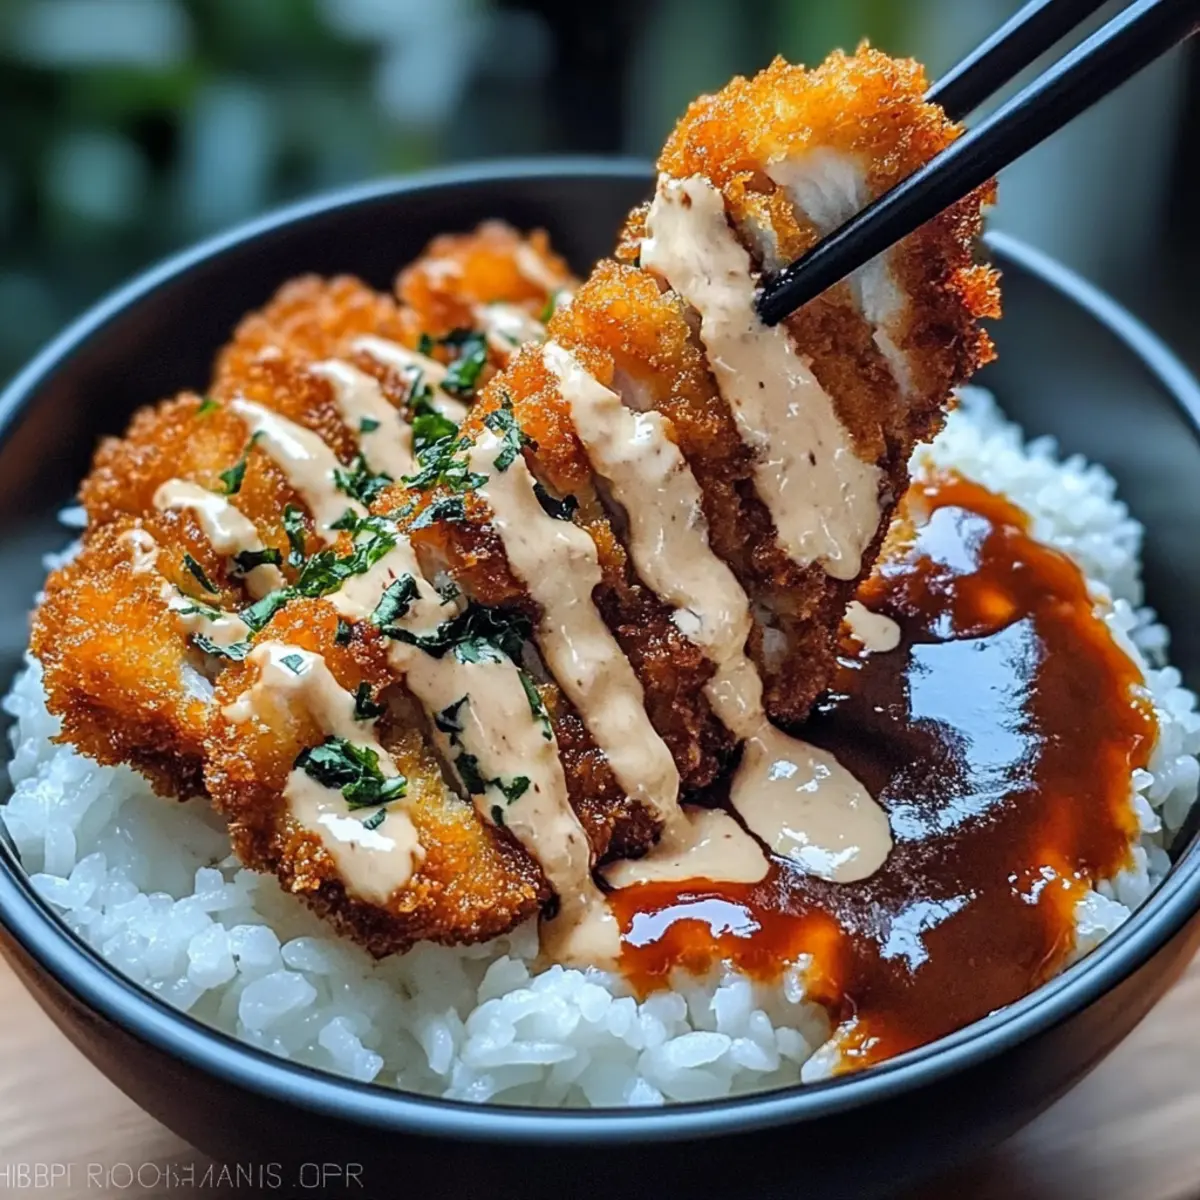
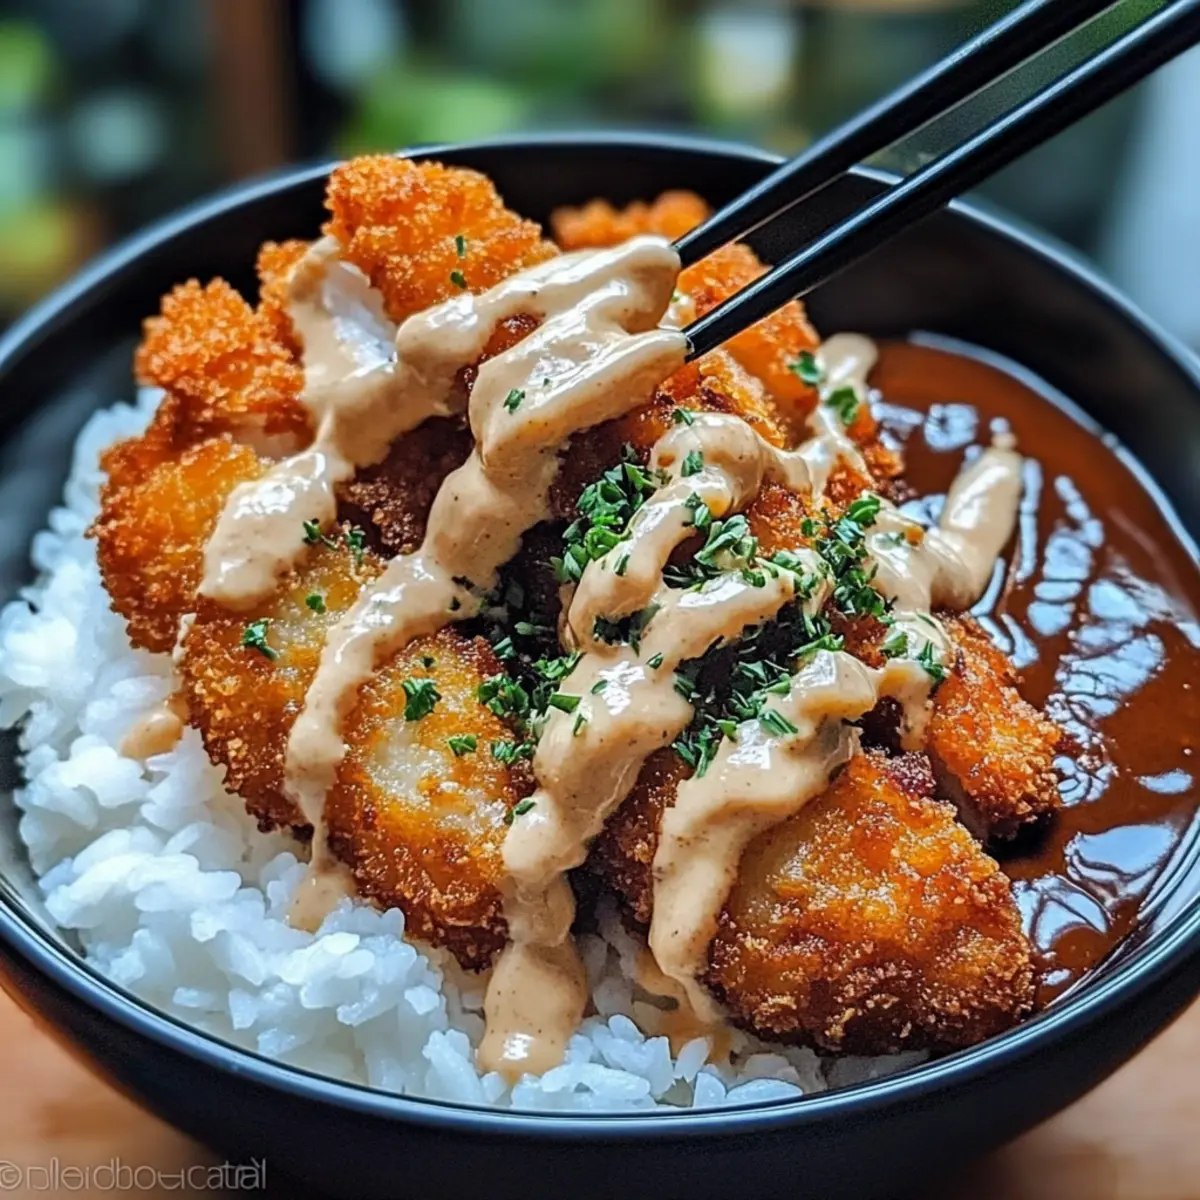
Crispy and comforting, Japanese Katsu Bowls with Tonkatsu Sauce whisk me away to bustling izakayas with every bite. The magic of this dish lies in the juicy panko-crusted cutlets—whether chicken or pork—that sit atop a fluffy bed of steaming white rice. Not only is this recipe a delightful crowd-pleaser, but it also offers quick prep for those busy weeknights when you crave homemade goodness over fast food. Picture adding your favorite customizable toppings, turning this classic meal into a personalized feast! Haven’t you ever wondered how such simple ingredients can create something truly unforgettable? Let's dive in and discover the secrets behind this delicious dish together!

Why are Katsu Bowls so Addictive?

Irresistible Crunch: The panko-breaded cutlets provide a delightful texture that pairs perfectly with soft, fluffy rice.

Flavor Explosion: Each bite of the cutlet coated in rich tonkatsu sauce delivers a balance of savory and slightly sweet flavors that’s simply unforgettable.

Quick and Easy: This dish is a breeze to prepare, making it ideal for busy evenings when you want something delicious without spending hours in the kitchen.

Customizable Toppings: Whether you prefer drizzling with fresh herbs or adding seasonal vegetables, you can easily make this dish your own.

Comfort Food Delight: Katsu bowls bring a cozy warmth to the table, transforming any meal into a comforting experience. For more flavorful ideas, check out my Tagliatelle Asparagus Peas or Fish Taco Bowls for inspiration!

Japanese Katsu Bowls Ingredients

For the Cutlets

  • Pork or Chicken Cutlets – The star of the dish; tenderize them for even cooking.
  • Salt and Pepper – Essential for seasoning; adjust according to your taste.
  • All-Purpose Flour – This forms the base coating for flavor; use gluten-free flour if necessary.
  • Eggs – Binds the panko breadcrumbs to the cutlets; swap for a flax or chia egg for a vegan-friendly option.
  • Panko Breadcrumbs – Provides a super crispy exterior; regular breadcrumbs can substitute, though they'll differ in texture.

For the Sauce

  • Ketchup – The main component of tonkatsu sauce, adding a sweet depth to the flavor.
  • Worcestershire Sauce – Offers a delightful tang that enhances the overall richness.
  • Soy Sauce – Introduces a savory umami flavor; opt for tamari for gluten-free needs.
  • Sugar – Balances the sauce's flavors; feel free to adjust to your liking.

For Serving

  • Steamed White Rice – This fluffy base complements the crunchy cutlets perfectly; consider substituting with brown rice or quinoa for a health twist.
  • Fresh Parsley or Green Onions – Optional garnishes that add a pop of freshness and color to your dish.

Enjoy crafting these Japanese Katsu Bowls with Tonkatsu Sauce, and let your kitchen transform into a delightful izakaya!

Step‑by‑Step Instructions for Japanese Katsu Bowls with Tonkatsu Sauce

Step 1: Prepare the Cutlets
Start by placing your pork or chicken cutlets between two sheets of plastic wrap and pound them to an even thickness of about ½ inch using a meat mallet. This ensures even cooking and tenderness. Once flattened, season both sides with salt and pepper to enhance the flavor of your Japanese Katsu Bowls.

Step 2: Set Up the Breading Station
Create a breading station by placing all-purpose flour in one shallow dish, beaten eggs in a second dish, and panko breadcrumbs in a third dish. This setup makes it easy to coat your cutlets thoroughly. It’s essential for achieving that wonderfully crispy texture in your Katsu Bowls!

Step 3: Bread the Cutlets
Dredge each seasoned cutlet in flour, making sure to shake off any excess. Next, dip it into the beaten eggs, allowing any excess egg to drip back into the dish. Finally, coat the cutlet with panko breadcrumbs, pressing gently to ensure they stick well. Your cutlets are now fully prepared for frying!

Step 4: Heat the Oil
In a large frying pan, heat about a half-inch of vegetable or canola oil over medium-high heat until it reaches around 350°F (175°C). You can test the oil's readiness by dropping in a few breadcrumbs; they should sizzle immediately. This temperature is key to achieving the perfect golden-brown crust for your Japanese Katsu Bowls.

Step 5: Fry the Cutlets
Carefully add the breaded cutlets to the hot oil, frying them for about 3-4 minutes on each side. Watch for a crunchy golden color as they cook. For safety, ensure the internal temperature reaches 165°F (74°C) for chicken or 145°F (63°C) for pork, so you know your Katsu Bowls are perfectly cooked and safe to eat.

Step 6: Drain the Cutlets
Once the cutlets are golden brown and cooked through, use tongs to transfer them to a plate lined with paper towels. This helps absorb any excess oil, keeping your Katsu Bowl delightful and crispy. Allow them to rest for a moment while you prepare the sauce.

Step 7: Make the Tonkatsu Sauce
In a small bowl, mix together ketchup, Worcestershire sauce, soy sauce, and sugar. Stir thoroughly to combine the flavors and adjust the sweetness to your liking. This tangy tonkatsu sauce is what brings your Japanese Katsu Bowls to life, adding that signature flavor that complements the crunchy cutlets.

Step 8: Assemble the Bowls
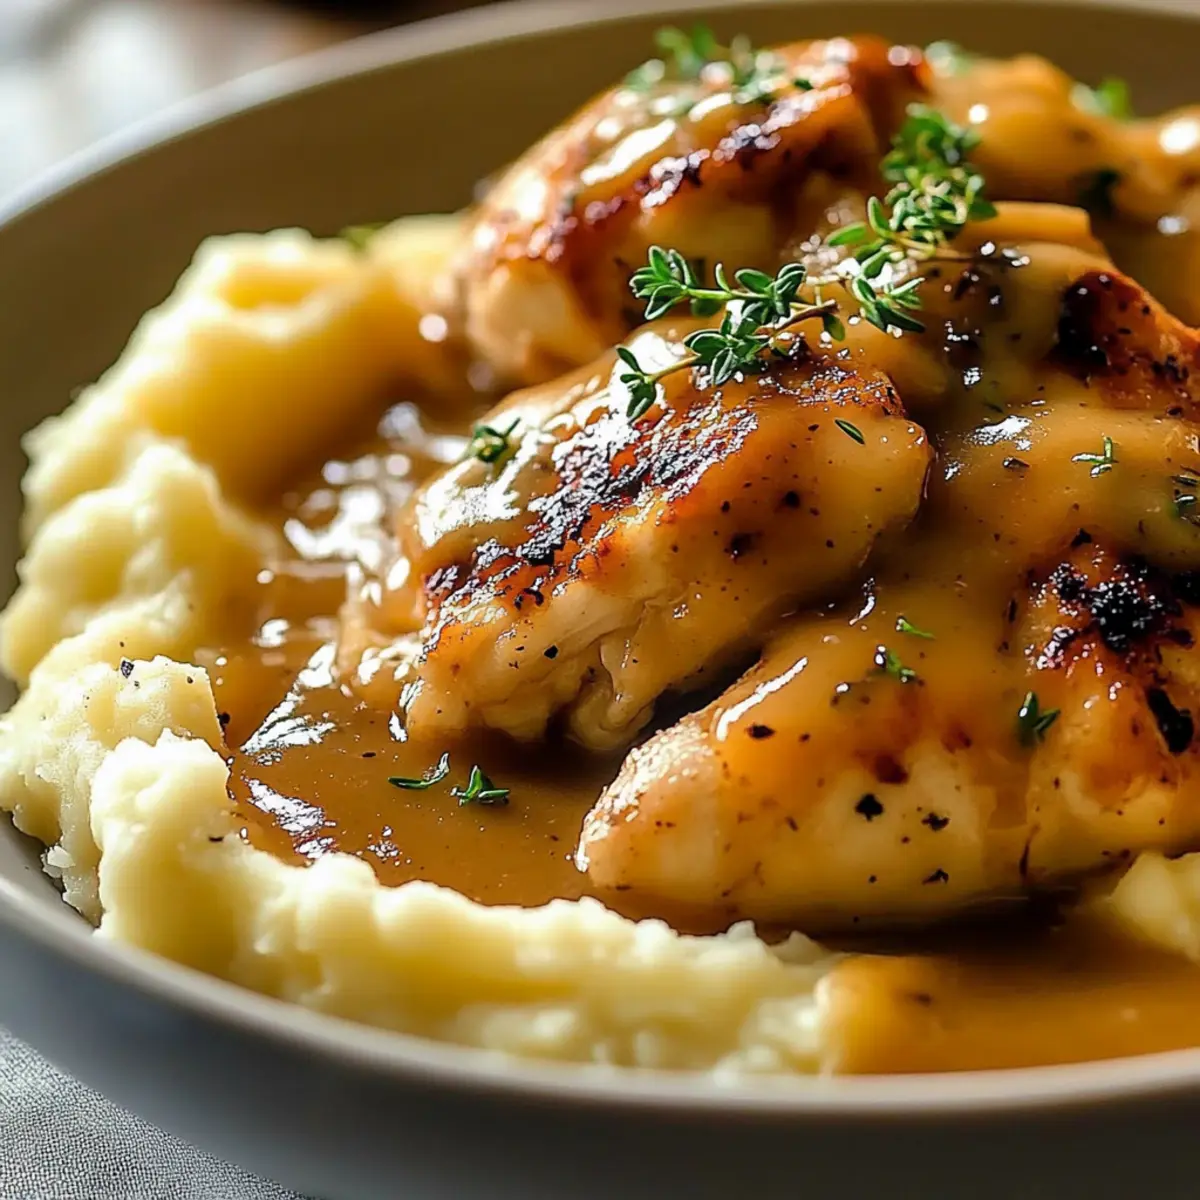
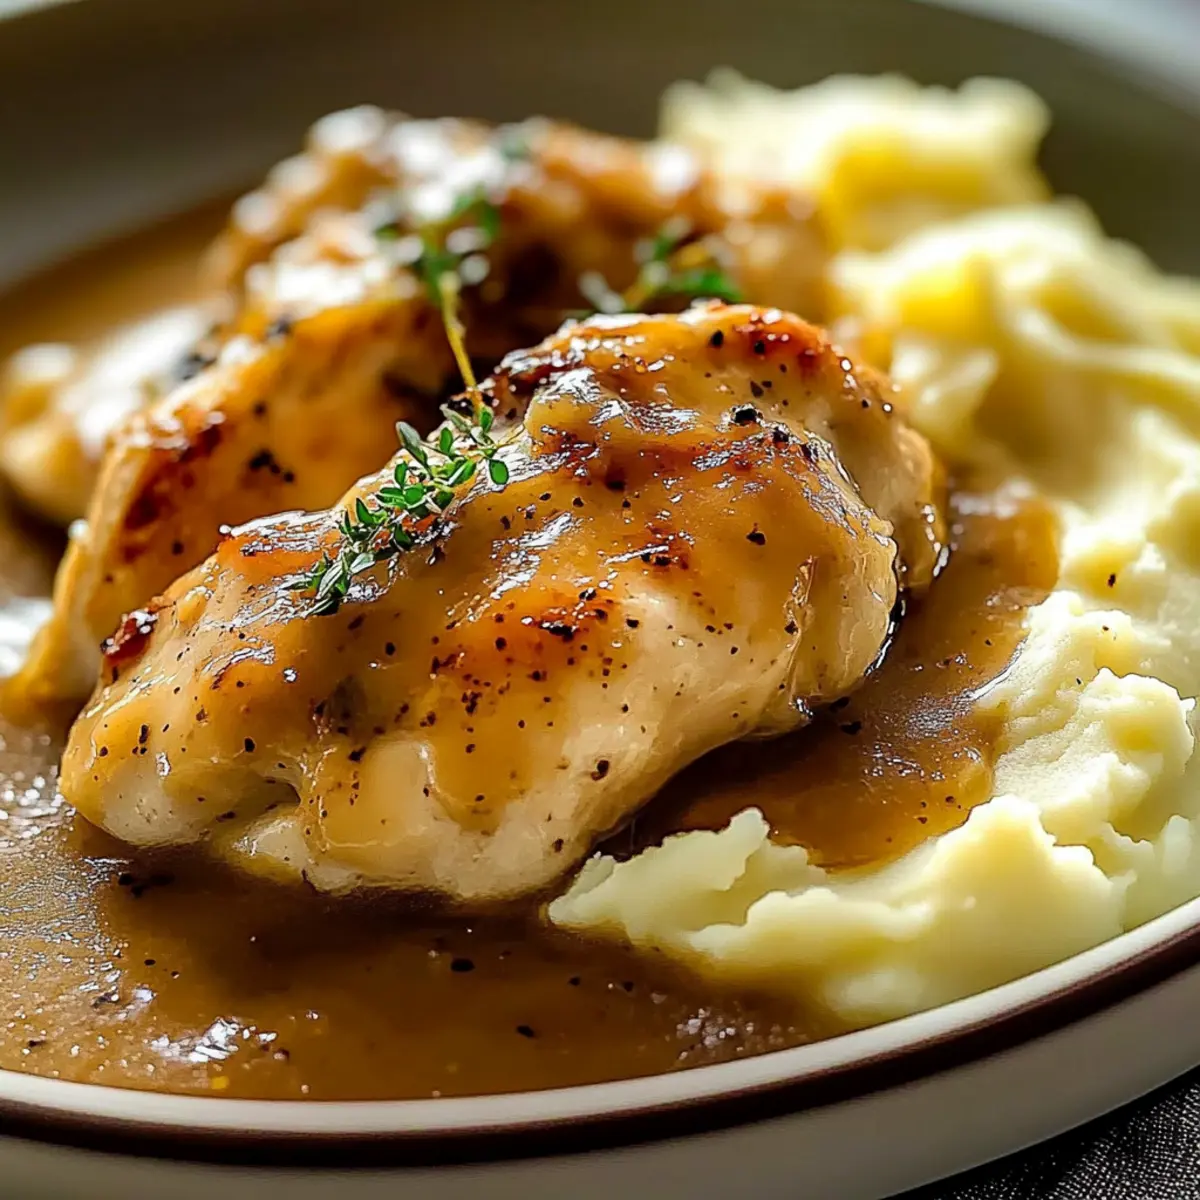
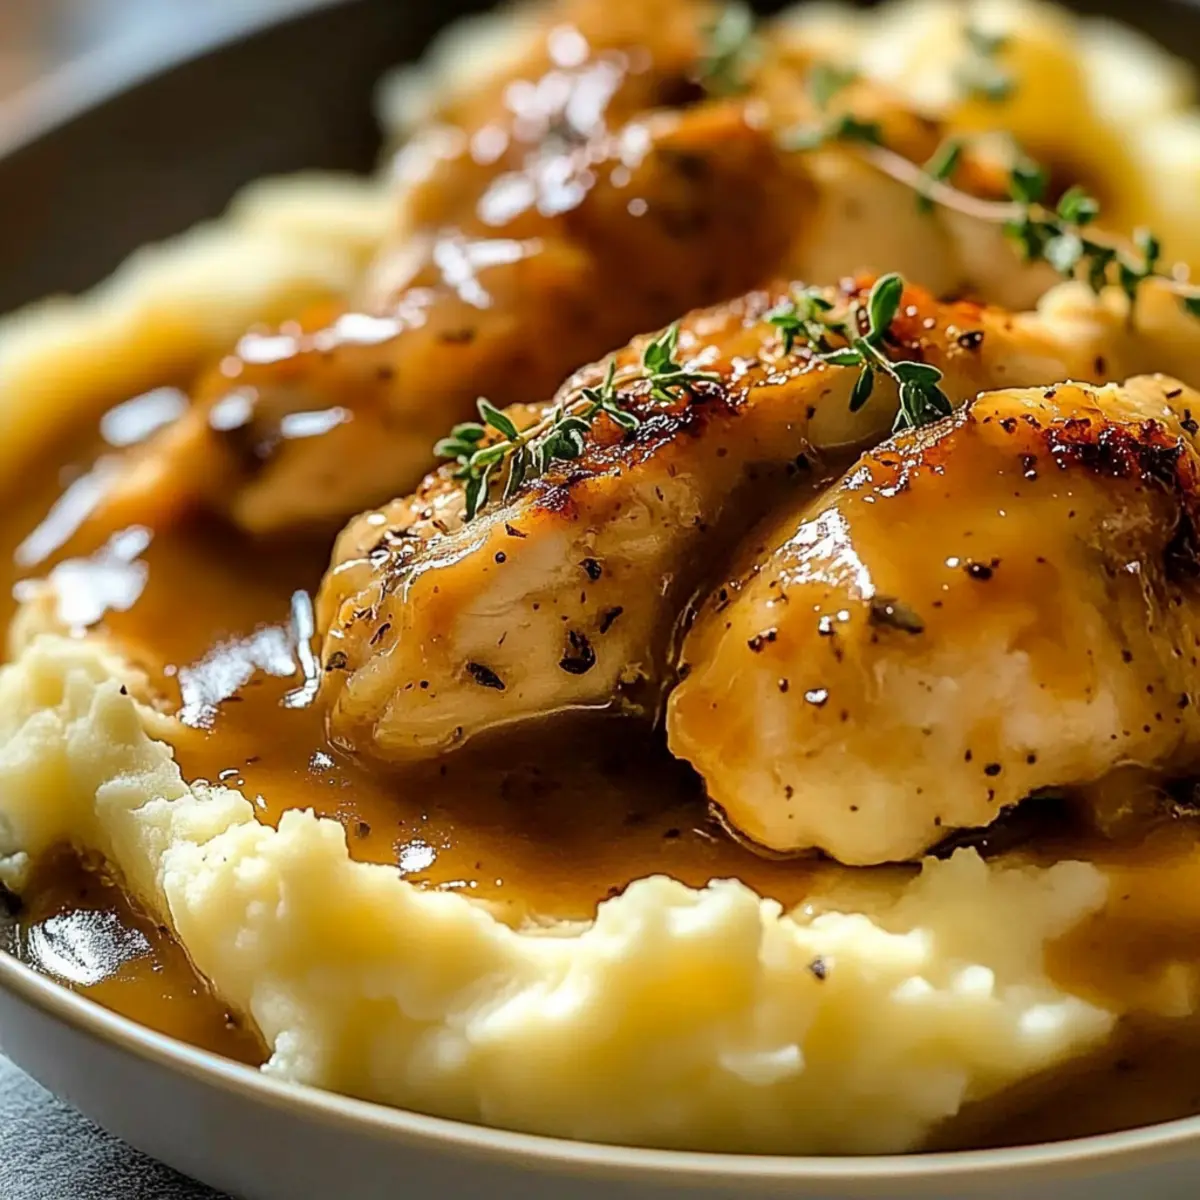
To serve, place a generous scoop of steamed white rice in each bowl, then slice the crispy cutlets and arrange them beautifully on top. Drizzle with the homemade tonkatsu sauce to infuse each bite with flavor. Feel free to add optional garnishes like fresh parsley or green onions for a burst of color and freshness.

Step 9: Serve Immediately
Serve your Japanese Katsu Bowls hot, allowing everyone to dig in while the cutlets are their crispiest. The combination of textures and flavors will create a comforting dining experience that’s sure to impress family and friends!

How to Store and Freeze Japanese Katsu Bowls

Fridge: Store leftover katsu and rice in separate airtight containers; they can last up to 3 days. This keeps the cutlets crispy and rice fluffy.

Freezer: You can freeze cooked cutlets for up to 2 months. Wrap them tightly in plastic wrap and place them in a freezer-safe bag to prevent freezer burn.

Reheating: To reheat, place cutlets in an oven at 350°F (175°C) for about 10-15 minutes until crisp. For the rice, add a splash of water and reheat in the microwave, covering it to preserve moisture.

Note: While the tonkatsu sauce can be refrigerated for up to a week, it’s best enjoyed fresh for your Japanese Katsu Bowls.

What to Serve with Japanese Katsu Bowls with Tonkatsu Sauce

Elevate your Katsu Bowl experience by exploring complementary dishes that enhance the delightful flavors and textures of this comforting meal.

  • Miso Soup: A warm, savory soup that adds depth and a touch of umami, perfectly balancing the richness of katsu.

  • Cucumber Salad: Refreshing and crunchy, this salad provides a crisp contrast that brightens each bite of the Katsu Bowl.

  • Steamed Edamame: Nutrient-packed and lightly salted, these bite-sized snacks offer a satisfying pop that pairs well with the sauce’s sweetness.

  • Pickled Vegetables: Tangy, crunchy pickles lift the dish’s flavors, providing a zesty counterpoint to the richness of the cutlets.

  • Sesame Noodles: The nutty flavor of sesame noodles creates a deliciously different texture while maintaining that delightful Asian flair.

  • Green Tea: A soothing drink, green tea cleanses the palate and complements the savory notes of the tonkatsu sauce.

  • Chocolate Mochi: For dessert, these chewy rice cakes filled with chocolate deliver a sweet finish that’s both fun and satisfying.

Each of these pairings enhances the experience, making your Japanese Katsu Bowls with Tonkatsu Sauce a truly memorable meal.

Expert Tips for Japanese Katsu Bowls

Oil Temperature Check: Ensure the oil is hot enough (around 350°F) before frying. This prevents greasy cutlets and promotes that perfectly crispy exterior.

Gentle Handling: Handle the cutlets gently during the breading process to avoid losing the panko coating, which is key for that delightful crunch in your Katsu Bowls.

Storage Wisdom: Store leftover katsu and rice separately in airtight containers to maintain the texture. Reheat rice with a splash of water for optimal fluffiness.

Custom Sauce Variations: Feel free to customize your tonkatsu sauce by adding ingredients like mustard or chili for an extra zing, enhancing the overall flavor of your Japanese Katsu Bowls.

Don’t Rush the Frying: Fry cutlets in batches if necessary; overcrowding can lower the oil temperature, resulting in less crispy katsu. Enjoy your cooking experience!

Make Ahead Options

These Japanese Katsu Bowls with Tonkatsu Sauce are perfect for busy home cooks looking to save time during hectic weeknights! You can prepare the panko-breaded cutlets and tonkatsu sauce up to 24 hours in advance. Simply bread the cutlets and store them in an airtight container in the refrigerator. For the sauce, mix the ingredients and refrigerate until needed. When ready to serve, just heat oil and fry the cutlets until golden brown, about 3-4 minutes per side. This method ensures your Katsu Bowls are just as delicious and crispy as if made fresh, making meal prep a breeze!

Japanese Katsu Bowls Variations & Substitutions

Feel free to explore the amazing possibilities for your Katsu Bowl and customize it to suit your taste and dietary needs!

  • Vegetarian Twist: Substitute chicken or pork with eggplant or tofu for a meatless delight that doesn’t skimp on flavor. You'll love the way the crispy coating contrasts with the tender vegetable or protein alternative.

  • Spicy Kick: Mix a teaspoon of sriracha or chili paste into your tonkatsu sauce for a heat boost that will spice things up. The warmth melds beautifully with the sweet and savory notes of the sauce!

  • Gluten-Free: Use gluten-free all-purpose flour and panko breadcrumbs to make this delightful dish accessible for those with gluten sensitivities. This way, everyone can enjoy the crispy goodness!

  • Brown Rice Base: Swap out the steamed white rice with brown rice or quinoa for a healthier, fiber-rich alternative that makes every bite even more satisfying. The nuttiness of the brown rice adds an extra layer of flavor!

  • Herbaceous Touch: Add fresh herbs like cilantro or basil to your rice or as a garnish to elevate the dish while adding a vibrant pop of color and freshness. The herbs can bring a whole new dimension to your bowls!

  • Tonkatsu Sauce Variants: Get creative with your tonkatsu sauce by incorporating coconut sugar instead of regular sugar for a deeper sweetness or a splash of lemon juice for a tangy twist. It can alter the flavor profile to suit your mood!

  • Flavorful Rice: Infuse steamed rice with furikake seasoning or mix in some pickled vegetables for an added crunch and burst of flavor. Just imagine each bite being a delightful surprise!

As you whip up your Katsu Bowls, consider pairing them with complementary dishes like Pan Fried Mayo or crispy sides like Sweet Potatoes Black to elevate your meal experience!

Japanese Katsu Bowls with Tonkatsu Sauce Recipe FAQs

How do I select the best cutlets for my Katsu Bowls?
When choosing pork or chicken cutlets, look for ones that are bright in color without any dark spots or blemishes. Tenderizing the cutlets to an even thickness of about ½ inch is key. This allows for uniform cooking and tenderness, ensuring your Japanese Katsu Bowls are perfectly juicy!

What’s the best way to store leftover Katsu and rice?
Store leftover cutlets and rice in separate airtight containers in the fridge. They'll stay fresh for up to 3 days. This separation helps maintain the cutlet's crispiness and the rice’s fluffiness, making sure you can enjoy them again!

Can I freeze my Katsu Bowls?
Absolutely! You can freeze the cooked cutlets for up to 2 months. I recommend wrapping them tightly in plastic wrap, then placing them in a freezer-safe bag to prevent freezer burn. For the best results when reheating, bake the cutlets at 350°F (175°C) for about 10-15 minutes, and reheat the rice with a splash of water in the microwave to keep it moist.

What dietary considerations should I keep in mind?
If you have dietary restrictions, consider using gluten-free flour and tamari instead of soy sauce for a gluten-free version. For a vegan option, substitute the chicken with eggplant or tofu and use a flax or chia egg as a binder for the breadcrumbs. Your personalized Katsu Bowl can still be delicious and satisfying while adhering to your dietary needs!

How can I troubleshoot if my cutlets end up greasy?
If your Katsu cutlets turn out greasy, it may be due to not enough oil heat. Make sure your oil is heated to around 350°F (175°C) before adding the cutlets. Additionally, avoid overcrowding the pan, as it can lower the temperature and lead to a soggier texture. Fry in smaller batches for optimal crispiness. Enjoy your Japanese Katsu Bowls to the fullest!

Japanese Katsu Bowls with Tonkatsu Sauce

Crispy Japanese Katsu Bowls with Tonkatsu Sauce Bliss

Experience the delightful crunch of Japanese Katsu Bowls with Tonkatsu Sauce, bringing you comfort and flavor in every bite.
Print Recipe Pin Recipe
Prep Time 20 minutes mins
Cook Time 30 minutes mins
Resting Time 5 minutes mins
Total Time 55 minutes mins
Servings: 4 bowls
Course: Dinner
Cuisine: Japanese
Calories: 650
Ingredients Equipment Method Nutrition Notes

Ingredients
  

For the Cutlets
  • 4 pieces Pork or Chicken Cutlets Tenderized for even cooking
  • 1 teaspoon Salt
  • 1 teaspoon Black Pepper
  • 1 cup All-Purpose Flour Gluten-free flour can be used
  • 2 large Eggs Can substitute with flax or chia egg
  • 2 cups Panko Breadcrumbs For extra crispiness
For the Sauce
  • 1/2 cup Ketchup
  • 2 tablespoons Worcestershire Sauce
  • 2 tablespoons Soy Sauce Tamari for gluten-free
  • 1 tablespoon Sugar Adjust to taste
For Serving
  • 4 cups Steamed White Rice Can substitute with brown rice or quinoa
  • 1/4 cup Fresh Parsley or Green Onions Optional for garnish

Equipment

  • Meat Mallet
  • frying pan
  • Shallow Dishes
  • Paper towels

Method
 

Step-by-Step Instructions
  1. Prepare the cutlets by pounding them to an even thickness of about ½ inch and seasoning with salt and pepper.
  2. Set up the breading station with flour, beaten eggs, and panko breadcrumbs in separate dishes.
  3. Bread the cutlets by dredging in flour, dipping in eggs, and coating with panko breadcrumbs.
  4. Heat vegetable or canola oil in a pan to about 350°F (175°C) for frying.
  5. Fry the cutlets for about 3-4 minutes on each side until golden brown and internal temperature is reached.
  6. Drain the fried cutlets on paper towels to absorb excess oil.
  7. Make the tonkatsu sauce by mixing ketchup, Worcestershire sauce, soy sauce, and sugar in a bowl.
  8. Assemble the bowls with steamed rice, sliced cutlets, and drizzle with tonkatsu sauce.
  9. Serve immediately for the best texture and flavor.

Nutrition

Serving: 1bowlCalories: 650kcalCarbohydrates: 75gProtein: 30gFat: 25gSaturated Fat: 5gPolyunsaturated Fat: 2gMonounsaturated Fat: 6gCholesterol: 150mgSodium: 800mgPotassium: 600mgFiber: 3gSugar: 8gVitamin A: 10IUVitamin C: 4mgCalcium: 2mgIron: 10mg

Notes

Store leftovers separately in airtight containers; reheat as needed, ensuring crispiness is maintained.

Tried this recipe?

Let us know how it was!

Spicy Crispy Mexican Taco Pockets for a Flavorful Fiesta

December 9, 2025 by Grace Snow Leave a Comment

“Crispy taco pockets are always a hit at our gatherings, and I can’t believe how simple they are to whip up! These Spicy Crispy Mexican Taco Pockets bring together the flair of Mexican cuisine and the allure of a warm, flaky pastry, making them perfect for a quick dinner or as fabulous party appetizers. Not only are they deliciously customizable to suit any taste but they’re also incredibly easy to prepare, allowing even novice cooks to impress a crowd. With a savory filling of meat and melty cheese tucked inside, each bite is a delightful fusion of textures and flavors. Are you ready to elevate your taco game and surprise your friends with this irresistible recipe?”

Why are Taco Pockets so Appealing?

Easy to Make: Experience a seamless cooking process that anyone can master! With just a few basic ingredients, these taco pockets come together quickly, making weeknight dinners a breeze.

Bursting with Flavor: Savor the mouthwatering combination of spices, meat, and melty cheese that create a taste explosion in every bite. Perfect if you love bold flavors!

Endless Versatility: Customize your taco pockets to fit every dietary preference! Whether you prefer chicken, turkey, or a vegetarian bean mix, the options are limitless.

Crowd-Pleasing Appetizer: Impress your guests! These crispy delights are an instant hit at parties and gatherings, sure to disappear from the platter in no time.

Perfect Pairing: Enhance your meal experience by serving these pockets with a variety of dips, just like our delicious Fish Taco Bowls or the flavorful Spicy Miso Tuna.

Spicy Crispy Mexican Taco Pockets Ingredients

For the Dough

  • All-purpose flour – Provides structure for the dough; can use whole wheat flour for a healthier option.
  • Salt – Enhances the flavor of both the dough and filling; sea salt offers a different taste.
  • Baking powder – Adds lightness and tenderness; do not substitute with baking soda without adjustments.
  • Vegetable oil – Adds tenderness to the dough and crispiness when frying; can substitute with canola or peanut oil.
  • Warm water – Brings the dough together; warm water aids in dough activation.

For the Filling

  • Ground beef or turkey – Protein-rich filling that offers savory flavor; can replace with chicken or a vegetarian bean mixture.
  • Taco seasoning mix – Blends spices to flavor the meat; consider using homemade seasoning for a custom flavor profile.
  • Cheddar cheese – Melts into the filling, adding richness; try Monterey Jack or pepper jack for a different taste.
  • Chopped onion – Provides sweetness and texture; green onions work well for a milder flavor.
  • Diced tomatoes – Introduces juiciness and freshness; canned tomatoes are a great alternative when fresh aren’t available.
  • Chopped cilantro – Adds fresh notes to elevate the filling; parsley can be used for a milder flavor.
  • Diced jalapeño (optional) – Adds extra heat for spice lovers; adjust the quantity according to your heat preference.

For Frying and Serving

  • Vegetable oil for frying – Essential for achieving a crispy exterior; maintain oil temperature at 350°F (175°C).
  • Sour cream and salsa (for serving) – Complements the spicy filling with creamy and tangy flavors; offer various salsas for guest variety.

These Spicy Crispy Mexican Taco Pockets are sure to delight everyone at your table! Enjoy the crunchy exterior and savory filling while making it your own with your favorite ingredients.

Step‑by‑Step Instructions for Spicy Crispy Mexican Taco Pockets

Step 1: Prepare the Dough
In a large mixing bowl, combine all-purpose flour, salt, and baking powder. Slowly add vegetable oil, followed by warm water, mixing until a cohesive dough forms. Knead the dough on a floured surface for about 5 minutes until smooth. Let the dough rest covered with a kitchen towel for 30 minutes, allowing it to relax and make rolling easier.

Step 2: Cook the Filling
Heat a skillet over medium heat and add the ground beef or turkey. Cook until browned, about 6-8 minutes, breaking it apart with a spatula. Drain any excess fat, then add taco seasoning and a splash of water, stirring to combine. Cook until the mixture thickens and is fragrant, around 4-5 minutes, then remove it from heat to cool slightly.

Step 3: Roll the Dough
Once the dough has rested, divide it into 8 equal portions. On a lightly floured surface, use a rolling pin to roll each piece into a 6-inch circle, ensuring the edges are even. Aim for a thin, consistent thickness that will create a nice crispy exterior when fried. Keep rolled circles covered to prevent drying out as you work.

Step 4: Fill and Seal
Take one dough circle and place a generous spoonful of the cooled filling on one half. Sprinkle some cheese, diced tomatoes, chopped onions, and cilantro on top. Carefully fold the other half over the filling and press the edges together firmly. Use a fork to crimp the edges, sealing the pockets and ensuring no filling escapes during frying.

Step 5: Fry the Pockets
In a deep pan or pot, heat vegetable oil to 350°F (175°C). Once hot, add the taco pockets in batches, making sure not to overcrowd the pan. Fry them for about 3-4 minutes per side, or until they are golden brown and crispy. Use a slotted spoon to transfer cooked taco pockets to a plate lined with paper towels to absorb excess oil.

Step 6: Serve
Serve the Spicy Crispy Mexican Taco Pockets hot, garnished with fresh cilantro if desired. Pair them with sour cream and a variety of salsas for dipping, offering a delightful kick to each crunchy bite. These taco pockets make for an irresistible treat that will surely become a household favorite!

What to Serve with Spicy Crispy Mexican Taco Pockets

Serve these addictive taco pockets with delicious accompaniments to elevate your meal experience.

  • Fresh Guacamole: Creamy and buttery, guacamole offers a refreshing contrast to the spicy taco pockets. It's perfect for dipping!

  • Zesty Coleslaw: A crunchy, tangy slaw adds brightness and texture to your plate, complementing the savory filling beautifully.

  • Mexican Street Corn (Elote): This sweet and smoky side, slathered with cheese and lime, pairs perfectly with the spiciness of your taco pockets.

  • Pico de Gallo: A bright, fresh salsa made from diced tomatoes, onions, and cilantro, enhancing flavor without overpowering the main star.

  • Cilantro Lime Rice: Offering a zesty flavor, this rice dish provides a tender base that balances the crispy pockets.

  • Chilled Cerveza or Margarita: Both drinks bring a festive spirit to your table while cooling down the heat from the spicy taco pockets.

Enhance your gathering with these delectable pairings for a truly memorable meal!

Spicy Crispy Mexican Taco Pockets Variations

Feel free to take these taco pockets in exciting new directions—there's no wrong way to enjoy them!

  • Dairy-Free: Substitute the cheese with nutritional yeast or a non-dairy cheese alternative for a deliciously creamy filling without the dairy.

  • Vegetarian: Use a hearty bean mixture or sautéed mushrooms instead of meat. This creates a satisfying and flavorful option that everyone can enjoy.

  • Gluten-Free: Swap all-purpose flour for a gluten-free flour blend, ensuring that your dough still comes together nicely. Your taste buds won’t know the difference!

  • Extra Crunch: Add crushed tortilla chips to the filling mixture for an unexpected crunch that will elevate each bite. This combination can create delightful textures.

  • Heat Level: Boost the spice by incorporating diced serrano peppers instead of jalapeños for a fiery kick. Adjust according to your tolerance for spice!

  • Savory Sweetness: Mix in some corn and roasted red peppers for a hint of sweetness. This delightful surprise will enhance the overall flavor profile.

  • Spicy Salsa: Spice up your serving sauces by blending chipotle in adobo with sour cream. The smoky flavor will add depth and heat, perfect for dipping!

  • Rustic Twist: For a more rustic finish, try pan-frying the pockets in olive oil instead of deep-frying. This option provides a lovely, slightly different taste that feels gourmet.

Remember, the creativity in making these taco pockets is what makes them so much fun! For serving, consider pairing with some fresh sides like a zesty salad or chips, reminiscent of our delightful Taco Spaghetti Cheesy or those scrumptious Mexican Wedding Cookies for a full fiesta experience!

Make Ahead Options

These Spicy Crispy Mexican Taco Pockets are fantastic for meal prep, making your busy weeknights much easier! You can prepare the filling up to 3 days in advance; simply cook the ground meat with taco seasoning and let it cool before storing in an airtight container in the refrigerator. Additionally, you can roll out the dough and store the circles in between parchment paper for up to 24 hours to prevent them from drying out. When you’re ready to enjoy, just fill, seal, and fry the pockets directly from the fridge or with the dough, ensuring they’re just as delicious and crispy as fresh. This way, you can whip up a delightful meal in no time!

Expert Tips for Spicy Crispy Mexican Taco Pockets

  • Seal Carefully: Ensure the edges are tightly pressed to avoid any filling leakage during frying; a strong seal is crucial for crispy taco pockets.
  • Dough Resting: Don’t skip the resting period for the dough. It makes the dough easier to roll out and enhances the texture of the crispy tacos.
  • Monitor Oil Temperature: Use a thermometer to maintain oil at 350°F (175°C) for optimal frying. This guarantees that your taco pockets cook evenly and get that beautiful golden color.
  • Batch Frying: Fry taco pockets in batches to avoid overcrowding; this allows each one to cook properly and achieve that desired crispiness.
  • Customize Fillings: Feel free to experiment with different fillings according to your taste! These spicy taco pockets are incredibly versatile and can satisfy various dietary preferences.

How to Store and Freeze Spicy Crispy Mexican Taco Pockets

Fridge: Store leftover taco pockets in an airtight container for up to 3 days to maintain their flavor and crispiness.

Freezer: Freeze uncooked taco pockets in a single layer on a baking sheet. Once frozen, transfer them to a resealable bag for up to 1 month.

Reheating: Reheat cooked taco pockets in the oven at 350°F (175°C) for about 10-15 minutes until heated through and crispy. Enjoy them as perfect appetizers or a quick dinner option!

Spicy Crispy Mexican Taco Pockets Recipe FAQs

What kind of flour should I use for the taco pockets?
You can use all-purpose flour to achieve the best structure for the dough. If you'd like a healthier option, whole wheat flour works well too, giving a nuttier flavor and added nutrition.

How long can I store leftover taco pockets?
Leftover taco pockets can be stored in an airtight container in the fridge for up to 3 days. I recommend placing them in a single layer with parchment paper in between to prevent them from sticking together.

Can I freeze the taco pockets? If so, how?
Absolutely! You can freeze uncooked taco pockets by placing them in a single layer on a baking sheet to freeze them first. Once frozen solid, transfer them to a resealable bag or airtight container and store them in the freezer for up to 1 month. When you're ready to eat, you can fry them straight from frozen!

What if my taco pockets leak during frying?
To avoid leakage, ensure that the edges of the taco pockets are tightly sealed. If you notice they’re leaking, make sure to press the edges firmly with a fork after folding. If they’re not sealing properly, you can also use a small dab of water on the edges to help them stick!

Can I make these taco pockets vegetarian?
Very! The filling can easily be adapted for vegetarians by using a mixture of beans, vegetables, and cheese. I often make them with black beans, bell peppers, and corn for a hearty, flavorful twist that everyone enjoys.

Are these taco pockets safe for my pets?
It’s best to keep these taco pockets away from pets, as the ingredients like onions and spices can be harmful to them. Always check what ingredients are safe before sharing any food with your furry friends.

Spicy Crispy Mexican Taco Pockets

Spicy Crispy Mexican Taco Pockets for a Flavorful Fiesta

These Spicy Crispy Mexican Taco Pockets are a delightful fusion of textures and flavors, perfect for a quick dinner or as fabulous party appetizers.
Print Recipe Pin Recipe
Prep Time 30 minutes mins
Cook Time 15 minutes mins
Resting Time 30 minutes mins
Total Time 1 hour hr 15 minutes mins
Servings: 8 pockets
Course: Snacks
Cuisine: Mexican
Calories: 300
Ingredients Equipment Method Nutrition Notes

Ingredients
  

For the Dough
  • 2 cups all-purpose flour can use whole wheat flour for a healthier option
  • 1 teaspoon salt sea salt offers a different taste
  • 1 teaspoon baking powder do not substitute with baking soda without adjustments
  • 2 tablespoons vegetable oil can substitute with canola or peanut oil
  • 1 cup warm water aids in dough activation
For the Filling
  • 1 pound ground beef or turkey can replace with chicken or vegetarian bean mixture
  • 1 packet taco seasoning mix consider using homemade seasoning for custom flavor
  • 1 cup cheddar cheese try Monterey Jack or pepper jack for a different taste
  • 1 medium chopped onion green onions work well for a milder flavor
  • 1 cup diced tomatoes canned tomatoes are a great alternative
  • 1/4 cup chopped cilantro parsley can be used for a milder flavor
  • 1 medium diced jalapeño adjust quantity according to heat preference
For Frying and Serving
  • 2 cups vegetable oil for frying maintain oil temperature at 350°F (175°C)
  • 1 cup sour cream for serving
  • 1 cup salsa offer various salsas for guest variety

Equipment

  • Skillet
  • Mixing Bowl
  • Rolling Pin
  • Deep pan
  • slotted spoon

Method
 

Step-by-Step Instructions
  1. In a large mixing bowl, combine all-purpose flour, salt, and baking powder. Slowly add vegetable oil, followed by warm water, mixing until a cohesive dough forms. Knead the dough on a floured surface for about 5 minutes until smooth. Let the dough rest covered for 30 minutes.
  2. Heat a skillet over medium heat and add the ground beef or turkey. Cook until browned, about 6-8 minutes. Drain any excess fat, then add taco seasoning and a splash of water, stirring to combine. Cook until thick and fragrant, around 4-5 minutes, then remove from heat.
  3. Divide the rested dough into 8 equal portions. Roll each piece into a 6-inch circle on a floured surface, keeping rolled circles covered to prevent drying out.
  4. Place a spoonful of the cooled filling on one half of a dough circle. Sprinkle cheese, diced tomatoes, chopped onions, and cilantro on top. Fold the other half over and seal the edges firmly.
  5. Heat vegetable oil to 350°F (175°C) in a deep pan. Fry taco pockets in batches for 3-4 minutes per side until golden brown and crispy. Use a slotted spoon to transfer cooked pockets to a plate lined with paper towels.
  6. Serve hot, garnished with fresh cilantro if desired, and paired with sour cream and various salsas for dipping.

Nutrition

Serving: 1pocketCalories: 300kcalCarbohydrates: 30gProtein: 15gFat: 15gSaturated Fat: 5gPolyunsaturated Fat: 2gMonounsaturated Fat: 5gCholesterol: 40mgSodium: 600mgPotassium: 350mgFiber: 2gSugar: 2gVitamin A: 500IUVitamin C: 5mgCalcium: 150mgIron: 2mg

Notes

These taco pockets are customizable with fillings to satisfy various tastes. Monitor oil temperature for the best frying results.

Tried this recipe?

Let us know how it was!

Melt-in-Your-Mouth Quick Cheesy Chicken Wrap Delight

December 9, 2025 by Grace Snow Leave a Comment

Waking up on a Saturday morning, I found myself tugging at the closet for comfort food, desperately craving something that hits the spot without taking all day to make. Enter these Quick Cheesy Chicken Wraps—a dazzling combination of juicy chicken, rich melted cheese, and hints of garlic tucked inside warm tortillas. Whipping this up takes just 25 minutes, making it a seamless choice for busy weeknights or leisurely weekends. This dish is not only family-friendly, but it also brings that warm hug of comfort food we all crave. With optional variations to customize it to your taste, you’ll have everyone asking for seconds. Ready to indulge in a delightful twist on classic wraps? Let’s dive in!

Why Will You Love These Wraps?

Quick, easy prep: In just 25 minutes, you can have these tasty wraps ready to enjoy. Perfect for busy weeknights or surprise guests!

Melty goodness: The combination of melted cheese and juicy chicken creates a comforting bite that’s hard to resist.

Versatile flavors: Customize with a layer of cream cheese or add your favorite veggies, like bell peppers, for an extra flavor kick!

Family-approved: These wraps are a hit with both kids and adults, making them an ideal choice for a satisfying family meal.

Crispy satisfaction: Enjoy the delicious contrast of crispy tortillas wrapped around warm, savory filling. Serve alongside a light cucumber salad or sweet potato fries for a complete meal.

With these Quick Cheesy Chicken Wraps, you’re guaranteed a comfort food favorite the whole family will love!

Quick Cheesy Chicken Wrap Ingredients

For the Filling

  • Diced Chicken – Provides protein and substance; for best results, use breast or thigh meat.
  • Olive Oil – Adds moisture and helps seasonings adhere; can be replaced with cooking spray for fewer calories.
  • Garlic Powder – Enhances flavor; if you’re a garlic lover, use fresh minced garlic for a punchy taste.
  • Onion Powder – Adds depth to the seasoning profile; really amps up the savory taste!
  • Paprika – Imparts smokiness and color; try smoked paprika for a richer flavor.
  • Salt and Pepper – Essential for seasoning; adjust according to your taste preferences.

For the Wrap

  • Flour Tortillas – Acts as the wrap base; swap for whole wheat or corn tortillas for a healthier option.
  • Shredded Cheddar Cheese – Offers a rich, hearty flavor; substitute with jack cheese or vegan cheese if desired.
  • Shredded Mozzarella Cheese – Provides that gooey meltiness; feel free to use a dairy-free alternative.

For the Creamy Sauce

  • Creamy Garlic Sauce – For that extra richness; a lighter yogurt-based sauce can be a healthier choice.
  • Fresh Parsley – Optional garnish for color and freshness; it brightens up the dish both visually and flavor-wise!

Note

These ingredients will come together to create undeniably delicious Quick Cheesy Chicken Wraps that your family will beg for again and again!

Step‑by‑Step Instructions for Quick Cheesy Chicken Wrap

Step 1: Prepare Chicken
In a medium mixing bowl, combine the diced chicken with olive oil, garlic powder, onion powder, paprika, salt, and pepper. Stir well until the chicken is evenly coated in the seasoning mix. Set the mixture aside for about 5 minutes to enhance the flavors while you prepare your cooking surface.

Step 2: Cook Chicken
Heat a non-stick skillet over medium heat for approximately 2 minutes. Once hot, add the seasoned chicken to the pan, ensuring it lays flat and cooks evenly. Sauté for 6-8 minutes, stirring occasionally, until the chicken turns golden brown and reaches an internal temperature of 165°F (75°C). Remove from heat and let it cool slightly.

Step 3: Assemble Wraps
On a clean surface, lay out your flour tortillas flat. Start by spreading a thin layer of creamy garlic sauce over each tortilla, leaving a small border around the edges. Evenly distribute the cooked chicken mixture onto the tortillas, topping generously with both shredded cheddar and mozzarella cheese.

Step 4: Grill Wraps
Carefully fold the tortillas over the filling, creating a sealed pocket. Return the cleaned non-stick skillet to medium heat, and grill the wraps for 2-3 minutes on each side. Look for a crispy exterior and melted cheese to ensure the wraps are perfectly cooked and deliciously golden.

Step 5: Serve
Once grilled, transfer the wraps to a cutting board and let them rest for a minute for easy cutting. Slice each wrap in half diagonally for a lovely presentation. Optionally, garnish with fresh parsley for a touch of color, and serve your Quick Cheesy Chicken Wraps hot for the ultimate savory experience.

Make Ahead Options

These Quick Cheesy Chicken Wraps are an excellent choice for meal prep enthusiasts! You can season and cook the diced chicken up to 3 days in advance. Once cooled, refrigerate the chicken in an airtight container to keep it fresh. Additionally, you can prepare the creamy garlic sauce ahead of time—just store it in the fridge and use it within 5 days. When it's time to serve, simply assemble the wraps with the prepped chicken and sauce, then grill them in a non-stick skillet for 2-3 minutes per side until golden and crispy. This way, you'll have a satisfying meal ready with minimal effort, perfect for busy weeknights!

Quick Cheesy Chicken Wrap Variations

Feel free to explore these delightful twists to make your wraps even more exciting and personalized!

  • Cream Cheese Addition:
    Add a thin layer of cream cheese for a rich, velvety texture that elevates the wraps. It's a simple addition that turns an ordinary meal into something extra special!

  • Vegetable Swaps:
    Substitute sautéed vegetables like bell peppers, onions, or mushrooms for a burst of color and nutrition. Mixing in veggies creates a flavor-packed experience the whole family can enjoy.

  • Spicy Kick:
    Use pepper jack cheese instead of cheddar for a spicy twist that adds extra warmth. Perfect for those who crave a little heat in their meals!

  • Whole Grain Goodness:
    Switch to whole wheat or corn tortillas for a healthier option. It gives the wraps a delightful texture while adding wholesome fiber to your meal.

  • Garlic Lovers Unite:
    If you're a garlic aficionado, fresh minced garlic can amplify the flavor in the creamy sauce. The result? A delightful, aromatic experience in every bite.

  • Zesty Salsa Surprise:
    Add a dollop of your favorite salsa for a burst of tanginess and extra dimensions of flavor. Pairing it with the cheesy filling creates an explosion of taste that brightens the wraps.

  • Crunchy Extras:
    Toss in some crispy lettuce or diced avocados just before rolling the wraps. This gives each bite a refreshing crunch that contrasts beautifully with the warm filling.

  • Herbed Infusion:
    Chop up fresh herbs like cilantro or basil to mix into the filling for a garden-fresh twist. It elevates the dish from simple wraps to a fragrant delight, reminiscent of sun-kissed gardens.

These variations are just the beginning—let your culinary creativity flow! If you enjoy these wraps, you might also love preparing Honey Garlic Chicken Thighs or try making some Chipotle Lime Chicken for a smoky flavor. Happy wrapping!

Storage Tips for Quick Cheesy Chicken Wraps

Fridge: Store leftover wraps in an airtight container, separating layers with parchment paper, for up to 3 days to maintain freshness.

Freezer: Wrap each cooled individual wrap in plastic wrap, then place them in a freezer bag for up to 2 months. This helps preserve flavor and texture.

Reheating: To reheat, thaw overnight in the fridge if frozen. Place wraps in a preheated oven at 350°F (175°C) for about 10-15 minutes or until heated through and crispy.

Make-Ahead: For convenience, the seasoned chicken can be cooked ahead of time and stored separately in the fridge. Assemble wraps just before serving for the best experience!

What to Serve with Quick Cheesy Chicken Wraps

Elevate your meal experience with delightful sides and pairings that complement these cheesy, gooey wraps.

  • Cucumber Salad: A refreshing mix of crisp cucumbers and tangy dressing, providing a light contrast to the richness of the wraps.

  • Sweet Potato Fries: Crispy, sweet, and slightly savory, these fries pair perfectly with the savory wraps, creating a satisfying contrast in taste and texture.

  • Roasted Veggies: Colorful roasted vegetables add a burst of flavor and nutrition, balancing the richness of the cheesy filling wonderfully.

  • Corn on the Cob: Grilled or boiled, buttery corn enhances the comfort food experience and is sure to delight everyone at the table.

  • Garlic Bread Sticks: Soft and cheesy, garlic bread sticks are deliciously indulgent, making them a perfect sidekick for dipping into any leftover garlic sauce!

  • Zesty Quinoa Salad: A light and nutritious quinoa salad with lemon and herbs adds brightness and freshness, making the meal well-rounded and nutritious.

  • Margaritas: Pair the meal with refreshing margaritas, adding a fun twist that complements the flavors of the wraps and enhances the social dining experience.

Each of these pairings combines textures and flavors that will elevate your Quick Cheesy Chicken Wrap experience, making it a meal to remember!

Expert Tips for Quick Cheesy Chicken Wraps

  • Chicken Choice: Use breast or thigh meat for the juiciness and flavor that make these wraps shine. Avoid overcooking to keep the chicken tender.

  • Tortilla Tips: When selecting tortillas, opt for larger ones for easy wrapping. Avoid whole grain if you prefer softer options, as they can be chewier.

  • Don’t Overfill: Stick to recommended amounts of filling to prevent bursting during grilling. An overstuffed wrap will make a mess!

  • Customize Flavor: Mixing in fresh veggies like bell peppers or onions can enhance texture and nutrition. Just sauté them with the chicken for a delicious twist.

  • Serving Ideas: Pair your wraps with a light salad or fries, complementing the rich flavors while balancing the meal. These Quick Cheesy Chicken Wraps will be a hit!

Quick Cheesy Chicken Wraps Recipe FAQs

What type of chicken is best for these wraps?
Absolutely! For juicy and flavorful wraps, I recommend using either chicken breast or thigh meat. Thigh meat often provides more moisture, which keeps the wraps from drying out during cooking. If you prefer leaner meat, go with breast, ensuring it remains tender by not overcooking it.

How should I store leftover wraps?
Very well! To keep your leftover Quick Cheesy Chicken Wraps fresh, store them in an airtight container and separate layers with parchment paper. They can last in the fridge for up to 3 days. When you're ready to enjoy them, just reheat by following the reheating instructions provided to keep that crispy texture!

Can I freeze the wraps?
Of course! To freeze your wraps, first let them cool completely. Then, wrap each one tightly in plastic wrap and place them in a freezer bag. They can be stored for up to 2 months. When ready to eat, simply thaw them overnight in the fridge, then reheat in the oven for that delightful warm crunch.

What if my tortillas are too chewy after cooking?
If the tortillas turn out chewy, it might be due to overcooking or using a thicker tortilla. For softer tortillas, try selecting thinner flour tortillas. Also, avoid overfilling, which can cause them to cook unevenly. If chewy, place the wrap in a preheated oven for a few minutes, covered with foil to help steam them back to softness.

Can I make this recipe dairy-free or vegan?
Absolutely! To make Quick Cheesy Chicken Wraps dairy-free, opt for dairy-free cheese alternatives and use a lighter yogurt-based sauce instead of the creamy garlic sauce. You can also swap in plant-based protein like tempeh or grilled vegetables to keep it delicious and satisfying.

How can I incorporate more vegetables into the wraps?
Very easily! To add more veggies, sauté bell peppers, onions, or mushrooms along with the chicken. Simply toss them into the pan after the chicken is cooked for about 4-5 minutes until tender, then layer them on your wraps. Mixing in fresh spinach or shredded carrots is another fantastic way to boost nutrition!

Quick Cheesy Chicken Wrap

Melt-in-Your-Mouth Quick Cheesy Chicken Wrap Delight

These Quick Cheesy Chicken Wraps are a delightful combination of juicy chicken and melted cheese, perfect for busy weeknights.
Print Recipe Pin Recipe
Prep Time 10 minutes mins
Cook Time 15 minutes mins
Resting Time 5 minutes mins
Total Time 25 minutes mins
Servings: 4 wraps
Course: Snacks
Cuisine: American
Calories: 350
Ingredients Equipment Method Nutrition Notes

Ingredients
  

Filling
  • 2 cups diced chicken use breast or thigh meat
  • 1 tablespoon olive oil can be replaced with cooking spray
  • 1 teaspoon garlic powder or use fresh minced garlic
  • 1 teaspoon onion powder
  • 1 teaspoon paprika try smoked paprika for richer flavor
  • to taste salt and pepper adjust according to taste
Wrap
  • 4 pieces flour tortillas can swap for whole wheat or corn tortillas
  • 1 cup shredded cheddar cheese substitute with jack cheese or vegan cheese
  • 1 cup shredded mozzarella cheese use dairy-free alternative if desired
Creamy Sauce
  • 1/2 cup creamy garlic sauce a lighter yogurt-based sauce can be used
  • 2 tablespoons fresh parsley optional garnish

Equipment

  • non-stick skillet
  • Mixing Bowl

Method
 

Step-by-Step Instructions
  1. In a medium mixing bowl, combine the diced chicken with olive oil, garlic powder, onion powder, paprika, salt, and pepper. Stir well until evenly coated and set aside for 5 minutes.
  2. Heat a non-stick skillet over medium heat for around 2 minutes. Add the seasoned chicken to the pan and sauté for 6-8 minutes until golden brown and cooked through.
  3. Lay out the tortillas flat and spread a thin layer of creamy garlic sauce over each, then evenly distribute the cooked chicken and top with cheddar and mozzarella cheese.
  4. Fold the tortillas over the filling to create a sealed pocket and grill them on medium heat for 2-3 minutes on each side until crispy and cheese is melted.
  5. Transfer the wraps to a cutting board, let them rest for a minute, slice them in half, garnish with fresh parsley, and serve hot.

Nutrition

Serving: 1wrapCalories: 350kcalCarbohydrates: 30gProtein: 25gFat: 15gSaturated Fat: 7gPolyunsaturated Fat: 1gMonounsaturated Fat: 3gCholesterol: 70mgSodium: 600mgPotassium: 300mgFiber: 2gSugar: 1gVitamin A: 500IUVitamin C: 2mgCalcium: 250mgIron: 2mg

Notes

These wraps will be a hit with the family and offer the option to customize with your favorite veggies.

Tried this recipe?

Let us know how it was!

Savor Sweet Honey BBQ Chicken Rice for Easy Family Dinners

December 9, 2025 by Grace Snow Leave a Comment

A sweet and smoky aroma fills the kitchen as dinner time approaches, and I can barely contain my excitement for this Easy Honey BBQ Chicken Rice. This one-pan meal not only cuts down on cleanup time, but it’s also a delightful fusion of flavors that will have everyone at the table asking for seconds. In less than an hour, you’ll enjoy tender chicken glazed with a sticky honey barbecue sauce, resting on a bed of fluffy rice that soaks up all those delicious juices. It’s the kind of dish that can elevate a weeknight family dinner or impress guests at a casual gathering. Plus, it's budget-friendly and incredibly customizable, ensuring that even the pickiest eaters will find a way to love it. Are you ready to dive into a comforting and satisfying meal that you can make tonight?

Why is Honey BBQ Chicken Rice a Must-Try?

Simplicity at its finest: This easy recipe lets you whip up a delicious meal without the fuss, perfect for busy weeknights.
Flavors that pop: The sweet honey and smoky BBQ sauce blend beautifully, enticing your taste buds in every bite.
Customizable: Whether you prefer chicken or tofu, rice or quinoa, this dish adapts to your tastes or dietary needs.
Family-friendly: Suitable for all ages, even picky eaters will find joy in this comforting meal.
One-pan wonder: Minimal cleanup means more time to enjoy dinner with loved ones! For other delightful options, check out my Honey Garlic Chicken or Crock Pot Chicken for more tasty ideas.

Honey BBQ Chicken Rice Ingredients

• Explore the delightful components of this dish!

For the Chicken

  • Chicken Thighs – Juicy and tender, perfect for soaking up the sticky honey BBQ glaze; can substitute with chicken breasts if preferred.

For the Rice Base

  • Rice – Fluffy long-grain rice acts as the perfect canvas for flavors; brown rice is a nutritious alternative for a heartier option.
  • Chicken Broth – Keeps the rice moist and flavorful while cooking; vegetable broth can be used for a vegetarian twist.

For the Sauce

  • Honey – Provides the sweet kick that pairs beautifully with BBQ flavors and creates a sticky glaze.
  • BBQ Sauce – Choose your favorite brand or make your own to bring a smoky, tangy depth; customize the heat level to your liking.
  • Soy Sauce – Adds umami richness to the sauce; tamari can be swapped in for gluten-free needs.
  • Garlic – Freshly minced garlic brings aromatic flavor to the dish; roasted garlic will add a mellow sweetness.

For Added Color and Nutrients

  • Mixed Vegetables (optional) – Add a variety of colors and nutrients with peas, carrots, or bell peppers; frozen vegetables are a convenient choice.

Enjoy bringing these flavorful ingredients together to create your perfect Honey BBQ Chicken Rice!

Step‑by‑Step Instructions for Honey BBQ Chicken Rice

Step 1: Preheat the Oven
Begin by preheating your oven to 375°F (190°C). This step is crucial for ensuring that your Honey BBQ Chicken Rice cooks evenly and thoroughly. While the oven warms up, you can prep the sauce and chicken, making sure everything's ready to go when the time comes to bake.

Step 2: Prepare the Sauce
In a large mixing bowl, blend together honey, BBQ sauce, soy sauce, and minced garlic until smooth and well combined. The aroma of this mixture should be sweet and enticing! Make sure the ingredients are fully incorporated to create a luscious glaze for your chicken. Set this aside while you prepare the chicken.

Step 3: Coat the Chicken
Grease a baking dish lightly with oil to prevent sticking. Take your chicken thighs and coat them generously with half of the prepared sauce mixture, ensuring each piece is nicely glazed. Once coated, arrange the chicken in the greased dish, with the glazed side facing up, and pour the remaining sauce over the top for extra flavor.

Step 4: Add the Rice and Broth
Carefully pour chicken broth into the baking dish, making sure it surrounds the chicken. Next, add the rice to the dish, stirring gently to combine everything for an even distribution. This will allow the rice to absorb all the savory flavors from the chicken and the sauce while cooking.

Step 5: Bake Covered
Cover the baking dish with aluminum foil and place it in the preheated oven. Bake for 35-40 minutes, during which time the rice will cook and absorb the delicious flavors. Remember to check halfway through and remove the foil to baste the chicken with the accumulating juices for a nice caramelization.

Step 6: Rest Before Serving
Once the baking time is up, take the dish out of the oven and let it sit for about 5 minutes. This resting period allows the flavors of the Honey BBQ Chicken Rice to meld together beautifully, making each bite all the more delicious.

Step 7: Plate and Serve
To serve, fluff the rice gently with a fork and plate it up, topping with the juicy chicken pieces. Don’t forget to drizzle any remaining sauce over the chicken for an extra burst of flavor! Now, your scrumptious honey BBQ chicken rice is ready to be enjoyed by family and friends!

Make Ahead Options

These Honey BBQ Chicken Rice bowls are perfect for meal prep, allowing you to save time during busy weeknights. You can marinate the chicken in the honey BBQ sauce and let it sit in the refrigerator up to 24 hours beforehand for deeper flavor. Additionally, you can prepare the rice and broth combination, refrigerating it for up to 3 days. When you're ready to cook, simply add the marinated chicken on top, cover, and bake as directed. To maintain quality, ensure the chicken is well-coated in sauce and keep it covered to lock in the moisture. With these simple prep steps completed, you'll have a warm, comforting meal with minimal effort when it’s time to dine!

Expert Tips for Honey BBQ Chicken Rice

  • Coat Well: Ensure the chicken is thoroughly coated in the sauce so each bite is bursting with flavor.
  • Adjust Cooking Time: If you opt for brown rice, remember to increase the broth and baking time to ensure it’s cooked properly.
  • Check Temperature: Always check the chicken’s internal temperature; it should reach 165°F (74°C) for safety and perfect tenderness.
  • Add a Kick: For an extra punch of heat, consider mixing in a pinch of chili flakes into the sauce.
  • Use Fresh Ingredients: Fresh garlic enhances the flavor significantly; don’t substitute with garlic powder if you can avoid it.
  • Customize Veggies: Feel free to toss in your favorite mixed vegetables to make this Honey BBQ Chicken Rice even more nutritious and colorful.

Storage Tips for Honey BBQ Chicken Rice

  • Fridge: Store leftovers in an airtight container, where they will remain fresh for up to 3 days. Ensure it's cooled down before sealing to maintain flavor and texture.
  • Freezer: For longer storage, freeze the Honey BBQ Chicken Rice in a freezer-safe container for up to 2 months. Portioning it into smaller servings helps for easy reheating later.
  • Reheating: When ready to enjoy, thaw in the fridge overnight if frozen, then reheat gently in the microwave or on the stovetop with a splash of chicken broth to keep it moist.
  • Room Temperature: Avoid leaving the dish out for more than 2 hours to prevent any food safety issues; refrigerate promptly after serving.

What to Serve with Easy Honey BBQ Chicken Rice

The perfect side dishes can elevate your Honey BBQ Chicken Rice into a memorable meal, bringing delightful flavors and textures to your table.

  • Garlic Bread: Buttery, warm, and infused with garlic, this classic pairs beautifully to soak up any extra honey BBQ sauce.
  • Classic Coleslaw: Crisp and refreshing, coleslaw provides a crunchy contrast to the tender chicken and fluffy rice.
  • Steamed Broccoli: Bright green and slightly crunchy, steamed broccoli adds a nutritious element while balancing the sweetness of the dish.
  • Corn on the Cobb: Juicy and sweet, grilled or boiled corn brings a summer BBQ vibe that complements the flavors perfectly.
  • Crispy Potato Wedges: Golden and crunchy on the outside, these wedges offer a satisfying texture as a hearty side option.
  • Fruit Salad: A light and colorful medley of fresh fruits contrasts the rich flavors of your dish beautifully, making it a refreshing end to the meal.
  • Lemonade: A refreshing glass of homemade lemonade can balance the rich BBQ flavor, providing a zesty splash to the dining experience.

Honey BBQ Chicken Rice Customization

Feel free to make this recipe your own by exploring delicious twists and nutritious swaps!

  • Vegetarian Delight: Replace chicken with tofu or tempeh, marinating it in the sauce for extra flavor. This makes a hearty, meatless meal you’ll love!
  • Low-Carb Option: Try substituting rice with cauliflower rice or quinoa, keeping it light and healthy while still packed with flavor.
  • Herb Infusion: Add fresh herbs like cilantro or green onions for a burst of freshness that brightens the flavors beautifully.
  • Heat it Up: Incorporate a tablespoon of sriracha or a pinch of chili flakes into the sauce for a delightful spicy kick that packs a punch.
  • Sweet and Savory: Drizzle a little balsamic glaze over the finished dish for added sweetness and tang, elevating your flavor profile.
  • Nutty Crunch: Toss in chopped nuts like almonds or cashews for a deliciously crunchy texture that contrasts beautifully with the tender chicken.
  • Beefy Twist: Swap chicken for beef for a completely different take on this recipe — consider flank steak for quick cooking and great flavor.
  • Veggie Boost: Add a medley of colorful vegetables, such as bell peppers or broccoli, into the mix to enhance the dish's nutritional value and visual appeal.

For more inspiration, why not explore my Chipotle Lime Chicken and Rice or try some amazing Spatchcock Chicken Flavor for a delightful variation?

Honey BBQ Chicken Rice Recipe FAQs

How do I choose the right chicken for this recipe?
Absolutely! For Honey BBQ Chicken Rice, I recommend using chicken thighs since they’re juicy and tender, making them perfect for absorbing the flavors of the sauce. If you prefer chicken breasts, they can be a suitable substitute, but be aware they may dry out faster. Look for thighs that are plump and have a good amount of fat for the best taste.

What is the best way to store leftover Honey BBQ Chicken Rice?
Great question! Store your leftover Honey BBQ Chicken Rice in an airtight container in the refrigerator. It will last up to 3 days. Make sure the dish is cooled down before sealing it to maintain its flavor and texture. If stored properly, it can remain delicious and ready to reheat without losing its charm!

Can I freeze Honey BBQ Chicken Rice?
Yes, definitely! Honey BBQ Chicken Rice freezes beautifully. Transfer the cooled dish into a freezer-safe container and it will keep well for up to 2 months. For easier reheating later, portion it into smaller servings. When you’re ready to enjoy it, thaw it in the refrigerator overnight and reheat gently in the microwave or on the stovetop. You might want to add a splash of chicken broth while reheating to keep it nice and moist.

What should I do if the chicken isn’t cooking through?
It can be frustrating, but don't worry! If your chicken isn't cooked through after the recommended time, simply cover it back up and return it to the oven for an additional 5-10 minutes. Always check with a meat thermometer to ensure the internal temperature reaches 165°F (74°C). This will guarantee your chicken is safe to eat and tender.

Are there any allergies I should be aware of with this recipe?
Very important! This Honey BBQ Chicken Rice recipe contains common allergens like soy (from soy sauce) and honey. If you're making it for someone with allergies, consider using gluten-free tamari as a soy sauce substitute, and ensure you use a honey substitute like agave syrup if needed. Always double-check ingredient labels when in doubt!

Can I make this recipe vegetarian?
Absolutely! To make a wonderful vegetarian version of Honey BBQ Chicken Rice, simply swap out the chicken for tofu or tempeh. Marinate them in the honey BBQ sauce mixture just like you would with the chicken, and bake them according to the recipe instructions. Using vegetable broth instead of chicken broth will keep the flavors intact while ensuring it's plant-based.

Honey BBQ Chicken Rice

Savor Sweet Honey BBQ Chicken Rice for Easy Family Dinners

Enjoy a delightful Honey BBQ Chicken Rice that's budget-friendly and perfect for family dinners.
Print Recipe Pin Recipe
Prep Time 10 minutes mins
Cook Time 40 minutes mins
Resting Time 5 minutes mins
Total Time 55 minutes mins
Servings: 4 servings
Course: Dinner
Cuisine: American
Calories: 450
Ingredients Equipment Method Nutrition Notes

Ingredients
  

For the Chicken
  • 4 pieces Chicken Thighs Juicy and tender
For the Rice Base
  • 1 cup Rice Fluffy long-grain rice
  • 1 cup Chicken Broth Moist and flavorful
For the Sauce
  • 1/2 cup Honey Sweet kick for the glaze
  • 1/2 cup BBQ Sauce Your favorite brand
  • 2 tablespoons Soy Sauce Adds umami richness
  • 2 cloves Garlic Freshly minced
For Added Color and Nutrients
  • 1 cup Mixed Vegetables Optional; use frozen for convenience

Equipment

  • Baking Dish
  • Mixing Bowl
  • Aluminum Foil

Method
 

Directions
  1. Preheat your oven to 375°F (190°C).
  2. In a large mixing bowl, blend together honey, BBQ sauce, soy sauce, and minced garlic until smooth.
  3. Coat chicken thighs with half of the sauce, then place in a greased baking dish and pour remaining sauce on top.
  4. Pour chicken broth into the dish and add rice, stirring gently to combine.
  5. Cover with aluminum foil and bake for 35-40 minutes.
  6. Let sit for about 5 minutes before serving.
  7. Fluff the rice, plate with chicken, and drizzle with remaining sauce.

Nutrition

Serving: 1plateCalories: 450kcalCarbohydrates: 55gProtein: 30gFat: 15gSaturated Fat: 4gPolyunsaturated Fat: 2gMonounsaturated Fat: 8gCholesterol: 80mgSodium: 800mgPotassium: 500mgFiber: 2gSugar: 15gVitamin A: 600IUVitamin C: 10mgCalcium: 40mgIron: 2mg

Notes

Customize with different proteins or vegetables to suit your tastes. Adjust cooking times if using brown rice or other grains.

Tried this recipe?

Let us know how it was!

Savory Cheddar & Bacon Dutch Baby: A Cozy Brunch Treat

December 9, 2025 by Grace Snow Leave a Comment

The moment I took my first bite of a Savory Cheddar & Bacon Dutch Baby, I felt like I had been transported to a cozy café where the aroma of freshly cooked pancakes fills the air. This dish is truly a showstopper—a fluffy pancake, crisped to perfection, generously topped with sharp cheddar and crunchy bacon that will have everyone asking for seconds. What I love most about this recipe is not just its stunning presentation, but how incredibly quick it is to whip up, making it perfect for lazy weekend brunches or a special weekday treat. Plus, with an easy swap for gluten-free flour, everyone can enjoy it. Are you ready to impress your friends and family with this comforting breakfast delight? Let's dive into the recipe and make some kitchen magic happen!

Why is this Dutch Baby a Must-Try?

Simplicity: The recipe is easy to follow, making it accessible for both novice and experienced cooks. Quick Cooking Time: Ready in just 30 minutes, it’s perfect for those busy mornings or weekend brunches. Flavor Explosion: The savory blend of cheddar and bacon creates a delightful taste that can’t be beaten. Gluten-Free Option: Easily swap the flour for a gluten-free blend, ensuring everyone can enjoy this treat! Showstopping Presentation: Its puffed-up appearance will impress family and friends, making it a perfect centerpiece for any gathering. If you’re craving something light yet hearty, don’t forget to check out our Seafood Pasta Savory for another irresistible option!

Savory Cheddar & Bacon Dutch Baby Ingredients

For the Batter

  • Eggs – Provide structure and help the pancake puff up; they are essential for this Dutch baby.
  • All-Purpose Flour – Creates the pancake's body; substitute with a gluten-free flour blend for a gluten-free Savory Cheddar & Bacon Dutch Baby.
  • Milk – Adds moisture and richness; use whole milk for best results, or oat/almond milk as lactose-free alternatives.
  • Melted Butter – Adds flavor and assists in browning; can be replaced with oil for a dairy-free option.
  • Salt – Enhances flavor; it's crucial for balance, so no substitutes are needed.
  • Black Pepper – Adds a hint of spice; adjust according to taste or omit for a milder flavor.

For the Topping

  • Sharp Cheddar Cheese – Provides savory flavor and gooey texture; substitute with gouda, feta, or pepper jack for a twist.
  • Bacon – Adds a savory, crunchy topping; for a vegetarian option, replace with sautéed mushrooms or crispy tempeh.

Step‑by‑Step Instructions for Savory Cheddar & Bacon Dutch Baby

Step 1: Preheat the Oven
Start by preheating your oven to 425°F (220°C). While the oven heats up, place a cast-iron skillet inside to warm; this will ensure your Savory Cheddar & Bacon Dutch Baby puffs up beautifully. Let the skillet heat for about 10 minutes, so it's ready for the batter.

Step 2: Blend the Batter
In a blender, combine the eggs, all-purpose flour, milk, melted butter, salt, and black pepper. Blend until the mixture is smooth and frothy, which should take about 30 seconds. Let the batter rest for 5 minutes while the skillet continues to heat up, allowing air to incorporate for a fluffier result.

Step 3: Prepare the Skillet
Once preheated, carefully remove the hot cast-iron skillet from the oven. Add a tablespoon of butter to the skillet, swirling it around to coat the bottom and sides. Pour the rested batter into the skillet immediately; you should hear a delightful sizzle when the batter hits the hot surface, indicating a good start for your Dutch baby.

Step 4: Add Toppings
Sprinkle the shredded sharp cheddar cheese and crumbled bacon evenly over the batter. The cheese will melt and create a gooey, savory layer while the bacon crisps up beautifully during baking. This combination is what makes the Savory Cheddar & Bacon Dutch Baby such a breakfast delight.

Step 5: Bake to Perfection
Place the skillet in the oven and bake for 20 to 25 minutes. Keep an eye on it; the edges should puff up and turn a golden brown, while the center remains slightly soft but set. Avoid opening the oven door during baking to prevent deflation of your delicious creation.

Step 6: Serve Warm
Once baked, carefully remove the skillet from the oven, and let it rest for a minute. You can garnish your Savory Cheddar & Bacon Dutch Baby with fresh parsley or chives for a touch of color and flavor. Slice and serve warm straight from the skillet, allowing everyone to enjoy this impressive breakfast treat!

What to Serve with Savory Cheddar & Bacon Dutch Baby

Discover the perfect accompaniments to enhance your savory delight, creating a memorable meal experience.

  • Crispy Green Salad: A fresh salad with mixed greens, cucumbers, and a light vinaigrette adds a bright crunch that balances the richness of the Dutch baby.

  • Roasted Asparagus: Tender asparagus, roasted with olive oil and garlic, brings a delightful earthiness that pairs beautifully with the cheesy pancake.

  • Sliced Avocado: Creamy avocado slices give a luxurious texture and additional healthy fats to your brunch spread, creating a satisfying contrast.

  • Fresh Fruit Medley: A vibrant mix of seasonal fruits, like berries and melons, provides a refreshing sweet touch that complements the savory flavors perfectly.

  • Honey Drizzle: A light drizzle of honey on top provides a sweet counterpoint to the cheese and bacon, making every bite irresistible.

  • Sparkling Water with Citrus: For a refreshing drink, serve sparkling water infused with lemon or lime slices for a zingy, palate-cleansing beverage.

Make Ahead Options

These Savory Cheddar & Bacon Dutch Babies are a game-changer for busy home cooks! You can prepare the batter up to 24 hours in advance; simply blend all the ingredients, and refrigerate it in an airtight container. Before baking, let the batter sit at room temperature for about 15-30 minutes to ensure a fluffy texture. Additionally, you can pre-cook the bacon and store it in the fridge for up to 3 days to save even more time. When you're ready to serve, just preheat the oven, melt butter in the skillet, pour in the chilled batter, sprinkle with cheese and bacon, and bake until perfectly puffed. Enjoy this comforting breakfast delight with minimal effort!

Storage Tips for Savory Cheddar & Bacon Dutch Baby

  • Fridge: Store leftovers in an airtight container for up to 2 days. This will help keep the flavors intact while preventing them from drying out.
  • Freezer: For longer storage, freeze individual slices wrapped tightly in plastic wrap and then placed in a freezer-safe bag for up to 2 months.
  • Reheating: Reheat in the oven at 350°F (175°C) for 10-15 minutes, ensuring the Savory Cheddar & Bacon Dutch Baby regains its fluffy texture.
  • Make-Ahead: The batter can be made and refrigerated for up to 24 hours. Just let it come to room temperature before pouring into the hot skillet for baking.

Expert Tips for Savory Cheddar & Bacon Dutch Baby

  • Preheat Properly: Make sure your oven and skillet are fully preheated; this ensures maximum puffiness for your Savory Cheddar & Bacon Dutch Baby.

  • Avoid Oven Door: Resist the urge to peek while it bakes; opening the oven door can cause your fluffy pancake to deflate, ruining its beautiful rise.

  • Serve Immediately: For the best texture, serve your Dutch baby right after baking; reheating can lead to a denser pancake, losing that delightful fluffiness.

  • Mix Well: Blend the batter until smooth and frothy for an airy finish; lumps will prevent the pancake from rising properly.

  • Customize Toppings: Feel free to get creative with different toppings or cheeses; variations will keep the dish exciting for repeat meals!

Savory Cheddar & Bacon Dutch Baby Variations

Feel free to get creative and make this dish your own with these delightful tweaks!

  • Gluten-Free: Substitute all-purpose flour with a gluten-free flour blend for a fluffy, inclusive treat.
  • Veggie Delight: Swap bacon for sautéed vegetables like bell peppers and spinach for a wholesome meatless option. The vibrant colors and flavors will keep you coming back for more!
  • Cheese Exchange: Try gouda or pepper jack for a flavor twist that will surprise and delight your taste buds. Each option brings a new personality to this beloved pancake.
  • Herb Infusion: Add fresh herbs like thyme or rosemary to the batter for a fragrant uplift. This simple touch can elevate the dish to a new level of deliciousness!
  • Spicy Kick: Mix in a pinch of cayenne pepper or chili flakes to the batter for a touch of heat, perfect for those who enjoy a spicy breakfast. Your taste buds will thank you for the fiery surprise.
  • Creamy Add-On: Drizzle a bit of sour cream or Greek yogurt on top before serving for a tangy richness that complements the savory flavors quite nicely. It adds a layer of creaminess that perfectly balances the pancake texture.
  • Sweet Savory Fusion: For a unique twist, add a drizzle of maple syrup or honey right before serving. This sweet contrast with savory flavors creates a deliciously unexpected combination.
  • Air Fryer Alternative: If you’re looking for a quicker method, you can cook your Dutch baby in an air fryer for a similar fluffy outcome. Just keep an eye on the timing to ensure it's just right!

By experimenting with these variations, you can add your personal touch and keep this dish fresh every time. And if you're looking for more delicious recipes, don't forget to check out our Santa Soup Savory or even consider pairing this with some tasty Grilled Mushrooms Savory as a side. Enjoy the kitchen adventures!

Savory Cheddar & Bacon Dutch Baby Recipe FAQs

What type of cheese works best for the Savory Cheddar & Bacon Dutch Baby?
I highly recommend using sharp cheddar cheese for its strong flavor and gooey texture. However, feel free to experiment with other cheeses like gouda, feta, or pepper jack for a delightful twist. Each cheese brings its unique taste, allowing you to customize your Dutch baby to your liking.

How should I store leftovers of the Savory Cheddar & Bacon Dutch Baby?
To keep your leftovers fresh, store them in an airtight container in the refrigerator for up to 2 days. If you want to maintain the best texture, I suggest reheating it in the oven at 350°F (175°C) for about 10-15 minutes, which will help regain its fluffy goodness.

Can I freeze the Savory Cheddar & Bacon Dutch Baby?
Absolutely! You can freeze individual slices of the Dutch baby. Wrap each slice tightly in plastic wrap, then place them in a freezer-safe bag. They can be kept in the freezer for up to 2 months. When you're ready to enjoy, simply reheat in the oven as mentioned above to restore its wonderful texture.

How do I ensure my Savory Cheddar & Bacon Dutch Baby comes out fluffy?
To achieve maximum puffiness, make sure your oven and cast-iron skillet are fully preheated before adding the batter. Blend the ingredients until smooth and frothy, and avoid opening the oven door while baking, as it can cause the Dutch baby to deflate. Serve immediately after baking for the best fluffy experience!

Are there any dietary considerations for this recipe, especially for allergies?
Yes! If you're looking for a gluten-free option, simply substitute the all-purpose flour with a gluten-free flour blend. Additionally, for those with dairy allergies, you can use oil instead of melted butter and non-dairy milk alternatives like oat or almond milk. For a vegetarian version, swap out the bacon for sautéed mushrooms or crispy tempeh.

How can I customize the toppings of my Savory Cheddar & Bacon Dutch Baby?
Feel free to get creative with your toppings! Instead of bacon, try sautéed vegetables like bell peppers and spinach for a healthy twist. You can also add fresh herbs like chives or parsley for a burst of color and flavor. If you want to change the flavor profile, mix different cheeses to level up your breakfast game!

Savory Cheddar & Bacon Dutch Baby

Savory Cheddar & Bacon Dutch Baby: A Cozy Brunch Treat

Savory Cheddar & Bacon Dutch Baby brings a delightful taste and stunning presentation, perfect for brunch or a cozy breakfast treat.
Print Recipe Pin Recipe
Prep Time 10 minutes mins
Cook Time 25 minutes mins
Resting Time 5 minutes mins
Total Time 35 minutes mins
Servings: 4 slices
Course: Breakfast
Cuisine: American
Calories: 300
Ingredients Equipment Method Nutrition Notes

Ingredients
  

For the Batter
  • 3 large Eggs Provide structure and help the pancake puff up.
  • 1 cup All-Purpose Flour Substitute with a gluten-free flour blend for a gluten-free option.
  • 1 cup Milk Use whole milk or oat/almond milk for lactose-free.
  • 4 tablespoons Melted Butter Can be replaced with oil for a dairy-free option.
  • 1 teaspoon Salt Essential for flavor balance.
  • 1 teaspoon Black Pepper Adjust according to taste.
For the Topping
  • 1 cup Sharp Cheddar Cheese Substitute with gouda, feta, or pepper jack for a twist.
  • 4 slices Bacon For a vegetarian option, replace with sautéed mushrooms or tempeh.

Equipment

  • cast iron skillet
  • Blender

Method
 

Step-by-Step Instructions
  1. Preheat your oven to 425°F (220°C) with a cast-iron skillet inside for about 10 minutes.
  2. In a blender, combine the eggs, all-purpose flour, milk, melted butter, salt, and black pepper. Blend until smooth and frothy, then let rest for 5 minutes.
  3. Remove the hot skillet from the oven, add 1 tablespoon of butter, and swirl to coat. Pour in the rested batter.
  4. Sprinkle the shredded sharp cheddar and crumbled bacon over the batter.
  5. Bake for 20 to 25 minutes until puffed and golden brown, avoiding opening the oven door.
  6. Let it rest for a minute, garnish with parsley or chives, slice, and serve warm.

Nutrition

Serving: 1sliceCalories: 300kcalCarbohydrates: 29gProtein: 12gFat: 18gSaturated Fat: 9gPolyunsaturated Fat: 1gMonounsaturated Fat: 6gCholesterol: 170mgSodium: 600mgPotassium: 300mgFiber: 1gSugar: 1gVitamin A: 500IUCalcium: 150mgIron: 1mg

Notes

Serve immediately for the best texture; reheating can make it dense. Feel free to customize toppings for variety.

Tried this recipe?

Let us know how it was!

Savor the Loaded Potato Taco Bowl for Ultimate Comfort Food

December 9, 2025 by Grace Snow Leave a Comment

As I stood in my kitchen, the savory aroma of roasting potatoes filled the air, instantly whisking me back to warm family gatherings and shared meals. The Loaded Potato Taco Bowl is not just another weeknight dish; it's a celebration of comfort food that blends crispy roasted russet potatoes with layers of seasoned meat and vibrant vegetables. This recipe hits the sweet spot, offering both soul-soothing indulgence and hearty nourishment with only about 600 calories per serving. Plus, it’s flexible—perfect for customizing to your taste preferences or dietary needs! With an easy prep time of just one hour, you’ll find this bowl is not just a meal but a fun experience to assemble. Ready to dive into a delicious culinary adventure?

Why is this Loaded Potato Taco Bowl special?

Comforting in every bite, this Loaded Potato Taco Bowl is your new go-to for cozy weeknight dinners. Versatile ingredients let you swap in your favorites, from sweet potatoes to black beans, catering to any diet. Gather the Family: Perfect for sharing, this dish invites everyone to create their own masterpiece! Satisfying Flavor: A blend of spices and textures makes each spoonful delightful. Plus, it’s ready in just an hour, making it ideal for busy schedules! Enjoy with a side of Acai Bowl Nutritious for a vibrant finish.

Loaded Potato Taco Bowl Ingredients

• Here’s everything you need to create this delicious and hearty bowl that will surely be a hit!

For the Potatoes

  • Russet Potatoes – The fluffy interior and crispy exterior make them ideal; try sweet potatoes for a different flavor!
  • Olive Oil – Essential for even roasting and adds richness.
  • Garlic Powder – Brings amazing savory depth; fresh garlic can work too!
  • Onion Powder – Complements the roasted potato flavor perfectly.
  • Smoked Paprika – Adds a delightful smokiness; Spanish paprika is a great substitute.
  • Salt and Black Pepper – Essential for flavor enhancement; adjust according to your taste.

For the Filling

  • Ground Beef or Turkey – A hearty protein source; beans or tofu are excellent vegetarian options.
  • Chili Powder – Offers earthy, spicy notes; feel free to omit for a milder bowl.
  • Cumin – Deepens flavor with warm, nutty aromas that elevate the dish.
  • Red Onion – Adds sweetness and texture; yellow onion can be swapped if needed.
  • Black Beans – Boosts fiber and protein; kidney or pinto beans make for tasty alternatives.
  • Corn Kernels – Provides sweet flavor and color; fresh, canned, or frozen varieties work well.

For the Toppings

  • Shredded Cheddar Cheese – Melts beautifully and adds creaminess; try different cheese varieties if you like!
  • Cherry Tomatoes – Adds juiciness and brightness; diced bell peppers can work too.
  • Avocado – Gives creaminess and healthy fats; Greek yogurt is a good substitute.
  • Fresh Cilantro – An herbaceous garnish that brightens the dish; omit if allergic.
  • Lime Wedges – Optional for serving; adds a zesty kick.
  • Sour Cream – A classic topping that balances the spices; Greek yogurt can replace it if desired.

Embrace the joy of cooking with this Loaded Potato Taco Bowl and enjoy every delicious bite!

Step‑by‑Step Instructions for Loaded Potato Taco Bowl

Step 1: Preheat the Oven
Begin your Loaded Potato Taco Bowl by preheating your oven to 425°F (220°C). While the oven warms up, wash and dice your russet potatoes into bite-sized chunks. Spread the diced potatoes evenly on a large baking sheet, ensuring they’re well spaced for optimal roasting. Drizzle generously with olive oil and season with garlic powder, onion powder, smoked paprika, salt, and black pepper. Toss everything together until well coated.

Step 2: Roast the Potatoes
Once the oven has reached the desired temperature, place the baking sheet with the seasoned potatoes inside. Bake for 25-30 minutes, turning them halfway through to ensure even crispiness. You'll know they are ready when the potatoes are golden brown and crispy on the edges. This step sets the foundation for your Loaded Potato Taco Bowl with flavorful, crunchy potatoes.

Step 3: Brown the Meat
While the potatoes are roasting, grab a large skillet and heat it over medium-high heat. Add the ground beef or turkey, breaking it apart with a spatula as it cooks. Brown the meat for about 5-7 minutes, draining any excess fat. The goal here is to achieve a lovely golden color on the meat, which will infuse your Loaded Potato Taco Bowl with rich flavor.

Step 4: Add Spices and Onions
To the browned meat, sprinkle in chili powder, cumin, and finely chopped red onion. Stir well to combine, and then cook everything together for another 5 minutes, allowing the onions to soften. The delightful aroma of spices mingling with the meat will signal that the next layer of flavor is coming together for your Loaded Potato Taco Bowl.

Step 5: Incorporate Beans and Corn
Next, stir in the black beans and corn, mixing thoroughly to heat everything through for about 3-4 minutes. This addition will not only enhance the nutritional profile of your Loaded Potato Taco Bowl but also add a burst of color and texture. Taste the mixture and adjust the seasonings if needed, ensuring every bite is packed with flavor.

Step 6: Assemble the Bowls
Now it's time to bring your Loaded Potato Taco Bowl together! Start by layering the crispy roasted potatoes into the bottom of your serving bowls. Next, spoon the savory meat and vegetable mixture generously over the potatoes. This warm, hearty base creates a delicious platform for the toppings that will follow.

Step 7: Add the Toppings
Top each bowl with a generous sprinkle of shredded cheddar cheese, followed by halved cherry tomatoes, diced avocado, and fresh cilantro. The melty cheese paired with fresh toppings adds a delightful contrast to the warm ingredients, completing the Loaded Potato Taco Bowl with vibrant flavors and textures.

Step 8: Serve and Enjoy
Serve your Loaded Potato Taco Bowl immediately, accompanied by lime wedges for a zesty squeeze and a dollop of sour cream on top. This dish is not just a meal but an experience, ready to be enjoyed with family or friends. Feel free to customize your bowls with additional toppings as you create your perfect comfort food feast!

Expert Tips for Loaded Potato Taco Bowl

  • Crispy Potatoes: Ensure the potatoes are spread in a single layer on the baking sheet to achieve optimal crispiness.

  • Flip It: Remember to flip the potatoes halfway through roasting to promote even browning and avoid sogginess.

  • Taste as You Go: Adjust the seasonings gradually during preparation to ensure the flavors suit your preference, making your Loaded Potato Taco Bowl truly yours.

  • Texture Matters: When reheating, separate the components to maintain the crispy texture of the potatoes and the fresh crunch of vegetables.

  • Customize Toppings: Personalize your bowls with extra toppings like jalapeños or pickled onions for a delightful kick!

What to Serve with Loaded Potato Taco Bowl

Create a delightful feast that complements the comforting richness of your Loaded Potato Taco Bowl.

  • Creamy Coleslaw: A crisp, tangy side that provides a refreshing contrast to the hearty bowl, enhancing every bite.
  • Mexican Street Corn: Grilled corn slathered in lime and cotija cheese adds a burst of flavor and sweetness, perfectly pairing with the savory elements.
  • Zesty Salsa: Fresh salsa made from tomatoes, onions, and cilantro elevates the flavors while adding a vibrant freshness that ties all the ingredients together.
  • Guacamole: The creamy texture of guacamole complements the crunchy potatoes beautifully, making each bite feel elevated and indulgent.
  • Chili Lime Roasted Vegetables: Roasted veggies tossed in chili and lime bring smokiness and acidity, balancing the flavors of your taco bowl with colorful, nutritious additions.
  • Sour Cream Salad: A light salad drizzled with sour cream dressing acts as a nice palate cleanser, harmonizing with the flavors of the taco bowl.

Make Ahead Options

These Loaded Potato Taco Bowls are perfect for busy home cooks wanting to save time during hectic weeknights! You can roast the potatoes and prepare the meat mixture up to 3 days in advance; simply refrigerate them in airtight containers. To maintain their quality, allow the roasted potatoes to cool completely before storing to prevent sogginess. When you're ready to enjoy, reheat the potatoes and meat mixture in the oven or on the stovetop until heated through. Then, assemble your Loaded Potato Taco Bowl with fresh toppings just before serving for that delightful contrast in texture and flavor. Enjoy delicious, hassle-free meals any night of the week!

Loaded Potato Taco Bowl Variations

Feel free to put your own twist on the Loaded Potato Taco Bowl—it's all about your taste and preferences!

  • Sweet Potato Swap: Substitute russet potatoes with sweet potatoes for a naturally sweet and vibrant flavor. Their creamy texture, combined with the savory toppings, brings a new dimension to this dish!

  • Vegetarian Delight: Replace meat with a mix of black beans, chickpeas, and extra veggies for a hearty vegetarian option. This twist is not only nutritious but also bursting with flavor and color.

  • Spicy Kick: Add jalapeños or diced chipotle peppers to the meat mixture for some heat! This fiery variation will ignite your taste buds and make for an exciting flavor journey.

  • Cheesy Variants: Switch up the shredded cheddar with pepper jack or a smoky gouda for an unexpected flavor profile. Experimenting with different cheeses can elevate the creaminess and overall taste.

  • Crunchy Toppings: For added texture, throw on some crushed tortilla chips or crispy fried onions atop your bowl. These crunchy elements contrast beautifully with the softness of the potatoes and toppings.

  • Herb Substitution: If cilantro's not your thing, try fresh parsley or green onions as a garnish. These alternatives will lend a fresh pop without overpowering the dish!

  • Cuisine Fusion: Transform the bowl into a Mediterranean delight by adding feta cheese, olives, and roasted red peppers. This fusion will create a delightful Mediterranean twist on a classic comfort food.

For even more delectable ideas, check out our delicious Fish Taco Bowls or try the creative Taco Spaghetti Cheesy for a unique meal experience! Enjoy the journey of cooking!

Storage Tips for Loaded Potato Taco Bowl

  • Fridge: Store assembled bowls in the refrigerator for up to 3 days, ensuring toppings remain fresh and are kept in airtight containers to prevent browning.

  • Freezer: For longer storage, freeze individual components separately (potatoes, meat mixture, and toppings) for up to 2 months. Reheat thoroughly before assembling.

  • Reheating: When reheating, warm potatoes in the oven for crispiness and heat the meat mixture in a skillet or microwave. Avoid microwaving topped bowls to maintain texture.

  • Airtight Storage: Use airtight containers for each component to keep flavors intact and freshness alive, ensuring your Loaded Potato Taco Bowl is ready to enjoy at a moment's notice!

Loaded Potato Taco Bowl Recipe FAQs

How do I select the best russet potatoes for this recipe?
Absolutely! Look for russet potatoes that are firm and heavy for their size. Avoid any with dark spots, bruises, or sprouts, as these can affect the flavor and texture. The ideal potatoes will have a smooth skin, which indicates freshness. If you're feeling adventurous, you can also opt for sweet potatoes for a delightful twist in flavor!

What’s the best way to store leftovers of the Loaded Potato Taco Bowl?
Great question! To keep your Loaded Potato Taco Bowl fresh, store the components separately. Roasted potatoes and meat mixture can be refrigerated in airtight containers for up to 3-4 days. Ensure that fresh toppings like avocado and tomatoes are stored in separate airtight containers to prevent browning and maintain their freshness.

Can I freeze the Loaded Potato Taco Bowl?
Of course! For longer storage, you can freeze the individual components separately. Cool the roasted potatoes and meat mixture completely before freezing. Use freezer-safe containers or bags to store each part, and they will maintain their quality for up to 3 months. When you're ready to enjoy, thaw overnight in the fridge and reheat the potatoes in the oven for that lovely crispiness!

What should I do if my potatoes don't get crispy?
I often recommend that you ensure the potatoes are spread out in a single layer on the baking sheet, as overcrowding can lead to steaming instead of roasting. Flipping them halfway through the cooking time can also help to achieve that perfect golden crisp. If they still aren't as crispy as you'd like after baking, you can broil them for an additional 2-3 minutes while keeping a close watch!

Are there any allergens I should be aware of in the Loaded Potato Taco Bowl?
Very much! This recipe includes common allergens such as dairy from the cheese and sour cream, and the possibility of gluten depending on your choice of seasoning brands. Always read labels carefully if you have allergies. If you’re preparing this for someone with dietary concerns, feel free to customize the toppings or substitute with dairy-free options like cashew cheese or yogurt!

How can I customize the flavors in my Loaded Potato Taco Bowl?
The more the merrier! You can easily customize this recipe to suit your taste. Experiment with different spices or add extras like jalapeños, pickled onions, or your favorite hot sauce for added heat. Additionally, swapping out proteins for beans or tofu can cater to vegetarian diets while maintaining flavor and texture. Enjoy the creative process!

Loaded Potato Taco Bowl

Savor the Loaded Potato Taco Bowl for Ultimate Comfort Food

The Loaded Potato Taco Bowl is the perfect comfort food, blending crispy potatoes, seasoned meat, and vibrant veggies for a satisfying meal.
Print Recipe Pin Recipe
Prep Time 15 minutes mins
Cook Time 45 minutes mins
Total Time 1 hour hr
Servings: 4 bowls
Course: Dinner
Cuisine: American
Calories: 600
Ingredients Equipment Method Nutrition Notes

Ingredients
  

For the Potatoes
  • 4 large Russet Potatoes or sweet potatoes for different flavor
  • 2 tablespoons Olive Oil for roasting
  • 1 teaspoon Garlic Powder
  • 1 teaspoon Onion Powder
  • 1 teaspoon Smoked Paprika or Spanish paprika
  • 1 teaspoon Salt to taste
  • 1 teaspoon Black Pepper to taste
For the Filling
  • 1 pound Ground Beef or Turkey or beans/tofu for vegetarian
  • 1 tablespoon Chili Powder optional for milder flavor
  • 1 teaspoon Cumin
  • 1 medium Red Onion finely chopped
  • 1 can Black Beans drained and rinsed
  • 1 cup Corn Kernels fresh, canned, or frozen
For the Toppings
  • 1 cup Shredded Cheddar Cheese or different cheese varieties
  • 1 cup Cherry Tomatoes halved
  • 1 large Avocado diced
  • 0.25 cup Fresh Cilantro chopped
  • 2 wedge Lime optional for serving
  • 0.5 cup Sour Cream or Greek yogurt

Equipment

  • Baking Sheet
  • Large skillet
  • Spatula

Method
 

Preparation Steps
  1. Preheat the oven to 425°F (220°C). Wash and dice russet potatoes into bite-sized chunks. Spread on a baking sheet, drizzle with olive oil and seasonings, and toss to coat.
  2. Roast the diced potatoes for 25-30 minutes, turning halfway through, until golden brown and crispy.
  3. In a large skillet over medium-high heat, brown the ground meat for about 5-7 minutes, draining excess fat.
  4. Add chili powder, cumin, and chopped red onion to the meat, stirring and cooking for another 5 minutes.
  5. Incorporate black beans and corn, mixing thoroughly to heat through for 3-4 minutes.
  6. Layer crispy roasted potatoes in bowls, topping with the meat mixture.
  7. Add toppings: shredded cheese, cherry tomatoes, avocado, and cilantro.
  8. Serve immediately with lime wedges and sour cream.

Nutrition

Serving: 1bowlCalories: 600kcalCarbohydrates: 80gProtein: 25gFat: 22gSaturated Fat: 10gPolyunsaturated Fat: 3gMonounsaturated Fat: 8gCholesterol: 80mgSodium: 900mgPotassium: 1500mgFiber: 10gSugar: 5gVitamin A: 10IUVitamin C: 30mgCalcium: 15mgIron: 20mg

Notes

Customize your bowl with different toppings like jalapeños or pickled onions for a kick.

Tried this recipe?

Let us know how it was!

Million Dollar Chicken Casserole: Creamy Comfort in Every Bite

December 8, 2025 by Grace Snow Leave a Comment

As I stood in the kitchen, the aroma of melting cheese and savory chicken filled the air, instantly transporting me to cozy family dinners spent gathered around the table. This Million Dollar Chicken Casserole is the epitome of comfort food, bringing warmth and joy to any occasion. With its creamy layers of cream cheese, cottage cheese, and a buttery Ritz cracker crust, this dish isn’t just easy to whip up but also a wallet-friendly choice for those busy weeknights. Whether you’re new to cooking or just looking for a simple yet satisfying meal, this casserole delivers on all fronts—convenient, delicious, and perfect for feeding a crowd. Ready to bring a little piece of home comfort to your dinner table? Let's dive into this heartwarming recipe!

Why Is This Casserole So Irresistible?

Unforgettable Comfort: This Million Dollar Chicken Casserole wraps you in warmth with its creamy layers and golden crust, making it an ideal dish for cozy gatherings.
Beginner-Friendly: Even if you're a novice in the kitchen, this recipe requires minimal cooking skills, ensuring success every time.
Budget-Friendly: Utilizing common ingredients like rotisserie chicken and Ritz crackers, you can create a luxurious meal without breaking the bank.
Crowd-Pleaser: Whether at potlucks or family dinners, this casserole is a guaranteed hit that will have everyone asking for seconds—like our Chicken Adobo Again or Honey Garlic Chicken.
Versatile Options: Feel free to mix in veggies or switch proteins for a personalized twist. Each bite promises gooey indulgence that you and your loved ones will relish!

Million Dollar Chicken Casserole Ingredients

For the Casserole Base

  • Cooked Chicken – Provides hearty protein; rotisserie chicken makes for a quick and easy option.
  • Cream Cheese – The creamy backbone, adding delightful tanginess to the mix.
  • Cottage Cheese – Offers a light creaminess; ricotta can serve as an alternative.
  • Sour Cream – Enhances moisture and adds a smooth finish; Greek yogurt is a tangy substitute.
  • Mayonnaise – Infuses richness and helps combine the cheese elements seamlessly.
  • Cream of Chicken Soup – Adds nostalgic flavor and thickens the casserole; homemade is a fresh option.

For the Cheesy Topping

  • Parmesan Cheese – Provides a sharp, nutty flavor and helps create a crispy golden crust.
  • Mozzarella Cheese – Melts beautifully for that classic gooey texture everyone loves.

For the Crunchy Topping

  • Ritz Crackers – Adds a buttery crunch that balances the creamy filling; panko can offer a different style.
  • Unsalted Butter – Coats the crackers to enhance browning; coconut oil works as a dairy-free alternative.

Flavor Enhancers

  • Garlic Powder & Onion Powder – Elevate the overall flavor; adjust amounts based on taste preferences.
  • Salt and Pepper – Essential for seasoning; don’t forget to taste!
  • Fresh Parsley – Optional garnish that brightens the dish with a pop of color and freshness.

Dive into this Million Dollar Chicken Casserole recipe, and experience the delightful fusion of flavors and textures that makes it a beloved comfort food. Happy cooking!

Step‑by‑Step Instructions for Million Dollar Chicken Casserole

Step 1: Preheat and Prepare
Begin by preheating your oven to 350°F (175°C). This temperature is key for achieving a beautifully bubbly casserole. While the oven heats, gather a large mixing bowl to combine the creamy elements of your Million Dollar Chicken Casserole. Make sure your cream cheese is softened for easy mixing; it should be smooth and spreadable.

Step 2: Mix the Base
In your mixing bowl, combine the softened cream cheese, cottage cheese, sour cream, mayonnaise, and cream of chicken soup. Using a hand mixer or a sturdy spoon, blend these ingredients until they form a smooth, cohesive mixture. This creamy base will be the heart of your casserole, so ensure there are no lumps—about 2–3 minutes of mixing will do the trick.

Step 3: Season to Taste
Next, stir in a sprinkle of garlic powder, onion powder, salt, and pepper into the creamy mixture. Taste as you go and adjust according to your preference. These seasonings will enhance the flavor profile of your Million Dollar Chicken Casserole, ensuring each bite is deliciously savory.

Step 4: Fold in the Chicken
Carefully fold in your diced or shredded cooked chicken, making sure every piece is evenly coated in the creamy mixture. This step is crucial as it combines the protein with the sauce, making a flavorful filling. Depending on your chicken’s size, this should take about 2 minutes; you’re looking for an even distribution throughout.

Step 5: Prepare the Baking Dish
Grease a 9×13-inch baking dish with a bit of non-stick spray or softened butter to prevent sticking. Spread the chicken mixture evenly across the bottom of the dish, smoothing it out with a spatula for an even layer. This ensures that the casserole cooks uniformly, giving it that coveted golden crust on top.

Step 6: Add the Cheese Layer
Sprinkle a generous layer of Parmesan cheese over the entire chicken mixture. This not only adds flavor but also helps create a rich, savory crust as it bakes. Visualize that golden-brown color; this will be a delightful contrast to the creamy filling once baked.

Step 7: Prepare the Crunchy Topping
In a small bowl, mix crushed Ritz crackers with melted butter until the crackers are fully coated. This mixture will add a crunchy texture on top of your casserole. Take your time to ensure that all crumbs are buttery; this step takes about 1–2 minutes and is essential for that perfect crispy topping.

Step 8: Assemble the Final Layers
Spread the buttery Ritz cracker mixture evenly over the Parmesan cheese, ensuring full coverage. Finish by adding a layer of shredded mozzarella cheese on top, which will melt into gooey perfection. This delightful blend of toppings will create an irresistible, cheesy crust for your Million Dollar Chicken Casserole.

Step 9: Bake to Perfection
Place the baking dish in the preheated oven and bake for 25–30 minutes. Look for the casserole to bubble up and the top to turn a gorgeous golden brown. The aroma will fill your kitchen, signaling that your comforting meal is almost ready.

Step 10: Cool and Garnish
After baking, remove the dish from the oven and let it rest for about 10 minutes. This allows the casserole to set up nicely for serving. Before plating, sprinkle freshly chopped parsley on top for a pop of color and a hint of freshness, elevating your Million Dollar Chicken Casserole to a stunning presentation.

Million Dollar Chicken Casserole Variations

Feel free to get creative with this classic recipe and make it your own with these delightful twists!

  • Turkey Option: Substitute cooked chicken with turkey for a flavorful alternative, perfect after the holidays.
  • Veggie Boost: Add spinach or broccoli to the mix for an extra layer of nutrition and texture. The more colors on your plate, the better!
  • Greek Yogurt Swap: Replace sour cream with Greek yogurt for a healthier, tangy twist that adds creaminess.
  • Spicy Kick: Toss in some diced jalapeños or a pinch of cayenne for a delightful heat that complements the creamy base. It's sure to awaken your taste buds!
  • Richer Flavor: Use homemade cream of chicken soup instead of canned for a fresher, richer taste. This small swap can elevate your casserole to new heights!
  • Pasta Layer: Incorporate cooked pasta like rotini or penne between layers for a heartier meal that feels like a big comforting hug.
  • Different Cheese: Experiment with different cheeses like sharp cheddar or Gouda for a unique flavor profile that dances on your palate.
  • Herb Infusion: Add fresh herbs like thyme or rosemary into the filling for an aromatic punch that revitalizes each bite. It’s all about layering those delicious flavors!

Each variation opens the door to a new flavor adventure! You can also explore more hearty chicken options like Crock Pot Chicken or zesty choices like Chipotle Lime Chicken and Rice for even more delicious family meals. Happy cooking!

How to Store and Freeze Million Dollar Chicken Casserole

Fridge: Store leftovers in an airtight container for up to 3 days. It’s a great option for quick meals during the week!

Freezer: For longer storage, freeze the unbaked casserole for up to 3 months. Wrap tightly in plastic wrap and foil to prevent freezer burn.

Reheating: To reheat, bake thawed casserole in a preheated oven at 350°F (175°C) for about 25–30 minutes. Ensure it’s heated through completely for the best flavor.

Leftovers Tip: If you have leftover baked casserole, consume it within a couple of days for optimal freshness and taste.

Helpful Tricks for Million Dollar Chicken Casserole

  • Resting Period: Allow the casserole to rest after baking. This ensures it holds its shape when served, making for neater portions.
  • Seasoning Check: Taste and adjust seasoning before baking. This is the perfect moment to enhance the flavors of your Million Dollar Chicken Casserole.
  • Mixing Method: Ensure all ingredients are evenly mixed to prevent clumps. A hand mixer or sturdy spoon will create a smooth and cohesive filling.
  • Easy Substitutions: If you need a quicker option, rotisserie chicken works perfectly—saving you time without sacrificing flavor.
  • Crispy Topping Tip: Make sure the crushed Ritz crackers are well-coated in butter for that irresistible golden, crunchy topping.

What to Serve with Million Dollar Chicken Casserole

Pairing the right sides can elevate your dining experience, transforming a simple casserole into a memorable meal.

  • Garden Salad: A crisp garden salad provides a fresh contrast to the creamy casserole, balancing the rich flavors beautifully. Topped with a light vinaigrette, it brings a refreshing crunch to your table.

  • Steamed Broccoli: Tender steamed broccoli adds a nutritious touch while offering a mild flavor that complements the casserole’s richness. The vibrant green color also brightens up your plate, making your meal visually appealing.

  • Garlic Bread: Golden, buttery garlic bread pairs perfectly with this cheesy dish, offering a wonderful complementary flavor. It’s also ideal for scooping up every last bite of casserole.

  • Coleslaw: The tangy crunch of coleslaw adds a delightful contrast to the silky texture of the casserole. Its zesty flavors will wake up your palate while the coolness complements the heartiness of the dish.

  • Roasted Carrots: Sweet and caramelized roasted carrots bring both flavor and a pop of color to your meal. Their natural sweetness beautifully balances the savory notes of the Million Dollar Chicken Casserole.

  • Apple Crisp: For dessert, a warm apple crisp can provide a delightful sweet contrast after the savory casserole. The soft, baked apples topped with a crunchy oat topping is a classic comfort finish to your meal.

Make Ahead Options

These Million Dollar Chicken Casserole are perfect for busy home cooks looking to save time during hectic weeknights! You can prepare the creamy filling by mixing the cheeses, mayonnaise, and soup up to 24 hours in advance; store it in the refrigerator to maintain its freshness. Additionally, the casserole can be assembled (without baking) and covered tightly for up to 3 days in the fridge, allowing for quick cooking when you're ready. When you're set to serve, simply top with the cracker mixture and mozzarella, then bake at 350°F (175°C) for 25–30 minutes until golden and bubbly. This makes it just as delicious while saving you valuable time!

Million Dollar Chicken Casserole Recipe FAQs

How do I choose the right chicken for the casserole?
Absolutely! You can use any cooked chicken, but for convenience, rotisserie chicken is perfect. Just make sure it’s tender and juicy for the best flavor. Aim for about 4 cups of shredded chicken, and if you have leftovers, even better!

How should I store leftovers from the casserole?
Leftovers can be stored in an airtight container in the fridge for up to 3 days. This makes it super convenient for quick meals throughout the week. I often just pop it into individual containers for easy reheating!

Can I freeze Million Dollar Chicken Casserole?
Yes, you can freeze it! I recommend wrapping the unbaked casserole tightly in plastic wrap and then in foil to prevent freezer burn. You can store it in the freezer for up to 3 months. When you're ready to enjoy it again, thaw it overnight in the fridge and bake it at 350°F (175°C) for about 25–30 minutes, or until thoroughly heated.

What if my casserole turns out too dry?
If your casserole ends up a bit dry, don’t fret! Try adding a splash of chicken broth to the mix before baking, or serve it with a dollop of sour cream or yogurt on top when you serve. You want that creamy texture, so keep an eye on the baking time to avoid drying it out.

Are there any dietary concerns I should consider?
Absolutely! If anyone you’re serving has dairy allergies, use dairy-free alternatives like coconut yogurt and cream cheese. For gluten-free options, ensure your Ritz crackers or substitute are gluten-free. Always keep your guests' dietary needs in mind to make sure everyone can enjoy this hearty dish!

Million Dollar Chicken Casserole

Million Dollar Chicken Casserole: Creamy Comfort in Every Bite

Enjoy the comforting Million Dollar Chicken Casserole, featuring creamy layers and a buttery crust, perfect for family dinners.
Print Recipe Pin Recipe
Prep Time 15 minutes mins
Cook Time 30 minutes mins
Cooling Time 10 minutes mins
Total Time 55 minutes mins
Servings: 8 servings
Course: Dinner
Cuisine: American
Calories: 350
Ingredients Equipment Method Nutrition Notes

Ingredients
  

For the Casserole Base
  • 4 cups Cooked Chicken shredded rotisserie chicken
  • 8 oz Cream Cheese softened
  • 1 cup Cottage Cheese
  • 1 cup Sour Cream Greek yogurt can be substituted
  • 1/2 cup Mayonnaise
  • 1 can Cream of Chicken Soup homemade is an option
For the Cheesy Topping
  • 1 cup Parmesan Cheese grated
  • 2 cups Mozzarella Cheese shredded
For the Crunchy Topping
  • 1 cup Ritz Crackers crushed
  • 1/2 cup Unsalted Butter melted
Flavor Enhancers
  • 1 tsp Garlic Powder
  • 1 tsp Onion Powder
  • 1 tsp Salt to taste
  • 1 tsp Pepper to taste
  • 1/4 cup Fresh Parsley chopped, for garnish

Equipment

  • Oven
  • Mixing Bowl
  • Spatula
  • 9x13-inch baking dish

Method
 

Preparation Steps
  1. Preheat your oven to 350°F (175°C). Gather a large mixing bowl.
  2. Combine softened cream cheese, cottage cheese, sour cream, mayonnaise, and cream of chicken soup in the mixing bowl. Mix until smooth.
  3. Stir in garlic powder, onion powder, salt, and pepper into the creamy mixture.
  4. Fold in the cooked chicken until evenly coated.
  5. Grease a 9x13-inch baking dish and spread the chicken mixture evenly.
  6. Sprinkle Parmesan cheese over the chicken mixture.
  7. In a small bowl, mix crushed Ritz crackers with melted butter until fully coated.
  8. Spread the buttery cracker mixture over the Parmesan cheese, then add shredded mozzarella on top.
  9. Bake for 25-30 minutes until bubbly and golden brown.
  10. Let the casserole cool for about 10 minutes before serving, then garnish with fresh parsley.

Nutrition

Serving: 1servingCalories: 350kcalCarbohydrates: 30gProtein: 25gFat: 18gSaturated Fat: 10gPolyunsaturated Fat: 2gMonounsaturated Fat: 4gCholesterol: 80mgSodium: 700mgPotassium: 300mgFiber: 1gSugar: 2gVitamin A: 500IUVitamin C: 2mgCalcium: 250mgIron: 2mg

Notes

Allowing the casserole to rest after baking helps it hold its shape for serving. Adjust flavors as needed before baking and ensure all ingredients are well mixed.

Tried this recipe?

Let us know how it was!

Mouthwatering Swedish Meatballs Recipe in Creamy Mushroom Sauce

December 8, 2025 by Grace Snow Leave a Comment

As I settled in for a cozy evening, the aroma of savory spices wafted from my kitchen, transporting me straight to the heart of Sweden. This Swedish Meatballs Recipe features tender meatballs nestled in a creamy mushroom sauce that wraps around your taste buds like a warm hug. Perfect for busy weeknights, it comes together in just 25 minutes, making it an ideal choice for anyone craving comfort without the lengthy prep time. Whether you're entertaining friends or feeding your family, this dish is a guaranteed crowd-pleaser that will leave everyone asking for seconds. What’s your secret ingredient for elevating a classic dish?

What makes these meatballs a must-try?

Comforting, savory goodness: These Swedish meatballs offer a delightful blend of flavors that warm the soul—perfect for family dinners or entertaining.
Quick preparation: In just 25 minutes, you can serve a gourmet meal that feels indulgent without hours in the kitchen.
Creamy mushroom sauce: The luscious gravy elevates the dish, clinging beautifully to each meatball and pasta, ensuring every bite is heavenly.
Versatile ingredients: Swap in ground turkey or chicken for a lighter version, or add herbs to suit your palate. This recipe works well with many variations!
Crowd-pleasing flavor: Whether it's a weeknight dinner or a gathering with friends, these meatballs are bound to impress and satisfy everyone at the table. If you’re in the mood for more delicious options, explore our tasty Spatchcock Chicken or a comforting Chicken Adobo.

Swedish Meatballs Recipe Ingredients

For the Meatballs

  • Lean Ground Beef – This is the primary protein and offers rich flavor; choose 90% lean for optimal juiciness.
  • Egg – Acts as a binder; while no substitution is necessary, you can opt for a flax egg for a plant-based alternative.
  • Chopped Onion – Adds depth; shallots can be used for a milder flavor if preferred.
  • Minced Garlic – Enhances the flavor profile; use fresh garlic for the best results.
  • Panko Breadcrumbs – Provides structure and helps maintain moisture; regular breadcrumbs work if needed.
  • Nutmeg – Offers warm, earthy notes that define the meatballs; allspice or ground cloves are good substitutes.
  • Fresh Parsley – Adds freshness and color; dried parsley can be used if fresh is unavailable.
  • Salt and Pepper – Essential for seasoning; adjust based on your taste preference.

For the Sauce

  • Olive Oil – Used for browning the meatballs; you can replace it with butter or vegetable oil if you like.
  • Beef Broth – Adds immense richness to the gravy; vegetable broth works wonderfully for a lighter touch.
  • Condensed Cream of Mushroom Soup – Forms the base of the gravy; try homemade mushroom sauce for a healthier twist.
  • Sour Cream – Provides creaminess and a tangy note; Greek yogurt or crème fraîche are great alternatives.

For Serving

  • Freshly Cooked Pasta – The perfect bed for your meatballs and sauce; any pasta type is great, even gluten-free options will work!

Cook up these meatballs using this Swedish Meatballs Recipe, and your family will be clamoring for more!

Step‑by‑Step Instructions for Swedish Meatballs Recipe

Step 1: Prepare the Meatball Mixture
In a medium bowl, thoroughly combine 1 pound of lean ground beef, 1 egg, ½ cup chopped onion, 2 cloves minced garlic, ½ cup Panko breadcrumbs, ¼ teaspoon nutmeg, 2 tablespoons chopped fresh parsley, and a sprinkle of salt and pepper. Mix until just combined to avoid tough meatballs, ensuring all ingredients are evenly dispersed.

Step 2: Shape the Meatballs
Once your mixture is ready, shape it into approximately 20 even meatballs, about 1 inch in diameter. Place them on a plate or tray lined with parchment paper as you work. This step is crucial for achieving that beloved Swedish meatball texture, so be gentle yet firm in your shaping.

Step 3: Brown the Meatballs
Heat 2 tablespoons of olive oil in a large skillet over medium-high heat. Once the oil is shimmering, add the meatballs in a single layer, ensuring they have space to brown. Cook for 5-7 minutes, turning occasionally, until they're evenly browned on all sides. Transfer them to a plate and leave behind any excess fat in the skillet.

Step 4: Make the Creamy Sauce
In the same skillet, pour in 1 cup of beef broth, followed by 10.5 ounces of condensed cream of mushroom soup and ½ cup of sour cream. Stir everything together until smooth and well combined. Heat the mixture over medium heat, bringing it to a gentle boil, allowing the flavors to meld beautifully for about 2-3 minutes.

Step 5: Simmer the Meatballs in Sauce
Return the browned meatballs to the skillet, ensuring they are well-coated in the creamy sauce. Reduce the heat to low, cover the skillet, and let them simmer for 5-7 minutes, or until the meatballs are cooked through and the sauce has thickened slightly. The sauce should be bubbling gently, creating a luscious coating for your meatballs.

Step 6: Serve and Enjoy
Once your meatballs are ready, remove the skillet from the heat and serve the Swedish meatballs over freshly cooked pasta. Make sure to spoon extra sauce generously over the top for that creamy goodness in every bite. Garnish with additional parsley if desired for a touch of freshness, and gather your loved ones to indulge in this heartwarming dish.

Expert Tips for Swedish Meatballs

  • Mix with Care: Avoid overmixing the meat mixture to ensure tender and juicy meatballs; a gentle hand goes a long way!
  • Don’t Rush Browning: Properly browning the meatballs enhances their flavor, so take your time with this crucial step.
  • Add Extra Mushrooms: Sauté additional mushrooms for added texture and flavor; they blend perfectly with the creamy sauce!
  • Cook Ahead: Prepare the meatballs in advance and refrigerate them; this makes for a quick, effortless weeknight dinner using this Swedish meatballs recipe.
  • Perfect Pasta Pairing: Serve the meatballs over pasta that can adequately hold the creamy sauce, like fettuccine or pappardelle, for a delightful meal.

What to Serve with The Best Swedish Meatballs in Creamy Mushroom Sauce

Experience a fully enjoyable family meal loaded with textures and delicious flavors that perfectly complement this hearty dish.

  • Crusty Bread: Perfect for soaking up the rich mushroom gravy, this crunchy companion adds a satisfying texture and enhances the overall experience. A warm baguette or rustic country loaf makes an excellent choice here.

  • Fresh Garden Salad: A crisp salad with mixed greens, cherry tomatoes, and a tangy vinaigrette balances the creamy richness of the meatballs. This refreshing element also adds a bright flavor to your meal.

  • Roasted Vegetables: Sweet, roasted carrots, and earthy Brussels sprouts introduce a warm, caramelized flavor that pairs beautifully with the savory meatballs. The crispy texture adds an exciting contrast.

  • Creamy Mashed Potatoes: Smooth and buttery, mashed potatoes serve as a comforting base for the meatballs, soaking up the sauce wonderfully for a truly indulgent bite.

  • Steamed Green Beans: Lightly steamed green beans offer a crisp and fresh contrast to the meatballs and sauce. Their vibrant color and taste bring balance to your plate.

  • Light White Wine: A chilled glass of Sauvignon Blanc or Chardonnay beautifully complements the savory notes of the dish, enhancing the overall flavor experience.

Invest a little more time into your meal and savor the love and comfort these pairings bring to your Swedish Meatballs Recipe!

Make Ahead Options

These Swedish Meatballs Recipe are perfect for meal prep enthusiasts looking to save time during busy weeknights! You can prepare the meatball mixture up to 24 hours in advance; just mix the ingredients, shape them into meatballs, and refrigerate until you're ready to cook. The creamy mushroom sauce can also be made ahead and stored in the fridge for up to 3 days. When you’re ready to enjoy your meal, simply brown the meatballs as directed, add them to the sauce, and simmer until cooked through. By doing the prep work in advance, you'll have a delicious and comforting dinner on the table with minimal effort!

How to Store and Freeze Swedish Meatballs

Fridge: Store leftover Swedish meatballs in an airtight container for up to 3 days. Reheat gently on the stovetop or in the microwave, adding a splash of broth or water to maintain moisture.

Freezer: For longer storage, freeze meatballs in a single layer on a baking sheet, then transfer to a freezer bag for up to 1 month. Thaw overnight in the fridge before reheating.

Reheating: To reheat frozen meatballs, simmer them in the creamy mushroom sauce on low heat until heated through. This keeps them juicy and flavorful.

Make-Ahead: Prepare the meatballs ahead of time and refrigerate them until you're ready to cook. This makes for a quick and satisfying meal later on.

Swedish Meatballs Recipe Variations

Feel free to put your personal spin on this delectable Swedish meatballs recipe for a unique twist!

  • Lean Meat: Use ground turkey or chicken for a lighter alternative that still brings delicious flavor.
  • Herb Infusion: Experiment with fresh herbs like thyme or dill to elevate the taste profile of your meatballs beautifully.
  • Extra Umami: Add a splash of Worcestershire sauce to the meat mixture for an extra punch of savory goodness.
  • Vegetarian Twist: Swap meat for a blend of finely chopped mushrooms and lentils, creating a hearty, plant-based version that’s just as satisfying.
  • Spicy Kick: Mix in a pinch of crushed red pepper flakes for those who crave a bit of heat with their comfort food.
  • Nutty Flavor: Incorporate a tablespoon of ground almonds or almond flour for added texture and a nutty nuance in the meatballs.
  • Creamy Mushroom Sauce Upgrade: Try making your own mushroom sauce using a medley of sautéed mushrooms and a splash of white wine – it adds depth and sophistication!
  • Pasta Alternatives: Don’t limit yourself to just traditional pasta! Serve these meatballs over zoodles or quinoa for a refreshing twist that’s equally delicious.

These variations can bring a whole new life to your dish! And if you’re looking for more flavorful dishes, don't forget to check out our mouthwatering Spatchcock Chicken or comforting Chicken Adobo. Enjoy your culinary adventures!

Swedish Meatballs Recipe FAQs

How do I choose the best ground beef for my meatballs?
Absolutely! For the best Swedish meatballs, I recommend using 90% lean ground beef. This provides a rich flavor and keeps the meatballs juicy without being overly fatty. If you're looking for a lighter option, ground turkey or chicken can be substituted, and they work well in this dish!

What’s the best way to store leftover meatballs?
Store leftover Swedish meatballs in an airtight container in the refrigerator for up to 3 days. To reheat, gently warm them on the stovetop over low heat, or pop them in the microwave. Adding a splash of broth or water can help retain moisture during reheating, making them just as delicious as when they were freshly made.

Can I freeze the meatballs?
Yes, you can absolutely freeze them! To do this, shape the meatballs and place them on a baking sheet in a single layer. Freeze them for about 1 hour until firm, then transfer them to a freezer-safe bag or container. They can be frozen for up to 1 month. When you're ready to enjoy them, thaw overnight in the fridge and reheat in the creamy mushroom sauce on low heat until warmed through.

I’m having trouble with my meatballs falling apart. What can I do?
I hear you! If your meatballs are falling apart, it could be due to overmixing the meat mixture or not enough binder. Make sure to mix just until combined—about 30 seconds is usually perfect. Additionally, ensure you're using enough Panko breadcrumbs and egg to help bind everything together. If necessary, add a touch more breadcrumbs next time for better structure.

Are there any dietary considerations for this recipe?
Certainly! If someone in your household has allergies, it's essential to replace or omit certain ingredients. For a dairy-free version, you can substitute sour cream with coconut yogurt or a plant-based alternative. If using a flax egg, combine 1 tablespoon of ground flaxseed with 2.5 tablespoons of water and let it sit for 5 minutes before adding it to your meat mixture! Just remember to factor in the suggested cooking times, as they may vary slightly.

Can I use regular breadcrumbs instead of Panko?
Very! While Panko breadcrumbs offer a lighter and crunchier texture, you can absolutely use regular breadcrumbs if they're what you have on hand. Just be aware that they might result in a slightly denser meatball, but it will still taste delicious!

Swedish Meatballs Recipe

Mouthwatering Swedish Meatballs Recipe in Creamy Mushroom Sauce

This Swedish Meatballs Recipe features tender meatballs in a creamy mushroom sauce. Perfect for busy weeknights!
Print Recipe Pin Recipe
Prep Time 10 minutes mins
Cook Time 15 minutes mins
Total Time 25 minutes mins
Servings: 4 servings
Course: Dinner
Cuisine: Swedish
Calories: 450
Ingredients Equipment Method Nutrition Notes

Ingredients
  

For the Meatballs
  • 1 pound lean ground beef choose 90% lean for optimal juiciness
  • 1 large egg acts as a binder
  • ½ cup chopped onion adds depth; shallots can be used for milder flavor
  • 2 cloves minced garlic use fresh garlic for the best results
  • ½ cup Panko breadcrumbs provides structure and helps maintain moisture
  • ¼ teaspoon nutmeg offers warm, earthy notes; allspice or ground cloves are substitutes
  • 2 tablespoons fresh parsley adds freshness and color; dried parsley can be used if fresh is unavailable
  • salt and pepper essential for seasoning; adjust based on taste
For the Sauce
  • 2 tablespoons olive oil used for browning the meatballs; can replace with butter
  • 1 cup beef broth adds richness; vegetable broth works for lighter touch
  • 10.5 ounces condensed cream of mushroom soup forms the base of the gravy
  • ½ cup sour cream provides creaminess; Greek yogurt or crème fraîche are alternatives
For Serving

Equipment

  • medium bowl
  • Large skillet
  • plate or tray

Method
 

Step-by-Step Instructions
  1. In a medium bowl, combine lean ground beef, egg, chopped onion, minced garlic, Panko breadcrumbs, nutmeg, chopped parsley, and a sprinkle of salt and pepper. Mix until just combined.
  2. Shape the mixture into approximately 20 meatballs, about 1 inch in diameter, and place them on a lined plate or tray.
  3. Heat olive oil in a large skillet over medium-high heat. Add the meatballs in a single layer and cook for 5-7 minutes until browned on all sides. Transfer to a plate.
  4. In the same skillet, pour in beef broth, condensed cream of mushroom soup, and sour cream. Stir until smooth and bring to a gentle boil for 2-3 minutes.
  5. Return meatballs to the skillet and cover to simmer for 5-7 minutes until cooked through and sauce thickens.
  6. Serve the meatballs over freshly cooked pasta with extra sauce and garnish with parsley.

Nutrition

Serving: 1servingCalories: 450kcalCarbohydrates: 30gProtein: 25gFat: 28gSaturated Fat: 10gPolyunsaturated Fat: 2gMonounsaturated Fat: 10gCholesterol: 100mgSodium: 600mgPotassium: 700mgFiber: 2gSugar: 3gVitamin A: 500IUVitamin C: 3mgCalcium: 50mgIron: 3mg

Notes

Avoid overmixing the meat mixture for tender meatballs; take your time with browning. Prepare meatballs ahead of time for a quick dinner.

Tried this recipe?

Let us know how it was!

Cheesy Beef Biscuit Bombs That Will Brighten Your Day

December 8, 2025 by Grace Snow Leave a Comment

As the aroma of browning beef fills your kitchen, it sparks a delightful memory: a family gathering where laughter is accompanied by the sound of crunching pastries. This whimsical culinary moment leads me to share my recipe for Cheesy Beef Biscuit Bombs—an easy recipe that embraces the essence of comfort food. Imagine transforming simple ingredients into a savory snack that warms the heart and pleases the palate. These little gems are not only beginner-friendly but also customizable, allowing you to cater to your taste or dietary preferences. Whether you're serving them for breakfast, a casual dinner, or a cozy family snack, I promise they’ll become a cherished staple in your home. Curious about how to create these mouthwatering bites? Let’s dive into the details!

Why Will You Love Cheesy Beef Biscuit Bombs?

Easy Preparation: This recipe is straightforward, making it perfect for beginner chefs or anyone looking to whip up a quick snack without fuss.

Customizable Options: With endless possibilities for fillings, you can easily swap out ingredients to fit your family’s tastes—think sautéed veggies or different cheeses!

Flavor Explosion: Each bite reveals a deliciously rich blend of savory beef and gooey cheese, giving your taste buds a treat that rivals fast food without the guilt.

Crowd-Pleaser: These biscuit bombs are sure to impress guests at any gathering, bringing smiles and satisfaction to everyone at the table. Pair them with a side of marinara sauce for a delightful dipping experience!

Perfect for Any Meal: Serve them for breakfast, as a snack, or a quick dinner option that everyone will love. It’s a versatile dish that fits any occasion!

Cheesy Beef Biscuit Bomb Ingredients

For the Filling

  • Ground Beef – Provides a rich, savory filling; substitute with ground turkey or chicken for a lighter option.
  • Cream Cheese (softened) – Adds a creamy texture, binding the beef and cheese together.
  • Shredded Cheddar Cheese – Creates a gooey, melty center; swap with mozzarella or Monterey Jack for a different flavor profile.
  • Grated Parmesan Cheese – Enhances the filling with a salty, umami taste.
  • Garlic Powder – Adds aromatic depth without overpowering the dish.
  • Onion Powder – Provides mild sweetness and savory notes.
  • Black Pepper – Adds a slight kick to balance the richness of the filling.

For the Dough

  • Refrigerated Biscuit Dough – Serves as the outer layer, creating a soft, flaky casing.

For Topping

  • Melted Butter – Brushed on top for a golden finish and enhanced flavor.

These Cheesy Beef Biscuit Bombs are not just delicious but also a wonderful way to delve into the realm of home cooking!

Step‑by‑Step Instructions for Cheesy Beef Biscuit Bombs

Step 1: Preheat the Oven
Begin by preheating your oven to 375°F (190°C). This step prepares the environment for your Cheesy Beef Biscuit Bombs, ensuring they cook evenly. While the oven is warming up, gather your ingredients and equipment, including a large skillet and a baking sheet lined with parchment paper for easy cleanup.

Step 2: Brown the Ground Beef
In a large skillet, add your ground beef and cook over medium heat. Stir frequently for about 6-8 minutes until the beef is nicely browned, breaking it into smaller pieces. Once cooked, drain off the excess grease, keeping the skillet ready for the next steps in preparing your cheesy filling.

Step 3: Season the Beef Mixture
Return the skillet to low heat and stir in the garlic powder, onion powder, and black pepper. Cook for an additional 1-2 minutes until the spices become fragrant and well incorporated into the beef. This step enhances the flavors of your Cheesy Beef Biscuit Bombs, making them savory and delicious.

Step 4: Cool the Beef Mixture
Transfer the skillet off the heat and allow the beef mixture to cool slightly, about 5 minutes. This cooling step is essential as it prevents the cream cheese from melting too quickly when mixed, ensuring a creamy filling instead of a runny one.

Step 5: Combine the Cheesy Ingredients
In a separate mixing bowl, combine the softened cream cheese, shredded cheddar cheese, and grated Parmesan cheese. Use a fork or spatula to mix until smooth and creamy, creating a luscious filling for your Cheesy Beef Biscuit Bombs that guests will rave about.

Step 6: Mix Together the Filling
Fold the cooled beef mixture into the cheese mixture, stirring gently until all components are evenly combined. The contrast of the creamy cheese with the savory beef creates a delightful filling that will burst with flavor in every bite.

Step 7: Prepare the Biscuit Dough
Open your refrigerated biscuit dough and separate it into individual biscuits according to package instructions. On a lightly floured surface, flatten each biscuit into a disc approximately 4 inches wide, ensuring it can encase the filling without tearing.

Step 8: Fill and Seal the Biscuit Bombs
Place a generous spoonful of the meat and cheese mixture in the center of each flattened biscuit. Carefully bring the edges up and pinch them together to seal tightly, ensuring no filling escapes during baking. This little step guarantees your Cheesy Beef Biscuit Bombs turn out beautifully.

Step 9: Arrange and Brush
Arrange the sealed biscuit bombs on your prepared baking sheet. Before baking, brush the tops generously with melted butter to give them a golden-brown finish during baking. This simple addition not only enhances flavor but creates a visually appealing crust.

Step 10: Bake to Perfection
Place the baking sheet in your preheated oven and bake for 12-15 minutes. Keep an eye on them; they should turn golden brown and become crispy on the outside. You’ll know they’re done when the cheese is bubbling slightly through the edges.

Step 11: Cool and Serve
Once baked, remove the Cheesy Beef Biscuit Bombs from the oven and let them cool for a few minutes on the baking sheet. This resting period helps set the filling, making them easier to eat. Serve warm, and watch them disappear quickly!

Make Ahead Options

These Cheesy Beef Biscuit Bombs are perfect for busy weeknights! You can prepare the beef and cheese filling up to 24 hours ahead; simply combine the cooled beef mixture with the cheeses and refrigerate it in an airtight container. Furthermore, you can assemble the biscuit bombs (filling them and sealing them up) and store them in the refrigerator for up to 3 days before baking. When you're ready to enjoy them, simply brush with melted butter and bake as directed—no need to thaw! This time-saving prep allows you to serve a delicious, homemade snack with minimal effort, ensuring that your cheesy comfort food shines just as brightly!

What to Serve with Cheesy Beef Biscuit Bombs

There’s something truly heartwarming about pairing these golden delights with complementary flavors and textures for a memorable meal.

  • Marinara Sauce: A tangy dip that enhances the savory beef, adding a zesty contrast that awakens every bite. Perfect for those who love a flavorful dunk!

  • Fresh Garden Salad: Crisp greens and colorful veggies provide a refreshing balance to the rich biscuit bombs. Drizzle with a light vinaigrette to brighten the meal.

  • Creamy Coleslaw: The crunchy and creamy textures of coleslaw contrast beautifully with the flaky biscuits, making each mouthful a delightful experience.

  • Garlic Breadsticks: Soft, buttery garlic breadsticks create a cozy Italian atmosphere. Pairing similar comfort foods enhances your dining experience!

  • Baked Sweet Potato Fries: These slightly sweet and crispy fries offer a delicious contrast. They’re nutritious too, complementing the richness of the biscuit bombs.

  • Sparkling Lemonade: A refreshing beverage that cleanses the palate, making each cheesy bite feel light and invigorating. This drink brings the meal together beautifully!

  • Chocolate Chip Cookies: For dessert, these classic treats add a sweet touch to round off your meal. Their warmth echoes the comfort of your main dish!

Cheesy Beef Biscuit Bombs Variations

Feel free to get creative and make these cheesy beef biscuit bombs your own by trying out some tasty twists!

  • Dairy-Free: Substitute cream cheese and cheddar with nondairy options like cashew cream and vegan cheese.

  • Veggie-Packed: Mix in sautéed diced bell peppers, onions, or spinach for a nutrient boost and added texture.

  • Spicy Kick: Add crushed jalapeños or diced green chilies to the beef filling for a flavor explosion.

  • Herb Infusion: Incorporate fresh herbs such as cilantro or parsley into the filling to brighten the taste.

  • Cheesy Mix-Up: Swap cheddar cheese for a blend of mozzarella and pepper jack for a melty and spicy combination.

  • Whole Wheat Dough: Choose whole wheat biscuit dough for a healthier alternative while still keeping that flaky texture.

  • Serve with Style: Accompany these bombs with homemade marinara or guacamole for a delicious dipping experience; similar to serving with the flavorful Cheesy Garlic Bread.

  • Breakfast Version: Use breakfast sausage instead of ground beef for a hearty morning treat that pairs wonderfully with eggs.

With these variations, there's no doubt you'll delight your family with your personalized versions of these delicious Cheesy Beef Biscuit Bombs!

Expert Tips for Cheesy Beef Biscuit Bombs

  • Seal Them Well: Ensure each biscuit is tightly sealed to avoid any filling leakage while baking. A strong pinch around the edges is key!

  • Vary the Cheese: Experiment with different cheeses for the filling. Mixing shredded mozzarella or pepper jack can create delightful surprises in flavor.

  • Don’t Overfill: Be cautious not to overload the biscuit dough with filling. A generous tablespoon is perfect; too much can make sealing difficult.

  • Crispy Reheating: For leftover Cheesy Beef Biscuit Bombs, reheating them in the oven at 350°F (175°C) restores their crispiness. Avoid the microwave!

  • Prep Ahead: You can prepare these savory snacks in advance and freeze them unbaked. Simply bake from frozen, adding a few extra minutes to the cooking time.

How to Store and Freeze Cheesy Beef Biscuit Bombs

Fridge: Store leftovers in an airtight container for up to 3-4 days. This keeps your Cheesy Beef Biscuit Bombs fresh so you can enjoy them later.

Freezer: Freeze the unbaked biscuit bombs for up to 3 months. Wrap each tightly in plastic wrap and place in a freezer-safe bag.

Reheating: When ready to eat, bake from frozen at 350°F (175°C) for about 20-25 minutes. Avoid microwaving to retain their crispy texture.

Thawing: If you prefer, you can thaw in the refrigerator overnight before baking for quicker prep; just adjust baking time accordingly.

Cheesy Beef Biscuit Bombs Recipe FAQs

How do I choose the right ground beef for the filling?
Absolutely! When selecting ground beef, look for lean options around 80/20 or 85/15 fat ratio for a rich flavor without too much grease. If you're health-conscious, feel free to swap it with ground turkey or chicken, which makes it lighter yet still delicious!

What is the best way to store leftover Cheesy Beef Biscuit Bombs?
I recommend storing leftovers in an airtight container in the refrigerator for up to 3-4 days. To keep them firm, ensure they are completely cooled before sealing. You can reheat them in the oven at 350°F (175°C) to restore their crispiness—definitely better than the microwave!

Can I freeze Cheesy Beef Biscuit Bombs for later use?
Very! You can freeze unbaked biscuit bombs for up to 3 months. Just wrap each one tightly in plastic wrap and place them in a freezer-safe bag. When you’re ready to enjoy them, bake from frozen at 350°F (175°C) for about 20-25 minutes until golden brown and delicious.

What should I do if the biscuit bombs leak during baking?
To prevent this, ensure that you pinch the edges of the biscuit dough tightly after filling. If you find leaks happening, don’t worry! Just keep the oven clean with a baking sheet underneath to catch any drips. You can also adjust how much filling you use; too much can make it harder to seal.

Are there any dietary considerations I should keep in mind?
Absolutely! If you or your loved ones have allergies, keep an eye on the ingredients. The filling contains dairy from cream cheese and cheeses, so it’s not suitable for those with lactose intolerance. For a gluten-free option, use gluten-free biscuit dough available at many stores—just double-check the label!

How can I customize Cheesy Beef Biscuit Bombs?
The more the merrier when it comes to customization! You can mix in sautéed vegetables like peppers or onions for added nutrition. Want a little spice? Incorporate some diced jalapeños or swap out the cheeses for something bold, like pepper jack or feta. Let your creativity shine!

Cheesy Beef Biscuit Bombs

Cheesy Beef Biscuit Bombs That Will Brighten Your Day

Cheesy Beef Biscuit Bombs are a delightful comfort food that transforms simple ingredients into a savory snack.
Print Recipe Pin Recipe
Prep Time 15 minutes mins
Cook Time 15 minutes mins
Cooling Time 5 minutes mins
Total Time 35 minutes mins
Servings: 12 bombs
Course: Snacks
Cuisine: American
Calories: 245
Ingredients Equipment Method Nutrition Notes

Ingredients
  

For the Filling
  • 1 pound Ground Beef Substitute with ground turkey or chicken for a lighter option.
  • 8 ounces Cream Cheese Softened
  • 1 cup Shredded Cheddar Cheese Swap with mozzarella or Monterey Jack for different flavor.
  • 1/4 cup Grated Parmesan Cheese Enhances the filling with a salty, umami taste.
  • 1 teaspoon Garlic Powder Adds aromatic depth.
  • 1 teaspoon Onion Powder Provides mild sweetness.
  • 1/2 teaspoon Black Pepper Adds a slight kick.
For the Dough
  • 1 package Refrigerated Biscuit Dough
For Topping
  • 2 tablespoons Melted Butter Brushed on top.

Equipment

  • Large skillet
  • Baking Sheet
  • Parchment Paper
  • Mixing Bowl

Method
 

Step-by-Step Instructions
  1. Preheat your oven to 375°F (190°C).
  2. In a large skillet, add your ground beef and cook over medium heat for about 6-8 minutes until browned.
  3. Stir in garlic powder, onion powder, and black pepper. Cook for an additional 1-2 minutes.
  4. Allow the beef mixture to cool slightly, about 5 minutes.
  5. In a mixing bowl, combine softened cream cheese, shredded cheddar cheese, and grated parmesan cheese until smooth.
  6. Fold cooled beef mixture into the cheese mixture until combined.
  7. Open refrigerated biscuit dough and separate into individual biscuits. Flatten each into a disc.
  8. Place a spoonful of filling in the center of each biscuit and pinch edges to seal.
  9. Arrange the sealed biscuit bombs on a baking sheet and brush tops with melted butter.
  10. Bake for 12-15 minutes until golden brown and crispy.
  11. Remove from oven and let cool before serving.

Nutrition

Serving: 1bombCalories: 245kcalCarbohydrates: 15gProtein: 11gFat: 16gSaturated Fat: 7gPolyunsaturated Fat: 1gMonounsaturated Fat: 7gCholesterol: 50mgSodium: 400mgPotassium: 180mgFiber: 1gSugar: 1gVitamin A: 250IUCalcium: 150mgIron: 1mg

Notes

These Cheesy Beef Biscuit Bombs are perfect for breakfast, snacks, or dinner. Customize them to fit your taste!

Tried this recipe?

Let us know how it was!

Savory Chicken and Garlic Gravy with Cheesy Mashed Potatoes

December 8, 2025 by Grace Snow Leave a Comment

The moment I caught a whiff of garlic sizzling in butter, I was transported back to my grandmother's kitchen, where cozy meals were served with love. That's what inspired me to create this Chicken and Garlic Gravy with Cheesy Mashed Potatoes, a comfort food classic that warms both the belly and the heart. This dish delivers big flavor with surprisingly quick prep, making it a perfect solution for busy weeknights or special gatherings with family and friends. Juicy chicken, enveloped in a luscious garlic gravy, pairs beautifully with creamy, cheesy mashed potatoes that everyone will rave about. Are you ready to bring some nostalgia into your kitchen? Let’s dive into this satisfying recipe that’s bound to become a favorite!

Why is this dish a must-try?

Comforting, This Chicken and Garlic Gravy with Cheesy Mashed Potatoes offers a heartwarming experience that feels like a hug on a plate.

Customizable, Whether you prefer chicken thighs or breasts, this recipe adapts to your taste, ensuring everyone can enjoy it.

Flavor-packed, The rich garlic and onion gravy perfectly complements the creamy, cheesy potatoes, creating a delightful harmony of flavors.

Quick and Easy, With straightforward steps, you can whip up this dish in no time, making it ideal for busy weeknights.

Crowd-pleaser, It’s a family-friendly meal that appeals to all age groups – a surefire way to impress your guests.

For a complete meal, consider serving this with a light mixed green salad to balance the richness, or why not try pairing it with a side of Cheesy Garlic Bread for extra flavor?

Chicken and Garlic Gravy Ingredients

For the Chicken
• Chicken Thighs or Breasts – Juicy thighs are recommended for better flavor and moisture retention, while breasts can offer a leaner option.

For the Gravy
• Garlic (6 cloves, minced) – Fresh garlic is preferred for vibrant taste; however, 1 teaspoon of garlic powder can substitute per 3 cloves.
• Yellow Onion (1 medium, finely chopped) – Adds sweetness and depth; caramelize it for enhanced flavors.
• Butter (2 tablespoons, divided) – Provides fat for cooking the chicken and making the roux; can be substituted with oil if desired.
• All-Purpose Flour (2 tablespoons) – Used to thicken the gravy by creating a roux.
• Chicken Broth (1.5 cups) – Forms the base of the gravy; vegetable broth is a lighter alternative.

For the Cheesy Mashed Potatoes
• Yukon Gold or Russet Potatoes (2 pounds, peeled and cubed) – These varieties are preferred for their buttery texture, making them ideal for creamy mashed potatoes.
• Shredded Cheddar Cheese (1 cup) – Adds creaminess and flavor; can be swapped for mozzarella or Gruyère for a twist.
• Milk or Heavy Cream (0.5 cup, warmed) – Ensures a rich and smooth mash; warming is essential to avoid lumps.

Seasoning & Garnish
• Salt and Black Pepper – Essential for enhancing flavors; adjust to personal taste.
• Fresh Parsley (1 tablespoon, chopped, optional) – Adds a pop of color and freshness to the dish.

With these ingredients at hand, you're on your way to creating a sumptuous Chicken and Garlic Gravy with Cheesy Mashed Potatoes that's sure to delight your family and friends!

Step‑by‑Step Instructions for Chicken and Garlic Gravy with Cheesy Mashed Potatoes

Step 1: Season the Chicken
Begin by seasoning your chicken thighs or breasts generously with salt and black pepper on both sides. This will enhance the flavor of your Chicken and Garlic Gravy with Cheesy Mashed Potatoes. Allow it to sit for a few minutes while you prepare your skillet.

Step 2: Sear the Chicken
In a large skillet, heat 1 tablespoon of butter over medium-high heat until it begins to sizzle. Carefully add the chicken and sear for 4–5 minutes on each side until golden brown and cooked through. Once done, remove the chicken from the skillet and set it aside on a plate.

Step 3: Sauté the Onion
Reduce the heat to medium and add the remaining tablespoon of butter to the same skillet. Once melted, add the finely chopped yellow onion and sauté for about 5 minutes, stirring frequently, until the onion becomes soft and golden. This step is crucial for building flavor in your gravy.

Step 4: Add the Garlic
Next, add the minced garlic to the skillet with the sautéed onions. Cook for an additional minute, stirring continuously to prevent burning. The fragrant aroma will begin to fill your kitchen, signaling it’s time to move on to the next step in creating your rich, savory garlic gravy.

Step 5: Create the Roux
Sprinkle the all-purpose flour over the onions and garlic mixture. Stir consistently for about 2 minutes, allowing the flour to cook and form a roux. This will help thicken your gravy and provide a rich flavor that complements the chicken perfectly.

Step 6: Incorporate the Broth
Gradually whisk in the chicken broth, making sure to scrape any browned bits from the bottom of the pan. This is where the flavor lies! Bring the mixture to a simmer, allowing it to cook and thicken slightly for about 3–4 minutes, stirring occasionally.

Step 7: Simmer the Chicken
Return the seared chicken to the skillet, making sure it’s submerged in the gravy. Cover your skillet and reduce the heat to low, letting it simmer for 15–20 minutes. This process will ensure the chicken is fully cooked, tender, and infused with the delicious flavors of the garlic gravy.

Step 8: Prepare the Mashed Potatoes
While the chicken simmers, bring a large pot of salted water to a boil. Add the peeled and cubed Yukon Gold or Russet potatoes, cooking them for about 15 minutes until fork-tender. This step will yield the creamy base for your cheesy mashed potatoes.

Step 9: Mash the Potatoes
Once the potatoes are tender, drain them and return them to the pot. Add the warmed milk or heavy cream along with the shredded cheddar cheese. Mash until smooth and creamy, seasoning with salt and black pepper to taste, creating a delightful companion to your chicken and gravy.

Step 10: Serve and Garnish
To serve, scoop a generous portion of the cheesy mashed potatoes onto each plate. Top with the chicken and a generous ladle of garlic gravy. For a finishing touch, sprinkle with freshly chopped parsley if desired, adding a pop of color and freshness that elevates your Chicken and Garlic Gravy with Cheesy Mashed Potatoes.

Helpful Tricks for Chicken and Garlic Gravy

  • Choose the Right Chicken: Select juicy chicken thighs for superior flavor and moisture; breast meat is leaner but can dry out without careful cooking.

  • Avoid Burnt Garlic: Add minced garlic only after the onions are soft, cooking it for no more than a minute; burnt garlic becomes bitter and can ruin your gravy.

  • Perfectly Crispy Chicken: Sear the chicken without moving it for the first 4-5 minutes; this allows a golden crust to form, enhancing both texture and flavor.

  • Master the Roux: Stir the flour constantly for about 2 minutes to ensure it cooks properly before adding liquid; this prevents a floury taste in your Chicken and Garlic Gravy.

  • Season the Potatoes Well: Add salt when boiling the cubed potatoes for mashed potatoes; this infuses flavor right into the potatoes, enhancing the overall dish.

With these expert tips, you'll create a Chicken and Garlic Gravy with Cheesy Mashed Potatoes that's sure to impress family and friends!

How to Store and Freeze Chicken and Garlic Gravy with Cheesy Mashed Potatoes

Fridge: Store leftovers in an airtight container for up to 3 days. Reheat gently on the stove or in the microwave, adding a splash of broth for moisture.

Freezer: For longer storage, freeze portions in freezer-safe containers for up to 3 months. Thaw overnight in the fridge before reheating.

Reheating: When reheating from the fridge or freezer, stir in a bit of milk or broth to maintain creaminess in the cheesy mashed potatoes and ensure the chicken and gravy are warmed through.

Make-Ahead: Prepare this Chicken and Garlic Gravy with Cheesy Mashed Potatoes a day in advance. Store it in the fridge and reheat before serving for convenience during busy weeknights.

Make Ahead Options

These Chicken and Garlic Gravy with Cheesy Mashed Potatoes are perfect for busy weeknights and can be prepped in advance to save time! You can sear the chicken and prepare the gravy up to 24 hours in advance; simply store them in an airtight container in the fridge. The creamy cheesy mashed potatoes can be made ahead as well, but avoid adding the cheese until you're ready to reheat; this keeps them fresh and melty! When you’re ready to serve, just reheat the gravy on the stovetop over low heat and warm the potatoes gently (adding a splash of milk or broth to loosen) to ensure they remain just as delicious as when freshly made.

Chicken and Garlic Gravy Variations

Customize your Chicken and Garlic Gravy with Cheesy Mashed Potatoes masterpiece to suit your taste buds and dietary needs!

  • Rotisserie Chicken: Use store-bought rotisserie chicken for a quicker prep—just shred and add to your gravy.

  • Vegan Option: Swap chicken for sautéed mushrooms or chickpeas and use plant-based butter and broth for a delightful vegan feast.

  • Herb-Infused: Add fresh thyme or rosemary to the gravy for an aromatic twist that elevates the flavor profile.

  • Cheesy Mix: Experiment with a blend of cheeses for the mashed potatoes, like Gruyère and mozzarella, for a creamy, flavor-rich base.

  • Spicy Kick: Sprinkle in a pinch of crushed red pepper flakes or cayenne pepper to heat things up if you enjoy a bit of spice.

  • Enriched Gravy: Stir in a tablespoon of dijon mustard or Worcestershire sauce while simmering the gravy for an extra depth of flavor.

If you're searching for even more complementary flavors, consider pairing this hearty dish with some Cheesy Garlic Bread to soak up that rich gravy or try it alongside Smoky Sweet Potatoes for an irresistible balance of flavors!

  • Veggie Boost: Add peas or spinach to the gravy to increase the nutrition and add a pop of color to your meal.

With these variations up your sleeve, you'll create a new family favorite every time you whip up this classic comfort food!

What to Serve with Chicken and Garlic Gravy with Cheesy Mashed Potatoes

A comforting dish deserves delightful companions that enhance the overall dining experience.

  • Light Mixed Green Salad: A fresh salad with a zesty vinaigrette brings a refreshing contrast to the rich, savory flavors of the gravy.

  • Crusty Garlic Bread: Warm, toasted bread infused with garlic offers a crunchy, flavorful side perfect for soaking up the delicious gravy.

  • Blistered Green Beans: Crisp-tender green beans, lightly sautéed, add vibrant color and a satisfying crunch that balances the creamy mashed potatoes.

  • Herbed Rice Pilaf: Fluffy rice with fresh herbs provides a gentle base to complement the hearty chicken and gravy, making each bite a joy.

  • Steamed Broccoli: A simple, vibrant side that adds a touch of color and nutrients to your plate, nicely offsetting the richness of the meal.

  • Red Wine: A glass of smooth red wine like Cabernet Sauvignon enhances the depth of flavors in the chicken and garlic gravy, making for a refined pairing.

  • Chocolate Mousse: Finish on a sweet note with a rich, airy chocolate mousse that provides a delightful contrast to the savory main course, closing the meal beautifully.

Chicken and Garlic Gravy with Cheesy Mashed Potatoes Recipe FAQs

How do I choose the right chicken?
Absolutely! For the best flavor and moisture, I recommend using chicken thighs. They tend to be tender and juicy, making them ideal for this dish. However, if you're looking for a leaner option, chicken breasts can certainly work—just be cautious not to overcook them.

What’s the best way to store leftovers?
Very! To keep your Chicken and Garlic Gravy with Cheesy Mashed Potatoes fresh, store leftovers in an airtight container in the fridge for up to 3 days. Gently reheat on the stove or in the microwave, adding a splash of broth to restore moisture and keep everything creamy and delicious.

Can I freeze this dish?
Absolutely! You can freeze portions of this dish in freezer-safe containers for up to 3 months. To do this, allow the dish to cool completely before sealing. When you're ready to enjoy it, thaw overnight in the fridge and reheat gently on the stove, stirring in a bit of milk or broth for extra creaminess.

What should I do if the gravy is too thin?
No worries! If your gravy turns out thinner than you'd like, you can thicken it by creating a slurry. Mix 1 tablespoon of cornstarch with 2 tablespoons of cold water until smooth, then stir this mixture into the simmering gravy. Cook for another few minutes until it thickens to your liking.

Are there any dietary considerations for this dish?
Indeed! This recipe is quite adaptable. For gluten-free options, you can substitute all-purpose flour with cornstarch or a gluten-free flour blend to thicken the gravy. Additionally, if you have a dairy allergy, consider using a dairy-free cream option and nutritional yeast for a cheesy flavor in the mashed potatoes.

What’s the best way to ensure the perfect mashed potatoes?
The key to achieving creamy mashed potatoes lies in the details! Make sure to use Yukon Gold or Russet potatoes for their buttery texture. Don’t forget to warm your milk or heavy cream before adding it to the potatoes, as this helps to avoid lumps. Finally, mash them with a gentle touch to keep them light and fluffy!

Chicken and Garlic Gravy with Cheesy Mashed Potatoes

Savory Chicken and Garlic Gravy with Cheesy Mashed Potatoes

A comforting Chicken and Garlic Gravy with Cheesy Mashed Potatoes recipe that warms both the belly and the heart.
Print Recipe Pin Recipe
Prep Time 15 minutes mins
Cook Time 35 minutes mins
Total Time 50 minutes mins
Servings: 4 servings
Course: Dinner
Cuisine: American
Calories: 700
Ingredients Equipment Method Nutrition Notes

Ingredients
  

Chicken and Garlic Gravy Ingredients
  • 4 pieces Chicken Thighs or Breasts Juicy thighs are recommended for better flavor and moisture retention.
  • 6 cloves Garlic, minced Fresh garlic is preferred for vibrant taste.
  • 1 medium Yellow Onion, finely chopped Adds sweetness and depth.
  • 2 tablespoons Butter, divided Provides fat for cooking the chicken and making the roux.
  • 2 tablespoons All-Purpose Flour Used to thicken the gravy.
  • 1.5 cups Chicken Broth Forms the base of the gravy.
Cheesy Mashed Potatoes
  • 2 pounds Yukon Gold or Russet Potatoes, peeled and cubed These varieties are preferred for their buttery texture.
  • 1 cup Shredded Cheddar Cheese Adds creaminess and flavor.
  • 0.5 cup Milk or Heavy Cream, warmed Warming is essential to avoid lumps.
Seasoning & Garnish
  • Salt and Black Pepper Essential for enhancing flavors.
  • 1 tablespoon Fresh Parsley, chopped, optional Adds a pop of color and freshness.

Equipment

  • Large skillet
  • pot
  • Mixing Bowl

Method
 

Chicken Preparation
  1. Season your chicken thighs or breasts generously with salt and black pepper on both sides.
  2. In a large skillet, heat 1 tablespoon of butter over medium-high heat until it begins to sizzle. Carefully add the chicken and sear for 4-5 minutes on each side.
  3. Remove the chicken from the skillet and set it aside.
  4. Add the remaining tablespoon of butter to the skillet, then add the finely chopped yellow onion and sauté for about 5 minutes until soft and golden.
  5. Add minced garlic and cook for an additional minute.
  6. Sprinkle flour over the onion and garlic mixture and stir for about 2 minutes to form a roux.
  7. Gradually whisk in the chicken broth, scraping any browned bits at the bottom, and bring to a simmer.
  8. Return the chicken to the skillet, cover, and let it simmer for 15-20 minutes.
Mashed Potatoes Preparation
  1. While the chicken simmers, bring a large pot of salted water to a boil. Add the peeled and cubed potatoes and cook for about 15 minutes until fork-tender.
  2. Drain the potatoes, return them to the pot, and add warmed milk or heavy cream and shredded cheddar cheese. Mash until smooth and season with salt and black pepper.
  3. To serve, scoop a generous portion of cheesy mashed potatoes onto each plate, top with the chicken and garlic gravy.
  4. Sprinkle with freshly chopped parsley if desired.

Nutrition

Serving: 1plateCalories: 700kcalCarbohydrates: 60gProtein: 40gFat: 30gSaturated Fat: 15gPolyunsaturated Fat: 5gMonounsaturated Fat: 10gCholesterol: 120mgSodium: 800mgPotassium: 1200mgFiber: 6gSugar: 4gVitamin A: 800IUVitamin C: 15mgCalcium: 200mgIron: 3mg

Notes

For a complete meal, consider serving with a light mixed green salad or Cheesy Garlic Bread.

Tried this recipe?

Let us know how it was!
  • « Previous Page
  • 1
  • …
  • 82
  • 83
  • 84
  • 85
  • 86
  • …
  • 180
  • Next Page »

Welcome!

Hi, I’m Grace, a Sydney-based home cook with a passion for bold flavors and trending ingredients. Whether you’re a busy beginner or a seasoned foodie, you’ll find dishes here that are fresh, fun, and full of flavor.

More about me

Popular Recipes

  • Butter Pecan Cookies
    Irresistibly Soft Butter Pecan Cookies for Cozy Moments
  • Decadent Turtle Bars
    Decadent Turtle Bars: Indulge in Sweet Gooey Perfection
  • Salted Caramel Butter Bars
    Decadent Salted Caramel Butter Bars You Can't Resist
  • Easy Italian Pasta Salad
    Easy Italian Pasta Salad: A Summer Delight to Share

Footer

↑ back to top

About

  • Privacy Policy
  • Disclaimer
  • Terms & Conditions

Newsletter

  • Sign Up! for emails and updates

Contact

  • About me
  • Contact me

Copyright © 2025 TastyTrendIngredients