tastytrendingredients

  • Home
  • Recipes
    • Appetizers
    • Breakfast
    • Dessert
    • Dinner
    • Drinks
    • Salads
    • Snacks
    • Soups
  • About me
  • Contact me
menu icon
go to homepage
  • Home
  • Recipes
    • Appetizers
    • Breakfast
    • Dessert
    • Dinner
    • Drinks
    • Salads
    • Snacks
    • Soups
  • About me
  • Contact me
search icon
Homepage link
  • Home
  • Recipes
    • Appetizers
    • Breakfast
    • Dessert
    • Dinner
    • Drinks
    • Salads
    • Snacks
    • Soups
  • About me
  • Contact me
×

Fig-Jam & Prosciutto Crostini: Your New Favorite Appetizer

December 20, 2025 by Grace Snow Leave a Comment

As I strolled through the vibrant farmer's market last weekend, the sweet aroma of figs caught my breath, pulling me closer to their luscious charm. This led me down the path of creating my irresistible Fig-Jam & Turkey Bacon Crostini—an appetizer that embraces both simplicity and elegance. With each crunchy baguette slice topped with creamy goat cheese, rich fig jam, and that delightful hint of smokiness from the turkey bacon, it’s truly a game-changer for entertaining or a cozy night in. You’ll love how easy it is to prepare—perfect for those moments when you want to impress without the stress! And if you're looking for a vegetarian alternative, I’ve got you covered with scrumptious options. Curious how to assemble this delightful crostini? Keep reading for the full recipe!

Why Choose Fig-Jam Crostini?

Unique Flavors: This recipe offers a delicious blend of sweet figs and savory turkey bacon that will surprise and delight your taste buds.

Effortless Preparation: With just a few minutes of setup, these crostinis are a breeze to make, ensuring zero stress when entertaining guests or enjoying a night in.

Versatile Alternative: Looking for vegetarian options? Simply swap turkey bacon for caramelized onions or roasted mushrooms for an equally delicious treat!

Crowd-Pleaser: Perfect for any gathering, these crostinis will quickly become a favorite appetizer, leaving your friends and family asking for seconds.

Impressive Presentation: Each bite beautifully combines crispy, creamy, and sweet textures, striking just the right balance to impress even the most discerning palates.

Enhance your culinary repertoire with this Fig-Jam & Turkey Bacon Crostini; your guests will be raving about it in no time!

Fig-Jam & Turkey Bacon Ingredients

• A delicious way to elevate your appetizers!

For the Crostini Base

  • Baguette – This provides a delightful crunch; feel free to sub with rustic Italian or French bread for a different flair.
  • Olive Oil – Brushing this on the baguette enhances flavor and ensures a lovely toast.

For the Topping

  • Fig Jam – The star of this recipe, adding natural sweetness; opt for high-quality or artisanal fig jam for best results.
  • Turkey Bacon – Gives that smoky, salty kick without the heaviness of prosciutto; for a vegetarian option, try caramelized onions or roasted mushrooms instead.
  • Goat Cheese – Offers creaminess and depth; softening it makes it a breeze to spread.
  • Fresh Arugula – A peppery garnish that not only adds color but also rounds out the flavors beautifully.

Step‑by‑Step Instructions for Fig-Jam & Turkey Bacon Crostini

Step 1: Preheat the Oven
Begin by preheating your oven to 375°F (190°C). This temperature is ideal for creating that perfect crunch on your crostini. While the oven warms up, gather your ingredients and prepare your baking sheet, ensuring it's ready for the baguette slices.

Step 2: Slice and Oil the Baguette
Slice your baguette into ½-inch thick pieces, arranging them in a single layer on the prepared baking sheet. With a pastry brush, lightly coat each slice with olive oil, allowing it to soak into the bread. This step ensures they'll toast beautifully and develop a golden-brown crust while they bake.

Step 3: Toast the Baguette Slices
Place the baking sheet in the preheated oven and toast the baguette slices for 8-10 minutes. Keep an eye on them as they bake; you'll know they're ready when they turn a lovely golden color and feel crispy to the touch. Once done, remove them from the oven and let them cool slightly.

Step 4: Cook the Turkey Bacon
While the baguette is toasting, heat a skillet over medium heat. Add your turkey bacon strips and cook them until they are crispy, about 5-7 minutes. Make sure to turn them occasionally for even cooking. Once crispy, remove from the heat, drain excess fat, and crumble the bacon into bite-sized pieces for topping.

Step 5: Spread the Goat Cheese
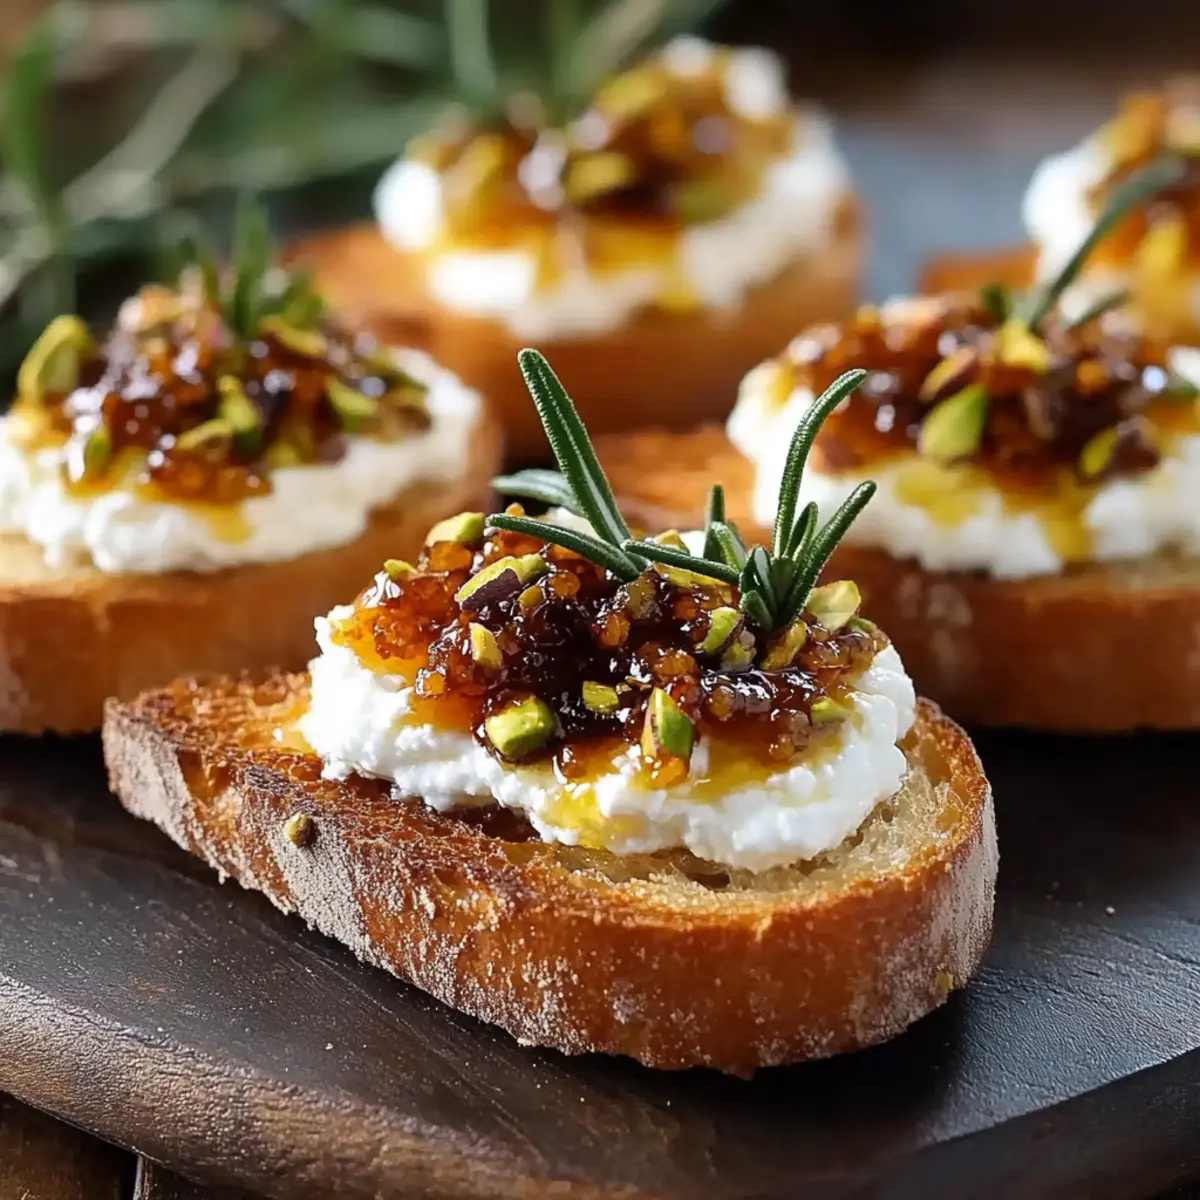
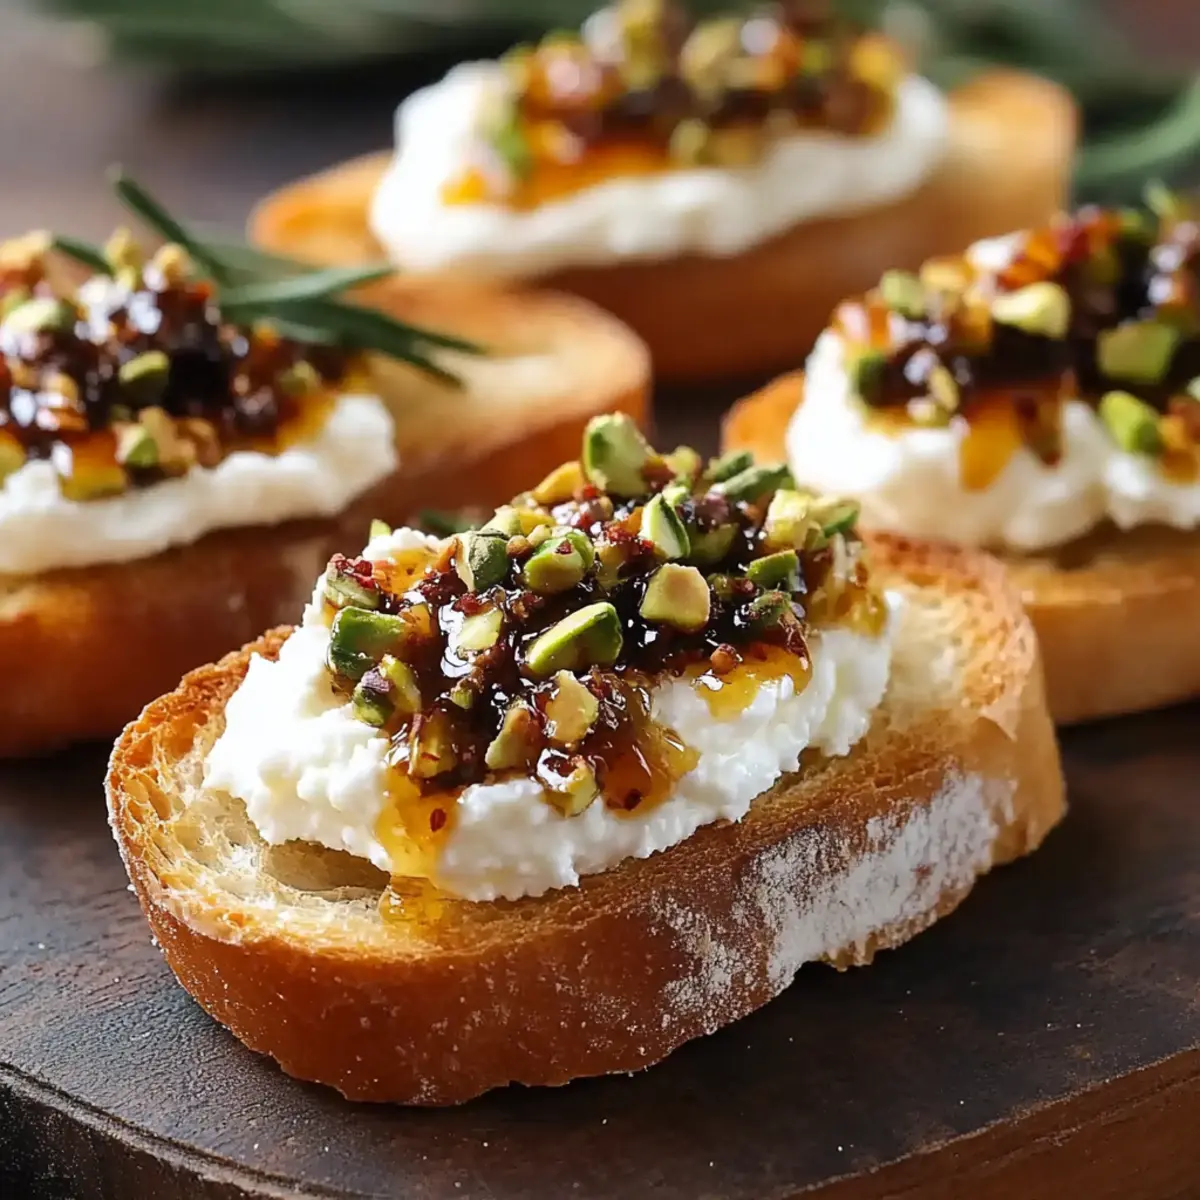
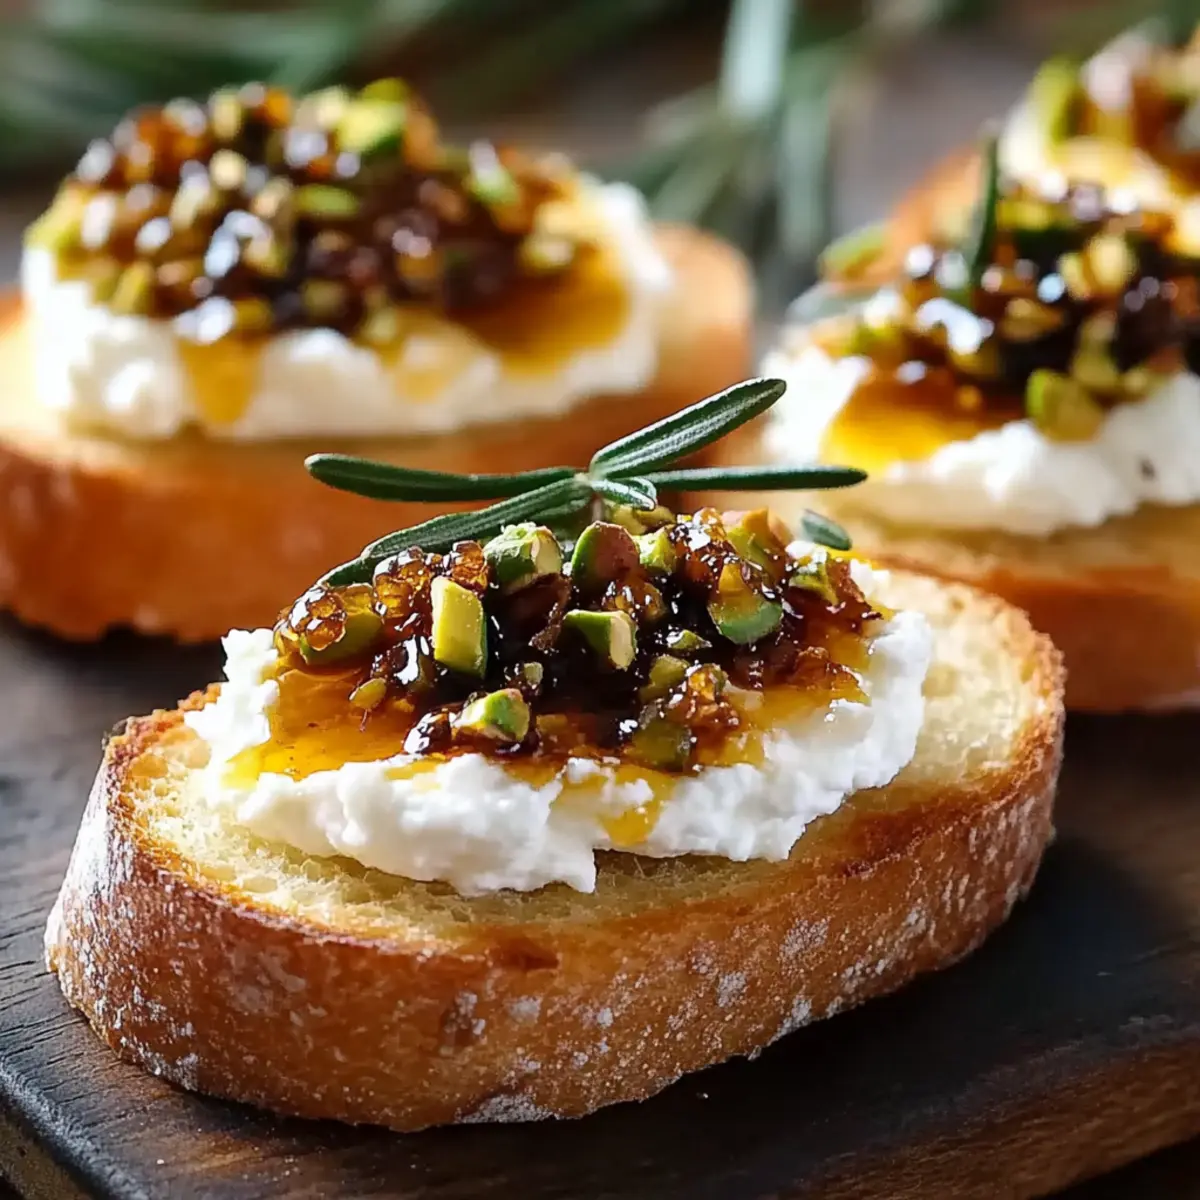
After the baguette slices have cooled, take your softened goat cheese and spread a generous layer on each toasted slice. The creaminess of the goat cheese will complement the sweetness of the fig jam effortlessly, creating a luscious base for your Fig-Jam & Turkey Bacon Crostini.

Step 6: Add Fig Jam and Bacon
Next, top each goat cheese-covered baguette slice with a generous dollop of fig jam. Follow this by sprinkling the crumbled turkey bacon on top, allowing the sweet and savory flavors to mingle beautifully. This combination will create an explosion of taste in each bite.

Step 7: Garnish With Arugula
Finally, finish your crostini by adding a few fresh arugula leaves on top for garnish. Not only will they add a pop of color, but they'll also offer a delightful peppery bite that perfectly balances the sweet and savory elements of your Fig-Jam & Turkey Bacon Crostini. Serve immediately and enjoy!

Expert Tips for Fig-Jam Crostini

  • Choose Quality Ingredients: Always opt for high-quality fig jam and goat cheese; they elevate the taste and richness of your Fig-Jam & Turkey Bacon Crostini.

  • Watch the Toasting Time: Toast baguette slices until golden; keep a close eye to prevent burning. A perfectly toasted crostini is key to the ideal crunch!

  • Assemble Just Before Serving: For optimal texture, assemble the crostini right before serving to retain that satisfying crunch.

  • Garnish with Flair: Fresh arugula offers a peppery contrast; feel free to experiment with microgreens for a unique twist on flavor and presentation!

  • Vegetarian Adaptation: If you’d like a meat-free option, forgo the turkey bacon and replace it with caramelized onions or roasted mushrooms—both are delicious alternatives.

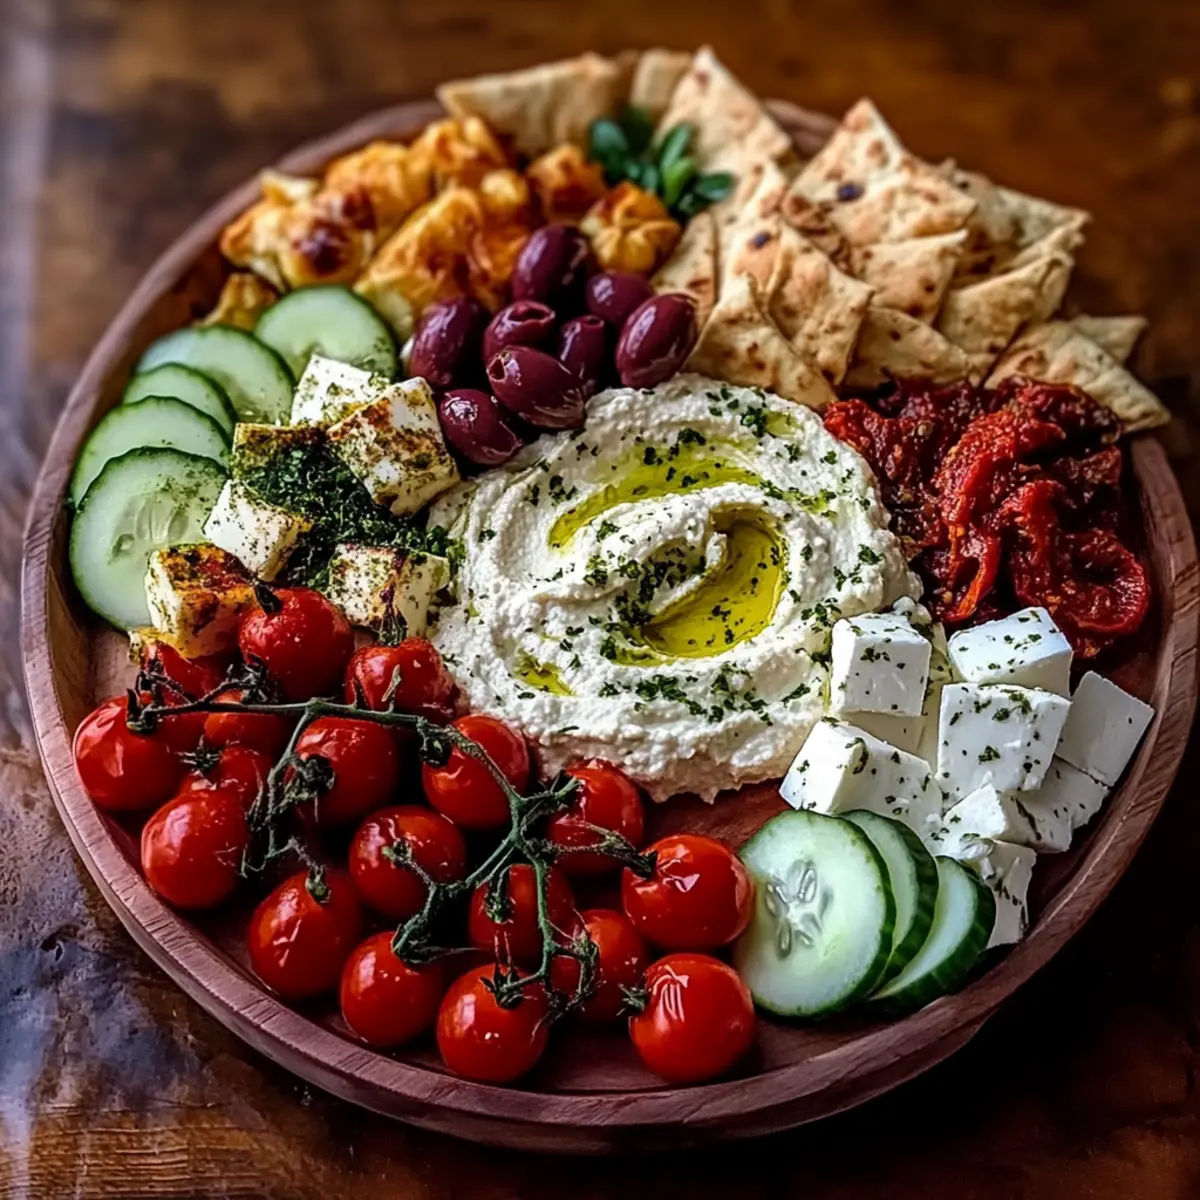
What to Serve with Fig-Jam & Turkey Bacon Crostini

Transform your appetizer into a luxurious dining experience with these delightful pairings that’ll leave everyone craving more.

  • Creamy Mashed Potatoes: The velvety texture and buttery flavor complement the crostini's crispness, creating a comforting juxtaposition.

  • Zesty Arugula Salad: A fresh, peppery arugula salad dressed with lemon vinaigrette offers a bright, refreshing contrast to the richness of the crostini.

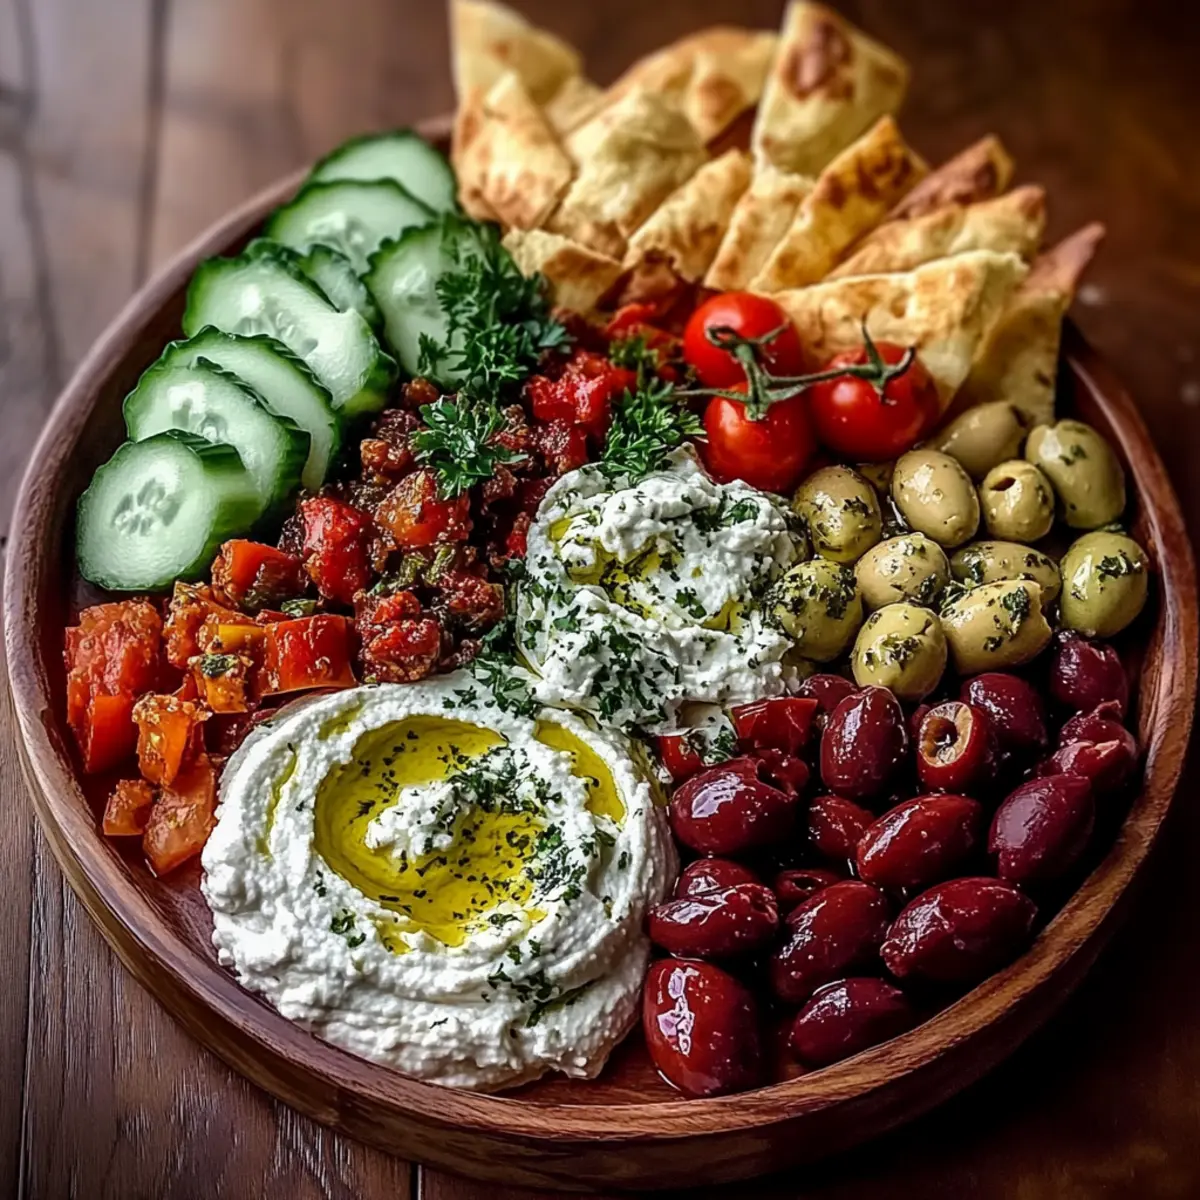
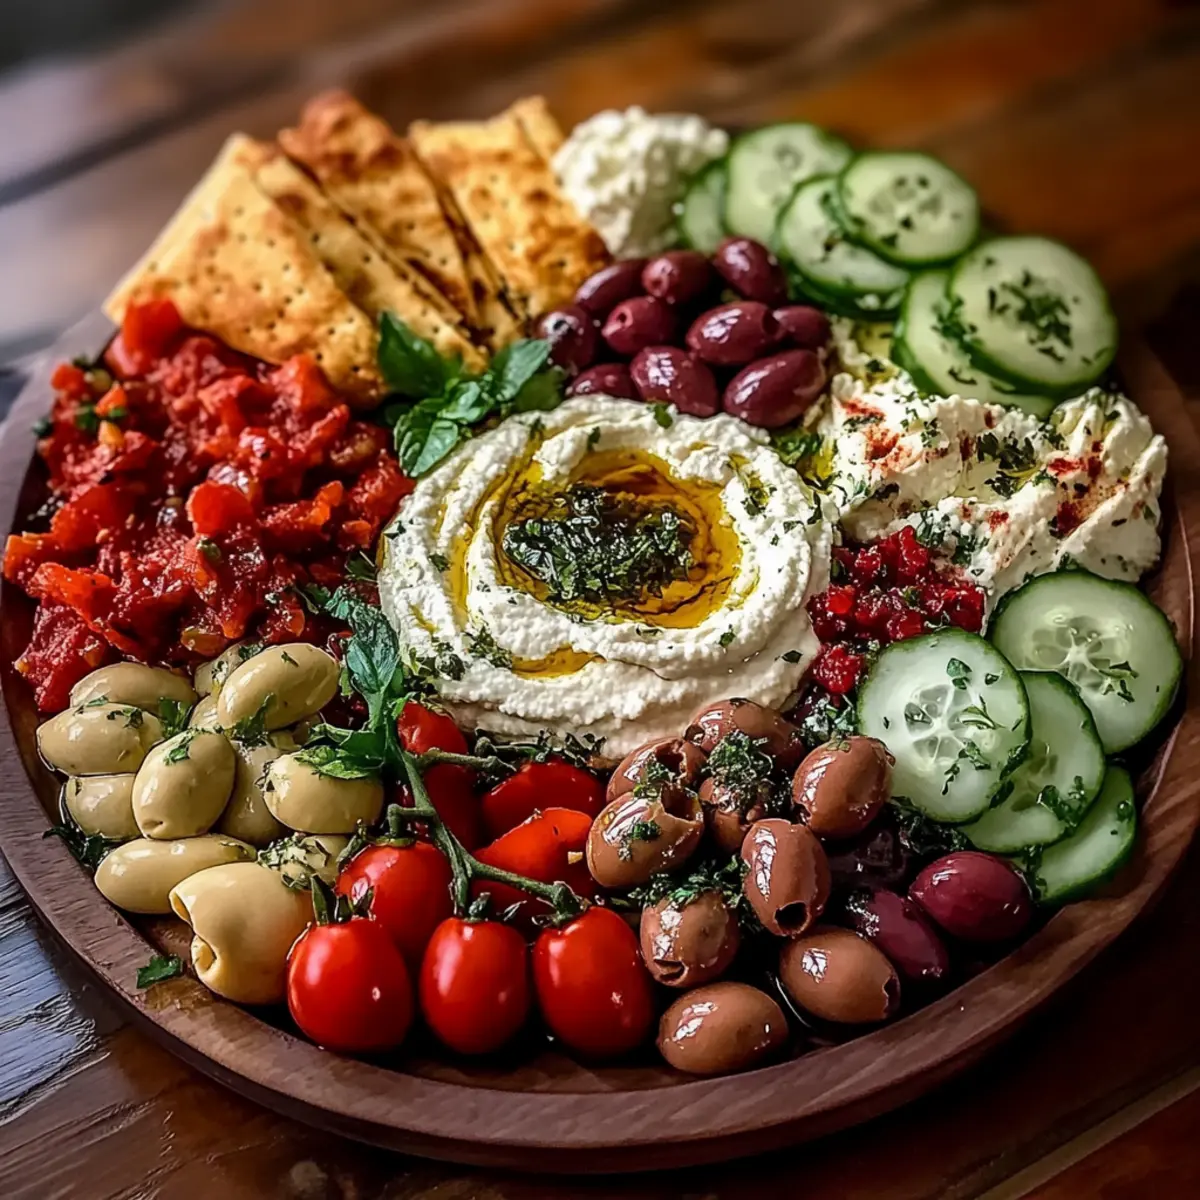
  • Mediterranean Hummus Platter: Serve with a variety of colorful veggies and pita, adding a flavorful dip option that’s perfect for sharing.

  • Sauvignon Blanc: This light, crisp white wine enhances the rich flavors of fig and cheese while refreshing your palate between bites.

  • Sparkling Water with Citrus: A non-alcoholic choice, this drink adds a bright, fizzy touch that balances the sweeter elements of the crostini beautifully.

  • Chocolate-Dipped Strawberries: For dessert, these sweet fruit treats offer a romantic finish, tying in the sweetness of fig jam while leaving a memorable impression.

  • Pistachio Crusted Cheese Ball: This savory ball dusted with crunchy nuts adds another layer of flavor and texture that pairs perfectly with the sweet and savory nuances of the crostini.

With these complementary dishes and drinks, your Fig-Jam & Turkey Bacon Crostini becomes the star of a truly enchanting meal!

Fig-Jam & Prosciutto Crostini Variations

Feel free to get creative with this recipe; there are so many delicious ways to make it your own!

  • Vegetarian Option: Omit turkey bacon and add caramelized onions or roasted mushrooms for a rich, savory twist.
  • Herbed Goat Cheese: Mix in fresh herbs like thyme or rosemary into your goat cheese for an aromatic flavor boost.
  • Spicy Kick: Drizzle a bit of sriracha or sprinkle crushed red pepper flakes on top for a delightful heat that complements the sweetness of the jam.
  • Different Spreads: Switch goat cheese for cream cheese or ricotta for a creamier, milder base that still holds all the yummy toppings.
  • Fruit Variation: Try different jams like fig-pear or peach preserves for a fruity change that adds a whole new flavor dimension.
  • Crunchy Topping: Add finely chopped walnuts or pecans as a topping for some extra crunch and nutty richness that pairs beautifully with fig.
  • Lemon Zest: Grate fresh lemon zest over the top for a burst of citrus that brightens up the flavor profile.
  • Balsamic Reduction: Drizzle a balsamic reduction as a finishing touch for an elegant, sweet-sour contrast that elevates the crostini to gourmet status.

Ready to elevate your appetizer game? Opt for a drink pairing like a crisp Sauvignon Blanc or a refreshing sparkling water with the zestiness of fresh citrus, and you'll have a stunning spread perfect for any gathering!

Storage Tips for Fig-Jam & Turkey Bacon Crostini

  • Room Temperature: Keep the toasted baguette slices in an airtight container at room temperature for up to 2 days to maintain their crispiness.

  • Fridge: Store leftover fig jam, goat cheese, and turkey bacon in the refrigerator for up to 5 days. Be sure to keep them in airtight containers to preserve their flavors.

  • Reassembly: For best results, reassemble your Fig-Jam & Turkey Bacon Crostini just before serving, allowing the baguette to regain its crunch and the flavors to shine.

  • Freezer: While not recommended for fully assembled crostini, you can freeze the baguette slices for up to 3 months. Toast them again directly from the freezer to revive that delightful crunch.

Make Ahead Options

These Fig-Jam & Turkey Bacon Crostini are excellent for meal prep, making entertaining a breeze! You can prepare each component up to 3 days in advance. Slice and toast the baguette, then store it in an airtight container at room temperature. Keep the fig jam, goat cheese, and crumbled turkey bacon refrigerated. When you're ready to serve, simply spread the goat cheese on the toasted crostini, add a dollop of fig jam and crumbled turkey bacon, and garnish with fresh arugula for that perfect touch. Assembling them just before serving ensures they maintain their crispiness and delightful flavor, making this appetizer just as delicious as when freshly made!

Fig-Jam & Turkey Bacon Crostini Recipe FAQs

What type of baguette is best for this recipe?
A crusty baguette works wonderfully, providing that perfect crunch! You can also substitute it with rustic Italian or French bread for a different flavor profile.

How should I store leftover crostini?
To maintain that glorious crispness, store the toasted baguette slices in an airtight container at room temperature for up to 2 days. Make sure to keep the fig jam, goat cheese, and turkey bacon in separate airtight containers in the refrigerator, where they will last for about 5 days.

Can I freeze the crostini ingredients?
Yes, you can freeze the baguette slices before toasting! Wrap them tightly in plastic wrap or place them in a freezer-safe bag for up to 3 months. When you’re ready to enjoy them, simply toast the slices directly from the freezer—no need to thaw!

What should I do if my fig jam is too thick to spread?
If your fig jam is too thick, simply microwave it for a few seconds in a microwave-safe dish or stir in a small amount of water to loosen it. Check the consistency as you go; you want it spreadable, but not too runny. This will make assembly a breeze!

Is there a vegetarian option for this recipe?
Absolutely! You can easily make this Fig-Jam & Turkey Bacon Crostini vegetarian by omitting the turkey bacon. Instead, try caramelized onions or roasted mushrooms for that added depth of flavor and delicious earthiness. Another great option is adding some fresh herbs to enhance the taste further!

Should I prepare the crostini ahead of time?
It's best to prepare the individual components in advance but assemble the crostini right before serving. This way, your crostini will maintain their crispy texture and the layers will shine in flavor! Enjoying that fresh crunch is a vital part of the experience!

Fig-Jam & Prosciutto Crostini

Fig-Jam & Prosciutto Crostini

A delightful blend of sweet figs and savory ingredients, perfect for entertaining or a cozy night in.
Print Recipe Pin Recipe
Prep Time 15 minutes mins
Cook Time 15 minutes mins
Total Time 30 minutes mins
Servings: 6 crostinis
Course: Appetizers
Cuisine: Mediterranean
Calories: 150
Ingredients Equipment Method Nutrition Notes

Ingredients
  

For the Crostini Base
  • 1 loaf Baguette or rustic Italian/French bread
  • 2 tablespoons Olive Oil for brushing
For the Topping
  • 1/2 cup Fig Jam high-quality or artisanal
  • 4 slices Turkey Bacon or caramelized onions for vegetarian option
  • 4 ounces Goat Cheese softened for easier spreading
  • 1 cup Fresh Arugula for garnish

Equipment

  • Skillet
  • Baking Sheet
  • Pastry brush

Method
 

Step-by-Step Instructions for Fig-Jam & Turkey Bacon Crostini
  1. Preheat your oven to 375°F (190°C). Prepare your baking sheet for the baguette slices.
  2. Slice your baguette into ½-inch thick pieces and arrange on the baking sheet. Brush each slice with olive oil.
  3. Toast the baguette slices in the oven for 8-10 minutes until golden and crispy.
  4. In a skillet, cook turkey bacon over medium heat until crispy, about 5-7 minutes. Crumble into pieces.
  5. Spread softened goat cheese on each toasted baguette slice.
  6. Add a dollop of fig jam on top of each slice and sprinkle with crumbled turkey bacon.
  7. Garnish with fresh arugula leaves. Serve immediately.

Nutrition

Serving: 1crostiniCalories: 150kcalCarbohydrates: 18gProtein: 6gFat: 7gSaturated Fat: 3gPolyunsaturated Fat: 1gMonounsaturated Fat: 3gCholesterol: 15mgSodium: 250mgPotassium: 100mgFiber: 1gSugar: 3gVitamin A: 200IUVitamin C: 2mgCalcium: 50mgIron: 0.5mg

Notes

Assemble crostini just before serving for optimal texture. Feel free to experiment with vegetarian options and additional garnishes.

Tried this recipe?

Let us know how it was!

Whipped Feta Crostini with Hot Honey Recipe You'll Adore

December 20, 2025 by Grace Snow Leave a Comment

As I stood in my kitchen, the aroma of toasting baguette wafted through the air, reminding me of sun-soaked Mediterranean escapes. Today, I’m thrilled to share my Whipped Feta Crostini with Hot Honey Recipe—an elegant yet easy appetizer that will wow guests at any gathering. This delightful dish combines the creamy, tangy goodness of whipped feta atop crispy crostini, all enhanced by a touch of sweet-and-spicy hot honey. The best part? It’s a total crowd-pleaser that offers a quick prep solution for busy home chefs, allowing you to serve something impressive without spending hours in the kitchen. Are you ready to take your entertaining skills to the next level with this irresistible, flavor-packed treat? Let’s dive into the recipe and unlock a world of culinary joy!

Why Is This Appetizer So Irresistible?

Simplicity at its finest: This Whipped Feta Crostini with Hot Honey Recipe is incredibly easy to create, even for beginner cooks.

Crowd-Pleasing flavors: The sweet and savory combination of whipped feta and hot honey will have your guests coming back for more.

Versatility is key: Feel free to swap in different toppings like roasted grapes or pomegranate seeds to tailor it to your palate.

Perfect presentation: With its stunning visual appeal, this appetizer is not just delicious but also a feast for the eyes, making it ideal for gatherings or even cozy nights in.

Whether it’s alongside a Homemade Hot Chocolate on a chilly evening or part of a vibrant cheese board, this dish is sure to impress.

Whipped Feta Crostini with Hot Honey Ingredients

For the Crostini

  • Baguette – The ideal base for crostini; any artisan bread like ciabatta or sourdough works well too.
  • Olive Oil – Adds essential richness and aids in crisping; opt for extra virgin for the best flavor.

For the Whipped Feta

  • Feta Cheese – The star ingredient that lends a tangy and creamy texture; substitute with goat cheese or ricotta for a different taste.
  • Cream Cheese – Lightens the whipped feta mixture; low-fat options maintain the creamy consistency.
  • Lemon Juice – Provides freshness and acidity to brighten the flavors; white wine vinegar is a fine alternative.
  • Black Pepper – Enhances overall flavor; a touch of cayenne can add an extra kick if desired.

For the Hot Honey Drizzle

  • Honey – Incorporates sweetness and texture; wildflower honey is recommended, while agave syrup is a great vegan substitute.
  • Red Pepper Flakes – Infuses a spicy note to the honey drizzle; adjust according to your heat preference.

Get ready to impress your guests with this delightful Whipped Feta Crostini with Hot Honey recipe!

Step‑by‑Step Instructions for Whipped Feta Crostini with Hot Honey Recipe

Step 1: Preheat the Oven
Begin by preheating your oven to 375°F (190°C). This ensures that when you’re ready to bake, your oven is at the perfect temperature to achieve that beautiful golden crust on your crostini. Meanwhile, gather your ingredients and equipment, including a baking sheet, to prepare for the next step.

Step 2: Prepare the Crostini
Slice the baguette into ½-inch thick pieces and arrange them on a baking sheet. Drizzle each slice generously with extra virgin olive oil, ensuring they are well-coated for even crisping. Bake the slices in your preheated oven for 8–10 minutes, flipping them halfway through, until they are golden brown and crisp to the touch.

Step 3: Make the Whipped Feta
In a food processor, combine crumbled feta, cream cheese, a splash of olive oil, fresh lemon juice, and a sprinkle of black pepper. Blend these ingredients until the mixture is smooth and creamy, which usually takes about 2-3 minutes. Once done, transfer the whipped feta to a bowl and chill it in the refrigerator to allow the flavors to meld before serving.

Step 4: Infuse the Hot Honey
In a small saucepan over low heat, warm up your honey and add a pinch of red pepper flakes, stirring gently. Allow it to heat for about 2–3 minutes, ensuring it does not boil, as you want to infuse the flavors rather than cook the honey. Afterward, remove from heat, letting it sit for a few minutes so the flavors can blend beautifully.

Step 5: Assemble the Crostini
Once the crostini have cooled slightly, take your chilled whipped feta and generously spread it across each slice. The contrast of the creamy feta on the crispy bread is a crucial component of this Whipped Feta Crostini with Hot Honey recipe. This is your moment to elevate each crostini with the delicious whipped texture.

Step 6: Drizzle with Hot Honey
Finally, drizzle the warm, infused hot honey over the whipped feta. Be generous but mindful of your spice preference; the warmth and slight heat from the honey is what ties this appetizer together. Serve your crostini immediately for the best texture and temperature, allowing your guests to indulge in this delicious dish fresh from the kitchen.

Whipped Feta Crostini with Hot Honey Variations

Feel free to let your creativity shine and customize this delightful appetizer to match your flavor cravings!

  • Goat Cheese: Swap feta for creamy goat cheese for a richer, tangier taste that some may prefer. The smooth texture and mild flavor make it a fantastic alternative.

  • Herbed Whipped Feta: Add fresh herbs like basil or dill to the whipped feta for an aromatic twist. This elevates the crostini with a burst of freshness, perfect for summer gatherings.

  • Spicy Kick: Mix in a bit of sriracha or chili paste into the honey drizzle for an extra kick. This variation will awaken your taste buds and keep your guests on their toes with surprise heat.

  • Fruitful Addition: Top your crostini with roasted grapes or fig jam for a sweet contrast. The juicy, caramelized fruit pairs beautifully with the creamy feta, and adds elegance to your appetizer plate.

  • Texture Twist: Use crispy prosciutto or pancetta as a topping for added crunch and saltiness. This savory addition creates a delightful contrast and brings umami flavors to the forefront.

  • Nutty Finish: Sprinkle toasted pistachios or walnuts on top for a delightful crunch and nutty flavor. This variation enhances texture while adding an earthy component that harmonizes nicely with the honey.

  • Infused Honey: Experiment with different honey infusions, like garlic or rosemary, to add unique layers of flavor. This twist allows your crostini to shine with gourmet flair, reminiscent of upscale Mediterranean bistros.

  • Vegan Option: Substitute the feta with a tasty cashew cream or vegan cream cheese and agave syrup for a completely plant-based version. This ensures everyone can enjoy deliciousness without compromise.

For a complete experience, why not serve these with a crisp salad or as part of a vibrant cheese board alongside Tagliatelle Asparagus Peas? These variations will take your Whipped Feta Crostini with Hot Honey to delicious new heights!

Expert Tips for Whipped Feta Crostini

  • Chill for Flavor: Make sure to chill your whipped feta before serving; this step enhances its flavor and overall enjoyment.

  • Crisp Factor: Allow crostini to cool slightly after baking to keep them crunchy. Toppings on hot bread can cause sogginess.

  • Honey Heat: Keep your hot honey warm for easy drizzling, and feel free to adjust the amount of red pepper flakes according to your preferred spice level.

  • Fresh Assembly: Assemble the Whipped Feta Crostini with Hot Honey just before serving to maintain the perfect texture and flavor.

  • Experiment: Don't hesitate to try different toppings or bread types to suit your taste! Adding unique elements can elevate the dish even more.

Make Ahead Options

These Whipped Feta Crostini with Hot Honey are perfect for busy home cooks seeking to save time without sacrificing flavor! You can prepare the whipped feta up to three days in advance; simply store it in an airtight container in the refrigerator to keep it fresh and creamy. The crostini themselves can be baked and stored at room temperature in a sealed bag for up to 24 hours. When you're ready to serve, just spread the chilled whipped feta on the crostini, drizzle with the hot honey, and enjoy the same delicious taste as if you made them fresh! By prepping ahead, you’ll simplify your entertaining time while still impressing your guests with an elegant appetizer.

What to Serve with Whipped Feta Crostini with Hot Honey

A perfect appetizer deserves delightful accompaniments to create an unforgettable meal experience.

  • Simple Arugula Salad: Bright and fresh, this salad adds a peppery crunch that balances the rich flavors of whipped feta. Toss it with a light lemon vinaigrette for extra zing.

  • Roasted Vegetable Medley: A warm platter of seasonal roasted veggies complements the crostini beautifully. The caramelization adds sweetness, enhancing the sweet-hot honey with every bite.

  • Creamy Tomato Basil Soup: Serve these crostini with a comforting bowl of soup. The creamy texture contrasts perfectly with the crisp crostini, making it a cozy match any time of year.

  • Charcuterie Board: Create an impressive spread alongside your crostini. Include cured meats, olives, nuts, and fruits to offer a variety of textures and flavors that harmonize with the dish.

  • Sparkling White Wine: Elevate your gathering with a glass of bubbly. Its acidity cuts through the richness of the feta and honey, making every sip and bite delightful.

  • Pistachio-Crusted Cheese Ball: For an added touch of sophistication, pair it with a cheese ball rolled in chopped pistachios. The nuttiness links beautifully with the whipped feta's creaminess.

  • Fruit Skewers: A colorful medley of fruit skewers adds a refreshing palate cleanser. Think juicy strawberries, crisp apples, or sweet grapes—you’ll be amazed at how well they play with the hot honey!

  • Dessert: Honey Cake: Finish your meal with a light honey cake. Its sweetness and subtle flavors tie back to the honey in the crostini, creating a beautiful thematic closure.

  • Chilled Mint Tea: Refreshing and aromatic, this beverage complements savory and sweet elements alike, providing a delightful contrast to the spicy honey drizzle.

How to Store and Freeze Whipped Feta Crostini with Hot Honey

Fridge: Keep whipped feta and hot honey in separate airtight containers for up to 4 days to maintain freshness.

Room Temperature: Store crostini at room temperature in a sealed bag or tin for up to 3 days. Ensure they’re fully cooled to preserve crispness.

Make-Ahead: You can prepare the whipped feta up to 2 days in advance, allowing the flavors to deepen.

Reheating: If crostini lose crispness, reheat them in a preheated oven at 375°F (190°C) for 5 minutes before serving the whipped feta crostini with hot honey.

Whipped Feta Crostini with Hot Honey Recipe FAQs

What is the best way to select ripe ingredients for the Whipped Feta Crostini?
Absolutely! When selecting your ingredients, look for a baguette that’s crusty but light; it should feel firm to the touch without any dark spots. For feta cheese, opt for a block of fresh feta with a creamy texture and avoid crumbled versions that may be drier. Fresh lemons should feel heavy for their size and have a vibrant color, ensuring maximum juice.

How should I store leftovers of the Whipped Feta Crostini?
Very! Keep your whipped feta and hot honey in separate airtight containers in the fridge. This will keep them fresh for up to 4 days. The crostini can be stored at room temperature in a sealed bag or tin for up to 3 days, but make sure they're completely cool to maintain their crispness.

Can I freeze the Whipped Feta Crostini?
Certainly! If you'd like to freeze the crostini, place them in a single layer on a baking sheet and freeze until solid. Then, transfer them to a freezer-safe bag and store them for up to 3 months. When ready to enjoy, reheat them in a preheated oven at 375°F (190°C) for 5–10 minutes until crispy. You can make the whipped feta ahead of time as well and freeze it in an airtight container for the same duration.

What can I do if my whipped feta mixture isn’t creamy enough?
If your whipped feta doesn’t achieve that desired creamy texture, there are a couple of things you can try. Start by ensuring that both the feta and cream cheese are at room temperature before mixing. If it still seems thick, add a tablespoon of olive oil or a splash of milk gradually while blending until you reach your preferred smooth consistency. Blending for 2-3 minutes in a food processor usually achieves that light and fluffy texture; just be patient!

Are there any dietary considerations for this recipe?
You bet! This Whipped Feta Crostini with Hot Honey is vegetarian; however, consider substituting honey with agave syrup for a vegan alternative. For those with dairy allergies, you may use dairy-free cream cheese and replace the feta with a nut-based cheese. Always ensure to read the labels of any ingredient you use for potential allergens.

How can I safely serve this appetizer to pets or children?
Although the Whipped Feta Crostini is delicious for humans, it’s wise to keep it away from pets. Dogs can consume small amounts of plain feta, but honey is not safe for them. For kids, assess their spice tolerance; you may want to hold back on the red pepper flakes in the honey until you know their preferences!

Whipped Feta Crostini with Hot Honey Recipe

Whipped Feta Crostini with Hot Honey Recipe You'll Adore

Savor the delicious Whipped Feta Crostini with Hot Honey, an elegant yet easy appetizer perfect for any gathering.
Print Recipe Pin Recipe
Prep Time 15 minutes mins
Cook Time 10 minutes mins
Chilling Time 30 minutes mins
Total Time 55 minutes mins
Servings: 12 crostini
Course: Appetizers
Cuisine: Mediterranean
Calories: 120
Ingredients Equipment Method Nutrition Notes

Ingredients
  

For the Crostini
  • 1 loaf Baguette or any artisan bread like ciabatta or sourdough
  • 2 tablespoons Olive Oil extra virgin for best flavor
For the Whipped Feta
  • 8 ounces Feta Cheese or substitute with goat cheese or ricotta
  • 4 ounces Cream Cheese low-fat options maintain creamy consistency
  • 1 tablespoon Lemon Juice or white wine vinegar as an alternative
  • 1 teaspoon Black Pepper or cayenne for extra kick
For the Hot Honey Drizzle
  • 1/2 cup Honey wildflower honey recommended
  • 1 teaspoon Red Pepper Flakes adjust according to heat preference

Equipment

  • Oven
  • Baking Sheet
  • Food Processor
  • small saucepan

Method
 

Step-by-Step Instructions
  1. Preheat your oven to 375°F (190°C).
  2. Slice the baguette into ½-inch thick pieces and arrange on a baking sheet. Drizzle with olive oil and bake for 8-10 minutes until golden brown.
  3. In a food processor, blend feta, cream cheese, olive oil, lemon juice, and black pepper until smooth; chill in refrigerator.
  4. In a saucepan, warm honey and add red pepper flakes; heat for 2-3 minutes but do not boil.
  5. Spread whipped feta across slightly cooled crostini.
  6. Drizzle the hot honey over the whipped feta and serve immediately.

Nutrition

Serving: 1crostiniCalories: 120kcalCarbohydrates: 15gProtein: 4gFat: 6gSaturated Fat: 3gPolyunsaturated Fat: 0.5gMonounsaturated Fat: 2gCholesterol: 15mgSodium: 180mgPotassium: 200mgFiber: 0.5gSugar: 6gVitamin A: 200IUVitamin C: 2mgCalcium: 150mgIron: 0.5mg

Notes

Chill whipped feta before serving to enhance flavor. Store whipped feta and hot honey separately in airtight containers for up to 4 days.

Tried this recipe?

Let us know how it was!

Savor Garlic Shrimp Crostini with Creamy Avocado Bliss

December 20, 2025 by Grace Snow Leave a Comment

As I stood by the kitchen counter, the scent of sizzling garlic danced through the air, signaling the start of something special. There’s something incredibly satisfying about whipping up delicious finger foods, especially when they boast flavors like my Garlic Shrimp Crostini with Avocado. This appetizer checks all the boxes: it’s quick to prepare and impressively colorful, making it the perfect choice for any gathering. The crunchy baguette delivers a delightful contrast to the tender shrimp and creamy avocado, allowing your guests to savor every bite while mingling and chatting. Whether you're entertaining friends or indulging in a cozy night at home, this dish is a fantastic way to elevate your culinary repertoire. Ready to make a culinary splash at your next gathering? Let's dive into this delightful recipe!

Why Make Garlic Shrimp Crostini?

Quick preparation: You can whip up this delightful appetizer in just 30 minutes, making it a perfect last-minute addition to any gathering.

Flavor explosion: The combination of succulent garlic shrimp and creamy avocado creates a mouthwatering bite that your guests will adore.

Crowd-pleaser: With its colorful presentation and irresistible taste, this dish is sure to impress your friends and family.

Versatile: Feel free to experiment—try using grilled chicken instead of shrimp or different breads like ciabatta for a unique twist on this classic!

Perfect for mingling: These bite-sized delights allow your guests to enjoy gourmet flavors while socializing, making them ideal for parties or casual get-togethers.

Enhance your entertaining skills with this simple, delicious recipe! If you’re interested in more seafood options, check out my Pan Fried Shrimp or Shrimp Tacos Zesty for even more flavor-packed creations.

Garlic Shrimp Crostini Ingredients

Get ready to create a flavor-packed appetizer!

For the Crostini

  • Baguette Slices – Use sourdough or French baguette for a delightful crunch.
  • Olive Oil – Essential for brushing the bread, adding richness and moisture.
  • Garlic Powder – This enhances the flavor and complements the shrimp beautifully.

For the Topping

  • Large Shrimp – Peeled and deveined shrimp are key for a succulent bite.
  • Garlic Cloves – Fresh garlic brings aromatic depth when sautéed.
  • Smoked Paprika – Adds a hint of smokiness; optional but recommended for added complexity.
  • Cumin – Offers warmth; chili powder can be used as a spicier alternative.
  • Salt and Black Pepper – Crucial for seasoning, enhancing the overall flavor.

For the Avocado Mix

  • Avocado – Creamy and fresh, this is the star of the topping; guacamole works as a handy substitute!
  • Lime Juice – This adds a zesty acidity that balances the richness of the avocado.
  • Salt and Black Pepper – Season to taste for that perfect finishing touch.

Step‑by‑Step Instructions for Garlic Shrimp Crostini with Avocado

Step 1: Preheat the Oven
Begin by preheating your oven to 350°F (175°C). While the oven heats, prepare a baking sheet by lining it with parchment paper. This makes cleanup a breeze and ensures even cooking for your garlic shrimp crostini.

Step 2: Prepare the Baguette
In a small bowl, mix 3 tablespoons of olive oil with garlic powder. Generously brush both sides of the baguette slices with this flavorful mixture. Arrange the slices on the prepared baking sheet in a single layer, ensuring they are not overcrowded for optimal toasting.

Step 3: Bake the Baguette
Place the baking sheet in the preheated oven and bake the baguette slices for 10 to 15 minutes. Keep an eye on them, removing them once they turn golden and crispy. This toasty base is essential for the perfect garlic shrimp crostini.

Step 4: Mash the Avocado
While the baguette is baking, scoop the ripe avocado into a mixing bowl. Add in lime juice, salt, and black pepper to taste, and mash the ingredients together until smooth and creamy. Set this delicious avocado mixture aside; it will complement the shrimp beautifully.

Step 5: Sauté the Garlic
Heat the remaining olive oil in a skillet over low heat. Add thinly sliced garlic and sauté for about 2 minutes, or until fragrant and lightly golden. This step infuses the oil with a rich garlic flavor, setting the stage for your garlic shrimp.

Step 6: Cook the Shrimp
Increase the heat to medium-high and carefully add the peeled and deveined shrimp to the skillet. Sprinkle in smoked paprika, cumin, salt, and black pepper, cooking for about 5 minutes. Stir occasionally, allowing the shrimp to turn pink and opaque, indicating they are perfectly cooked.

Step 7: Assemble the Crostini
Once the baguette slices are toasted and the shrimp are ready, it's time to assemble your garlic shrimp crostini with avocado. Spread a generous layer of the mashed avocado on each toasted slice. Next, crown each crostini with a few pieces of the sautéed shrimp, ensuring a vibrant and inviting presentation.

Step 8: Serve Immediately
Arrange your stunning garlic shrimp crostini on a serving platter and serve right away for the best texture and flavor. This delightful appetizer is sure to impress at any gathering, allowing your guests to savor gourmet flavors while mingling.

Make Ahead Options

These Garlic Shrimp Crostini with Avocado are perfect for meal prep enthusiasts! You can prepare the shrimp mixture up to 3 days in advance; just cook and then refrigerate in an airtight container. To maintain their quality, make sure the shrimp are completely cooled before sealing. The avocado mixture can be prepped 24 hours ahead; add a dash of lime juice to prevent browning, and store it covered. When you’re ready to serve, toast the baguette slices fresh and assemble by spreading the avocado and topping with shrimp to ensure they stay crispy and flavorful. This way, you’ll have a stunning appetizer ready with minimal effort—ideal for busy weeknights or impromptu gatherings!

How to Store and Freeze Garlic Shrimp Crostini

Fridge: Store any leftover garlic shrimp in an airtight container for up to 2 hours after cooking. This keeps them fresh while preventing any unwanted odors in your fridge.

Assembly Tip: The crostini are best enjoyed fresh, but you can keep the components separate. Refrigerate the cooked shrimp and mashed avocado, then assemble just before serving for the best texture.

Freezer: If needed, you can freeze cooked shrimp for up to 2 months. Seal in an airtight container or freezer bag, removing as much air as possible. Thaw in the fridge before using.

Reheating: To reheat cooked shrimp, warm in a skillet over low heat until heated through. Avoid the microwave to prevent overcooking. Prepare fresh crostini right before serving for that perfect crunch!

Expert Tips for Garlic Shrimp Crostini

  • Quality Shrimp: Use wild shrimp if possible for fresher flavor and better nutritional benefits. Avoid frozen shrimp if you can, as they can be less flavorful.

  • Perfect Avocado: Buy avocados a few days in advance to ensure they ripen just right. A ripe avocado should yield slightly when pressed.

  • Avoid Overcooking: Keep a close eye on the shrimp; overcooking can make them rubbery. They should only be cooked until they turn pink and opaque.

  • Crostini Consistency: For that perfect crunch, let the baguette slices cool slightly after baking. This will keep them crisp even after adding the toppings.

  • Serving Suggestions: Assemble the garlic shrimp crostini just before serving to maintain optimal texture. This ensures a delightful contrast between the crunchy bread and creamy avocado!

Garlic Shrimp Crostini Variations

Feel free to explore these delightful twists and substitutions to personalize your garlic shrimp crostini experience!

  • Protein Swap: Try using grilled chicken instead of shrimp for a heartier, yet equally delicious option. Chicken pairs beautifully with the creamy avocado!

  • Bread Choices: Experiment with different breads like ciabatta or whole grain for varied textures and flavors. You'll be amazed how simple changes can elevate the dish!

  • Dairy-Free Option: Substitute avocado with a mixture of hummus and lime juice for a zesty, creamy spread. This swap offers a punch of flavor without dairy!

  • Herb-Infused: Add freshly chopped cilantro or parsley to the avocado mix to bring a burst of freshness that complements the shrimp perfectly. Herbs can truly elevate your bites!

  • Spice It Up: For an extra kick, include a pinch of cayenne pepper in your shrimp seasoning. This adds a subtle heat that makes each bite even more exciting!

  • Zesty Variation: Mix in some zest from a lime or lemon to your avocado for a refreshing citrus kick. It brightens up the entire crostini experience.

  • Add Cheese: Sprinkle crumbled feta or goat cheese on top for a rich, tangy contrast to the sweetness of the shrimp. Cheese lovers won’t be able to resist!

  • Veggie Boost: Top the crostini with thinly sliced cherry tomatoes for a pop of color and sweetness. It adds a fresh element that balances the richness of the avocado.

These variations not only allow you to personalize your flavor journey but also enhance your entertaining options. If you're in the mood for different seafood options, consider trying my Shrimp Tacos Zesty next!

What to Serve with Garlic Shrimp and Avocado Crostini

Elevate your gathering with delightful pairings that complement the vibrant flavors of your appetizer!

  • Creamy Mashed Potatoes: This rich side offers a wonderful contrast to the lightness of crostini, creating a filling experience.
  • Zesty Arugula Salad: The peppery greens tossed with lemon vinaigrette add a refreshing burst that brightens up the meal.
  • Grilled Asparagus: Tender, slightly charred asparagus enhances the seafood flavors while adding a delightful crunch.
  • Chilled White Wine: A crisp Sauvignon Blanc or refreshing Pinot Grigio pairs beautifully with shrimp, enhancing oceanic notes.
  • Herbed Quinoa: Light and fluffy, this nutritious side can absorb any extra flavors, offering a satisfying, earthy balance.
  • Tropical Fruit Salsa: Exotic fruits like mango and pineapple provide a sweet contrast, elevating the dish's freshness and brightness.
  • Garlic Breadsticks: Perfectly baked to complement the garlic in your crostini, these are a mouthwatering, familiar favorite.
  • Lemon Sorbet: For dessert, the citrusy sorbet is the perfect palate cleanser to cool off after enjoying delicious shrimp.
  • Pineapple Coconut Mocktail: A refreshing non-alcoholic drink that ties in tropical flavors while delighting your guests.

Garlic Shrimp and Avocado Crostini Recipe FAQs

What type of avocado should I use for the garlic shrimp crostini?
Absolutely! I recommend using ripe avocados for the best flavor and creaminess. They should yield slightly when pressed gently, indicating they are ready to use. If they're too hard, leave them at room temperature for a few days to ripen.

How long can I store leftovers in the refrigerator?
Very! You can store leftover garlic shrimp in an airtight container in the fridge for up to 2 hours. However, it's best to keep the components separate. Refrigerate the cooked shrimp and mashed avocado, and assemble just before serving to maintain that delightful crunch!

Can I freeze the garlic shrimp for later use?
Yes! If you need to freeze it, you can do so for up to 2 months. Simply place the cooked shrimp in an airtight container or freezer bag, removing as much air as possible. When you’re ready to enjoy, thaw the shrimp in the fridge overnight and warm gently before using on fresh crostini.

How do I prevent the shrimp from becoming tough when cooking?
Great question! To avoid overcooking and tough shrimp, keep them on medium-high heat and cook only until they turn pink and opaque, typically about 5 minutes. Stirring occasionally will help ensure even cooking.

Can I use chicken instead of shrimp in this recipe?
Absolutely! If you’d like a variation, grilled chicken works beautifully as a protein alternative. Just ensure that it's cooked through before adding it on top of the avocado crostini for a different but equally delicious flavor profile!

What should I do if my baguette slices become soggy?
To keep your crostini crispy, it's best to let the baked baguette slices cool slightly after baking. If they do become soggy, you can re-crisp them in the oven at 350°F for a few minutes. Just be sure to also prepare them fresh right before serving for the best textural contrast!

Garlic Shrimp Crostini with Avocado

Savor Garlic Shrimp Crostini with Creamy Avocado Bliss

Enjoy delicious Garlic Shrimp Crostini with Avocado, a quick and colorful crowd-pleaser perfect for any gathering.
Print Recipe Pin Recipe
Prep Time 15 minutes mins
Cook Time 15 minutes mins
Total Time 30 minutes mins
Servings: 4 crostini
Course: Appetizers
Cuisine: American
Calories: 250
Ingredients Equipment Method Nutrition Notes

Ingredients
  

For the Crostini
  • 1 loaf Baguette Use sourdough or French baguette for crunch.
  • 3 tablespoons Olive Oil For brushing the bread.
  • 1 teaspoon Garlic Powder Enhances flavor.
For the Topping
  • 1 pound Large Shrimp Peeled and deveined.
  • 3 cloves Garlic Fresh, thinly sliced.
  • 1 teaspoon Smoked Paprika Optional, for smokiness.
  • 1 teaspoon Cumin For warmth; chili powder can be a substitute.
  • 1 teaspoon Salt For seasoning.
  • 1 teaspoon Black Pepper For seasoning.
For the Avocado Mix
  • 1 large Avocado Ripe and fresh.
  • 1 tablespoon Lime Juice For acidity.
  • 1 teaspoon Salt To taste.
  • 1 teaspoon Black Pepper To taste.

Equipment

  • Oven
  • Skillet
  • Mixing Bowl
  • Baking Sheet
  • Parchment Paper

Method
 

Step-by-Step Instructions
  1. Preheat your oven to 350°F (175°C). Line a baking sheet with parchment paper.
  2. Mix 3 tablespoons of olive oil with garlic powder in a small bowl. Brush both sides of baguette slices with the mixture and arrange on the baking sheet.
  3. Bake the baguette slices for 10 to 15 minutes until golden and crispy.
  4. Scoop avocado into a bowl, add lime juice, salt, and pepper. Mash until smooth and creamy.
  5. Heat remaining olive oil in a skillet over low heat. Sauté sliced garlic for about 2 minutes until fragrant.
  6. Increase heat to medium-high, add shrimp, smoked paprika, cumin, salt, and black pepper. Cook for about 5 minutes until shrimp are pink and opaque.
  7. Once toasted, spread mashed avocado on each baguette slice, top with shrimp.
  8. Serve immediately on a platter for best texture and flavor.

Nutrition

Serving: 1crostiniCalories: 250kcalCarbohydrates: 20gProtein: 15gFat: 15gSaturated Fat: 2gPolyunsaturated Fat: 1gMonounsaturated Fat: 10gCholesterol: 150mgSodium: 300mgPotassium: 350mgFiber: 3gSugar: 1gVitamin A: 200IUVitamin C: 10mgCalcium: 30mgIron: 2mg

Notes

Use wild shrimp for better flavor and avoid overcooking to maintain texture. Assemble just before serving for a delightful experience.

Tried this recipe?

Let us know how it was!

Cucumber Smoked Salmon Bites for Effortless Summer Snacking

December 20, 2025 by Grace Snow Leave a Comment

At an impromptu summer gathering last week, I found myself rifling through the fridge, on a mission to create something refreshing yet effortless. That’s when it hit me—Cucumber Smoked Salmon Bites! These stunning no-cook appetizers are not only a breeze to whip up but also deliver a delightful crunch that pairs perfectly with the savory richness of smoked salmon and creamy herb cheese. Perfect for entertaining or an afternoon snack, they’re a hit that keeps everyone chatting and coming back for more. Plus, you can prepare the herb cream cheese ahead of time, making assembly a snap! So why not impress your friends with this beautiful and tasty treat that’s sure to be the star of your next gathering? Let’s dive in!

Why Choose Cucumber Smoked Salmon Bites?

Freshness is at the heart of these delightful bites, making them an ideal appetizer for warm summer evenings. No-Cook Convenience means you can prepare them in minutes, freeing up your time for fun with guests. Enjoy the Crowd-Pleasing Flavor combo of crisp cucumbers and smoky fish—perfect for gatherings! You can also explore exciting Variations like adding horseradish for a zing or swapping in crab meat for a different twist. Prepping the herb cream cheese ahead of time ensures you can assemble these bites in a snap, so why not pair them with a refreshing drink and wow your crowd? ✅

Cucumber Smoked Salmon Bites Ingredients

Get Ready to Delight!
• A perfect blend of flavors awaits you in these Cucumber Smoked Salmon Bites.

For the Base

  • Cucumber – Provides a refreshing crunch and a sturdy base; slice evenly at about 1/2 inch thick for stability.
  • Smoked Salmon – Adds rich umami flavor; substitute with lox or other smoked fish for a variation.

For the Creamy Spread

  • Cream Cheese – Acts as the creamy glue that binds everything together; Greek yogurt can substitute for a lighter option.
  • Spring Onion – Offers a mild onion flavor; finely mince for smooth incorporation.
  • Chives – Enhances freshness with an onion-like taste; feel free to use green onions if needed.
  • Lemon Juice & Zest – Provides acidity and a bright zing; lime juice works too if you prefer.
  • Black Pepper – Adds a hint of heat; a mix of fresh cracked pepper can elevate the flavor complexity.

Finishing Touches

  • Extra Black Pepper – Sprinkle on top for added flavor; it’s a delightful way to enhance taste.
  • Additional Chives – Use for garnish and a pop of color; they elevate presentation and freshness.

Get your ingredients ready and prepare to impress with these Cucumber Smoked Salmon Bites—perfect for effortless summer snacking!

Step‑by‑Step Instructions for Cucumber Smoked Salmon Bites

Step 1: Prepare the Cream Cheese Mixture
In a medium mixing bowl, combine cream cheese, finely minced spring onion, chopped chives, lemon juice, lemon zest, and freshly cracked black pepper. Use a hand mixer or spatula to blend until smooth and creamy, taking about 2-3 minutes. This savory spread will form the flavorful base for your Cucumber Smoked Salmon Bites, so ensure it’s well combined and set aside.

Step 2: Slice the Cucumber
Wash and dry the cucumber, then slice it into even rounds, about 1/2 inch thick. This thickness provides a stable base for your toppings, preventing them from toppling over. A sharp knife will give you clean, precise cuts, showcasing the beautiful color of the cucumber. Lay the slices on a paper towel to pat them dry and remove any excess moisture.

Step 3: Assemble the Bites
On each cucumber slice, spread a generous teaspoon of the cream cheese mixture, making sure it covers the entire surface for maximum flavor. The contrasting textures of crisp cucumbers and creamy cheese will keep your Cucumber Smoked Salmon Bites delightful. This step is crucial, as an even spread helps the toppings sit snugly without slipping off.

Step 4: Add the Smoked Salmon
Carefully place a piece of smoked salmon on top of each cream cheese-covered cucumber slice. You can tear the salmon into bite-sized pieces for a more rustic look, or cut them uniformly for a polished presentation. The rich umami from the salmon complements the cream cheese and provides a beautiful color contrast.

Step 5: Final Touches
For an extra pop of flavor, sprinkle the assembled bites with a dash of black pepper and garnish with additional chives. These finishing touches elevate your Cucumber Smoked Salmon Bites, making them visually appealing and irresistible. If desired, you can also drizzle a touch of fresh lemon juice over the bites for added brightness before serving.

Step 6: Serve or Store
Serve the Cucumber Smoked Salmon Bites immediately for the best flavor and texture, or keep them stored in the refrigerator for up to 2-3 hours before your gathering. Place them on a beautiful serving platter or a white plate to let the vibrant colors shine through. This no-cook appetizer is sure to impress your guests!

Expert Tips for Cucumber Smoked Salmon Bites

• Slice Thickness Matters: Ensure your cucumber slices are about 1/2 inch thick; this not only provides stability but also enhances the bite’s overall presentation and taste.

• Keep It Dry: Pat cucumber slices dry after washing; this prevents sogginess, allowing your Cucumber Smoked Salmon Bites to maintain their refreshing crunch.

• Make Ahead Magic: Prepare the cream cheese mixture in advance. This not only saves time but also enhances the flavors, making assembly a breeze when you’re ready to serve.

• Chill for Freshness: Keep the assembled bites chilled before serving; this ensures they are refreshingly cool and delightful, enhancing the flavor profile.

• Garnish for Impact: Don’t skip the extra black pepper and chives; these not only add flavor but also brighten up the appearance of your Cucumber Smoked Salmon Bites for a stunning presentation.

How to Store and Freeze Cucumber Smoked Salmon Bites

Fridge: Store prepared Cucumber Smoked Salmon Bites in an airtight container for up to 2-3 hours to keep them fresh and crisp before serving.

Make-Ahead Tips: You can prepare the herb cream cheese mixture a day ahead. Store it in the refrigerator, then assemble the bites on the day of serving for optimal freshness.

Freezer: While these bites are best enjoyed fresh, you can freeze the cream cheese mixture for up to a month. Thaw in the fridge before using, but avoid freezing assembled bites to maintain texture.

Reheating: These bites are served cold, so there's no need to reheat. Enjoy them directly from the fridge or after a brief chill for that refreshing crunch!

Make Ahead Options

These Cucumber Smoked Salmon Bites are perfect for meal prep, allowing you to impress your guests without the last-minute rush! You can prepare the cream cheese mixture up to 24 hours in advance; simply refrigerate it in an airtight container to maintain its creamy texture. On the day of serving, slice your cucumber and pat it dry to keep it crisp—this step prevents sogginess. Assemble the bites shortly before serving for the freshest taste, ensuring the toppings stay intact and delicious. With these make-ahead options, you can enjoy effortless entertaining that saves time, leaving plenty of moments to spend with your friends!

Cucumber Smoked Salmon Bites Variations

Feel free to get creative and customize your Cucumber Smoked Salmon Bites to fit your taste preferences and dietary needs!

  • Seafood Swap: Use crab meat instead of smoked salmon for a sweet, tender twist that adds a luxurious feel.

  • Vegetarian Delight: Replace smoked salmon with a flavorful hummus spread, making it a fresh, plant-based option that everyone will love.

  • Creamy Upgrade: For a zesty kick, add capers or horseradish to your cream cheese mixture, giving these bites a delightful punch. It’s sure to surprise your guests!

  • Herbal Infusion: Experiment with different herbs, such as dill or tarragon, for a unique flavor profile that enhances the freshness of each bite. Each herb brings its own character to the dish.

  • Add Some Heat: Incorporate sliced jalapeños for a spicy kick that balances beautifully with the rich creaminess of the spread. Perfect for those who enjoy a bit of fire!

  • Alternative Citrus: Swap lemon juice for lime juice for a different type of brightness—this tangy change can make your bites even more refreshing during those hot summer days.

  • Nutty Crunch: Sprinkle chopped toasted nuts, like almonds or pecans, on top for a delightful crunch and extra texture, adding a surprising twist with each bite.

  • One Pot Inspiration: If you like exploring more delicious seafood dishes, don’t forget to check out this One Pot Salmon recipe that’s just as easy and versatile!

With these variations, your Cucumber Smoked Salmon Bites can cater to all tastes and dietary preferences, making them even more inclusive for your gatherings! Enjoy the process of creating and sharing.

What to Serve with Cucumber Smoked Salmon Bites

Elevate your gathering with complementary flavors and textures that will keep your guests coming back for more.

  • Creamy Avocado Dip: Rich and luscious, this dip adds a velvety texture that contrasts beautifully with the crisp cucumber, enhancing your appetizer experience.

  • Refreshing Cucumber Salad: A light, zesty mix of cucumbers, tomatoes, and a tangy dressing brightens up your spread and echoes the freshness of the bites.

  • Sparkling White Wine: Its crisp acidity and bubbles elevate the flavors of the smoked salmon while offering a delightful refreshment on warm days.

  • Herbed Quinoa Salad: This nutty, herb-infused side not only adds heartiness but also provides a delightful chewiness that complements the lightness of the bites.

  • Caprese Skewers: Juicy cherry tomatoes, fresh mozzarella, and basil drizzled with balsamic glaze mimic the freshness of the cucumber bites, creating an enticing visual feast.

  • Lemonade Spritzers: A fizzy blend of lemonade and sparkling water makes for a refreshing pairing, balancing the savory richness of the Cucumber Smoked Salmon Bites perfectly.

Each pairing brings something unique to the table, enhancing your summer snack experience!

Cucumber Smoked Salmon Bites Recipe FAQs

How do I choose the right cucumbers?
Absolutely! Look for firm cucumbers with a vibrant green color and minimal blemishes. Avoid cucumbers with dark spots all over or soft spots, as these may indicate overripeness. If you're using them the same day, select Persian or English cucumbers for a sweeter flavor and thinner skin.

How should I store Cucumber Smoked Salmon Bites?
To keep your Cucumber Smoked Salmon Bites fresh, it's best to store them in an airtight container in the refrigerator for up to 2-3 hours. This preserves the crunchiness of the cucumber and the creaminess of the filling. For longer storage, keep the cream cheese mixture in the fridge and assemble the bites just before serving.

Can I freeze the Cucumber Smoked Salmon Bites?
While assembled bites don’t freeze well due to the moisture in the cucumber, you can freeze the cream cheese mixture alone! Transfer it to a freezer-safe container and store for up to a month. When you’re ready to use it, thaw it in the refrigerator overnight before spreading it onto fresh cucumber slices.

What if my cream cheese mixture is too thick?
Very! If your cream cheese mixture feels too thick to spread, simply add a splash of lemon juice or a small amount of milk to thin it out. Mix well until you achieve a creamy, spreadable consistency. This will help ensure that your Cucumber Smoked Salmon Bites are easy to assemble and enjoy.

Can I make this recipe gluten-free or dairy-free?
For sure! To make the Cucumber Smoked Salmon Bites gluten-free, ensure your cream cheese doesn’t contain any additives with gluten. For a dairy-free option, try using a vegan cream cheese substitute or Greek yogurt. These alternatives will still provide a creamy base, making your bites delightful!

Are these bites safe for pets?
Definitely! However, while cucumber in small amounts is safe for dogs, the cream cheese and smoked salmon can be high in fat and salt. It’s best to keep these bites as a treat for your guests and not share them with your furry friends.

Cucumber Smoked Salmon Bites

Cucumber Smoked Salmon Bites for Effortless Summer Snacking

Enjoy Cucumber Smoked Salmon Bites, refreshing no-cook appetizers perfect for summer snacking.
Print Recipe Pin Recipe
Prep Time 15 minutes mins
Total Time 15 minutes mins
Servings: 12 bites
Course: Appetizers
Calories: 100
Ingredients Equipment Method Nutrition Notes

Ingredients
  

For the Base
  • 1 large Cucumber sliced into 1/2 inch rounds
  • 8 ounces Smoked Salmon can substitute with lox or other smoked fish
For the Creamy Spread
  • 8 ounces Cream Cheese Greek yogurt can substitute for a lighter option
  • 2 tablespoons Spring Onion finely minced
  • 2 tablespoons Chives chopped or green onions can be used
  • 1 tablespoon Lemon Juice or lime juice
  • 1 teaspoon Lemon Zest
  • 1 teaspoon Black Pepper freshly cracked
Finishing Touches
  • 1 teaspoon Extra Black Pepper for sprinkling on top
  • 1 tablespoon Additional Chives for garnish

Equipment

  • Mixing Bowl
  • Knife
  • Spatula
  • Paper towels

Method
 

Directions
  1. In a medium mixing bowl, combine cream cheese, finely minced spring onion, chopped chives, lemon juice, lemon zest, and freshly cracked black pepper. Blend until smooth and creamy, about 2-3 minutes.
  2. Wash and dry the cucumber, then slice it into even rounds, about 1/2 inch thick. Lay the slices on a paper towel to pat them dry.
  3. On each cucumber slice, spread a generous teaspoon of the cream cheese mixture.
  4. Carefully place a piece of smoked salmon on top of each cream cheese-covered cucumber slice.
  5. Sprinkle with extra black pepper and garnish with additional chives.
  6. Serve immediately or store in the refrigerator for up to 2-3 hours before serving.

Nutrition

Serving: 1biteCalories: 100kcalCarbohydrates: 4gProtein: 6gFat: 7gSaturated Fat: 4gPolyunsaturated Fat: 1gMonounsaturated Fat: 2gCholesterol: 20mgSodium: 300mgPotassium: 120mgFiber: 1gSugar: 1gVitamin A: 200IUVitamin C: 2mgCalcium: 50mgIron: 1mg

Notes

Prepare the herb cream cheese mixture ahead of time for quicker assembly. Keep the bites chilled before serving for optimal freshness.

Tried this recipe?

Let us know how it was!

Delicious Christmas Deviled Eggs: A Festive Holiday Delight

December 20, 2025 by Grace Snow Leave a Comment

As I stood in the kitchen, the crisp scent of winter wafted through the air, reminding me that the holiday season was upon us. There’s something magical about creating culinary delights that bring family and friends together, and these Classic Christmas Deviled Eggs are a perfect tribute to that joy. With a creamy, tangy filling that takes just 30 minutes to prepare, they make for an effortless holiday appetizer—a true crowd-pleaser that hardly ever makes it back to the fridge! What I love most is their versatility; you can get creative with toppings, ensuring there’s something for everyone. Let me share with you the recipe for these delightful Christmas Deviled Eggs, so your festive gatherings can sparkle with a little extra flair. Why not find out what whimsical twists you can add to make them your own?

Why Are These Deviled Eggs Special?

Crowd-Pleasing: These Christmas Deviled Eggs are a guaranteed hit at any holiday gathering, loved by both kids and adults alike.

Quick to Prepare: In just 30 minutes, you can whip up this creamy, tangy appetizer that allows more time for merriment with friends and family.

Versatility: With endless customization options, feel free to sprinkle in unique toppings like crumbled bacon or fresh herbs to cater to your guests’ tastes.

Make-Ahead Magic: These deviled eggs can be prepared days in advance—perfect for hassle-free entertaining! Just store them in the fridge until it's time to serve.

Classic Charm: Embrace the timeless joy of a holiday staple that evokes fond memories and is bound to be a conversation starter at your festive table.

Ready to embark on a delicious journey with these festive appetizers? Check out more ideas with these delightful Turkish Eggs Discover for a fun exchange!

Christmas Deviled Eggs Ingredients

• Get ready to whip up a delicious twist on a classic favorite!

For the Filling
• Eggs – Fresh, large eggs are essential to create that classic structure; use room temperature eggs for easier peeling.
• Mayonnaise – Adds creaminess and richness to the filling; substitute with vegan mayo for a dairy-free option.
• Dijon mustard – Provides a delightful tang that balances the richness of the filling.
• White vinegar – Brightens the flavor; feel free to swap in apple cider vinegar as a fun alternative.

For the Garnish
• Paprika – A must-have for that festive sprinkle and subtle warmth on top of the eggs.
• Salt and pepper – Essential seasonings to enhance the flavors; adjust to your taste for that perfect bite.
• Chopped chives – Optional but a lovely way to add color and a mild onion flavor to your presentation.

These Christmas Deviled Eggs are not just a treat for the taste buds but also a delight for the eyes, making your holiday spread truly special!

Step‑by‑Step Instructions for Christmas Deviled Eggs

Step 1: Prepare and Steam
Begin by placing 12 large eggs in a steamer basket over boiling water. Cover and steam them for about 12 minutes to achieve perfectly cooked yolks. Once done, immediately plunge the eggs into a bowl of ice water to cool completely, which not only stops the cooking process but also makes peeling easier.

Step 2: Peel and Slice
Once the eggs are cool, gently tap each egg on a hard surface to crack the shell. Carefully peel the shells off under running water, which helps reduce any sticking. Slice each egg in half lengthwise and carefully scoop the yolks into a medium mixing bowl, ensuring the whites remain intact for filling.

Step 3: Mix Filling
To the bowl with the yolks, add ½ cup of mayonnaise, 1 tablespoon of Dijon mustard, 1 teaspoon of white vinegar, and a pinch of salt and pepper. Use a fork to mash the ingredients together until the mixture is smooth and creamy, giving it a taste test and adjusting the seasoning as desired for your perfect Christmas Deviled Eggs.

Step 4: Fill Egg Whites
Spoon the creamy yolk mixture back into the hollowed egg whites, or for a neater approach, use a piping bag fitted with a large star tip. Fill each egg white generously until the filling slightly mounds above the surface, creating visually appealing deviled eggs that are sure to impress at your holiday gathering.

Step 5: Garnish and Chill
Sprinkle a dusting of paprika over each filled egg for that classic appearance, and add chopped chives for a pop of color if desired. Carefully arrange the filled Christmas Deviled Eggs on a decorative platter, cover them with plastic wrap, and refrigerate for at least 30 minutes before serving to allow the flavors to meld beautifully.

How to Store and Freeze Christmas Deviled Eggs

Fridge: Store your Christmas Deviled Eggs in an airtight container for up to 3 days. This keeps them fresh and safe to enjoy at your holiday gatherings.

Freezer: For optimal taste and texture, it's not recommended to freeze deviled eggs, as the filling may become watery upon thawing.

Reheating: If you've prepared any fillings separately, feel free to refrigerate them and assemble just before serving for fresher flavor and presentation.

Make-Ahead: These deviled eggs can be made 1-3 days in advance, making them a convenient option for stress-free holiday celebrations.

Make Ahead Options

These Christmas Deviled Eggs are a fantastic choice for meal prep, making it easy to enjoy festive gatherings without last-minute stress. You can prepare the filling (egg yolk mixture) up to 3 days in advance, storing it in an airtight container in the refrigerator. To maintain the creamy texture, be sure to press plastic wrap directly onto the surface of the filling to prevent air exposure. When it's time to serve, simply fill the egg whites with the prepared filling and garnish with paprika and chives right before presenting them at your gathering. This method ensures your deviled eggs stay fresh and delicious, allowing you to savor more quality time with your loved ones!

What to Serve with Christmas Deviled Eggs

Imagine vibrant flavors dancing on your palate, adding joy to your festive table alongside these delightful appetizers.

  • Crispy Bacon-Wrapped Asparagus: The savory crunch of bacon balances the creaminess of the deviled eggs, while fresh asparagus adds a seasonal touch.
  • Warm Holiday Roll: Soft, buttery rolls are perfect for soaking up the flavors on your plate, making every bite feel like a cozy hug.
  • Hummus and Veggie Platter: A light and healthy accompaniment, offering a range of fresh, crunchy vegetables that brighten and complement the rich eggs charmingly.
  • Festive Fruit Salad: A medley of seasonal fruits offers a sweet contrast that refreshes the palate and adds a burst of color to your spread.
  • Sparkling Cider: The crisp effervescence refreshes your taste buds, making it a dazzling drink choice that pairs beautifully with holiday dishes.
  • Chocolate Peppermint Bark: A sweet finish, this decadent dessert with a hint of mint complements the savory deviled eggs wonderfully, leaving everyone on a sweet note.
  • Creamy Coleslaw: A zesty and crunchy companion that adds texture and a hint of acid to balance the richness of the eggs, elevating your holiday spread.
  • Herbed Potato Salad: The herbaceous flavors bring a heartiness that rounds out your meal, making it satisfyingly wholesome beside the eggs.
  • Holiday Cheese Board: A selection of cheeses provides variety, while contrasting textures and flavors enhance the richness of your Christmas Deviled Eggs, enticing every guest to indulge.
  • Spiced Hot Chocolate: To warm your heart, this comforting drink creates a sweet and heartwarming close to your meal, perfect for sipping alongside appetizers.

Expert Tips for Christmas Deviled Eggs

  • Egg Freshness: Use eggs that are a week old for easier peeling; fresher eggs tend to stick to the shell, making it hard to get that perfect look.

  • Steaming Secrets: Steaming eggs rather than boiling helps prevent cracks and retains a vibrant yellow yolk, ensuring your Christmas Deviled Eggs are visually appealing.

  • Smooth Filling: Blend your yolk mixture until silky smooth for a delightful texture. Avoid over-mixing to keep the filling light and creamy.

  • Chill for Flavor: Allow the filled eggs to chill in the refrigerator for at least 30 minutes before serving to enhance flavor blending and achieve a refreshing bite.

  • Serving Sizes: Plan for 2-3 deviled eggs per person to keep your guests satisfied, as these delightful Christmas Deviled Eggs disappear quickly!

Christmas Deviled Eggs: Customization Ideas

Let your creativity shine by personalizing these festive deviled eggs, ensuring every bite bursts with flavor!

  • Spicy Twist: Add a dash of sriracha or cayenne pepper to the filling for a delightful heat that complements the creamy texture.
    For an even bolder kick, consider serving alongside a spicy dipping sauce. Your guests will love the balance of flavors!

  • Herb Infusion: Mix in fresh dill or parsley for a garden-fresh taste that brightens every bite.
    The vibrant colors and aromas of the herbs lift these Christmas Deviled Eggs into a whole new realm of deliciousness!

  • Cheesy Delight: Fold in crumbled feta or shredded cheddar cheese for a rich, savory addition.
    This not only enhances the flavor profile but gives the filling a luscious creaminess that’s hard to resist!

  • Savory Add-Ons: Top with crispy bacon bits or smoked salmon to elevate the flavor and texture.
    These delicious additions bring a gourmet touch and add an unexpected surprise to the classic recipe.

  • Veggie Boost: Consider mixing in finely chopped cucumbers or pickles for a crunchy contrast.
    Adding a bit of crunch not only delights the palate but also adds a refreshing element to balance the creaminess.

  • Tangy Flair: A teaspoon of pickle juice or lemon zest can brighten the filling and add a zesty flair.
    It’s a perfect way to add complexity without overpowering the original flavors—just a hint can make all the difference!

  • Festive Colors: Try topping with pomegranate seeds or diced red bell peppers for a burst of color and sweetness.
    These bright toppings not only make your Christmas Deviled Eggs visually stunning but enhance the overall flavor experience!

Feel free to mix and match these ideas, and if you're looking for something a little different, check out these tasty suggestions for delightful Turkish Eggs Discover. The possibilities are endless, and with every twist, you’ll create a unique holiday appetizer that your guests will adore!

Christmas Deviled Eggs Recipe FAQs

How do I select fresh eggs for Christmas Deviled Eggs?
Absolutely! When choosing fresh eggs, look for large, intact shells without any cracks. Ideally, opt for eggs that have been in your fridge for about a week, as older eggs peel much more easily. If you notice any dark spots on the eggshell, that's a sign to pick a different carton!

How long can I store Christmas Deviled Eggs in the refrigerator?
Very! You can store your Christmas Deviled Eggs in an airtight container for up to 3 days. Just make sure they are well-covered to prevent them from absorbing any odors from the fridge. It’s best to consume them within this timeframe for optimal freshness and flavor.

Can I freeze Christmas Deviled Eggs?
Not recommended! While you can freeze many dishes, freezing deviled eggs can affect both texture and flavor. The egg whites may become rubbery, and the filling might turn watery once thawed. Instead, prepare your filling and whites separately, and assemble just before serving for the best experience.

What should I do if my filling is too runny?
If you find that your egg yolk mixture is too runny, don't worry—this is easily fixable! Start by adding a tablespoon of mayonnaise or Dijon mustard to thicken it up. If it’s still not as creamy as you’d like, try adding a bit more yolk or even a spoonful of softened cream cheese. Blend again until you achieve your desired consistency.

Are there any allergy considerations I should be aware of?
Absolutely! If you're serving guests, it’s important to consider common allergies. The traditional filling includes mayonnaise, which typically contains eggs; for a vegan version, substitute it with a plant-based mayonnaise. Be sure to check for any additional toppings like bacon or chives in case of allergies, and don't hesitate to inquire about your guests' dietary restrictions before preparing!

Can I make these deviled eggs a day in advance?
Of course! Preparing your Christmas Deviled Eggs a day ahead is a smart option. Simply follow the full recipe and store the filled eggs in the refrigerator. They will not only save you time on the day of the gathering but also allow the flavors to meld beautifully—the longer they chill, the more delightful they become!

Christmas Deviled Eggs

Delicious Christmas Deviled Eggs: A Festive Holiday Delight

These Christmas Deviled Eggs are a creamy, tangy appetizer that is sure to please at any holiday gathering.
Print Recipe Pin Recipe
Prep Time 30 minutes mins
Cook Time 12 minutes mins
Chilling Time 30 minutes mins
Total Time 1 hour hr 12 minutes mins
Servings: 12 eggs
Course: Appetizers
Cuisine: American
Calories: 70
Ingredients Equipment Method Nutrition Notes

Ingredients
  

For the Filling
  • 12 large eggs Fresh, at room temperature for easier peeling
  • ½ cup mayonnaise Can substitute with vegan mayo for dairy-free option
  • 1 tablespoon Dijon mustard
  • 1 teaspoon white vinegar Apple cider vinegar can be used as an alternative
For the Garnish
  • to taste paprika For sprinkling
  • to taste salt Essential seasoning
  • to taste pepper Essential seasoning
  • ¼ cup chopped chives Optional for garnish

Equipment

  • Steamer
  • medium mixing bowl
  • Fork
  • Spoon
  • piping bag
  • Decorative platter

Method
 

Preparation Steps
  1. Place 12 large eggs in a steamer basket over boiling water and steam for about 12 minutes.
  2. Immediately plunge the eggs into ice water to cool completely.
  3. Gently tap and peel the eggs under running water.
  4. Slice each egg in half lengthwise and scoop the yolks into a mixing bowl.
  5. Mix yolks with mayonnaise, Dijon mustard, white vinegar, salt, and pepper until smooth.
  6. Fill hollowed egg whites with the yolk mixture and garnish with paprika and chives.
  7. Refrigerate for at least 30 minutes before serving.

Nutrition

Serving: 1eggCalories: 70kcalCarbohydrates: 1gProtein: 5gFat: 5gSaturated Fat: 1gCholesterol: 186mgSodium: 50mgPotassium: 60mgVitamin A: 270IUCalcium: 26mgIron: 0.5mg

Notes

These deviled eggs can be made 1-3 days in advance. Store in an airtight container for up to 3 days.

Tried this recipe?

Let us know how it was!

Sweet Potato and Bacon Skewers: Irresistibly Delicious Bites

December 20, 2025 by Grace Snow Leave a Comment

As the aroma of sweet caramelized goodness wafts through the air, it’s hard to resist the allure of these Candied Sweet Potato and Bacon Skewers. This delicious blend of sweet and savory transforms ordinary ingredients into a delightful creation that will brighten any gathering. These skewers not only shine as an irresistible party food, but they also combine quick prep with crowd-pleasing flavors, making them perfect for both holiday festivities and casual get-togethers. Each bite offers tender sweet potatoes wrapped in crisp, smoky bacon, all glazed to perfection, ensuring you won’t want to stop at just one. Ready to impress your friends and family with this tasty treat? Let's dive into the delicious world of flavors!

Why are Sweet Potato and Bacon Skewers Amazing?

Irresistible Flavor: The combination of sweet potatoes and smoky bacon creates an explosion of savory goodness that’ll have everyone coming back for more.

Quick & Easy: With just a few simple ingredients, these skewers come together in no time, making them perfect for those busy weeknights or last-minute gatherings.

Crowd-Pleasing Appeal: Whether it’s a holiday feast or a casual get-together, these skewers are sure to be the star of the show. Your guests won’t be able to resist!

Versatile Options: Don’t hesitate to swap out ingredients, like using turkey bacon or exploring different sweet potato varieties, for a unique twist that suits your taste.

Visual Delight: The vibrant colors and beautifully glazed finish make these skewers not only delicious but also a stunning addition to your appetizer spread.

Give these a try alongside Smoky Sweet Potatoes or pair them with a refreshing Cabbage Slaw for a well-rounded meal.

Sweet Potato and Bacon Skewers Ingredients

For the Skewers

  • Sweet Potatoes – Provide natural sweetness and earthiness; peel and cut into even 1-inch cubes for uniform cooking.
  • Bacon – Adds smoky, salty flavor and crispy texture; regular-cut or turkey bacon can be used for a lighter option.
  • Brown Sugar – Contributes sweetness and caramelization; can be substituted with coconut sugar for a healthier option.
  • Maple Syrup or Honey – Enhances sweetness with distinctive flavors; use maple syrup for a richer taste or honey for a floral note.
  • Olive Oil or Melted Butter – Used for coating and enhancing flavor; feel free to use a flavored oil like garlic-infused for more taste.
  • Cinnamon – Adds warmth and depth to the glaze; can be replaced with pumpkin spice for a seasonal twist.
  • Cayenne or Chili Powder – Introduces a subtle heat; adjust according to your spice preference—omit for a milder taste.
  • Garlic Powder (optional) – Provides additional savory flavor; fresh minced garlic can be used instead for a richer taste.
  • Fresh Rosemary or Thyme (optional) – Adds aromatic herbaceous notes; substitute other herbs like sage or parsley if desired.
  • Sea Salt – For finishing and enhancing flavor; use smoked salt for extra depth.

For Dipping Sauces

  • Marshmallow Fluff – A sweet dip that contrasts nicely with savory bacon.
  • Spicy Aioli – Adds a kick to the sweet and savory flavors; perfect for those who love an extra punch.
  • Maple Mustard – Enhances the sweet potato and bacon skewers with a delightful blend of flavors.

Step‑by‑Step Instructions for Sweet Potato and Bacon Skewers

Step 1: Preheat and Prepare
Begin by preheating your oven to 400°F (200°C) or prepare your grill for direct heat. While it's heating up, line a baking sheet with parchment paper or aluminum foil. This will make cleanup a breeze and ensure your sweet potato and bacon skewers don't stick during roasting, culminating in crispy, delicious bites.

Step 2: Parboil Sweet Potatoes
In a pot of boiling water, carefully add the peeled and cut 1-inch sweet potato cubes. Let them simmer for 5-7 minutes until just fork-tender but not mushy. Once done, drain them and allow to cool slightly. This step ensures your sweet potatoes cook evenly and enhances their caramelization once baking begins.

Step 3: Make the Glaze
In a large bowl, whisk together brown sugar, maple syrup, olive oil, cinnamon, and cayenne, optionally adding garlic powder for extra flavor. This sticky glaze not only enhances the sweet potato and bacon skewers' flavor but will help them achieve that tempting caramel-like finish. You’ll know it’s ready when it’s well combined and smooth.

Step 4: Coat Sweet Potatoes
Transfer the parboiled sweet potato cubes into your bowl of glaze. Gently toss them until every piece is evenly coated, ensuring that the sweet potato absorbs all that lovely flavor. You’ll see the cubes glistening with the thick mixture, setting the stage for delightful sweet and savory notes in your skewers.

Step 5: Assemble Skewers
Now it's time to bring your sweet potato and bacon skewers to life! Take a piece of bacon and wrap it around each glazed sweet potato cube snugly. Alternatively, you can thread them onto skewers, alternating between pieces of bacon and sweet potatoes for a beautiful presentation. Ensure the bacon is secured tightly to prevent unraveling.

Step 6: Roast the Skewers
Place the assembled skewers onto your prepared baking sheet or a wire rack for even crispiness. Roast in the preheated oven for about 25-30 minutes, flipping them halfway through. Keep an eye on them until the bacon crisps up beautifully and the sweet potatoes become caramelized, giving a wonderful golden brown color.

Step 7: Glaze and Finish
In the final 5 minutes of roasting, consider brushing your sweet potato and bacon skewers with extra glaze. This step will add an irresistible shine and enhance the sweet flavor profile. Watch as the glaze bubbles and gets sticky, wrapping your skewers in a delicious, glossy coat.

Step 8: Serve and Garnish
Once cooked, remove the skewers from the oven and allow them to cool briefly. Serve warm, optionally garnished with fresh herbs or a sprinkle of sea salt. Pair these tantalizing sweet potato and bacon skewers with your choice of dipping sauces for an extra dose of flavor that will leave everyone wanting more!

Make Ahead Options

These Sweet Potato and Bacon Skewers are a fantastic choice for meal prep! You can easily parboil the sweet potato cubes and prepare the glaze up to 24 hours in advance. Simply store the parboiled sweet potatoes in an airtight container and refrigerate them, ensuring they don't become mushy. The glaze can also be mixed and refrigerated to maintain its flavors. When you're ready to cook, just toss the sweet potatoes in the glaze, assemble the skewers, and roast them for 25-30 minutes. This way, you can enjoy a delightful appetizer with minimal effort, saving time for busy weeknights!

Sweet Potato and Bacon Skewers Variations

Feel free to play around with these delightful variations to make the sweet potato and bacon skewers even more fabulous!

  • Turkey Bacon: Swap regular bacon for turkey bacon for a lighter, healthier alternative that still packs a flavor punch.

  • Sweet Potato Varieties: Experiment with different types like purple or Japanese sweet potatoes to offer a striking color and taste contrast. Each variation brings a unique sweetness that compliments the bacon beautifully.

  • Agave Nectar: Replace maple syrup with agave nectar for a vegan-friendly glaze that still provides a sweet and sticky finish. This swap keeps the flavors luscious while accommodating dietary preferences.

  • Pumpkin Spice: For a seasonal twist, substitute cinnamon with pumpkin spice in your glaze. This change adds a warm, autumnal aroma that elevates the entire dish.

  • Spicy Kick: Add a pinch of crushed red pepper flakes to the glaze for a little extra heat. This will tantalize taste buds and provide that delightful spicy-sweet contrast.

  • Herb Infusion: Consider using fresh herbs like sage or cilantro instead of rosemary or thyme. They offer a different aromatic nuance that can refresh the dish altogether, creating an inviting fusion of flavors.

  • Loaded Skewers: Amp up your skewers by threading in some veggies! Bell peppers, onions, or cherry tomatoes can add a fresh twist, amplifying both texture and visual appeal.

  • Balsamic Glaze: Drizzle with balsamic reduction before serving for a tart-sweet flavor that enhances the overall dish. This finishing touch adds a sophisticated element that elevates your sweet potato and bacon skewers to gourmet status.

Try these variations alongside a classic Sweet Potato Casserole or a vibrant batch of Maple Roasted Sweet Potatoes for an impressive spread that will wow your guests!

Storage Tips for Sweet Potato and Bacon Skewers

Fridge: Store leftovers in an airtight container in the refrigerator for up to 3 days to keep the sweet potato and bacon skewers fresh.

Freezer: For longer storage, freeze the skewers in a single layer on a baking sheet. Once frozen solid, transfer them to a freezer-safe bag for up to 2 months.

Reheating: To enjoy leftover skewers, reheat in the oven at 350°F (175°C) for about 10-15 minutes to restore crispness, flipping them halfway through.

Wrapping: If you plan to store them, wrap the skewers tightly in plastic wrap or foil before placing them in the fridge or freezer to help prevent freezer burn.

What to Serve with Candied Sweet Potato and Bacon Skewers

Enhance your experience with these delightful skewers by pairing them with equally scrumptious sides and drinks that will leave your guests raving.

  • Creamy Mashed Potatoes: A classic pairing, these buttery mashed potatoes absorb the savory flavors and provide a smooth contrast to the crispy skewers.

  • Garlic Green Beans: Sautéed green beans with garlic add a vibrant pop of color and a fresh crunch, balancing the richness of the sweet potatoes and bacon.

  • Spicy Slaw: A zesty cabbage slaw brings refreshing acidity and a slight crunch, perfectly countering the sweetness of the skewers while adding dimension to your plate.

  • Cornbread Muffins: Soft and sweet cornbread muffins are an irresistible side that complements the smoky bacon and sweet potato goodness, providing a cozy comfort element.

  • Fruit Salad: A vibrant fruit salad can bring a light and refreshing counterbalance to the skewers’ richness, with notes of sweetness enhancing the overall flavor profile.

  • Apple Cider: This autumnal drink is perfect for gatherings, with its sweet and spicy notes pairing beautifully with the flavors of the skewers. It’s a drink that evokes warmth and festivities.

  • Maple Pecan Pie: End the meal on a sweet note with a slice of this classic dessert. The nutty pecans and rich caramel flavors echo the sweet notes of the skewers, creating a harmonious finish.

  • Herbed Quinoa Salad: This nourishing grain salad, with its fresh herbs and zesty dressing, adds a nutritious fiber component to your spread while harmonizing the sweet and savory elements.

Exploring these sides and drinks will elevate your Sweet Potato and Bacon Skewers into a memorable dining experience!

Expert Tips for Sweet Potato and Bacon Skewers

  • Even Cuts: Ensure sweet potatoes are cut uniformly into 1-inch cubes. This guarantees they cook evenly and achieve that perfect tender texture.

  • Don't Overboil: Parboil sweet potatoes just until fork-tender—5-7 minutes is ideal. Overcooking will make them too soft and difficult to skewer.

  • Crispy Bacon Hack: For extra crispy bacon, place skewers on a wire rack over the baking sheet. This allows hot air to circulate and renders excess fat.

  • Soaking Skewers: If using wooden skewers, soak them in water for 20 minutes before assembly. This prevents them from burning during roasting.

  • Taste-Test the Glaze: Always taste and adjust your glaze before tossing in sweet potatoes. You can add more sweetness or spice based on your preference for these sweet potato and bacon skewers.

  • Storage Tips: Leftovers can easily be stored in the fridge for up to three days. Reheat the skewers in an oven to maintain their crispy texture.

Sweet Potato and Bacon Skewers Recipe FAQs

What type of sweet potatoes are best for this recipe?
Absolutely! When selecting sweet potatoes, look for firm, smooth-skinned ones without dark spots or blemishes. Morrison, garnet, or even Japanese sweet potatoes will work beautifully, each offering a slightly different flavor and texture.

How should I store Sweet Potato and Bacon Skewers?
After enjoying your skewers, store any leftovers in an airtight container in the fridge for up to 3 days. Reheating in an oven at 350°F (175°C) for 10-15 minutes helps restore their crispiness.

Can I freeze Sweet Potato and Bacon Skewers?
Yes! To freeze, lay the skewers out in a single layer on a baking sheet and freeze them until solid. Then transfer them to a freezer-safe bag for up to 2 months. When you're ready to enjoy, bake them directly from frozen, adding a few extra minutes to the cooking time.

What if my sweet potatoes are too soft after boiling?
If your sweet potatoes become overly soft during parboiling, don't worry! You can still use them. Just handle them gently while assembling the skewers, and make sure to reduce the roasting time to avoid mushiness. A crispier bacon layer will help enhance the texture!

Is this recipe suitable for people with dietary restrictions?
Yes, definitely! For dairy-free or paleo options, substitute olive oil for melted butter and use turkey bacon instead of pork bacon. If gluten-free is a must, ensure any sauces or glazes used are gluten-free. Always double-check all labels if allergies or strict dietary needs are present.

What dipping sauces pair well with Sweet Potato and Bacon Skewers?
The more the merrier! Pair your skewers with dipping sauces like spicy aioli for a kick, maple mustard for a sweet contrast, or even a simple marshmallow fluff to highlight the sweet flavor of the skewers. Experiment and find your perfect match!

Sweet Potato and Bacon Skewers

Sweet Potato and Bacon Skewers: Irresistibly Delicious Bites

Delicious Sweet Potato and Bacon Skewers are an irresistible blend of sweet and savory flavors, perfect for gatherings.
Print Recipe Pin Recipe
Prep Time 15 minutes mins
Cook Time 30 minutes mins
Total Time 45 minutes mins
Servings: 6 skewers
Course: Appetizers
Cuisine: American
Calories: 250
Ingredients Equipment Method Nutrition Notes

Ingredients
  

For the Skewers
  • 2 cups Sweet Potatoes peeled and cut into 1-inch cubes
  • 8 slices Bacon can use regular or turkey bacon
  • 1 cup Brown Sugar can substitute with coconut sugar
  • 1/4 cup Maple Syrup or Honey use maple syrup for richer taste
  • 2 tablespoons Olive Oil or Melted Butter flavored oil can be used
  • 1 teaspoon Cinnamon can replace with pumpkin spice
  • 1/2 teaspoon Cayenne or Chili Powder adjust according to spice preference
  • 1/2 teaspoon Garlic Powder (optional) fresh minced garlic can be used
  • 2 sprigs Fresh Rosemary or Thyme (optional) can substitute with other herbs
  • 1 teaspoon Sea Salt smoked salt for extra depth
For Dipping Sauces
  • 1 cup Marshmallow Fluff
  • 1/2 cup Spicy Aioli
  • 1/4 cup Maple Mustard

Equipment

  • Oven
  • Baking Sheet
  • pot
  • Mixing Bowl

Method
 

Step-by-Step Instructions
  1. Preheat your oven to 400°F (200°C) and prepare a baking sheet lined with parchment paper.
  2. Parboil the sweet potato cubes in boiling water for 5-7 minutes until fork-tender, then drain and cool.
  3. In a bowl, whisk together brown sugar, maple syrup, olive oil, cinnamon, cayenne, and optional garlic powder until smooth.
  4. Coat sweet potato cubes in the glaze, ensuring each piece is evenly coated.
  5. Wrap each glazed sweet potato cube with a piece of bacon, ensuring it's snug.
  6. Place skewers on the prepared baking sheet and roast for 25-30 minutes, flipping halfway through.
  7. In the final 5 minutes of roasting, brush with extra glaze to enhance shine and flavor.
  8. Serve warm, optionally garnished with fresh herbs or sea salt, alongside dipping sauces.

Nutrition

Serving: 2skewersCalories: 250kcalCarbohydrates: 30gProtein: 8gFat: 12gSaturated Fat: 4gPolyunsaturated Fat: 1gMonounsaturated Fat: 6gCholesterol: 20mgSodium: 500mgPotassium: 350mgFiber: 3gSugar: 15gVitamin A: 12000IUVitamin C: 20mgCalcium: 40mgIron: 1mg

Notes

Ensure sweet potatoes are evenly cut for even cooking. Parboiling helps with texture. Store leftovers in the fridge for up to 3 days.

Tried this recipe?

Let us know how it was!

Delicious Mediterranean Mezze Tapas Platter for Easy Sharing

December 20, 2025 by Grace Snow Leave a Comment

As I stood in my kitchen, the aroma of Mediterranean herbs swirling around me, I was reminded of my travels through sun-drenched markets bustling with vibrant produce and rich aromas. It’s this playful spirit that inspires my Mediterranean Mezze Tapas Platter—a delightful assembly of easy-to-make shareable appetizers perfect for any gathering. Not only does this platter feature creamy hummus, tangy tzatziki, and a rainbow of fresh veggies, but it also provides a healthy alternative to the usual fast food options. With minimal prep required, you can whip it up in no time, making it an elegant centerpiece for your next get-together or a wholesome snack any day of the week. Ready to dive into a world of flavors and textures that bring a taste of the Mediterranean right to your table?

Why is the Mediterranean Mezze Tapas Platter a Must-Try?

Colorful, Vibrant Display: The Mediterranean Mezze Tapas Platter showcases a stunning array of colors and textures, making it the perfect eye-catching centerpiece for any gathering.

Easy Assembly: Preparation is a breeze—this platter requires just a little chopping and arrangement, making it an ideal choice for quick meal prep.

Health-Conscious Choice: Loaded with fresh veggies, healthy fats, and protein-rich dips, it offers a nutritious alternative to typical fast food fare, perfect for anyone trying to eat healthier without sacrificing flavor.

Versatile Options: You can easily customize the platter to suit dietary preferences with substitutes, ensuring everyone at your table finds something delightful.

Crowd-Pleaser: Friends and family will love sharing this communal dish, encouraging conversation and connection over each delicious bite.

Transform your dining experience with this easy-to-make yet impressive platter that will surely satisfy your guests—check out more of my favorite appetizer recipes for additional inspiration!

Mediterranean Mezze Tapas Platter Ingredients

• Gather the essential components to create your delicious Mediterranean Mezze Tapas Platter that's perfect for sharing!

For the Dips

  • Hummus – Creamy dip for flavor and protein; substitute with any bean dip for variety.
  • Tzatziki Sauce – Refreshing yogurt-based dip for tanginess; ranch can work as a substitute if needed.

For the Veggies and More

  • Roasted Red Peppers – Adds a smoky flavor and vibrant color; use fresh bell peppers if roasting isn't suitable.
  • Marinated Artichoke Hearts – Brings zestiness and texture; marinated mushrooms can be a delicious alternative.
  • Kalamata Olives – Provides a briny, salty punch; swap with green olives for a milder taste.
  • Feta Cheese – Adds creaminess and saltiness; goat cheese can be substituted for a different flair.
  • Cucumber Slices – Offers crunch and freshness; celery sticks can provide an alternative crunch.
  • Cherry Tomatoes – Juicy and sweet, enhancing visual appeal; grape tomatoes are a great substitute if desired.
  • Whole Wheat Pita Bread – Serves as a base for scooping; use gluten-free pita for a gluten-free option.

Finishing Touches

  • Extra Virgin Olive Oil – Drizzle this for added flavor and richness; tahini can substitute for a nutty touch.
  • Fresh Parsley – Used as a garnish for a pop of freshness and color; dill or mint can be used for varied flavors.

With these ingredients at your fingertips, you're on your way to creating a vibrant Mediterranean Mezze Tapas Platter that will surely be the star of your next gathering!

Step‑by‑Step Instructions for Mediterranean Mezze Tapas Platter

Step 1: Preheat the Oven
Start by preheating your oven to 350°F (175°C). This temperature is ideal for warming the pita bread, giving it a soft, fluffy texture that’s perfect for scooping up your delicious dips. While the oven heats, gather your large baking tray, which will be ready to hold the pita wedges.

Step 2: Warm the Pita Bread
Arrange the whole wheat pita bread on the baking tray and place it in the preheated oven for about 5 minutes. Keep an eye on the bread as it warms; it should become pleasantly soft but not brown or crispy. This warming step enhances the Mediterranean Mezze Tapas Platter by making the bread warm and inviting.

Step 3: Prepare the Dips
While the pita warms, measure out the creamy hummus and tangy tzatziki sauce into two small serving bowls. Aim for visually appealing portions—each bowl should be filled generously but leave some space for presentation. These dips are the heart of your Mediterranean Mezze Tapas Platter, so make sure they look inviting.

Step 4: Arrange the Ingredients
Next, it's time to create an artful display! On a large serving platter or wooden board, begin arranging the roasted red peppers, marinated artichoke hearts, Kalamata olives, and feta cheese in colorful clusters around the dips. Be creative and allow the vibrant colors and different textures to draw the eye and excite the appetite.

Step 5: Add Fresh Ingredients
Now, slice the cucumbers and cherry tomatoes, arranging them neatly alongside the other ingredients on your platter. These fresh additions will bring crunch and juiciness, complementing the dips beautifully. As you arrange, remember that your Mediterranean Mezze Tapas Platter is all about inviting communal enjoyment.

Step 6: Drizzle with Olive Oil
Take the extra virgin olive oil and gently drizzle it over the entire platter for added flavor and richness. This finishing touch not only enhances the taste but also adds a glossy sheen that makes everything look even more appetizing. It’s the perfect way to elevate your Mediterranean Mezze Tapas Platter.

Step 7: Garnish and Serve
Finally, sprinkle fresh parsley over the assembled platter for a burst of freshness and a pop of color. Once everything is beautifully arranged and garnished, immediately serve with the warm pita wedges. Sharing this Mediterranean Mezze Tapas Platter will bring delight and connection to your gathering, inviting everyone to dig in!

What to Serve with Mediterranean Mezze Tapas Platter

Elevate your Mediterranean experience by pairing delightful sides and beverages with this colorful and vibrant platter.

  • Creamy Mashed Potatoes: The buttery texture adds warmth and comfort, balancing the freshness of the mezze.

  • Greek Salad: Tossed with olives and feta, this salad brings zesty crunch that beautifully complements the flavors of the platter.

  • Grilled Vegetable Skewers: These smoky bites offer a charred richness, making a perfect contrast to the creamy dips.

  • Pita Chips: For an extra crunch, serve these alongside your warm pita; they’re ideal for scooping up dips!

  • Olive Tapenade: This bold, savory spread adds depth and flavor, inviting another layer to your Mediterranean spread.

  • Sparkling Water with Lemon: Refreshing and light, this drink enhances the meal's vibrant flavors, offering a palate cleanser between bites.

  • Baklava: For a sweet finish, this sticky, nutty dessert brings a delightful Mediterranean twist to your meal.

Each of these pairings enriches the experience, turning your Mediterranean Mezze Tapas Platter into a feast that truly delights the senses!

Expert Tips for the Mediterranean Mezze Tapas Platter

  • Presentation Matters: Arrange your ingredients in groups by color for a visually stunning display that showcases the beauty of the Mediterranean Mezze Tapas Platter.

  • Prep Ahead: Chop your veggies and marinate artichokes the day before to save time on the day of serving, ensuring a stress-free gathering.

  • Storage Solutions: Store leftover hummus and tzatziki in airtight containers for up to 3 days. Keep leftover veggies separate to maintain freshness and crunch.

  • Flavor Variations: Don’t hesitate to mix in your favorite ingredients! Adding roasted eggplant or a sprinkle of herbs can create a unique take on the Mediterranean Mezze Tapas Platter.

  • Warm Pita Perfection: Take care not to overheat the pita bread. Warm it just enough to be soft and pliable, which enhances the experience when scooping up your dips.

Mediterranean Mezze Tapas Platter Variations

Get ready to tailor your Mediterranean Mezze Tapas Platter with these delightful twists that will elevate your shared experience!

  • Dairy-Free: Use a creamy avocado dip in place of hummus and tzatziki for a rich, plant-based alternative. This change not only keeps it dairy-free but adds a lovely, buttery texture.

  • Spicy Kick: Incorporate some sliced jalapeños or a drizzle of harissa on top of your dips to bring in some heat. This adds an exciting punch that can wake up even the mildest of flavors!

  • Nutty Flavor: Toss in some lightly toasted walnuts or almonds to the platter for a crunchy texture and nutty flavor boost. These nuts bring an additional layer of richness that pairs beautifully with the dips.

  • Grilled Vegetables: Swap the raw veggies for grilled zucchini and eggplant for a smoky flavor. Grilling brings out the sweetness in the vegetables, creating a delicious contrast to the creamy dips.

  • Herb Variations: Instead of parsley, try using fresh mint or cilantro as a garnish for a refreshing twist. Each herb offers a unique flavor profile that can transform the dish into a new culinary experience.

  • Extra Zesty: Add a sprinkle of lemon zest on top of your dip dishes to brighten up the flavors. This little burst of citrus can really elevate the whole platter, making every bite refreshing.

  • Earthy Touch: Include roasted chickpeas for an added crunch and earthiness. They offer a protein boost and the perfect complement to the creamy textures already present.

  • Stuffed Pita: Fill your whole wheat pita with a delicious blend of falafel and tahini for a more scrumptious bite. This twist turns your already delightful platter into a truly decadent meal.

Explore these variations to create a personalized Mediterranean Mezze Tapas Platter that’s perfect for every occasion! And if you’re looking for more ways to make the most of your ingredients, check out my collection of healthy sharing platters for inspiration!

Make Ahead Options

Preparing the Mediterranean Mezze Tapas Platter ahead of time is a fantastic way to save time while still providing a gorgeous and flavorful presentation! You can prep the dips—hummus and tzatziki—up to 3 days in advance; simply store them in airtight containers in the refrigerator to keep them fresh and creamy. Also, consider chopping the cucumbers, tomatoes, and any other veggies a day ahead to maintain their crunch. Keep them in a sealed container, separate from the dips, to prevent sogginess. Then, when you're ready to serve, simply arrange the prepped ingredients on a platter, drizzle with olive oil, and garnish with fresh parsley for a stunning, last-minute touch! Enjoy the extra time saved!

How to Store and Freeze Mediterranean Mezze Tapas Platter

Fridge: Store leftover hummus and tzatziki in airtight containers for up to 3 days, ensuring they stay fresh and flavorful.

Veggie Storage: Keep cut vegetables like cucumbers and tomatoes separate in the fridge, ideally in sealed bags, to prevent them from becoming soggy.

Freezer: While it’s best to enjoy the Mediterranean Mezze Tapas Platter fresh, you can freeze hummus for up to 3 months. Thaw in the fridge and stir before serving.

Reheating Pita: If you have leftover pita, reheat it briefly in the oven at 350°F (175°C) for about 5 minutes to restore its softness before serving.

Mediterranean Mezze Tapas Platter Recipe FAQs

What type of produce should I choose for my mezze platter?
Absolutely! For the freshest taste, look for vibrant, firm vegetables. Cucumbers should be crisp with no dark spots, and cherry tomatoes should be plump and bright red. Roasted red peppers can be jarred or homemade; just ensure they’re not overly charred or mushy for the best texture.

How can I store leftovers for the Mediterranean Mezze Tapas Platter?
Very good question! Store leftover hummus and tzatziki in airtight containers in the refrigerator, where they’ll stay fresh for up to 3 days. Keep your cut vegetables like cucumbers and tomatoes stored separately in sealed bags. This helps to preserve their crunch, preventing them from getting soggy!

Can I freeze any components of the Mediterranean Mezze Tapas Platter?
Yes, you can! Hummus can be frozen for convenience, so your guests can always savor that fresh taste. Simply place it in an airtight container, leaving space for expansion, and store it in the freezer for up to 3 months. When ready to enjoy, thaw it in the fridge overnight and give it a good stir before serving.

What should I do if my pita bread gets hard?
If your pita bread becomes hard or stale, don’t worry! You can revive it quickly. Preheat your oven to 350°F (175°C), wrap the pita in aluminum foil, and warm it in the oven for about 5-7 minutes. This will help restore its softness, making it perfect for dipping!

Are there any dietary considerations I should keep in mind?
Very much so! This Mediterranean Mezze Tapas Platter is vegetarian and can easily be customized for various dietary needs. For gluten sensitivities, substitute the whole wheat pita with gluten-free options. Always check for allergens like dairy in hummus and tzatziki or nuts in substitute ingredients, ensuring that everyone can enjoy this delightful platter!

How can I make my mezze platter visually appealing?
To create that stunning appearance, take your time with the arrangement. Group ingredients by color, using bowls for the dips and vibrant vegetables artfully arranged around them. You can even garnish with fresh herbs like parsley for that extra pop of color, inviting everyone to dig in and share your delicious Mediterranean Mezze Tapas Platter!

Mediterranean Mezze Tapas Platter

Delicious Mediterranean Mezze Tapas Platter for Easy Sharing

Experience the vibrant flavors of a Mediterranean Mezze Tapas Platter, perfect for easy sharing.
Print Recipe Pin Recipe
Prep Time 15 minutes mins
Cook Time 5 minutes mins
Total Time 20 minutes mins
Servings: 6 people
Course: Appetizers
Cuisine: Mediterranean
Calories: 300
Ingredients Equipment Method Nutrition Notes

Ingredients
  

For the Dips
  • 1 cup Hummus Creamy dip for flavor and protein; substitute with any bean dip for variety.
  • 1 cup Tzatziki Sauce Refreshing yogurt-based dip for tanginess; ranch can work as a substitute if needed.
For the Veggies and More
  • 1 cup Roasted Red Peppers Adds a smoky flavor and vibrant color; use fresh bell peppers if roasting isn't suitable.
  • 1 cup Marinated Artichoke Hearts Brings zestiness and texture; marinated mushrooms can be a delicious alternative.
  • 1 cup Kalamata Olives Provides a briny, salty punch; swap with green olives for a milder taste.
  • 1 cup Feta Cheese Adds creaminess and saltiness; goat cheese can be substituted for a different flair.
  • 1 cup Cucumber Slices Offers crunch and freshness; celery sticks can provide an alternative crunch.
  • 1 cup Cherry Tomatoes Juicy and sweet, enhancing visual appeal; grape tomatoes are a great substitute if desired.
  • 2 pieces Whole Wheat Pita Bread Serves as a base for scooping; use gluten-free pita for a gluten-free option.
Finishing Touches
  • 2 tablespoons Extra Virgin Olive Oil Drizzle this for added flavor and richness; tahini can substitute for a nutty touch.
  • 1 tablespoon Fresh Parsley Used as a garnish for a pop of freshness and color; dill or mint can be used for varied flavors.

Equipment

  • Baking tray
  • serving platter or wooden board

Method
 

Preparation Steps
  1. Preheat your oven to 350°F (175°C).
  2. Arrange the whole wheat pita bread on the baking tray and place it in the preheated oven for about 5 minutes.
  3. Measure out the creamy hummus and tangy tzatziki sauce into two small serving bowls.
  4. Begin arranging the roasted red peppers, marinated artichoke hearts, Kalamata olives, and feta cheese on a serving platter.
  5. Slice the cucumbers and cherry tomatoes, and arrange them alongside the other ingredients on your platter.
  6. Drizzle the extra virgin olive oil over the entire platter.
  7. Sprinkle fresh parsley over the assembled platter and serve immediately with warm pita wedges.

Nutrition

Serving: 1plateCalories: 300kcalCarbohydrates: 35gProtein: 10gFat: 15gSaturated Fat: 3gPolyunsaturated Fat: 5gMonounsaturated Fat: 7gCholesterol: 15mgSodium: 500mgPotassium: 500mgFiber: 4gSugar: 4gVitamin A: 1000IUVitamin C: 15mgCalcium: 150mgIron: 2mg

Notes

This platter can be customized with various dips and vegetables based on personal preference. Perfect for gatherings or casual snacking.

Tried this recipe?

Let us know how it was!

Savory Prosciutto and Melon Skewers Appetizers for Summer Fun

December 20, 2025 by Grace Snow Leave a Comment

On a particularly sweltering day, I caught myself dreaming of a dish that encapsulated summer’s joy without turning on the stove. That's when I stumbled upon the timeless delight of 3-Ingredient Prosciutto and Melon Skewers Appetizers. Picture this: the sweet, juicy melon mingling perfectly with the savory richness of thinly sliced prosciutto, creating a heavenly bite of contrasting flavors and textures. This no-cook recipe not only comes together in just 15 minutes, but it's also an effortless crowd-pleaser, making it the ideal choice for casual gatherings or a refreshing snack. With minimal ingredients, you can create a stunning dish that shines on any plate. Curious about how to make these effortless treats? Let’s dive in!

Why are Prosciutto and Melon Skewers a Must-Try?

Effortless Elegance: With just three ingredients, creating these skewers is a breeze – the perfect solution for busy summer days.
Bold Flavor: The juicy sweetness of the melon beautifully balances the rich, salty notes of prosciutto.
Versatile Appeal: Serve them as a delightful appetizer at your next BBQ or enjoy them as a light snack by the pool!
Culinary Twist: Add fresh herbs or a drizzle of olive oil and balsamic vinegar for an elevated experience! You’ll also love making Coconutty Beans and Greens Stew for a heartier option.
Chill Factor: Prepare them ahead and keep them chill for that refreshing summer treat that everyone will adore!

Prosciutto and Melon Skewers Ingredients

• Discover the simple components for delicious Prosciutto and Melon Skewers Appetizers.

For the Skewers

  • Cantaloupe or Honeydew Melon – Choose ripe melons for optimal sweetness; any seasonal melon works beautifully.
  • Thinly Sliced Prosciutto – The rich, salty flavor perfectly complements the melon’s sweetness; substitute with Parma or Spanish jamón if needed.
  • Fresh Basil Leaves (Optional) – Adds a fresh, herbaceous note; omit if unavailable or switch to mint for a different flair.

For Assembly

  • Skewers (Wooden or Metal) – Essential for creating the skewers; soak wooden skewers for 10 minutes to prevent burning.

Optional Enhancements

  • Olive Oil and Balsamic Vinegar – Drizzle these for added depth and flavor; they’re great options to elevate your appetizer experience.

Step‑by‑Step Instructions for Prosciutto and Melon Skewers Appetizers

Step 1: Prepare the Ingredients
Begin by washing your cantaloupe or honeydew melon thoroughly. Using a sharp knife, slice the melon in half and remove the seeds. Carefully cut the flesh into bite-sized cubes, aiming for pieces around 1-inch in size for easy assembly. If you’re using fresh basil leaves, rinse and gently pat them dry. Set all prepared ingredients aside to streamline the assembly process.

Step 2: Assemble the Skewers
Grab your wooden or metal skewers and start threading the delicious components. Begin with a piece of melon, followed by a slice of thinly sliced prosciutto. If you’re adding basil for an aromatic twist, place a leaf between the melon and prosciutto. Continue this pattern until the skewer is full, leaving a bit of space at each end for easier handling. Aim to make about 4-5 skewers, depending on your gatherings.

Step 3: Arrange and Chill
Once your prosciutto and melon skewers are fully assembled, place them neatly on a platter. For the freshest taste, cover the platter with plastic wrap and chill in the refrigerator for at least 15 minutes. This chilling time enhances the flavors and ensures the skewers are refreshingly cool when served. Keep an eye on the time, as these are best enjoyed when served cold.

Step 4: Final Touches
If you opted for the optional enhancements, drizzle a light touch of olive oil and balsamic vinegar over the skewers just before serving. This adds a rich depth of flavor that complements the sweet and savory taste of the prosciutto and melon skewers. Make sure to do this right before presenting the dish to maintain the freshness of the ingredients.

Step 5: Serve and Enjoy
With your prosciutto and melon skewers appetizer beautifully chilled and dressed, it’s time to serve them to your guests. Arrange them on a larger serving platter or individual plates, garnished with a few extra basil leaves for an inviting touch. The colorful presentation and delicious taste will surely be a hit, making these easy appetizers a perfect choice for any summer gathering.

What to Serve with Prosciutto and Melon Skewers

Pair these delightful appetizers with equally refreshing sides to create a lovely summer dining experience that sings with flavor.

  • Creamy Burrata: The rich, creamy texture of burrata beautifully complements the lightness of the skewers, adding a luscious touch to each bite.

  • Arugula Salad: A peppery arugula salad tossed with lemon vinaigrette provides a delightful contrast to the sweet and savory notes of the skewers.

  • Grilled Vegetables: The smoky flavors of grilled zucchini and bell peppers bring depth and an earthy touch, balancing the sweetness of the melon.

  • Chilled White Wine: A crisp Sauvignon Blanc elevates the meal, enhancing the savory notes of the prosciutto and refreshing palate after each bite.

  • Herbed Focaccia: Soft, herb-infused focaccia makes for a wonderful contrast in texture, allowing you to scoop up any leftover melon or prosciutto.

  • Cucumber Mint Cooler: A refreshing cucumber mint cooler is perfect for quenching thirst while echoing the fresh elements of your rustic skewers.

Share these additional touches with your prosciutto and melon skewers for a warm summer gathering, and watch as your guests marvel over the delightful medley of flavors!

Make Ahead Options

These Prosciutto and Melon Skewers are a fantastic option for meal prep enthusiasts! You can prepare the melon by cutting it into bite-sized cubes up to 24 hours in advance, and it’s best to do this in a sealed container in the refrigerator to maintain freshness and prevent browning. The prosciutto can also be pre-sliced and stored in an airtight container for added convenience. When you're ready to serve, simply assemble your skewers by alternating the melon and prosciutto, adding basil if desired. Chill them again briefly before serving for that perfect, refreshing taste! Enjoy effortless entertaining with these delightful appetizers that are just as delicious, even when prepped ahead!

Prosciutto and Melon Skewers Variations

Feel free to get creative with these delicious skewers and make them your own!

  • Fruit Fusions: Mix in strawberries or figs for a delightful burst of sweetness that complements the prosciutto beautifully. You may discover a favorite combination you never imagined!

  • Cheesy Layers: Add mozzarella balls or mild goat cheese between the melon and prosciutto for a creamy texture twist. This addition makes for an indulgent and satisfying bite.

  • Herb Switch: Swap fresh basil for mint or thyme to give your skewers a refreshing spin. Both herbs bring a lovely aromatic quality that partners nicely with the sweet and savory elements.

  • Spicy Kick: A sprinkle of crushed red pepper flakes can rev up the heat and add an exciting contrast to the flavors. This twist is perfect for those who love a bit of spice!

  • Mediterranean Touch: Drizzle with yogurt sauce seasoned with lemon juice and garlic for an extra layer of creamy goodness. This Mediterranean-style enhancement is sure to impress at any gathering.

  • Nutty Crunch: Toss some chopped pistachios or almonds on top for an unexpected crunch and depth of flavor. Plus, it adds a nice visual appeal!

  • Savory Glaze: Brush with a homemade balsamic reduction for an elegant finish that enhances every bite. It’s a fantastic way to elevate your appetizer to gourmet status!

  • Zesty Drizzle: Try squeezing fresh lime juice over the skewers just before serving. This adds a zesty brightness that perfectly balances the richness of the prosciutto!

For a heartier option, pair your skewers with Chipotle Lime Chicken or enjoy a bowl of Chickpea Spinach Curry. Your summer gatherings will surely be unforgettable!

Expert Tips for Prosciutto and Melon Skewers Appetizers

  • Select Ripe Melons: Choose melons that are fragrant and slightly soft to the touch for maximum sweetness; avoid any that feel overly mushy or have bruises.

  • Perfectly Cut Prosciutto: Always use thinly sliced prosciutto to ensure it easily wraps around the melon and doesn’t overpower the flavors, creating harmony in your prosciutto and melon skewers appetizers.

  • Prep Ahead of Time: Assemble the skewers ahead of time, but wait to drizzle olive oil and balsamic vinegar until just before serving for the freshest taste.

  • Chill for Refreshment: For a truly refreshing experience, chill the assembled skewers in the refrigerator for at least 15 minutes before serving.

  • Experiment with Flavors: Try adding other seasonal fruits or cheeses to diversify your skewers; offering variety will engage your guests and enhance their enjoyment!

How to Store and Freeze Prosciutto and Melon Skewers

  • Fridge: Store assembled skewers in an airtight container in the refrigerator for up to 1 day. This helps maintain their freshness and flavor until you're ready to serve.

  • Freezer: It's not advisable to freeze prosciutto and melon skewers, as the texture of the melon deteriorates and the prosciutto may become too salty. Enjoy fresh for the best experience!

  • Reheating: Serve these skewers chilled or at room temperature; do not heat them as they are meant to be refreshing summer appetizers.

  • Leftovers: If you have leftover ingredients, keep the melon and prosciutto stored separately in the fridge for up to 2 days to use in salads or other dishes instead of freezing.

Prosciutto and Melon Skewers Recipe FAQs

How do I choose the best melon for my skewers?
Absolutely! Opt for ripe cantaloupe or honeydew melons that feel slightly soft to the touch and have a sweet aroma. Avoid melons with bruises or dark spots all over. If you're uncertain, give it a gentle squeeze; it should yield slightly but not feel overly mushy. Seasonal varieties always yield the best flavors!

How should I store leftover prosciutto and melon skewers?
Very! If you have leftover skewers, pop them into an airtight container and store them in the refrigerator for up to 1 day. This will help maintain their freshness. Be sure to keep them covered to avoid drying out. If you prefer not to serve them immediately, it's best to assemble them fresh when you're ready!

Can I freeze prosciutto and melon skewers?
No, it's not advisable to freeze these skewers. Freezing can lead to a mushy texture in the melon and the prosciutto might become overly salty. I recommend enjoying them fresh for the best taste! If you have leftover melon and prosciutto, store them separately in the fridge for a couple of days instead.

What should I do if my prosciutto is too salty?
Not to worry! If your prosciutto seems excessively salty, you can cut through that by pairing it with even sweeter melon chunks. Additionally, try incorporating a drizzle of olive oil or balsamic vinegar over the skewers, which can help balance the flavors beautifully.

Can I use different herbs for my skewers?
Absolutely! While fresh basil adds a lovely herbal note, you can switch it up with mint for a refreshing twist. Other delightful options include arugula or even cilantro for a surprising flavor that contrasts with the sweetness of the melon. The more the merrier!

Is this recipe suitable for people with dietary restrictions?
Yes! The basic ingredients in prosciutto and melon skewers are gluten-free and dairy-free, making them a versatile choice. However, always check to ensure there aren’t any cross-contamination concerns with specific brands; for instance, select a gluten-free prosciutto to keep it safe for those with gluten sensitivities.

Prosciutto and Melon Skewers Appetizers

Savory Prosciutto and Melon Skewers Appetizers for Summer Fun

Enjoy these Prosciutto and Melon Skewers Appetizers, a no-cook delight perfect for summer gatherings!
Print Recipe Pin Recipe
Prep Time 15 minutes mins
Chilling Time 15 minutes mins
Total Time 30 minutes mins
Servings: 4 skewers
Course: Appetizers
Calories: 100
Ingredients Equipment Method Nutrition Notes

Ingredients
  

For the Skewers
  • 1 medium cantaloupe or honeydew melon Choose ripe melons for optimal sweetness.
  • 4 ounces thinly sliced prosciutto Substitute with Parma or Spanish jamón if needed.
  • 10 leaves fresh basil leaves Optional; omit if unavailable or switch to mint.
For Assembly
  • 5 wooden or metal skewers Soak wooden skewers for 10 minutes to prevent burning.
Optional Enhancements
  • 2 tablespoons olive oil Drizzle for added depth and flavor.
  • 2 tablespoons balsamic vinegar Great option to elevate your appetizer experience.

Equipment

  • Skewers

Method
 

Step-by-Step Instructions
  1. Wash your cantaloupe or honeydew melon thoroughly. Slice the melon in half and remove the seeds. Cut the flesh into 1-inch cubes.
  2. Grab your skewers and start threading: begin with a piece of melon, followed by a slice of prosciutto. Add basil if using. Continue this pattern until the skewer is full.
  3. Place the assembled skewers on a platter, cover, and chill in the refrigerator for at least 15 minutes.
  4. Before serving, drizzle olive oil and balsamic vinegar over the skewers for extra flavor.
  5. Serve the skewers on a platter, garnished with extra basil leaves.

Nutrition

Serving: 1skewerCalories: 100kcalCarbohydrates: 10gProtein: 5gFat: 6gSaturated Fat: 2gPolyunsaturated Fat: 0.5gMonounsaturated Fat: 3.5gCholesterol: 15mgSodium: 400mgPotassium: 200mgFiber: 1gSugar: 5gVitamin A: 500IUVitamin C: 15mgCalcium: 20mgIron: 0.5mg

Notes

Freshness is key; serve cold for best enjoyment. Experiment with additional ingredients for variety.

Tried this recipe?

Let us know how it was!

Deliciously Fluffy Orange Rolls Made from Scratch at Home

December 19, 2025 by Grace Snow Leave a Comment

As I pulled the warm, fluffy orange rolls from the oven, the sweet, citrusy aroma enveloped my kitchen like a sunny afternoon. These delightful treats are not just a breakfast option; they’re a hug in pastry form, perfect for elevating any morning or special occasion. My homemade orange rolls, made from scratch, showcase a beautiful marriage of sweet dough and zesty orange flavors that will have everyone reaching for seconds. Beyond their mouthwatering taste, these rolls are a breeze to whip up and make an impressive centerpiece for holiday gatherings or lazy weekend brunches. Are you ready to fill your home with irresistible scents and create memories around the breakfast table? Let’s get rolling!

Why Are Orange Rolls So Irresistible?

Fluffy Texture: These homemade orange rolls are light and airy, achieving that perfect bakery-style fluffiness right in your own kitchen.

Bursting Citrus Flavor: Each roll is infused with vibrant orange zest and juice, bringing a refreshing brightness to every bite that will have your taste buds dancing.

Quick Preparation: With a straightforward dough recipe that’s surprisingly easy to make, you can enjoy these sweet delights without spending hours in the kitchen.

Perfect for Any Occasion: Whether for a festive brunch or a cozy family breakfast, these rolls are a hit with everyone, making them a must-try treat.

Endless Variations: Experiment with different flavors by swapping in lemon or chocolate chips—each twist offers a delightful surprise that's sure to impress!

Get ready to impress your friends and family with these delicious, homemade orange rolls; they’re bound to become a staple in your breakfast lineup!

Orange Rolls Ingredients

• Make sure to gather these staples for your homemade orange rolls!

For the Dough

  • Warm Water – This activates the instant yeast, ensuring your rolls rise beautifully.
  • Instant Yeast – The key to fluffy texture; don't use active dry yeast for this recipe.
  • Large Egg & Egg Yolk – Adds richness and moisture, keeping your rolls soft and delightful.
  • Unsalted Butter – This enhances flavor and moisture; melted, it blends seamlessly into the dough.
  • Whole Milk – The creaminess contributes to a rich dough; steer clear of low-fat alternatives for the best taste.
  • Granulated Sugar – Essential for both sweetness and creating that perfect texture within the rolls.
  • Salt – Amplifies flavor; use half if substituting with kosher salt.
  • All-Purpose Flour – Formulated for structure; weighing for accuracy is key to successful baking.

For the Filling

  • Oranges (2-3) – Fresh, organic oranges provide both zest and juice for a vibrant citrus burst.
  • Additional Sugar – Sweetens the filling, balancing the tart orange flavor perfectly.
  • Melted Butter – Helps achieve an ooey-gooey filling that's irresistible!

For the Glaze

  • Powdered Sugar – Creates a sweet, smooth glaze that complements your orange rolls perfectly.
  • Orange Juice – Adds a touch of citrus brightness to the glaze; it’s vital for that tangy finish.

Now that you have your ingredients ready, it’s time to roll up your sleeves and create these heavenly homemade orange rolls that everyone will adore!

Step‑by‑Step Instructions for Orange Rolls

Step 1: Dough Preparation
In a large mixing bowl, combine 1 cup of warm water (about 110°F) and 2 ¼ teaspoons of instant yeast, letting it sit until foamy, about 5 minutes. Gradually stir in ¼ cup of melted unsalted butter, ½ cup of whole milk, 1 large egg, 1 egg yolk, ½ cup of granulated sugar, the zest of 1 orange, and 1 teaspoon of salt. Slowly add in 3 to 4 cups of all-purpose flour until the mixture forms a soft dough.

Step 2: Kneading & First Rise
Dust your clean work surface with flour, and turn out the dough. Knead for about 8-10 minutes until smooth and elastic. The dough should be slightly sticky but not too wet. Form the dough into a ball and place it in a lightly greased bowl, covering it with plastic wrap. Let it rise in the refrigerator for 8 to 24 hours, or until it doubles in size.

Step 3: Filling Preparation
While the dough is rising, prepare the orange filling. In a small bowl, mix together ¼ cup of melted butter, ½ cup of granulated sugar, the juice of 1 orange, and the zest of 1 orange until well combined. The mixture should be smooth and sweetly aromatic, enticing you with its citrus scent.

Step 4: Rolling & Cutting
After the dough has risen, gently punch it down and turn it out onto a floured surface. Roll out the dough into a rectangle, about ¼ inch thick. Evenly spread the orange filling across the surface, ensuring to cover all corners. Using a sharp knife, slice the dough into 1-inch wide strips, then roll each strip tightly into a spiral shape, securing the filling inside.

Step 5: Final Rise
Arrange the rolled orange pieces into a well-buttered muffin pan, spacing them apart to allow for expansion. Cover the pan with a clean kitchen towel and let the rolls rise in a warm area until they double in size, which should take about 30-45 minutes. As they rise, preheat your oven to 350°F (175°C) for baking.

Step 6: Baking
Once the rolls have doubled, place the muffin pan into the preheated oven. Bake for about 15-20 minutes, or until the tops are lightly golden brown and the rolls are puffed. To check for doneness, gently tap the top of the rolls; if they sound hollow, they are ready to come out of the oven.

Step 7: Glazing
While the orange rolls are baking, prepare the glaze by whisking together 1 cup of powdered sugar and enough orange juice to achieve a smooth, pourable consistency. Once the rolls are out of the oven, immediately invert them onto a serving plate and drizzle with the orange glaze, allowing it to seep into the warm rolls for the ultimate sweet finish.

Expert Tips for Orange Rolls

  • Proper Yeast Activation: Ensure the warm water is around 110°F for optimal yeast activation. If it's too hot, you'll kill the yeast, resulting in flat rolls.

  • Flour Measurement: Always weigh your all-purpose flour for the most accurate results. Too much flour can lead to dry, dense orange rolls.

  • Right Dough Texture: The dough should be slightly sticky. If it’s too dry, your rolls will not rise properly. Add flour gradually until the right consistency is achieved.

  • Final Rise Importance: Allow the rolls to rise until they double in size before baking. Skipping this step can yield tough or dense orange rolls.

  • Glazing Tip: Glaze your rolls immediately after pulling them from the oven for a delicious, gooey finish. The warmth helps the glaze soak in!

What to Serve with Fluffy Homemade Orange Rolls

Brighten your breakfast table with delicious pairings that complement the sweet citrus of these irresistible orange rolls.

  • Creamy Butter: A dollop of creamy butter enhances the sweetness, creating a rich spread that melts into each warm roll.

  • Fresh Fruit Salad: A mix of berries and citrus provides a refreshing contrast to the sweet rolls, balancing flavors beautifully.

  • Savory Breakfast Casserole: The rich, cheesy elements of a breakfast casserole pair wonderfully, making for a hearty brunch experience.

  • Hot Coffee or Tea: The aromatic warmth of coffee or a soothing herbal tea enhances the rolls, creating a comforting morning ritual.

  • Scrambled Eggs: Fluffy scrambled eggs add a savory touch, ensuring a satisfying and well-rounded meal.

  • Yogurt Parfait: Layering yogurt with granola and fruit offers a delightful crunch and tartness that complements the sweet rolls.

  • Maple Syrup: Drizzling pure maple syrup over the rolls elevates their sweetness and adds depth to their flavor profile.

  • Chocolate Hazelnut Spread: For the adventurous, spread a thin layer of chocolate hazelnut spread to introduce a luscious twist that pairs astonishingly well.

  • Glass of Fresh Orange Juice: A chilled glass of orange juice brightens the table and reinforces the natural orange flavor of the rolls.

  • Cinnamon Roll Icing: For those who love a bit more sweetness, a swirl of cinnamon roll icing adds decadence and a delightful finish.

Orange Rolls: Delicious Variations & Substitutions

Feel free to let your creativity shine as you customize these delightful orange rolls to suit your preferences!

  • Lemon Rolls: Swap orange zest and juice for freshly zested lemons for a bright, tangy alternative that's refreshing and equally scrumptious.
    The tartness of lemon pairs beautifully with a sweet glaze, creating a delightful twist that will awaken your palate.

  • Chocolate-Orange Fusion: Add chocolate chips to the filling to create a decadent chocolate-orange roll.
    The rich chocolate elevates the brightness of the orange, creating a mouthwatering combination that’s hard to resist.

  • Nutty Orange Rolls: Incorporate chopped walnuts or pecans into the filling for added crunch.
    This twist brings a delightful texture contrast, making your rolls even more satisfying and bite-worthy.

  • Spicy Zing: For those who crave a little heat, add a pinch of cayenne pepper to the filling or the glaze.
    The heat will beautifully complement the sweetness of the orange, giving your rolls an unexpected kick.

  • Vegan-Friendly: Substitute the egg with flaxseed meal or a chia seed mixture and replace the milk with almond or oat milk.
    You can still enjoy soft, fluffy rolls without compromising on taste or texture!

  • Gluten-Free: Use a gluten-free all-purpose flour blend to make these rolls gluten-free.
    The fluffy texture can still be achieved, so everyone can partake in this delicious treat!

  • Cinnamon Swirl: Mix in a cinnamon-sugar blend into the filling for a cinnamon-orange roll variation.
    The warm, aromatic spices will enhance the orange flavor, creating a comforting treat perfect for chilly mornings.

For more creative baking ideas, check out my posts on baking tips or discover other sweet breakfast treats to make your mornings even more delightful. Enjoy experimenting with these variations!

Make Ahead Options

These fluffy homemade orange rolls are perfect for meal prep, allowing you to enjoy them on busy mornings with minimal effort! You can prepare the dough in advance and refrigerate it for up to 24 hours; just make sure to cover it tightly to maintain moisture. Alternatively, you can roll the filled orange rolls, place them in a greased muffin pan, and refrigerate them for up to 3 days before baking. This way, they’ll be ready to rise before baking. When it’s time to enjoy your delicious orange rolls, simply take them out, let them rise for 30-45 minutes, and bake as directed, ensuring you have warm, fresh rolls that are just as delightful!

How to Store and Freeze Orange Rolls

Fridge: Store leftover orange rolls in an airtight container for up to 3 days. They are best enjoyed fresh, but refrigeration can help maintain their softness.

Freezer: Wrap individual orange rolls tightly in plastic wrap or aluminum foil, and place them in a freezer-safe bag for up to 2 months. This ensures the rolls stay moist and delicious.

Reheating: To enjoy frozen rolls, thaw them overnight in the fridge, then let them rise at room temperature for about 30 minutes before baking at 350°F for 10-15 minutes until warmed through.

Make-Ahead Tip: If you wish to prepare your orange rolls ahead of time, you can freeze the unbaked rolled dough. Just shape the rolls, freeze them on a baking sheet, and then transfer to a freezer-safe bag for up to 2 months.

Homemade Orange Rolls Recipe FAQs

How do I select the best oranges for my orange rolls?
Absolutely! Choose fresh, organic oranges for the best flavor. Look for oranges that are firm with smooth skin and without dark spots; these are signs of freshness. The vibrant color and a little give when squeezed indicate juiciness, perfect for zesting and juicing.

What’s the best way to store leftover orange rolls?
Very good question! Store leftover orange rolls in an airtight container at room temperature for up to 3 days. If you find they dry out, reheating them briefly in the microwave can help restore their fluffiness. Enjoy them fresh for the best taste!

Can I freeze orange rolls, and how should I do it?
Yes, you can! To freeze orange rolls, wrap each cooled roll tightly in plastic wrap or aluminum foil and place them in a freezer-safe bag. They can be frozen for up to 3 months. When you're ready to enjoy, simply thaw them overnight in the fridge and allow them to rise at room temperature for about 30 minutes before baking.

My orange rolls didn’t rise enough, what went wrong?
Oh, don’t worry! If your orange rolls didn’t rise as expected, it’s often due to inactive yeast. Ensure your water is warm but not too hot (about 110°F) to activate the yeast. Additionally, if the dough was too dry or the rising time wasn’t long enough, it can also affect the fluffiness. Next time, try measuring your flour accurately and be patient during the rising phase.

Are orange rolls suitable for those with dietary restrictions?
Good question! These orange rolls contain gluten and dairy, which may not suit everyone’s diet. If you wish to make a gluten-free version, you can substitute all-purpose flour with a 1:1 gluten-free baking flour blend. For dairy-free options, use plant-based milk and dairy-free butter to maintain the texture and flavor. Always check for any allergies with your ingredients!

How can I decorate my orange rolls for special occasions?
What a lovely idea! You can top your orange rolls with additional glaze or sprinkle them with citrus zest before serving. Adding fresh mint leaves for garnish also brings a lovely touch. If you want some extra flair, consider serving them on a beautiful platter with orange slices or edible flowers for a festive presentation.

Orange Rolls

Deliciously Fluffy Orange Rolls Made from Scratch at Home

These homemade orange rolls are fluffy and bursting with citrus flavor, perfect for breakfast or any special occasion.
Print Recipe Pin Recipe
Prep Time 20 minutes mins
Cook Time 20 minutes mins
Resting Time 12 hours hrs
Total Time 12 hours hrs 40 minutes mins
Servings: 12 rolls
Course: Breakfast
Cuisine: American
Calories: 250
Ingredients Equipment Method Nutrition Notes

Ingredients
  

Dough Ingredients
  • 1 cup Warm Water about 110°F
  • 2.25 teaspoons Instant Yeast
  • 1 large Egg
  • 1 large Egg Yolk
  • 0.25 cup Unsalted Butter melted
  • 0.5 cup Whole Milk
  • 0.5 cup Granulated Sugar
  • 1 teaspoon Salt
  • 3-4 cups All-Purpose Flour for dusting
Filling Ingredients
  • 2-3 pieces Oranges fresh, organic
  • 0.25 cup Additional Sugar
  • 0.25 cup Melted Butter
Glaze Ingredients
  • 1 cup Powdered Sugar
  • to taste cup Orange Juice for consistency

Equipment

  • Mixing Bowl
  • Muffin Pan
  • Whisk
  • Rolling Pin
  • Sharp Knife

Method
 

Dough Preparation
  1. In a large mixing bowl, combine warm water and instant yeast, letting it sit until foamy, about 5 minutes.
  2. Gradually stir in melted butter, whole milk, egg, egg yolk, granulated sugar, zest of 1 orange, and salt.
  3. Slowly add in all-purpose flour until the mixture forms a soft dough.
Kneading & First Rise
  1. Turn out the dough onto a floured surface and knead for about 8-10 minutes until smooth and elastic.
  2. Form the dough into a ball, place in a greased bowl, cover with plastic wrap, and let it rise in the refrigerator for 8 to 24 hours.
Filling Preparation
  1. In a small bowl, mix melted butter, additional sugar, juice of 1 orange, and zest of 1 orange until well combined.
Rolling & Cutting
  1. After the dough has risen, gently punch it down and turn it out onto a floured surface.
  2. Roll out the dough into a rectangle, about ¼ inch thick and spread the orange filling evenly across.
  3. Slice the dough into 1-inch wide strips and roll each strip tightly into a spiral shape.
Final Rise
  1. Place the rolled orange pieces into a well-buttered muffin pan, cover with a towel, and let them rise until doubled in size, about 30-45 minutes.
  2. Preheat your oven to 350°F (175°C) during this time.
Baking
  1. Bake in the preheated oven for about 15-20 minutes until the tops are golden brown and rolls are puffed.
  2. Tap the top of the rolls; if they sound hollow, they're ready.
Glazing
  1. Whisk together powdered sugar and enough orange juice for a smooth, pourable consistency.
  2. Invert the rolls onto a serving plate and drizzle with the glaze.

Nutrition

Serving: 1rollCalories: 250kcalCarbohydrates: 35gProtein: 3gFat: 12gSaturated Fat: 7gCholesterol: 30mgSodium: 150mgPotassium: 50mgFiber: 1gSugar: 12gVitamin A: 400IUVitamin C: 20mgCalcium: 50mgIron: 1mg

Notes

For accurate results, weigh all-purpose flour and ensure the water temperature is perfect for yeast activation.

Tried this recipe?

Let us know how it was!

Decadent Chocolate Raspberry Cupcakes You Must Try Today

December 19, 2025 by Grace Snow Leave a Comment

As I stood in my kitchen, the enticing aroma of melting chocolate enveloped me, instantly reminding me of special moments shared over decadent desserts. Today, I’m excited to share my recipe for Chocolate Raspberry Cupcakes—these delightful treats are an exquisite blend of rich dark chocolate and the vibrant tartness of fresh raspberries. Perfect for impressing your loved ones on Valentine’s Day, they’re not only a crowd-pleaser but incredibly easy to whip up, making them an ideal choice for both seasoned bakers and novices. With a luscious ganache filling and a light raspberry buttercream frosting, these cupcakes deliver a delightful contrast of flavors that will have you craving just one more. Curious how to bring this sweet creation to life? Let’s dive in!

Why not try these cupcakes today?

Decadence at Its Finest: These Chocolate Raspberry Cupcakes are a luxurious treat that will leave you and your guests craving more.

Sweet and Tart Harmony: The vibrant raspberry filling perfectly balances the rich chocolate, making each bite a delightful experience.

Easy to Make: Whether you're an experienced chef or a beginner, the straightforward steps ensure you’ll achieve bakery-quality results without the stress.

Impressive Presentation: Topped with fluffy raspberry buttercream and garnished with fresh raspberries, they add a touch of elegance to any occasion.

Versatile Treat: Perfect for special occasions like Valentine’s Day or as a comforting dessert with your afternoon tea.

Elevate your dessert game and explore the delightful world of Homemade Hot Chocolate to complement these scrumptious cupcakes!

Chocolate Raspberry Cupcake Ingredients

• Prepare for baking these delicious Chocolate Raspberry Cupcakes with this essential ingredient list!

For the Cupcakes

  • All-Purpose Flour – Provides structure to the cupcakes. Ensure flour is spooned and leveled for accuracy.
  • Dutch Process Cocoa Powder – Adds deep chocolate flavor. Regular cocoa powder can be used as a substitute.
  • Baking Powder & Baking Soda – Leavening agents that help cupcakes rise.
  • Salt – Enhances flavor and balances sweetness.
  • Espresso Powder (optional) – Intensifies chocolate flavor. Can be omitted if not available.
  • Unsalted Butter – Adds moisture and richness. Should be softened to room temperature.
  • Granulated Sugar – Sweetens the batter and contributes to texture.
  • Egg & Egg Yolk – Provide moisture and structure; should be at room temperature.
  • Vanilla Extract – Adds flavor depth to the batter.
  • Whole Milk & Sour Cream – Contributes to moistness and crumb texture. All dairy should be at room temperature.

For the Ganache

  • Semi-Sweet Chocolate – Provides rich chocolate flavor. Chopped chocolate should be evenly sized for melting.
  • Heavy Cream – Creates a smooth chocolate mixture when heated.
  • Raspberry Preserves – Adds fruity flavor and moisture.

For the Buttercream

  • Freeze-Dried Raspberries – Provides tart raspberry flavor; must be ground to a fine powder. Can be omitted if preferred.
  • Powdered Sugar – Sweetens the buttercream and gives it the right consistency.

With these key ingredients, your journey to creating the ultimate Chocolate Raspberry Cupcakes will be both enjoyable and rewarding!

Step‑by‑Step Instructions for Chocolate Raspberry Cupcakes

Step 1: Preheat the Oven
Begin by preheating your oven to 350°F (175°C). While the oven heats up, line a standard cupcake pan with cupcake liners. This is a crucial step to ensure your Chocolate Raspberry Cupcakes bake evenly and achieve that perfect tender crumb.

Step 2: Mix Dry Ingredients
In a large mixing bowl, sift together the all-purpose flour, Dutch process cocoa powder, baking powder, baking soda, salt, and optional espresso powder. This helps incorporate air into your dry ingredients and prevents lumps, setting the stage for a light and fluffy cupcake. Once combined, set this mixture aside for now.

Step 3: Cream Butter and Sugar
In another bowl, use an electric mixer to cream the softened unsalted butter and granulated sugar together until the mixture becomes light and fluffy, which should take about 3-4 minutes. This step is essential for achieving the right texture in your Chocolate Raspberry Cupcakes, so be patient and watch for a pale, airy consistency.

Step 4: Add Wet Ingredients
Next, incorporate the room temperature egg, egg yolk, and vanilla extract into the creamed butter and sugar. Mix well until fully combined and smooth. Afterward, gently blend in the whole milk and sour cream until the batter is velvety and uniform, ensuring your cupcakes remain moist and delicious.

Step 5: Combine Dry and Wet Mixtures
Carefully add the dry ingredient mixture to the wet ingredients in three additions, mixing slowly until just combined. Be cautious not to overmix, as this can lead to dense cupcakes. Once combined, the batter should be glossy and smooth, filled with rich chocolate flavor ready to scoop.

Step 6: Fill Cupcake Liners
Using a cookie scoop or spoon, fill each cupcake liner about three-quarters full with the batter. This should ensure that your Chocolate Raspberry Cupcakes have enough room to rise beautifully during baking. Place the cupcake pan in the preheated oven and bake for 17-20 minutes, or until a toothpick inserted into the center comes out clean.

Step 7: Cool the Cupcakes
After baking, remove the cupcake pan from the oven and let it cool in the pan for about 10 minutes. This will allow the cupcakes to firm up slightly and makes it easier for you to transfer them. Once cooled, gently lift the cupcakes out of the pan and place them on a wire rack to cool completely.

Step 8: Prepare the Ganache
For the decadent ganache, heat the heavy cream in a saucepan over medium heat until it just starts to simmer. Pour the hot cream over the chopped semi-sweet chocolate in a bowl, allowing it to sit for a minute before stirring until melted and smooth. Mix in the raspberry preserves for that luscious fruity flavor, then let it cool slightly before transferring to a piping bag.

Step 9: Make the Buttercream
To prepare the raspberry buttercream, beat the softened unsalted butter in a mixing bowl until pale and fluffy. Gradually add powdered sugar and the ground freeze-dried raspberries. Continue to mix until light and fluffy, ensuring a creamy texture that will beautifully top each cupcake and complement the chocolate.

Step 10: Assemble the Cupcakes
Once the cupcakes have completely cooled, use a cupcake corer or a small knife to remove a portion from the center of each cupcake. Pipe a generous amount of the raspberry chocolate ganache into the hollowed core, filling it generously to create a delicious surprise in every bite.

Step 11: Frost and Garnish
Finally, use a piping bag fitted with your favorite tip to generously swirl the raspberry buttercream on top of each cupcake. For a finishing touch, garnish with a fresh raspberry on top of each swirled cupcake to add color and an extra hint of fruity flavor, creating an irresistible presentation.

Expert Tips for Chocolate Raspberry Cupcakes

  • Precise Measurements: Use the spoon-and-level method for flour to ensure accuracy. Too much flour can lead to dry cupcakes.

  • Room Temperature Ingredients: Always bring eggs, milk, and butter to room temperature. This helps create a smooth batter and prevents dense cupcakes.

  • Don’t Overmix: When combining wet and dry ingredients, mix until just combined. Overmixing can result in tough cupcakes instead of the light, fluffy texture you desire.

  • Cooling Time: Allow cupcakes to cool completely before filling and frosting. This prevents melting and sliding of the ganache and buttercream.

  • Effective Piping: For the ganache, allow it to cool to the right consistency before piping. If too warm, it may run out instead of holding its shape.

Chocolate Raspberry Cupcakes Variations & Substitutions

Feel free to get creative and make these delightful cupcakes your own with these simple swaps and twists!

  • Different Berries: Swap out raspberry preserves for strawberry or blueberry preserves for a delightful flavor twist. Each berry brings a unique sweetness and tartness, creating vibrant new combinations.

  • Gluten-Free: Substitute all-purpose flour with a gluten-free blend to make these cupcakes gluten-free, ensuring everyone can enjoy them without worry. Just keep in mind that the texture may vary slightly!

  • Dairy-Free: Use coconut or almond milk in place of whole milk and replace the unsalted butter with a dairy-free butter alternative for a delicious dairy-free treat. The hint of coconut will add a wonderful twist!

  • Chocolate Variation: For a richer chocolate flavor, replace some of the all-purpose flour with cocoa powder or use dark chocolate instead of semi-sweet for the ganache. This will deepen the chocolatey essence and create an indulgent experience.

  • Enhanced Flavor: Add a splash of orange or almond extract to the cupcake batter for an unexpected pop of flavor that complements the chocolate and raspberry beautifully. It’s a subtle change that could steal the show!

  • Cream Cheese Frosting: For a tangy contrast, substitute half the butter in the buttercream frosting with cream cheese. This indulgent twist brings an irresistible creaminess that pairs perfectly with the cupcake’s sweetness.

  • Spice It Up: If you like a bit of heat, add a pinch of cayenne pepper or cinnamon to the batter. This unexpected spice will add warmth, elevating the overall flavor profile to something truly special.

  • Choco-Chip Surprise: Fold chocolate chips into the cupcake batter for a gooey, fudge-like texture that plays off the raspberry and chocolate beautifully, adding an extra layer of yum!

Looking to warm up your kitchen and cozy up with a cup of homemade goodness? Why not explore the delightful world of Homemade Hot Chocolate too? It’s the perfect pairing for your delectable cupcakes!

What to Serve with Chocolate Raspberry Cupcakes

Indulging in these delightful treats goes beyond just savoring their rich flavors; pairing them perfectly elevates your experience to new heights.

  • Fresh Berries: The bright sweetness of strawberries or blueberries enhances the tartness of the cupcakes, creating a refreshing contrast.

  • Vanilla Ice Cream: A scoop of creamy vanilla ice cream provides a luxurious backdrop that complements the chocolate and raspberry flavors beautifully.

  • Espresso or Coffee: A cup of freshly brewed coffee or espresso deepens the rich taste, balancing the sweetness of the cupcakes while invigorating your senses.

  • Chocolate Milkshake: Pair these indulgent cupcakes with a thick chocolate milkshake for a nostalgic twist, making every bite an exciting treat!

  • Chocolate-Covered Strawberries: Decadent chocolate-covered strawberries add a touch of elegance and echo the flavors in the cupcakes for a luxurious dessert spread.

  • Whipped Cream: Light and airy whipped cream complements the cupcakes' rich texture, enhancing their overall experience while adding a touch of brightness.

  • Champagne or Prosecco: For a special celebration, a glass of bubbly pairs wonderfully, cutting through the sweetness and adding a festive spirit to your dessert.

  • Raspberry Sorbet: For a fruity burst, raspberry sorbet cleanses the palate between bites, bringing an extra pop of flavor to each mouthful.

  • Dark Chocolate Truffles: These rich bites bring more chocolate bliss, perfectly aligning with the cupcakes and inviting decadent indulgence for chocolate lovers.

  • Fruit Salad: A light, refreshing fruit salad with a mix of citrus and berries pairs well, providing a fresh contrast to the cupcakes’ sweetness.

Make Ahead Options

These Chocolate Raspberry Cupcakes are perfect for busy home cooks looking to save time without sacrificing flavor! You can bake the cupcakes up to 3 days in advance; simply allow them to cool completely before storing them in an airtight container at room temperature to maintain their moisture. The raspberry chocolate ganache and raspberry buttercream frosting can also be prepared up to 24 hours ahead and refrigerated separately; just make sure to bring them to room temperature before assembling. When you're ready to serve, core the cupcakes, fill them with ganache, and top with frosting for that freshly made taste that everyone loves. Enjoy the ease of prepped stages while still delivering a decadent dessert!

How to Store and Freeze Chocolate Raspberry Cupcakes

Room Temperature: Store leftover cupcakes in an airtight container for up to 3 days. This keeps them moist while preventing them from drying out.

Fridge: If you prefer, you can refrigerate the cupcakes for up to 5 days; just be sure to cover them tightly to maintain their deliciousness.

Freezer: For longer storage, freeze the unfilled cupcakes in an airtight container for up to 3 months. Thaw them in the fridge before filling and frosting.

Reheating: To enjoy chilled cupcakes, bring them to room temperature before serving or warm them slightly in the microwave for 10-15 seconds—ideal for a cozy treat!

Chocolate Raspberry Cupcakes Recipe FAQs

How do I choose ripe raspberries for this recipe?
Absolutely! When selecting fresh raspberries, look for berries that are plump, firm, and vibrant in color. Avoid any that are mushy or have dark spots, as these may be overripe or spoiled. If possible, try to pick raspberries that are fragrant; this indicates they're fresh and flavorful.

What’s the best way to store leftover cupcakes?
Store leftover Chocolate Raspberry Cupcakes in an airtight container at room temperature for up to 3 days. If you want to keep them longer, you can refrigerate them for up to 5 days, ensuring they’re well-covered to maintain that decadent taste.

Can I freeze these cupcakes? How?
Absolutely! To freeze Chocolate Raspberry Cupcakes, first, allow them to cool completely. Then, place the unfilled cupcakes in an airtight container or a zip-top freezer bag, ensuring as much air as possible is removed. They can be frozen for up to 3 months. When you're ready to enjoy them, simply thaw in the fridge overnight before filling and frosting.

What if my cupcakes turn out dense or gummy?
If your cupcakes are dense, it might be due to overmixing the batter. Always mix dry and wet ingredients until just combined; little lumps are okay! Another common culprit is using cold ingredients—ensure your eggs, milk, and butter are at room temperature for a light, airy texture. Finally, be cautious when measuring flour; use the spoon-and-level method for accuracy.

Can I make these cupcakes allergy-friendly?
Yes, you can! Consider using gluten-free flour as an alternative to all-purpose flour. For dairy-free options, use unsweetened almond milk or any plant-based butter substitute. Always check the ingredients of the raspberry preserves to ensure there are no allergens present. Adjusting recipes based on dietary needs can still lead to delicious results!

Chocolate Raspberry Cupcakes

Decadent Chocolate Raspberry Cupcakes You Must Try Today

Indulge in rich Chocolate Raspberry Cupcakes, a blend of dark chocolate and fresh raspberries that captivates any dessert lover.
Print Recipe Pin Recipe
Prep Time 25 minutes mins
Cook Time 20 minutes mins
Cooling Time 10 minutes mins
Total Time 55 minutes mins
Servings: 12 cupcakes
Course: Dessert
Cuisine: American
Calories: 320
Ingredients Equipment Method Nutrition Notes

Ingredients
  

For the Cupcakes
  • 1 cup All-Purpose Flour Ensure flour is spooned and leveled for accuracy.
  • 1/2 cup Dutch Process Cocoa Powder Regular cocoa powder can be used as a substitute.
  • 1 tsp Baking Powder
  • 1/2 tsp Baking Soda
  • 1/4 tsp Salt
  • 1 tsp Espresso Powder Optional; can be omitted if not available.
  • 1/2 cup Unsalted Butter Should be softened to room temperature.
  • 1 cup Granulated Sugar
  • 1 large Egg Should be at room temperature.
  • 1 large Egg Yolk Should be at room temperature.
  • 1 tsp Vanilla Extract
  • 1/2 cup Whole Milk Should be at room temperature.
  • 1/2 cup Sour Cream Should be at room temperature.
For the Ganache
  • 8 oz Semi-Sweet Chocolate Chopped evenly for melting.
  • 1/2 cup Heavy Cream
  • 1/4 cup Raspberry Preserves
For the Buttercream
  • 1/2 cup Freeze-Dried Raspberries Ground to a fine powder; can be omitted if preferred.
  • 2 cups Powdered Sugar

Equipment

  • Cupcake pan
  • Mixing bowls
  • Electric mixer
  • Saucepan
  • Baking liners
  • piping bags

Method
 

Step-by-Step Instructions
  1. Preheat your oven to 350°F (175°C) and line a standard cupcake pan with liners.
  2. In a large mixing bowl, sift together the all-purpose flour, Dutch cocoa powder, baking powder, baking soda, salt, and optional espresso powder. Set aside.
  3. Cream the softened butter and sugar in another bowl until light and fluffy, about 3-4 minutes.
  4. Add the egg, egg yolk, and vanilla extract to the creamed mixture, mixing until smooth. Then blend in the milk and sour cream until velvety.
  5. Carefully add the dry ingredients to the wet mixture in three additions, mixing slowly until just combined.
  6. Fill cupcake liners about three-quarters full with the batter, then bake for 17-20 minutes or until a toothpick comes out clean.
  7. Let the cupcakes cool in the pan for about 10 minutes before transferring them to a wire rack to cool completely.
  8. For the ganache, heat heavy cream until simmering, then pour over chopped chocolate and let sit before stirring until smooth. Mix in raspberry preserves.
  9. Beat the softened butter for the buttercream until fluffy, then gradually add the powdered sugar and ground raspberries until light and creamy.
  10. Once cooled, use a cupcake corer to remove some center from each cupcake and pipe the ganache into the hollow.
  11. Frost with raspberry buttercream and garnish with fresh raspberries for elegant presentation.

Nutrition

Serving: 1cupcakeCalories: 320kcalCarbohydrates: 44gProtein: 3gFat: 15gSaturated Fat: 9gPolyunsaturated Fat: 2gMonounsaturated Fat: 3gCholesterol: 50mgSodium: 150mgPotassium: 200mgFiber: 2gSugar: 25gVitamin A: 300IUVitamin C: 2mgCalcium: 50mgIron: 2mg

Notes

Key tips include using precise measurements and room temperature ingredients for best results. Allow cupcakes to cool completely before filling and frosting to prevent melting.

Tried this recipe?

Let us know how it was!
  • « Previous Page
  • 1
  • …
  • 71
  • 72
  • 73
  • 74
  • 75
  • …
  • 180
  • Next Page »

Welcome!

Hi, I’m Grace, a Sydney-based home cook with a passion for bold flavors and trending ingredients. Whether you’re a busy beginner or a seasoned foodie, you’ll find dishes here that are fresh, fun, and full of flavor.

More about me

Popular Recipes

  • Butter Pecan Cookies
    Irresistibly Soft Butter Pecan Cookies for Cozy Moments
  • Decadent Turtle Bars
    Decadent Turtle Bars: Indulge in Sweet Gooey Perfection
  • Salted Caramel Butter Bars
    Decadent Salted Caramel Butter Bars You Can't Resist
  • Easy Italian Pasta Salad
    Easy Italian Pasta Salad: A Summer Delight to Share

Footer

↑ back to top

About

  • Privacy Policy
  • Disclaimer
  • Terms & Conditions

Newsletter

  • Sign Up! for emails and updates

Contact

  • About me
  • Contact me

Copyright © 2025 TastyTrendIngredients