tastytrendingredients

  • Home
  • Recipes
    • Appetizers
    • Breakfast
    • Dessert
    • Dinner
    • Drinks
    • Salads
    • Snacks
    • Soups
  • About me
  • Contact me
menu icon
go to homepage
  • Home
  • Recipes
    • Appetizers
    • Breakfast
    • Dessert
    • Dinner
    • Drinks
    • Salads
    • Snacks
    • Soups
  • About me
  • Contact me
search icon
Homepage link
  • Home
  • Recipes
    • Appetizers
    • Breakfast
    • Dessert
    • Dinner
    • Drinks
    • Salads
    • Snacks
    • Soups
  • About me
  • Contact me
×

Creamy Garlic Sauce Potatoes for Comforting Flavor Bliss

February 12, 2026 by Grace Snow Leave a Comment

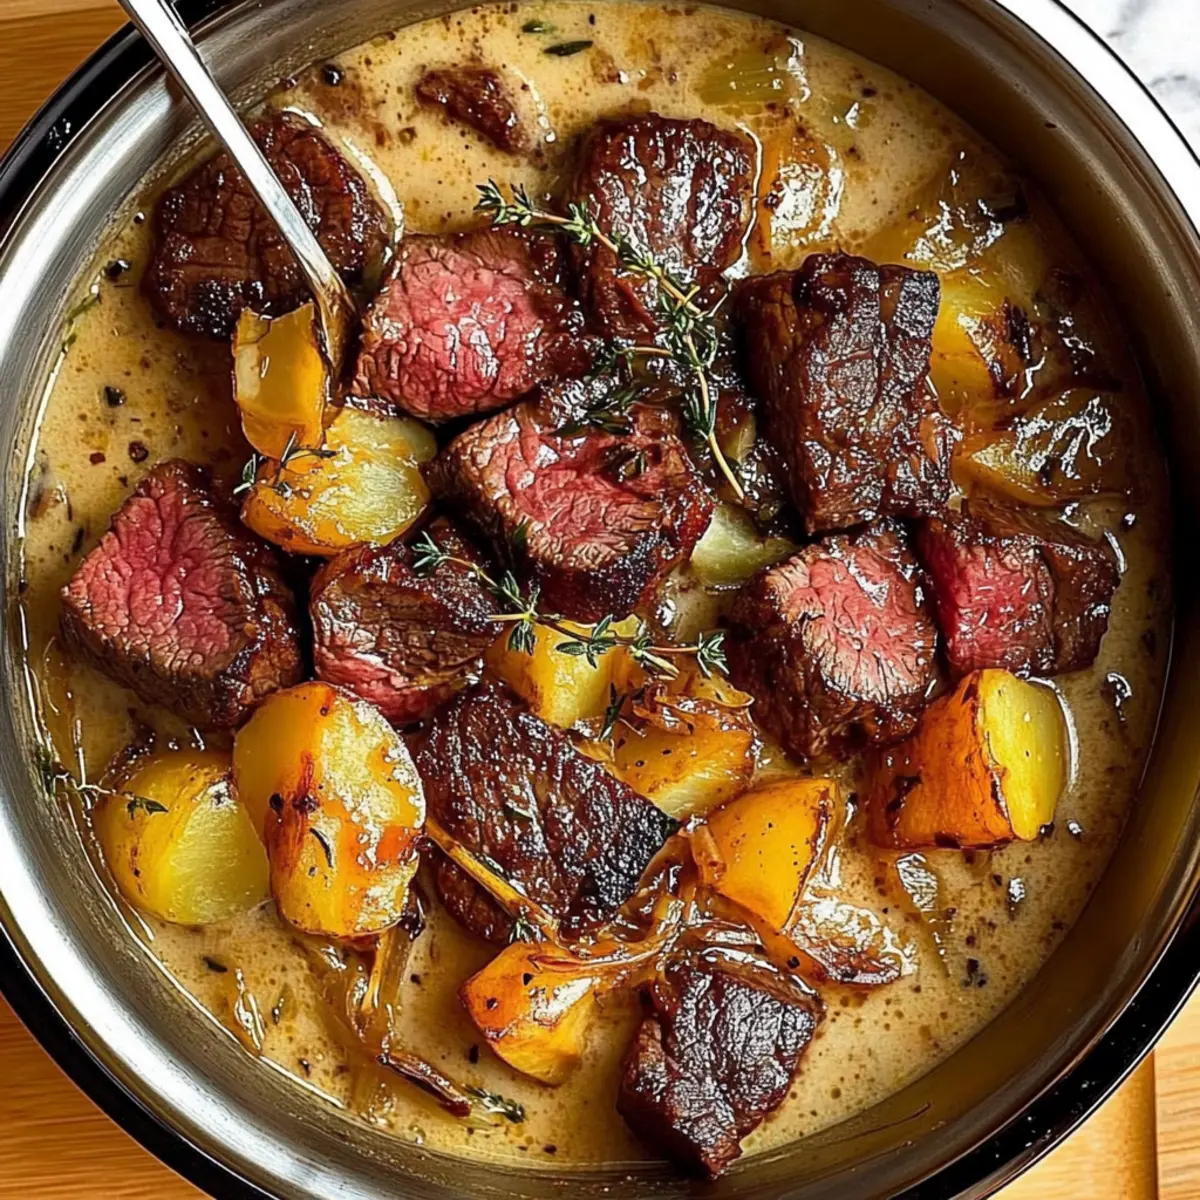
As I stood in my kitchen, the unmistakable aroma of garlic sizzling in butter filled the air, whisking me away to evenings spent with family, sharing laughter over hearty meals. Today, I'm inviting you to create your own cozy culinary moment with these Creamy Garlic Sauce Potatoes. This dish isn't just a side; it's a versatile comfort food that brings warmth and satisfaction to any occasion, whether you're serving it with roasted chicken or indulging in a lazy brunch alongside eggs and bacon. In under 30 minutes, you can whip up this dish that’s not only creamy and indulgent but can also easily be tailored to suit your taste preferences. Are you ready to discover the magic of a homemade garlic sauce that complements every dinner snapshot?

Why Are Creamy Garlic Sauce Potatoes Irresistible?

Comforting Warmth: This dish embraces your palate with its creamy texture and soothing flavors, making it the ultimate comfort food. Speedy Prep: Whip up these potatoes in under 30 minutes, perfect for busy weeknights or last-minute gatherings. Versatile Pairings: Serve alongside Honey Garlic Chicken or as a brunch staple with eggs and bacon for delightful combinations. Customizable Delight: Easily adjust the seasoning—add herbs or spices tailored to your taste! Family-Friendly Appeal: Loved by both kids and adults, these potatoes are bound to gather everyone around the table for a memorable meal.

Creamy Garlic Sauce Potatoes Ingredients

For the Potatoes

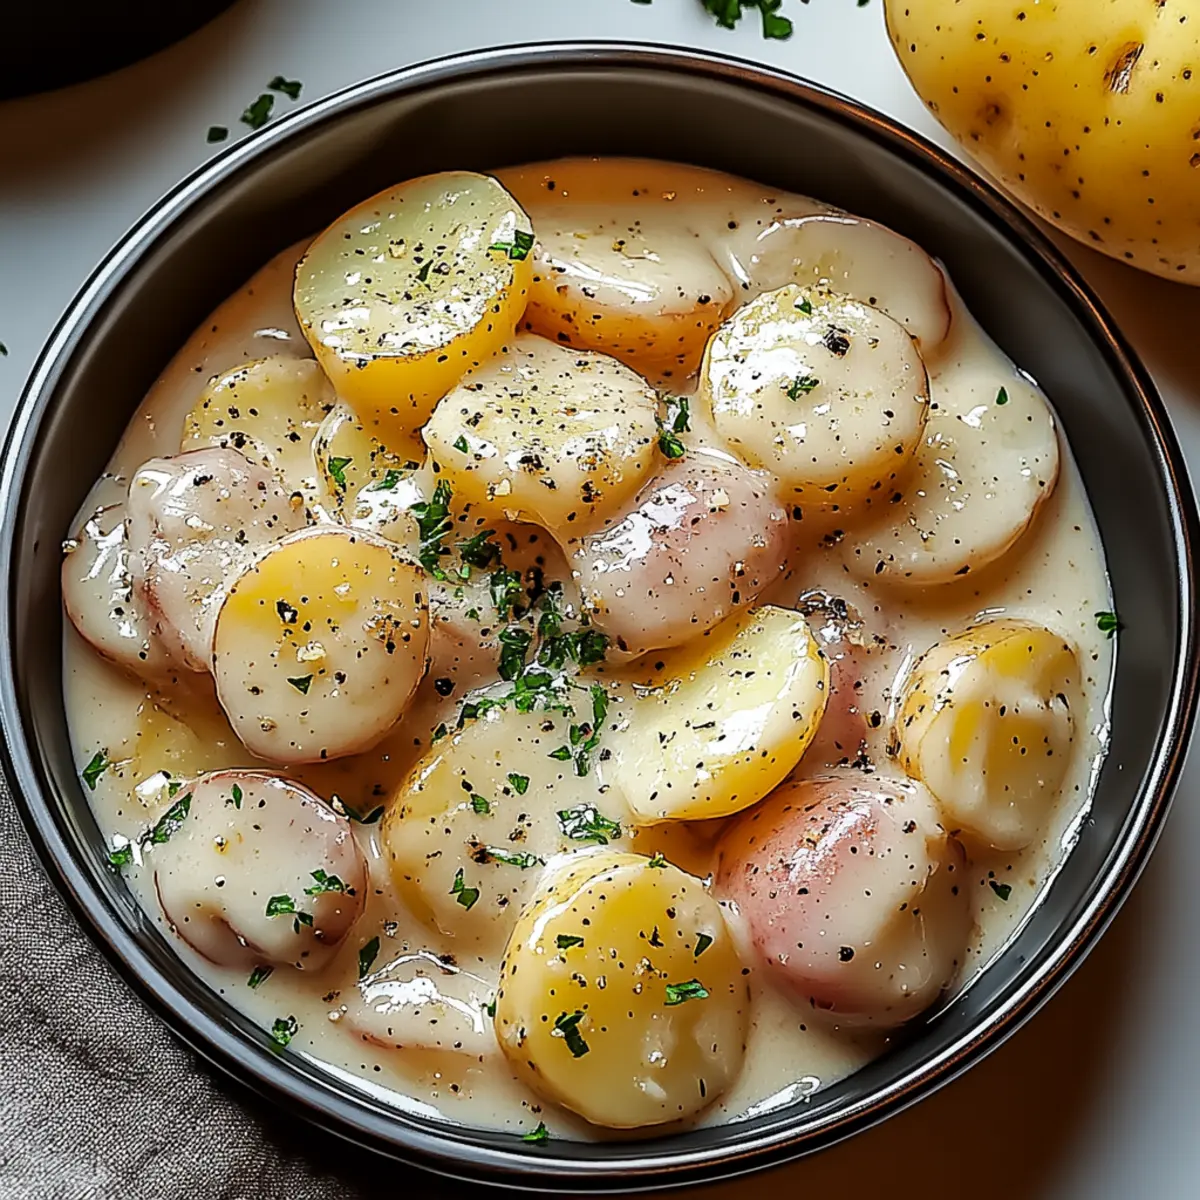
• Potatoes – The foundation of this dish; russet, Yukon gold, or red varieties work wonderfully.
• Butter – Adds richness; margarine can be used for a dairy-free alternative.
• Garlic (minced) – Provides the signature aromatic flavor; stick with fresh garlic for the best taste.

For the Sauce

• Heavy Cream – Creates that luxurious creamy texture; half-and-half or whole milk can lighten it up.
• Salt – Essential for enhancing flavor; adjust to your preference, with sea salt or kosher salt as great options.
• Black Pepper – Adds a hint of spice; freshly ground is preferable for depth of flavor.
• Parmesan Cheese (grated) – Thickens the sauce and adds a savory richness; use cheddar or nutritional yeast for a dairy-free option.

Optional Add-Ins

• Fresh Herbs – Consider adding thyme or chives for a bright note.
• Spices – Incorporate red pepper flakes or smoked paprika for a fun kick.
• Toppings – Elevate the dish with crispy bacon bits or a drizzle of gourmet truffle oil.

These Creamy Garlic Sauce Potatoes are so easy to make, and the delightful creaminess will charm your taste buds while making them the perfect addition to any meal!

Step-by-Step Instructions for Creamy Garlic Sauce Potatoes

Step 1: Prepare the Potatoes
Start by washing, peeling, and dicing about 2 pounds of your chosen potatoes into small, even pieces, roughly 1-inch cubes. This ensures they cook uniformly and absorb the creamy garlic sauce beautifully. Set aside the diced potatoes once finished, ready to be boiled to tender perfection.

Step 2: Boil the Potatoes
Bring a large pot of salted water to a rolling boil over high heat. Once boiling, gently add the diced potatoes and cook for about 15 minutes or until they are fork-tender and can be easily pierced. Drain the potatoes in a colander, allowing them to steam dry for a minute while you prepare the creamy garlic sauce.

Step 3: Melt the Butter
In a large skillet, melt 2 tablespoons of butter over medium heat. Keep an eye on it to prevent burning and stir gently until the butter is fully melted and begins to foam, filling your kitchen with that intoxicating buttery aroma. This will create a rich base for your creamy garlic sauce.

Step 4: Sauté the Garlic
Add 4 cloves of minced garlic to the melted butter and sauté for about 1 minute. Stir frequently until the garlic is fragrant and just starts to turn golden. Be cautious not to let it brown too much, as overcooked garlic can develop a bitter taste that interferes with the dish's overall flavor.

Step 5: Incorporate the Cream
Slowly pour in 1 cup of heavy cream into the skillet, stirring continuously to combine with the sautéed garlic and melted butter. You’ll notice the sauce starting to thicken slightly as it warms up. Allow it to simmer gently for about 2 minutes to blend the flavors while keeping the heat over medium.

Step 6: Season the Sauce
Sprinkle in salt and freshly ground black pepper to taste, stirring well to integrate the seasonings. Taste the sauce and adjust the saltiness and pepper to your preference. This step is crucial to enhance the flavors of your Creamy Garlic Sauce Potatoes, making them truly delightful.

Step 7: Combine the Potatoes and Sauce
Add the drained, cooked potatoes directly into the creamy sauce, gently stirring to coat them evenly in the luscious mixture. Be careful to not mash the potatoes; you want them to remain tender and intact while absorbing all that delicious flavor.

Step 8: Add the Parmesan Cheese
Sprinkle in 1 cup of grated Parmesan cheese, stirring until it melts completely into the sauce and thickens it. This will create a rich, creamy texture that envelops the potatoes beautifully. Feel free to adjust the amount of cheese based on your preference for creaminess.

Step 9: Final Simmer
Lower the heat and let the creamy garlic sauce potatoes simmer for an additional 2-3 minutes. Stir occasionally to ensure everything is well combined and heated through. This final simmer allows the flavors to meld perfectly, resulting in a dish that is comforting and warmly inviting.

Step 10: Serve and Enjoy
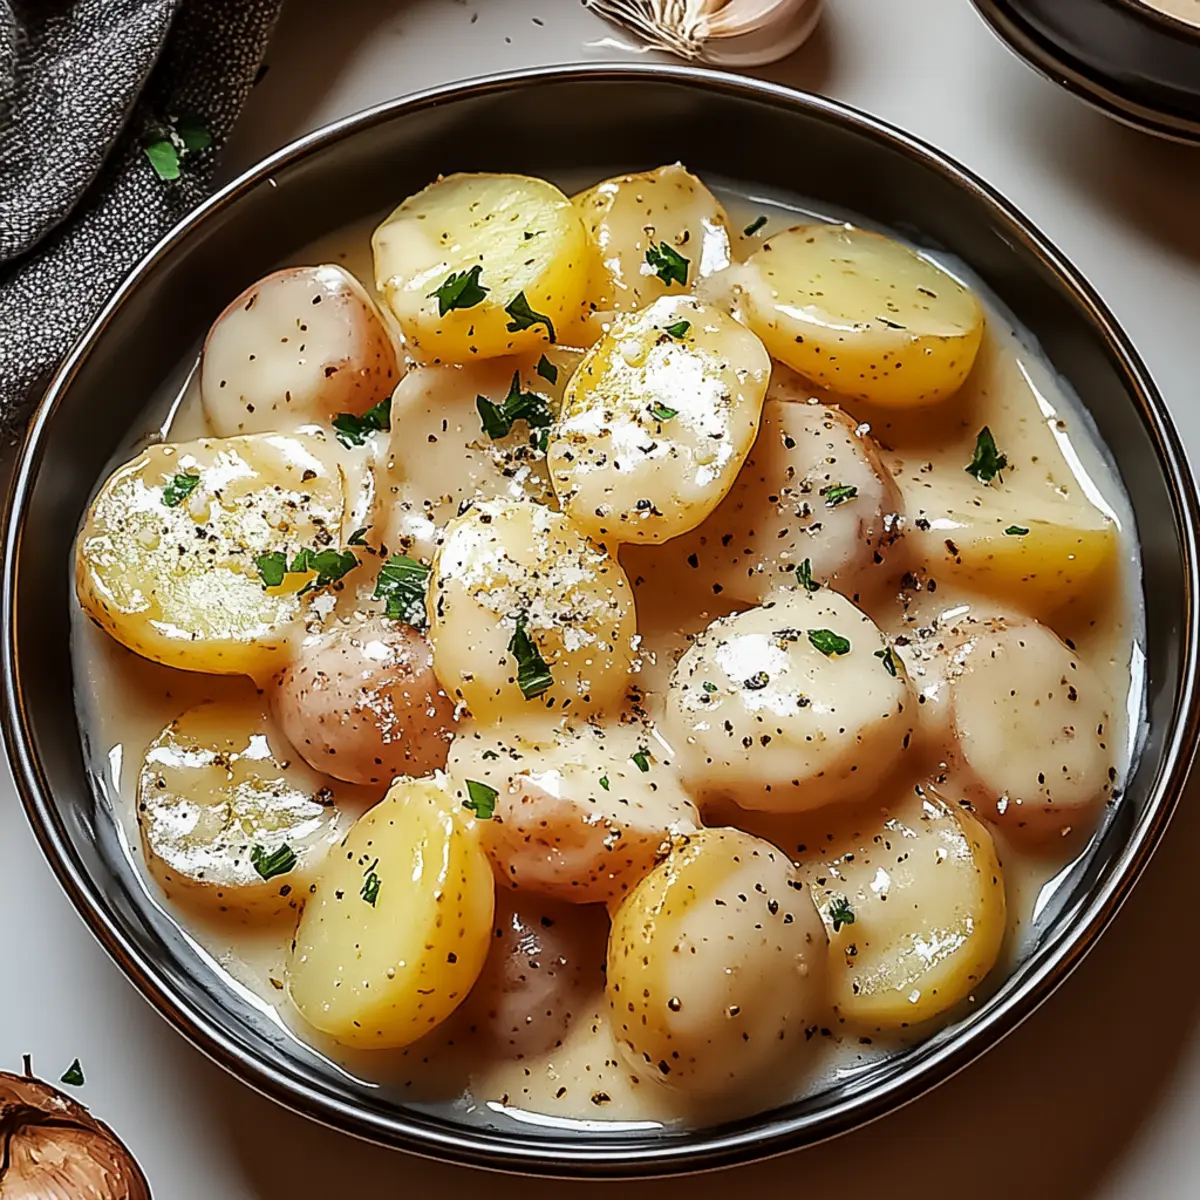
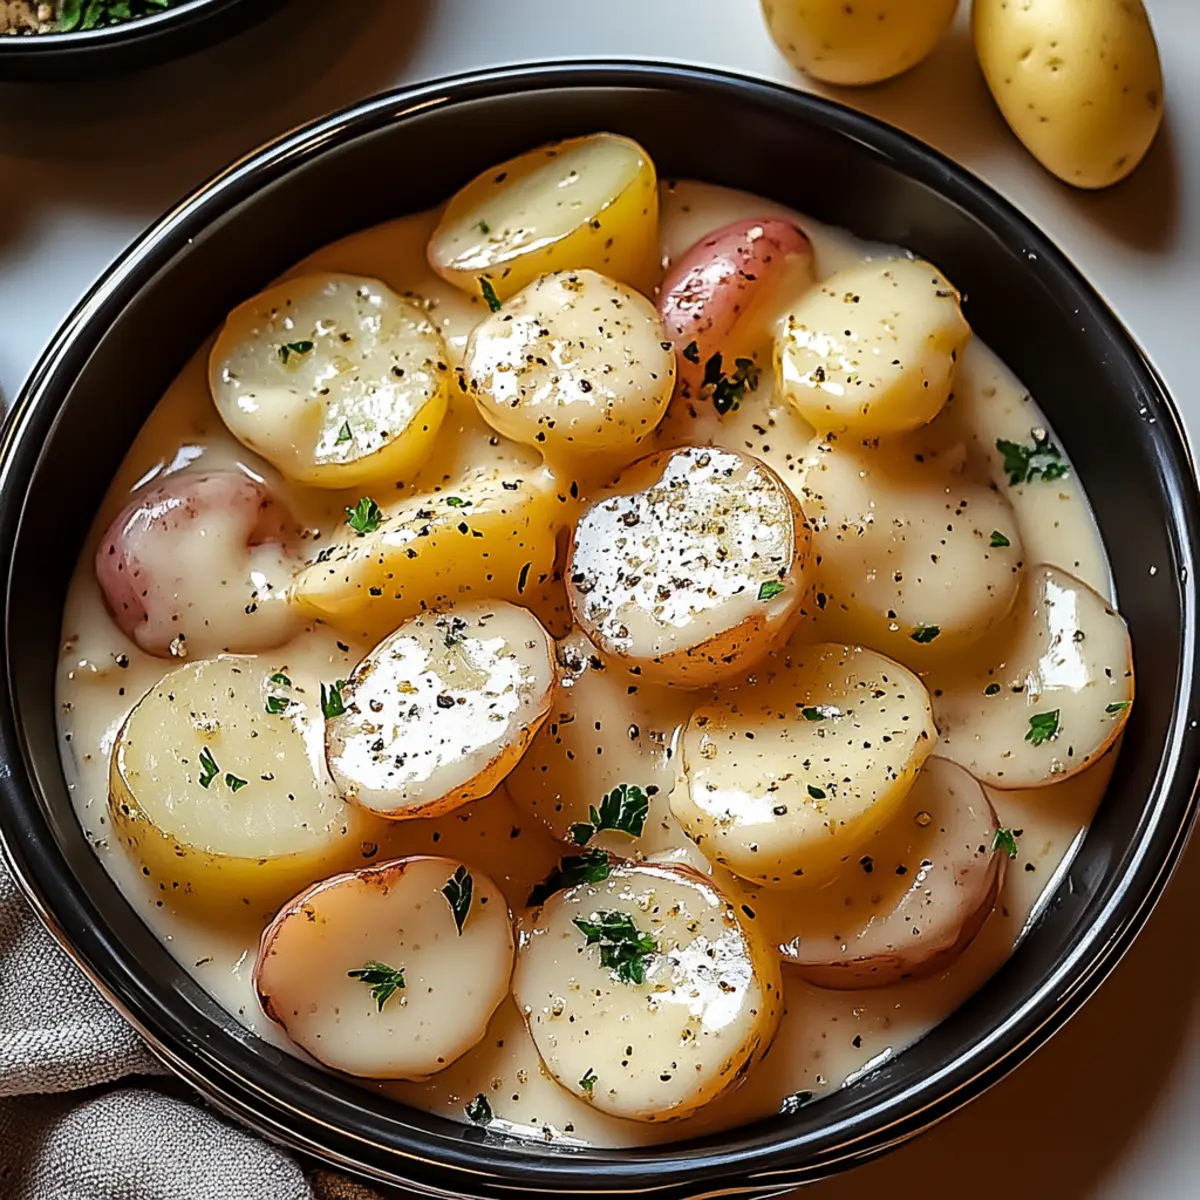
Remove the skillet from the heat and let the creamy garlic sauce potatoes sit for a couple of minutes before serving. This allows the sauce to settle a bit. Serve them warm alongside your favorite main dish or as a fabulous addition to any meal, reveling in the creamy texture and rich flavors.

Make Ahead Options

These Creamy Garlic Sauce Potatoes are perfect for busy cooks looking to save time during hectic weeknights! You can prep the potatoes—wash, peel, and dice them—up to 24 hours in advance. Store them submerged in water in the refrigerator to prevent them from browning. The creamy garlic sauce can also be made up to 3 days ahead; simply prepare as instructed and allow it to cool before storing in an airtight container. When you're ready to serve, just reheat the sauce over low heat and add the cooked potatoes, stirring gently until they’re coated in the delicious sauce. With this prep, you can enjoy creamy, comforting potatoes with minimal effort!

Creamy Garlic Sauce Potatoes Variations

Get ready to play with flavors and textures in your Creamy Garlic Sauce Potatoes, transforming them into your perfect side dish!

  • Herbaceous Twist: Sprinkle in fresh chopped parsley or chives right before serving for a delightful pop of color and freshness.
    You’ll love how the herbal notes elevate the comforting garlic flavor, making it even more inviting!

  • Spicy Kick: Add a pinch of red pepper flakes or smoked paprika to the sauce for a warmth that brings a little heat to the dish.
    This is a fun way to wake up your taste buds while keeping the overall dish comforting and delicious.

  • Crispy Topping: Consider folding in crispy bacon bits or topping your potatoes with panko breadcrumbs before baking for a crunchy contrast.
    This crunchy layer becomes a textural delight against the creamy base that everyone will adore.

  • Cheesy Variation: Swap Parmesan cheese for aged cheddar or a blend for a richer, sharper flavor that adds depth to your sauce.
    Each bite brings a delightful surprise of gooey goodness, making it a delightful twist on classic comfort food.

  • Light and Luscious: For a lighter option, replace heavy cream with half-and-half or whole milk while adding more seasoning for flavor richness.
    Your waistline will appreciate this twist, but the creamy allure will remain irresistibly intact.

  • Umami Boost: Include sautéed mushrooms or sun-dried tomatoes to infuse earthy flavors into your sauce.
    These additions will offer a layered taste experience that pairs beautifully with the creamy potatoes.

  • Vegan Delight: Opt for dairy-free butter and coconut cream while using nutritional yeast instead of cheese for a vegan-friendly version that doesn't skimp on comfort.
    You’ll be amazed at how well these flavors meld together, satisfying even non-vegan guests!

  • Zesty Option: Stir in a teaspoon of lemon juice or some zest for a tangy finish that brightens up the richness of the dish.
    This swift burst of acidity cuts through the creaminess, creating a lovely balance to every forkful.

Enhance your Creamy Garlic Sauce Potatoes adventure by trying one or more of these delightful variations, and let every bite transport you to cozy culinary bliss!

How to Store and Freeze Creamy Garlic Sauce Potatoes

Fridge: Store leftovers in an airtight container for up to 3 days to maintain freshness and flavor.

Freezer: For long-term storage, freeze the cooled creamy garlic sauce potatoes in a freezer-safe container for up to 2 months.

Reheating: Thaw in the refrigerator overnight before reheating. Gently warm on the stove over low heat, adding a splash of cream if needed to restore creaminess.

Serving Freshness: These potatoes are best enjoyed fresh, but proper storage techniques can keep them delicious for a few days, ensuring your comfort food cravings are satisfied.

Expert Tips for Creamy Garlic Sauce Potatoes

  • Perfect Potato Choice: Use Yukon gold or red potatoes for a buttery texture that complements the creamy garlic sauce beautifully. Avoid using waxy potatoes, which may not absorb the flavors well.
  • Don’t Rush the Garlic: Saute garlic just until fragrant and lightly golden; overcooking can lead to bitterness ruining the dish’s taste.
  • Cream Consistency: For a lighter version, consider using half-and-half instead of heavy cream, but be prepared for a slightly less creamy sauce.
  • Adjust to Taste: Always taste as you go; don’t forget to adjust seasoning with salt and freshly ground black pepper to enhance the flavors of the creamy garlic sauce.
  • Storage Tips: Allow leftover potatoes to cool completely before storing them in an airtight container to avoid excess moisture, which can lead to sogginess.

What to Serve with Creamy Garlic Sauce Potatoes

Picture your dinner table filled with bright colors and delightful aromas, leaving everyone eager for a satisfying meal.

  • Roast Chicken: The juicy flavors of a perfectly roasted chicken pair beautifully with the creamy texture of the potatoes, creating a classic comfort meal.
  • Steamed Green Beans: Crisp-tender green beans add a fresh crunch that balances the rich creaminess, making every bite harmonious and colorful.
  • Salmon Fillets: The light and flaky nature of salmon complements the garlic sauce's savory notes, offering a lovely contrast of textures and flavors.
  • Fresh Garden Salad: A vibrant salad with mixed greens and zesty vinaigrette lends brightness and acidity to cut through the creaminess of the dish.
  • Garlic Bread: For those who crave even more garlic goodness, serve with warm garlic bread for dipping into the creamy sauce—a true indulgence!
  • Red Wine: A glass of smooth red wine enhances the comforting meal, richening the experience and warming your spirits as you enjoy your cozy feast.
  • Chocolate Mousse: A light dessert like chocolate mousse provides the perfect sweet ending, balancing the savory flavors of the potatoes with a touch of indulgence.

Creamy Garlic Sauce Potatoes Recipe FAQs

What type of potatoes should I use for the best results?
Choose Yukon gold or red potatoes for their buttery texture, which perfectly complements the creamy garlic sauce. Avoid using waxy varieties, as they may not absorb the flavors as well.

How should I store leftover Creamy Garlic Sauce Potatoes?
Store leftovers in an airtight container in the refrigerator for up to 3 days. Make sure to let them cool completely before sealing to maintain freshness and prevent excess moisture that can make them soggy.

Can I freeze Creamy Garlic Sauce Potatoes?
Absolutely! To freeze, let them cool completely, then transfer to a freezer-safe container. They can be stored for up to 2 months. When you're ready to enjoy, thaw overnight in the refrigerator, then gently reheat on the stove over low heat, adding a splash of cream to restore creaminess if necessary.

What should I do if my garlic sauce turns bitter?
If your garlic becomes bitter, it's likely overcooked. To avoid this, sauté garlic only until fragrant and lightly golden, around 1 minute. If it does turn bitter, unfortunately, you may need to start over—fresh garlic is key to the rich flavor of your sauce.

Are there any dietary considerations for these potatoes?
For a lighter version, substitute heavy cream with half-and-half or whole milk, and for a dairy-free option, use non-dairy alternatives like almond or oat milk. Always check for individual allergies with ingredients like butter and cheese.

null

Creamy Garlic Sauce Potatoes for Comforting Flavor Bliss

Indulge in creamy garlic sauce potatoes, a comforting dish that brings warmth and joy to every meal.
Print Recipe Pin Recipe
Prep Time 10 minutes mins
Cook Time 15 minutes mins
Resting Time 2 minutes mins
Total Time 27 minutes mins
Servings: 4 servings
Course: Dinner
Cuisine: American
Calories: 425
Ingredients Equipment Method Nutrition Notes

Ingredients
  

For the Potatoes
  • 2 pounds Potatoes (russet, Yukon gold, or red)
  • 2 tablespoons Butter or margarine for dairy-free option
  • 4 cloves Garlic (minced) use fresh for best flavor
For the Sauce
  • 1 cup Heavy Cream or half-and-half for a lighter option
  • to taste Salt sea salt or kosher salt
  • to taste Black Pepper freshly ground
  • 1 cup Parmesan Cheese (grated) can substitute cheddar or nutritional yeast for dairy-free
Optional Add-Ins
  • to taste Fresh Herbs (thyme or chives)
  • to taste Spices (red pepper flakes or smoked paprika)
  • to taste Toppings (crispy bacon bits or truffle oil)

Equipment

  • Large pot
  • Colander
  • Large skillet
  • Wooden spoon

Method
 

Step-by-Step Instructions
  1. Prepare the potatoes by washing, peeling, and dicing them into small, even pieces.
  2. Boil the potatoes in salted water for about 15 minutes until fork-tender, then drain.
  3. Melt the butter in a large skillet over medium heat.
  4. Sauté the minced garlic in the melted butter until fragrant and lightly golden.
  5. Incorporate the heavy cream into the skillet and allow it to simmer for about 2 minutes.
  6. Season the sauce with salt and freshly ground black pepper to taste.
  7. Combine the cooked potatoes with the creamy garlic sauce, stirring gently to coat.
  8. Add the grated Parmesan cheese, stirring until melted into the sauce.
  9. Simmer the mixture for an additional 2-3 minutes and then serve warm.
  10. Enjoy your creamy garlic sauce potatoes with your favorite main dish!

Nutrition

Serving: 1servingCalories: 425kcalCarbohydrates: 40gProtein: 10gFat: 26gSaturated Fat: 16gCholesterol: 75mgSodium: 500mgPotassium: 800mgFiber: 3gSugar: 2gVitamin A: 800IUVitamin C: 25mgCalcium: 200mgIron: 1.5mg

Notes

Store leftovers in an airtight container for up to 3 days. For long-term storage, freeze in a container for up to 2 months.

Tried this recipe?

Let us know how it was!

Strawberry Crackle Salad: A Refreshing Crunch for Summer Bliss

February 12, 2026 by Grace Snow Leave a Comment

As I opened the fridge, a wave of nostalgia hit me—just like the summer picnics of my childhood. That’s when I spotted the perfect star ingredient for my Strawberry Crackle Salad, a dish that captures the joy of sunny gatherings with family and friends. This refreshing salad is a delightful mix of sweet, ripe strawberries and a crunchy pretzel topping, making it a satisfying choice that stands out at any potluck. With its creamy dressing and minimal prep time, you can whip it up in a flash, leaving you more moments to enjoy those sunny smiles. Plus, it's versatile enough to pair with your favorite grilled dishes or serve as a stand-alone treat! Ready to dive into summer flavors with me?

Why is Strawberry Crackle Salad a Must-Try?

Nostalgic flavors will transport you back to joyful summer picnics, evoking memories with every bite. Quick and easy to prepare, this salad takes minimal time, leaving you free to relish those great moments. Versatile enough to shine at barbecues, it pairs perfectly with grilled chicken or even on its own! Crunchy pretzels and juicy strawberries unite for a delightful texture that keeps it exciting. Plus, if you love easy yet impressive dishes, you'll find this Strawberry Crackle Salad rivals any classic, just like Chicken Salad Apples or Grilled Balsamic Steak Salad!

Strawberry Crackle Salad Ingredients

• A delightful blend of sweet and crunchy awaits!

For the Pretzel Crust

  • Crushed pretzels – Adds a delightful crunch that contrasts perfectly with the creamy dressing; can use graham crackers for a different texture.
  • Chopped pecans – Provide a nutty flavor and additional crunch; feel free to substitute with walnuts or almonds based on your preference.
  • Brown sugar – Adds sweetness and enhances other flavors; can substitute with coconut sugar for a less processed alternative.
  • Butter, melted – Binds the crust together; margarine or coconut oil can be used for a dairy-free option.

For the Creamy Dressing

  • Sliced strawberries – The key ingredient that brings sweetness and freshness; fresh is preferred for the best texture, though frozen will work in a pinch.
  • Cream cheese, softened – Provides a creamy, rich base for the salad; opt for low-fat cream cheese for a lighter version.
  • Granulated sugar – Balances the creaminess of the dressing; adjust to taste based on the sweetness of the strawberries.
  • Vanilla extract – Enhances overall flavor; pure vanilla extract is recommended for the best taste.
  • Cool Whip – Adds lightness and fluffiness to the salad; consider using homemade whipped cream for a fresher taste.

Enjoy creating your Strawberry Crackle Salad with these simple yet essential ingredients!

Step‑by‑Step Instructions for Strawberry Crackle Salad

Step 1: Prepare the Oven and Baking Sheet
Begin by preheating your oven to 400°F (200°C). While it warms up, line a baking sheet with parchment paper to prevent sticking. This will help ensure your pretzel crust bakes evenly without mess.

Step 2: Mix Pretzel Crust
In a medium bowl, combine your crushed pretzels, chopped pecans, and brown sugar. Pour in the melted butter, mixing with a spatula until everything is well coated and crumbly. The mixture should hold together when squeezed, creating a flavorful base for your Strawberry Crackle Salad.

Step 3: Bake the Crust
Spread the pretzel mixture evenly on the prepared baking sheet and bake it in the preheated oven for 8-10 minutes. You want it to be bubbling and lightly golden. Keep an eye on it, as you don’t want it to burn. Once done, remove it and let it cool completely on the sheet.

Step 4: Make the Creamy Base
In a large bowl, beat together the softened cream cheese, granulated sugar, and vanilla extract using an electric mixer until smooth and creamy. It should be free of lumps, creating a rich base for your salad. Once smooth, gently fold in the Cool Whip, blending just until combined to maintain its airy texture.

Step 5: Combine the Salad
Before serving, carefully fold the sliced strawberries into the creamy mixture using a rubber spatula. Add half of the pretzel crunch mixture and combine gently, preserving the flavor and texture of the salad. This will ensure that every bite of your Strawberry Crackle Salad is delightfully refreshing.

Step 6: Serve Immediately
Transfer the assembled Strawberry Crackle Salad to a serving bowl and top with the remaining pretzel crunch mixture. This will create a beautiful, crunchy topping that enhances both the flavor and the presentation. For the best experience, serve immediately to keep the pretzel topping crispy.

Strawberry Crackle Salad Variations

Feel free to mix it up and make this delightful salad your own with these fun twists!

  • Berry Medley: Substitute some strawberries with blueberries or raspberries for a colorful twist. The combination of flavors will brighten your salad and bring a summer vibe.

  • Coconut Bliss: Add shredded coconut for a tropical flair. Those subtle, sweet coconut shavings will give your salad a delightful chewiness that pairs beautifully with the strawberries.

  • Nutty Alternatives: Swap out pecans for your favorite nuts, such as walnuts or almonds. Each nut brings its unique crunch and flavor, adding a new layer of texture to your dish.

  • Gluten-Free Option: For a gluten-free version, replace the pretzels with gluten-free crackers. You’ll achieve that satisfying crunch without compromising on taste!

  • Creamy Upgrade: Use Greek yogurt instead of cream cheese for a tangier dressing. This adds a nice creaminess while upping the nutritional value—perfect for health-conscious gatherings.

  • Spiced Up: For a touch of heat, sprinkle in some cinnamon or a dash of cayenne pepper. This unexpected twist can enhance the sweetness of the strawberries and impress your guests.

  • Fluffy Lifts: Use homemade whipped cream in place of Cool Whip for a richer flavor. This simple switch can elevate your salad to a whole new level of deliciousness.

  • Fruity Addition: Mix in some finely chopped apples or pears. This will add additional crunch and a sweet surprise, making every bite a delightful discovery.

Your creativity will shine through in every bite of this refreshing Strawberry Crackle Salad! And, if you enjoy similar flavors, try adding a twist from my Avocado Egg Salad or use your remaining strawberries in a sumptuous German Potato Salad. Enjoy exploring!

Make Ahead Options

These Strawberry Crackle Salad preparations are perfect for busy home cooks looking to save time! You can make the pretzel crust up to 24 hours in advance by baking it and then storing it in an airtight container at room temperature to maintain its crunch. Additionally, the creamy dressing can be prepared up to 3 days ahead; blend the cream cheese, sugar, and vanilla, then fold in the Cool Whip, and refrigerate until ready to use. Just before serving, gently mix in the sliced strawberries and half of the pretzel crunch. This will ensure your Strawberry Crackle Salad remains fresh and delicious with optimal texture!

What to Serve with Strawberry Crackle Salad?

Nothing elevates a gathering quite like a well-rounded meal, and this salad makes for the perfect appetizer or side dish!

  • Grilled Chicken: Juicy, marinated chicken complements the sweetness of strawberries, creating a delightful balance of flavors. Plus, the grill’s smokiness adds a delightful contrast.
  • Herbed Quinoa: This nutritious grain infused with fresh herbs provides a hearty texture that pairs beautifully with the lightness of the salad. It makes for a fulfilling meal alongside the Strawberry Crackle Salad.
  • Summer Veggie Skewers: Colorful, grilled veggies such as bell peppers and zucchini add a vibrant visual contrast and smoky flavor, making every bite an adventure.
  • Crispy Fish Tacos: Lightly battered fish wrapped in soft tortillas adds a refreshing twist, while tangy slaw mirrors the freshness of the strawberry salad perfectly. Each crunch complements the other!
  • Iced Lemonade: A chilled glass of homemade lemonade refreshes the palate and enhances the dessert-like quality of the salad. The zesty tang is an invigorating companion.
  • Chocolate Mousse: For a sweet ending, rich chocolate mousse provides a creamy, velvety finish that beautifully balances the fruity, crunch of your meal. The contrasts create a memorable dessert experience.
  • Pineapple Mint Punch: This vibrant, refreshing drink harmonizes with the light flavors in the salad and offers a tropical flair that transports you to sunny beaches. What a delight to sip alongside!

How to Store and Freeze Strawberry Crackle Salad

Refrigerator: Store any leftover Strawberry Crackle Salad in an airtight container in the fridge for up to 2-3 days. This helps maintain its freshness and crunch.

Freezer: While it’s best enjoyed fresh, you can freeze the pretzel mixture separately for up to a month. Just be sure to wrap it tightly to prevent freezer burn.

Thawing: To enjoy the frozen pretzel mix, let it thaw at room temperature and re-crunch it in the oven for a few minutes to restore its crispiness before combining with the creamy salad.

Serving Tips: When serving leftovers, mix in freshly sliced strawberries to revitalize the flavor and texture of your Strawberry Crackle Salad.

Expert Tips for Strawberry Crackle Salad

  • Cool the Crust: Ensure the pretzel mixture cools completely before breaking it into pieces. This helps maintain that perfect crunch texture essential for your Strawberry Crackle Salad.

  • Gentle Mixing: Be gentle when folding in the Cool Whip and strawberries. This keeps the salad light and airy, enhancing the delightful flavors throughout.

  • Serve Fresh: For the best experience, serve the salad immediately after mixing. This ensures the strawberries remain fresh and the pretzel crust stays crunchy, avoiding any sogginess.

  • Adjust Sweetness: Taste the creamy base before serving and adjust the granulated sugar according to the natural sweetness of your strawberries. This customization keeps your Strawberry Crackle Salad perfectly balanced.

  • Explore Variations: Don’t hesitate to add other berries or textures! Incorporating blueberries or shredded coconut can elevate your salad, making it uniquely yours while still deliciously nostalgic.

Strawberry Crackle Salad Recipe FAQs

How do I choose ripe strawberries?
Absolutely! When selecting strawberries, look for ones that are bright red, firm, and free of dark spots. The green caps should appear fresh and green. Avoid those with a dull appearance or any signs of mold, as these may affect the flavor and texture of your Strawberry Crackle Salad.

How should I store leftovers?
To store any leftover Strawberry Crackle Salad, place it in an airtight container in the refrigerator. It will last for about 2-3 days. Ensure it's sealed well to maintain the freshness and crunch of the pretzel crust. Remember, the longer it sits, the softer the crust will become!

Can I freeze the salad?
While the salad itself isn't ideal for freezing, you can certainly freeze the pretzel mixture! Simply prepare the crust, allow it to cool, and then wrap it tightly in plastic wrap or place it in a freezer-safe bag. It can be stored for up to 3 months. When ready to use, just thaw it at room temperature and re-crunch it by baking it in a preheated oven for a few minutes before combining with the creamy dressing and fresh strawberries.

What if my pretzel mixture gets soggy?
If you find your pretzel mixture has become soggy, it could be due to moisture in your container or from the strawberries releasing juices. To prevent this, ensure the pretzel crust cools completely before breaking it apart. You could also consider storing the pretzel crunch separately and adding it to each serving right before eating for that perfect crunch!

Are there any allergy considerations?
Yes! If you're preparing this salad for someone with allergies, keep in mind that it contains nuts and dairy. For a nut-free option, omit the pecans or substitute with seeds like sunflower seeds. To make a dairy-free version, consider using a dairy-free cream cheese alternative and homemade whipped coconut cream instead of Cool Whip.

Can I make substitutions for the ingredients?
Very! If you're looking to switch things up, you can substitute graham crackers for the pretzel crust if you're after a sweeter base. If you want to keep it gluten-free, opt for gluten-free pretzels or crackers. Additionally, feel free to play around with other berries like raspberries or blueberries for a delightful berry medley that will add different flavors to your Strawberry Crackle Salad!

Strawberry Crackle Salad

Strawberry Crackle Salad: A Refreshing Crunch for Summer Bliss

Strawberry Crackle Salad captures the joy of summer picnics with its mix of sweet strawberries and crunchy pretzel topping.
Print Recipe Pin Recipe
Prep Time 15 minutes mins
Cook Time 10 minutes mins
Cooling Time 10 minutes mins
Total Time 35 minutes mins
Servings: 6 servings
Course: Salads
Cuisine: American
Calories: 250
Ingredients Equipment Method Nutrition Notes

Ingredients
  

Pretzel Crust
  • 2 cups Crushed pretzels Can use graham crackers for a different texture.
  • 1/2 cup Chopped pecans Feel free to substitute with walnuts or almonds.
  • 1/4 cup Brown sugar Can substitute with coconut sugar.
  • 1/2 cup Butter, melted Margarine or coconut oil can be used for a dairy-free option.
Creamy Dressing
  • 2 cups Sliced strawberries Fresh is preferred.
  • 8 oz Cream cheese, softened Opt for low-fat cream cheese for a lighter version.
  • 1/2 cup Granulated sugar Adjust to taste.
  • 1 teaspoon Vanilla extract Pure vanilla extract is recommended.
  • 1 cup Cool Whip Consider using homemade whipped cream.

Equipment

  • Oven
  • Baking Sheet
  • medium bowl
  • large bowl
  • Electric mixer
  • Spatula

Method
 

Preparation
  1. Preheat your oven to 400°F (200°C) and line a baking sheet with parchment paper.
  2. In a medium bowl, combine crushed pretzels, chopped pecans, and brown sugar. Pour in melted butter and mix until coated.
  3. Spread the pretzel mixture on the baking sheet and bake for 8-10 minutes until bubbling and golden.
  4. In a large bowl, beat together cream cheese, granulated sugar, and vanilla extract until smooth. Fold in Cool Whip.
  5. Fold sliced strawberries in the creamy mixture and add half the pretzel crunch.
  6. Transfer to a serving bowl and top with remaining pretzel crunch. Serve immediately.

Nutrition

Serving: 1servingCalories: 250kcalCarbohydrates: 30gProtein: 3gFat: 12gSaturated Fat: 7gPolyunsaturated Fat: 1gMonounsaturated Fat: 4gCholesterol: 30mgSodium: 200mgPotassium: 150mgFiber: 1gSugar: 18gVitamin A: 200IUVitamin C: 30mgCalcium: 50mgIron: 0.5mg

Notes

Store leftovers in an airtight container for 2-3 days. For best results, serve immediately after mixing to keep ingredients fresh and crunchy.

Tried this recipe?

Let us know how it was!

Creamy Steak au Poivre Soup for Cozy Comfort Nights

February 11, 2026 by Grace Snow Leave a Comment

The aroma wafting from the kitchen could fool anyone into thinking they’ve stepped into a cozy Parisian bistro. What if I told you that you can recreate that enchanting experience at home? Enter my Creamy Steak au Poivre Soup, a delightful twist on the classic French favorite. This easy dinner option is perfect for a cozy night in or impressing friends at your next gathering. With tender steak mingling in a peppery cream sauce and hearty waxy potatoes, this dish captures the essence of comfort food with an elegant flair. It’s rich, warm, and utterly satisfying. Are you ready to dive into a bowl of pure indulgence? Let’s get cooking!

Why Is This Soup So Irresistible?

Comforting Flavors: The creamy texture of this soup is a hug in a bowl, combining the richness of heavy cream with tender steaks.

Elegant Appeal: Perfect for cozy nights or fancy occasions, this soup transforms an ordinary meal into a gourmet experience.

Easy Preparation: You’ll love how straightforward the steps are! A few simple ingredients come together beautifully for a rewarding dish.

Versatile Variations: Want something spicier? Just add a dash of red pepper flakes! Or switch it up with egg noodles for a noodle version of this comforting classic.

Pair this dish with a simple green salad or crusty bread for an unforgettable meal, just like you’d find in a French bistro! Don’t forget to explore more delicious options, like this Zuppa Toscana Soup or a comforting Asparagus Soup Healthy.

Steak au Poivre Soup Ingredients

• To create this creamy masterpiece, gather these essentials!

For the Soup Base

  • Whole Black Peppercorns – Freshly cracked delivers the soup's signature spicy kick.
  • Filet Mignon (or Sirloin Steaks) – These tender cuts ensure a delightful, buttery texture.
  • Kosher Salt – Enhances the overall flavor; feel free to use sea salt as a substitute.
  • Extra-Virgin Olive Oil – Ideal for sautéing and adding flavor; can be substituted with a high-smoke-point oil.
  • Butter – Infuses richness into the soup; plant-based butter works well for a dairy-free option.

For the Aromatics

  • Thyme Sprigs & Chopped Thyme Leaves – Adds aromatic notes; dried thyme serves as a suitable substitute if needed.
  • Shallots – Imparts sweetness and depth; yellow onions can be used in their place.
  • Garlic – Gives a savory base flavor, with fresh being preferred for its rich aroma.

For Thickening & Flavor

  • All-Purpose Flour – Works as a thickening agent for the soup; use gluten-free flour if necessary.
  • Cognac (or Brandy) – Essential for that authentic flavor; substitute with white wine or omit for a non-alcoholic version.
  • Low-Sodium Beef Broth – Creates a rich, meaty flavor; chicken broth can be a good alternative.

For the Creamy Finish

  • Waxy Baby Potatoes – The secret to creaminess; red or yellow varieties work best.
  • Heavy Cream – This is your ticket to a luscious texture; dairy-free options are available if desired.
  • Worcestershire Sauce – Adds depth; tamari is a gluten-free alternative!

Gather these ingredients, and you’ll be on your way to crafting a comforting bowl of Steak au Poivre Soup, perfect for any occasion!

Step‑by‑Step Instructions for Steak Au Poivre Soup

Step 1: Prepare Seasoning
Begin by crushing about 2 tablespoons of whole black peppercorns using a mortar and pestle or a rolling pin. Generously season your 1 pound of filet mignon (or sirloin steak) with kosher salt on both sides. Let the seasoned steak rest at room temperature for about 15 minutes to enhance its flavor before cooking.

Step 2: Sear Steak
In a large skillet, heat 2 tablespoons of extra-virgin olive oil and 1 tablespoon of butter over medium-high heat until shimmering. Once hot, carefully add the seasoned steak to the pan, searing it for about 3-4 minutes on each side until well-browned and a bit crispy. Remove the steak from the skillet and let it rest on a cutting board before chopping into bite-sized pieces.

Step 3: Sauté Aromatics
In the same skillet, reduce the heat to medium and add 2 chopped shallots and 2 minced garlic cloves. Sauté for about 2-3 minutes until the shallots become translucent and fragrant, scraping up any browned bits from the steak that adds flavor. The aromatics should look soft and slightly golden when ready for the next step.

Step 4: Thicken the Base
Sprinkle 2 tablespoons of all-purpose flour over the onion-garlic mixture and stir constantly for about 1 minute to cook off the raw flour taste. Slowly pour in 1/2 cup of cognac (or brandy) while deglazing the pan, vigorously scraping the bottom to incorporate any delicious remnants. Cook for about 2 minutes until the alcohol evaporates and the mixture thickens slightly.

Step 5: Make Soup
Pour in 4 cups of low-sodium beef broth along with 1 pound of waxy baby potatoes, peeled and diced. Add 3 sprigs of fresh thyme and 1 tablespoon of Worcestershire sauce. Bring the mixture to a gentle simmer, cover, and cook for about 15-20 minutes, or until the potatoes are fork-tender and you can easily pierce them with a knife.

Step 6: Finish Soup
Stir in 1 cup of heavy cream and the chopped steak pieces into the soup, ensuring everything is well combined. Allow the soup to heat through for an additional 5 minutes without boiling. Taste and adjust the seasoning with more salt and pepper as needed. The Steak au Poivre Soup should be creamy, rich, and inviting when served!

Expert Tips for Steak au Poivre Soup

  • Cut Smart: Choose tender cuts like filet mignon for best results. Alternatively, sirloin is a budget-friendly option that still offers great flavor.

  • Crack the Pepper: Use freshly cracked black peppercorns for the most aromatic and spicy flavor. Pre-ground pepper lacks the same intensity!

  • Don’t Rush the Sear: Ensure the skillet is hot enough when searing the steak. This creates a beautiful crust and locks in juices—take your time!

  • Thickening Tricks: Sprinkle flour evenly to avoid clumps. Cooking it briefly before adding liquids helps achieve a smooth texture in the soup.

  • Simmer Down: Allow the soup to simmer gently with the potatoes to develop depth. Avoid boiling, which can break down the potatoes too much.

  • Creamy Finish: Stir in the heavy cream slowly to prevent curdling. It should be the last addition for that luscious finish in your Steak au Poivre Soup!

How to Store and Freeze Steak au Poivre Soup

Fridge: Store your Steak au Poivre Soup in airtight containers for up to 5 days. Allow it to cool before sealing to maintain freshness.

Freezer: For longer storage, freeze portions of the soup in airtight containers for up to 3 months. Make sure to leave some space for expansion as it freezes.

Reheating: To enjoy your soup later, thaw overnight in the fridge and reheat gently on the stovetop over low heat, stirring occasionally to restore its creamy texture.

Avoiding Separation: If the cream appears separated after freezing, whisk it back together while reheating to ensure that comforting richness comes through in every bite!

Make Ahead Options

These Creamy Steak au Poivre Soup is perfect for busy weeknights and meal prep enthusiasts! You can sear the steak and prepare the soup base up to 24 hours in advance; simply refrigerate the sautéed aromatics, broth, and potatoes separately. To maintain quality, store the components in airtight containers to prevent moisture loss and preserve the flavors. When you're ready to enjoy, reheat the soup base over medium heat, add the chopped steak and heavy cream, then simmer for about 5 minutes until heated through. This way, you’ll have all the comforting flavors of Steak au Poivre Soup with minimal effort!

What to Serve with Creamy Steak au Poivre Soup

Elevate your dining experience with these delicious pairings that perfectly complement the rich flavors of this cozy French soup.

  • Crusty Baguette: This classic French bread is perfect for dipping or soaking up the creamy soup, enhancing each delightful bite.

  • Simple Green Salad: A refreshing salad with mixed greens and a light vinaigrette balances the richness of the soup, adding a crisp contrast.

  • Roasted Asparagus: Tender, roasted asparagus sprinkled with lemon and Parmesan adds a burst of fresh flavor and a delightful crunch.

  • Garlic Bread: Crispy garlic bread offers a comforting companion with its buttery, aromatic profile, making each scoop of soup even more satisfying.

  • French Red Wine: A glass of velvety red Bordeaux or Merlot enhances the peppery notes of the soup, creating an elegant dining experience.

  • Cheesy Gratin Potatoes: Creamy, cheesy potatoes elevate the comfort level with their delicious flavors and textures, perfect alongside the soup for a hearty meal.

  • Chocolate Mousse: End the meal on a sweet note with rich chocolate mousse, providing a luxe touch that mirrors the soup's elegance while satisfying your sweet tooth.

  • Sparkling Water: A chilled glass of sparkling water makes for a refreshing palate cleanser, allowing you to fully enjoy the robust flavors of the soup.

Variations & Substitutions for Steak Au Poivre Soup

Feel free to unleash your culinary creativity with these delightful twists that will elevate your soup experience!

  • Gluten-Free: Swap all-purpose flour for gluten-free flour to thicken the soup without compromising taste.

  • Dairy-Free: Use coconut milk or a cashew cream as a substitute for heavy cream, perfect for those avoiding dairy!

  • Spicy Kick: Add a teaspoon of cayenne pepper or a splash of hot sauce to the pot for a lively, fiery twist that will warm your soul.

  • Savory Depth: Experiment with smoked paprika instead of traditional peppercorns to create a smoky flavor profile that’s simply irresistible.

  • Vegetarian Version: Replace the steak with hearty mushrooms like portobello. Their umami-rich flavor shines through, making this soup deliciously plant-based.

  • Pasta Variant: Try adding cooked noodles like fettuccine or egg noodles instead of potatoes for a comforting, noodle-infused experience.

  • Herb Boost: Mix in a handful of fresh spinach or kale just before serving for added nutrition and a pop of color.

  • Garnish Ideas: Top your bowl with crispy shallots or a dollop of crème fraîche for that gourmet finish—just like at your favorite bistro!

With these variations, you can make this already fantastic soup even more suited to your palate. And if you’re looking for more ideas, don’t miss out on my delightful Grilled Balsamic Steak Salad for a fresh twist!

Steak au Poivre Soup Recipe FAQs

How do I choose the right steak for my soup?
Absolutely! For the best results, opt for tender cuts like filet mignon or sirloin steak. If you're looking for a budget-friendly alternative, sirloin works wonderfully while still providing great flavor and tenderness. Just make sure to season the steak well to enhance the dish.

What’s the best way to store leftover Steak au Poivre Soup?
You can store your Steak au Poivre Soup in airtight containers in the fridge for up to 5 days. Just remember to let it cool completely before sealing to help maintain freshness. It’s perfect for meal prep or quick lunches during the week!

Can I freeze the Steak au Poivre Soup?
Certainly! Freeze portions of your soup in airtight containers for up to 3 months. Make sure to leave a little space at the top of the container, as the soup may expand while freezing. When you're ready to enjoy it, simply thaw it overnight in the fridge and reheat gently on the stovetop.

How can I fix a soupy flavor if it’s too bland?
Very! If your soup tastes a bit flat, consider adding a splash more Worcestershire sauce or a dash of salt to balance out the flavors. You can also enhance the peppery kick by adding more freshly cracked black pepper. If it needs some extra depth, a tablespoon of cognac or a sprinkle of fresh herbs can work wonders!

Is this soup suitable for people with dietary restrictions?
Absolutely! If you're catering to dietary restrictions, this soup can easily be modified. Substitute with gluten-free flour for a gluten-free option and use plant-based butter and dairy-free cream to make it vegan-friendly. Always check labels to ensure that other ingredients, like broth, meet specific dietary needs.

How can I make this soup spicier?
For those who enjoy a bit of heat, I often recommend adding red pepper flakes or a few dashes of chili oil. You can also add a minced jalapeño while sautéing the shallots and garlic, which will bring an extra layer of flavor and a nice kick to your Steak au Poivre Soup!

Steak Au Poivre Soup

Creamy Steak au Poivre Soup for Cozy Comfort Nights

This Creamy Steak Au Poivre Soup offers a warm and satisfying twist on the classic French dish, perfect for cozy nights or gatherings.
Print Recipe Pin Recipe
Prep Time 15 minutes mins
Cook Time 35 minutes mins
Resting Time 15 minutes mins
Total Time 1 hour hr 5 minutes mins
Servings: 4 cups
Course: Soups
Cuisine: French
Calories: 410
Ingredients Equipment Method Nutrition Notes

Ingredients
  

For the Soup Base
  • 2 tablespoons Whole Black Peppercorns Freshly cracked
  • 1 pound Filet Mignon or Sirloin Steaks
  • 1 teaspoon Kosher Salt
  • 2 tablespoons Extra-Virgin Olive Oil
  • 1 tablespoon Butter or plant-based butter
For the Aromatics
  • 3 sprigs Thyme Fresh or dried
  • 2 medium Shallots
  • 2 cloves Garlic Minced
For Thickening & Flavor
  • 2 tablespoons All-Purpose Flour or gluten-free flour
  • 1/2 cup Cognac or Brandy
  • 4 cups Low-Sodium Beef Broth
For the Creamy Finish
  • 1 pound Waxy Baby Potatoes Peeled and diced
  • 1 cup Heavy Cream or dairy-free option
  • 1 tablespoon Worcestershire Sauce or tamari

Equipment

  • Skillet
  • Mortar and Pestle
  • Cutting Board

Method
 

Step-by-Step Instructions
  1. Prepare seasoning by crushing black peppercorns and seasoning steak with kosher salt. Let rest for 15 minutes.
  2. Heat olive oil and butter in a skillet, sear the steak for 3-4 minutes on each side, then chop into bite-sized pieces.
  3. Sauté shallots and garlic in the same skillet for 2-3 minutes until translucent.
  4. Sprinkle flour over the onion-garlic mixture, stir for 1 minute, then add cognac and deglaze the pan.
  5. Pour in beef broth and add potatoes, thyme, and Worcestershire sauce. Simmer for 15-20 minutes.
  6. Stir in heavy cream and chopped steak, heat through for 5 minutes without boiling, and adjust seasoning.

Nutrition

Serving: 1cupCalories: 410kcalCarbohydrates: 28gProtein: 25gFat: 25gSaturated Fat: 10gPolyunsaturated Fat: 1gMonounsaturated Fat: 12gTrans Fat: 1gCholesterol: 80mgSodium: 600mgPotassium: 800mgFiber: 3gSugar: 2gVitamin A: 500IUVitamin C: 6mgCalcium: 50mgIron: 3mg

Notes

Pair with a simple green salad or crusty bread for an unforgettable meal. For spicier variation, add red pepper flakes.

Tried this recipe?

Let us know how it was!

Hot Honey Ricotta Pizza Delight for a Cozy Night In

February 11, 2026 by Grace Snow Leave a Comment

As I stood in my kitchen, the enticing aroma of melted cheese and spicy sweetness danced in the air, transporting me to my favorite pizzeria. This was the moment I knew I was about to create a culinary masterpiece: the Irresistible Hot Honey Ricotta Pizza Delight. This dish is not just a pizza; it’s a quick and comforting escape from the hustle of daily life. Loaded with creamy ricotta and gooey mozzarella, each slice is an invitation to revel in flavor. Perfect for casual get-togethers or cozy weeknight dinners, this vegetarian delight offers both the satisfaction of homemade comfort food and the convenience of quick prep. Are you ready to savor a slice of heaven that blends sweet heat with cheesy goodness? Let's dive into this delicious recipe!

Why is Hot Honey Ricotta Pizza Delight a Must-Try?

Flavor Explosion: This dish boasts a unique blend of sweet and spicy flavors, thanks to the hot honey drizzled over creamy ricotta and melty mozzarella.

Quick and Easy: Perfect for weeknights, this recipe comes together in just under 30 minutes—great for those busy evenings!

Vegetarian Comfort: A satisfying vegetarian option, it appeals to anyone tired of fast food and craving something homemade.

Crowd-Pleaser: Whether for a gathering or a cozy dinner, this pizza never fails to impress family and friends. Pair it with a side salad or indulge alone for a tasty treat!

Customizable: Get creative with toppings! Try adding caramelized onions or using Herby Ricotta Stuffed peppers on the side for a delightful twist.

Hot Honey Ricotta Pizza Delight Ingredients

• Get ready to impress with this delicious twist on pizza!

For the Pizza Base
• Pre-made pizza dough – Use store-bought for convenience, or make your own for a personal touch.
• Olive oil – Enhances flavor and prevents sticking; sub with melted butter for a richer taste.

For the Cheesy Topping
• Fresh ricotta cheese – Provides creaminess and richness; swap with cottage cheese if desired.
• Shredded mozzarella cheese – For that classic melty goodness; low-fat or dairy-free options work too.

For Flavoring
• Dried oregano – Adds an herbaceous kick; fresh oregano can elevate the flavor profile.
• Garlic powder – Boosts overall flavor; try fresh minced garlic for a vibrant alternative.
• Salt and pepper – Essential to taste; adjust according to your preference.

For the Finishing Touch
• Hot honey – Gives a sweet and spicy finish; adjust the amount to fit your heat tolerance.
• Fresh basil leaves – Beautiful garnishing herb; arugula or spinach can be refreshing substitutes.
• Crushed red pepper flakes – Optional for an extra heat boost; sprinkle cautiously based on your spice love!

Create your Hot Honey Ricotta Pizza Delight with these ingredients and elevate your next homemade meal into something memorable!

Step‑by‑Step Instructions for Hot Honey Ricotta Pizza Delight

Step 1: Preheat the Oven
Begin by preheating your oven to 475°F (245°C) to ensure a crispy crust for your Hot Honey Ricotta Pizza Delight. This high temperature allows for that delightful golden finish. While the oven heats up, gather your ingredients and equipment, including a baking sheet or pizza stone for baking.

Step 2: Prepare the Dough
On a floured surface, roll out the pre-made pizza dough to your desired thickness, aiming for about ¼ inch for a perfect balance between crunch and chewiness. Once rolled, transfer the dough onto the baking sheet or pizza stone, ensuring it’s centered and smooth. Aim for evenly shaped edges for a beautiful presentation.

Step 3: Add Olive Oil
Brush a generous layer of olive oil over the surface of the dough using a pastry brush. This step not only enhances flavor but also prevents sticking. The oil will give the Hot Honey Ricotta Pizza Delight a sumptuous richness and help achieve that beautiful golden crust as it bakes.

Step 4: Spread Ricotta
Evenly spoon dollops of fresh ricotta cheese over the dough, leaving at least a ½-inch border for the crust. Use the back of the spoon to smooth the ricotta into an even layer, creating a creamy base that complements the gooey mozzarella to follow. The white, luscious ricotta acts as a perfect canvas for the toppings.

Step 5: Sprinkle Mozzarella
Generously layer the shredded mozzarella cheese on top of the ricotta, covering it completely. The mozzarella will melt and create that irresistible, stretchy texture that pizza lovers adore. Ensure no spots of ricotta are visible, as the melted cheese will beautifully meld into a cohesive topping during baking.

Step 6: Season
Dust the pizza generously with dried oregano, garlic powder, salt, and pepper. This simple yet effective seasoning enhances the flavors of the Hot Honey Ricotta Pizza Delight, adding an aromatic touch. The spices will infuse the toppings as they cook, creating a savory undertone to balance the sweetness of the hot honey.

Step 7: Bake
Carefully place your pizza in the preheated oven and bake for 15-20 minutes. Keep a watchful eye on it as it bakes; look for a golden-brown crust and melted, bubbly cheese. The edges should be crispy, and the cheese should have a delightful stretch when you pull a slice away from the pie.

Step 8: Finish with Hot Honey
Once baked to perfection, remove your Hot Honey Ricotta Pizza Delight from the oven. Immediately drizzle a generous amount of hot honey over the pizza, allowing it to seep into the warm, cheesy layers. This finishing touch introduces a sweet heat that elevates the entire dish and makes for a captivating experience.

Step 9: Garnish
For an extra pop of color and flavor, top your pizza with fresh basil leaves and a sprinkle of crushed red pepper flakes, if desired. The aromatic basil adds freshness, while the red pepper flakes can intensify the heat to suit your taste. Cut the pizza into slices and savor the delight!

Hot Honey Ricotta Pizza Delight Variations

Feel free to play with these savory ideas and make this pizza your own culinary masterpiece!

  • Dairy-Free: Substitute the cheese with a blend of cashew cheese and nutritional yeast for a creamy and cheesy experience without dairy. It adds a delightful nutty flavor that complements the heat of the honey.

  • Herb-Infused: Add fresh herbs like basil or thyme into the ricotta mixture for a burst of freshness. This twist not only enhances the flavor but also brings a vibrant color to the pizza.

  • Spicy Kick: Mix in some chopped jalapeños or sliced banana peppers into the mozzarella layer to elevate the heat level. This adds a zesty flair and can became a new favorite for spice lovers.

  • Veggie-Laden: Top the pizza with sautéed spinach, mushrooms, or roasted bell peppers for a heartier meal. With each slice, you'll enjoy added texture, flavor, and nutrition that goes perfectly with the creamy cheeses.

  • Fruit Fusion: Incorporate sliced figs or pears on top of the cheese before baking for a sweet contrast that pairs beautifully with the hot honey drizzle. This unexpected fruit element will surprise and delight your taste buds.

  • Smoky Flavor: Try using smoked mozzarella or adding bits of smoked Gouda for a richer taste. The smoky notes complement the sweet heat of the hot honey and add depth to each bite.

  • Cauliflower Crust: For a lower-carb alternative, consider using a cauliflower pizza crust. This healthier spin retains the delicious flavors while making it suitable for gluten-conscious individuals.

Consider also pairing this delightful pizza with a side of Homemade Hot Chocolate to warm up those cozy nights! You can't go wrong with a sweet finish after such an amazing meal.

Expert Tips for Hot Honey Ricotta Pizza Delight

  • Even Dough Thickness: Roll the pizza dough to a consistent thickness. Uneven areas can result in unevenly cooked pizza; avoid thick edges to ensure chewier crust.

  • Watch the Baking Time: Keep an eye on the pizza while it bakes. Different ovens can vary in temperature, and monitoring helps prevent overbrowning.

  • Rest Before Slicing: Allow the pizza to rest for a minute after baking. This practice helps the cheese set, making it easier to slice without losing toppings.

  • Customize with Toppings: Feeling adventurous? Swap ricotta for feta or add toppings like caramelized onions for added flavor. Enjoy experimenting with your Hot Honey Ricotta Pizza Delight!

  • Hot Honey Control: Adjust the amount of hot honey based on your preference. Start with less if you're cautious about heat, then add more for a delightful spice kick.

What to Serve with Hot Honey Ricotta Pizza Delight?

Create the perfect meal experience that tantalizes every taste bud!

  • Refreshing Side Salad: A crisp salad with mixed greens and a tangy vinaigrette cuts through the richness of the pizza, balancing flavors beautifully.

  • Garlic Bread Sticks: These buttery delights with a sprinkle of garlic pair perfectly for a comforting side that echoes the cheesy goodness of your pizza.

  • Roasted Veggies: Seasoned roasted vegetables add a hearty element that complements the sweet heat of the hot honey, enhancing your meal with vibrant textures.

  • Soft Bread Rolls: Warm, soft rolls could be perfect for sopping up any leftover hot honey, creating a delightful way to enjoy every last bite.

  • Chilled White Wine: A glass of chilled Sauvignon Blanc perfectly complements the spicy notes of the pizza, elevating your dining experience with every sip.

  • Lemon Sorbet: Offering a sweet and citrusy contrast, this light dessert cleanses the palate after the rich flavors of your Hot Honey Ricotta Pizza Delight.

Embrace these pairings for a memorable meal that brings warmth to your dining table!

How to Store and Freeze Hot Honey Ricotta Pizza Delight

Fridge: Store any leftovers in an airtight container in the fridge for up to 3 days. Reheat in the oven for the best texture rather than the microwave.

Freezer: You can freeze the Hot Honey Ricotta Pizza Delight by wrapping it tightly in plastic wrap and then again in aluminum foil. It will stay good for up to 2 months.

Reheating: To reheat, preheat your oven to 375°F (190°C) and bake for about 10-15 minutes until heated through and the cheese is melty again.

Room Temperature: If you plan to serve your pizza immediately, let it sit at room temperature for up to 2 hours before serving for optimal flavor and texture.

Make Ahead Options

These Hot Honey Ricotta Pizza Delight preparations are perfect for busy weeknights! You can pre-assemble the pizza up to 24 hours in advance by rolling out the dough, spreading the ricotta, and sprinkling the mozzarella, then covering it tightly with plastic wrap and refrigerating. To maintain the quality, ensure the dough is well-oiled to prevent it from drying out. When you're ready to bake, simply add your seasonings, drizzle the hot honey, and pop it in a preheated oven for 15-20 minutes. This way, you’ll have a delicious, homemade pizza on the table with minimal effort—just as tasty as if you’d made it from scratch that same day!

Hot Honey Ricotta Pizza Delight Recipe FAQs

What type of pizza dough should I use for Hot Honey Ricotta Pizza Delight?
You can use store-bought pre-made pizza dough for convenience, or make your own if you want to add a personal touch. Look for dough that has a good balance of elasticity and firmness for the best results.

How should I store leftovers of Hot Honey Ricotta Pizza Delight?
For optimal freshness, store any leftovers in an airtight container in the refrigerator for up to 3 days. When you're ready to enjoy it again, simply reheat it in the oven at 375°F (190°C) for about 10-15 minutes until heated through and the cheese is delightfully melty.

Can I freeze Hot Honey Ricotta Pizza Delight?
Absolutely! To freeze, wrap the pizza tightly in plastic wrap and then again in aluminum foil. This will keep it fresh for up to 2 months. When you're ready to enjoy it, preheat your oven to 375°F (190°C) and bake it for about 15-20 minutes from frozen, checking to ensure it’s heated all the way through.

What should I do if my cheese doesn’t melt properly?
If your cheese doesn’t melt fully, it might be due to uneven oven heat or the type of cheese used. Make sure you’re using a good-quality mozzarella, and consider setting your oven to broil for the last few minutes to help achieve that perfectly gooey texture. Just keep a close eye to prevent burning!

Is Hot Honey Ricotta Pizza Delight suitable for people with dietary restrictions?
This recipe is vegetarian-friendly, but if you're concerned about allergies, always check the labels on your cheese and dough for potential allergens such as dairy or gluten. Additionally, you can customize it by using dairy-free cheese or a gluten-free pizza crust to accommodate different dietary needs.

What if I can’t find hot honey?
If hot honey is unavailable, you can make your own by mixing regular honey with a few pinches of crushed red pepper flakes—let it sit for about 30 minutes to allow flavors to meld. Alternatively, you can use regular honey and drizzle some spicy sauce on top for a similar sweet and spicy kick!

Hot Honey Ricotta Pizza Delight

Hot Honey Ricotta Pizza Delight for a Cozy Night In

Indulge in the Hot Honey Ricotta Pizza Delight, a quick and comforting vegetarian dish perfect for cozy nights in.
Print Recipe Pin Recipe
Prep Time 10 minutes mins
Cook Time 20 minutes mins
Total Time 30 minutes mins
Servings: 4 slices
Course: Dinner
Cuisine: Italian
Calories: 300
Ingredients Equipment Method Nutrition Notes

Ingredients
  

For the Pizza Base
  • 1 pre-made pizza dough Store-bought or homemade
  • 2 tablespoons olive oil Can substitute with melted butter
For the Cheesy Topping
  • 1 cup fresh ricotta cheese Can substitute with cottage cheese
  • 1 cup shredded mozzarella cheese Low-fat or dairy-free options possible
For Flavoring
  • 1 teaspoon dried oregano Fresh oregano can be used
  • 1 teaspoon garlic powder Fresh minced garlic can be used
  • to taste salt and pepper
For the Finishing Touch
  • 3 tablespoons hot honey Adjust based on heat preference
  • 1/4 cup fresh basil leaves Can substitute with arugula or spinach
  • to taste crushed red pepper flakes Optional

Equipment

  • Baking Sheet
  • Pizza stone

Method
 

Step-by-Step Instructions
  1. Preheat your oven to 475°F (245°C).
  2. On a floured surface, roll out the pre-made pizza dough to about ¼ inch thickness.
  3. Brush a generous layer of olive oil over the surface of the dough.
  4. Evenly spoon dollops of fresh ricotta cheese over the dough, leaving a ½-inch border.
  5. Generously layer shredded mozzarella cheese on top of the ricotta.
  6. Dust the pizza with dried oregano, garlic powder, salt, and pepper.
  7. Bake for 15-20 minutes until golden brown and bubbly.
  8. Remove from the oven and drizzle hot honey over the pizza.
  9. Garnish with fresh basil leaves and crushed red pepper flakes, if desired.

Nutrition

Serving: 1sliceCalories: 300kcalCarbohydrates: 35gProtein: 14gFat: 12gSaturated Fat: 6gPolyunsaturated Fat: 1gMonounsaturated Fat: 5gCholesterol: 30mgSodium: 600mgPotassium: 250mgFiber: 2gSugar: 4gVitamin A: 500IUVitamin C: 2mgCalcium: 250mgIron: 2mg

Notes

Allow the pizza to rest for a minute before slicing for easier serving. Customize toppings to your taste.

Tried this recipe?

Let us know how it was!

Heartwarming Borscht Soup with Beef for Cozy Nights

February 11, 2026 by Grace Snow Leave a Comment

The aroma hit me like a cozy blanket on a chilly day, wrapping me in warmth as I stirred the pot. This is the magic of my Best Beef Borscht Soup with Short Ribs, a cherished recipe that embodies the heart of Russian and Ukrainian cuisine. Each spoonful offers a delightful blend of sweet beets, tender beef, and vibrant vegetables, making it the perfect comfort food for those crisp fall and winter evenings. Not only is this recipe a true crowd-pleaser, but it’s also nutrition-rich and ideal for meal prep. Imagine coming home after a long day to a bowl filled with hearty goodness waiting for you! Are you ready to dive into this warming culinary adventure?

Why Is Borscht Soup So Comforting?

Hearty, Nourishing Base: This Borscht Soup with Beef starts with a rich, flavorful broth from tender short ribs, ensuring each spoonful is packed with depth.

Vibrant, Colorful Ingredients: With its stunning deep red hue from beets, every bowl is not just a feast for the stomach but also for the eyes!

Versatile Preparation: Customize it with variations such as chuck roast or sweet potatoes for your preferred twist, ensuring it suits all palates.

Perfect for Meal Prep: Make a large batch ahead of time—its flavors intensify, making it even more delicious for quick dinners throughout the week.

Crowd-Pleasing Comfort: Great for family gatherings or gatherings with friends, this soup is sure to impress and warm everyone's hearts.

You’ll also love making Lemon Chicken Soup for a bright, zesty contrast or serving it alongside crusty bread for the ultimate comfort meal!

Borscht Soup with Beef Ingredients

For the Soup
• Bone-in Short Ribs – A main protein source that adds depth to the broth; substitute with chuck roast for a different flavor.
• Water – The base for the broth; essential for simmering the beef and extracting flavors.
• Onion – Adds aroma and sweetness; sauté until translucent to enhance its natural flavors.
• Beets – Provides the soup's vibrant color and earthy sweetness; wear gloves to prevent staining while handling.
• Carrots – Contributes natural sugar and beautiful color; grating them helps with faster cooking.
• Tomato Paste – Boosts richness and umami notes; a key ingredient for depth of flavor.
• Cabbage – Adds texture and earthiness; feel free to substitute with kale or Swiss chard if you prefer.
• Potatoes – Delivers heartiness and helps thicken the soup; Russet potatoes are ideal for the perfect texture.
• Sugar – Balances the acidity in the soup and enhances the sweetness of the vegetables.
• Parsley & Dill – Fresh herbs for garnish that elevate the flavor and bring brightness to each bowl.
• Sour Cream – A classic creamy topping; can be omitted for Whole 30 or dairy-free diets.

Step‑by‑Step Instructions for Borscht Soup with Beef

Step 1: Prepare Broth
In a large pot over medium-high heat, sear the bone-in short ribs for 5 minutes on each side until browned, using tongs to turn them. Once browned, transfer the ribs to the pot and add 16 cups of water. Bring this mixture to a boil, then reduce the heat to low and let it simmer softly for about 2 hours, allowing the beef to become tender and flavorful.

Step 2: Sauté Vegetables
In the same skillet used for the ribs, add diced onions and sauté over medium heat for 10-15 minutes until they become translucent. This will enhance their sweetness. Next, stir in the grated carrots and beets, cooking them for an additional 10 minutes until they are vibrant and tender. Add the tomato paste, a pinch of salt, and sugar, stirring continuously for another 10 minutes to meld the flavors.

Step 3: Combine Ingredients
Once the short ribs have simmered and are tender, carefully add diced Russet potatoes and shredded cabbage to the pot. Cook everything together for 15-20 minutes until the potatoes are easily pierced with a fork. Then, mix in the sautéed vegetable blend along with chopped parsley and dill, letting it all simmer together for another 10 minutes.

Step 4: Shred Meat
Remove the short ribs from the pot and allow them to cool slightly. Using two forks, shred the meat from the bones, discarding any excess fat. Return the shredded beef to the pot and stir well, letting the soup sit covered for 10-15 minutes to allow the flavors of the Borscht Soup with Beef to deepen and meld beautifully.

Step 5: Serve
Ladle generous portions of the vibrant Borscht Soup into bowls, ensuring each serving has a hearty mix of meat and vegetables. Top each bowl with a tablespoon of sour cream for creaminess and an extra sprinkle of fresh dill for a touch of brightness. Enjoy your warm, comforting bowl of homemade goodness!

Make Ahead Options

These hearty portions of Borscht Soup with Beef are perfect for busy home cooks looking to meal prep! You can prepare the broth and sauté the vegetables up to 24 hours in advance, making your cooking process much smoother. Simply follow the first two steps, letting the soup cool completely before refrigerating it in an airtight container. When you’re ready to serve, add the diced potatoes and cabbage, and simmer everything together until the potatoes are tender (about 15-20 minutes). This approach not only saves time during busy weeknights but also allows the flavors to deepen, making your Borscht Soup with Beef just as delicious as when freshly made!

How to Store and Freeze Borscht Soup with Beef

  • Fridge: Store in an airtight container for up to 5 days. Let the soup cool completely before sealing to maintain optimal freshness.

  • Freezer: Freeze for up to 2 months in a freezer-safe container. Portioning the soup makes it easy to heat individual servings as needed.

  • Reheating: Thaw overnight in the fridge and gently reheat on the stove over low heat until warmed through, stirring occasionally for even heating.

  • Flavor Reminder: Flavors deepen over time, making this Borscht Soup with Beef a perfect candidate for meal prep!

What to Serve with Borscht Soup with Beef

Transport yourself to a cozy Ukrainian kitchen where the heartwarming aroma fills the air, perfectly complementing your delicious bowl of soup.

  • Crusty Bread: The ideal partner for soaking up the rich broth; each bite of bread enhances the soup's comforting essence.

  • Pickles: A tangy bite of pickles brightens the meal, cutting through the soup's rich flavors, providing a delightful contrast. Pairing them with rye bread amplifies the savory experience.

  • Sour Cream Dip: A creamy, herbed dip serves as a refreshing side; its coolness balances the warmth of the borscht beautifully.

  • Fresh Salad: Crisp greens with a light vinaigrette add a refreshing crunch and a splash of color, creating a harmonious balance with the hearty soup.

  • Potato Varenyky: These dumplings filled with creamy mashed potatoes add a comforting touch; they are a classic side that echoes traditional Slavic cuisine.

  • Herbal Tea: A soothing cup of chamomile or mint tea can calm the palate, enhancing the cozy feel of your meal, perfect for those chilly evenings.

Expert Tips for Borscht Soup with Beef

  • Choose Quality Meat: Opt for bone-in short ribs for the richest flavor; chuck roast is a great substitute if needed.

  • Flavor Boost: Don't rush the sautéing process! Searing the onions and vegetables adds depth; let them caramelize a bit for maximum flavor.

  • Control the Sweetness: Adjust sugar according to personal taste; remember, beets are naturally sweet and may reduce the need for extra sugar.

  • Beet Handling: When preparing beets, wear gloves to avoid staining your hands and surfaces; cleanliness in the kitchen is key!

  • Simmer to Perfection: Allow the broth to simmer for at least two hours—patience enhances the depth and richness of this Borscht Soup with Beef.

  • Storage Benefits: This soup tastes even better the next day, making it perfect for meal prep; refrigerate or freeze leftovers for future cozy dinners.

Borscht Soup with Beef Variations & Substitutions

Feel free to unleash your culinary creativity and make this Borscht Soup with Beef truly your own!

  • Chuck Roast: Replace short ribs with chuck roast for a milder flavor and leaner option, perfect for those watching their fat intake.
  • Sweet Potatoes: Swap out regular potatoes for sweet potatoes to introduce a delightful sweetness and a pop of color to your soup.
  • Kale or Swiss Chard: Substitute cabbage with kale or Swiss chard for a nutritional boost and vibrant green hues, all while keeping the heartiness intact.
  • Sour Cream Alternative: Use Greek yogurt or cashew cream instead of sour cream to create a creamy, delicious topping suitable for dairy-free diets.
  • Lemon Zest: Add a splash of fresh lemon juice and zest at the end to elevate and brighten the flavors, adding a refreshing twist to this hearty dish.
  • Heat It Up: Incorporate diced jalapeños or a pinch of red pepper flakes for a spicy kick that complements the sweetness of the beets.
  • Pickled Beets: For a tangy flavor boost, mix in pickled beets towards the end of cooking; they introduce a delicious contrast, enhancing the soup’s complexity.
  • Savory Herbs: Experiment with adding fresh thyme or a bay leaf while the soup simmers for an aromatic depth that takes the comfort level to new heights.

You might also enjoy pairing this dish with comforting sides like Santa Soup Savory or crusty bread to soak up all the deliciousness. Each variation opens a new door to flavor, making this soup a versatile delight!

Borscht Soup with Beef Recipe FAQs

What kind of beets should I use for Borscht Soup?
Absolutely! I recommend using fresh beets, preferably medium-sized for this recipe. Look for firm beets without any dark spots or soft spots; they should have a vibrant color. If you want an extra sweetness, go for the variety labeled as "candy stripe" beets!

How long can I store Borscht Soup in the fridge?
You can store your Borscht Soup with Beef in an airtight container in the fridge for up to 5 days. Be sure to let it cool completely before sealing to help maintain freshness and prevent spoilage. Trust me, the flavors only get better as the soup sits!

Can I freeze Borscht Soup? How do I do it?
Yes, you can freeze this hearty soup for up to 2 months! To do this, let the soup cool completely and then transfer it into freezer-safe containers, leaving some space for expansion. Alternatively, portion out the soup into freezer bags, remove as much air as possible, and label them with the date. When you're ready to enjoy it, thaw overnight in the fridge and reheat on the stovetop over low heat until warmed through.

What if my Borscht Soup is too sour?
Very! If you find your Borscht Soup with Beef is a bit more sour than you'd like, you can balance the flavors easily. My go-to method is adding a teaspoon of sugar or honey to help cut the acidity. Start with a little and taste as you go, stirring it in well until you achieve the perfect balance!

Is Borscht Soup safe for pets?
It's essential to be cautious! While the individual ingredients in Borscht Soup are safe for pets (like beets and carrots), the combination may cause digestive upset in cats and dogs. Therefore, it's best to avoid sharing this soup with your furry friends or stick to a basic veggie broth specifically tailored for them.

Borscht Soup with Beef

Heartwarming Borscht Soup with Beef for Cozy Nights

This Borscht Soup with Beef is a nutrition-rich, comforting dish perfect for chilly evenings.
Print Recipe Pin Recipe
Prep Time 15 minutes mins
Cook Time 2 hours hrs
Resting Time 15 minutes mins
Total Time 2 hours hrs 30 minutes mins
Servings: 6 bowls
Course: Soups
Cuisine: Russian, Ukrainian
Calories: 350
Ingredients Equipment Method Nutrition Notes

Ingredients
  

For the Soup
  • 4 lbs Bone-in Short Ribs A main protein source that adds depth to the broth; substitute with chuck roast for a different flavor.
  • 16 cups Water The base for the broth; essential for simmering the beef and extracting flavors.
  • 1 large Onion Adds aroma and sweetness; sauté until translucent to enhance its natural flavors.
  • 2 medium Beets Provides the soup's vibrant color and earthy sweetness; wear gloves to prevent staining while handling.
  • 2 medium Carrots Contributes natural sugar and beautiful color; grating them helps with faster cooking.
  • 2 tbsp Tomato Paste Boosts richness and umami notes; a key ingredient for depth of flavor.
  • 1 small Cabbage Adds texture and earthiness; feel free to substitute with kale or Swiss chard if you prefer.
  • 2 medium Potatoes Delivers heartiness and helps thicken the soup; Russet potatoes are ideal for the perfect texture.
  • 1 tbsp Sugar Balances the acidity in the soup and enhances the sweetness of the vegetables.
  • 2 tbsp Parsley Fresh herbs for garnish that elevate the flavor and bring brightness to each bowl.
  • 2 tbsp Dill Fresh herbs for garnish that elevate the flavor and bring brightness to each bowl.
  • 1 cup Sour Cream A classic creamy topping; can be omitted for Whole 30 or dairy-free diets.

Equipment

  • Large pot
  • Skillet

Method
 

Step-by-Step Instructions
  1. In a large pot over medium-high heat, sear the bone-in short ribs for 5 minutes on each side until browned. Transfer the ribs to the pot and add 16 cups of water. Bring to a boil, then reduce to low and let it simmer for about 2 hours.
  2. In the same skillet, add diced onions and sauté over medium heat for 10-15 minutes until they become translucent. Stir in the grated carrots and beets, cooking for an additional 10 minutes. Add tomato paste, a pinch of salt, and sugar, stirring continuously for another 10 minutes.
  3. Once the short ribs are tender, add diced Russet potatoes and shredded cabbage to the pot. Cook for 15-20 minutes until potatoes are easily pierced with a fork. Mix in the sautéed vegetable blend along with chopped parsley and dill. Let it simmer for another 10 minutes.
  4. Remove short ribs from the pot and allow to cool slightly. Shred the meat from the bones and return it to the pot, stirring well. Let the soup sit covered for 10-15 minutes.
  5. Ladle generous portions into bowls, top with a tablespoon of sour cream and extra dill. Enjoy your warm bowl of homemade goodness!

Nutrition

Serving: 1bowlCalories: 350kcalCarbohydrates: 40gProtein: 25gFat: 12gSaturated Fat: 5gPolyunsaturated Fat: 1gMonounsaturated Fat: 3gCholesterol: 80mgSodium: 600mgPotassium: 950mgFiber: 5gSugar: 7gVitamin A: 1500IUVitamin C: 20mgCalcium: 60mgIron: 3mg

Notes

This soup tastes even better the next day, making it perfect for meal prep. Refrigerate or freeze leftovers for future cozy dinners.

Tried this recipe?

Let us know how it was!

Savory Msmen Filled with Chicken: A Comforting Moroccan Delight

February 11, 2026 by Grace Snow Leave a Comment

As I stood in my kitchen, the aroma of spices wafted through the air, transporting me straight to the bustling streets of Morocco. Today’s culinary adventure brings us to the charming and flavorful world of Msmen Filled with Chicken. This enchanting dish is not just comfort food; it’s an experience that marries flaky flatbread with a savory, spiced chicken and gooey cheese filling. Perfect for meal prep, these crispy morsels are easily made ahead and offer both generous portions and delightful gatherings. As I rolled out the dough, my heart raced with the anticipation of the delicious results to come. Are you ready to embark on a culinary journey that promises to impress and satisfy? Let’s get started!

Why is Msmen Filled with Chicken special?

Unique Texture: The crispy, flaky layers of the Msmen wrap around a savory, spiced chicken filling, creating a satisfying bite that’s hard to resist.

Hands-On Fun: This recipe is a joyful cooking experience—perfect for involving the whole family or a fun gathering with friends.

Meal Prep Friendly: Make a batch ahead of time and enjoy them throughout the week, just reheat for a quick, satisfying meal.

Crowd-Pleasing Appeal: With their delicious combination of textures and flavors, these Msmen are sure to be a hit at any gathering, much like Fiesta Lime Chicken or Chicken Salad with Apples.

Flavors of Morocco: Experience a taste of Moroccan culture with every bite, as the blend of spices delights your palate and transports you to another place.

Msmen Filled with Chicken Ingredients

For the Dough
• Flour – Essential for forming the base structure; all-purpose or bread flour works well.
• Baking Powder – Helps achieve a light and tender dough texture that is key to Msmen filled with chicken.
• Salt – Enhances the overall flavor of the dough.
• Honey – Adds a hint of sweetness to balance the savory filling.
• Water – Hydrates the flour to create a smooth, workable dough.
• Sunflower Oil – Contributes to the dough's flakiness by coating the gluten strands.

For the Filling
• Olive Oil – Used for sautéing the onions and greasing surfaces to prevent sticking.
• Yellow Onion – Provides a rich flavor; sauté until translucent for maximum taste.
• Chicken Thighs – Juicer and more flavorful than chicken breast; this is the heart of your filling.
• Ras el Hanout – A traditional Moroccan spice blend that infuses authentic flavor.
• Turmeric – Adds an earthy taste and vibrant color to the filling.
• Cayenne – Offers a kick of heat; adjust according to your spice preference.
• Garlic Powder – Enhances the depth of the overall flavor profile.
• Dried Parsley – Adds a touch of freshness to the filling.
• Cheese (e.g., Gouda, Cheddar) – Melts beautifully, binding the filling and enhancing the taste.

Embark on this delicious journey of creating Msmen filled with chicken that’s sure to bring warmth and excitement to your table!

Step‑by‑Step Instructions for Msmen Filled with Chicken

Step 1: Prepare the Dough
In a large mixing bowl, whisk together flour, baking powder, and salt. Create a well in the center, then pour in honey and gradually add water while mixing until you form a shaggy dough. Knead the mixture for 10-12 minutes until it becomes stretchy and smooth. Add sunflower oil, knead for another minute, then cover and let the dough rest for 30 minutes at room temperature.

Step 2: Cook the Filling
While the dough rests, heat olive oil in a skillet over medium heat. Sauté the finely chopped yellow onion for about 5 minutes, or until it becomes translucent. Add diced chicken thighs along with ras el hanout, turmeric, cayenne, garlic powder, and dried parsley. Cook until the chicken is fully cooked, approximately 10-12 minutes, ensuring it's juicy and flavorful. Allow the filling to cool completely.

Step 3: Shape the Dough
After the dough has rested, gently deflate it and divide it into 9 equal portions. Roll each portion into a smooth ball and flatten it slightly. Cover the pieces with a cloth and let them rest again for another 30 minutes, allowing the gluten to relax for easier stretching later.

Step 4: Stretch the Dough
On a lightly oiled surface, take one dough piece and lightly oil your hands. Stretch the dough into a thin rectangle, aiming for about 10 inches long, making sure the edges are slightly thinner for easier folding. Repeat this process with the remaining pieces, keeping them oiled to prevent sticking.

Step 5: Fill and Cook
Place a spoonful of the cooled chicken filling in the center of each stretched dough rectangle, adding a sprinkle of cheese. Fold the dough edges over to form a sealed packet. Heat oil in a skillet over medium heat and fry each filled Msmen for about 3-4 minutes on each side, or until golden brown and crispy. Adjust the heat to ensure even cooking and prevent burning.

Expert Tips for Msmen Filled with Chicken

Kneading Magic: Don’t rush kneading or resting phases—this is crucial for achieving the flaky texture you desire in your Msmen filled with chicken.

Cooling Matters: Always let the filling cool completely before sealing the dough. This prevents sogginess and keeps your Msmen perfectly crispy.

Stretch with Care: Use generous oil when stretching the dough. This prevents sticking and helps maintain the delicate layers.

Flavor Balance: Taste your filling during cooking to ensure the spice levels align with your preference, adjusting spices like cayenne for the perfect kick.

Fry Smart: Fry on medium heat to ensure the Msmen cook evenly and achieve that golden brown crunch without burning the outside.

Msmen Filled with Chicken Variations

Feel free to get creative with your Msmen; give your taste buds something to celebrate!

  • Vegetarian Delight: Replace chicken with spiced mushrooms or chickpeas for a satisfying meatless option. The earthy flavors harmonize beautifully with the spices.
  • Cheese Lovers: Swap Gouda or Cheddar for mozzarella or feta to bring new textures and flavors to your filling. Creamy mozzarella melts luxuriously, while feta adds a briny kick.
  • Spicy Kick: Add jalapeños or red pepper flakes to your filling for a bold heat that elevates the dish. Adjust spice levels to your liking; the vibrancy will surely awake your palate!
  • Herbed Twist: Mix fresh herbs like cilantro or mint into the chicken filling for a fresh and aromatic pop. The added herbs bring a lively and fragrant contrast to the savory depth of chicken.
  • Sweet & Savory: Incorporate diced apples or raisins in your filling for a touch of sweetness that beautifully balances the savory flavors. This unexpected combo adds an exciting layer to your Msmen.
  • Whole Grain Swap: For a heartier variation, use whole wheat flour for the dough. This will give your Msmen a nutty flavor and boost their nutritional value.
  • Smoky Sensation: Incorporate smoked paprika into your filling for an irresistible depth and warmth. Just a pinch will create a cozy atmosphere in every bite—perfect for family gatherings.
  • Topping Choices: Serve with a drizzle of tahini sauce or spicy harissa yogurt to elevate your dish. Just like Lemon Chicken Soup, these garnishes will enhance flavor while adding delightful textures.

Explore and mix these variations to find your favorite twist on Msmen filled with chicken! Each version offers a unique experience that's bound to impress friends and family alike.

Make Ahead Options

These Msmen Filled with Chicken are perfect for meal prep aficionados! You can prepare the dough up to 24 hours in advance; simply mix and let it rest as instructed. Additionally, cook the filling ahead of time, storing it in the refrigerator for up to 3 days. Ensure the filling cools completely before sealing it in an airtight container to maintain its delicious juiciness. When you're ready to enjoy this comforting Moroccan treat, simply stretch the dough, fill it with the cooled mixture, and fry until golden brown. This way, you’ll have mouthwatering Msmen on hand for busy weeknights or quick gatherings!

How to Store and Freeze Msmen Filled with Chicken

Fridge: Store leftover Msmen filled with chicken in an airtight container for up to 3 days to maintain their texture and flavor.

Freezer: For longer storage, wrap each Msmen tightly in plastic wrap and place them in a freezer-safe bag. They can be frozen for up to 2 months.

Reheating: To enjoy, simply reheat the Msmen in a dry frying pan over medium heat until crispy, about 3-4 minutes per side. This method keeps that delightful crunch!

Make-Ahead Tip: Prepare the Msmen and freeze them before cooking—great for quick meals on busy days when comfort food is a must.

What to Serve with Msmen Filled with Chicken

A delightful meal composed of Msmen Filled with Chicken can be elevated with the perfect accompaniments for a truly memorable experience.

  • Cucumber and Tomato Salad: This refreshing salad adds a crisp, light crunch that balances the rich flavors of the filling, making each bite feel lighter. Pairing fresh, juicy tomatoes with cool cucumbers creates a vibrant contrast that invites second helpings.

  • Harissa Yogurt Sauce: This spicy, creamy sauce enhances the Moroccan flavor profile beautifully. A dollop of harissa yogurt offers a cool and spicy kick, complementing the savory Msmen without overpowering them.

  • Moroccan Lentil Soup: A warm bowl of lentil soup filled with fragrant spices provides a hearty base, adding warmth and depth to your meal. Serve it alongside to create a comforting and filling dining experience that warms both body and soul.

  • Roasted Vegetables: Roasted seasonal veggies bring a caramelized sweetness to the table, enhancing the savory notes of the chicken and spices. The soft, tender veggies paired with the crispy Msmen create a delightful textural variety on your plate.

  • Mint Tea: End your meal with a traditional Moroccan touch by serving sweet mint tea. Its refreshing taste helps cleanse the palate and adds a fragrant finish, leaving everyone feeling satisfied and uplifted.

  • Almond Cake: For dessert, an almond cake brings a nutty sweetness, providing a lovely contrast to the savory flavors of the Msmen. Its light, fluffy texture pairs perfectly with a warm cup of tea or coffee, creating a sweet conclusion to your Moroccan feast.

Msmen Filled with Chicken Recipe FAQs

What type of flour is best for the dough?
For the dough of Msmen filled with chicken, I recommend using all-purpose or bread flour. Both types will create a great texture, but bread flour may provide added chewiness due to its higher protein content.

How long can I store leftover Msmen in the fridge?
Leftover Msmen filled with chicken can be stored in an airtight container in the fridge for up to 3 days. To keep them fresh, be sure they are completely cooled beforehand to prevent condensation.

Can I freeze Msmen filled with chicken? How?
Absolutely! To freeze, wrap each Msmen tightly in plastic wrap and place them in a freezer-safe bag. They can be kept for up to 2 months. When you’re ready to enjoy, reheat them in a dry frying pan over medium heat for about 3-4 minutes on each side to retain their crispy texture.

What should I do if my filling is too wet?
If your filling seems too wet and could make the dough soggy, try adding a bit more cooked chicken or some breadcrumbs to absorb excess moisture. Ensure your filling is cool before sealing it inside the dough to avoid sogginess.

Are there any dietary restrictions I should consider?
If you're making Msmen filled with chicken for individuals with allergies, be aware of the potential wheat and dairy content from the flour and cheese. For a gluten-free version, you can experiment with gluten-free flour blends. Moreover, subbing chicken with spiced mushrooms or chickpeas makes it friendly for plant-based diets!

Msmen Filled with Chicken

Savory Msmen Filled with Chicken: A Comforting Moroccan Delight

Enjoy the delightful experience of making Msmen Filled with Chicken, a comforting Moroccan dish that marries flaky flatbread with savory chicken and cheese.
Print Recipe Pin Recipe
Prep Time 1 hour hr
Cook Time 20 minutes mins
Resting Time 1 hour hr
Total Time 2 hours hrs 20 minutes mins
Servings: 9 pieces
Course: Dinner
Cuisine: Moroccan
Calories: 350
Ingredients Equipment Method Nutrition Notes

Ingredients
  

Dough Ingredients
  • 3 cups All-purpose flour
  • 1 tbsp Baking powder
  • 1 tsp Salt
  • 1 tbsp Honey
  • 1 cup Water
  • 2 tbsp Sunflower oil
Filling Ingredients
  • 2 tbsp Olive oil
  • 1 large Yellow onion finely chopped
  • 1 lb Chicken thighs diced
  • 2 tbsp Ras el Hanout
  • 1 tsp Turmeric
  • 1/2 tsp Cayenne adjust to preference
  • 1 tsp Garlic powder
  • 2 tbsp Dried parsley
  • 1 cup Cheese such as Gouda or Cheddar

Equipment

  • Mixing Bowl
  • Skillet
  • Rolling Pin
  • Airtight Container

Method
 

Prepare the Dough
  1. In a large mixing bowl, whisk together flour, baking powder, and salt. Create a well in the center, then pour in honey and gradually add water while mixing until you form a shaggy dough. Knead the mixture for 10-12 minutes until it becomes stretchy and smooth. Add sunflower oil, knead for another minute, then cover and let the dough rest for 30 minutes at room temperature.
Cook the Filling
  1. While the dough rests, heat olive oil in a skillet over medium heat. Sauté the finely chopped yellow onion for about 5 minutes, or until it becomes translucent. Add diced chicken thighs along with ras el hanout, turmeric, cayenne, garlic powder, and dried parsley. Cook until the chicken is fully cooked, approximately 10-12 minutes, ensuring it's juicy and flavorful. Allow the filling to cool completely.
Shape the Dough
  1. After the dough has rested, gently deflate it and divide it into 9 equal portions. Roll each portion into a smooth ball and flatten it slightly. Cover the pieces with a cloth and let them rest again for another 30 minutes, allowing the gluten to relax for easier stretching later.
Stretch the Dough
  1. On a lightly oiled surface, take one dough piece and lightly oil your hands. Stretch the dough into a thin rectangle, aiming for about 10 inches long, making sure the edges are slightly thinner for easier folding. Repeat this process with the remaining pieces, keeping them oiled to prevent sticking.
Fill and Cook
  1. Place a spoonful of the cooled chicken filling in the center of each stretched dough rectangle, adding a sprinkle of cheese. Fold the dough edges over to form a sealed packet. Heat oil in a skillet over medium heat and fry each filled Msmen for about 3-4 minutes on each side, or until golden brown and crispy. Adjust the heat to ensure even cooking and prevent burning.

Nutrition

Serving: 1pieceCalories: 350kcalCarbohydrates: 30gProtein: 20gFat: 18gSaturated Fat: 4gPolyunsaturated Fat: 1gMonounsaturated Fat: 12gCholesterol: 75mgSodium: 600mgPotassium: 350mgFiber: 2gSugar: 1gVitamin A: 200IUVitamin C: 4mgCalcium: 150mgIron: 2mg

Notes

For best results, let the filling cool entirely before sealing in the dough to ensure crispy Msmen.

Tried this recipe?

Let us know how it was!

Irresistible Steak and Ale Soup with Mushrooms for Cozy Nights

February 11, 2026 by Grace Snow Leave a Comment

You know that feeling when the first chill of autumn hits? It sparks an instant craving for cozy comfort food, and nothing embodies that desire quite like a steaming bowl of Hearty Steak and Ale Soup with Mushrooms. This recipe is a game-changer for weeknight dinners, delivering rich flavors and the tender goodness of ribeye steak without requiring hours in the kitchen. With its savory broth enhanced by a splash of ale, this dish promises to warm both your heart and soul. Plus, it’s incredibly adaptable—swap out ingredients or adjust seasonings to suit your taste or dietary needs. Ready to discover how to whip up this cozy masterpiece? Let’s dive in!

Why is Steak and Ale Soup Irresistible?

Heartwarming Comfort: There’s nothing like curling up with a bowl of rich, savory soup on a chilly evening. This hearty Steak and Ale Soup with Mushrooms perfectly captures that comforting feeling, with tender ribeye and earthy mushrooms in every spoonful.

Versatile Delights: You can easily adapt the recipe to fit your pantry, swapping ribeye for chuck roast or using gluten-free cornstarch. It’s a meal that fits your lifestyle!

Quick & Easy: With simple steps and under an hour of cooking, this recipe transforms your weeknight dinner routine.

Crowd-Pleaser: Whether for family or friends, it’s a sure hit that’ll get everyone raving about your culinary skills—serve it with warm crusty bread for a complete feast!

For more comforting meals, check out my delicious Bratwurst Peppers Onions or Skillet Pasta Feta.

Steak and Ale Soup with Mushrooms Ingredients

For the Soup Base
• Ribeye Steak – Provides rich and beefy flavor; opt for high-quality cuts for the best taste.
• Onions – Adds sweetness and depth to the broth; yellow onions are recommended.
• Mushrooms – Contributes earthiness and texture; choose cremini or button mushrooms for great results.
• Garlic – Enhances flavor complexity; fresh minced garlic is preferred.

For Coating and Flavor
• Flour – For coating the steak for a crispy crust; substitute cornstarch to make it gluten-free.
• Ale – Imparts unique earthy flavors; a quality ale like "Fat Tire" elevates the dish. Non-alcoholic beer works as a substitute too.
• Beef Stock – The foundation of the soup; homemade or store-bought is perfect for richness.

For Seasoning
• Dried Herbs (Thyme, etc.) – Adds flavor infusion; adjust quantities to suit your palate.
• Salt & Pepper – Essential for seasoning; taste to adjust according to preference.

This delightful Steak and Ale Soup with Mushrooms is sure to make your weeknight meal feel special, bringing warmth and comfort to your table.

Step‑by‑Step Instructions for Steak and Ale Soup with Mushrooms

Step 1: Prepare Ingredients
Start by cubing the ribeye steak into bite-sized pieces, ensuring uniformity for consistent cooking. Chop the onions and mushrooms, and mince the garlic. Gather your ingredients together, as having everything prepped will streamline the cooking process and set you up for success while making this delightful Steak and Ale Soup with Mushrooms.

Step 2: Sear Steak
In a large pot, heat a tablespoon of oil over medium-high heat until shimmering. Season the cubed ribeye steak with salt, pepper, and a light dusting of flour for a crispy crust. Add the steak to the pot, searing it for about 4-5 minutes until browned on all sides. Once seared, remove the steak and set it aside, keeping the flavorful remnants in the pot.

Step 3: Sauté Aromatics
In the same pot, reduce the heat to medium and add a little more oil if needed. Toss in the chopped onions, mushrooms, and minced garlic, sautéing for about 5-7 minutes. Stir occasionally until the onions turn translucent and the mushrooms soften, releasing their earthy aroma. This step creates a fragrant base for your Steak and Ale Soup with Mushrooms.

Step 4: Deglaze with Ale
Pour in a cup of quality ale, such as "Fat Tire," scraping up the browned bits from the bottom of the pot. This deglazing step enhances the soup's flavor and depth. Allow the ale to simmer for about 2-3 minutes, letting the alcohol evaporate and the flavors meld together before proceeding to the next step.

Step 5: Combine & Simmer
Return the seared steak to the pot, along with 4 cups of beef stock, dried herbs, salt, and pepper. Stir everything together, raise the heat until it reaches a gentle boil, then reduce to low. Simmer uncovered for roughly 45 minutes, allowing the soup to thicken while the flavors develop into a rich, hearty broth of Steak and Ale Soup with Mushrooms.

Step 6: Adjust Seasoning
After simmering, taste your soup and adjust the seasoning with more salt and pepper if needed. If you prefer, you can also add a pinch of additional herbs to enhance the flavor. Serve the soup hot, garnished with fresh herbs or accompanied by crusty bread for dipping, completing your cozy meal experience.

Steak and Ale Soup with Mushrooms Variations

Feel free to unleash your creativity and customize this delightful soup to suit your taste and dietary needs.

  • Gluten-Free: Substitute the flour with cornstarch to make the soup gluten-free without sacrificing flavor. Simply mix cornstarch with a bit of water to create a slurry before adding it to the pot.
  • Different Meats: Swap ribeye steak for chuck roast or stew meat for a more budget-friendly option. Just remember to adjust the cooking time to ensure those proteins become tender and flavorful.
  • Mushroom-Free: If mushrooms aren’t your thing, try using diced potatoes for a lovely hearty texture instead; they’ll soak up the delicious broth beautifully.
  • Bolder Flavor: Enhance the flavor by adding a splash of Worcestershire sauce or a teaspoon of smoked paprika for a smoky undertone; this adds an extra layer of richness that elevates the dish.
  • Vegetarian Version: For a meat-free variation, replace the beef stock with vegetable broth and add lentils or chickpeas for protein, making a filling vegetarian soup. Pair it with some Grilled Balsamic Steak Salad for a wholesome meal.
  • Herb Infusion: Experiment with fresh herbs like rosemary or parsley in place of or in addition to dried herbs. Fresh herbs can bring a burst of freshness and complexity to your soup that’s absolutely delightful.
  • Extra Creamy: For a richer finish, swirl in a dollop of crème fraîche or heavy cream just before serving for extra indulgence; this makes each spoonful feel luxurious.

As you explore these variations, remember to embrace the joy of cooking. It’s your kitchen, your flavors—make this recipe uniquely yours!

What to Serve with Hearty Steak and Ale Soup with Mushrooms

There’s nothing like enjoying a warm, comforting meal paired with delightful sides that enhance each delicious bite.

  • Crusty Bread: Perfect for dipping, the crunchy exterior and soft inside complements the hearty soup, soaking up all the rich flavors.
  • Mashed Potatoes: Creamy and buttery mashed potatoes provide a smooth texture contrast, absorbing the savory broth beautifully.
  • Garlic Bread: Crispy with a hint of garlic, it adds a deliciously fragrant element, making each meal feel more indulgent.
  • Salad with Vinaigrette: A refreshing green salad brings a crisp, zesty bite that balances the richness of the soup, showcasing seasonal veggies.
  • Roasted Root Vegetables: Sweet and earthy, they add a rustic charm while enhancing the comfort of the meal with their caramelized flavors.
  • Cheddar Biscuits: Flaky and cheesy, these mouthwatering biscuits pair perfectly with the soup, making dinner feel like a special occasion.
  • Red Wine: A glass of robust red wine, like a Merlot or Cabernet Sauvignon, beautifully complements the savory notes in the Steak and Ale Soup.
  • Chocolate Cake: For dessert, a rich chocolate cake rounds out the meal, offering a sweet contrast to the hearty soup experience.

How to Store and Freeze Steak and Ale Soup with Mushrooms

Fridge: Store your delicious Steak and Ale Soup with Mushrooms in an airtight container for up to 3 days. Allow it to cool completely before sealing to maintain freshness.

Freezer: For longer storage, freeze the soup in freezer-safe containers or bags for up to 2 months. Leave some space at the top of the container as the soup will expand when frozen.

Reheating: When ready to enjoy, thaw the soup in the fridge overnight, and reheat gently on the stove or in the microwave until heated through. Stir frequently to maintain creaminess and even heating.

Tip: If the soup thickens in the fridge or freezer, add a splash of beef stock or water while reheating to reach your desired consistency.

Expert Tips for Steak and Ale Soup

Quality Ingredients Matter: Use the best ribeye steak for rich flavor; fresh vegetables can elevate the whole dish.

Cornstarch Substitution: If you’re going gluten-free, mix cornstarch with water to create a slurry before adding it to the soup for perfect thickening.

Avoid Overcooking: When returning the seared steak to the pot, warm it through instead of cooking it further to maintain its tenderness.

Flavor Depth: Don’t forget to scrape the bottom of the pot when deglazing with ale; that fond is packed with flavor for your Steak and Ale Soup with Mushrooms.

Taste as You Go: Keep tasting during the cooking process to adjust seasoning to your liking; everyone's tastebuds are different!

Make Ahead Options

This Hearty Steak and Ale Soup with Mushrooms is a fantastic option for meal prep, saving you time for those busy weeknights! You can chop the onions, mushrooms, and mince garlic up to 24 hours in advance and store them in the refrigerator. Additionally, you can sear the ribeye steak beforehand and refrigerate it for up to 3 days. When you're ready to enjoy your soup, simply follow the final steps: sauté the prepped aromatics, deglaze with ale, combine all ingredients, and simmer. Keeping the components separate helps maintain their freshness and flavor, ensuring that your soup is just as delicious when you serve it!

Steak and Ale Soup with Mushrooms Recipe FAQs

What type of steak should I use for the best flavor?
For optimal richness, I recommend using high-quality ribeye steak. Ribeye provides a deep, beefy flavor and tender texture that truly elevates the soup. If you prefer an alternative, chuck roast can work, but keep in mind that it may require longer cooking time to become tender.

How long can I store the soup in the fridge?
Your Steak and Ale Soup with Mushrooms can be safely stored in an airtight container in the refrigerator for up to 3 days. To maintain its delicious flavor, make sure the soup cools completely before sealing it up.

Can I freeze this soup?
Absolutely! You can freeze your Steak and Ale Soup with Mushrooms for up to 2 months. Just be sure to use freezer-safe containers or bags, and leave a little room at the top to allow for expansion as it freezes.

What should I do if my soup turns out too thick after refrigerating or freezing?
No worries! If you find that the soup is too thick upon reheating, simply add a splash of beef stock or water to reach your desired consistency. Gently stir while reheating to ensure it heats evenly.

Are there any dietary considerations I should be aware of?
Yes! If you have dietary restrictions, you can easily adapt this recipe. To make it gluten-free, substitute the flour used to coat the steak with cornstarch and ensure your ale or beer is gluten-free as well. Always check labels for allergens if cooking for others.

How can I enhance the flavor of my soup?
For an extra boost, consider adding a bay leaf during the simmering stage or tossing in fresh herbs like parsley or thyme before serving. Experimenting with these additions can really personalize your Steak and Ale Soup with Mushrooms!

Steak and Ale Soup with Mushrooms

Irresistible Steak and Ale Soup with Mushrooms for Cozy Nights

This hearty Steak and Ale Soup with Mushrooms is perfect for cozy nights, combining rich flavors and tender ribeye steak in a savory broth.
Print Recipe Pin Recipe
Prep Time 15 minutes mins
Cook Time 45 minutes mins
Total Time 1 hour hr
Servings: 4 bowls
Course: Soups
Cuisine: Comfort Food
Calories: 450
Ingredients Equipment Method Nutrition Notes

Ingredients
  

For the Soup Base
  • 1 pound Ribeye Steak Provides rich and beefy flavor; opt for high-quality cuts for the best taste.
  • 1 medium Onion Yellow onions are recommended.
  • 8 ounces Mushrooms Choose cremini or button mushrooms for great results.
  • 3 cloves Garlic Fresh minced garlic is preferred.
For Coating and Flavor
  • 1 cup Flour For coating the steak for a crispy crust; substitute cornstarch to make it gluten-free.
  • 1 cup Ale A quality ale like 'Fat Tire' elevates the dish.
  • 4 cups Beef Stock Homemade or store-bought is perfect for richness.
For Seasoning
  • 1 teaspoon Dried Herbs (Thyme, etc.) Adjust quantities to suit your palate.
  • to taste Salt Essential for seasoning.
  • to taste Pepper Essential for seasoning.

Equipment

  • Large pot

Method
 

Step-by-Step Instructions
  1. Start by cubing the ribeye steak into bite-sized pieces, ensuring uniformity for consistent cooking. Chop the onions and mushrooms, and mince the garlic.
  2. In a large pot, heat a tablespoon of oil over medium-high heat until shimmering. Season the cubed ribeye steak with salt, pepper, and a light dusting of flour. Add the steak to the pot, searing it for about 4-5 minutes until browned on all sides.
  3. In the same pot, reduce the heat to medium and add a little more oil if needed. Toss in the chopped onions, mushrooms, and minced garlic, sautéing for about 5-7 minutes.
  4. Pour in a cup of quality ale, scraping up the browned bits from the bottom of the pot. Allow the ale to simmer for about 2-3 minutes.
  5. Return the seared steak to the pot, along with 4 cups of beef stock, dried herbs, salt, and pepper. Stir everything together, raise the heat until it reaches a gentle boil, then reduce to low.
  6. After simmering, taste your soup and adjust the seasoning with more salt and pepper if needed. Serve the soup hot, garnished with fresh herbs or accompanied by crusty bread.

Nutrition

Serving: 1bowlCalories: 450kcalCarbohydrates: 30gProtein: 28gFat: 20gSaturated Fat: 7gPolyunsaturated Fat: 1.5gMonounsaturated Fat: 10gCholesterol: 80mgSodium: 900mgPotassium: 800mgFiber: 3gSugar: 4gVitamin A: 500IUVitamin C: 10mgCalcium: 30mgIron: 4mg

Notes

Quality ingredients matter; use the best ribeye steak for rich flavor. Store leftovers in an airtight container for up to 3 days or freeze for 2 months.

Tried this recipe?

Let us know how it was!

Heartwarming Borscht Soup with Beef to Brighten Your Day

February 11, 2026 by Grace Snow Leave a Comment

While sipping a warm cup of tea on a chilly day, I found myself craving comfort in a bowl. That’s when I decided to whip up a classic Borscht Soup with Beef, a heartfelt dish that never fails to wrap me in warmth. This vibrant beetroot soup is not only rich in flavors but also a feast for the eyes, making it a true favorite in my kitchen. What sets this recipe apart is its quick prep time and its ability to nourish both the body and soul, perfect for those of us who are tired of fast food but still want something cozy and satisfying. Plus, it’s a fantastic option for meal prep or sharing with loved ones. Are you ready to dive into a symphony of textures and tastes that will transport you right to Eastern Europe?

Why is Borscht Soup a Must-Try?

Comforting and Nourishing: Nothing beats the soothing goodness of warm Borscht Soup, especially on a cold day.
Vibrant Flavors: The combination of earthy beets, tender beef, and zesty citrus creates a delightful taste explosion.
Quick Preparation: With efficient prep time, this soup fits perfectly into your busy schedule while delivering homemade comfort.
Versatile Meal: Serve it as an appetizer, main dish, or even as part of a cozy dinner spread alongside a warm loaf of bread.
Meal Prep Friendly: Ideal for batch cooking, you can enjoy it throughout the week—just like my Lemon Chicken Soup or hearty Zuppa Toscana Soup!
Crowd-Pleasing Delight: With its stunning color and rich flavors, it’s sure to impress family and friends at your next gathering.

Borscht Soup with Beef Ingredients

For the Soup
• Beef Chuck or Brisket – this cuts beautifully tender when simmered and adds depth to your Borscht soup with beef.
• Beets – the star of the show, these vibrant roots bring sweetness and color to your comforting bowl.
• Cabbage – adds a crunchy texture that balances the soup’s richness while enhancing the nutritional profile.
• Carrots – their natural sweetness complements the earthiness of the beets wonderfully.
• Onion – a must for a flavor base, sautéing it brings out a lovely sweetness and aroma.
• Garlic – infuses the soup with warmth, making every spoonful feel cozy.
• Vegetable or Beef Broth – choose high-quality broth for a deeper, richer flavor experience.
• Tomato Paste – intensifies the soup’s flavor with a slight acidity that balances sweetness.
• Bay Leaves – these aromatic leaves add a subtle depth, enhancing the overall taste.
• Salt and Pepper – essential for balancing flavors; adjust to your preference.

For the Garnish
• Sour Cream – adds a luxurious creaminess and tang that beautifully contrasts the soup’s sweetness.
• Fresh Dill – a sprinkle of this herb adds brightness and freshness to each bowl.
• Lemon Wedge – squeeze a little before serving for a zesty finish that elevates the flavors!

With these ingredients, you’ll create a Borscht Soup with Beef that's a true reflection of comfort and love!

Step‑by‑Step Instructions for Borscht Soup with Beef

Step 1: Make the Broth
Begin by searing the beef short ribs in a large skillet over high heat for about 5 minutes per side, until they develop a rich, golden crust. Once seared, transfer the ribs to a large pot, add 16 cups of water, and bring to a vigorous boil. Reduce the heat and let it simmer on medium-low for approximately 2 hours, or until the meat is fork-tender.

Step 2: Prepare Vegetables
While the broth simmers, chop the onion and grate the carrots and beets. In the same skillet used for the ribs, add the leftover beef fat and sauté the chopped onion over medium heat for 10 to 15 minutes, or until golden and fragrant. Next, stir in the grated carrots and beets, cooking for an additional 10 minutes until the vegetables soften beautifully.

Step 3: Combine Ingredients
Stir in the tomato paste, salt, and sugar into the sautéed vegetable mixture, enhancing the flavors as you cook for an extra 10 minutes. When the beef in your pot is tender, add diced potatoes and shredded cabbage to the broth, letting them cook for 15 to 20 minutes until the potatoes are soft and the soup becomes hearty.

Step 4: Finish the Soup
Combine the sautéed vegetable mixture with the simmering broth, stirring gently to mix the flavors. Carefully remove the beef short ribs, shred the meat, and return it to the pot, letting everything thicken together. Allow the soup to sit off the heat for about 10 to 15 minutes before serving, giving the flavors a chance to meld perfectly.

Storage Tips for Borscht Soup with Beef

Fridge: Store your Borscht Soup with Beef in an airtight container in the refrigerator for up to 5 days. This allows the flavors to deepen, making it even more delicious!

Freezer: For longer storage, freeze the soup in portioned containers for up to 2 months. Make sure to leave some space at the top for expansion as it freezes.

Reheating: To reheat, place the frozen soup in the refrigerator overnight to thaw, then warm it gently on the stove over low heat, stirring occasionally.

Refrigerate Leftovers: If you have leftovers, they can be refrigerated but consume them within 3 days for the best taste and freshness.

Make Ahead Options

These Beef Borscht Soup options are perfect for those who want to enjoy home-cooked goodness without the last-minute rush! You can chop the vegetables (onion, carrots, beets, and potatoes) and store them in an airtight container in the refrigerator up to 3 days before cooking. Additionally, the broth can be prepared up to 24 hours ahead; simply make it, let it cool, and refrigerate. When you're ready to serve, heat the broth, sauté the vegetables, and add them to the pot. To ensure the soup remains just as delicious, avoid adding the sour cream until serving. Embrace these make-ahead steps to delight in a comforting Borscht Soup with Beef on busy evenings!

Borscht Soup with Beef Variations

Feel free to make this vibrant Borscht Soup with Beef your own by trying out these delightful variations!

  • Vegetarian Delight: Replace beef with cooked lentils or chickpeas and use vegetable broth for a savory twist.
  • Tangy Addition: Stir in fresh sauerkraut for a burst of acidity that complements the soup's sweetness beautifully.
  • Sweet Twist: Experiment with golden beets for a sweeter flavor and a less earthy taste, perfect if you're a beet novice.
  • Herb Swap: Substitute dill for fresh thyme, adding a unique aroma that pairs delightfully with the soup.
  • Creamy Alternative: For a dairy-free version, omit sour cream or try coconut cream for a luscious finish.
  • Heat Factor: Add a pinch of cayenne pepper or red pepper flakes to infuse a gentle warmth into your Borscht.
  • Texture Boost: Top with crispy fried onions for an added crunch that contrasts with the soup's softness.
  • Bold Citrus: Squeeze a little lemon juice over the soup before serving for a refreshing burst of citrus that brightens the dish.

Whether you're in the mood for a cozy meal or want to explore different flavor profiles, these ideas can help tailor the classic Borscht to your taste. Plus, if you're looking for a different comforting soup, why not check out my Asparagus Soup Healthy or my hearty Santa Fe Soup Savory?

Tips for the Best Borscht Soup

  • Sear for Flavor: Searing the beef and vegetables is crucial for creating a rich flavor base in your Borscht Soup with Beef—don't skip this step!

  • Let it Rest: Allow your soup to sit off the heat before serving. This helps the flavors meld beautifully, enhancing overall taste.

  • Storage Savvy: Store leftovers in the refrigerator for up to 5 days or freeze for 2 months; soups often taste even better the next day!

  • Cut Evenly: Chop your vegetables into even pieces for consistent cooking; this ensures every bite is tender and delicious.

  • Beets Handling: Wear gloves when handling beets to prevent staining your hands—a simple trick to keep your kitchen clean!

  • Customize Wisely: Don’t hesitate to adjust ingredients according to your diet; Borscht Soup can be adapted for Whole 30 and dairy-free diets beautifully!

What to Serve with Borscht Soup with Beef

Bring your meal to life with tantalizing accompaniments that enhance the comforting essence of this hearty soup.

  • Crusty Bread: A warm, rustic loaf is perfect for dipping, soaking up every drop of that rich, flavorful broth.
  • Sour Cream & Dill Topping: A dollop of tangy sour cream with fresh dill balances the soup's earthiness, adding creaminess and flavor.
  • Pickled Vegetables: A side of tart pickles or fermented vegetables brings a delightful crunch, cutting through the soup’s richness with zing.
  • Roasted Potatoes: Crispy roasted potatoes provide a textural contrast and absorb all those comforting flavors from the soup wonderfully.

Pair your Borscht with a fresh salad for brightness. A simple mixed green salad dressed with lemon vinaigrette will refresh your palate and bring out the soup's depth.

  • Citrusy Coleslaw: A crunchy coleslaw featuring citrus dressing offers a zestful crunch and pairs beautifully with the soup's warmth.
  • Red Wine: A glass of light-bodied red wine, like Pinot Noir, complements the earthy flavors of beets and beef, enhancing the dining experience.
  • Apple Pie: For dessert, a slice of warm apple pie brings a sweet touch to a hearty meal, rounding out your comforting feast.

These additions will embrace the spirit of the Borscht Soup with Beef and elevate your cozy dining experience!

Borscht Soup with Beef Recipe FAQs

What kind of beets should I use for Borscht Soup?
I recommend using traditional red beets for their vibrant color and sweetness, but you can also experiment with golden beets for a milder, sweeter flavor. Just remember to wear gloves when handling beets to avoid staining your hands!

How should I store leftovers of Borscht Soup with Beef?
Store your Borscht Soup with Beef in an airtight container in the refrigerator for up to 5 days. This allows the flavors to meld together nicely! If you have more soup than you can eat, you can freeze it for up to 2 months in portioned containers. Just leave some room for expansion as it freezes.

Can I freeze Borscht Soup with Beef?
Absolutely! To freeze Borscht Soup, ladle it into airtight containers, leaving some space for the soup to expand as it freezes. It can be stored for up to 2 months. When you're ready to enjoy it, simply transfer it to the refrigerator to thaw overnight and reheat it gently on the stovetop.

What if my Borscht Soup is too sweet?
If your Borscht Soup turns out sweeter than you'd like, a quick fix is to add a splash of vinegar or a squeeze of lemon juice to balance the sweetness. You can also increase the amount of salt slightly, which may help counteract the sweetness from the beets.

Is this Borscht Soup suitable for those with dietary restrictions?
Yes, indeed! This Borscht Soup with Beef can easily be adapted for Whole 30 and dairy-free diets. You can skip the sour cream and use vegetable broth instead of beef broth. Alternatively, for a vegetarian version, substitute beef with cooked lentils or chickpeas, and use vegetable broth to keep it hearty and satisfying.

How long does Borscht Soup stay fresh in the fridge?
Your Borscht Soup will stay fresh in the refrigerator for about 5 days. Soups often taste even better after a day or two, as the flavors continue to develop. Just be sure to store it in an airtight container for maximum freshness!

Heartwarming Borscht Soup with Beef to Brighten Your Day

This Borscht Soup with Beef is a comforting dish that brings warmth and satisfaction.
Print Recipe
Prep Time 30 minutes mins
Cook Time 2 hours hrs
Resting Time 15 minutes mins
Total Time 2 hours hrs 45 minutes mins
Servings: 6 bowls
Course: Soups
Cuisine: Eastern European
Calories: 352
Ingredients Equipment Method Nutrition Notes

Ingredients
  

For the Soup
  • 2 pounds Beef Chuck or Brisket
  • 4 cups Beets peeled and grated
  • 2 cups Cabbage shredded
  • 2 medium Carrots peeled and grated
  • 1 large Onion chopped
  • 4 cloves Garlic minced
  • 16 cups Vegetable or Beef Broth high-quality
  • 2 tablespoons Tomato Paste
  • 2 leaves Bay Leaves
  • to taste Salt and Pepper adjust as needed
For the Garnish
  • 1 cup Sour Cream
  • 1 tablespoon Fresh Dill chopped
  • 1 wedge Lemon for serving

Equipment

  • Large skillet
  • Large pot
  • Cutting Board
  • Knife

Method
 

Step-by-Step Instructions
  1. Begin by searing the beef short ribs in a large skillet over high heat for about 5 minutes per side, until they develop a rich, golden crust.
  2. Transfer the ribs to a large pot, add 16 cups of water, and bring to a vigorous boil. Reduce the heat and let it simmer on medium-low for approximately 2 hours, or until the meat is fork-tender.
  3. While the broth simmers, chop the onion and grate the carrots and beets. In the same skillet used for the ribs, add the leftover beef fat and sauté the chopped onion over medium heat for 10 to 15 minutes, or until golden and fragrant.
  4. Next, stir in the grated carrots and beets, cooking for an additional 10 minutes until the vegetables soften beautifully.
  5. Stir in the tomato paste, salt, and sugar into the sautéed vegetable mixture, enhancing the flavors as you cook for an extra 10 minutes.
  6. When the beef in your pot is tender, add diced potatoes and shredded cabbage to the broth, letting them cook for 15 to 20 minutes until the potatoes are soft and the soup becomes hearty.
  7. Combine the sautéed vegetable mixture with the simmering broth, stirring gently to mix the flavors.
  8. Carefully remove the beef short ribs, shred the meat, and return it to the pot, letting everything thicken together.
  9. Allow the soup to sit off the heat for about 10 to 15 minutes before serving, giving the flavors a chance to meld perfectly.

Nutrition

Serving: 1bowlCalories: 352kcalCarbohydrates: 28gProtein: 24gFat: 16gSaturated Fat: 6gPolyunsaturated Fat: 1gMonounsaturated Fat: 8gCholesterol: 81mgSodium: 653mgPotassium: 786mgFiber: 6gSugar: 5gVitamin A: 195IUVitamin C: 15mgCalcium: 65mgIron: 3mg

Notes

Allow your soup to sit off the heat before serving to enhance overall taste. Store leftovers in the refrigerator for up to 5 days or freeze for 2 months.

Tried this recipe?

Let us know how it was!

Savory Chicken Lentil Soup for Cozy Nights In

February 11, 2026 by Grace Snow Leave a Comment

As the chilly air wraps around us, there’s nothing quite like the scent of Easy Chicken Lentil Soup simmering on the stove to lift your spirits. This hearty one-pot meal combines tender chicken with luscious green lentils, creating a dish that's both comforting and satisfying—ideal for those busy weeknights when our lives feel a little chaotic. Packed with protein and fiber, it’s not just a great way to nourish your family, but also a clever twist on classic comfort food. The best part? This soup is simple to whip up, so you can enjoy quality homemade flavor without the usual fuss. Curious about how a humble bowl can bring warmth to your kitchen? Let’s dive in!

Why is Chicken Lentil Soup So Special?

Comforting, Hearty Meal: Enjoy a bowl that feels like a warm hug, making it perfect for chilly nights.
Nutritious Boost: Packed with protein from chicken and fiber from lentils, it’s a wholesome choice your family will love.
One-Pot Wonder: Minimal cleanup makes cooking and enjoying this dish a breeze, letting you savor more moments together.
Flavorful Upgrade: The combination of spices like cumin and smoked paprika offers a unique twist on classic soup flavors.
Endless Versatility: Feel free to adapt ingredients or spices, ensuring this Easy Chicken Lentil Soup can fit any palate or dietary need. Enjoy it as a cozy meal or with a side of crusty bread for a complete dinner experience, just like you'll find in some of our other favorites like Crock Pot Chicken or Honey Garlic Chicken.

Chicken Lentil Soup Ingredients

For the Soup
• Chicken Breast – Provides protein and flavor; thighs can be used for a richer taste.
• Green Lentils – Adds fiber and holds shape in soup; brown lentils are a substitute that works, but avoid red or yellow for their mushiness.
• Yellow Onion – Forms a base flavor; diced for even cooking.
• Carrots – Adds sweetness and texture; cut into 1/2-inch rounds for even cooking.
• Celery – Adds crunch and flavor; diced into 1/2-inch pieces for consistent cooking.
• Garlic – Offers aromatic depth; freshly minced is preferred for maximum flavor.
• Fire-Roasted Diced Tomatoes – Adds acidity and a smoky flavor; opt for high-quality canned tomatoes for the best results.
• Chicken Broth – Provides a liquid base; low-sodium options are excellent for controlling saltiness.
• Olive Oil – Used for sautéing; a neutral oil can be substituted.

For Seasoning
• Smoked Paprika – Imparts depth and color; optional but recommended for flavor enhancement.
• Cumin – Adds warm flavor notes; adjust to taste.
• Black Pepper – Enhances flavor; use freshly ground for the best results.
• Salt – Essential seasoning; adjust to taste.

For Freshness
• Spinach – Introduces freshness and nutrients; add just before serving to retain color and taste.

This Chicken Lentil Soup is not only easy to make but also a wholesome choice perfect for cozy nights in!

Step‑by‑Step Instructions for Easy Chicken Lentil Soup

Step 1: Prepare Ingredients
Begin by cutting the chicken breast into bite-sized chunks, then season generously with salt and black pepper. Next, dice the yellow onion, carrots, and celery into 1/2-inch pieces, and mince the garlic. Organizing your ingredients beforehand will ensure a smooth cooking process when making your Chicken Lentil Soup.

Step 2: Sauté Vegetables
In a large pot, heat 2 tablespoons of olive oil over medium heat. Once hot, add the diced onion, carrots, and celery. Sauté the vegetables for about 6 minutes, stirring frequently, until they soften and become translucent. This foundational step contributes rich flavors to your Chicken Lentil Soup.

Step 3: Add Garlic and Spices
Stir in the minced garlic, along with 1 teaspoon of smoked paprika and 1 teaspoon of cumin. Cook the mixture for an additional minute, allowing the spices to bloom and the garlic to release its aromatic depth. This step enhances the flavor profile of your Chicken Lentil Soup, making it truly comforting.

Step 4: Combine Ingredients
Next, add the seasoned chicken chunks, 1 cup of green lentils, one can of fire-roasted diced tomatoes, and 6 cups of chicken broth to the pot. Stir everything together well and bring the mixture to a boil over high heat. This combination is where the magic of your Chicken Lentil Soup begins to take shape!

Step 5: Simmer
Once boiling, reduce the heat to medium-low and cover the pot loosely. Let the soup simmer for about 25 minutes, stirring occasionally. You’ll know it’s ready when the lentils are tender and the chicken is cooked through. This gentle simmering helps develop a rich and hearty flavor in your Chicken Lentil Soup.

Step 6: Finish with Spinach
Finally, stir in two cups of fresh spinach just before serving, allowing it to wilt for about 2 minutes. Adjust the seasoning with additional salt and pepper to taste. This last step not only adds vibrancy but also enhances the nutritional profile of your Chicken Lentil Soup, making it both delicious and wholesome.

What to Serve with Easy Chicken Lentil Soup

Warm your heart and home with delightful accompaniments that enhance your hearty one-pot meal perfectly.

  • Crusty Bread: Perfect for dipping, its rustic texture contrasts beautifully with the smooth soup, making each bite even more satisfying.
  • Simple Side Salad: A fresh mix of greens with a light vinaigrette adds a refreshing crunch, balancing the warmth of the soup.
  • Garlic Breadsticks: Soft and buttery, these offer a delightful twist that pairs beautifully with the soup's flavors, inviting extra indulgence.
  • Roasted Vegetables: A medley of seasonal veggies brings an earthy sweetness that complements the rich flavors of your chicken lentil soup.
  • Couscous or Quinoa: These grains offer a nutty undertone and a delightful chew, enhancing the meal’s overall texture and heartiness.
  • Pita Chips: Crunchy and addictive, they make for a fun dipper while contrasting nicely with the soup’s warmth.
  • Hot Apple Cider: This cozy beverage brings a festive touch, warming up chilly evenings and perfectly pairing with the soup’s savory notes.

How to Store and Freeze Chicken Lentil Soup

Fridge: Store your Chicken Lentil Soup in an airtight container for up to 5 days; make sure it’s completely cooled before sealing for optimal freshness.

Freezer: If you want to enjoy it later, freeze the soup in portioned airtight containers for up to 3 months. Leave some space at the top for expansion as it freezes.

Reheating: When ready to enjoy, reheat on the stovetop over medium heat, adding a splash of chicken broth or water if it’s too thick. Alternatively, microwave in a covered bowl, stirring occasionally.

Thawing: For best results, thaw frozen soup overnight in the fridge before reheating. This ensures even heating without compromising texture.

Make Ahead Options

These Easy Chicken Lentil Soup options are perfect for meal prep enthusiasts looking to save time on busy weeknights! You can chop all your vegetables (onions, carrots, and celery) up to 3 days in advance and store them in the refrigerator to keep them fresh. Additionally, you can cook the soup and refrigerate it for up to 5 days or freeze it in portioned containers, making it quick to reheat when hunger strikes. To maintain quality, ensure it's cooled before refrigerating or freezing, and add fresh spinach only just before serving to keep its vibrant color. When ready to enjoy, simply heat the soup on the stovetop or microwave until warmed through for a comforting meal that feels just as fresh!

Chicken Lentil Soup Variations

Feel free to play around with the flavors and ingredients to create your perfect bowl of warmth!

  • Dairy-Free: Use coconut milk instead of chicken broth for a creamy, dairy-free version. This adds a subtle sweetness that complements the spices beautifully.

  • Spicy Kick: Incorporate diced jalapeños or a pinch of cayenne pepper for added heat. This variation turns your comforting soup into a delightful adventure for your taste buds.

  • Veggie-Loaded: Toss in additional vegetables like zucchini or bell peppers for extra nutrients and varying textures. A medley of colors not only makes the soup visually appealing but also enhances its health benefits.

  • Herb Infusion: Swap spinach for fresh kale or add a handful of fresh herbs like parsley or cilantro just before serving. This vibrant touch brightens the soup and adds a fresh layer of flavor.

  • Savory Depth: Consider adding a splash of soy sauce or Worcestershire sauce for a deeper umami flavor. This twist creates a rich, savory profile that’s simply irresistible!

  • Garnish & Texture: Top with crumbled feta or goat cheese to introduce a creamy element that balances the hearty lentils. A sprinkle of crispy bacon or toasted nuts can add a delightful crunch, captivating both texture and taste.

  • Meal Prep Friendly: Make a large batch and freeze portions for quick meals later. For a soup that's ready when you are, try the Crock Pot Chicken for an effortless alternative to traditional cooking.

These variations will keep your Chicken Lentil Soup exciting and adaptable for every taste!

Tips for the Best Chicken Lentil Soup

  • Chicken Timing: Add the chicken during the last 10–12 minutes of cooking to prevent it from drying out and maintain tenderness.

  • Rinse Lentils: Be sure to rinse green lentils before adding them to your Chicken Lentil Soup. This helps remove excess starch that can thicken the soup undesirably.

  • Gentle Simmer: Always simmer your soup gently rather than boiling vigorously. This keeps the broth clear and the lentils intact, resulting in a beautiful texture.

  • Adjust Consistency: If your soup thickens too much, simply add more chicken broth or water gradually while reheating to reach your desired consistency.

  • Seasoning Balance: Taste the soup before serving and adjust your salt and pepper accordingly. The right seasoning can elevate the overall flavor of your Chicken Lentil Soup!

Chicken Lentil Soup Recipe FAQs

How do I select the best chicken for the Chicken Lentil Soup?
Absolutely! When selecting chicken, look for fresh, skinless breast or thigh pieces that are lean and pack a lot of flavor. To ensure optimal freshness, check that the chicken is firm to the touch, free from discolorations, and has no off-putting smell. If you prefer richer flavors, opting for thighs is a fantastic choice!

How should I store leftover Chicken Lentil Soup?
To store your Chicken Lentil Soup, transfer it to an airtight container and let it cool completely before sealing. It will keep well in the fridge for up to 5 days. If you want to savor it later, consider freezing in portioned containers for up to 3 months, making it incredibly convenient for future meals!

Can I freeze Chicken Lentil Soup, and if so, how?
Very! To freeze your Chicken Lentil Soup, allow it to cool completely, then pour it into airtight containers, leaving about an inch of space at the top to accommodate for expansion. For easy portions, you can also use freezer bags! Label them with the date, and it will be good for up to 3 months. When ready to enjoy, simply thaw overnight in the fridge or use the microwave's defrost setting!

What should I do if my soup turns out too thick?
If your Chicken Lentil Soup turns out thicker than you’d like, no worries! Simply add a bit of chicken broth or water gradually while reheating on the stovetop until you reach your desired consistency. Stir well to ensure a smooth mixture. Remember, it’s all about making it perfect for your taste!

Is there a vegetarian option for this Chicken Lentil Soup?
Absolutely! If you'd like to create a vegetarian version, simply omit the chicken and replace chicken broth with vegetable broth. You can supplement the dish with hearty vegetables like mushrooms or zucchini for added flavor and texture while maintaining delicious protein with the lentils. Enjoy making this adaptable recipe!

Can I serve Chicken Lentil Soup to kids with allergies?
For those with dietary concerns, it's crucial to check ingredient labels carefully. The core ingredients in this soup are generally safe, but be cautious with seasonings like garlic and spices, which some may be allergic to. If unsure, customize the recipe with alternative spices and omit or substitute any ingredient that raises concern. Always consult with a healthcare provider for personalized advice!

Chicken Lentil Soup

Savory Chicken Lentil Soup for Cozy Nights In

A hearty Chicken Lentil Soup that combines tender chicken and green lentils, perfect for comforting meals on chilly nights.
Print Recipe Pin Recipe
Prep Time 15 minutes mins
Cook Time 45 minutes mins
Total Time 1 hour hr
Servings: 6 cups
Course: Soups
Cuisine: American
Calories: 320
Ingredients Equipment Method Nutrition Notes

Ingredients
  

For the Soup
  • 1 pound Chicken Breast Cut into bite-sized chunks
  • 1 cup Green Lentils Rinsed
  • 1 medium Yellow Onion Diced
  • 2 medium Carrots Cut into 1/2-inch rounds
  • 2 stalks Celery Diced into 1/2-inch pieces
  • 4 cloves Garlic Minced
  • 1 can Fire-Roasted Diced Tomatoes Quality brand preferred
  • 6 cups Chicken Broth Low-sodium recommended
  • 2 tablespoons Olive Oil For sautéing
For Seasoning
  • 1 teaspoon Smoked Paprika Optional but recommended
  • 1 teaspoon Cumin Adjust to taste
  • 1 teaspoon Black Pepper Freshly ground preferred
For Freshness
  • 2 cups Spinach Added just before serving

Equipment

  • Large pot

Method
 

Step-by-Step Instructions for Easy Chicken Lentil Soup
  1. Cut the chicken breast into bite-sized chunks, season with salt and black pepper. Dice the onion, carrots, and celery into 1/2-inch pieces, and mince the garlic.
  2. In a large pot, heat olive oil over medium heat, add onion, carrots, and celery. Sauté for about 6 minutes until softened and translucent.
  3. Stir in the minced garlic, smoked paprika, and cumin. Cook for an additional minute to bloom the spices.
  4. Add seasoned chicken, lentils, diced tomatoes, and chicken broth. Stir well and bring to a boil.
  5. Reduce heat to medium-low, cover loosely, and simmer for about 25 minutes, stirring occasionally, until lentils are tender.
  6. Stir in fresh spinach just before serving and adjust seasoning with salt and pepper to taste.

Nutrition

Serving: 1cupCalories: 320kcalCarbohydrates: 40gProtein: 30gFat: 10gSaturated Fat: 2gPolyunsaturated Fat: 1gMonounsaturated Fat: 6gCholesterol: 75mgSodium: 600mgPotassium: 700mgFiber: 15gSugar: 5gVitamin A: 500IUVitamin C: 8mgCalcium: 50mgIron: 4mg

Notes

For the best flavor, add the chicken during the last 10-12 minutes of cooking to prevent drying out. Rinse the lentils before use and simmer gently for the best texture.

Tried this recipe?

Let us know how it was!

Ultimate Beef Vegetable Soup: Your Go-To Comfort in a Bowl

February 11, 2026 by Grace Snow Leave a Comment

It was a chilly evening, and the wind howled outside while I rummaged through my kitchen, craving a cozy meal. That’s when I decided to whip up a pot of Beef Vegetable Soup, the ultimate comfort food that wraps you in warmth. This recipe is not just about delicious flavors; it’s a one-pot wonder that’s as easy to make as it is to enjoy later—perfect for meal prep! Packed with tender beef, vibrant veggies, and a savory broth, this soup is not only healthy but also freezer-friendly, making it an excellent choice for those busy weeknights. Whether you're hosting friends or just treating yourself, there’s something satisfying about savoring every spoonful of this hearty dish. Are you ready to dive into a comforting bowl of homemade goodness?

Why Is Beef Vegetable Soup So Special?

Hearty Comfort: This Beef Vegetable Soup wraps you in a warm embrace, perfect for chilly nights. It's a one-pot meal that simplifies your cooking experience without sacrificing flavor.

Healthier Choice: Loaded with nutrient-rich vegetables, it’s not just comforting but packed with vitamins.

Meal Prep Friendly: Make a big batch and freeze portions; it's ready whenever you need a quick, wholesome meal!

Crowd-Pleasing Flavor: It’s a hit among family and friends—perfect for gatherings or cozy dinners.

Endless Variability: Feel free to get creative by adding seasonal vegetables or even swapping the beef for turkey, ensuring every bowl remains exciting.

Experience a satisfying blend of flavors that is sure to become your go-to recipe, just like this Asparagus Soup Healthy that warms the heart!

Beef Vegetable Soup Ingredients

• Dive into your kitchen and gather all the flavors for this comforting dish!

For the Soup Base

  • Extra Lean Ground Beef – Provides a hearty and protein-rich base; look for minimal fat for a lighter dish.
  • Onion (Medium, Diced) – Adds an aromatic foundation and deep flavor; dice finely for even cooking.
  • Minced Garlic – Infuses bold, aromatic richness; freshly minced gives the best flavor.
  • Beef Broth – The core flavor component; choose high-quality broth to enhance richness.

For the Vegetables

  • Carrots (Sliced) – Contributes sweetness and texture; ideal for balancing flavors.
  • Celery (Diced) – Essential for a classic soup base, delivering a mild, peppery crunch.
  • Petite Diced Tomatoes (Canned) – Adds acidity and sweetness; melds seamlessly into the soup's texture.
  • Potatoes (Peeled and Diced) – Naturally thickens the soup, adding creaminess.
  • Fresh Green Beans (Trimmed and Cut) – Provide a bright, crunchy element along with visual appeal.
  • Frozen Peas – Adds a sweet pop of color and convenience; no prep needed.
  • Frozen Corn – Contributes a sweet crunch that complements the other ingredients.

For Flavor Enhancement

  • Tomato Paste – Intensifies tomato flavor, enhancing overall depth in your Beef Vegetable Soup.
  • Worcestershire Sauce – Offers a tangy, umami kick that amplifies beef flavor.
  • Italian Seasoning – Blends herbs for balanced Mediterranean notes.
  • Salt and Black Pepper – Essential seasonings that enhance all other flavors.

For the Finishing Touch

  • Fresh Parsley (Chopped) – A fresh finishing touch, adding brightness and color.

Gather these ingredients, and you're on your way to crafting a bowl of warmth and delight!

Step‑by‑Step Instructions for Beef Vegetable Soup

Step 1: Cook Beef and Onion
In a large Dutch oven, heat over medium-high heat and add the extra lean ground beef. Brown the beef until it’s no longer pink, about 5-7 minutes, breaking it apart with a spoon. Stir in the diced onion and continue cooking until the onion is translucent, approximately 3 minutes. Add minced garlic and sauté for an additional 30 seconds until fragrant. Drain any excess fat.

Step 2: Add Vegetables and Broth
Return the Dutch oven to medium heat and mix in the sliced carrots and diced celery. Pour in the beef broth, then add the petite diced tomatoes, diced potatoes, and trimmed green beans. Stir in tomato paste, Worcestershire sauce, and Italian seasoning, along with a sprinkle of salt and black pepper. Increase the heat and bring everything to a boil, then reduce to a low simmer and cover. Cook for about 25 minutes, or until the vegetables are tender.

Step 3: Finish with Peas, Corn, and Parsley
After 25 minutes of simmering, remove the lid and carefully stir in the frozen peas and corn. Cook for an additional 5 minutes until they are heated through and the soup is vibrant. To enhance the flavor and freshness, fold in chopped parsley just before serving. This hearty Beef Vegetable Soup is now ready; serve hot and enjoy!

Beef Vegetable Soup Variations

Feel free to personalize your Beef Vegetable Soup to suit your family's tastes or dietary preferences!

  • Lean Meat: Substitute ground turkey or chicken for a lighter protein option without sacrificing flavor. You’ll find the soup still wonderfully hearty!

  • Seasonal Veggies: Incorporate seasonal vegetables like zucchini or squash for a fresh, garden-inspired twist. This adds vibrant color and a seasonal touch to your warm bowl of goodness.

  • Protein Boost: Add lentils or beans for extra protein and fiber. Not only does this elevate the nutritional content, but it also creates a delightful contrast in textures.

  • Herb Infusion: Experiment with fresh herbs such as thyme or basil for a different flavor dimension. They bring a bright freshness that complements the richness of the broth beautifully.

  • Spicy Kick: Toss in a few chopped jalapeños or a sprinkle of crushed red pepper flakes for a subtle heat. This way, each spoonful can pack a punch of warmth.

  • Creamy Texture: Stir in a splash of heavy cream or coconut milk for a luxuriously creamy soup base. This addition transforms it into a comforting, velvety delight that's perfect for cozy nights.

  • Grainy Goodness: Incorporate cooked quinoa or rice for an added texture and heartiness. It’s a delightful way to make the soup even more filling and satisfying.

  • Flavorful Broth: Swap out beef broth for vegetable or chicken broth for a unique spin while keeping the flavors bold. This can also lighten the dish while maintaining its robust essence.

As you adjust these variations, you’ll discover endless possibilities that can charm your palate, just like this scrumptious Lemon Chicken Soup perfect for any time of year!

What to Serve with Hearty Beef Vegetable Soup

A cozy meal is best enjoyed with delightful accompaniments that enhance the whole experience.

  • Crusty Bread: Perfect for soaking up the rich broth; it adds a satisfying crunch to each bite. Pairing warm, fresh bread with your soup creates a classic and comforting combination.

  • Fresh Garden Salad: A vibrant mix of greens and veggies balances the hearty soup; the crunchiness adds a refreshing contrast. Toss in a tangy vinaigrette for an extra burst of flavor that elevates the meal.

  • Creamy Mashed Potatoes: The smooth, buttery texture complements the rustic elements of the soup; they provide an indulgent, comforting side. You can also mix in some garlic or herbs for added depth.

  • Savory Cheese Biscuits: These fluffy biscuits are delightful alongside the soup; their buttery richness and cheesy flavor will have everyone asking for a second helping.

  • Garlic Breadsticks: Soft and warm, these are great for sharing; they’re perfect for dipping into your Beef Vegetable Soup. Their garlic flavor pairs beautifully and adds a gourmet touch to your meal.

  • Red Wine: A glass of medium-bodied red wine enhances the dish’s savory flavors; it brings out the depth of the beef and complements the tomatoes beautifully.

  • Chocolate Cake: A slice of moist chocolate cake provides a sweet ending to a savory meal; the richness is the perfect counterpoint to the wholesome soup.

  • Crispy Roasted Brussels Sprouts: They add a unique earthy flavor along with crunch; drizzling with balsamic glaze creates a lovely contrast to the soup.

How to Store and Freeze Beef Vegetable Soup

Fridge: Store your Beef Vegetable Soup in an airtight container for up to 4 days. Allow it to cool completely before sealing to maintain flavor and freshness.

Freezer: For longer storage, freeze the soup in portion-sized airtight containers or freezer bags for up to 3 months. Leave some space for expansion as it freezes.

Reheating: To reheat, thaw overnight in the fridge, then warm gently on the stove or in the microwave until heated through. Add a splash of broth if it seems too thick.

Serving Suggestion: Consider garnishing with fresh parsley or a sprinkle of cheese when serving for an added touch of flavor!

Expert Tips for Beef Vegetable Soup

  • Quality Ingredients: Use high-quality beef broth and fresh vegetables; this elevates the overall taste and nutrition of your Beef Vegetable Soup.
  • Brown the Meat Well: Ensure the ground beef is browned thoroughly for rich, deep flavors; undercooked beef can lead to bland soup.
  • Adjust Seasonings Gradually: When tweaking flavors, add salt and pepper gradually; over-seasoning can overpower the delicate broth.
  • Even Veggie Sizes: Cut vegetables into uniform sizes to ensure even cooking and a pleasing texture throughout the soup.
  • Storage Savvy: Cool completely before transferring to airtight containers; this prevents condensation and keeps the soup fresh in the freezer for up to 3 months.

Make Ahead Options

These Beef Vegetable Soup meal prep options are a fantastic way for busy cooks to save time and enjoy home-cooked goodness! You can chop all the vegetables (carrots, celery, and potatoes) and store them in an airtight container in the fridge for up to 3 days. Additionally, brown the ground beef and sauté the onions a day ahead; just refrigerate them in a separate container. When you’re ready to enjoy your hearty Beef Vegetable Soup, simply combine the prepped ingredients in your Dutch oven along with the remaining components and cook. This smart approach not only maintains the soup's quality but also ensures a delicious meal is just a pot away, perfect for those chilly evenings!

Beef Vegetable Soup Recipe FAQs

How do I choose the best ingredients for Beef Vegetable Soup?
Absolutely! When selecting your ingredients, look for extra lean ground beef with minimal fat content, which will give you the best flavor while keeping it light. For the veggies, pick fresh ones that are firm and avoid any with dark spots or blemishes. Opt for vibrant carrots, crisp celery, and rich green beans for the best taste and nutrition.

How should I store my Beef Vegetable Soup?
Very! Store your Beef Vegetable Soup in an airtight container in the refrigerator for up to 4 days. Make sure it has cooled down completely before sealing it tight; this helps maintain its delicious flavor. For longer storage, consider freezing it!

Can I freeze Beef Vegetable Soup?
Absolutely! To freeze your soup, let it cool completely. Then, pour it into freezer-safe containers or resealable freezer bags, leaving some space for expansion. You can store it in the freezer for up to 3 months. When you’re ready to enjoy it, thaw it overnight in the fridge before reheating.

What can I do if my soup is too salty?
Oh no! If you find that your soup has turned out too salty, don’t fret. You can add more water or broth to dilute the saltiness. Additionally, tossing in a few diced potatoes can absorb some salt while making the soup heartier. Let it simmer for a while longer to blend the flavors.

Is this Beef Vegetable Soup safe for my pets?
Great question! While the soup is tasty for humans, it’s important to note that it may not be safe for pets. Ingredients like onions and garlic can be harmful to dogs and cats, so it's best to keep this comforting dish to yourself and stick with pet-approved recipes for your furry friends.

Beef Vegetable Soup

Ultimate Beef Vegetable Soup: Your Go-To Comfort in a Bowl

Enjoy this comforting Beef Vegetable Soup, a hearty one-pot meal loaded with nutritious vegetables and tender beef.
Print Recipe Pin Recipe
Prep Time 15 minutes mins
Cook Time 35 minutes mins
Total Time 50 minutes mins
Servings: 6 servings
Course: Soups
Cuisine: American
Calories: 350
Ingredients Equipment Method Nutrition Notes

Ingredients
  

For the Soup Base
  • 1 lb Extra Lean Ground Beef Look for minimal fat for a lighter dish.
  • 1 medium Onion, diced Dice finely for even cooking.
  • 3 cloves Minced Garlic Freshly minced gives the best flavor.
  • 6 cups Beef Broth Choose high-quality broth to enhance richness.
For the Vegetables
  • 2 medium Carrots, sliced Contributes sweetness and texture.
  • 2 stalks Celery, diced Delivers a mild, peppery crunch.
  • 1 can Petite Diced Tomatoes Adds acidity and sweetness.
  • 2 medium Potatoes, peeled and diced Naturally thickens the soup.
  • 1 cup Fresh Green Beans, trimmed and cut Provides a bright, crunchy element.
  • 1 cup Frozen Peas Adds a sweet pop of color.
  • 1 cup Frozen Corn Contributes a sweet crunch.
For Flavor Enhancement
  • 2 tbsp Tomato Paste Intensifies tomato flavor.
  • 1 tbsp Worcestershire Sauce Offers a tangy, umami kick.
  • 1 tbsp Italian Seasoning Blends herbs for balanced flavor.
  • to taste Salt Essential seasoning.
  • to taste Black Pepper Essential seasoning.
For the Finishing Touch
  • 1/4 cup Fresh Parsley, chopped Adds brightness and color.

Equipment

  • Dutch oven

Method
 

Step-by-Step Instructions
  1. In a large Dutch oven, heat over medium-high heat and add the extra lean ground beef. Brown the beef until it’s no longer pink, about 5-7 minutes, breaking it apart with a spoon.
  2. Stir in the diced onion and continue cooking until the onion is translucent, approximately 3 minutes. Add minced garlic and sauté for an additional 30 seconds until fragrant. Drain any excess fat.
  3. Return the Dutch oven to medium heat and mix in the sliced carrots and diced celery. Pour in the beef broth, then add the petite diced tomatoes, diced potatoes, and trimmed green beans.
  4. Stir in tomato paste, Worcestershire sauce, and Italian seasoning, along with a sprinkle of salt and black pepper. Increase the heat and bring everything to a boil, then reduce to a low simmer and cover. Cook for about 25 minutes, or until the vegetables are tender.
  5. After 25 minutes of simmering, remove the lid and carefully stir in the frozen peas and corn. Cook for an additional 5 minutes until they are heated through and the soup is vibrant. To enhance the flavor and freshness, fold in chopped parsley just before serving.

Nutrition

Serving: 1bowlCalories: 350kcalCarbohydrates: 35gProtein: 25gFat: 12gSaturated Fat: 4gPolyunsaturated Fat: 2gMonounsaturated Fat: 5gCholesterol: 70mgSodium: 800mgPotassium: 800mgFiber: 6gSugar: 5gVitamin A: 800IUVitamin C: 20mgCalcium: 50mgIron: 3mg

Notes

Use high-quality ingredients for the best flavor. Adjust seasonings gradually to taste.

Tried this recipe?

Let us know how it was!
  • « Previous Page
  • 1
  • …
  • 24
  • 25
  • 26
  • 27
  • 28
  • …
  • 179
  • Next Page »

Welcome!

Hi, I’m Grace, a Sydney-based home cook with a passion for bold flavors and trending ingredients. Whether you’re a busy beginner or a seasoned foodie, you’ll find dishes here that are fresh, fun, and full of flavor.

More about me

Popular Recipes

  • Cheesy Chicken Garlic Bread Sandwich
    Cheesy Chicken Garlic Bread Sandwich for Cozy Family Moments
  • Easy Chicken Ranch Wraps
    Easy Chicken Ranch Wraps: Quick, Creamy & Totally Satisfying
  • Chicken Caesar Sandwiches
    Delicious Chicken Caesar Sandwiches for Quick Comfort Food
  • best Cuban sandwich
    The Best Cuban Sandwich You’ll Want Every Weeknight!

Footer

↑ back to top

About

  • Privacy Policy
  • Disclaimer
  • Terms & Conditions

Newsletter

  • Sign Up! for emails and updates

Contact

  • About me
  • Contact me

Copyright © 2025 TastyTrendIngredients