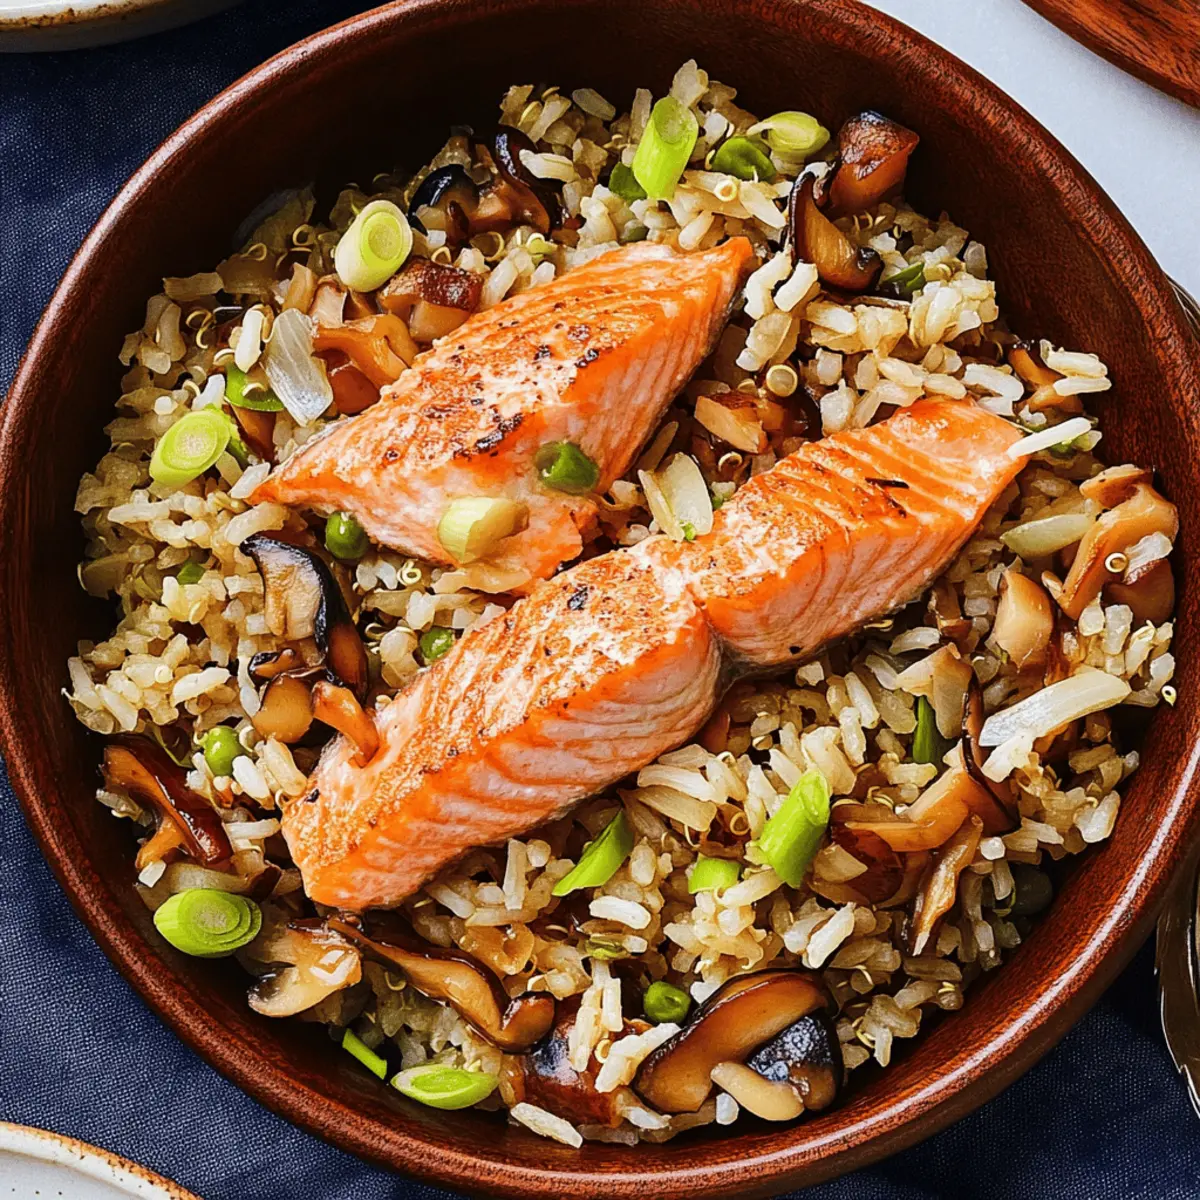
As I lifted the lid, a cozy steam wafted from the pot, revealing perfectly cooked rice mingling with tender salmon and earthy shiitake mushrooms. This One-Pot Salmon and Shiitake Rice is my go-to recipe when the weeknight rush hits, combining simplicity and nourishment in under an hour. The best part? It's dairy-free and nut-free, making it a guilt-free option for anyone craving a satisfying meal without the fuss. You’ll appreciate how the savory umami flavors blend so beautifully, while the protein-packed salmon fuels your evening. So, why settle for takeout when you can whip up this delightful dish at home? Ready to get cooking? Let’s dive into the recipe!
Why is One-Pot Cooking Perfect?
Easy Preparation: This One-Pot Salmon and Shiitake Rice takes convenience to a new level; combining everything in one pot means fewer dishes to wash afterward!
Flavor Explosion: The earthy shiitake mushrooms and tender salmon create a savory blend that elevates your dinner experience with each flavorful bite.
Flexible Ingredients: Swap out proteins or grains—try quinoa or brown rice for added texture, or even mix in vibrant veggies like peas for a pop of color!
Quick and Nourishing: This dish is ready in under an hour, making it a perfect fit for busy weeknights when you need a nutritious meal without the hassle.
Crowd-Pleasing Delight: Whether cooking for family or friends, this one-pot wonder is sure to impress, leaving everyone asking for seconds. So, why not make it tonight and make a switch from fast food for good?
One-Pot Salmon and Shiitake Rice Ingredients
For the Base
• Short-Grain White Rice – Essential for that perfect chewy texture; rinse before cooking to remove excess starch.
• Quinoa – Adds a protein boost and nutty flavor; can easily be swapped with brown rice for a different twist.
• Water – The necessary cooking medium; adjust the amount based on your choice of grain to ensure optimal cooking.
For the Seasoning
• Mirin or Sake – Enhances the umami depth; rice vinegar can substitute in a pinch if you don’t have these on hand.
• Soy Sauce – Introduces saltiness; for a gluten-free option, tamari works perfectly.
For the Veggies
• Shiitake Mushrooms – Imparts an earthy flavor and pleasant texture; feel free to replace with cremini mushrooms if desired.
• Scallions – Adds a refreshing crunch to your dish; chives or green onions can be alternatives as well.
For the Protein
• Skinless Salmon Fillets – The star of the dish, rich in protein and omega-3s; skin-on can be used but ensure to remove it post-cooking.
For the Dressing
• Unseasoned Rice Vinegar or Apple Cider Vinegar – Brings acidity to the dressing; lemon juice is a good substitute if needed.
• Toasted Sesame Oil – Infuses a nutty flavor; olive oil can step in if you’re out of sesame oil.
• Kosher Salt – Enhances the salmon's flavor; sea salt works as an alternative.
Step‑by‑Step Instructions for One-Pot Salmon and Shiitake Rice
Step 1: Rinse the Grains
Begin by rinsing 2 cups of short-grain white rice under cool running water until the water runs clear. This crucial step removes excess starch, ensuring fluffy rice. While rinsing, prepare your ingredients, such as measuring out ¼ cup of quinoa, to have them ready for the next steps.
Step 2: Combine Ingredients
In a medium heavy saucepan, add the rinsed rice, quinoa, 1 tablespoon of mirin or sake, 2 teaspoons of soy sauce, and 2½ cups of water. Stir the mixture thoroughly to ensure even distribution of flavors. This combination creates a wonderful base for the One-Pot Salmon and Shiitake Rice that will harmonize beautifully during cooking.
Step 3: Layer the Mushrooms
Carefully layer 5 ounces of sliced shiitake mushrooms directly on top of the rice mixture without stirring. This helps the mushrooms infuse their earthy flavor into the rice as it cooks. You’ll notice the vibrant colors contrast beautifully, adding visual appeal to your dish.
Step 4: Add the Salmon
Gently place three skinless salmon fillets (4–6 ounces each) atop the mushrooms, making sure they are evenly spaced. Season the salmon with a sprinkle of kosher salt to enhance its natural flavor. Visualize the salmon melting into the dish as it cooks, creating a tender, savory profile in your One-Pot Salmon and Shiitake Rice.
Step 5: Cook on High Heat
Cover the pot with a lid slightly ajar to allow steam to escape. Set the pot over medium-high heat and watch carefully for small bubbles to form around the edges; this should take about 5 minutes. This initial heating stage sets the foundation for a perfectly cooked meal.
Step 6: Reduce Heat and Simmer
Once bubbles appear, reduce the heat to medium and cover the pot tightly. Let it simmer undisturbed for 15 minutes; resist the urge to lift the lid! During this time, the steam will cook the rice and salmon, blending the flavors beautifully, perfecting the One-Pot Salmon and Shiitake Rice.
Step 7: Let it Rest
After 15 minutes of cooking, remove the pot from the heat. Keep the lid on and let it rest for 20 minutes. This step allows the rice to absorb any remaining moisture and results in a fluffy texture, creating the ultimate comfort food experience in your One-Pot Salmon and Shiitake Rice.
Step 8: Prepare the Dressing
While the pot is resting, whisk together 2 tablespoons of vinegar, 1 tablespoon of toasted sesame oil, 2½ sliced scallions, and 3 tablespoons of soy sauce in a small bowl. This dressing will enhance the dish's richness while adding a fresh kick that perfectly complements the flavors of your meal.
Step 9: Fluff and Serve
After resting, remove the lid and gently scrape any moisture from it back into the pot. Flake the salmon into the rice, mixing in the remaining scallions for a burst of color and flavor. The One-Pot Salmon and Shiitake Rice will have a wonderful, comforting aroma inviting everyone to the table.
Step 10: Enjoy the Dish
Scoop servings of the One-Pot Salmon and Shiitake Rice into bowls, drizzling the reserved scallion-soy dressing over each portion. This not only elevates the flavor but also adds visual appeal. Each bite will reward you with umami-packed goodness, making it a meal to savor and share!
Expert Tips for One-Pot Salmon and Shiitake Rice
-
Keep the Lid Closed: Avoid lifting the pot lid while it cooks; letting steam escape can lead to unevenly cooked rice and salmon in your One-Pot Salmon and Shiitake Rice.
-
Cook Time Adjustments: If you're using brown rice or another grain, remember to adjust the cooking times accordingly. Brown rice typically requires a longer cooking time than white rice.
-
Let It Rest: Allow the dish to sit for 20 minutes after cooking. This resting period is key, as it helps the rice absorb moisture and achieve a fluffy consistency.
-
Flavor Infusions: Add extra layers of flavor by incorporating herbs like thyme or cilantro during cooking. This simple touch can elevate your One-Pot Salmon and Shiitake Rice to the next level.
-
Customize Proteins: Feel free to experiment with different seafood or veggies. Try using trout or adding peas for a colorful, nutritious twist that fits the One-Pot theme!
One-Pot Salmon and Shiitake Rice Variations
Feel free to get creative and customize your dish with these tasty variations and substitutions that can add a personal touch!
-
Different Fish: Swap salmon for trout or white fish for a lighter alternative. Each fish brings its unique flavor while maintaining the dish's core essence.
-
Veggie Boost: Add vibrant peas or carrots for a splash of color, enhancing not just presentation but also nutrition. These vegetables provide subtle sweetness that complements the umami flavors beautifully.
-
Mushroom Mix: Experiment by using different mushrooms such as cremini or portobello for varied textures and tastes. Each variety brings its distinctive earthiness, making every bite interesting.
-
Quinoa Alternatives: If quinoa isn't your thing, try bulgur or farro for a chewy texture that brings a rustic vibe to your dish. These grains not only enhance the overall eating experience but also boost fiber content.
-
Broth for Cooking: Substitute water with vegetable broth or fish stock to infuse the rice with extra flavor. The savory depth adds richness, making the dish feel like a warm hug on a cold evening.
-
Herb Infusion: Toss in fresh herbs like dill or cilantro during cooking for a fragrant twist that elevates the meal. This simple addition takes the One-Pot Salmon and Shiitake Rice from delicious to extraordinary.
-
Gluten-Free Soy Sauce: Use tamari instead of soy sauce for a gluten-free option. This small switch allows everyone to enjoy this nourishing meal without compromise.
-
Citrus Zest: Grate some lemon or lime zest over the finished dish for a burst of freshness. The citrus notes cut through the richness of the salmon and mushrooms, brightening each bite.
Ready to take your dish to the next level? You can easily modify the One-Pot Salmon and Shiitake Rice with these variations, creating something uniquely yours. If you're looking for more delightful one-pot ideas, check out Lime Chicken Rice or Furikake Fried Rice. Happy cooking!
Make Ahead Options
These One-Pot Salmon and Shiitake Rice are perfect for busy home cooks looking to streamline meal prep! You can cook the rice and quinoa base up to 24 hours in advance and refrigerate it, ensuring a more flavorful dish when you’re ready to finish cooking. Just layer the rinsed grains in the pot, add the mushrooms, and season the salmon, then cover and refrigerate. When you’re ready to serve, simply reheat the base, add the salmon, and cook as directed to ensure it stays tender and flavorful. For the best quality, store the dressing separately and drizzle it on just before serving, giving your meal a fresh taste that’s just as delightful as when you first made it!
How to Store and Freeze One-Pot Salmon and Shiitake Rice
-
Fridge: Store any leftovers in an airtight container for up to 3 days. Make sure it’s completely cooled before sealing to prevent moisture buildup.
-
Freezer: For longer storage, freeze your One-Pot Salmon and Shiitake Rice in a freezer-safe container for up to 2 months. This allows you to enjoy a quick meal later!
-
Reheating: When ready to enjoy, thaw overnight in the fridge. Reheat gently in a saucepan over low heat, adding a splash of water to revive the rice's texture.
-
Avoid Repeated Thawing: Try to only thaw what you will consume to maintain flavor and quality.
What to Serve with One-Pot Salmon and Shiitake Rice
Creating the perfect meal experience calls for delightful accompaniments that enhance and enrich your One-Pot Salmon and Shiitake Rice.
- Steamed Broccoli: A vibrant green side that adds a crunch and pairs beautifully with the savory flavors of the salmon.
- Garlic Roasted Asparagus: Tender asparagus spears tossed in garlic and olive oil provide a nutty contrast to the dish's earthiness.
Consider making a simple mixed greens salad with a light vinaigrette. The Salad’s crisp freshness and tartness act as a refreshing counterpoint, complementing the umami-rich elements in your one-pot wonder.
- Coconut Rice: For a touch of sweetness, coconut rice adds a creamy texture and fragrant flavor, truly elevating your dining experience.
- Chilled Cucumber Soup: This light, cool soup offers a refreshing balance to the warmth of the creamy dishes while providing a burst of flavor.
- Green Tea: A delicate drink that supports digestion and enhances the meal's overall umami experience, serving as a calming drink alongside dinner.
- Fruit Sorbet: As a light dessert, fruity sorbet cleanses the palate and offers a sweet yet refreshing end to the meal.
One-Pot Salmon and Shiitake Rice Recipe FAQs
What type of rice should I use for this recipe?
For the One-Pot Salmon and Shiitake Rice, I strongly recommend using short-grain white rice for its delightful chewy texture. However, you can easily substitute it with medium-grain rice or even quinoa for a nuttier flavor. Just remember to adjust the water amount according to the instructions for each grain type!
How should I store leftovers of One-Pot Salmon and Shiitake Rice?
Absolutely! You can store any leftovers in an airtight container in the fridge for up to 3 days. Be sure the dish is completely cooled before sealing, as this prevents moisture buildup that can affect texture and freshness.
Can I freeze One-Pot Salmon and Shiitake Rice?
Yes, you can freeze this dish! Place it in a freezer-safe container and it will keep well for up to 2 months. Just make sure to allow it to cool completely before freezing. When you're ready to enjoy it, thaw it overnight in the fridge for the best results.
What if my rice turns out mushy?
If your rice becomes mushy, it may have been overcooked or used too much water. Next time, try reducing the water quantity slightly and keep the pot sealed during cooking for optimal steaming. Always let the dish rest afterward to allow moisture to redistribute!
Is this recipe suitable for people with food allergies?
Yes! The One-Pot Salmon and Shiitake Rice is naturally dairy-free and nut-free. However, if you have a soy allergy, you can substitute the soy sauce with coconut aminos, which provides similar flavor without the allergens. Feel free to pick a protein that suits your dietary needs as well!
How do I ensure my salmon is perfectly cooked?
To achieve perfectly tender salmon, avoid lifting the lid during cooking to maintain steam. Place the salmon fillets on top of the mushrooms and rice, season, then let it simmer undisturbed for 15 minutes. After resting, gently flake the salmon into the rice for that delectable mix of flavors!
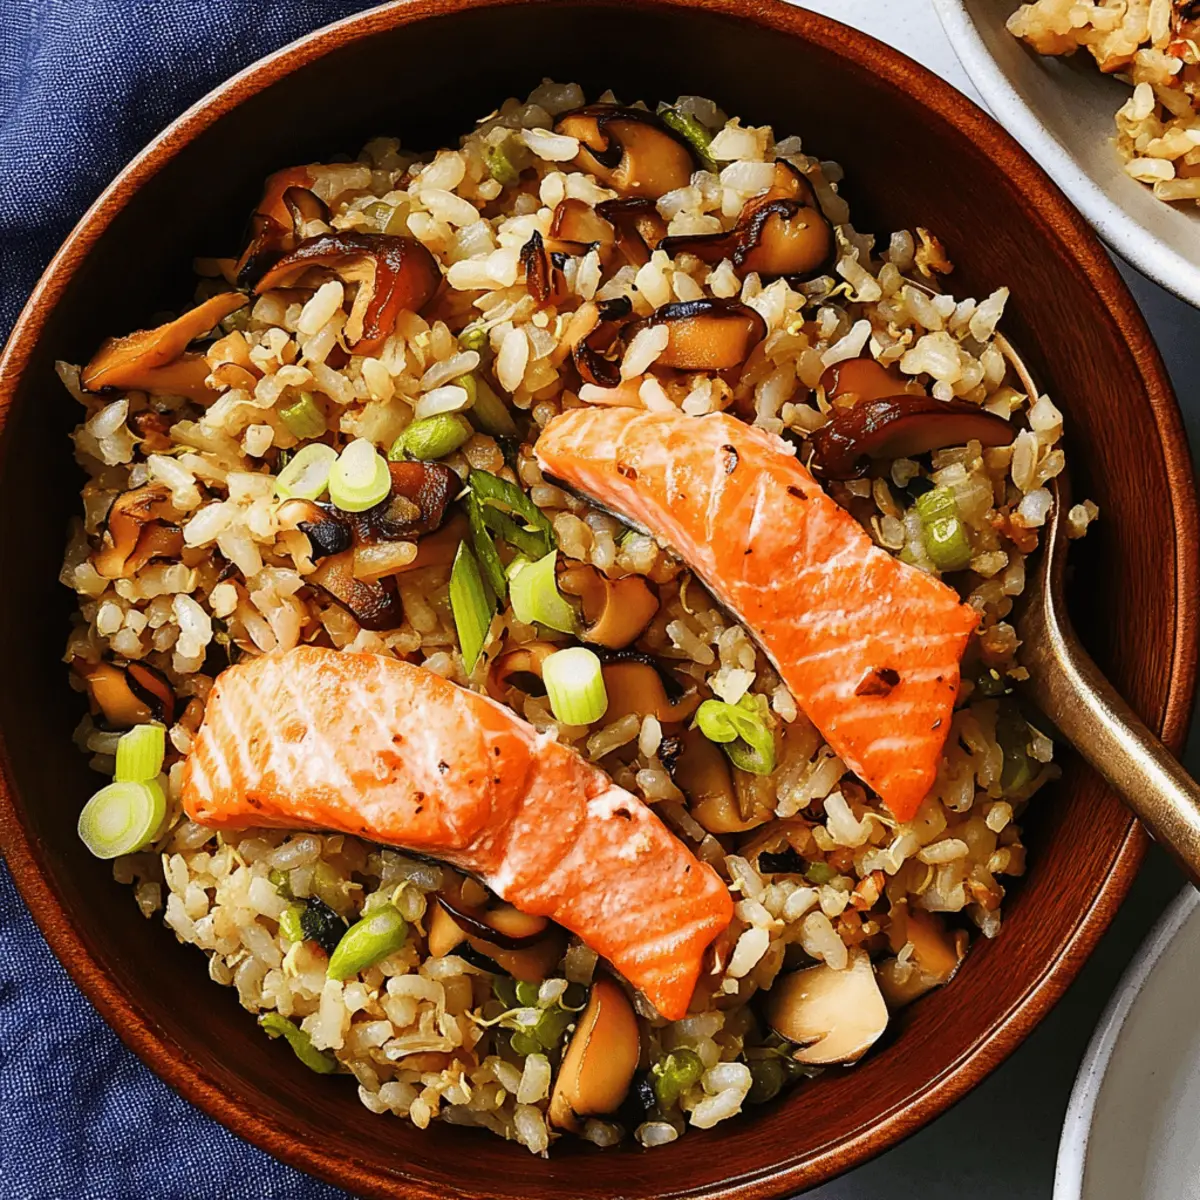
One-Pot Salmon and Shiitake Rice for a Cozy Weeknight Dinner
Ingredients
Equipment
Method
- Begin by rinsing 2 cups of short-grain white rice under cool running water until the water runs clear.
- In a medium heavy saucepan, add the rinsed rice, quinoa, 1 tablespoon of mirin or sake, 2 teaspoons of soy sauce, and 2½ cups of water. Stir thoroughly.
- Layer 5 ounces of sliced shiitake mushrooms on top of the rice mixture without stirring.
- Place three skinless salmon fillets on top of the mushrooms and sprinkle with kosher salt.
- Cover the pot with a lid slightly ajar and set over medium-high heat. Watch for small bubbles to form around the edges (about 5 minutes).
- Reduce the heat to medium, cover the pot tightly, and let it simmer undisturbed for 15 minutes.
- After 15 minutes, remove the pot from heat and let it rest with the lid on for 20 minutes.
- While resting, whisk together 2 tablespoons of vinegar, 1 tablespoon of toasted sesame oil, 2½ sliced scallions, and 3 tablespoons of soy sauce in a small bowl.
- Remove the lid, gently scrape moisture from it back into the pot, and flake the salmon into the rice.
- Serve the One-Pot Salmon and Shiitake Rice in bowls with the reserved scallion-soy dressing drizzled over each portion.