tastytrendingredients

  • Home
  • Recipes
    • Appetizers
    • Breakfast
    • Dessert
    • Dinner
    • Drinks
    • Salads
    • Snacks
    • Soups
  • About me
  • Contact me
menu icon
go to homepage
  • Home
  • Recipes
    • Appetizers
    • Breakfast
    • Dessert
    • Dinner
    • Drinks
    • Salads
    • Snacks
    • Soups
  • About me
  • Contact me
search icon
Homepage link
  • Home
  • Recipes
    • Appetizers
    • Breakfast
    • Dessert
    • Dinner
    • Drinks
    • Salads
    • Snacks
    • Soups
  • About me
  • Contact me
×

Chai-Spiced Pear Tart: A Heartwarming Fall Delight

September 2, 2025 by Grace Snow Leave a Comment

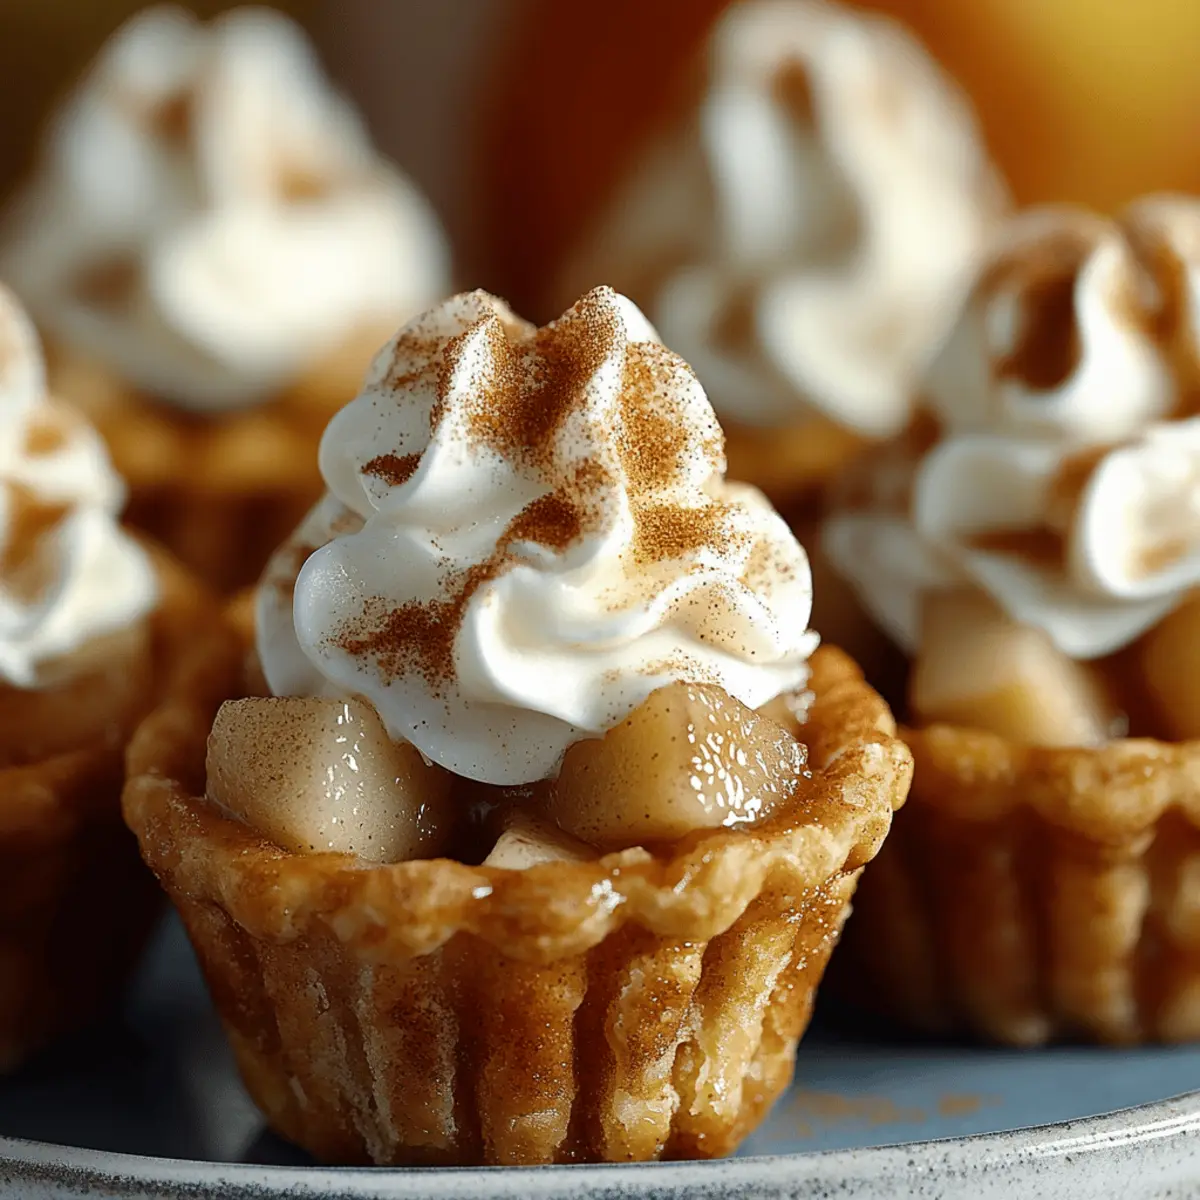
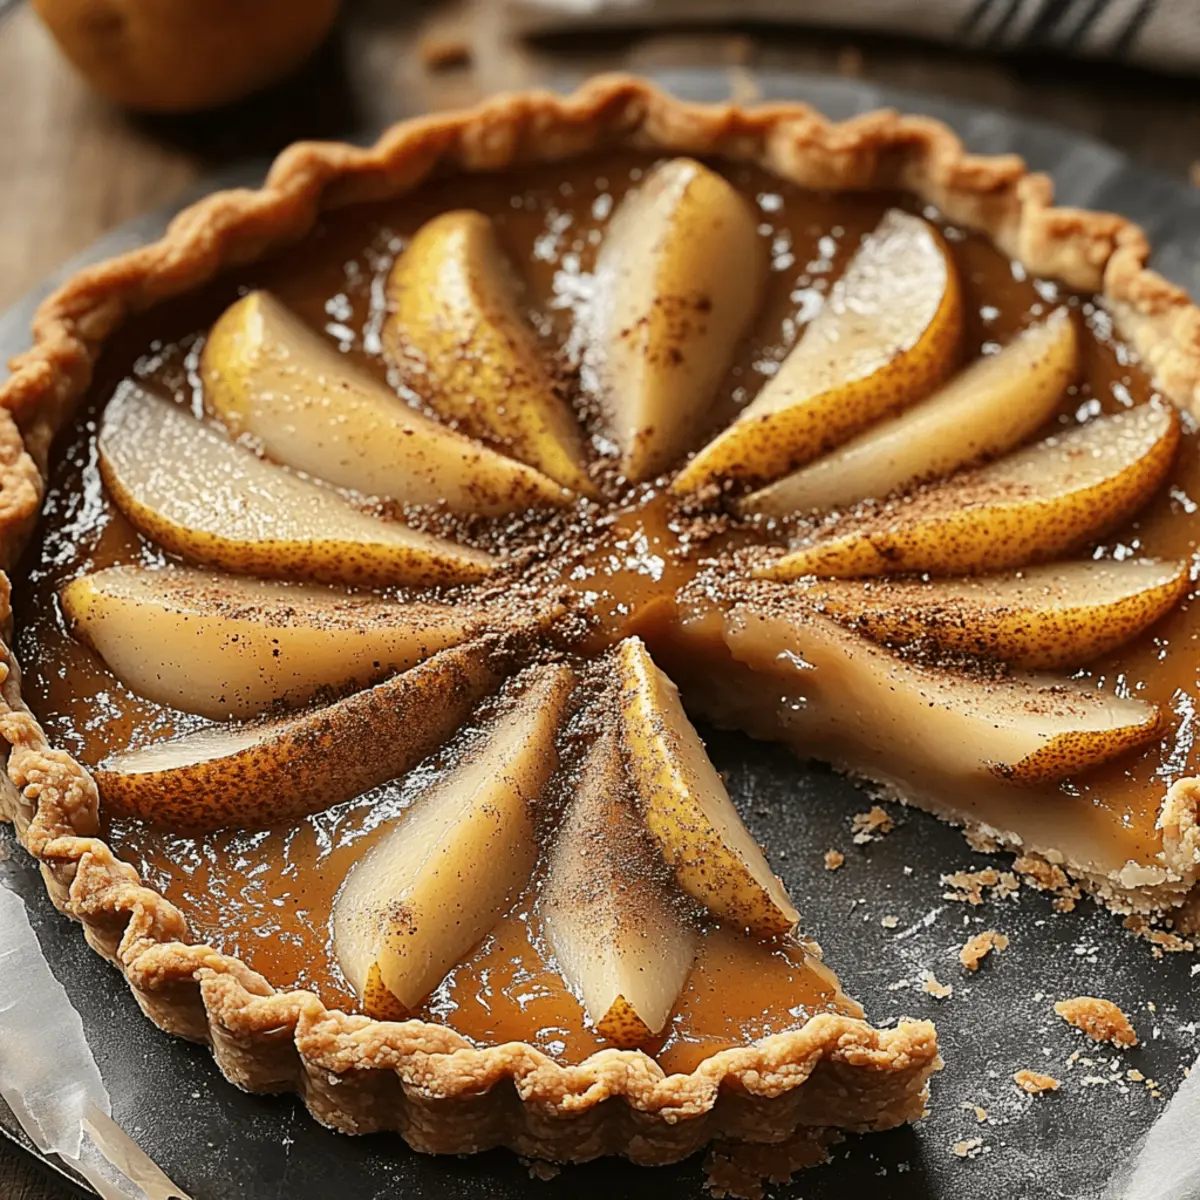
There’s nothing quite like the first hint of autumn to inspire cozy baking, and this Chai-Spiced Pear Tart will transport you straight to a harvest festival. The buttery crust cradles a luxuriously creamy, chai-infused custard topped with sweet, tender caramelized pears—an irresistible combination that’s both simple and elegant. What I love most about this recipe is its versatility; whether you opt for classic pears, swap in crisp apples, or explore vegan alternatives, each variation is sure to impress. Plus, this dessert is perfect for sharing, making it a real crowd-pleaser for gatherings with friends and family. Are you ready to infuse your kitchen with the warm aromas of spice and sweet fruit? Let’s dive in!

Why is this tart a fall favorite?

Versatile and Customizable: Each slice of the Chai-Spiced Pear Tart offers the flexibility to change up ingredients as per your preference. Unique Flavor Profile: The chai spices add a comforting warmth that’s perfect for fall! Crowd-Pleasing Dessert: This tart is an ultimate showstopper, guaranteed to impress even the toughest critics at your dinner table. Easy to Make: With straightforward steps, this recipe allows you to create a stunning dessert without stress—perfect for novice bakers and seasoned chefs alike. Cute Mini Options: Try making mini tartlets for a delightful bite-sized treat, ideal for gatherings or cozy evenings at home. If you're feeling adventurous, consider pairing it with a scoop of vanilla ice cream for an extra indulgent twist!

Chai-Spiced Pear Tart Ingredients

For the Crust

  • All-Purpose Flour – Provides structure for the tart crust; substitute with a gluten-free blend plus xanthan gum if desired.
  • Cold Unsalted Butter – Creates a flaky texture in the crust; use coconut oil for a vegan option.
  • Cold Water – Binds the crust together; additional may be needed if the dough is too dry.
  • Sugar – Adds sweetness to the crust—adjust to taste.
  • Salt – Enhances flavor in the crust.

For the Chai Custard

  • Whole Milk – Contributes to a creamy custard texture; substitute with full-fat coconut milk for a dairy-free version.
  • Heavy Cream – Adds richness to the custard; replace with coconut cream for a vegan option.
  • Black Tea Bags – Infuses chai flavor into the custard; chai tea bags can enhance the flavor even more.
  • Egg Yolks – Provide richness and help the custard set—no substitutes are available for this recipe.
  • Cornstarch – Thickens the custard; avoid substitutions for best results.
  • Vanilla Extract – Adds depth of flavor to the custard.
  • Chai Spice – A blend of spices like cinnamon, ginger, and cardamom that enhances the chai flavor; adjust to personal preference.

For the Topping

  • Pears (Bosc or Anjou) – The main topping that adds sweetness and texture; ensure they are ripe for optimal results.

Feel the warmth of the chai-spiced flavor profile come alive as you prepare your Chai-Spiced Pear Tart, a true celebration of the season!

Step‑by‑Step Instructions for Chai-Spiced Pear Tart

Step 1: Prepare the Crust
In a food processor, combine all-purpose flour, sugar, and salt, pulsing until mixed. Cut in cold unsalted butter until the mixture resembles sandy crumbs. Gradually add cold water, one tablespoon at a time, until the dough just holds together. Shape into a disc, wrap in plastic, and chill in the refrigerator for 30 minutes to firm up.

Step 2: Roll Out the Crust
On a lightly floured surface, roll the chilled dough into a 12-inch circle, about 1/8-inch thick. Carefully place the rolled dough into a tart pan, trimming any excess from the edges. Freeze the crust for 10 minutes to set. Preheat your oven to 375°F (190°C) while you prepare the next steps.

Step 3: Blind Bake the Crust
Once the oven is heated, line the tart crust with parchment paper and fill it with ceramic pie weights or dried beans. Bake for 15-18 minutes, or until the edges are golden brown. Remove the weights and parchment, then return the crust to the oven for an additional 5 minutes until the base is lightly browned and dry.

Step 4: Make Chai Custard
In a medium saucepan, heat whole milk, heavy cream, and black tea bags over medium heat until it just begins to simmer. Allow the mixture to steep for 10 minutes to infuse the chai flavor. Remove the tea bags and whisk the egg yolks, sugar, cornstarch, vanilla extract, and chai spice in a bowl until smooth and well-combined.

Step 5: Temper the Egg Mixture
Gradually whisk about a cup of the warm milk mixture into the egg yolk mixture to temper it, avoiding curdling. Return the entire mixture to the saucepan over low heat, stirring continuously for about 4 minutes until the custard thickens and is smooth. Remove from heat and let it cool for 10 minutes.

Step 6: Assemble with Pears
Thinly slice your ripe pears and artfully arrange them on top of the cooled custard in the tart crust, forming concentric circles. Once arranged, bake the Chai-Spiced Pear Tart at 350°F (175°C) for 20-25 minutes, or until the custard jiggles slightly but is set in the center, creating a luscious filling.

Step 7: Cool and Serve
Allow the tart to cool at room temperature for at least 1 hour before slicing. For an elegant touch, dust with powdered sugar before serving. Pair with a drizzle of honey or a dollop of whipped cream if desired, enhancing the flavors of the Chai-Spiced Pear Tart with warmth and sweetness.

Expert Tips for Chai-Spiced Pear Tart

  • Choosing Pears: Use ripe Bosc or Anjou pears for optimal sweetness and texture. Underripe pears won't caramelize properly, affecting flavor.

  • Dough Consistency: Ensure your butter is cold and handle the dough minimally to keep it flaky. Overworking can lead to a tough crust.

  • Baking Precautions: Keep a close eye on baking times. Overbaking can result in a rubbery custard; remove it when it jiggles slightly in the center.

  • Spice It Up: Feel free to customize the chai spice mix! A pinch of cayenne can add a surprising kick to the Chai-Spiced Pear Tart.

  • Blind Baking: Don’t skip the blind baking step; it’s essential for a crisp crust. Use pie weights to prevent the crust from puffing up.

  • Make-Ahead Friendly: Prepare the crust and chai custard in advance, keeping them separate until you’re ready to assemble for a seamless baking experience.

Make Ahead Options

These Chai-Spiced Pear Tarts are perfect for meal prep enthusiasts looking to save time! You can prepare the tart crust and chai custard up to 24 hours in advance, storing them separately in airtight containers in the refrigerator. To maintain the crust's flaky texture, wrap it tightly in plastic wrap. The custard can be kept fresh by ensuring it has a film of plastic wrap directly covering its surface to prevent skin from forming. When you’re ready to serve, simply assemble the tart with the sliced pears and bake according to the instructions. You'll enjoy the same delicious, comforting flavors of a freshly made Chai-Spiced Pear Tart, but with far less stress on busy weeknights!

What to Serve with Chai-Spiced Pear Tart

Dive into the world of cozy comfort food and create a delightful meal that perfectly complements the exquisitely spiced and sweet Chai-Spiced Pear Tart.

  • Creamy Mashed Potatoes: Their smooth, buttery texture contrasts beautifully with the tart's flaky crust, creating a satisfying savory side.
  • Roasted Brussels Sprouts: The earthy flavor and slight bitterness balance the sweetness of the tart, making for a well-rounded meal.
  • Spiced Apple Cider: Warm and fragrant, this drink echoes the chai spices and adds a festive touch to your gathering.
  • Vanilla Ice Cream: A scoop of creamy vanilla melts wonderfully over warm slices, enhancing the tart's sweet flavors and aroma.
  • Gingerbread Cookies: These spiced cookies add a playful crunch, perfect for dipping and pairing with the rich custard of the tart.
  • Butternut Squash Soup: Its velvety texture and hint of sweetness provide a warm, comforting start before indulging in dessert.
  • Coffee or Chai Latte: Brewed beverages that harmonize with the chai flavors in the tart, offering a warm embrace for sipping alongside dessert.
  • Pecan Pie: For those who desire a double dessert experience, this classic pie brings nutty crunch and sweetness to the table, enhancing a fall-themed feast.

Chai-Spiced Pear Tart Variations

Feel free to get creative and customize your Chai-Spiced Pear Tart, enhancing it to suit any occasion!

  • Apple-Chai Twist: Substitute pears with thinly sliced Honeycrisp apples and add bourbon to the custard for a delightful spin.

  • Vegan Version: Swap cold unsalted butter for coconut oil and use coconut cream in place of heavy cream. This adjustment makes it completely plant-based!

  • Nutty Crunch: Incorporate toasted almonds into the crust edges for an irresistible, crunchy texture that contrasts beautifully with the creamy custard.

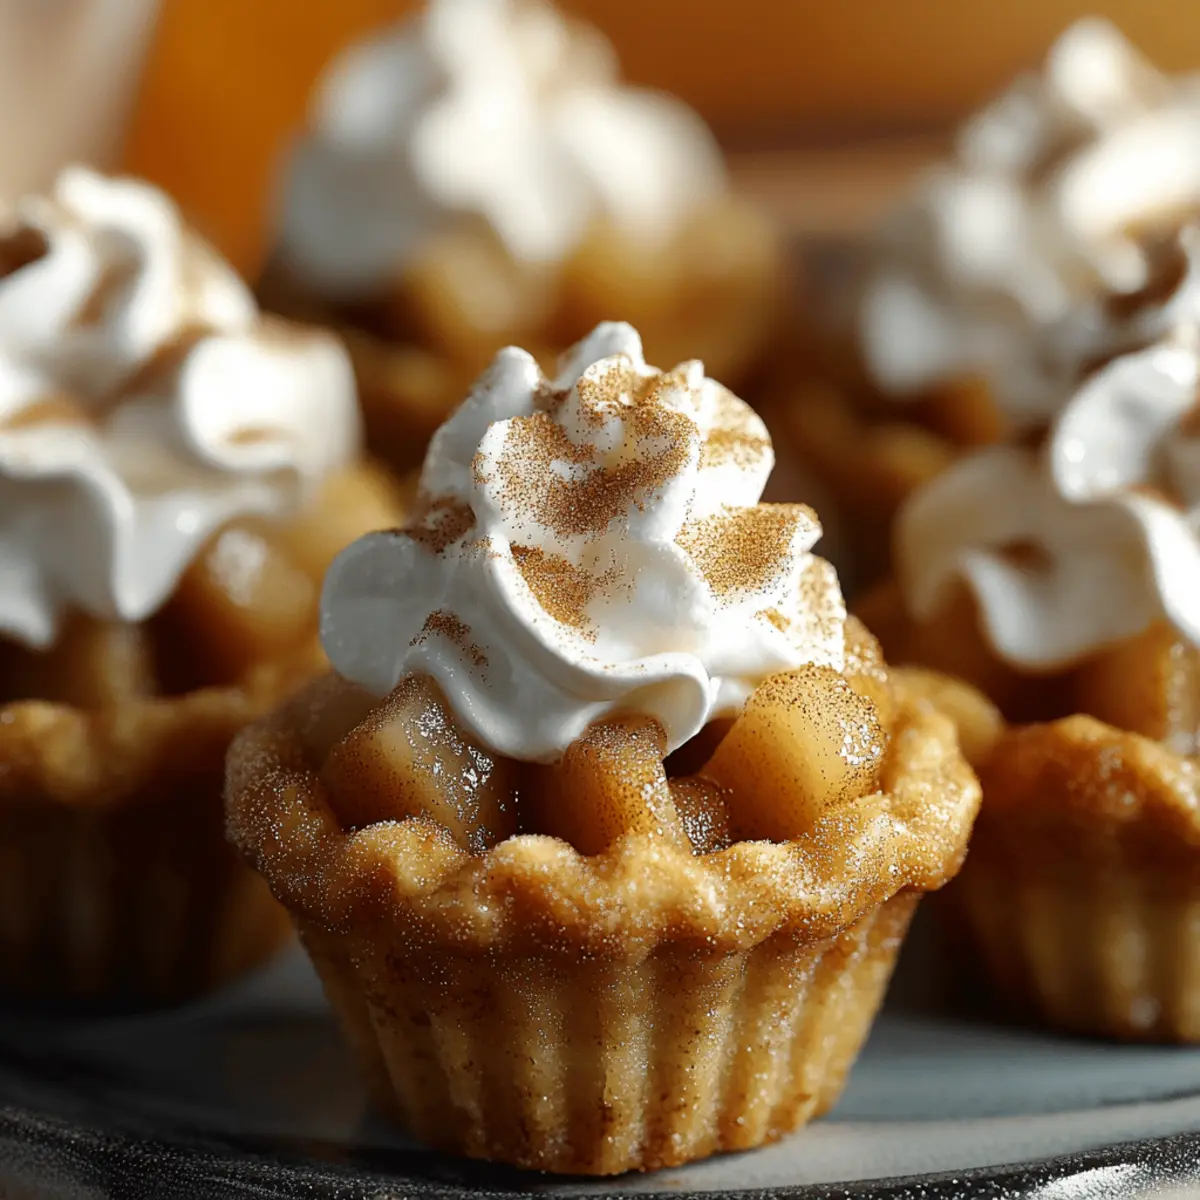
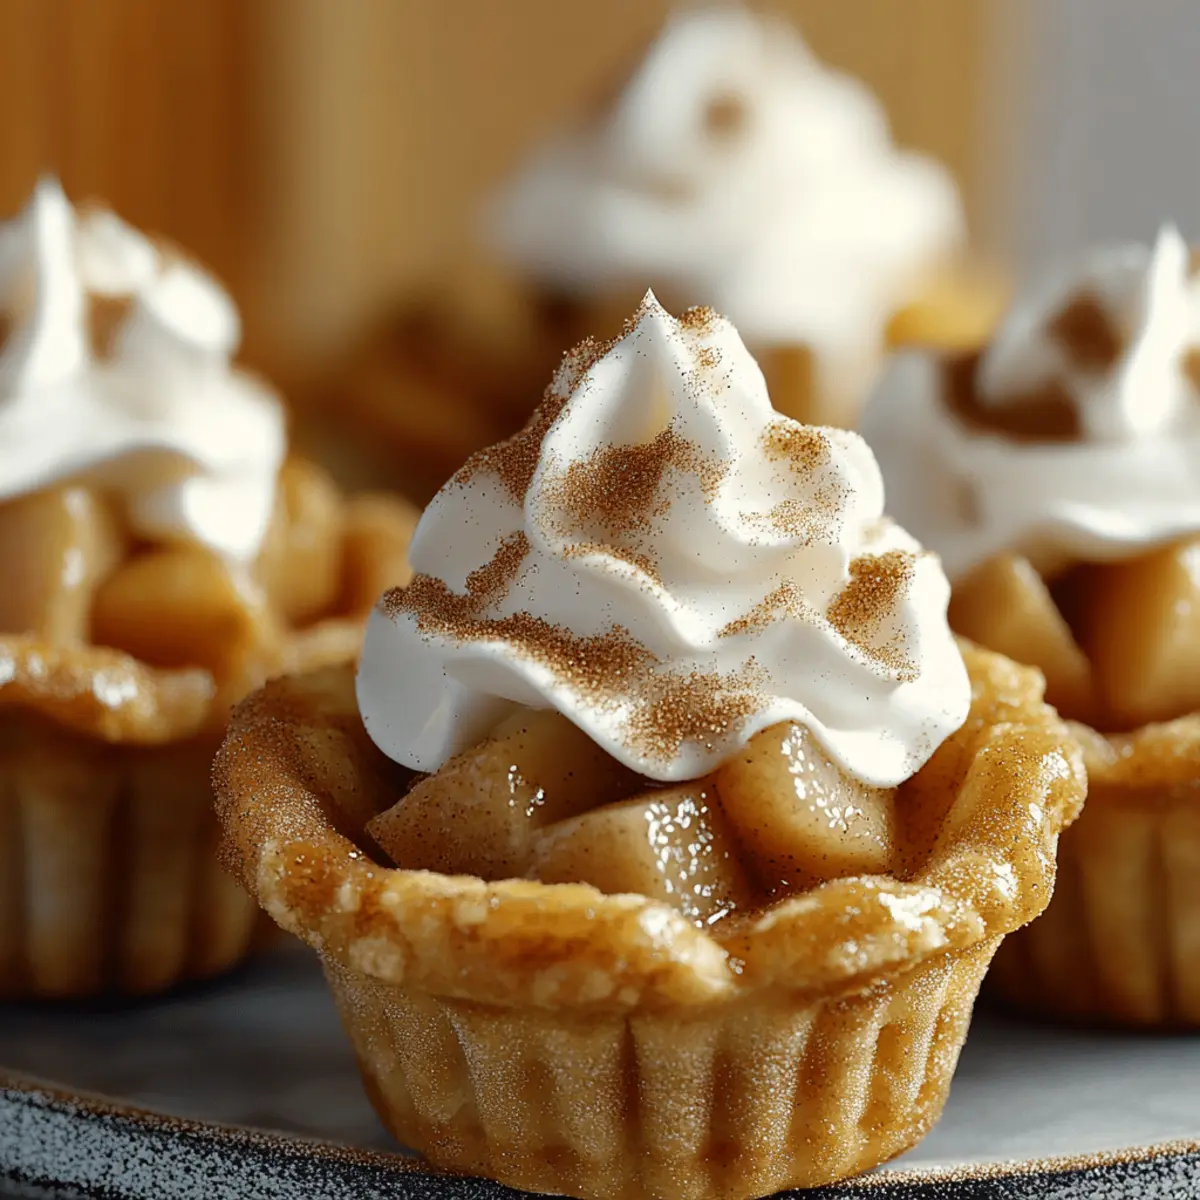
  • Mini Tartlets: Use muffin tins to create bite-sized mini tartlets; bake the crusts for 10 minutes, fill, and bake for an additional 12-15 minutes for a charming twist.

  • Spiced Pear Upgrade: Enhance the pears by tossing them with cinnamon and nutmeg before arranging them atop the custard, inviting an extra layer of warmth and spice.

  • Gluten-Free Delight: Use a gluten-free flour blend instead of all-purpose flour to make a tart that everyone can enjoy without compromising on flavor or texture.

  • Coconut Cream Layer: For an added twist, add a layer of whipped coconut cream atop the custard before garnishing with pears. It makes for a luscious treat!

  • Warm Spice Kick: Mix in a pinch of cayenne or black pepper to the chai spices for a unique flavor profile that kicks up the warmth and rounds out the sweetness of the pears.

For an equally delightful experience, consider pairing your tart with a scoop of homemade vanilla ice cream or a drizzle of homemade caramel sauce—the options are endless!

Storage Tips for Chai-Spiced Pear Tart

Fridge: Store your Chai-Spiced Pear Tart in an airtight container in the refrigerator for up to 3 days to maintain freshness and flavor.

Freezer: For longer preservation, wrap the tart tightly in plastic wrap and aluminum foil before freezing. It will keep well for up to 2 months.

Thawing: To enjoy your tart, thaw it overnight in the fridge before serving. This will help retain its delightful texture.

Reheating: If desired, gently warm slices in the microwave or enjoy cold!

Chai-Spiced Pear Tart Recipe FAQs

What type of pears are best for this tart?
Absolutely! For the best results, I recommend using ripe Bosc or Anjou pears. These varieties offer a wonderful sweetness and a firm texture that caramelizes beautifully when baked. Avoid underripe pears, as they won't provide the same depth of flavor or ideal texture.

How should I store leftover Chai-Spiced Pear Tart?
You can store your Chai-Spiced Pear Tart in an airtight container in the refrigerator for up to 3 days. This will help maintain its freshness and ensure that those delightful chai flavors are preserved.

Can I freeze the tart, and if so, how?
Yes, you can definitely freeze the tart! To do so, wrap it tightly in plastic wrap and then aluminum foil to prevent freezer burn. This will keep it fresh for up to 2 months. When you're ready to enjoy, thaw it overnight in the refrigerator before serving to restore its delicious texture.

What should I do if my custard doesn’t thicken?
If your custard hasn’t thickened properly after following the steps, don’t worry! You can continue cooking it on low heat while stirring continuously for an additional 1-2 minutes, as this often helps it to attain the right consistency. Just be careful not to overcook; the goal is to achieve a smooth, rich custard without scrambling the eggs.

Are there any dietary alternatives I can make for this tart?
Very! For a vegan version, simply replace the cold unsalted butter with coconut oil and the heavy cream with coconut cream. Instead of egg yolks, mix a cornstarch slurry (1 tablespoon of cornstarch mixed with 2 tablespoons of water) to thicken the custard. This way, you can enjoy a deliciously dairy-free Chai-Spiced Pear Tart!

Can I use apples instead of pears?
Absolutely! If you prefer apples, go for thinly sliced Honeycrisp apples for an Apple-Chai twist. You might also want to add a splash of bourbon to the custard for an extra kick. Each variation brings its unique flavor while staying true to the comforting essence of chai spices.

Chai-Spiced Pear Tart

Chai-Spiced Pear Tart: A Heartwarming Fall Delight

Experience the warm flavors of autumn with this Chai-Spiced Pear Tart, featuring a buttery crust and creamy chai-infused custard topped with caramelized pears.
Print Recipe Pin Recipe
Prep Time 1 hour hr
Cook Time 35 minutes mins
Chilling Time 30 minutes mins
Total Time 2 hours hrs 5 minutes mins
Servings: 8 slices
Course: Dessert
Cuisine: American
Calories: 320
Ingredients Equipment Method Nutrition Notes

Ingredients
  

For the Crust
  • 2 cups all-purpose flour Can substitute with gluten-free blend plus xanthan gum
  • 1 cup cold unsalted butter Use coconut oil for a vegan option
  • 4-6 tablespoons cold water Add additional if dough is too dry
  • 1 tablespoon sugar Adjust to taste
  • 1/4 teaspoon salt Enhances flavor
For the Chai Custard
  • 1 cup whole milk Substitute with full-fat coconut milk for dairy-free
  • 1 cup heavy cream Replace with coconut cream for vegan
  • 2 bags black tea bags Chai tea bags can enhance flavor
  • 4 large egg yolks No substitutes for this recipe
  • 1/4 cup cornstarch Avoid substitutions for best results
  • 1 teaspoon vanilla extract Adds depth of flavor
  • 1 tablespoon chai spice Adjust to personal preference
For the Topping
  • 3-4 medium pears (Bosc or Anjou) Ensure they are ripe for optimal results

Equipment

  • Food Processor
  • tart pan
  • Saucepan

Method
 

Step-by-Step Instructions
  1. Prepare the Crust: In a food processor, combine all-purpose flour, sugar, and salt, pulsing until mixed. Cut in cold unsalted butter until the mixture resembles sandy crumbs. Gradually add cold water, one tablespoon at a time, until the dough just holds together. Shape into a disc, wrap in plastic, and chill in the refrigerator for 30 minutes to firm up.
  2. Roll Out the Crust: On a lightly floured surface, roll the chilled dough into a 12-inch circle, about 1/8-inch thick. Carefully place the rolled dough into a tart pan, trimming any excess from the edges. Freeze the crust for 10 minutes to set. Preheat your oven to 375°F (190°C) while you prepare the next steps.
  3. Blind Bake the Crust: Once the oven is heated, line the tart crust with parchment paper and fill it with ceramic pie weights or dried beans. Bake for 15-18 minutes, or until the edges are golden brown. Remove the weights and parchment, then return the crust to the oven for an additional 5 minutes until the base is lightly browned and dry.
  4. Make Chai Custard: In a medium saucepan, heat whole milk, heavy cream, and black tea bags over medium heat until it just begins to simmer. Allow the mixture to steep for 10 minutes to infuse the chai flavor. Remove the tea bags and whisk the egg yolks, sugar, cornstarch, vanilla extract, and chai spice in a bowl until smooth and well-combined.
  5. Temper the Egg Mixture: Gradually whisk about a cup of the warm milk mixture into the egg yolk mixture to temper it, avoiding curdling. Return the entire mixture to the saucepan over low heat, stirring continuously for about 4 minutes until the custard thickens and is smooth. Remove from heat and let it cool for 10 minutes.
  6. Assemble with Pears: Thinly slice your ripe pears and artfully arrange them on top of the cooled custard in the tart crust, forming concentric circles. Once arranged, bake the Chai-Spiced Pear Tart at 350°F (175°C) for 20-25 minutes, or until the custard jiggles slightly but is set in the center, creating a luscious filling.
  7. Cool and Serve: Allow the tart to cool at room temperature for at least 1 hour before slicing. For an elegant touch, dust with powdered sugar before serving. Pair with a drizzle of honey or a dollop of whipped cream if desired.

Nutrition

Serving: 1sliceCalories: 320kcalCarbohydrates: 40gProtein: 4gFat: 17gSaturated Fat: 10gPolyunsaturated Fat: 1gMonounsaturated Fat: 5gCholesterol: 80mgSodium: 150mgPotassium: 200mgFiber: 2gSugar: 15gVitamin A: 500IUVitamin C: 4mgCalcium: 80mgIron: 1mg

Notes

Use ripe pears for optimal sweetness and handle the dough minimally to keep it flaky. Blind baking is essential for a crisp crust.

Tried this recipe?

Let us know how it was!

Delicious Maple Protein Pancake Bowls for Quick Morning Fuel

September 2, 2025 by Grace Snow Leave a Comment

Ever find yourself staring blankly at the fridge, craving something hearty yet quick? Allow me to introduce you to the delightful world of Maple Protein Pancake Bowls. Imagine fluffy banana-sweet goodness ready in under 5 minutes, offering a healthy lift to your morning routine with a whopping 40g of protein. With no flipping involved, these delightful bowls are perfect for those bustling weekdays when time is short, yet you'll still want a breakfast that warms you from the inside out. Plus, they’re incredibly customizable! Whether you prefer a Chocolate Lover's twist or a tropical escape with mango, these pancake bowls meet every craving while making meal prep a breeze. What flavor combination will you dream up for your next breakfast adventure?

Why Are Pancake Bowls a Game Changer?

Convenience: No flipping or frying necessary—just mix and microwave! Quick Preparation: Whip up a nutritious breakfast in under 5 minutes. High Protein: Each bowl packs a punch with 40g of protein to kickstart your day. Customization: With variations like Chocolate Lover's or Berry Bliss, you can tailor each bowl to your taste. Delicious Flavor: Enjoy a warm, comforting meal reminiscent of traditional pancakes but hassle-free! Minimal Cleanup: Serve straight from the bowl for easy dining and less mess, allowing more time for you to savor every bite.

Maple Protein Pancake Bowls Ingredients

For the Batter

  • ½ ripe banana, mashed – Adds natural sweetness and moisture; or use unsweetened applesauce for a lower-calorie option.
  • 2 scoops vanilla protein powder – Provides structure and a protein boost; choose whey for fluffiness or plant-based for a creamy alternative.
  • 2 egg whites – Acts as a binding agent and protein source; substitute with 3 tbsp carton egg whites or 2 tbsp flax egg for a vegan option.
  • 1 tbsp sugar-free maple syrup – Imparts sweetness and flavor depth; feel free to swap for other liquid sweeteners if desired.
  • Dash cinnamon – Elevates flavor; add more for a stronger spice kick.

For the Toppings

  • 2 tbsp PB Fit – Mix with water to achieve a drizzle consistency; regular peanut butter can be a tasty alternative.
  • ½ banana, sliced – Provides additional sweetness and texture; any fresh fruit of your choice can be used here.
  • Extra syrup + cinnamon – Optional toppings that enhance sweetness and flavor for a delightful finish.

These Maple Protein Pancake Bowls are not only a fast and delicious breakfast option, but they also deliver a nutritious boost with every bite! Customize the flavors to your heart's content and enjoy a breakfast packed with protein.

Step‑by‑Step Instructions for Maple Protein Pancake Bowls

Step 1: Mix Batter
In a greased, microwave-safe bowl (at least 16oz), mash ½ ripe banana until smooth. Stir in 2 scoops of vanilla protein powder, 2 egg whites, 1 tablespoon of sugar-free maple syrup, and a dash of cinnamon. Mix thoroughly until the batter is lump-free and well combined. If it feels too thick, add a splash of water to achieve a thinner consistency.

Step 2: Microwave
Place the bowl in the microwave and heat it on high for 1 minute and 50 seconds to 2 minutes. Begin checking at 90 seconds; the edges should pull away from the bowl, and the center must be set and not rubbery. The pancake bowl will rise slightly during cooking, creating a fluffy texture.

Step 3: Rest
Once microwaved, allow the bowl to rest for a full minute. This pause will help the pancake bowl finish cooking evenly and set the texture, resulting in that soft, fluffy bite that makes Maple Protein Pancake Bowls so delightful.

Step 4: Top
After resting, spread 2 tablespoons of prepared PB Fit over the pancake surface for a creamy topping. Fan out banana slices on top, drizzle with extra maple syrup, and dust with additional cinnamon. Feel free to sprinkle with sea salt or even chocolate chips if you're looking for a flavor boost!

Step 5: Serve and Enjoy
Enjoy your Maple Protein Pancake Bowls immediately for the best experience. Serve it right in the cooking bowl, reducing cleanup time, and savor the warm, fluffy goodness of a high-protein breakfast that feels like a hug in a bowl.

Variations & Substitutions for Maple Protein Pancake Bowls

Feel free to get creative and make this recipe your own with some fun substitutions and twists!

  • Chocolate Lover’s: Swap out the vanilla protein powder for chocolate and add 1 tablespoon of cocoa powder for a rich, indulgent treat. This variation will satisfy your sweet tooth while still keeping it nutritious.

  • Berry Bliss: Fold in ¼ cup of fresh blueberries and spread raspberry chia jam instead of peanut butter for a fruity explosion. Imagine each bite bursting with flavor that dances on your palate!

  • Tropical Escape: Use unflavored collagen powder and a splash of coconut extract, topping your bowl with juicy mango chunks and toasted coconut. You’ll be transported to a beachy paradise with every delicious spoonful.

  • Pumpkin Spice: Replace the banana with pumpkin puree and sprinkle on some chopped nuts for added crunch and flavor. This cozy variation is perfect for fall mornings or whenever you need a warm hug in a bowl.

  • Savory-Sweet: Ditch the syrup and cinnamon, utilizing shredded cheddar cheese and garlic powder while topping your bowl with a fried egg for an excellent savory hit. This style gives you the breakfast feel without the sweetness.

If you're ever looking for more breakfast inspiration, I highly recommend checking out my delicious Ricotta Protein Pancakes or a heavenly serving of Maple Roasted Sweet Potatoes with Pecans. They’re great for impressing your family and friends, and you’ll love how versatile they are!

Make Ahead Options

These Maple Protein Pancake Bowls are perfect for busy home cooks looking to save time during hectic mornings! You can prepare the batter up to 24 hours in advance by mixing the mashed banana, protein powder, egg whites, maple syrup, and cinnamon in a microwave-safe bowl. Cover tightly with plastic wrap or a lid to prevent drying out. When you're ready to enjoy, simply microwave the bowl for 1 minute and 50 seconds to 2 minutes, allowing it to rest for one minute afterward. This way, you’ll have a warm, fluffy pancake bowl ready in just minutes, without sacrificing freshness or flavor!

Expert Tips for Maple Protein Pancake Bowls

  • Choose the Right Bowl: Use a wide, microwave-safe bowl (16oz+) to prevent overflow while cooking. A deeper bowl may cause messy results.

  • Watch the Time: Overcooking can result in a rubbery texture. Start checking your pancake bowl at 90 seconds to get that perfect fluffiness.

  • Customize the Protein: If you opt for plant-based protein, add 1 tablespoon of almond milk to ensure a smoother texture in your Maple Protein Pancake Bowls.

  • Enhance Flavor: Don’t hesitate to increase the cinnamon or add a splash of vanilla extract to elevate the taste profile of your pancake bowl.

  • Make it Your Own: Experiment with different toppings like fresh fruits, nuts, or even a dollop of Greek yogurt for extra creaminess and nutrition.

How to Store and Freeze Maple Protein Pancake Bowls

Fridge: Keep any leftover Maple Protein Pancake Bowls in an airtight container for up to 3 days. Reheat in the microwave for about 30 seconds to 1 minute for a quick morning fix.

Freezer: You can freeze cooked pancake bowls for up to 1 month. Wrap each bowl tightly in plastic wrap and then place in a freezer-safe bag. Reheat directly from frozen in the microwave for 2-3 minutes, adding a little water to help steam.

Make-Ahead: Prepare the batter ahead of time by mixing all the dry ingredients and storing them in the fridge. Just add wet ingredients and microwave when you’re ready for a quick breakfast!

Reheating: For best results, reheat in a microwave-safe bowl, covered loosely with a paper towel to retain moisture and prevent drying out. Enjoy your fluffy creation!

What to Serve with Maple Protein Pancake Bowls?

Indulging in these fluffy pancake bowls is a delightful start to any day, but elevating the experience can truly transform your breakfast into something extraordinary.

  • Fresh Berries: Juicy blueberries or strawberries add a burst of tartness, balancing the sweetness of the pancake bowls with refreshing flavors.

  • Creamy Greek Yogurt: Topped with a dollop of Greek yogurt, the tanginess complements the sweet and nutty notes, providing a rich, protein-packed companion.

  • Almond Milk Latte: A warm, frothy almond milk latte crowns your morning routine, contributing a nutty depth that pairs beautifully with the flavors in your pancake bowl.

  • Chopped Nuts: Add a sprinkle of crunchy walnuts or pecans for a delightful contrast in texture that brings extra healthy fats and protein to your meal.

  • Maple Pecans: Drizzling some maple pecans over the top will amplify that warm maple flavor while adding a satisfying crunch.

  • Sliced Apples with Cinnamon: Servings of tender, cinnamon-dusted apple slices introduce a cozy, homey feel, echoing the warm spices in your pancake bowl.

  • Coconut Flakes: Sprinkle toasted coconut flakes on top for a tropical twist, enhancing both flavor and texture with delightful chewiness.

  • Cocoa Powder Dusting: A light dusting of cocoa powder can transform your pancake bowl into a chocolatey delight for a richer breakfast experience.

  • Shredded Coconut Yogurt: Switch regular yogurt for coconut yogurt to add an extra dimension of creaminess while providing a delightfully tropical flair.

Maple Protein Pancake Bowls Recipe FAQs

How ripe should my banana be?
Absolutely! The riper the banana, the sweeter and more flavorful your pancake bowl will be. Look for bananas with a few brown spots—this indicates peak sweetness and moisture. If you don’t have a banana, you can substitute with ¼ cup unsweetened applesauce for a lower-calorie option.

How should I store leftover Maple Protein Pancake Bowls?
Leftover pancake bowls can be stored in an airtight container in the refrigerator for up to 3 days. When you're ready to enjoy them again, simply reheat in the microwave for about 30 seconds to 1 minute. This quick method restores the comforting warmth and fluffy texture, making it feel freshly made!

Can I freeze Maple Protein Pancake Bowls?
Certainly! To freeze, wrap each cooked pancake bowl tightly in plastic wrap, then place in a freezer-safe bag. They can be stored for up to 1 month. When ready to enjoy, reheat directly from frozen in the microwave for 2-3 minutes, adding a splash of water to help steam and keep the bowl moist.

What if my pancake ends up too rubbery?
Very commonly, overcooking can lead to that rubbery texture. I recommend checking your pancake bowl at the 90-second mark in the microwave. If it’s not set in the middle, try adding an extra 10-15 seconds at a time until done. Remember, the edges should pull away from the bowl while the center remains slightly soft. Patience is key!

Are these pancake bowls suitable for vegans?
Yes, absolutely! To make the Maple Protein Pancake Bowls vegan, simply use 2 tablespoons of flax egg (mix 1 tablespoon of ground flaxseed with 2.5 tablespoons of water and let it sit until gel-like) in place of the egg whites. This gives your pancake bowl that essential binding without any animal products. Plus, use vegan protein powder to keep it aligned with your dietary preferences.

Can I modify the recipe for allergies?
Of course! For nut allergies, try using sunflower seed butter or tahini instead of PB Fit. You can also substitute the protein powder for one that suits your dietary needs—just ensure it's labeled gluten-free if that's a concern. Creating your perfect stack while accommodating allergies is very doable!

These tips will help you create and enjoy the deliciousness of Maple Protein Pancake Bowls while ensuring you're well-informed on its versatility and storage!

Maple Protein Pancake Bowls

Delicious Maple Protein Pancake Bowls for Quick Morning Fuel

Experience hearty Maple Protein Pancake Bowls, packed with 40g of protein and customizable to satisfy your breakfast cravings.
Print Recipe Pin Recipe
Prep Time 5 minutes mins
Cook Time 2 minutes mins
Resting Time 1 minute min
Total Time 8 minutes mins
Servings: 1 bowl
Course: Breakfast
Cuisine: American
Calories: 350
Ingredients Equipment Method Nutrition Notes

Ingredients
  

For the Batter
  • ½ banana ripe banana, mashed Adds natural sweetness and moisture; or use unsweetened applesauce for a lower-calorie option.
  • 2 scoops vanilla protein powder Provides structure and a protein boost; choose whey for fluffiness or plant-based for a creamy alternative.
  • 2 whites egg whites Acts as a binding agent and protein source; substitute with 3 tbsp carton egg whites or 2 tbsp flax egg for a vegan option.
  • 1 tbsp sugar-free maple syrup Imparts sweetness and flavor depth; feel free to swap for other liquid sweeteners if desired.
  • 1 dash cinnamon Elevates flavor; add more for a stronger spice kick.
For the Toppings
  • 2 tbsp PB Fit Mix with water to achieve a drizzle consistency; regular peanut butter can be a tasty alternative.
  • ½ banana sliced banana Provides additional sweetness and texture; any fresh fruit can be used.
  • Extra syrup + cinnamon Optional toppings that enhance sweetness and flavor for a delightful finish.

Equipment

  • Microwave-safe bowl

Method
 

Step-by-Step Instructions for Maple Protein Pancake Bowls
  1. In a greased, microwave-safe bowl (at least 16oz), mash ½ ripe banana until smooth. Stir in 2 scoops of vanilla protein powder, 2 egg whites, 1 tablespoon of sugar-free maple syrup, and a dash of cinnamon. Mix thoroughly until the batter is lump-free and well combined. If it feels too thick, add a splash of water to achieve a thinner consistency.
  2. Place the bowl in the microwave and heat it on high for 1 minute and 50 seconds to 2 minutes. Begin checking at 90 seconds; the edges should pull away from the bowl, and the center must be set and not rubbery.
  3. Once microwaved, allow the bowl to rest for a full minute. This pause will help the pancake bowl finish cooking evenly and set the texture, resulting in that soft, fluffy bite.
  4. After resting, spread 2 tablespoons of prepared PB Fit over the pancake surface for a creamy topping. Fan out banana slices on top, drizzle with extra maple syrup, and dust with additional cinnamon.
  5. Enjoy your Maple Protein Pancake Bowls immediately for the best experience. Serve it right in the cooking bowl, reducing cleanup time, and savor the warm, fluffy goodness.

Nutrition

Serving: 1bowlCalories: 350kcalCarbohydrates: 40gProtein: 40gFat: 8gSaturated Fat: 2gPolyunsaturated Fat: 1gMonounsaturated Fat: 3gCholesterol: 4mgSodium: 150mgPotassium: 400mgFiber: 5gSugar: 10gVitamin A: 2IUVitamin C: 12mgCalcium: 20mgIron: 15mg

Notes

Customize the flavors by adding fruits, nuts, or a dollop of Greek yogurt for extra creaminess and nutrition.

Tried this recipe?

Let us know how it was!

Delicious Zucchini Cheddar Scones for Savory Snacking

September 2, 2025 by Grace Snow Leave a Comment

The warm aroma of baked goods wafts through the kitchen, beckoning anyone nearby to come and indulge. Today, I’m excited to share my go-to recipe for Zucchini Cheddar Scones, a delightful twist on traditional scones that you won’t want to miss! Not only are these savory scones quick to whip up, but they also cleverly incorporate tender, juicy zucchini, giving you a delicious reason to add more veggies to your day. Perfect for a brunch gathering or a cozy breakfast at home, these scones are sure to impress. With a golden crust and pockets of gooey cheddar, you’ll find them irresistibly comforting. Are you ready to add a splash of charm to your next meal? Let’s dive right into this scrumptious recipe!

Why Are These Scones So Irresistible?

Flaky Goodness: The combination of buttery layers and melted cheddar creates a scone that practically melts in your mouth.

Veggie Boost: Featuring zucchini not only adds moisture but also sneaks in healthy nutrients, making each bite guilt-free.

Quick to Make: These scones come together in under 30 minutes, perfect for busy mornings or last-minute brunch plans.

Versatile Delights: Serve them with whipped butter, a drizzle of honey, or alongside your favorite soup, and watch them disappear in no time! For more veggie-infused ideas, check out our Cheesy Zucchini Bake.

Crowd Favorite: Your family and friends will rave about these savory treats, making them a must-have at any gathering.

Zucchini Cheddar Scones Ingredients

• Enjoy making these delightful savory scones with the following key ingredients:

For the Scone Base

  • All-Purpose Flour – This provides the structure you need for light and fluffy scones; you can swap it out for gluten-free flour if desired.
  • Salt – Essential for enhancing the overall flavor of the scones.
  • Baking Powder & Baking Soda – These leavening agents ensure your scones rise beautifully.
  • Granulated Sugar – Just a hint of sweetness! You can reduce this or use a sugar alternative for a lighter option.

For the Rich Texture

  • Unsalted Butter – Use very cold, cubed butter for a deliciously flaky texture; it’s key to the scone’s charm!
  • Egg – This binds the ingredients together, helping with the scone's structure.
  • Full-Fat Sour Cream (or Greek Yogurt/Buttermilk) – Adds moisture and tenderness; feel free to use low-fat options if preferred.

For the Savory Flavor

  • Grated Zucchini – Your secret weapon for moisture and nutrition; make sure to drain it well to prevent sogginess.
  • Sharp Cheddar Cheese – Deliciously rich and flavorful! Grate your own for optimal melting goodness, and don't forget to reserve some for topping.

With these ingredients, you're on your way to creating the ultimate Zucchini Cheddar Scones that will tantalize your taste buds and impress your loved ones!

Step‑by‑Step Instructions for Zucchini Cheddar Scones

Step 1: Preheat the Oven
Begin by preheating your oven to 400°F (200°C) and lining a baking sheet with parchment paper. This will ensure that your Zucchini Cheddar Scones bake evenly and do not stick to the pan. The parchment also aids in achieving that golden-brown crust we all love.

Step 2: Mix Dry Ingredients
In a large mixing bowl, whisk together 2½ cups of all-purpose flour, 1 teaspoon of salt, 1 tablespoon of baking powder, ½ teaspoon of baking soda, and 1 tablespoon of granulated sugar. This mixture forms the dry base for your scones. Ensure everything is well combined to promote even rising and flavor throughout the scones.

Step 3: Incorporate Cold Butter
Next, add ½ cup of very cold, cubed unsalted butter into the flour mixture. Use a pastry cutter or your fingers to cut the butter into the dry ingredients until the mixture resembles pea-sized crumbs. This step is crucial for achieving the flaky texture characteristic of delicious Zucchini Cheddar Scones, so handle the dough gently to maintain the coldness of the butter.

Step 4: Add Wet Ingredients
In a separate small bowl, beat 1 large egg and combine it with ½ cup of full-fat sour cream and 1 cup of well-drained, grated zucchini. Gently fold this mixture into the dry ingredients, ensuring everything is just combined. Be careful not to overmix, as this can result in dense scones instead of fluffy ones.

Step 5: Mix in Cheese
Now, fold in ½ cup of grated sharp cheddar cheese, ensuring that it's evenly distributed within the dough. Set aside a small amount of cheese for topping later. The melted cheese will create delightful pockets of flavor, enhancing the savory experience of your Zucchini Cheddar Scones.

Step 6: Shape the Dough
Turn the dough out onto a lightly floured surface and gently shape it into an 8-inch round that is about 1-inch thick. Use a sharp knife to cut this round into 8 wedges, making sure to separate them slightly. This allows for even baking and helps the edges crisp up beautifully.

Step 7: Prepare for Baking
Transfer the scone wedges to the prepared baking sheet. Brush the tops with a bit of milk or cream to promote browning, then sprinkle the reserved cheddar cheese and a tablespoon of flour over the tops. This adds a delicious exterior and enhances the overall flavor of your Zucchini Cheddar Scones.

Step 8: Bake the Scones
Place the baking sheet in your preheated oven and bake the scones for 18-22 minutes, or until they are golden brown on the tops and slightly firm to the touch. The aroma filling your kitchen will be absolutely irresistible during this time, signaling that delicious Zucchini Cheddar Scones are on the way!

Step 9: Cool Before Serving
Once baked, remove the scones from the oven and allow them to cool on the baking sheet for 5 minutes. This cooling period will help the flavors settle and make them easier to handle. After this, you can serve them warm, perhaps with a side of herb butter or a drizzle of honey!

Make Ahead Options

These Zucchini Cheddar Scones are perfect for meal prep enthusiasts! You can prepare the dough up to 24 hours in advance and refrigerate it tightly wrapped to keep it fresh. Simply mix all the ingredients, shape the dough into wedges, and place them on the baking sheet before chilling. When you’re ready to serve, simply preheat your oven and bake them straight from the fridge, adding an extra 2-3 minutes to the baking time for optimal results. This method ensures that the scones will be just as delicious and flaky as if you made them fresh that day, saving you valuable time on busy mornings!

How to Store and Freeze Zucchini Cheddar Scones

  • Room Temperature: Store leftover scones in an airtight container at room temperature for up to 2 days for the best flavor and texture.

  • Fridge: If you prefer, you can keep the scones in the fridge for up to 4 days, though they may lose some of their flaky texture.

  • Freezer: To freeze unbaked scone dough, wrap tightly in plastic wrap and store in a freezer-safe bag for up to 3 months. Bake directly from frozen, adding an extra 3-5 minutes to the bake time.

  • Reheating: To reheat baked scones, warm them in the oven at 350°F (175°C) for about 5-7 minutes to refresh their golden crust and gooey cheddar.

What to Serve with Zucchini Cheddar Scones

Looking to create a balanced meal around the comforting, cheesy delight of these scones?

  • Herb Butter: A spread of herb-infused butter adds a luscious layer of flavor that complements the scones' warmth beautifully.
  • Tomato Basil Soup: The acidity and rich tomato flavors of this classic soup make a perfect pairing, elevating your dining experience.

Imagine dipping a warm scone into the velvety soup, the contrast enhancing each bite.

  • Scrambled Eggs: Soft, fluffy scrambled eggs can be a wonderful companion, providing a light protein-packed element to your brunch.
  • Crisp Salad: A fresh salad with greens, cucumbers, and a tangy vinaigrette brings a refreshing crunch that contrasts with the scones' texture.
  • Savory Fruit Chutney: A dollop of savory fruit chutney adds a delightful sweetness, balancing the richness of the cheddar cheese.

For a delightful dessert experience, pair with a soothing cup of tea or a delicate dessert like lemon bars to end your meal on a light note.

Zucchini Cheddar Scones Variations

Feel free to get creative and customize these scones to suit your taste preferences or dietary needs!

  • Herb-Infused: Add fresh herbs like chives or dill into the dough for an aromatic twist that pairs beautifully with the cheese. A sprinkle of these herbs brightens up every bite.

  • Gluten-Free: Swap all-purpose flour with a gluten-free blend, and ensure your baking powder is also gluten-free for a delightful and inclusive treat. You can still achieve that flaky texture everyone loves!

  • Spicy Kick: Replace sharp cheddar with pepper jack cheese to add a zesty flair. This variation will give your scones a warm kick that spicy food lovers will adore.

  • Veggie Medley: Mix in grated carrots along with zucchini for added sweetness and color. This duo not only adds visual appeal but also enhances the overall nutrition of your scones!

  • Smoky Flavor: Incorporate smoked cheddar cheese to introduce a rich, smoky depth. The flavor complexity will elevate your scones into something truly gourmet!

  • Sweet Swap: Use a sugar alternative like honey or maple syrup for a touch of natural sweetness, creating a perfect harmony with the savory elements.

  • Add Nuts: Toss in chopped nuts, such as walnuts or pecans, for a crunchy texture that complements the softness of the scones. It’s a delightful surprise with each bite!

  • Cheesy Topping: For extra cheesy goodness, sprinkle additional cheese on top before baking. You can never have too much cheese in a scone!

Feel free to experiment with these ideas, and remember, these Zucchini Cheddar Scones are a canvas for your culinary creativity! For a tasty side suggestion, try them alongside our delicious Cheesy Zucchini Bake for a meal that’s full of vegetable goodness.

Expert Tips for Zucchini Cheddar Scones

  • Drain Zucchini Well: Make sure to press out excess moisture from the grated zucchini to avoid a soggy dough. This keeps your scones light and flaky!

  • Use Cold Ingredients: Ensure your butter is very cold and your sour cream is chilled. This step is key for achieving that desirable flaky texture in the Zucchini Cheddar Scones.

  • Handle with Care: Mix the dough gently and avoid overworking it. Too much handling can lead to dense scones; treat it with love for the best results!

  • Grate Fresh Cheese: For optimal melting and flavor, always grate your own sharp cheddar instead of using pre-shredded cheese. It'll enhance the richness of your scones.

  • Experiment with Herbs: Add herbs like chives or dill for extra flavor. A hint of fresh herbs can elevate the savory notes of your Zucchini Cheddar Scones!

Zucchini Cheddar Scones Recipe FAQs

How do I choose ripe zucchini?
Absolutely! Look for zinnias that are firm, smooth, and free of dark spots. The ideal zucchini should be small to medium-sized, typically around 6 to 8 inches long. Larger zucchini can be watery and tough, so keep an eye out for those perfect, tender specimens!

How should I store leftover scones?
After enjoying these delicious Zucchini Cheddar Scones, store any leftovers in an airtight container at room temperature for up to 2 days. To maintain their flaky texture, it's best to consume them fresh. If you opt for refrigeration, they can last in the fridge for about 4 days, though they might lose some crispness.

Can I freeze the scone dough?
Certainly! To freeze the unbaked Zucchini Cheddar Scones, press the formed dough into a disc, wrap it tightly in plastic wrap, and then place it in a freezer-safe bag. It can stay fresh for up to 3 months. When you’re ready to bake, simply pull the dough from the freezer, cut it into wedges, and bake directly from frozen, adding an extra 3-5 minutes to the baking time.

What should I do if my scones turn out dense?
If your Zucchini Cheddar Scones are dense, it might be due to overmixing the dough or perhaps too much moisture from the zucchini. Next time, be gentle while combining the wet and dry ingredients and ensure that the zucchini is thoroughly drained. Remember, it’s all about treating the dough with care!

Are these scones safe for those with allergies?
Great question! These Zucchini Cheddar Scones contain common allergens like wheat (in the all-purpose flour), dairy (in the butter and cheese), and eggs. If you have any food sensitivities, consider substituting gluten-free flour, using dairy-free cheese, or a flaxseed egg as a binding alternative. Always check labels to ensure you’re catering to specific dietary needs.

What can I serve with Zucchini Cheddar Scones?
Oh, the options are delightful! These savory scones pair beautifully with whipped herb butter or honey drizzles for a sweet-savory balance. Serve alongside a steaming bowl of tomato basil soup, or with a side of eggs and bacon for a heartier brunch option. Your family and friends will surely appreciate the added touches!

Zucchini Cheddar Scones

Delicious Zucchini Cheddar Scones for Savory Snacking

Enjoy these Zucchini Cheddar Scones for a savory snack that’s both quick and delicious!
Print Recipe Pin Recipe
Prep Time 10 minutes mins
Cook Time 20 minutes mins
Cooling Time 5 minutes mins
Total Time 35 minutes mins
Servings: 8 scones
Course: Breakfast
Cuisine: American
Calories: 200
Ingredients Equipment Method Nutrition Notes

Ingredients
  

For the Scone Base
  • 2.5 cups all-purpose flour can substitute with gluten-free flour
  • 1 teaspoon salt essential for flavor
  • 1 tablespoon baking powder leavening agent
  • 0.5 teaspoon baking soda leavening agent
  • 1 tablespoon granulated sugar can reduce or use alternative
For the Rich Texture
  • 0.5 cups unsalted butter very cold, cubed
  • 1 large egg helps bind ingredients
  • 0.5 cups full-fat sour cream can substitute with Greek yogurt or buttermilk
For the Savory Flavor
  • 1 cups grated zucchini drain well to avoid sogginess
  • 0.5 cups sharp cheddar cheese reserve some for topping

Equipment

  • Mixing Bowl
  • Baking Sheet
  • Pastry cutter
  • Oven

Method
 

Step-by-Step Instructions
  1. Preheat your oven to 400°F (200°C) and line a baking sheet with parchment paper.
  2. In a large bowl, whisk together the flour, salt, baking powder, baking soda, and sugar.
  3. Cut the cold butter into the dry mixture until it resembles pea-sized crumbs.
  4. In another bowl, beat the egg and mix it with sour cream and zucchini. Fold into the dry ingredients.
  5. Fold in the grated cheese, reserving some for topping.
  6. Turn the dough onto a floured surface, shape into an 8-inch round, and cut into 8 wedges.
  7. Transfer wedges to the baking sheet, brush with milk, and sprinkle with cheese and flour.
  8. Bake for 18-22 minutes until golden brown.
  9. Cool on the baking sheet for 5 minutes before serving.

Nutrition

Serving: 1sconeCalories: 200kcalCarbohydrates: 25gProtein: 5gFat: 10gSaturated Fat: 5gPolyunsaturated Fat: 0.5gMonounsaturated Fat: 3gCholesterol: 35mgSodium: 300mgPotassium: 160mgFiber: 1gSugar: 2gVitamin A: 200IUVitamin C: 4mgCalcium: 150mgIron: 1mg

Notes

For best results, handle the dough gently and ensure cold ingredients are used.

Tried this recipe?

Let us know how it was!

Protein Power Breakfast Bowl for a Quick Protein Boost

September 2, 2025 by Grace Snow Leave a Comment

Every busy morning feels like a mini race against time, doesn’t it? But what if I told you that you can fuel your day with a delicious, high-protein breakfast in just 10 minutes? Enter the Protein Power Breakfast Bowl—your new go-to for a quick, nutritious start. Fluffy scrambled eggs mingle with savory turkey and cool cottage cheese, all drizzled with honey for a delightful sweet surprise. This customizable bowl allows you to use whatever you have on hand—be it fruits, proteins, or the creamy goodness of almond butter. It’s not just a dish; it’s a satisfying way to greet the day, packing over 35 grams of protein per serving! Ready to stir up something delicious and energizing? Let’s dive in!

Why Is This Bowl a Breakfast Game-Changer?

Customization at Its Best: The Protein Power Breakfast Bowl lets you personalize each serving by choosing your favorite proteins, fruits, or nut butters, ensuring there's something for everyone.
Quick and Easy: Whip this up in just 10 minutes—perfect for those hectic mornings when you're racing against the clock!
Packed with Protein: With over 35g of protein per bowl, it’s a powerhouse meal that fuels your day and keeps you satiated.
Textures that Delight: Enjoy the shimmy of fluffy eggs, creamy cottage cheese, and crunchy apples with chewy raisins for a breakfast experience that's as enjoyable to eat as it is nutritious.
Meal Prep Friendly: Components can be prepped ahead of time, making assembling breakfast a breeze. If you love quick, nourishing meals, don't miss out on pairing it with a Breakfast Egg Muffins for an even greater kickstart!

Ingredients for Protein Power Breakfast Bowl

  • For the Base
    • 2 eggs, scrambled – The main protein source providing fluffy texture. Alternatively, use silken tofu for a vegan option.
    • ½ cup cottage cheese – Acts as a protein-rich base. Can be replaced with Greek yogurt for a tangier flavor.
    • 2 oz cooked lean protein (deli turkey, ham, tofu crumbles) – Adds heartiness. Choose any favorite lean protein or omit for a vegetarian version.

  • For the Sweetness
    • 1 tsp honey – Adds a natural sweetness to balance savory elements. Maple syrup can be used as a vegan alternative.
    • 1 tbsp raisins – Offers a chewy texture and sweetness. Substitutions include craisins or chopped dates.

  • For the Crunch
    • ½ apple, chopped – Adds sweetness and crunch. Substitute with a firm pear for a similar texture.
    • 1 tbsp peanut butter – Provides creaminess and flavor. Can replace with almond or sunflower butter to accommodate allergies.

  • For the Spice
    • Dash of cinnamon – Enhances warmth and flavor complexity. Omit if desired or swap for nutmeg for a different spice profile.

  • Optional Add-Ons
    • Cheese slices/cubes – Adds creaminess if included. Omit for a lower-fat version or use non-dairy cheese for a vegan option.
    • Additional fruits (like berries or bananas) – Swap in your favorite fruits to switch things up and add freshness.

With the Protein Power Breakfast Bowl, you can create a nourishing, delicious start to your day in just a flash!

Step‑by‑Step Instructions for Protein Power Breakfast Bowl

Step 1: Prepare the Apple
Start by dicing half an apple into small cubes, ensuring they’re bite-sized for easy eating. Toss the chopped apple with a dash of cinnamon in a bowl. To add a warm twist, microwave 1 tablespoon of peanut butter for about 10 seconds to soften it, then drizzle it over the apple mixture. Finish with a sprinkle of 1 tablespoon of raisins for a delightful burst of sweetness.

Step 2: Scramble the Eggs
In a separate bowl, whisk together 2 eggs with a splash of water until fully combined. Preheat a non-stick skillet over medium heat and pour in the egg mixture, stirring gently with a spatula. Cook for 3-4 minutes until the eggs start to set but remain soft and fluffy. During the last minute of cooking, add in 2 ounces of cooked lean protein like turkey or ham, stirring until heated through.

Step 3: Assemble the Bowl
Grab a serving bowl and scoop in ½ cup of cottage cheese as the base. Swirl 1 teaspoon of honey over the cottage cheese to incorporate a sweet element. This Protein Power Breakfast Bowl is coming together beautifully, so take a moment to admire the creamy texture of the cottage cheese mixed with the glistening honey.

Step 4: Combine the Ingredients
Carefully layer the scrambled eggs mixed with the cooked protein on top of the cottage cheese in the bowl. If you’re adding cheese slices or cubes, place them strategically into the mix now, allowing them to melt slightly from the warmth of the eggs. The combination of textures is truly mouthwatering.

Step 5: Serve and Enjoy
To finish, gently mix all the layers together for an enticing blend of sweet, savory, and creamy flavors. This Protein Power Breakfast Bowl is best enjoyed right away, allowing you to savor the harmony of fluffy eggs, rich cottage cheese, crunchy apples, and chewy raisins. Prepare to start your day with energy and satisfaction!

What to Serve with Protein Power Breakfast Bowl

Every morning deserves a delicious companion to elevate your breakfast experience and keep you energized throughout the day.

  • Refreshing Green Smoothie: A vibrant blend of spinach, banana, and almond milk adds a refreshing and nutrient-rich balance to your protein bowl.
  • Crispy Whole Wheat Toast: Perfect for a satisfying crunch, lightly toasted whole wheat bread complements the creamy textures of your breakfast bowl. Spread it with a bit of almond butter for a delightful nutty flavor!
  • Sliced Avocado: Creamy avocado brings healthy fats and a velvety texture, making each bite of your breakfast bowl even more satisfying. Just sprinkle with a pinch of salt for a simple yet delicious touch.
  • Zesty Fruit Salad: A colorful mix of berries, melon, and citrus brightens your meal while adding a refreshing, vitamin-packed contrast to the hearty bowl.
  • Black Coffee or Herbal Tea: A warm beverage like rich black coffee or soothing herbal tea balances flavors perfectly, providing a comforting start to your day.
  • Yogurt Parfait: Layered with granola and fresh fruit, Greek yogurt creates a delightful, creamy counterpoint, introducing different textures and flavors alongside your Protein Power Breakfast Bowl.
  • Chia Seed Pudding: This delightful pudding, rich in omega-3s, can be made with almond milk and topped with fruits, creating a sweet, nutrient-dense side that pairs well with your deliciously savory bowl.
  • Homemade Granola Bars: These chewy treats keep you fueled longer, enhancing your breakfast experience with added crunch and a hint of sweetness as a mid-morning snack later!
  • Scrambled Tofu: For a vegan twist, serve a side of scrambled tofu seasoned with turmeric and herbs. It mirrors the flavors of your protein bowl and offers a protein boost.
  • Nutty Oatmeal: A small bowl of oatmeal topped with seeds or nuts provides a warm and hearty side, complementing the flavors of your breakfast bowl while adding a lovely texture variation.

Expert Tips for Protein Power Breakfast Bowl

  • Ingredient Flexibility: Use what you have on hand—any fruit, nut butter, or protein source works well. This ensures your Protein Power Breakfast Bowl is always delicious and unique!
  • Scramble Sensibly: Scramble your eggs until just set for fluffier results. Overcooking can lead to rubbery textures, diminishing your breakfast experience.
  • Preparation Perfection: Meal prep by chopping your apple and cooking proteins in advance. Store separately to keep everything fresh and flavorful for busy mornings.
  • Creamy Contrast: Keep cottage cheese separate until serving to maintain its texture. Mixing it too early can make it watery, affecting your delightful bowl's consistency.
  • Sweetener Swap: Try different natural sweeteners according to your dietary needs. Maple syrup is a lovely vegan alternative to honey that pairs beautifully with this bowl.

Storage Tips for Protein Power Breakfast Bowl

  • Fridge: Store any leftover components in airtight containers for up to 3 days. Keep the cottage cheese separate from the warm ingredients to maintain texture.
  • Freezer: While it's best fresh, scrambled eggs and cooked proteins can be frozen separately for up to 2 months. Reheat thoroughly before combining.
  • Reheating: Reheat scrambled eggs and proteins in the microwave or on the stove until hot. Combine with the cold cottage cheese just before serving for the best experience.
  • Meal Prep: Prepare components ahead of time, and store in individual containers in the fridge. This way, you can easily grab and assemble your Protein Power Breakfast Bowl on busy mornings.

Make Ahead Options

The Protein Power Breakfast Bowl is a dream for meal prep enthusiasts looking to save time during busy mornings! You can chop the apple and mix it with cinnamon, then store it in an airtight container for up to 24 hours to maintain its crispness. Similarly, cook your choice of protein (turkey, ham, or tofu) in advance, and refrigerate for up to 3 days. Mornings can get rushed, so scrambling the eggs ahead of time and reheating them quickly in the microwave just before serving can help as well. When you're ready to enjoy your breakfast bowl, simply layer the prepped ingredients with fresh cottage cheese and a drizzle of honey, and you've got a delicious, nutritious meal ready in no time!

Protein Power Breakfast Bowl Variations

Customize this delightful breakfast bowl to match your mood or dietary preferences for a truly satisfying treat!

  • Vegan Option: Swap scrambled eggs with scrambled silken tofu for a completely plant-based dish that’s equally satisfying.

  • Nut Butter Flexibility: Replace peanut butter with almond or sunflower butter for a nutty twist, perfect for those with allergies or preferences.

  • Fruity Swaps: Experiment by adding different fruits like sliced bananas or juicy blueberries. Each fruit brings a unique taste that brightens the bowl.

  • Greek Yogurt Twist: Use Greek yogurt instead of cottage cheese for a creamier, tangier base that packs a protein punch.

  • Sweetness Adjustments: Opt for maple syrup as a vegan-friendly sweetener, allowing you to tailor the sweetness level according to your taste.

  • Texture Variations: Add a handful of granola or toasted nuts on top for a crunchy finish, giving each bite an enjoyable layer of texture.

  • Cheesy Delight: Incorporate aged cheddar or feta cheese for those who love a cheesy flavor; it melts beautifully amongst the warm ingredients.

  • Spicy Kick: Add a pinch of cayenne pepper or a drizzle of sriracha for those who enjoy a hint of heat; this excitement complements the sweetness beautifully.

With these variations, your Protein Power Breakfast Bowl can be a rotating favorite, ensuring that breakfast never grows dull. If you're looking for more incredible breakfast ideas, try pairing it with a nourishing Acai Bowl Nutritious or a comforting Cornbread Breakfast Casserole!

Protein Power Breakfast Bowl Recipe FAQs

What fruits can I use for the Protein Power Breakfast Bowl?
Absolutely! You can use any fruit you have on hand. Besides apples, bananas, berries, and pears work wonderfully. Just ensure they’re fresh and not overly ripe—look for firm textures and bright colors!

How long can I store the Protein Power Breakfast Bowl components?
You can store the components in airtight containers in the refrigerator for up to 3 days. I recommend keeping the cottage cheese separate from the scrambled eggs to avoid a watery texture. When you're ready to enjoy, just reheat the eggs and protein, combine them with the cottage cheese, and savor!

Can I freeze parts of the Protein Power Breakfast Bowl?
Yes, you can absolutely freeze the scrambled eggs and cooked proteins! To freeze, let them cool completely before placing them in airtight containers or freezer bags. They can be frozen for up to 2 months. When you’re ready to eat, thaw them overnight in the fridge, then reheat until hot. Combine them with fresh cottage cheese just before serving.

What should I do if my scrambled eggs turn out rubbery?
Very good question! To avoid rubbery scrambled eggs, make sure you’re not cooking them on too high heat or for too long. Aim for medium heat, and stir gently until they’re just set and fluffy, about 3-4 minutes. If you prefer, you can whisk a splash of milk or water into the eggs before scrambling for an extra fluffy texture.

Are there any common allergens in the Protein Power Breakfast Bowl?
Yes, this recipe does include ingredients that can trigger allergies, particularly eggs, dairy (cottage cheese), and peanuts if using peanut butter. If you or someone you’re serving has allergies, consider substituting with silken tofu for a vegan option, using almond or sunflower butter instead of peanut butter, and choosing a dairy-free yogurt alternative. Always feel free to adjust according to dietary needs!

Can I meal prep individual servings of the Protein Power Breakfast Bowl?
Absolutely! I often meal prep by dividing the components into individual containers. Store the cottage cheese separately to keep its texture. You can store the chopped apples and cooked proteins together; just ensure everything stays airtight. When you're ready, just combine and enjoy a quick, nutritious meal!

Protein Power Breakfast Bowl

Protein Power Breakfast Bowl for a Quick Protein Boost

Fuel your day with the Protein Power Breakfast Bowl, a delicious high-protein meal ready in just 10 minutes.
Print Recipe Pin Recipe
Prep Time 5 minutes mins
Cook Time 5 minutes mins
Total Time 10 minutes mins
Servings: 1 bowl
Course: Breakfast
Cuisine: American
Calories: 400
Ingredients Equipment Method Nutrition Notes

Ingredients
  

For the Base
  • 2 eggs scrambled Alternatively, use silken tofu for a vegan option.
  • 0.5 cup cottage cheese Can be replaced with Greek yogurt for a tangier flavor.
  • 2 oz cooked lean protein (deli turkey, ham, tofu crumbles) Adds heartiness.
For the Sweetness
  • 1 tsp honey Maple syrup can be used as a vegan alternative.
  • 1 tbsp raisins Substitutions include craisins or chopped dates.
For the Crunch
  • 0.5 apple chopped Substitute with a firm pear for a similar texture.
  • 1 tbsp peanut butter Can replace with almond or sunflower butter to accommodate allergies.
For the Spice
  • 1 dash cinnamon Enhances warmth and flavor complexity.
Optional Add-Ons
  • cheese slices/cubes Omit for a lower-fat version or use non-dairy cheese for a vegan option.
  • additional fruits (like berries or bananas) Swap in your favorite fruits to switch things up.

Equipment

  • non-stick skillet
  • Mixing Bowl
  • Spatula

Method
 

Step-by-Step Instructions
  1. Start by dicing half an apple into small cubes, and toss with a dash of cinnamon in a bowl. Microwave 1 tbsp of peanut butter for about 10 seconds to soften, then drizzle over the apple mixture. Finish with 1 tbsp of raisins.
  2. In a mixing bowl, whisk together 2 eggs with a splash of water. Preheat a non-stick skillet over medium heat and pour in the egg mixture, stirring gently. Cook for 3-4 minutes until the eggs start to set but remain soft. Add 2 oz of cooked lean protein for the last minute to heat through.
  3. In a serving bowl, scoop in 0.5 cup of cottage cheese. Swirl 1 tsp of honey over the cottage cheese.
  4. Layer the scrambled eggs mixed with cooked protein on top of the cottage cheese. If using, add cheese slices now.
  5. Gently mix all layers together, and enjoy your Protein Power Breakfast Bowl right away.

Nutrition

Serving: 1bowlCalories: 400kcalCarbohydrates: 30gProtein: 35gFat: 20gSaturated Fat: 5gPolyunsaturated Fat: 3gMonounsaturated Fat: 12gCholesterol: 370mgSodium: 600mgPotassium: 800mgFiber: 5gSugar: 10gVitamin A: 500IUVitamin C: 5mgCalcium: 200mgIron: 2mg

Notes

This bowl is customizable, perfect for busy mornings. Add your favorite ingredients for a unique breakfast experience.

Tried this recipe?

Let us know how it was!

No-Bake Banana Cinnamon Energy Bites for Sweet Fuel Anytime

September 2, 2025 by Grace Snow Leave a Comment

As I stood in my kitchen, the aroma of cinnamon wafted through the air, instantly wrapping me in a comforting embrace. It was time to whip up my No-Bake Banana Cinnamon Energy Bites, a delightful recipe that never fails to brighten my day. In just 10 minutes, these chewy morsels transform wholesome ingredients into a snack that’s perfect for busy mornings or that post-workout pick-me-up. With the heartiness of oats and the natural sweetness of ripe bananas, they merge the nostalgic goodness of banana bread with the convenience of quick snacks. Not only are these energy bites a healthier alternative to store-bought options, but they’re also customizable; toss in some chocolate chips or nuts for an extra pop of flavor! Ready to fuel your day with a homemade touch? Let’s dive into this simple and satisfying recipe!

Why are No-Bake Energy Bites Perfect?

Convenience at Its Core: You’ll whip up these No-Bake Banana Cinnamon Energy Bites in just 10 minutes, making it an ideal recipe for busy lifestyles.
Nutrient-Packed Satisfaction: With wholesome oats and ripe bananas, these bites are a nutritious treat that keep you energized throughout the day.
Customizable Goodness: Feel free to mix in chocolate chips or nuts for added textures, ensuring every batch is uniquely yours.
No-Bake Wonder: Skip the oven! These bites come together without any baking, keeping your kitchen cool and cleanup easy.
Crowd-Pleasing Snack: Whether for post-workout fuel or an afternoon treat, these bites are sure to make friends and family smile, much like my Pumpkin Cinnamon Roll Muffins do!
Great for Meal Prep: Make a batch ahead of time and store them in the fridge for snacks all week long—much simple than reaching for fast food!

No-Bake Banana Cinnamon Energy Bites

• Let’s get cooking!

For the Bites

  • Rolled Oats – Provides the essential chewy texture; stick with old-fashioned oats for the best results.
  • Mashed Ripe Banana – Adds natural sweetness and moisture, making each bite delightful; you can use ½ cup of applesauce for a different twist.
  • Peanut Butter or Almond Butter – Brings creaminess and a protein punch; for nut-free options, swap it with sunflower seed butter.
  • Honey or Maple Syrup – Acts as a sweetener and a binder to hold everything together; agave syrup or brown rice syrup can serve as great alternatives.
  • Ground Cinnamon – Infuses the bites with warm flavor; feel free to adjust the quantity to suit your taste.
  • Vanilla Extract – Elevates the overall flavor; opt for high-quality vanilla for the best results.
  • Pinch of Salt – Enhances the overall sweetness and balance; it really makes the flavors pop.
  • Optional: Mini Chocolate Chips or Chopped Nuts – For added crunch and sweetness; consider using dried fruit instead for an extra chewiness.

With these simple ingredients, you're just moments away from enjoying your very own No-Bake Banana Cinnamon Energy Bites!

Step‑by‑Step Instructions for No-Bake Banana Cinnamon Energy Bites

Step 1: Mix Wet Ingredients
In a medium mixing bowl, combine 1 mashed ripe banana, ½ cup of peanut butter (or your preferred nut butter), 2 tablespoons of honey (or maple syrup), 1 teaspoon of vanilla extract, 1 teaspoon of ground cinnamon, and a pinch of salt. Use a fork or spatula to mix until the ingredients blend smoothly, creating a creamy, cohesive texture that looks inviting.

Step 2: Add Oats
Next, fold in 1 cup of rolled oats using a spatula. Stir gently to ensure each oat is coated with the sticky mixture. If you're including add-ins like mini chocolate chips or chopped nuts, now’s the perfect time to add about ¼ cup of your choice. Mix until everything is evenly distributed, creating a deliciously fragrant mixture that’s begging to be rolled.

Step 3: Chill
To make rolling easier, cover your bowl with plastic wrap and refrigerate for 15–20 minutes. This step helps firm up the mixture, allowing it to hold together better as you shape it into bites. You'll know it’s ready when the mixture is slightly stiff but still pliable, creating the perfect foundation for your No-Bake Banana Cinnamon Energy Bites.

Step 4: Roll
Once chilled, use a tablespoon to scoop out portions of the mixture. Roll each portion into your hands to form small balls, about the size of a golf ball. If the mixture feels sticky, dampen your hands lightly with water to make rolling easier. Place each ball on a parchment-lined tray, and admire your progress as they take shape!

Step 5: Store
After rolling out all the energy bites, transfer them to an airtight container. Store in the refrigerator for up to one week for a quick grab-and-go snack, or freeze them for 2–3 months to enjoy later. As you pop the lid on your container, feel satisfied knowing you’ve created a healthy, homemade treat that’s ready whenever you need a little fuel!

No-Bake Banana Cinnamon Energy Bites Variations

Feel free to get creative and make these energy bites your own with delightful swaps and added flavors.

  • Espresso Boost: Add 1 tablespoon of espresso powder for a subtle coffee kick to energize your day. Coffee lovers will adore how it enhances the flavor profile!

  • Citrus Zest: Incorporate the zest of one orange or lemon for a refreshing citrus twist that brightens each bite. It’s a fantastic way to wake up your taste buds!

  • Nut Butter Swap: Substitute almond butter for peanut butter or use sunflower seed butter for a nut-free version, capturing the same creamy goodness without the nuts.

  • Vegan Sweetener: Replace honey with agave syrup or brown rice syrup to easily make this recipe vegan-friendly without compromising on sweetness.

  • Flavorful Spices: Experiment with a pinch of nutmeg or ginger for an aromatic depth that pairs perfectly with cinnamon, adding warmth and complexity to each bite.

  • Dried Fruit Addition: Mix in ¼ cup of dried cranberries, raisins, or apricots for a sweet and chewy surprise that makes these energy bites even more satisfying.

  • Extra Crunch: Toss in ¼ cup of chia seeds or flaxseeds for added nutrition and a delightful crunch that complements the texture of the oats beautifully.

  • Chocolate Lovers Delight: Fold in dark chocolate chunks or cocoa nibs to satisfy your chocolate cravings, turning these bites into a decadent treat that feels indulgent yet wholesome.

As you substitute ingredients or add new elements, remember to keep it fun—just like in my recipes for Pumpkin Cinnamon Roll muffins or Pumpkin Cinnamon Roll cupcakes. Let your taste preferences guide you, and happy snacking!

Expert Tips for No-Bake Energy Bites

  • Use Ripe Bananas: Ensure your bananas are fully ripe to maximize natural sweetness and binding; under-ripe bananas will make rolls crumbly.

  • Chill Thoroughly: Don’t skip the chilling step! This helps the mixture firm up, making it easier to roll into perfect bites without sticking to your hands.

  • Choose the Right Oats: Stick to old-fashioned rolled oats for the best texture; quick oats can lead to a gummy consistency in your No-Bake Banana Cinnamon Energy Bites.

  • Experiment with Flavors: Don’t hesitate to get creative! Adding extras like dark chocolate chips or spices can elevate your energy bites to a new level of deliciousness.

  • Rolling Technique: If the mixture is too sticky, moisten your hands with water; this simple trick can make the rolling process much smoother and more enjoyable.

What to Serve with No-Bake Banana Cinnamon Energy Bites

These delightful energy bites create a wholesome snack experience that goes beyond just sweetness and flavor.

  • Greek Yogurt Parfait: Layer creamy Greek yogurt with fresh fruit and granola for a delightful breakfast that complements the chewy bites.

  • Fresh Berries: Serve a bowl of vibrant strawberries or blueberries to add a juicy freshness that balances the richness of the energy bites.

  • Nutty Granola: A sprinkle of crunchy granola adds a delightful texture contrast, enhancing the flavors of both the energy bites and your morning routine.

Imagine a cozy breakfast table graced with these flavors—perfect for kick-starting your day!

  • Herbal Tea: Sip on a warm cup of chamomile or peppermint tea, offering a cozy sip to pair with your energy bites for an afternoon delight.

  • Apple Slices with Almond Butter: Crisp apple slices drizzled with almond butter create a satisfying combo that adds a dose of fiber to your snacking routine.

  • Dark Chocolate Treats: How about a few pieces of dark chocolate on the side? The bitterness of the chocolate heightens the sweetness of the energy bites for a decadent touch.

  • Milk or Plant-Based Drink: Pair with a tall glass of cold milk or almond milk to wash down the bites and keep you feeling refreshed.

These pairing ideas not only complement your No-Bake Banana Cinnamon Energy Bites but elevate them into a delightful and complete snacking experience!

How to Store and Freeze No-Bake Banana Cinnamon Energy Bites

Fridge: Keep your energy bites in an airtight container in the fridge for up to 1 week. This allows you to grab a delicious snack on the go!

Freezer: For longer storage, freeze the energy bites for 2–3 months. Layer them between parchment paper in an airtight container to avoid sticking.

Thawing: When ready to enjoy, simply remove the desired amount from the freezer and let them thaw in the fridge for a few hours or at room temperature for about 30 minutes.

On-the-Go: You can also pack a few bites in a zip-top bag for a quick snack, making it easy to fuel your day whenever you need it!

Make Ahead Options

These No-Bake Banana Cinnamon Energy Bites are perfect for meal prep enthusiasts! You can mix all the ingredients and chill the mixture up to 24 hours in advance; this allows the flavors to meld beautifully and makes for easier rolling later. For optimal quality, refrigerate the prepared mixture in an airtight container. When you're ready to serve, simply roll the chilled mixture into bite-sized balls—if the mixture feels too soft, refrigerate for an additional 15 minutes before rolling. These energy bites store well in the fridge for up to 1 week or can be frozen for 2–3 months, ensuring you always have a wholesome snack at hand!

No-Bake Banana Cinnamon Energy Bites Recipe FAQs

What type of bananas should I use?
Absolutely! It's best to use fully ripe bananas for this recipe. Look for those that are slightly speckled with brown spots, as they will be sweeter and easier to mash, ensuring your energy bites have the perfect texture and flavor.

How should I store my energy bites?
For optimal freshness, keep your No-Bake Banana Cinnamon Energy Bites in an airtight container in the fridge for up to 1 week. If you prefer longer storage, you can freeze them for 2–3 months. Just layer them between parchment paper in your container to prevent sticking!

Can I freeze these energy bites?
Yes, you can! To freeze your energy bites, make sure they are rolled into balls first. Place them on a parchment-lined baking sheet and freeze until firm. Then, transfer them to an airtight container or freezer bag, separating layers with parchment paper. When ready to enjoy, thaw at room temperature for 30 minutes or in the fridge for a few hours.

What if my mixture is too sticky to roll?
Very! If your mixture feels too sticky, simply dampen your hands lightly with water before rolling. This helps keep the mixture from adhering to your palms and allows you to form perfect little bites with ease. If the mixture is still too warm, chill it for an additional 10 minutes to firm it up.

Are these energy bites safe for all dietary needs?
While the No-Bake Banana Cinnamon Energy Bites are naturally vegetarian, adjustments can be made for various dietary needs. For nut allergies, you can easily substitute peanut or almond butter with sunflower seed butter. If you're looking for a vegan option, replace honey with agave syrup or maple syrup. Always check ingredient labels for any potential allergens!

How long do they take to prepare?
You’ll be delighted to know that making these No-Bake Banana Cinnamon Energy Bites takes just about 10 minutes! Plus, with the chilling time, you're only looking at a total of around 30 minutes before they’re ready to enjoy. Perfect for quick snack prep!

No-Bake Banana Cinnamon Energy Bites

No-Bake Banana Cinnamon Energy Bites for Sweet Fuel Anytime

Delight in No-Bake Banana Cinnamon Energy Bites, the perfect sweet fuel for anytime snack.
Print Recipe Pin Recipe
Prep Time 10 minutes mins
Chill Time 15 minutes mins
Total Time 25 minutes mins
Servings: 12 bites
Course: Snacks
Calories: 90
Ingredients Equipment Method Nutrition Notes

Ingredients
  

For the Bites
  • 1 cup Rolled Oats Use old-fashioned oats for best results.
  • 1 large Mashed Ripe Banana Can substitute with ½ cup of applesauce.
  • ½ cup Peanut Butter or Almond Butter Can use sunflower seed butter for nut-free option.
  • 2 tablespoons Honey or Maple Syrup Agave syrup or brown rice syrup can be used as alternatives.
  • 1 teaspoon Ground Cinnamon Feel free to adjust to taste.
  • 1 teaspoon Vanilla Extract Opt for high-quality vanilla for best results.
  • 1 pinch Salt Enhances sweetness and balance.
  • ¼ cup Optional Mini Chocolate Chips or Chopped Nuts Can substitute with dried fruit for chewiness.

Equipment

  • Mixing Bowl
  • Spatula
  • tablespoon
  • plastic wrap
  • Airtight Container

Method
 

Step-by-Step Instructions
  1. In a medium mixing bowl, combine 1 mashed ripe banana, ½ cup of peanut butter, 2 tablespoons of honey, 1 teaspoon of vanilla extract, 1 teaspoon of ground cinnamon, and a pinch of salt. Mix until smooth.
  2. Fold in 1 cup of rolled oats gently using a spatula until each oat is coated. Stir in any add-ins like mini chocolate chips or nuts if desired.
  3. Cover the bowl with plastic wrap and refrigerate for 15–20 minutes to firm up the mixture.
  4. Scoop portions of the mixture and roll into small balls. If sticky, moisten your hands with water. Place on a parchment-lined tray.
  5. Transfer rolled energy bites to an airtight container and store in the fridge for up to one week or freeze for 2–3 months.

Nutrition

Serving: 1biteCalories: 90kcalCarbohydrates: 10gProtein: 3gFat: 4gSaturated Fat: 1gMonounsaturated Fat: 3gSodium: 50mgPotassium: 100mgFiber: 1gSugar: 4gVitamin C: 2mgCalcium: 2mgIron: 4mg

Notes

Use ripe bananas for maximum sweetness. Chilling the mixture is essential for easy rolling. Customize with various add-ins for unique flavors.

Tried this recipe?

Let us know how it was!

Crispy Tofu Bowls with Kimchi: A Flavorful Weeknight Hit

September 2, 2025 by Grace Snow Leave a Comment

As I stood in my kitchen, the tantalizing aroma of sesame and garlic enveloped me, igniting memories of my favorite Asian dishes. Today, I’m excited to share my Crispy Tofu Bowls with Kimchi, a dish that transforms the chaos of weeknight cooking into a vibrant, satisfying meal. This recipe not only offers a delightful crunch with every bite of sesame-crusted tofu and garlicky roasted broccoli but also packs a nutritional punch—high in protein and low in carbs. With minimal prep time, you can whip this up faster than any takeout order! Ready to elevate your dinner game and savor a little slice of deliciousness? Let’s dive into this flavorful adventure together!

Why is this recipe a must-try?

Flavor Explosion: The combination of crispy tofu, garlicky broccoli, and tangy kimchi creates a mouthwatering harmony that delights the palate.
Nutrient-Dense: Packed with protein and low in carbs, these bowls are a filling yet healthy choice for any meal.
Quick & Easy: With minimal prep and cook time, you can enjoy this gourmet experience on any busy weeknight.
Customizable: Feel free to swap ingredients! Replace tofu with shrimp or add your favorite veggies to make it your own. Explore other options like Buffalo Tofu Caesar for a twist!
Crowd-Pleaser: Perfect for family dinners, this dish appeals to both veggie lovers and meat enthusiasts alike.

Crispy Tofu Bowls with Kimchi Ingredients

  • For the Tofu

  • Extra-firm tofu – The primary protein source, providing a satisfying texture when roasted or fried. Substitute tempeh or edamame for a different protein boost.

  • Cornstarch – Creates a crispy coating for the tofu. For a gluten-free option, use potato starch or rice flour.

  • Sesame seeds – Adds nuttiness and texture contrast. Try poppy seeds or crushed nuts as alternatives.

  • Gochugaru – Provides heat and flavor; can be substituted with red pepper flakes for a similar spice level.

  • Neutral oil for frying – Enhances crispiness while cooking tofu; olive oil or avocado oil work well as substitutes.

  • For the Broccoli

  • Broccoli – Roasts beautifully for flavor and texture; consider using cauliflower or Brussels sprouts as alternatives.

  • For the Sauce

  • Yogurt – Forms the creamy base; plain or coconut yogurt works well, or use a vegan yogurt for a plant-based option.

  • Mayonnaise – Adds richness; opt for vegan mayo if desired.

  • Toasted sesame oil – Provides depth of flavor; regular sesame oil can be used if needed.

  • Rice vinegar – Adds a tangy kick to the sauce.

  • Fresh ginger – Enhances flavor with its warm, zesty notes.

  • Garlic – Contributes aromatic flavor to the sauce.

  • For the Bowl Assembly

  • Cooked brown rice – Serves as the base; consider cauliflower rice for a low-carb alternative.

  • Shelled edamame – Adds protein and vibrant color to your bowl.

  • Chopped kimchi with juice – Provides a tangy, spicy kick; feel free to adjust the amount to your taste.

  • Scallions – Sliced for a fresh garnish, bringing brightness to the dish.

  • Optional garnishes – Include sesame seeds and chili crisp for added flavor and heat.

These Crispy Tofu Bowls with Kimchi will bring excitement back to your dinner table and satisfy your cravings for a delicious, homemade meal!

Step‑by‑Step Instructions for Crispy Tofu Bowls with Kimchi

Step 1: Preheat the Oven
Begin by preheating your oven to 425°F (220°C). This high temperature will ensure that your broccoli roasts to perfection, getting crispy and flavorful. Once your oven is heated, you’ll be ready to start preparing the broccoli while it warms up.

Step 2: Roast the Broccoli
Toss the broccoli florets in a mixing bowl with neutral oil, salt, and 1 teaspoon of gochugaru until evenly coated. Spread the florets on a parchment-lined sheet pan in a single layer, ensuring they aren’t overcrowded. Roast for 20-25 minutes, turning halfway through, until the edges are lightly charred and crispy.

Step 3: Prepare the Tofu
While the broccoli is roasting, cube the pressed extra-firm tofu and toss it with cornstarch, sesame seeds, and the remaining ½ teaspoon of gochugaru in a bowl. Make sure each piece is well-coated for maximum crispiness. This will create an irresistible outer layer when cooked.

Step 4: Heat the Oil for Frying
In a large skillet, heat 2-3 tablespoons of neutral oil over medium-high heat. You’ll know the oil is ready when it shimmers slightly. This step is crucial for achieving that perfect golden exterior on your tofu, so take care to not overcrowd the pan.

Step 5: Fry the Tofu
Add the coated tofu cubes to the skillet in a single layer. Cook for 2-3 minutes on each side until golden brown and crispy, turning carefully with tongs or a spatula. Once cooked, transfer the tofu to a plate lined with paper towels to drain excess oil.

Step 6: Whisk the Sauce Together
In a separate bowl, whisk together the yogurt, mayonnaise, toasted sesame oil, rice vinegar, grated ginger, minced garlic, and a pinch of salt. Mix until smooth and creamy, adjusting the flavor to your liking—this sauce will add a delightful richness to your Crispy Tofu Bowls with Kimchi.

Step 7: Warm the Kimchi
In a small pan over low heat, warm the chopped kimchi for a few minutes until heated through. If you prefer a milder flavor, feel free to stir in a little honey at this stage to balance the spiciness. The warmth will enhance the flavors, making it a perfect complement to your dish.

Step 8: Assemble the Bowls
To assemble your Crispy Tofu Bowls with Kimchi, start by fluffing your cooked brown rice or cauliflower rice as the base. Top with the roasted broccoli, shelled edamame, warm kimchi, and finally, the crispy tofu. Drizzle the creamy yogurt sauce generously over the top and garnish with sliced scallions and optional sesame seeds for added texture.

What to Serve with Crispy Tofu Bowls with Kimchi

Elevate your meal experience with delightful side dishes that add flavor, texture, and satisfaction to your vibrant crispy tofu bowls.

  • Jasmine Rice: This fragrant rice complements the bowl’s flavors while remaining a familiar and comforting base. Its light texture allows the other ingredients to shine.

  • Garlic Edamame: A quick and healthy snack, these tender soybeans bring a satisfying crunch and enhance the protein content of your meal. Toss them with a sprinkle of sea salt for extra flavor!

  • Miso Soup: Warm and brothy, miso soup offers a umami-rich pairing that balances the brightness of kimchi. Serve it as a starter for a complete dining experience.

  • Asian Slaw: A crunchy mix of cabbage, carrots, and a tangy sesame dressing adds freshness and texture. The add a bright contrast to the hearty tofu bowls!

  • Cucumber Salad: Light and refreshing, a simple cucumber salad dressed with rice vinegar and sesame oil can cleanse the palate between bites, enhancing your overall enjoyment.

  • Chili Oil: Drizzle a bit of chili oil over the finished bowls for a spicy kick that intensifies the flavors of the dish.

  • Green Tea: The earthy notes of green tea provide a soothing complement that balances the bowl's richness and aids in digestion.

These options will turn your Crispy Tofu Bowls with Kimchi into a delightful multi-course experience, tinged with various textures and flavors. Enjoy the journey!

How to Store and Freeze Crispy Tofu Bowls with Kimchi

Fridge: Store individual components separately in airtight containers; tofu and broccoli will stay fresh for up to 2 days, while kimchi can last up to 1 week.

Freezer: For long-term storage, freeze cooked tofu (without sauce) in a single layer for up to 3 months. Thaw in the fridge overnight before reheating.

Sauce: Keep the yogurt sauce in the fridge for up to 3 days; store it in a well-sealed jar to prevent drying out.

Reheating: To restore tofu's crispness, reheat it in an air fryer at 375°F for 5-7 minutes or in a hot skillet for a few minutes until heated through. Enjoy your Crispy Tofu Bowls with Kimchi fresh and flavorful!

Expert Tips for Crispy Tofu Bowls with Kimchi

  • Hot Oil is Key: Ensure your oil is properly heated before frying tofu; this helps avoid sticking and gives that essential crispy texture.

  • Fry in Batches: Don’t overcrowd the skillet when frying tofu. This ensures each piece gets crispy without steaming, leading to the perfect golden tofu.

  • Broccoli Timing: Check the broccoli frequently in the oven. Cooking times can vary, so look for lightly charred edges for that ideal crunch.

  • Adjust Kimchi Spice: If you're not a fan of spicy flavors, warm the kimchi with a touch of honey to mellow its heat, balancing it nicely with the creamy sauce.

  • Sauce Customization: Feel free to adjust the sauce ingredients; a splash of lemon juice can brighten the flavors, or adding a pinch of cumin could give it a lovely twist.

These Crispy Tofu Bowls with Kimchi are sure to become a favorite, full of flavor, texture, and satisfying goodness!

Crispy Tofu Bowls with Kimchi Variations

Feel free to get creative with these bowls, turning them into your own culinary masterpiece that excites your taste buds!

  • Meat Lover’s Swap: Use quick-seared shrimp or marinated chicken thighs instead of tofu for a savory, hearty dish. The seafood's delicate flavor pairs beautifully with the kimchi, bringing a delightful twist!

  • Keto-Friendly: Omit the rice and double the broccoli, adding creamy avocado slices for a low-carb alternative that's still satisfying. This version won't skimp on flavor while keeping your carb count in check.

  • Kimchi Options: Experiment with cucumber kimchi for a refreshing crunch or try white kimchi for a milder, sweeter flavor. Both variations will retain that authentic tang while offering something fresh!

  • Sauce Remix: Blend in some peanut butter into the yogurt sauce for a satay-like twist full of creaminess and richness. You'll find it’s a delightful departure from the traditional!

  • Rainbow Upgrade: Add colorful veggies like shredded purple cabbage, pickled radishes, or mango slices to make your bowl pop with color and texture. Each bite becomes a feast for both the eyes and the palate.

If you love the vibrant flavor of this dish, you'll enjoy how it pairs well with options like Fish Taco Bowls and Smoky Sweet Corn for even more culinary adventures!

Make Ahead Options

These Crispy Tofu Bowls with Kimchi are perfect for busy home cooks looking to save time! You can prepare the roasted broccoli and crispy tofu up to 3 days in advance. Simply roast the broccoli, allow it to cool, then store it in an airtight container in the fridge. For the tofu, after cooking, let it cool and refrigerate it in an airtight container; reheat in an air fryer to maintain crispiness before serving. The yogurt sauce can be prepared up to 24 hours in advance and stored in the fridge. When you’re ready to enjoy your bowls, just fluff the rice, warm the kimchi, and assemble everything for a delightful meal with minimal effort!

Crispy Tofu Bowls with Kimchi Recipe FAQs

How do I select ripe ingredients for my Crispy Tofu Bowls with Kimchi?
Absolutely! When choosing tofu, look for extra-firm varieties that feel dense and have no dark spots or excessive moisture. Fresh broccoli should be vibrant green with firm florets, and avoid any that appear yellow or have wilting leaves. If you're picking kimchi, opt for brands that mention fermentation on the label for the best flavor.

What are the best storage methods and duration for the Crispy Tofu Bowls?
To keep your Crispy Tofu Bowls delicious, store each component separately. The tofu and broccoli in airtight containers will last up to 2 days in the fridge, while the kimchi can stay fresh for up to 1 week. The yogurt sauce will be good for about 3 days. Keeping ingredients separate preserves their textures, which is essential for that perfect bite!

Can I freeze the components of my Crispy Tofu Bowls with Kimchi?
Yes, you can! For freezing, ensure the cooked tofu is cooled and then spread it in a single layer on a baking sheet to freeze before transferring to a freezer-safe bag. This prevents clumping, and it can stay fresh for up to 3 months. To reheat, thaw it in the fridge overnight and then warm it in an air fryer or skillet to restore its crispiness.

What if my tofu sticks to the pan while frying?
Not to worry! If you find that your tofu is sticking, it might be because the oil wasn't hot enough. Ensure the oil shimmers and is properly heated before adding tofu. Frying in batches also helps to prevent sticking, as overcrowding the pan traps steam. If sticking occurs, a bit of patience will help to free the tofu as it cooks.

Are there any dietary considerations for the Crispy Tofu Bowls with Kimchi?
This recipe is quite versatile! It's suitable for a vegan diet with dairy-free yogurt and vegan mayo. If you have gluten sensitivities, opt for gluten-free cornstarch and check that your kimchi contains no gluten or wheat products. As for pet considerations, avoid letting pets indulge in spicy ingredients like kimchi, as these can be harmful to them.

Can I customize my Crispy Tofu Bowls with Kimchi further?
Very! This recipe is highly customizable; feel free to swap in your favorite vegetables or proteins. For example, if you want something even more filling, add avocado slices or double the amount of broccoli. Don't hesitate to make this bowl truly your own by mixing in diverse flavors with different sauces or garnishes!

Crispy Tofu Bowls with Kimchi

Crispy Tofu Bowls with Kimchi: A Flavorful Weeknight Hit

Crispy Tofu Bowls with Kimchi is a vibrant weeknight meal combining protein-rich tofu, crispy vegetables, and a creamy sauce.
Print Recipe Pin Recipe
Prep Time 15 minutes mins
Cook Time 30 minutes mins
Total Time 45 minutes mins
Servings: 4 bowls
Course: Dinner
Cuisine: Asian
Calories: 400
Ingredients Equipment Method Nutrition Notes

Ingredients
  

For the Tofu
  • 1 block extra-firm tofu Can substitute tempeh or edamame.
  • 1/4 cup cornstarch Substitute potato starch or rice flour for a gluten-free option.
  • 2 tablespoons sesame seeds Try poppy seeds or crushed nuts as alternatives.
  • 1 teaspoon gochugaru Can substitute with red pepper flakes.
  • 2-3 tablespoons neutral oil for frying Olive oil or avocado oil work well as substitutes.
For the Broccoli
  • 2 cups broccoli florets Consider using cauliflower or Brussels sprouts as alternatives.
For the Sauce
  • 1/2 cup yogurt Plain or coconut yogurt works well.
  • 2 tablespoons mayonnaise Opt for vegan mayo if desired.
  • 1 tablespoon toasted sesame oil Regular sesame oil can be used if needed.
  • 1 tablespoon rice vinegar Adds a tangy kick to the sauce.
  • 1 teaspoon fresh ginger Grated.
  • 2 cloves garlic Minced.
For the Bowl Assembly
  • 2 cups cooked brown rice Consider cauliflower rice for a low-carb alternative.
  • 1 cup shelled edamame Adds protein and color.
  • 1 cup chopped kimchi with juice Adjust amount to taste.
  • 2 scallions sliced For fresh garnish.
  • optional garnishes Include sesame seeds and chili crisp.

Equipment

  • Oven
  • Skillet
  • Mixing Bowl
  • sheet pan

Method
 

Preparation Steps
  1. Preheat your oven to 425°F (220°C).
  2. Toss the broccoli florets in a bowl with neutral oil, salt, and 1 teaspoon of gochugaru. Spread on a parchment-lined sheet pan and roast for 20-25 minutes until crispy.
  3. Cube the pressed tofu and toss with cornstarch, sesame seeds, and remaining ½ teaspoon of gochugaru.
  4. Heat 2-3 tablespoons of neutral oil in a skillet over medium-high heat until shimmering.
  5. Add tofu cubes in a single layer and fry for 2-3 minutes on each side until golden brown. Drain on paper towels.
  6. Whisk together yogurt, mayonnaise, sesame oil, rice vinegar, ginger, garlic, and a pinch of salt in a bowl until smooth.
  7. Warm kimchi in a small pan over low heat for a few minutes.
  8. Assemble bowls starting with rice, topped with roasted broccoli, edamame, warm kimchi, and crispy tofu. Drizzle with yogurt sauce and garnish with scallions and sesame seeds.

Nutrition

Serving: 1bowlCalories: 400kcalCarbohydrates: 50gProtein: 20gFat: 15gSaturated Fat: 2gPolyunsaturated Fat: 8gMonounsaturated Fat: 3gSodium: 600mgPotassium: 800mgFiber: 10gSugar: 5gVitamin A: 500IUVitamin C: 60mgCalcium: 200mgIron: 3mg

Notes

Ensure oil is heated properly for frying to get crispy tofu. Adjust sauce ingredients as per taste.

Tried this recipe?

Let us know how it was!

Cinnamon Churro Apple Pie Cups for a Cozy Fall Treat

September 2, 2025 by Grace Snow Leave a Comment

As I pulled the warm cinnamon-sugar-coated mini pie cups from my oven, the sweet aroma enveloped my kitchen in a comforting embrace, transporting me to cozy autumn gatherings. These Cinnamon Churro Apple Pie Cups are more than just a delightful treat; they're a celebration of fall in every bite. With their crispy, flaky shells and luscious, spiced apple filling, they’re incredibly easy to whip up—making them the perfect homemade dessert for busy evenings or casual get-togethers. Not only do these mini wonders look gorgeous on any table, but they also provide a fun twist on traditional apple pie, combining familiar flavors in a portable style. Ready to dive into this delicious fall-inspired recipe that’s bound to impress? Let’s get started!

Why will you love these cups?

Ease of Preparation: You’ll appreciate how simple these Cinnamon Churro Apple Pie Cups are to make—perfect for busy weeknights or unexpected guests.

Autumnal Delight: Each cup captures the essence of fall with warm spices and apple goodness, a cozy taste that conjures up memories of crisp leaves and family gatherings.

Crowd-Pleasing Appeal: These adorable mini desserts are sure to impress at parties or holiday dinners, making them a definite showstopper.

Versatile Flavor: Feel free to customize with different fillings or toppings—think cherry or peach instead of apple for a delicious twist!

Perfect Texture: The crunchy churro-like exterior perfectly contrasts with the soft, sweet apple filling, creating a delightful bite every time.

Try serving these with a scoop of ice cream or alongside a cup of Pumpkin Cinnamon Roll for an unforgettable dessert spread!

Cinnamon Churro Apple Pie Cups Ingredients

• Here’s what you’ll need!

For the Cups

  • Mini Pie Shells – A convenient base; opt for store-bought to save time.
  • Melted Unsalted Butter – Adds rich flavor and helps the cinnamon sugar stick; margarine can be a suitable substitute.
  • Granulated Sugar – Sweetens the dessert; brown sugar works well for depth of flavor.
  • Ground Cinnamon – Essential for that delightful churro taste.

For the Filling

  • Apple Pie Filling – The star of the show; use premade canned filling or whip up your own with fresh apples for vibrant flavor.

For Topping

  • Whipped Cream – Lightens everything up; feel free to use store-bought or make it homemade for a personal touch.

These Cinnamon Churro Apple Pie Cups are not only easy to prepare but also capture that warm, inviting energy we all crave during the fall season. Enjoy creating these delightful treats!

Step‑by‑Step Instructions for Cinnamon Churro Apple Pie Cups

Step 1: Bake Shells
Preheat your oven to 375°F (190°C) according to the package instructions for the mini pie shells. Place the shells on a baking tray and bake them for about 10–12 minutes, or until they are golden brown and crisp. Keep an eye on them to ensure they don't burn, as a perfect shell is key to these Cinnamon Churro Apple Pie Cups.

Step 2: Butter & Sugar Coat
Once the shells are out of the oven, promptly brush the rims with melted unsalted butter to add richness and help the coating adhere. In a small bowl, mix granulated sugar and ground cinnamon. Generously sprinkle or dip the warm pie shell rims into the cinnamon sugar mixture to create that signature churro-like finish, making sure they are well coated.

Step 3: Warm Filling
While the pie shells cool slightly, gently warm your apple pie filling in a saucepan over low heat, stirring occasionally to avoid boiling. This should take about 5 minutes; your goal is to heat it until just warm. Warming the filling enhances its flavor and ensures it doesn't dampen the crispness of your Cinnamon Churro Apple Pie Cups.

Step 4: Fill
Once the apple filling is heated, take a spoon and carefully fill each mini pie shell, being generous and allowing the filling to slightly overflow. This creates an inviting look and ensures every bite is packed with delicious apple flavors. Make sure each cup is filled evenly to maintain a delightful balance for all your guests!

Step 5: Top
Right before serving, add a swirl of whipped cream on top of each filled mini pie for a light and airy finish. You can either pipe the whipped cream for a decorative touch or dollop it directly with a spoon. Serve these Cinnamon Churro Apple Pie Cups immediately to enjoy the contrast of textures; the warm filling and crispy shell paired with the cool cream.

Cinnamon Churro Apple Pie Cups Variations

Feel free to get creative and customize your Cinnamon Churro Apple Pie Cups with these exciting ideas that will elevate your delightful treats!

  • Fruit Filling Swap: Substitute apple pie filling with cherry or peach filling for a vibrant twist on flavors. Each option brings a different fruity sweetness that pairs beautifully with the churro shell.

  • Spice it Up: Add a sprinkle of nutmeg or allspice to your cinnamon sugar mix for an aromatic boost. The extra spices will warm your heart and entice your senses, making each cup even more inviting.

  • Creamy Upgrade: Top your cups with a dollop of cream cheese frosting for an indulgent twist. This creaminess complements the warm fruit perfectly, creating a rich contrast that's hard to resist.

  • Dairy-Free Option: Use coconut oil instead of melted butter and a dairy-free whipped topping for a vegan-friendly dessert. You won't sacrifice taste while being kinder to dietary restrictions!

  • Chocolate Drizzle: Drizzle melted chocolate over the top before serving for a decadent finish. The rich chocolate adds a luscious layer of flavor that makes these Cinnamon Churro Apple Pie Cups truly irresistible.

  • Crispy Crunch: For an added textural element, sprinkle some crushed graham crackers or nuts on top of the whipped cream. This gives a lovely crunch that beautifully balances the soft filling.

  • Seasonal Flair: Try infusing pumpkin spice into the filling during fall months. The warm pumpkin flavor harmonizes wonderfully with apple, creating a holiday dessert that’s bursting with festive cheer.

  • Mini-Cup Variations: Use mini muffin tins for a fun twist, creating bite-sized versions that are perfect for sharing. This option makes them ideal for gatherings or just snacking on-the-go!

You can also accompany these delightful cups with a warm cup of Pumpkin Cinnamon Roll for a deliciously cozy and comforting dessert experience!

How to Store and Freeze Cinnamon Churro Apple Pie Cups

Room Temperature: Store the empty mini pie shells at room temperature in an airtight container for up to 1 day to maintain their crispiness.

Fridge: Keep any filled Cinnamon Churro Apple Pie Cups in the refrigerator for up to 2 days, but remember to add whipped cream just before serving for optimal freshness.

Freezer: Freeze unfilled mini pie shells for up to 2 months. Thaw and bake them fresh to enjoy their crunchy texture again!

Reheating: If you've made these treats ahead of time, reheat the filled cups in the oven at 350°F (175°C) for about 10 minutes. This will warm the filling while keeping the shells crispy.

What to Serve with Cinnamon Churro Apple Pie Cups

Imagine a cozy evening where your guests are surrounded by aromas of fall, complemented perfectly by these delightful cups of sweetness.

  • Spiced Cider: The warm, comforting flavors of spiced cider echo the cinnamon in the cups, creating a harmonious autumn drink that warms the soul.
  • Vanilla Ice Cream: A scoop of velvety vanilla ice cream contrasts beautifully with the delicious warmth of the pie cups while enhancing the overall indulgence.
  • Fresh Apple Slices: Crisp, tangy apple slices lighten the dessert experience and add a refreshing crunch that beautifully balances the sweetness of the churro cups.
  • Pumpkin Spice Latte: Elevate your serving with a cozy pumpkin spice latte, perfect for embracing the fall season, and offering a delightful caffeine boost.
  • Whipped Cream Dip: Pair additional whipped cream in a small dish for dipping; this way, guests can enjoy a creamy extra touch alongside the churro cups.
  • Nutty Trail Mix: Serve a bowl of homemade nutty trail mix on the side for a contrasting crunchy texture and earthy flavors that add a fun twist!

Expert Tips for Cinnamon Churro Apple Pie Cups

  • Cool Shells First: Let mini pie shells cool completely before filling. This prevents them from becoming soggy and helps retain their delicious crunch.

  • Warm the Filling: Heat the apple pie filling gently to enhance its flavor. This simple step will make your Cinnamon Churro Apple Pie Cups even more delectable without risking a soggy base.

  • Avoid Cracking: If any pie shells crack during baking, don’t fret! A little melted butter and cinnamon sugar can disguise the cracks and add extra flavor.

  • Testing for Doneness: Keep an eye on your mini pie shells while they bake. Overbaking can lead to unwanted bitterness, so look for a golden color without any dark spots.

  • Serving Style: For an impressive touch, consider garnishing with a sprinkle of extra cinnamon sugar on top of the whipped cream before serving. This elevates the visual appeal!

Make Ahead Options

These Cinnamon Churro Apple Pie Cups are perfect for busy home cooks looking to save time! You can prepare the mini pie shells up to 24 hours in advance; simply bake and coat them in cinnamon sugar, then store them at room temperature to maintain their crispy texture. The apple pie filling can be made ahead and refrigerated for up to 3 days; just warm it slightly before filling the cups to enhance the flavors. When you're ready to serve, simply fill each shell with the warmed apple filling and add a swirl of whipped cream for a delightful finish. This way, you can have a decadent dessert ready with minimal effort, perfect for gatherings or cozy family nights!

Cinnamon Churro Apple Pie Cups Recipe FAQs

What type of apples should I use for making the filling?
Absolutely! For the best apple pie filling, I recommend using a combination of sweet and tart apples like Granny Smith and Honeycrisp. This balance provides the perfect flavor and texture. If you wish, you can also choose all-purpose apples like Fuji or Gala for a sweeter option.

How should I store leftover filled Cinnamon Churro Apple Pie Cups?
It's best to store any filled Cinnamon Churro Apple Pie Cups in the refrigerator for up to 2 days. Just remember to keep the whipped cream separate until you’re ready to serve. This way, your mini pies will maintain that delightful crunch, and the cream will stay fresh and fluffy!

Can I freeze these Cinnamon Churro Apple Pie Cups?
Yes, you can! For freezing, I recommend storing the unfilled mini pie shells in an airtight container for up to 2 months. Just thaw them overnight in the fridge once you’re ready to enjoy them again, and bake them fresh. Make sure to fill and top them after thawing to preserve that wonderful texture!

What can I use if I have a cinnamon allergy?
No worries at all! If you or your guests have a cinnamon allergy, you can simply omit the cinnamon sugar coating and replace it with a sugar with a hint of vanilla or nutmeg. Alternatively, a mixture of brown sugar and pumpkin spice will still give you that warm autumn feel without the cinnamon.

How can I make these cups ahead of time?
Certainly! You can bake and coat the mini pie shells with cinnamon sugar and store them in an airtight container at room temperature for up to one day. Prepare the apple pie filling separately and refrigerate it for 2-3 days. When you're ready to serve, simply warm the filling and assemble the cups to keep things delightfully crispy!

What can I serve with Cinnamon Churro Apple Pie Cups?
Oh, I love this question! These adorable cups pair wonderfully with a scoop of vanilla ice cream or a drizzle of caramel sauce. You might also consider offering a spiced cider or coffee on the side to create that cozy fall experience. Your guests will love it!

Cinnamon Churro Apple Pie Cups

Cinnamon Churro Apple Pie Cups for a Cozy Fall Treat

These Cinnamon Churro Apple Pie Cups are the perfect cozy fall dessert, combining crispy shells with spiced apple filling.
Print Recipe Pin Recipe
Prep Time 15 minutes mins
Cook Time 12 minutes mins
Cooling Time 5 minutes mins
Total Time 32 minutes mins
Servings: 12 cups
Course: Dessert
Cuisine: American
Calories: 250
Ingredients Equipment Method Nutrition Notes

Ingredients
  

For the Cups
  • 12 count Mini Pie Shells Store-bought recommended for convenience
  • 4 tablespoons Melted Unsalted Butter Can substitute margarine
  • 1/2 cup Granulated Sugar Brown sugar can be used for depth of flavor
  • 1 tablespoon Ground Cinnamon
For the Filling
  • 2 cups Apple Pie Filling Can use premade or homemade
For Topping
  • 1 cup Whipped Cream Can be store-bought or homemade

Equipment

  • Oven
  • Baking tray
  • Saucepan

Method
 

Step-by-Step Instructions
  1. Preheat your oven to 375°F (190°C) and bake the mini pie shells for about 10–12 minutes, until golden brown and crisp.
  2. Brush the rims of the baked shells with melted unsalted butter and coat in a mixture of granulated sugar and ground cinnamon.
  3. Warm the apple pie filling in a saucepan over low heat until just warm, about 5 minutes.
  4. Fill each mini pie shell generously with the warm apple filling, allowing it to slightly overflow.
  5. Top each filled mini pie with whipped cream just before serving and enjoy immediately.

Nutrition

Serving: 1cupCalories: 250kcalCarbohydrates: 35gProtein: 2gFat: 12gSaturated Fat: 7gMonounsaturated Fat: 3gCholesterol: 30mgSodium: 150mgPotassium: 100mgFiber: 1gSugar: 15gVitamin A: 200IUVitamin C: 1mgCalcium: 20mgIron: 1mg

Notes

Let shells cool completely before filling to prevent sogginess. Store empty shells at room temperature and filled cups in the fridge.

Tried this recipe?

Let us know how it was!

Hearty Kale, Sausage & White Bean Skillet in 30 Minutes

September 2, 2025 by Grace Snow Leave a Comment

As I stood in my kitchen, the savory aroma of sizzling Italian sausage filled the air, instantly transporting me to a cozy Italian eatery. In just 30 minutes, I crafted this hearty Kale, Sausage & White Bean Skillet, a delightful one-pan meal that’s as satisfying as it is simple. With the perfect balance of creamy cannellini beans, vibrant kale, and that splash of fresh lemon, it’s a dish that elevates weeknight dinners without fuss. One of my favorite benefits? Not only does it come together in a snap, but clean-up is a breeze, leaving more time for family and conversation around the table. Are you ready to whip up this comforting classic tonight?

Why is this skillet so special?

Hearty, one-pan meal: This Kale, Sausage & White Bean Skillet is the ultimate solution for busy weeknights, marrying flavor with convenience in just 30 minutes.

Flavor-packed comfort: The savory Italian sausage and creamy beans create a delightful balance, while the fresh kale adds a nutritious crunch.

Versatile and adaptable: Feel free to swap in chicken sausage or even add roasted sweet potatoes for an extra twist!

Easy dish to impress: It's a crowd-pleaser, making it perfect for family gatherings or casual get-togethers.

Quick clean-up: With just one skillet needed, you'll spend less time washing dishes and more time enjoying the meal, just like with my Tuscan White Bean or Skillet Pasta Sun.

Kale, Sausage & White Bean Ingredients

For the Skillet
• 1 lb Italian sausage (spicy or sweet) – Adds protein and flavor; consider using turkey sausage for a leaner option.
• 1 can (15 oz) cannellini beans, drained & rinsed – Provides creaminess and fiber; can substitute with Great Northern or Navy beans if desired.
• 1 small onion, diced – Enhances sweetness and depth; yellow or white onions work beautifully.
• 2-3 garlic cloves, minced – Offers aromatic flavor; adjust quantity based on your preference.
• 4 cups chopped kale (stems removed) – Adds nutrients and heartiness; feel free to substitute with spinach if you prefer.
• 1 tbsp olive oil – Used for cooking; avocado oil serves as a great alternative.
• Salt & black pepper, to taste – Essential for seasoning and balancing flavors.
• Juice of ½ lemon – Brightens the dish; a splash of vinegar can be used instead if lemon is unavailable.

Optional Additions
• Pinch of red pepper flakes – For a touch of heat that pairs wonderfully with the sausage.
• Parmesan cheese for topping – Adds richness and umami; non-negotiable if you're aiming for extra flavor.
• Crusty bread for serving – Perfect for scooping up that hearty dish and truly completes the meal.

Now that you have all the ingredients ready, you're just moments away from enjoying this delightful Kale, Sausage & White Bean Skillet!

Step‑by‑Step Instructions for Kale, Sausage & White Bean Skillet

Step 1: Heat the Skillet
Begin by heating a large skillet over medium heat. Add 1 tablespoon of olive oil and let it warm until shimmering but not smoking. This will create a perfect base for your Kale, Sausage & White Bean Skillet, ensuring that the sausage browns nicely without sticking.

Step 2: Brown the Sausage
Add 1 pound of Italian sausage to the heated skillet, breaking it up into small crumbles with a wooden spoon. Cook for 5-7 minutes, stirring occasionally until the sausage is golden brown and cooked through. If there’s excess fat, drain it off to keep your dish balanced and savory.

Step 3: Soften the Onion
Next, add 1 diced small onion to the skillet, stirring it in with the sausage. Cook for 4-5 minutes, or until the onion becomes translucent and fragrant. This combination of flavors will lay the foundation for your Kale, Sausage & White Bean Skillet, enriching it with sweetness.

Step 4: Add Garlic
Introduce 2-3 minced garlic cloves to the skillet. Sauté for about 1 minute, stirring constantly until the garlic is fragrant and slightly golden. Be careful not to let it burn, as this step elevates the overall flavor profile of your dish.

Step 5: Wilt the Kale
Incorporate 4 cups of chopped kale, along with a pinch of salt, into the skillet mixture. Stir well, allowing the kale to wilt for 3-5 minutes until it becomes vibrant and tender. If needed, add a splash of water to help the greens soften beautifully, melding with the sausage and beans.

Step 6: Incorporate the Beans
Now, stir in 1 can (15 oz) of drained and rinsed cannellini beans. Cook for another 2-3 minutes until the beans are heated through, becoming creamy and delightful with the other ingredients. This step ensures your Kale, Sausage & White Bean Skillet is hearty and nourishing.

Step 7: Finish the Dish
Remove the skillet from heat and season the mixture with salt and black pepper to taste. Squeeze the juice of ½ lemon over the top, brightening the flavors and adding a zesty finish. Serve your Kale, Sausage & White Bean Skillet immediately for a warm, comforting meal.

Expert Tips for Kale, Sausage & White Bean Skillet

  • Perfectly Cooked Sausage: Always break the sausage into small crumbles for even cooking and flavor distribution in the Kale, Sausage & White Bean Skillet.

  • Fresh Ingredients: Use fresh kale and quality Italian sausage for the best flavor; this dish shines with quality components.

  • Avoid Mushy Kale: Remove the stems from kale before adding it to prevent a tough texture; tender greens elevate your meal.

  • Seasoning Balance: Don’t skip the final squeeze of lemon juice—it brightens the dish and balances flavors beautifully.

  • Meal Prep Friendly: For efficiency, brown the sausage and sauté the onions ahead of time, then combine with fresh ingredients when ready to cook.

Make Ahead Options

This Kale, Sausage & White Bean Skillet is perfect for meal prep enthusiasts looking to save time during hectic weekdays! You can brown the sausage and sauté the onions up to 24 hours in advance, refrigerating them in an airtight container. Additionally, you can wash and chop the kale, keeping it fresh in the fridge until you’re ready to cook. When it’s time to enjoy this hearty skillet, simply reheat the sausage mixture in the skillet, add the kale, and incorporate the beans as you follow the final steps. This way, you can savor a delicious, homemade meal without any last-minute hustle, ensuring it's just as delightful as if made fresh!

What to Serve with Kale, Sausage & White Bean Skillet

When you’re ready to turn your comforting skillet into a full meal, consider these delightful pairings that elevate your dining experience.

  • Crusty Bread: This non-negotiable side beckons to be dipped into the savory skillet, soaking up every flavorful bite.

  • Mixed Green Salad: A light salad topped with a tangy vinaigrette balances the hearty elements of the skillet, adding freshness and crunch.

  • Roasted Vegetables: Seasonal roasted veggies provide wonderful textures and vibrant flavors, making for an inviting plate that complements your meal.

  • Garlic Bread: Toasted garlic bread adds an aromatic touch, perfect for scooping up the creamy beans and luscious sausage.

  • Parmesan Shavings: Freshly shaved Parmesan on top enhances the umami flavors, providing a rich finish that makes your dish even more comforting.

  • Chilled White Wine: A crisp Sauvignon Blanc or Pinot Grigio pairs beautifully, cutting through the richness while enhancing the dish’s bright notes.

  • Apple Crisp: End on a sweet note with warm apple crisp, its spiced sweetness providing a delightful contrast to your savory skillet.

  • Lemonade Spritzer: A refreshing lemonade spritzer adds a zingy pop, ensuring your palate stays lively and engaged through every bite.

How to Store and Freeze Kale, Sausage & White Bean Skillet

Fridge: Store leftovers in an airtight container for up to 3 days. Reheat on the stovetop over low heat, adding a splash of water or broth to maintain moisture.

Freezer: While not recommended, you can freeze the dish for up to 2 months. To avoid mushiness, consider freezing only the sausage and beans separately and combining them fresh with kale later.

Reheating: To reheat, thaw any frozen portions in the refrigerator overnight. Warm gently on the stovetop, stirring occasionally, until heated through; add a bit of lemon juice for flavor.

Tip: Enjoy fresh kale in your meal as it doesn't freeze well; plan to cook this hearty Kale, Sausage & White Bean Skillet fresh for the best texture!

Kale, Sausage & White Bean Skillet Variations

Feel free to get creative with this dish and make it your own!

  • Lean Protein: Substitute the Italian sausage with chicken sausage for a lighter option without sacrificing flavor.
  • Different Beans: Swap the cannellini beans for chickpeas or even lentils; both will add a unique twist. Chickpeas will give a nutty flavor, while lentils offer a lovely earthiness.
  • Sweet Potatoes: Add roasted sweet potatoes for a delightful sweetness that complements the savory elements beautifully. Imagine the comforting aroma filling your kitchen!
  • Leafy Green Swap: If kale isn't your favorite, spinach folds in easily and wilts quickly, making it a great, nutritious substitute that's milder in flavor.
  • Extra Crunch: Top with toasted breadcrumbs or crushed nuts for added texture; both bring a delightful crunch that contrasts beautifully with the creamy beans.
  • Spice it Up: For a bolder flavor, incorporate sliced jalapeños or a dash of hot sauce. The heat can elevate the dish and excite the taste buds!
  • Herb Infusion: Fresh herbs like thyme or parsley can breathe new life into the dish. Their vibrant aromas add freshness and depth after cooking.
  • Cheese Lover's Delight: Add a sprinkle of feta or goat cheese instead of Parmesan for a tangy kick that enhances the richness of the skillet. Need more cheesy inspiration? Check out my Coconutty Beans Greens recipe!

Embrace these variations to create a customized experience everyone at the table will love!

Kale, Sausage & White Bean Skillet Recipe FAQs

How do I choose the best kale for this dish?
Absolutely! Look for kale with vibrant, dark green leaves and a crisp texture. Avoid any bunches with yellowing or dark spots all over, as they may be past their prime. The fresher the kale, the better the flavor and texture in your Kale, Sausage & White Bean Skillet.

How should I store leftovers?
You can store any leftover Kale, Sausage & White Bean Skillet in an airtight container in the fridge for up to 3 days. When reheating, try warming it up on the stovetop over low heat, adding a splash of water or broth to keep it moist and delicious.

Can I freeze this dish?
It's not recommended to freeze the entire dish since the kale may turn mushy upon thawing. However, if you must, consider freezing only the sausage and beans separately. You can then combine them fresh with sautéed kale when you’re ready to eat. If you do freeze, store it for up to 2 months.

What if I don’t have Italian sausage?
Very! You can absolutely substitute Italian sausage with chicken sausage or even turkey sausage for a leaner meal. The key is to still keep that savory flavor, so ensure you choose a sausage that’s well-seasoned. Additionally, adding a pinch of red pepper flakes can replicate some of that heat!

Any dietary considerations I should be aware of?
Great question! This dish is naturally gluten-free, but you should always check the labels on your sausage and any broth you might use to ensure there are no allergens. If you're serving this to pets, the dish is not suitable for dogs or cats due to the garlic and onion content; always prepare pet meals separately.

What can I do if my kale doesn’t wilt properly?
If your kale isn’t wilting as you'd like, it may be too tough. Make sure to remove the stems thoroughly before cooking, as they can be quite fibrous. If you find that it's still not tender after adding to the skillet, add a splash of water and cover it momentarily to create steam. This will help soften the kale nicely, ensuring a delicious, hearty texture for your Kale, Sausage & White Bean Skillet!

Kale, Sausage & White Bean Skillet

Hearty Kale, Sausage & White Bean Skillet in 30 Minutes

A delightful Kale, Sausage & White Bean Skillet combines savory Italian sausage, creamy beans, and vibrant kale for a satisfying weeknight dinner.
Print Recipe Pin Recipe
Prep Time 10 minutes mins
Cook Time 20 minutes mins
Total Time 30 minutes mins
Servings: 4 servings
Course: Dinner
Cuisine: Italian
Calories: 350
Ingredients Equipment Method Nutrition Notes

Ingredients
  

For the Skillet
  • 1 lb Italian sausage (spicy or sweet) Consider using turkey sausage for a leaner option.
  • 1 can (15 oz) cannellini beans, drained & rinsed Can substitute with Great Northern or Navy beans.
  • 1 small onion, diced Yellow or white onions work beautifully.
  • 2-3 cloves garlic, minced Adjust quantity based on preference.
  • 4 cups chopped kale (stems removed) Feel free to substitute with spinach.
  • 1 tbsp olive oil Avocado oil serves as a great alternative.
  • Salt & black pepper, to taste Essential for seasoning and balancing flavors.
  • ½ lemon Juice of A splash of vinegar can be used if lemon is unavailable.
Optional Additions
  • Pinch of red pepper flakes For a touch of heat.
  • Parmesan cheese for topping Adds richness and umami.
  • Crusty bread for serving Perfect for scooping up the dish.

Equipment

  • Large skillet

Method
 

Step-by-Step Instructions
  1. Heat the skillet over medium heat and add olive oil, warming until shimmering.
  2. Add Italian sausage, breaking it into crumbles. Cook for 5-7 minutes until golden brown.
  3. Add diced onion and cook for 4-5 minutes until translucent.
  4. Introduce minced garlic and sauté for about 1 minute until fragrant.
  5. Incorporate chopped kale and a pinch of salt, cooking for 3-5 minutes until wilted.
  6. Stir in cannellini beans and cook for another 2-3 minutes until heated through.
  7. Remove from heat and season with salt, black pepper, and lemon juice before serving.

Nutrition

Serving: 1servingCalories: 350kcalCarbohydrates: 30gProtein: 20gFat: 15gSaturated Fat: 4gPolyunsaturated Fat: 1gMonounsaturated Fat: 9gCholesterol: 60mgSodium: 800mgPotassium: 600mgFiber: 8gSugar: 2gVitamin A: 1200IUVitamin C: 70mgCalcium: 100mgIron: 4mg

Notes

Use fresh ingredients for the best flavor and avoid mushy kale by removing stems.

Tried this recipe?

Let us know how it was!

Crispy Butternut Squash & Sage Arancini with a Cozy Twist

September 2, 2025 by Grace Snow Leave a Comment

As the leaves turn golden and a crispness fills the air, there’s nothing quite like the aroma of Butternut Squash & Sage Arancini wafting from the kitchen. These delightful Italian rice balls strike the perfect balance between creamy and crispy, transporting me straight to cozy autumn evenings spent with loved ones. Bringing the sweetness of roasted butternut squash together with earthy sage, each bite is a comforting delight that’s perfect for family gatherings or as a hearty snack anytime. Plus, this recipe is vegetarian-friendly and easily adaptable for gluten-free diets, making it a crowd-pleaser for everyone at the table. Are you ready to dive into a deliciously warm experience this fall? Let’s get cooking!

Why Are Arancini So Irresistible?

Crispy exterior: These Butternut Squash & Sage Arancini boast a perfectly golden and crunchy shell that gives way to a velvety filling.

Comfort food delight: Infused with the warm flavors of roasted squash and sage, they ooze cozy vibes, making them ideal for chilly autumn evenings.

Versatile variations: Customize these arancini with unique filling options like gooey mozzarella or spicy jalapeños to suit any palate.

Quick and easy: Made effortlessly from leftover risotto, they'll save you time and still impress your guests.

Crowd-pleaser: Perfect as appetizers for gatherings, family dinners, or even just a tasty snack that everyone will love.

Whether you choose to serve them with marinara or a drizzle of brown butter, your loved ones are sure to come back for seconds!

Butternut Squash & Sage Arancini Ingredients

  1. For the Risotto Base
  • Cooked Risotto – A creamy foundation; use Arborio or Carnaroli rice, ensuring it's cooled for optimal texture.
  • Roasted Butternut Squash – Adds natural sweetness and creaminess; feel free to substitute with other winter squash varieties if needed.
  • Grated Parmesan Cheese – Enhances umami flavor and binds the mixture; swap with nutritional yeast for a vegan version.
  • Fresh Sage – Provides aromatic notes that boost the filling’s richness; dried sage can work but use fresh for best results.
  1. For Coating
  • All-Purpose Flour – A light coating to help the batter adhere; gluten-free flour is an excellent alternative.
  • Eggs – Binds the breadcrumbs and forms a crispy shell; can replace with flax eggs for a vegan option.
  • Breadcrumbs – Creates that satisfying crunch on the outside; panko breadcrumbs give extra crispiness, while nuts can be used for gluten-free options.
  1. For Frying & Serving
  • Oil for Frying – Essential for achieving a golden-brown crisp; avocado, canola, or peanut oil all work well.
  • Marinara or Brown Butter with Sage – Complements the arancini as a dipping sauce; both homemade and store-bought options are delightful.

Indulge in these Butternut Squash & Sage Arancini that weave together fall flavors and comforting textures into a dish that warms the heart!

Step‑by‑Step Instructions for Butternut Squash & Sage Arancini

Step 1: Prepare the Filling
In a large mixing bowl, combine 2 cups of cooled risotto with 1 cup of mashed roasted butternut squash, ½ cup of grated Parmesan cheese, and ¼ cup of minced fresh sage. Mix thoroughly until the ingredients come together in a dough-like consistency. If the mixture feels sticky, chill it in the refrigerator for about 15 minutes to make rolling easier.

Step 2: Shape the Arancini
Once the mixture is chilled, use your hands to roll the risotto mixture into 12 golf-ball-sized balls. Ensure that they are compact to hold their shape during frying. Place the formed balls on a baking sheet as you work to keep them organized.

Step 3: Set Up the Coating Stations
Prepare three shallow bowls for coating the arancini. In the first bowl, add all-purpose flour; in the second, whisk together 2 eggs. Fill the third bowl with panko breadcrumbs. This setup will allow for efficient coating of each arancini before frying.

Step 4: Coat the Arancini
Dredge each arancini ball first in the flour, ensuring an even coating. Then, dip it in the beaten eggs, allowing any excess to drip off. Finally, roll the ball in the panko breadcrumbs, covering it completely. This step is crucial for achieving a perfectly crispy texture when fried.

Step 5: Heat the Oil
In a deep pot, heat oil over medium-high heat until it reaches 350°F (175°C). Use a frying thermometer for accuracy. Depending on the size of your pot, this may take about 5-10 minutes. Ensure there's enough oil to submerge the arancini for even cooking and browning.

Step 6: Fry the Arancini
Carefully add 4-5 coated arancini balls to the hot oil. Fry them for about 3-4 minutes, turning occasionally, until they are deeply golden brown and crispy on all sides. Remove them from the oil using a slotted spoon and place them on paper towels to drain any excess oil.

Step 7: Serve
Arrange the golden Butternut Squash & Sage Arancini on a platter while they are still hot. Serve them with a side of marinara sauce or a drizzle of brown butter infused with sage for a decadent touch. These delightful bites are ready to be enjoyed by family and friends!

Storage Tips for Butternut Squash & Sage Arancini

Room Temperature: Keep freshly fried arancini at room temperature for up to 2 hours. Serve them warm for the best texture and flavor!

Fridge: Store leftover arancini in an airtight container in the refrigerator for up to 3 days. Reheat in the oven or air fryer for a crispy finish.

Freezer: For long-term storage, freeze un-fried butternut squash & sage arancini on a baking sheet until solid, then transfer to a freezer bag for up to 3 months.

Reheating: From frozen, fry directly without thawing, adding a few extra minutes to your frying time. Alternatively, bake in a preheated oven at 400°F (204°C) for a healthier option!

Expert Tips for Butternut Squash & Sage Arancini

  • Cool Your Risotto: Make sure the cooked risotto is completely cooled before mixing. This prevents the arancini from falling apart during frying.

  • Chill If Sticky: If your mixture feels too sticky to roll into balls, place it in the fridge for 15 minutes. This extra chill helps solidify the mixture.

  • Coating Consistency: Ensure each arancini is evenly coated in flour, egg, and breadcrumbs. A thorough coating ensures a crispy finish when fried.

  • Frying Temp Matters: Keep the oil temperature at 350°F (175°C). Too hot can burn the outside before the inside is cooked, and too low can make them greasy.

  • Make Ahead: Prepare the un-fried arancini ahead of time and freeze them. Fry directly from frozen, just add a few extra minutes to the cooking time for these Butternut Squash & Sage Arancini.

What to Serve with Butternut Squash & Sage Arancini?

As you prepare to delight your family with these golden, crispy arancini, consider rounding out the meal with complementary dishes that enhance their rich flavors and comforting textures.

  • Crispy Arugula Salad: The peppery crunch of fresh arugula dressed with a zesty lemon vinaigrette brightens up your plate, balancing the richness of the arancini.

  • Marinara Sauce: A classic choice, the tangy sweetness of marinara provides a perfect dip for the arancini, complementing the savory squash and cheese.

  • Roasted Vegetables: Root vegetables like carrots and parsnips roasted to caramelized perfection add a sweet, earthy contrast to your buttery rice balls.

  • Creamy Polenta: This velvety accompaniment not only absorbs delicious flavors but adds a warming, comforting element that echoes the vibe of the arancini.

  • Garlic Bread: A crunchy, garlicky bite offers a satisfying contrast to the creamy center of the arancini, making for a delightful, hearty meal.

  • Glass of Unoaked Chardonnay: The light acidity of an unoaked Chardonnay harmonizes beautifully with the dish’s earthy flavors, enhancing your overall dining experience.

  • Dark Chocolate Mousse: For dessert, a rich and creamy dark chocolate mousse pairs beautifully, contrasting the savory nature of the arancini with a touch of indulgence.

Each of these pairings brings a unique element to the table, creating a cozy and inviting dining experience for you and your loved ones.

Butternut Squash & Sage Arancini Variations

Feel free to get creative and personalize your Butternut Squash & Sage Arancini for a unique culinary experience!

  • Gooey Center Surprise: Add a cube of mozzarella or goat cheese into each ball before coating. This ooey-gooey addition makes for a delightful main attraction with each bite.

  • Spicy Kick: Incorporate red pepper flakes into the risotto mixture or utilize jalapeño-infused breadcrumbs. For those who crave heat, this variation will warm you right up!

  • Nutty & Nice (GF/V): Use crushed pecans or almonds instead of breadcrumbs, and flax eggs as a substitute for traditional eggs. This twist adds a lovely nutty flavor while keeping it gluten-free and vegan-friendly.

  • Breakfast Arancini: Mix in crumbled sausage and use thyme in place of sage; serve with a drizzle of maple syrup. It’s breakfast wrapped in that nostalgia of crispy perfection!

  • Mediterranean Mood: Stir chopped sun-dried tomatoes and substitute Parmesan for feta; serve with a tangy tzatziki. This refreshing take transports your taste buds on a trip to the sunny Mediterranean.

  • Herbed Delight: Swap out sage for fresh rosemary or thyme. The aromatic profile shifts, creating a whole new world of flavor in these delightful bites.

  • Cheesy Broccoli Blend: Add finely chopped steamed broccoli and a bit more cheese into the filling for an extra veggie boost. This vibrant addition not only enhances the flavor but also adds a pop of color!

  • Sweet & Savory: Fold in a touch of maple syrup or honey into the filling for a sweet contrast to the savory elements. This unexpected twist can delight anyone looking for a comforting yet surprising dish.

Feel free to explore these variations, and don’t forget to serve your arancini with a perfectly paired sauce, like a homemade marinara or a drizzle of brown butter, for an elevated dining experience!

Make Ahead Options

These Butternut Squash & Sage Arancini are fantastic for those busy weeknights! You can prepare the risotto filling and roll the arancini balls up to 24 hours in advance, storing them in the refrigerator on a parchment-lined baking sheet. For longer storage, freeze un-fried arancini for up to 3 months; simply fry them directly from frozen, adjusting cooking time as needed. To maintain their delightful crispiness, be sure to allow any frozen balls to thaw slightly before frying. When you're ready to enjoy, just heat your oil and fry until golden and crispy, ensuring a comforting, homemade treat with minimal effort!

Butternut Squash & Sage Arancini Recipe FAQs

What type of butternut squash should I use?
Absolutely! For the best flavor and texture, go for a medium-sized butternut squash that feels heavy for its size, with smooth skin and no dark spots. Ensure you select a squash with a firm skin, and avoid any with soft areas or blemishes. If you can’t find butternut squash, feel free to substitute it with acorn squash or pumpkin for a similar sweetness!

How should I store leftover Butternut Squash & Sage Arancini?
Very good question! Store the leftover arancini in an airtight container in the fridge for up to 3 days. When you’re ready to enjoy them again, reheat in your oven at 350°F (175°C) for about 10-15 minutes to restore their crispiness. Alternatively, you can use an air fryer for the same duration if you want that delightful crunch!

Can I freeze Butternut Squash & Sage Arancini?
Absolutely! If you want to prepare ahead, freeze the un-fried arancini on a baking sheet until firm, which usually takes about an hour. Once solid, transfer them to a freezer bag or container and keep them frozen for up to 3 months. When you’re ready to cook, fry them straight from frozen, just add a couple of extra minutes to the frying time, ensuring they’re golden and crispy!

What should I do if my arancini are falling apart while frying?
Don’t worry, it happens to the best of us! If your arancini fall apart, double-check that your risotto is completely cooled before mixing. Additionally, make sure you’re using enough egg in the coating mixture to bind everything together — if needed, try chilling the mixture for an extra 15 minutes before rolling. Lastly, ensure your oil is hot enough; if it’s too cool, the arancini can become greasy and break apart.

Are there any dietary considerations for Butternut Squash & Sage Arancini?
Yes! This recipe is vegetarian-friendly and easily adaptable for gluten-free diets. You can swap the all-purpose flour for gluten-free alternatives and replace regular breadcrumbs with gluten-free panko. For those allergic to eggs, flax eggs are a great substitute (1 tbsp of ground flaxseed mixed with 2.5 tbsp of water equals one egg). Always double-check for any additional allergens with your chosen ingredients!

How long can I keep arancini at room temperature?
Generally, freshly fried Butternut Squash & Sage Arancini can be kept at room temperature for around 2 hours. However, I recommend serving them warm for the best flavor and texture. If they sit longer than that, it’s best to refrigerate them to maintain quality. Enjoy your tasty creations without worries!

Butternut Squash & Sage Arancini

Crispy Butternut Squash & Sage Arancini with a Cozy Twist

Delight in Butternut Squash & Sage Arancini, a cozy and crispy treat perfect for autumn gatherings.
Print Recipe Pin Recipe
Prep Time 15 minutes mins
Cook Time 15 minutes mins
Total Time 30 minutes mins
Servings: 12 arancini
Course: Appetizers
Cuisine: Italian
Calories: 150
Ingredients Equipment Method Nutrition Notes

Ingredients
  

For the Risotto Base
  • 2 cups cooked Risotto use Arborio or Carnaroli rice, cooled
  • 1 cup mashed roasted Butternut Squash substitute with other winter squash if needed
  • ½ cup grated Parmesan Cheese swap with nutritional yeast for a vegan option
  • ¼ cup minced Fresh Sage dried sage can work but use fresh for best results
For Coating
  • 1 cup All-Purpose Flour gluten-free flour is an alternative
  • 2 large Eggs can replace with flax eggs for a vegan option
  • 1 cup Breadcrumbs panko breadcrumbs give extra crunch
For Frying & Serving
  • as needed Oil for Frying avocado, canola, or peanut oil work well
  • as needed Marinara or Brown Butter with Sage for serving

Equipment

  • large mixing bowl
  • shallow bowls
  • deep pot
  • frying thermometer
  • slotted spoon
  • Baking Sheet

Method
 

Prepare the Filling
  1. In a large mixing bowl, combine 2 cups of cooled risotto with 1 cup of mashed roasted butternut squash, ½ cup of grated Parmesan cheese, and ¼ cup of minced fresh sage. Mix thoroughly until the ingredients come together in a dough-like consistency. If the mixture feels sticky, chill it in the refrigerator for about 15 minutes.
Shape the Arancini
  1. Once the mixture is chilled, roll the risotto mixture into 12 golf-ball-sized balls. Place the formed balls on a baking sheet.
Set Up the Coating Stations
  1. Prepare three shallow bowls: one with all-purpose flour, one with whisked eggs, and one with panko breadcrumbs.
Coat the Arancini
  1. Dredge each ball in flour, then dip in eggs, and finally roll in breadcrumbs, covering completely.
Heat the Oil
  1. Heat oil in a deep pot over medium-high heat until it reaches 350°F (175°C), about 5-10 minutes.
Fry the Arancini
  1. Carefully add 4-5 arancini balls to the hot oil and fry for about 3-4 minutes until golden brown.
Serve
  1. Arrange the arancini on a platter and serve with marinara sauce or brown butter infused with sage.

Nutrition

Serving: 1aranciniCalories: 150kcalCarbohydrates: 20gProtein: 4gFat: 6gSaturated Fat: 1gPolyunsaturated Fat: 0.5gMonounsaturated Fat: 4gCholesterol: 50mgSodium: 200mgPotassium: 200mgFiber: 1gSugar: 2gVitamin A: 10IUVitamin C: 2mgCalcium: 100mgIron: 1mg

Notes

Cool the risotto completely before mixing to prevent the arancini from falling apart. Freeze un-fried arancini for up to 3 months.

Tried this recipe?

Let us know how it was!

Savoring Japanese Yakisoba with Cabbage & Carrots Tonight

September 2, 2025 by Grace Snow Leave a Comment

The sizzling sound of yakisoba in a hot pan is like music to my ears, instantly transporting me to bustling Japanese street markets. This Quick and Flavorful Japanese Yakisoba with Cabbage & Carrots is your ticket to an easy, delicious dinner that comes together in under 20 minutes. Perfect for busy weeknights, this stir-fry not only highlights vibrant vegetables but also offers flexibility with ingredient swaps, making it delightful for vegetarians and meat lovers alike. Packed with savory, slightly sweet notes, it’s a dish I find myself turning to again and again when I need a comforting meal that doesn’t skimp on flavor. So, why not join me in whipping up this easy and delightful recipe that’s sure to impress everyone at your table? What variations will you try?

Why is Yakisoba a Weeknight Favorite?

Quick Preparation: In just 20 minutes, you can serve a delicious meal that's perfect for busy evenings.

Flavor Explosion: A delightful mix of savory and slightly sweet flavors from the sauce elevates simple ingredients.

Versatile Ingredients: Customize your yakisoba by adding your favorite veggies or proteins—tofu, chicken, or even shrimp, the choice is yours!

Healthy & Fresh: With vibrant cabbage and carrots, this dish is not just tasty but also packed with nutrients.

Boredom Buster: Say goodbye to fast food! This easy recipe is a fun way to bring Japanese street food to your kitchen. Dive into this comforting dish, and if you're seeking more delicious stir-fry options, check out my Fried Shrimp Cabbage or Sweet Potatoes Black. Enjoy!

Japanese Yakisoba with Cabbage & Carrots Ingredients

For the Stir-Fry
• Vegetable Oil – Adds fat for cooking and prevents ingredients from sticking. Substitution: Canola or avocado oil may also be used.
• Yakisoba Noodles – The base of the dish; fresh or instant-style noodles provide a quick cook time. Note: Soak in warm water to loosen if using instant noodles.
• Onion – Adds sweetness and depth of flavor. Preparation: Thinly sliced.
• Carrots – Provides sweetness and texture. Preparation: Julienned to ensure quick cooking.
• Green Cabbage – Contributes bulk and crunch. Preparation: Shredded.
• Green Onions – Offers fresh flavor; used twice in cooking and as garnish. Preparation: Sliced, with white/light green parts for cooking and dark green for garnish.

For the Sauce
• Worcestershire Sauce – Introduces a complex umami flavor. Note: Essential for authenticity; cannot be fully substituted.
• Soy Sauce – Adds saltiness and depth. Suggestion: Use low-sodium for a lighter dish.
• Ketchup – Provides sweetness and balances flavors. Can be adjusted to taste.
• Oyster Sauce – Adds a savory note; optional for vegetarian diets. Note: Vegetarian versions are available.
• Sugar – Balances the savory flavors of the sauce.

Step‑by‑Step Instructions for Japanese Yakisoba with Cabbage & Carrots

Step 1: Prepare the Sauce
In a bowl, whisk together the Worcestershire sauce, soy sauce, ketchup, oyster sauce, and sugar until well combined. This savory mixture is essential for flavoring your Japanese yakisoba. Set the sauce aside, allowing the ingredients to meld while you move on to the noodles and veggies.

Step 2: Soak the Noodles
If you're using instant yakisoba noodles, soak them in warm water for 1–2 minutes until they loosen. Drain well and toss them with a bit of oil to prevent sticking. If you're using fresh noodles, rinse briefly under hot water. This step ensures the noodles cook perfectly in your flavorful stir-fry.

Step 3: Heat the Skillet
Place a large skillet or wok over medium-high heat and wait for faint smoke to rise. It's crucial to preheat the pan adequately to achieve that satisfying sizzle once you add the ingredients. This will keep your vegetables crisp and prevent the noodles from steaming instead of stir-frying.

Step 4: Stir-Fry the Vegetables
Add vegetable oil to the hot skillet, followed by the sliced onions and julienned carrots. Stir-fry for 2–3 minutes until the onions become translucent and the carrots soften slightly. Keep them moving with a spatula or tongs to ensure even cooking and enhance their sweetness before introducing the cabbage.

Step 5: Add Cabbage
Next, add the shredded green cabbage to the skillet. Continue to stir-fry for another 2–3 minutes until the cabbage wilts and becomes tender yet retains a bit of crunch. This vibrant addition provides bulk and texture, balancing the dish beautifully with the other vegetables.

Step 6: Incorporate the Noodles and Sauce
Gently toss the cooked yakisoba noodles into the skillet, then pour the prepared sauce evenly over the mixture. Using tongs or a spatula, ensure everything is coated well. Stir-fry for about 2–4 minutes, allowing the sauce to thicken and envelop the noodles as they get deliciously caramelized.

Step 7: Add Green Onions
Stir in most of the sliced green onions, reserving a handful for garnishing later. This final touch adds freshness and color to your Japanese yakisoba. Keep stirring until everything is mixed thoroughly, ensuring those beautiful flavors meld into each bite.

Step 8: Serve and Garnish
Once everything is hot and beautifully cooked, transfer the yakisoba to serving bowls. Garnish with the reserved green onions and, if desired, a sprinkle of sesame seeds, pickled ginger, or Kewpie mayonnaise for added flavor. Serve immediately while hot, and savor the warmth and tastes of your homemade Japanese yakisoba!

Japanese Yakisoba with Cabbage & Carrots Variations

Feel free to make this recipe your own by experimenting with different ingredients and flavors!

  • Vegetable Medley: Add bell peppers, zucchini, or snow peas for a colorful crunch. Mixing in different vegetables not only enhances the flavor but adds vibrant textures to your dish.
  • Protein-Packed: Toss in tofu, chicken, or shrimp to make it heartier. Simply cube the tofu or chicken, or use precooked shrimp, and stir-fry until cooked through for a satisfying meal.
  • Spicy Kick: Add chili paste or sriracha to the sauce for a fiery twist. Just a dash can lift the flavors and tickle your taste buds, making each bite more exciting!
  • Nutty Flavors: Sprinkle sesame seeds or chopped peanuts for extra nutty depth. Not only does this add an appealing crunch, but it also brings a delightful richness that complements the sauce beautifully.
  • Herbaceous Touch: Incorporate fresh herbs like cilantro or Thai basil for a pop of freshness. Herbs can transform the flavor profile and make each bowl of yakisoba feel like a gourmet dish.
  • Sweet and Sour: Opt for sweet chili sauce in place of ketchup for a tangy twist. The balance of sweetness and heat will elevate your yakisoba to a whole new level.
  • Gluten-Free: Use gluten-free soy sauce and rice noodles as a substitute for traditional yakisoba noodles. This way, you can enjoy the same great taste in a gluten-free way!
  • Leftover Remix: Turn yesterday's yakisoba into a fun fried rice by adding day-old rice to the mix. This twist is a great way to utilize leftovers while keeping the essence of the original dish.

If you're in the mood for more fabulous recipes, why not try my comforting Buffalo Tofu Caesar or a refreshing Chicken Salad Apples? Happy cooking!

How to Store and Freeze Japanese Yakisoba with Cabbage & Carrots

Fridge: Store leftovers in an airtight container and refrigerate for up to 3 days. Reheat gently on the stovetop to prevent overcooking the noodles.

Freezer: For longer storage, freeze in portions using freezer-safe containers. It can last for about 2 months. Thaw overnight in the fridge before reheating.

Reheating: When reheating, add a splash of water or broth to help revive the textures and flavors. Stir-fry over medium heat until warmed through, ensuring it doesn't dry out.

Airtight Packaging: For best results, wrap tightly or use vacuum-sealed bags to prevent freezer burn, preserving the delicious taste of your Japanese yakisoba with cabbage and carrots.

Make Ahead Options

These Japanese Yakisoba with Cabbage & Carrots are perfect for meal prep enthusiasts! You can slice and prep your vegetables, including onions, carrots, and cabbage, up to 3 days in advance. Store them in airtight containers in the fridge to maintain their freshness and crunch. Additionally, the sauce can be mixed and refrigerated for up to 24 hours before use. When you're ready to serve, simply stir-fry the prepped ingredients in a hot skillet, add the soaked noodles, and pour in the sauce. This approach allows you to whip up a delicious, satisfying meal in just minutes, proving that convenience doesn't mean sacrificing flavor!

Expert Tips for Japanese Yakisoba

  • Well-Drained Noodles: Ensure that your noodles are well-drained after soaking to avoid a mushy texture in your Japanese yakisoba.
  • Pan Preheating: Preheating your pan is essential—this avoids steaming the ingredients and helps achieve that delightful stir-fry sizzle.
  • Sauce Consistency: If your sauce appears too watery, keep stir-frying over medium-high heat to evaporate the excess moisture until it thickens beautifully.
  • Worcestershire Essential: For authentic flavor, don’t skip the Worcestershire sauce; it provides a unique depth that enhances your yakisoba.
  • Flexibility with Veggies: Feel free to substitute vegetables like bell peppers or zucchini if you prefer; it’s all about personal taste!

What to Serve with Japanese Yakisoba with Cabbage & Carrots

Enhance your mealtime experience and create a delightful spread that complements the savory flavors of this quick stir-fry.

  • Crispy Tempura: Lightly battered and fried vegetables or shrimp offer a delightful crunch that pairs beautifully with the tenderness of yakisoba.
  • Miso Soup: A warm bowl of miso soup brings a comforting umami flavor, balancing the meal perfectly with its light broth and tofu.
  • Edamame: Fresh, steamed edamame sprinkled with sea salt add a fun texture and a pop of freshness, making it a nutritious side.
  • Pickled Vegetables: Japanese pickles (tsukemono) lend a refreshing tang that enlivens your palate, contrasting beautifully with the savory yakisoba flavors.
  • Steamed Rice: A simple bowl of fluffy jasmine or sticky rice can soak up the delicious sauce, making every bite satisfying and savory.
  • Japanese Beer or Sake: Refreshing beer or warm sake enhances the authentic experience, heightening flavors while offering a comforting touch to your meal.
  • Fruit Salad: A light fruit salad featuring tangy citrus or sweet melon can cleanse the palate after every bite, making it a lovely, refreshing end.
  • Green Salad: A simple green salad with sesame dressing adds a fresh crunch and lightness to balance out the richness of the yakisoba.
  • Chocolate Mochi: Wind down your meal with a sweet treat like chocolate mochi. The chewy texture and sweet filling are delightful after the savory yakisoba.

Japanese Yakisoba with Cabbage & Carrots Recipe FAQs

What kind of yakisoba noodles should I use?
For this recipe, you can opt for either fresh or instant-style yakisoba noodles. If using instant noodles, soak them in warm water for about 1–2 minutes to loosen them up before cooking. Fresh noodles are ready to go after a quick rinse under hot water.

How long can I store leftovers in the fridge?
Store any leftover Japanese Yakisoba in an airtight container in the refrigerator for up to 3 days. When reheating, do it gently over medium heat on the stovetop to avoid overcooking the noodles and maintaining the dish’s vibrant textures.

Can I freeze Japanese Yakisoba, and how?
Absolutely! To freeze your Japanese Yakisoba, portion it into freezer-safe containers or bags. It can last for about 2 months in the freezer. When you're ready to enjoy it again, simply thaw it overnight in the fridge. Reheat in a pan, adding a splash of water or broth to restore moisture as you stir-fry over medium heat.

What if my sauce turns out too watery?
If you find that your sauce is too watery, it's best to continue stir-frying over medium-high heat. This will allow excess moisture to evaporate and thicken the sauce. Keep tossing the noodles and vegetables for optimal flavor distribution. If you prefer a thicker sauce next time, you can also adjust the sugar or soy sauce amounts slightly.

Are there any dietary considerations for this recipe?
Yes, please note that the Worcestershire sauce typically contains anchovies, so it's not suitable for vegetarians. However, you can find vegetarian alternatives in stores, or create a sauce with soy sauce, rice vinegar, and brown sugar as a substitute. Always check ingredient labels for potential allergens if you're serving this dish to guests with dietary restrictions.

What's the best way to enjoy my leftover yakisoba?
The best way to enjoy your leftover Japanese Yakisoba is to simply reheat it gently on the stovetop. Adding a splash of water or vegetable broth during reheating will help revive the dish’s flavors and textures, preventing it from drying out. Enjoy those vibrant, savory bites all over again!

Japanese Yakisoba with Cabbage & Carrots

Savoring Japanese Yakisoba with Cabbage & Carrots Tonight

This Quick and Flavorful Japanese Yakisoba with Cabbage & Carrots offers an easy dinner option.
Print Recipe Pin Recipe
Prep Time 10 minutes mins
Cook Time 10 minutes mins
Total Time 20 minutes mins
Servings: 4 servings
Course: Dinner
Cuisine: Japanese
Calories: 450
Ingredients Equipment Method Nutrition Notes

Ingredients
  

For the Stir-Fry
  • 2 tablespoons Vegetable Oil Can substitute with Canola or avocado oil.
  • 8 oz Yakisoba Noodles Soak in warm water to loosen if using instant noodles.
  • 1 medium Onion Thinly sliced.
  • 1 cup Carrots Julienned.
  • 2 cups Green Cabbage Shredded.
  • 4 stalks Green Onions Sliced; use white/light green for cooking and dark green for garnish.
For the Sauce
  • 2 tablespoons Worcestershire Sauce Essential for authenticity.
  • 2 tablespoons Soy Sauce Use low-sodium for a lighter dish.
  • 2 tablespoons Ketchup Adjust to taste.
  • 1 tablespoon Oyster Sauce Optional for vegetarian diets.
  • 1 teaspoon Sugar Balances savory flavors.

Equipment

  • Skillet
  • Bowl
  • Tongs
  • Spatula

Method
 

Step-by-Step Instructions
  1. In a bowl, whisk together the Worcestershire sauce, soy sauce, ketchup, oyster sauce, and sugar until well combined. Set the sauce aside.
  2. If using instant yakisoba noodles, soak them in warm water for 1–2 minutes until they loosen. Drain well.
  3. Place a large skillet or wok over medium-high heat and wait for faint smoke to rise.
  4. Add vegetable oil, followed by the sliced onions and julienned carrots. Stir-fry for 2–3 minutes until onions are translucent.
  5. Add shredded green cabbage and stir-fry for another 2–3 minutes until it wilts and is tender.
  6. Gently toss in the yakisoba noodles and pour the prepared sauce over the mixture. Stir-fry for 2–4 minutes.
  7. Stir in most of the sliced green onions, reserving some for garnish.
  8. Transfer the yakisoba to serving bowls and garnish with reserved green onions.

Nutrition

Serving: 1plateCalories: 450kcalCarbohydrates: 60gProtein: 10gFat: 20gSaturated Fat: 3gPolyunsaturated Fat: 2gMonounsaturated Fat: 5gSodium: 800mgPotassium: 600mgFiber: 4gSugar: 6gVitamin A: 3500IUVitamin C: 30mgCalcium: 70mgIron: 2mg

Notes

Store leftover yakisoba in an airtight container for up to 3 days. Reheat gently on the stovetop.

Tried this recipe?

Let us know how it was!
  • « Previous Page
  • 1
  • …
  • 156
  • 157
  • 158
  • 159
  • 160
  • …
  • 179
  • Next Page »

Welcome!

Hi, I’m Grace, a Sydney-based home cook with a passion for bold flavors and trending ingredients. Whether you’re a busy beginner or a seasoned foodie, you’ll find dishes here that are fresh, fun, and full of flavor.

More about me

Popular Recipes

  • Cheesy Chicken Garlic Bread Sandwich
    Cheesy Chicken Garlic Bread Sandwich for Cozy Family Moments
  • Easy Chicken Ranch Wraps
    Easy Chicken Ranch Wraps: Quick, Creamy & Totally Satisfying
  • Chicken Caesar Sandwiches
    Delicious Chicken Caesar Sandwiches for Quick Comfort Food
  • best Cuban sandwich
    The Best Cuban Sandwich You’ll Want Every Weeknight!

Footer

↑ back to top

About

  • Privacy Policy
  • Disclaimer
  • Terms & Conditions

Newsletter

  • Sign Up! for emails and updates

Contact

  • About me
  • Contact me

Copyright © 2025 TastyTrendIngredients